Paula
-
Posts
11 -
Joined
-
Last visited
-
 Kenneth Powell reacted to a post in a topic:
Swift 1805 by Scotty W - FINISHED - Artesania Latina - 1/50th scale - Virginia Pilot Boat
Kenneth Powell reacted to a post in a topic:
Swift 1805 by Scotty W - FINISHED - Artesania Latina - 1/50th scale - Virginia Pilot Boat
-
Cpt. Jack reacted to a post in a topic:
Polaris by Paula - OcCre - 1:50
-
Cpt. Jack reacted to a post in a topic:
Polaris by Paula - OcCre - 1:50
-
GrandpaPhil reacted to a post in a topic:
Polaris by Paula - OcCre - 1:50
-
GrandpaPhil reacted to a post in a topic:
Polaris by Paula - OcCre - 1:50
-
GrandpaPhil reacted to a post in a topic:
Polaris by Paula - OcCre - 1:50
-
Jeff preisler reacted to a post in a topic:
Polaris by Paula - OcCre - 1:50
-
Auger reacted to a post in a topic:
Polaris by Paula - OcCre - 1:50
-
BobG reacted to a post in a topic:
Polaris by Paula - OcCre - 1:50
-
Paula reacted to a post in a topic:
Polaris by Cpt. Jack - OcCre - 1:50 - first build
-
Scotty W reacted to a post in a topic:
Polaris by Paula - OcCre - 1:50
-
Polaris by Paula - OcCre - 1:50
Paula replied to Paula's topic in - Kit build logs for subjects built from 1801 - 1850
-
Polaris by Paula - OcCre - 1:50
Paula replied to Paula's topic in - Kit build logs for subjects built from 1801 - 1850
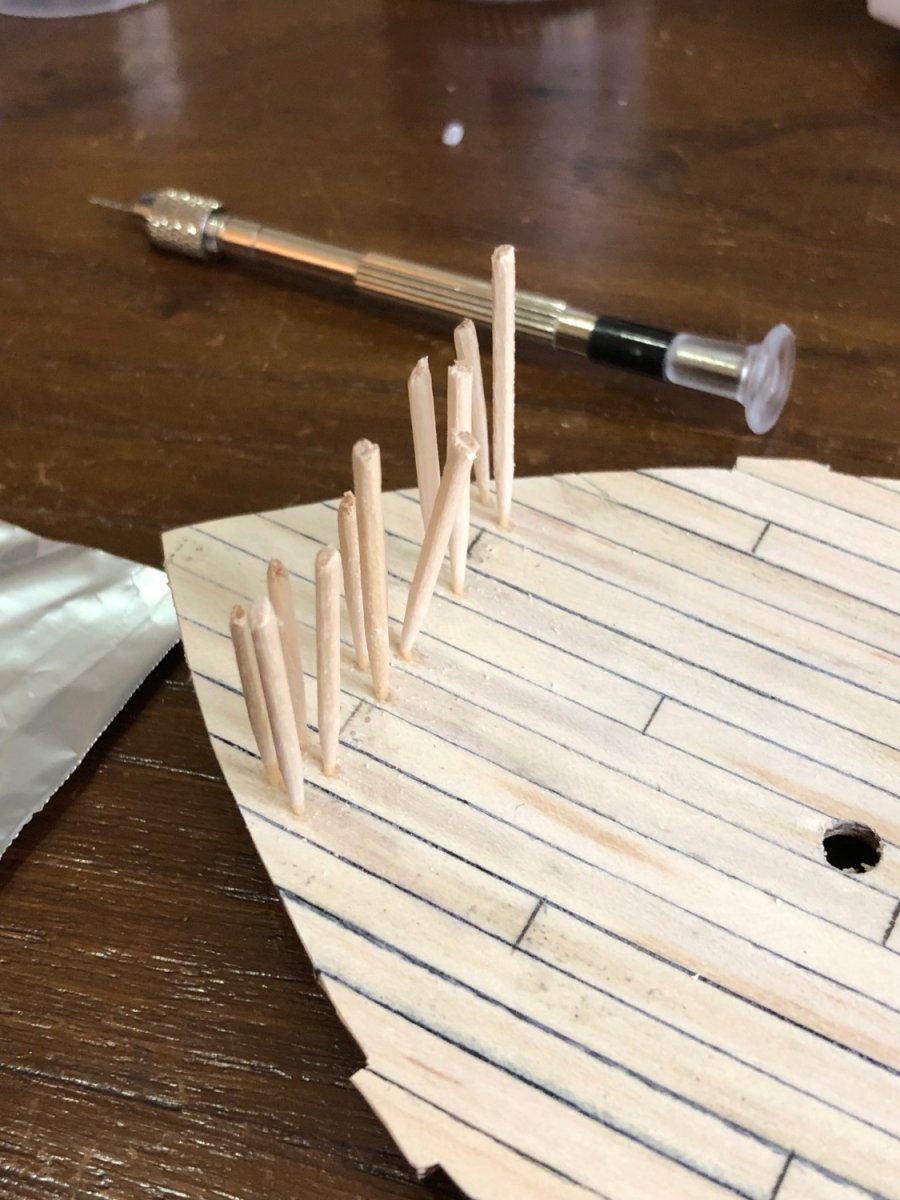
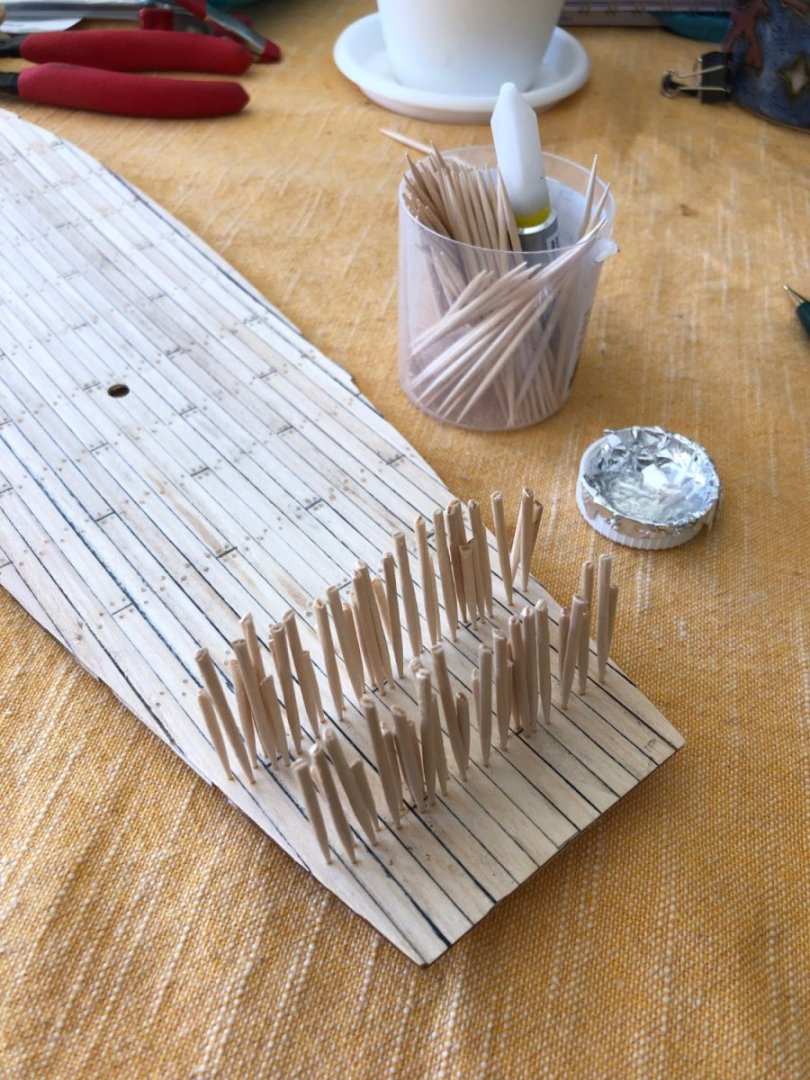
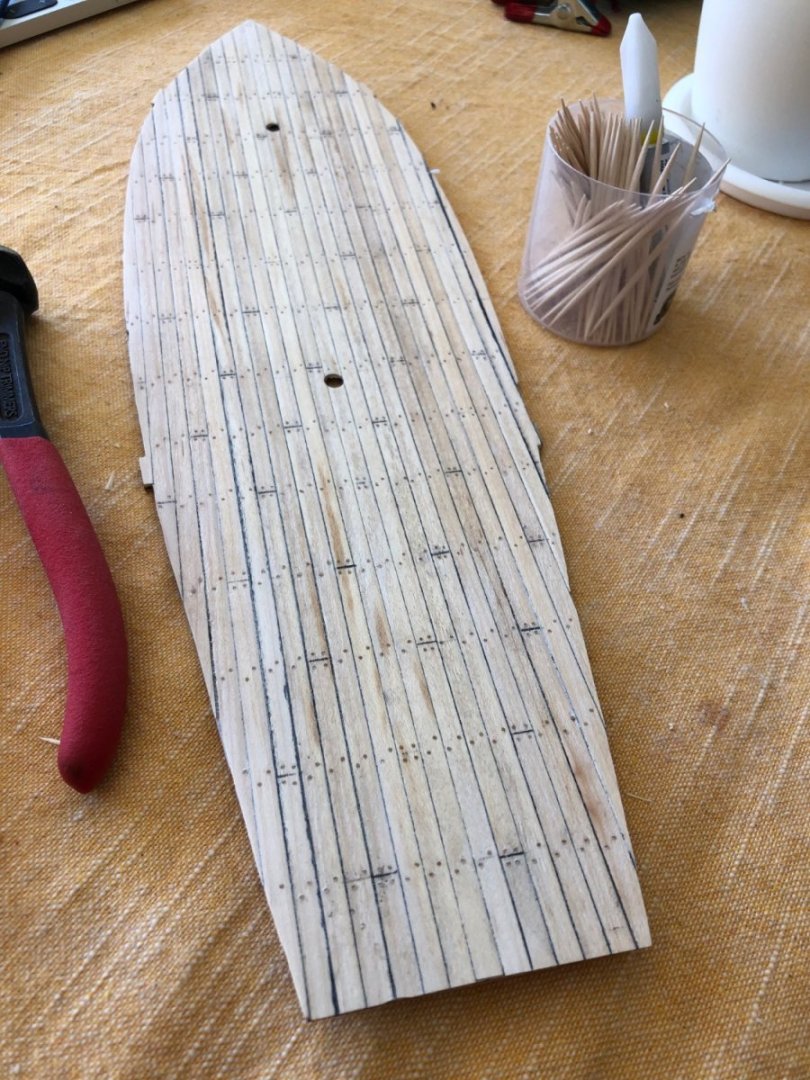
Well, it's been a hot minute since I posted an update. Mostly this was due to slowly slogging through the planking of the deck. I've learned a lot on the way and while I'm aware of things I could have done differently, I feel pretty good about the learning experience. Key take-aways are: I started out thinking I would cut all the planks to the correct length and fully deck it that way. I ended up not doing that and in retrospect wish I had actually taken the time and done that. I used a more period appropriate spacing of the planks. I think that went well and was a good choice. I used toothpicks to simulate the treenails. I cut each toothpick in half using some flush nippers. One thing I did that was helpful was to cut the toothpicks so there was a short half and a long half. That gave me more room to work as I was installing them. Initially I used PVA glue and then switched to CA. I think that worked better. I started using a .6mm drill bit and a small hammer to install them. I was about three fourths through when my .6 bit finally bit the dust. I then switched to a .7mm bit and actually found that worked better. Rather than hammering the toothpicks in, I could insert them just with finger pressure. Once the CA had set, I used my flush nippers to trim them and then sanded them smooth. This ended up being much faster and I think it actually gave better results. The treenails may be a bit large for the 1:50 scale but I'm happy with them for this build. -
Polaris by Paula - OcCre - 1:50
Paula replied to Paula's topic in - Kit build logs for subjects built from 1801 - 1850
I ended up not cutting individual short planks but instead drew in the cuts between planks with a pencil. I think it looks ok but I’m afraid I may have preferred it in the long run had I cut them to 5 inch sections. I did decide that since this is a learning experience, I may as well try installing treenails. It’s going to take some time to do them all and it may be a subtle difference but I think it will add something.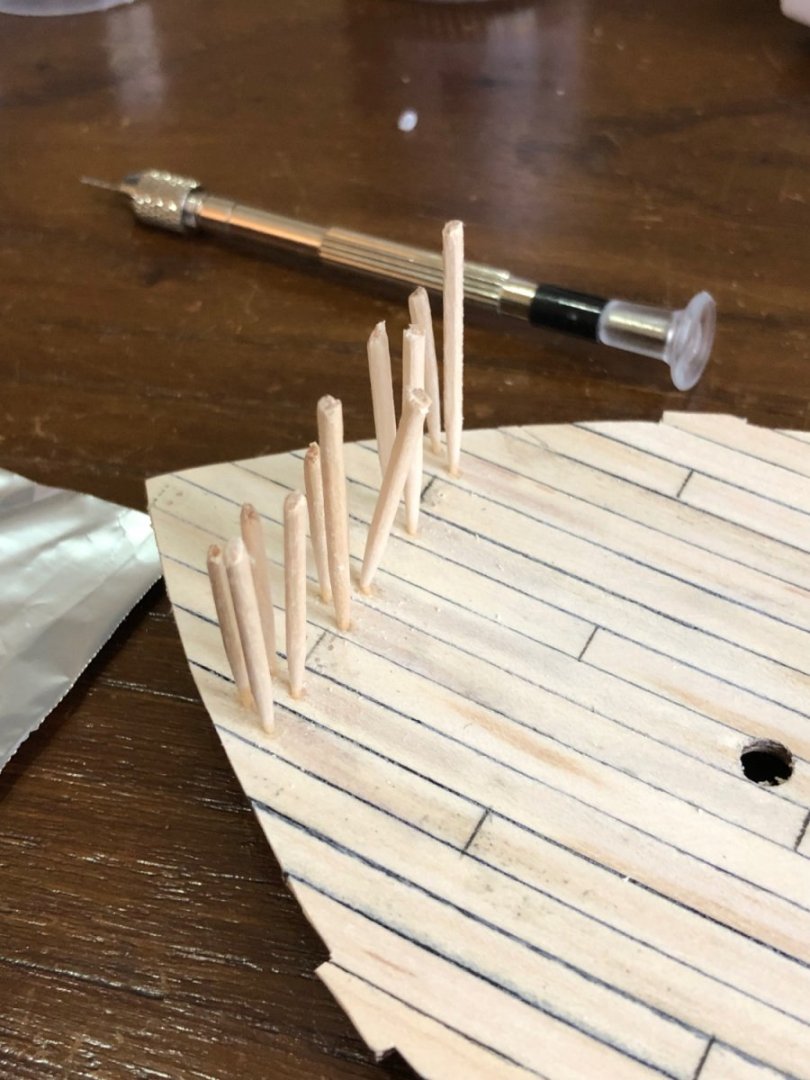
-
 Paula reacted to a post in a topic:
Polaris by Paula - OcCre - 1:50
Paula reacted to a post in a topic:
Polaris by Paula - OcCre - 1:50
-
Polaris by Paula - OcCre - 1:50
Paula replied to Paula's topic in - Kit build logs for subjects built from 1801 - 1850
So, the other thing I’m planning on doing (before I get to the bulwarks) is a more authentic deck planking. I’m planning on actually cutting the planks and installing them with a more historic pattern. For an excellent discussion on this matter, see the following topic Deck Plank Shift post #20 by DelF seems to summarize it perfectly and is how I intend to proceed. (Moderators please let me know if there was a better way for me to attribute this, I want to make sure people get the credit they deserve) cheers, paula -
 Paula reacted to a post in a topic:
Polaris by Paula - OcCre - 1:50
Paula reacted to a post in a topic:
Polaris by Paula - OcCre - 1:50
-
Polaris by Paula - OcCre - 1:50
Paula replied to Paula's topic in - Kit build logs for subjects built from 1801 - 1850
The journey begins. The kit came yesterday as anticipated. We have guests from the States so don’t have quite an much time to devote. Last night I was able to remove the bulkheads from their sheet and today was sanding the edges where they were attached and gluing the first several bulkheads. Looking at the plans and several other builds there are a couple things I initially see that I hope to do beyond how the plans specify. First, I don’t like that the bulwarks are not planked on the inboard side. To my mind it really screams inauthentic. I’ll need to order some additional planking material. I’m also wanting to use some copper black on the fittings. I’m having trouble locating any here in Portugal but will be back to the States in April so will bring some back with me.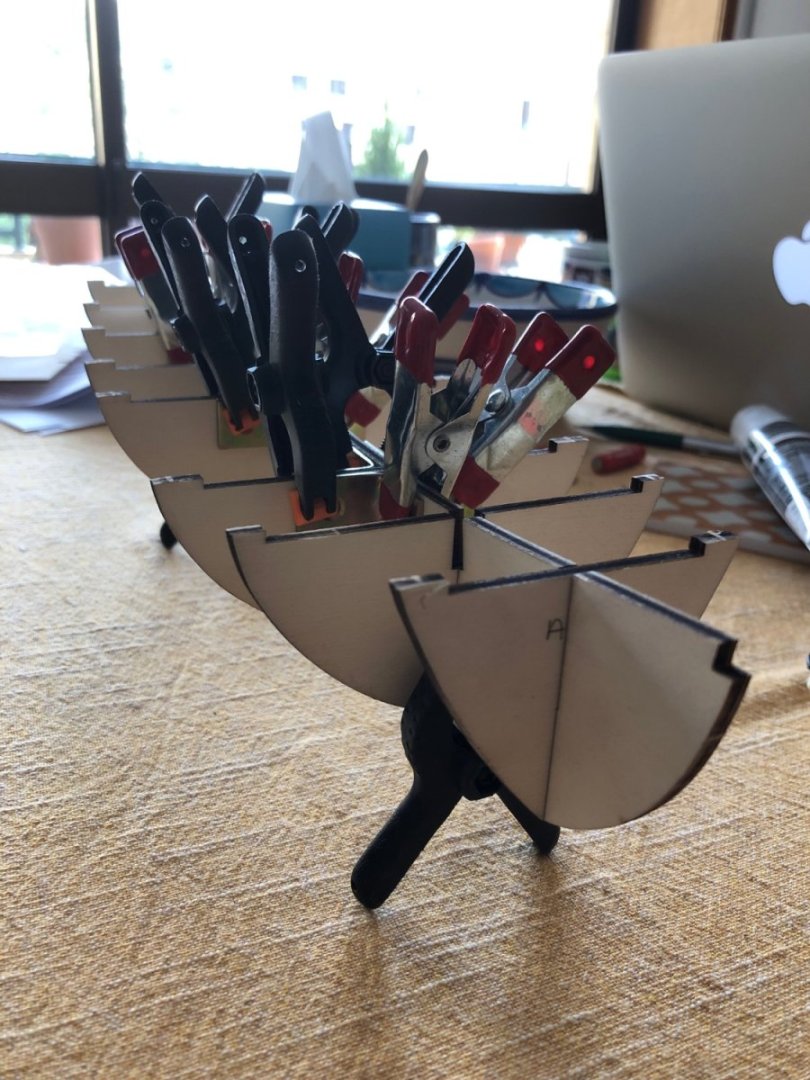
-
Polaris by Paula - OcCre - 1:50
Paula replied to Paula's topic in - Kit build logs for subjects built from 1801 - 1850
So….. my kit is scheduled to be delivered Thursday. In the meantime, much work getting tools, watching videos, and reading. Thank you all for the warm welcomes. I’m sure I’ll have many questions as I get going. cheers, Paula -
Love the shipyard organization Scotty! Giving me ideas to work on while I’m waiting for my Polaris kit to arrive. BTW, You were in Austin during a pretty sweet spot. I moved there in 1972 and other than a few short stints elsewhere lived there until last summer. cheers, paula
- 59 replies
-
- 3
-
-
- Swift
- Artesania Latina
- (and 1 more)
-
Polaris by Paula - OcCre - 1:50
Paula replied to Paula's topic in - Kit build logs for subjects built from 1801 - 1850
So….. my kit is scheduled to be delivered Thursday. In the meantime, much work getting tools, watching videos, and reading. Thank you all for the warm welcomes. I’m sure I’ll have many questions as I get going. cheers, Paula -
Paula reacted to a post in a topic:
Polaris by Paula - OcCre - 1:50
-
Paula reacted to a post in a topic:
Polaris by Paula - OcCre - 1:50
-
Paula reacted to a post in a topic:
Polaris by Paula - OcCre - 1:50
-
Paula reacted to a post in a topic:
Swift 1805 by Scotty W - FINISHED - Artesania Latina - 1/50th scale - Virginia Pilot Boat
-
Hi All, greetings from Portugal. First time builder here. I’m newly semi-retired and recently moved from Austin, Texas to Portugal. I’m not a novice woodworker but no longer have the full workshop I had in Texas. I’ve had a lifelong love of wooden ships and am looking forward to this build. I decided on Polaris as a modestly priced, beginner level model and have been reading build logs and watching videos and working on understanding methods and techniques. My kit is due to arrive in a couple days and so I’m gathering tools and getting my workspace ready. I know Polaris is not based on a specific ship but in the interest of historical accuracy, I’m curious about what time frame and similar ships I might study as reference. It seems like the general idea is that she’s first half of 19th century, American design, based on a merchant type outfitted for polar exploration. Accurate so far? The actual USS Polaris was a “screw steamer” so clearly not the basis for this model. (Though reading through the Wikipedia article about her, she seems like she’d be a fascinating project!) So…. On with my first build!