HOLIDAY DONATION DRIVE - SUPPORT MSW - DO YOUR PART TO KEEP THIS GREAT FORUM GOING! (89 donations so far out of 49,000 members - C'mon guys!)
×
.jpg.c334ea1d4cfb12b6b3e2eb949f8f8dea.jpg)
François de Saint Nazaire
-
Posts
206 -
Joined
-
Last visited
-
 MrNabo73 reacted to a post in a topic:
Il Trabaccolo by François de Saint Nazaire - MarisStella - 1:32
MrNabo73 reacted to a post in a topic:
Il Trabaccolo by François de Saint Nazaire - MarisStella - 1:32
-
Paul Le Wol reacted to a post in a topic:
Il Trabaccolo by François de Saint Nazaire - MarisStella - 1:32
-
Keith Black reacted to a post in a topic:
Il Trabaccolo by François de Saint Nazaire - MarisStella - 1:32
-
gsdpic reacted to a post in a topic:
Il Trabaccolo by François de Saint Nazaire - MarisStella - 1:32
-
gsdpic reacted to a post in a topic:
Il Trabaccolo by François de Saint Nazaire - MarisStella - 1:32
-
ccoyle reacted to a post in a topic:
Il Trabaccolo by François de Saint Nazaire - MarisStella - 1:32
-
JacquesCousteau reacted to a post in a topic:
Il Trabaccolo by François de Saint Nazaire - MarisStella - 1:32
-
Ronald-V reacted to a post in a topic:
Il Trabaccolo by François de Saint Nazaire - MarisStella - 1:32
-
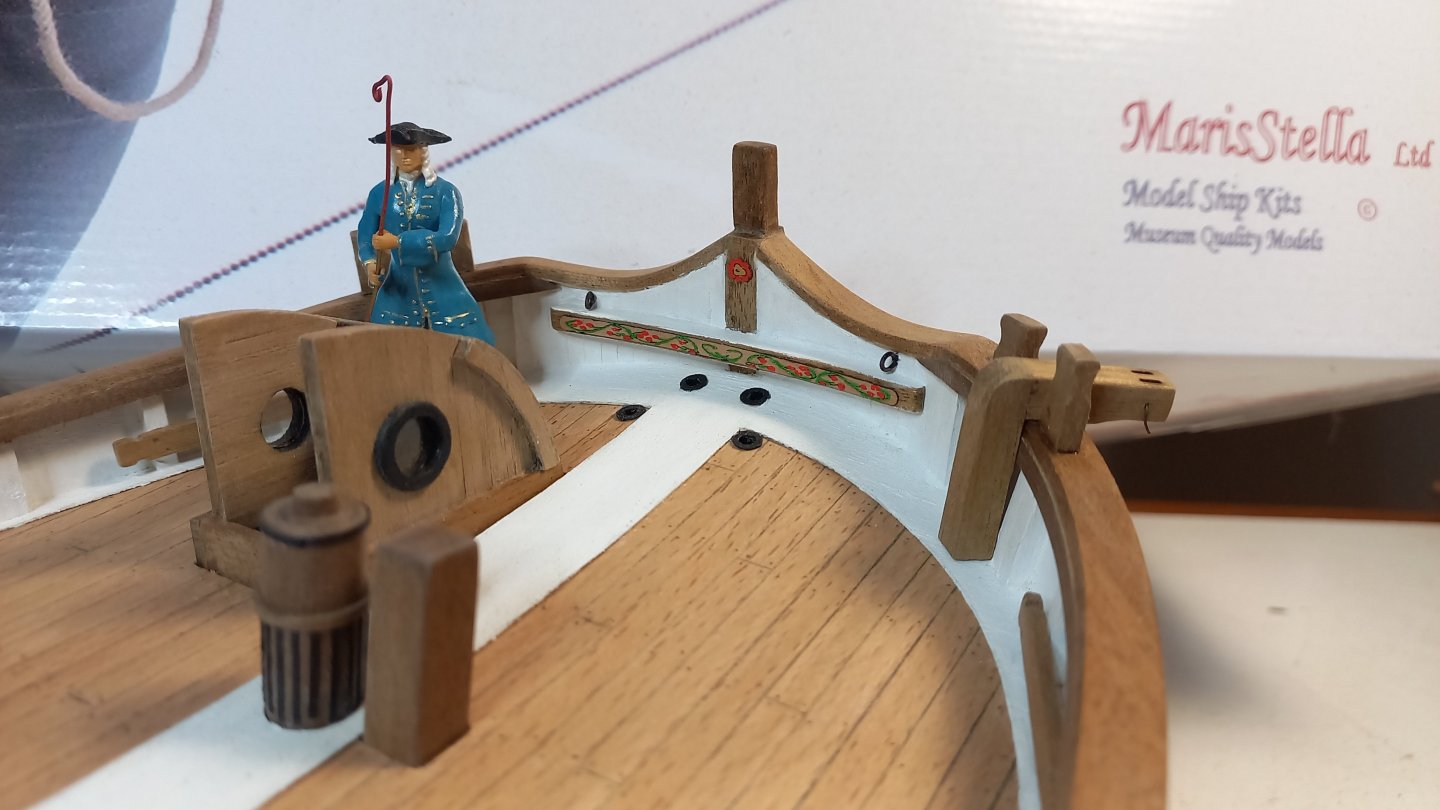
 Hello all and happy new year, Rudder in progress. These fittings allowed it to slide vertically along the sternpost; when the vessel operated in shallow waters or was at anchor, it could be raised to the level of the keel. The lifting of the rudder was carried out by means of a double tackle fixed to two supports at the stern, one to port and the other to starboard, with the rope (vela) passing through the rudder blade itself, as can be seen below. Cathead in progress with stopper.
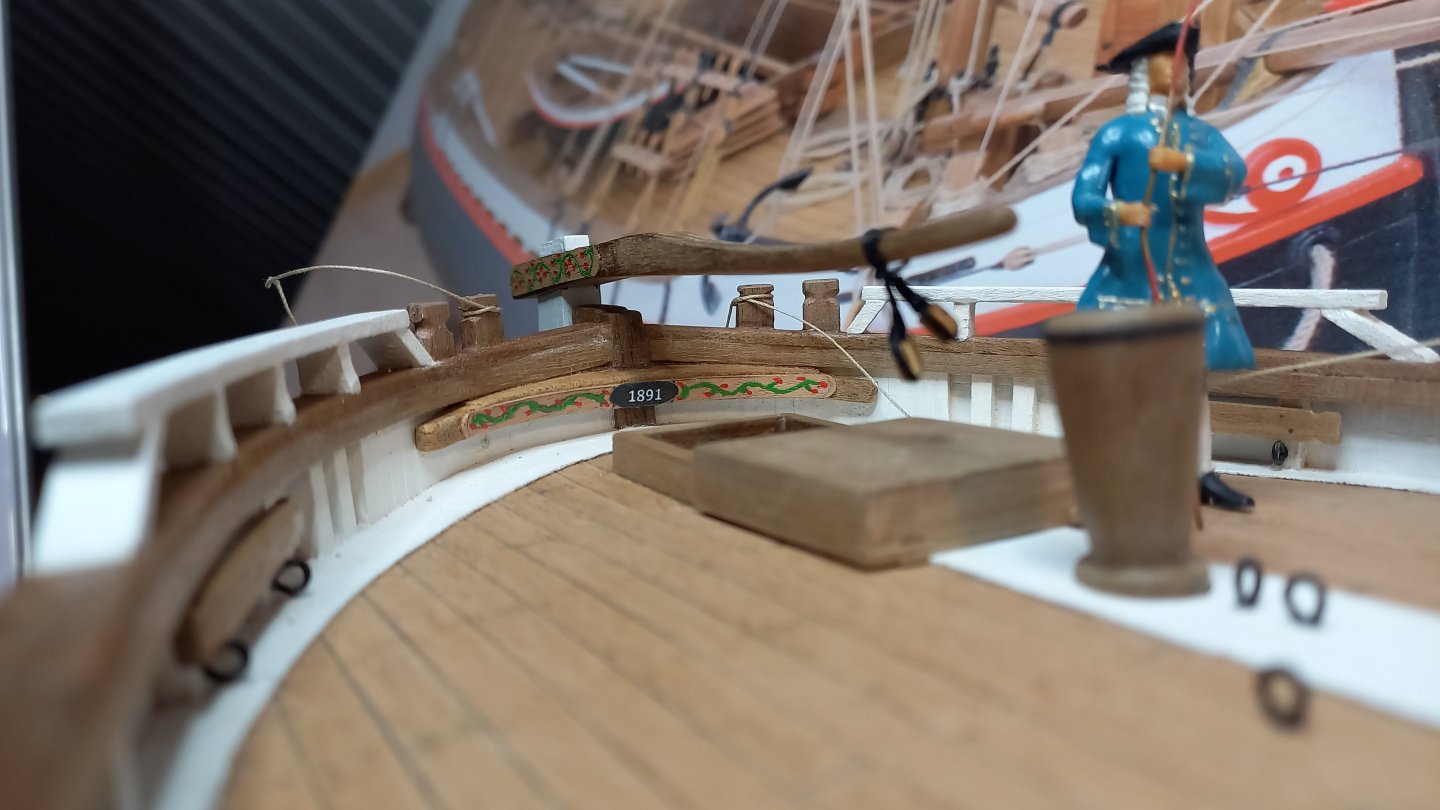


-
François de Saint Nazaire reacted to a post in a topic:
News and Info from MarisStella Ship Model Kits
-
François de Saint Nazaire reacted to a post in a topic:
HMS Surprise 1796 (prototype) by James H - Vanguard Models - 1:64
-
 François de Saint Nazaire reacted to a post in a topic:
Chris Watton and Vanguard Models news and updates Volume 2
François de Saint Nazaire reacted to a post in a topic:
Chris Watton and Vanguard Models news and updates Volume 2
-
Dear Chris, I am writing to follow up on the French version of the Tourterelle 28 frigate. Could you please clarify the current status? Specifically, are we pursuing an alternative version, or has the project been officially cancelled? Je te te souhaite une excellente année.
-
François de Saint Nazaire reacted to a post in a topic:
Chris Watton and Vanguard Models news and updates Volume 2
-
François de Saint Nazaire reacted to a post in a topic:
HMS Surprise 1796 (prototype) by James H - Vanguard Models - 1:64
-
François de Saint Nazaire reacted to a post in a topic:
Chris Watton and Vanguard Models news and updates Volume 2
-
Joyeux Noel et bonnes fêtes de fin d'année
-
François de Saint Nazaire reacted to a post in a topic:
HMS Bounty Launch by EvanKeel - Model Shipways - 1:16
-
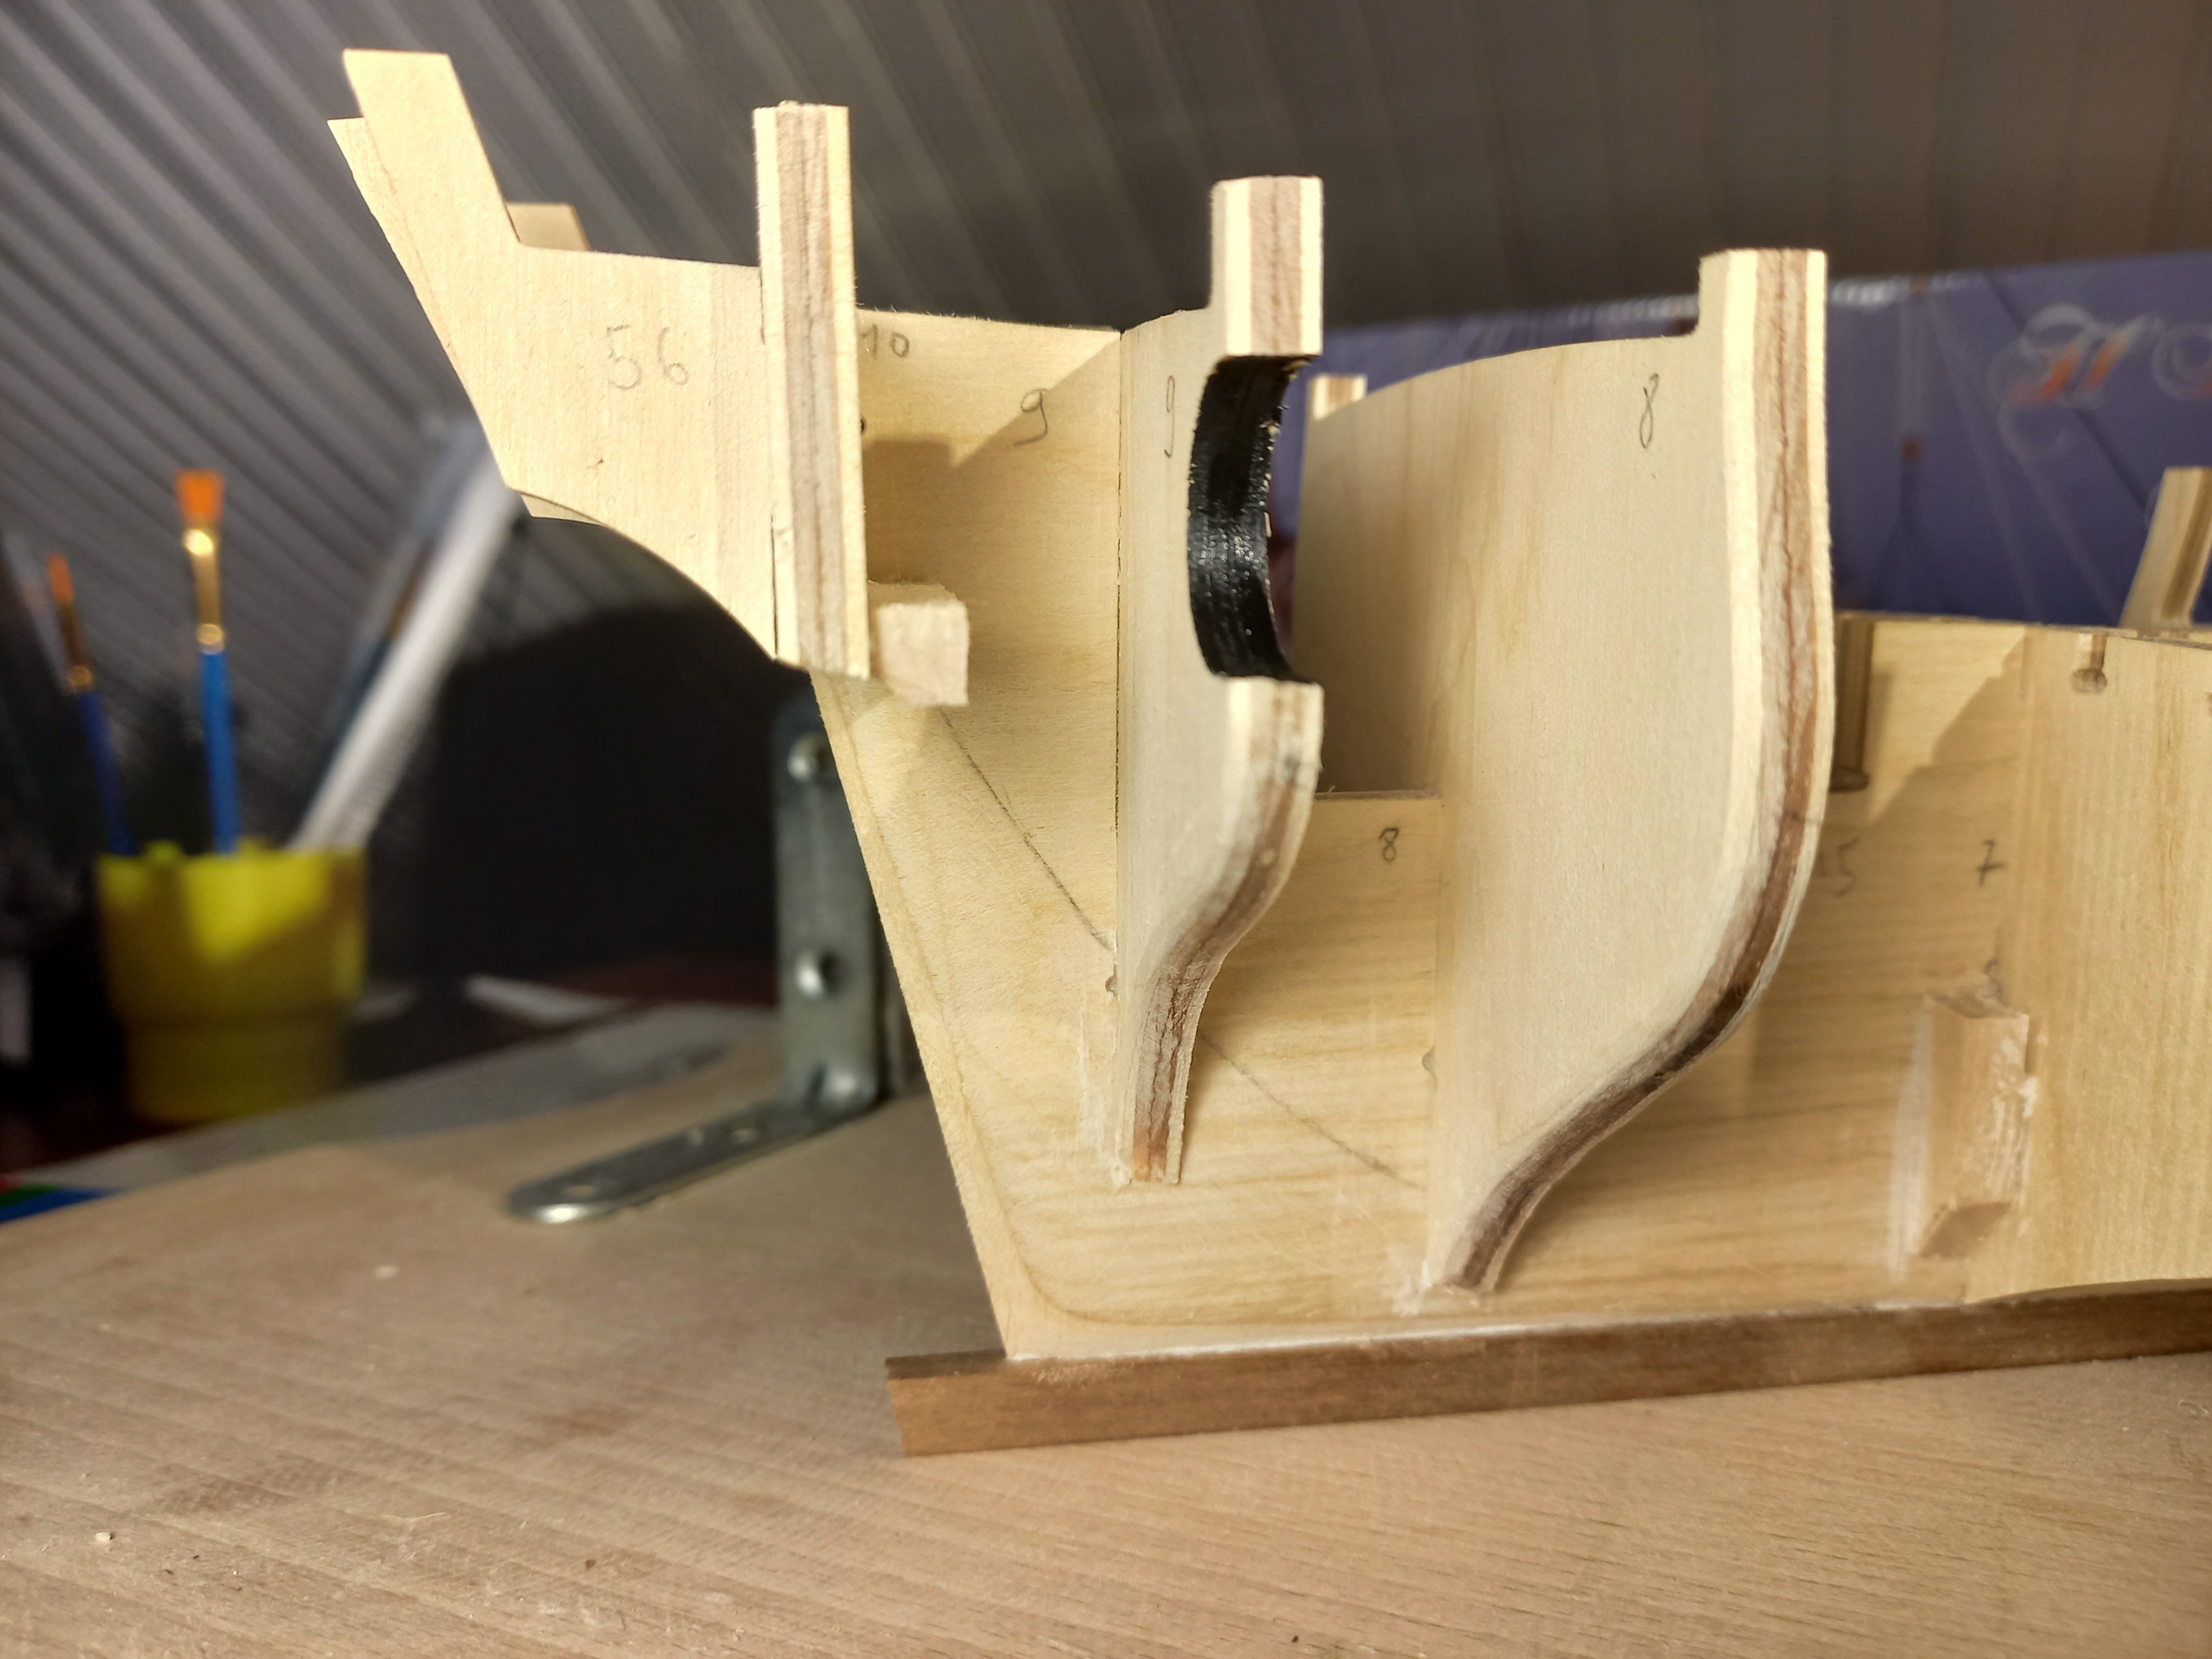
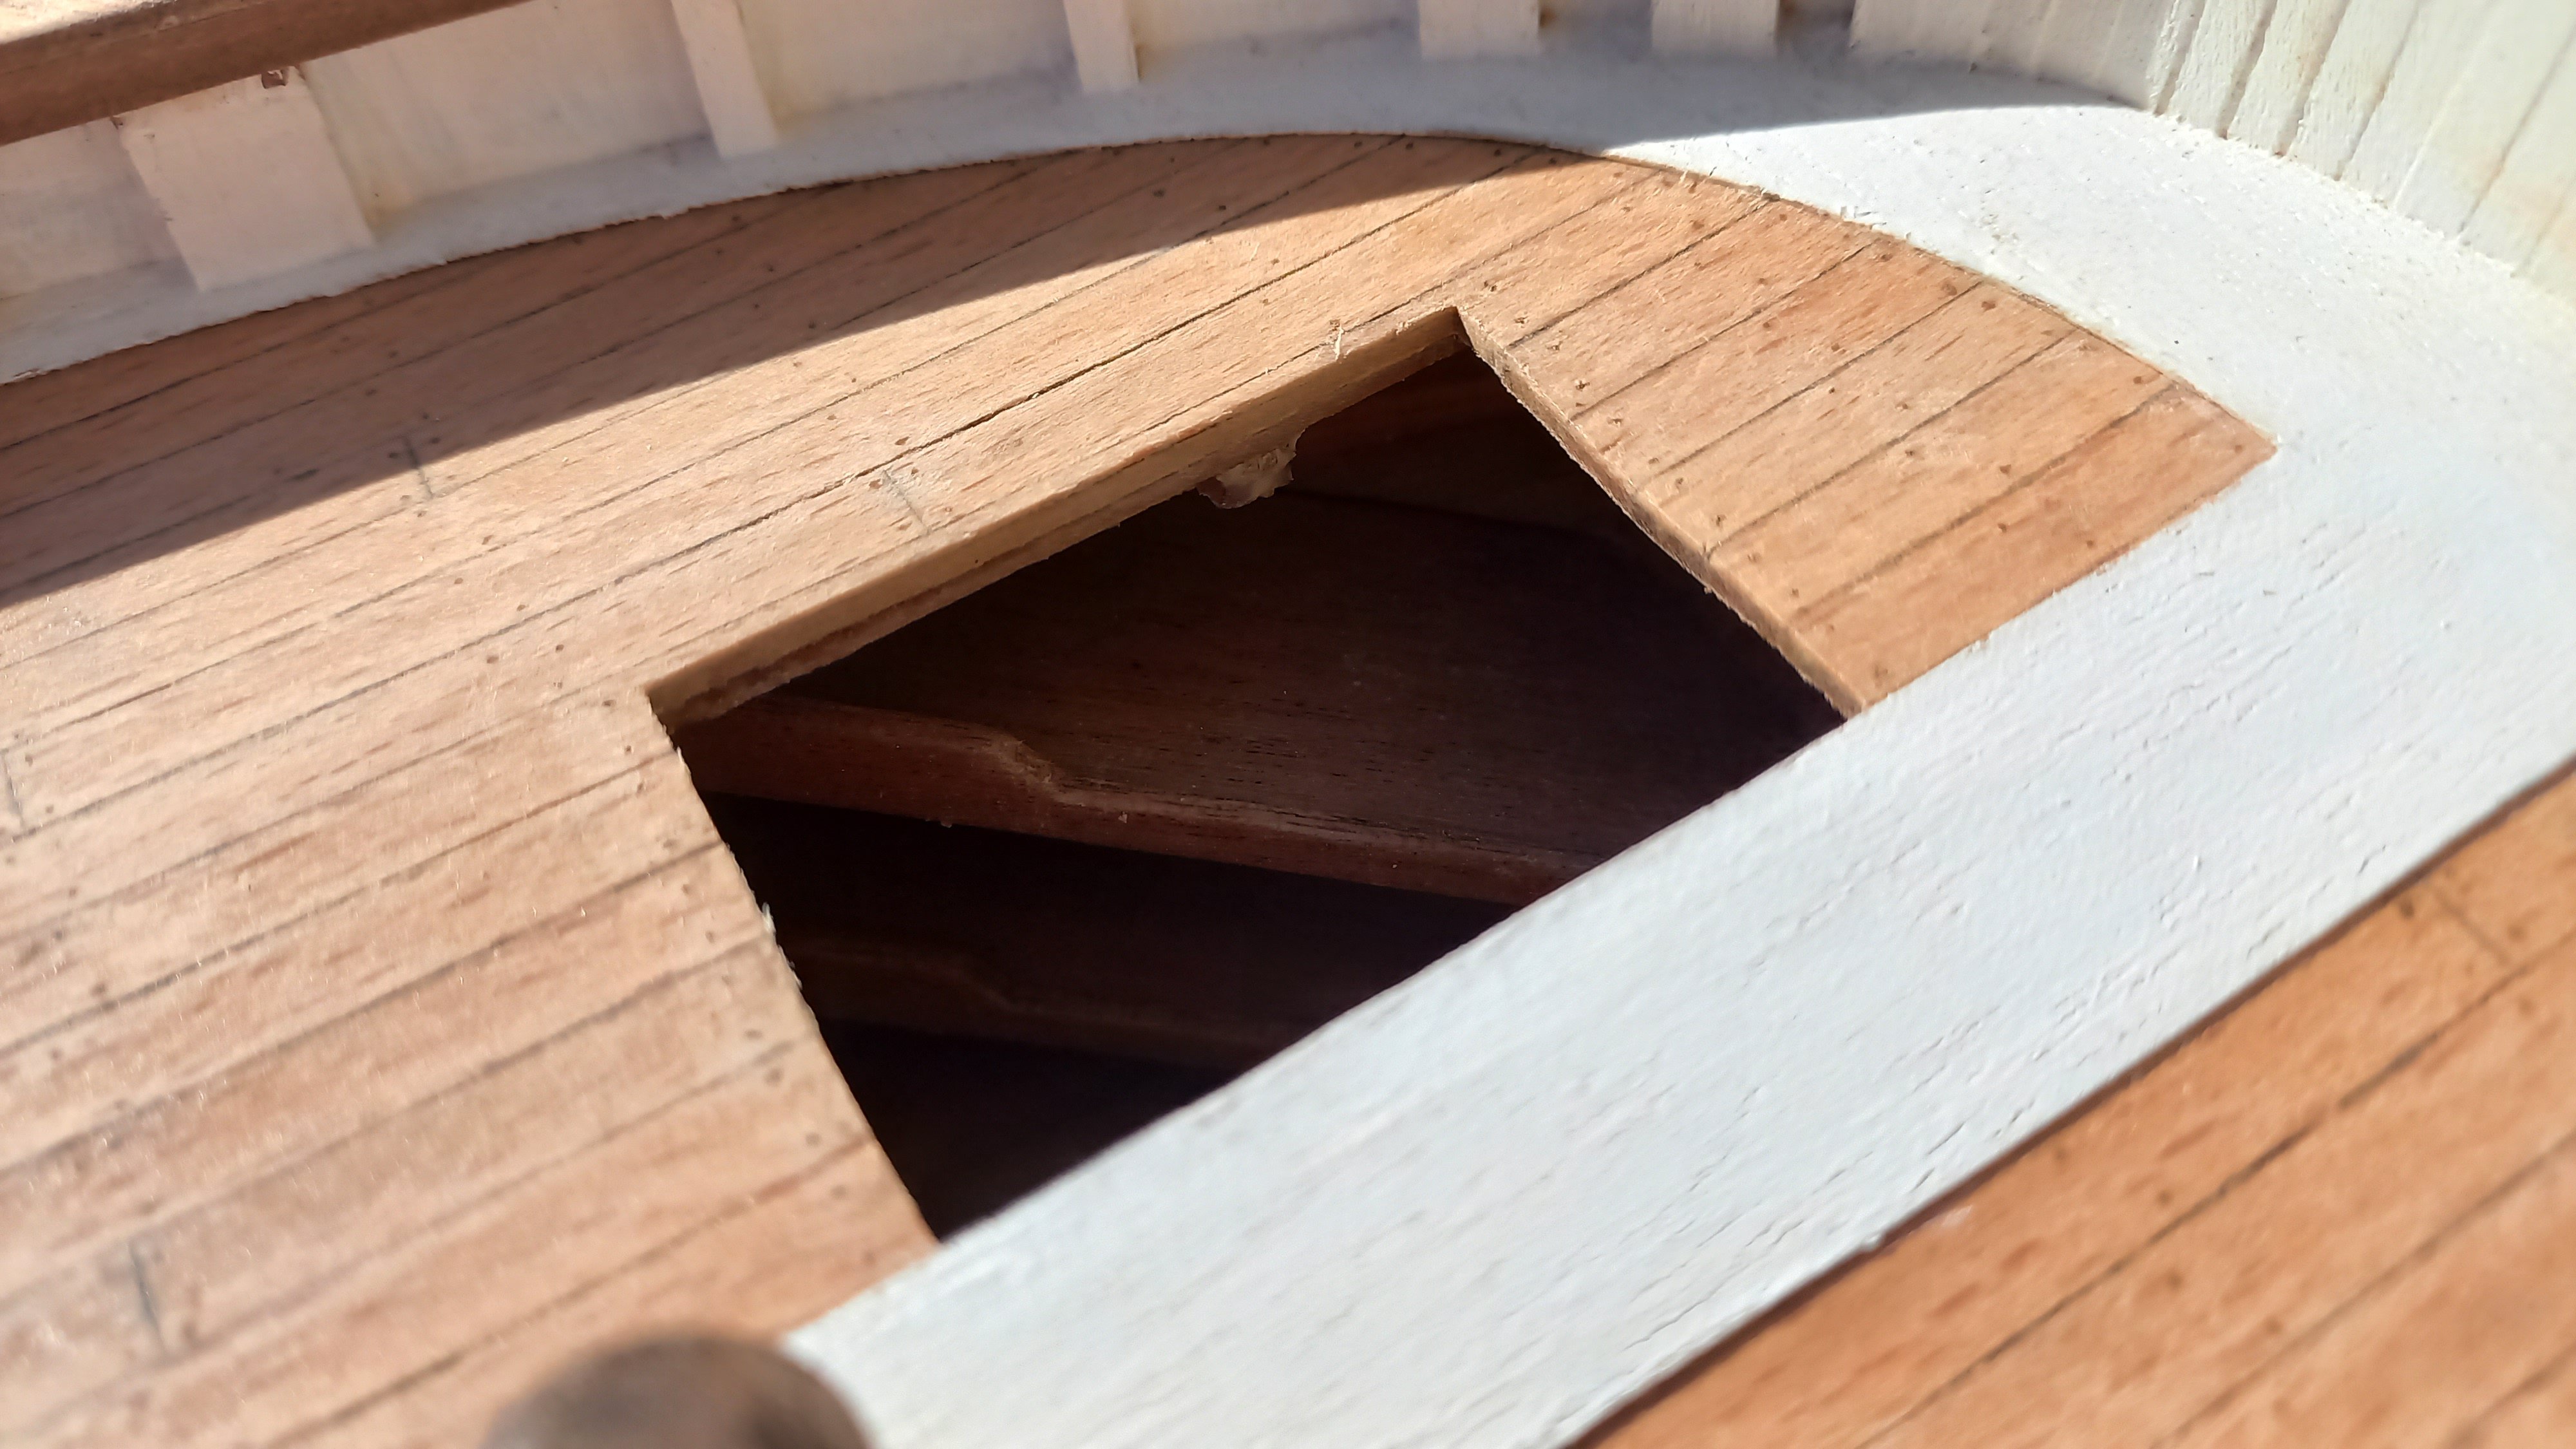
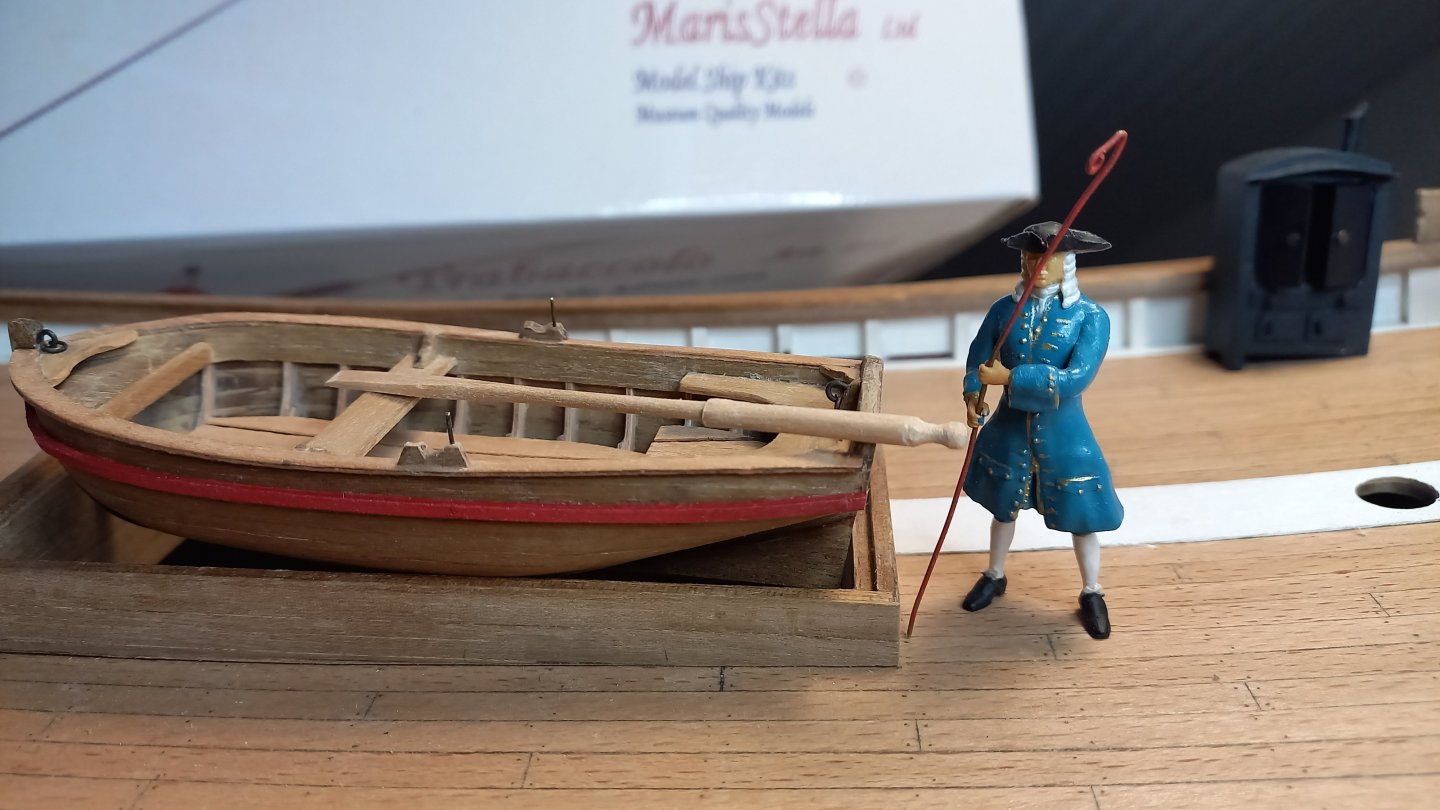
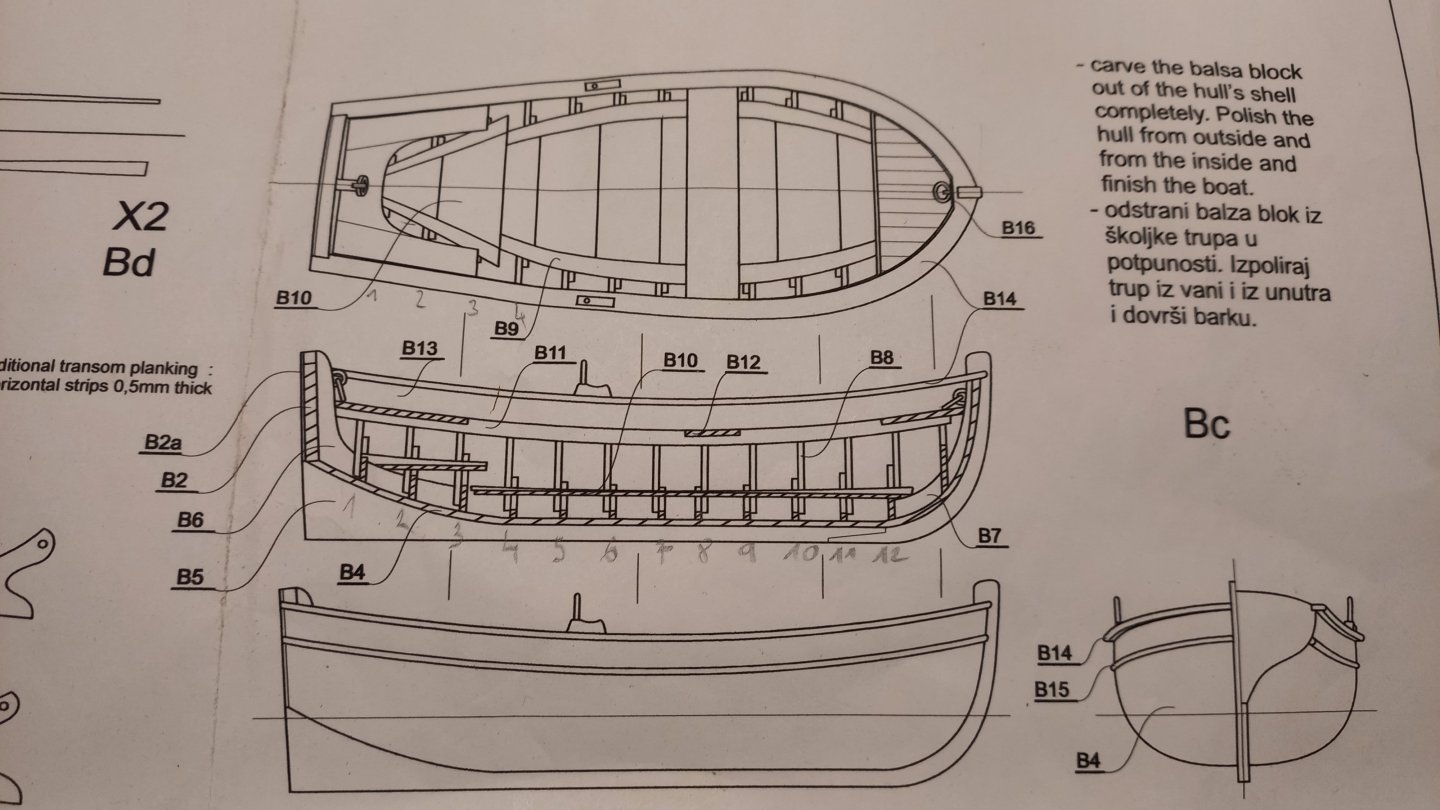
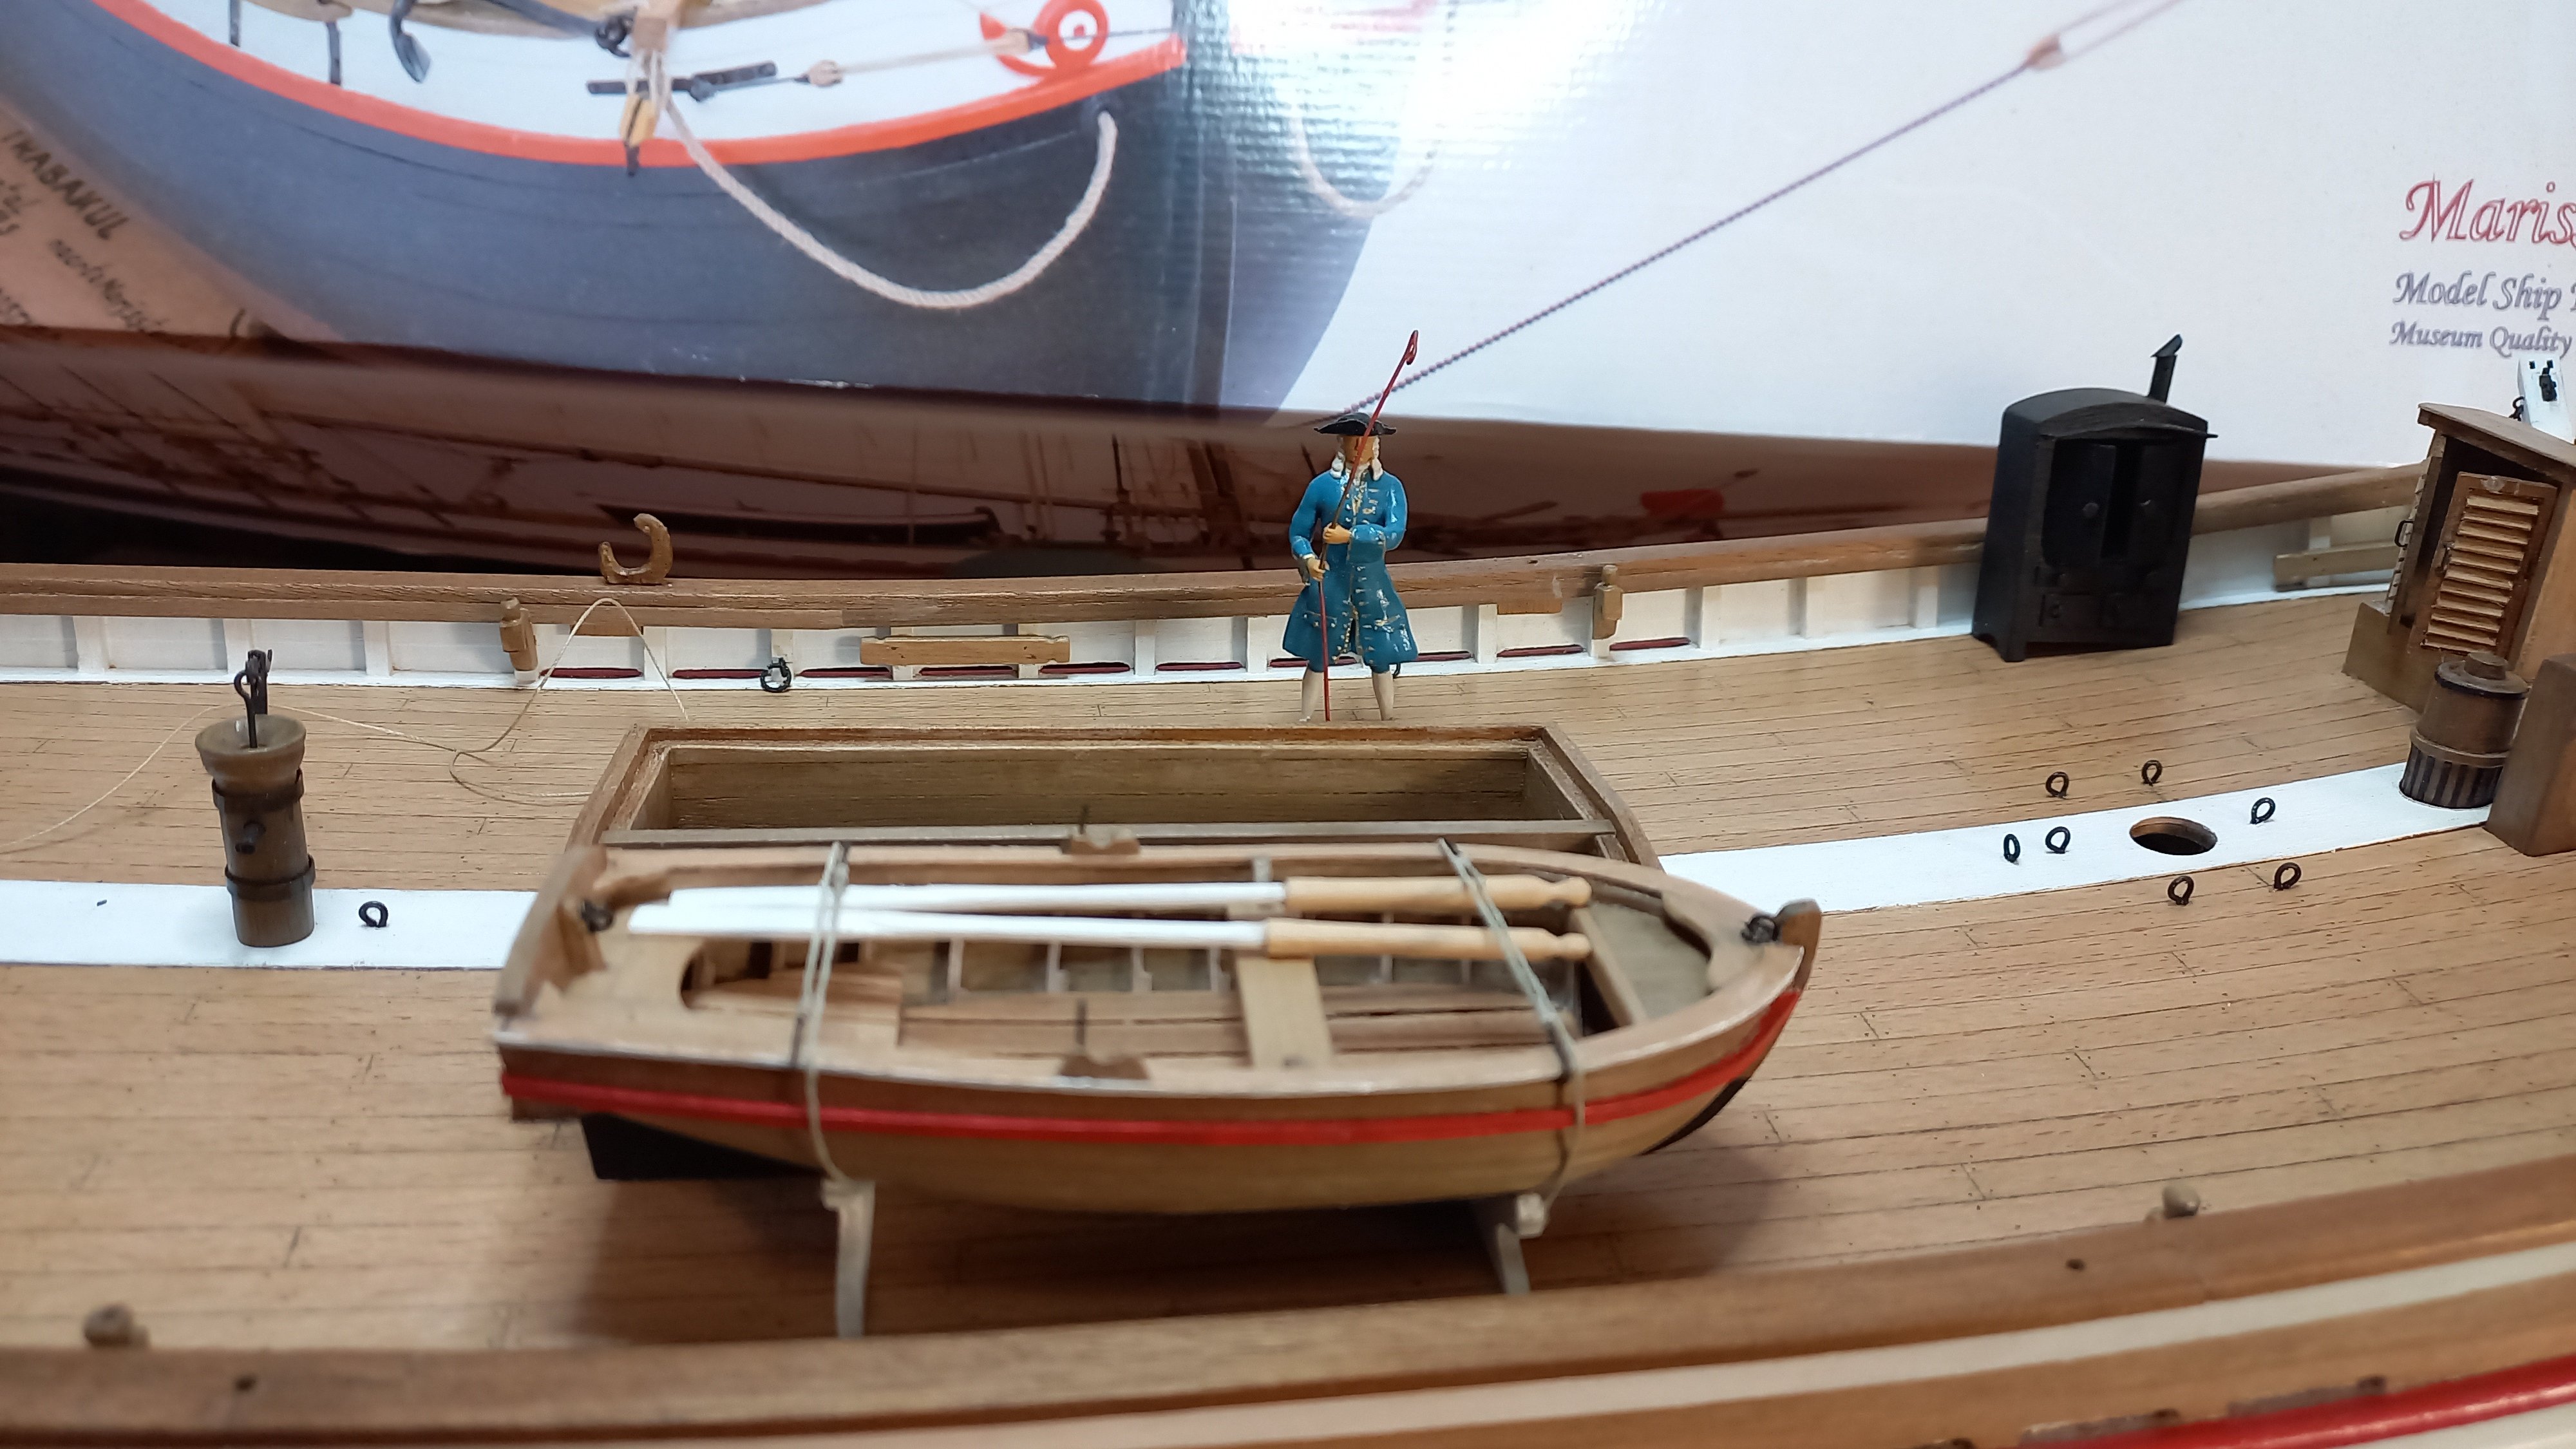
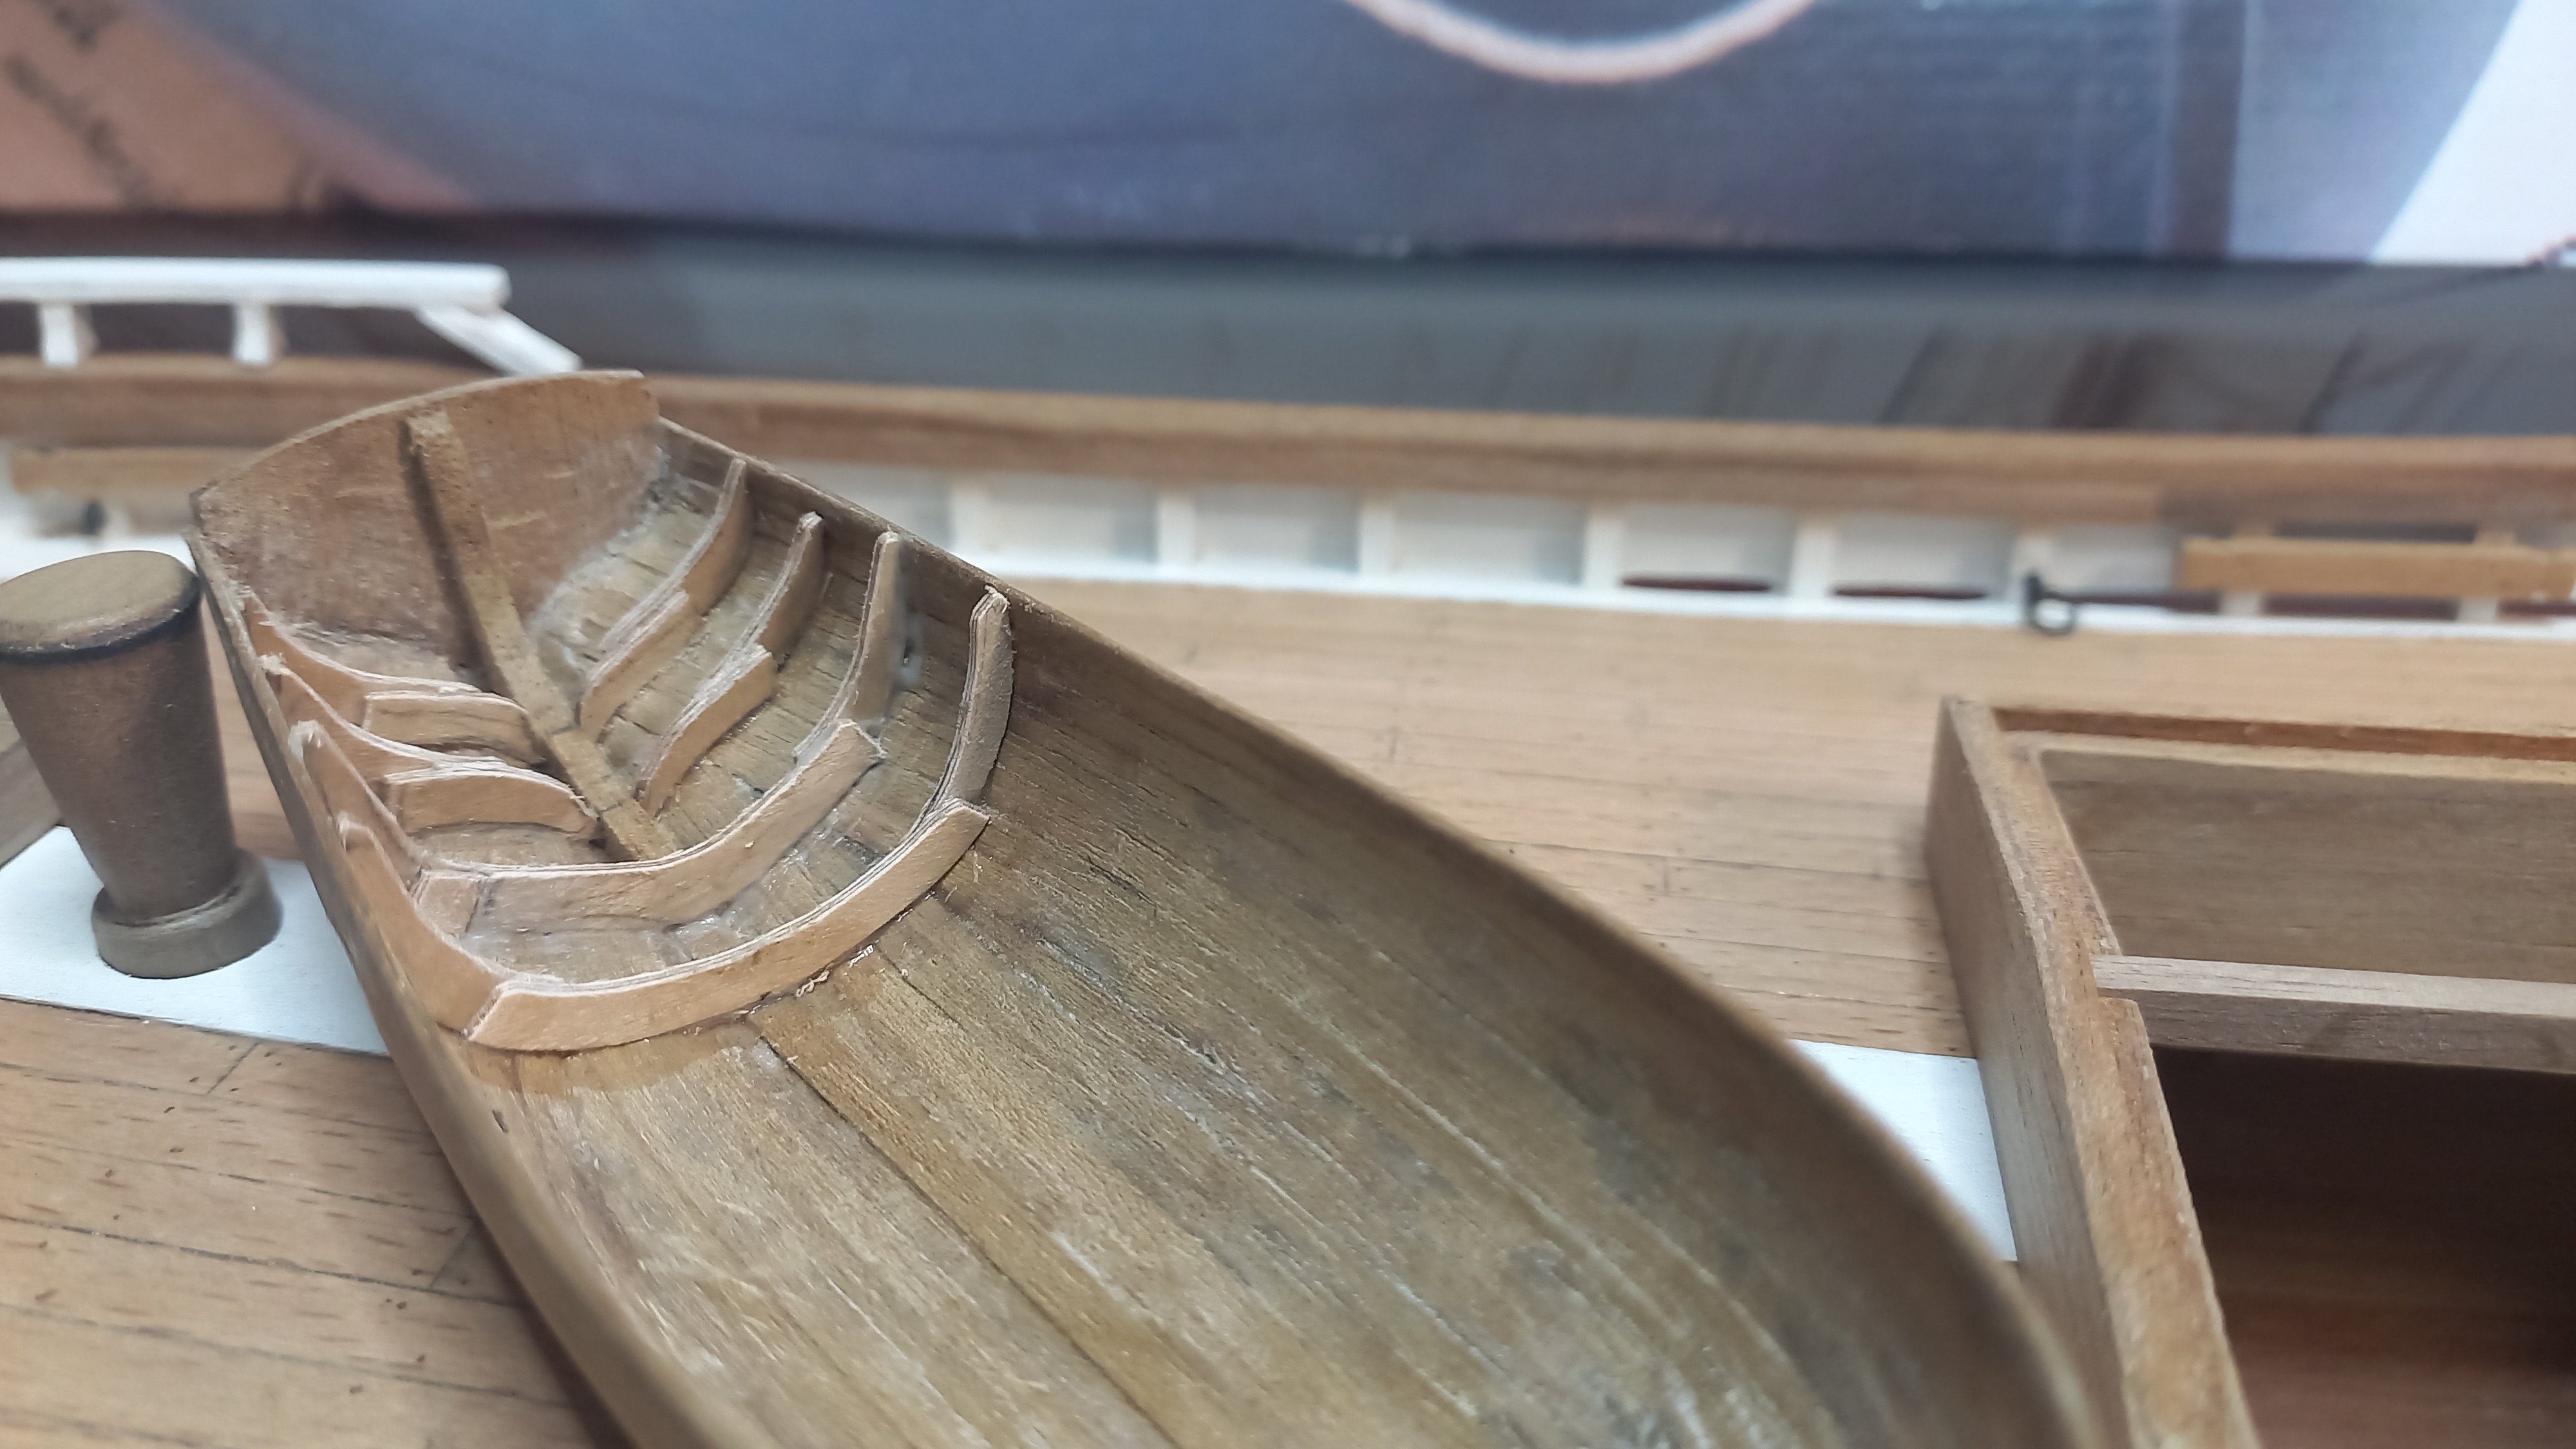
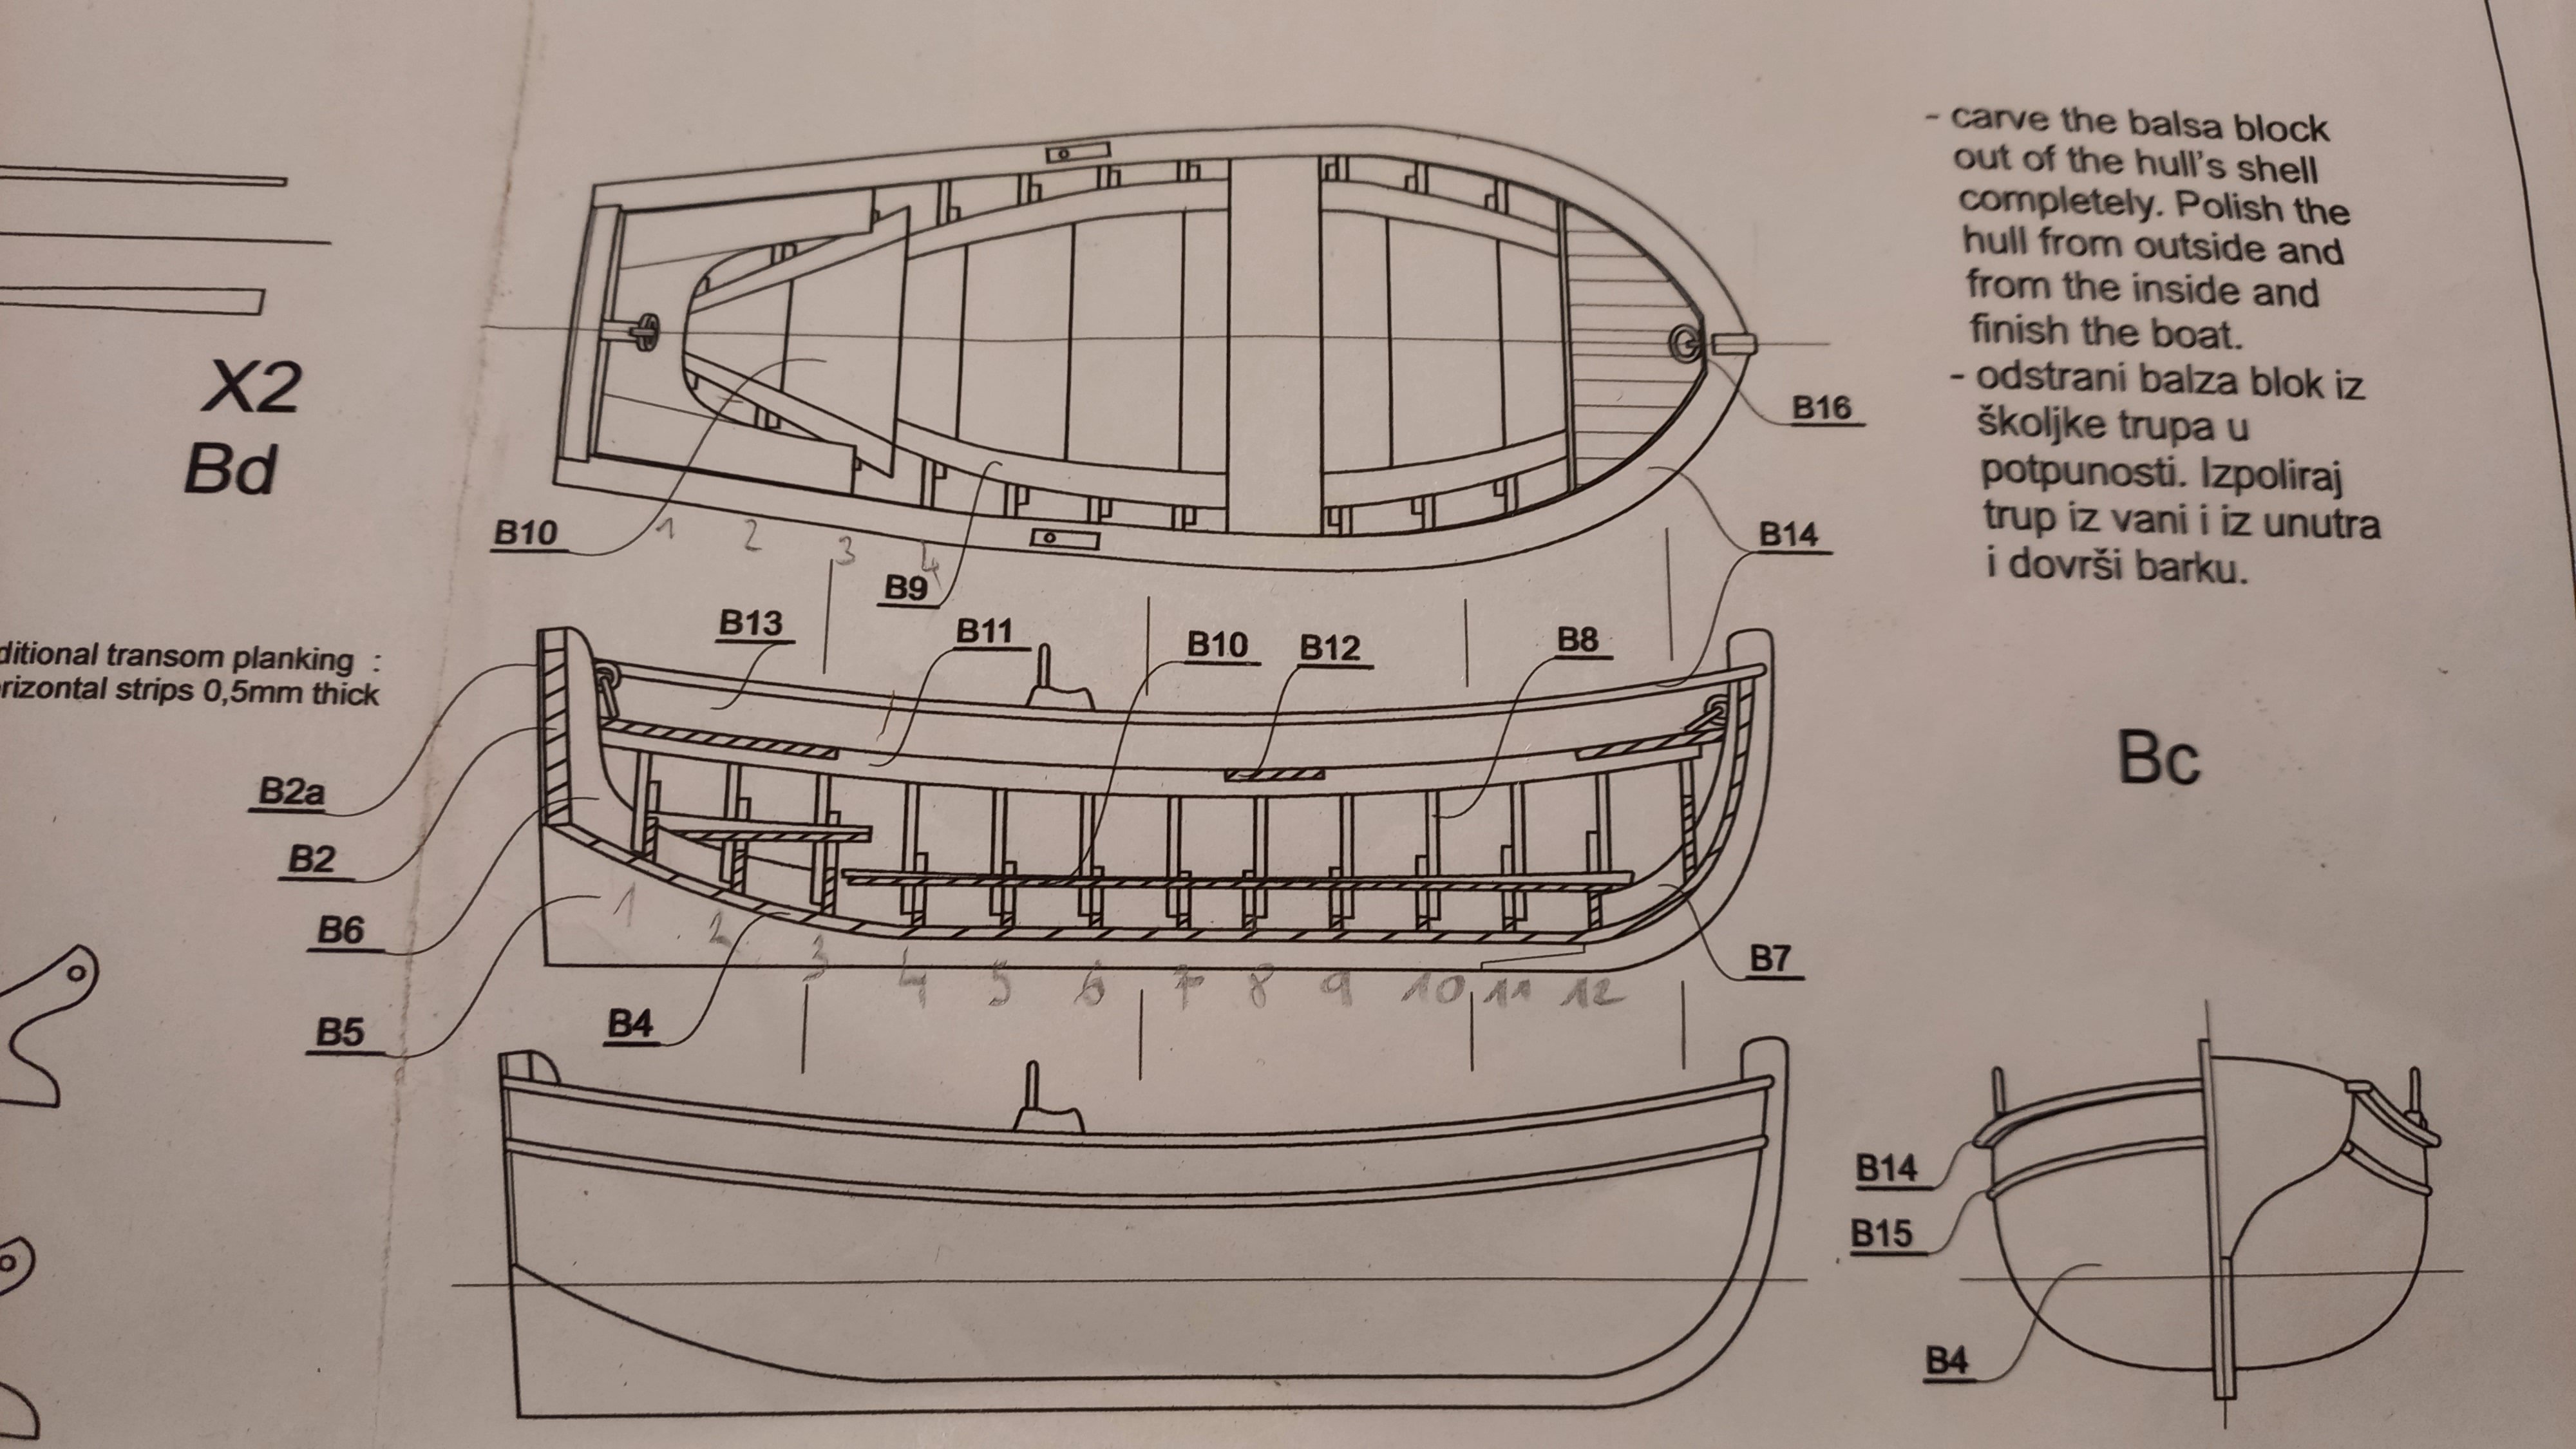
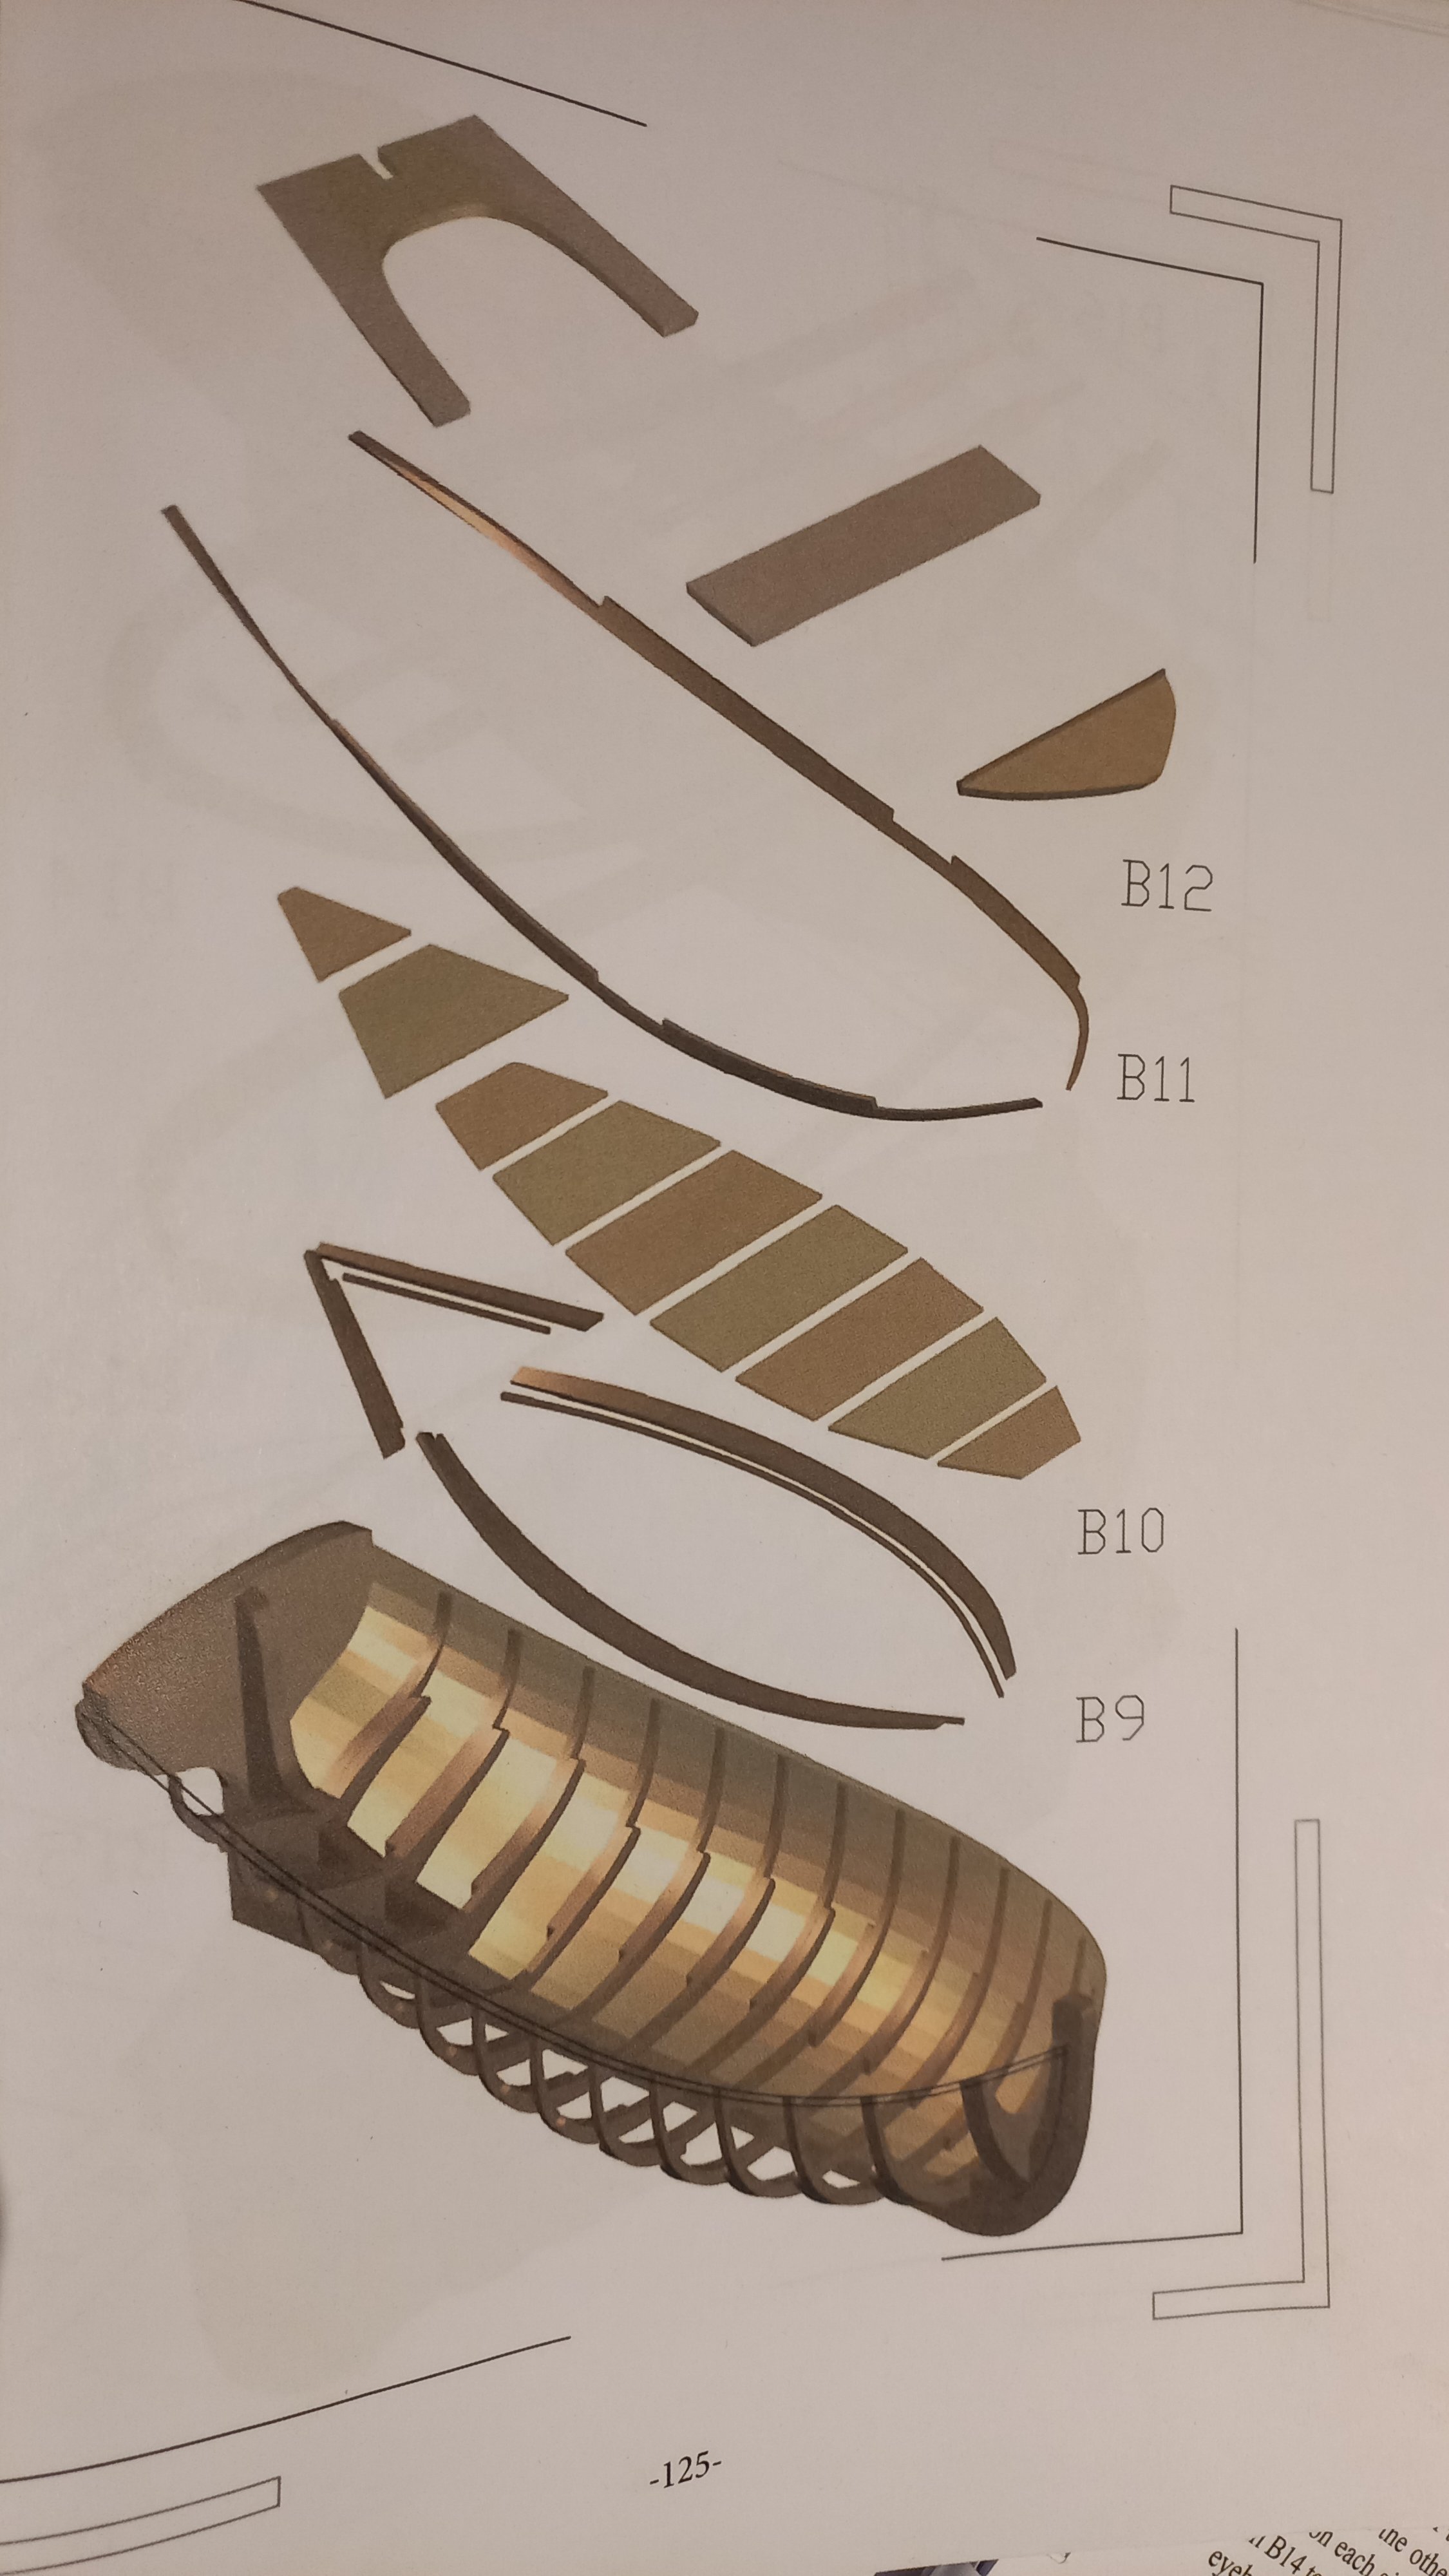
Bonjour, The trabaccolo traditionally carried a smaller boat, which was sometimes towed behind. However, during long journeys, this boat was usually secured on deck. It was typically lashed to the outboard side of the lanyards with a simple rope, either resting against the shrouds or sometimes placed on a dedicated stand located on the deck. The construction of the ship's boat is divided into three main stages. The first involves creating the mould (or 'jig') for the model's hull and preparing it for planking. The second step is the installation and sanding of the transom and planking the mould with two layers of veneer, followed by the removal of the mould. The third stage consists of fitting the outer keel and performing the final adjustments to the model's hull, both inside and out.


-
Bravo. A big step in your development and good news for us 😉
-
Bravo it is beautiful
-
And now the stove. The door needs to be sanded a little bit to reduce the thickness. 😉

-
Chris, I hope the option to build La Tourterelle is still alive... with the French flag....😉 We also have people that like vexillology. Histoire du drapeau français - Société Française de Vexillologie
-
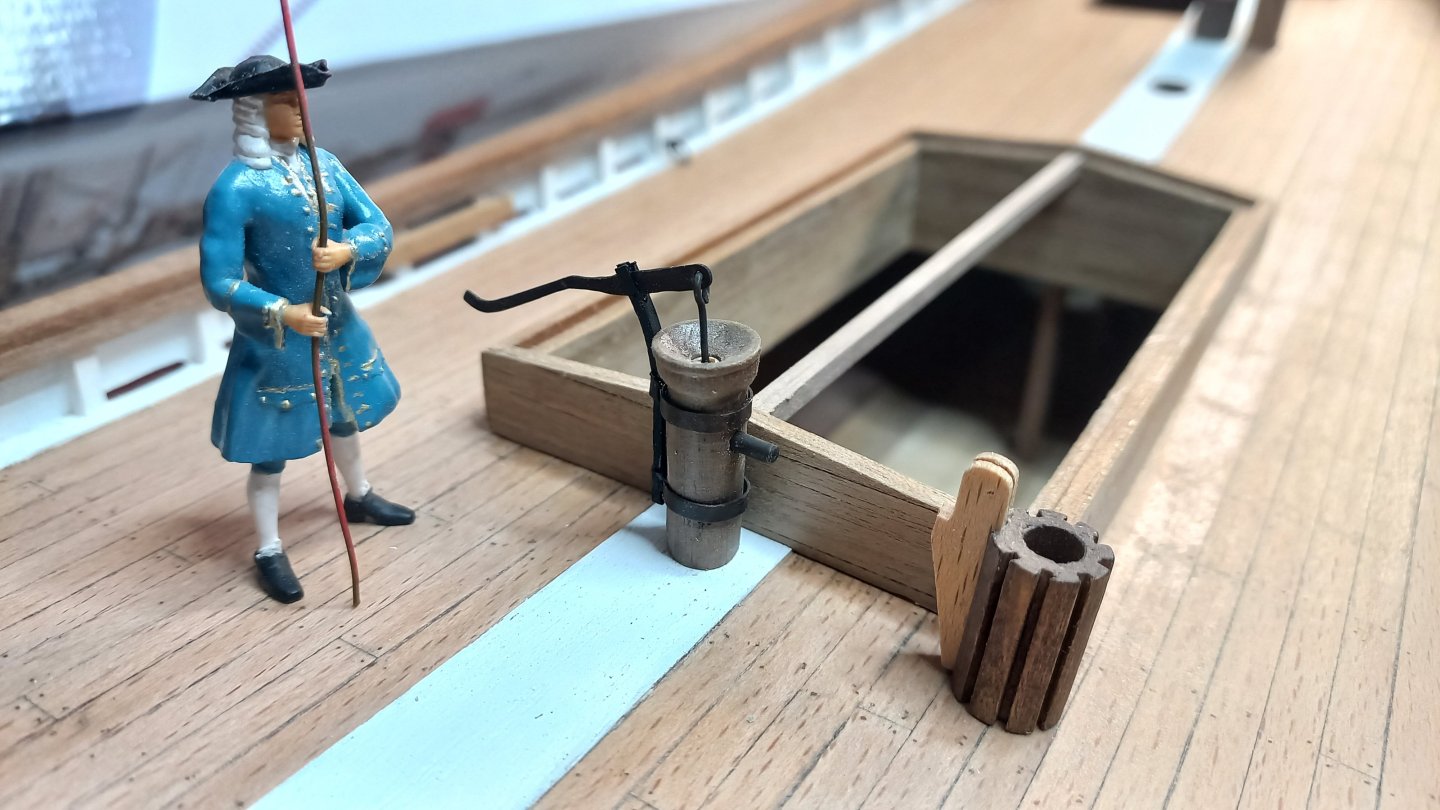
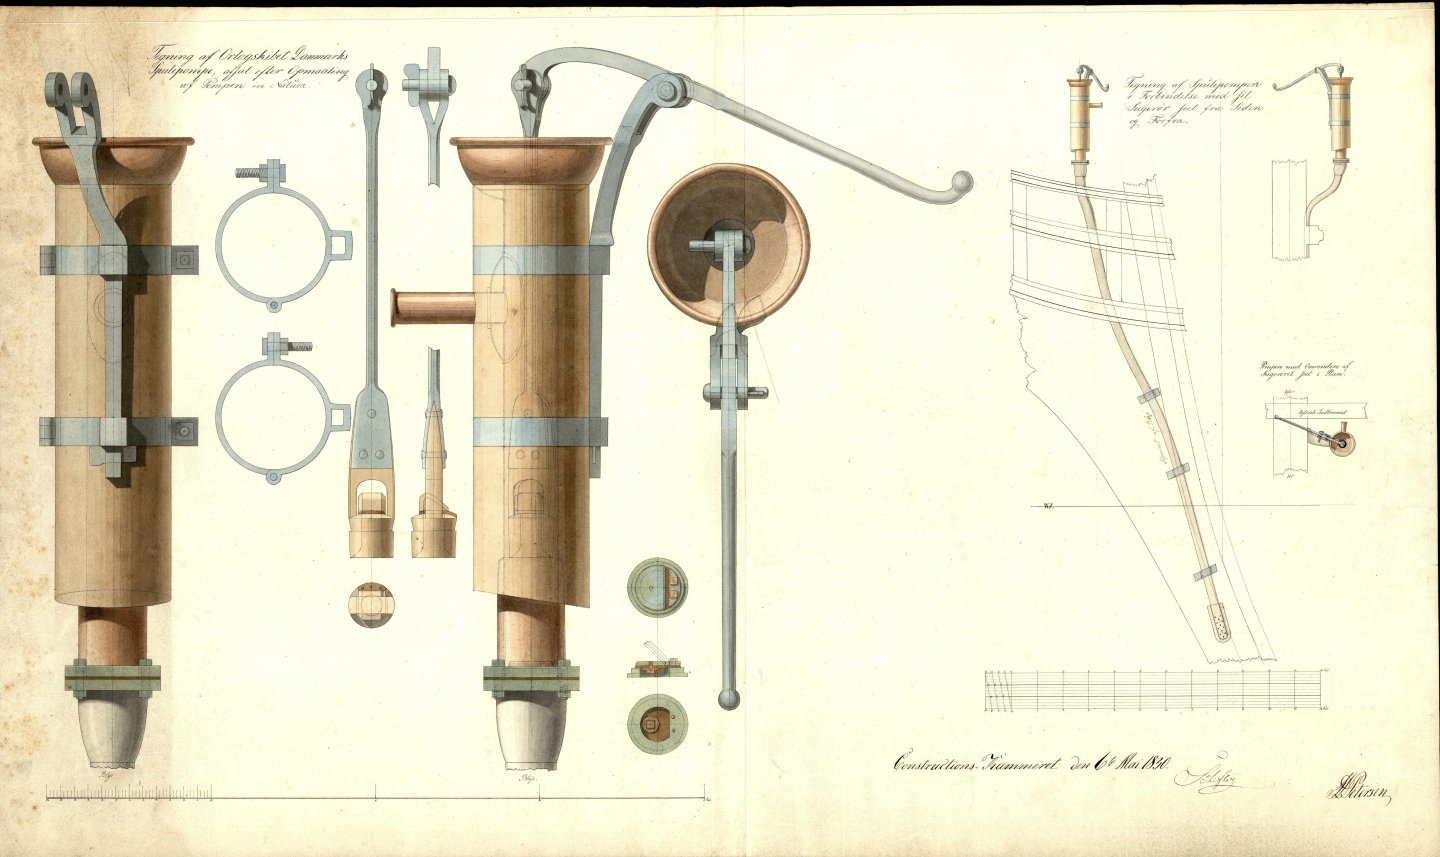
Hello, Bonjour, I made a small adjustment to the design of the pump. I have done the pump according to a Danish drawing provided by Bruce D. Compared to the kit's pump, it looks better. I hope so. link : https://arkivalieronline.rigsarkivet.dk/en/billedviser?epid=17149179#189467,31913228
-
Hello Bruce, Is it possible to have the link to get the original drawings of the pumps? Thank you.
-
Good news, I will follow your blog with pleasure. I did as you said
.thumb.jpg.687242cd098594130f0fd9312151c8ce.jpg)

-
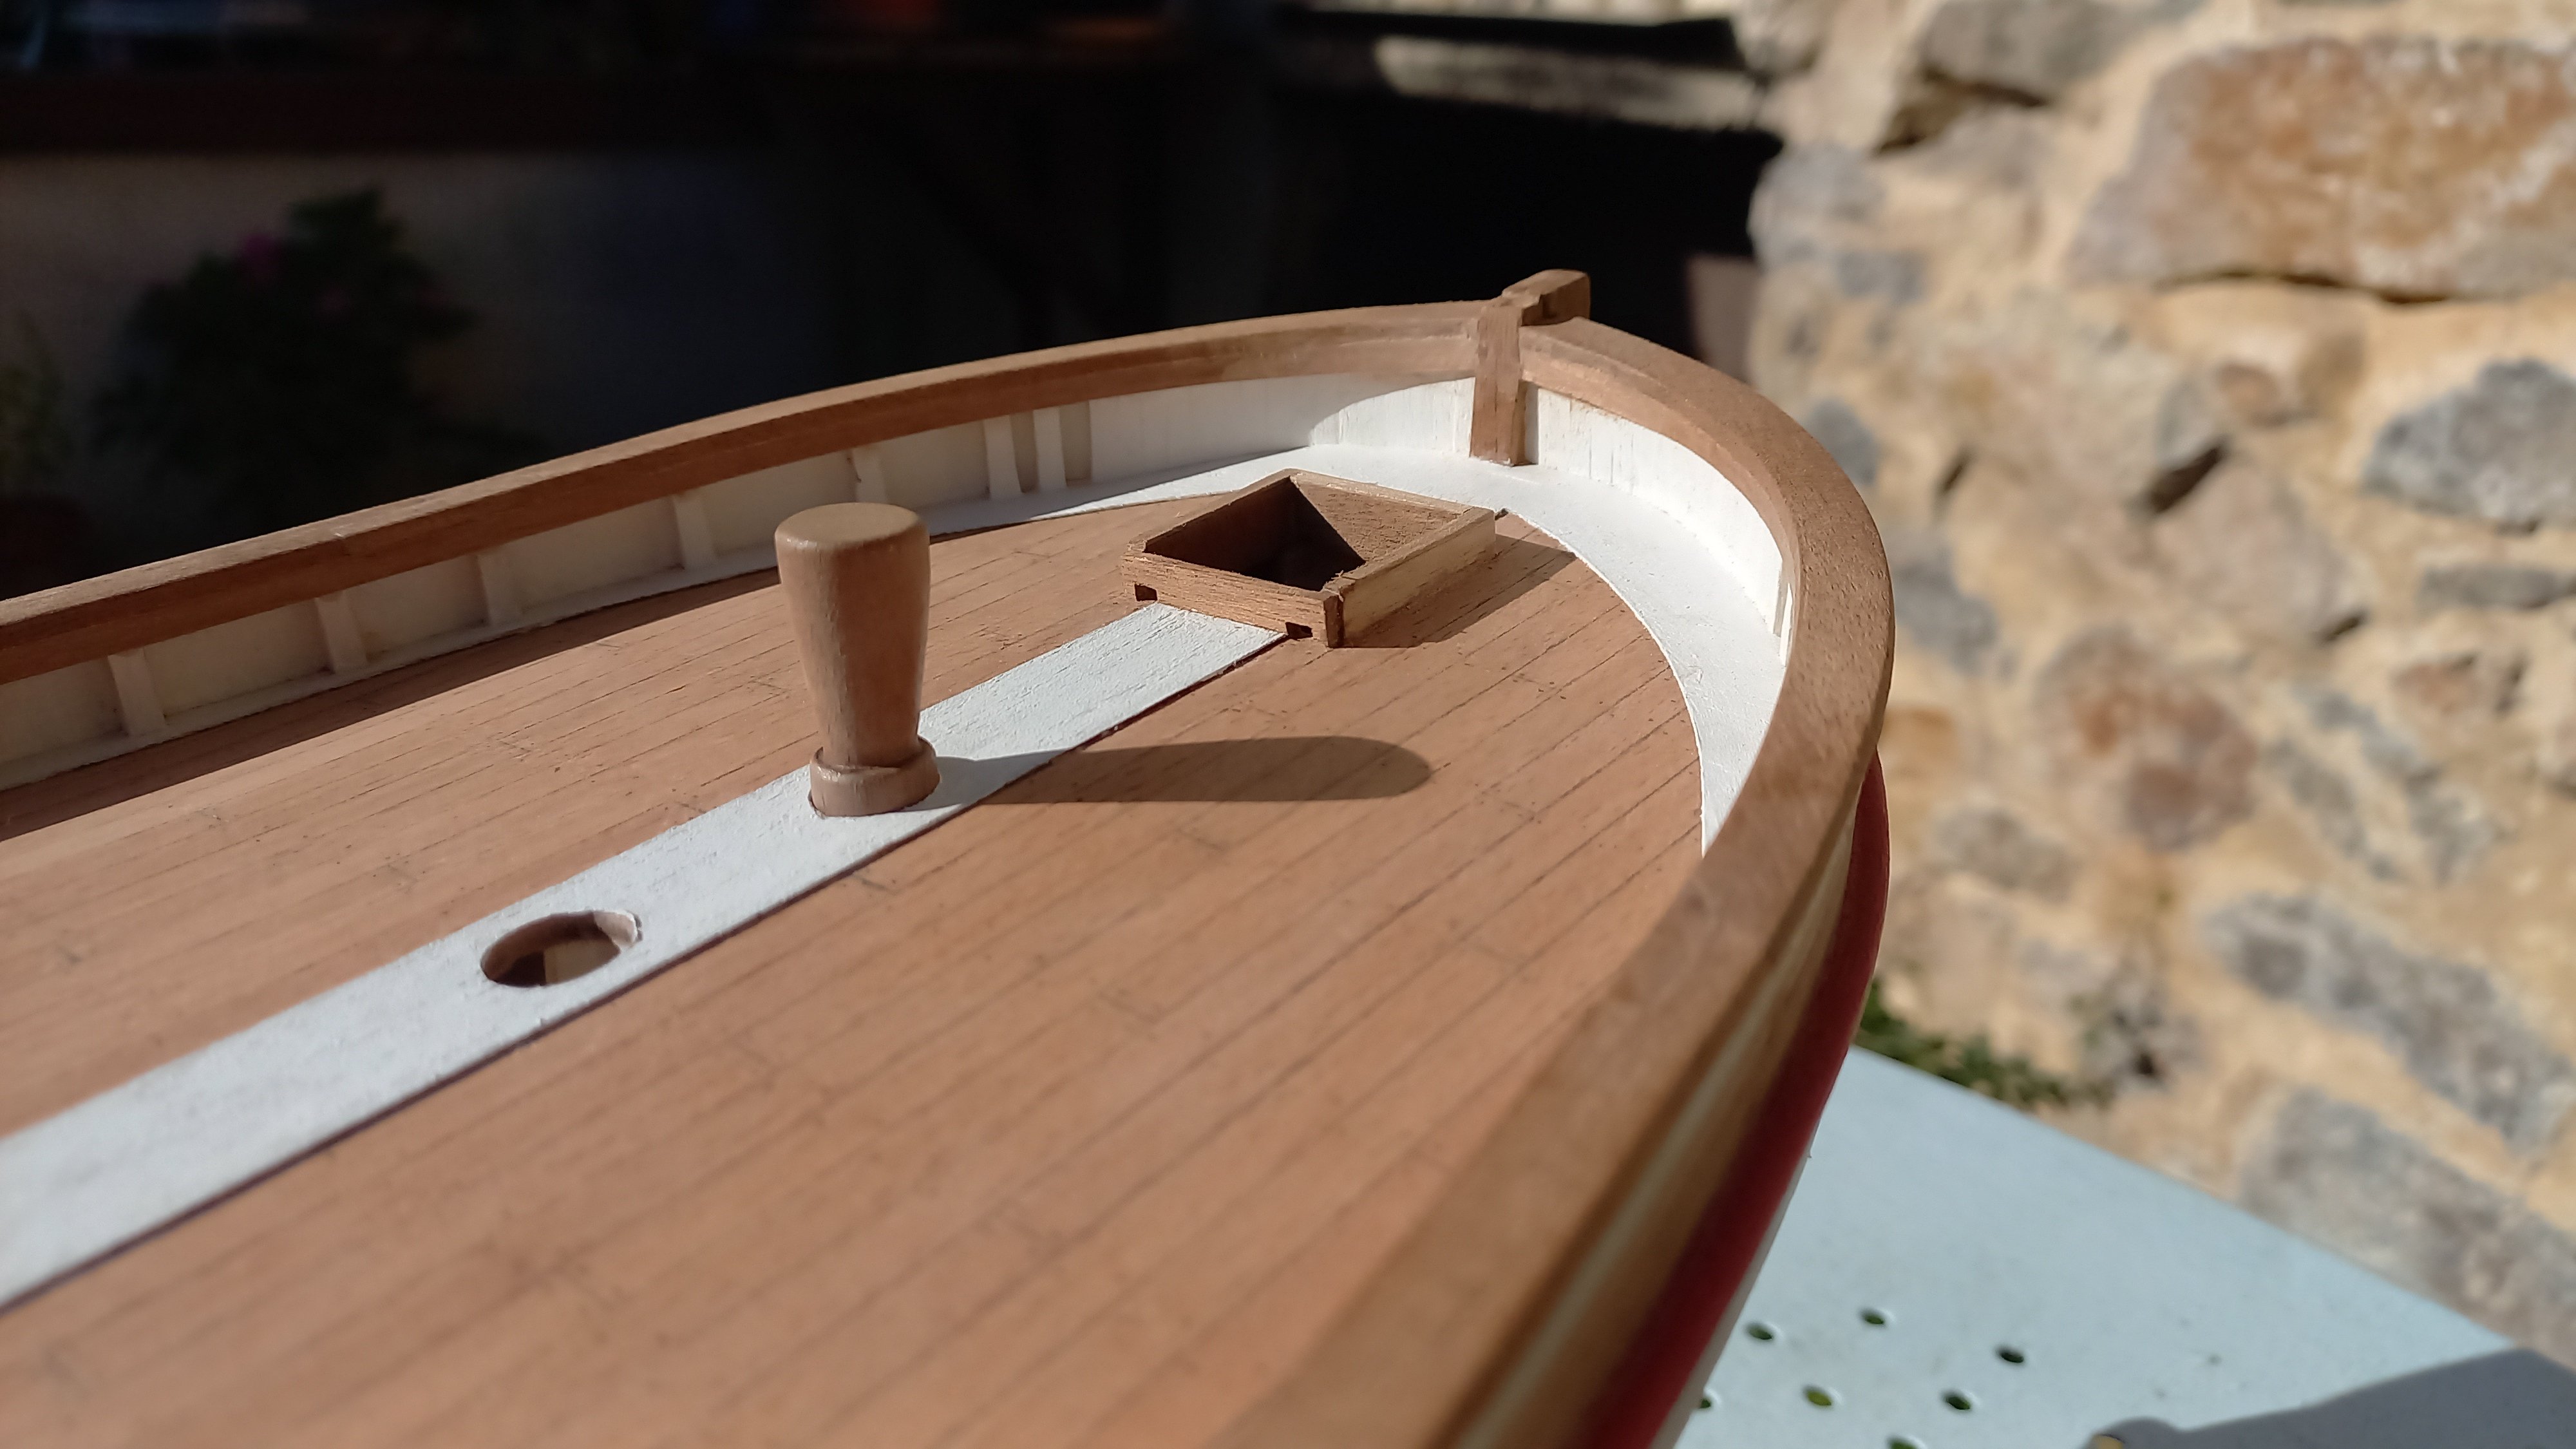
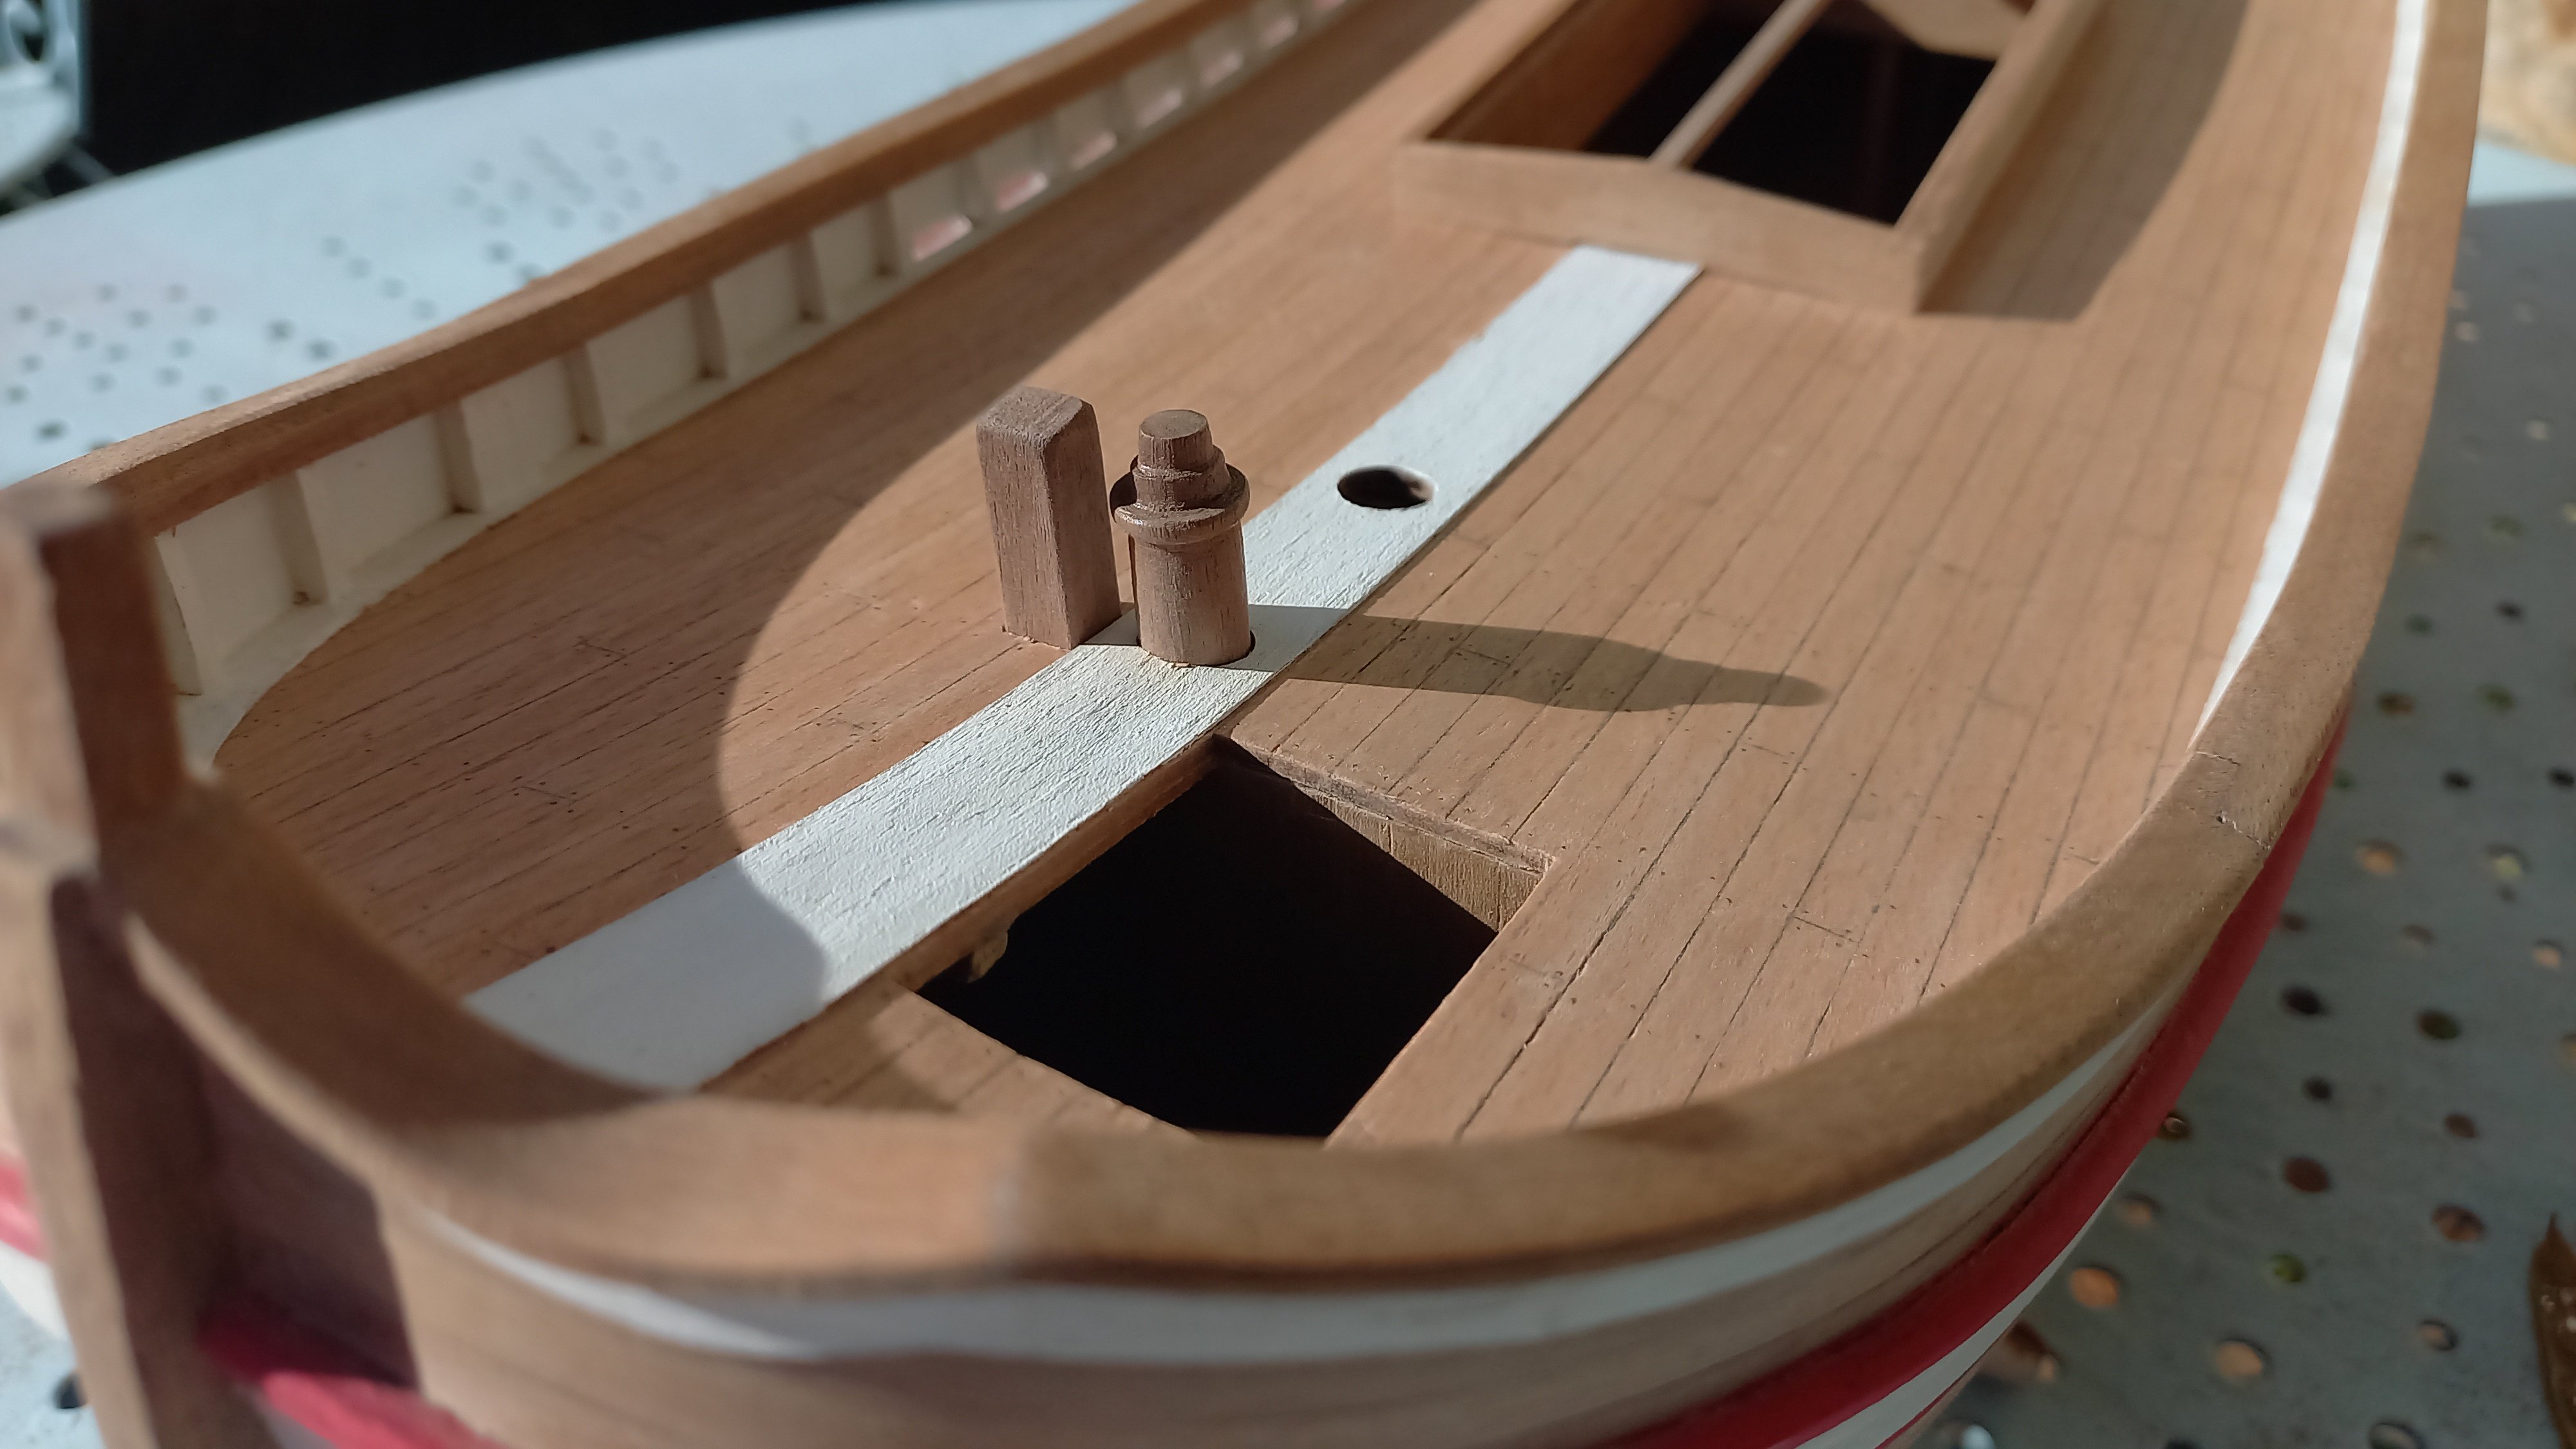
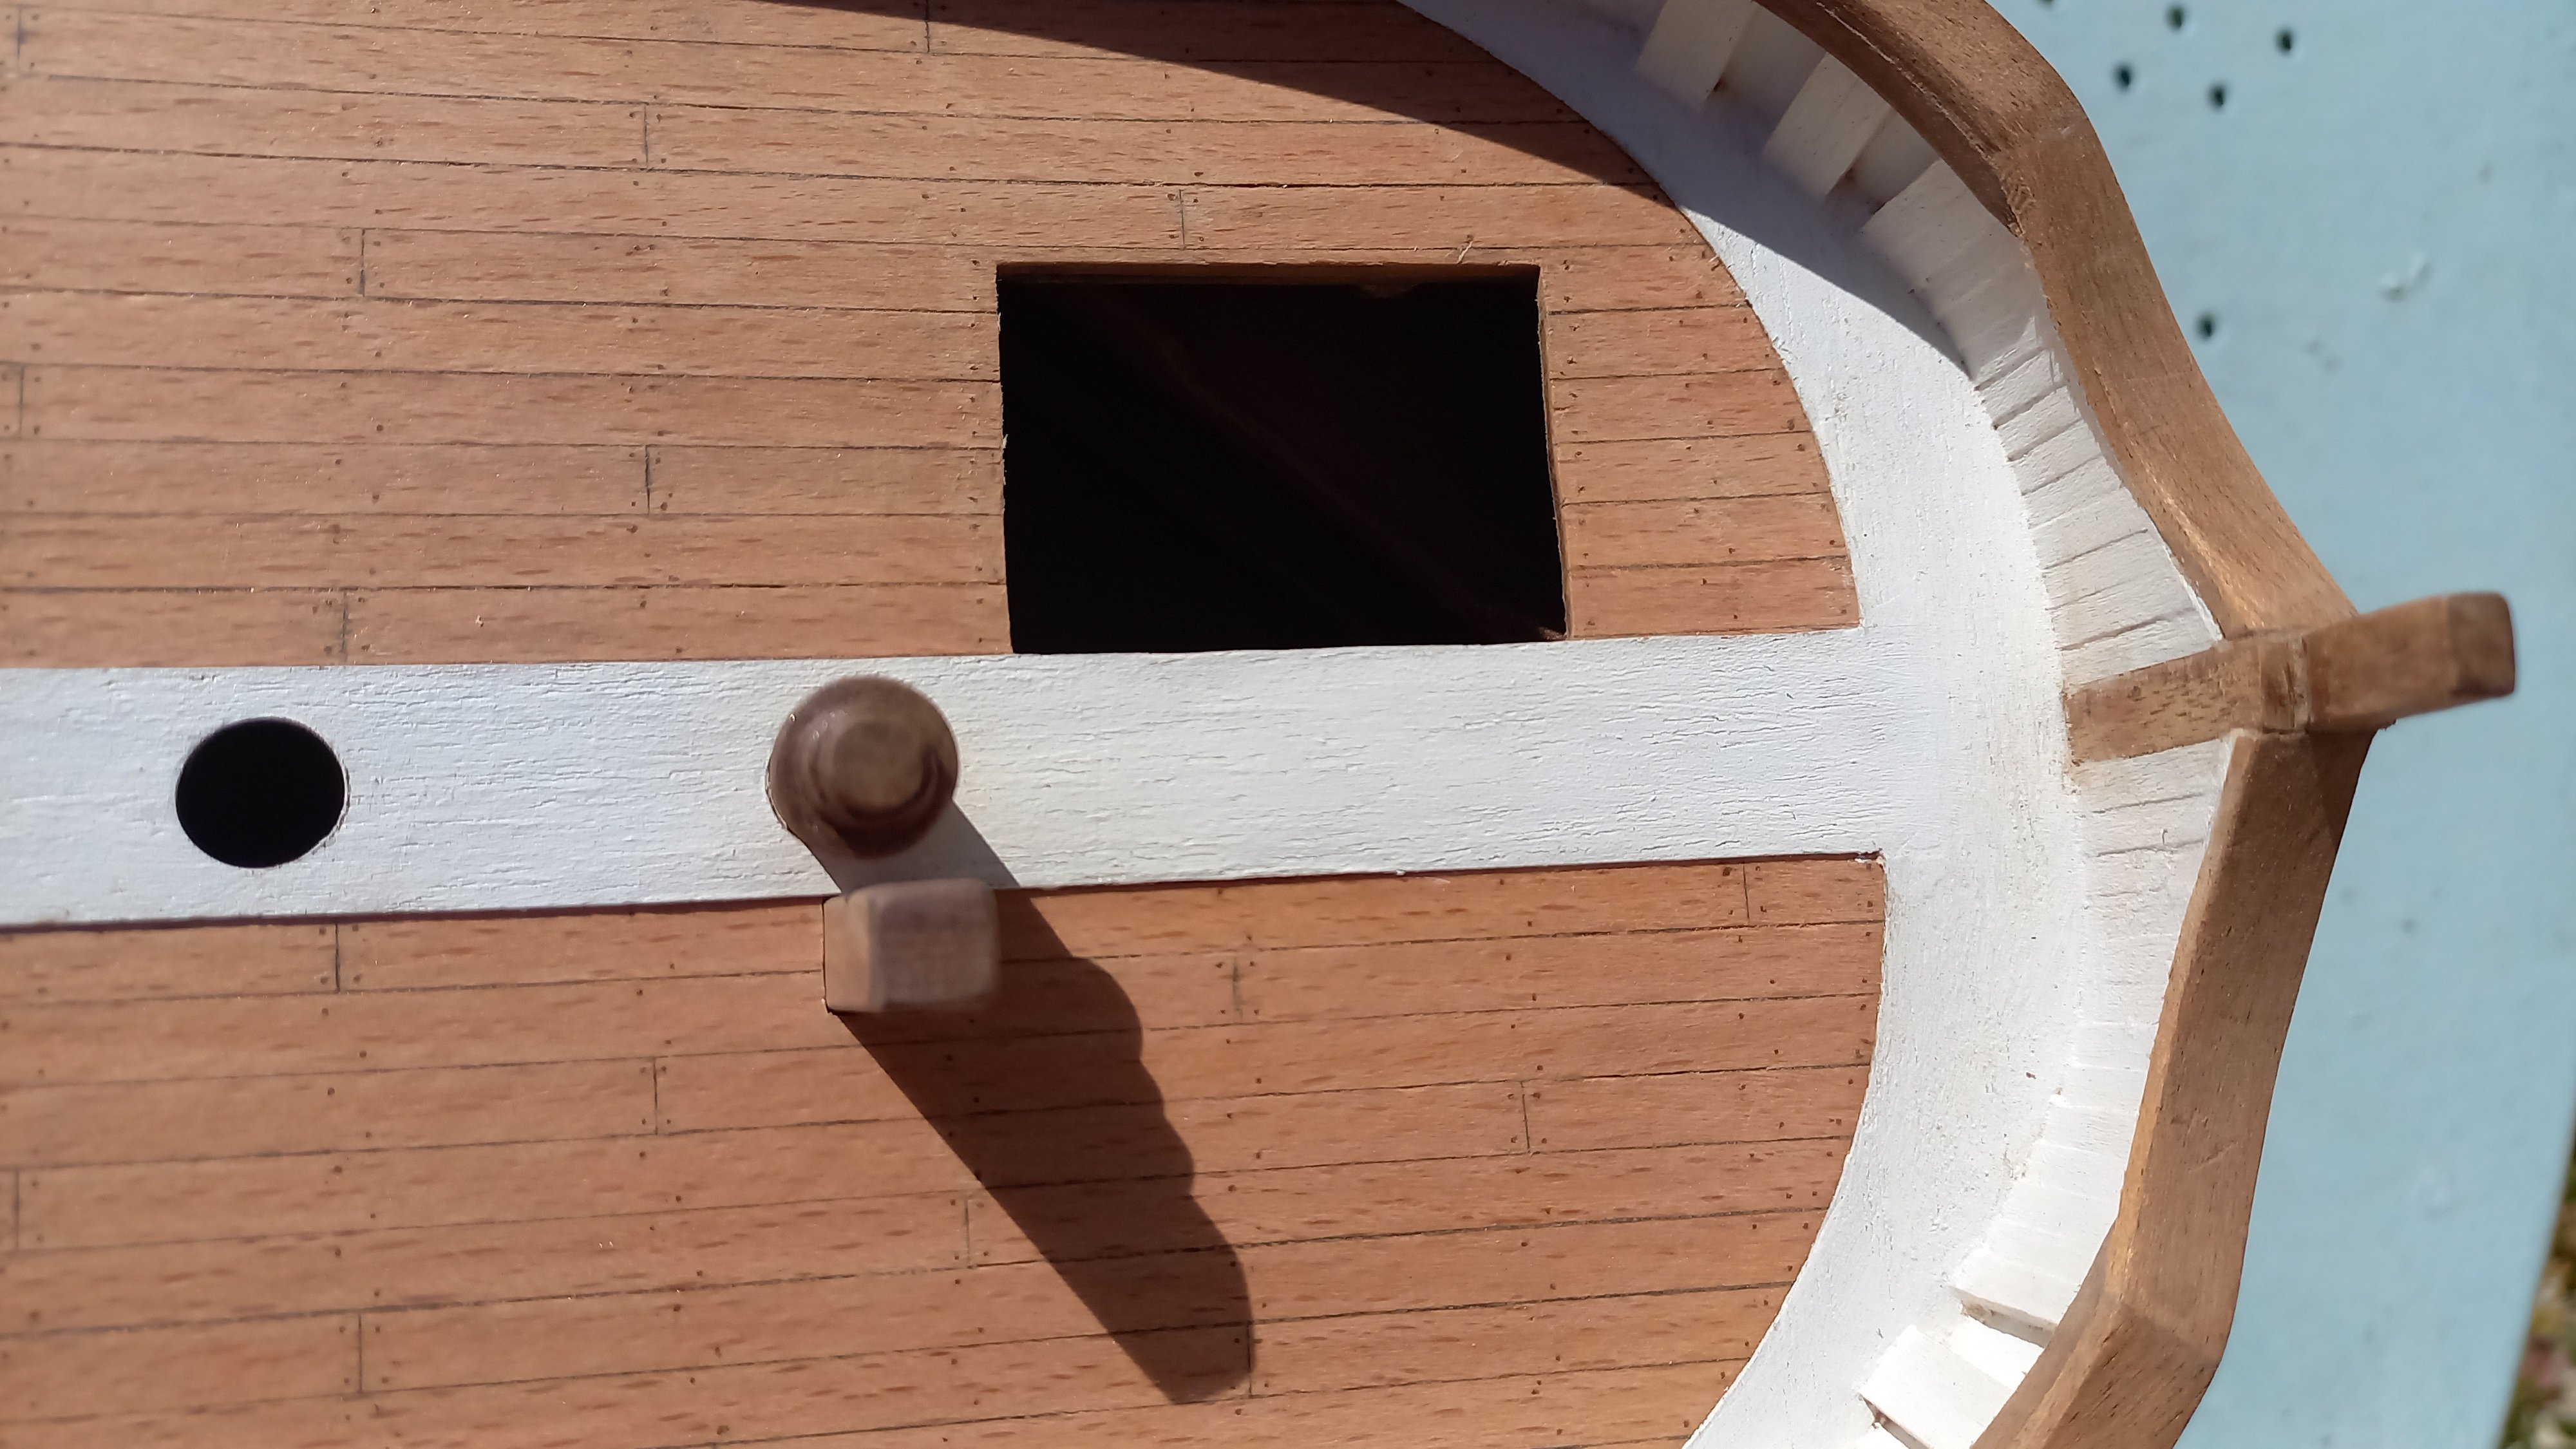
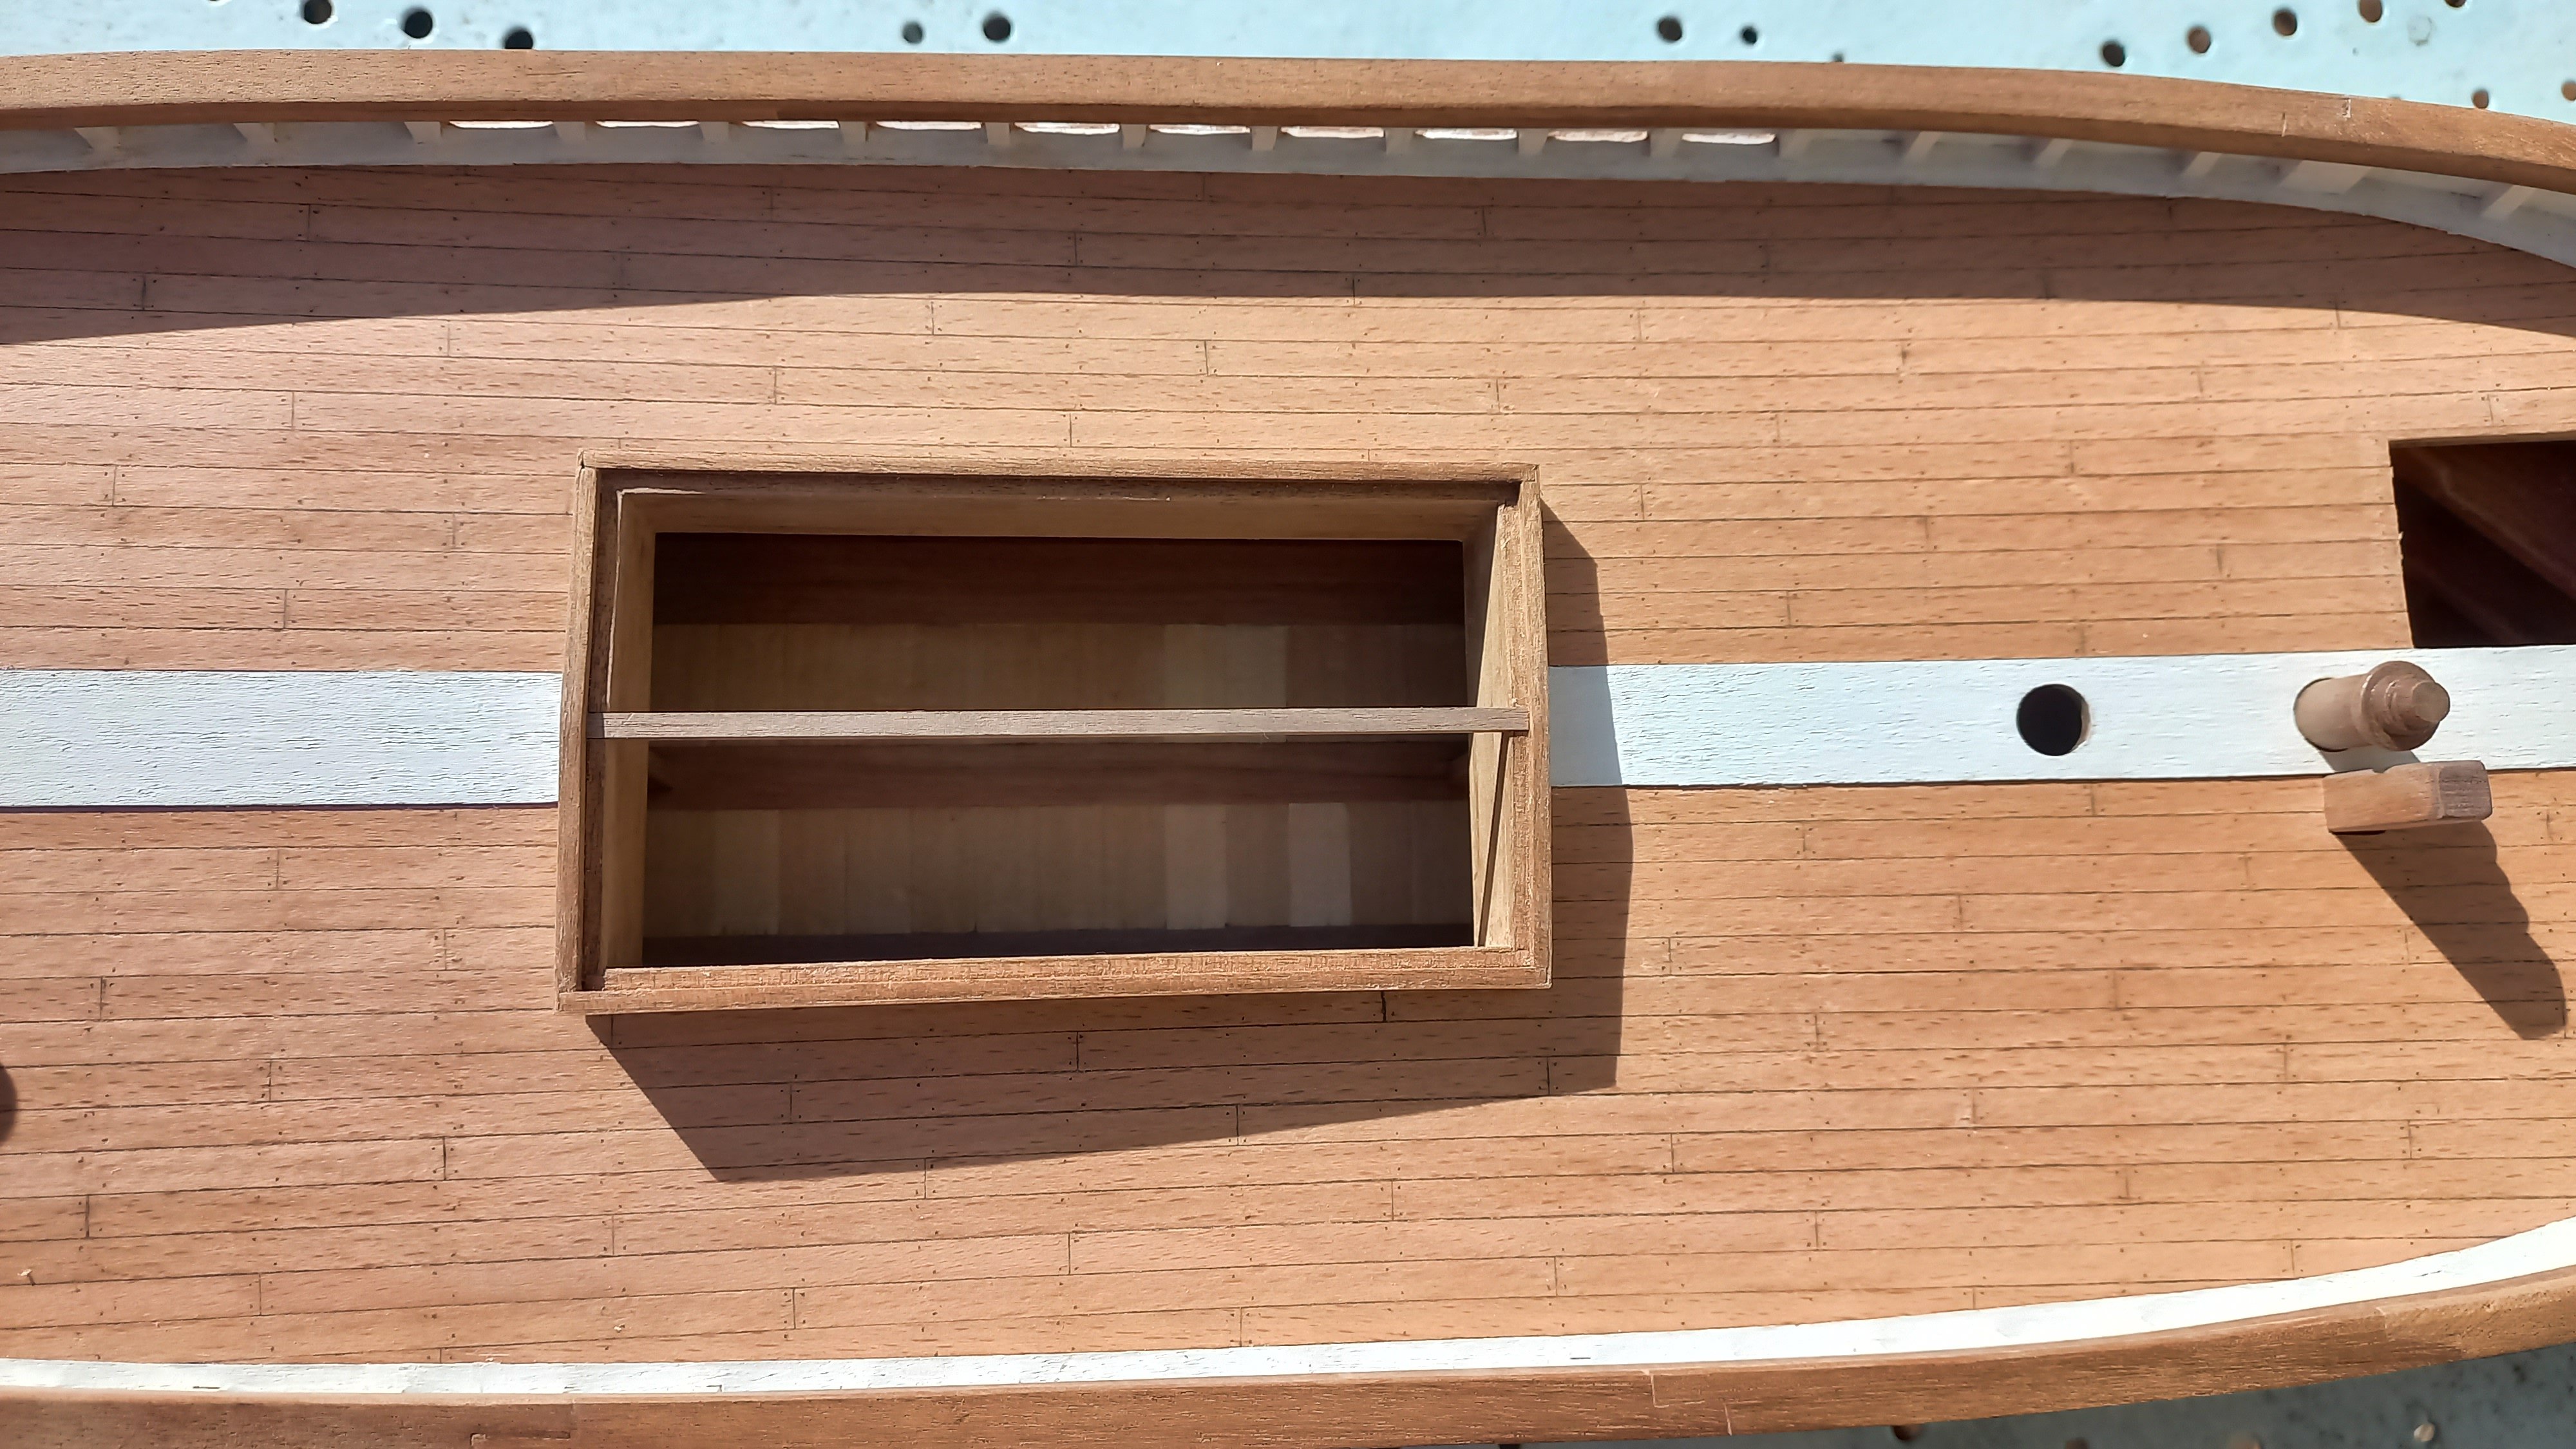
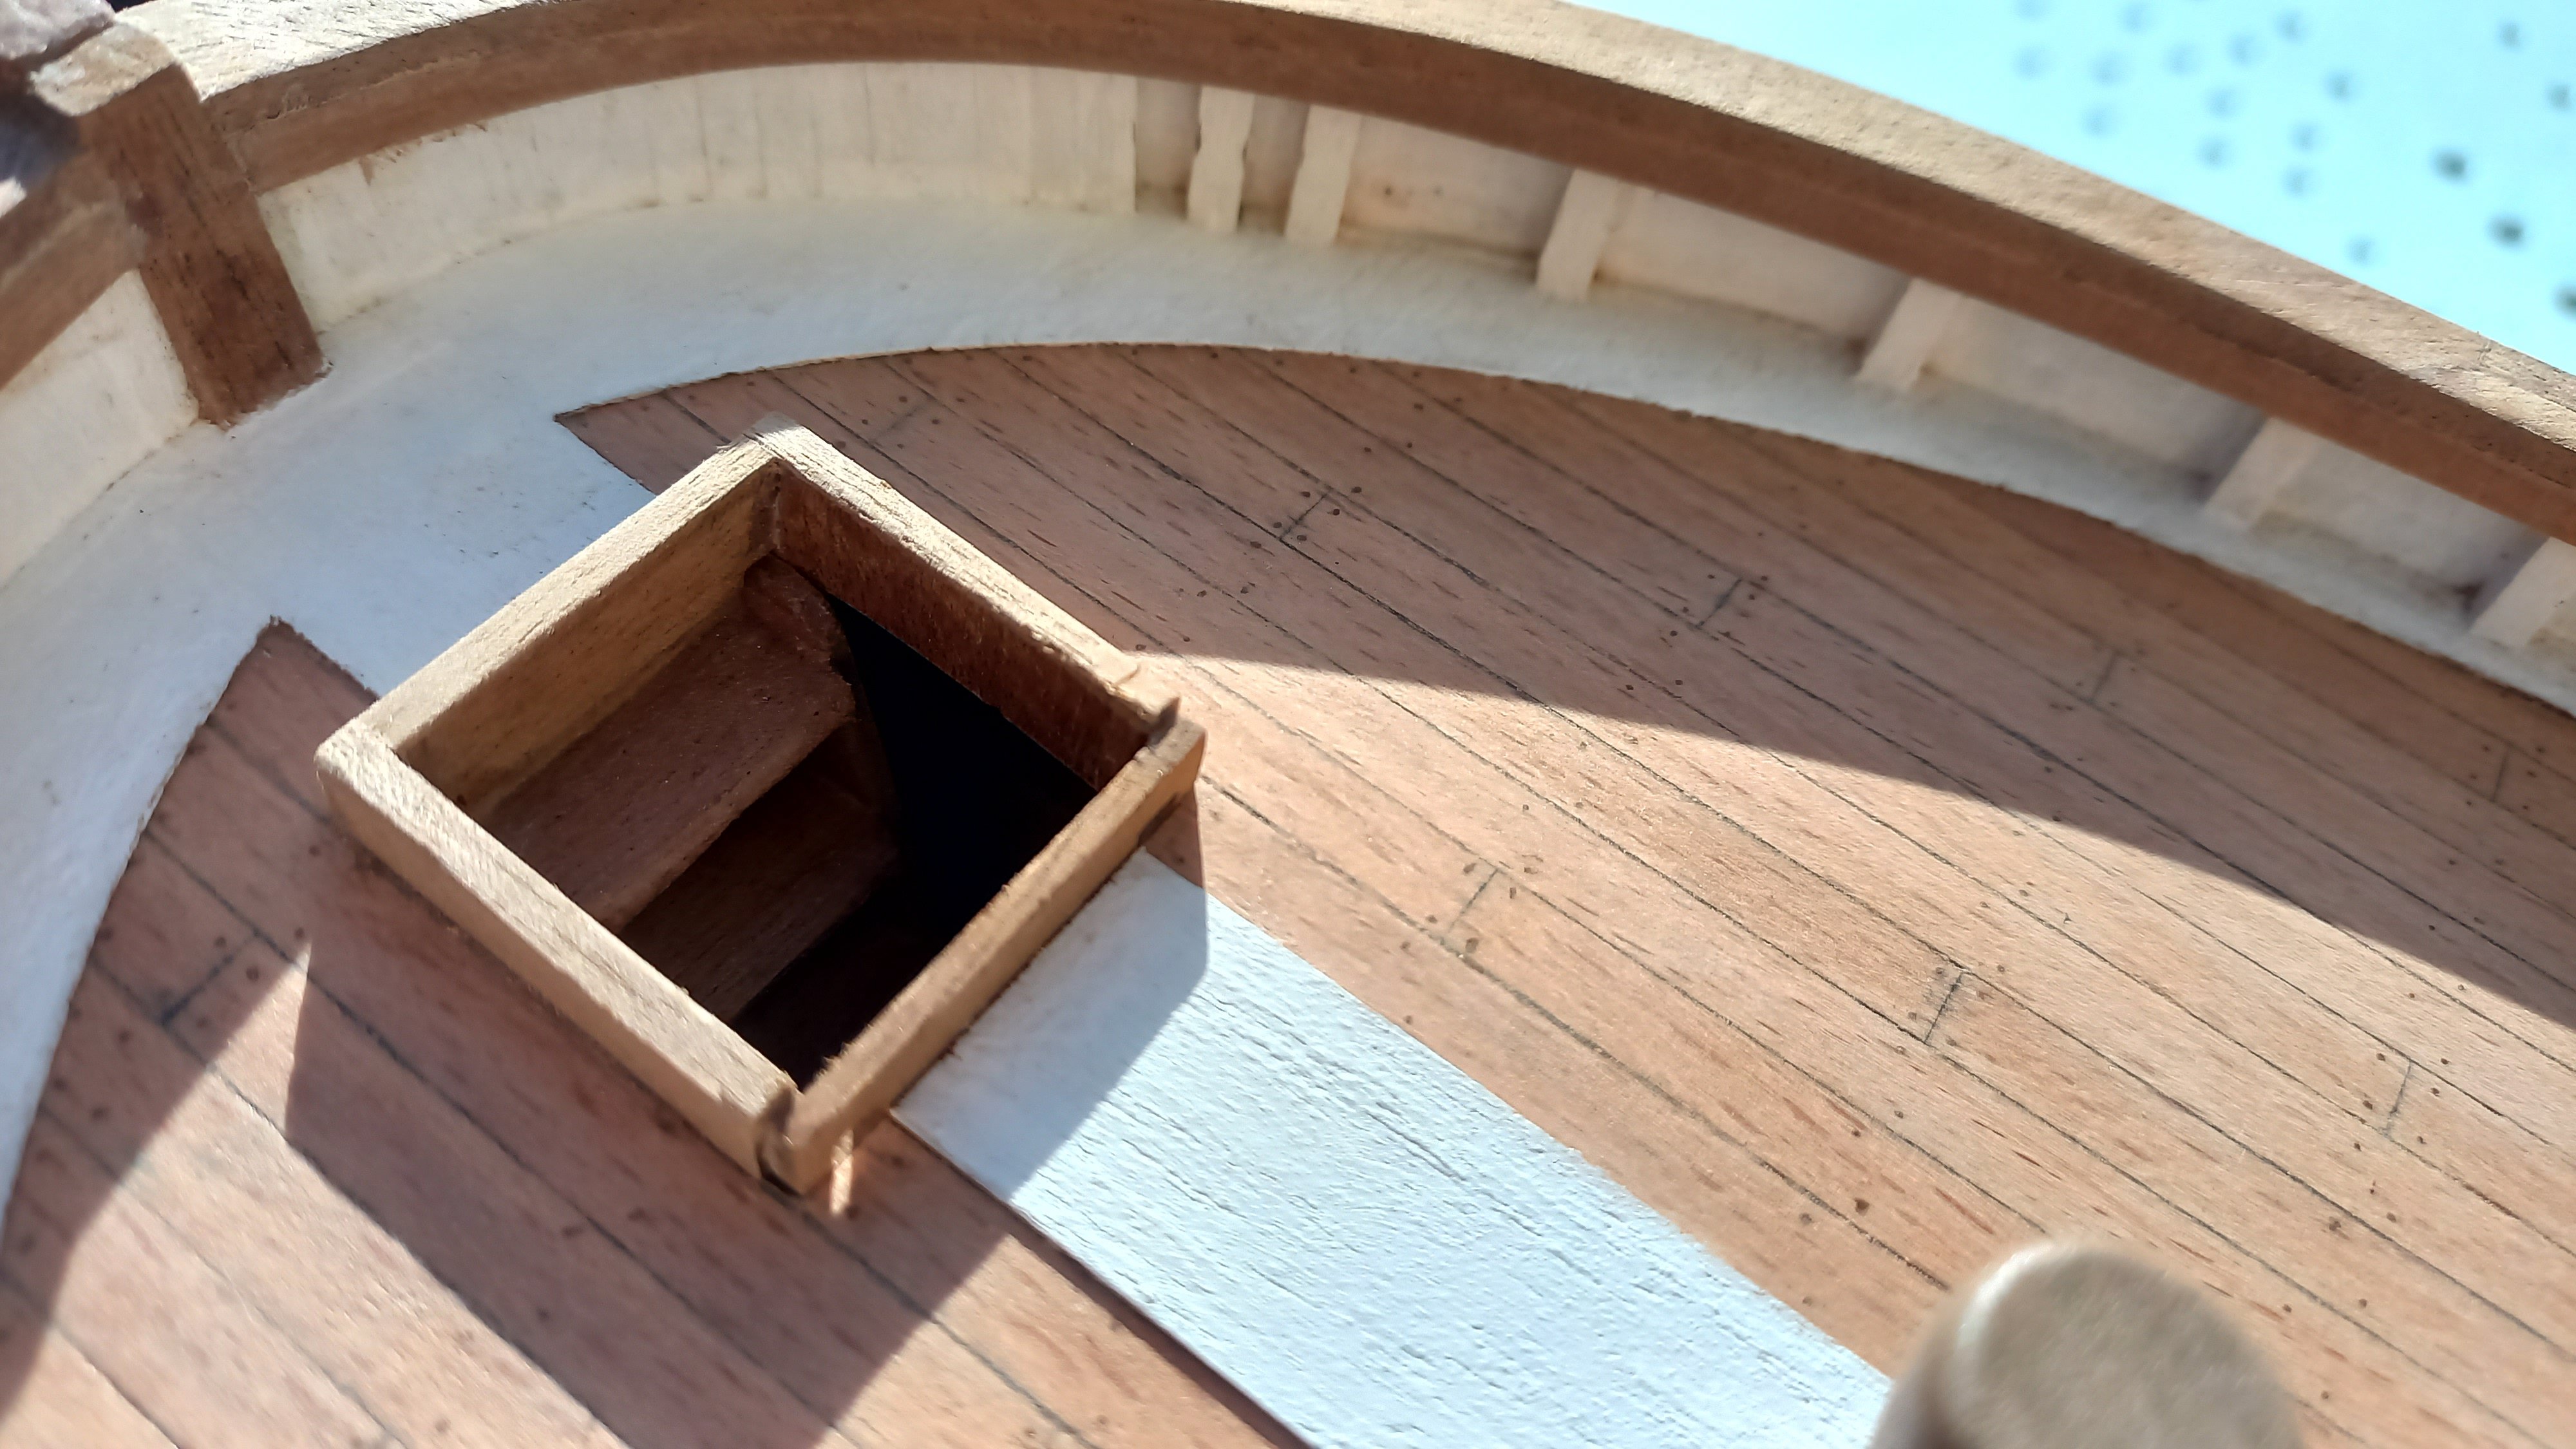
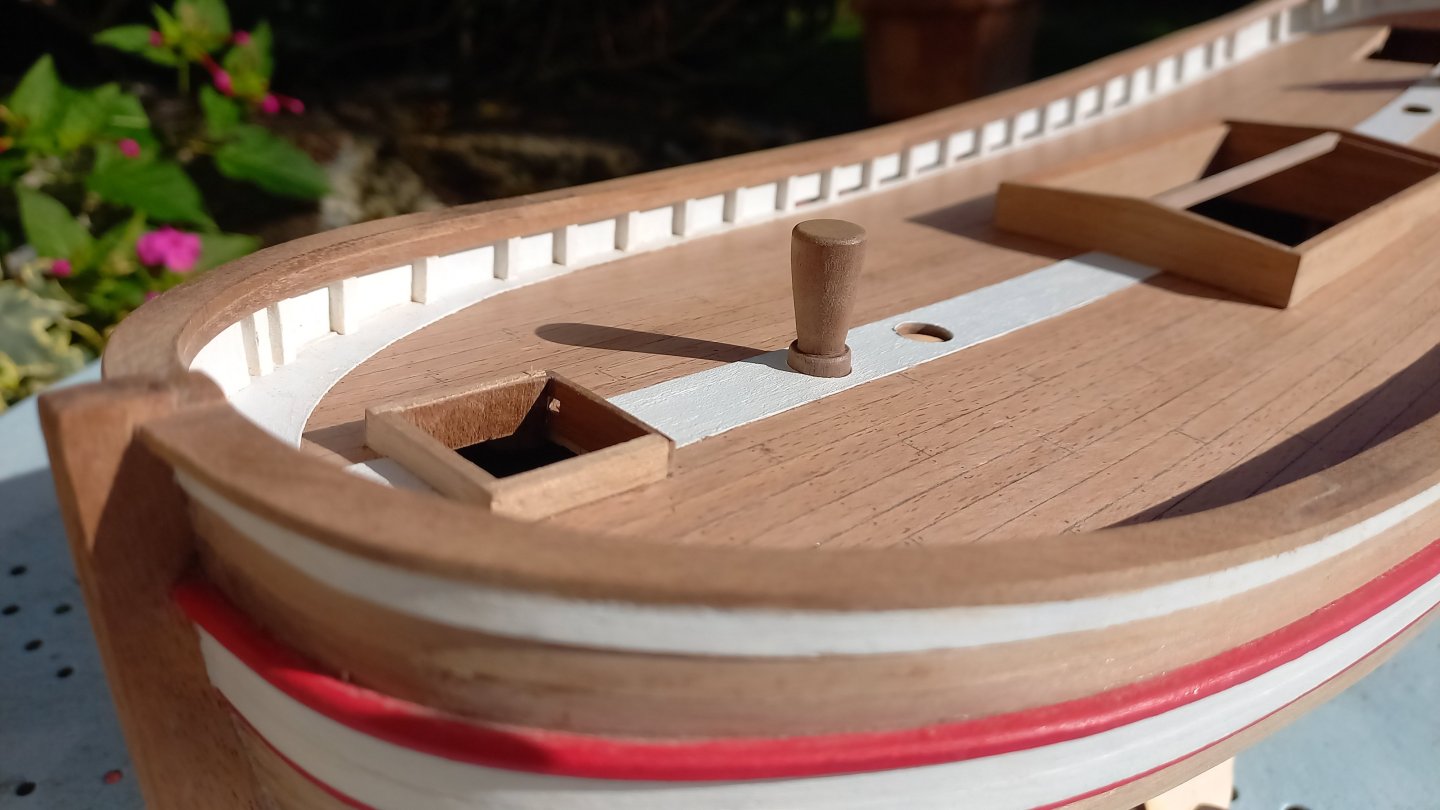
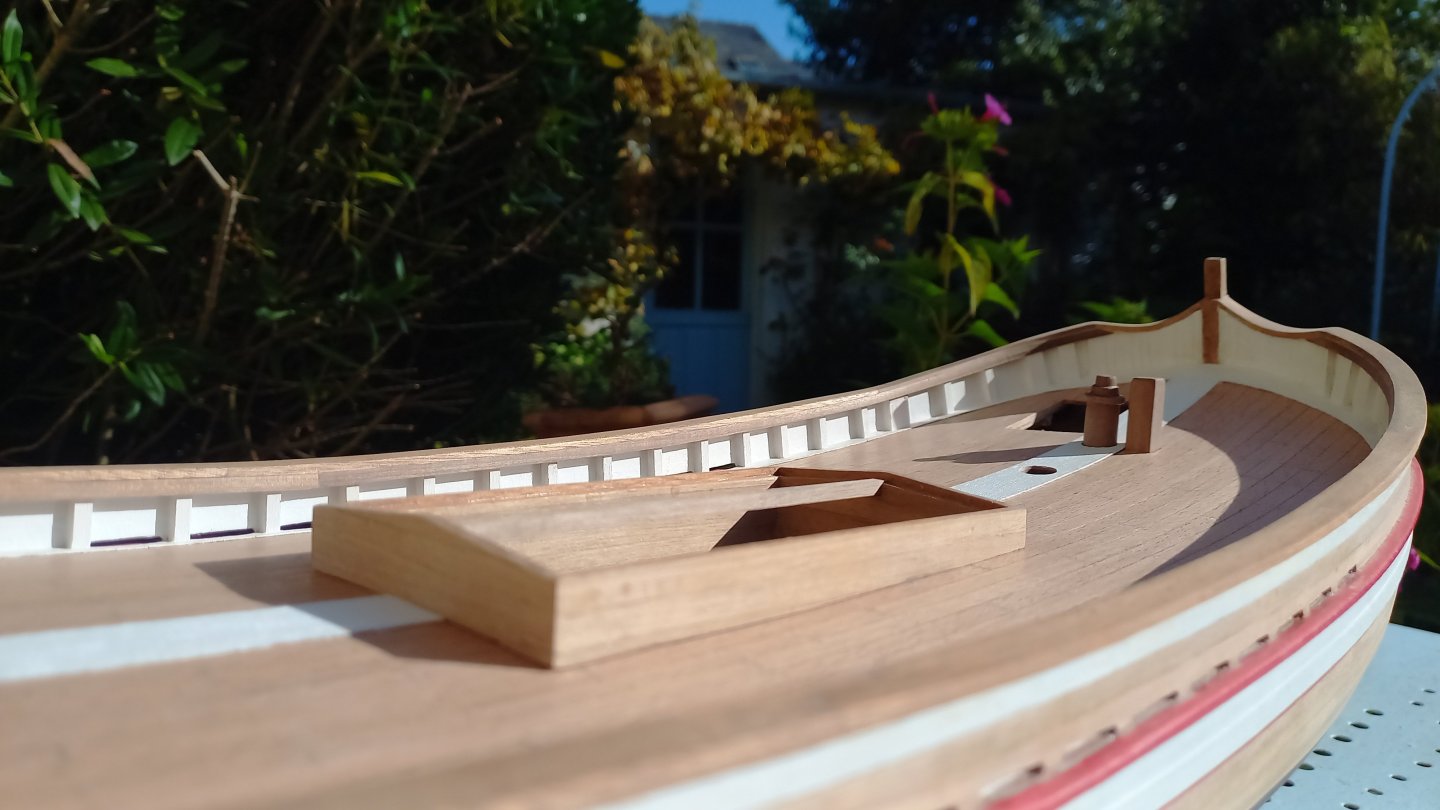
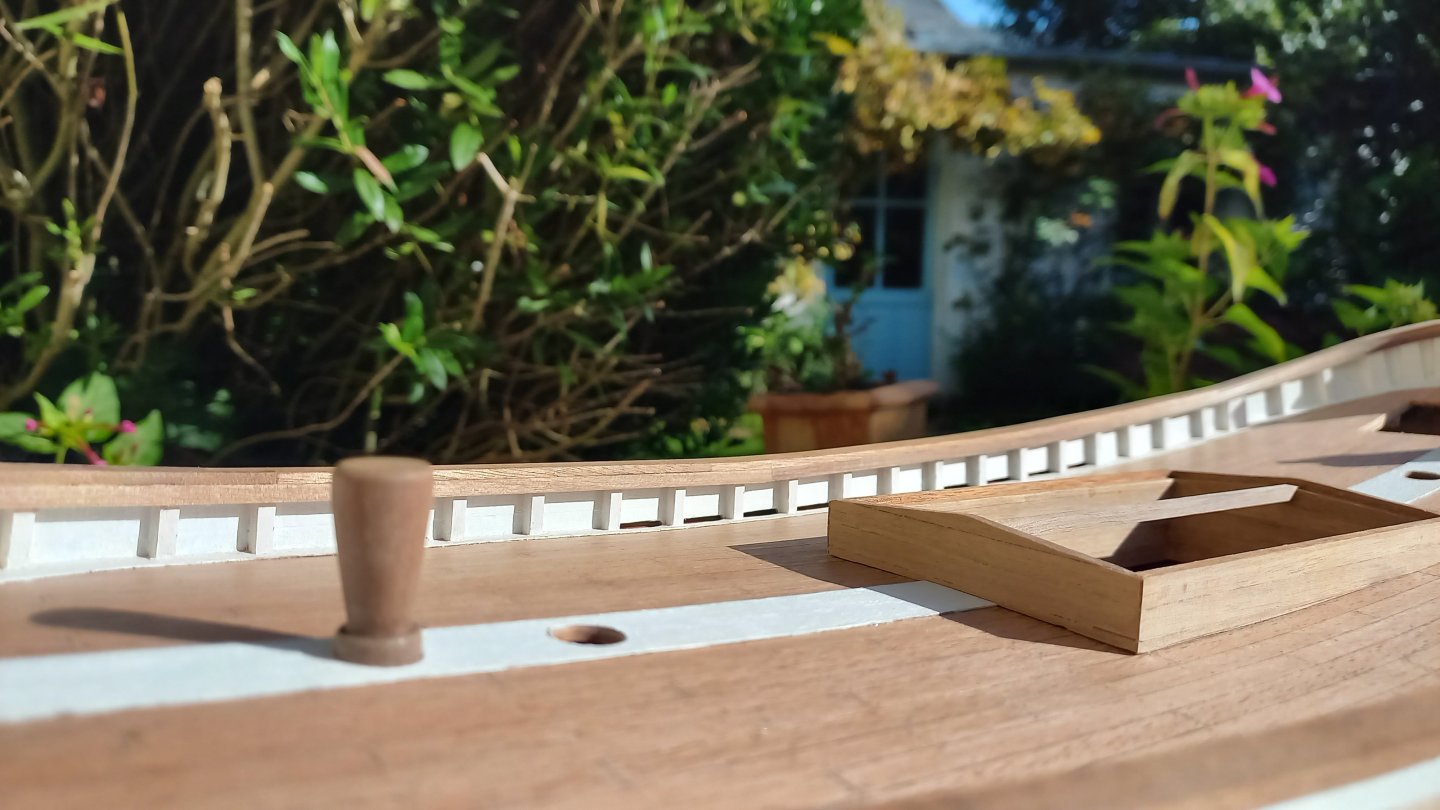
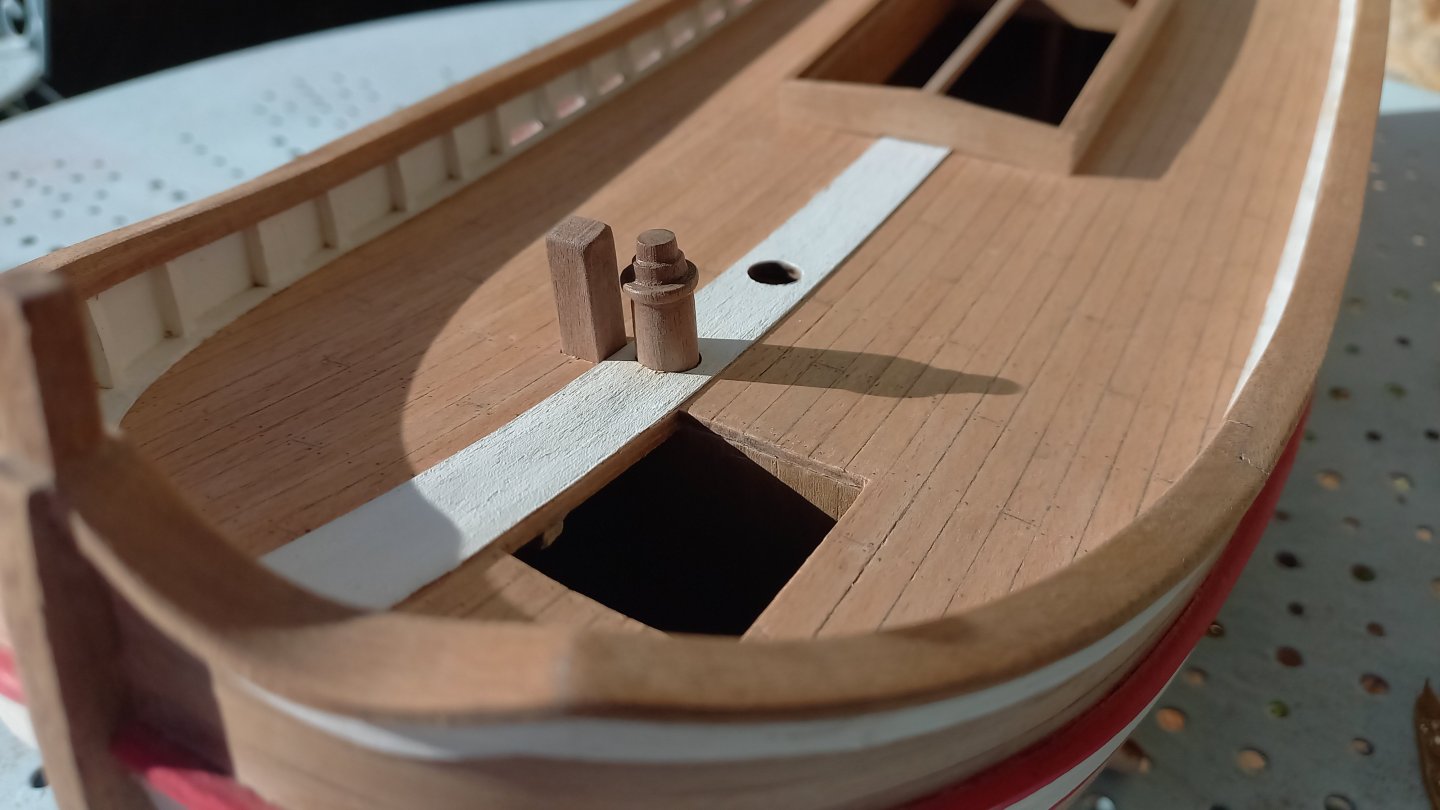
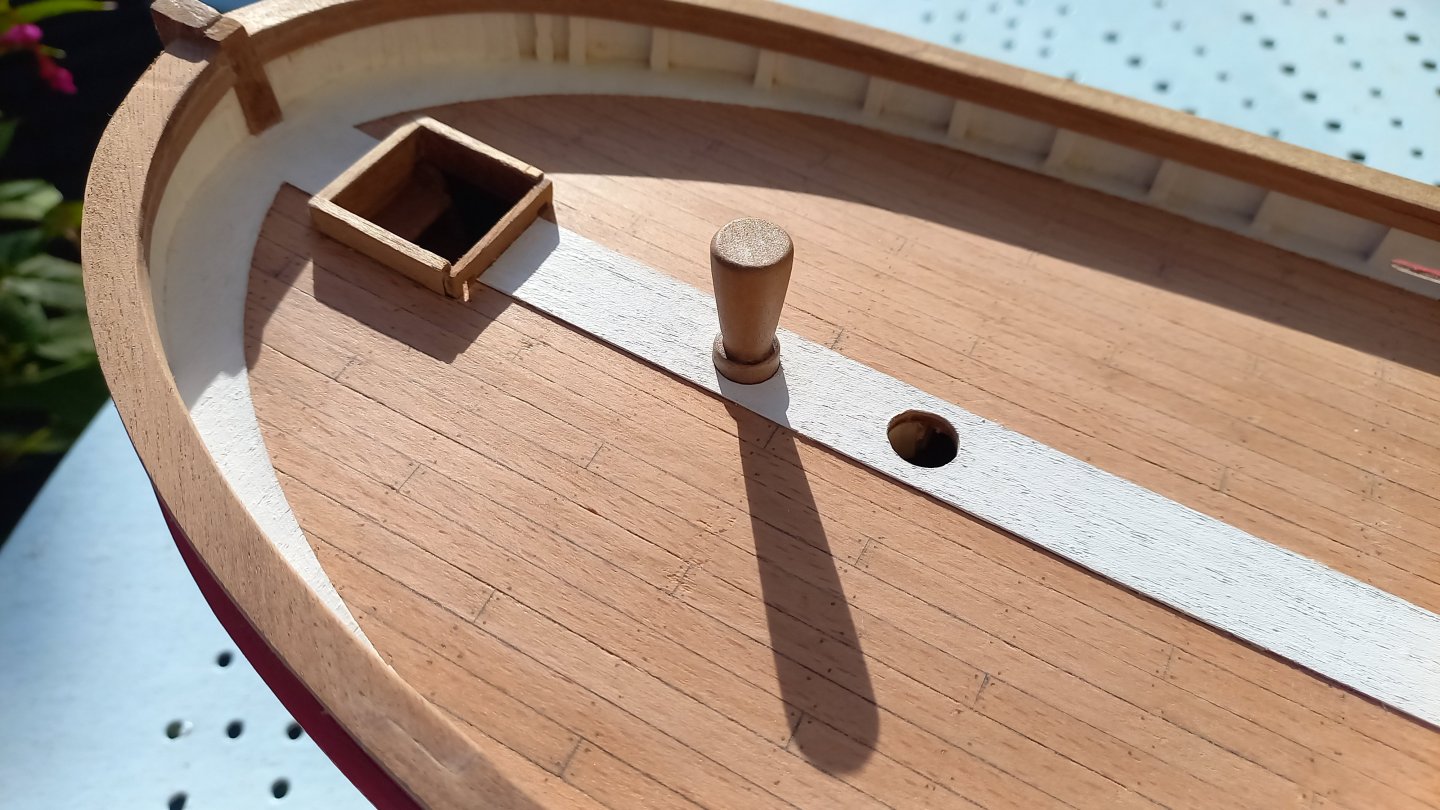
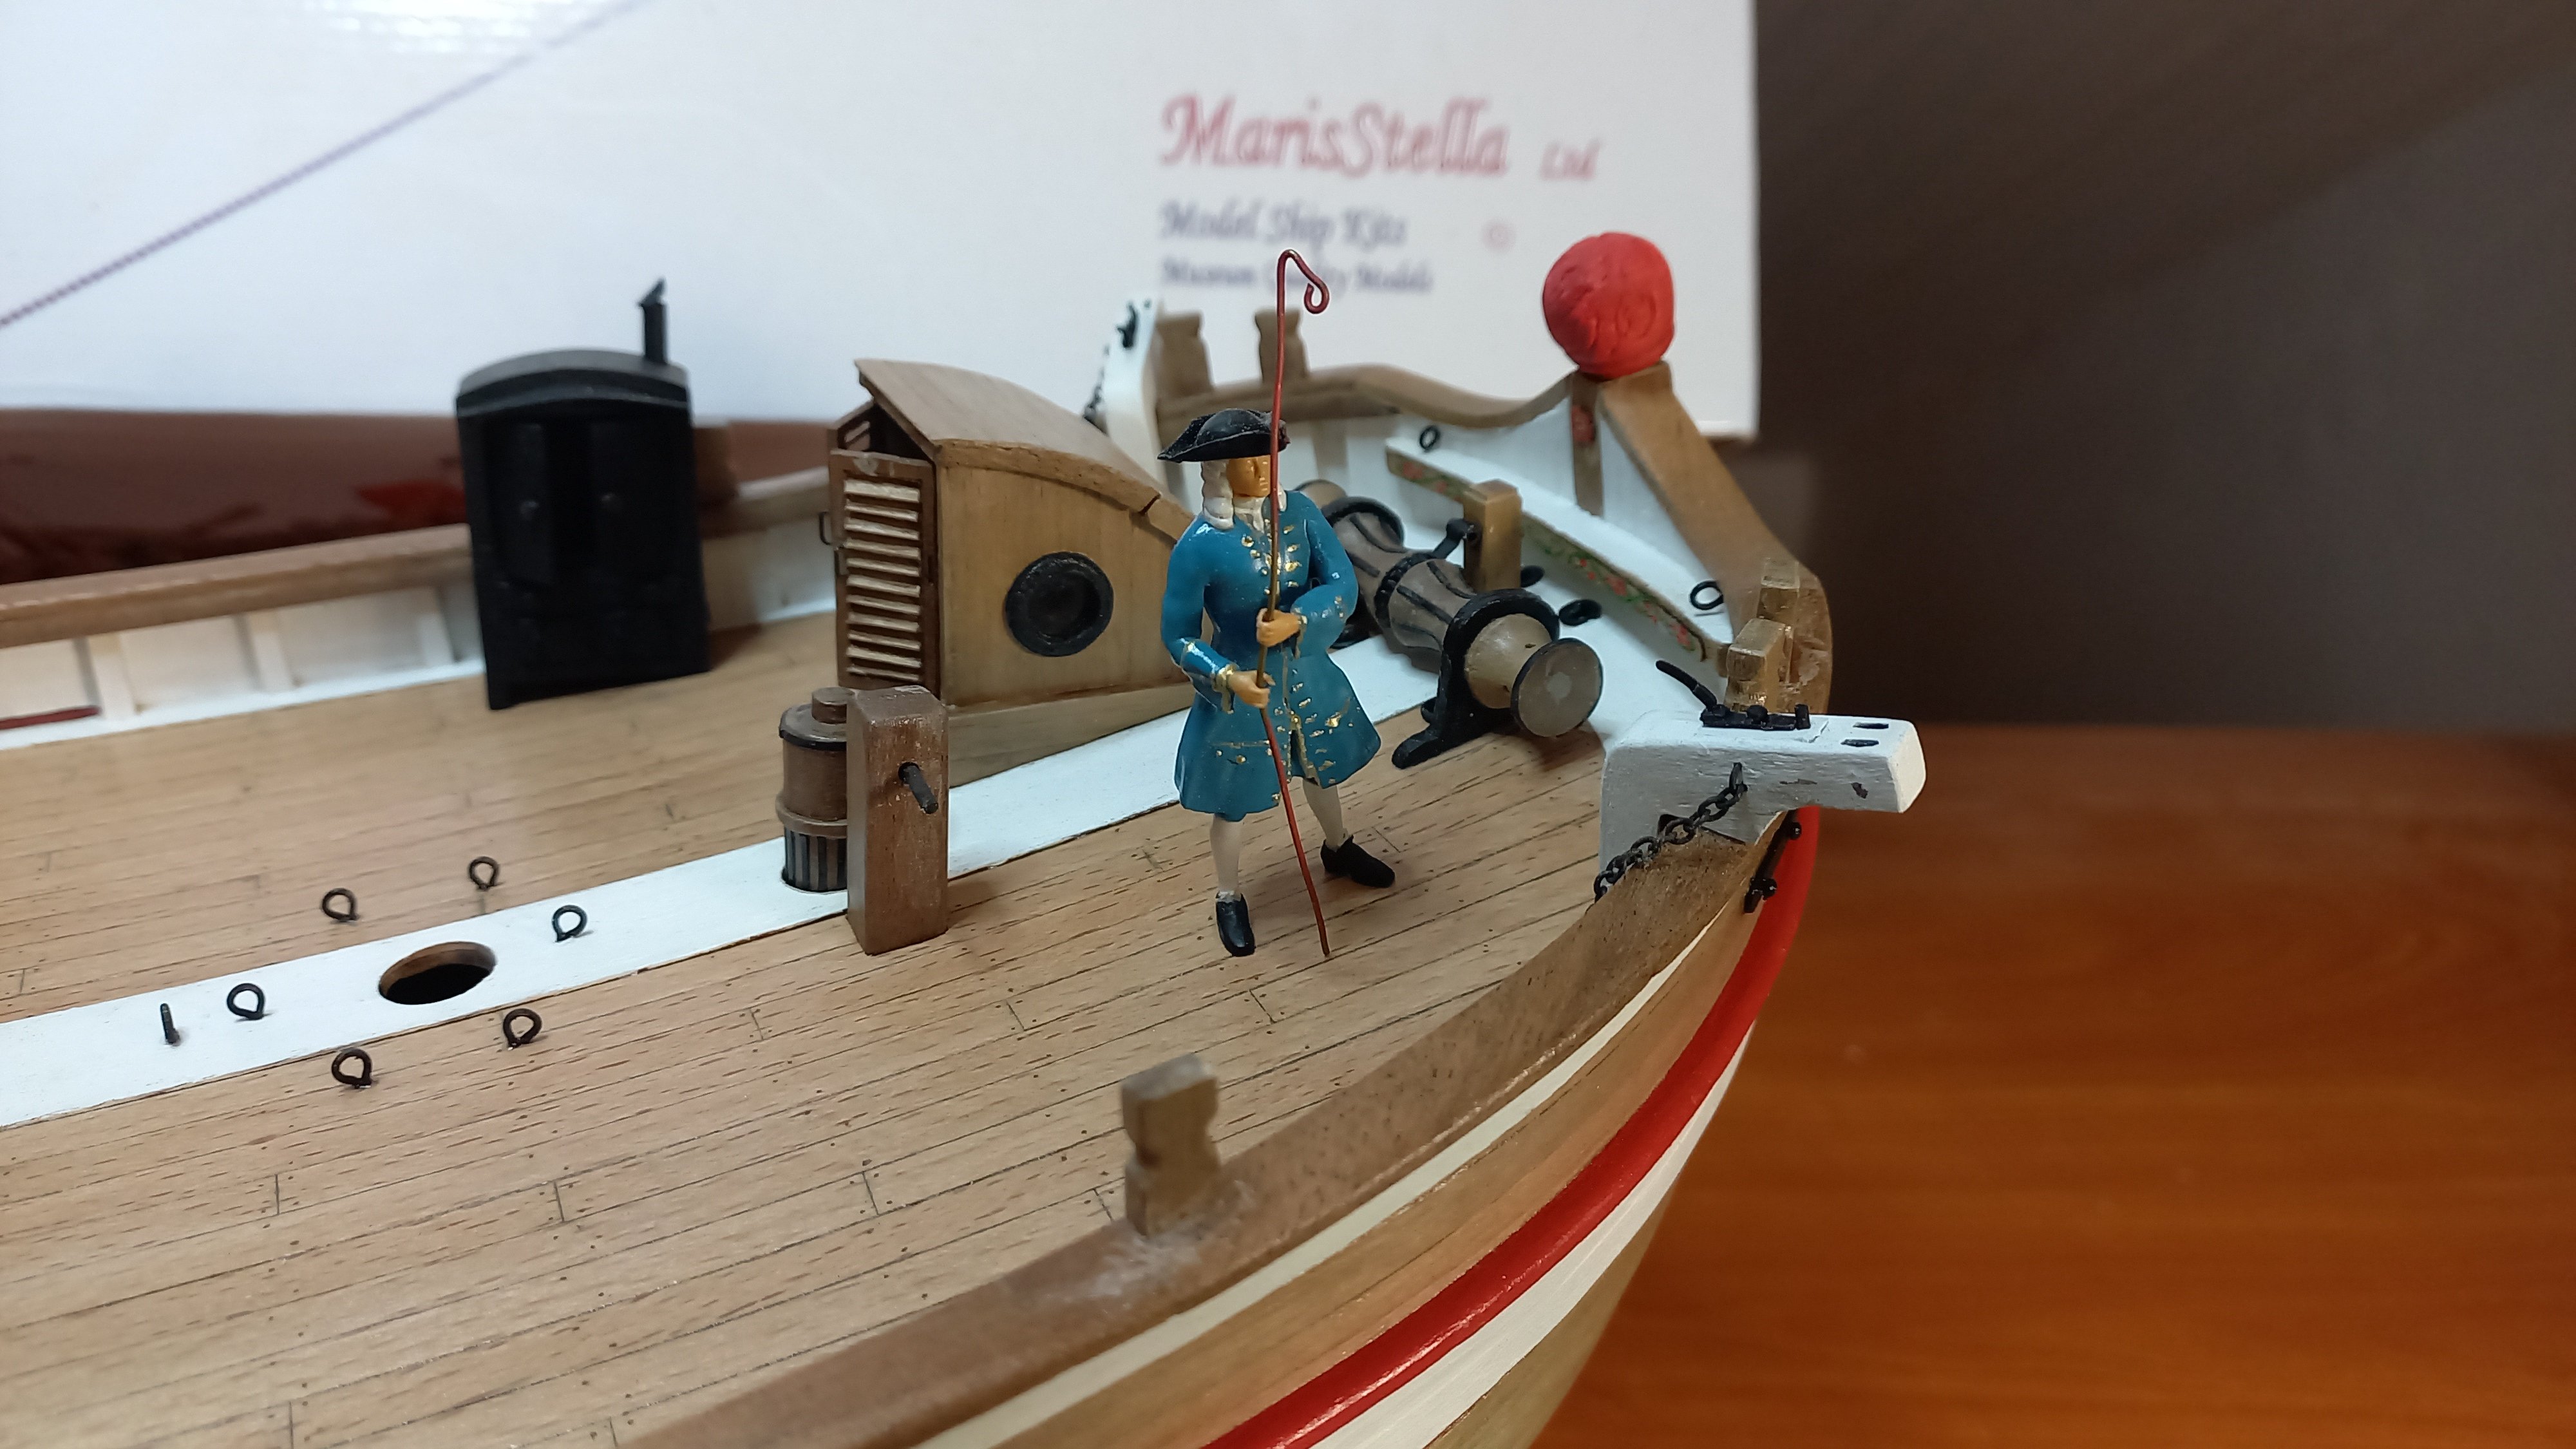
I've made some progress on the fore part. The modifications from the kit are the davit and the bitt.
-
Hello, what is the difference between the corvettes La Tourterelle and L'Unité, since they were of the same class ? Why do you prefer La Tourterelle ?
-
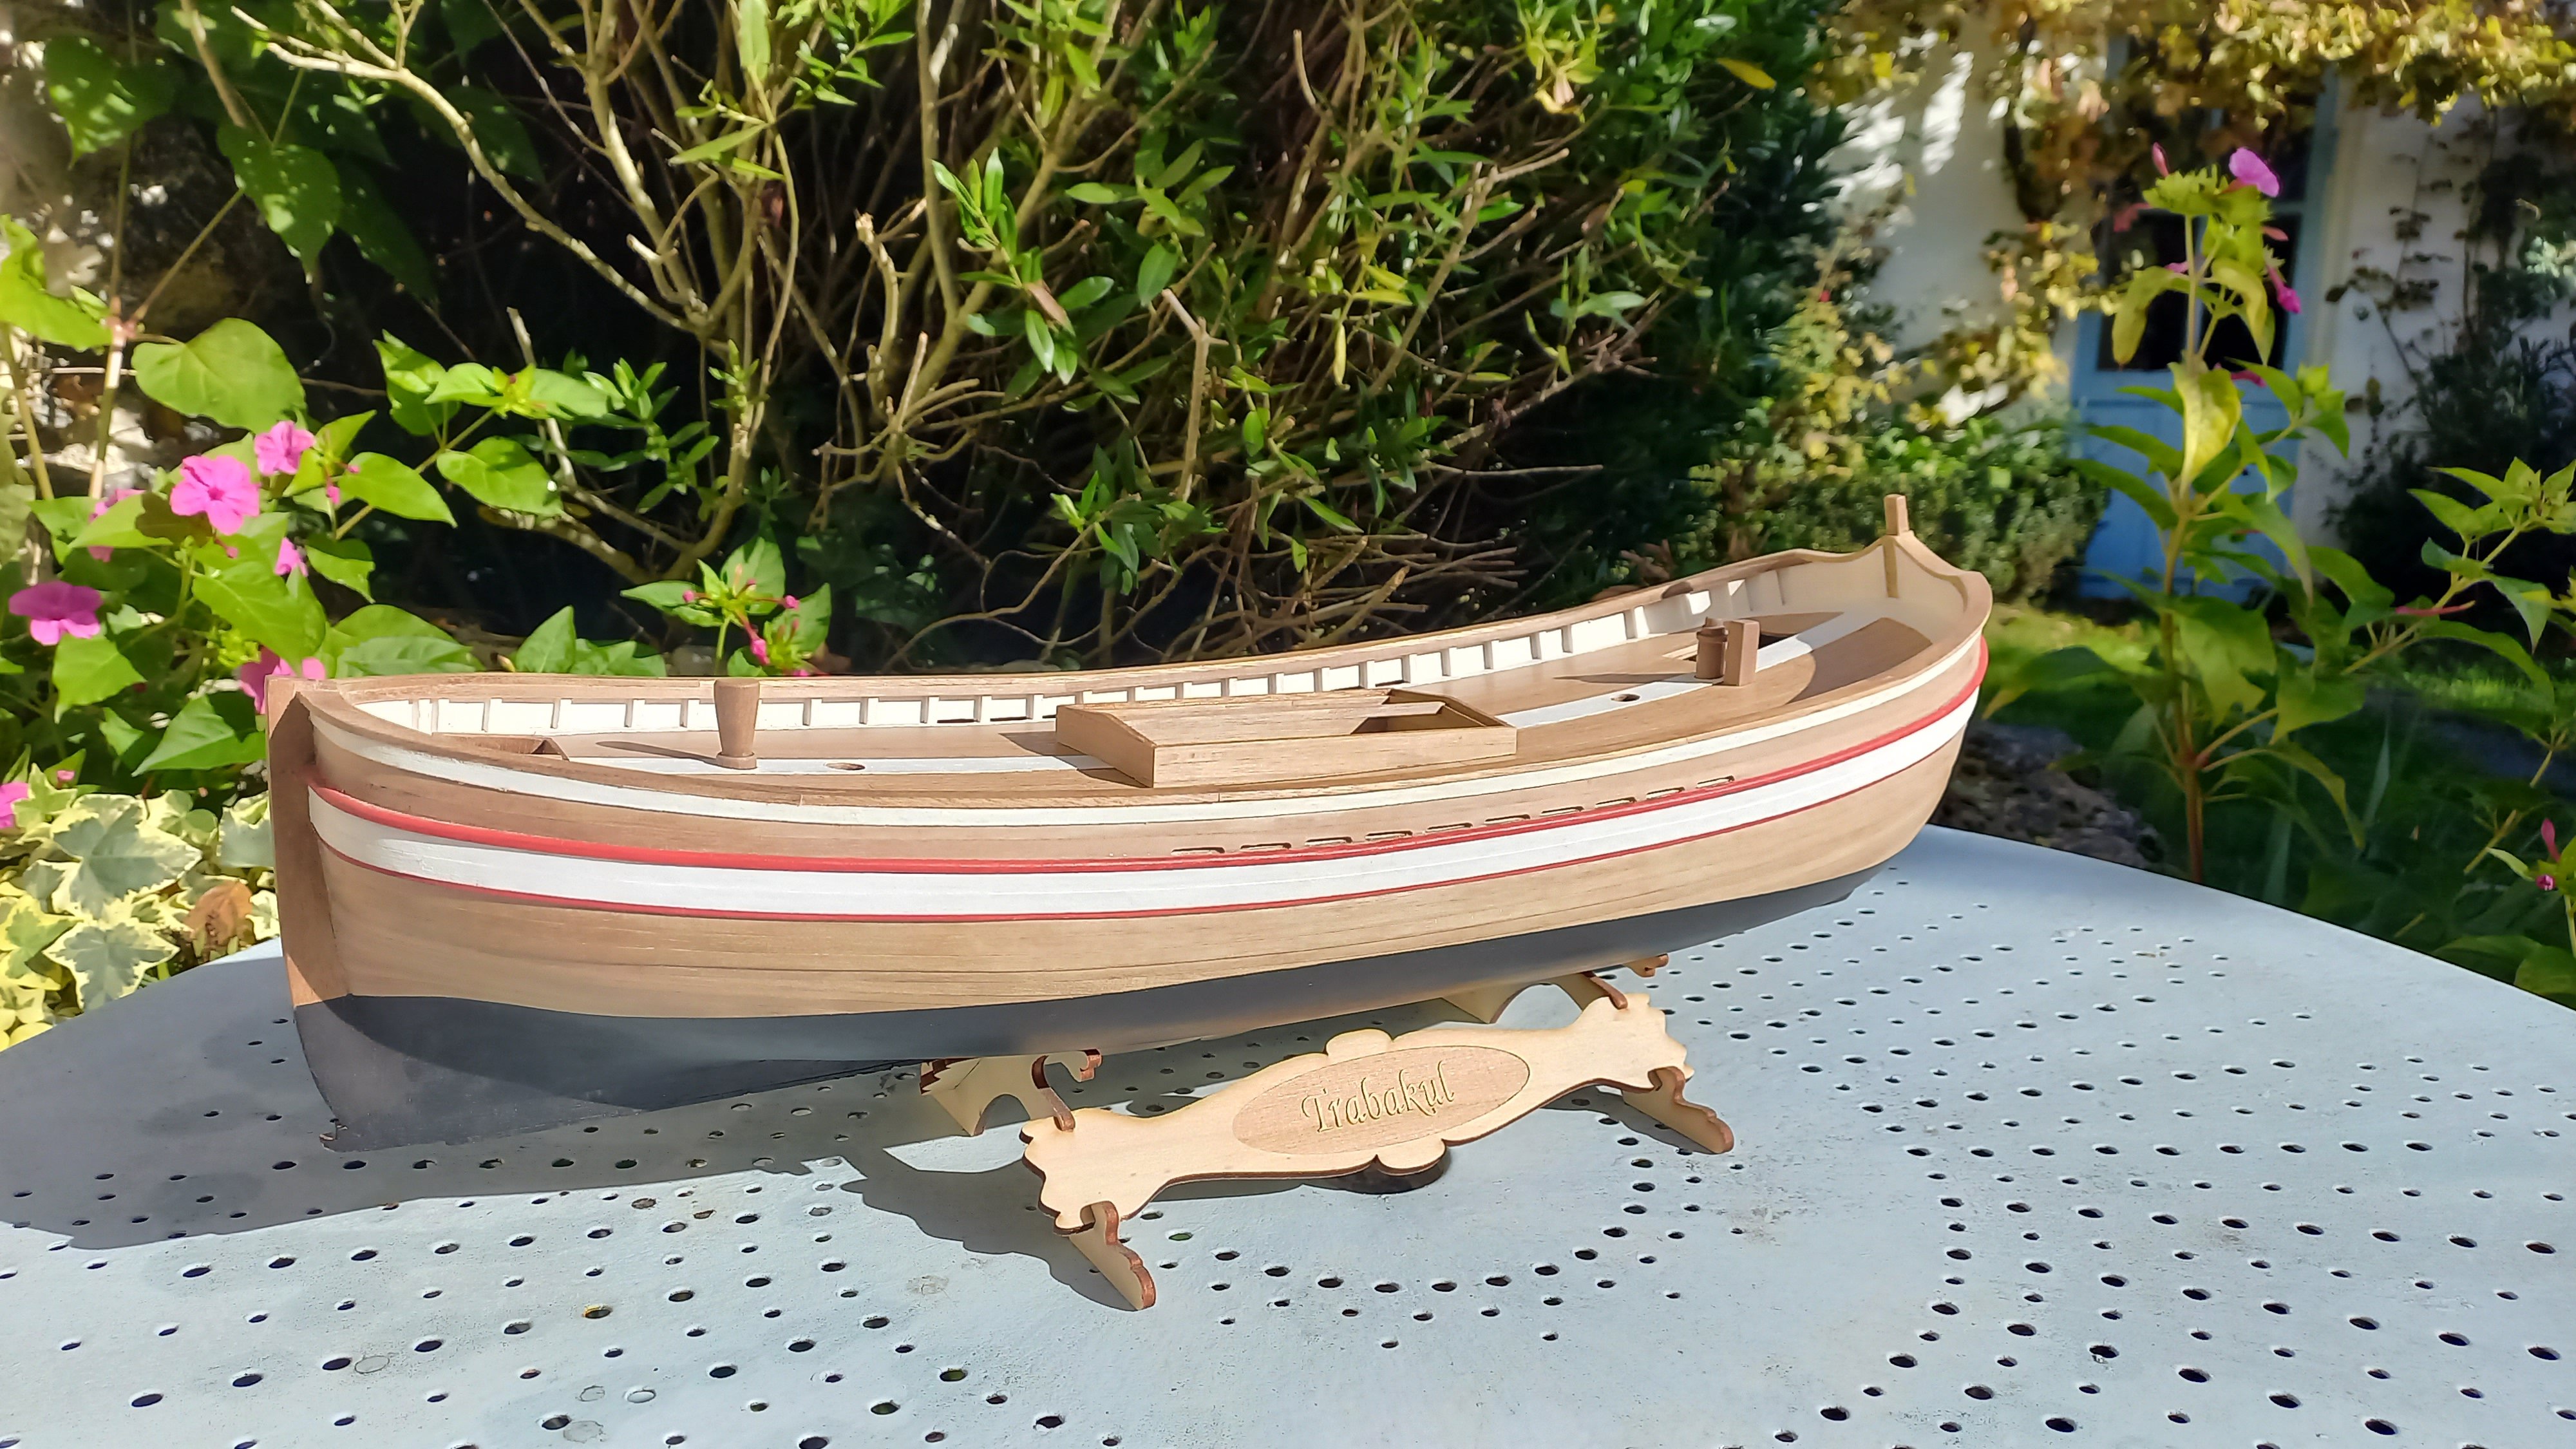
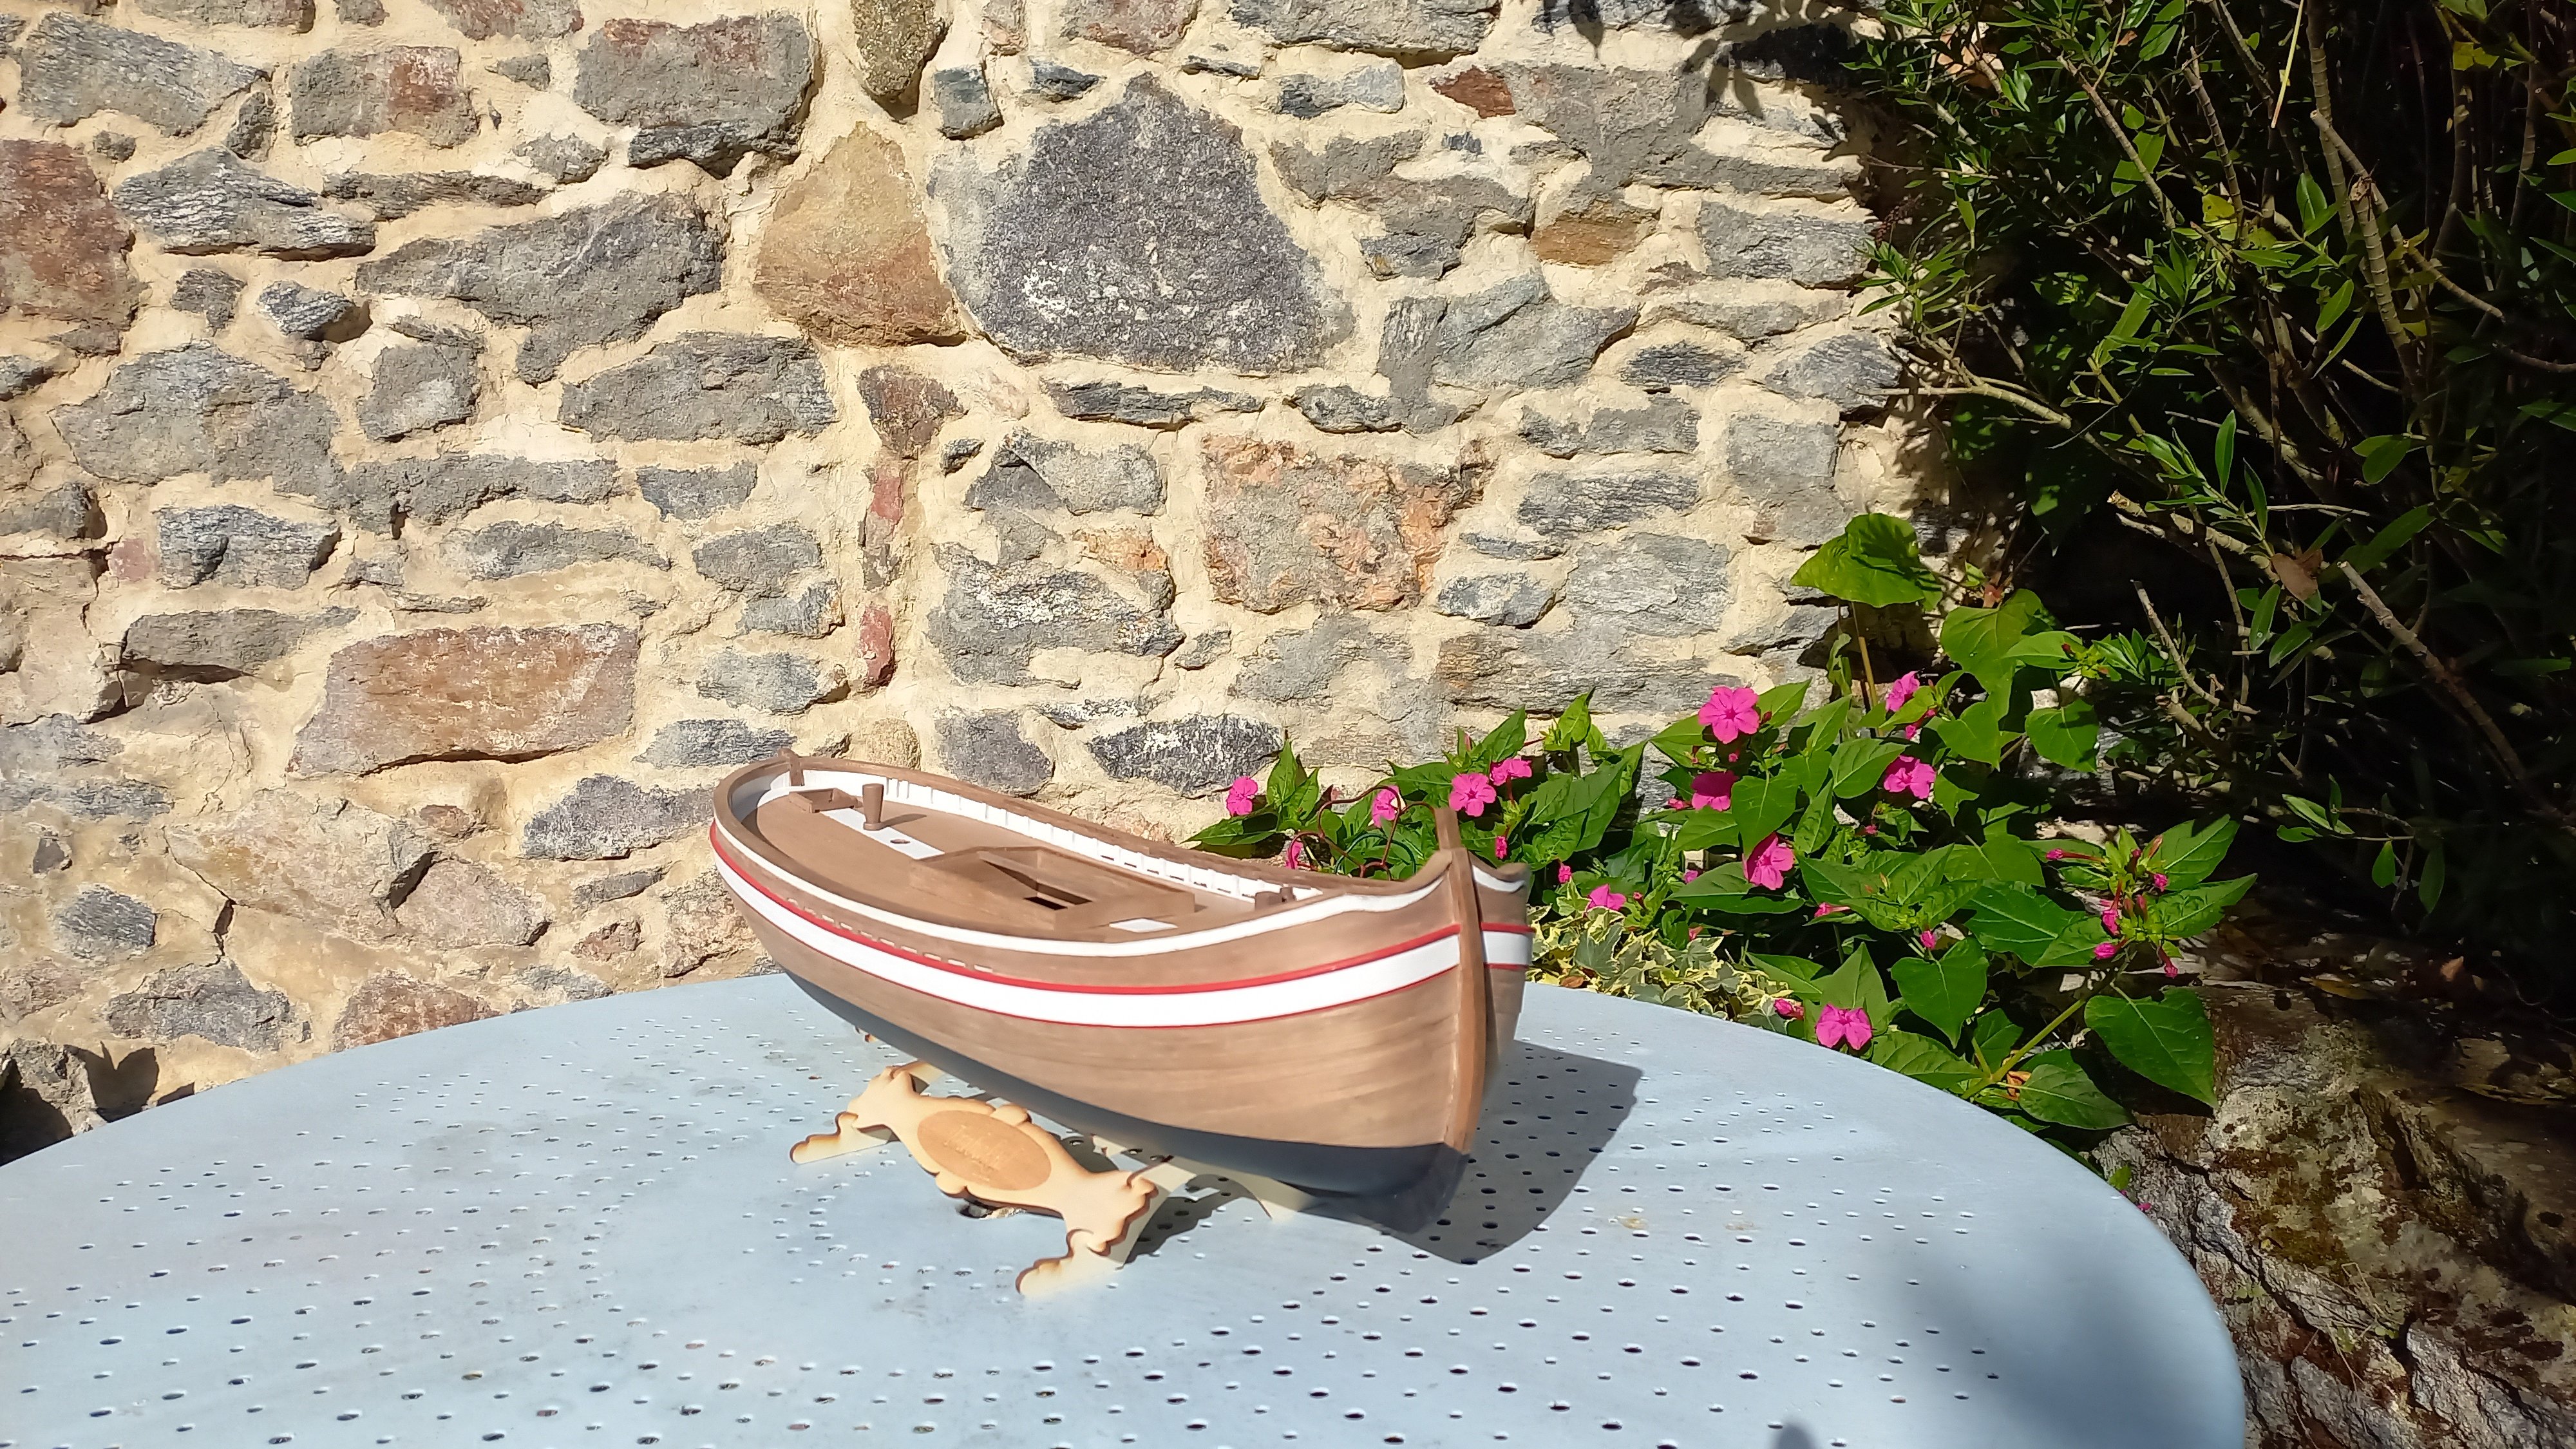
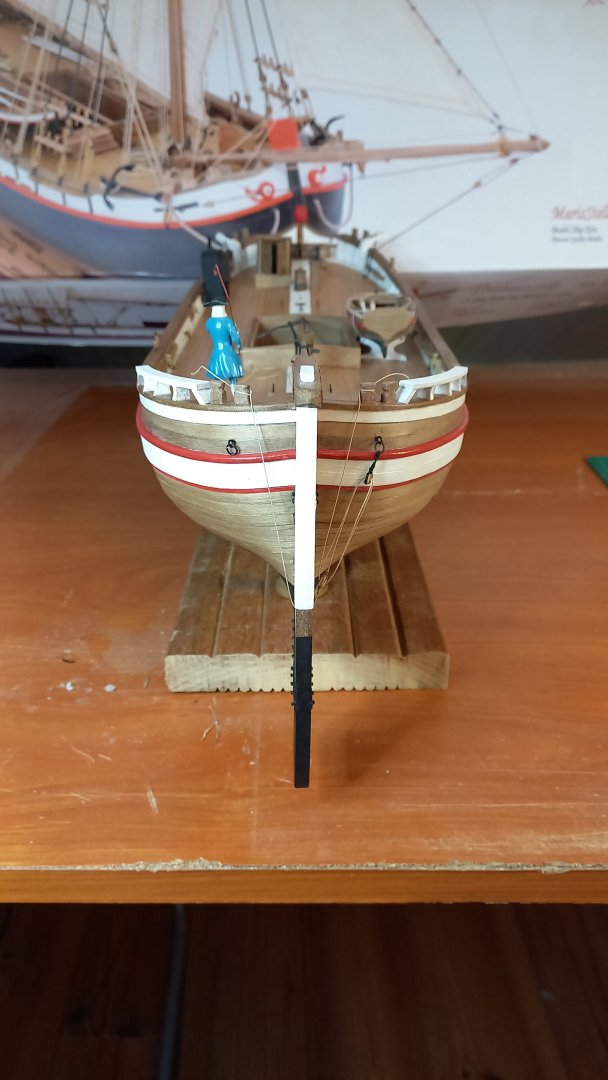
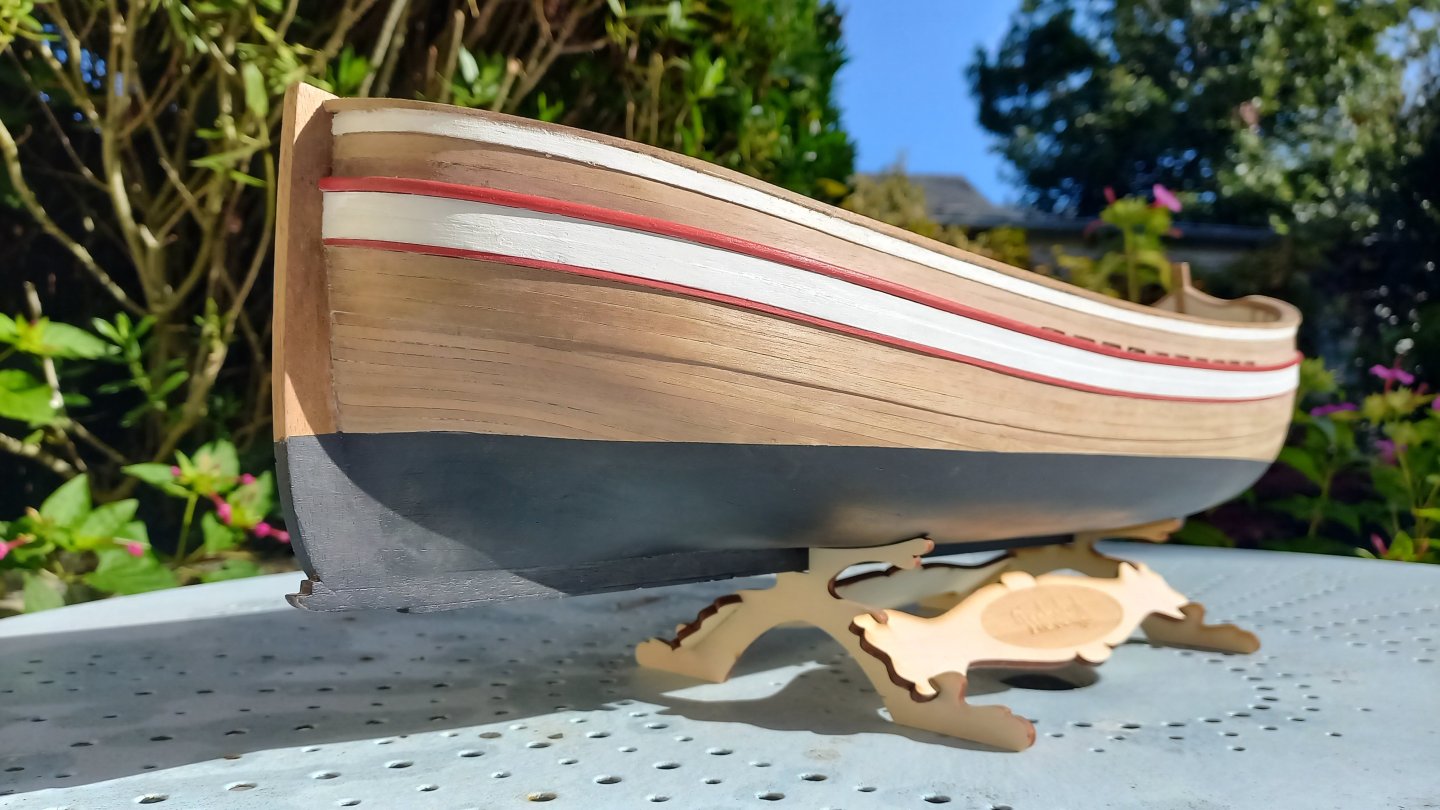
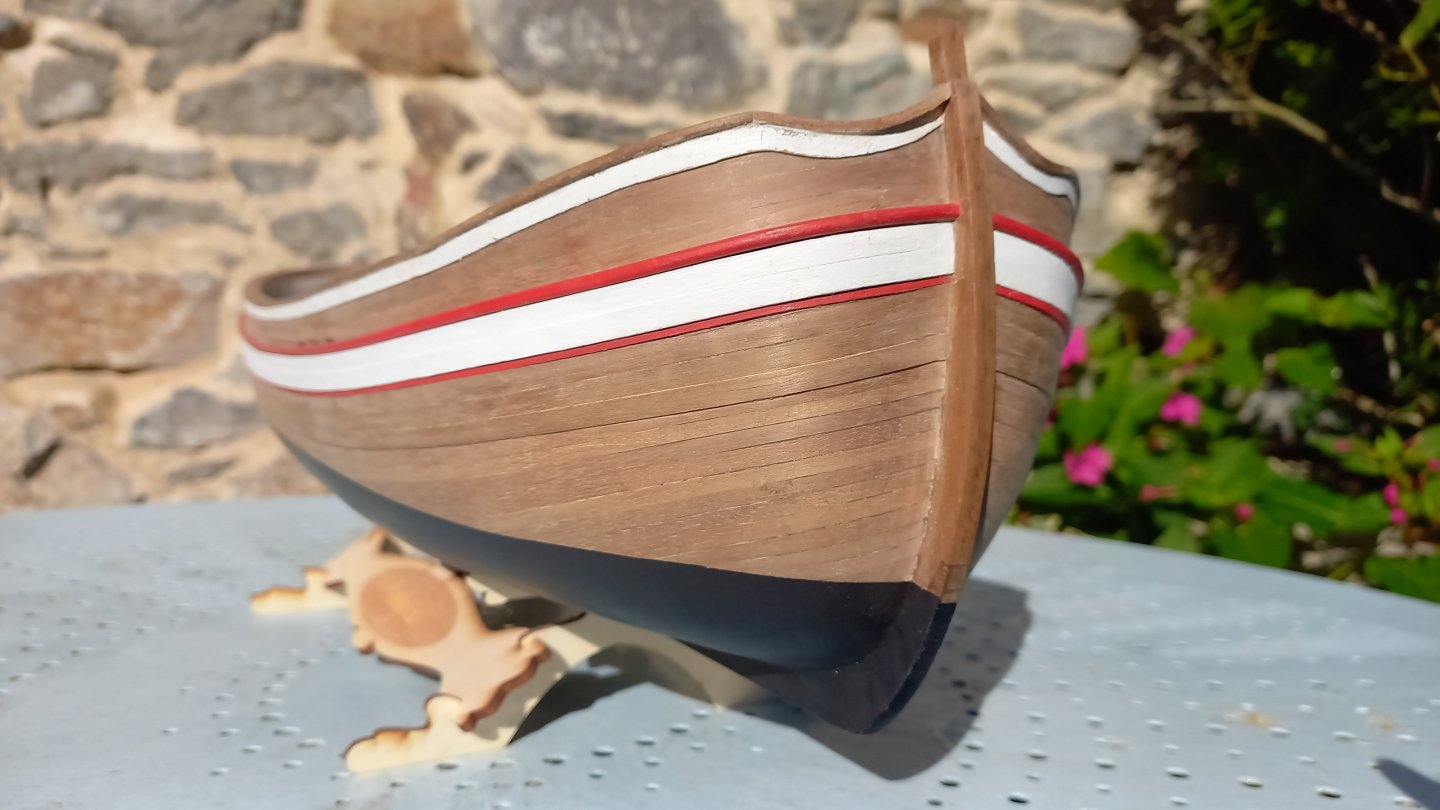
Hello, The trabaccolo is ready to be launched! I took the pictures outside where the light is better. Have a nice day. 😄


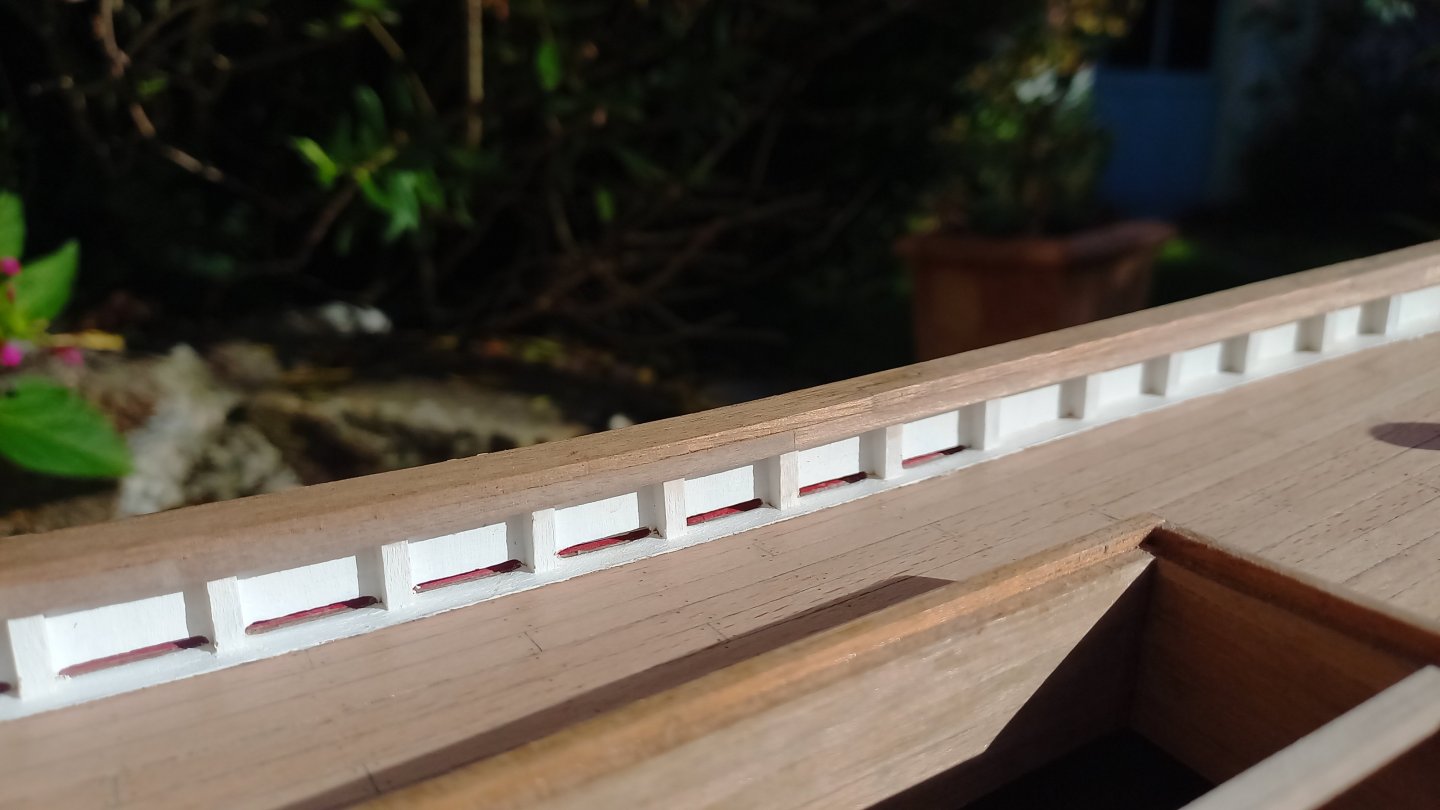
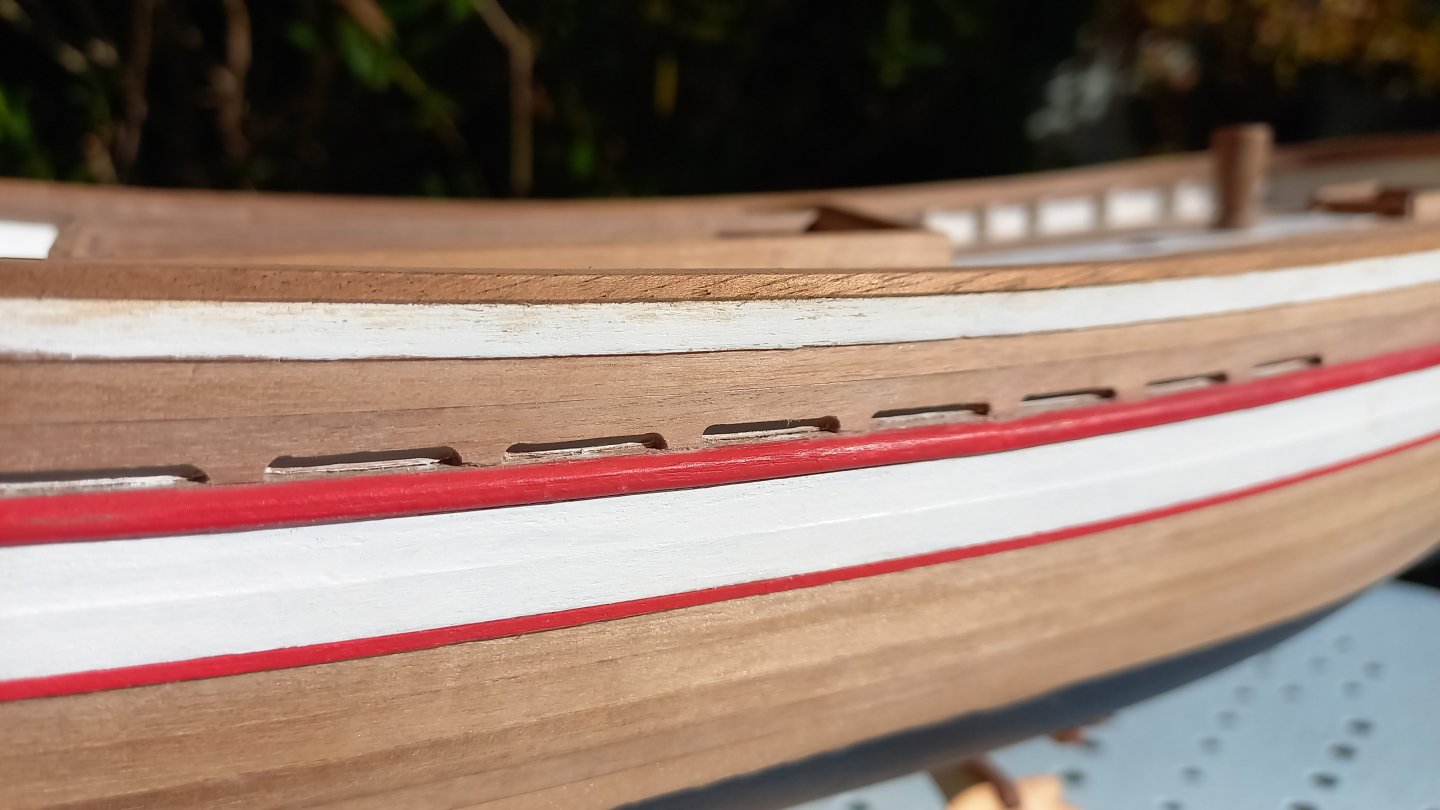


.jpg.402f262886842e5499cfed0d42bedf65.jpg)