HOLIDAY DONATION DRIVE - SUPPORT MSW - DO YOUR PART TO KEEP THIS GREAT FORUM GOING! (89 donations so far out of 49,000 members - C'mon guys!)
×

Loracs
-
Posts
296 -
Joined
-
Last visited
Content Type
Profiles
Forums
Gallery
Events
Everything posted by Loracs
-
 as usual you are.... fast!! It took me several days to rig those little fellows.
 -
It is a very sad day for us modelers... but we understand that your decision was likely not an easy one. I truly wish you the best in health and passion. Your service will be really missed. Wait!!! where will we get our wood now! It was such high quality and your service exceptional. Please rest assured that you left a VERY positive mark in the modeling community. Something to be truly proud off. Please take care of yourself...
-
It was my first build... I found it very enjoyable. I would recommend it to anyone.
- 20 replies
-
- 1
-

-
- chinese pirate junk
- Amati
- (and 1 more)
-
kit review 1:48 La Renommée 1744 - CAF Model
Loracs replied to James H's topic in REVIEWS: Model kits
Now, I have to give credit to CAF in many other areas... my comment has to be balance. 1) Design: fantastic design overall. If you are into POF this is a very nice provider, one of few. 2) Originality: Le coureur, which is one unique ship' hull available commercially. HMS Granado, a split design already incorporated within the design of the kit, that a first too. La Renommee seen here, the level of details is impressive. 3) Licensed plan/design, this is one consideration that matter to many. Those are some of the pluses I can think right now.- 16 replies
-
- 2
-
-
- cafmodel
- la renommee
- (and 1 more)
-
kit review 1:48 La Renommée 1744 - CAF Model
Loracs replied to James H's topic in REVIEWS: Model kits
I agree but chapter need to be available... if it takes 2 years to get a next chapter or it is always in limited, short-term supply, that a huge deterrent. Second, "chapters" seen to be a reason to boost the overall price while staying under the radar. Some "modules" are the price of a whole kit! I'm NOT taking about intensive boxwood carving but standard plan and wood. Again, so sorry about the comment, but it has to be said. This seen to be changing at CAF but slowly... precedent is hard to overcome in the buyer's mind.- 16 replies
-
- 1
-
-
- cafmodel
- la renommee
- (and 1 more)
-
kit review 1:48 La Renommée 1744 - CAF Model
Loracs replied to James H's topic in REVIEWS: Model kits
Loving the design... BUT Cherry is a no-go for me at this price point. Premium price has to call for premium wood: Quality Pear or boxwood. I so sorry to say that, but it is just the reality of thing.- 16 replies
-
- 1
-
-
- cafmodel
- la renommee
- (and 1 more)
-
@bnw, this is quite a nice deck planking. Very well done. Would you mind sharing a little bit more on how you made the cutouts in the curved outer plank with such precision? This is something I would like to do... but would like to tap in your experience first.
-
@GrandpaPhil, a beauty... nice to see you back on the revenge. I stopped mine after the standing rigging but likely will get back to it one day.
-
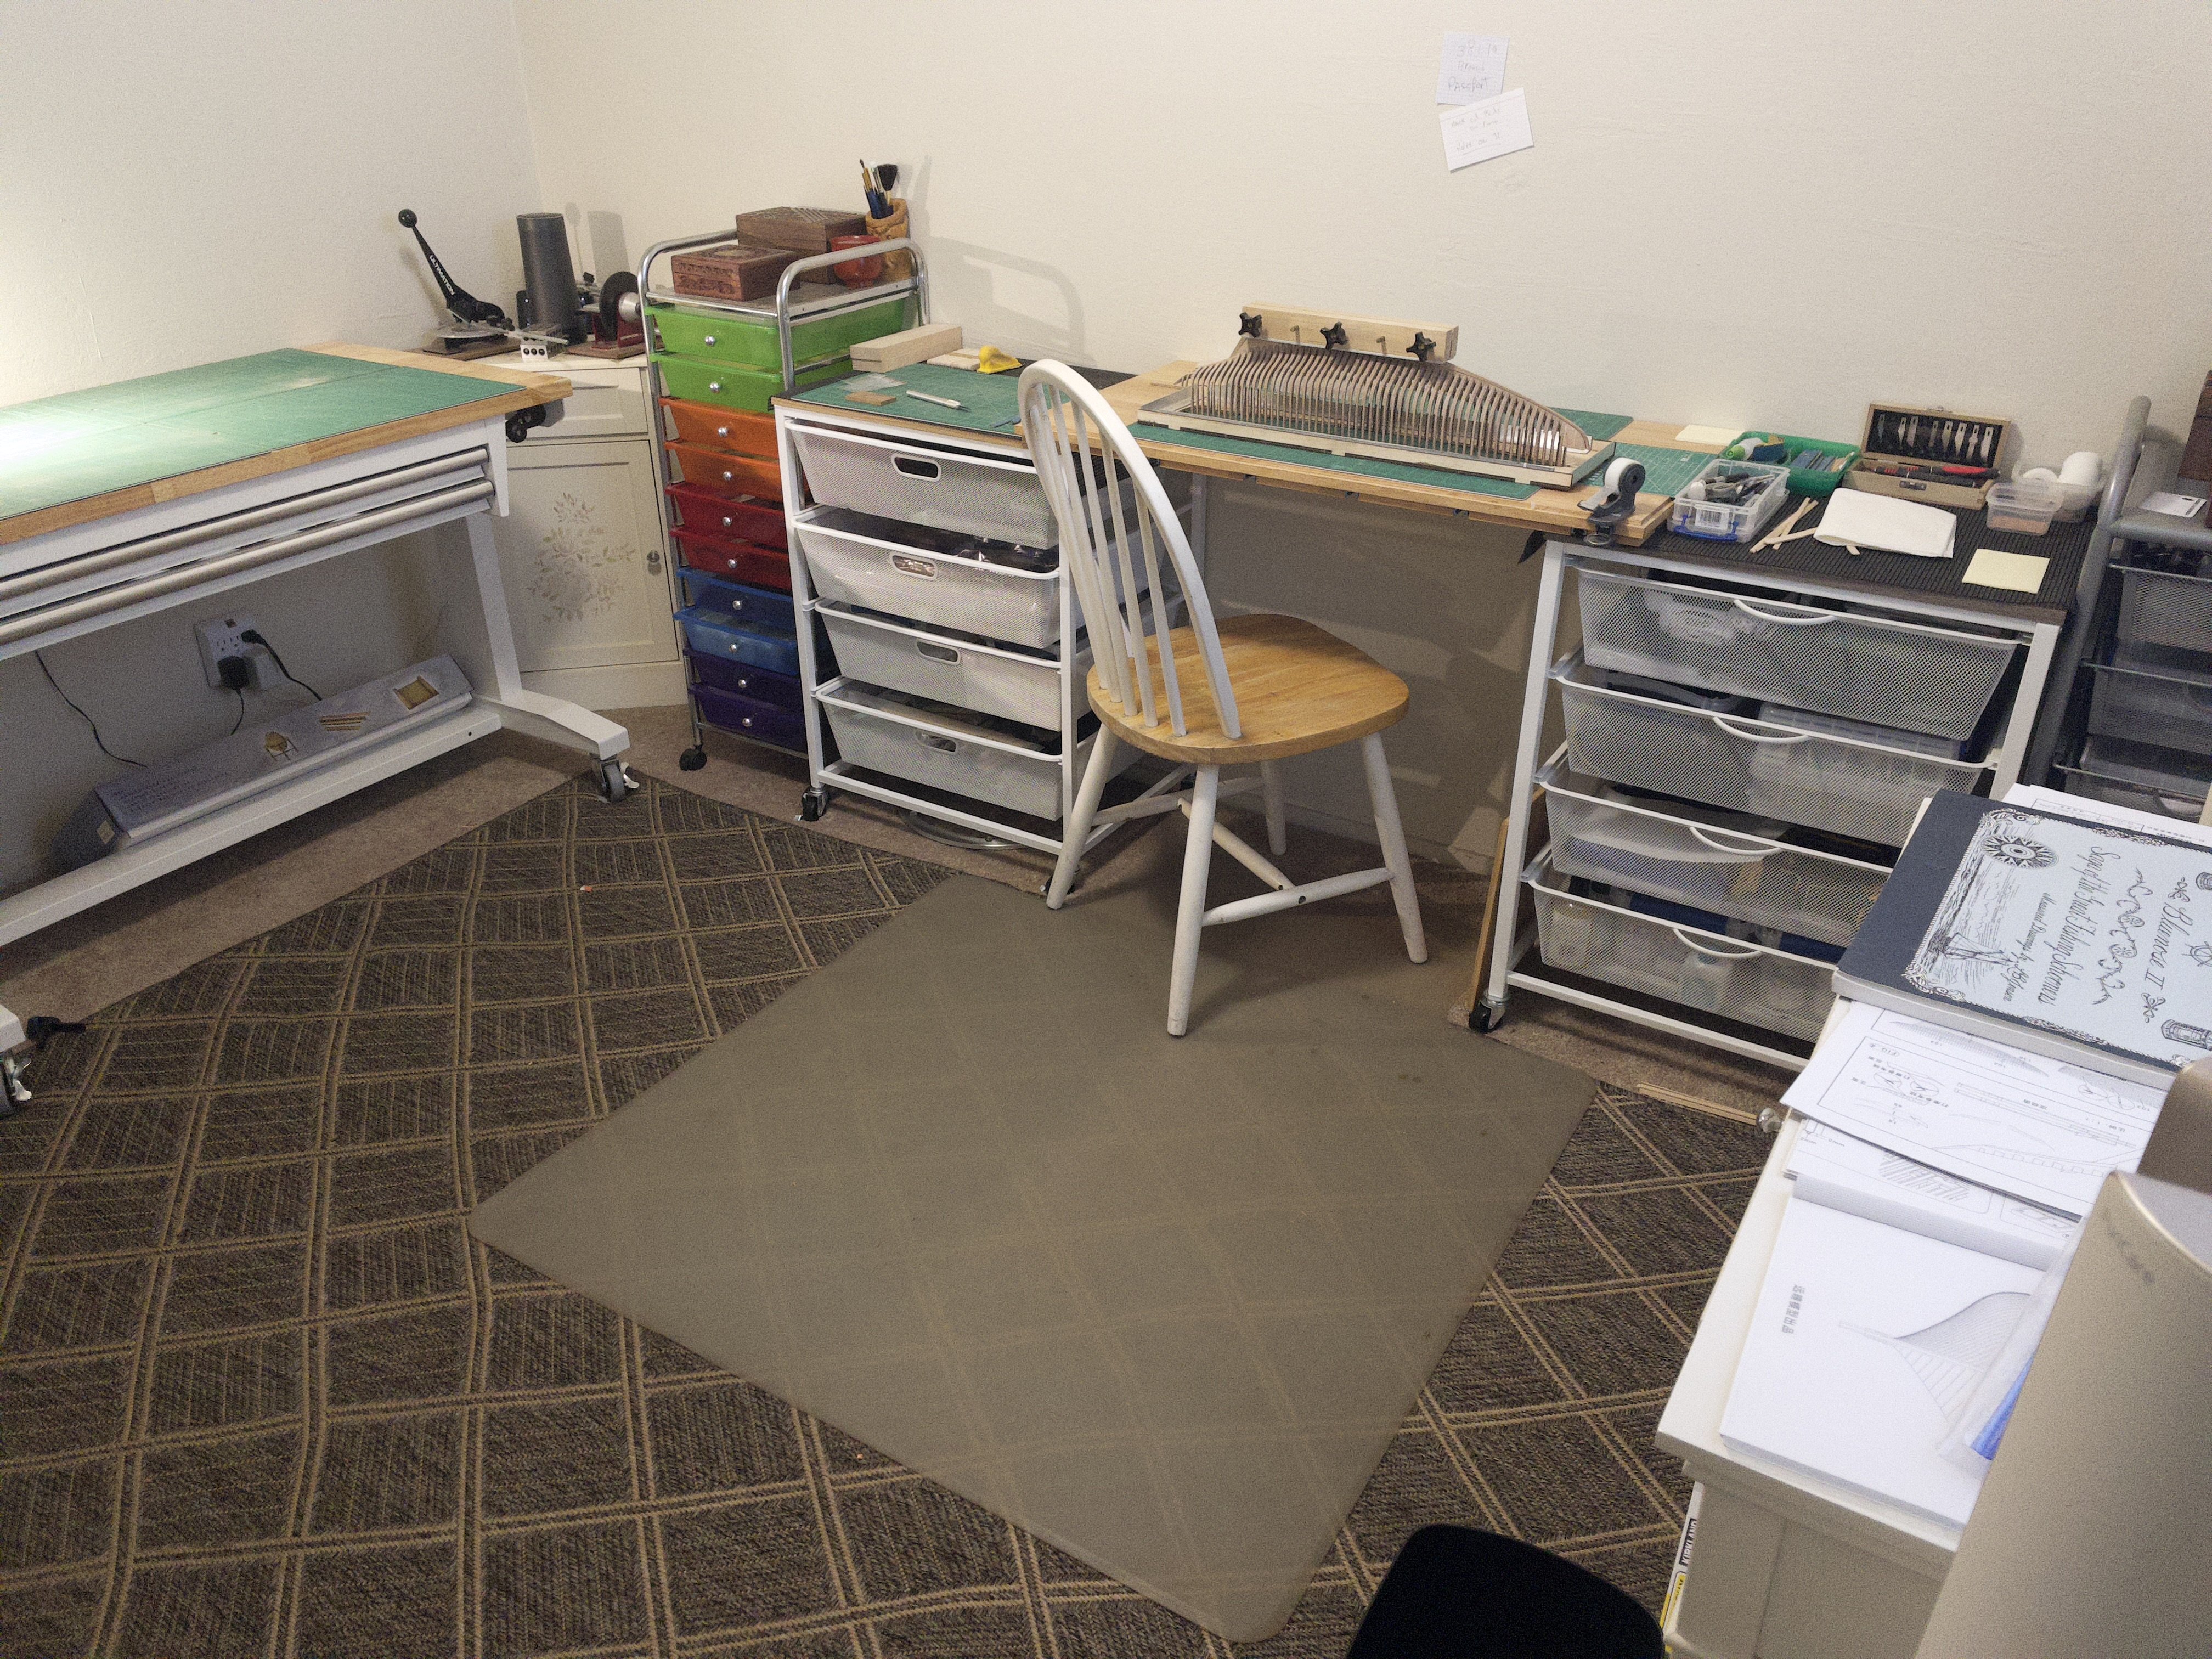
Work area pictures only
Loracs replied to Johnny Mike's topic in Modeling tools and Workshop Equipment
Newly requisitioned modeling room.
- 52 replies
-
- 10
-
-
I'm at a lack of words.... inspiring work. Please, keep maintaining your log with as much detail as possible. This can act as tutorial for many of us.
-
Hello @MintGum, the last few ships I was doing calculation manually... but like I say before this tool could both ease the process as well as provide more accuracy. Now the PLEASE excuse the beginner question: What is the purpose of the first page, the tick strip? I'm not quite clear about it. I must be missing something obvious. EDIT: To mark the frames... I knew it was obvious! A night sleep make wonder.
-
This indeed look quite useful. The printable template is a good idea to transfer the shape/bevel to the strip. Will definitively try it out. Thanks!
-
@Y.T., OH! nice let me read thru this. a thousand thanks.
-
Hello all, I'm an absolute beginner at basic wood working. So please excuse this basic question. Your help is greatly appreciated. I would like to purchase the Byrnes mini saw. However, before I make the purchase, I would like to get a good idea what I'm getting into... or simply outsource it. The main need initially would be making strips at 1-2 mm thick and from 1-5 mm wide (pear, boxwood, mahogany, etc.). How do you even get started with stock lumber? how it is it cut precisely without saw mark and perfect thickness/wideness. Is there a very good tutorial, written and/or video? What are the tricks and the difficulties?
-
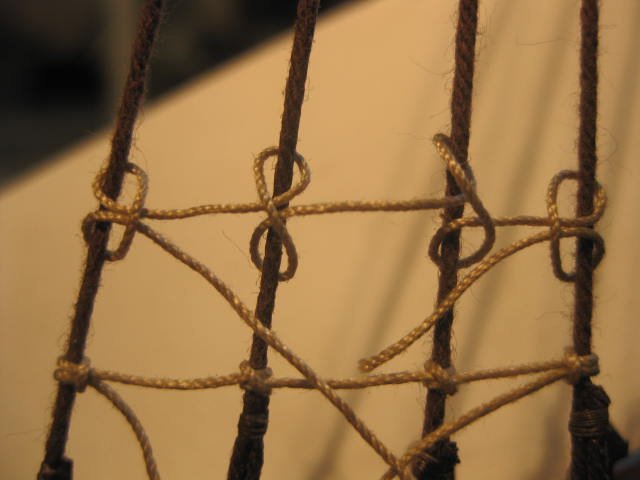
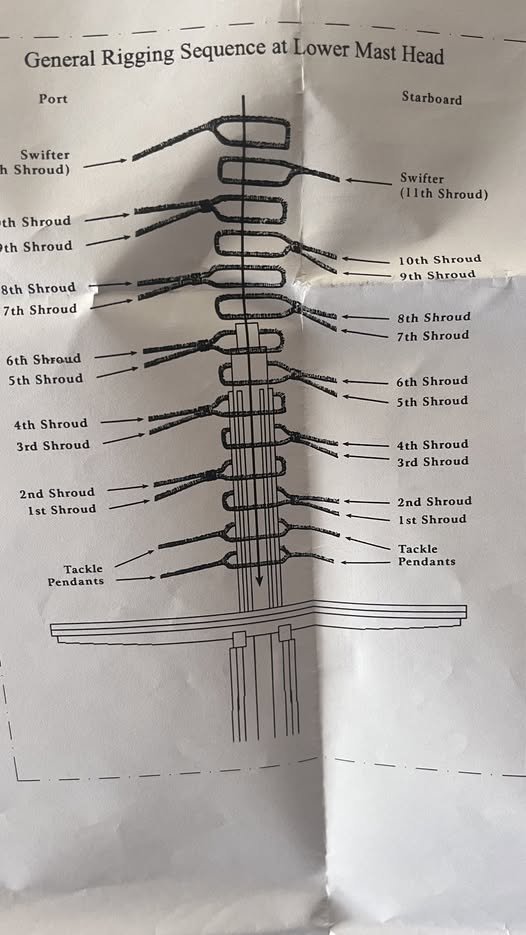
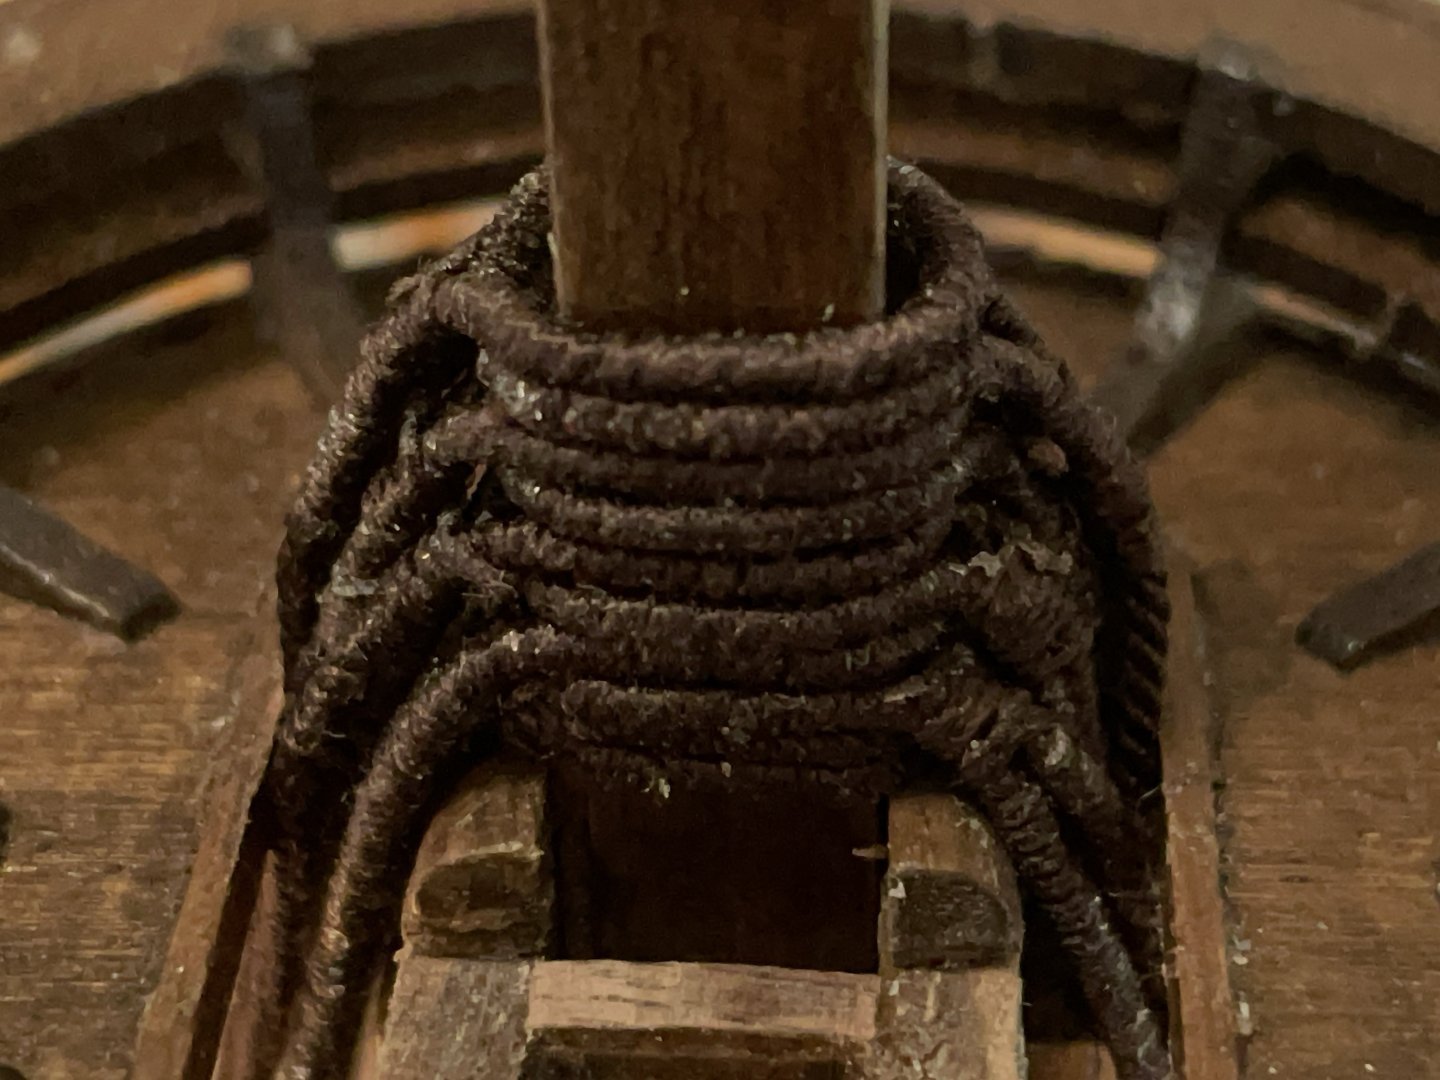
Greeting, first off: nice model. It looks fantastic. You should be proud... will be a nice display piece. Personally, I would not bother using the jig for the shrouds/ratline. It looks easier, faster and more accurate... but it is not. Setting them up to the ship will be a nightmare. Most people DON"T recommend using this type of jig. I would rather set the shrouds one by one (will look better) directly on the ship and then make the ratlines. Watch video on how to set it up on the mats. There is a specific order for each shroud (in an alternating pattern), so it flow nicely from the mat to the deadeye. Here a link to a tutorial. Rigging is an integral part of modeling sail ship... can be fun to do properly. HEY! you will get another set of skills to your repertoire. (1) HOW TO START STANDING RIGGING CORRECT | Ships of Scale Note: picture is a close-up. The rope is ~1.5-2mm. The ratlines are far better done after you set the shrouds. I would do it the classical way, using clove hitch knots. At first it is intimidating... but soon it will go as a breeze. Remember after a dozen or so, you will get the hang of it. After, few hundred knots... you could do it while watching TV. A few thousand later, while you sleep. Seriously, it gets that easy. Just take you time.
-
@Snug Harbor Johnny, thanks a lot for the input. I was guessing than the answer would be more complicated. Therefore, I should not dismiss one approach or another summarily. Thanks for that, I will try to research a tad more for a given ship in question. That kind of data thought don't seen to be often available. @wefalck, LOL indeed this is a very long timeframe. Sorry about that. I should had written "in general".
-
@chris watton, Greetings Chris. To start, I want to thank you for your presence here and all your wonderful ship design. As kit manufacturer, you are really raising the bar in quality and materials. Since your old Amati Revenge design, which I built... I'm a fan! I do have a question for you, and it is ok if you don't want to disclose anything at the moment. My current phase in model building is POF. Far more complex (for me), allows to represent the frames and interior fatefully and just look nice. Unfortunately, there is very little option in this area beside scratch built. I see on Chuck's web site that the Ketch Rigged Sloop may be produced by Vanguard Models. Are you planning the POF version? Do you have any idea of the potential timeframe?
-
I have a simple question on the design of interior compartment in old 16-19th century ships. Sometimes I see peoples building interior walls with planks oriented horizontally to the deck. Is it correct? should it be layout vertically instead? I know a silly question. I just wondering since design maybe different back then for practical and/or convenience reasons, or even in different locations such depth cargo area versus captain's cabin.
-
This is great... at least you are not dealing with multiple product interaction. I would try with @RossR suggestion. Try to reproduce it on a scrap wood and then see if it can be solved that way. Far less risky than trying to fix on the ship first.
-
@Richard Braithwaite, this is such a great build. Congratulation. Are the plan(s) still available? I never scratch build but if I ever do... this is the model I would do.
-
Nate's PANDORA in 3D
Loracs replied to 3DShipWright's topic in CAD and 3D Modelling/Drafting Plans with Software
@3DShipWright, @CDR_Ret, a thousand thanks for even considering such project.... and there are absolutely no hard feelings if you think it is just unrealistic. This would indeed be quite a demanding project. Let me see what I can find online to go from an utterly beginner level to an "I somehow understand level" of proficiency with blender. ;_) In addition, you further make a comment about the final purpose: artistic digital modeling and Ship modeling with the intent to develop an actual model via CNC and/or laser cutting. In my naive view, I thought that achieving one get you automatically to the other. You already see that I don't understand blender at all. Lastly, with ship modeling in mind, with the objective of creating 3d frames from 2d plan down the road, would it be better using a parametric CAD software as starting point, rather them a mesh like blender. -
Nate's PANDORA in 3D
Loracs replied to 3DShipWright's topic in CAD and 3D Modelling/Drafting Plans with Software
amazing... I so much would like to do that. With zero experience in Blender, I don't even know where and how to start. @3DShipWright, fantastic work. You need a series of video with step-by-step guide 😉 I know I'm being unreasonable. That would be a huge undertaking by itself. In fact, would you have something very simple at hand, such as a launch or a cutter with frames, that you would be able to share a series of Blender files from the beginning. Almost like a step by step but with a simple layout. Current tutorial just does not deal with model ship, so the motivation to learn Blender is low for us focus exclusively on ship modeling. This could be an entry point for us to learn from. This is just food for thought and just a suggestion, this is still a large undertaking and maybe hand holding is just not what you want to do. hehe! Even simpler, would you know of a ship modeling-centric tutorial channel (youtube) using blender? -
Greeting, I'm slowly considering "scratch" building. Having little experience and mostly no equipment, I'm considering outsourcing wood laser cutting from CAD drawing. Would anyone having used such service? quality service where I will provide the boards and drawings. Mostly something affordable for a full POF project. If it will cost 2-3x the price of a kit.... there not much a point. Thanks for your input!
-
"I might possibly release my plans and files for my ropewalk and we could have a group build. You could make it without a laser cutter. I could work up a material list and the sources to buy the stuff needed. Would you guys be interested in that?" I would definitively enjoy that. I already have your ropewalk and enjoy making ropes - in moderation and as needed. I could use a second one (I hate changing the configuration between 3- 4- strands), I was even planning on getting a second one when shortage happen. I can't see doing a build without it. The first time I made ropes I was a beginner (still a beginner but with a couple builds under my belt - and enough ambition to get me in trouble), and I can attest that your ropewalk and tutorials were great to get me started. Without YOU, I don't think I would have ever started making my own - and liking it.... so, thumb up for the above. I think that, at heart, you are a mentor and teacher... and enjoying it.
-
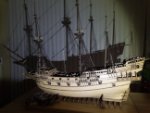
Your building speed is just amazing... in addition, fantastic results. At this rate, you will be able to fill a museum to capacity anytime soon.
- 288 replies
-
- 6
-
-

-
- Card
- Pre-Dreadnought
- (and 3 more)