Loracs
-
Posts
297 -
Joined
-
Last visited
Content Type
Profiles
Forums
Gallery
Events
Everything posted by Loracs
-
thank you so much all for the comments... it is very instructive.
-

Help with tapering
Loracs replied to N1ckel's topic in Building, Framing, Planking and plating a ships hull and deck
@No Idea, thanks for the illustration. It help so much at explaining your point. This is what I try to do, and it is indeed quite time consuming. However, the end result speak for themselves. I need more practice, since I'm still at my first build. Another thing you're doing is very useful. Doing the treenail as you go (or marking them). They can be carefully aligned to follow the curvature of the frame. I give up on hull treenail because I could not easily align then precisely after the fact (once planked completely). BTW the one you show are SOOOO nice. This is the same for the plank-to-plank joins across the hull, they can be positioned far better to the middle of a frame (even if you don't see them at the end). Seen easy... yes if you do single frame planking, not if you're using a double planking approach to your built. The frames are underneath the first planking, and out of view. I struggled with that. I'm planning on marking the center of each bulkhead on each first level plank in the future. -
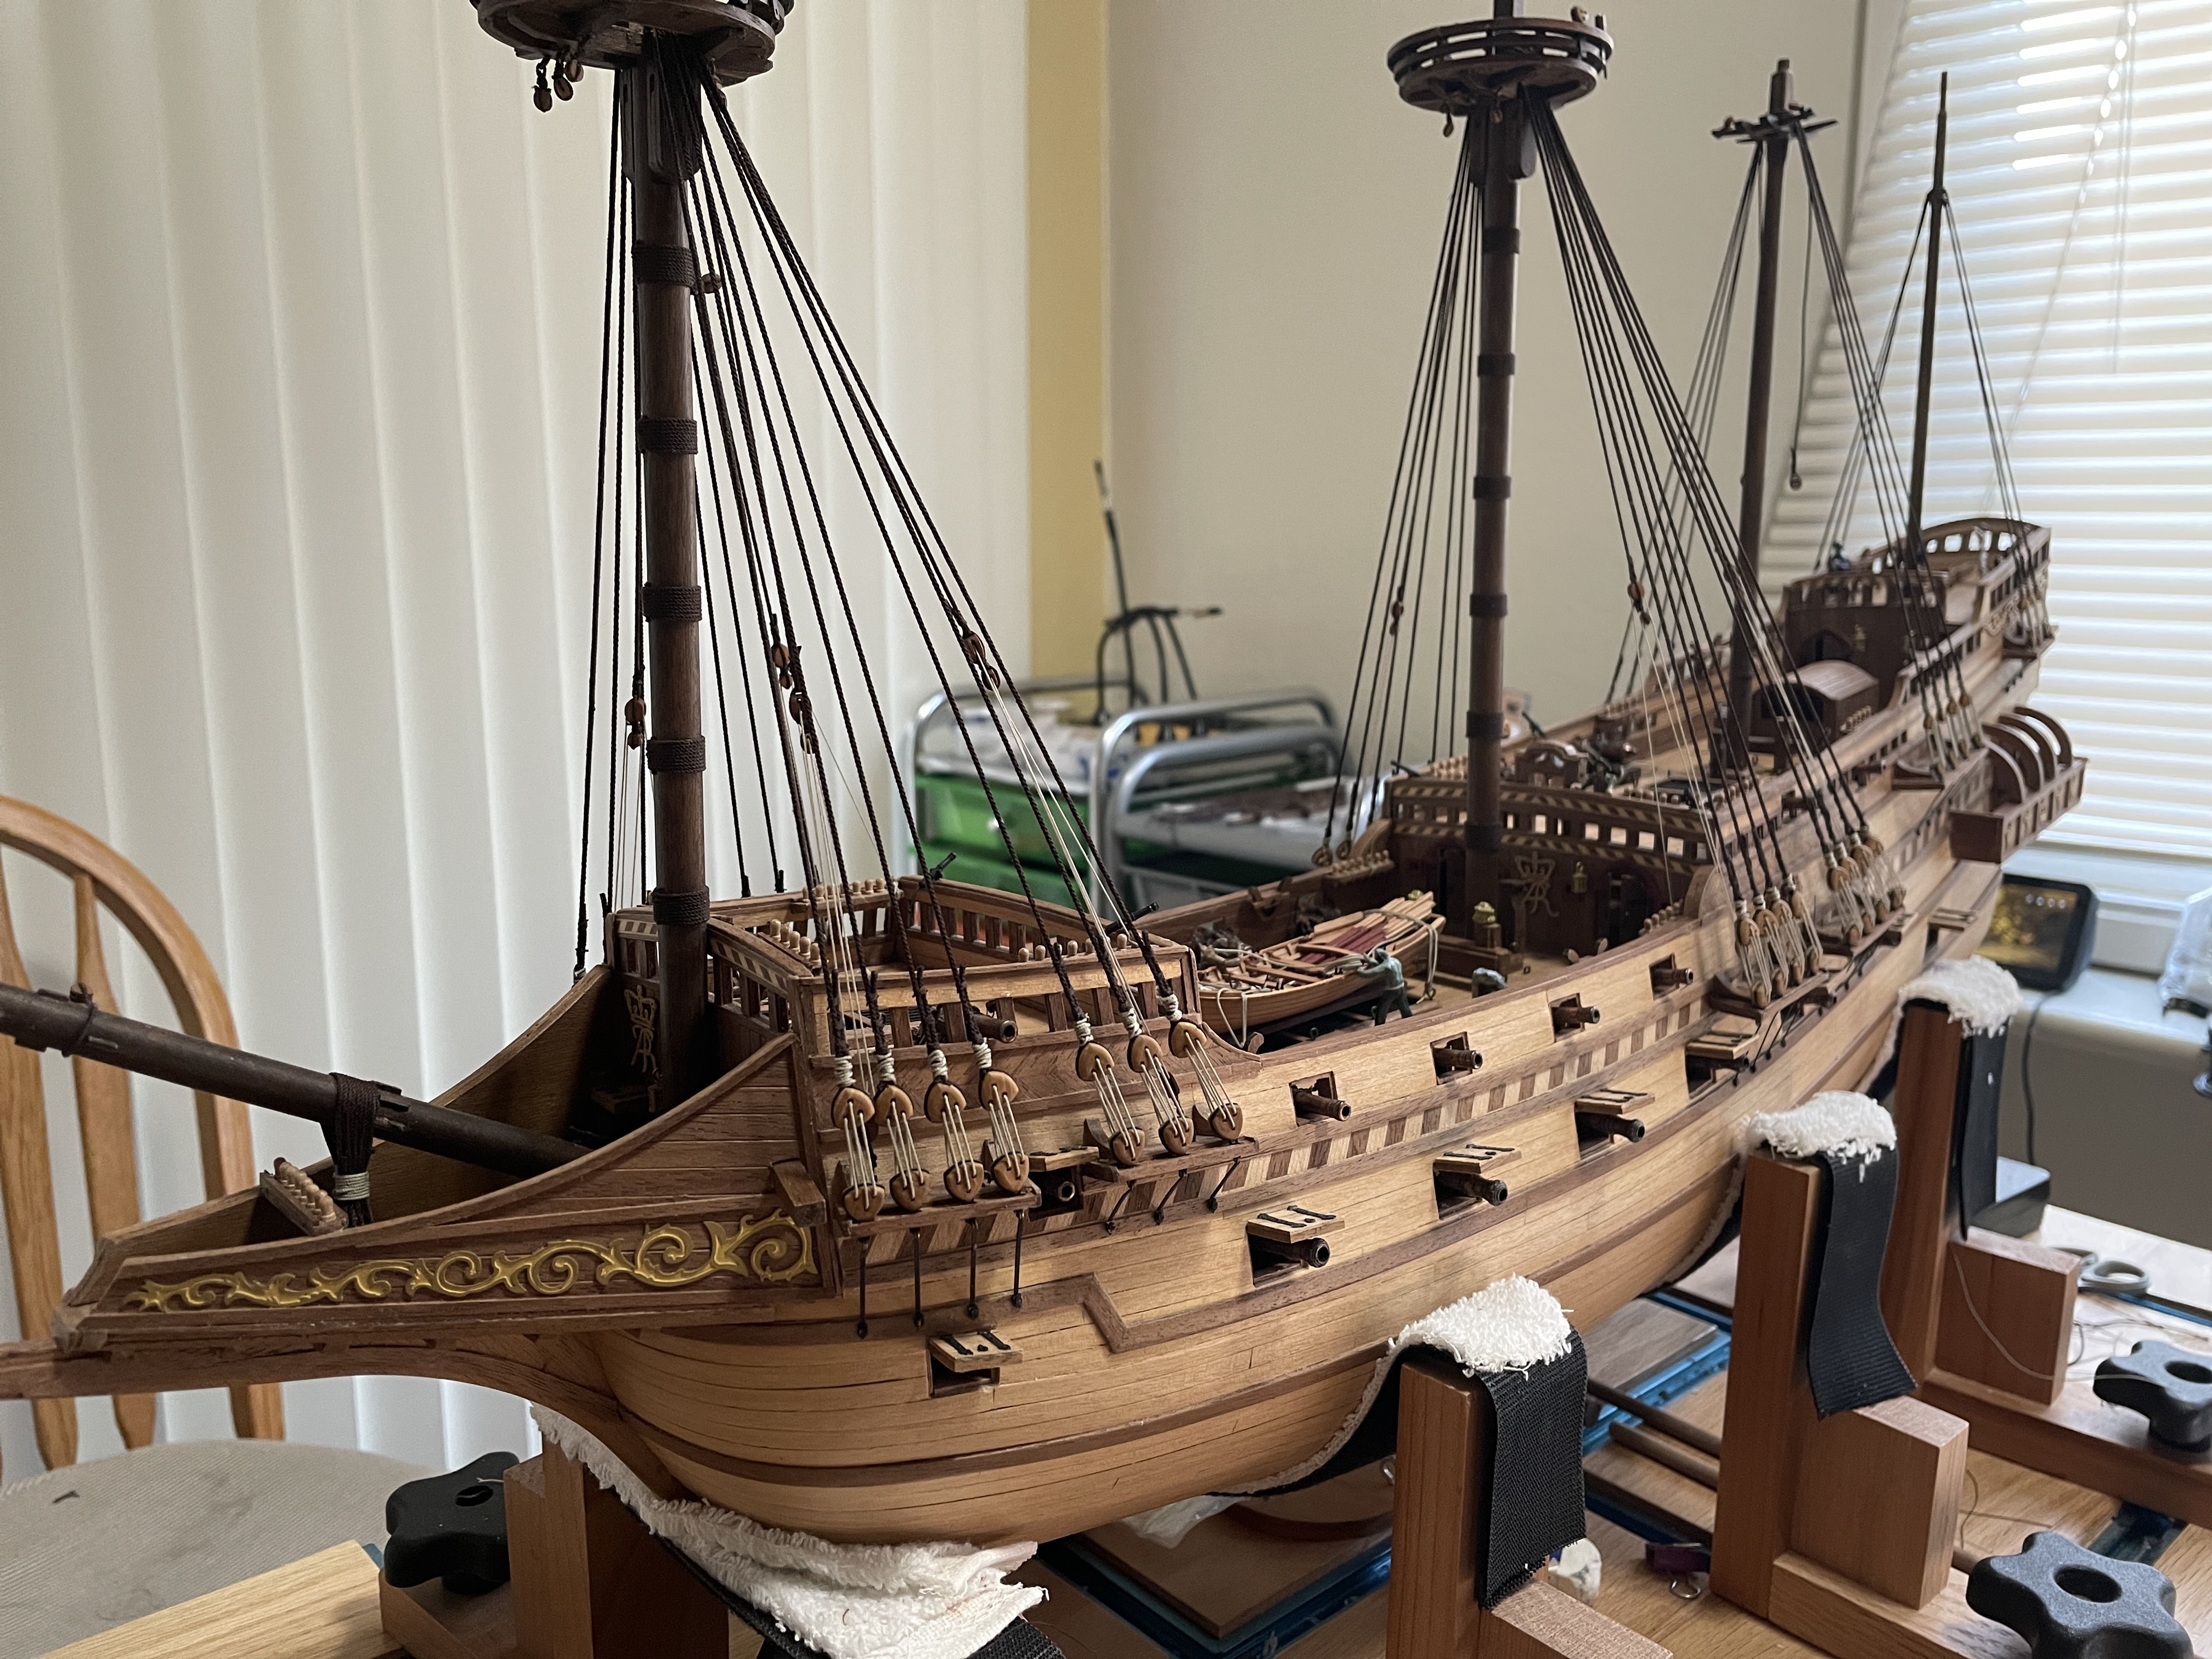
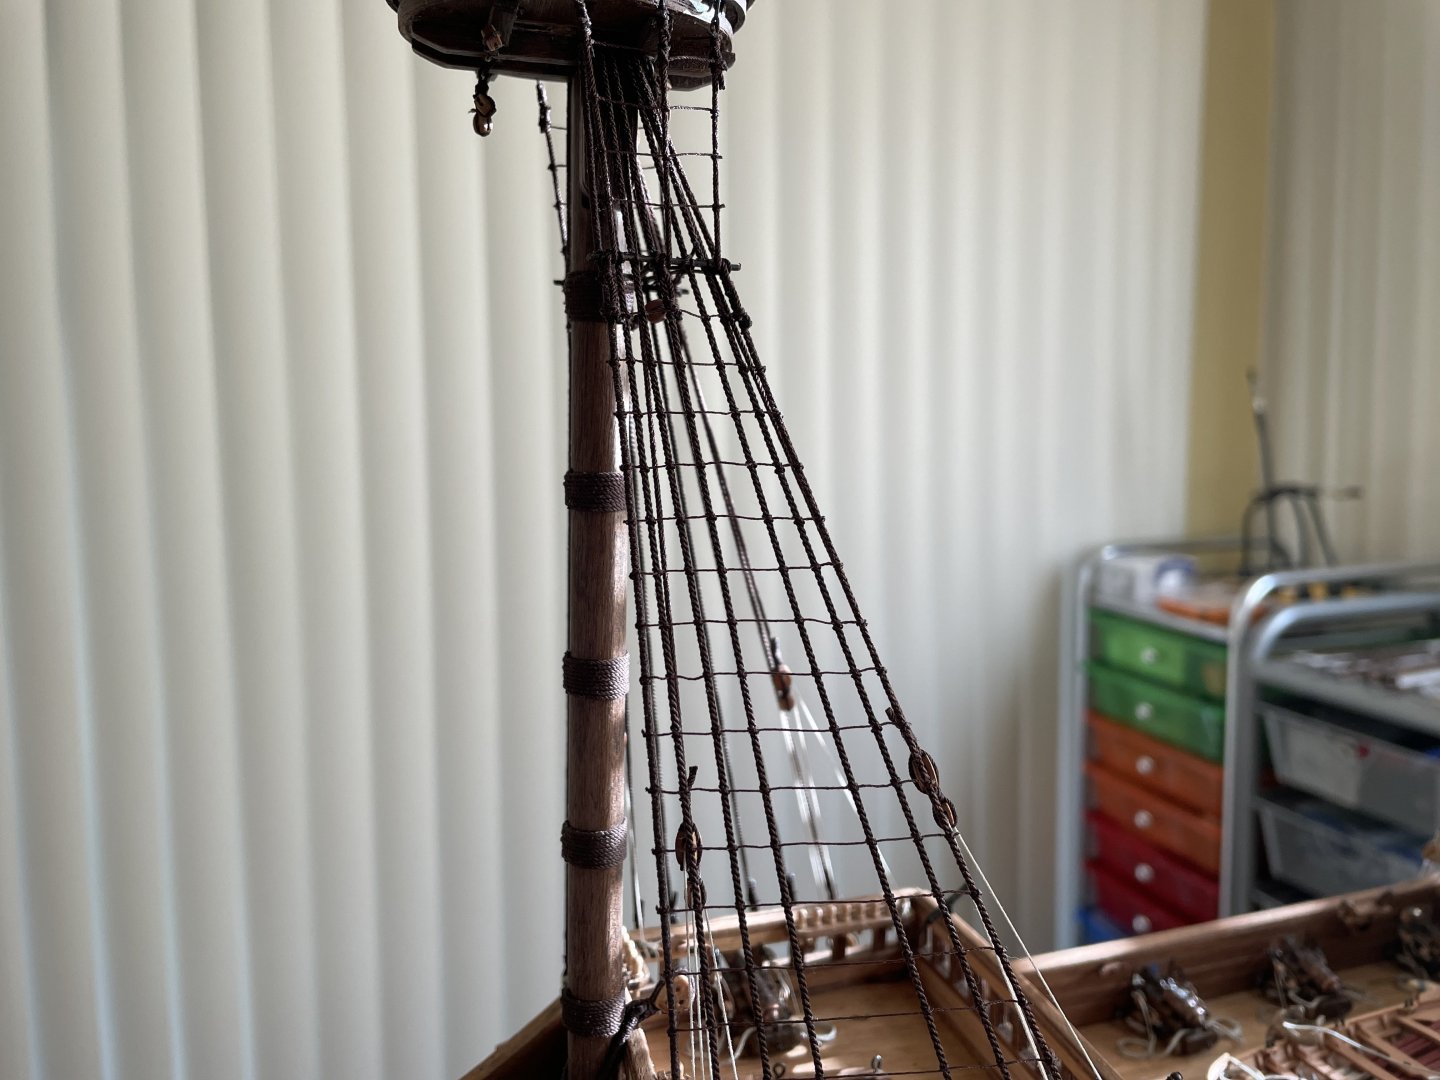
Was about to post progress on the Revenge but found a small mistake. When I set-up the Stays, I pass-through the stays through the space that the secondary masts will sit ... obviously the masts do not fit anymore. The STAYS had to be taken down. No room for mistake there, it simply won't fit otherwise. Luckily, it is just a matter of cutting the sizing and doing it again, passing the rope through the outer edge. Dry fit ok now. Beside this... more of the same - ratlines. Knots 400 of ~1600. Two steps forward, one step backward... there are days like that!
-
Thank you both. Looking at various logs. Already thinking of a number of modifications. HEY! I can't resist.
-
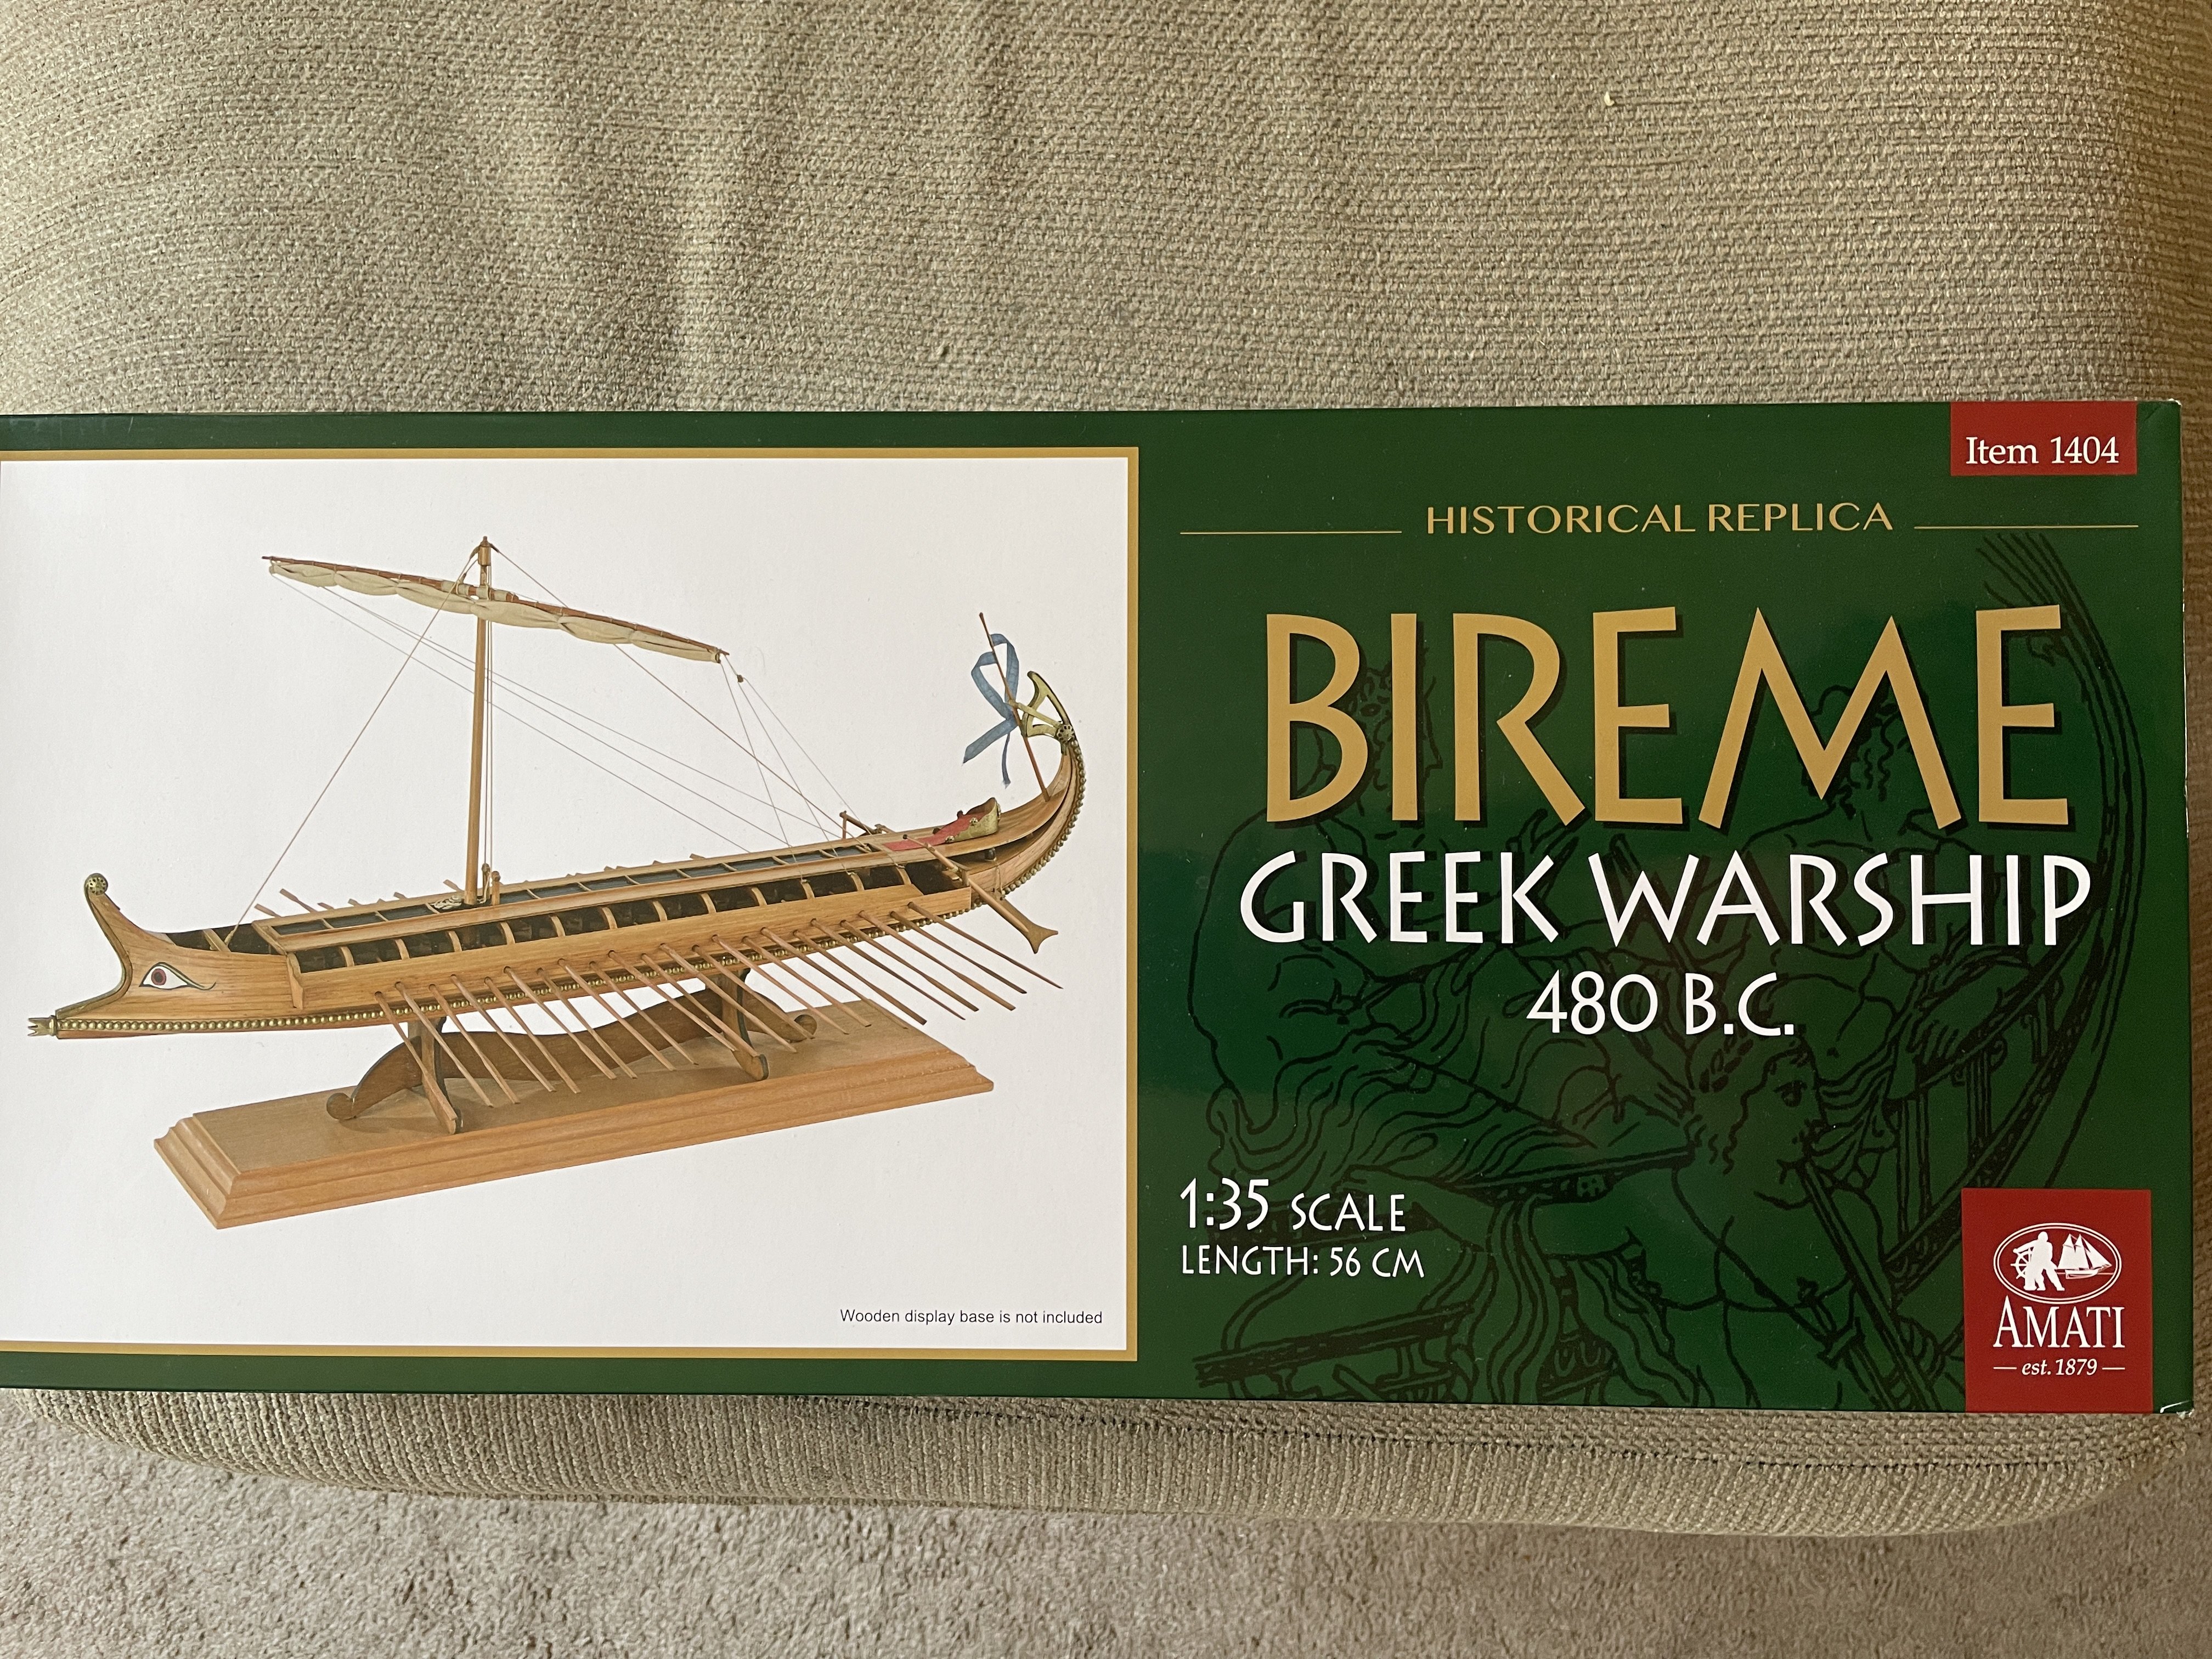
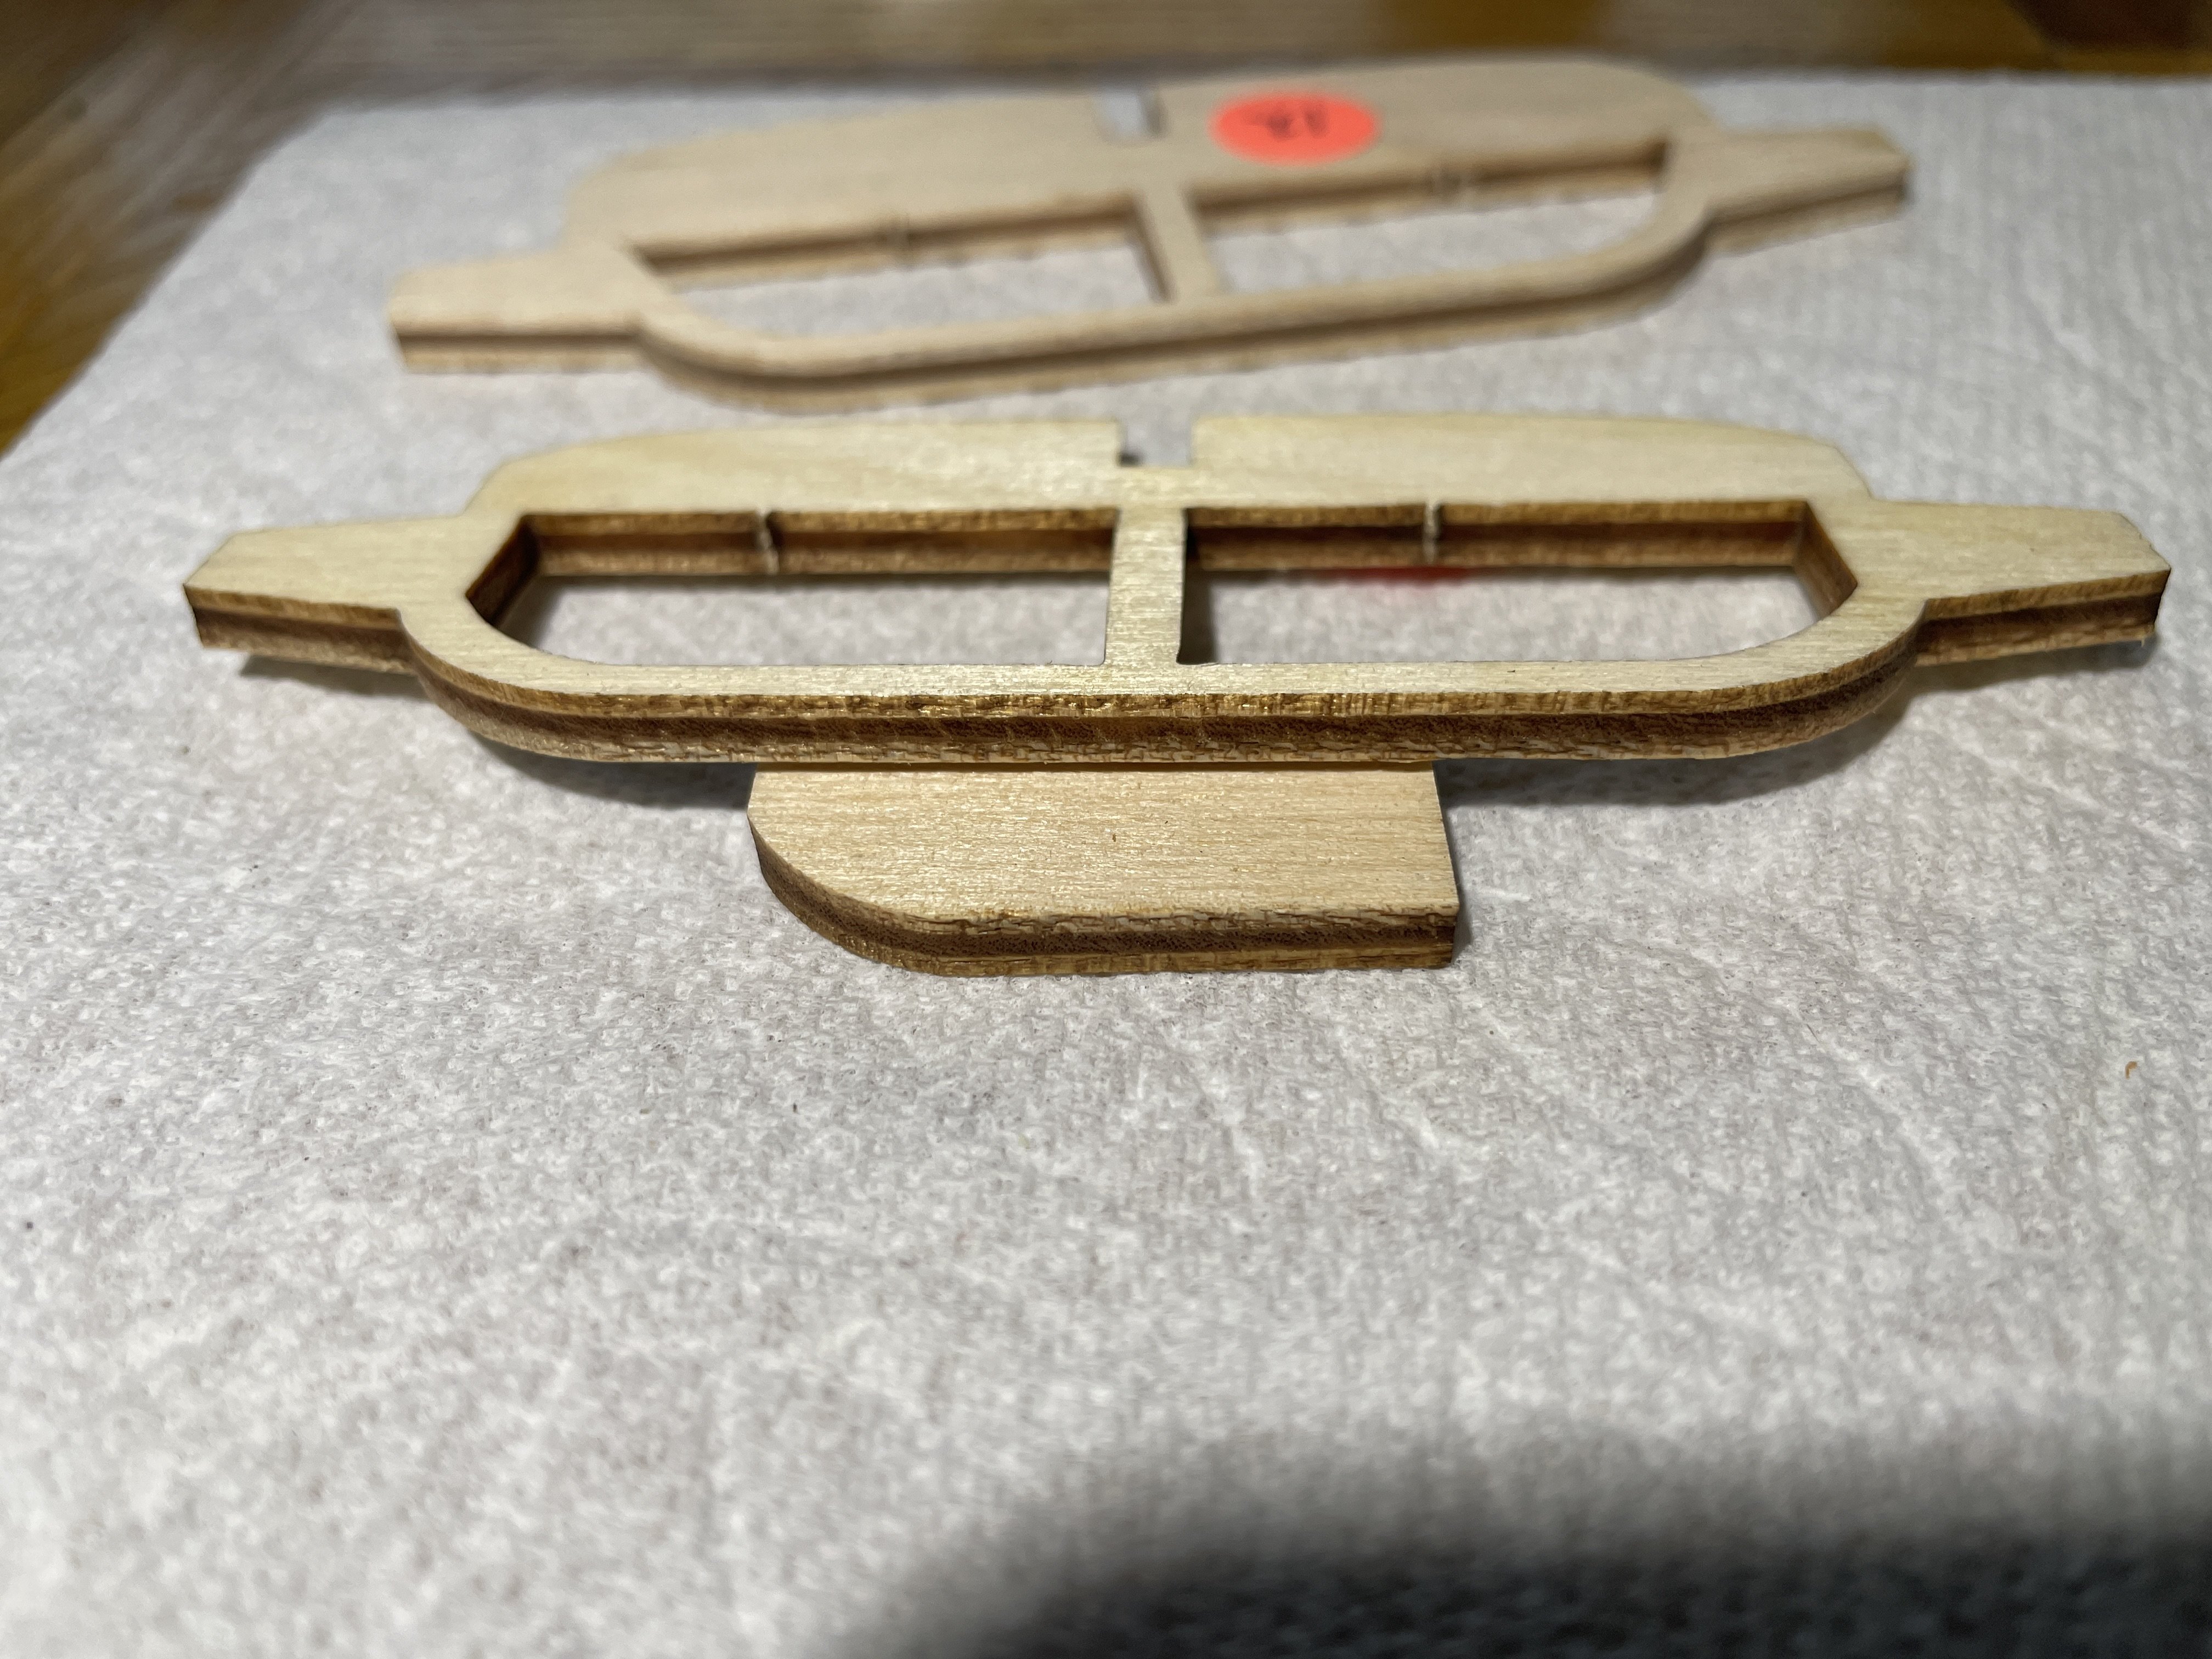
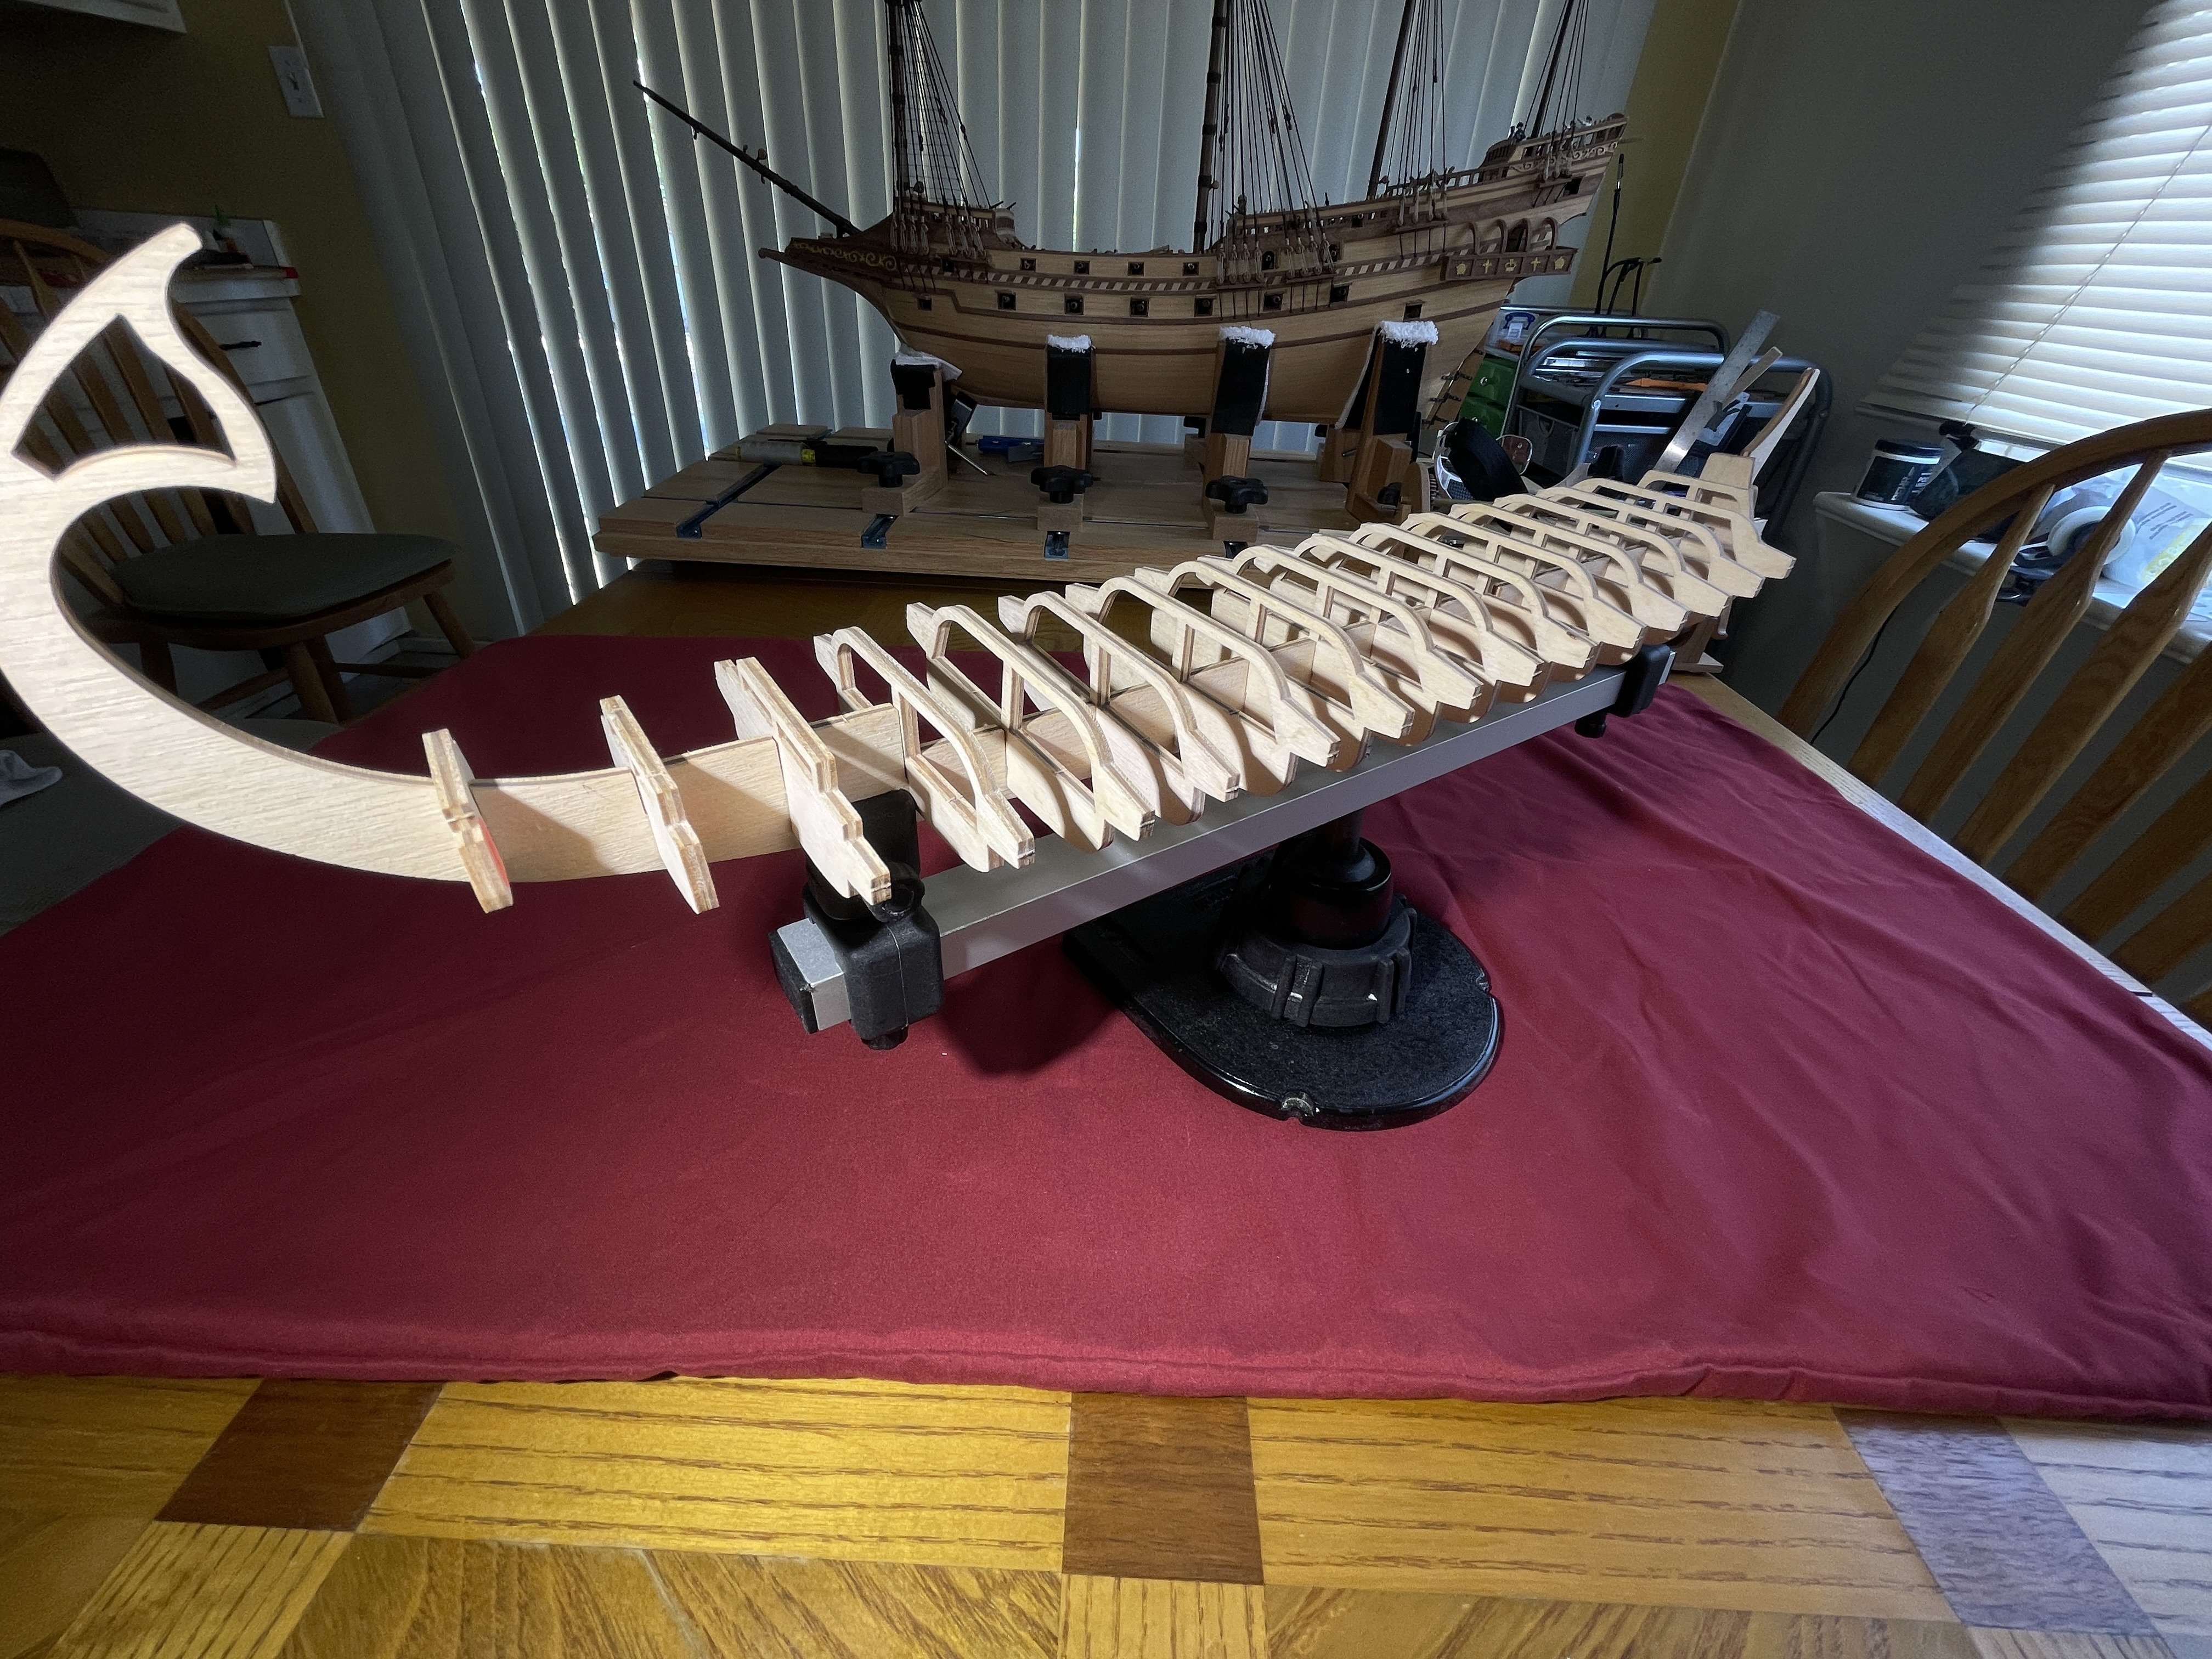
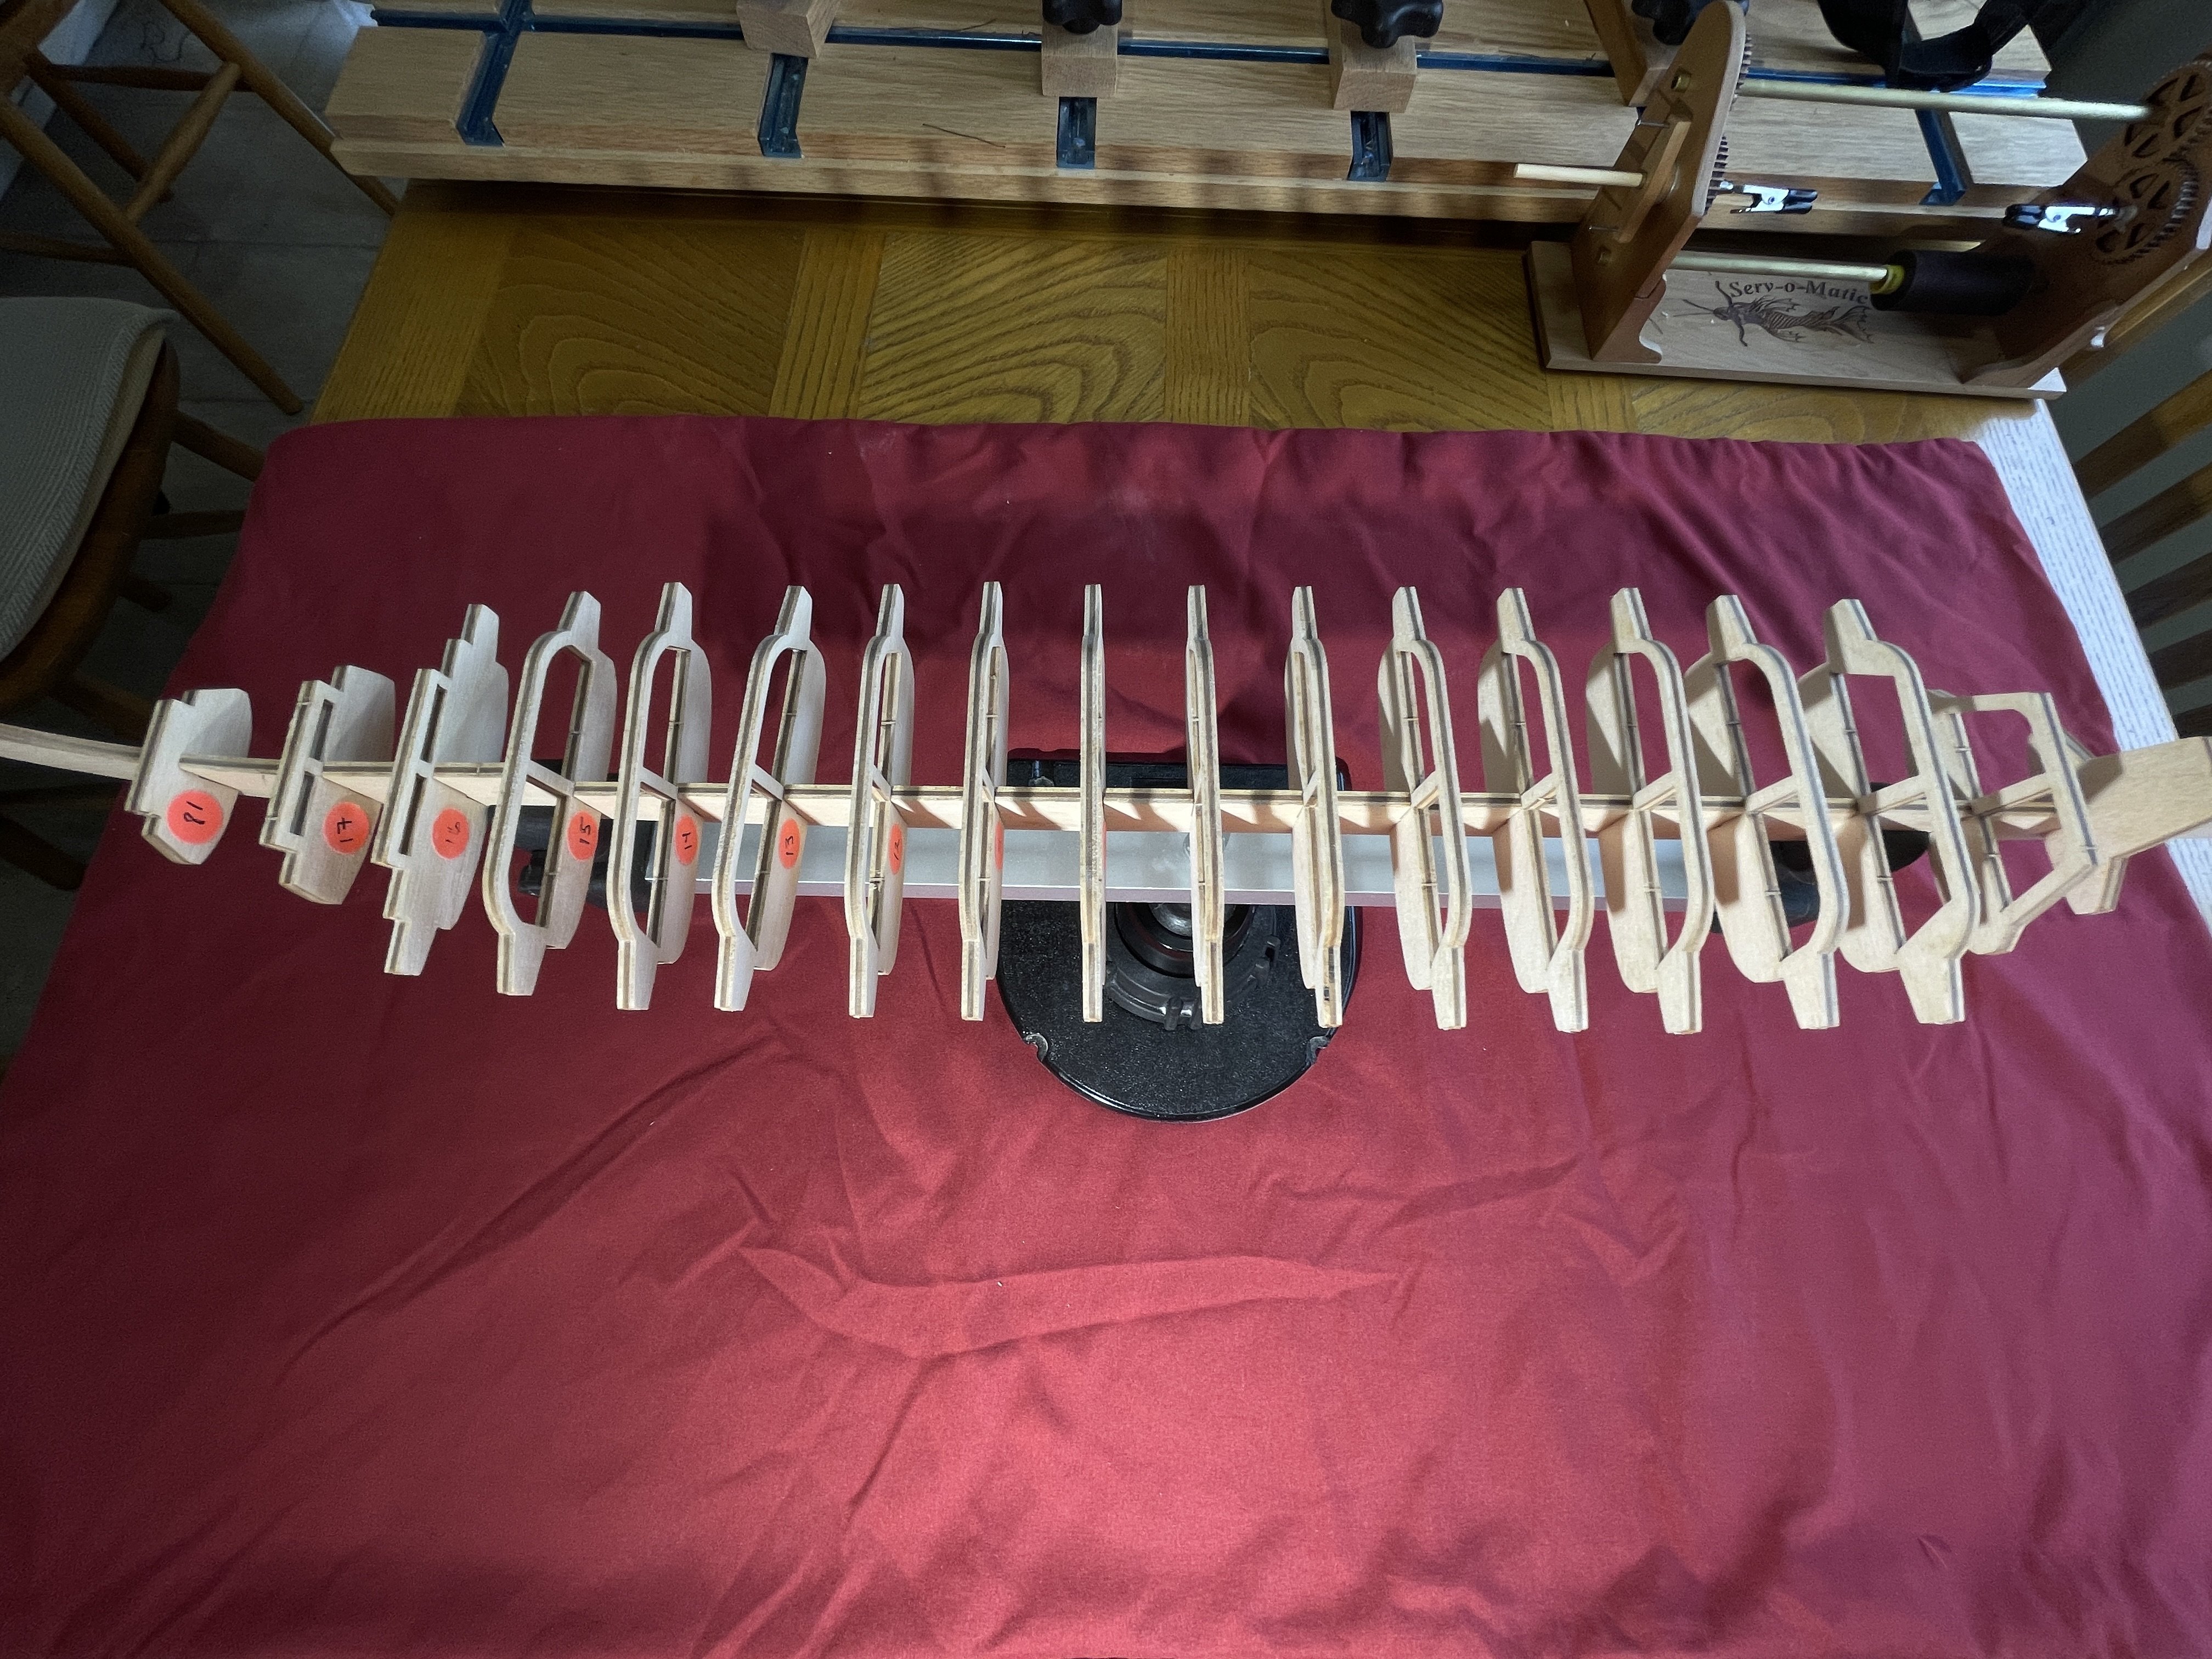
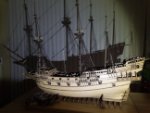
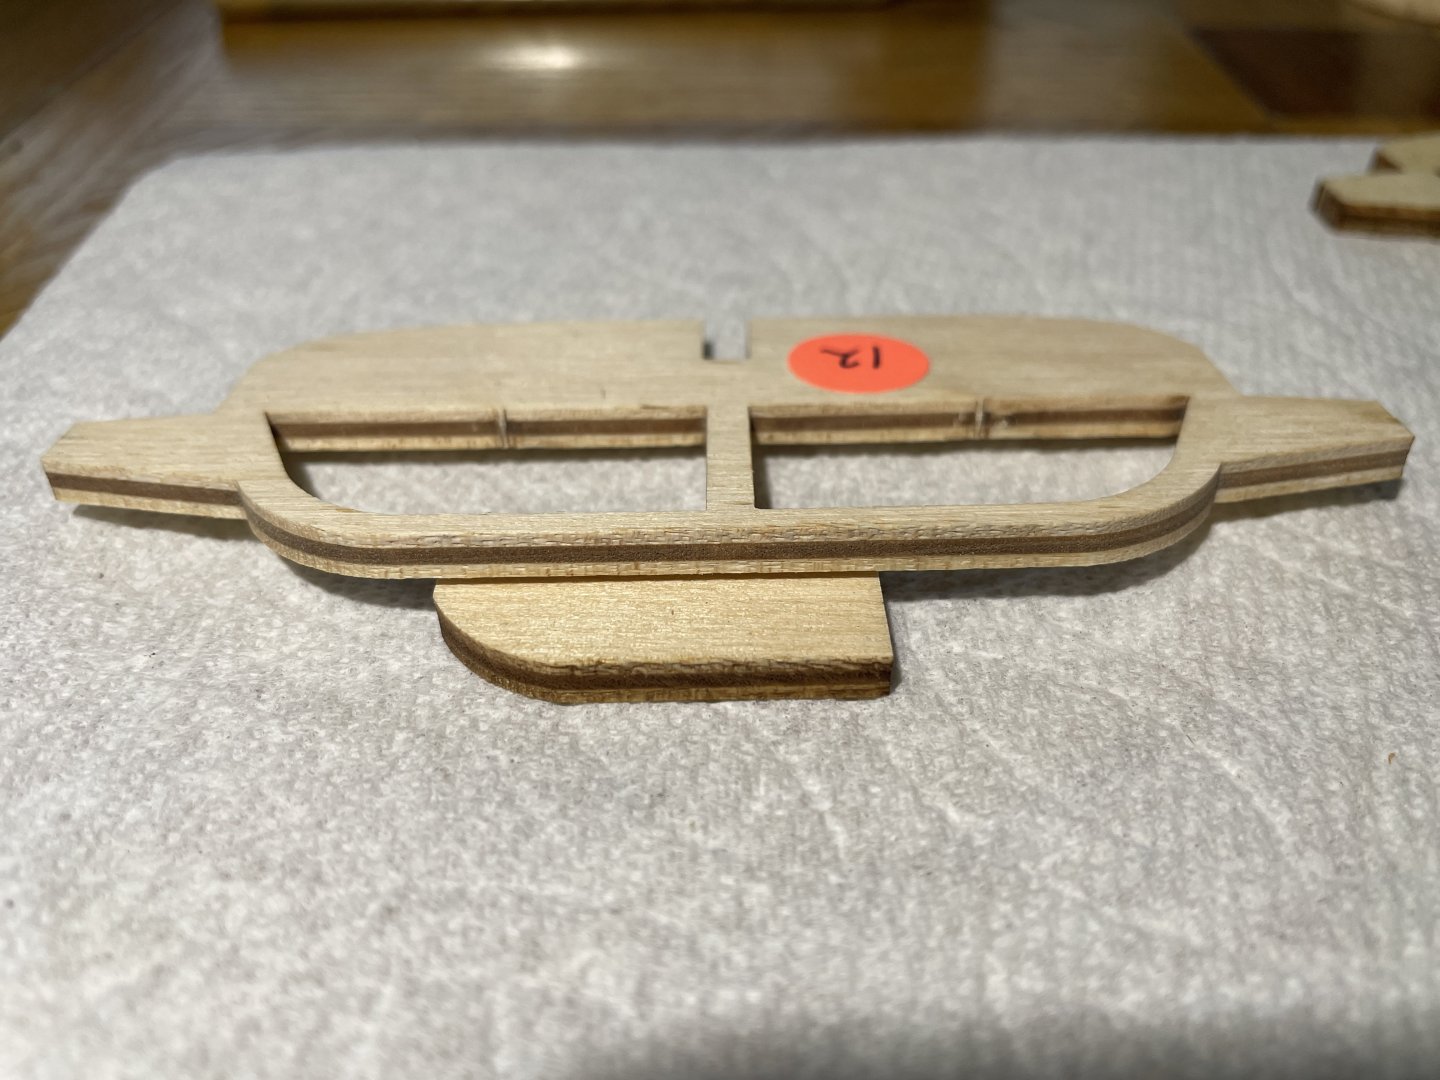
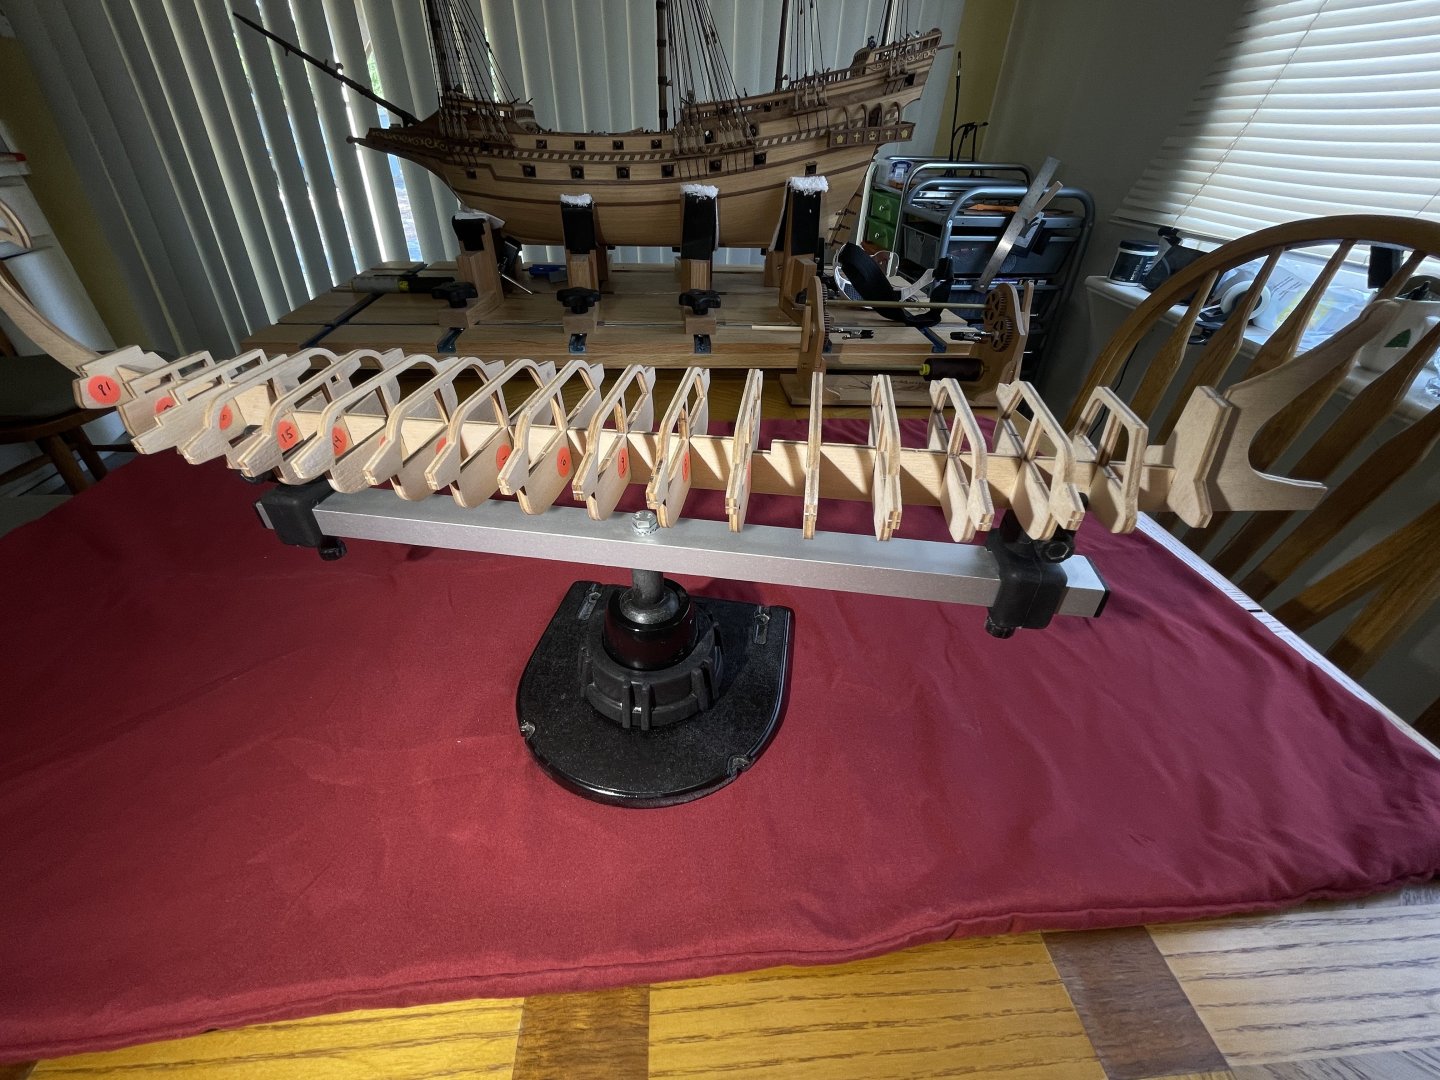
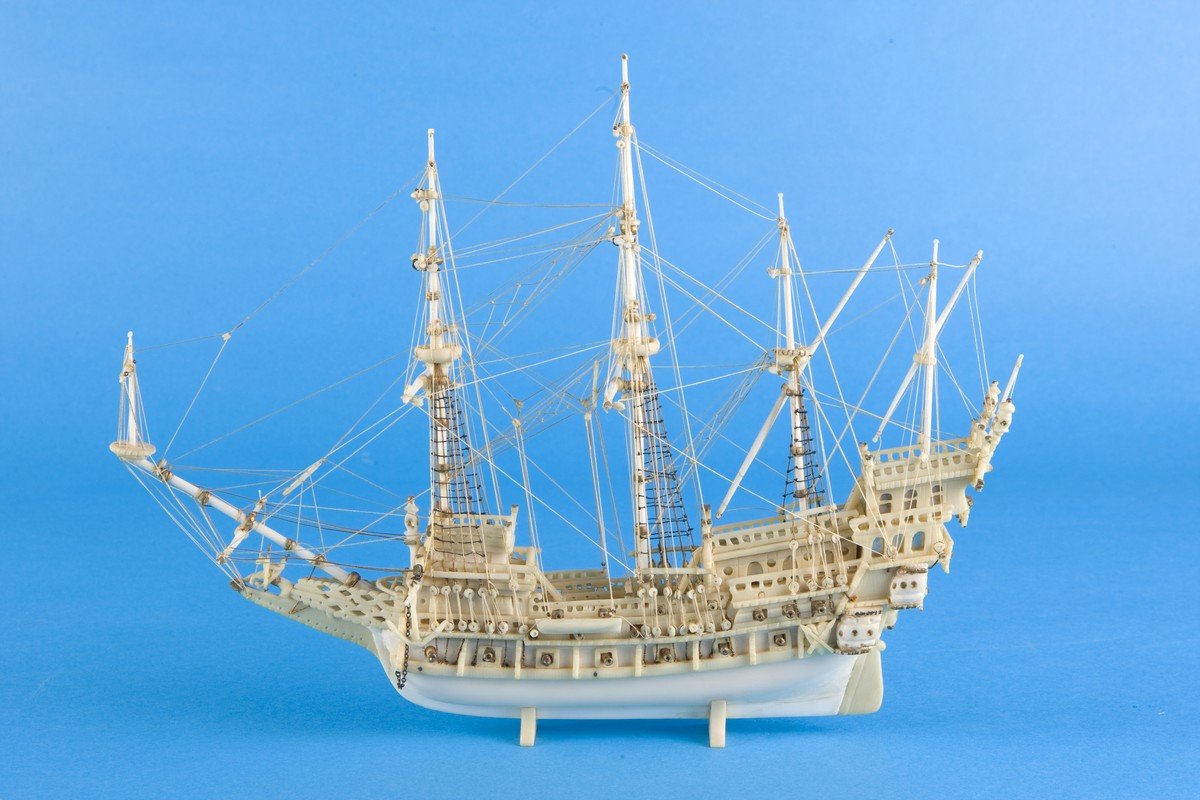
New build: Initiating a new build as a side project while finishing rigging the HMS Revenge. I was looking for something interesting, not too big and not with too small protruding parts (like cannon doors, shrouds, etc..). The reason: it will be a small Christmas gift to my father of 93 and will need to be shipped across the country. The materials are pretty much standard Amati. Good, but not overboard. This is what I was expecting. I started by removing all the charring using the Paasche ER-1S air eraser - Baking Soda. It's very gentle on wood and it does a pretty good job. The first two pictures provide an example of the results. Two different bulkheads as before-after pictures. The remaining shots give an idea of the proportion and design (dry fitting). I find this model elegant. Overall Review of the kit (adding to this section as I build) Although an elegant model, the design HAS NOT the user in mind. There is a lot of adjustments as you build. You may say, well this is normal!! I think not so much, it could be better. Difficulties is likely because of the lack of documentation. Everything seen ok, until you start planking. Then there always a gap to be fill a plank to taper or an extreme curvature. None of the sections are really multiple of the plank-width. So, you have to adjust constantly. NOT a quick and fast build. IF YOU WANT a planking challenge and/or perfect your skills... this maybe it! With this in mind, it is a good kit, but not excellent. If you take your time, you can achieve good results. Conclusion: The planking is a challenge here... don't under-estimate the difficulty: high moderate to expert in places. The Plusses of the kit Bulkhead tri-ply plywood: Surprisingly good quality. Nice and clean laser cuts. A little play at the junction with the heel... so careful when gluing. Wood strips: Very high-quality wood, well cut. Walnuts and something else (white) for the decks. The minuses of the kit Documentation: NONE, we have a picture after all, that ok!?! no Amati, unacceptable. Bow and Stern: The most obvious and predominant part of the build.... and the most difficult. I spend hours shaping balsa (note: NOT INCLUDED) with no guides at all. When done, expect to be shaping again... this time with wood filler. An indication on how this is supposed to fit would have been nice in the form of a plan, drawing or better include a pre-shaped part to the kit. As much as I like some of their kits... This is a major negative. Extreme side planking: Definitively NOT beginner, not even intermediary. Extreme strips side binding needed will take a lot of patience and a fair number of trial and miss. Not a pleasant experience. Just includes few pre-shaped strips or 2-3x wide planks so we can shape it yourself. Decal for the "eyes" in front: NONE. you are expected to paint yourself. Is it a scratch-build I'm doing? Metal "RAM": nope, just a cheap little piece of wood. Side ornaments: sorry it looks cheesy and likely not even realistic. This is a warship not a "display piece". Wait it is a display piece afterward. More to come...


-
Shellac + Bitumen
Loracs replied to Loracs's topic in Painting, finishing and weathering products and techniques
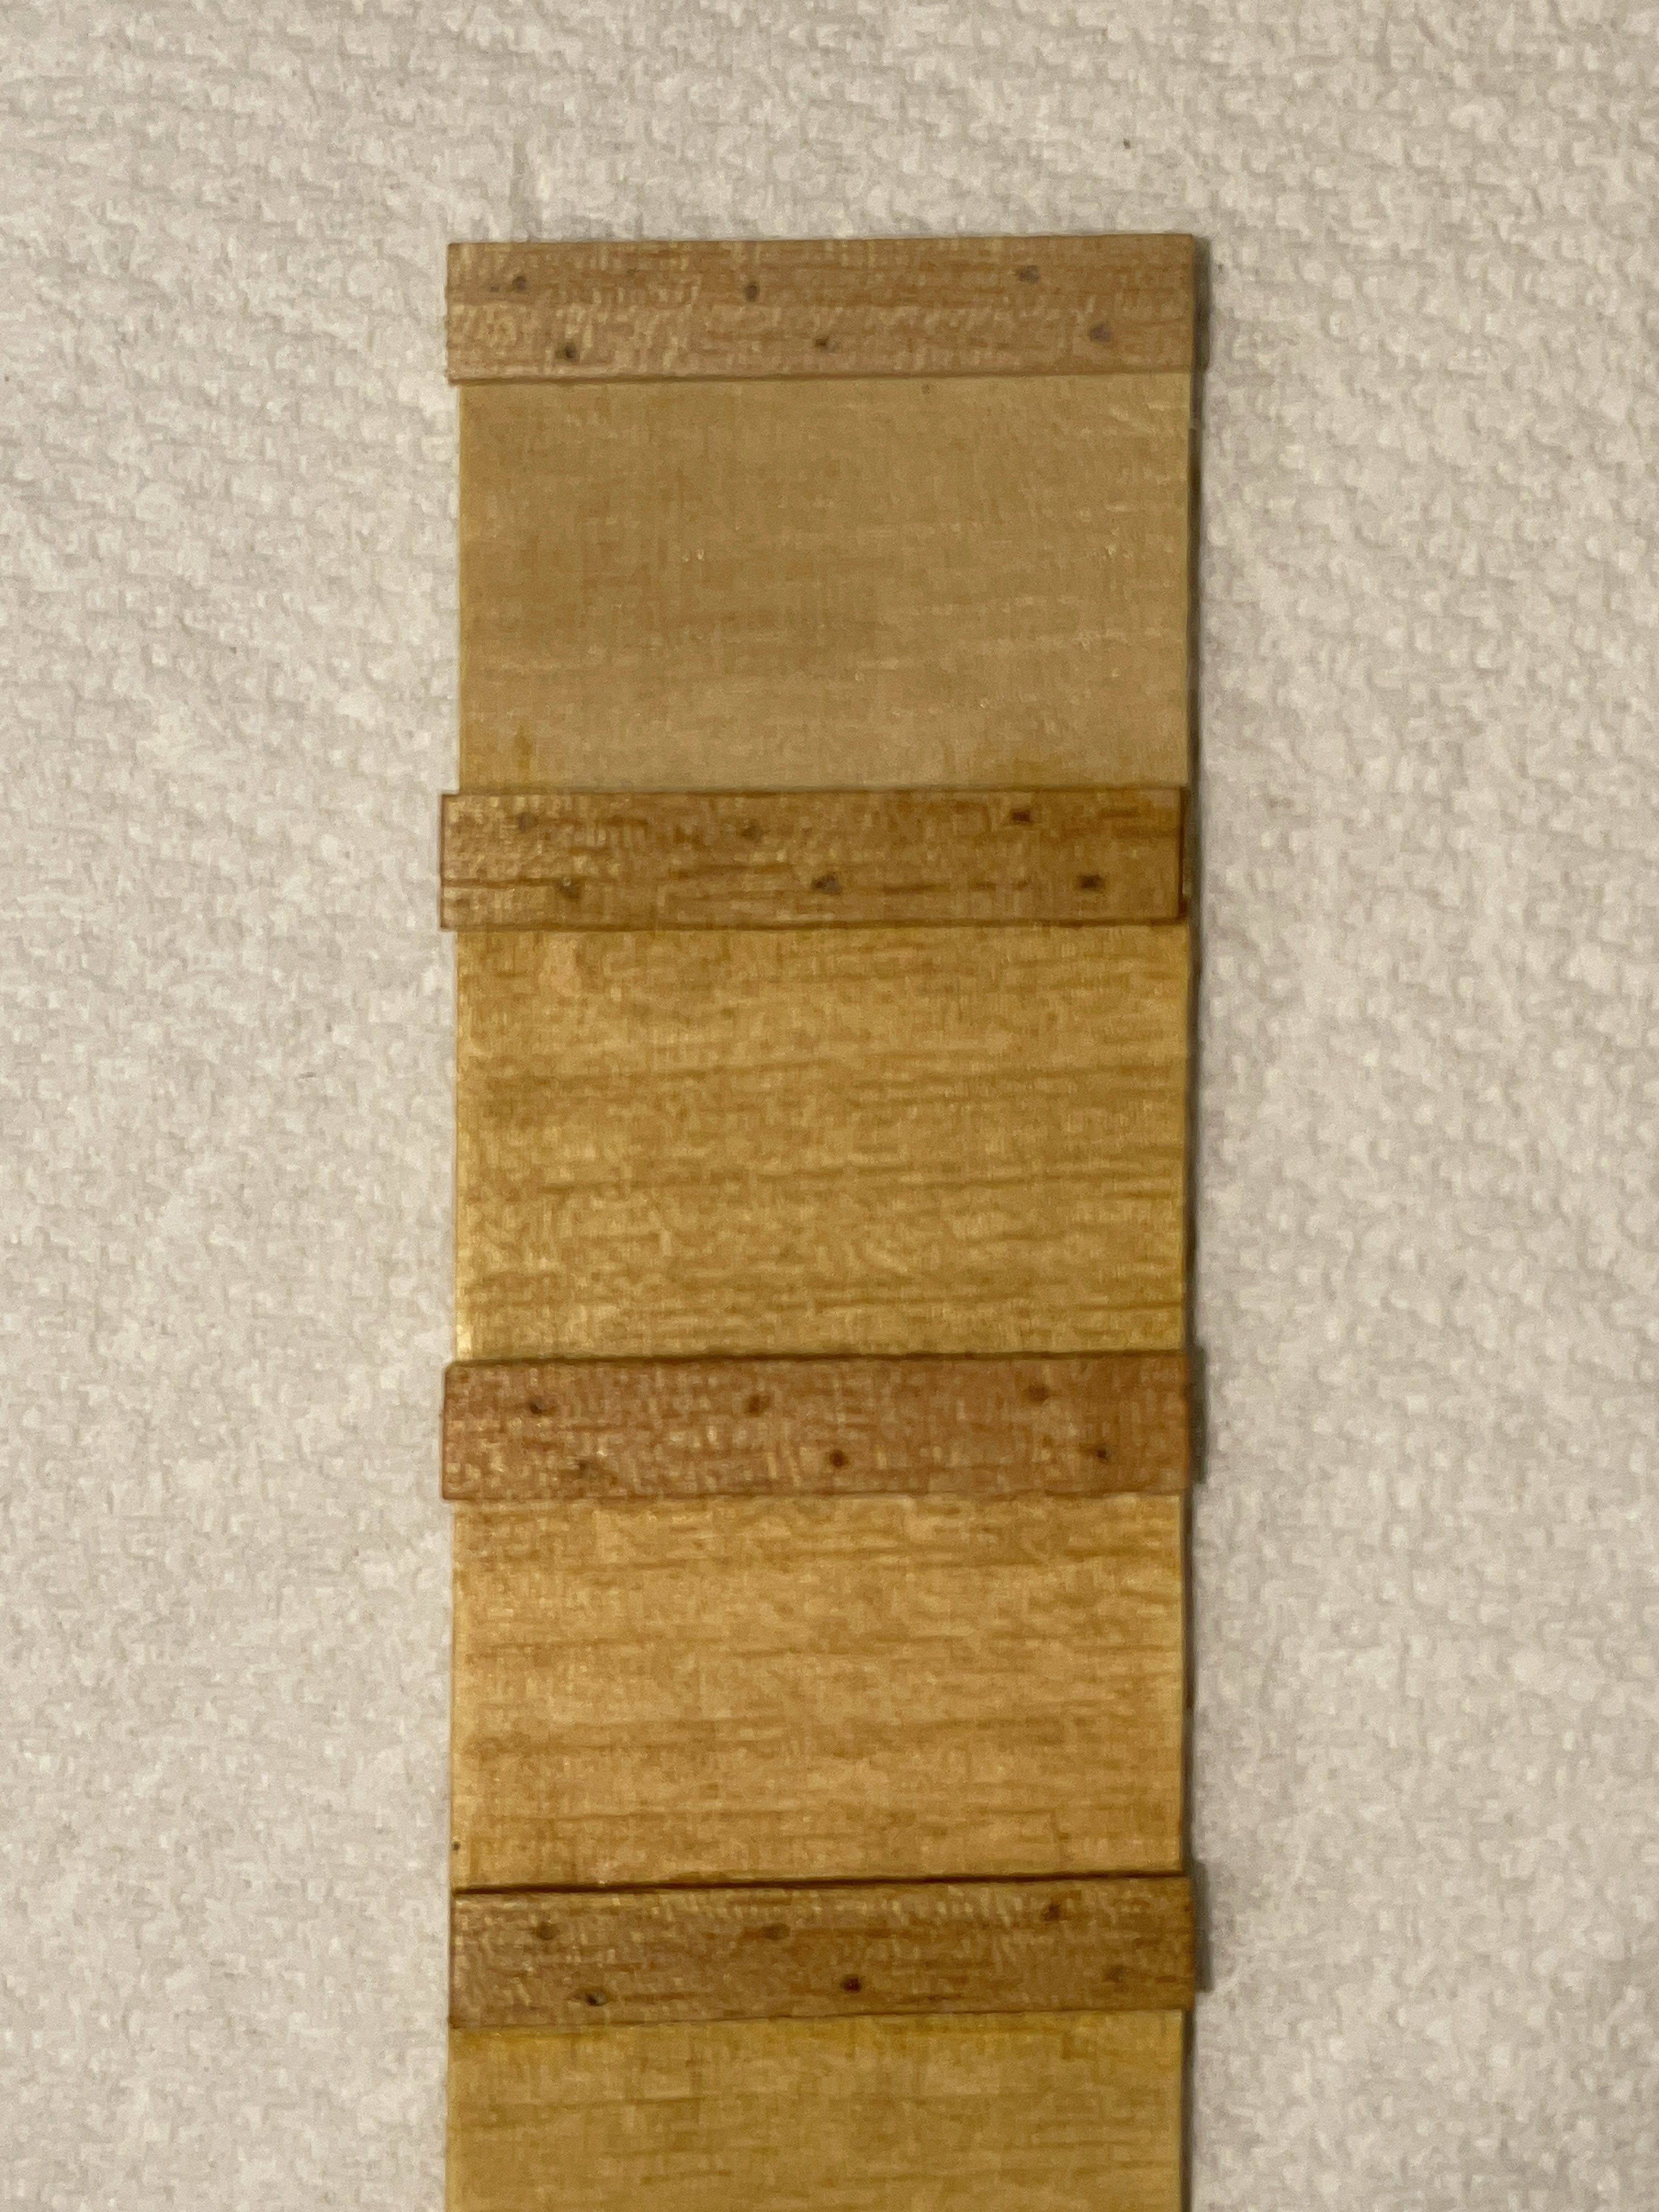
Here's a version with treenails. At 0.3mm, it need to be simple. I simply drilled holes and added a layer of poly/shellac. At this point, it was still looking like empty holes. I then layered a thin coat of wax... looking better.
-
OMG!!! this is fantastic. I just discover your post. Not many ship in a bottle out there... with a castle and multiple ship... wow, this is unique. Talk about hand to eye coordination. I don't think I can even do that... and I'm not so bad at detail work. Outstanding. It looks like you BUILD the bottle around the model!! Thanks a lot for sharing.
-
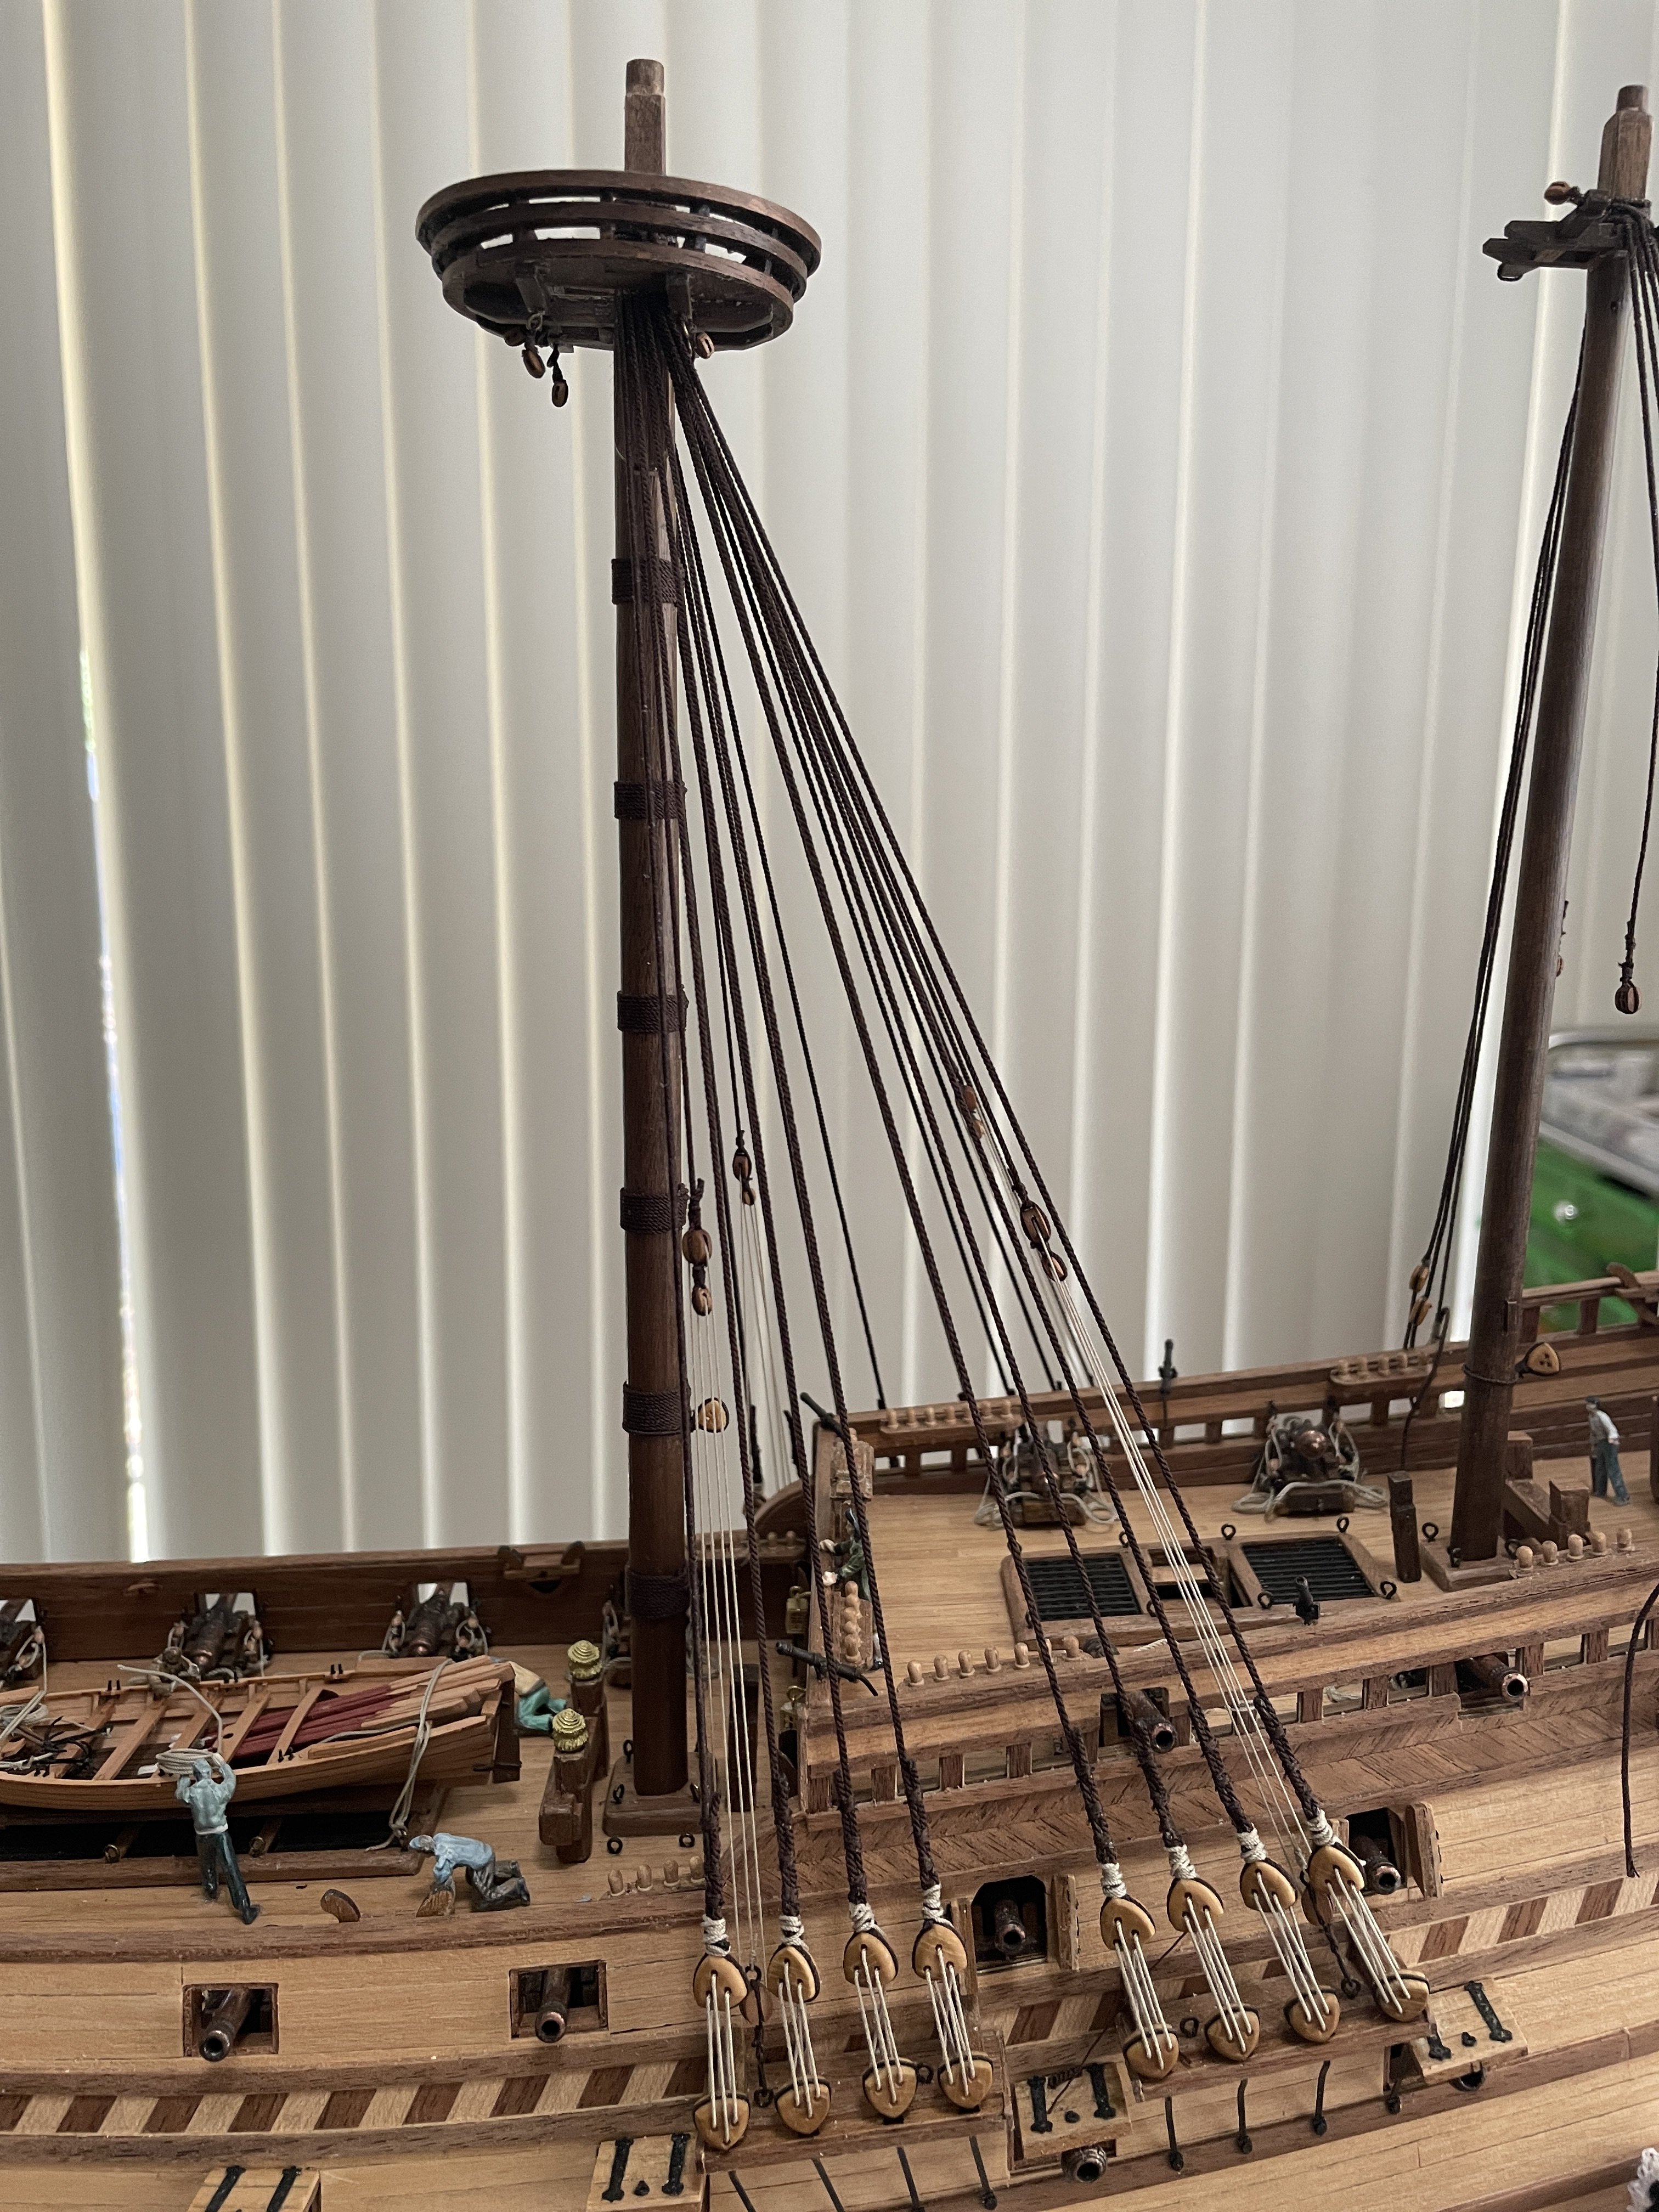
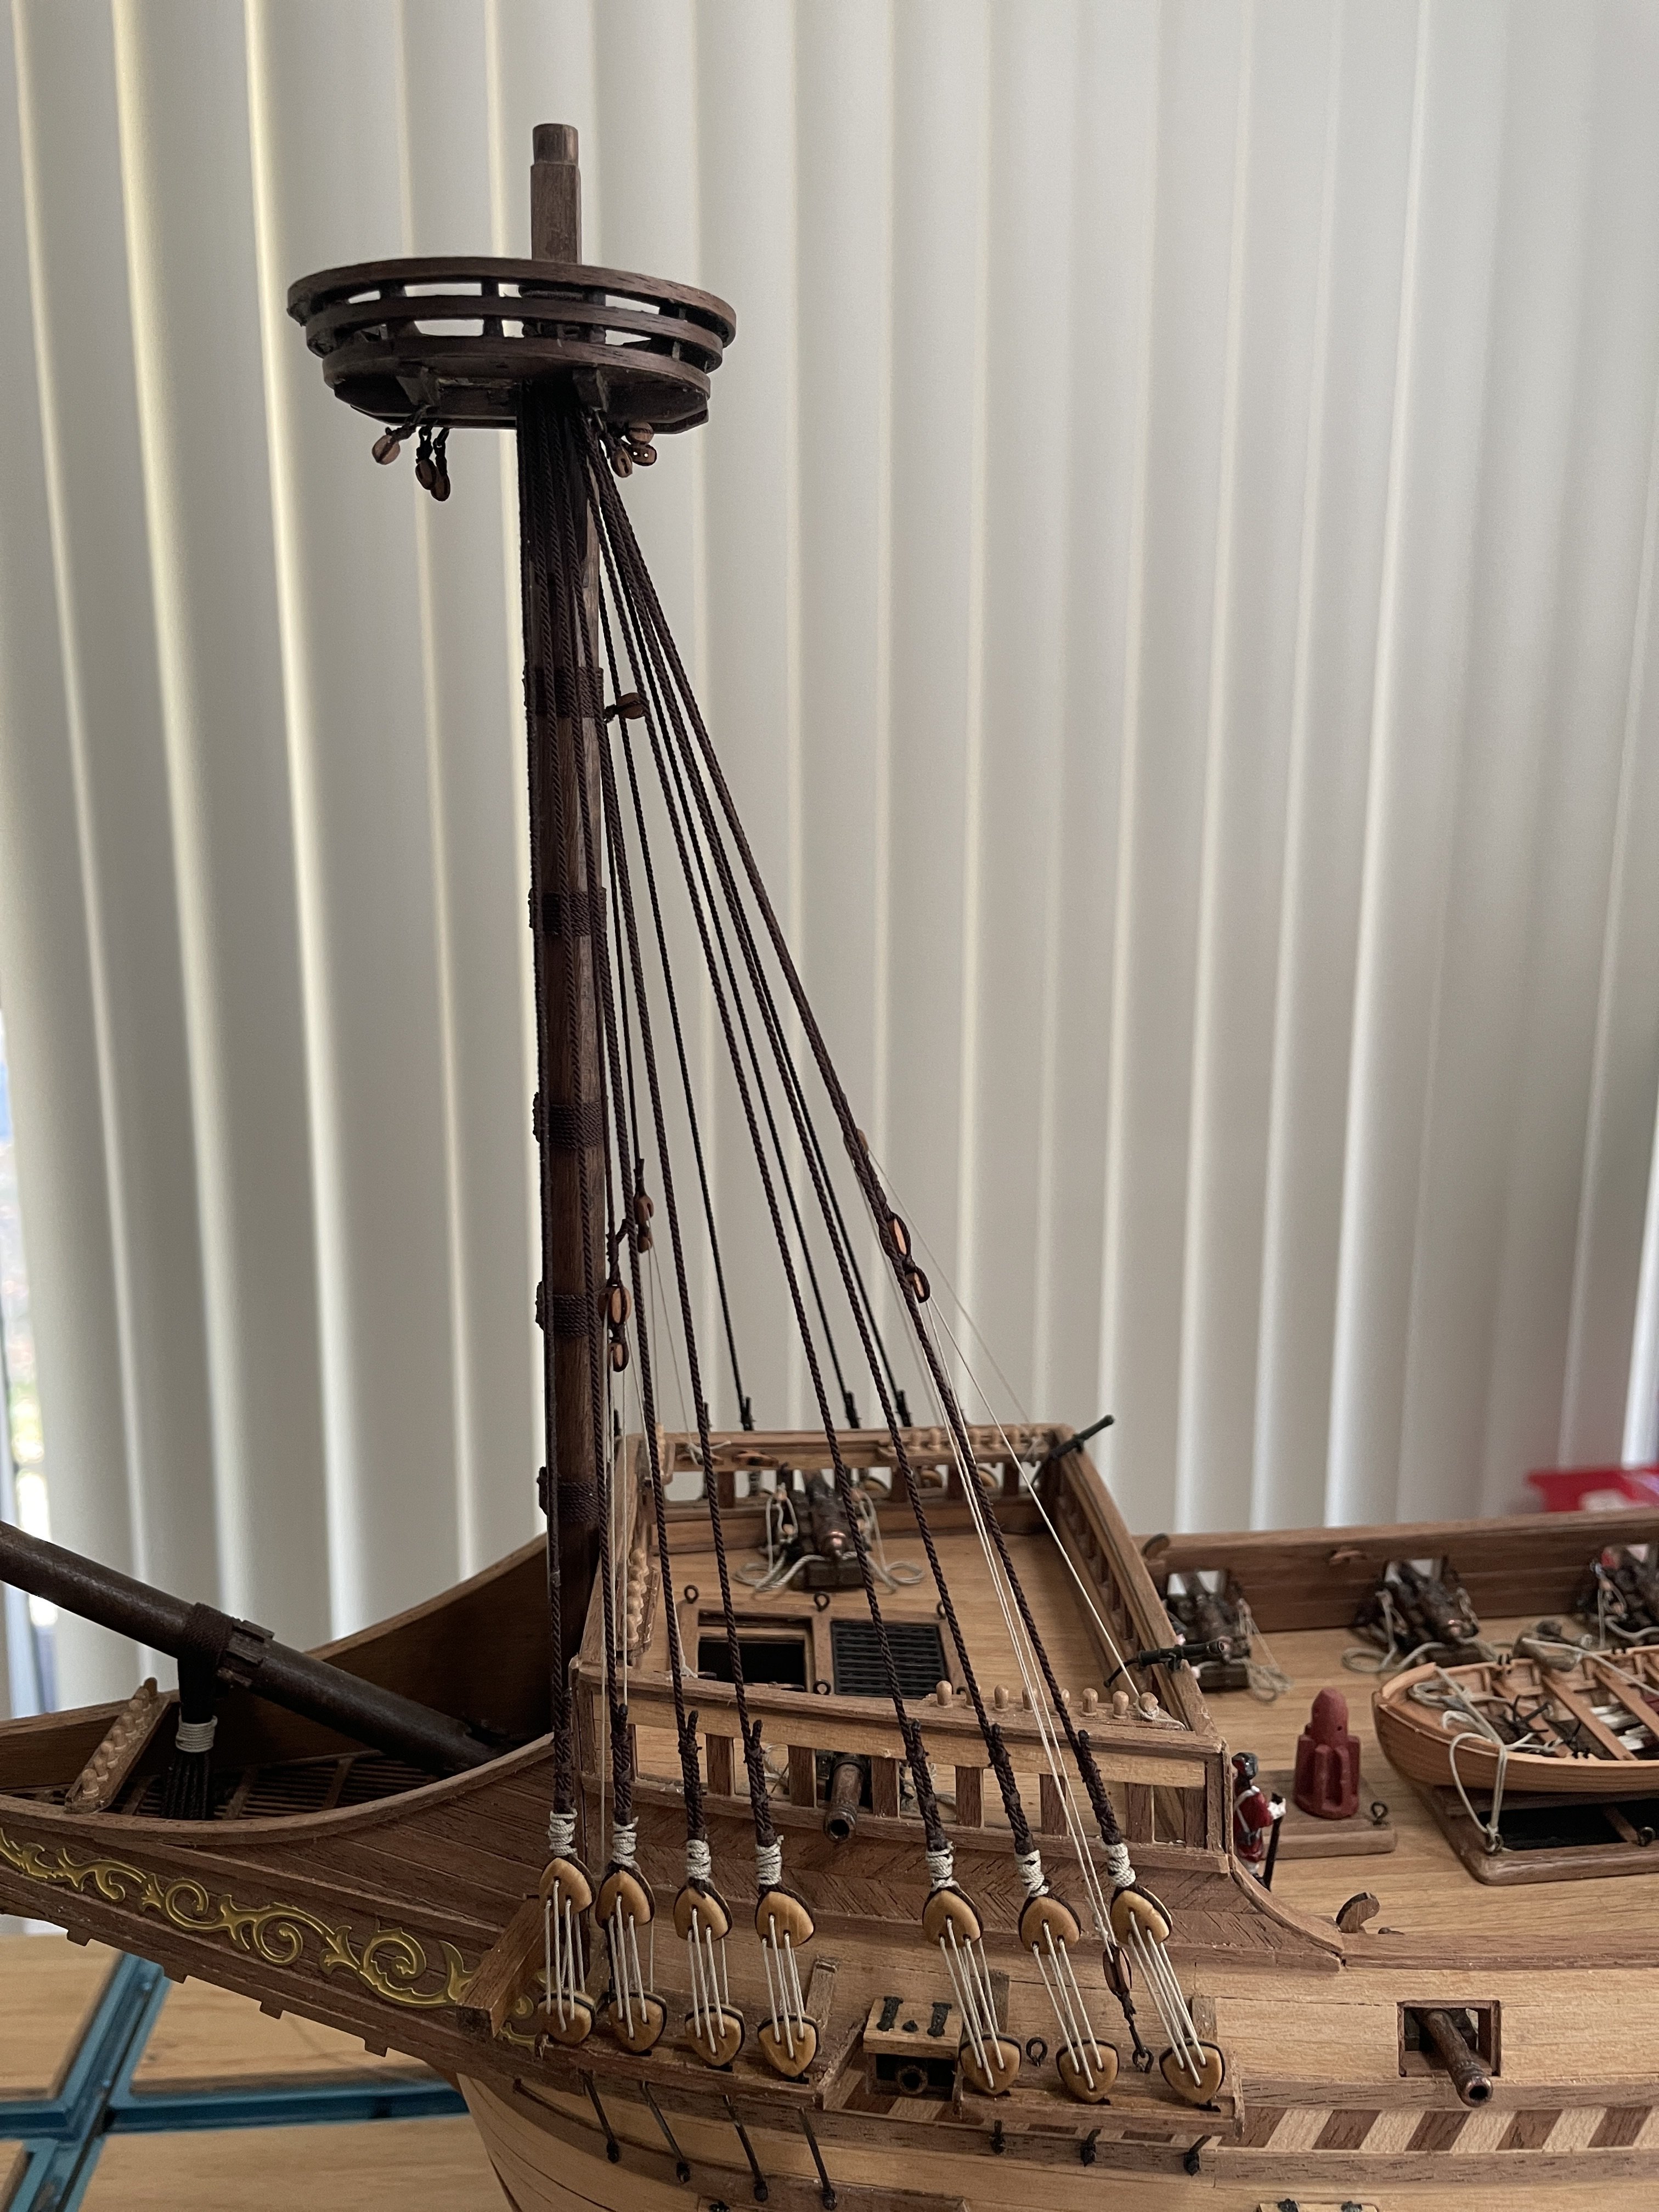
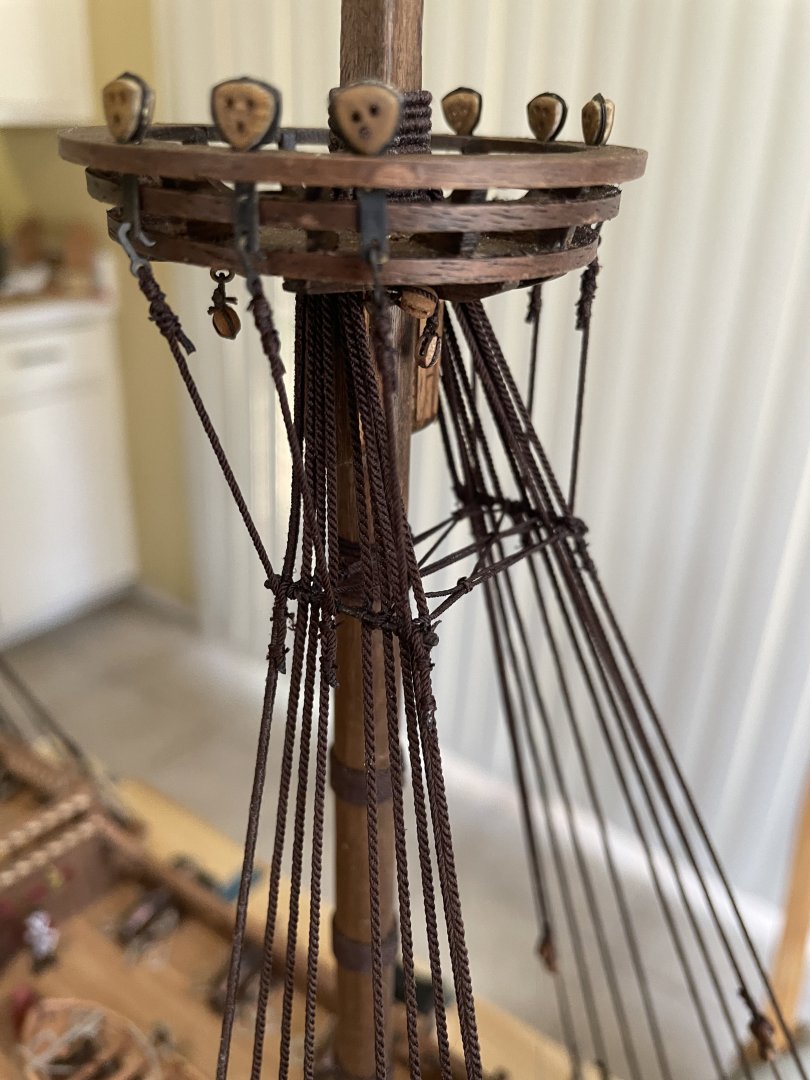
Ratlines and Stays: Starting to work on the ratlines. Not as difficult as anticipated but... it will take a while. A few everyday while doing other things. It is still quite hot middays, which limits my time. Note: dark ratlines, rather than tan, were a choice based on preference. I just did not like the tan... too much contrast. The 2mm main and fore stays are quite big when compared to the ratlines. The pendant/loop is made by incorporating a block into the cable before serving. Here a before and after.
-
Shellac + Bitumen
Loracs replied to Loracs's topic in Painting, finishing and weathering products and techniques
@paul ron, In my test, I was using stain straight for the bottle (new to stain) ... very far from ideal. Diluting in poly/shellac/oil and building multiple coats indeed seen the way to go... thanks for the tips. More testing! -
Shellac + Bitumen
Loracs replied to Loracs's topic in Painting, finishing and weathering products and techniques
Hello Paul, I'm having such poor experience in trying wood stain. Just did not look right. This is the reason for trying shellac/bitumen. -
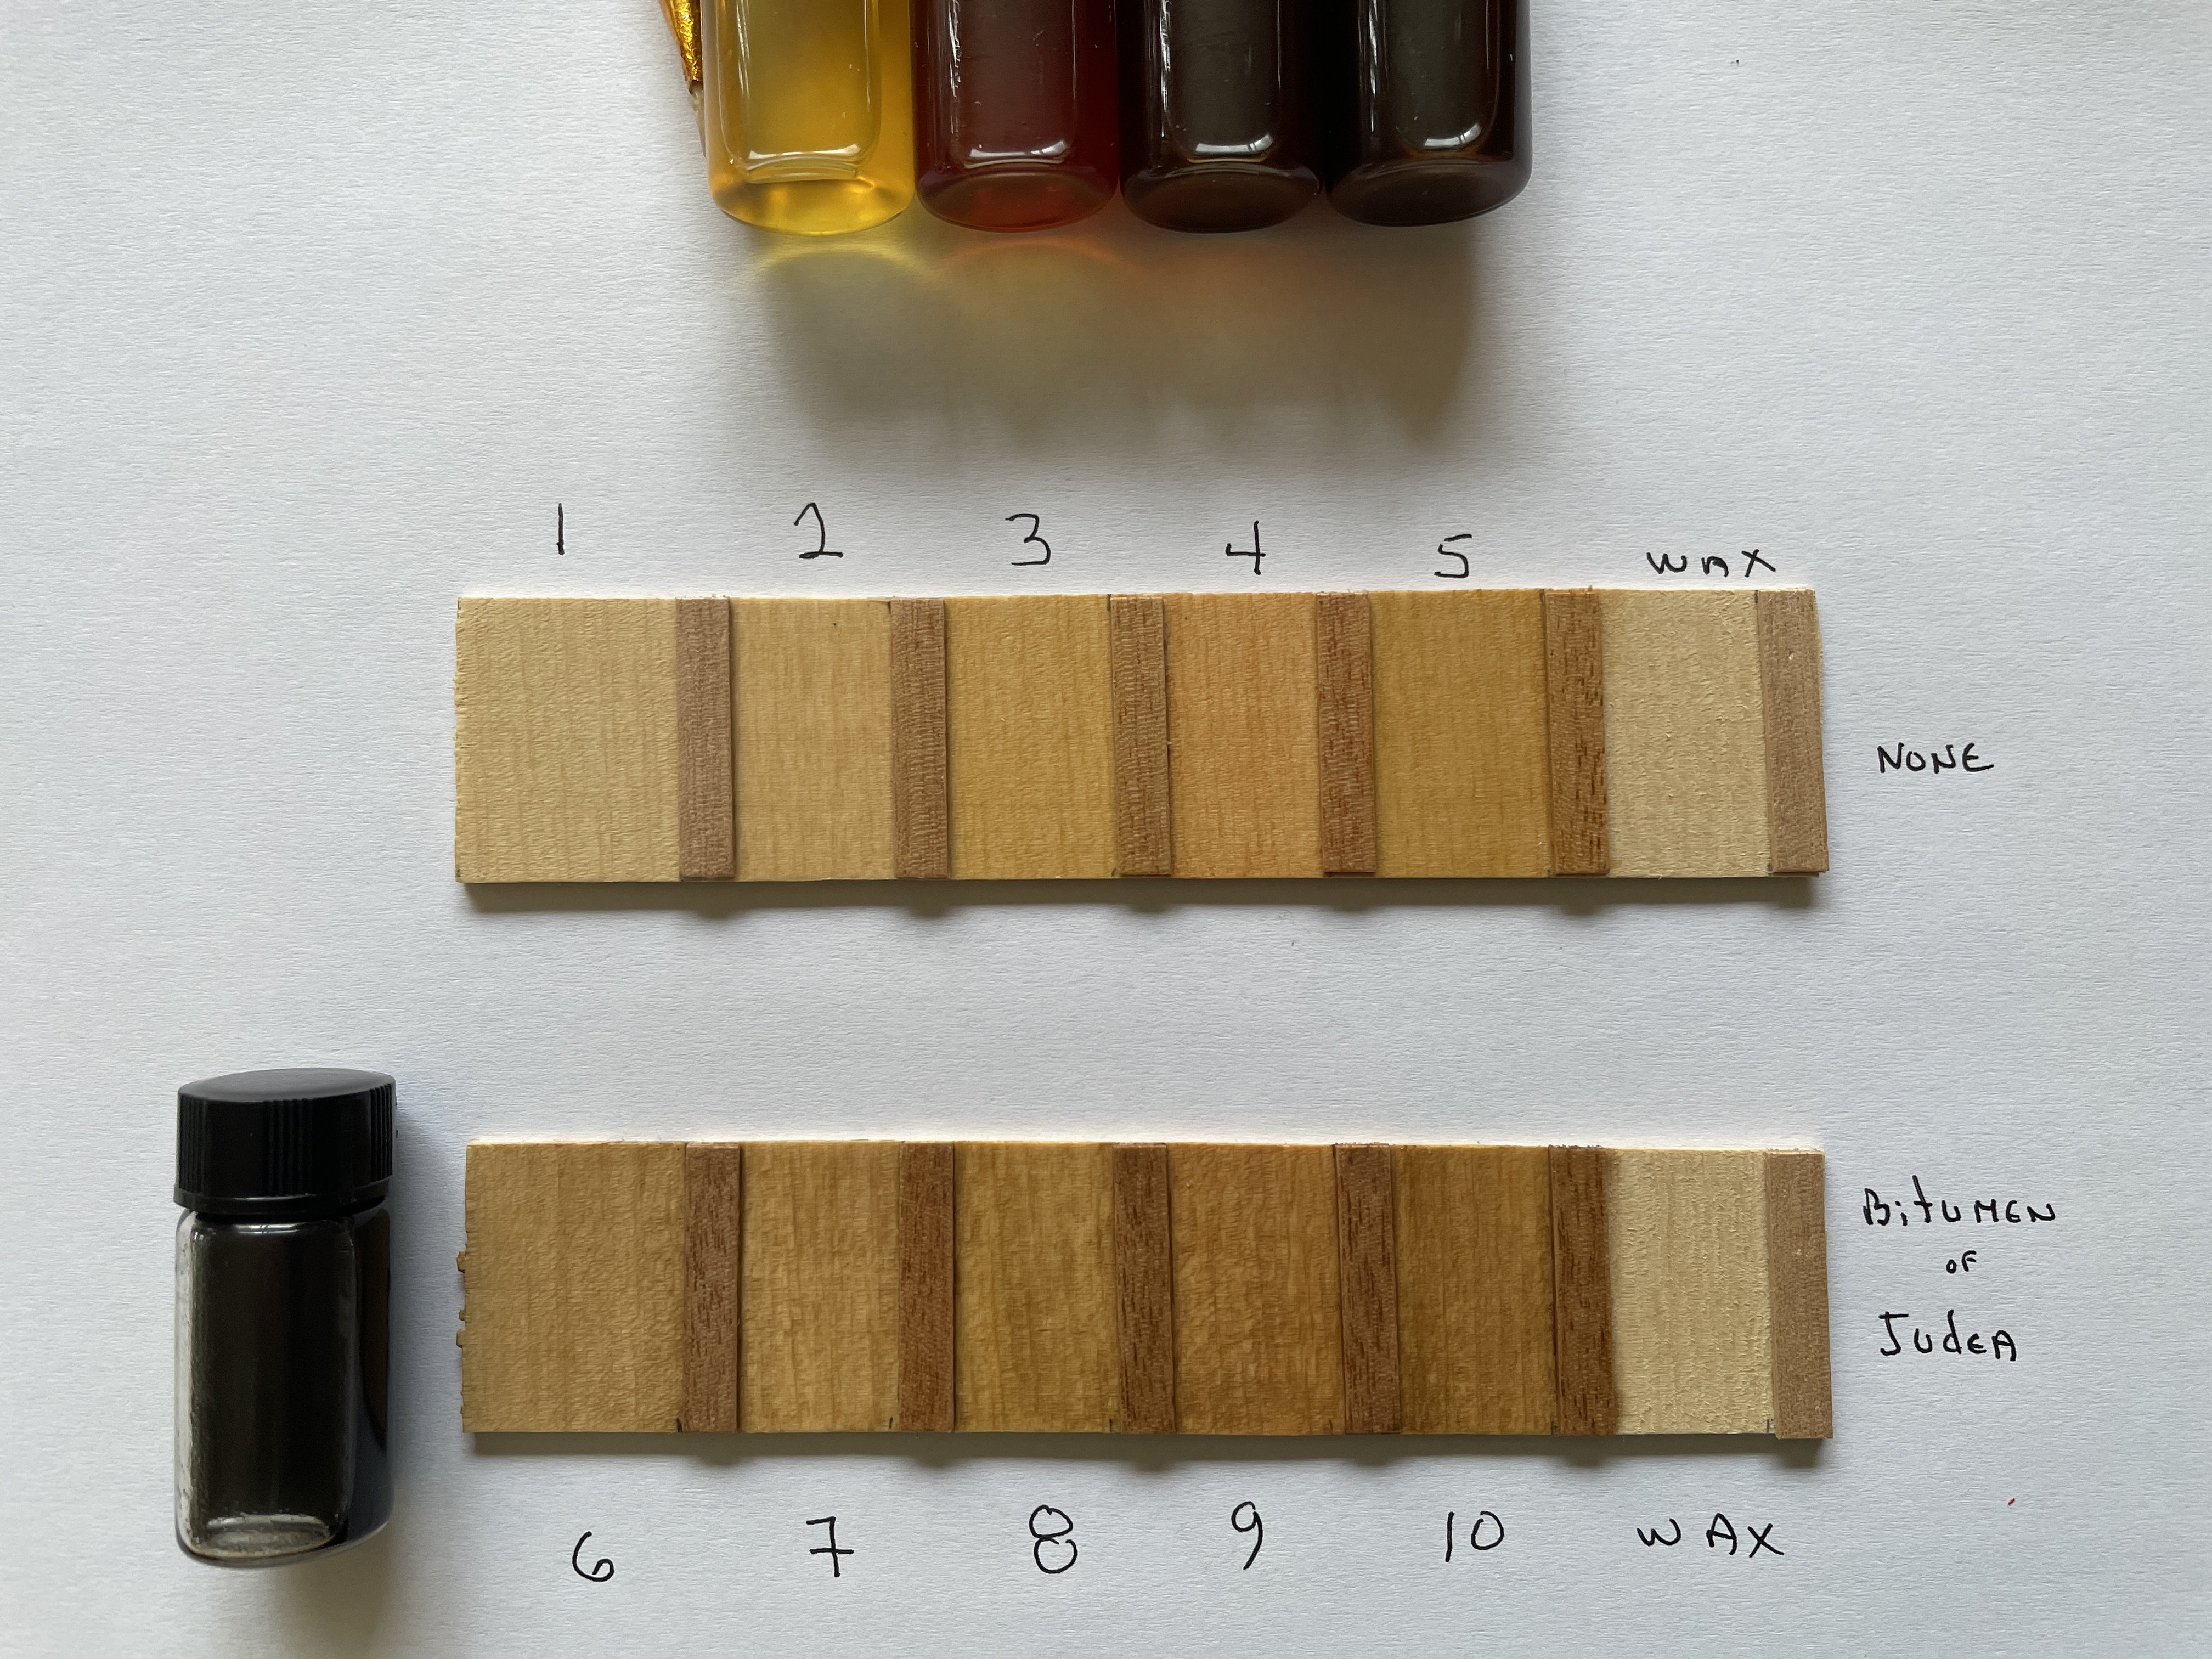
Which finish do you like most? Boxwood base + tanganyca strips 3 coats 1. Matte Poly 2. Shellac platina 3. Shellac orange 4. Shelac ruby 5. Shellac garnet 3 coats + Bitumen Judea (to age) 5-10 order same as above

-
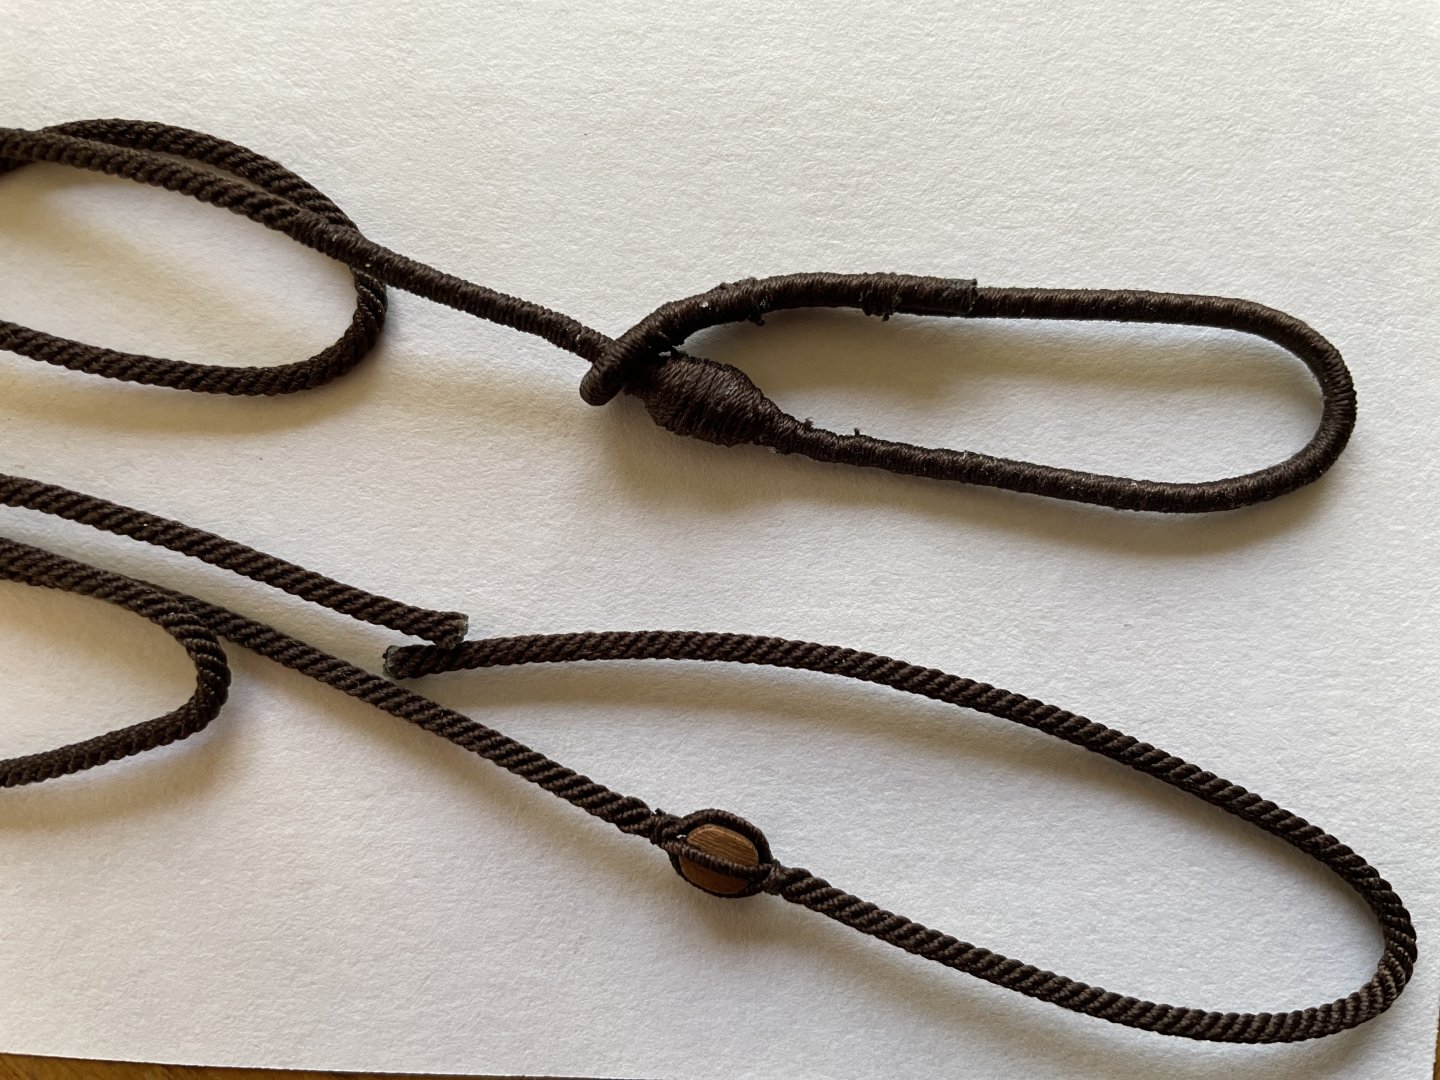
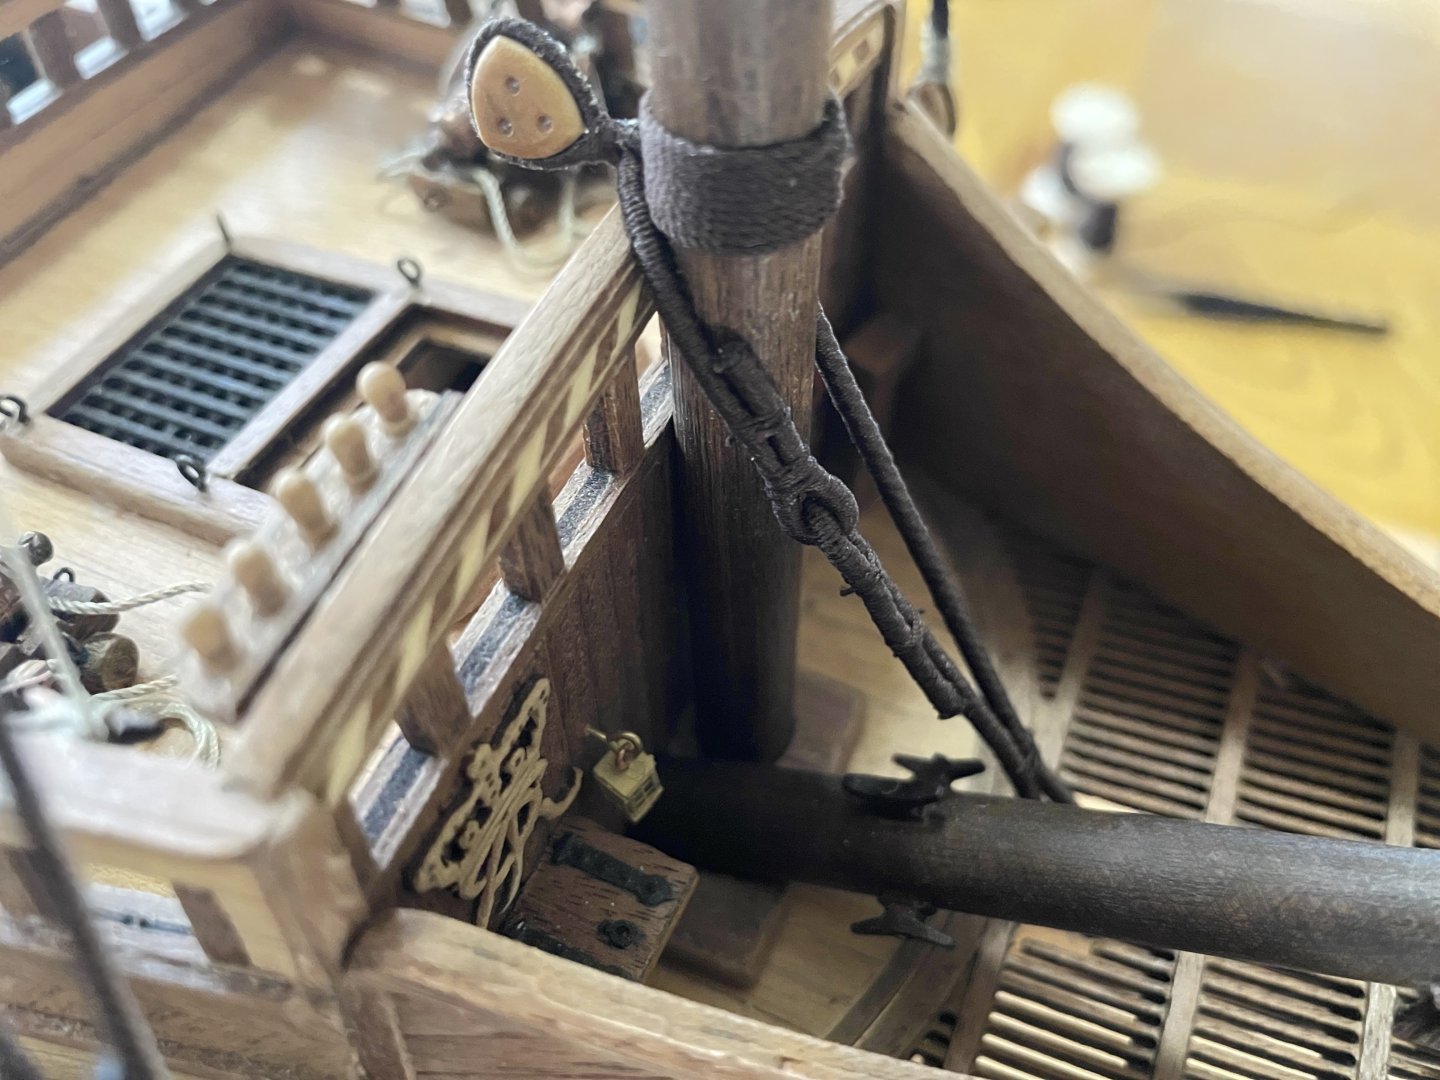
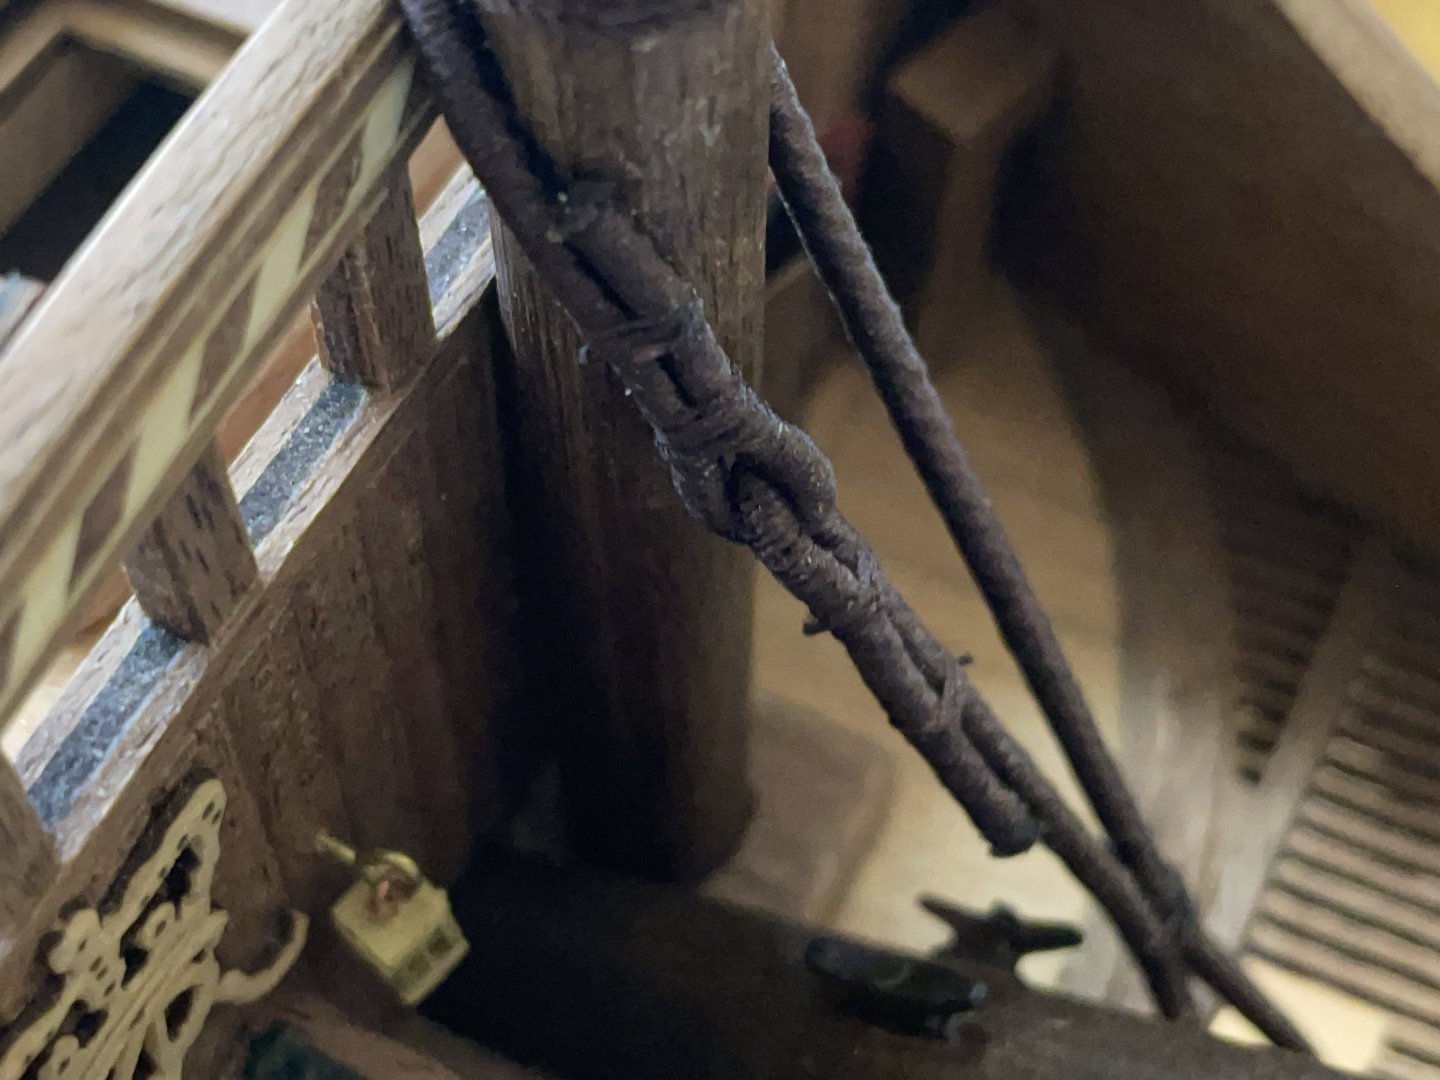
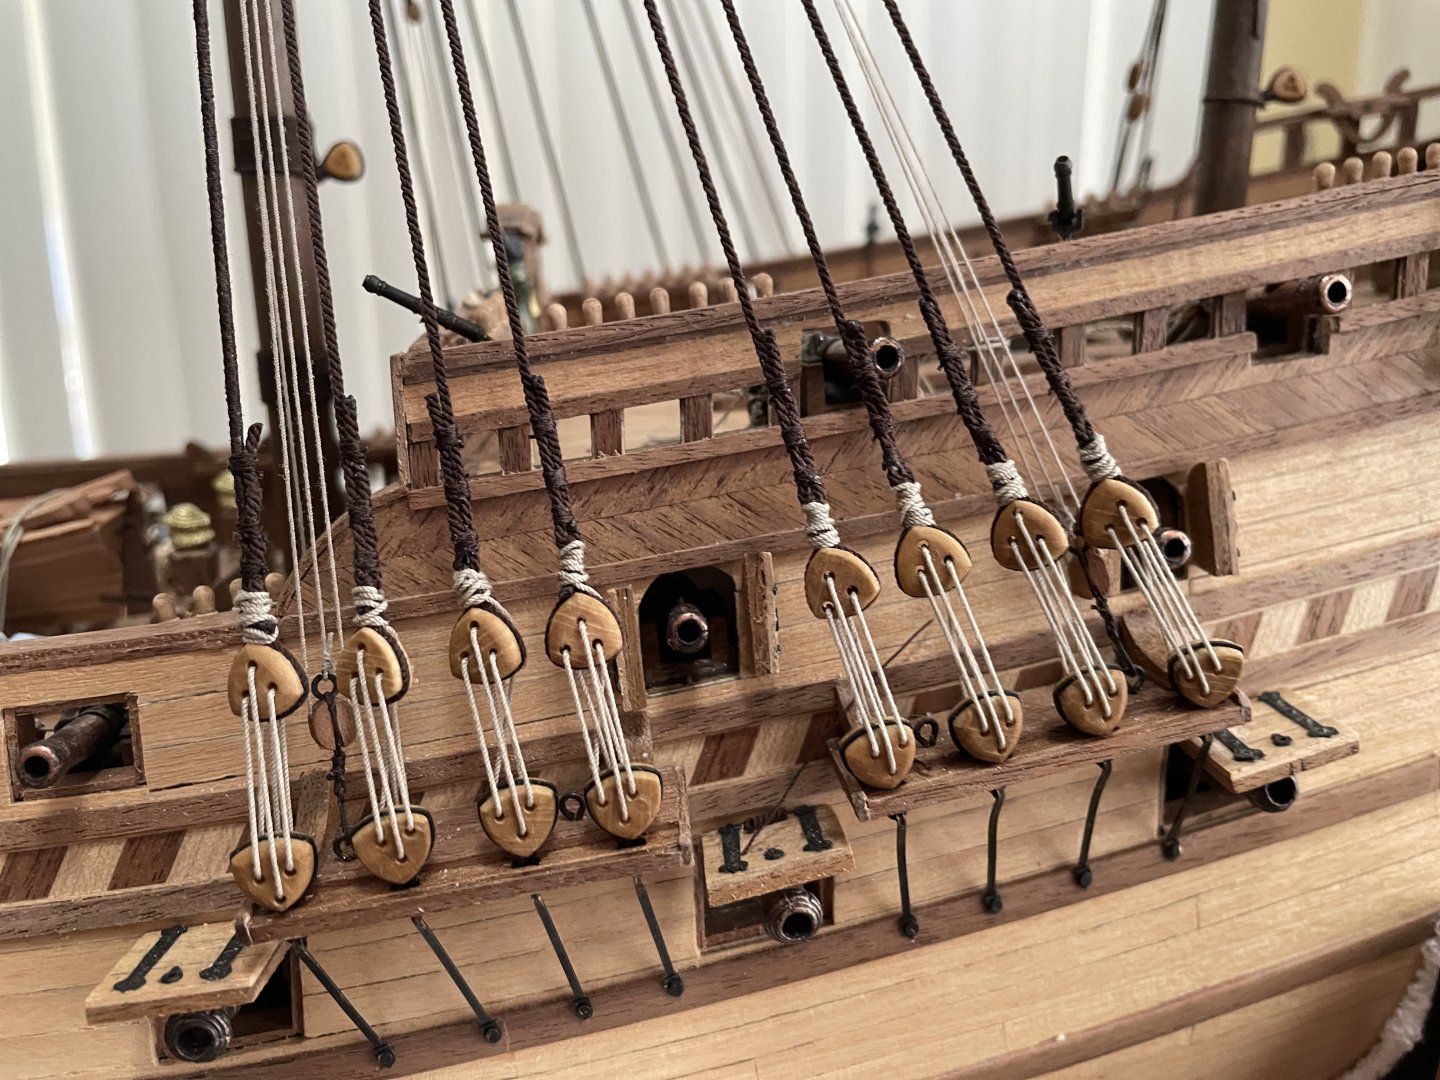
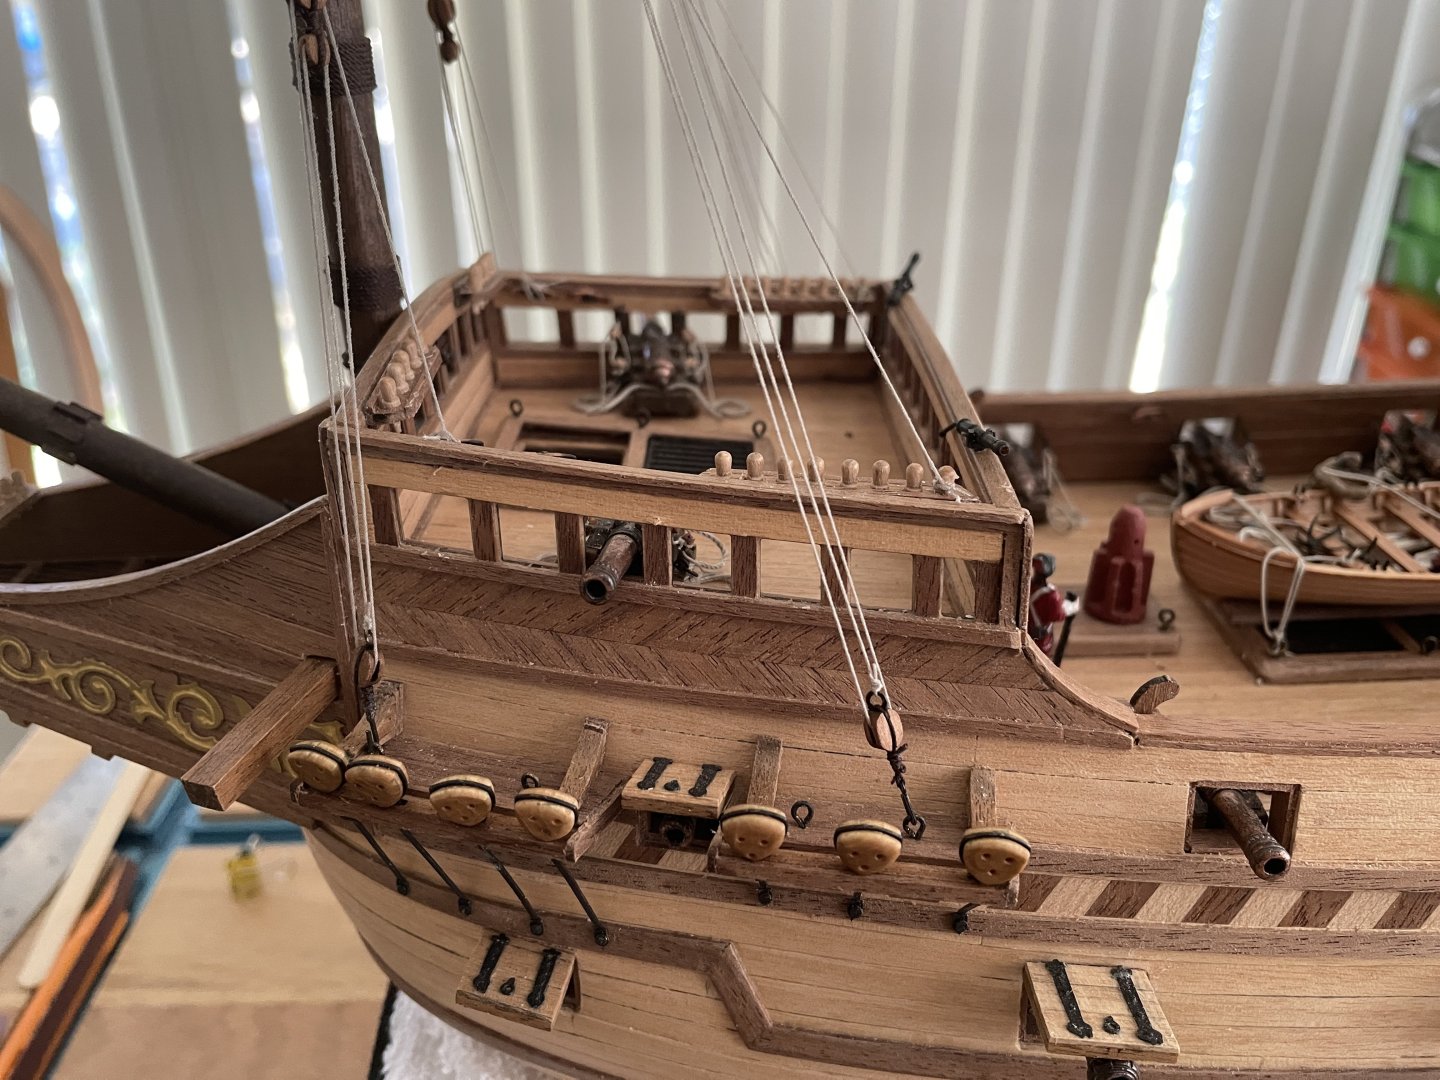
Mainstay Collar: Amati provided little information on how to anchor the mainstay. Lennarth Petersson drawings (Rigging period ship model) were used as a reference. A 2mm rope, the same size as the mainstay, was served and attached through the hole in the bow.
-
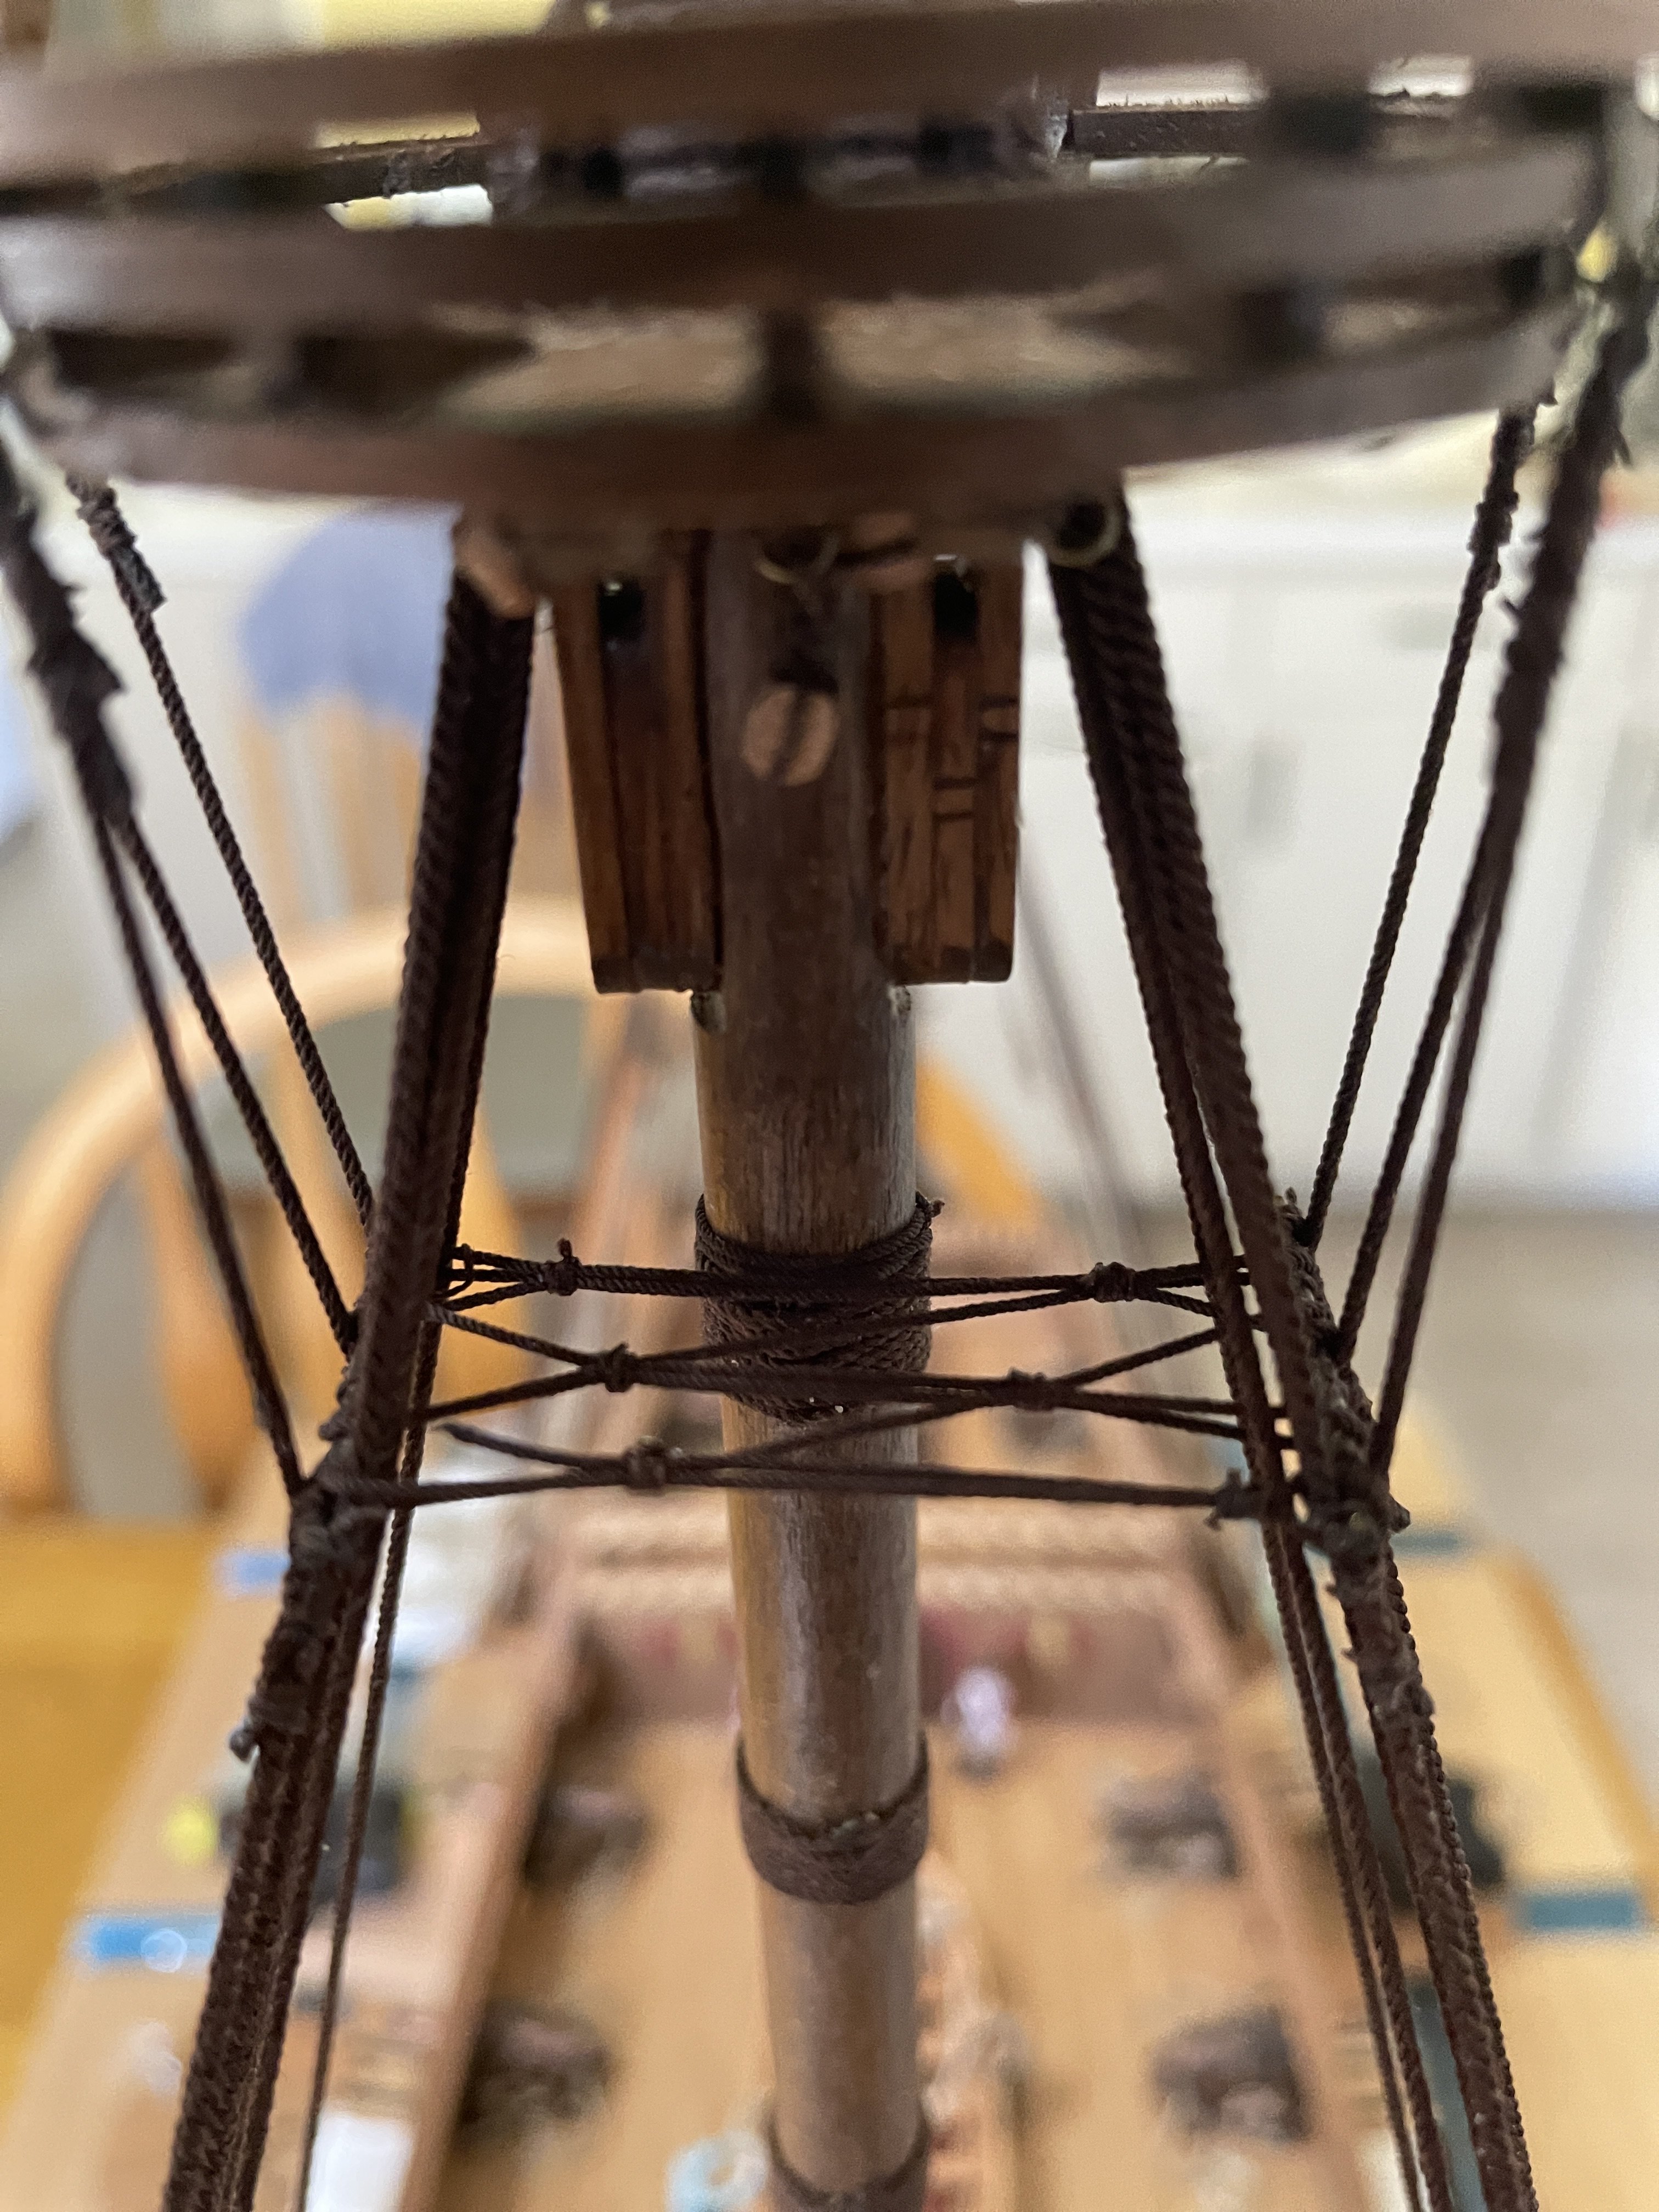
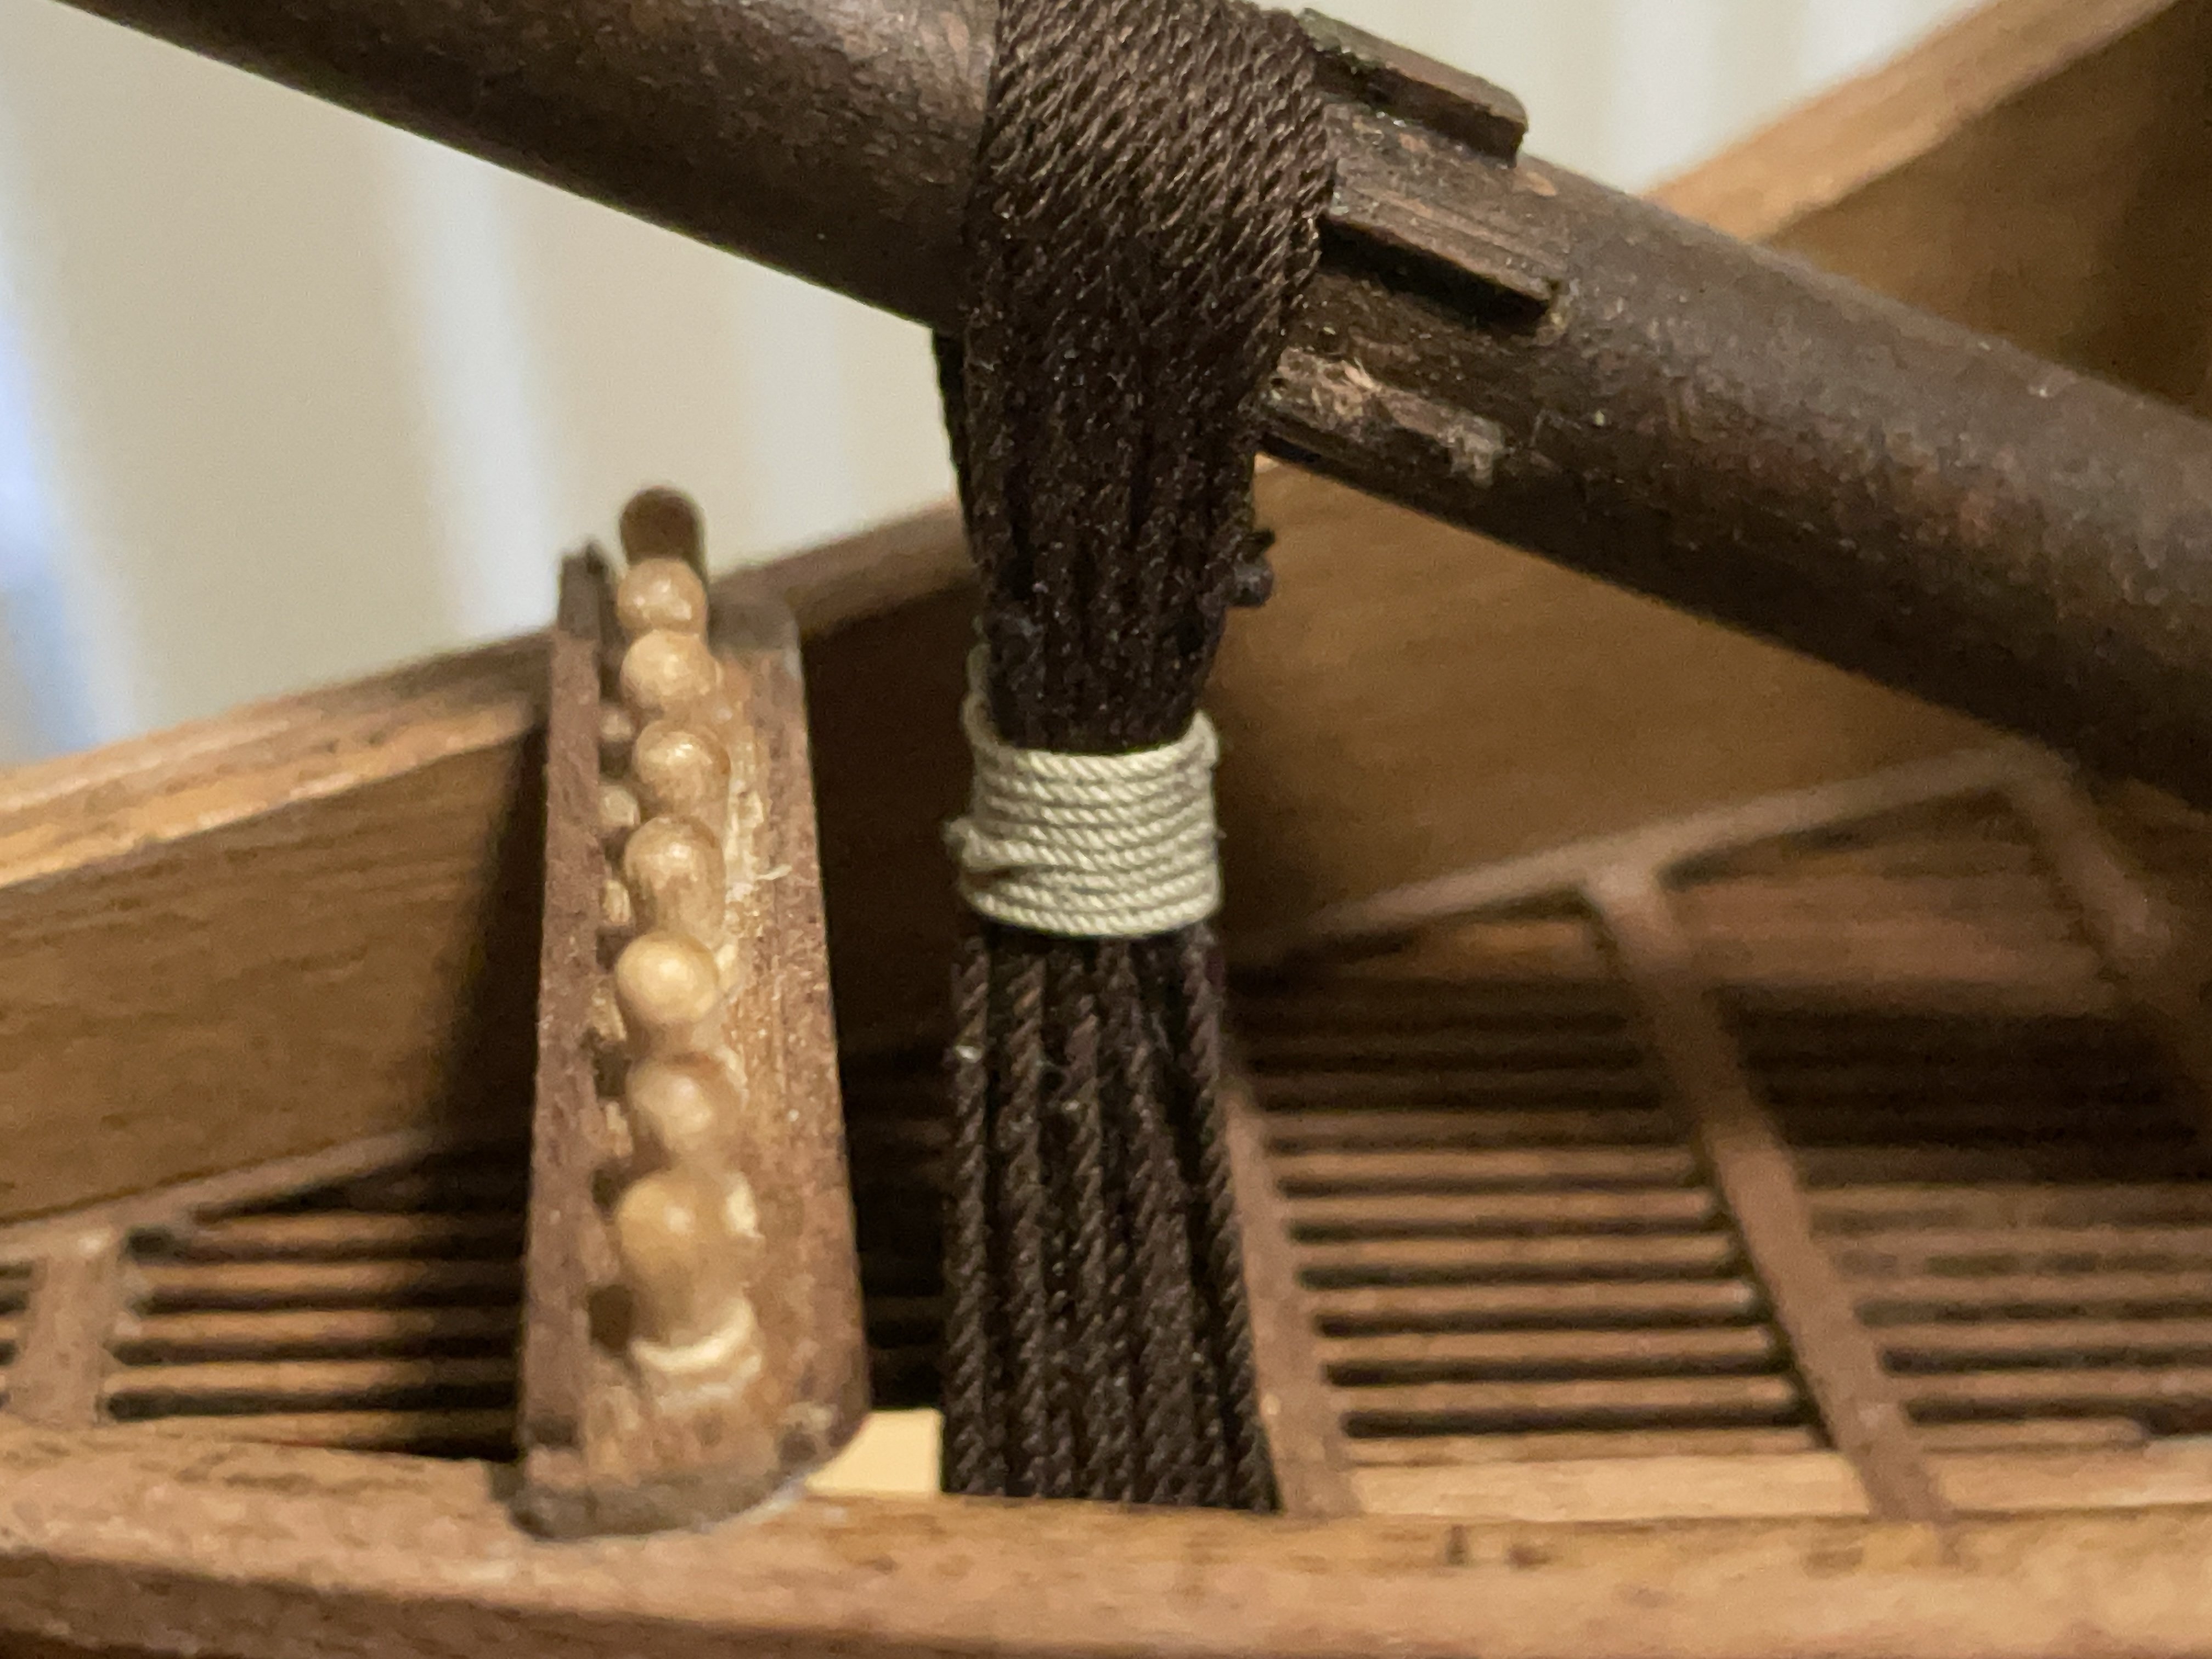
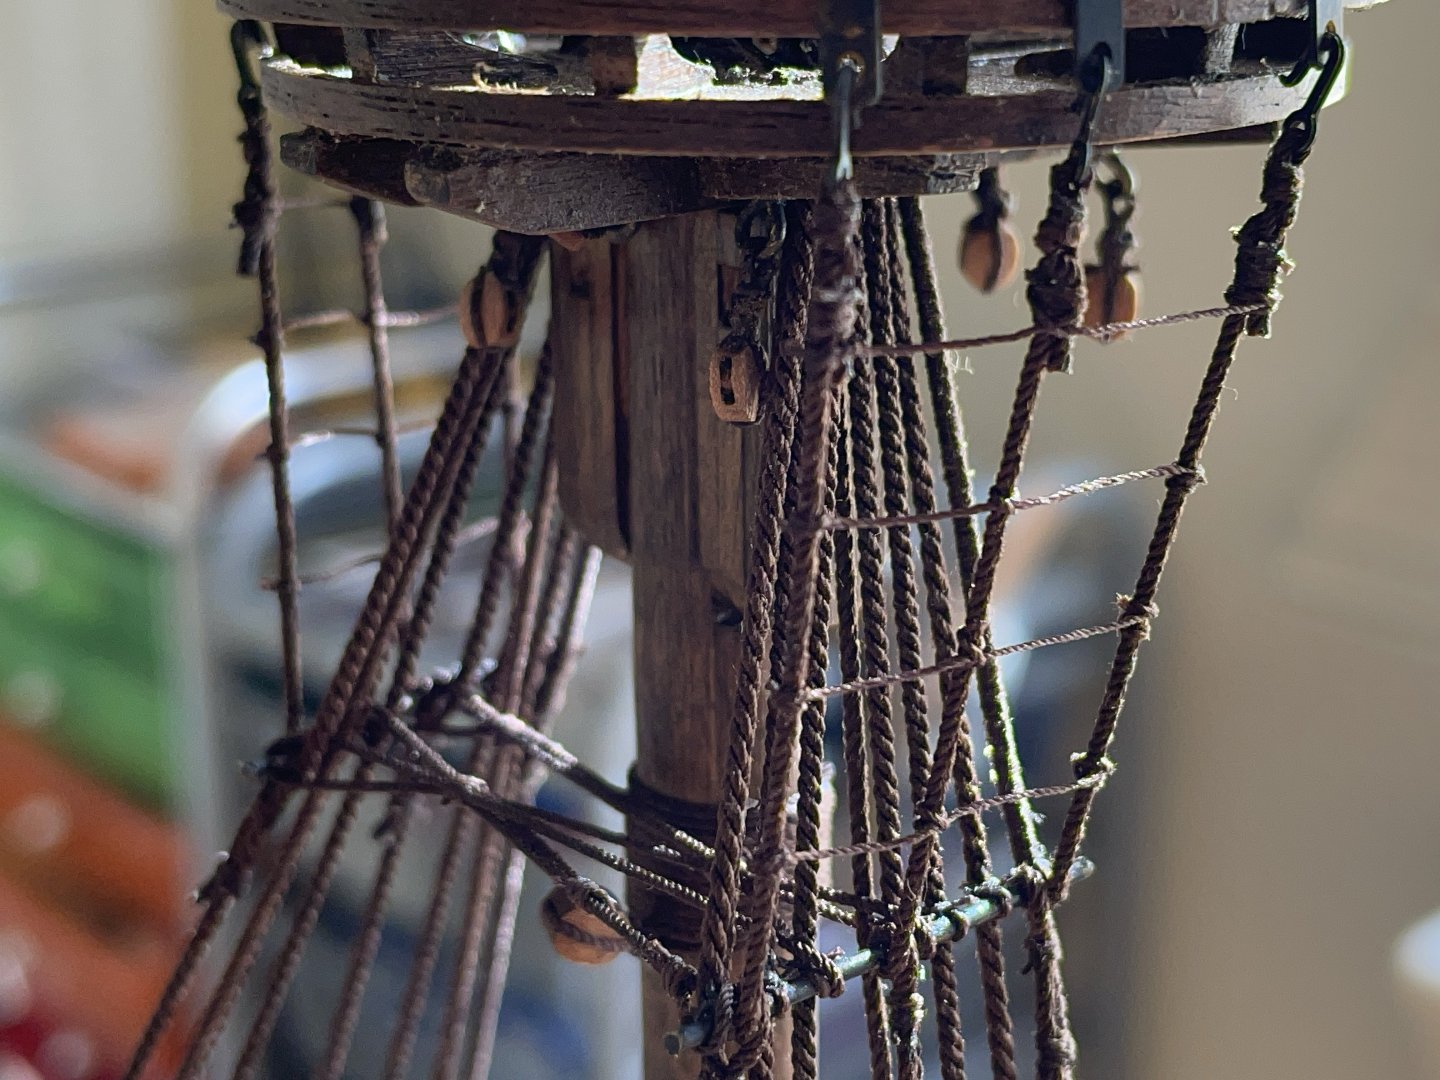
Futtock-staves and catharpins: With all the lower shrouds completed, it was time to tackle the futtock-staves and catharpins. What a pain... at least for me. I tried doing it with blocks but with so many knots, it is quite difficult to adjust. The second approach (which may not be quite right for the Revenge) was to do the catharpins as described by Boubriot. It involved treading a single rope between the futtock staves. It looks easier on paper than done. After several trials and failings, I settled on a variant. Rather than having two passes every second shroud, I alternate 1-2, in a single pass. It just holds in place better for me without constant adjustment. The end result is a trapezoid pattern rather than a parallel layout. After working several days on that... I decided to just keep it. Not perfect but it worked, move to the second one and be done with this. Please pardon the deviation.


-
@Knocklouder, thank. Believe me, if I can do it, you most certainly can. Only a matter of time and pacing yourself. Of course, all the tips and know-how found here are quite helpful too. There is nothing more useful than seeing people's logs.
-
Hello all, I fixed some of the issues mentioned before. I could not tie the rope to the lower block because the shrouds are in the way now... but, like @Baker to the deck rail, which pretty much solved the issue. Second, I then complete the shrouds to the bow. I'm working my way to the Mizzen and Bonaventure shrouds, which are incomplete for now. Slowly but steadily.


-
hello all, with the heat wave here... I'm making very slow progress. I hope to come back with few update pictures soon.
-
a thousand thanks
-
a thousand thanks... I did not quite realize the huge amount of variation on a theme from ship to ship, era and nationality. Will keep looking.
-
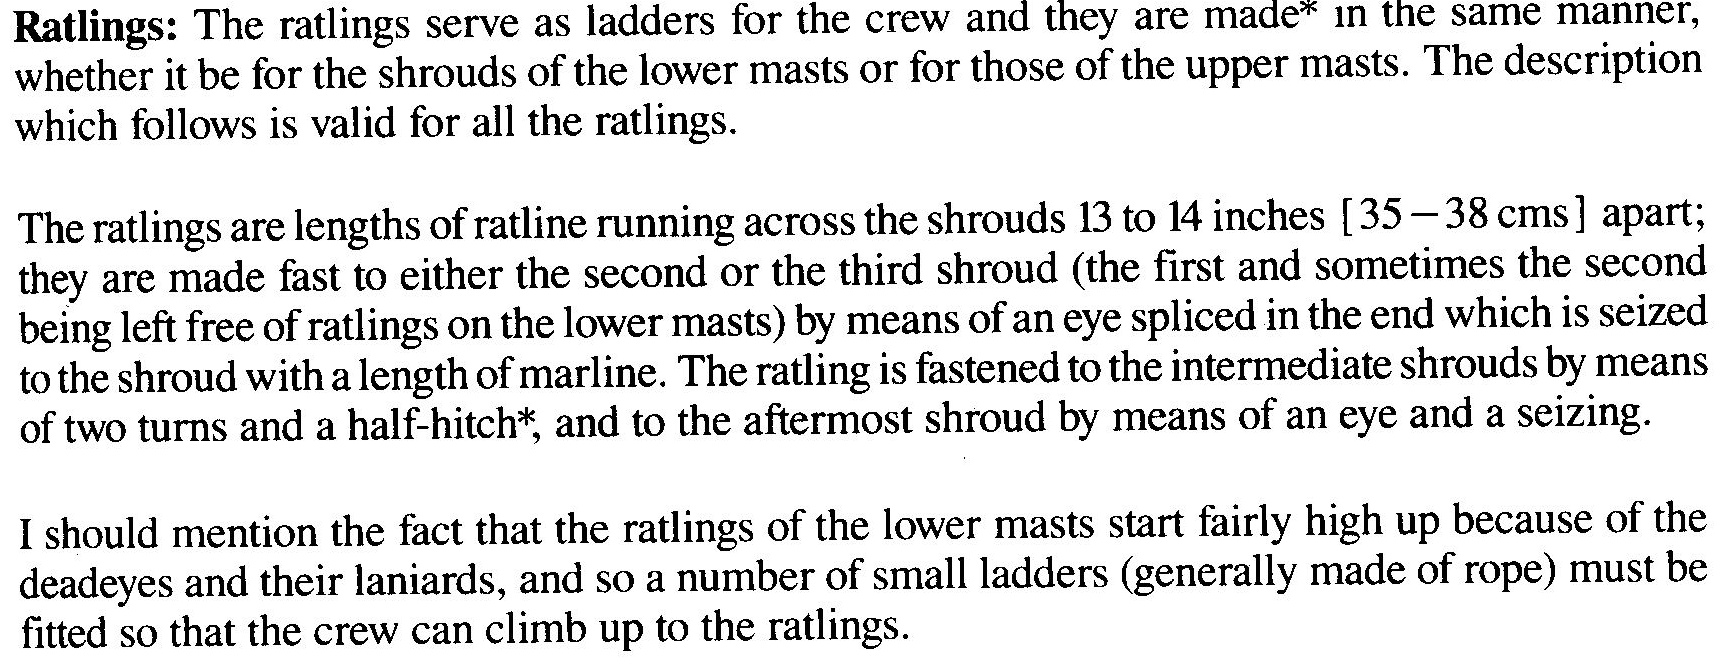
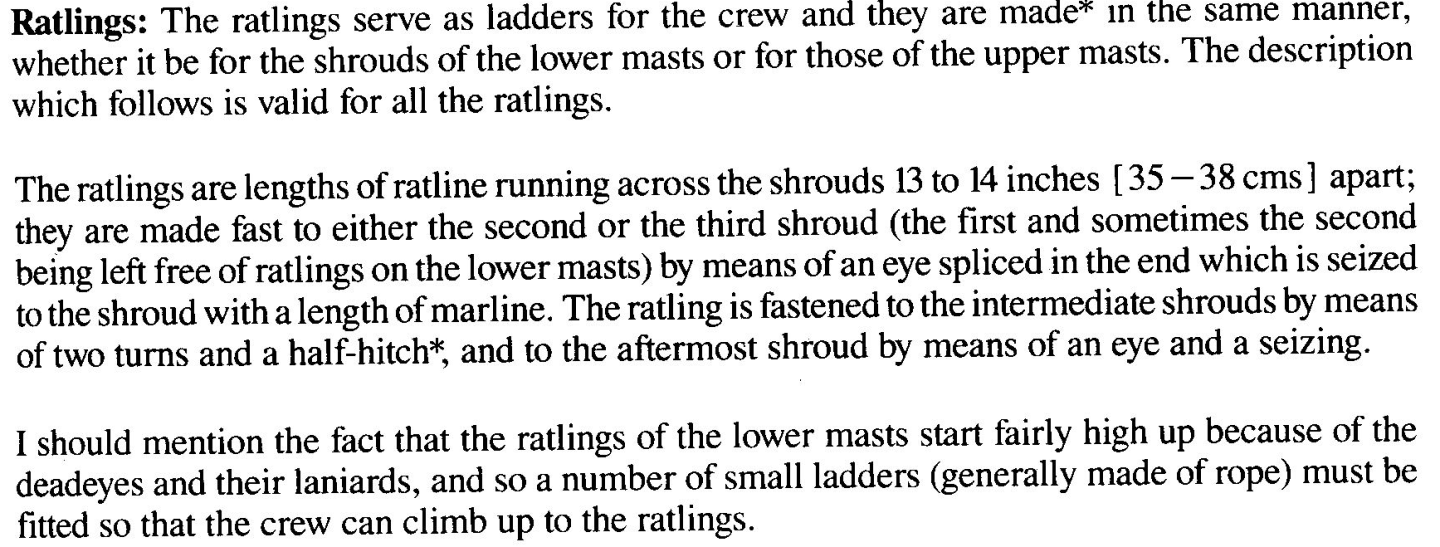
I'm a little confused: According to Boudriot in the 74-guns ships, the ratlines start at the second or third shroud. Is this true for ship of the 1577 period? thanks again,
-
A quick question: The first shroud (toward the bow) of the main masts is generally a served rope for all the length. What about the first shroud of the mizzen and Bonaventure masts (the smaller back two masts)? Should I serve the first rope to length too? Sorry for the beginner questions.... this is my first rigging.
-
Off topic: The collection of Lecouvie-Dery du Quebec. Model ship in Ivory. Very interesting. I may try to see it once of those day.

-
@Baker Thanks for the pictures... I like it a lot! thanks
-
I think I get it (for the main masts backstay): Tying the ends like that ... to each front-end eye bolt. Should I do the same for the Front masts' backstay?
.JPG.9e98c4f3065012fadc9327909120cf30.JPG)
-
@kirill4 @baker, what do you think of the front Masts tackles? OK to tie the end to the rack as shown (as per plan)? or hook the block-end of the backstays to the front eye bolt on each platform? or should I tie the opposite end of the backstay to each adjacent eye bolt? rather that shown here on the rack? Lastly, rather than tying the end to the eyebolt as suggested, would adding a cleat to the deck for the backstays-end be ok (front and main masts)? (Like what you see here for the front one). Finally, Was I OK to use light rope for the lower part? or all dark rope?
-
Hello @kirill4, again a thousand thanks... a lot of great information to digest. About the backstay anchor points: @Baker did point this out too... and I got distracted with building the ratlines. I'm really glad for you both... I will get on it. Great suggestions.