Loracs
-
Posts
297 -
Joined
-
Last visited
Content Type
Profiles
Forums
Gallery
Events
Everything posted by Loracs
-
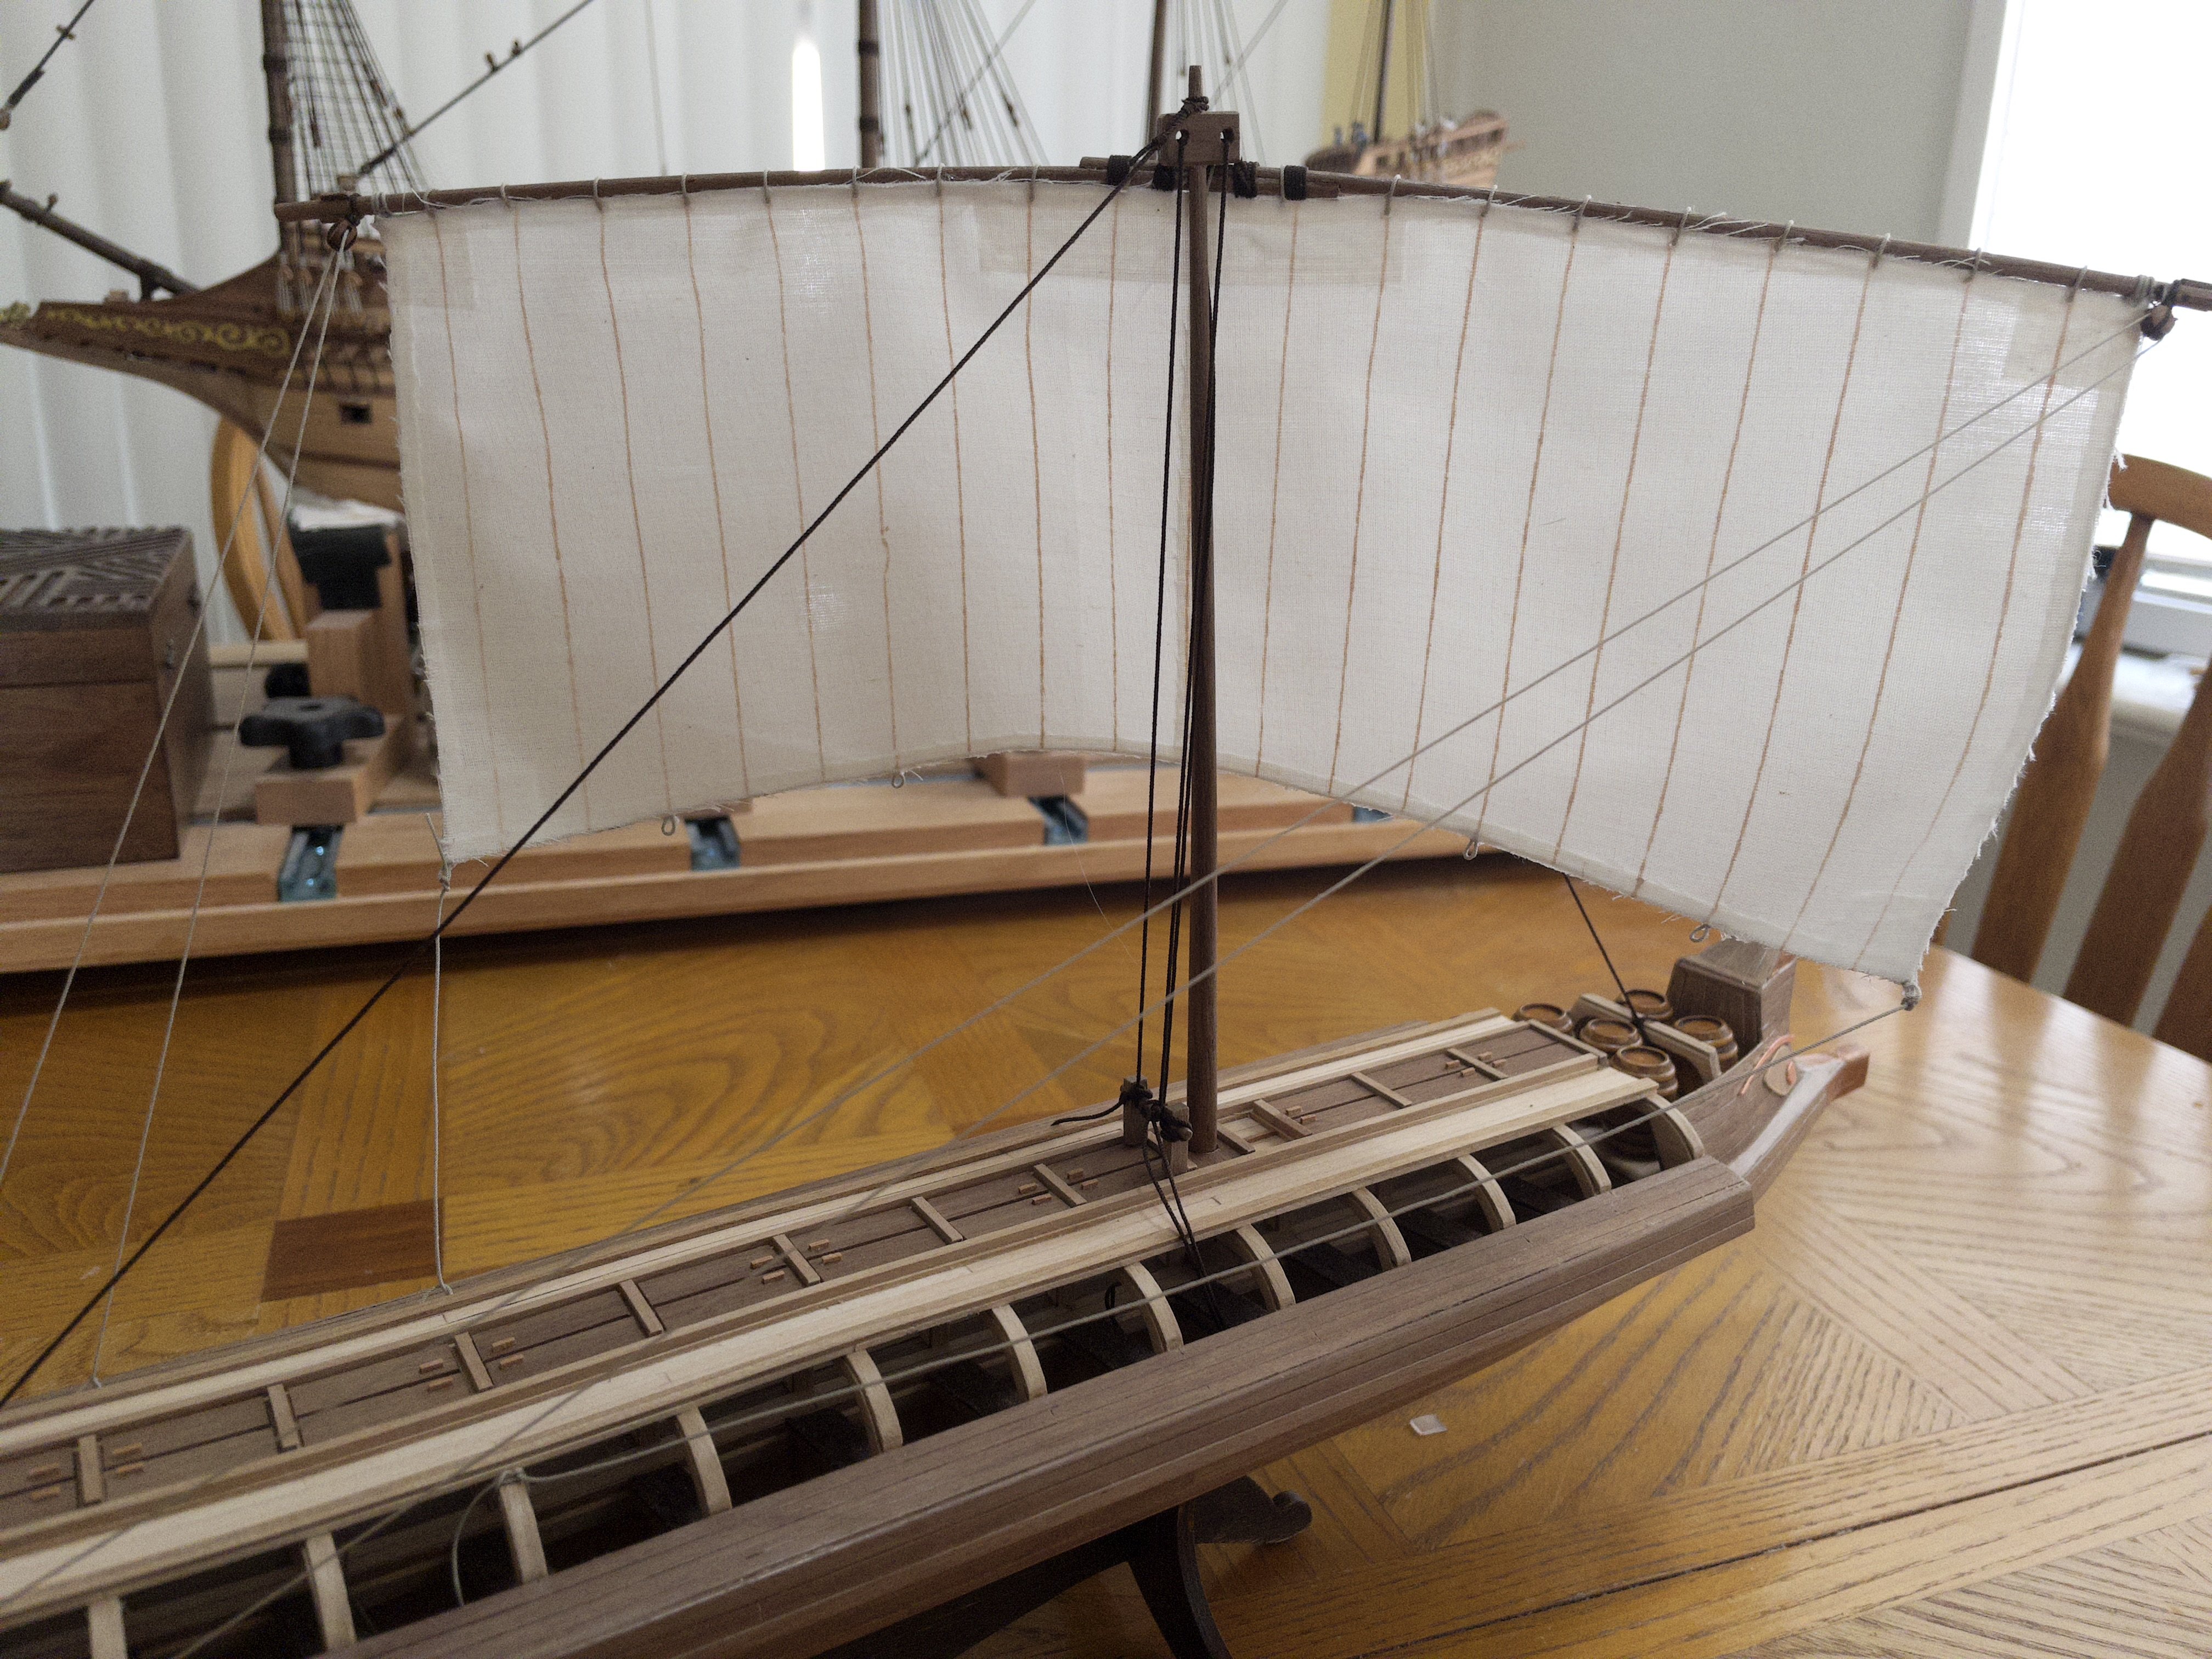
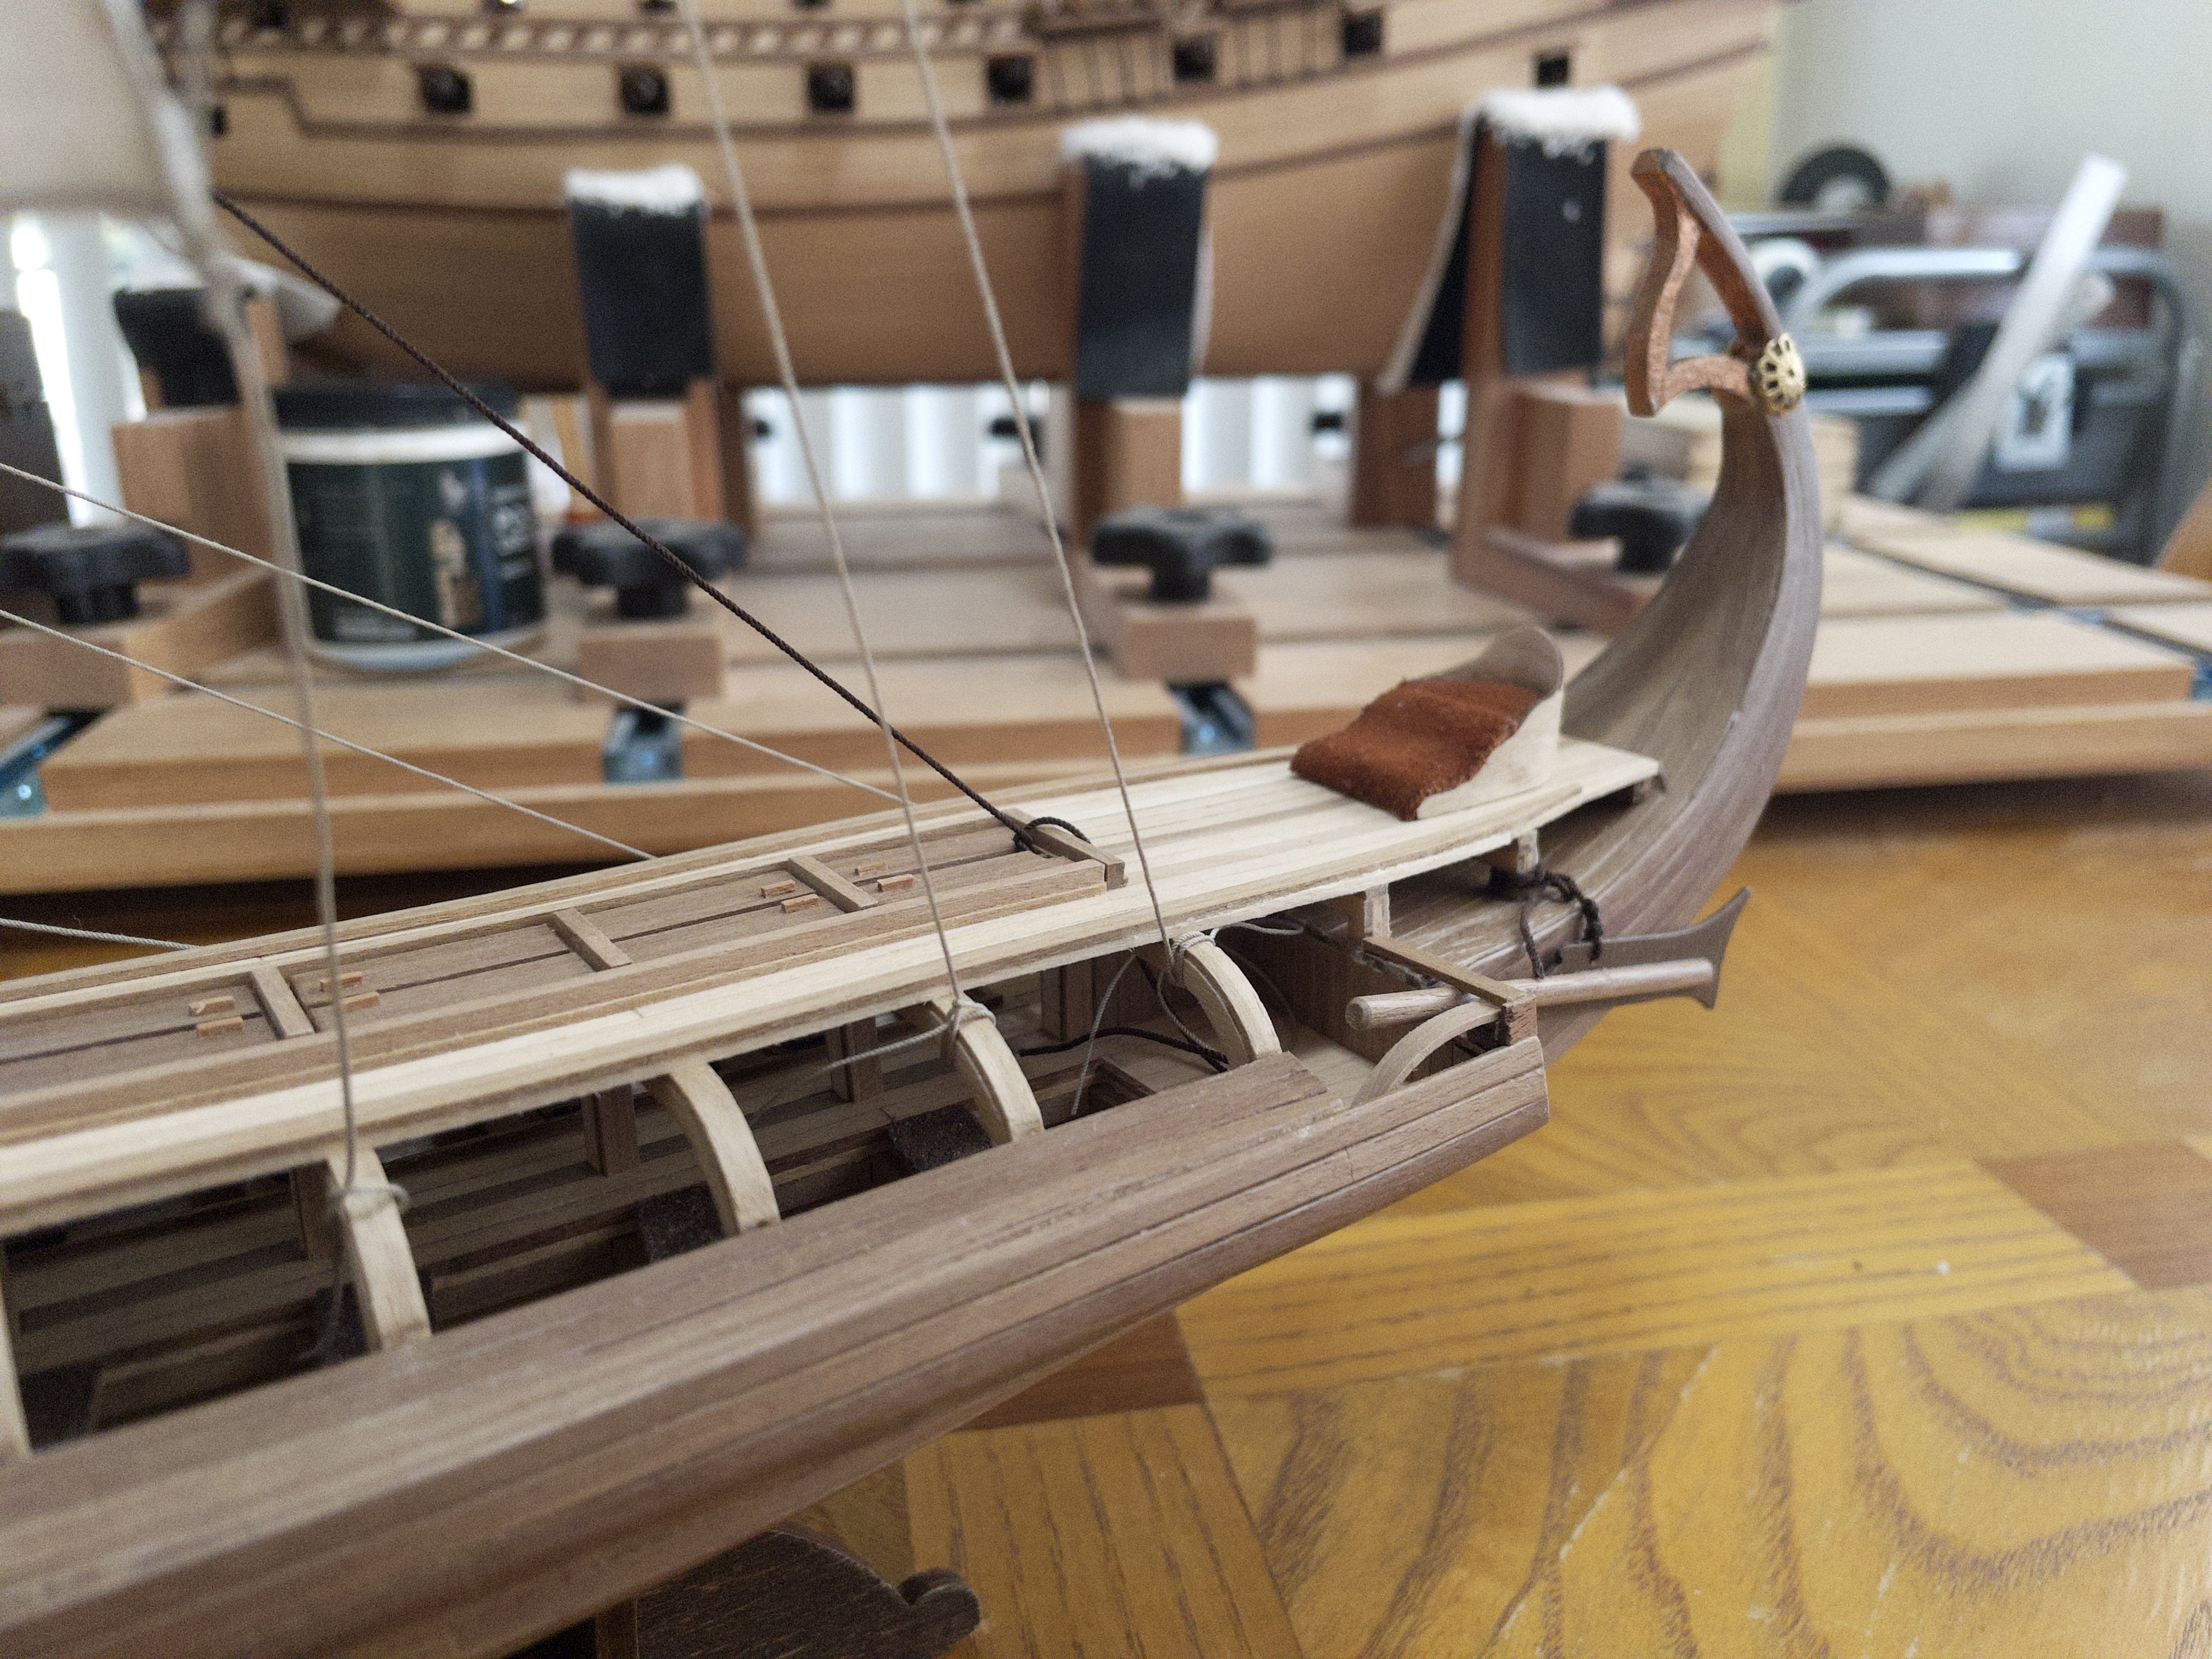
 Final update: Completed the build by adding a few accessories and temporary rigging. I'm not sure if I will be adding the 42 paddles. Let's say that the ship was "converted" into a transport and/or reconnaissance ship. This little ship will travel with me at Christmas as a gift. Will set up the final rigging then. Hope you enjoy. It's always fun to do those weekly updates. Short term, I will be returning to "The Revenge" to complete the build with the addition of the sails.
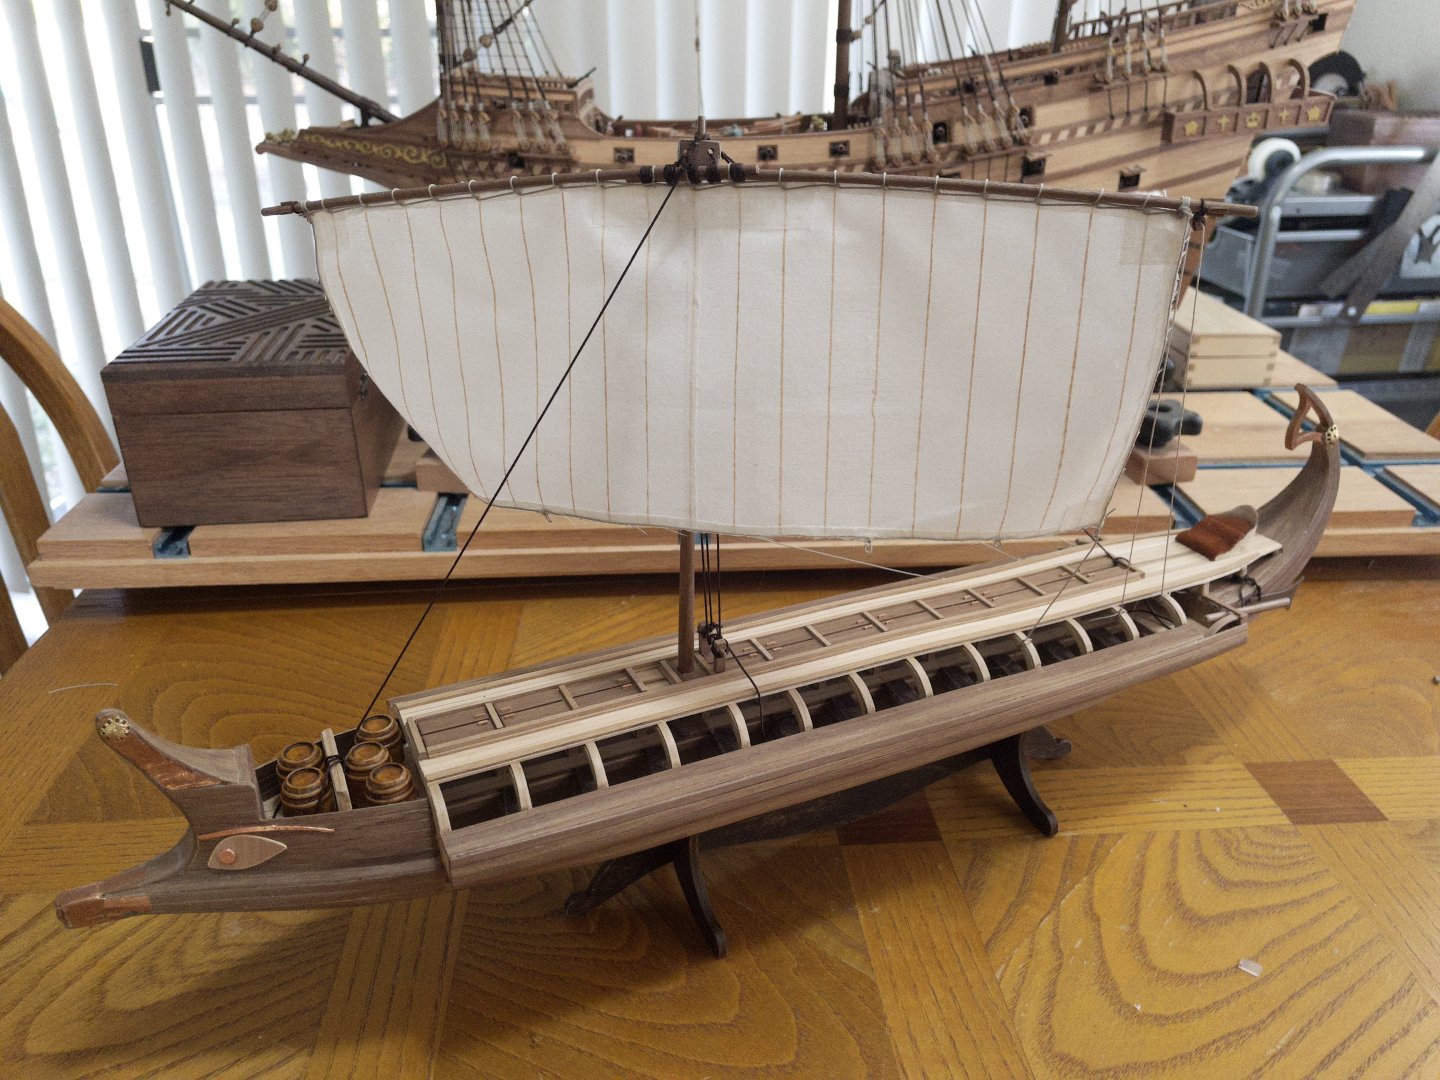


-
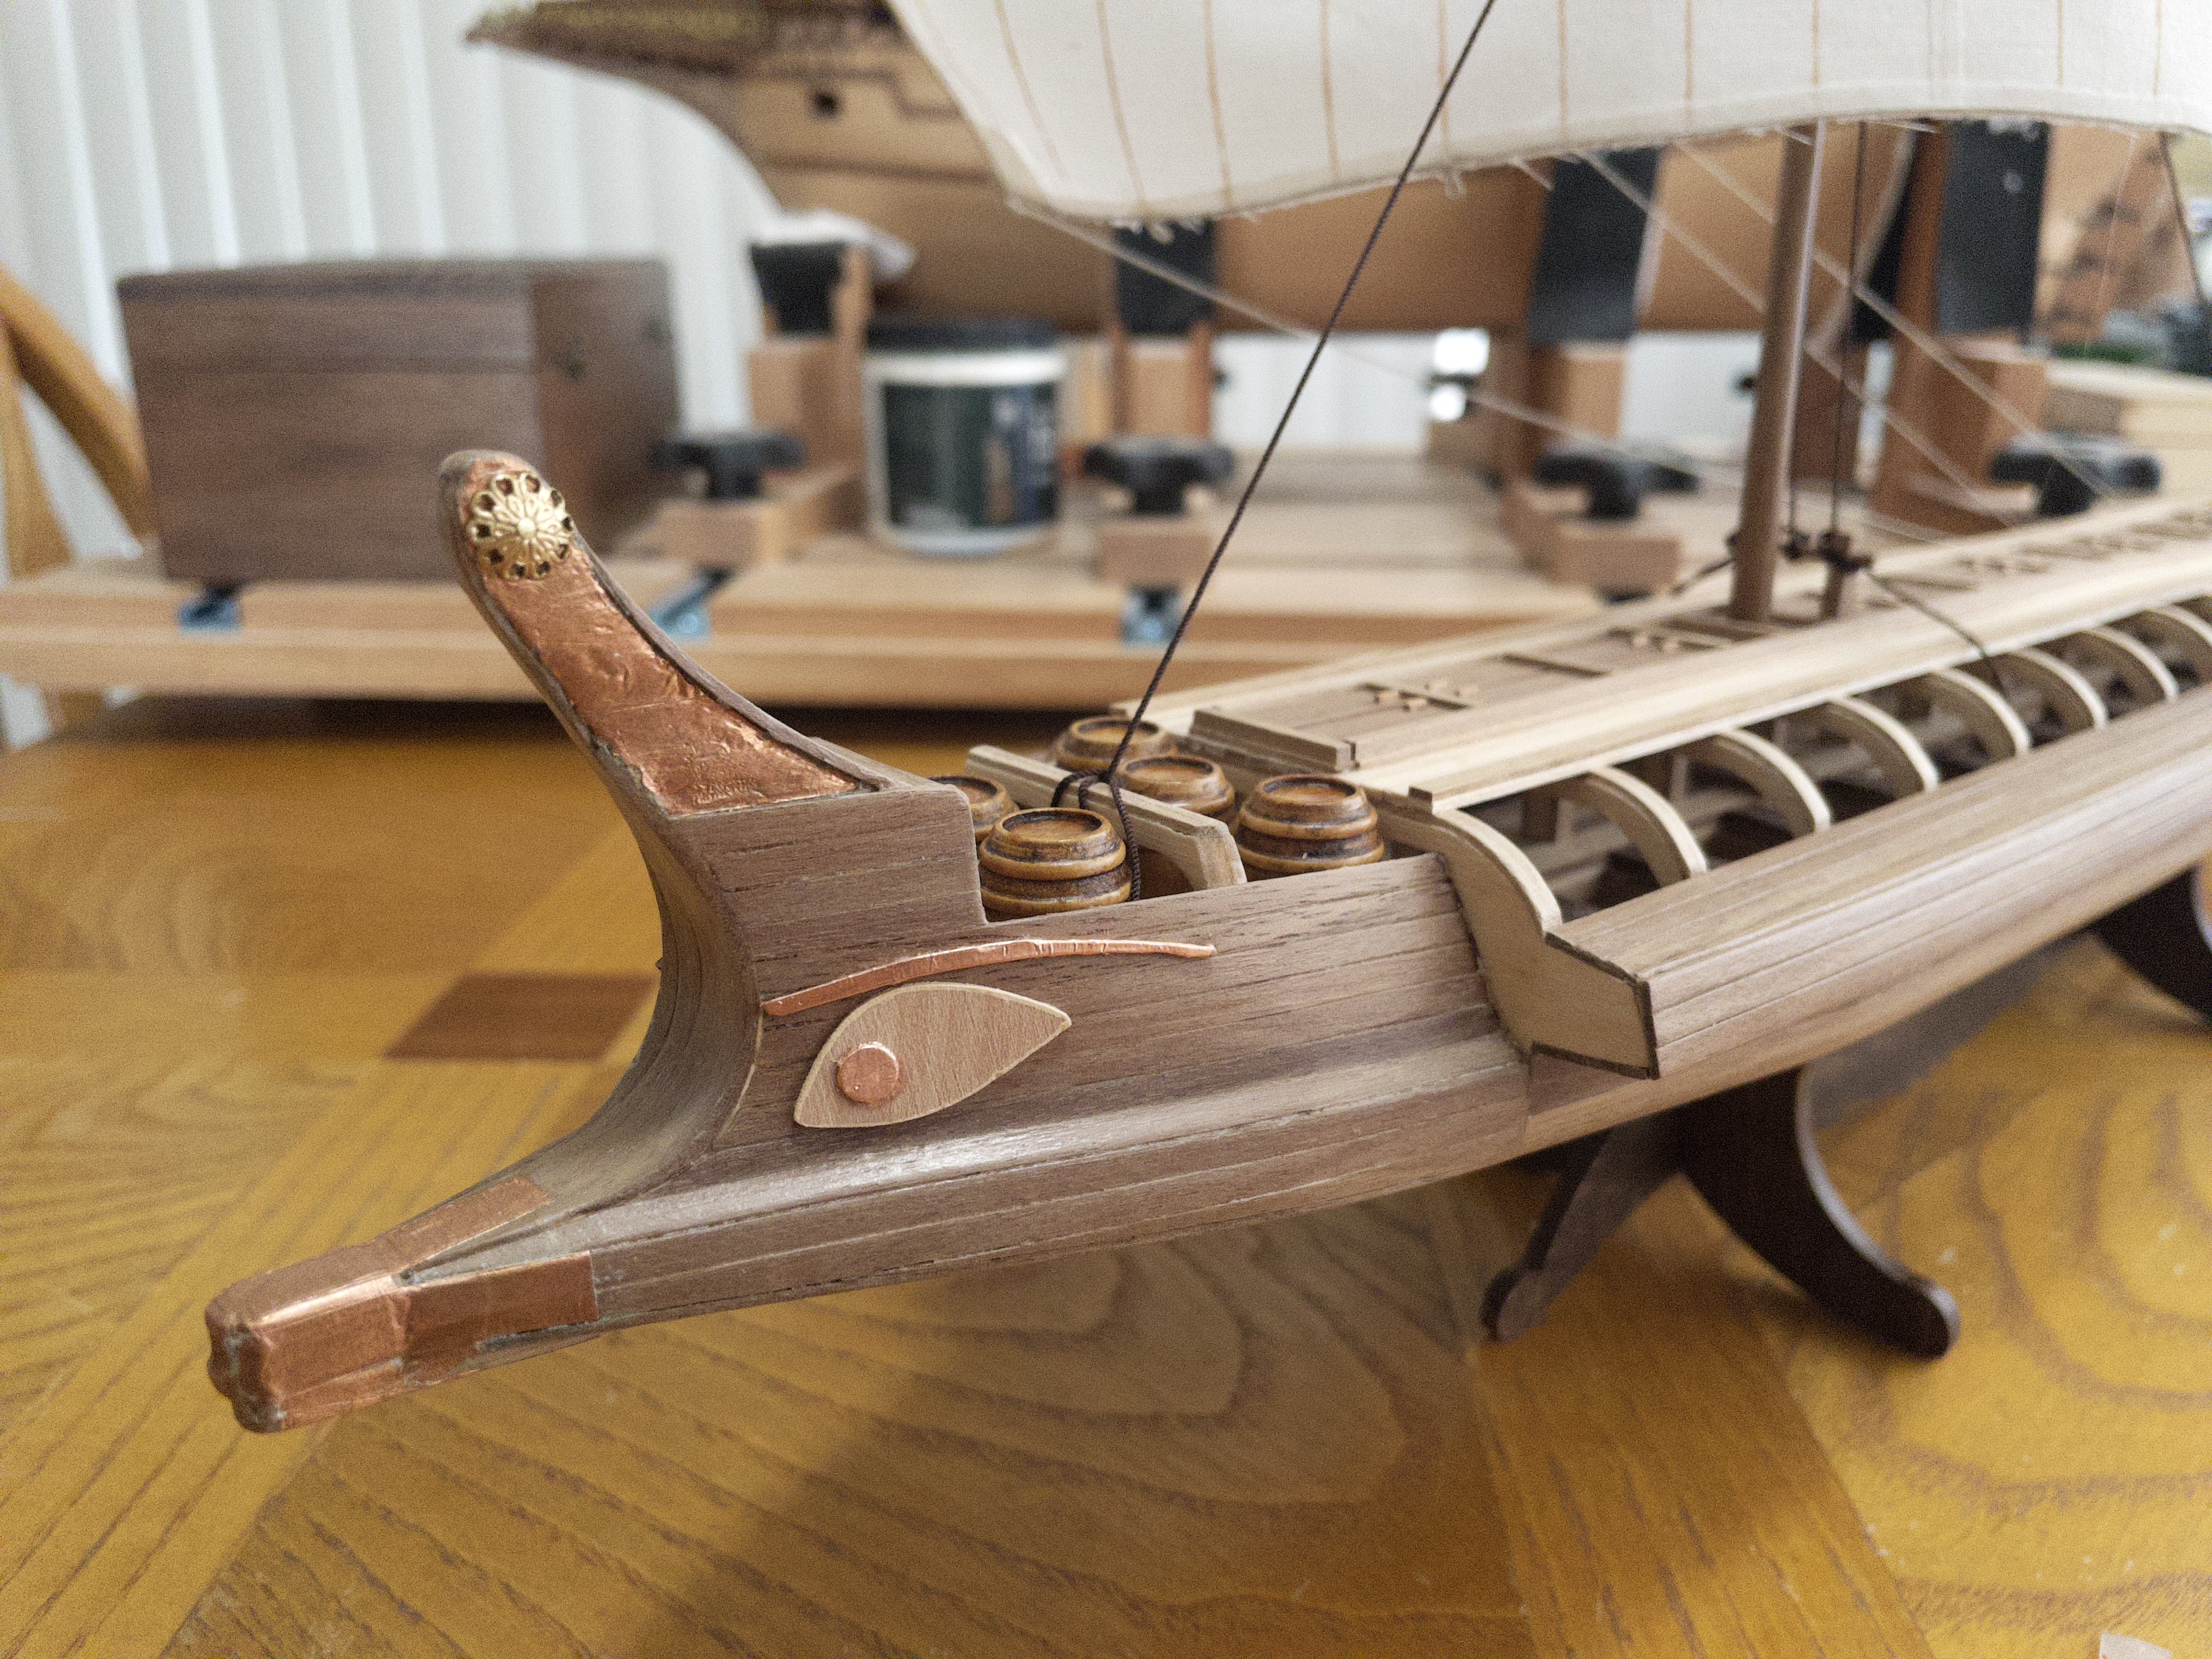
Greek eyes: Just a small update... had little time this week. Build the greek eyes with pearwood left over from another kit.

-
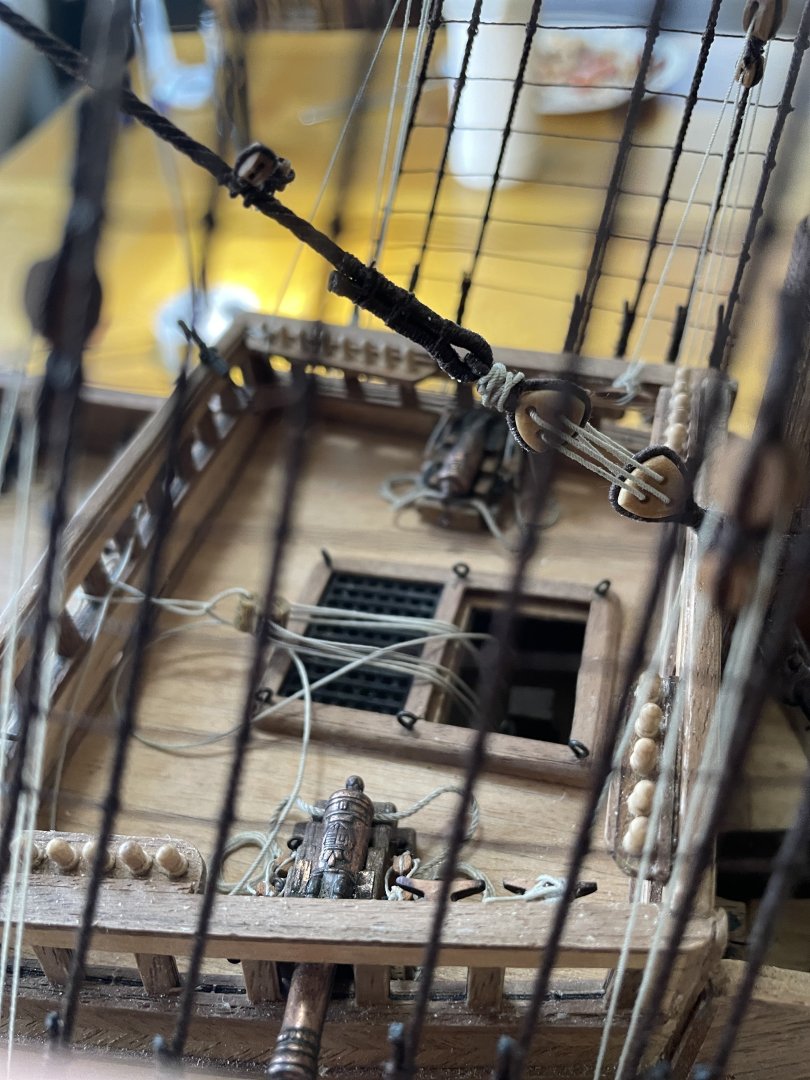
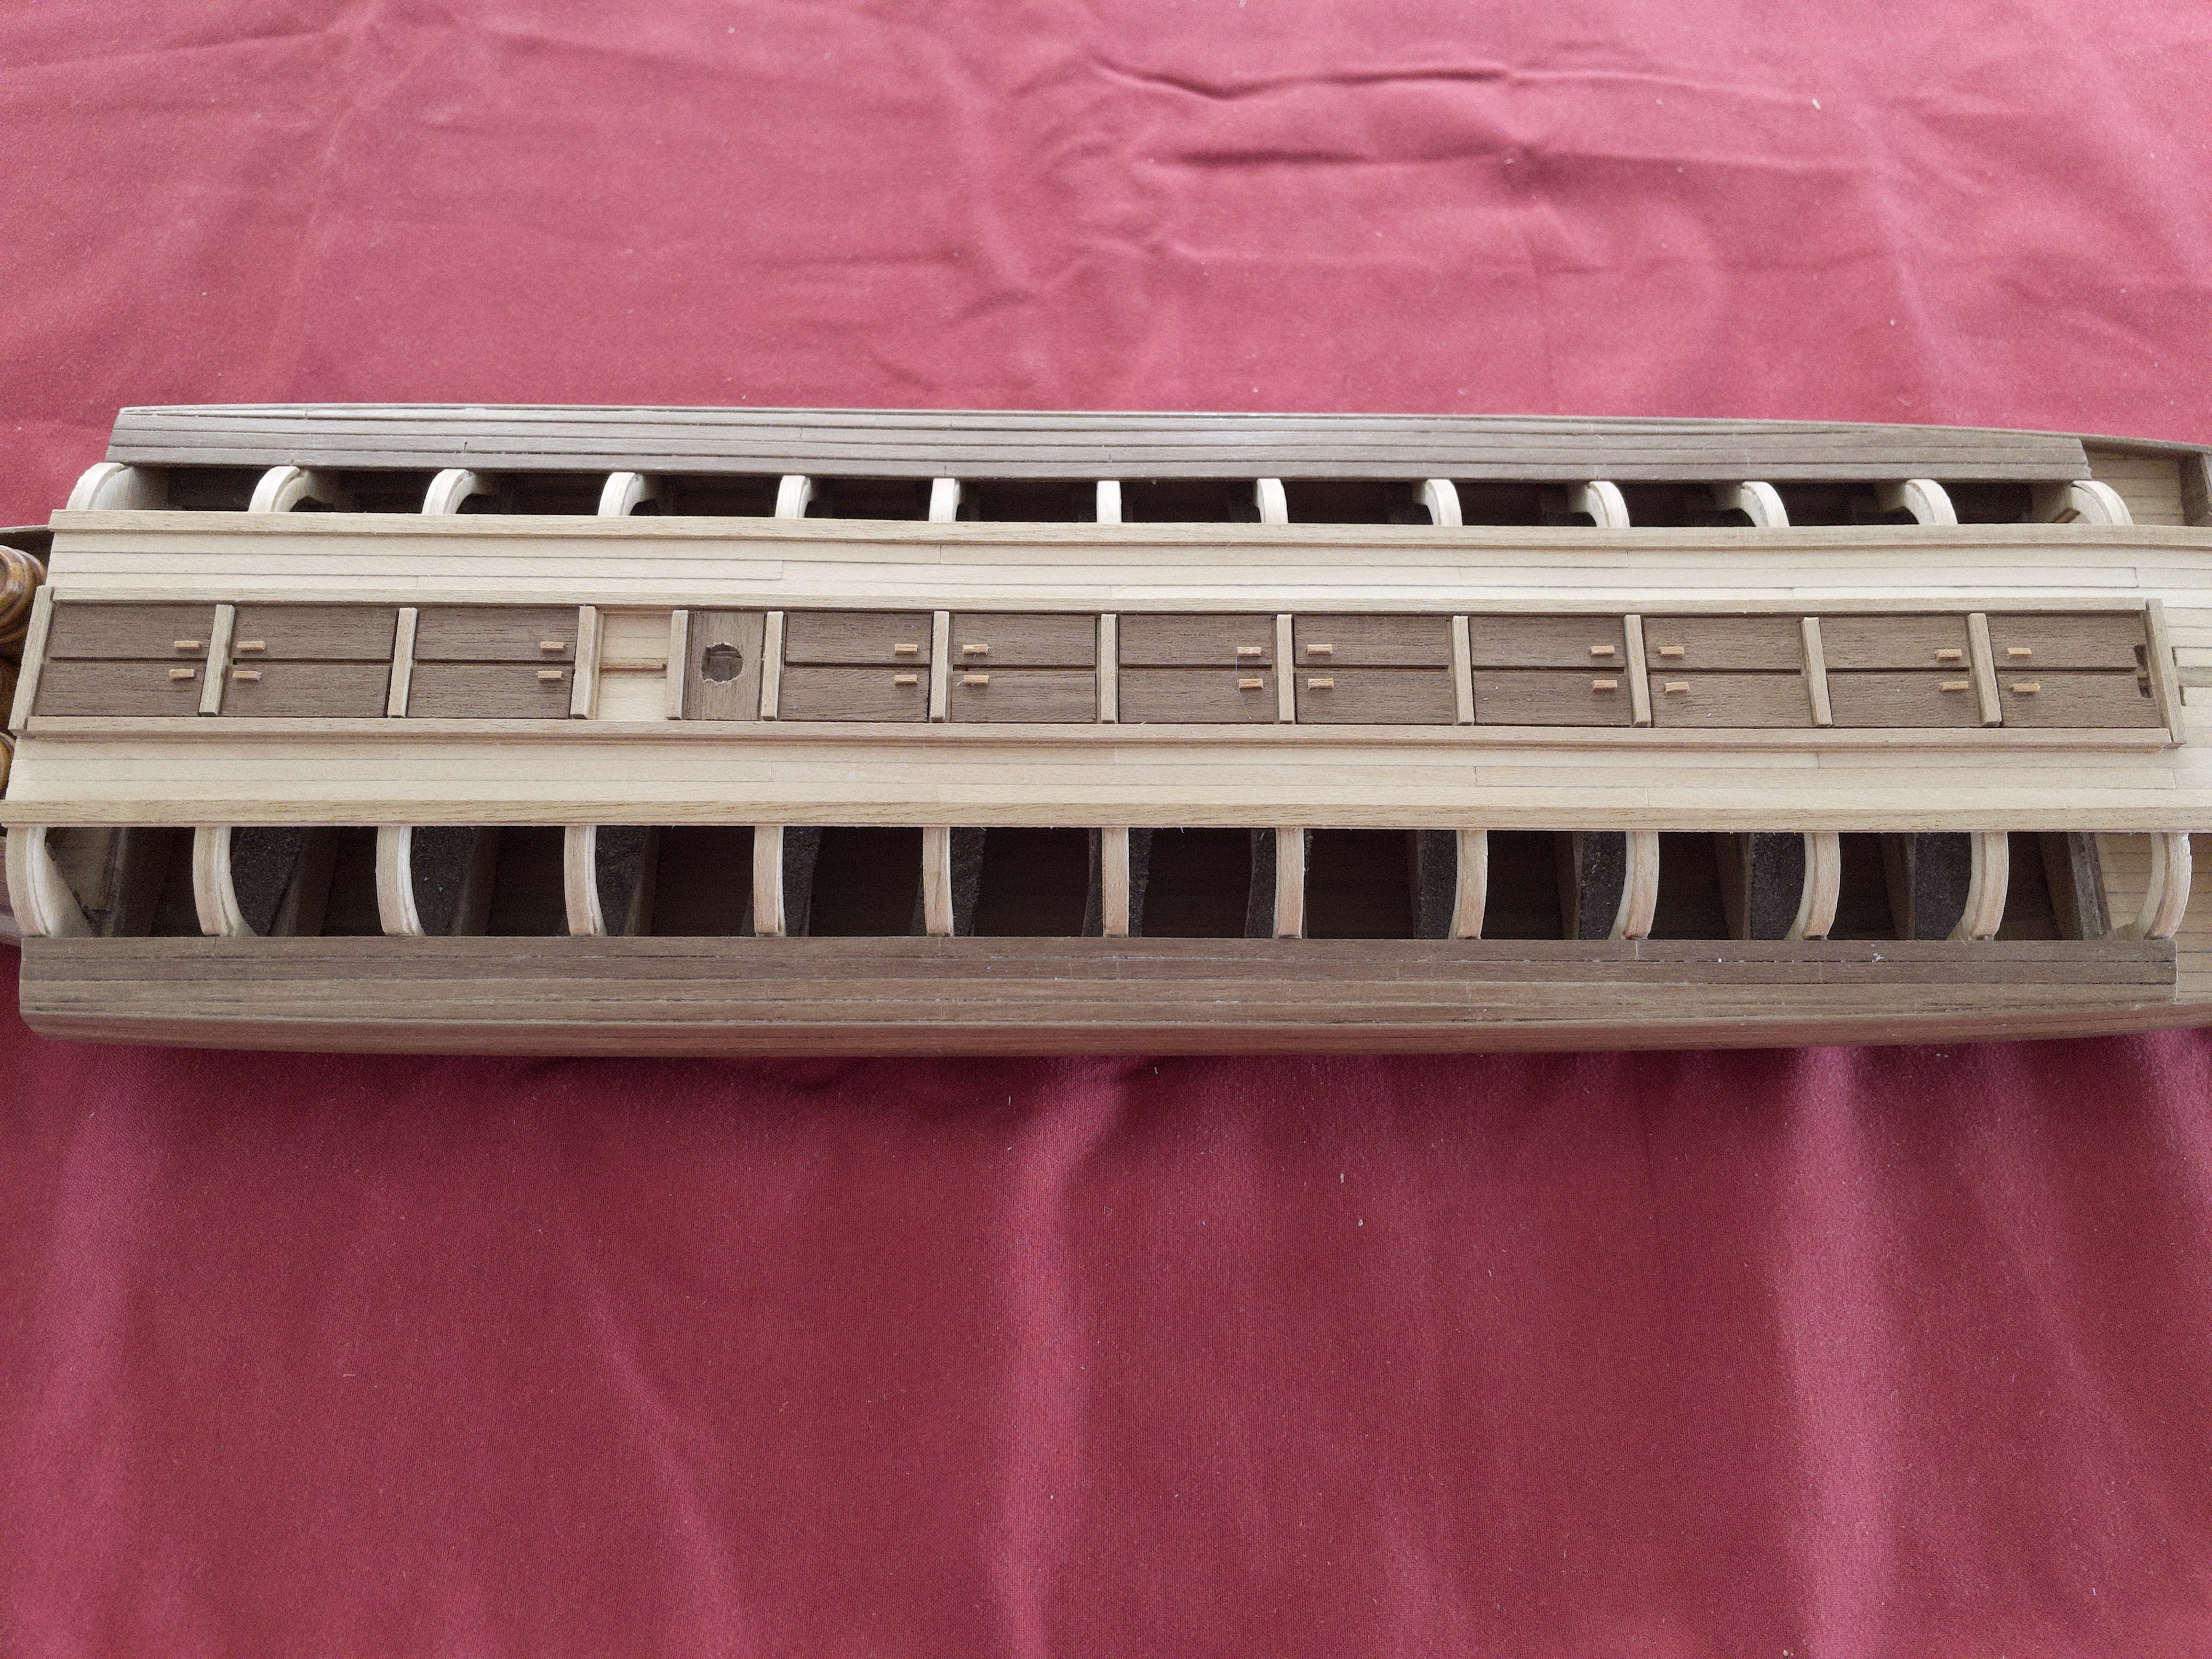
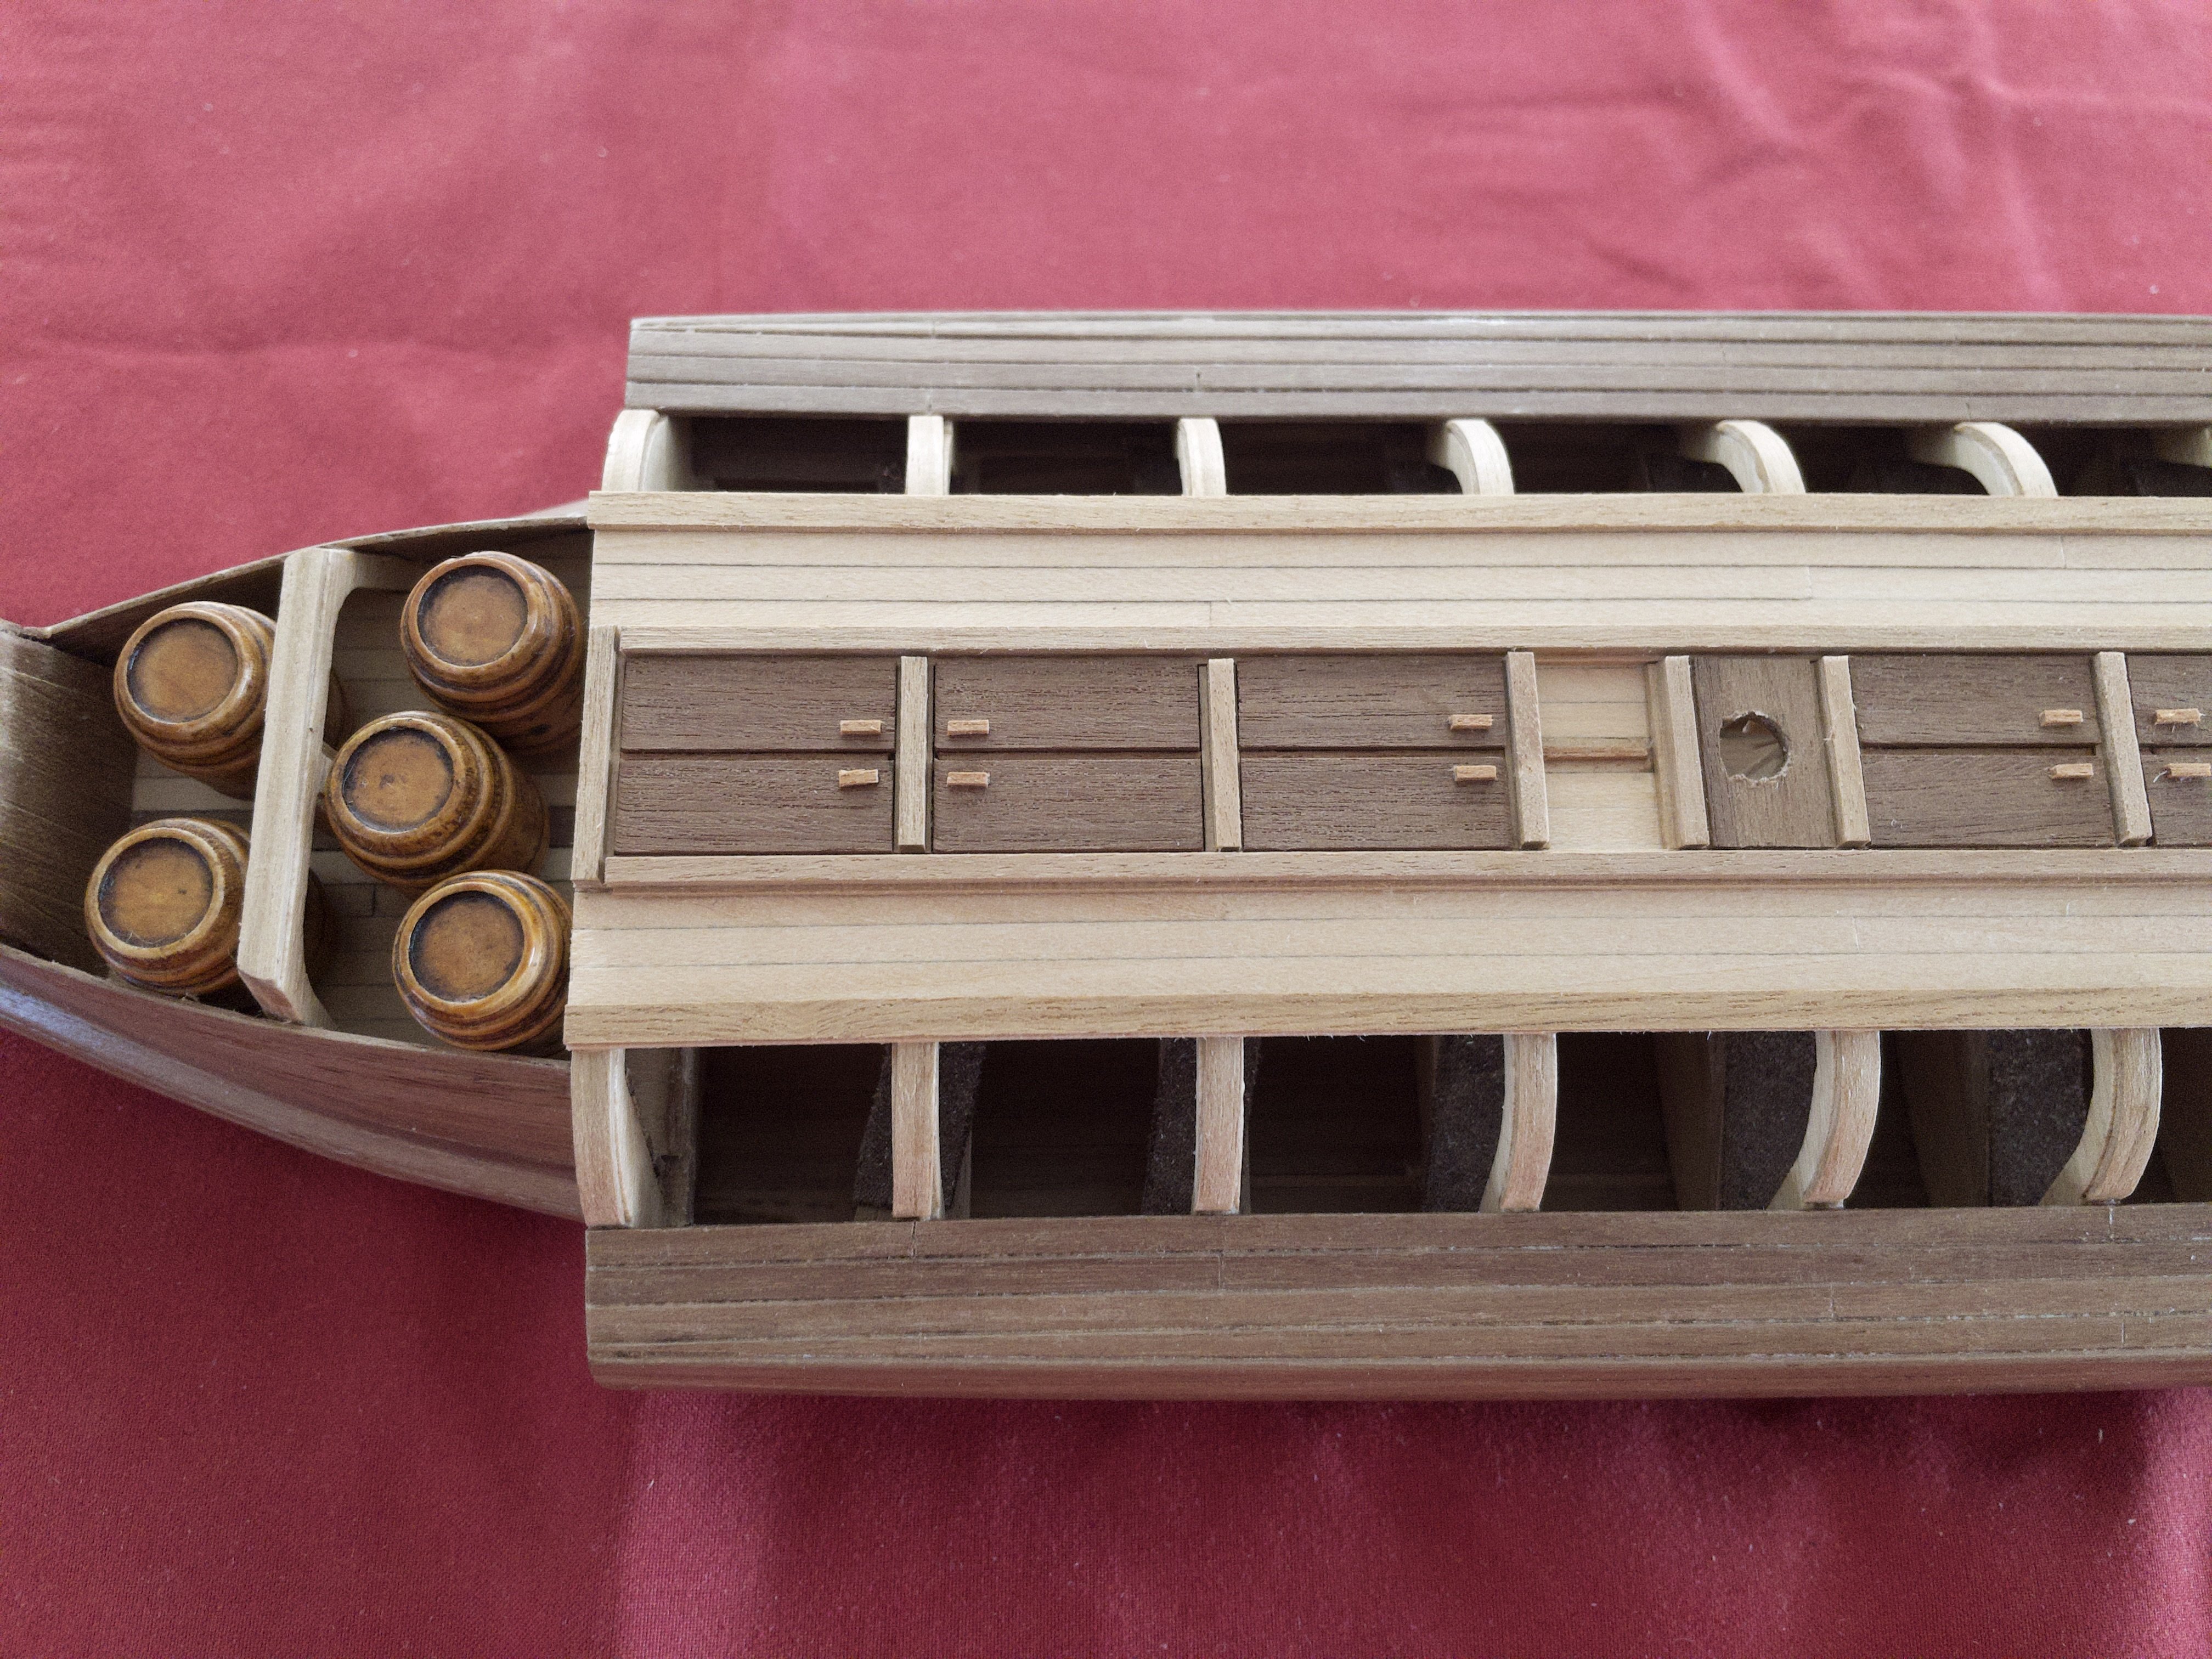
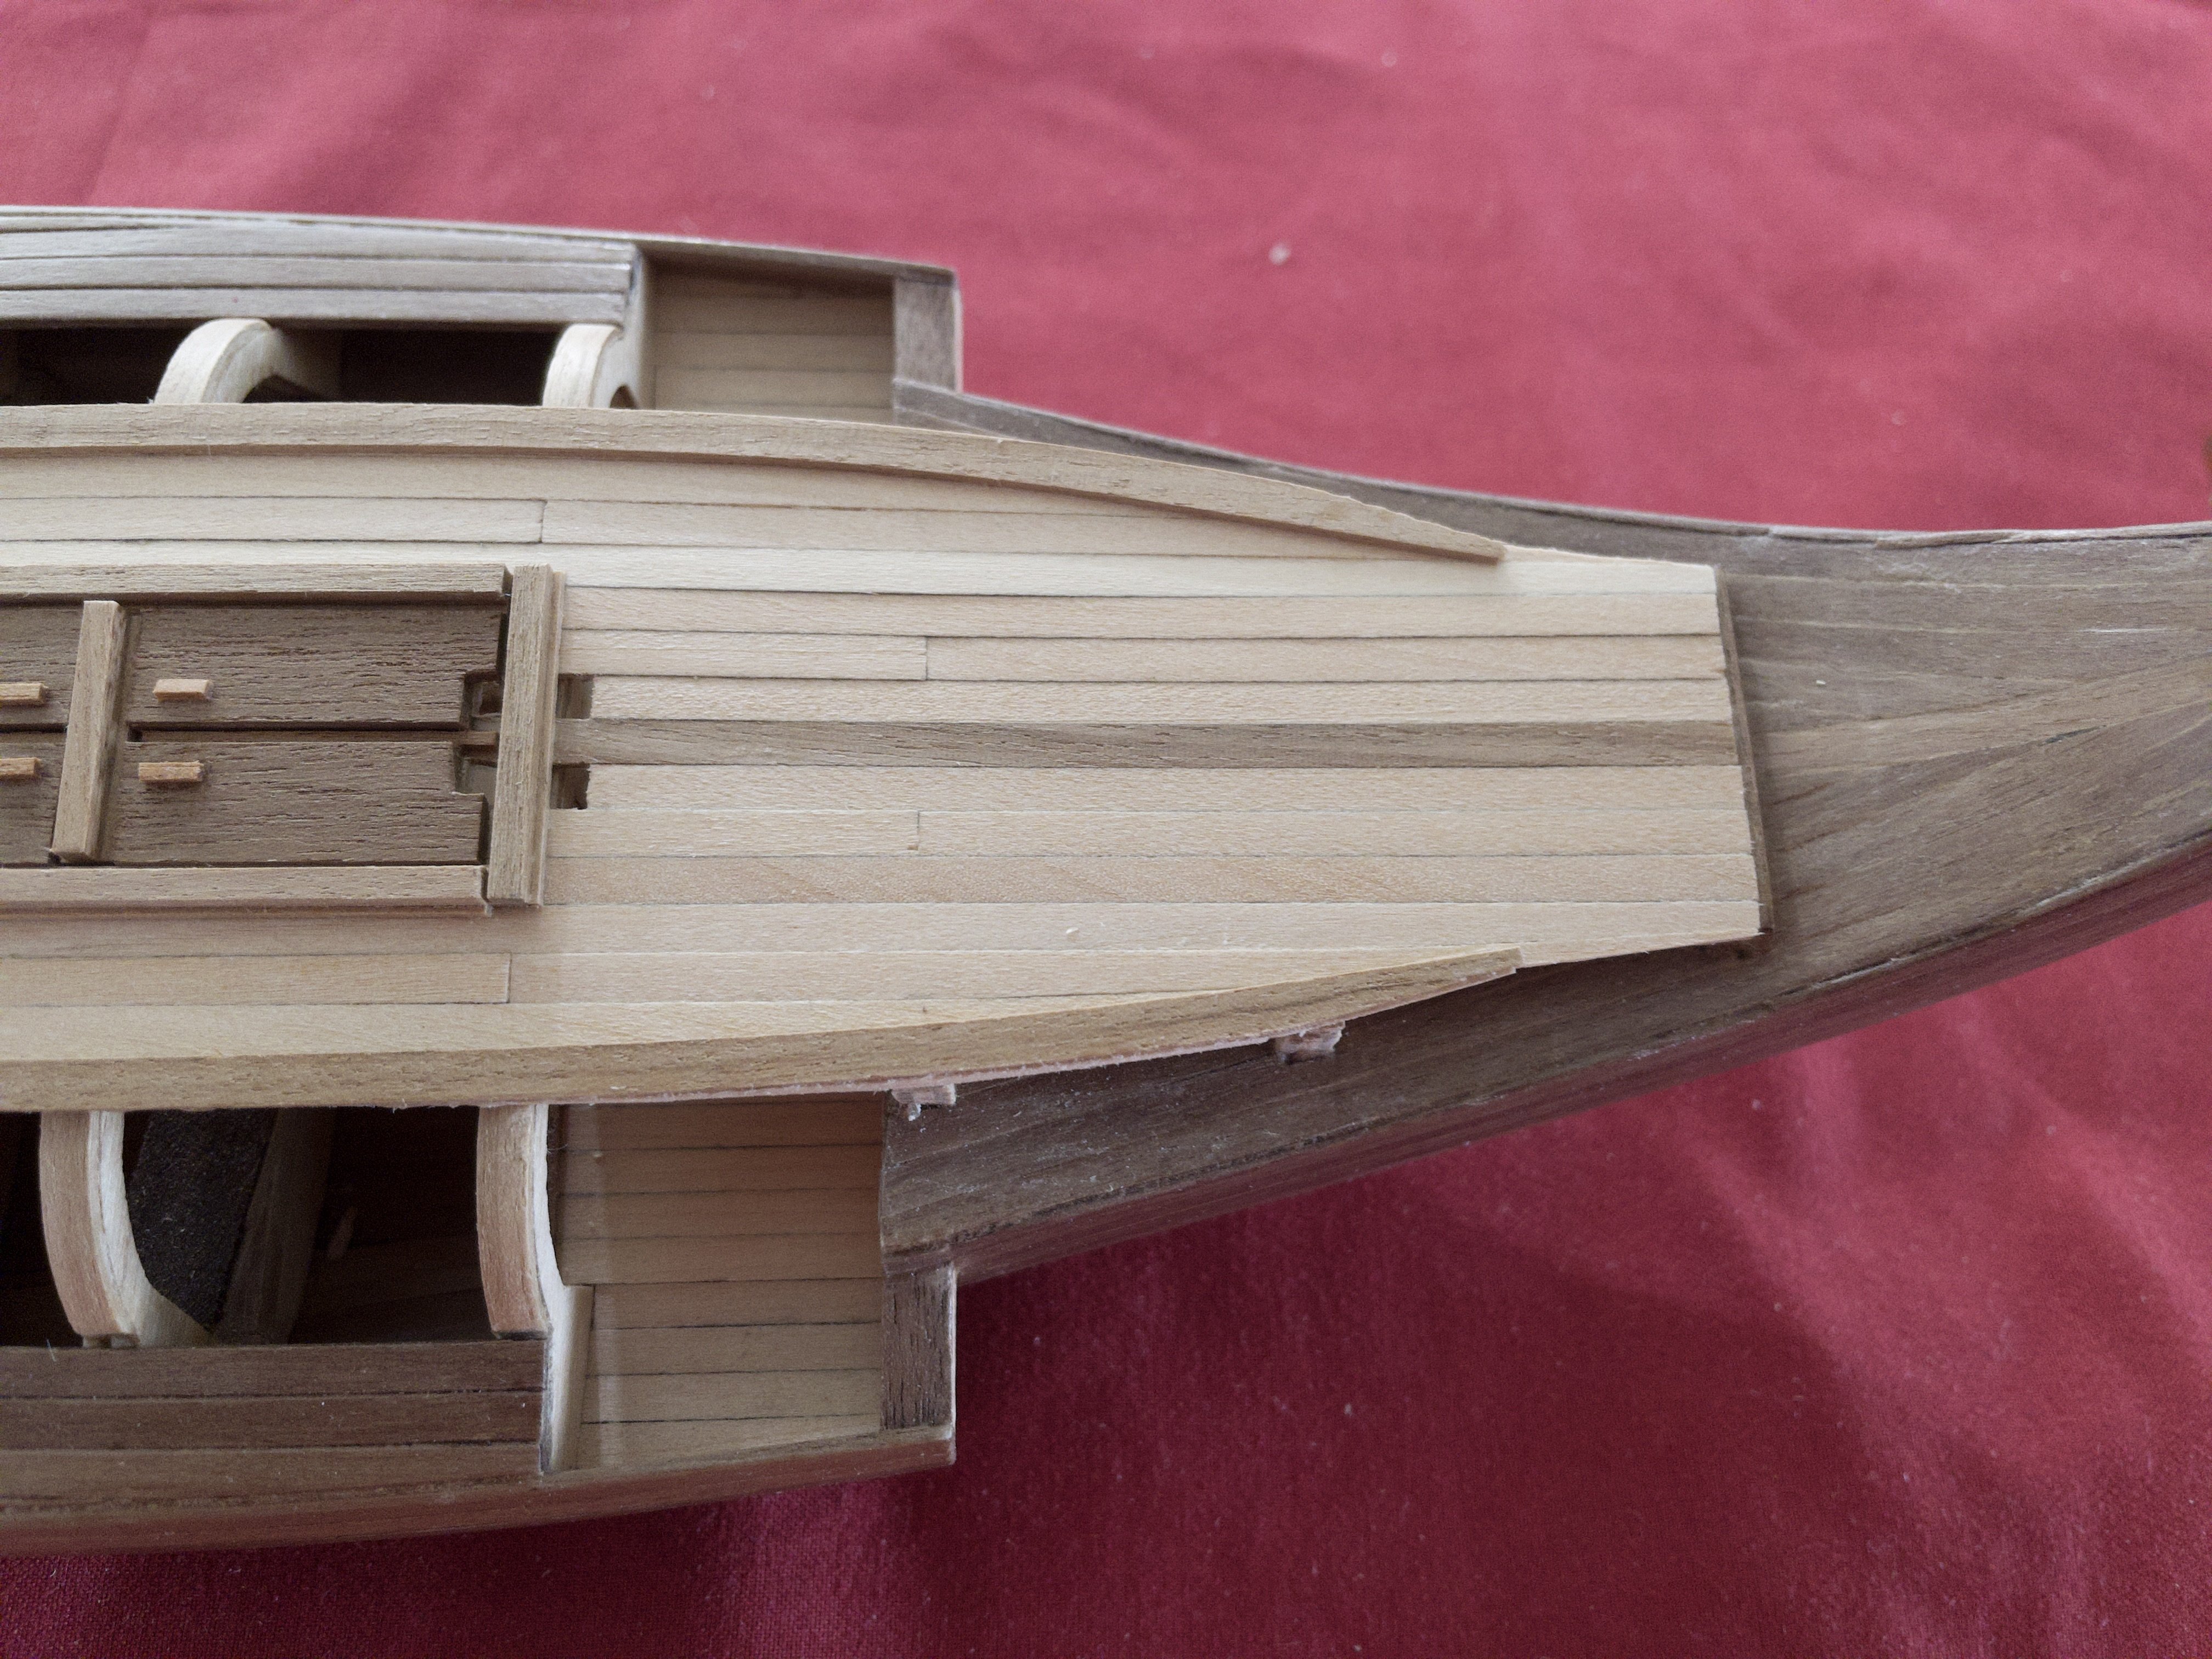
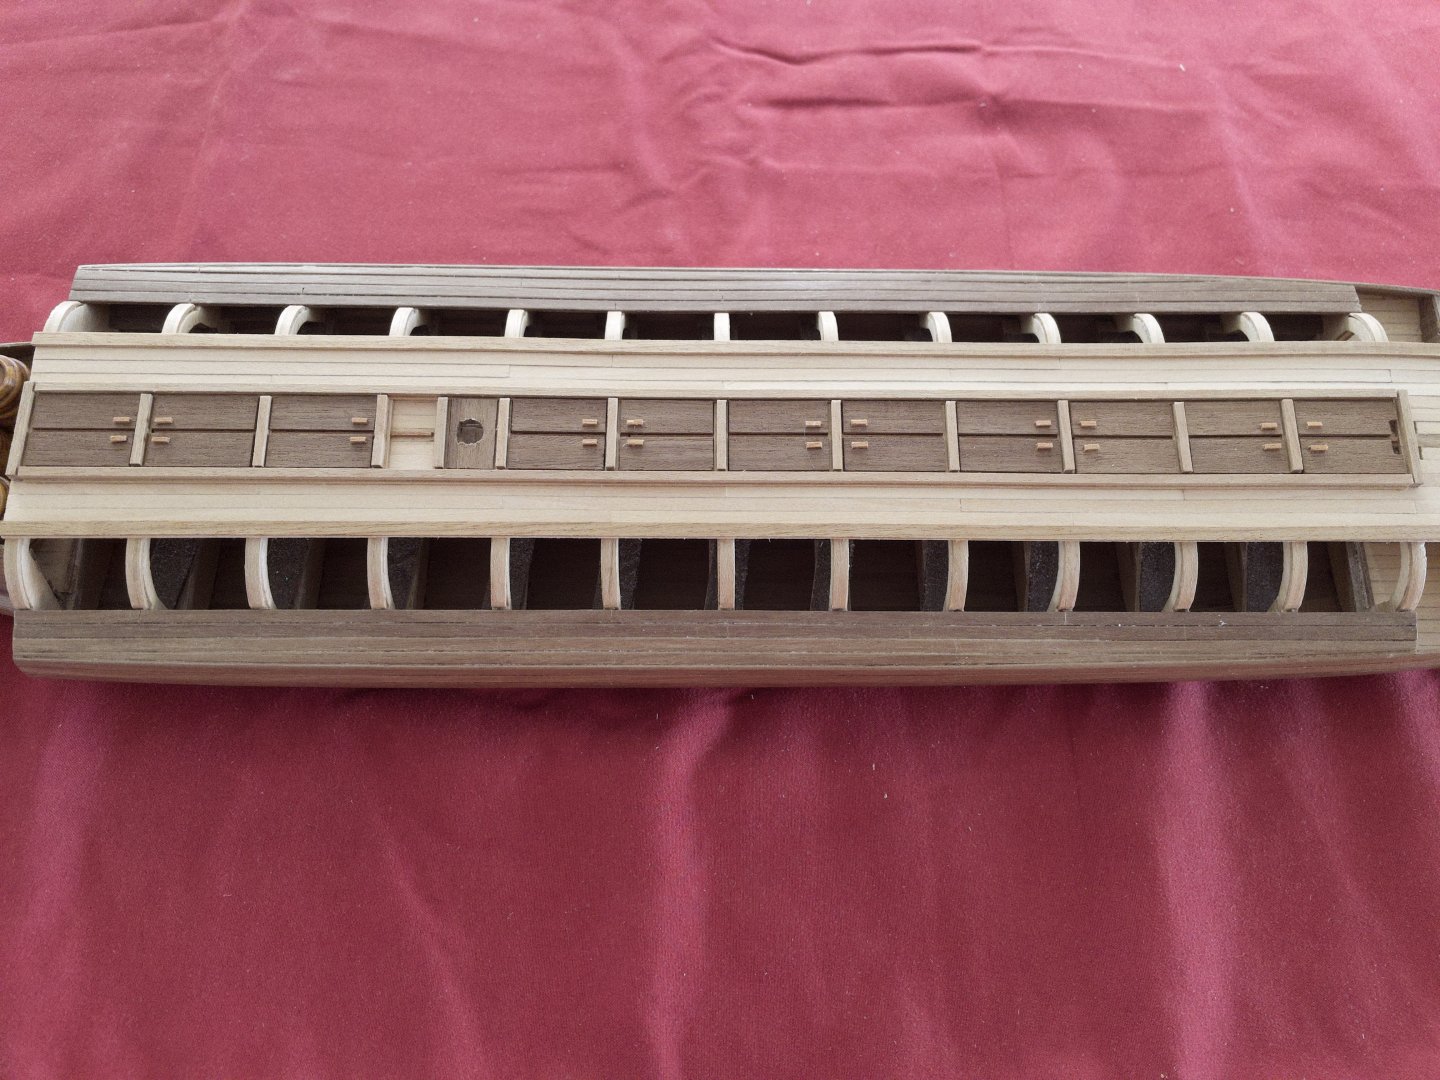
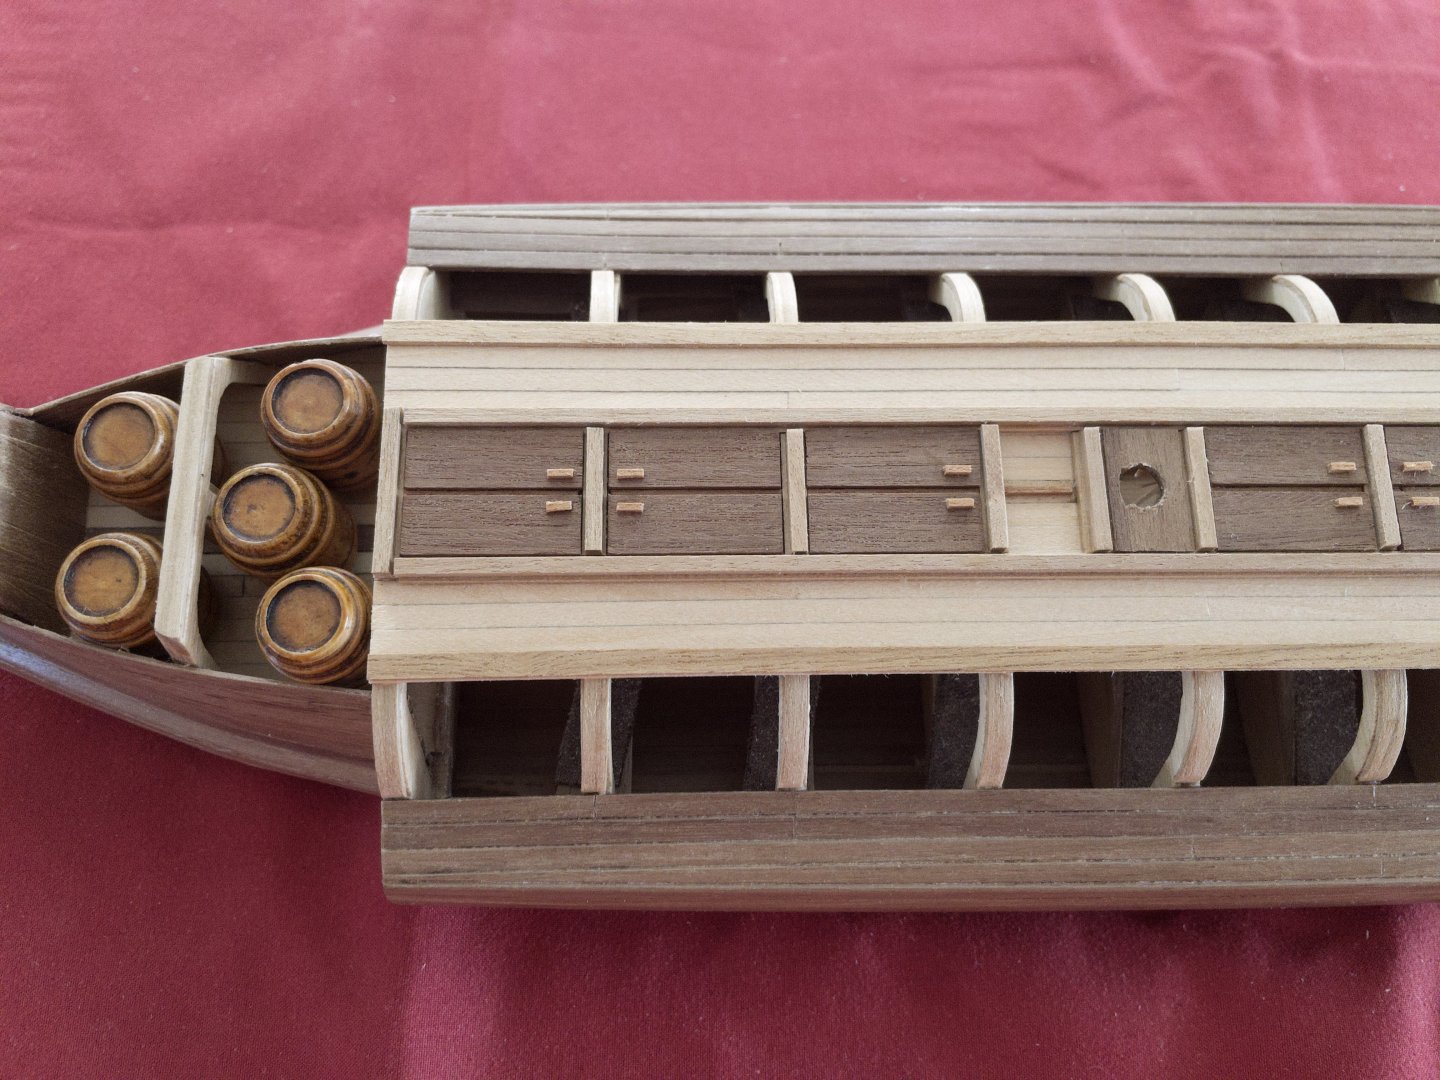
Deck: The deck is finally completed. The kit supplies little to build the floor-doors. I designed it a little differently. First, the frame is built using T-shaped strips (2x2 mm strips glued over a 3.25mm strips). This creates the little space around the doors that I was looking to achieve, as well as a recessed layout. Metal RAM: the copper is starting to oxidize slowly, which is a little bit more realistic. That's all for this week.

-
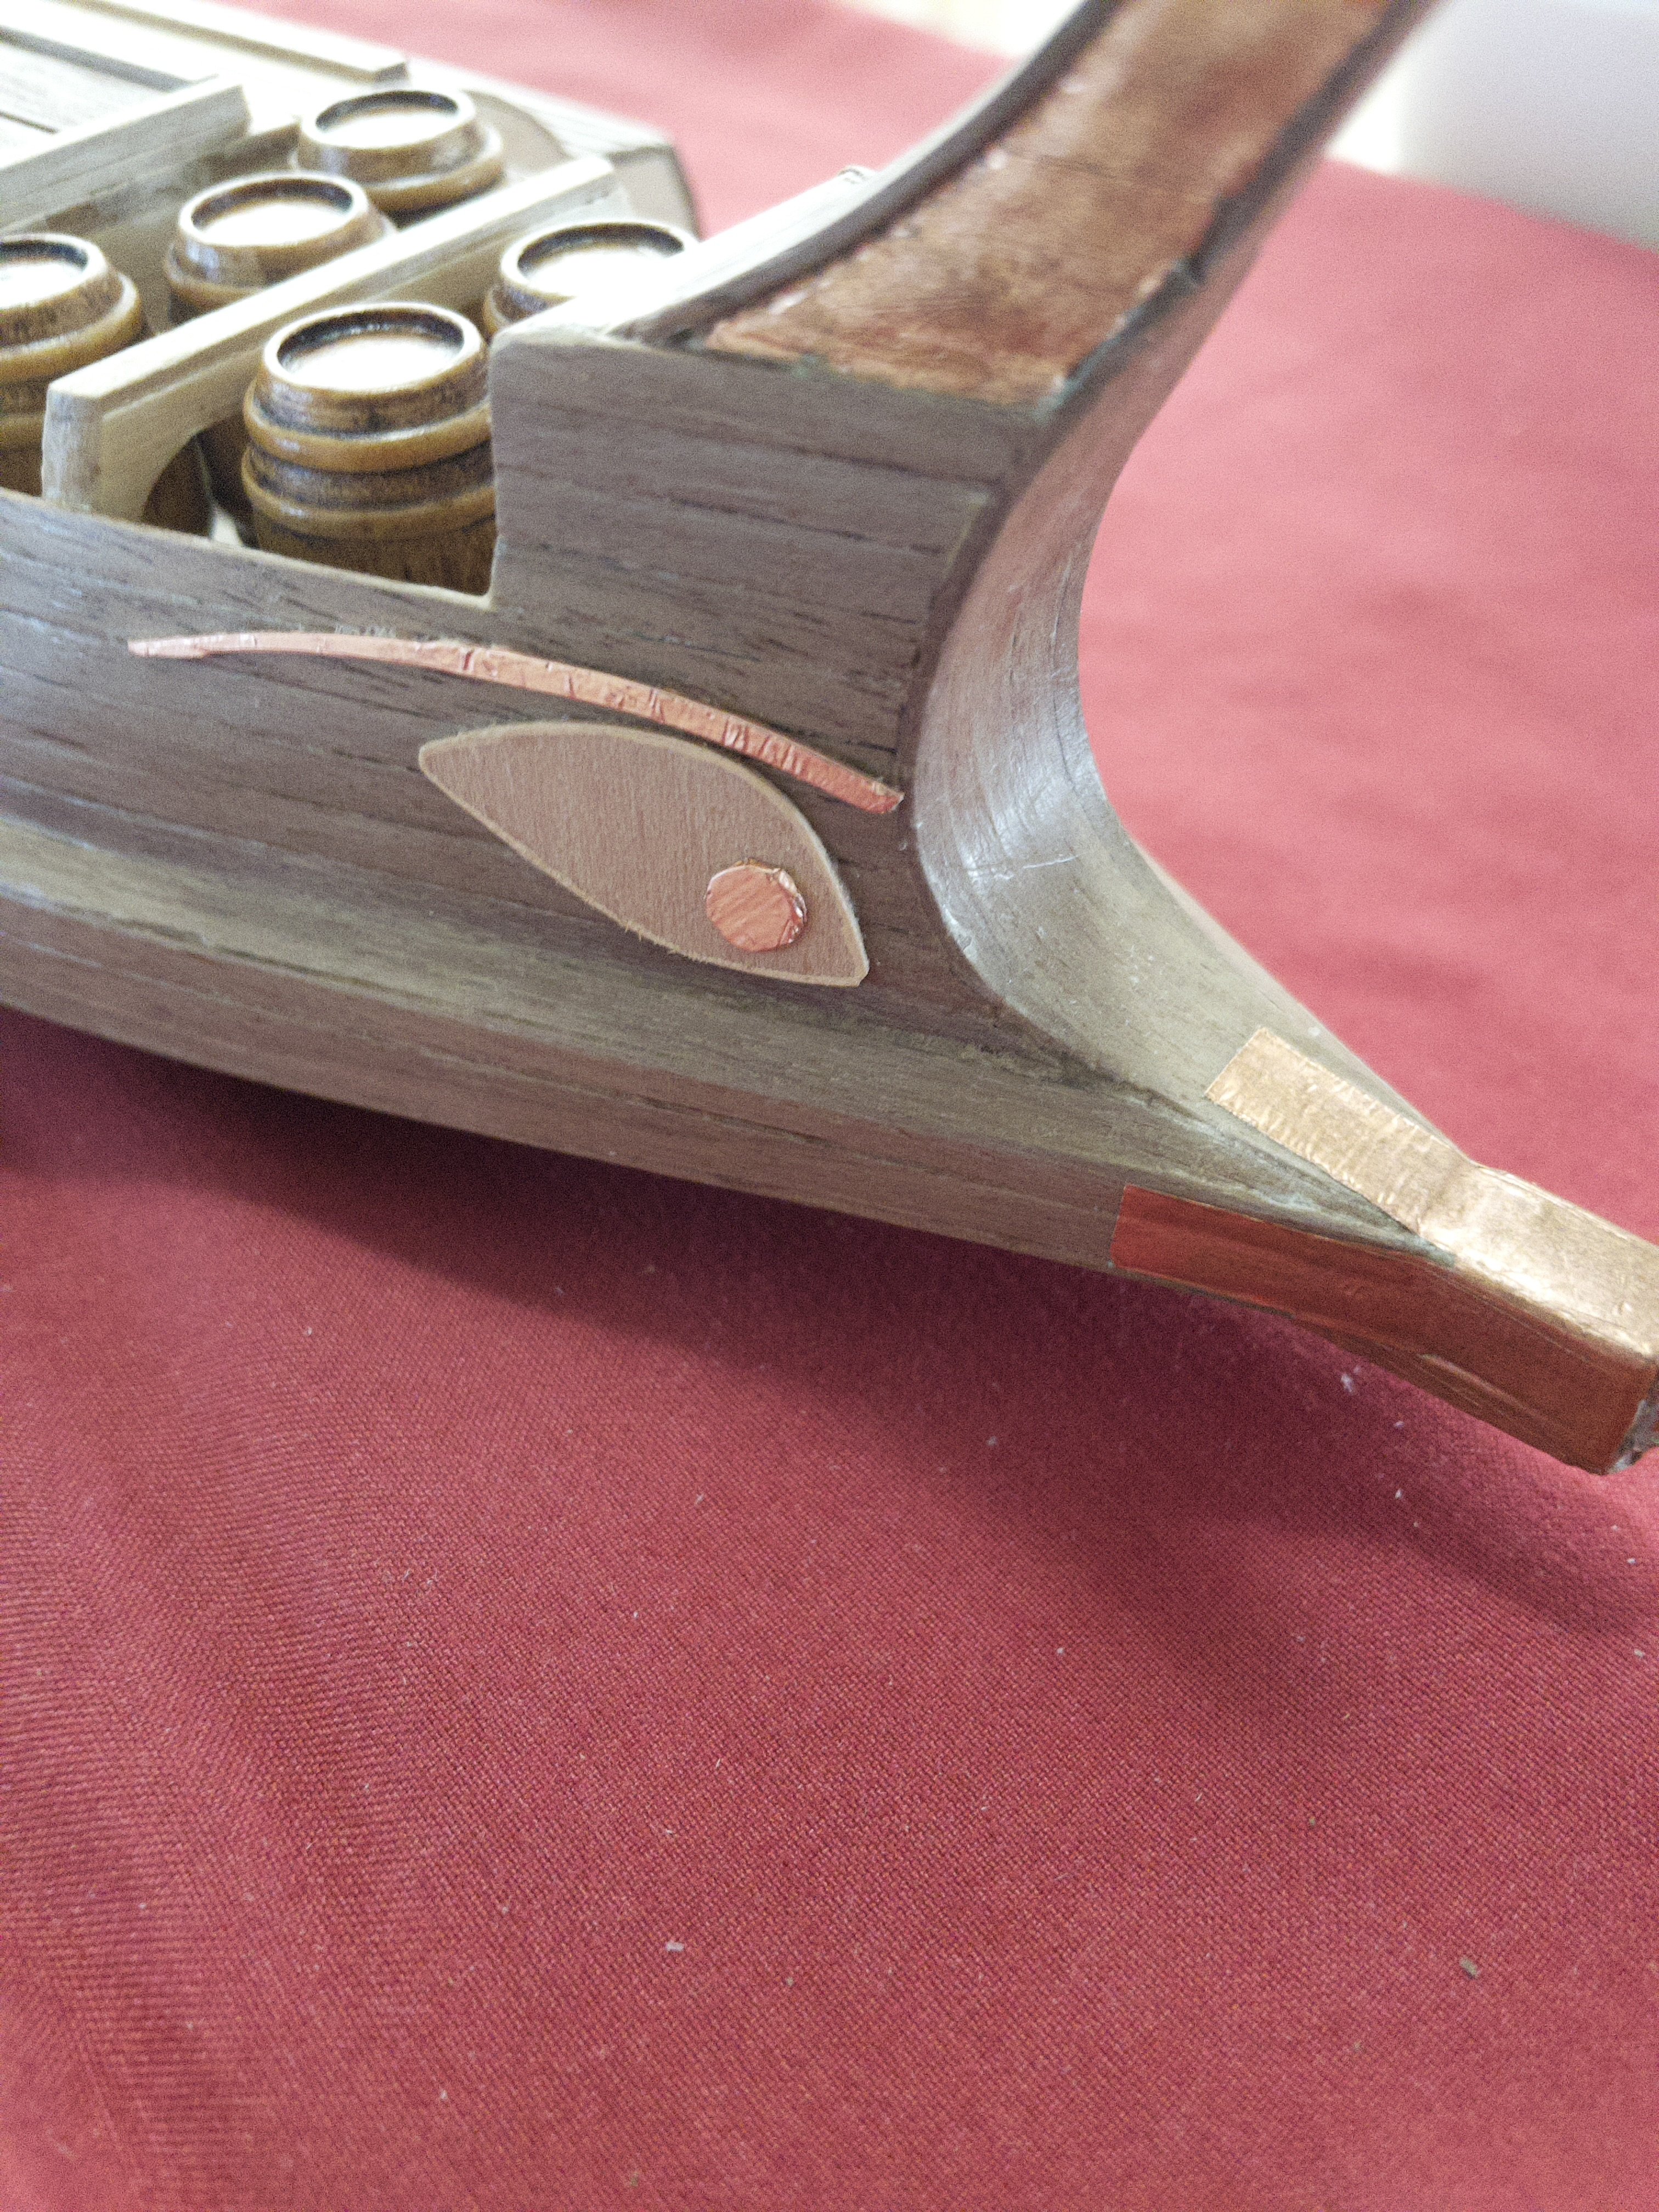
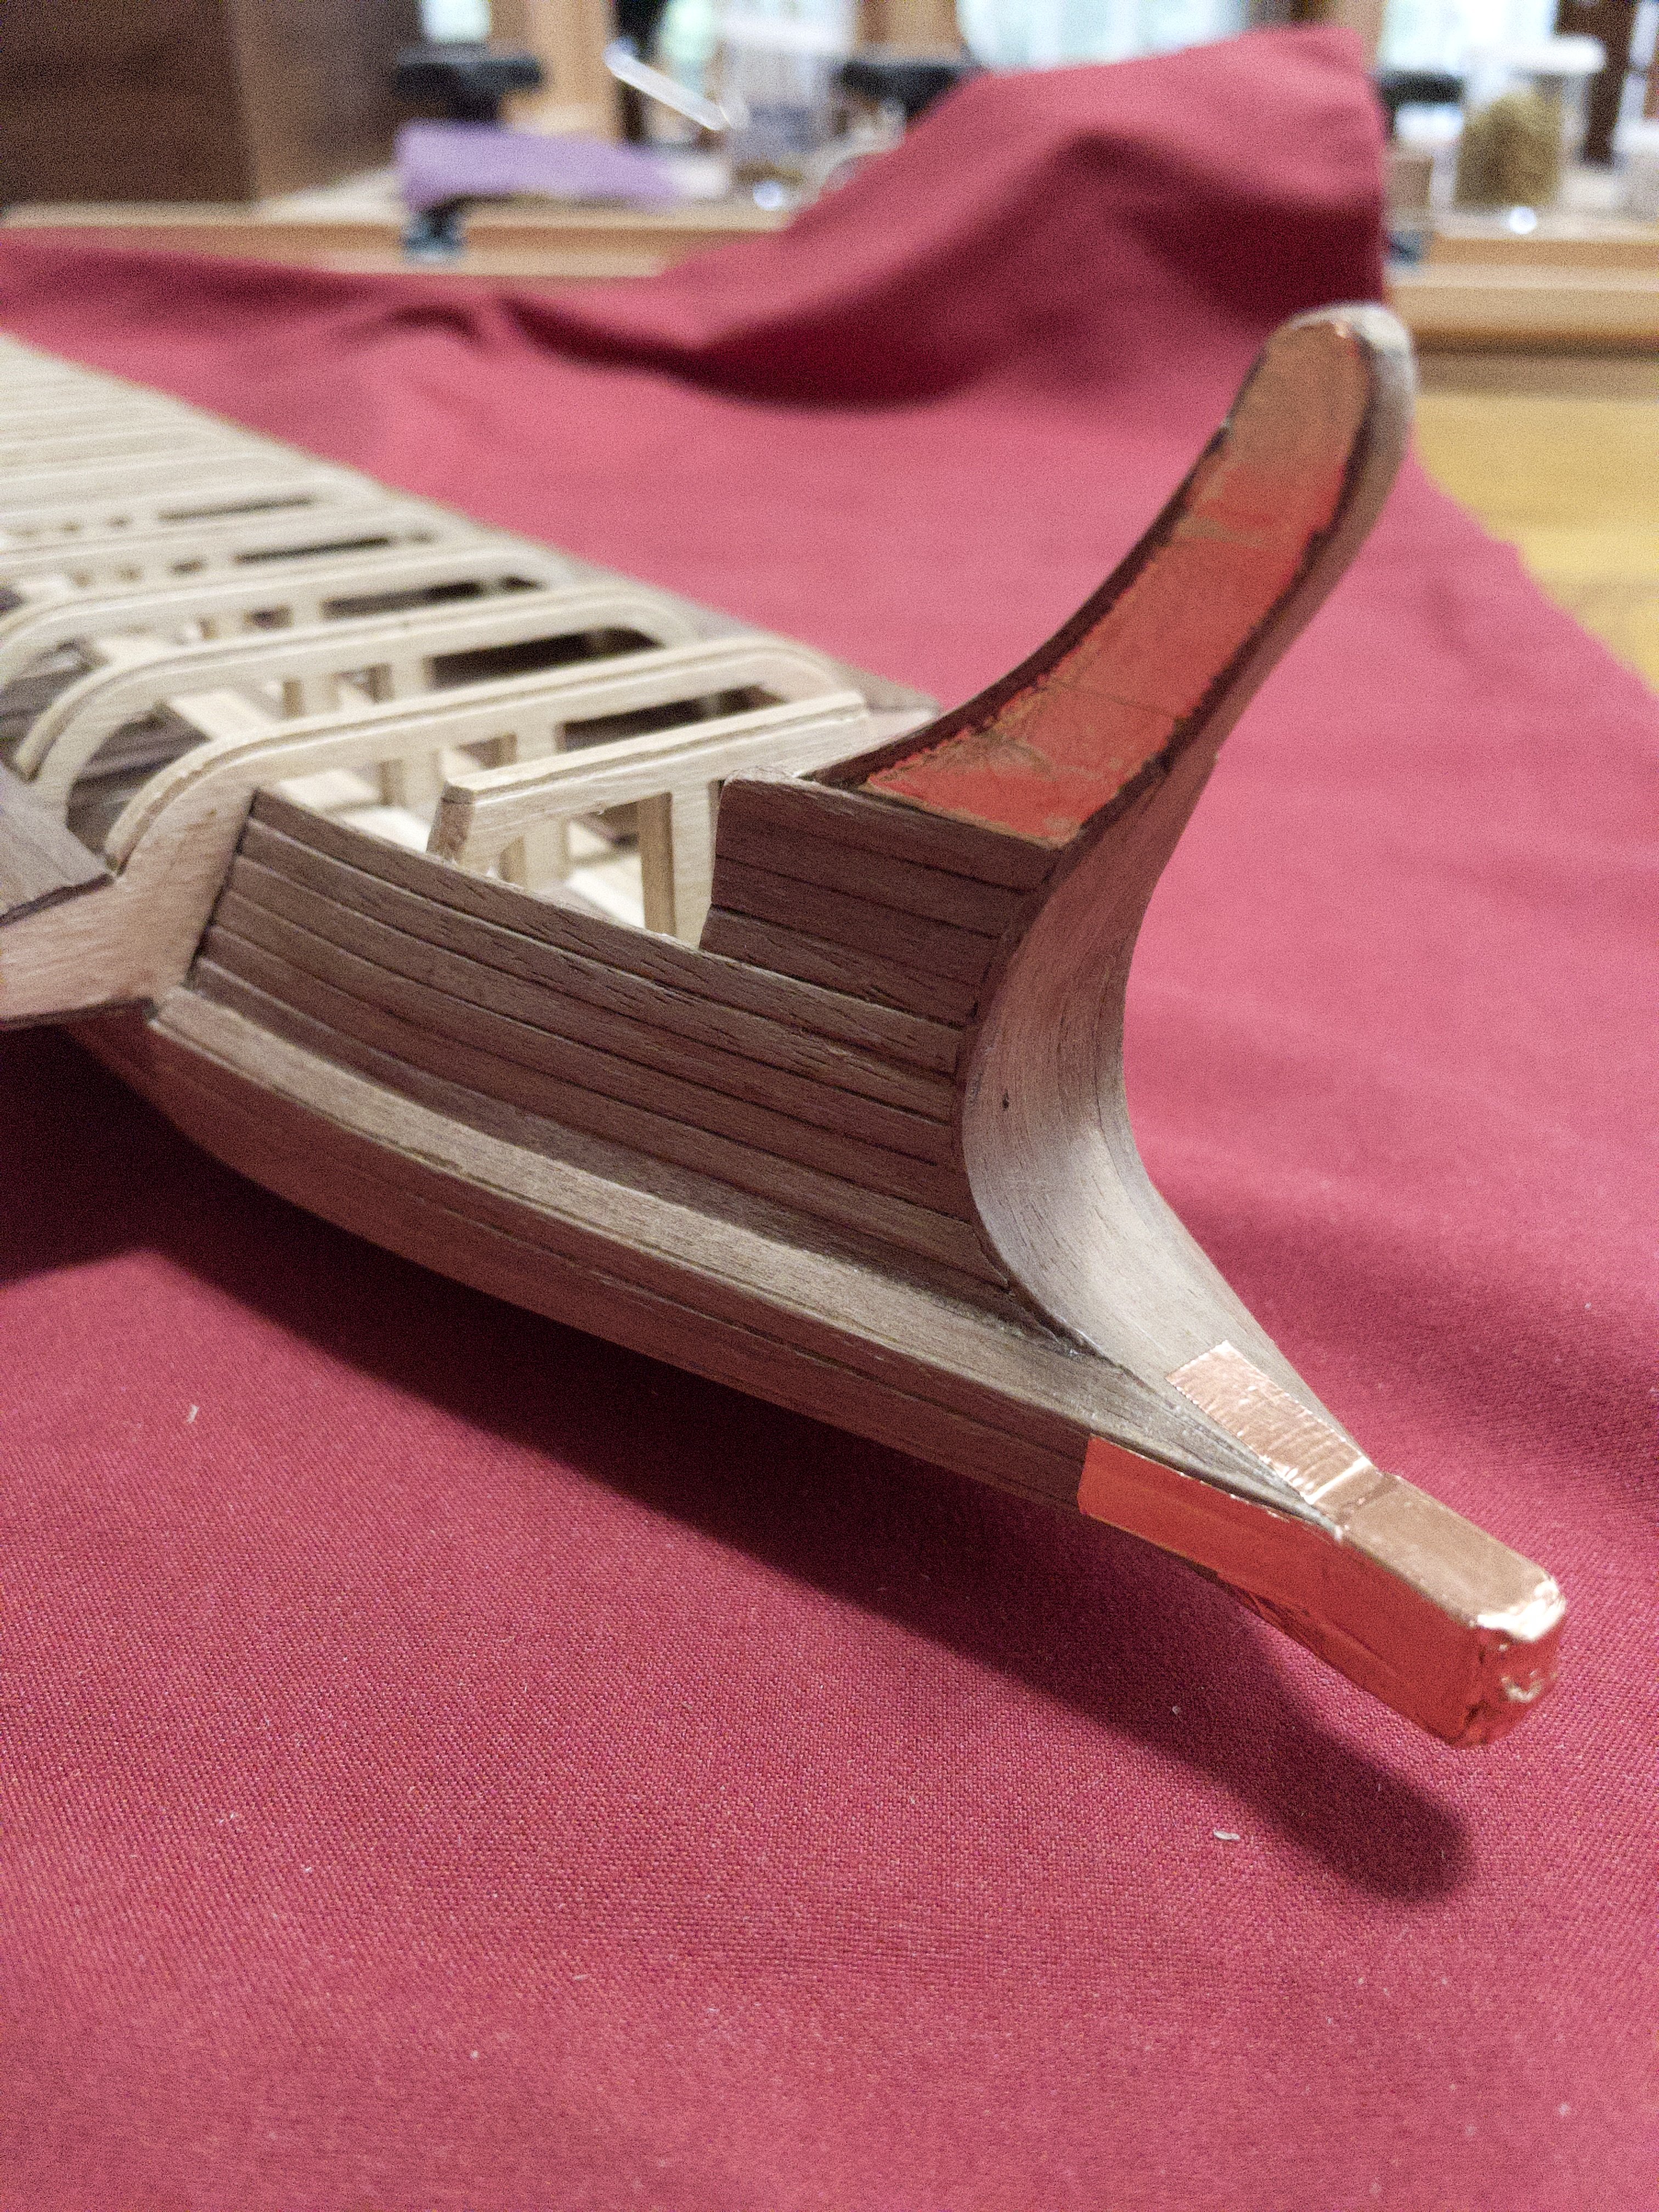
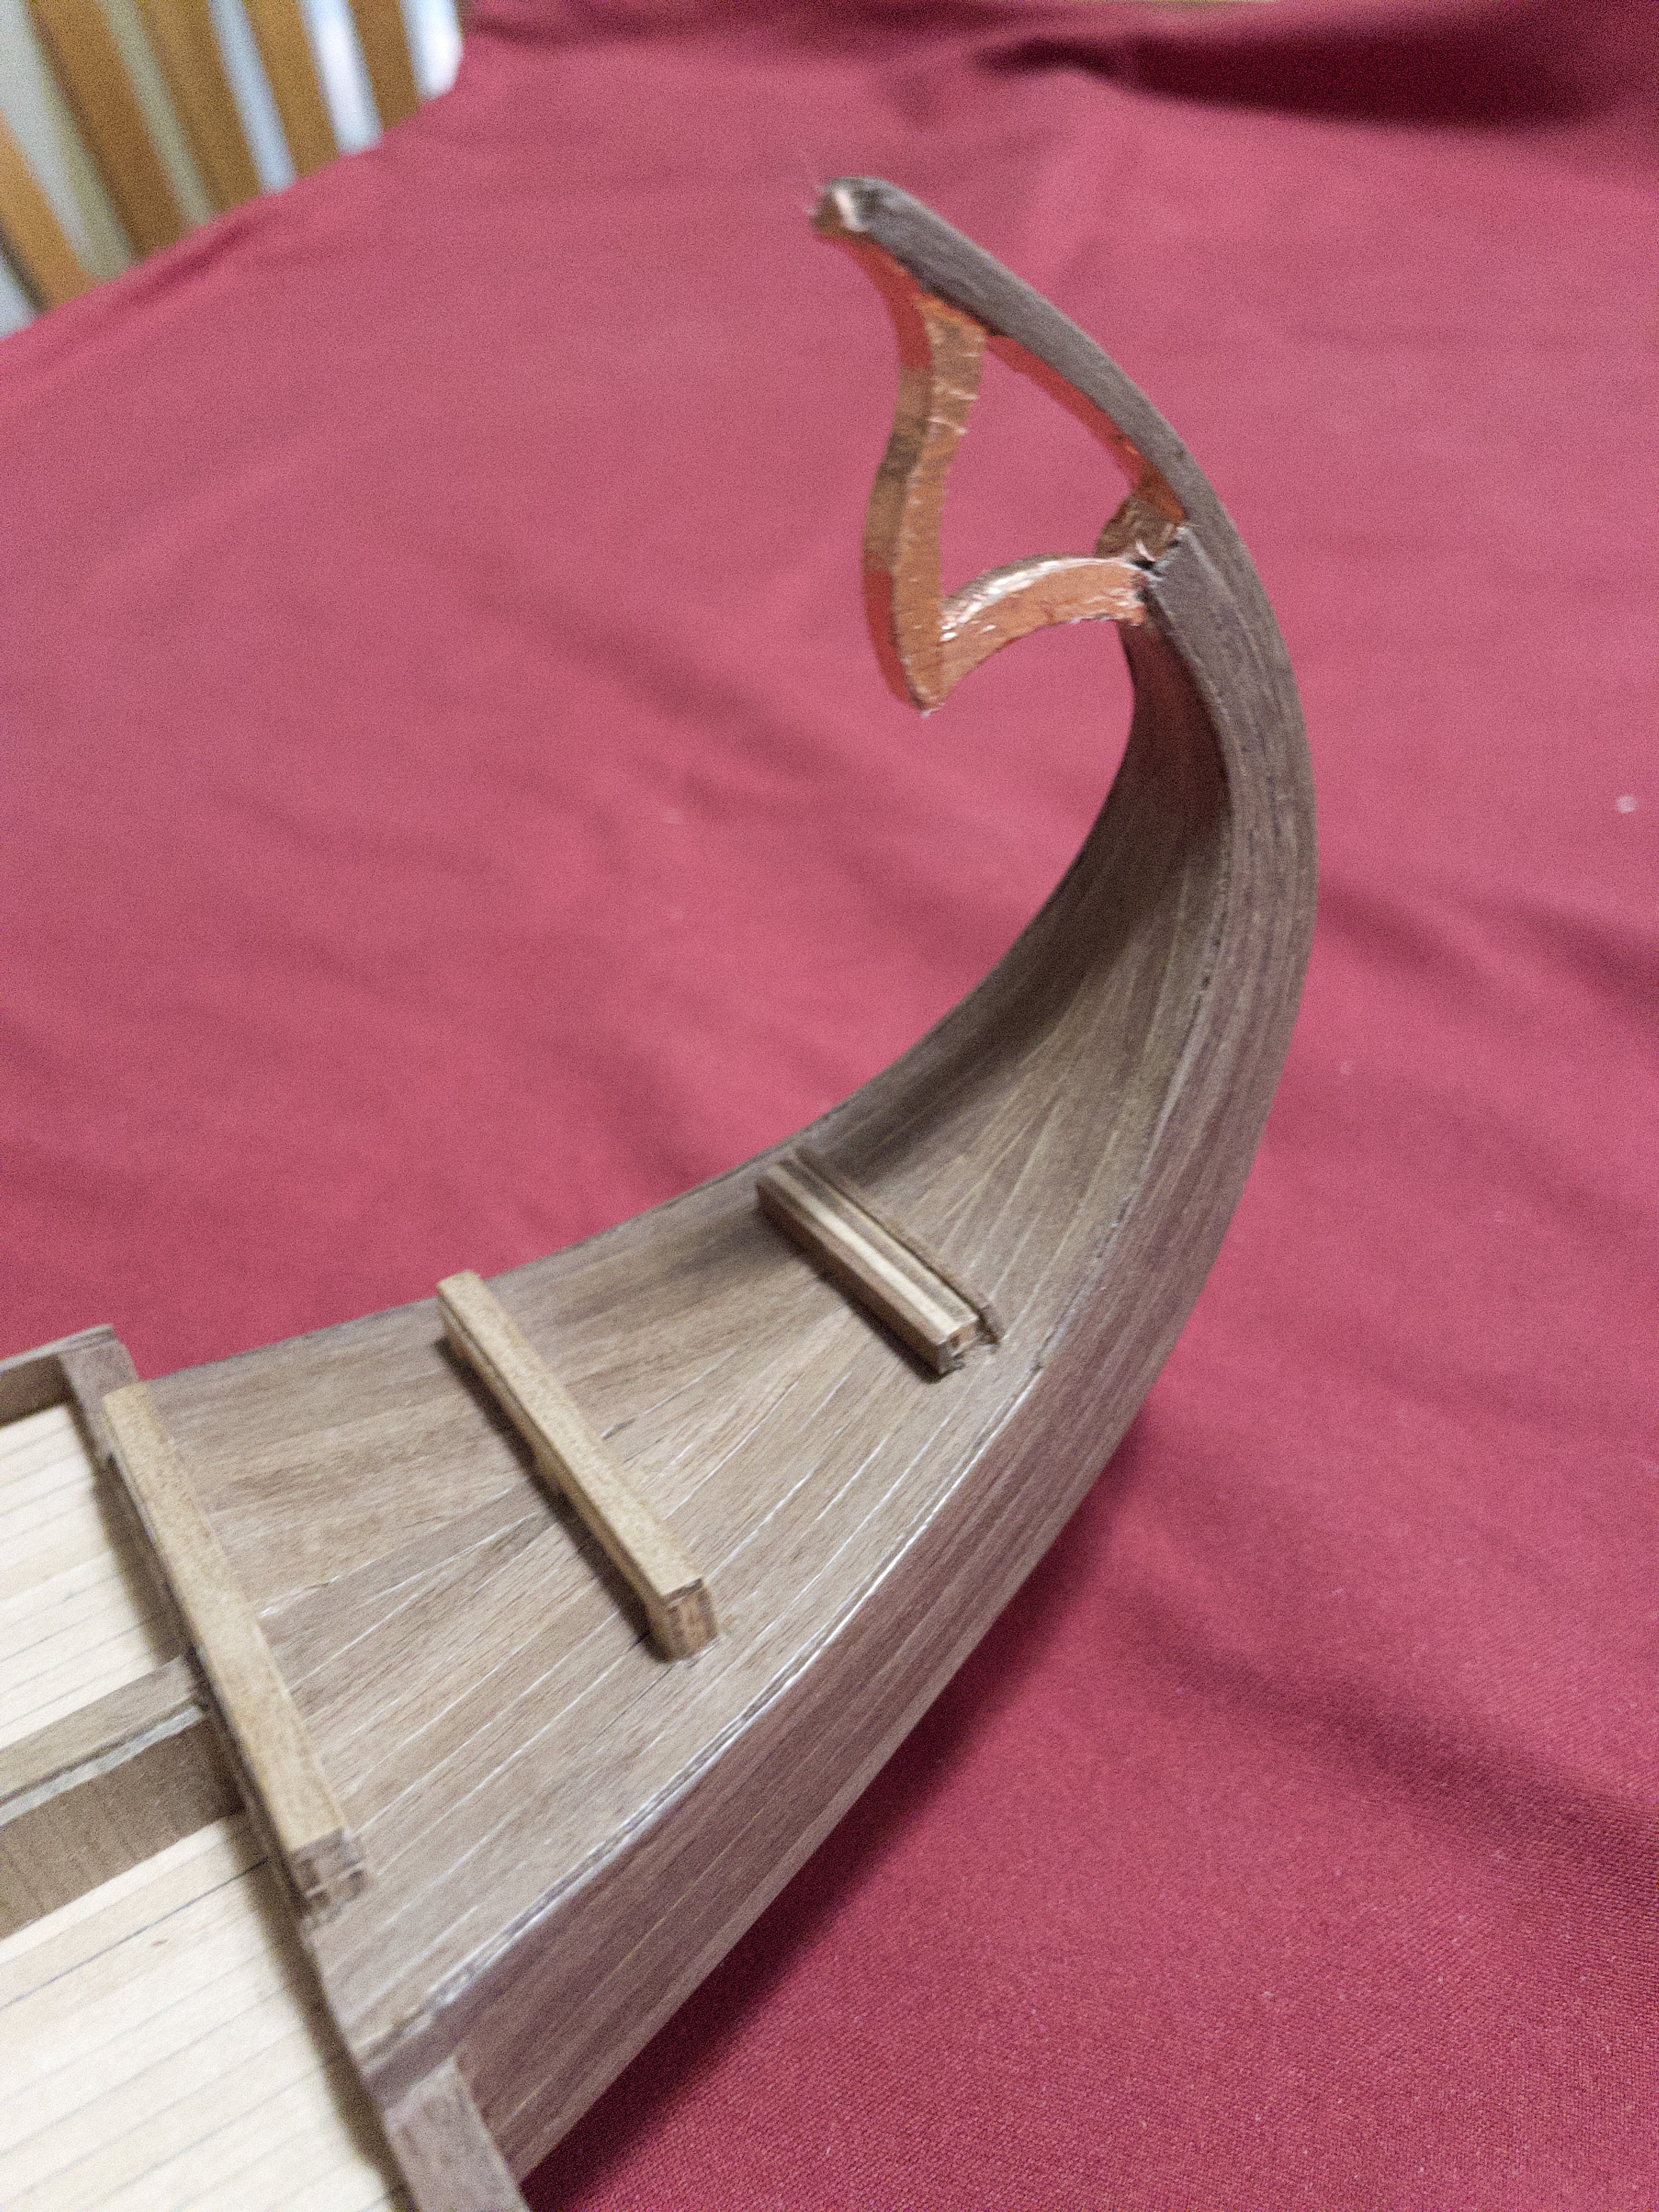
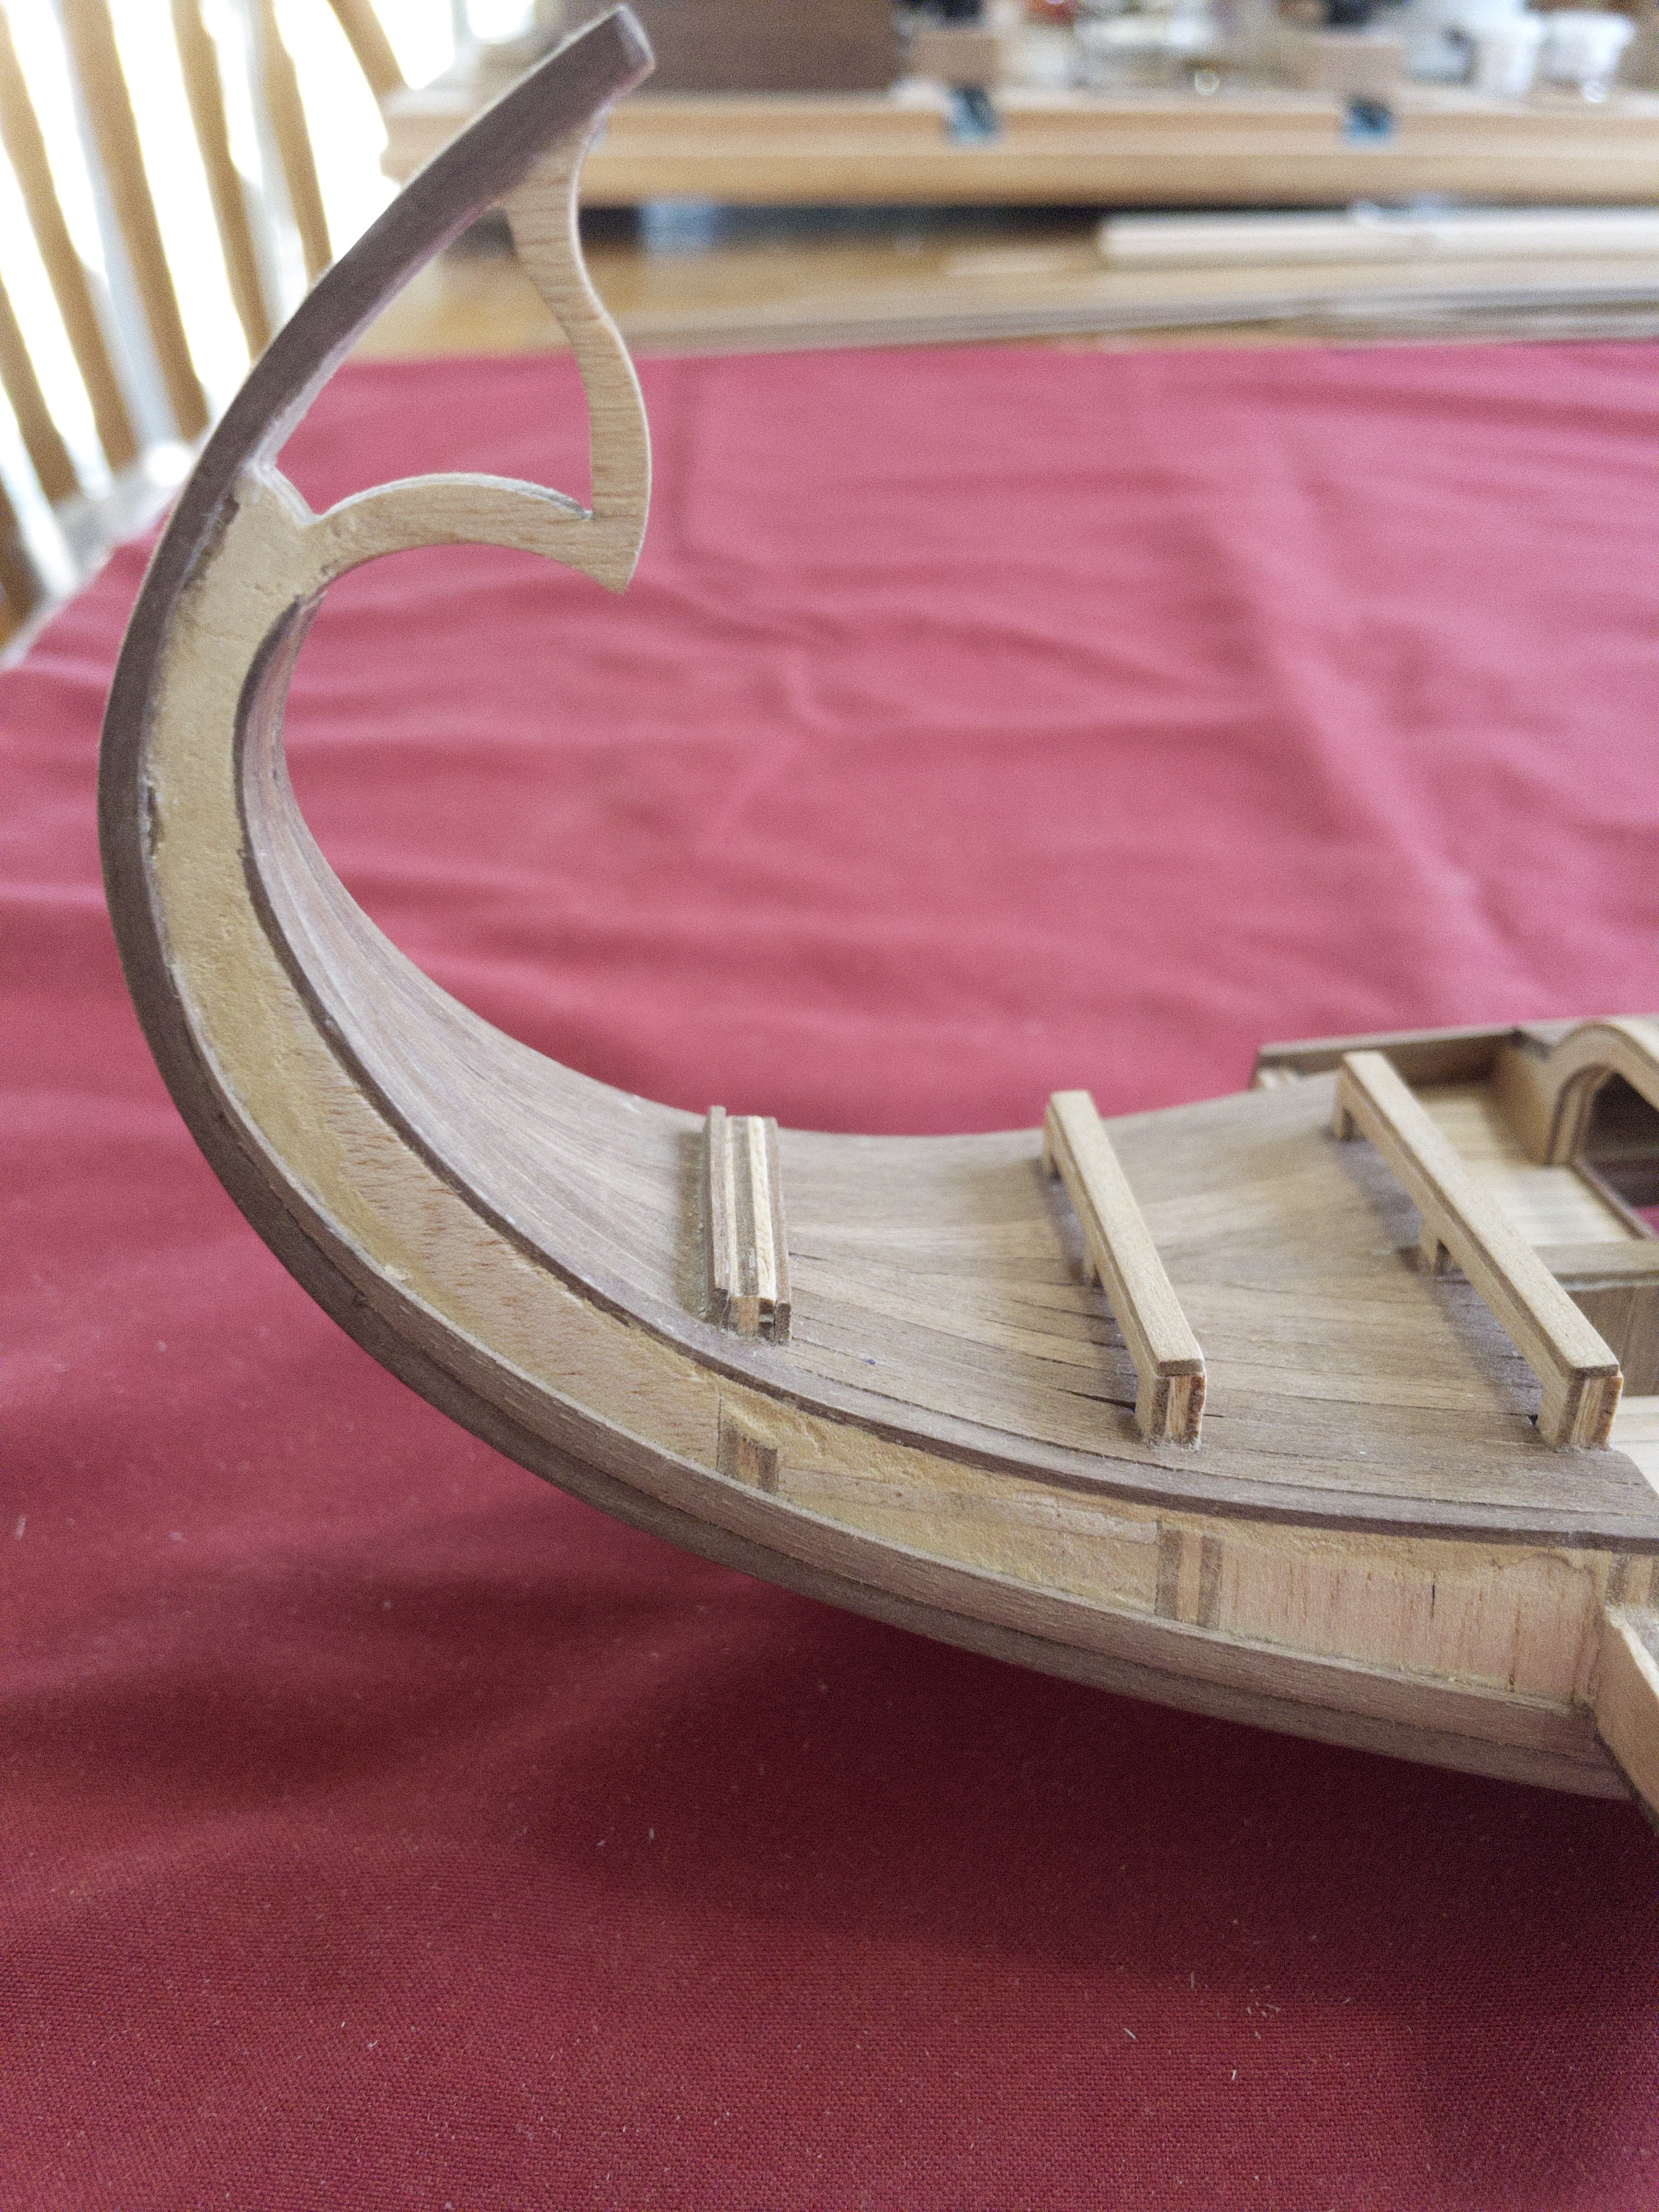
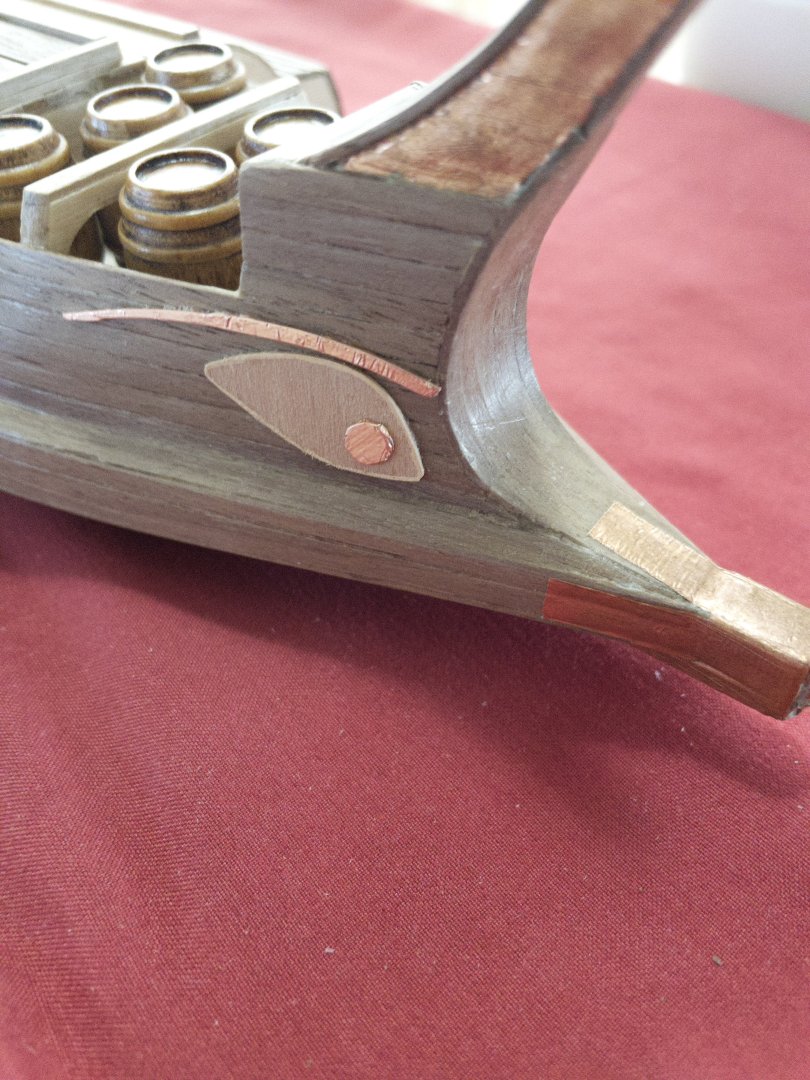
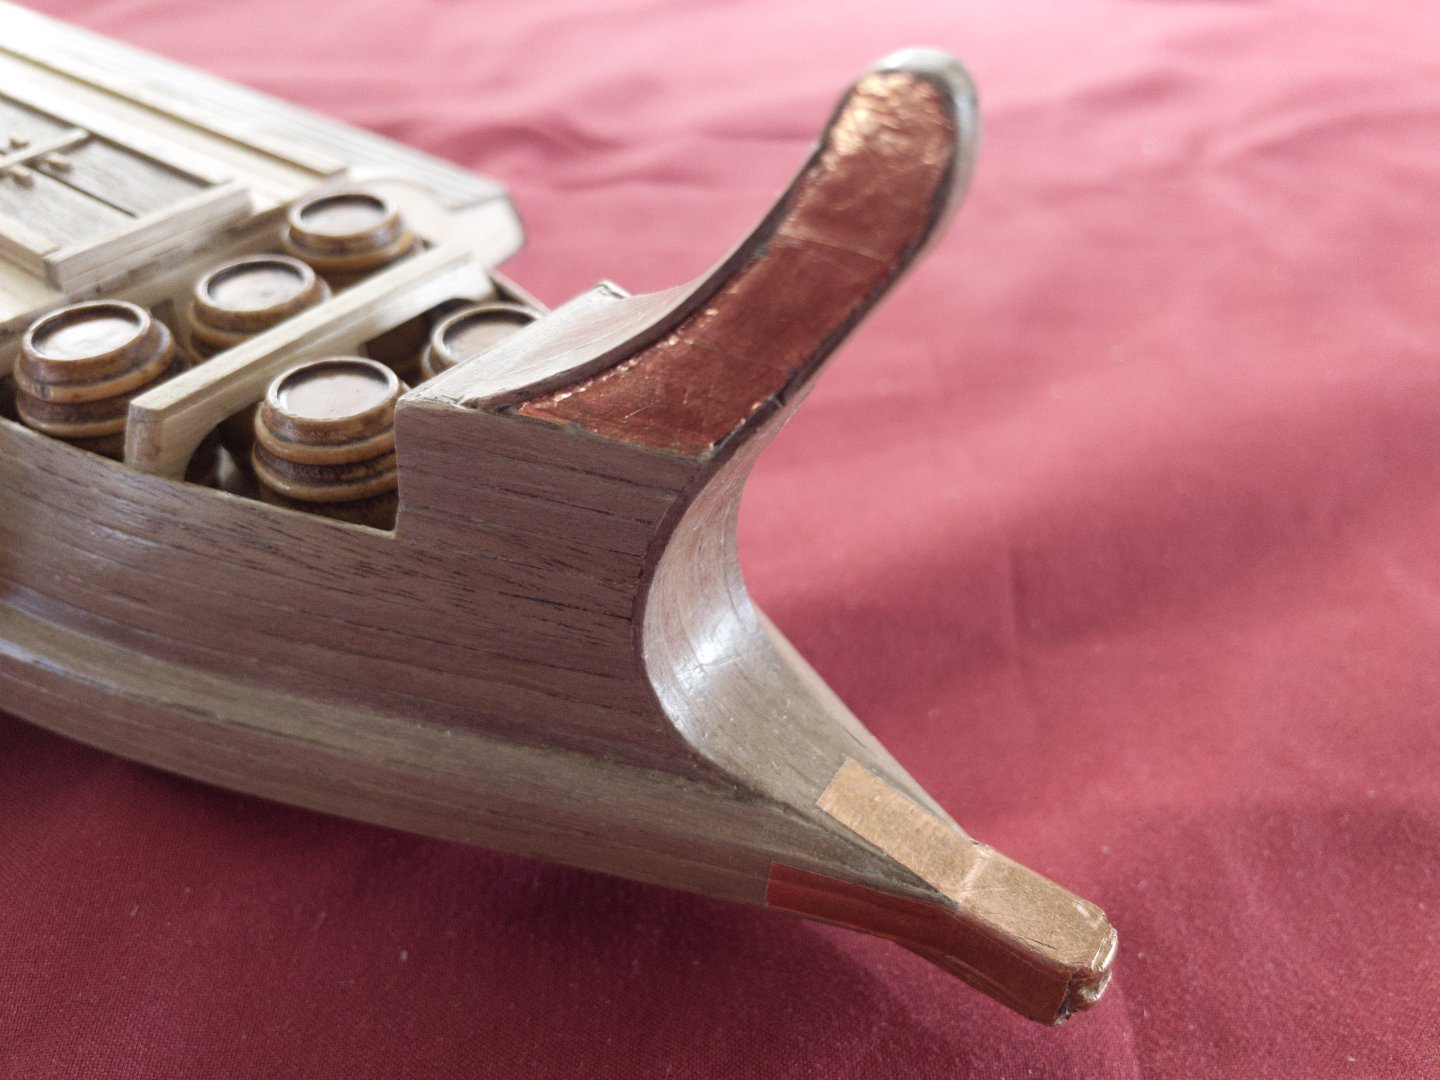
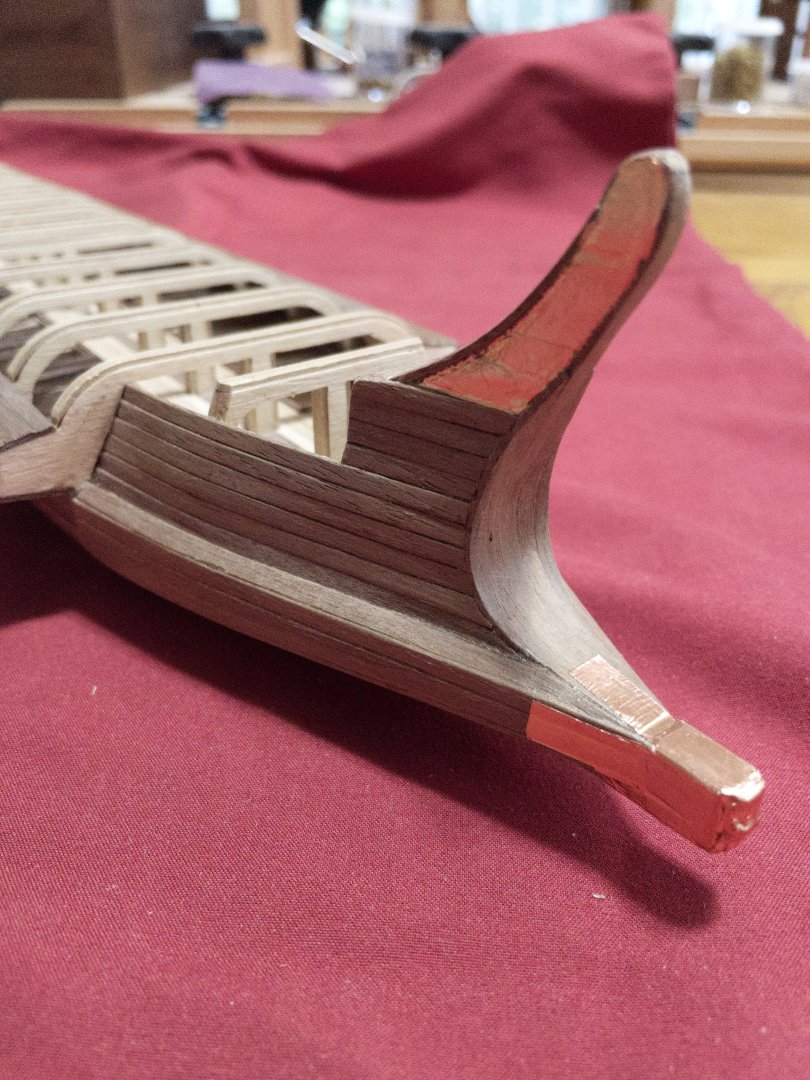
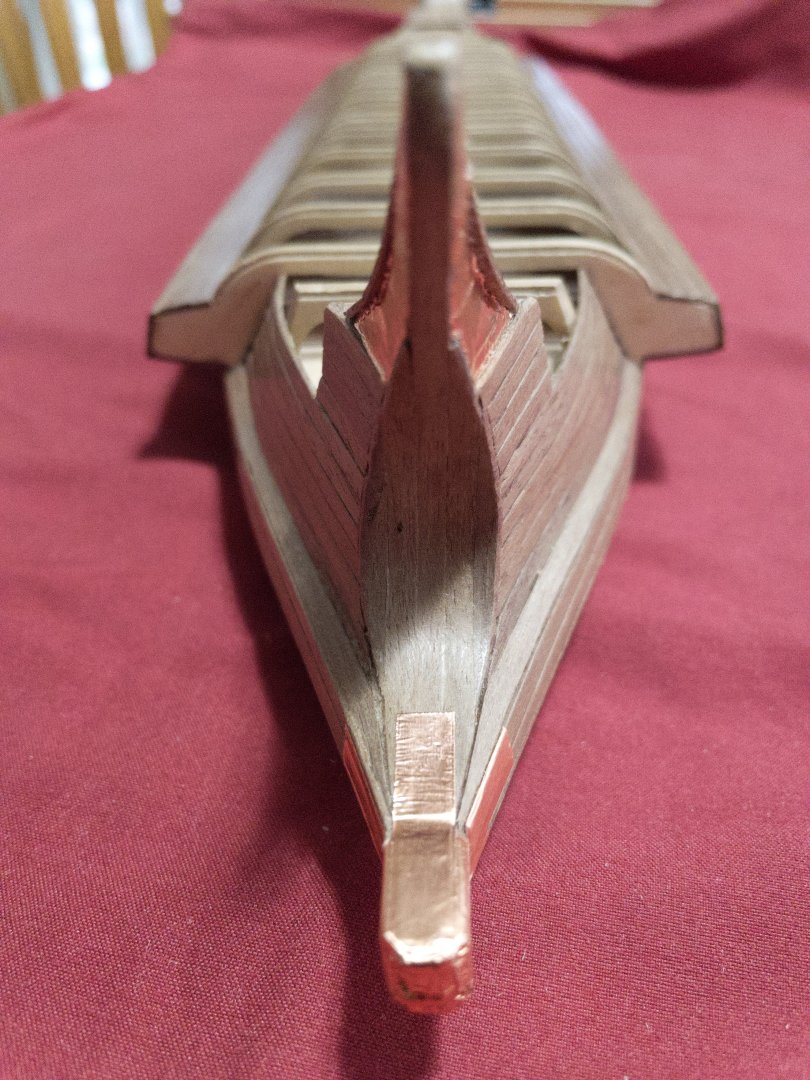
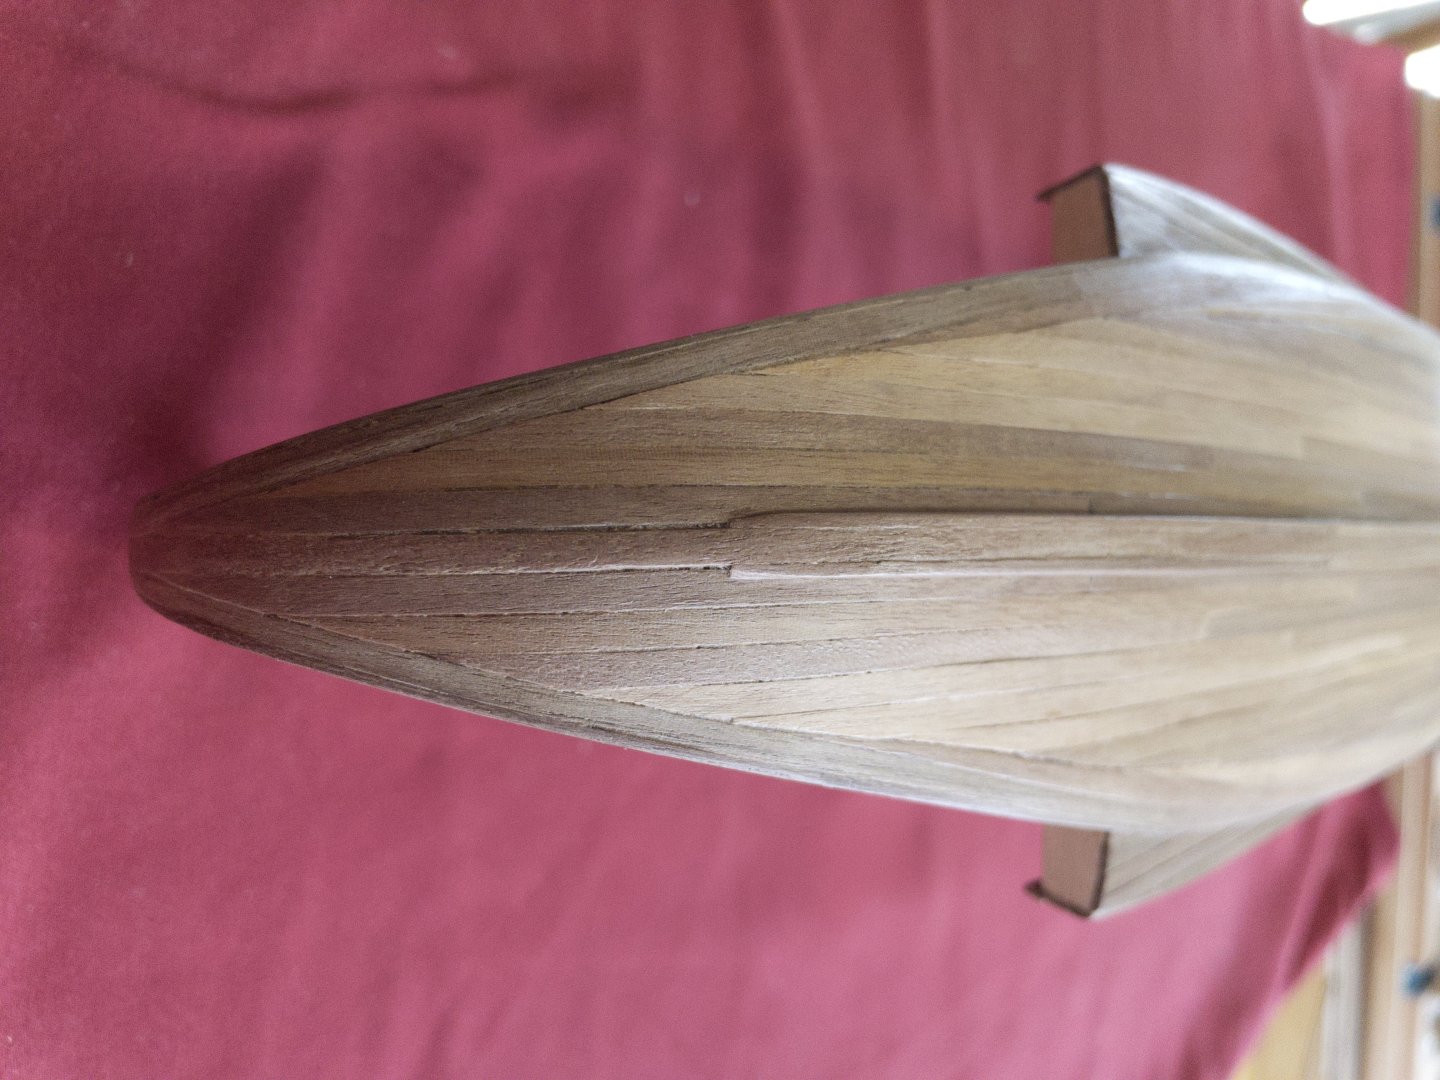
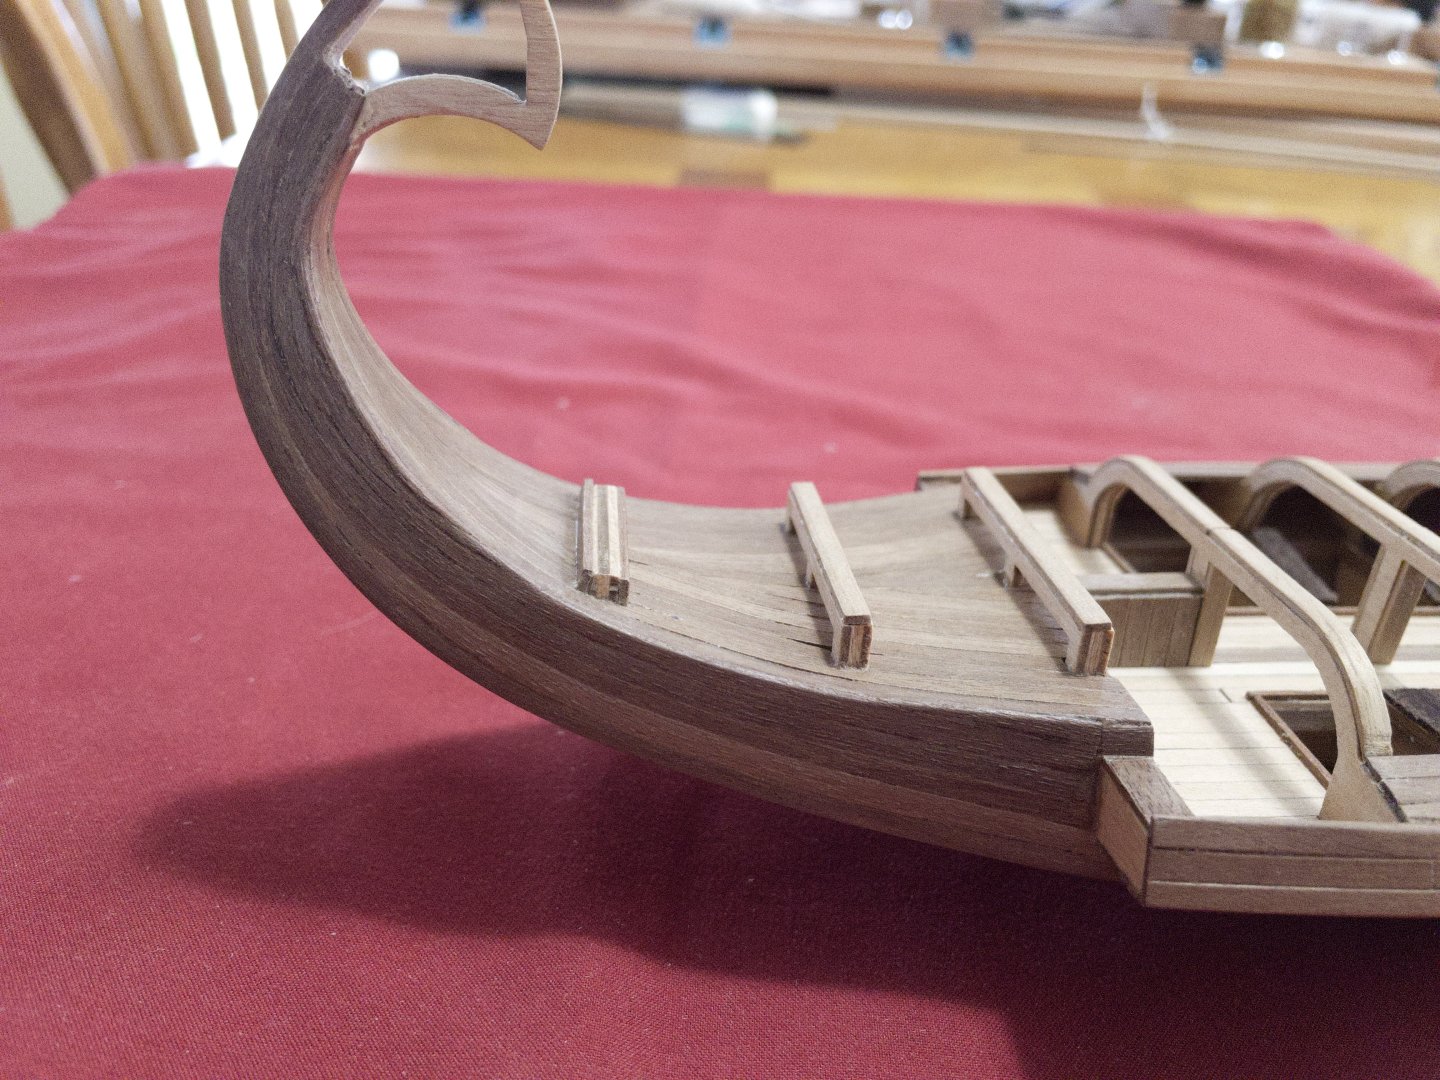
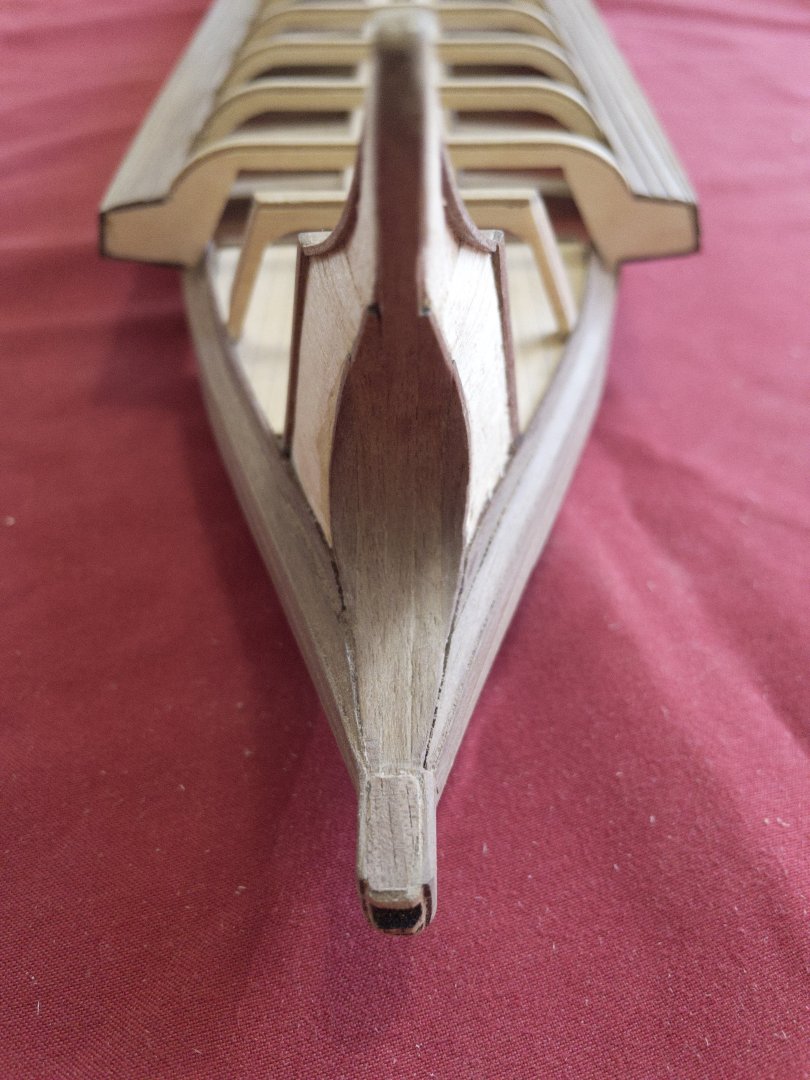
Bow: I finally completed the bow. Added some copper to simulate metal. Very shiny now but will tarnish brown/greenish soon enough. That's pretty much it. CA stain gave me quite some problems here, a reminder to be more careful while planking. Worse to fix than to use sparingly.


-
The caulking is just perfect like this... well done. With the length of time it takes to complete a ship, it often almost irresistible to have a peak at the final result. I time, I even finish a section if I know there is no more work to be done. Fantastic deck, well worth the time. New tools!!! come on... I don't have those, please stop teasing!! Hehe 🤩
-
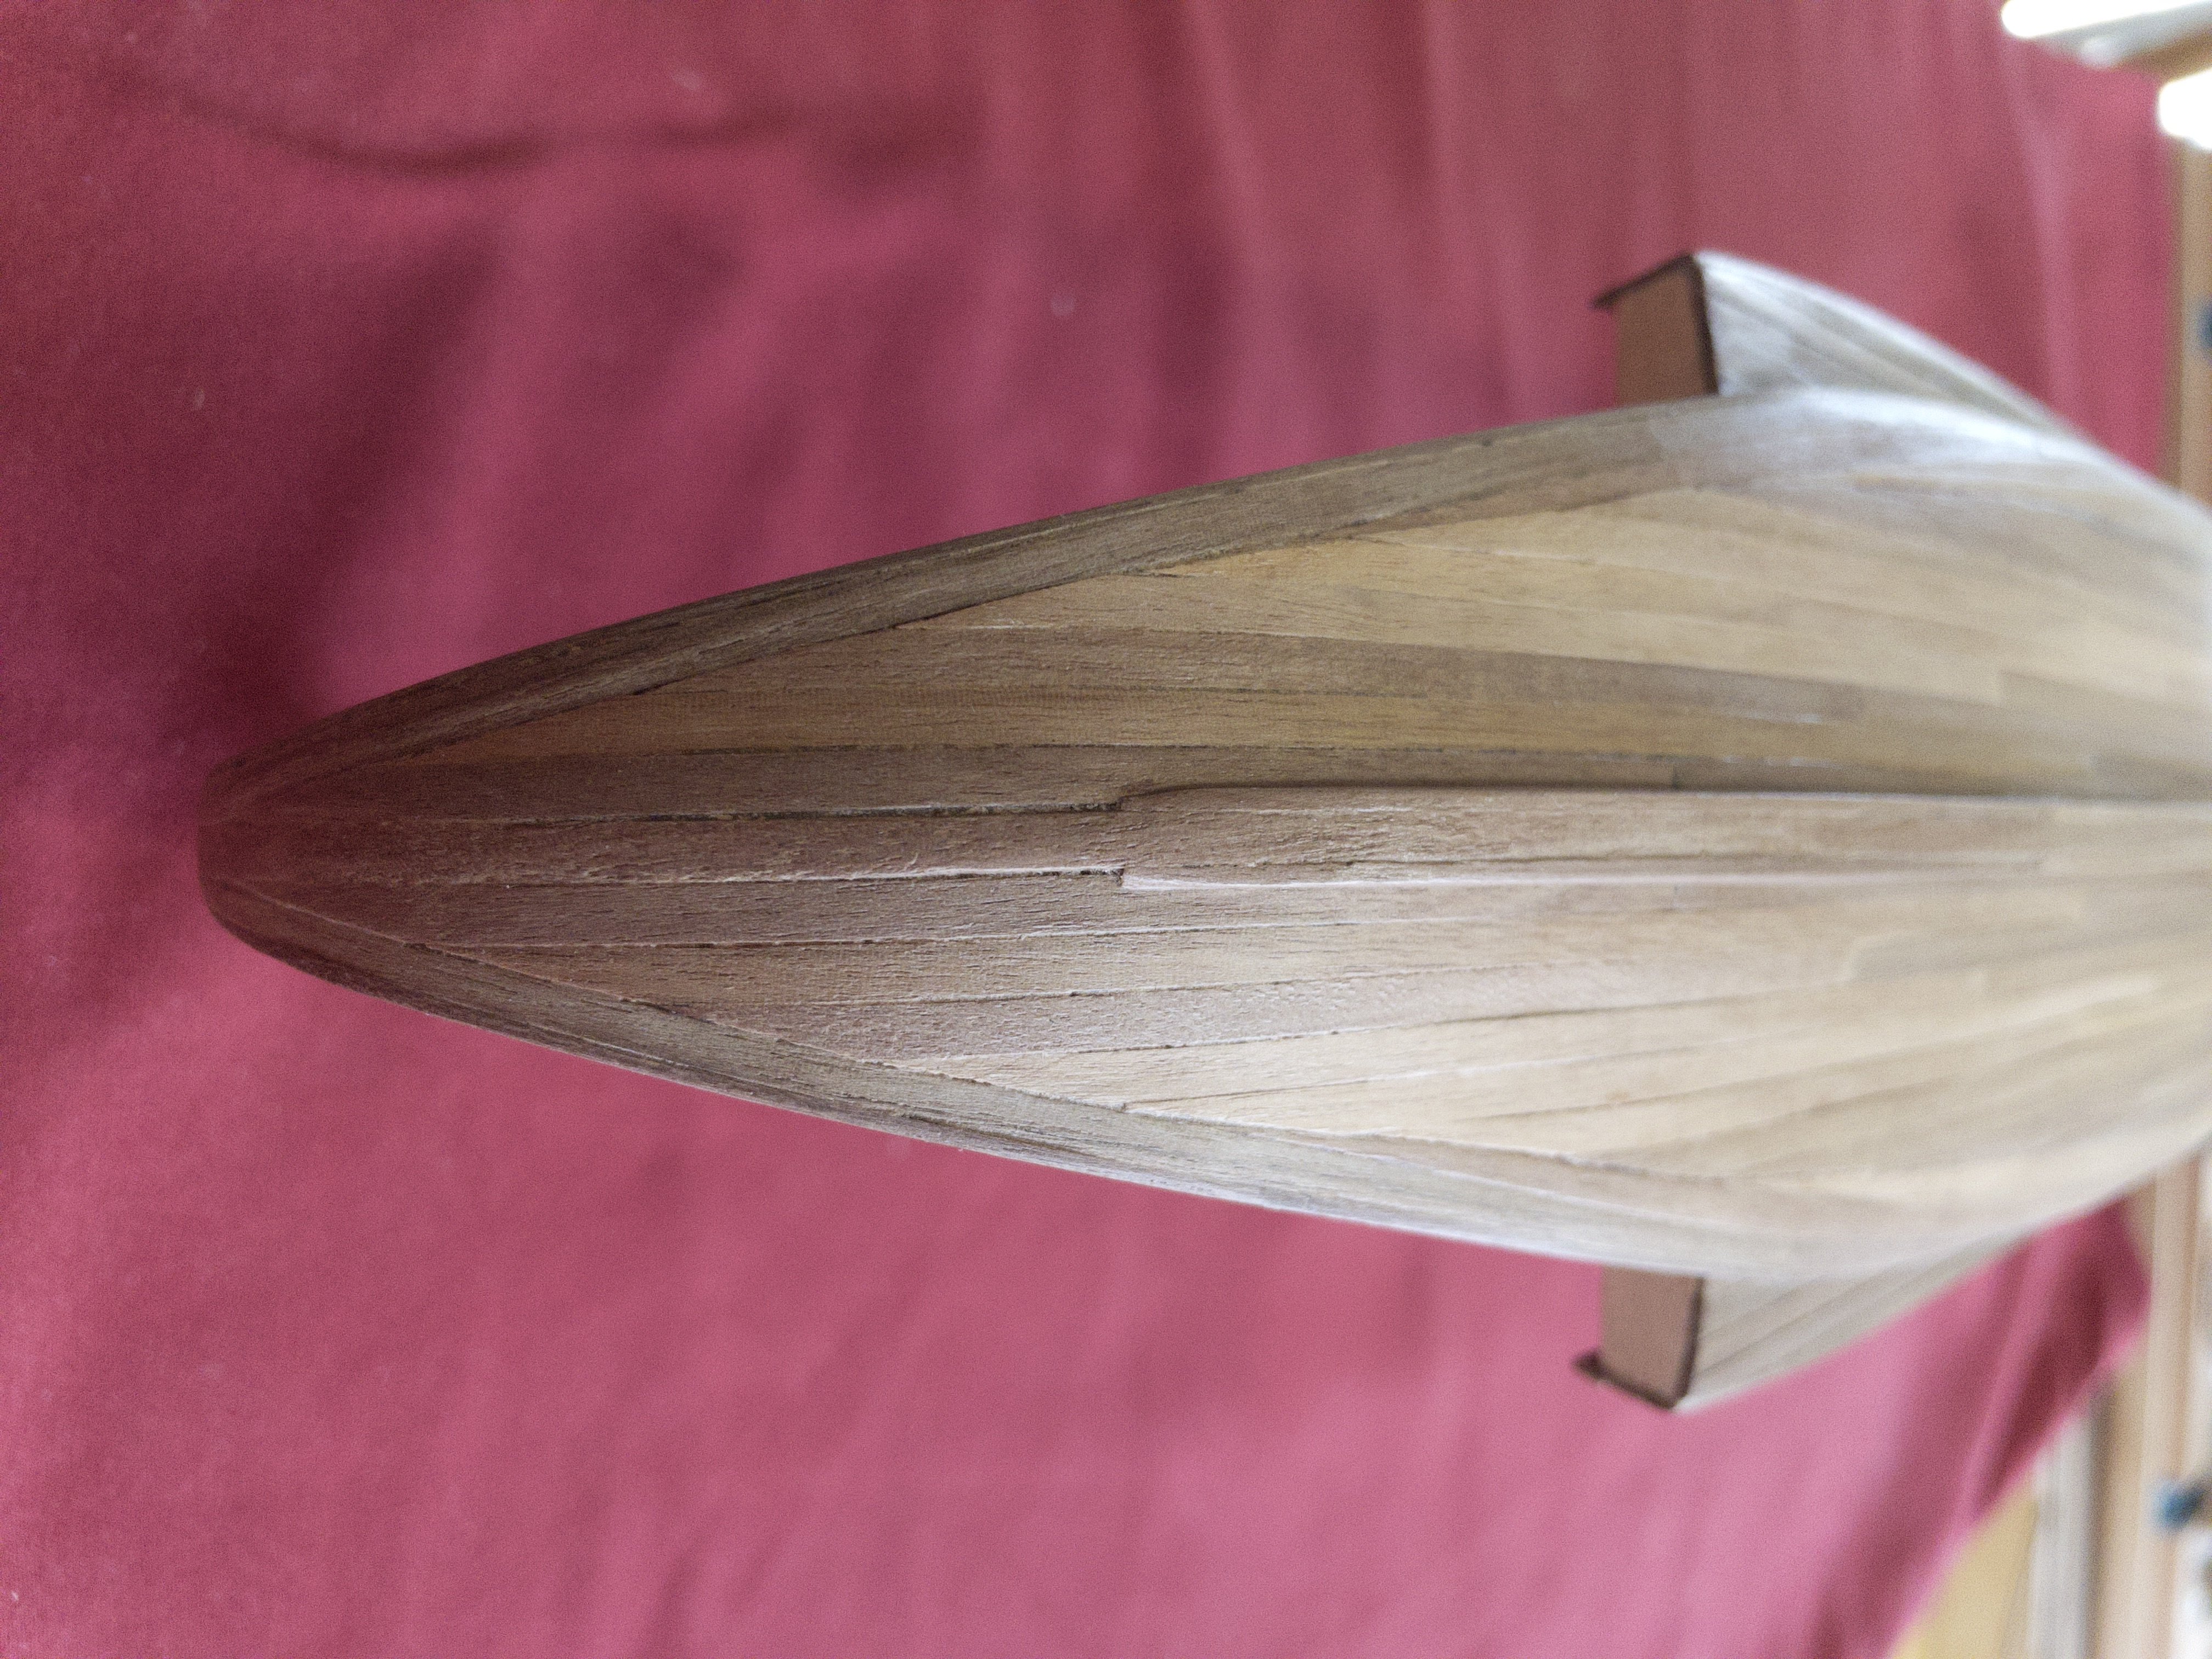
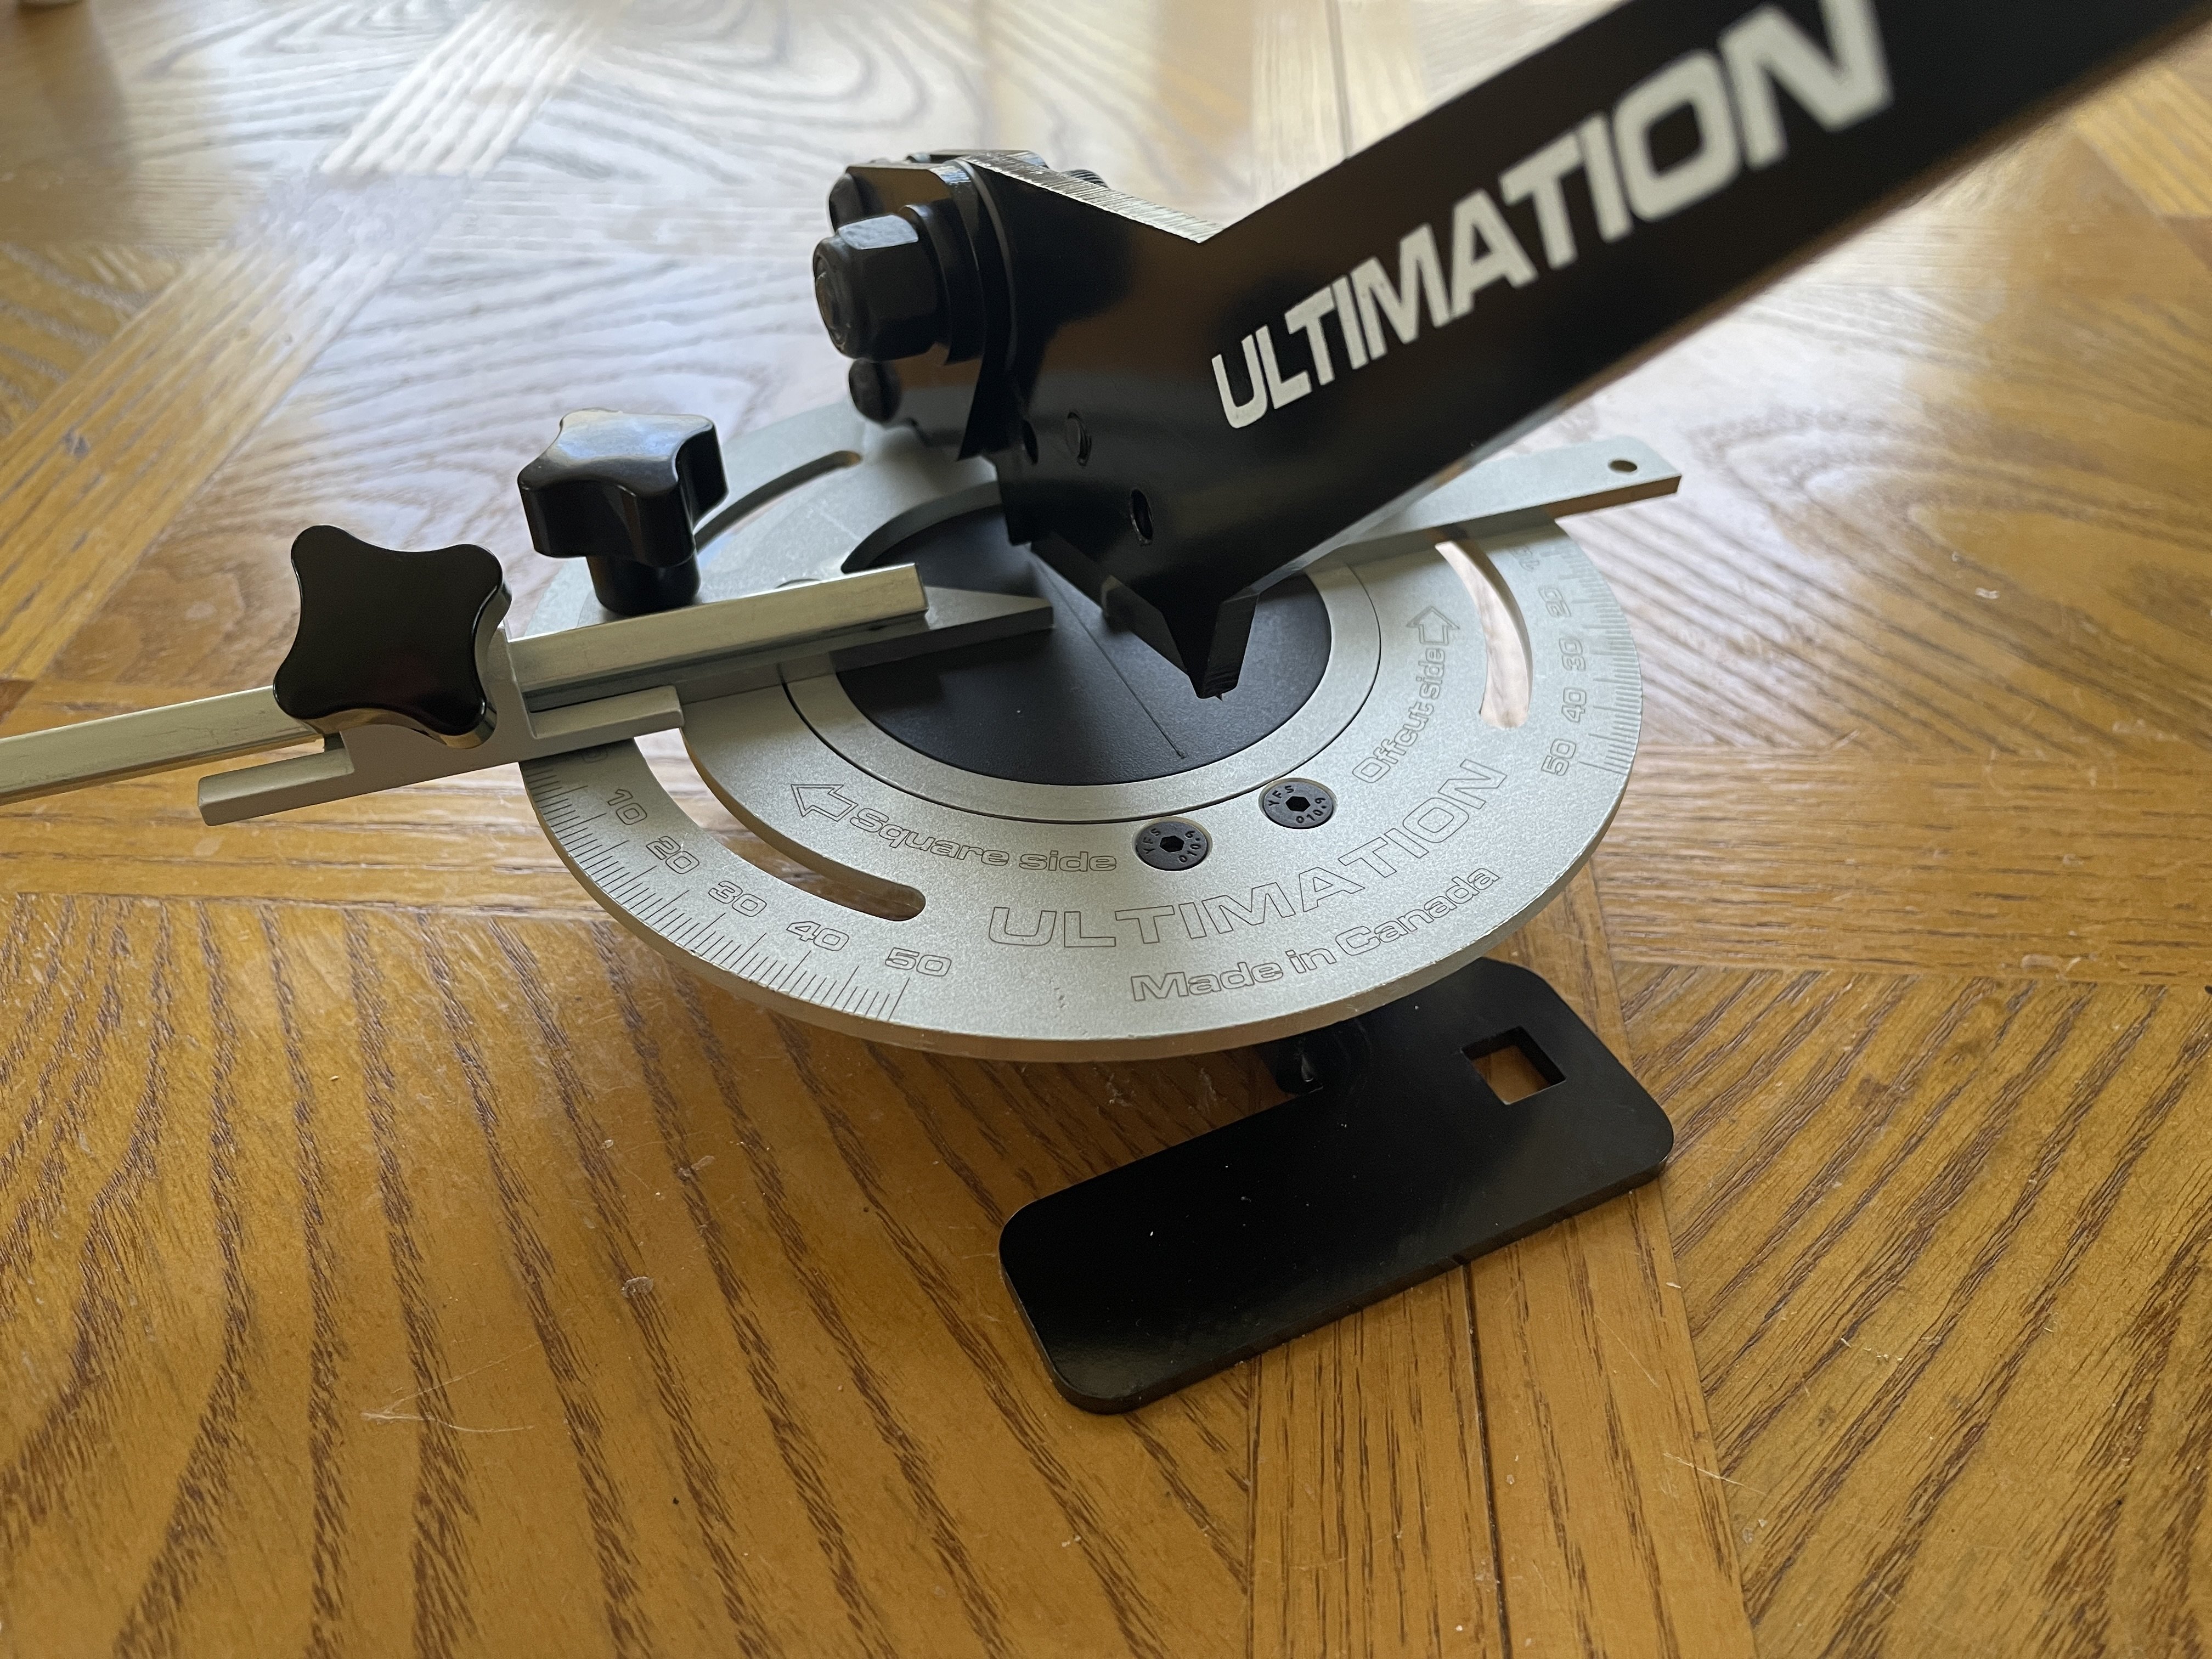
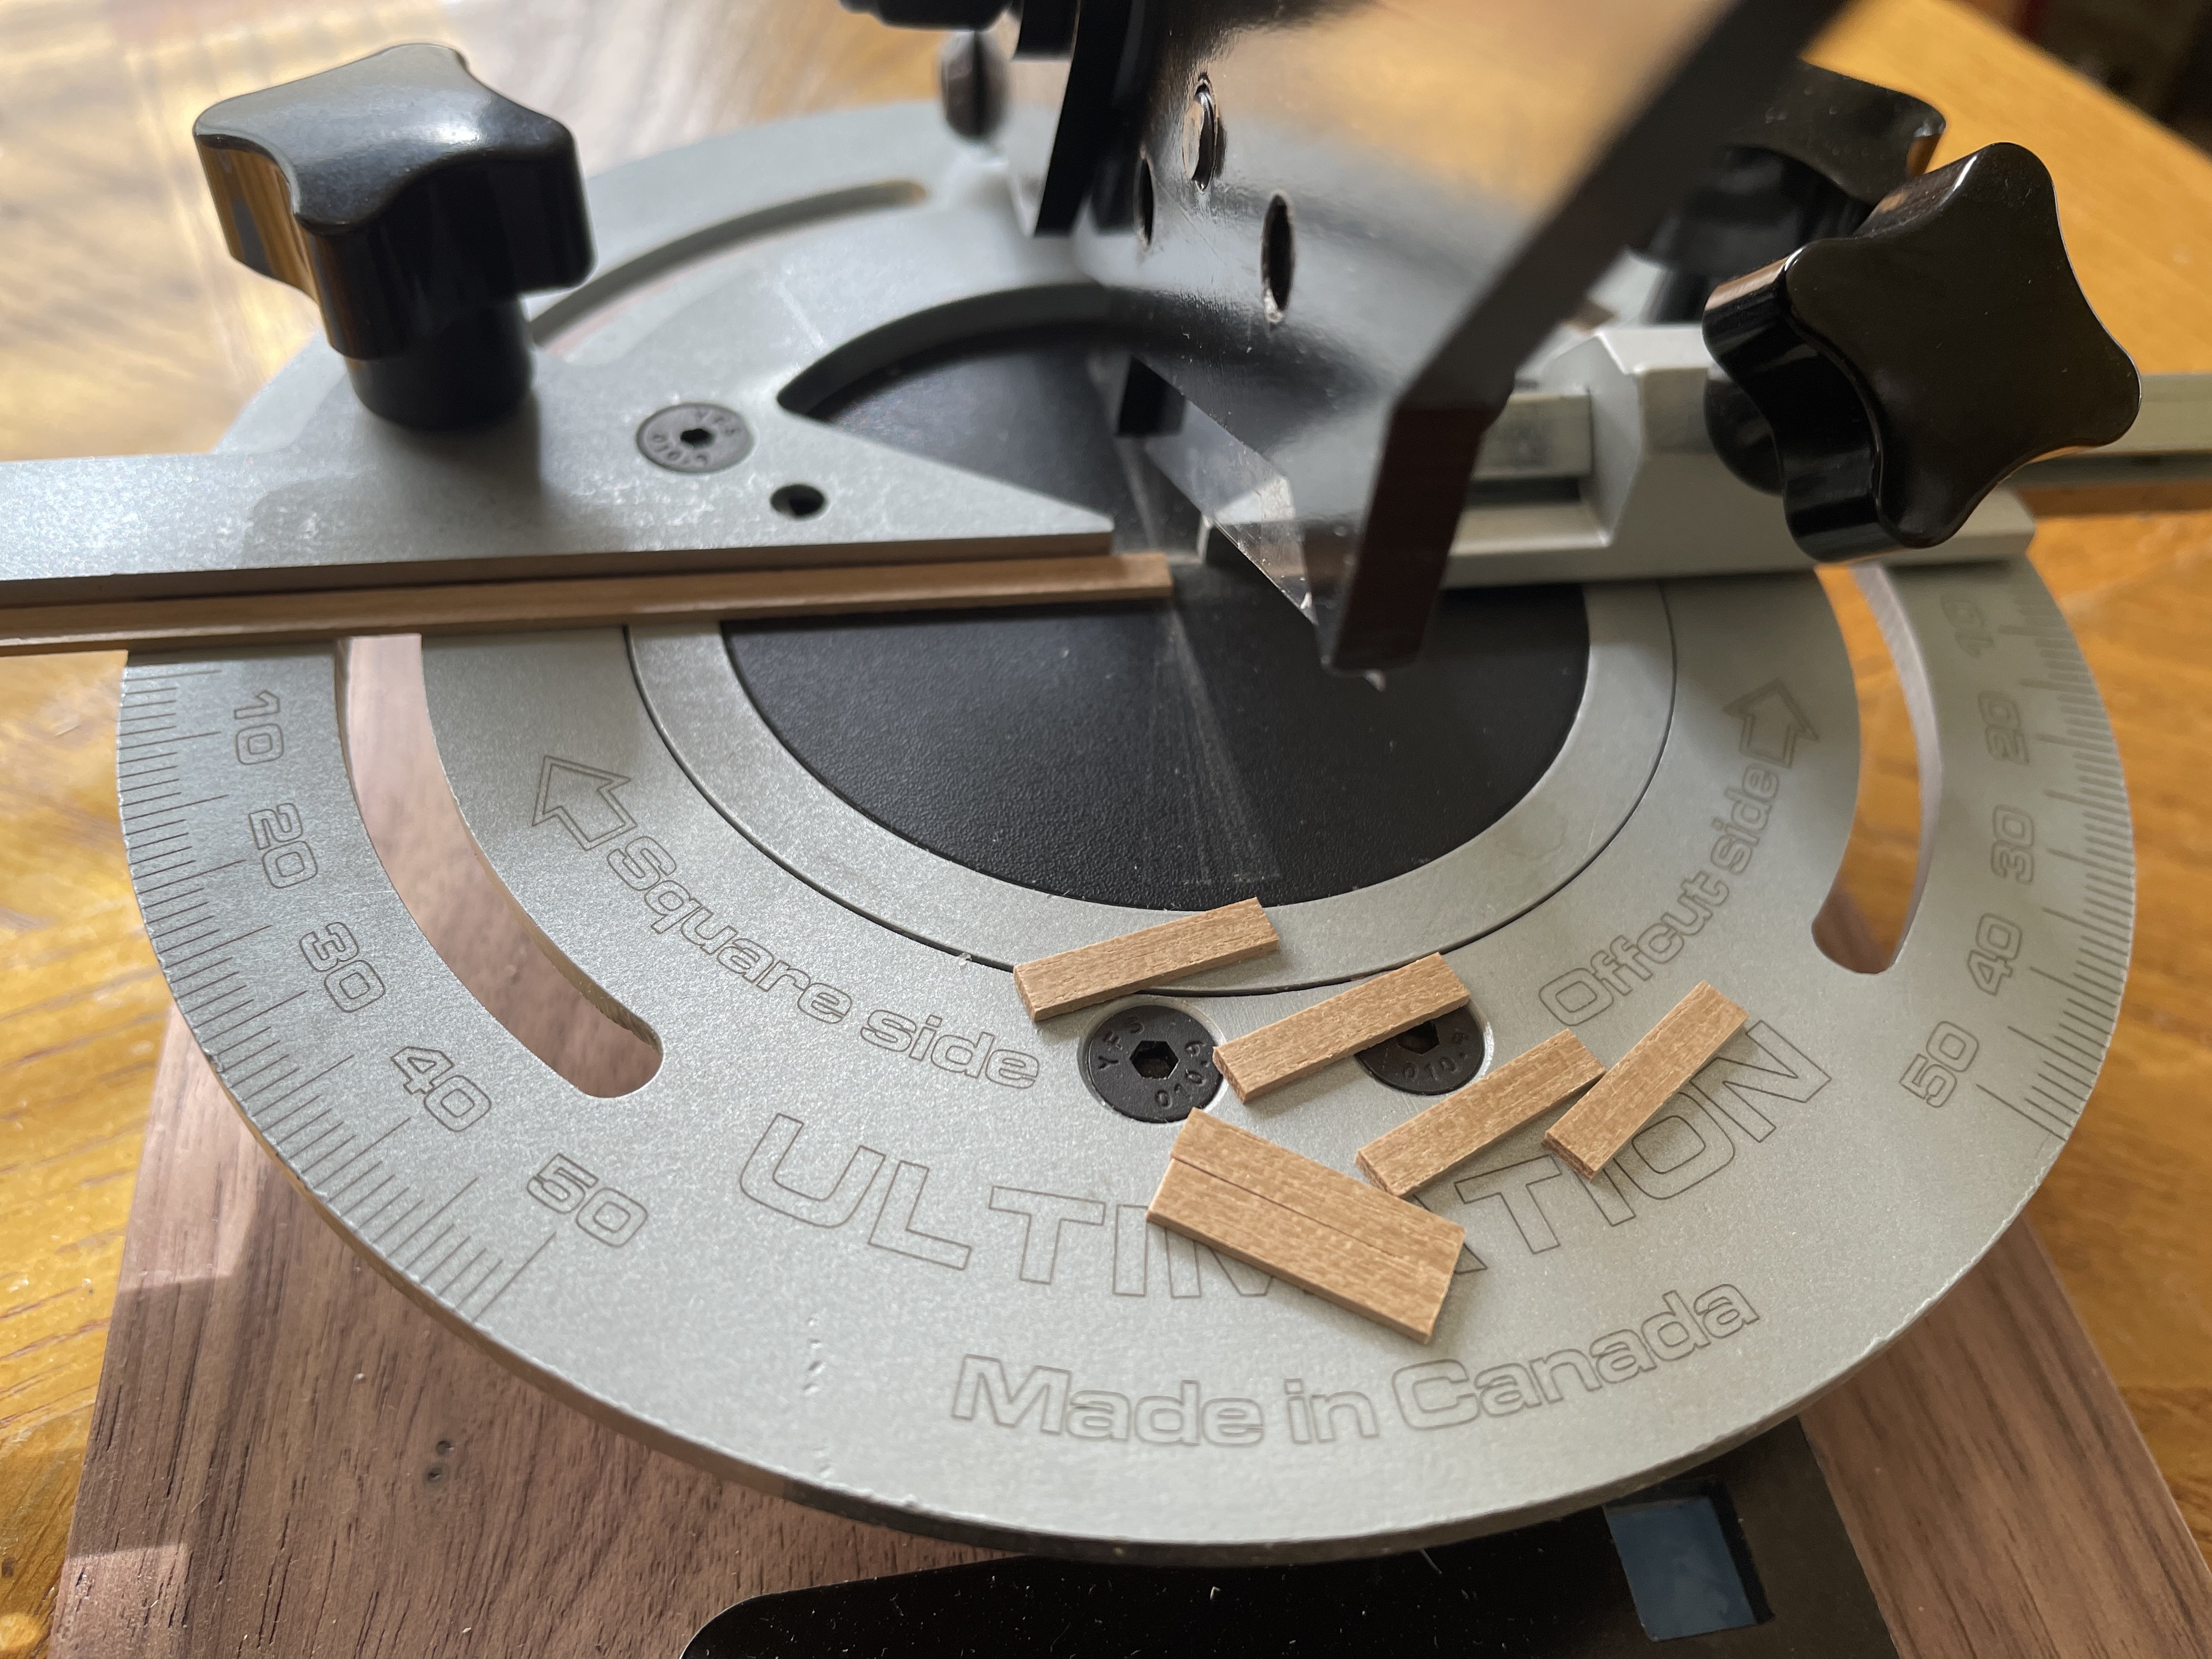
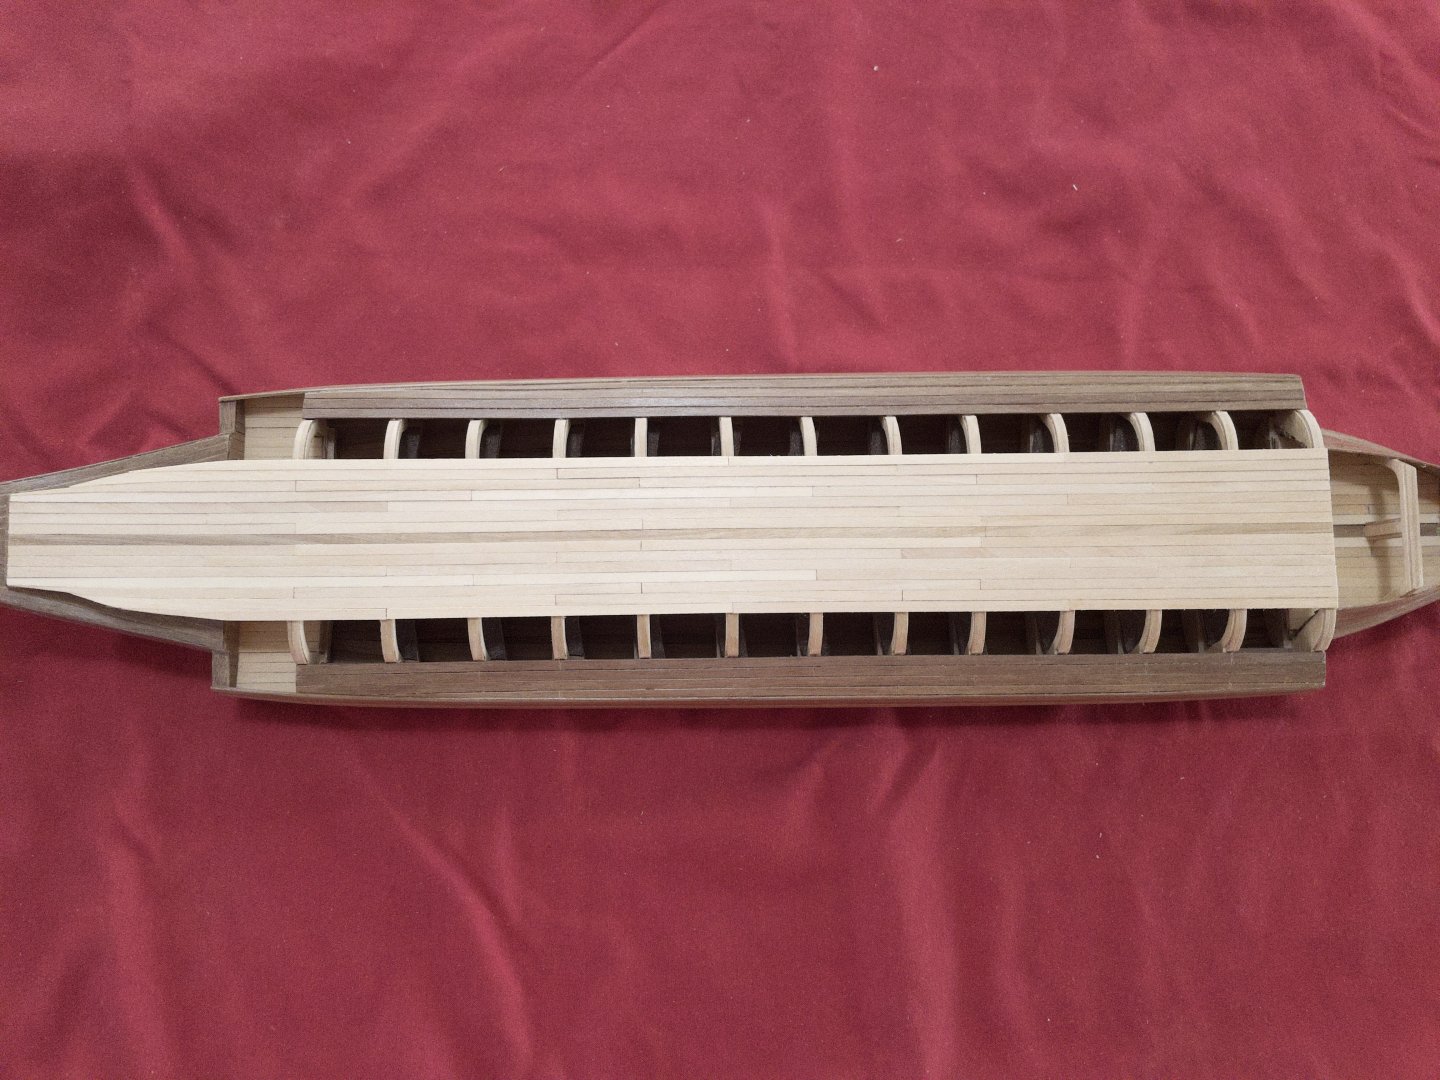
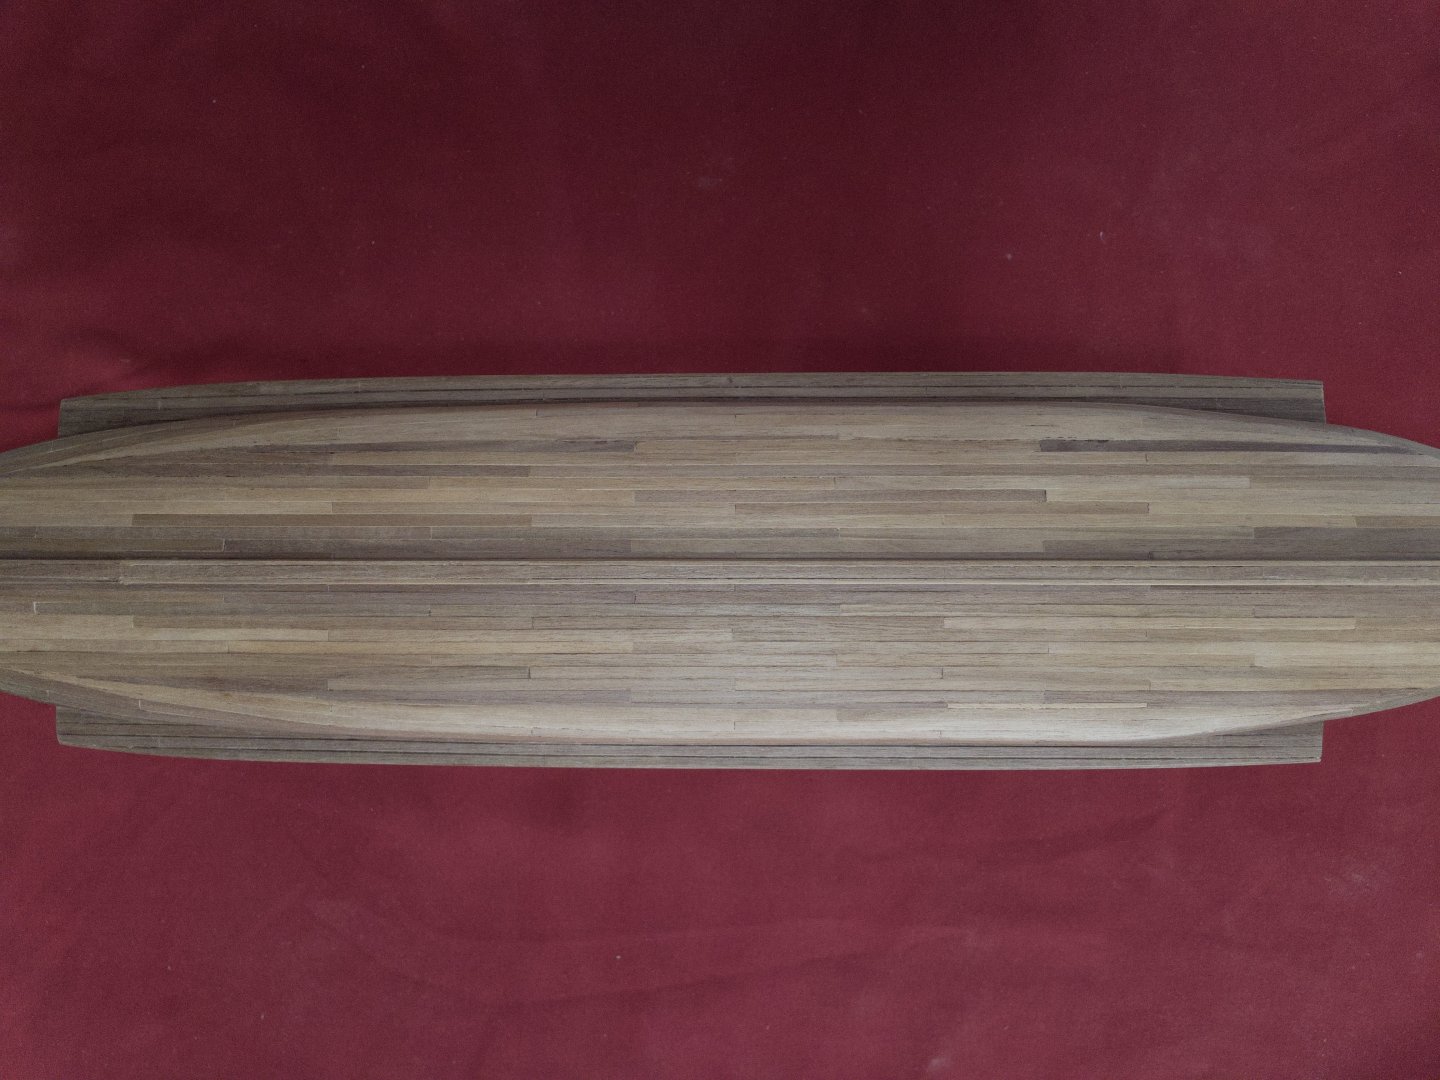
Hull: closing the gap, a little more, done! I really like the mix and match color pattern. A beauty in its own right. Dozens of color variations. This is the advantage of planking at 15-20' length or 10-12 cm/plank. Stern: only a few words can truly summarize the experience: Holy @#$@@ #$#$#@@@!! Special mention: the Ultimation slicer is really worth it. Accurate and reproducible cuts. The blade is so sharp... and stays sharp. I'm really liking it. For me, it was worth the price if you are planning on multiple ships. Who among us is not!


-
I thought that this build (a planned gift to my father) would be a quick but interesting one. Still quite fun to do BUT it is indeed nothing close to a quick build. If you are not careful the nice lines can turn awful very fast. It is indeed a tricky planking exercise, with the drawback that you have virtually no documentation or any guides from the kit itself. Not much repetition... it always keeps you on your toes. A lot of planks spilling, curving (with and again the grains) and shaping.
-
Seats: reading about the greek bireme and trireme, I noted a mention that the seats were likely covered with leather to minimize blisters. That makes sense to me and went ahead and added small leather patches to the interior seats. Stern: side curving of 3mm strips only brings you so far. As you plank inwards the curvature increases and there is no way to keep up. I had to come up with a plan B. I started spilling the planks. Being smaller in width, it can be curved more aggressively. General planking: The difficulty of this build is the sharp edges in many areas. In other words, how to get clean results at the junction. To address this, I always start a new area by "framing" it. Then you have a guide for the remainder.

-
a thousand thanks @Ronald-V, I greatly appreciate the extra time you took to put together this great tutorial. It is of great help and illustrate very well the process. Having seen the results in your blog motivate me to move forward. A great skill to acquire. Fantastic how-to outline, very clear.
-
very nice... I love the look of it. It all worth the stress of the redo. In fact, I like it so much that I want to incorporate the technique is my next build. Question: In practice, how do you carve the donor and receiving strips, so that it aligns so well at the join. Just want to learn from the expert ;_)
-
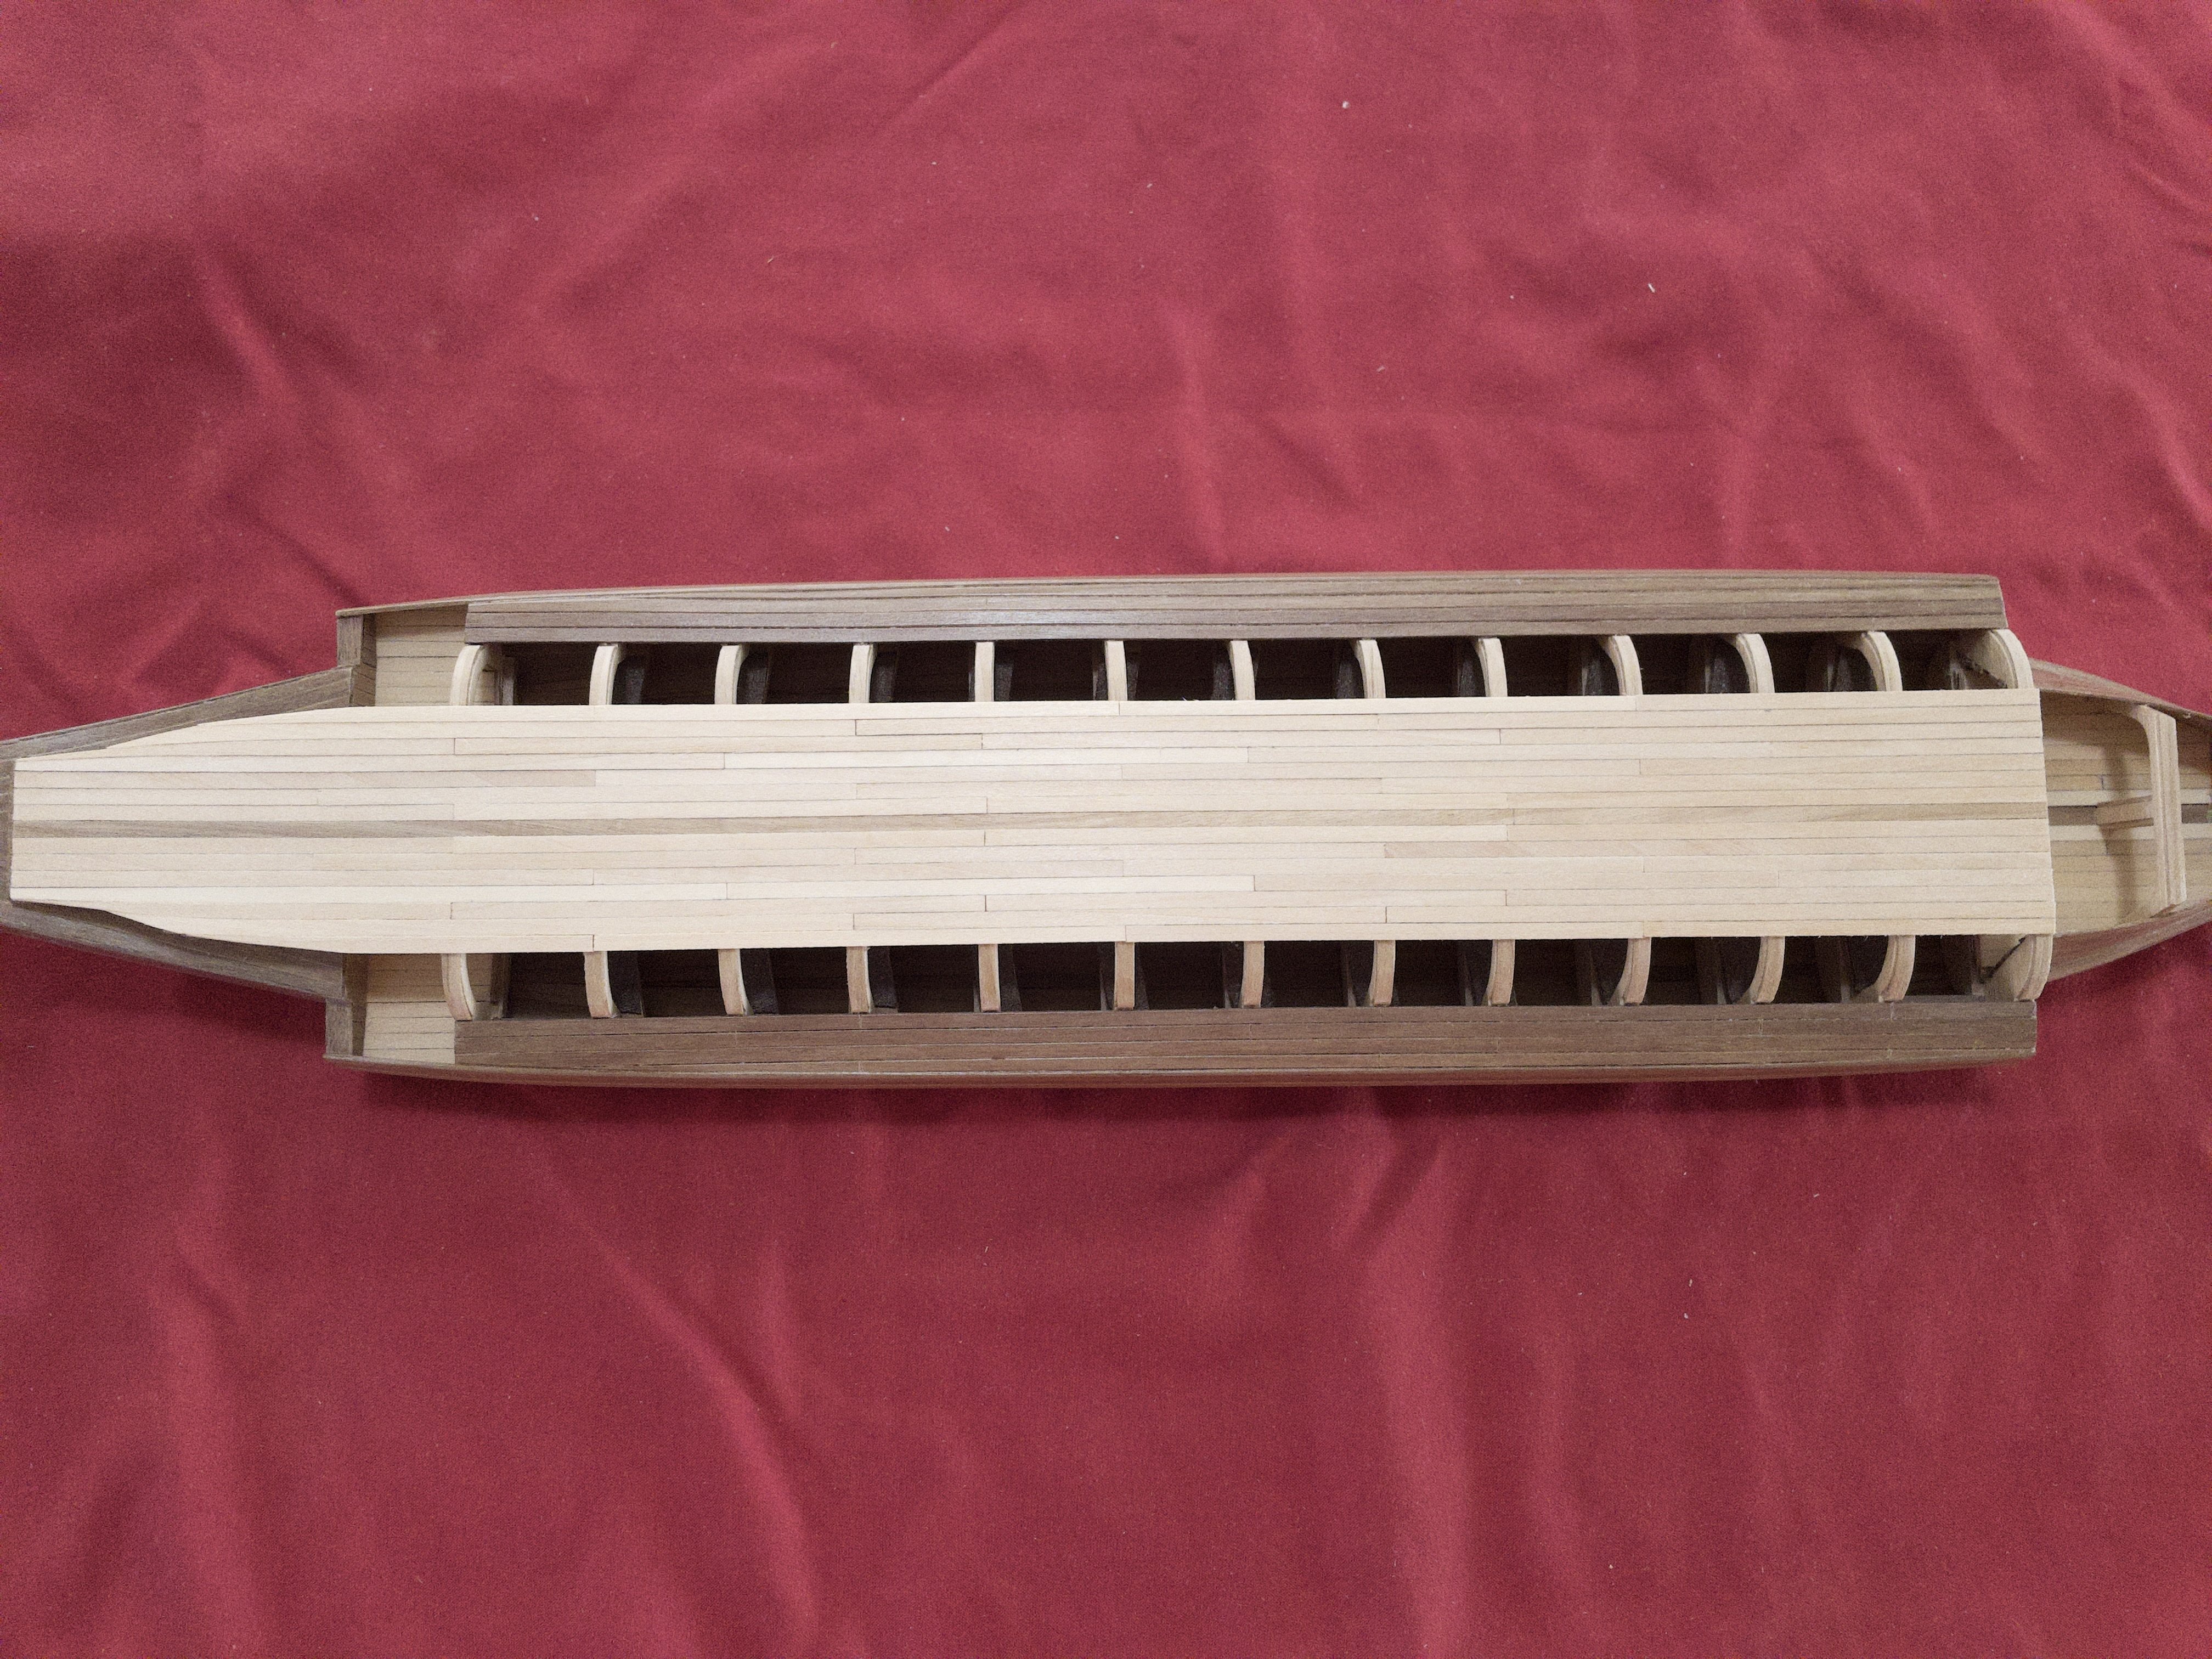
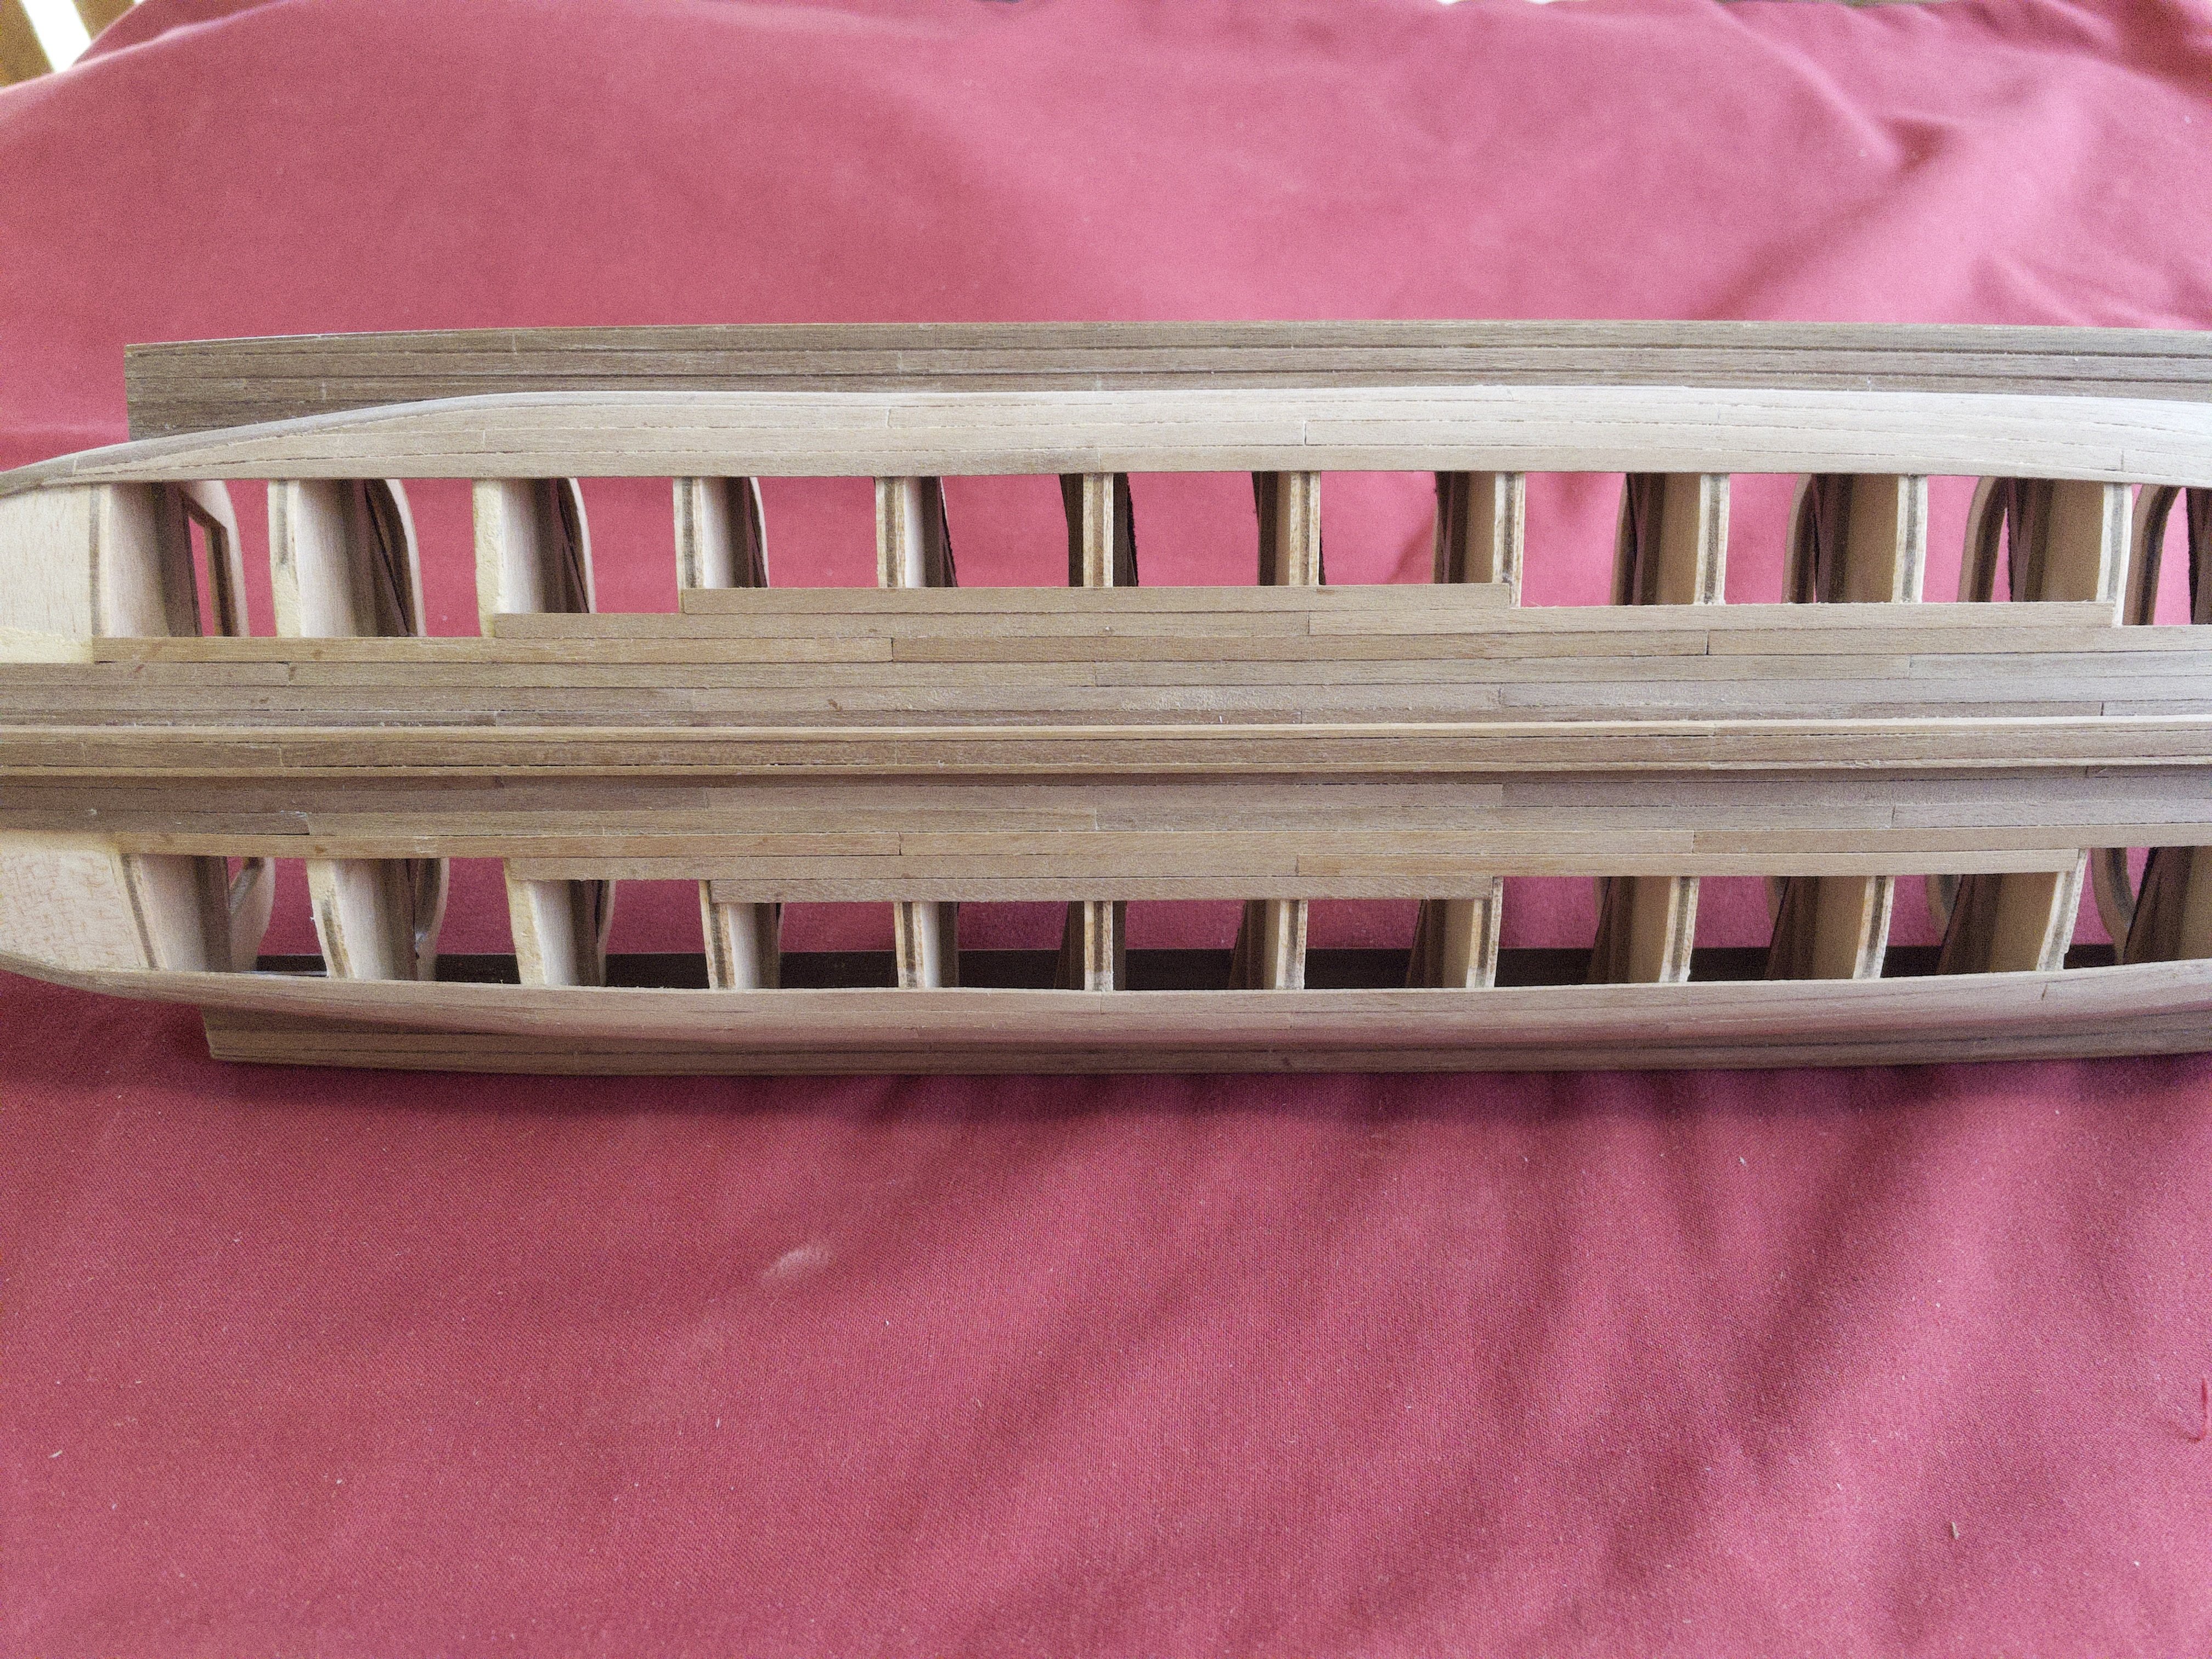
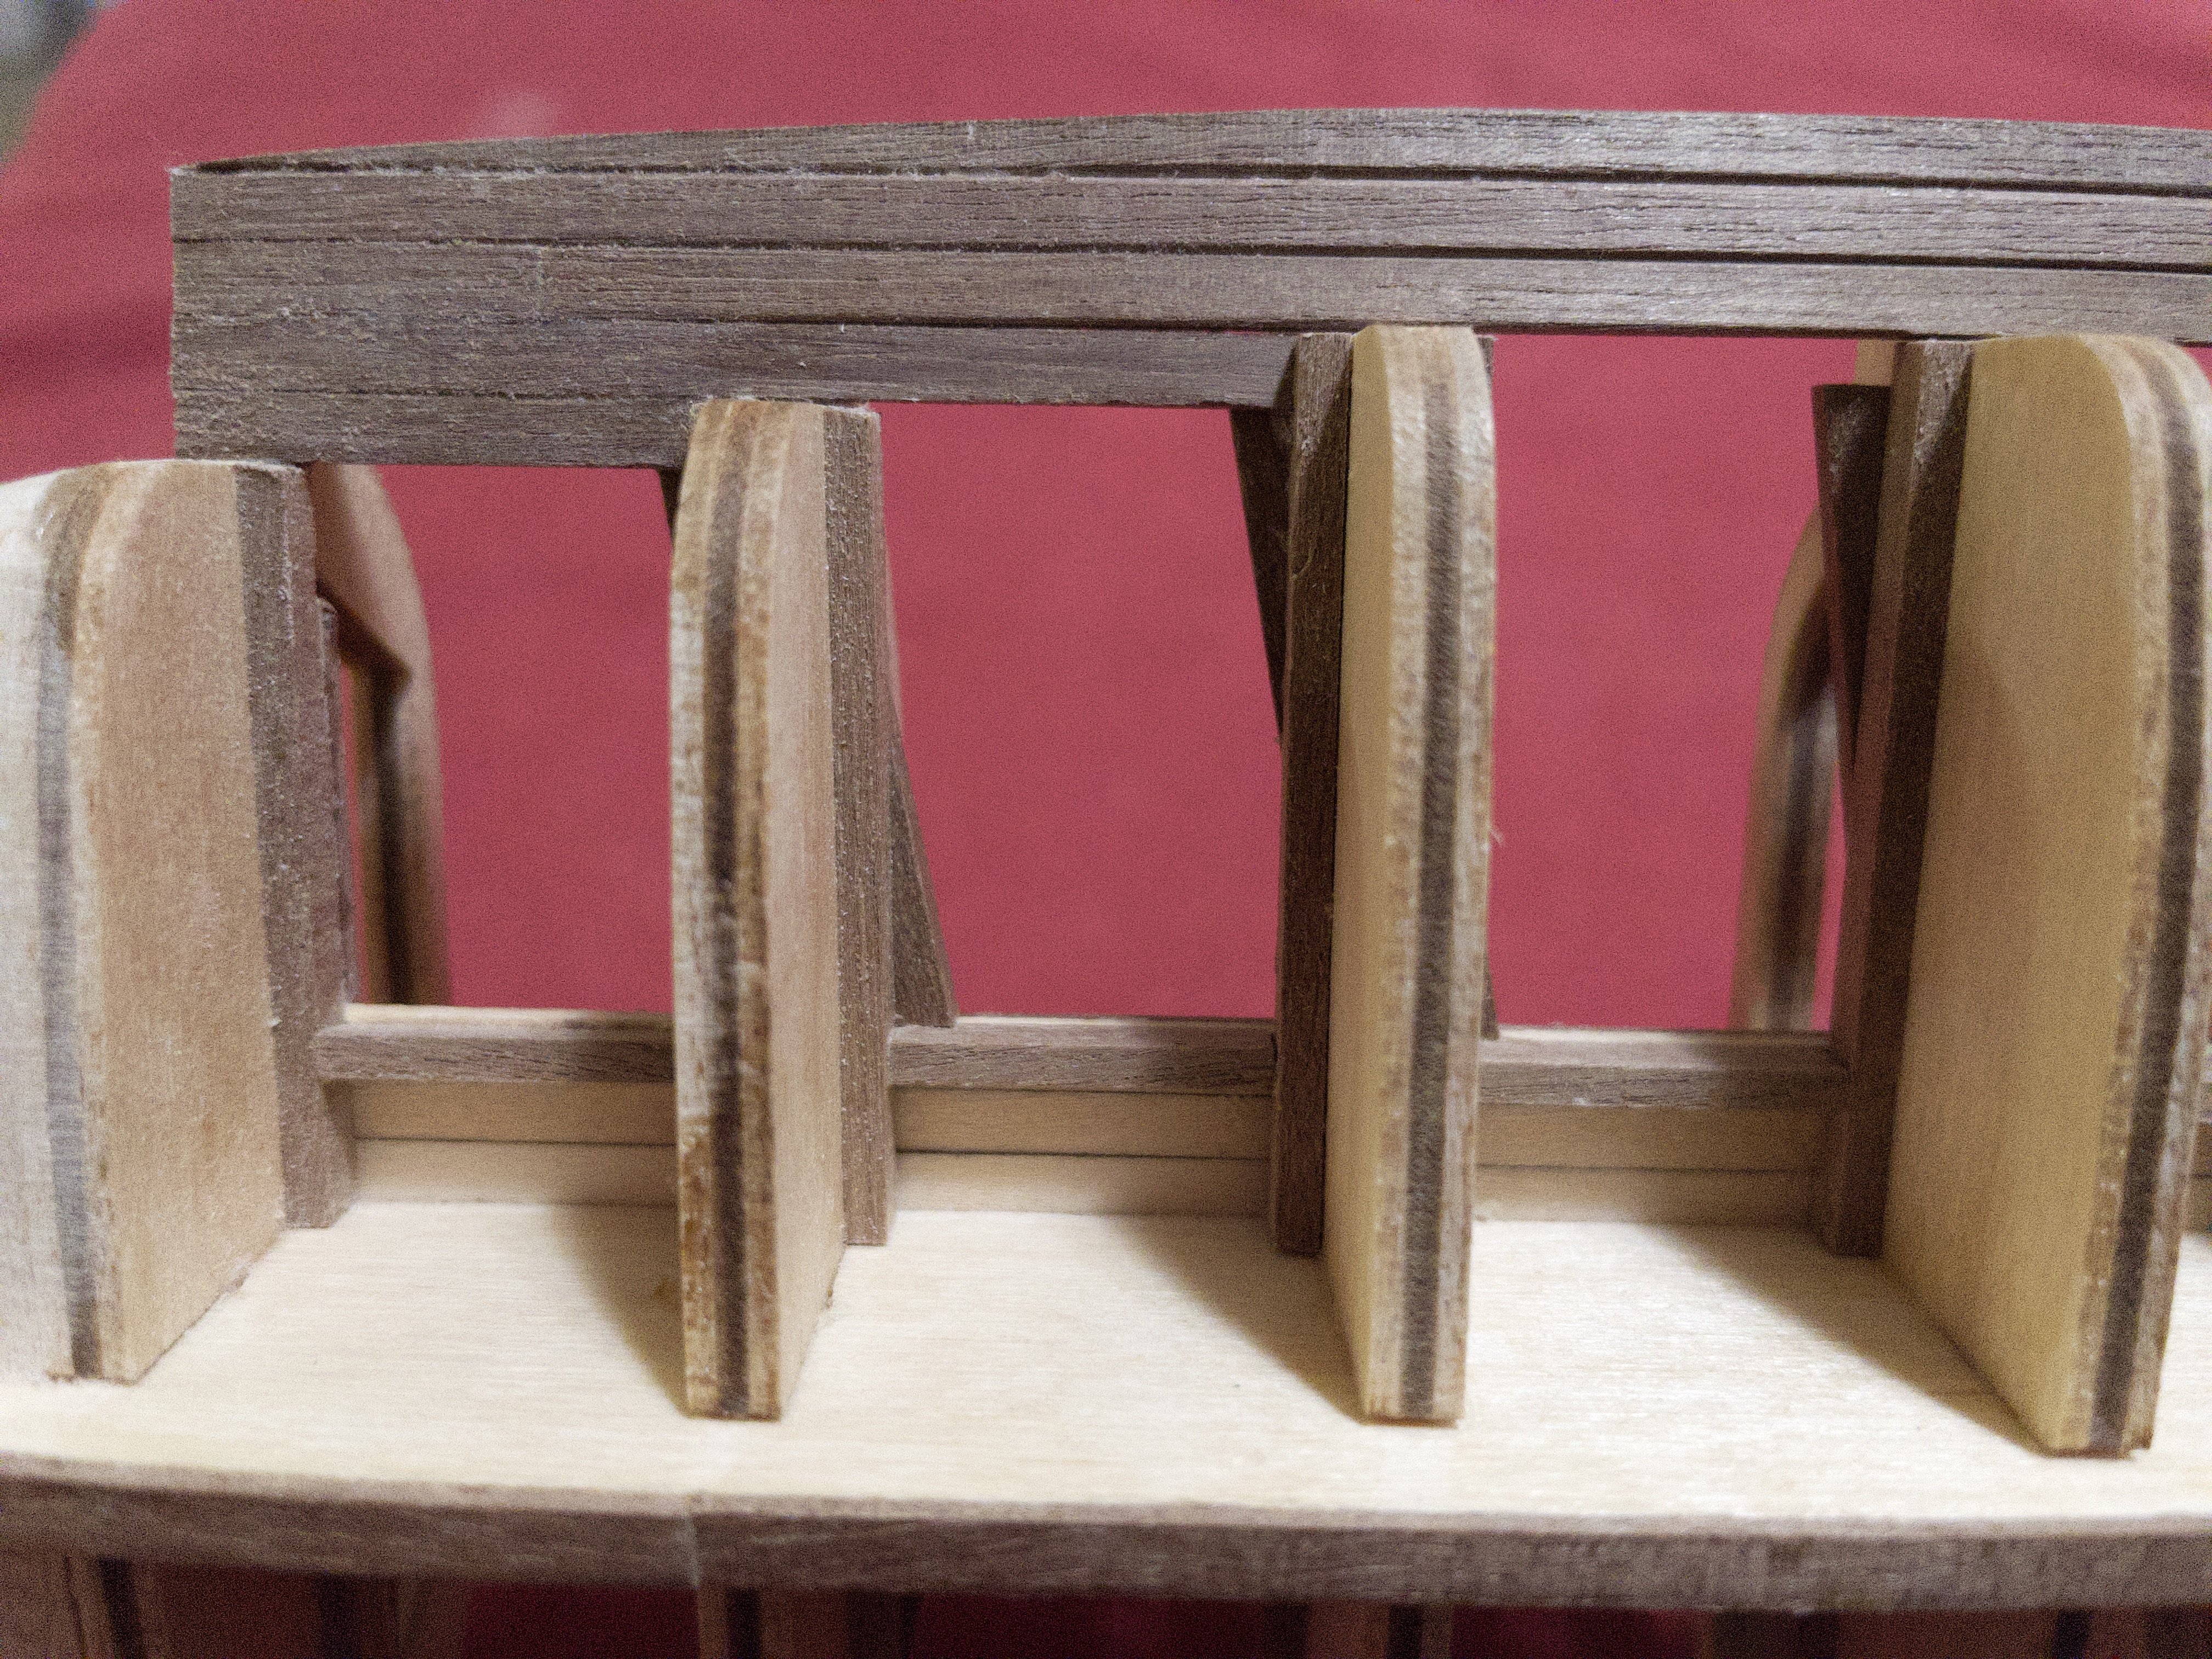
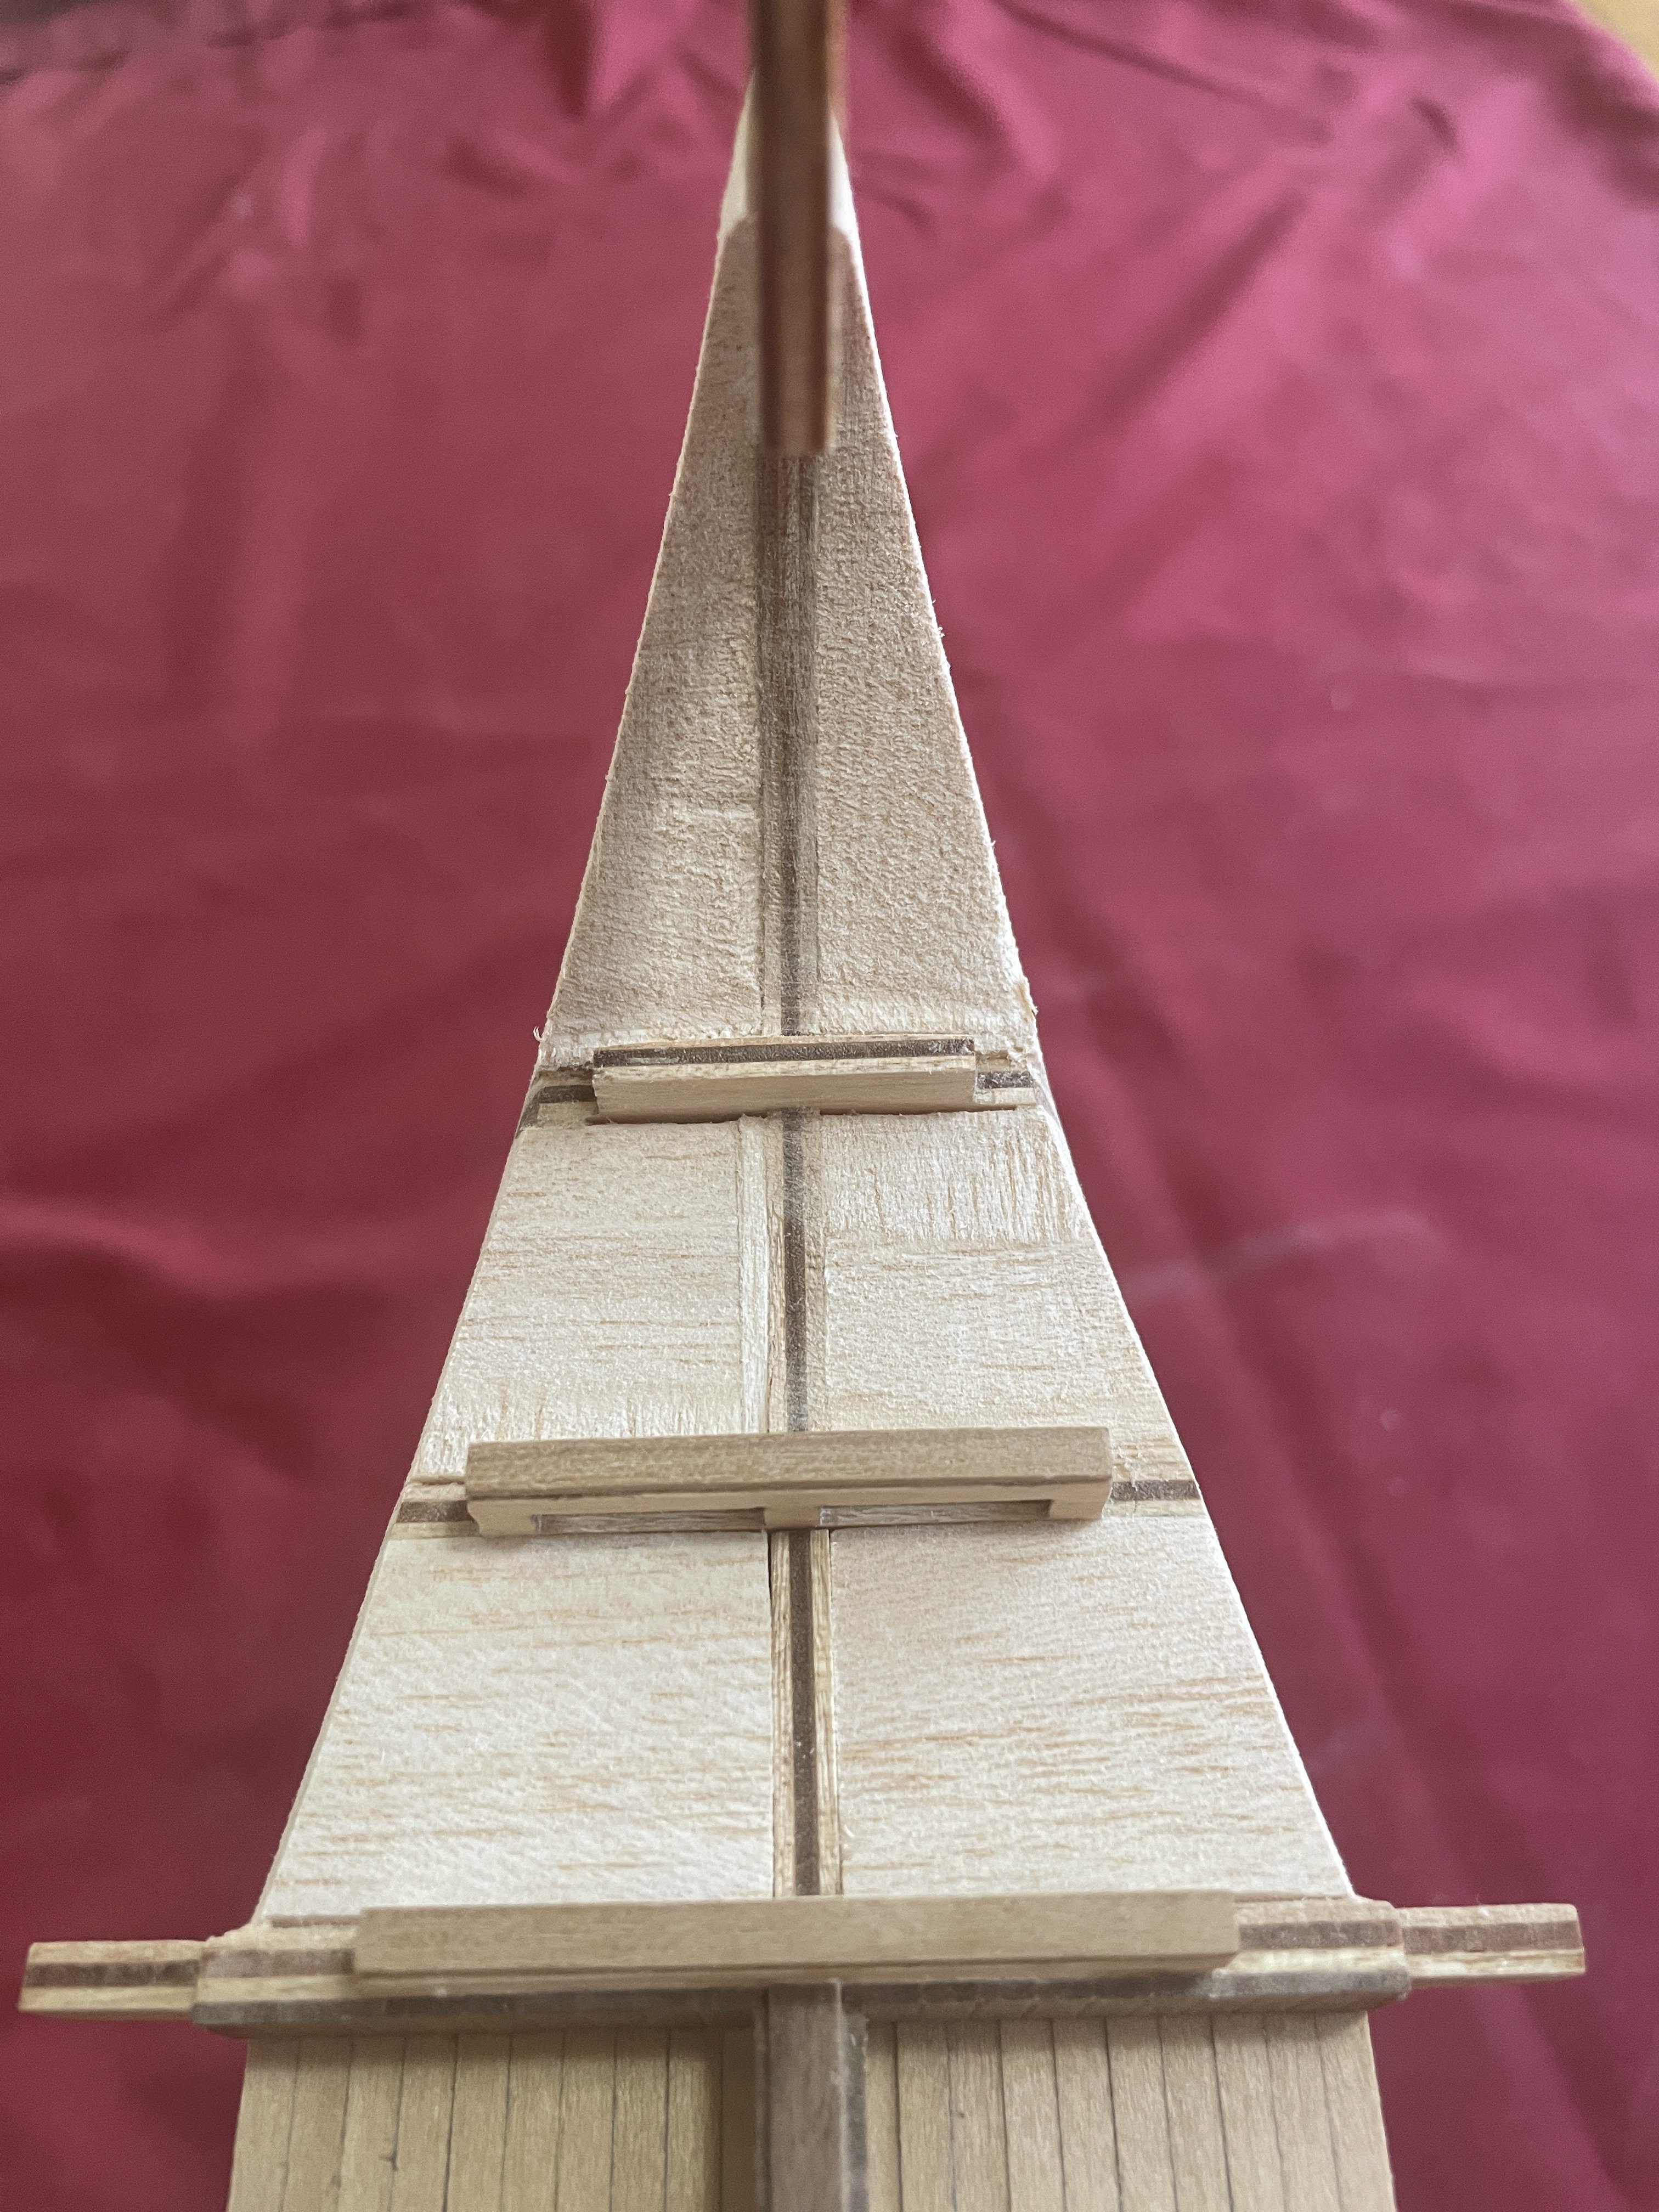
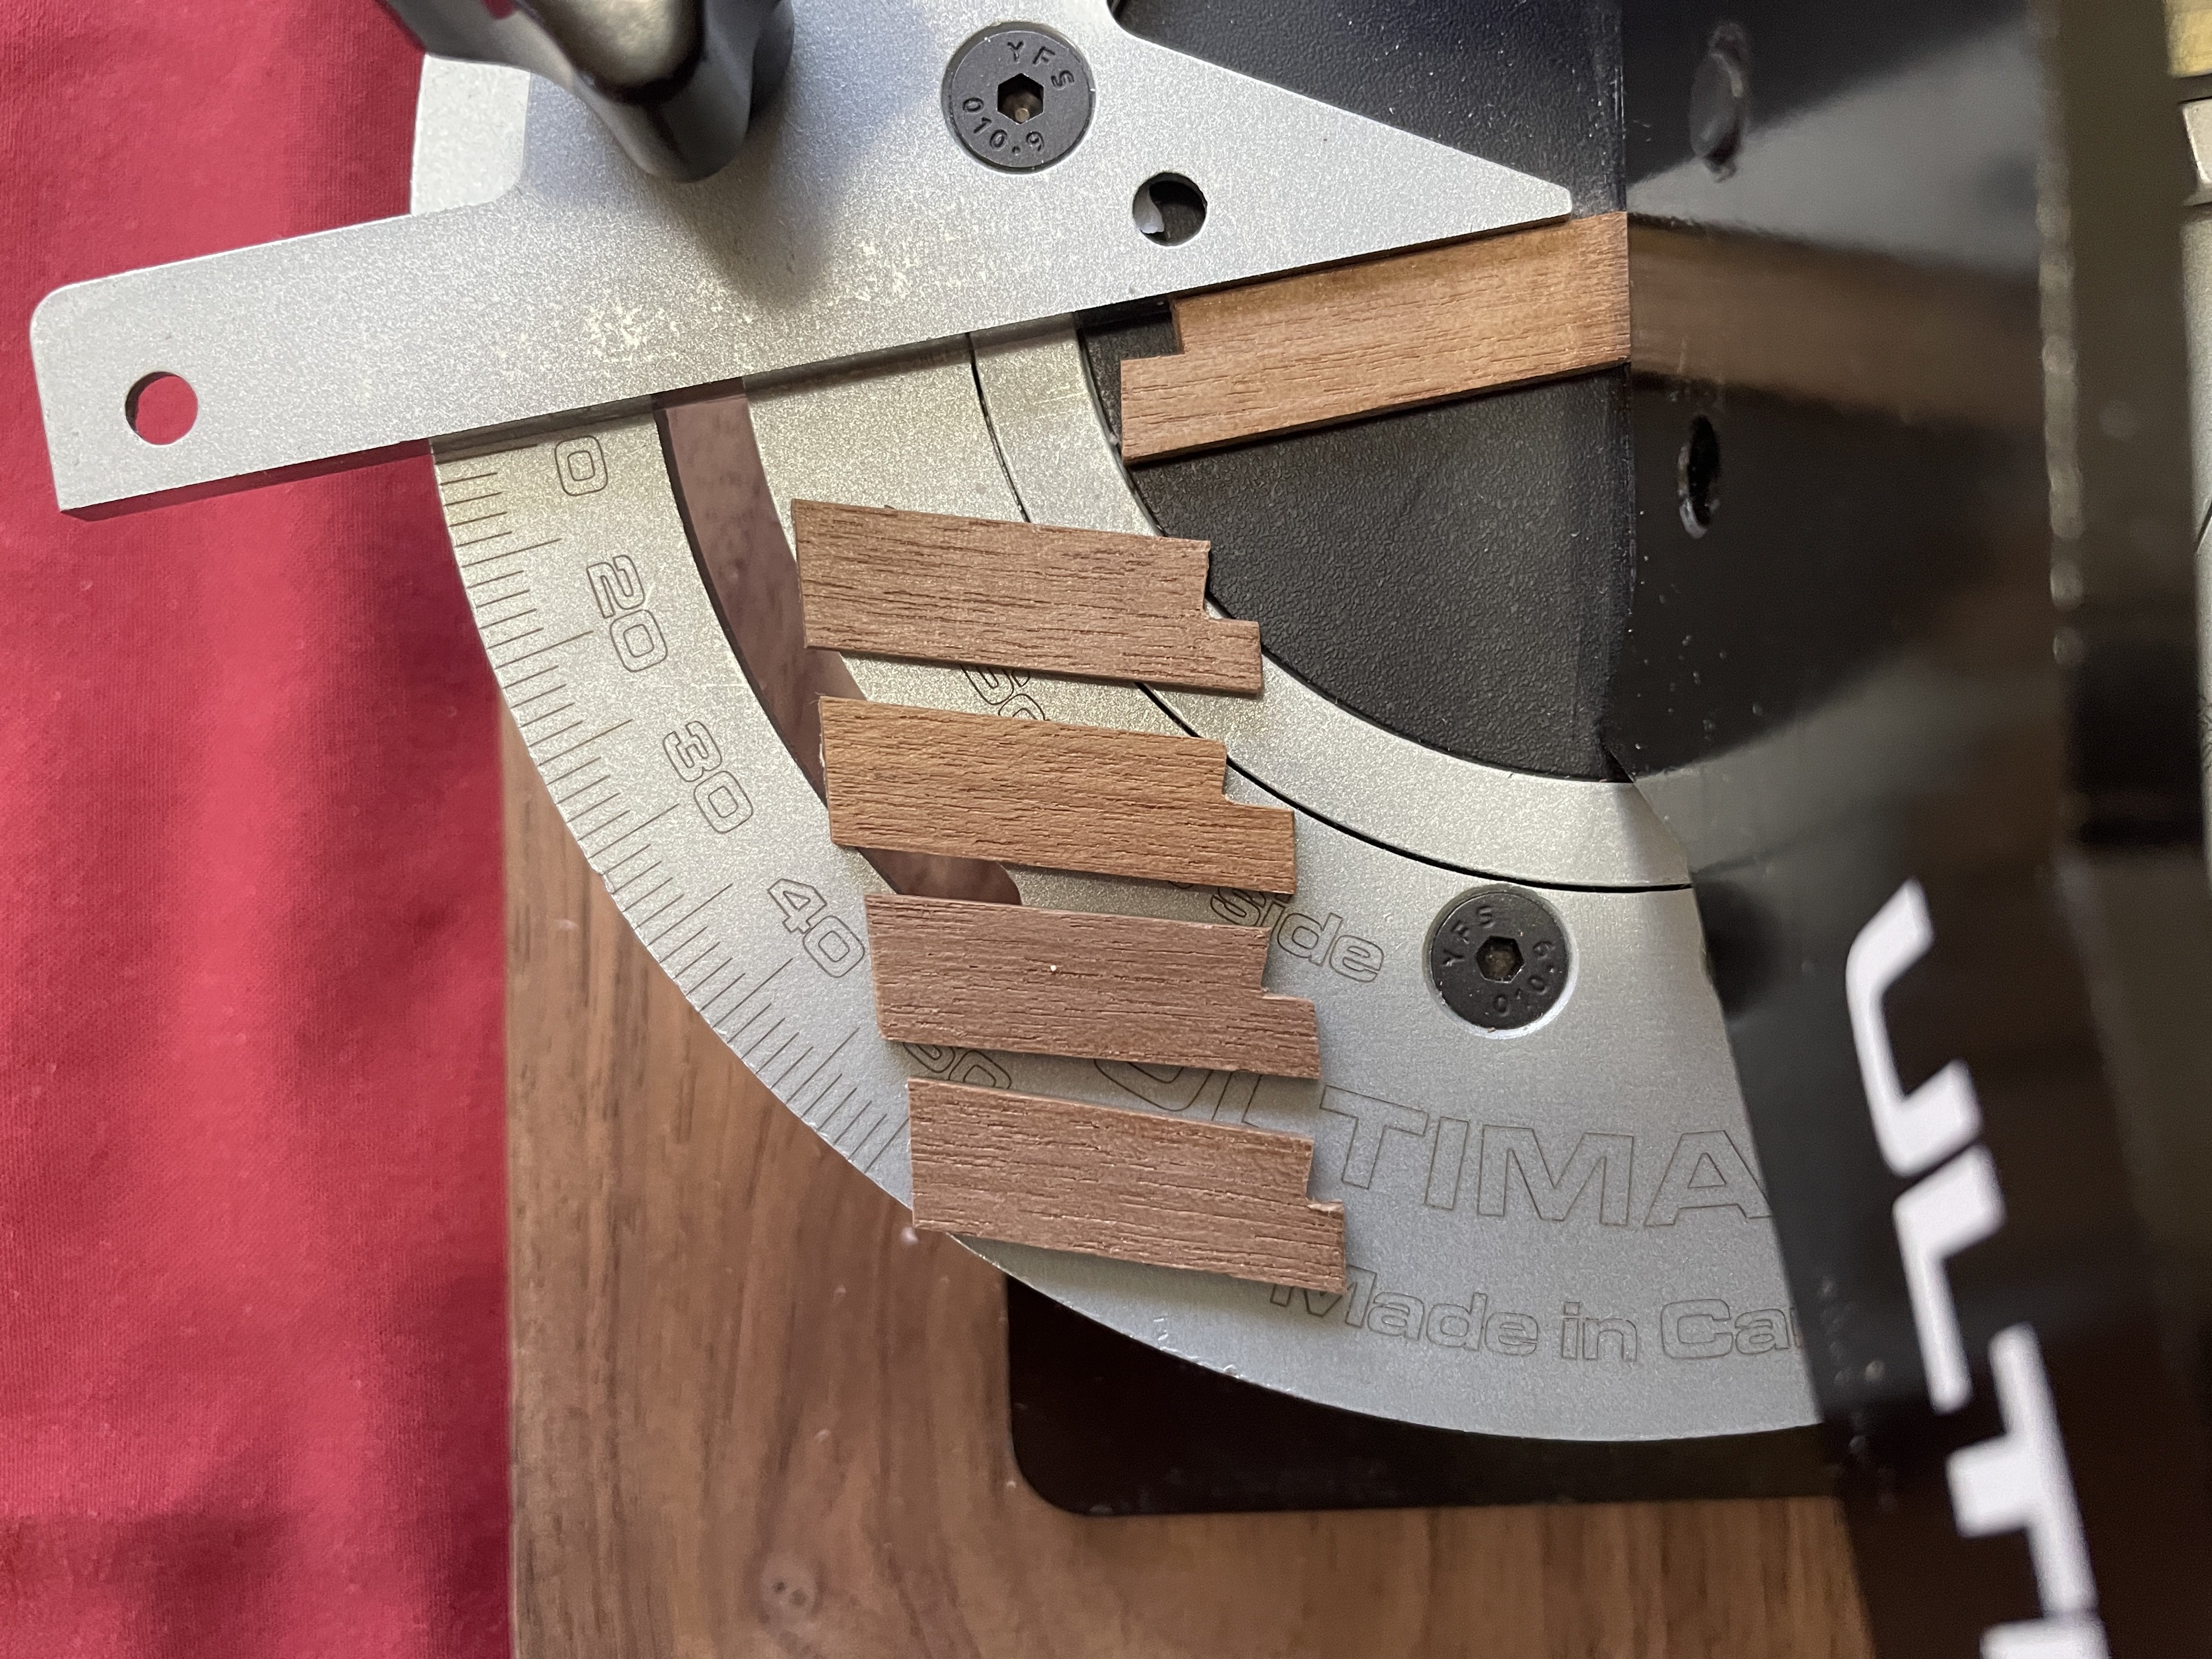
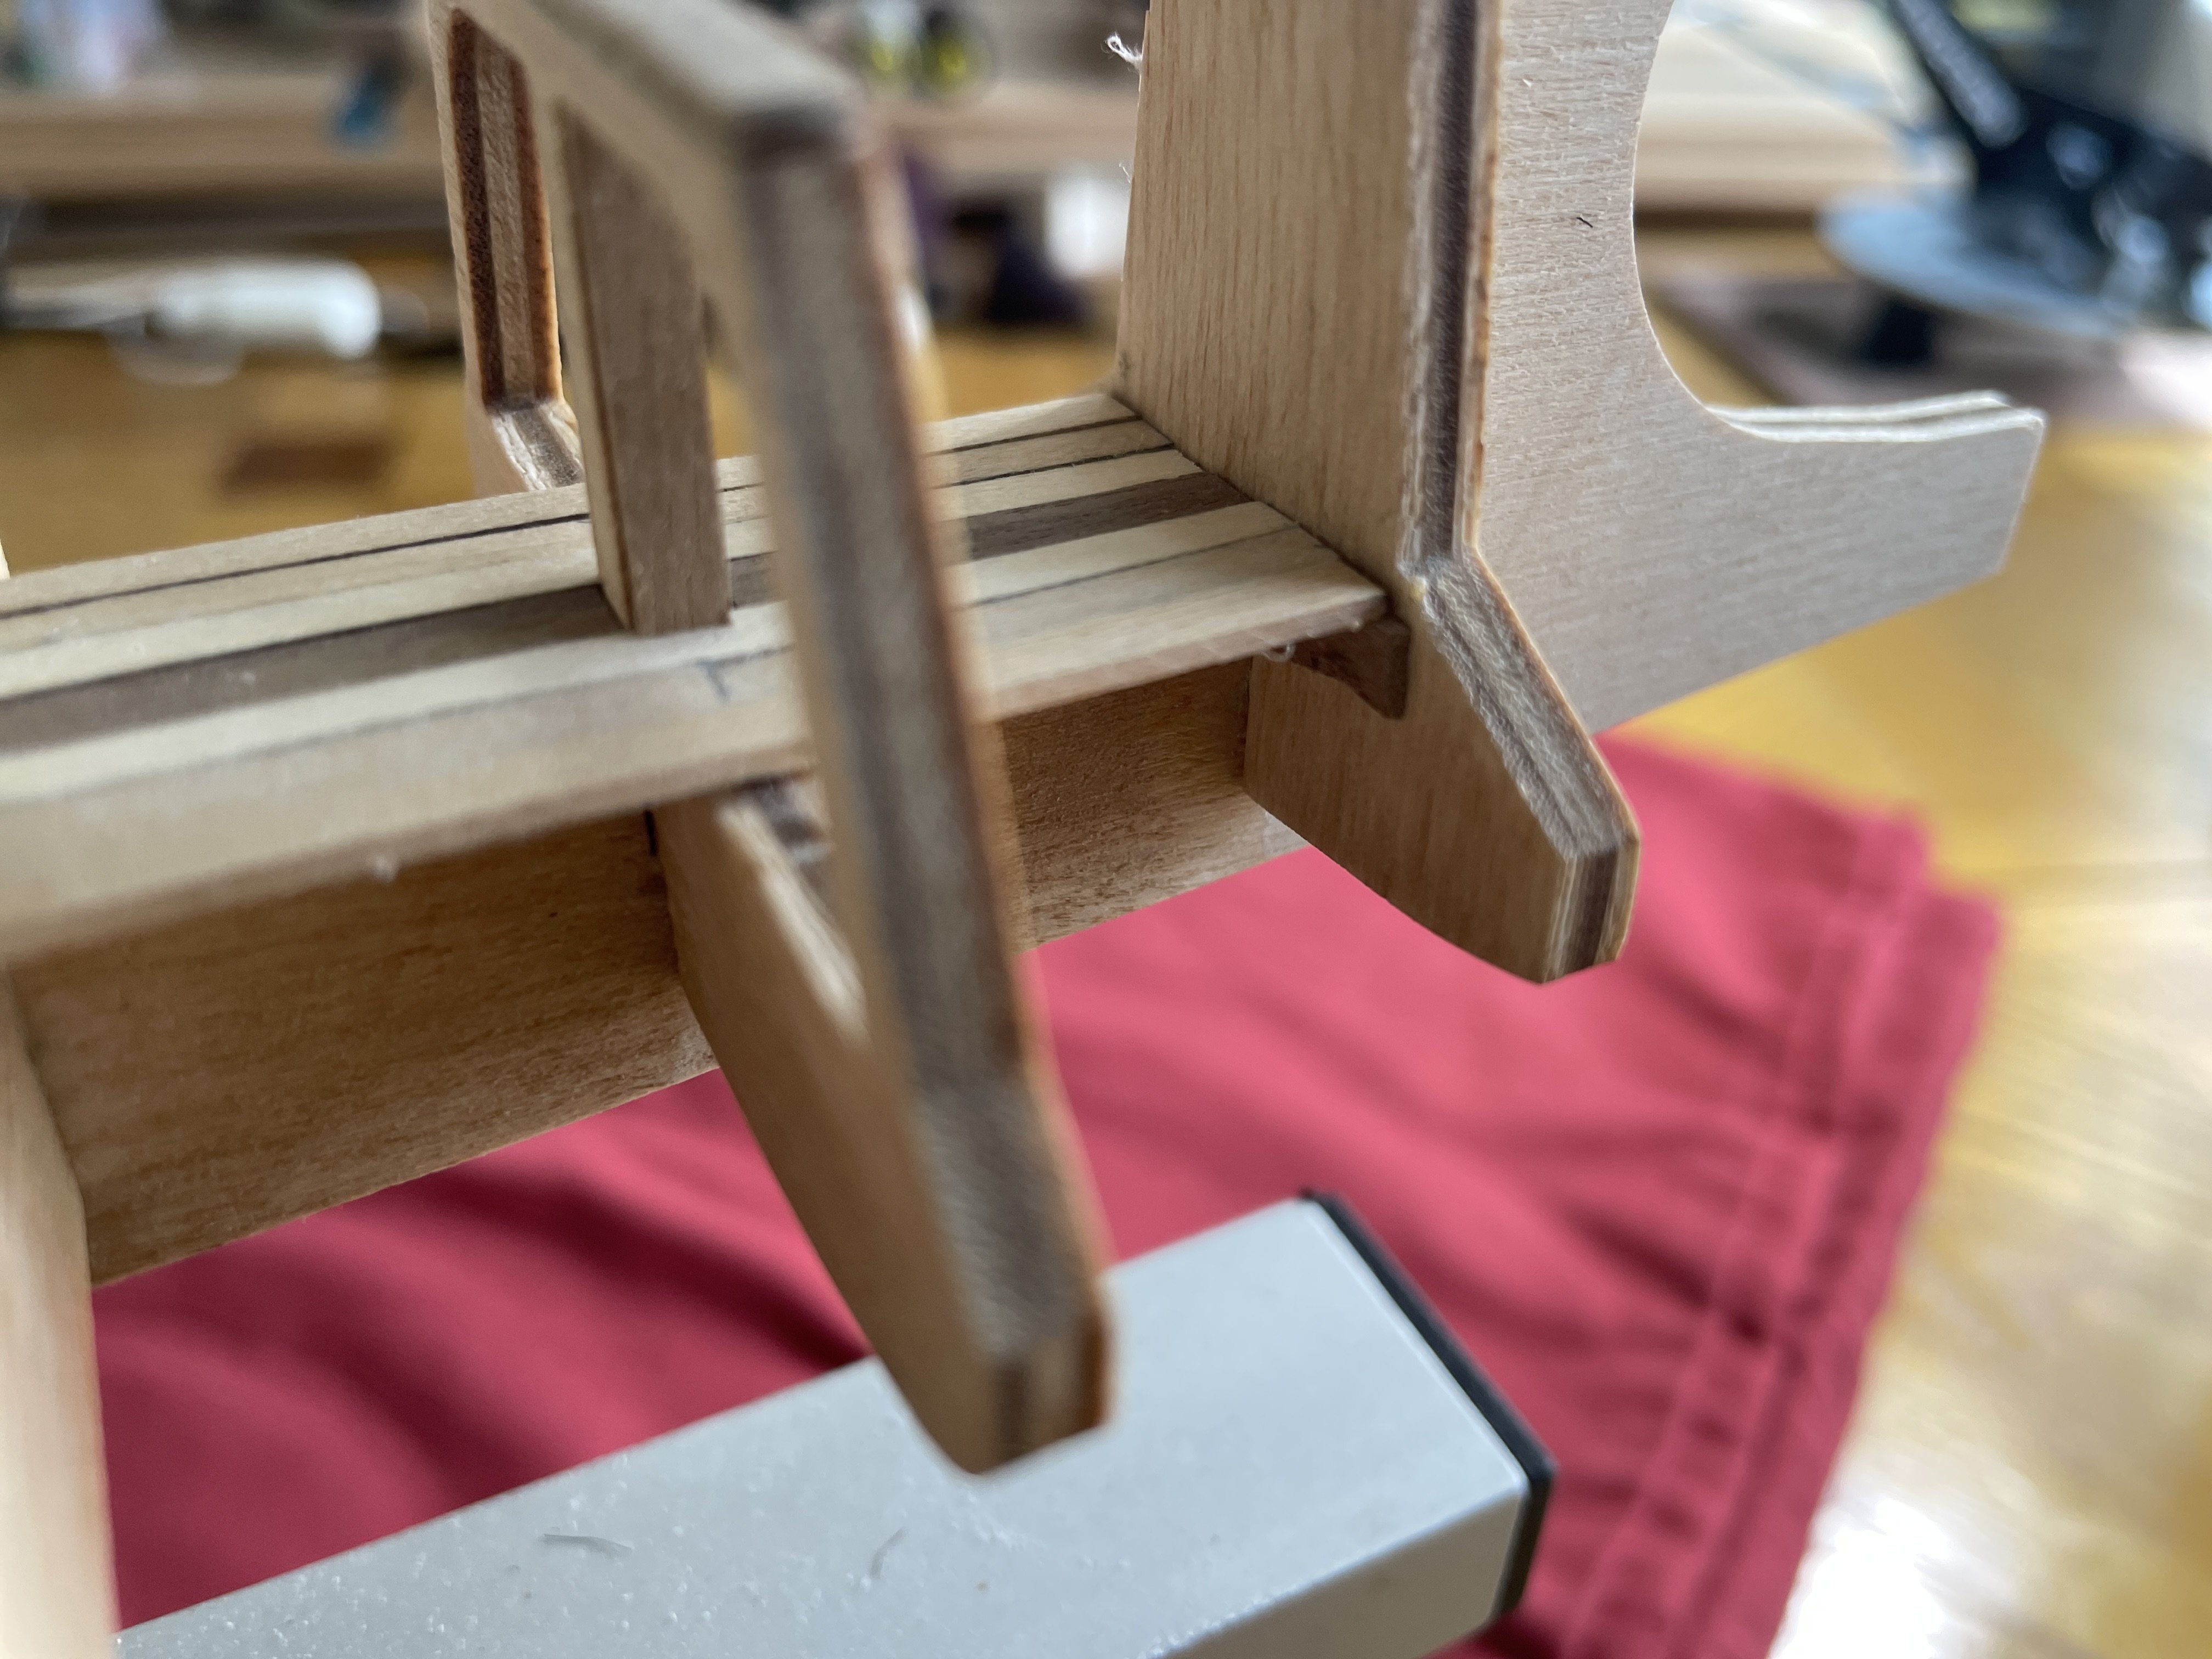
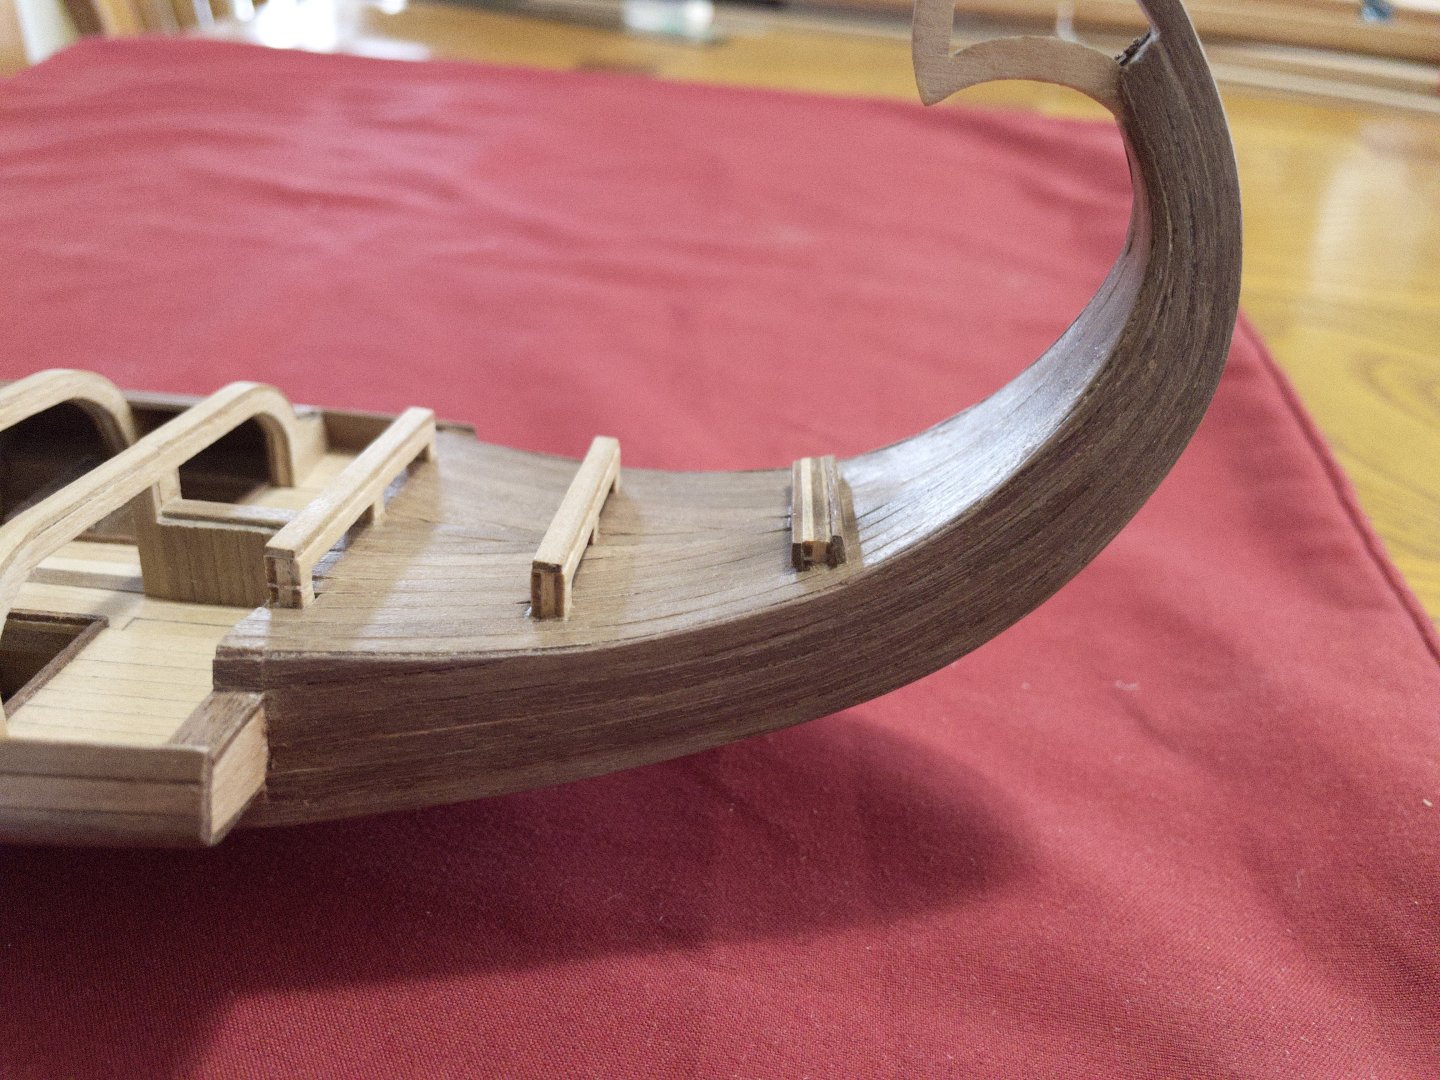
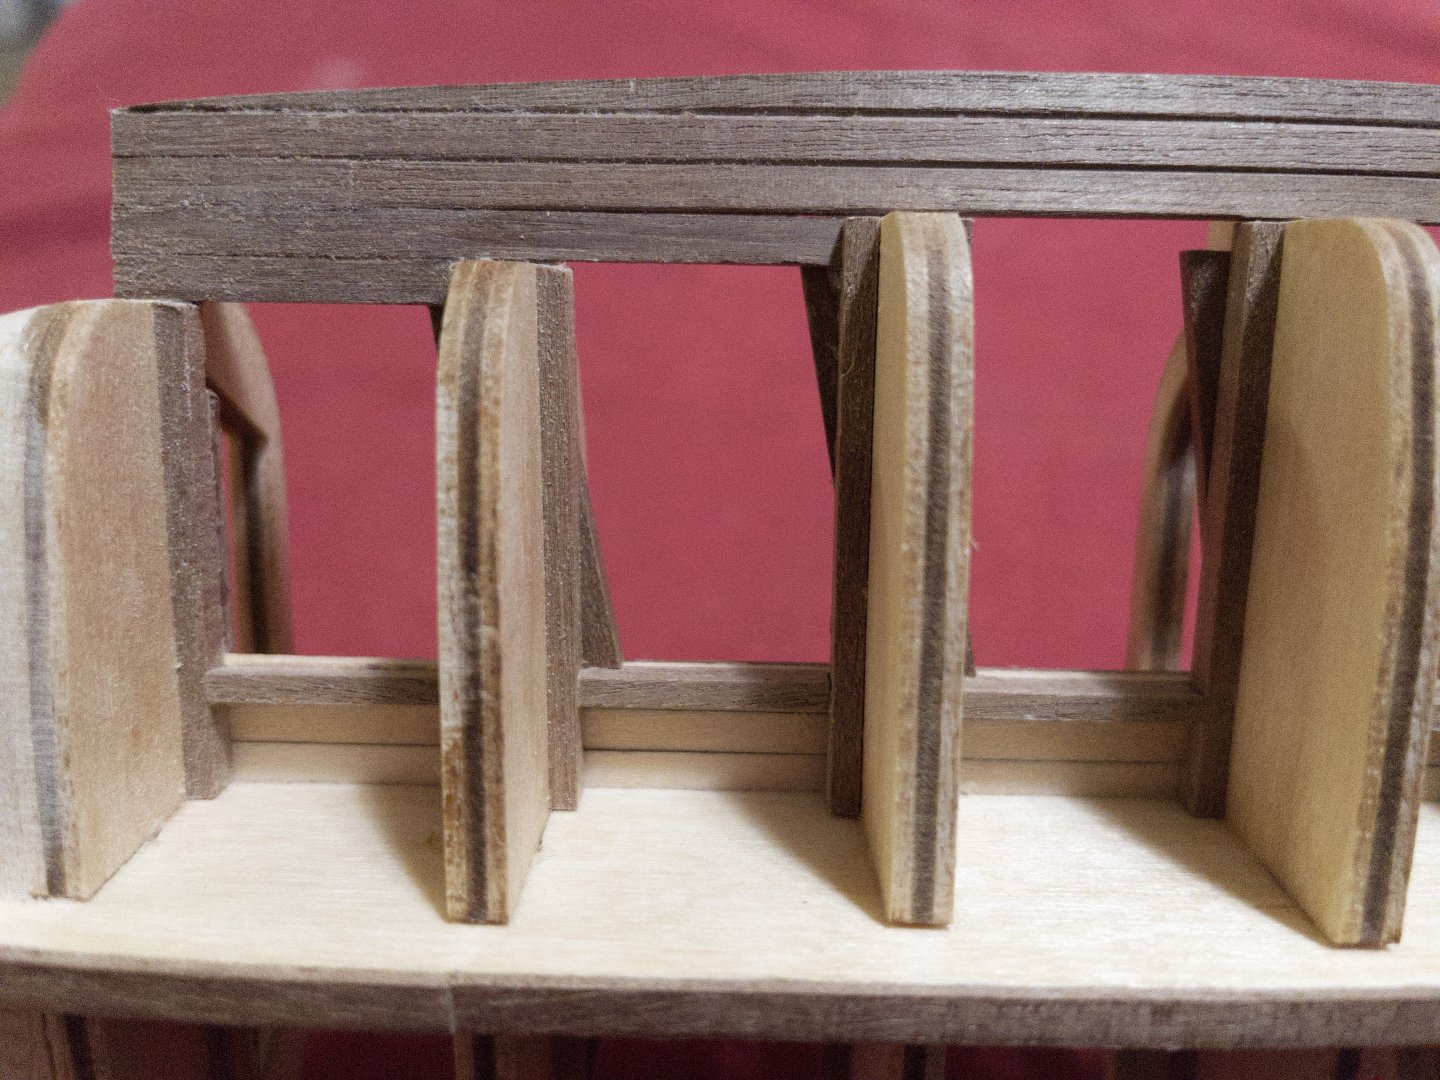
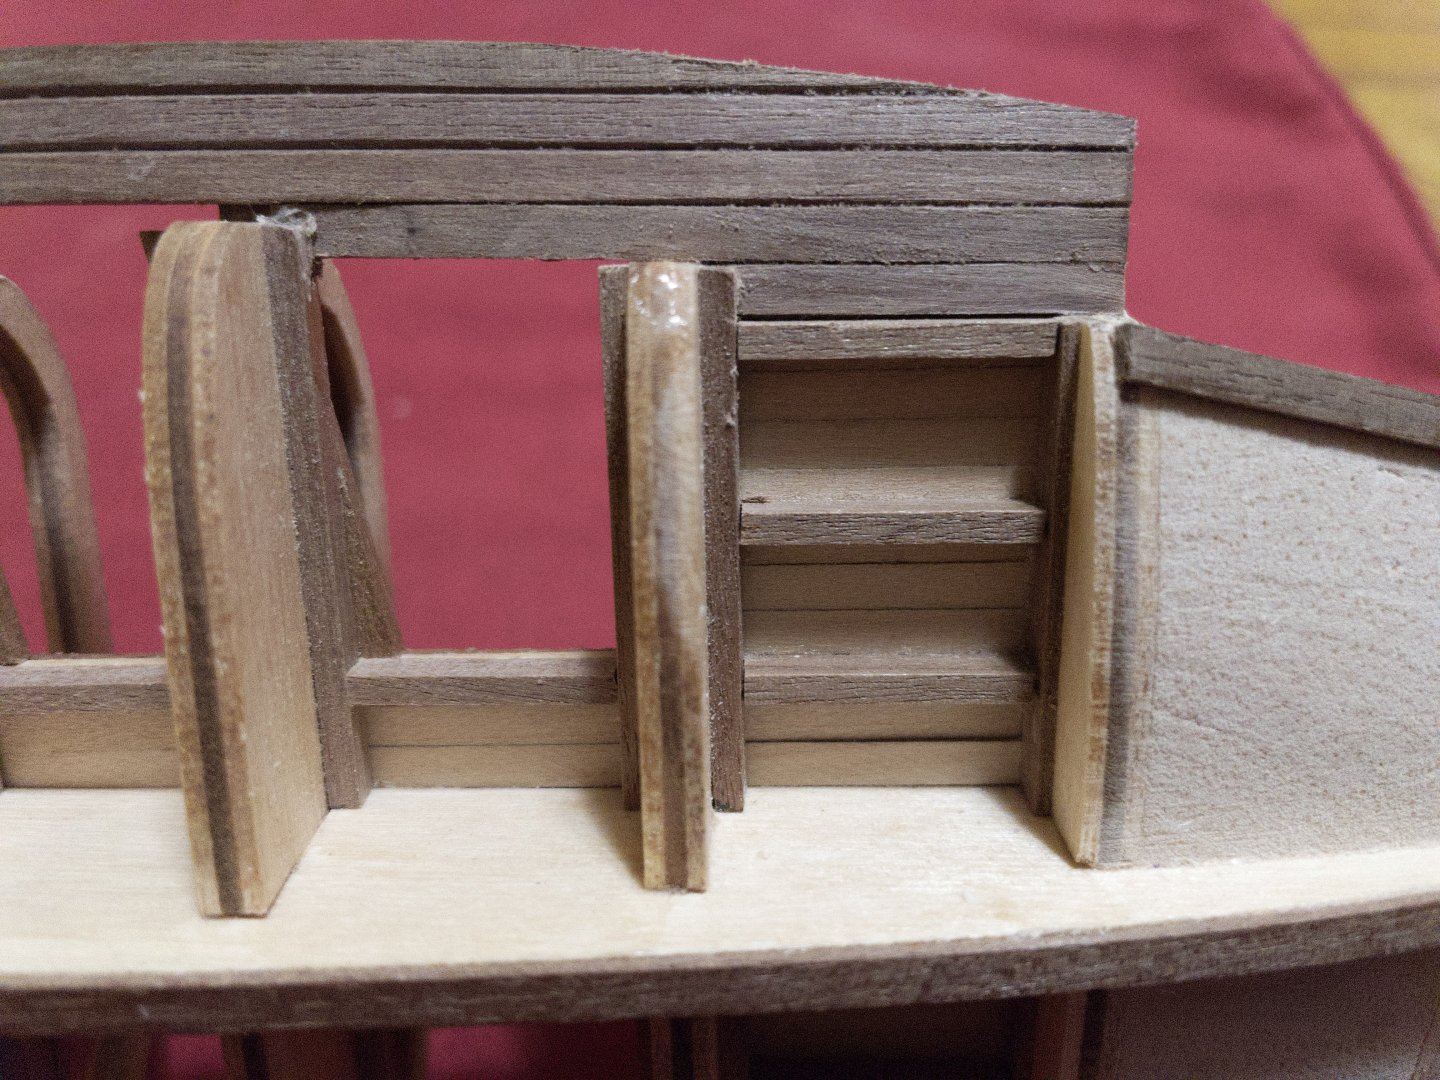
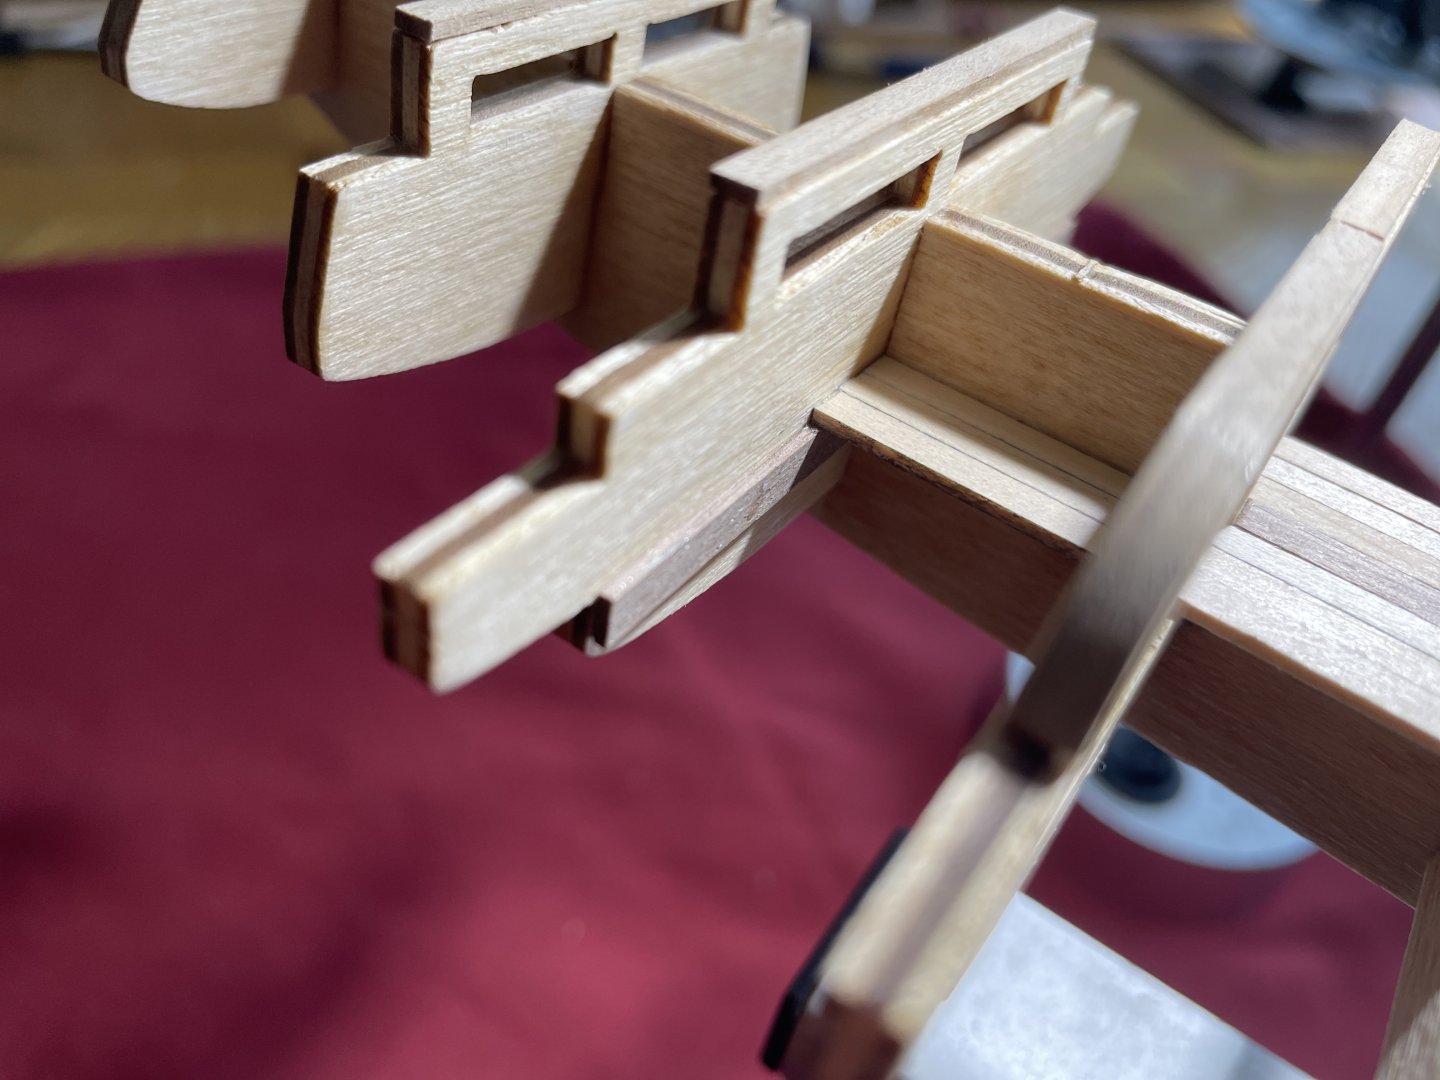
Planking the bow, stern, starboard and port: I started with the bow and stern since they are by far the hardest area. There is no trick here, just careful shaping of the strips and some re-adjustment (sanding) of the balsa underneath. Speed of planking in those areas crawls down to an average of 2 planks a day... ouch! Stern still needs more love, but shaping those strips is... not fun. Starboard and port side, on the other end, allow me to do some relaxing planking. However, there is a little twist. The bulkhead-ends are a little too narrow to support a full 3 strips. In addition, the underside was a little short, while the upper part a little too long for smooth planking. Solution, I sanded the ends of the bulkheads at a slight inward angle (see picture) - likely a 10-degree angle.


-
Does it??? Not with planking this model. hehe. Stress relief update.

-
Does it??? Not with planking this model. hehe. Stress relief update.
-
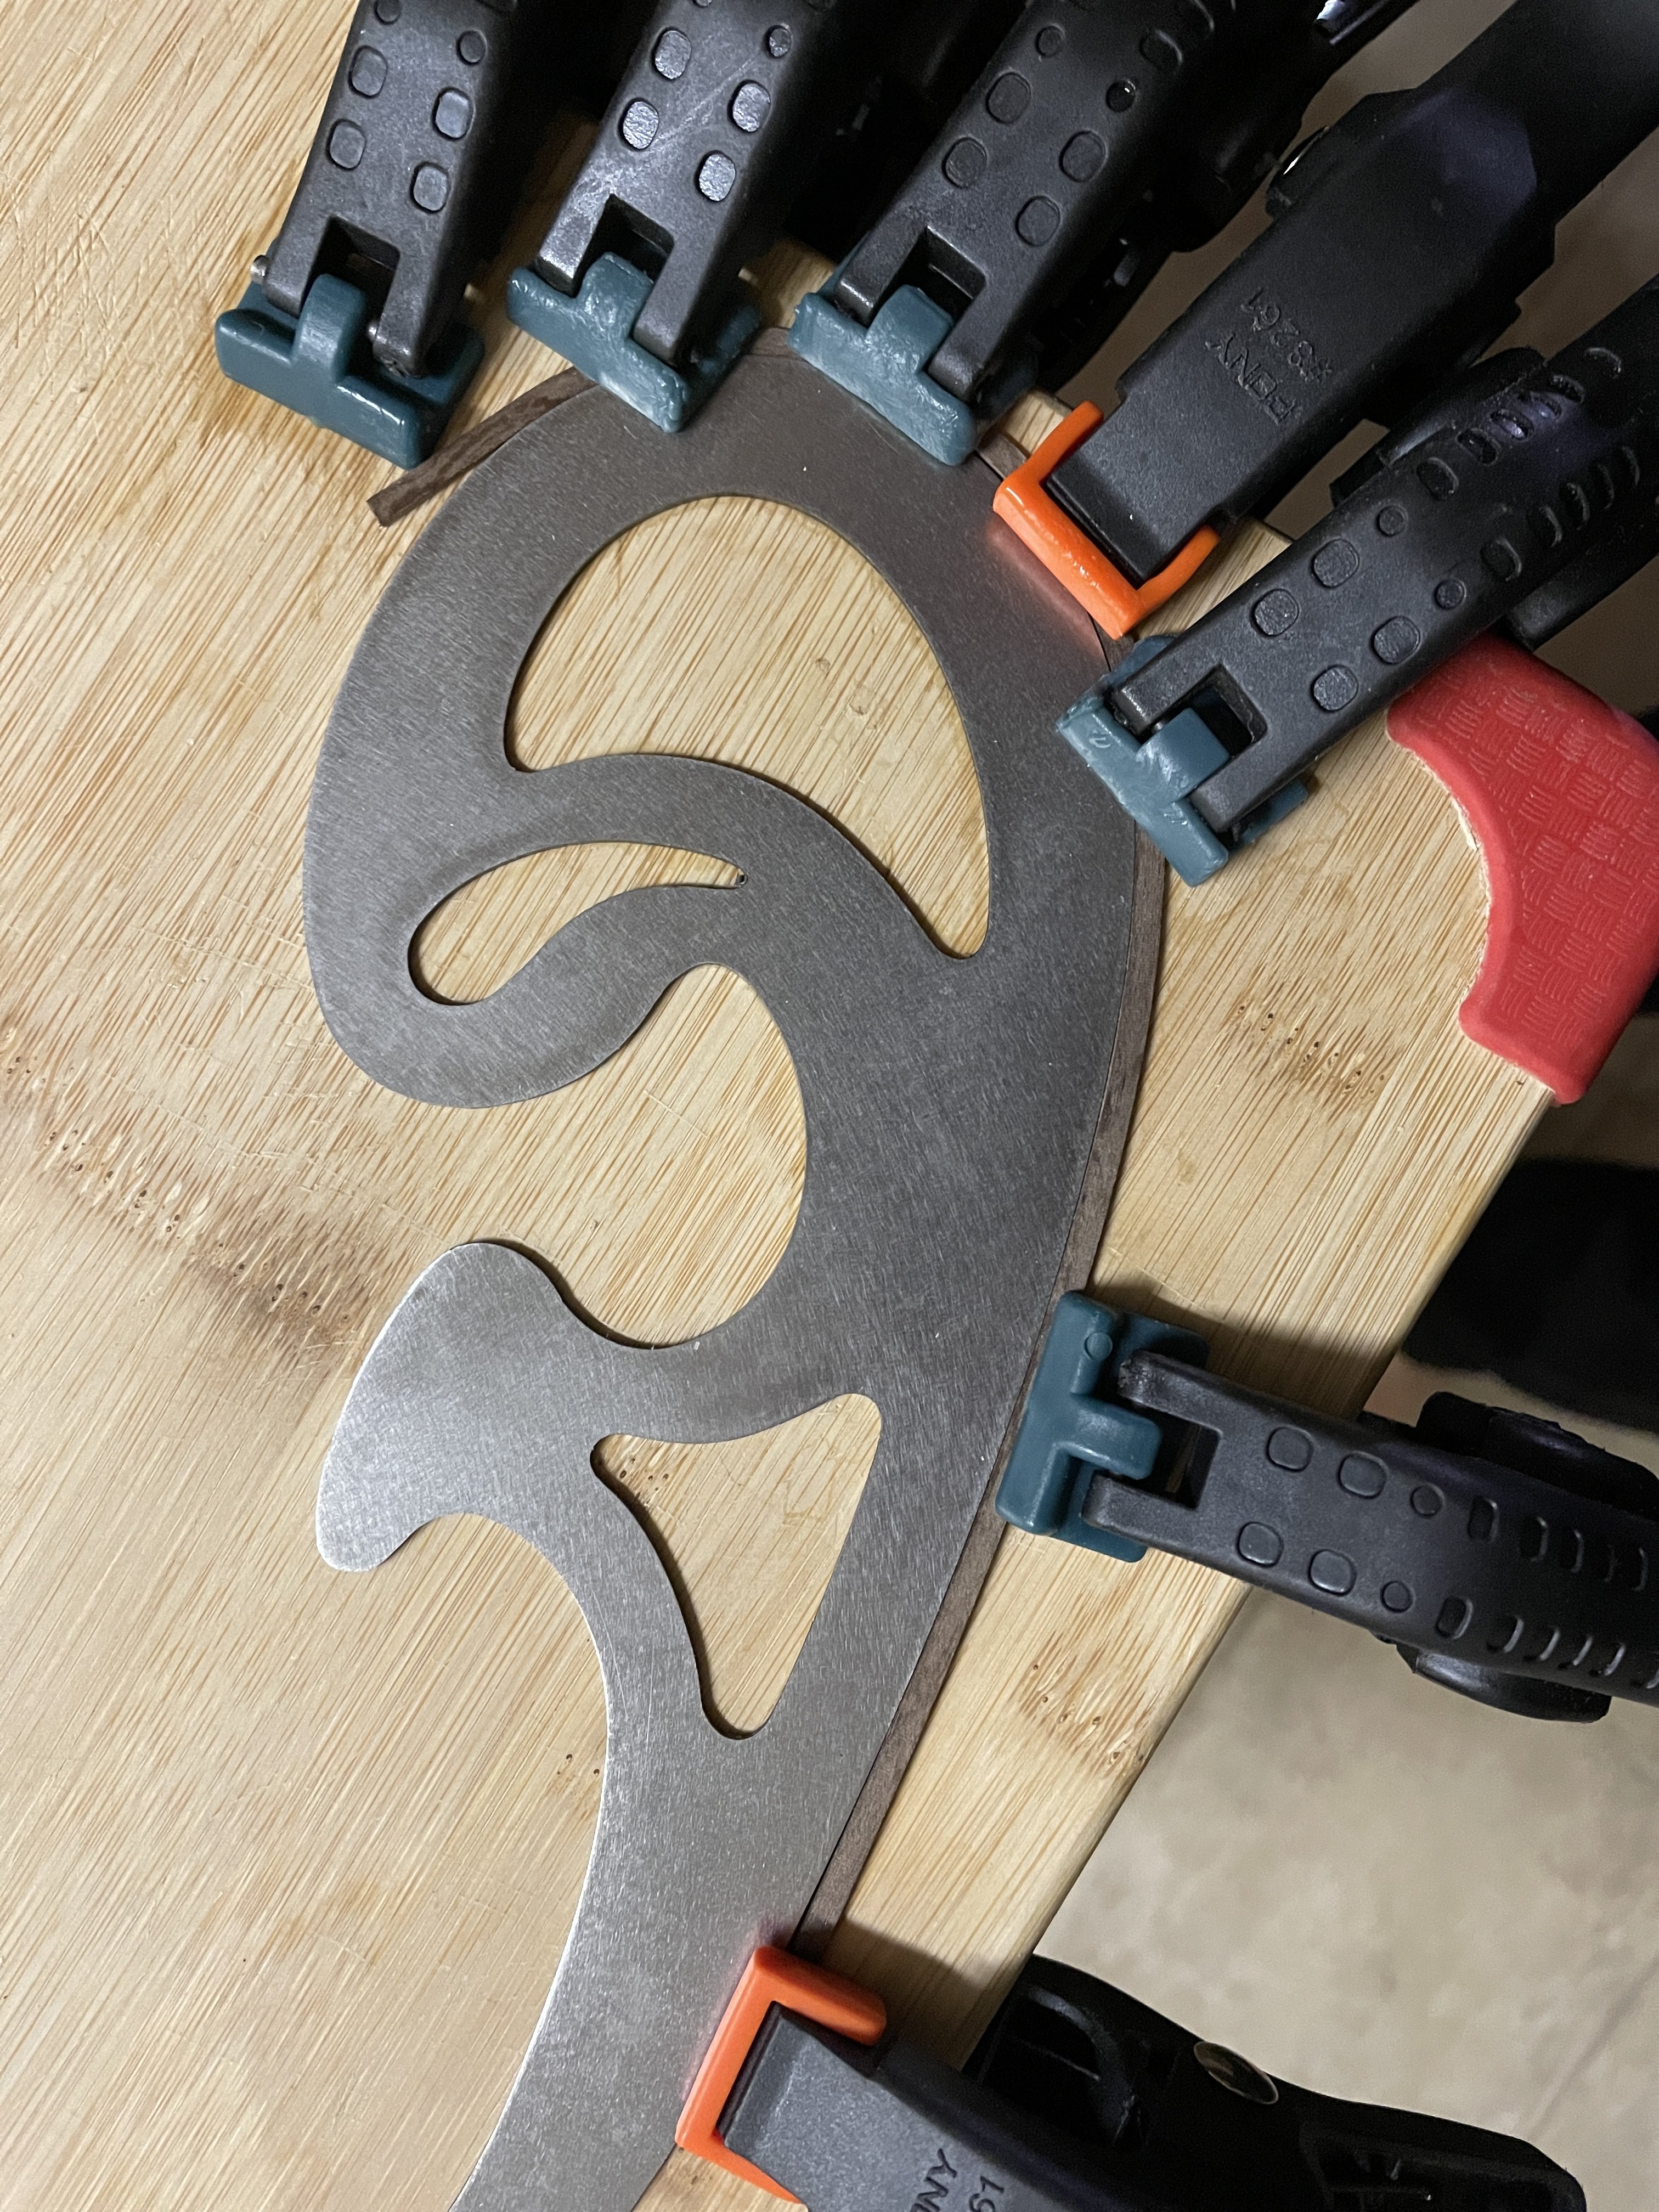
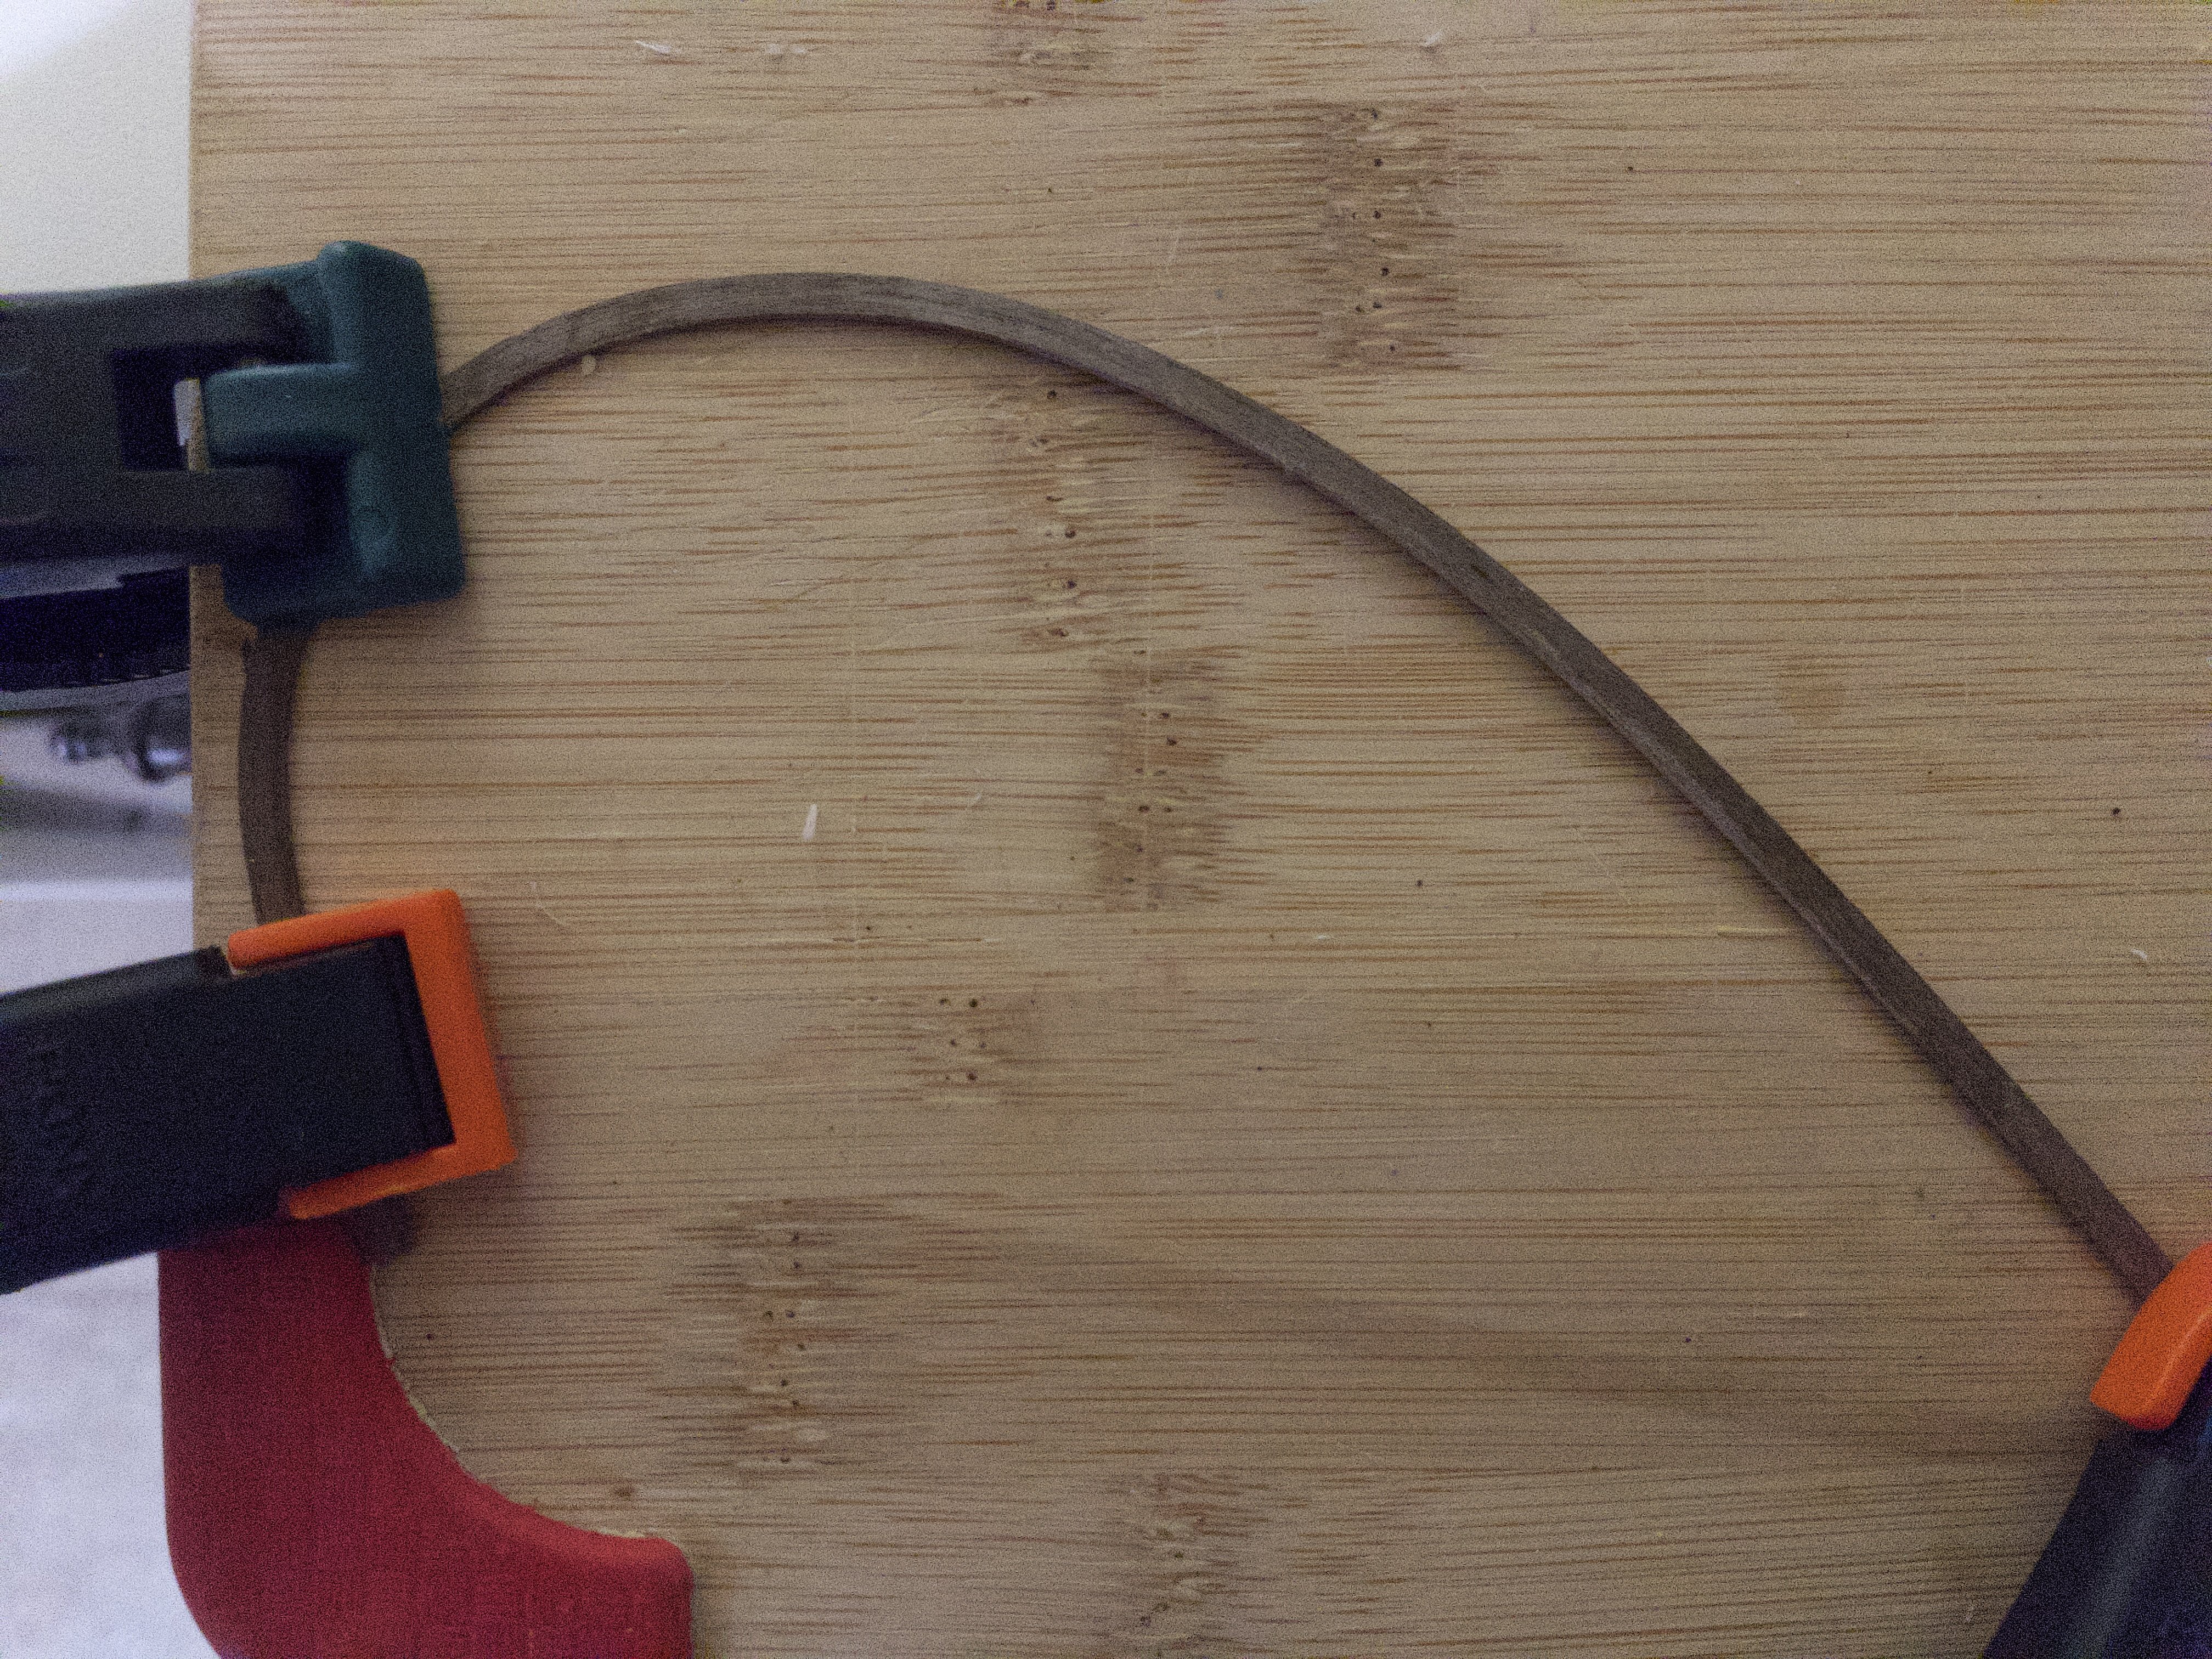
@Ian_Grant, greetings. Indeed, this set of metal French curves (a tad thicker than 1mm) are quite useful. I use it all the time for side bending.
-
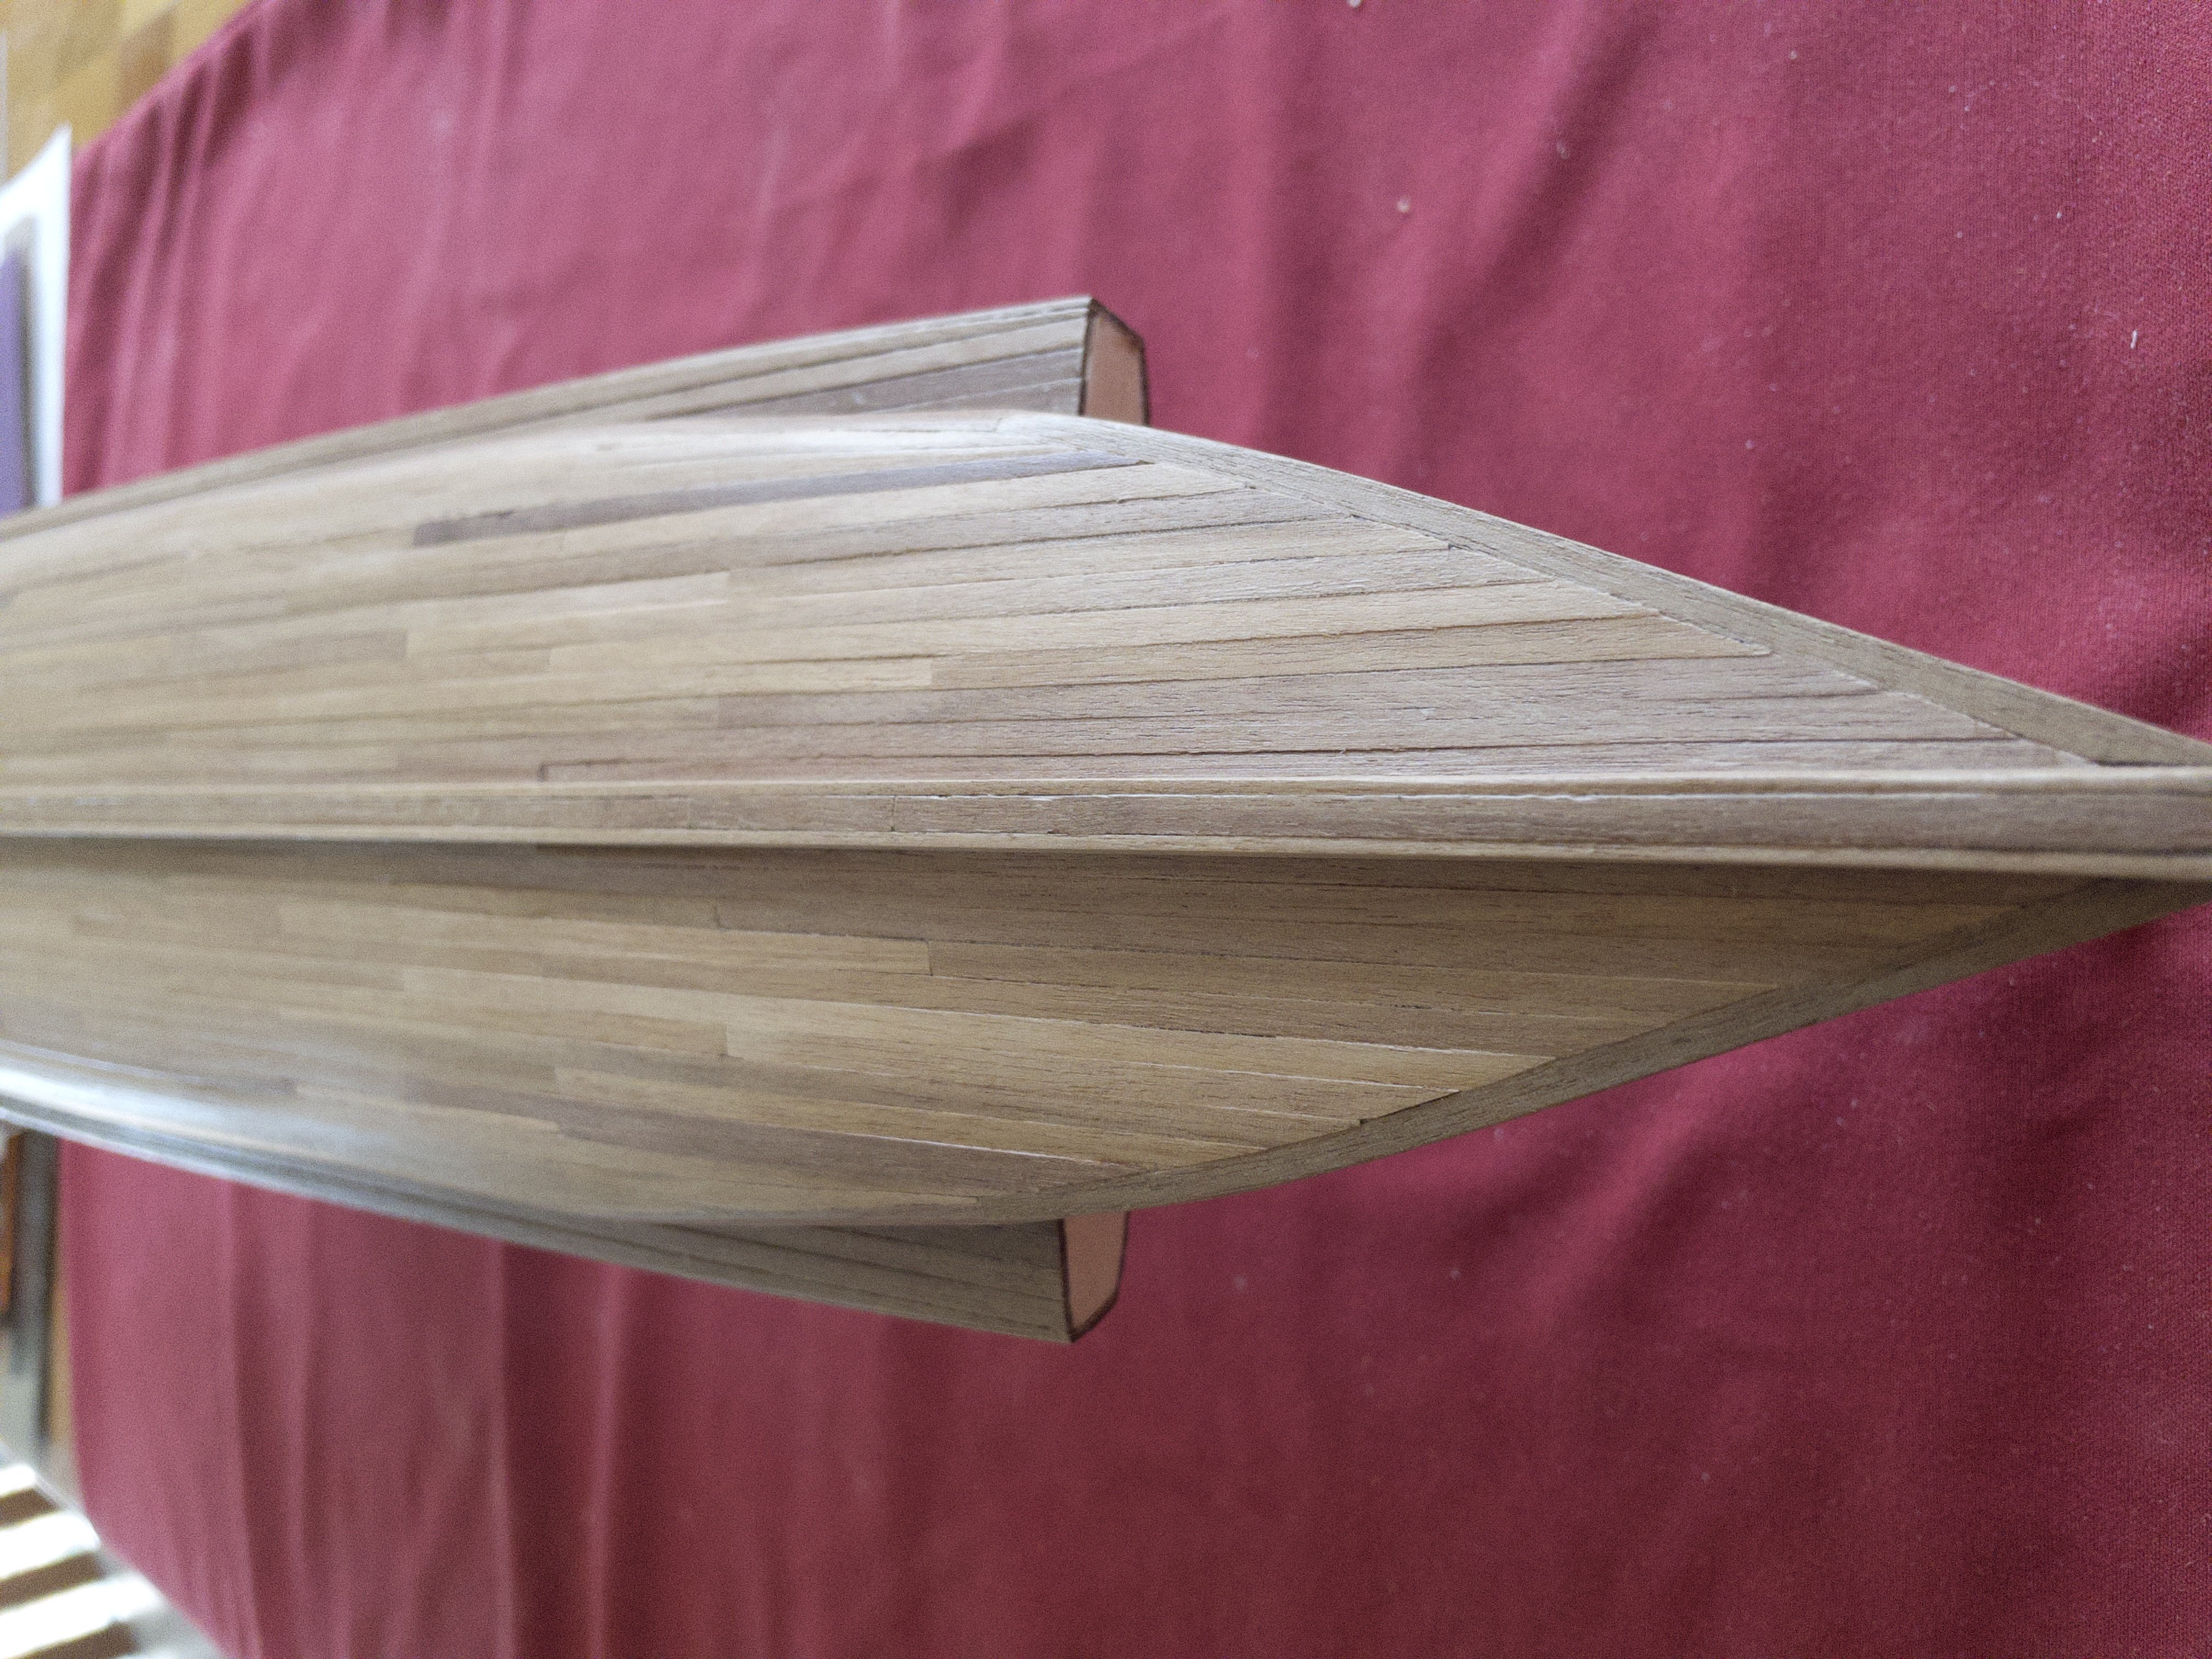
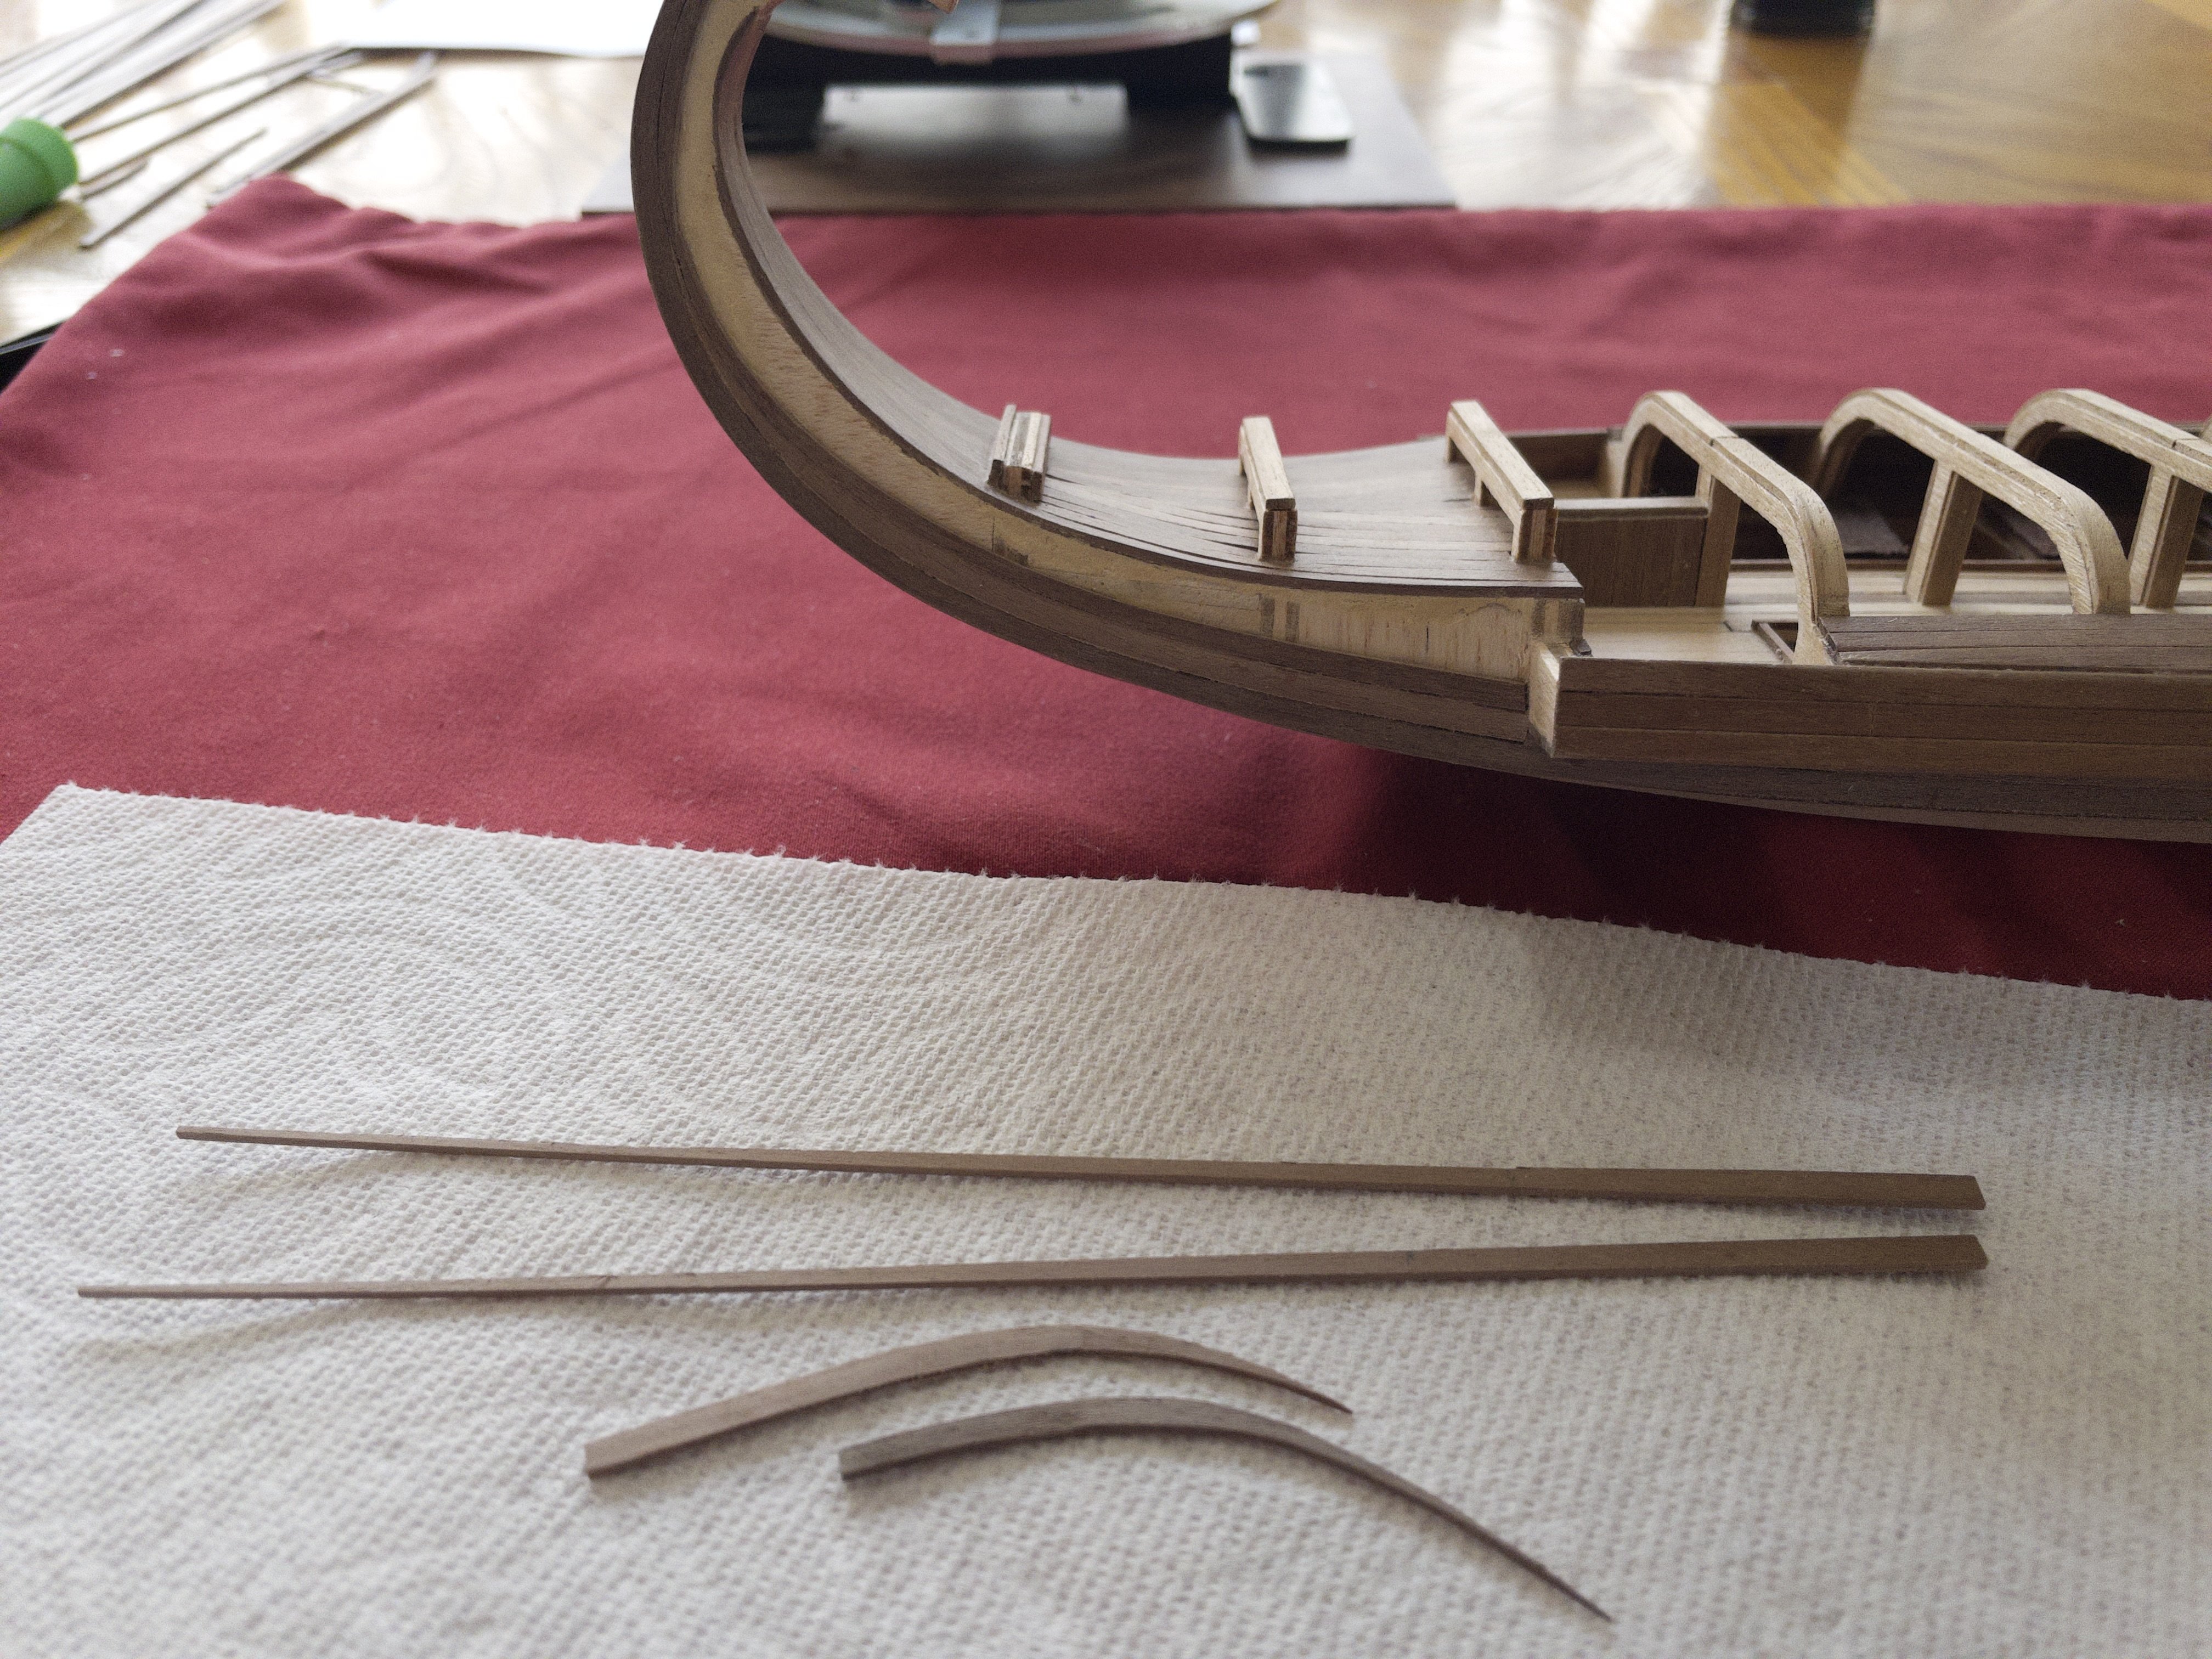
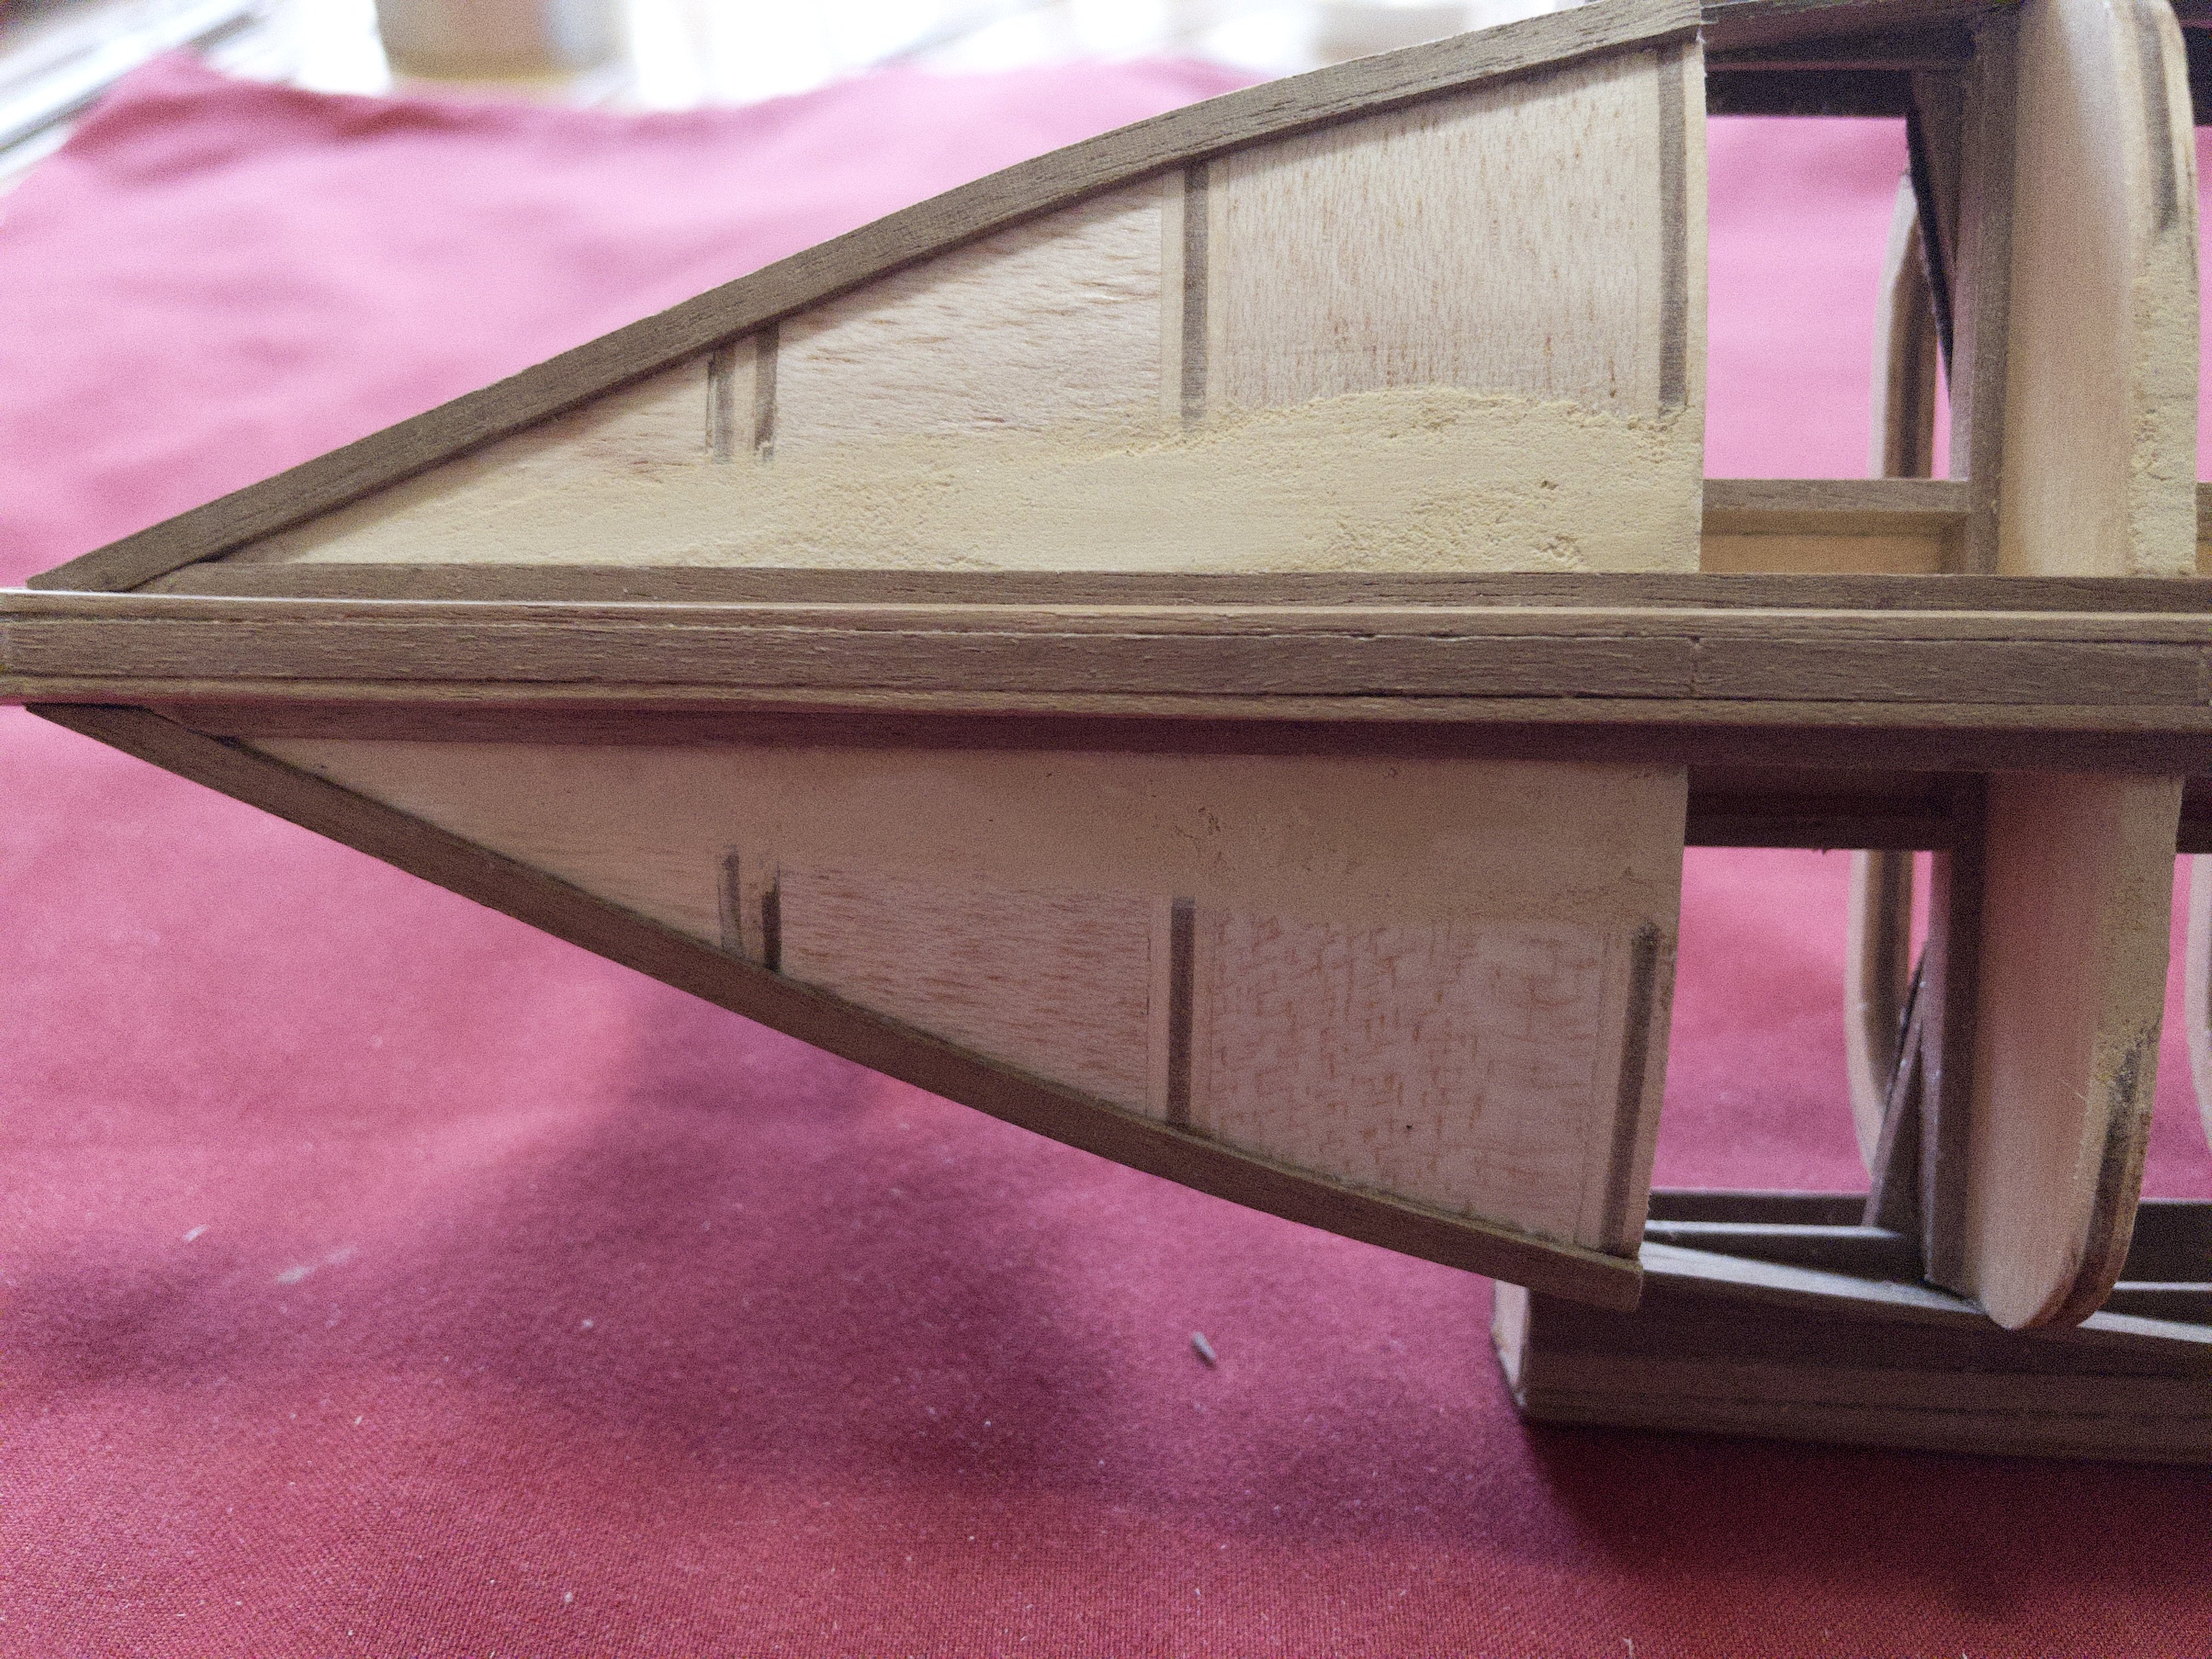
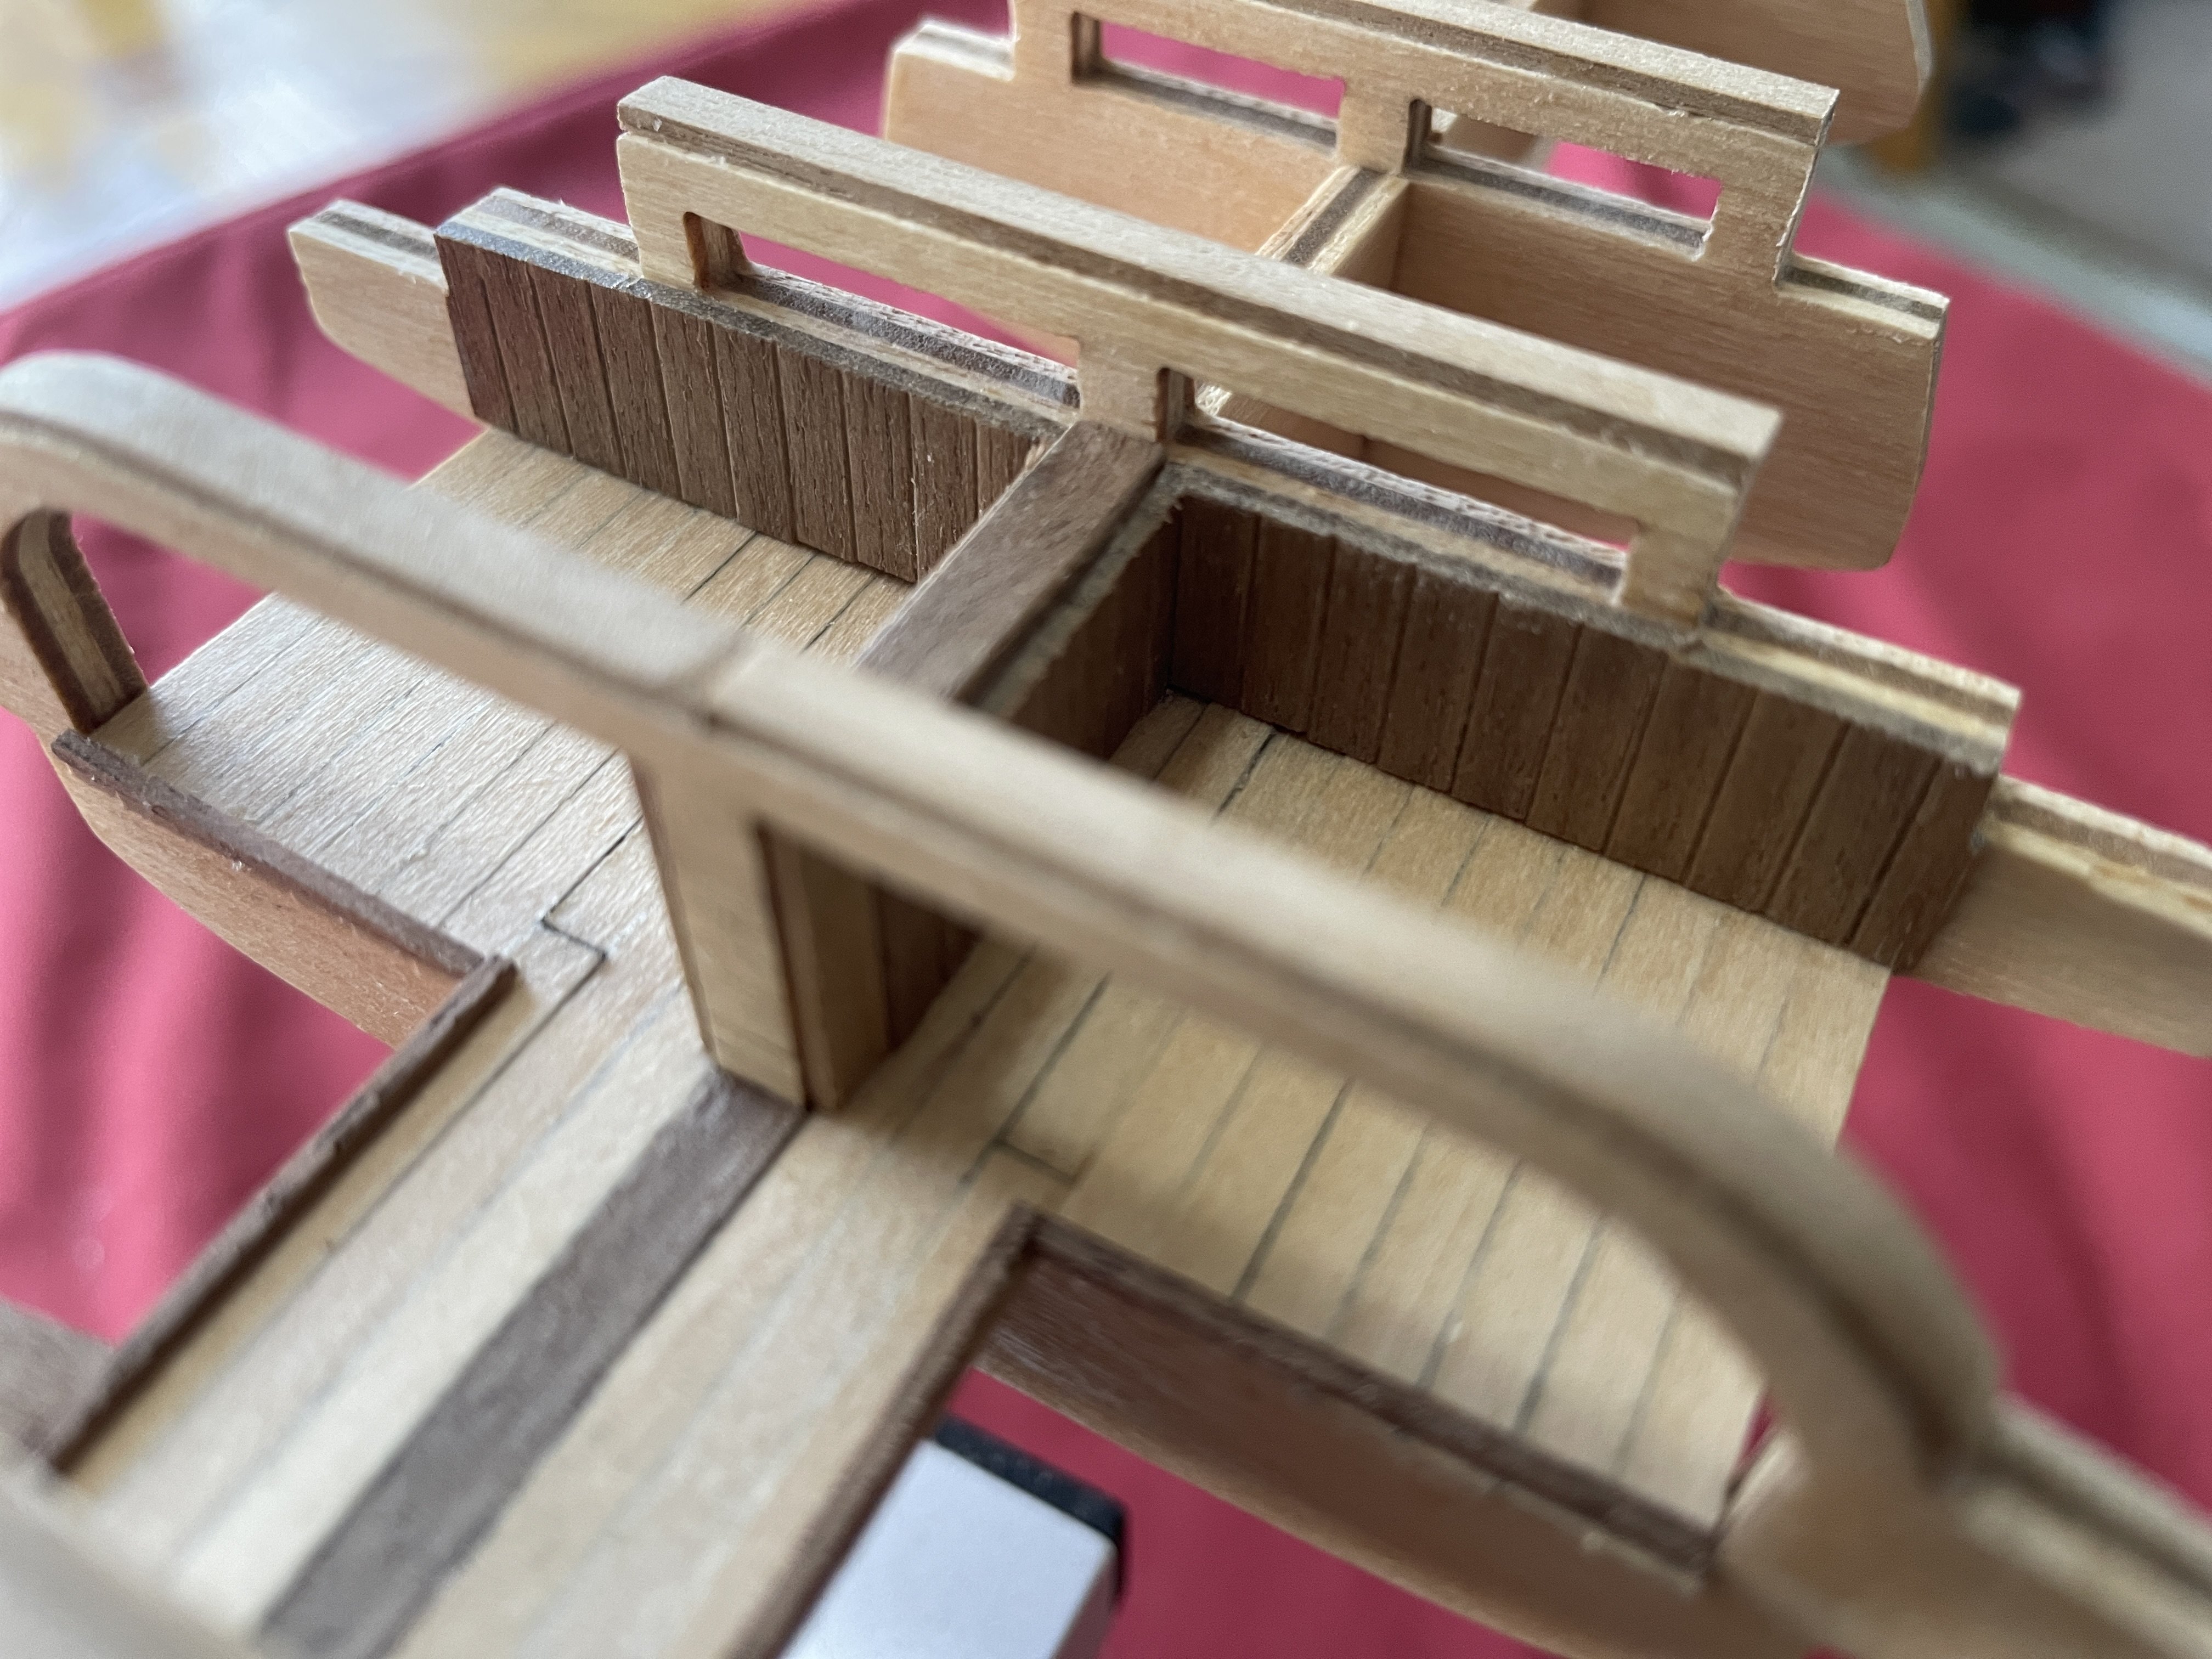
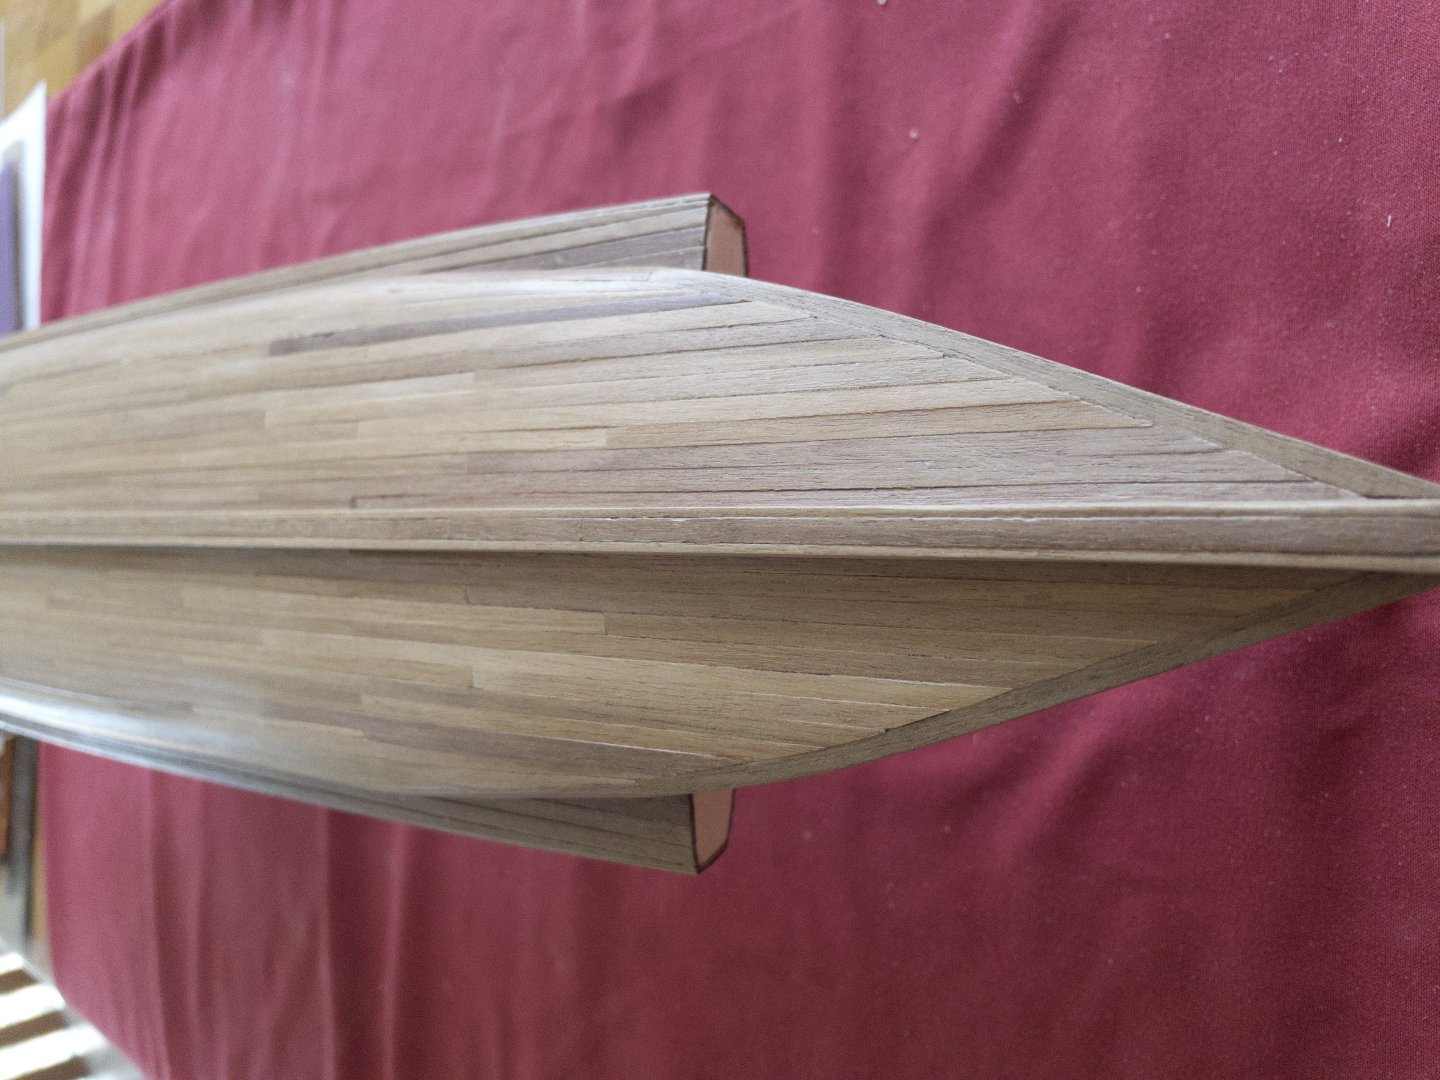
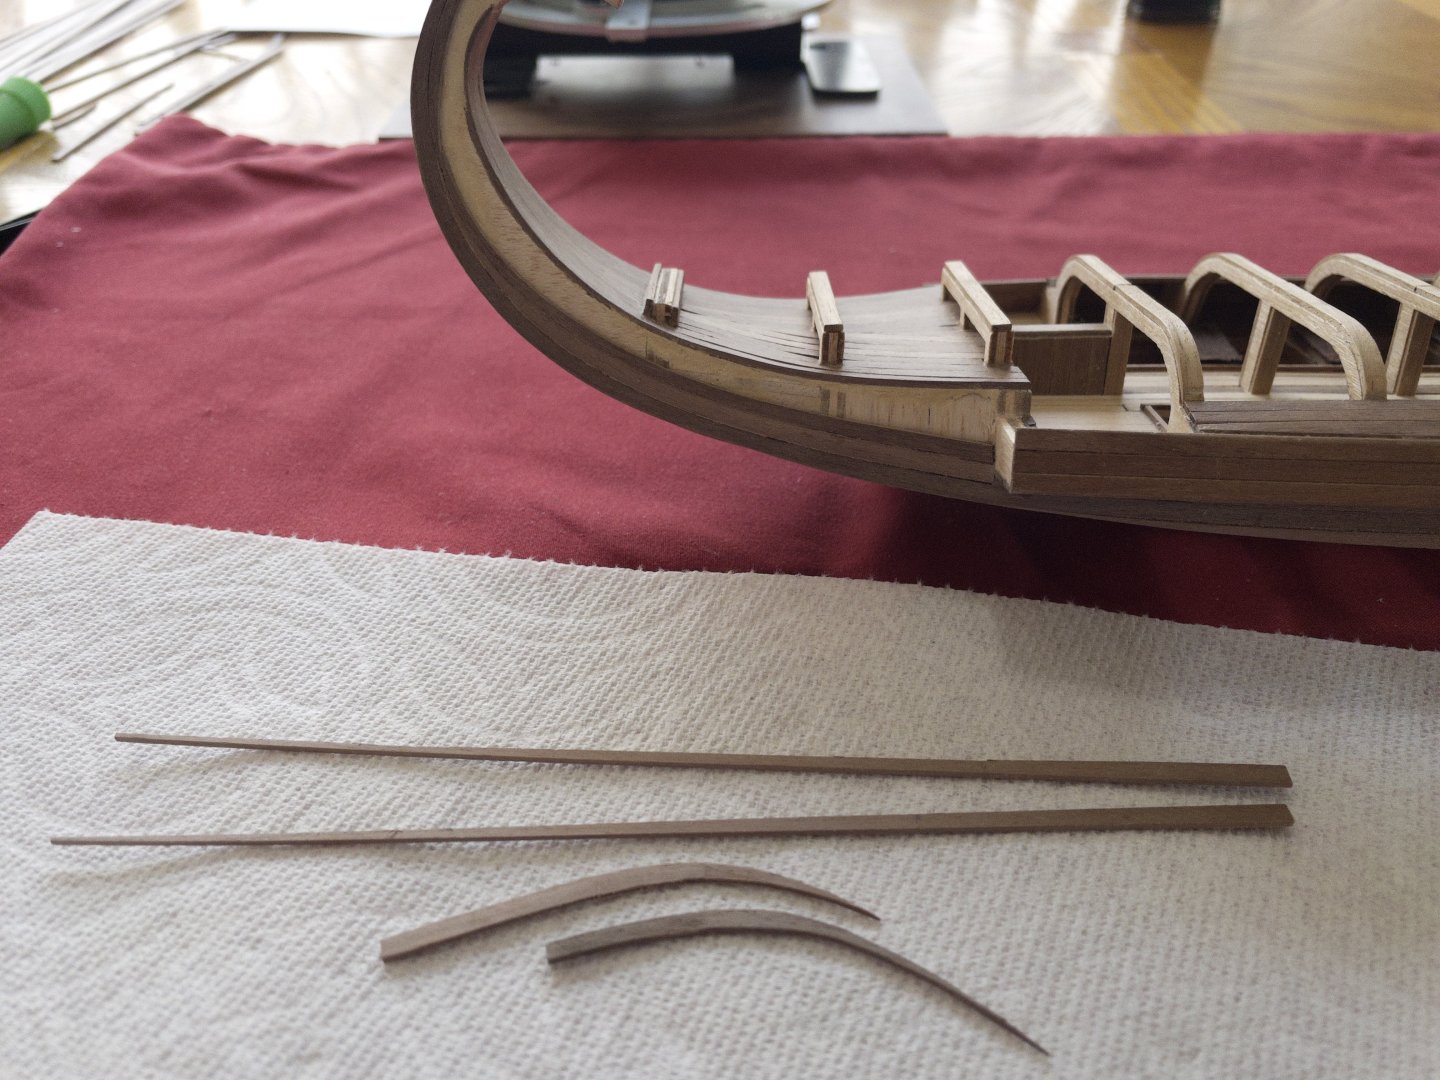
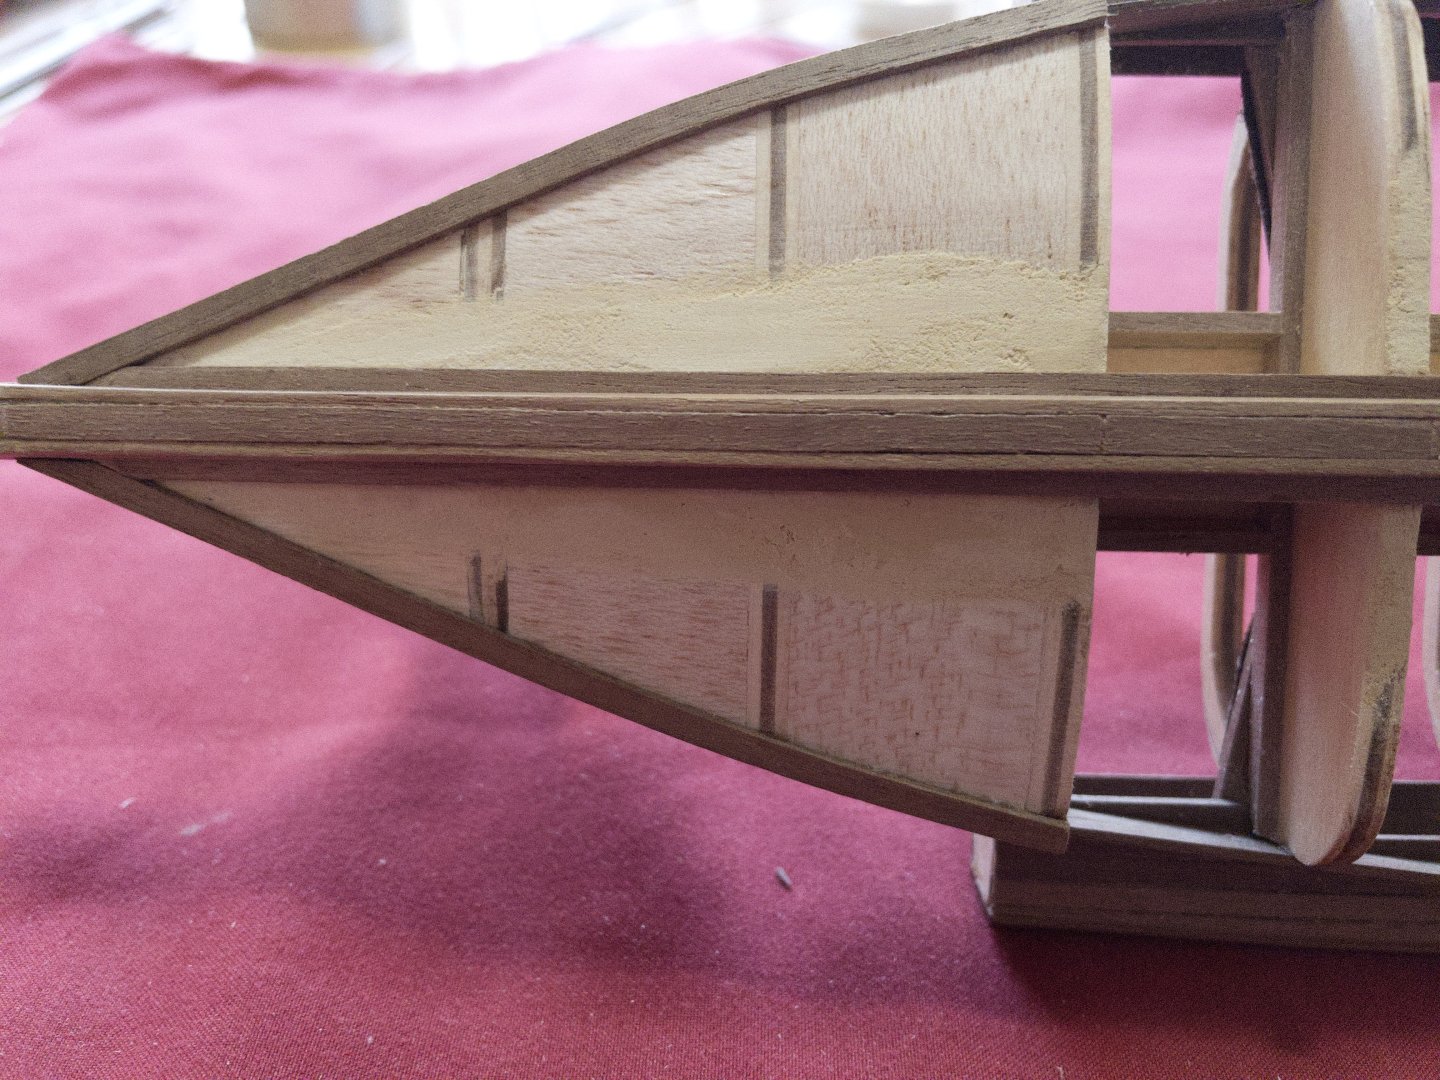
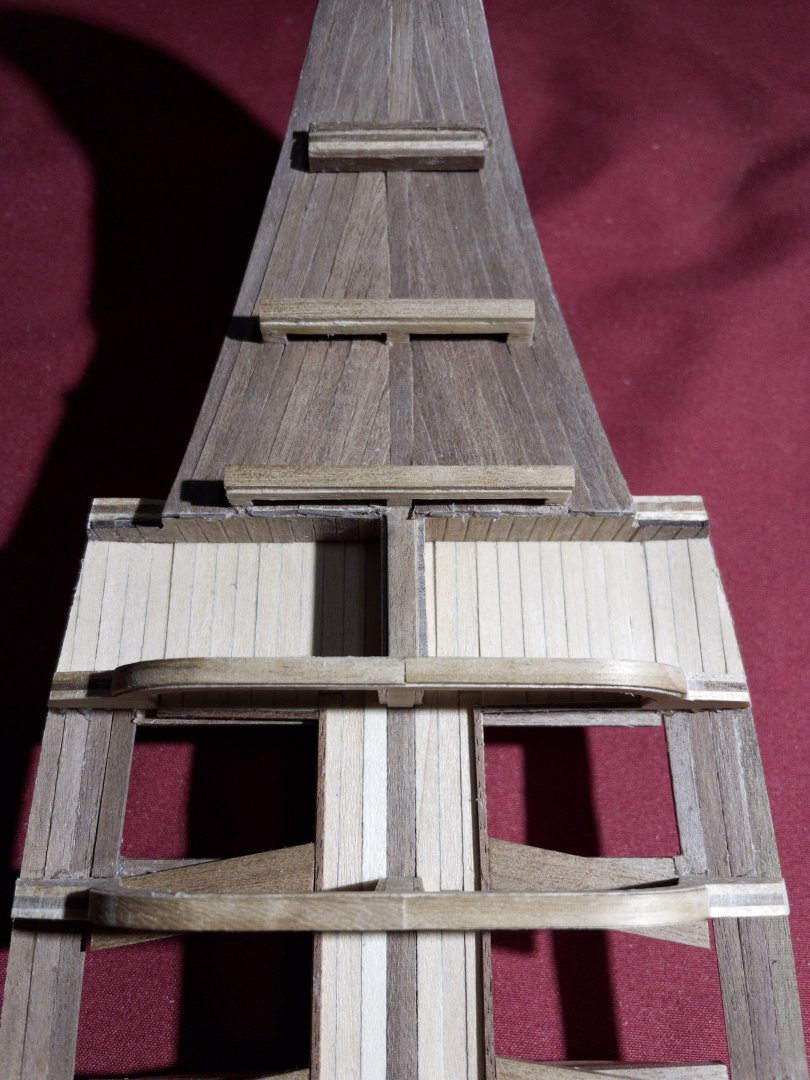
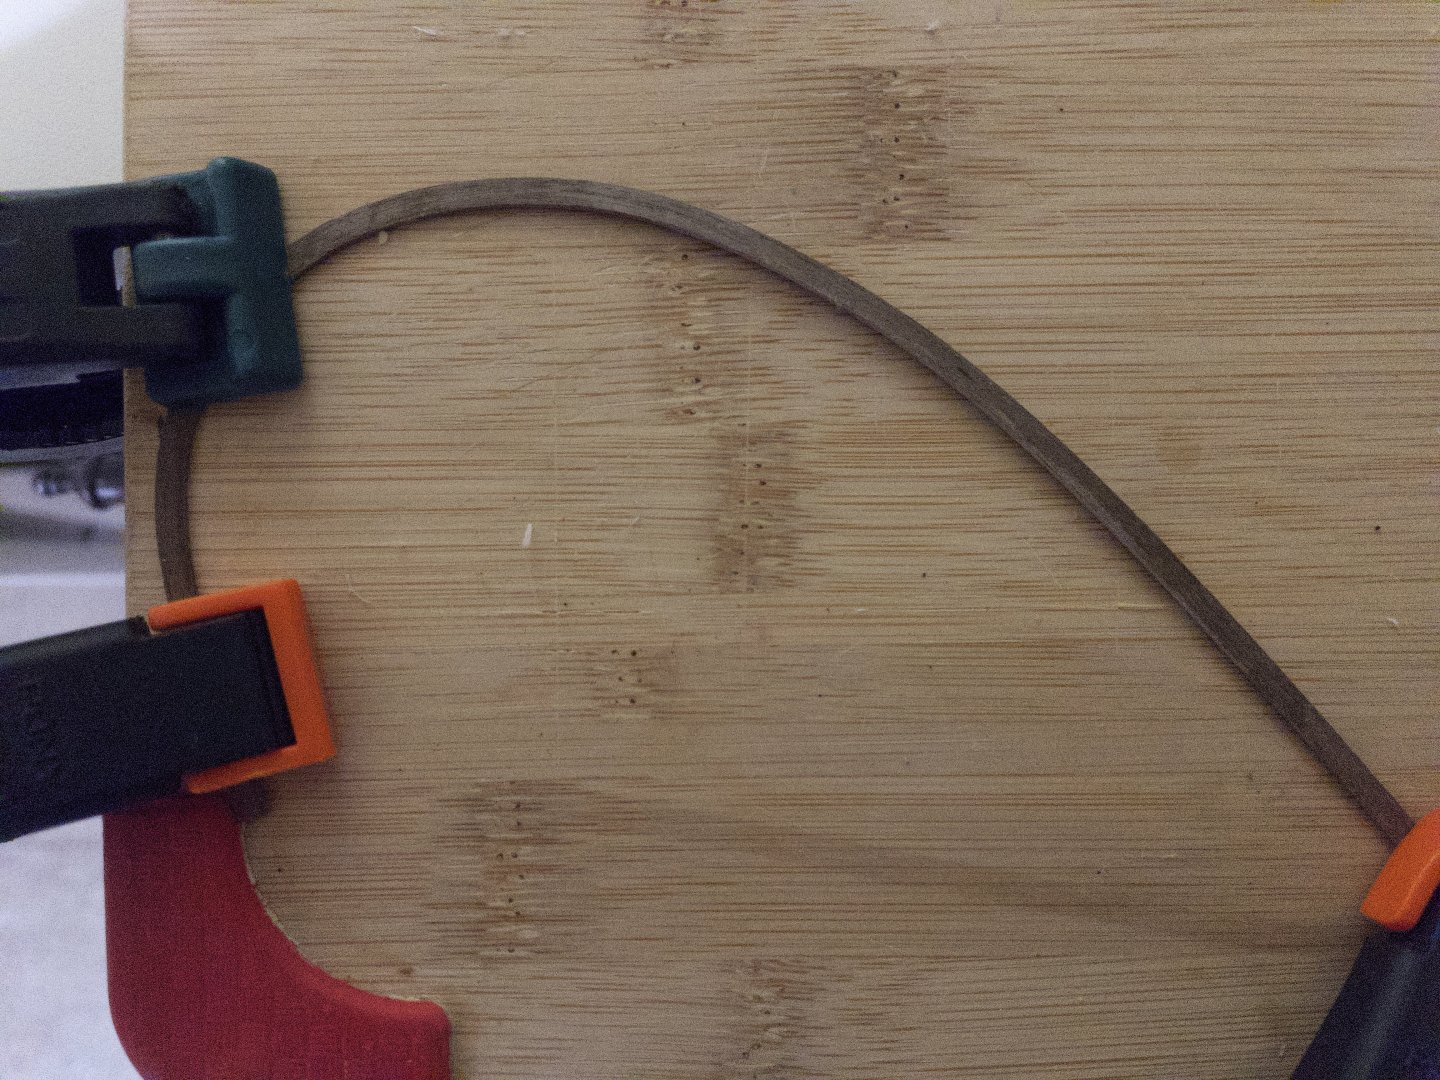
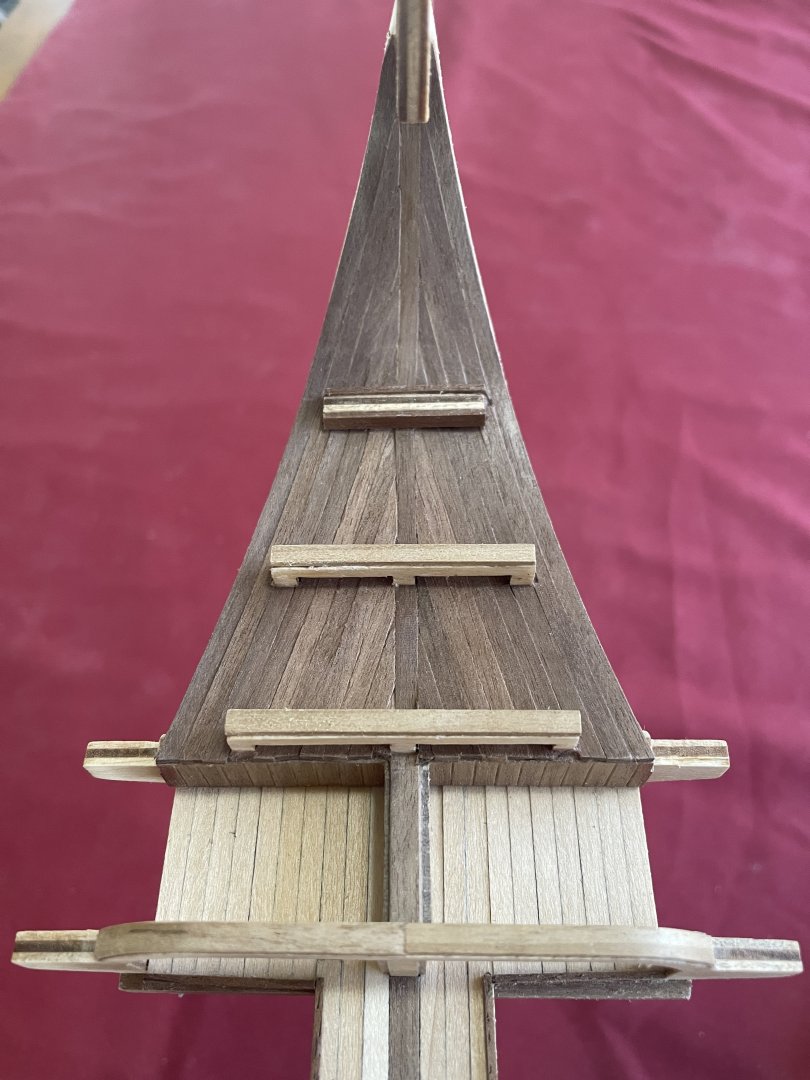
Stern: The underside of the stern will be planked as the top side - in a triangular shape. I just like this style, which provides a clean edge. The initial step is to frame the area to be planked (see pictures). This will ease planking of the internal area. Side areas - underneath: additional planks are added below deck - both at the bow and stern side. It only covers a small area - 2 and 3 bulkheads. I then proceeded with the remaining planks and finished by sanding. You can then flip around and complete the deck planking. Note: I sand the tope edge a little to create a "groove between the planks - just for a little depth (zooming in and lighting exaggerate the effect). Top sanding fills the small gap with dust that can be remove later. Note 2: you can see a filler plank that I forgot to do - the 3d effect get lost. They underside edge is not sanded too - so when you flip around the effect is lost too. Planning to do that only for the side and upper deck. Stern side: This will require quite an extreme side bending of the planks to follow the stern. Strips are immersed in water for 30 minutes, the shape using a guide as back support. Don't try to do the full bending in one go - it will break. Do an initial curve, then let dry for several hours. Wet again and go a little further. 3-4 times should do it. It is a lengthy process. Start one... and do something else. In a couple of weeks, you should have sets available.


-
I second the Vanda-lay system. Very stable, very well build. Highly configurable. In addition, if you have a Foredom flex-shaft, you can get an additional adaptor for it. For me, the Foredom and the vanda-lay system are great combo. However, for small hole 0.5mm or less a manual option (Pin Vise Hand Drill) is likely the best.
-
Thank you @Ronald-V, appreciate. I forgot to mention a small trick I read somewhere in furniture building. Working with wood will almost always create small gaps around some areas, such as around the vertical bulkheads here. One way to correct this at the end is to fill the small gap with wood glue, remove the excess rapidly and pour on top plenty of saw dust (a piece of strip wood that you sand to create dust of the same color). After that I use a strip to push down on top... et voila! wood putty of exactly the same color. HOWEVER, gap still need to be very small to start with.
-
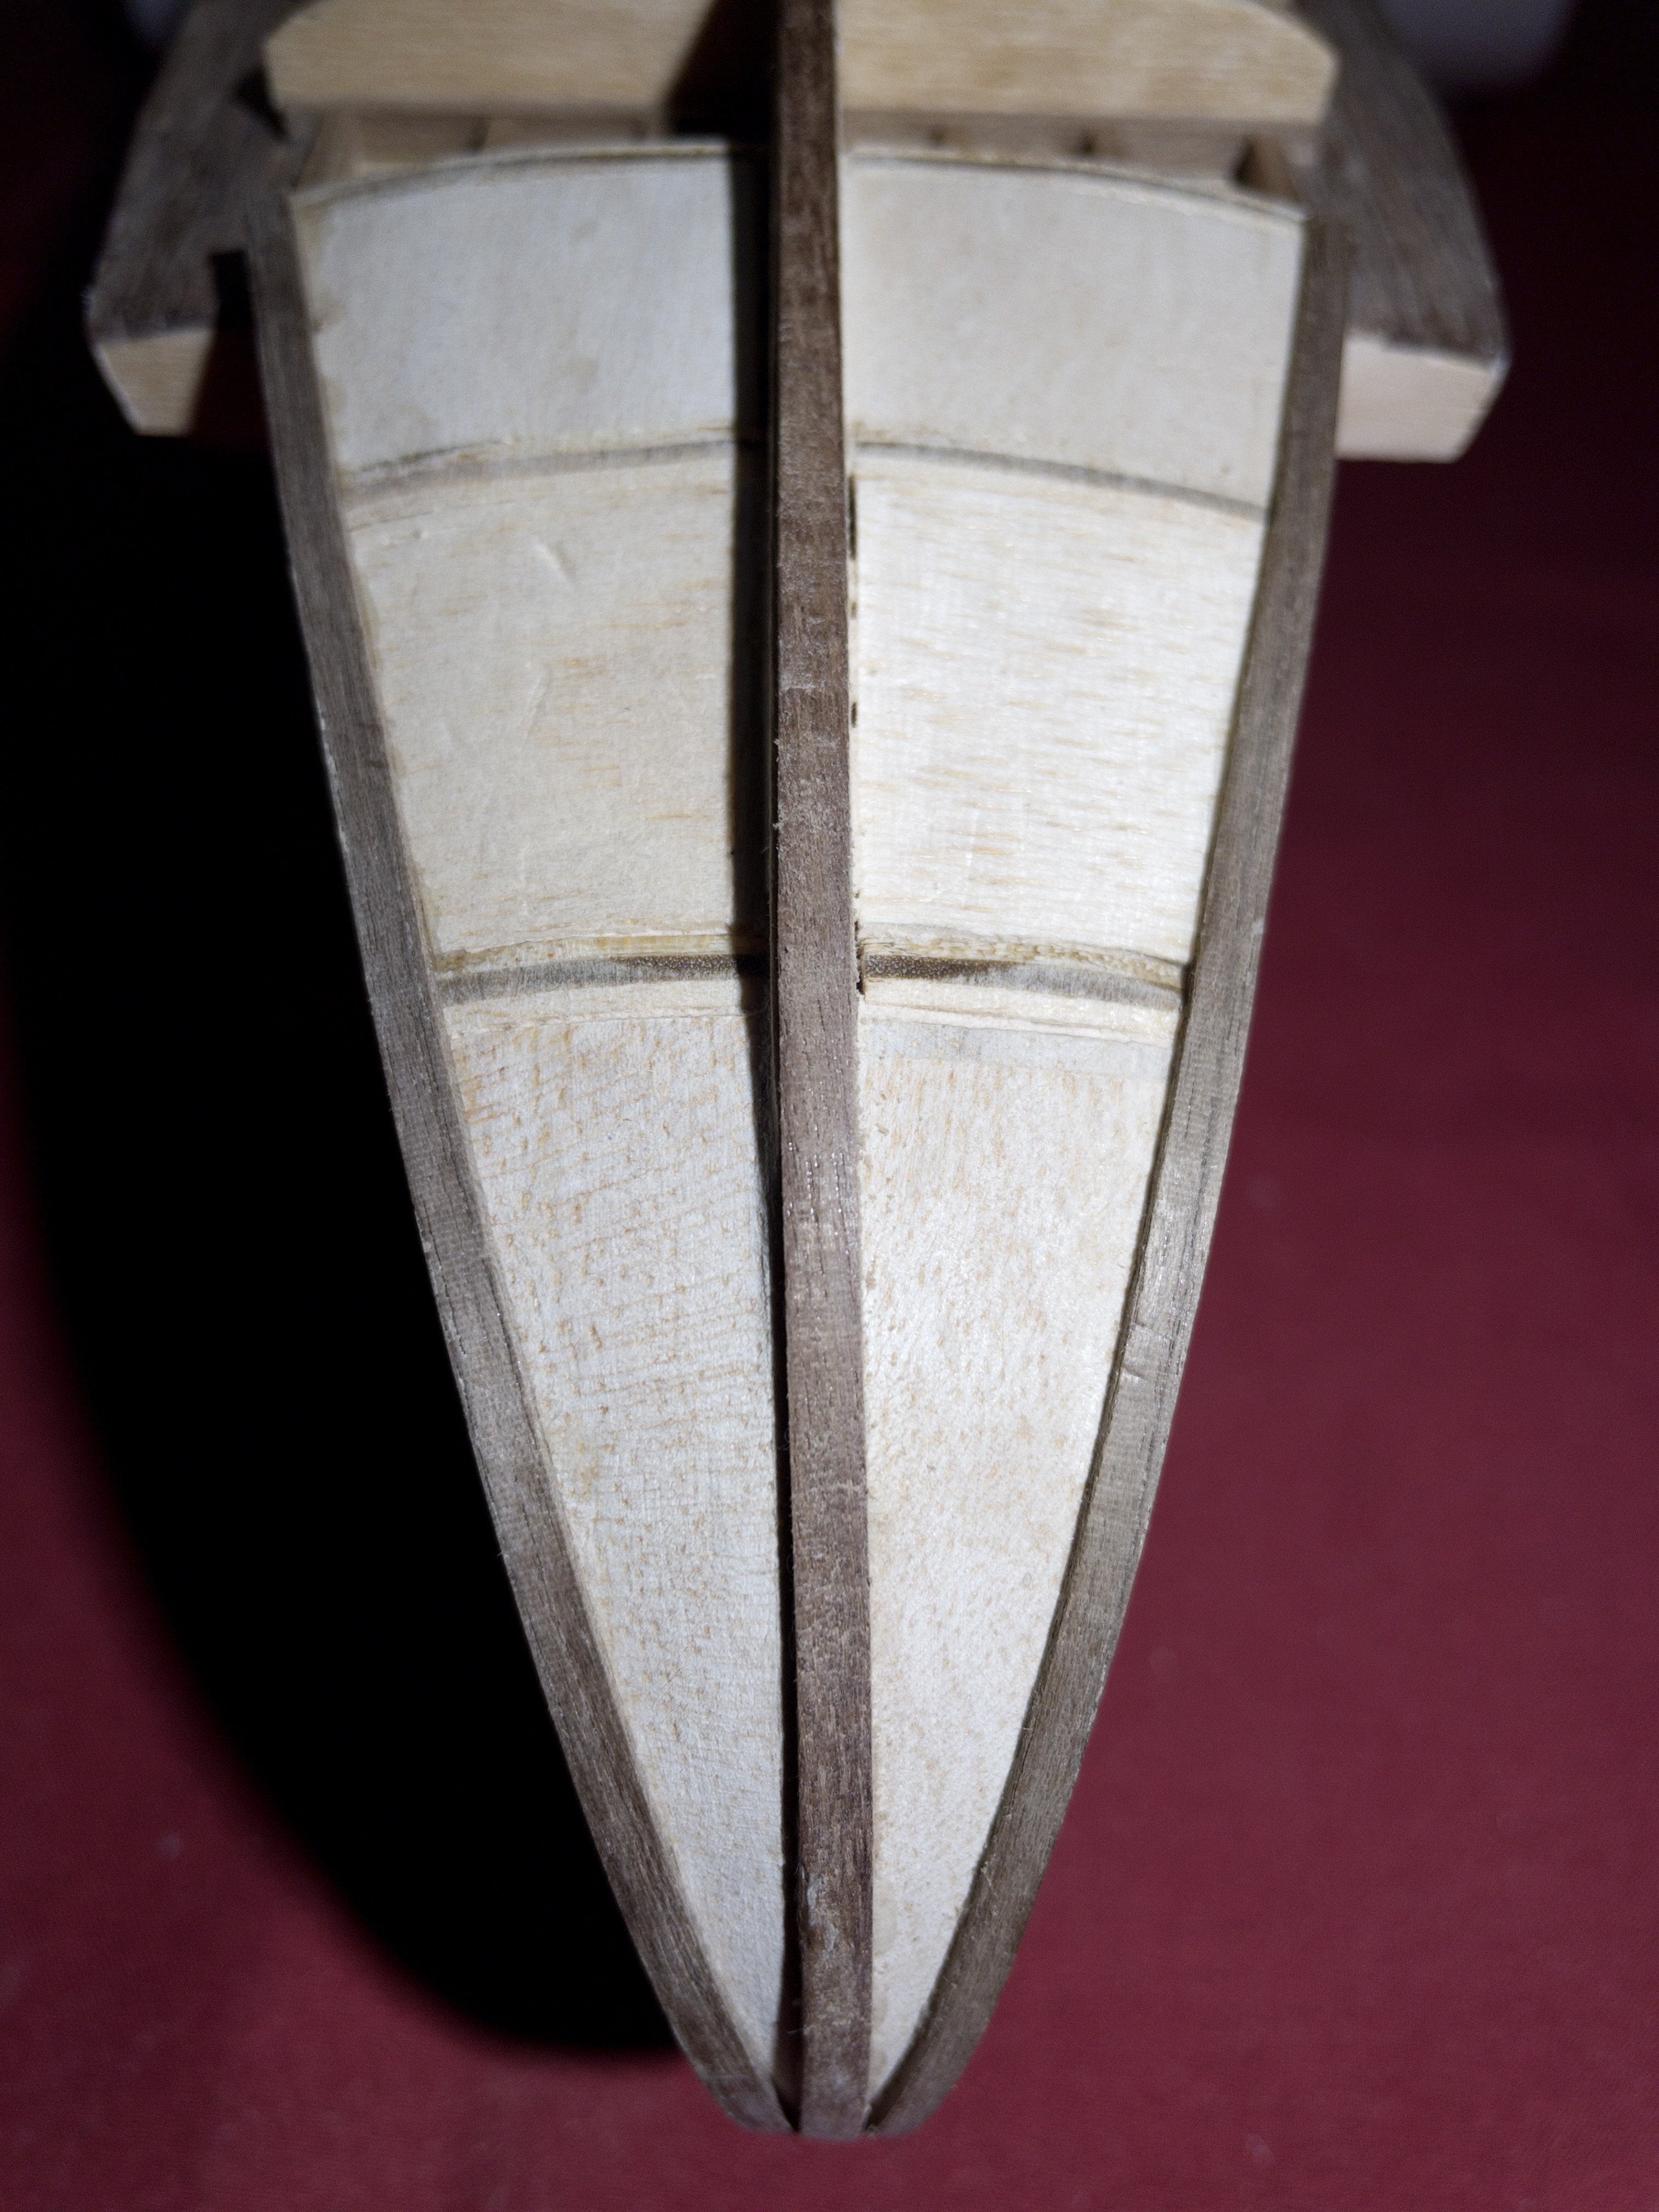
Planking Bow and stern (part 1): It is amazing how we can underestimate the difficulty of planking those small ships. The amount of detail, the relatively thick strips, and obviously the curvature of the ship is just .... hell at times. I'm still not sure how to tackle the side at the stern. Curving hardwood (walnut) sideways to such an extreme is not a joke. It may not even be possible... will see next week.

-
I had a similar experience but with other issues, long story short... Building model ship is an excellent way to occupy mind and body. The fascination in the background history, admiration of the initial builders and their beautiful - yet practical- designs, the development of technical skills that keep growing, problem solving and bashing outlet for the perfectionist, and mostly the beauty and satisfaction of the final model. I'm happy having discovered this world...
-
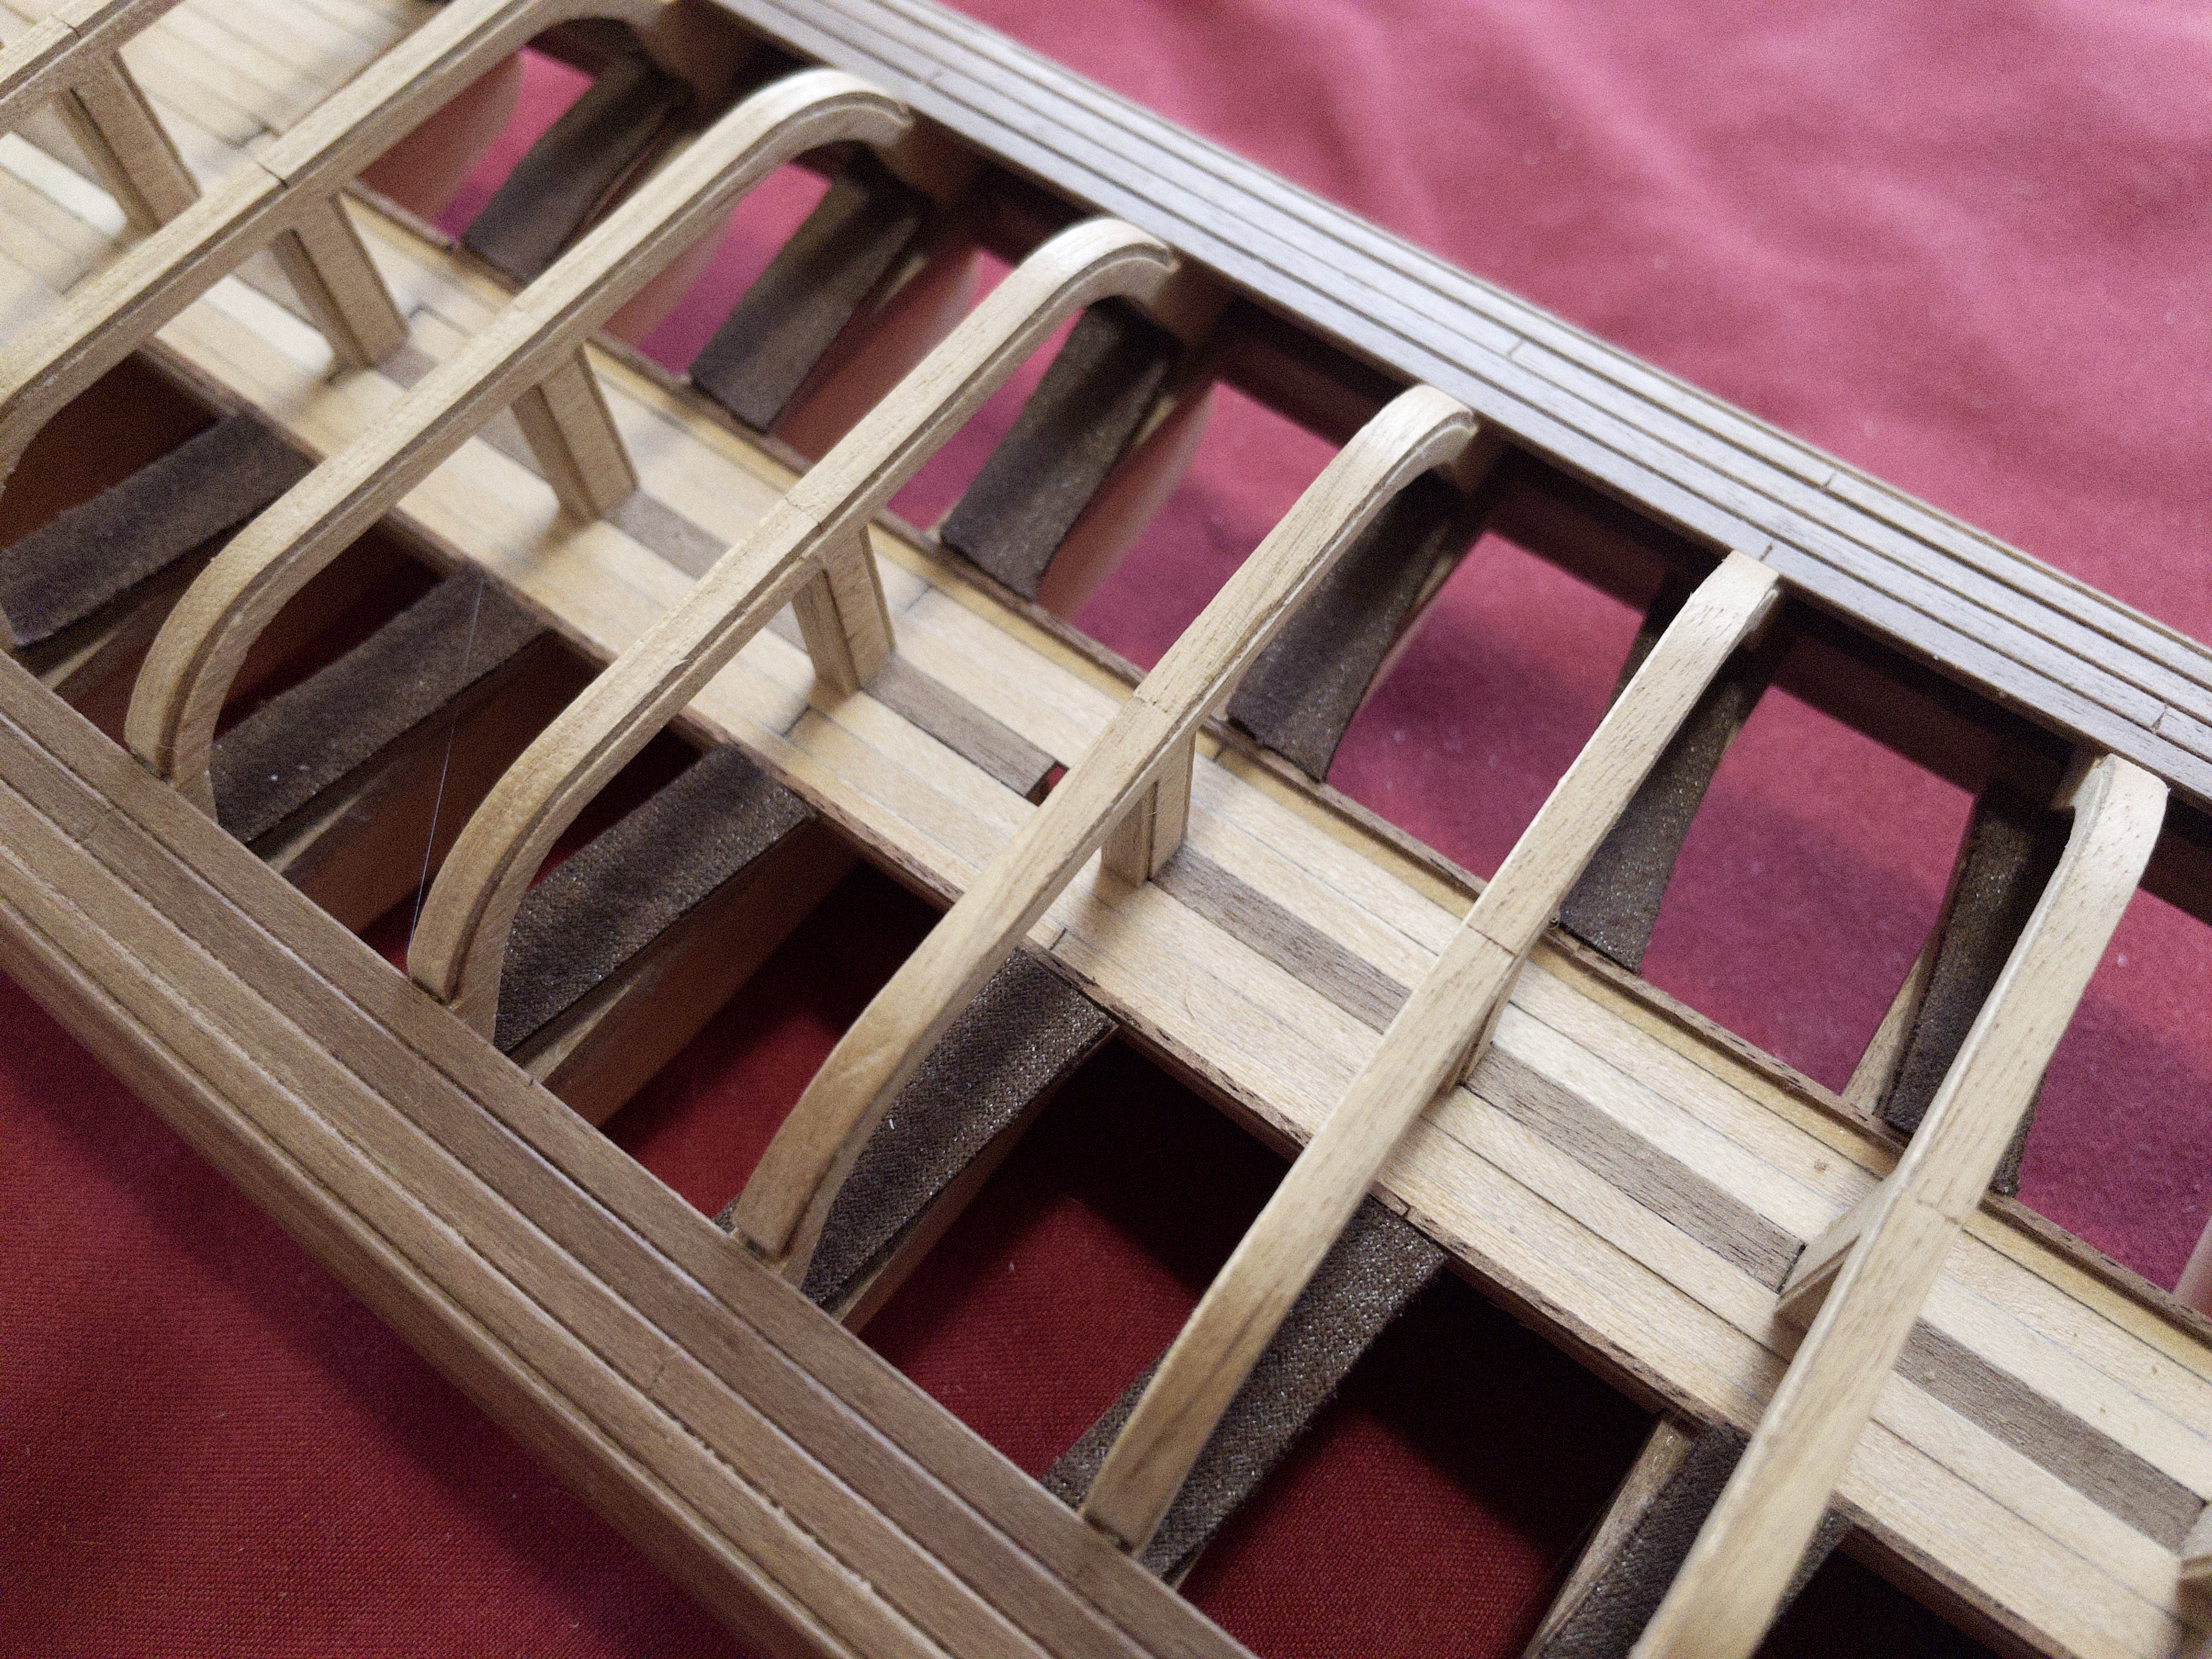
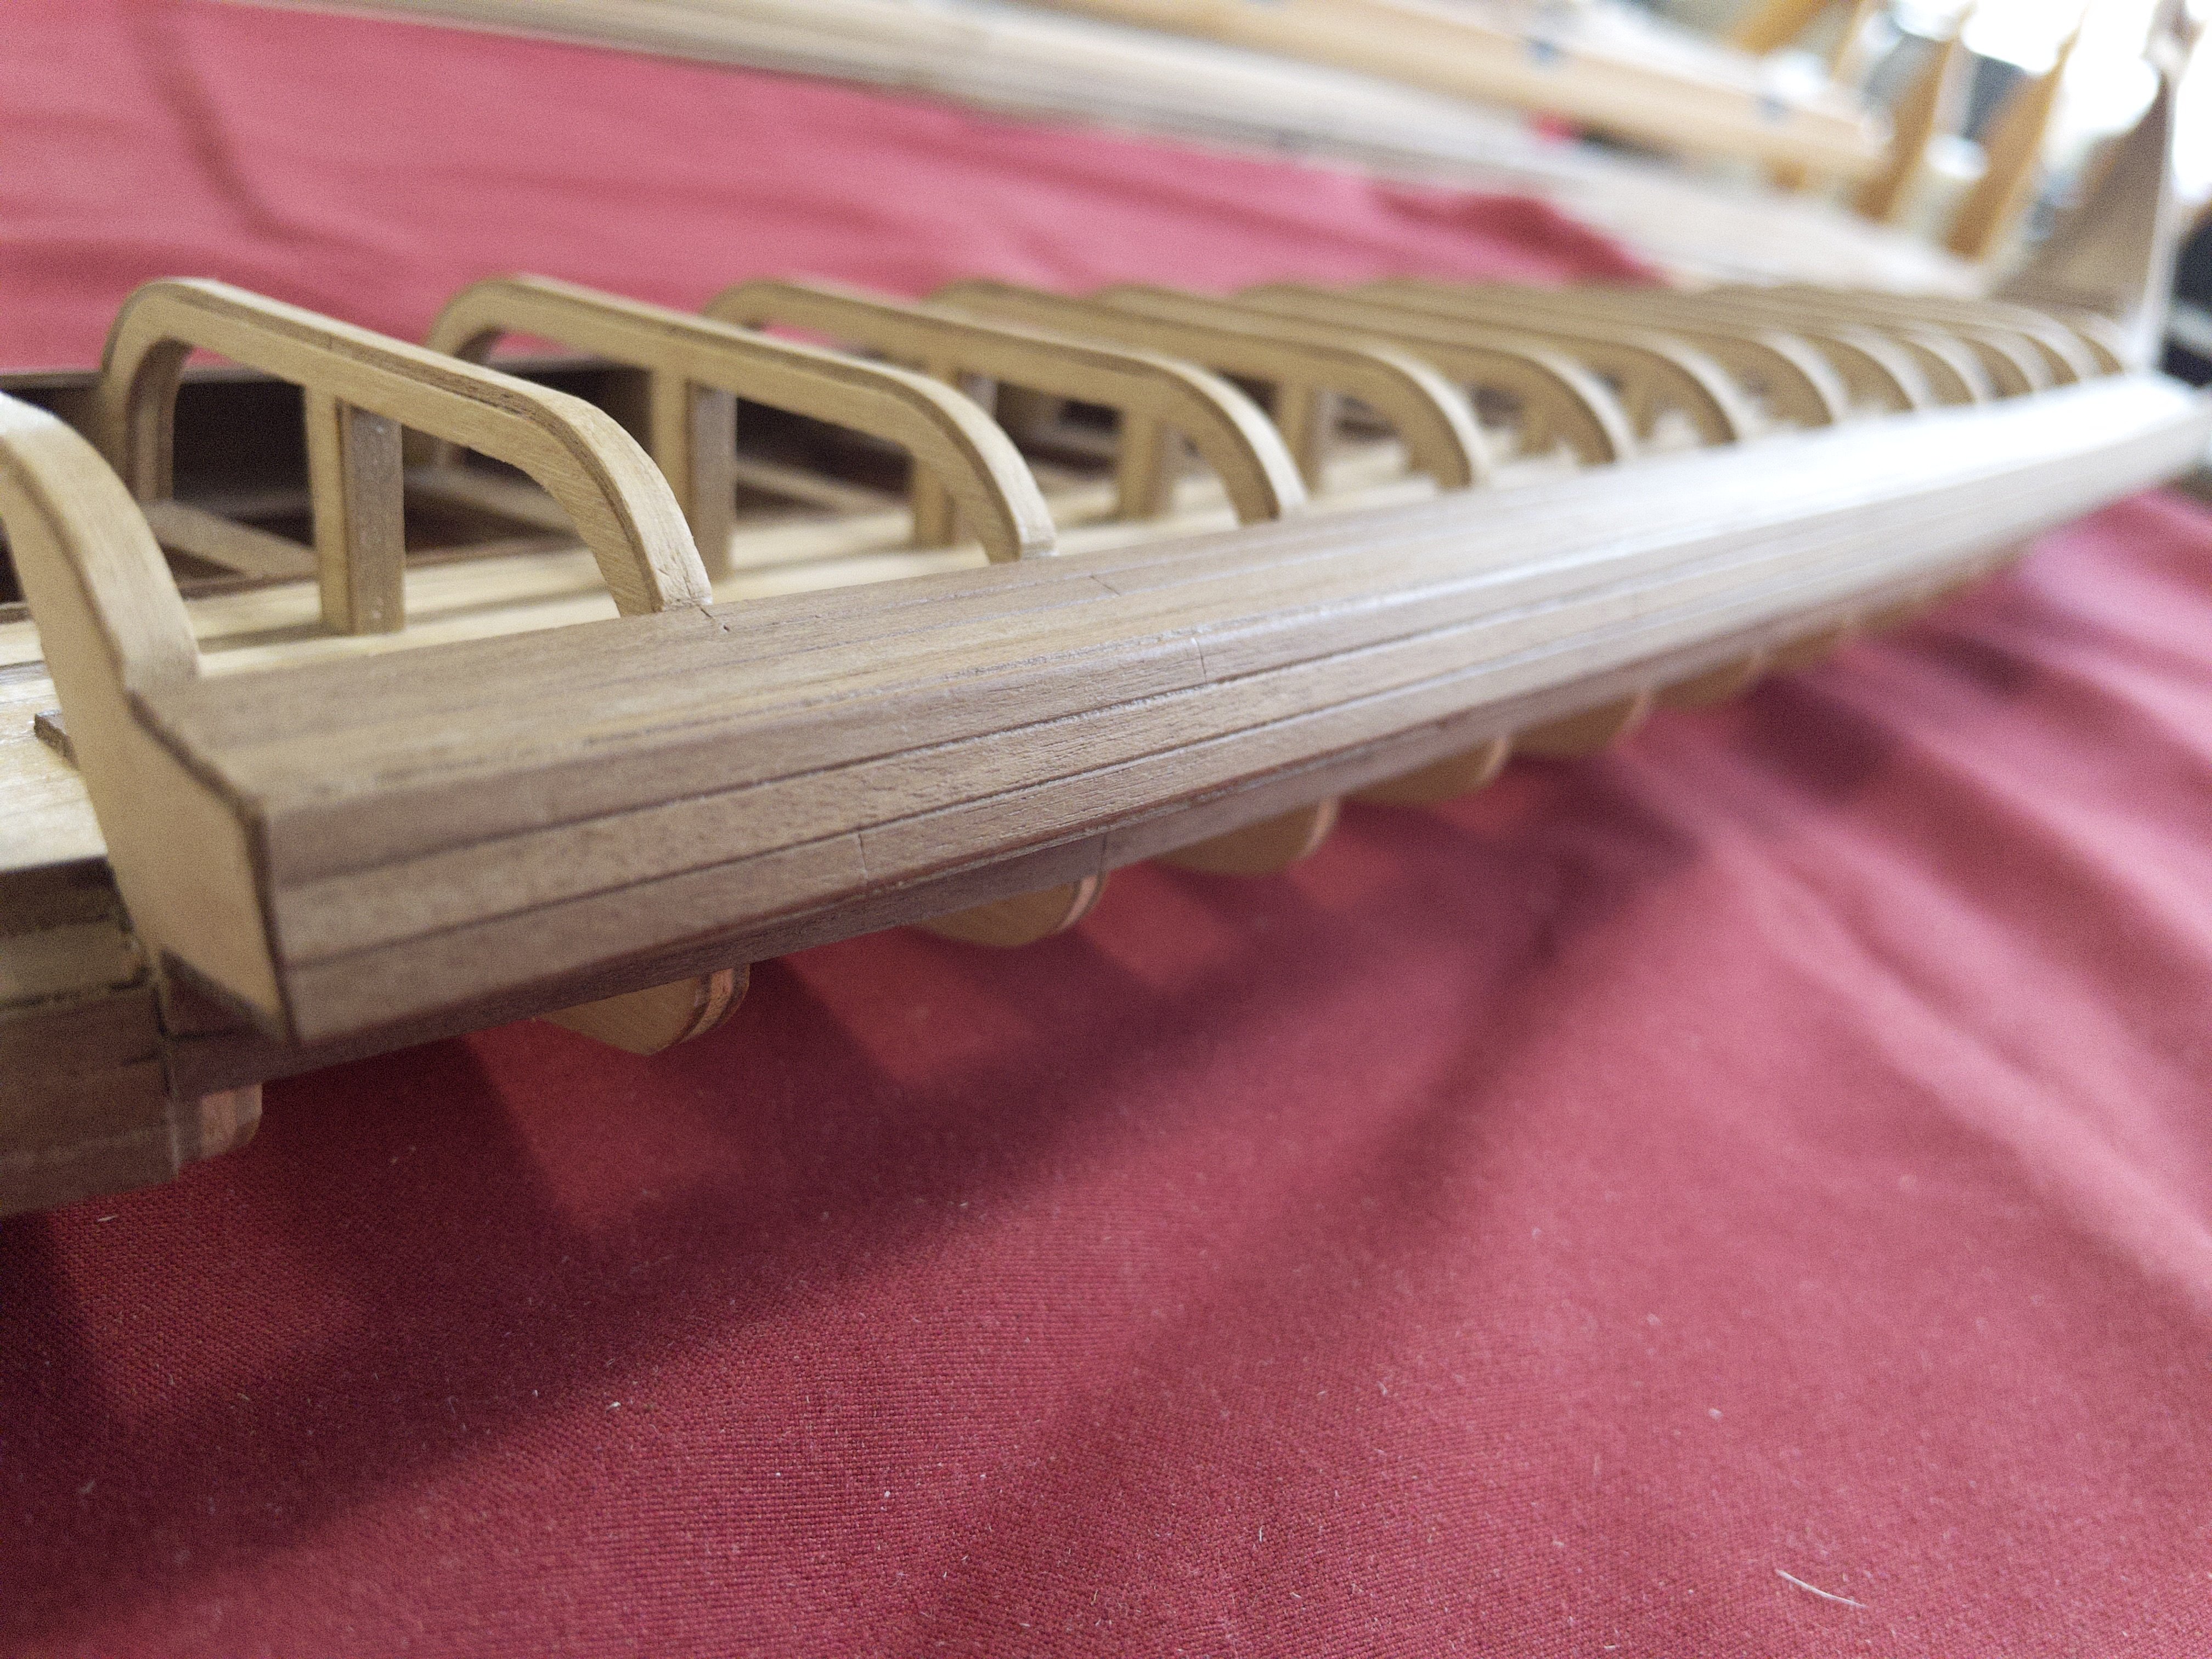
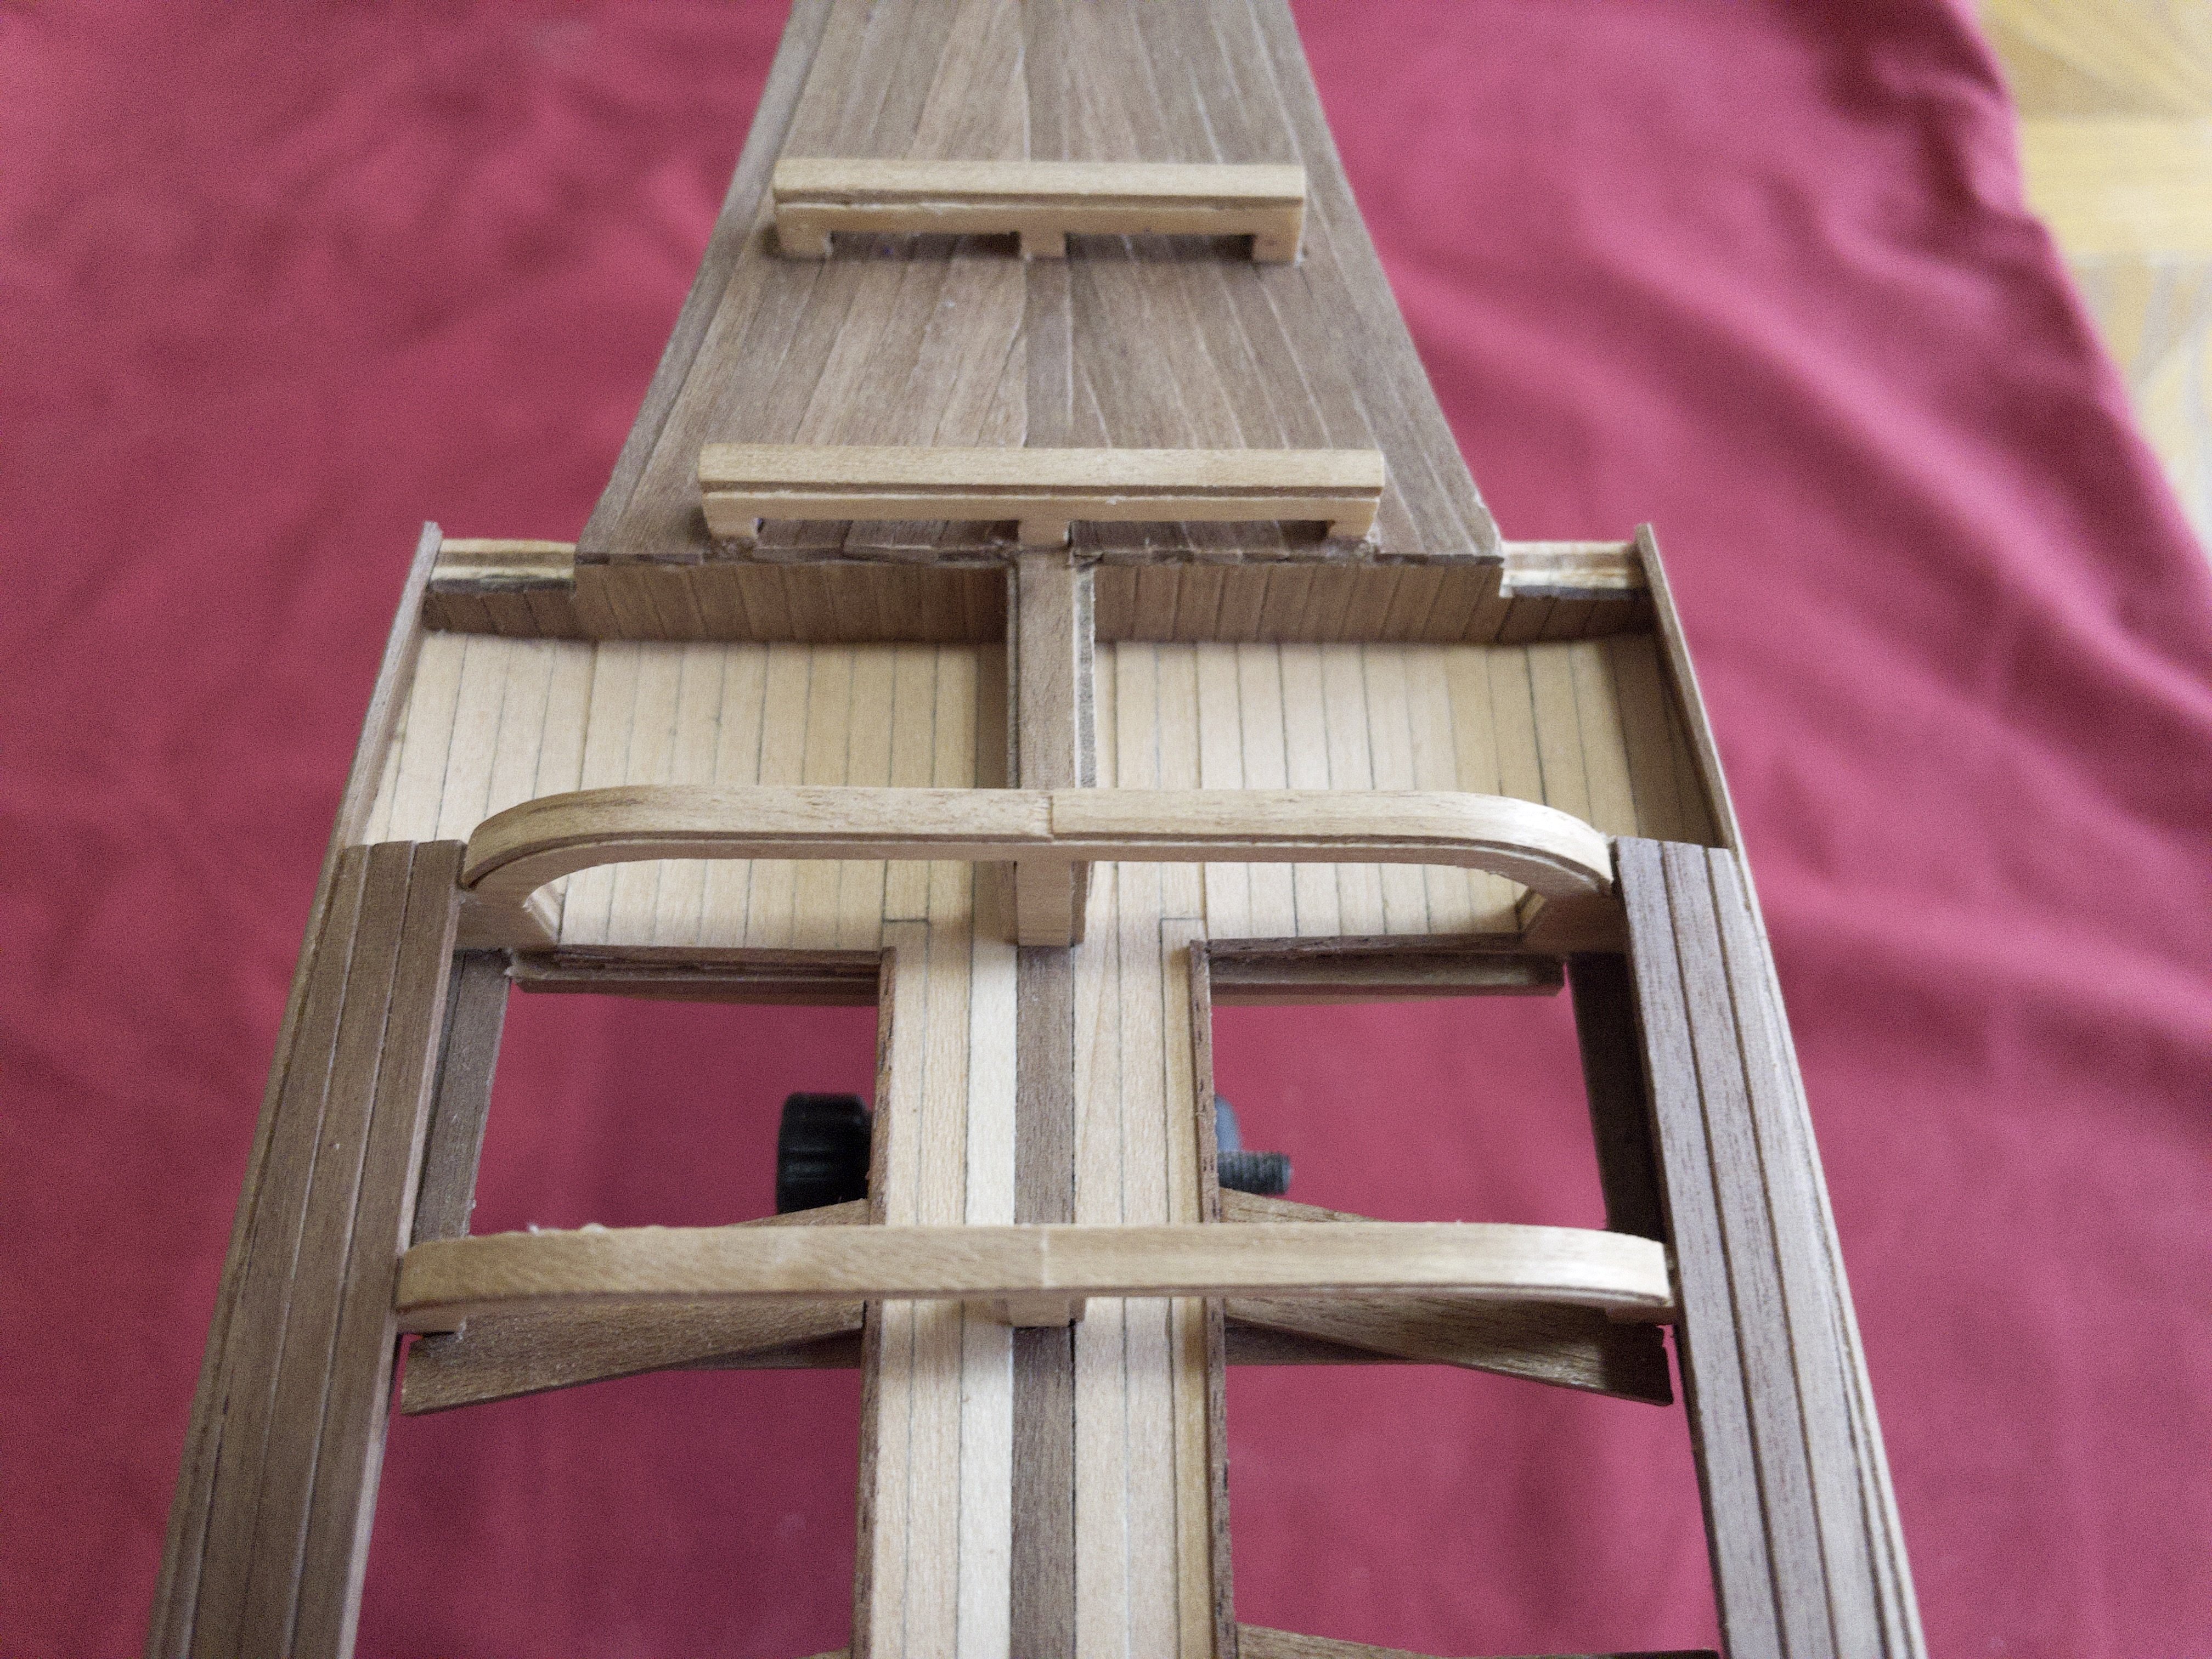
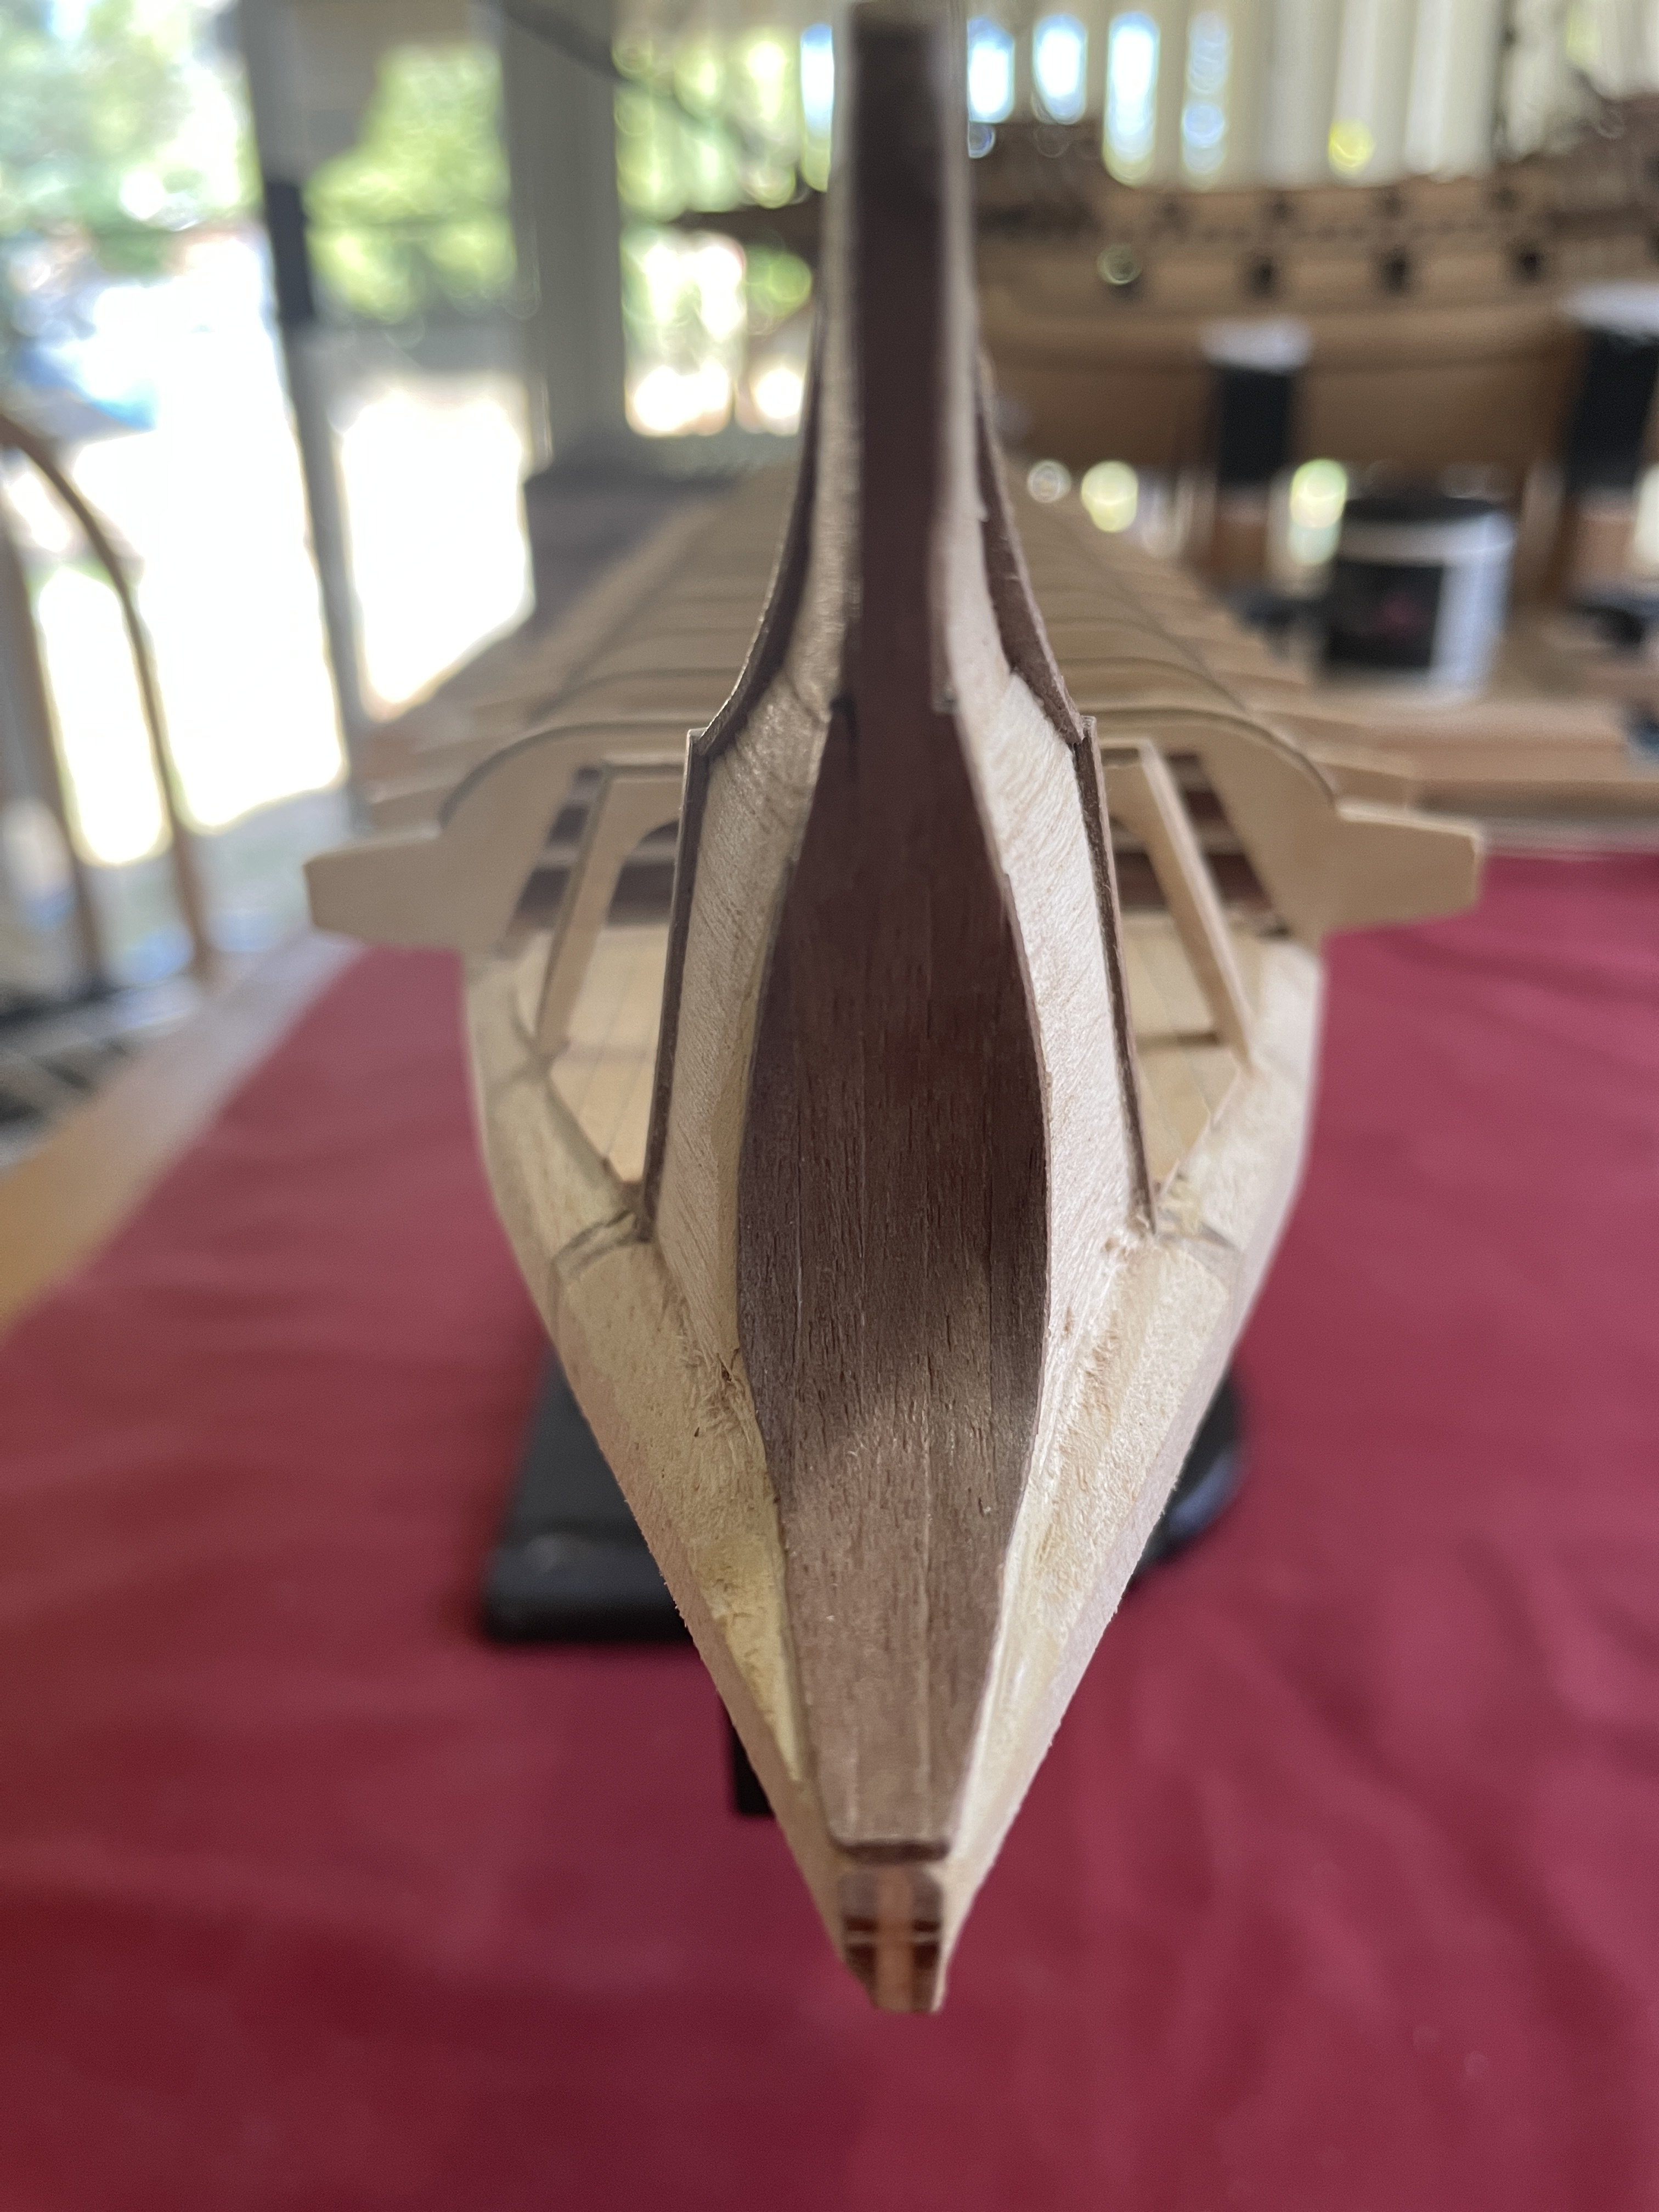
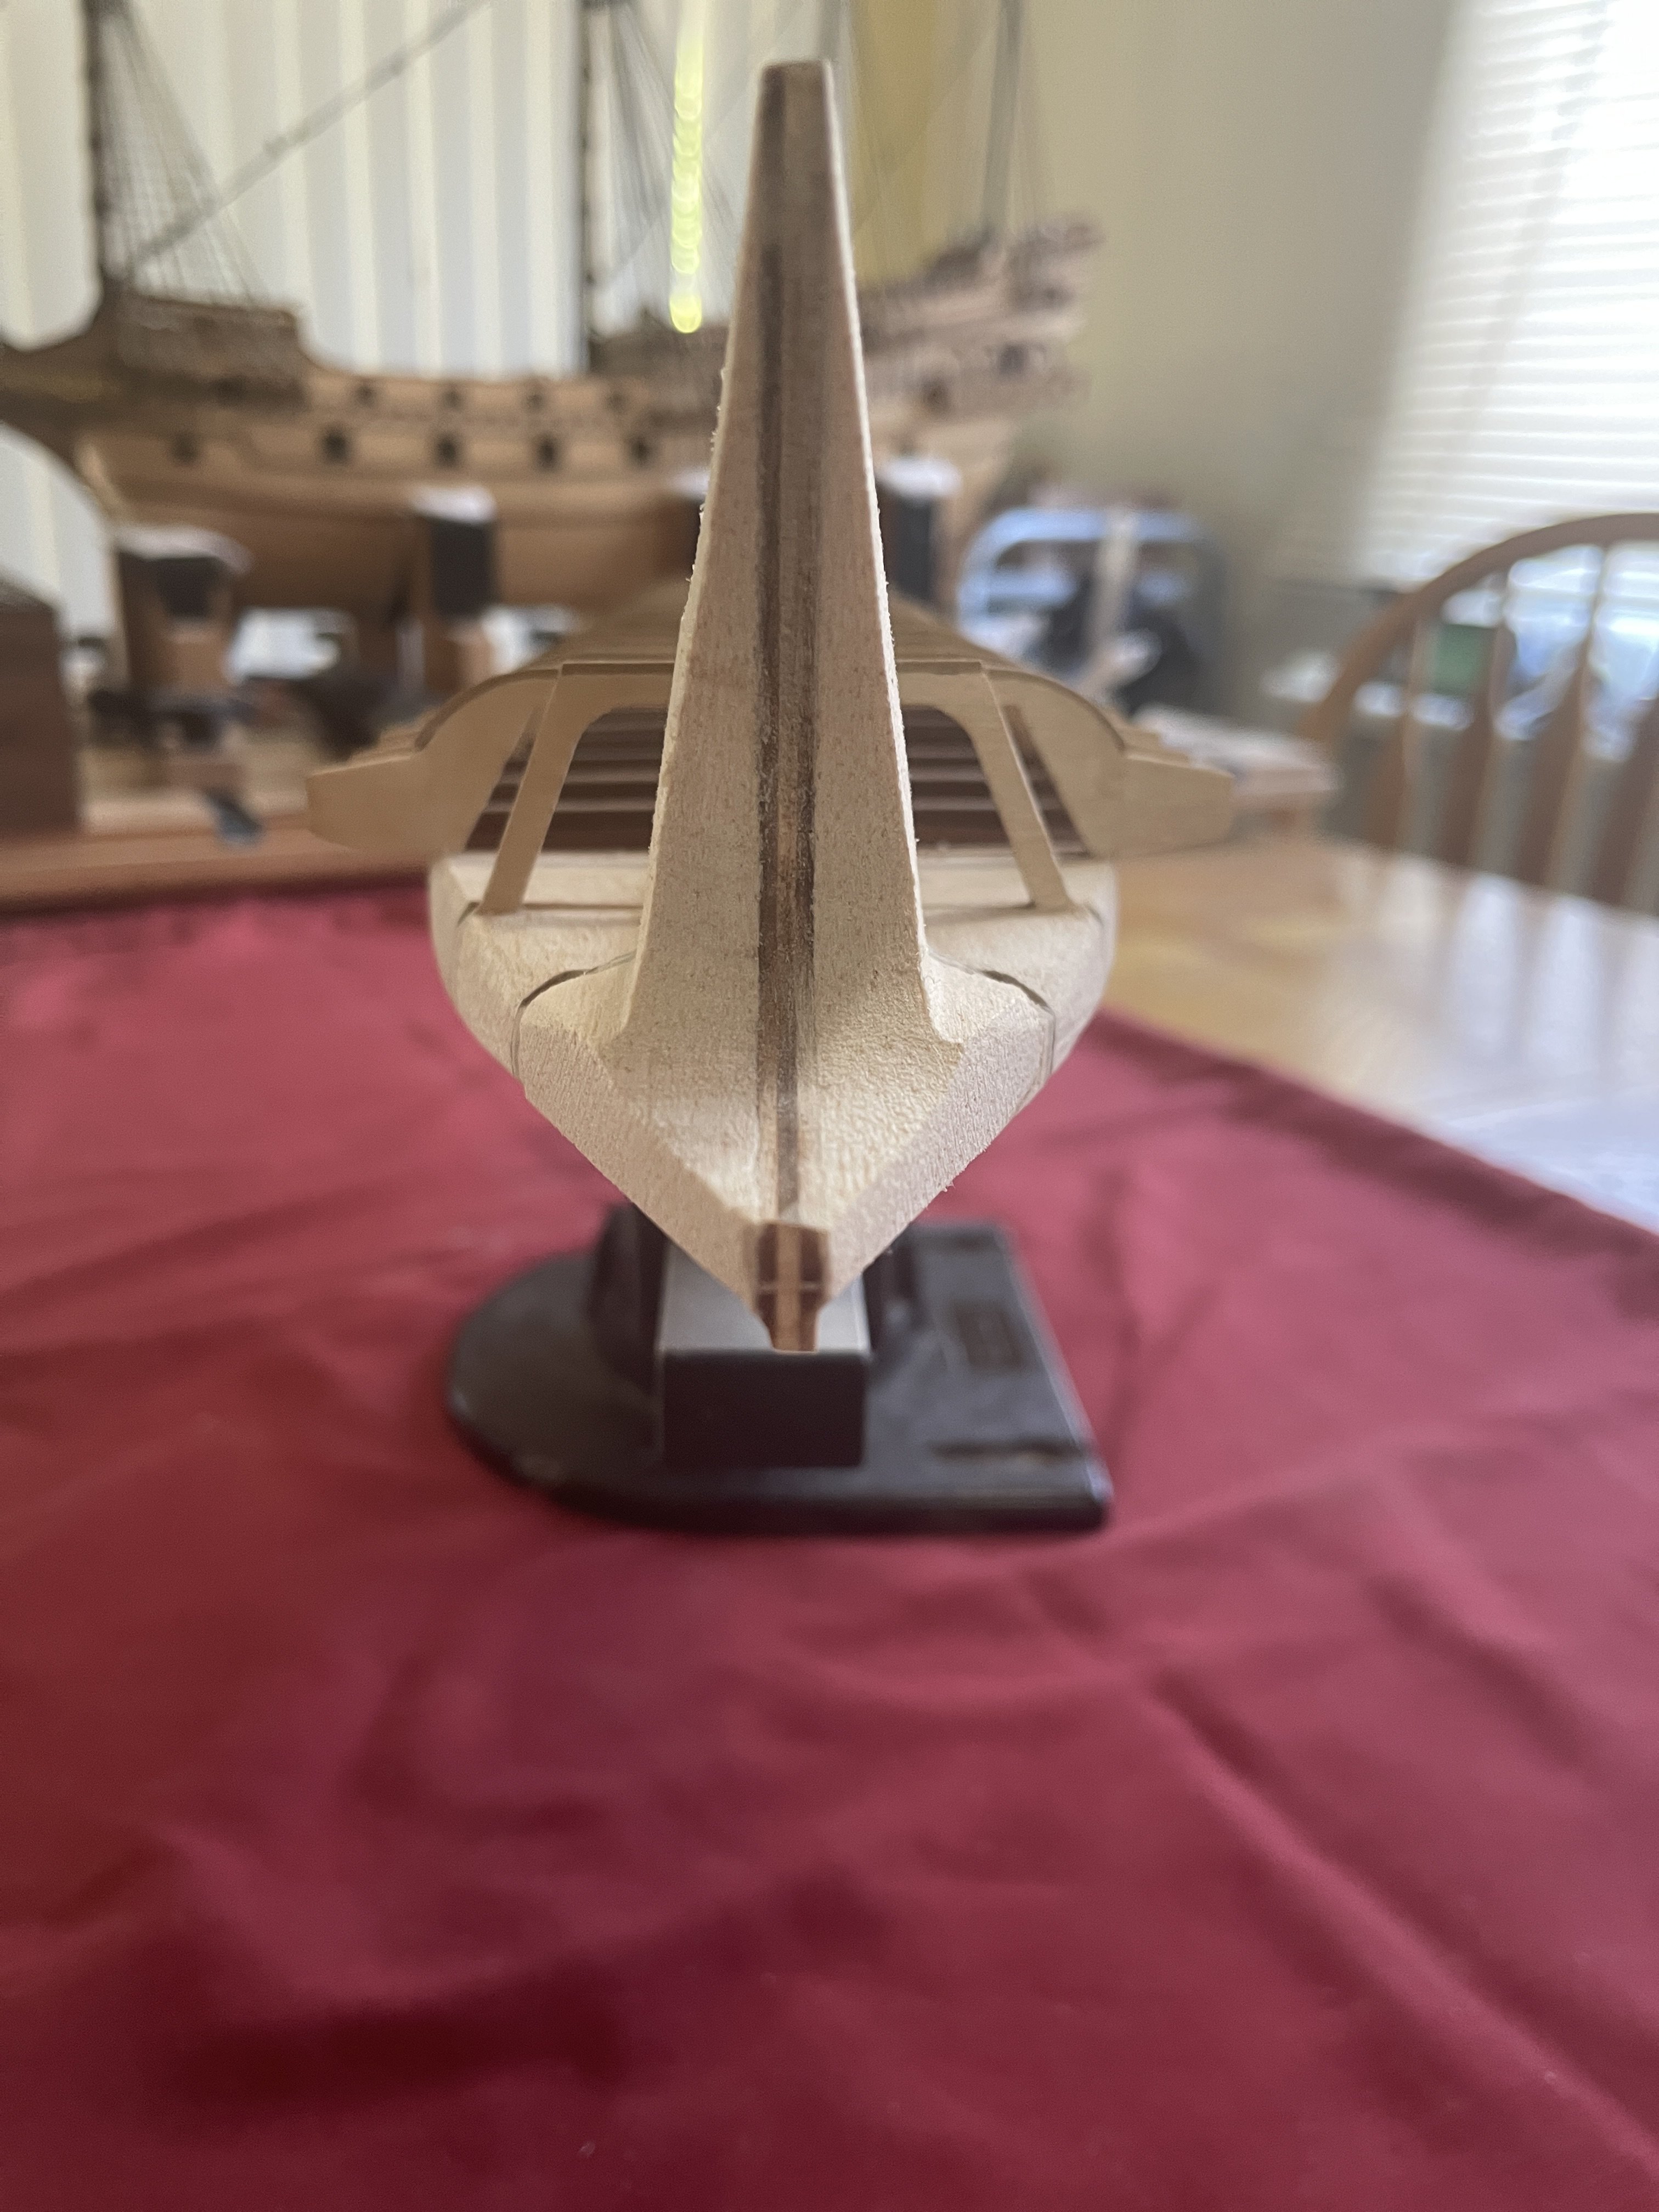
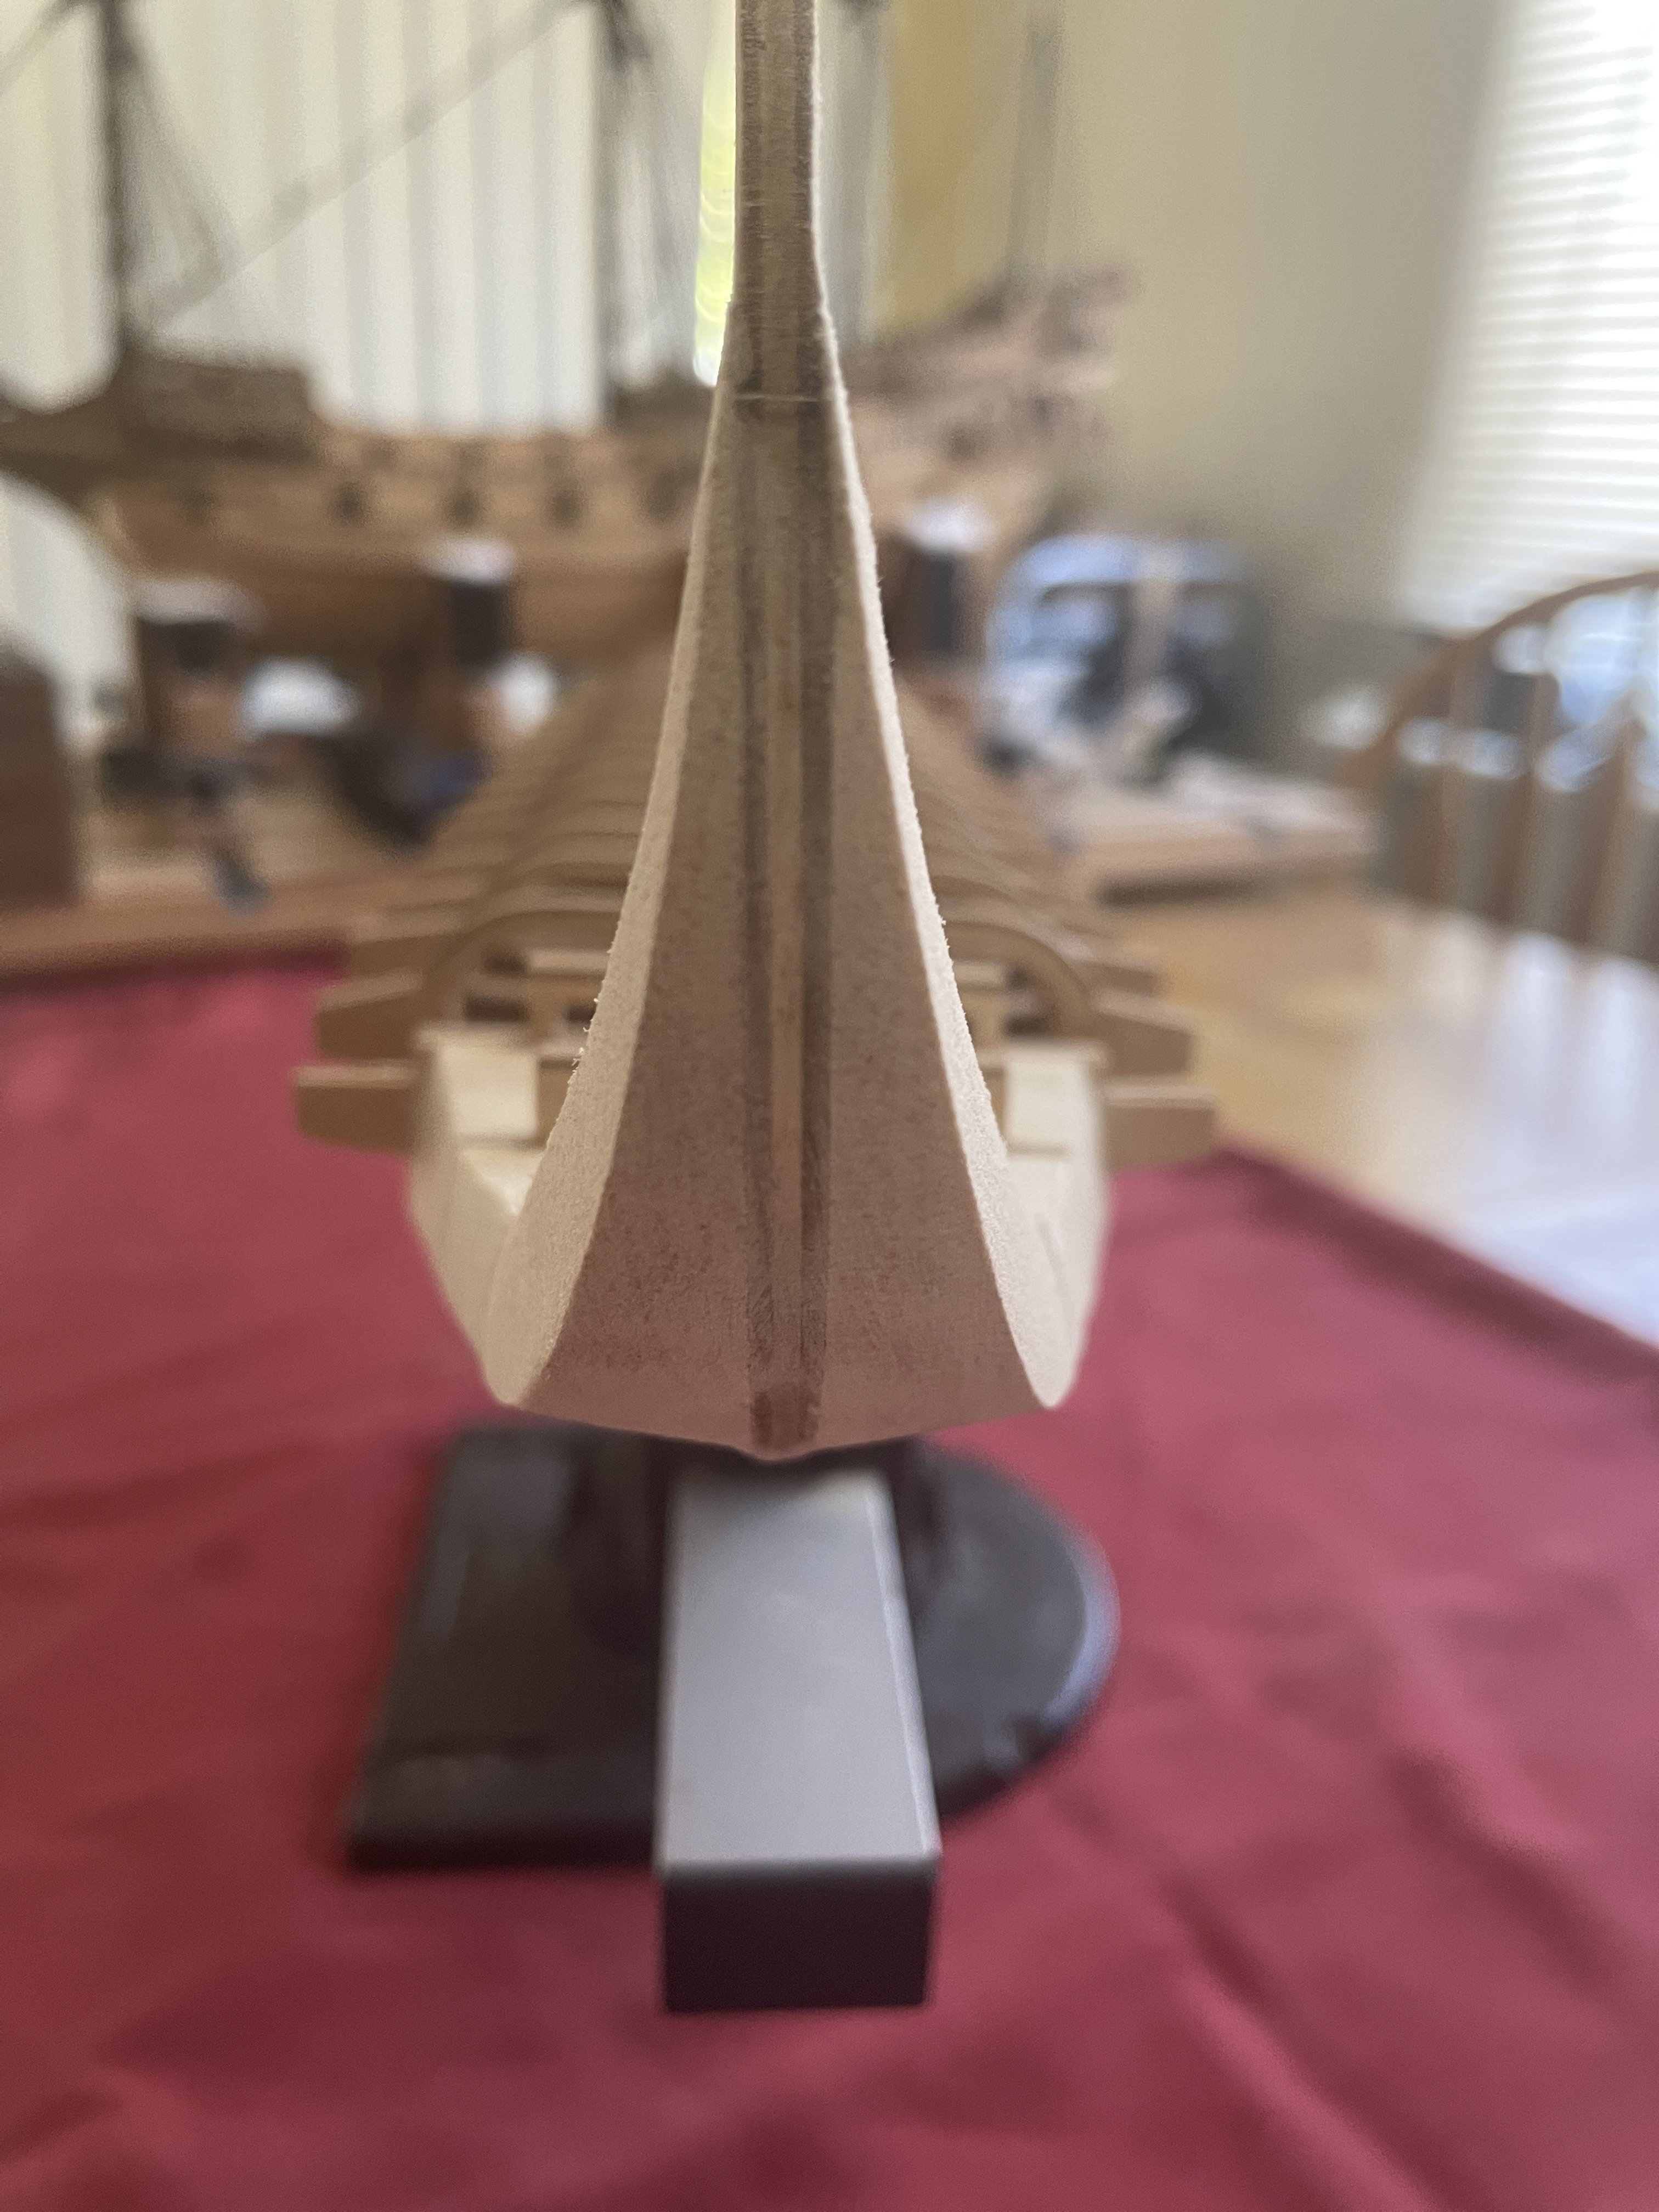
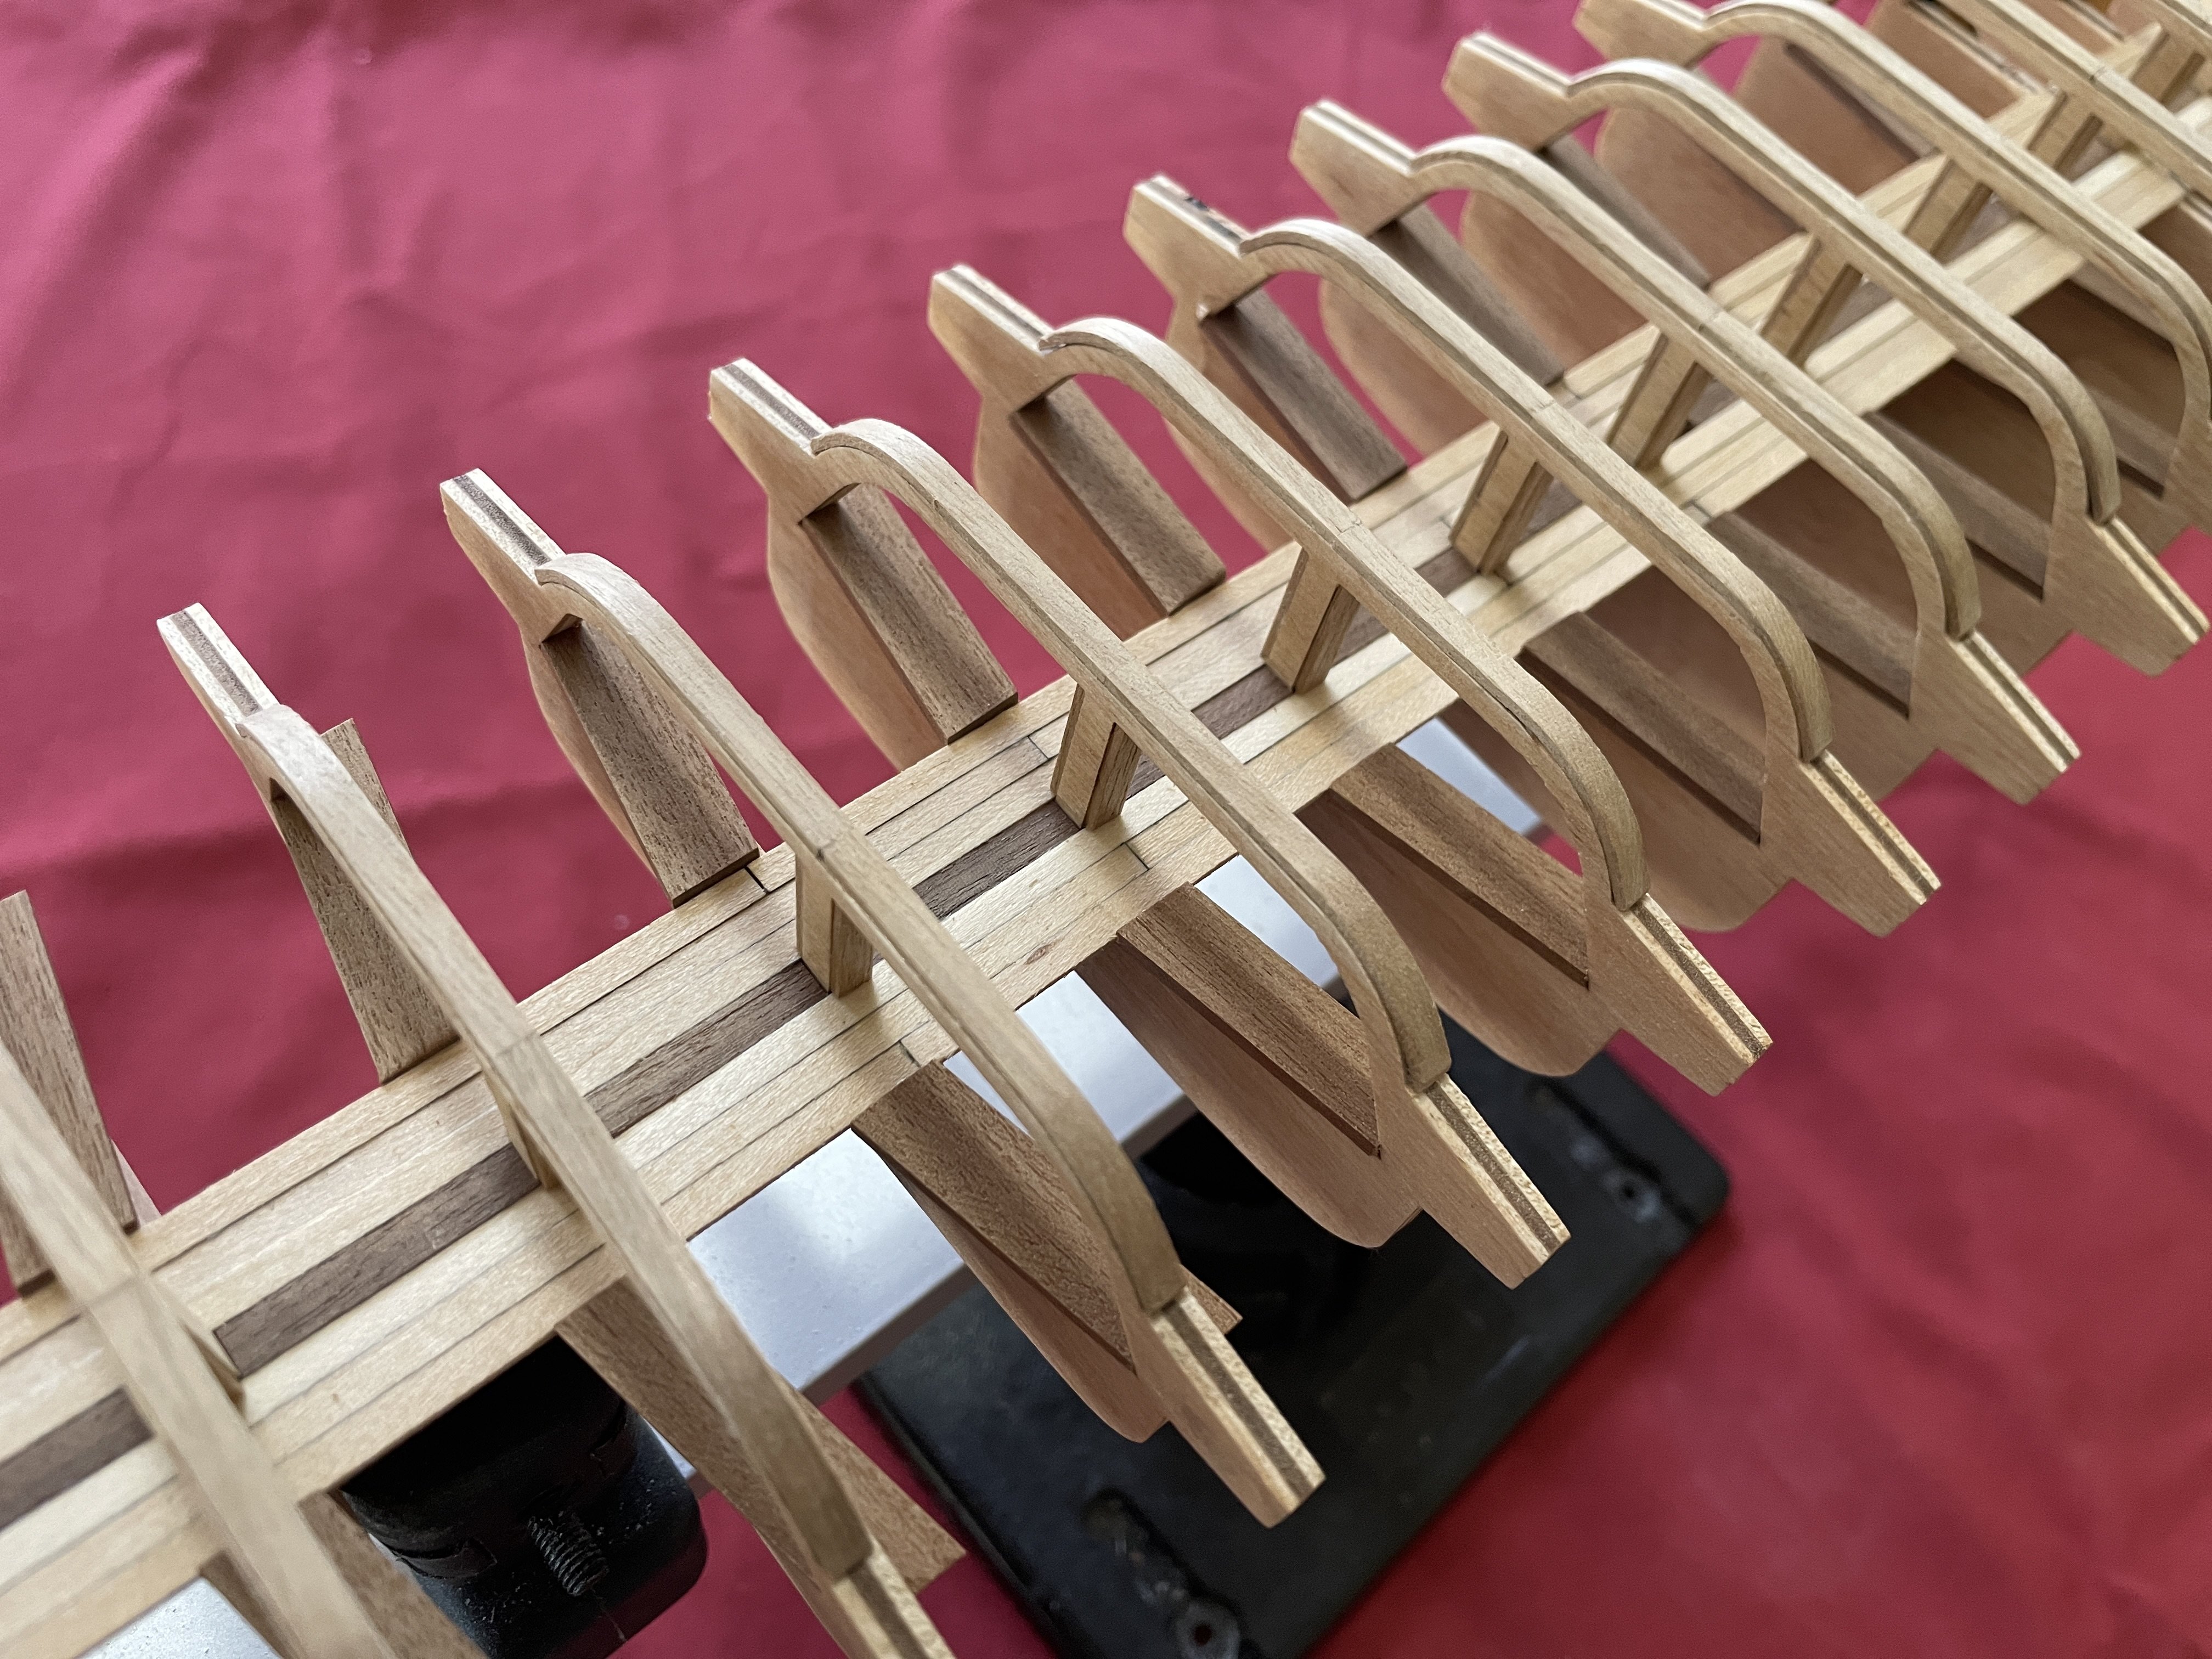
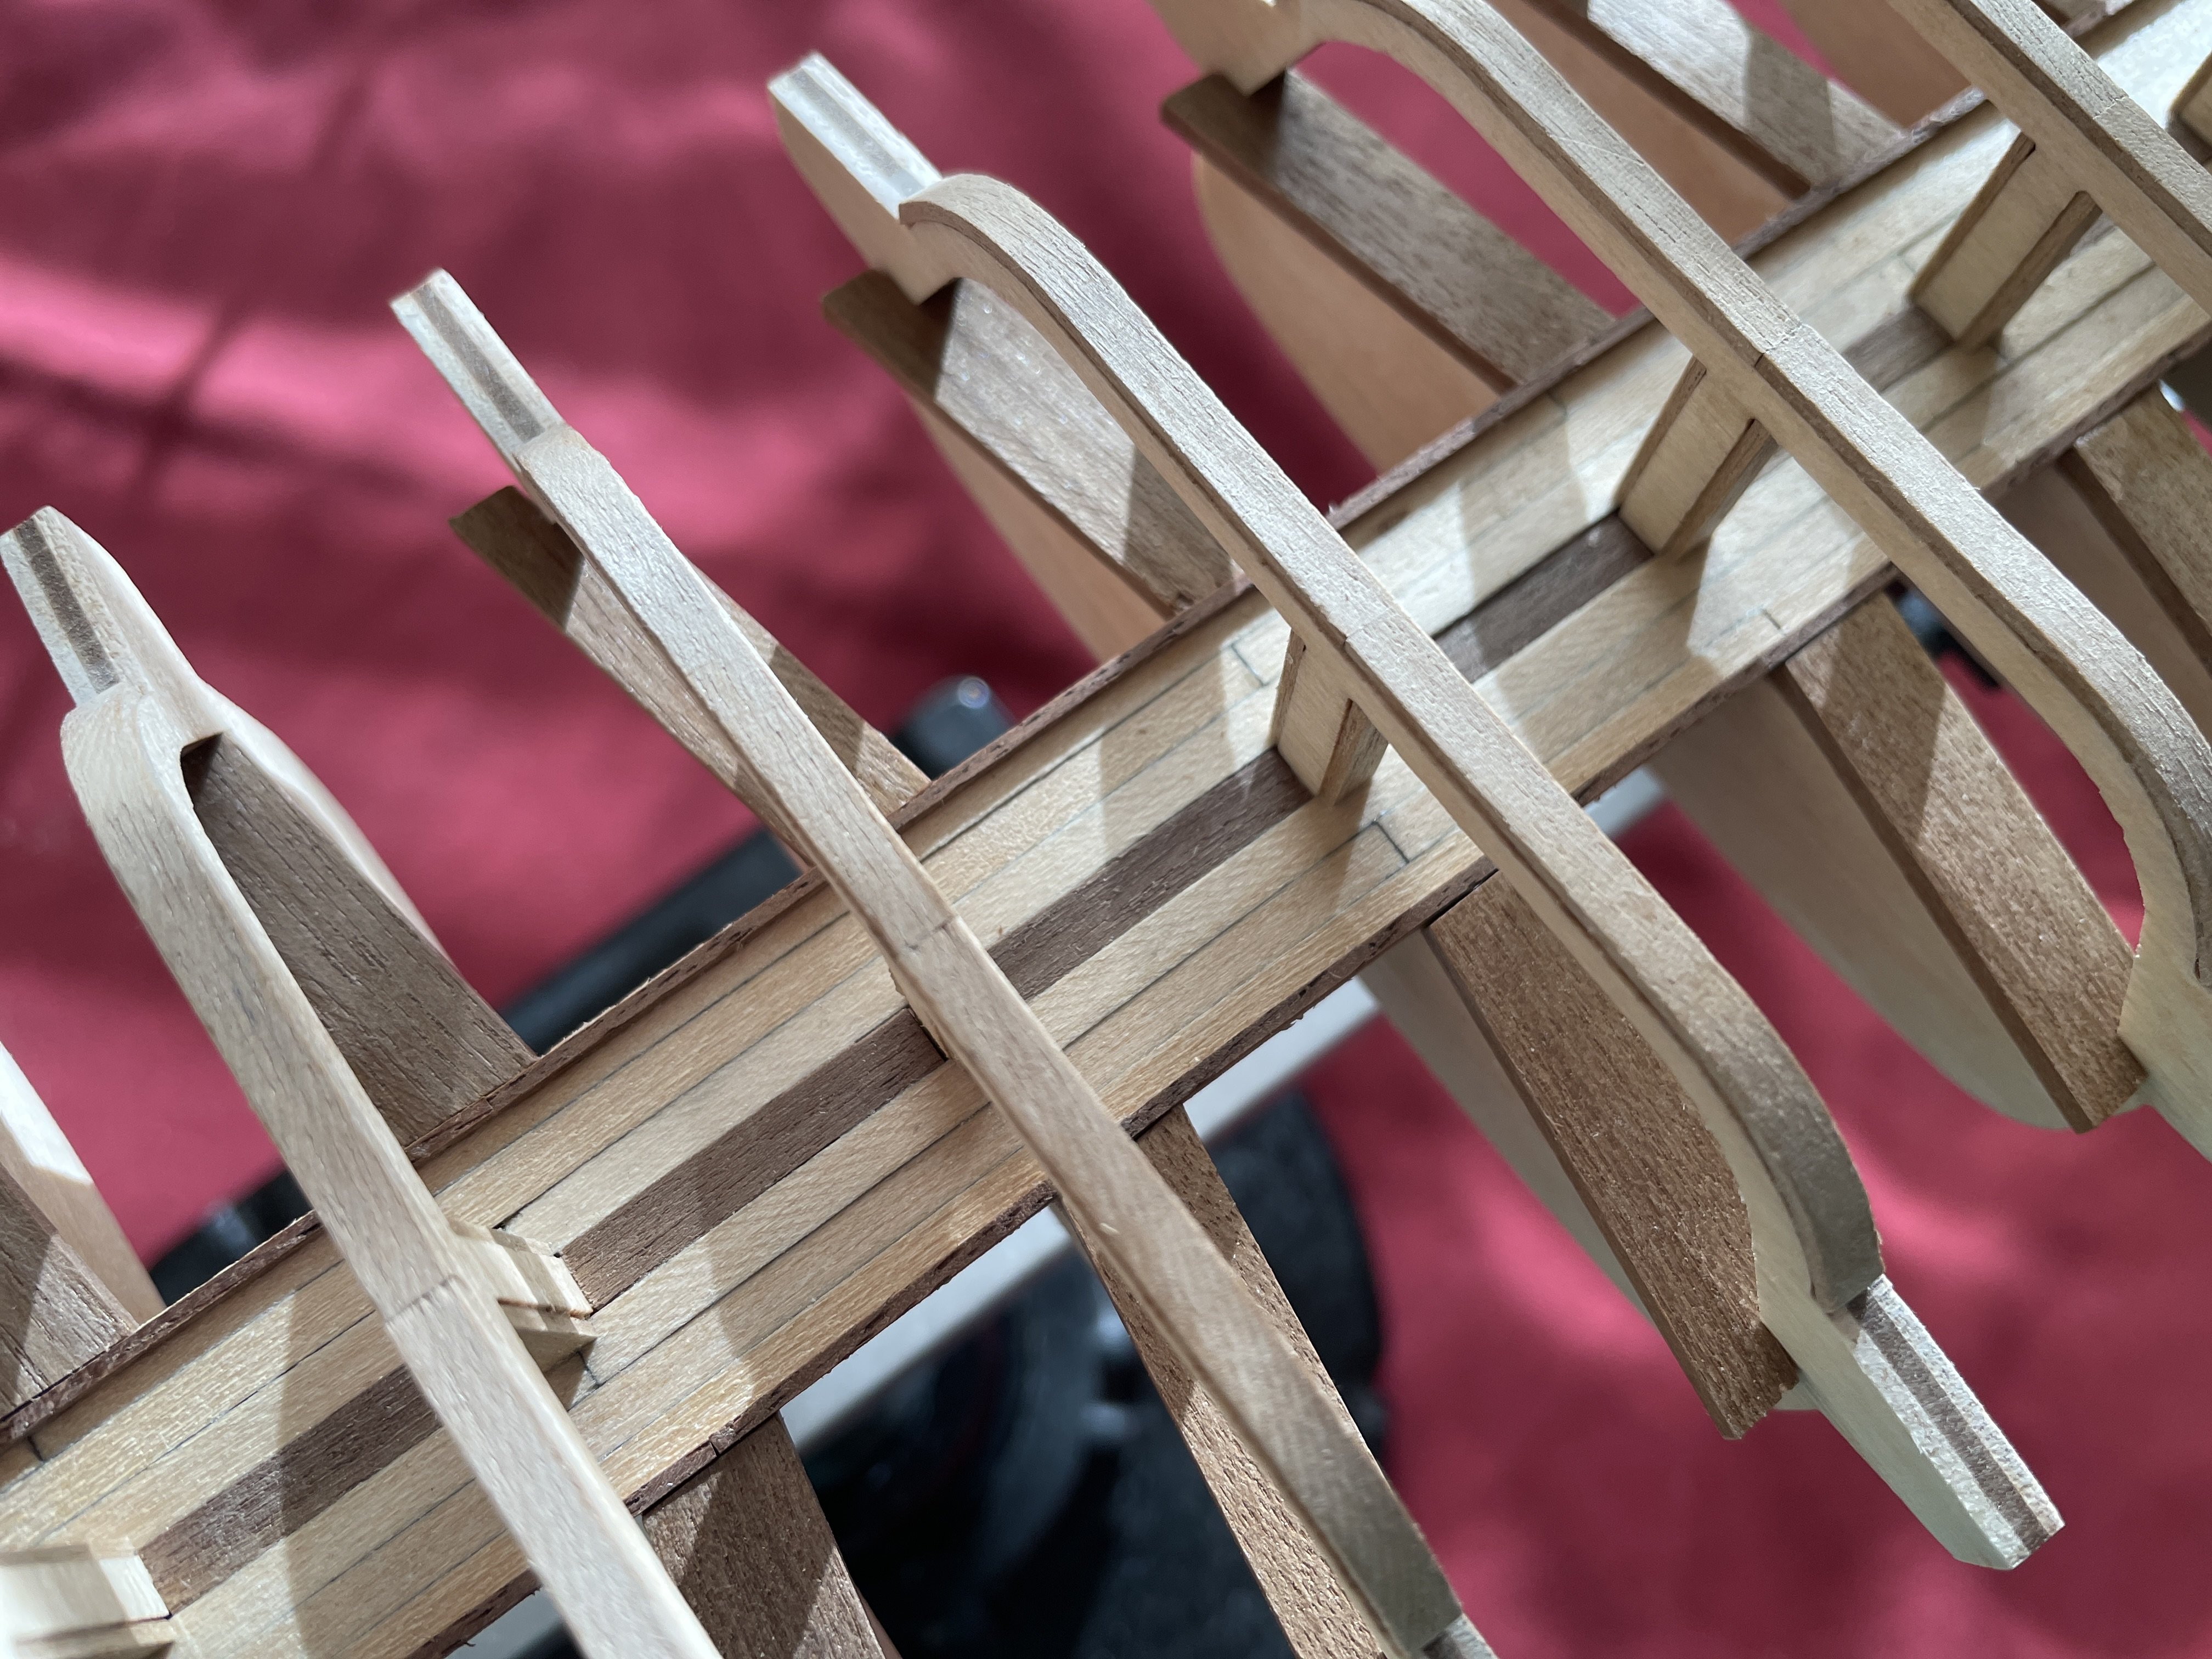
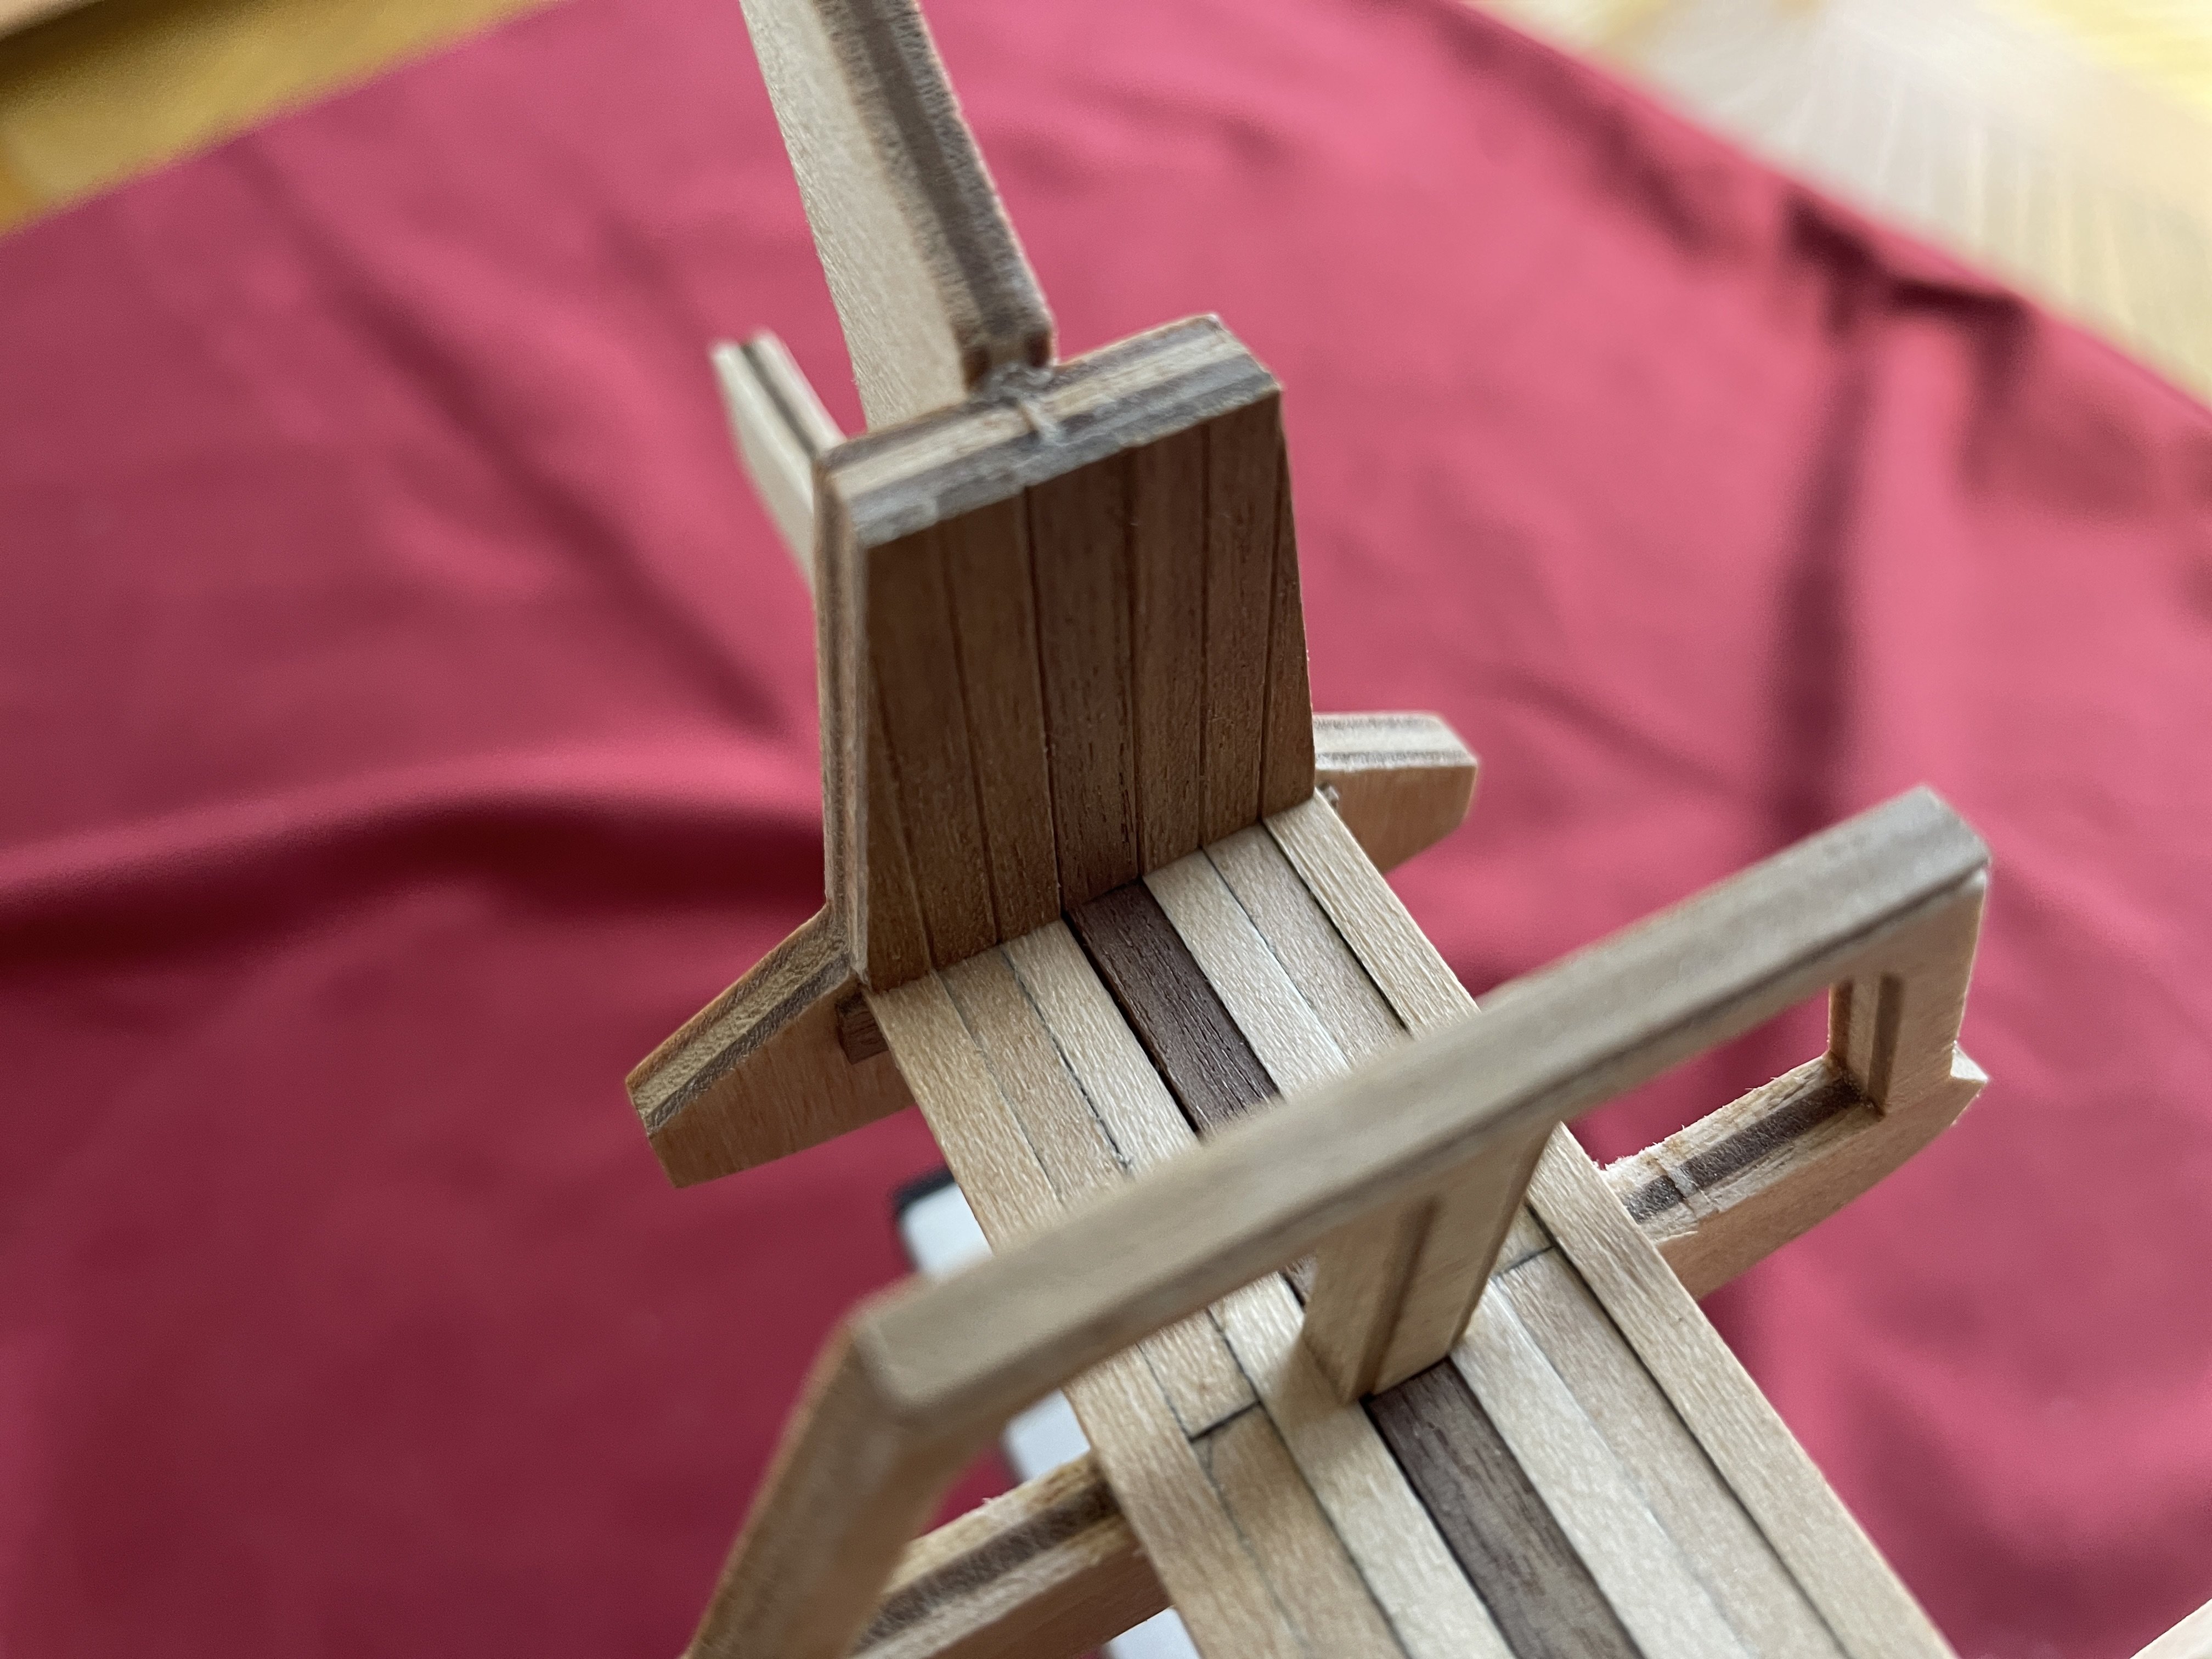
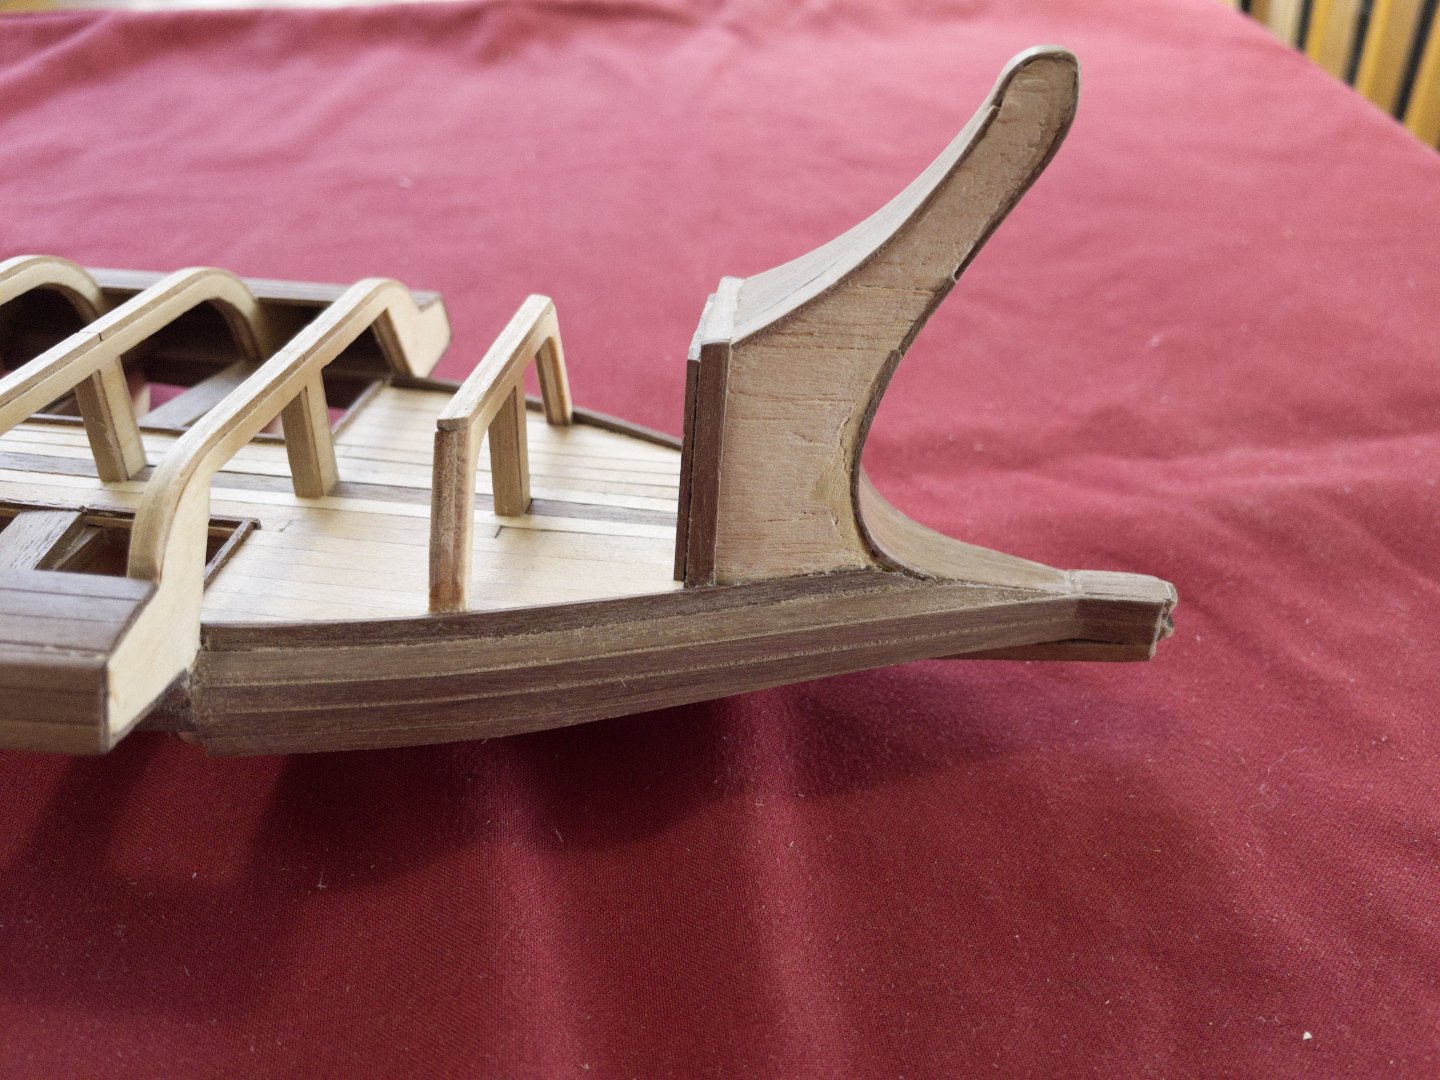
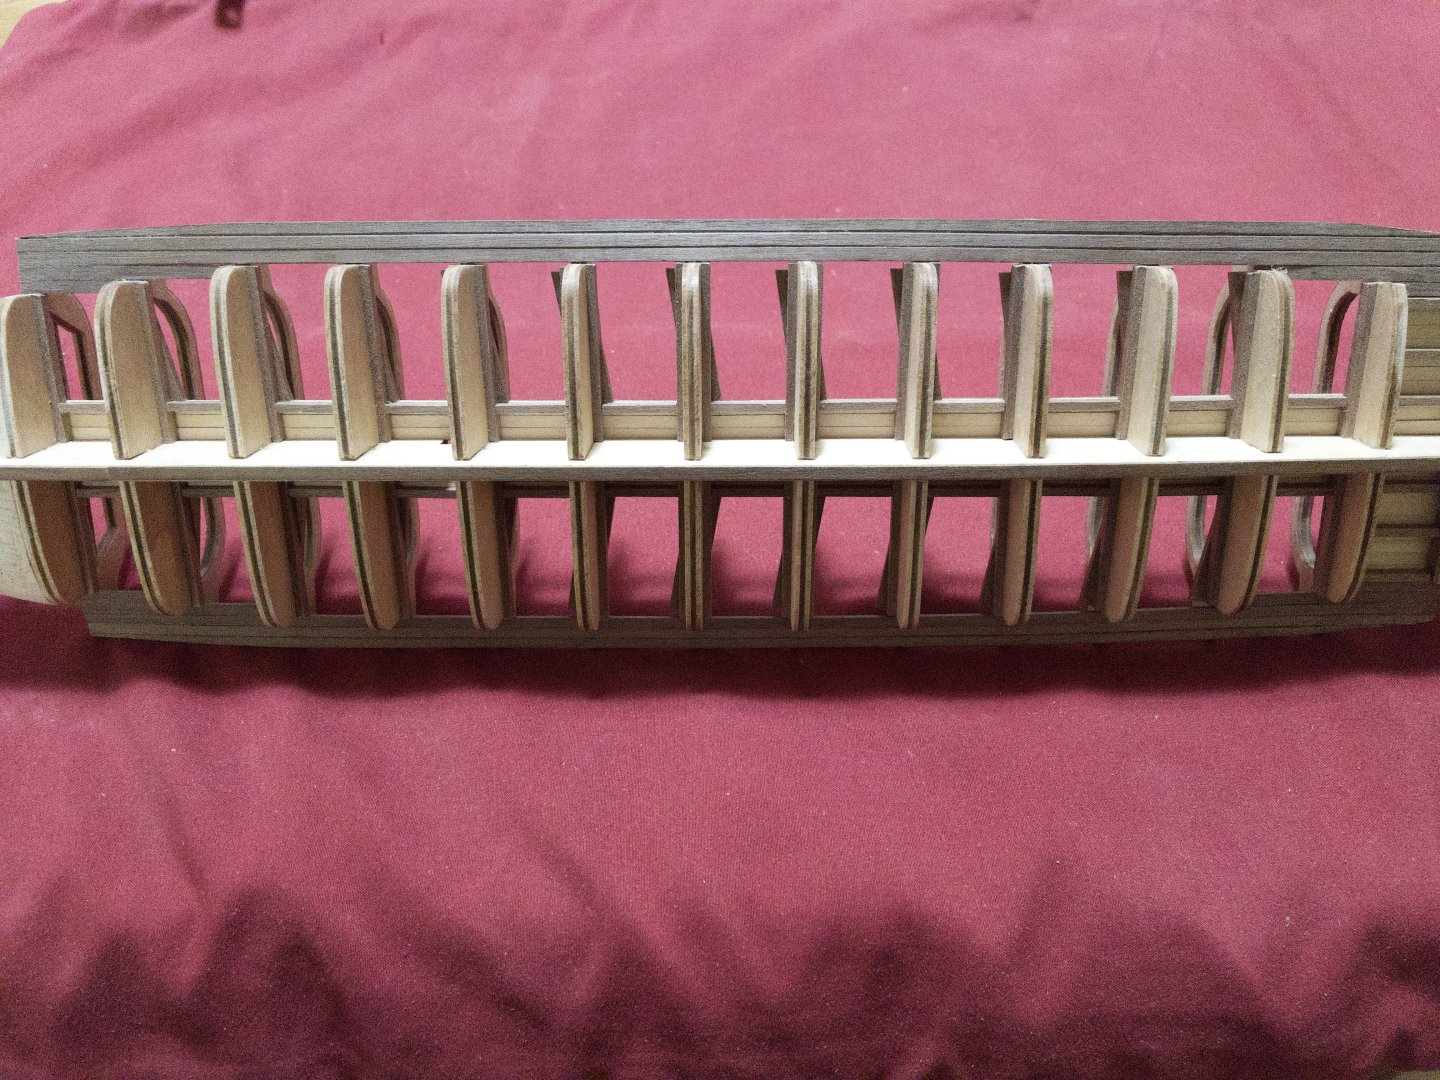
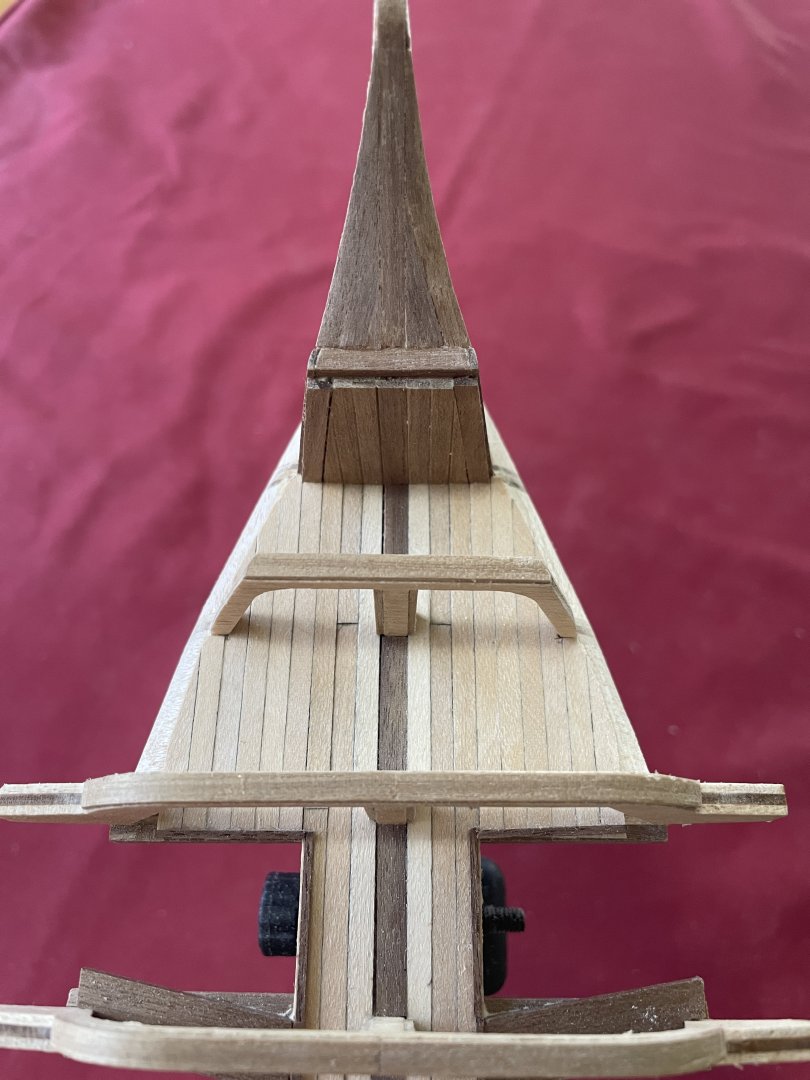
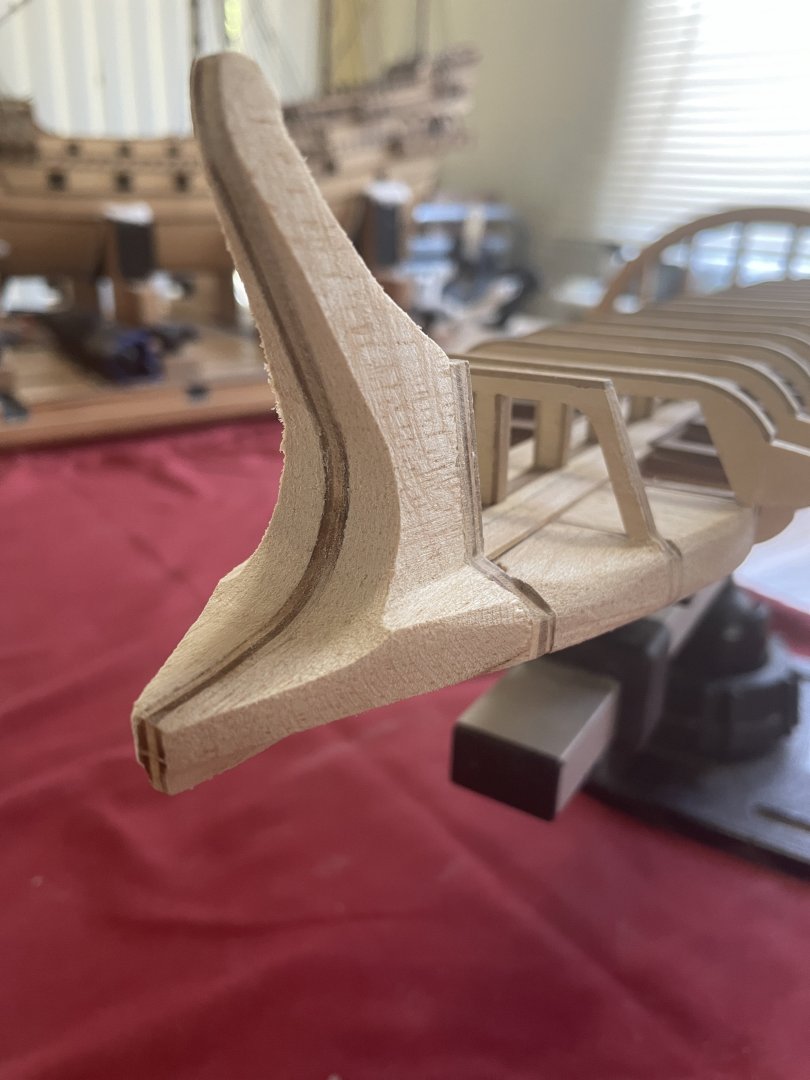
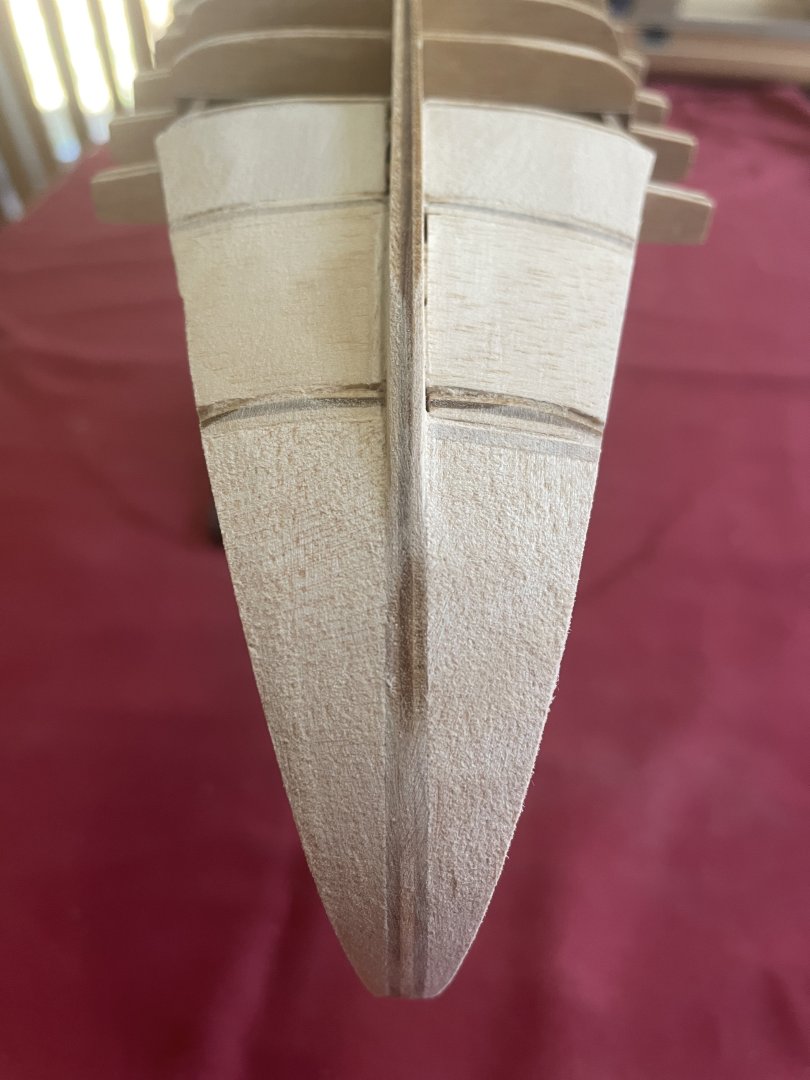
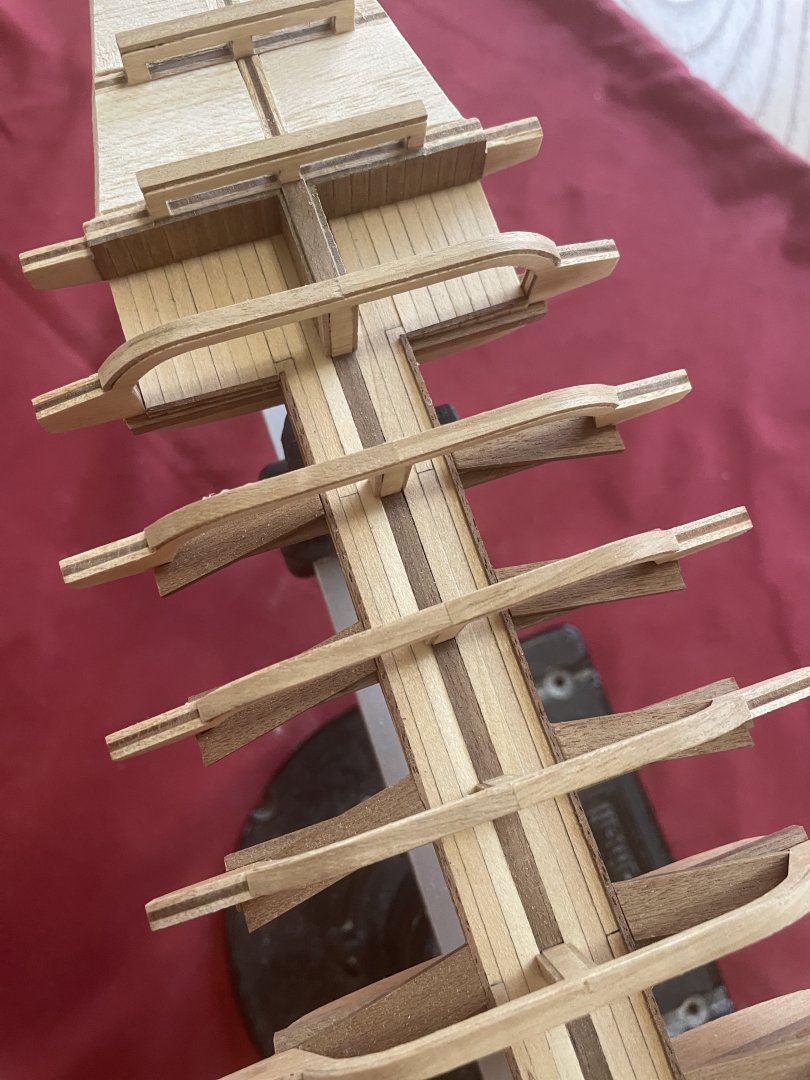
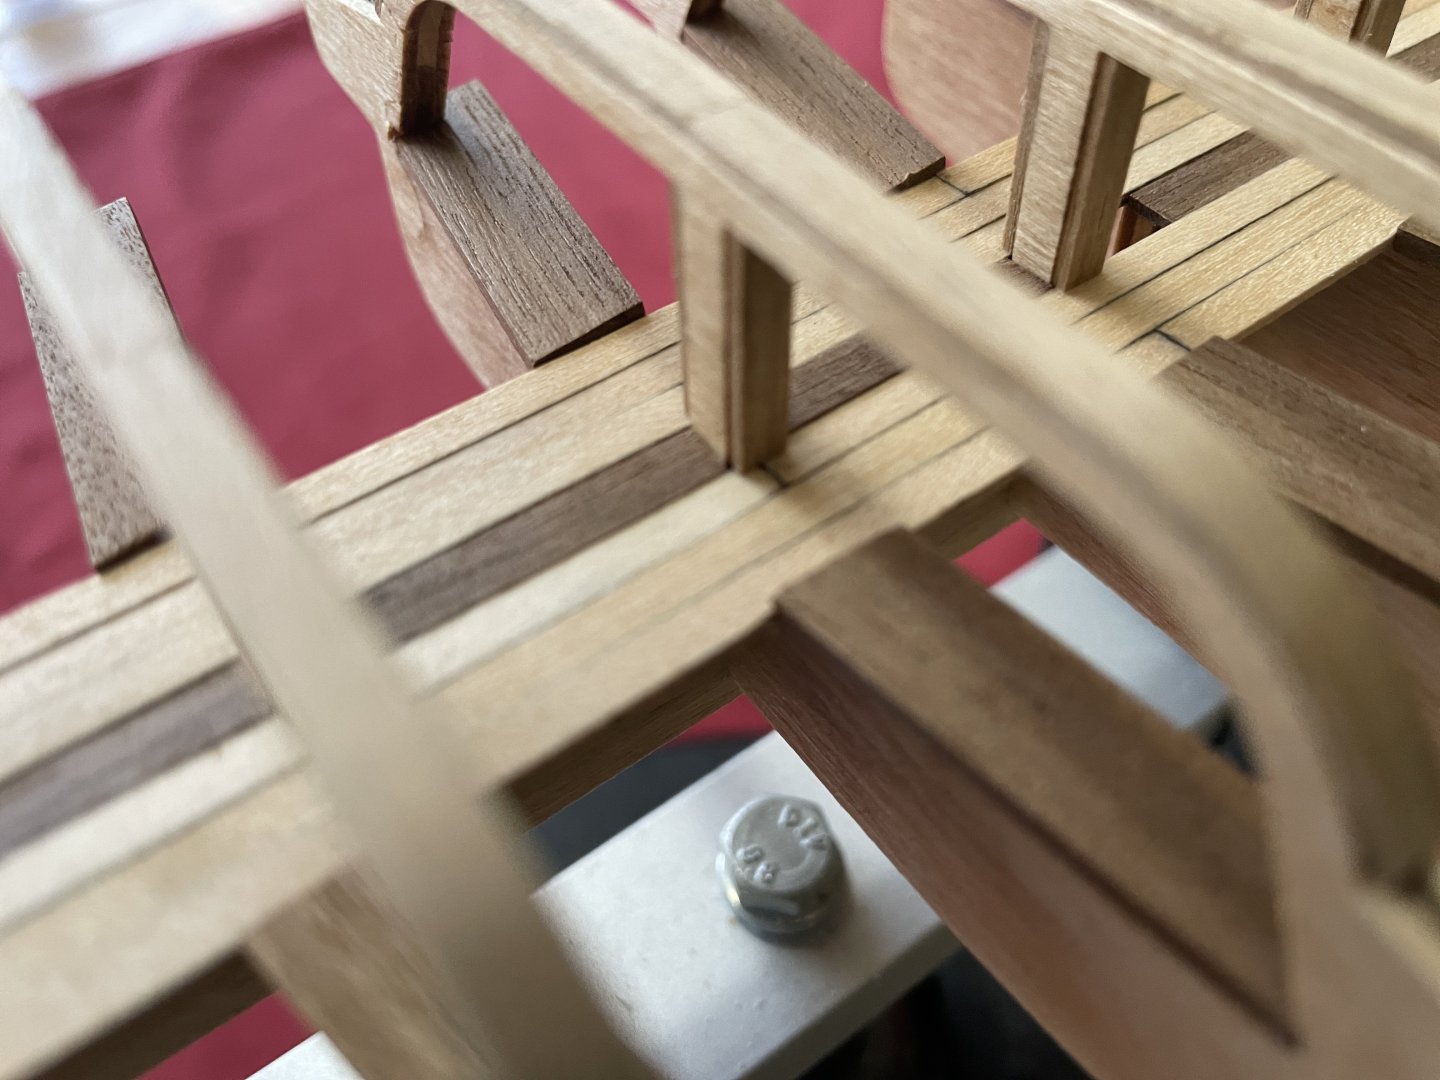
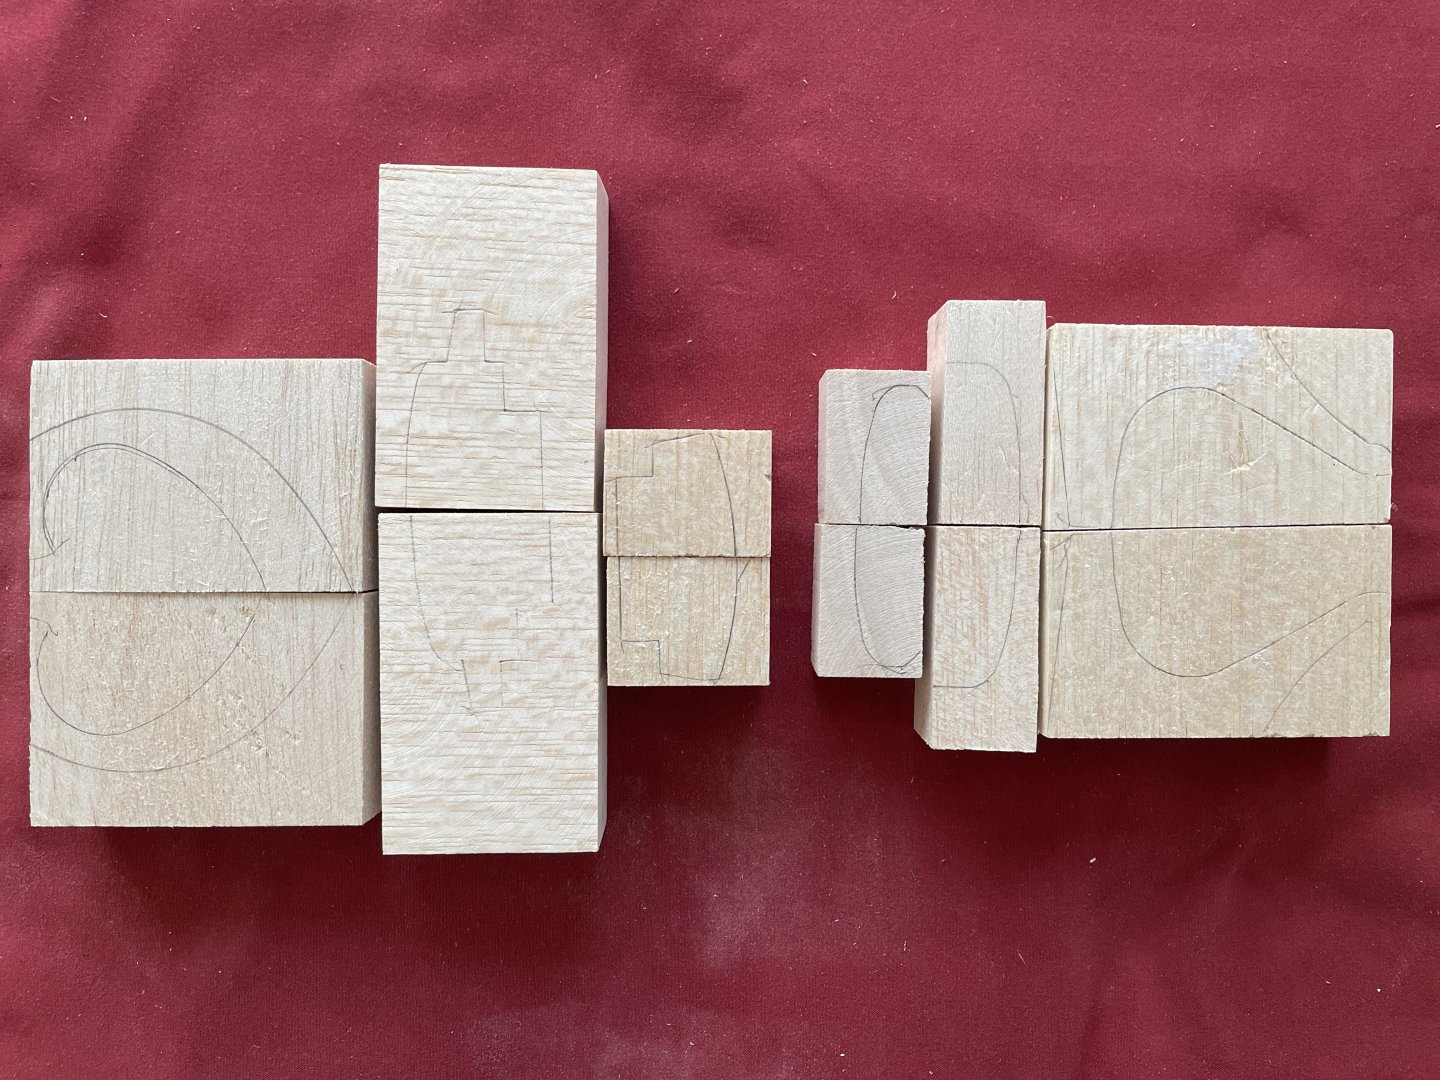
I'm in the middle of a heat wave, so I'm unlikely to have more updates until next week. Balsa: I found that shaping balsa is tedious and not really satisfying. After a lot of elbow grease, I think I have something that will do. I shaped the front RAM area a little differently. This is an area that needs to appear robust. Having a little extra thickness helps the overall feel of robustness. See below, Addons: Stairring at the ship, I keep having the impression that something was missing. The benches seen to be "floating" rather than being an integral part of the ship. To correct that, I decided to add some structures underneath, simulating beams support. 2x3mm strips were added under the seats (each side), as well as a crossbeam at the edge (under) the planking area. It's not likely that anyone will really notice... but HEY! I'm the one that will know.


-
Planking Method Name
Loracs replied to Thukydides's topic in Building, Framing, Planking and plating a ships hull and deck
I like the hooked scarf joints... but how do you implement those? how do you cut the two joints to match each other perfectly? Just wondering about the technique. -
@Ronald-V, I really like the fact that you got the courage to break down the existing deck to implement something new and potentially better. It already looks better to me. NICE! Thanks for the link to Chuck pdf. I was not aware of the method.
-
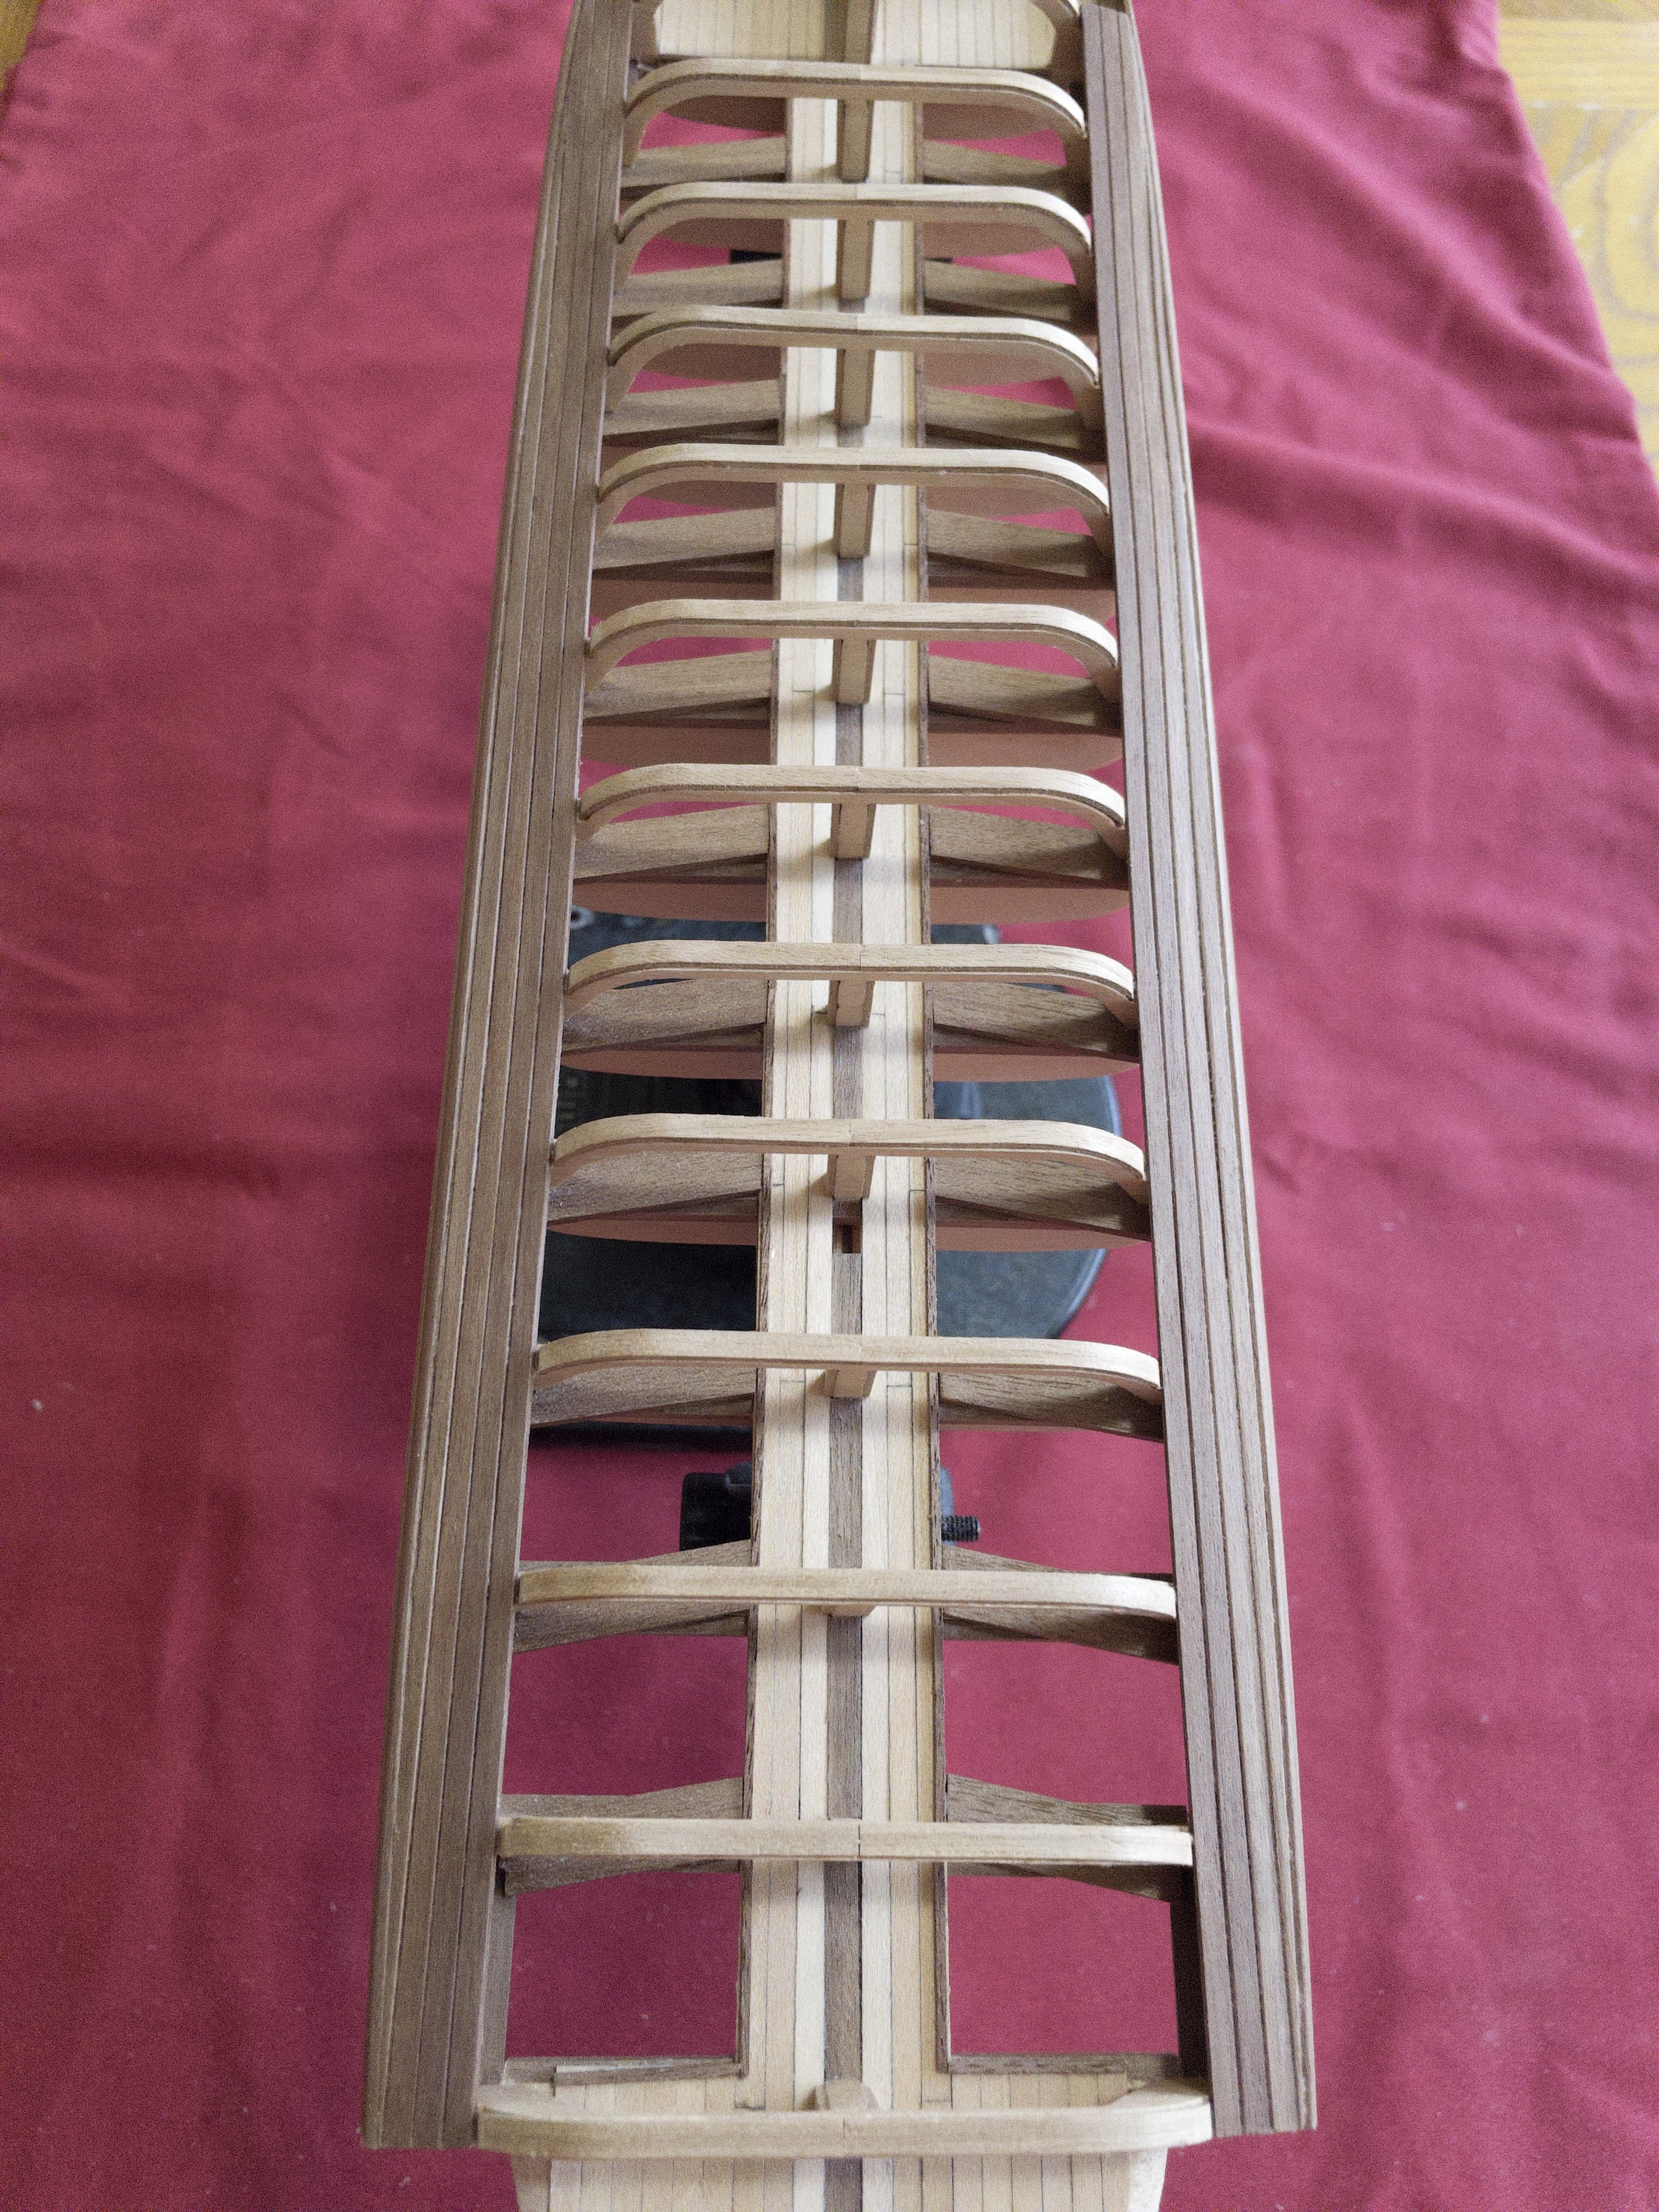
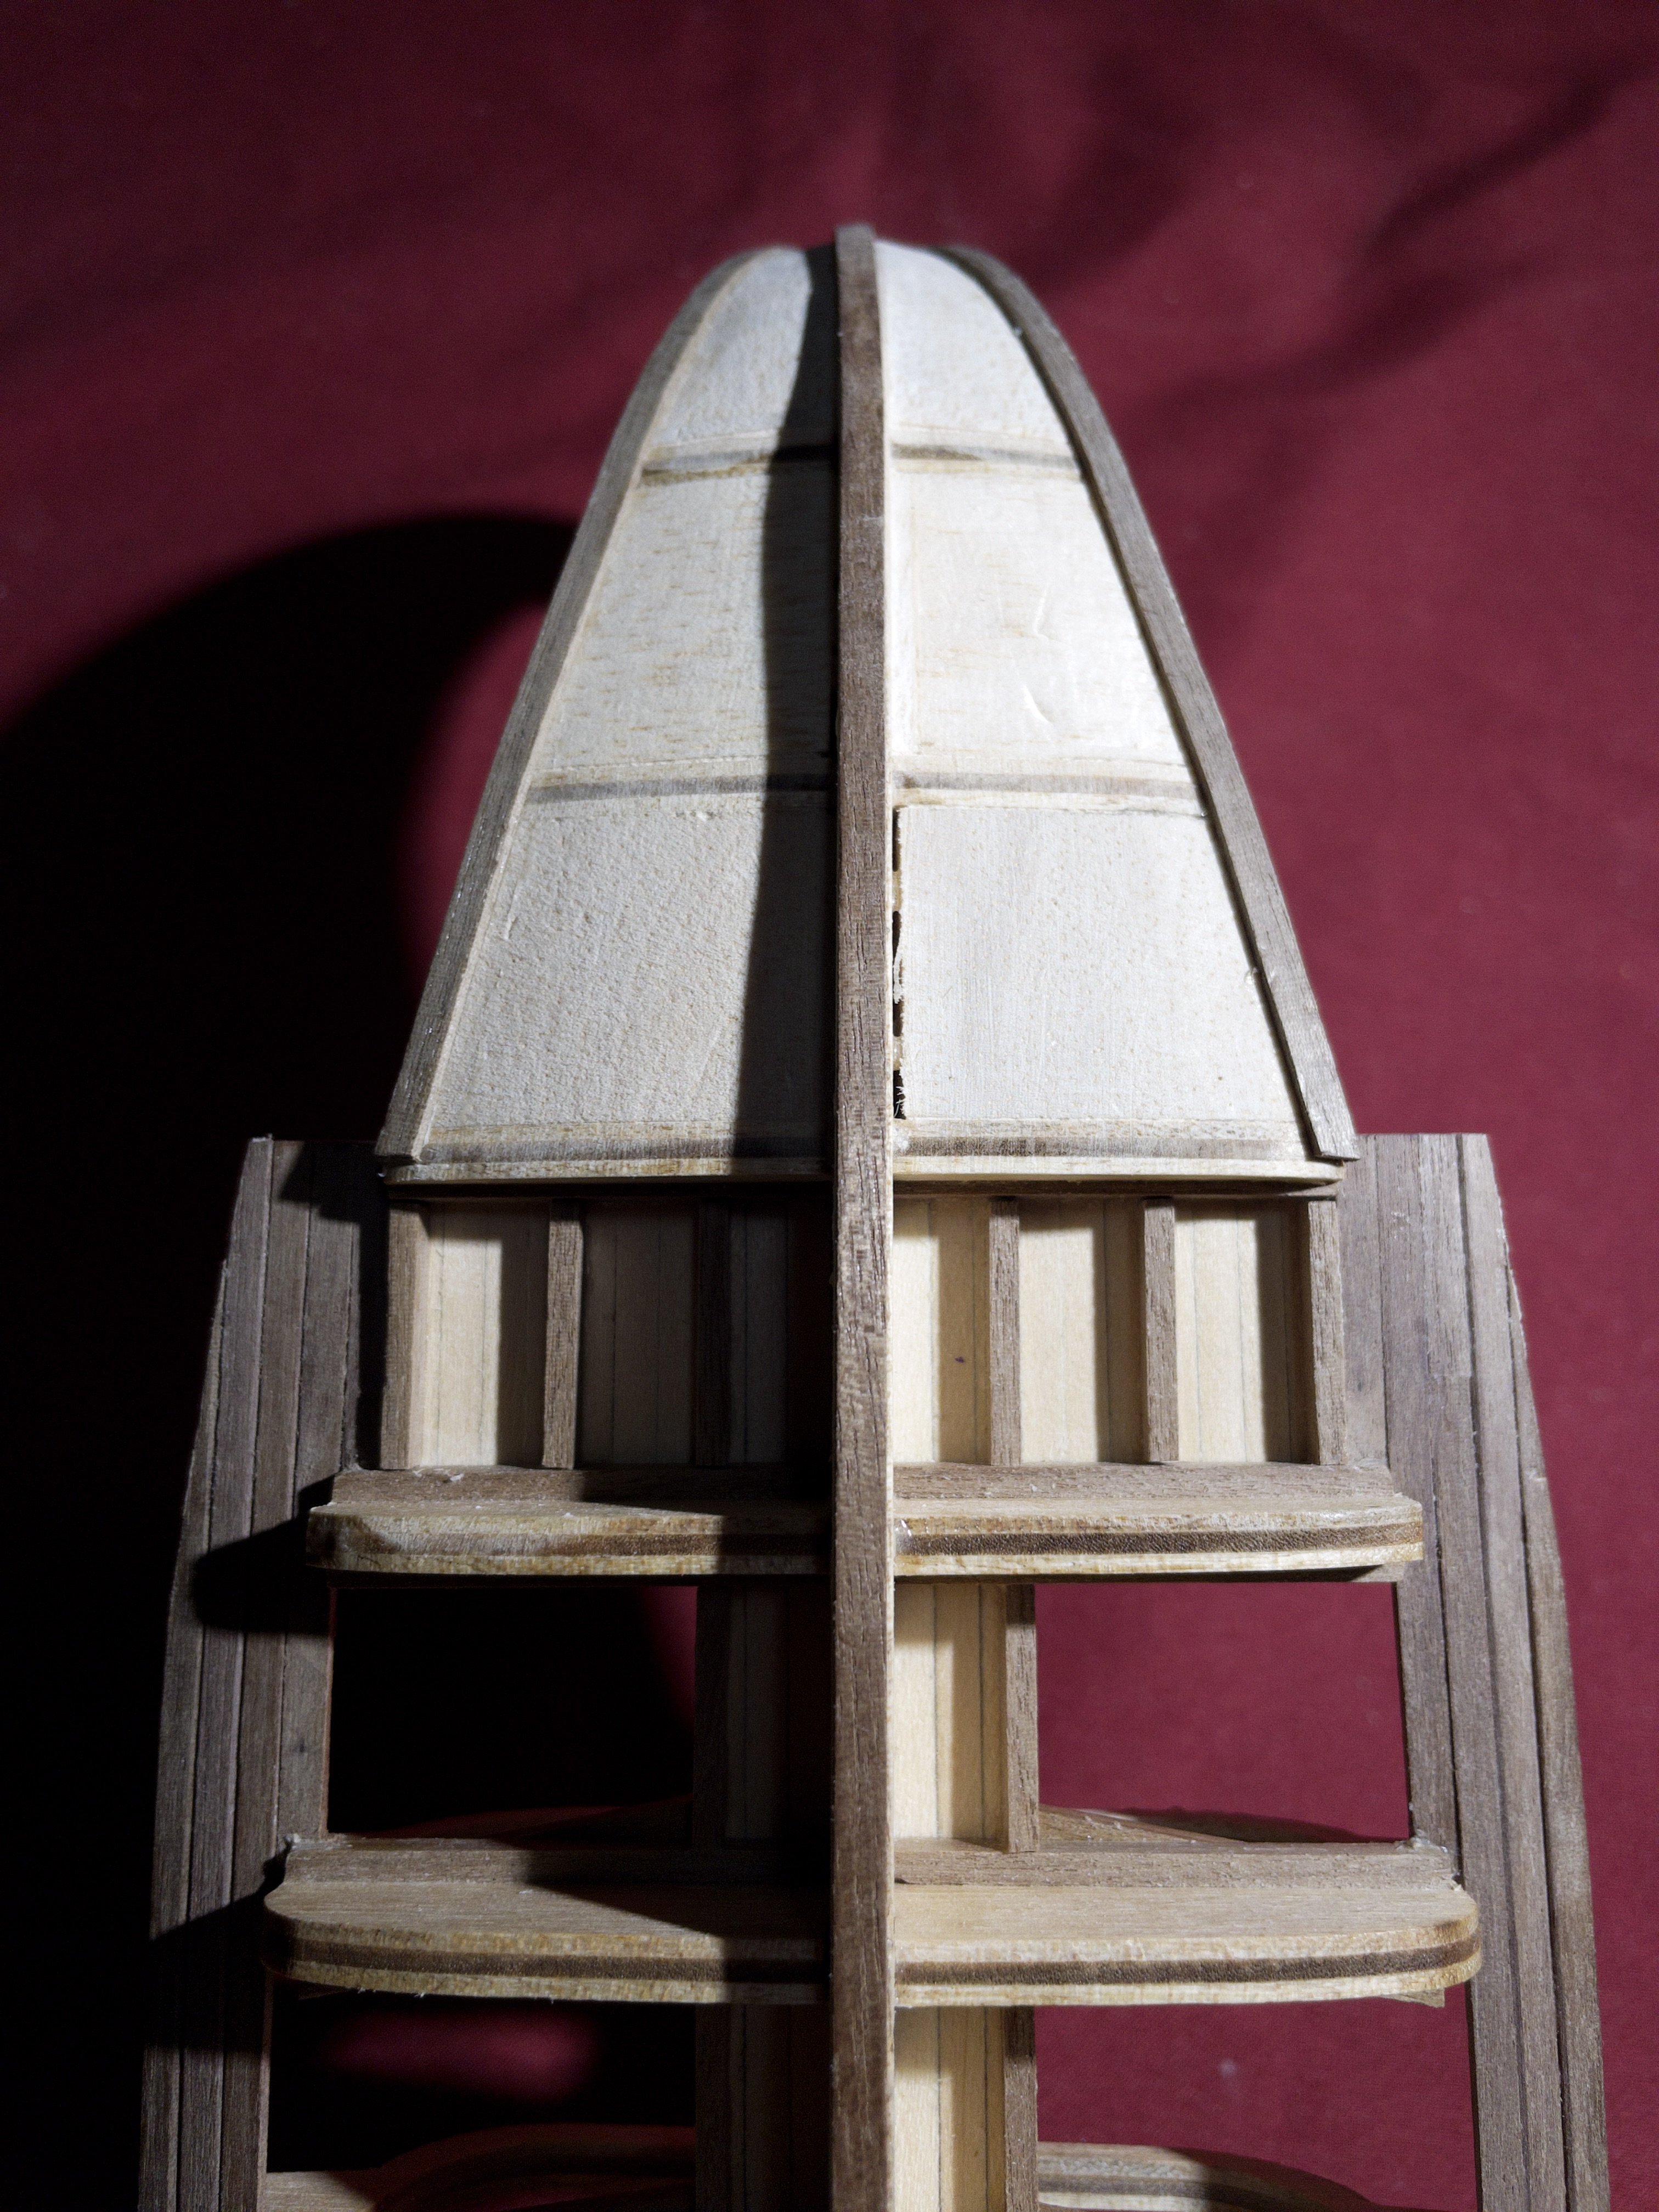
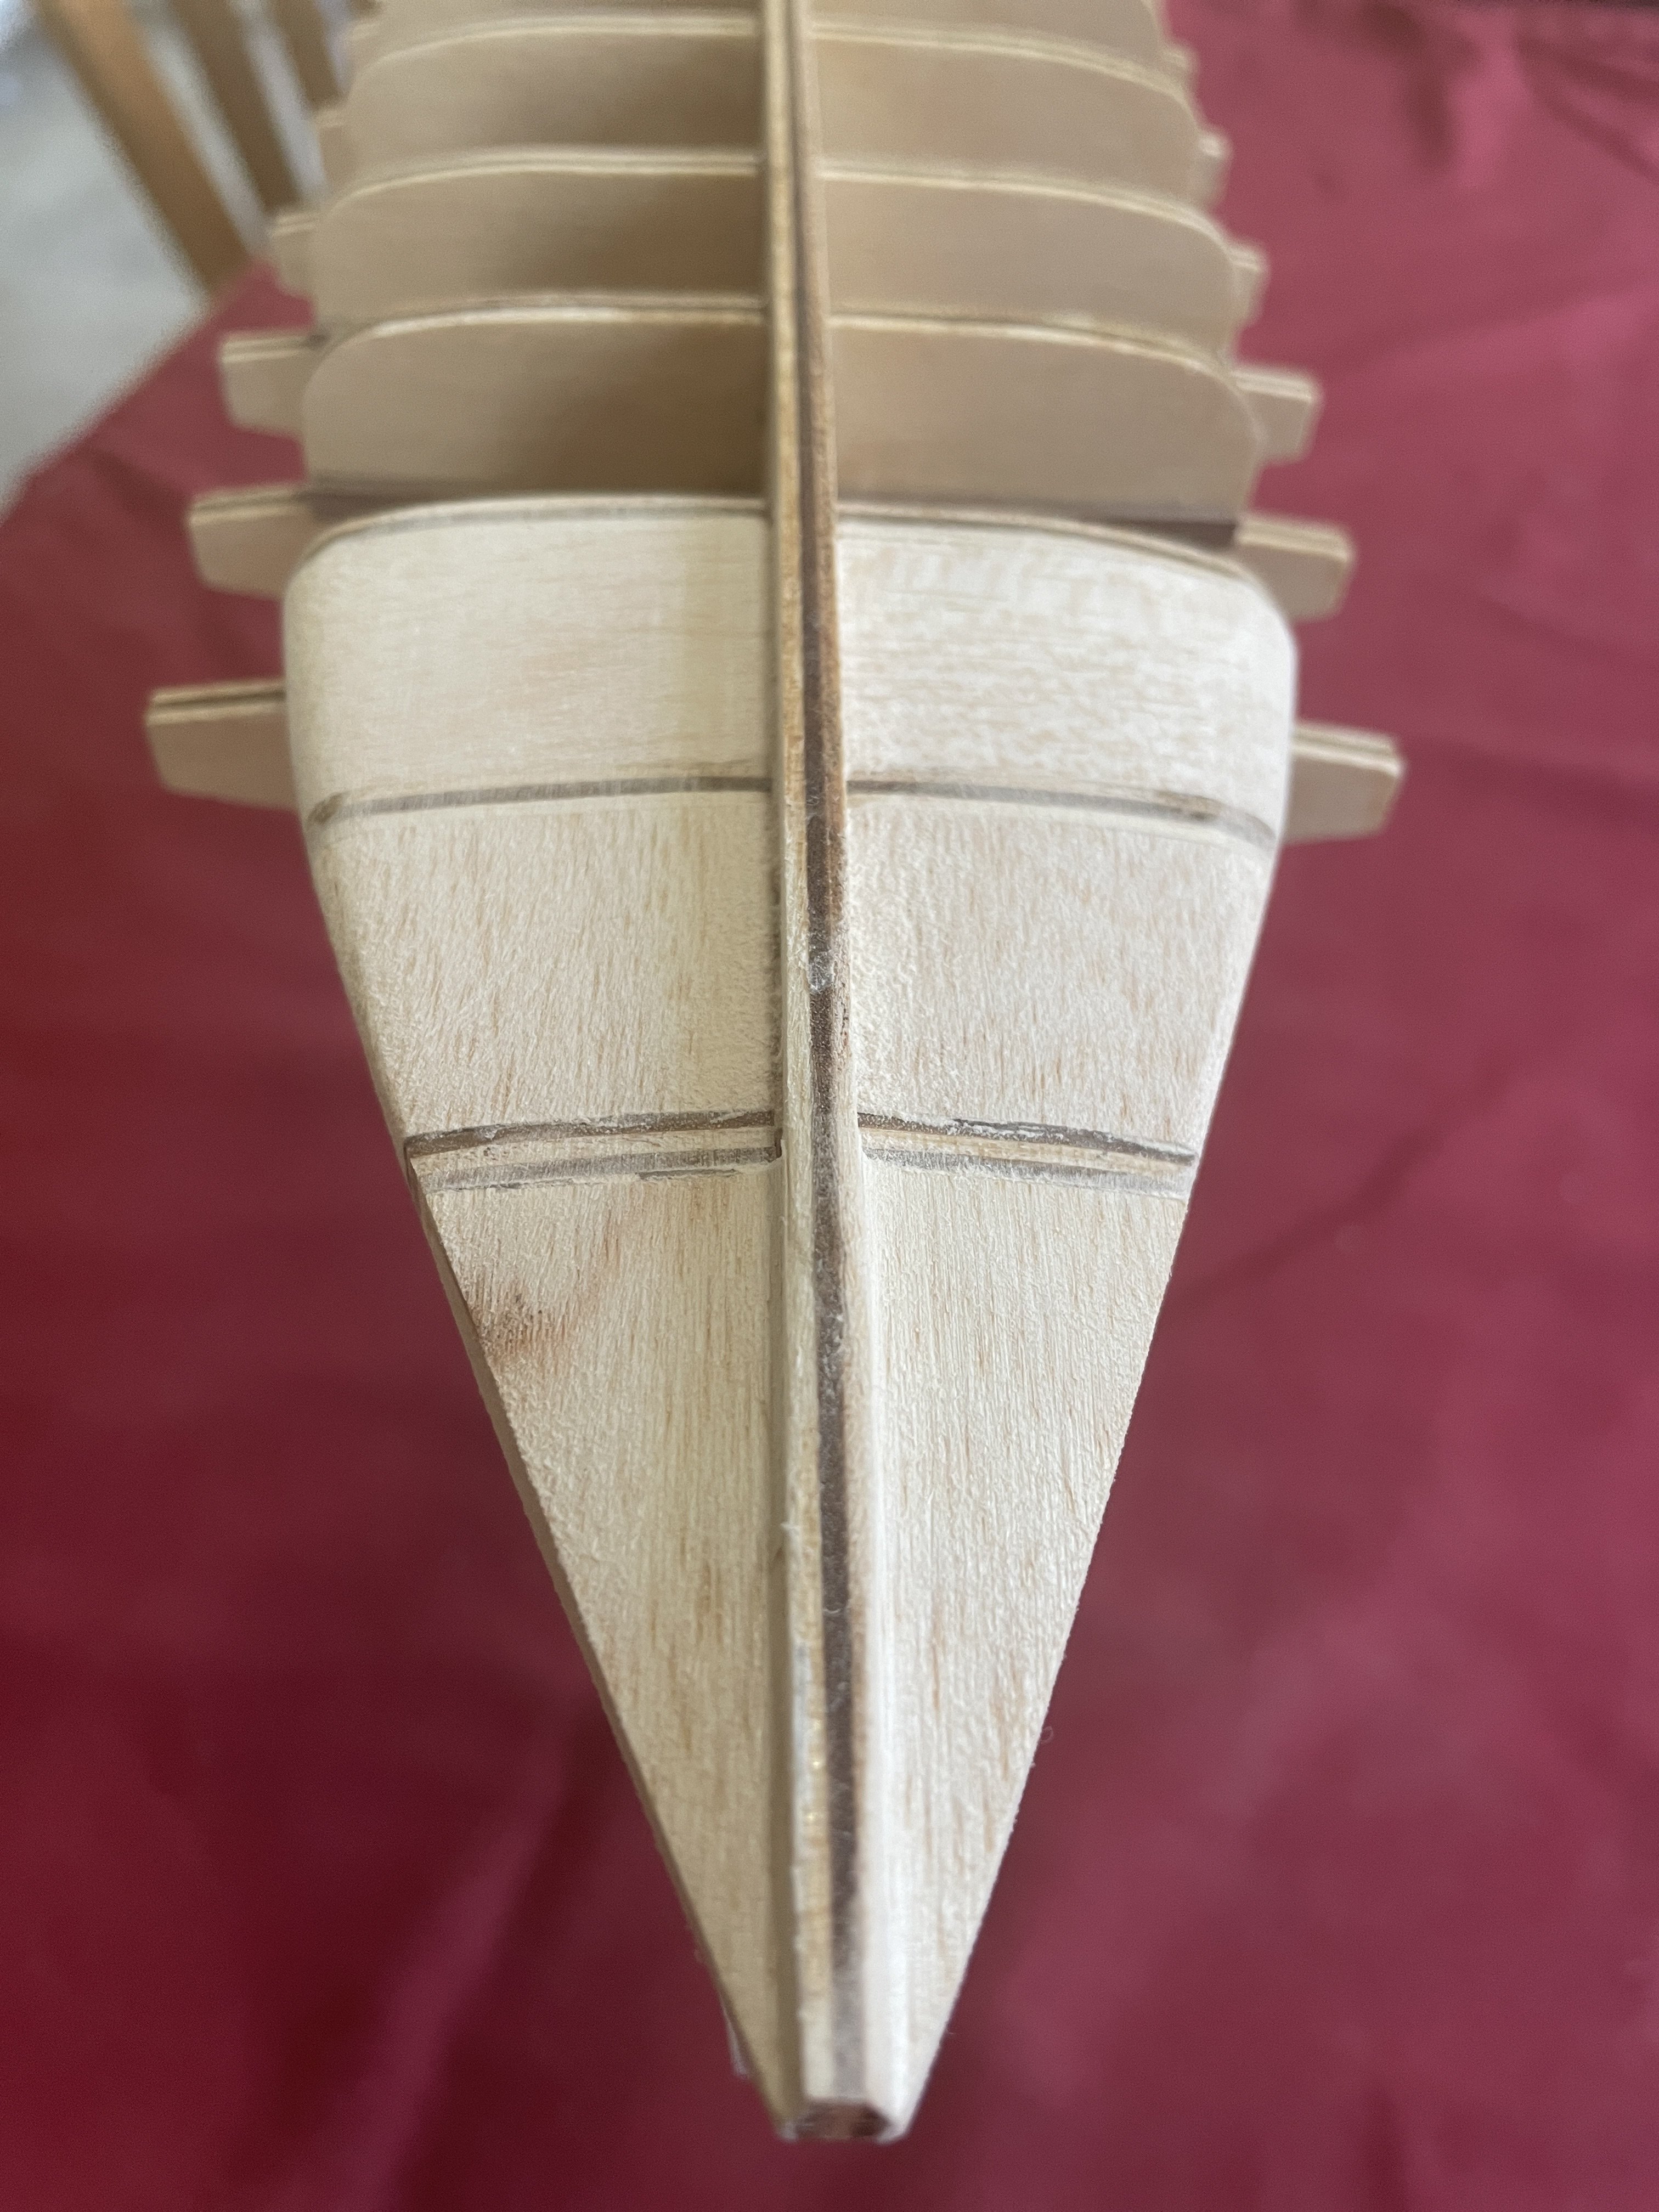
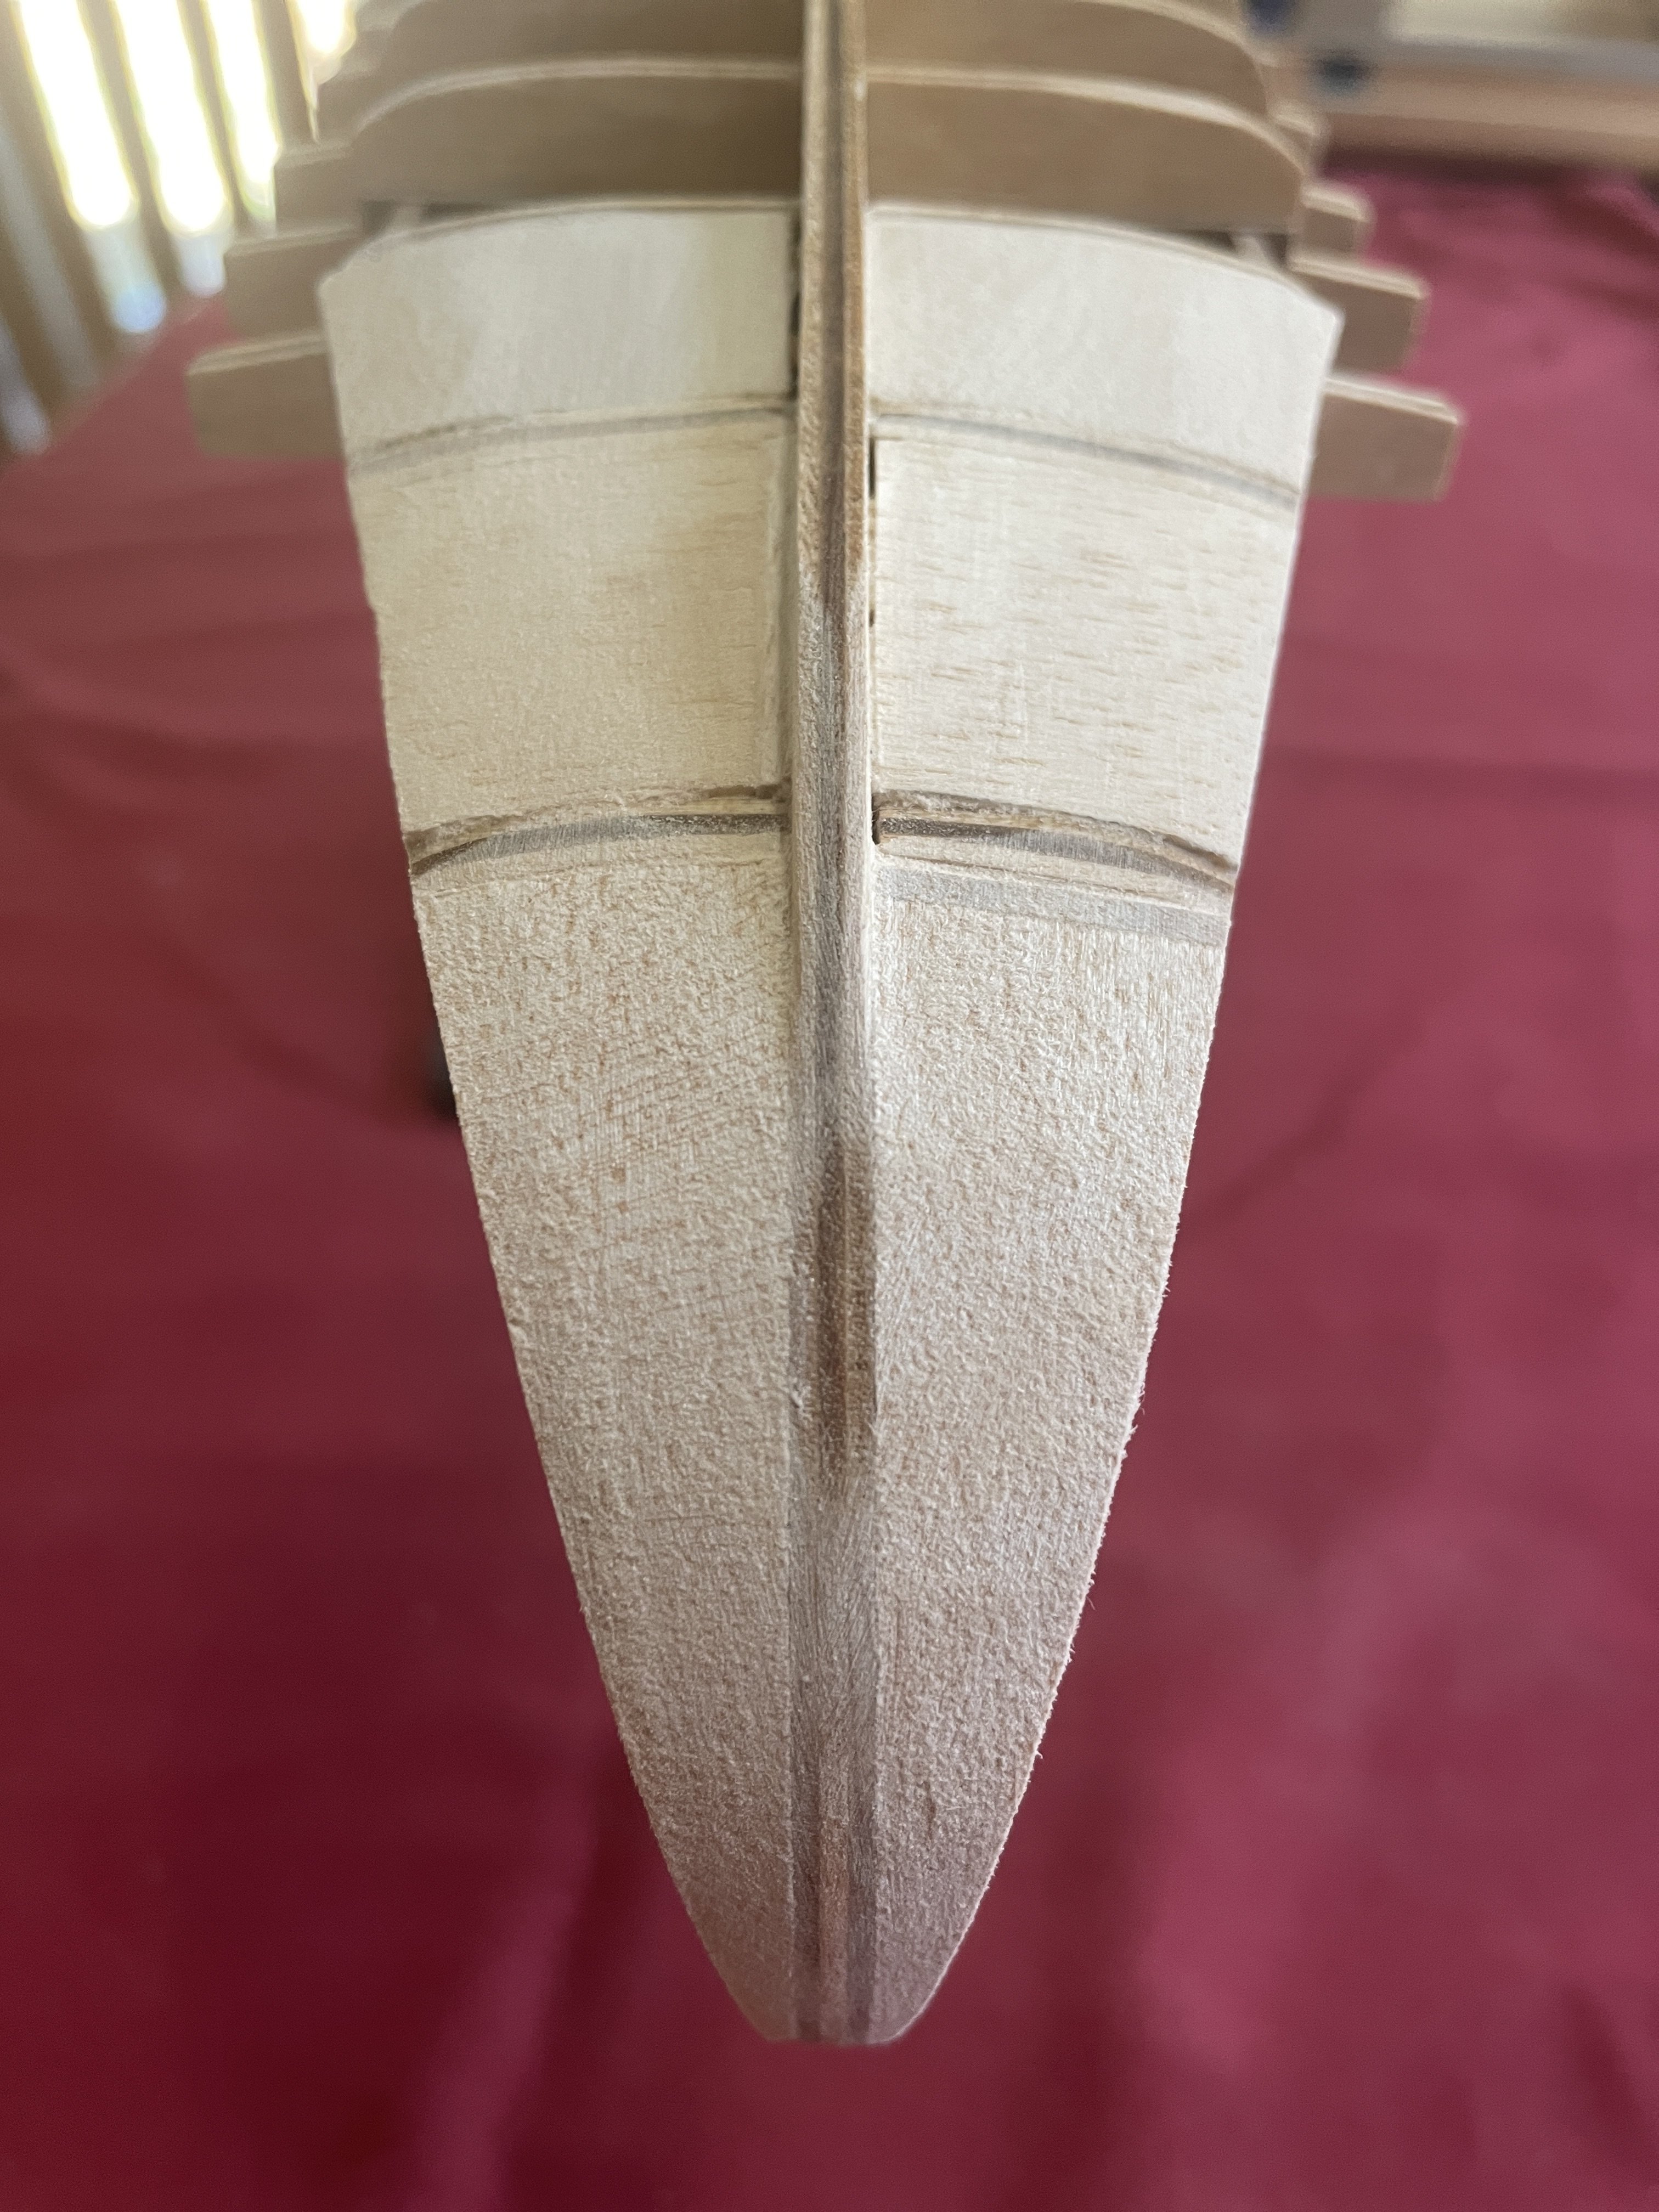
Benches: the interior benches are cut to size with an angle of 10 degrees, cut-true on one side for the bulkhead. Once glued into place, a small 1x1mm border is added primarily to add some relief and finish. Interior Walls: Few sections of the interior (visible from the outside) were planked with walnut strips. Prior to cutting, the upper side of the strip was rounded by sanding, which provides slightly more relief to the walls. Balsa fillers: Started on balsa fillers to the bow and stern. This is pretty much required for this model and is NOT included in the kit. You are left own. Here are a couple pictures of the work in-progress. It will still need dry fitting and tweaking.


-
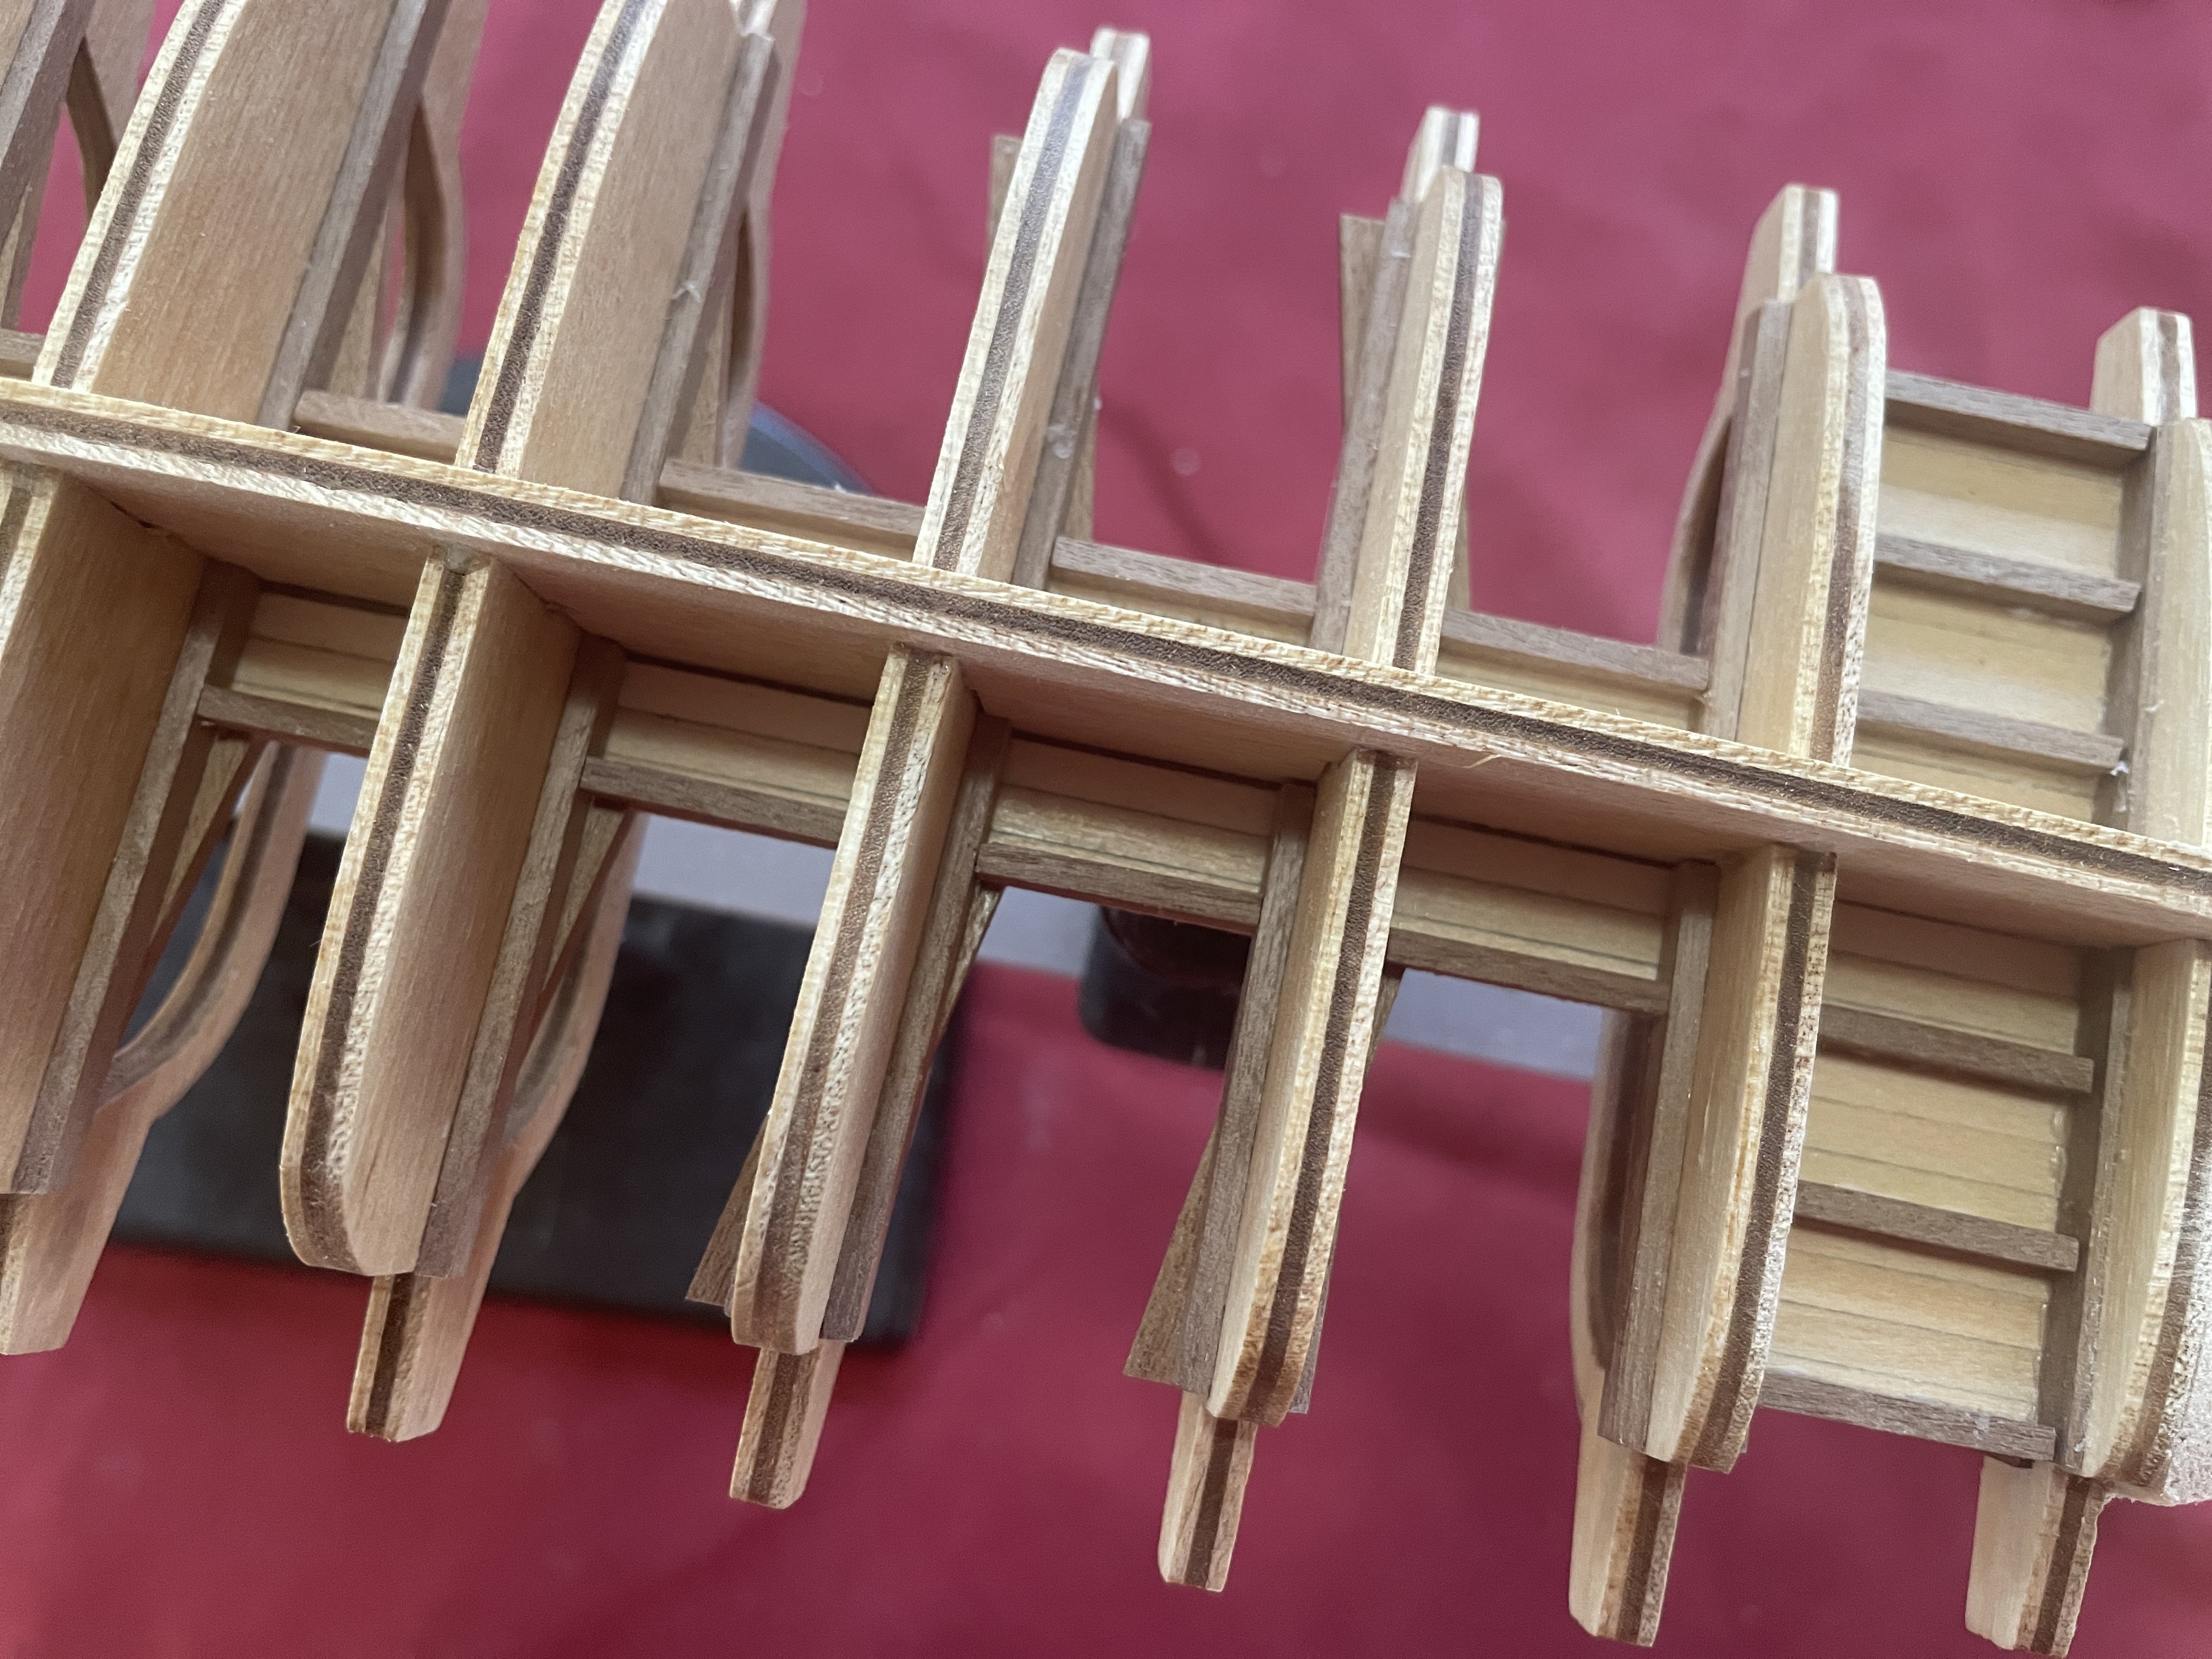
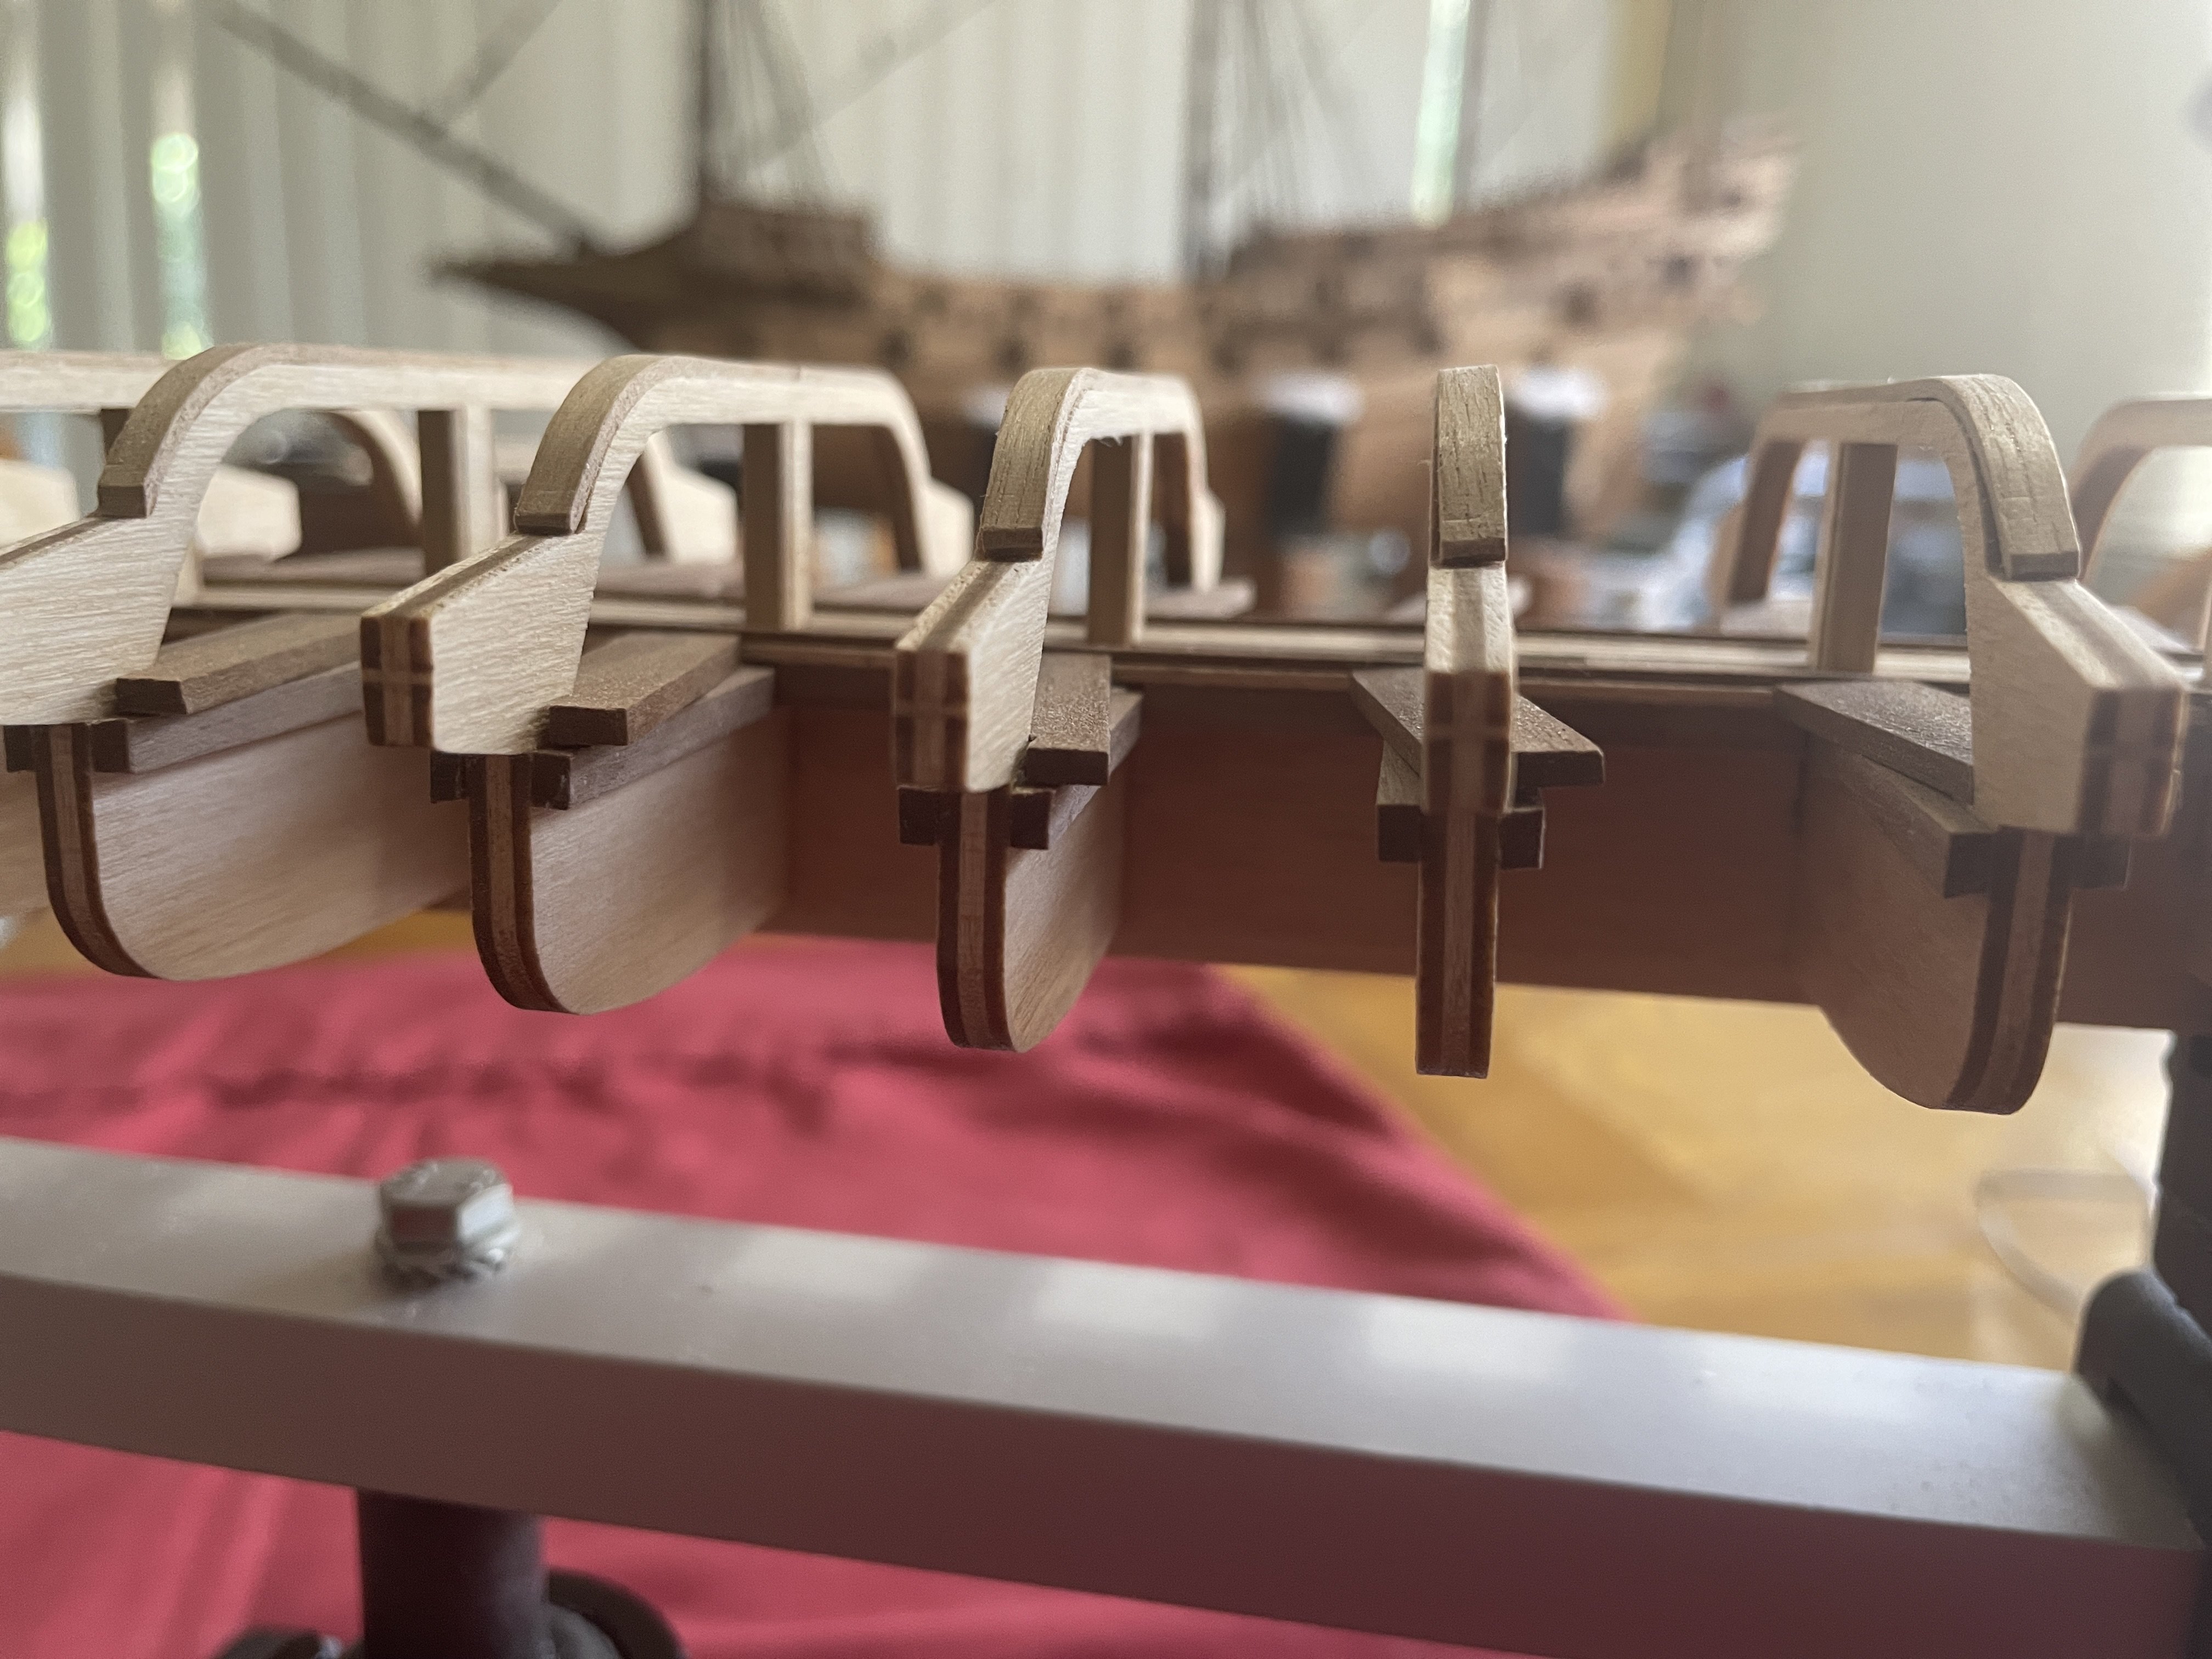
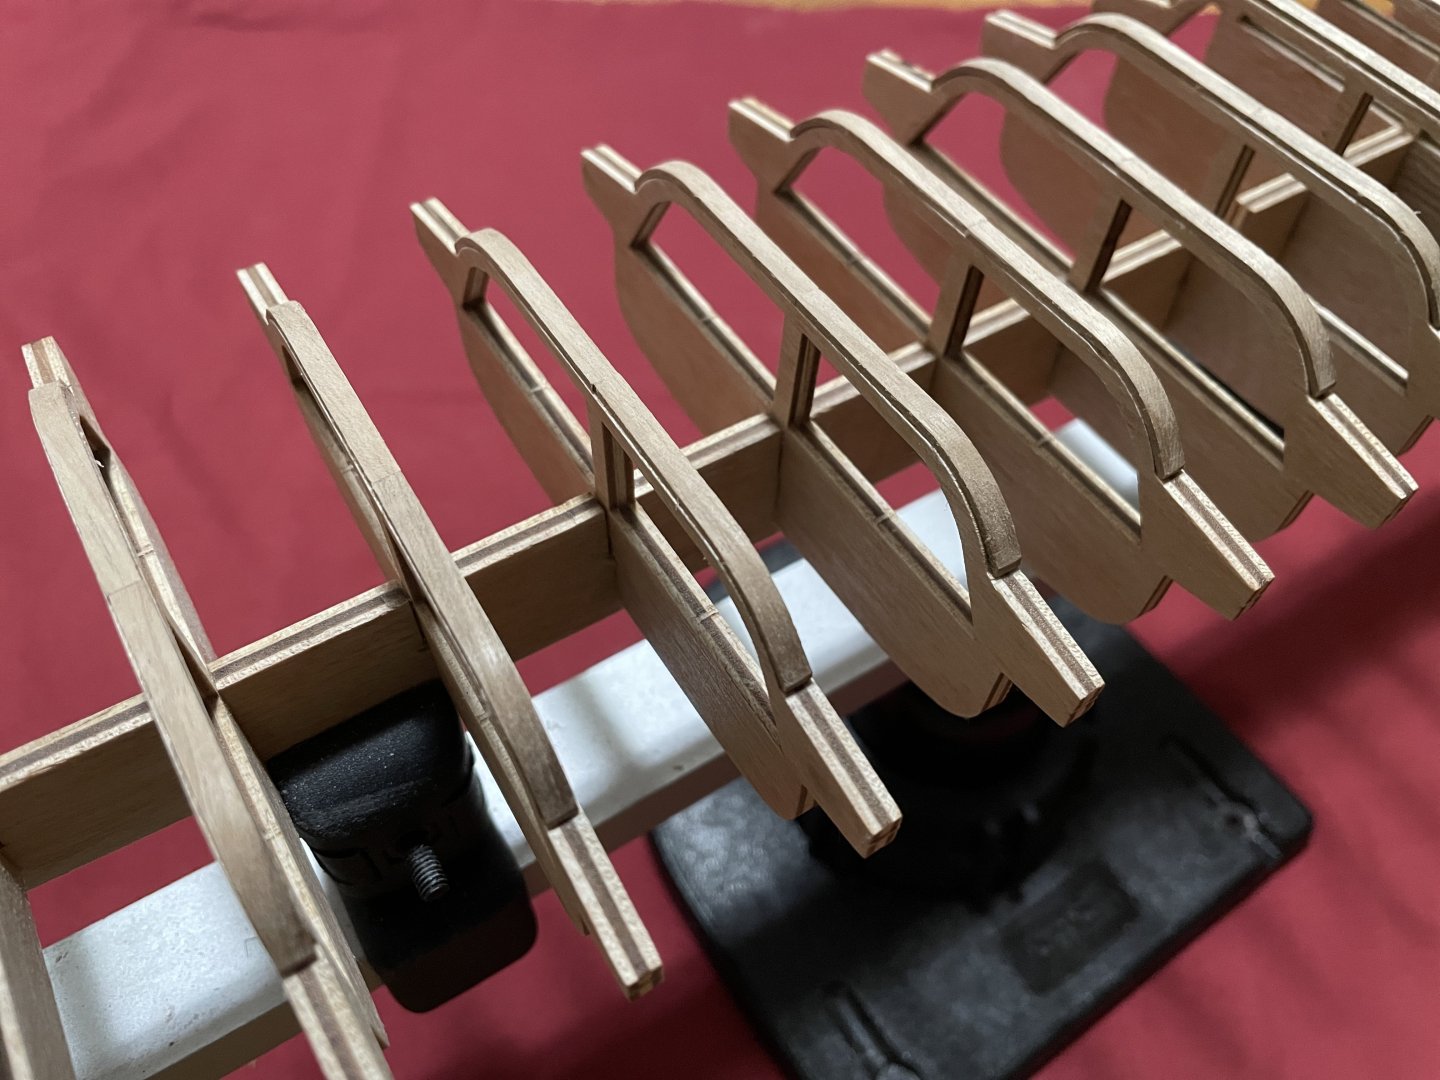
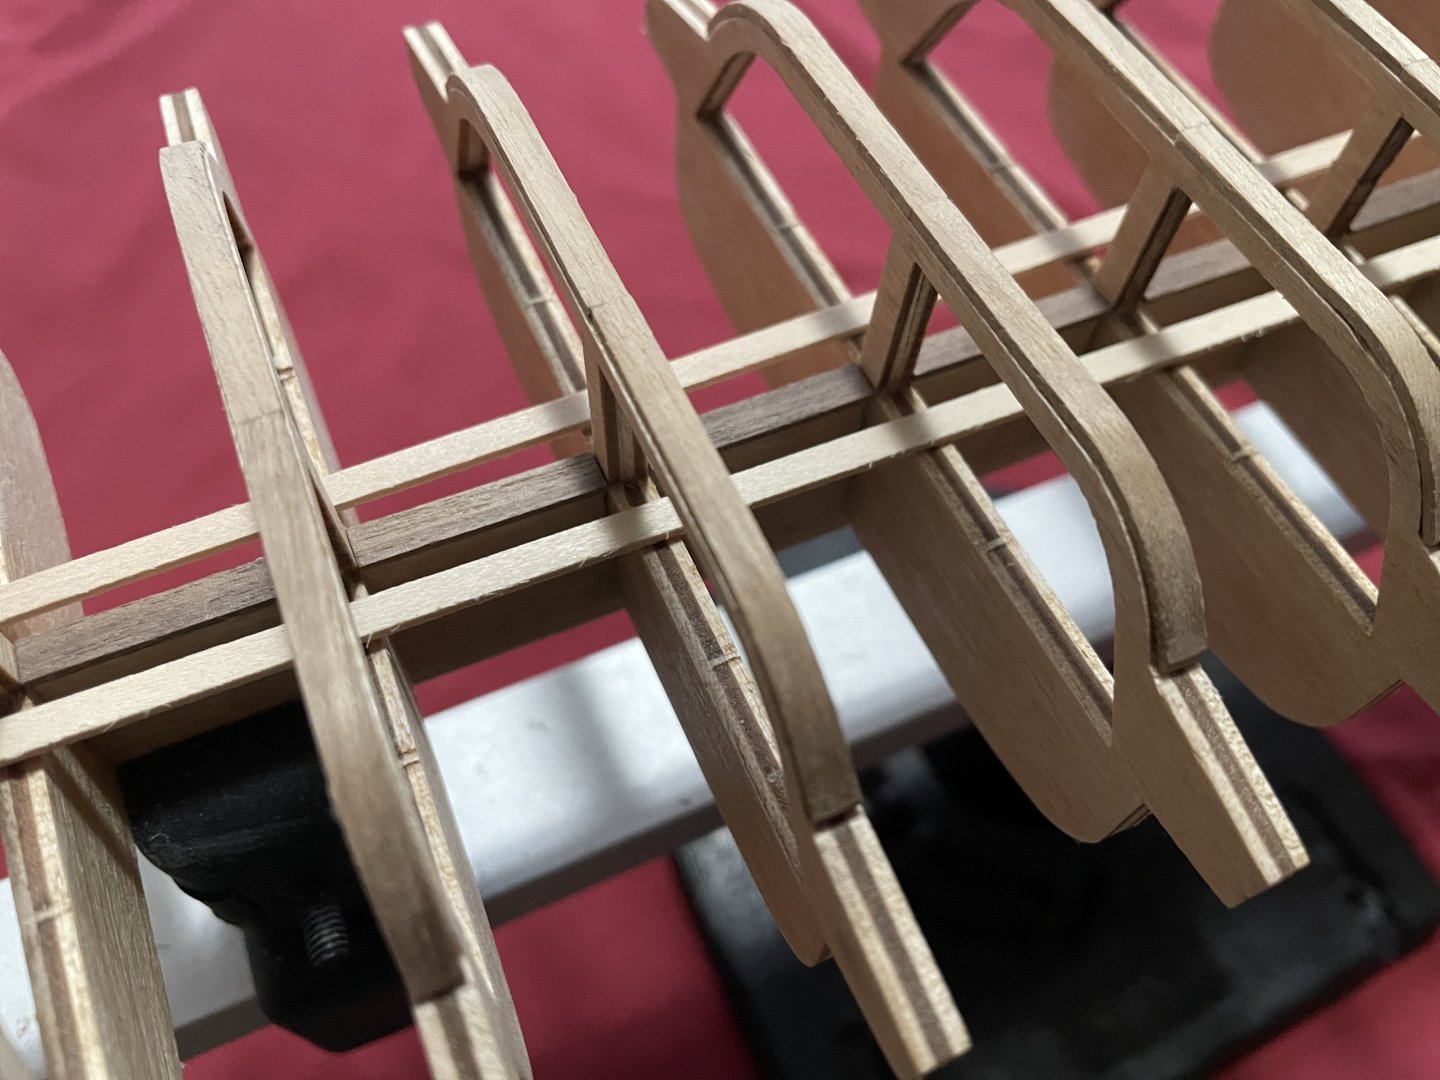
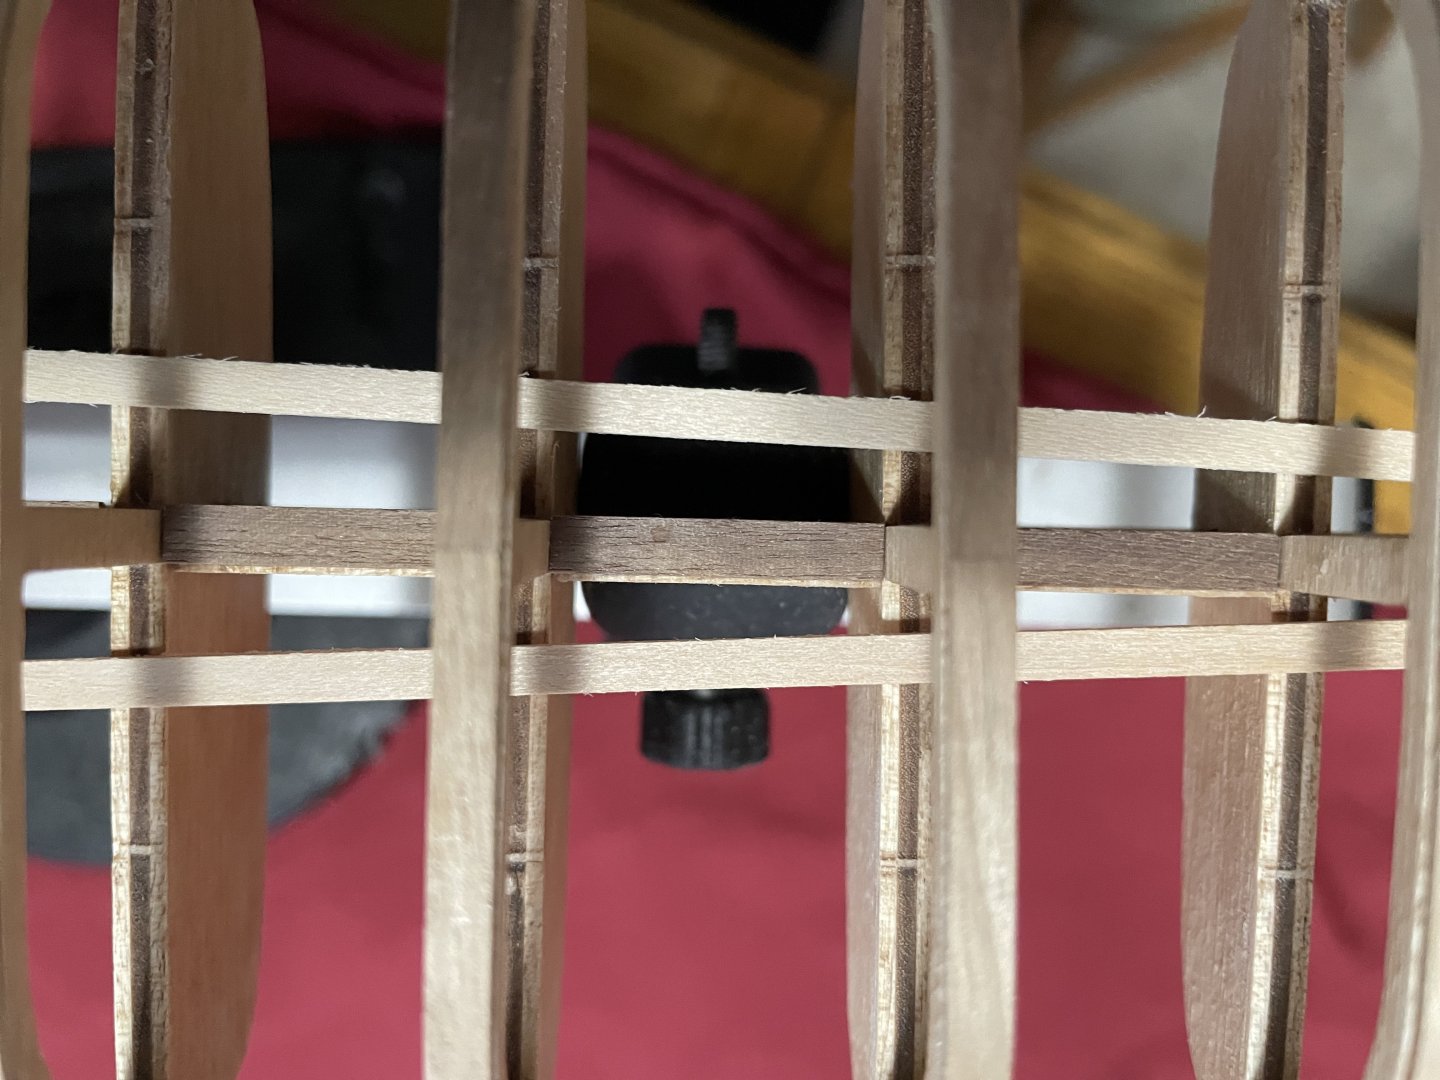
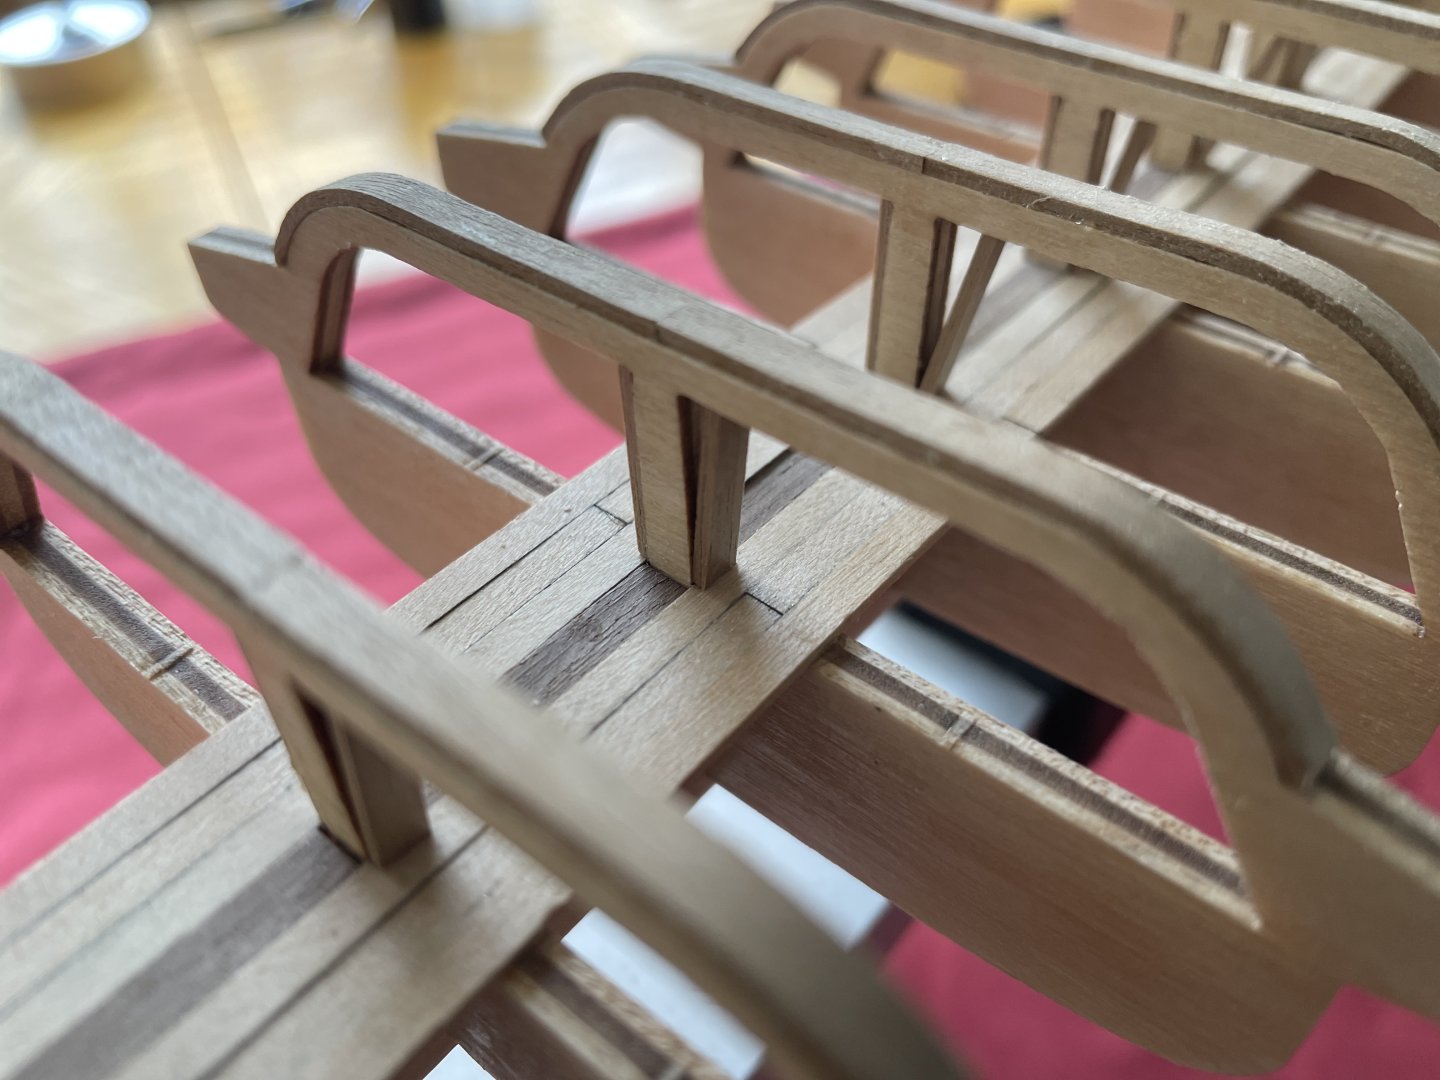
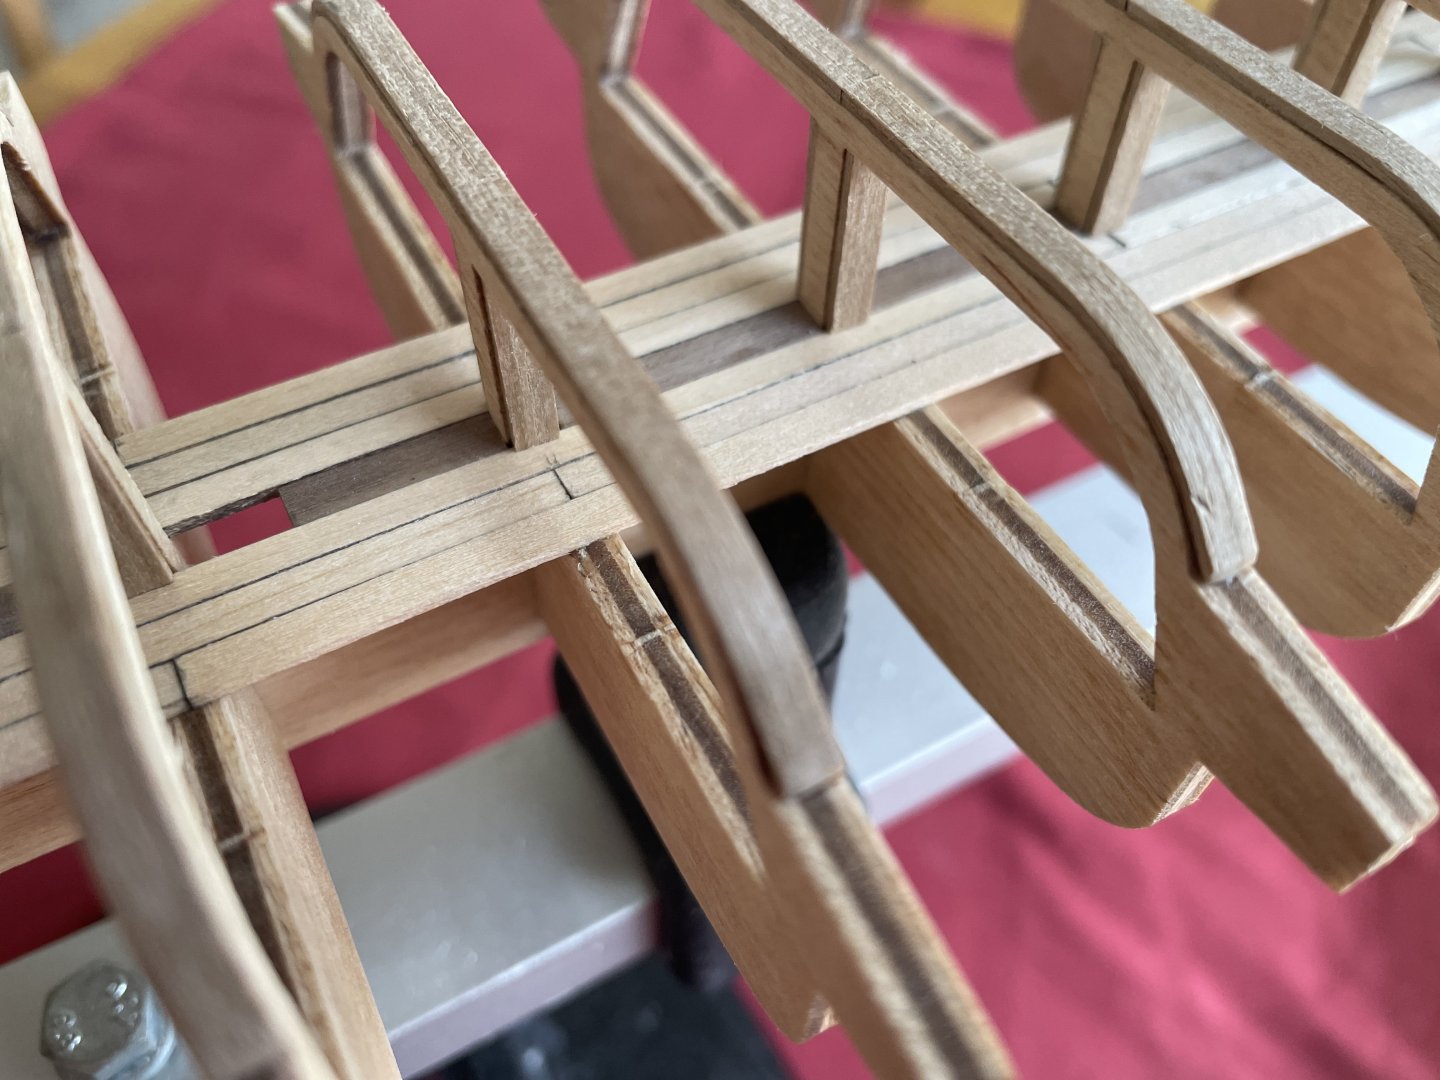
Bulkhead and internal deck: The bireme kit from Amati is good so far with one exception: poor documentation. The two plans provided are ok but at times, more details would have been nice. BUT HEY! This is an opportunity for me to have a more detailed build log. A) Frames: There is little play between the bulkheads and the keel, maybe 1mm or less. I was careful when I glued the bullheads to push them in one direction for good contact at least on one side. Be consistent, all on the same side. Bulkhead: the visible side of the bulkheads has to be fixed, not pretty. The upper edge was planked with some spare strips I had in hand. I am not sure how much excess is included in the kit. Planks are curved with a hot iron (plank binder), and installed in pairs. Cut the first half to length to the middle on the bulkhead and glue. After drying, cut the second half precisely to length and installed... perfect joints. C) Internal deck: The bias introduced at the junction of the bulkheads and keel (see above) had a slight impact on the initial deck planking. The vertical section is a little off center to the keel. Two planks were used for alignment before I glued the middle section. The supplier strips at 3mm were a little short in width. I then used spare strips of 4mm walnut. Furthermore, it adds contrast to the deck. The deck was then built with strips cut every 5-bulkheads (10cm or 4 inch), for a length of approximately 15-18 ft real size. You just have to be careful that the junctions are on the bulkheads. Note: Don't forget the support strips at the bow and stern. D) Vertical beams: The vertical beams will be visible once built. This means the plywood ends too... can't have that. This is where my new Ultimation slicer shined. Repeated cuts can be made easily and mostly reproducibly... Small strips were cut 0.2-0.3mm longer and pushed into position with slight force... it makes good joints. Note: use glue very sparingly... you don't want excess, no "blob" or staining. That's it, folks!


-
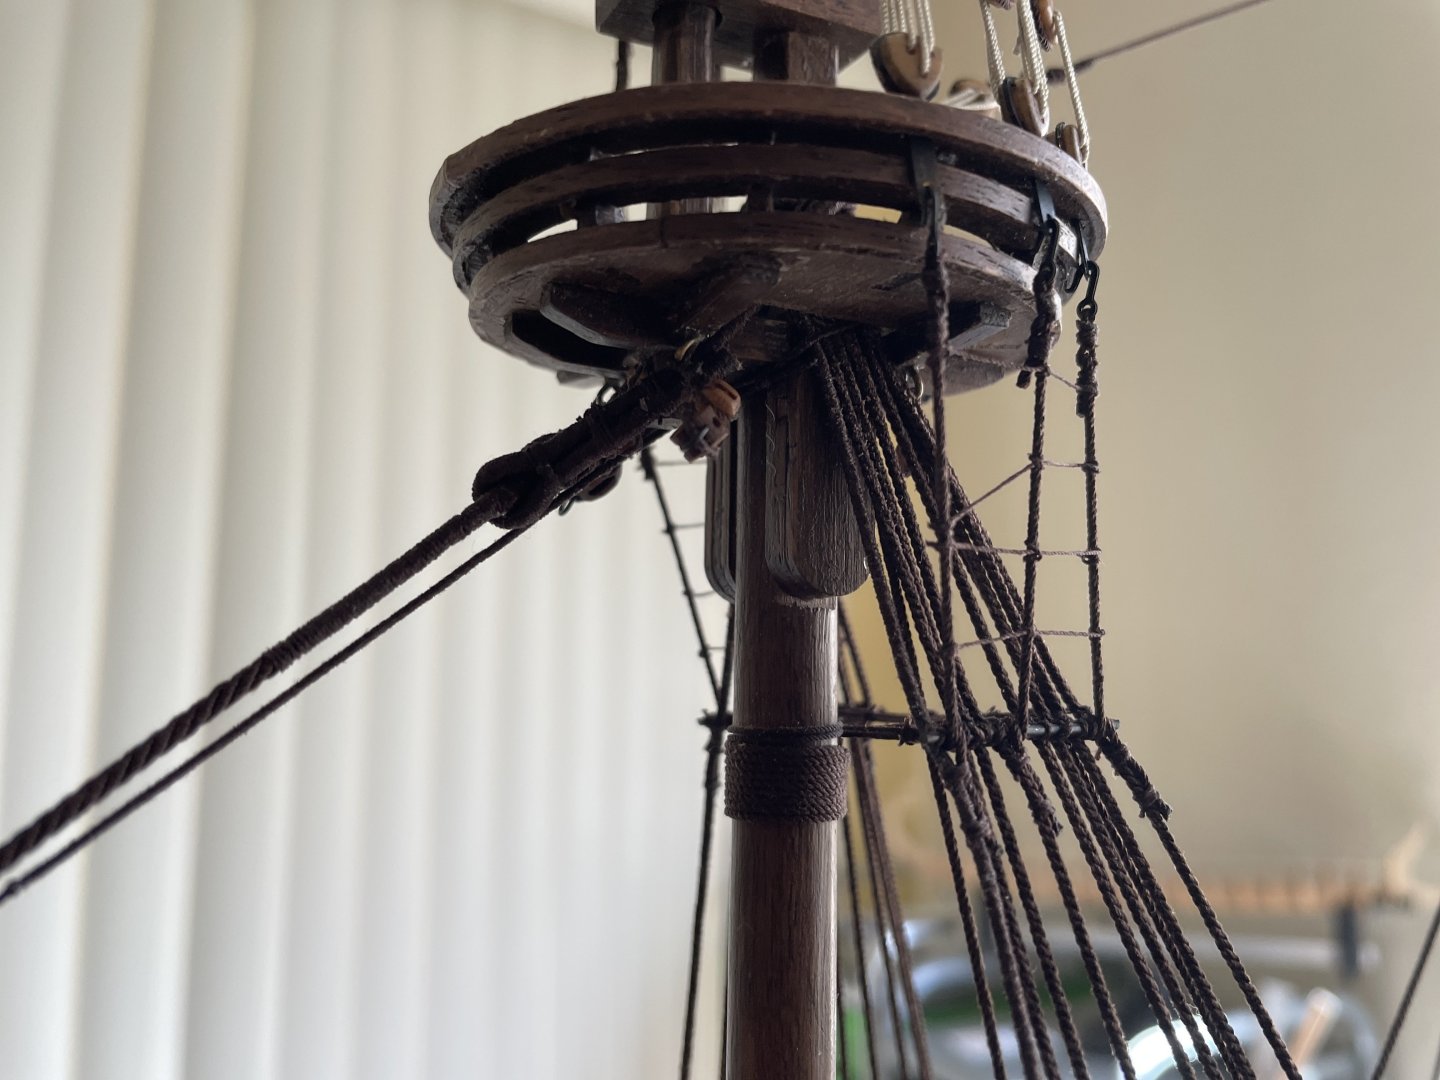
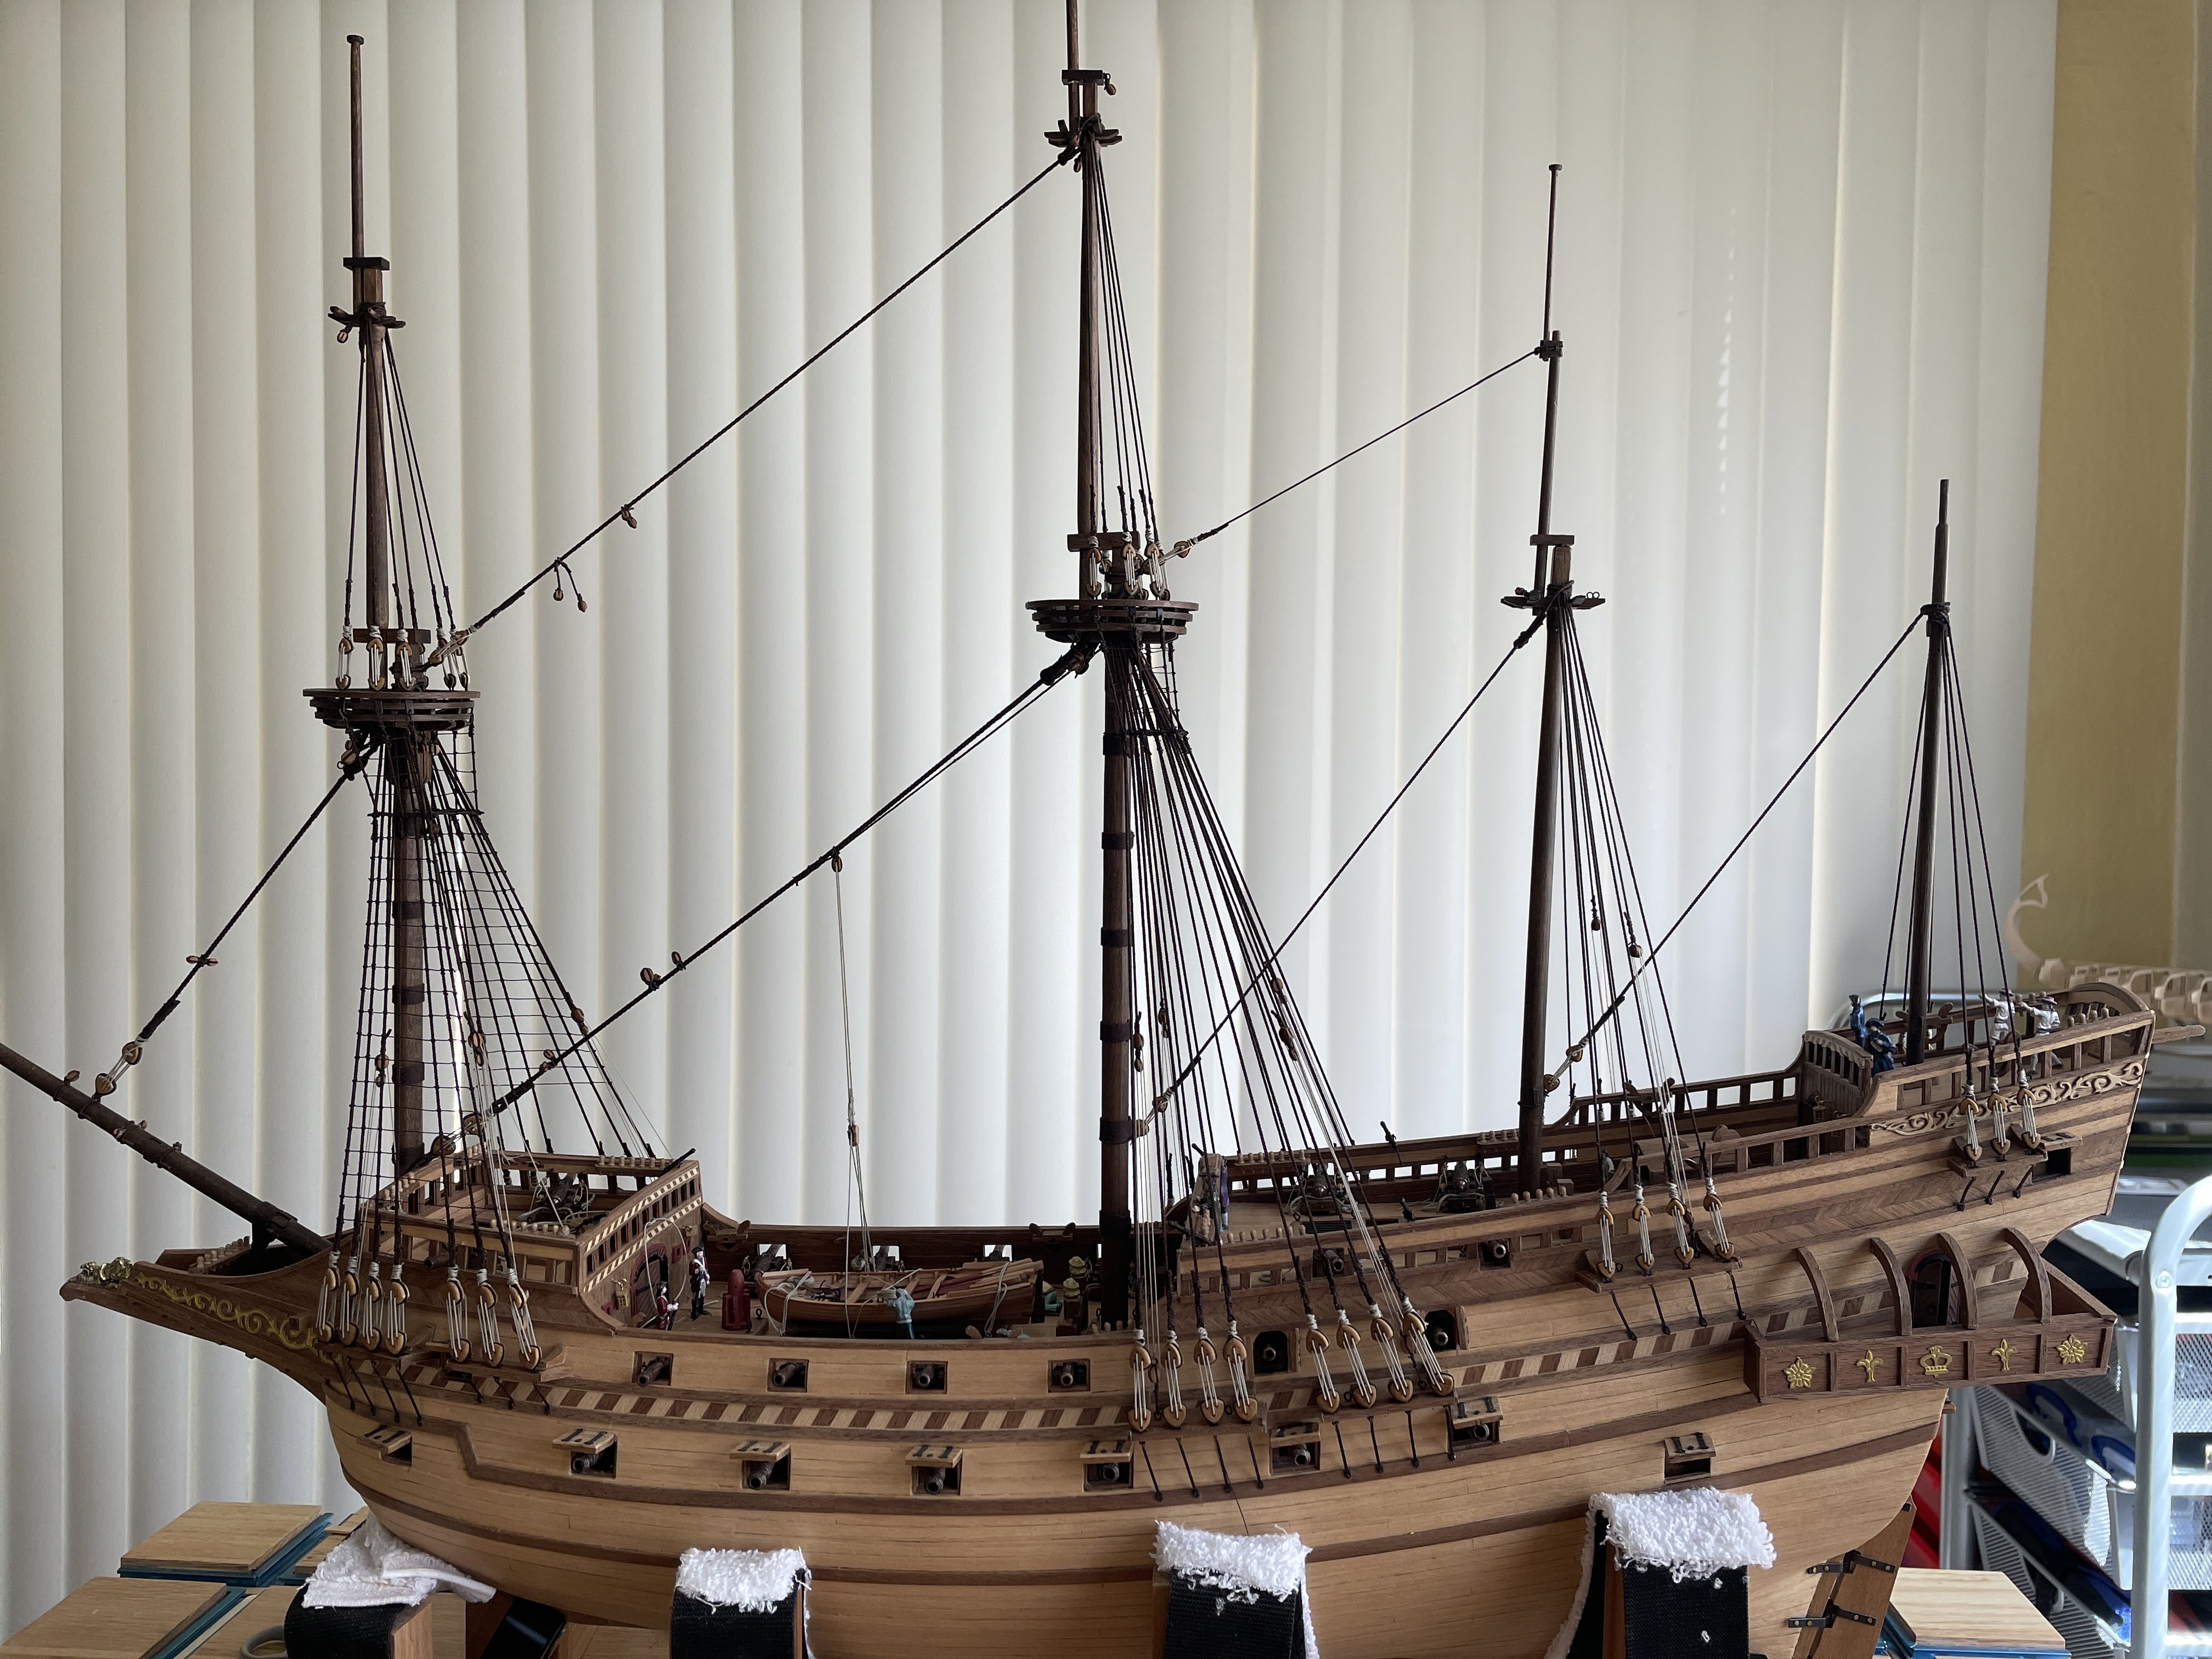
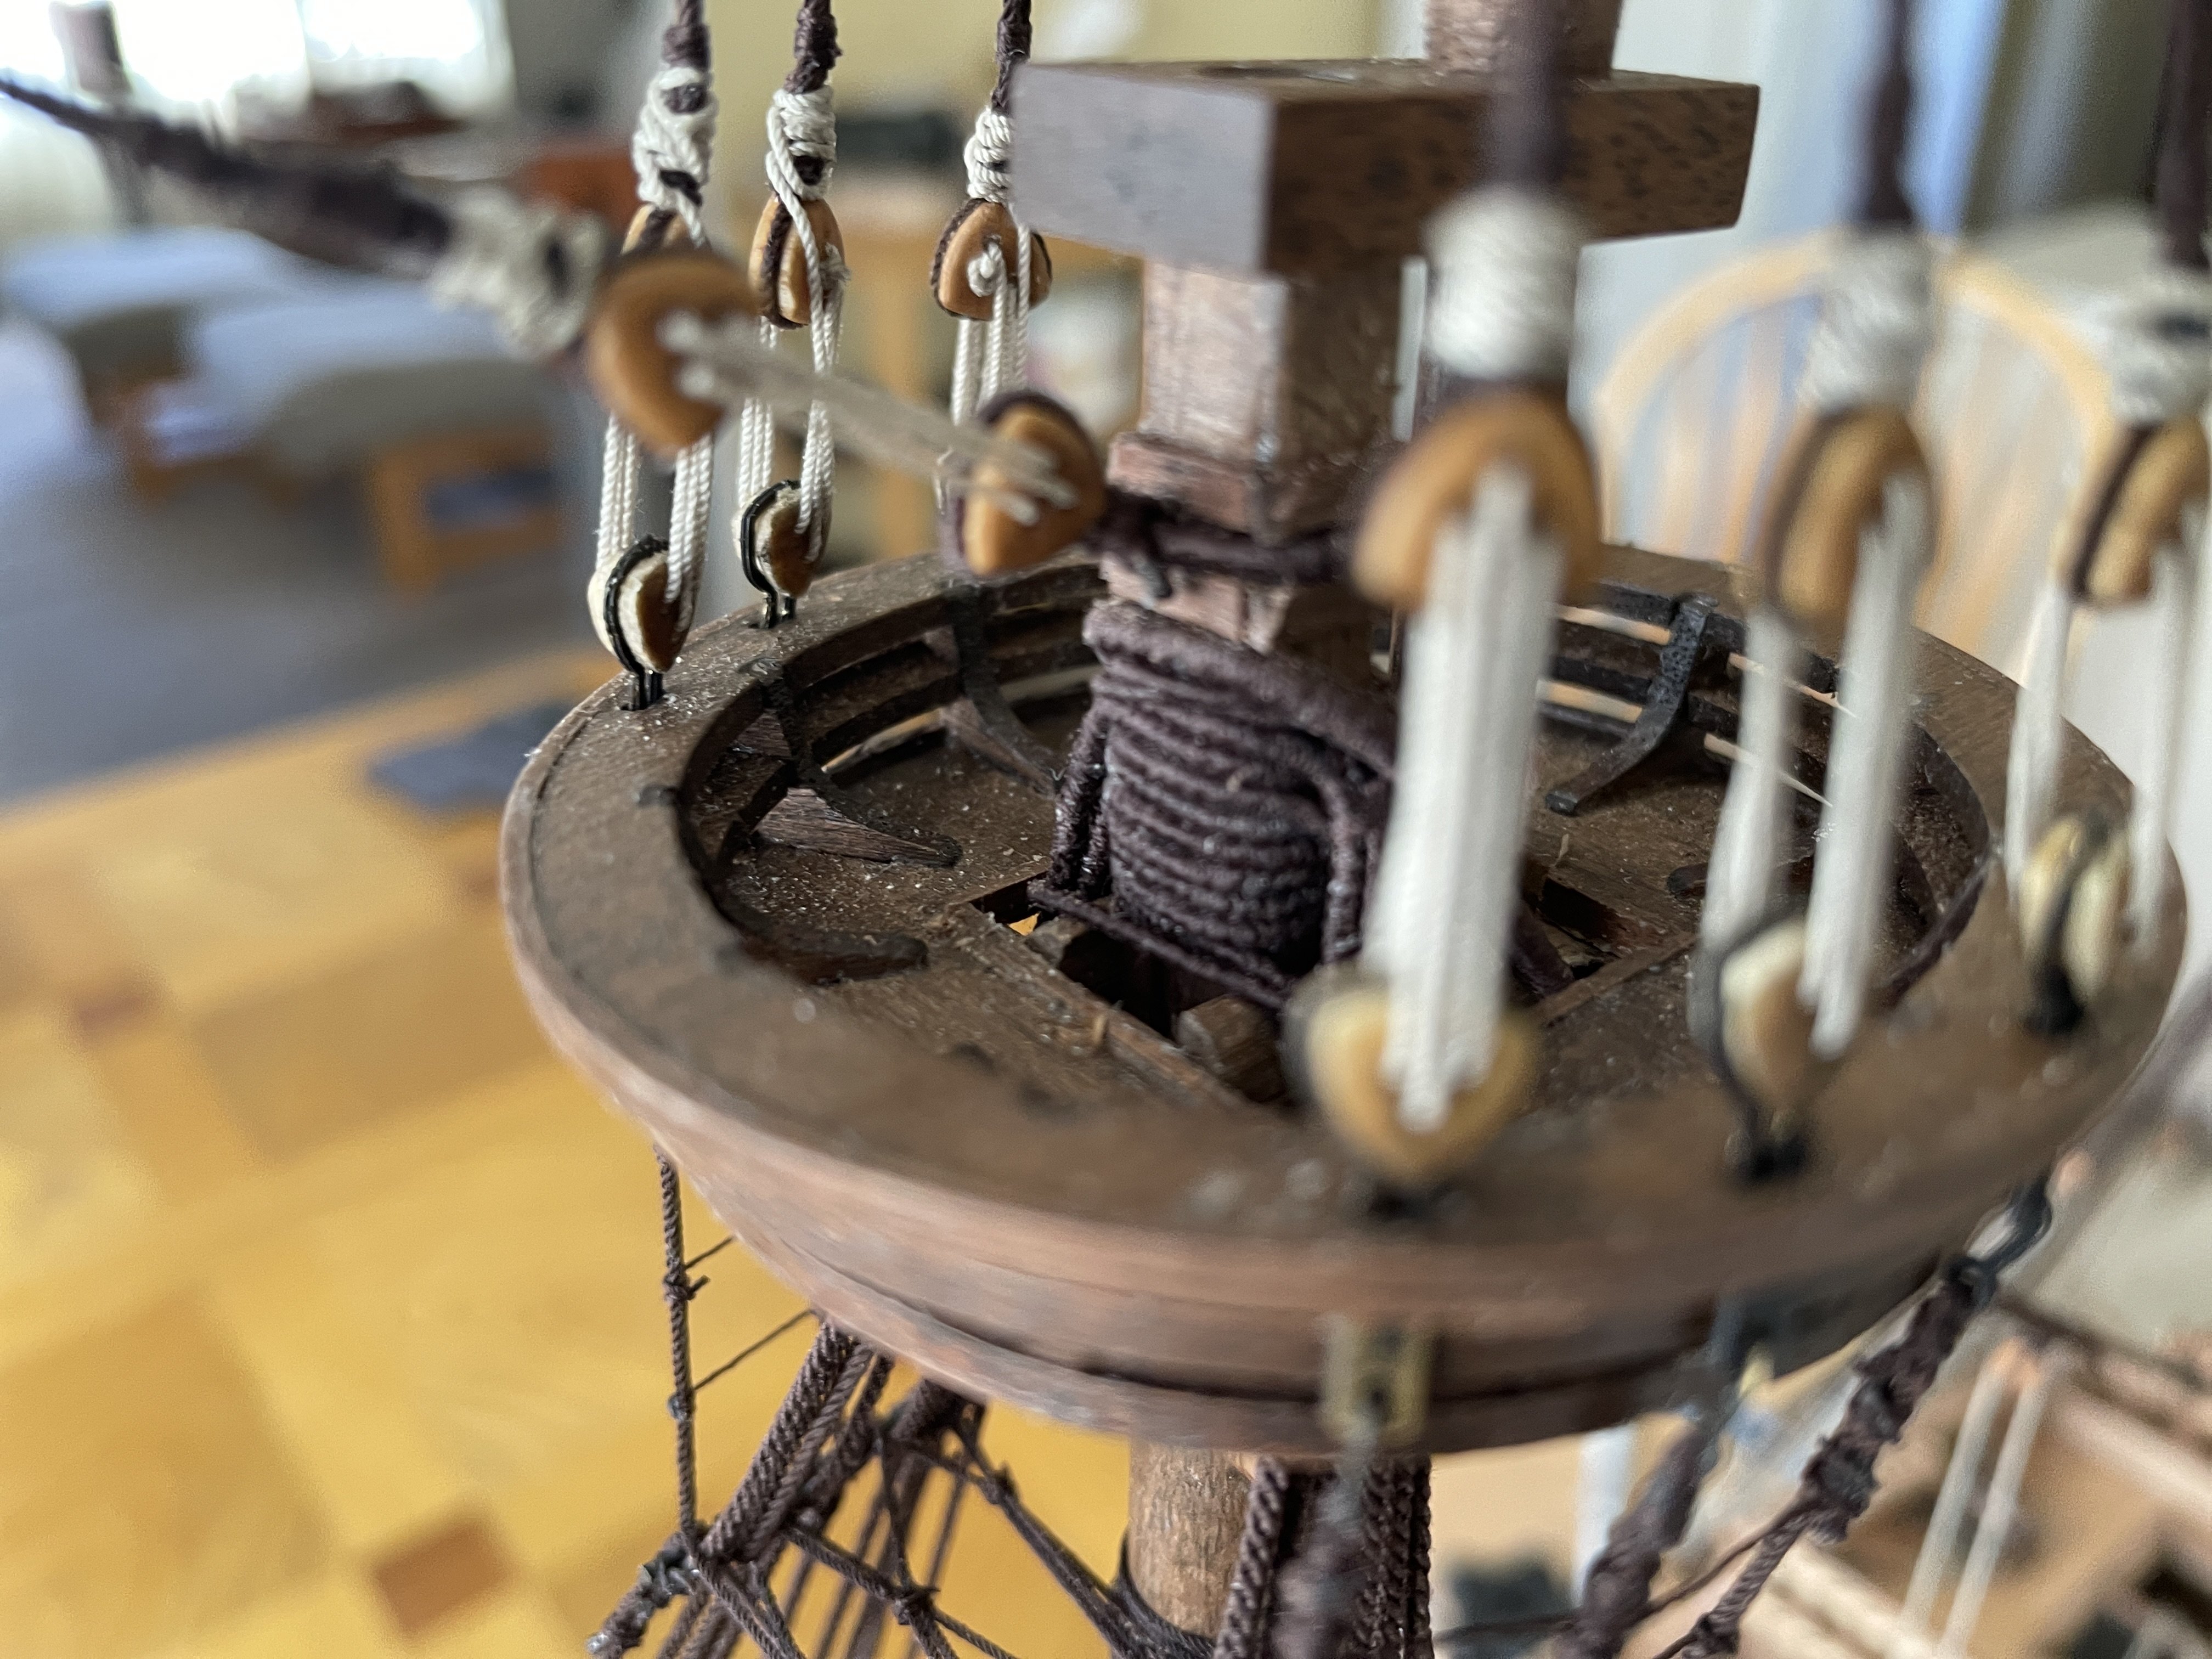
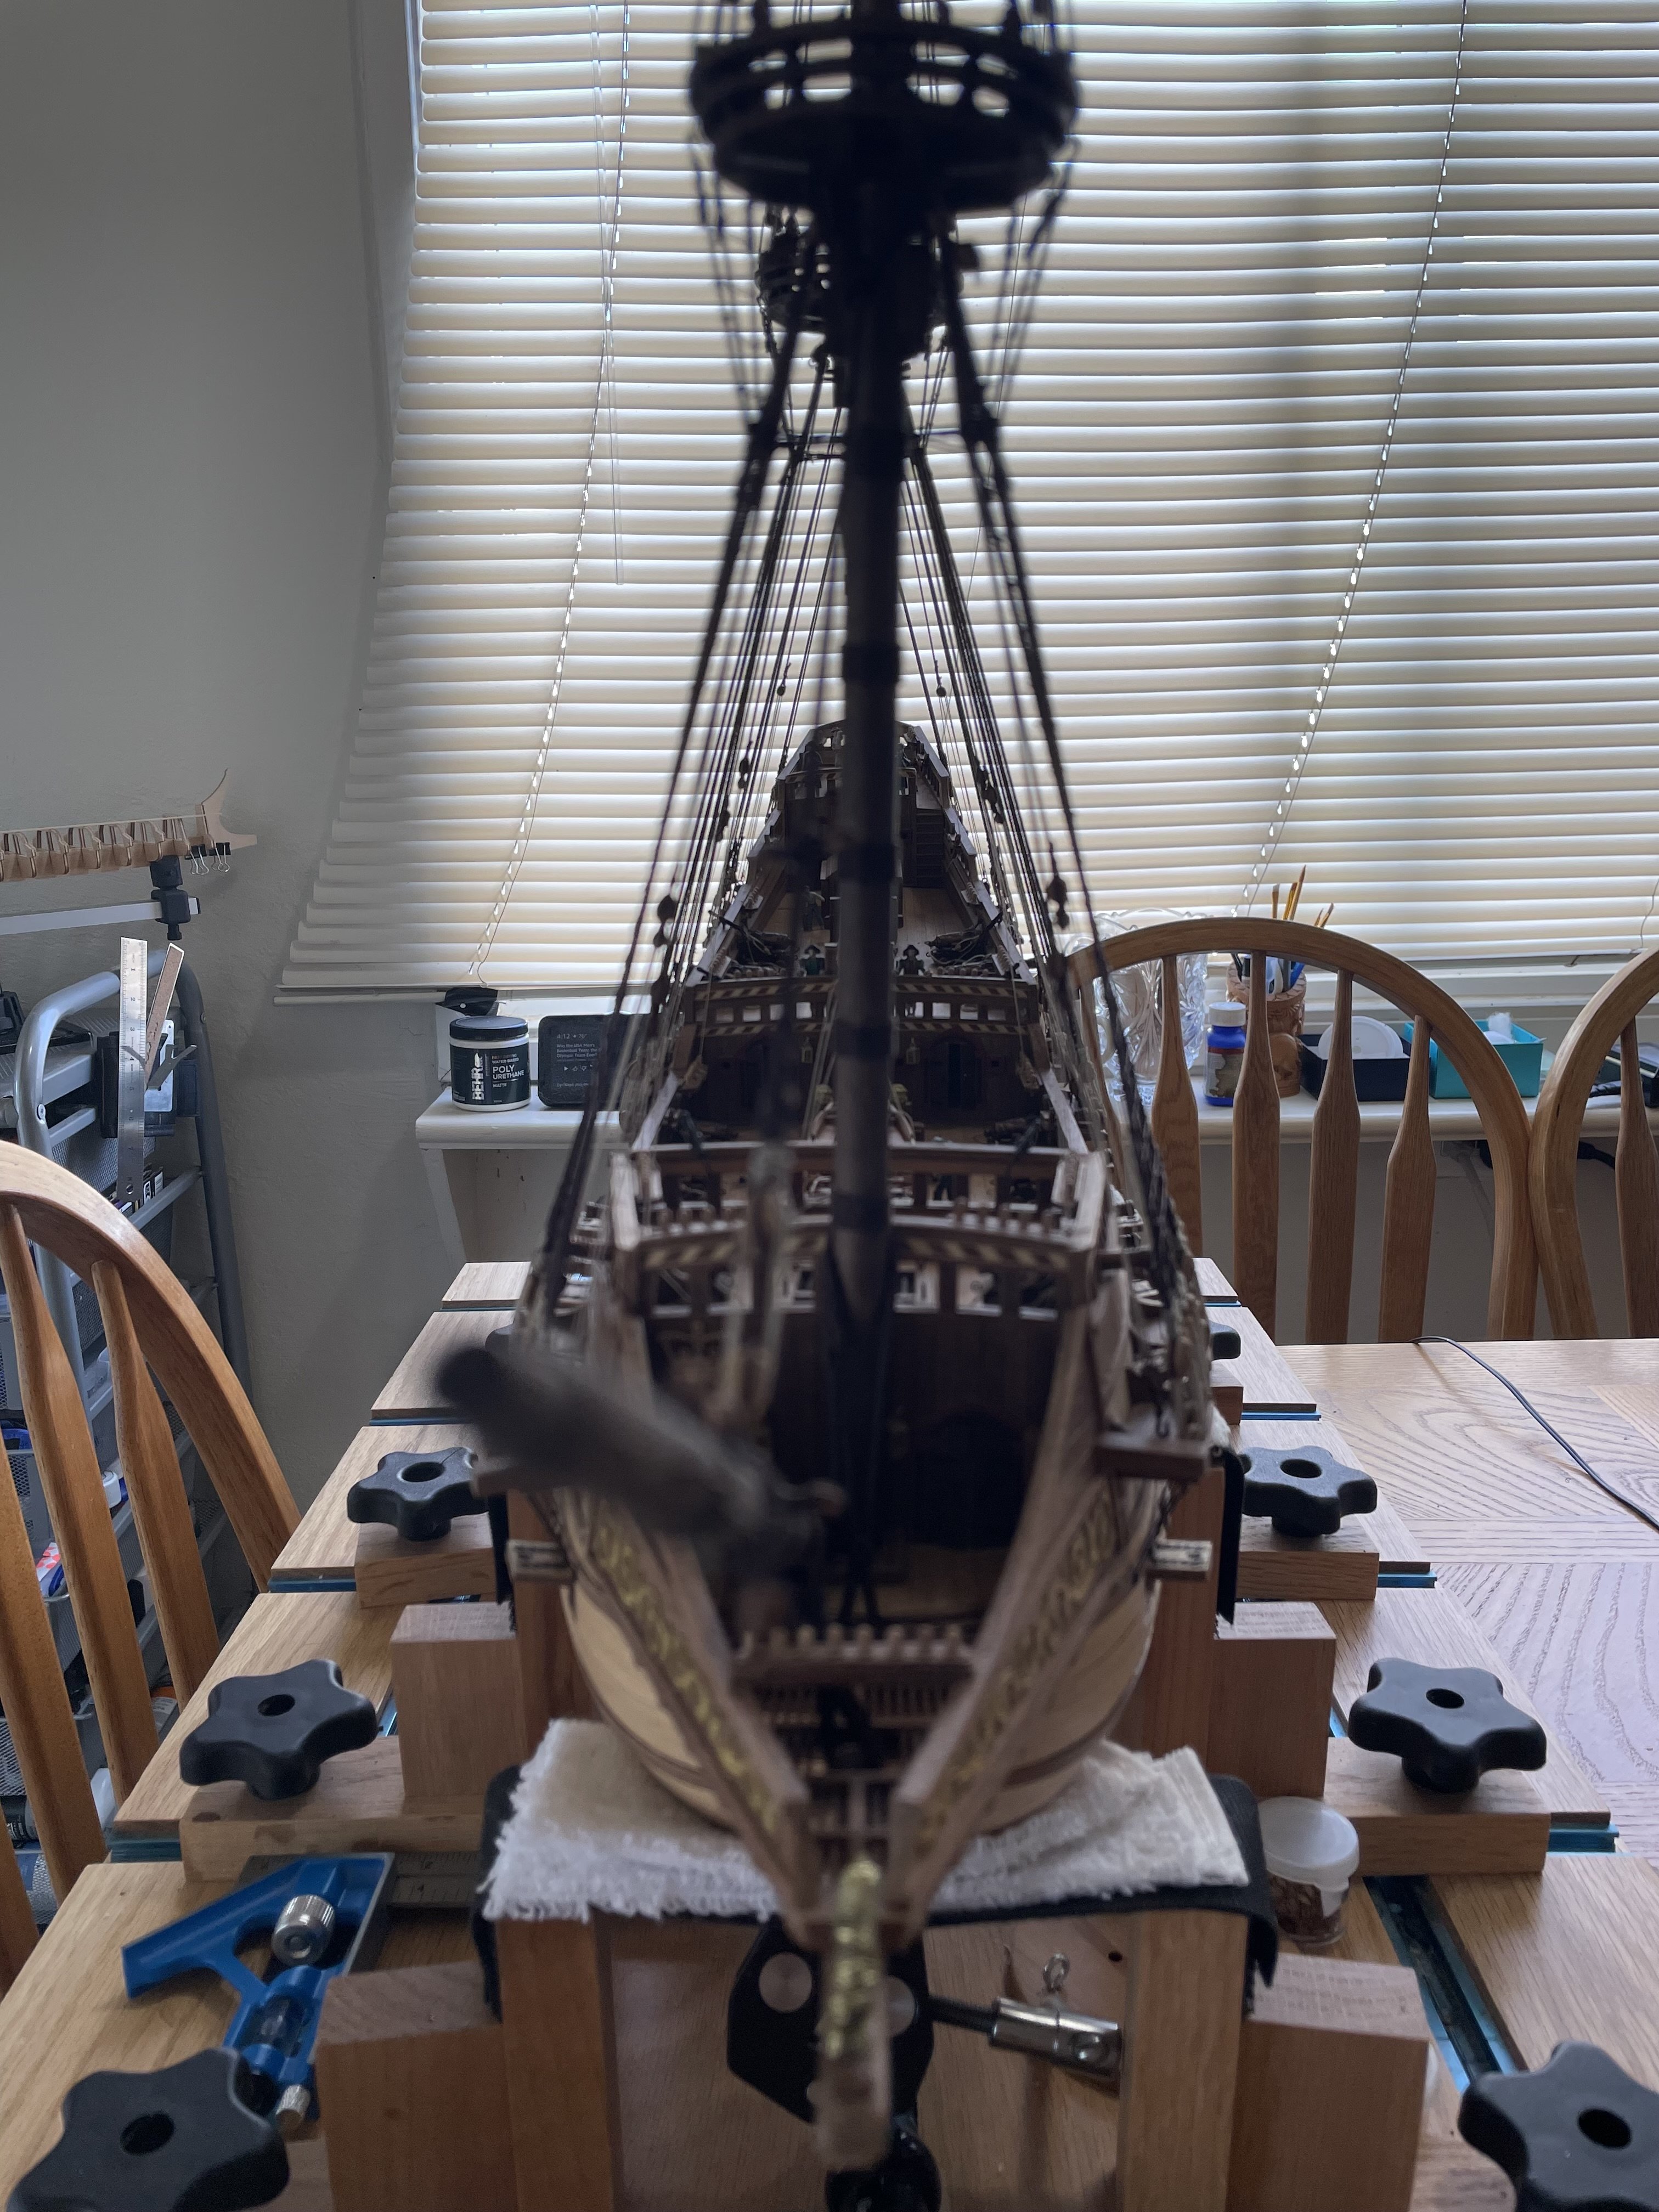
Shrouds and Stays: Except for the front one (rigging blues), all shrouds and stays are installed. This is a very slow process for me. It looks straightforward but it is not always... and somewhat lengthy. Here's what it looks like: Ropes: all ropes are made using a ropewalk, 15 feet at a time. A range at 0.25, 0.5, 0.65, 0.75, 1, 1.2 and 2mm (light or dark), it adds up fast. However, I keep running out of ropes of any given size, which means that I'm doing them often. Serving: All first shrouds are served to full length. It's especially important to serve the end of the shrouds around the topmasts (crow's nest). Serving makes the rope very rigid, so it does NOT compress as you add one on top of each other. Similarly, all blocks attached to masts/cables are served too (not quite sure if they were actually done that way). Rope to length: Installing the rope is ok but it has to be sized to length on the ship before finishing. I usually set them a good 1cm shorter, since they stretch while installing. I like to have good tension when possible. Ratlines: so many to do. Finally, I'm getting "Rigging Burn-out": Can't do too much at a time without making mistakes. Planning on taking a short break before starting on the spars... those look quite tricky to install.