Loracs
-
Posts
297 -
Joined
-
Last visited
Content Type
Profiles
Forums
Gallery
Events
Everything posted by Loracs
-
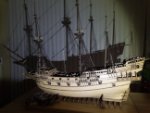
 Your building speed is just amazing... in addition, fantastic results. At this rate, you will be able to fill a museum to capacity anytime soon.
- 288 replies
-
- 6
-

-

-
- Card
- Pre-Dreadnought
- (and 3 more)
-
a thousand thanks... greatly appreciated.
-
@drobinson02199, greeting I am interest in the kit. I have a quick question for you. Does Amati include plan of the detailed layout of the hull plates. I would like to simulate it using thin polystyrene sheet. Thanks for the reply.
-
a small question: in your post on "british Practice", second picture. How is the lines attach to the yarn? what kind of knots? so sorry for the basic question. I can't see the knot very well. here reposted:

-
This is great information... thanks a lot for taking the time.
-
Indeed amazing, a must stop for anything rigging. Thanks for your detailed log. I'm sorry if you posted before but could you provide information on the thread (type, manufacturer and color) you used for making the various ropes/cables? I really like both the texture and color.
-
Tapering Masts and Arms the easy way
Loracs replied to Johnny Mike's topic in Masting, rigging and sails
This is a good idea, simple and straightforward. Look like quite precise too. -
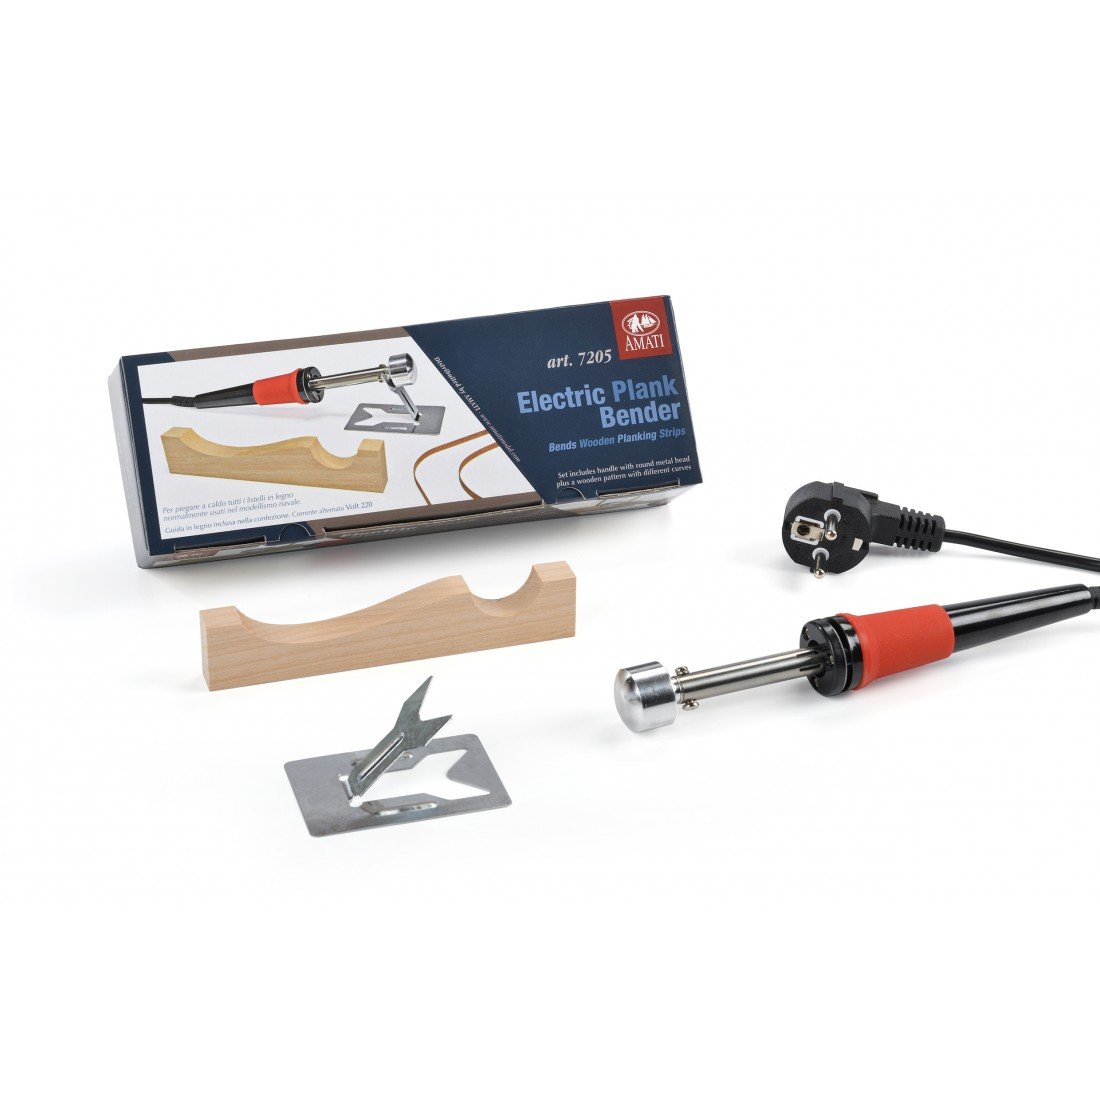
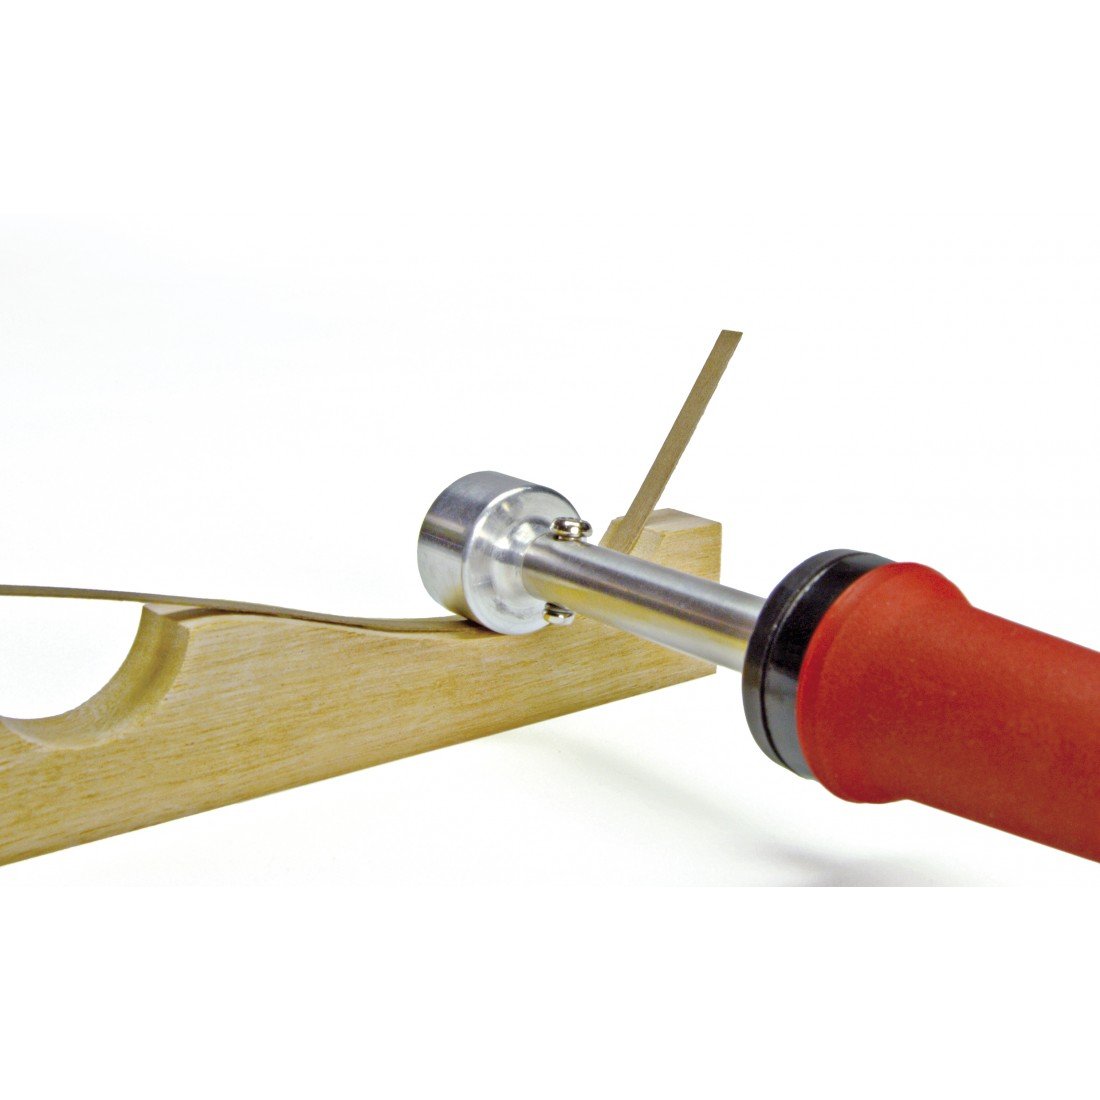
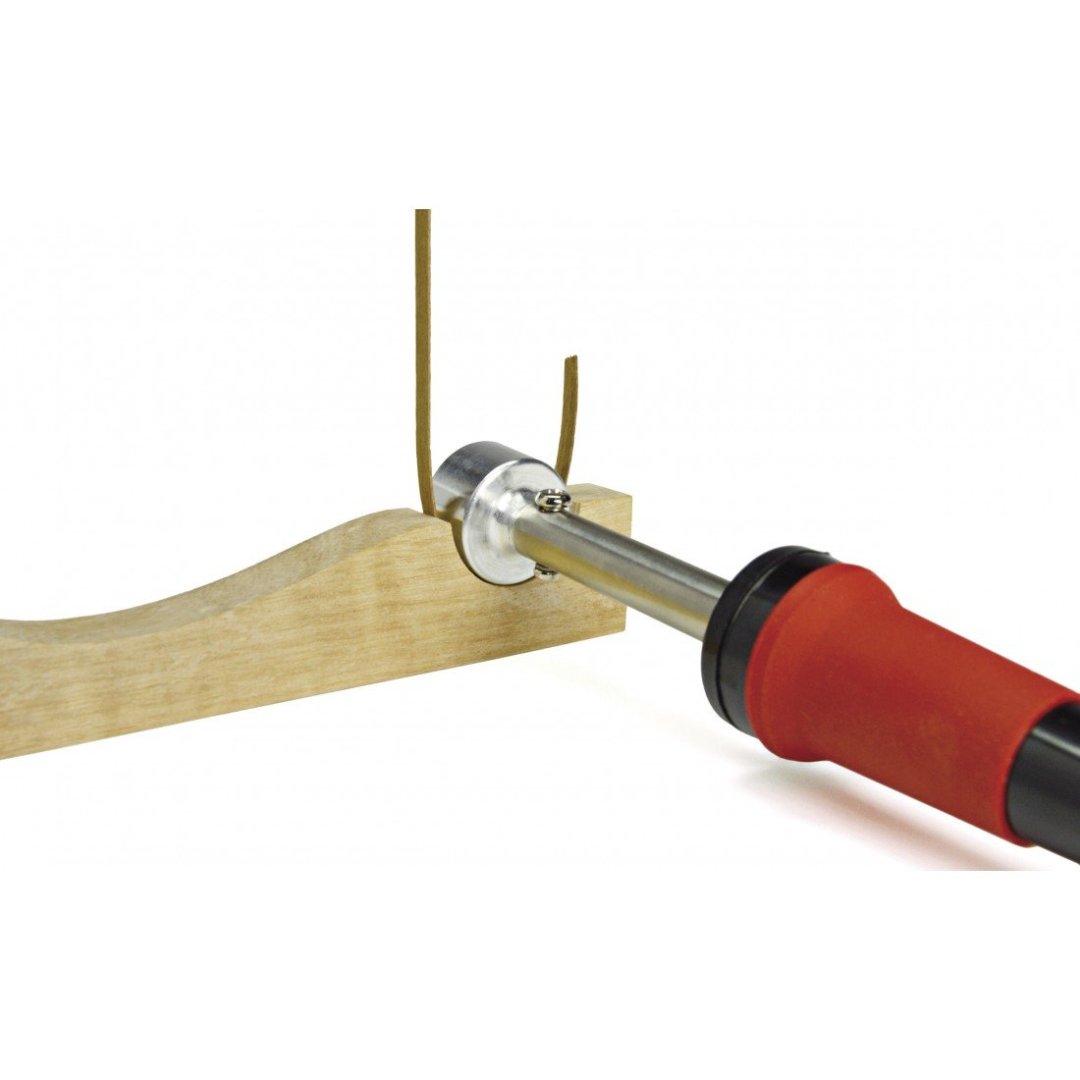
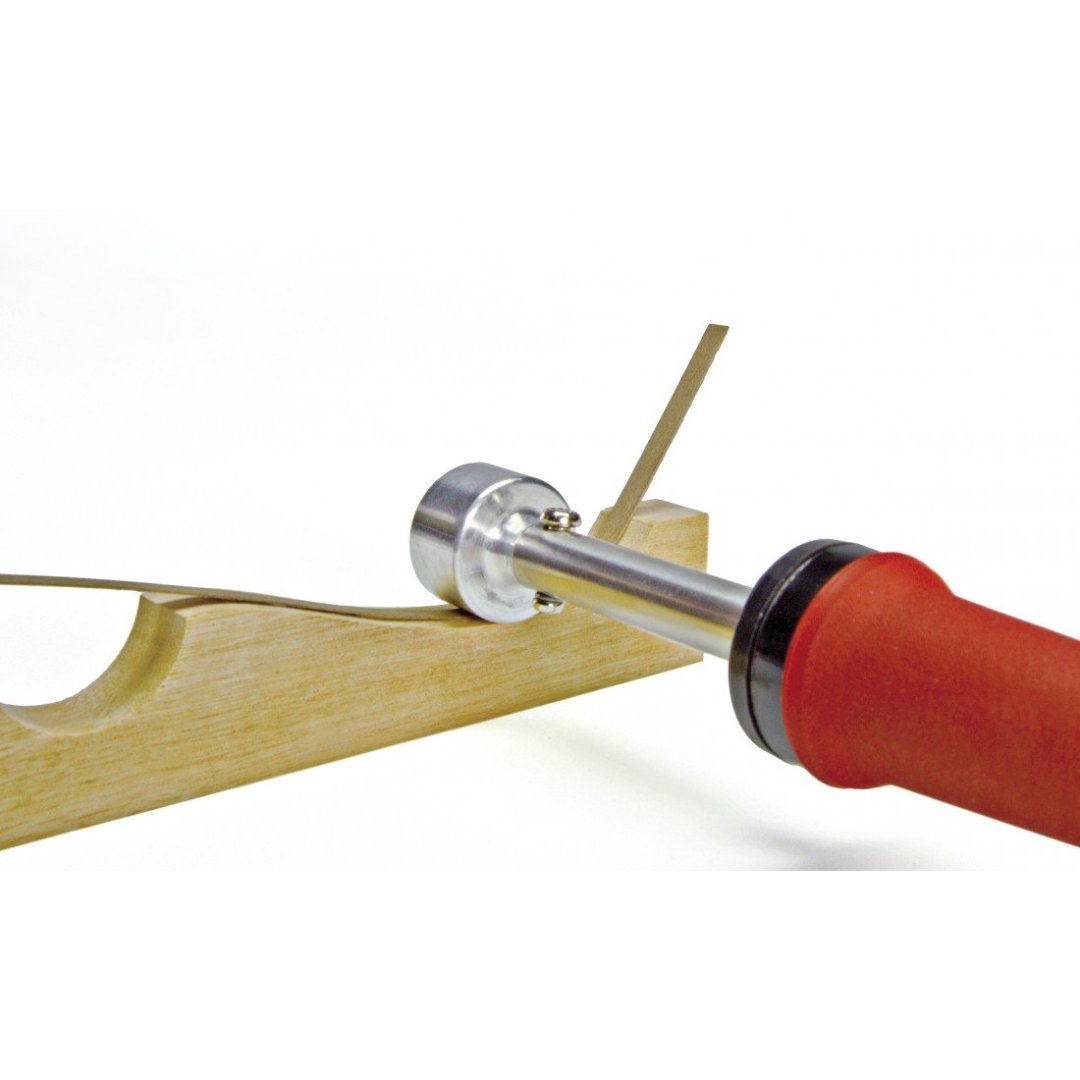
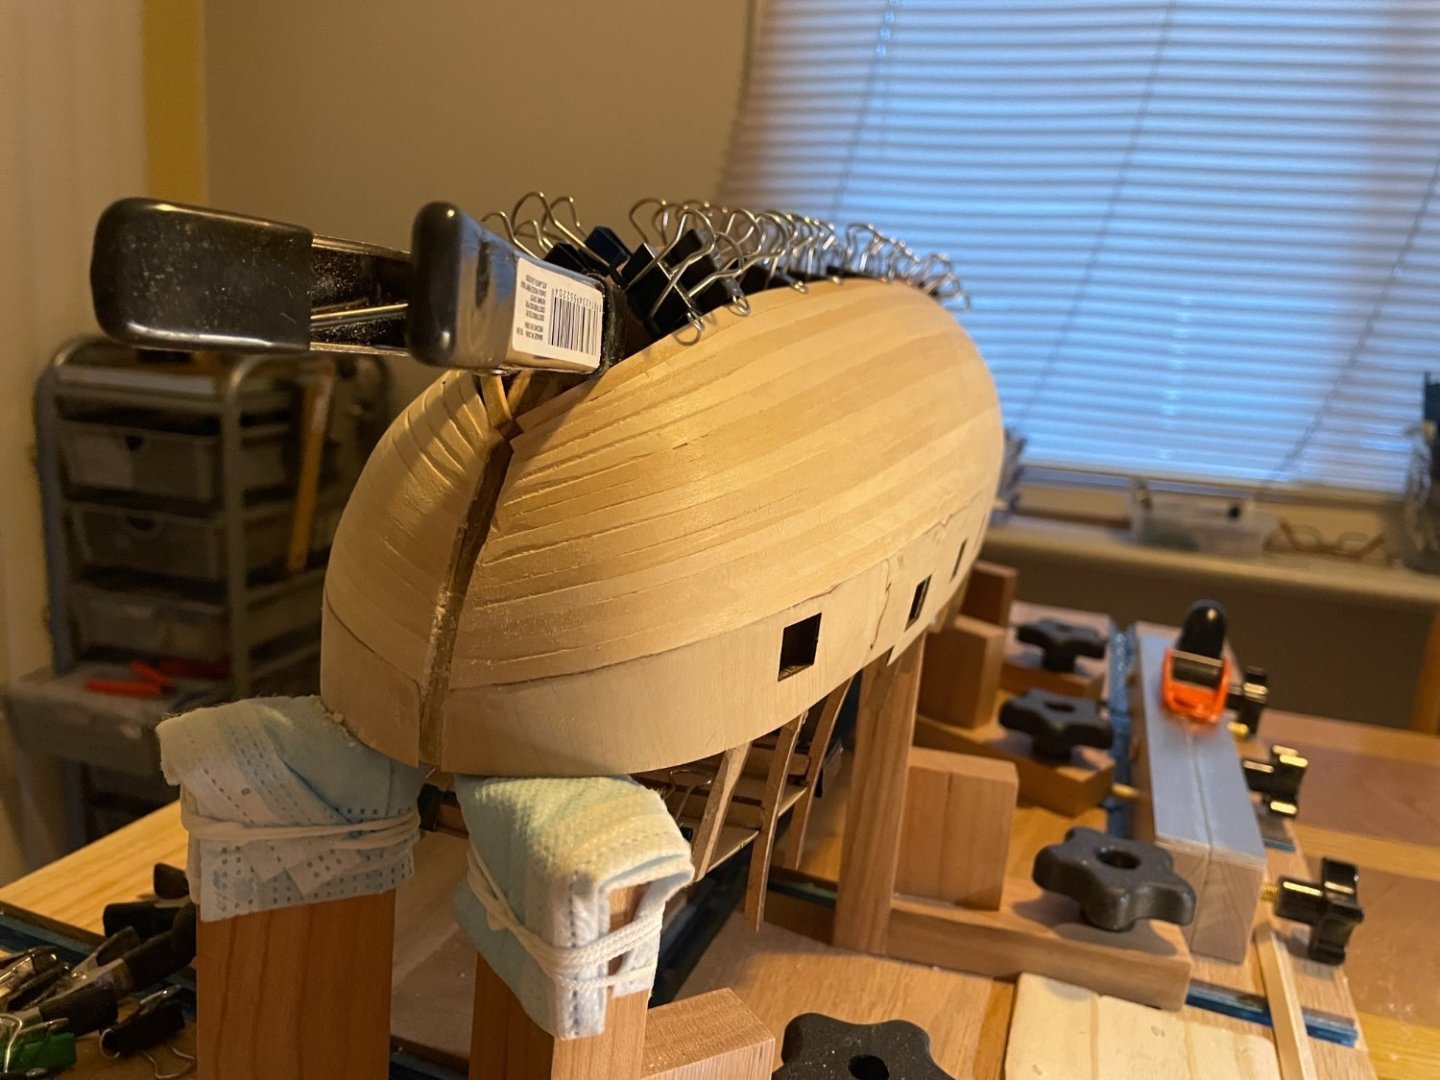
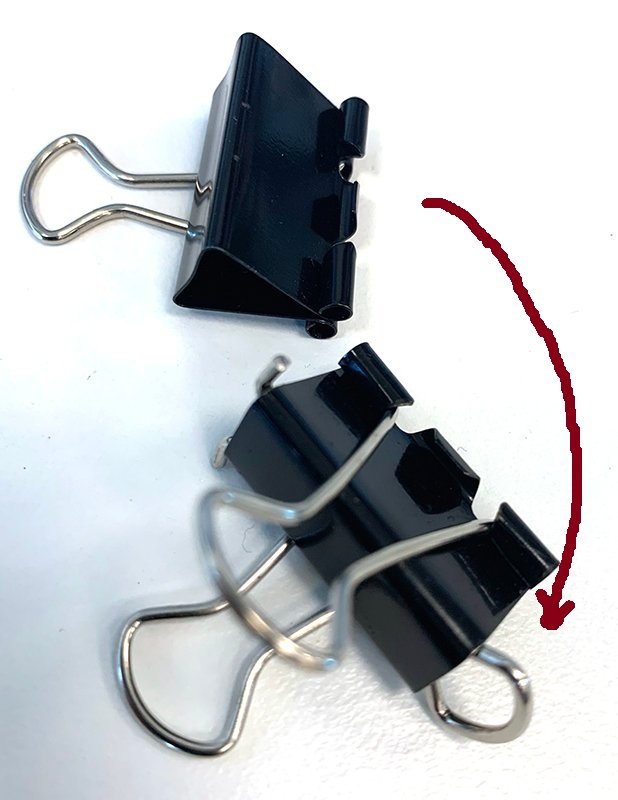
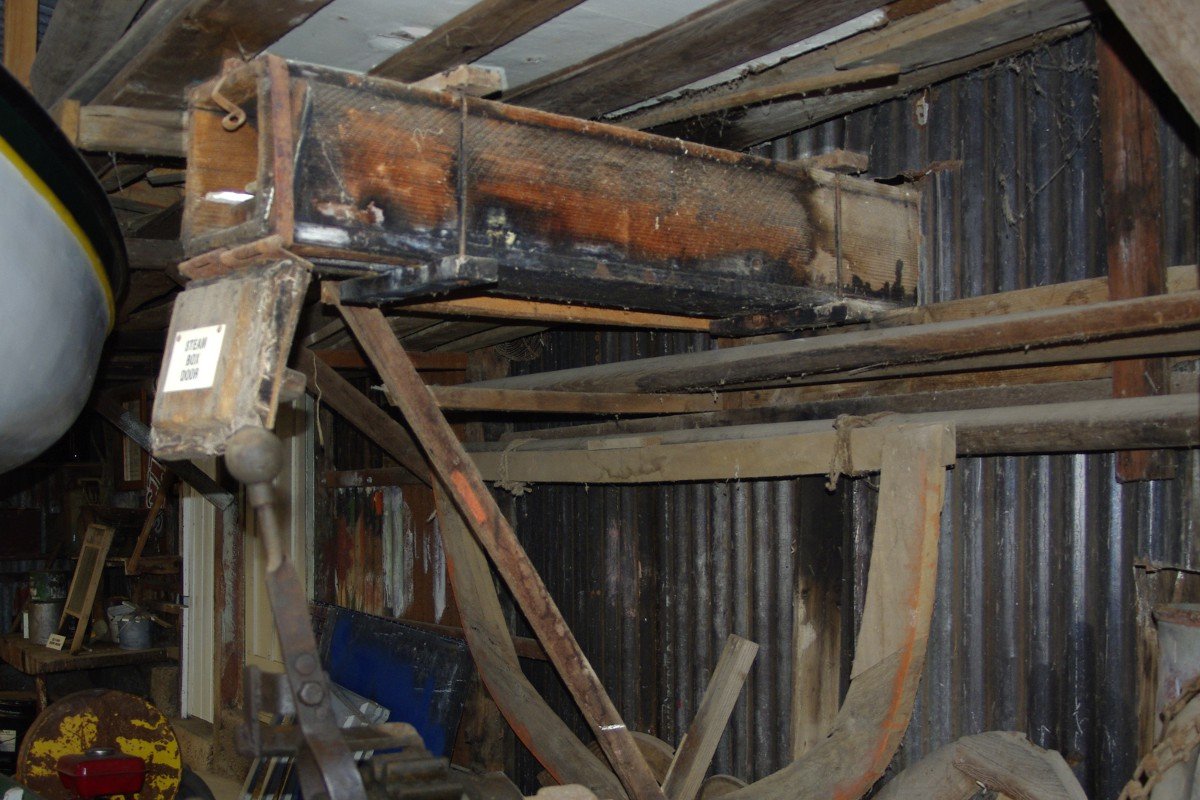
I forgot to mention... you may need to invest in a couple tools. Something you will find useful is a plank binder. It allows to shape planks to follow the, sometime pronounced, curves of the ship. This allows you more flexibility in placement since you won't need as much force to get everything in place. Plank binder uses heat and water (steam) to shape or round planks. I use this one but there many others. If you shape the planks beforehand, you won't really need to use nails (which btw are not that easy to use in planking), just glue and few clamps. Note, this can get very hot. Careful not burning yourself or the wood. Keep the plank moist with water. In real ship building, they used a steam box like here: Steam box - Wikipedia Another trick is to use the bulkheads to hold the plank in place. A simple modification of a standard clamp is good enough (see last picture, taken from @peterbrowne). It will hold the plank sideway (no gap when planking the hull) and apply pressure from the top (while the glue cure). The right tools for the right jobs help so much. LASTLY, you can shape the plank without plank binder. Wet you plank for 5-10 min in hot water then slowly place it to the corresponding hull position. Hold it with clamps you made above. DO NOT glue it yet. At the bow, you may need a hair dryer to help bend the plank in place without breaking it. Water and heat are the key. Then leave it there for few hours until dry... you then have a perfectly shaped plank to work with. There is more to hull planking... but this will get you going while you read.

-
@Claudius_Rex, Greeting, I'm pleased that you took the time to post your progress here. This is one of the great ways to learn the craft. Let me try to give you few pointers. I hope this will help you here and in future build. Amati kits are not too bad of a choice. Some kits are better than others and I am not familiar with this one. First, you came here: fantastic decision. My first general suggestion will be to read. Wood modeling is all about learning the various techniques involved. There are many... I'm still learning after nearly 3 years of building model, so never get discourage. I'm giving couple links to section of the forum to get you started. There are far more out there. Shop Notes, Ship Modeling Tips, Techniques and Research - Model Ship World™ Nautical Research Guild - Articles and How Tos Second, try to locate here and/or YouTube build logs for this specific model... read then all. Build logs are a perspective from someone else, how they progressed and often the methods the use. THIS IS A GREAT OPPORTUNITY TO LEARN FROM THEM. Not everyone presents a detailed build, but that ok... it gives YOU an idea of what is coming and potentially how to do it. Third, Never, ever rush into the project. This is a recipe for disaster. Model building is as much patience and dedication (there a lot of repetition) than skills. Lastly, let get to your build. First planking is all about getting a solid and smooth foundation to the hull. It will be hidden so you have an opportunity to PRACTICE and develop your skills at planking. Your planking still needs a lot of work... AND THAT OK! Reading the methods and practicing them are keys. My suggestion: Wood model is a labor of love. You need to be gentle, accurate and rigorous in your approach. RULE NO 1: If you have to force it, you are using the wrong approach. Something is not right, and you will have difficulties. I think you try to force the planks in place here. This is your first mistake. There are methods to deal with this. Second, Ships are all about symmetry and style, with gentle flowing curves. Keep that in mind as you work on the model. Is there symmetry? yes, how will I make identical on each side. This is just a starter comments. We just can't write full tutorials it will take too long. But it is up to you to read as much as possible. LAST NOTE: you mentioned and assumed that the hole for the mats is miss-aligned. Amati is generally good at design. Ask yourself: for this kit, is it a mistake OR is it by design? In many ship the mats are not necessarily perpendicular to the deck... often it leans back (relative to the bow) by few degrees. I just don't know about this model to answer. But make no assumptions.
-
thank you... appreciate. It is fun to do.
-
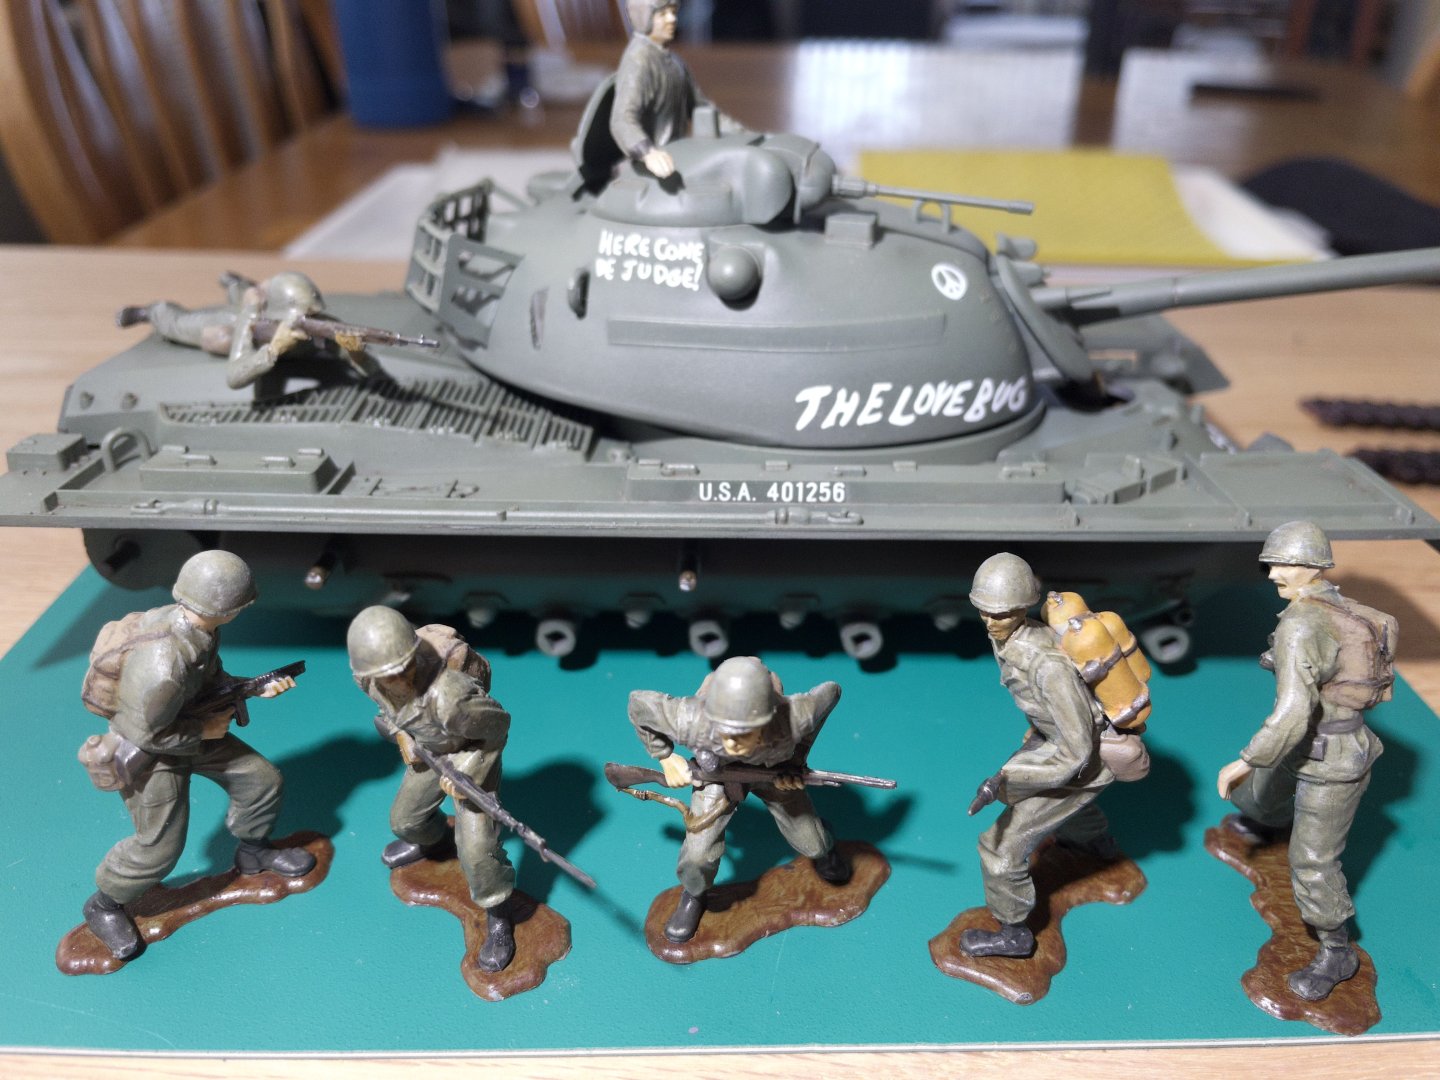
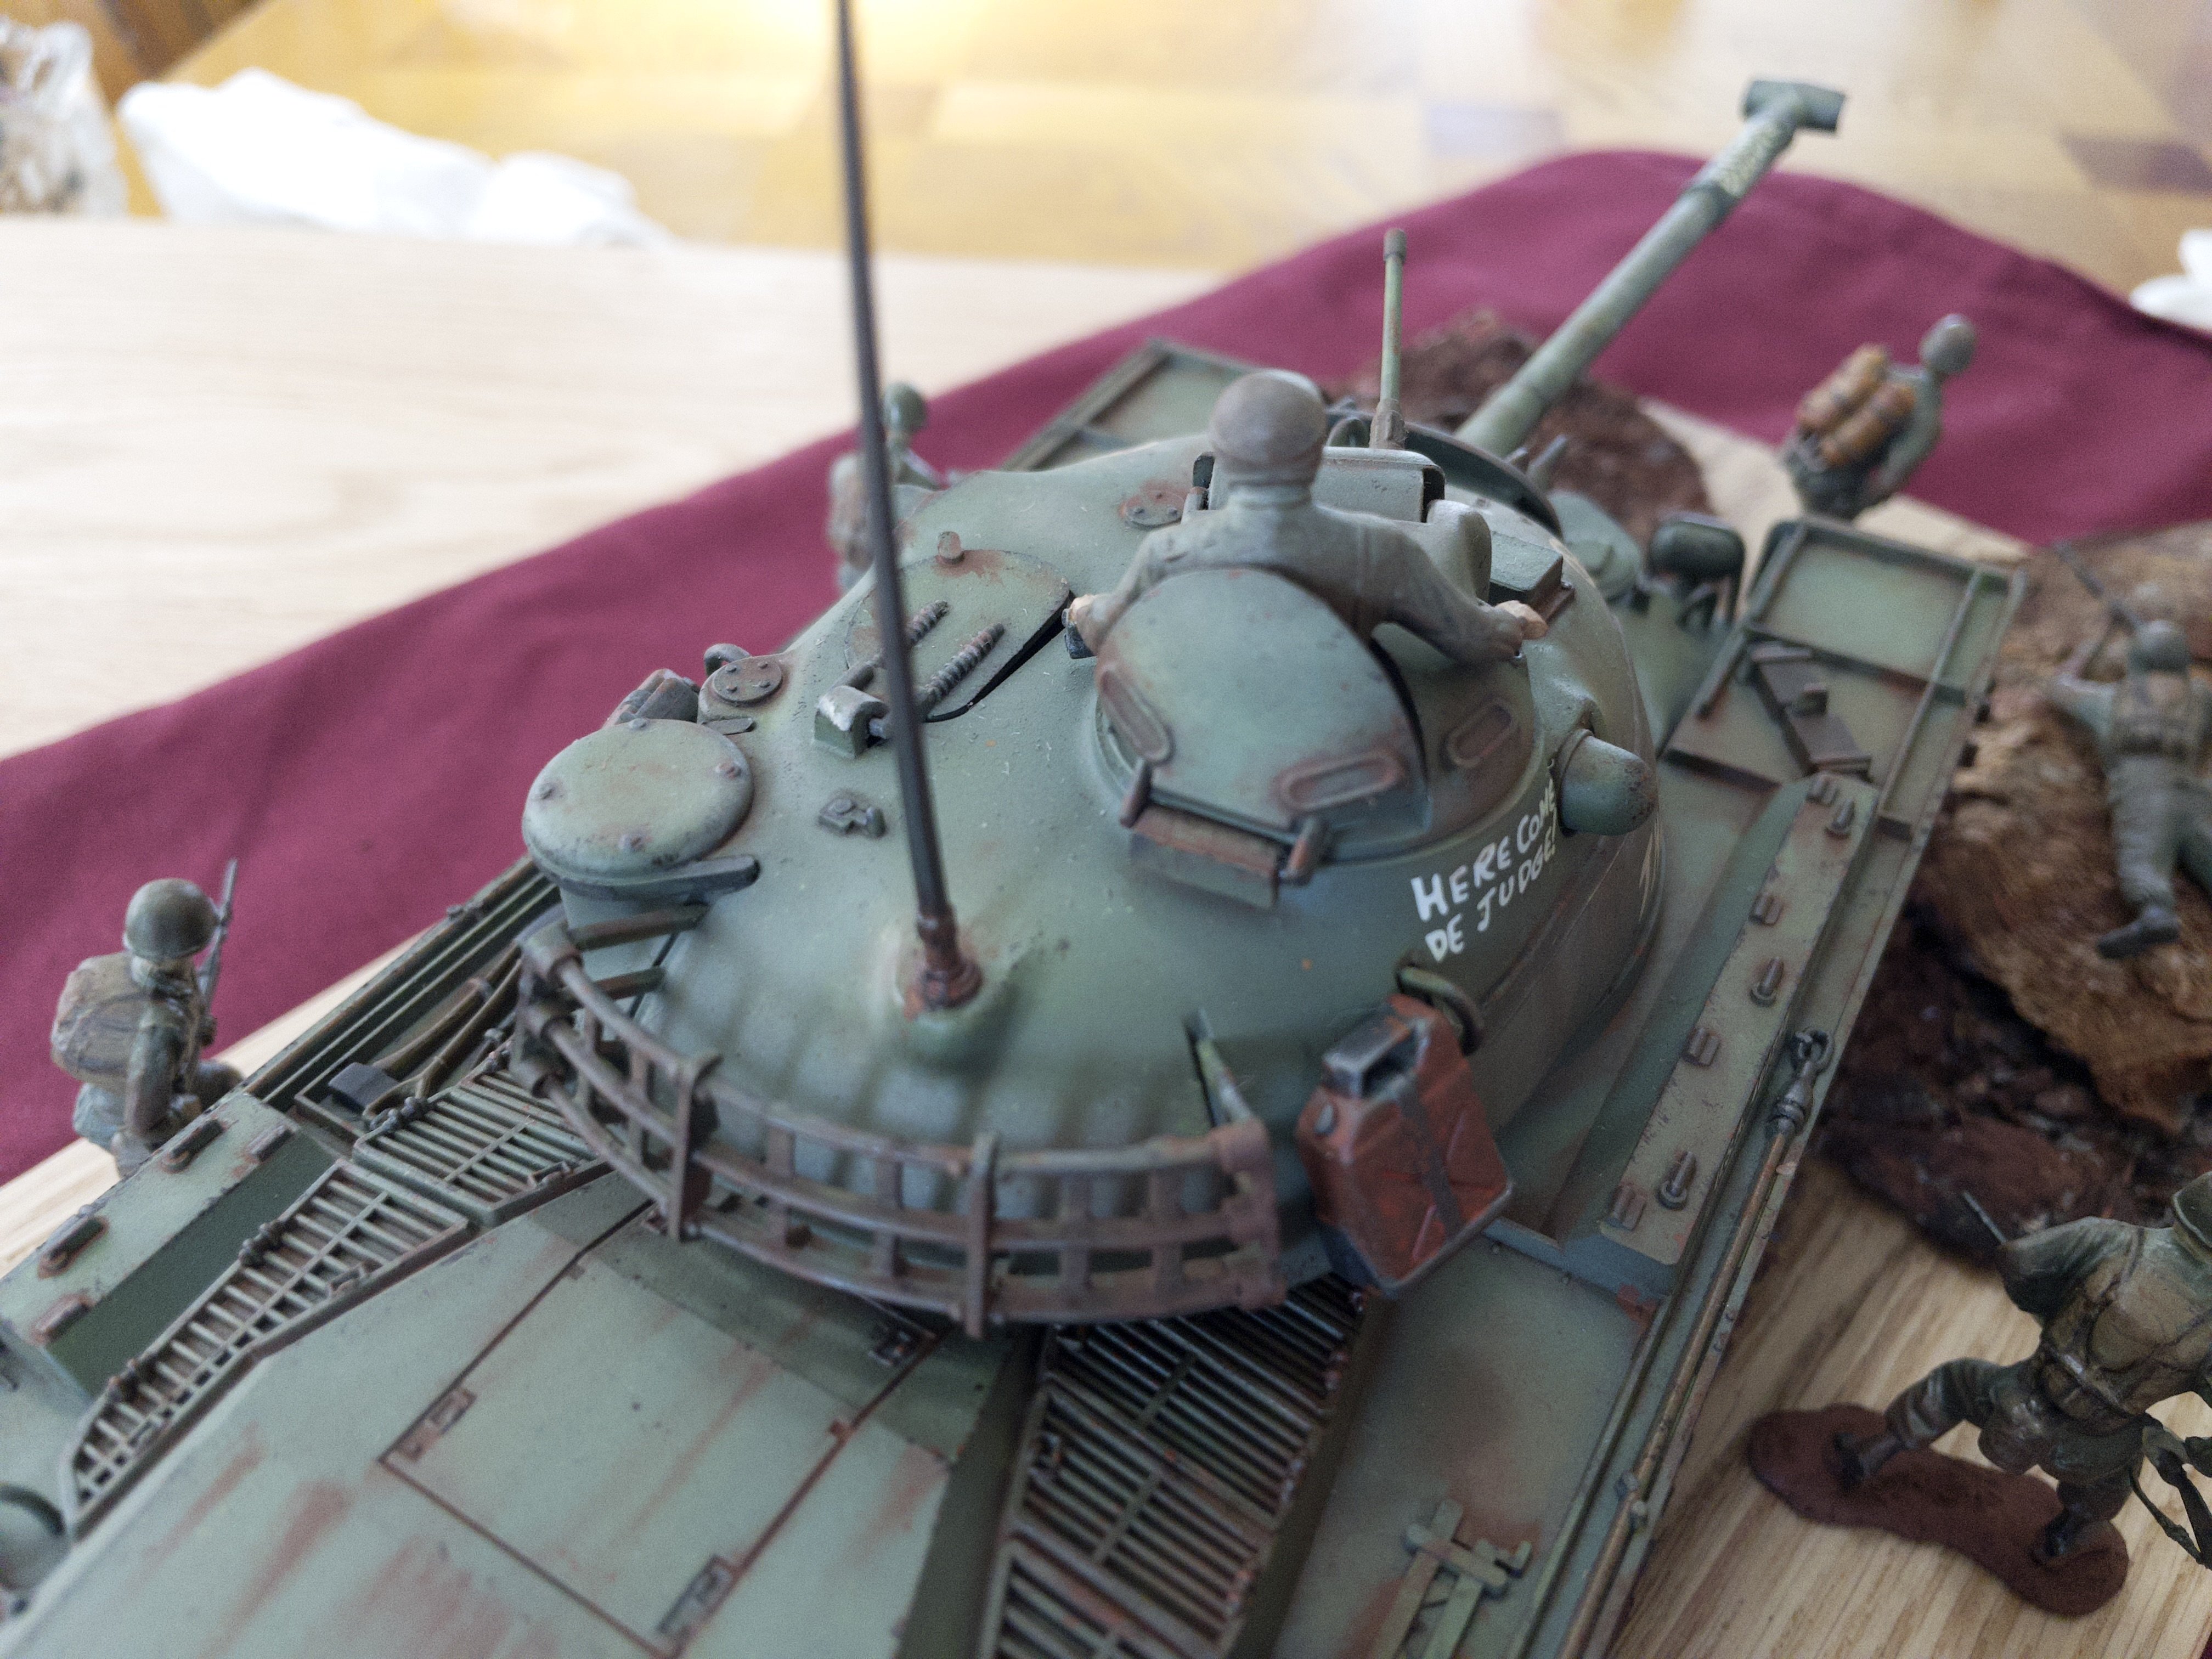
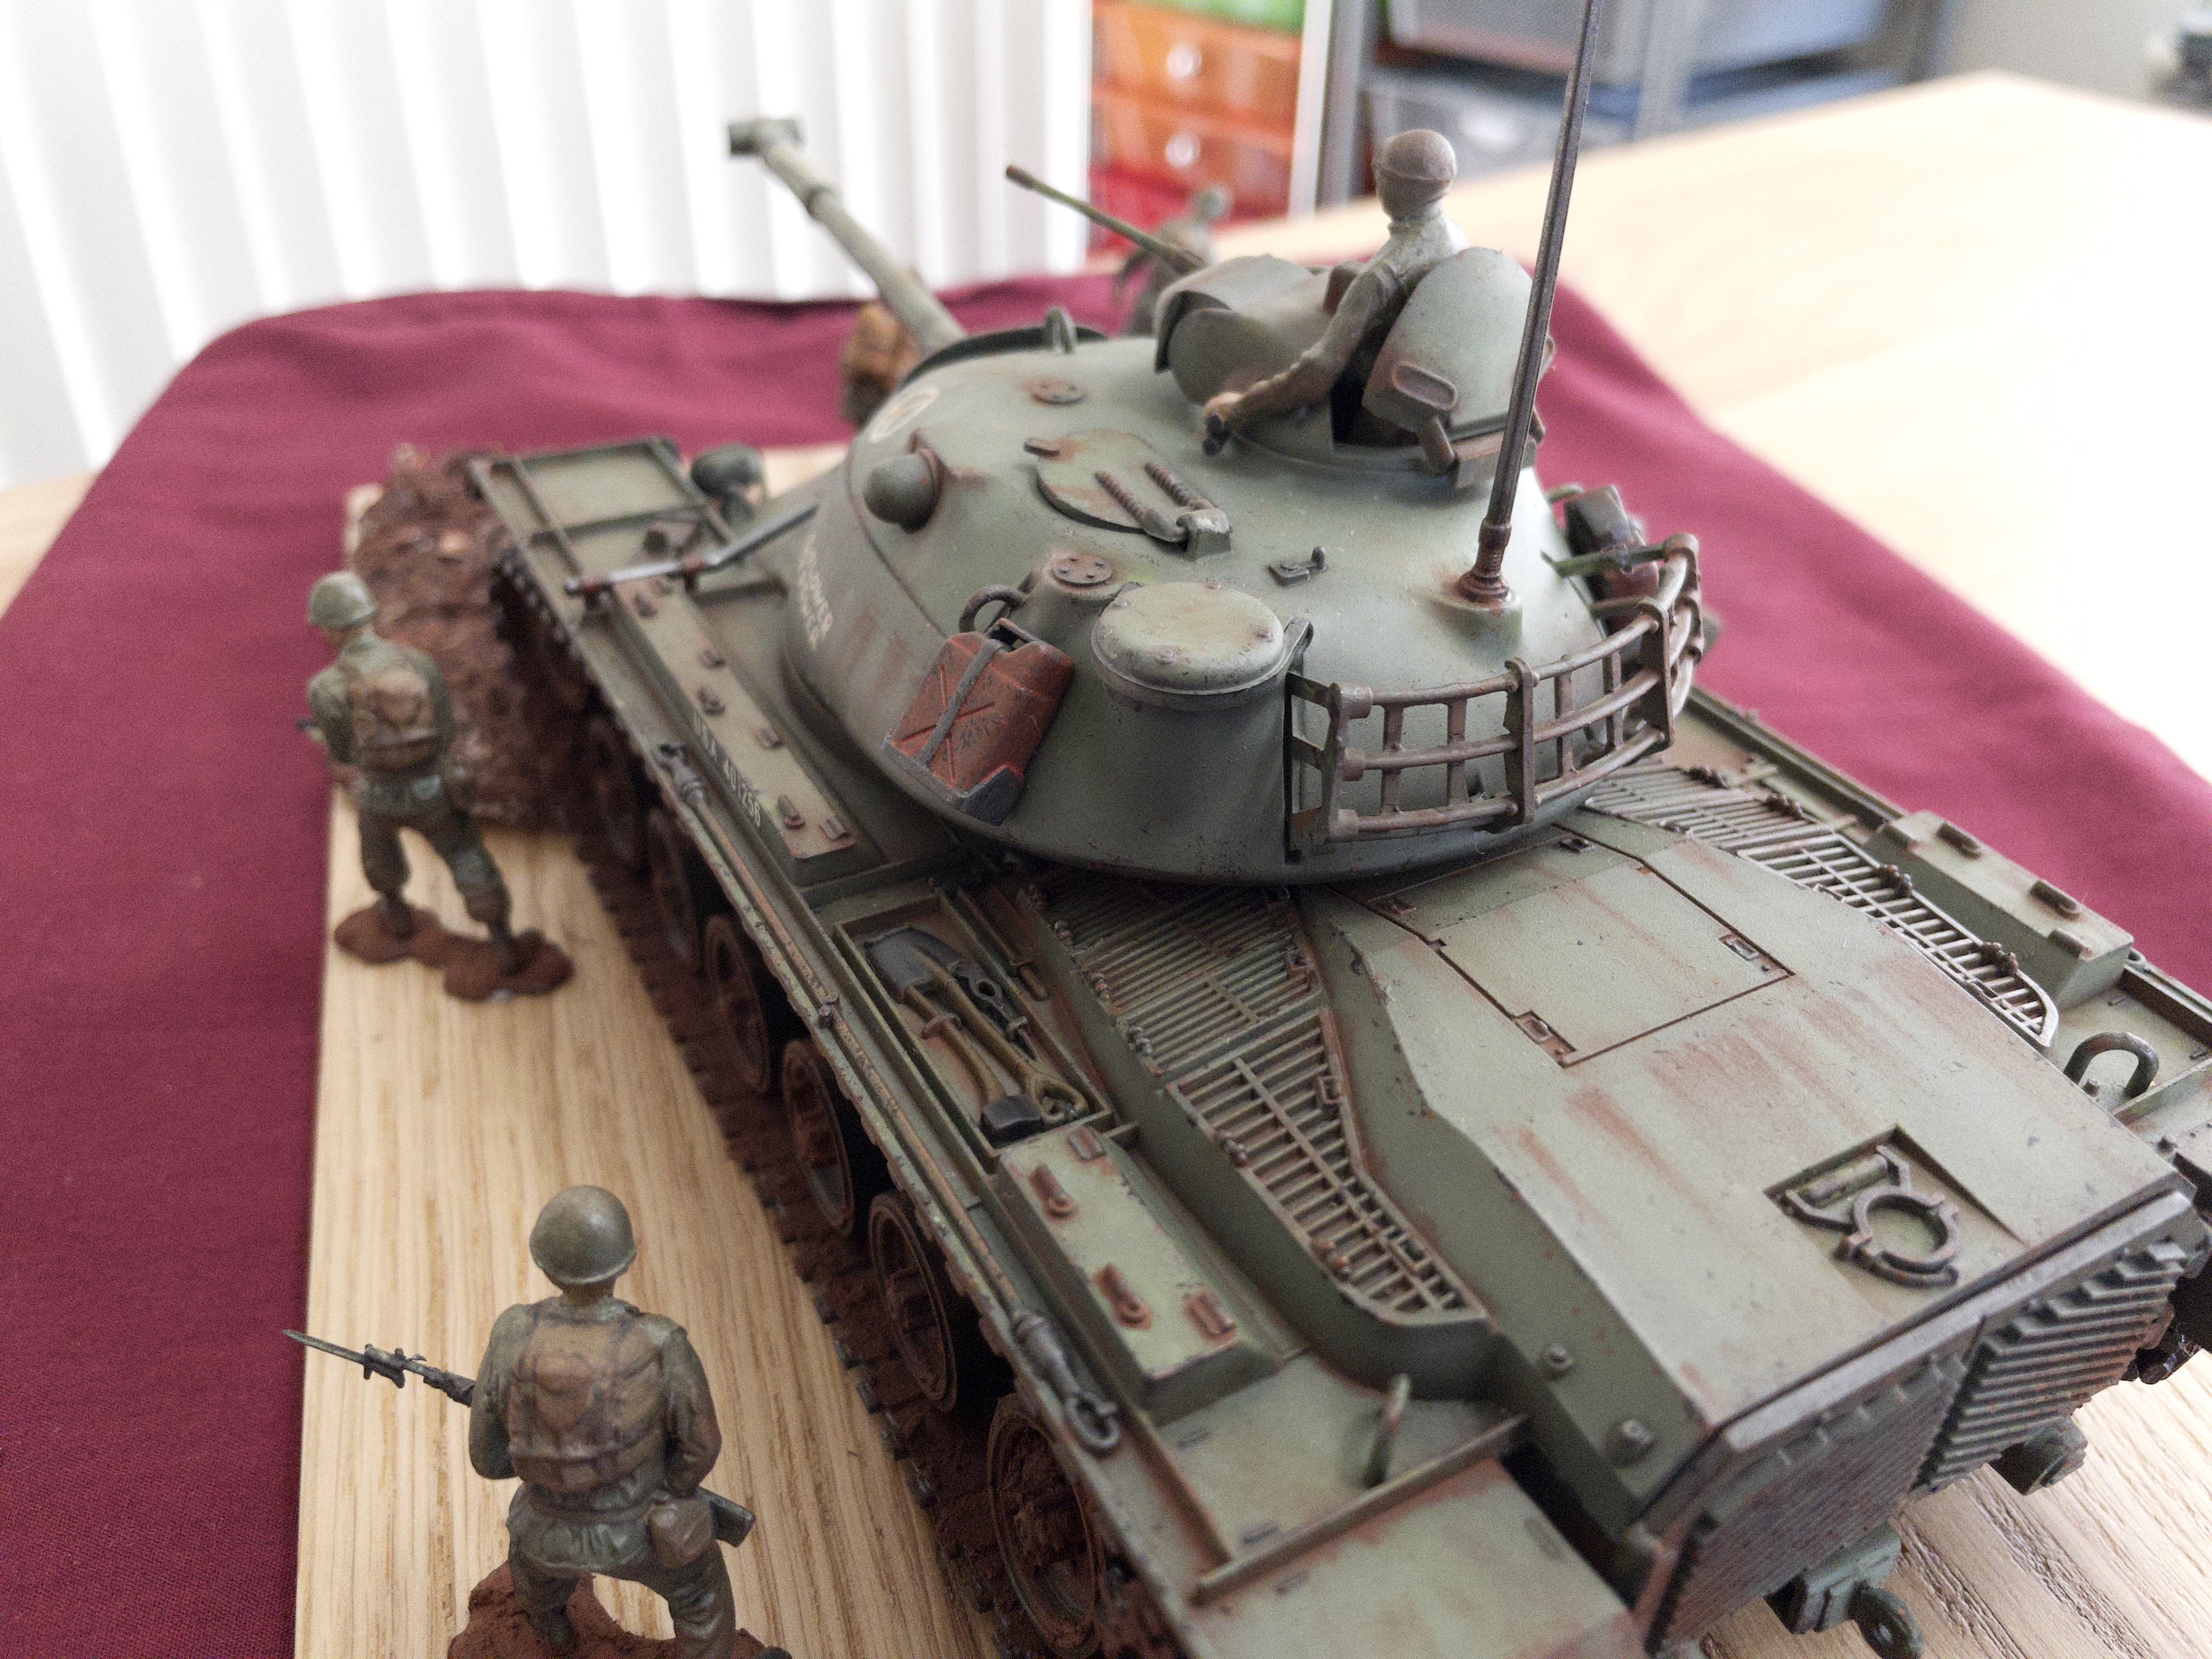
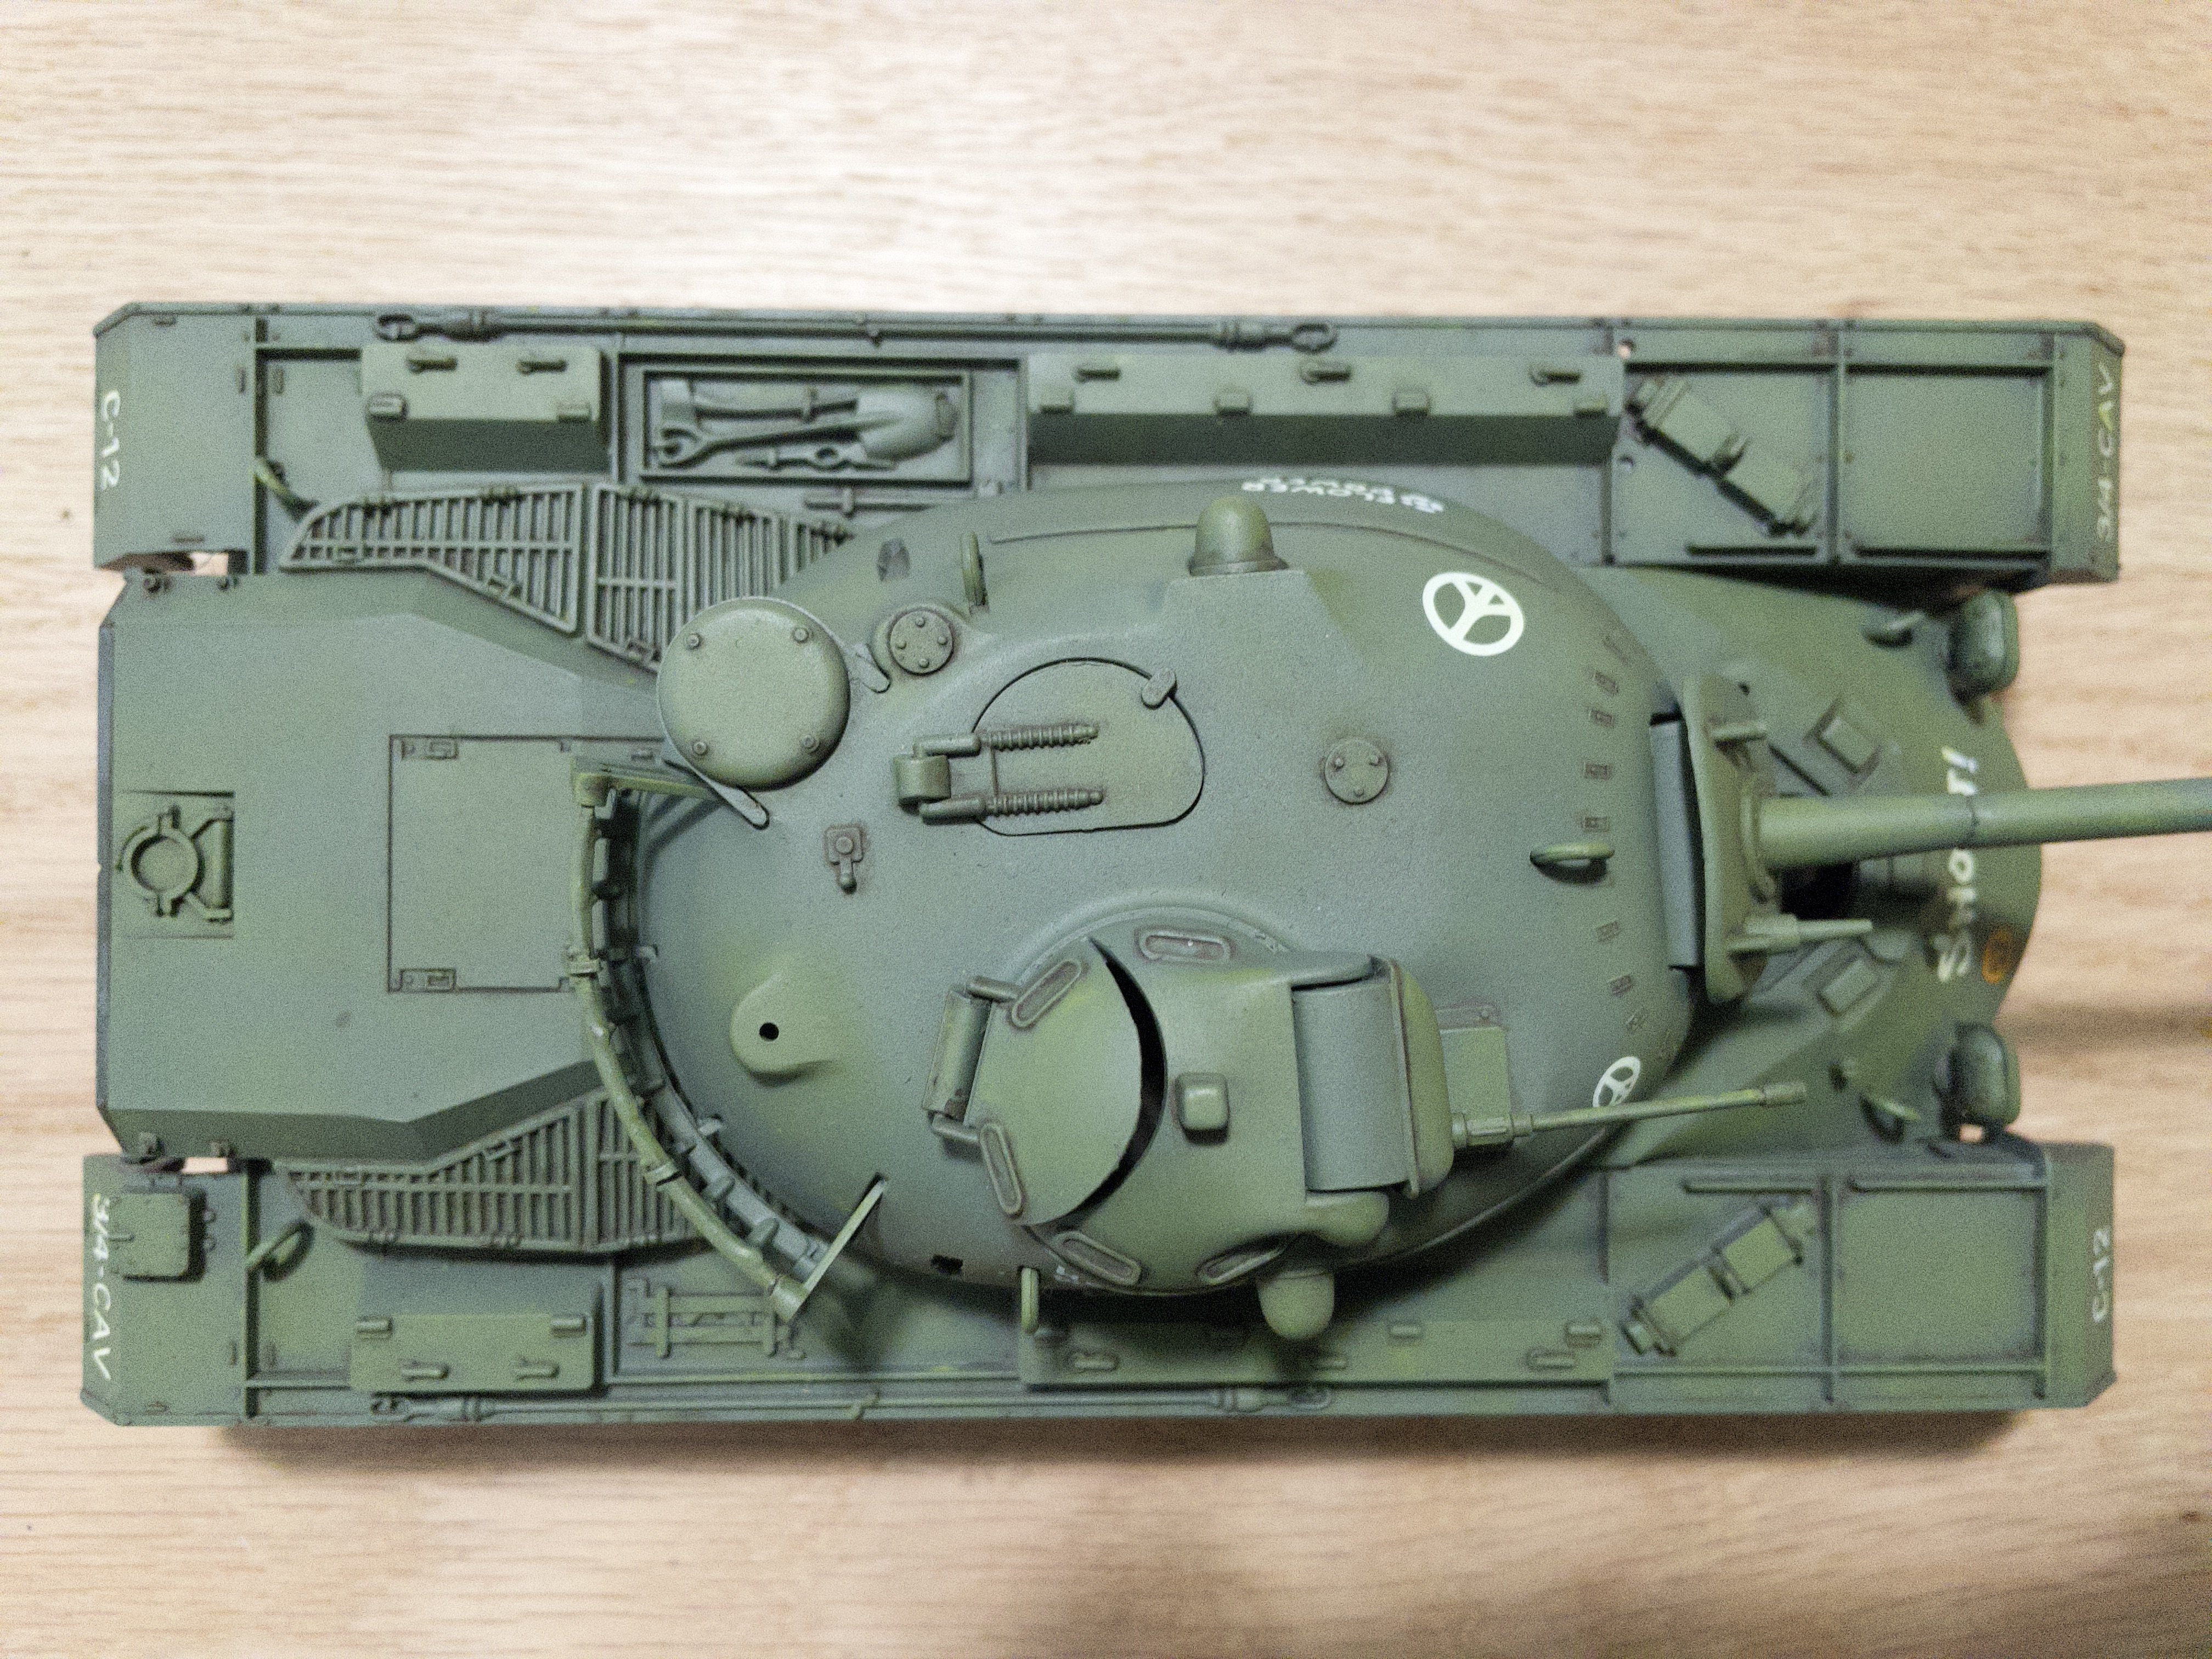
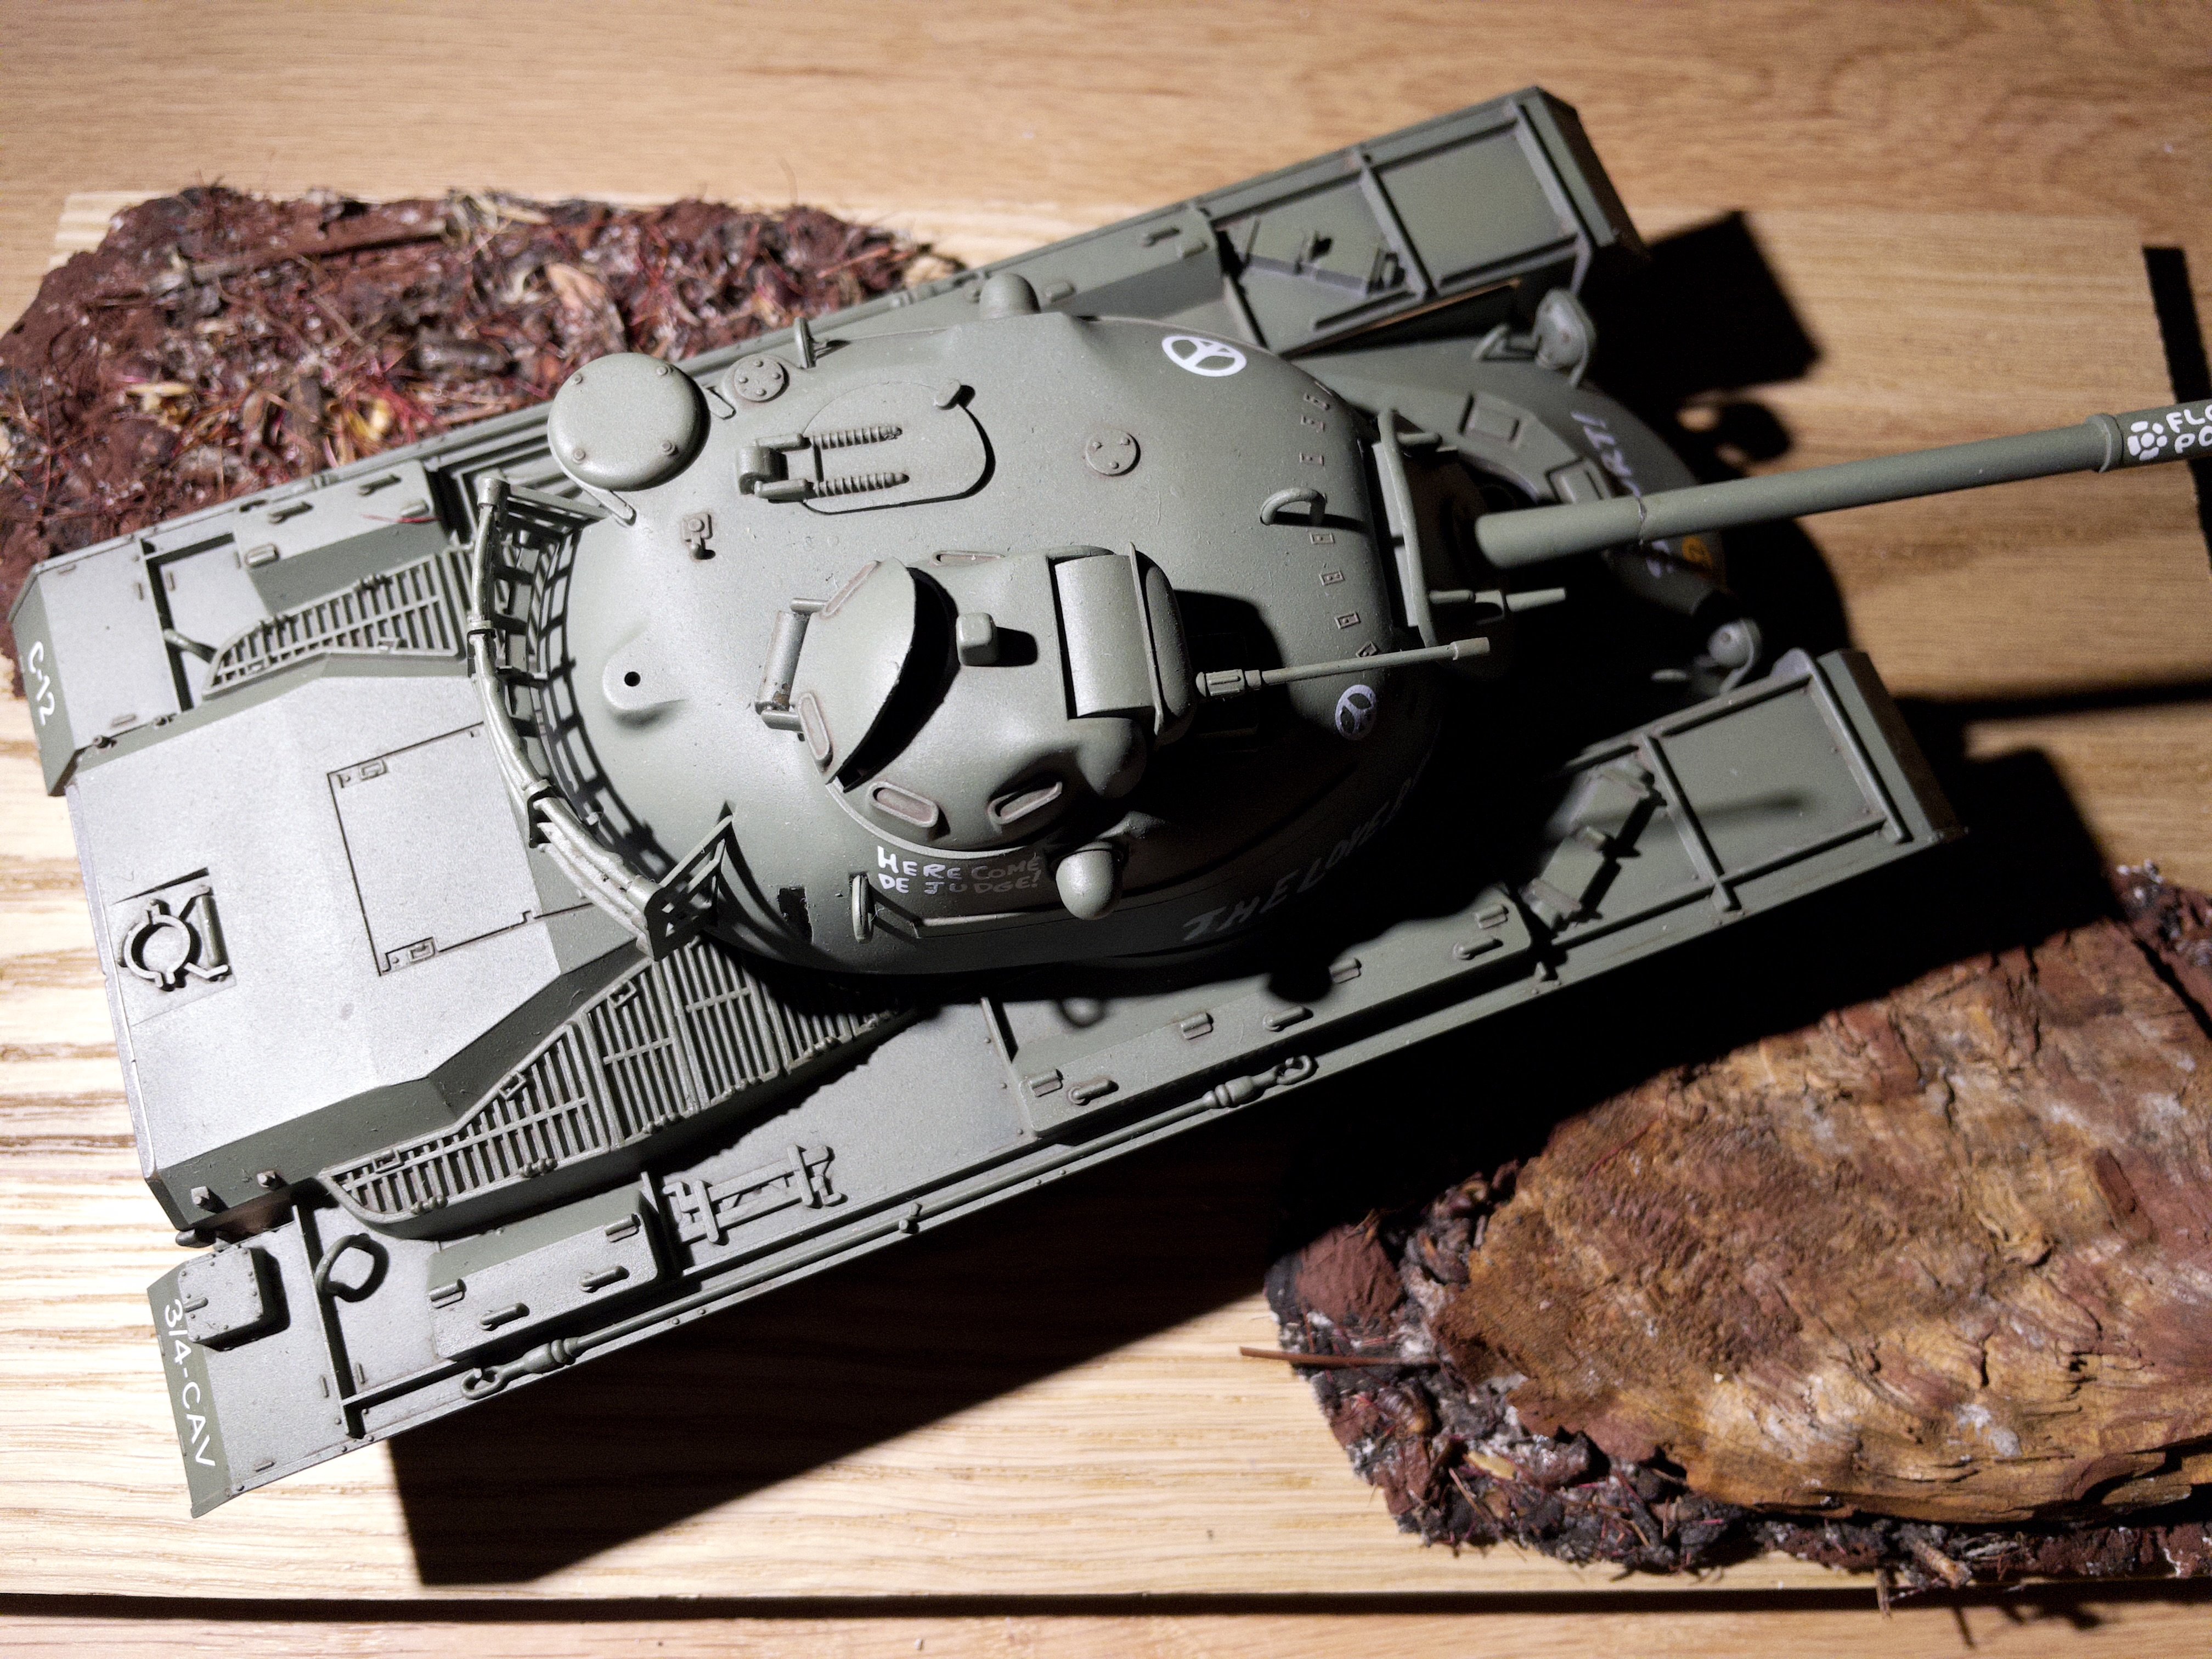
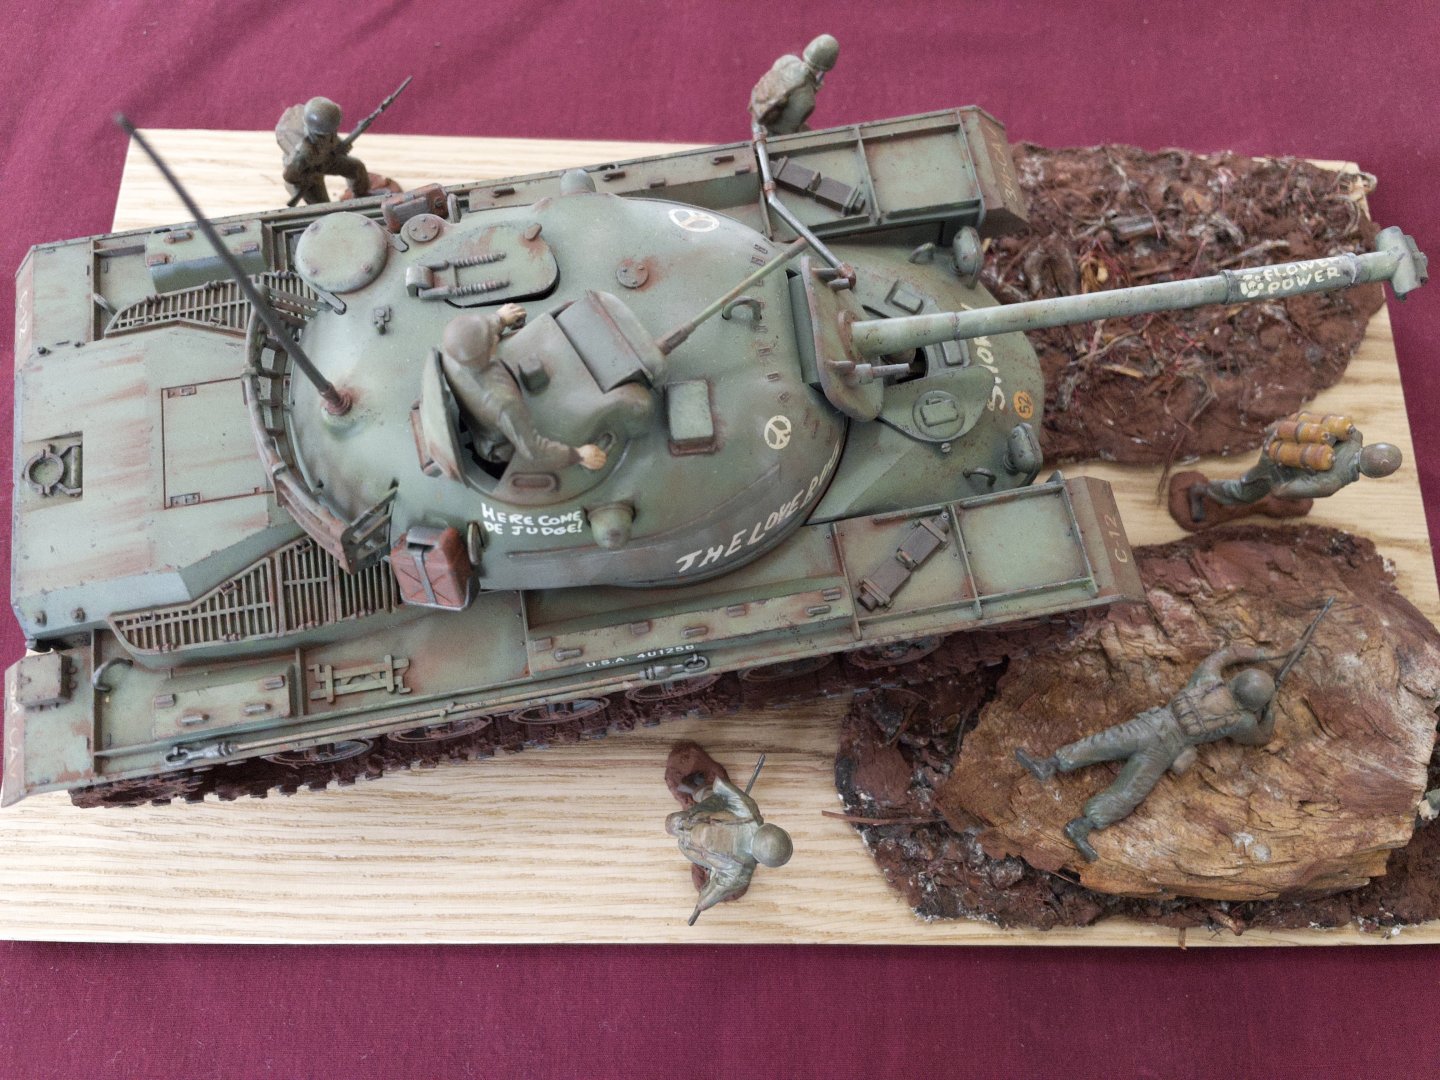
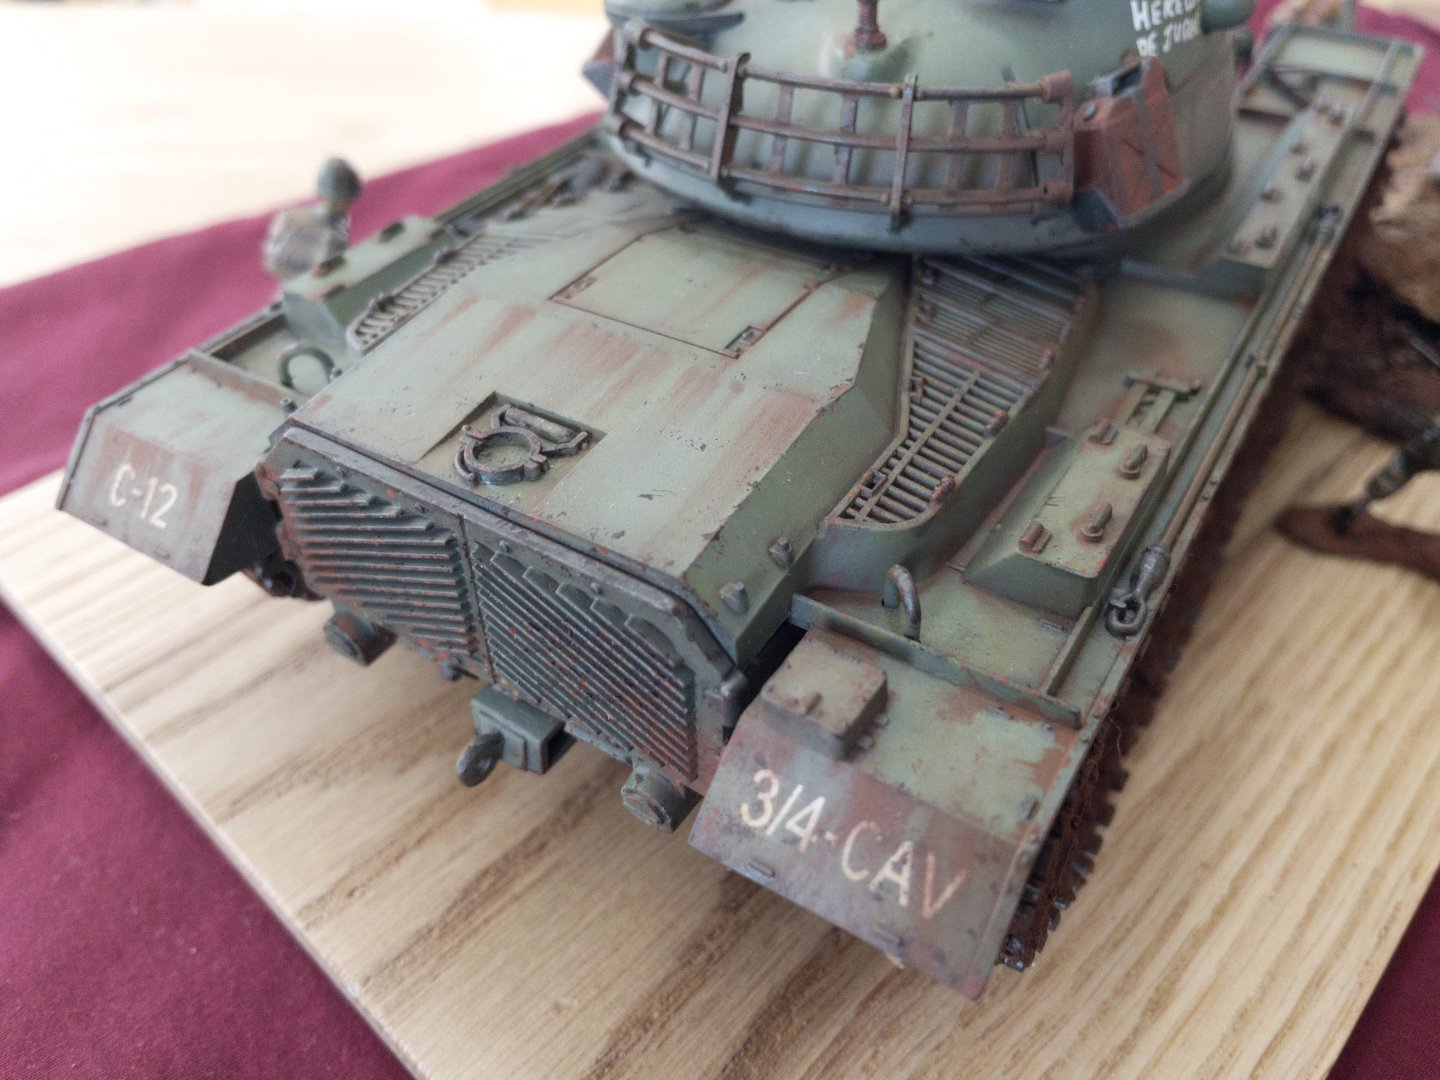
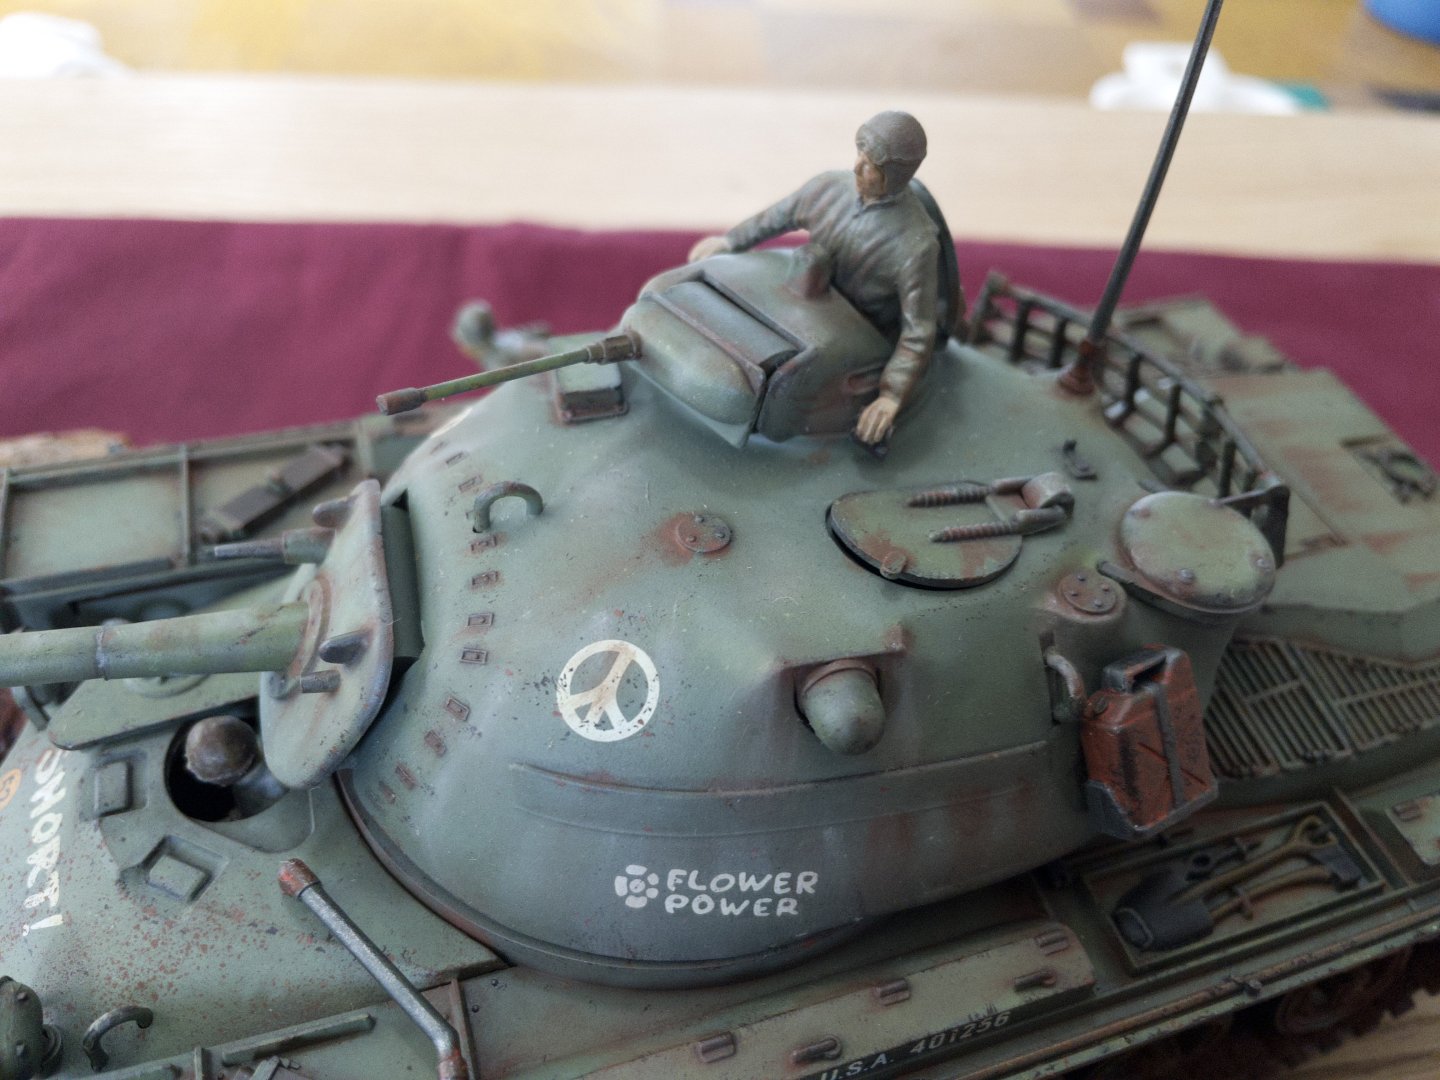
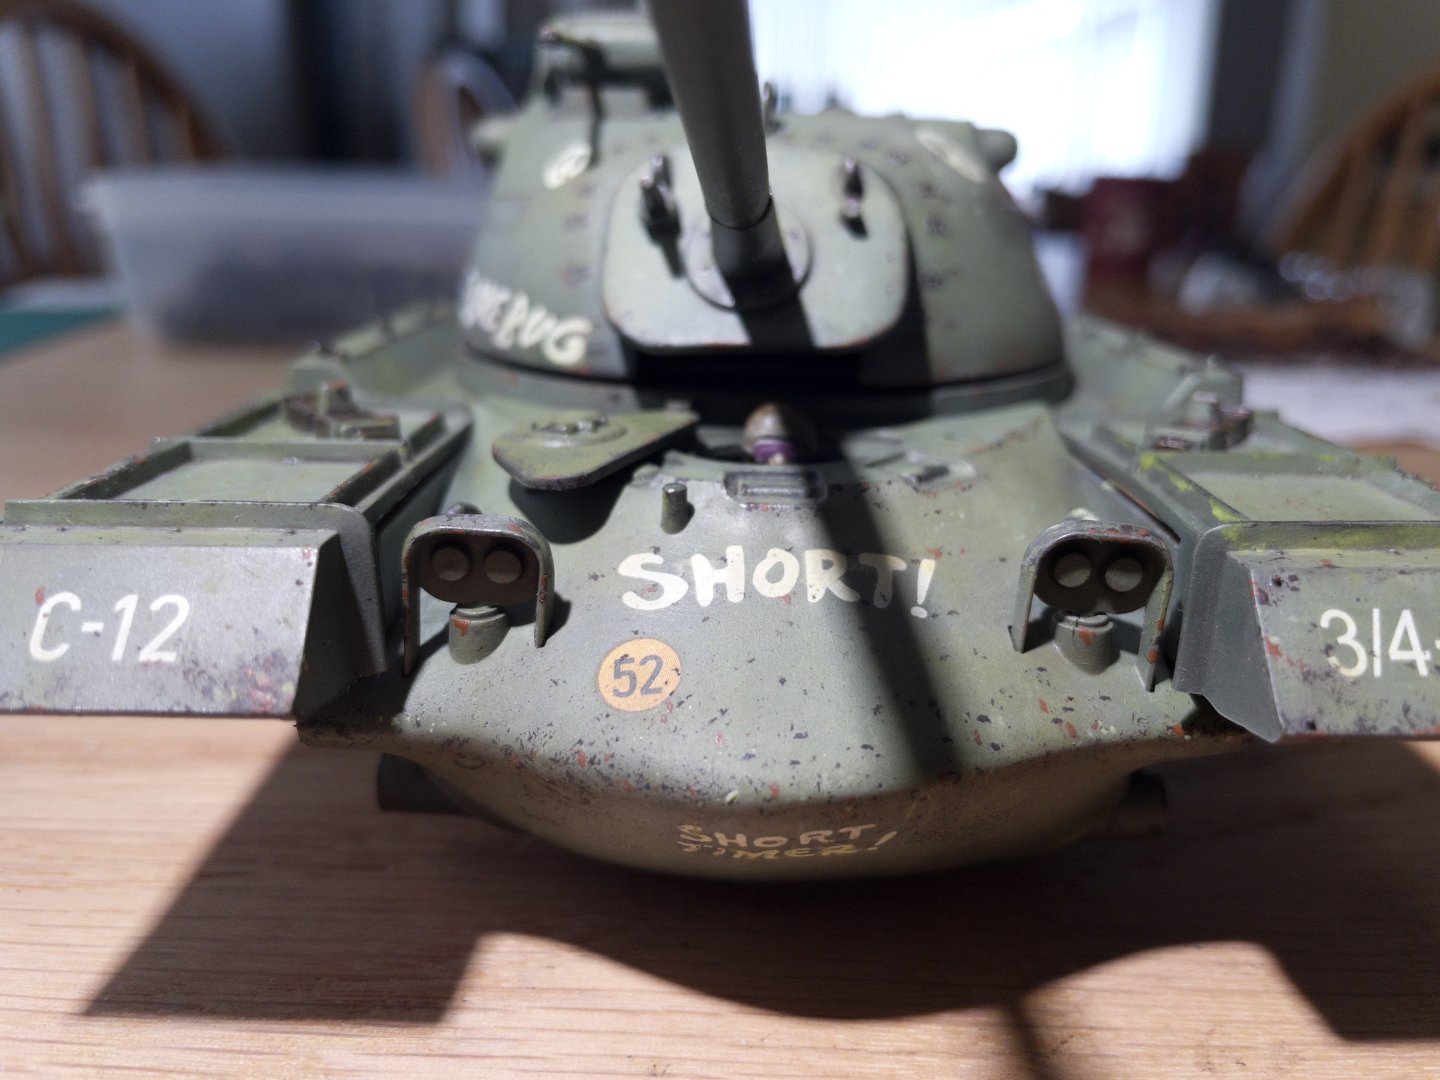
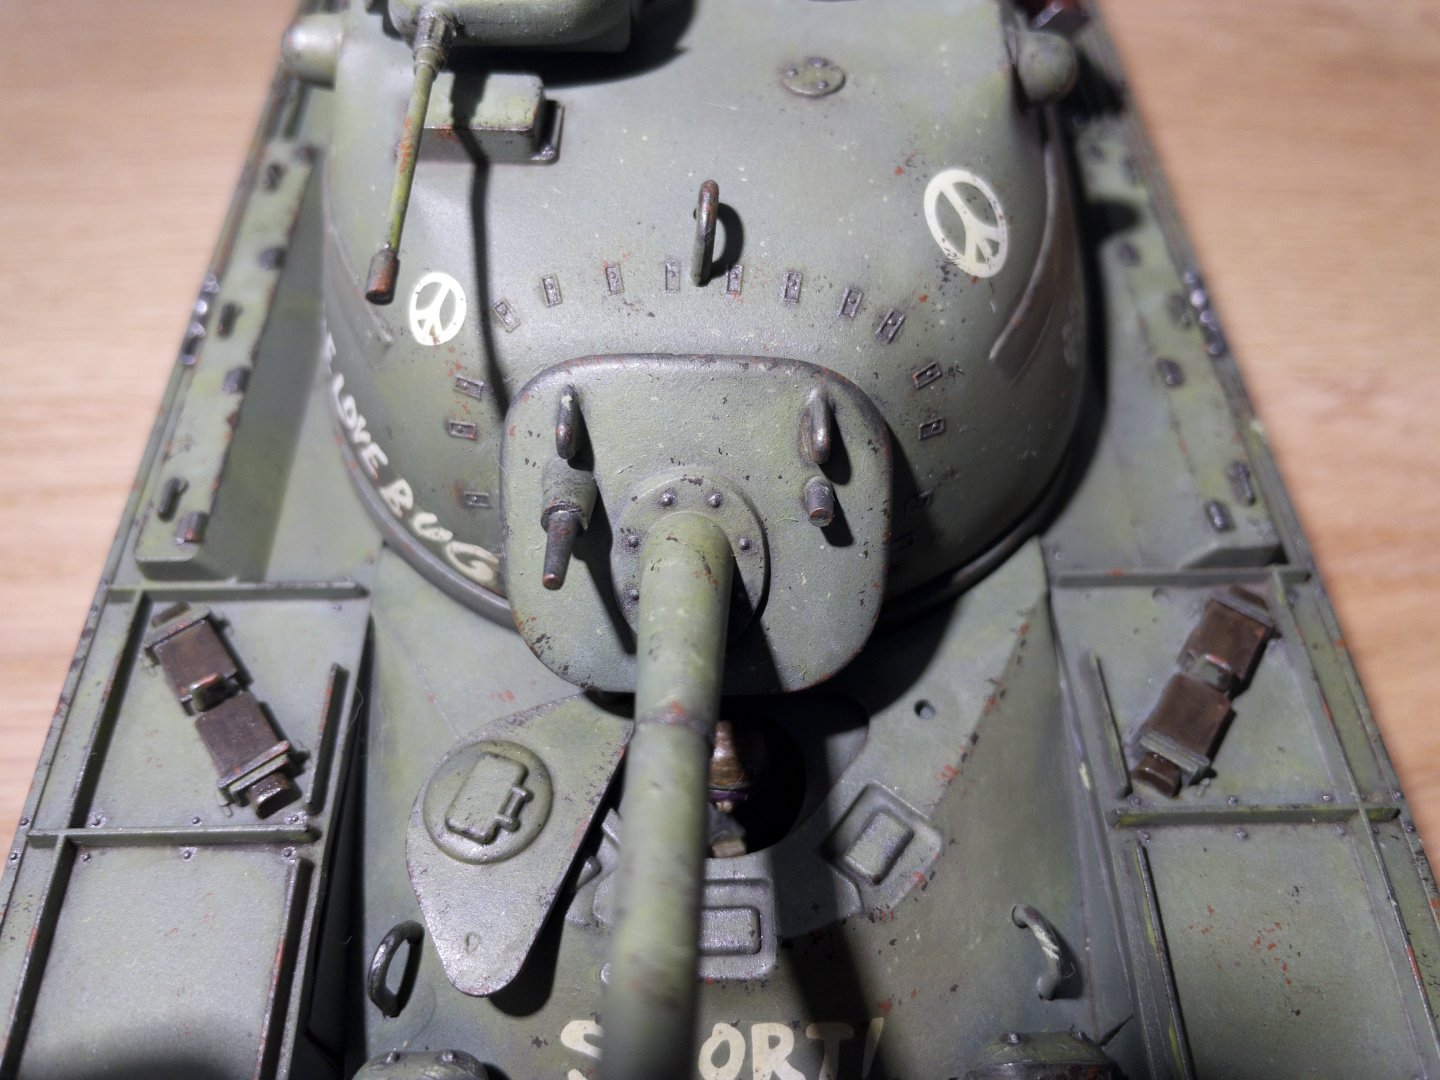
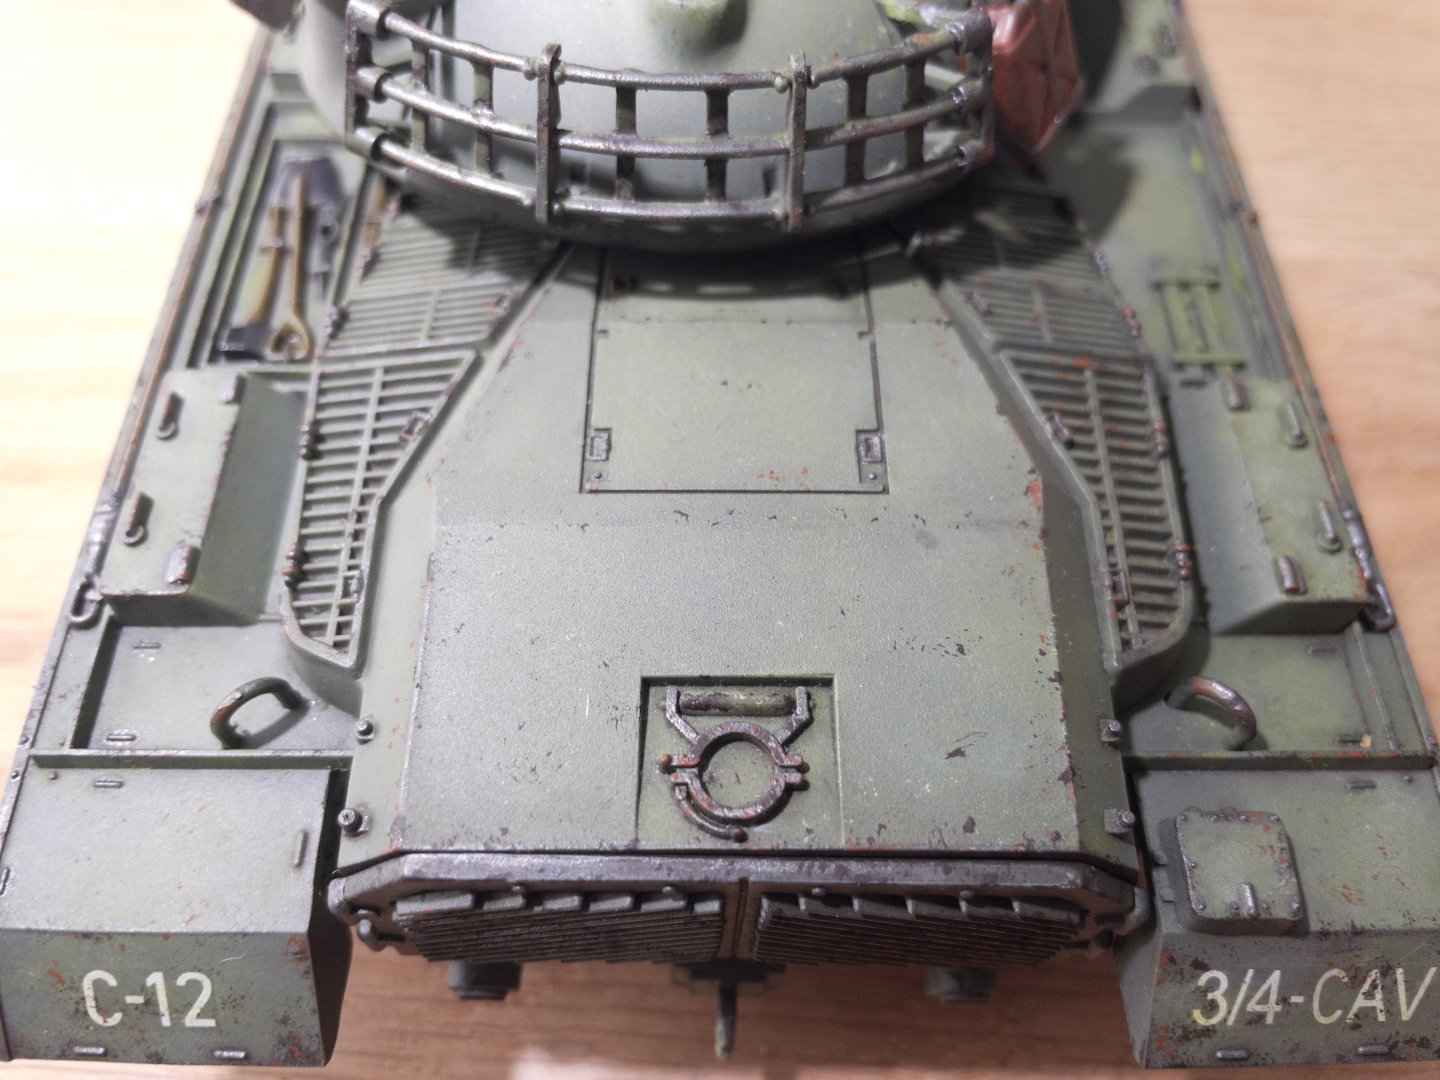
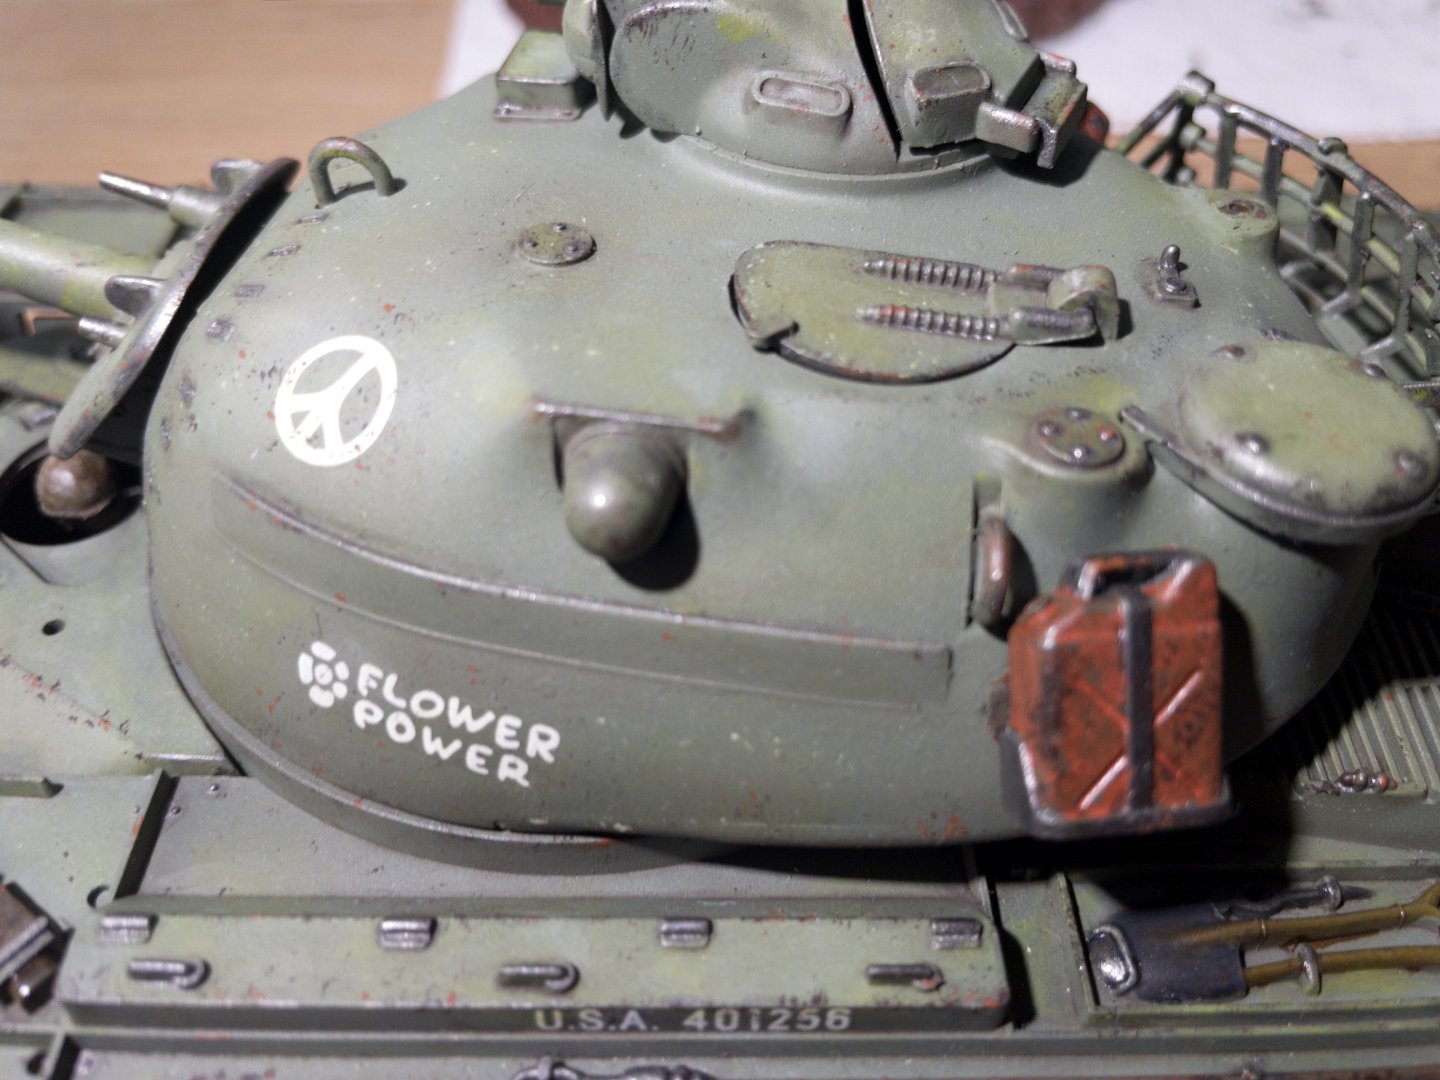
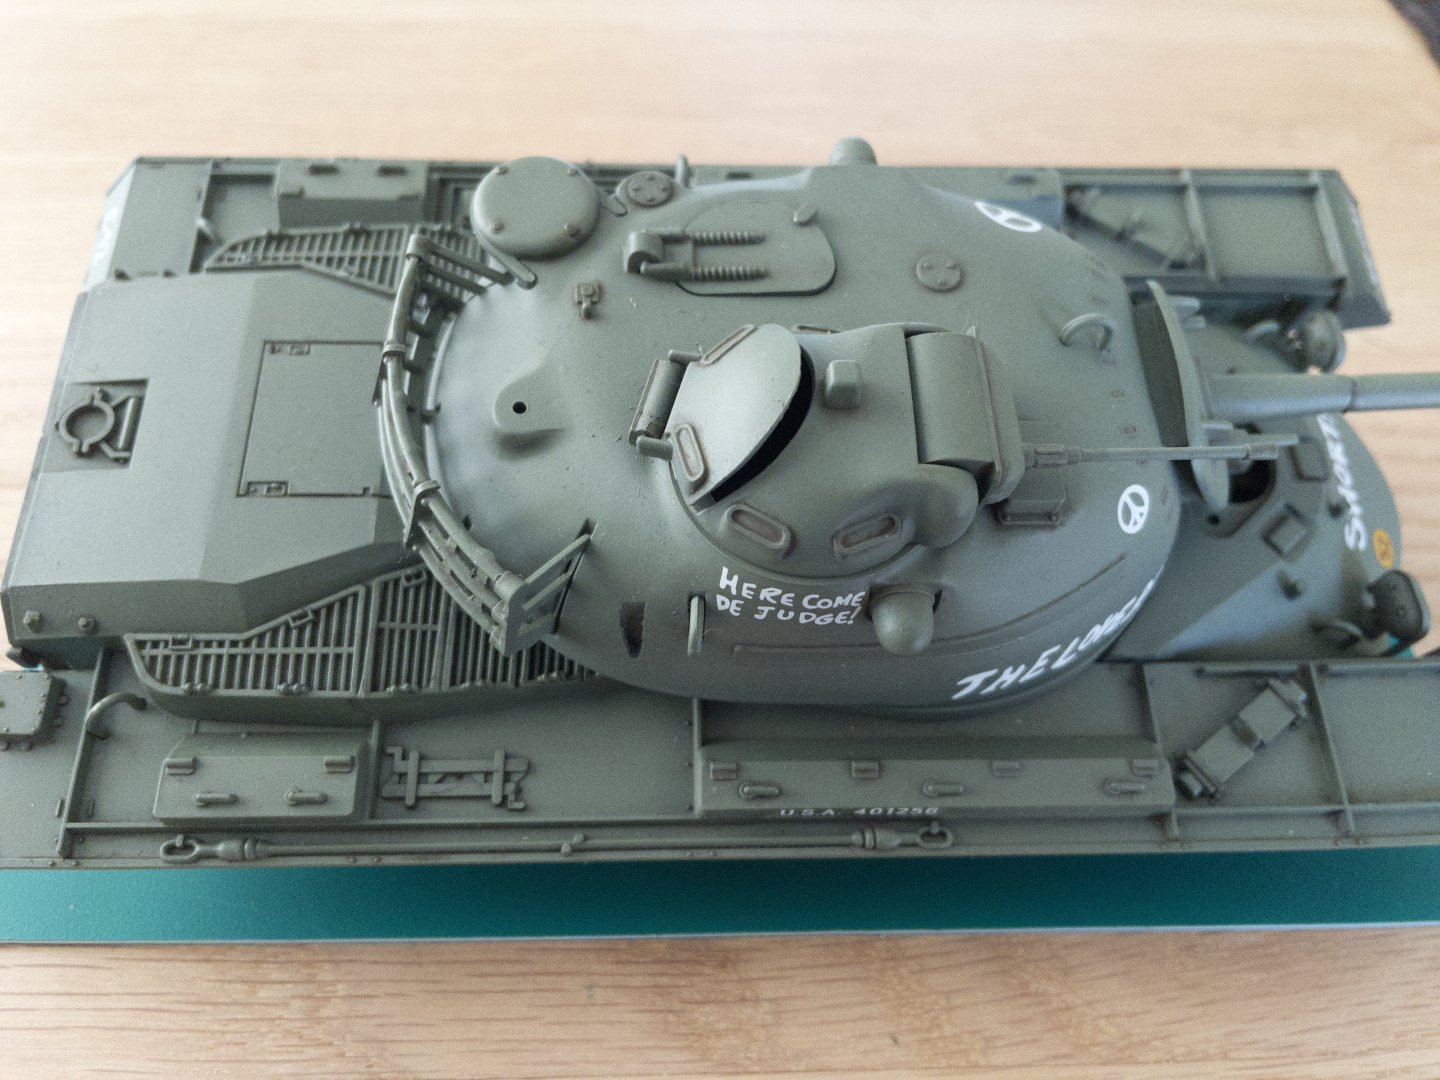
Final step - Dusting/mudding: Obviously the most apparent step. I had to be careful not to overdo it and hide all the previous weathering and chipping. Vietnam red earth does stand out a lot (if you look at the tracks for example). Here is the final set of pictures, with the stand and figures.


-
Weathering (Chipping): Chipping with a sponge is relatively easy. Not my best work... but it definitely brings a batter-up look. As a bonus, it is further defined panel edges. Overall, not too bad. Will seal the work with varnish, ready for the next step.

-
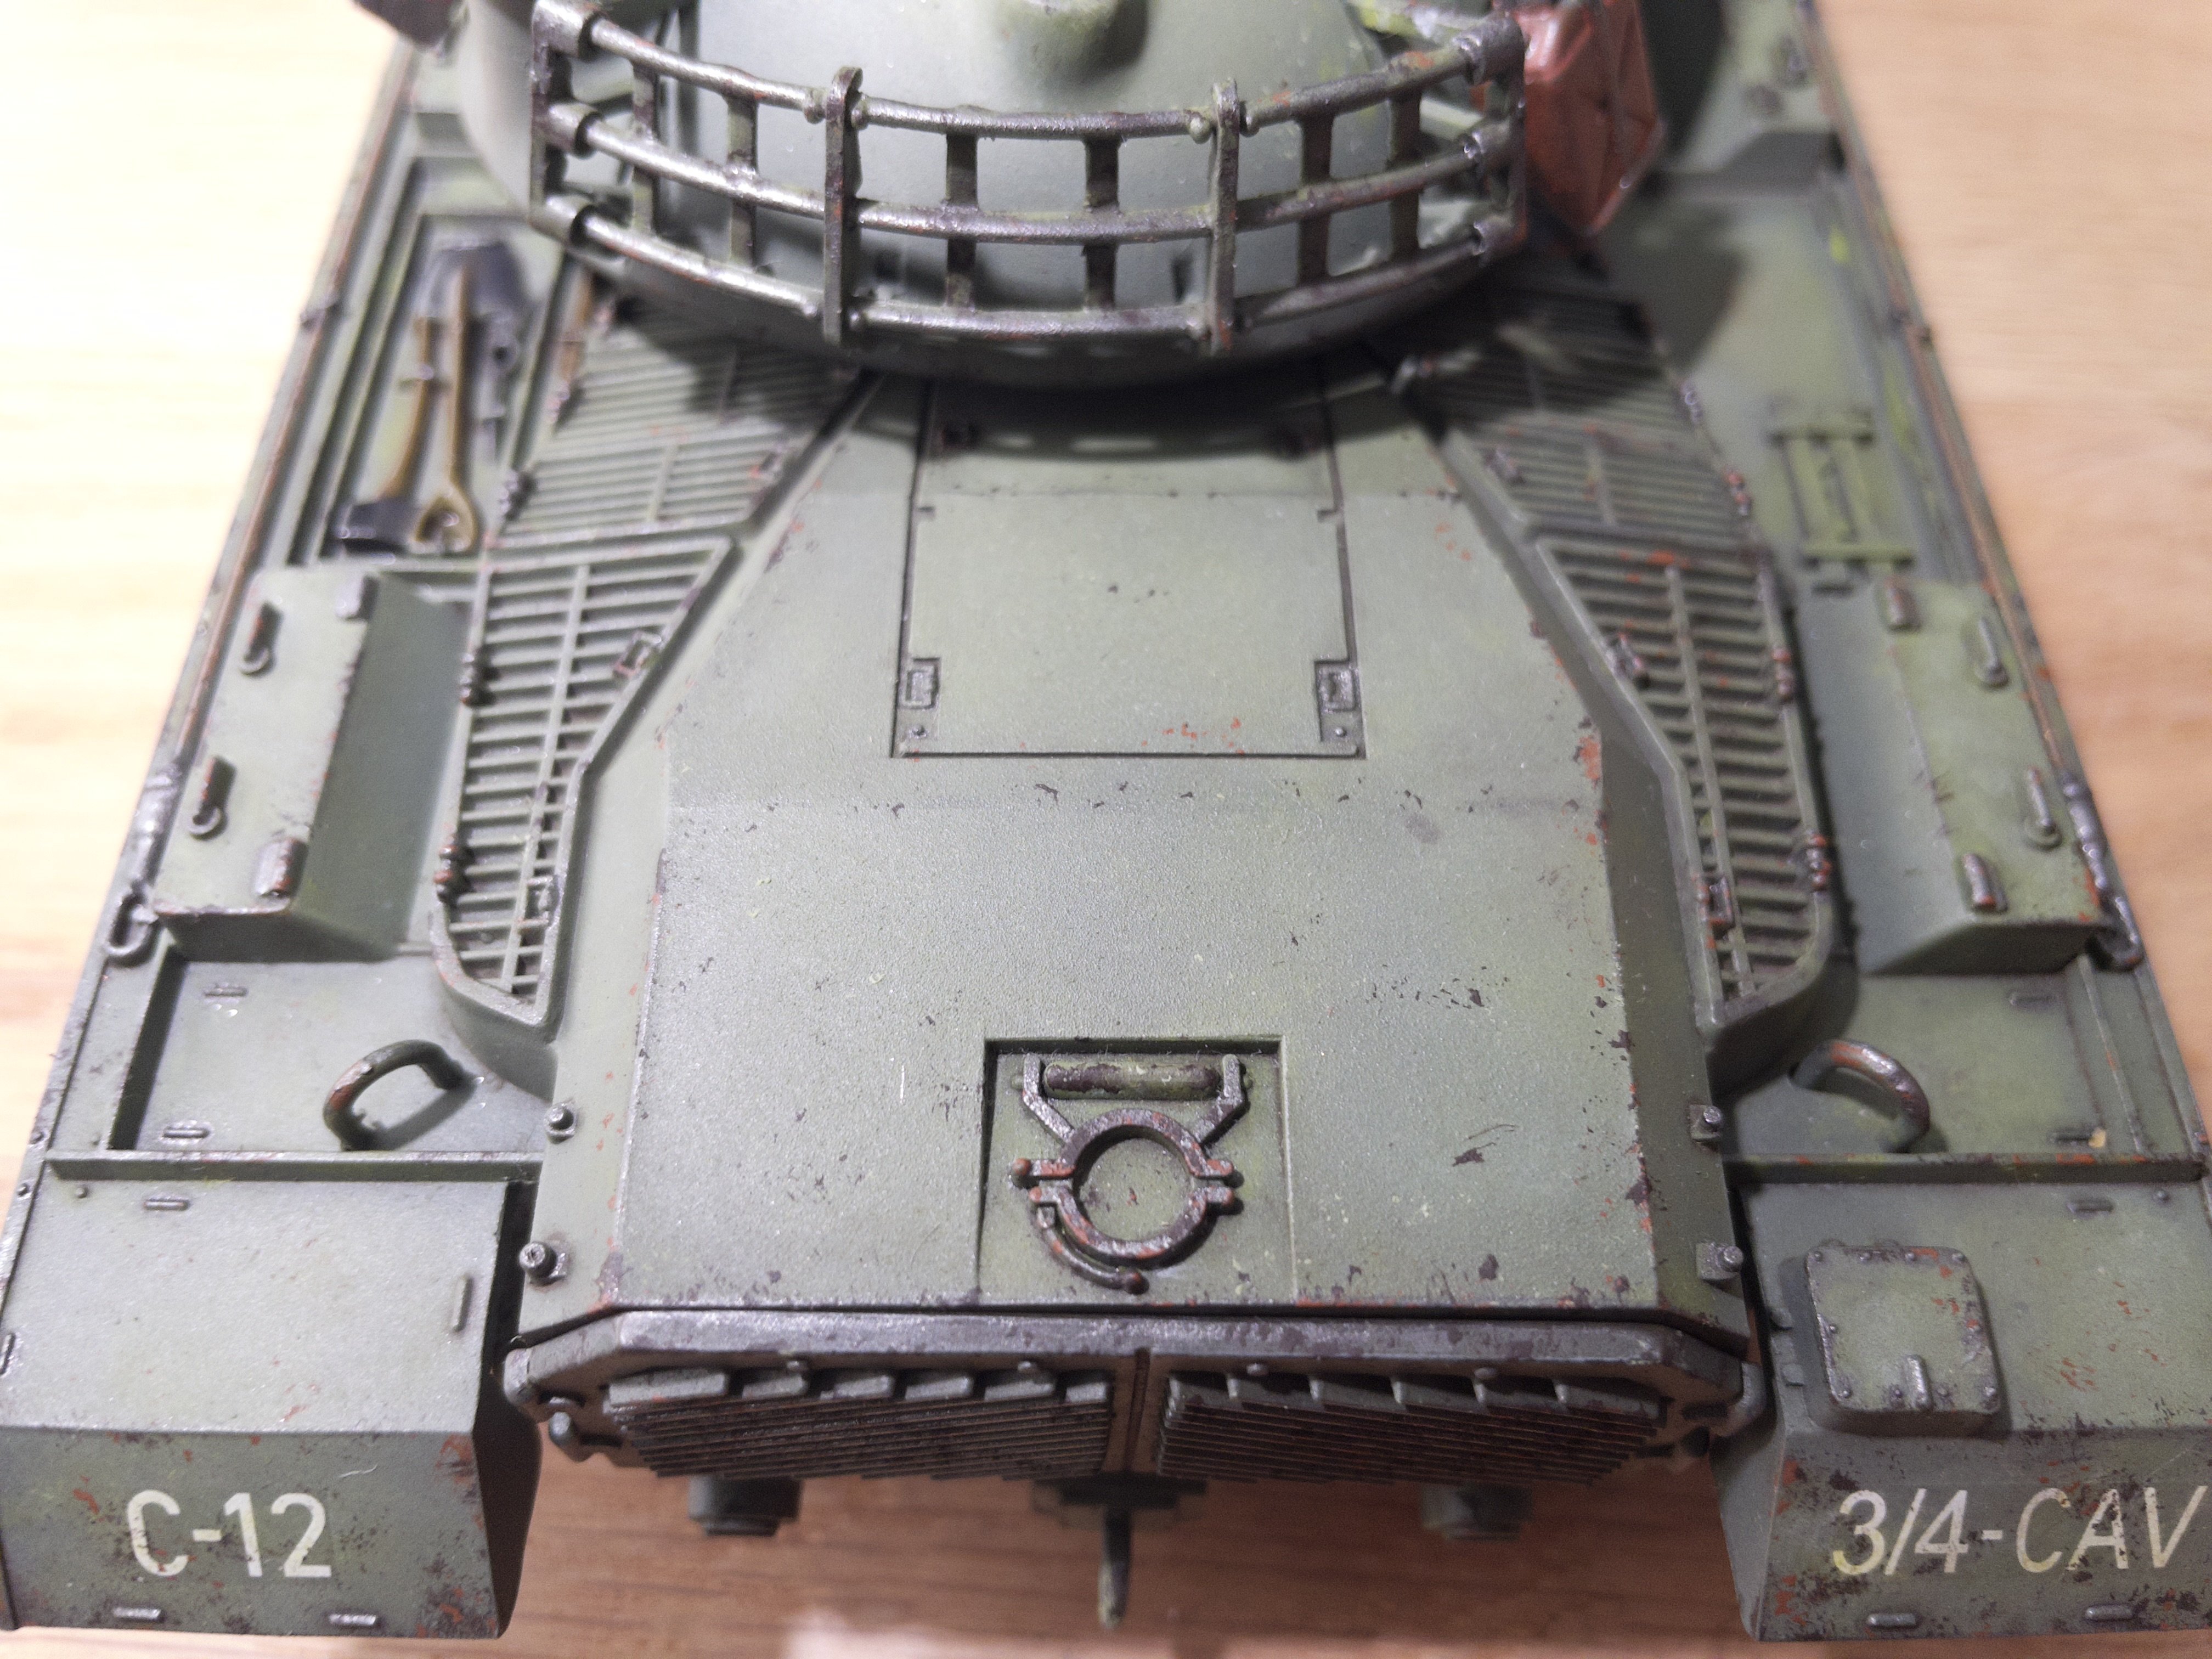
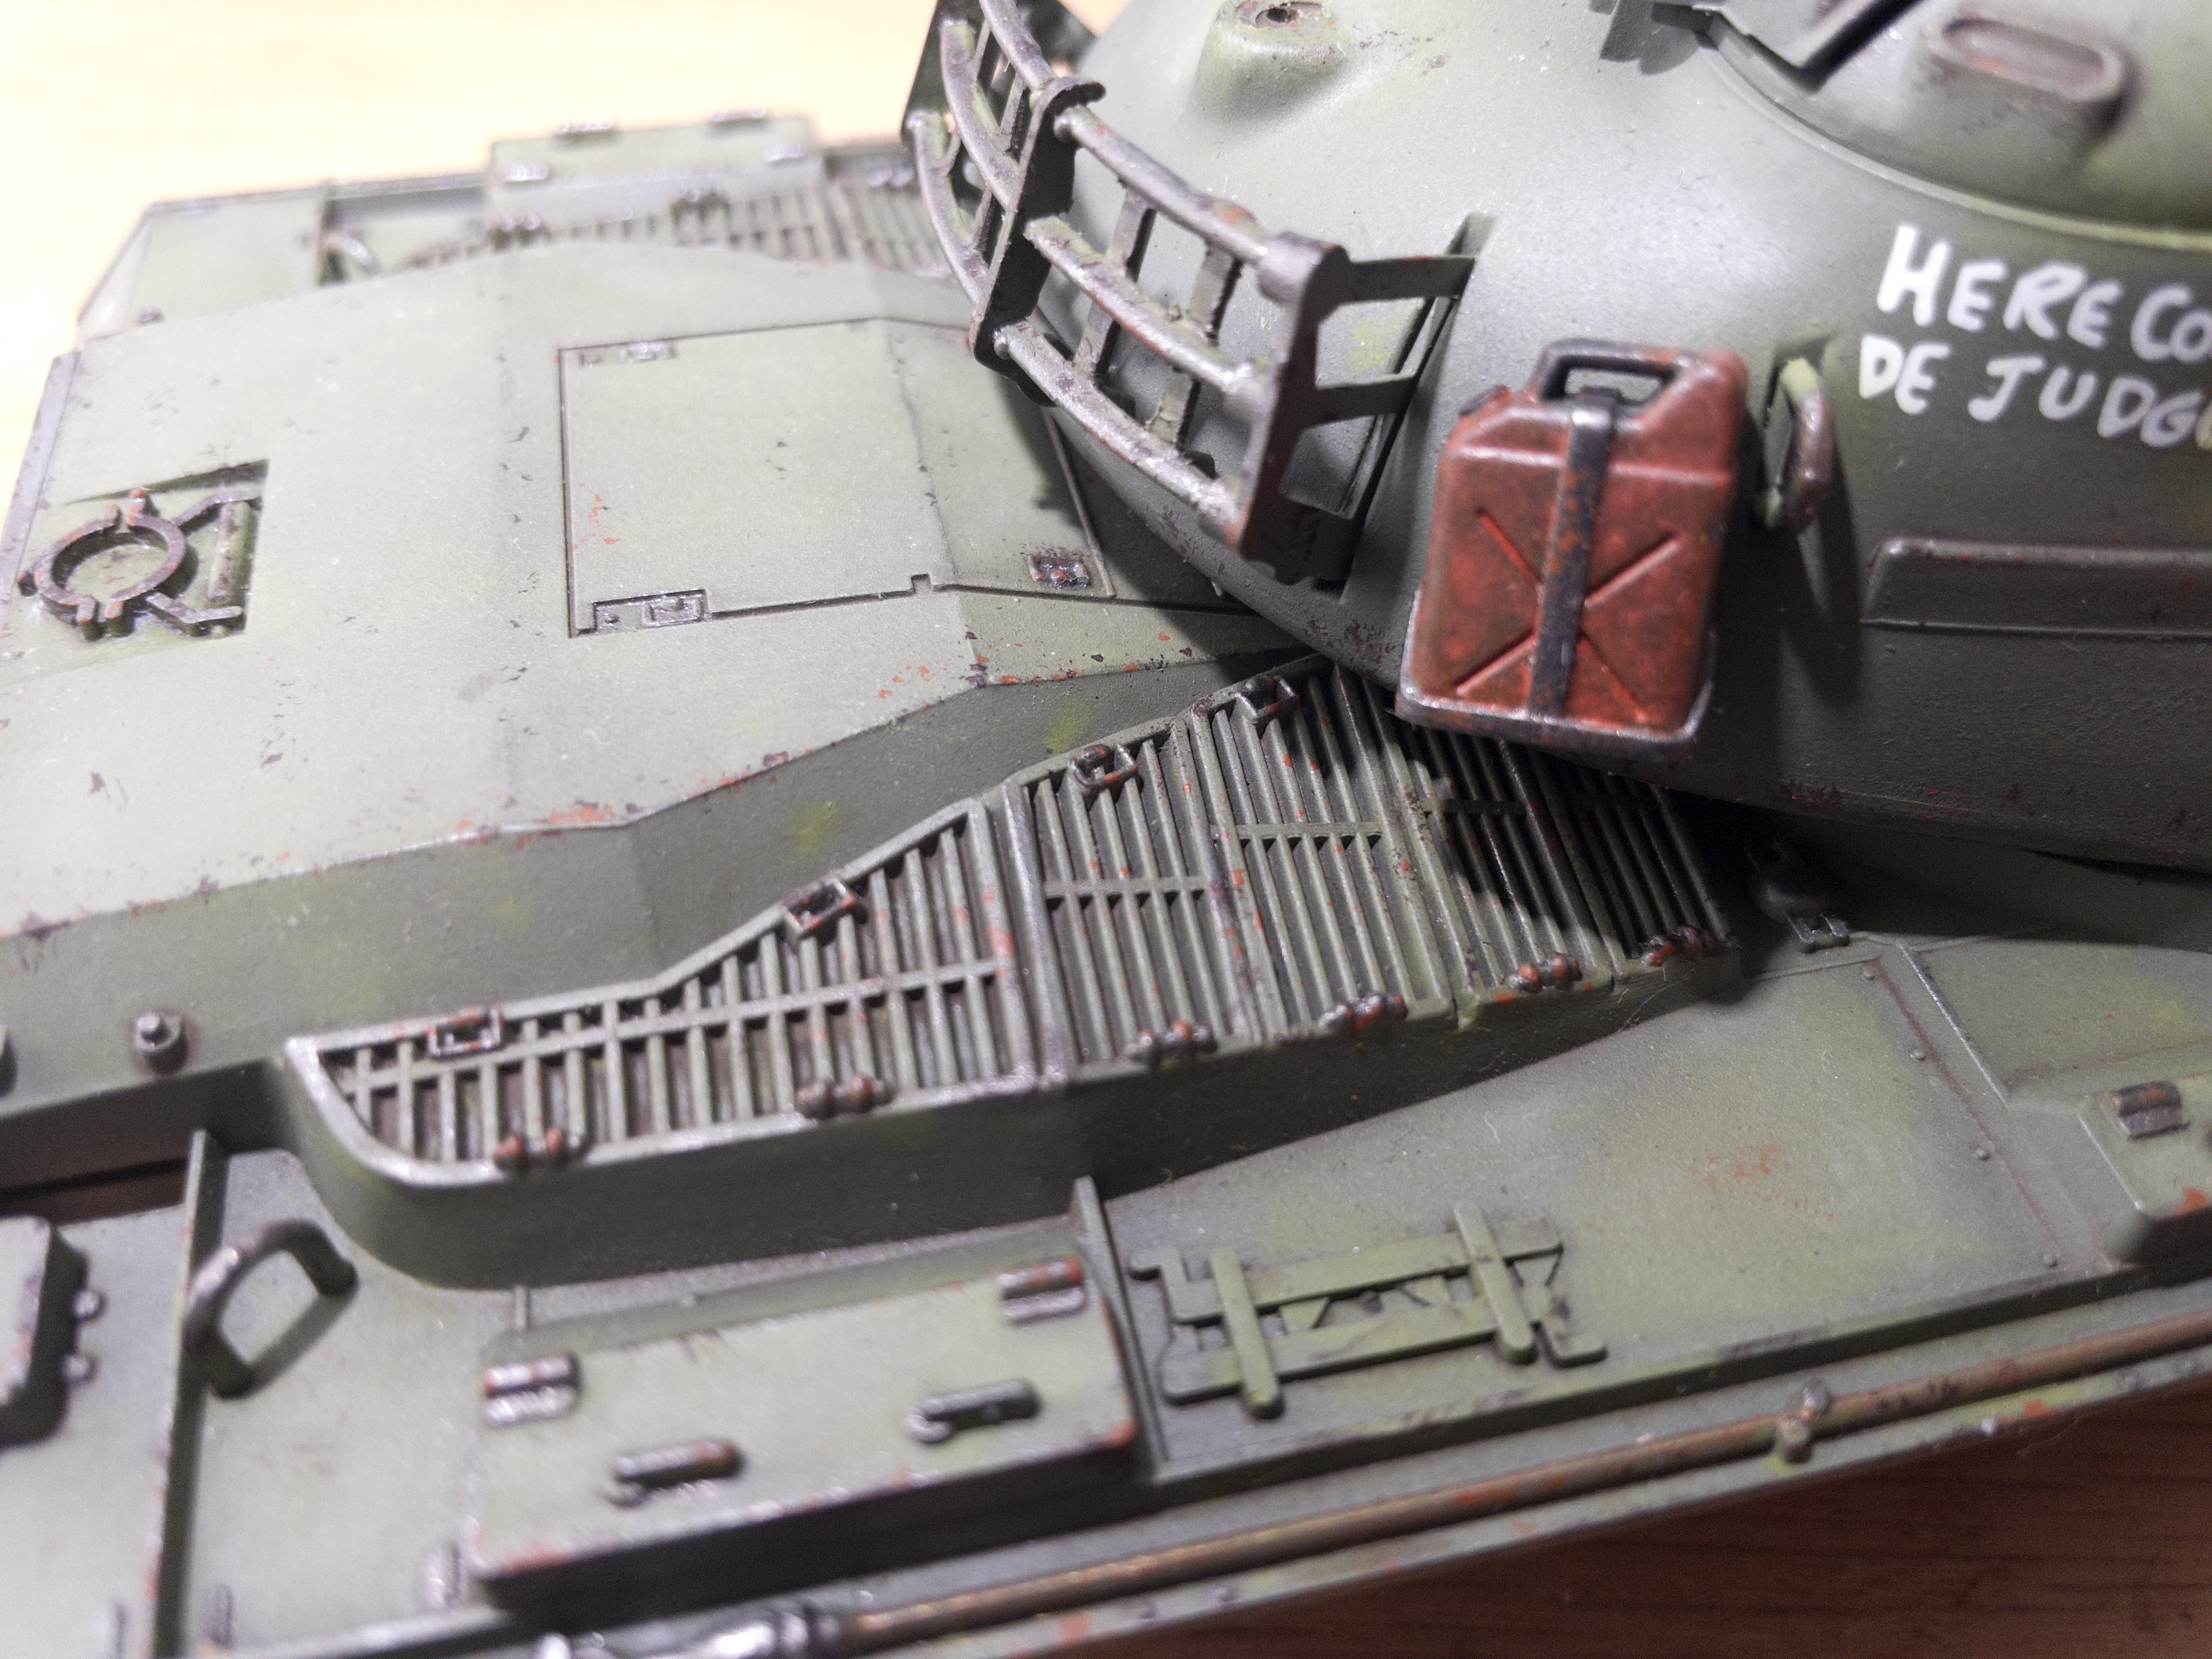
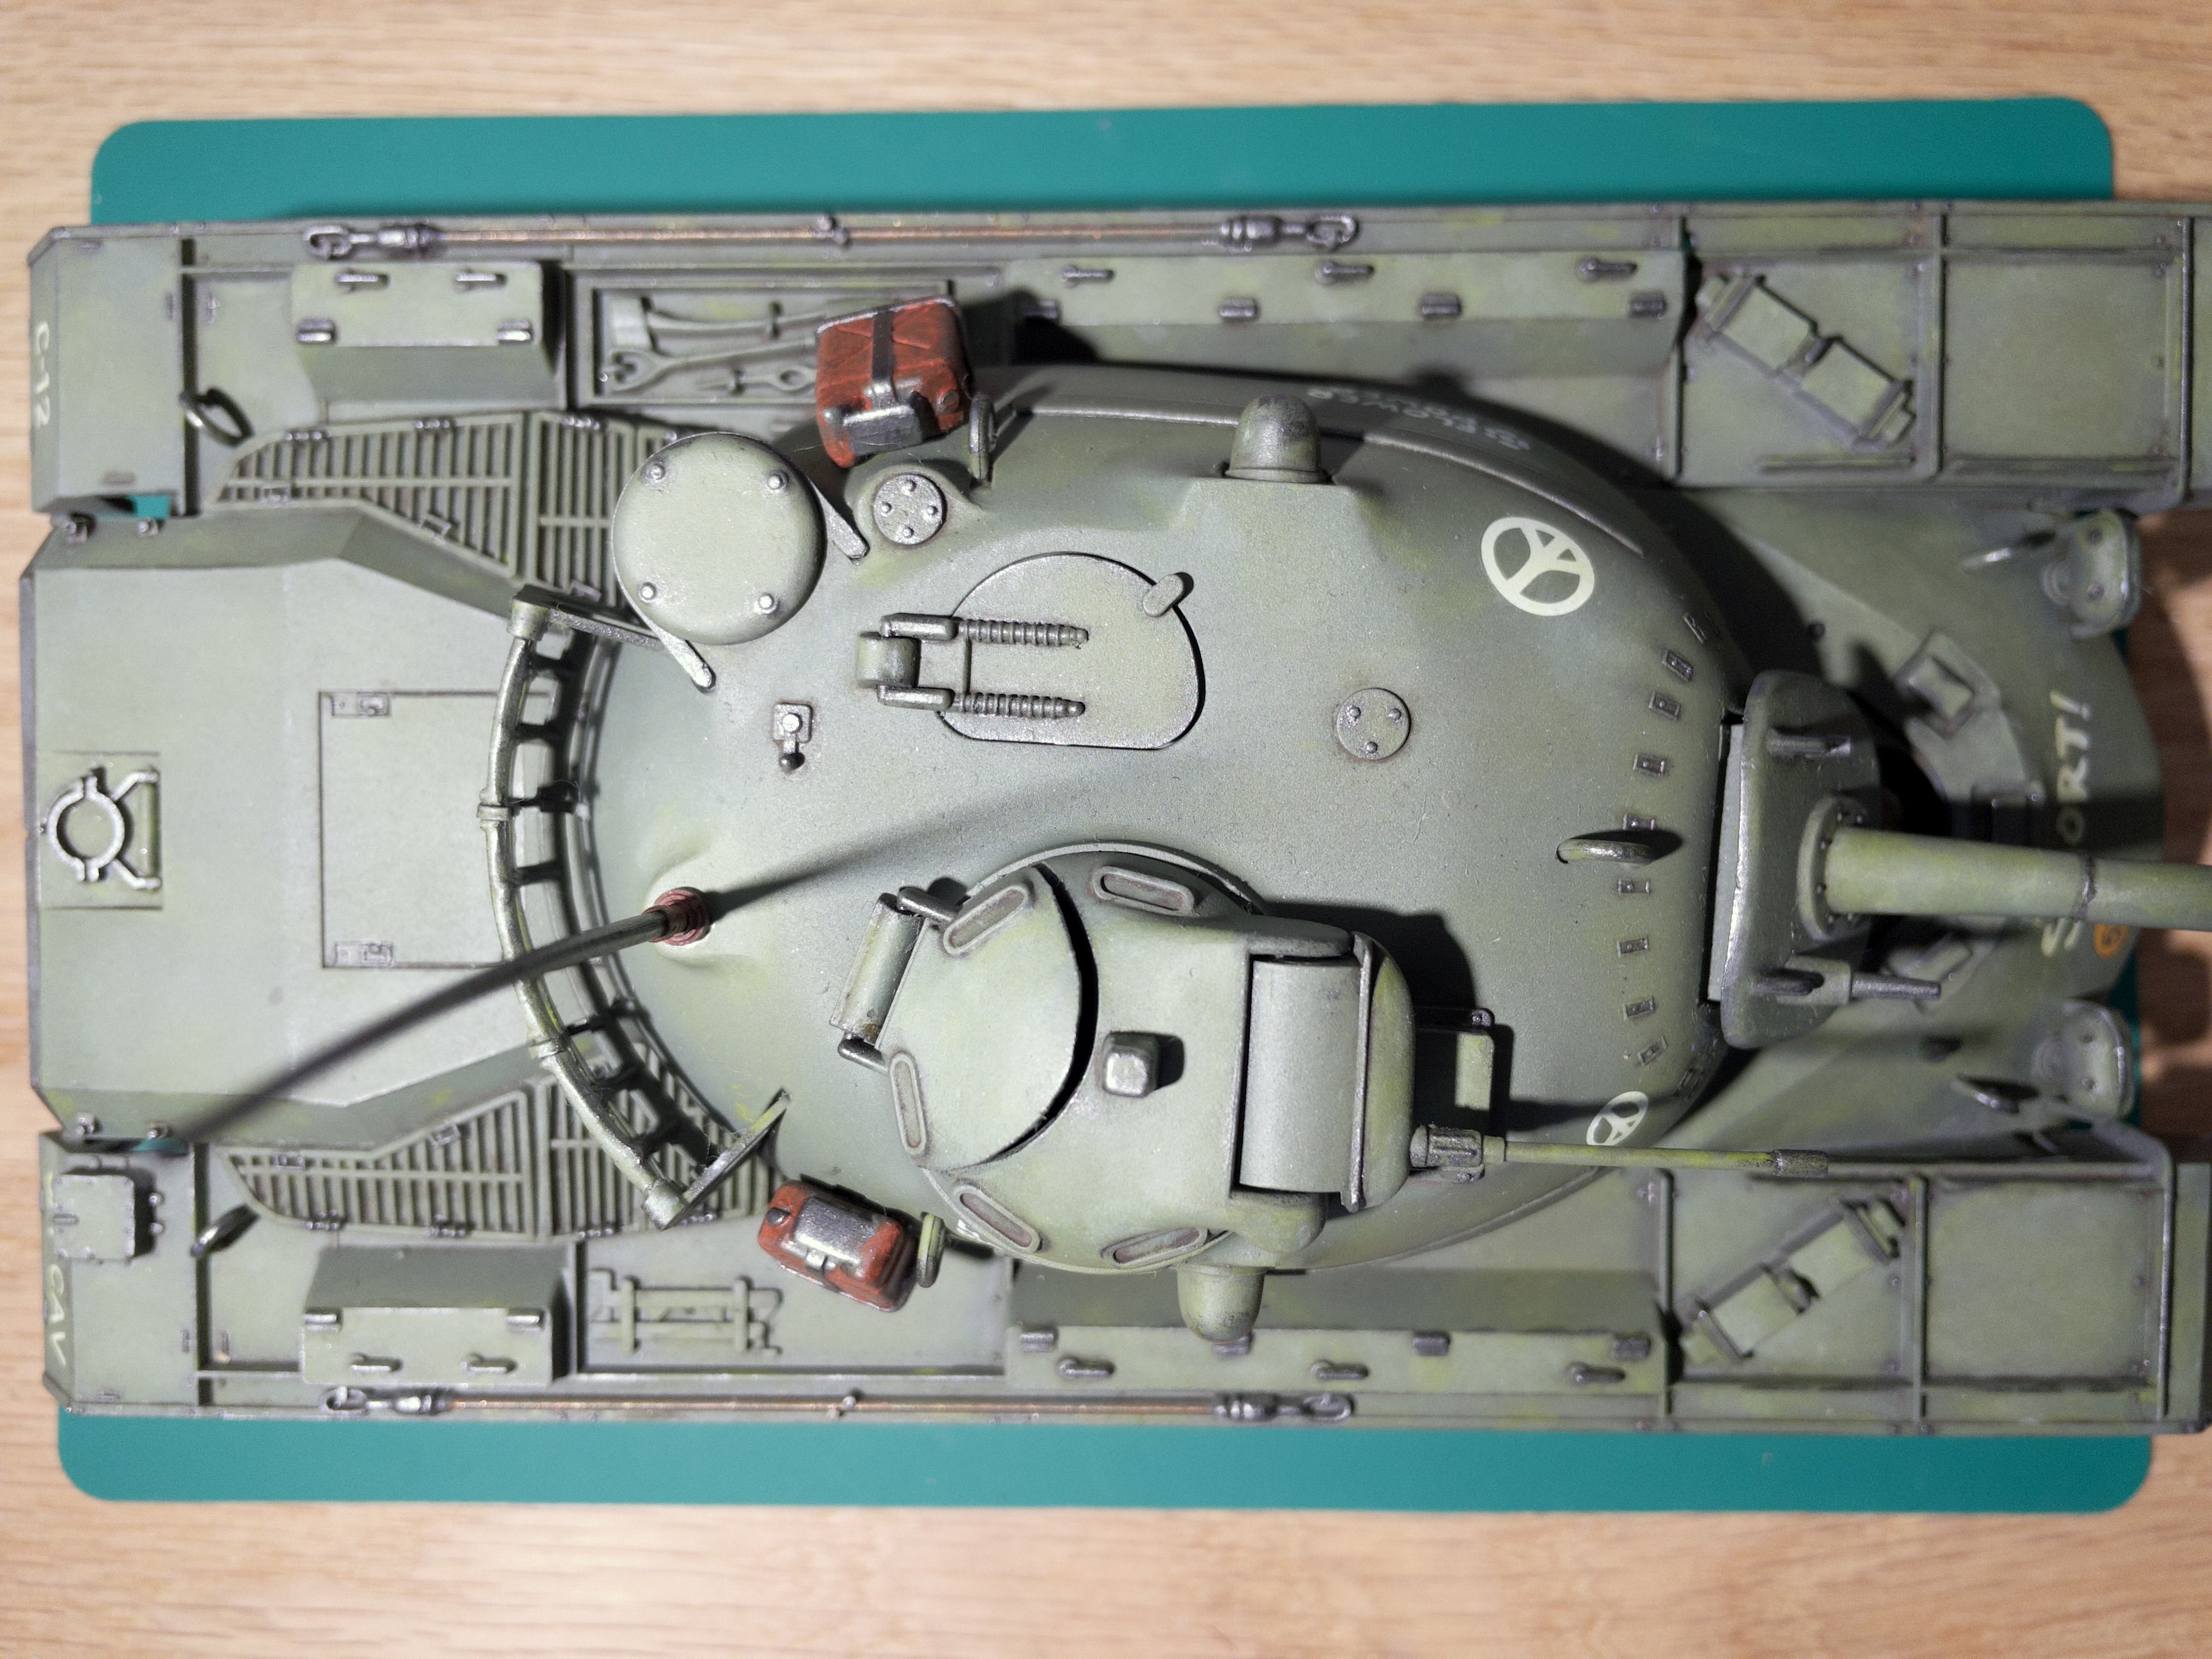
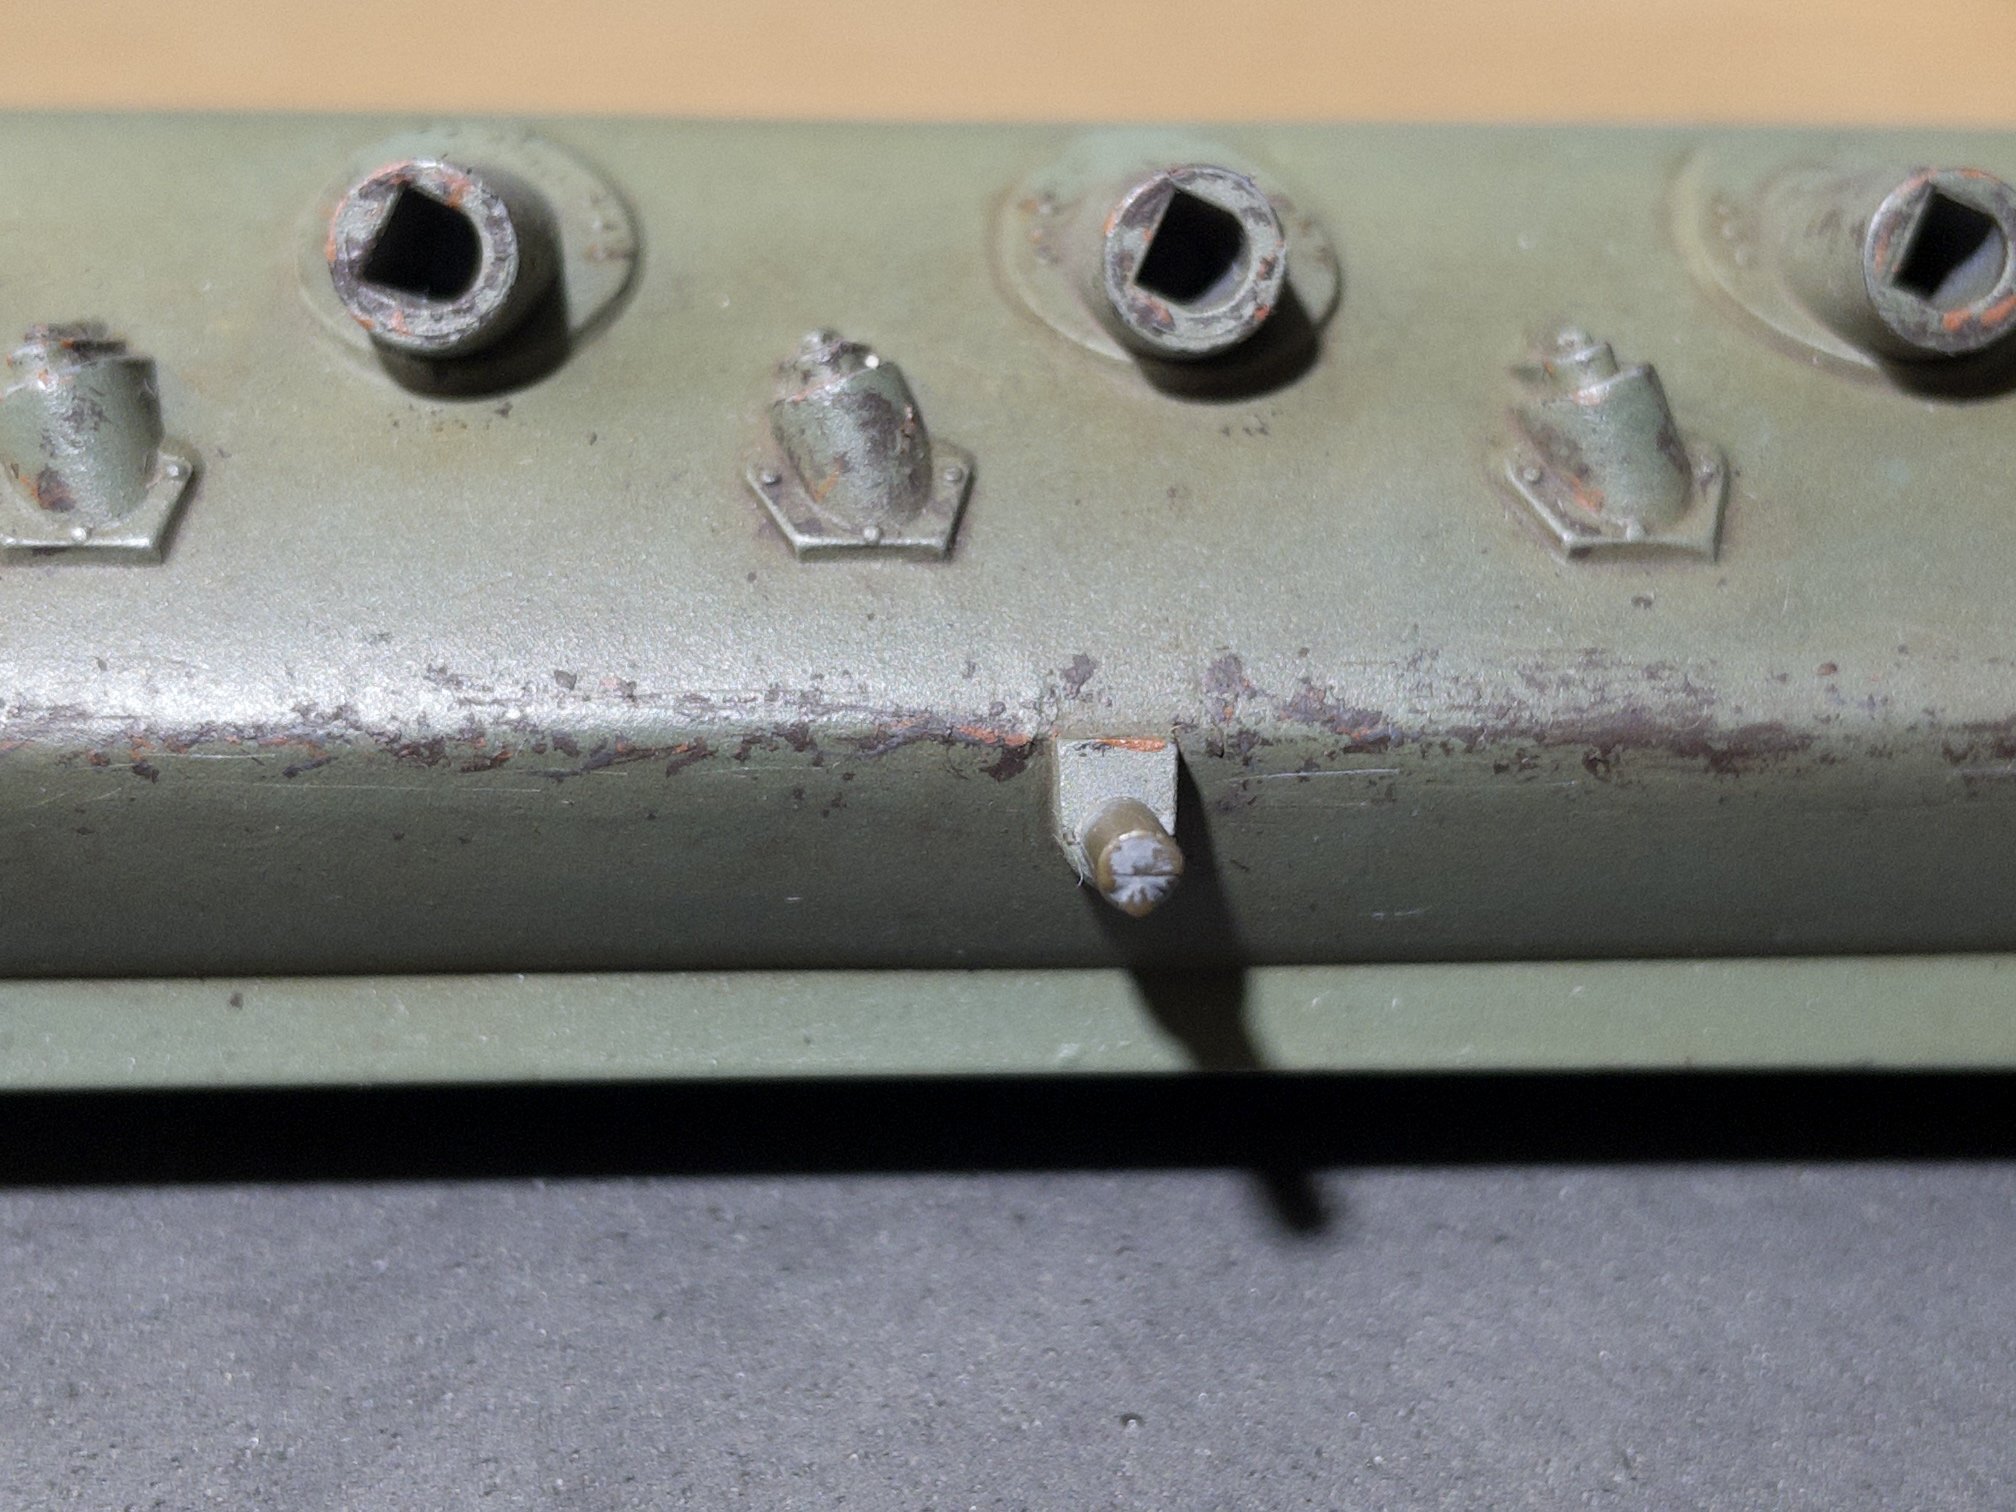
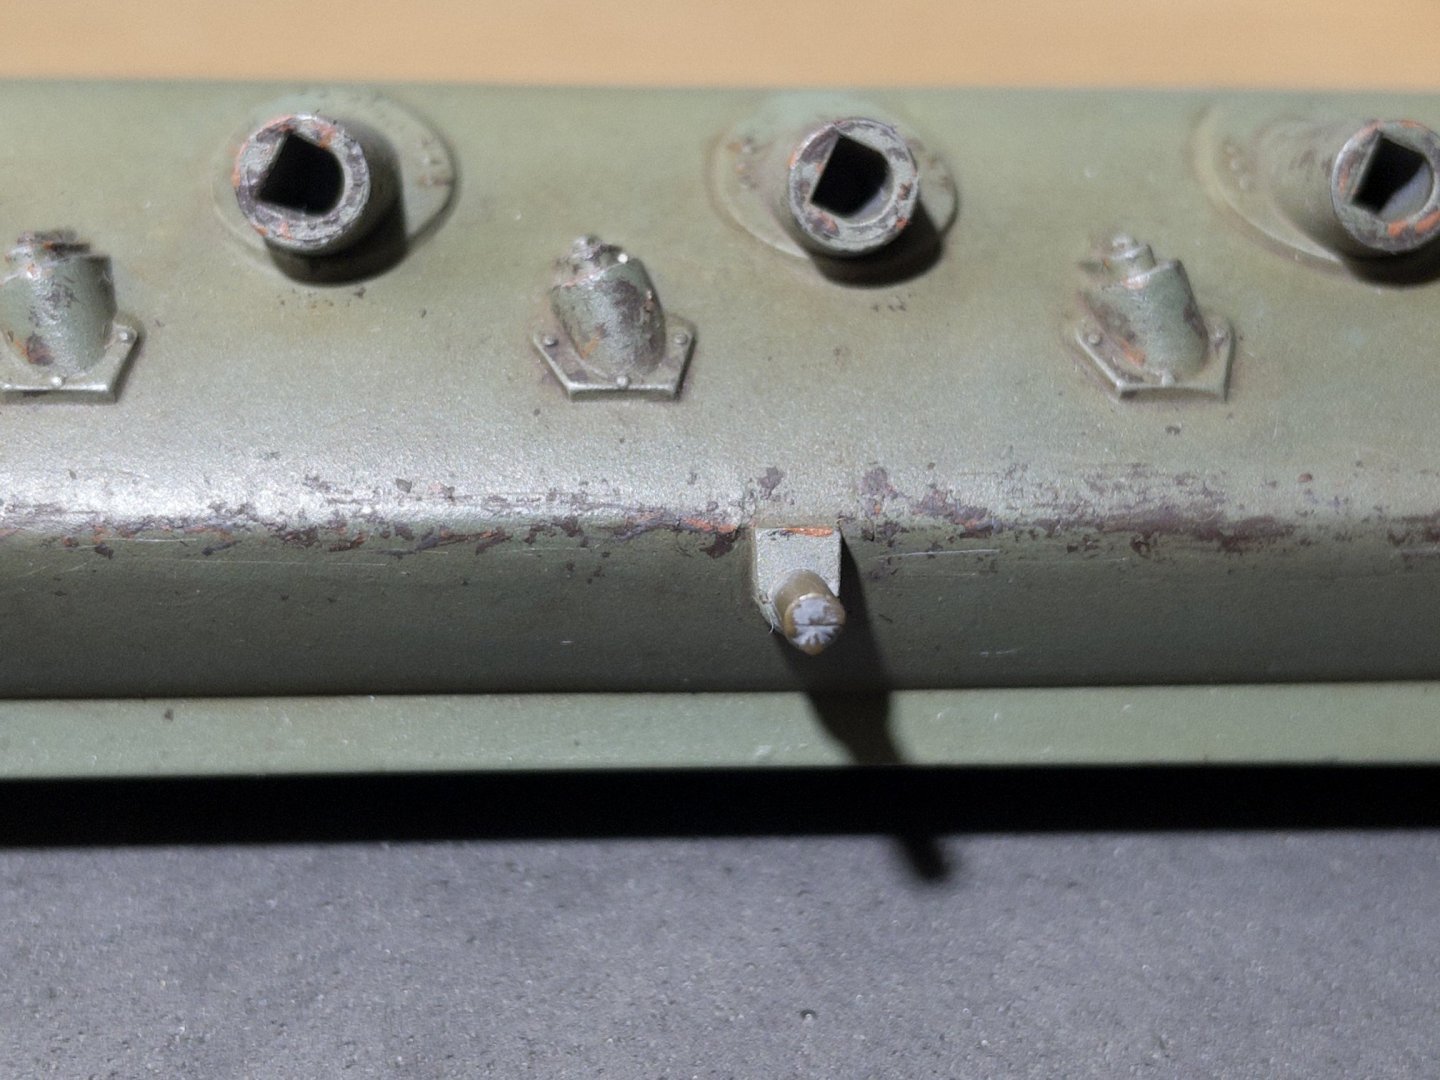
Burnishing (metallic steel): Edges, rivets and other details are burnished as an initial step to weathering and chipping. It brings even more contrast overall. It starts to give a more metallic look to the tanks.

-
Oil pin wash: I give a second try to pin wash. This time, I used a few variations of olive drab, focusing on raised and flat panels. I think it is better... it brings more shades and makes everything pop a little. The yellow will be tone down later when I start weathering.

-
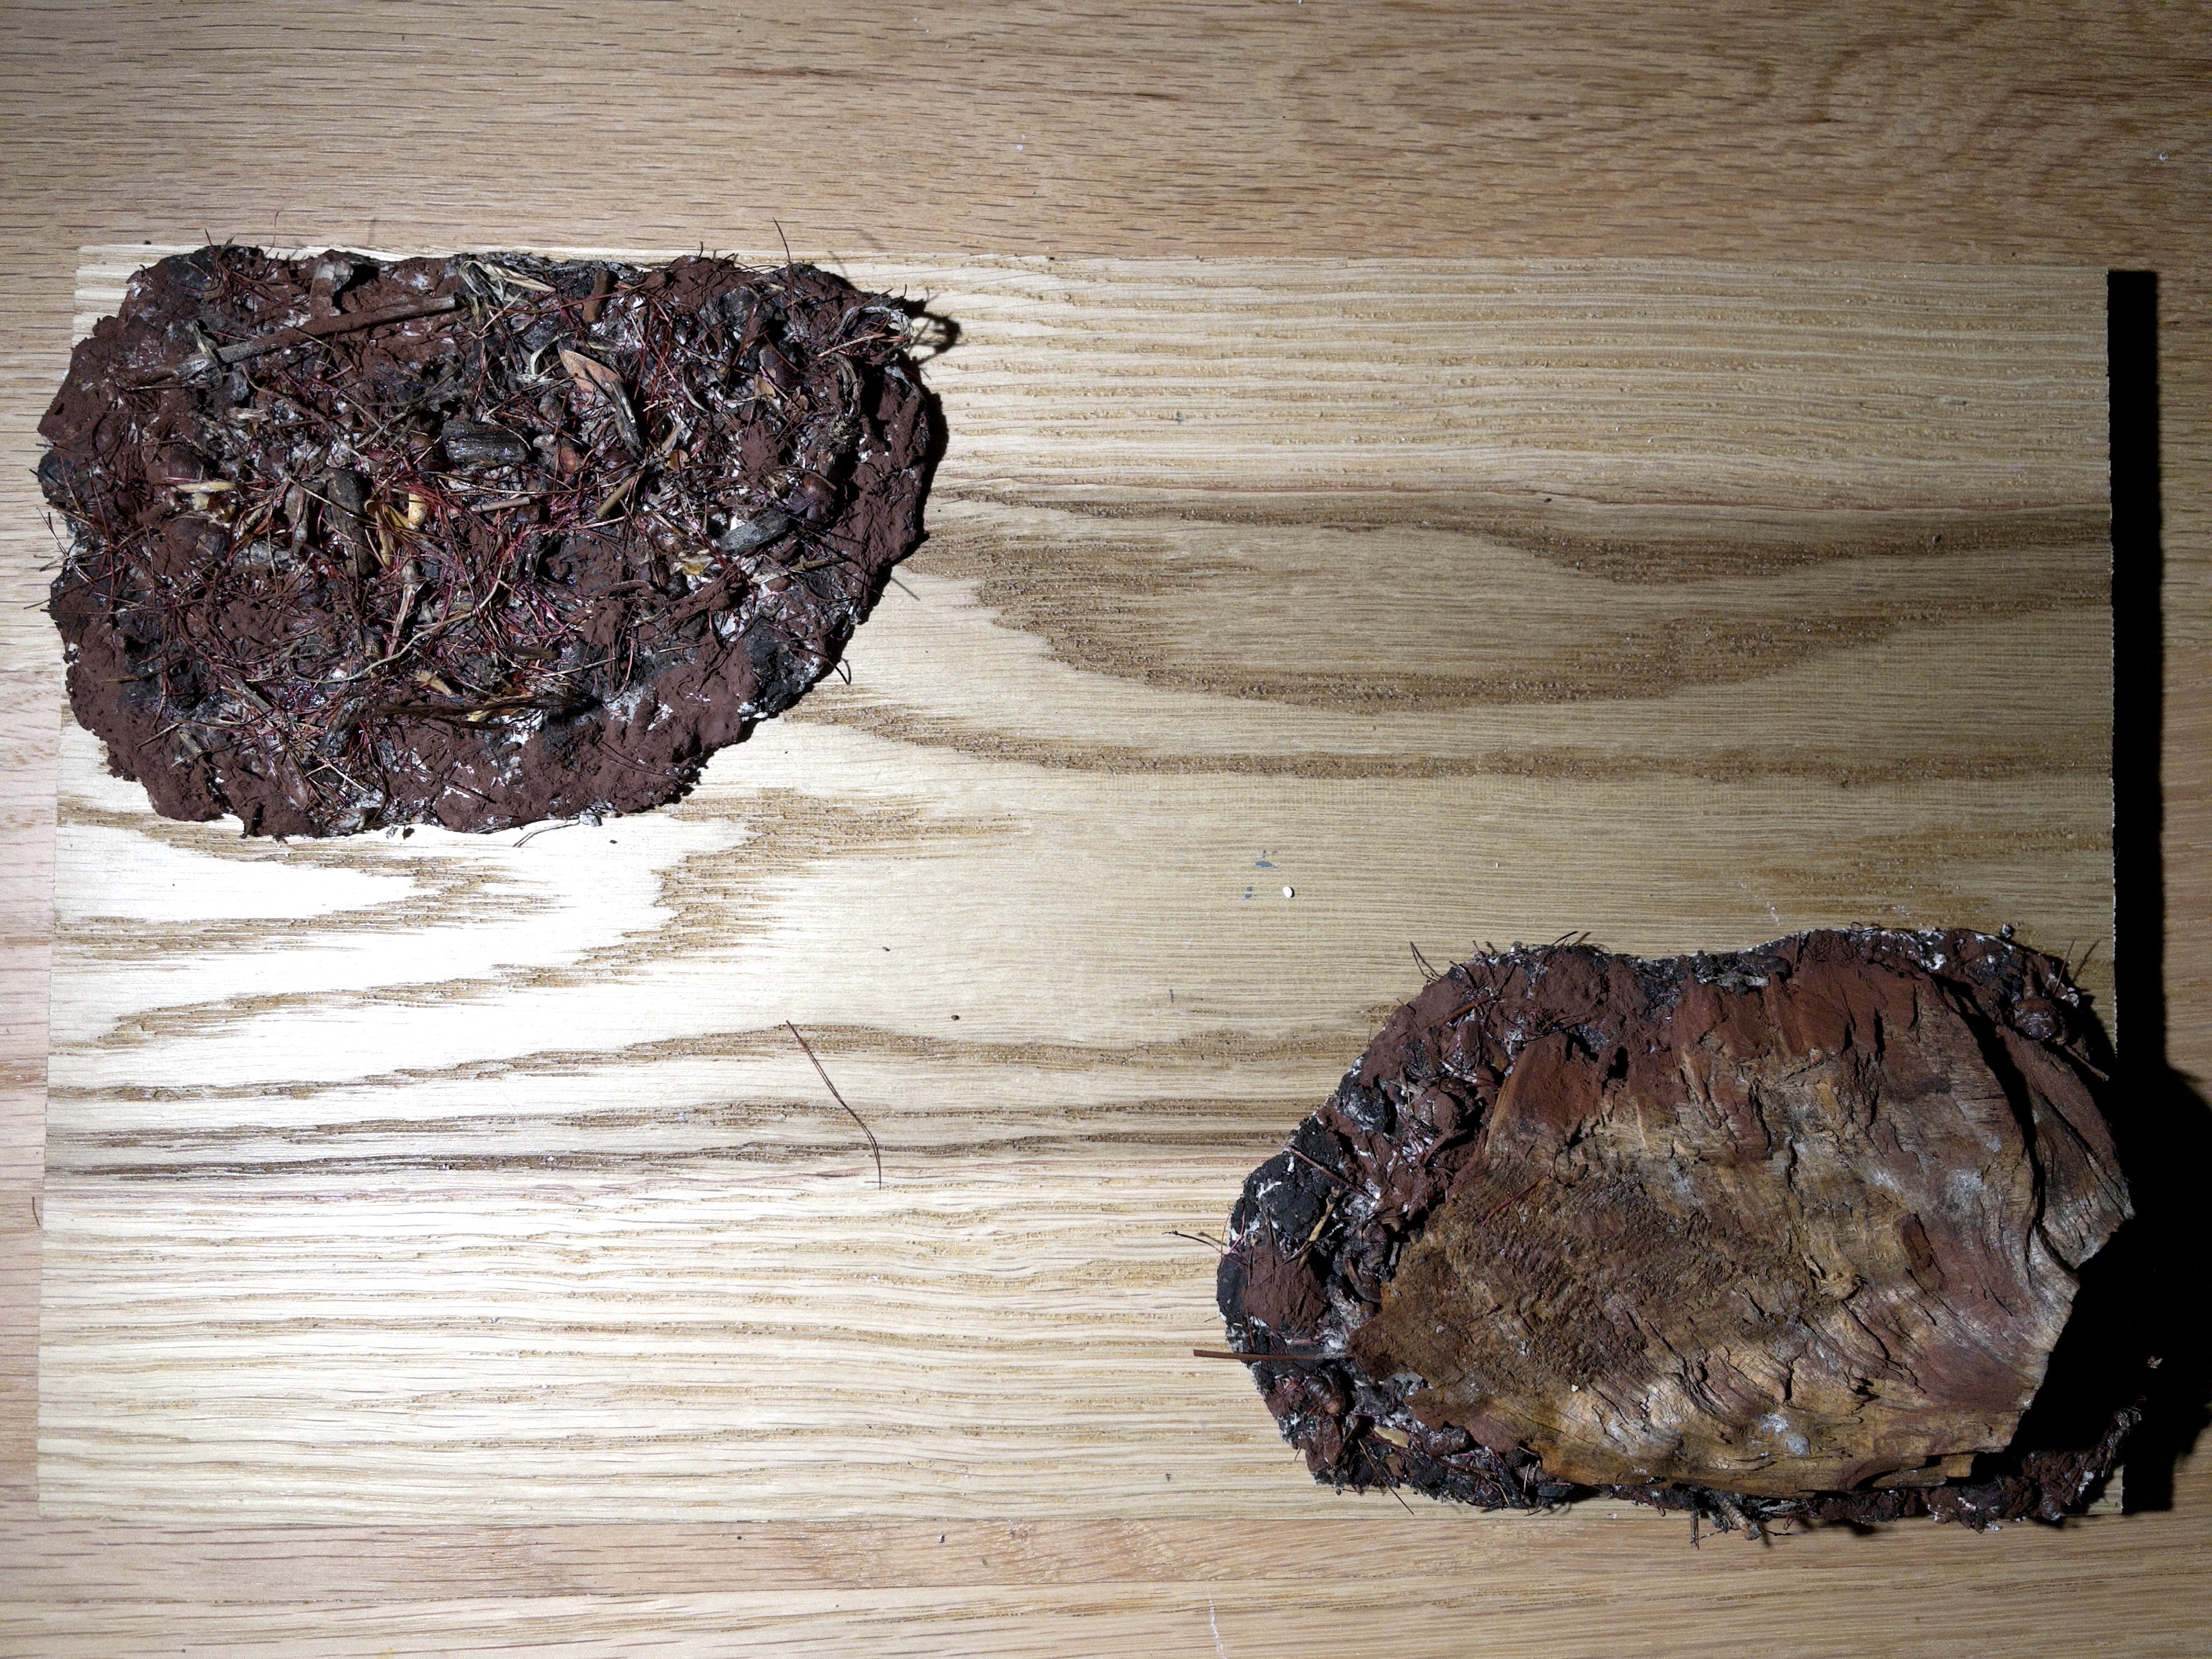
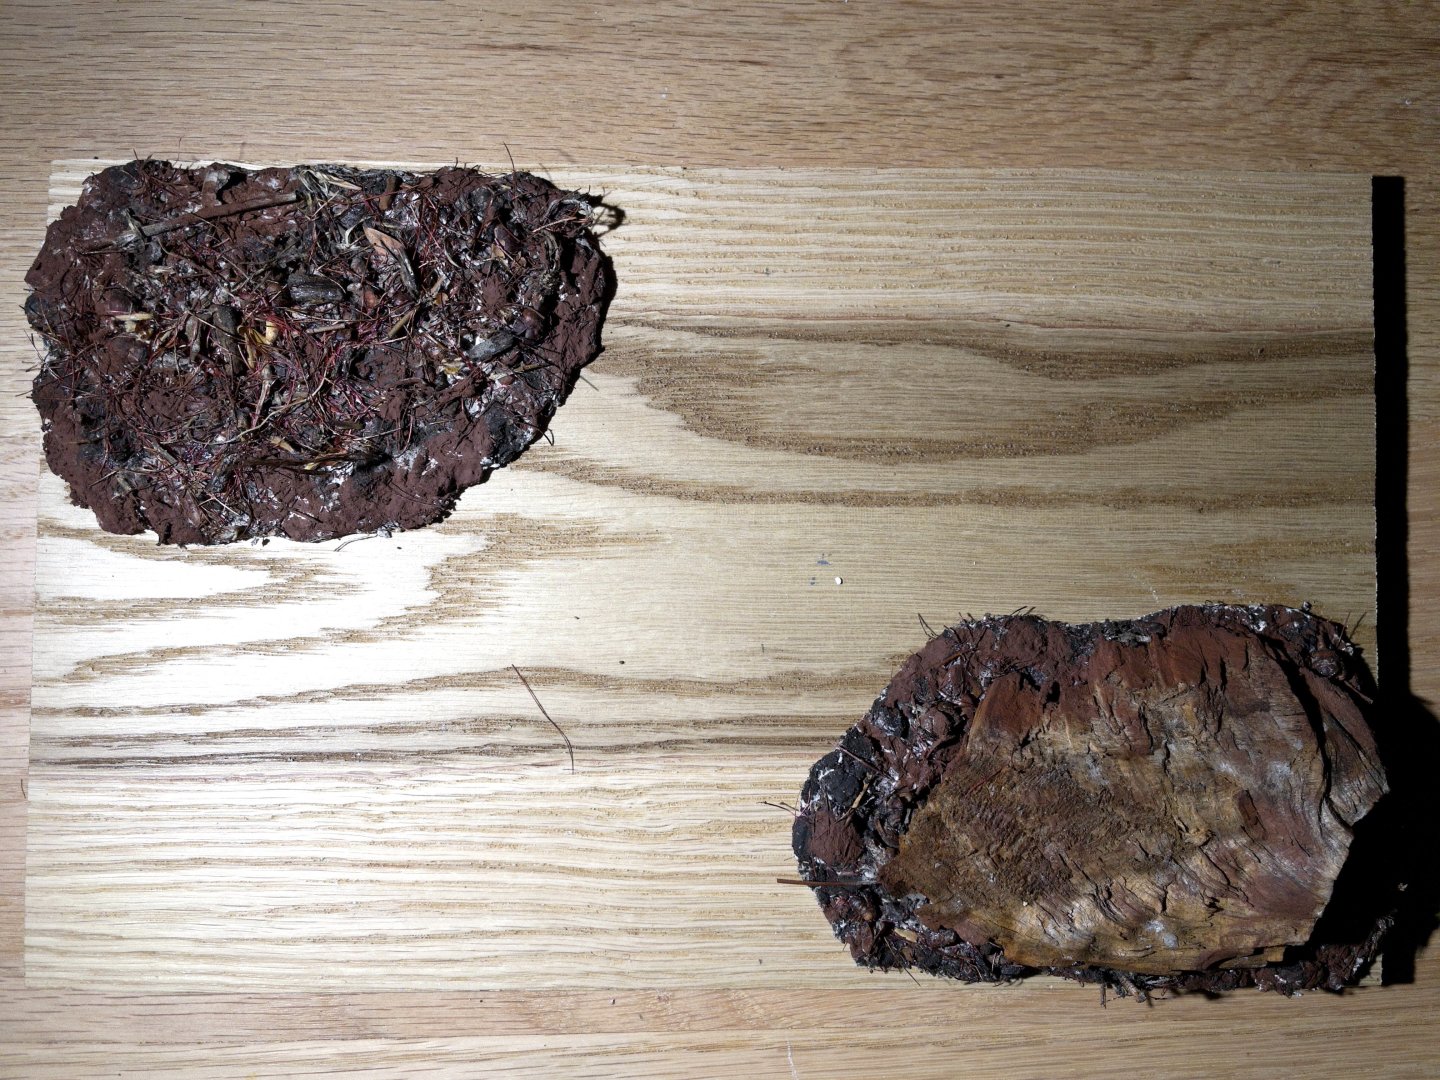
Stand and diorama: I'm looking at something very simple... A wooden stand with a couple of earth/rock patches. The figures will fill the remaining space. Easy to build: plaster cloth forms the base, dirt/wood from the backyard and a touch of Vietnamese earth pigment. I drilled a hole in the bottom of the tank (and glued a nut inside), so it could be held later in place with a 1/4 inch bolt.

-
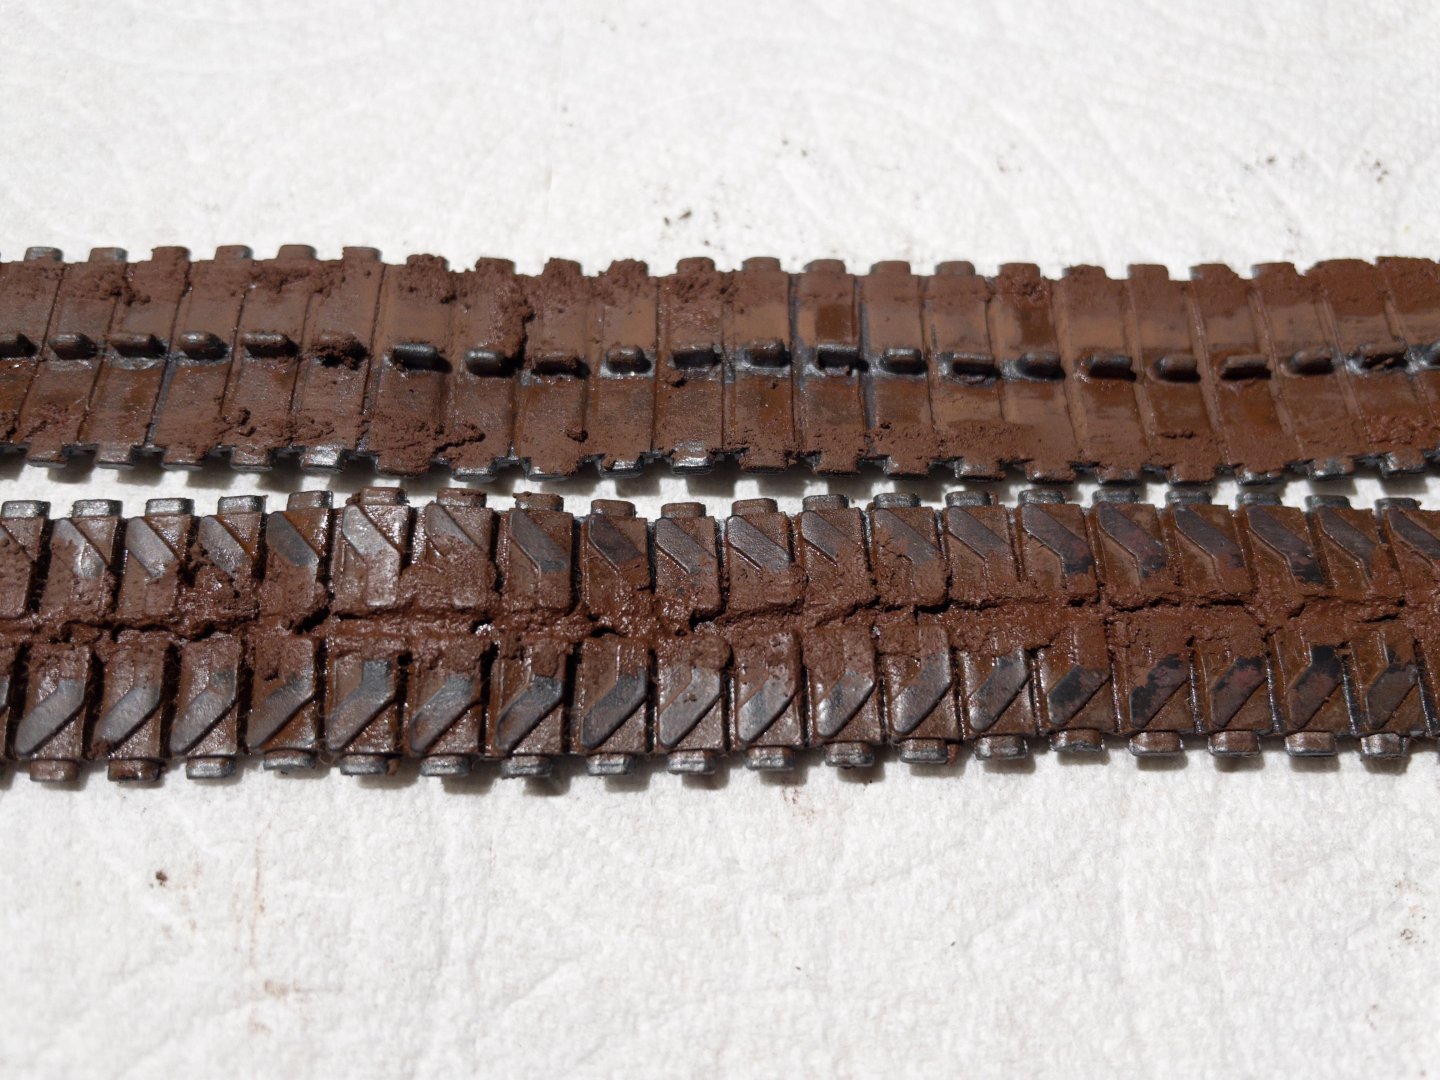
Tank tracks: The tracks are plastic and would need a fair amount of work to look a little more realistic. The tracks were first primed, painted black and sealed with mat varnish. The edge was then painted with metallic steel. Once dry overnight, I used VMS Vietnam earth pigment (with enamel solvent) to generously cover the tracks. Then I add the "texture" pigment of the same color to add a more earth appearance. It can be seen in pictures 1 and 2. Lastly, I turned to the figures to work on the base, adding texture pigment. Finally, the figures were dry brushed to "dirty then up" to better integrate them with the same color scheme.


-
I was... thanks for the clarification. 😉
-
I personally find Boxwood (or similar light color) so difficult to work with. Either you leave as is, which often stand out with the rest, or you stain it. I had bad experience with staining in the past. I find it very difficult to match with the remaining ship or just look natural. Most time I just settle with no staining at all, just varnish. I never tried adding a little bit of stain to the varnish though, just to darken it a tiny bit.
-
Sorry for the update/posting delay. I did not want to post that I would be traveling until back safely at home, which we are. I will be back to the build very shortly. I'm really looking forward to weathering the upper portion. This is a first for me.
-
I have some Chip and nick in white, that could be mixed with fine pigment color (cheap way is using soft pastel sticks). I'm hoping to create a solution that will be a light version of Olive drab to try a two or three tone chipping without changing the paint property. Any acrylic liquid paint and/or thinner I have tried as "add-on" so far alters the chipping property. Solid pigment should do the trick. I'm hoping for: Light green for color discoloration (spot and light scratches), another for primer (oxide red) and finally brown/rust for rust metal. Seen a lot of work but everything will be far more localize in the upper parts. Have not tried yet.... we will see.
-
Heavily Chipped Paint: Looking at doing some paint chipping. Work on the underside, since it is forgiving (mud will be added later). I'm using VMS Chip and Nick Paint. After application and a few minutes dry time, you can reactivate the paint to either remove it or chip it further. Quite nice, in fact.

- 39 replies
-
- 10
-
-
Indeed... here is the result. A little bit more visible, better when looking at a normal distance. The details just stand out more. Time to try chipping now.
-
The pin wash was a little bit too subtle... Making another stock solution and will see later. This is the problem with making your own paint and washes. But hey, just a small drawback to pay to be independent of any brand of reagents (as much as possible).
-
Complete painting of the figures. Not much to say. Will start chipping paint and steel burnishing on the tank later next week. Figure base is temporary until I start working on sand/dirt (vietnam red/brown) with pigments.