HOLIDAY DONATION DRIVE - SUPPORT MSW - DO YOUR PART TO KEEP THIS GREAT FORUM GOING! (Only 36 donations so far out of 49,000 members - C'mon guys!)
×

Loracs
-
Posts
285 -
Joined
-
Last visited
Content Type
Profiles
Forums
Gallery
Events
Everything posted by Loracs
-
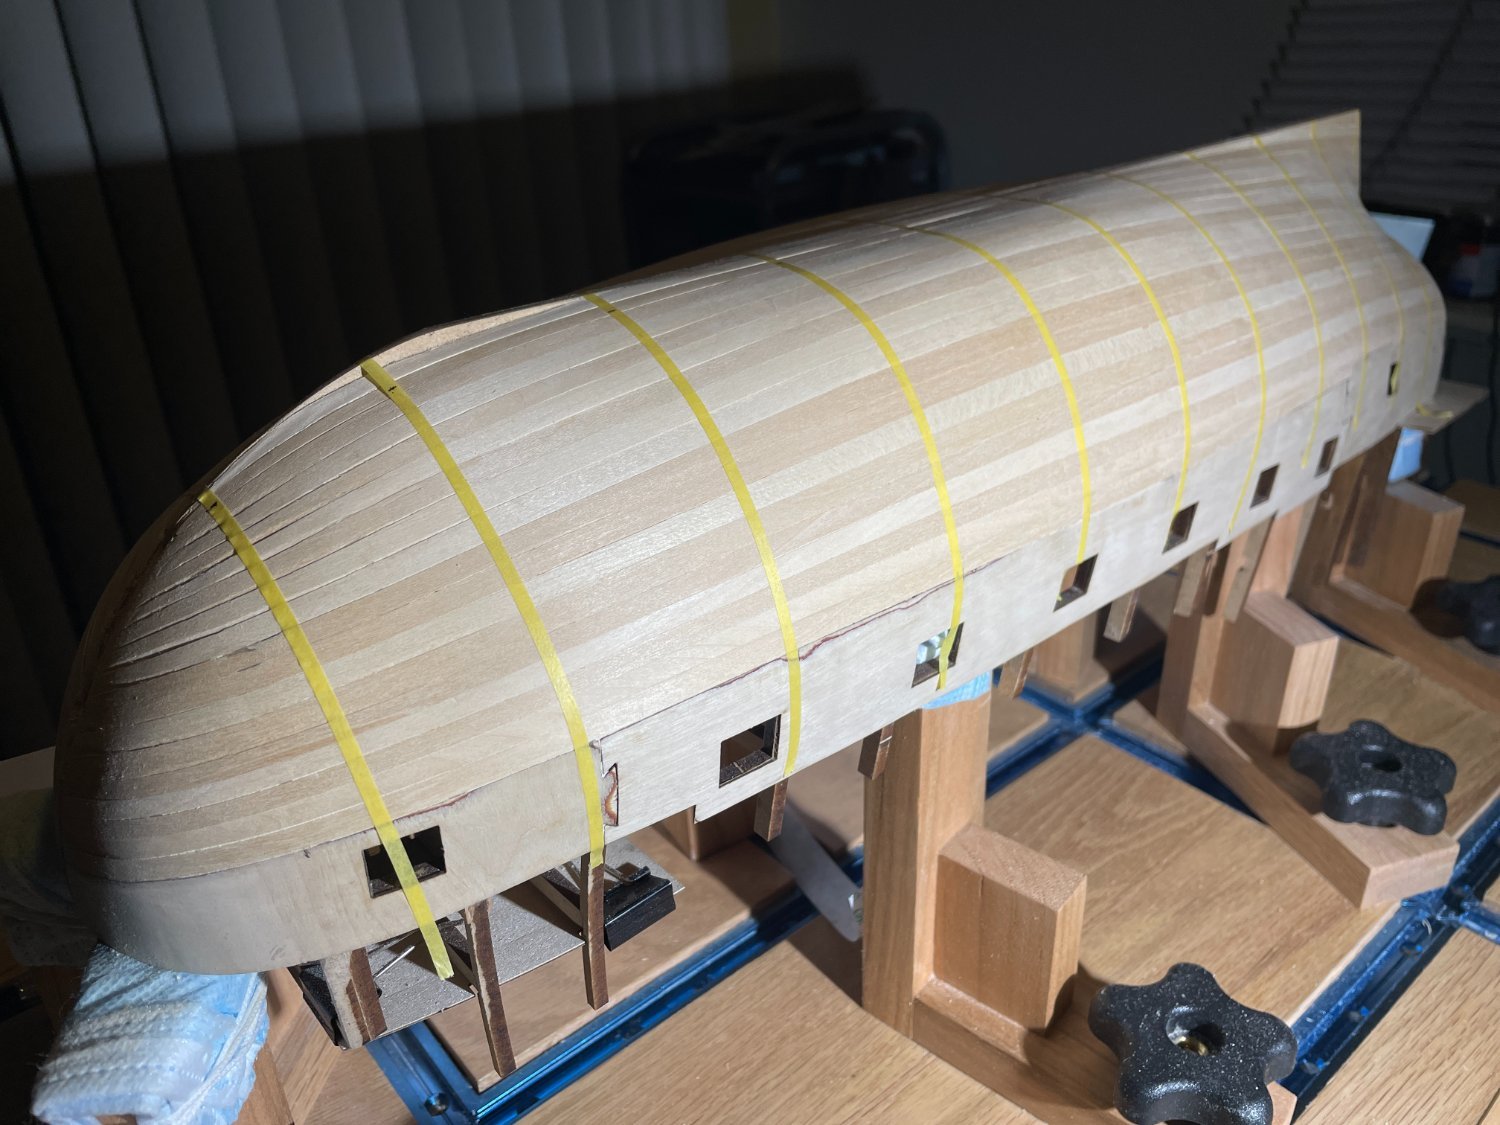
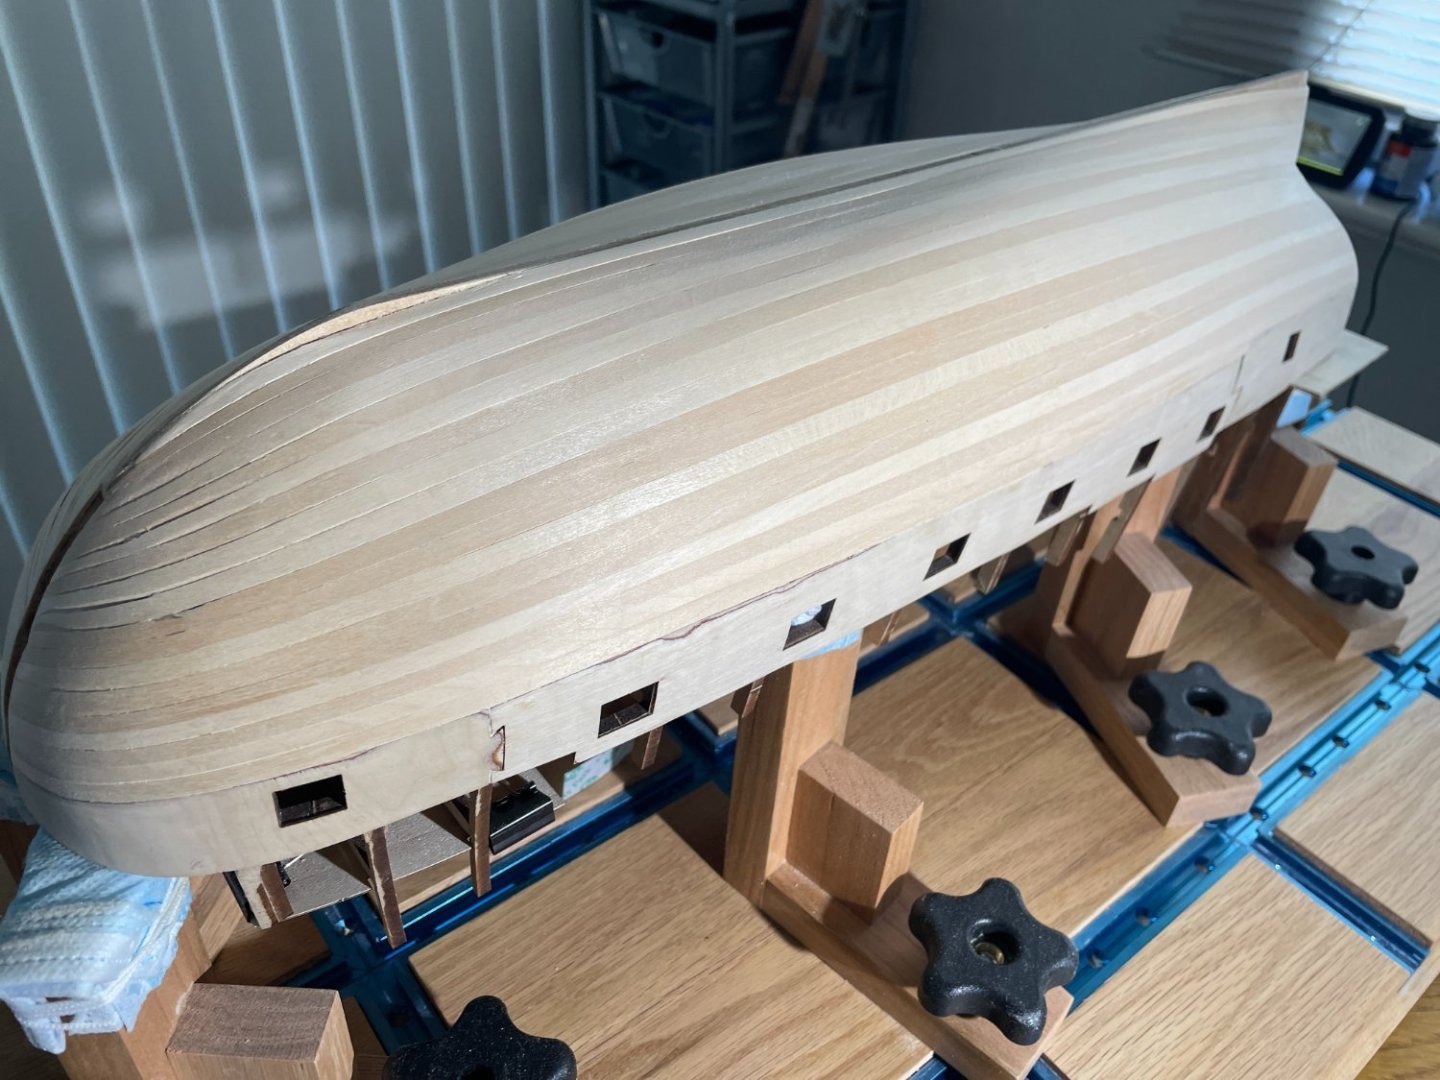
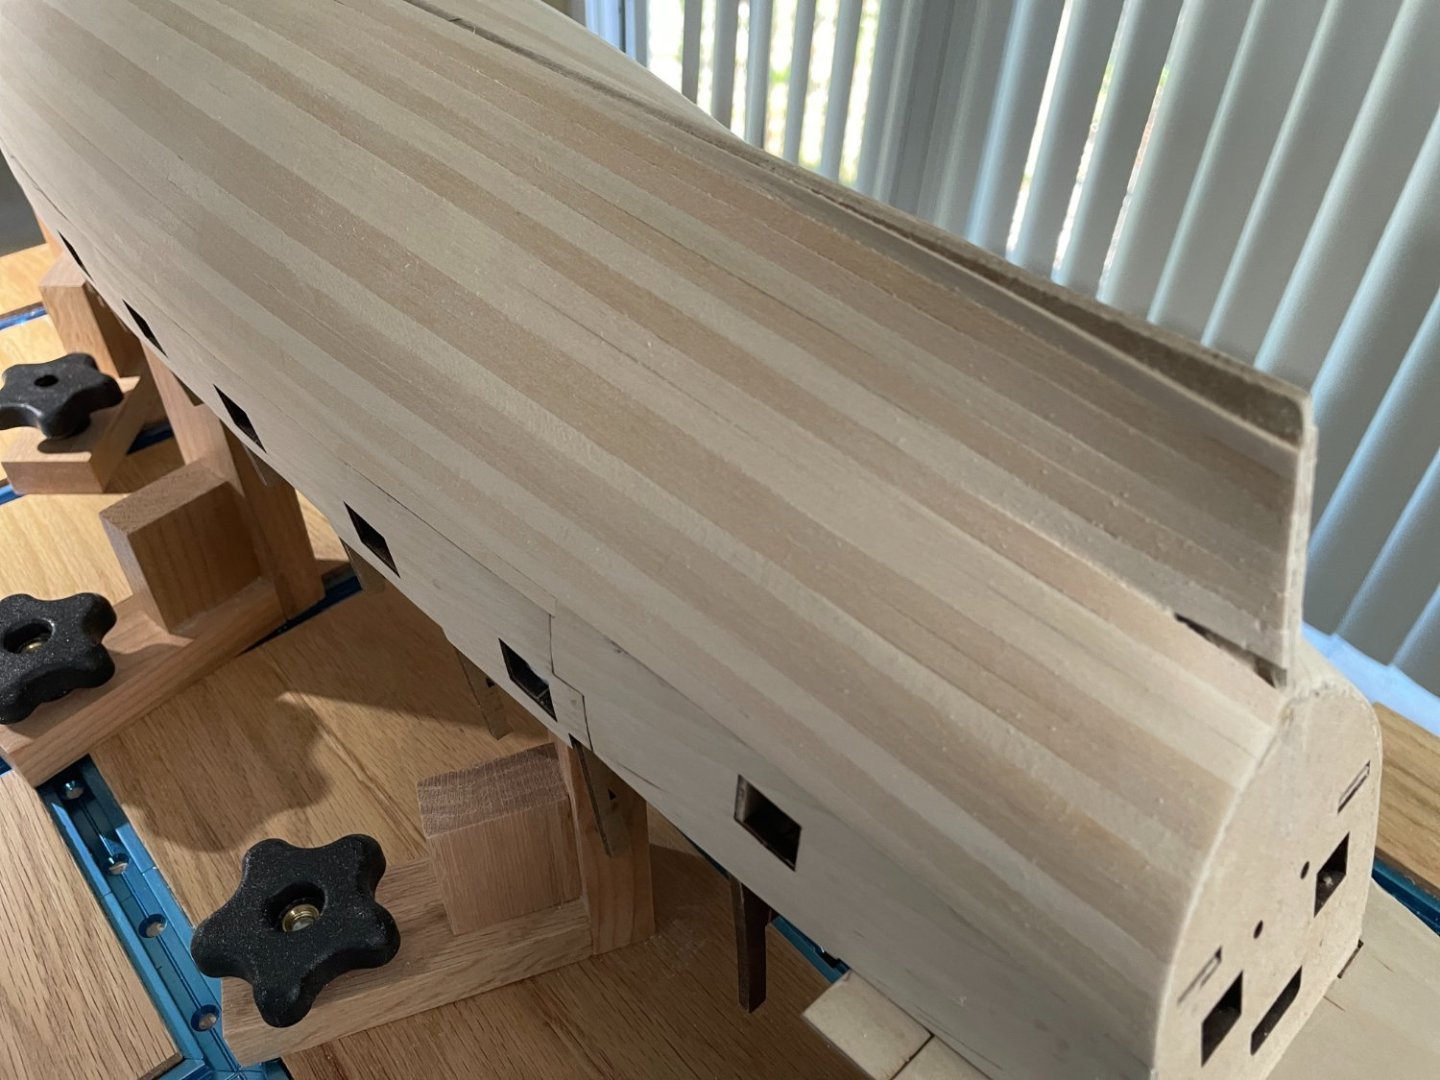
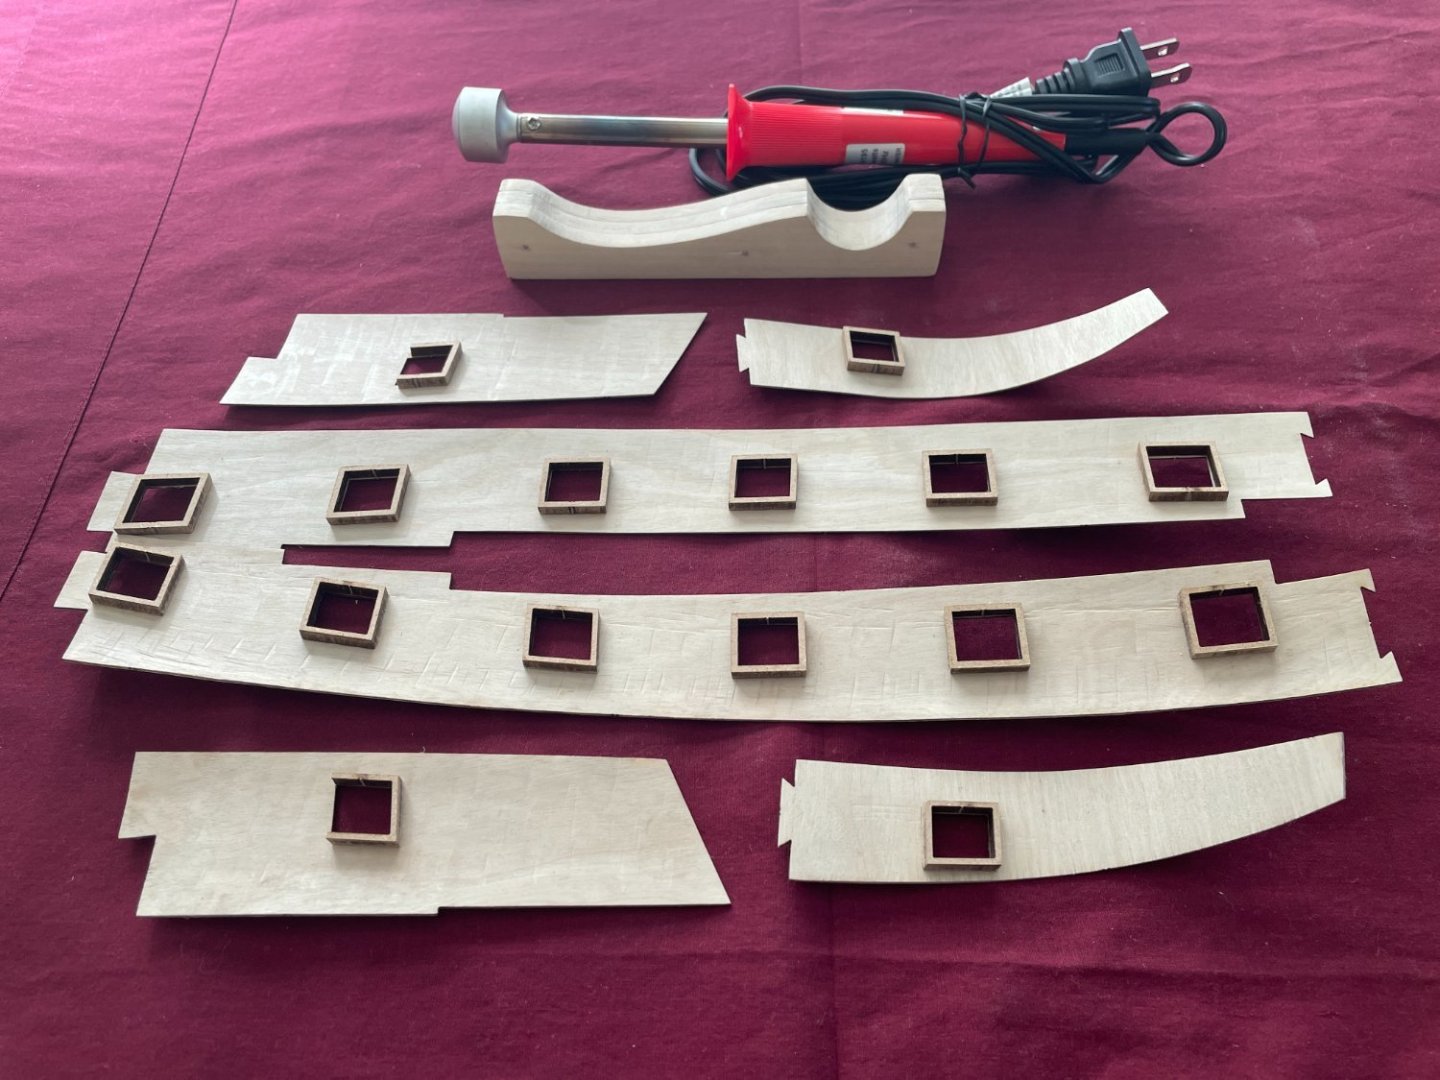
 Second Planking, slow progress. Curving each plank against the grains seen to take forever!! Almost midway to the hull. Plank length is 120mm or 25 feet at this scale.
-
Good evening, a quick question... are you planning to release pearwood blocks later on? just checking up, nothing urgent.
-
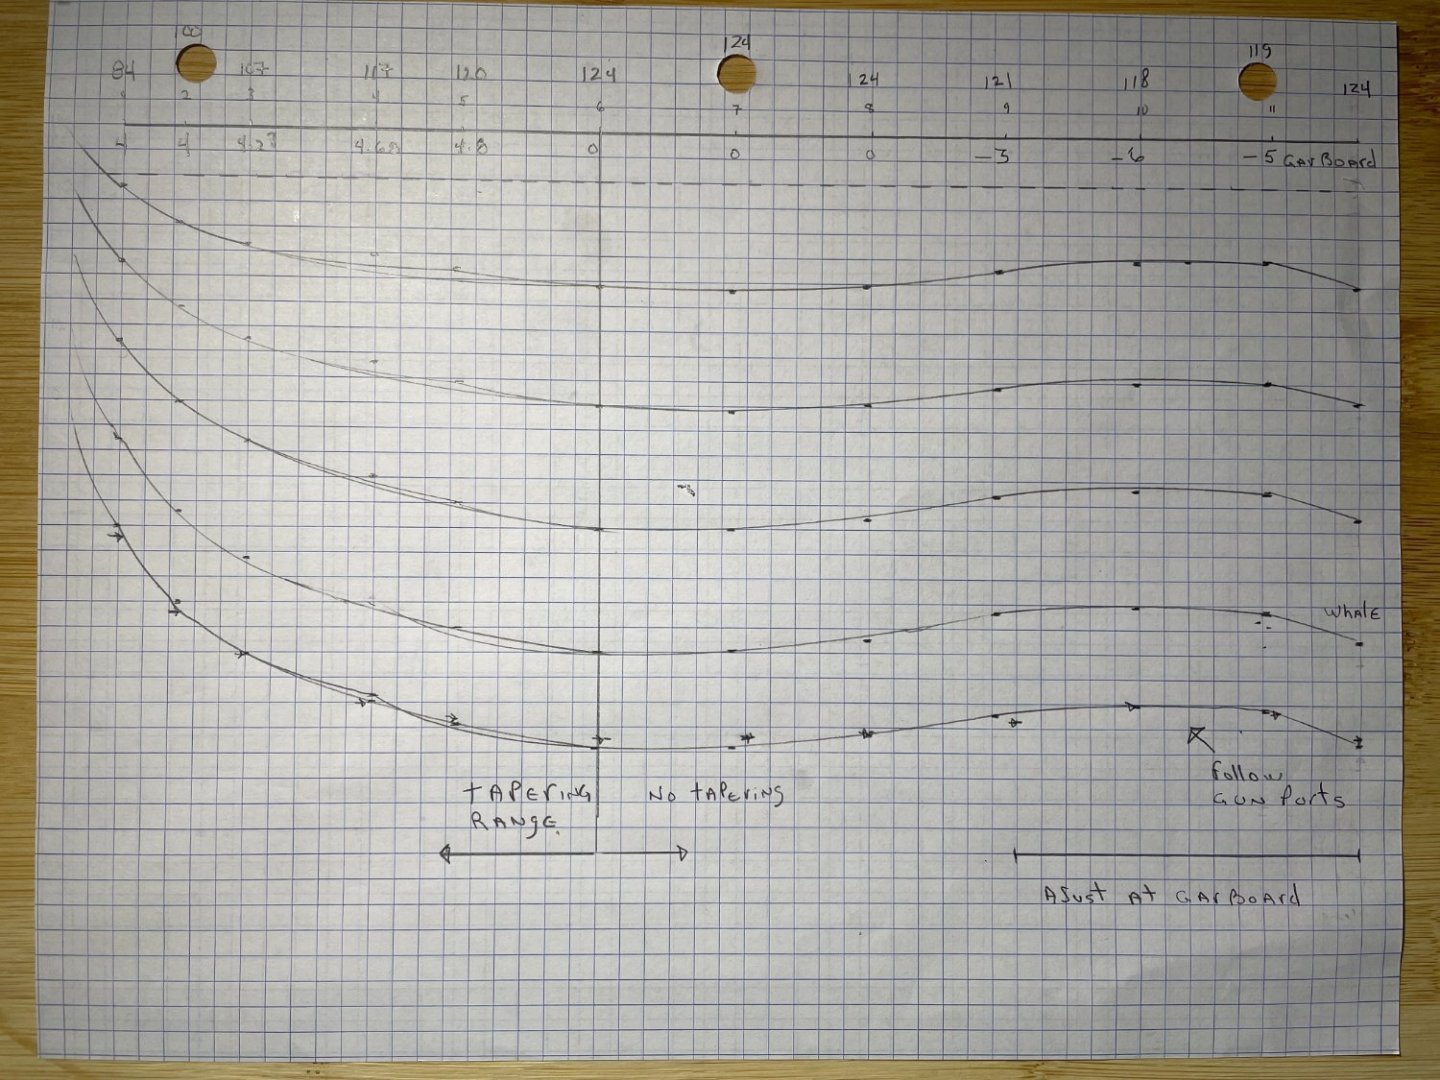
Greetings all, A small question about planking at the bow. Let assume that the ship is divided into 4 sections for planking. In logs, I often see peoples tapering more aggressively at the 2 middle sections, but only lightly at the upper and the lowest section. Is it the right approach? Or do you taper uniformly in all sections (at the bow). Any advantage of one approach versus the other? Thanks a lot for your help. I'm still learning...
-
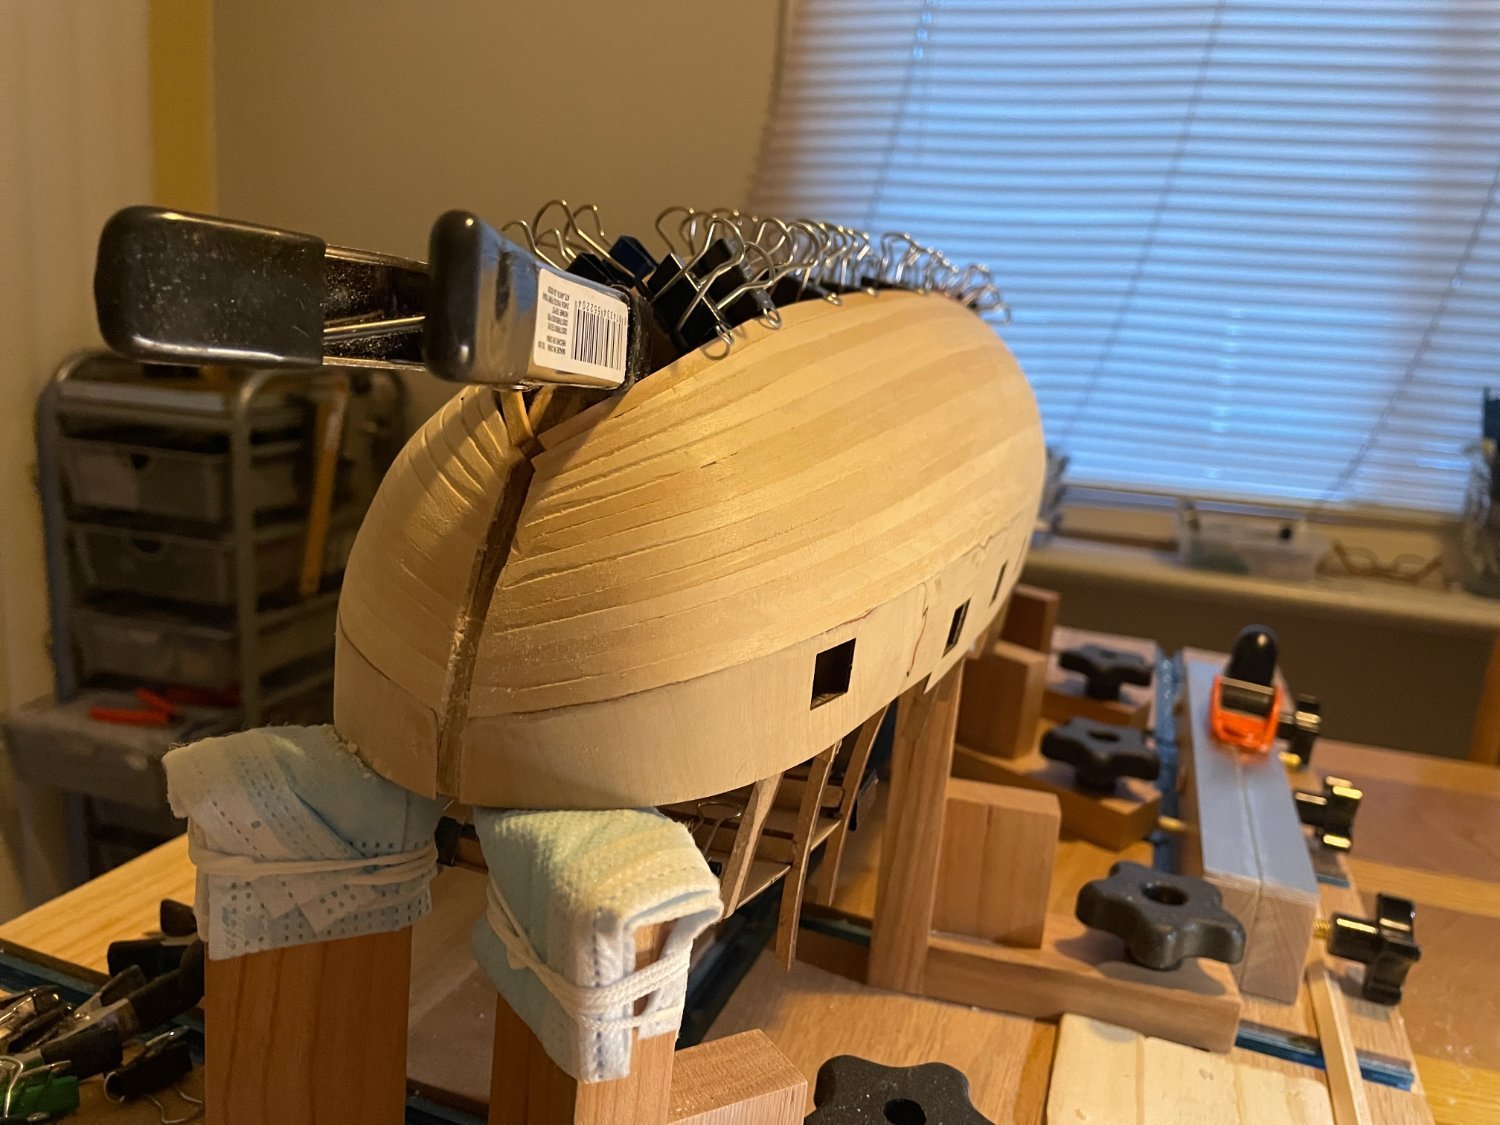
Second Planking: A plan is in place... now, I just need to follow it. Took a while. I'm still learning this, so I keep questioning myself and the measurements.
-
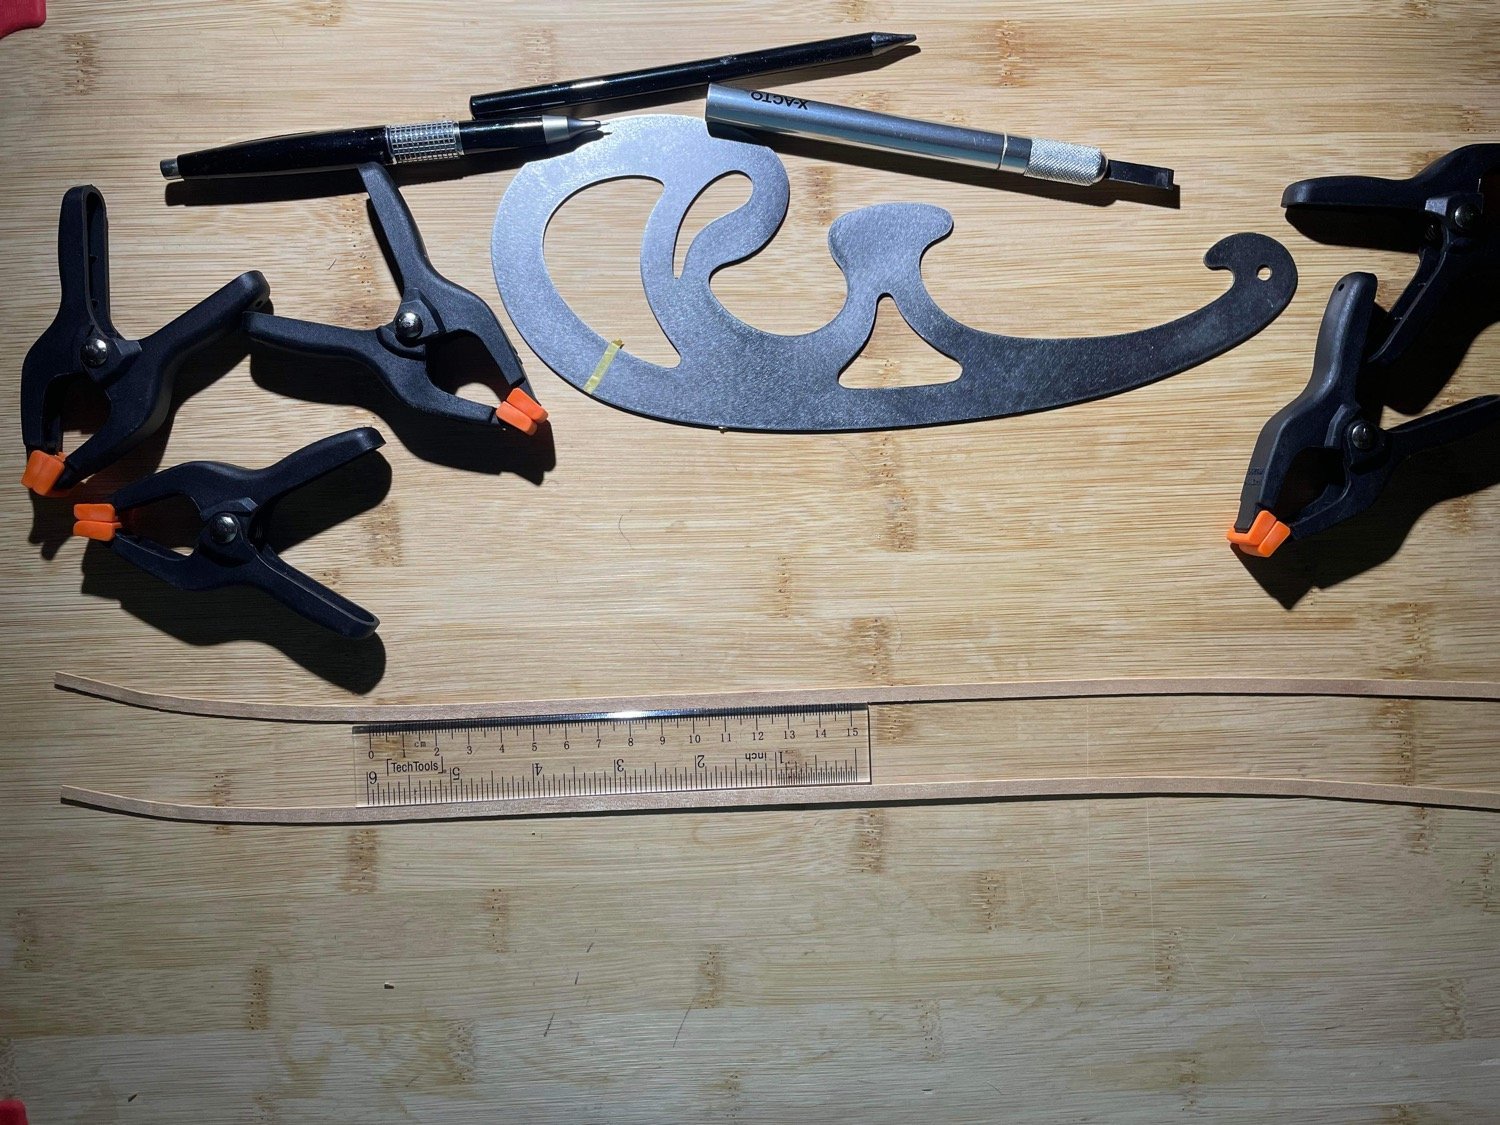
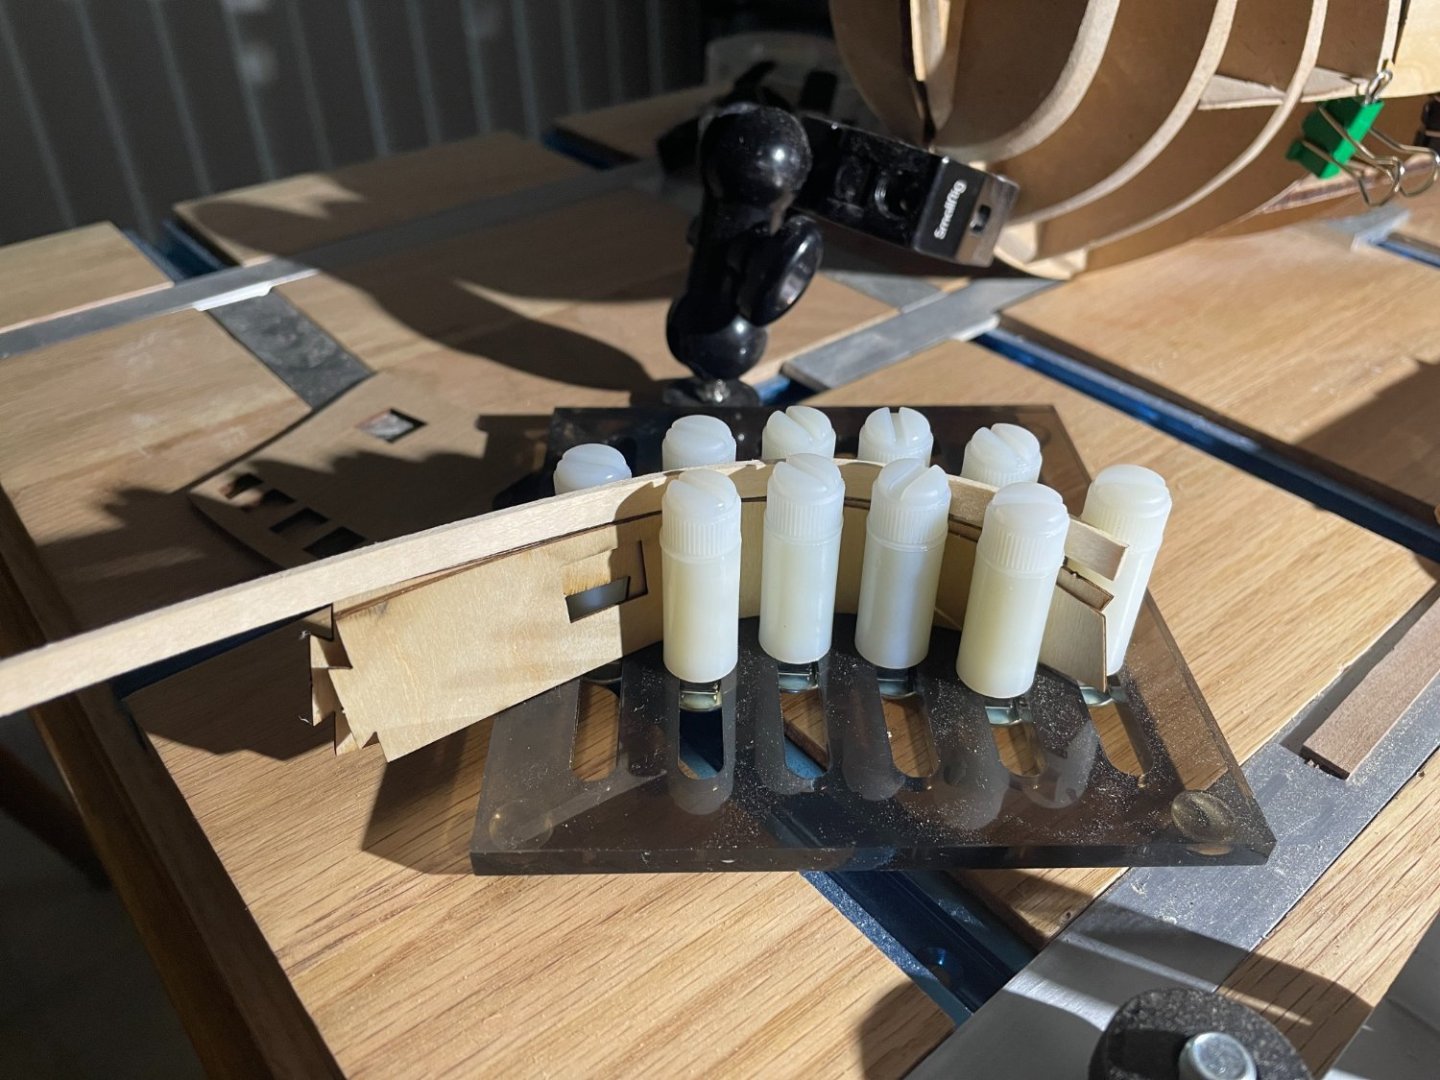
Spilling planks. I learned the hard way that it is better to do before planking than fixing after. For me, I'm more comfortable using a guide for the shape I want to obtain, wet the planks and use a hairdryer for shaping. I got mixed results using a travel iron, mostly because I have difficulties holding in place while ironing. It keeps springing up in the curved area. We each develop small tricks to get things done... Note: Clamps can leave a mark on the planks... use a wood strip on top of the planks (under the clamp) to hold things together now.
-
Hull and Deck treenails
Loracs replied to Loracs's topic in Building, Framing, Planking and plating a ships hull and deck
Morning all, I truly appreciate your comments everyones. As a beginner builder, I have so much to learn. This Forum and peoples are such a wealth of knowledge. I think that I will follow the consensus and focus on a clean planking without trunnels. The effort of having drilling and using bamboo of appropriate size is just daunting... for a very subtle look. I will consider the blacklines for POF beans in the next model 😉 -
Question about treenails. Looking ahead... I have fishing line at 0.23, 0.32 and 0.5mm, color black. Is it appropriate color for hull and Deck treenails or is it too dark? what size best (1/64 scale)?
-
Deleted... asking the question is the appropriate forum channel.
-
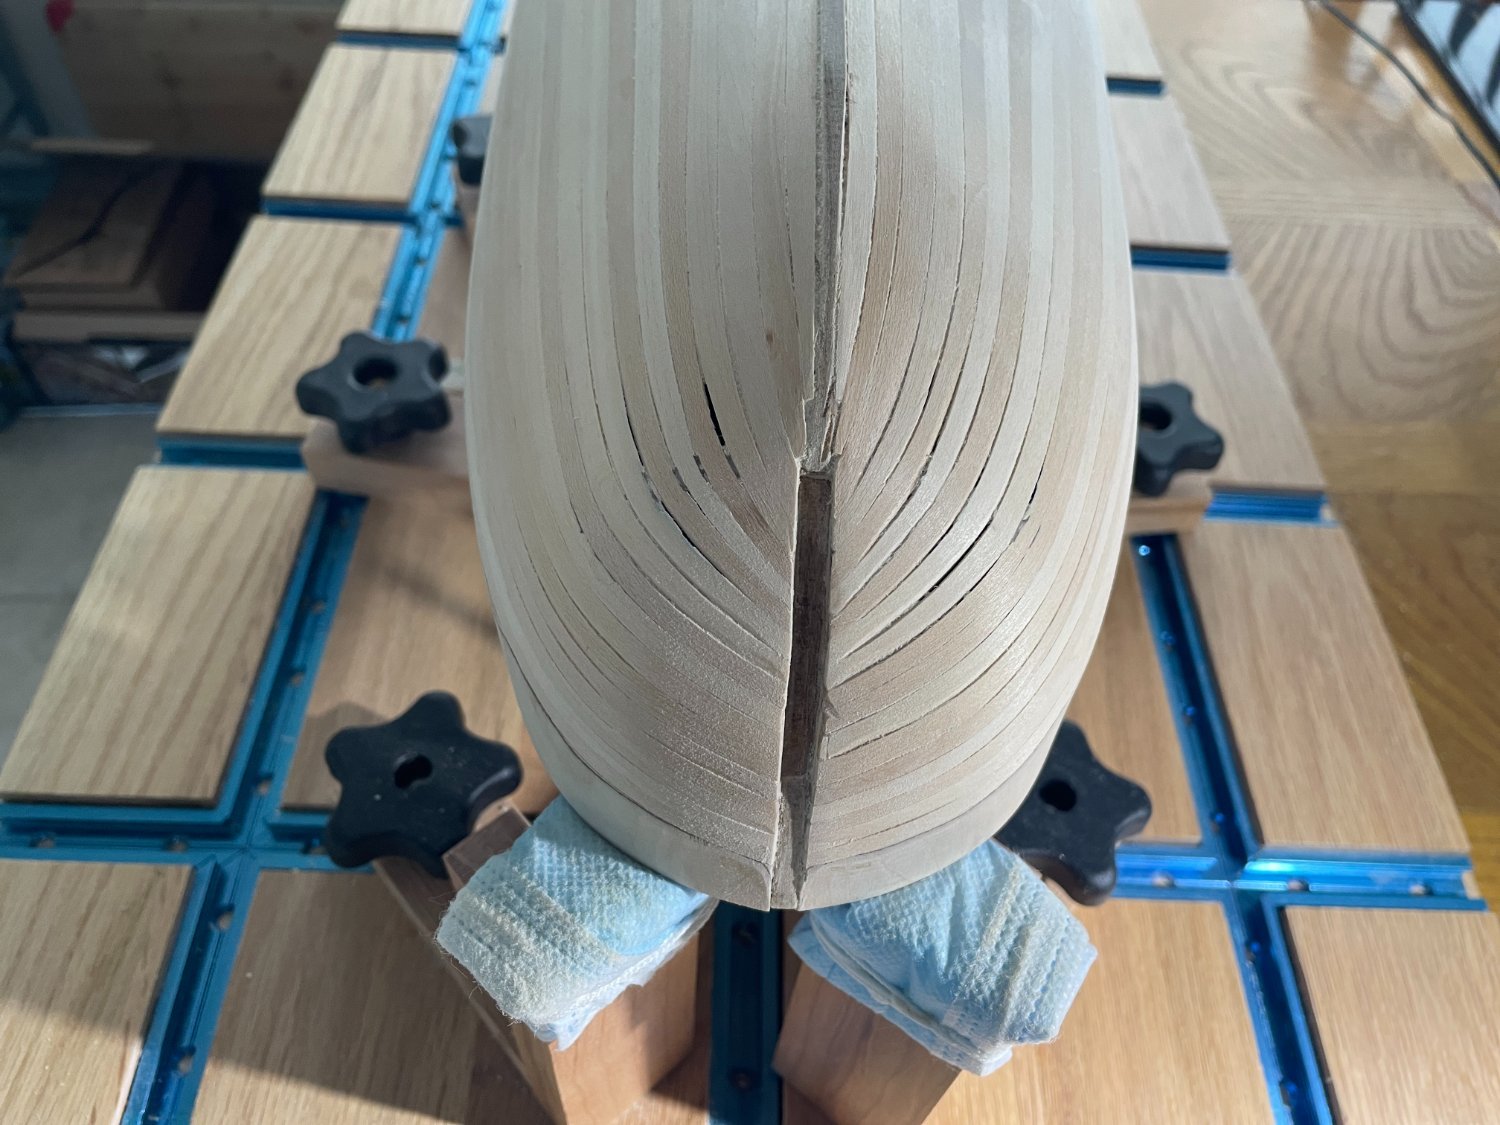
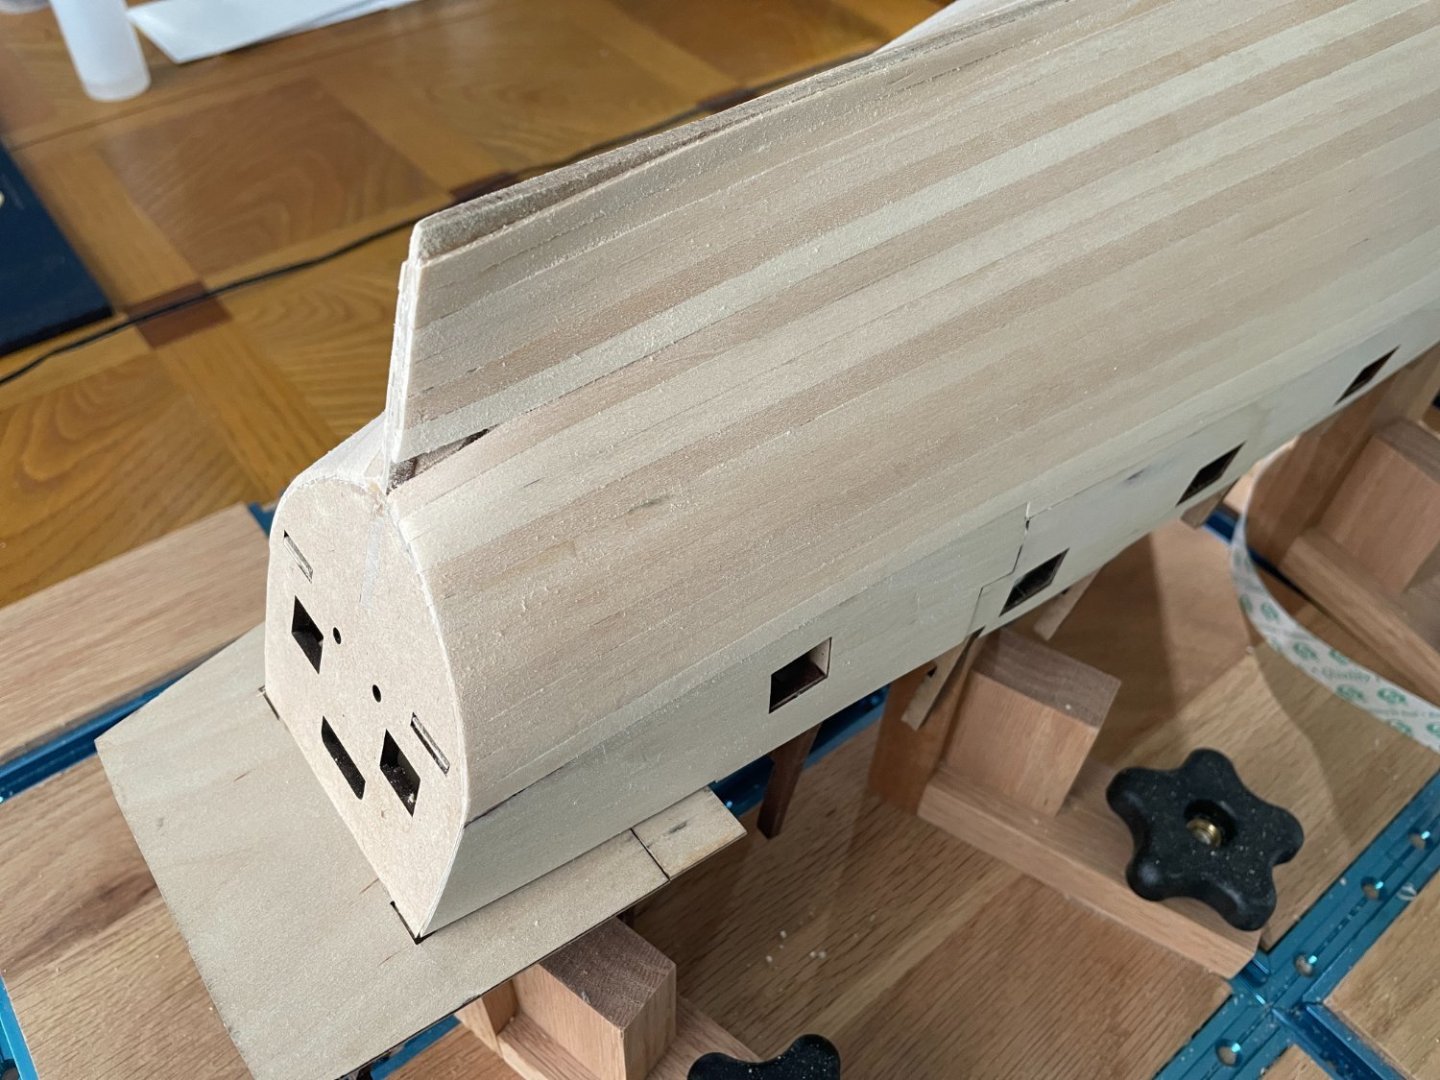
Small wedges at the stern are now filled. I reviewed the tutorials on planking and noted the steps for improvement. I'm starting to layout the hull completely anew for the second planking. Note that the tapes are set at intervals rather than following the bulkheads. It will accomplish the same goal, getting measurements for each sector/band. Temporary battens to follow. However, I will need a week or two break to give my back a rest... but will be back...!

-
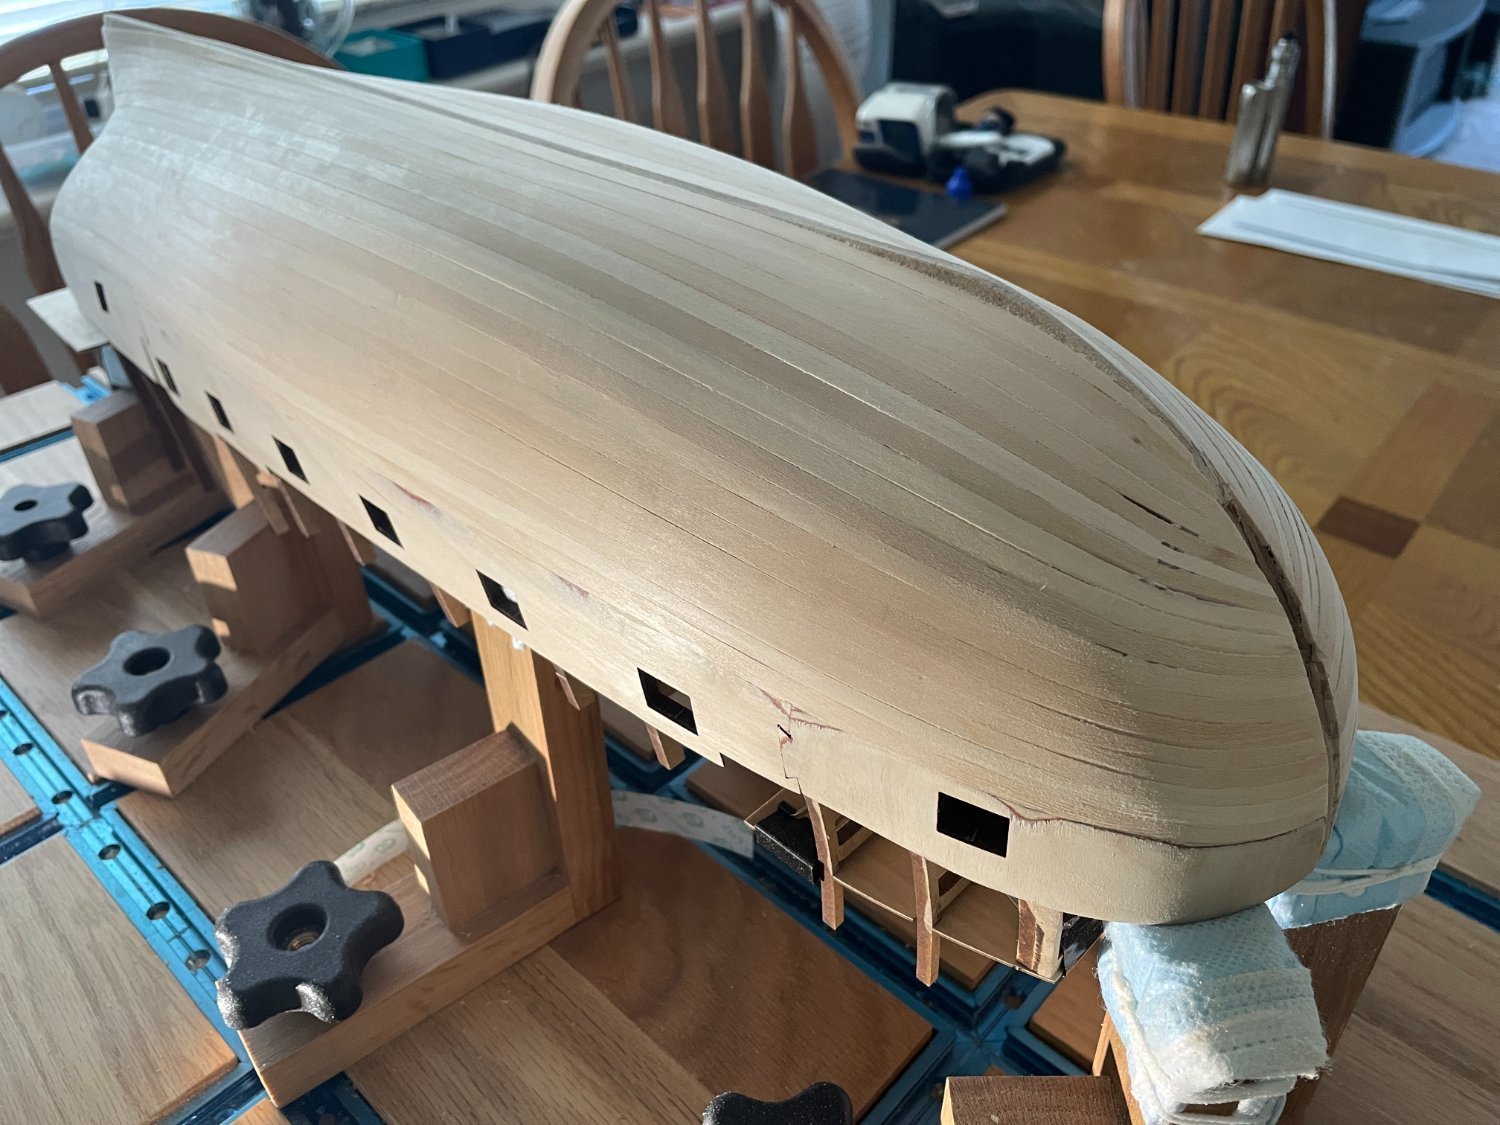
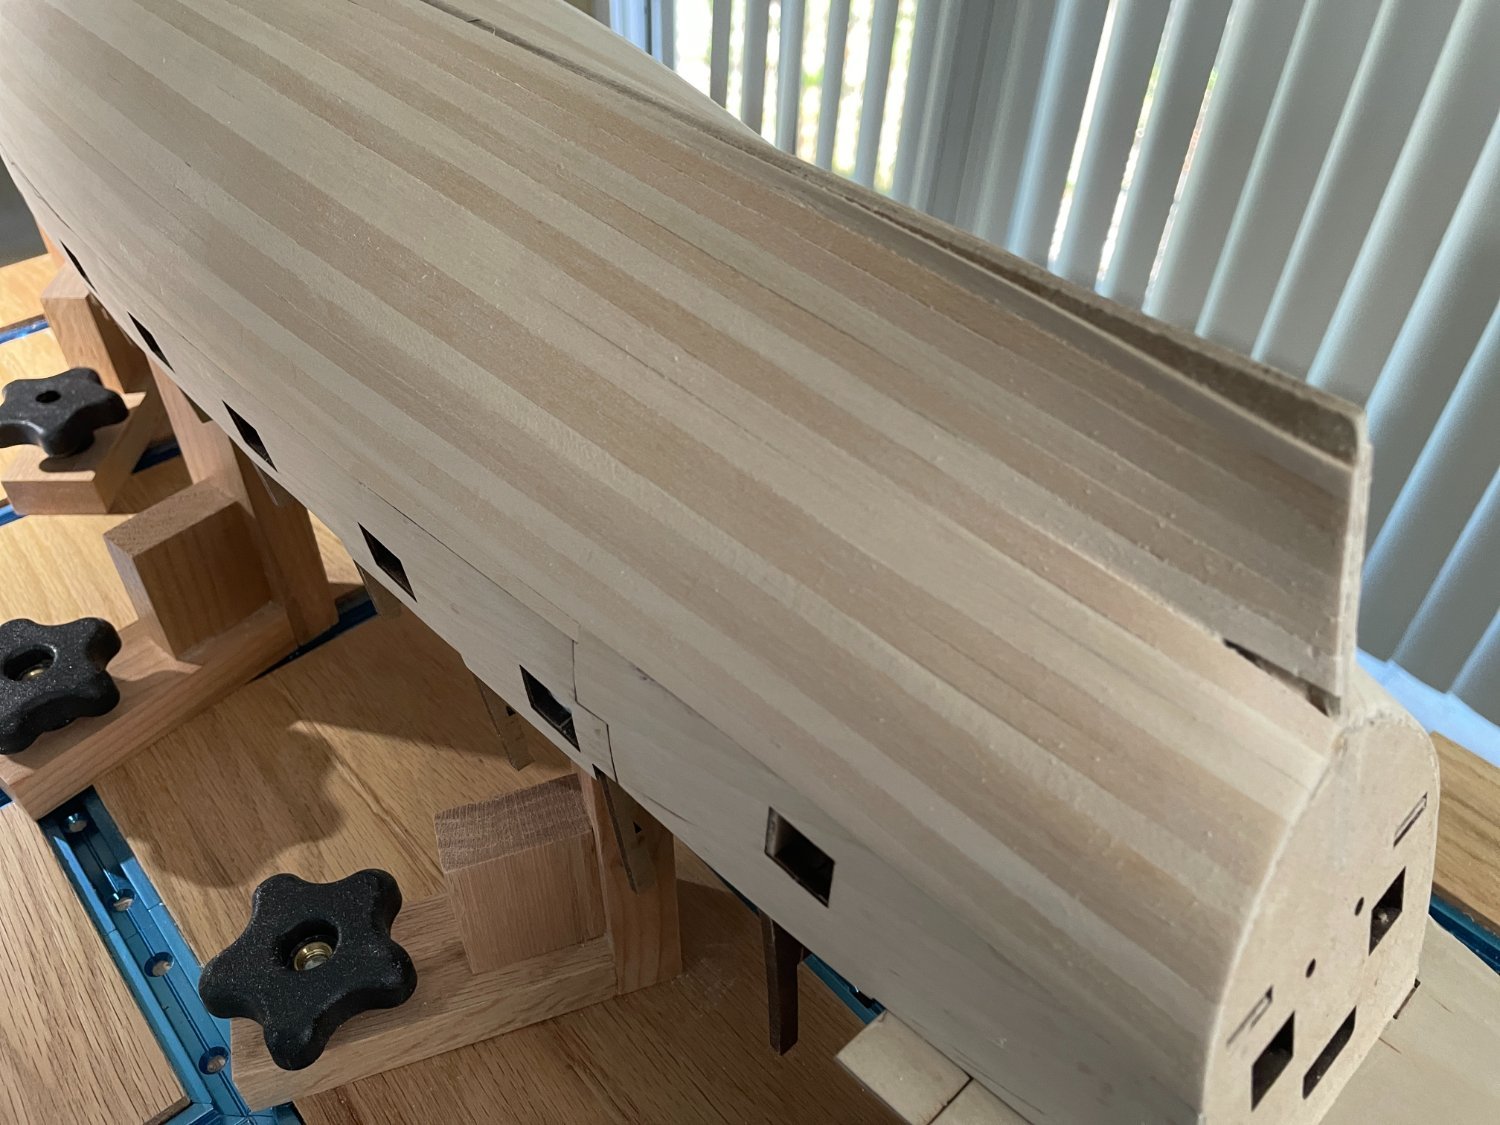
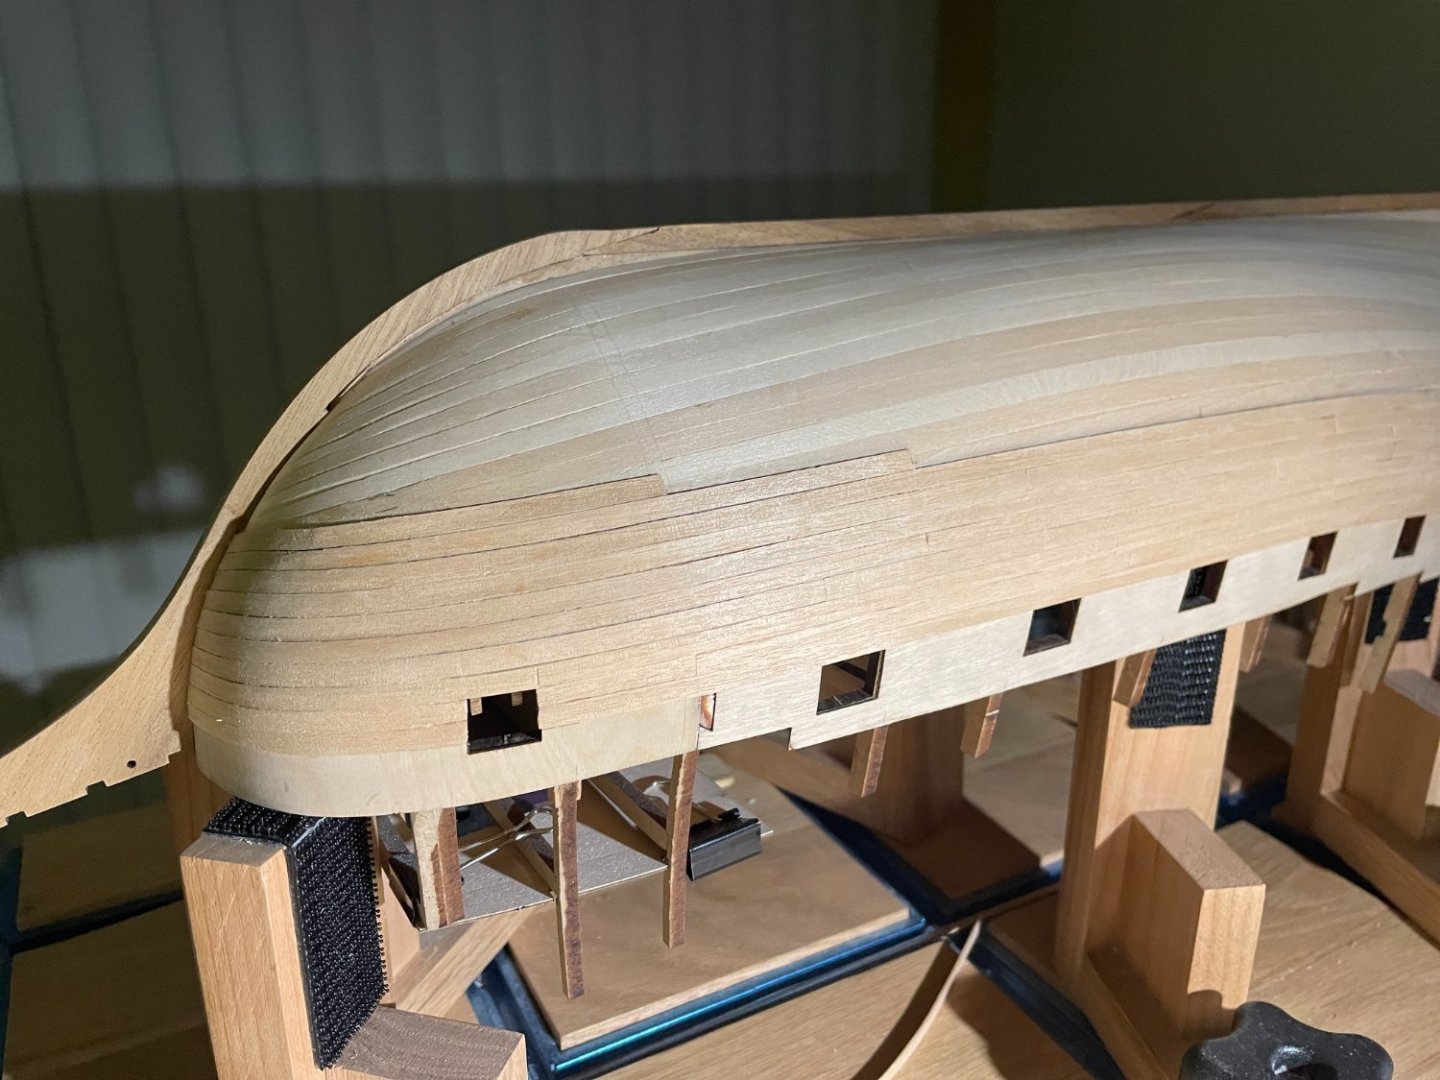
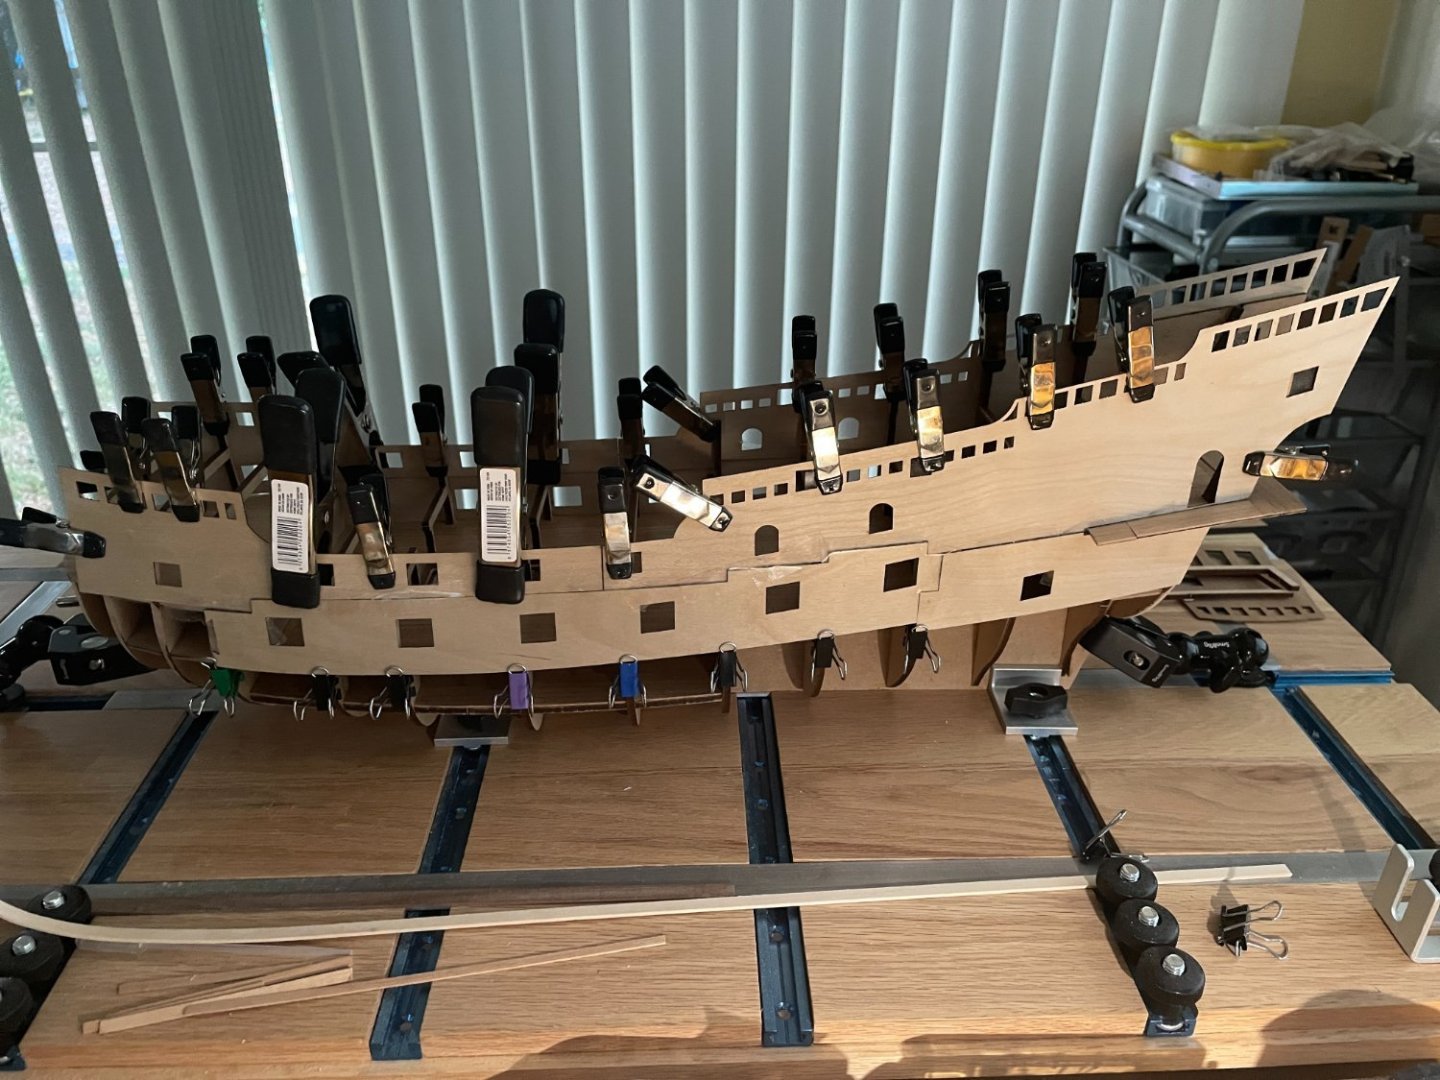
First Planking, mostly done. My first planking on a ship that size with such "curves" It was far more difficult than anticipated. I truly underestimated the "clinker effect". It was ok up to mid hull, then it started to get bad. I had to wet the surface and iron out the planks on the ship. Wood expanded, then shrank, creating hairline space in places.... not the best approach. Surface is ok tho, ready for the finishing step. On the bright end, the sides and back (still doing the wedges) are nice. No spaces, clean and smooth surface. No need for wood putty!! What I learned: Read and re-read the planking tutorial. Spilling planks are a must. Don't underestimate the plank clinker effect. And finally, better define (planning stage) the shape (angle down) of each of the 4 sectors at the bow. Having difficulties there.


-
@Baker, a thousand thanks! Very nice model too... so it is a pleasure to read your log.
-
@Knocklouder, reading again the tutorial, it seen that option (c) would be the most appropriate approach. I forgot about using a 3-inch-wide tape to define the curvature of the plank. I will try that. Thanks.
-
Question about planking heavy curves (bow). This is my first large ship with pronounced "curves". If you look at the pictures (now sanded partially), you will see that I have a significant "clinker" effect (is it the right term? I mean plank binding upward at an angle with curvature) as I progress planking upward. The question is how to avoid it in the first place. a) should I have tapered all the planks below a little more to start with, basically better planning, to avoid a compounding-effect later? b) should I have considered doing a drop plank to reduce the effect when it started mid-bow? c) Should I have bent upward (against the grain) to reduce this effect and keep going? d) I have a problem in the planning of the bow. Mainly the width of the planks since (due to the drop with the vertical curvature) there is no definitive end-point for calculation (like with the side of the ship). Your help is very much welcome... I can apply a better technique for the second planking. Cheers,

-
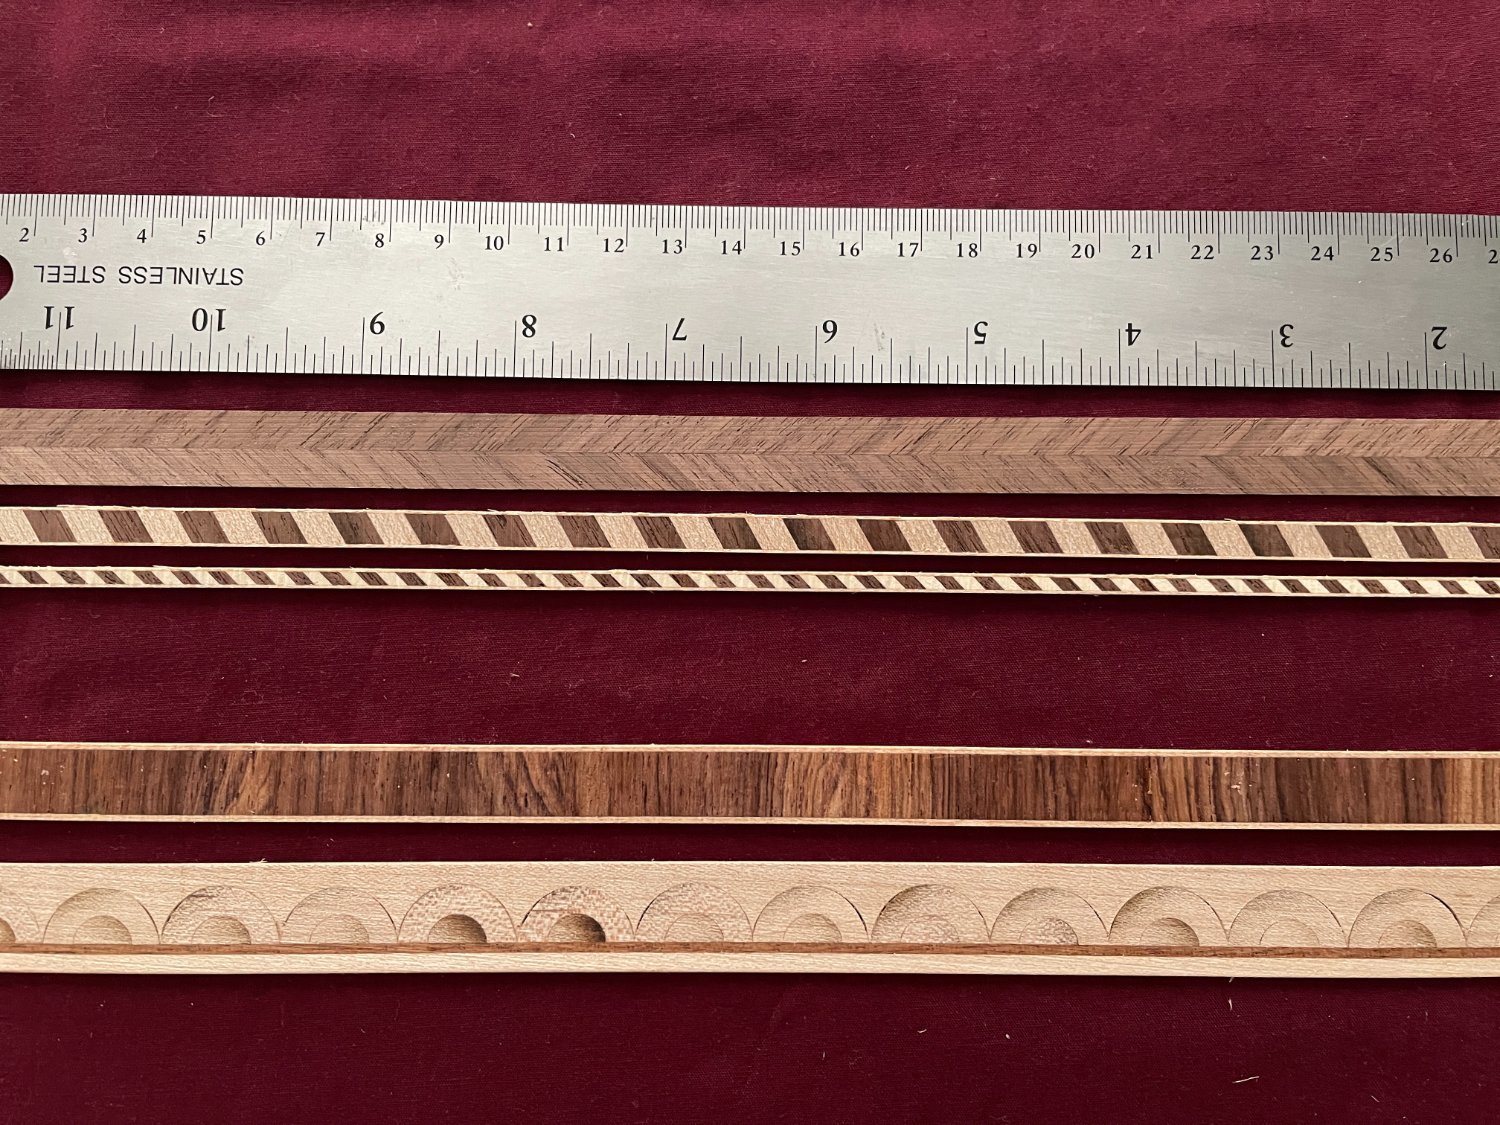
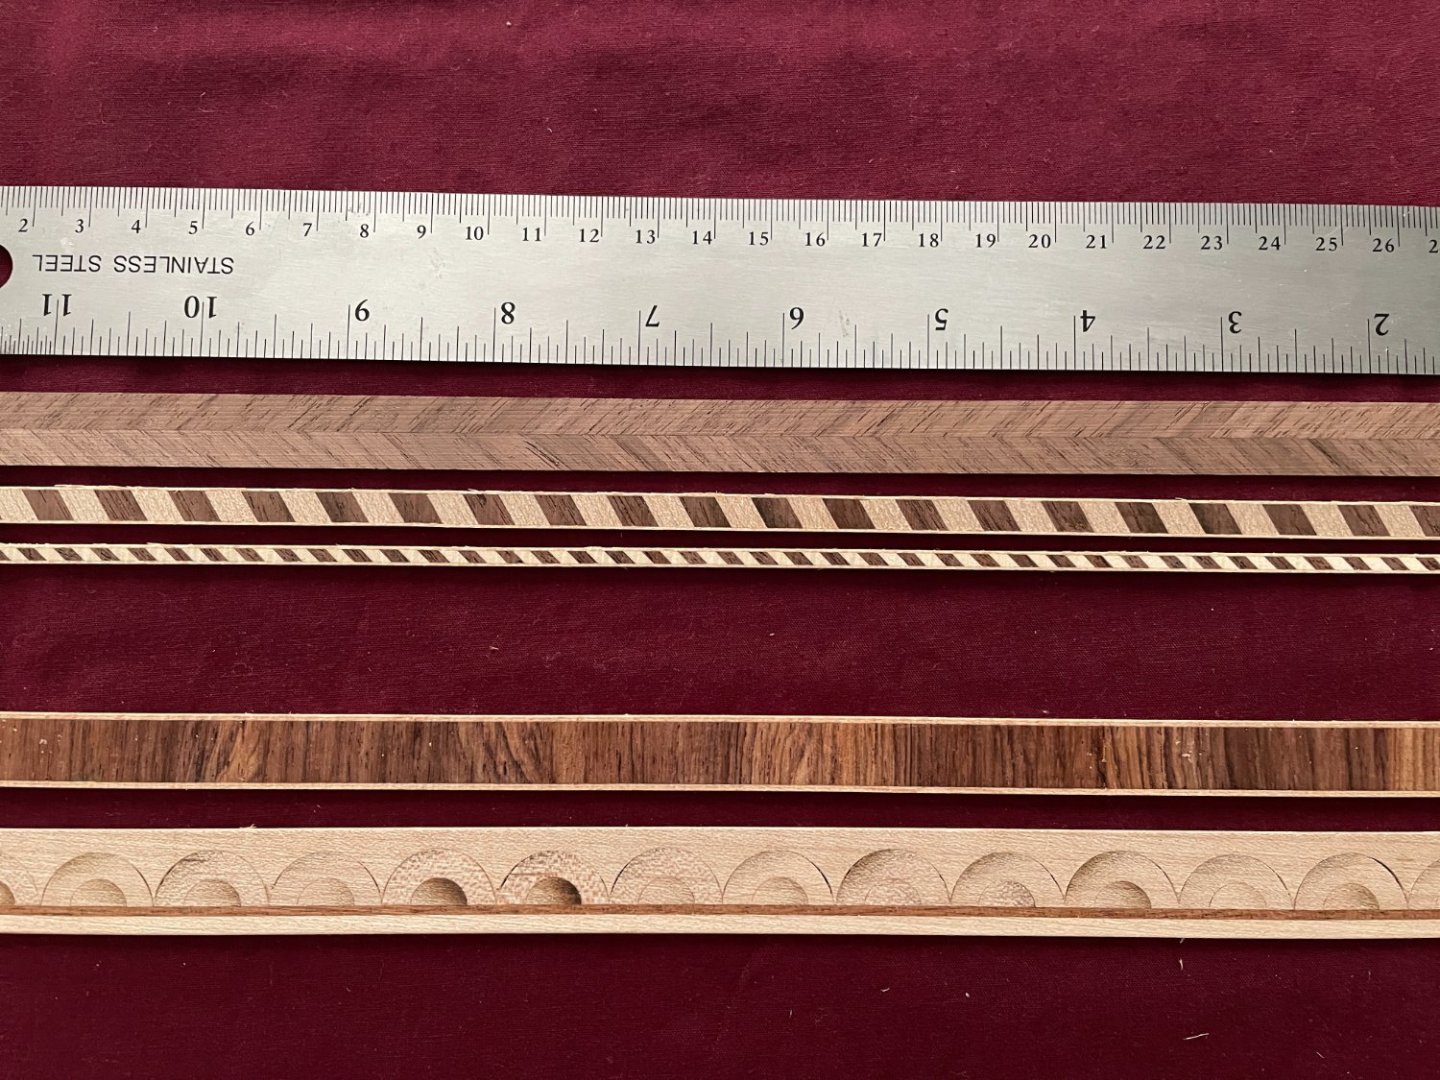
About Inlays. This is what I'm thinking (see picture). The "feather pattern" (top one), on the side, along with a number of walnut strips. Nothing really fancy, a simple outlook. The two below, likely for deck wall decoration, again with walnut strips for accent. The last two, unlikely. The one with the vertical pattern may clash due to the color. The moon-cycle inlay is nice (loving it)... but maybe it's too wide. Let me know what you think. Would truly appreciate all your comments.
-
@Baker, you are more than welcome... BUT it is going away fast 😉 @AllanYed, a thousand thanks for the reference and comments. I will definitively look it up. The printed sections from the kit are in fact nice. I just like the look and feel of wood. Hiding it behind paint/decal just makes me cringe. It may end NOT historically accurate to use alternative, but I may just prefer the look. What if the "Revenge" was sold, late in its life, to a rich merchant that revamp it a little (hey!). Still few weeks to think it out over.
-
Dam... it won't fit!!!

-
hey Jack, my pleasure... this is why we make logs. Enjoy your build, it is all about the journey. Have Fun!
-
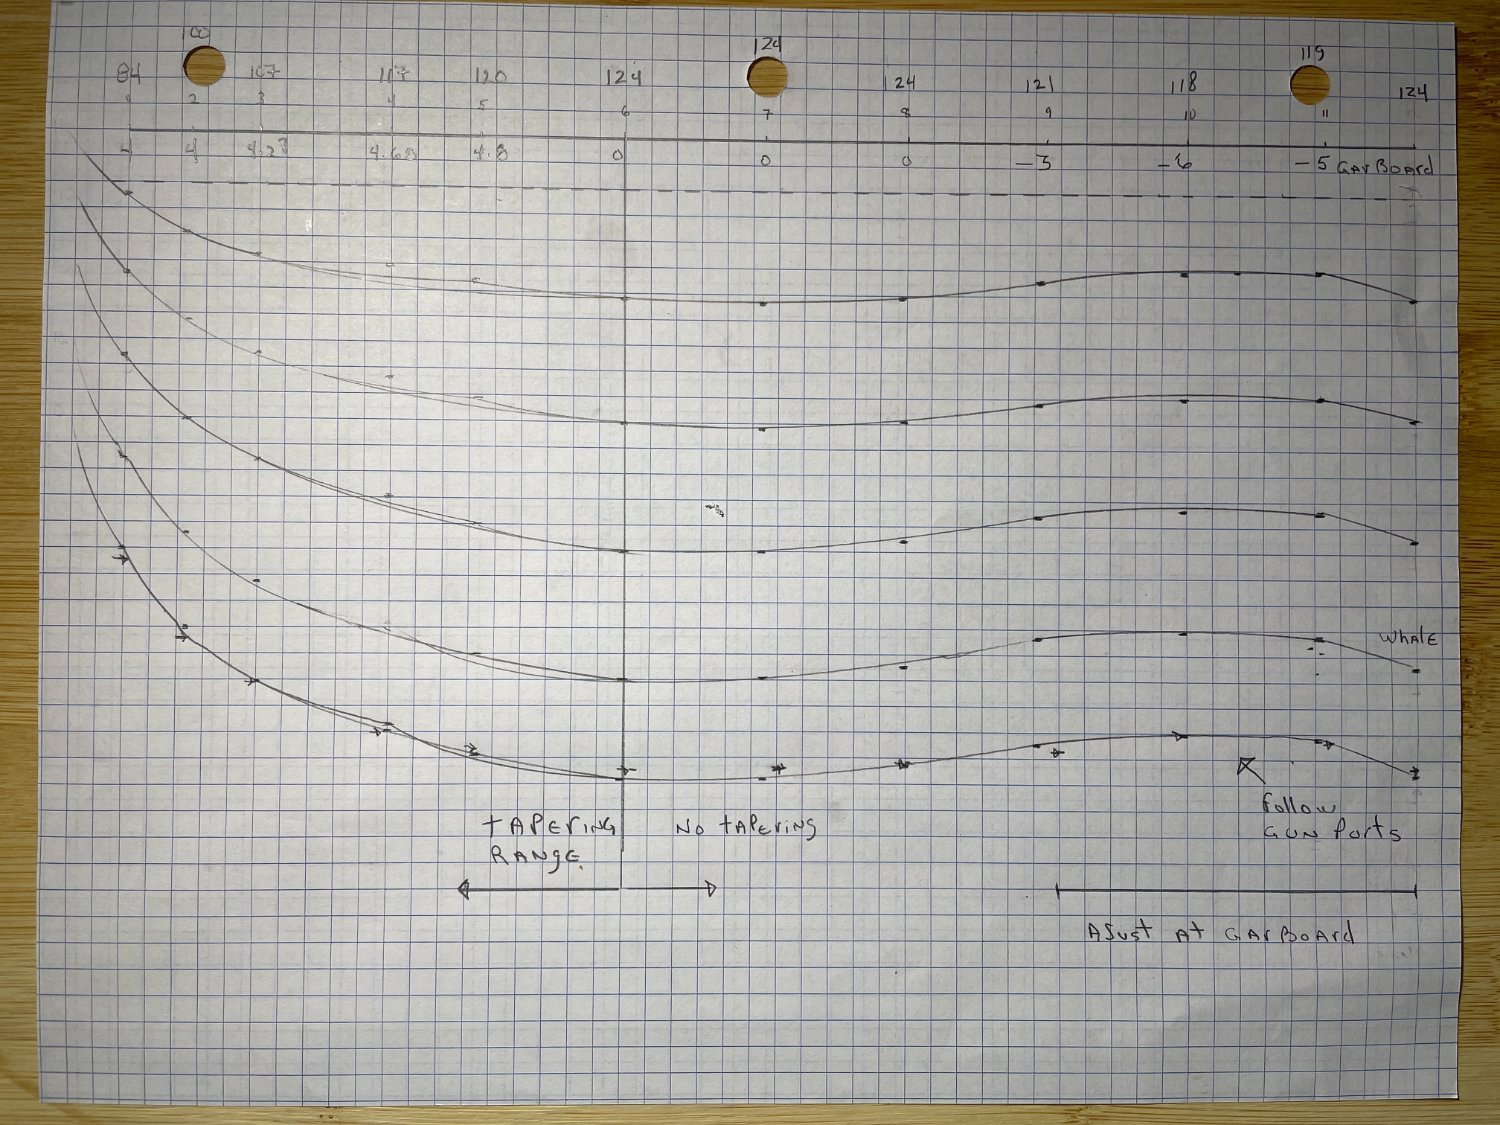
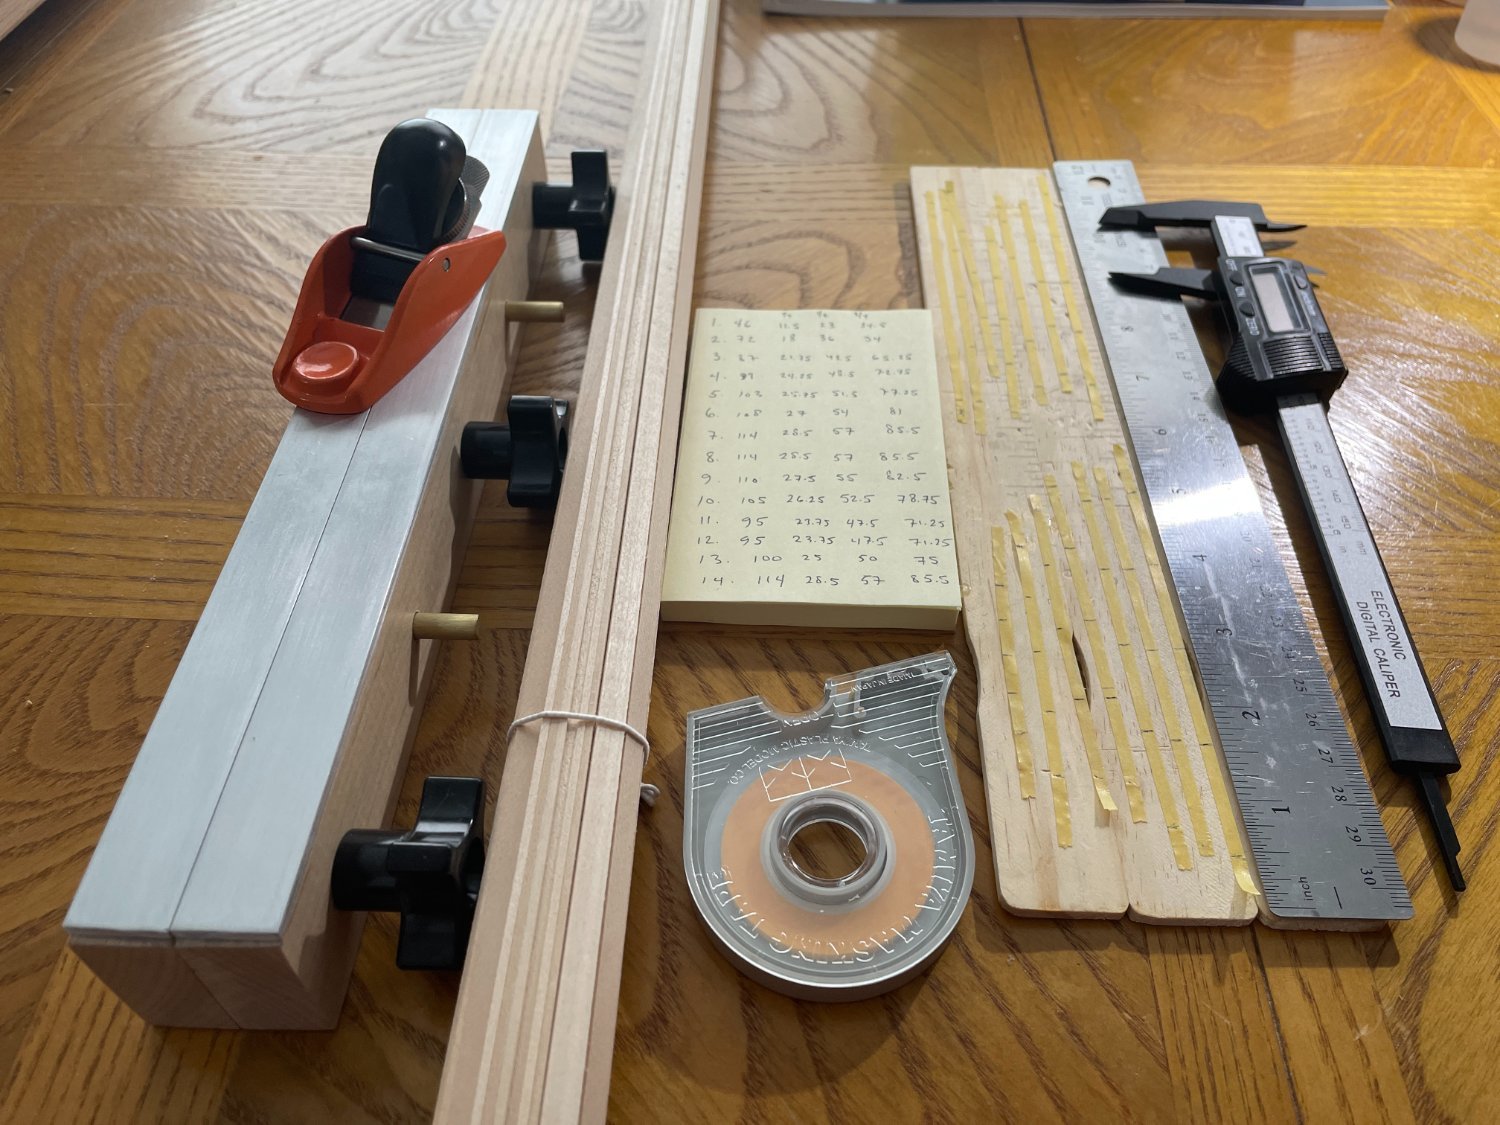
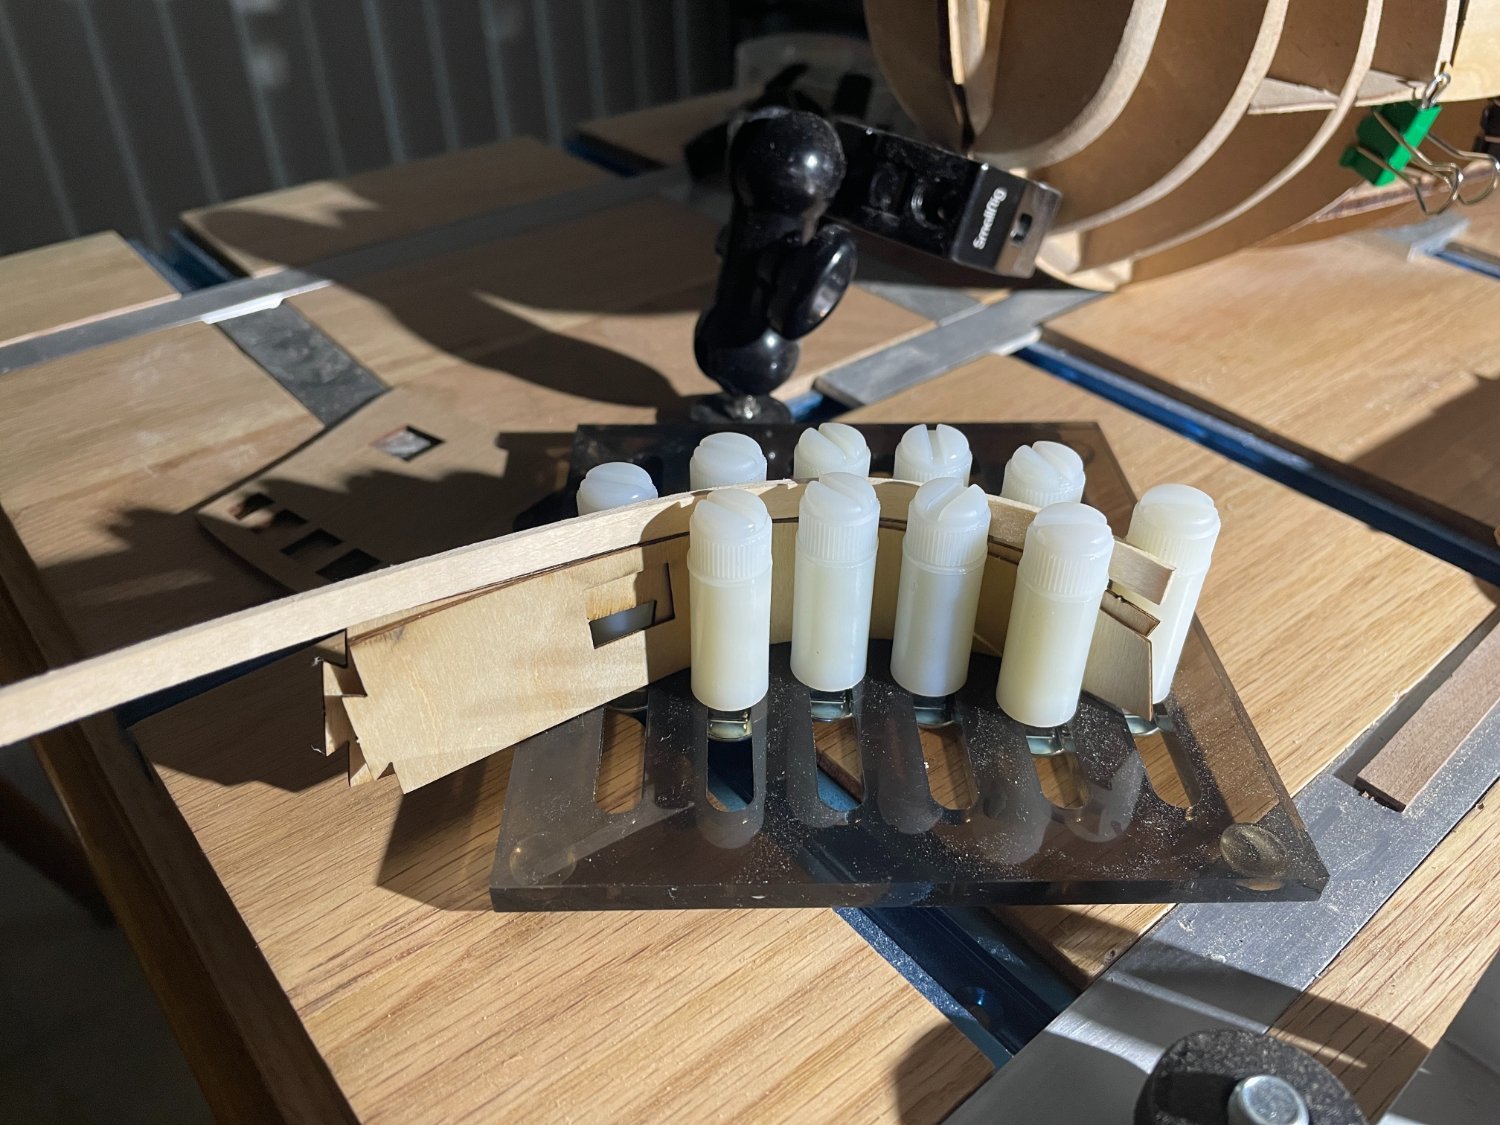
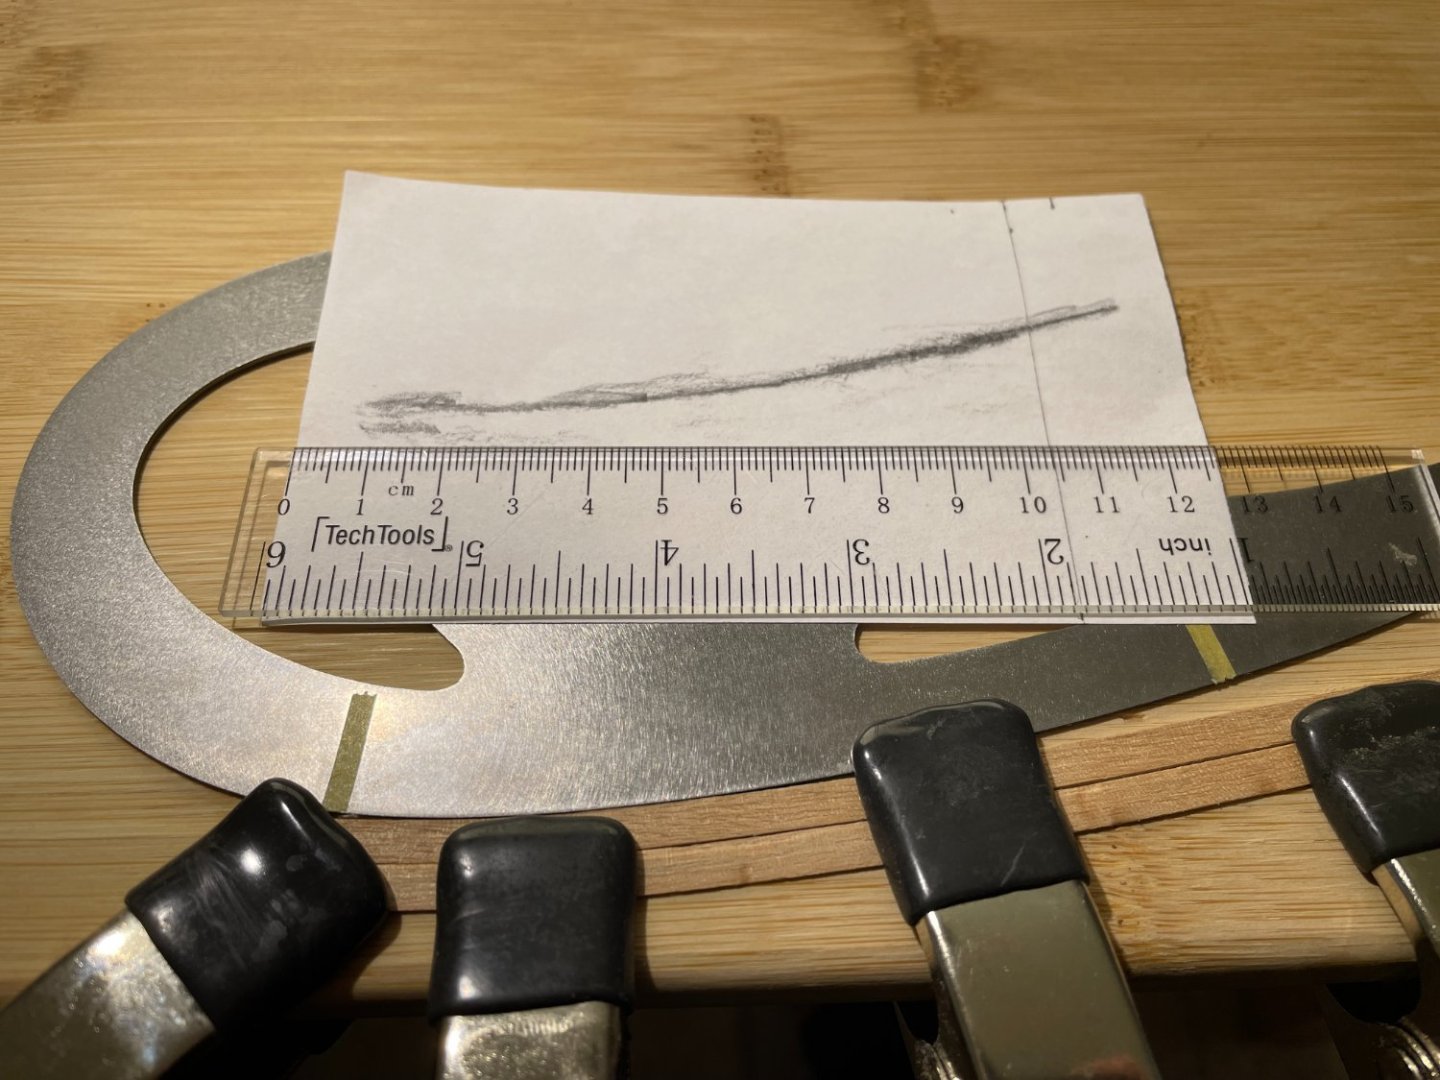
This ship has curves, which is nice aesthetically but harder for planking. Here's my process. 1. I measured the length at each bulkhead, then defined the optimal plank width at each position (Fig 1). 2. I used a mini planer to trim the planks. I did a batch of 4 (x2) at a time (Fig 2). The edge remains flat with a nice tapering. Don't forget to mark the tapered edge. 3. Using a curly iron, I give the plank its rough shape, primarily at the bow. THEN, 4. I slightly wet the plank using a rag (5 sec no more), then I attached it without glue (Fig 3). 5. Using a hair dryer, I then dry on the ship. Repeat 2x (wetting then dry), leave alone 15 min, then dry again (until completely dry). Figure 4 shows the upper plank in place WITHOUT any glue... a nice fit. It was then glued in place. Rinse and repeat.....


-
Thanks, it is fun to keep a log. Agree with you... we can't keep bad back away from building models. Just need to pace ourselves and keep having fun!
-
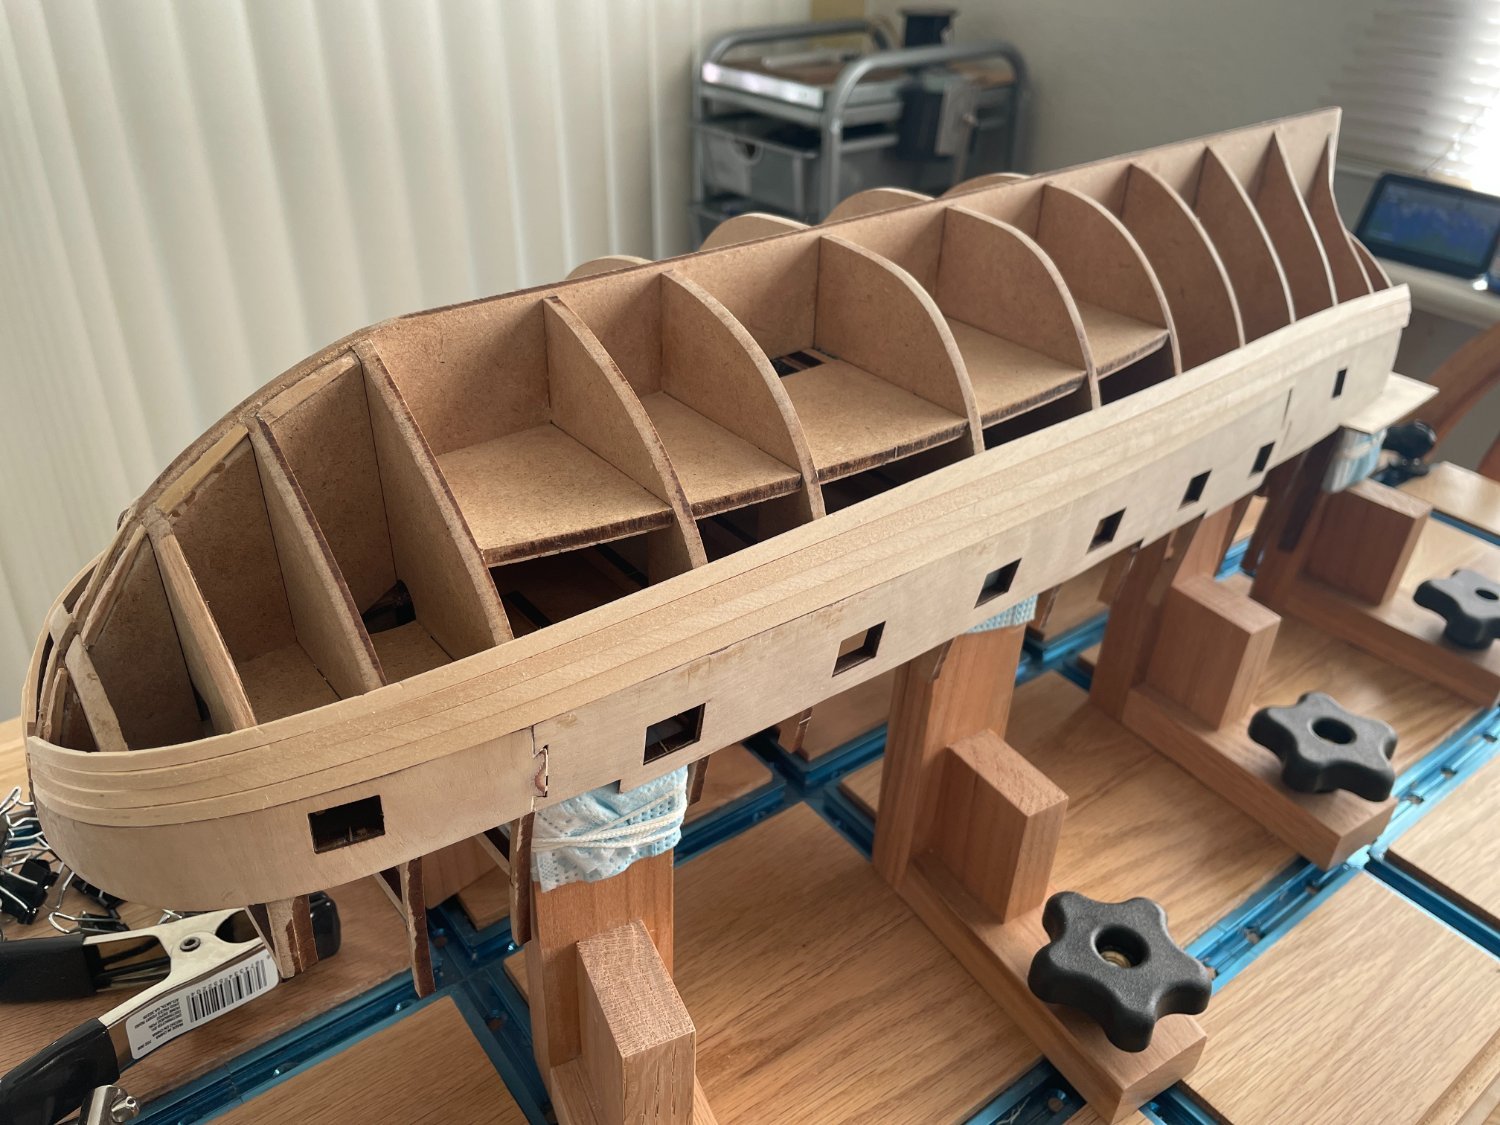
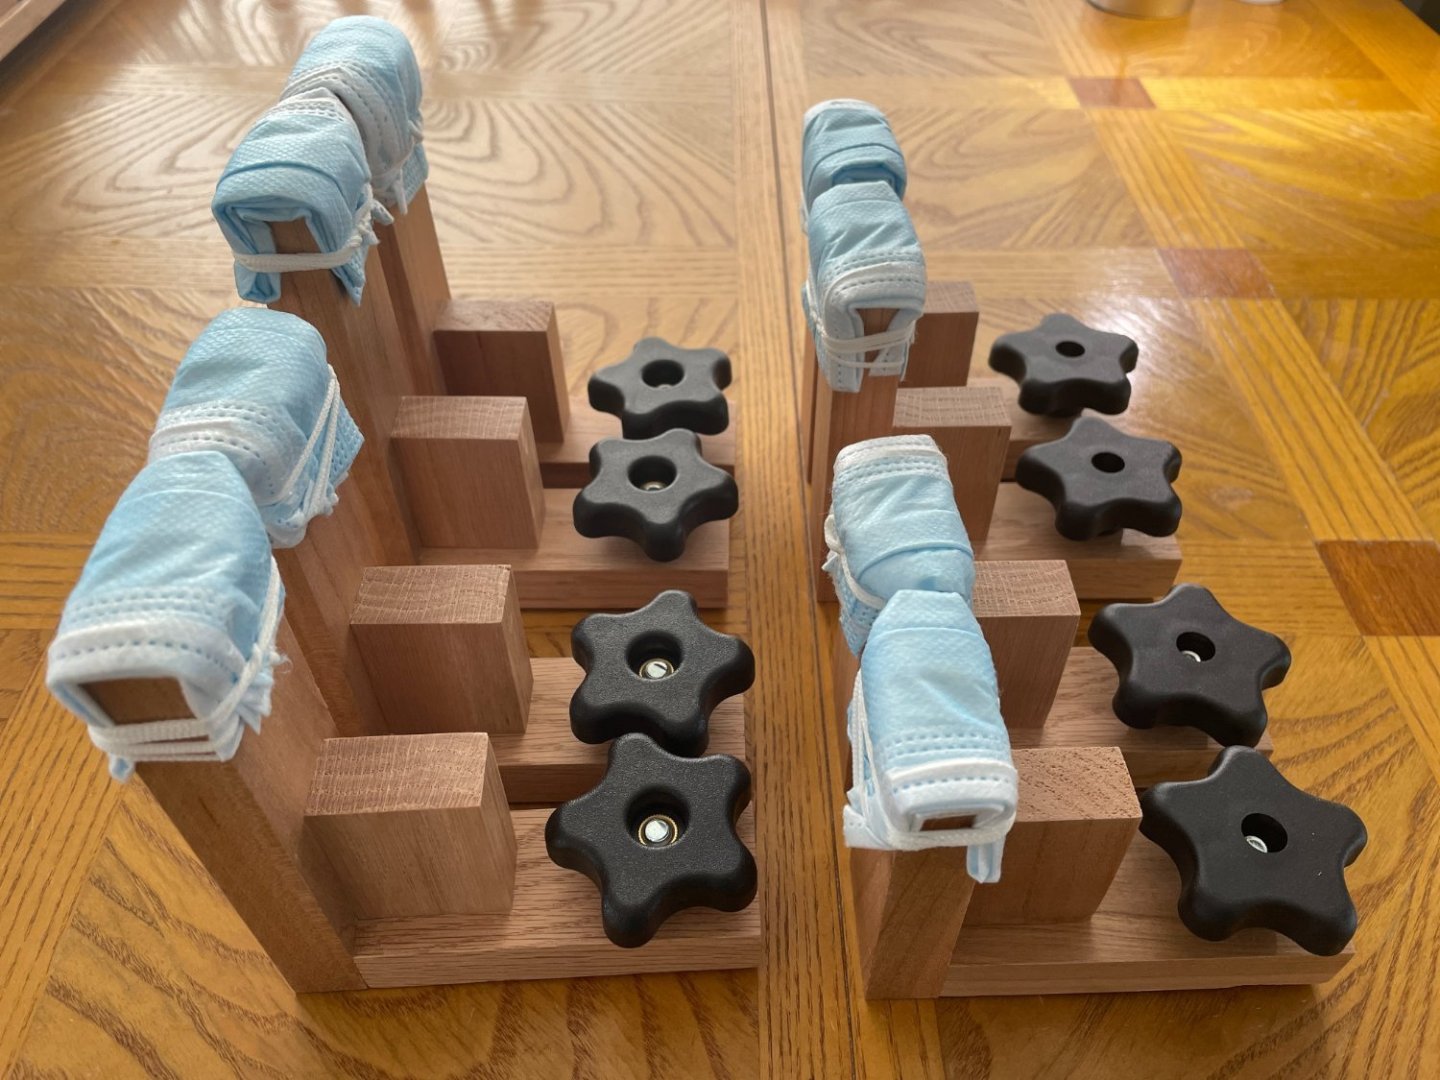
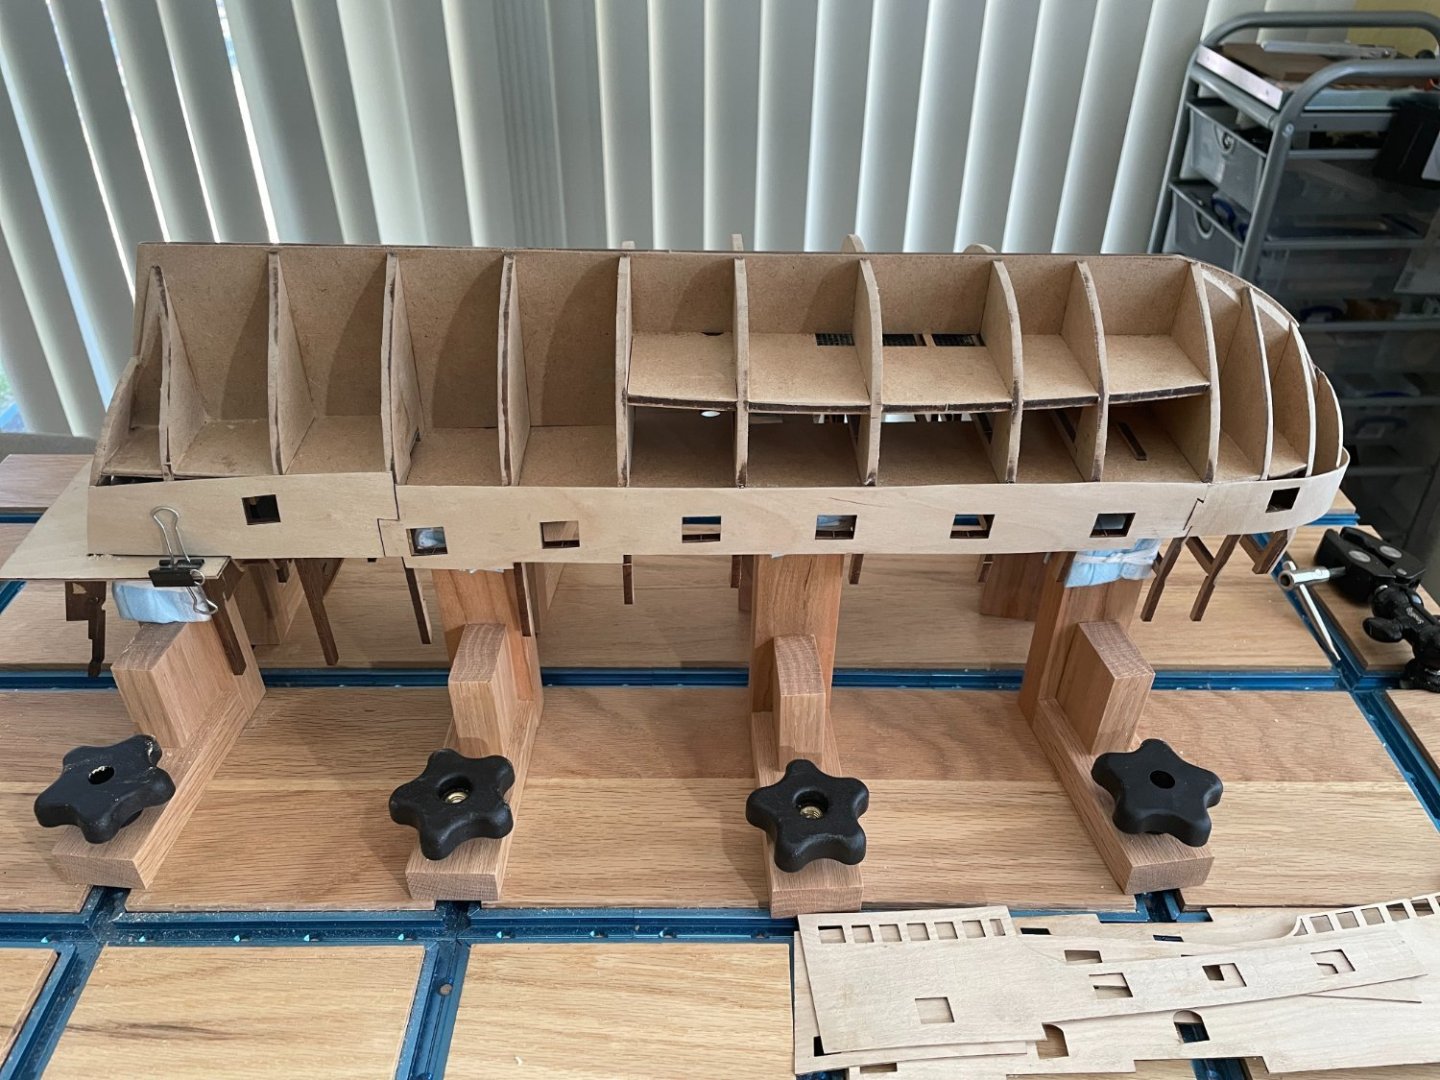
In planning for the first planking, I built a number of stands to invert the ship and keep the bulkhead off the ground. Having a worktable with rails will be handy here. Note: found a use for the many masks left over from the pandemic. The worktable is set on 2 feet circular "Lazy Susan", which allow me to rotate the table and work on either side without having to handle the ship.
-
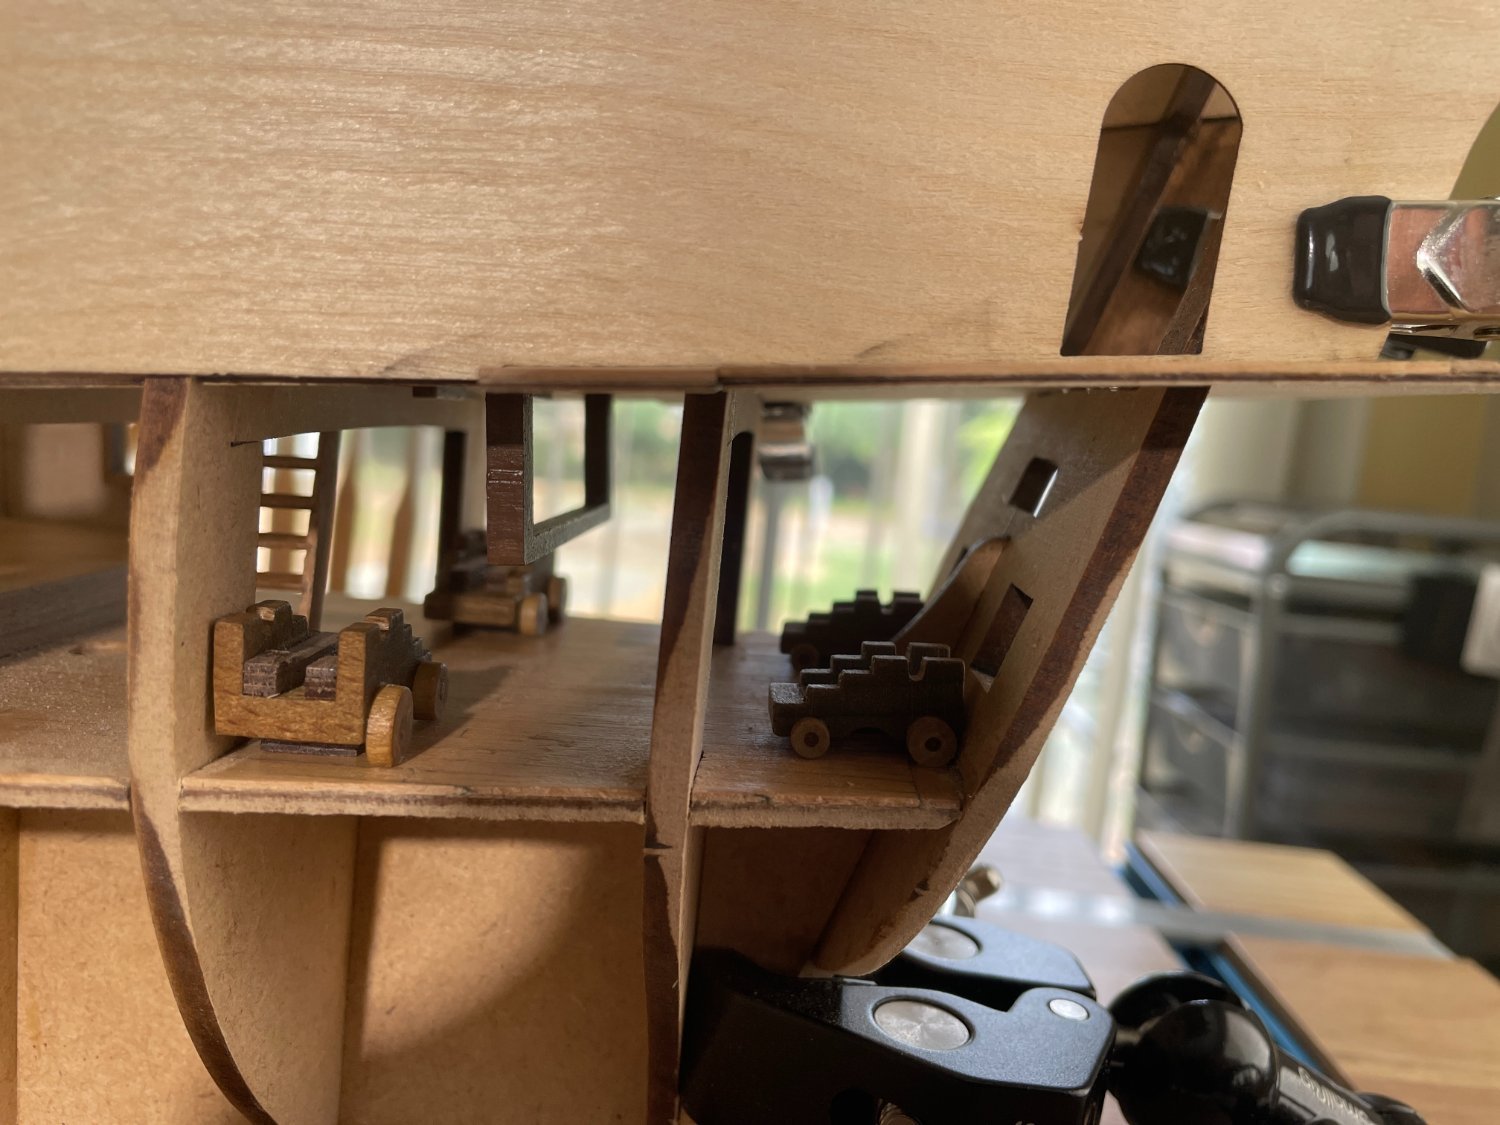
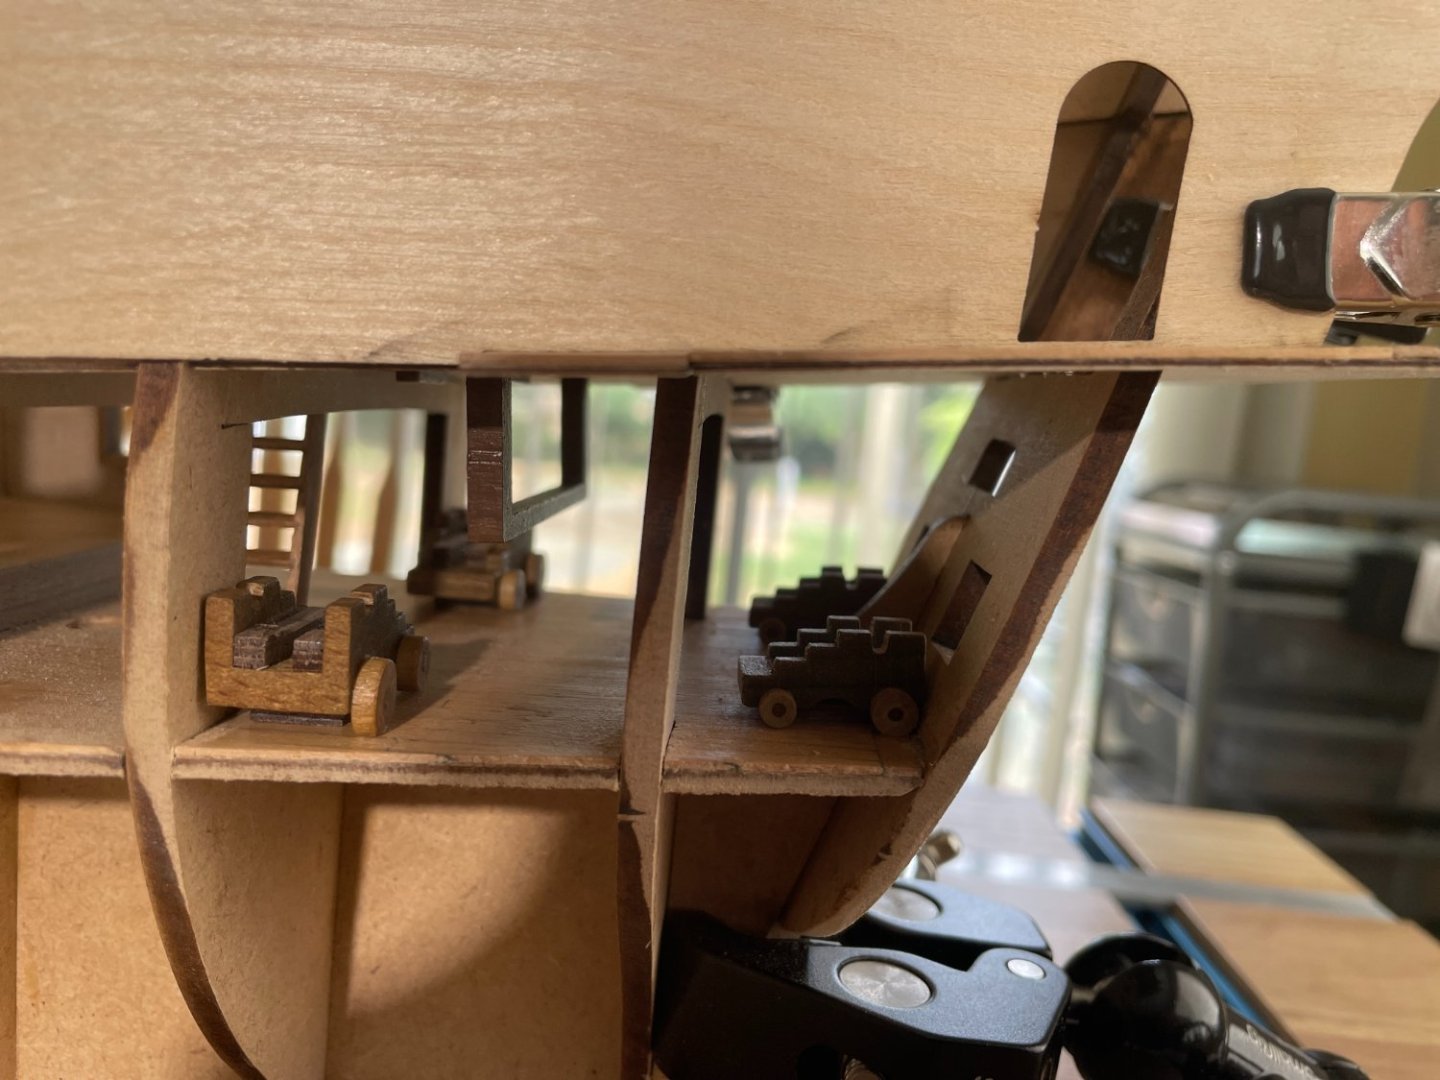
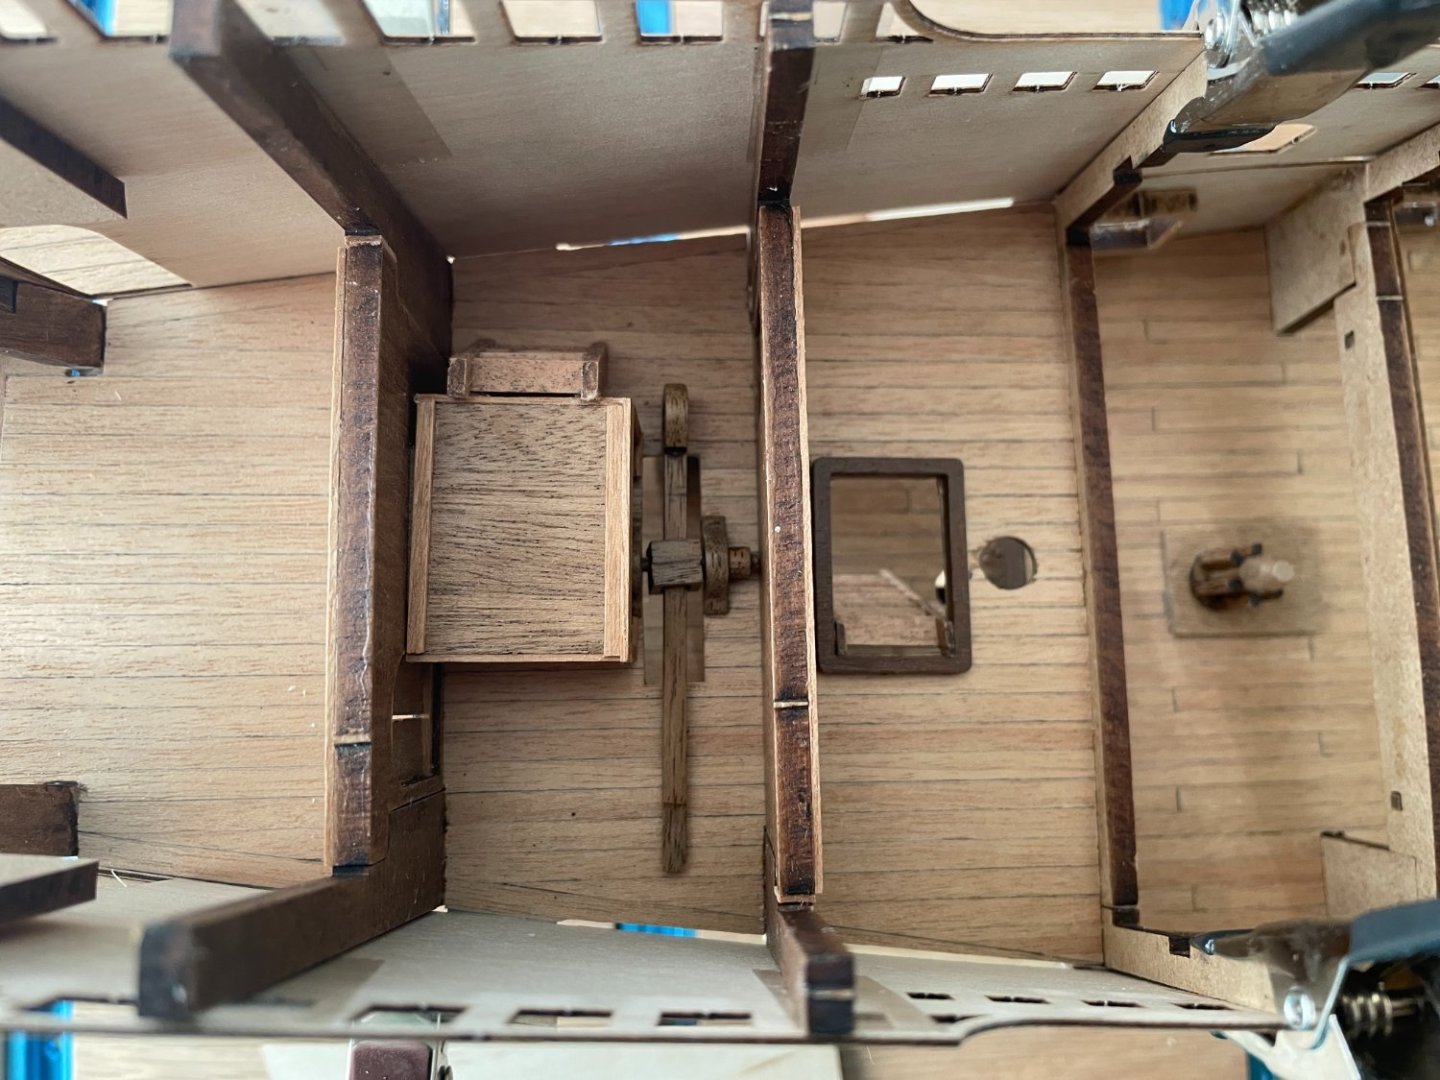
The middle lower portion of the side panel was glued in place and the gun carriages are set inside.


-
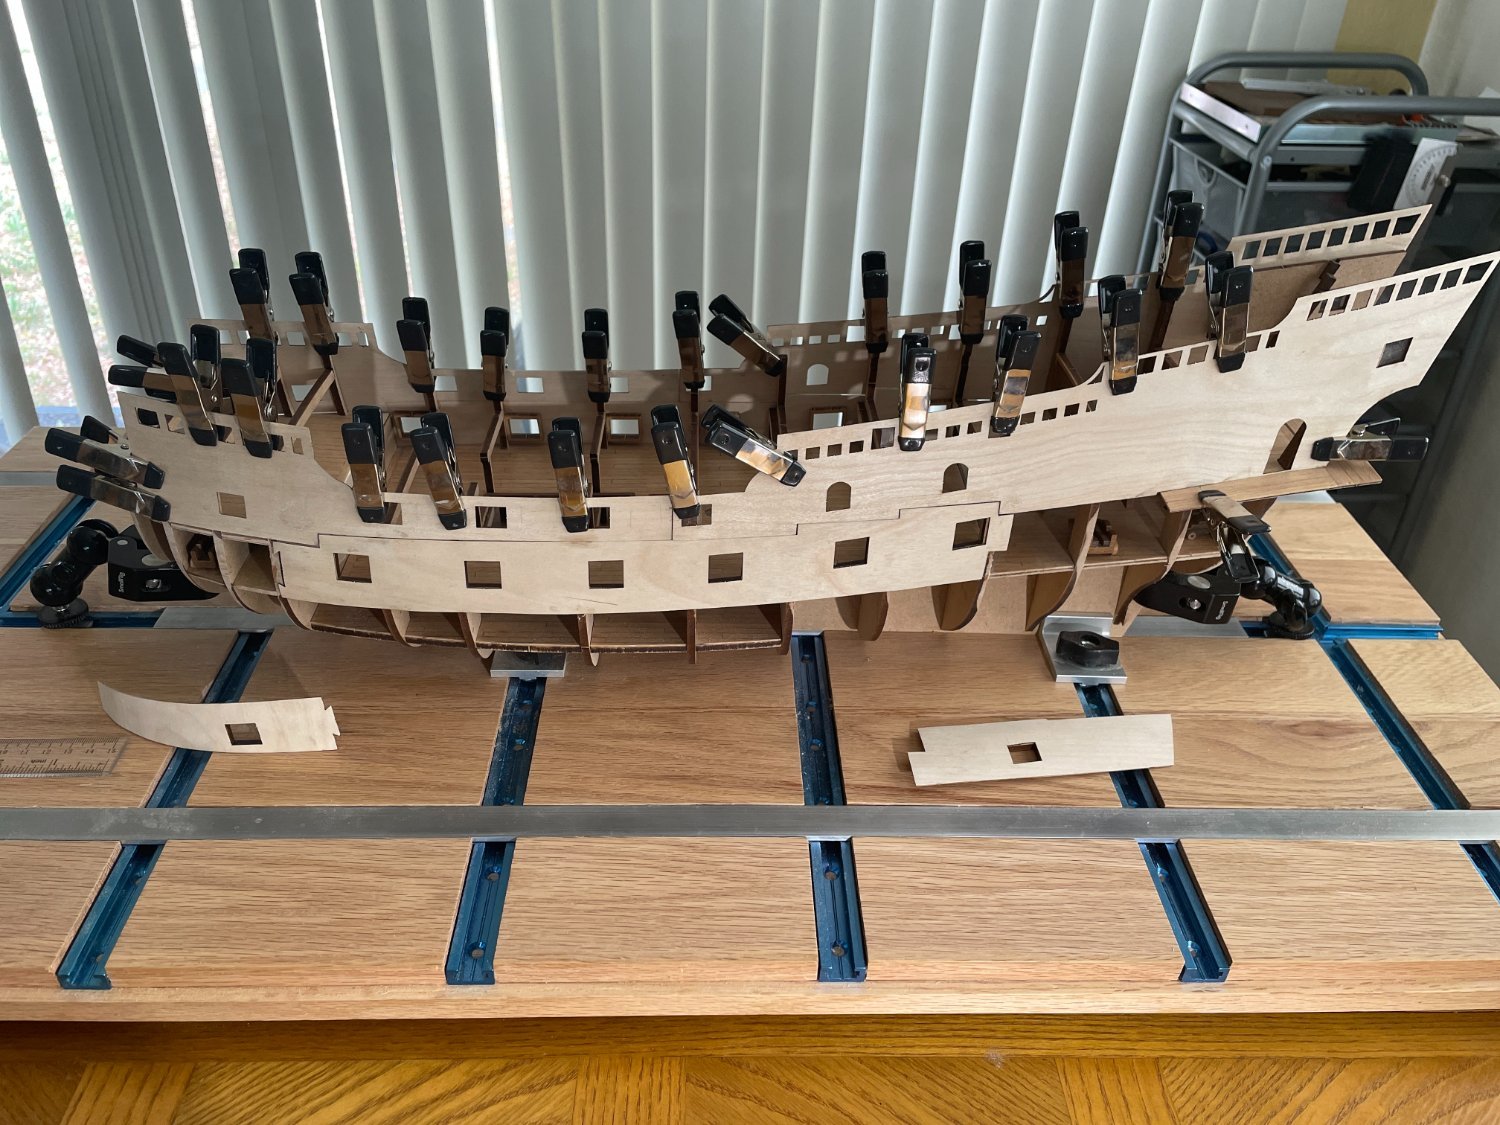
Wet the side walls lightly and leave it dry on the ship for a few days, then finish the curvature with a steam iron. The front parts required more aggressive bending using a small jig. The frames for the gun-ports were glued off-ship, but require close fitting back and forth to the ship... a very close fit.
-
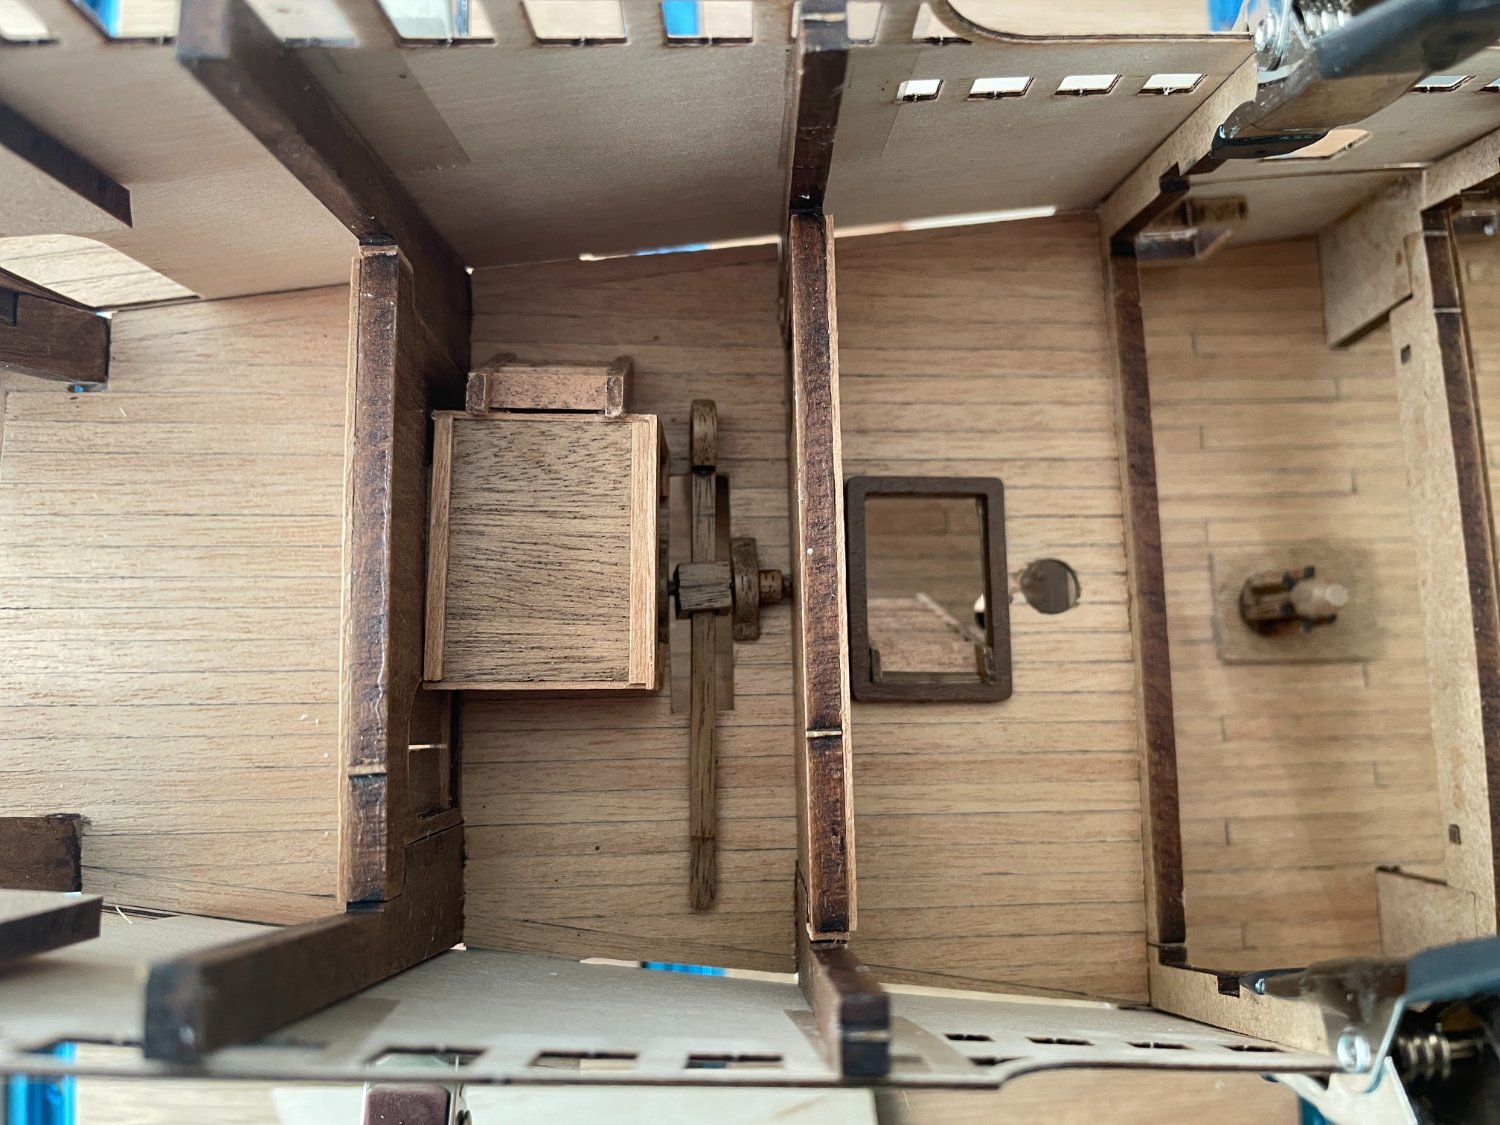
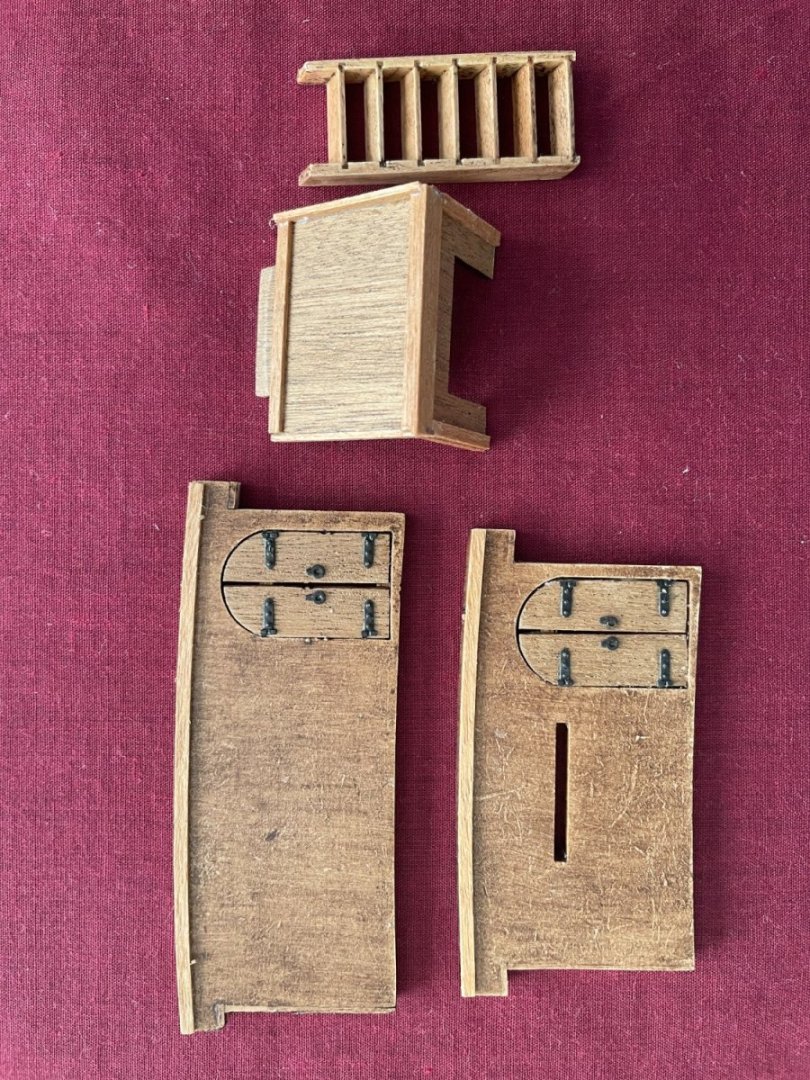
Greetings all, a small update. Painted internal walls, added doors and assembled a small platform. Glue to the ship and set the staircases.

-
Without it.... I would spend 12 hrs. a day building. This is a great hobby. Great to meet you all.
-
My god.... such a nice model. Are you serious about potentially releasing it as POF kit. If yes, I'm 100% in. On the same line of the semi-scratch build Winchelsea but POF (than would be so nice)? A rigged version would great... I'm a fan of rigged model. Still have no room for a bunch of power tools even mini ones (the reason I'm looking for semi-scratch build). I was looking around for such a kit... but almost all are Chinese manufacturer. CAF model seen ok... but would 300% prefer a model from Chuck and Co. Let us know if you have a timeline. cheers, --loracs