Loracs
-
Posts
297 -
Joined
-
Last visited
Content Type
Profiles
Forums
Gallery
Events
Everything posted by Loracs
-
 Rigging: Not quite what I was expecting. It is far harder and slower than I thought. I had to redo things a few times to get the results I wanted. Hopefully, it gets easier over time.... I know, wishful thinking. Slow progress but progress nonetheless. Note: It is a very tight fit with served 1.2mm line.... very tight. I learned earlier that anything larger won't fit if you serve the line.
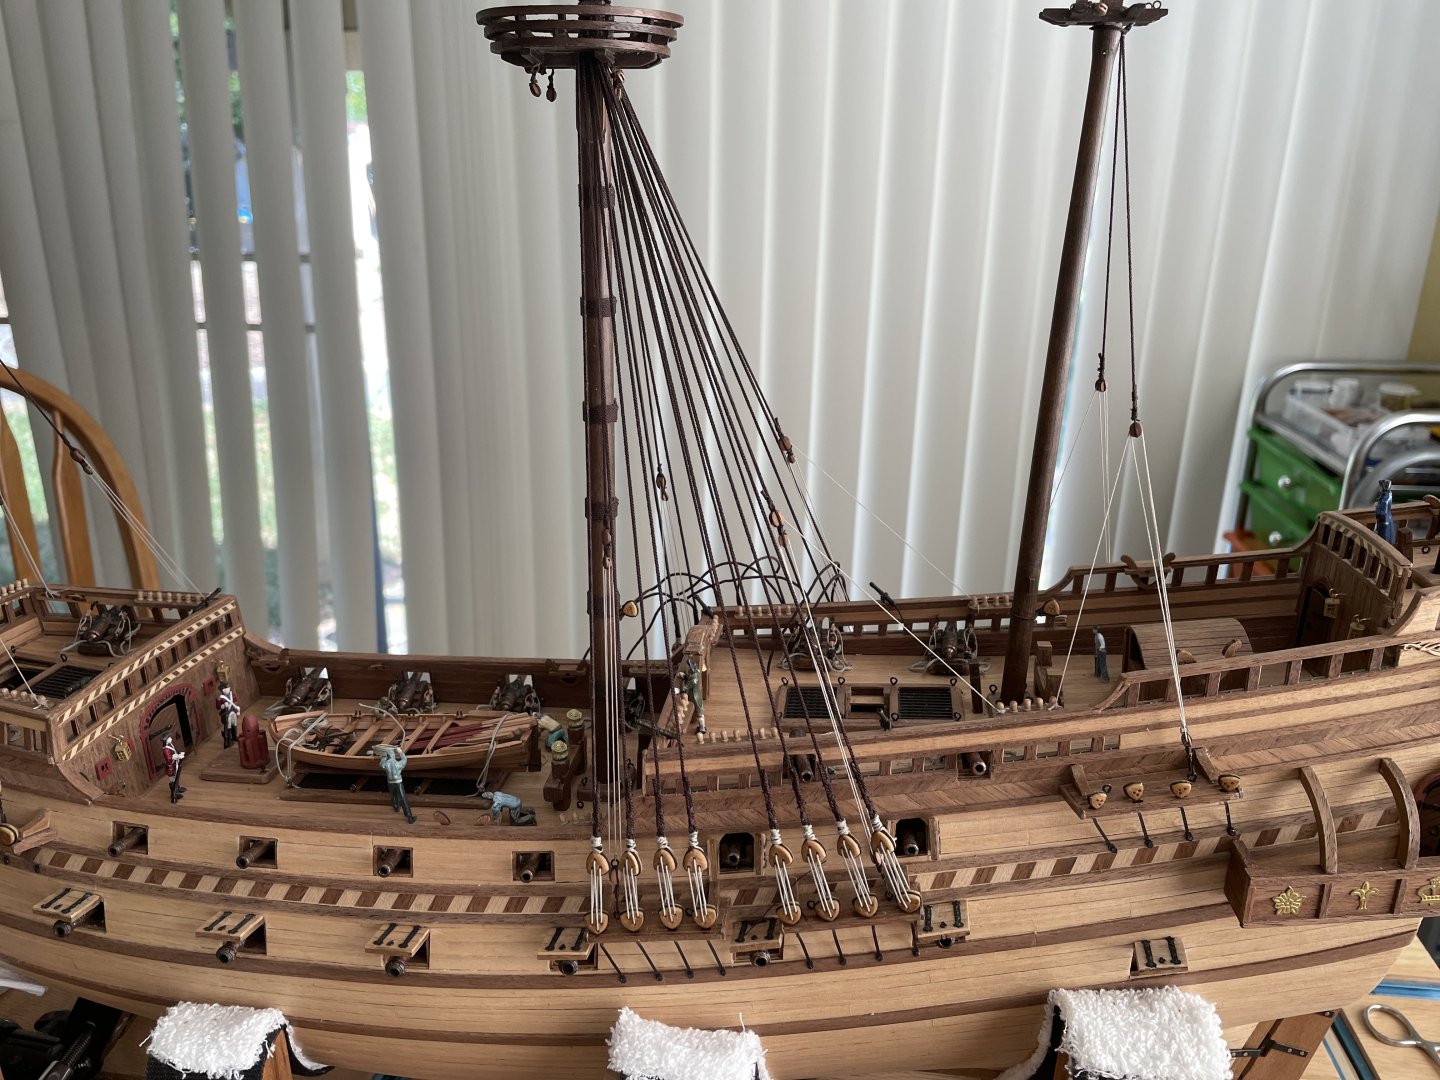

-
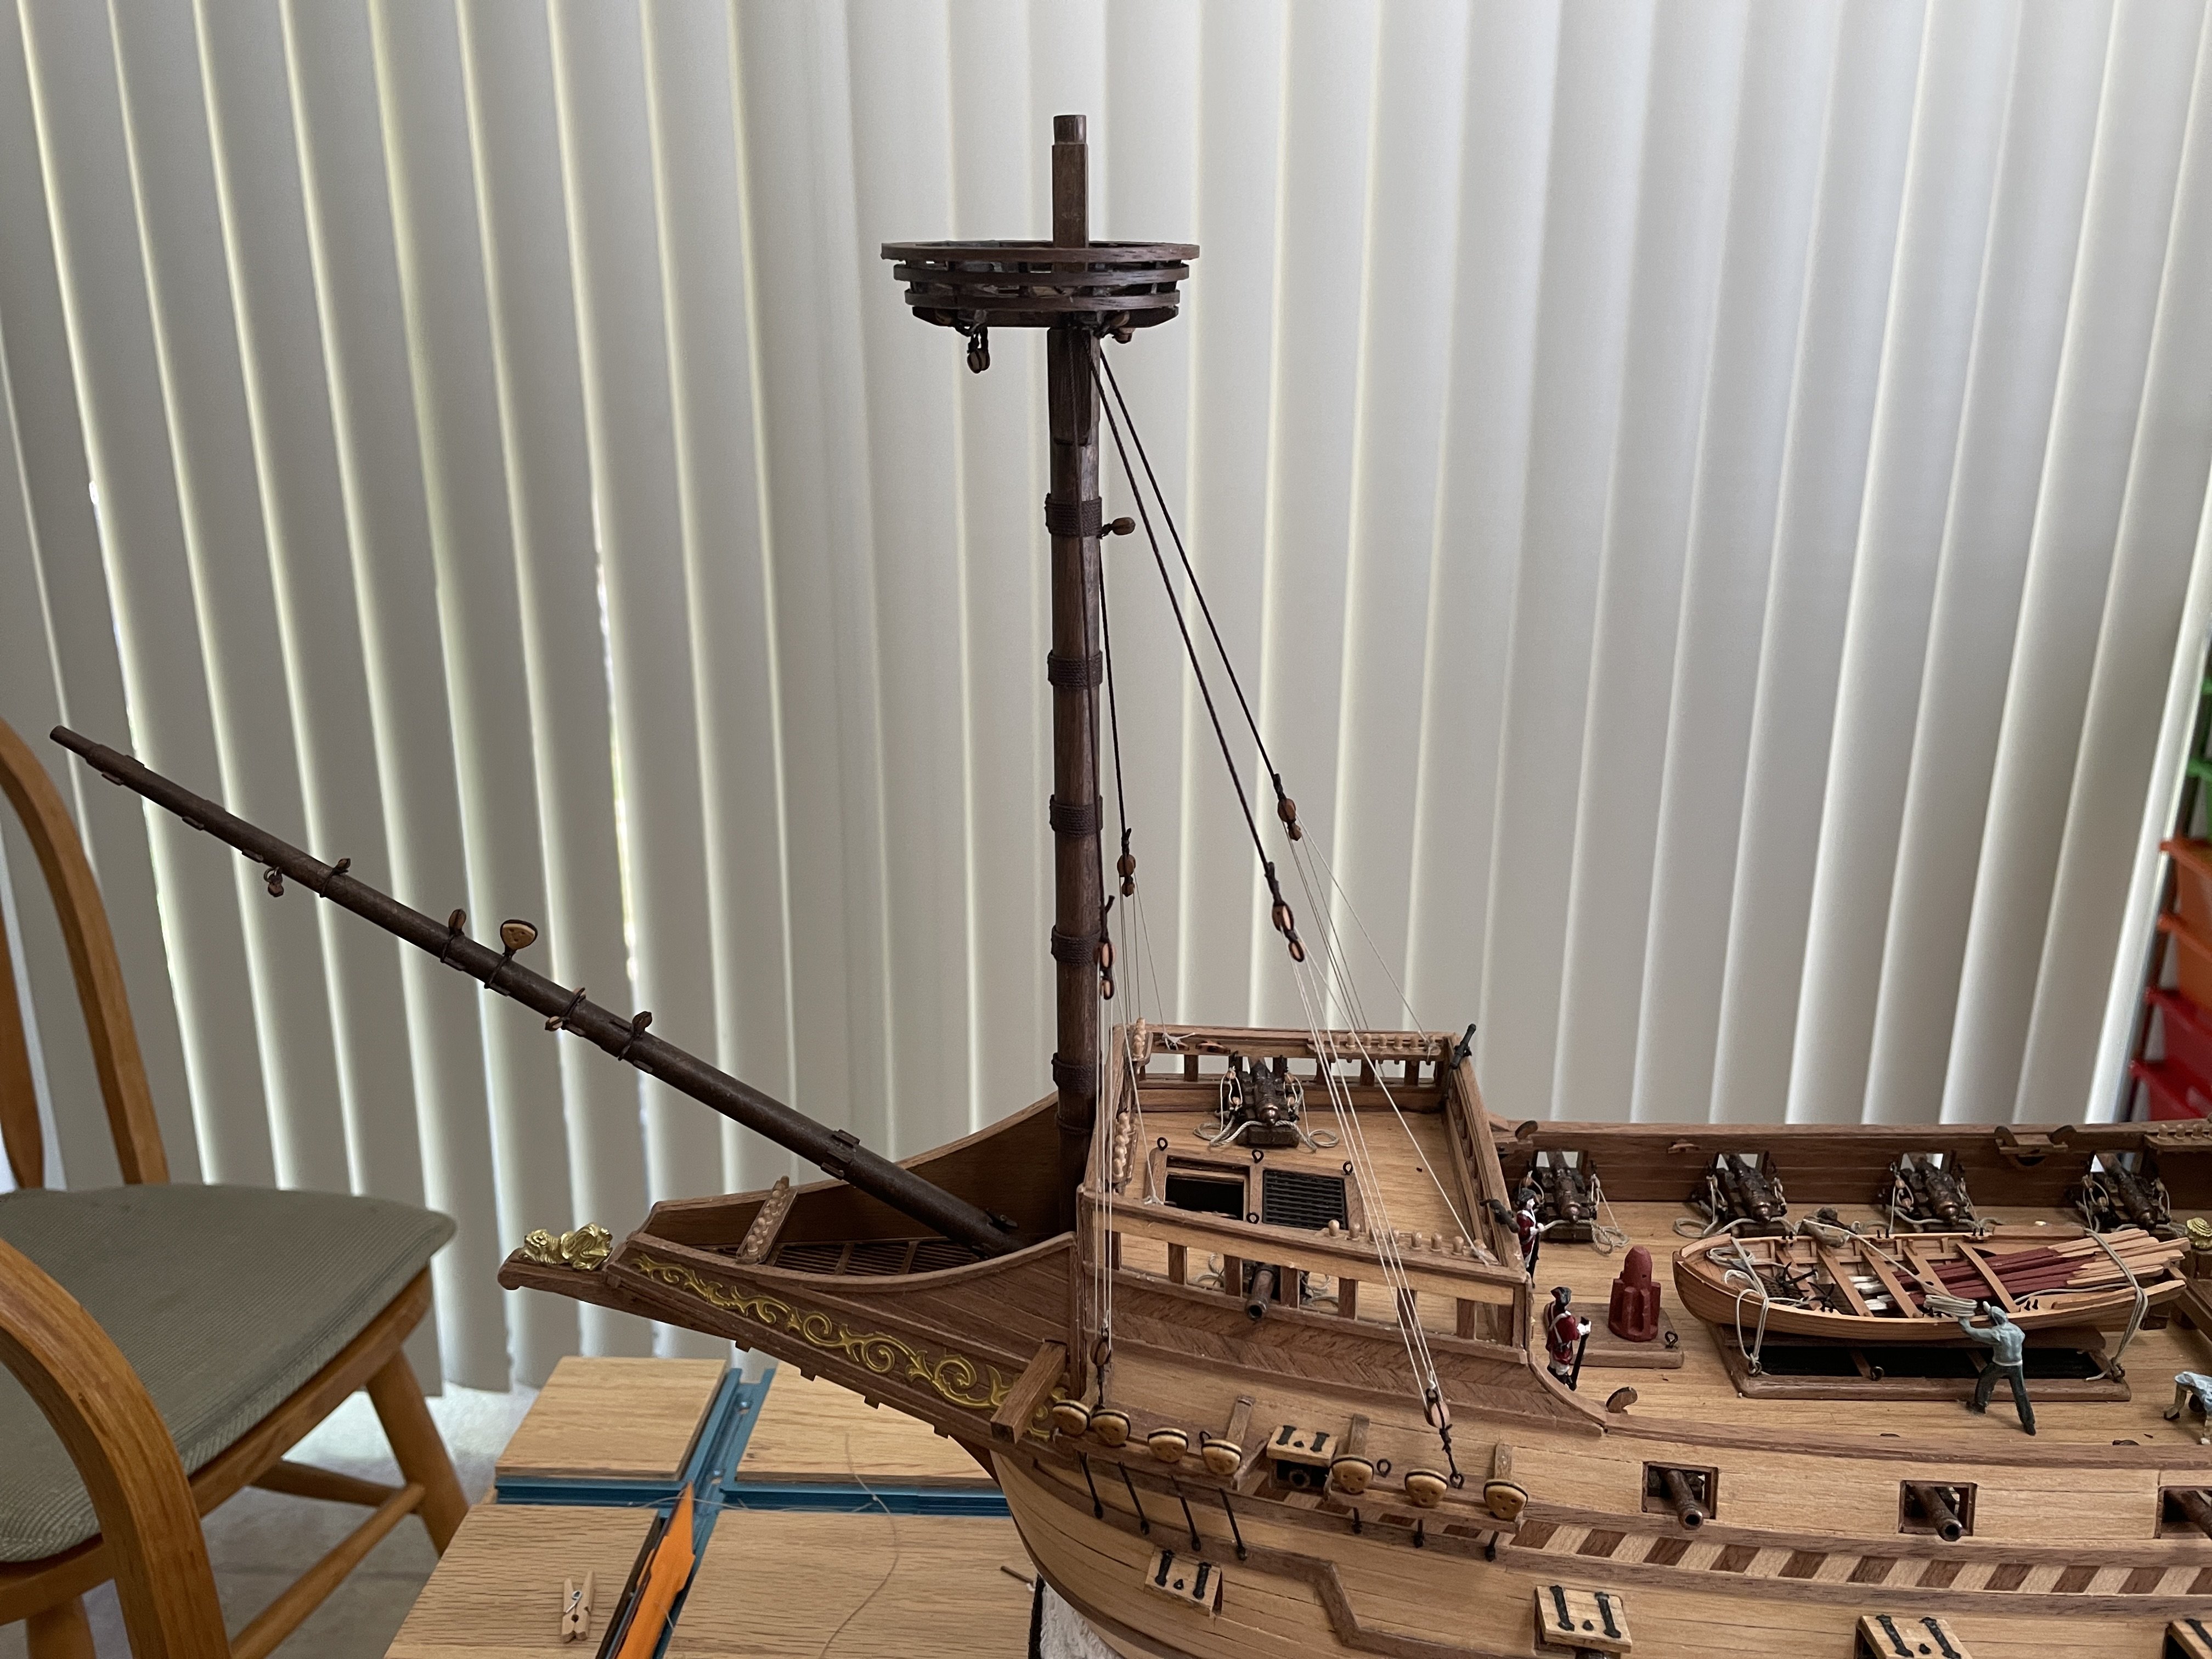
Thank you for your input both... I greatly appreciate. That why I was asking... I was afraid it may look odd. Keeping the spars horizontal but rotate around the masts is a great idea. It would help with the space issue while retaining fidelity to the model. I like it a lot!
-
Hello, I'm starting rigging and looking ahead to how I would like to display the Yards with furled (semi-furled) sails. Because of space reason, I would like to have the yards at roughly 45 degrees or even more. Basically, with one end toward the deck and the other toward the sky. I looked at a lot of pictures and could not find any with this configuration. Did anyone ever saw one? Was there even a purpose for it? such as dock at a port? let me know if you came across anything. -- cheers For reference, I'm working on the "HMS Revenge".
-
@baker, Thanks a lot. Let me check the plans if I can use alternative attach points. I'm planning on adding sails later on, which will use quite a lot of attach points... I may run into potential conflict/complication. However, it is really worth looking into it. Thanks for the compliment, I'm just taking my time and looking at as many logs possible... to learn from all of you.
-
Worth Repeating: Please DO NOT hesitate to correct me or highlight mistakes. I'm somewhat a beginner and welcome your comments. Even thought, this build may not be historically accurate (I took liberties with the hull decoration, for example) ... I still want to improve my skills. Sometimes you just don't even know when you are making a mistake. I love the "craft" and this won't be my last ship. cheers all.
-
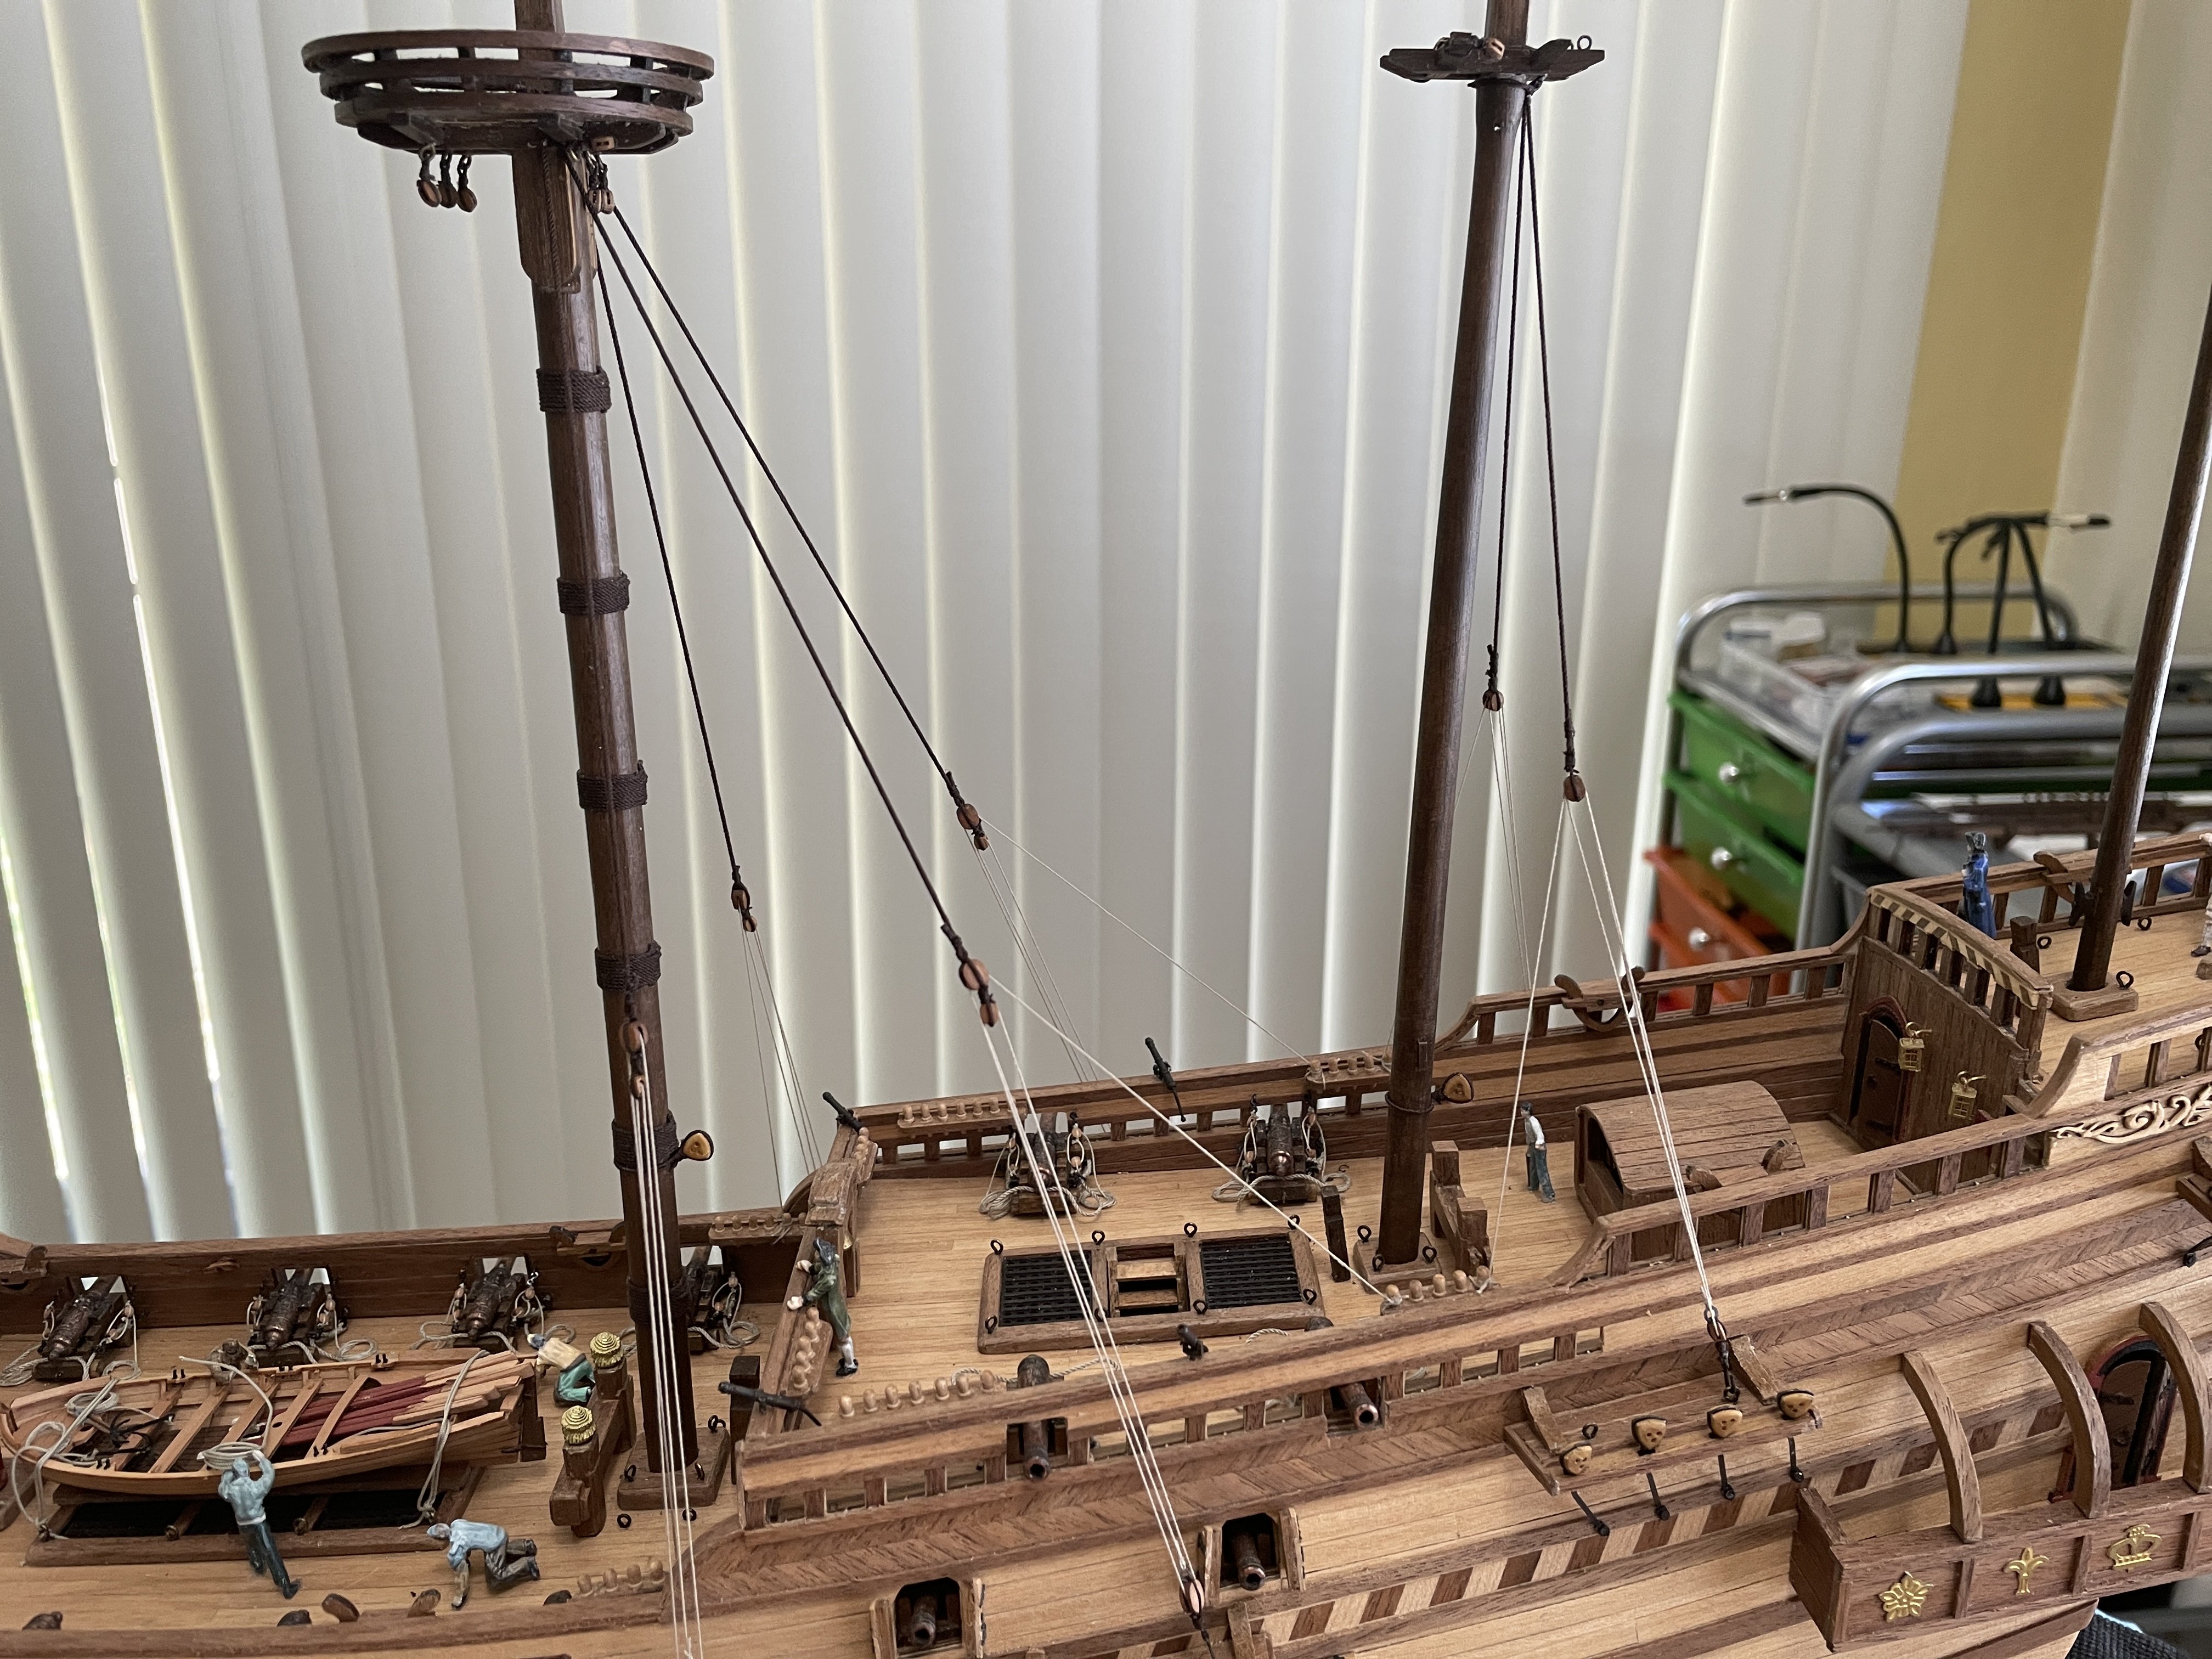
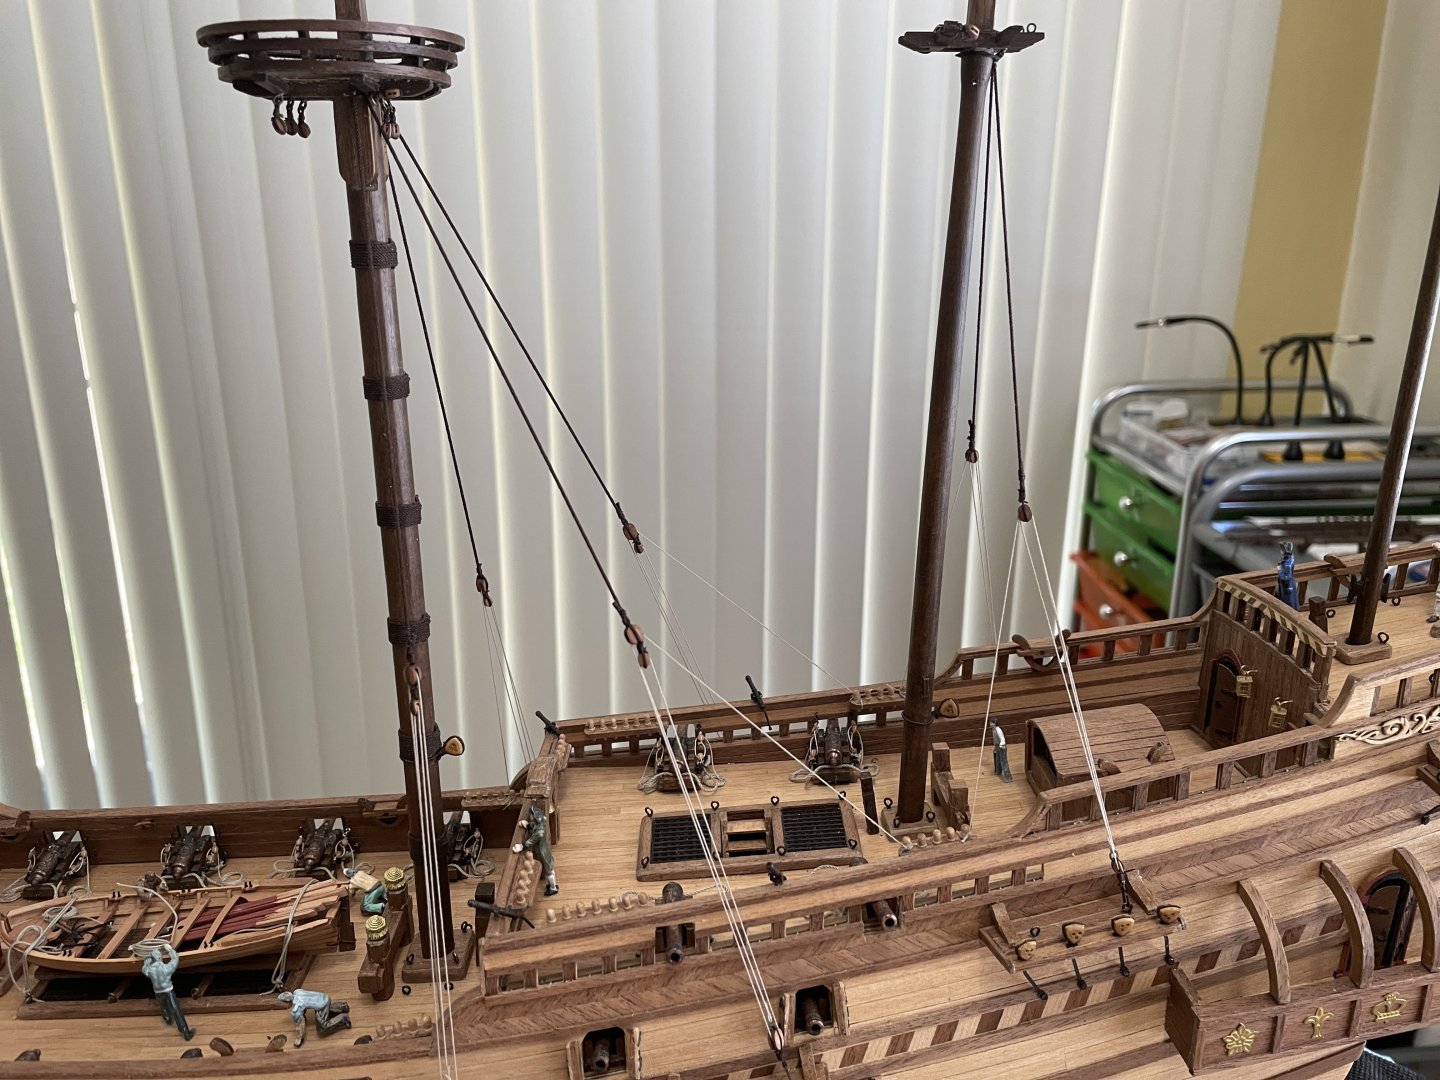
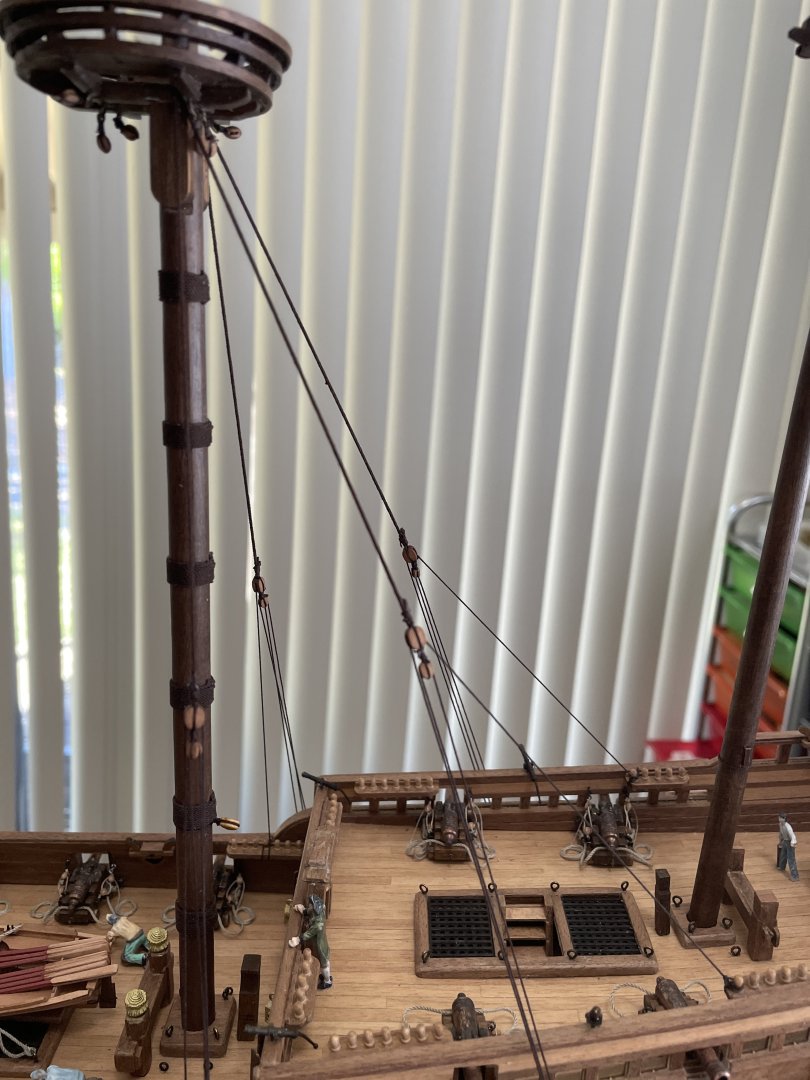
Backtrack completed. It was a slow process, but I think it is better now. The small changes I made were to use a light colored rope for the lower part of mast tackle. I think it is more appropriate since the rope is tied mainly to the deck racks, which I assumed would be kept clean (no tar). here it is...

-
delete... was duplicated.
-
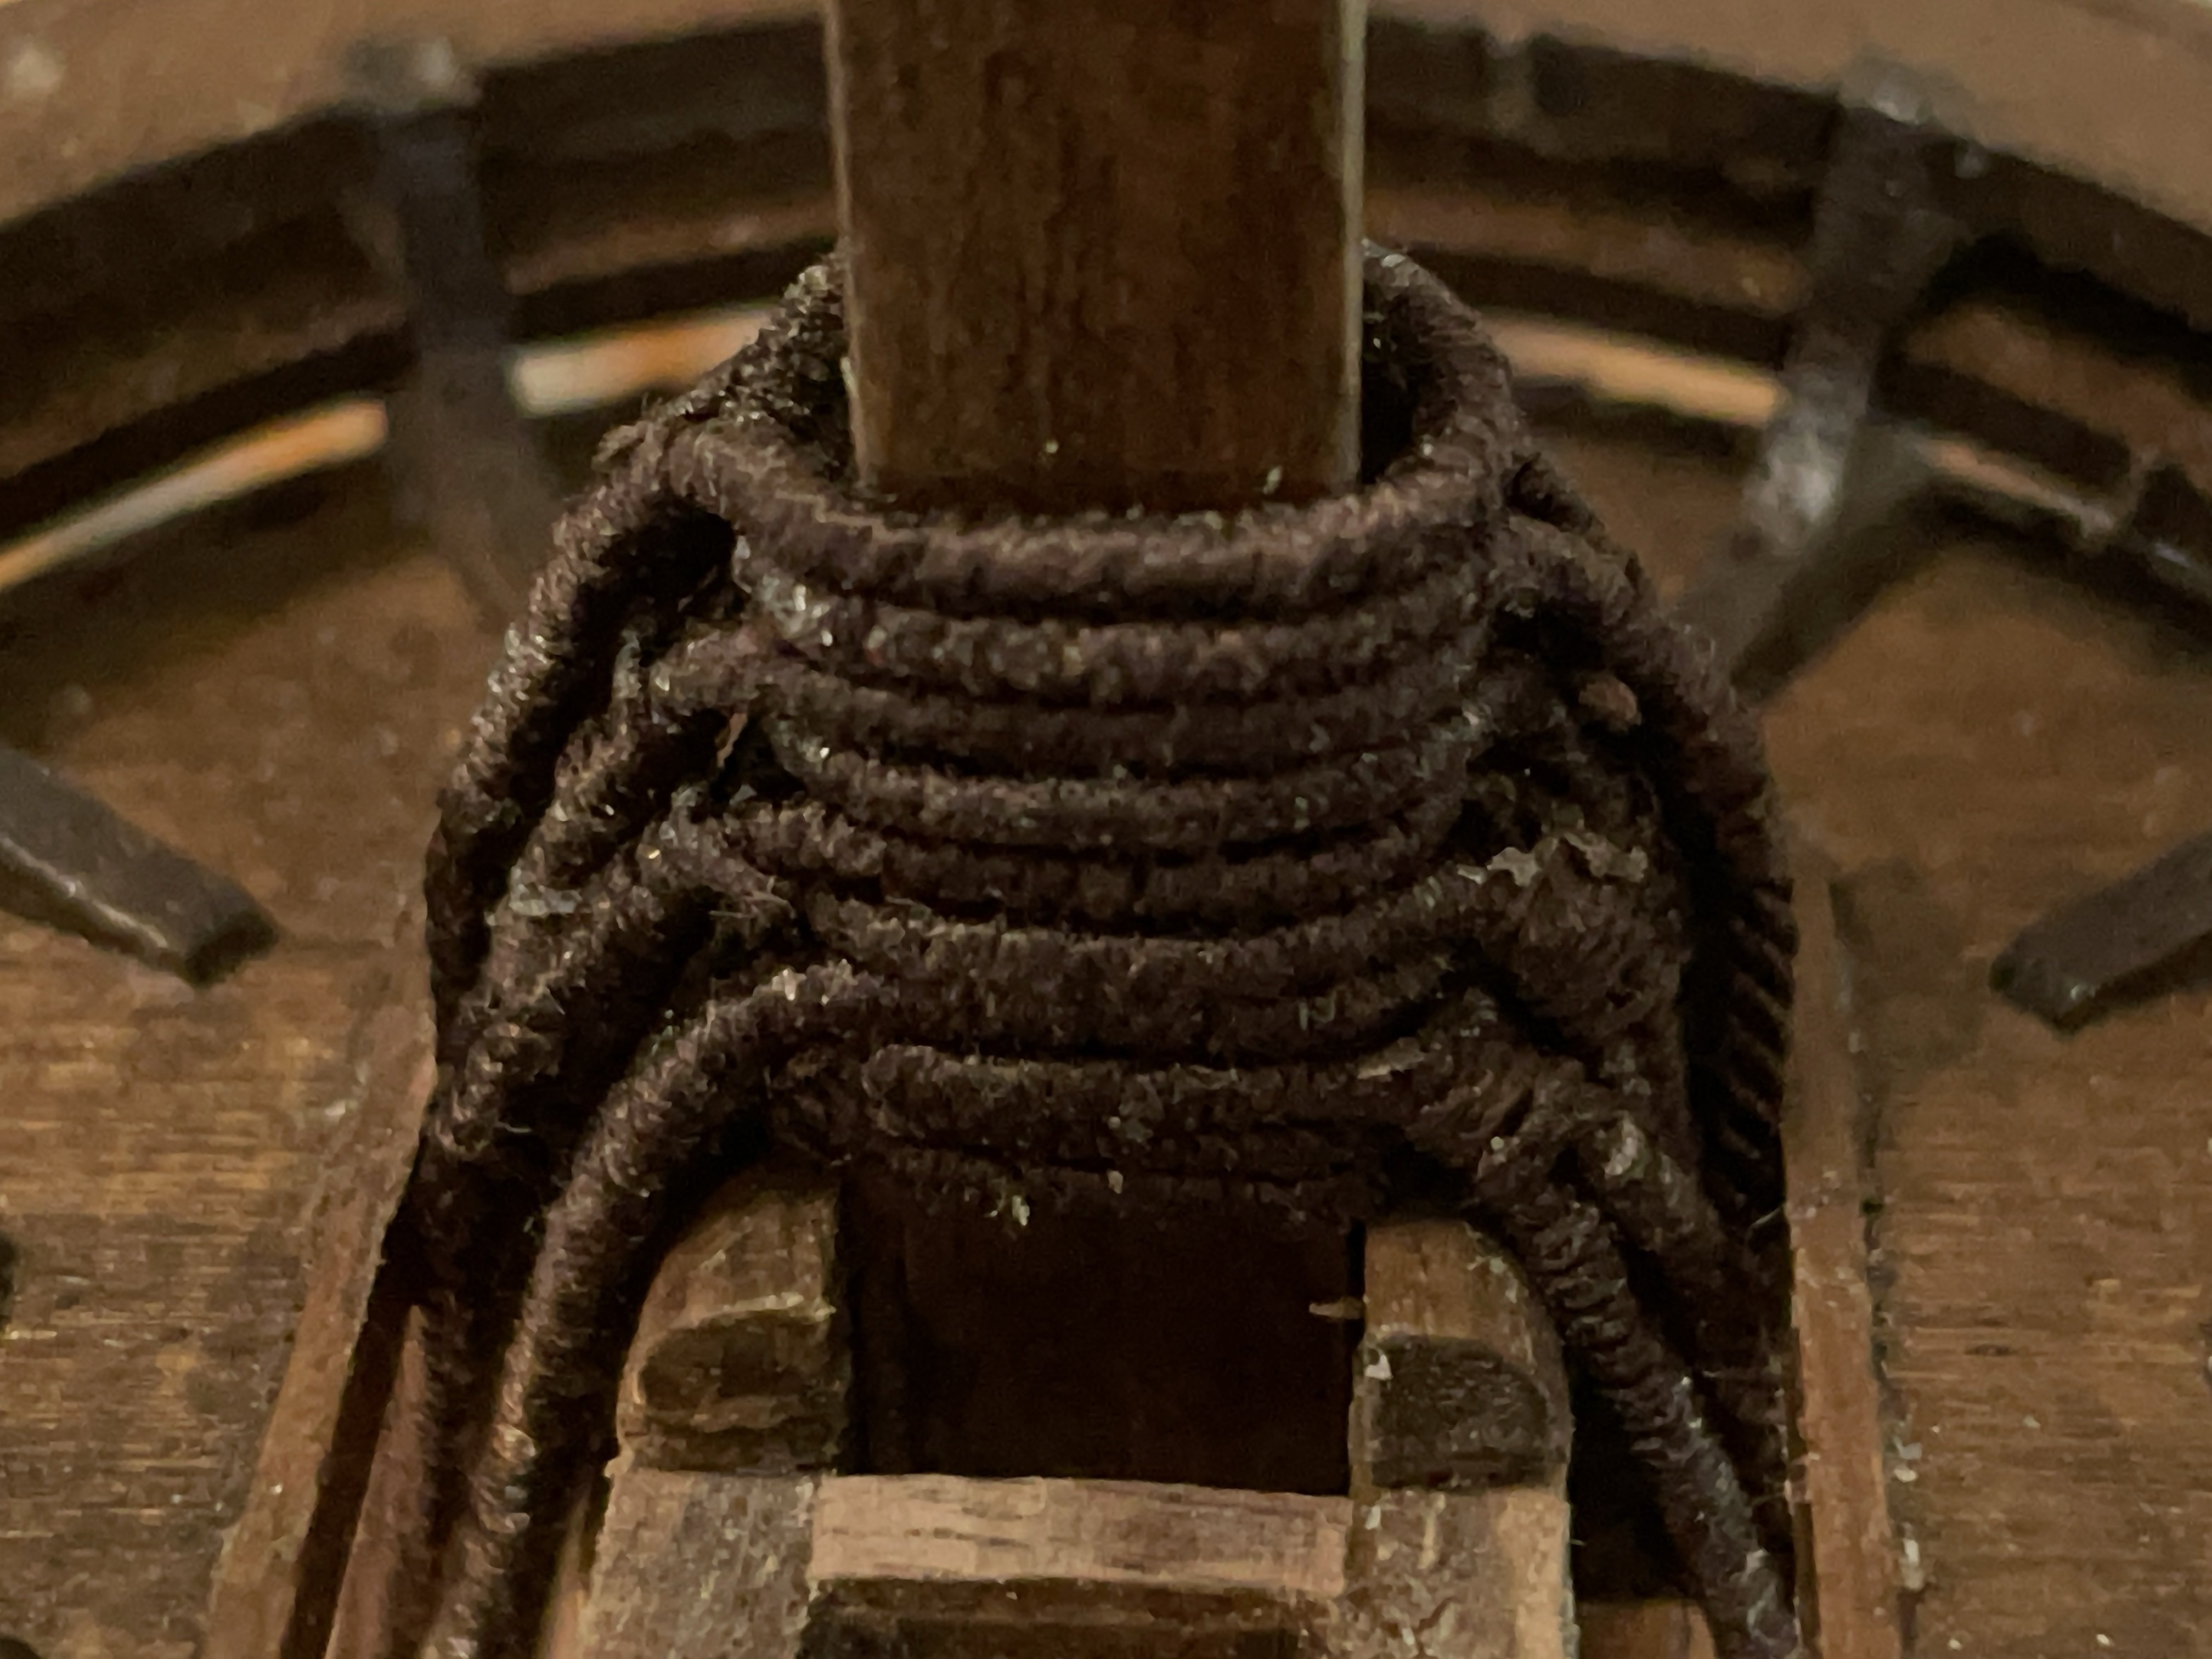
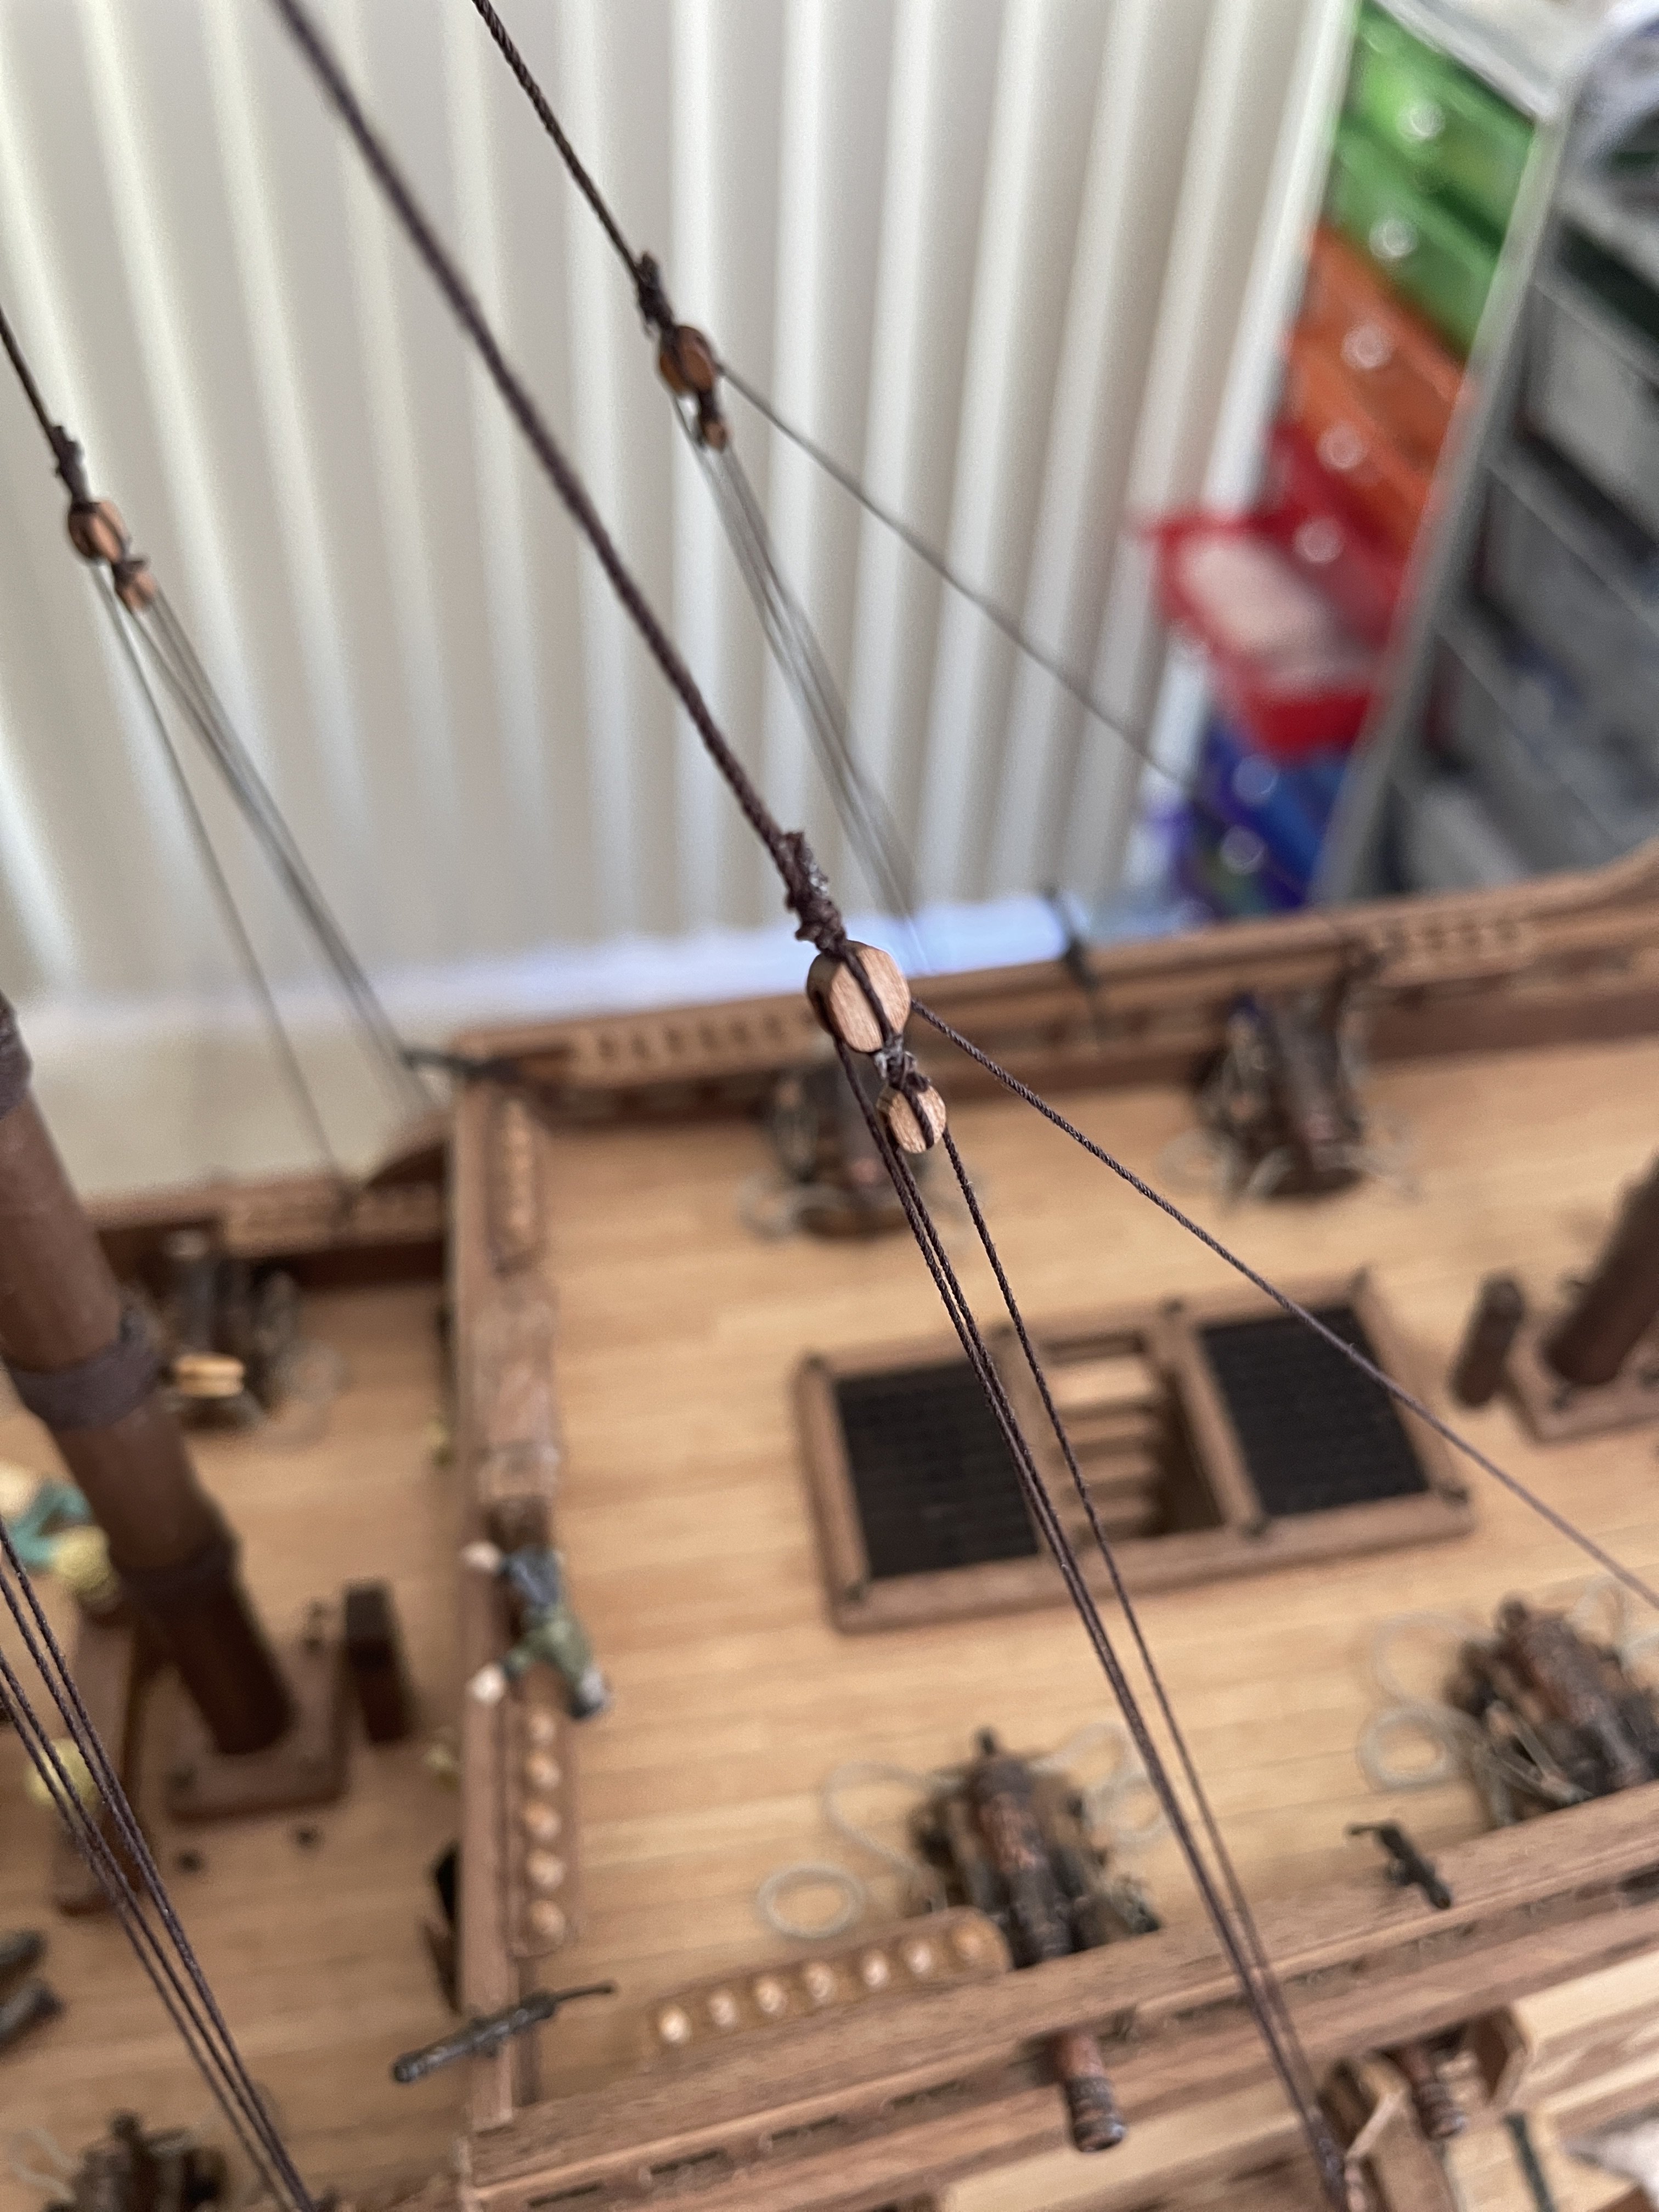
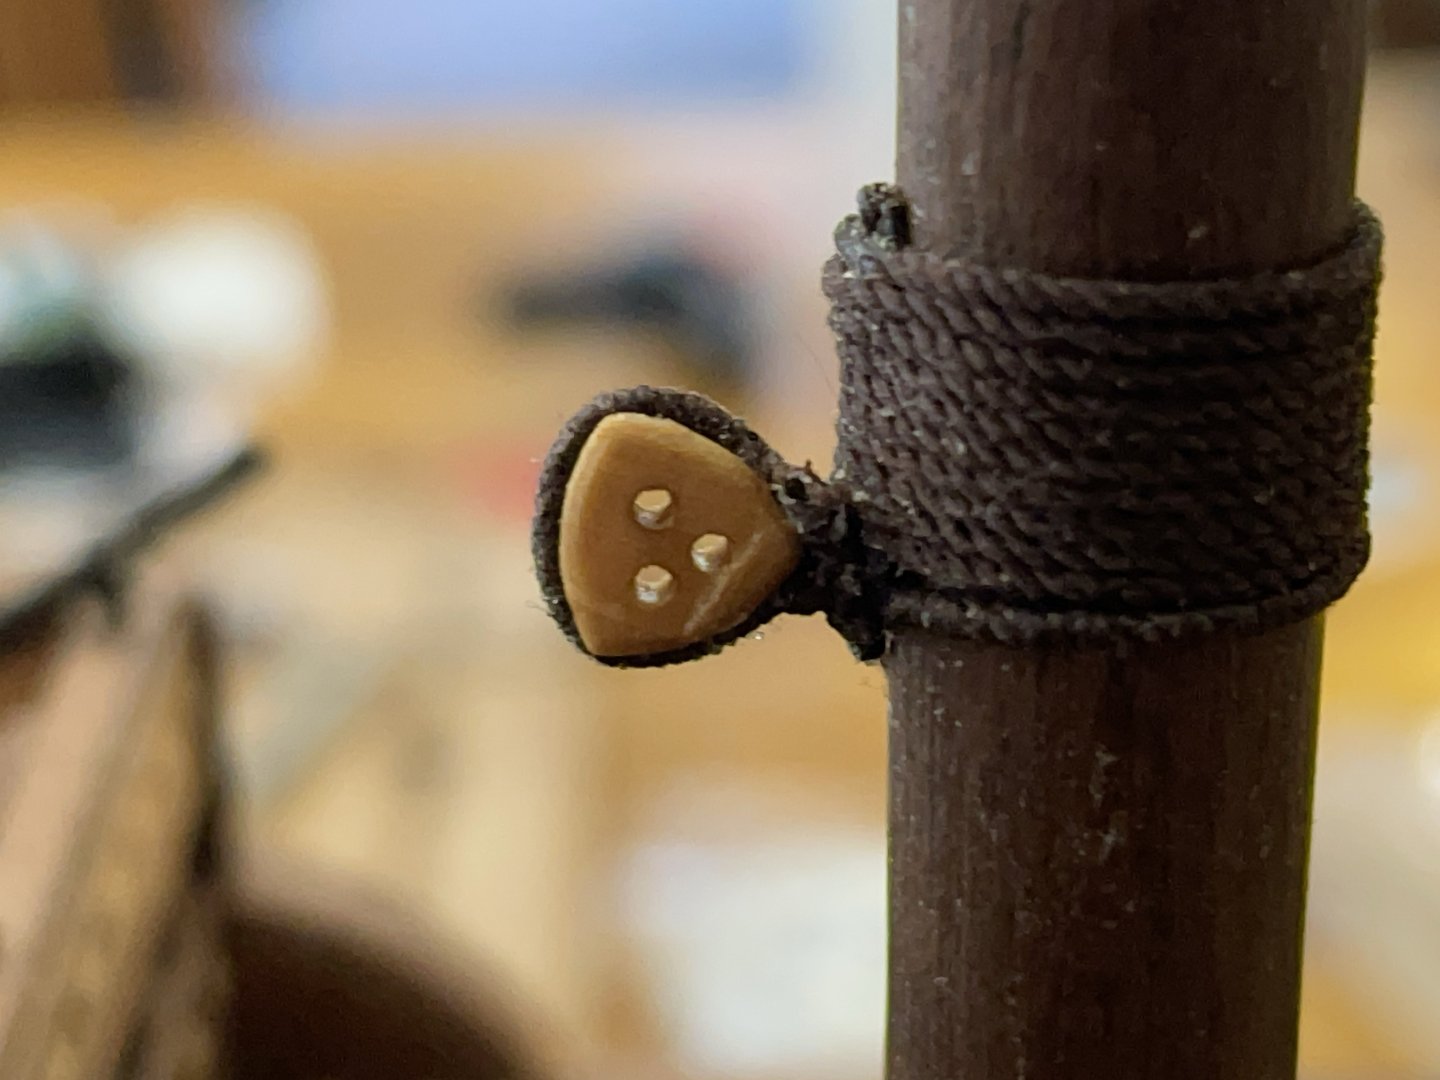
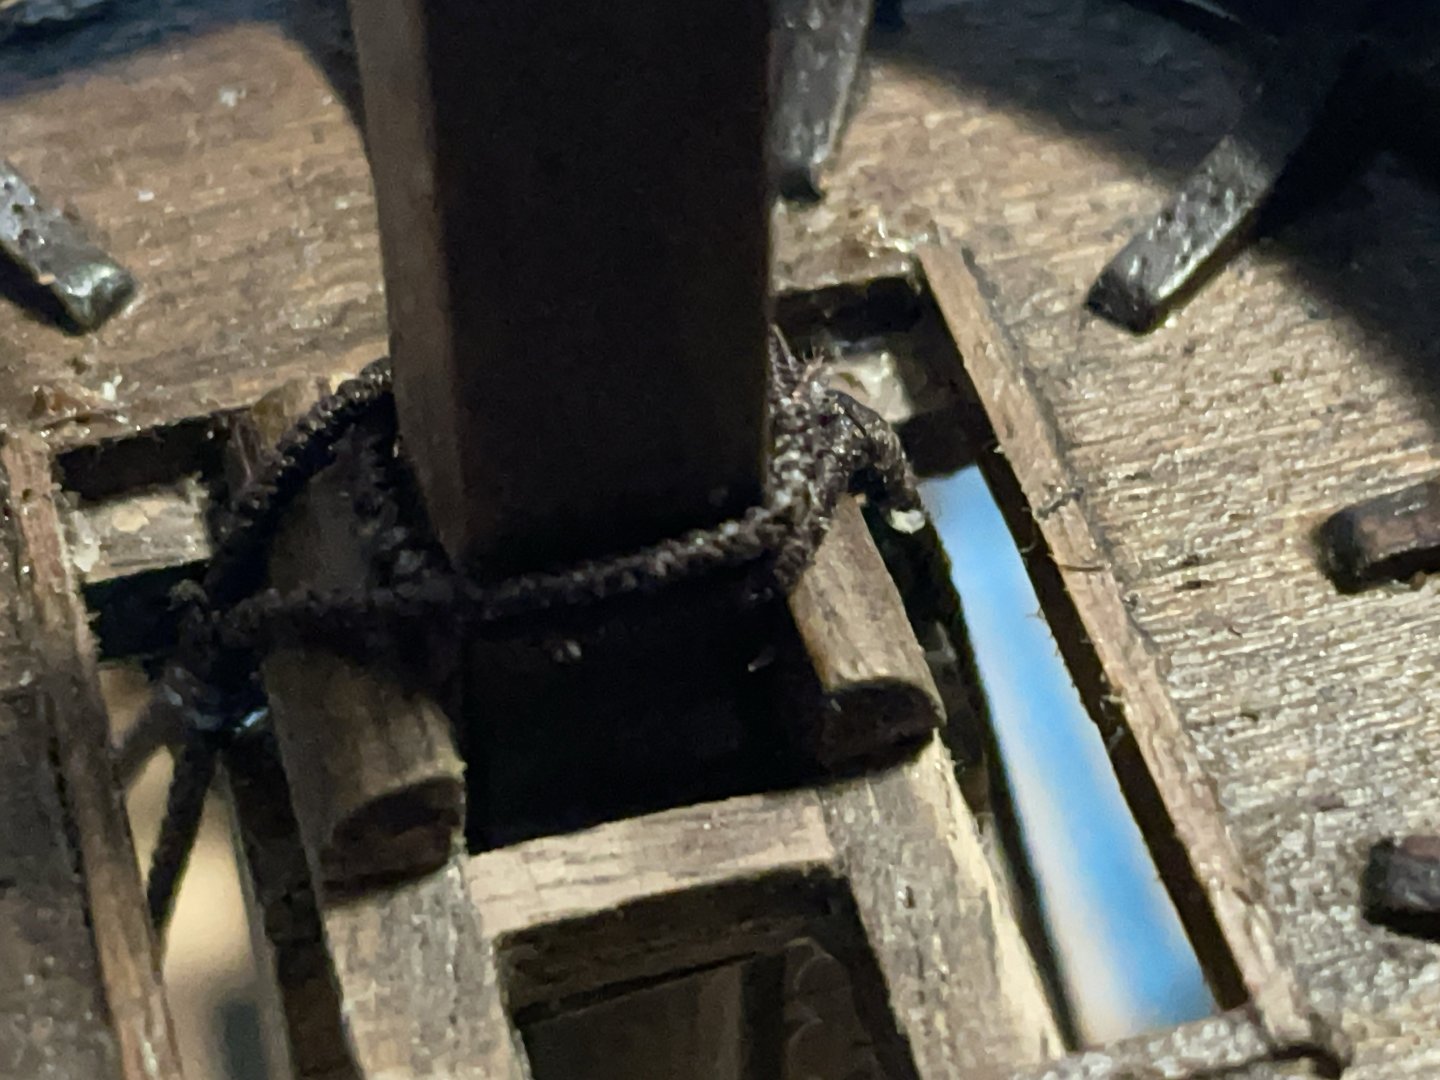
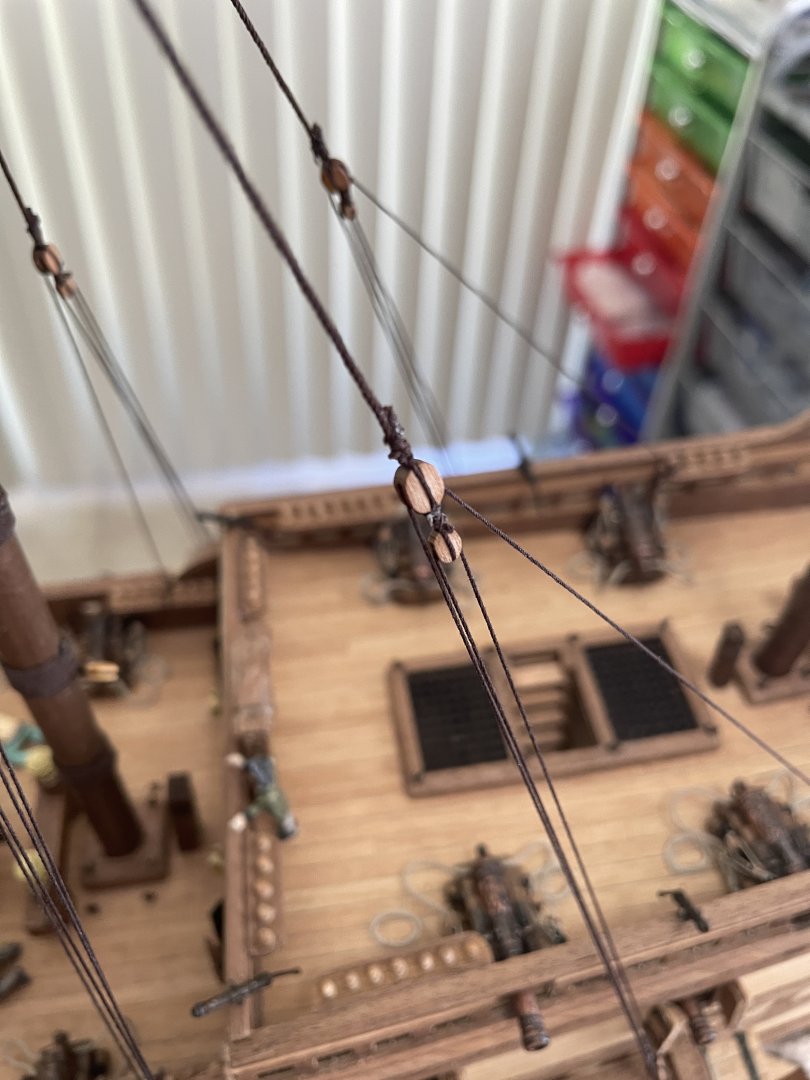
Rigging - upgrades: I'm slowly catching up from last week's misadventures. I took this opportunity to "upgrade" some of the rigging as @kirill4 suggested. Thanks! I changed the way I tied the block to masts, using serve-rope this time. Lastly, I changed the way I tied the small boat on the deck. I do not have blocks of the appropriate size, so I simply tied but this time vertically without any cross-over. The sailors are in the process of tying the third one ;_) Back from a small vacation, so I should be able to catch-up this week.


-
@kirill4, Fantastic pictures and very nice builds. I'm seeing a lot I did not know of, like the serving of the block ropes tied to masts. It makes sense since those are potentially weak junction that likely did need serving for strength. Will be working on a lot of things as improvement. ;_) Very timely, with the rigging down I can make the modifications easily.
-
@kirill4, Thousand thanks for the comments. Many easy fixes that will improve fidelity. I will get on those.
-
@kirill4 Again thanks a lot... this is my first ship with more comprehensive rigging. All these tips are very helpful. ;_)
-
@GrandpaPhil, Hey... just a little set back. I'm still determined to complete the build. It is worth it!
-
@kirill4 Thanks for the tips and pictures... it is worth a thousand words. Love your build, very original. The color choice is very cool! Thanks a lot for taking the time, it is greatly appreciated!!
-
Hum.... a little set back. After working on the ratlines, I come to realize two things (both my fault) after waking up at 2am with a nagging feeling that something was wrong with the build. I checked more closely. 1. The lines are just too thick to fit several in a thigh space. The issue, I think, is that I served the rope. It makes it thicker and very hard; it doesn't compress and take too much space above. 2. The top platform was not set-up quite right. I decided to fix that. Results: All the rigging made so far had to... go down. 2 weeks gone in an instant, but experience gained.
-
Hello @Pfälzer, if you like the model design like I do... please don't be put off (not discouraged). You just need to know what to expect. Amati (Chris Walton) design of the revenge is superb (I would say unique) and documentation top notch. The foundation and first planking are quite fine. The review was to bring awareness on a number of weak points. Other manufacturers are raising the bar... so should Amati and many others. BTW, I'm a little perfectionist. I bought the kit last year.... but who know how long it was on the shelve. At a minimum, I would change the rope and blocks. The blocks are made of soft/brittle wood and very hard to work with (and could look a lot better). Bright side: pearwood/basswood blocks are available. I choose pearwood. The ropes... invest in a Syren ropewalk (careful assembly require). Easy to use, fun and superb end-results. You will recoup cost very fast (MARA strings of various thickness is not that expensive). The wood strips are brittle BUT look OK (basswood or pear would be better but it is asking a lot). You just need to be extra careful. They break easily or fray at the end while cutting (go slow and use sharp tools/blades). I don't like the paper decorations, but this is personal preference. Replacement was more expensive for me. I would buy walnut wood strips at few width 1-3mm mostly (or use some of the extra strips). This would allow you to plank (to re-enforce) the very brittle/soft accessories like the small side platforms and cannon bay doors. Trying to drill a side hole for nails (or adding nails) just damage them, sometime beyond repair. Same goes with the larger front and back pieces. I just planked then all. The glue and planking solved the issue, and the end-results look better to me... The masts can be stained walnut... so they all look the same. They look fine afterward. Bright side, I found the sails to be nice but have not seen other. HOPE, I'm not discouraging you. The kit is still worth it with the above restrictions.
-
Beginner looking for advice on first kit
Loracs replied to O-Nurse's topic in New member Introductions
A short comment here... I'm still a beginner myself. Truly understand you about the requirement for doing full scratch build. You need the instruments and the space for it. This is why I got with kit. Having say that, the kit manufacturer does matter. Spending countless hours on a build mean you want a good outcome. Materials matter. I heard VERY good thing for kit available at Syren and Vanguard. I will look at those. Same goes with some Chinese manufacturer but you have to be far more careful to choose a reputable company. Some other may be able to guide you here. Just to start your choice: Syren Ship Model Company|Boxwood ship model rigging blocks|Ship Model rigging rope |turned brass cannon| Chuck Passaro Model Kits – VANGUARD MODELS Lastly, once you narrow down to few model... search here for build log(s). The more the better. It will teach you so much as you progress one on your own. -
GrandpaPhil, Agree with you 100%. this is my first large scale ship... you learn with time. Indeed, the Vanguard ship model is fantastic. I tried the small cutter/yawl. Just superb. I don't know if Chris Watton is still following this tread (which intimidates me a little at first as a beginner - I wanted to bring justice to his design), but yes his work is so nice.
-
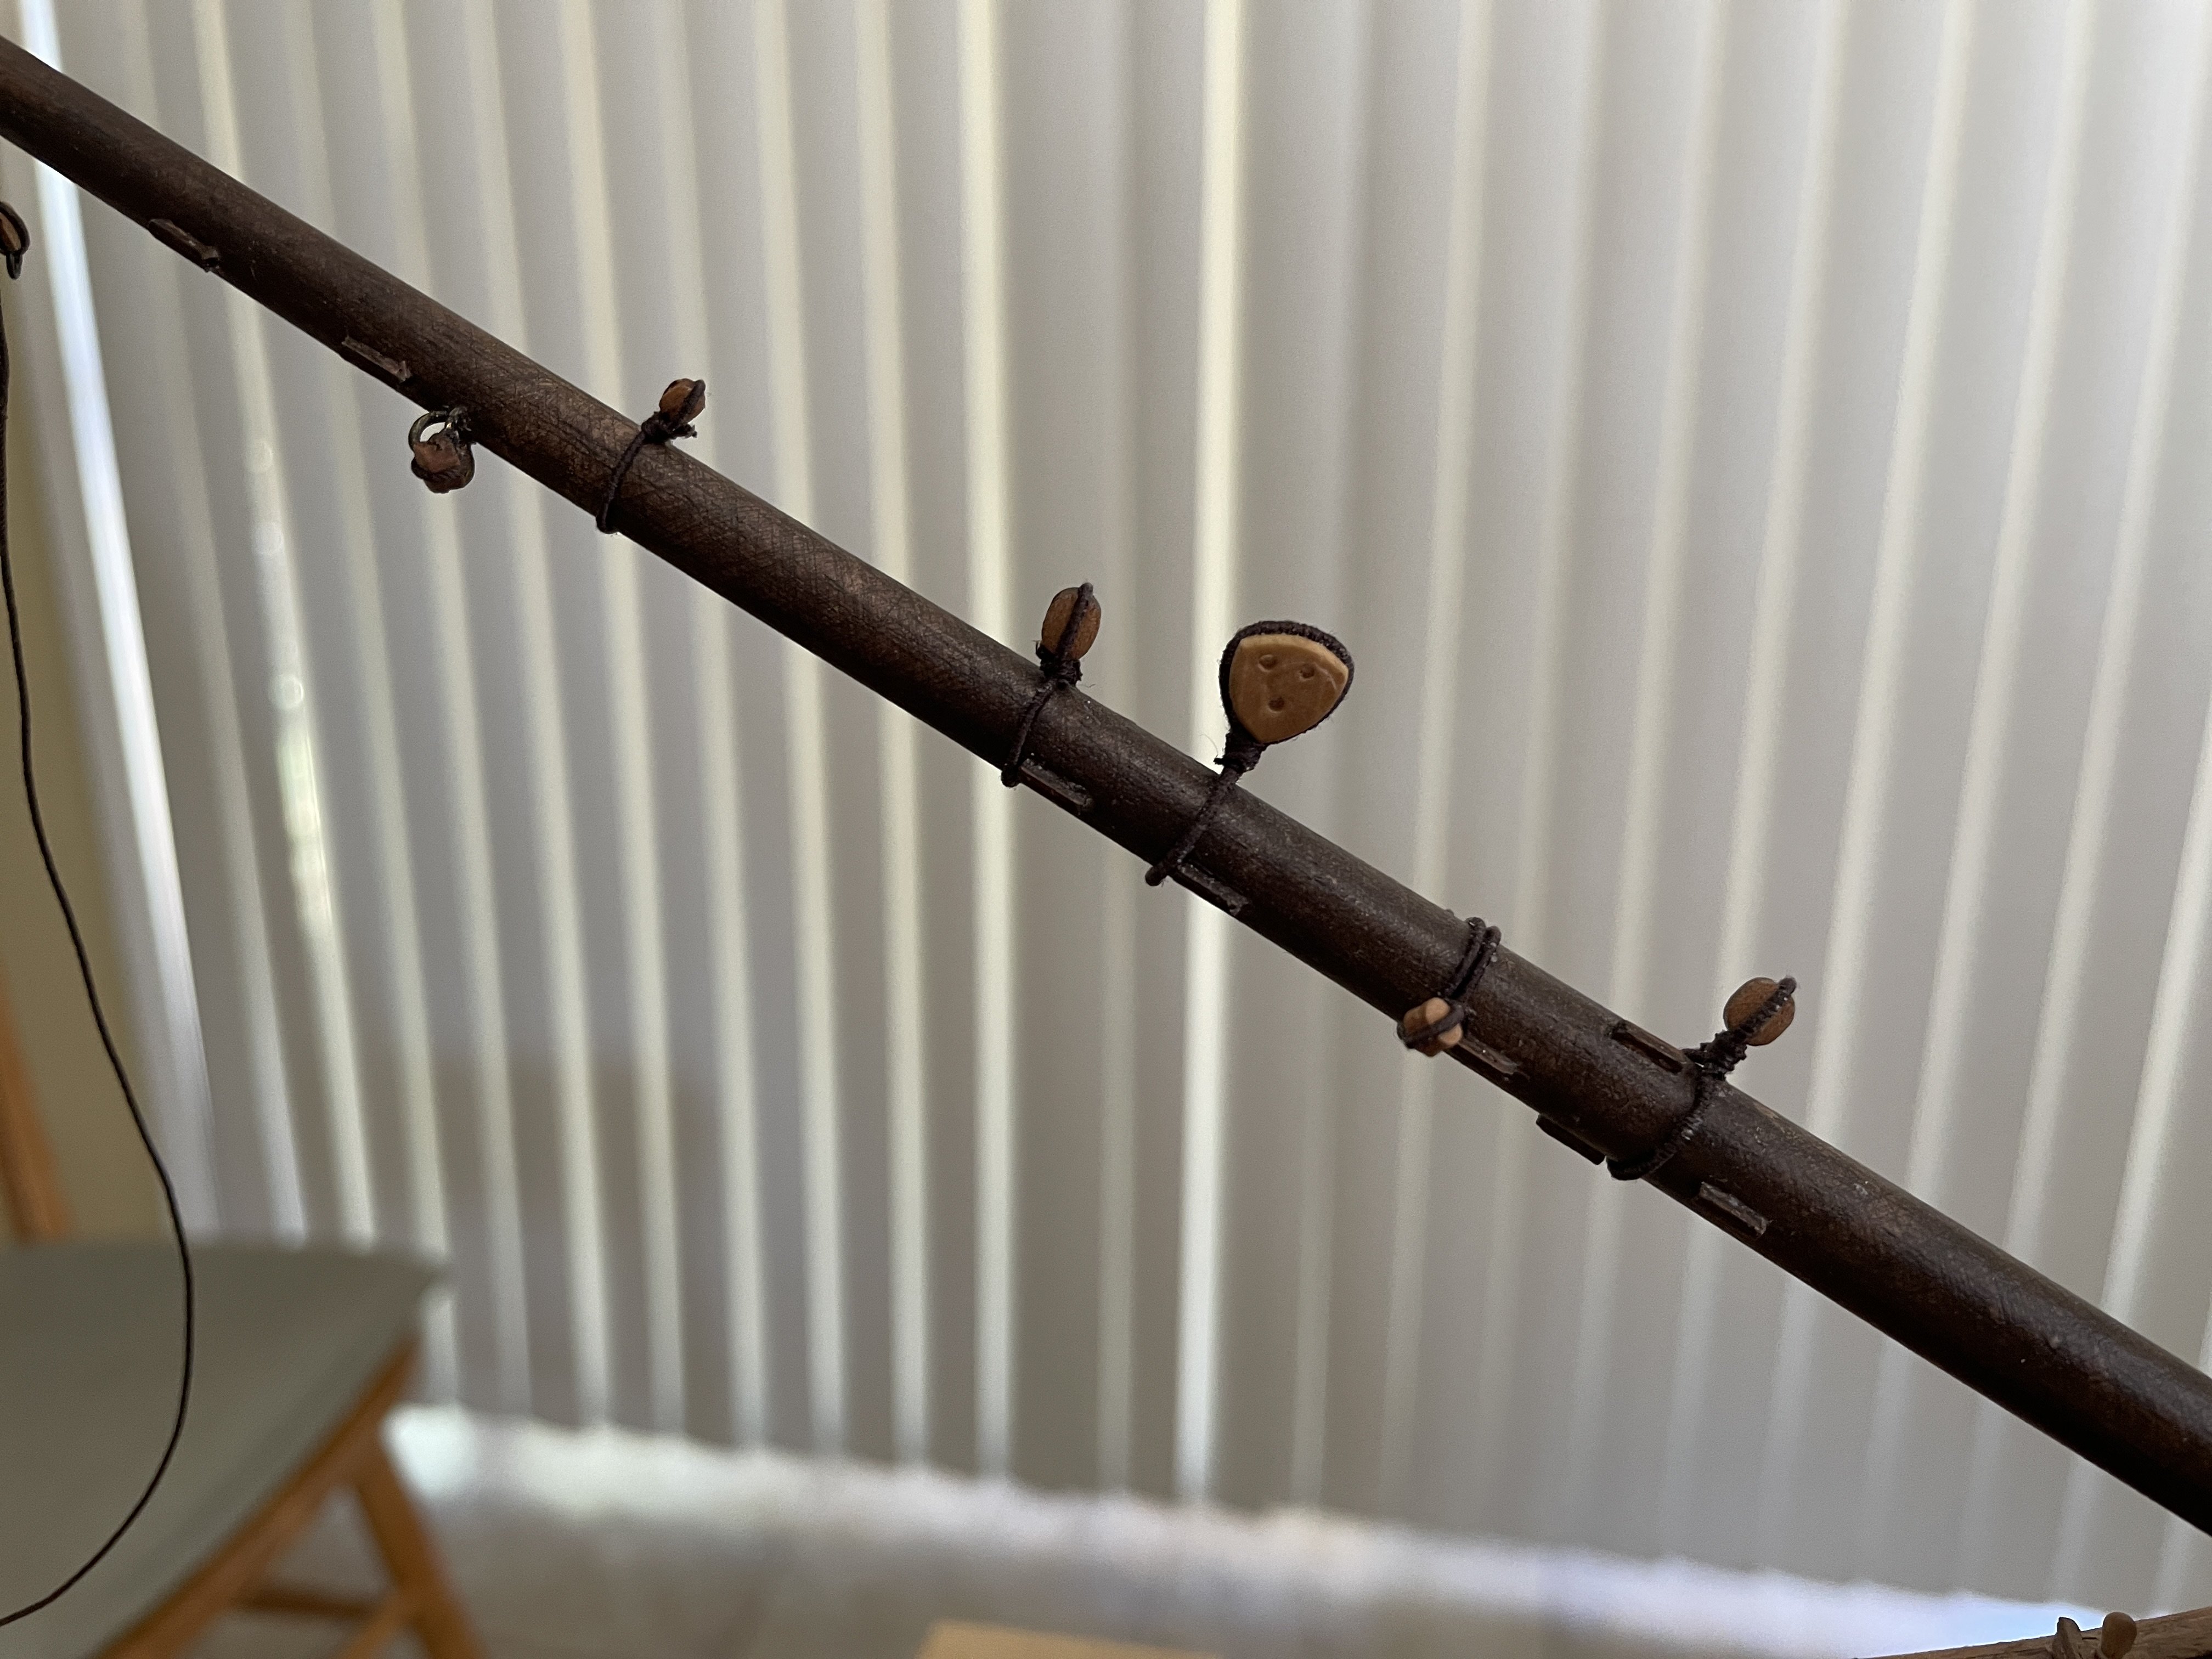
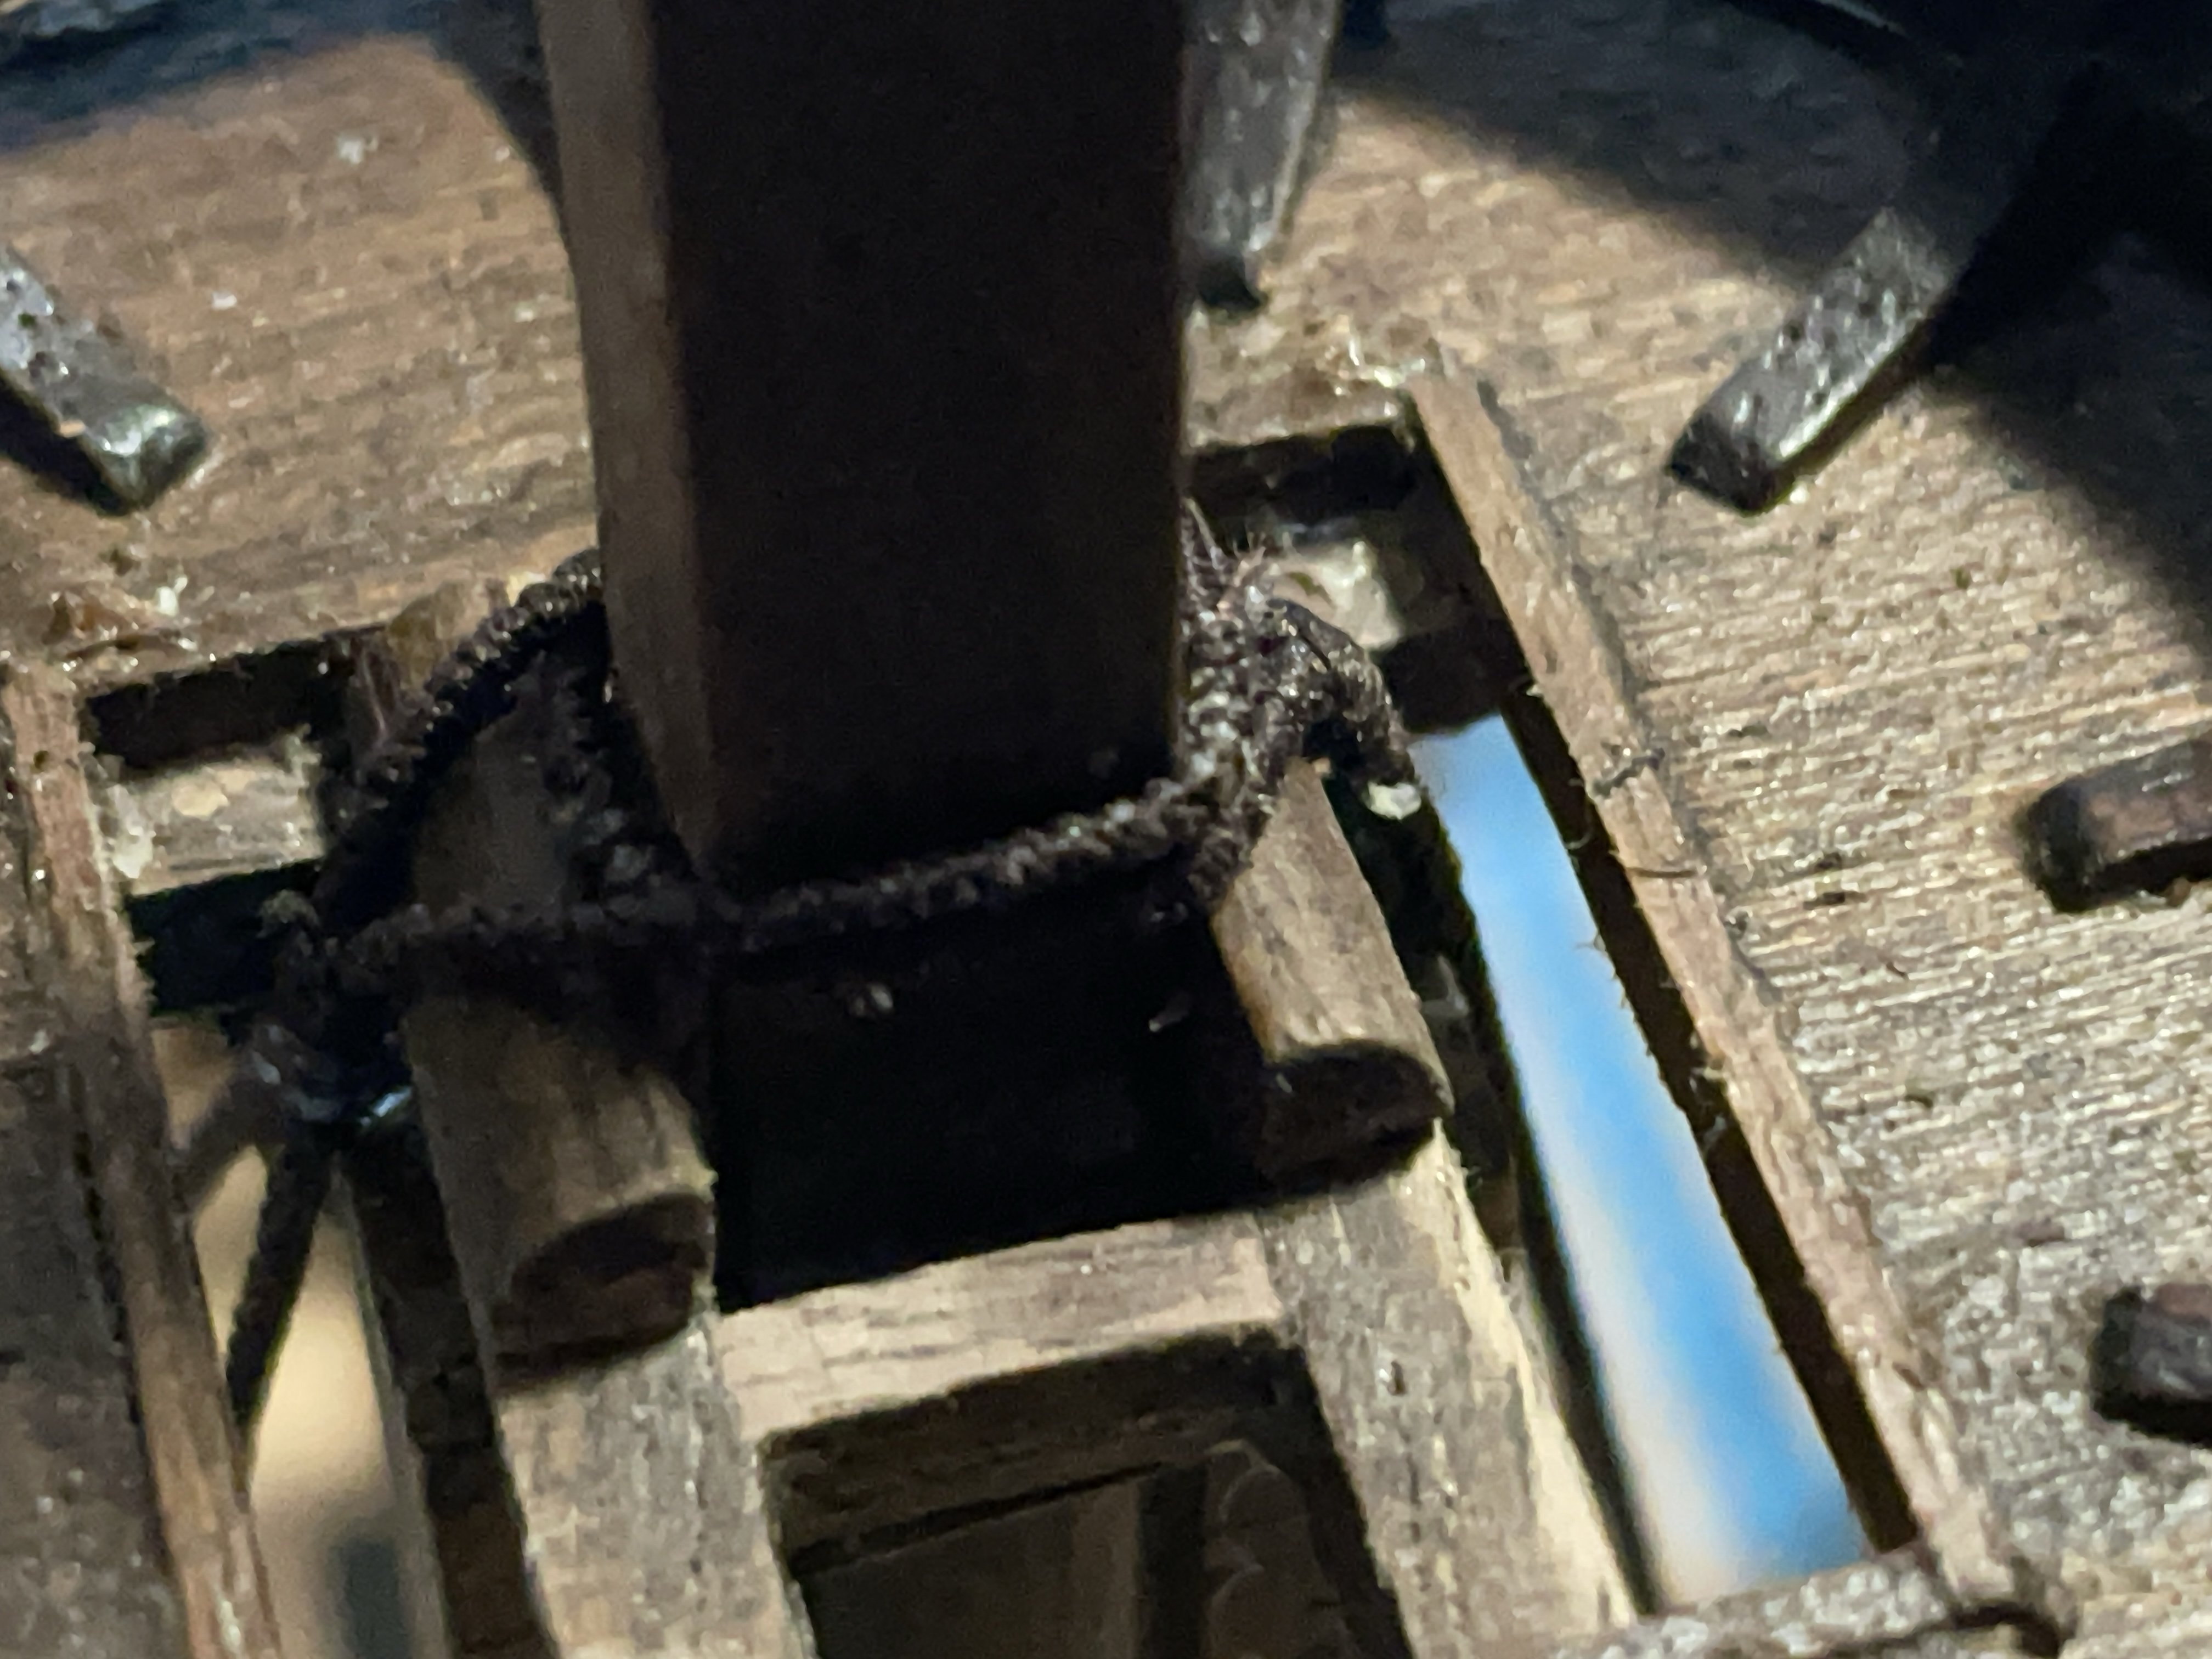
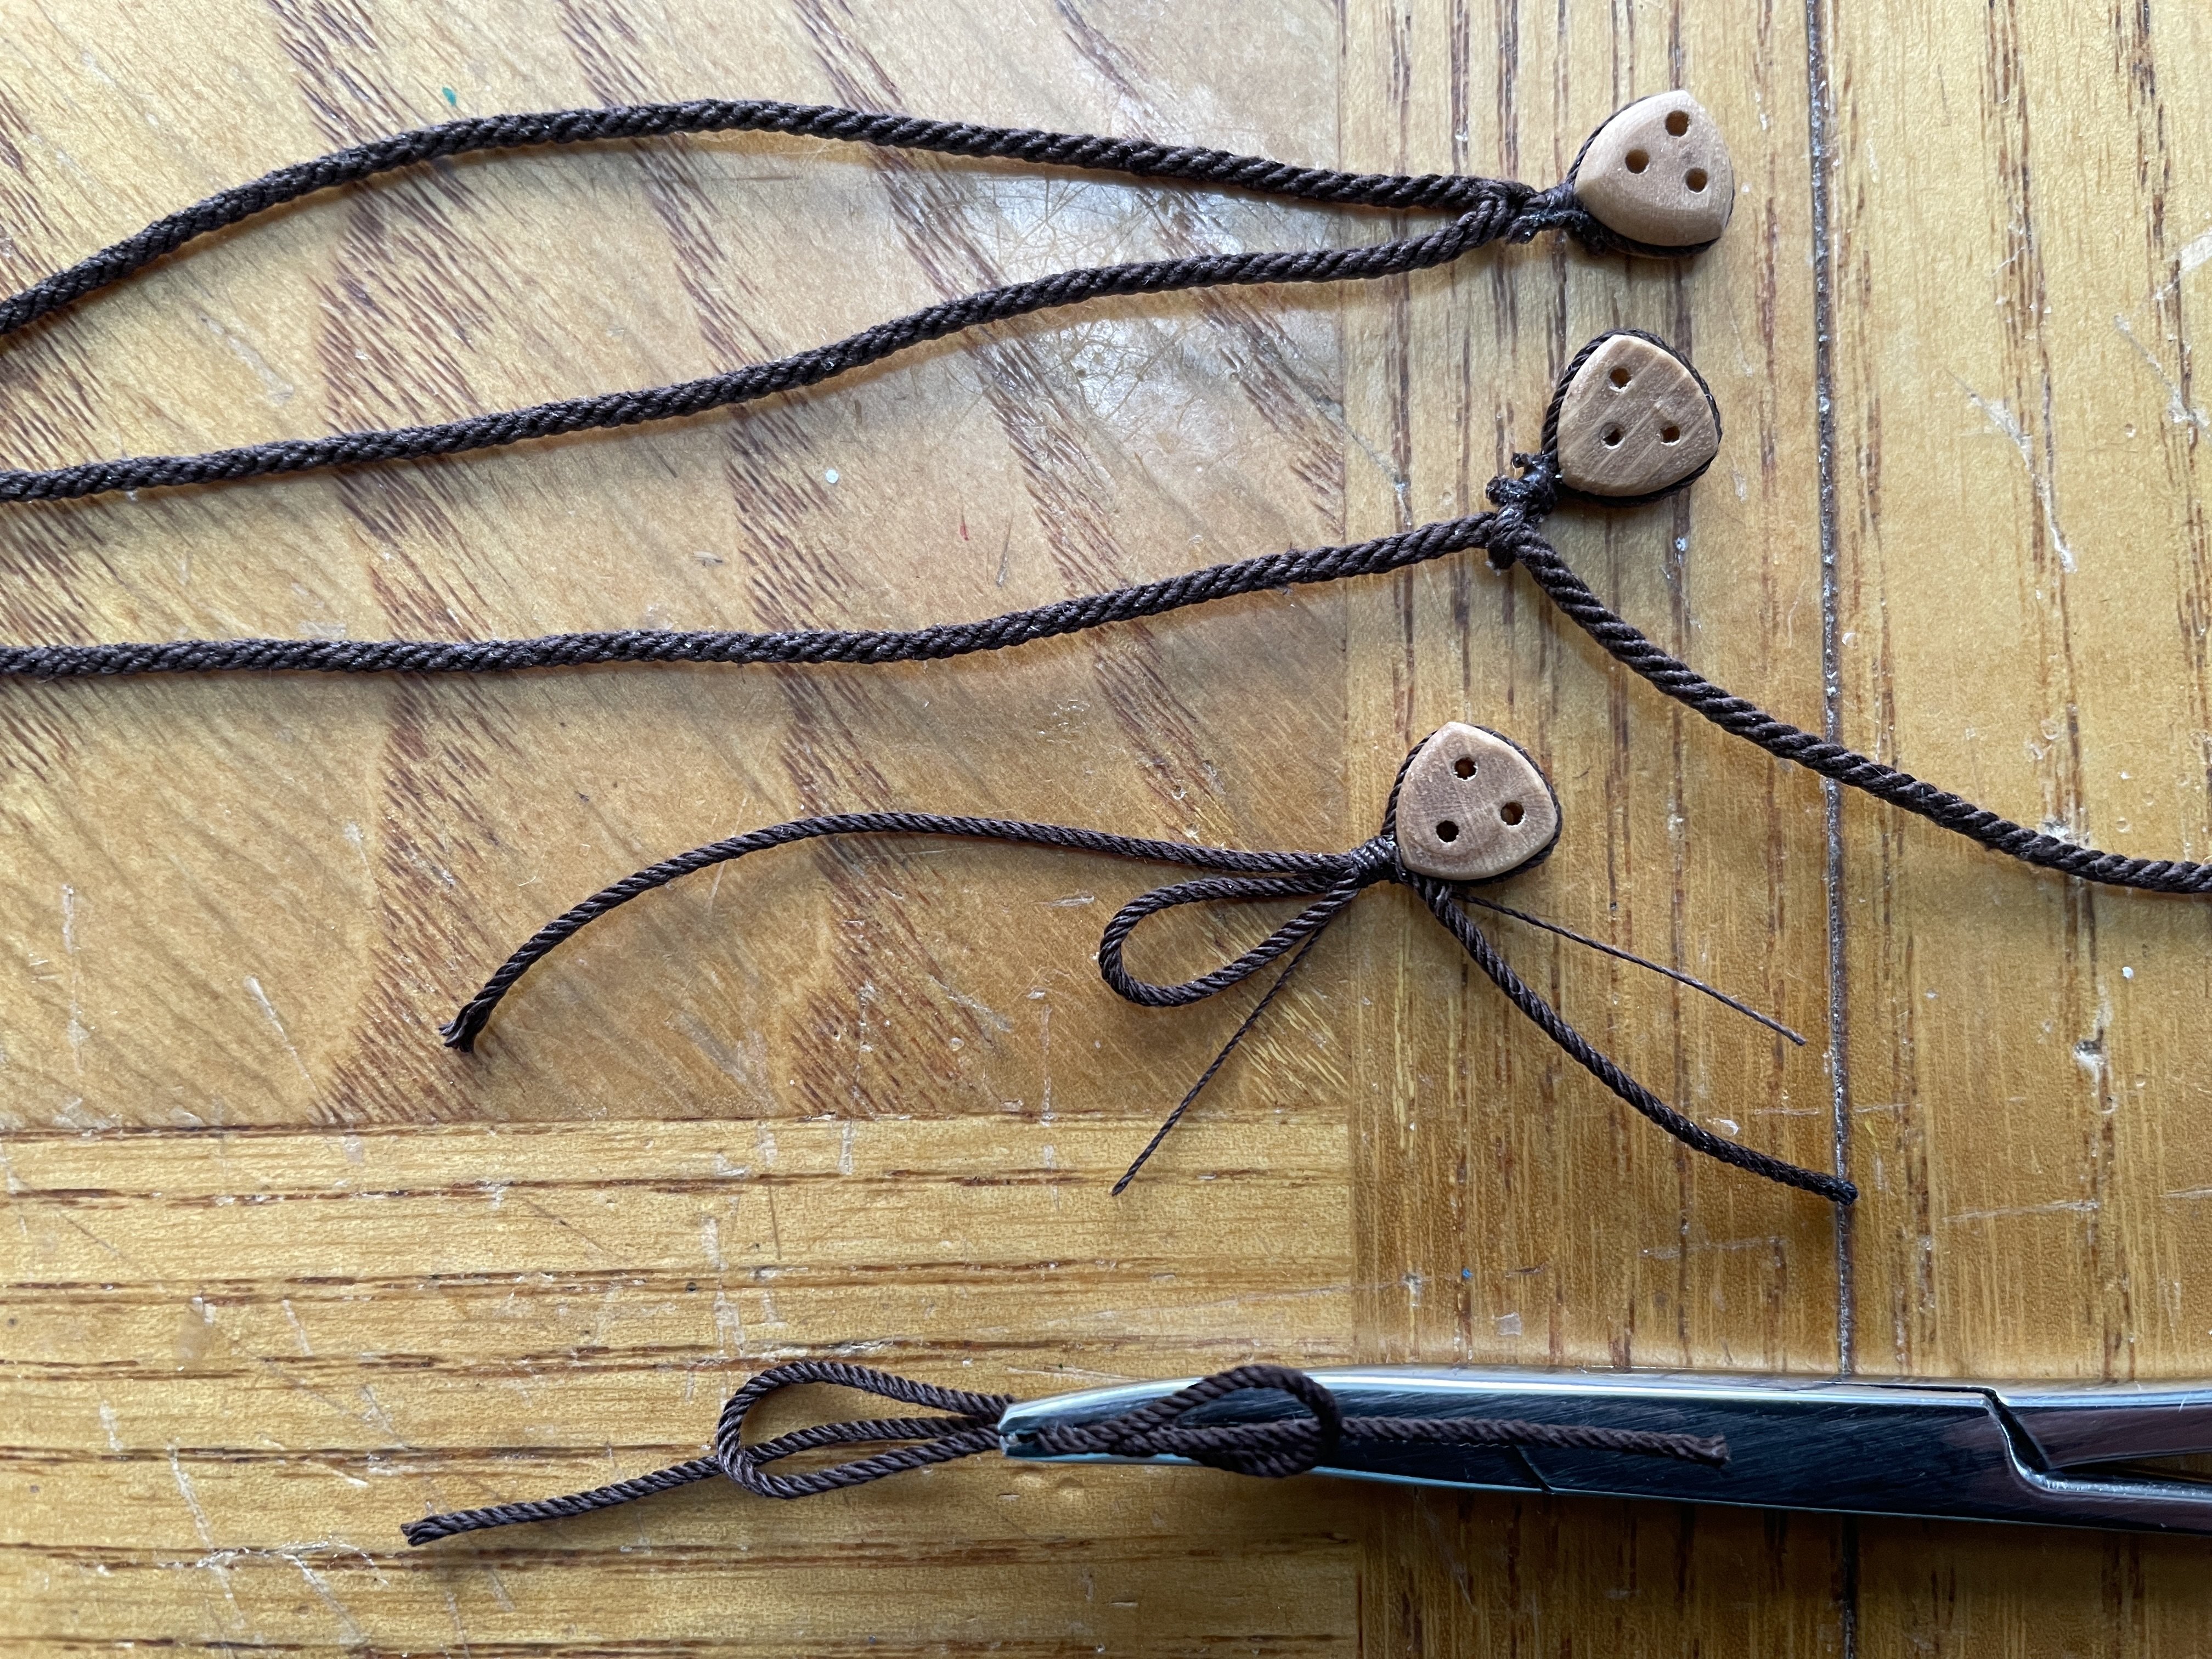
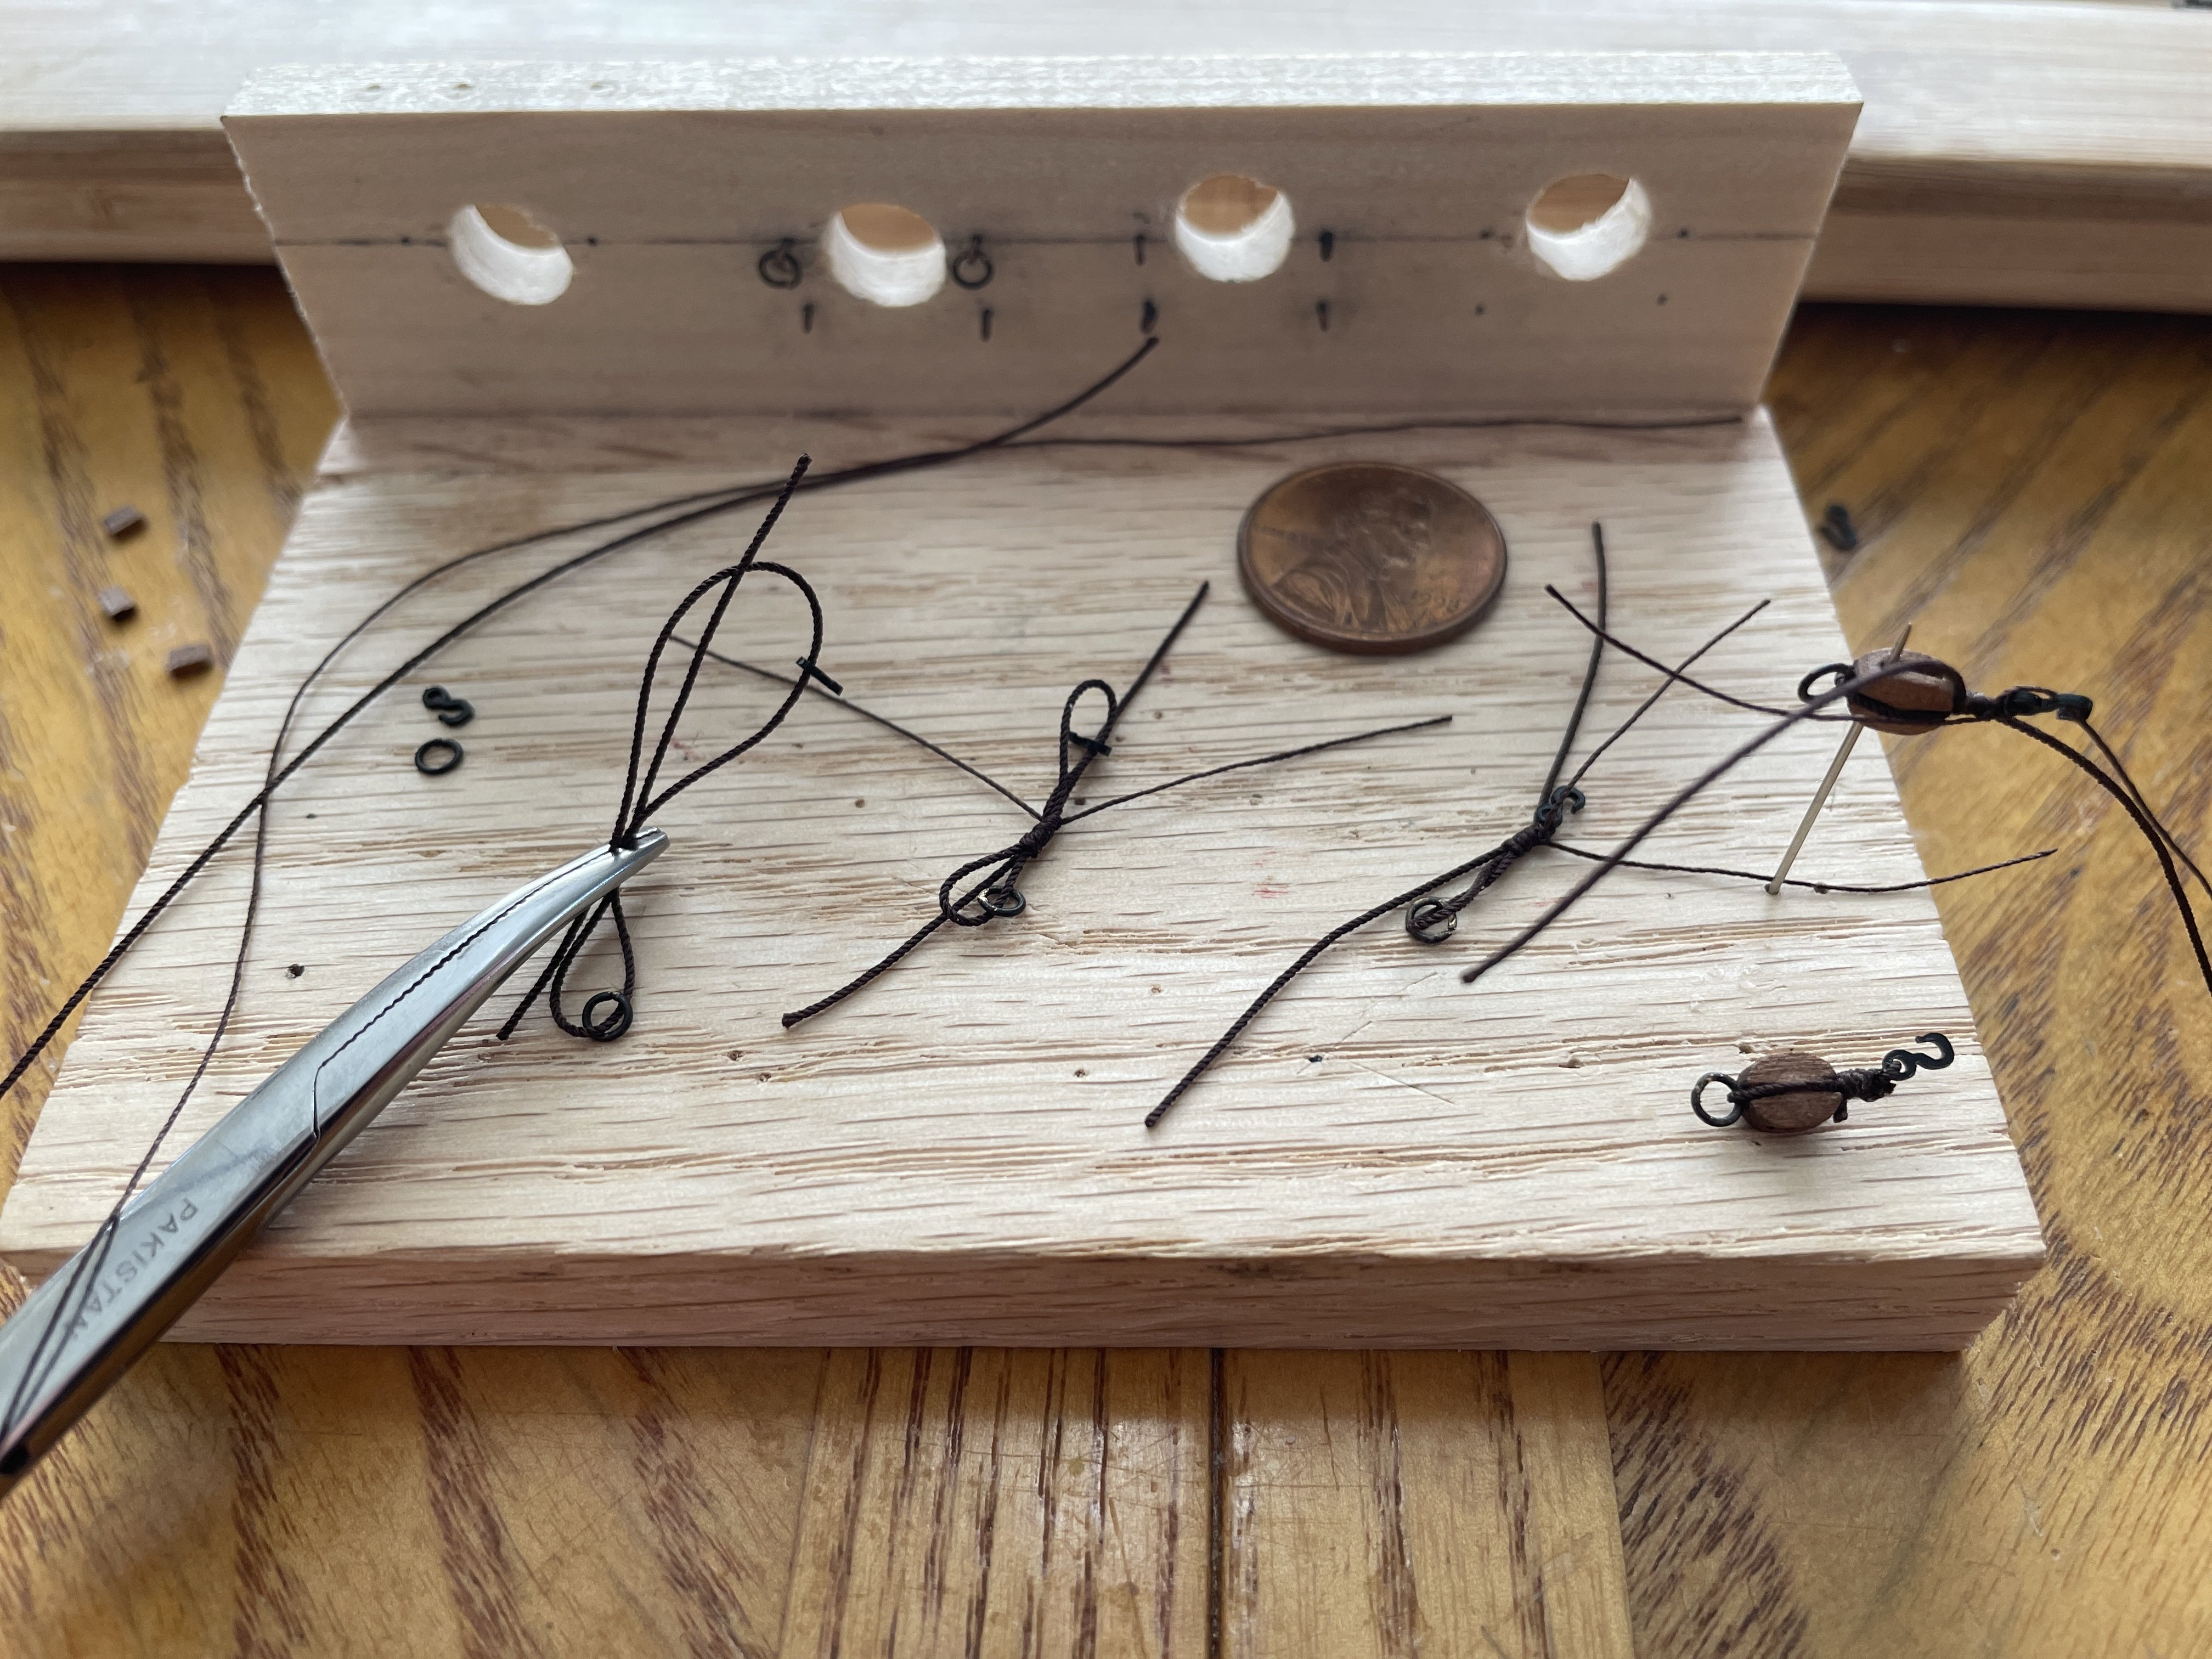
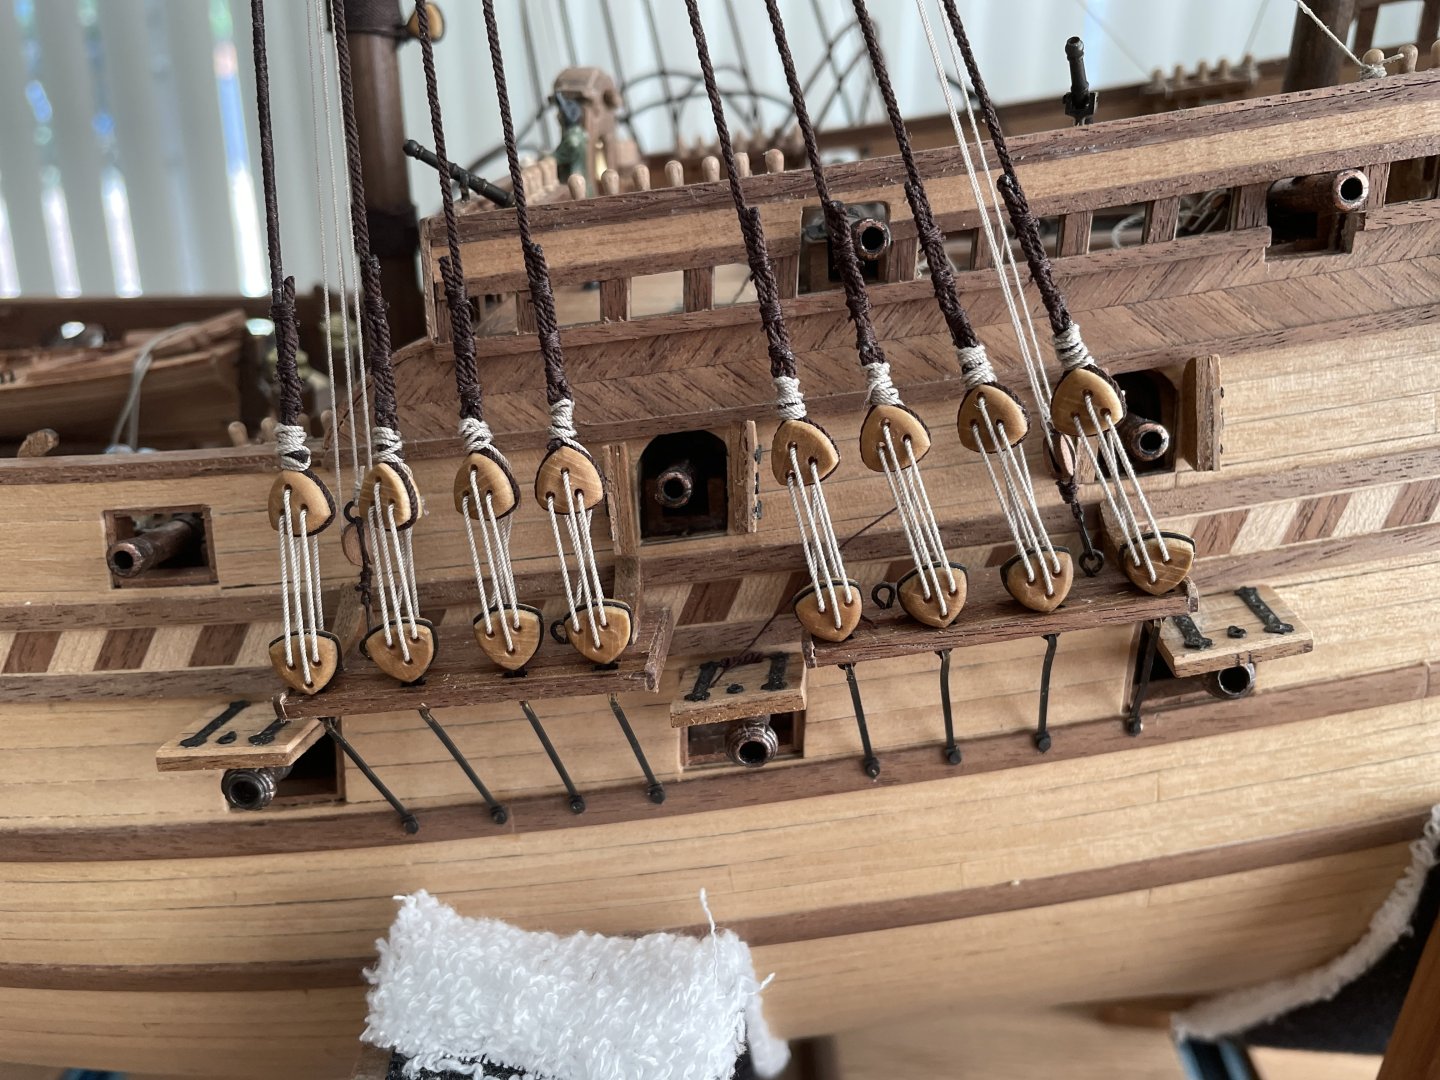
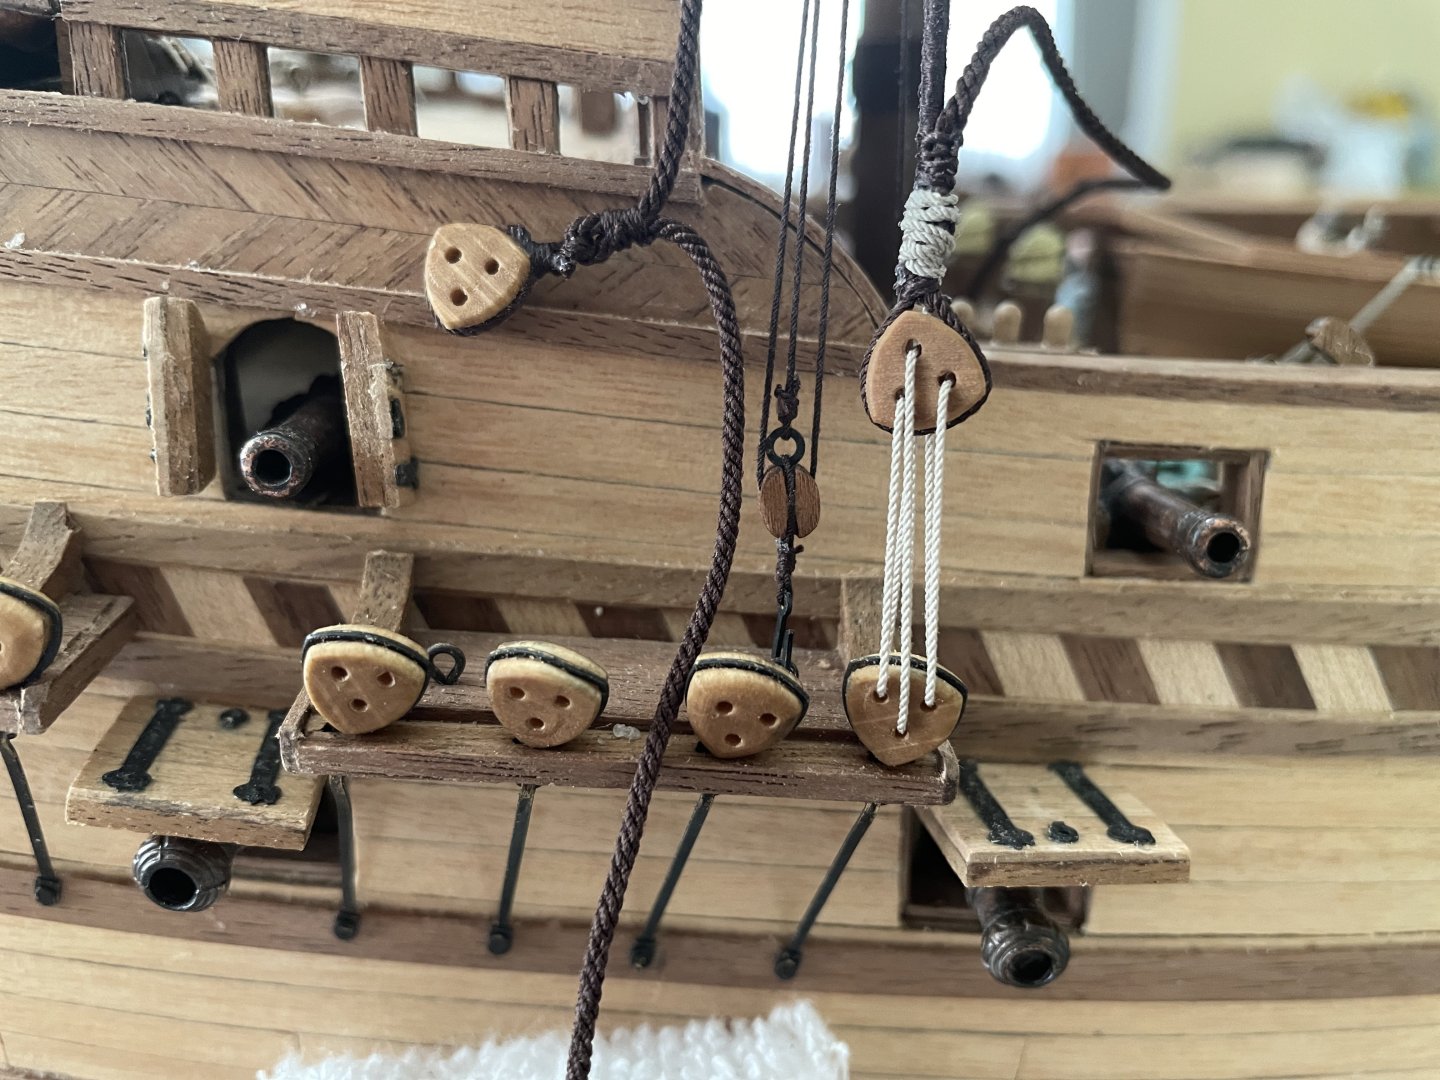
Ratline slight modification. 1. The triangular blocks are, well, needed some love. The side grooves are just too shallow as is. Got some miniature files and got to work on them (I should have bought some earlier... too late now). 2. The blocks are fine with a metal brace but don't really work with 1.3mm rope. The block just slips out easily. A no-go for the ratline if you want to have some tension. In addition, it is really hard for me to tie them strongly on the ship directly. 3. Adjusting the height was difficult: hard to do without a second pair of hands. The rope just does not slip well around a triangular-shaped block. I had to come up with a plan (see pictures below). a. I used a 1mm rope to tie them. Using a slip-knot in a figure-eigth. This allows me to tie really strongly so they don't slip. b. next I slip the 1.3mm rope through the eye-lid open at the other end of the block. After tying firmly, it does not slide freely BUT can still be adjusted later on. c. I can then move it to the ship and tie. Only 41 more to go. Time will tell if the approach holds on. Lastly, I served the ropes on top as well. I'm reading that the first line of the ratline is served for the full length too, which I did. Hopefully it is appropriate for 1577. Things will get busy up there soon.

-
Hey GranpaPhil, nothing really wrong. Just a little frustration on the supplied materials that more often than not as to be fixed or just replaced. Still moving along though.
-
Amati Revenge Kit Comments: Frankly, Amati will need to significantly up their game before I ever consider one of their kits. From what I seen, Syren and Vanguard is leading here by offering quality design and supplies, and they should be commented for it. EDIT: This is mean to bring awareness, not a deterrent at all. The good: 1. Overall design: Excellent, top notch Note: paper template ok, but seriously this is NOT a paper ship. Wood inlays please or change the design. 2. Documentation: Excellent, top notch 3. Accessories (cannon and others): Excellent, would definitively use 4. Frame quality: good... nothing seen anyway Edit: the sails seen quite nice material but have not seen other. Now, with the bad: 5. Wood strips: sub-par, cheap wood, need significant improvement. I had to replace a lot. Frankly, I would change everything if I was doing again. 6. Wood laser-cut accessories: Very brittle and cheap, not usable without significant re-enforcement 6. Masts: ok, at least try to supply the same type of wood. Need staining for consistency (I prefer natural wood). 7. Rope: very low quality, no one will use that 8. Blocks: very low quality, disintegrate in your hand. Did anyone ever use that? Overall: B-. I'm sorry not worth the price as is. This is a shame BECAUSE the design and look are FANTASTIC. You are basically paying for just that. Be ready to spend at least the kit price or more in improvement for a good finish. As a kit manufacturer, I would ask myself this: Would the consumer, who will spend a thousand+ hours building a kit, be whiling to have sub-par end-result at a premium cost?
-
A great tutorial... very timely, I'm just starting the ratlines on the Revenge. Thanks for the tips!
- 80 replies
-
- 5
-

-
- rigging/masts
- NRG
- (and 2 more)
-
Thank you... so much more to be done. ;_). I still need to find a way to clean up the slip-knock better for elegance.
-
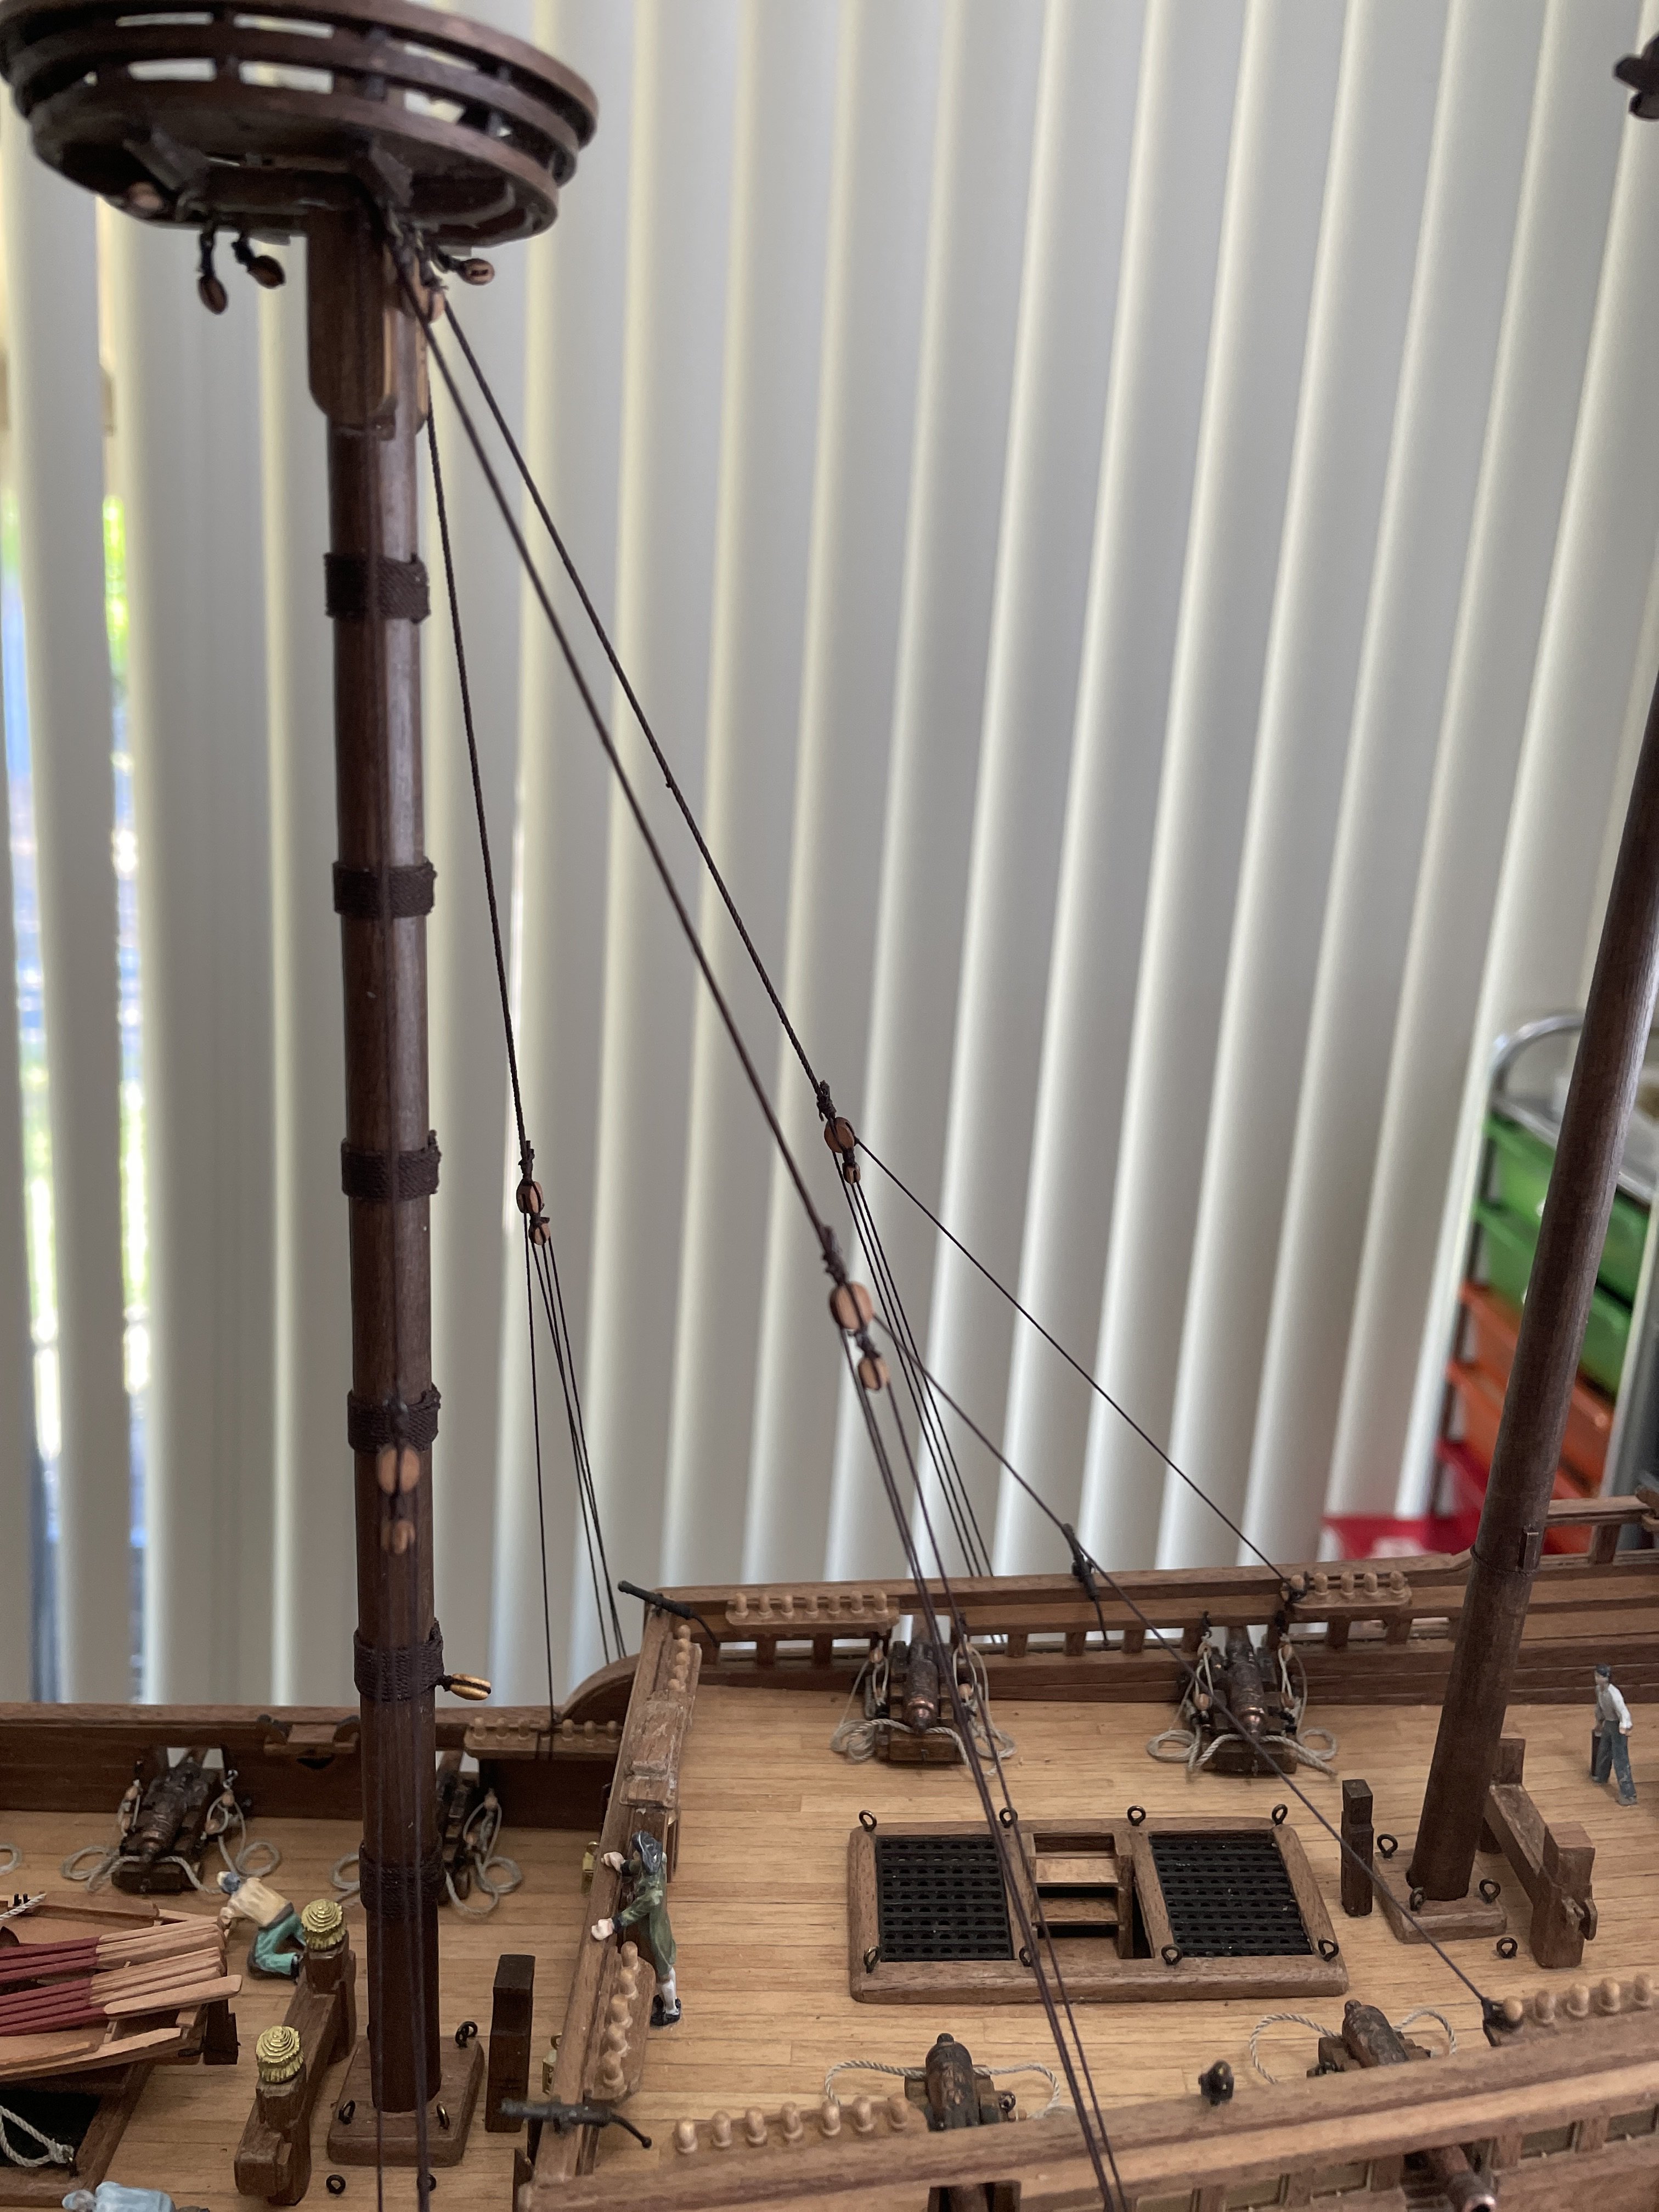
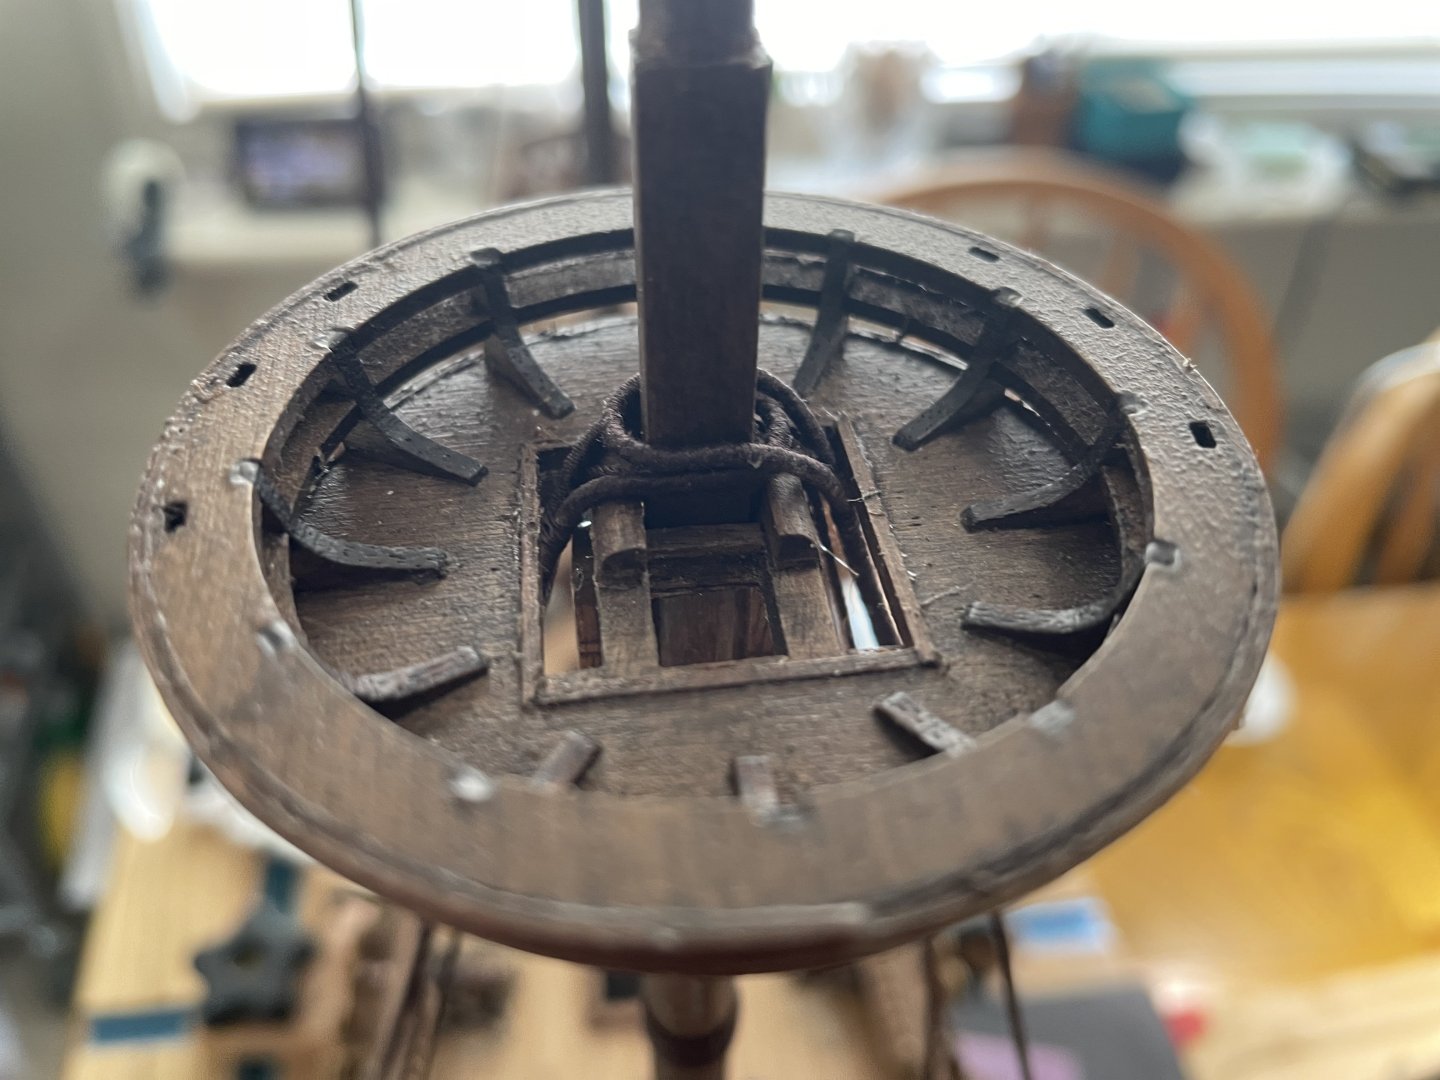
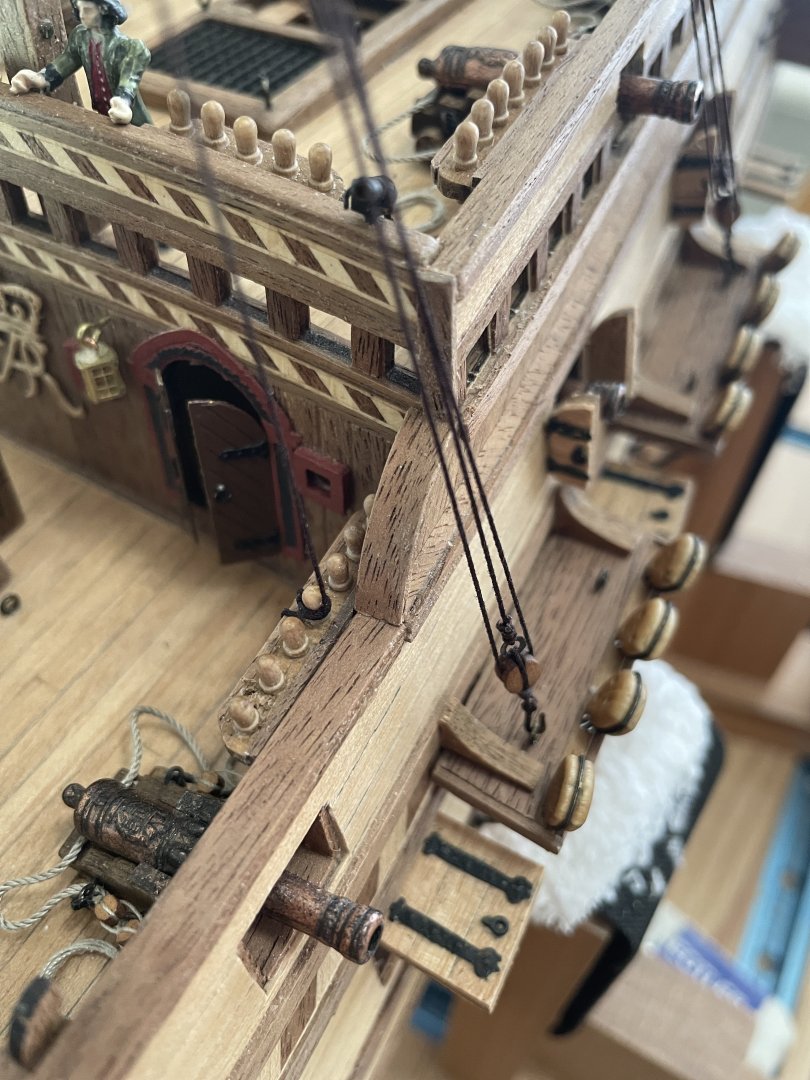
Main Mast Tackle: Attaching those under tension to side racks is a little challenging. One mast done, three more to go. Note: Initially, I used MARA 30 thread directly for the lower part of the tackle... the one that runs through the block (since it was roughly 0.25mm as is). It was a BIG mistake. The tread by itself is slightly elastic and unwinds/twists crazily under tension. It had to be replaced. The same diameter rope was built from 4 MARA 120 treads for the same final diameter. IT WAS so much better. As expected, couple crews got knock over in the process LOL.
-
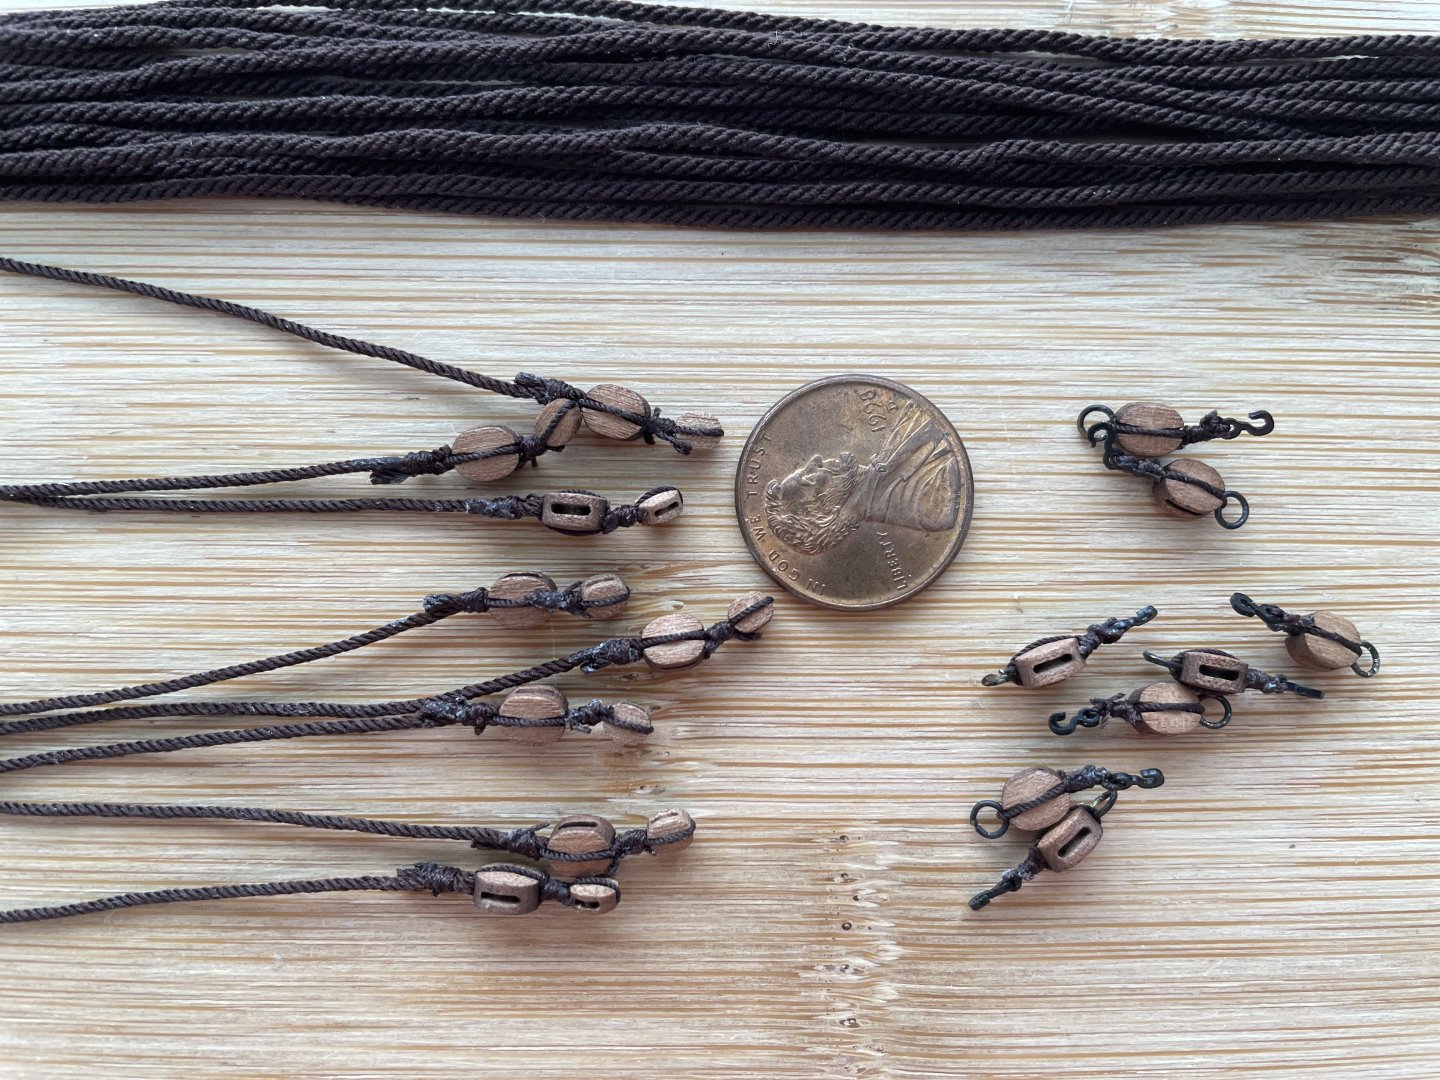
Preparing ropes for rigging: Quite a number of ropes will need to have blocks attached one way or another. Sometime 2 blocks in a row like in the first picture. At times, it is not the difficulty but simply having a method to tackle the tasks. Tying rope in a figure eight, all tied using a slip knot is very useful for all kind of attachments, either to another rope, mats, spars, etc... For those new to this, let me share my simple how-to (pictures 2). 1: cut two ropes of appropriate diameter. 2: insert the elements you need (here a hook and a ring) and form a figure eight with the rope. Hold in place with a lock hemostat. 3: Tie a slip knock around the figure eight. 4. once done, you can just simply pull one or the other end to adjust the length of the loop. 5. insert the block in one end-loop... and cut all excess ropes.

-
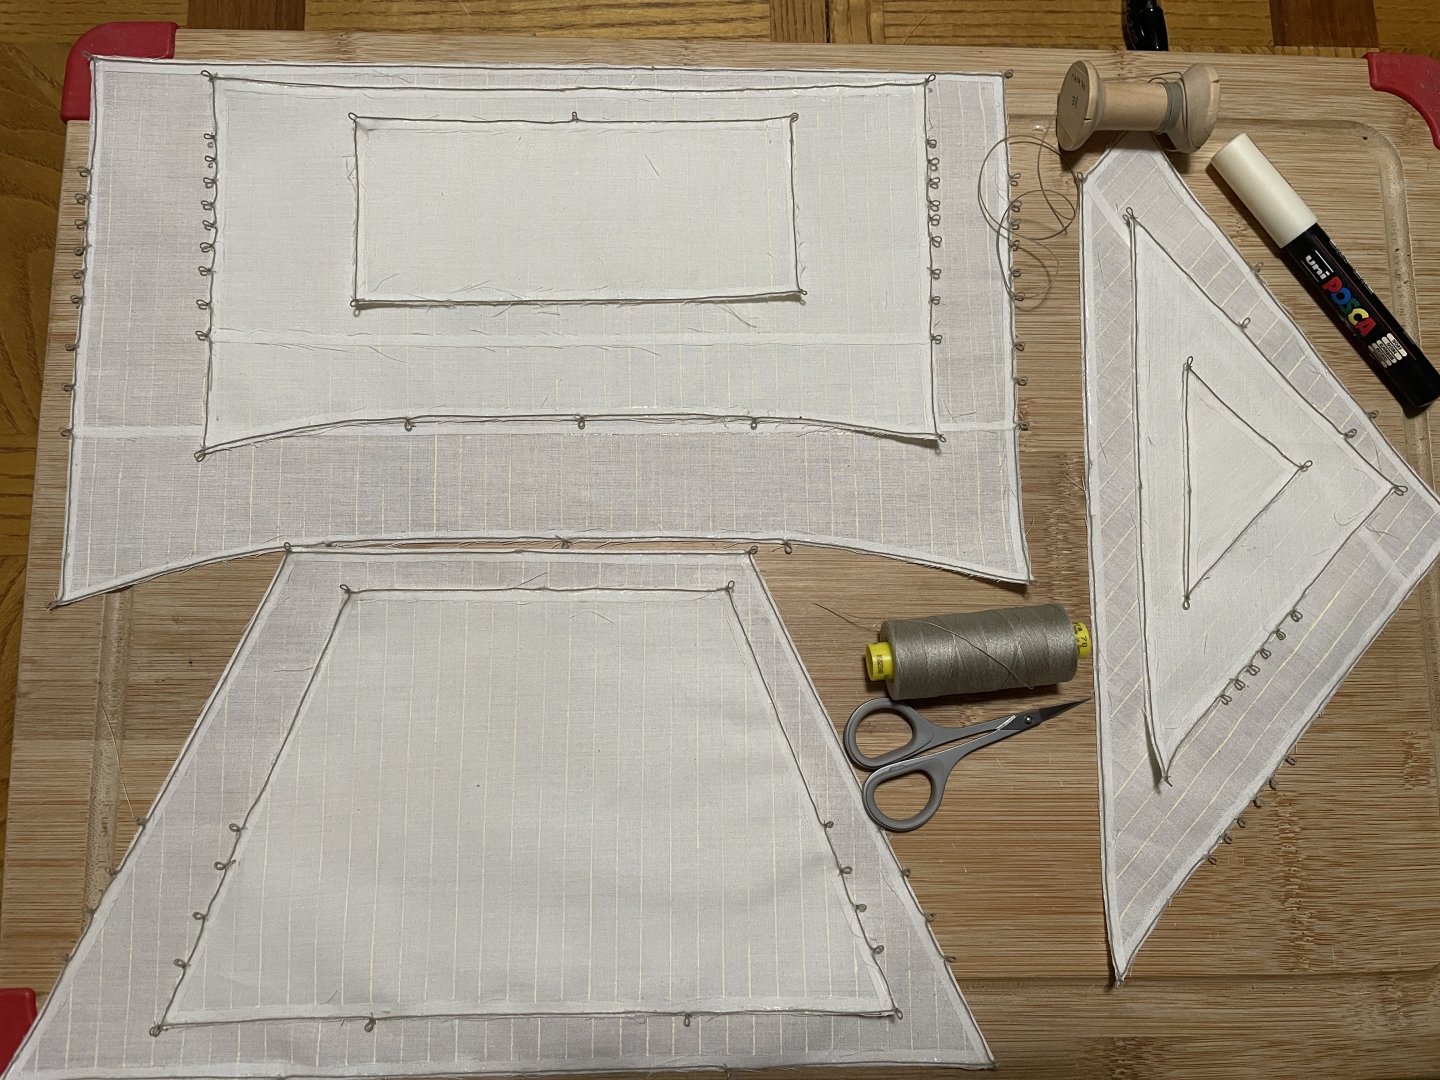
Sails: I wanted to keep the sails flexible... so no dipping in diluted glue. A 2-3 mm border was glued around to reenforce them at the edge. The "cringles" were a pain to do as well as sizing them.