LoydB
-
Posts
94 -
Joined
-
Last visited
-
 scrubbyj427 reacted to a post in a topic:
Spam in member message section?
scrubbyj427 reacted to a post in a topic:
Spam in member message section?
-
vvvjames reacted to a post in a topic:
Spam in member message section?
-
 LoydB reacted to a post in a topic:
Spam in member message section?
LoydB reacted to a post in a topic:
Spam in member message section?
-
uss frolick reacted to a post in a topic:
Spam in member message section?
-
hollowneck reacted to a post in a topic:
Spam in member message section?
-
Chuck reacted to a post in a topic:
Spam in member message section?
-
 Would this be the correct thread to talk about your car's extended warranty?
 -
Ryland Craze reacted to a post in a topic:
Lowell Grand Banks Dory by LoydB - Model Shipways - 1:24 - First Build
-
Kenchington reacted to a post in a topic:
Lowell Grand Banks Dory by LoydB - Model Shipways - 1:24 - First Build
-
robert952 reacted to a post in a topic:
Lowell Grand Banks Dory by LoydB - Model Shipways - 1:24 - First Build
-
JacquesCousteau reacted to a post in a topic:
Lowell Grand Banks Dory by LoydB - Model Shipways - 1:24 - First Build
-
mandolinut reacted to a post in a topic:
Lowell Grand Banks Dory by LoydB - Model Shipways - 1:24 - First Build
-
It’s been awhile on this. I’m dealing with serious nerve pain from stenosis and a herniated disc which has made it no fun to sit and do much of anything. The bands have been soaked and are clamped into position. I’ll glue tomorrow.

- 46 replies
-
- 5
-
-
- Dory
- Lowell Grand Banks Dory
- (and 3 more)
-
LoydB reacted to a post in a topic:
Lowell Grand Banks Dory by MikJ - Model Shipways - 1:24 - First Build
-
LoydB reacted to a post in a topic:
Next "Intermediate Kit"
-
LoydB reacted to a post in a topic:
Next "Intermediate Kit"
-
I am reasonably certain that I will never buy a kit from anyone but Vanguard in the future. You cannot go wrong with one from there you like. He has them broken up by skill level, very helpful.
-
LoydB reacted to a post in a topic:
HM cutter Sherbourne by Maid of the Mist - Vanguard Models - 1:64
-
The ModelKit videos on this are really good, other than his occasional inability to have what he's working on actually in the camera shot. I'm a few smaller projects away from starting on mine.
- 18 replies
-
- 1
-
-
- cutter
- Sherbourne
- (and 1 more)
-
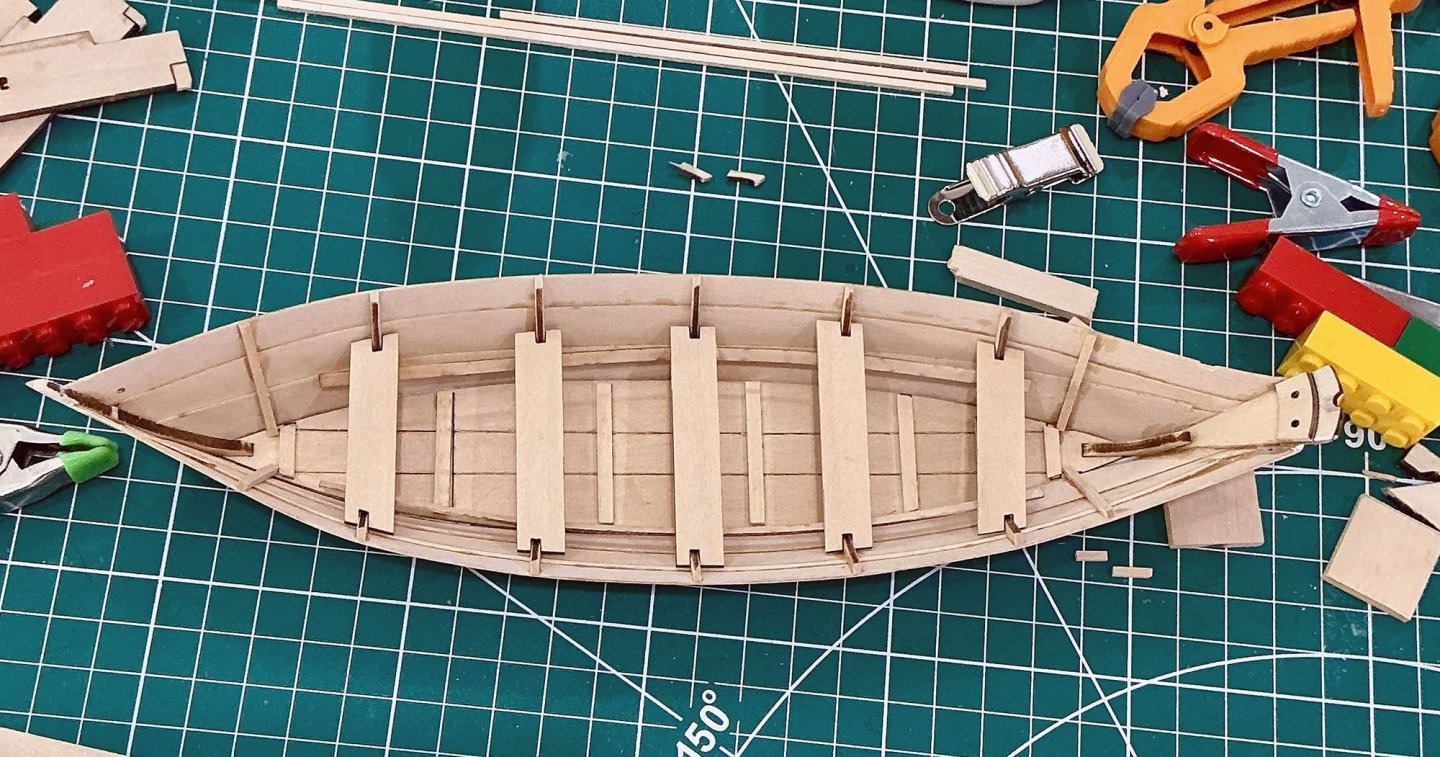
Nice job setting that up. I was slightly off center and spent a bunch of time sanding it even.
- 29 replies
-
- 2
-
-

-
- Lowell Grand Banks Dory
- Model Shipways
- (and 1 more)
-
LoydB reacted to a post in a topic:
Lowell Grand Banks Dory by MikJ - Model Shipways - 1:24 - First Build
-
LoydB reacted to a post in a topic:
Lowell Grand Banks Dory by aaronc - Model Shipways - 1:24 scale - First Build
-
LoydB reacted to a post in a topic:
Lady Isabella by palmerit - Vanguard Models - 1:64 - Zulu
-
So absurdly tall. That looks great!
-
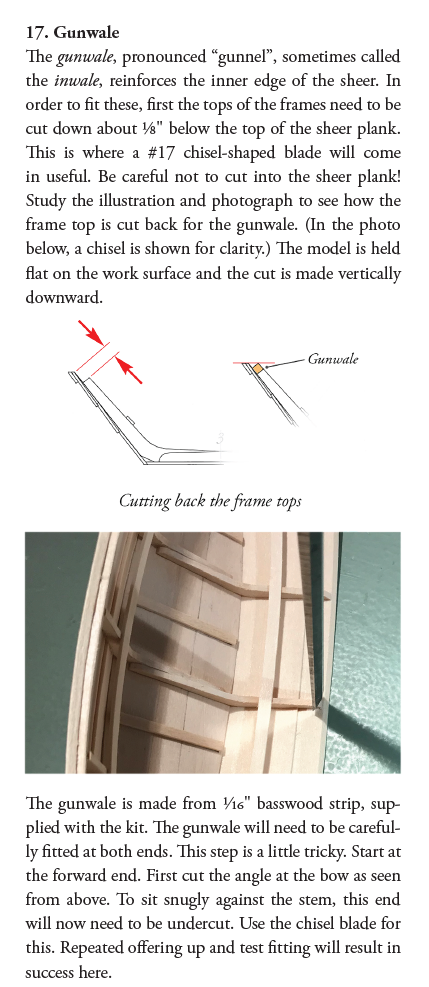
I used basswood strips. I gotta say, having a labeled view off all of these lasered sheets would have added 2 pages to the instructions PDF and would have been immensely helpful.
- 46 replies
-
- 2
-
-
- Dory
- Lowell Grand Banks Dory
- (and 3 more)
-
Ahah. There's no actual picture, it's just on the plan sheet. I missed that completely, thanks y'all.
- 46 replies
-
- 3
-
-
- Dory
- Lowell Grand Banks Dory
- (and 3 more)
-
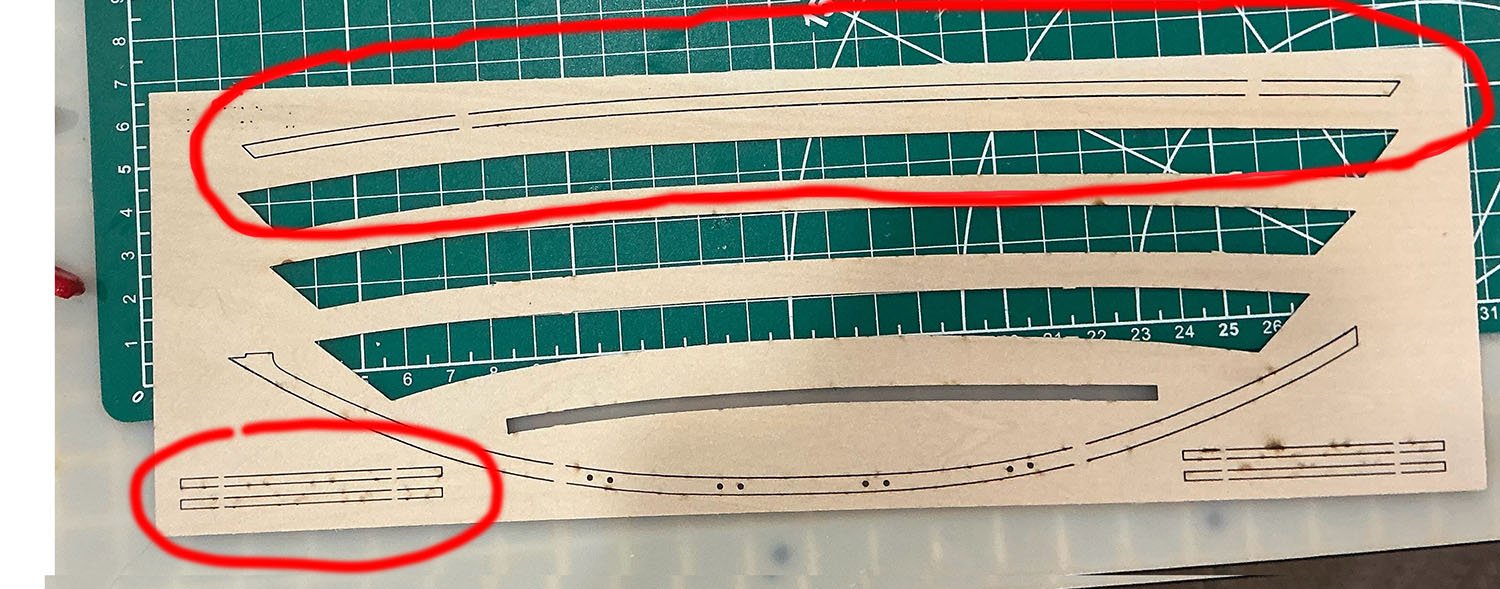
I don't see any outboard bands in either the instructions or in the various pix I've seen online, but I'm also a noob, so maybe I'm not looking for what I think I am. I'll email Expo when I'm back at the house later, thanks.
- 46 replies
-
- 1
-
-
- Dory
- Lowell Grand Banks Dory
- (and 3 more)
-
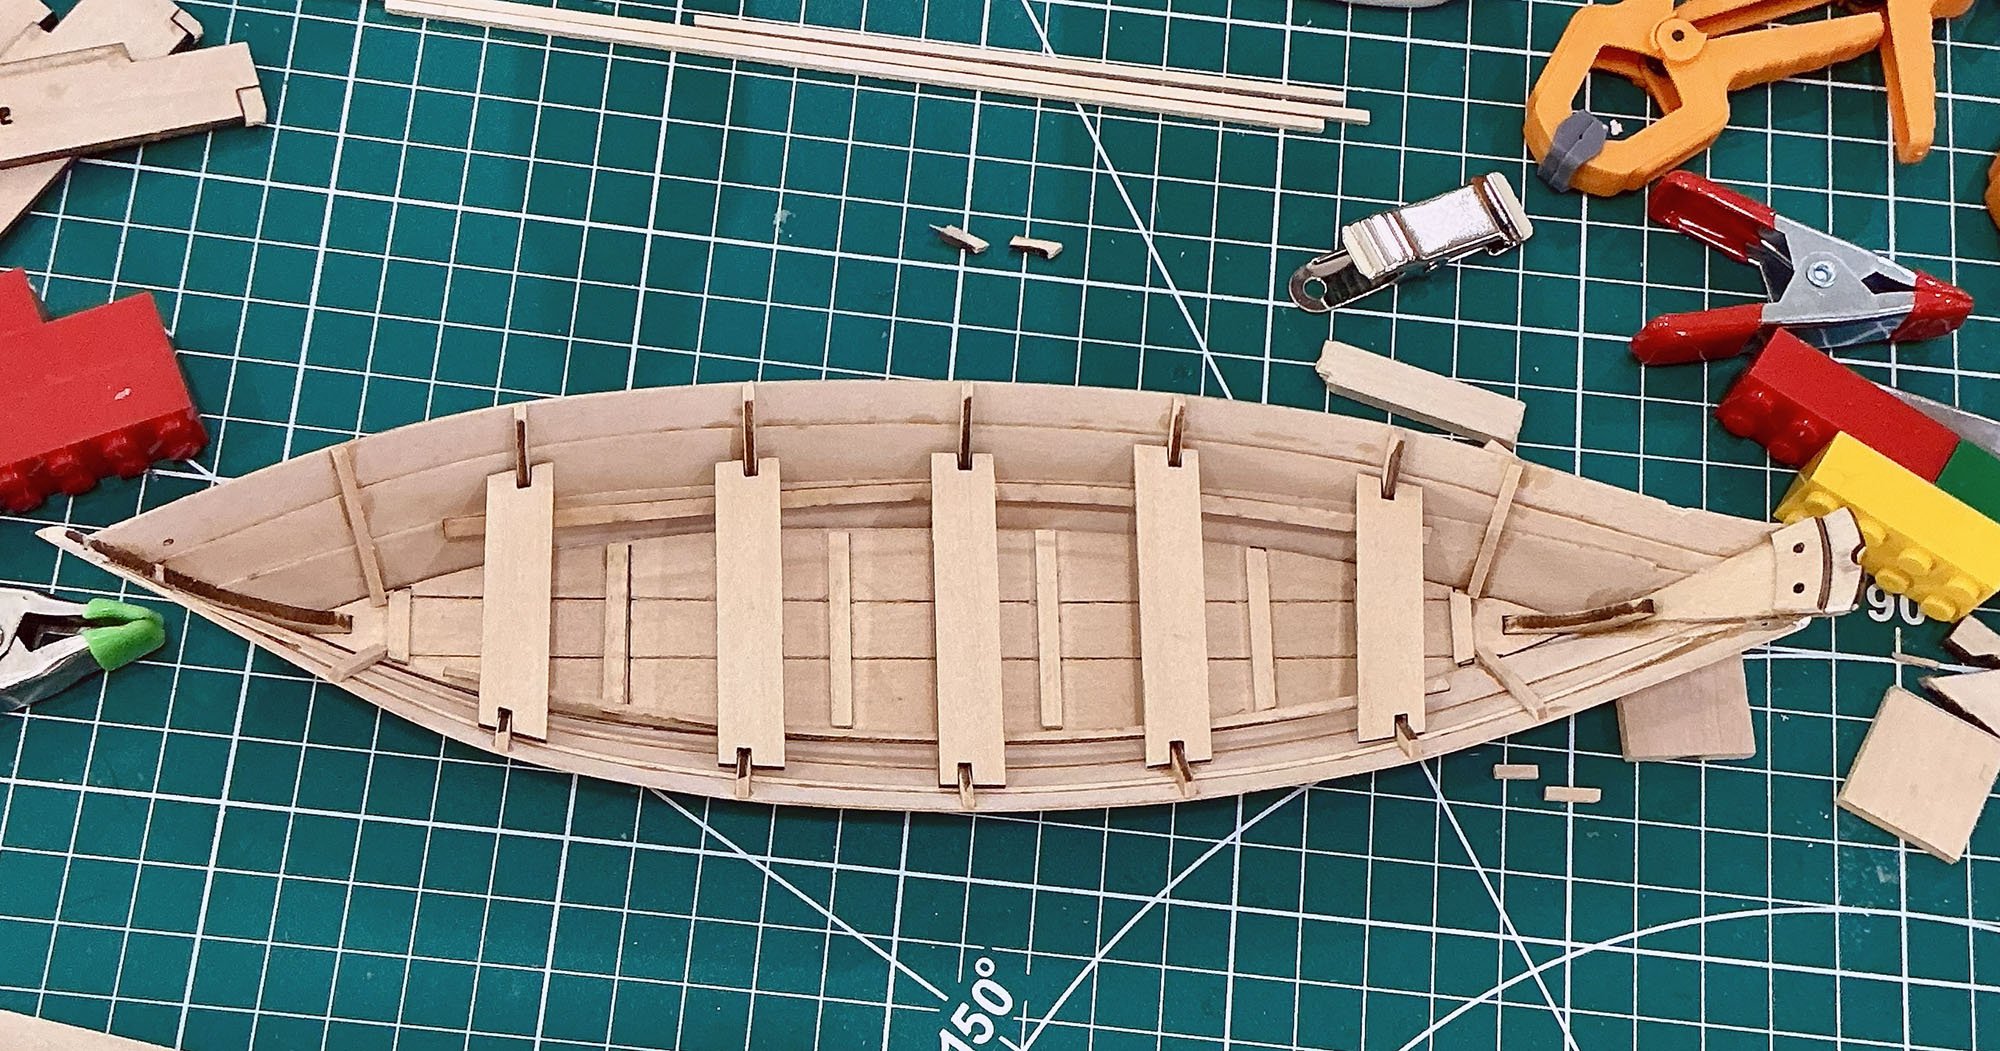
The seat risers have already been installed. In the instructions, the gunwales are made from 1/16" square stock. I have no idea what else it could be for.
- 46 replies
-
- 2
-
-
- Dory
- Lowell Grand Banks Dory
- (and 3 more)
-
Finally back on this after the holiday season, hope everyone is doing well in 2026. I cleaned up the seats and added the seat risers, I'm closing in on it. Question though, what are the pieces circled in red? I'm starting to get 'Why are there leftover bolts?" after reassembling something vibes.

- 46 replies
-
- 2
-
-
- Dory
- Lowell Grand Banks Dory
- (and 3 more)
-
Cutters, Choppers, Guillotines, Slicers
LoydB replied to MintGum's topic in Modeling tools and Workshop Equipment
I have the DSPIAE one (and many of their other tools) and really like it. It's heavy and well-machined. -
I got their plank bending jig and like it. The only thing wrong with it is that I had to partially cover the peg slots on the bottom so the wooden dowels wouldn't fall through.