


rmccook
-
Posts
13 -
Joined
-
Last visited
Content Type
Profiles
Forums
Gallery
Events
Posts posted by rmccook
-
-
2 hours ago, Chikpeas said:
Oh man thanks for sharing!!
I actually broke a lot of things so far 😑😂
The bulwark for example— broke in half. Not willing to talk about that, BUT, I fixed it and honestly you really can’t tell.

LOL!!! That little weird glue spot- I had no idea wood was so forgiving. I’ll also give you a dollar if you can find the plank that split in half.
glad you said that because I’m having a fit at how these planks aren’t fitting properly. Being an artist I keep telling myself if anything is Too off I’ll slap clay on it, model, and paint it to match 😂
What build are you going to next!!!
Mine broke too…
the good news is it glues easily…


I worried it looked terrible and spent time sanding, etc and only later discovered it’s covered up on the outside and painted and partially obscured on the inside.
Same thing with the planking - a second layer is going to go on, so it’s important for it to hold together and be smooth. But, aesthetically, it’s not super important if there are errors. You can slice and splice in planks, as long as it’s sturdy and the correct shape.
Now, if you’re like me and you break planks on the second layer, where they are much thinner and delicate, or don’t make clean cuts, which leaves it looking ragged, it’s more of a problem. I had to peel off a number of garbage looking outer layer planks and fit in new ones, particularly on the bow as I tried to fit the keel piece on… it definitely wound up looking a bit patched and I thought I had ruined it… but some obsessive sanding and varnish REALLY goes a long way. I probably won’t post a picture of THAT after seeing the gorgeous work some people do around here, but it looks acceptable to the naked eye, that is not inspecting it too carefully, which most eyes won’t since this model is probably going to live above my desk or workbench. It all *mostly* was okay, but most importantly, now I know what’s important to pay attention to on my next model (don’t ask me about the next one yet, I’ve got to get through the rigging).
The other thing I’ve read (here on MSW) is that OcCre has very good customer service and if you do irreparably break/lose something they will be very helpful in replacing. And when it comes to things like planks, copper wires, thread, little eyelet hardware, they seem to have packed a significant number of extras. Even when I had to discard planks I really botched I had plenty to spare and now that I’m down with the hull and deck, I probably have enough leftovers to do another half side of a hull, if I needed to.
-
-
Welcome!
I've just finished the first book of instructions (the hull part) for my Polaris and am stalling work on the mast and rigging. It's a fun kit!
I've found OcCre's manual extremely clear and easy to use, but the YouTube series they have for each step has been INCREDIBLY useful. Sometimes you just need a different angle, or watching someone do some tricky little thing that you just can't show in even the most detailed instruction or clear photo. I've also noticed that the videos slightly deviate from the manual, but always in ways that get it done.
My biggest piece of advice (as someone barely ahead of you) is that you should not be afraid to make mistakes, because you will make a lot of them, but almost all of them can be fixed with some sanding. AND, I've discovered, most of the mistakes I really worried about ending up being completely inconsequential because they were covered up.
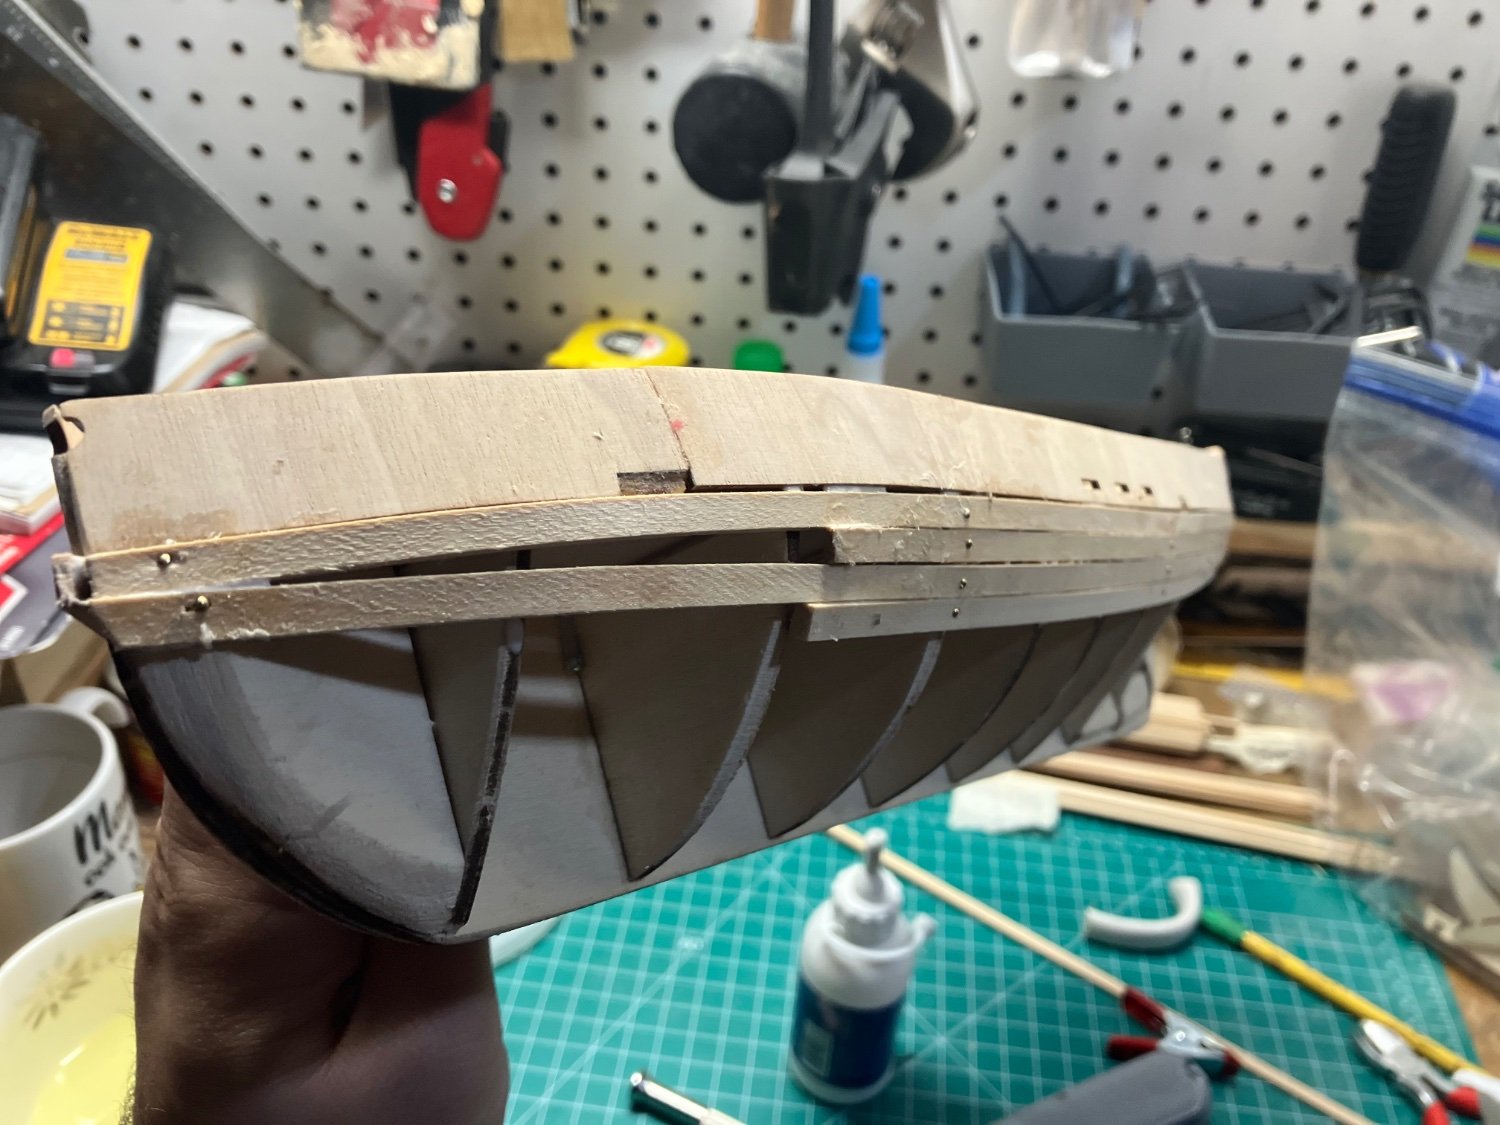
I did not take shaping the bulwarks in the bow very seriously and ended up really worrying about it, but by the time the two layers of planking were on, sanded and stained, you'd have no idea something was amiss. It certainly is uneven in its shape in a way that would matter tremendously if it was a real boat trying to sail anywhere, but to the naked eye it can't be seen and it sits levelly in the stand. Same with the bow—really stressed over how the planks were coming together at the front, how it would all feet with the front section of keel, etc. and sanding, a small amount of wood-filler, and stain made my mistakes barely perceptible and now mostly covered by the anchors.Good luck!
-
On 2/24/2024 at 8:00 AM, Eamon said:
Hello! I'm writing from my current home in Tanzania, but originally from Virginia.
One of my grandfathers was a model ship builder himself, the other was a naval architect, and one of my uncles is a nautical painter, so it was somewhat inevitable I'd try picking this hobby up at some point.
I'm currently working on my sixth ship. The first was a very old-school model with only vague instructions, and I had to give it up after the first planking. The second and third turned out just ok, and I ended up throwing them away to conserve space in my house. Finally, my fourth was the Artesania Latina Endurance, which I picked because of the comprehensive instructions and design for lighting. It may offend purists a bit because I ran out of time before moving overseas, and had to leave off the lanterns, ship's boats, and a few other details.
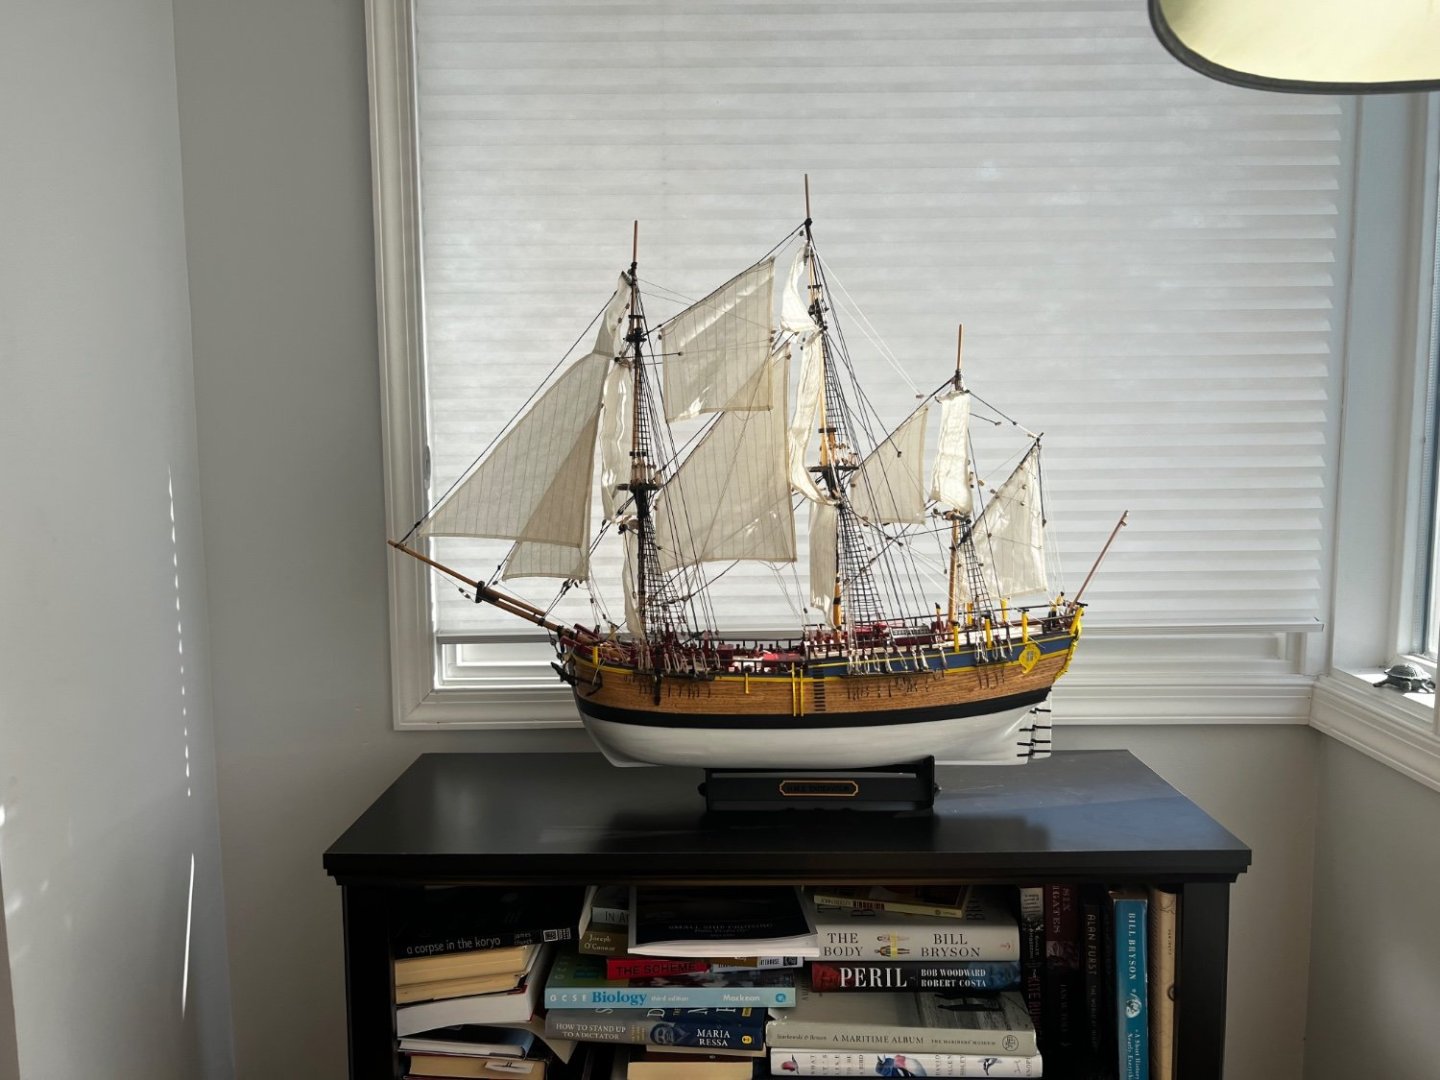
Next, I completed the Occre Endurance, which I picked for the subject:
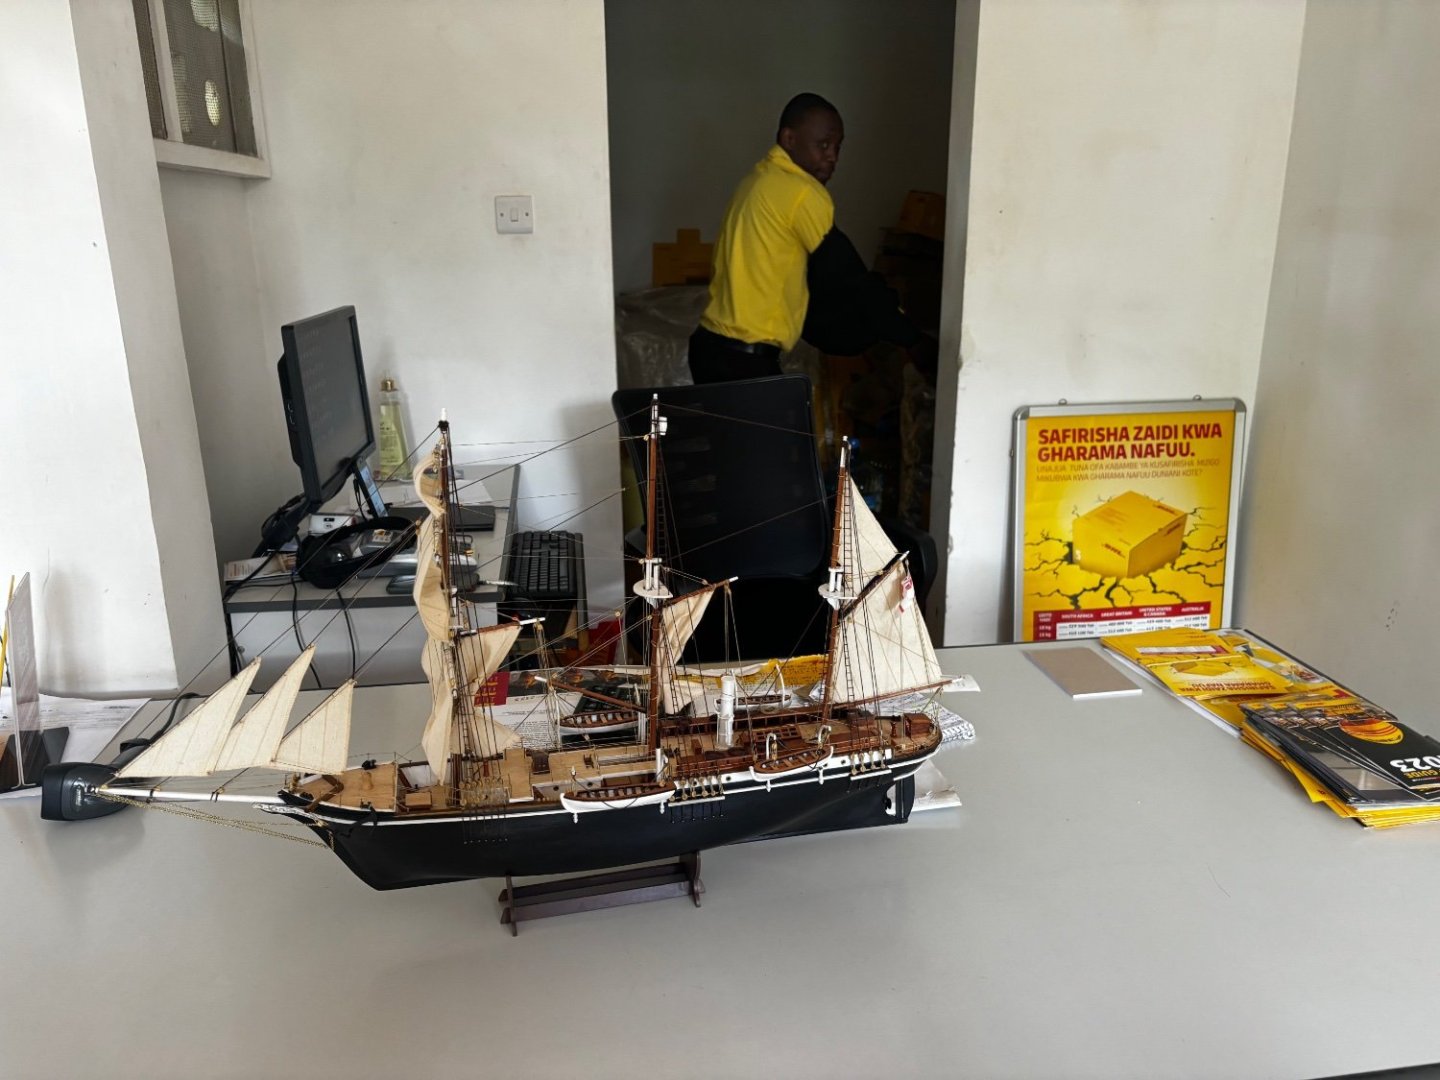
Now moving on to the Artesania Latina Bounty, which is a monstrous kit. I'm looking forward to getting help from the experts here as I work through it!
great looking boats! How did you ship them safely when you went overseas?- Eamon, Keith Black and mtaylor
-
 3
3
-
12 hours ago, scrubbyj427 said:
As a moderate to advanced builder You can spend $1700 dollars on the full Winchelsea build and have a fully authentic model of an English frigate that is not only authentic but perfectly to scale and almost indistinguishable from a contemporary model or you could buy the Indefatigable kit from vanguard for even less than $1700 and still have a better more authentic scale model that accurately represents a 44 gun heavy frigate. As a new builder I’d be looking to cut my teeth on sub $500 models that I wont sweat if they turn out poorly. This model makes no sense to me at that price.
Well, again, it’s definitely not for a beginner. And it’s pretty clearly marketed as for someone with “expert” ability. Having a wider tolerance for authenticity doesn’t mean you’re necessarily a beginner - there’s probably a big part of the model ship market who just enjoys the challenge of putting together a complex project. Good for them, and good for OcCre if they can get $1700 out of them.
And if there is some hypothetical random person with $1700 burning a hole in their pocket who sees that kit as their entry point into model ship building… well, someone was going to separate them from their $1700 might as well be OcCre. If they impulsively spend THAT much money on a model ship kit they have no experience doing anything like, it doesn’t sound like they were going to be much of an asset to the community anyway - they were just as likely to stumble into a sporting good store and buy a set of golf clubs or something. Frankly, if it keeps a model ship kit company in business seems fine to me.
But I also think what’s really going on, if you read the marketing material, the justification for the price seems to be the “exclusivity” of it - the limited quantity and the numbering of each model, accompanied by a coin, etc. I find people who are interested in that sort of thing completely mysterious, but there are plenty of people who LOVE the idea.
It doesn’t appeal to me, for a variety of reasons, but mainly the open hull, but I think it’s for people who have enjoyed OcCre kits before, want a complex challenge and are motivated by the collectors item shtick.
- mtaylor, DavidG, scrubbyj427 and 1 other
-
4
-
On 11/6/2023 at 8:58 AM, allanyed said:
It's not totally accurate but that may not be that important for some. I do wonder if there is a market for yet another Victory kit.
Check out the sails, oversize belaying pins and odd looking gratings as they are not realistic but still look nice to many people. The wales are completely wrong but again, it probably does not matter to some builders or any casual observer.
Hope we can agree to disagree Keith, but if the pintles and gudgeons are any indication, the fittings may not be very good. They are hugely out of scale. For a first rate around 1800 the pintles would be 5 1/2 inches wide (0.06" at 1:87) Scaling the photos, they look to be closer 0.12" wide, or double what they should be.
On the plus side, this kit gives a lot of builders a chance to do a plank on frame model instead of POB. There is always the opportunity to do some research and replace the things that are not correct.
Allan
Would it really be authentic if it showed up perfectly built and no need for reworking? I mean, what's more authentic than a British warship that turns out from the shipyard with questionable construction technique, incorrect fittings and poor quality materials? They should include a scale Admiralty inspector, with little notes stuffed in his back pocket looking the other way and then you can call any problems with hatches, sails and pins authentic!
On 11/6/2023 at 8:44 AM, Gregory said:Experienced modelers won't be interested, but there are lots of beginners who will be all over this.
$1700 kit price and 6,000 pieces... it's not for beginners.
-
On 10/25/2023 at 3:42 AM, Bob Cleek said:
Yes and no. Gesso would work, but the problem is that gesso is quite thick. When painting miniatures such as ship models, the goal is to apply a "scale" coat of paint, which is best defined as "the thinner the better." It is important to use as fine a grind of pigment as can be obtained, or perhaps as can be afforded, for the finer the pigment is ground, the more expensive the paint is. A thicker coating on a model will tend to obliterate fine detail. Corners become rounded on their outside and paint pools and creates "fillets" on the inside of corners.. The "crispness" one hopes to achieve is lost by applying a thick coat of paint. There is a difference with quality model paint, be it oil-based or water-based: the "good stuff" will have very finely ground pigments. Without getting into the really expensive top-end premixed "modeling paints," the pigments in high quality tubed artist's oil and acrylic paints are usually ground sufficiently fine for modeling purposes provided that the modeler "conditions" them properly, adding the required thinners and dryers. Pigment content and grind should be stated on the paint tubes, or in the manufacturer's product literature. Note that with artist's oils, particularly, they require dryer to be added (sometimes called "Japan dryer) because they are formulated with various vegetable oils, frequently raw linseed oil, which takes a long time to "dry" or, actually, cure by polymerization of the oil. This is a favorable quality in artist's oils because the slow drying oil paint permits the artist to work with the paint on the canvas and enable the painter to work on the painting for a number of days before it hardens and can't be worked on the canvas. It takes some experimentation to get a feel for how much dryer is required, but it isn't much. Most manufacturers will have proprietary driers in their product line for this purpose. If the modelers wishes to add a bit of "boiled" linseed oil when conditioning the paint, this may often be enough to increase the rate of polymerization of the oil to eliminate the inconvenience of slow drying paint on the model. "Boiled" linseed oil, a standard paint and hardware store item, as opposed to "raw" linseed oil, is simply raw linseed oil with some Japan dryer added to it.
If using tubed artists' oils or acrylics and conditioning them for model painting or airbrushing is inconvenient, one very high-quality alternative, if one doesn't mind living with the color selection or mixing their own, is to use "One Shot" brand sign painters' paint. This is an oil-based paint which has a very high concentration of very high quality finely ground pigments. It is made this way for use by sign painters who, with the right sign painting and pin striping brushes, can freehand letter and stripe in "one shot" without having to go back over a sharp edge. It's sold in half-pint cans at some artists' supply houses and most automotive paint supply stores. See: https://www.1shot.com/One-Shot/colors/Lettering-Enamels.aspx
In my experience, I've found the best sealer for modeling purposes (and for cementing rigging knots and for lots of other sorts of similar purposes) is canned pre-mixed clear (or "white") shellac (not the natural unbleached or "orange" shellac which is colored "orange" to "dark brown.") Zinsser's "Bullseye" is a common brand. This is, as I recall, a "two pound cut," which means it is two pounds of shellac dissolved in one gallon of alcohol. It is relatively inexpensive and is thinned with plain alcohol. (If need be, it is conveniently reversible, as in untying sealed rigging knots, by simply dissolving it with a drop or two of plain alcohol and blotting it up.) Don't use rubbing alcohol or isopropyl alcohol to thin shellac. Just use straight alcohol such as is used for fueling marine stoves. Do not, however, use the type of regular alcohol which is sometimes dyed to distinguish it from "drinking" alcohol, since you don't want the color on your model! Shellac will soak into wood nicely and a single coat won't build up on the surface appreciably. Shellac is compatible with just about every other coating and shellacked wood is very easy to sand to a very fine surface. (It is used, mixed with linseed oil in "French polishing" fine furniture." If it thickens in the can due to the alcohol evaporating when the can is left open, as it will do, just add a bit of alcohol to the can and you're good to go.
Yes, your instincts were correct. To obtain razor sharp masked lines on any surface, including models, one should "bite the bullet" and use "fine line" masking tape as is available for the purpose from Tamiya, or, less expensively, from automotive paint supply stores. See: https://www.amazon.com/3M-TALC-218-Premium-Masking/dp/B0065GVEZ8/ref=sr_1_8?keywords=3m+fine+line+tape&qid=1698216542&sr=8-8
"Fine line" tape is a plastic material which will stretch a bit and permit curved edges to be formed. It comes in varying widths. I've never needed anything wider than the quarter-inch size. I use it to define the edge and put regular blue painter's masking tape over it if a wider area needs to be masked, as when I am airbrushing. Be careful what type you buy. There are several specialty tapes, for example, one called "striping tape" is cut into three sections on the roll so that it can be applied to a car body and then the middle strip of it can be removed, leaving a masked line of perfectly uniform width. That's a neat feature if you are striping car bodies, but not so much for ship models and the stuff is pretty expensive for masking tape, but nothing does the job like the stuff made to do the job. You will find that if you use it only where you need a perfect paint separation edge, you won't need a lot. I have a roll that I bought so long ago I don't even know when that was. Like all masking tape once opened, the roll should be kept in a zip-lock plastic sandwich bag to prevent drying out or becoming contaminated with dust and dirt. Masking tape rolls which are laid down on their sides on a bench or wherever will immediately pick up any dust or grit that the tacks sides of the tap on the roll touch and then, when the tape is laid down, this dirt will contaminate the adhesive contact at the tape edge and promote paint runs under the tape. As with all masking tape, particular care needs to be exercised to burnish the edges well with a finger tip so the adhesive is fully in contact with the surface.
I'll mention, as well, that if you are ever in need of something more substantial than the quarter-inch fine line tape, there is a similar material in letter-size sheet form called "frisket." Frisket is an adhesive backed clear plastic material used for masking large areas of a picture or other surface for airbrushing. It can be applied to the surface and then the area to which one wants to apply paint can be cut out with an Xacto knife to any shape or level of detail required and removed from the surface, leaving the rest of the sheet in place to mask the adjacent surface. It's sold in art supply stores and anyplace airbrushing supplies are sold.
Also as you note, it is extremely difficult, if not impossible, to mask a sharp paint line on a surface which is not smooth. Any scale model surface should be perfectly smooth. Nothing ruins the "compelling impression of reality in miniature" like a rough, out-of-scale paint or varnish job. I realize it may be easier said than done in the case of modelers new to the game who want a "bright" finished hull showing the wood grain, which, if any grain is showing, will also be grossly out-of-scale. (Some will say that's a matter of taste, and for them, I suppose it is. I'm just speaking of "best practices" in the trade, as it were.) One cannot expect masking tape to seal and edge that involves spanning open grain or plank seams that at life-size you could stick your fist into.
By adding some "Japan dryer" (sometimes sold in art stores as "accelerator") to the paint, (or by using the manufacturer's equivalent for acrylics) you should be able to adjust the drying of oil paint (or acrylics, as the case may be) to your own satisfaction. I also will use acetone judiciously to thin artist's oil paints for airbrushing. The highly volatile acetone results in a "hot" solvent carrier that quickly evaporates, leaving the linseed oil binder to polymerize thereafter.
This is a good full-size technique which I always used when I painted yachts. However, I've found it only works on miniature models when the paint is applied very thinly, often in multiple coats, because thicker paint creates a clearly noticeable raised edge or "lip" when the tape is removed and the dried paint remains. (This phenomenon, on the other hand, can be quite handy for subtly delineating scale iron plating edges and armor plate bands on ship hulls.) With thicker paint coats, as well, there is always the danger that the tape edge will lift the partially dried paint edge, with disastrous results. Now, when I need a razor sharp paint edge on a model, I always use the 3M Fine Line tape and an airbrush. I find the airbrush is far superior because it lays much less paint on the surface and by slowing building up the coat with successive airbrush passes, I can avoid any paint pooling up against the edge of the tape and thereby minimize the chances of a run-under on the edge.
all very helpful -- thank you!
-
On 10/18/2023 at 10:00 AM, ubjs said:
Occre Polaris is also a good beginner kit with a lot of videos showing each step.
I am building it myself and one thing that I really like is all printed instructions that comes in the box.
Printed on A3 everything is very easy to read and the pictures are also in big size.
There is a printed side with all wooden strips in actual size, just put the real strip beside and compare, so easy, so clever.
Of course Occre have taken some shortcuts to make a easy build, the deck is completely level, easier to build but not so correct.
Polaris is not a model of a real ship, its a real beginner kit and the best one I have seen so far.
I have tried Billing boats, Mamoli, Bluejacket, Amati and some smaller companies modelboats and Polaris I think is best in instructions.
We dont have Model Shipways in Sweden I think, but I have read the build logs and got the impression their beginner kits have som problem with fitting issues. Maybe they are a little bit old and the lasercut not so exact?
I dont know, read the build logs yourself and decide.
Polaris instructions, link from Occres website:
https://drive.google.com/file/d/1FwgMxKs20rx1Ec5VMwuTVq6lWc7agKw3/view
Polaris has at least one very good building log on this forum.
Seconded and this series of YouTube videos showing step-by-step is a godsend and will also give you an idea of what's involved:
- Keith Black, mtaylor and Ryland Craze
-
3
-
On 2/5/2023 at 4:29 PM, Bob Cleek said:
The use of water-based coatings on the bare wood of models is not advised because water soaks into wood and raises the grain and "fuzz" to one degree or another depending upon the wood species and grain orientation. Multiple coats of water-based coatings can be applied and any resulting raised grain can be sanded fair, in which instance the first coat(s) serve as the sealer. Oil-based coatings will also benefit from a sealer applied first to the wood surface, but will not raise the wood grain.
This was very helpful advice for.a first time wooden model ship painter -- I was very frustrated with the look of the first application. Admittedly it was cheap acrylic, but I was wondering how much improvement I would really see from purchasing another higher-end brand for such a tiny area (it IS a model shop after all)... sanding and a second coat improved the look enormously.
As someone who has painted with oils (artistically, not models) I wonder whether gesso would work... it might be overkill, but if you happen to have it, as I do...?
I would also love thoughts from some veterans on taping off before painting. Maybe I should start another thread, but it goes along with surface preparation. In short, the instructions I was using showed masking tape, and, again, from non-modelling experience, I never find it that effective but went along with it. For some of the straight lines I used some pinstripe fine line tape... not surprisingly, the paint seeped under the masking tape, leaving an irregular edge. The pinstripe paint worked like a charm, but is a little trickier to use on a gentle curve.
I fixed the problem with a little careful freehand touching up, but it seems that applying masking tape to a surface consisting of planks that are not perfectly even will always lead to seeping... is there a preferred taping method? Better sanding? Would sealed wood keep the paint from seeping? Thoughts and I'm happy to take this to a new thread...
-
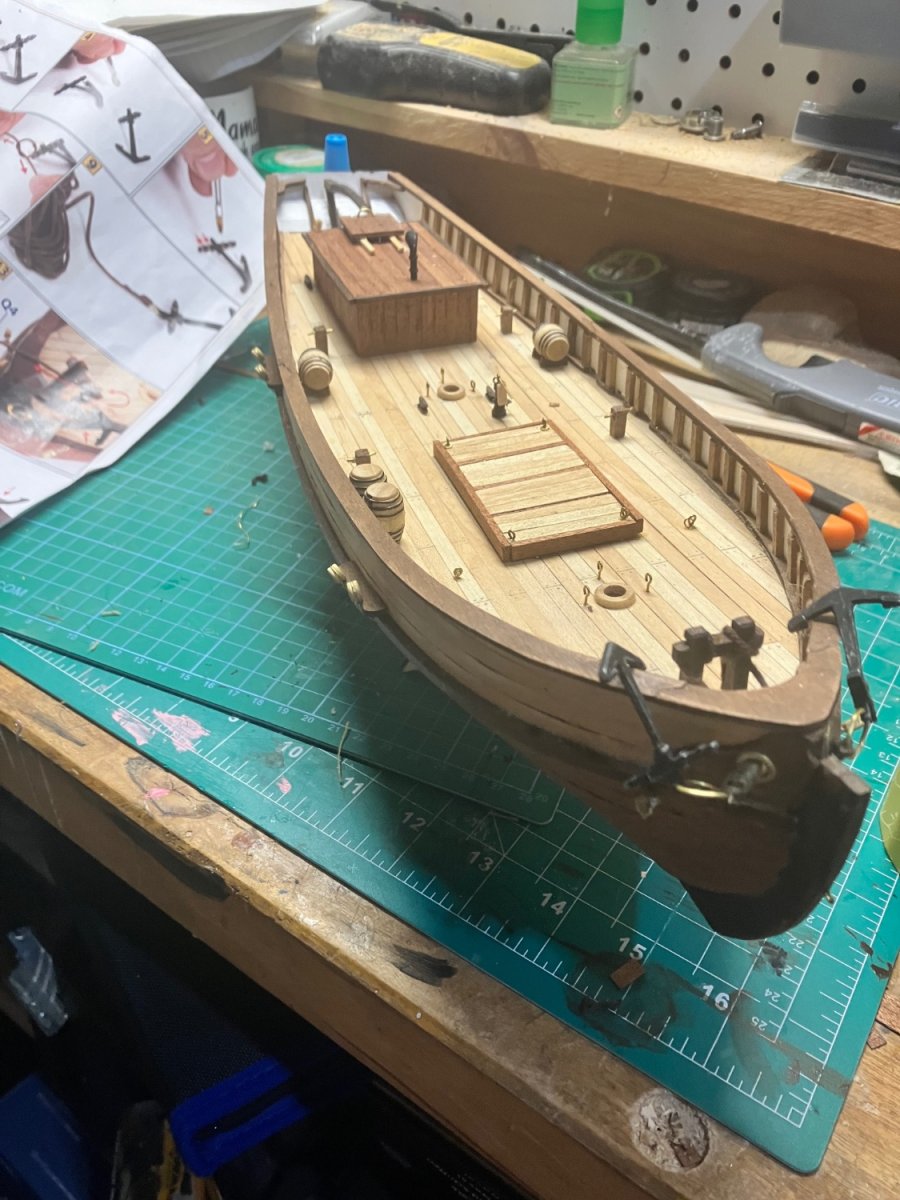
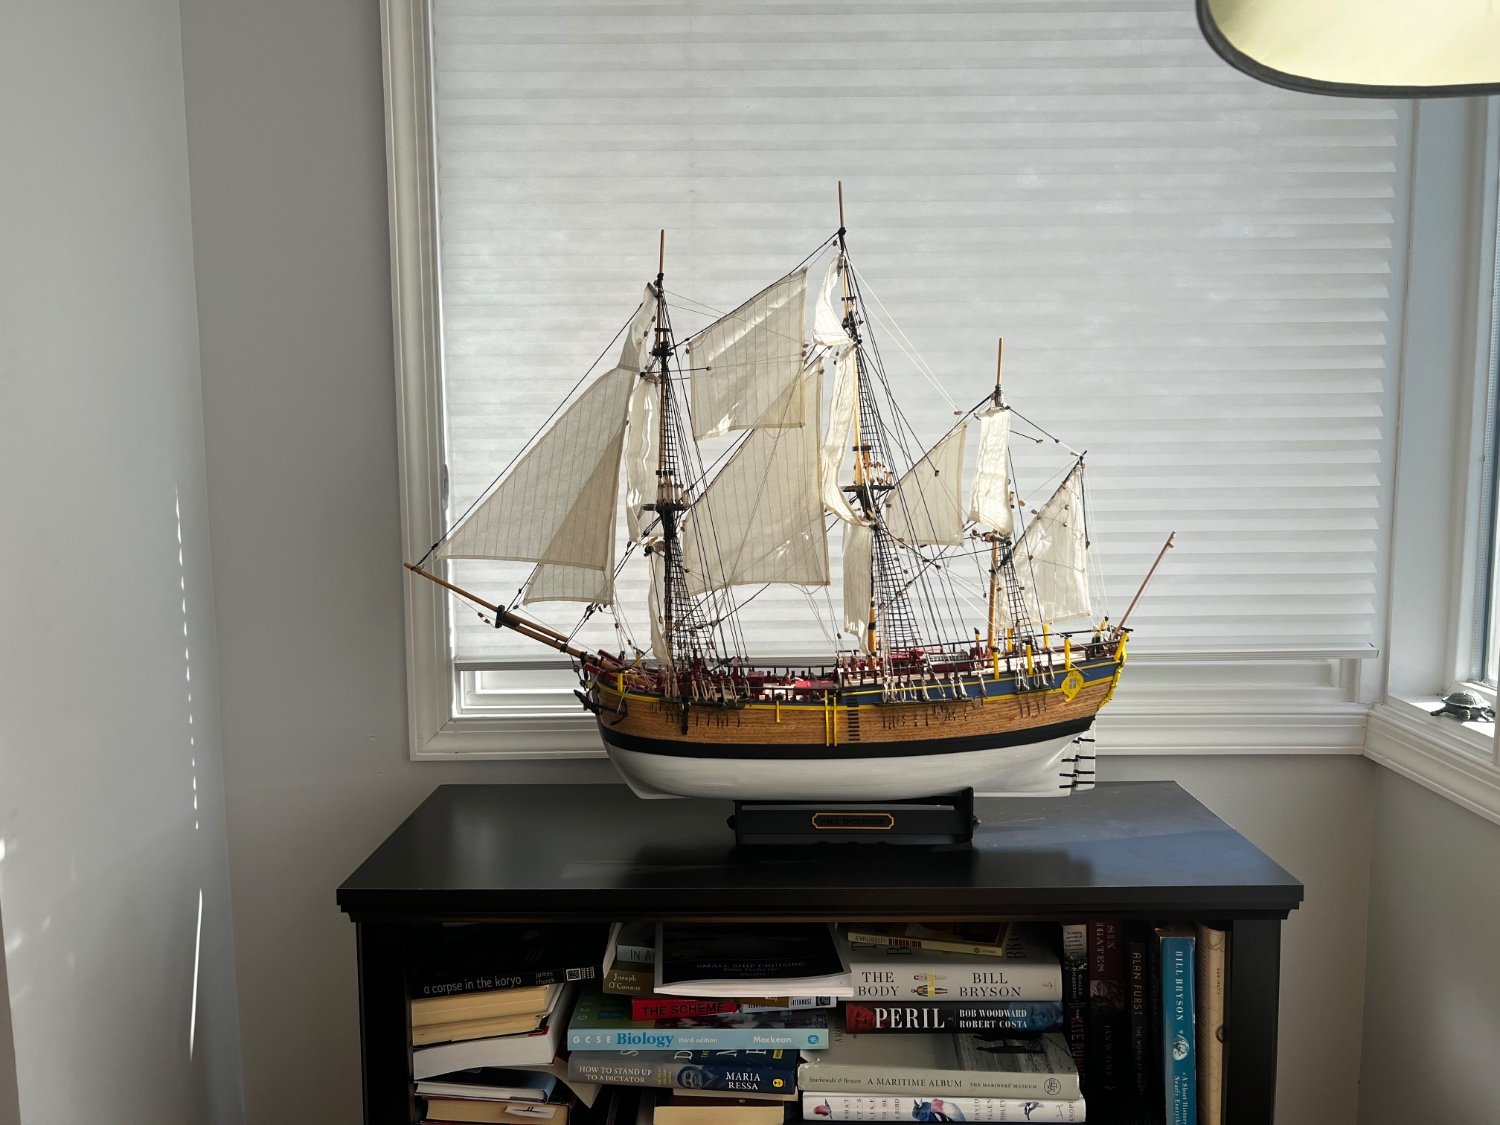
I'm also a newcomer and I was given my first kit as a gift, so I didn't have a choice in the matter, but I am building OCCRE's Polaris... I've found the instructions very clear, the required tools to be things that I already possess or can easily (and cheaply acquire) but most importantly, there is an extremely useful YouTube series that shows everything in very good, simple detail and has helped me enormously. I'm very happy with the way my boat is progressing—there have been stumbles, but it's a simple enough model that I think (so far) they're easily remedied. And it's been an encouraging enough experience that I am interested in doing more model-building. One of the things I like about this model is that it is a serious step-up in sophistication and difficulty than anything I have done before, but the overall model is still pretty simple—especially compared to some of the gorgeous complicated projects here.
Below is a some recent photo of where I'm at... I think it cost about $100USD.
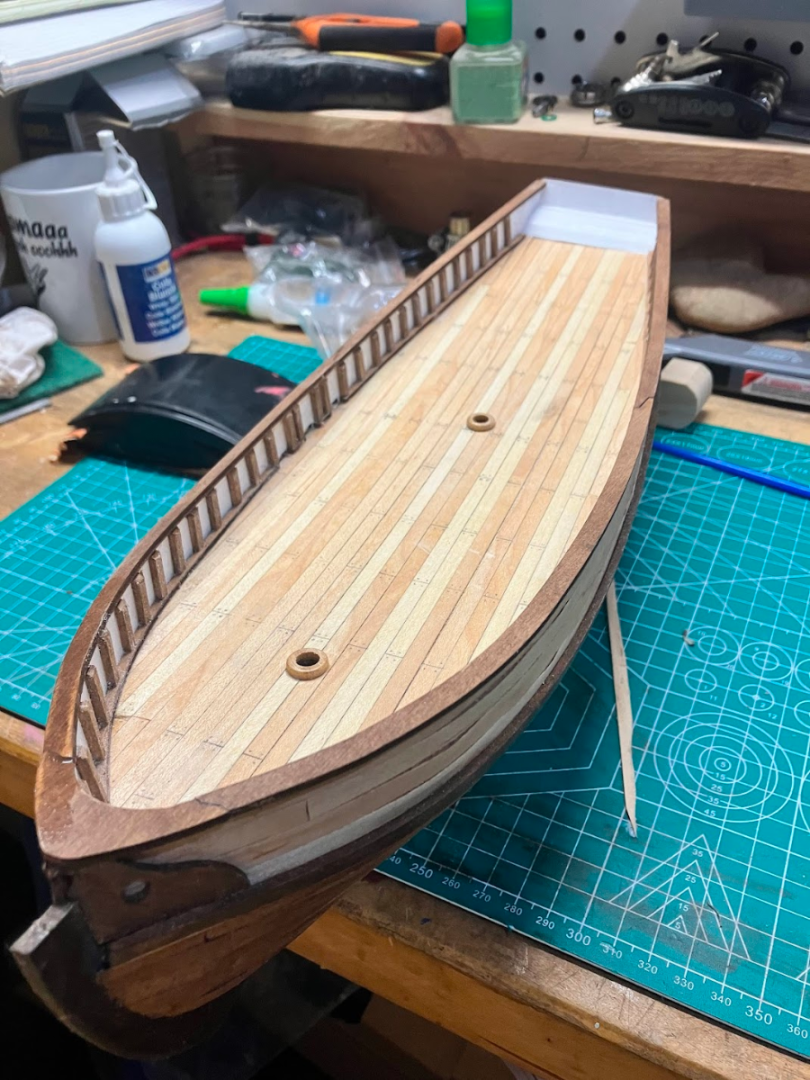
The only really notable potential downside, which I was only aware of after coming here and reading build logs and reviews is that, perhaps, the material quality isn't the greatest. I've had a couple of pieces snap, and some outer planking be so fragile it was difficult to cut, resulting in some complications. I had chalked that all up to my own incompetence and dull knives, but now I wonder if it wasn't really attributable to the quality of the material. But none of it has been something I couldn't repair or fix.
All of THAT said, if I had been aware of Vanguard "novice" kits, and if I had been the one selecting the kit, I might have gone with one of those. I've read the directions for those and they appear to be at least as thorough and the models are similarly sophisticated-yet-doable. The Ranger, for instance, looks very similar, but is much prettier.
- Keith Black, Thukydides, mtaylor and 1 other
-
4
-
Hiya,
I'm a new member and I'm very interested in what I've seen here so far!
I'm new to models—at least as an adult. I did not particularly enjoy them as a kid, but as I've grown up I've developed a real interest in woodworking, art (painting and drawing) and doing crafty things in general. What I used to find tedious and frustrating is now calming and relaxing. Besides those interests, I'm a fan of Aubrey/Maturin—again, as a kid I found them tedious and frustrating and now I love it. I also love sailing real boats (and, unlike the other things, I have since I was a kid.) Last year, in the middle of a re-read of a Aubrery/Maturin book, I was googling some obscure sail reference and was searching for photos or diagrams of the HMS Surprise and thought to search for models as well... a few days later, my Instagram feed started showing me ads for Occre models—creepy, but highly accurate! Amused/bemused by the accuracy of the algorithm in knowing what I was interested in, I showed one ad to my wife and when my birthday rolled around, she and my kids proudly presented me with the Occre Polaris.
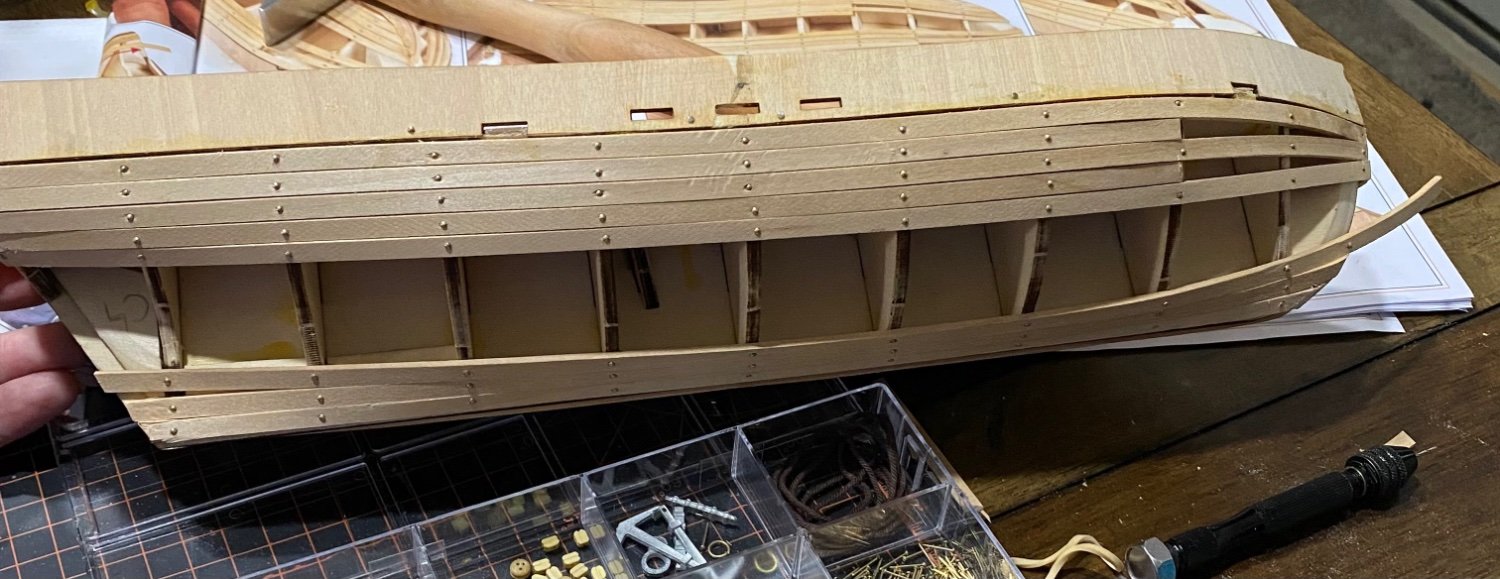
And, as disturbed as I am at Instagram for leading me to the models, I've absolutely loved working on it. I started in January, took a break for the warm months and am back at it. I've completed the hull and am starting work on the deck and am vaguely dreading the rigging. I'm considering a log, but there's nothing particularly extraordinary about my build and I haven't documented it well thus far... but I will say that I'm finding the Occre Polaris a perfect thing to start with. It's much more challenging than any plastic model, but there is nothing that isn't doable, nothing that can't be done with tools that a reasonably well-equipped home handyman/hobbyist wouldn't have mostly on hand anyway, the instructions are clear and there is a YouTube series demonstrating everything.
I think one day I would like to build a small craft of my own—and while it's a lot more pricey and requires more space, I think some of the plans I'm looking at for that are actually less complex than the model plans I currently have. I'll wait until I finish this model before I say if I'll do another, but I'm thoroughly enjoying this one.
I've made a few errors, most of which I stressed over before discovering that they really didn't matter as they were easily patched or covered up in later steps. I've got quite a bit of work left to do, and I don't want to jinx myself, as I could always not finish it, but I do think the end is in sight (as in, it is very likely that the model will be finished). With that caveat, as a beginner still in the process, I would say a helpful piece of advice is to just keep plowing ahead—at least on a simple-ish model like Polaris, most mistakes seem pretty solvable by some sanding and paint. Oh, and I suppose an understanding that, while perfection is desired, it's okay if you don't get it all perfect on your first model.
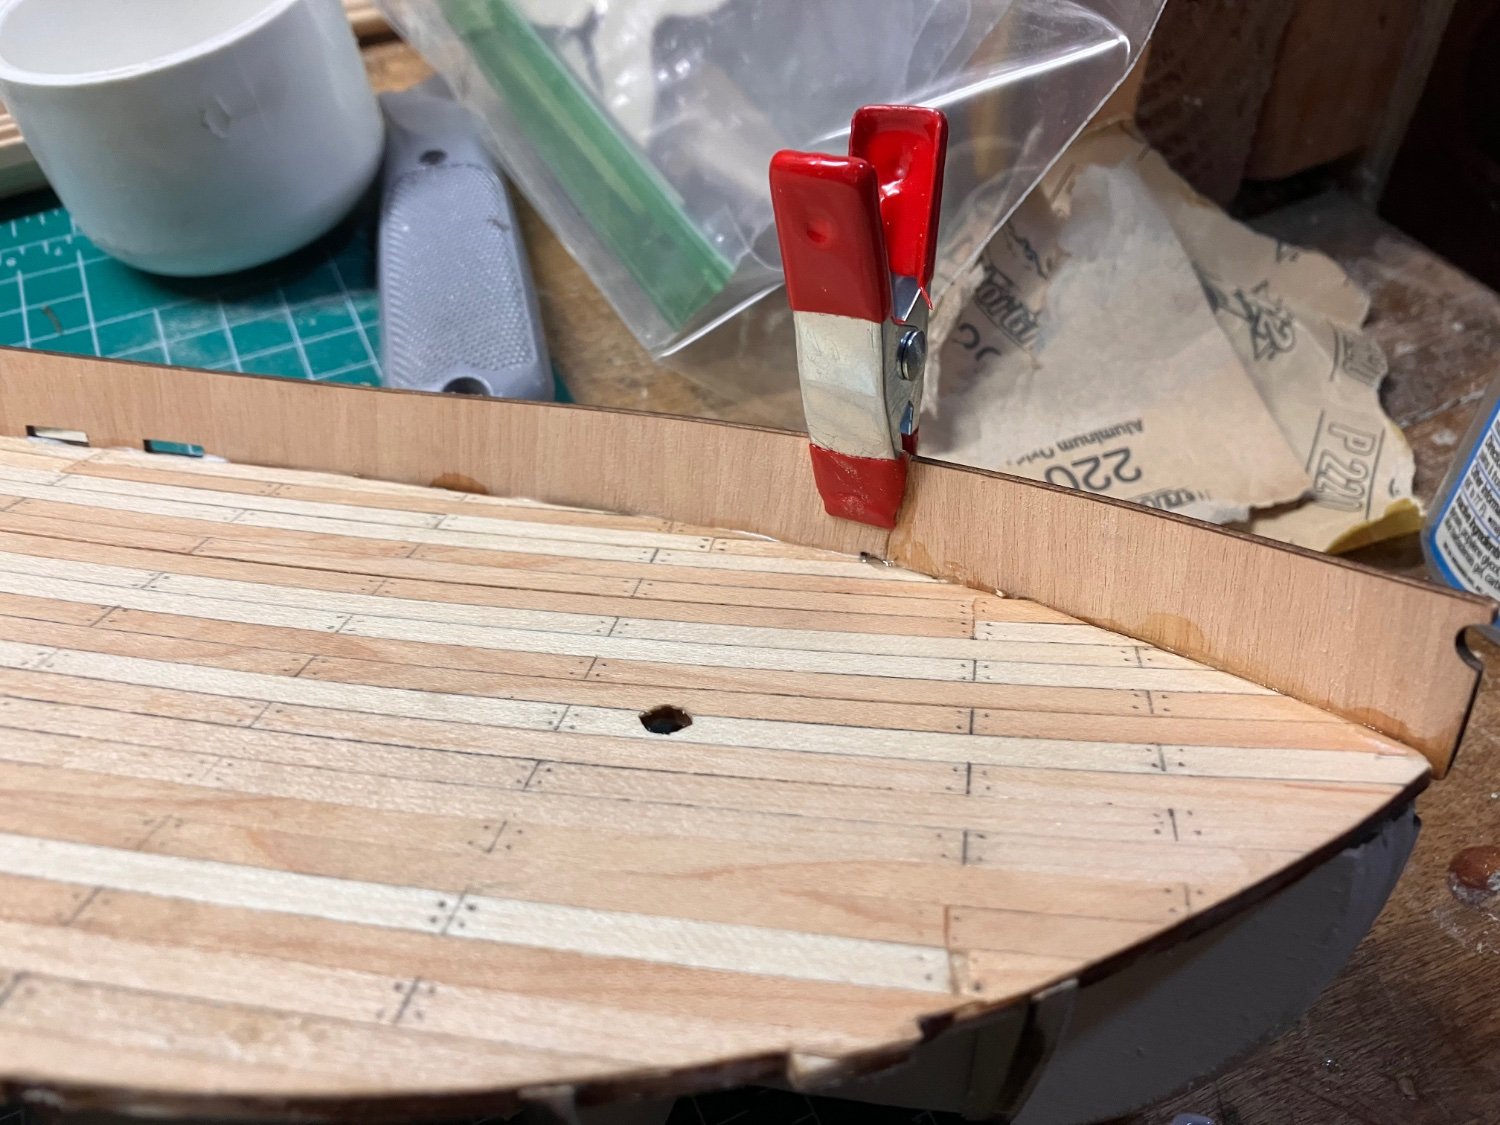
I, for example, botched the bow—I did not nail the sanding and shaping of the reinforcements under the hull that give the front of the boat the right shape. I got it pretty well—if it was a real boat, it would cut through the water, but when I applied the planking, the shape was off enough that it made the planking uneven and the gap for the keel piece at the front was ragged and very un-seaworthy. And since it wasn't a perfect fit at the front, the false keel didn't meet up with the sternpost perfectly at the back. But after some thought—and some impulsive stabs as well—I got it to fit pretty well... I pulled up some of the second layer of planking and patched in new pieces... It is definitely noticeable if you look at it closely, but sanding and varnish covered a lot of the sin. And, the other option was to not finish.
I've found all your models inspiring and your tips and suggestions for tools and supplies helpful.
- JeffT, JacquesCousteau, oakheart and 4 others
-
7
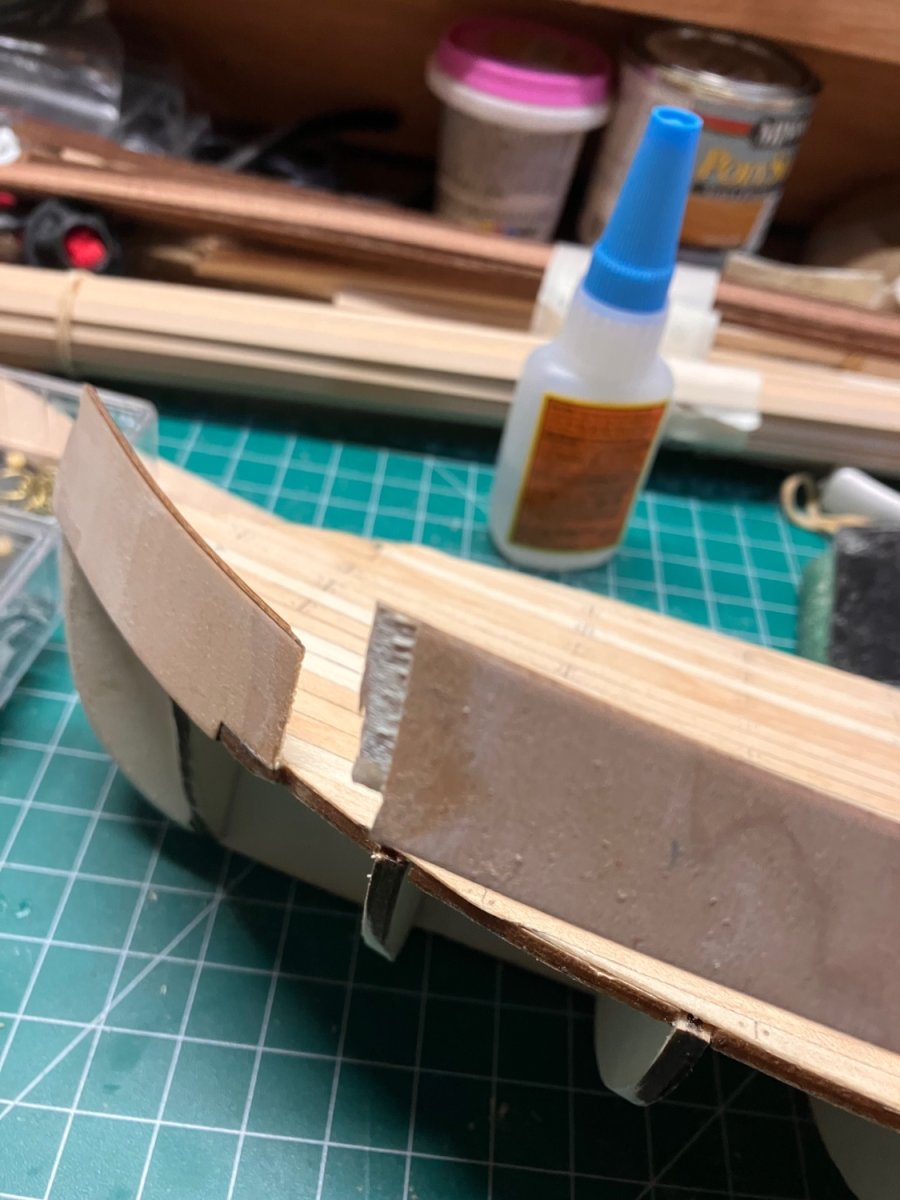


Howdy! From Wisconsin, USA!!
in New member Introductions
Posted
The bow is tricky and that’s the one area they don’t show very clearly in either the manual or the YouTube videos. And it’s crucial, because if you read ahead, the keel has a bow piece that has to fit in perfectly in that notch and sit flush with the hull. It was the hardest part so far, but sanding, cutting, swearing, regluing, more sanding, more swearing, walking away for a week, etc finally got it in. I’d say Just keep it as neat as possible at the front so it’s all uniform if you do have to make any alterations to make the piece fit.