HOLIDAY DONATION DRIVE - SUPPORT MSW - DO YOUR PART TO KEEP THIS GREAT FORUM GOING! (Only 72 donations so far out of 49,000 members - Can we at least get 100? C'mon guys!)
×


Pitan
-
Posts
170 -
Joined
-
Last visited
Content Type
Profiles
Forums
Gallery
Events
Everything posted by Pitan
-
Ooo, I see Chris has announced HMS Surprise as comming soon on the Vanguard home page!
-
Back in October, I asked a question about the choice of power supply for the table saw (I'm in the UK, so would need a European unit). It took a little while, but Donna did answer my question. (The intent is/was to offer 230v as well as US power supplies.) Note, the email reply was from an unexpected email address. Try searching your email client for Donna to see if you had a reply.
-
Good luck Chris, I hope the new space works well for you.
-
The flag Chris has produced looks great, very like contemporary paintings. If you want to show a flag on a model, check surviving examples. This is a pre-1801 white ensign at the National Maritime Museum: https://www.rmg.co.uk/collections/objects/rmgc-object-937 In 1784, Lord Howe had a Union Jack with similar 'errors' in the saltire, about 5:7 (h:w ratio), see p70, Flags at Sea, Timothy Wilson, Chatham Publishing. I doubt any business would offer that style, but it would make a good talking point at a show or exhibition.
-
There are lots of paintings with boats being towed, even in peacetime. Reasons include those given, but it also gave more space on deck, and helped keep the hull timbers wet, thus avoiding shrinkage and reduced the risk of leaks. Didn't Aubrey once put a mix of (potential) mutineers and good men in a towed boat? An uncomfortable experience.
-
Glad to learn this, I hear nothing but good about Byrnes machines and would like to get my hands on some (a table saw heads my list).
-
Question. When not in action, would the gun carriages in the captain's cabin be stored facing fore or aft, rather than out to the side? At the moment, they seem to be blocking access through the cabin doors while Aubrey and Maturin are relaxing with their music.
-
It's a nice kit, nicely priced - a good introduction to model ship building
-
As others have said, a Vanguard kit would make a nice next kit. I went for Sherbourne (still to be rigged), and am enjoying the Duchess of Kingston's yatch. Off topic, do you enjoy research? If you do, and since you are in Scotland, have a dig around, see what you can learn about HMS Wickham. There's no kit unfortunately, but I found her history interesting.
-
Deck details Some progress on the DoK's deck furniture. Bow sprit and main and mizzen mast bitts are glued in place. Also seen here are the windlass, wheel, ship's belfry, binacle and bowsprit. I also started making the bowsprit. The oval opening in the kit's bowsprit bitt looked odd to me. Taking a look around, I stumbled on a thread that suggests using a mortise and tenon joint. I haven't tried to make a mortise and tenon joint since school, decades ago, but I had a go here. Not perfect, but it works. The DoK windlass is (I think) 3d printed. It paints up well.


-
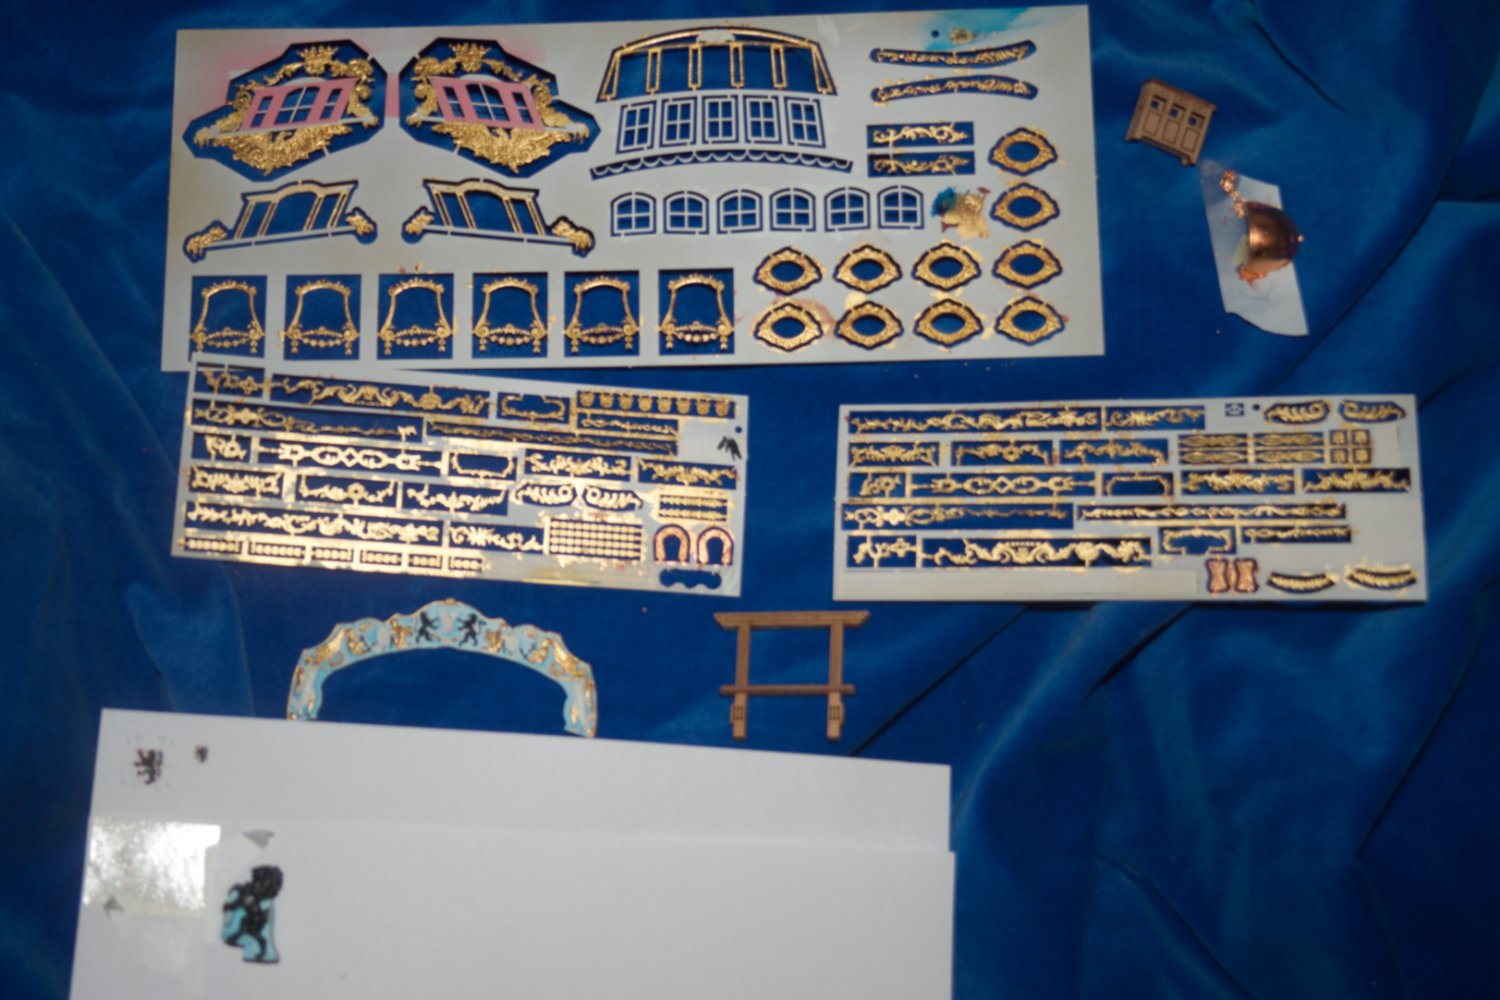
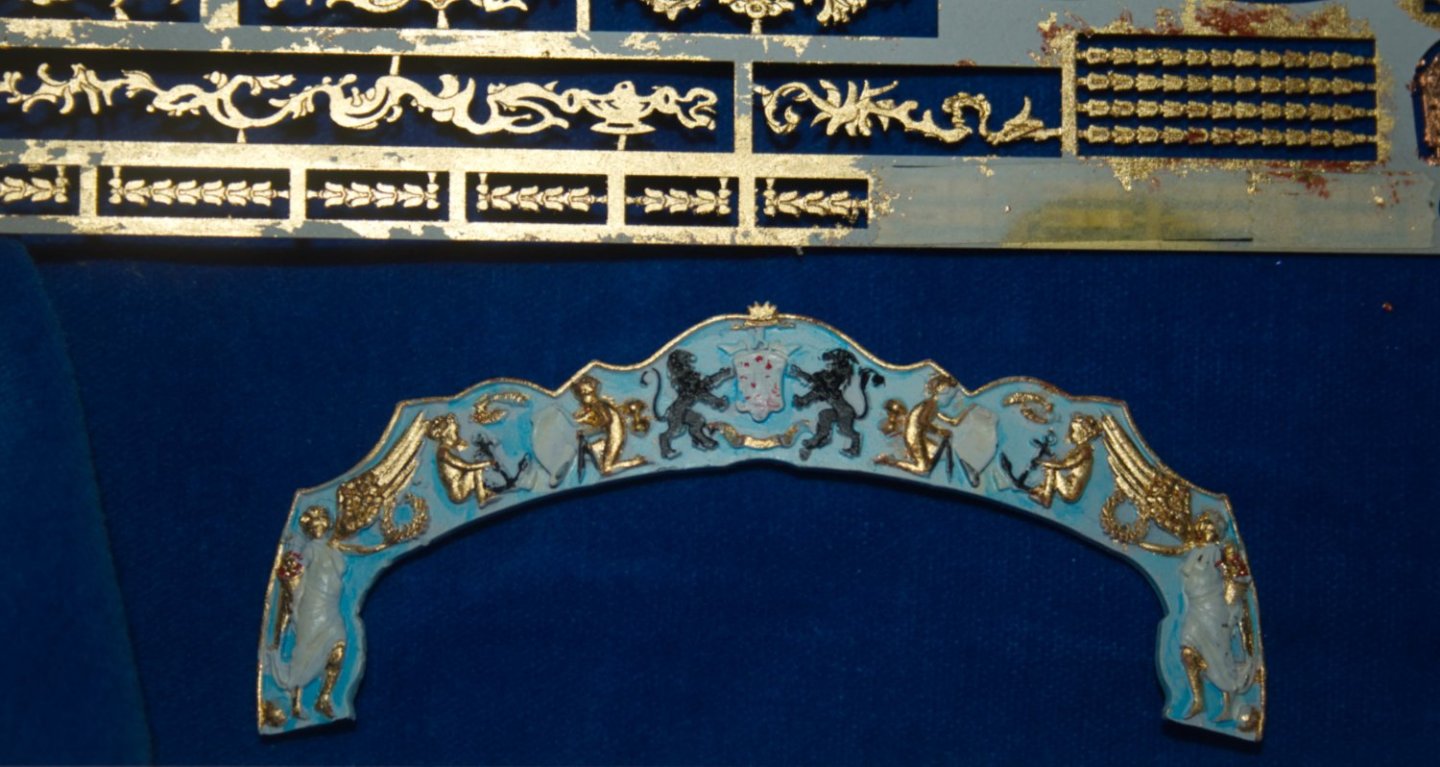
I made some home printed decals to add the Duke of Kingston's arms to significant parts of the yacht: To the stern decoration, the figurehead and above the cabin doors. Reflections haven't helped with the photo, rest assured, the lion on the stern decoration has not been decapitated. The duke's shield was a black lion on a white (silver) field scattered with red cinquefoils. Conveniently, the supporters were also black lions. Since the yacht was made for the duchess, I've presumed she would use the duchy arms, rather than anything inherited through her father. The lion is loosely based on Fig 284 in Fox-Davies A COMPLETE GUIDE TO HERALDRY (link: https://www.gutenberg.org/files/41617/41617-h/41617-h.htm#page179). The cinquefoils are distorted stars.


-
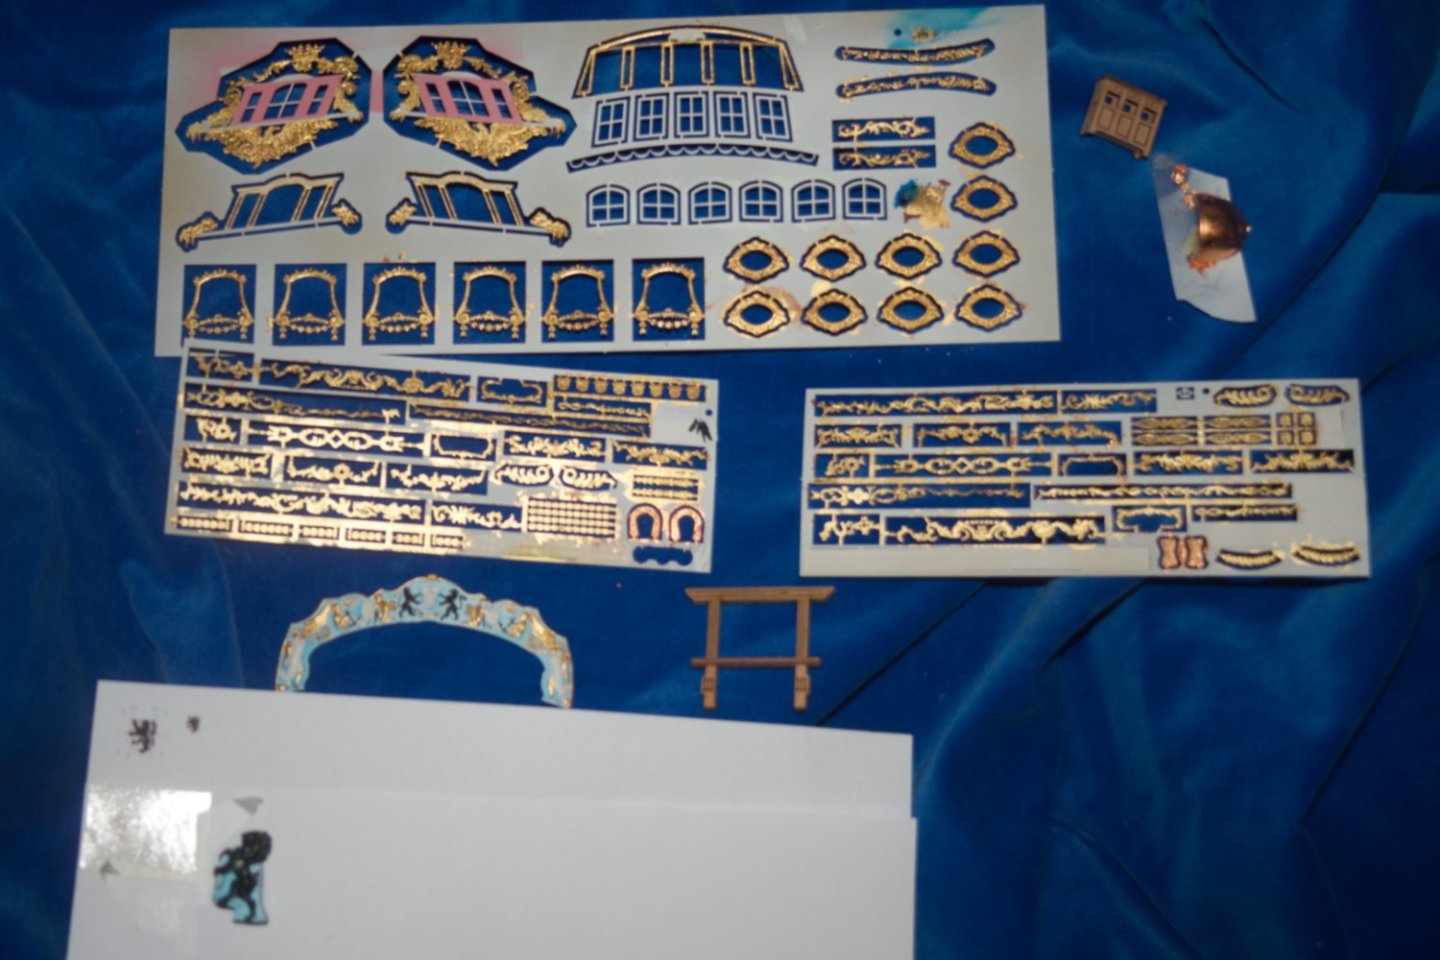
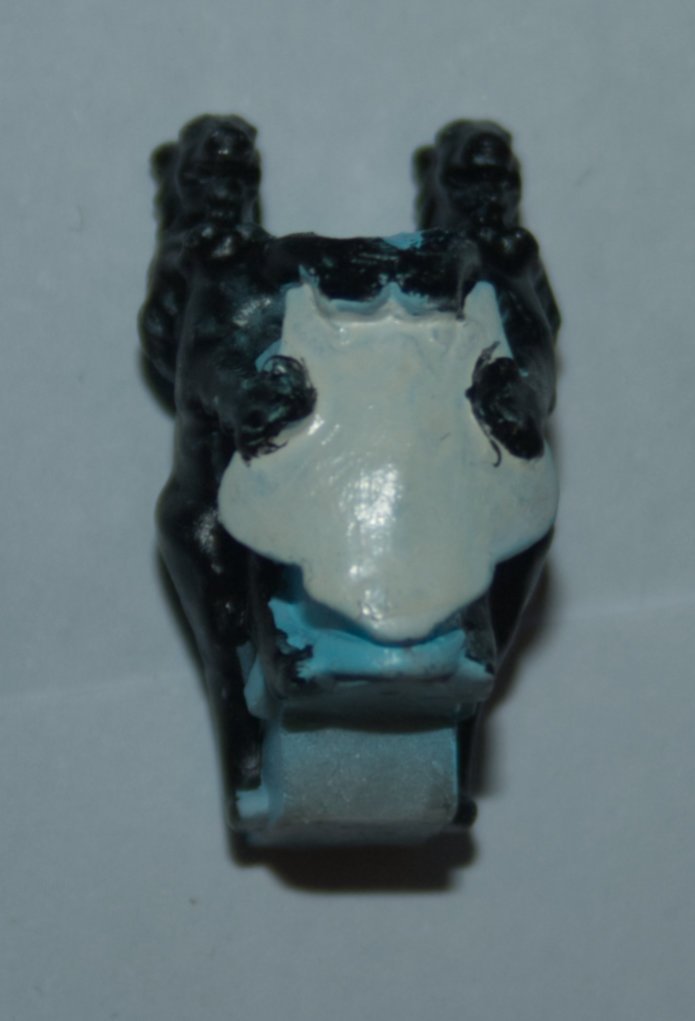
Gilding the Lily ... Or, no lilies. I removed the fleur-de-lis on the DoK's figurehead and on the stern decoration, and much gilding was applied (at least applied on the sprue/fret). Blurred, but detail shots will (may) follow. This is mostly gold leaf on an acrylic gold size. These I found surprisingly easy to use. My previous experience has been with silver leaf on oil size, and, while it worked well, that was noticeably more difficult in practice. Why gold leaf? I find most gold paints become disappointing over time; gold is very resistant to tarnish. Detail showing stern decoration. The central shield will be re-worked, but the rest may be passable. Above the stern decoration, you can see some of the ship's side decor. The red brown here is size (note, traditional water gilding often uses a red/brown bole). The figurehead This came with a knight's helm, which was removed; my intent is to replace it with a ducal coronet. (My interpretation of the DoK plans is that a coronet was to be used). The shield is, again, work in progress. Along with the gold leaf, I've applied some copper leaf to the quarter deck dome, (and to the horse shoe plates and fish plates). The deck dome, standing on some tape to aid painting/handling, is seen here with the ship's binnacle. Copper will tarnish in time, and I should give it some protection.

-
I was wondering when 18C child labour would come up. What age was Aubrey when he went to sea? I have him, in my head, at about 12 years old, but that may be a minimum age?
-
Those figures look great Chris. I'm wondering about the front legs of Aubrey's chair, could the tops be a tad shorter? Maybe just proud of the seat? They look uncomfortable, digging into his right thigh (I doubt the change would affect Maturin's stance).
-
@chris watton had one at the Society of Model Shipwrights show in Portsmouth earlier this summer, and I spent a lot of time looking at his original. I succumbed to temptation ...
-
Thanks. I went over the top decorating the back (forward facing) side of the stairs, then realised that the bulkhead door was blind, and I needn't have made the effort.
-
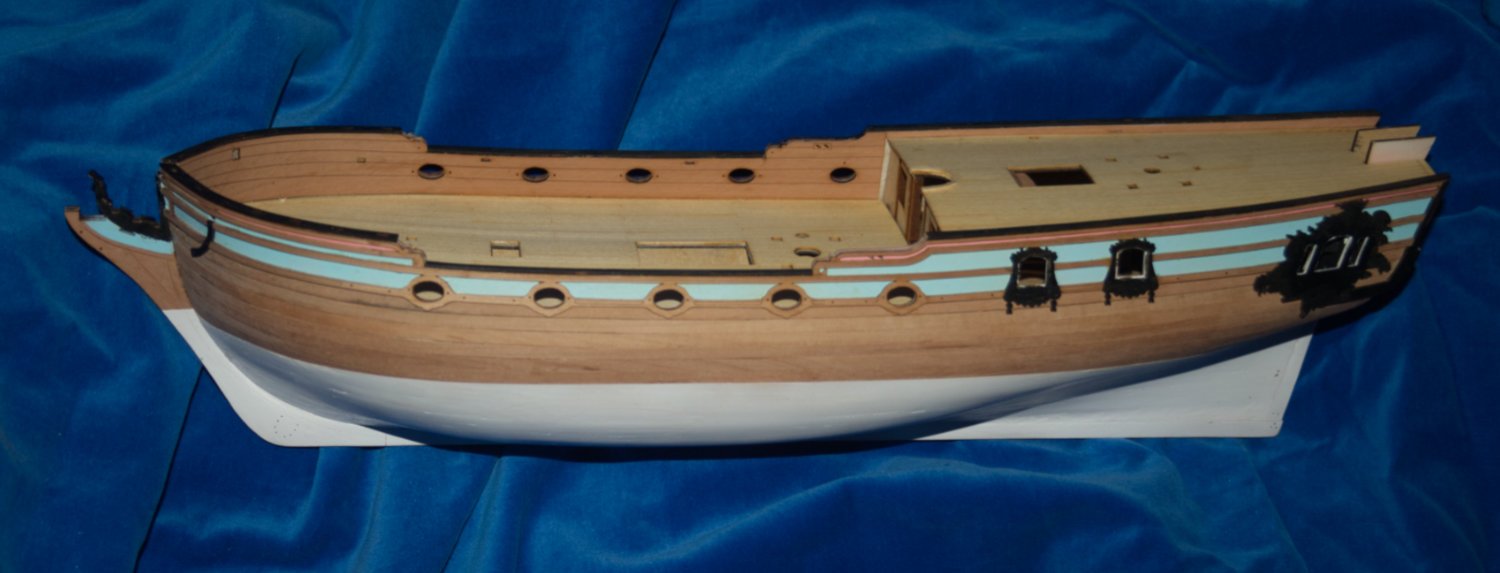
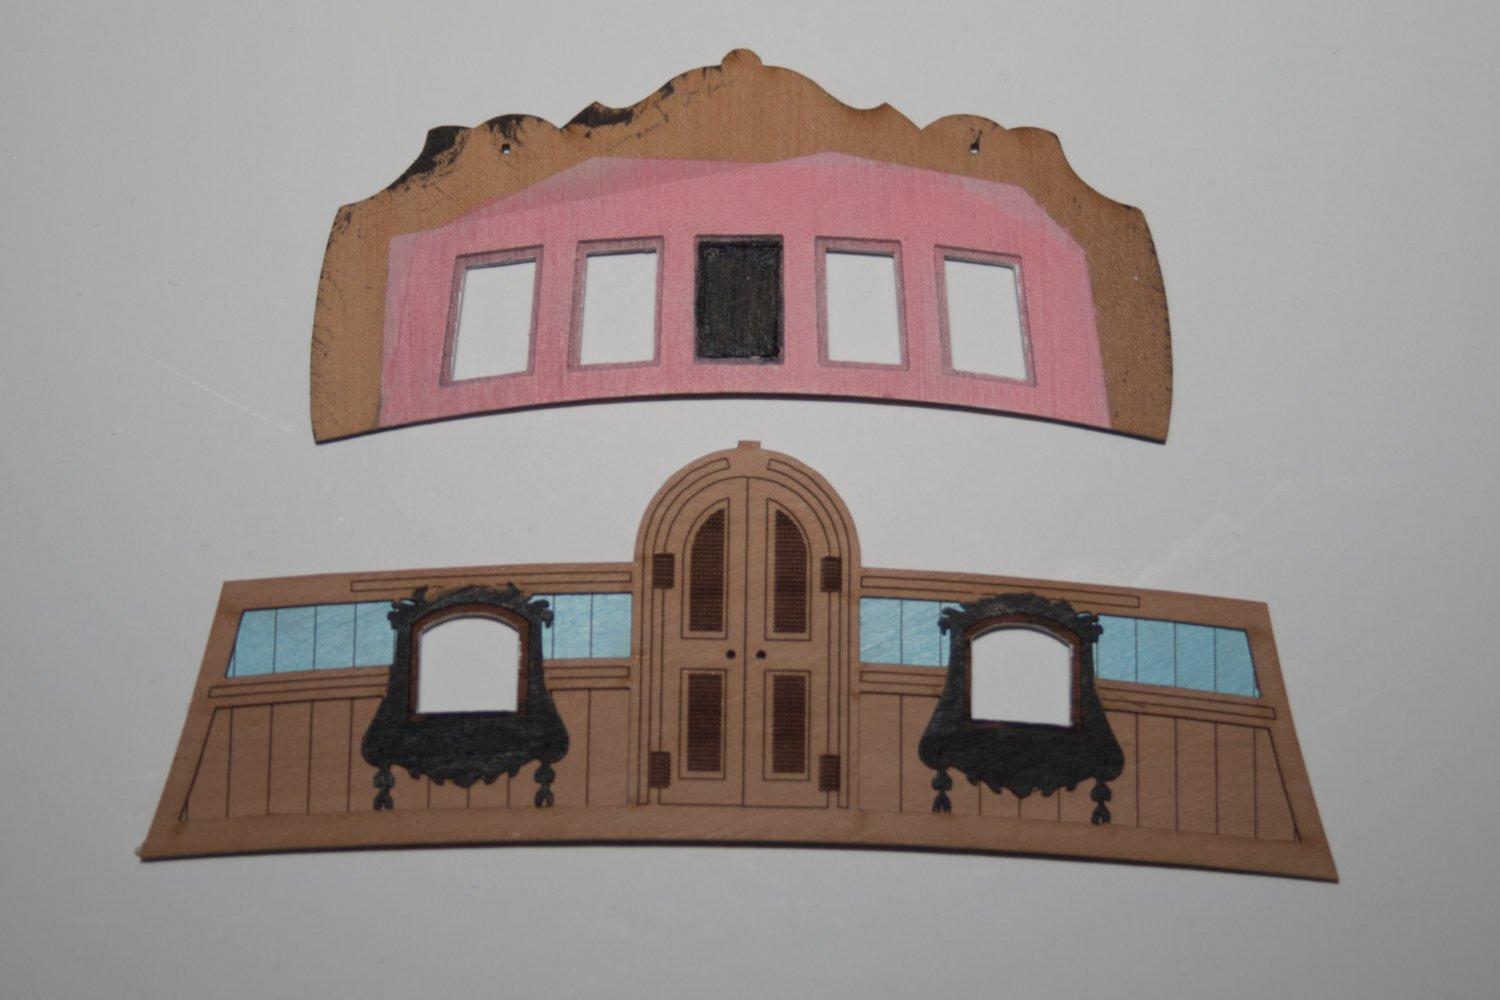
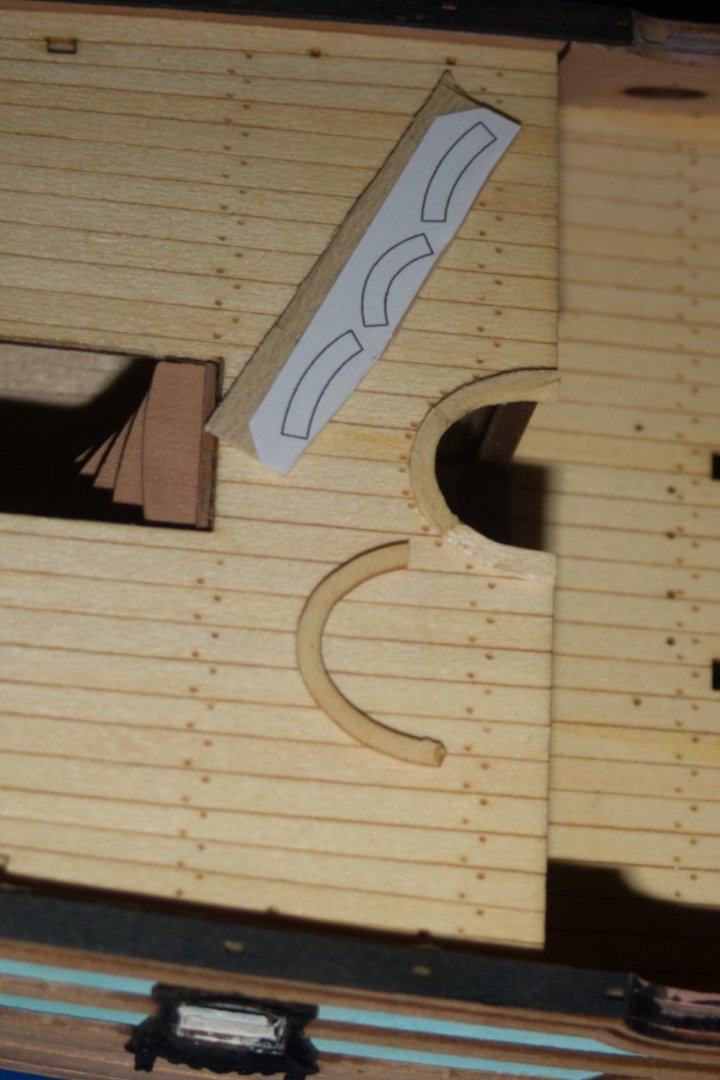
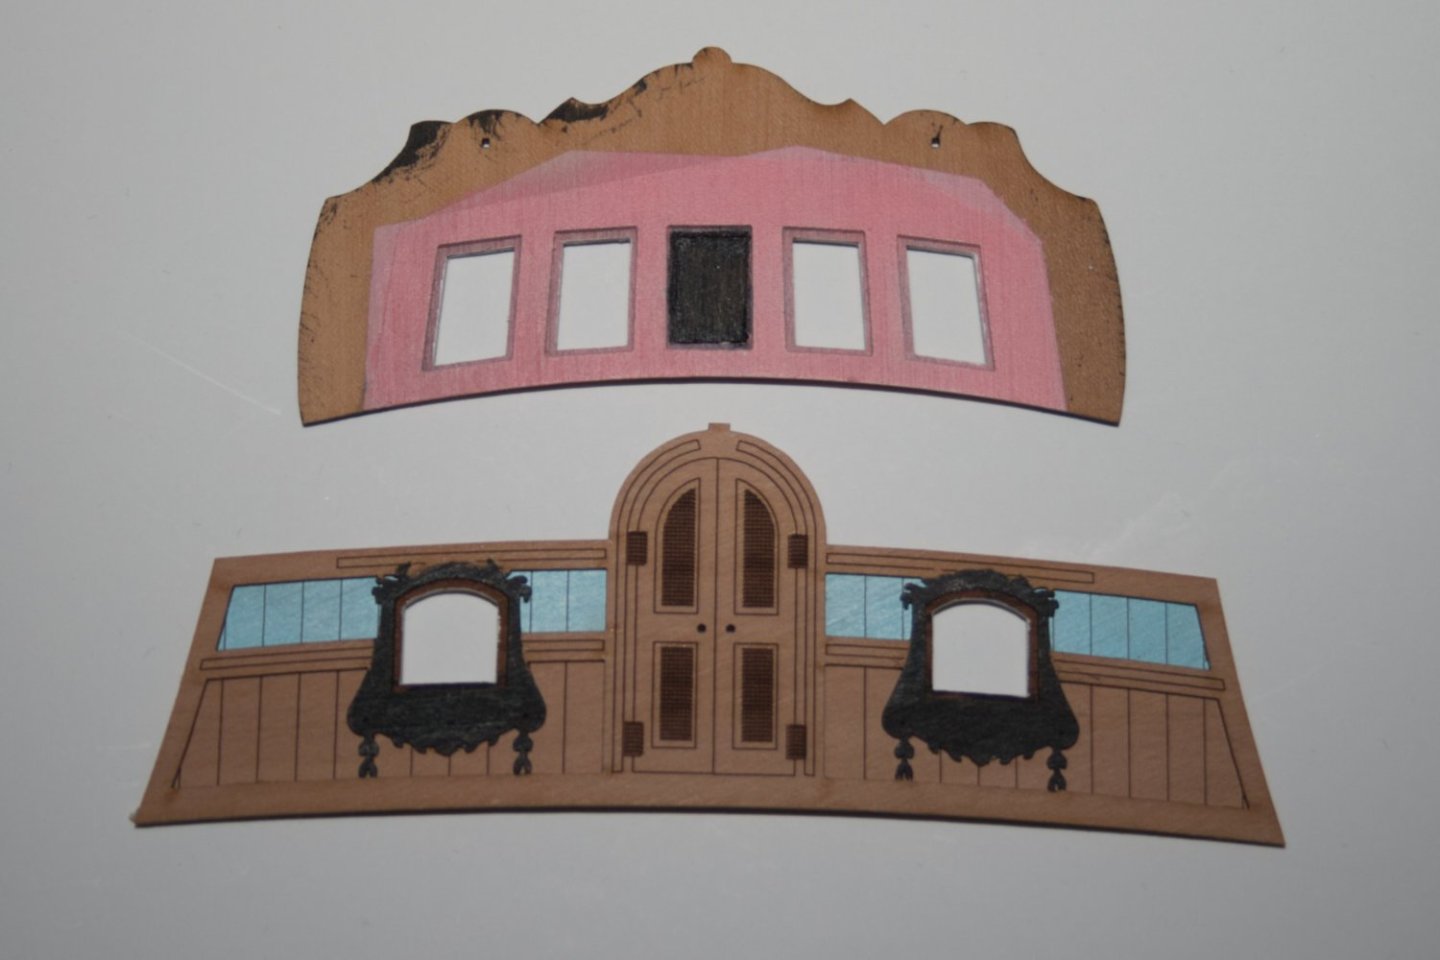
A little catch-up on her grace, the Duchess. We have a fair amount of re-painting, and a little assembly to report. The pink was remixed, and is subtly darker in tone. This, I think, shows to better effect on the model. The rail patterns and rails have been added. One issue I had on the quarterdeck was the dome base (by the central cabin door). This single piece broke along the grain, and, after a struggle, has been replaced with three pieces. I planned for two attempt, but my first effort works well enough. You can see the spiral stair into the reception cabin here too (How easy would that have been to negotiate in an 18c pannier skirt?). The wales have been painted, but are not attached yet. Here you may see a wooden gauge, made to help guide the upper wale. A start has been made on the Stern fascia, and mid-deck bulkhead (reception cabin wall). I've been reading about the French use of false windows earlier in the 18C, and have decided to make the middle window of the stern fascia blind. In practice, a glazed window would have been very close to the rudder, and probably wouldn't allow much light.


-
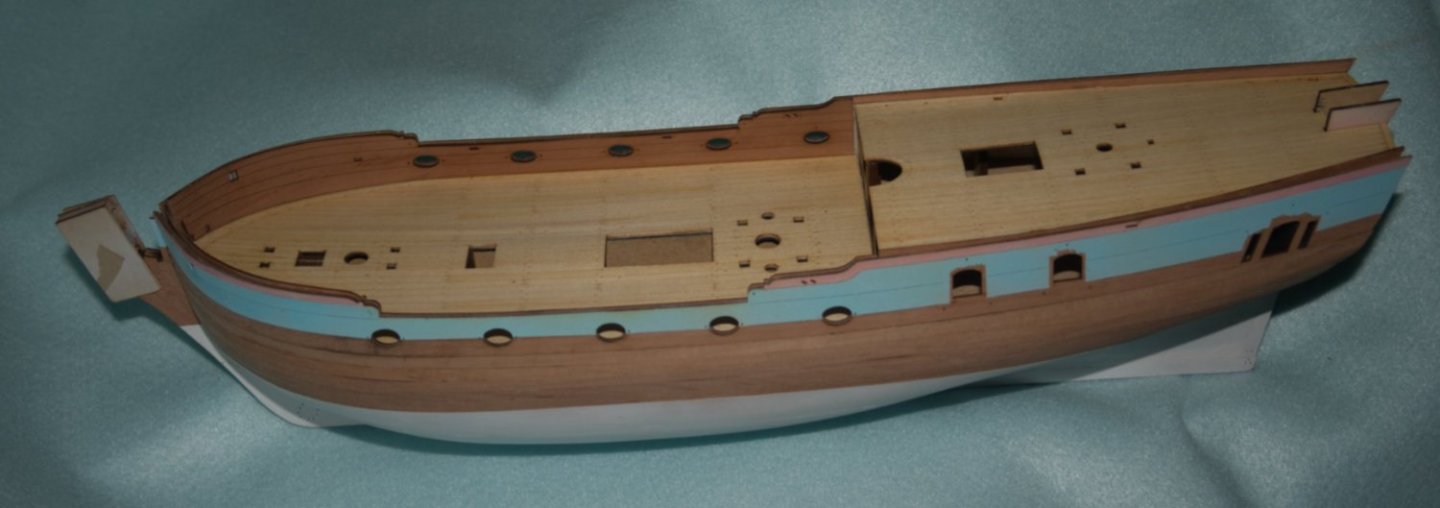
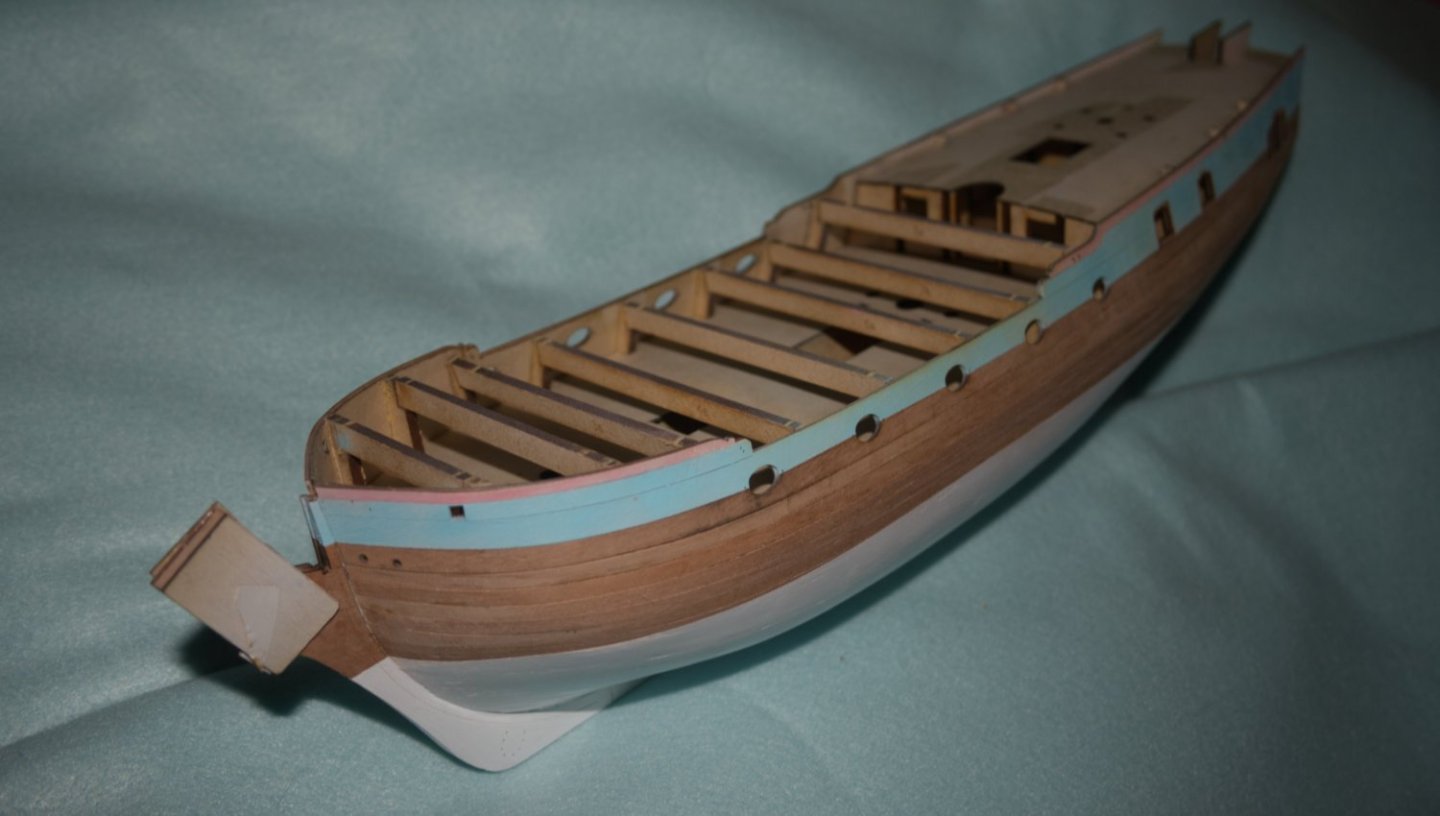
The decks and inner bulwarks have been added: In order to break up the sameness of the deck planking, some planks were given a thin wash of colour (burnt sienna, or transparent yellow iron oxide*), which was rubbed back before spraying a light harmonising coat of oxide yellow. The inner bulwarks are unpainted, and will, likely, retain their natural colour. The next stage will be to clean up excess material, especially the quarter deck / poop deck bulwarks. * Looks like very translucent yellow ochre.
-
That looks beautiful Chris. Noob question, is that 3d print (by the first hatch) the stove's chimney? It seems to point/vent aft.
-
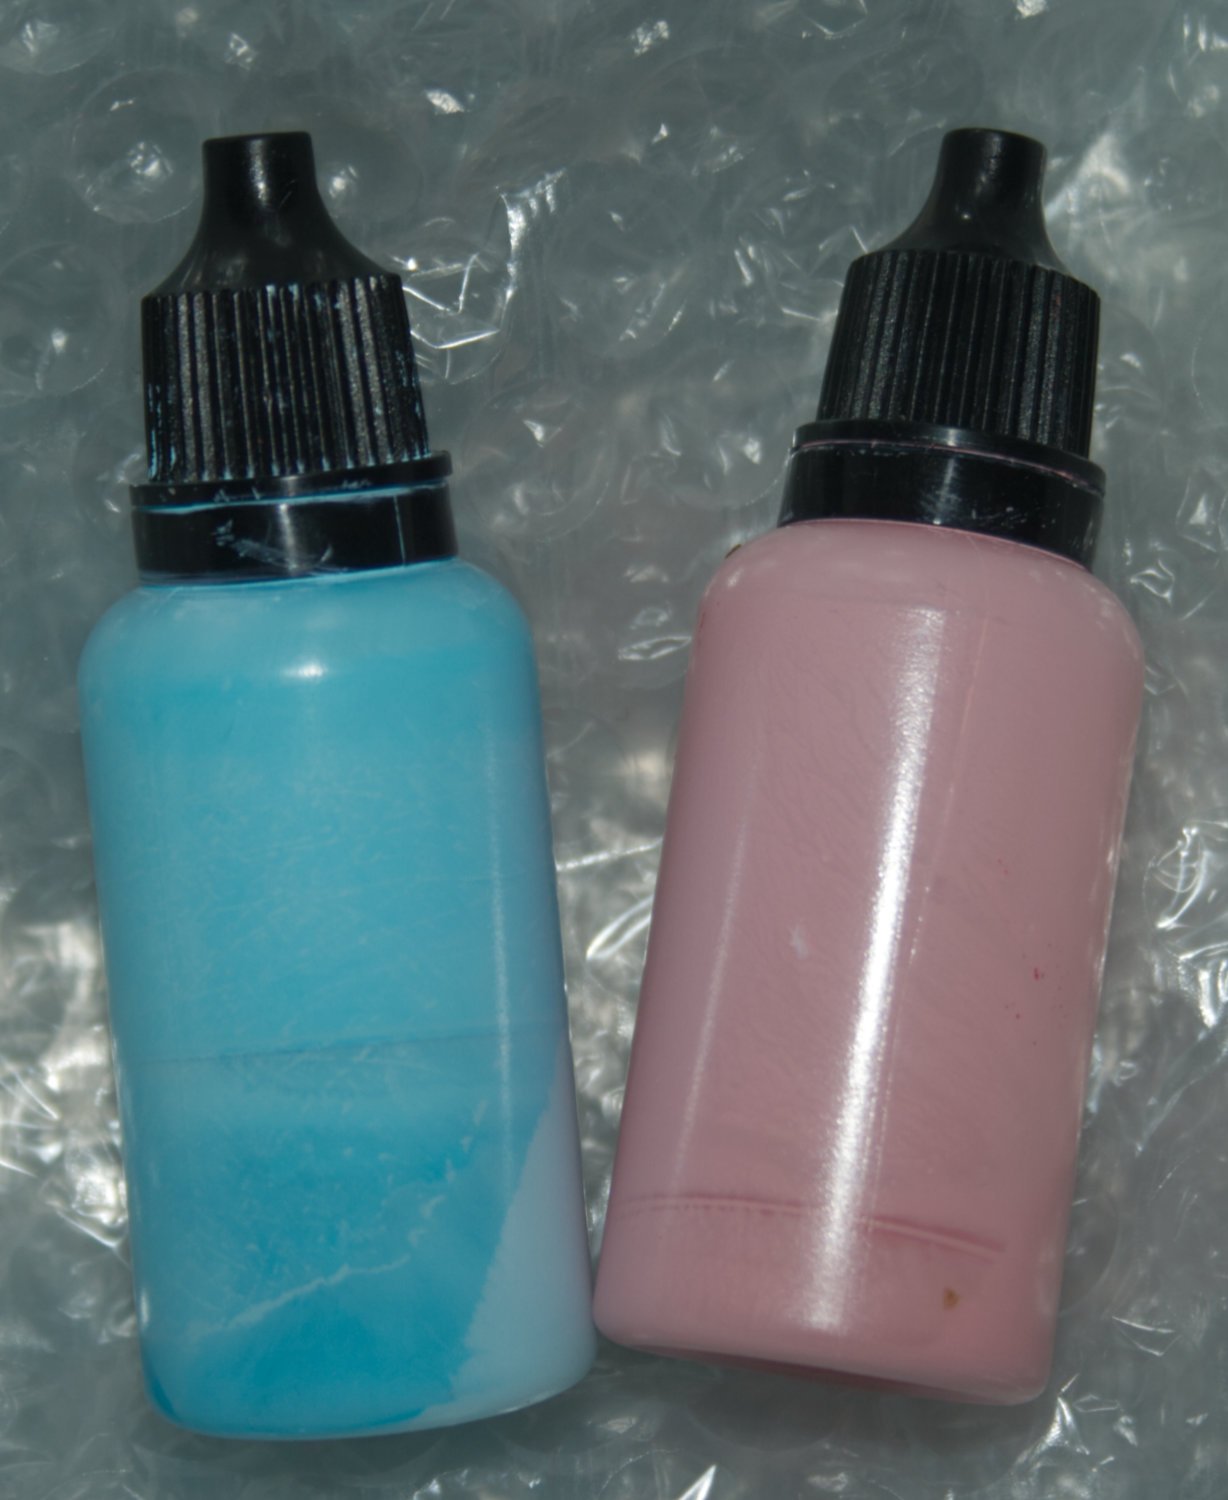
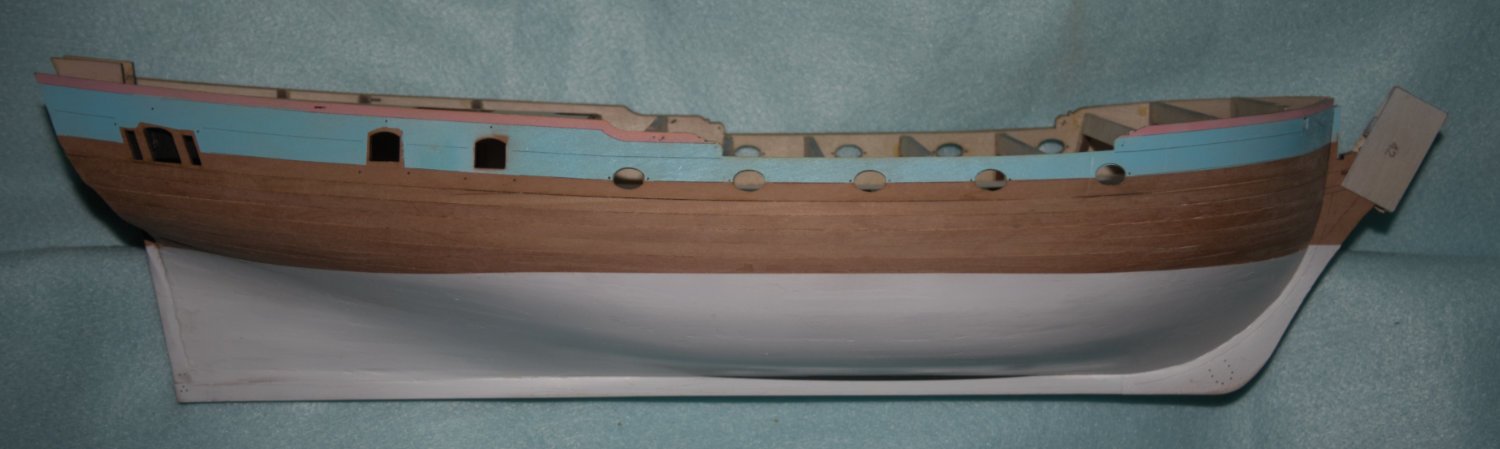
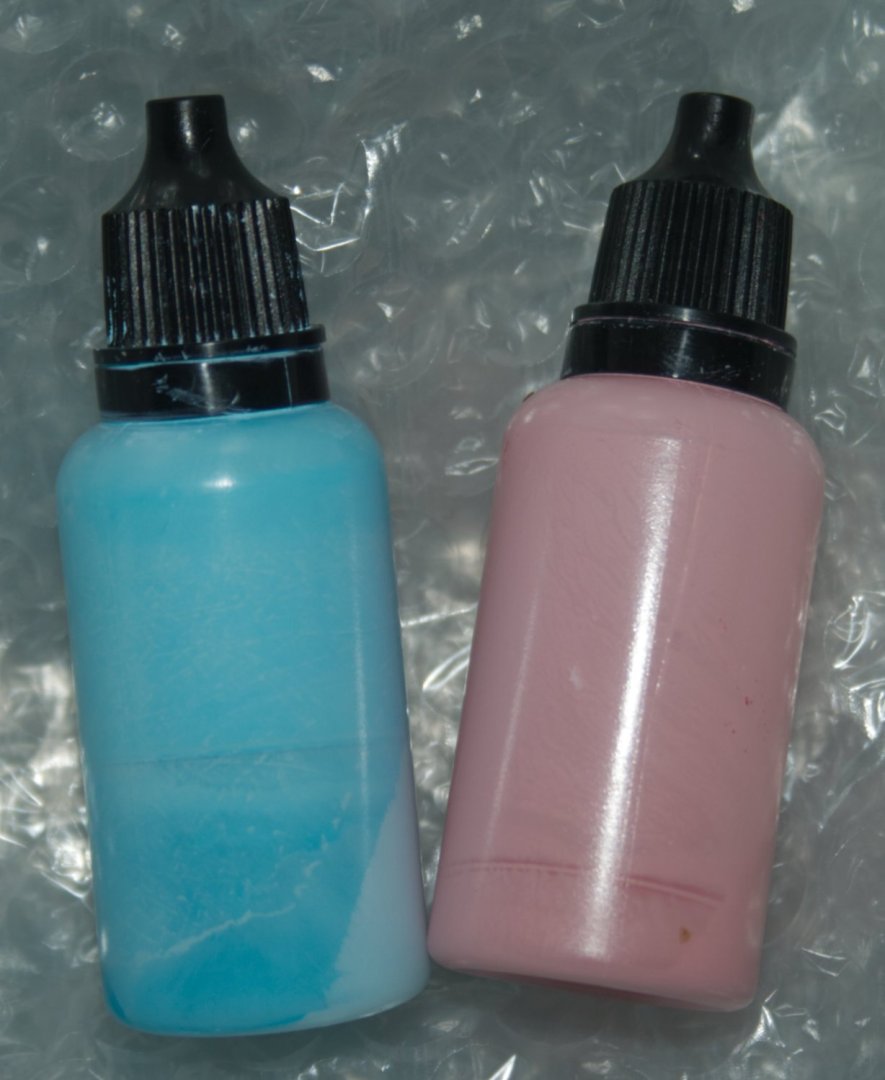
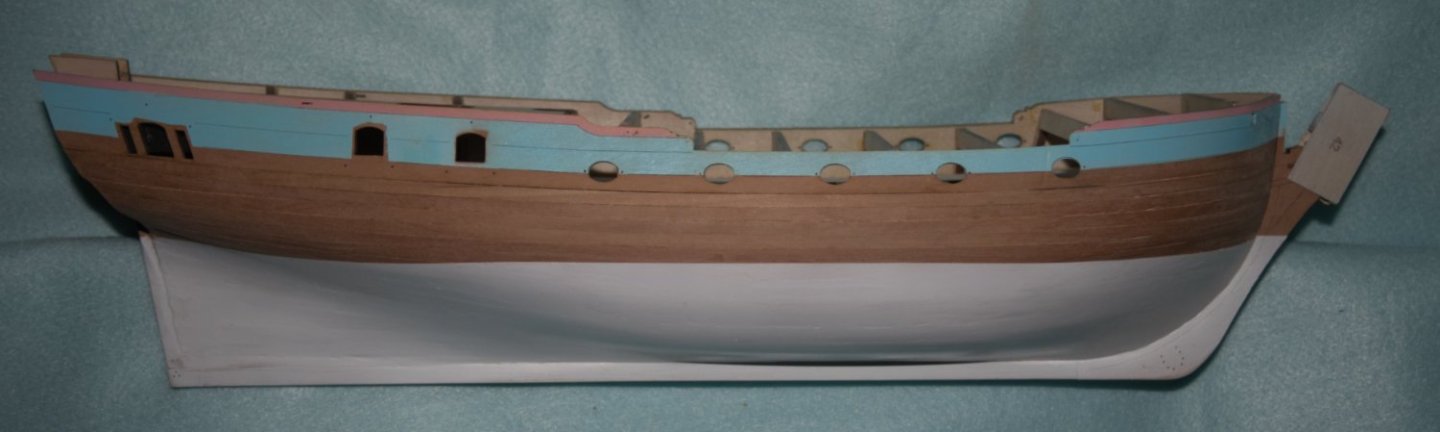
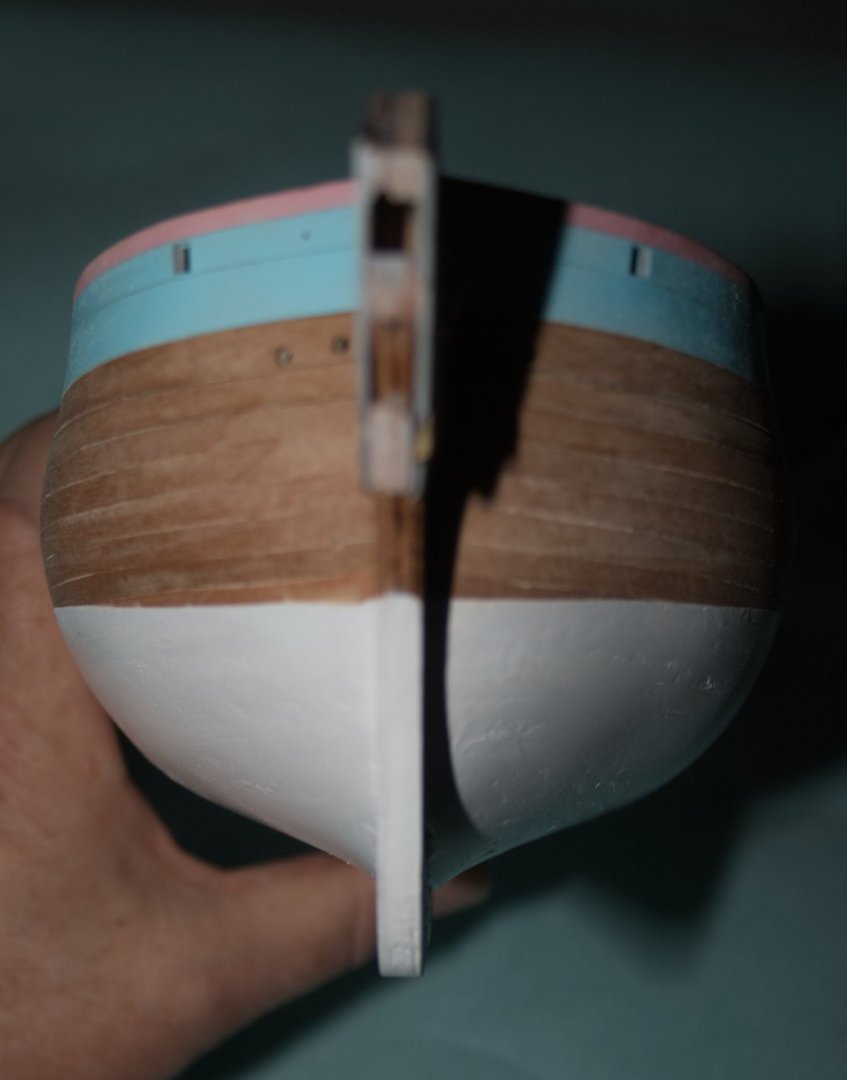
After a bit more delay, painting has started on the DoK. Since we're not using standard colours, a couple of bottles have been made up: These have been applied in a conventional arrangement (if lighter tones). The white has been applied a bit early in the build sequence, I hope that doesn't come back to bite me. This slight downward shot shows a little over spray, the (previously masked) area around deck holes.
-
On Royal Navy snows, how was the rope mast attached?
Pitan replied to Pitan's topic in Masting, rigging and sails
Hello wefalck, and thank-you Steel in his writing agreed with you: Source: https://maritime.org/doc/steel/part7.php#pg220 I have no idea what it would have been called. -
In the 18th century, the Royal Navy had several classes of snow rigged sloops*. The rig is mentioned in The Masting and Rigging of English Ships of War 1625-1860 by James Lees, and in The Sloop of War 1650-1763 by Ian McLaughan. Both authors suggest that the later RN snows used a rope hawse (or horse?) rather than the wooden mast used on merchant vessels. While discussing snows, Steel mentions the RN's use of a rope horse to support a try sail. Lees does give a couple of examples for attaching wooden snow masts (pp 11-12). I have not seen how a rope mast was secured, neither at the head nor the foot. There is an indication in McLaughlin that the foot of the rope was tightened with a pair of blocks (possibly deadeyes), but no indication of how the lower block was attached to the ship (Fig 1-9, p 18). My question is, how was the rope mast attached? Are there examples out there? * For example, about 25 sloops built between 1742 and 1747 were snow rigged.
-
Sorry, very late to the party, but, are you aware of the book The Athenian Trireme by Morrison, Coates and Rankov from Cambridge University Press? This is about a full size reconstruction of a Greek warship (the Olympias) and the archaeological research that went into the build.
-
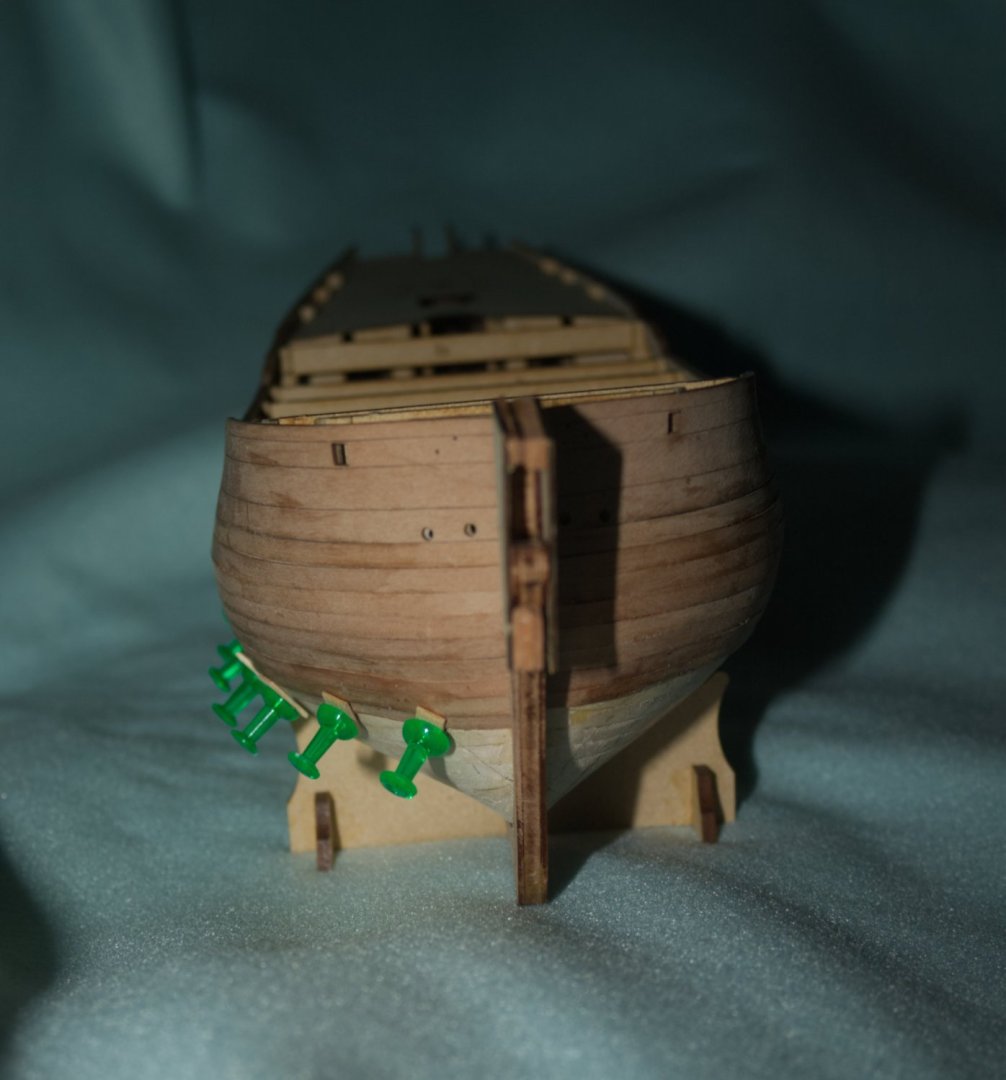
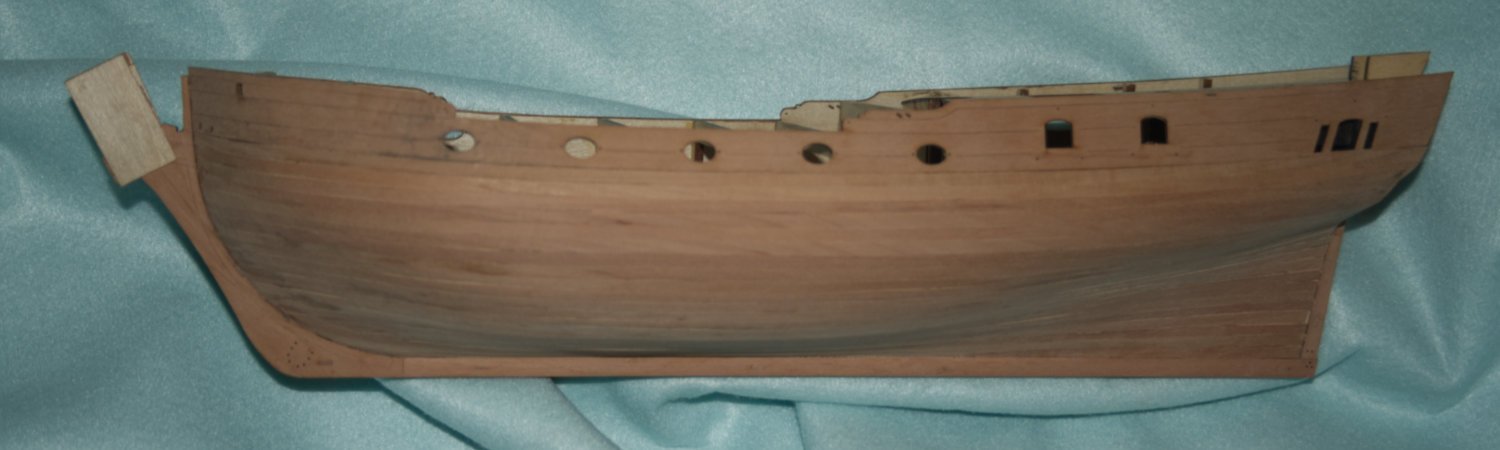
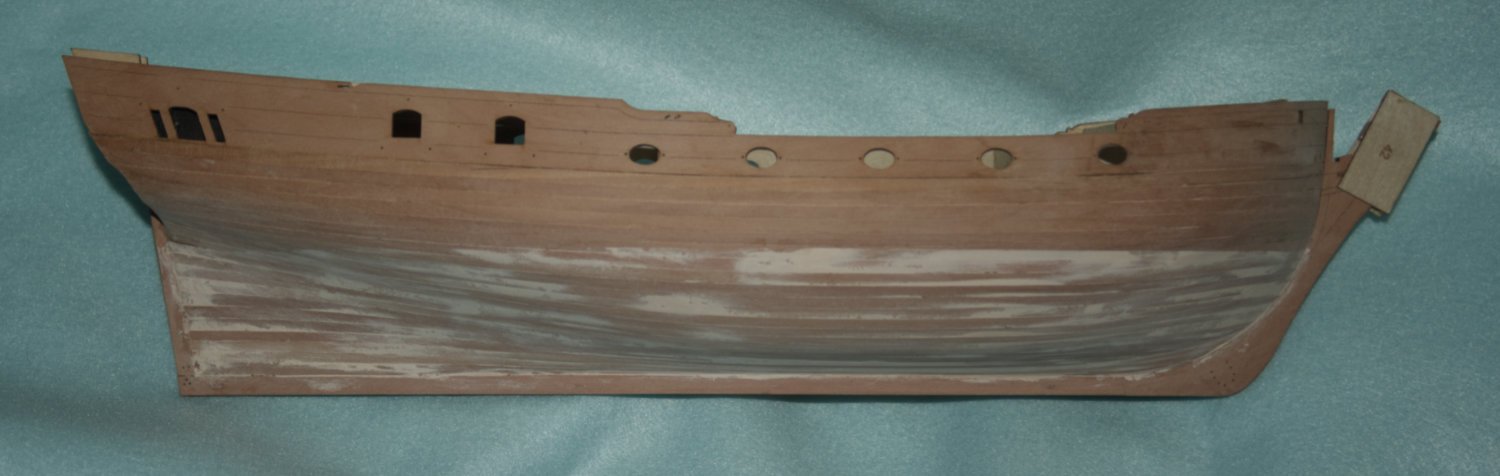
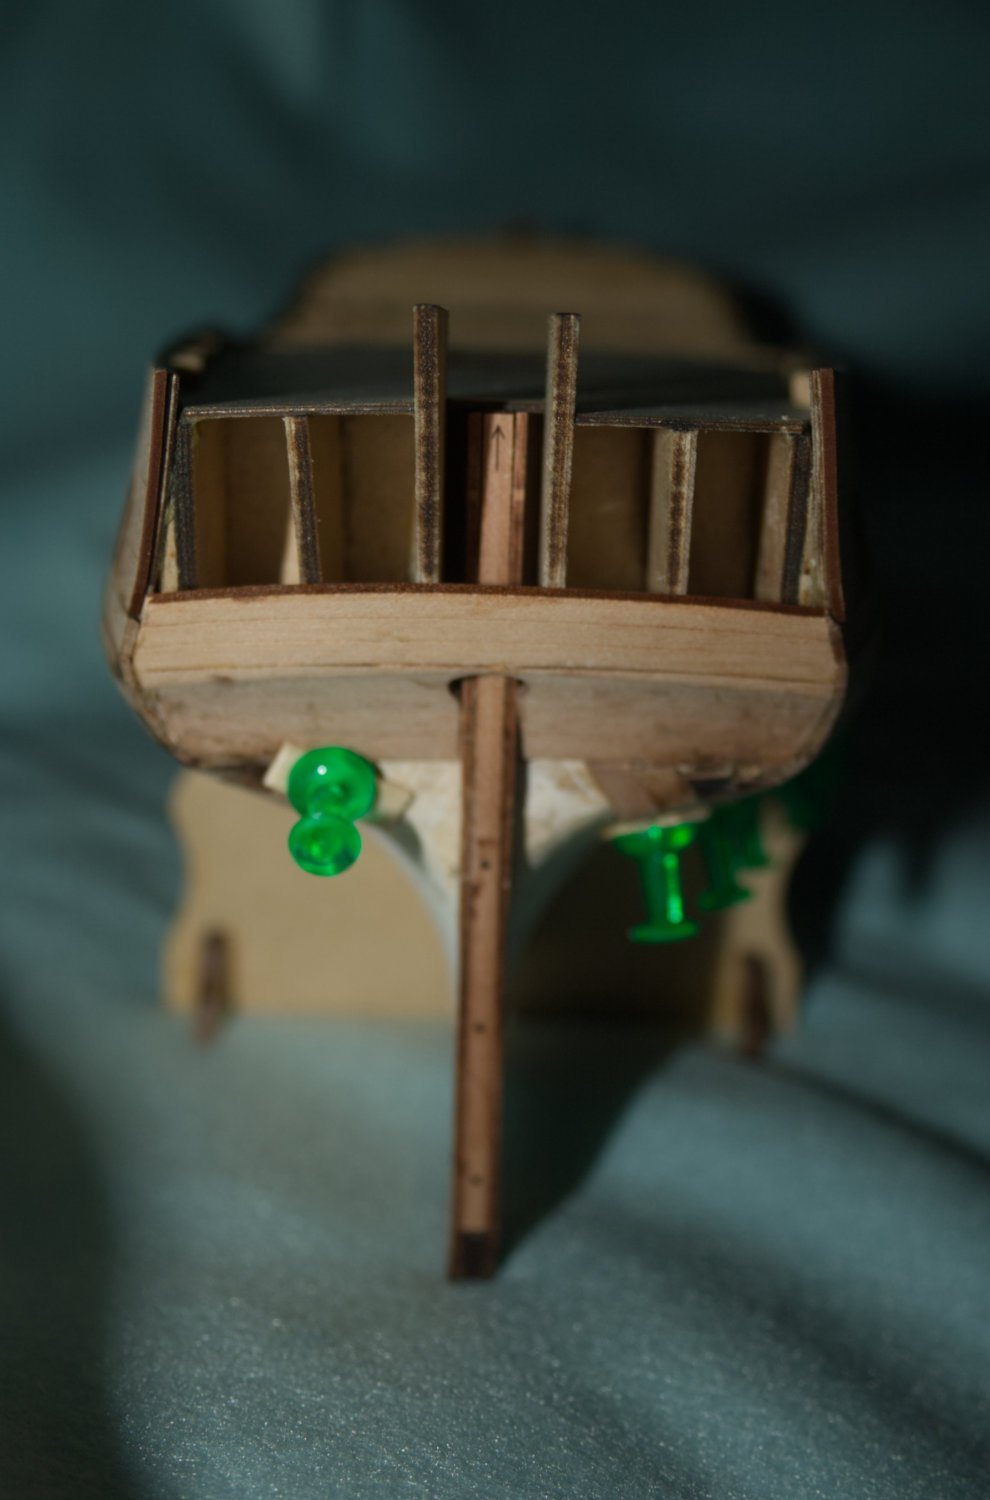
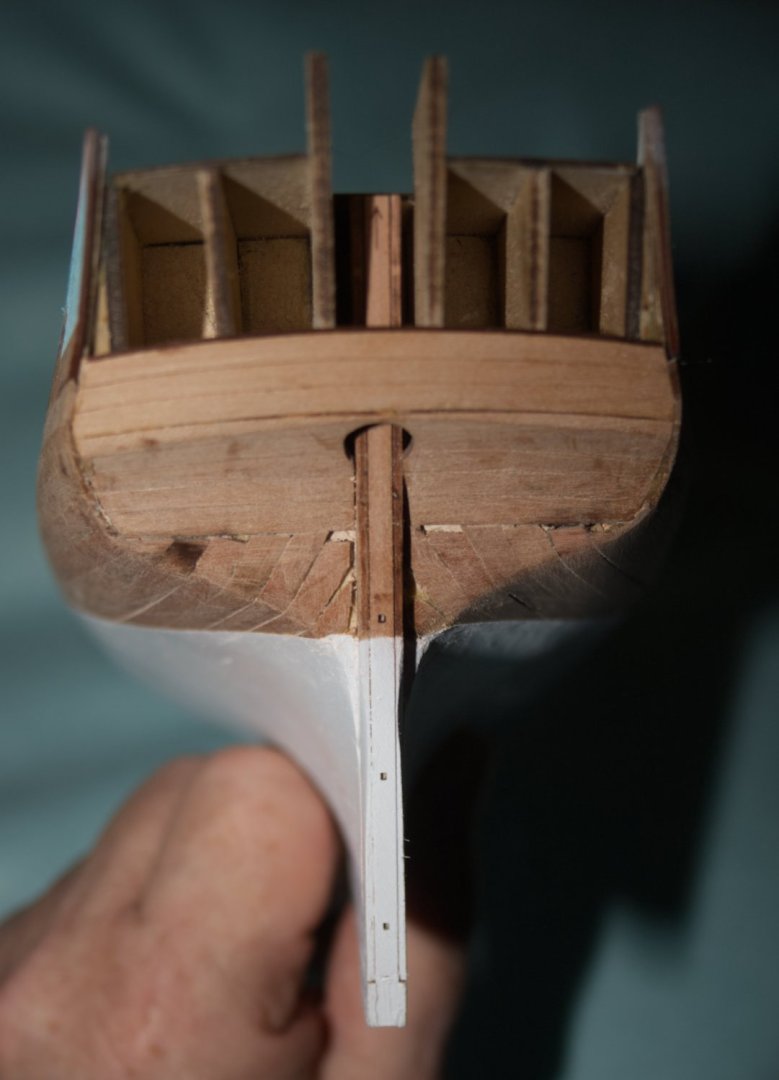
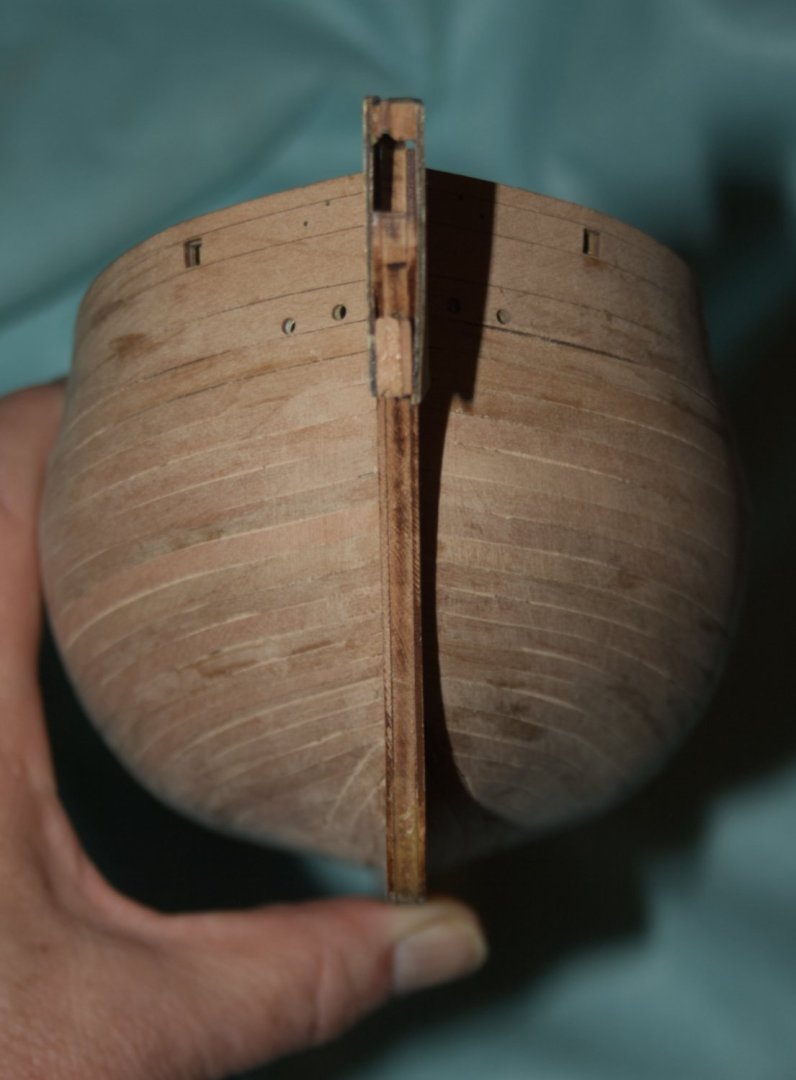
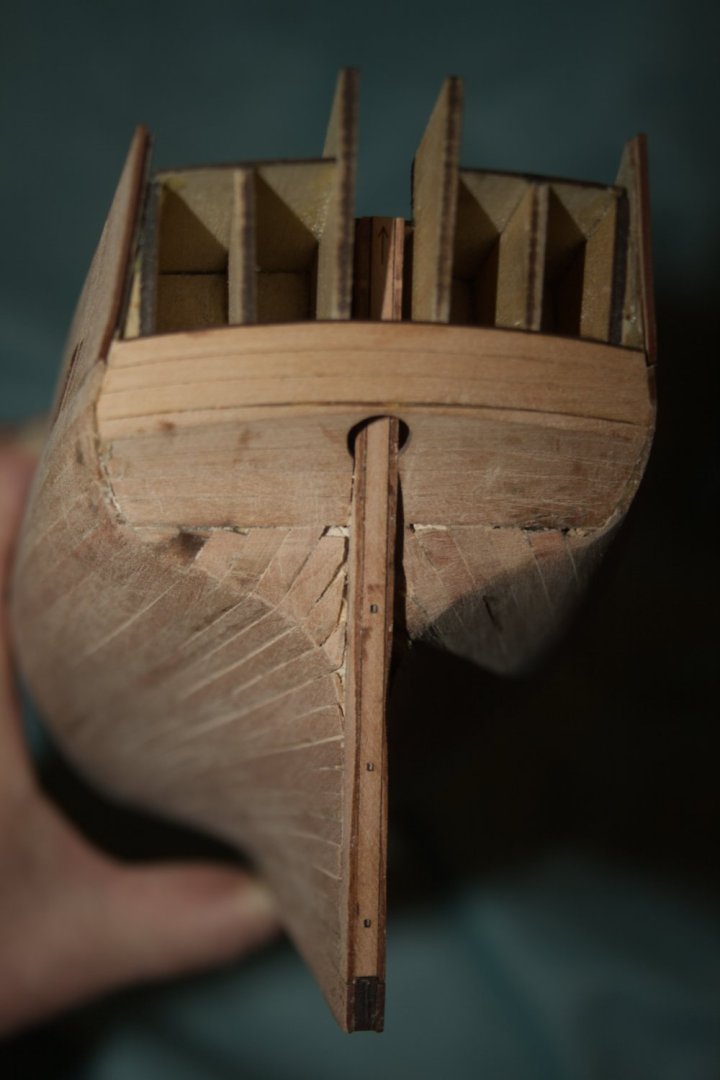
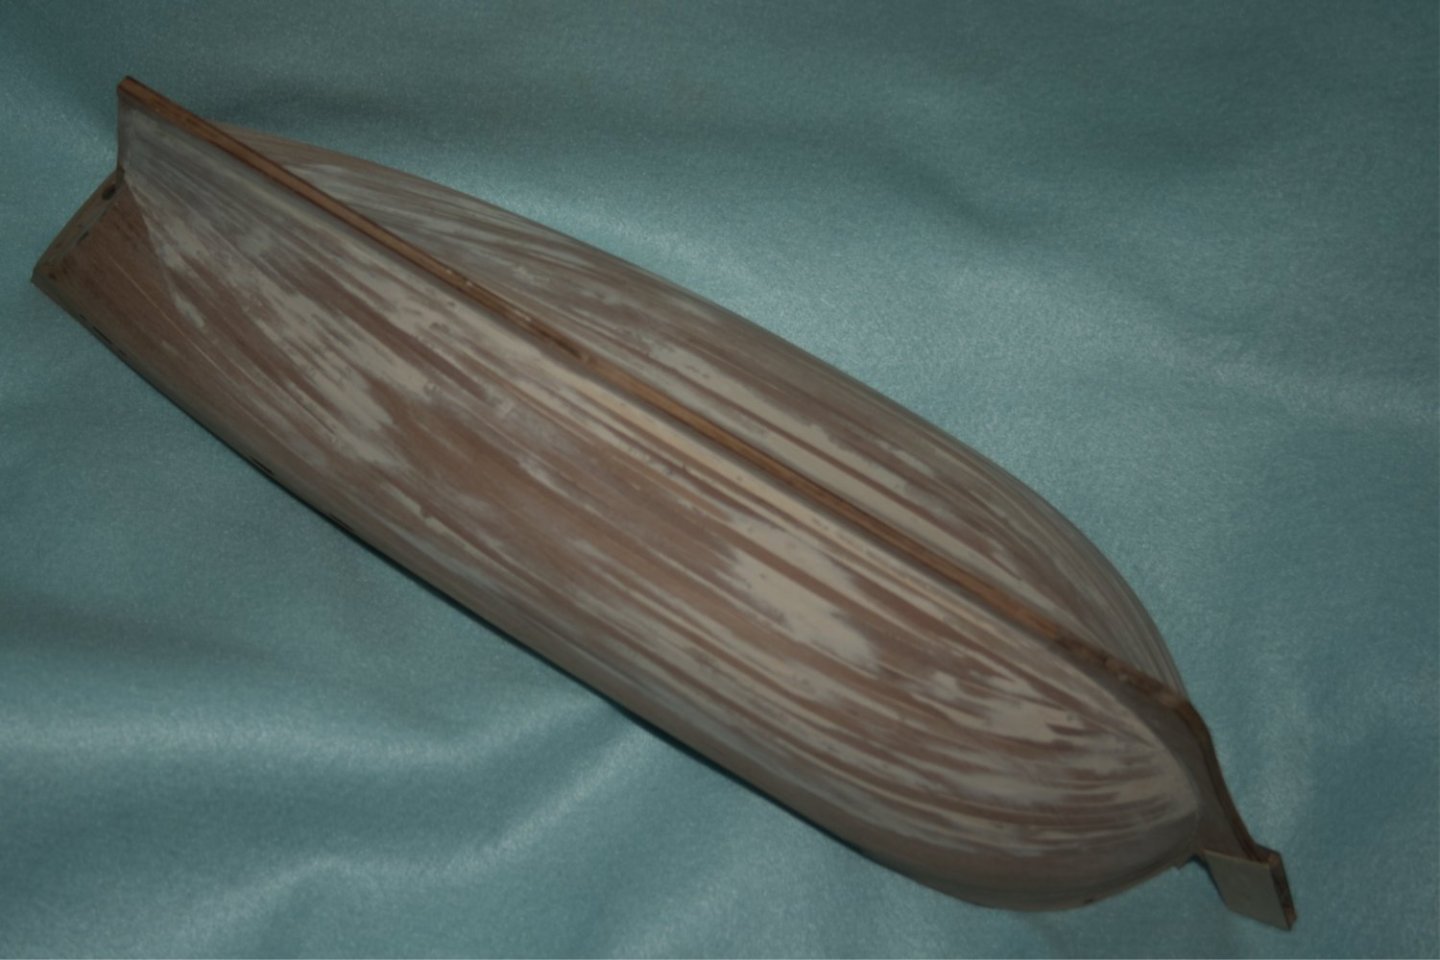
It feels like a long time since I posted an update on my DoK build. Second planking is complete. It even looks reasonable in front and side views. Looking at the stern, it is a mess. I think my biggest mistake here was following the instructions and gluing the stern counter and, especially, the stern post this early. Had I left them off, I could have trimmed the lower planks to length before attaching the stern components. Not sure what that would have done for the first five planks, though? Maybe there's an even better way? I've also done the below water-line filling, smoothing the hull in this area. This highlights an issue that was harder to see in earlier photos - my planks at the bow haven't been thinned enough. This is low, under the hull, and won’t be that visible later, but... Now, I need to think about painting the bulwarks. Vanguard suggest blue, red and gold, which are royal colours, but, I feel this is the Duchess of Kingston's personal yacht. The Duchy of Kingston's arms were Argent, semée of cinquefoils gules, a lion rampant sable. Which translates as a white (silver) shield, covered in red cinquefoils, with a black lion rampant. The shield's supporters were also black lions. A picture can be seen here: https://lordbelmontinnorthernireland.blogspot.com/2017/08/1st-duke-of-kingston.html. Click on the picture in that link to see a larger version. The supporters in that link stand upon a blue-turquoise, gold and light red (pink?) structure. The Duchess was born a Chudleigh. The Chudleigh arms are, essentially, an ermine field (black on white), with three red lions rampant - essentially the same colour scheme as the Dukes of Kingston. (Versions can be seen in this link: http://chudleighhistorygroup.uk/articles/town_crest.html). (Ermine is the white winter fur and black tail of a stoat). While common to both families, black, white, and red strike me as a bit masculine for a duchess's yacht. Question is, what colour would she paint her ship?


-
A small update, to say I've been away for a week, but am back and the duchess' yacht is still in progress. The second layer of planking has started. The green pins on the starboard side are a happy accident. I'm having problems at the stern, with bending hull planks up. I'm using a lot of heat to make those bends, and we can see scorching as a result. At this stage, I realise that I followed the instructions and added the stern post before the second planks. The planking process would probably be easier if I'd swapped the sequence (i.e. second planks should be before the stern post).