HOLIDAY DONATION DRIVE - SUPPORT MSW - DO YOUR PART TO KEEP THIS GREAT FORUM GOING! (Only 72 donations so far out of 49,000 members - Can we at least get 100? C'mon guys!)
×


Pitan
-
Posts
170 -
Joined
-
Last visited
Content Type
Profiles
Forums
Gallery
Events
Everything posted by Pitan
-
Looks complex Nick. I don't recall using edge bending on my Sherbourne, though I did bend the planks using an electric plank bender (mine isn't Amarti, but this is similar https://www.amatimodel.com/en/tools-and-equipment-parts-per-model/product-electric-plank-bender-b7205.html). Every few rows of planks, I heated the planks with the iron, to get them to conform to the hull. (Use a splash of water to prevent scorching.)
-
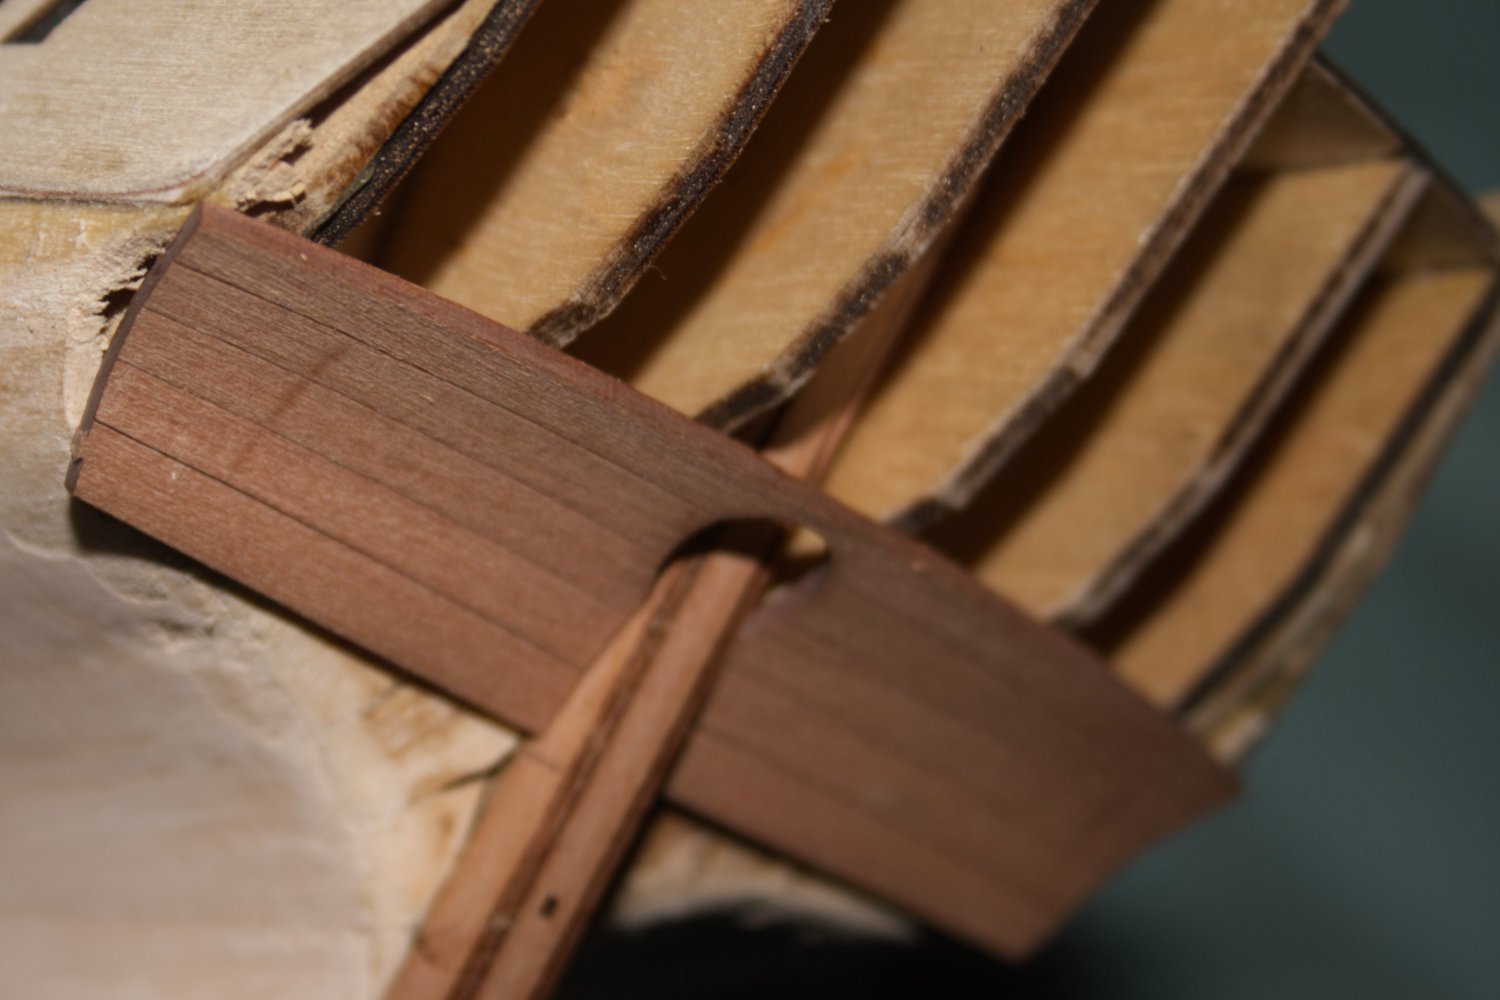
Thanks Knocklouder, Was that three times those rails broke for you? At least they can be repaired
-
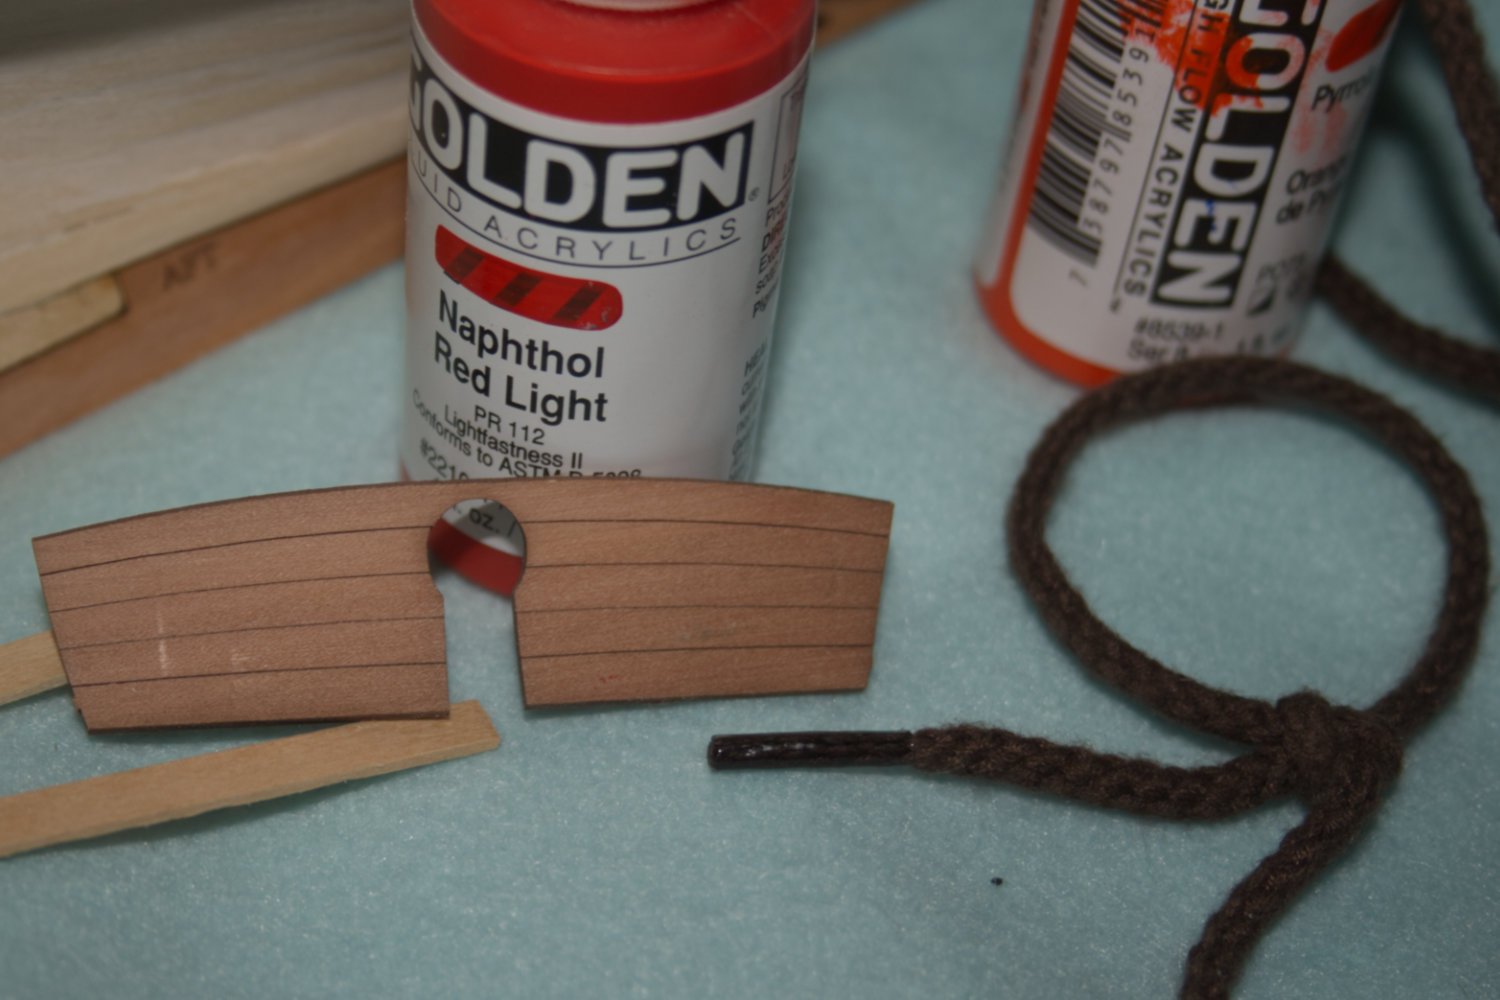
Help, a long time ahead of need, but I expect I'll want guidance for these rails. These are side rails, but I'm concerned that they'll be very vulnerable when attached to the model. Is there a trick to preventing breakages, or limiting the damage, that I can apply now? TIA

-
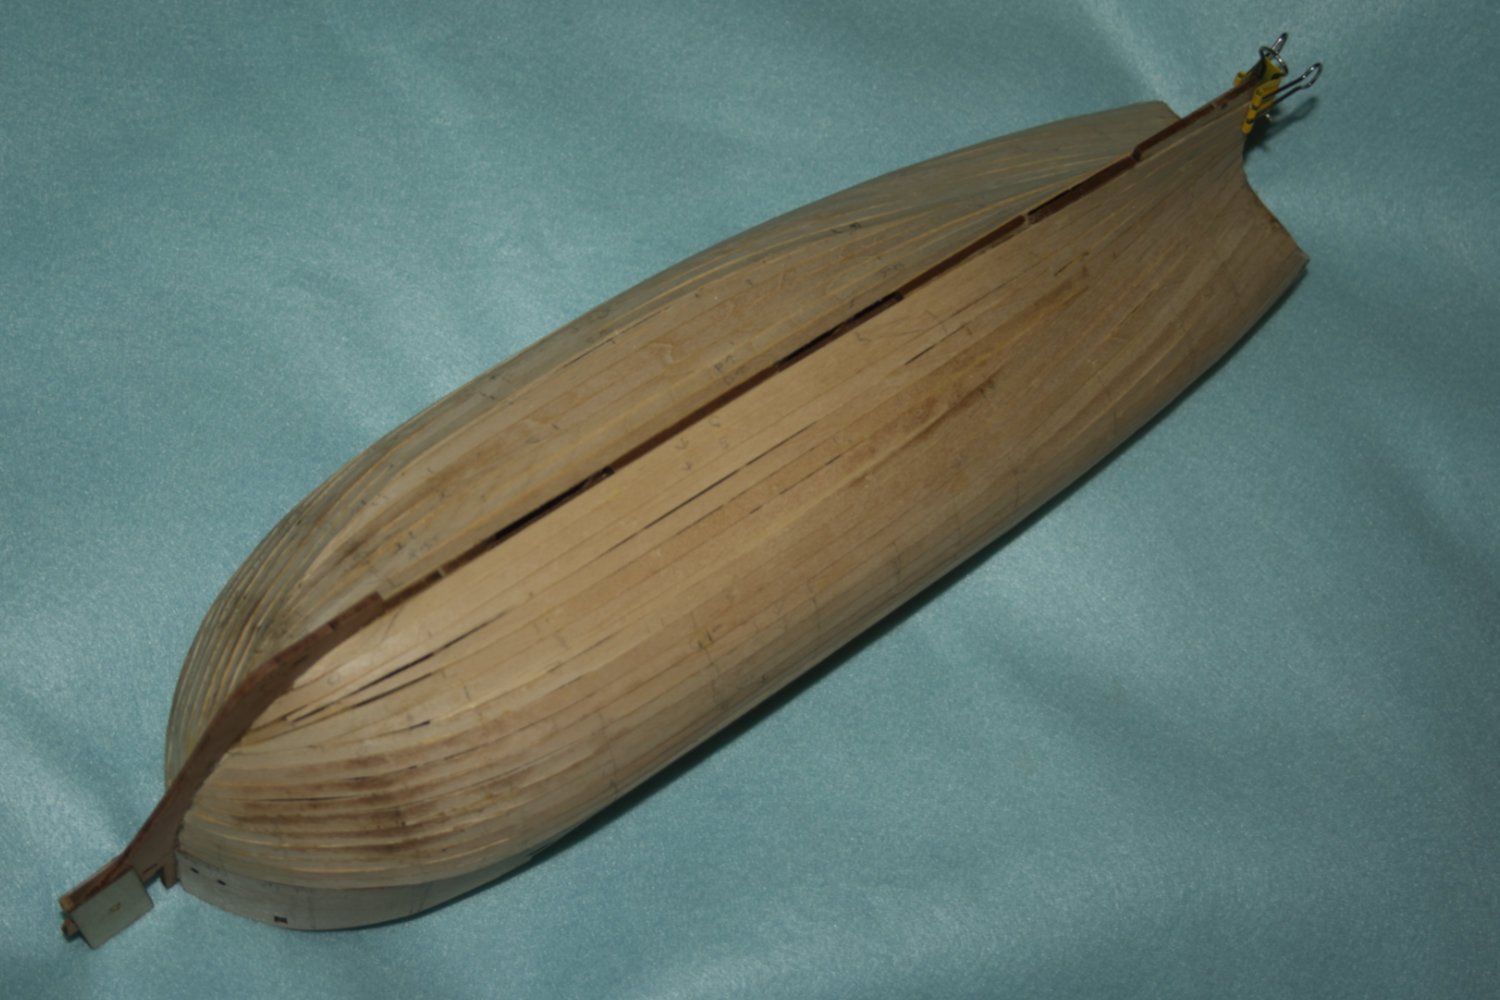
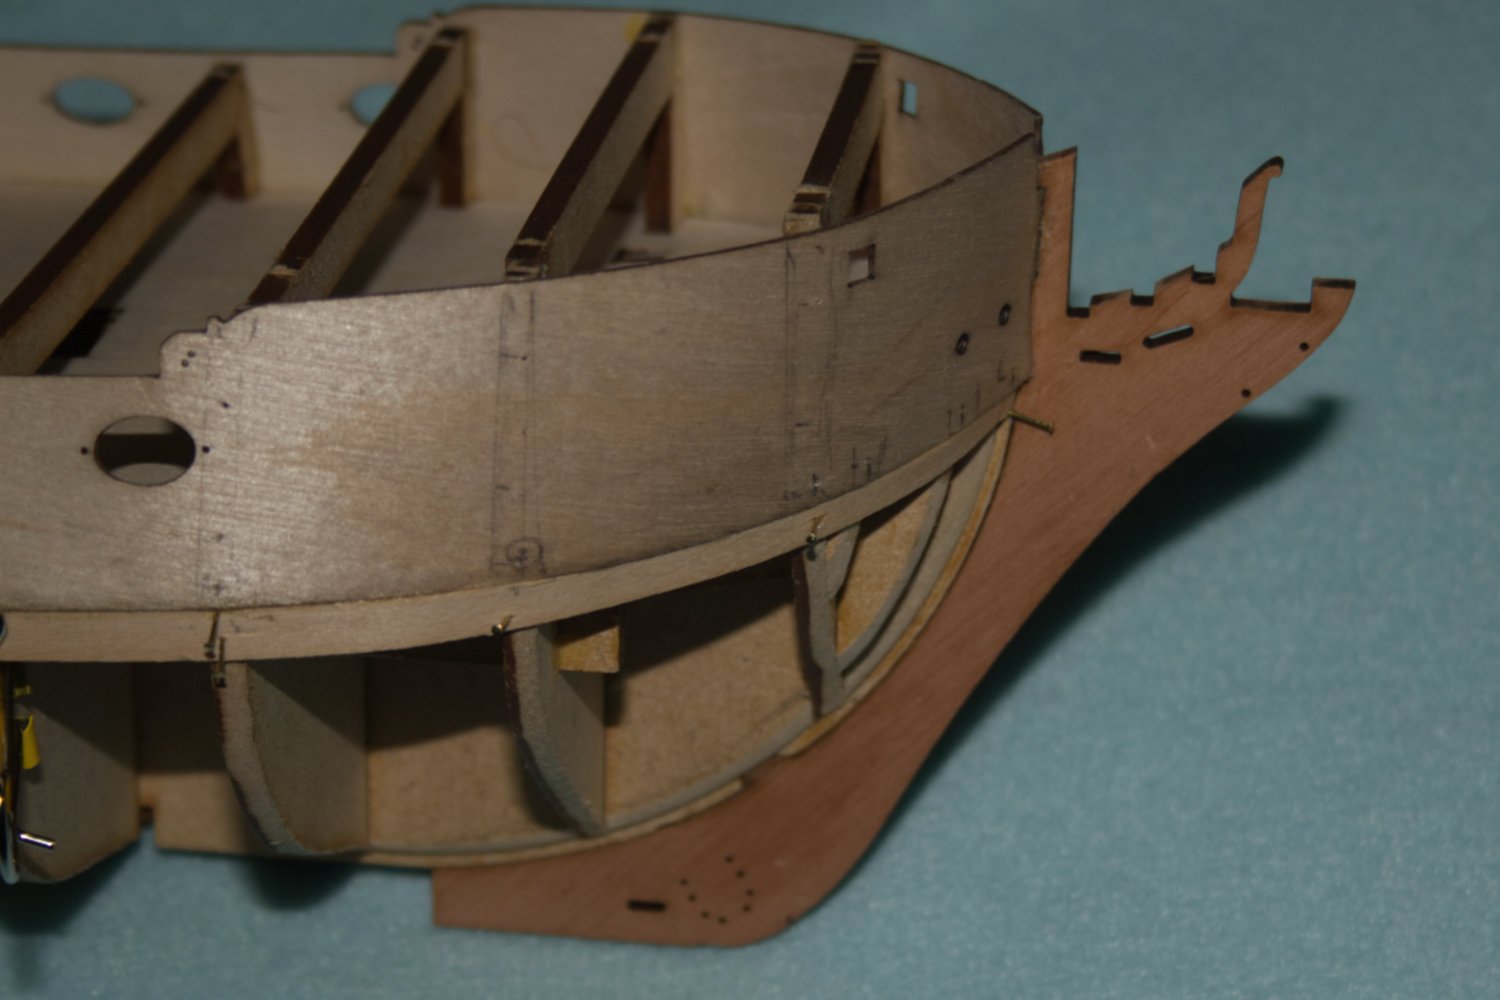
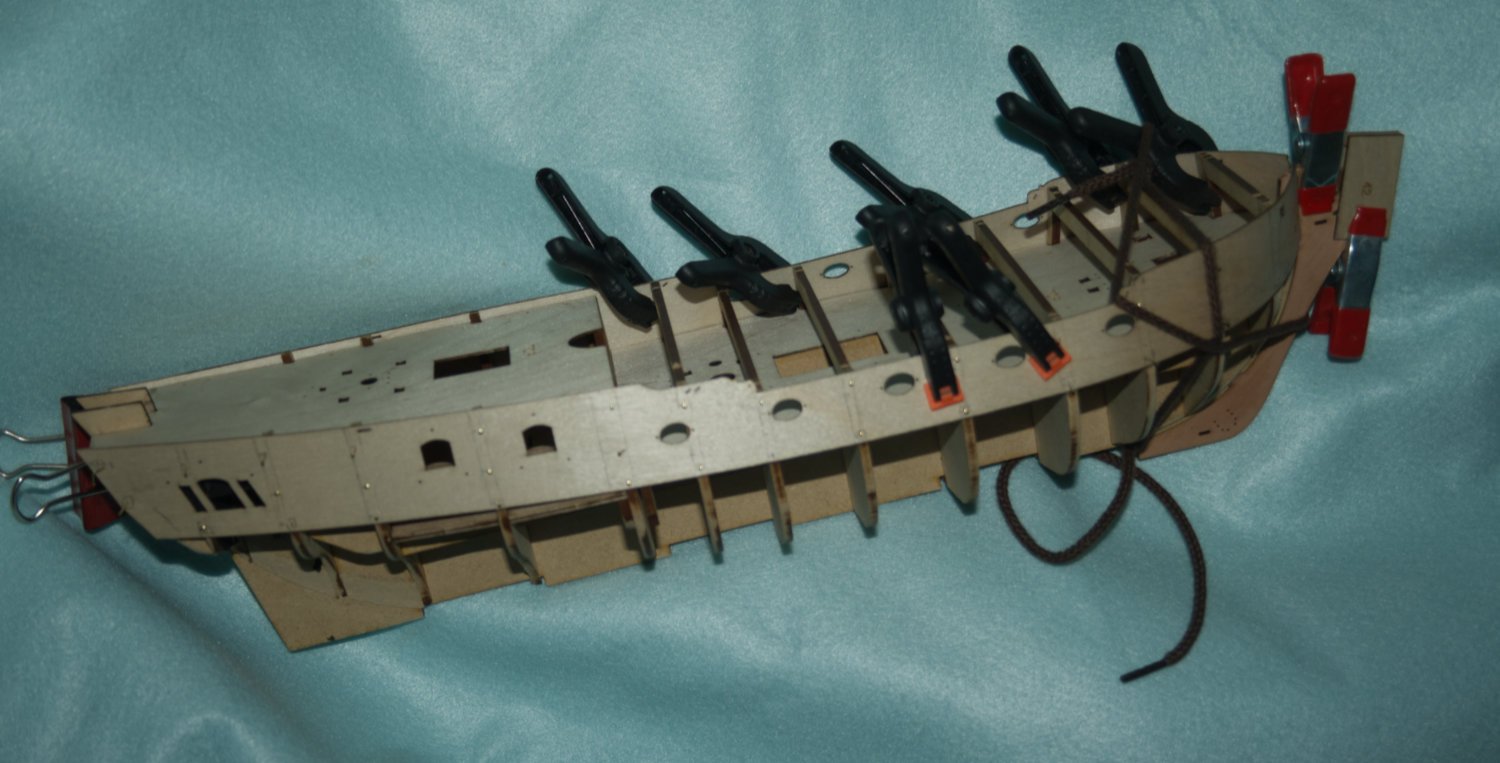
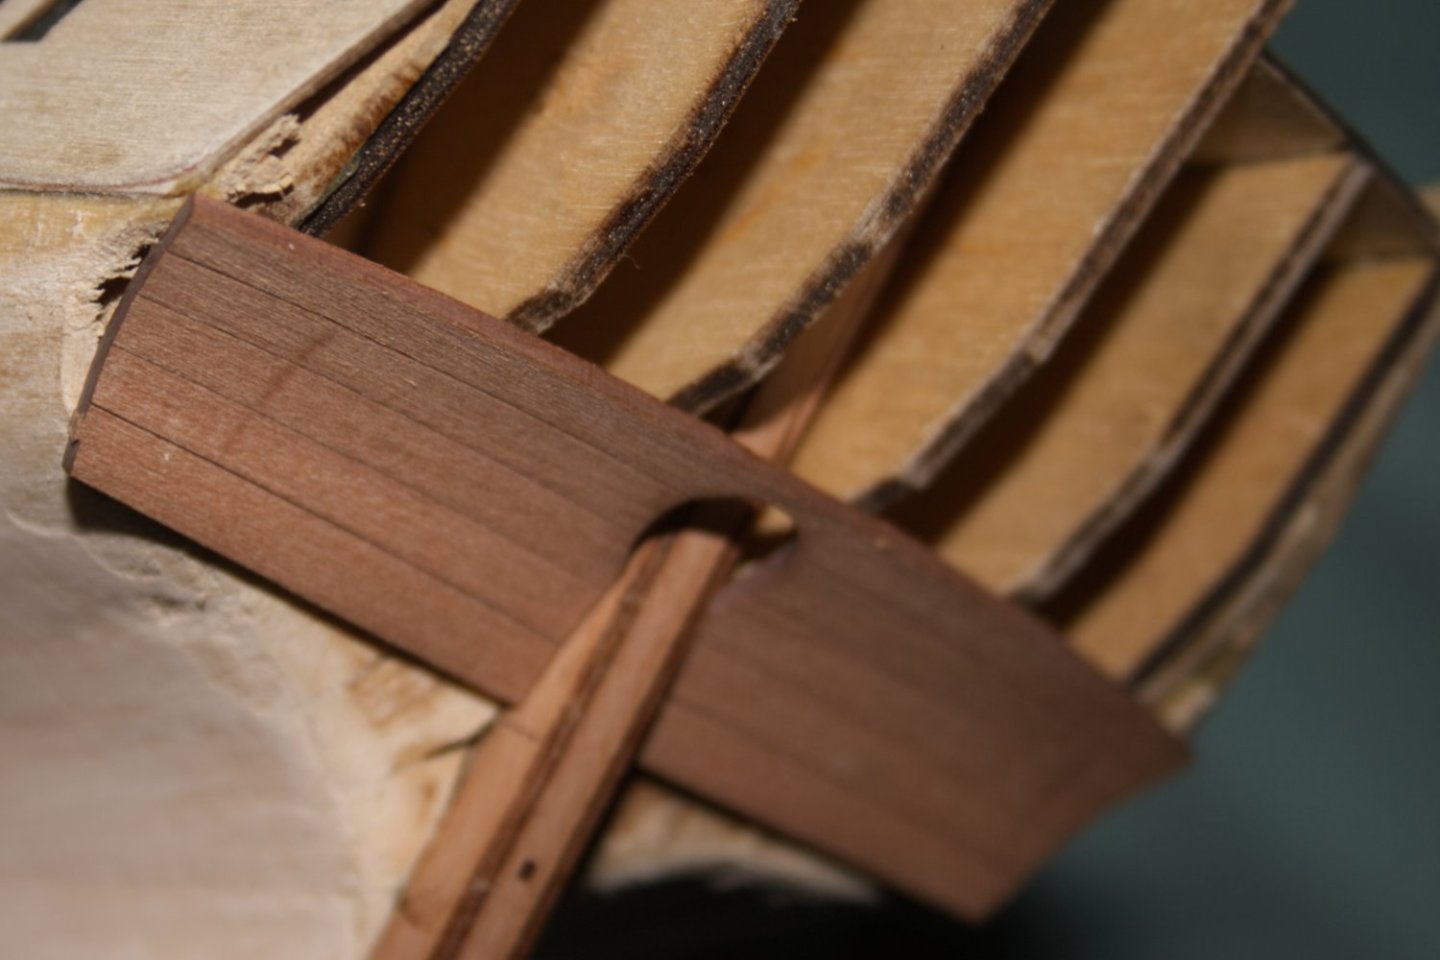
A bit more progress - the outer bulwarks, stem and keel skins are on. The figurehead guard has been modified to accommodate the extra width. Clamped here, because the glue is still drying.

-
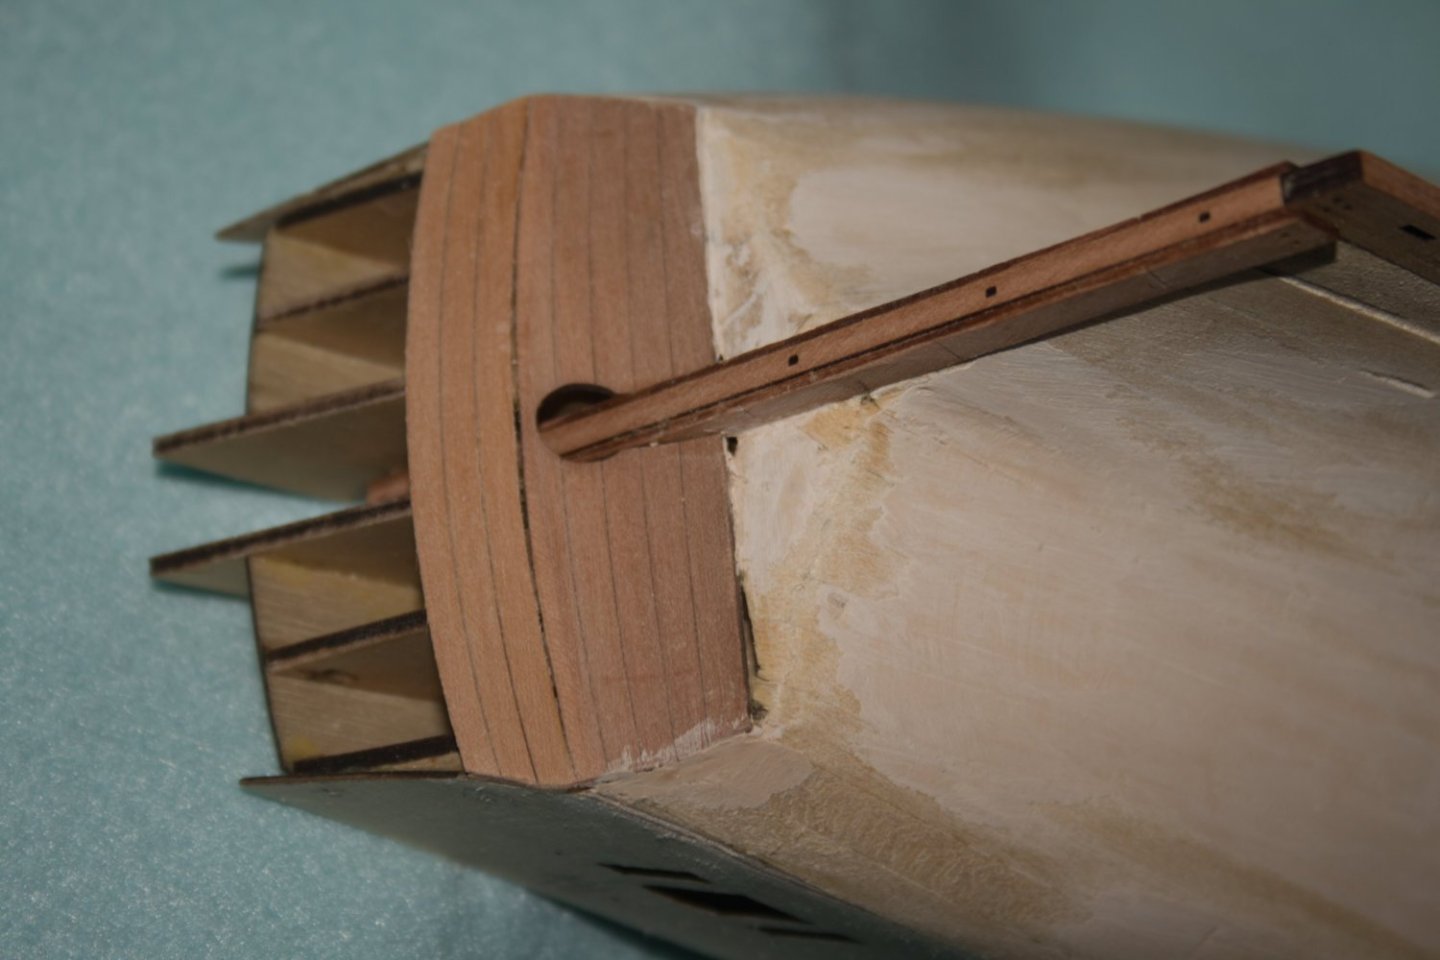
The instructions say to soak the Stern Counter Pattern – Lower (part 77) in boiling water for an hour and a half. Well, I didn't boil it for that long, but the lower counter pattern did get its soaking. It was then bound to a cylinder that happened to be the right size to fit under the yacht's stern, and left to set over night. Unwrapping the part this morning, it'd taken on the desired curve. This is (I believe) dry fitted, but looked similar glued. And now, with the Stern Counter Pattern – Upper (part 78) glued, filled and filed back. The next stage will be the side patterns, meaning yet more overnight soaking.

-
Progress with the inner planking; the garboard plank clamped. The inner planking is on, awaiting filling and smoothing. There is some scorching visible here: A hot plank bender is first used to curve the plank to the hull for fitting. After glue has set, I then come back with the plank bender, and press the boards down to the bulkhead form.


-
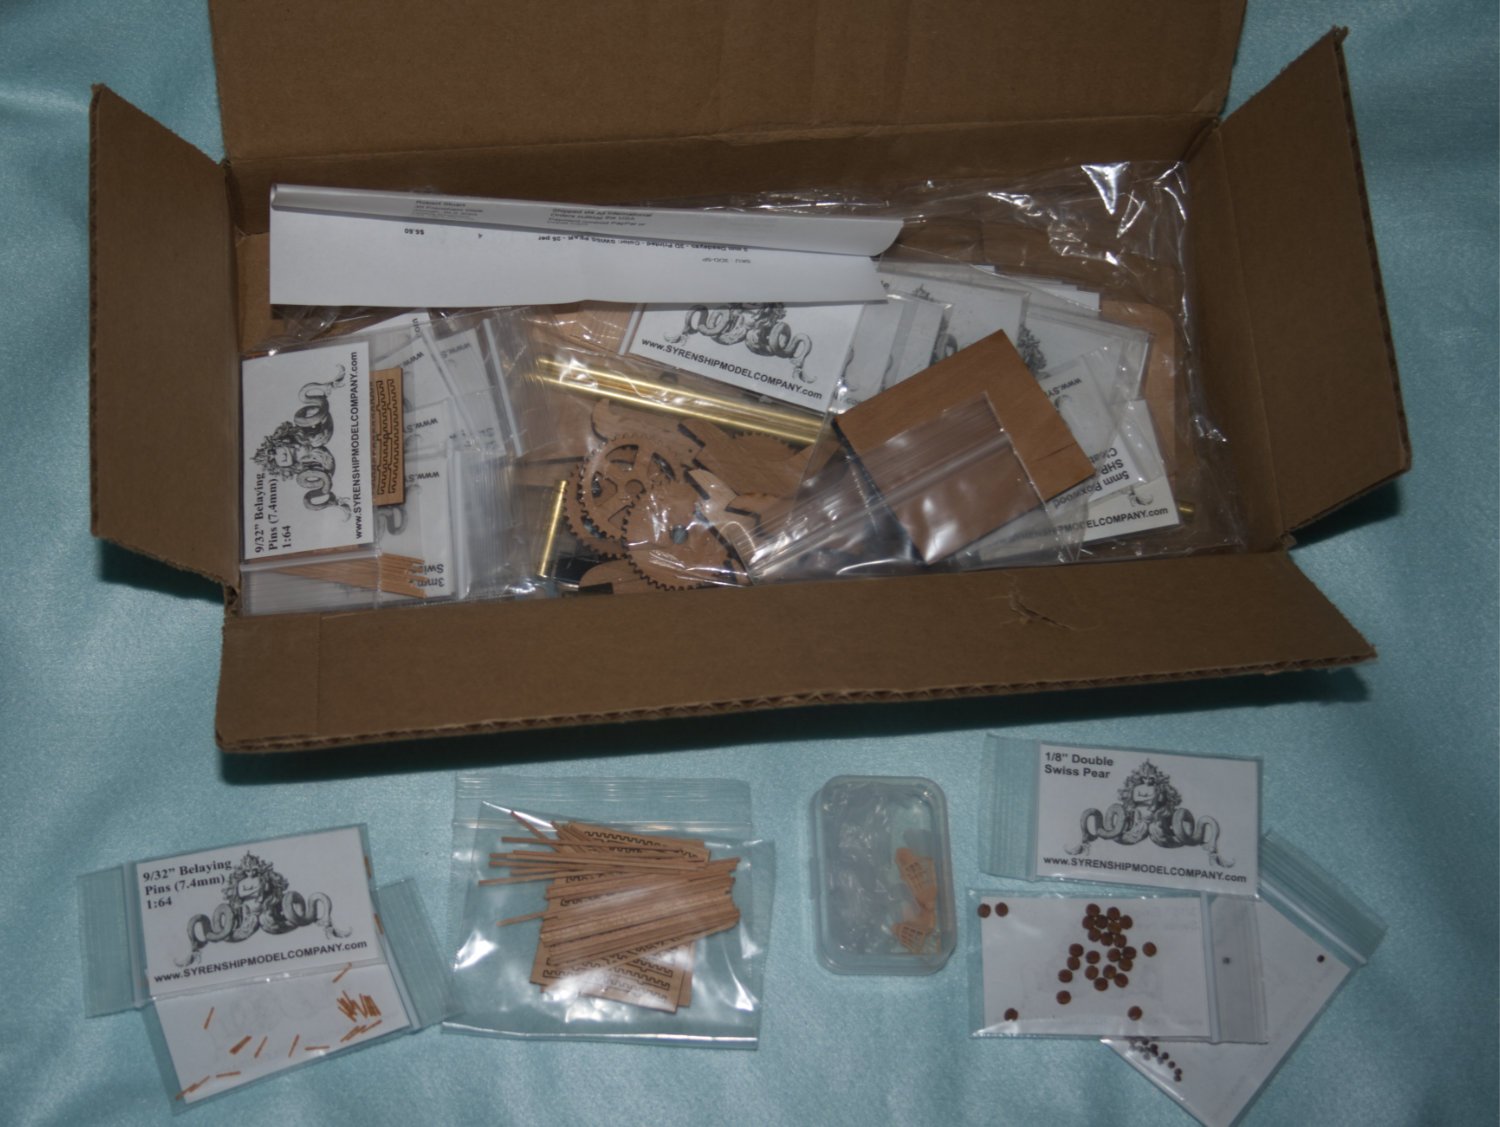
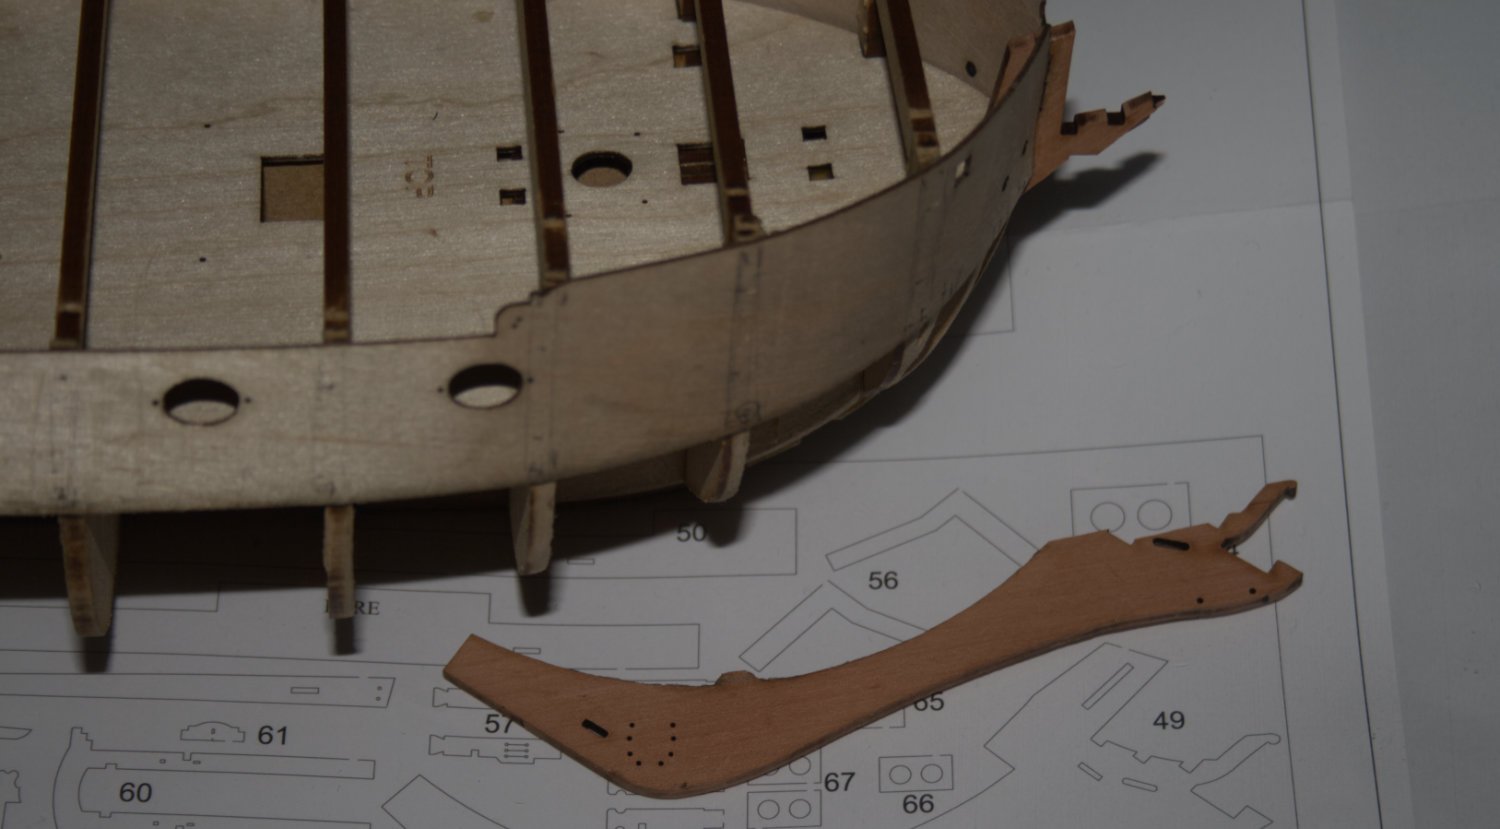
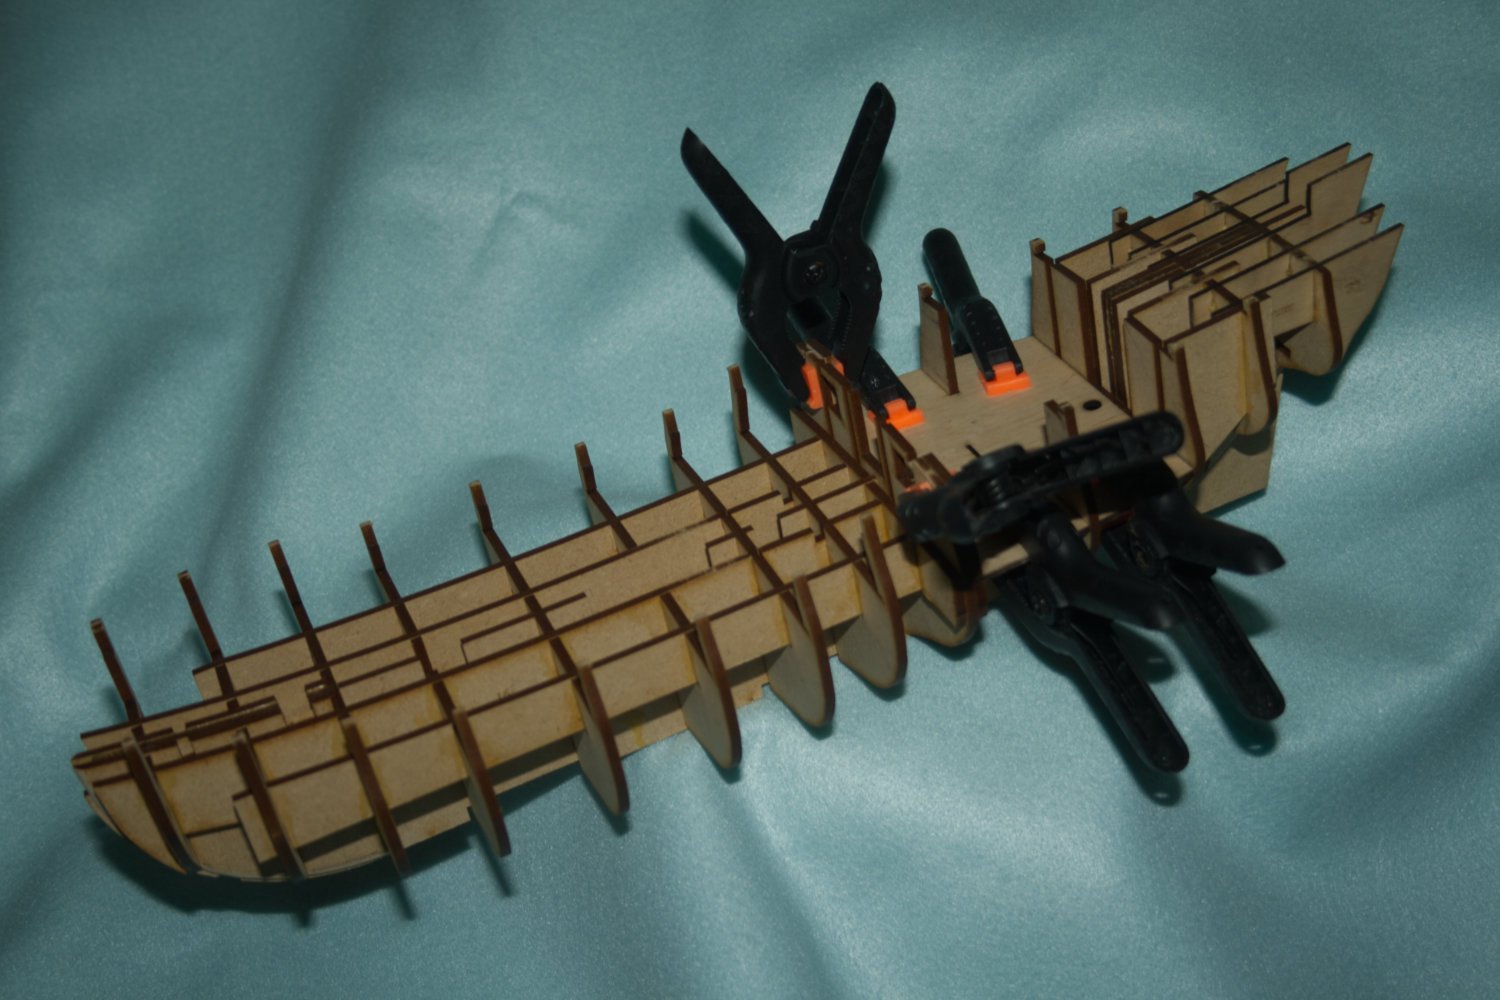
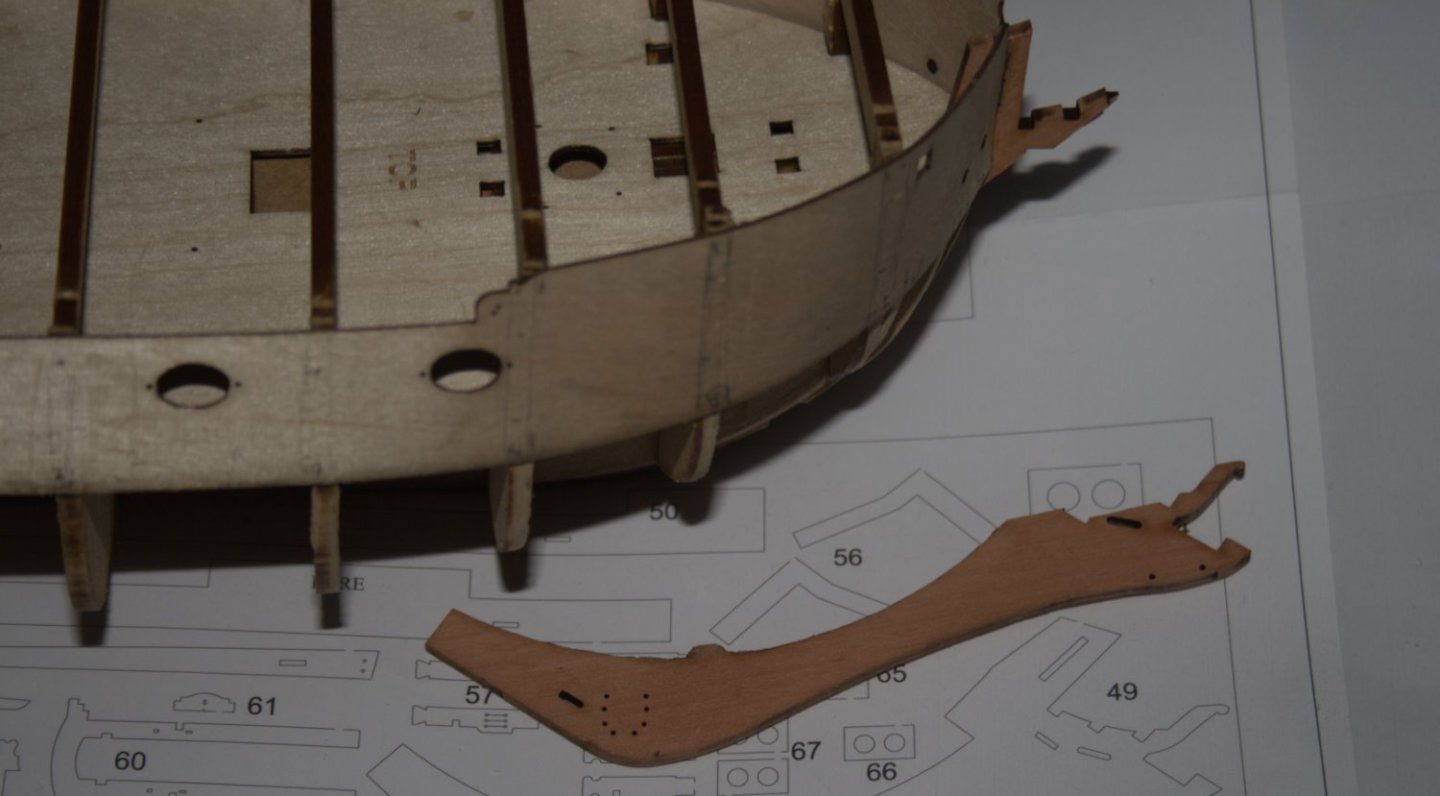
Last week, a few bits and pieces for rigging the Duchess arrived from Chuck at Syren Ship Modelling. These won't be used for a while yet (and some might divert to my Sherbourne). Today, I dropped the duchess on her stem, and succeeded in breaking off the bow pattern (part 49). Not an intended action, but it is, at least, recoverable. The figurehead support I'd made earlier shattered, but preserved the form of the pattern. The bow pattern, back in place, together with the first of the inner planks. I'll repair the support, and, while it worked before, hope that experiment isn't repeated.

-
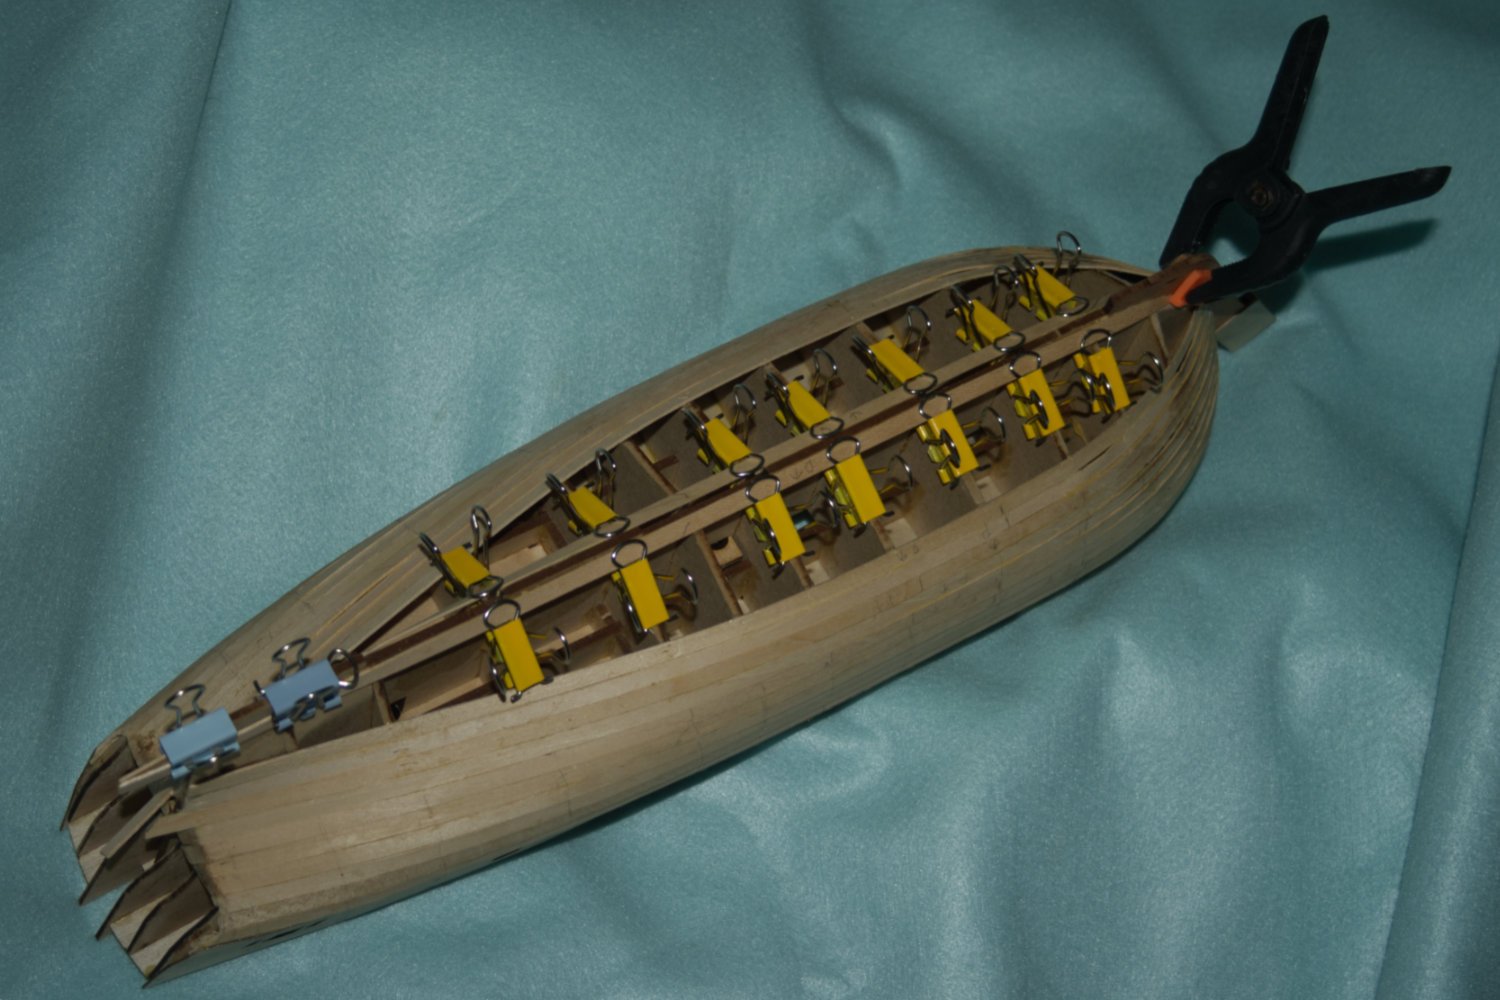
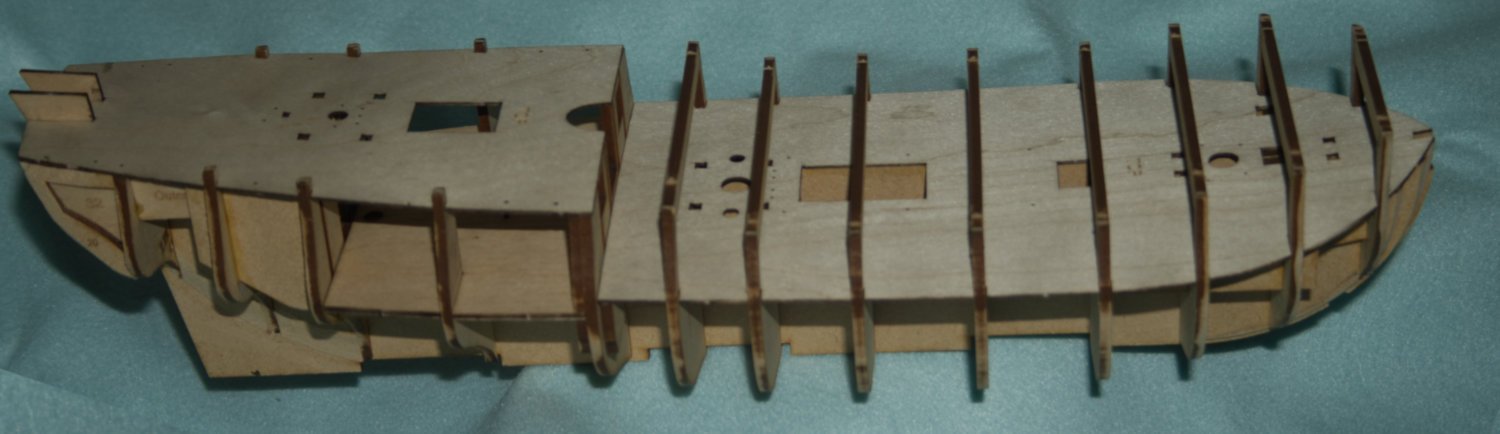
Inner (core) bulwark assembly under way. The near (starboard) bulwark is glued. The far (port) bulwark is attached at the stem and first two bulkheads are glued, clip & clamps establishing the proposed future set of the wood. The string (coarse boot lace) makes an effective strap.

-
Thanks Bob I'll probably leave the knight's head off. It is known to be fragile, and I can't see a helmet in the RMG drawing (here: https://www.rmg.co.uk/collections/objects/rmgc-object-460861)
-
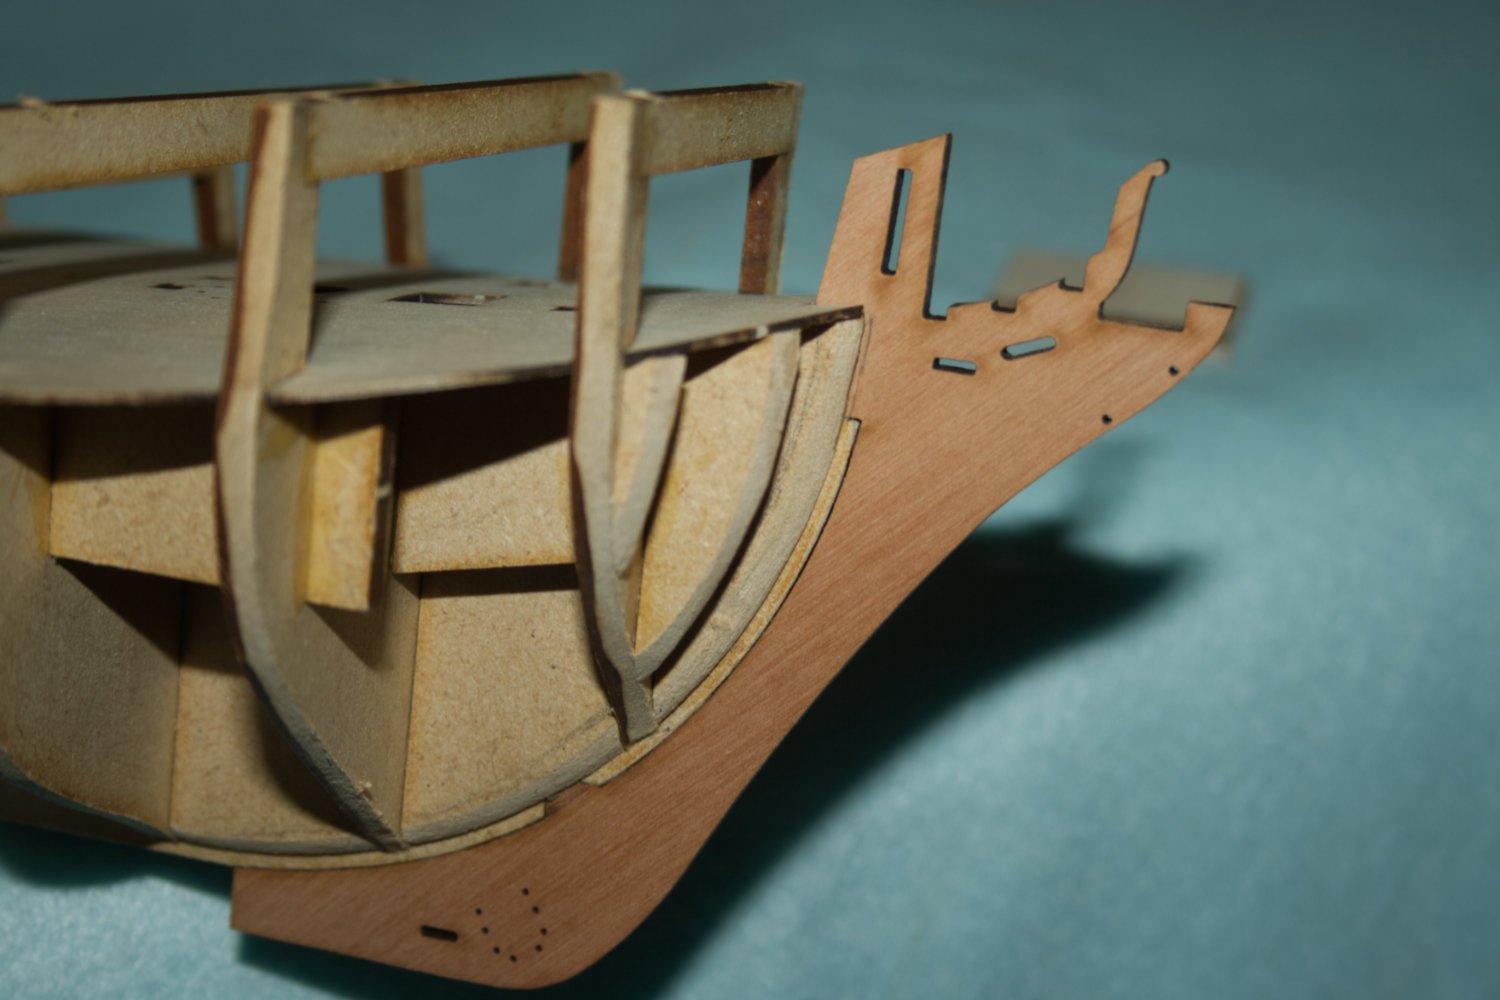
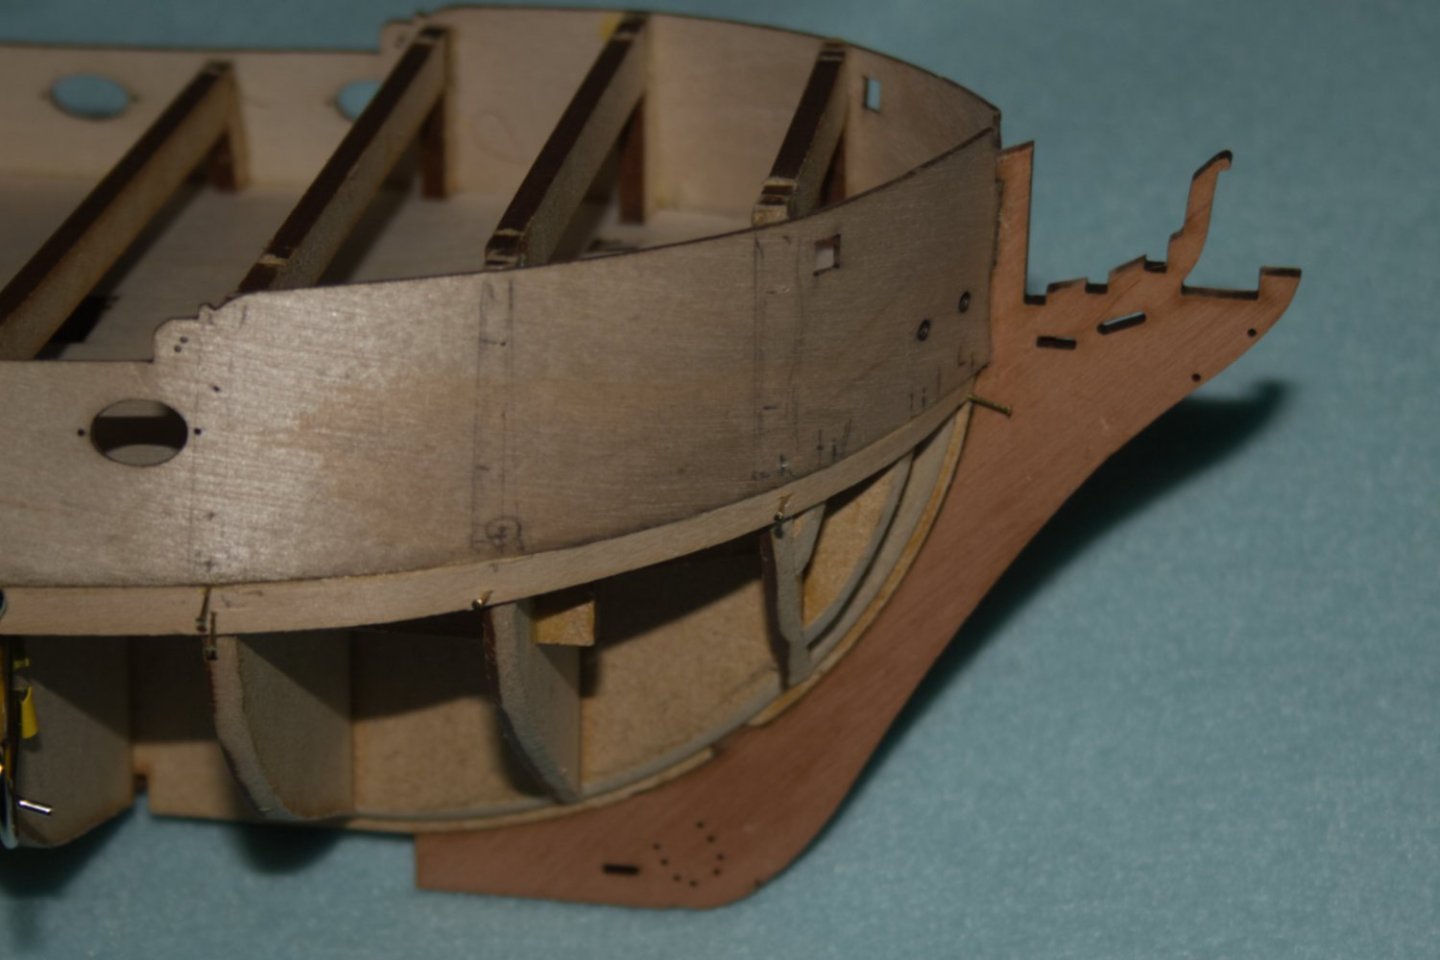
A small update. The bulkheads have received more shaping and the bow core is added. One detail, I made a guard for the figurehead support Made from scrap wood, I hope to reduce the risk of breakages in this area.


-
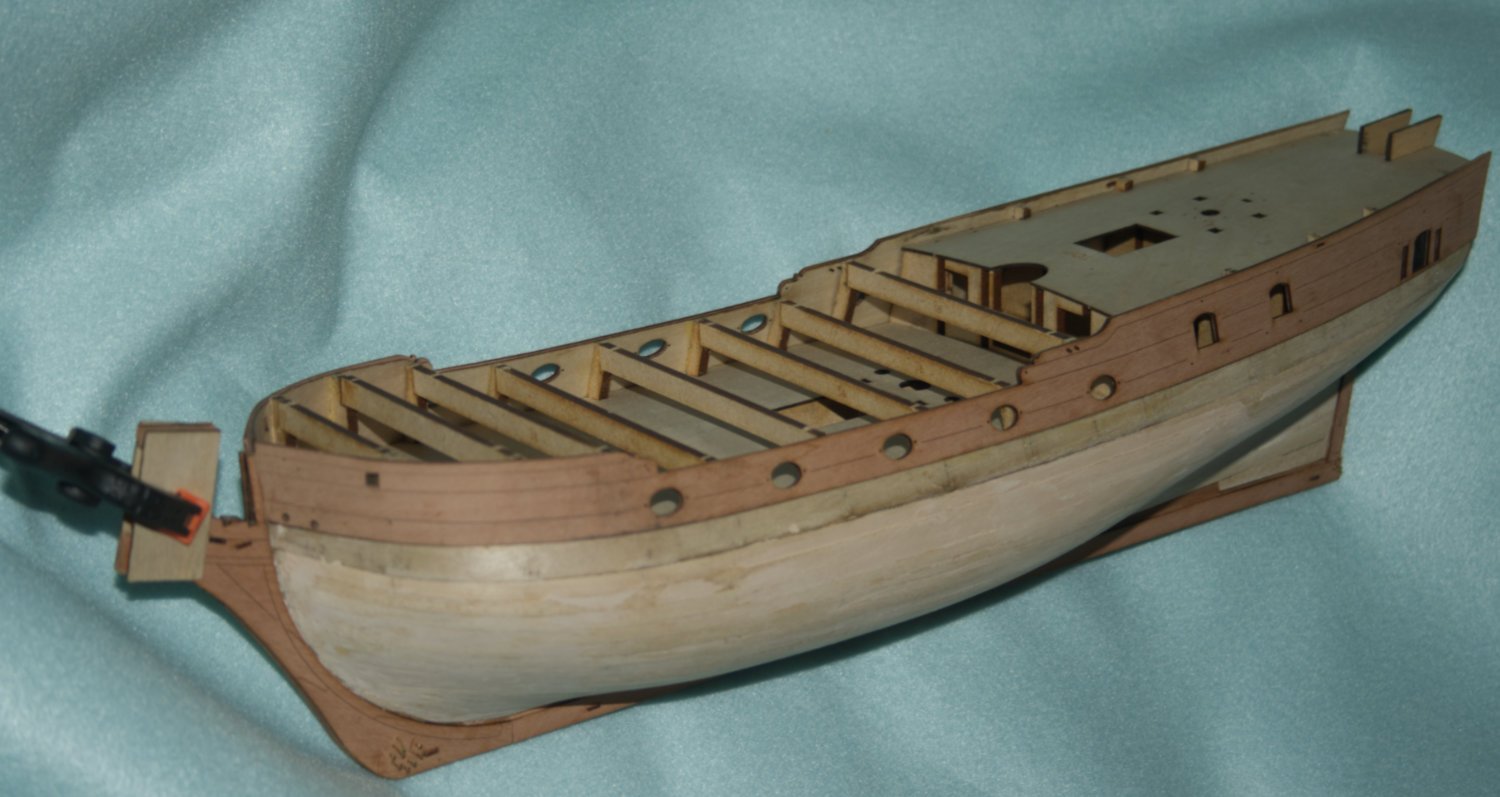
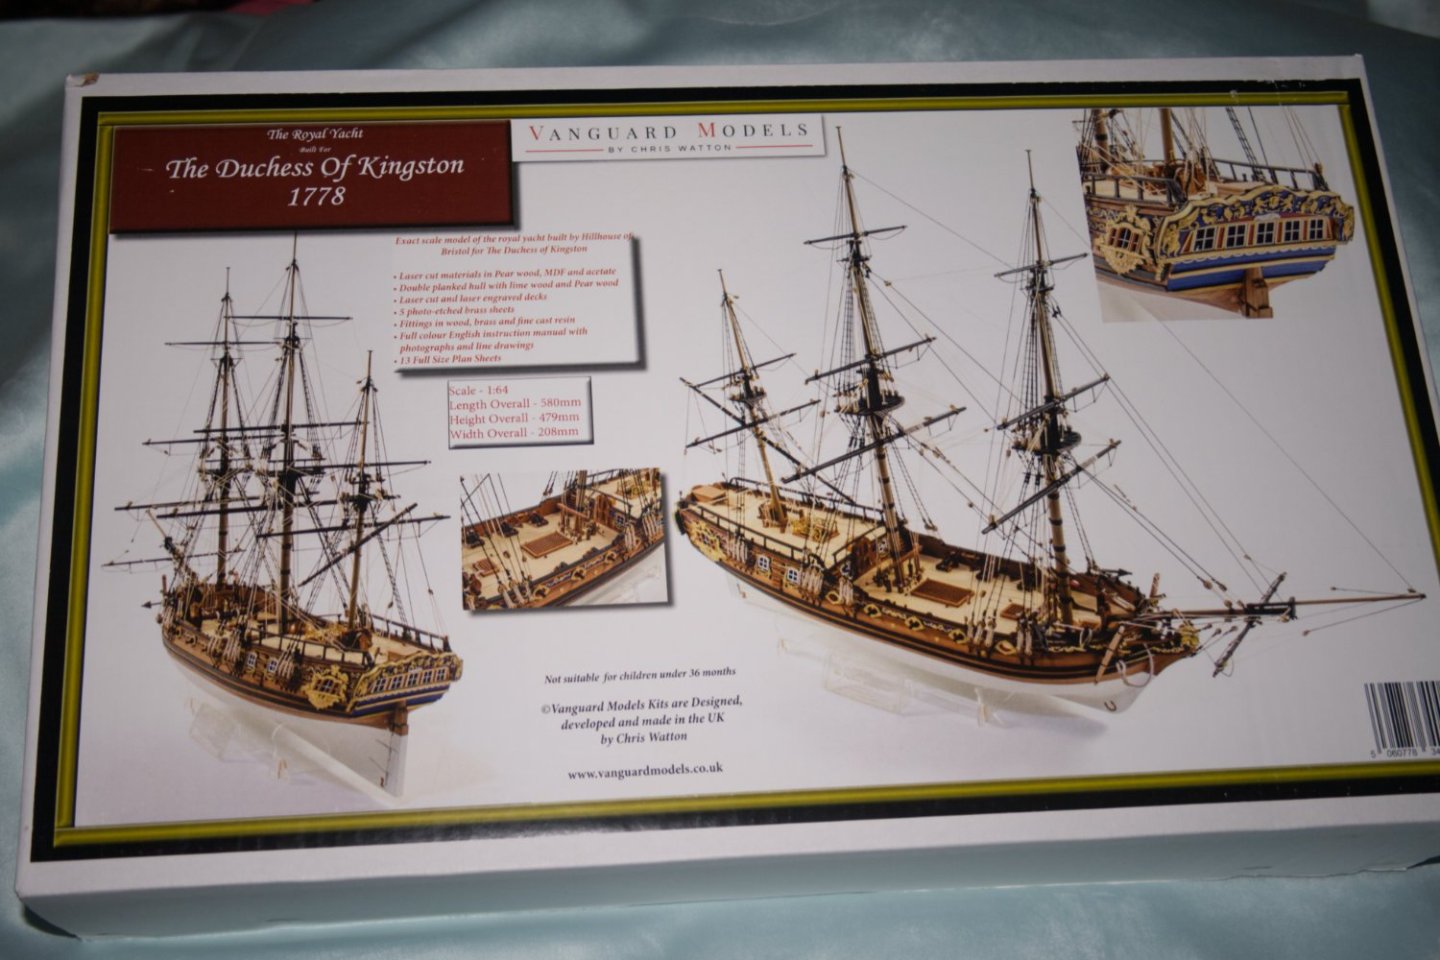
I was at the Society of Model Shipwrights exhibition in Plymouth last week, stationed next to Chris Watton's stand. One model, in particular, caught my eye, the "Royal Yacht, Duchess of Kingston – 1778" kit. The ship was built in an old-fashioned style, early 18C, rather than late 18C, but, for me, this adds to the appeal. Once home from the show, I placed an order. It was in the next post and, arrived in my porch on Monday. A remarkably quick turn around. The kit is based on plans held at the National Maritime Museum, and it is known that the duchess owned (at least) one yacht. Soon after the Duke of Kingston's death, she sailed the vessel to Italy, and had it conveyed up the Tiber to Rome (according to the Newgate Calendar https://www.exclassics.com/newgate/ng308.htm). Now, I have a Vanguard Sherbourne, about ready for fitting out - delayed for want of small (< 2mm) blocks, and really shouldn't start another build before that is complete. Shouldn't? I have started another build, the Duchess of Kingston's yacht. Assembly started last night, with me testing the fit of the MDF core, which led to gluing the same. A bit more work today led to the fitting of a deck (not sure which deck this'd be, with that much space it could be a lounge) I did deviate from Vanguard's instructions, in that they call for bevelling of some bulkheads before adding to the model. While some doublers at the bow and stern were bevelled before gluing, the bulk heads were delayed until after the ply decks were complete. And, with all MDF and structural decks fitted.


-
Oh, that sounds interesting. The shallop was one of my first models, and the Viking ship is on my wish list.
-
Looks like good progress. Off topic, I'm intrigued by your scenic materials (I think), and, (maybe) figure armatures in the background of your last photo.
-
Looks like good progress there.
-
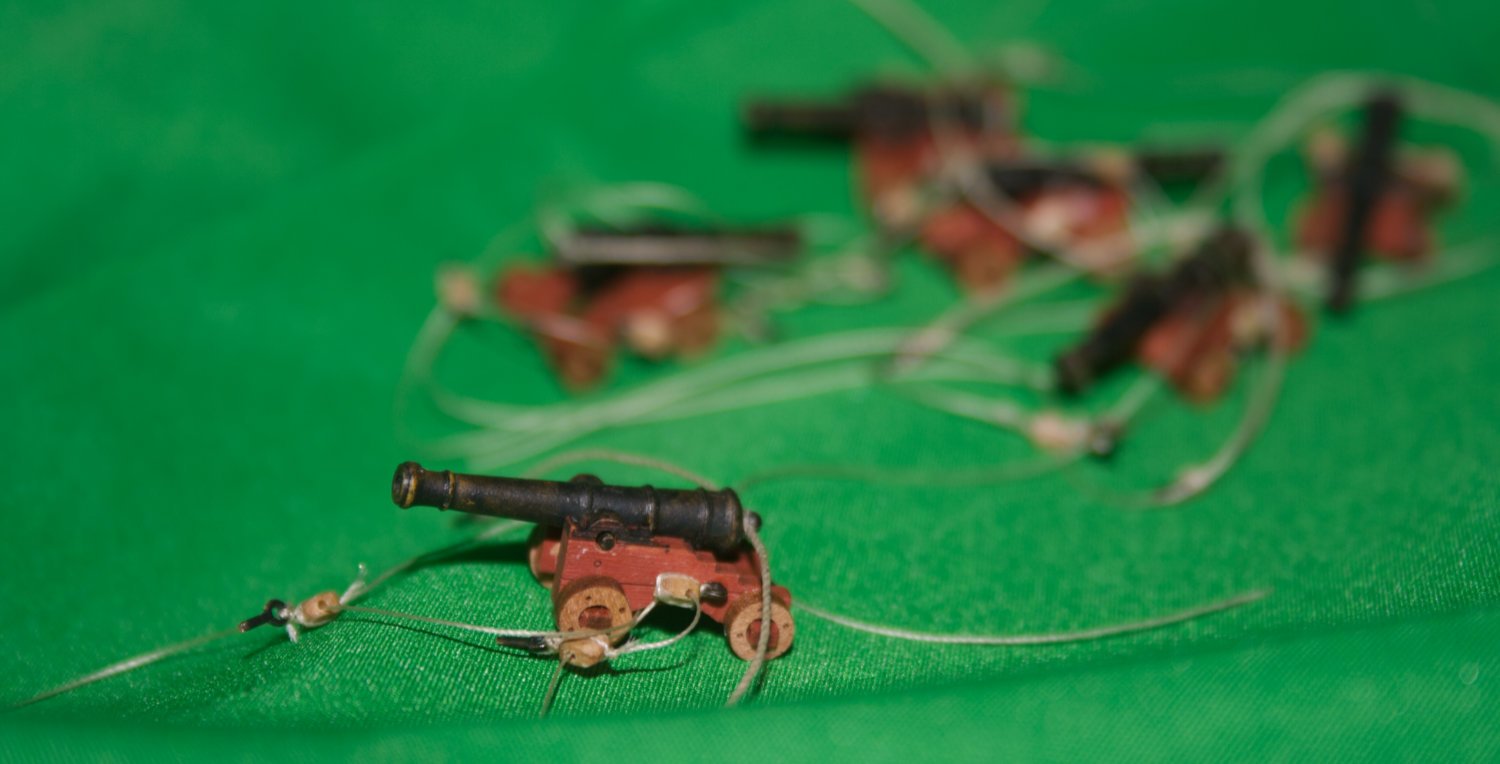
I haven't been able to replace my blocks, though I have tried to soften corners on the ones I have. All of Sherbourne's canons are now rigged with 0.2mm out-hauls, and 0.4mm breech ropes. The out hauls will be trimmed to length after test fitting to the model, while the breech ropes are all 60mm. Longer breech ropes would give more space to work the guns, but I settled for 60.

-
Thanks guys. I've ordered some finer rope (0.2mm for the haul ropes, and a choice of 0.4mm & 0.5mm for the breach ropes) and some fly threads (8/0, couldn't find 10/0).
-
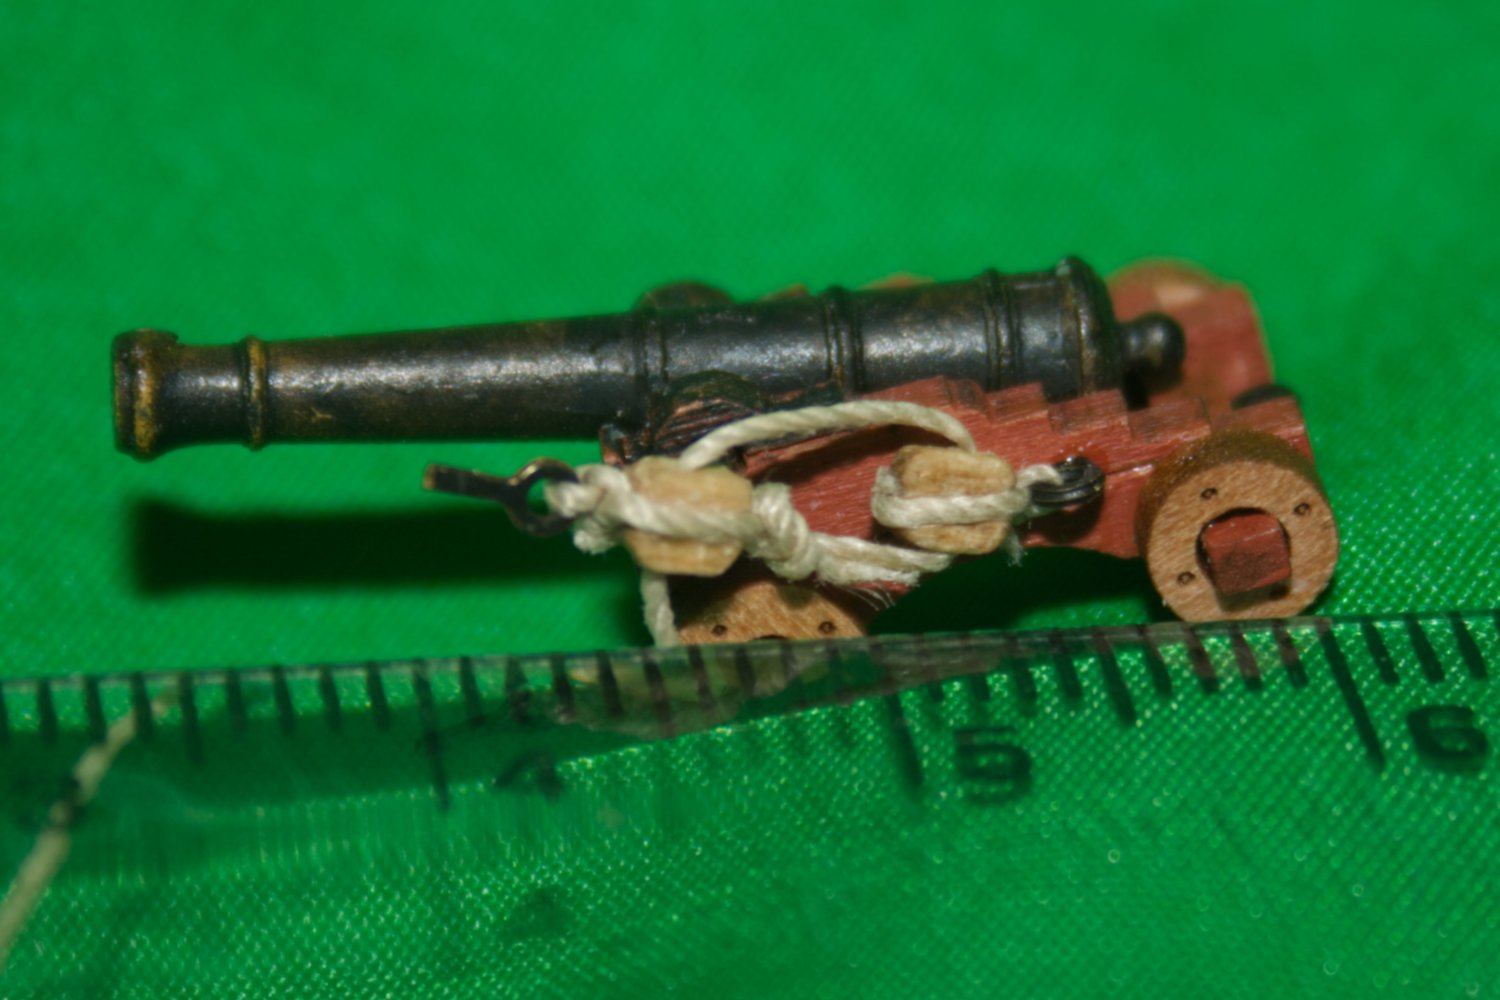
I'm having problems with the size of the guns, and any blocks I try to add. Ruler scale is in mm. The smallest commercial blocks I can find are 2mm*, seen here with one of Sherbourne's 3 pounder (3 lb) guns. Does this look right? Questions What do other people do if they need a smaller block? (Is there commercial option?) Is there a better solution? * 2mm at 1/64 scales to ~5 inches full size.

-
Thank-you @Thukydides for pointing out that post, there are several useful ideas there.
-
Think I might steal your approach to the hooks on the blocks here. Thank-you to @Thukydides for pointing out your post.
- 38 replies
-
- 2
-

-
- Alert
- Vanguard Models
- (and 1 more)
-
I'll follow with interest.
-
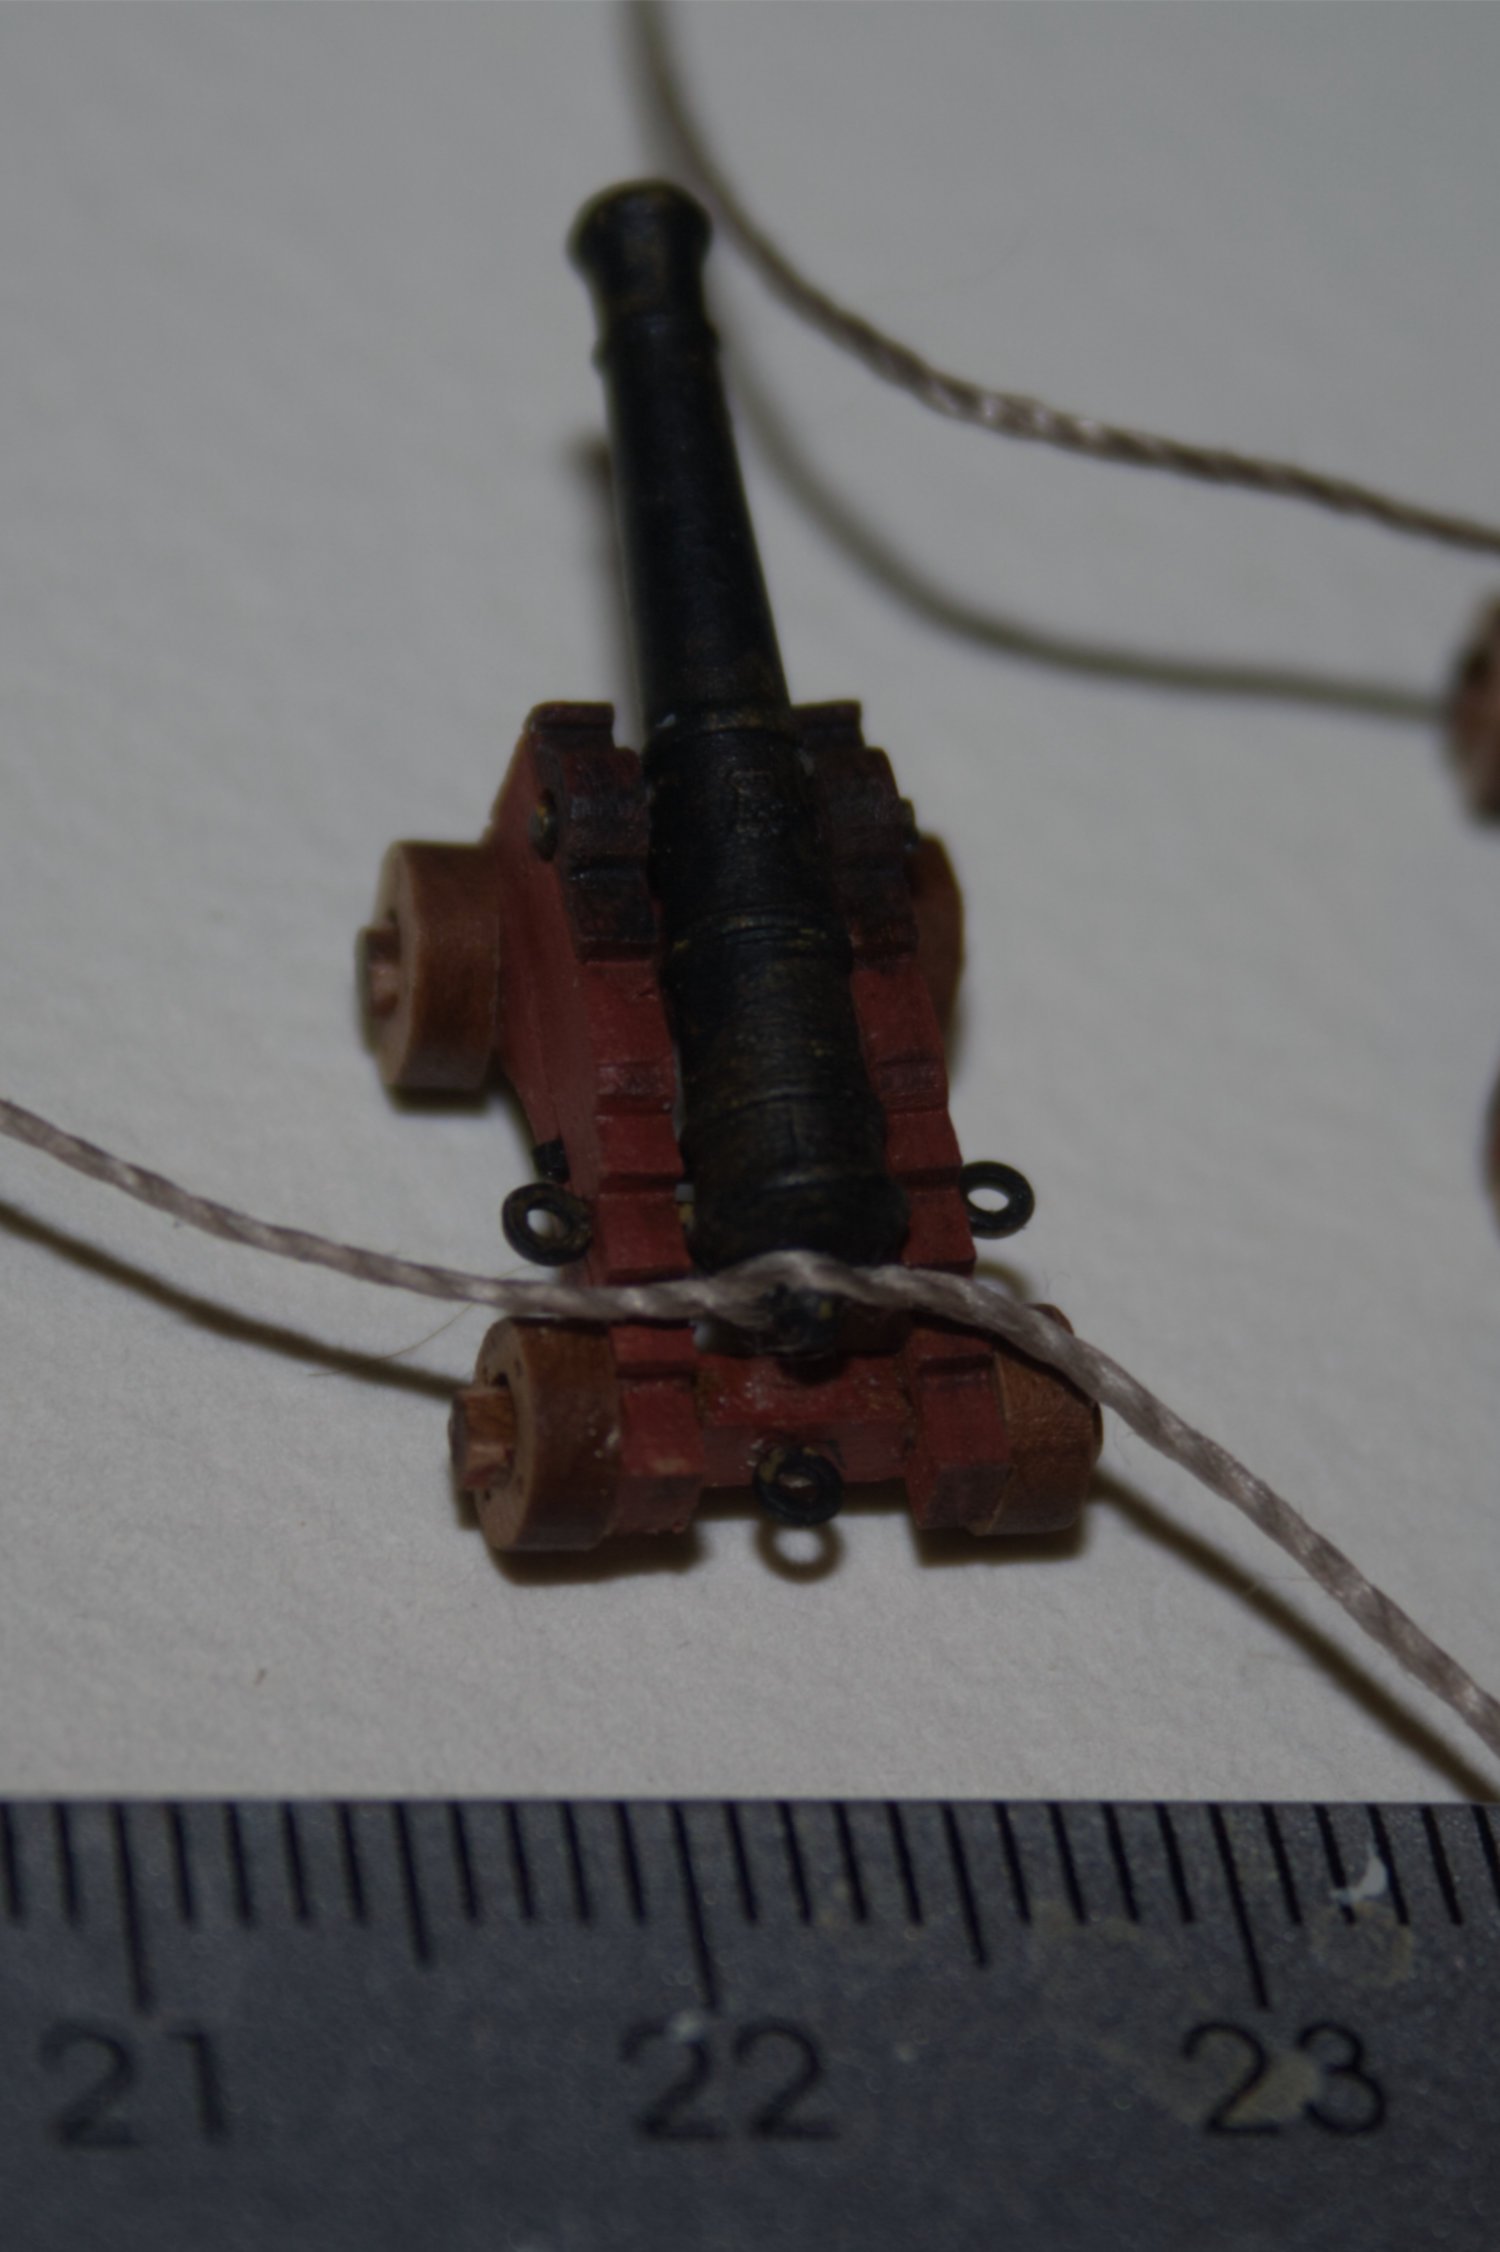
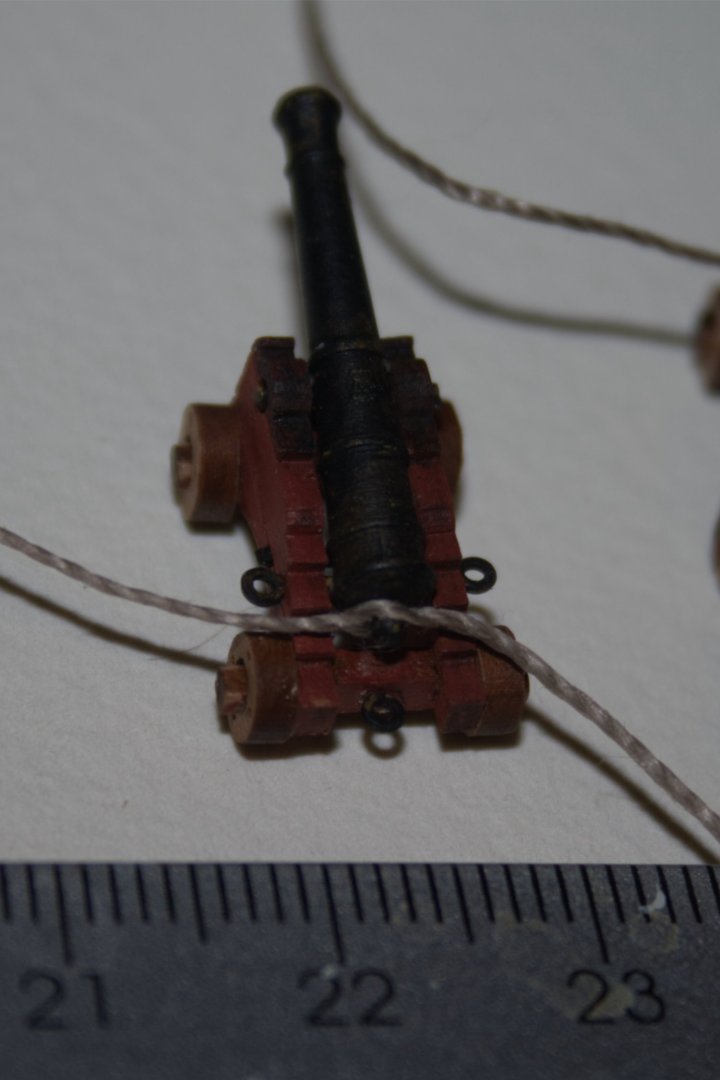
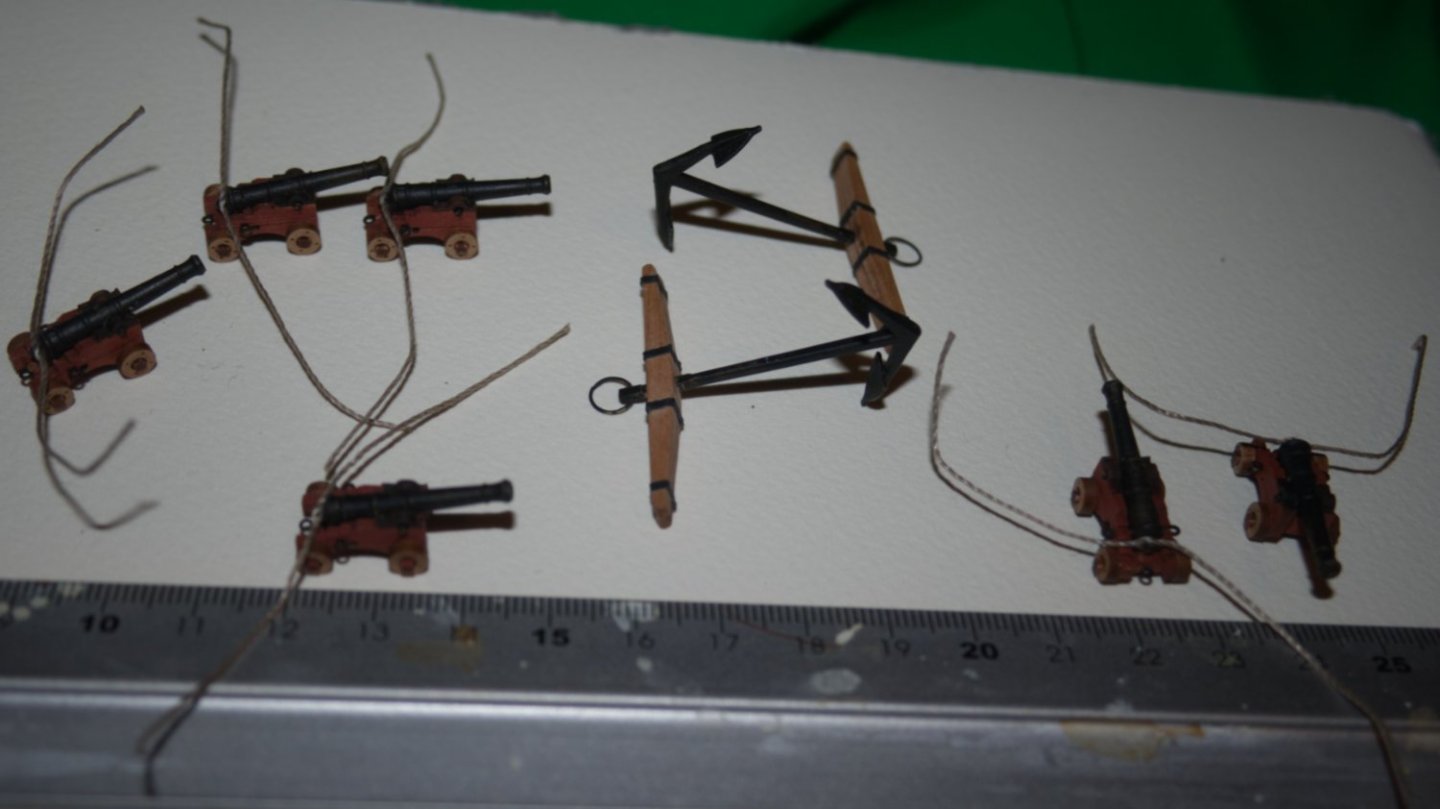
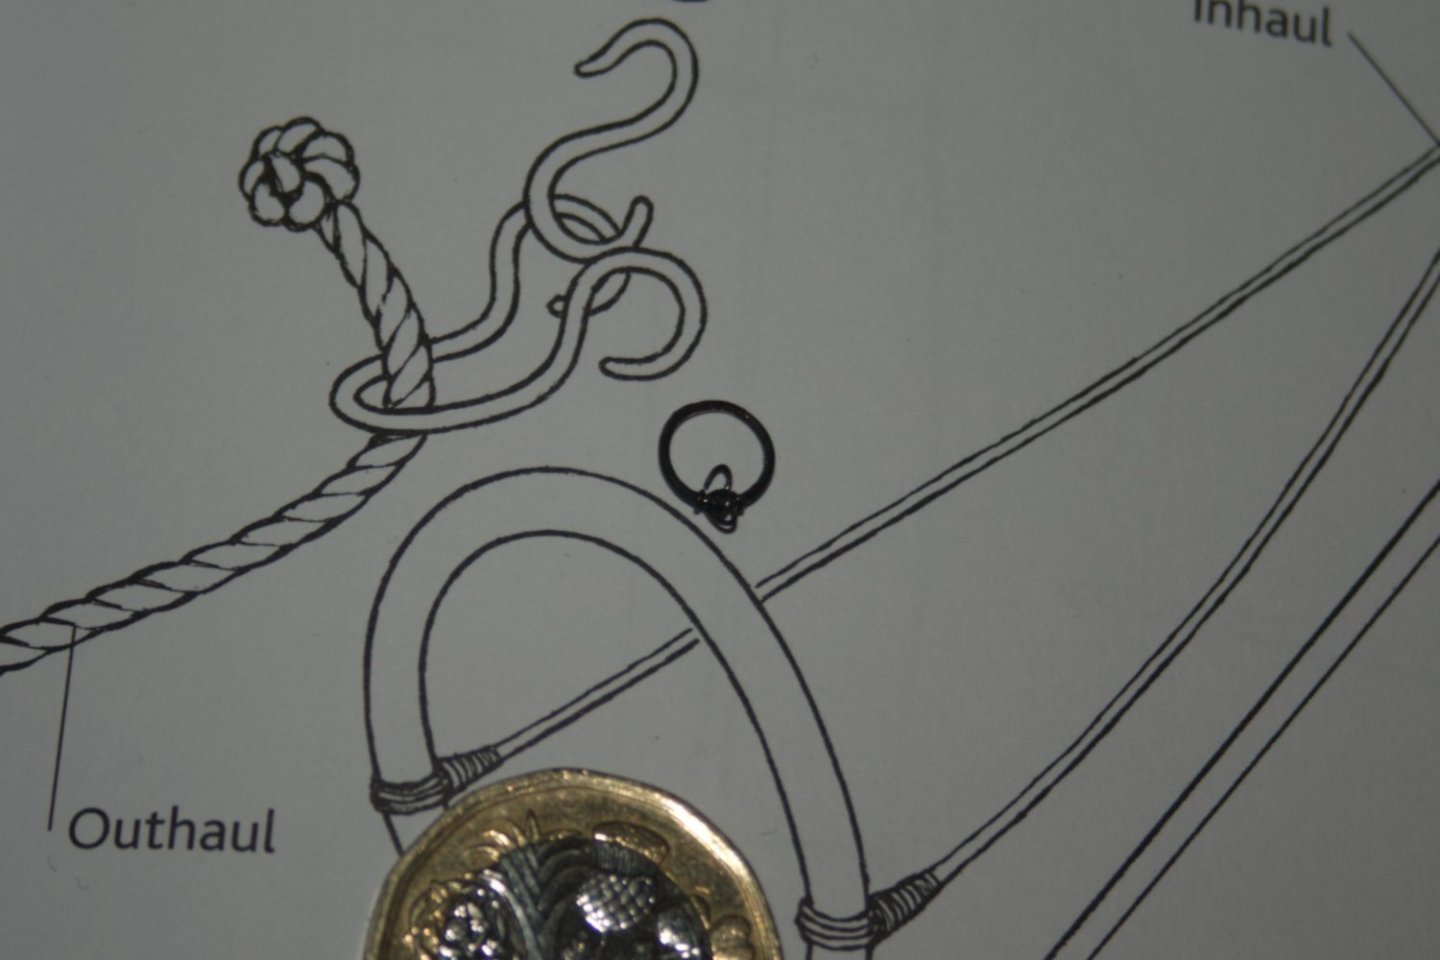
A small update today. The gun carriages and anchors have been assembled. Sherbourne will carry the historic six guns as described in the supplied history, rather than her 'official' complement of the eight. I made wire rings for the anchors, rather than use the supplied flat photo-etched items. The guns all have breech ropes. Getting them to this stage was easier than I feared. Next step should be adding retaining eyes and the tackle for running the weapons out.
-
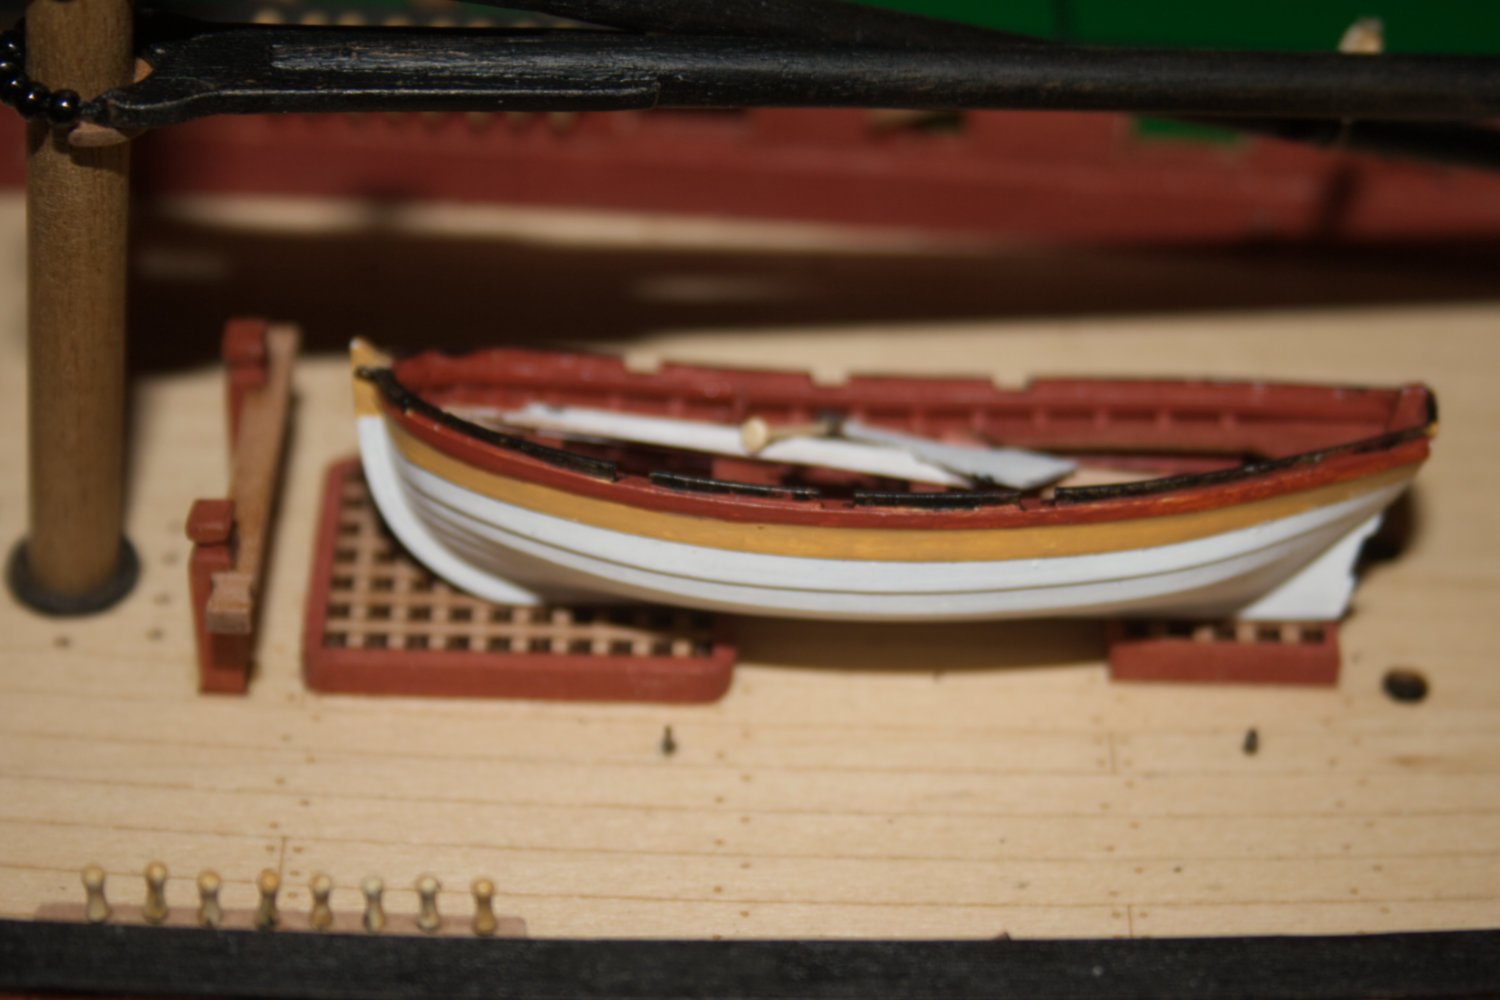
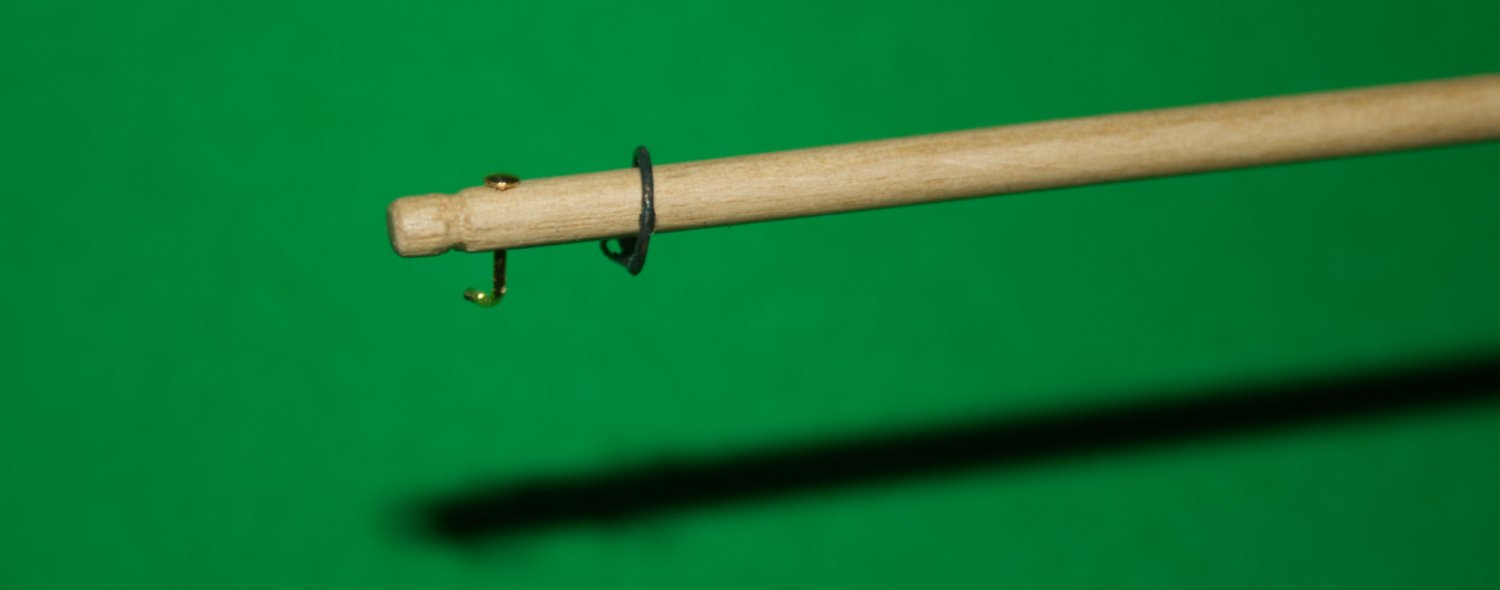
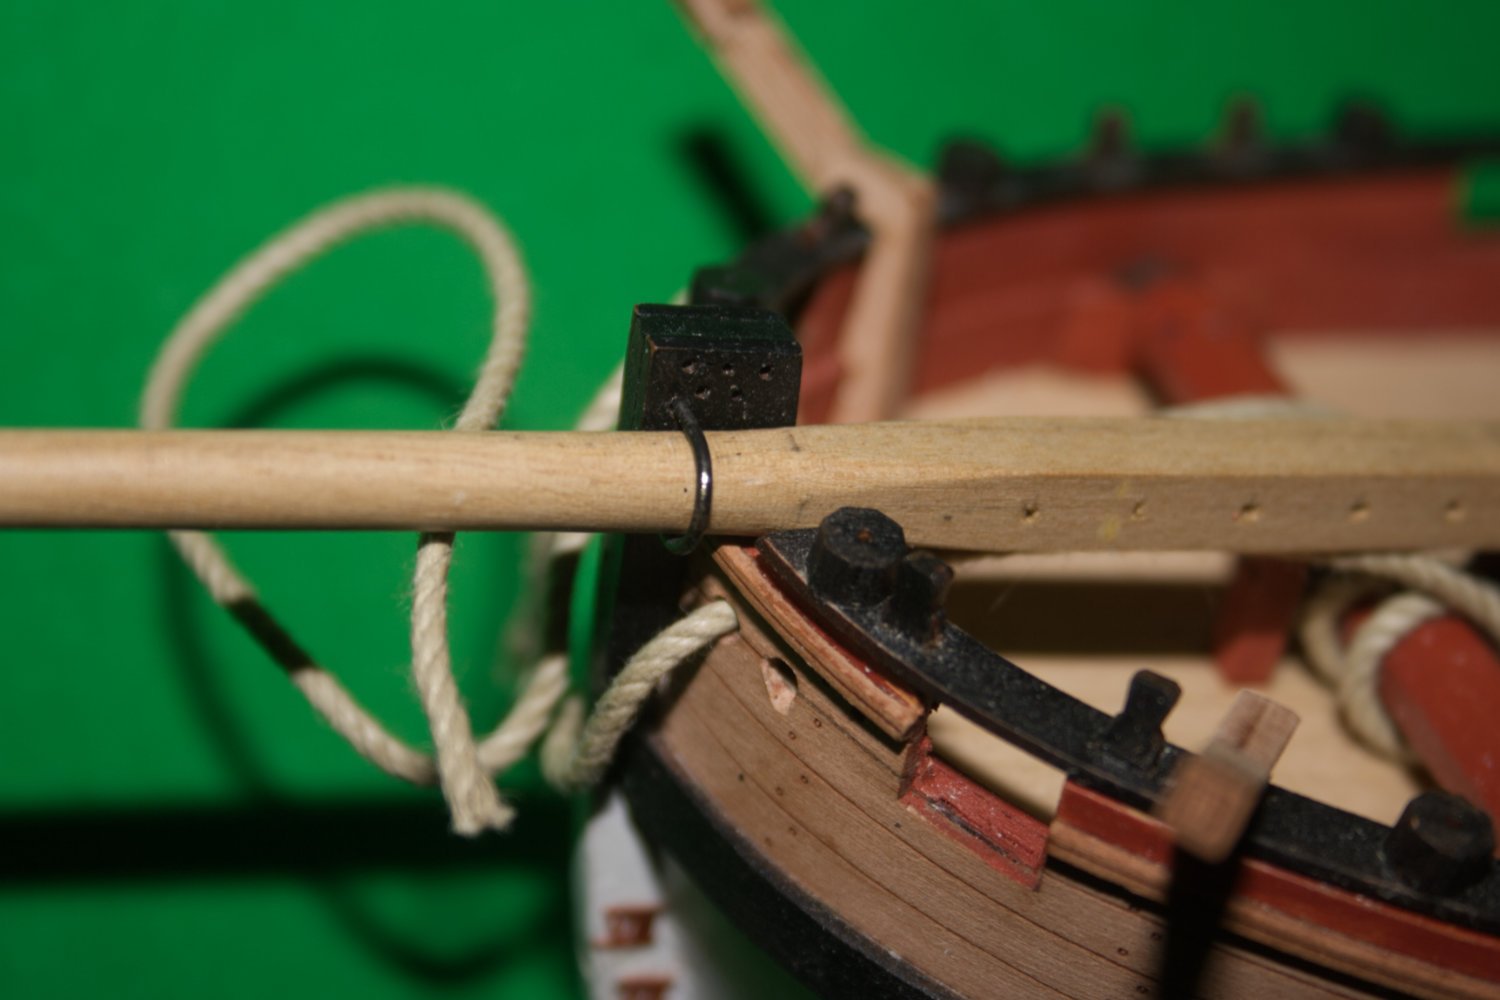
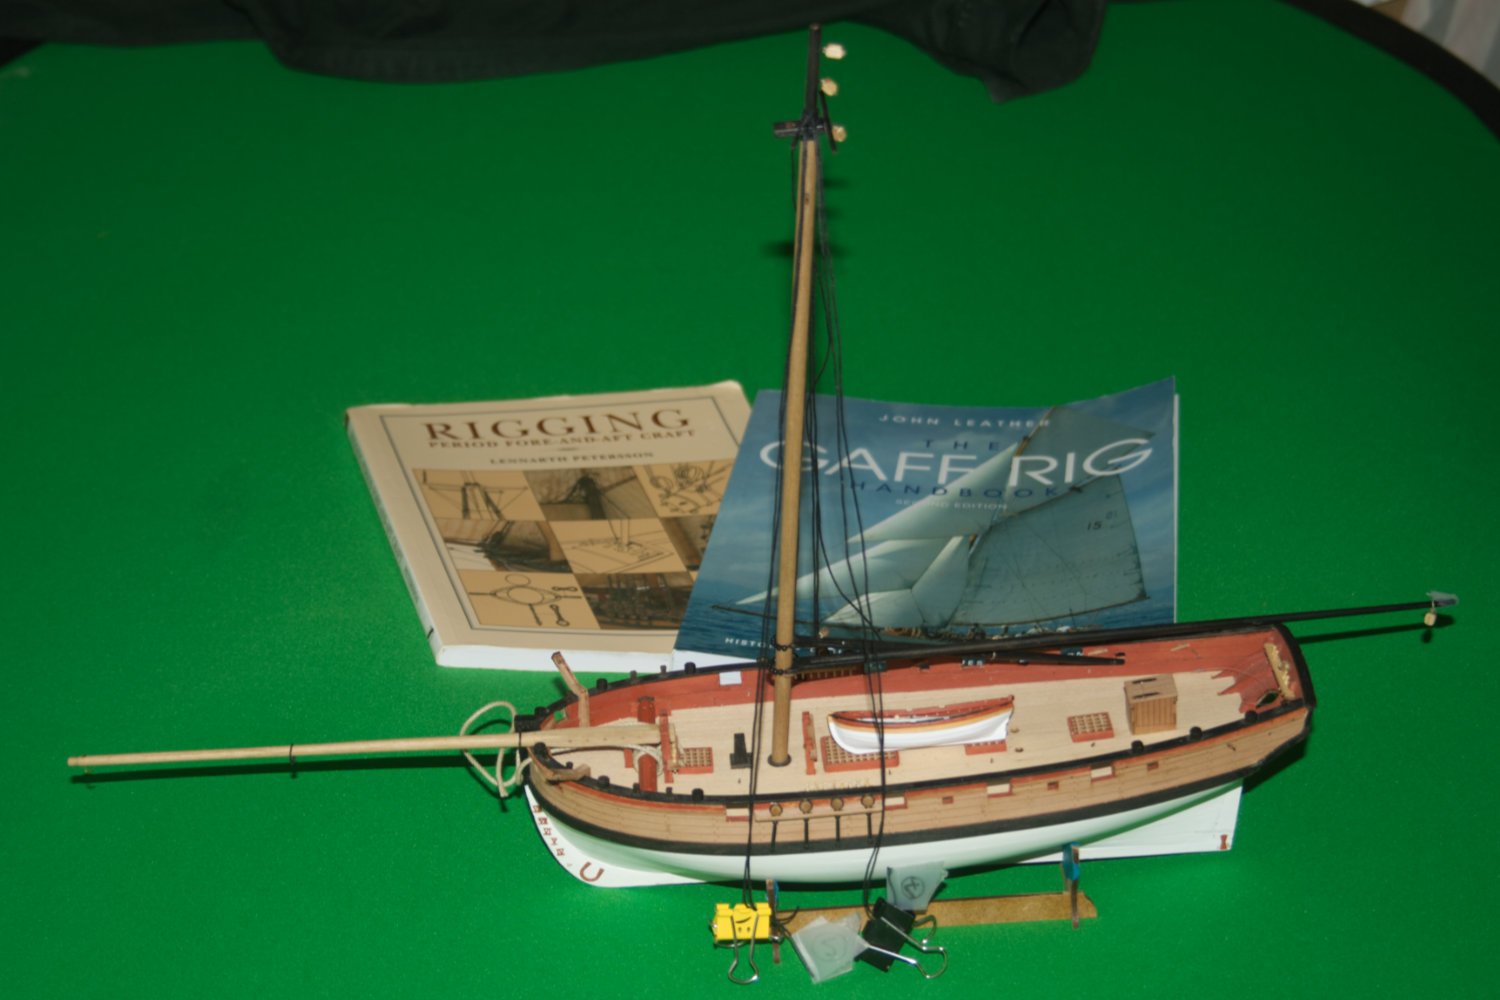
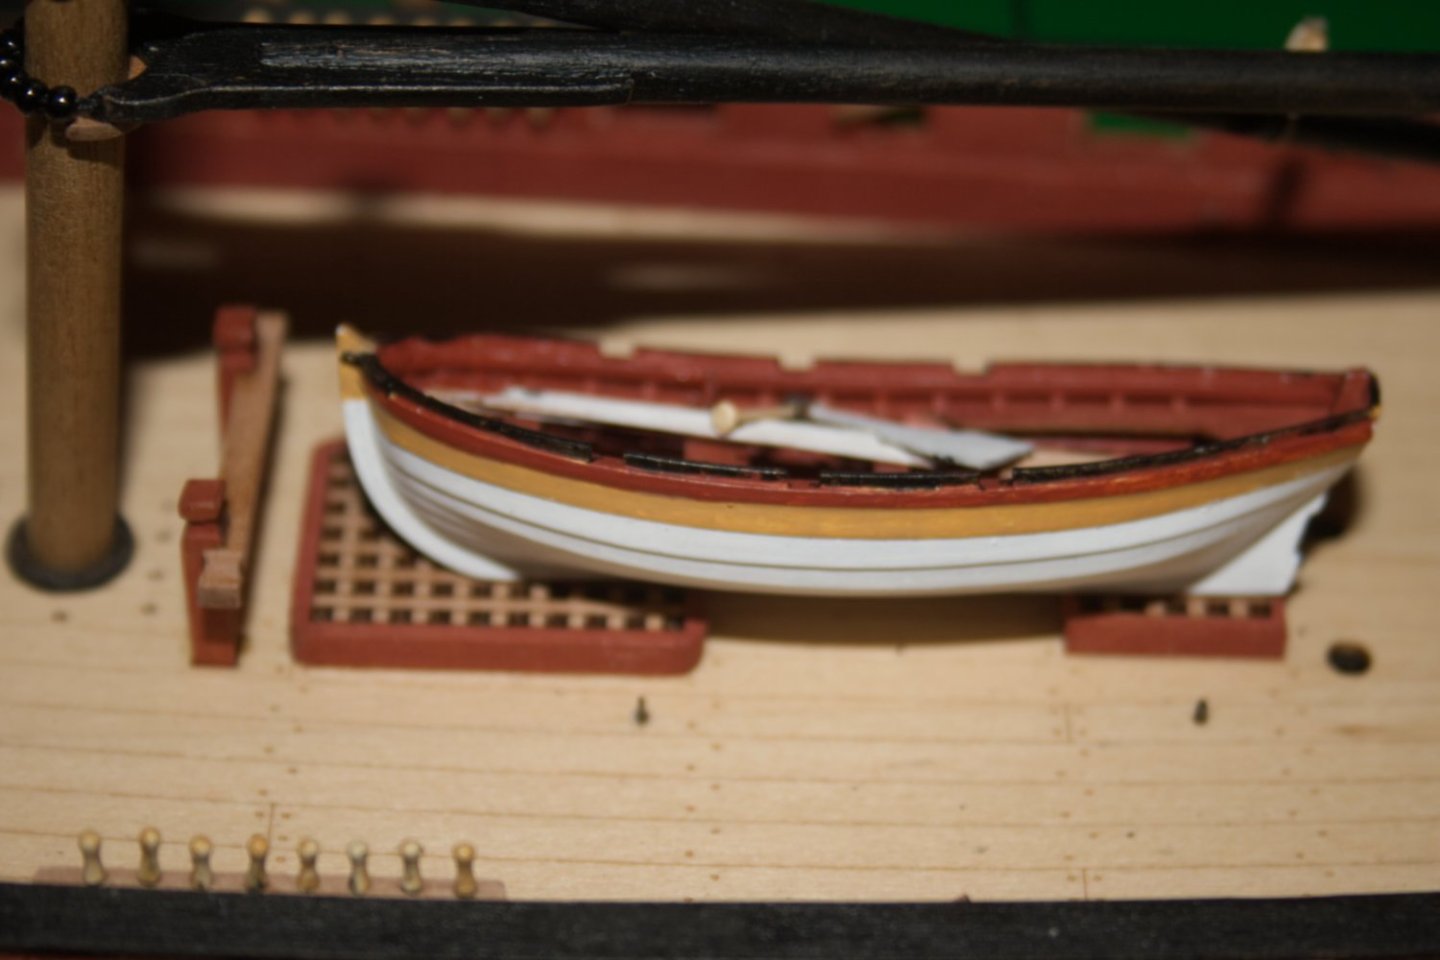
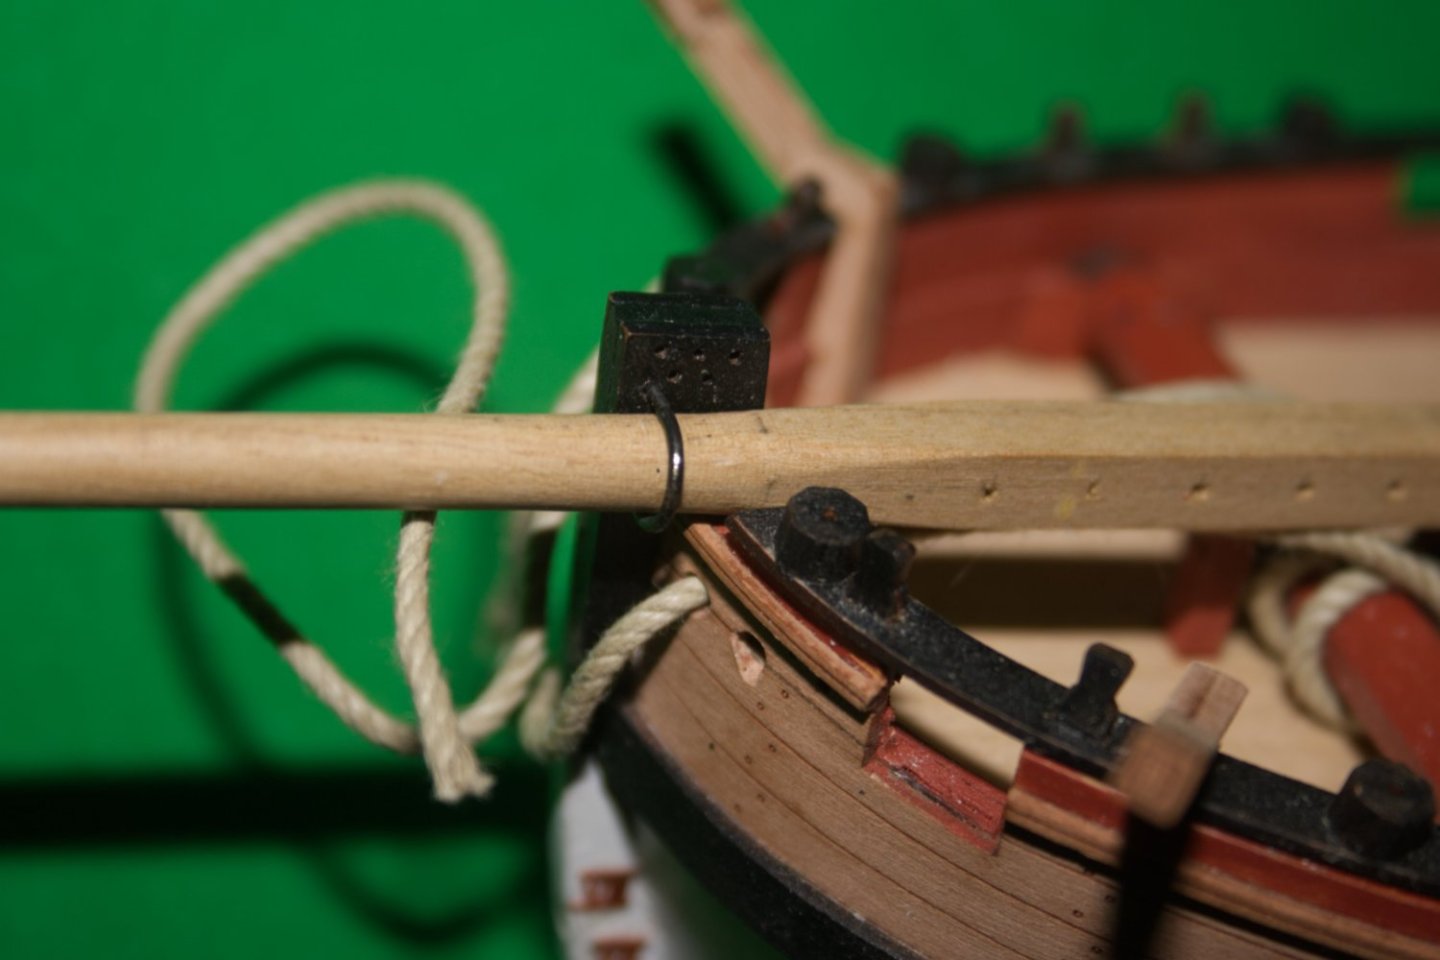
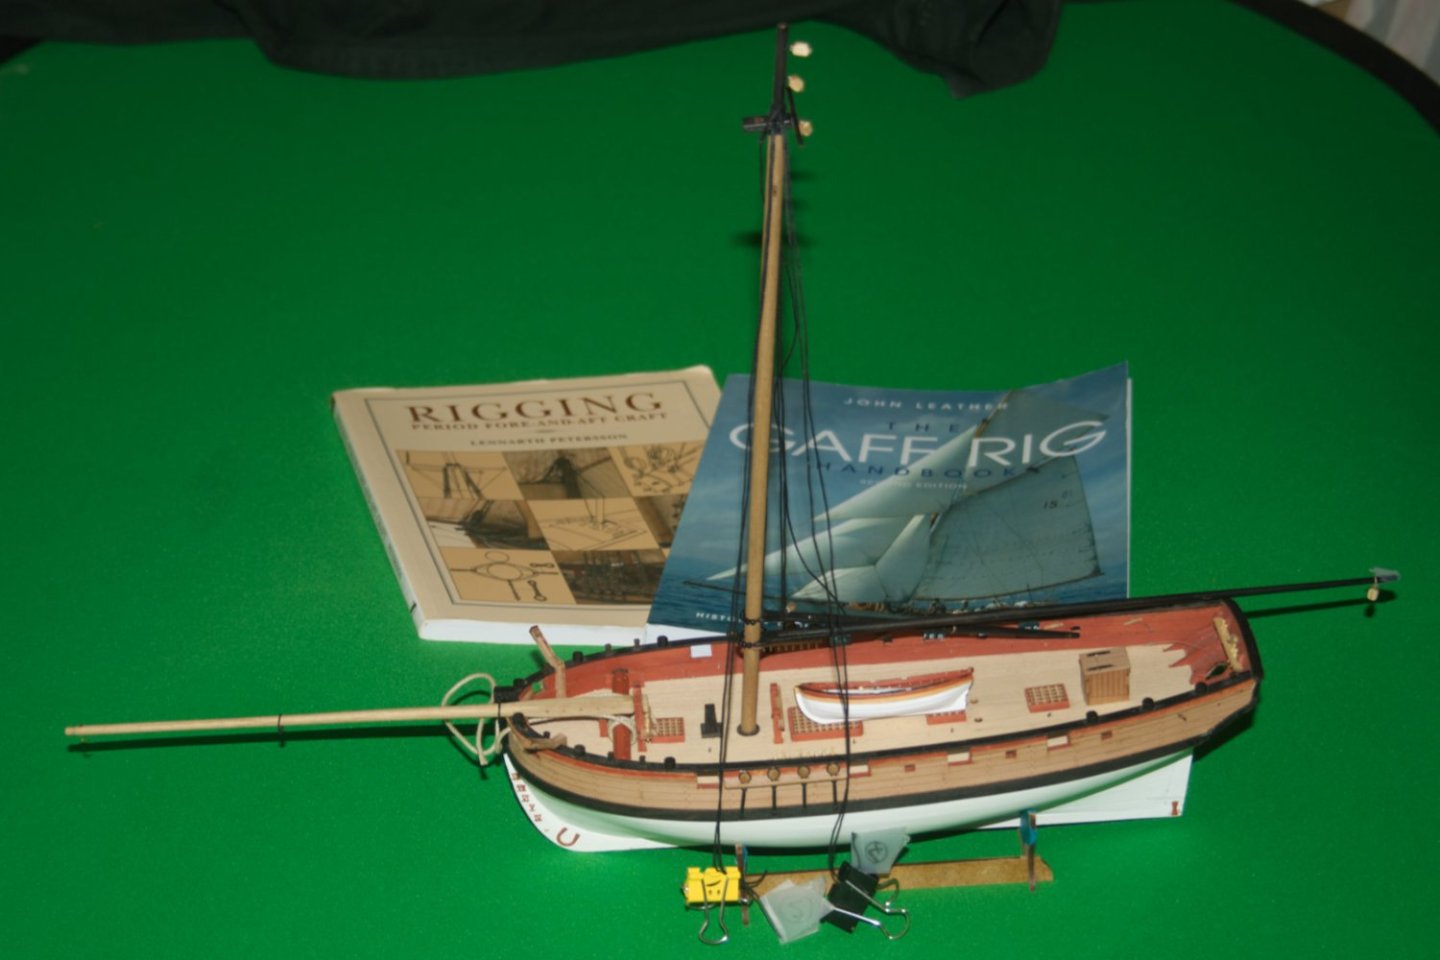
Sorry for such little progress in the past seven months, and no posts. Time, and over time, for an update. We have a ship's boat. This is Vanguard's 3d printed 14' yawl, which is (I think) the smallest vessel they offer. It will fit between the mast and the bilge pumps (round holes to right of the image). I'm not sure how the boat will be stowed, though this seems to be the most logical location. FWIW, I replaced the yawl's tiller with a brass pin, the (somewhat blurred) head of which can be seen in the photo. Other changes. Visible in the photo above are round belaying pins. These are turned brass items, painted. These replace the supplied photo etch pins. A traveller for the jib. This is attempt four or five, made from a mix of brass and bronze wires. The design is based on an illustration in Petersson's Rigging Period Fore-and-Aft Craft. The traveller in place on Sherbourne's jib, together with a bent pin acting as a keeper. Sherbourne is a beginner's kit, and doesn't include any means of holding the jib at the stem. I added a piece of U shaped wire to aid in this task (is this a gammon iron?). Sherbourne, as she is now. The jib and main mast are dry fitted.

-
Or reviewing that design, plasticard down to 0.25 mm is available, and can be cut into strips. Again, I'm not certain that needs to be supplied by Vanguard
-
Rails could be replaced with wire*, which would be more robust, so easier both for the customer and yourself. Brackets would be useful though. *Customer can supply the wire if needed, either from electric cable, or from a reel ... we are modellers after all.
-
I, too, would like a boat in one of these, smaller, sizes. A wooden kit would be my preference, though I understand the drive toward a 3d printed hulls.