DanBArt
-
Posts
25 -
Joined
-
Last visited
Content Type
Profiles
Forums
Gallery
Events
Everything posted by DanBArt
-
The stern plate looks incredible, but I am wondering if painting it all yellow in acrylic and then dabbing in a few layers of enamel blackwash to darken the relief areas will work?
-
Thanks for posting this thread and for giving detailed information on what you are using concerning blocks, tackle, and rigging materials. I'm planning to start this kit soon and already know I want to use upgraded materials in many places.
-
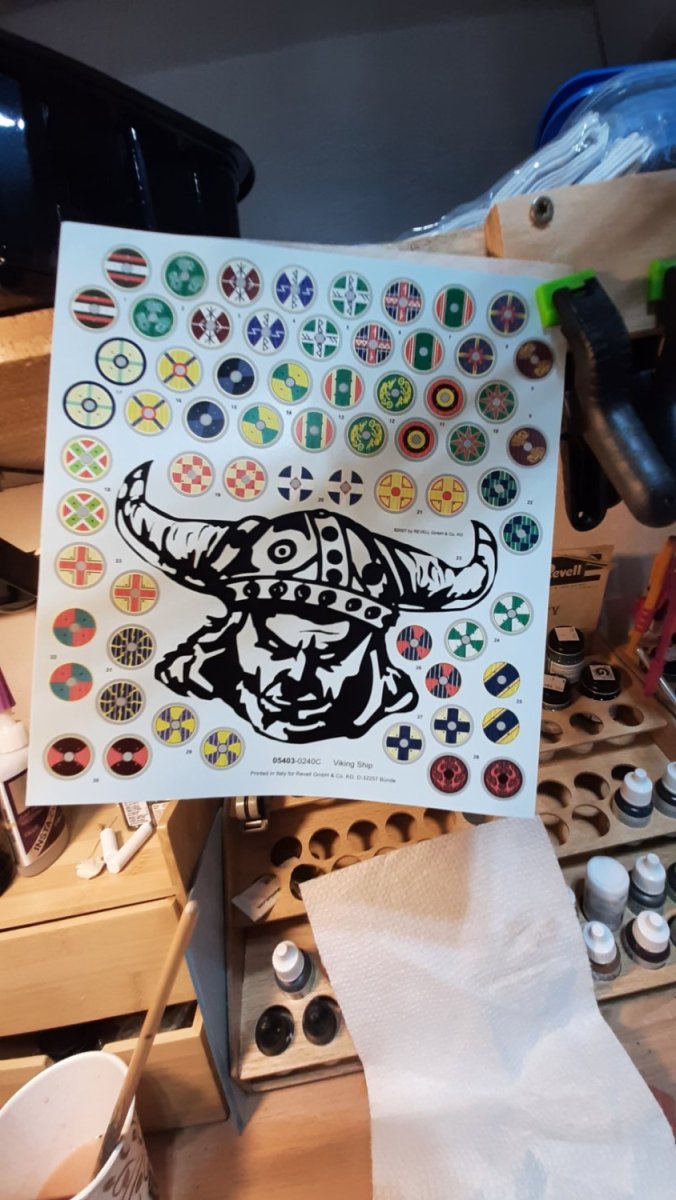
I don't think I'll be using any of the decals. I'm trying to preserve the sheet in case someone needs it. Historical basis, or lack thereof is another reason I don't want to use them. That's not to say the looks or techniques i employ are going to produce 100% historically accurate results. I don'treally believe such a pursuit is possible; we only have the archeology we've thus far discovered to go on while much remains hidden. To limit ourselves to only what we know to be verifiable and ignore the artistic license I believe our hobby can allow is missing the point. Now if one is building for the sake of research and historical accuracy then the purpose and parameters change significantly. In the case of ancient things like Viking ships there is only so much we can fully know, and while we know alot I believe there is still room in a hobby like this to let our imagination float a little and recreate things in a way we think they might have been, to immerse our creativity into the age we are trying to touch. Please do not take my tone as argumentative; on the contrary, I think we are having a great discussion here. I'm merely stating my thoughts and feelings on the subjects we are discussing, not trying to push the rightness or wrongness of any stance expressed. The impersonal nature of the internet can sometimes portray intentions that don't exist. Concerning the shield thickness I'm considering sanding the edges to taper them a little, and perhaps give the impression of a thinner shield? I've used this technique on race car fender openings to give the impression of the very thin sheet metal the car body is made of. I'm not sure if it would be worth the effort or not. I'm in a similar conundrum with the oars. I like the look of them displayed in the rowing position but worry about their fragility. And I am planning to display the sail unfurled right now, and to me it makes sense to have to oars stowed if the ship is at full sail. Thank you again for your input and encouragement. It helps alot to keep a person engaged and motivated!
-
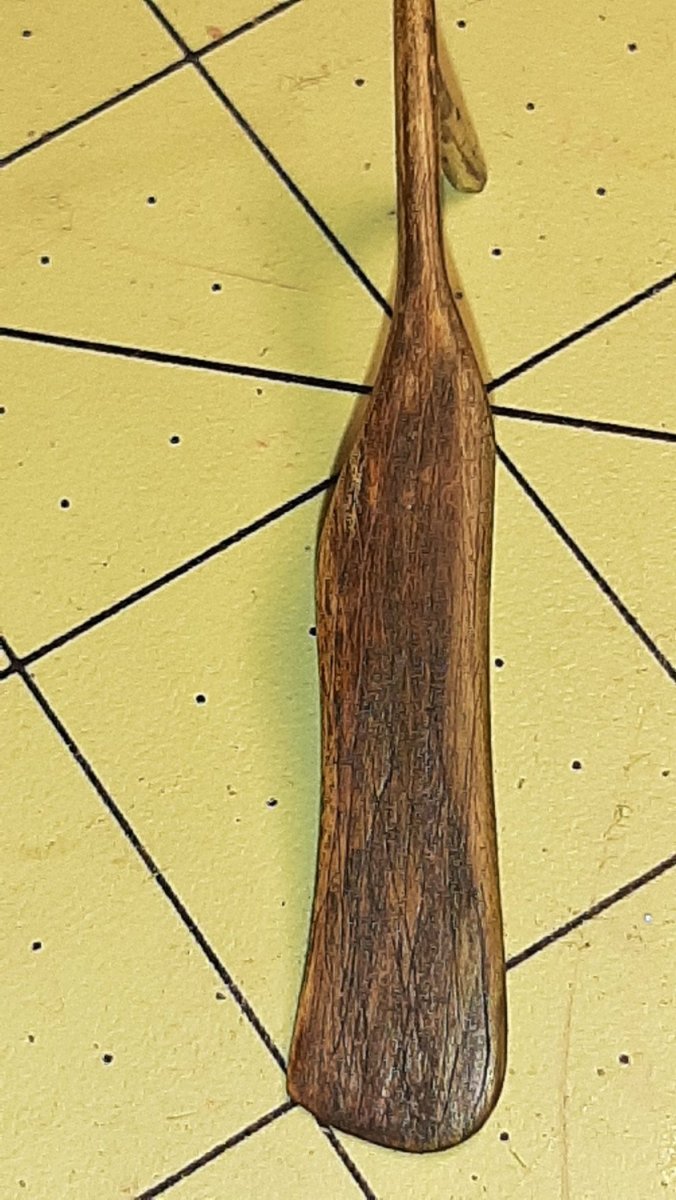
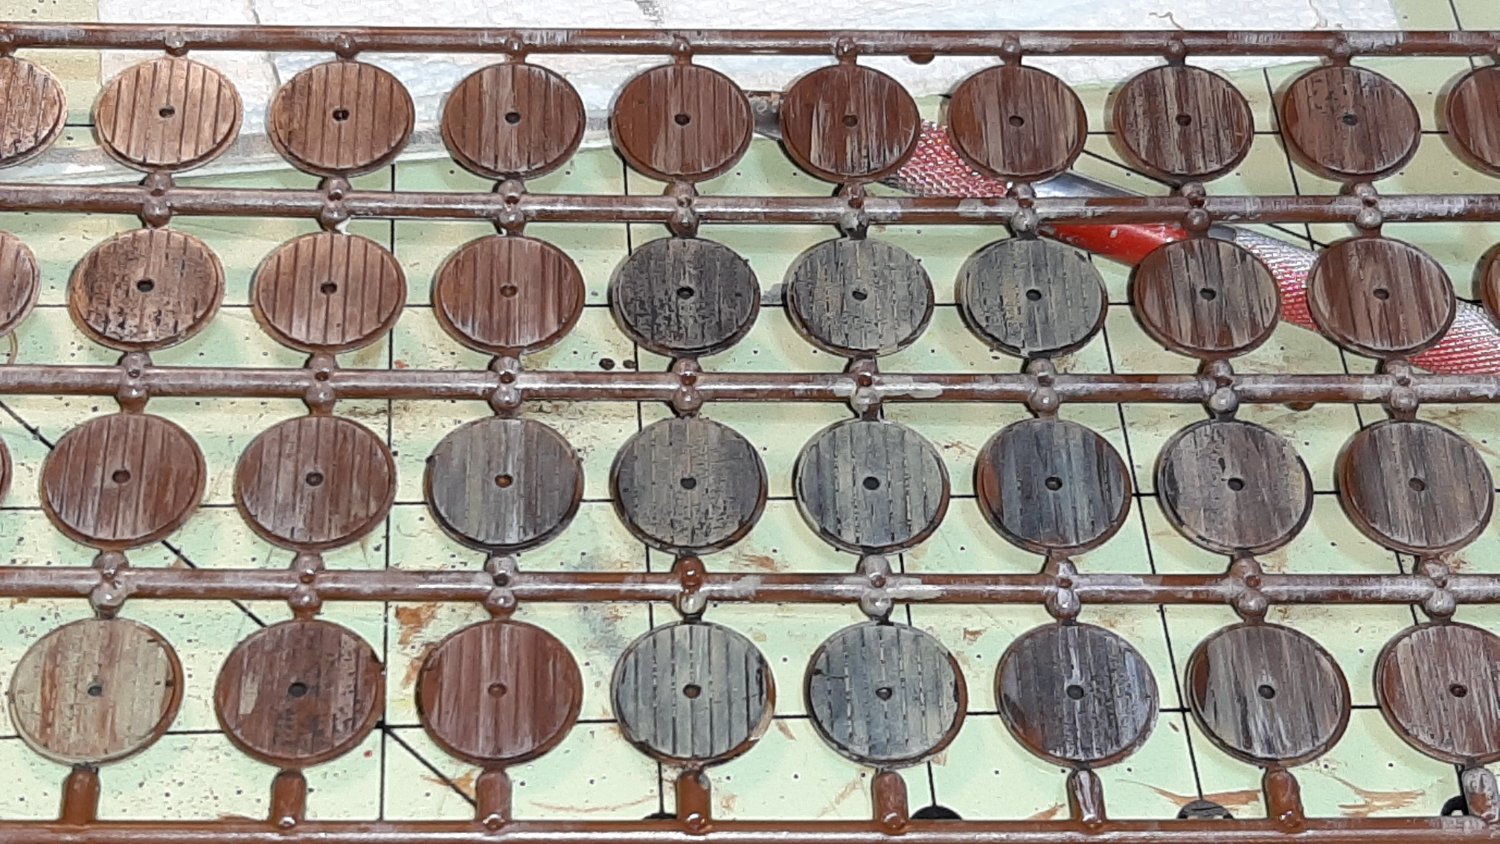
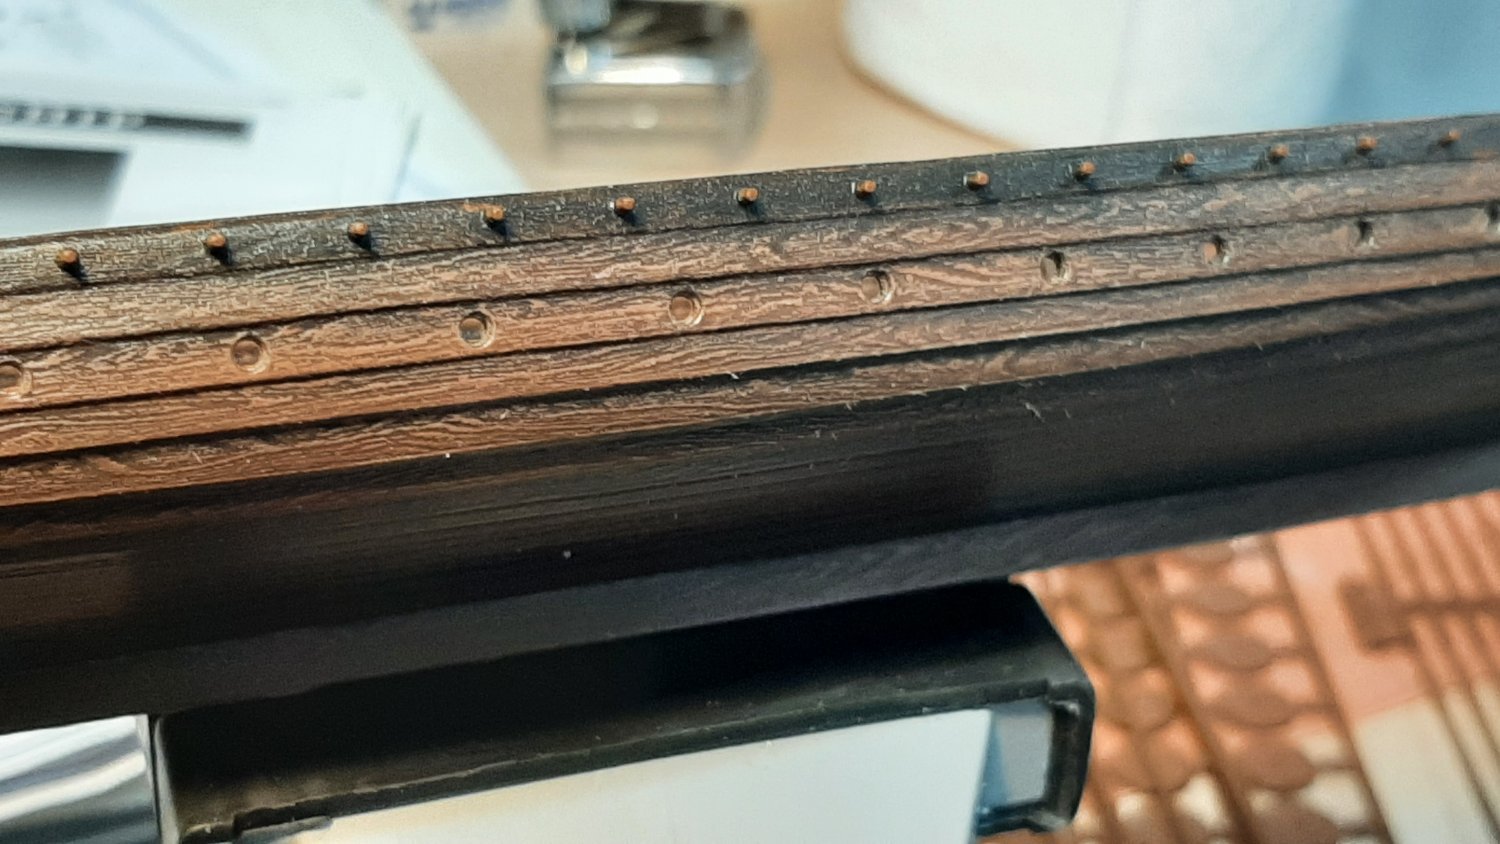
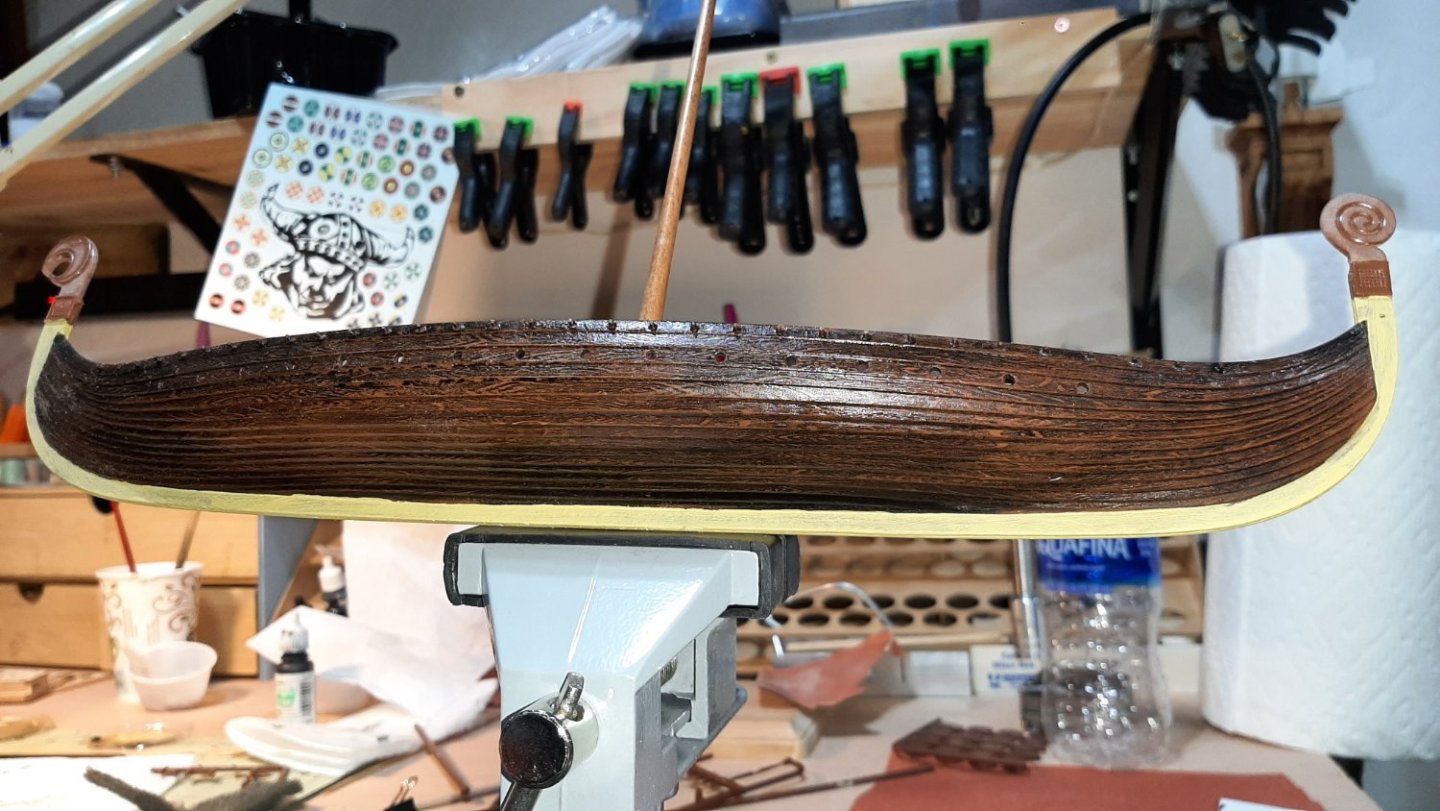
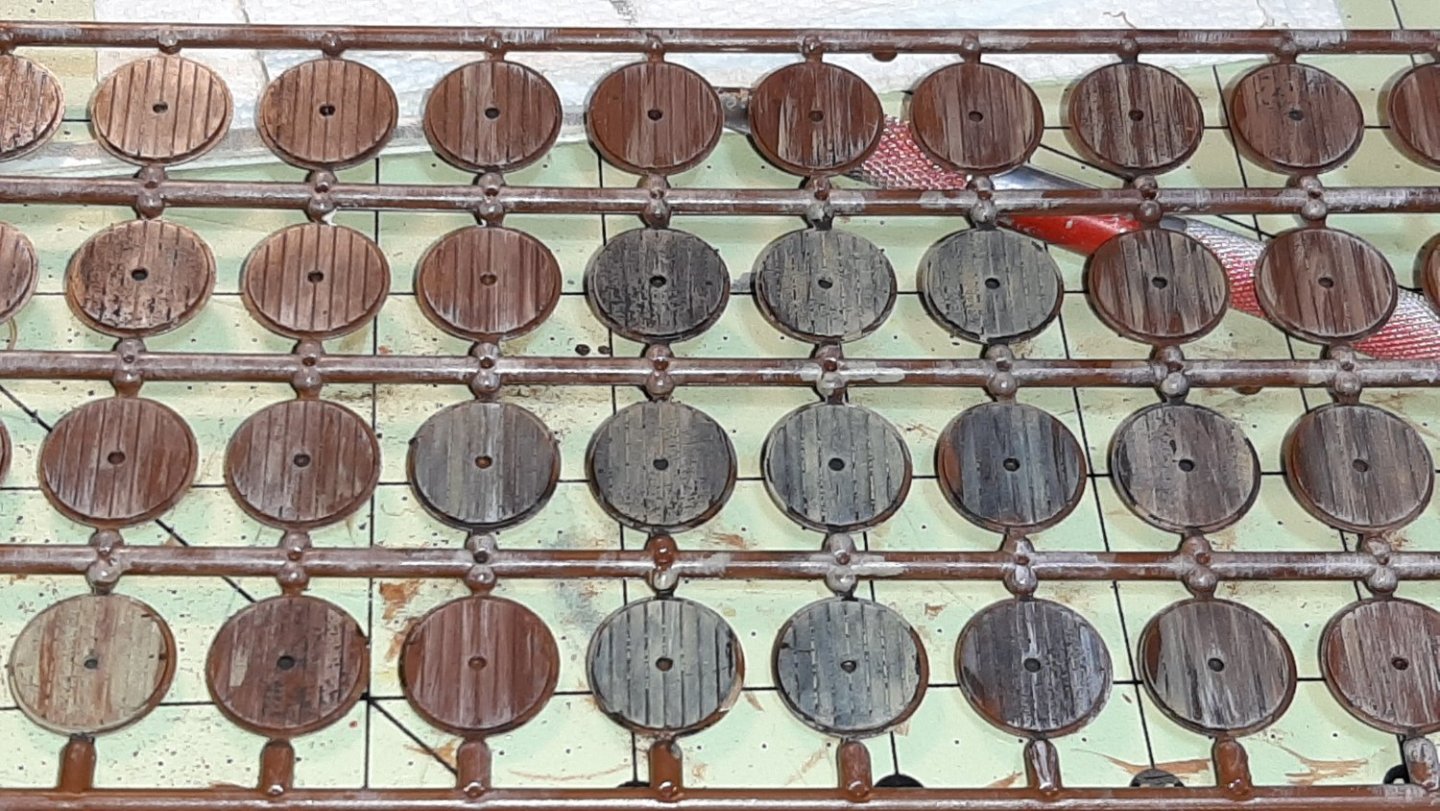
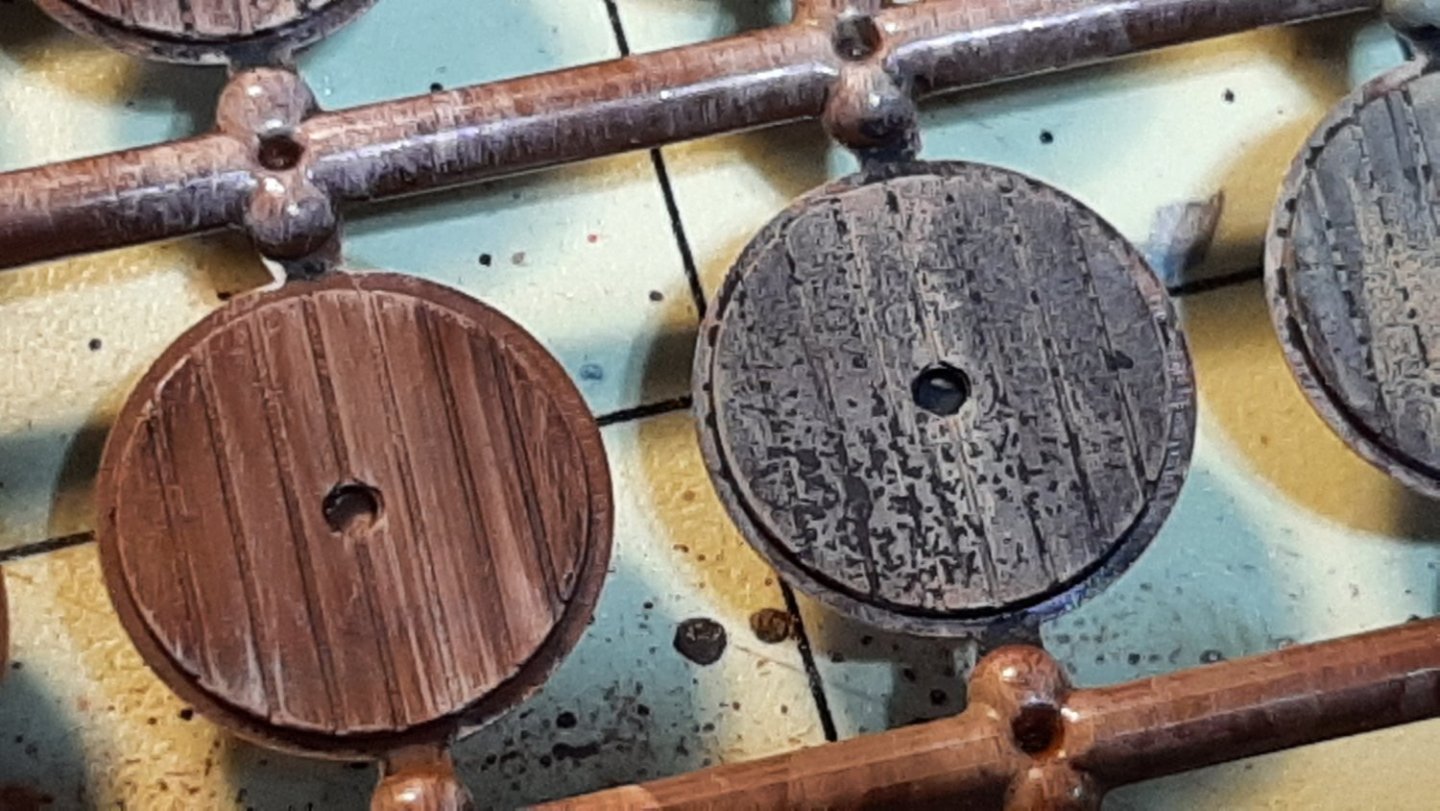
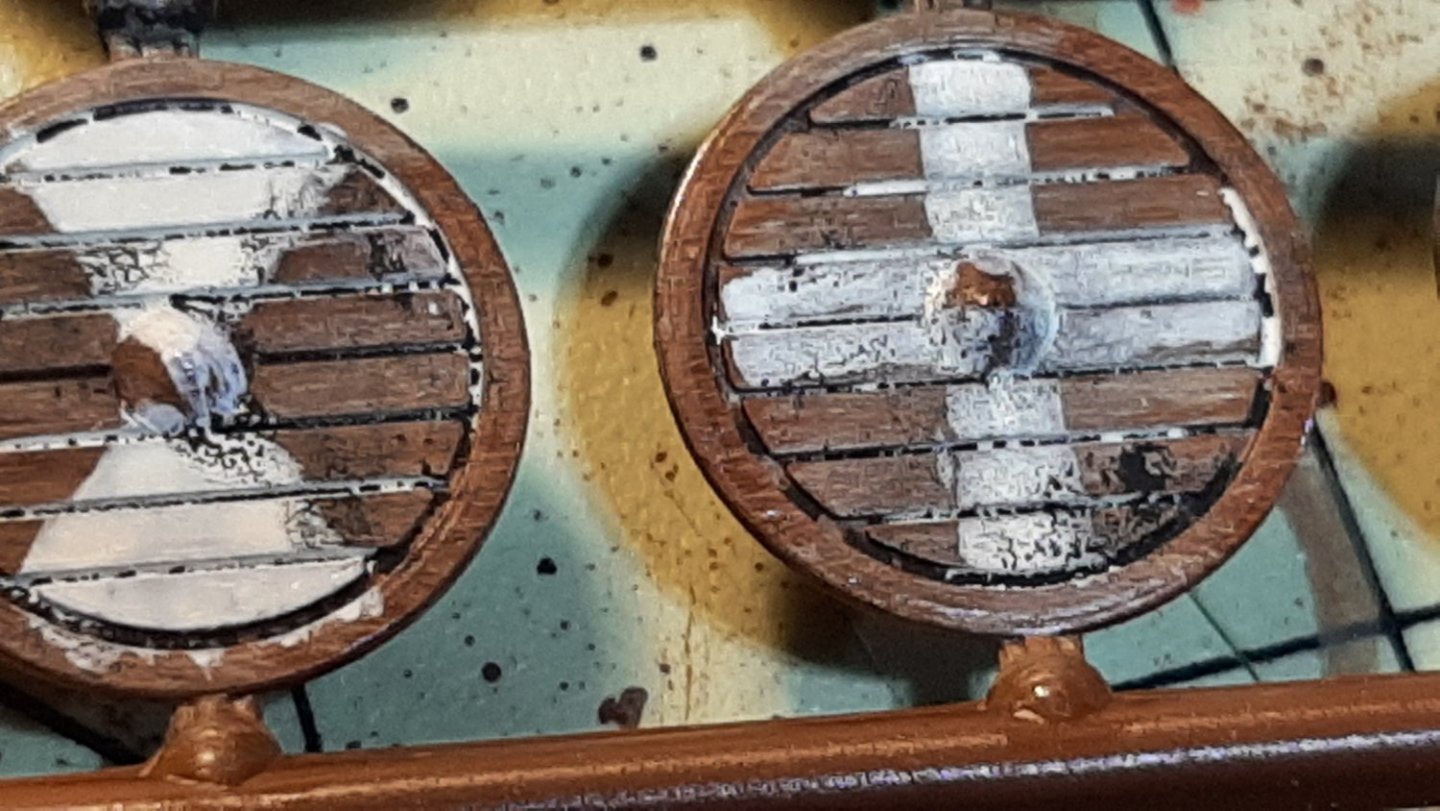
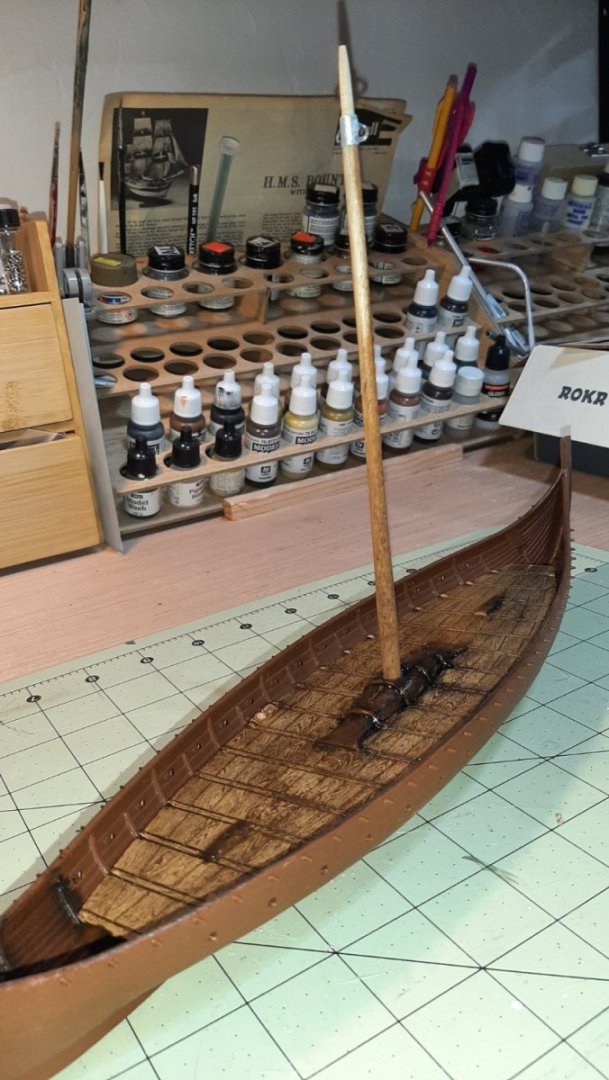
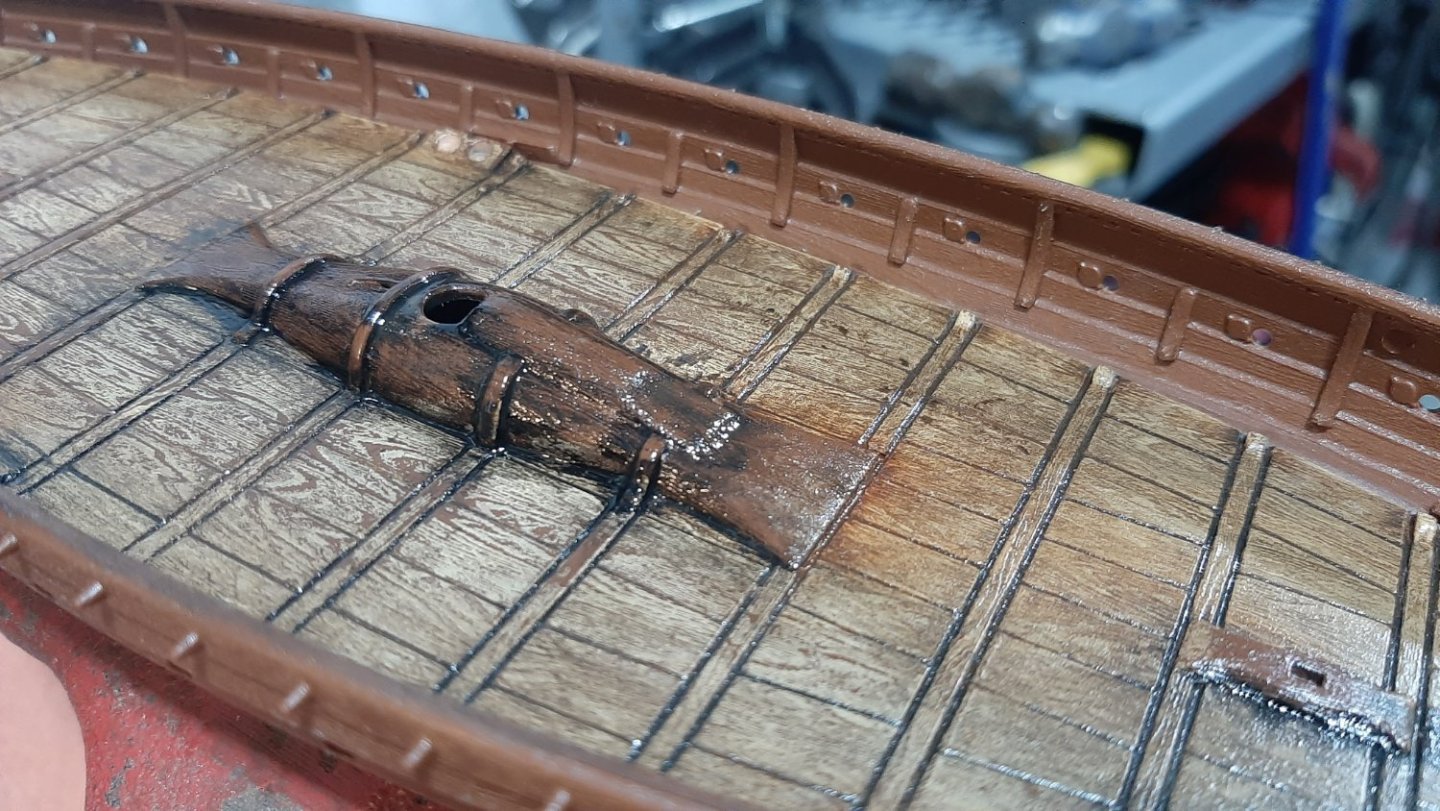
Thank you for the links and information. This is helpful. The kit shields are thick...probably about 1.5-2mm. Except for that they look decent, in my opinion. I could have done with a bit more detail such as handles and their associated hardware. I won't be using all of them. I made a little more progress on this kit this past weekend. It's been a couple weeks since I've worked on it because we got hit with some -35 weather and I don't yet have heat in my shop. I'm continuing on painting and weathering the hull and other miscellaneous parts. I hit the rudder plank with some oil paints after scrubbing and scratching it with the tip on my knife and I'm very pleased with how it looks. I'll be employing the same technique on th keel, oars, and other bits. The hull will not remain in the glossy finish I'm showing here; its just a stage in the process. I also made good progress on the shields. I brushed them with a variance of Vallejo acrylics to simulate wood grains and colors in different stages of weathering. Once dry I hit them with a black enamel wash (Testors). I also started playing with painting my own designs on the shields in a muted and weathered pallet. The Revell decals are, frankly, obnoxious as hell. Please bear in mind they are no where near finished, as is any of the kit. I got some handkerchiefs for making sails and bought a small handheld sewing machine. I'll try my hand at that soon and need to get some small dowels for the yard. Thanks for looking!


-
Thank you for the input. This kit is surely a learning experience, despite being plastic. Other ship models I've done were mostly painted and so didn't present the challenge of the bare wood. I think it could be interesting to do another version of this model but sand most of the grain away and do it up as a mostly painted hull, assuming there is evidence that such a technique was employed by the northmen. But right now it's serving to get my modeling juices going and dipping into ship modeling again with some wooden pieces here and there to get me ready for a full wood kit. I'll try my hand at shaping the yard by hand. This isn't the only place I've heard that suggestion. My only "lathe" is that poor-man's version you mentioned. I am beginning to see the utility of a very small plane for that bit of work. Yes, on the shields I'm envisioning using maybe half the number the kit comes with and dispersing them a little farther apart and in a little more haphazardly. As far as colors, I think I'll paint a few by hand with toned-down, earthier colors on a few, maybe half, and do the remainder in a natural wood finish with maybe some very small identification marks. I also want to attempt a cloth sail for it. I have some handkerchiefs on order. That will be a learning experience for sure. I've done a little sewing on my work clothes over the years but I'm no seamstress.
-
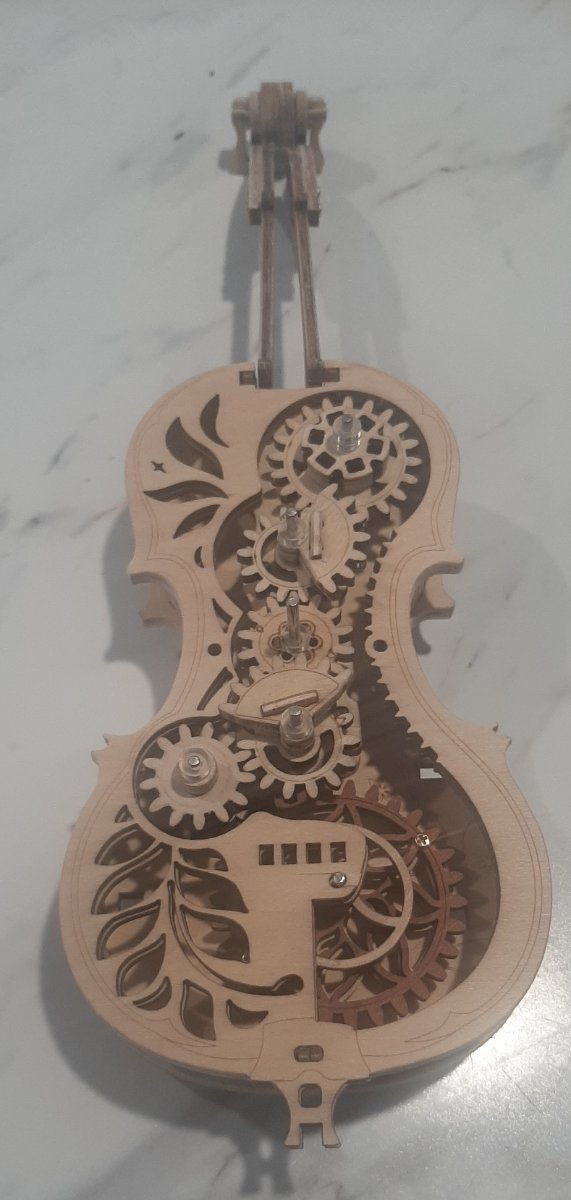
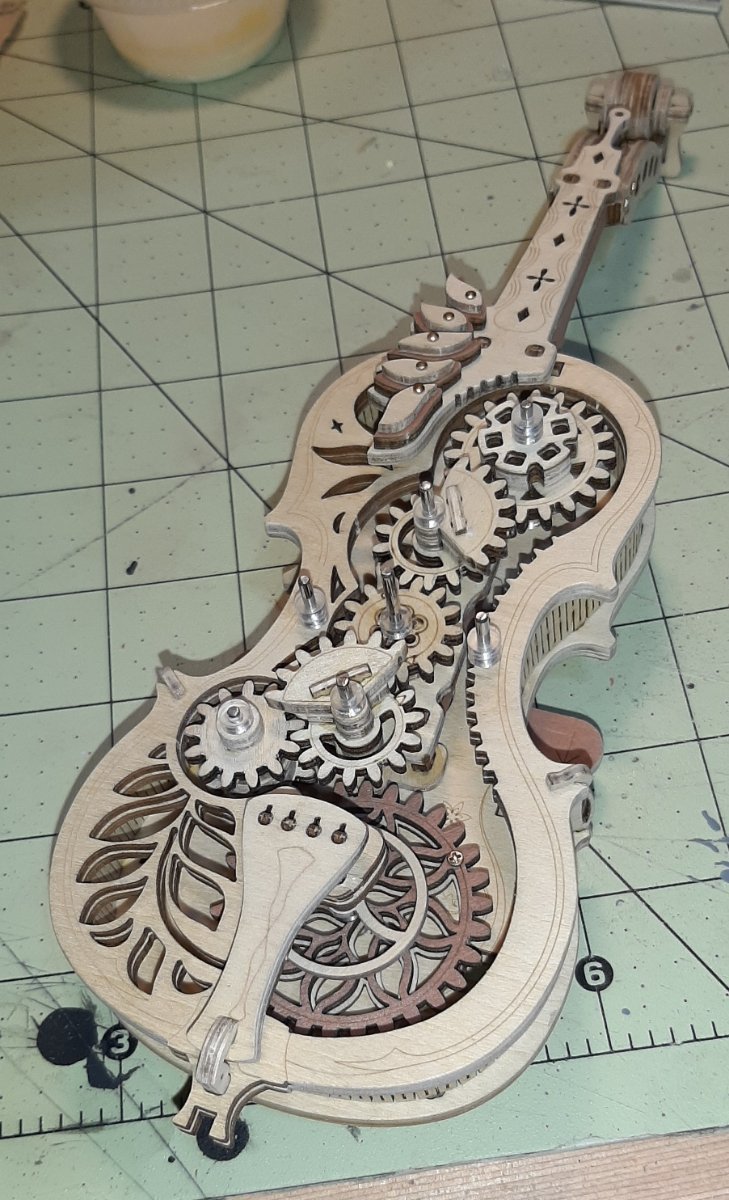
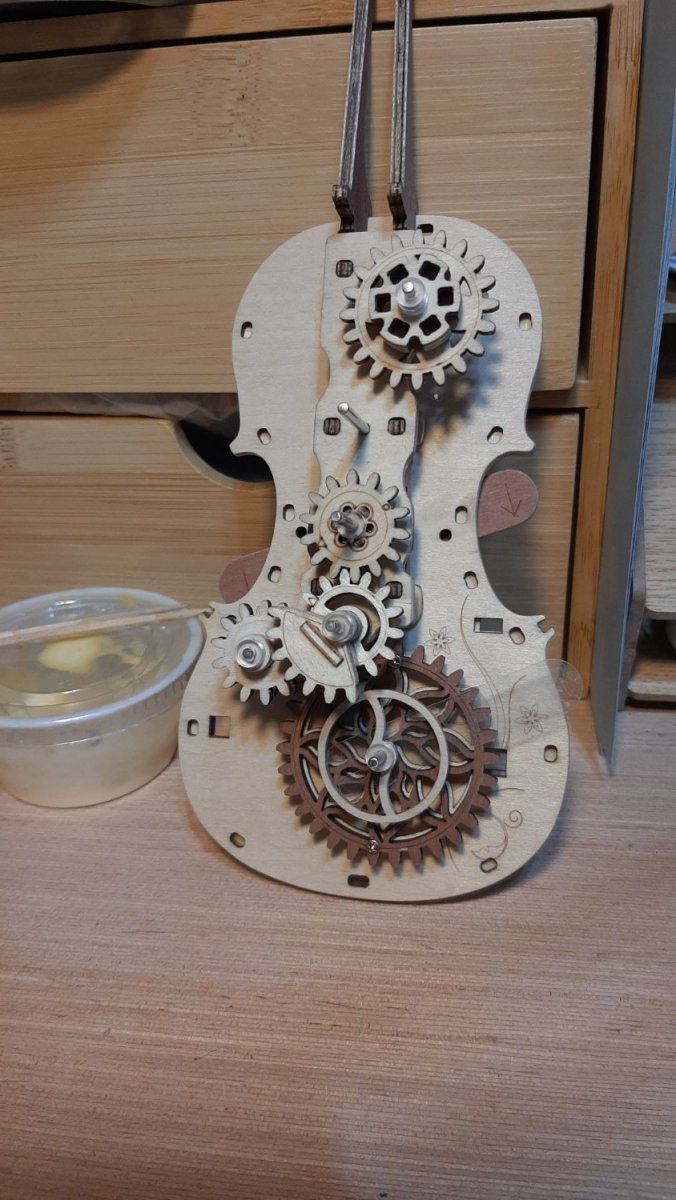
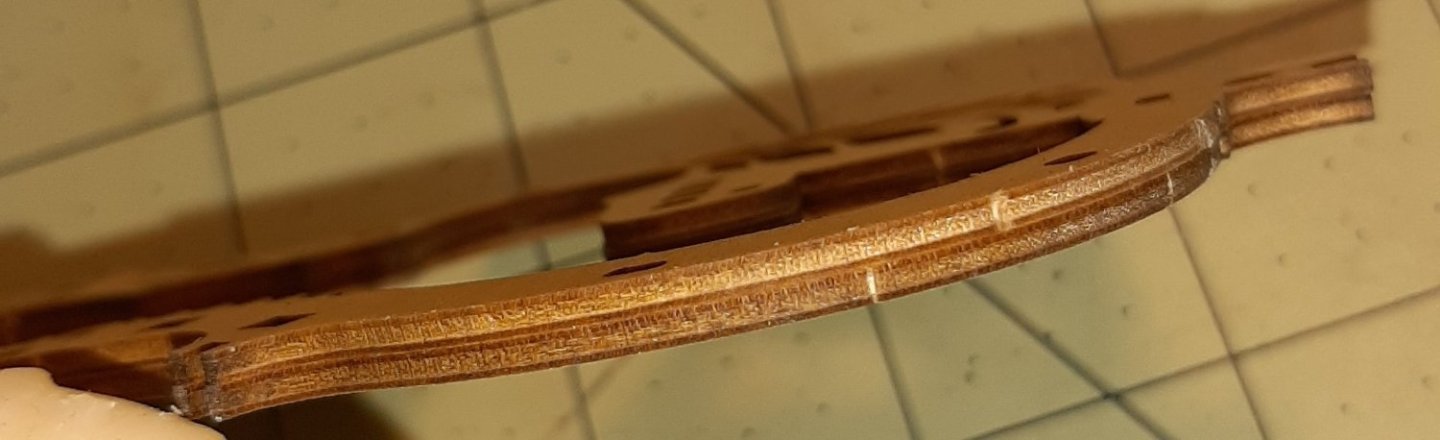
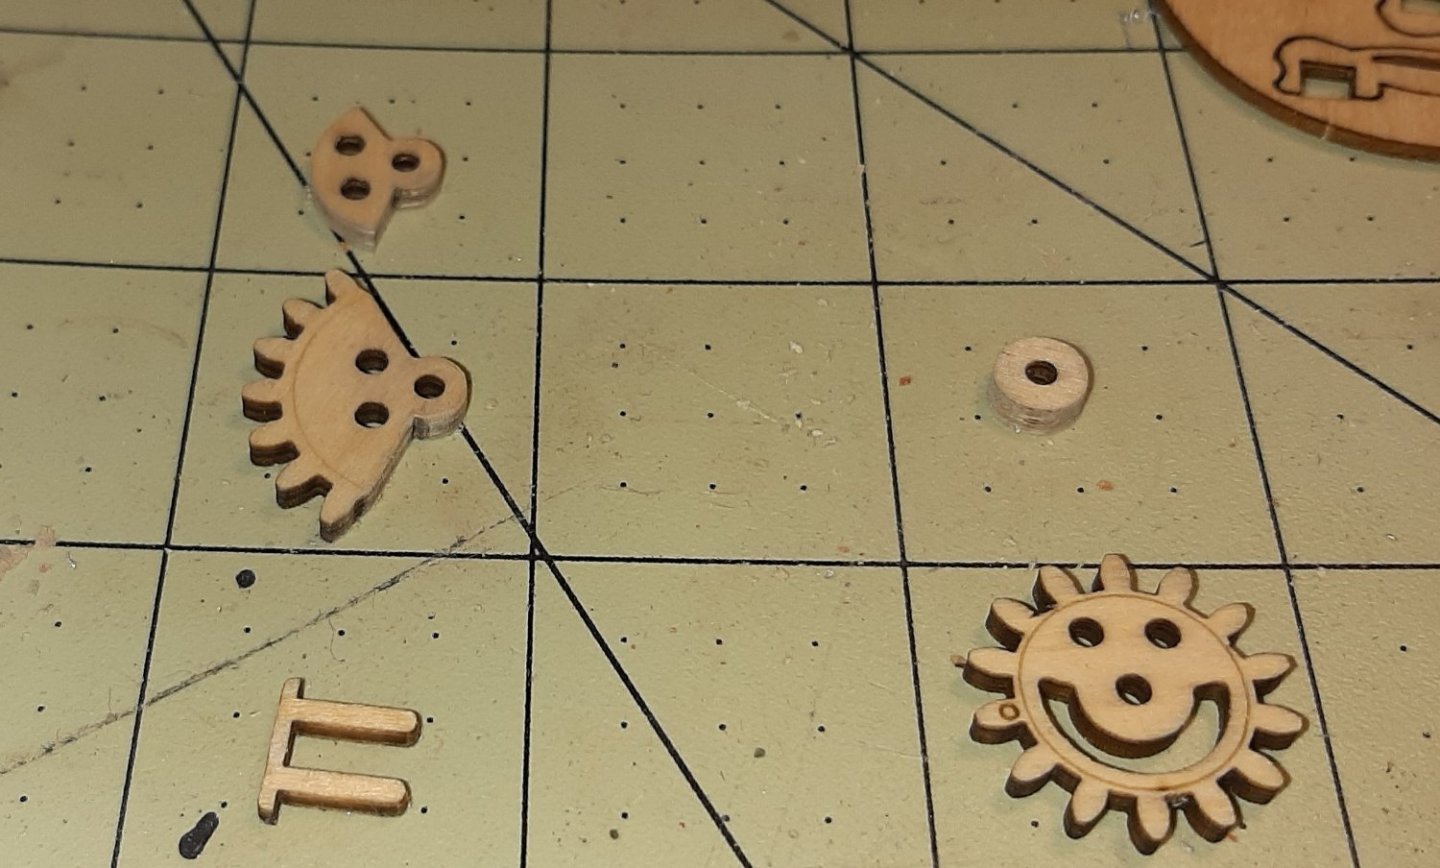
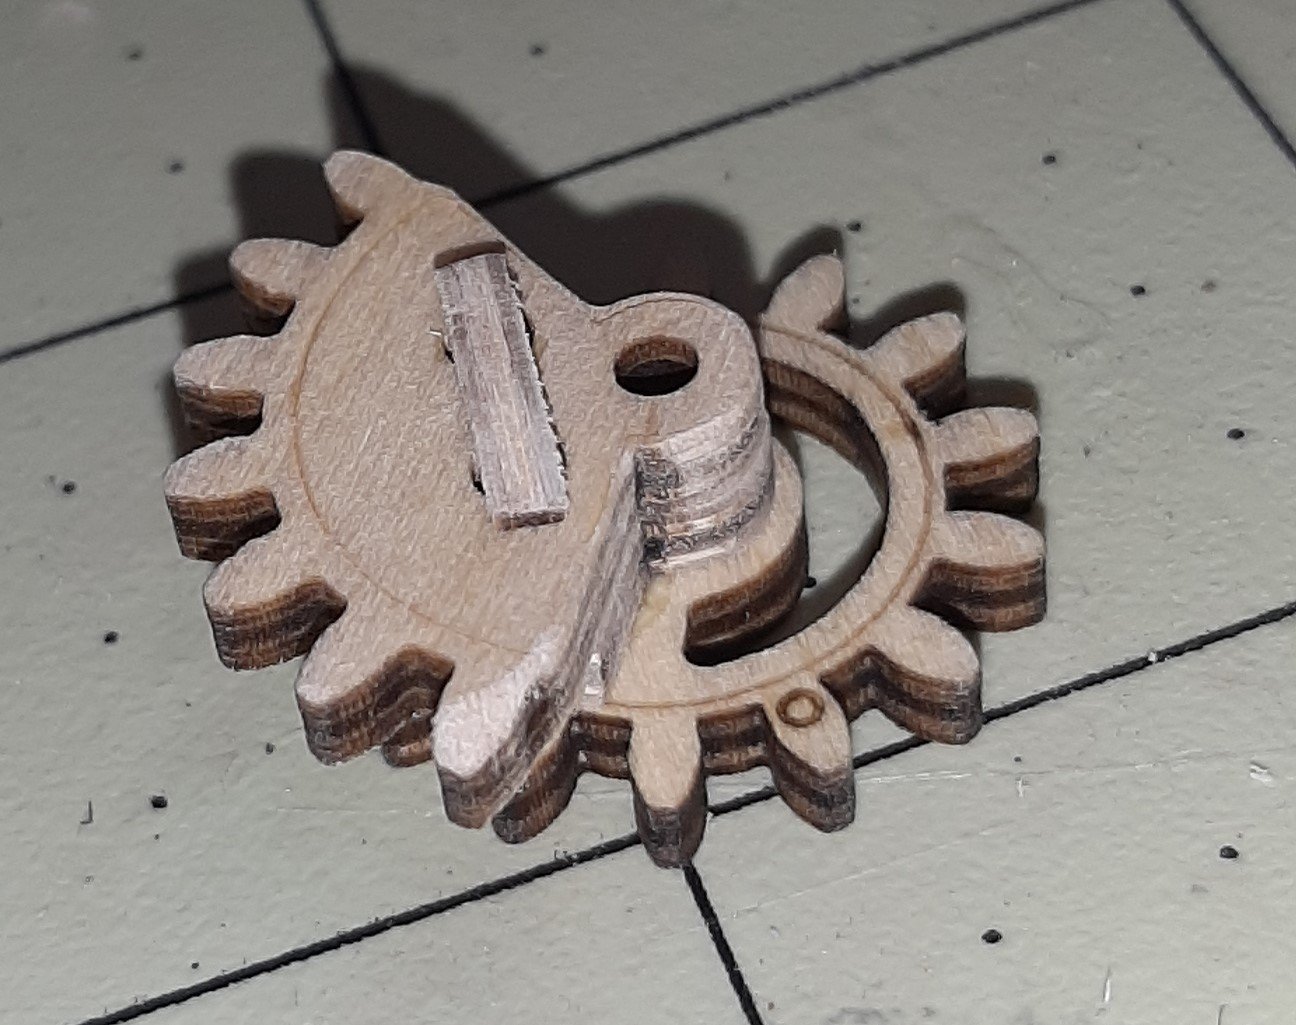
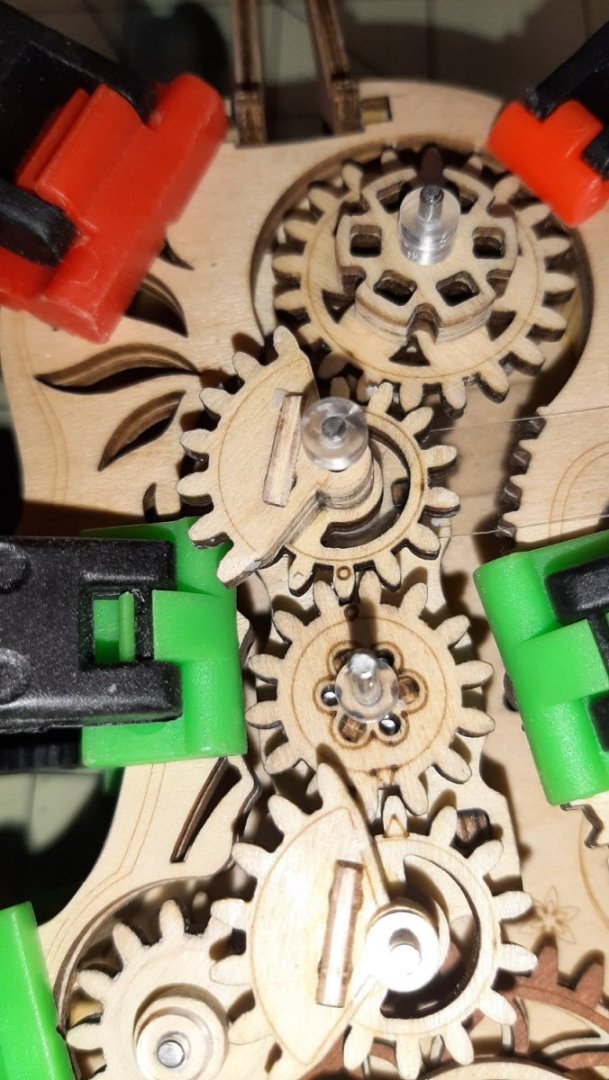
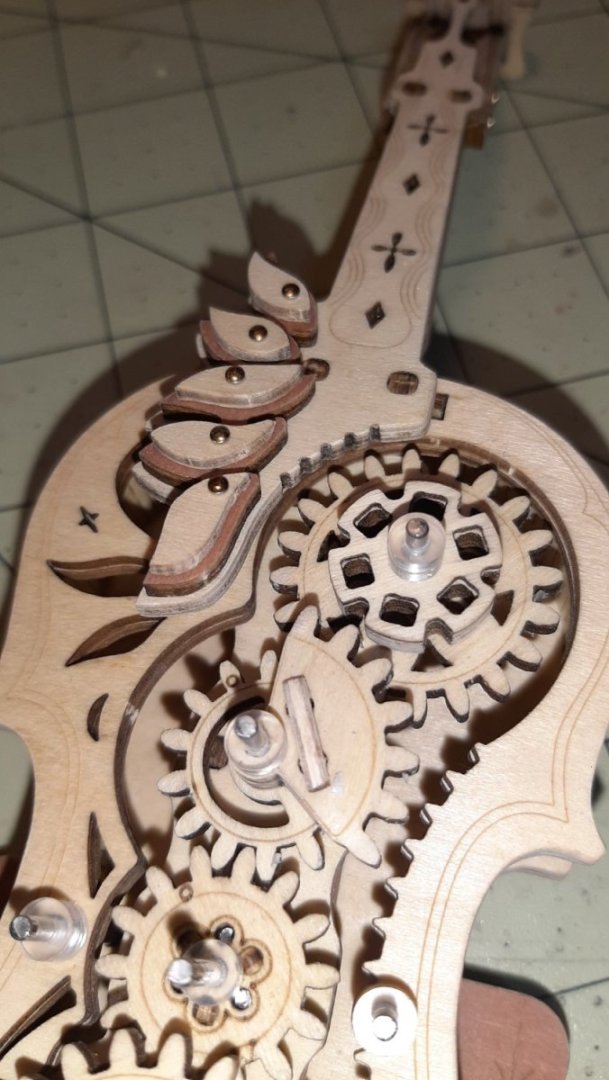
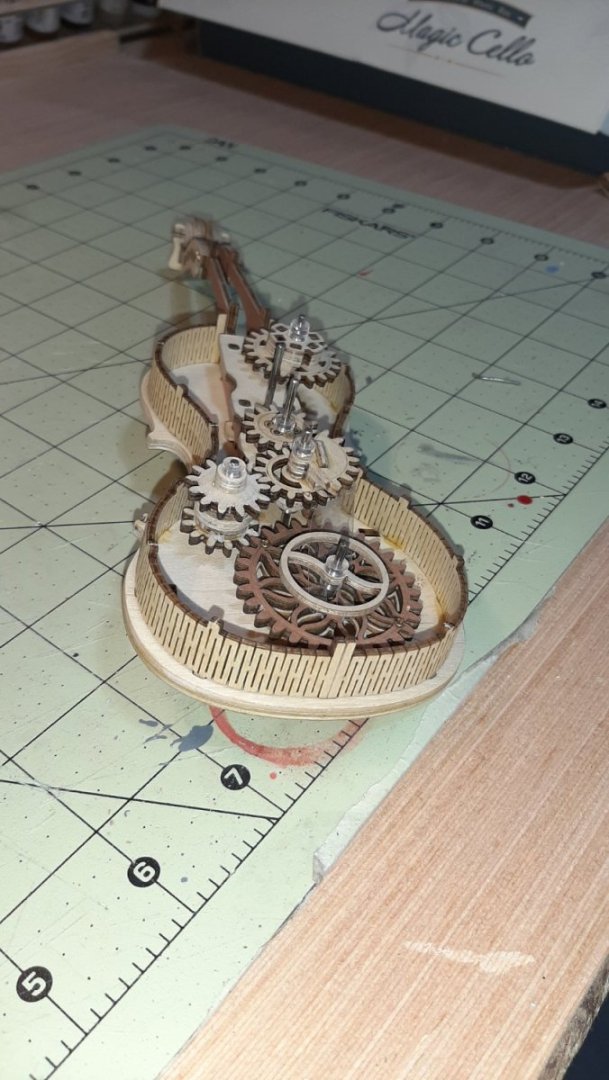
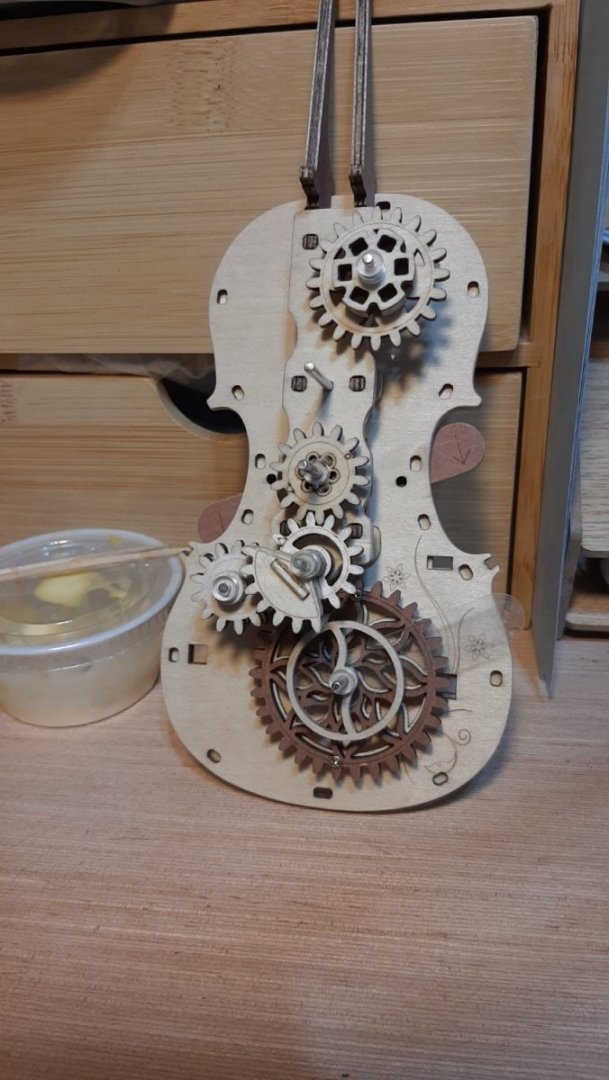
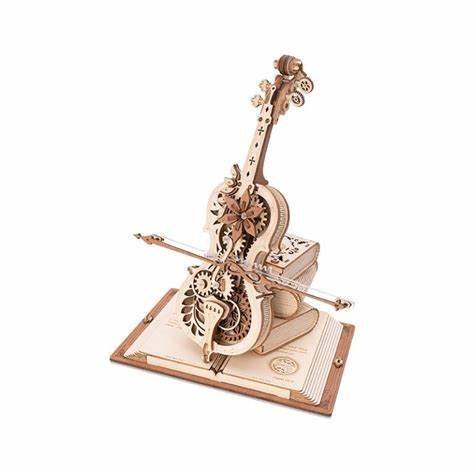
More work today. No leaps and bounds, just more finish work on the cello. I'd say the cello itself is about 85% done. I'm posting many of these photos more for reference than anything, in case someone might be interested in these Rokr kits and wants to see details on the processes they implement. The base consists of models of stacked books. I'll build them, but not sure if I'll use them. That will be up to my wife; this is for her. Thanks for looking!


-
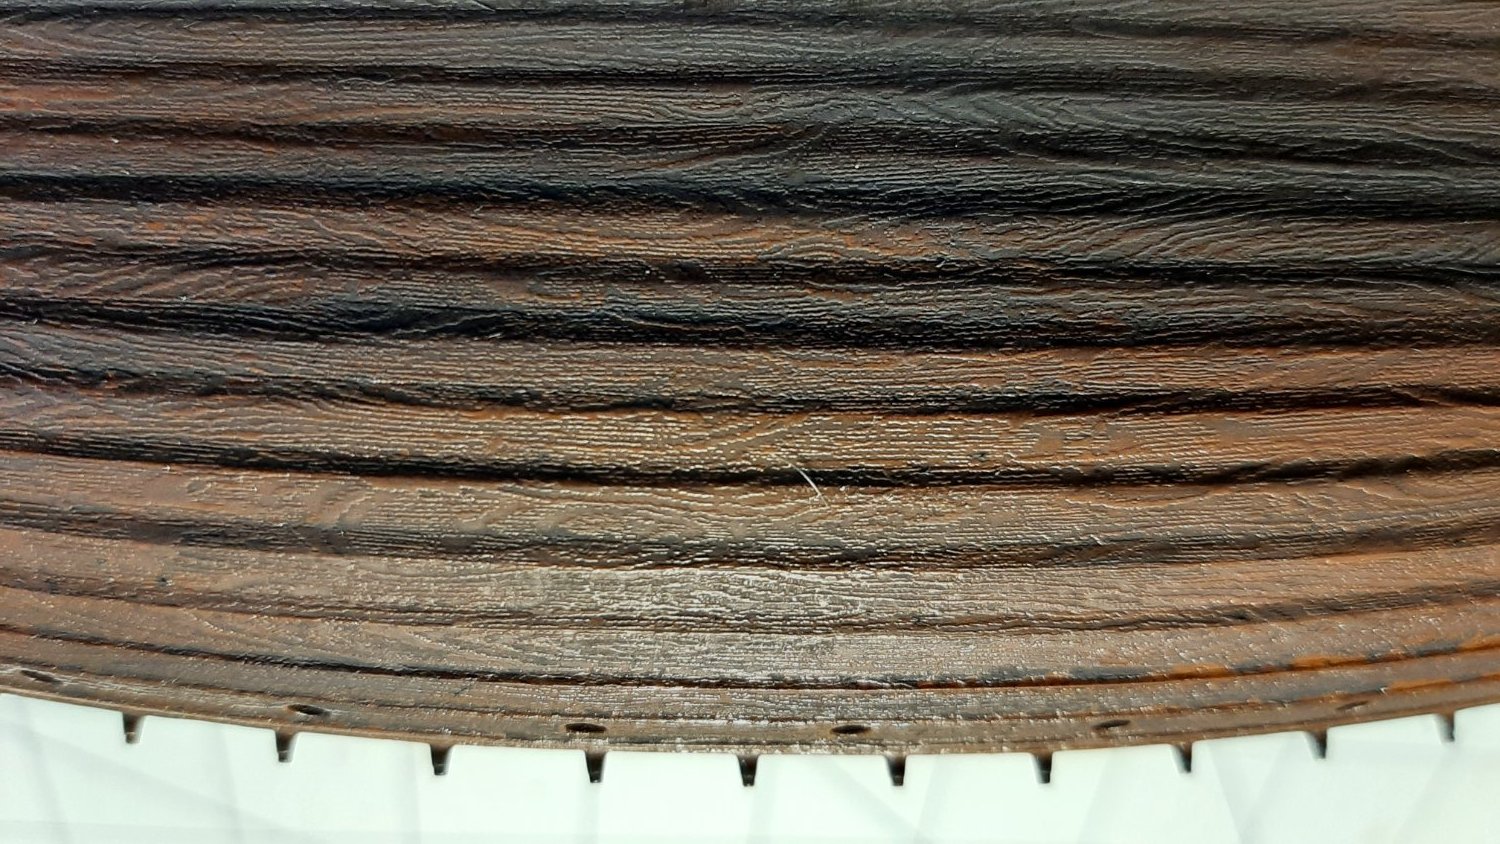
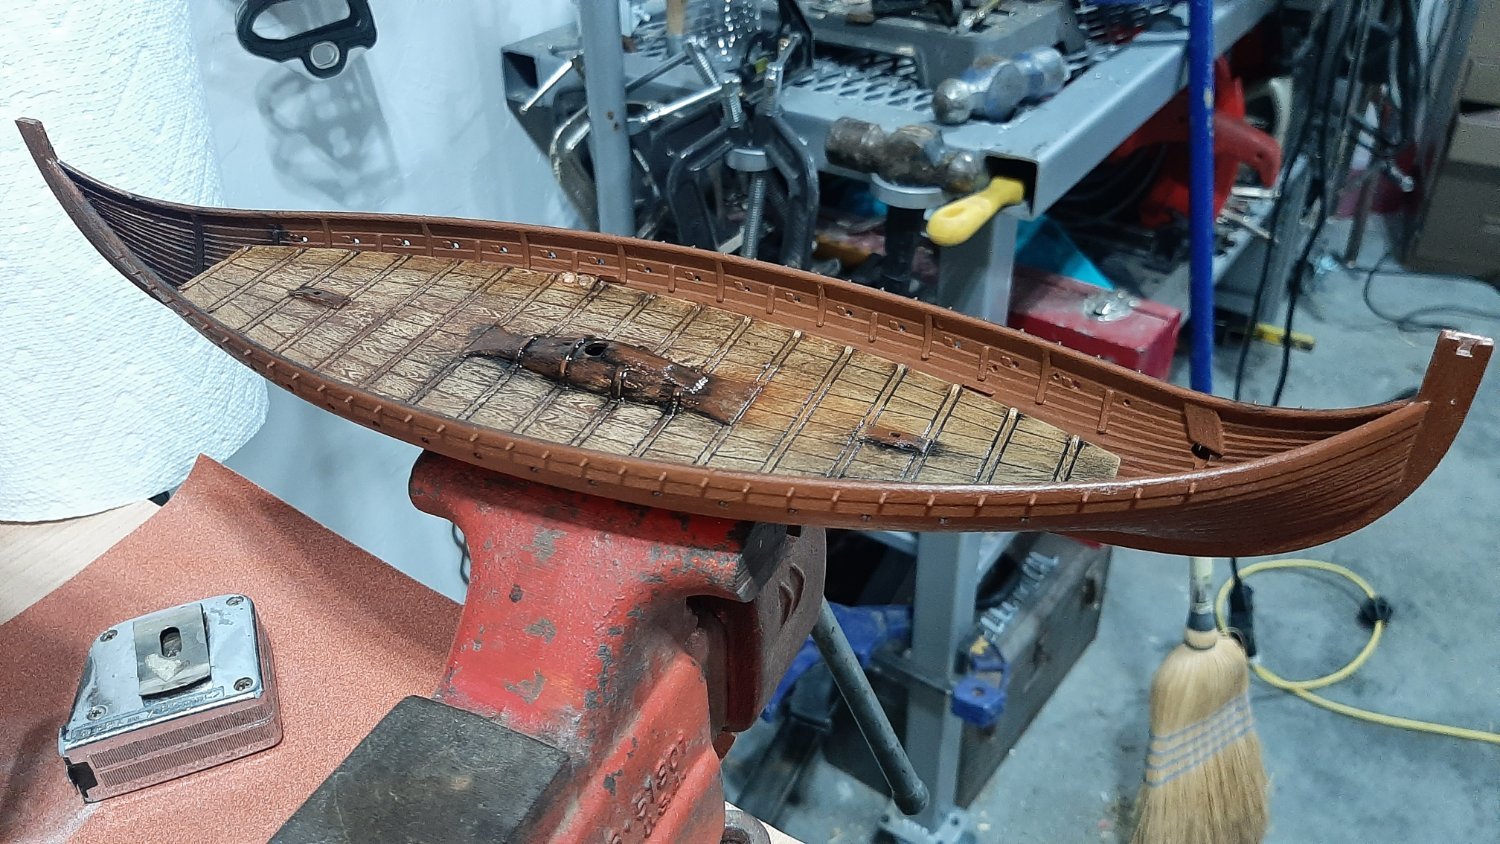
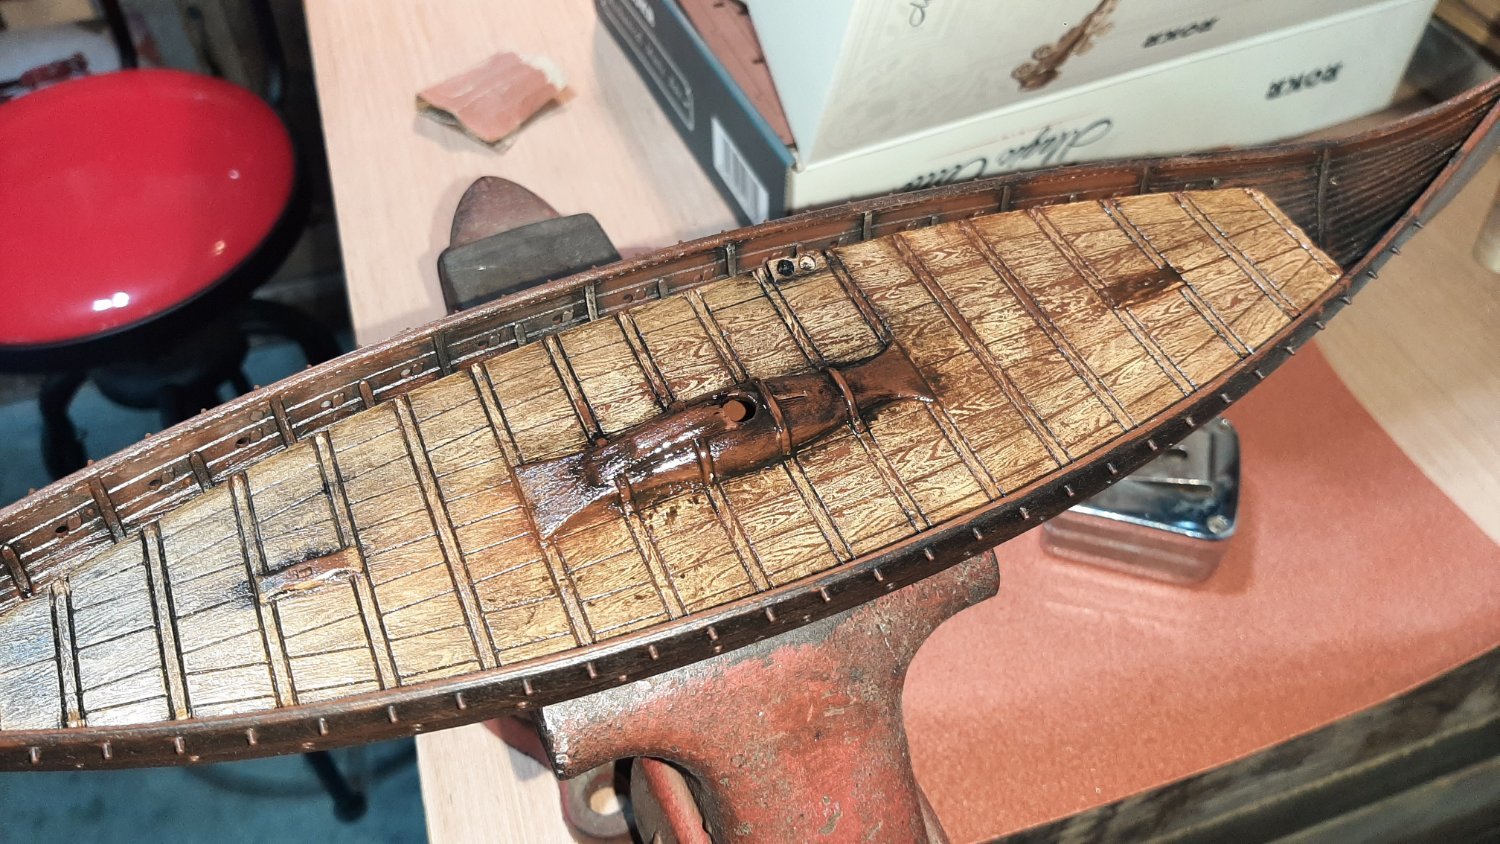
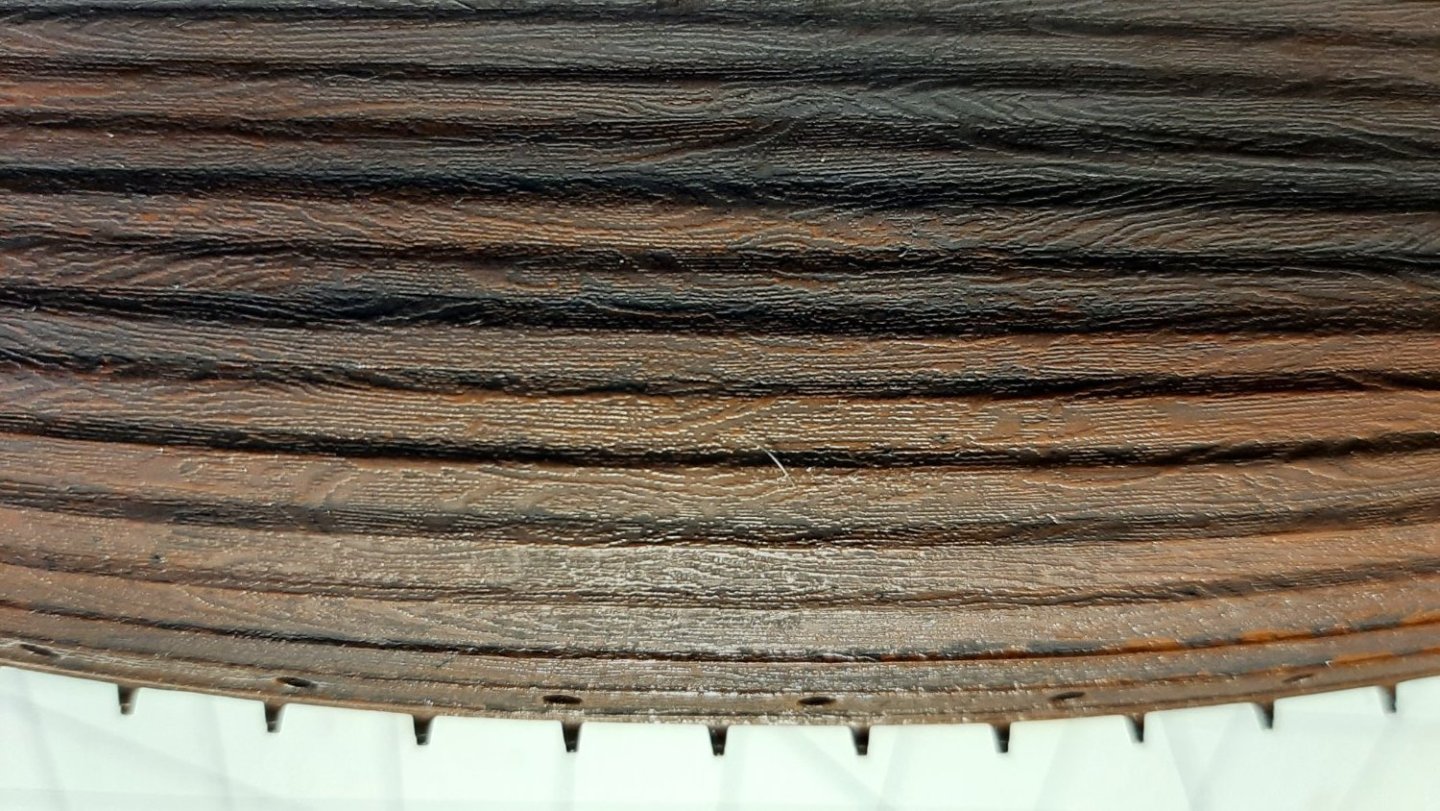
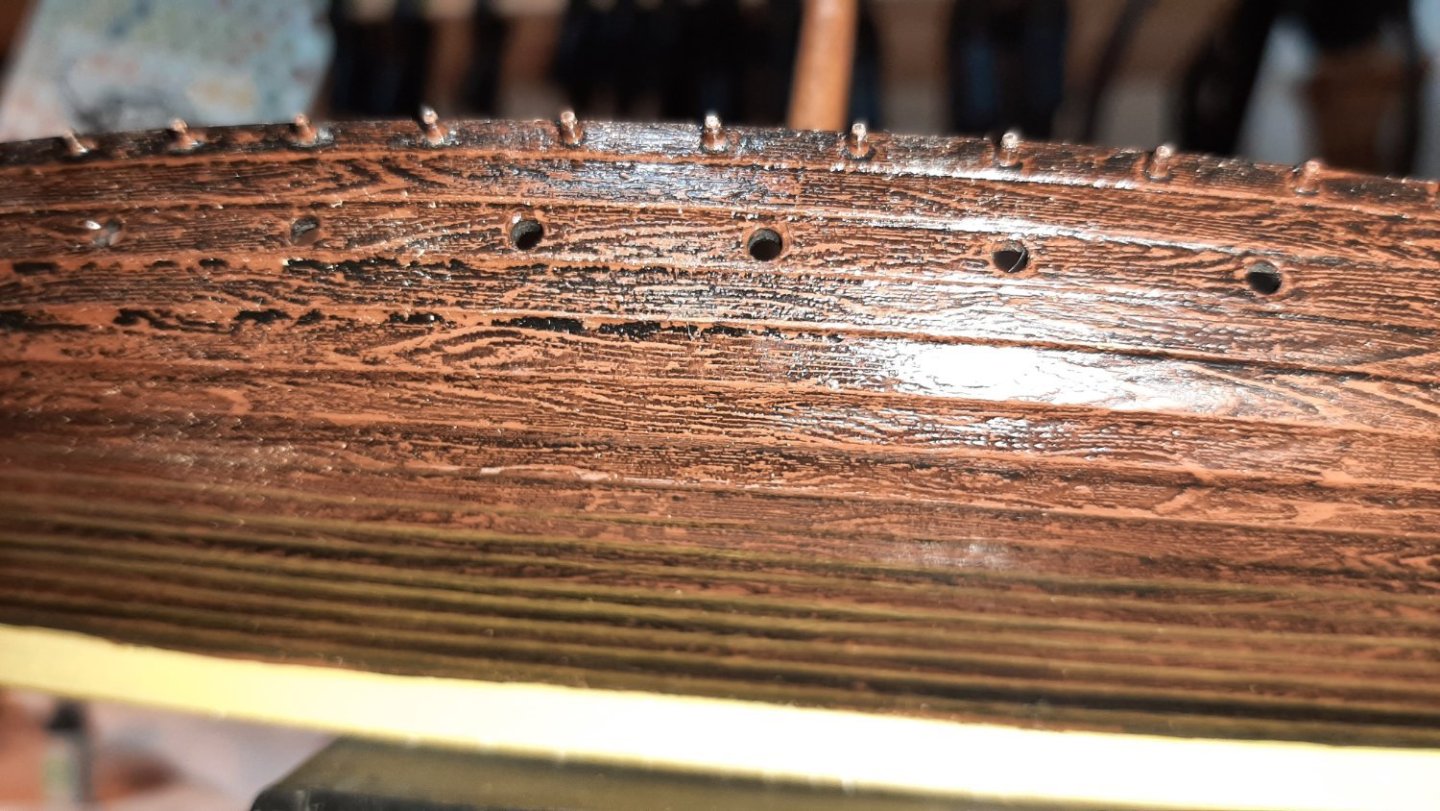
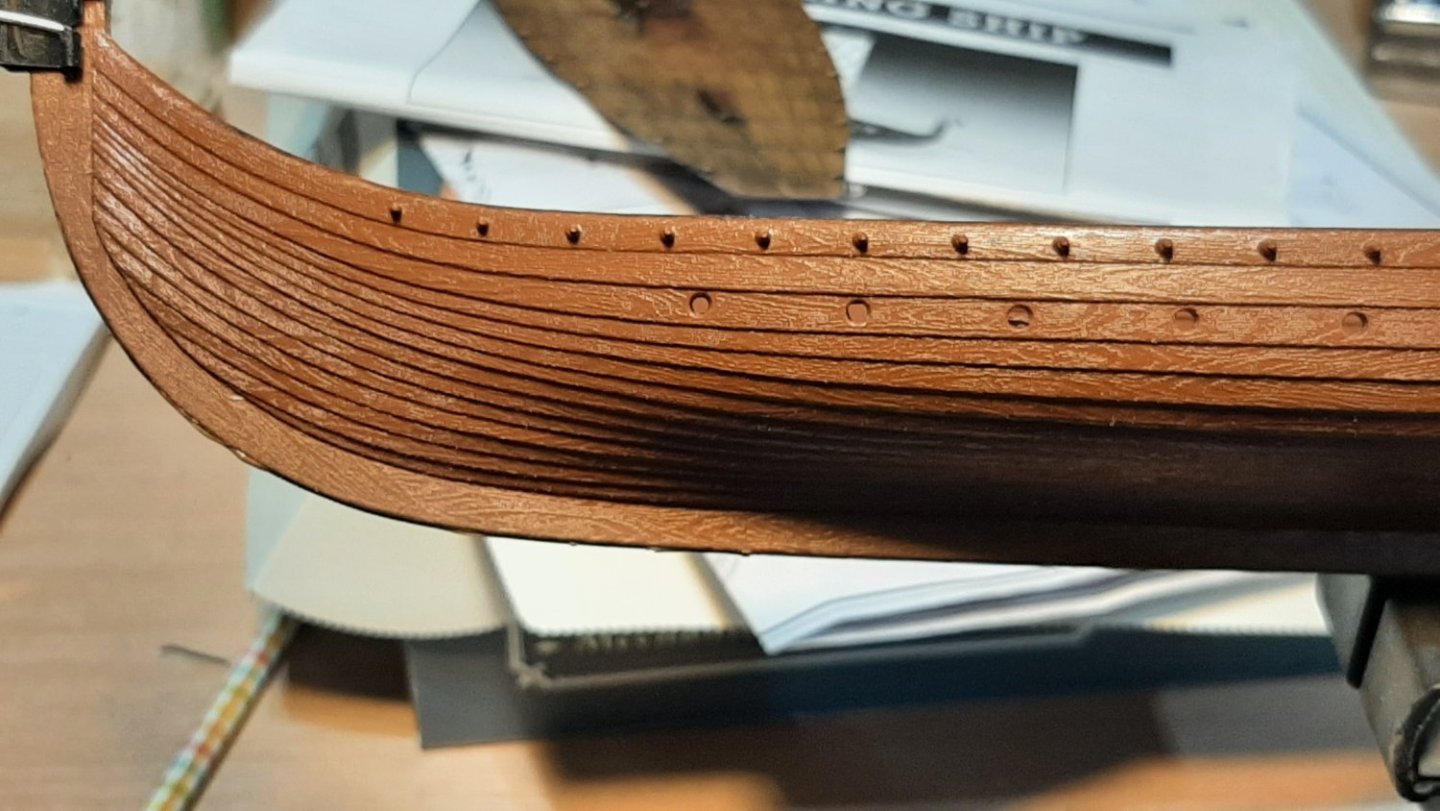
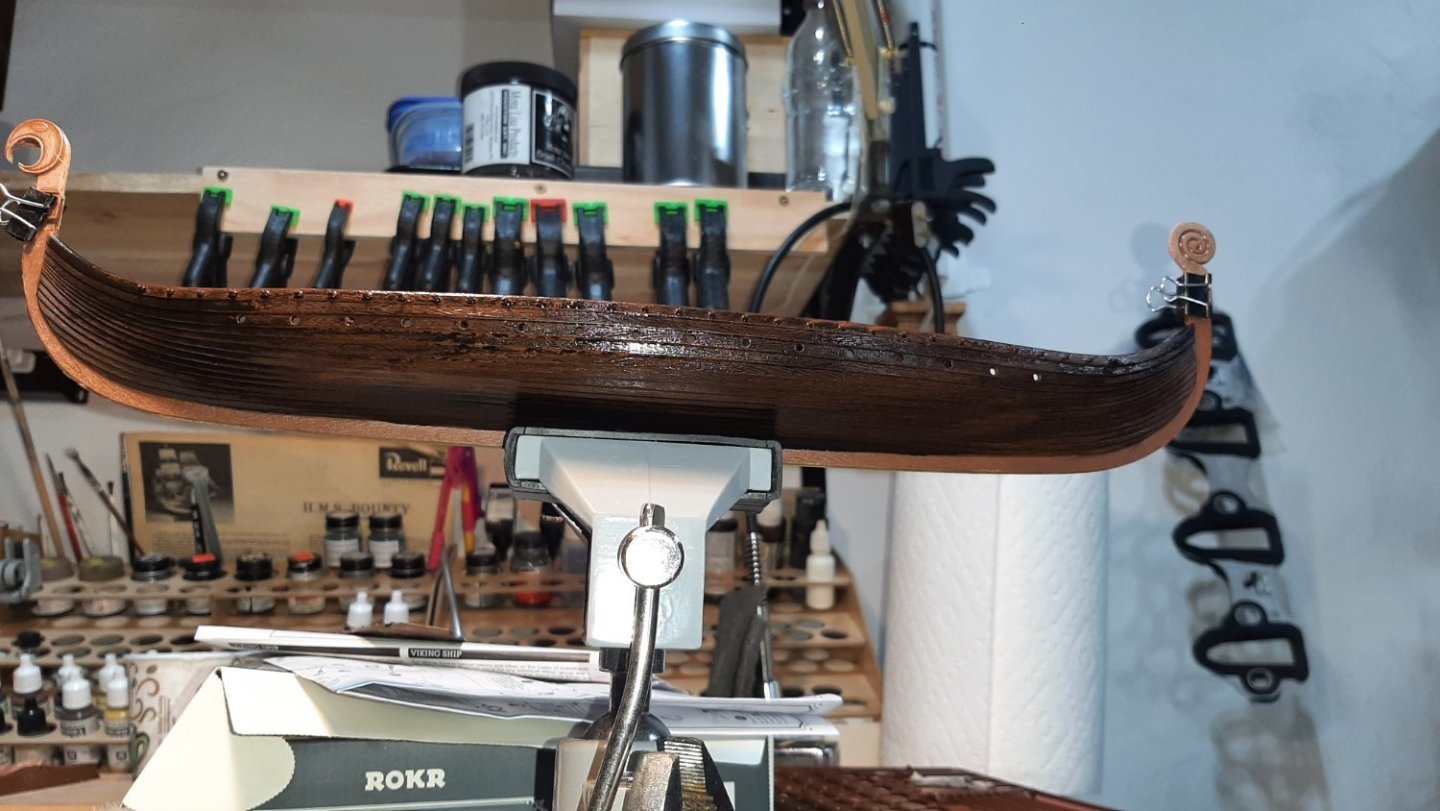
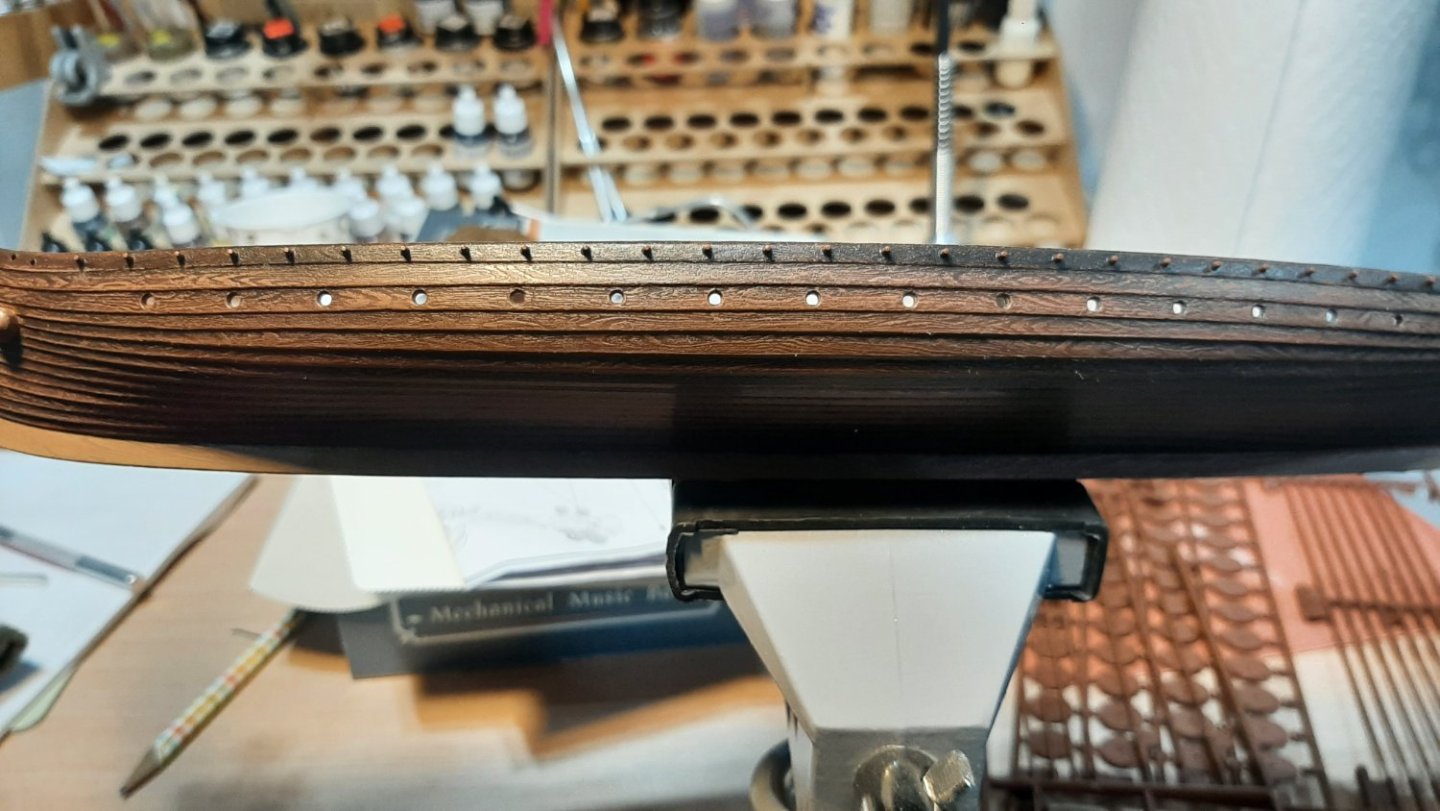
Thank you, but no, I actually agree...it did become more weathered than I wanted. At this point I'm happy enough with the results to leave well enough alone. I'm playing with matte clear on it that is lightening it up a little and taking a touch of the weathered feeling back a notch, but it's still too much. The kit is looking good if I do say. I'm pleased with the meager progress, especially given the small amount of time I am able to put into it every week...perhaps a couple hours...and the fact that I haven't modeled in several years. I had begun to worry that I may be losing my dexterity and vision for it, but its coming back to me quicker than I'd hoped. The update today concerns continued finishing experiments to make the plastic look as wood-like as I can. I think this model used the Oseberg ship as a rough inspiration, and I'm running with that. I like the darkened planks and lighter-hued keel of the Oseberg so I'm kind of using that as an inspiration for my model. When I started this kit several years ago I had applied a wash of Testors flat black enamel to one side of the ship with the intentions of picking out the wood grain details against the black undercoat. Today I finally got around to trying my technique and it worked well. I very lightly sanded...like a light single pass...with very fine sanding sticks across each hull plank and the result is pleasing to my eye. I applied the wash to the rest of the hull and interior surfaces with the intent of continuing this process. Shown in the photos are the bare kit plastic, then the black wash applied, and 2 photos showing the lightly sanded planking. Now, I do agree with AndyA in that the grain effect is overdone...without a doubt, however I'm running with it for the simple fact that I don't see a real alternative. I feel that in the case of the hull, and the deck in this case, trying to turn the negative of exaggerated wood grain into a positive is my best course of action. If I remove the texture I'm left with smooth plastic and an effort to create my own wood color and texture using paint, which to me is an even less realistic course. I do agree that scale effect is very real, however I'm using some artistic license with this model. That said, I completely agree with regards to spars. The kit yard looks OK, but, again, is lacking in any texture or grain effect. It will look out of place on that wooden mast, so I'll have to make a yard. With that, I have concerns about achieving believable, let-alone accurate, taper. I don't own a lathe, so I'll figure something out. I'm also trying to consider alternatives to the shield decals. They are interesting and add some needed color, but I feel like it might almost be too much. Would such bright and varied shields have really been displayed as Revell thinks they would have? Opinions please, along with any historical input anyone might have. Thanks!!

-
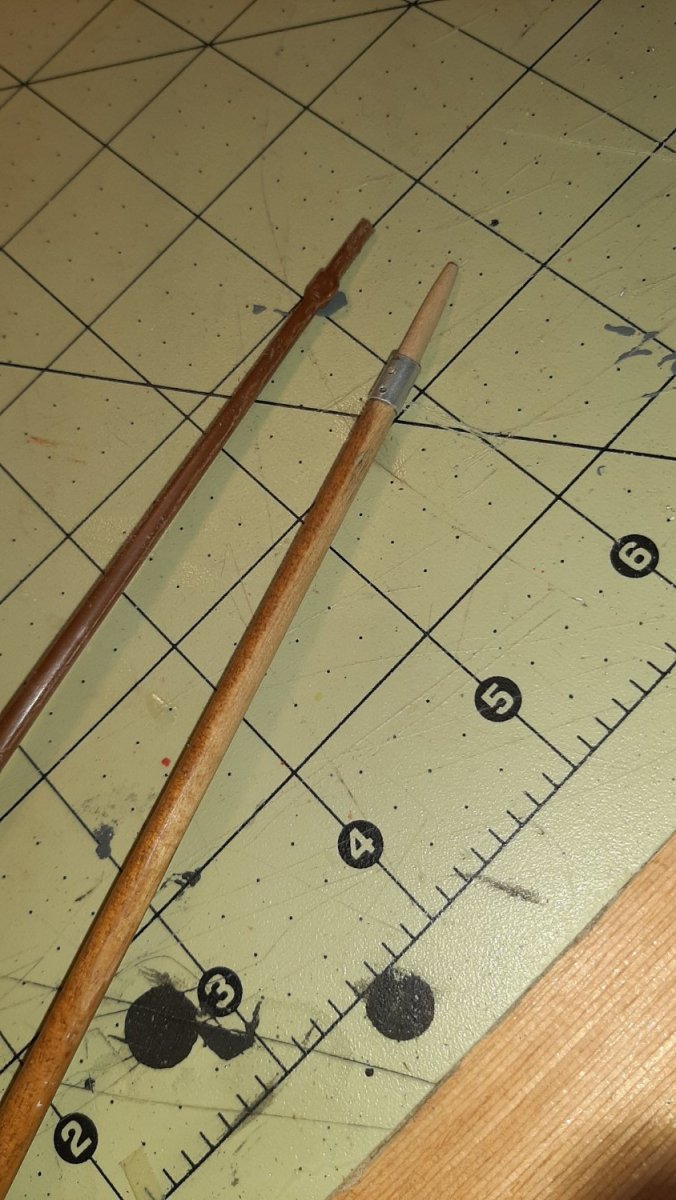
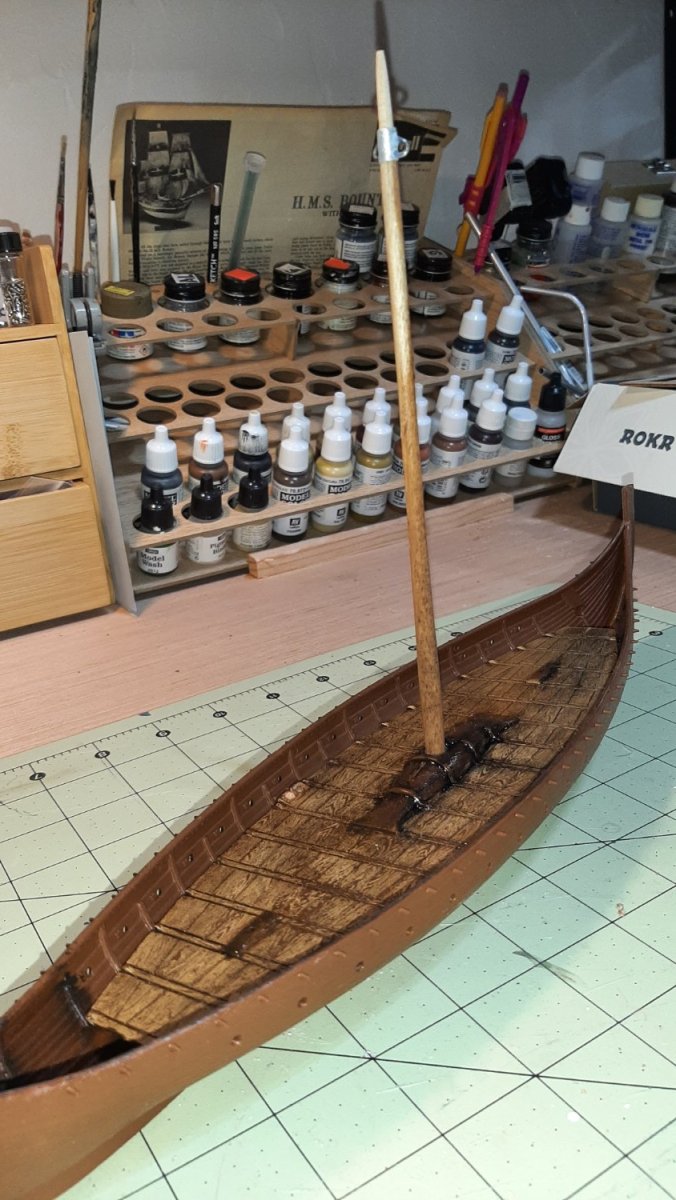
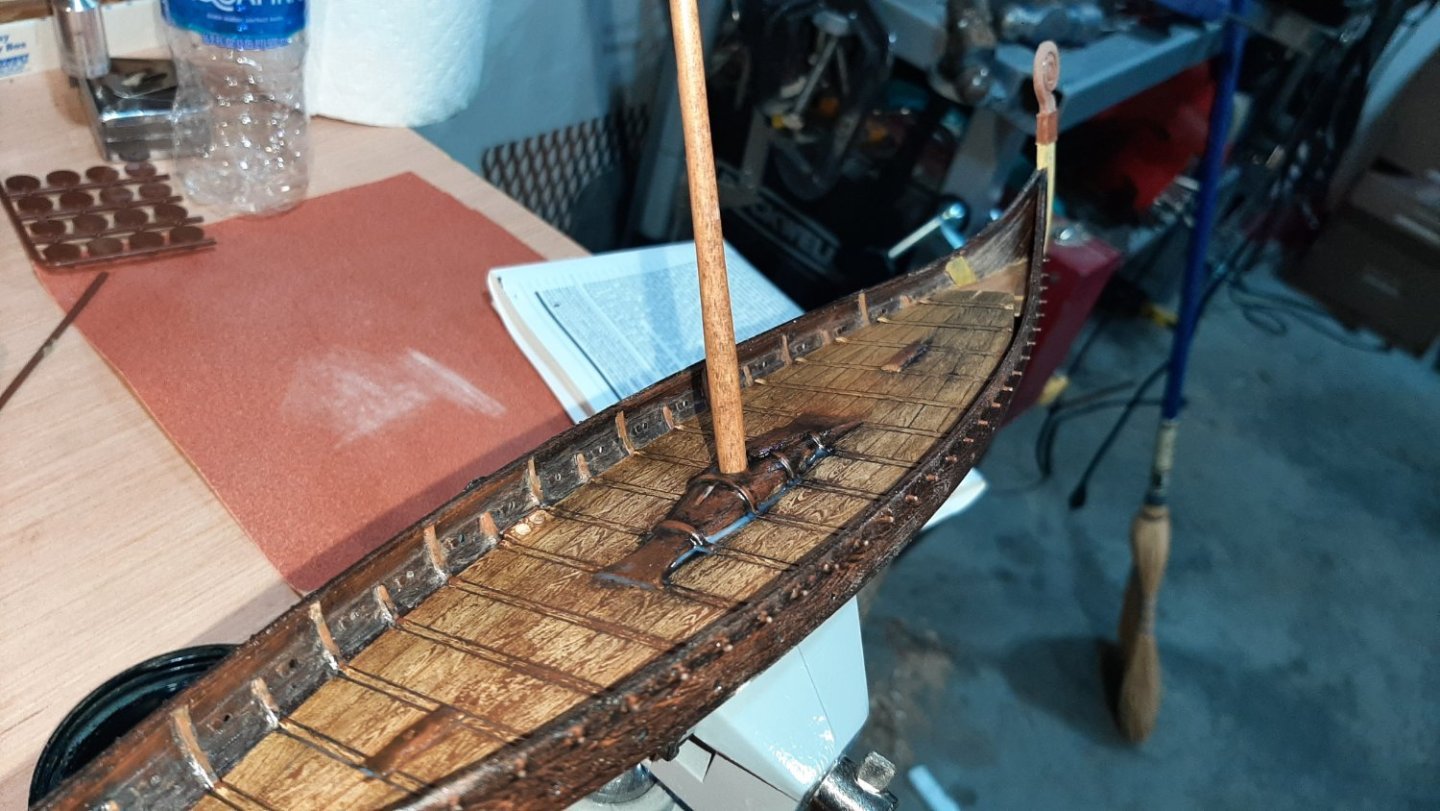
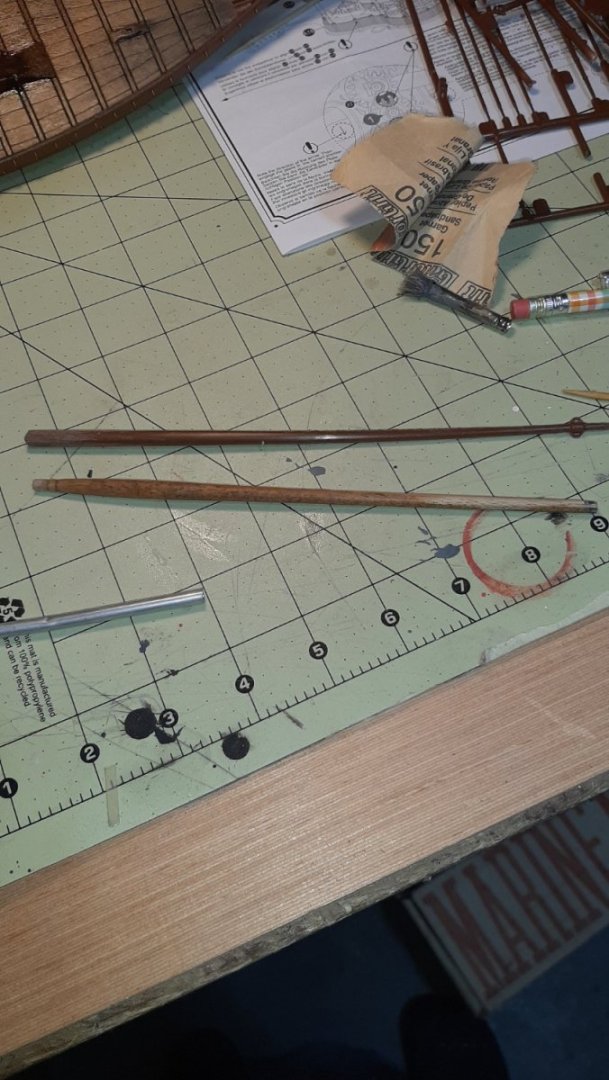
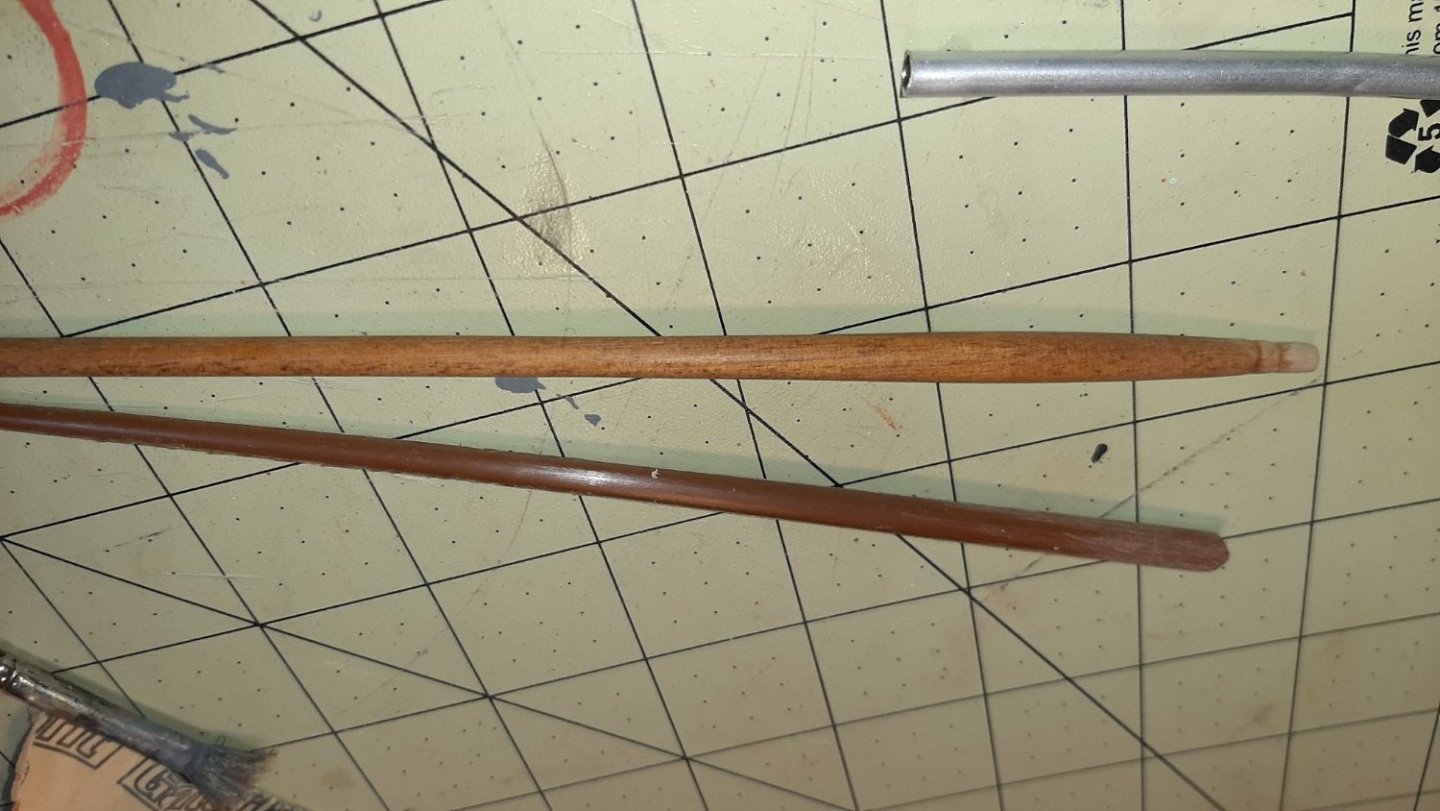
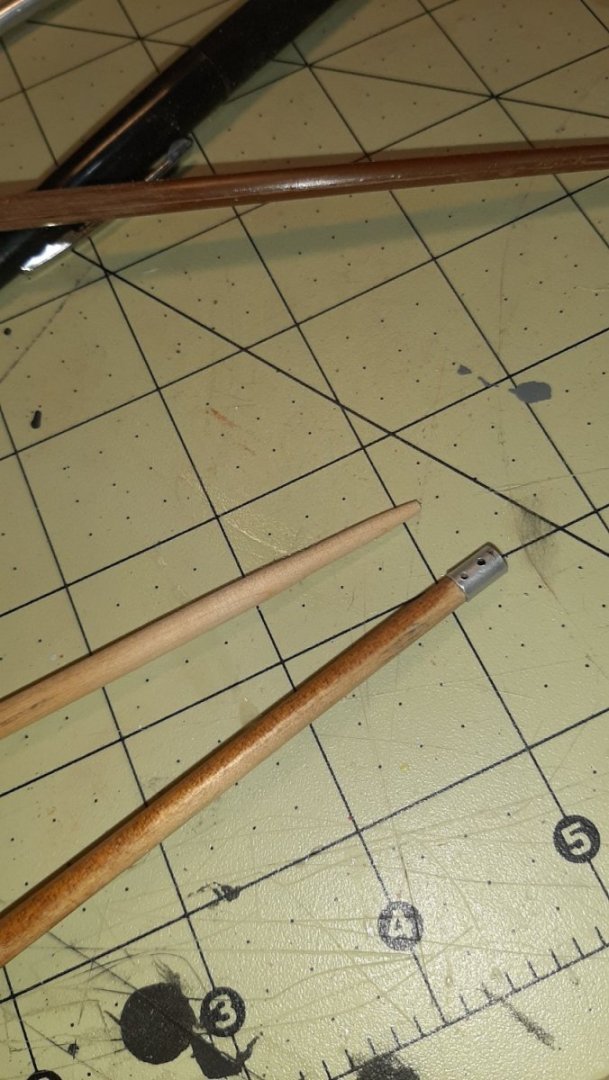
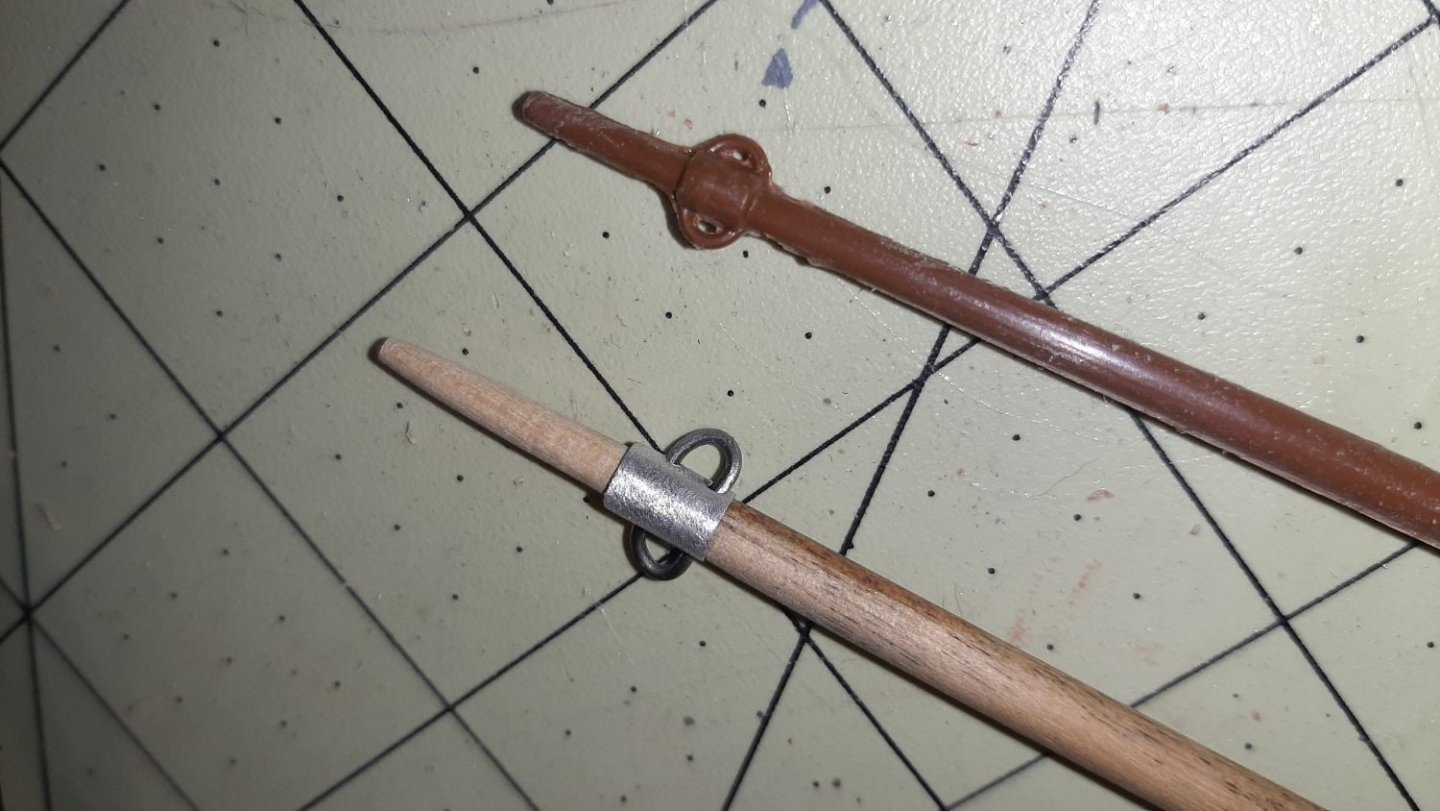
Another small update on this Revell viking ship build. I feel confident with my plans and technique for trying to simulate wood on the plastic, so I'm starting to think about the next construction phases of the model. The kit mast is truly miserable. Aside from being bent out of the box and barely able to hold it's shape against gravity, I shudder to think what the meager amount of rigging tension that will be imposed on it would do to it. On top of that it is smooth and shiny, lacking any kind of texture or simulated wood grain. Usually that simulated grain is over the top, an occurrence that is all-too prevalent on this particular kit, but then a major piece like the mast is left devoid of any character at all. Odd. For a suitable replacement I only had to look at my junk brushes I use for weathering. One was a good diameter, length, and shape, not to mention having beautiful and fine grain. The cast-in rigging fitting at the top of the kit mast is nice, but nothing that I couldnt duplicate with some wire, aluminum tubing, and CA. I needed to build a new top portion of the mast above the fitting, which I accomplished by turning a dowel of bamboo (I think, a cooking skewar of some sort) down in my drill press with a file and sandpaper. The sanded portions of the mast will get some manner of stain to match the darker color of the mast, and the rigging fitting will likely be painted in some type of steel/rust combination.

- 10 replies
-
- 3
-

-
- Viking Ship
- Revell
- (and 1 more)
-
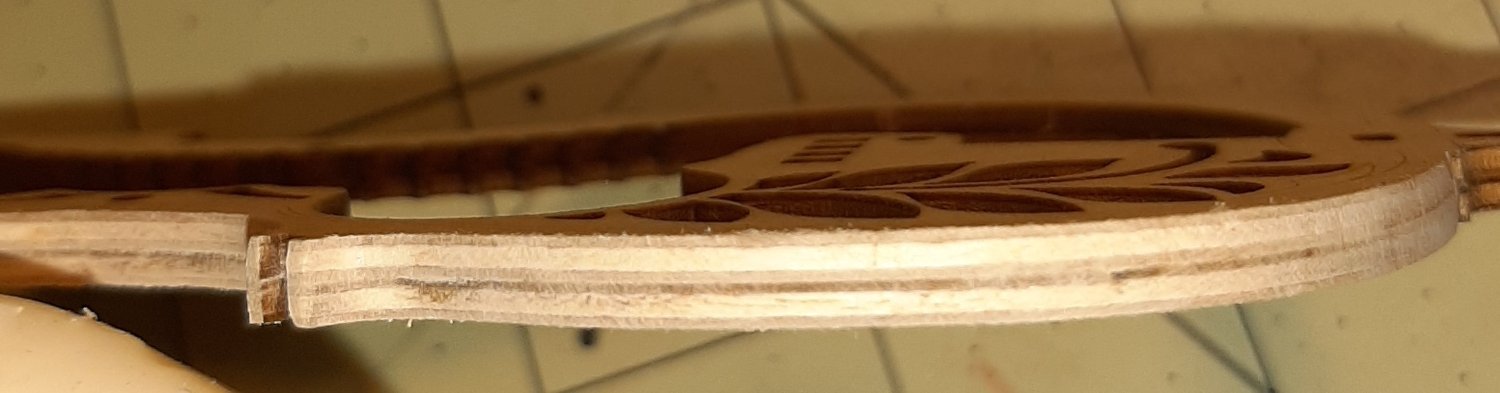
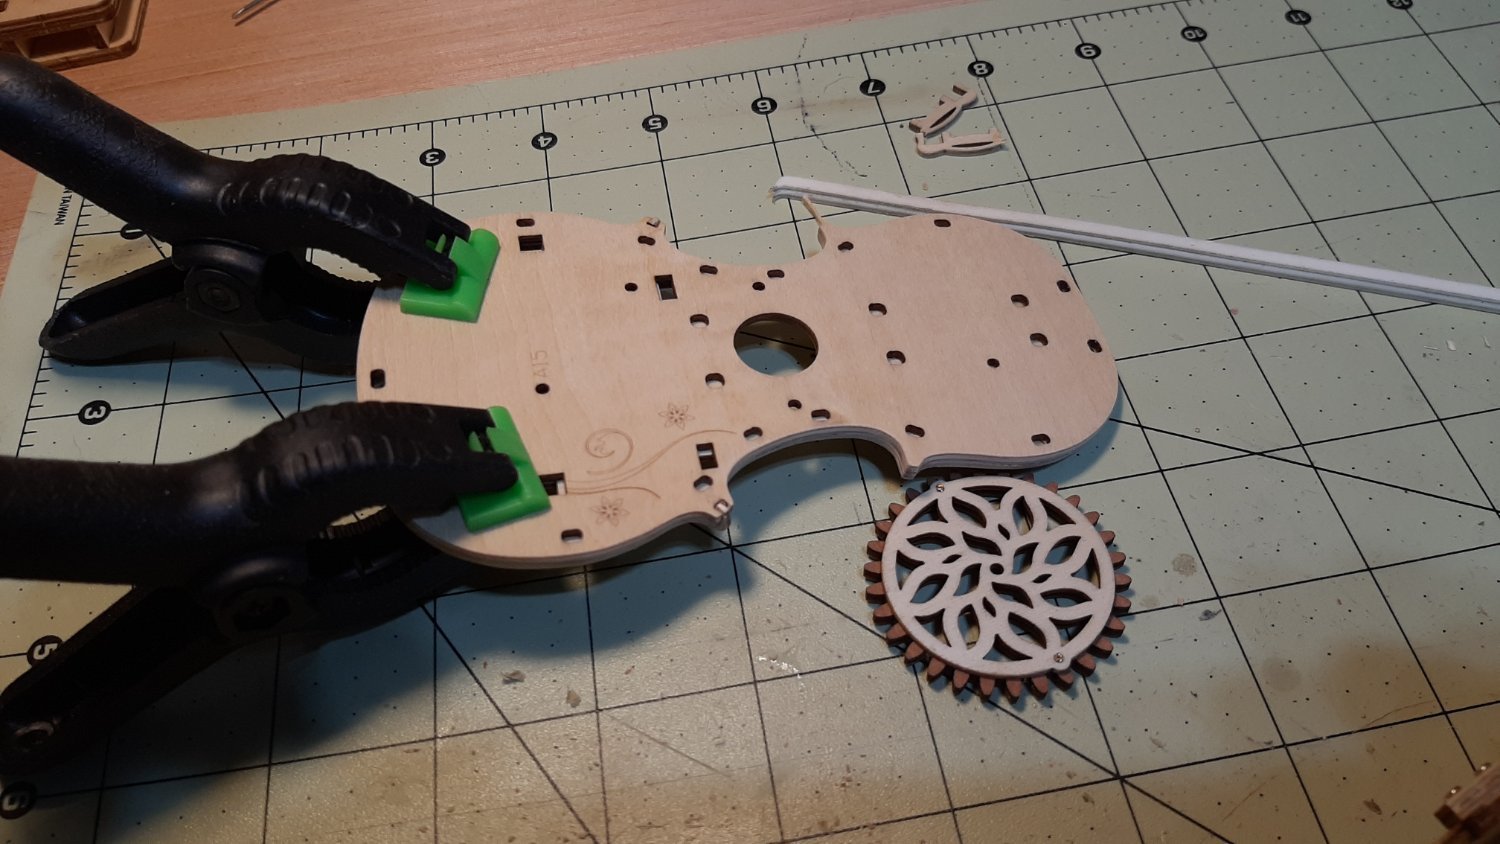
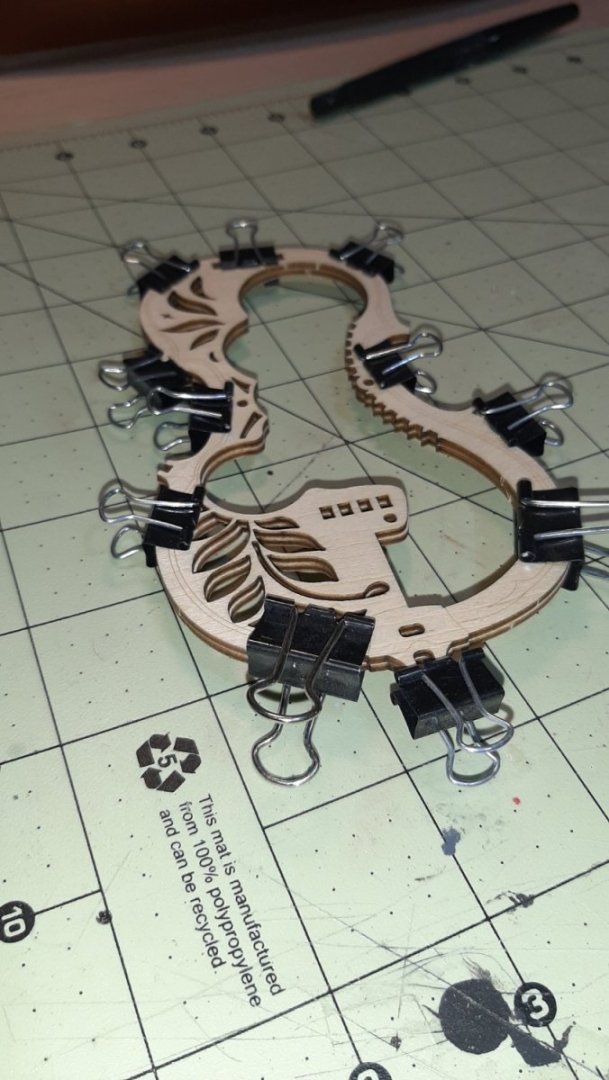
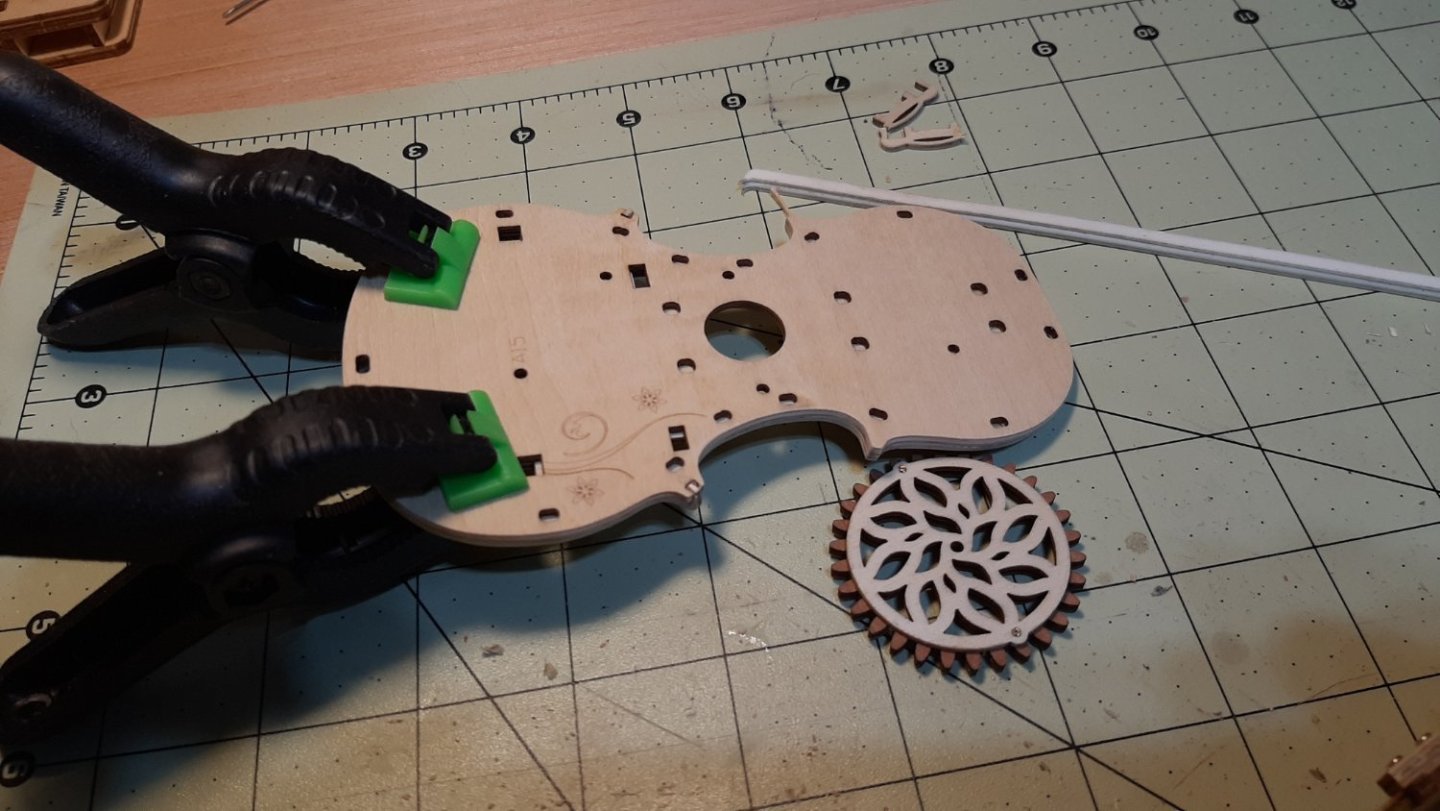
Very small update, but just keeping it going here. I wanted to have this done for the holidays for my wife but didnt make it. I'm just continuing the construction but it's starting to really take shape! The back and front panels of the body of the cello are 2 layers thick plywood. Here you can see the front panel pieces have been glued and clamped together and the kerffed side pieces installed, giving the body its thickness. Thanks for looking.
- 3 replies
-
- 13
-
-
Hello All, Yes I have another viking ship build going on here too, a vintage wooden kit. I also have this plastic kit in progress. I'm really a plastic guy...nearly all my modeling experience has been in styrene. This one presents a unique challenge because it's a material I'm most familiar with but I'm tasked with making it look like an entirely different material! This has been difficult so far, but I think I'm getting the hang of some techniques that might work. I can't claim to have thought up the methods, only that this is my own attempt. The Revell Germany kit has good...if a tad heavy...wood grain and texture molded into this kit. The base brown color is useful in some circumstances but I do wish they had mixed up the molding color a bit. I started experimenting on the main (only) deck with some Vallejo acrylics several years ago when I started the kit. It got boxed up for a couple moves until I played around with some artists oil paints on it today. I sanded the acrylic base (the color was a buff or tan of some sort) to reveal some of the darker wood grain below. Using dabs of Ivory Black, Burnt Sienna, and Titanium White, along with some linseed oil, I was able to work some color and variation into the existing acrylic base. I then just wiped it off to lighten and reveal some of the lighter graining below. I was careful to get some good darks deep into the recesses molded into the deck as well. Overall I'm pleased with the outcome thus far. Thanks for looking.


- 10 replies
-
- 5
-
-
- Viking Ship
- Revell
- (and 1 more)
-
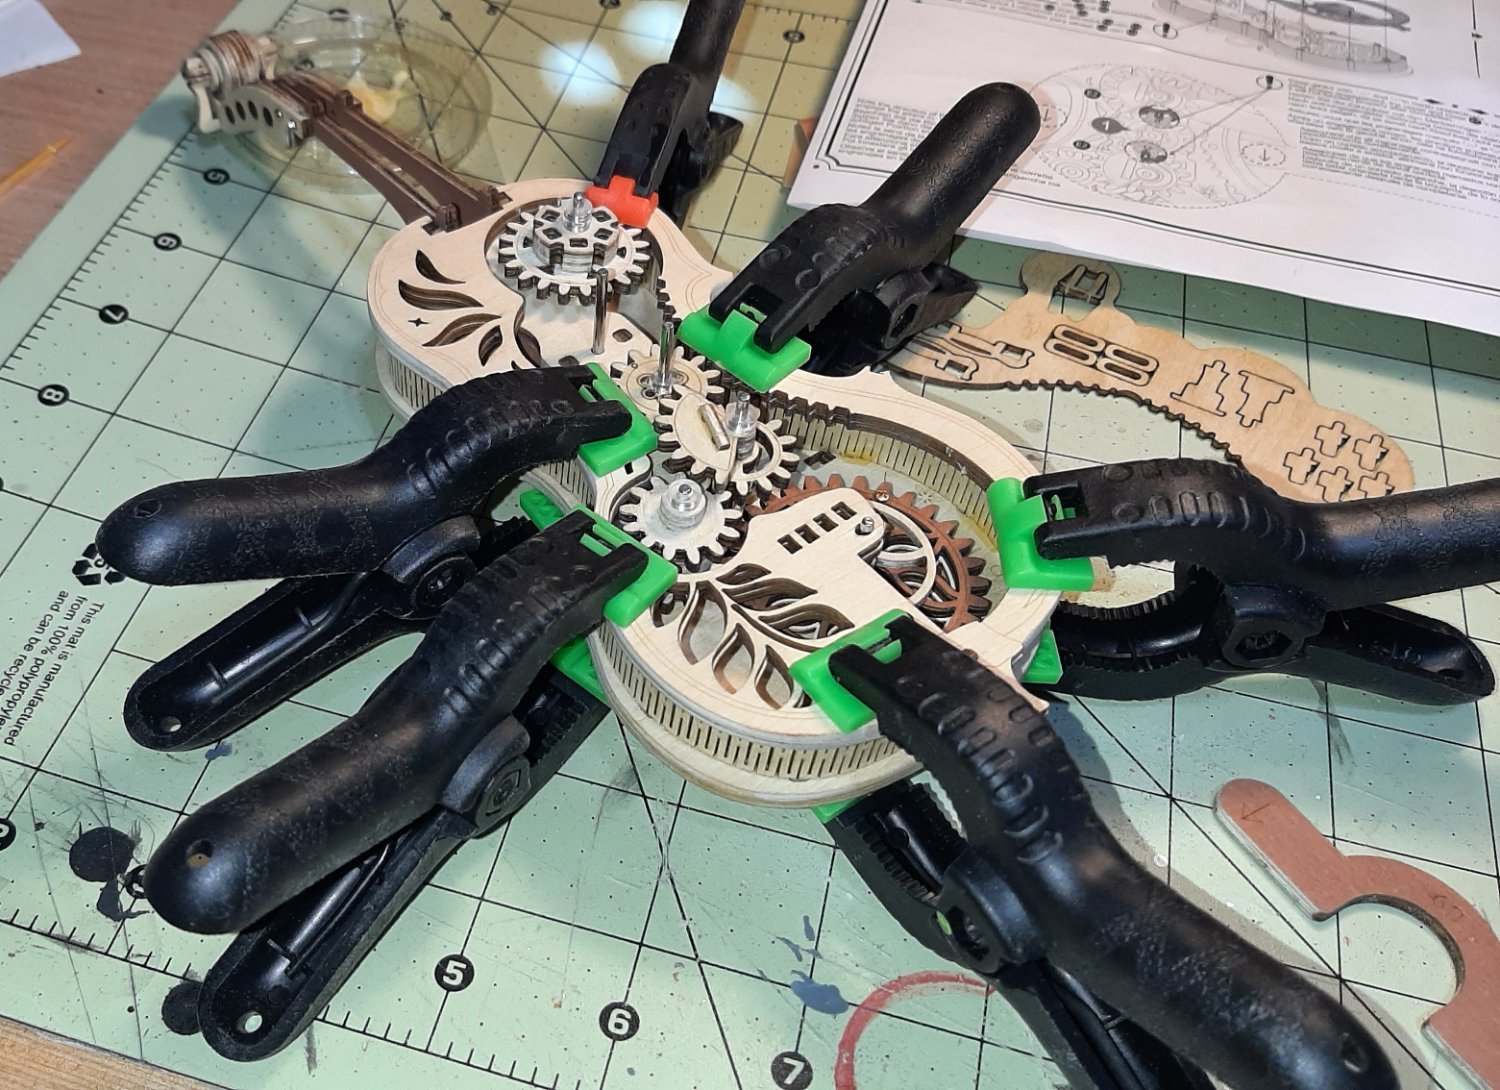
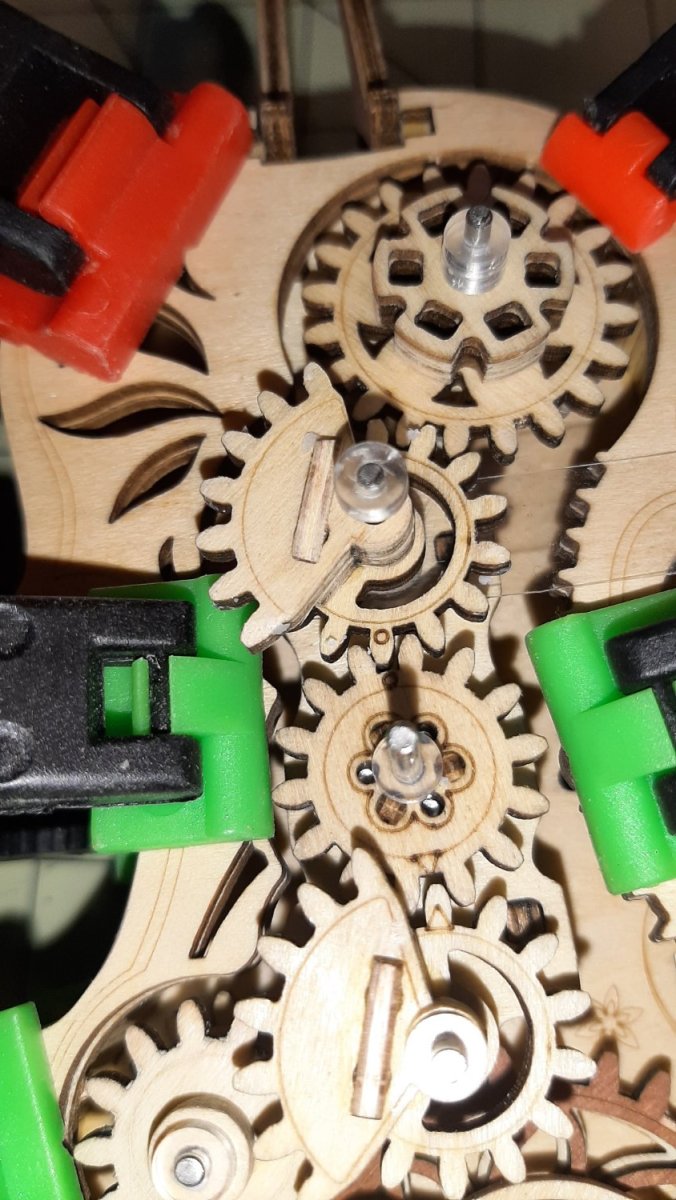
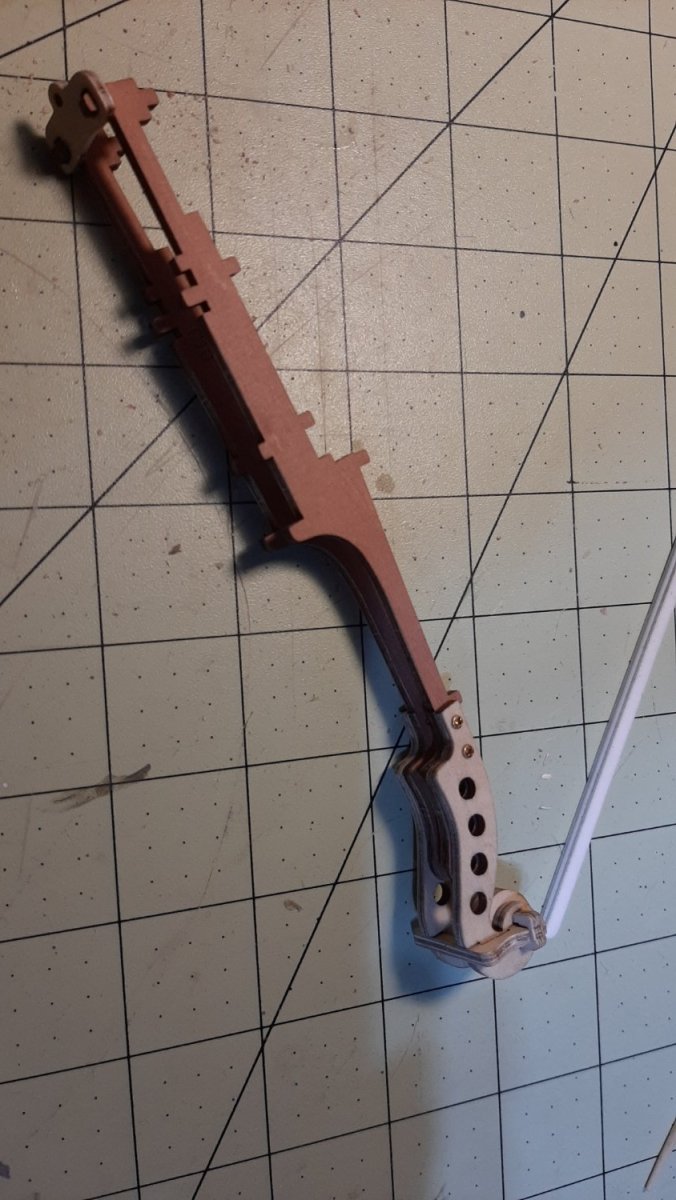
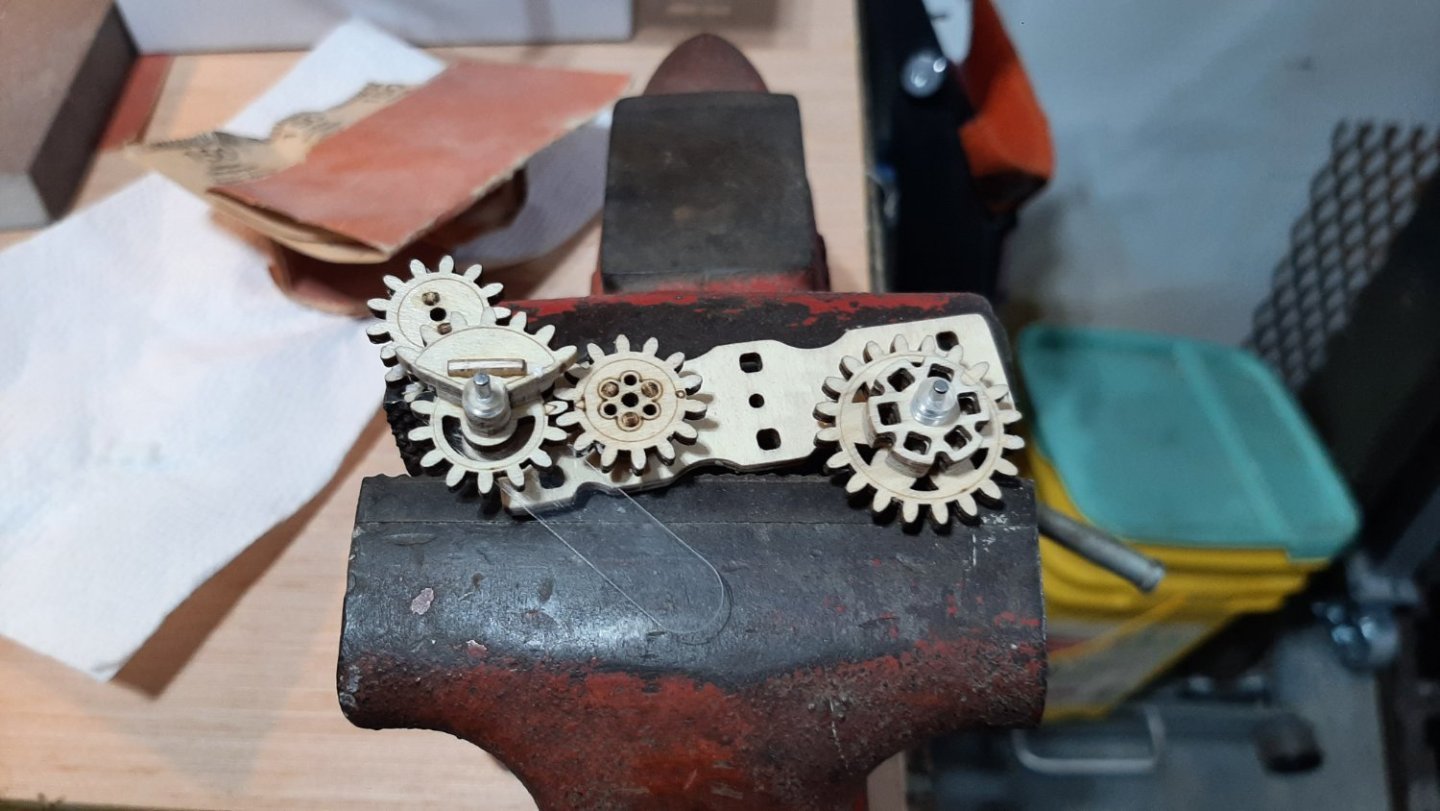
Some progress made on this model today. The guts of the inside of the cello are really taking shape and the neck was joined with the body today. I am glueing as I go here too, with a diluted mixture of Titebond wood glue. The instructions don't call for it but I'm doing it anyway. I also started playing around with brushing on acrylic clear and using some thinned oil paints as stain.

- 3 replies
-
- 13
-
-
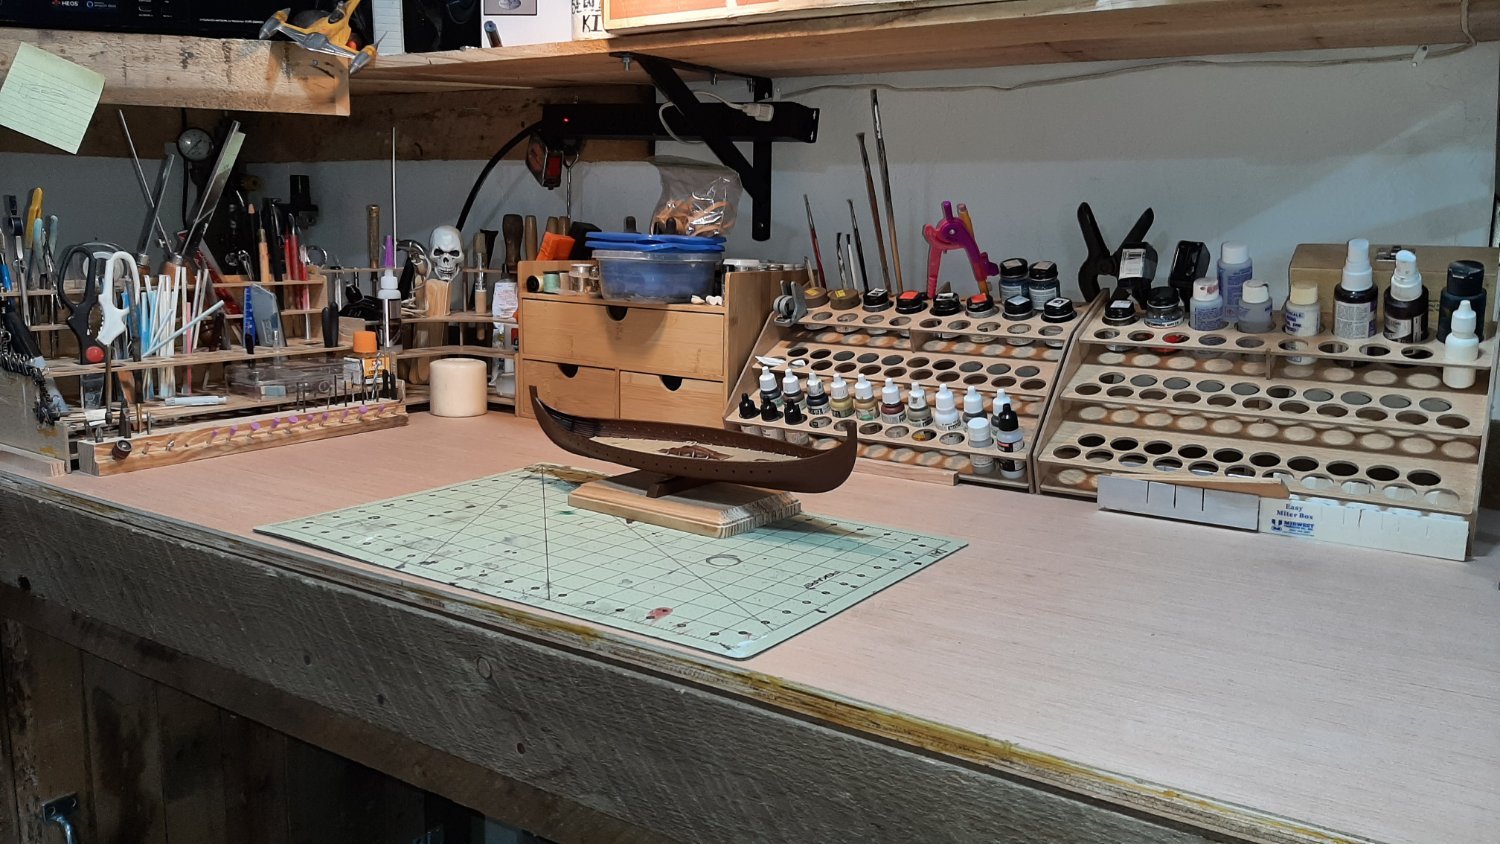
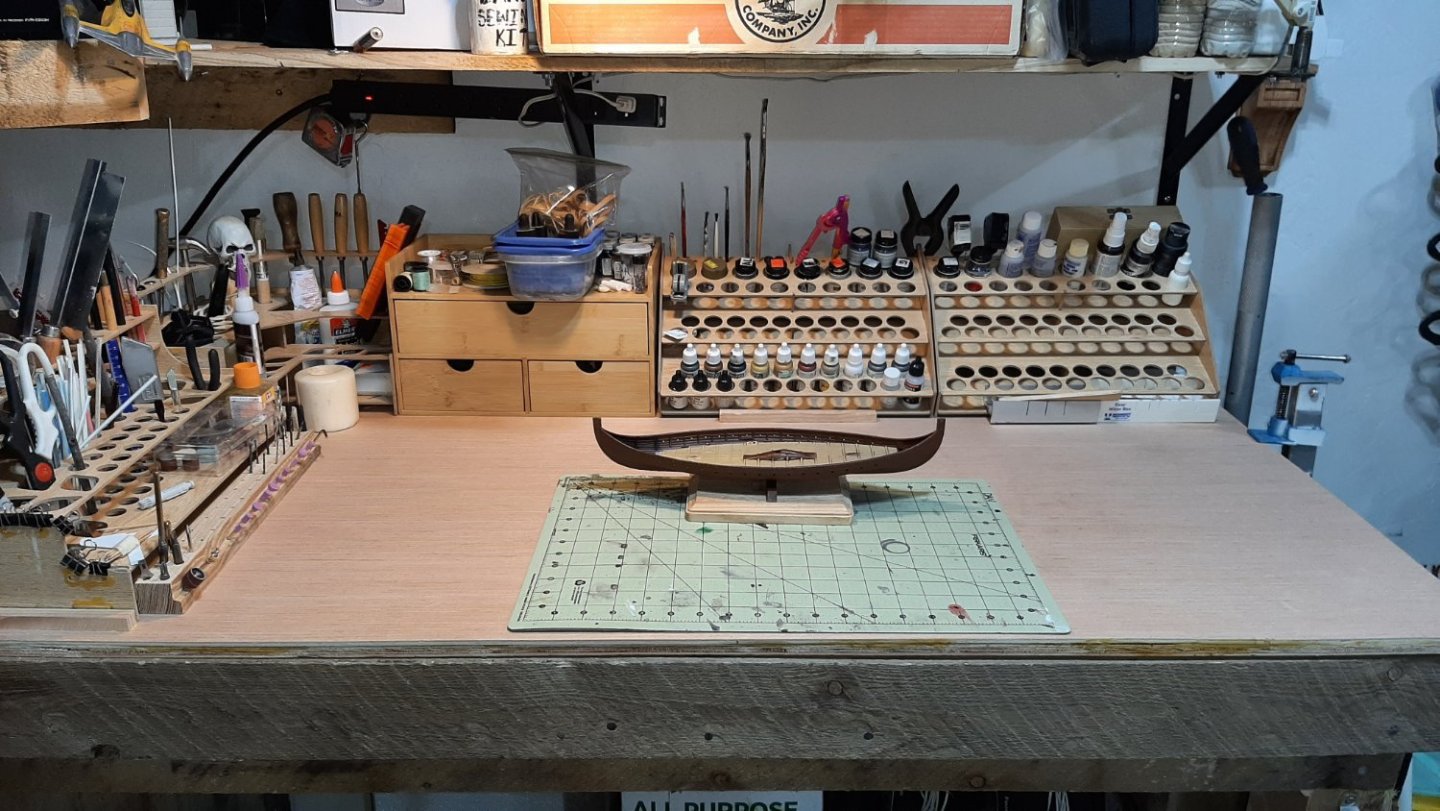
Hello, I am new to the site and largely new to model ship building. I've done a few plastic ships in my day but never a wooden one. I built 1 wood kit many years ago of a beer wagon. Since I'm delving into wooden ship modeling I felt I needed a primer, a model of wooden construction that might let me sample some of the basic materials and techniques but on something much less expensive than most ship models. My wife found this unique cello music box kit made by Rokr and it looked fun, so here goes! Along with sampling this new modeling medium I'm also trying out a new modeling bench setup in a dedicated seperate shop building on our new property. So far it is working well. I'll try to update this thread as I continue construction. Thanks for looking.


- 3 replies
-
- 15
-
-
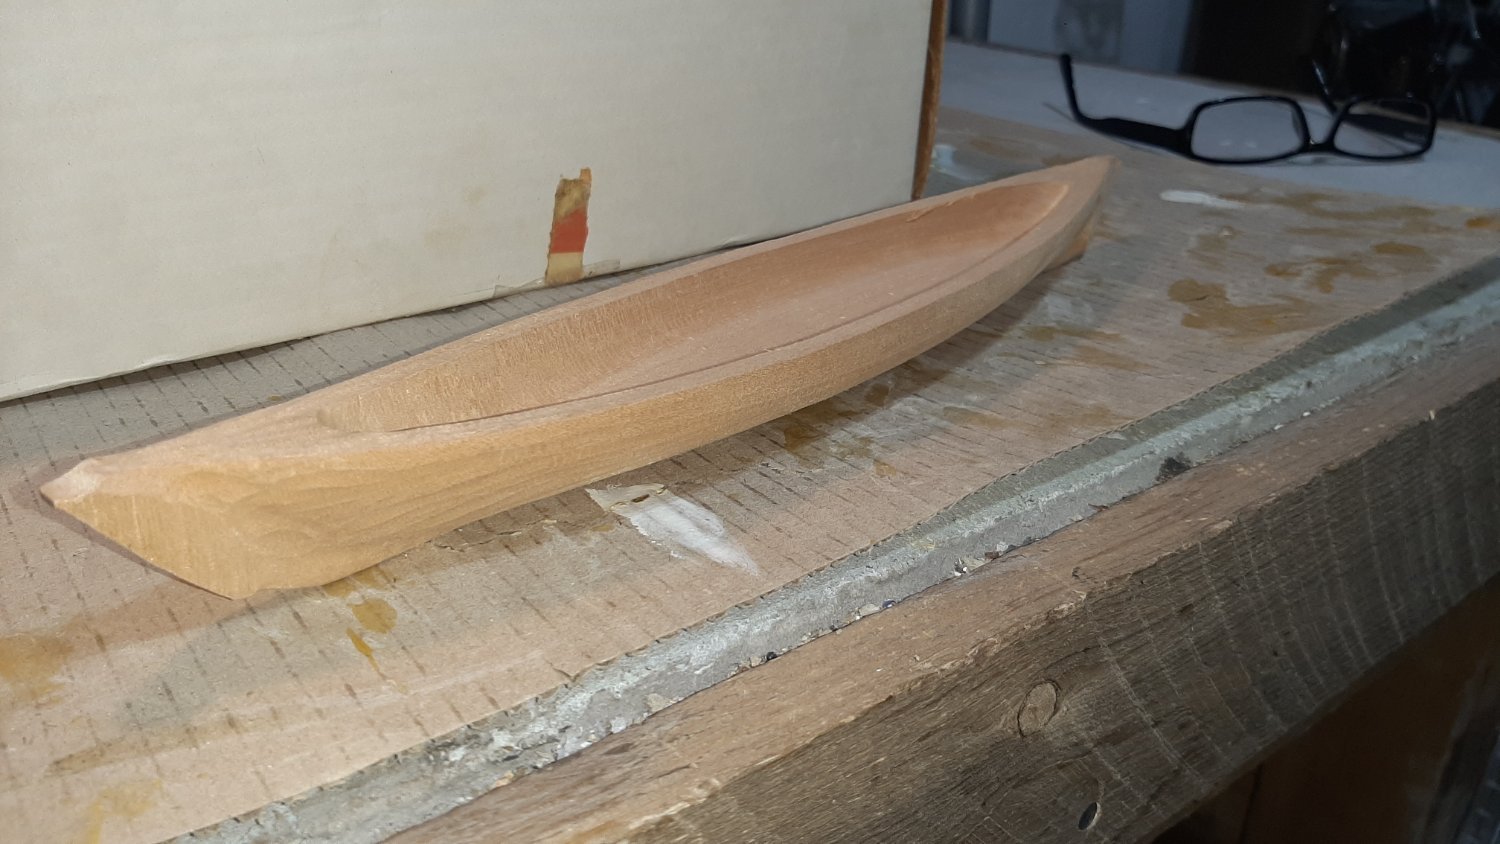
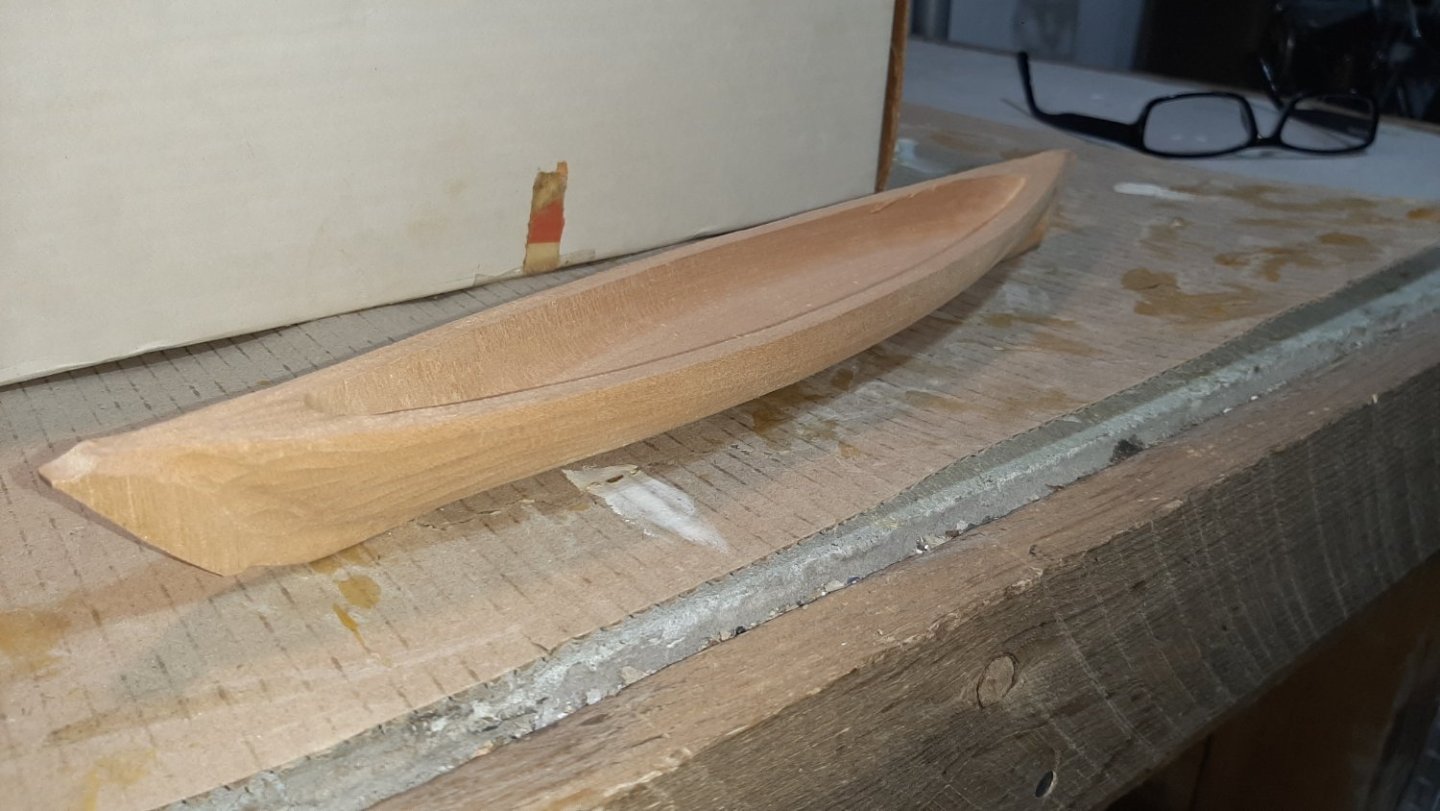
Thanks to all for the encouragement! I do have many ideas swirling around my brain about this kit. I want to really do it justice since it's a bit of a piece of history itself. I am viewing the hull very much as an extremely approximate starting point. I would like to thin the bulwarks to something more scale, and as for planking, I might try to carve the shape of the clinker planking right into the wood. While thinning the bulwarks my hope is to bring them much deeper into the hull and perhaps leave room to either construct a new deck and all relevant accoutrements upon it, or create a nice flat floor that I can carve planking and details into. Wood is a largely foriegn media to me from a modeling or artistic standpoint. I do have a BA in Fine Art, specifically painiting, but I also have a minor in printmaking that included making wood-cut prints that I can draw from. Having a homogenous block of it to wrest a form from is both exciting and terrifying. Add to that the fact that I haven't done any modeling at all in several years, I'm trying to put my mind back into that place to make it a fun and enjoyable process that I used to do with a large amount of confidence. To help me getting my mind and hands going again my wife suggested I start with something similar but less critical or taxing. She found a Rokr cello music box wooden model kit that she thought was whimsical so I'm trying out my new modeling digs on my first wooden modeling project. I may start a thread on that as well if there is a forum here for non-nautical subjects. Thanks again for your interest too...having other modelers interested in my project is alway great encouragement and motivation to keep working. Thank you.
-
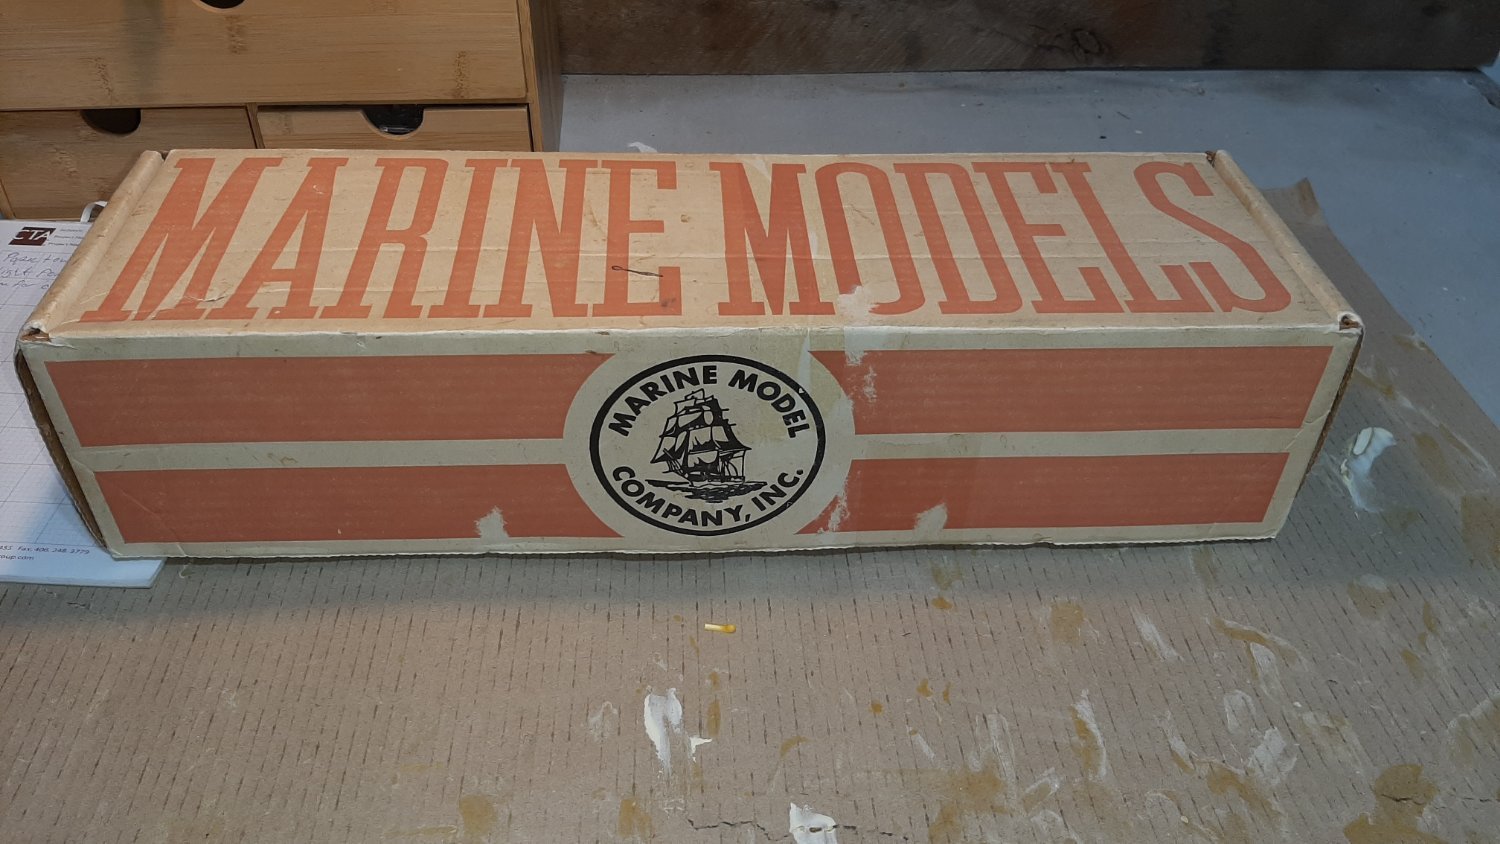
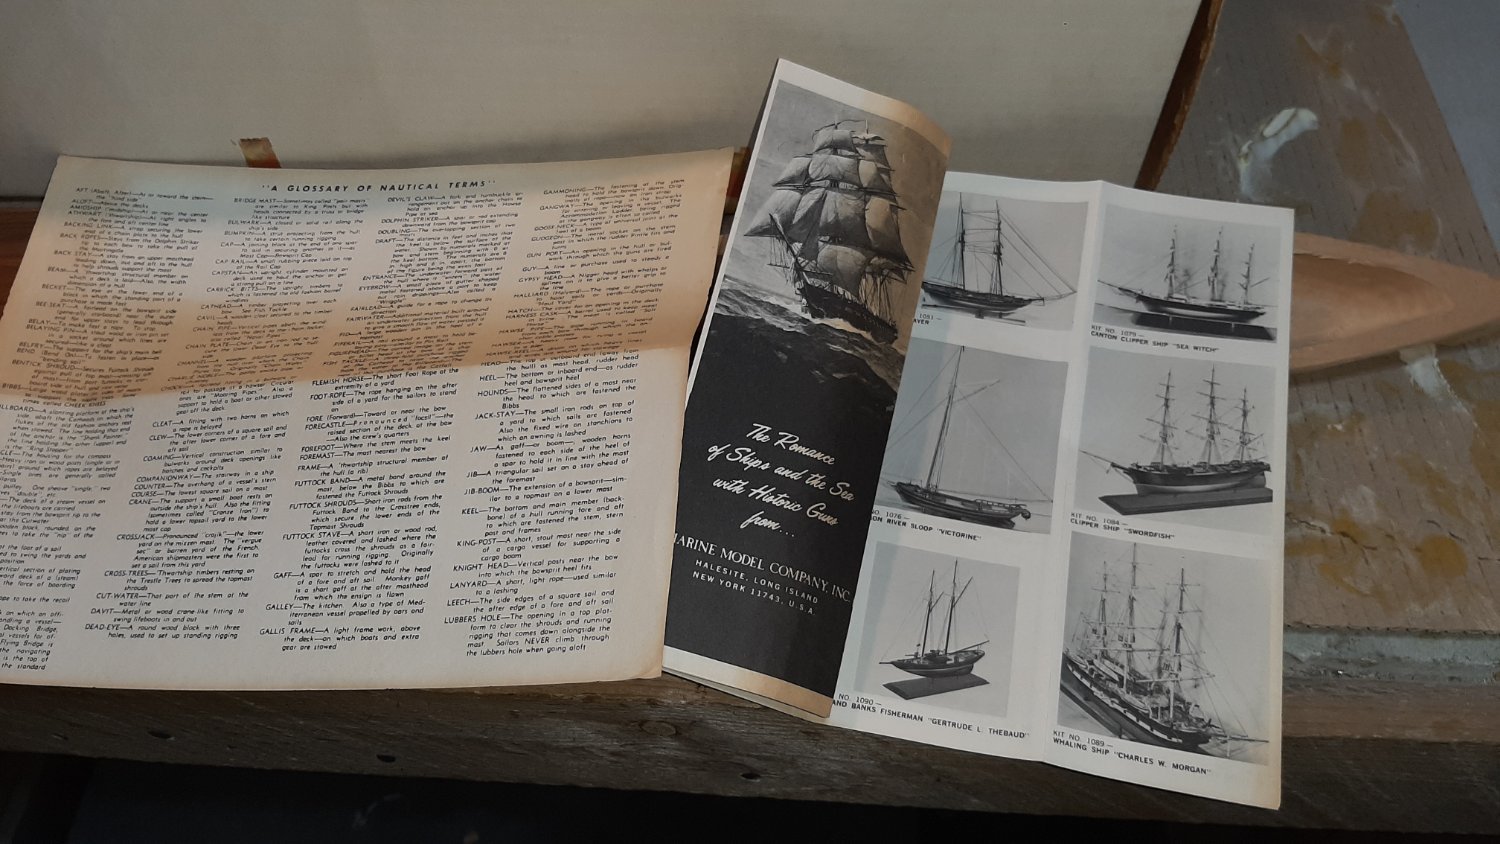
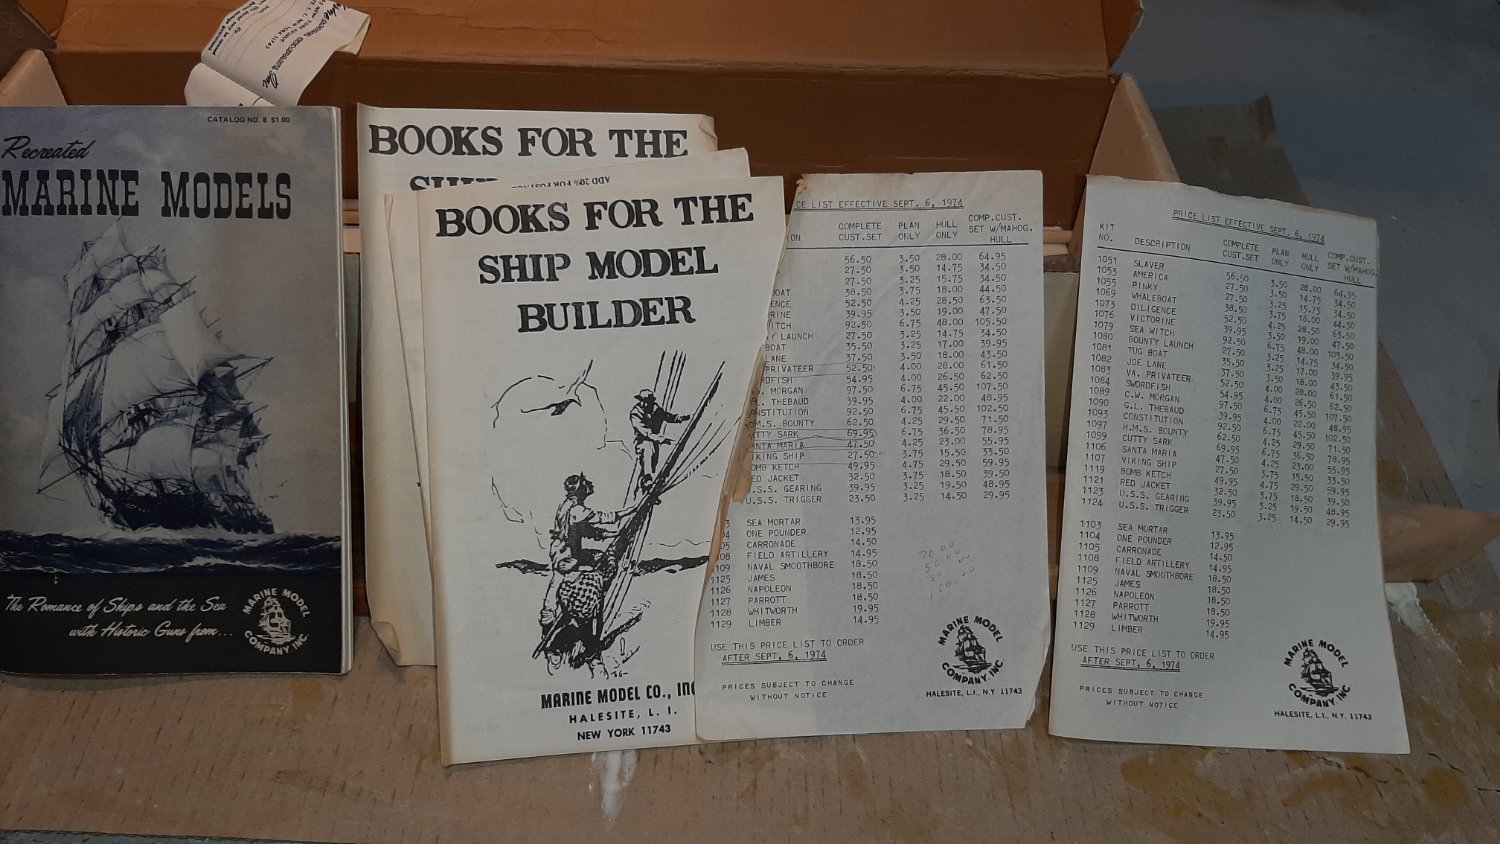
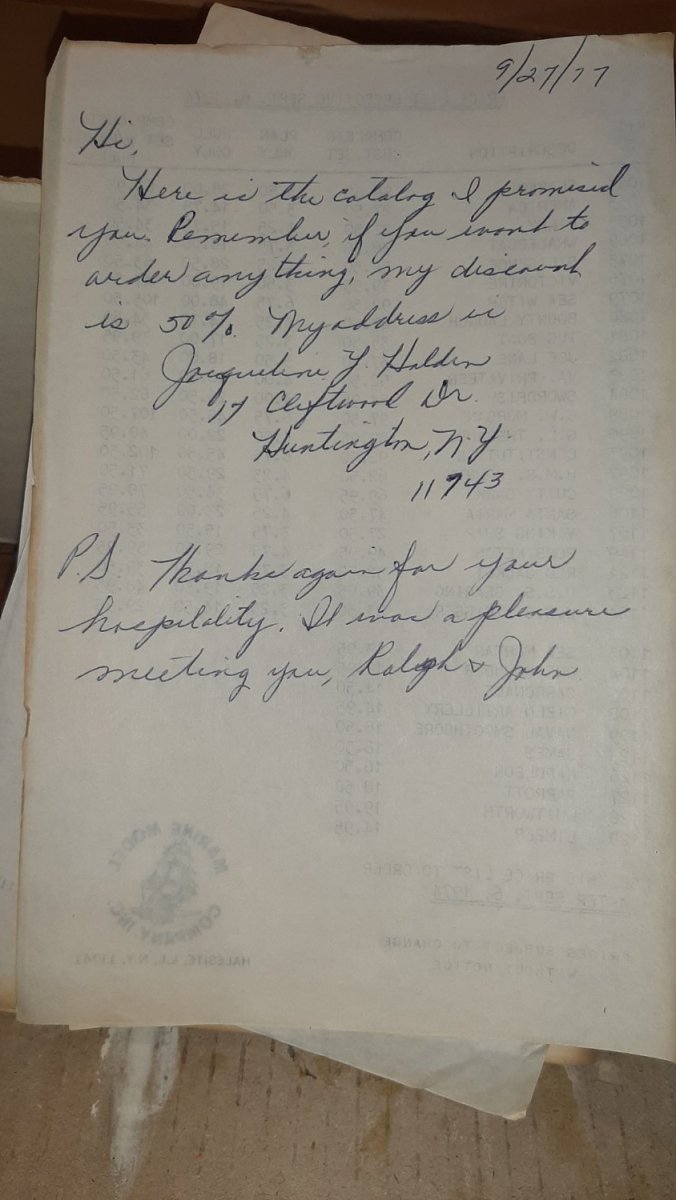
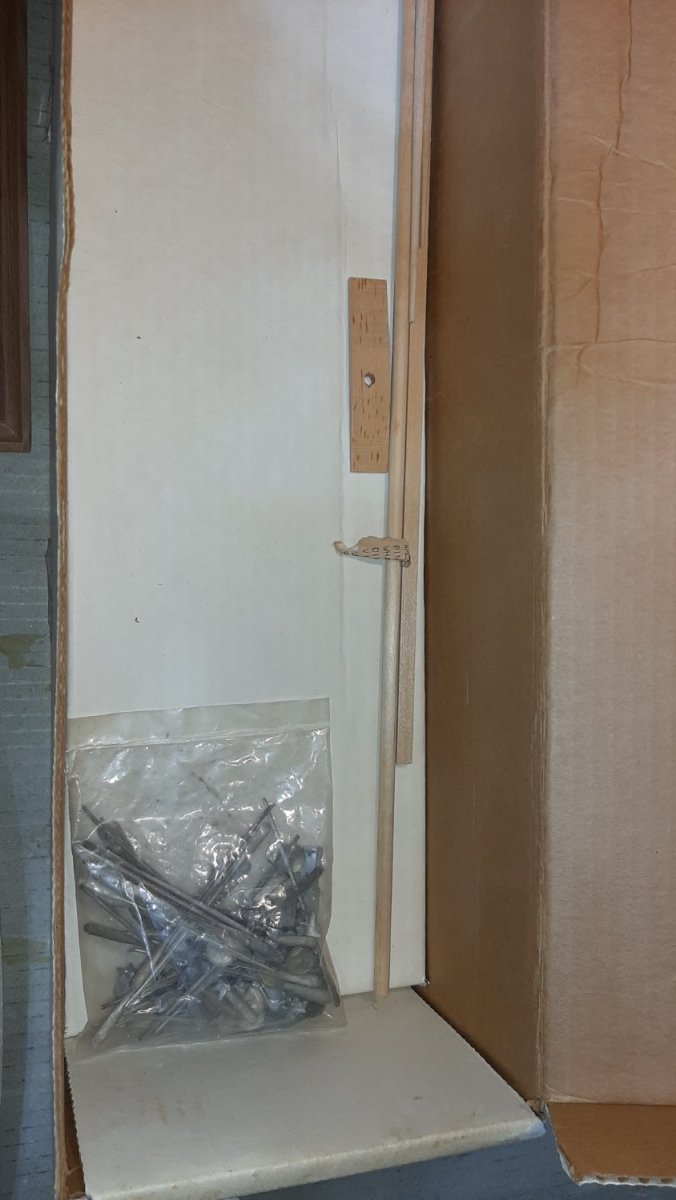
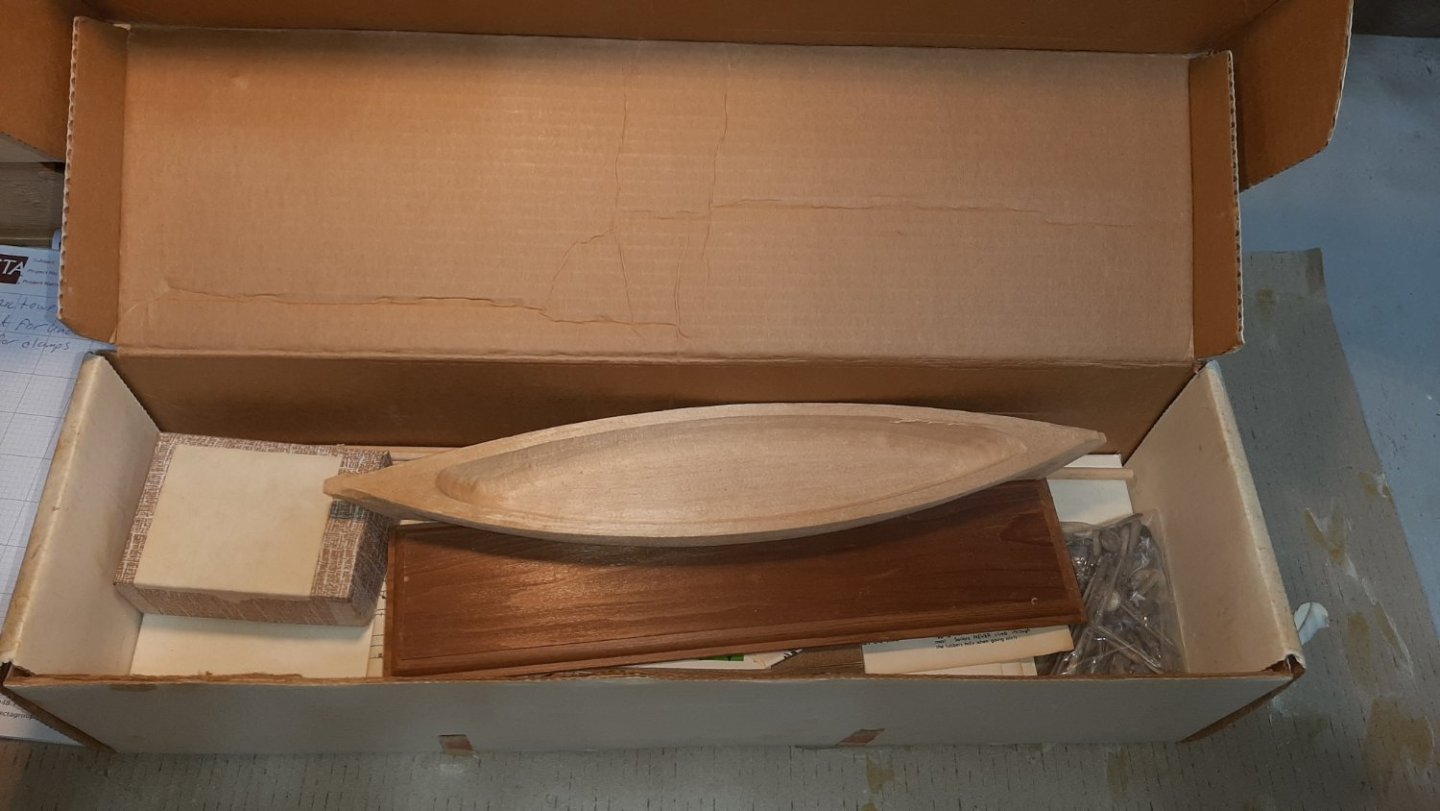
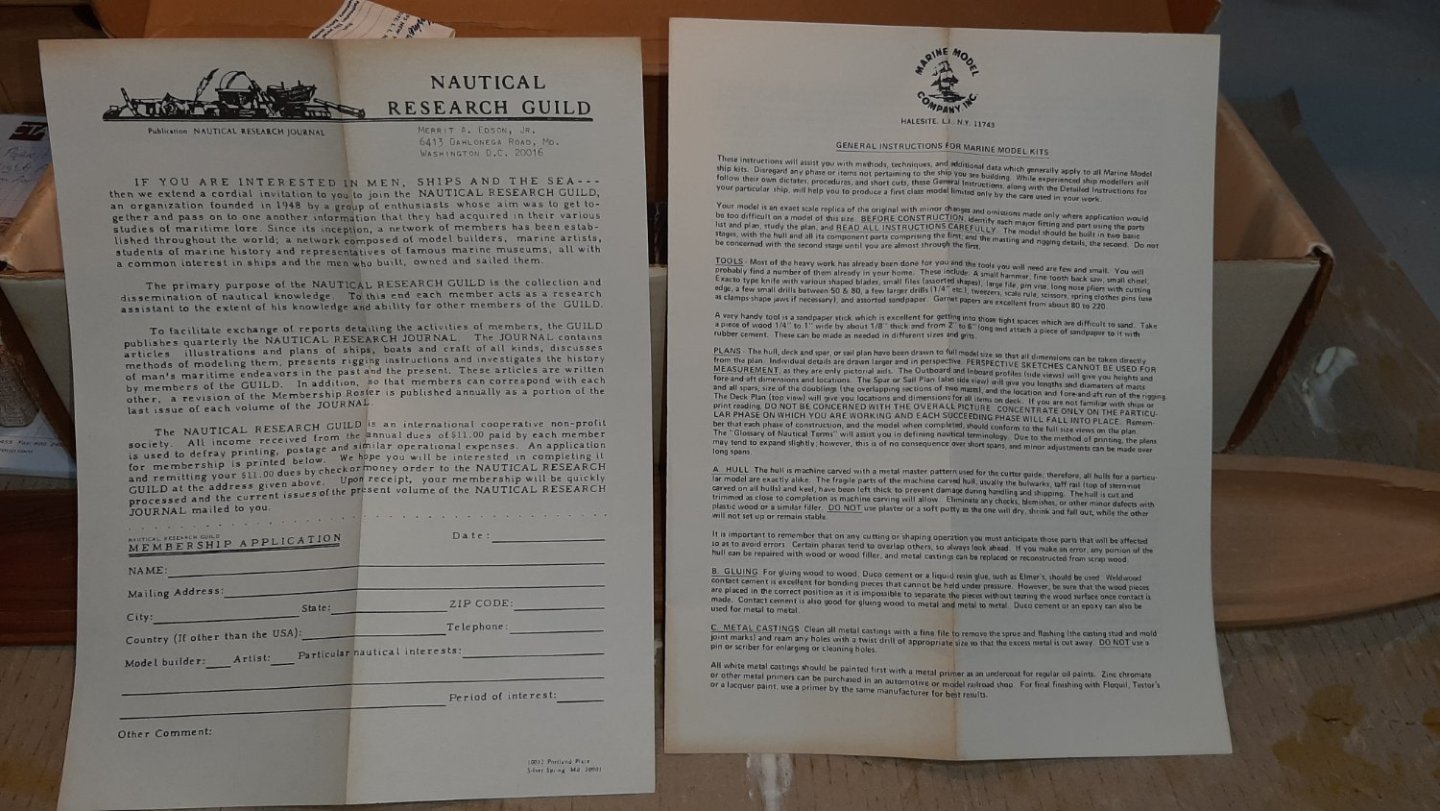
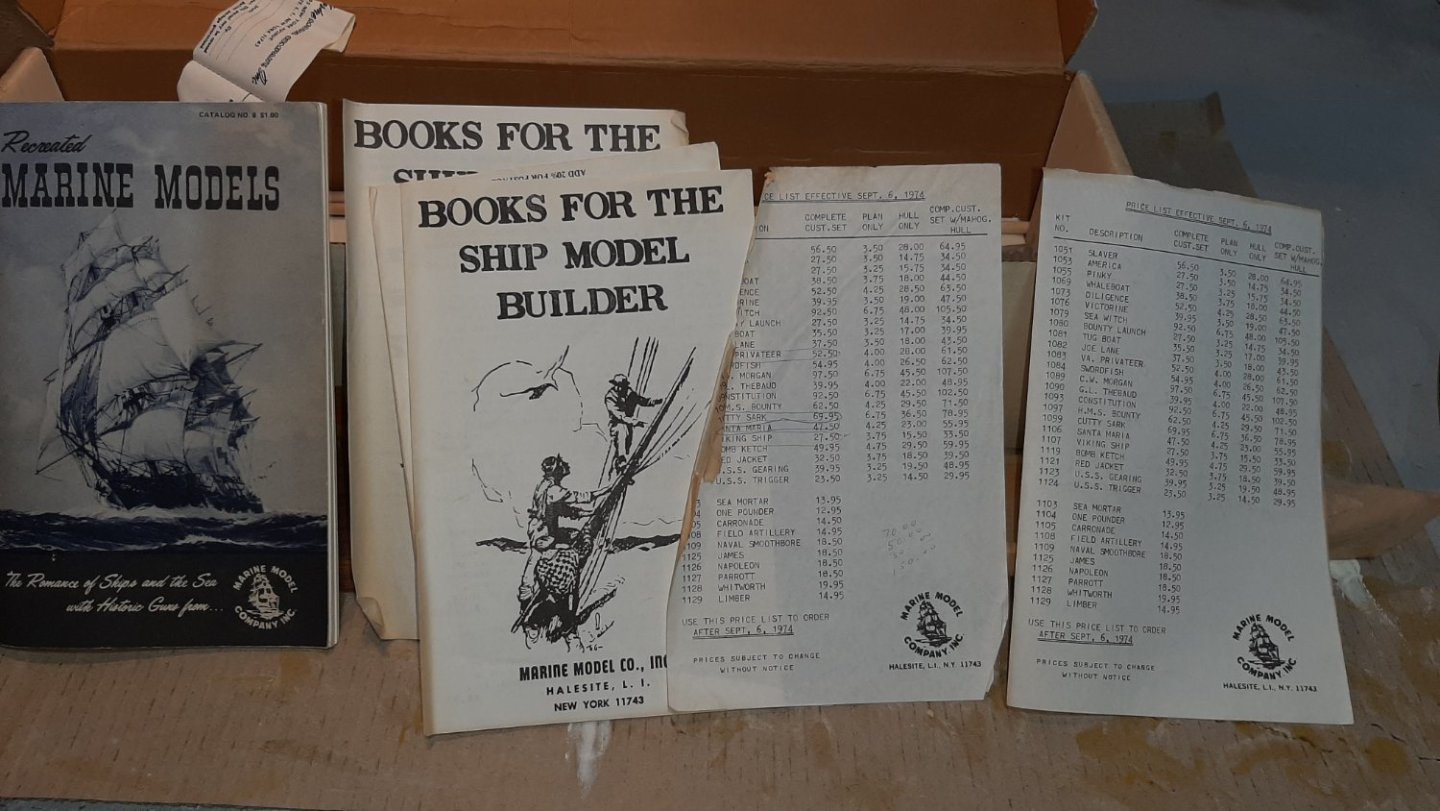
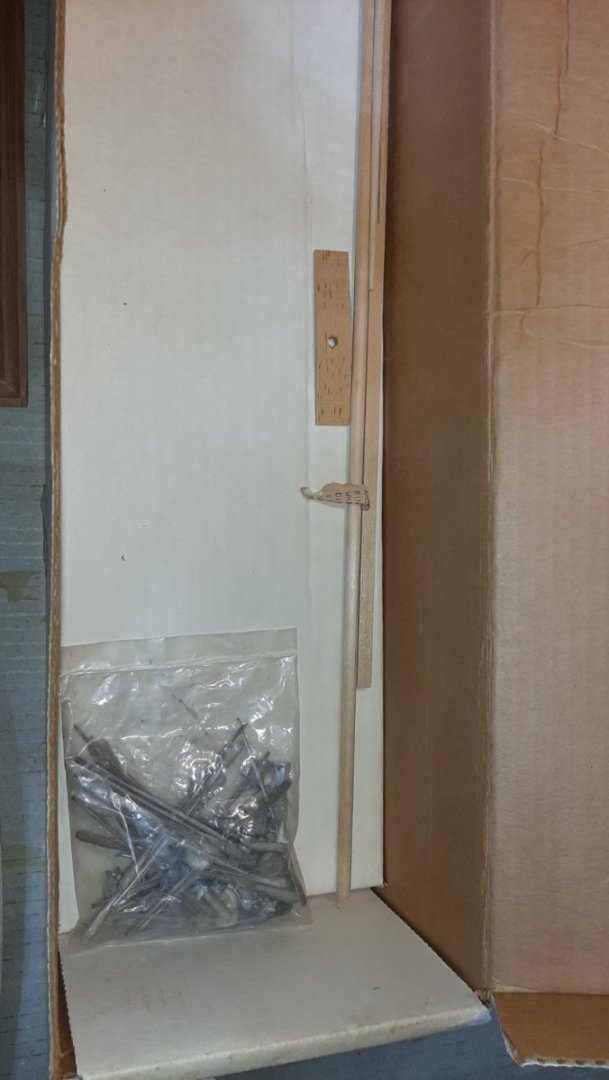
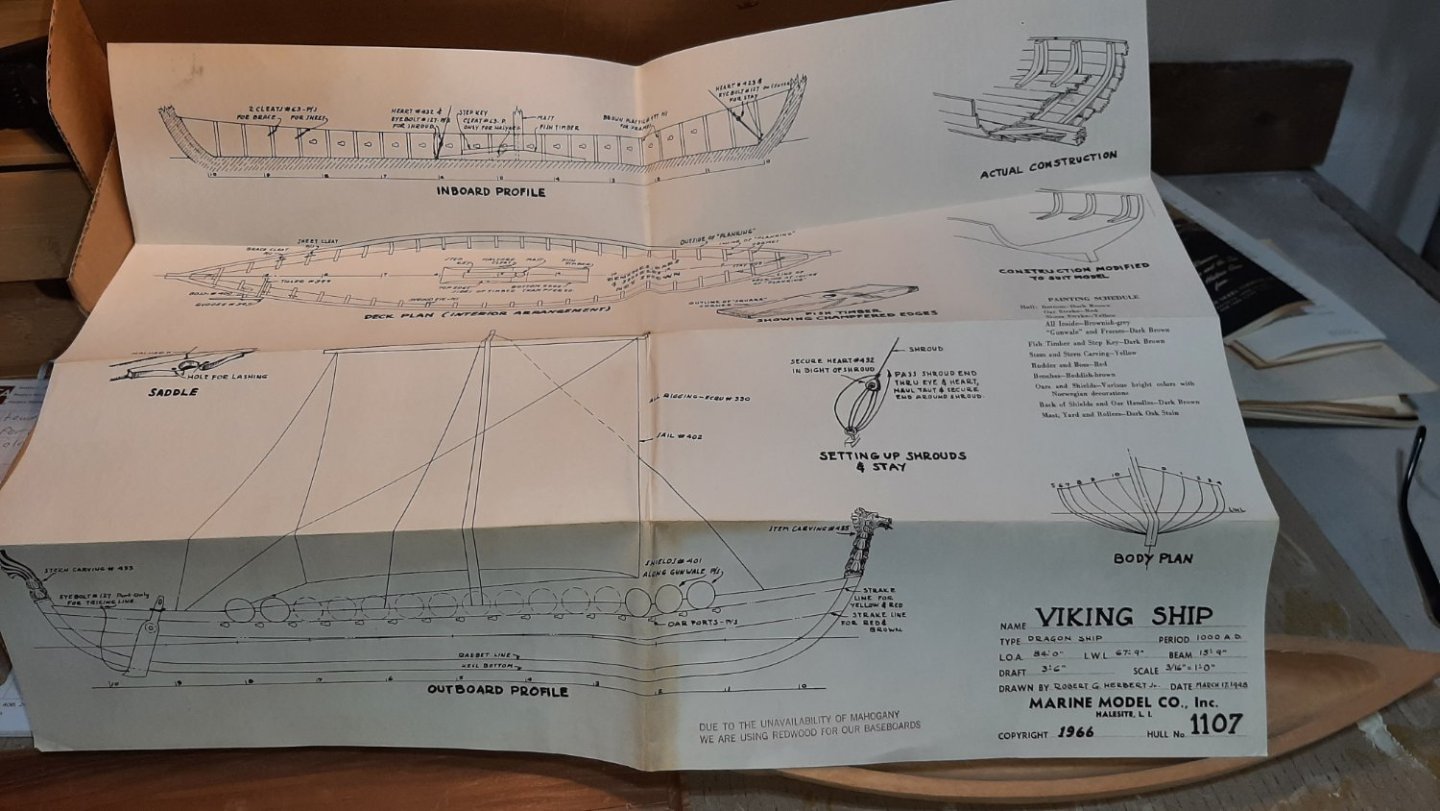
Hello, I am a new member here and pretty new to ship modeling as well. I have been plastic modeling for over 40 years, since I was a child, and have completed a few plastic ship models in my time but I've always wanted to try a wooden ship model. Several years ago, 2017-18-19-ish, I decided I'd try a wooden viking ship. The price was palatable and the complexity seemed within my tolerance and skillset. I tried purchasing a planked model off Amazon but that became a drawn-out issue that I won't get into right now. The short of it is that it didn't work out but I still wanted a wooden viking model. I found this old Marine Models kit on eBay and again the price was right so I snatched it up. It seems to have been purchased in late 1977 while the original plan for the model was drawn up in 1966. From what I can tell all the parts and pieces are still there. It also looks like the customer ordered 1 other kit an expressed interest in others.. The model is worth a write-up simply because of its age and uniqueness, in my opinion, but the plan is to make a nice, convincing model out of it. It came with more literature than parts, and shows a time when kit manufacturers seemed to do it as a labor of love and had a personal interest and ambassadorial spirit with regards to the hobby. I'm not sure how soon I'll get started on the construction here as I'm still setting up a new modeling shop at a new property but please be patient. Thanks for looking.


-
Thanks so much! I will definitely look fir Chuck's videos! I searched a bit on YouTube for so good videos but was a bit let down in what I found. I'm pretty sure I did not see his videos. Thanksa
-
Thank you so much for this valuable information! I am looking hard at the dory, though may jump up to the Norwegian pram or even the lobster smack first. I definitely want something with some masts and sails. I have enough model ship experience to know I want that aspect of the challenge. But I have a soft spot for the dory though too, as I've featured them in my own art as did Homer. The date on my Marine Models kit plans is 1966, so yes, 66 or 67 would be correct. It came with a full catalog and price list from either 73 or 74 (the year I was born), and a hand written letter from someone within either a distributorship that sold the model or Marine Models itself. Planking it would be very difficult I think, and I don't think it will be my last viking subject, so I kind of want to stay a little true to what the model is...an old solid hull, and try to use my own craftsmanship to make it an accurate and attractive model. I will certainly check out that NRG Merchantman as well...that sounds like a great subject. Thank you!
-
Another Montanan! It seems Model Ship World is a small world! I'm in the Billings/Molt area. Born and raised in Laurel.
-
Thanks for the information! Yes, we'll see what I decide to do on that old model. It does seem a bit of a complex form to plank for a beginner. I'm also looking at some very basic kits to cut my teeth on. The China Amazon kit I have is supposed to be my sacrificial lamb as it literally cost under 20 bucks but seems a nice little kit for that paltry price. Both of these 2 kits are designed to fulfill the role of test mules though the viking ship is a very old, classic kit that I really want to do justice.
-
Thank you. That thought had crossed my mind, to use it as a mold but it's quite small and not really a shape or size that I would think I would like to build again. A technique I may employ, however, is planking on top of the solid hull itself, for the sake of finer detail on this model.
-
Very interesting subject and a beautiful build. I'd love to see more of these most ancient subjects. Thank you for sharing.
-
Thanks again to all the new comments. While I'm a very experienced modeler in plastic, much of ship modeling is new to me. Between my modeling, art, and mechanical background experience I'm confident I can become skilled at this as well, assuming my eyes and hands keep functioning ok, and I like the nature of the materials utilized in this niche. Thanks again for having me.
-
Beautiful build!
-
Thank you for the warm welcome!
-
Hello, I am a new member residing in the state of Montana. I am in my late 40s, a 20-year veteran of the rail industry, and have been an avid modeler for most of my life. Modeling subjects of interest for me have ranged from cars, armor, aircraft, motorcycles, and sci-fi to an occasional plastic sailing ship model. About 10 years ago I purchased the Heller 1/100th HMS Victory kit as a 'retirement' project, when I get there. I've been lugging that huge box around for years but so far have resisted the urge to start it. I do love wooden sailing vessel models but l have also been intimidated by them. It's a slightly different skillset than is required for plastic modeling. A couple years ago I purchased a very old Marine Models viking ship kit that I'm planning on starting soon. Near as I can tell the model is from the mid-70s and appears complete. More on that kit in a dedicated build post. After that I bought a very cheap wood kit off Amazon that I think will build into a nice little model with some work and patience. It is mostly my sampler to try out a planked hull as the old viking boat is a solid hull. And lastly I have a Revell viking ship plastic kit that is started but I put down a couple years ago. I'm here for history and resource materials, wood kit tips and tricks, part and material supplier information, and people and projects to keep me motivated. Thanks for having me.
- 20 replies
-
- 12
-