HOLIDAY DONATION DRIVE - SUPPORT MSW - DO YOUR PART TO KEEP THIS GREAT FORUM GOING! (Only 27 donations so far out of 49,000 members - C'mon guys!)
×


cdrusn89
-
Posts
1,915 -
Joined
-
Last visited
Content Type
Profiles
Forums
Gallery
Events
Everything posted by cdrusn89
-
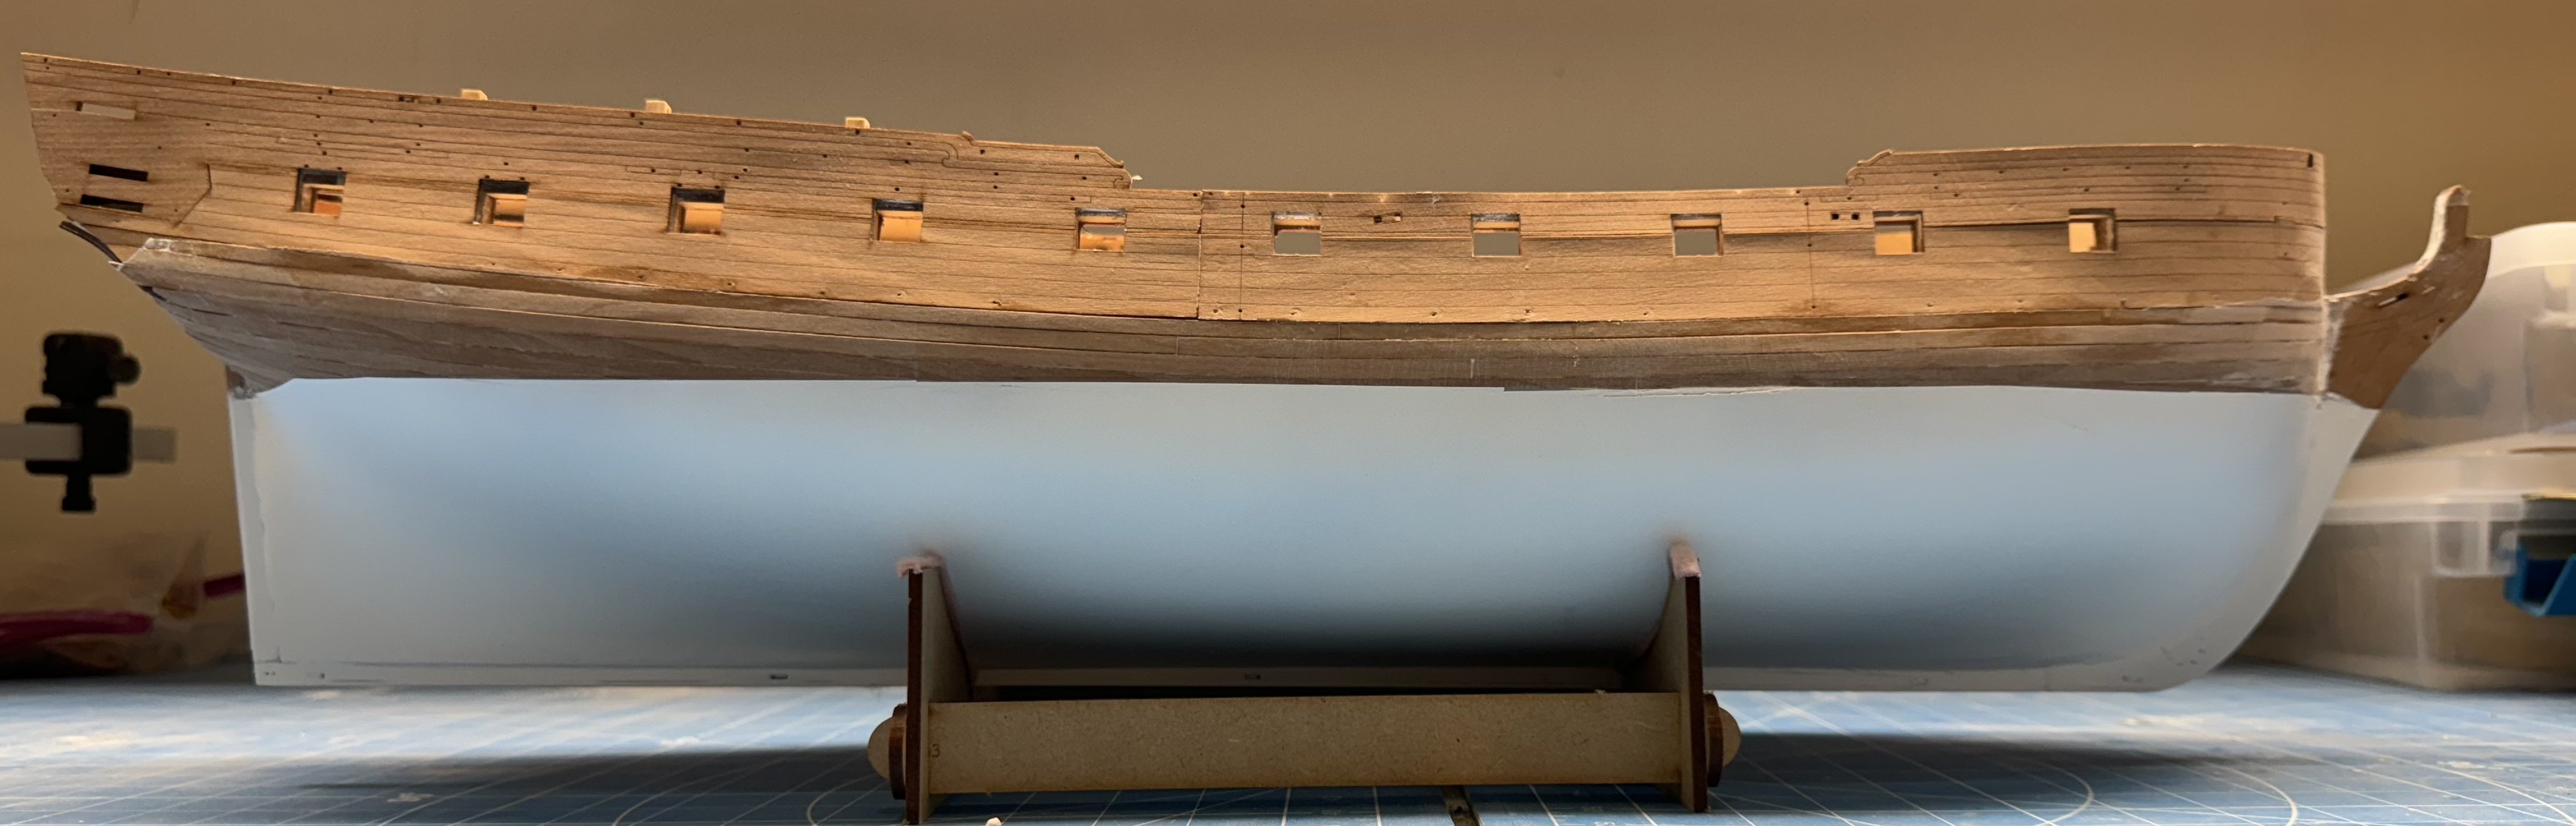
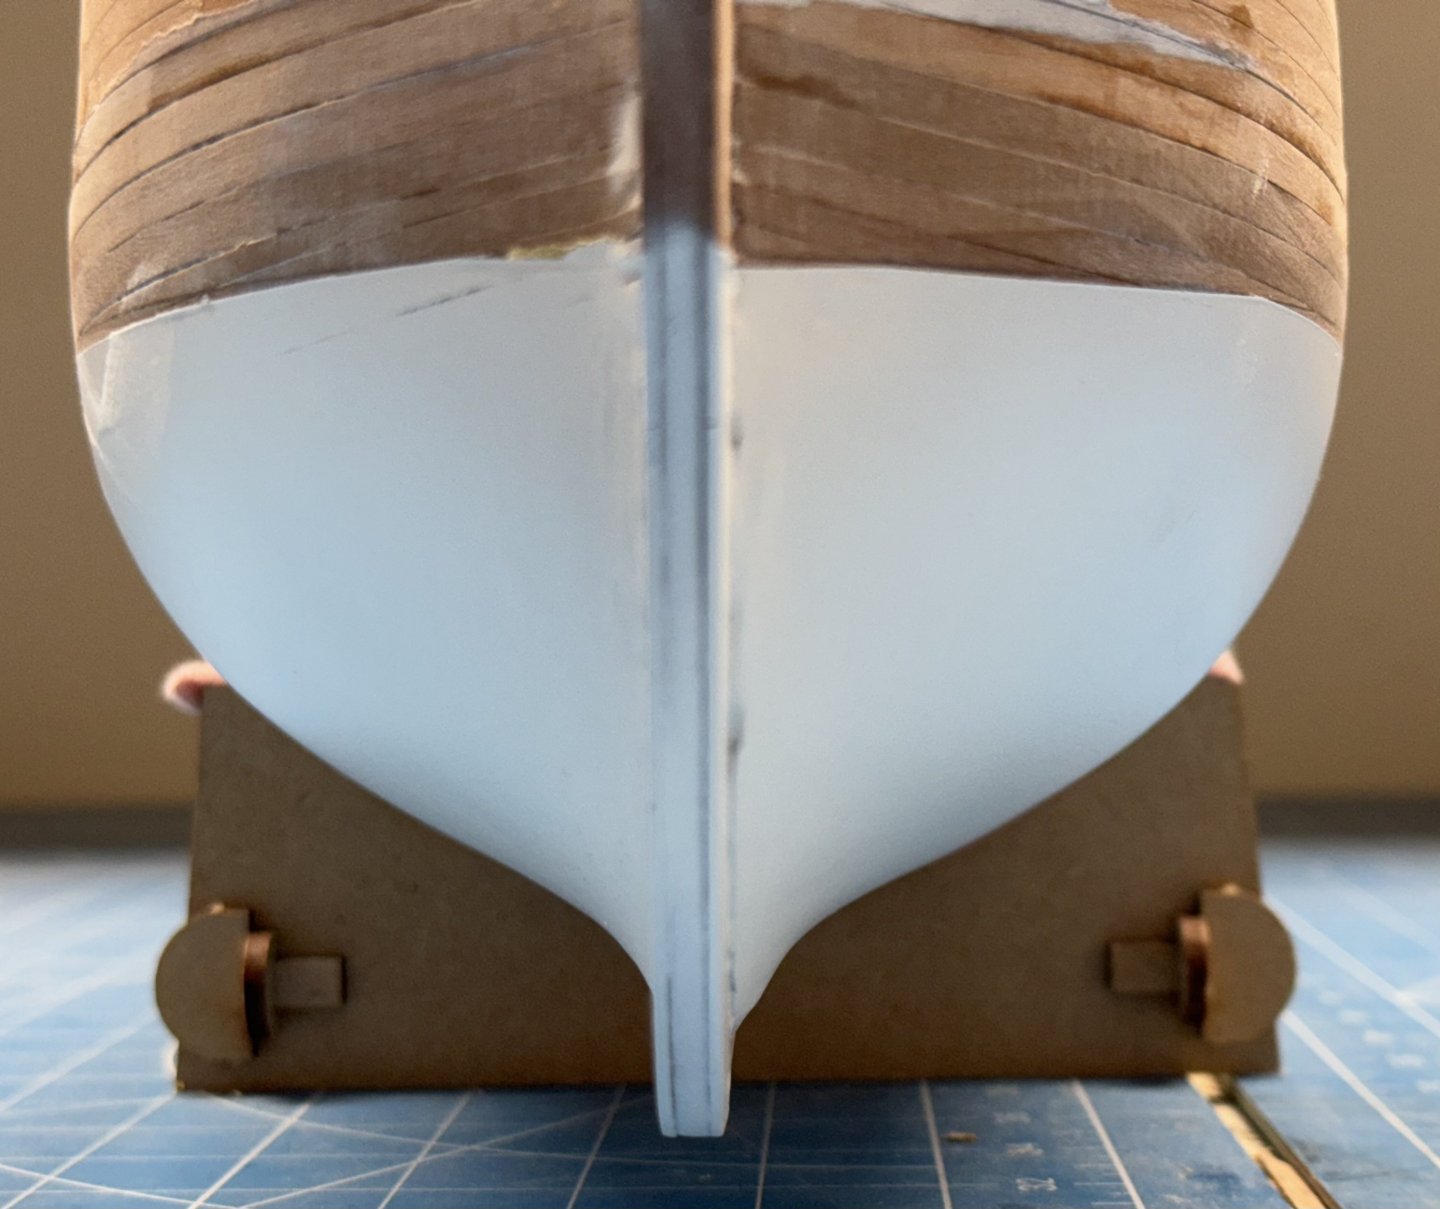
 With the lower hull paint now dry completely (it takes much longer than it says on the can) I need to add the Wales. I decided it would probably be easier to secure the piece to the hull with rubber bands and then pin it only where really necessary. I plan on doing one side at a time with 24 hours to dry between sides and then another 24 hours before gluing them on; also one at a time. After looking at the drawing and my hull it would seem that I have the waterline a bit too high, at least amidships since there is supposed to be a 1.5mm gap between the bottom of the wales and the top of the waterline. I have less than .5mm. Nothing I can (or am willing) to do about that now. Trying to scrape off 1mm of the white paint, in a straight line is more than I am capable of. I will see what it looks like on the other side - maybe that will determine which side faces the wall when displayed.
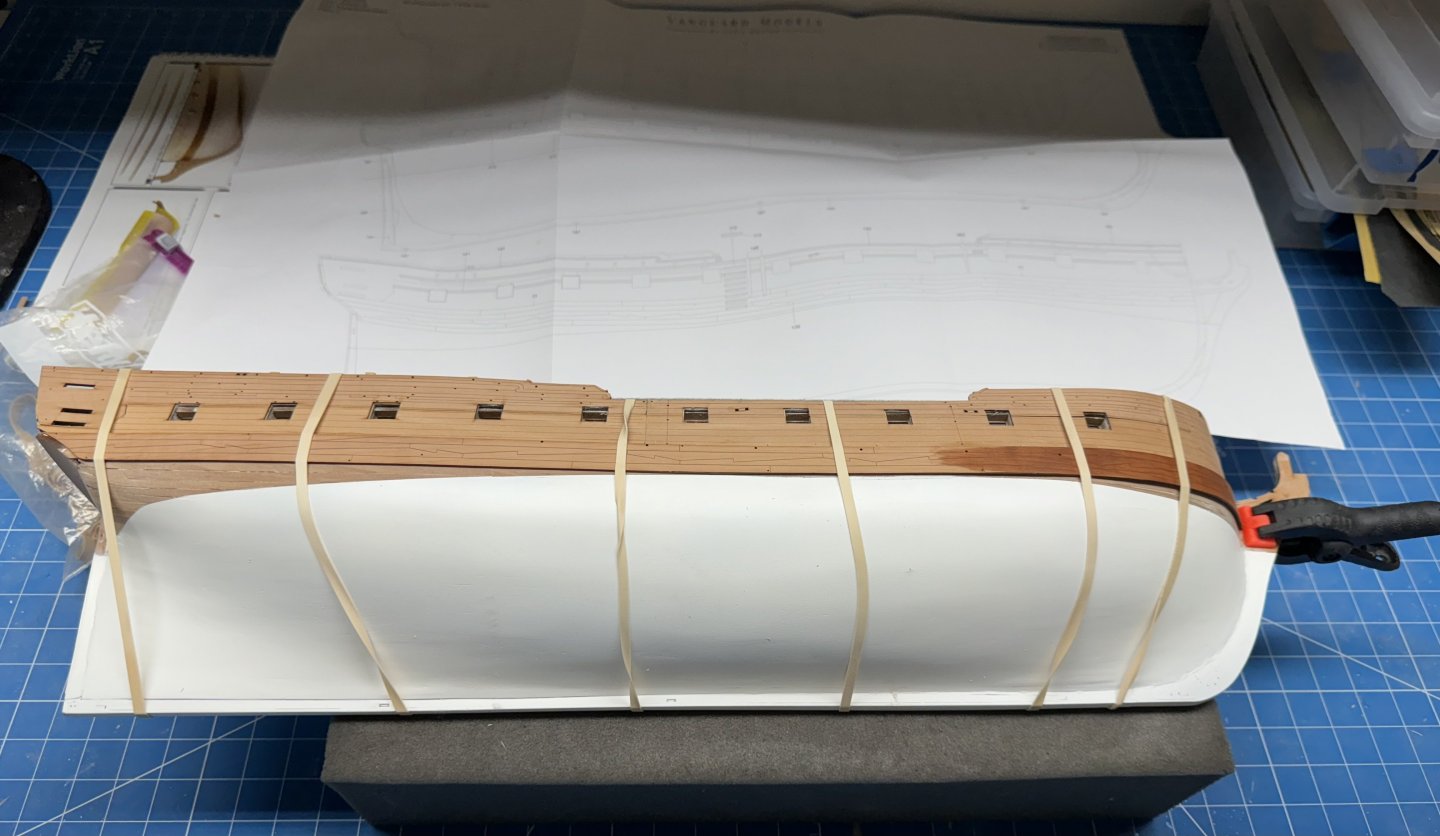
- 422 replies
-
- 6
-

-
- Vanguard Models
- Sphinx
- (and 1 more)
-
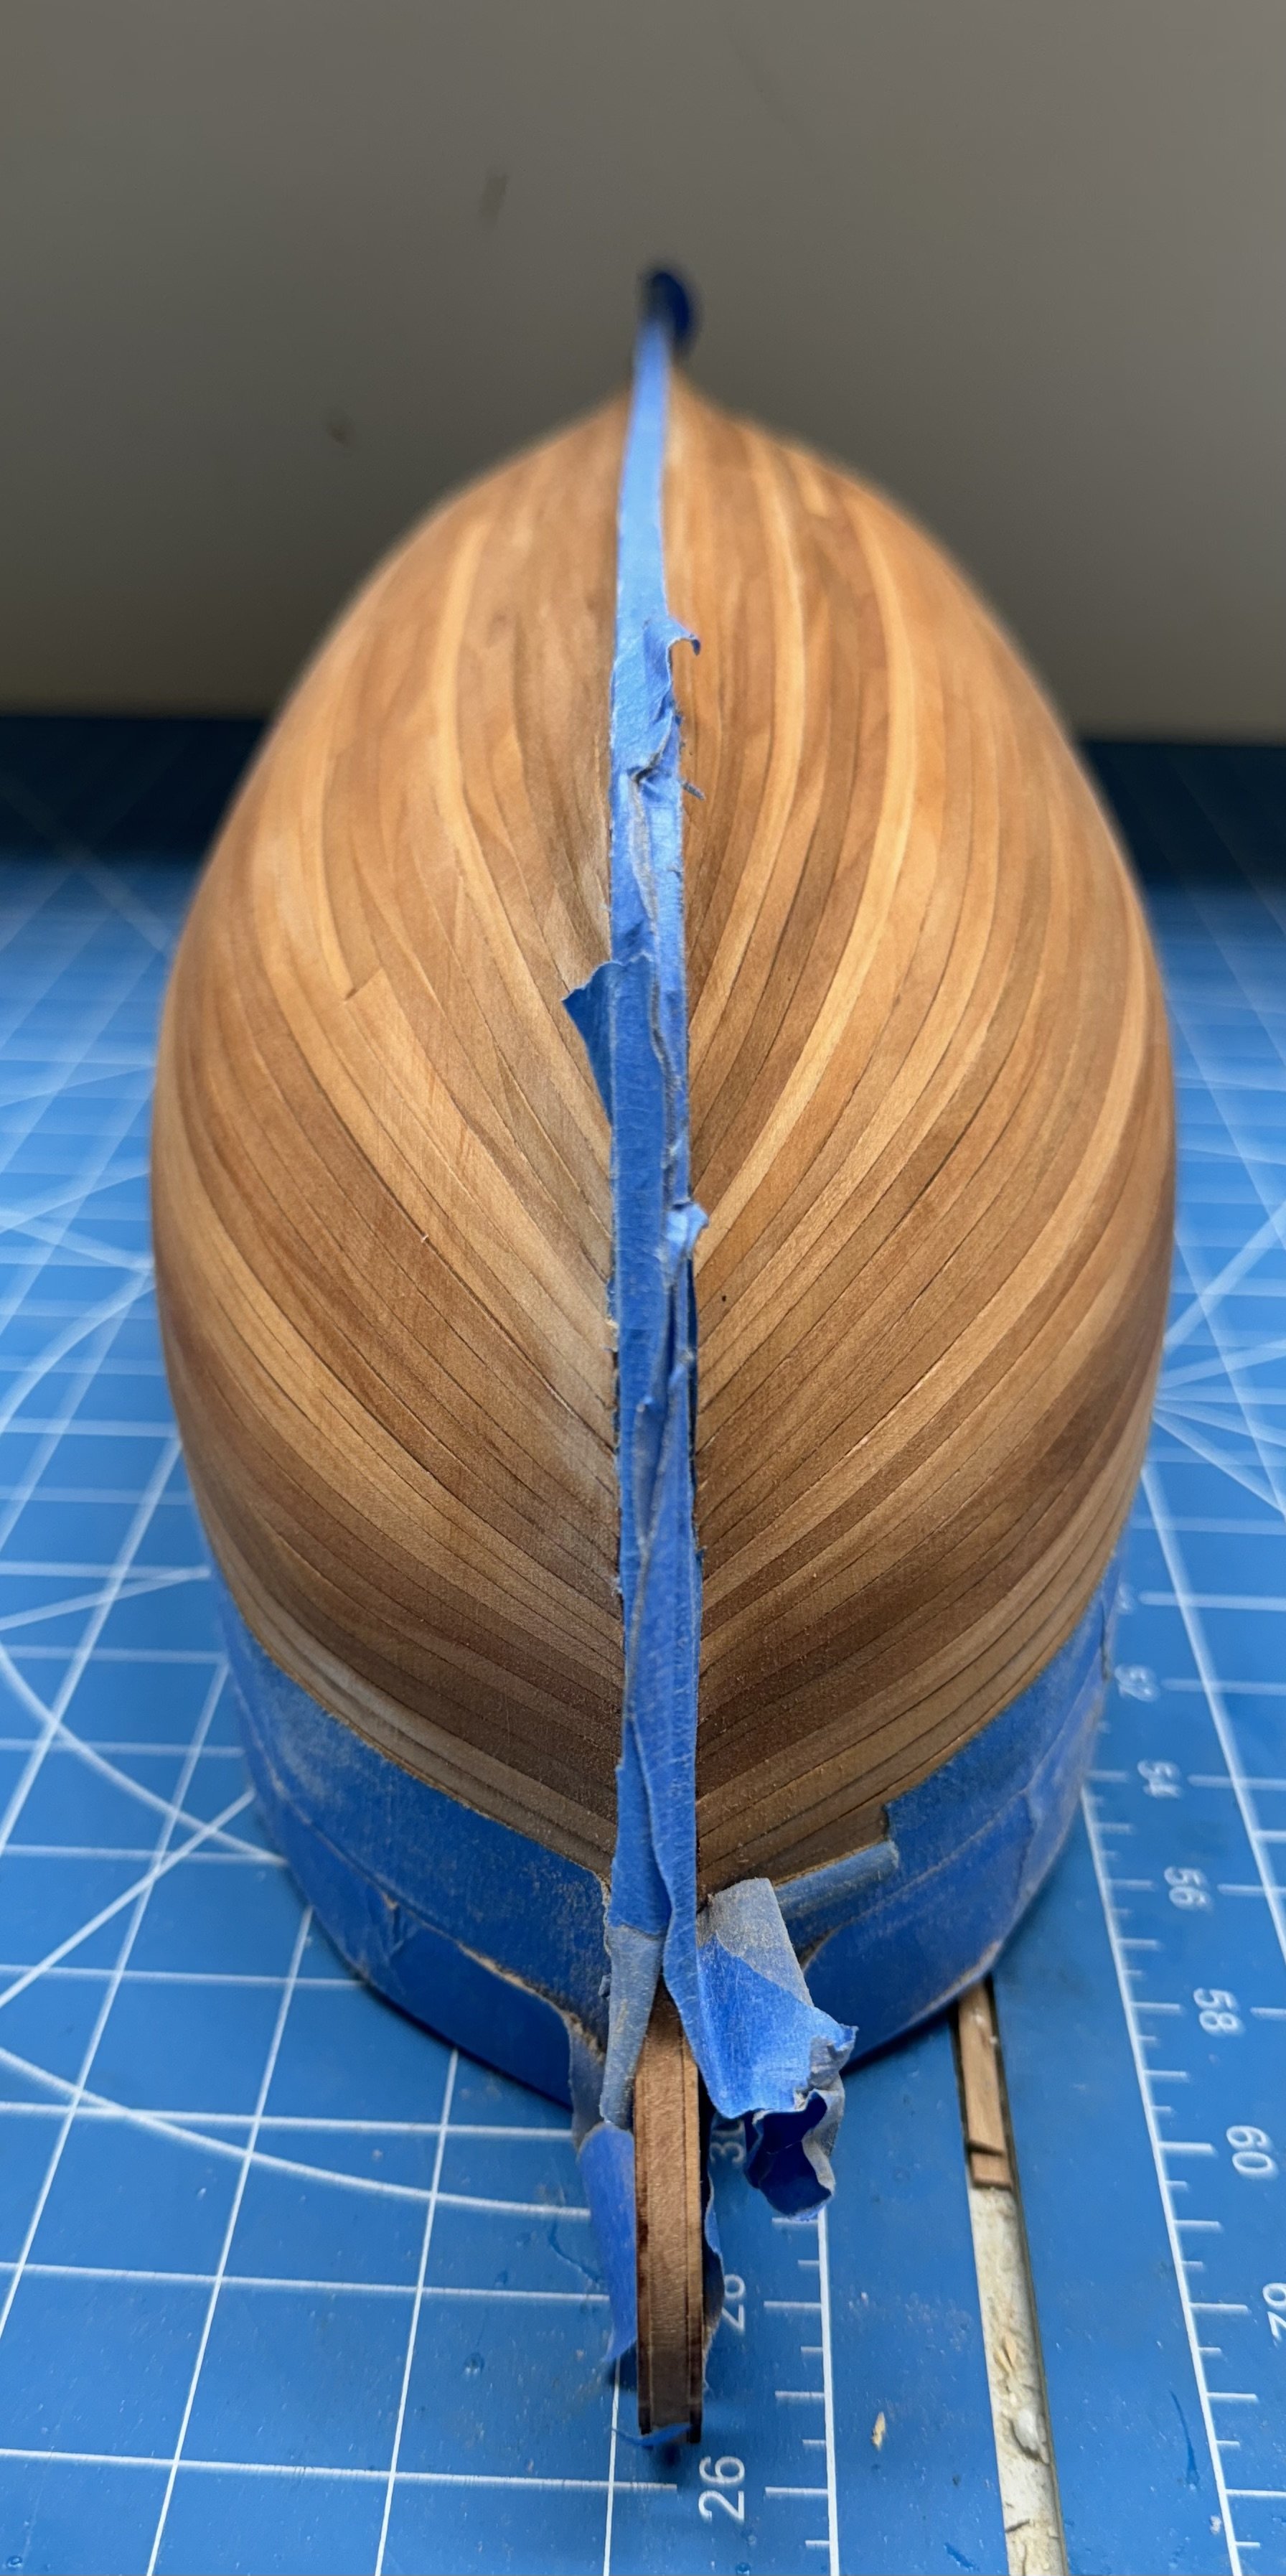
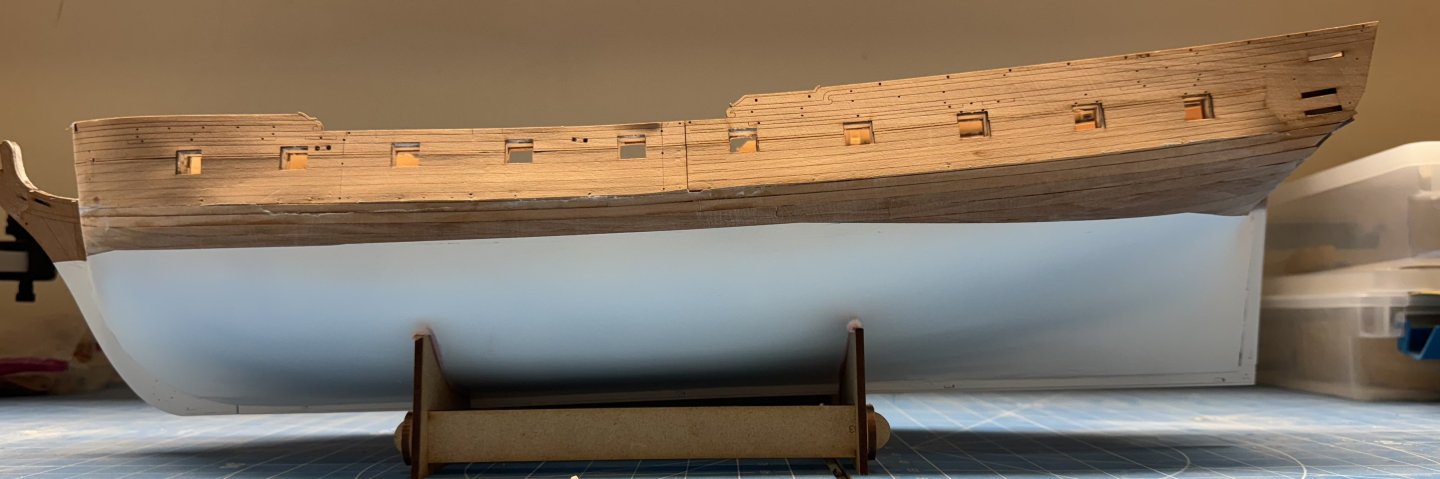
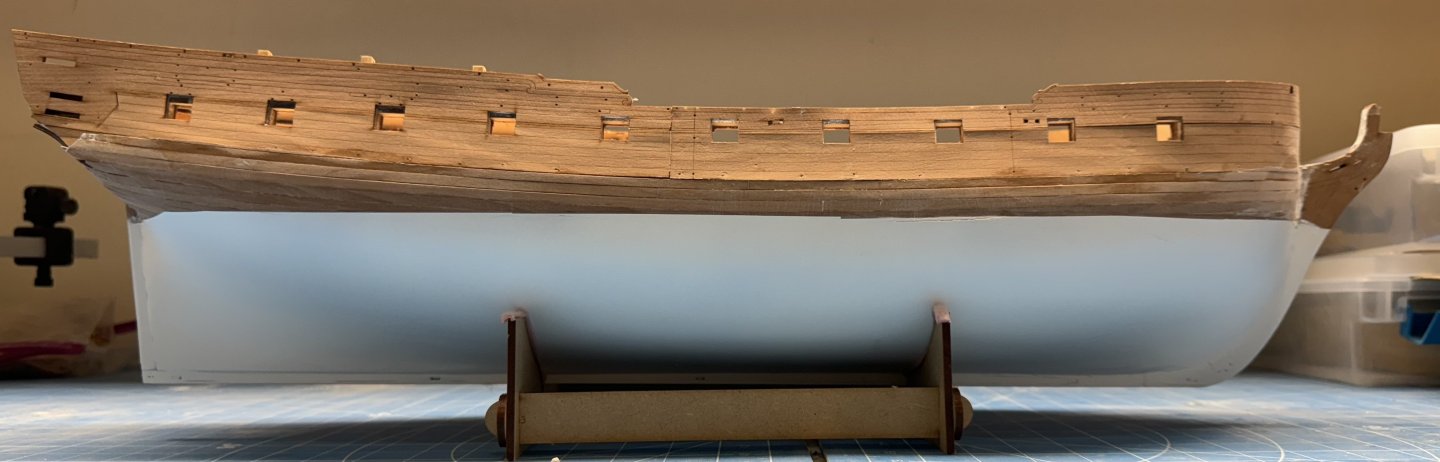
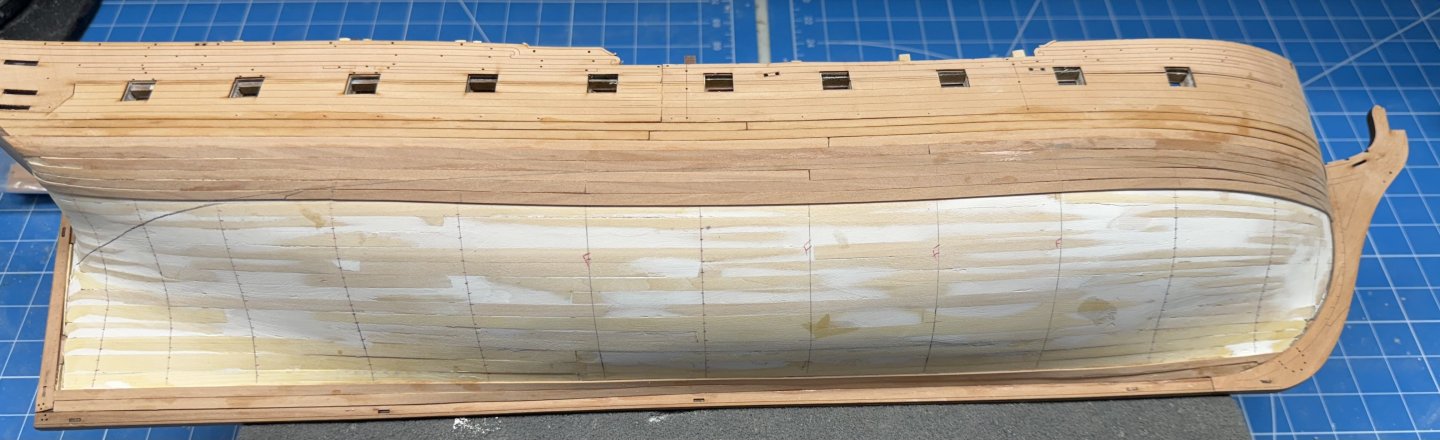
Hull painting completed. I did not do a very good job getting the two sides to match at the stern - may have a bit more to do there. Bow needs a bit of touch up too but overall i think I finally got more of the glaring gaps filled and fared. While the spray can says to wait two hours between coats I am going to give this 48 hours to "set" before I start working the wales and quarter galleries.

- 422 replies
-
- 8
-
-
- Vanguard Models
- Sphinx
- (and 1 more)
-
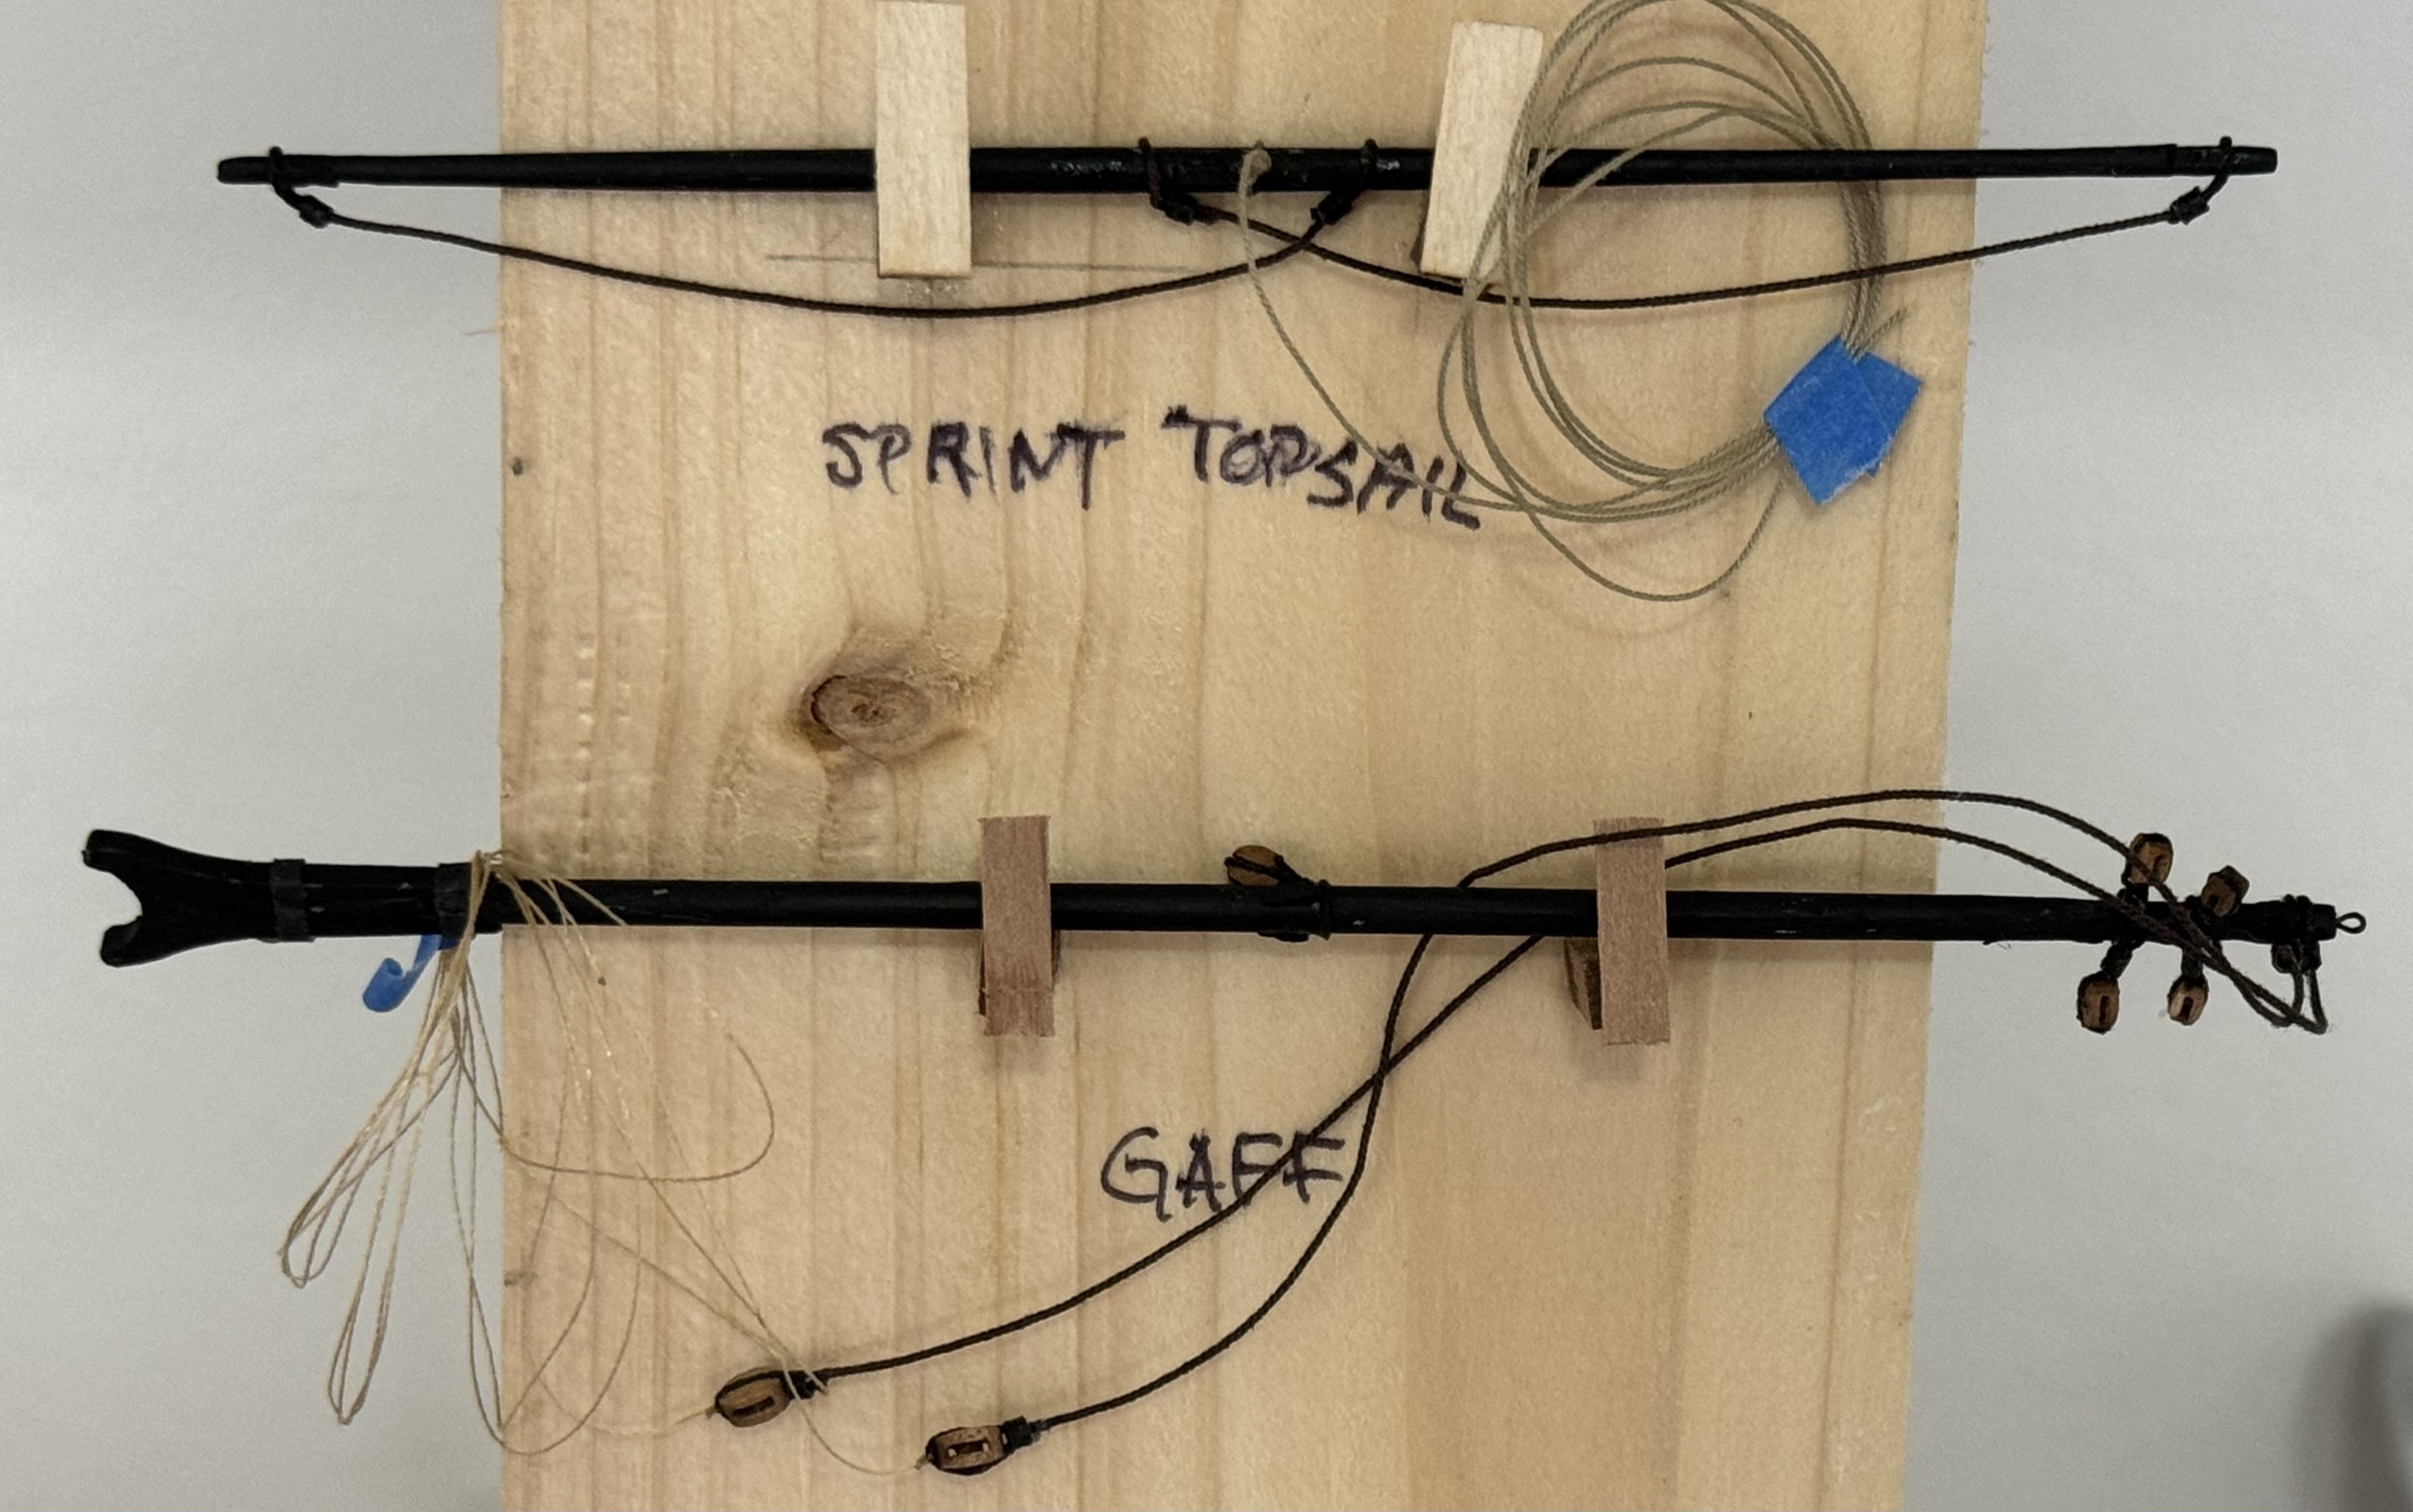
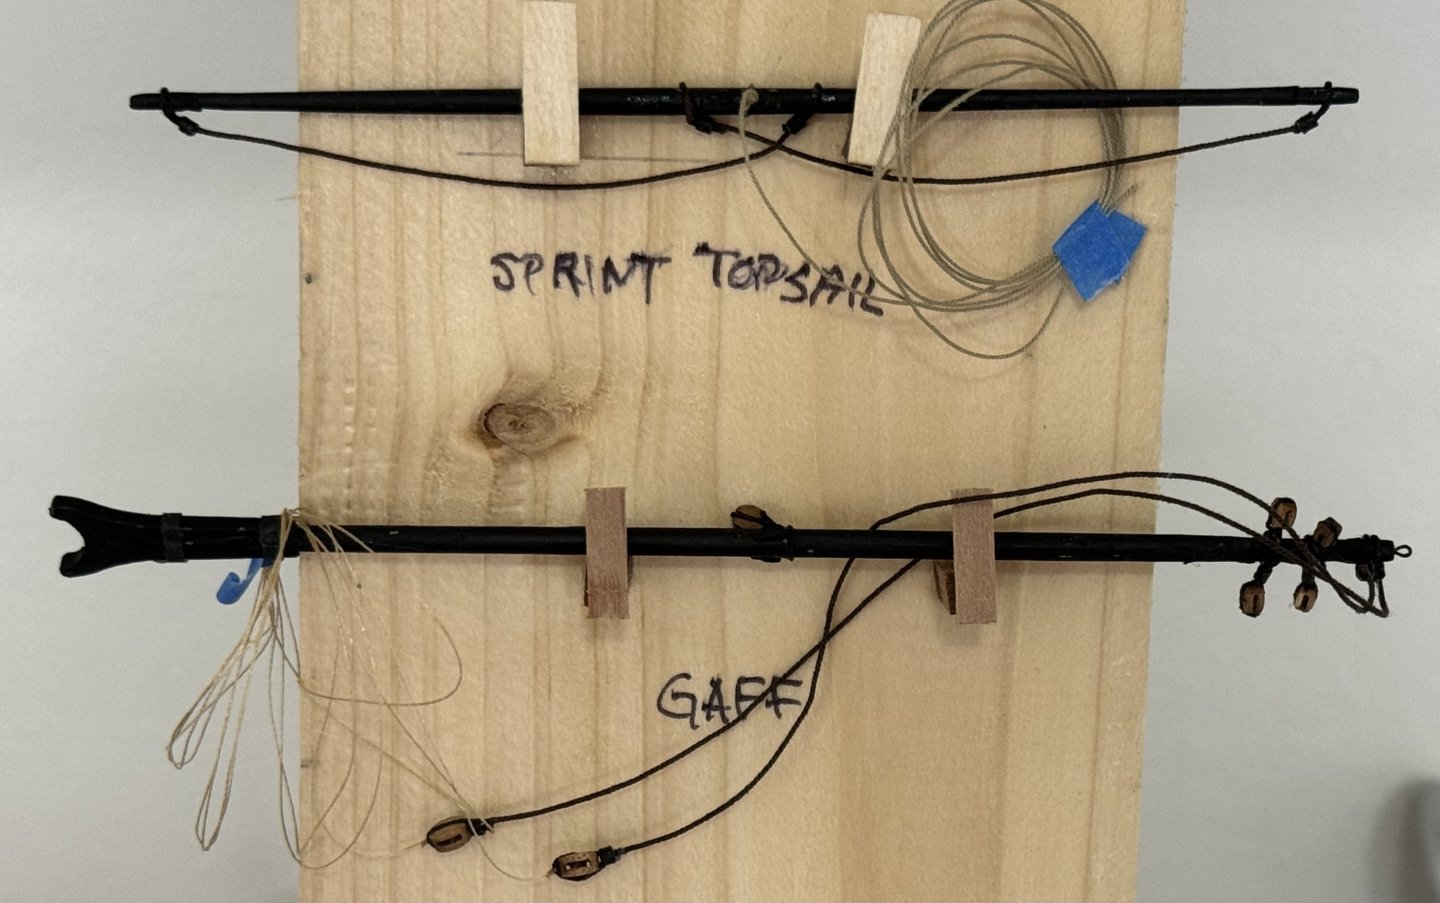
Considerably fewer areas needing attention this time - other side is similar. Hopefully when these are "fixed" and the masking is modified to uncover the keel, stem, etc. we can "get on" with the final hull painting. In my "spare" time I managed to get the Sprint Topsail and Mizzen Gaff spars completed. I was glad to see the blocks that held the standing end of the tackles identified. I would not want to try and add these with the yards on the model.
- 422 replies
-
- 6
-
-
- Vanguard Models
- Sphinx
- (and 1 more)
-
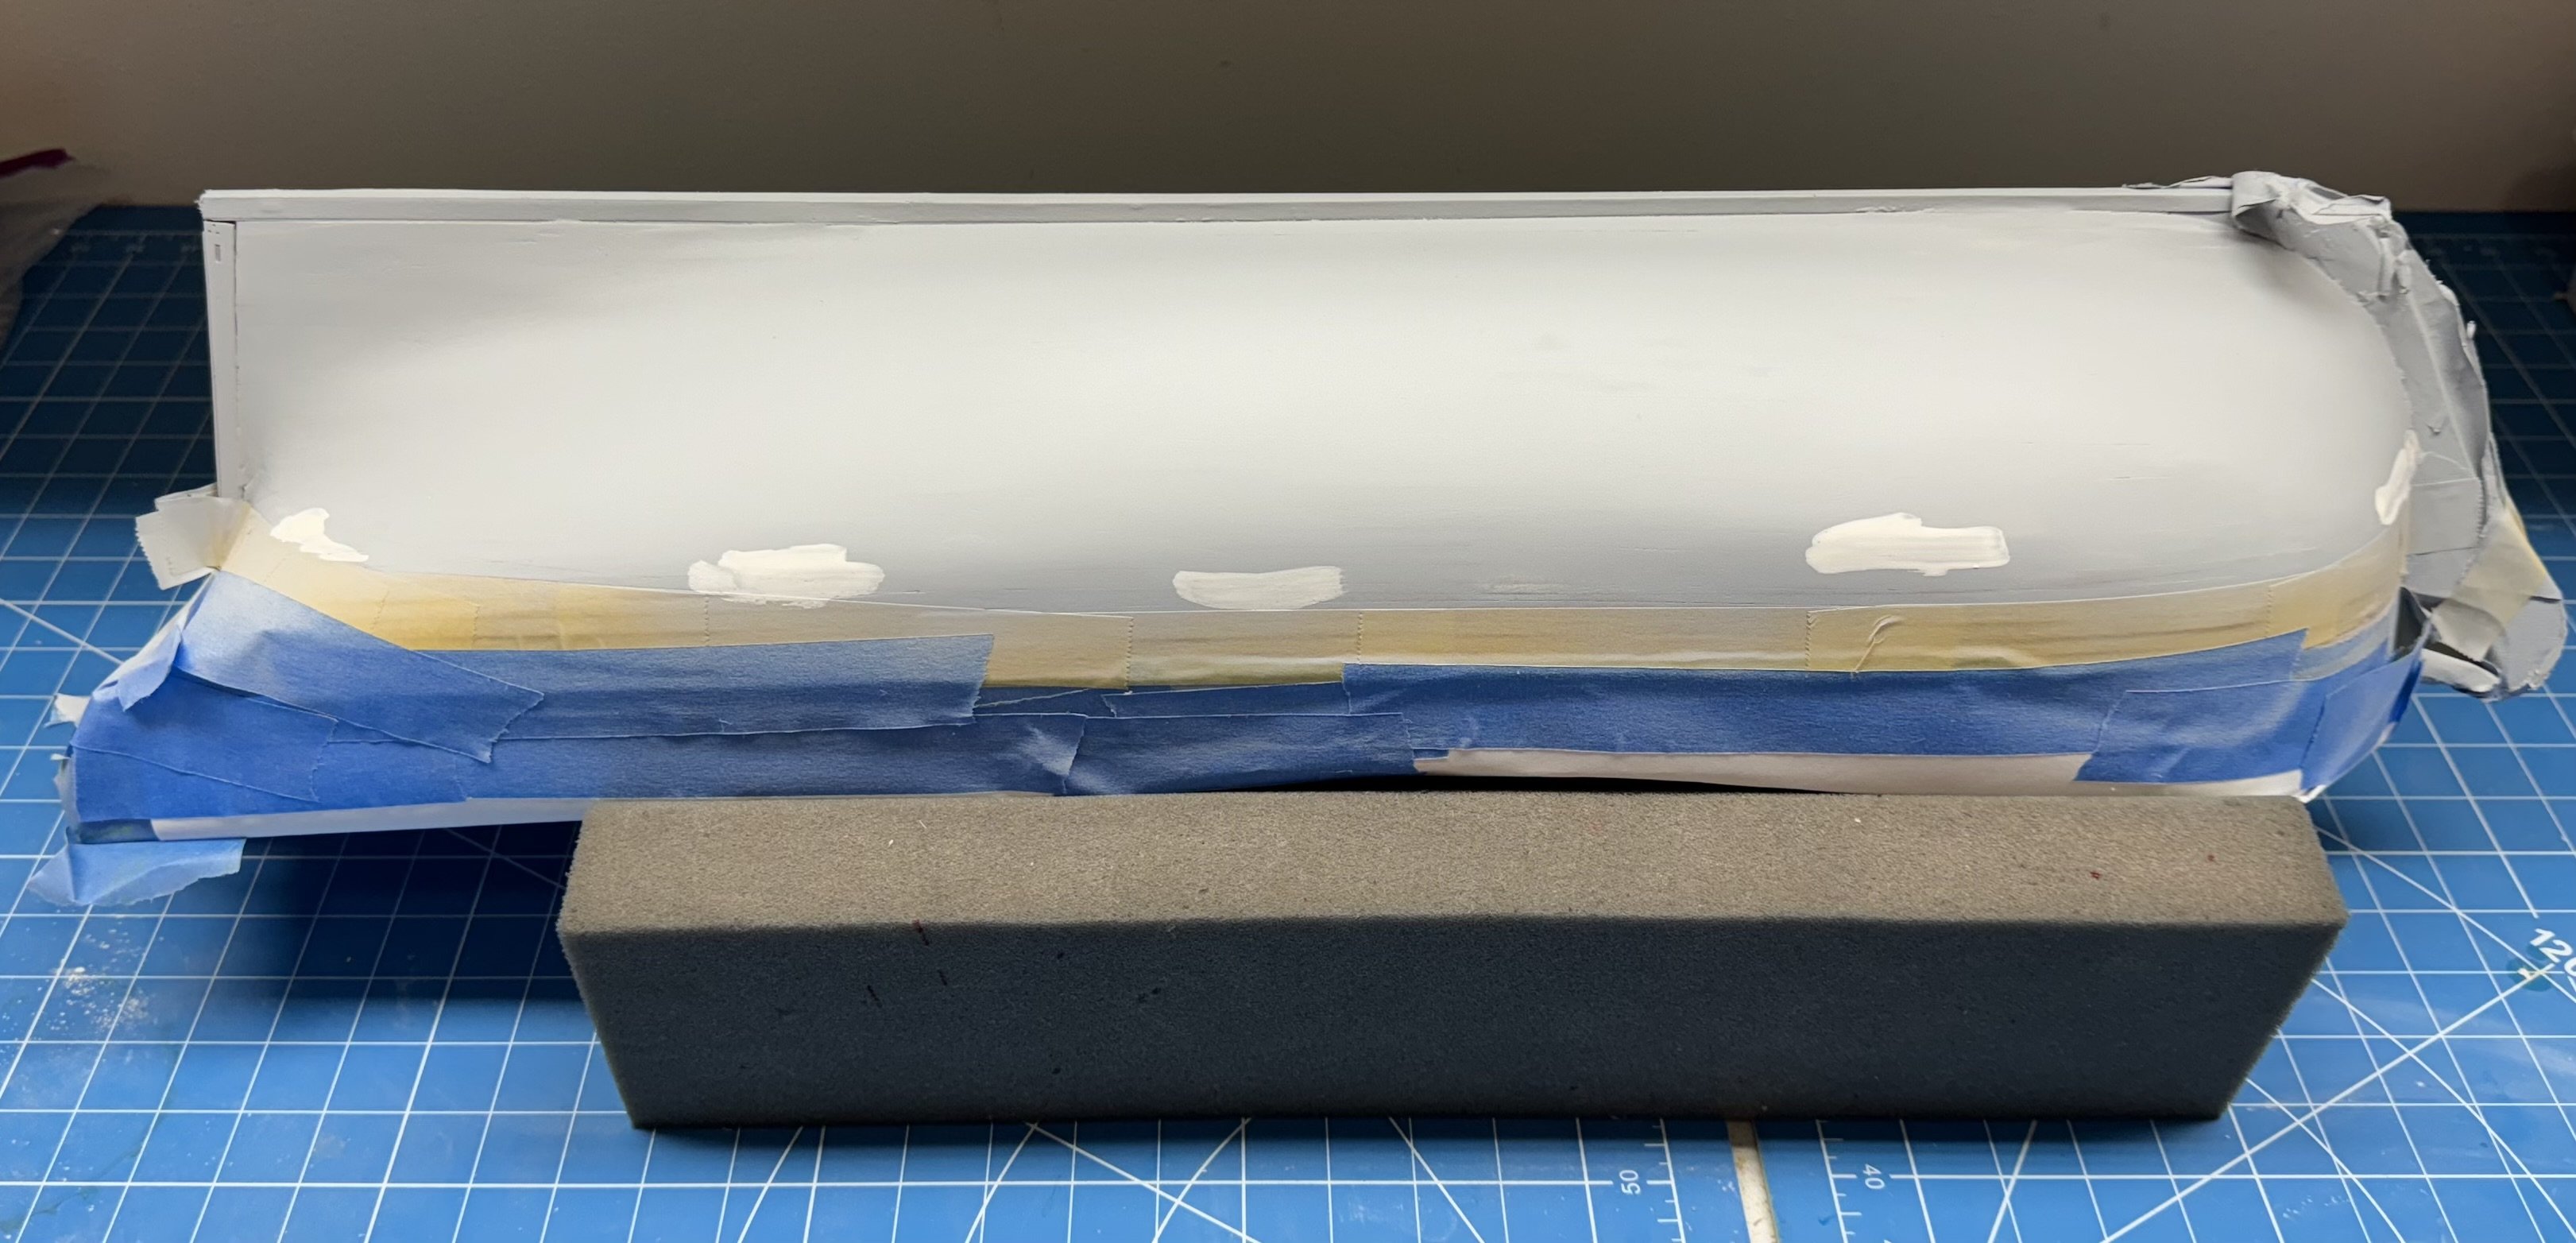
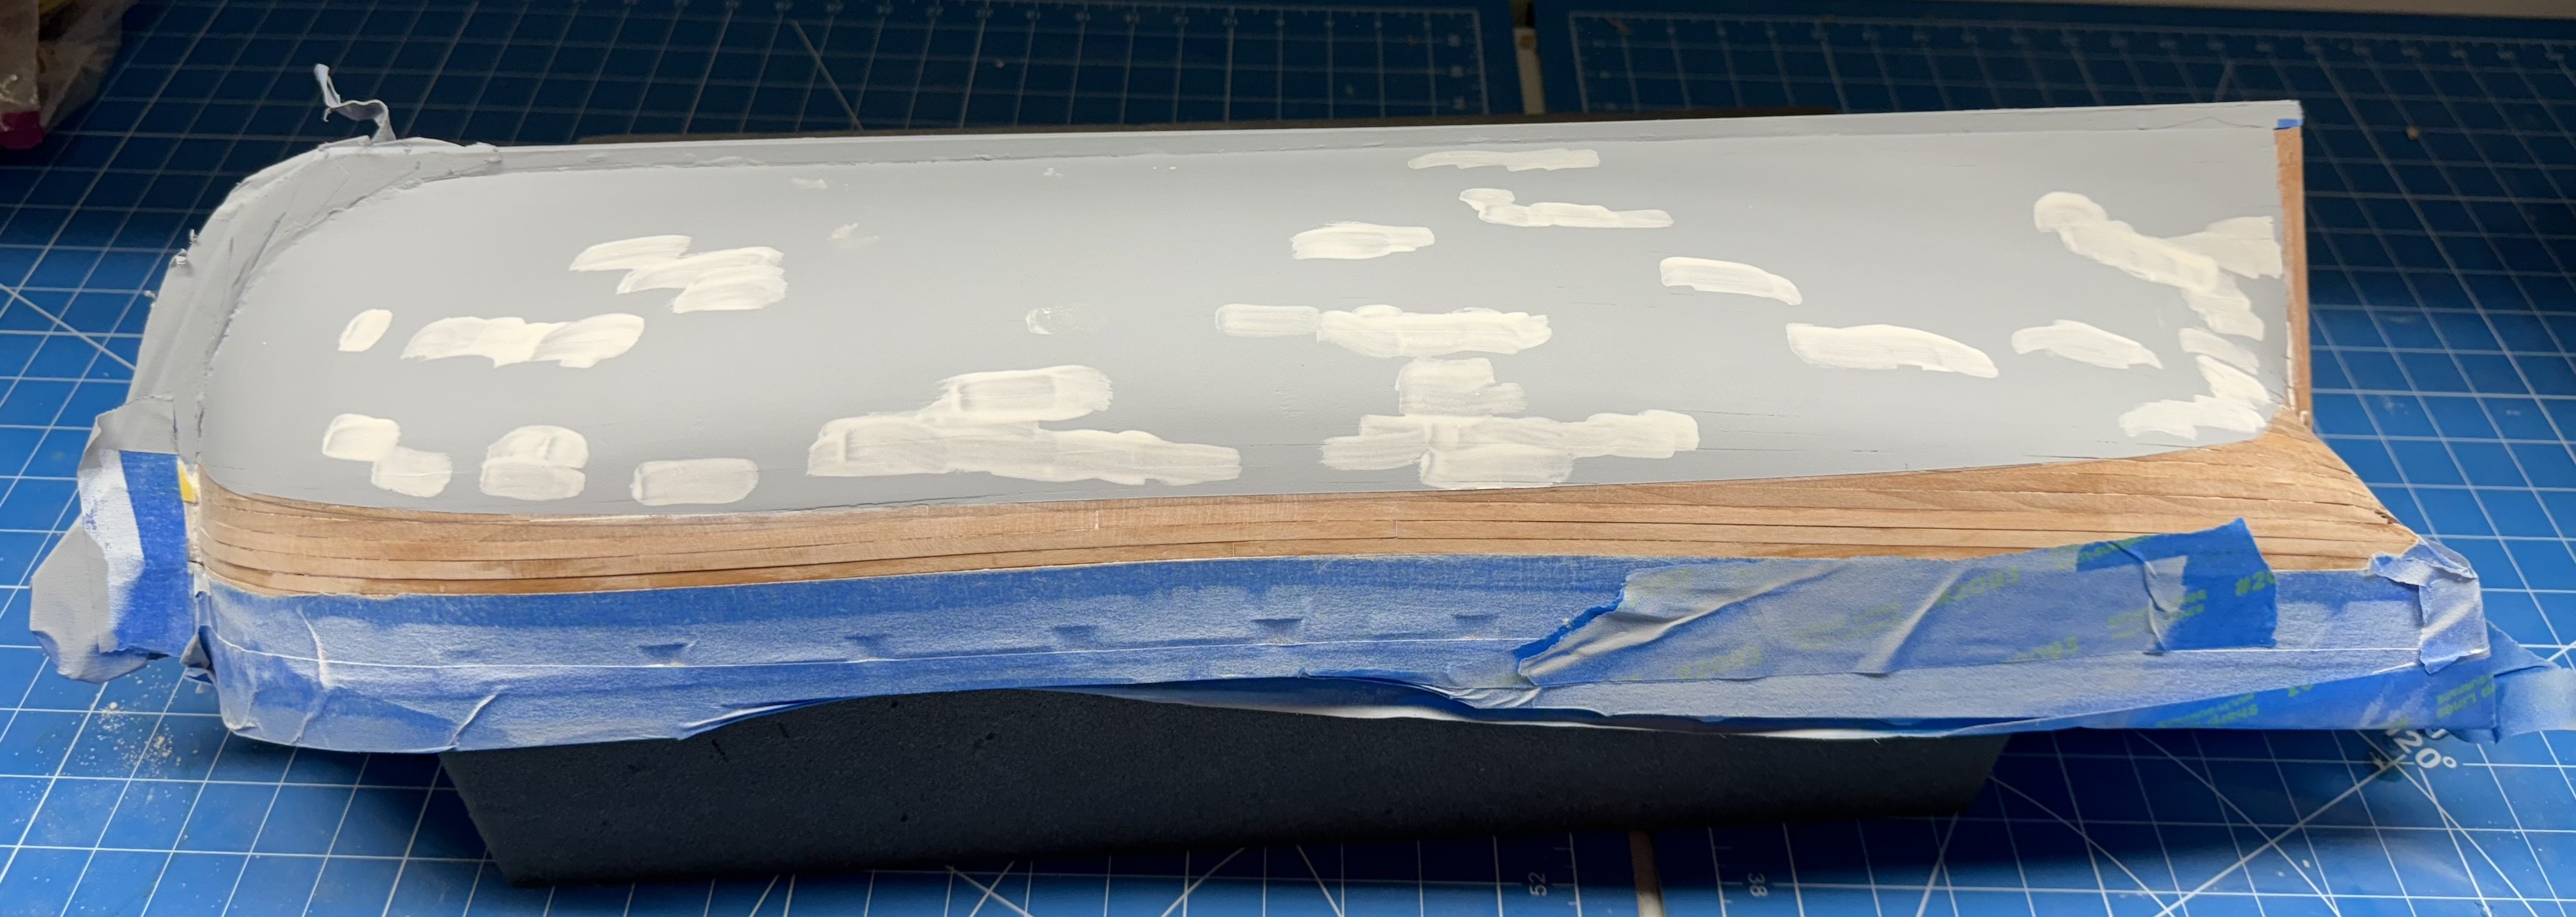
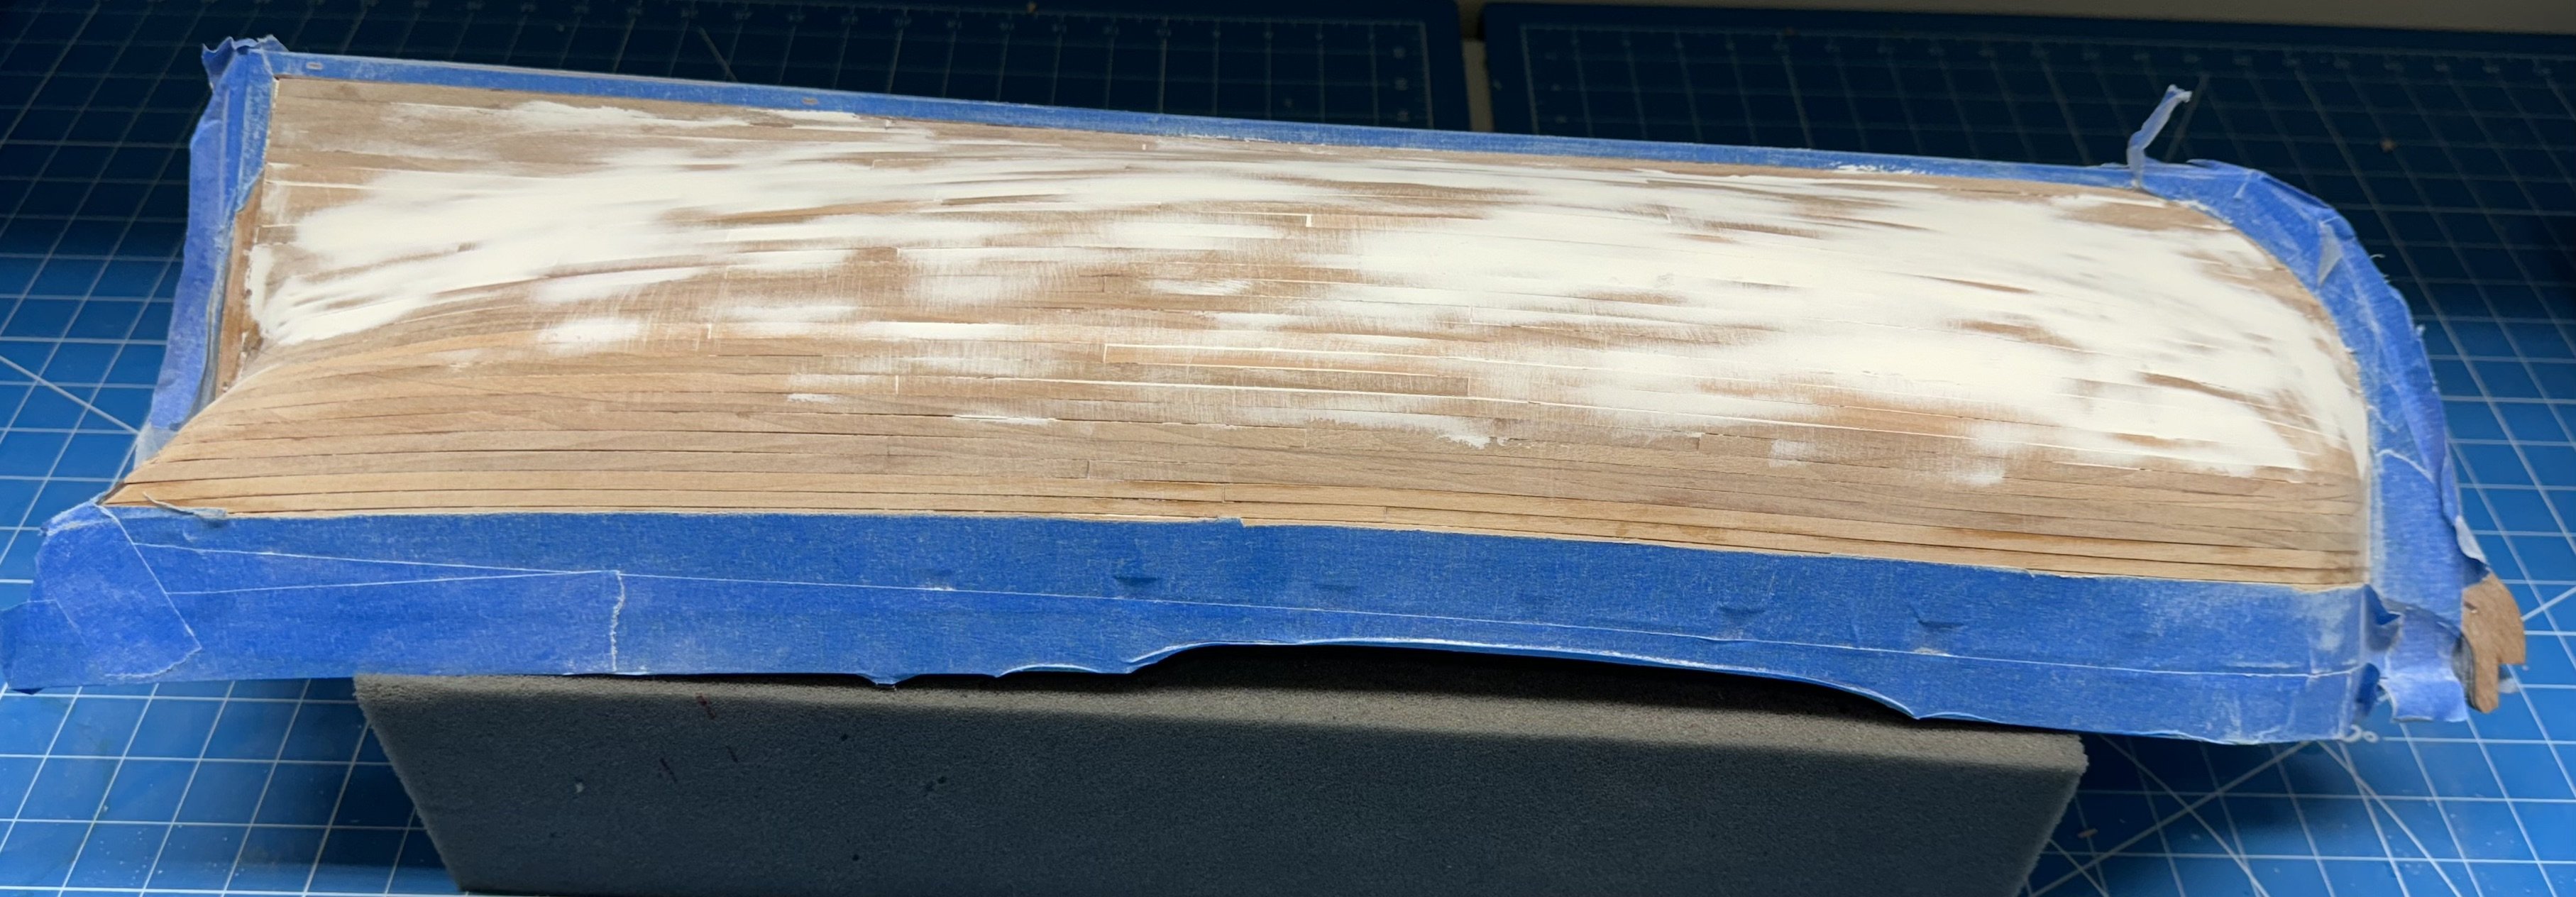
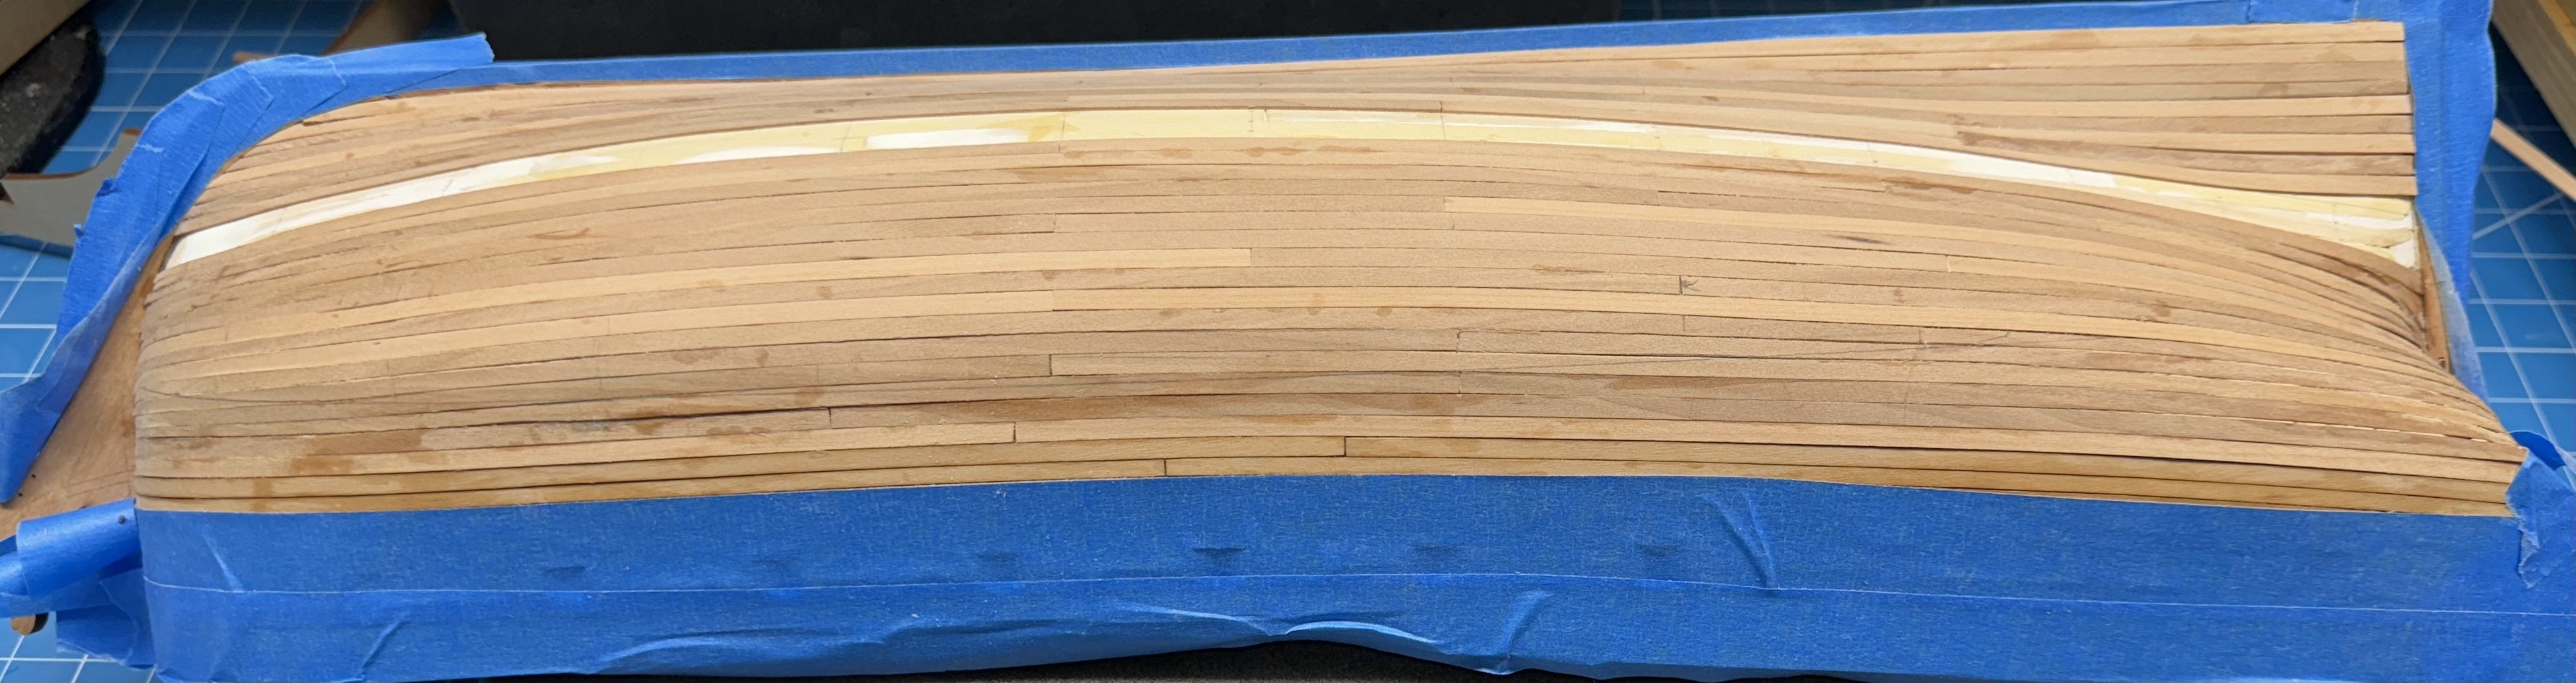
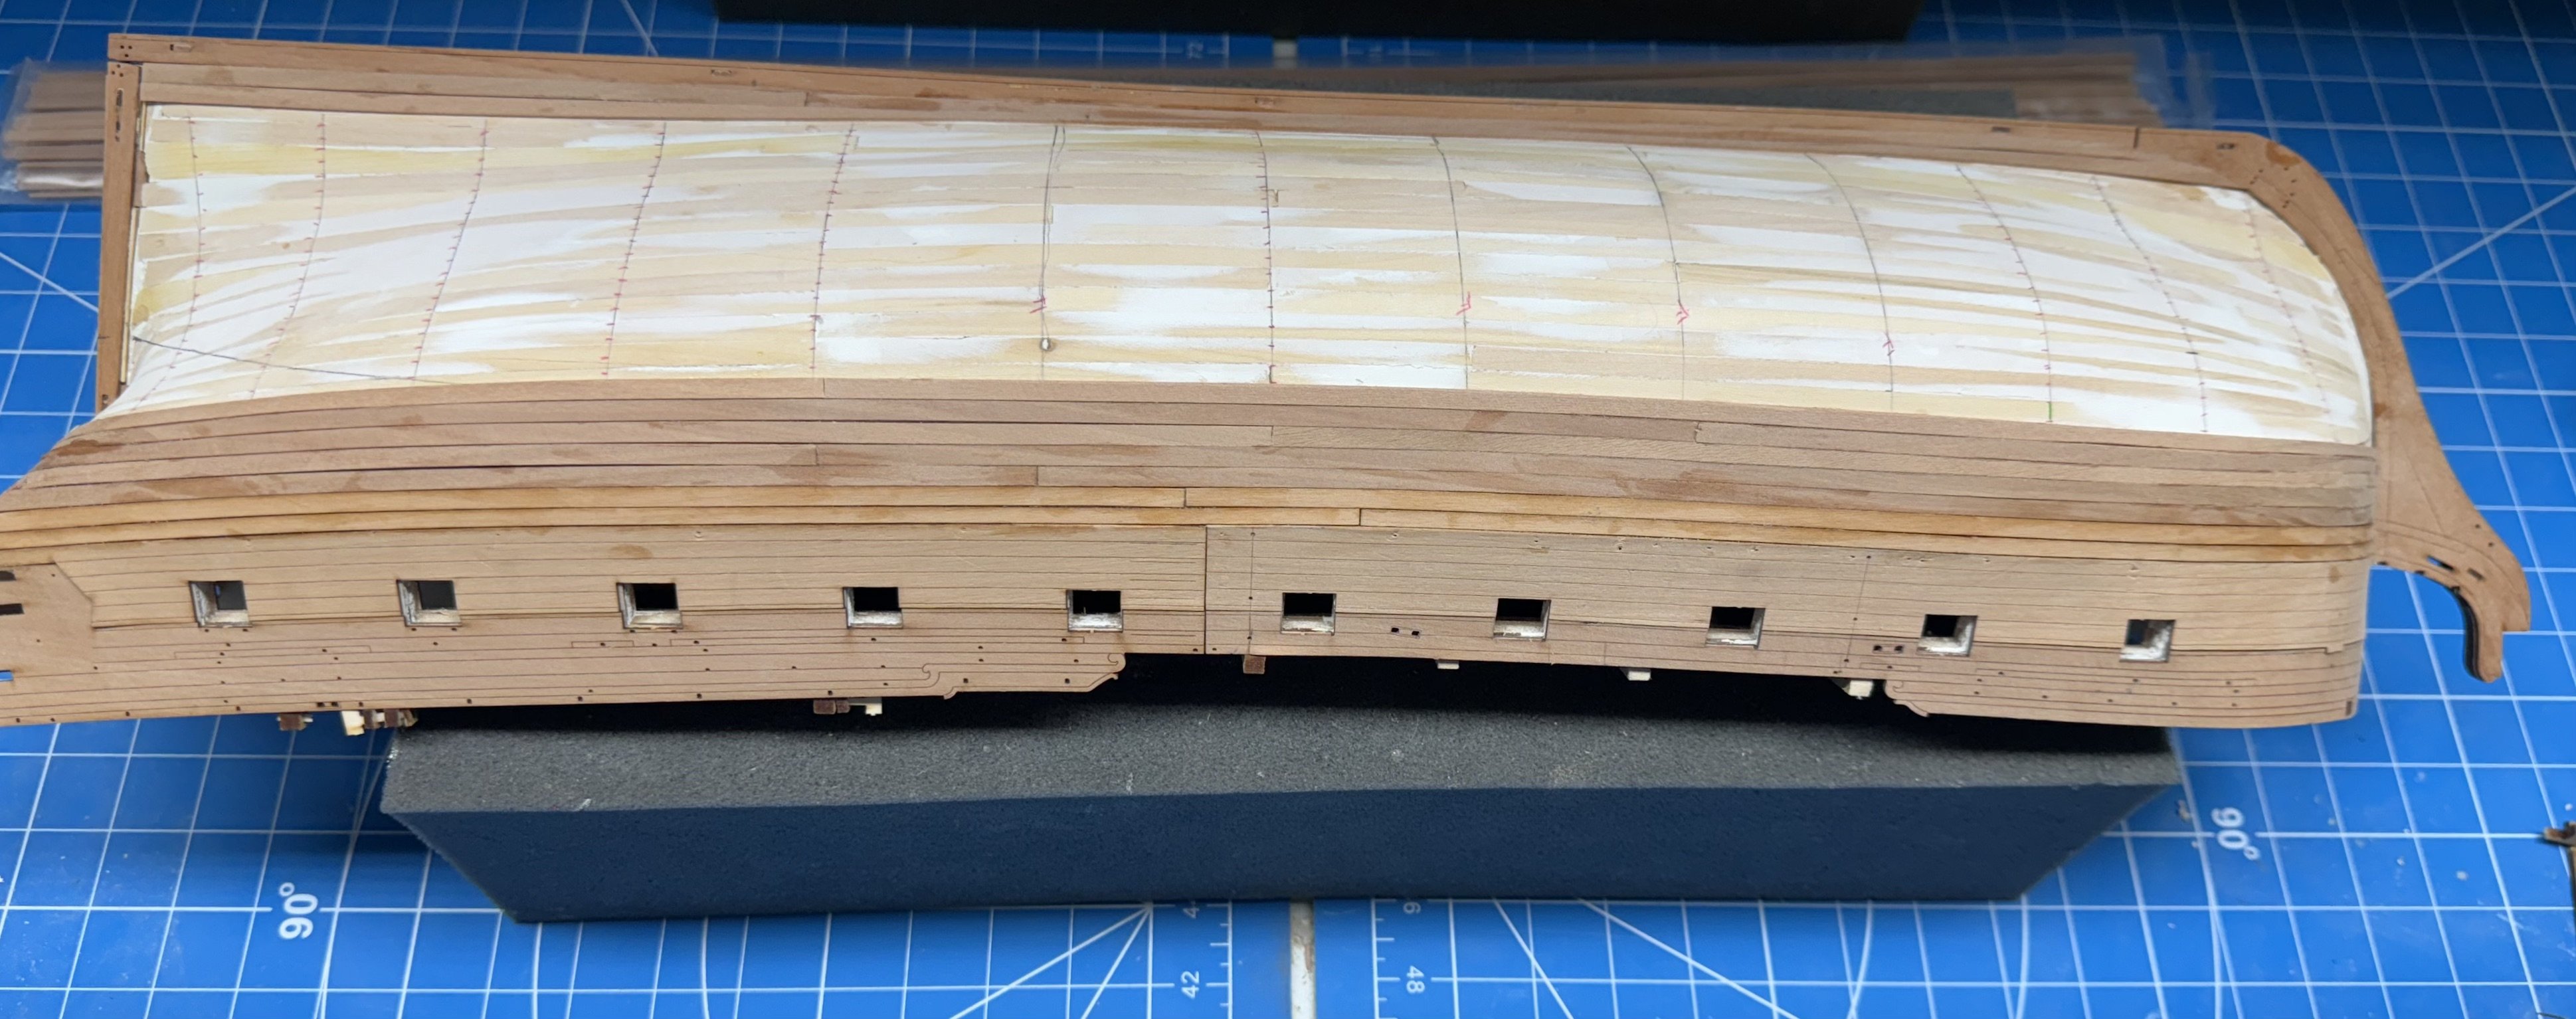
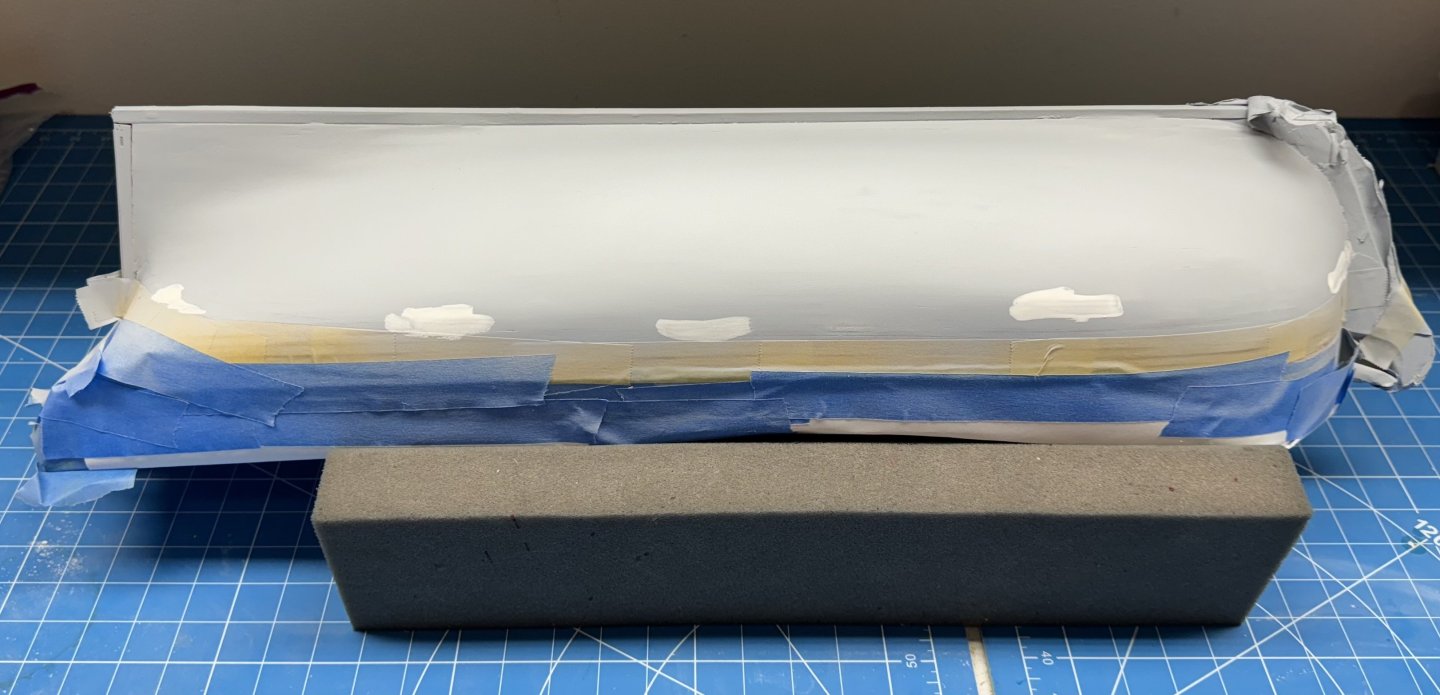
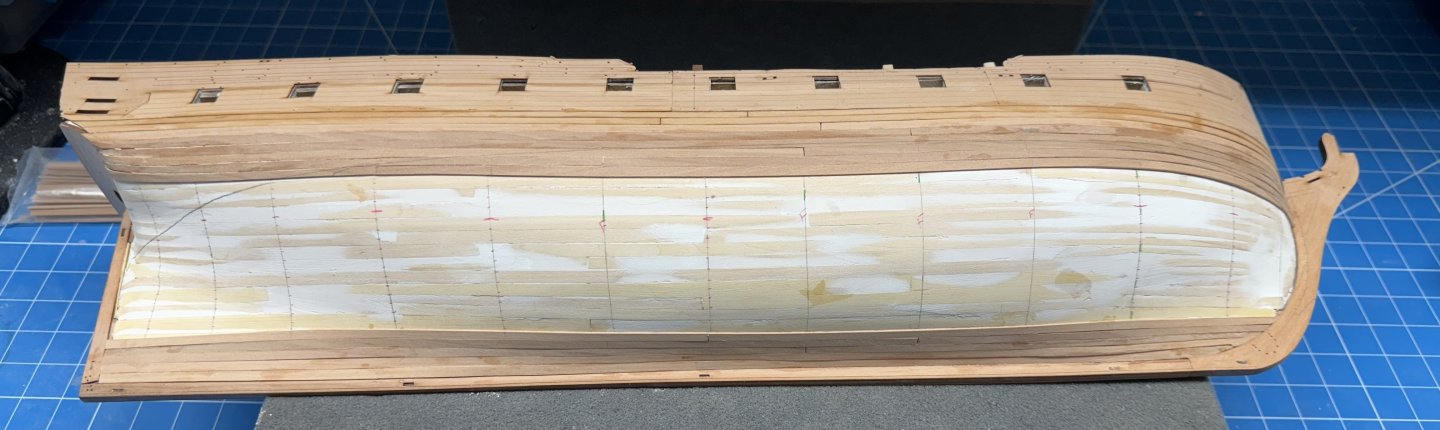
Although it has been ten days since I posted last I have not been completely idle. The contractor just finished converting one bay of the garage to an air conditioned space so I have been busy out there trying to bring order to the resulting chaos. I was able to set up the paint station and make a pass over the hull using automotive gray primer with filler. I believe it a better choice than the flat white primer I started with. As expected (by me) the gray showed more than a few areas that still needed attention. This time I added more water to the filler and "really" painted it onto the cracks and gaps that showed through the primer. Here one side after the filler was applied. The other side is similar. Now to sand this down (using 320 grit paper) and than back to the paint booth. This time I am going to mask at the waterline and hope this is the final pass before going with the final paint coats.

- 422 replies
-
- 4
-
-
- Vanguard Models
- Sphinx
- (and 1 more)
-
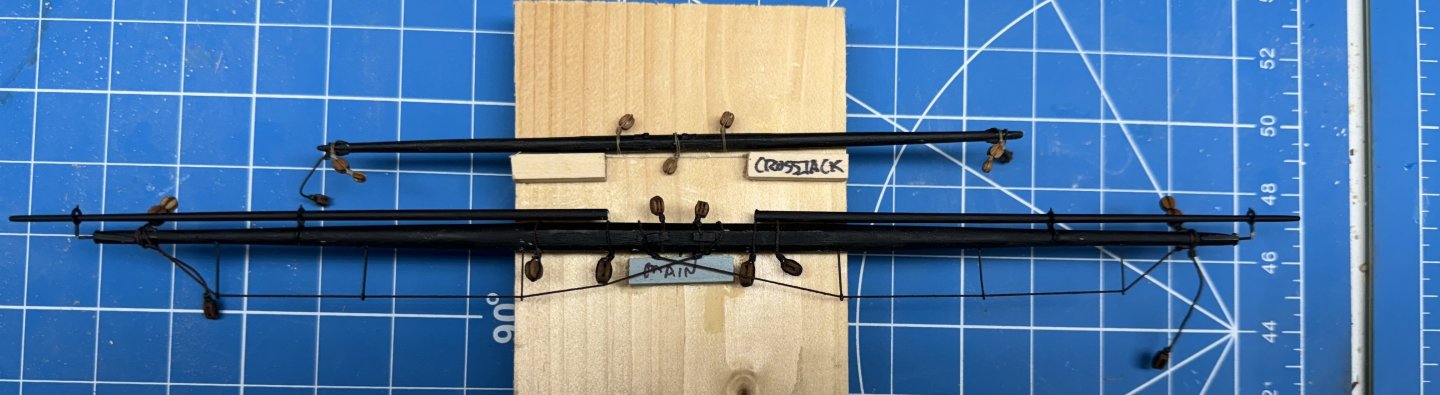
Main and Crossjaclk yards completed and mounted on my "storage board" so they are out of "harms way" more or less. I did the Crossjack as sort of a test case for starting with a square billet. I am not sure in what order to work the yards - probably does not matter since they all have to be done and are very similar. Probably should keep going once I start again since I think I learn a new "trick" with each one.
- 422 replies
-
- 5
-
-
- Vanguard Models
- Sphinx
- (and 1 more)
-
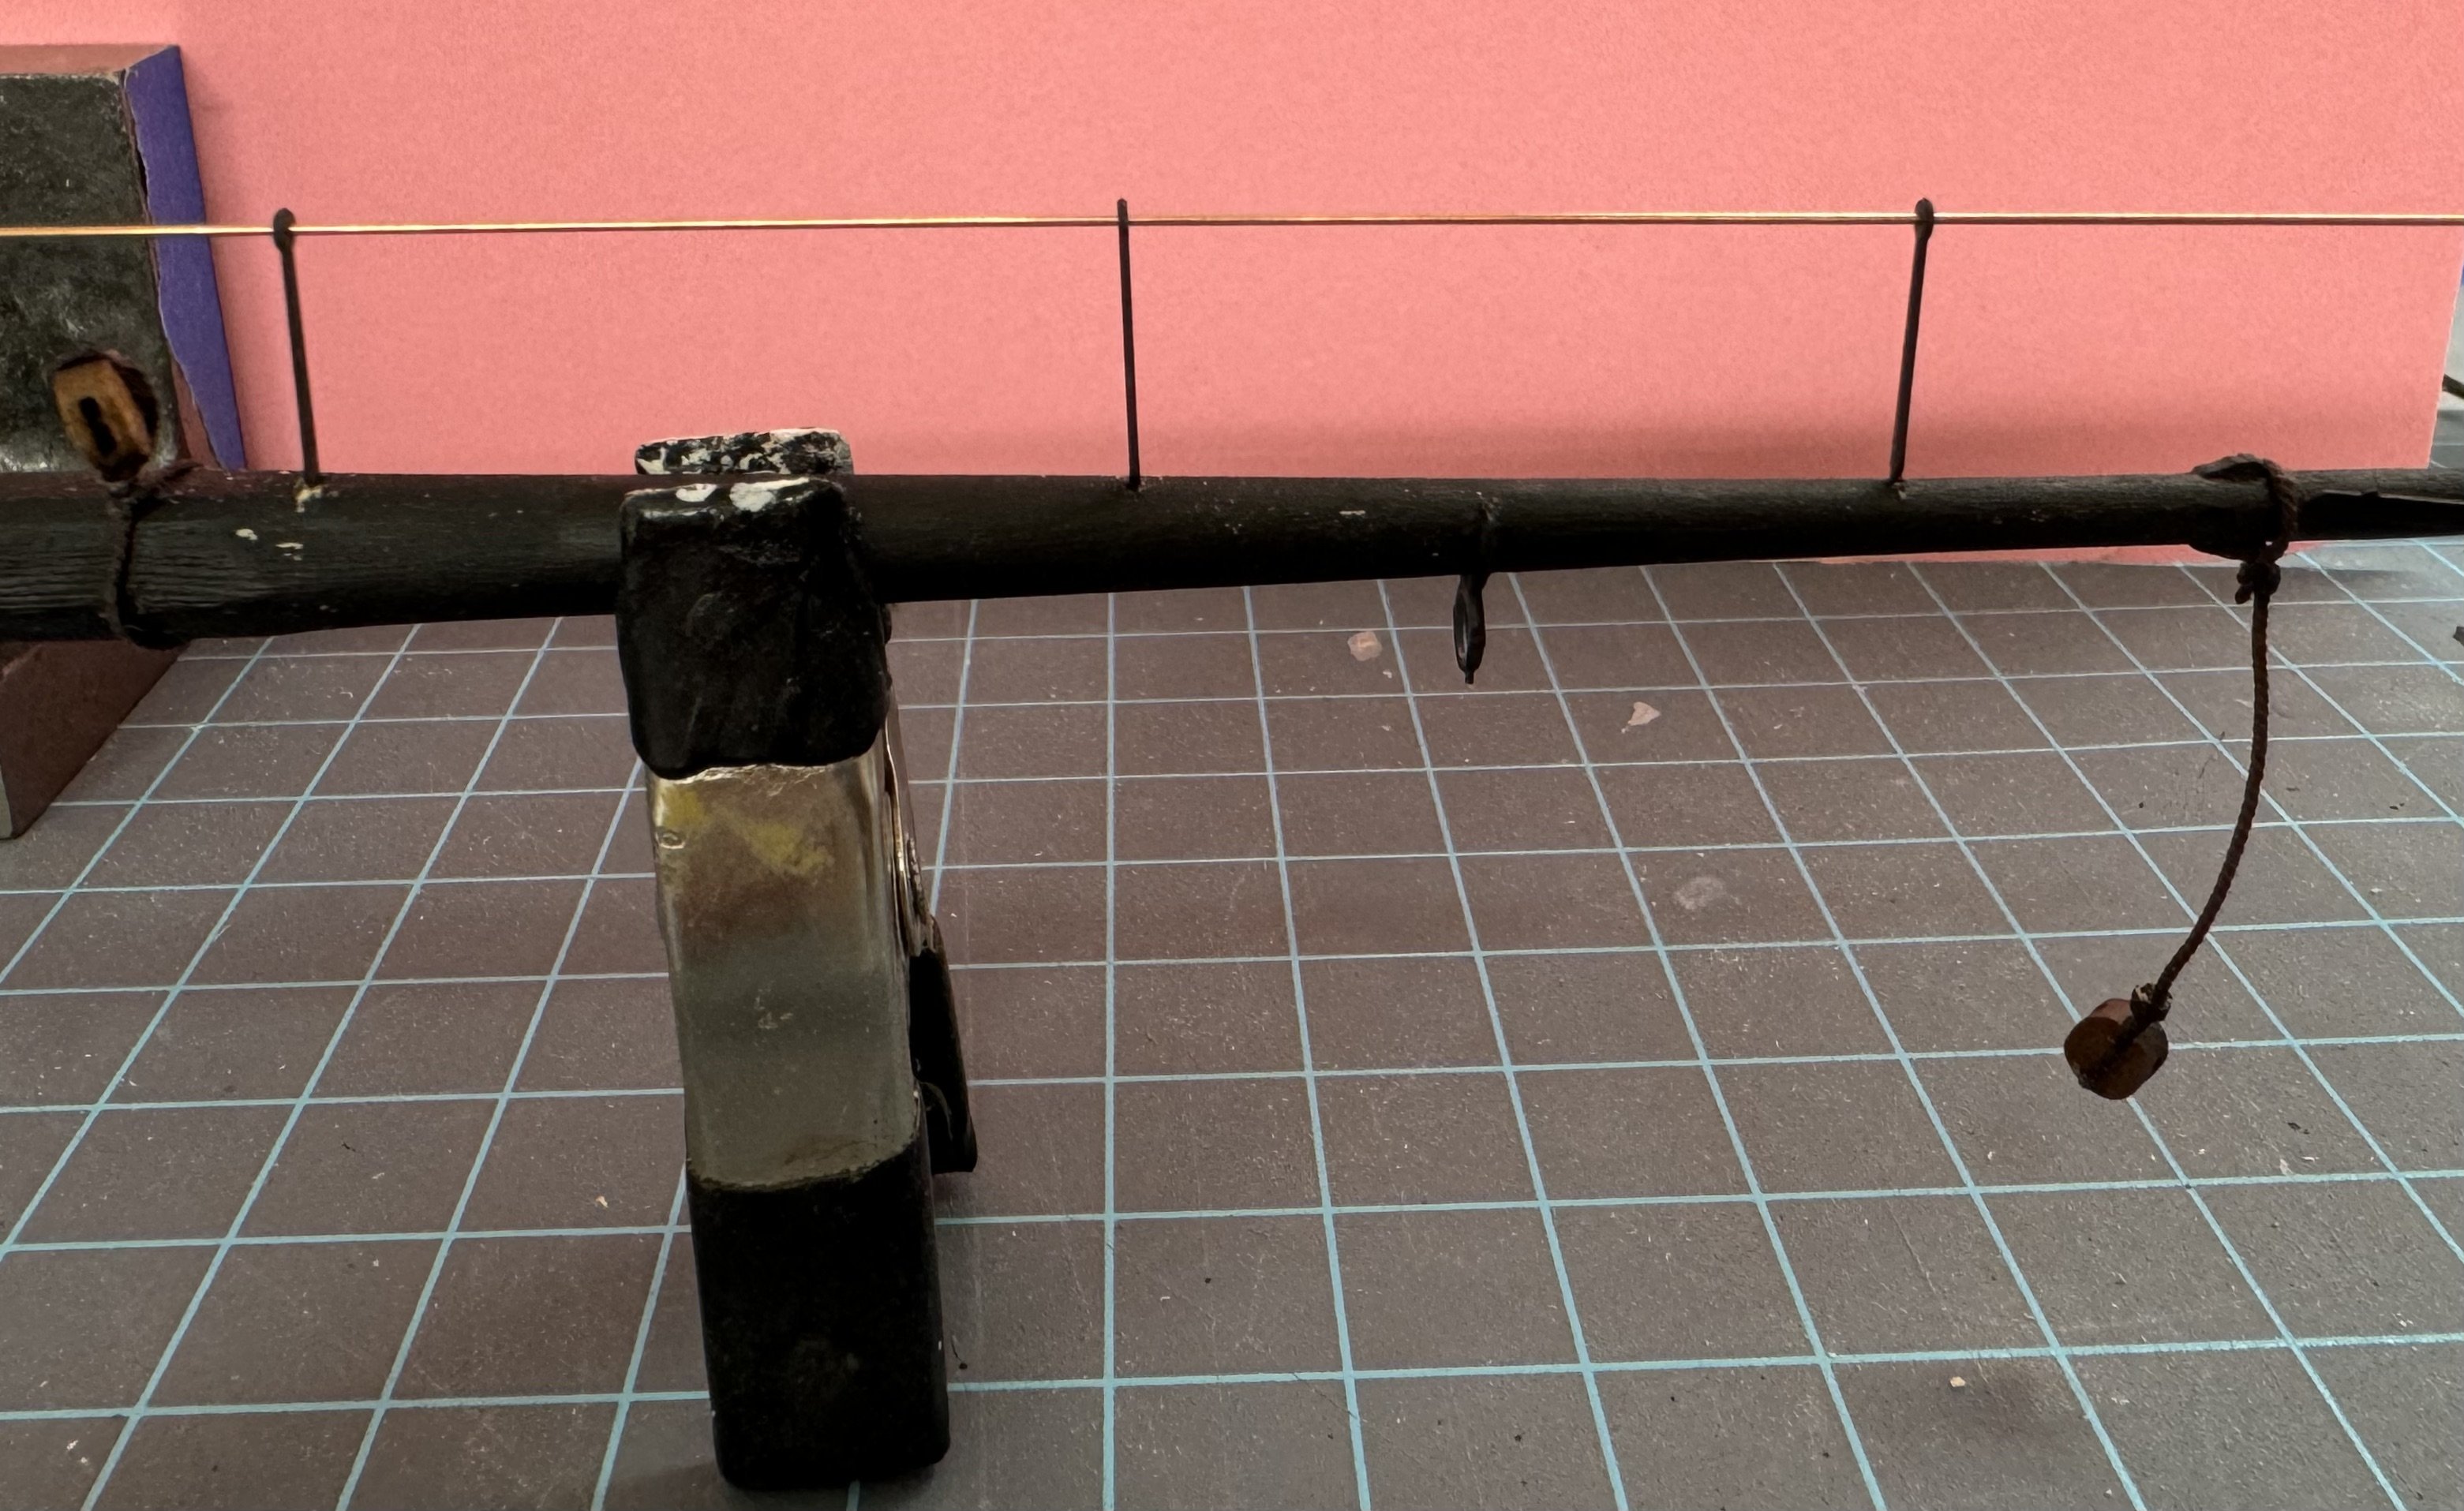
Speaking of yards - I had previously completed the Main Yard except for the foot ropes and connection to the mast. I have glued in a .049" piece of music wire to hold the yard to the mast and will add the rope connection once the yard is glued to the mast - or at least that is my plan subject to extensive modification once the battle has been joined. So I decided to add the foot ropes but was having a difficult time getting the stanchions lined up along the mast and standing vertically. Once I got the three stanchions for one side glued in place I used a piece of .020" phosphor-bronze wire passing through the stanchion loops to given me a better reference for how the lined up and the verticality. Now to get the line through and secured. One thing I might add is about the foot rope stanchions. I had to drill out the eyelet to get the rope through even though I am using a somewhat small diameter rope than the instructions call for (.018" vs .020"). Perhaps the paint (I sprayed them flat black using an "etching primer") was on so thick it partially obstructed the opening. So now I know to drill out (#74) the stanchions before I glue them to the yard.


- 422 replies
-
- 3
-
-
- Vanguard Models
- Sphinx
- (and 1 more)
-
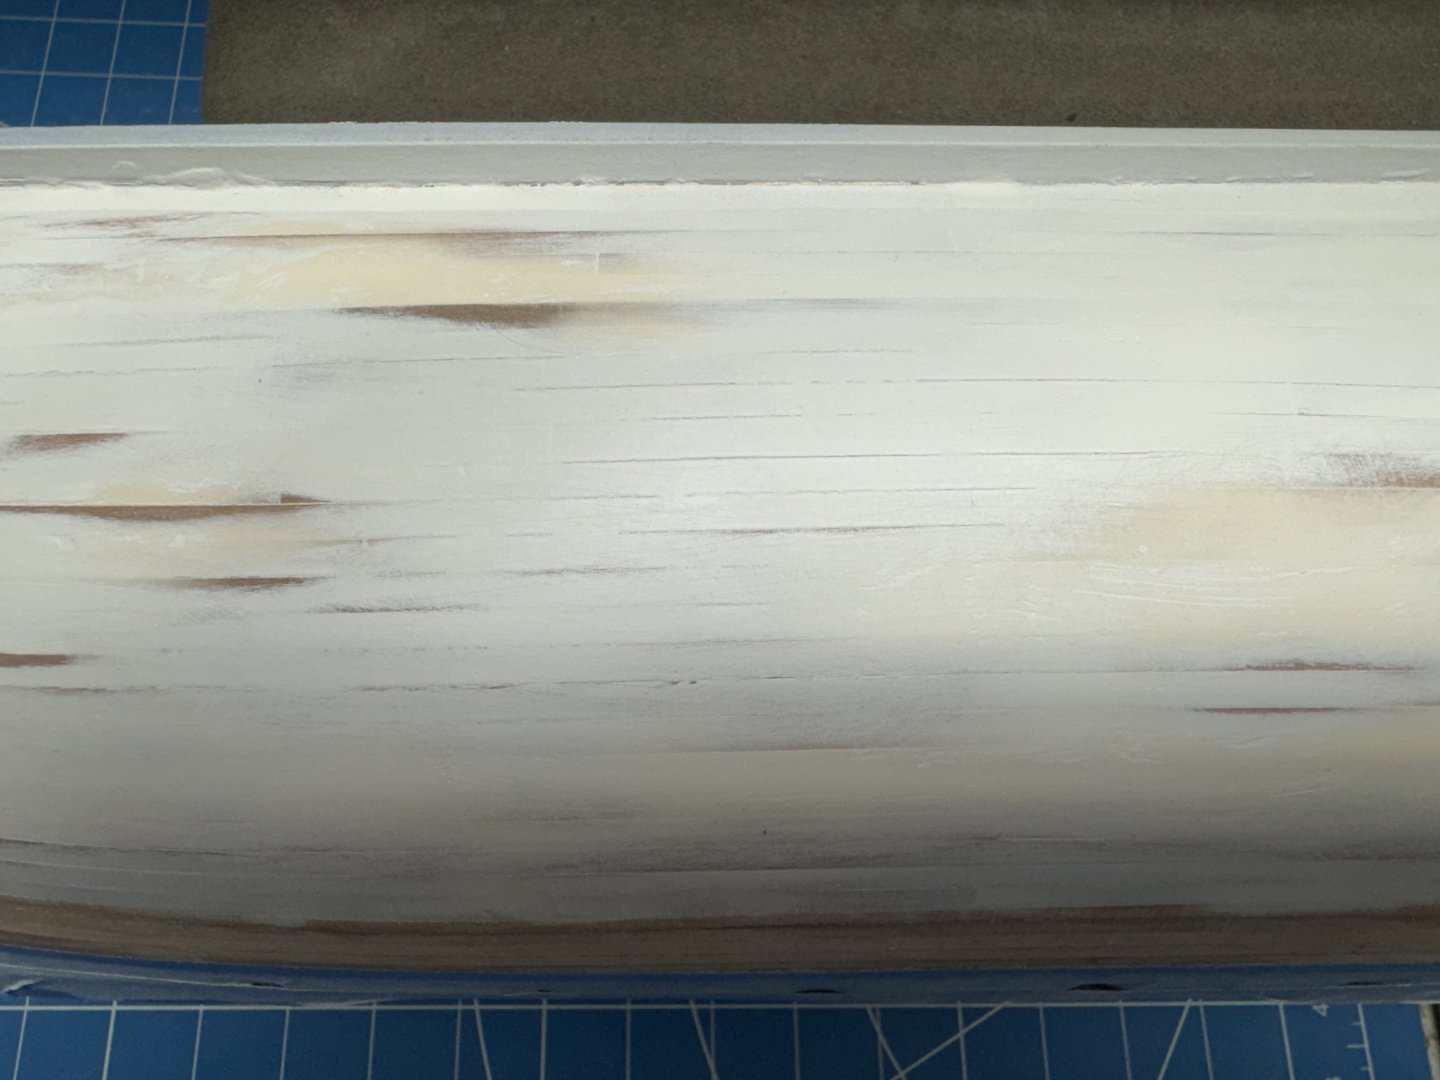
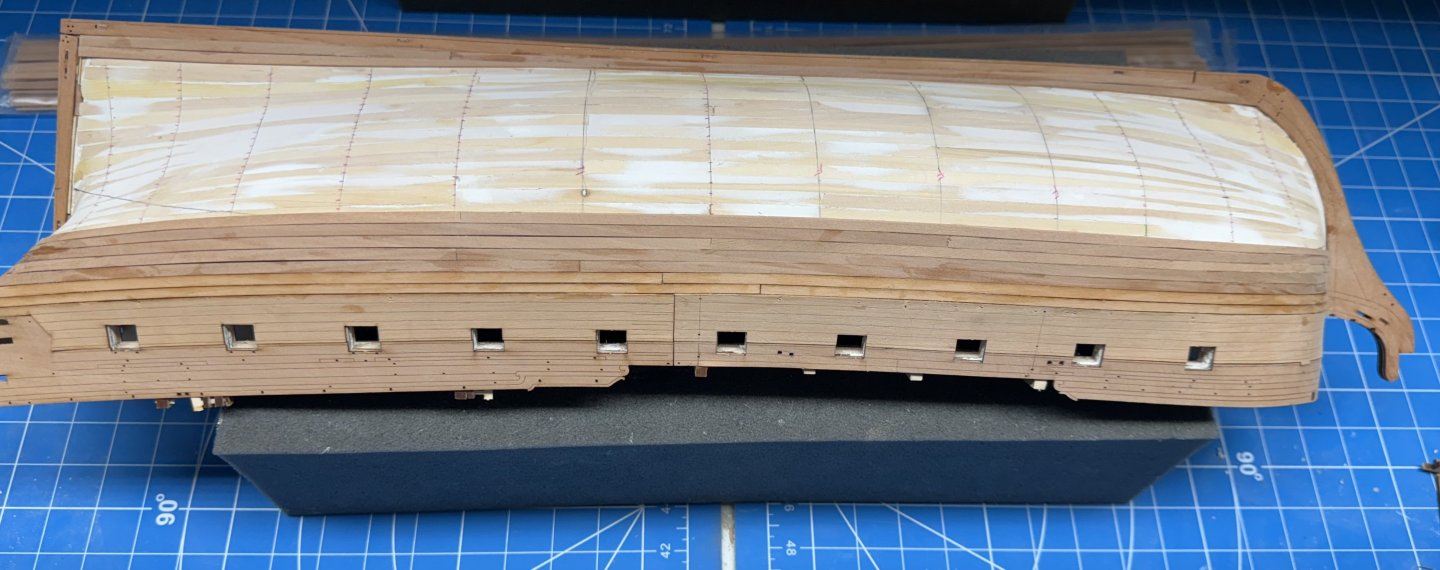
The spray job with the flat white primer did not go well. You could virtually see almost every seam between the planks in spite of they being undetectable by sight or touch before the paint. Maybe the liquid in the paint caused the grain in the wood to raise up or something. This is what it looked like after a brief sanding with 320 grit paper. You can see where the seam showed in the upper center which was not sanded. Next pass I will use the automotive gray primer with embedded filler as I have had some success with this on previous projects. It may take more coats of the flat white to cover but I think that is a price I am will to pay to get the hull closer to smooth. Anyway, back to the drawing board and another layer of diluted filler. In the meantime I will work on the yards. This time I will bore you with the picture.
- 422 replies
-
- 4
-
-
- Vanguard Models
- Sphinx
- (and 1 more)
-
While waiting for things to dry and to take a break from planking I completed the bowsprit and jib boom except for the gammoning between the two (paint is still wet). I'll get to that sometime "real soon now". I did depart from the recommended paint scheme on the jib boom. When I fabbed the piece (from Alaskan Yellow Cedar as you may remember) it developed a dark strip on both sides of the piece out toward the end. Since I thought this somewhat unsightly especially out in front of everything I painted the forward end of the jib boom black for the first third or so. You can see that is the pictures below. I have sprayed the hull with the white primer and will wait until tomorrow to decide what to do next.


- 422 replies
-
- 6
-
-
- Vanguard Models
- Sphinx
- (and 1 more)
-
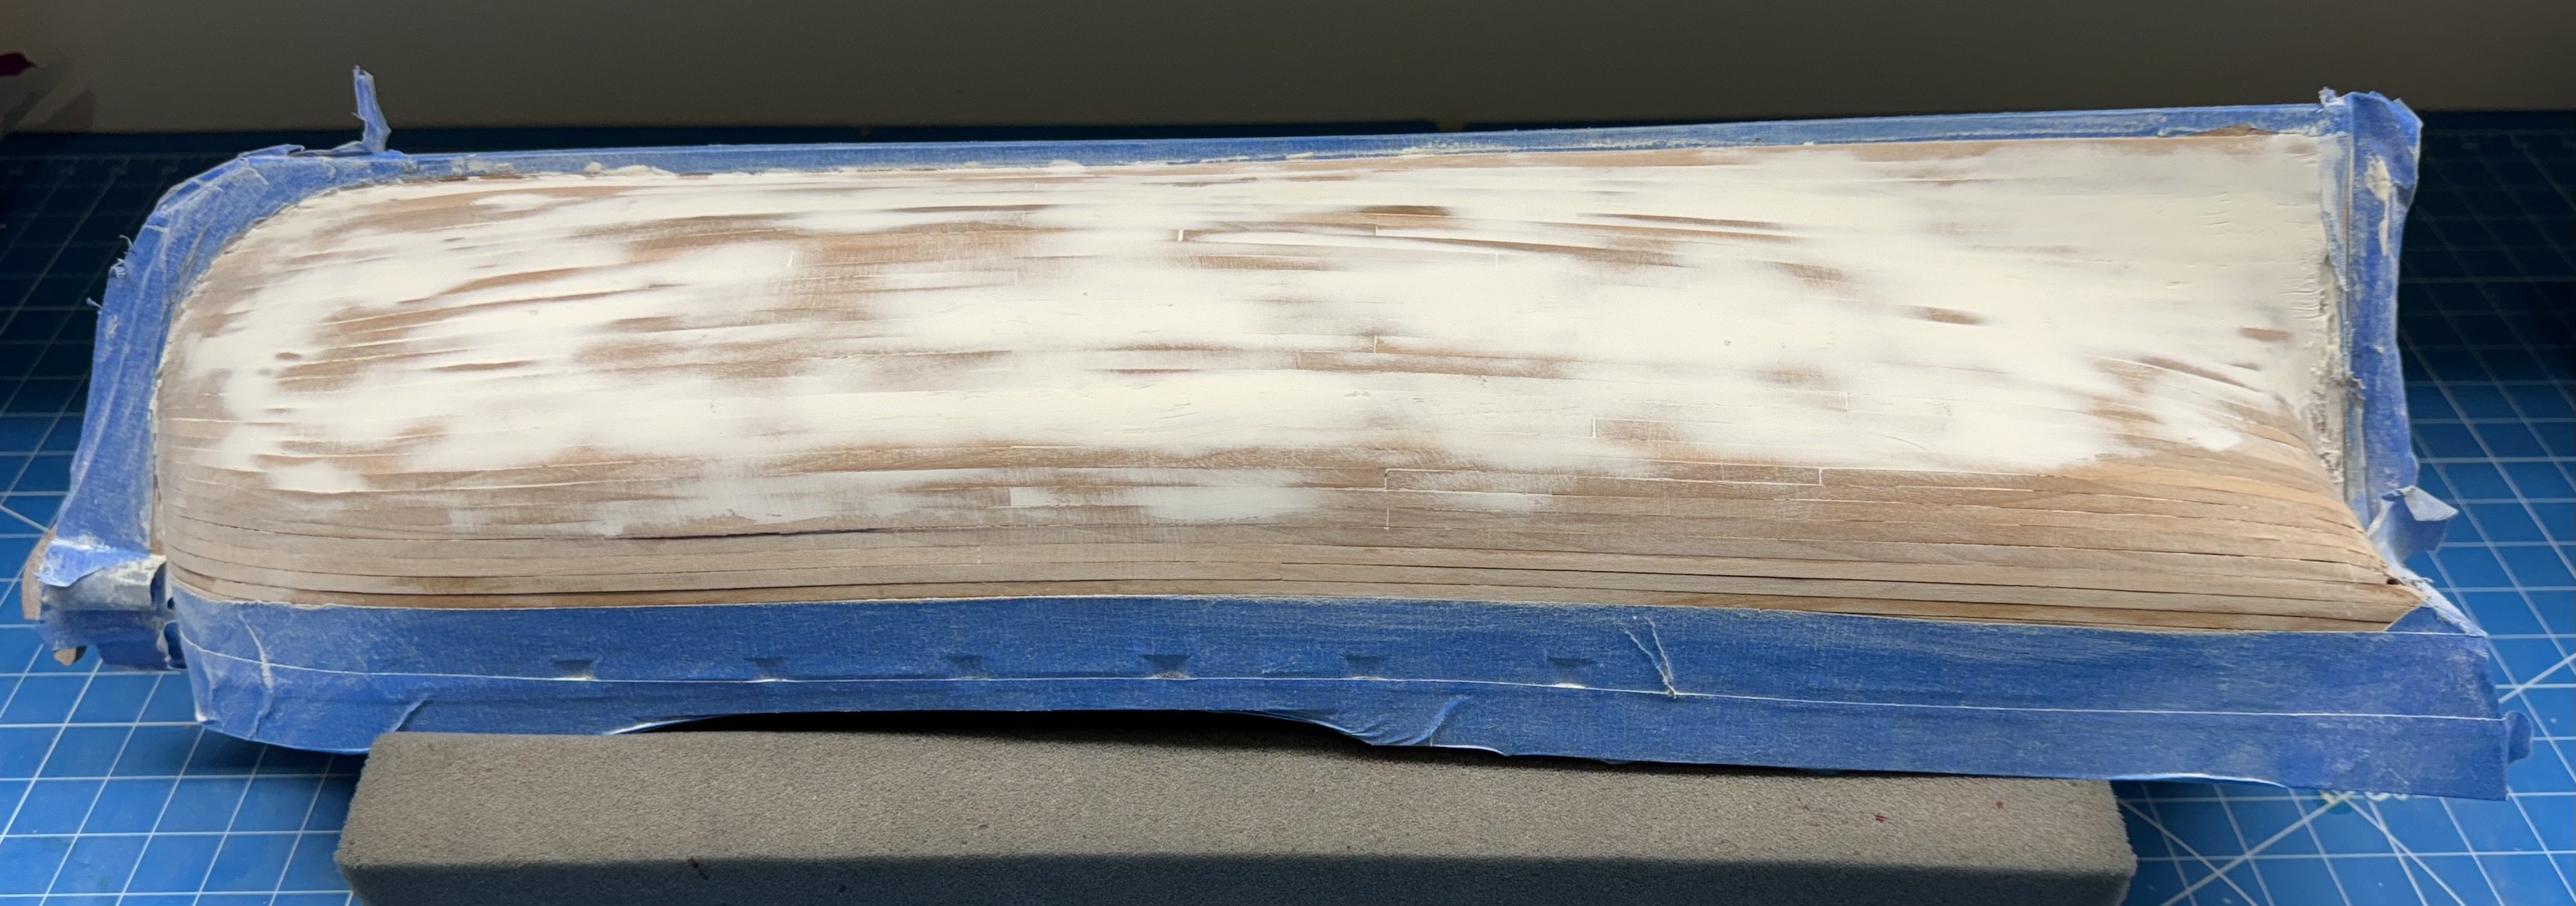
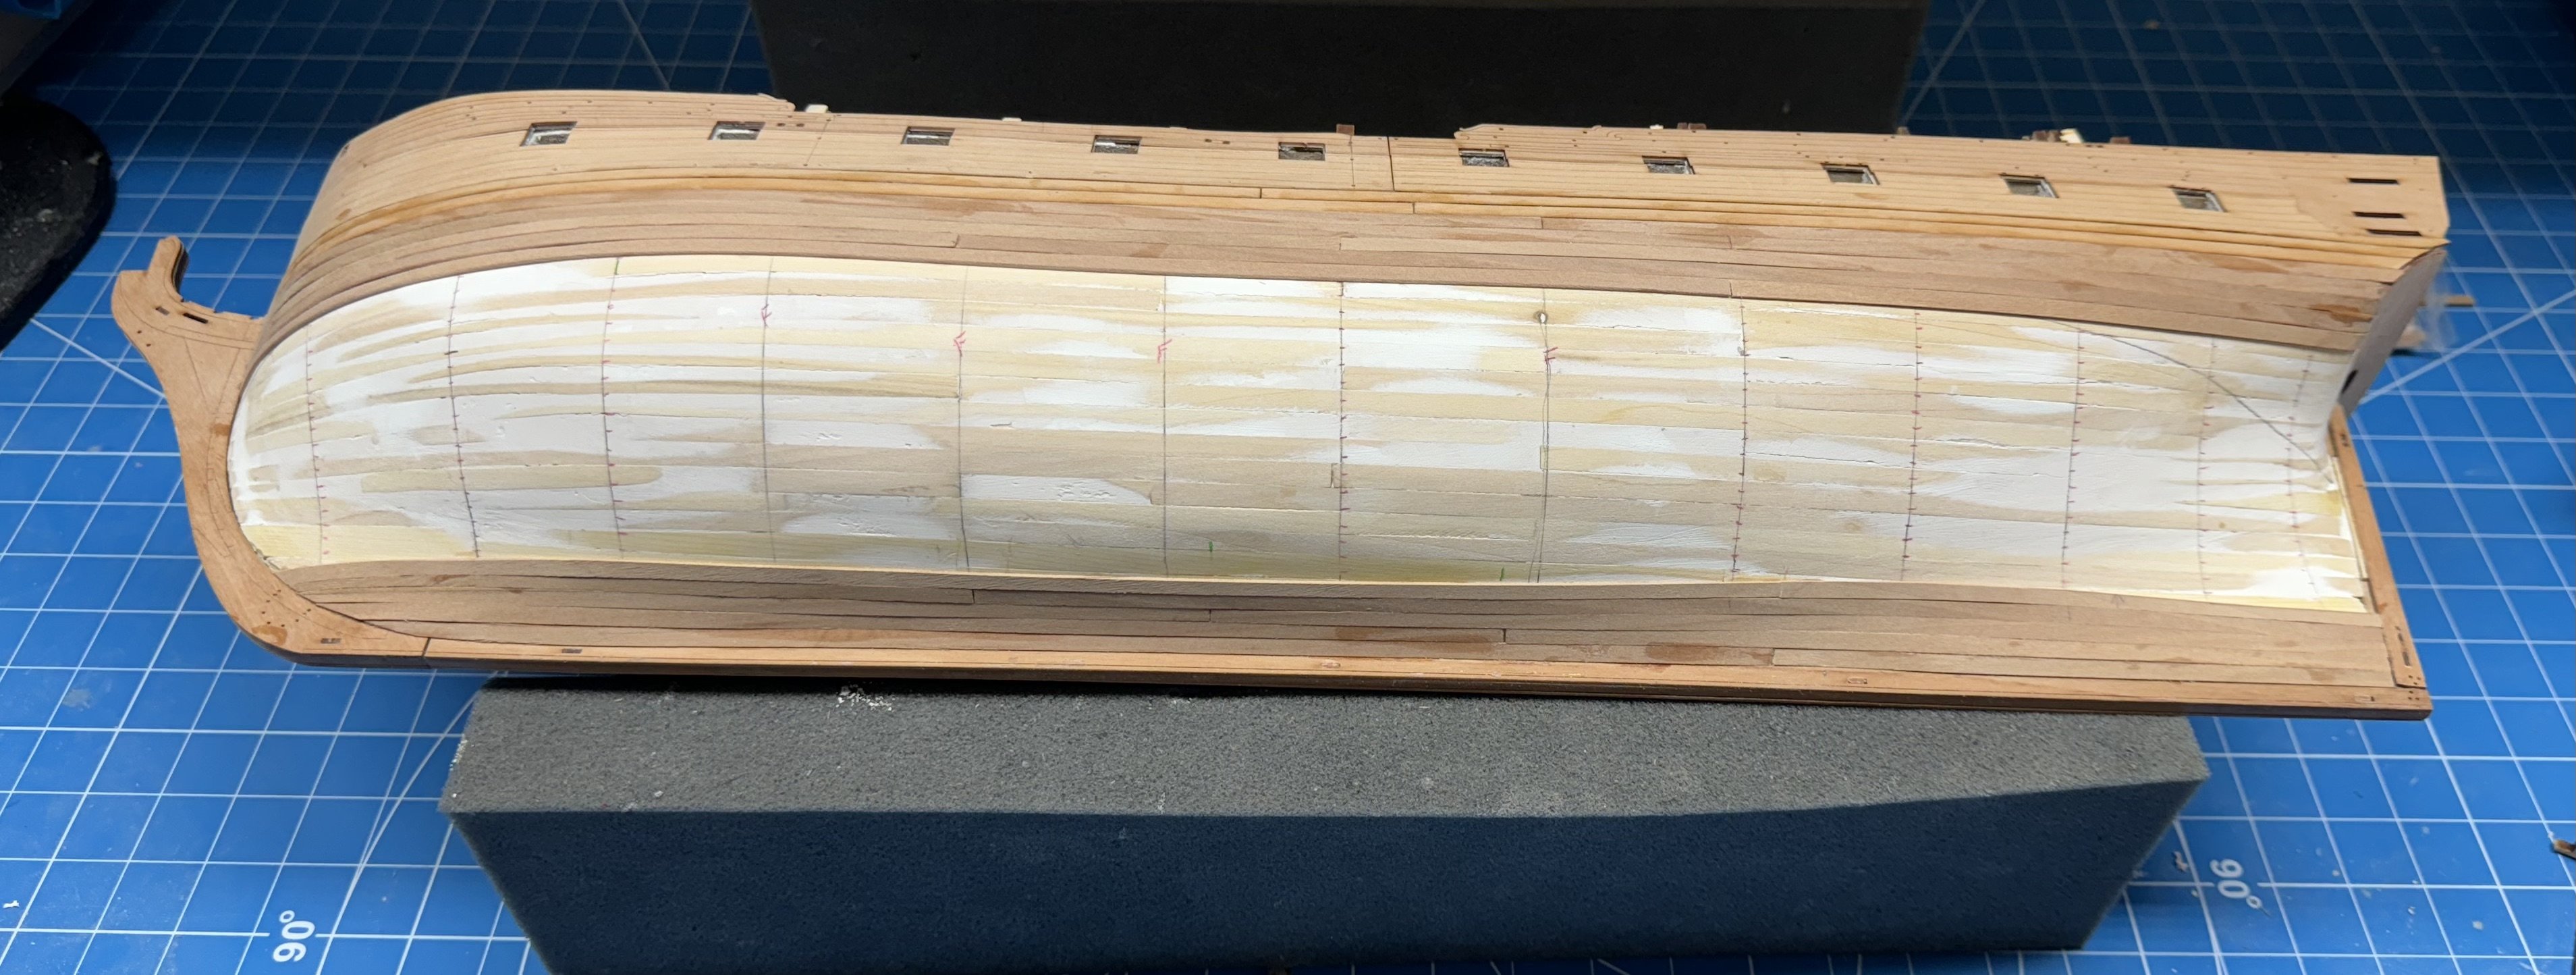
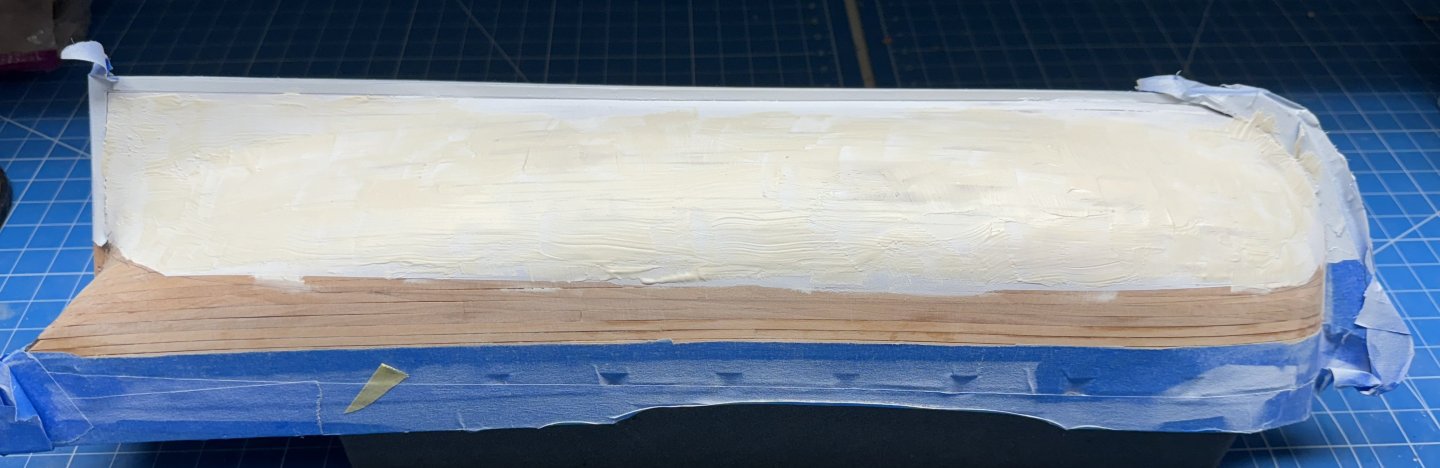
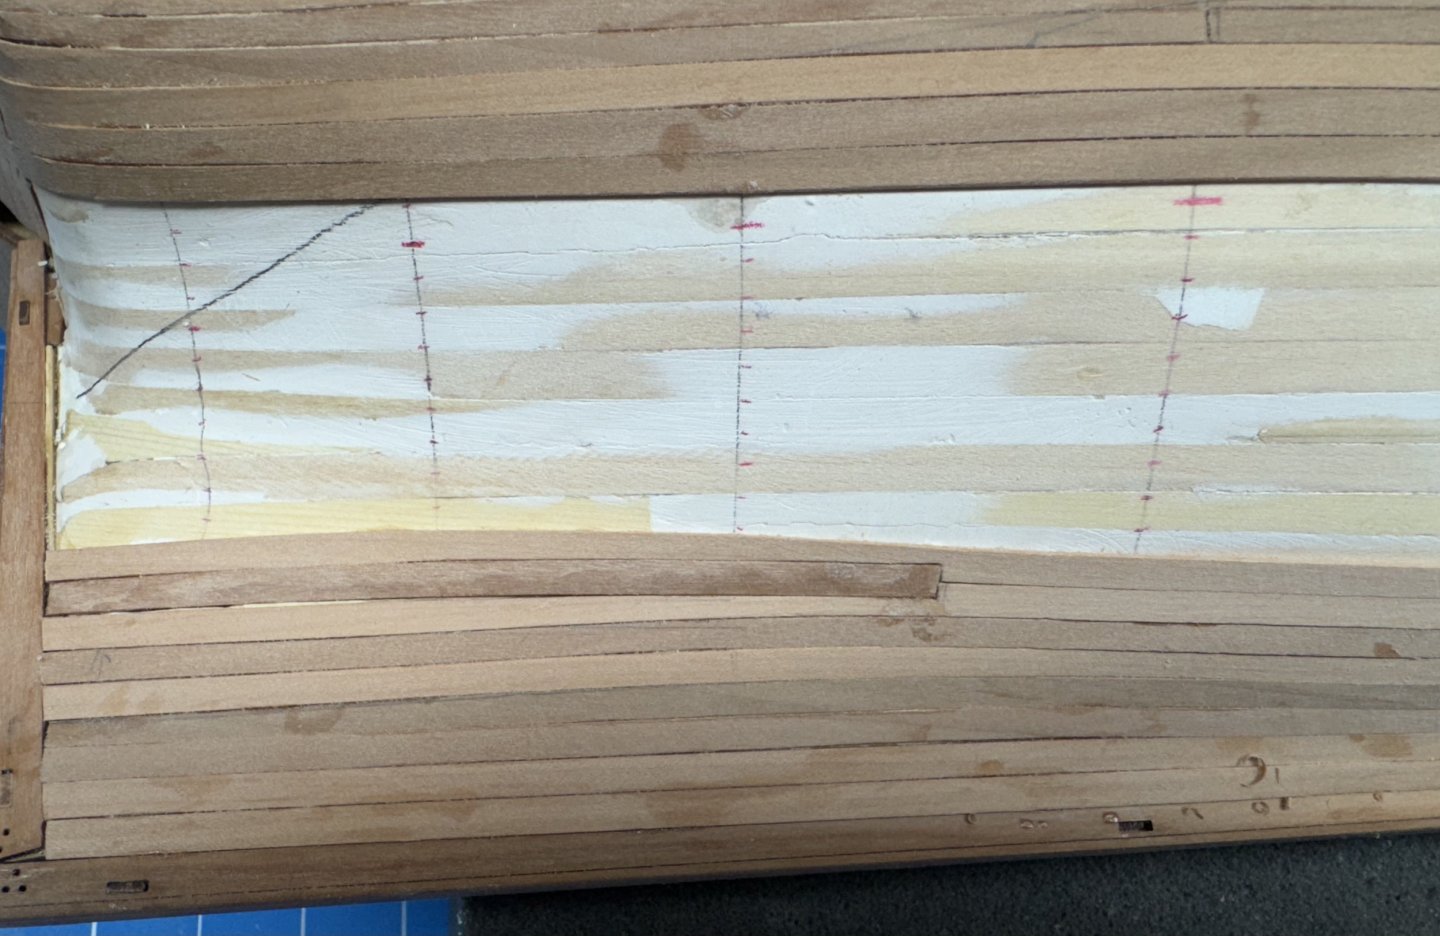
Tanks TJ So I took some Goodfilla natural wood filler and added water to about a 4 parts filler, 1 part water to get to a point where I could spread the filler on with a stiff brush and hopefully get the filler in all the "nooks and crannies" of the surface. I will not bore you with a picture, just imagine the entire hull below the waterline covered with a more or less solid layer of filler - both sides. I used a sanding pad and 220 grit paper to attack the dried (overnight just to be sure) filler. I used (where possible) a rotary motion - like polishing your car (if you can remember the last time you did that - I can't). That suggestion was made in the instructions of the Model Expo Muscongus Bay lobster smack which were written by David Antscherl who ought to know a thing or two on the subject. I is hard (for me) to resist the temptation to sand in the direction of the planking but... Anyway I sanded the filler down to what I think, based on sight and feel is a mostly smooth surface. My next step is to mask off above the waterline (with a generous (1/4" or so) margin and use some flat white primer (spray paint) to see what the surface "really" looks like. Here is what the hull looks like now - based on the amount of filler left I guess my second layer wasn't all that much better than the first.


- 422 replies
-
- 4
-
-
- Vanguard Models
- Sphinx
- (and 1 more)
-
Thanks mugie - it doesn't look quite so good closeup and without the thinner but it certainly is a better job than the first layer.
- 422 replies
-
- 3
-
-
- Vanguard Models
- Sphinx
- (and 1 more)
-
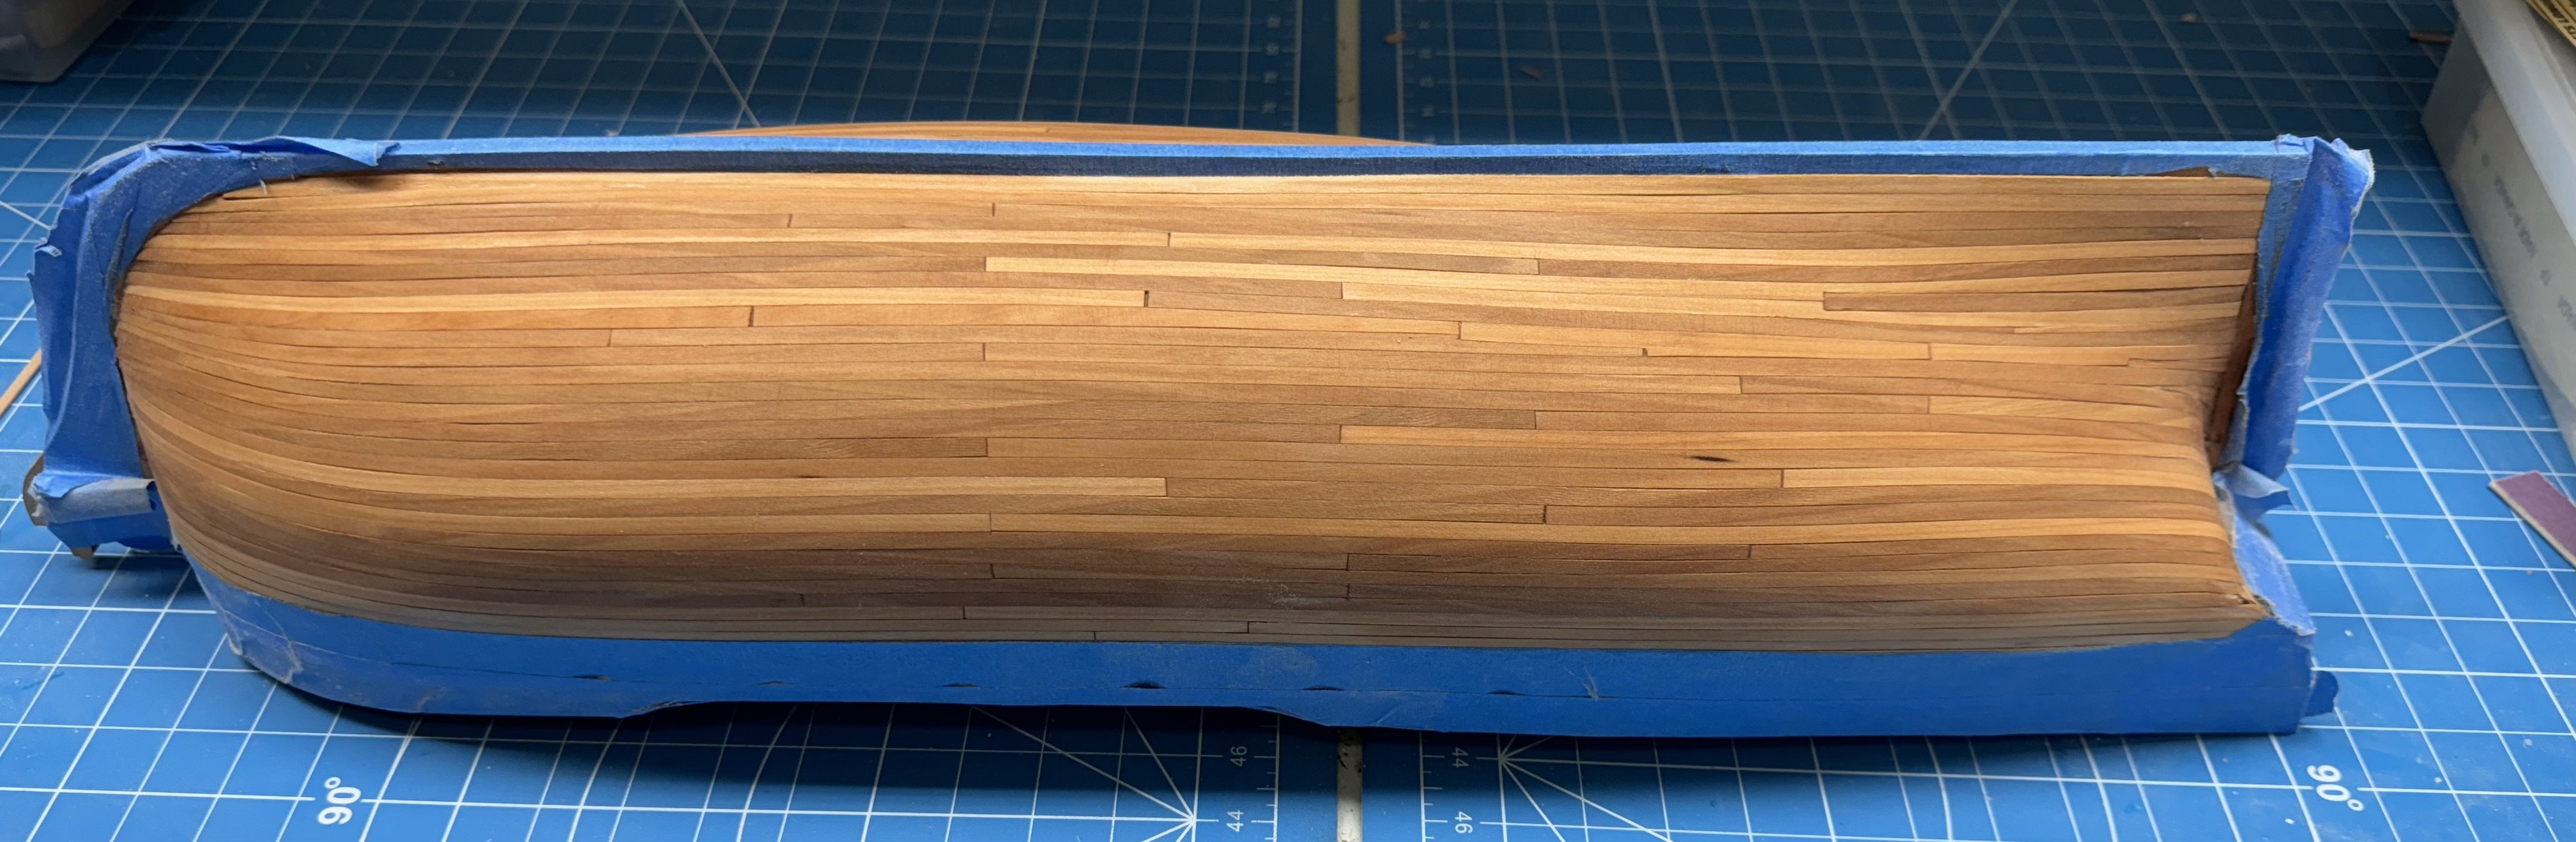
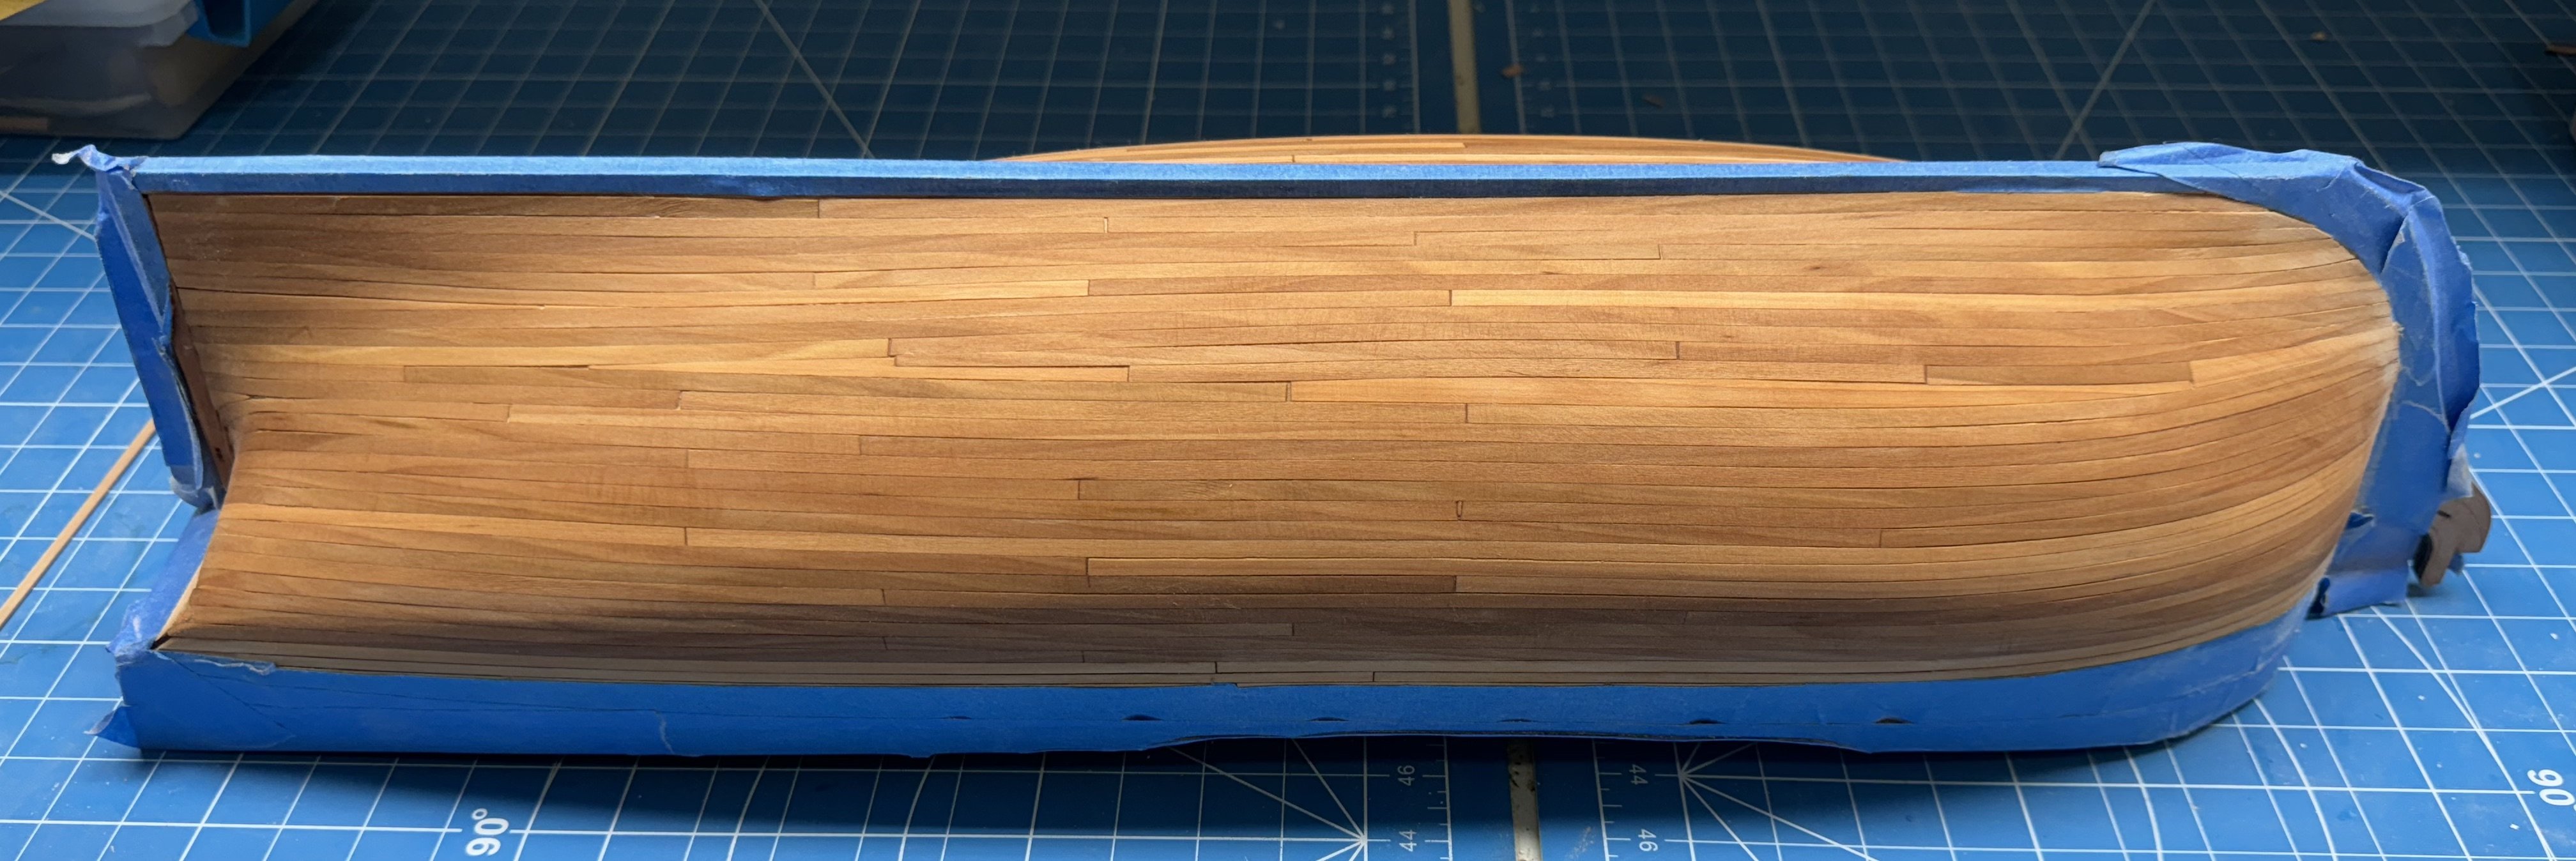
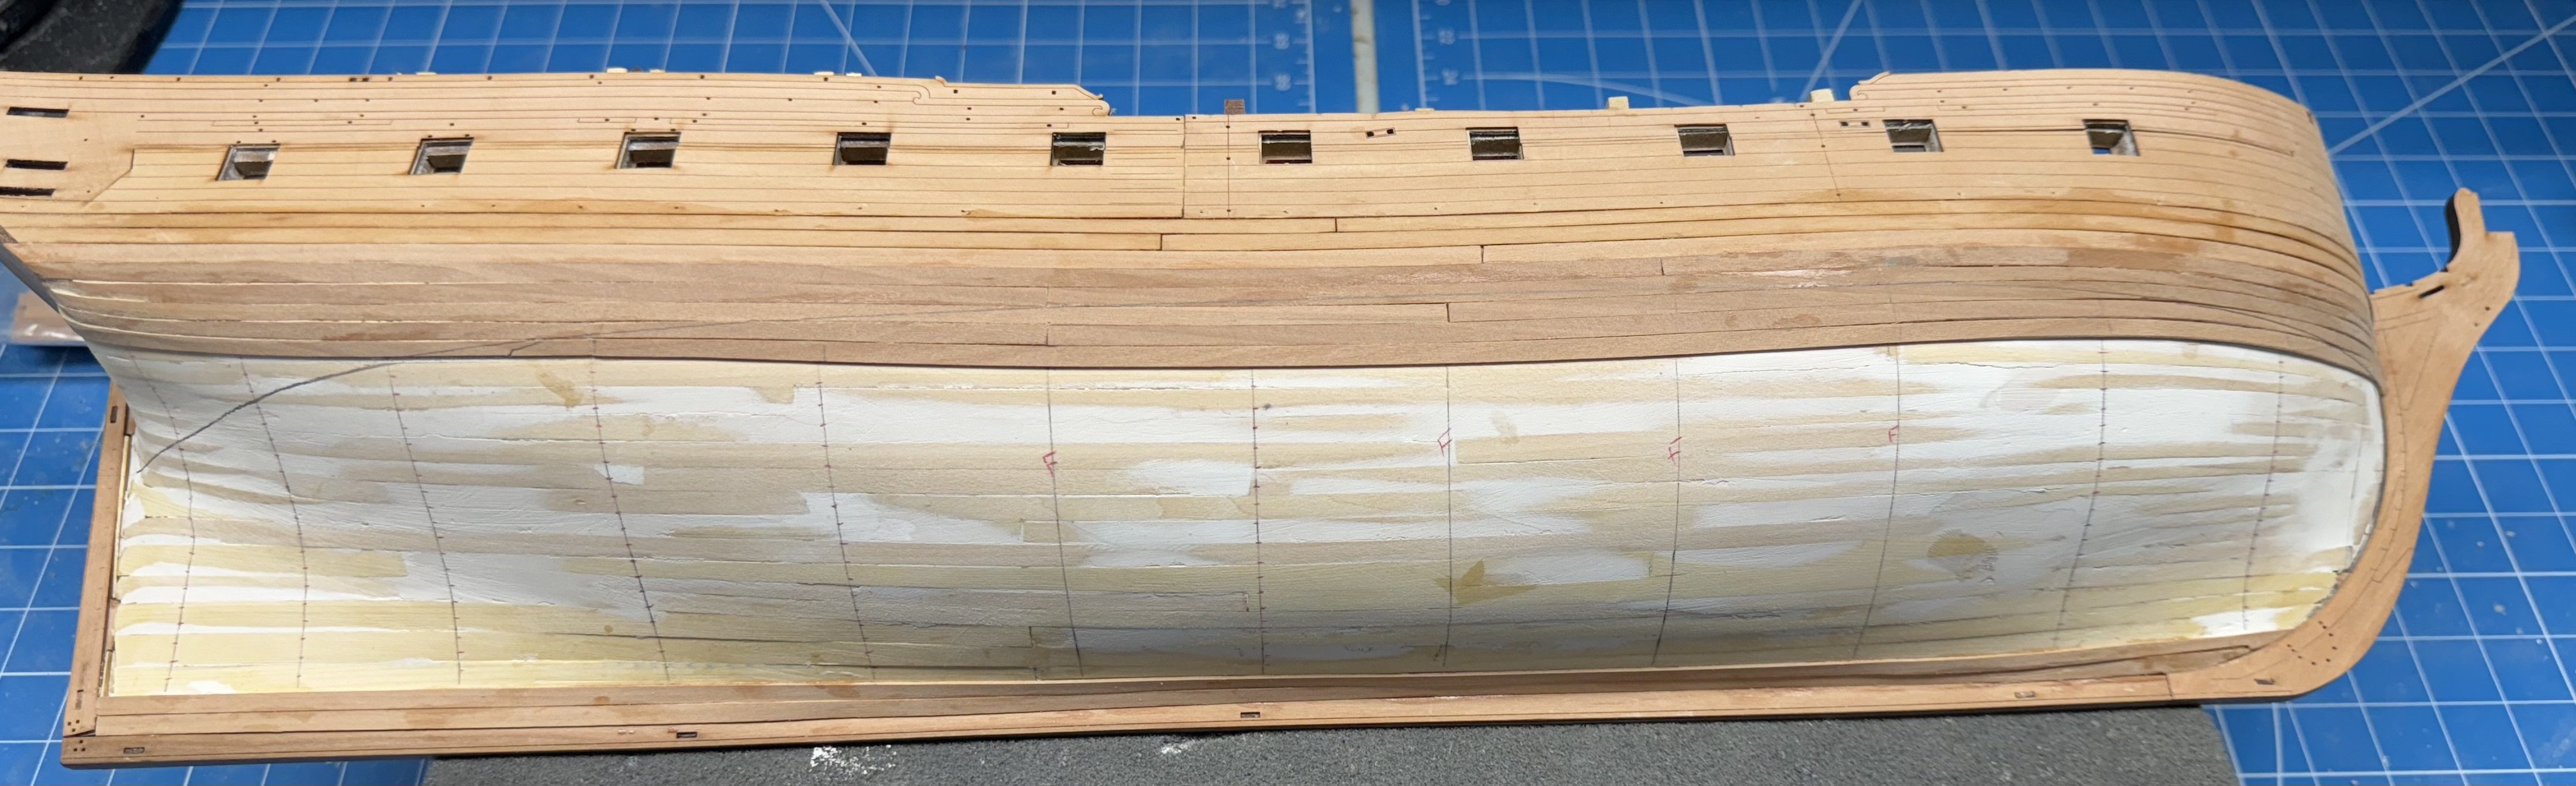
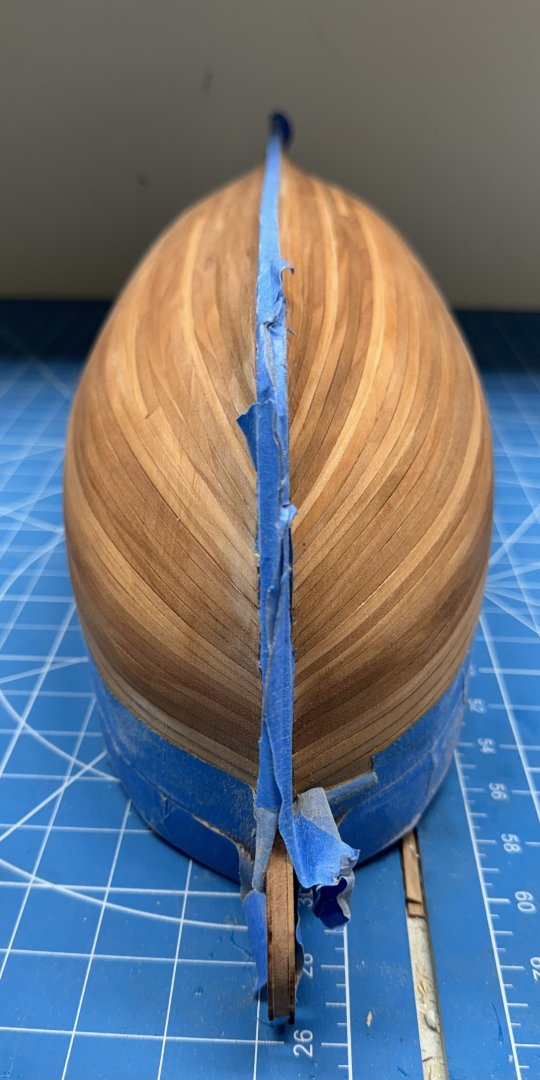
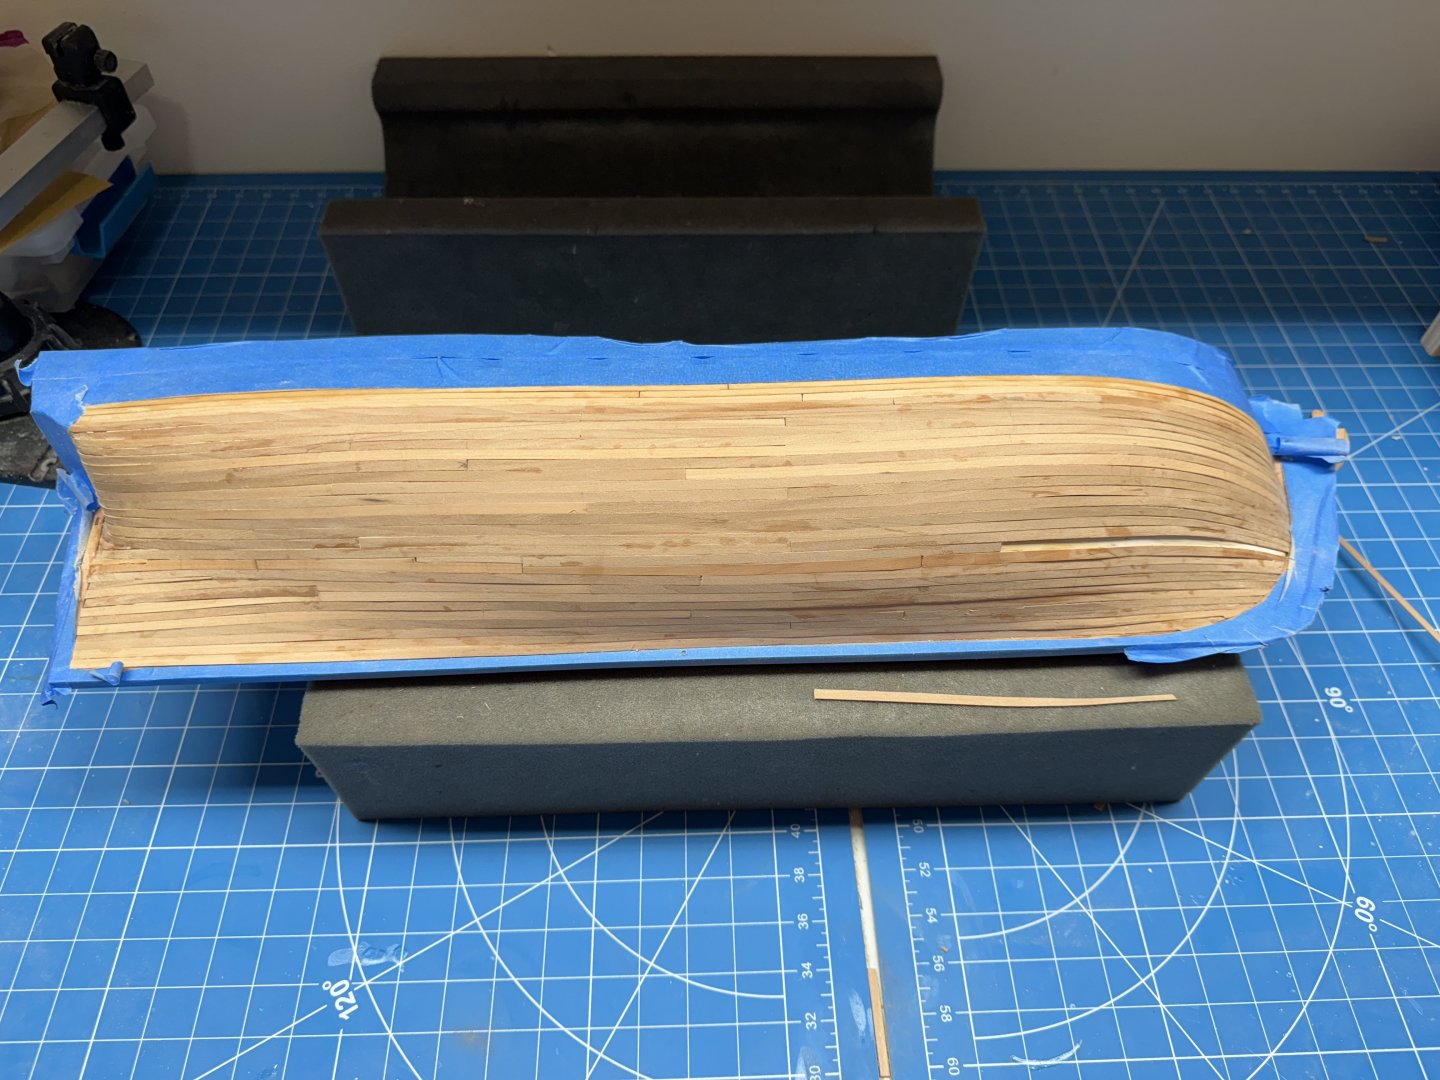
The first pass sanding the planking with 120 grit. Hull has been wiped down with paint thinner so it looks much darker than its "natural" state. I could probably done a better job matching plank color but since most of it is "under paint" I thought it not worth a great deal of effort and it is not nearly as noticeable when the paint thinner evaporates.. Mixing up my thinner filler now. Will apply after the thinner is gone and I remark the waterline.


- 422 replies
-
- 10
-
-
- Vanguard Models
- Sphinx
- (and 1 more)
-
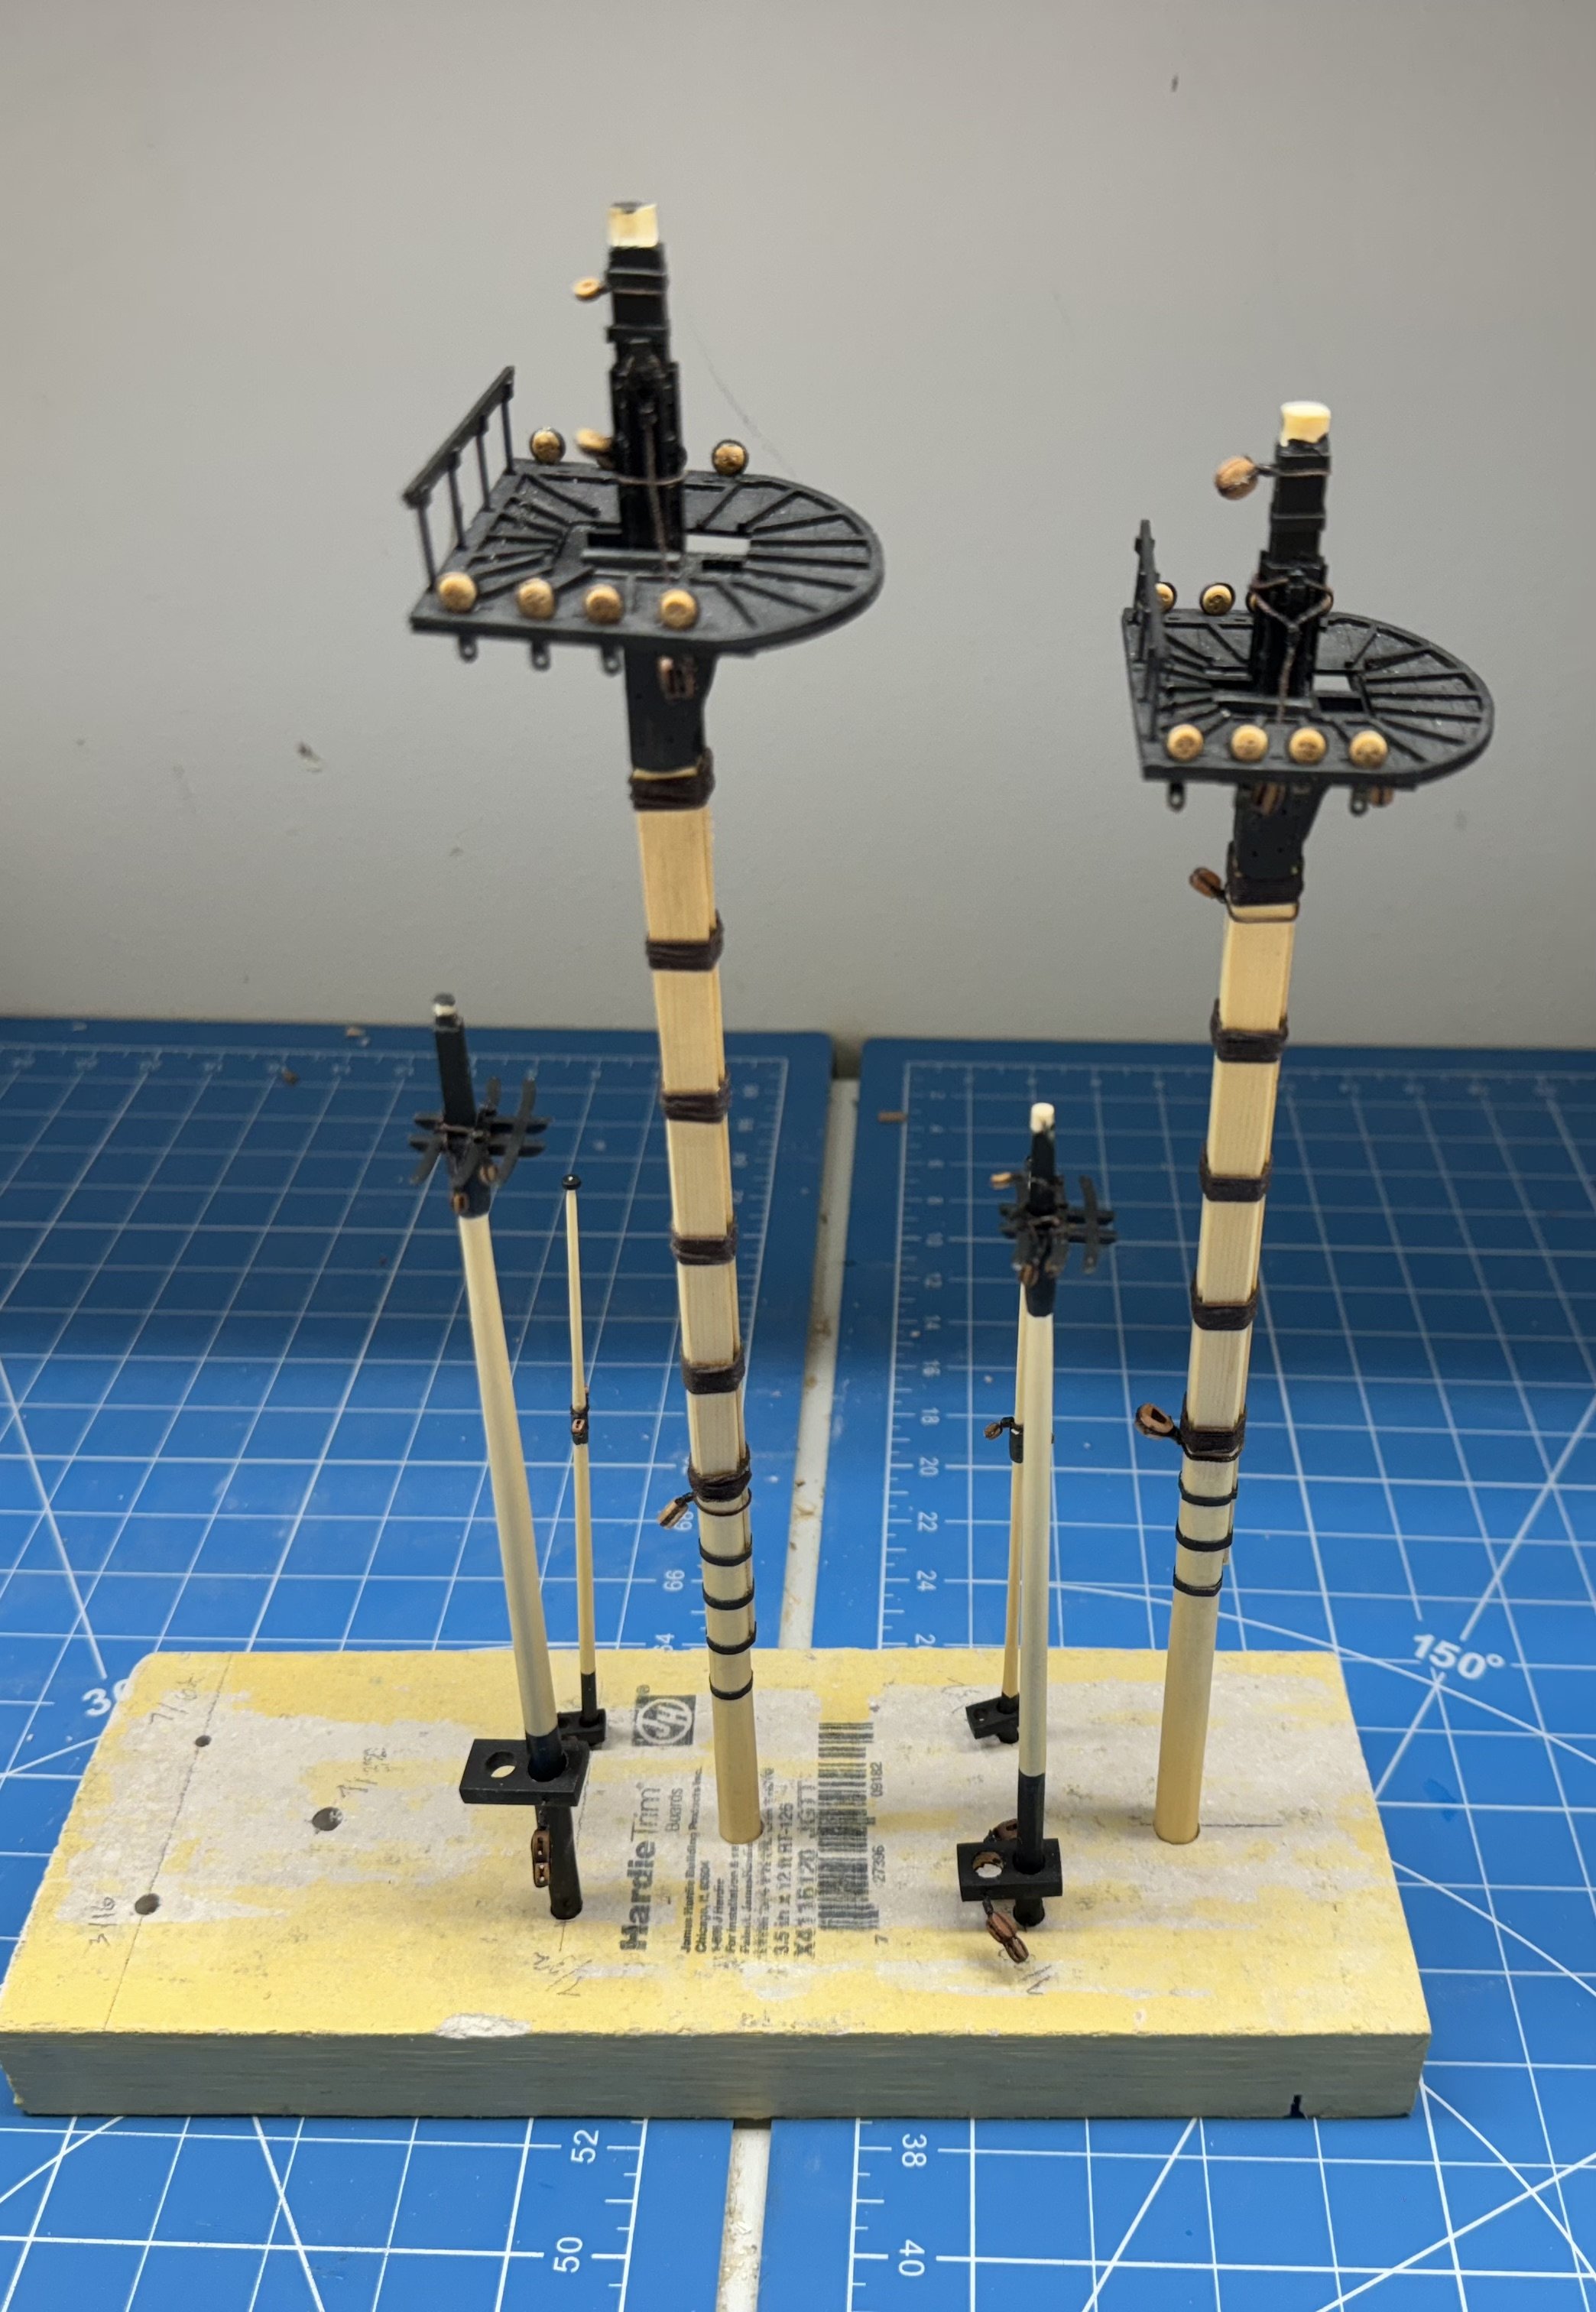
Starboard side 2nd planking completed except for the final plank. On this side I did not have to resort to using "alternative methods" to fit the final plank. But it did take awhile to get it to fit. Also while planking I could not resist and fabbed (refabbed actually) the Mizzen Mast. Here are all three masts awaiting "further developments. I need to do the bowsprit and jib boom and then go back to the yards.

- 422 replies
-
- 8
-
-
- Vanguard Models
- Sphinx
- (and 1 more)
-
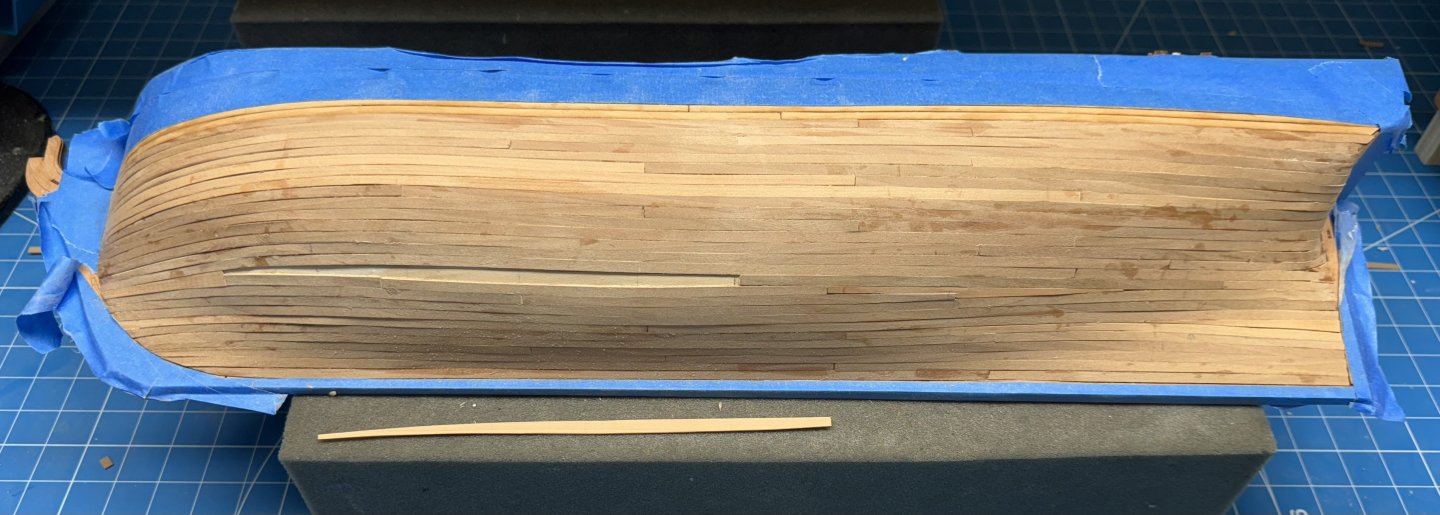
Port side planking is DONE (well almost - the final piece is sitting on the stand to give you an idea of what it looks like. I had to use a 6mm wide plank and took an impression of the opening with scotch tape. I cut the tape out of the opening and taped it to the plank then cut around it (with a generous margin) then sanded and sanded and sanded some more until I got the piece to fit. Back to the starboard side and when that is done it will be a rinse and repeat on the fill and sand and fill and sand.... from the first layer.
- 422 replies
-
- 6
-
-
- Vanguard Models
- Sphinx
- (and 1 more)
-
Only three more rows to go on starboard side. Going back to port side - will finish this after I get port side to about this same state.

- 422 replies
-
- 7
-
-
- Vanguard Models
- Sphinx
- (and 1 more)
-
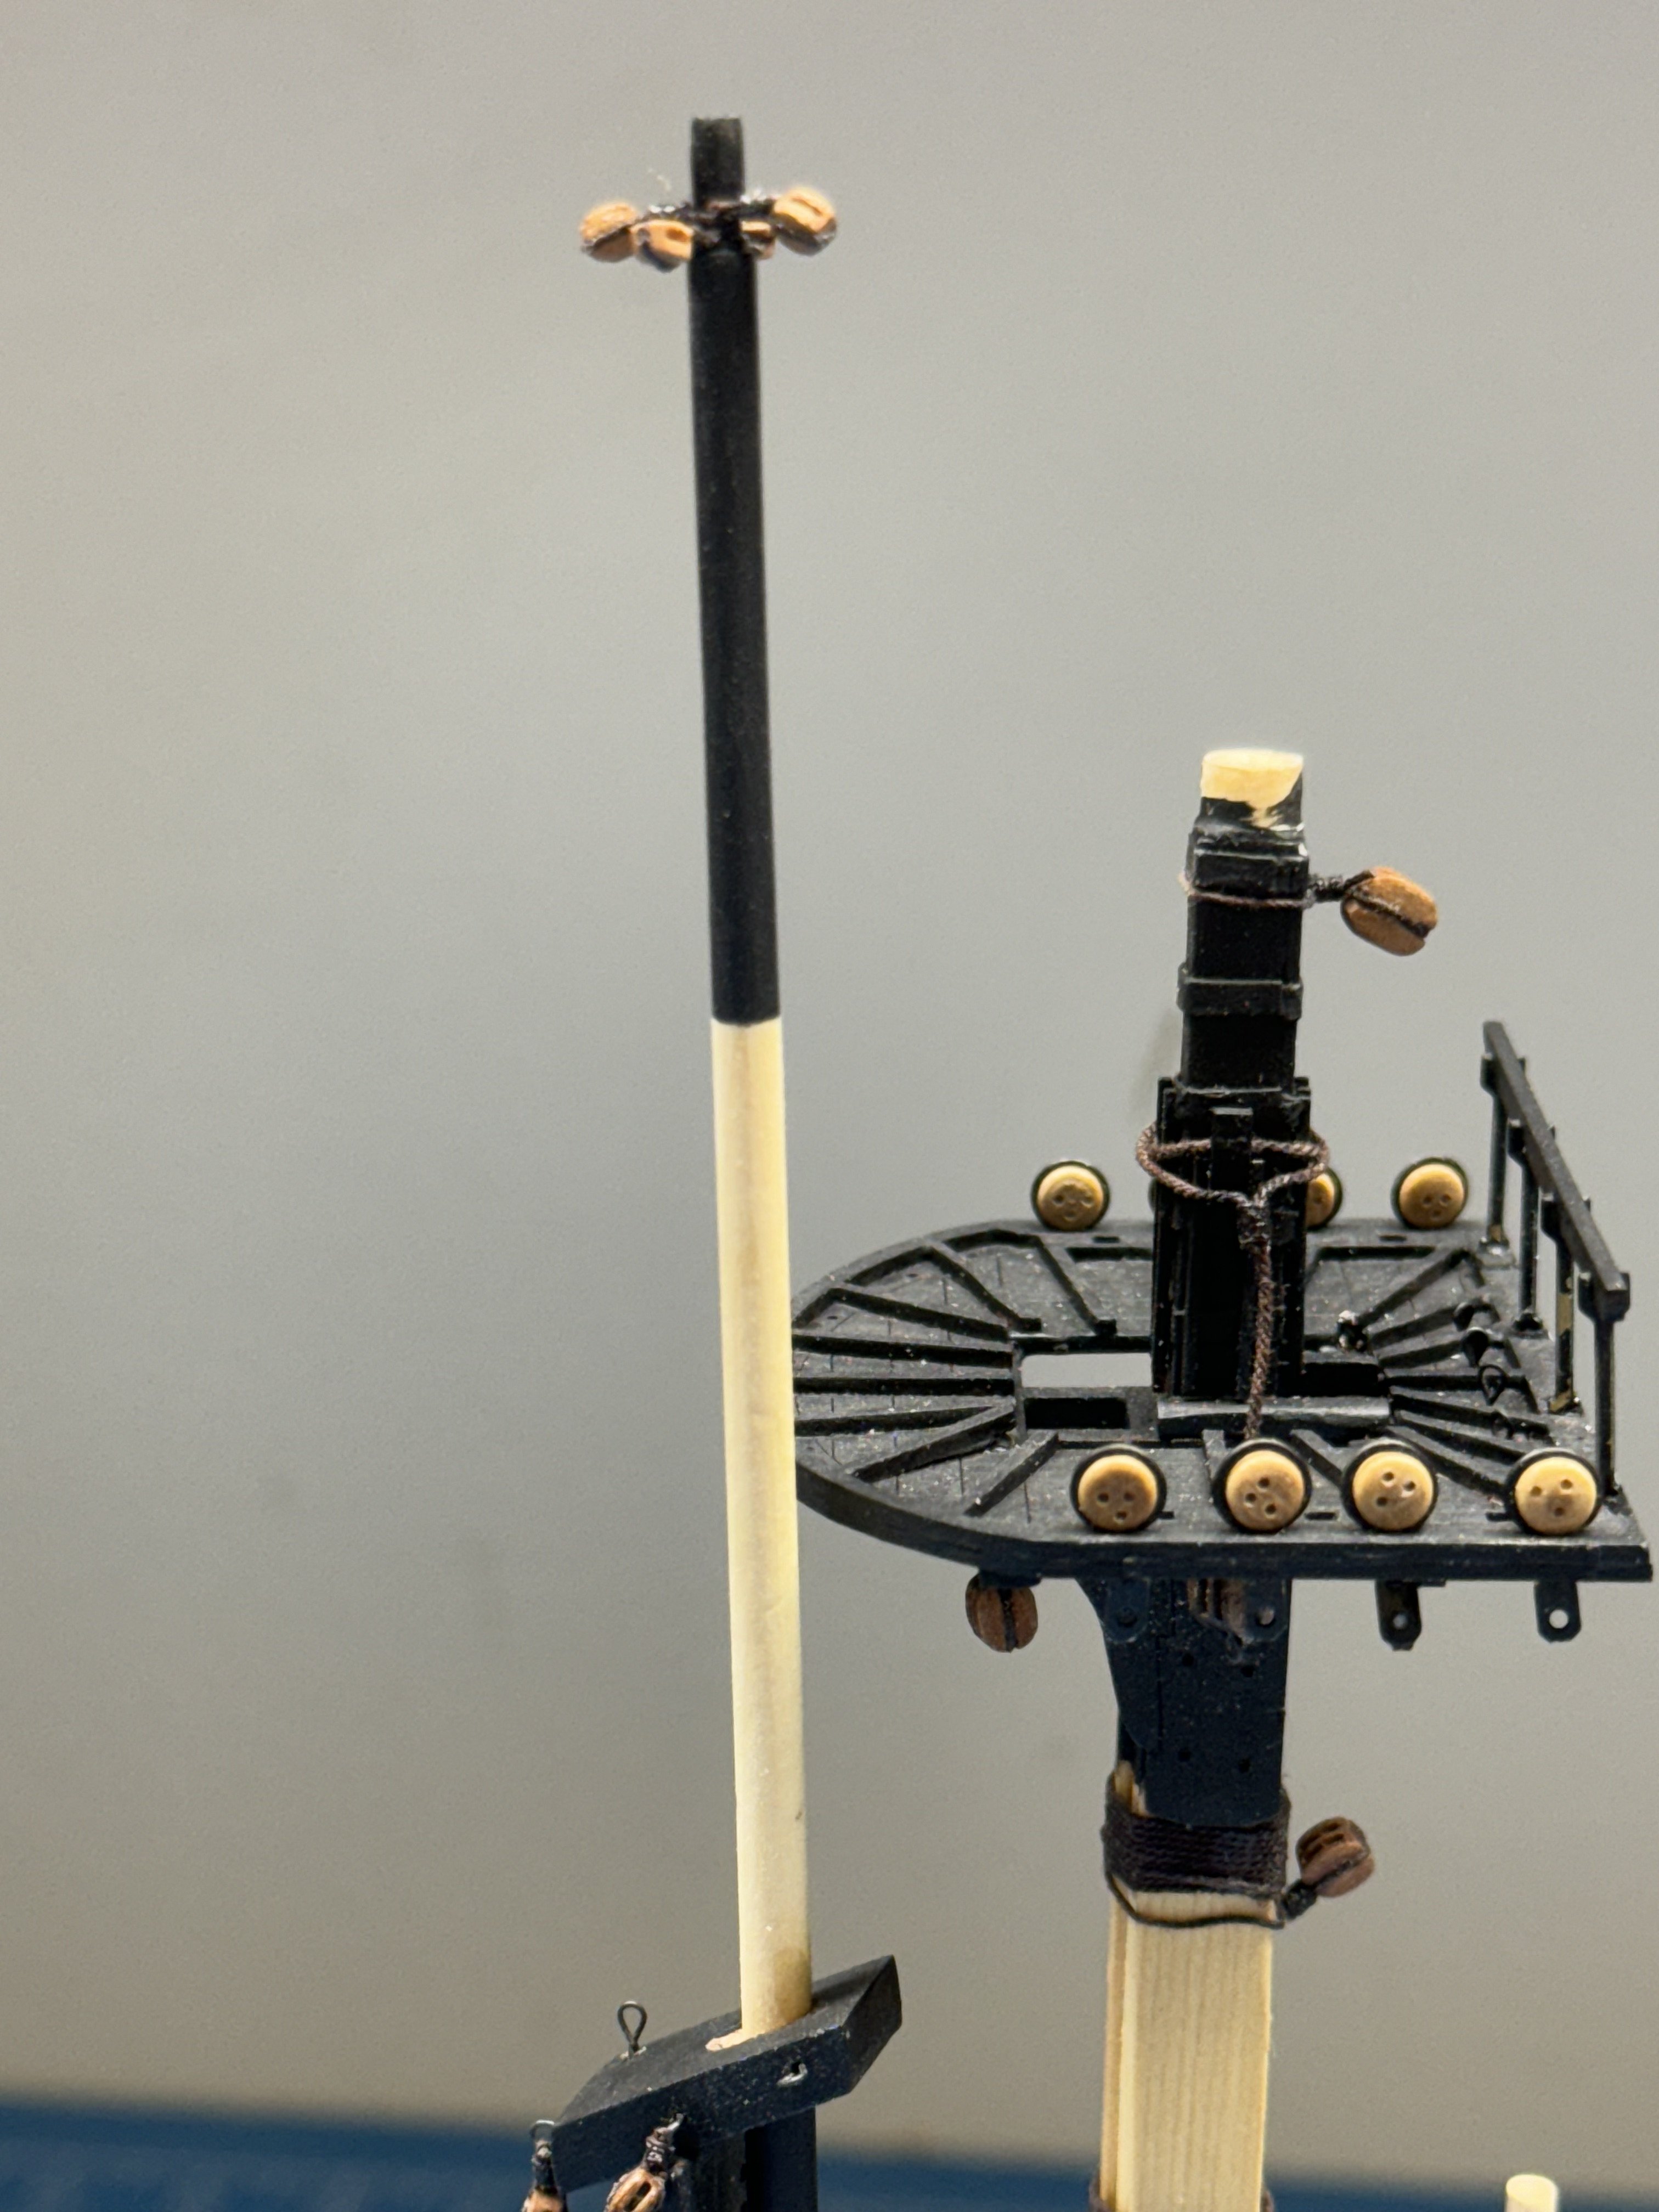
When I decided to go with Alaskan Yellow Cedar masts I had already assembled and configured (blocks, etc.) the Mizzen masts. So I had to "disassemble" them so I could reuse the components for which I had no replacements (mast top, upper platform etc. That went okay (nothing broke) and everything appears reusable except for the belaying pin rack on the lower mast. I managed to break that in three places getting it removed. I salvaged the belaying pins - I did not use the PE ones supplied but some cylindrical ones I bought at BlueJackets some time back. Anyway I needed to replicate the belaying pin rack that fits around the mast. Turns out that was not that easy. My first thought was to make it from AYC but when I got a piece planed down to approx 1mm thick the grain was so pronounced that I knew it would probably break apart before I got it finished. And I was correct. So next I tried boxwood and this time made it a little thicker than 1mm, like 1.1mm and managed to find a place where the grain did not run perfectly straight. Now for the sequence. First I rough cut a piece using the carrier piece to get the size. Once I had it close to round and just up to but not over the pencil line I drilled a small hole in the center (more or less) and then used a series of needle files to enlarge the hole until it fit around the mast and was in the center (more or less). So far, so good - then I marked the location for the holes and while drilling them out on the micro drill press the piece broke into three pieces. Back to the boxwood sheet and this time I drilled a 7/16" hole and used the needle files to enlarge it enough to fit the mast - not much work there as the mast is just a bit over 7/16" diameter. Then I used the carrier sheet to put the hole in the center of the circle and then roughed out the piece and sanded it to shape using 220 sanding sticks. Then I marked and drilled the holes (again on the micro drill press) and again it broke after two holes were done. Back to the boxwood sheet one more time. Only this time I drilled ALL the holes before I roughed the piece out of the sheet. And I used a series of thumb drills (#73 then 68 then 62) to drill the pin holes. Once that was finished I roughed out the piece and used sanding sticks to refine the shape. And here it is - I checked the rigging sheets and all but one of these pins is accounted for so all the effort was not in vain. Now to paint it black, install the pins (maybe a coat of thin CA in the process) and install on lower Mizzen mast.

- 422 replies
-
- 4
-
-
- Vanguard Models
- Sphinx
- (and 1 more)
-
Thanks mugie - When you are retired it helps to have a "hobby".
- 422 replies
-
- 3
-
-
- Vanguard Models
- Sphinx
- (and 1 more)
-
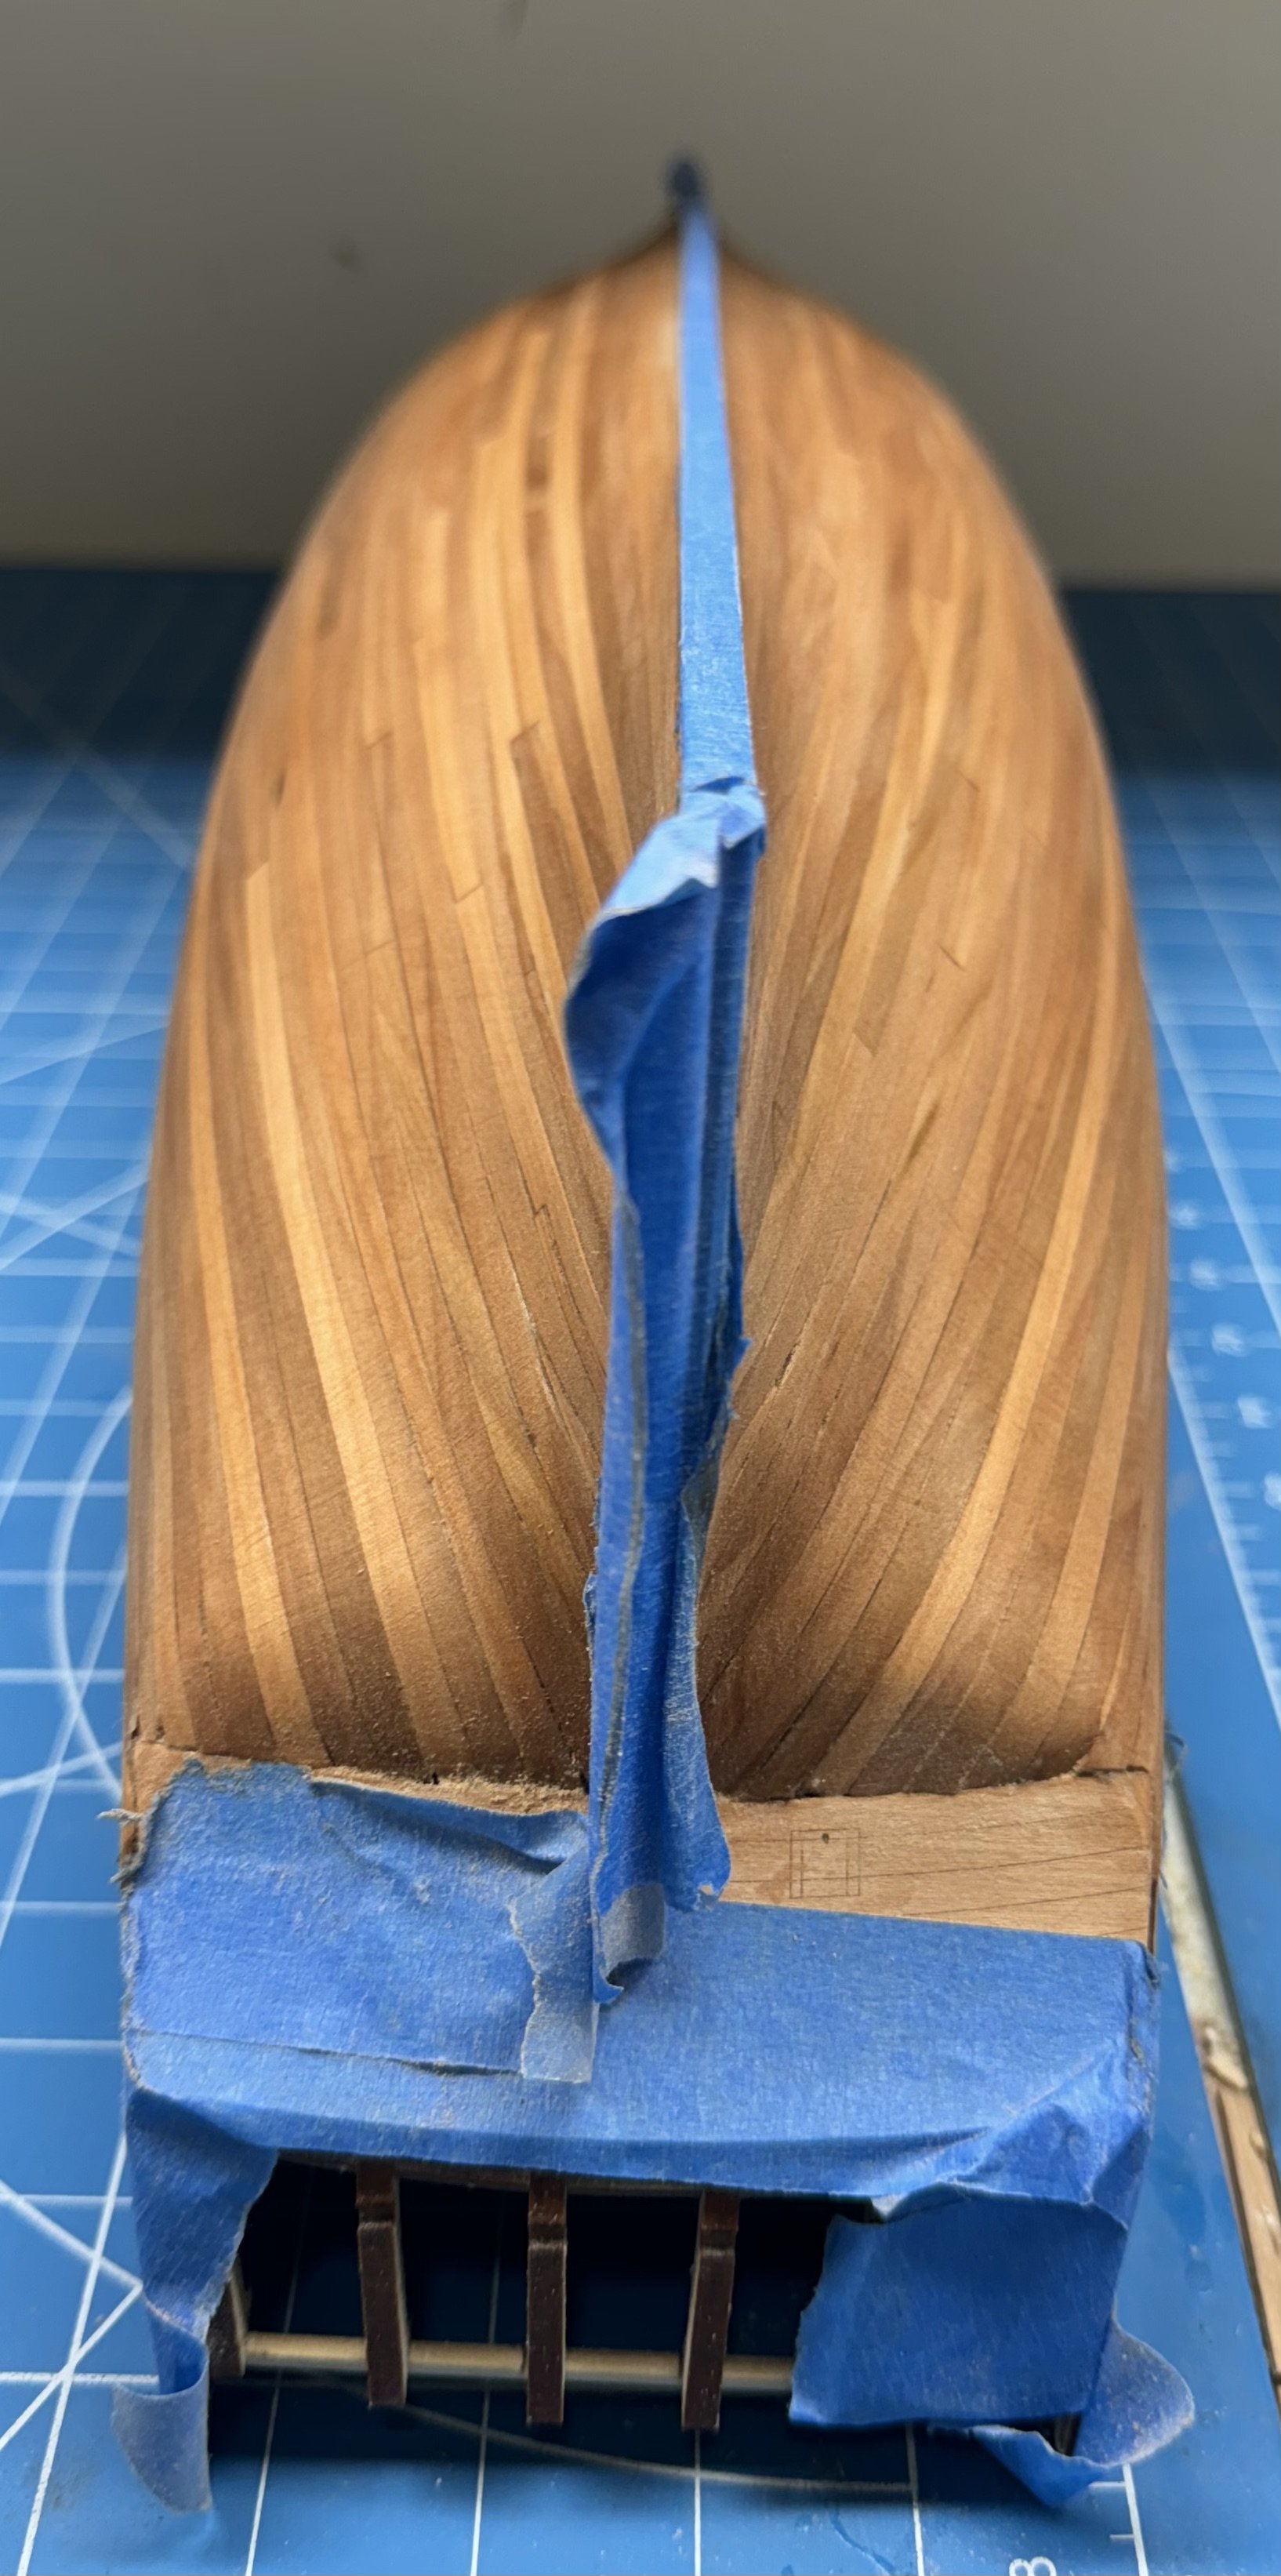
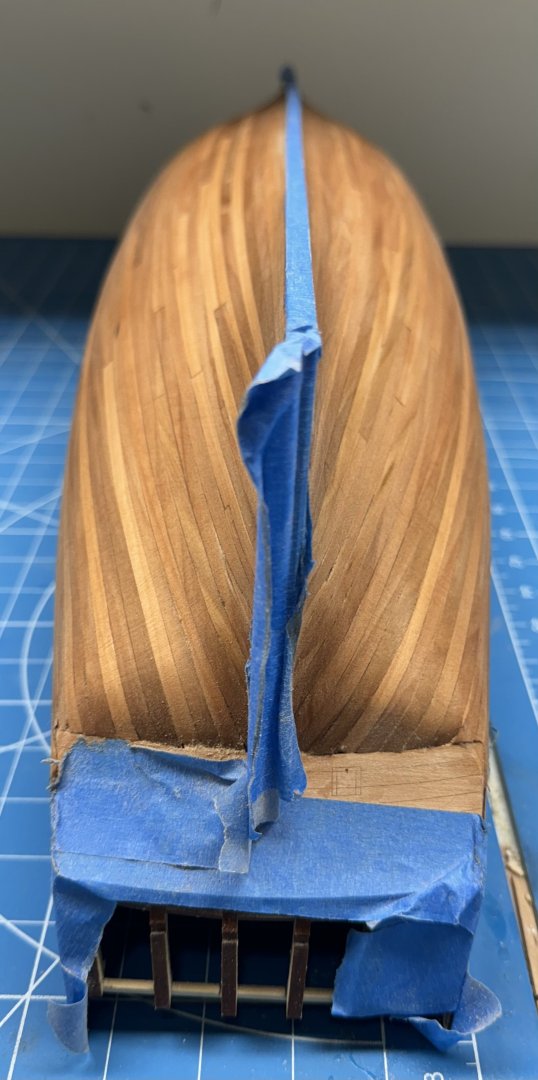
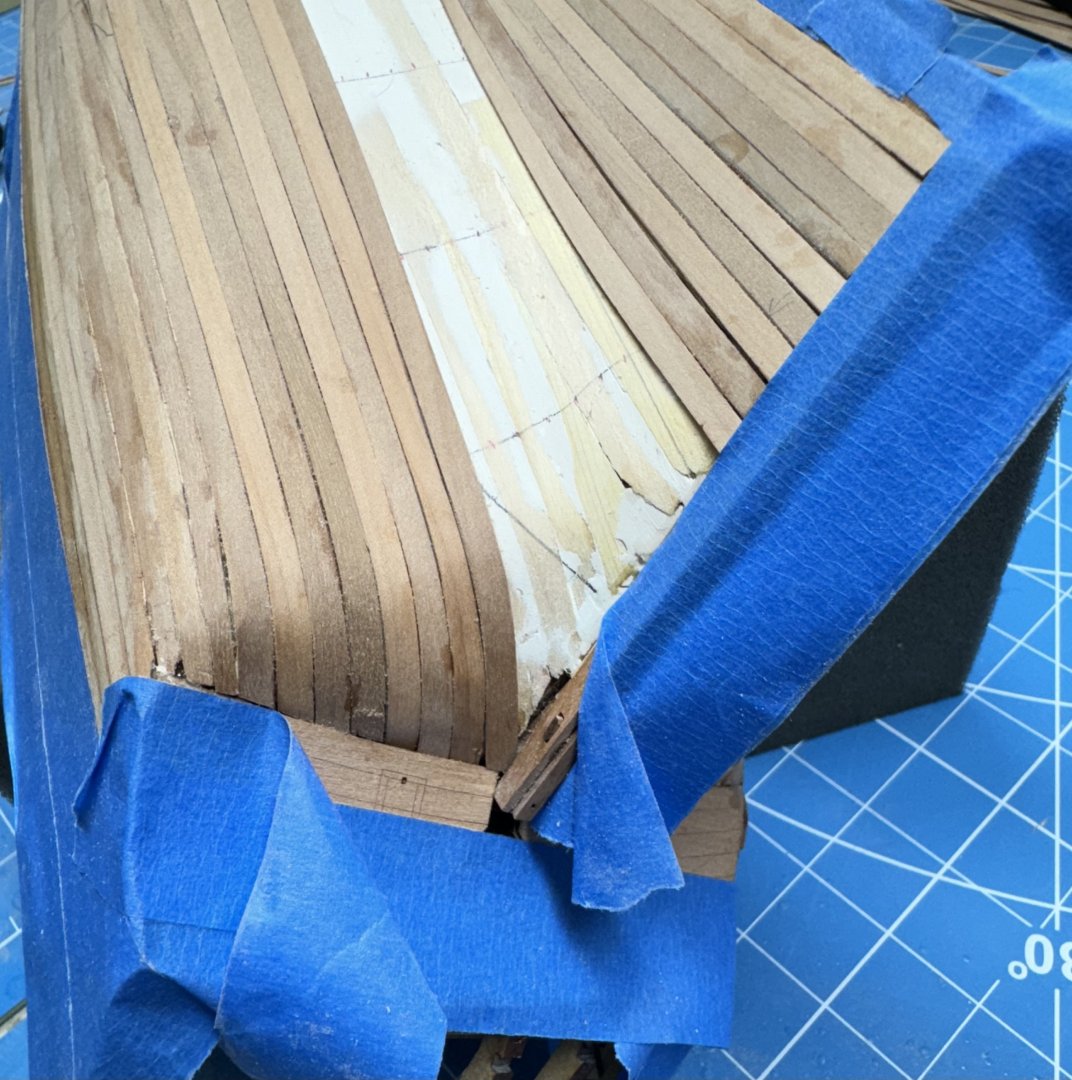
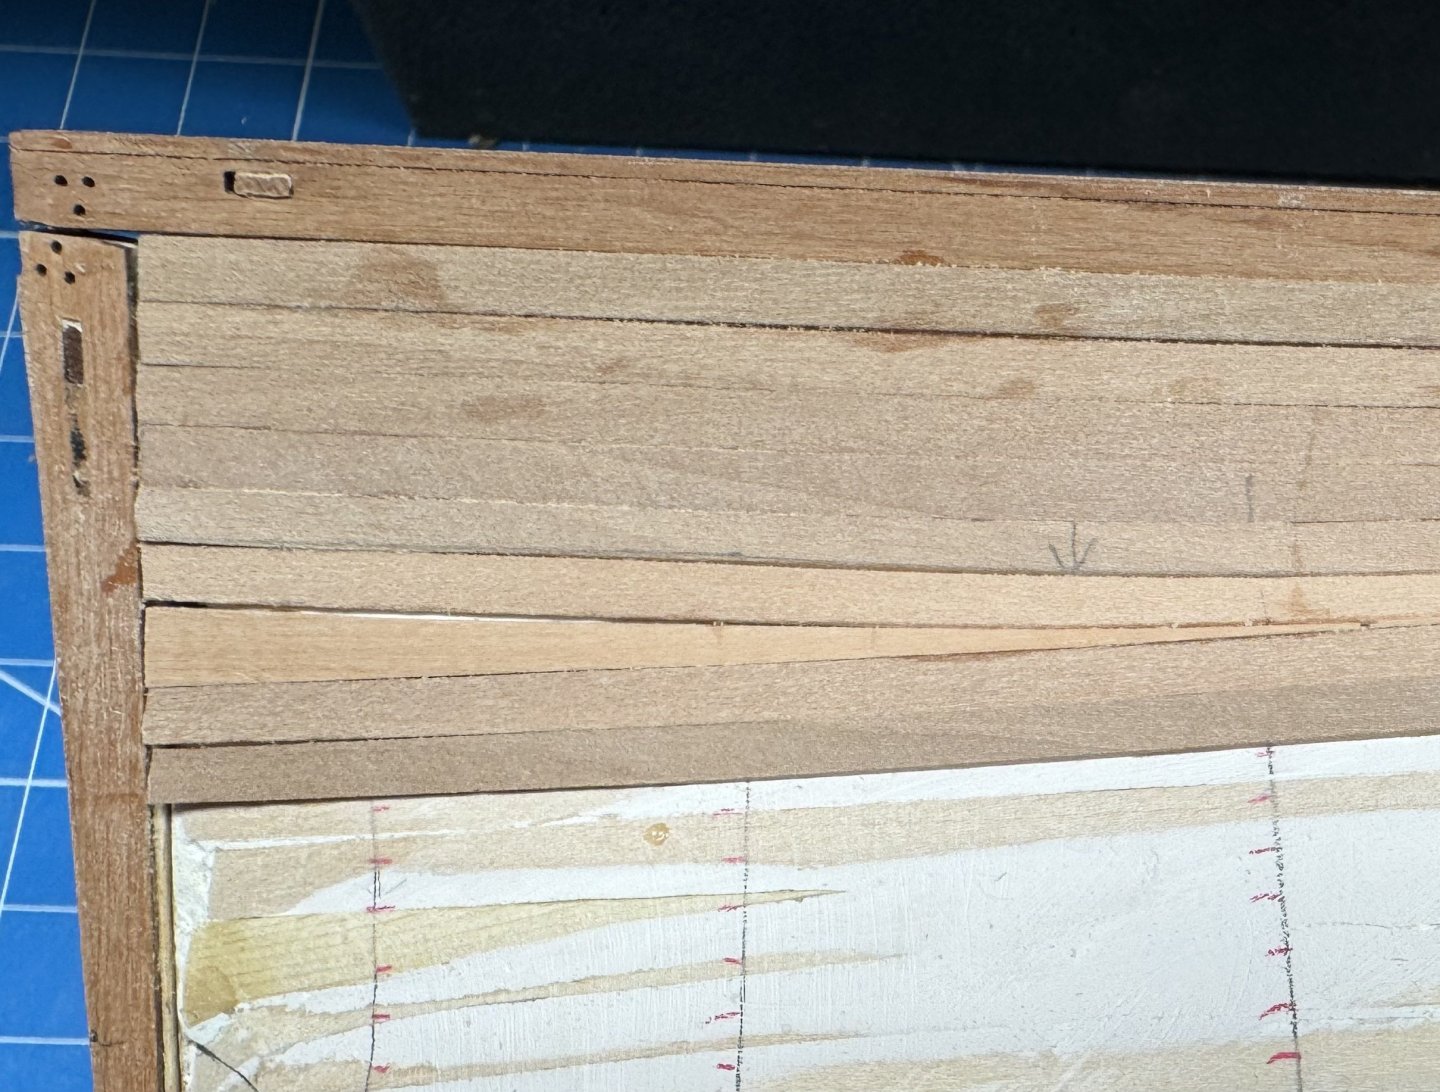
I decided to work the starboard side this morning and the port in the afternoon - sounds like a song title. I also decided to extend the upper band (the one that starts at the wales) to the "break" at the stern post before adding any more to the keel side. Here is the stern - I also added the protective masking tape since it in necessary when sanding and it can't do any harm now. If you look closely you and see one of the planks cracked just above (below) the transom. Hopefully this will "sand out" but... As I working down the side the "twist" required at the bow gets larger and larger and getting the plank to lay flat against the first layer more difficult. So I recalled an "edge bending" technique that was presented in the HMS Wincheslea monograph. It uses a small jig to bend the plank and a little water and an iron to "fix" the bend in place. Here is one of the planks after being edge bent. While it still takes some "force" to get it up against the row above it does relieve much of the stress trying to twist the plank off the first layer. It will likely be necessary for the reminder of the plan ks at the bow.
- 422 replies
-
- 7
-
-
- Vanguard Models
- Sphinx
- (and 1 more)
-
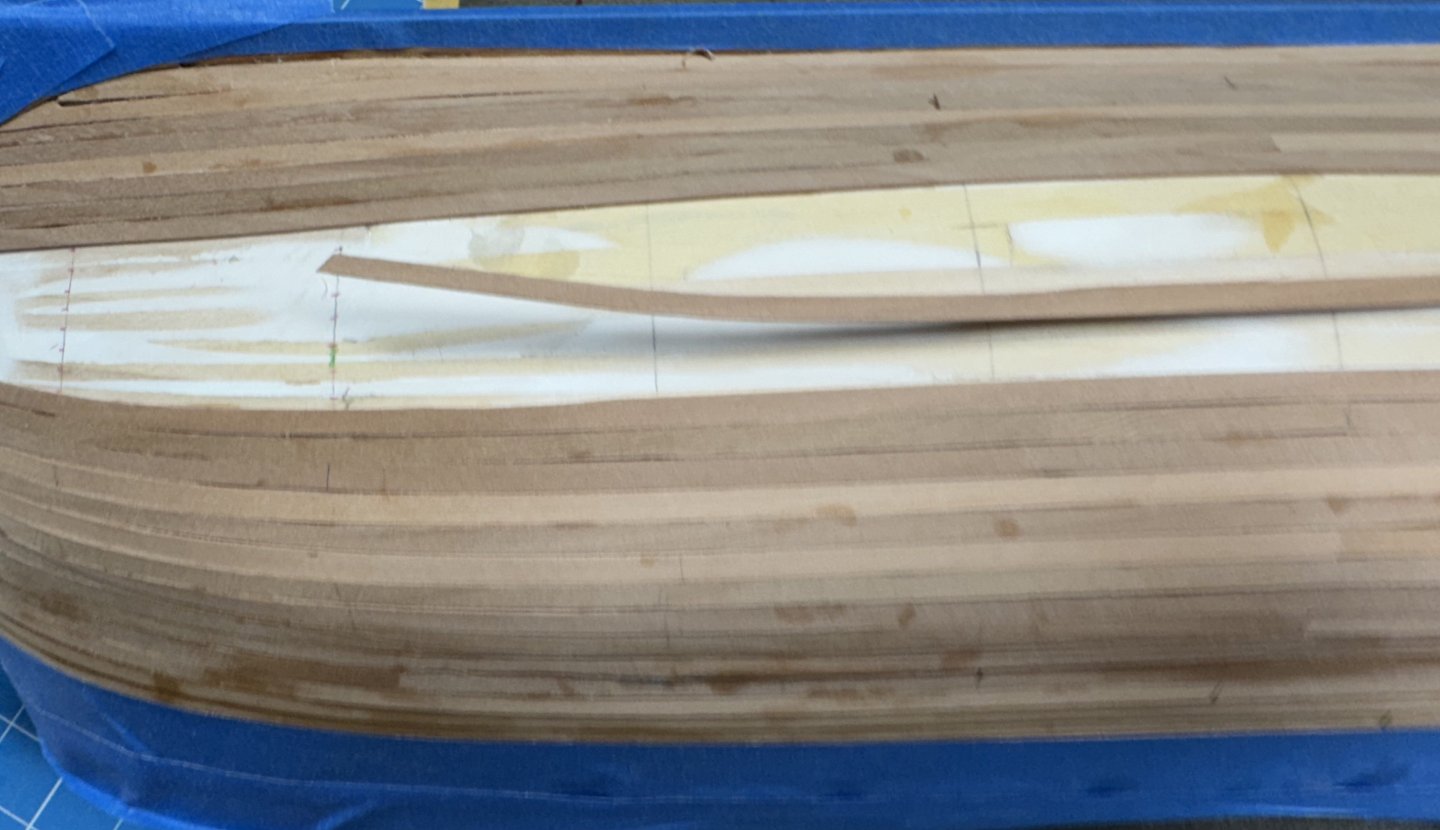
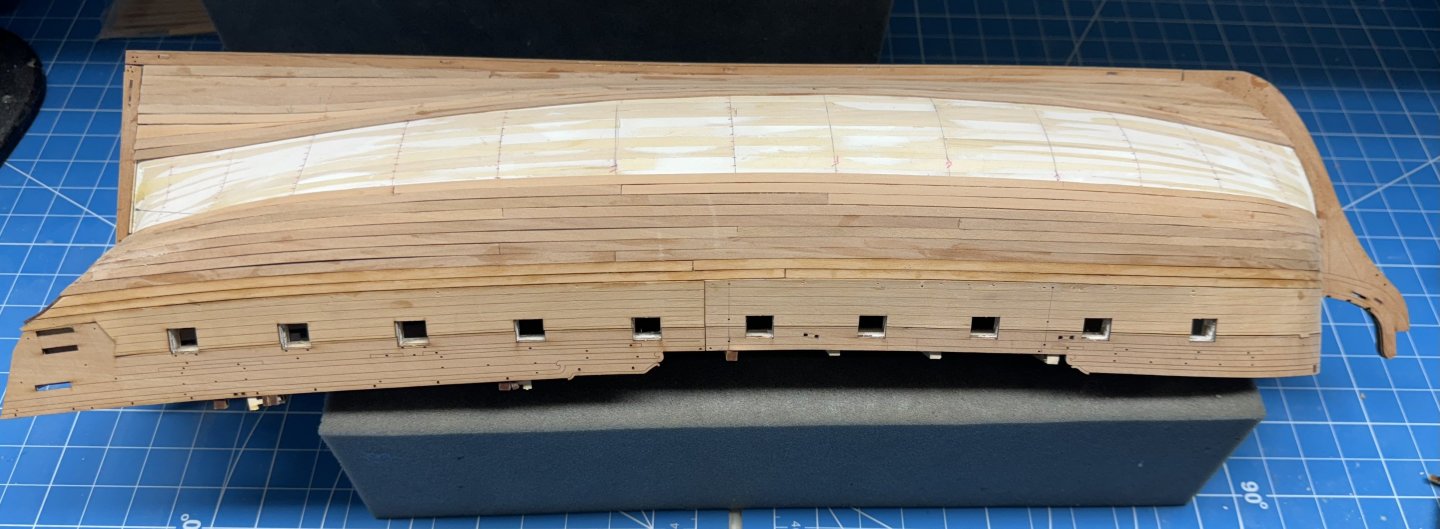
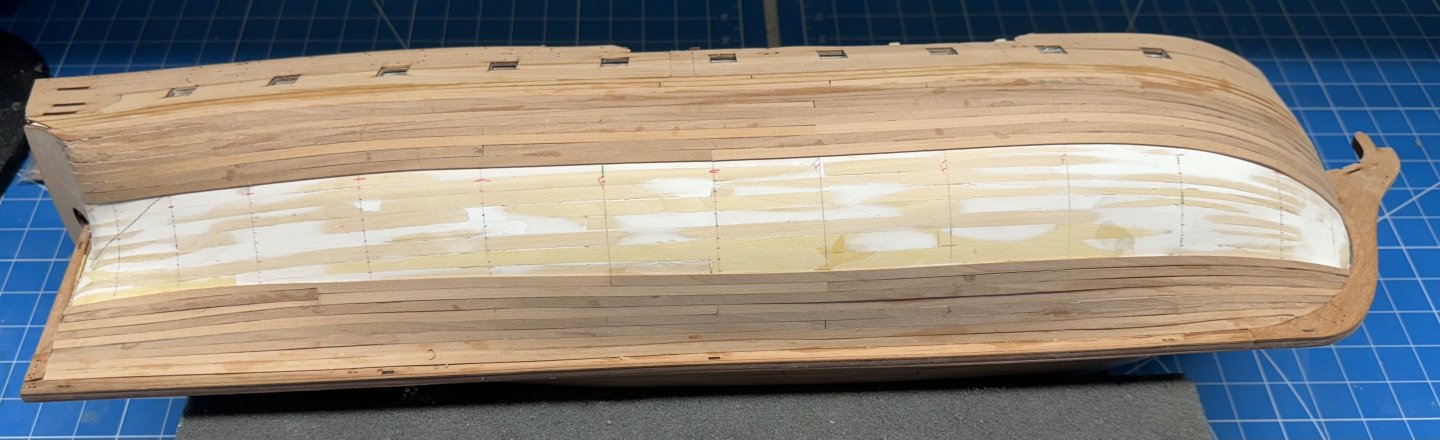
Here is the port side completed to the same degree as the starboard - 11 or 12 (depending where you count) planks left to go on each side. On the port side I went with the "triangular" stealer. I cut a piece of my wider pear stock to 6.5mm wide and then "wedged" it into the opening created between the last two full planks. I recognize that this was not (is not) the way it is done full size but since this part will all be painted it is faster to implement then the more correct method on the starboard side. Plus since I went to the trouble to mill/sand down the pear for this eventuality I thought I should avail myself of the opportunity to use it. This is probably the only stealer that will be necessary. However, if it gets to the "last" plank and I need something a bit wider than 4mm I will not hesitate to cut whatever width I need to fit rather than have to cut two 4mm planks to fill a 6mm or so space.
- 422 replies
-
- 4
-
-
- Vanguard Models
- Sphinx
- (and 1 more)
-
Starboard side with 14 of 24 rows complete. I did add one stealer at the stern but am not sure it really helped things all that much. Maybe I will see what it looks like on port side before I try this "over there".
- 422 replies
-
- 4
-
-
- Vanguard Models
- Sphinx
- (and 1 more)
-
And now three more rows on the bottom of the port side. 12 rows complete - 36 (more or less) to go.

- 422 replies
-
- 7
-
-
- Vanguard Models
- Sphinx
- (and 1 more)
-
And now three new rows on the bottom of starboard side. Starting to "get in the swing" of this now.
- 422 replies
-
- 4
-
-
- Vanguard Models
- Sphinx
- (and 1 more)
-
And now three rows on the port side. I did not taper the planks at the stern as I (mistakenly) did on the stbd side. In case I need them I created some .8mm thick pearwood strips this morning that i can use if I need something wider than the 4mm that came with the kit. Hopefully I will not need them but the contractor is coming to create a garage work shop and I will not be able to find anything once that starts. so I have them "just in case". Now back to the starboard side and consideration of whether or not to add the transition plank (transom to stern post) now or wait until it "comes naturally".
- 422 replies
-
- 6
-
-
- Vanguard Models
- Sphinx
- (and 1 more)
-
Three rows completed on the stbd side. I finally got around to marking the waterline (so I know where I have to be really careful) on both sides. Not sure it would meant anything had I marked on this side but I will find out when I get to the port side which is next on the hit parade. I am thinking about jumping ahead on this side and putting in the plank that marks the transition from ending at the transom to ending at the stern post. It seems (to me) that leaving that more or less to chance depending on how accurately I have measured/cut each plank between now and then (at least 6) is chancing having that transition not go well. For now - off to the port side.
- 422 replies
-
- 1
-
-
- Vanguard Models
- Sphinx
- (and 1 more)
-
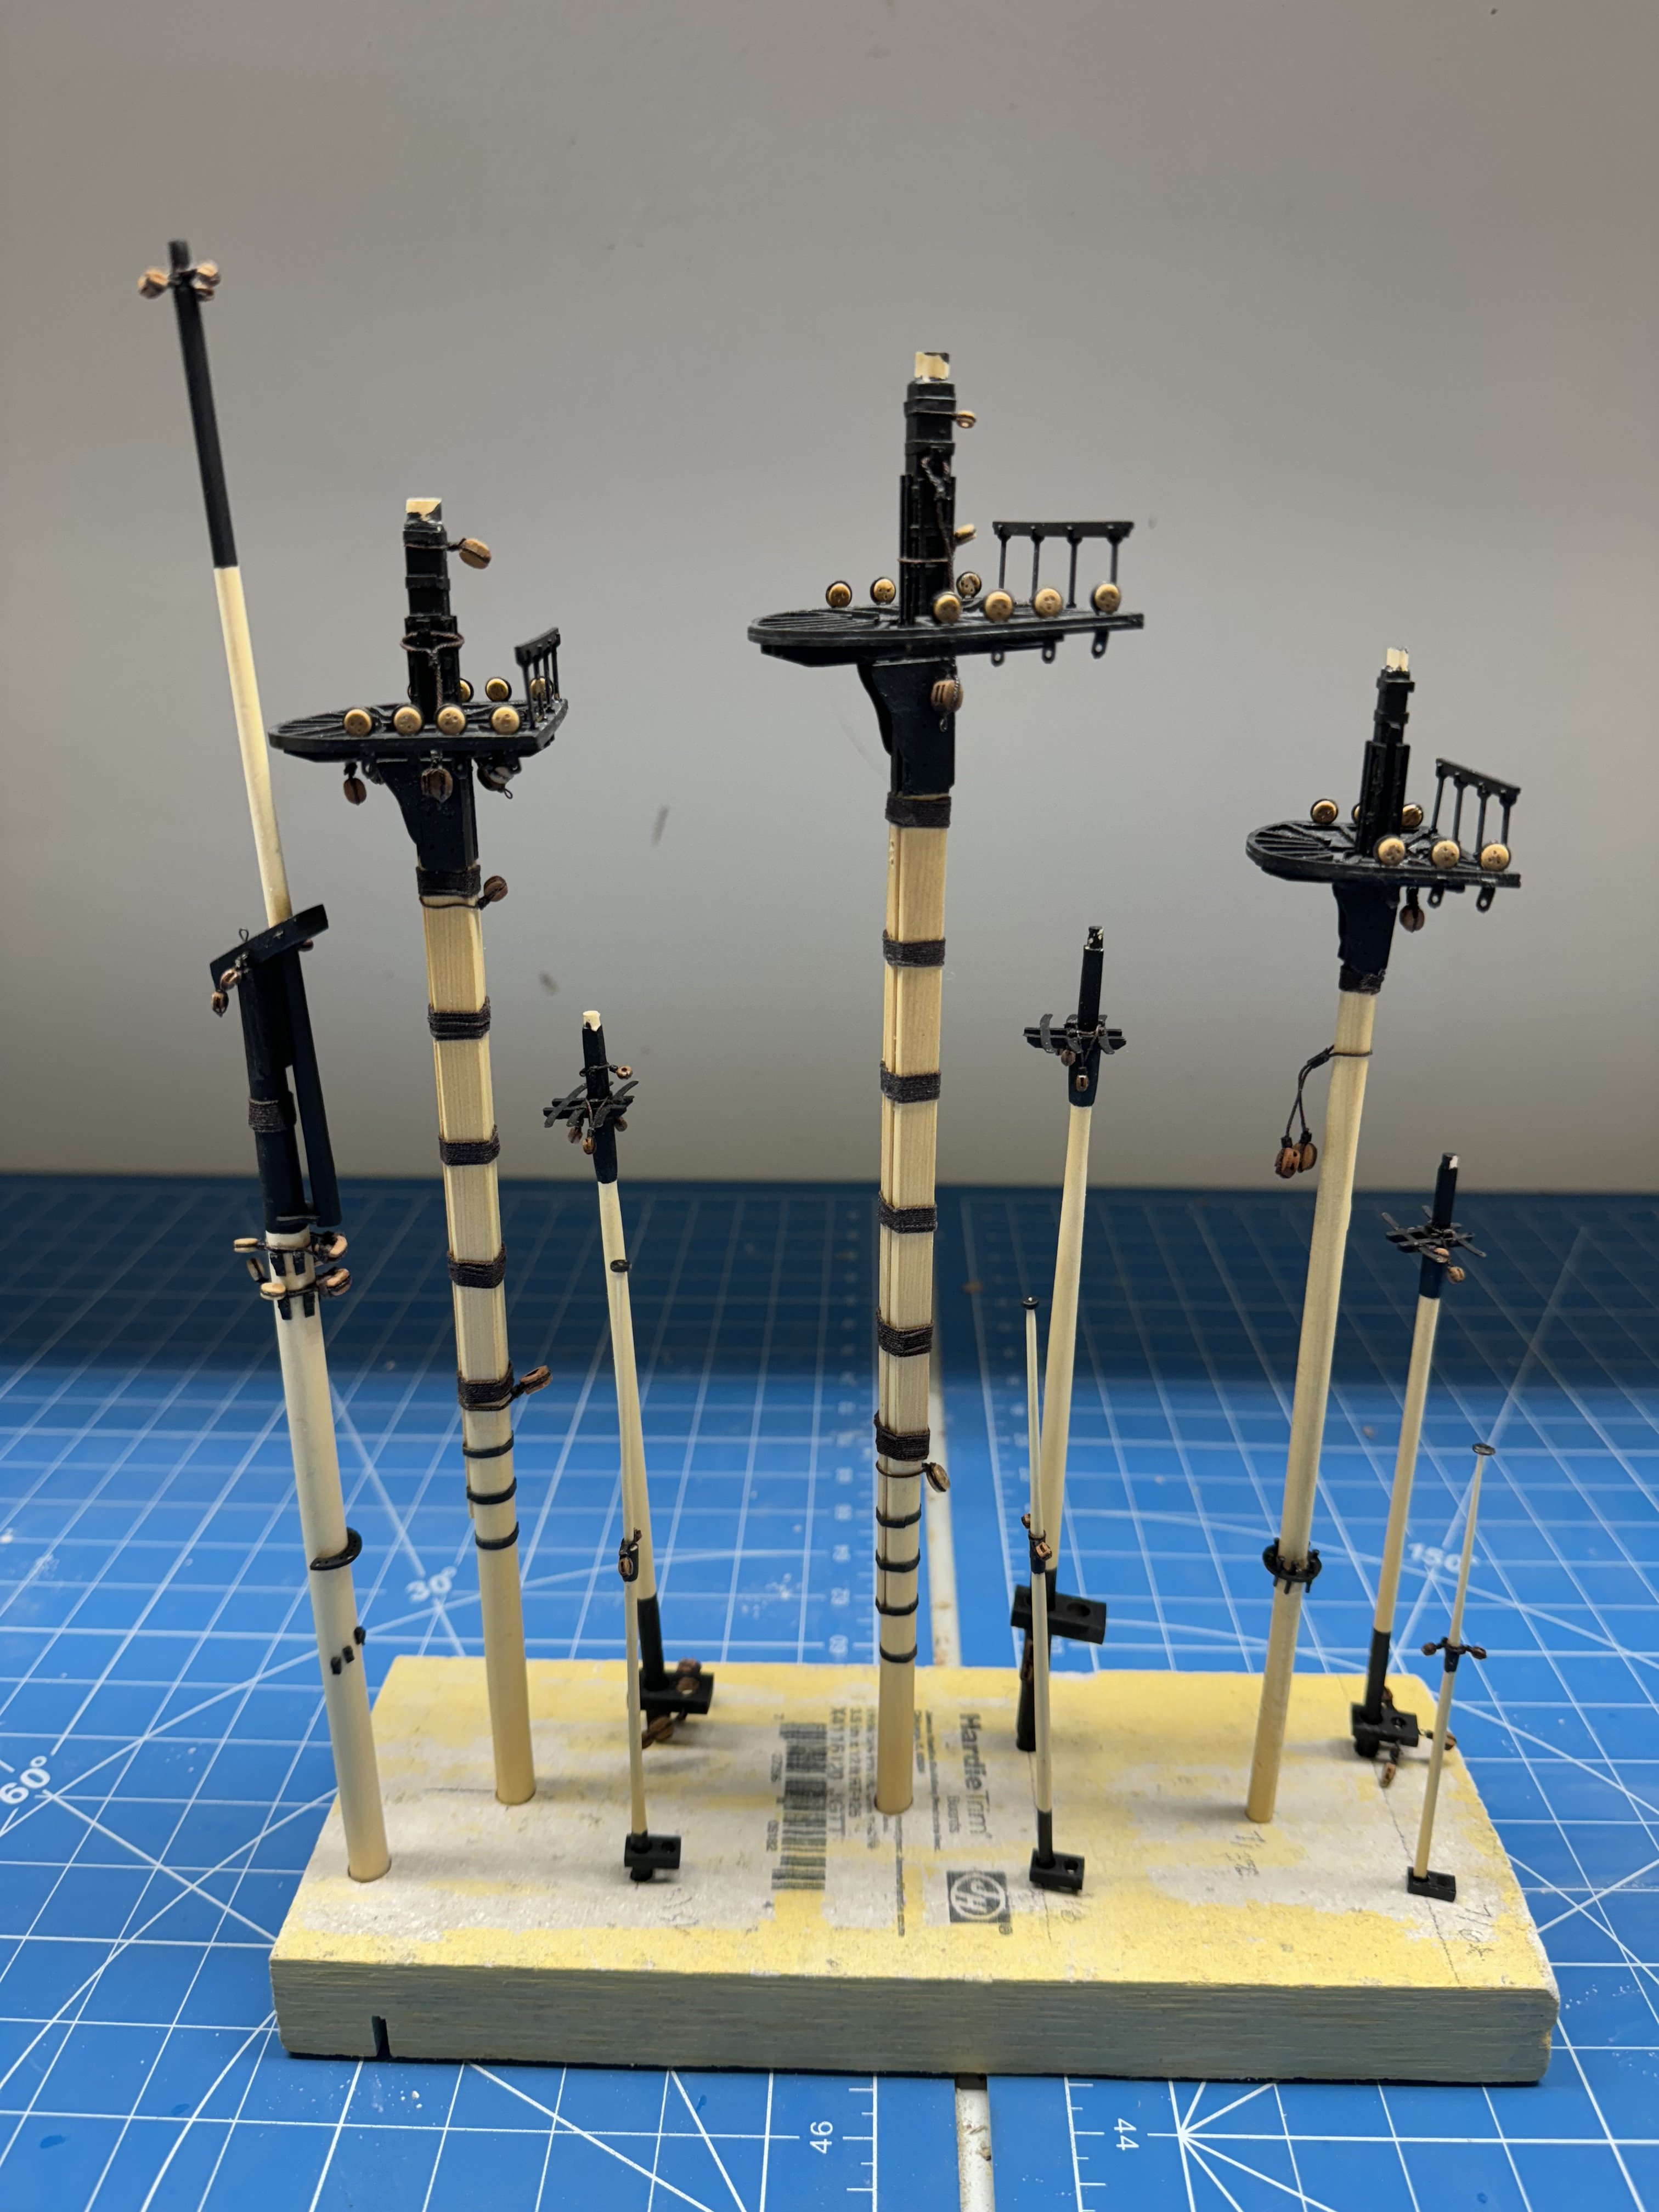
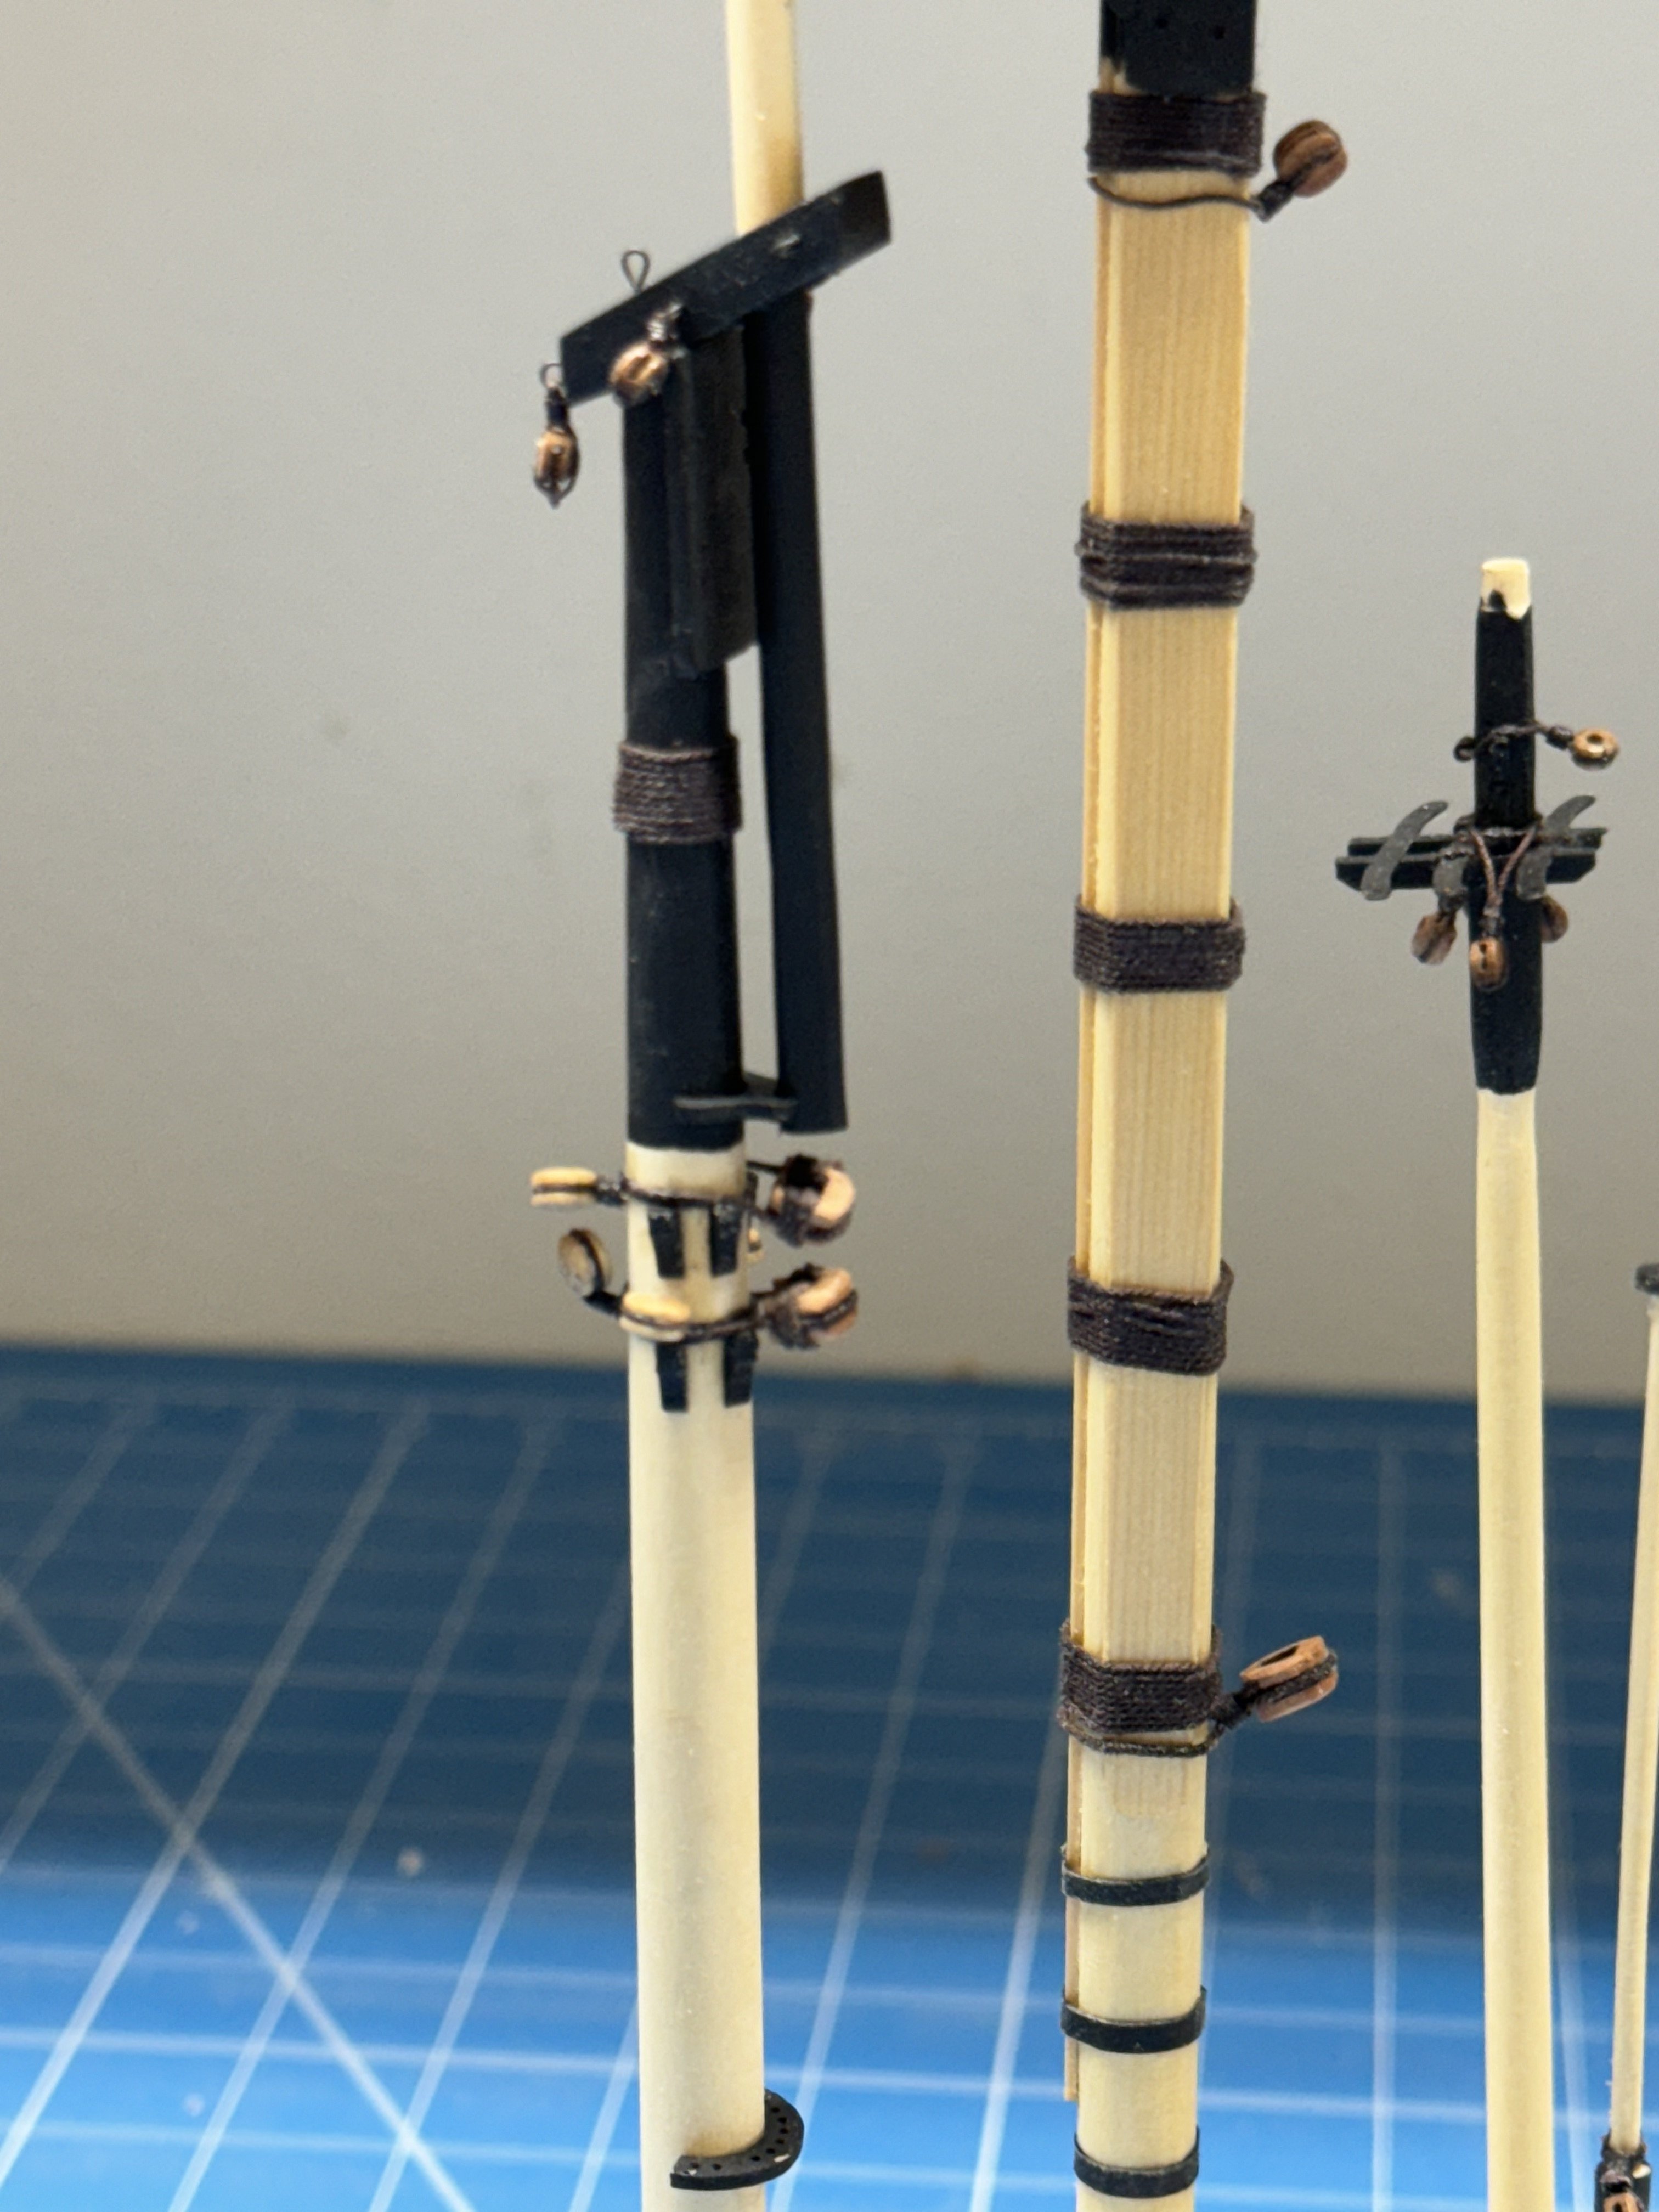
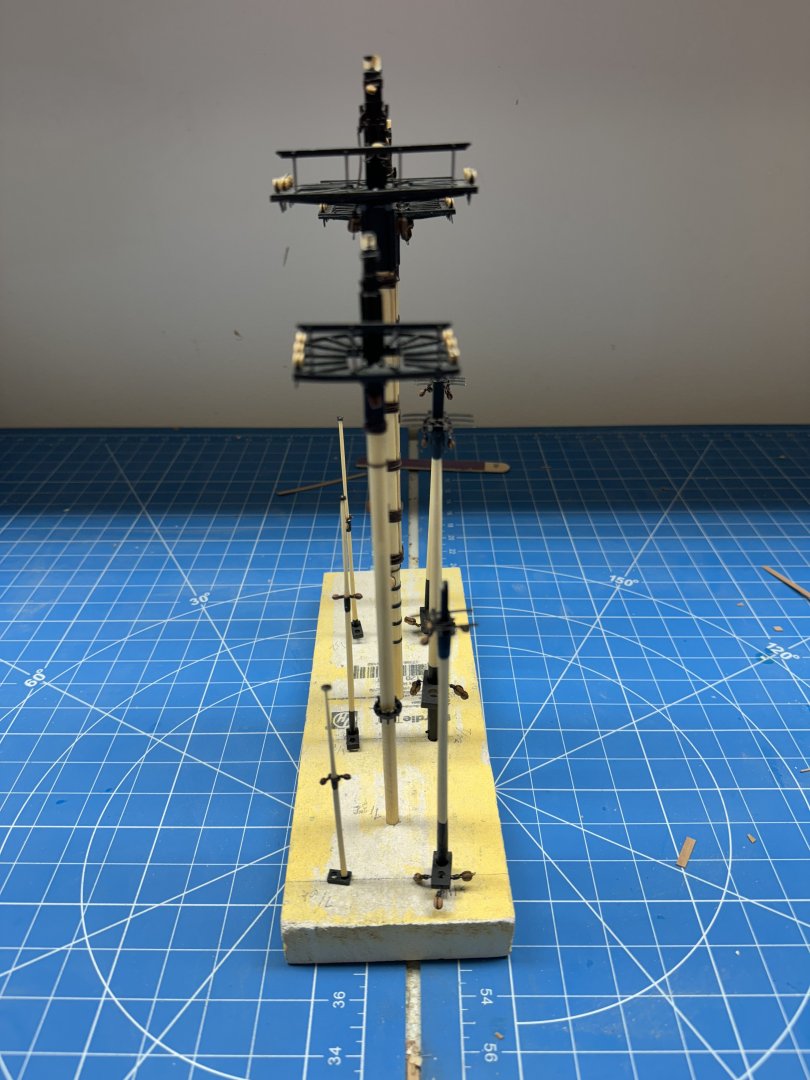
In my seemingly unending effort to NOT do the hull planking I did complete the Fore Masts and associated blocks, hearts and thimbles. Here they are awaiting the Mizzen which I shall attempt to ignore while I get to the planking.

- 422 replies
-
- 9
-
-
- Vanguard Models
- Sphinx
- (and 1 more)
-
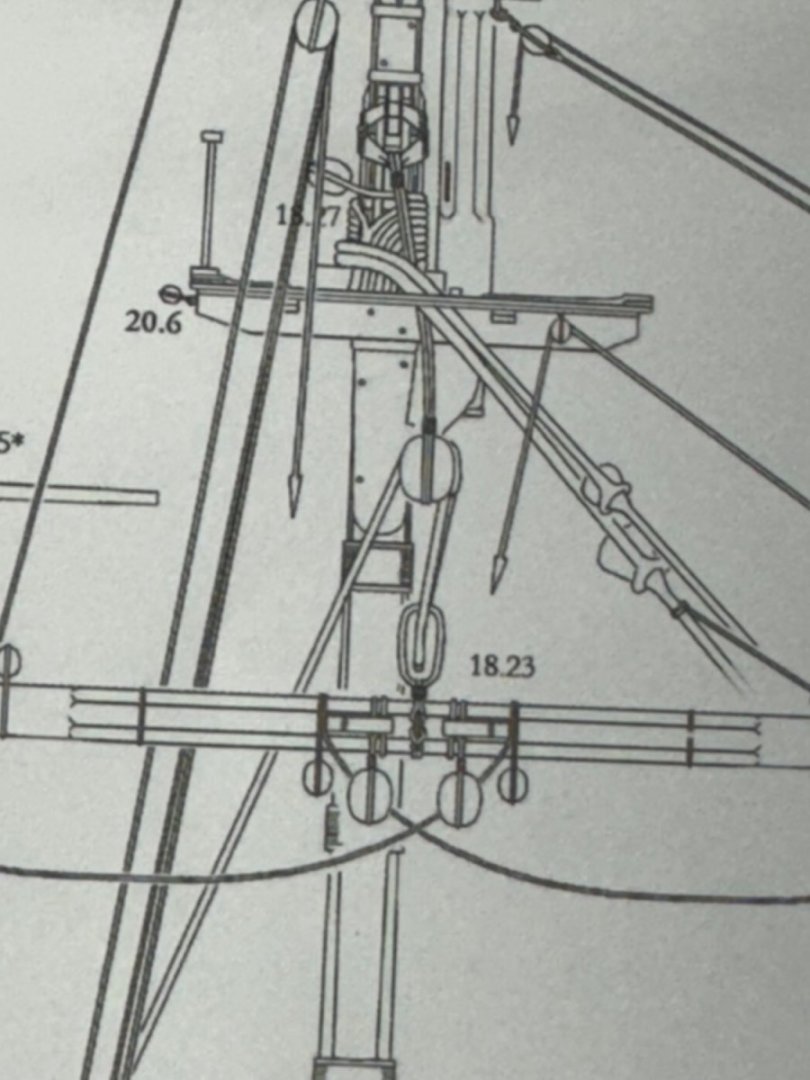
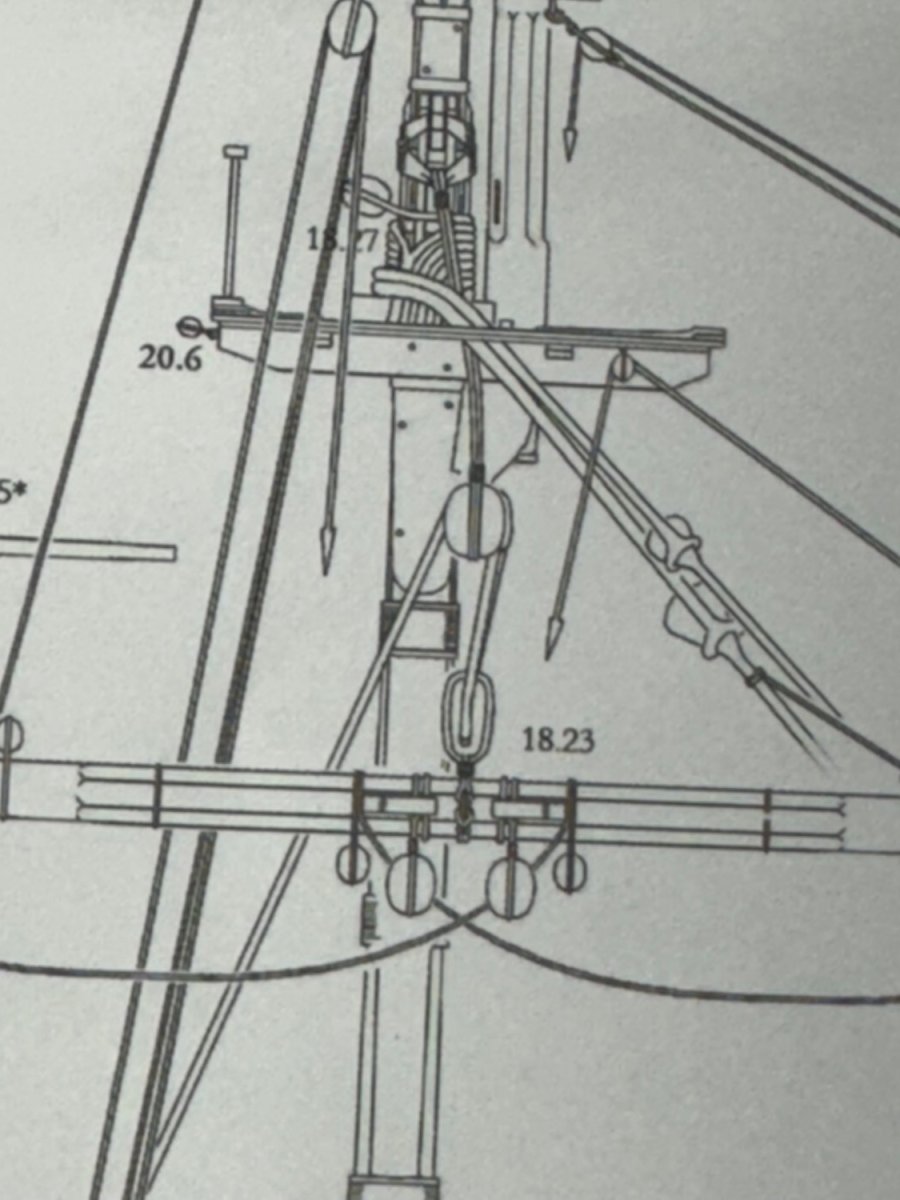
This one uses triple blocks with the standing end secured to the yard. This looks to be about as "big" (i.e. triple blocks above and below) as you could reasonably get and this is only a 36 gun 4th rate? Wow!! David Antscherl's "Rigging a Sixth Rate Sloop of 1767-1780" shows a single. albeit 20" (8mm at 1/64th scale) jeer block on the Fore and Main yards. I did not wrap the strop around the mast as above since there was no indication on the drawing showing that. I am not sure how that would work with the mast battens in place. Seems like the strop might crush the battens unless they were installed after the jeer block was in place. Probably not the sort of thing (jeer block) that got changed unless absolutely necessary. (aka battle damage).