cdrusn89
-
Posts
1,890 -
Joined
-
Last visited
Content Type
Profiles
Forums
Gallery
Events
Everything posted by cdrusn89
-
 Nic, Thanks. I also thought about taking the whole hull down an extra 1/32" and planking it to get the plank lines in the paint. I saw someone do that with the Smuggler in Model Ship World a few years back.
- 166 replies
-
- 1
-

-
- fannie a gorham
- finished
- (and 1 more)
-
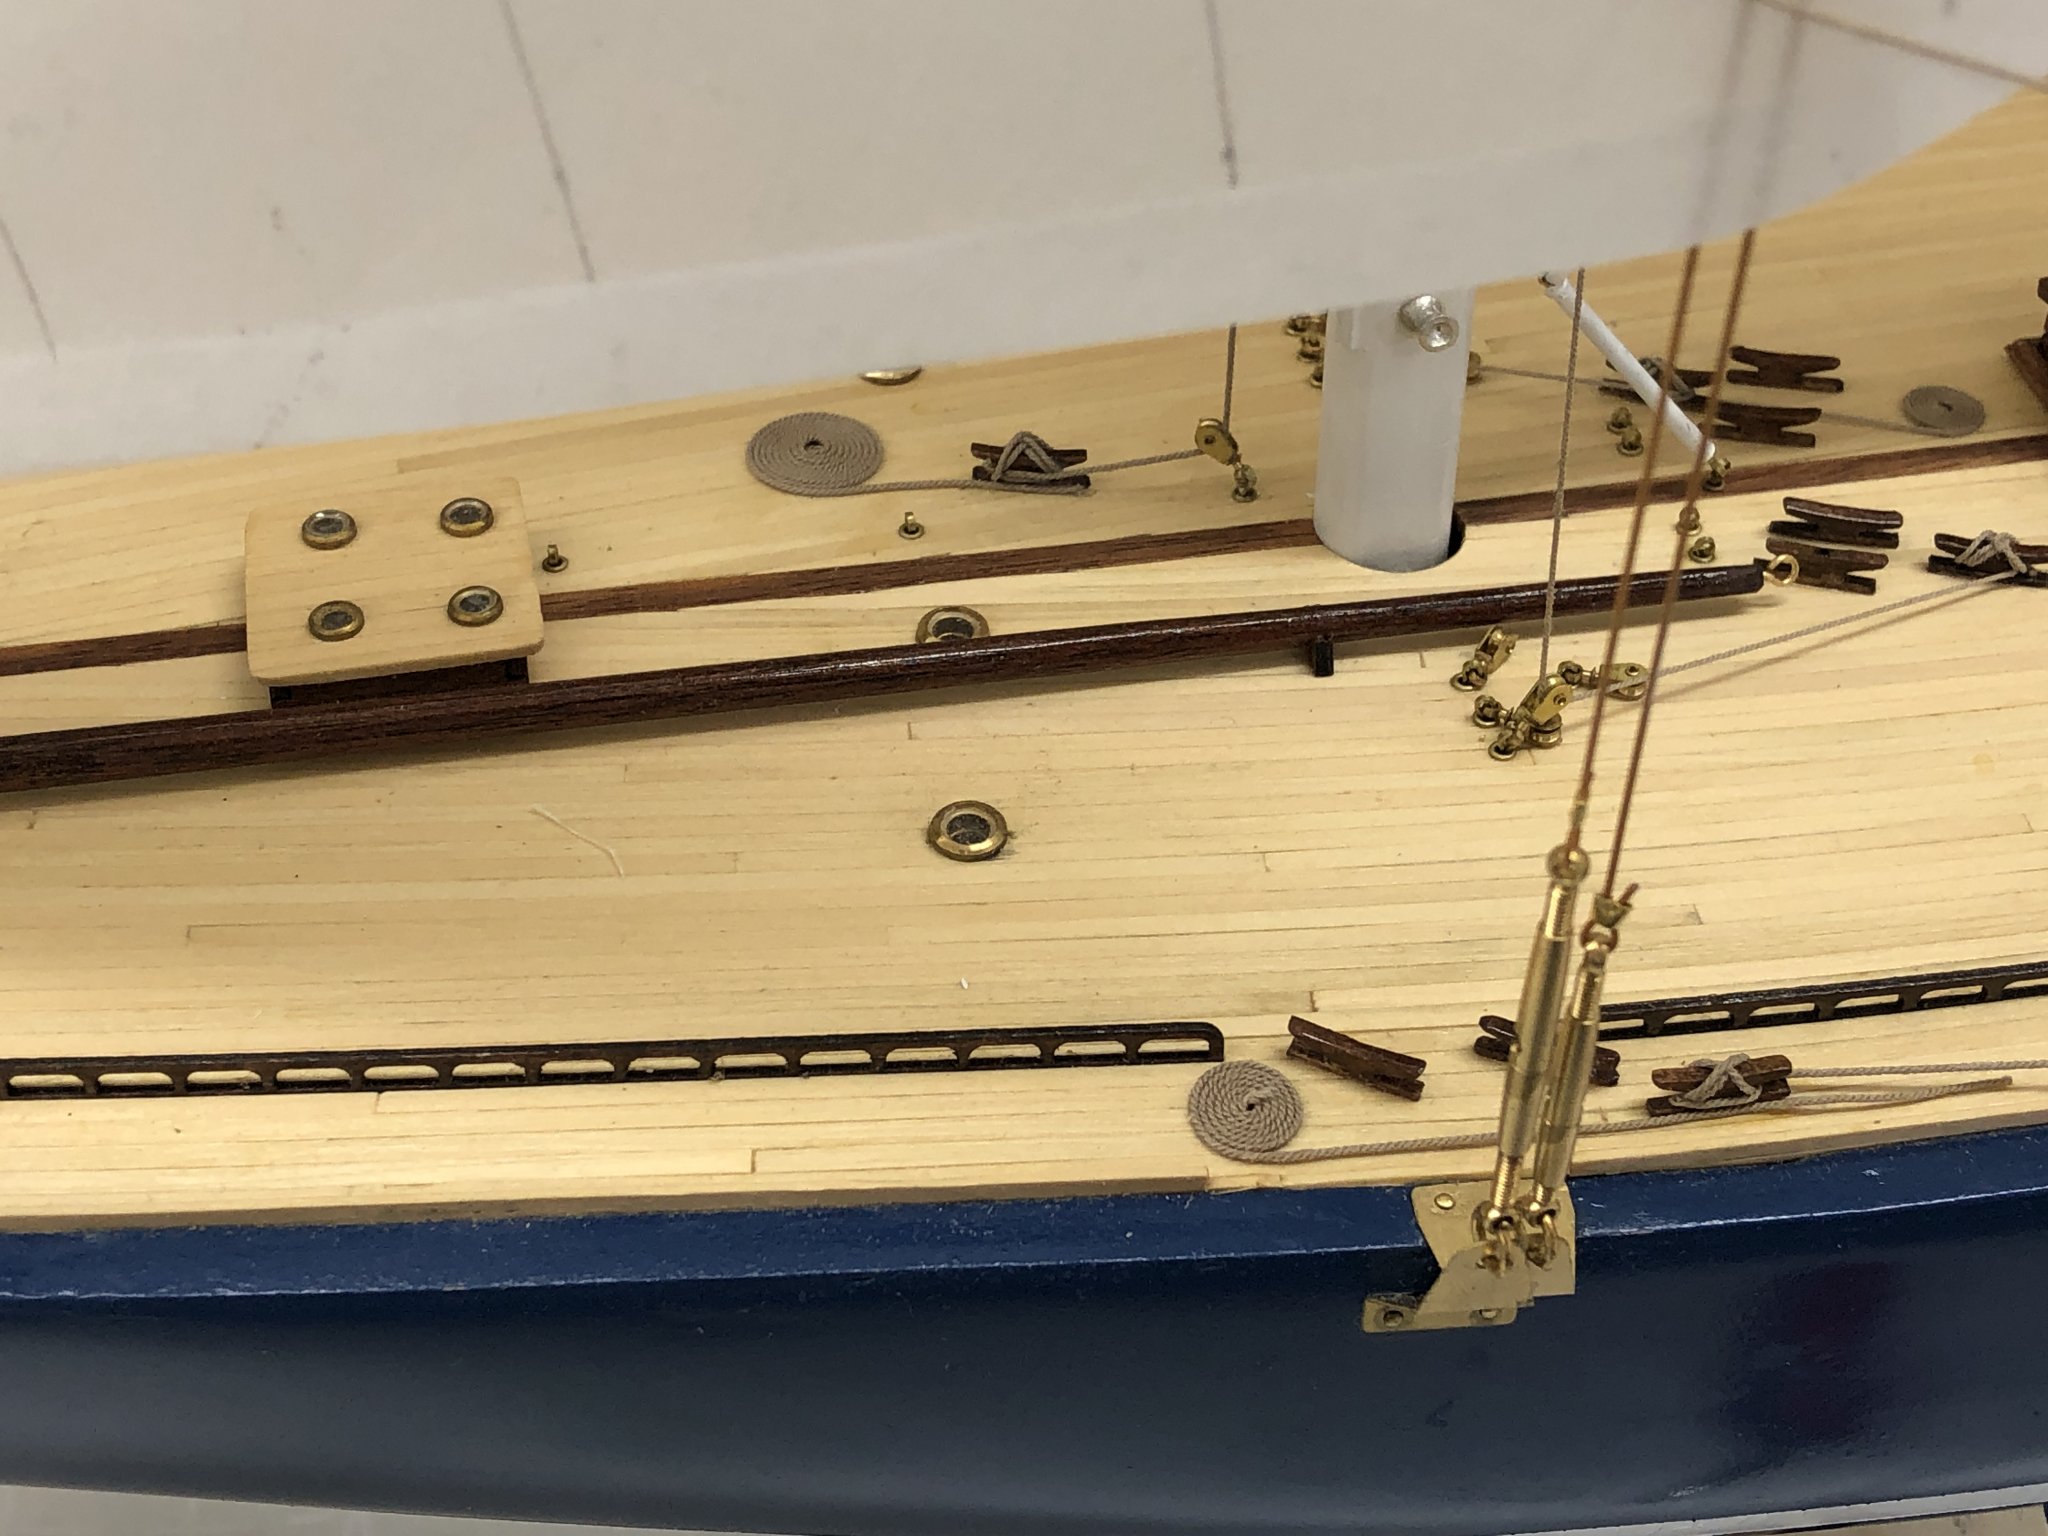
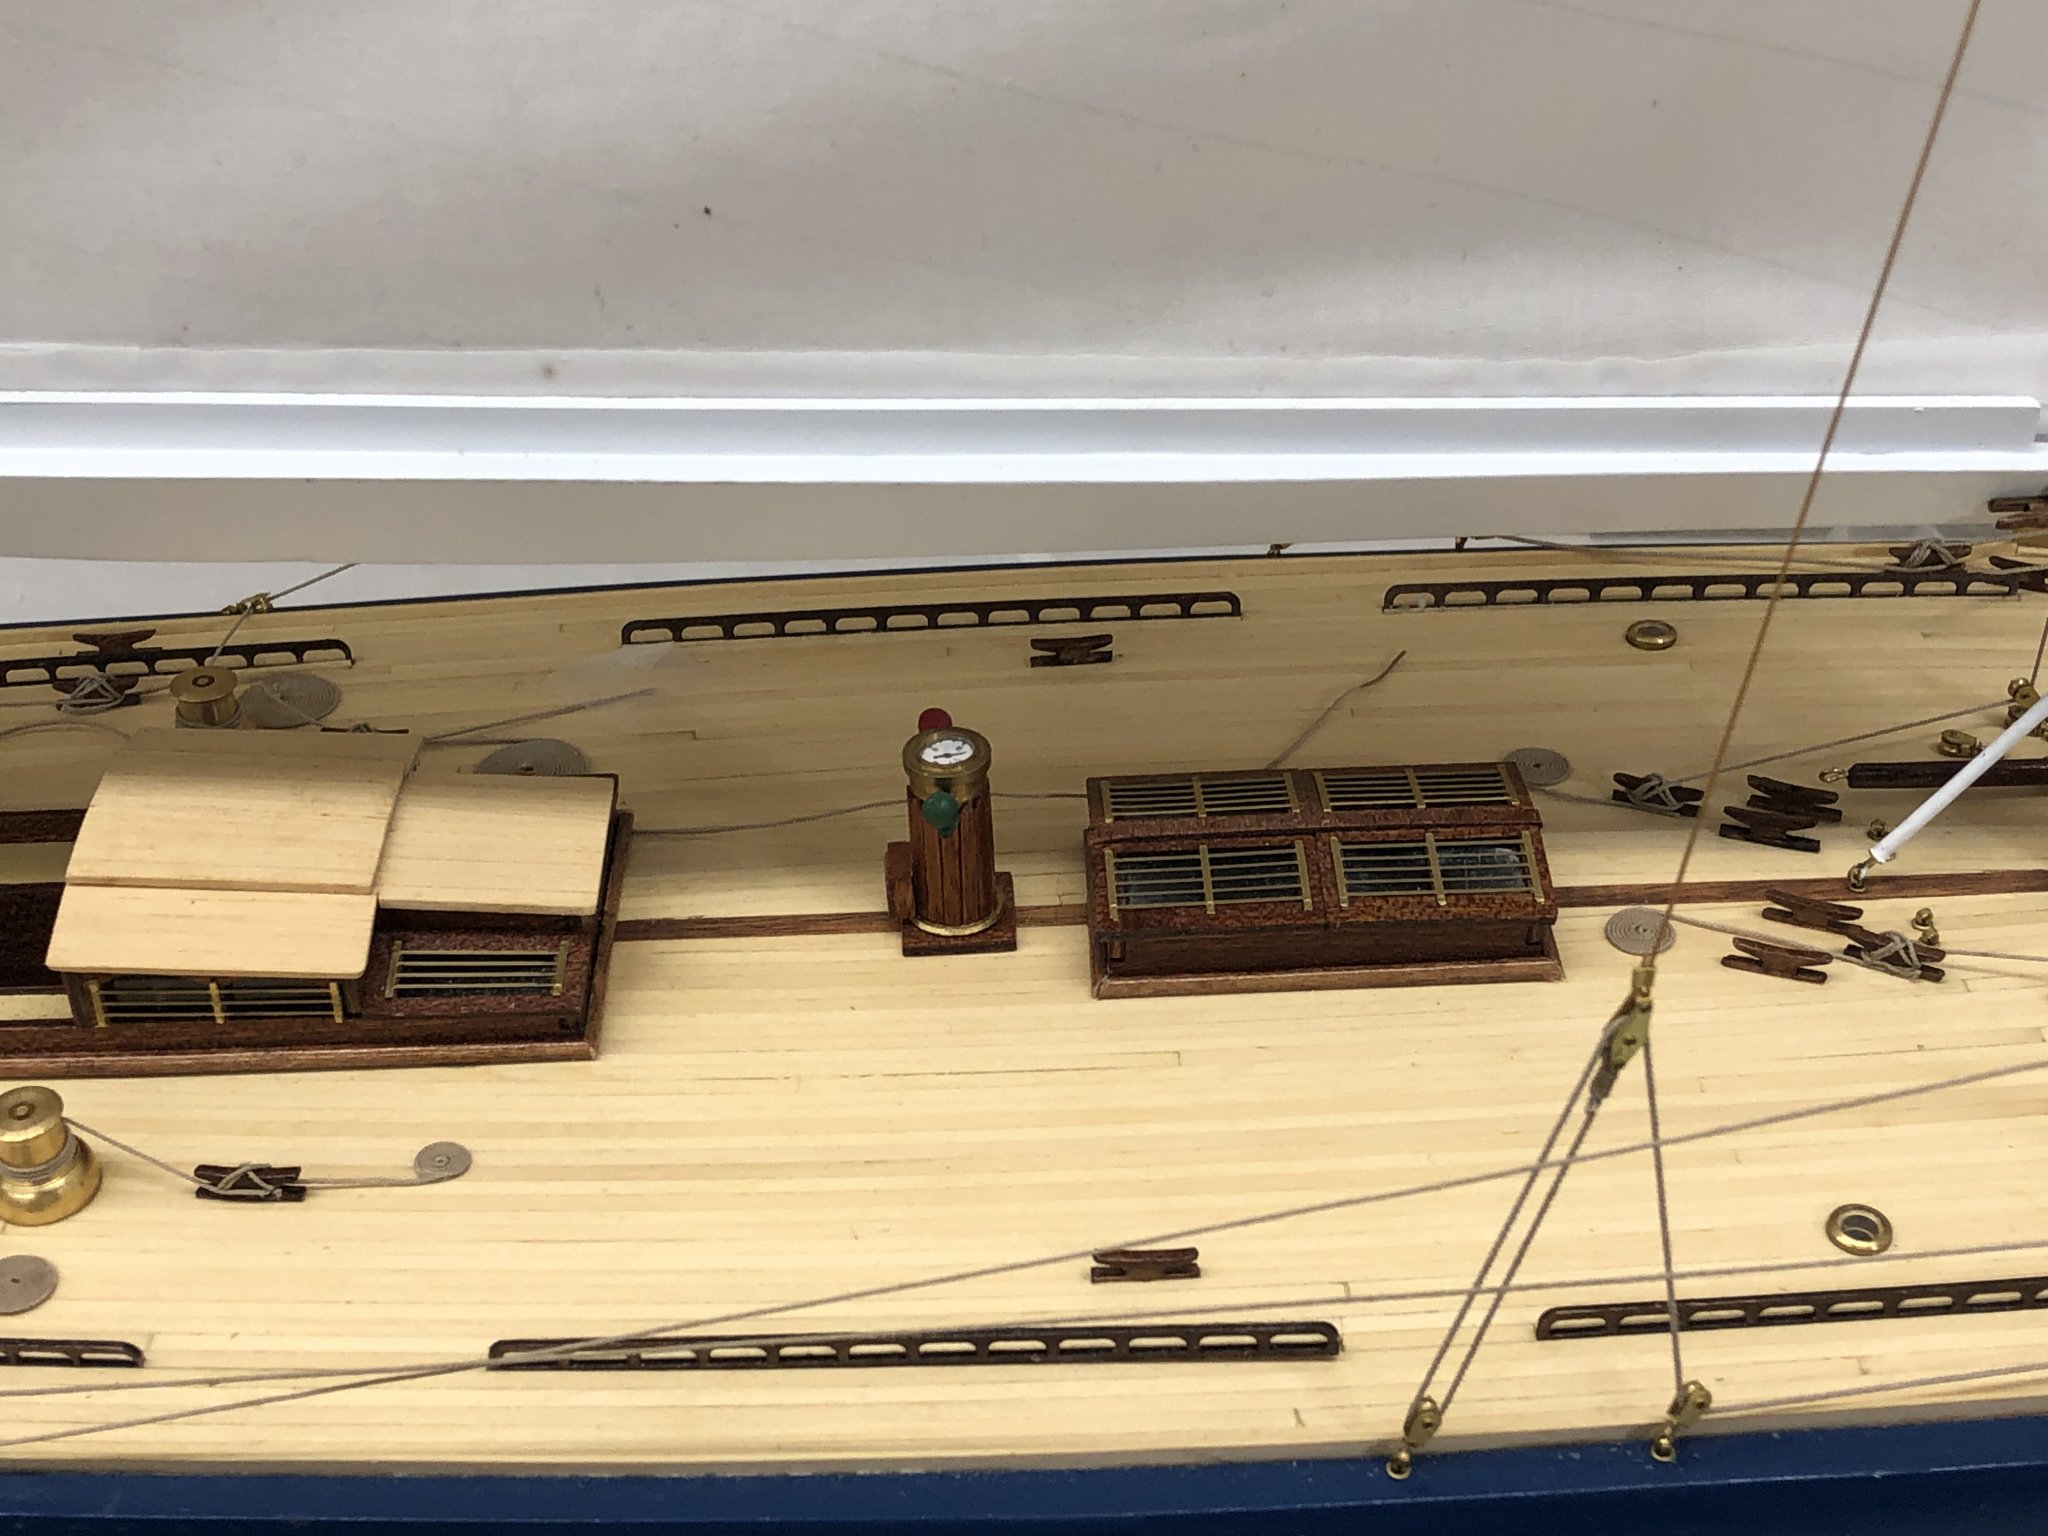
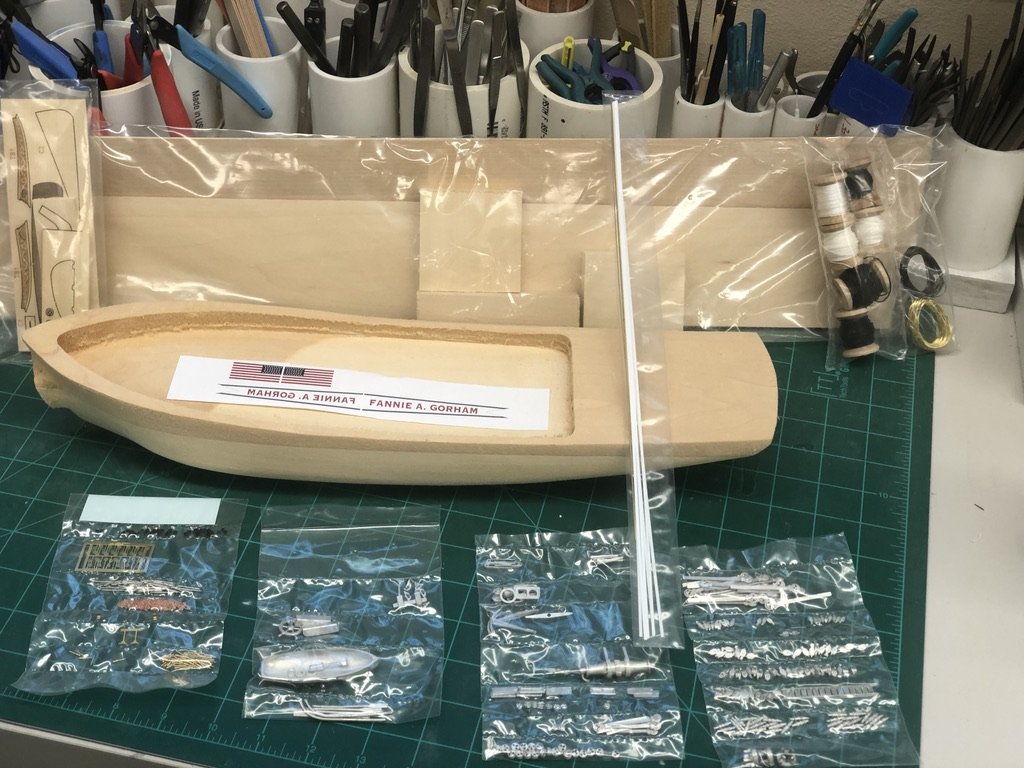
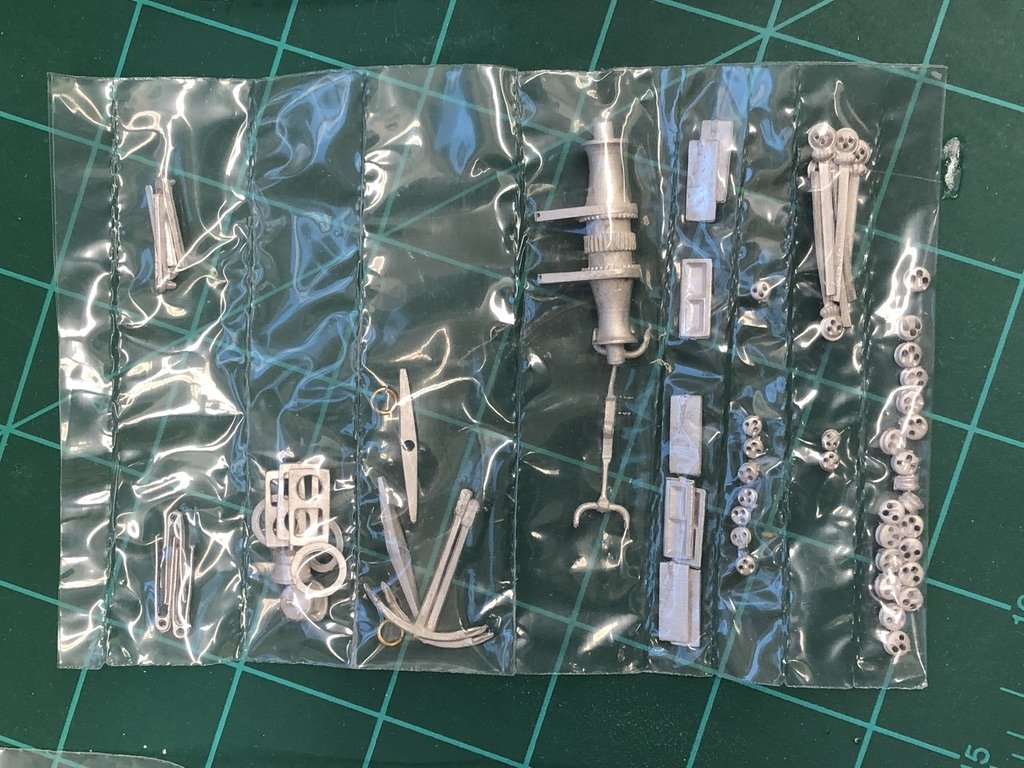
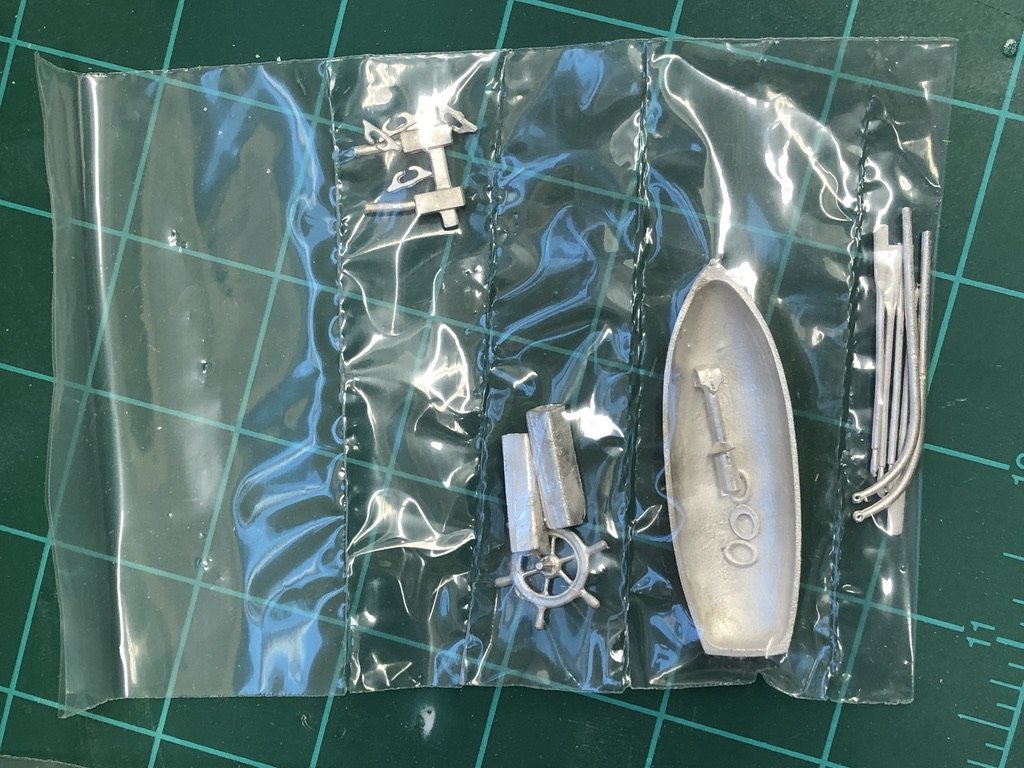
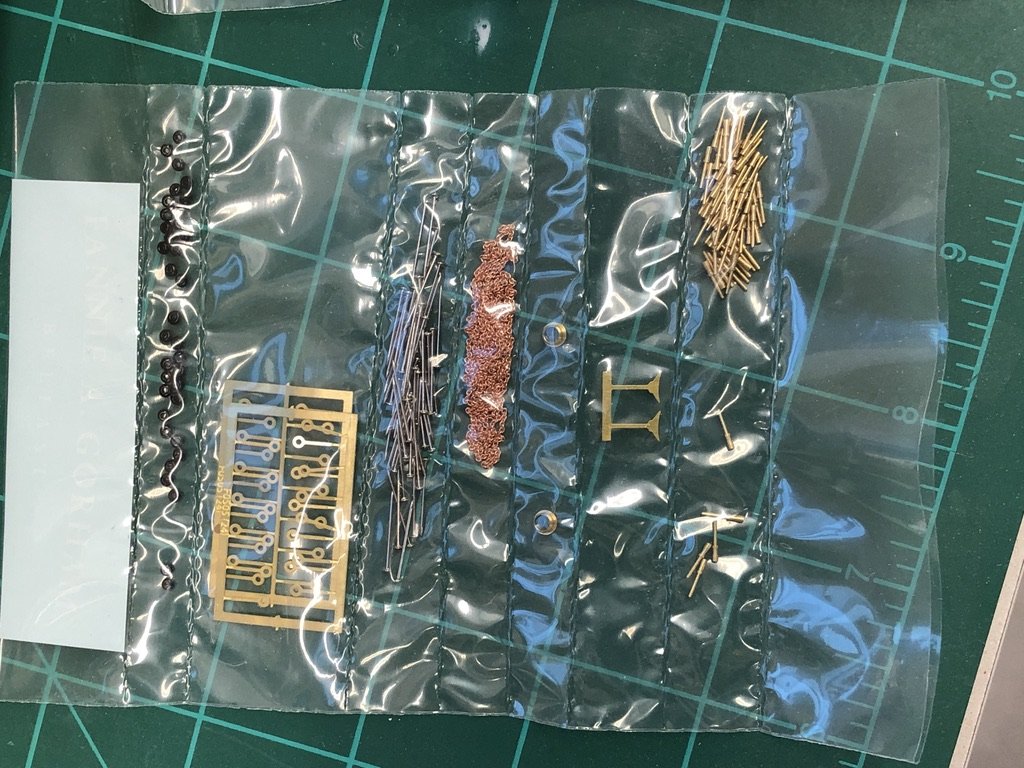
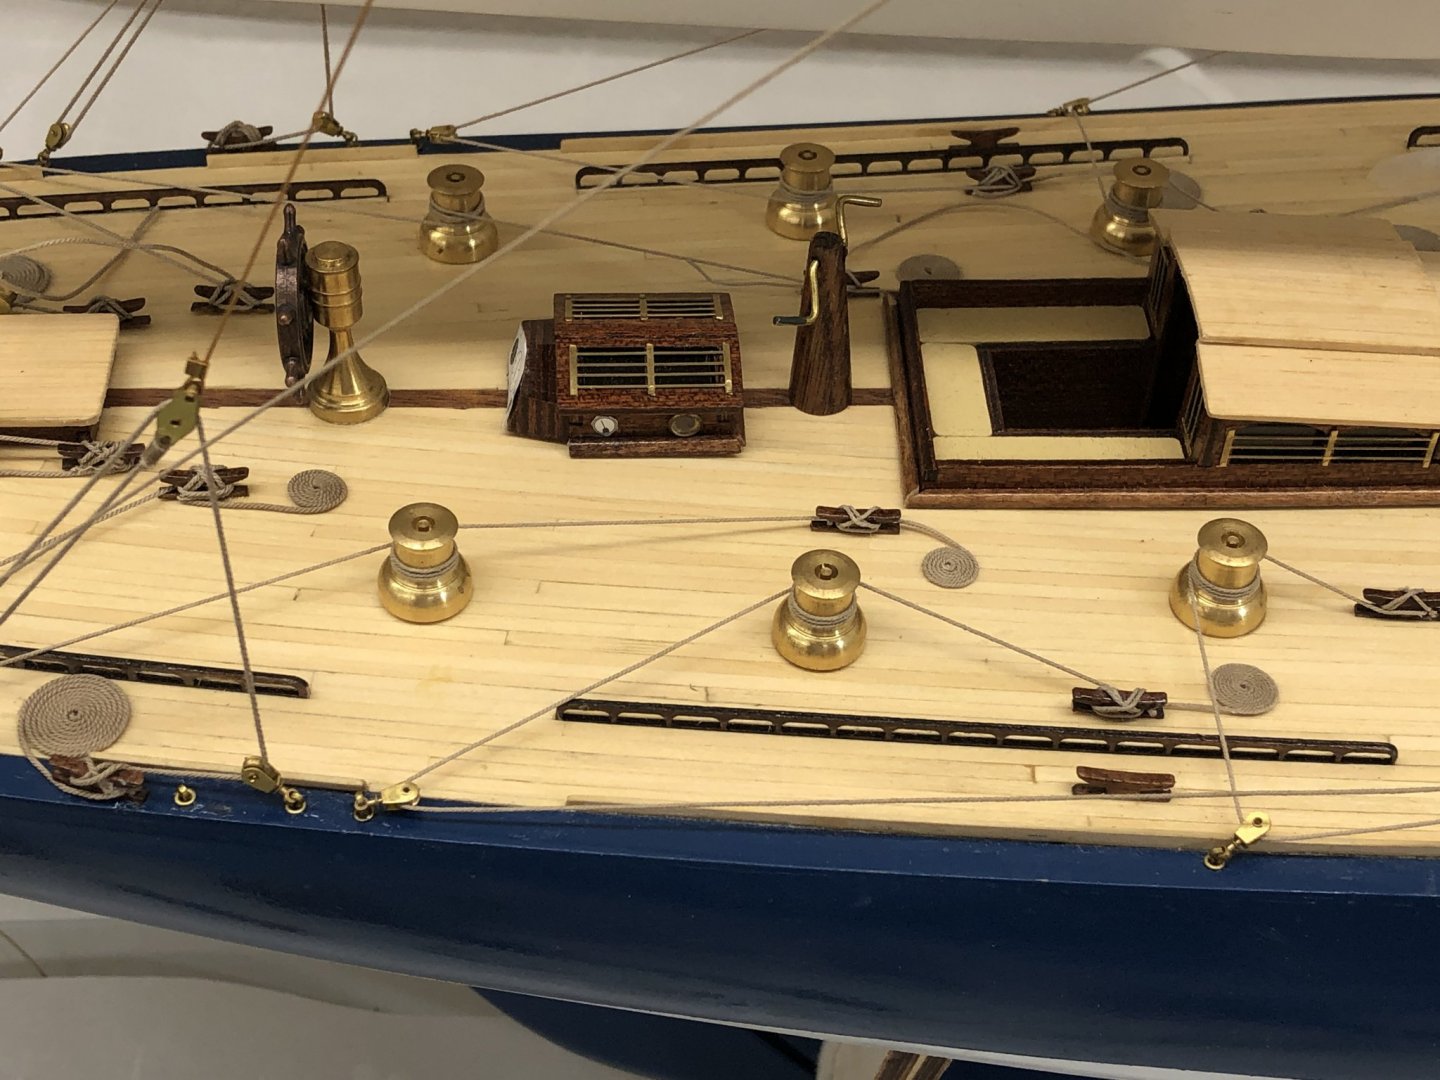
Upon opening the box I found (somewhat to my initial surprise) that this kit includes a pre-carved hull. I then remembered seeing that referred to somewhere in the BlueJacket's documentation. So here are the kit contents which include a significant number of Britannia metal parts including the yawl boat. It is my intention to replace the metal blocks with Syren wooden ones and the metal yawl with a wooden one though at the moment I am not sure exactly how. Having looked at the pre-carved hull and instructions for a minute I also though about cutting the bulwarks off on the main deck, adding the timberheads and bulwark sheathing as separate items. I guess I could try to thin down the provided bulwarks and if that proves unsightly (or I get carried away and make them too think somewhere) I could use this as my "Plan B".

- 166 replies
-
- 5
-
-
- fannie a gorham
- finished
- (and 1 more)
-
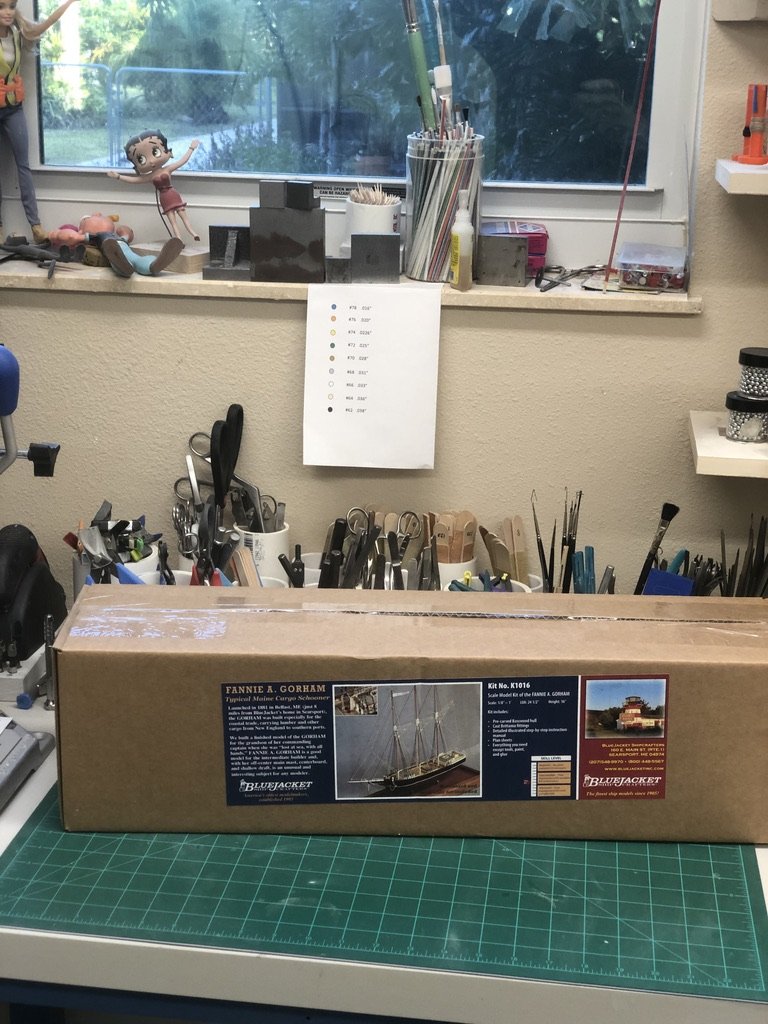
To the best of my knowledge this is the first build log on MSW for this kit. Here is the apparently obligatory first picture of the kit box on the work bench. Given the season I will probably not get to much done in the near future 🎅

- 166 replies
-
- 6
-
-
- fannie a gorham
- finished
- (and 1 more)
-
I have decided to try a solid hull model at about a third (1/96) the scale of the Endeavour - BlueJacket's Fannie A. Gorham, a three masted coastal schooner from the late 1800's. See you on the Fabnnie A. Build Log
-
Thanks all - as for the stand, I am thinking about taking a page from Keith Aug's stand and replacing the end pieces with thick (1/4" or maybe thicker) plexiglass. But that will have to wait until I get a case built which will require additional shop machines (like a full size table saw) for which I need approval from HQ. Maybe for Christmas.
-
Thanks Michael
-
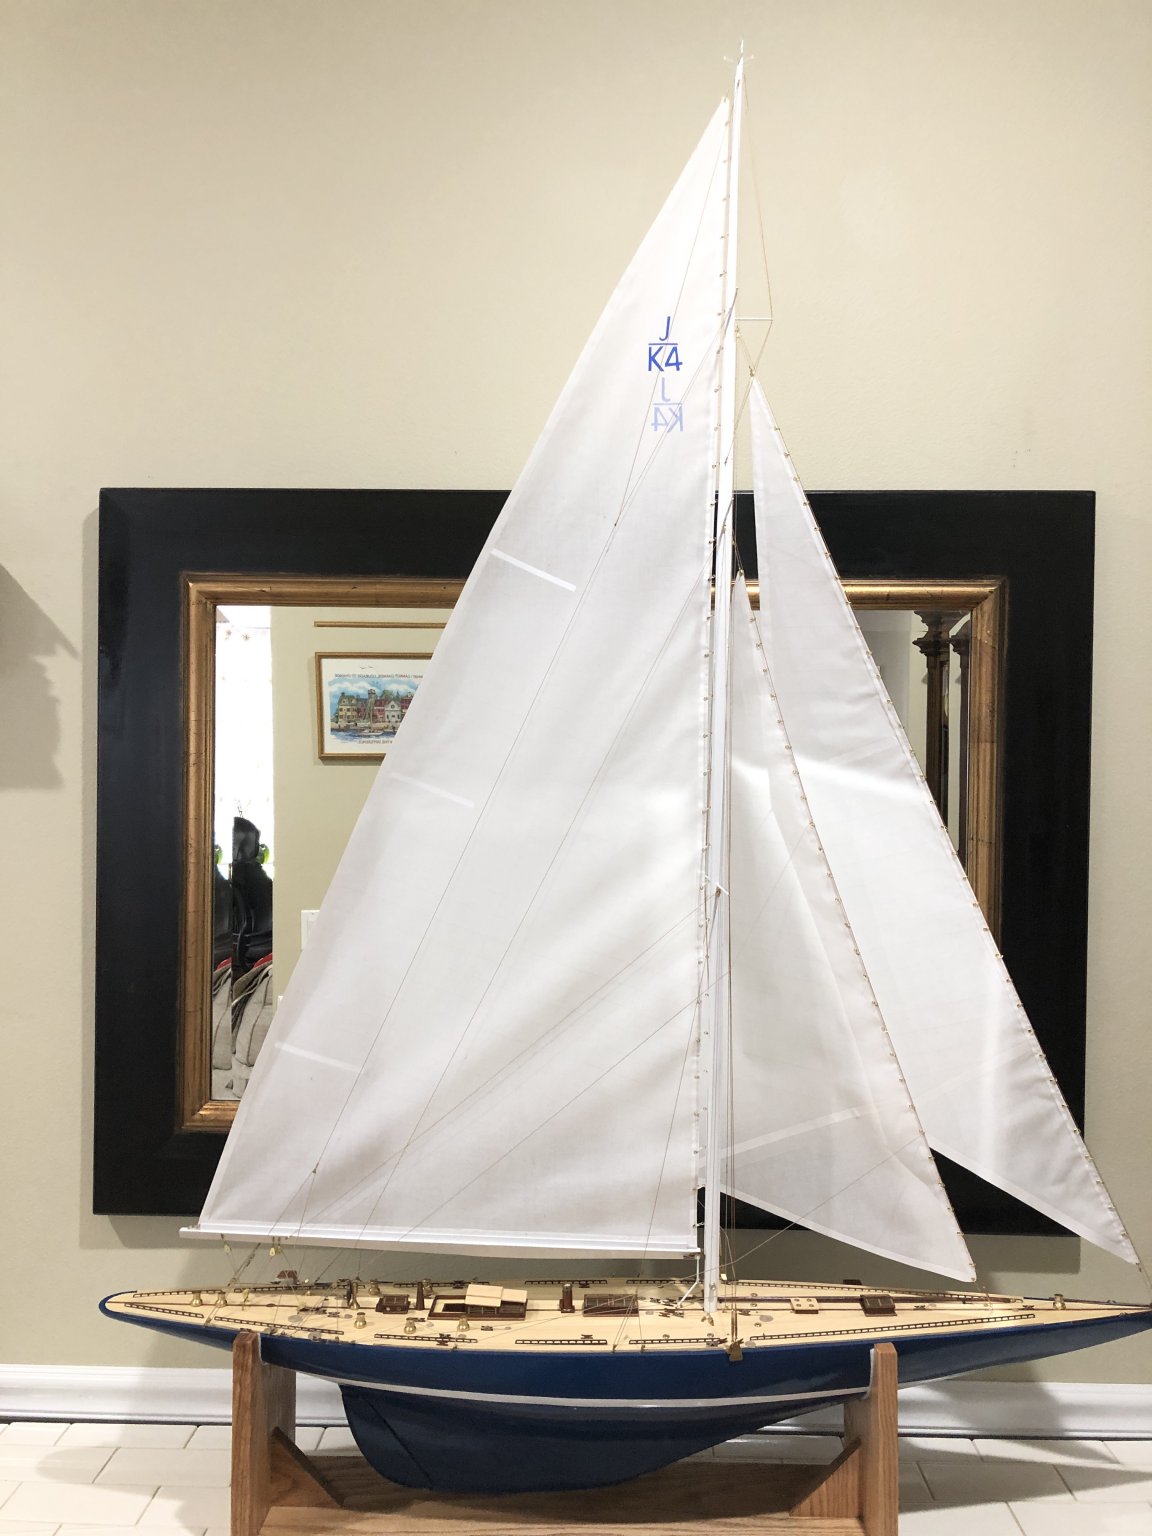
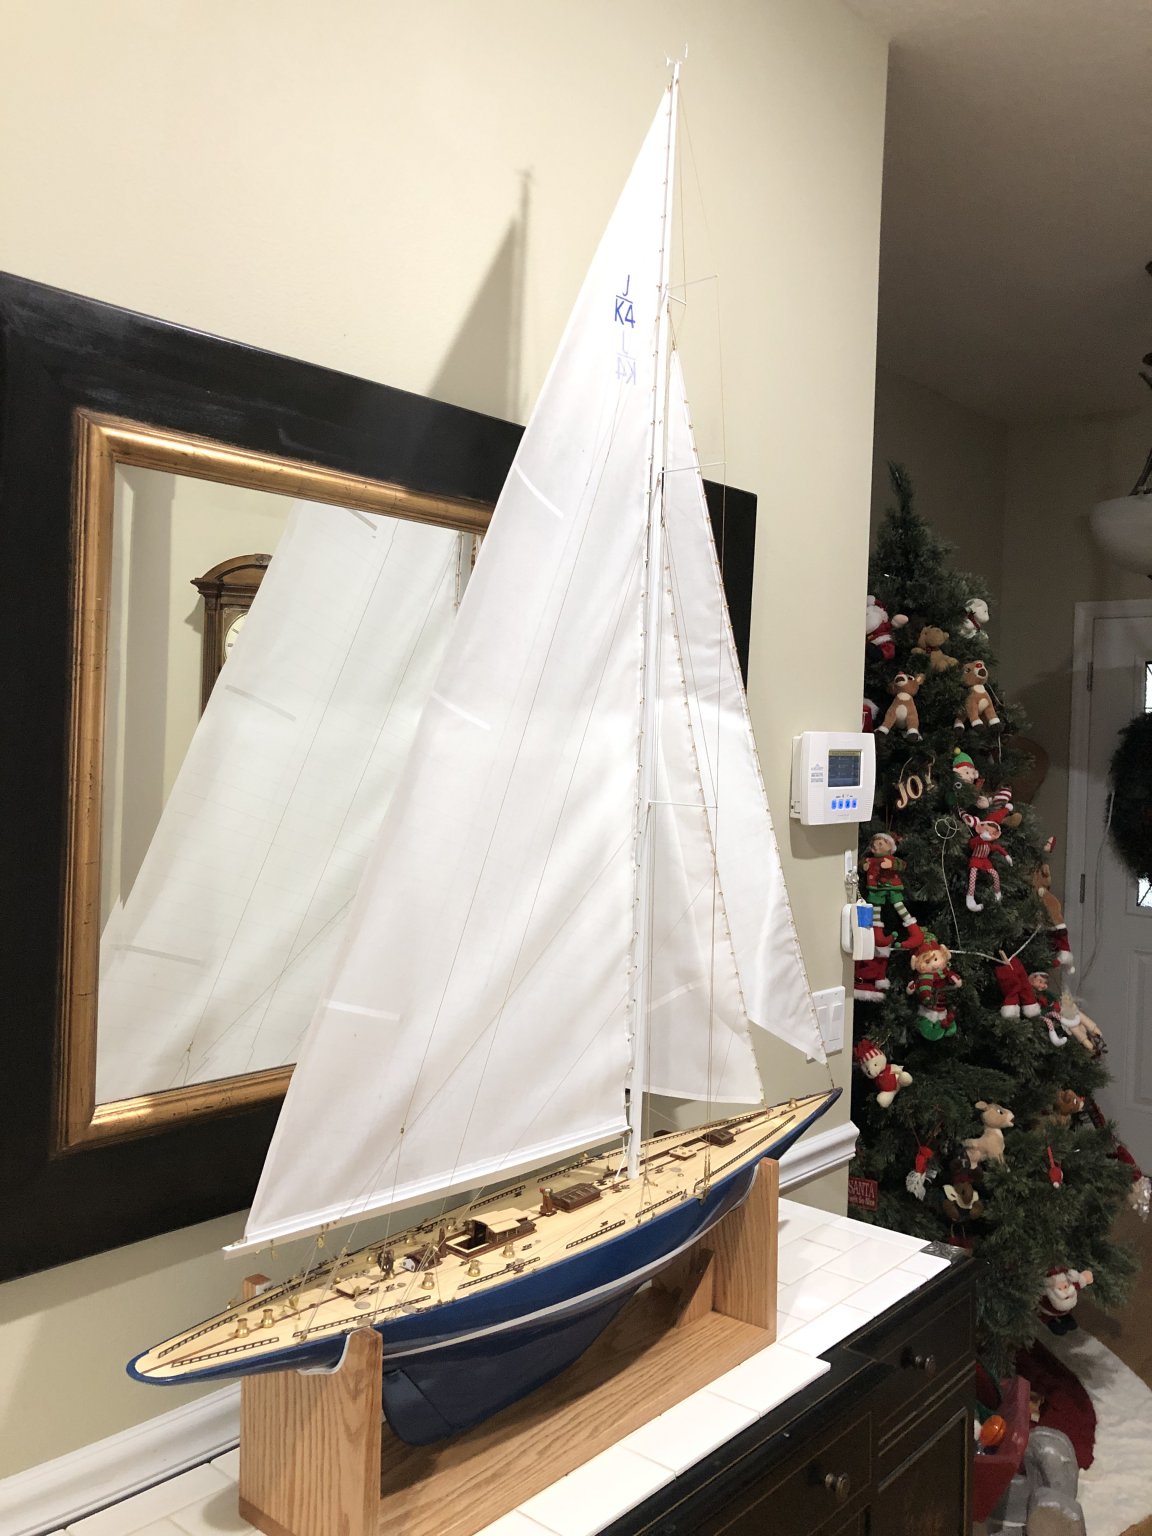
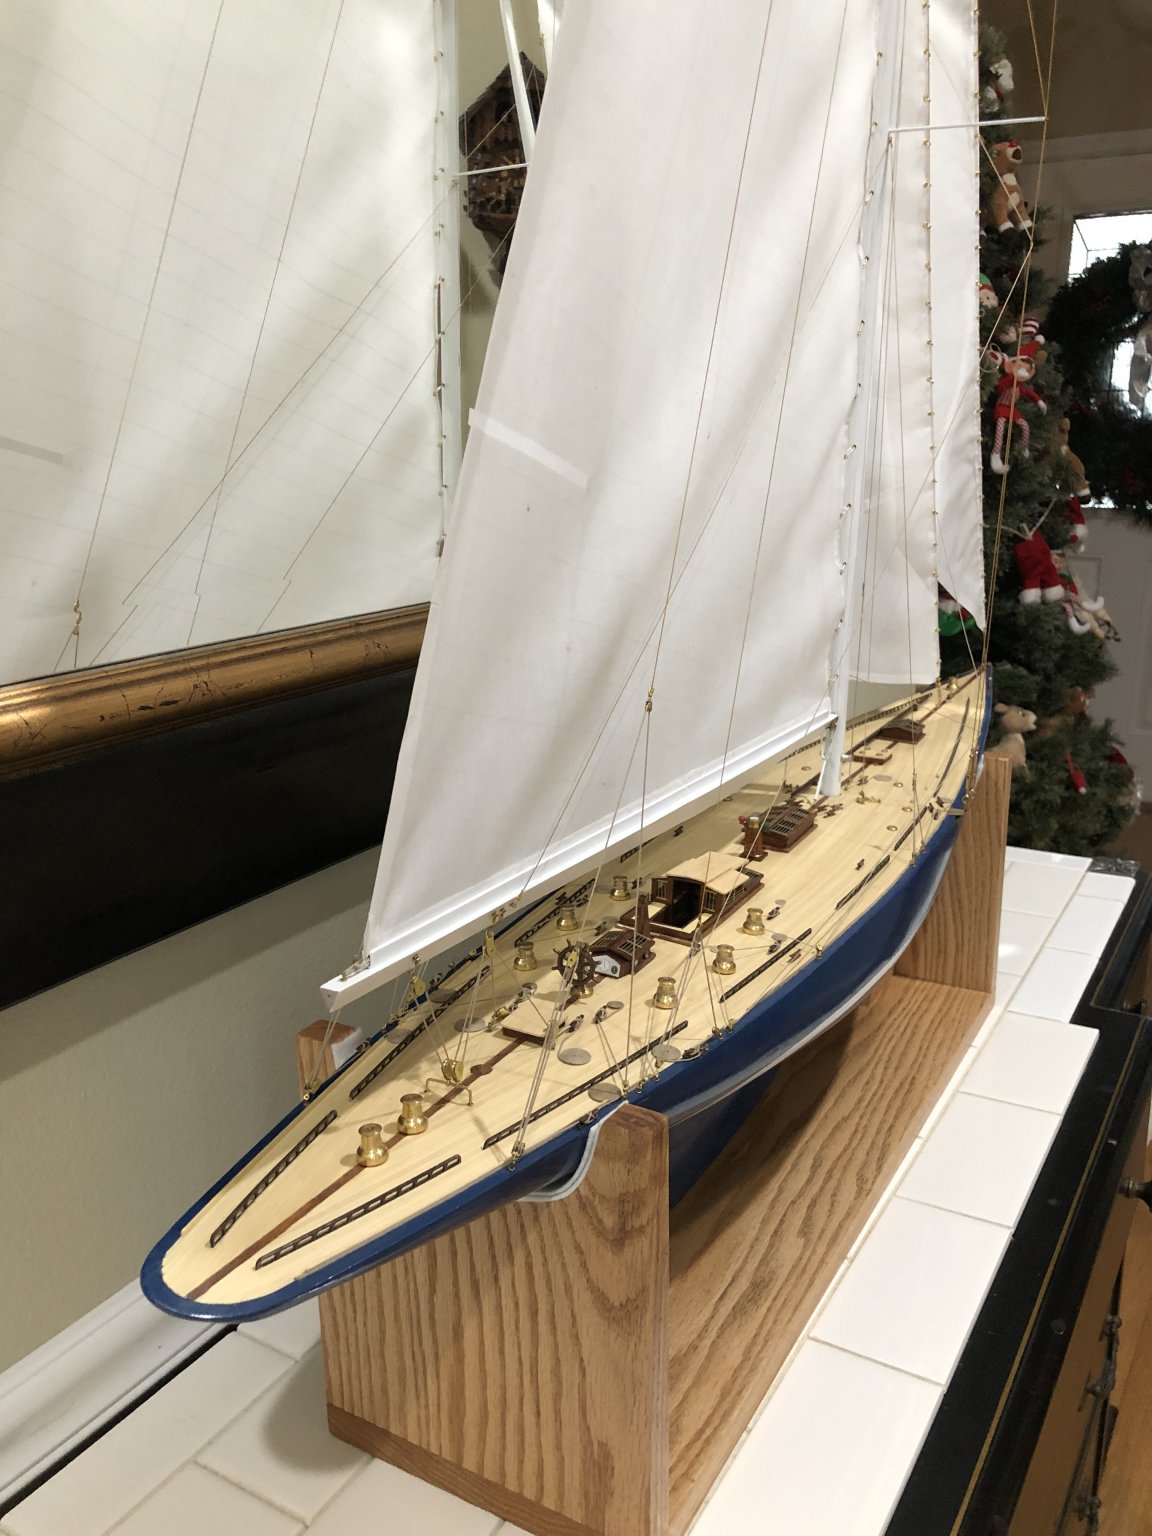
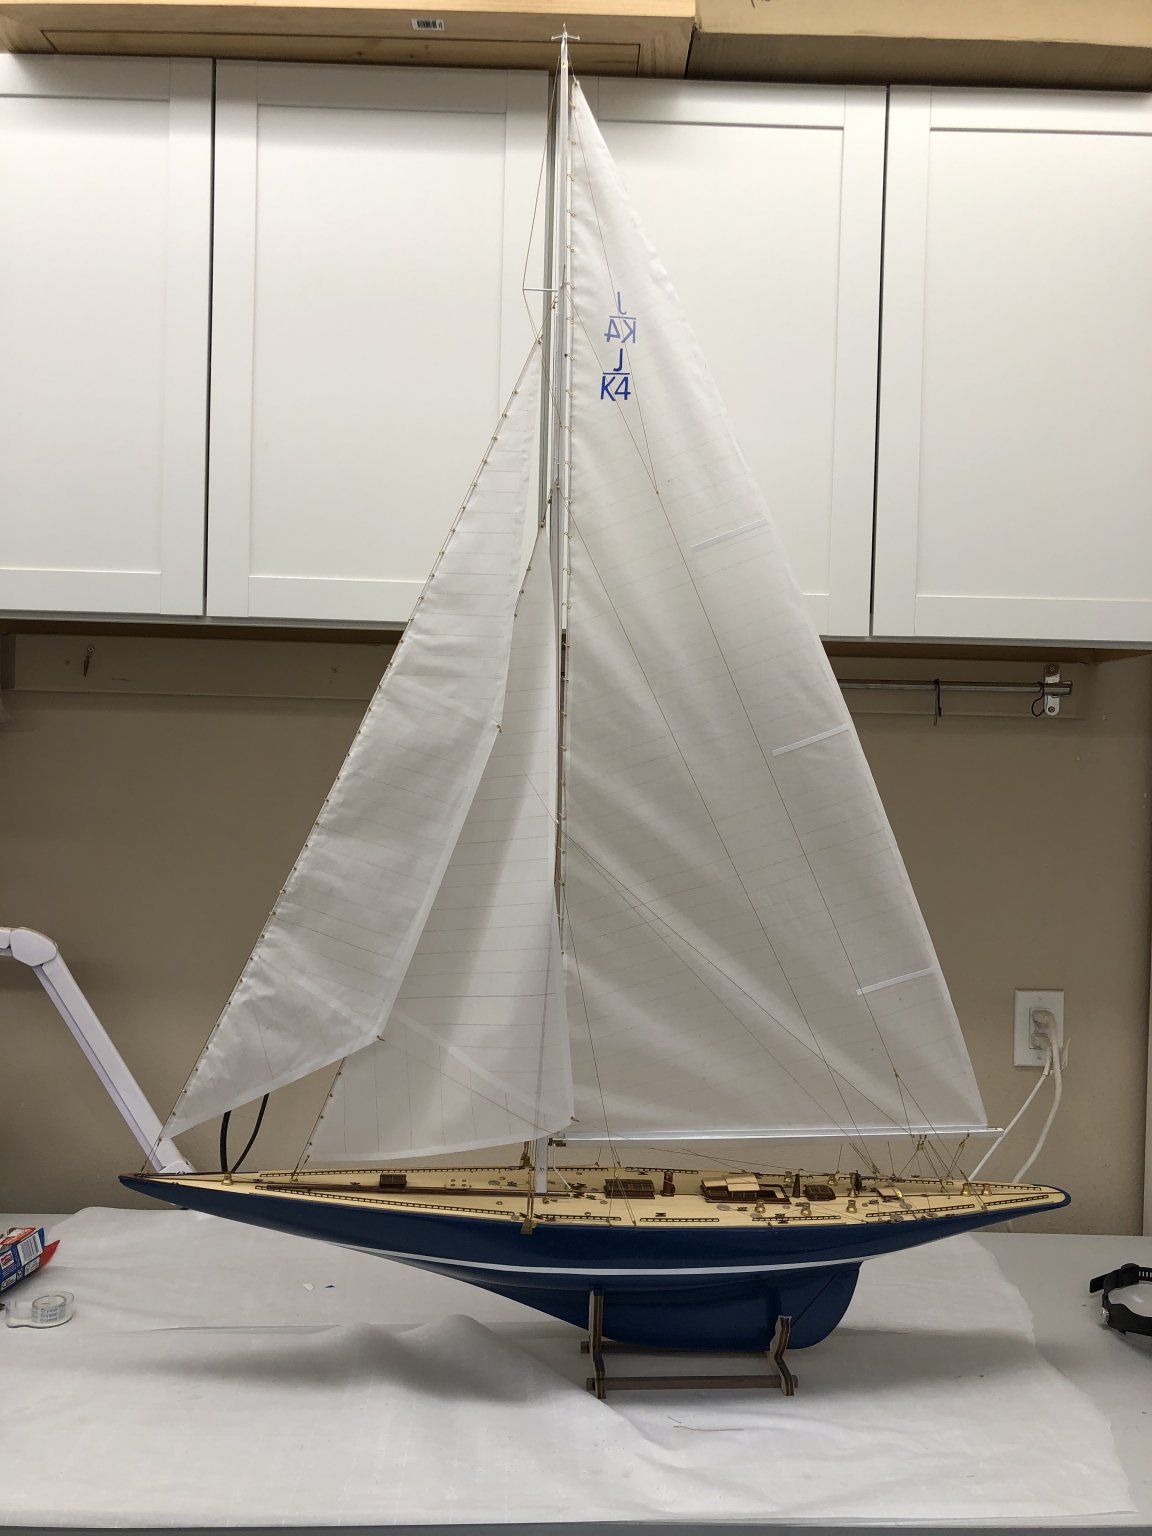
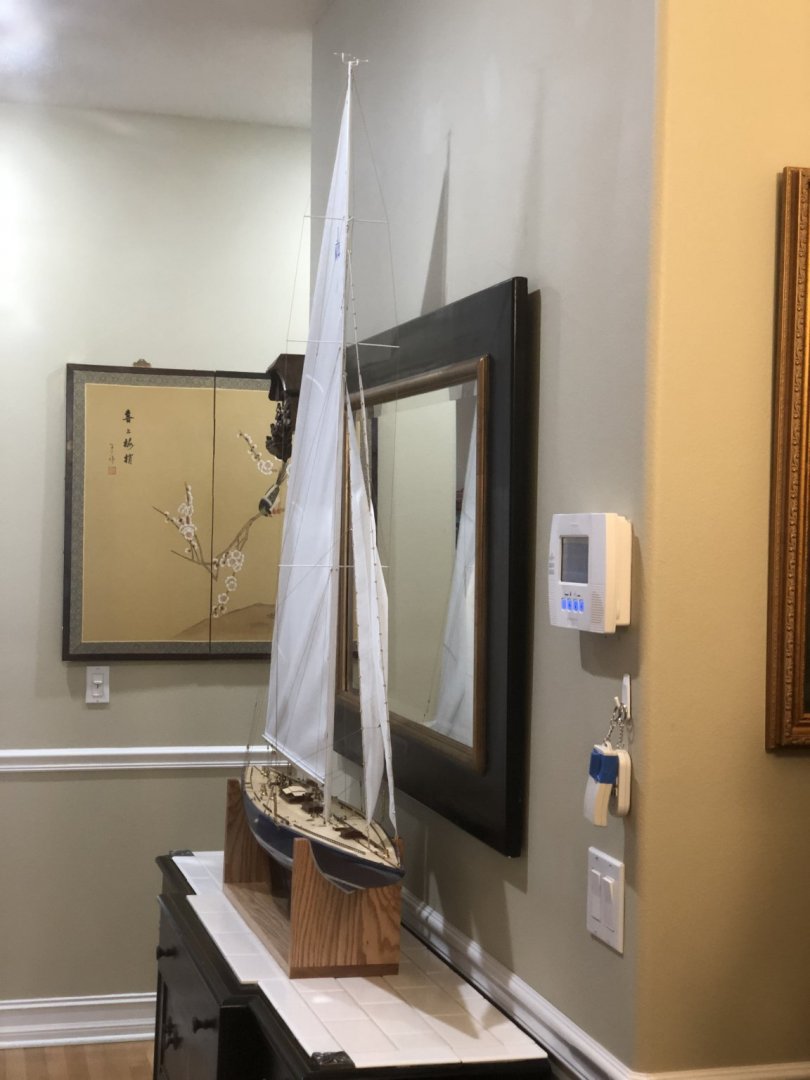
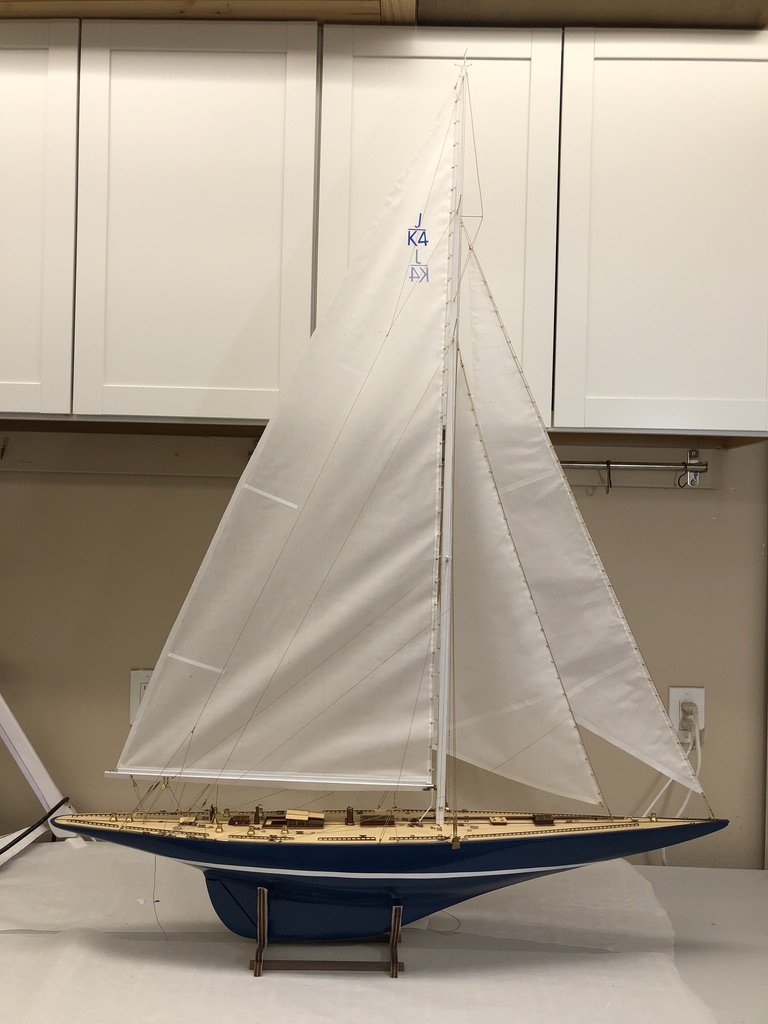
Thanks Keith😀 Here she is at home in the front hall. People entering will have a hard time not seeing her. Case is under consideration but the panels will have to be plexiglass/Lexan/etc. as glass this size would be way to heavy to ever move.


- 192 replies
-
- 16
-
-
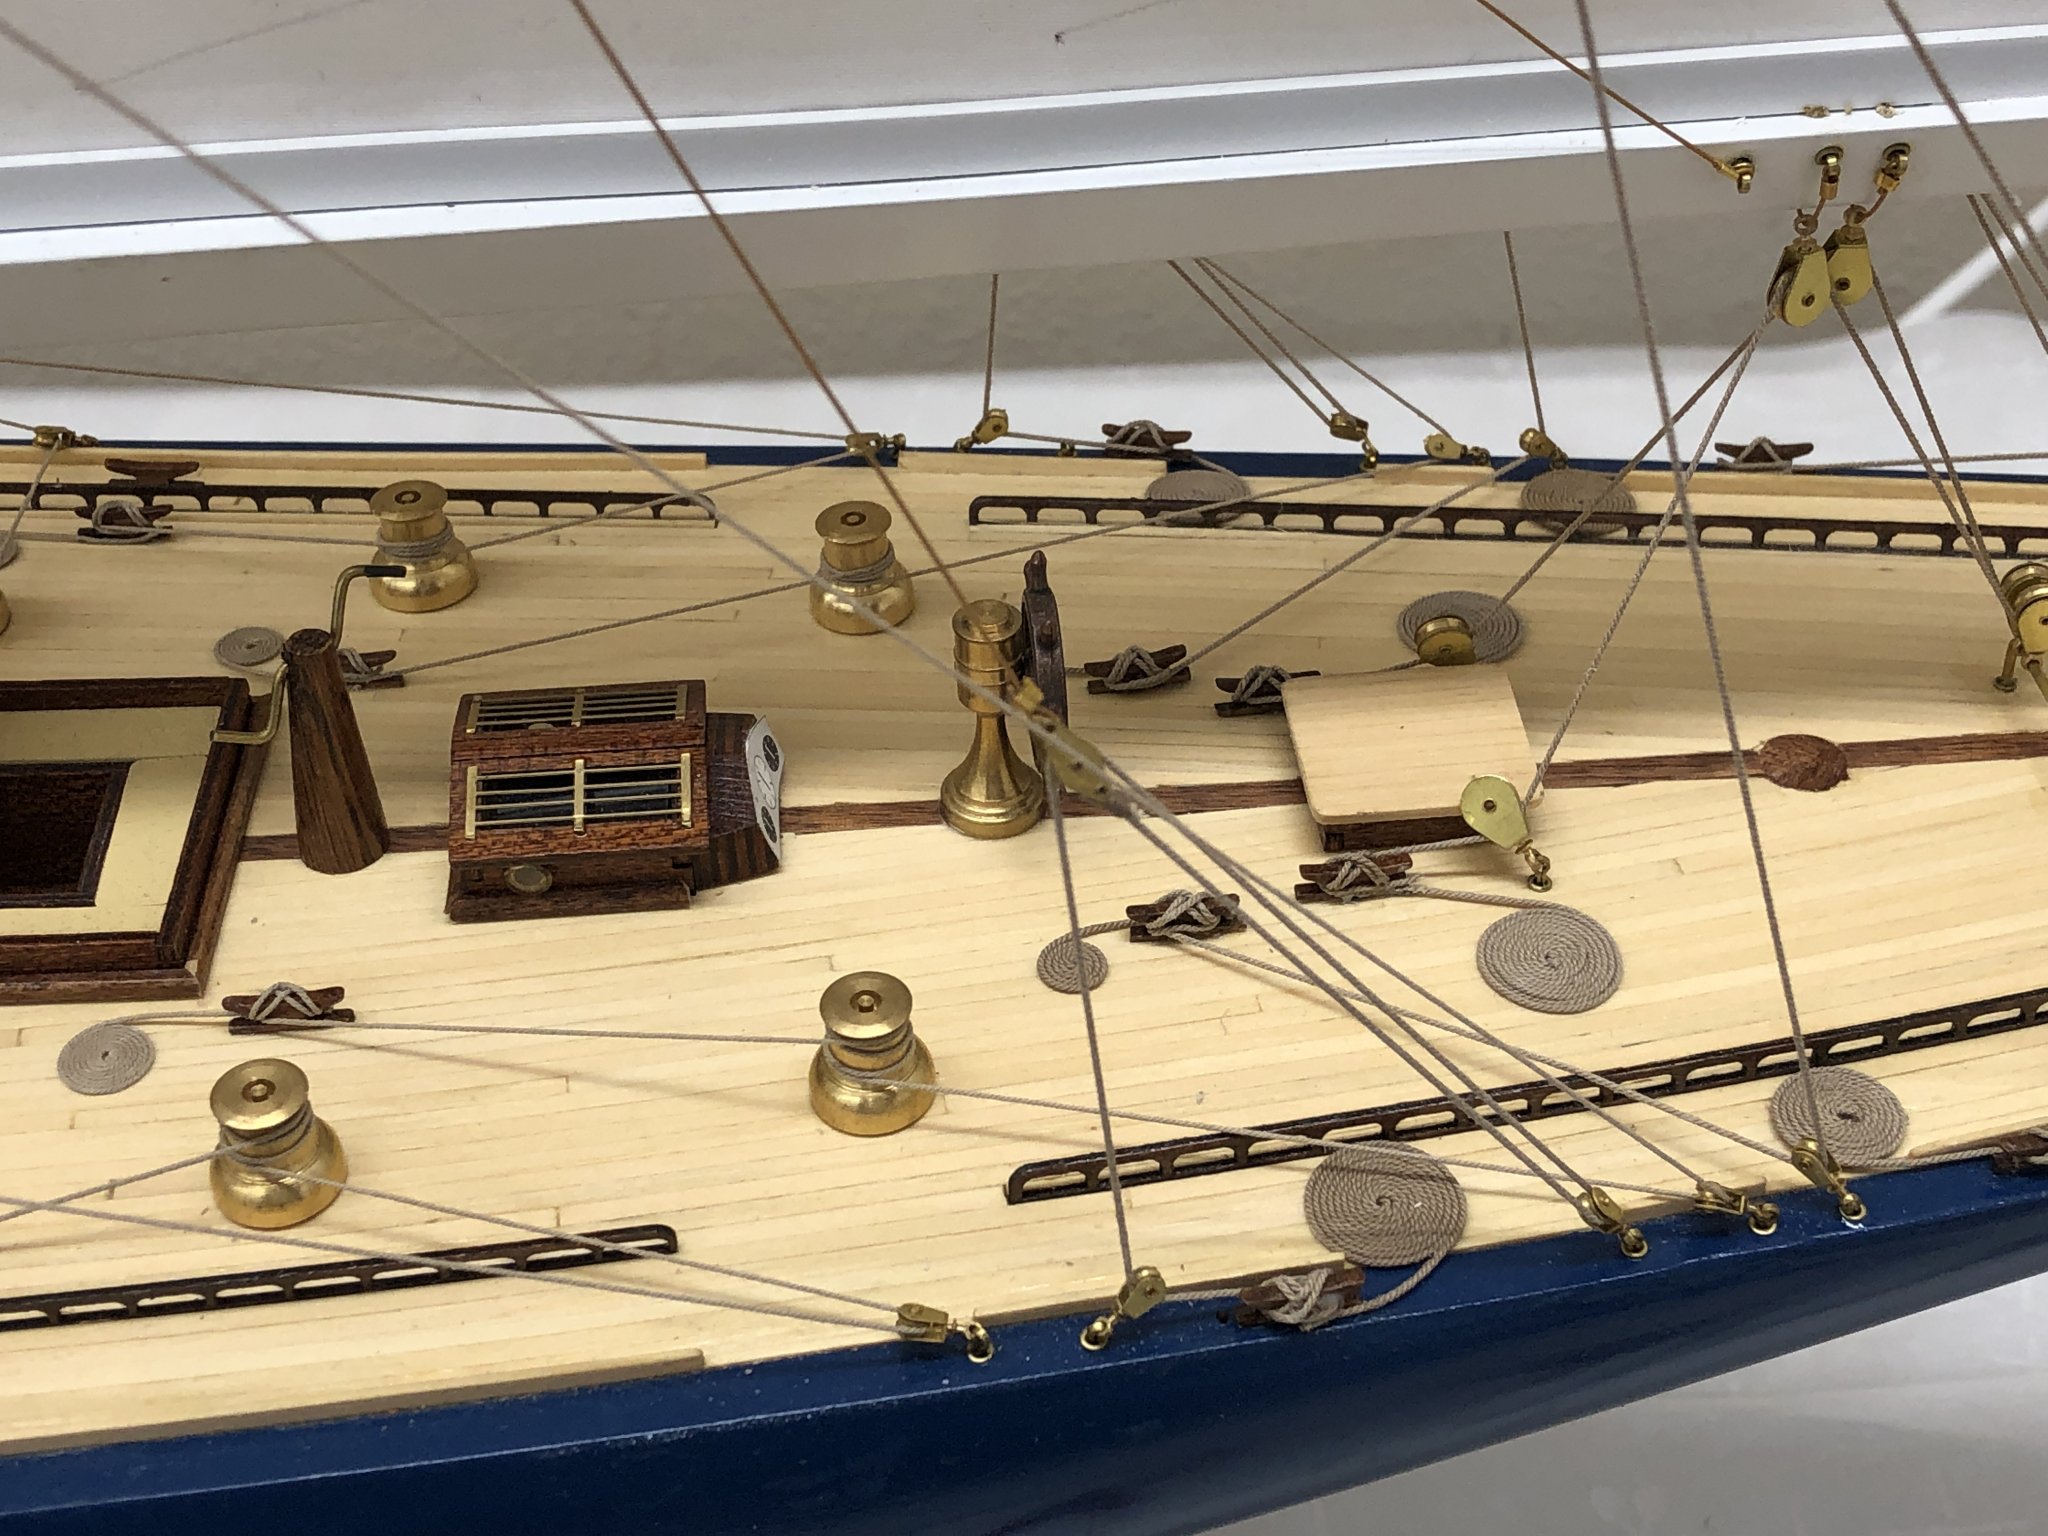
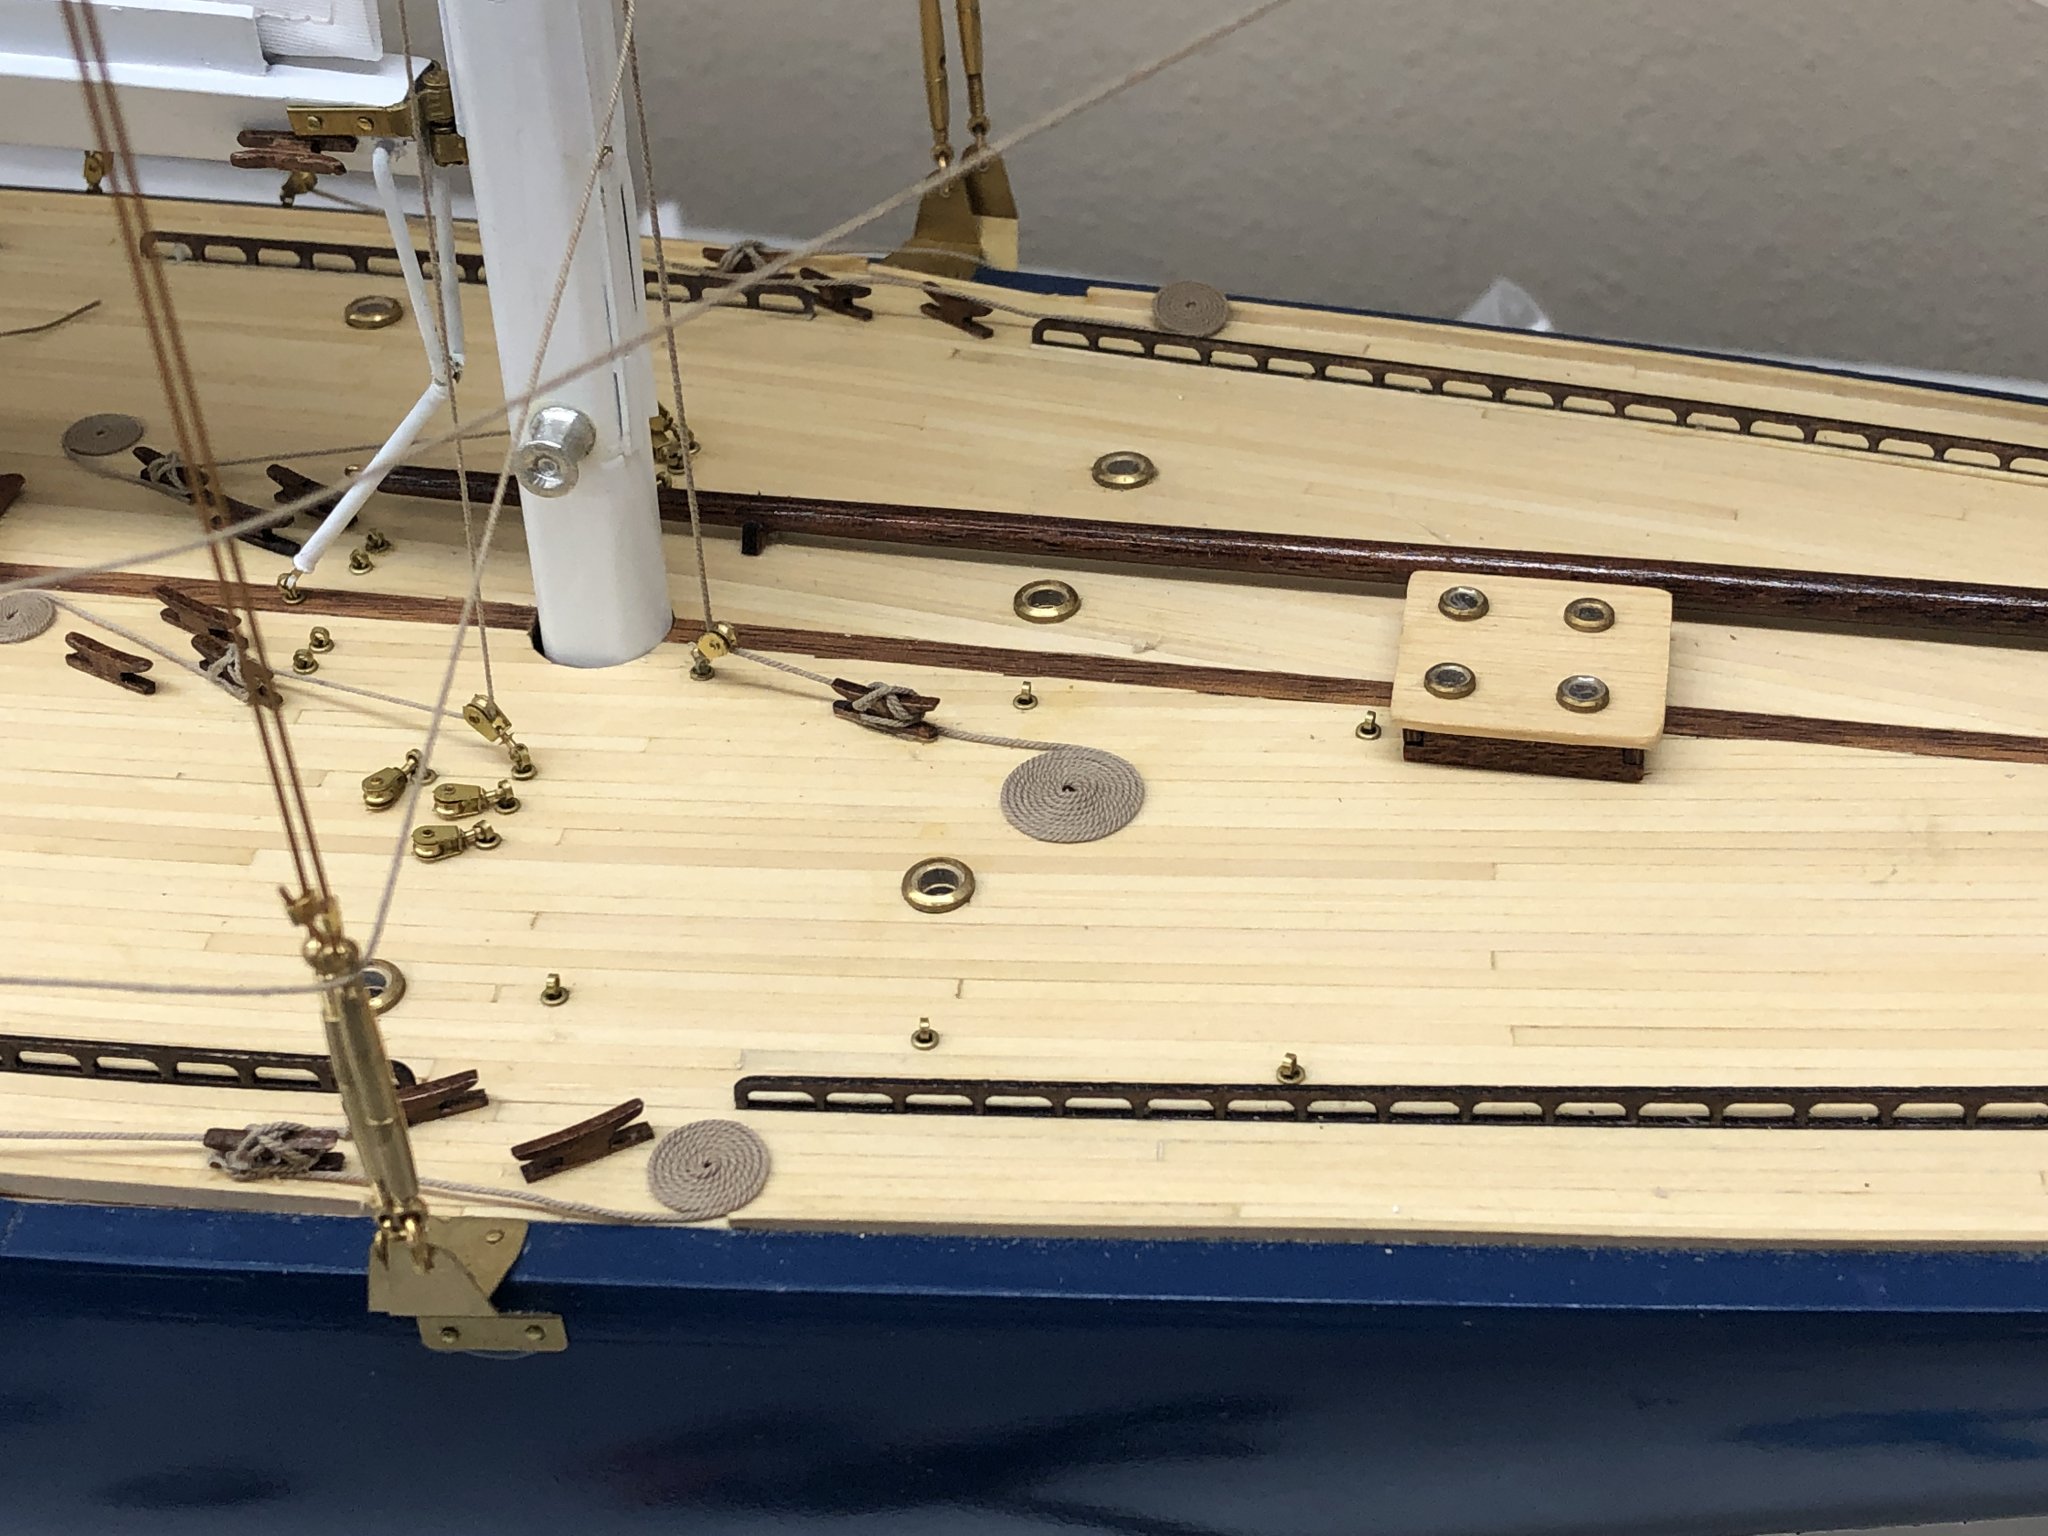
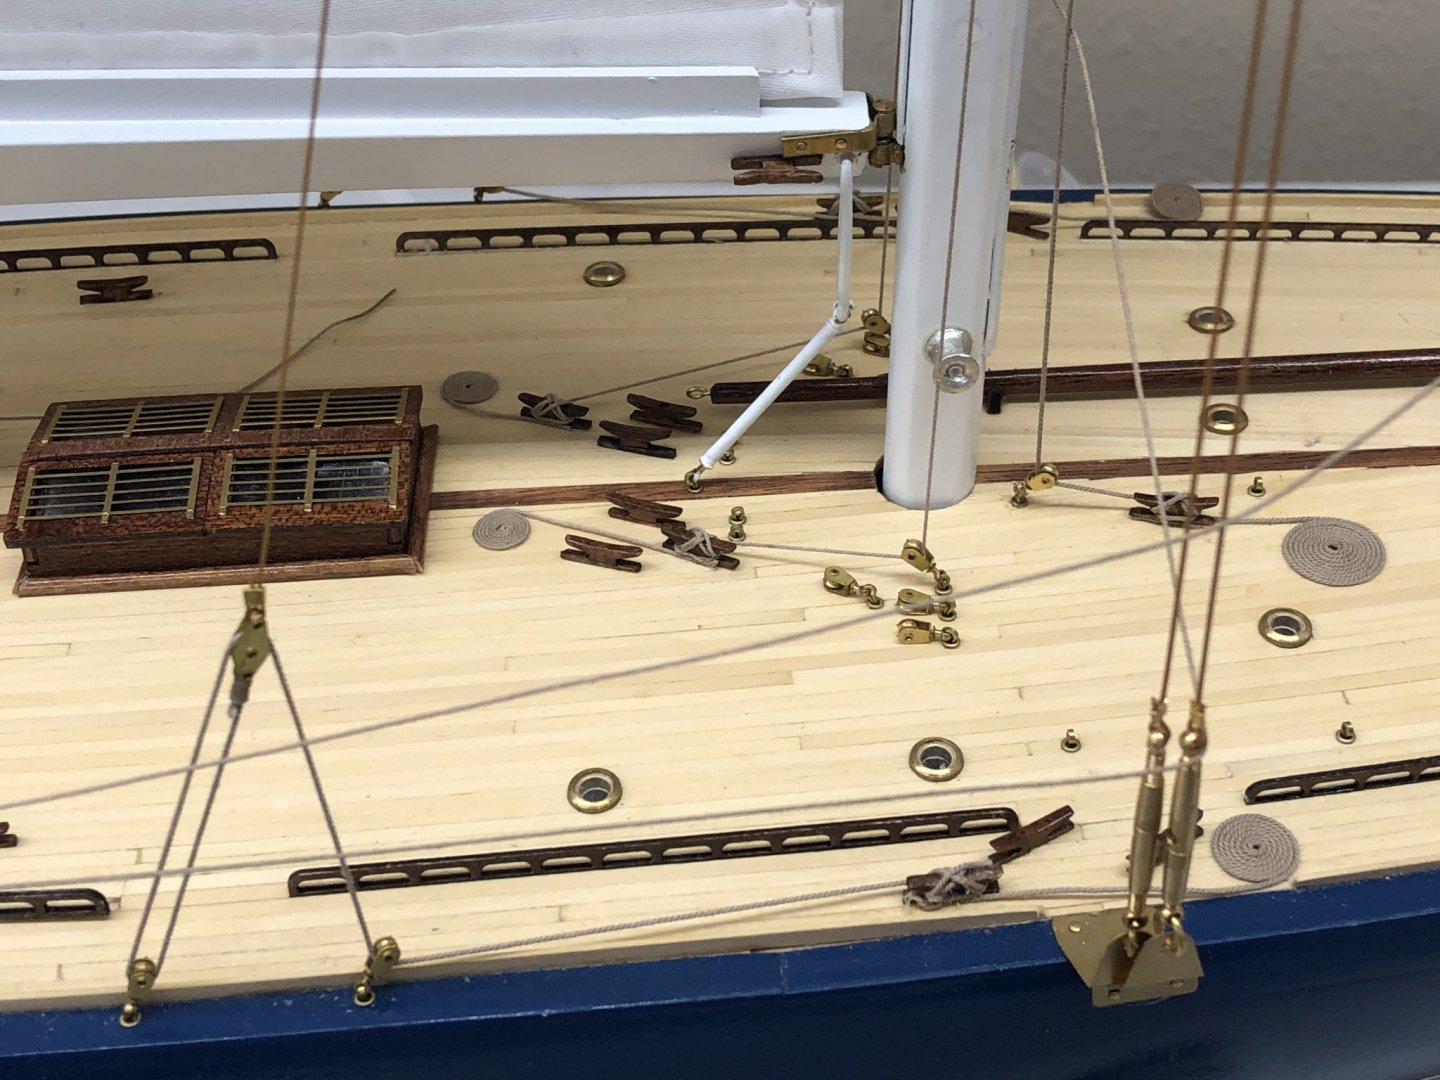
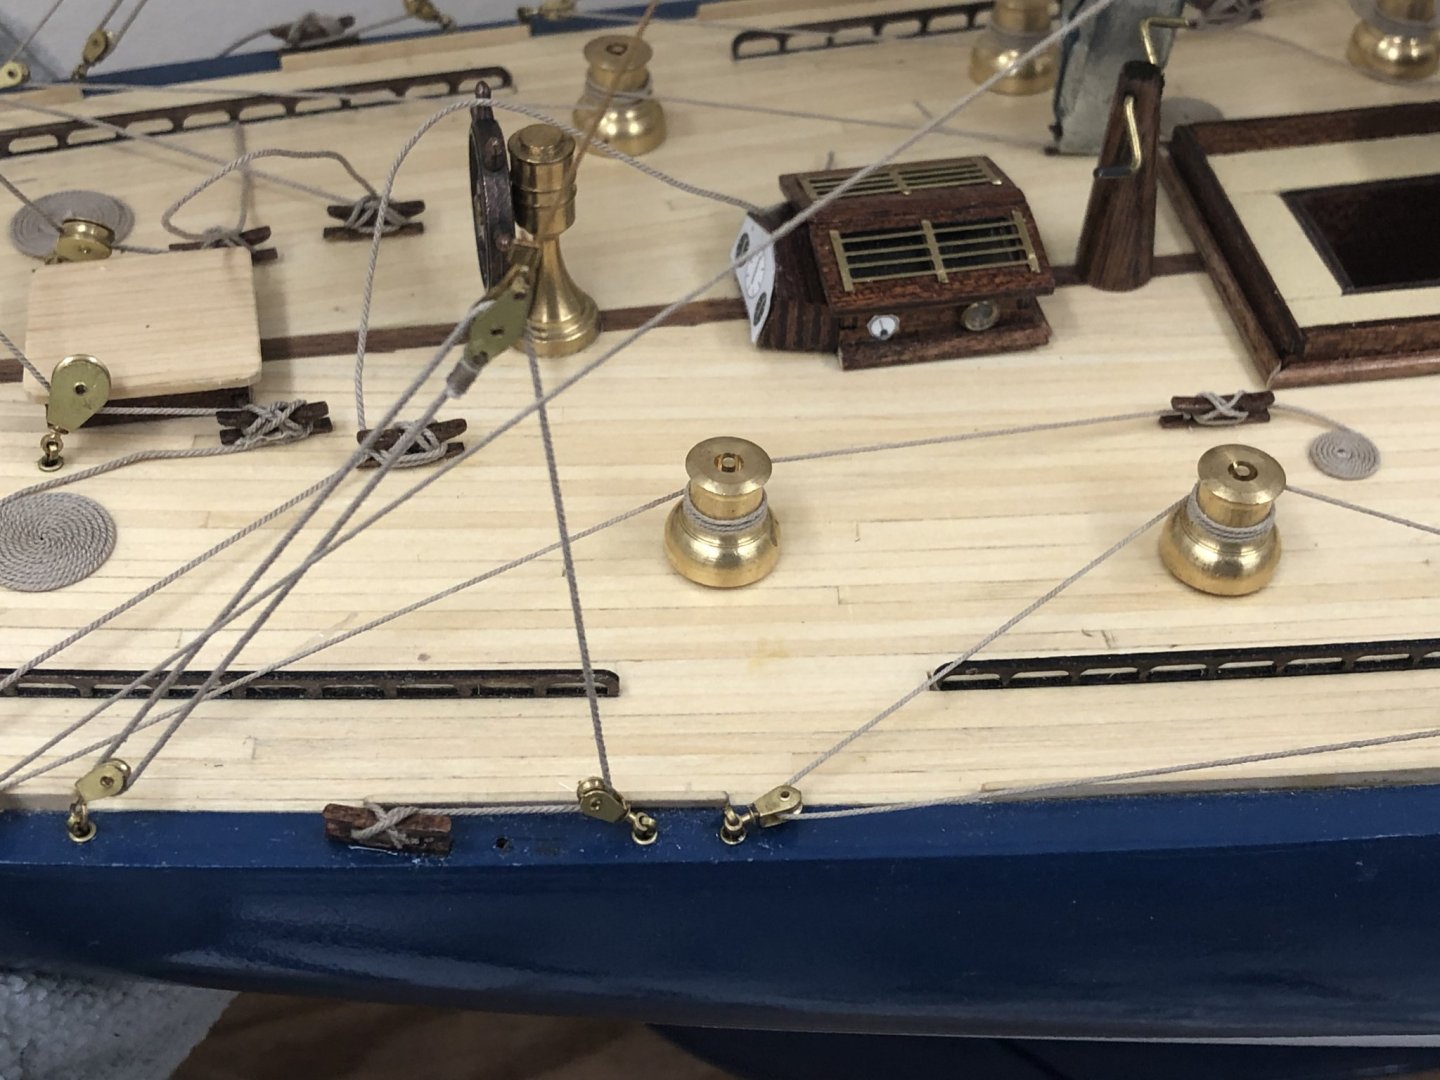
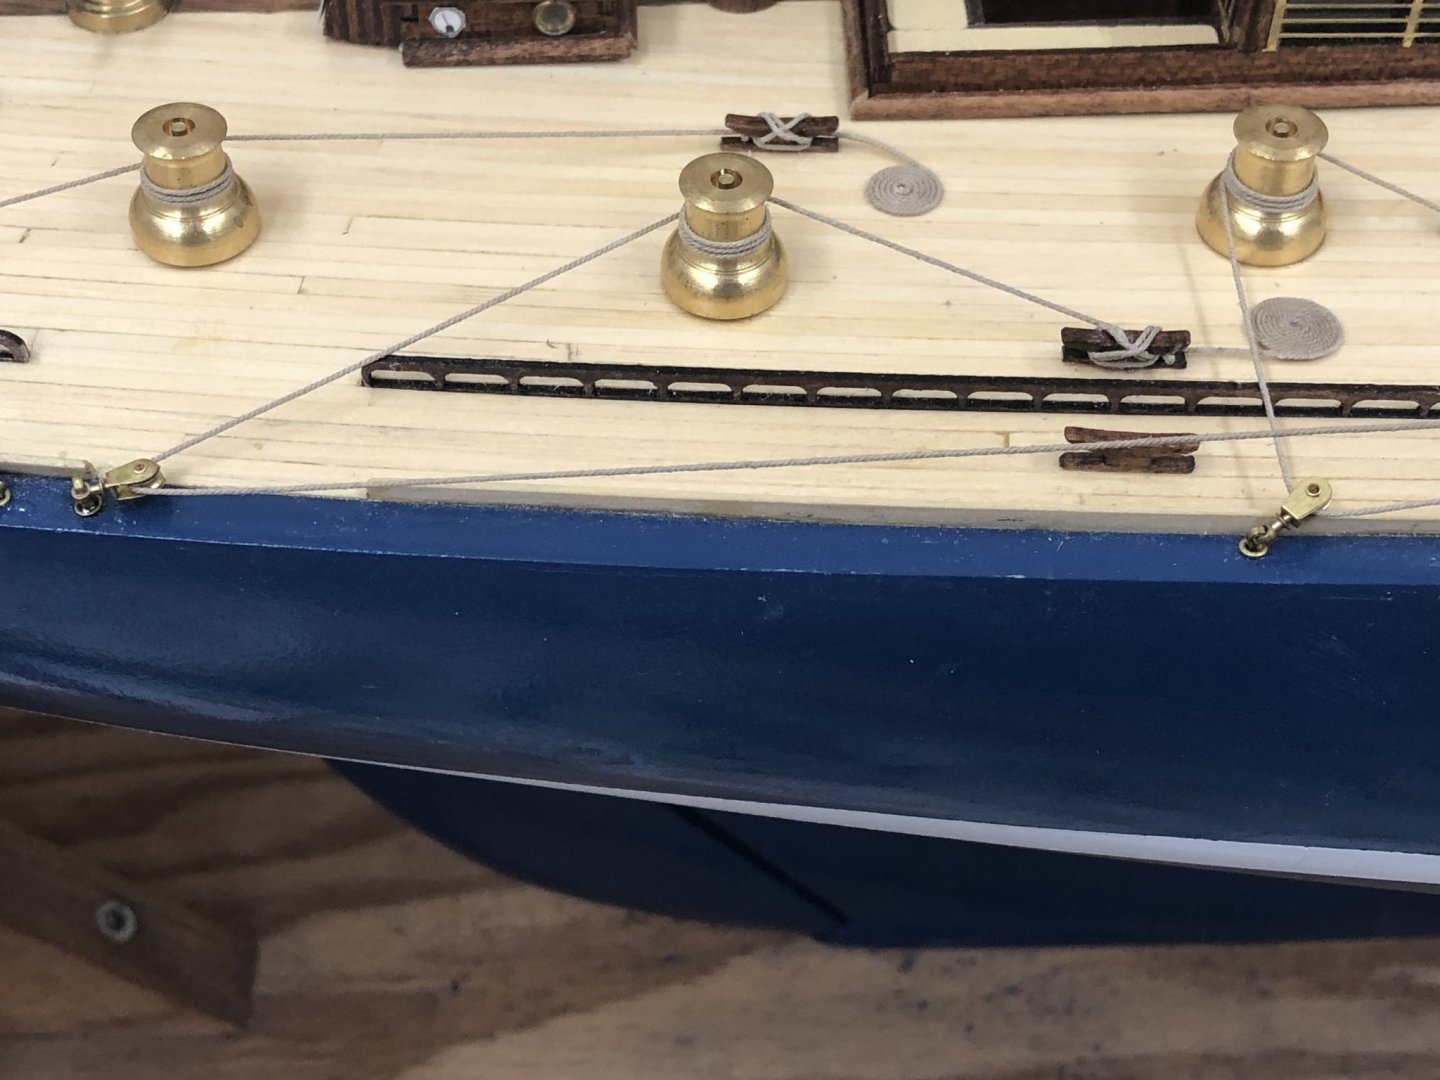
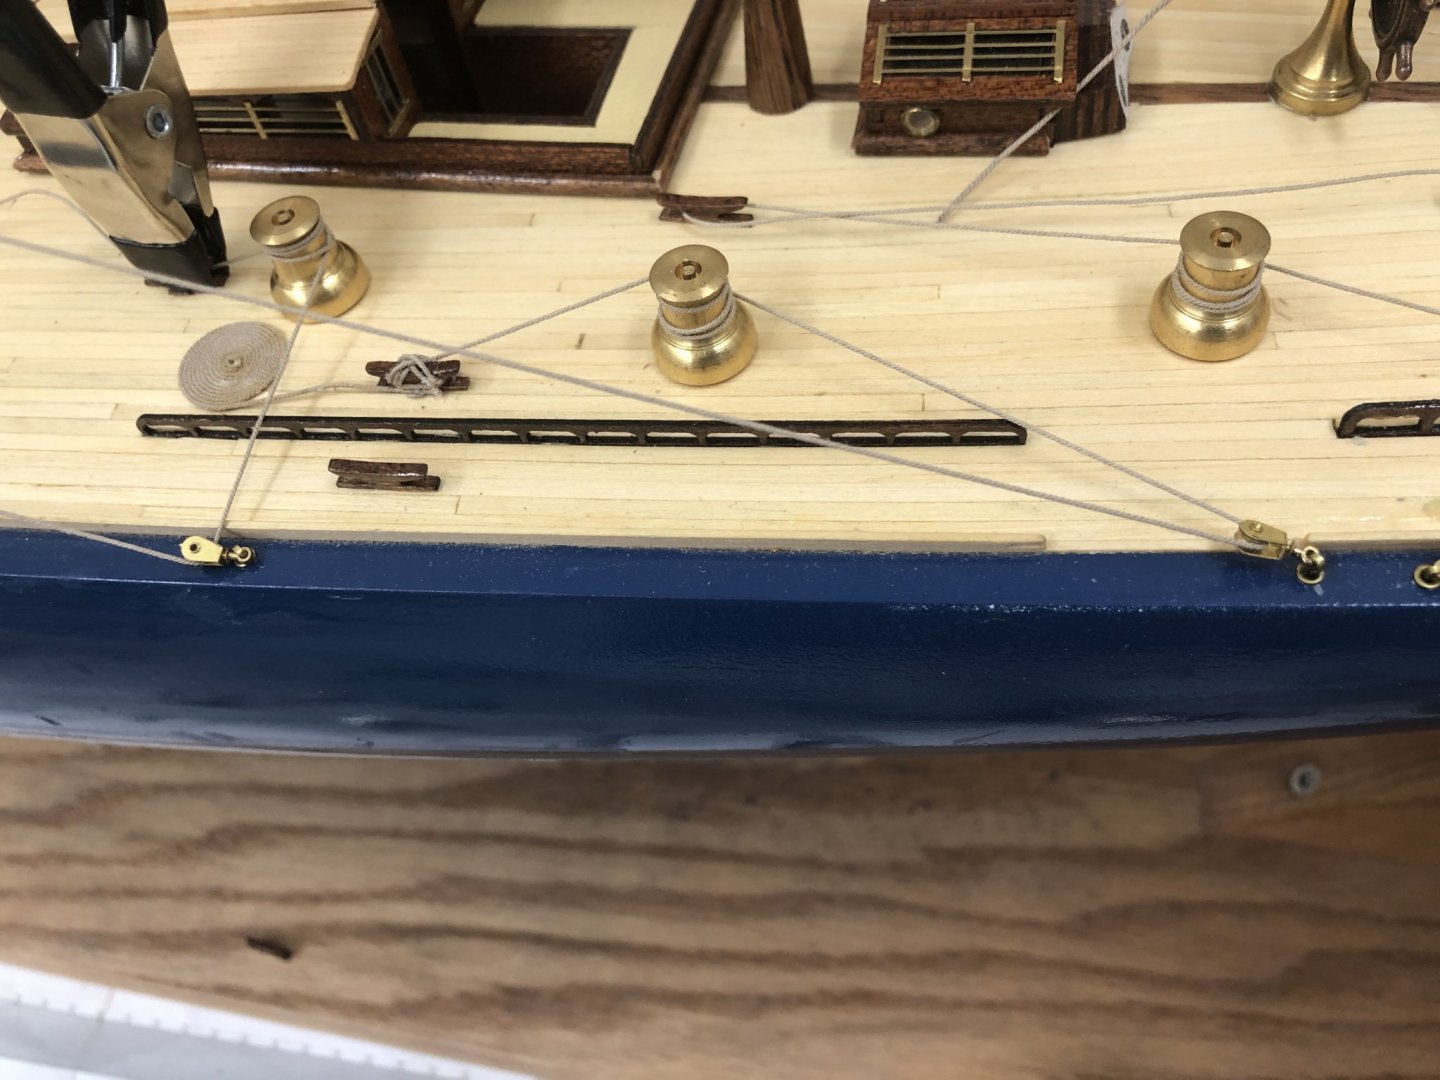
Keith - I had enough trouble getting the two and half turns around the winches that I managed. The line kept working its way off. I finally used tweezers to move the line down the winch drum and hold it between turns. I too have had a line "get away from me" while on a winch - no fun indeed. Port side is complete now. Am working on the final cradle (not nearly as nice or inventive as Keith's) varnish now so it will be another day before she m akes it in to the house. More pictures then


-
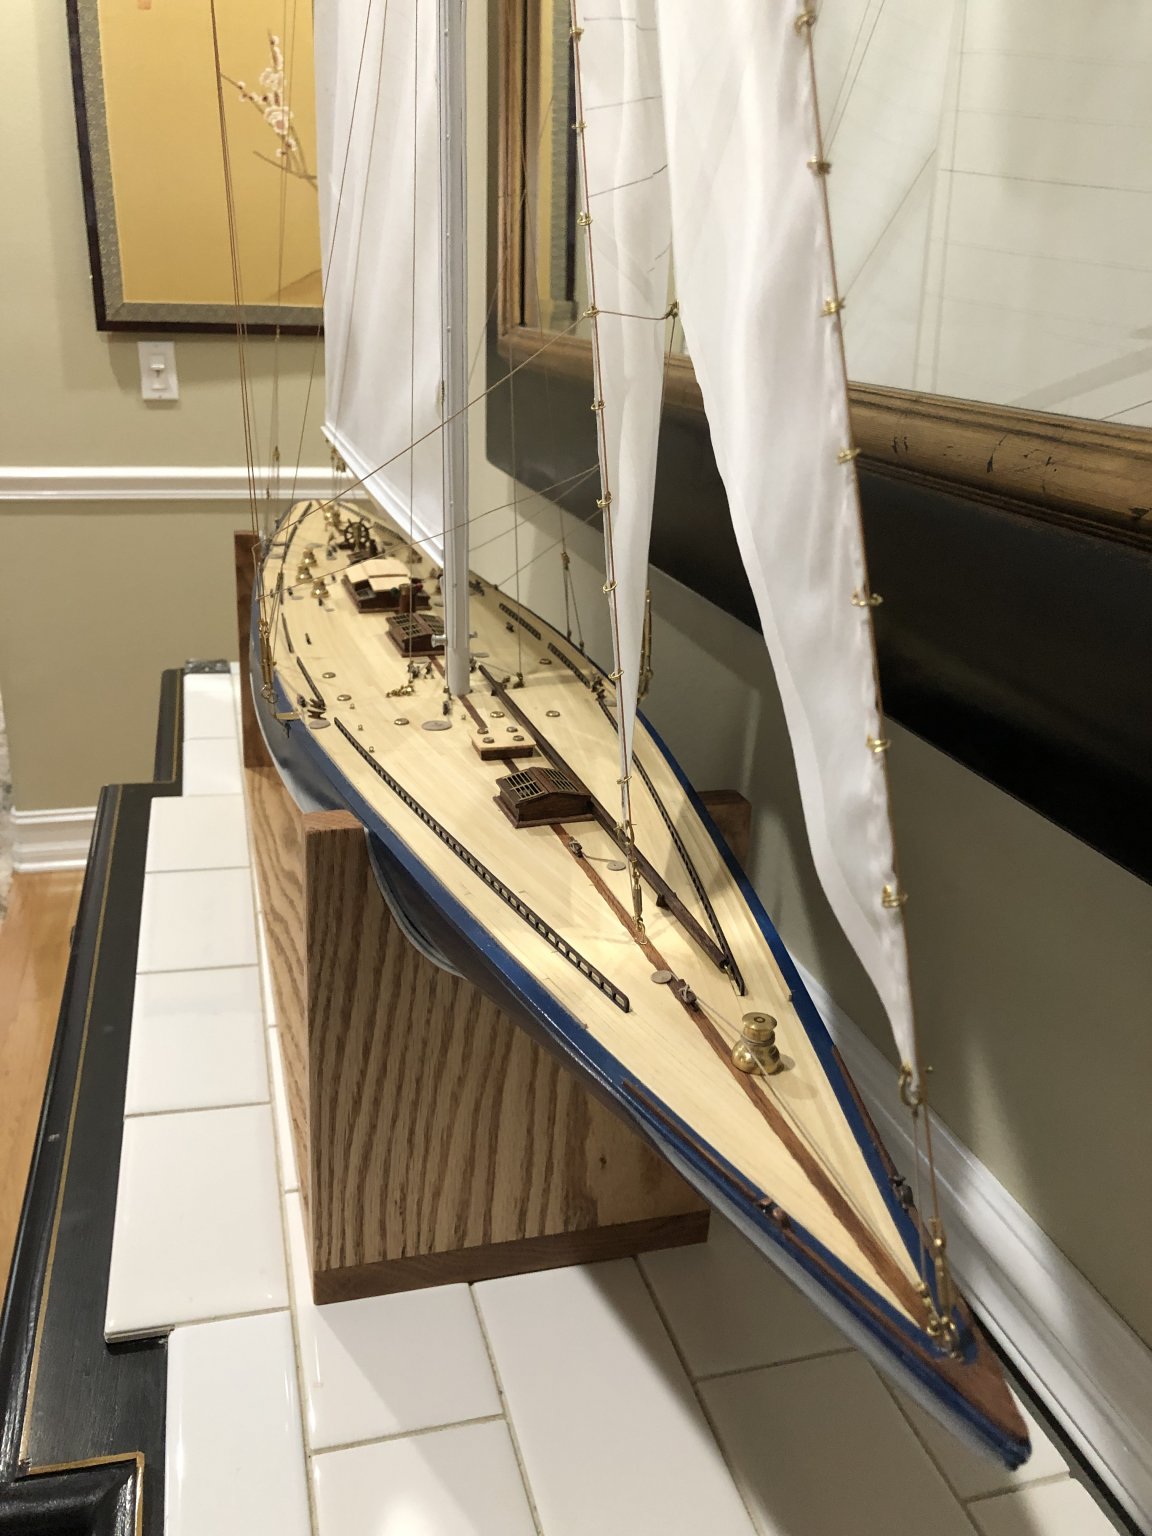
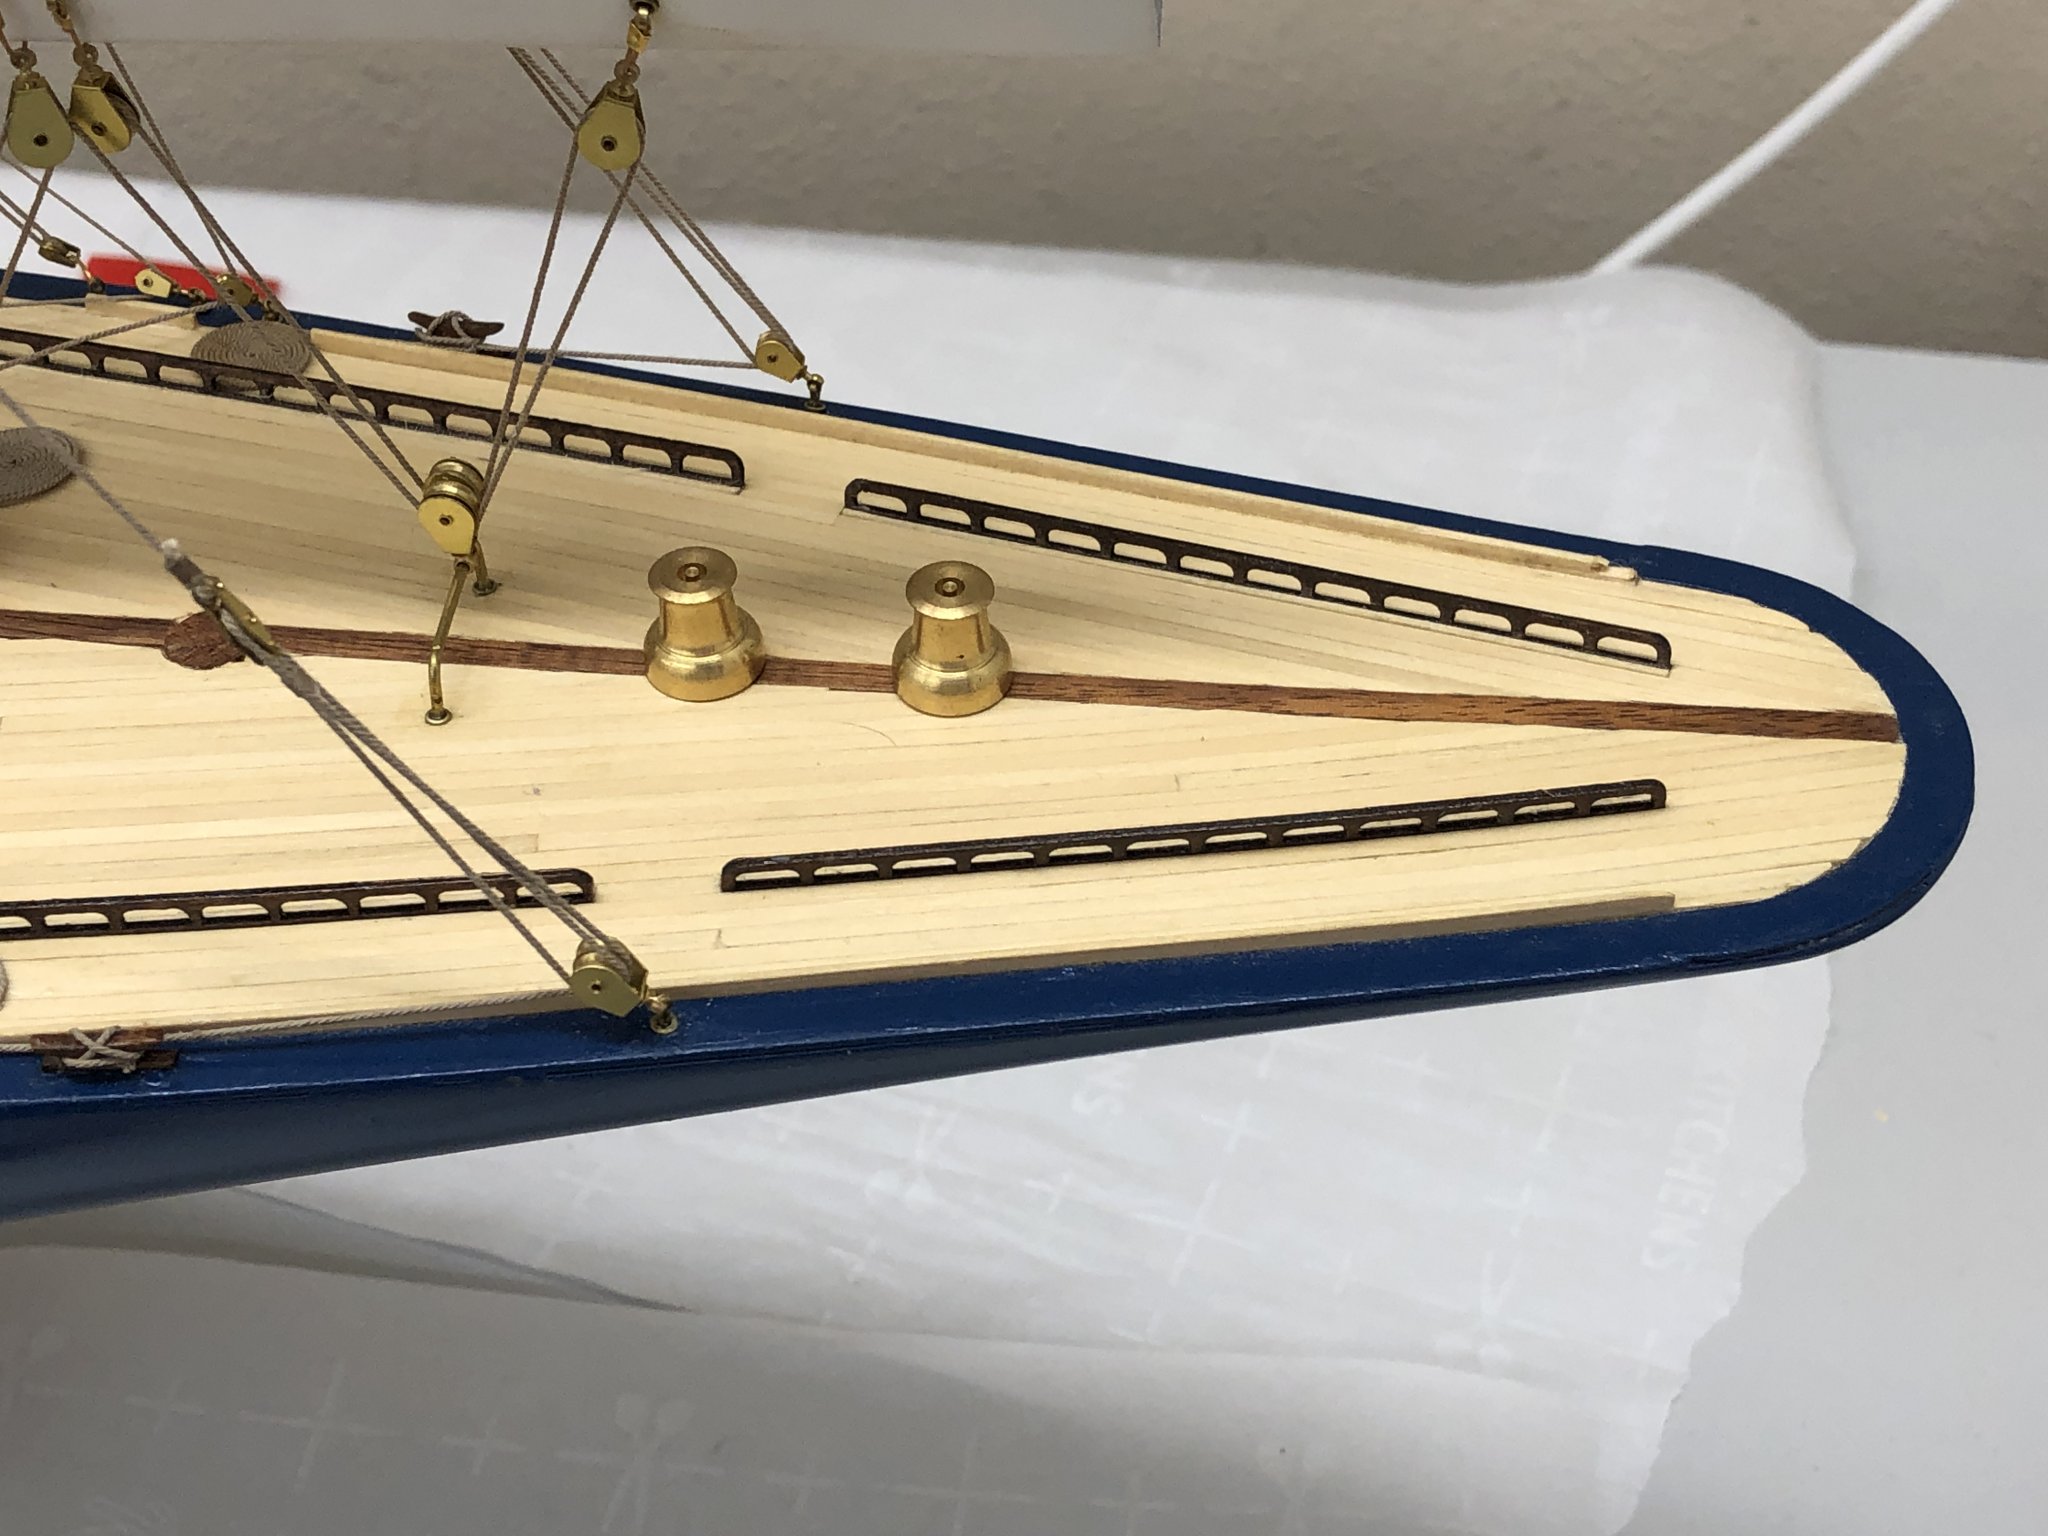
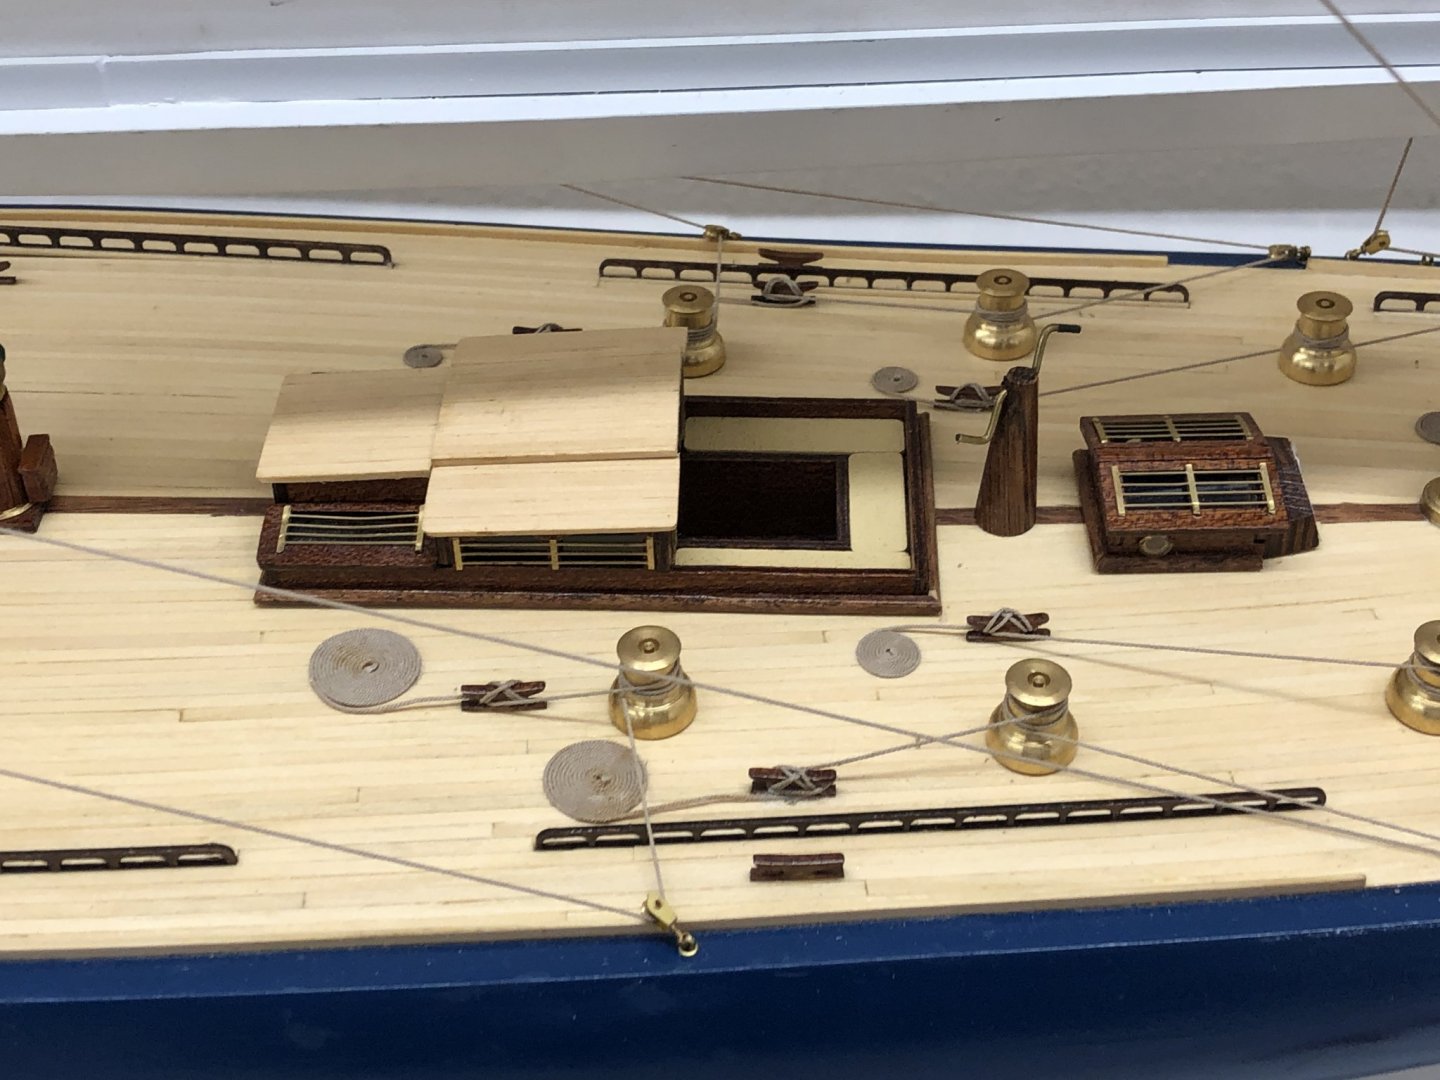
A full shot of the starboard side in the kit supplied stand. I have to clean up the one used in construction to use as this one is too unstable to use for the long term. I am trying to figure out if I can get/make a case for it that will not cost an arm and a leg and be so heavy it will need a "ten man working party" (old USN term) to move it. This is the side that will "show" where she will be displayed.
-
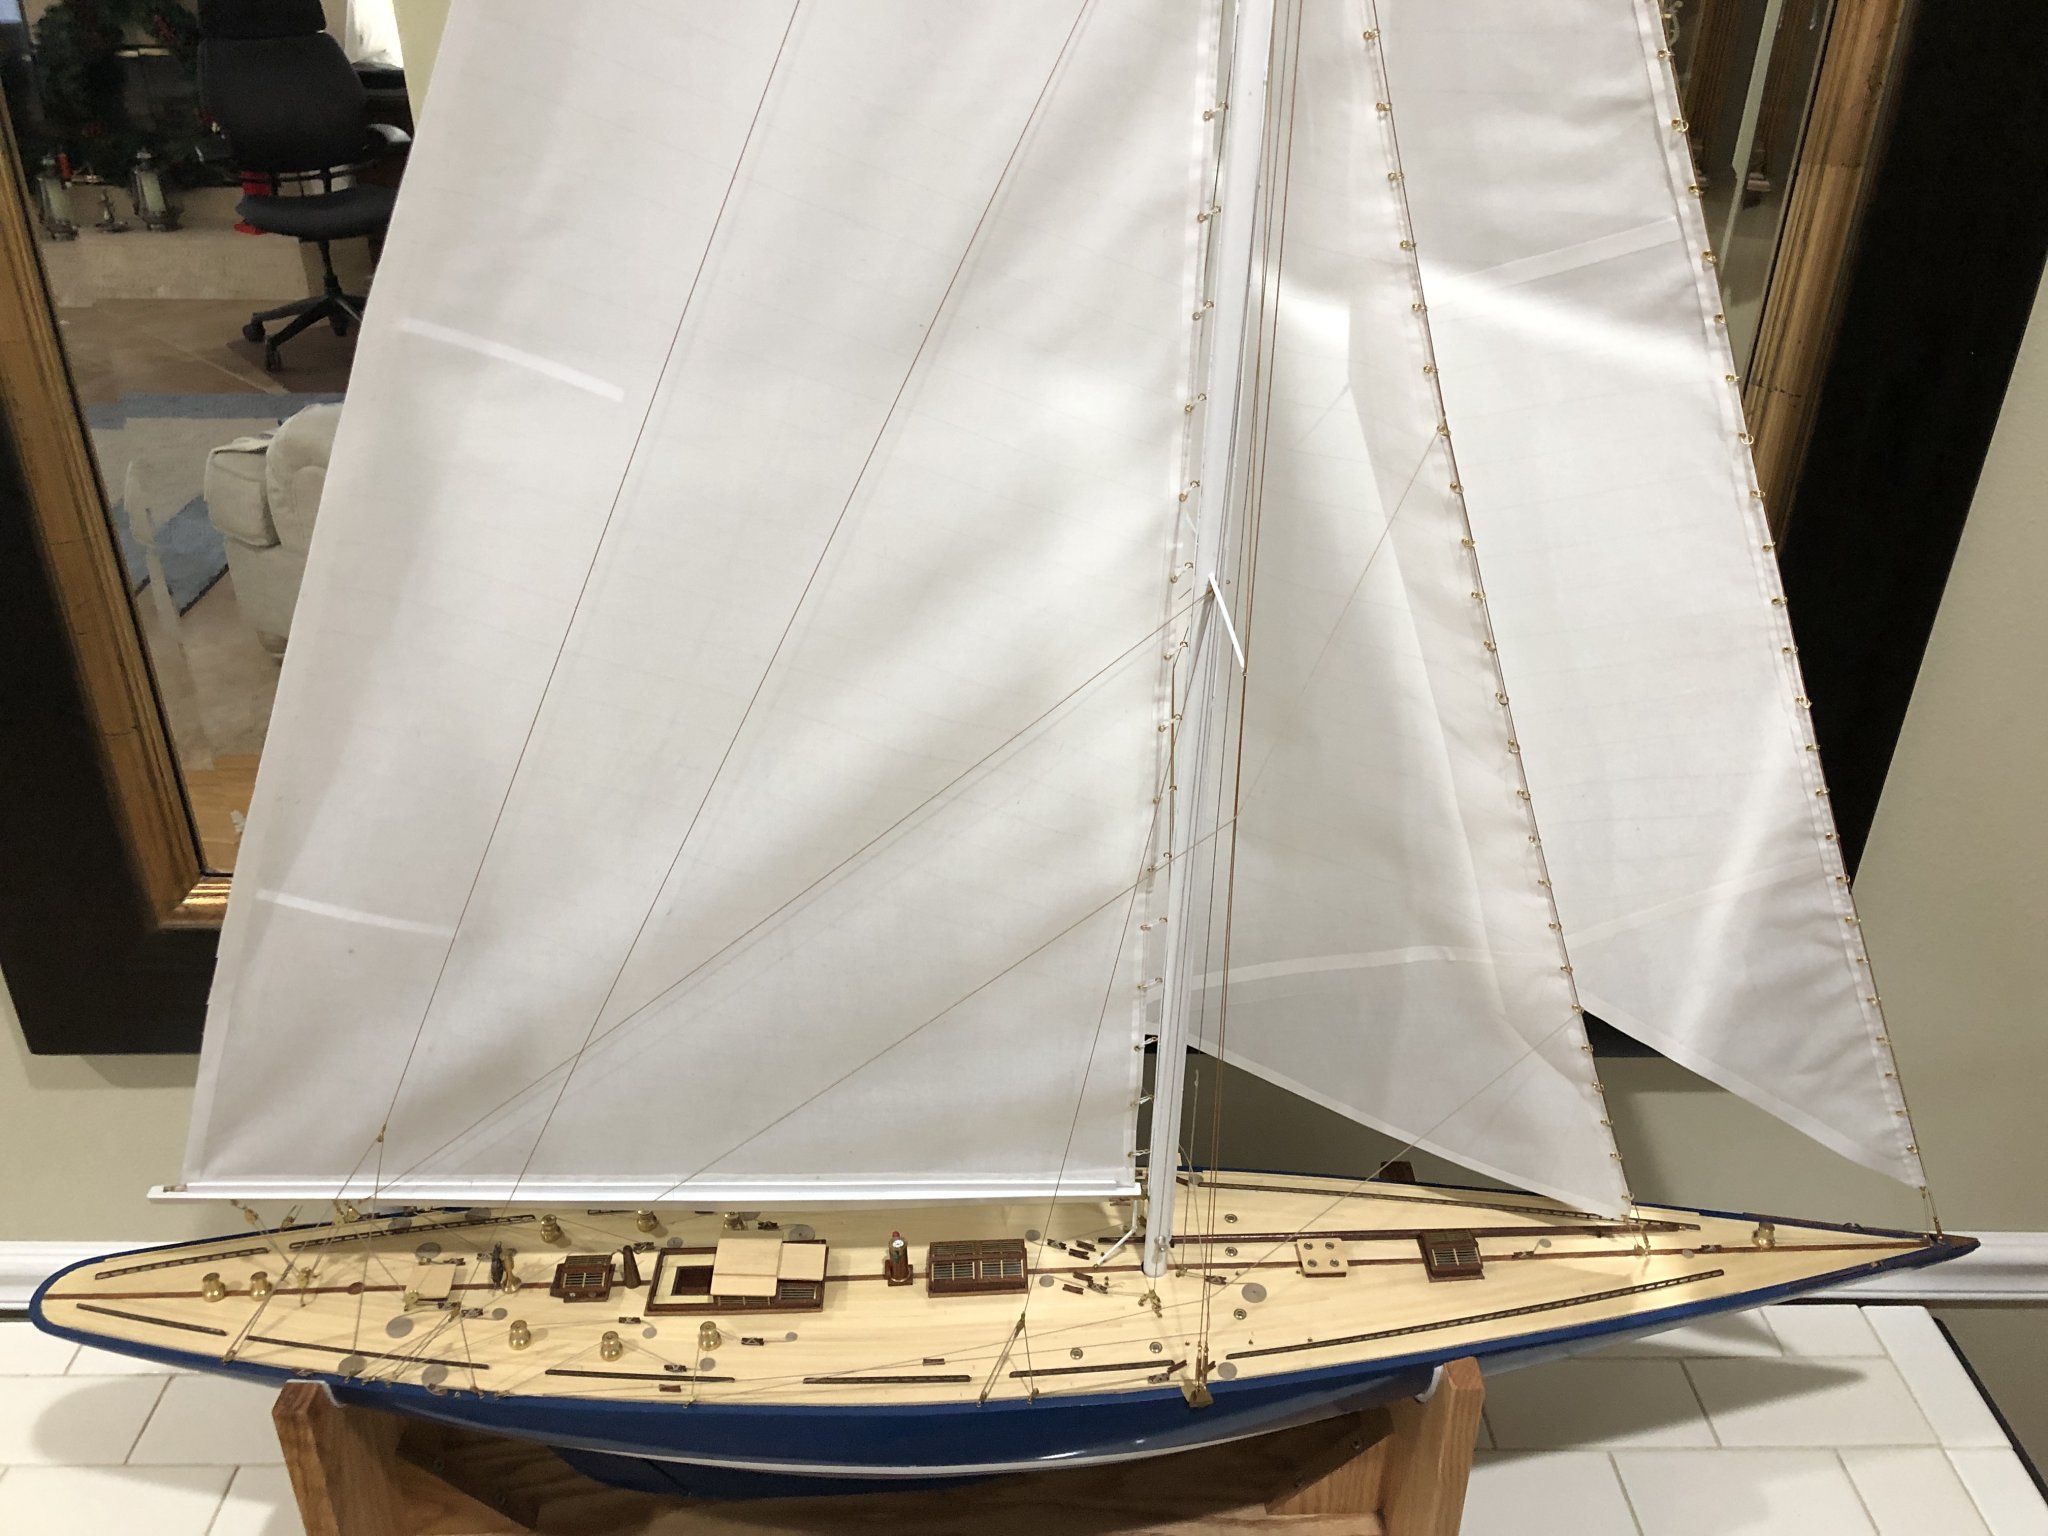
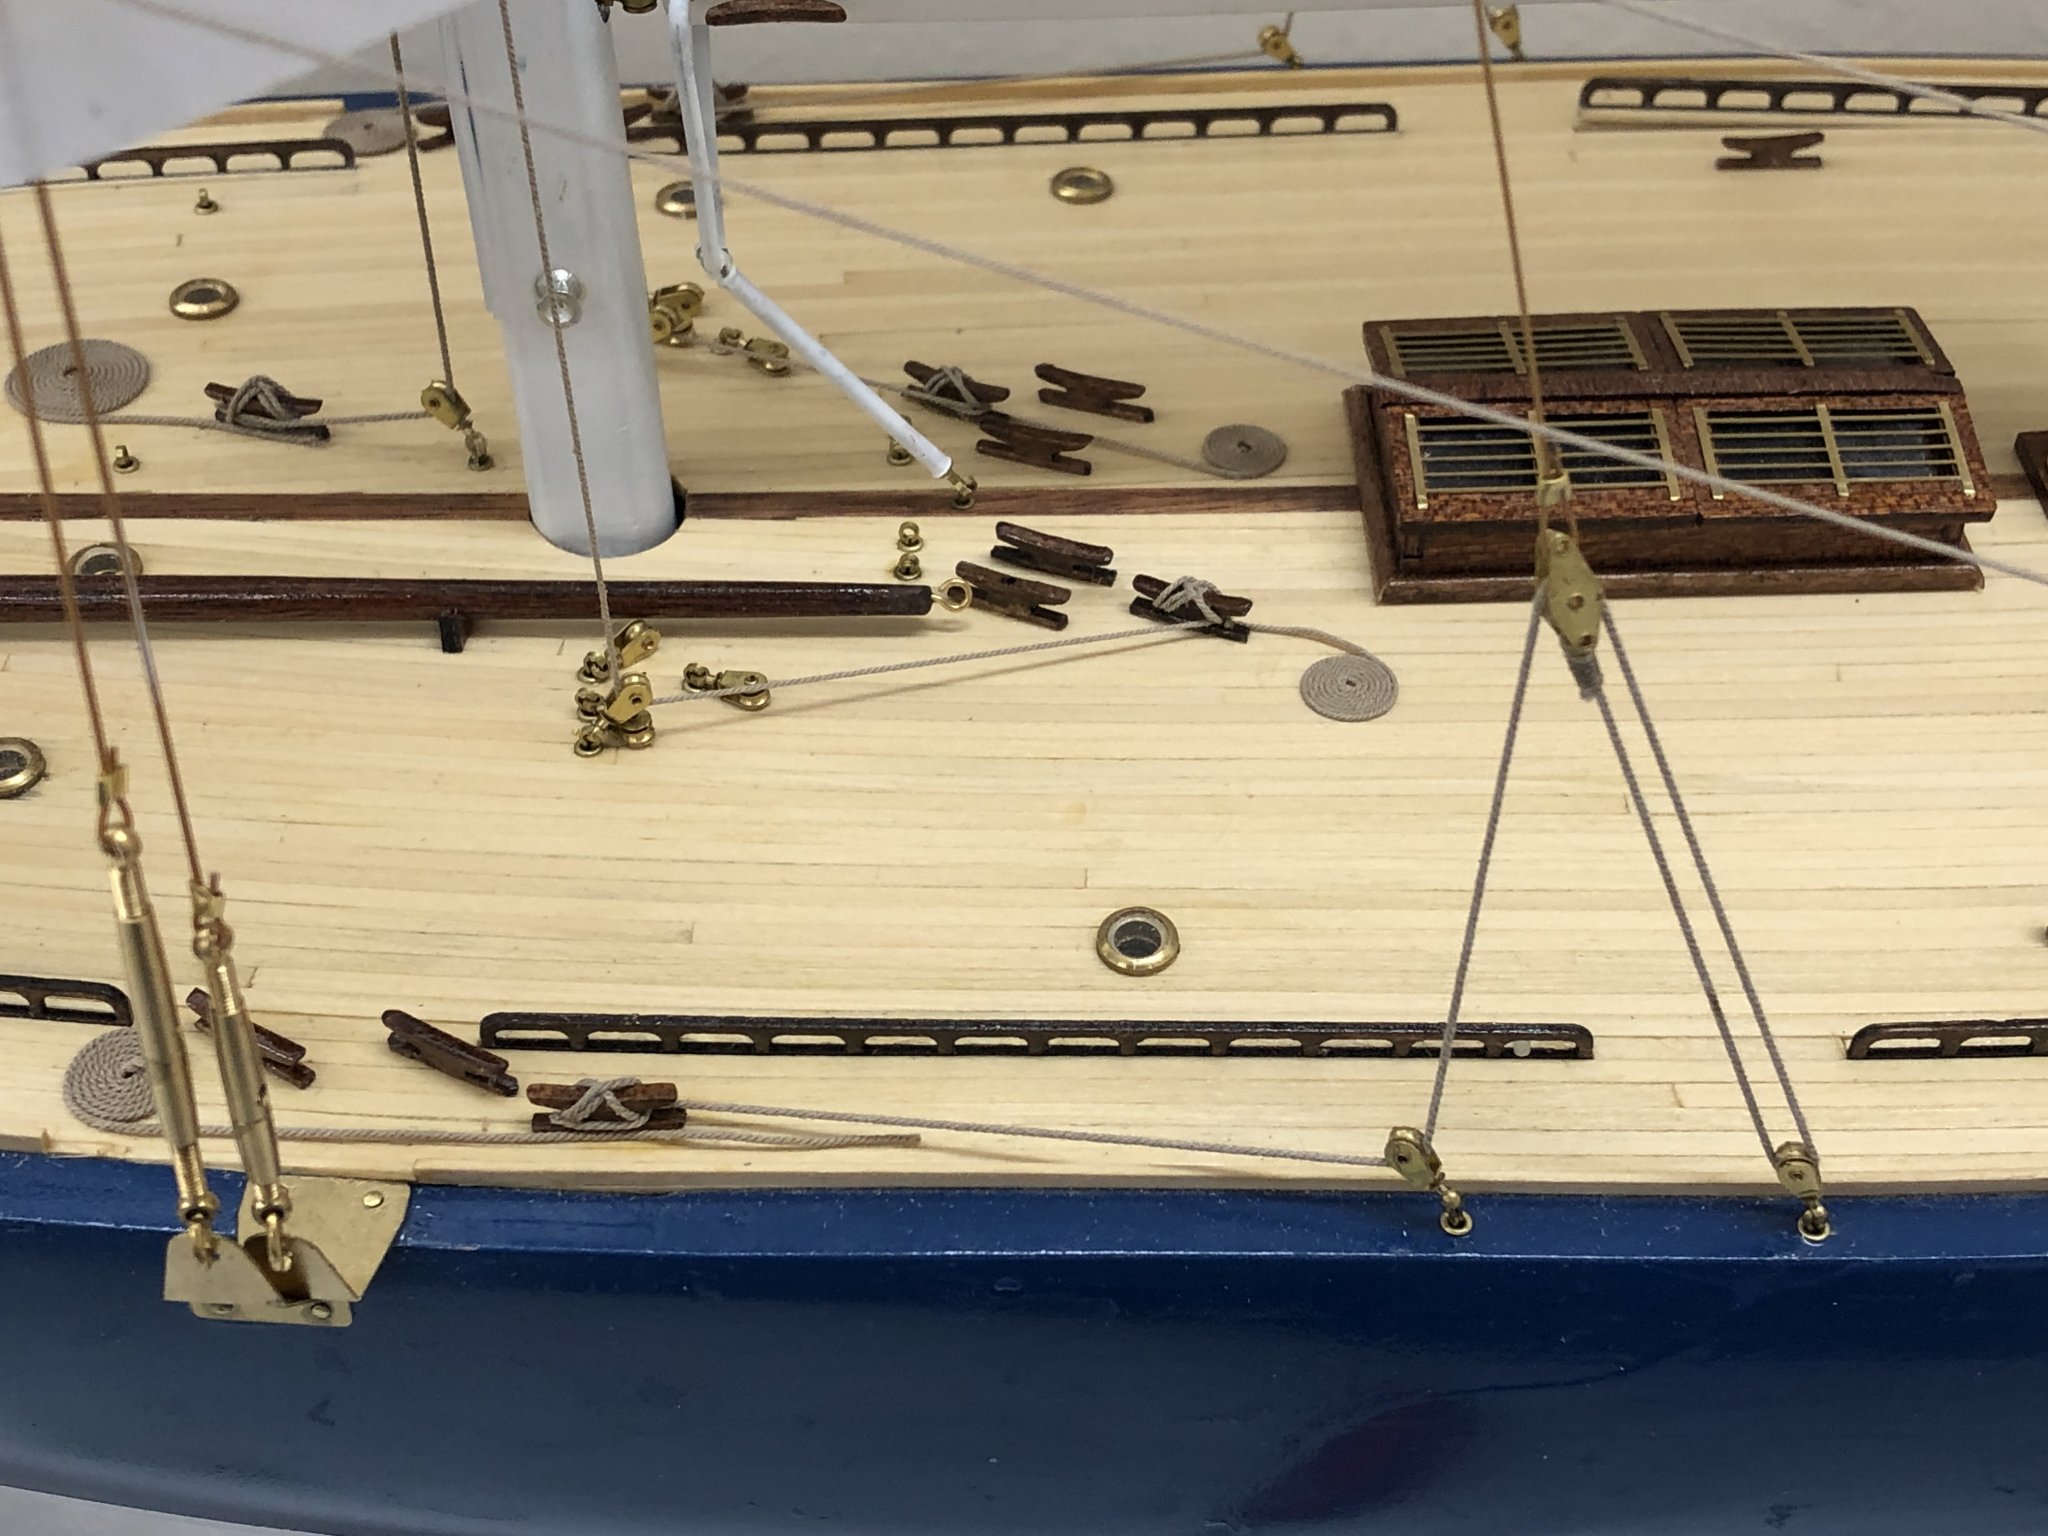
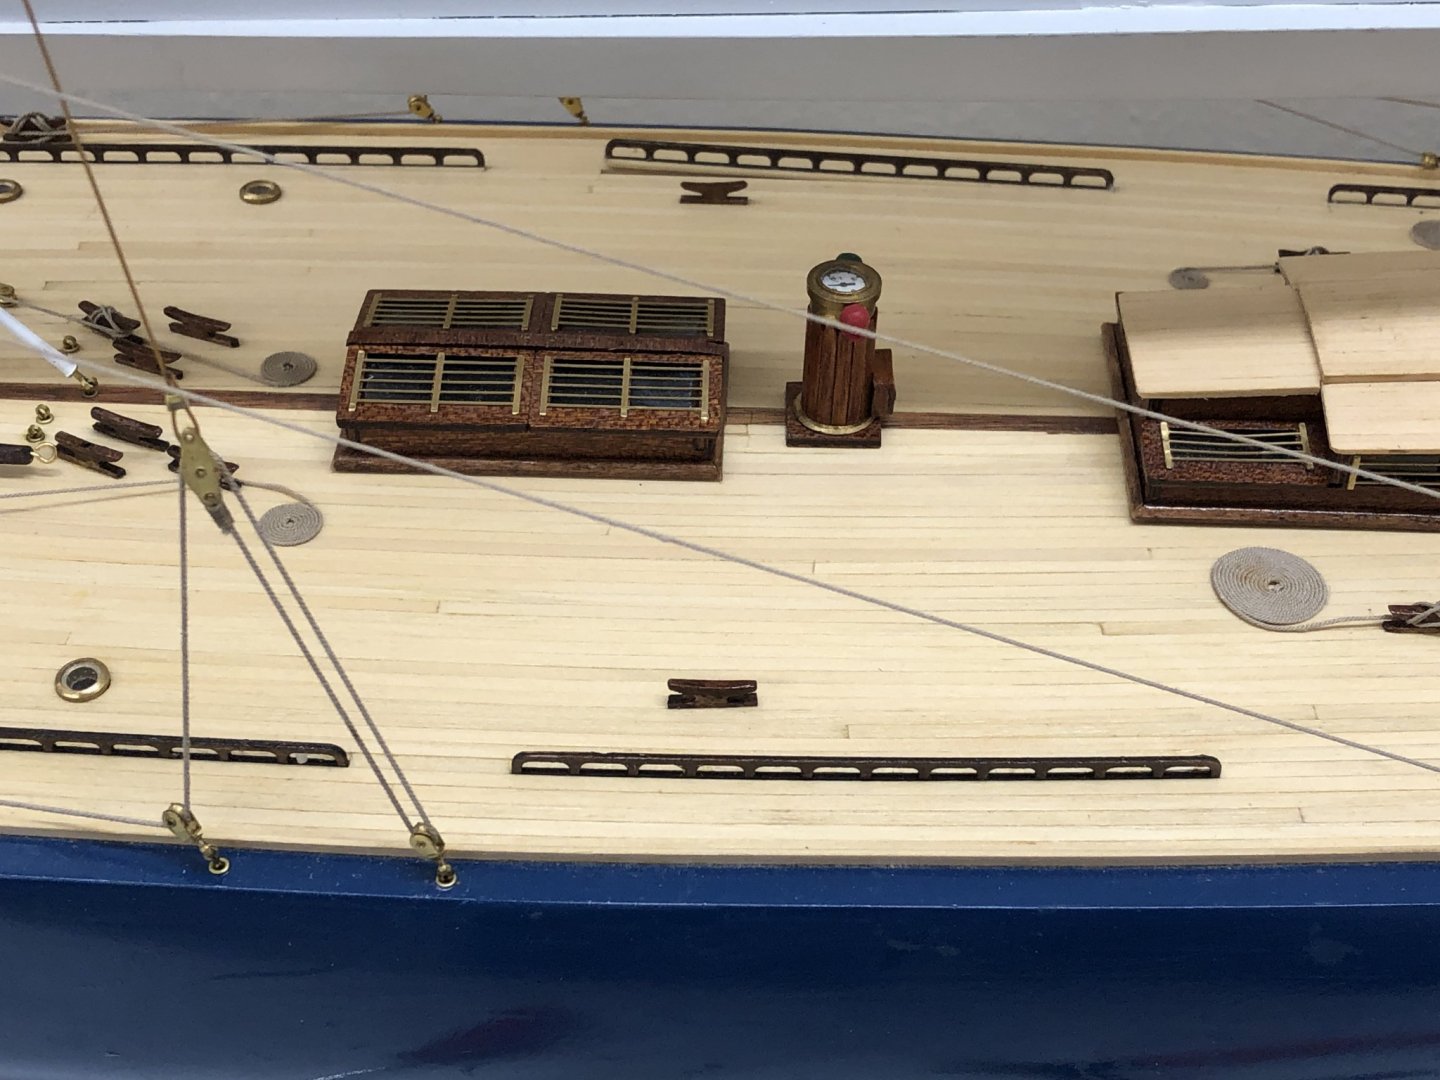
Starboard side deck is complete😀 Now to fix the port side winches☹️ Here are some closeups of the starboard side.


-
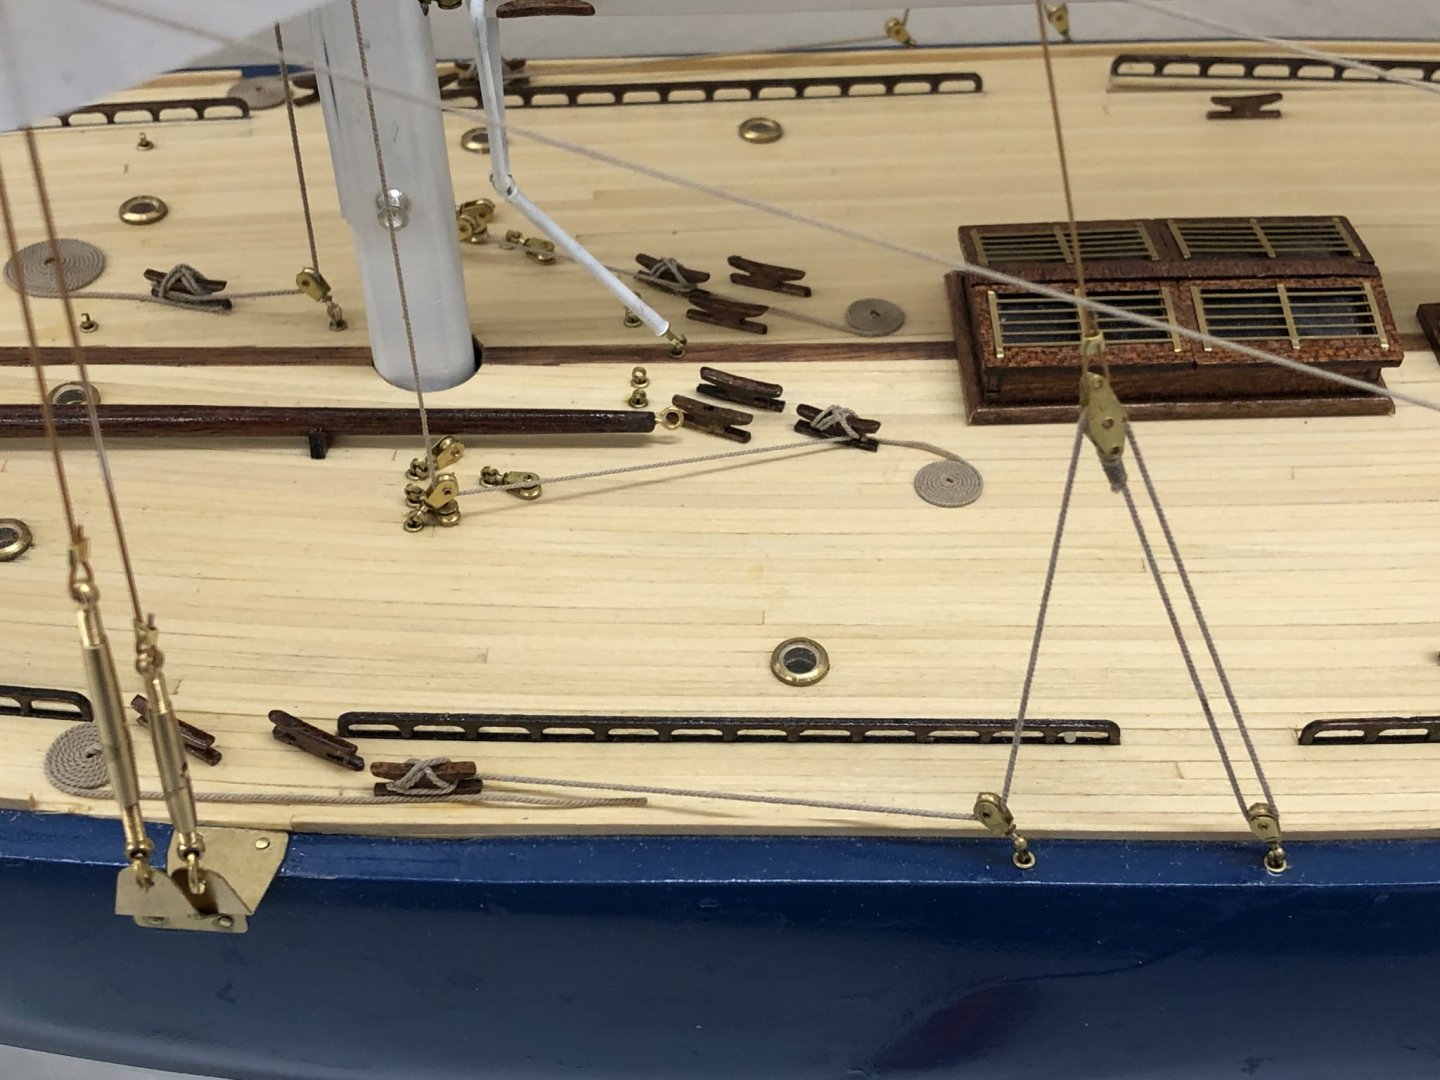
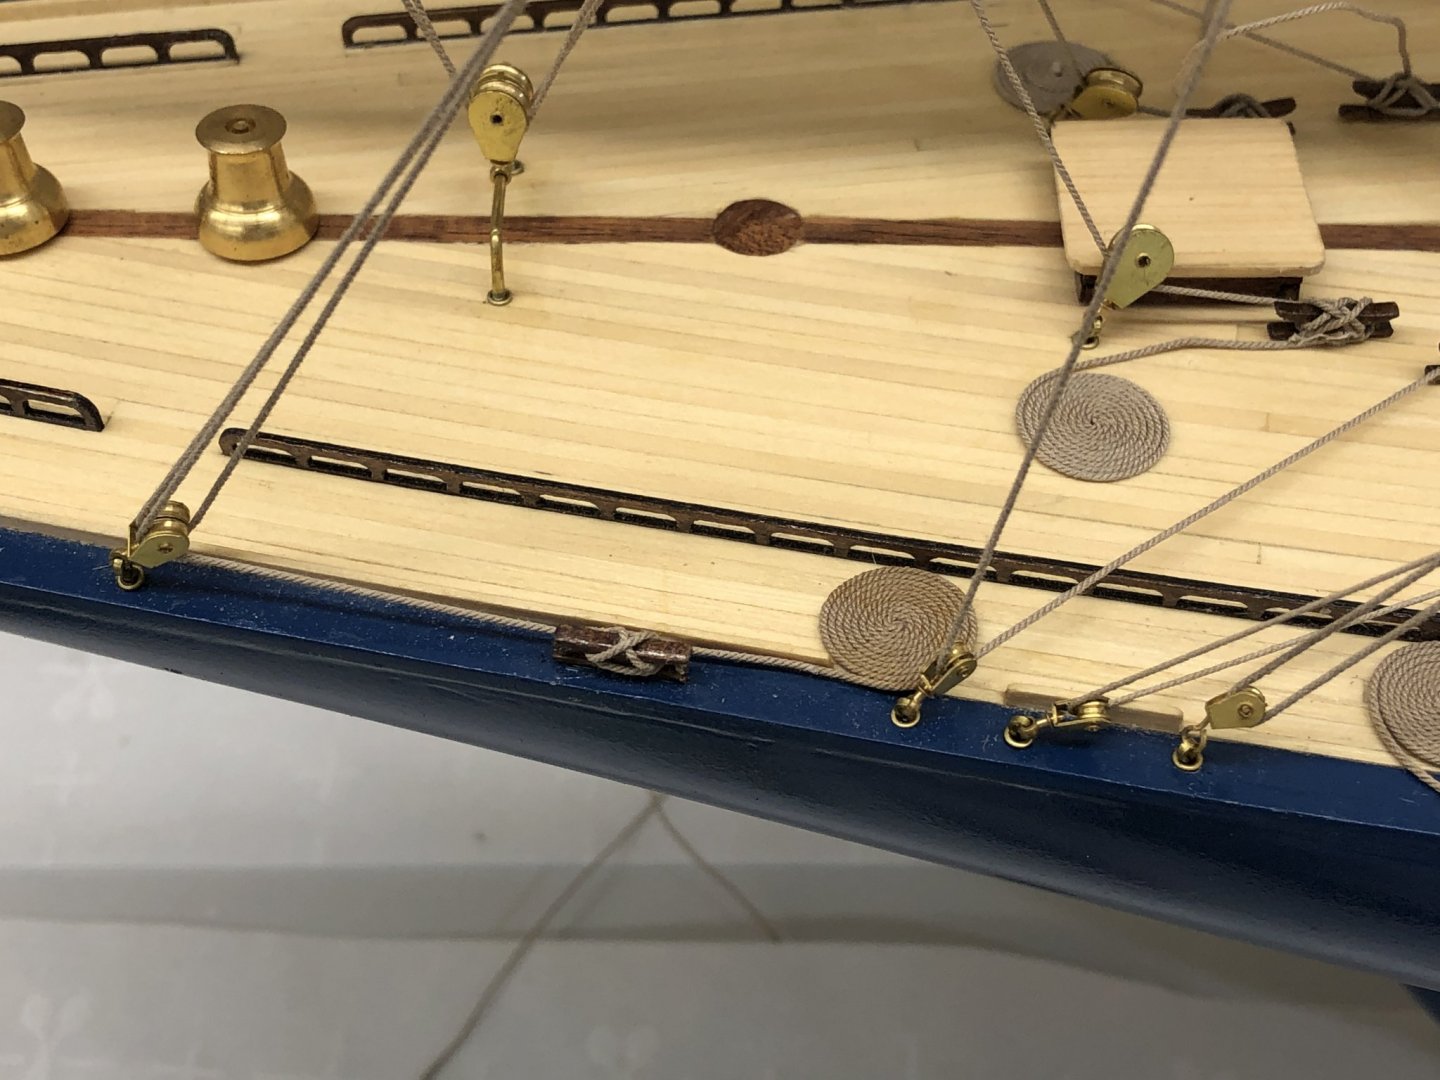
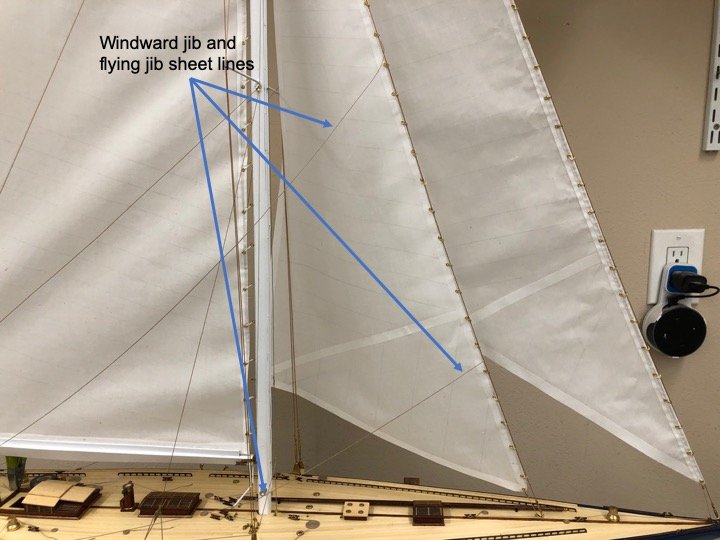
Windward side jib sheet and upper flying jib sheet lines in place around winches, belayed to cleats with rope coils.
-
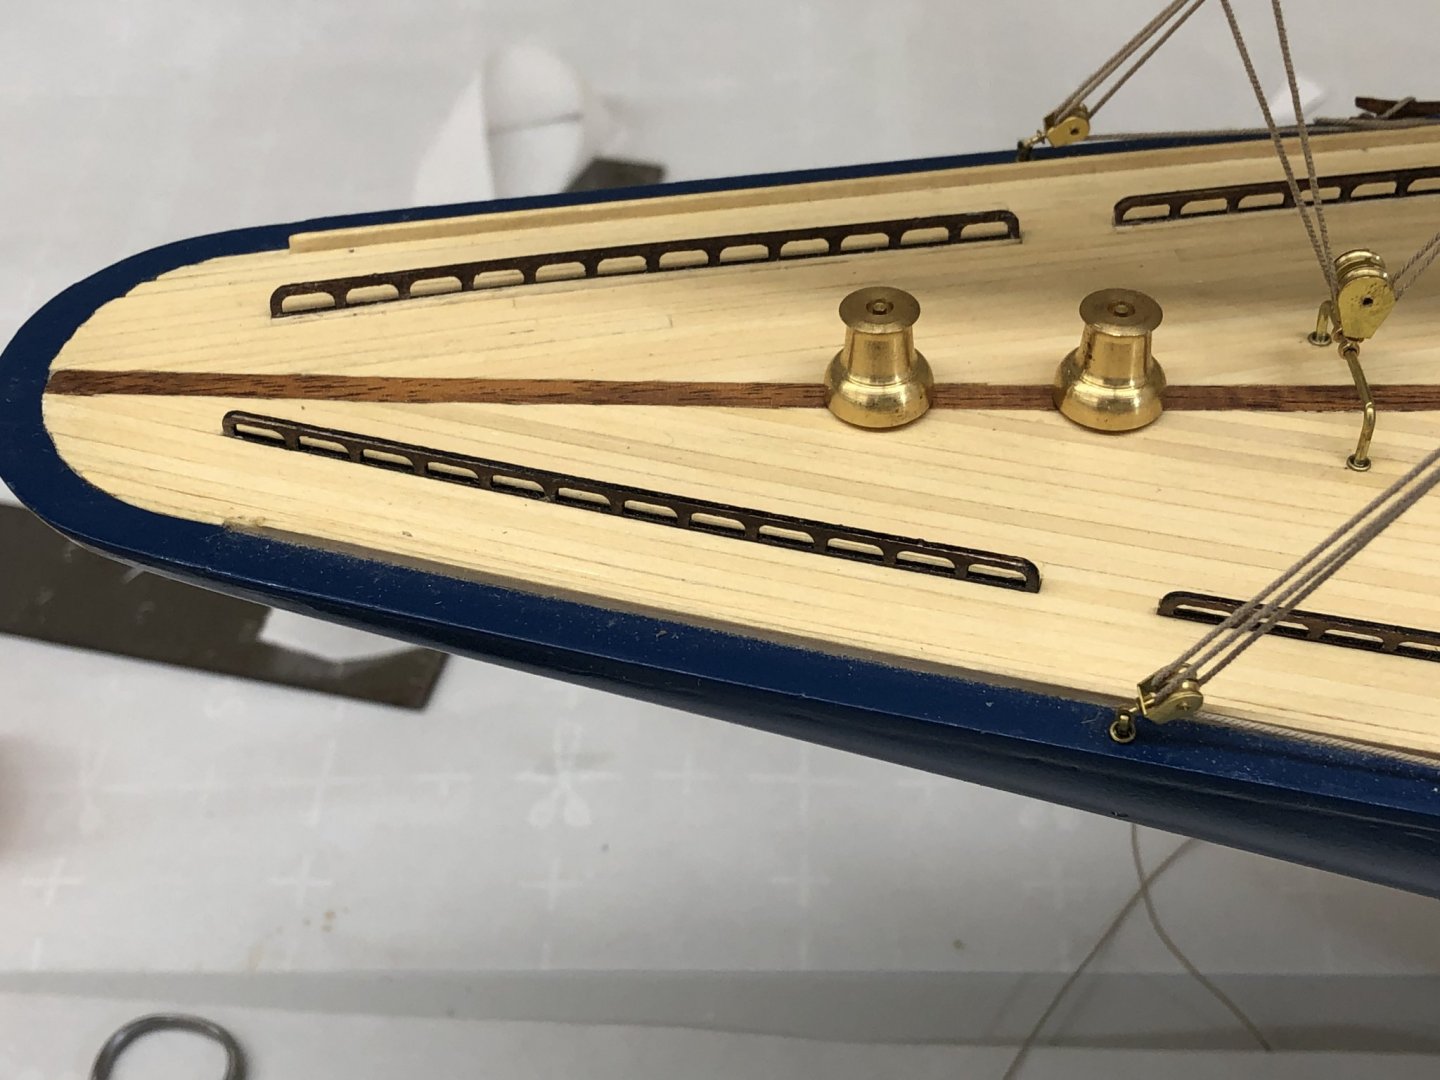
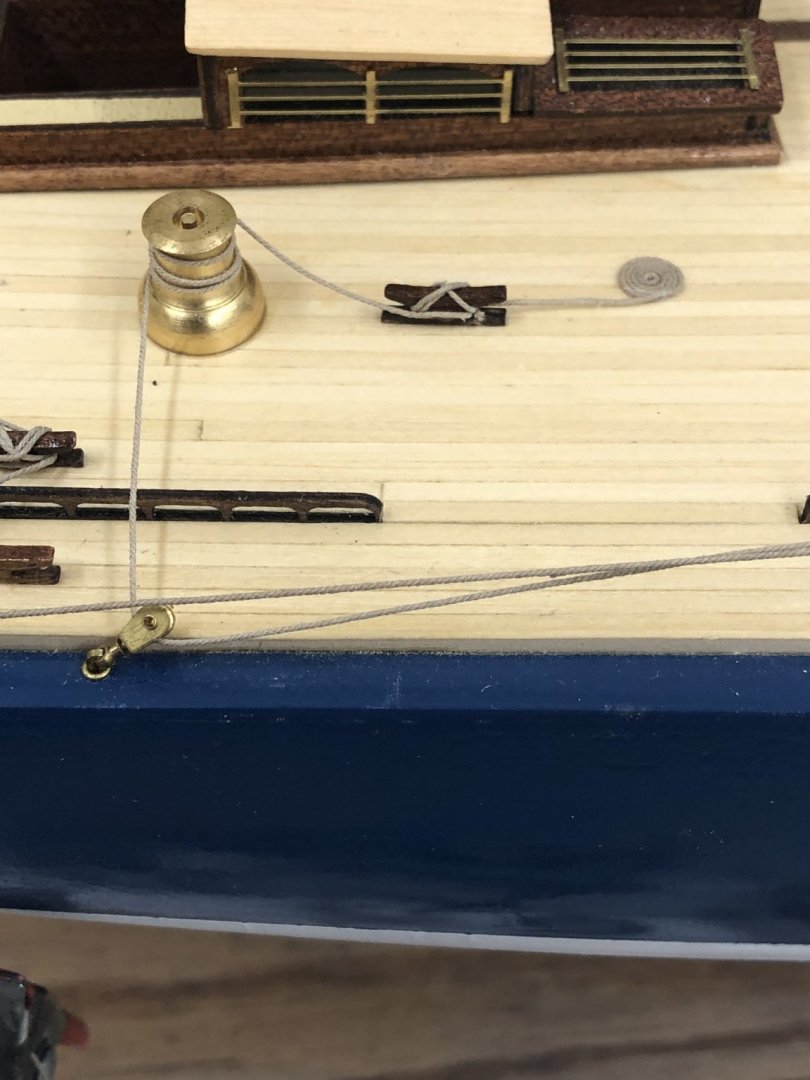
Windward side lower flying jib sheet (forward most of the sheet lines) going around the winch clockwise. Line is not tight as this side sheets lines and not holding the sail. I used a smaller coil of line since some of the line is used to carry the sheet around the jib stay for the flying jib or mast for jib.
-
Working to "undo" the my mistake on the winches I wanted to get a picture of the windward sheet lines (which I have decided to also rig around the winches (in a clockwise manner of course) - thanks again Keith) as they are seen from the windward side. So here it is! Admittedly it is a little hard to find the jib sheet as it goes pretty close to the deck but I think I got the arrow pointed in the correct spot.
-
Yes Keith thanks - I caught your note just before I did two out of three incorrectly on the windward side.
-
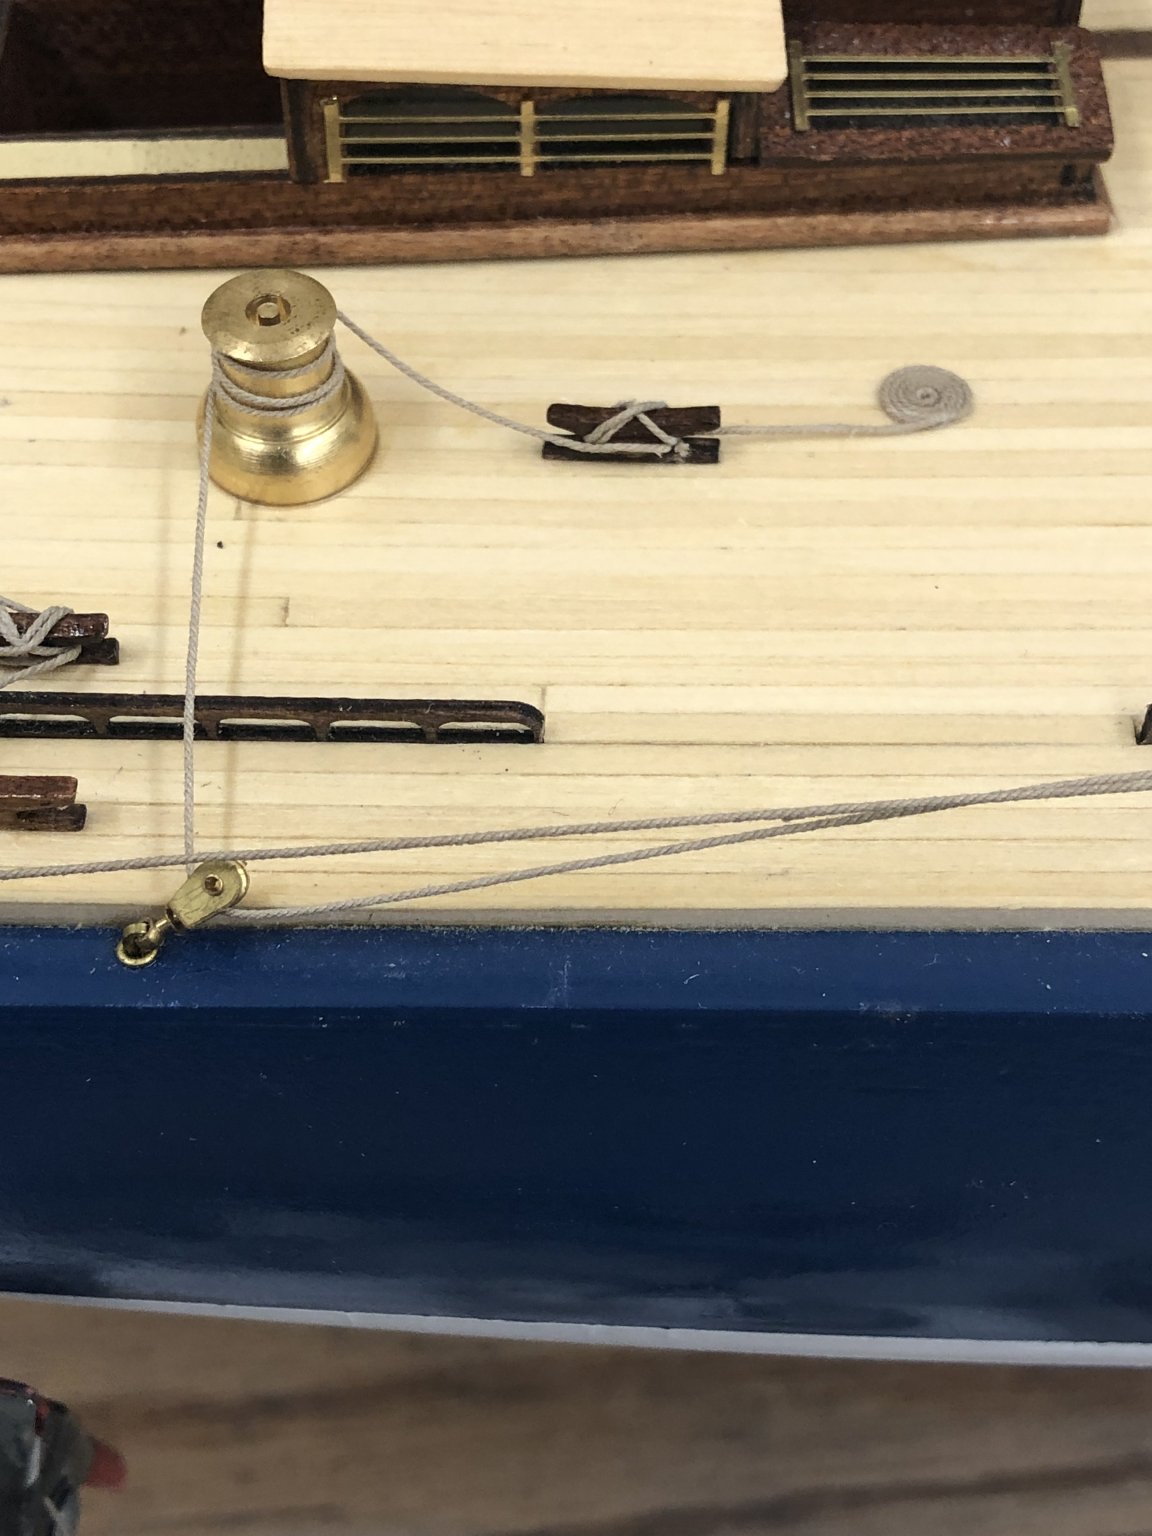
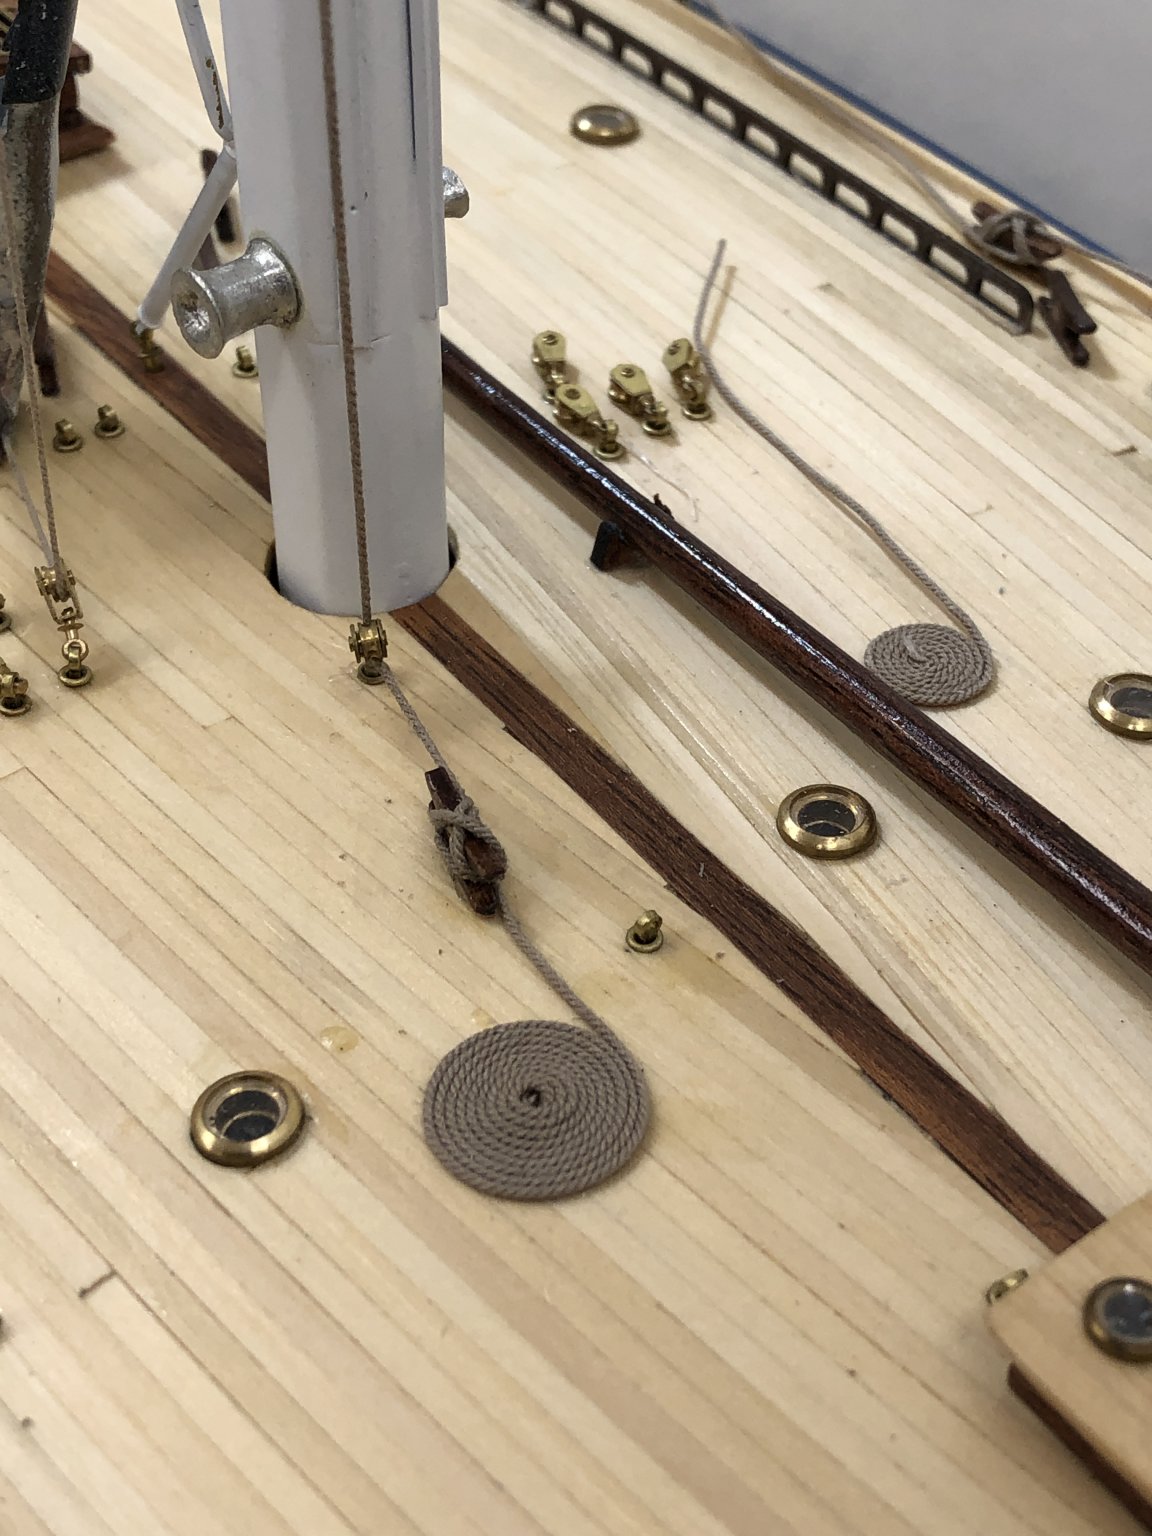
Here is the first leeward sheet line, the jib sheet around winch and terminated at cleat with rope coil.
-
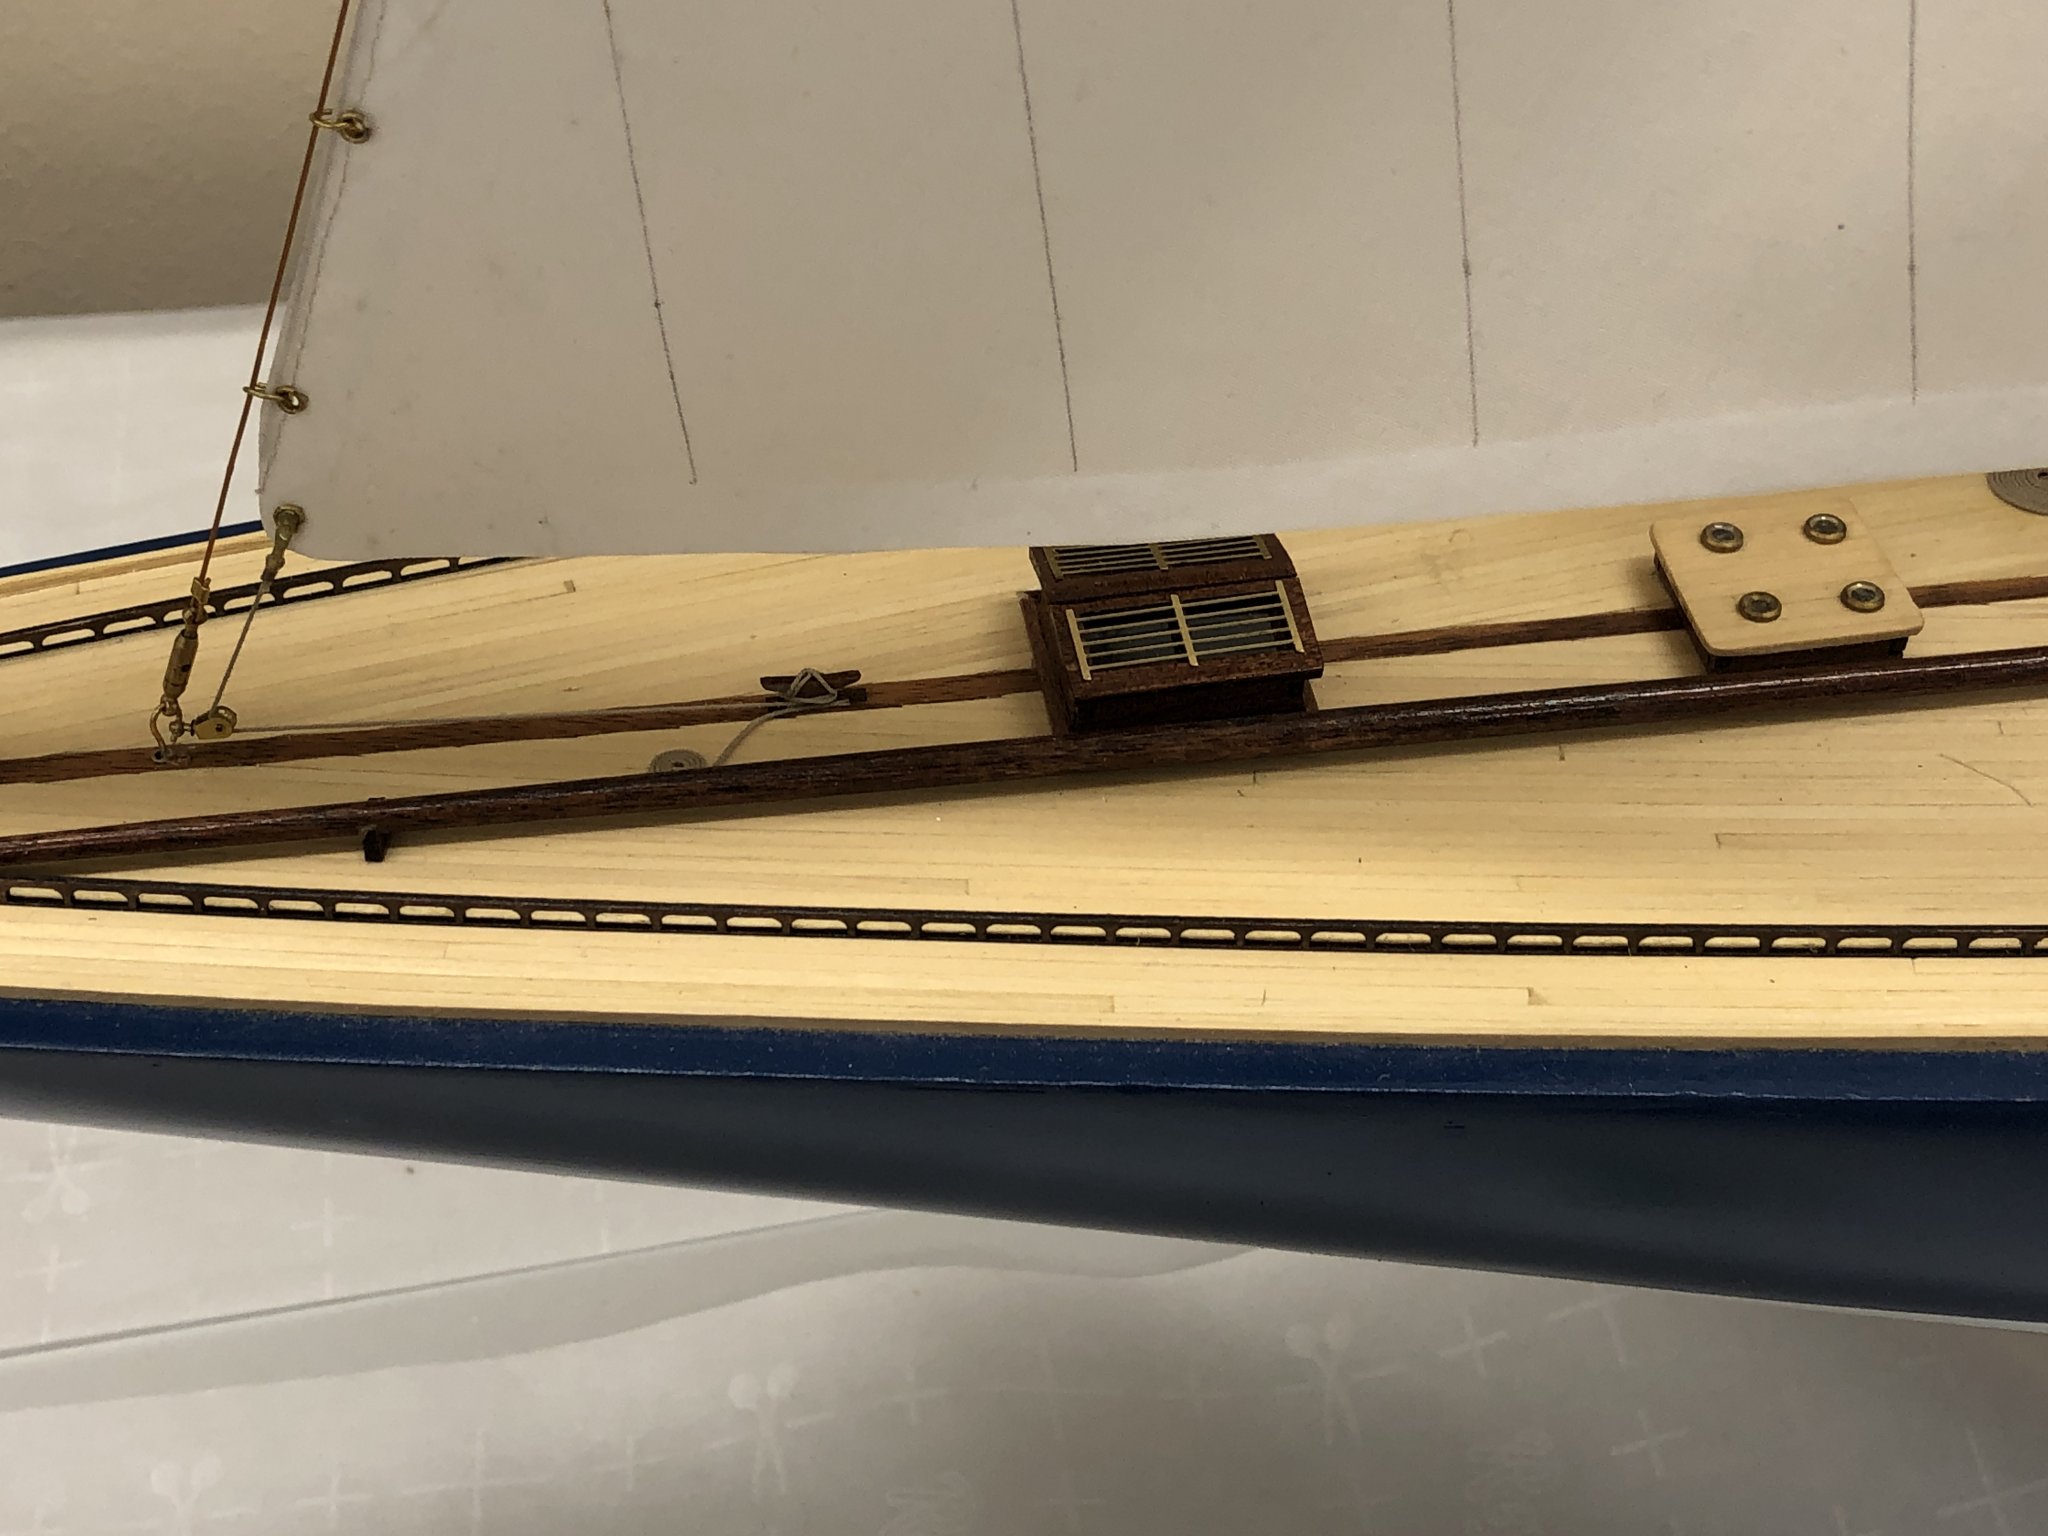
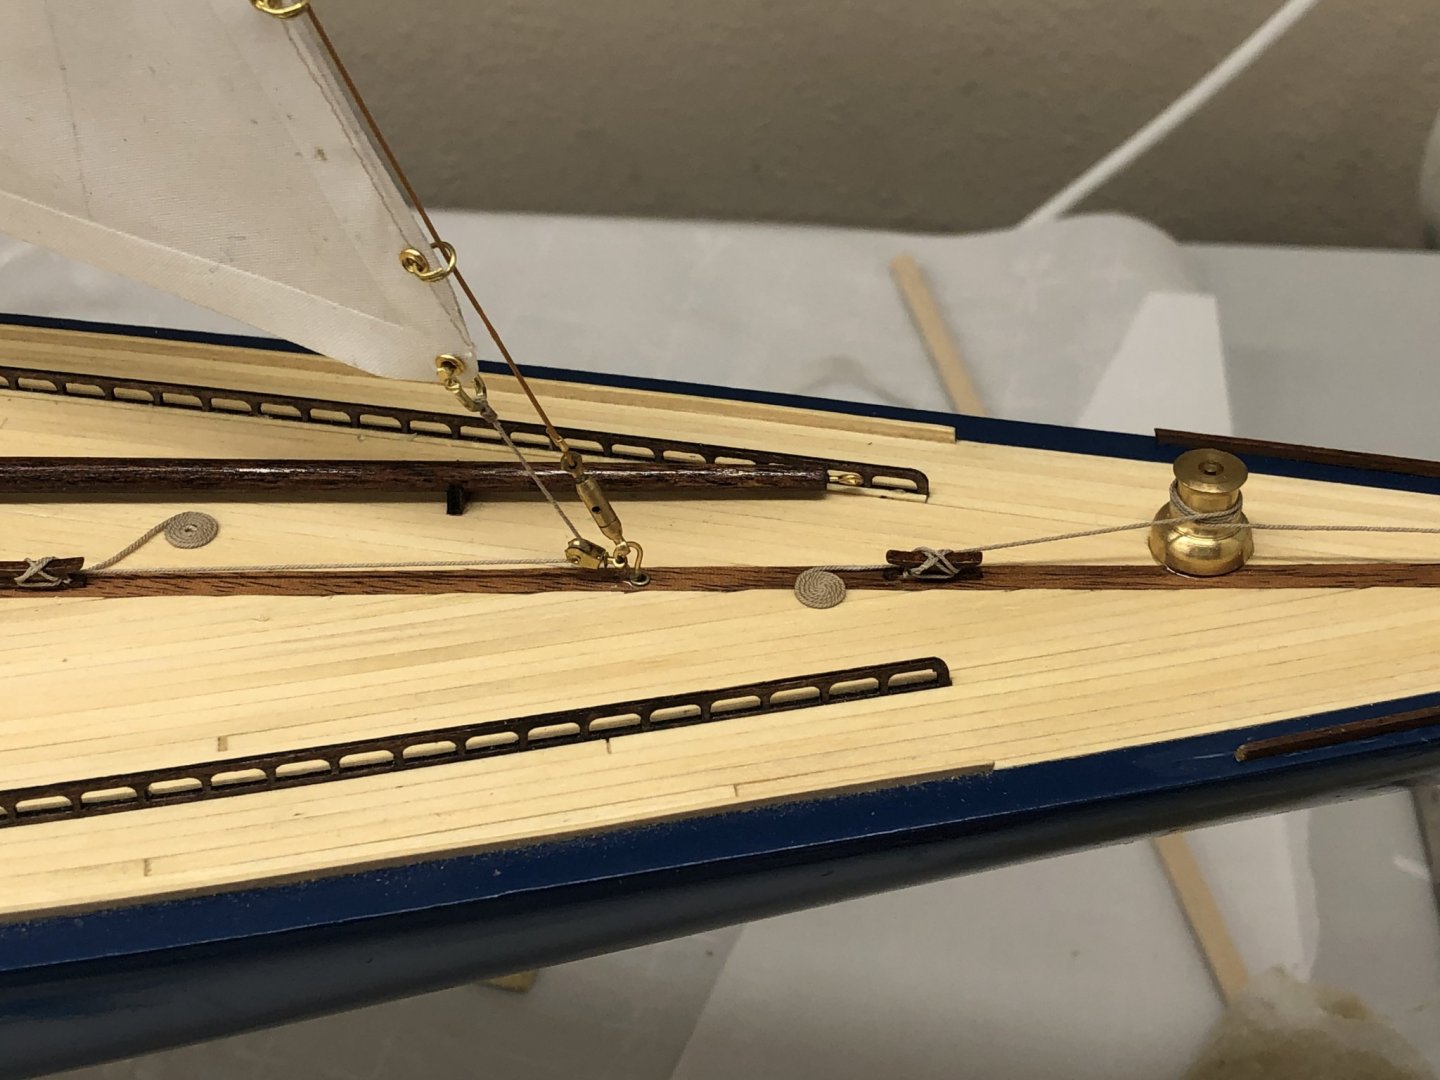
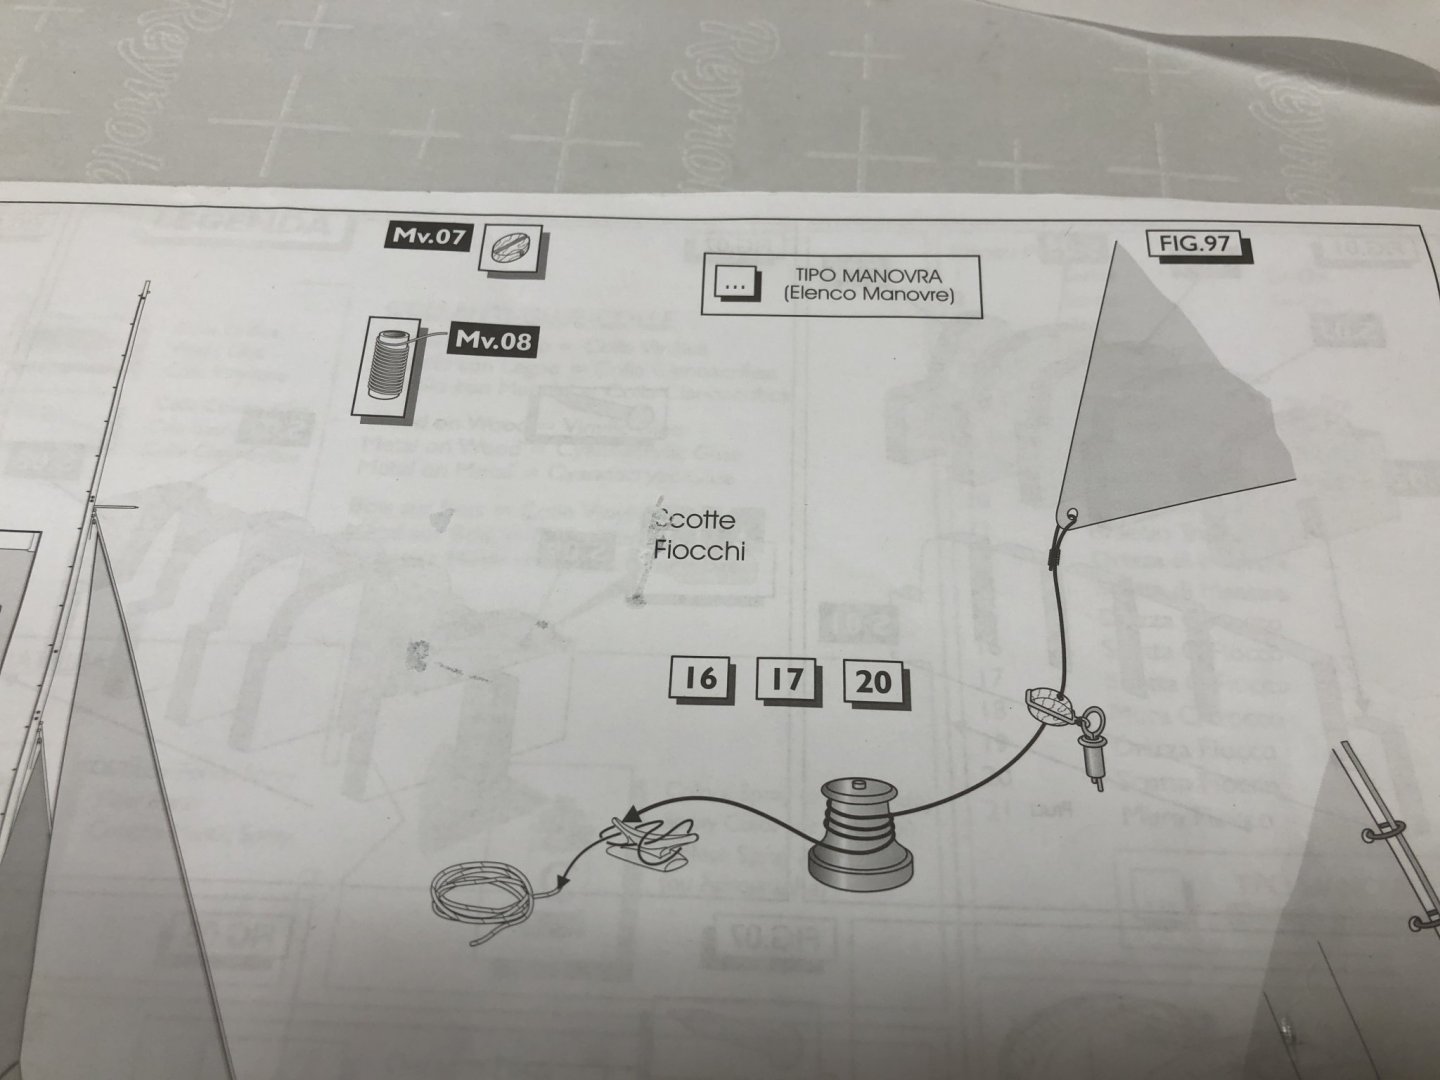
Working to rig the sheet lines for the jib and flying jib. The instructions show the sheet lines on one side (presumably the leeward side) but there are sheet lines that run to both sides of the ship. On the leeward side the sheet lines run through blocks at the deck edge and around the indicated winches and terminate at the indicated cleats. On the windward side the sheet lines run through the corresponding deck edge blocks and I think they would go directly to the indicated cleats rather than around the winches. Here is the Flying Jib tack going around the forward winch (and feeding from the top not the bottom as shown in the instructions) and termionating at the forwardmost cleat.
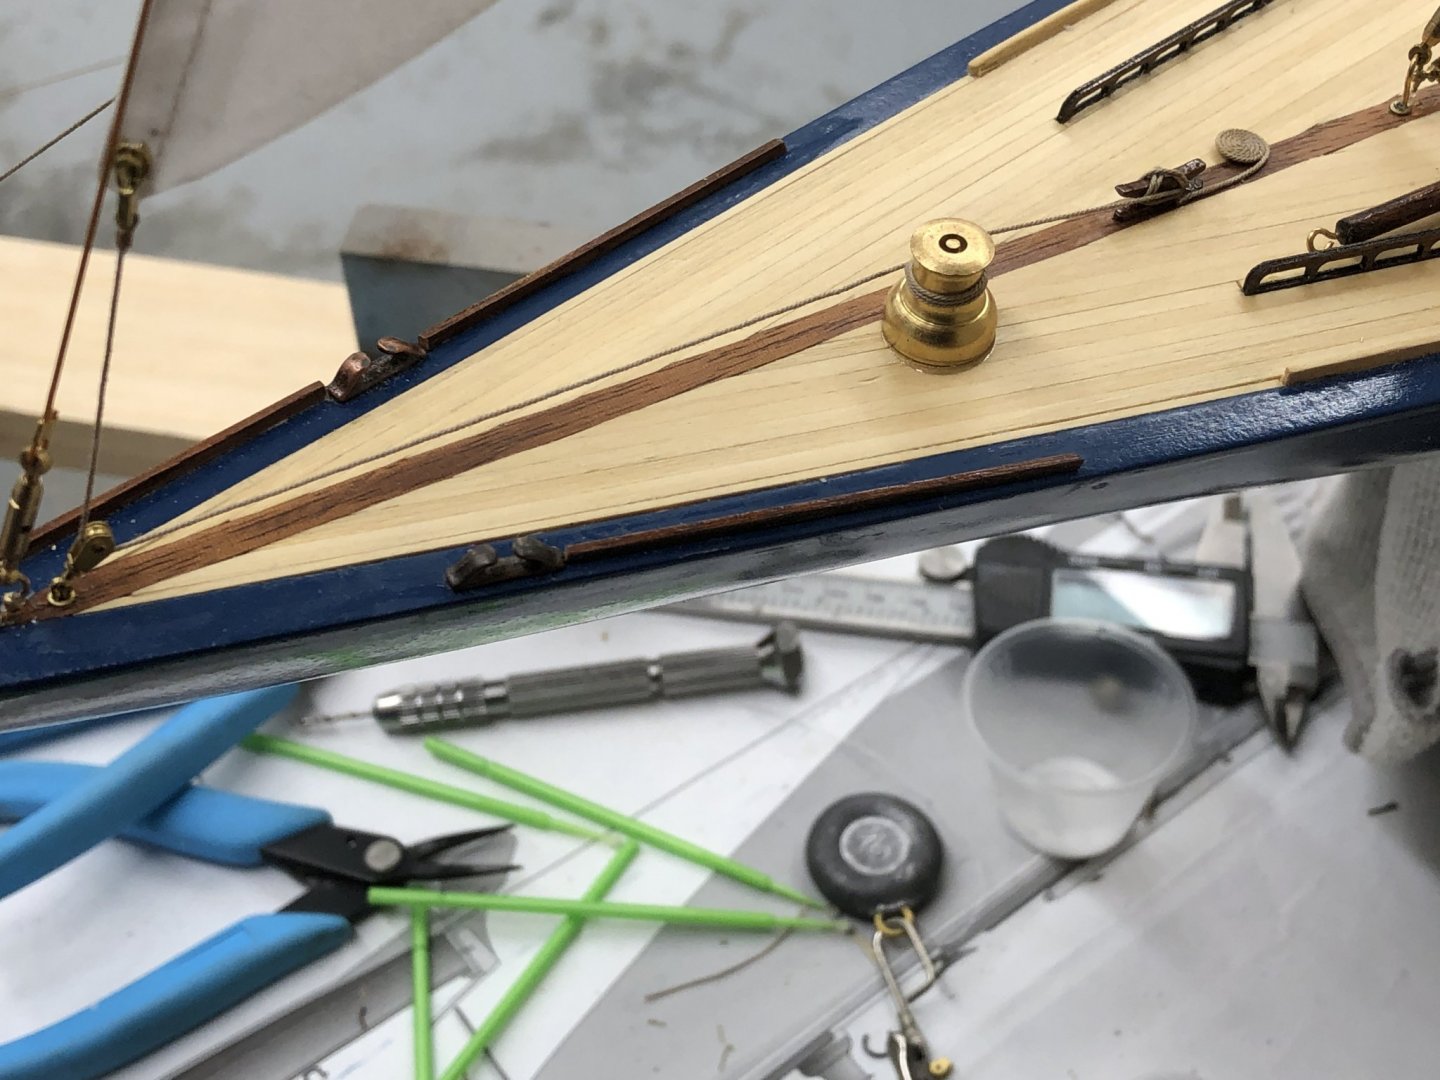
-
Thanks Keith - not the first error in the instructions.
-
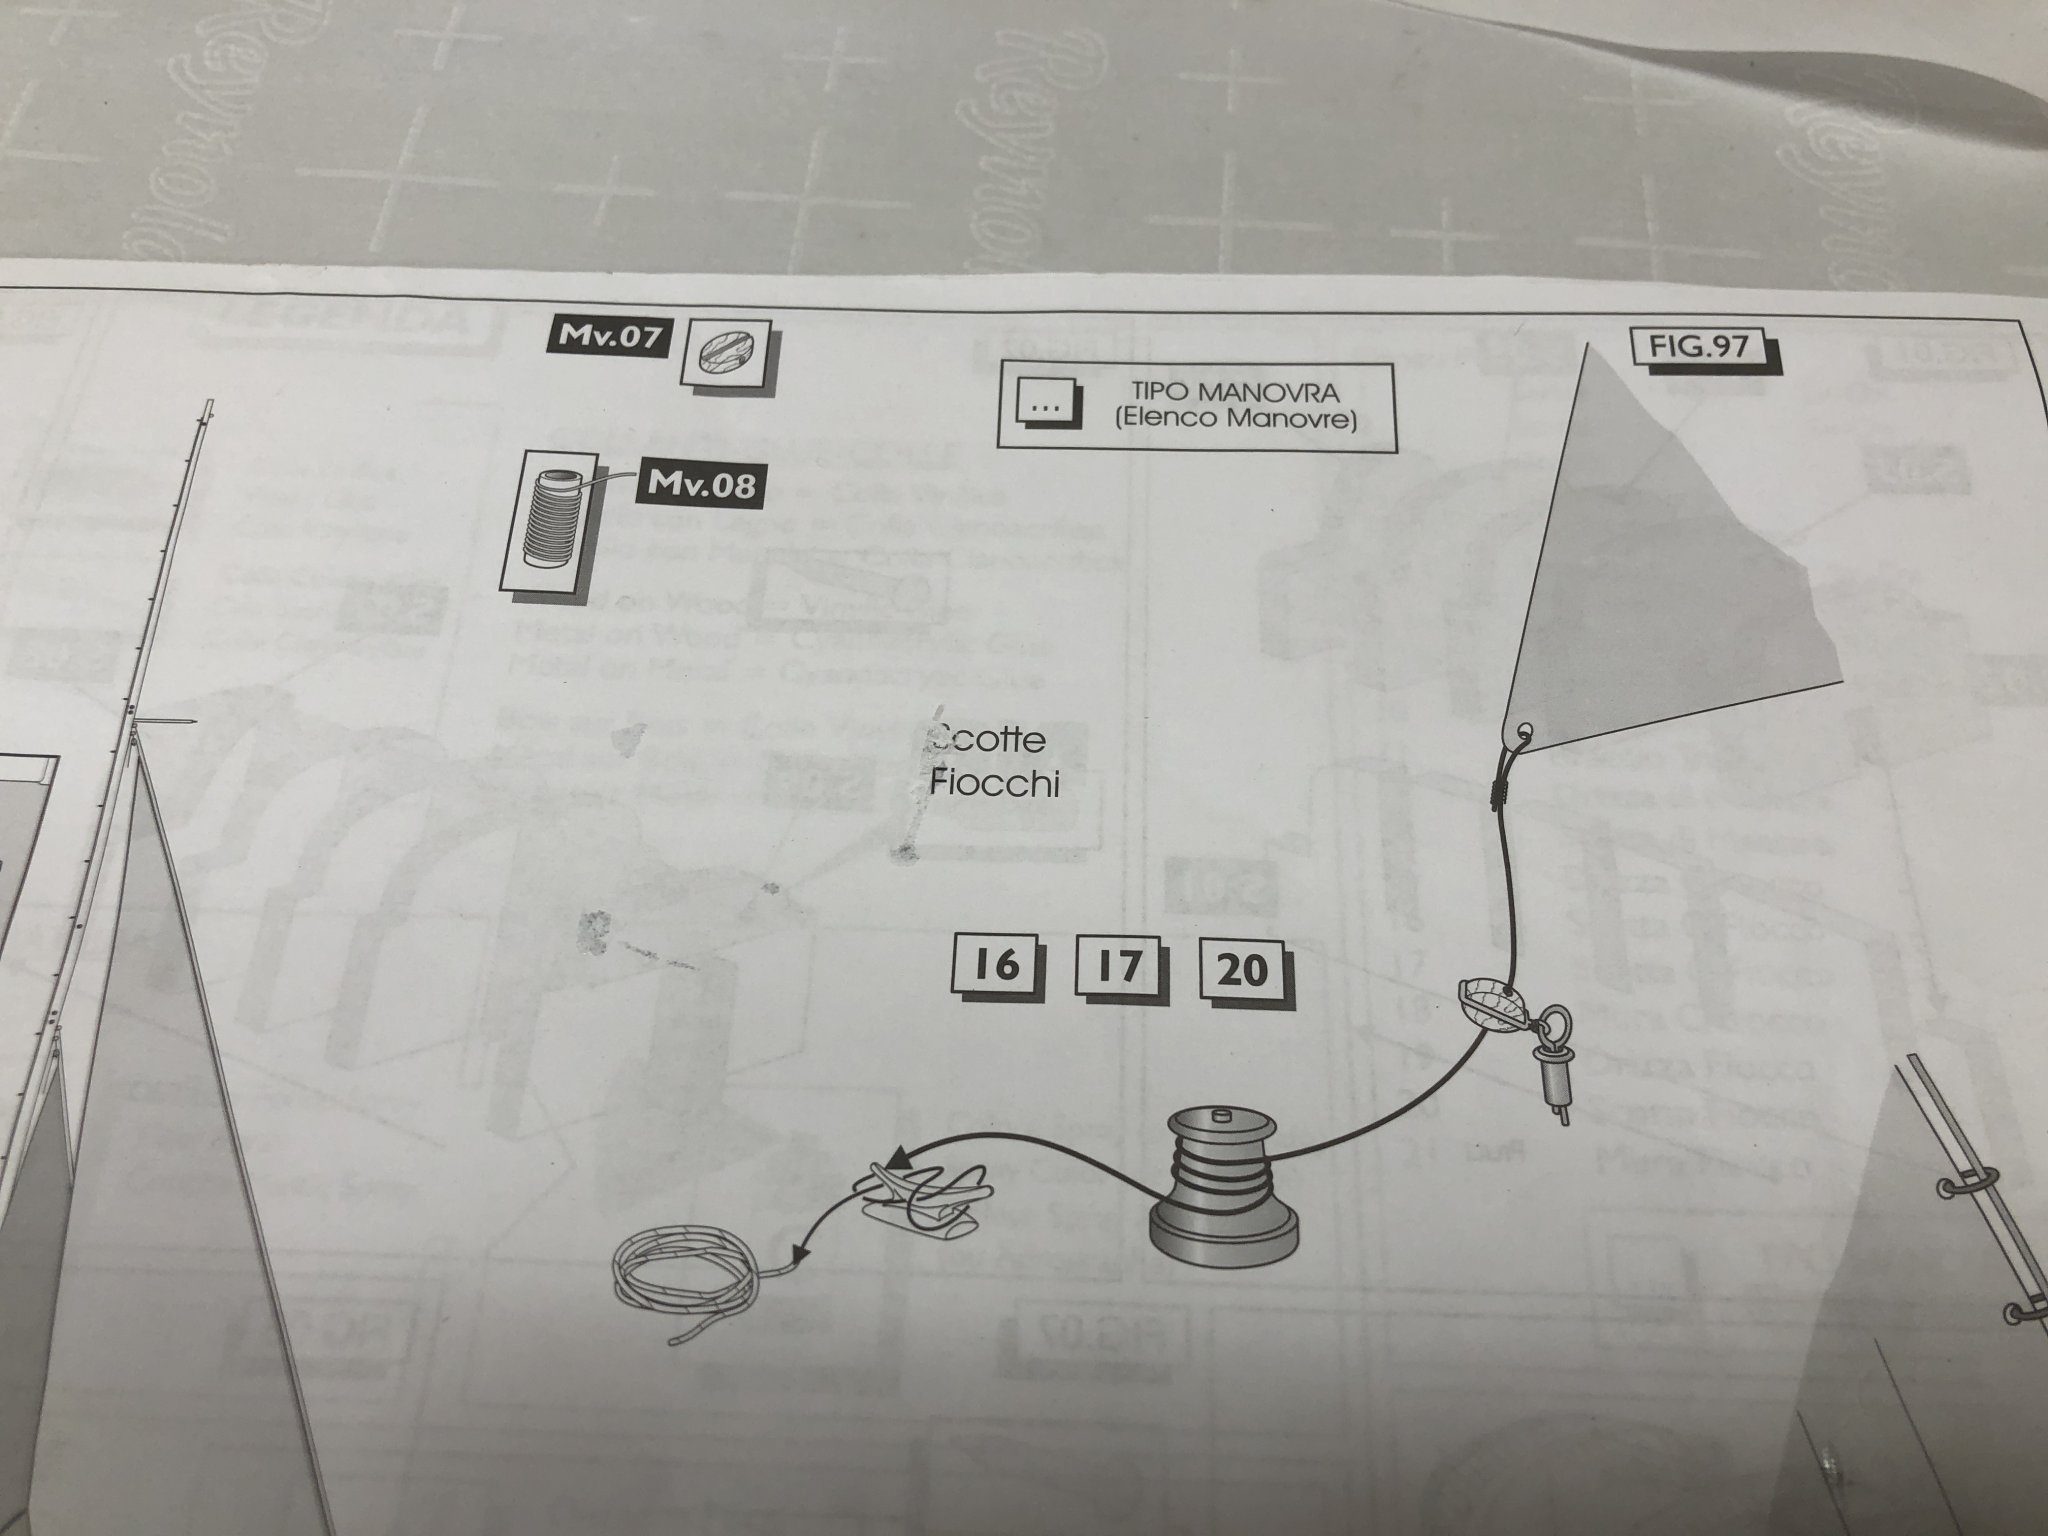
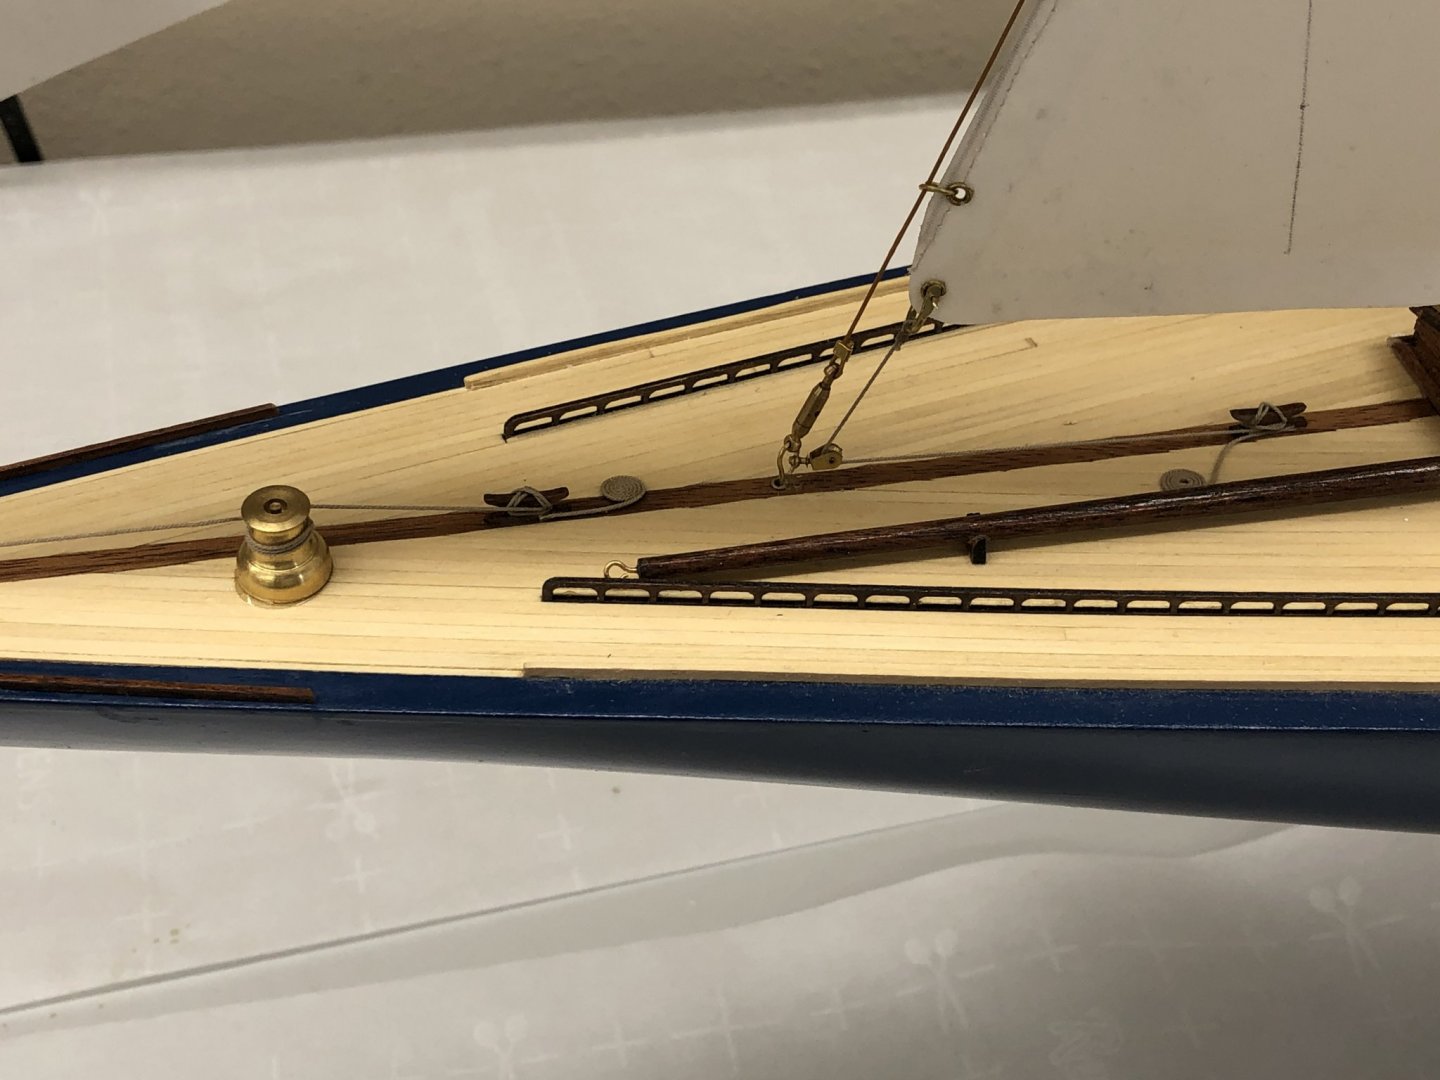
Hey all you sailors out there here is a question. The Amati instructions for the Endeavour kit show (see photo below) pretty clearly that the line goes around the winch starting at the top in a clockwise direction. Thus the line feeds off the winch at the bottom as the winch turns clockwise. That is contrary to the limited experience that I have had and the You-Tube videos on sheet winches all show the line feeding off the top of the winch not the bottom. I am getting ready to rig the jib and flying jib sheets on my Endeavour and would like to do it correctly (in spite of the instructions). Anyone see things differently or is this the British way of rigging winches?
-
Keith - I have been thinking about the next build for some time. I would like to do the Charles P. Notman (4 masted schooner from early 1800's) kit by BlueJackets. I have not seen it done before on MSW so no "cheating" by looking at previous build logs. My only reservation is that it is 1/96 scale which is smaller than I have done before (with the exception of Endeavour all the kits I have built were 1/48 or 1/64) and I kind of like the larger scales which allow more detailing. I thought about just buying the plans and trying to sort of scratch build by replicating the center keel/bulkheads at 1/64th but the 1/96th kit is 41" overall so a 50% scale up would make the model almost 5' long (bigger than Endeavour!) which would be a problem to find a place to display. I have the brig Syren (Model Expo) on hand but do not want to do another square rigger this soon after doing Niagara. As much as I like rigging it seemed to never end on the Niagara and I am sure the Syren would be the same. So I will just have to press on with Endeavour and then tend to the Christmas decorations and think some more.
-
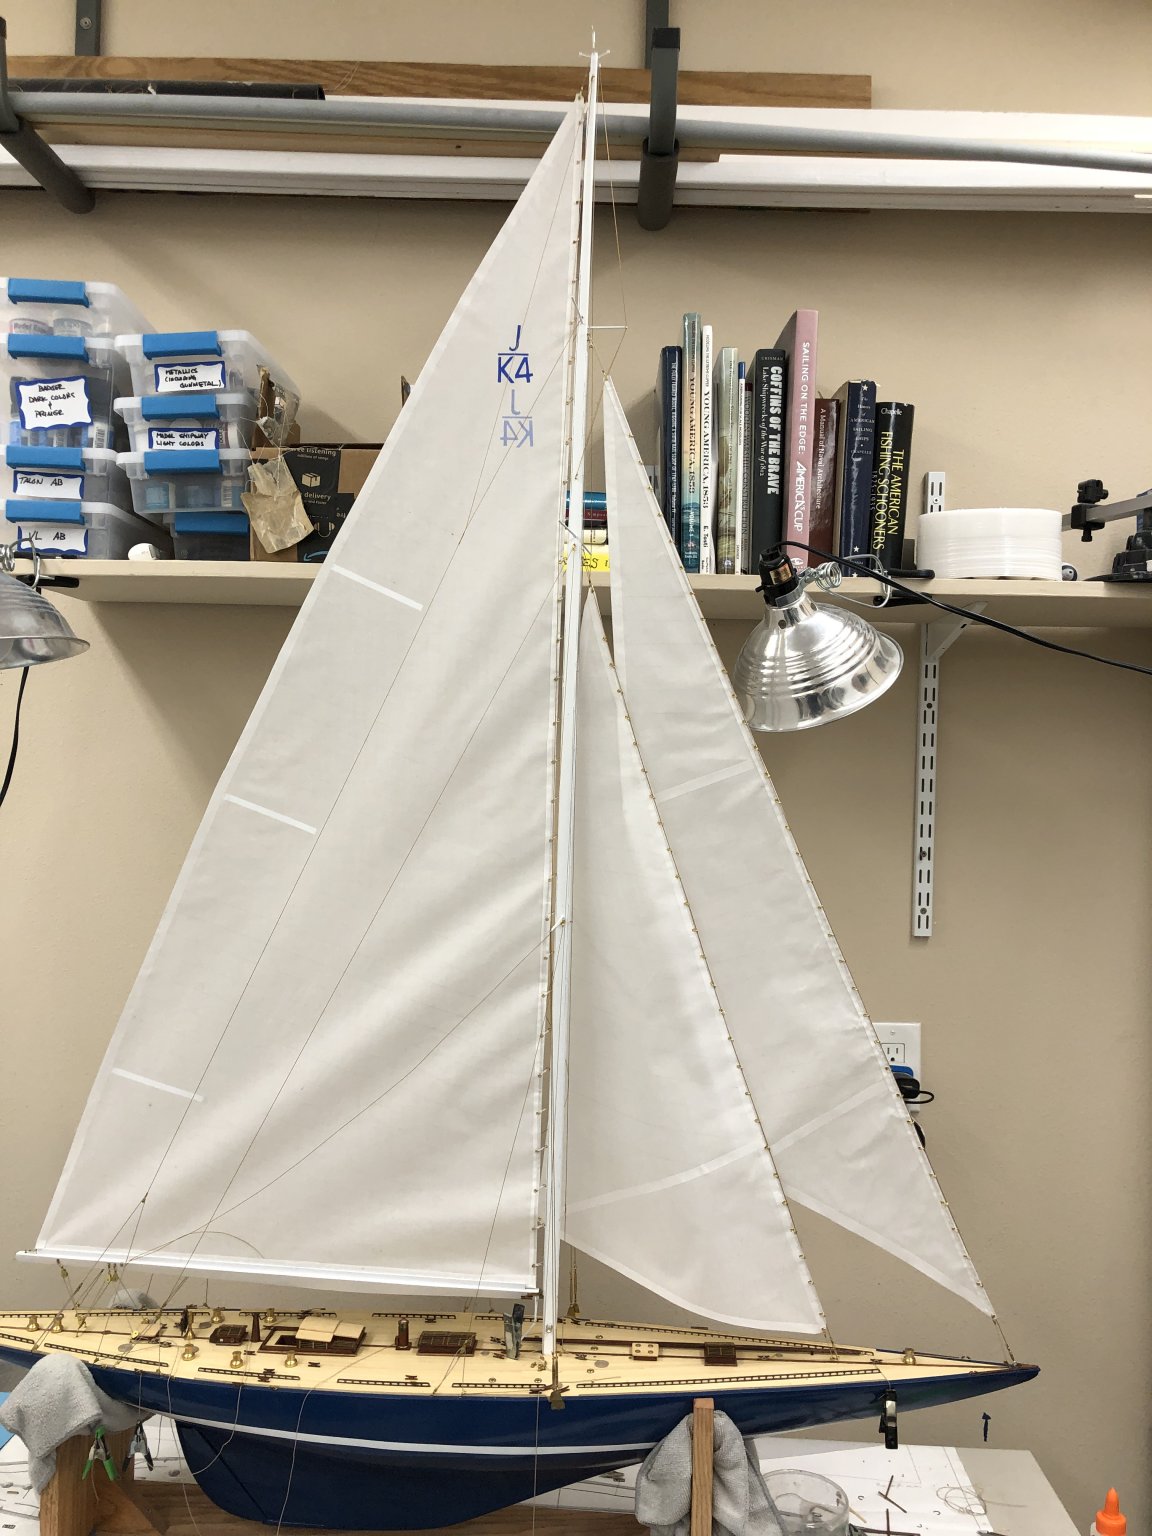
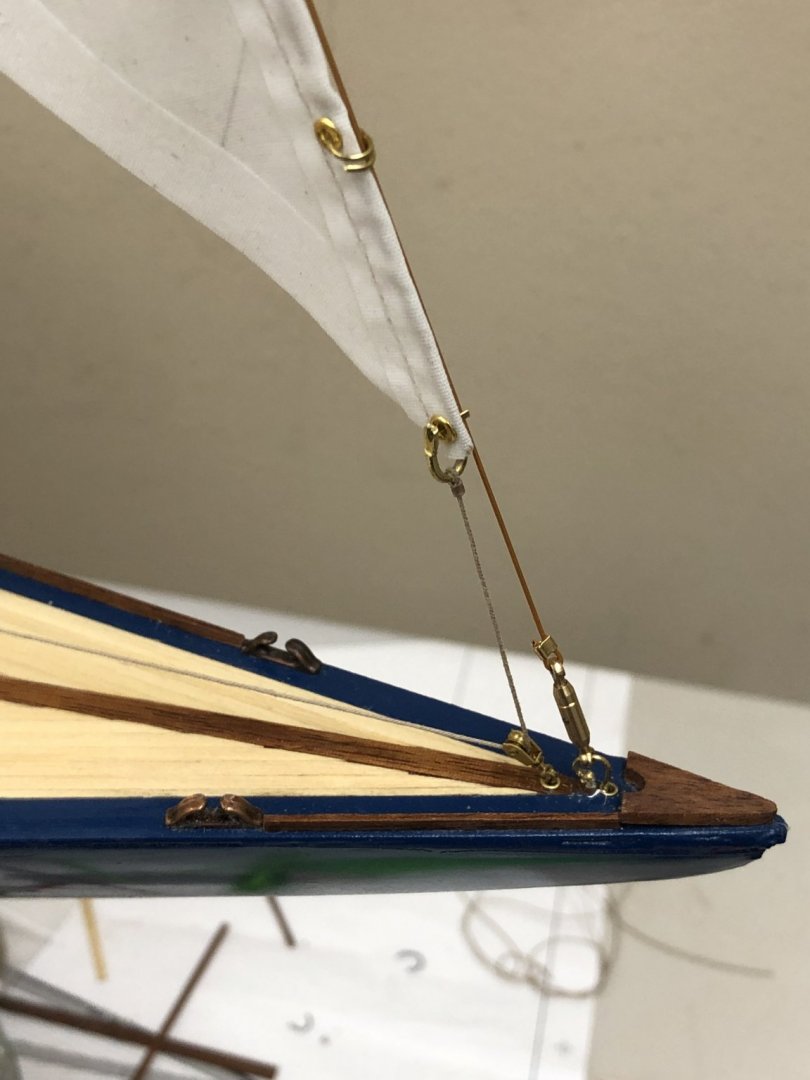
Although not without drama (a block came apart on the tack) the Fly Jib is flying. I am going to quit while I am ahead tonight and rig the sheet lines tomorrow along (hopefully) with getting the back stay retensioned. Then it is adding the remaining rope coils and cleaning up a few odds and ends. Completion is in sight😊

-
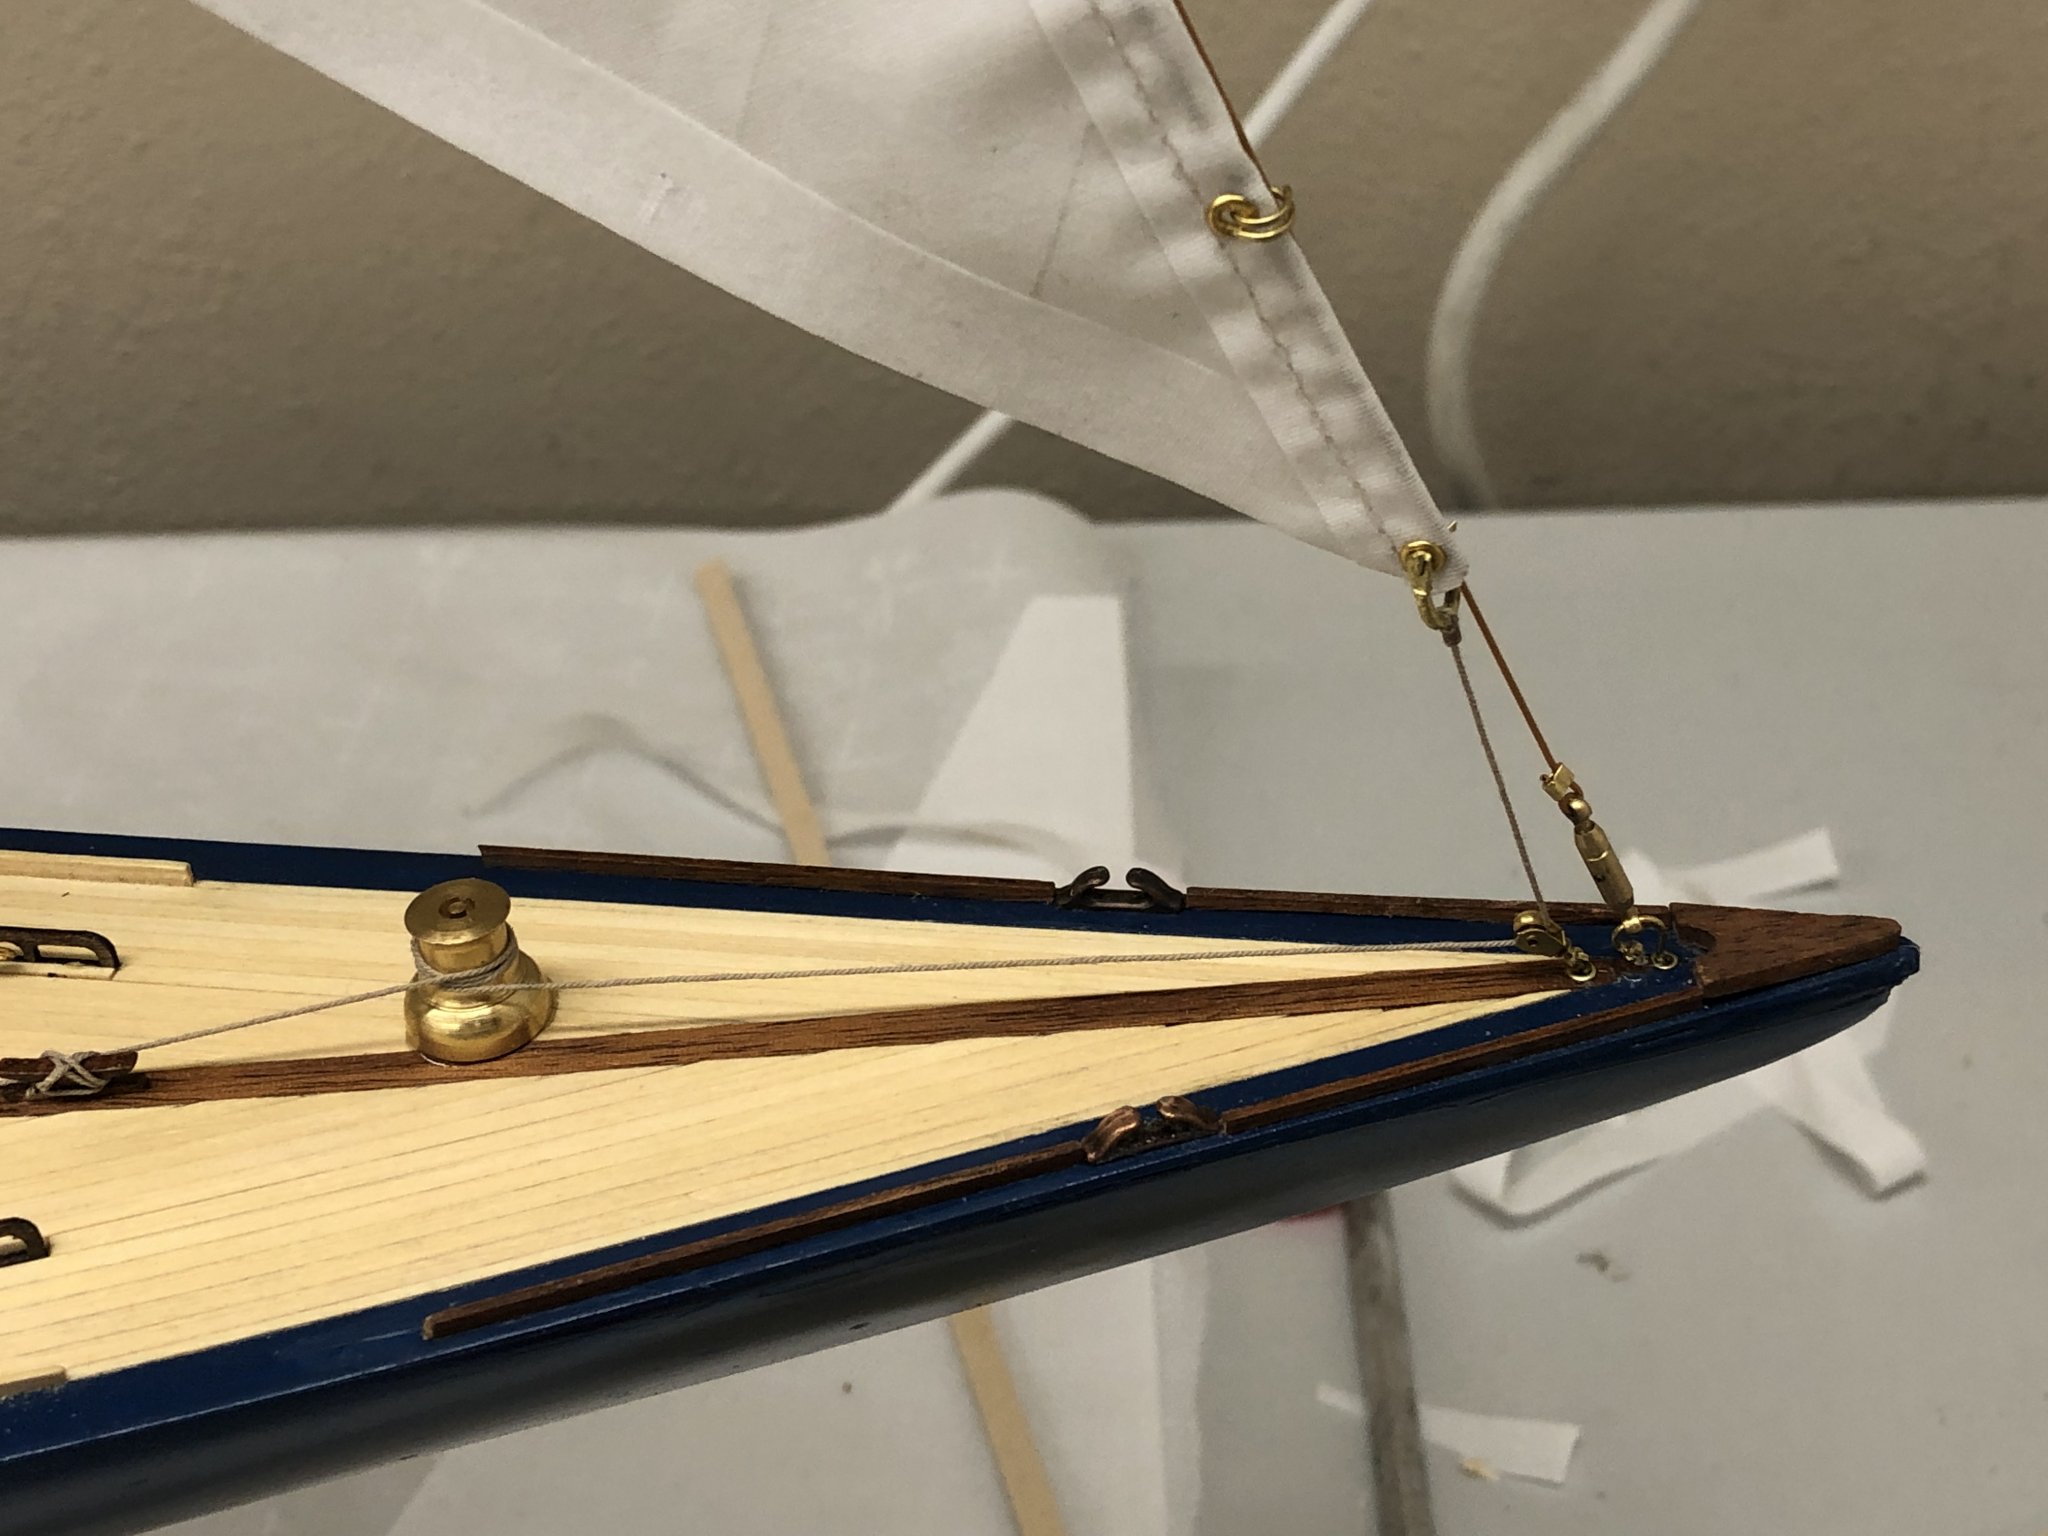
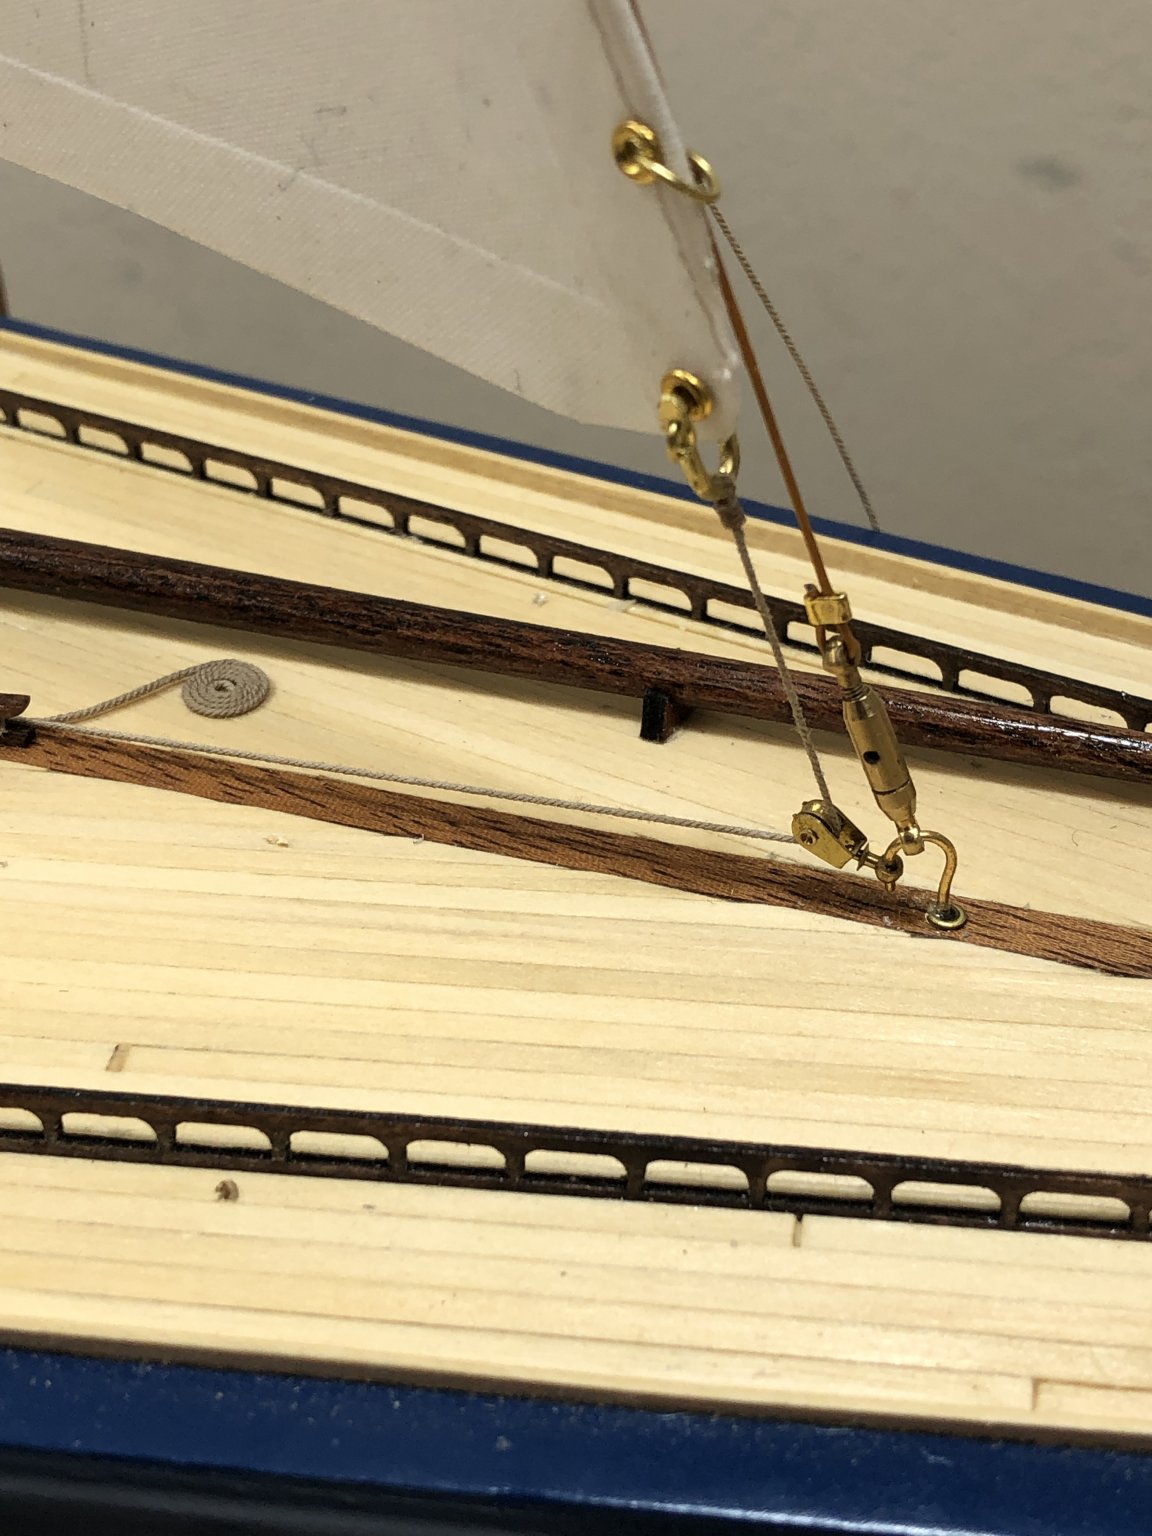
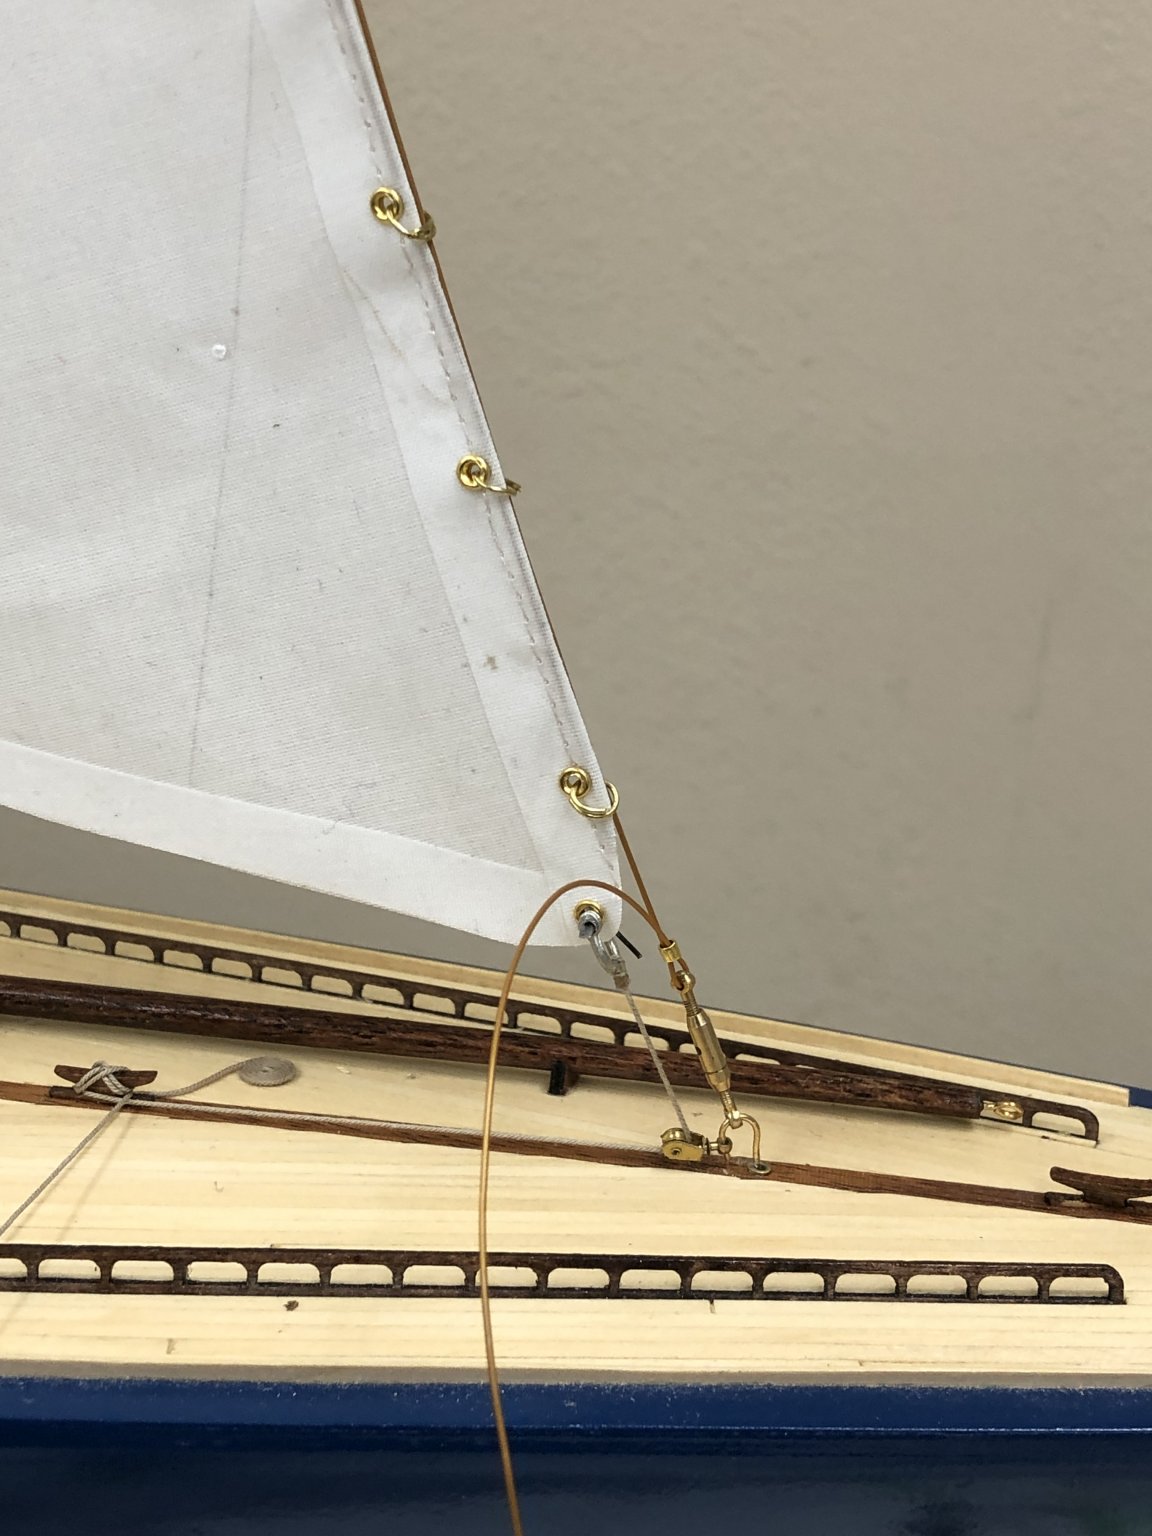
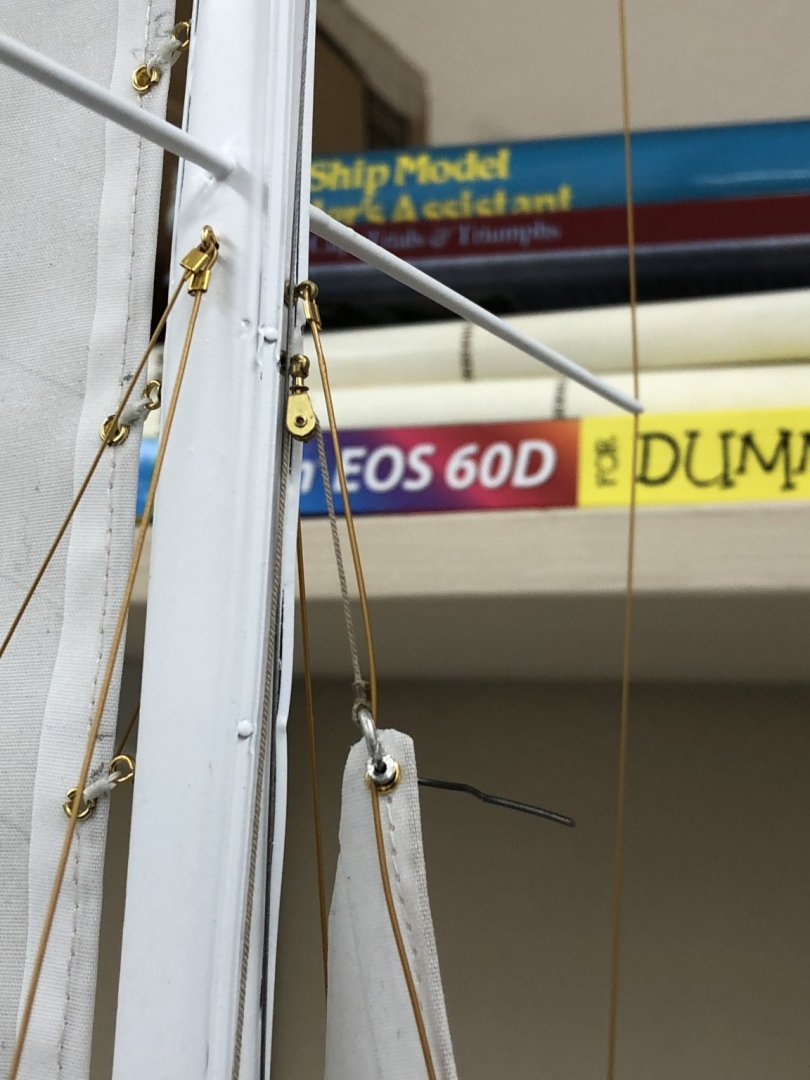
As it turned out I had just enough 3/64" brass rod to make nine shackles, one spare over the eight required (main sail, jib and flying jib halyards, jib and flying jib tacks and jib sheet and flying jib sheets (two). So I went ahead and made them up and installed the three on the main and jib. Here is a new picture of the jib tack with the new shackle, the tack belayed on its cleat and the rope coil and the main halyard belayed with its rope coil.


-
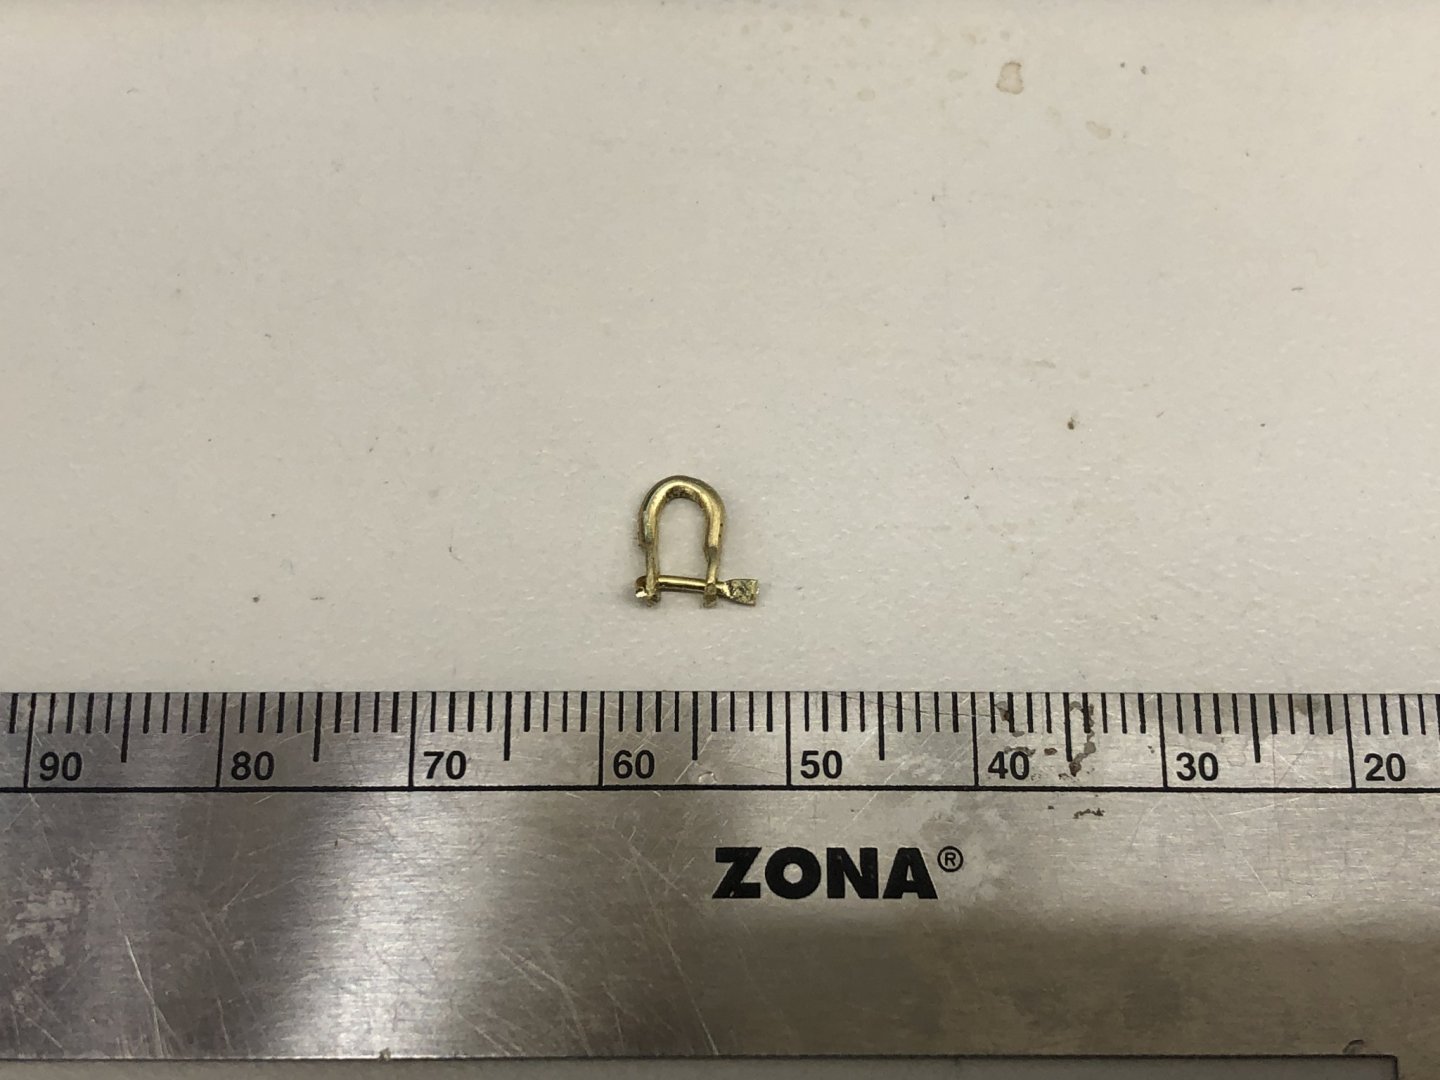
I found a short piece of 3/64" brass rod this morning so since what I ordered will not be here until tomorrow at the earliest I decided to try my hand at making a shackle. The overall length of the piece of brass is 19mm which yields a shackle about 6mm X 3mm. At this scale that would be just over 8" tall. Probably not too out of scale as these sails are pretty big. I will make as many as I have material (and patience) for now and finish when I get the rest of the 3/64" brass. I will use the Britannia metal ones as place holders and not secure any of the lines where they are used. I may have enough to do the main and flying jib but that will depend on how many I ruin in the process.
-
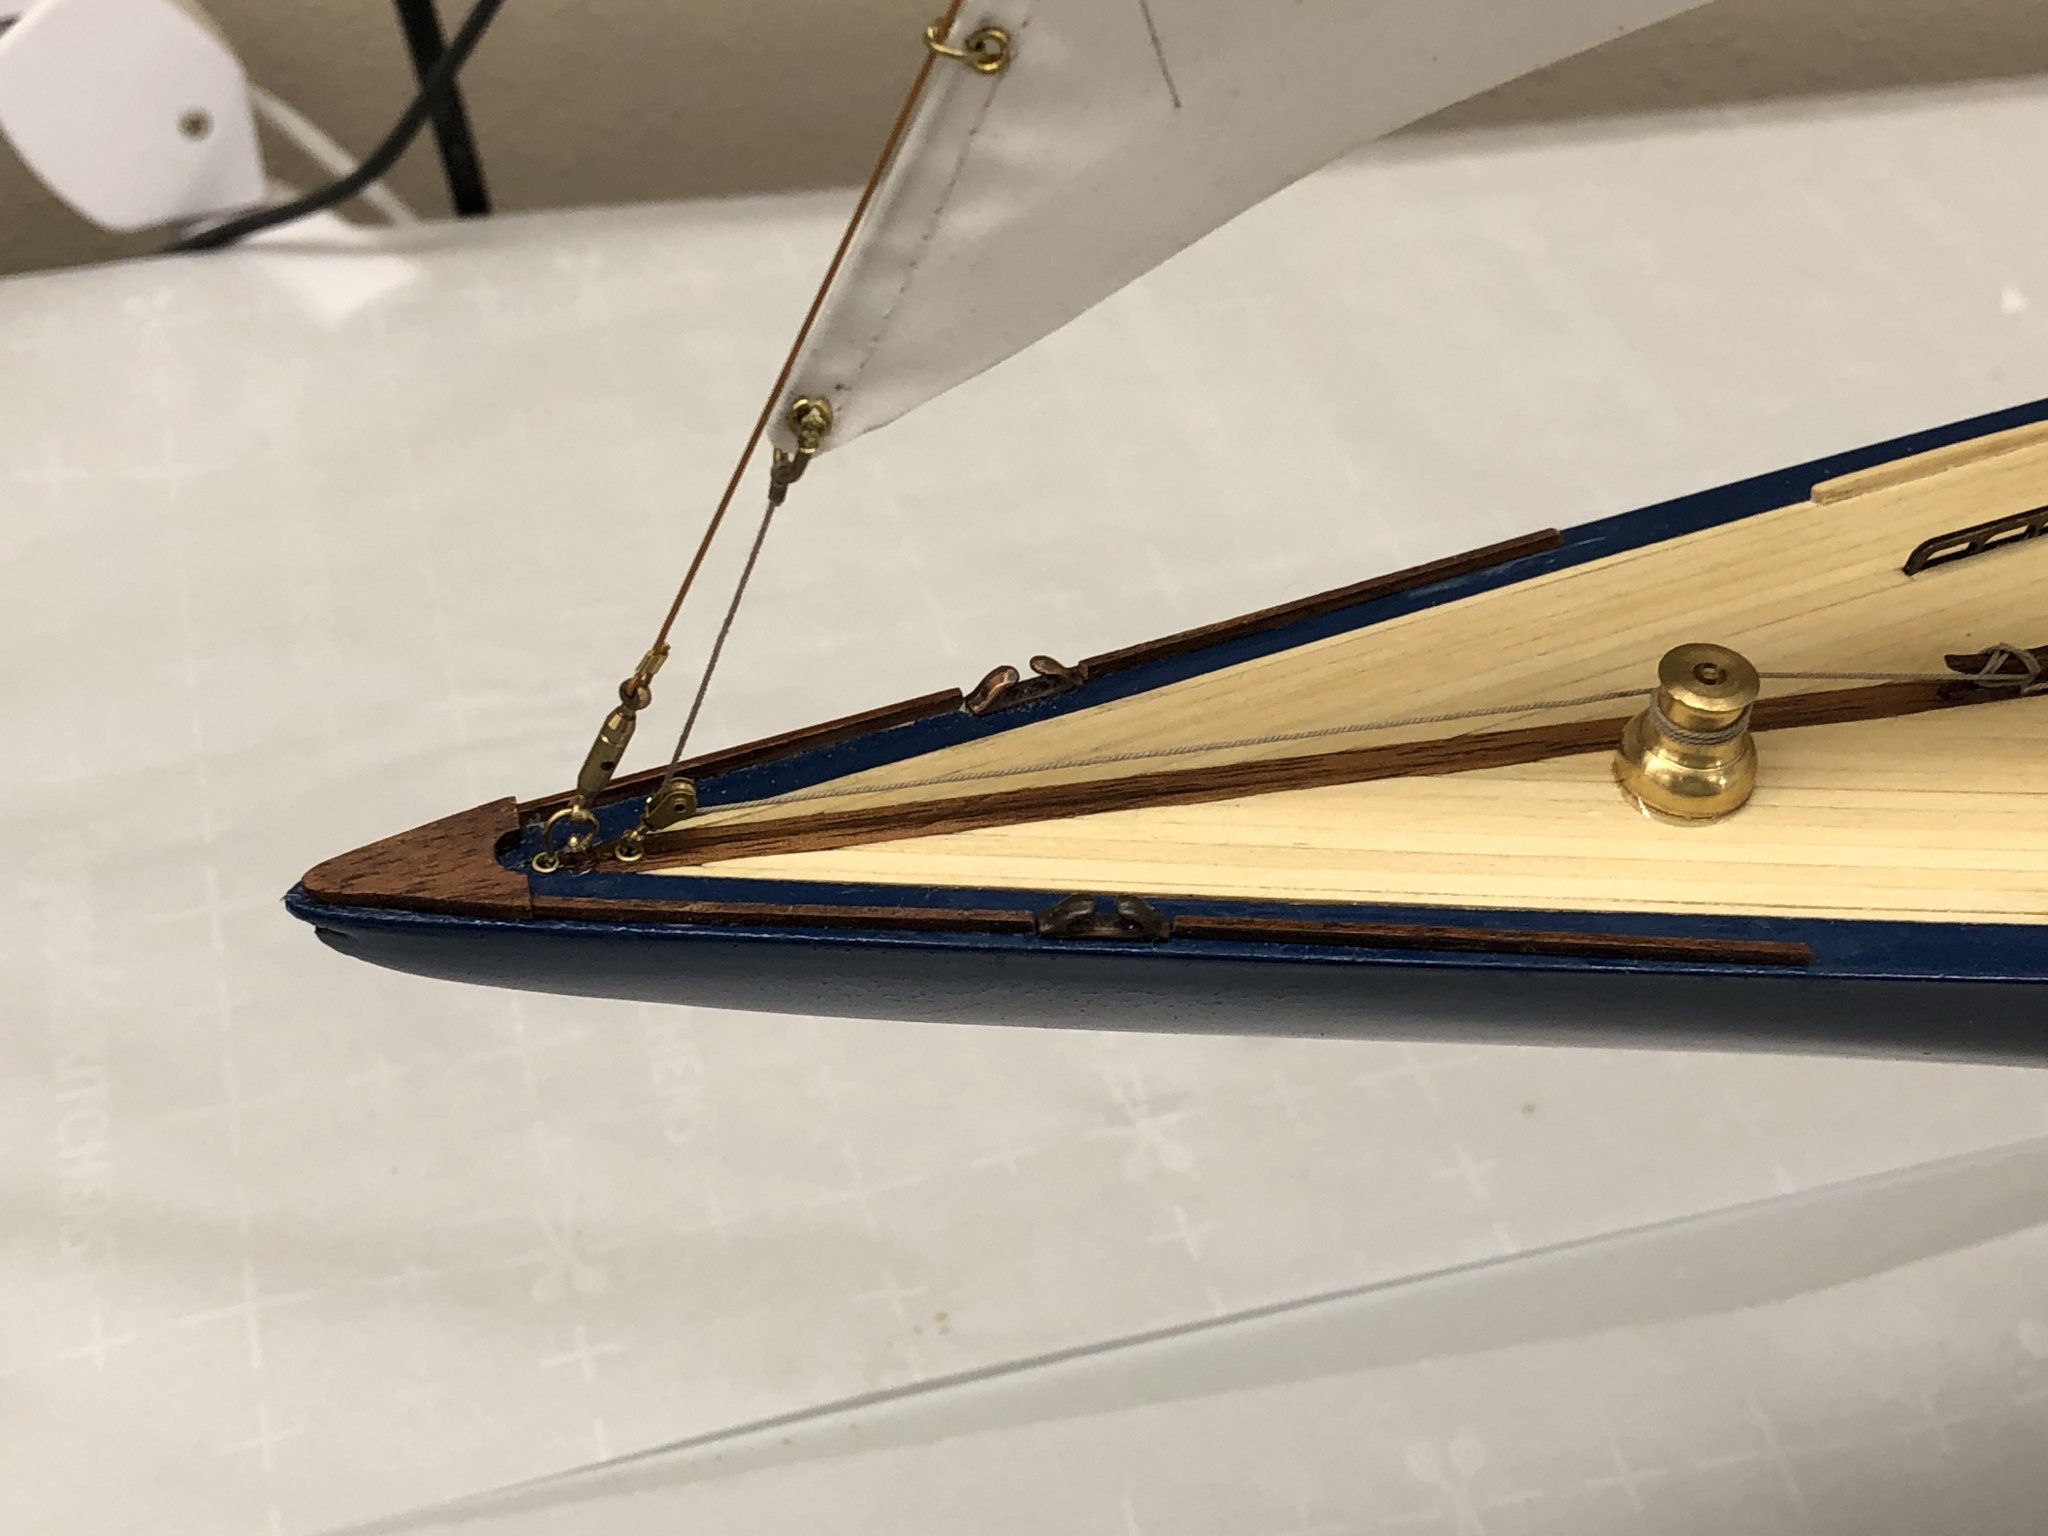
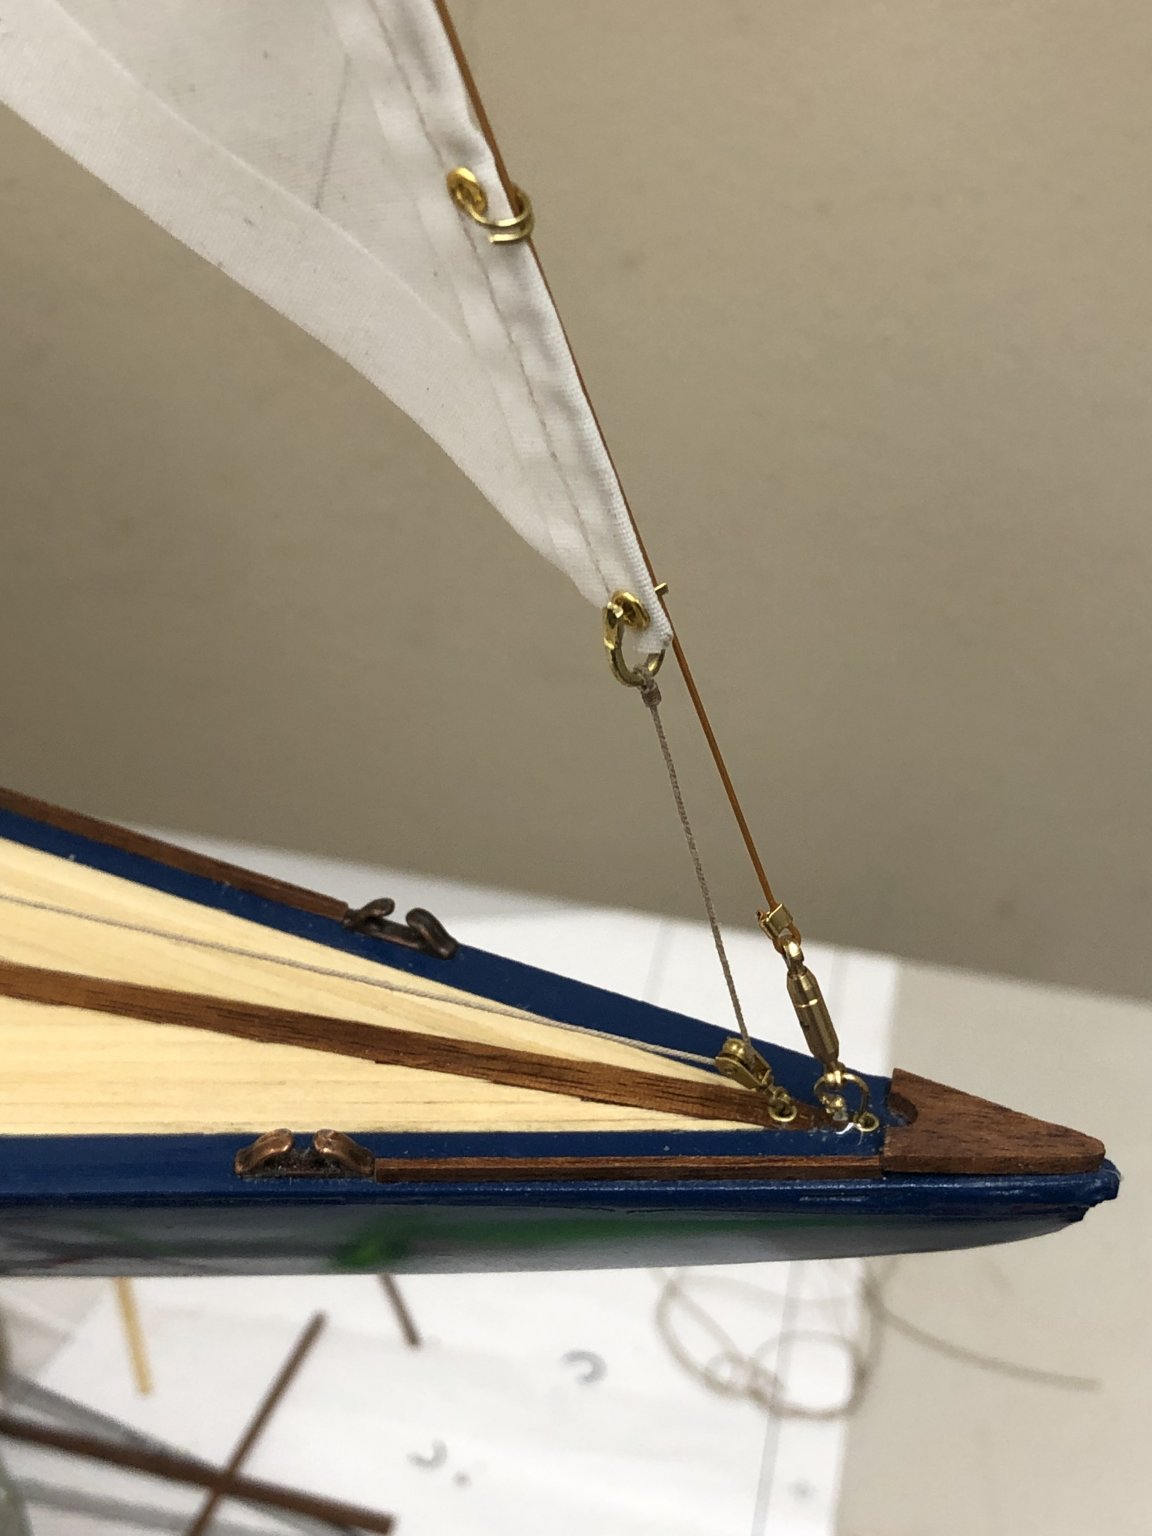
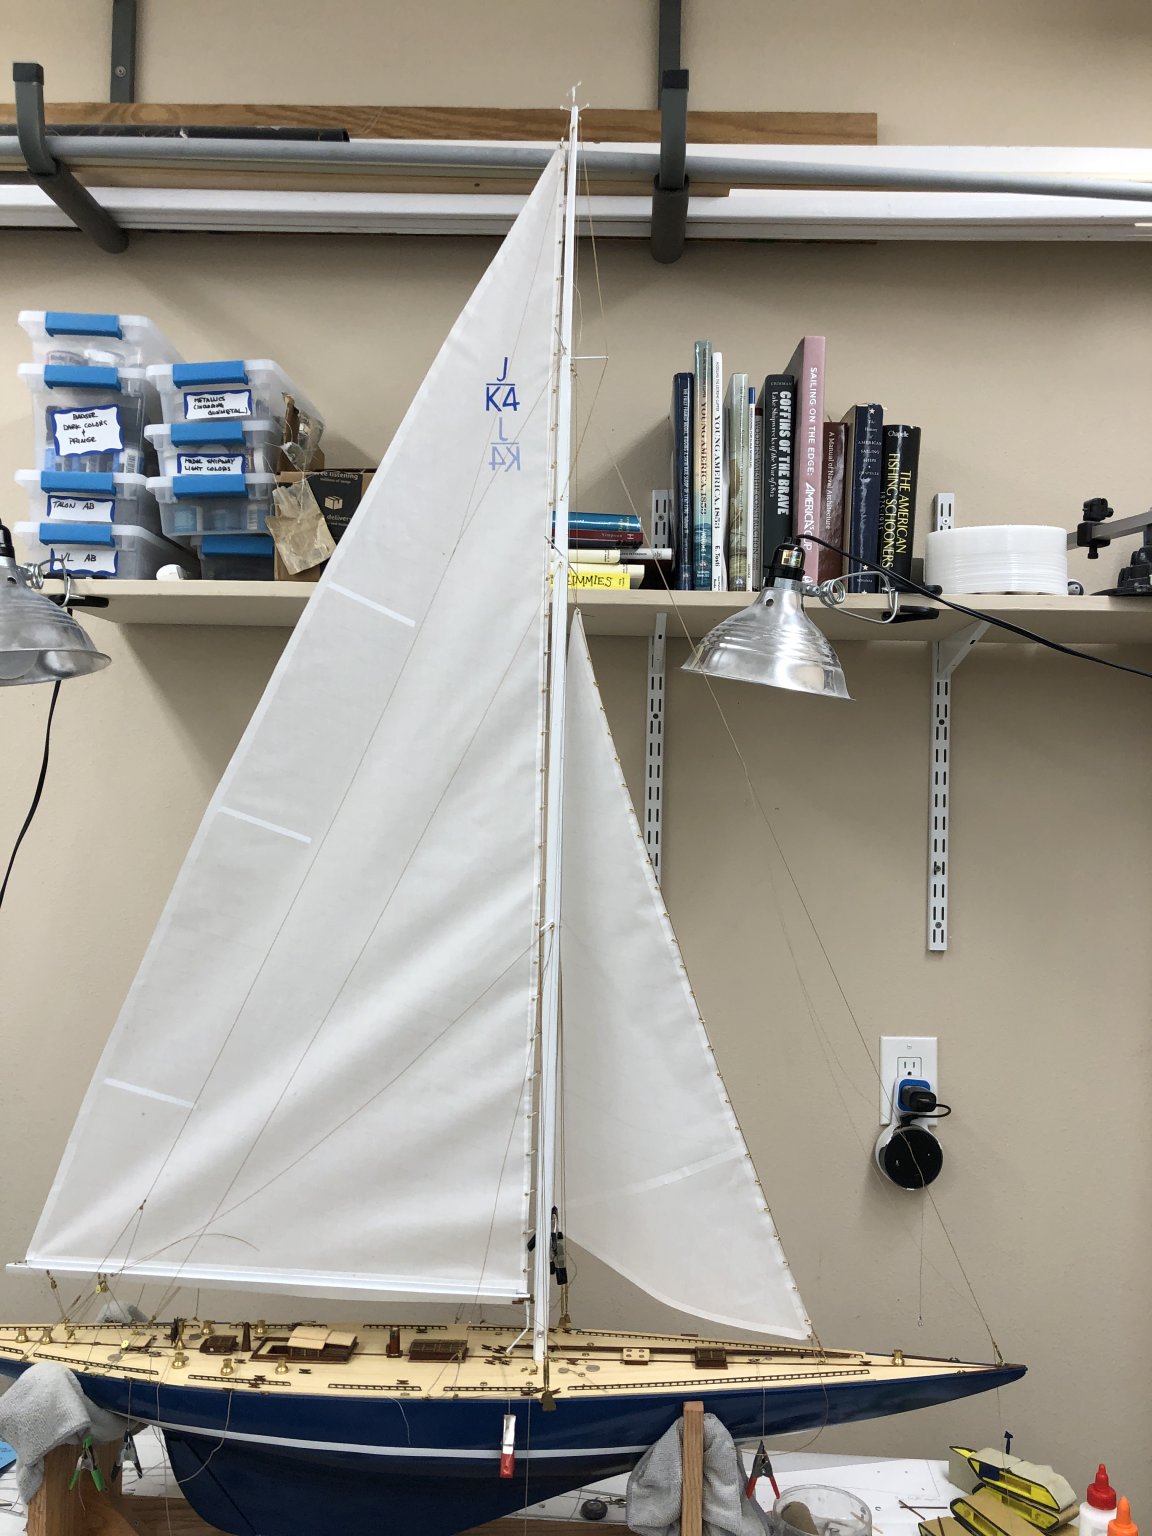
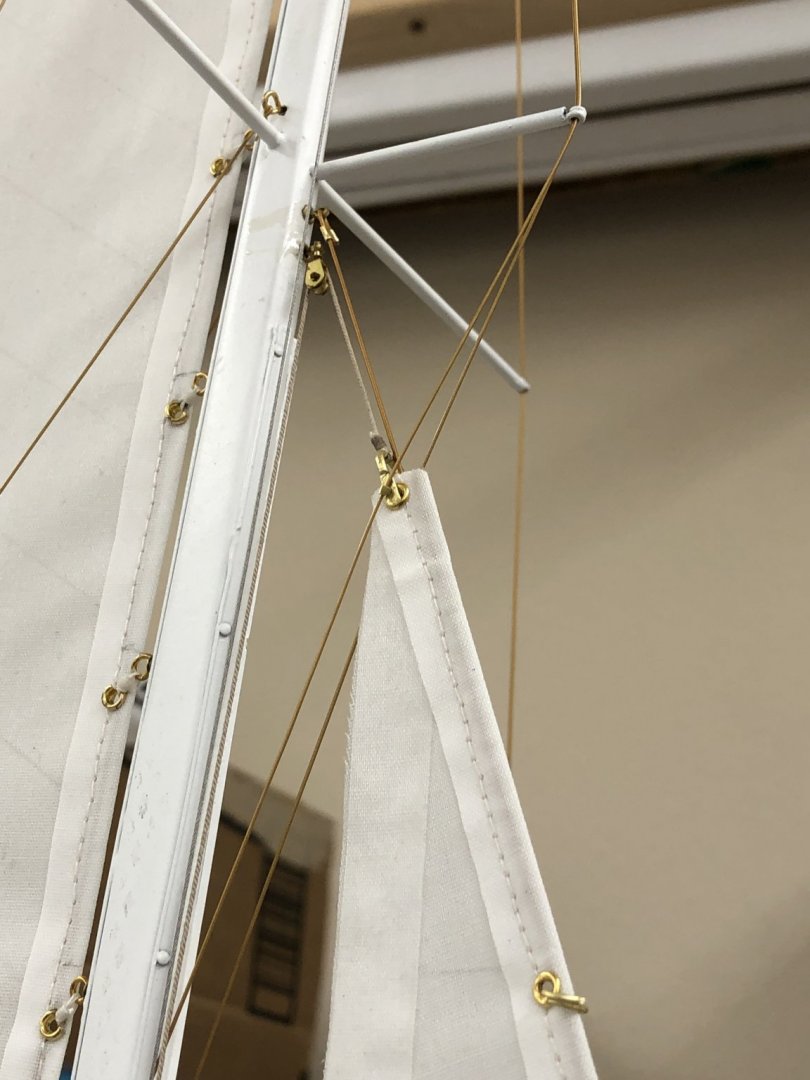
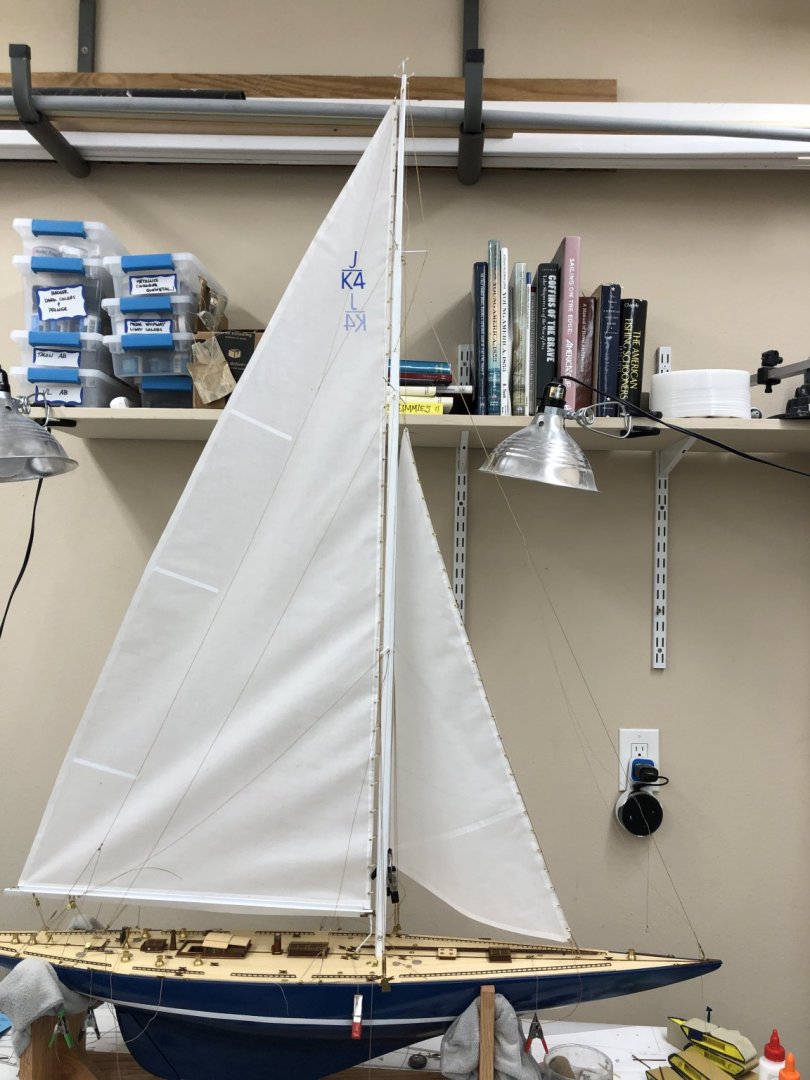
The jib has been successfully raised.!😅 I have not trimmed the extra wire off the lower end of the shroud or tensioned the turnbuckle but the jib is flying. I am using Britannia metal shackles (from Bluejackets) for the attachment of the halyard, tack and (eventually) the sheet lines. I tried making my own from brass but when I used 1/16" rod as the starting point it was too massive and when I used 1/32" rod it was too small and very hard to get holes drilled in as the bit would wonder and using a center punch bent the end so badly it would break off when drilled. So I have ordered some 3/64" rod which should b e here shortly. I will try again but may have to stick with the Britannia metal (I may blacken it but am still on the fence. Black or silver it still introduces another color onboard ☹️. So here is a shot of the entire model with the main and jib up and close-ups of the attachment points.

-
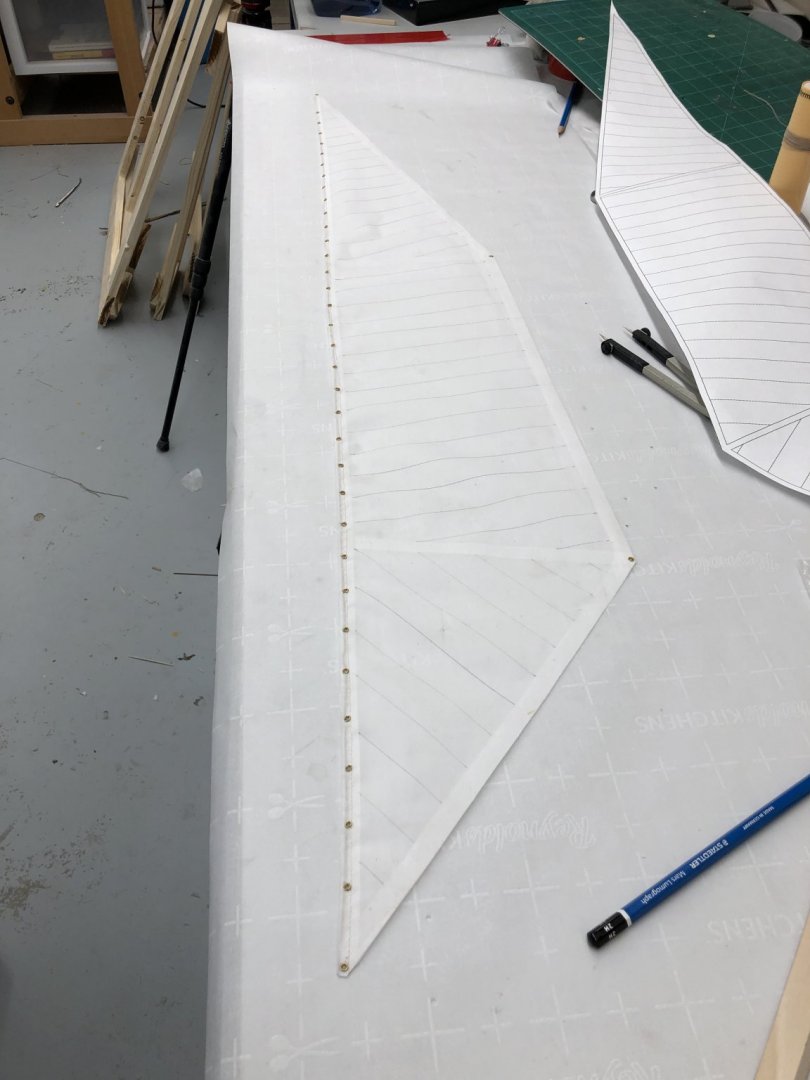
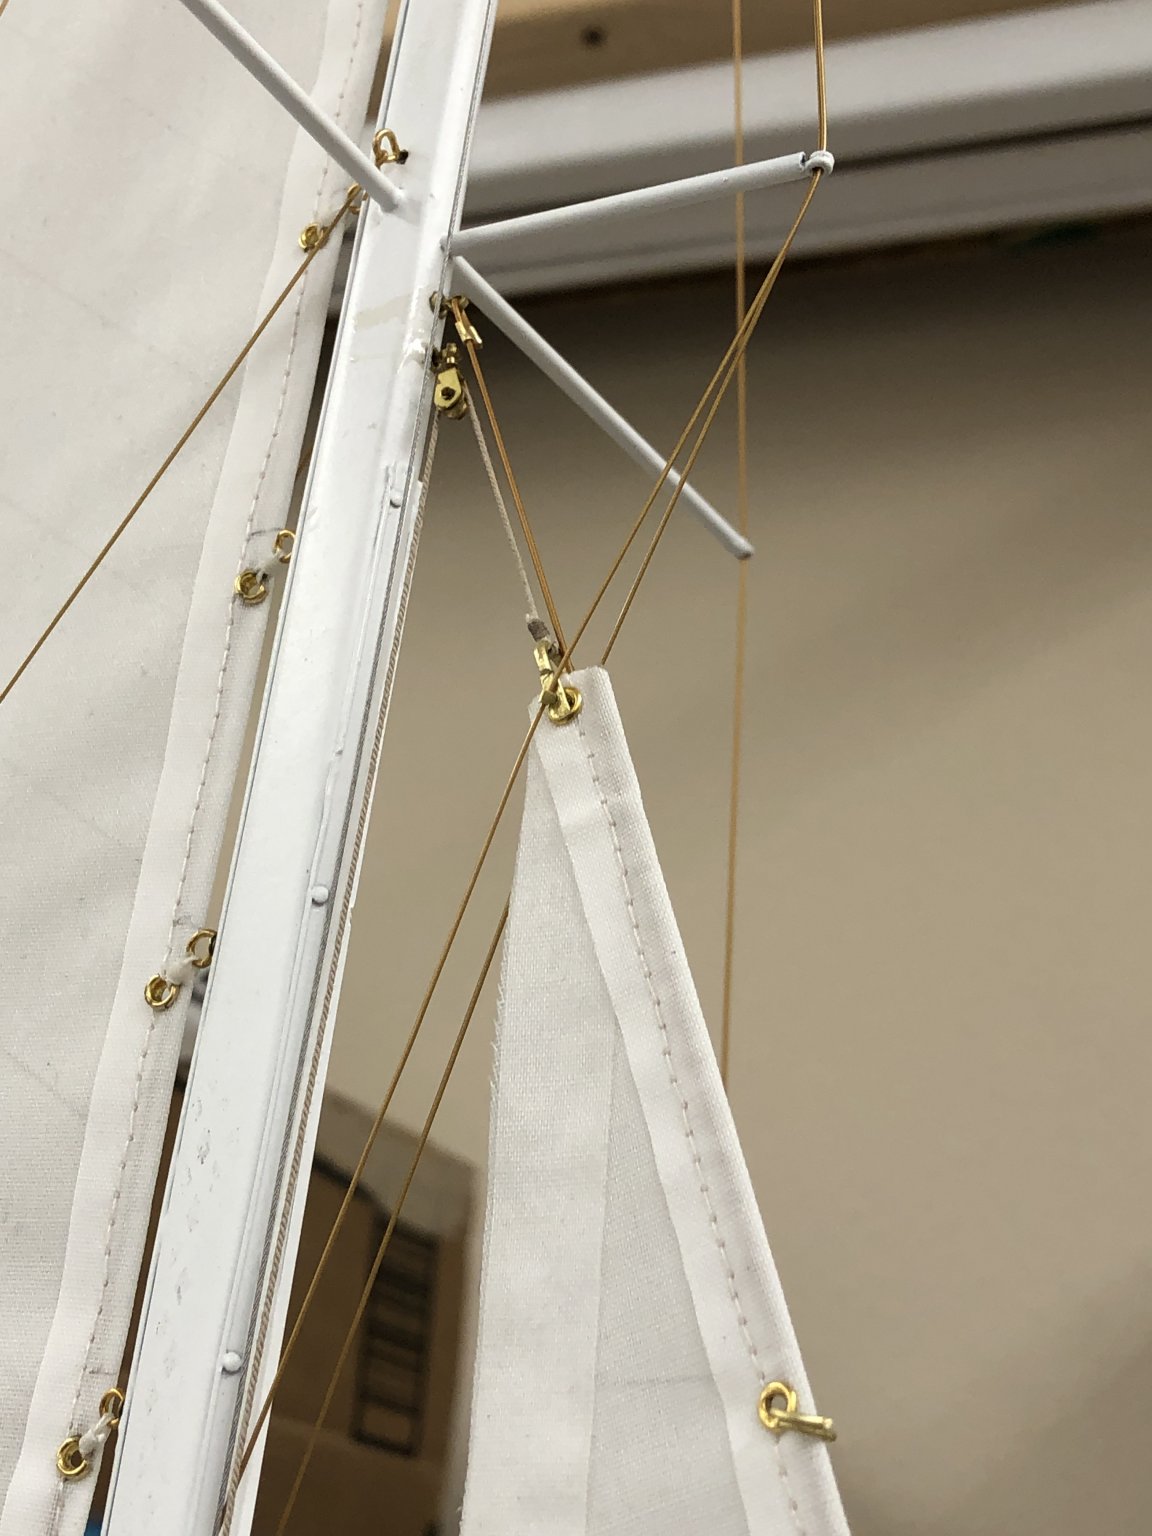
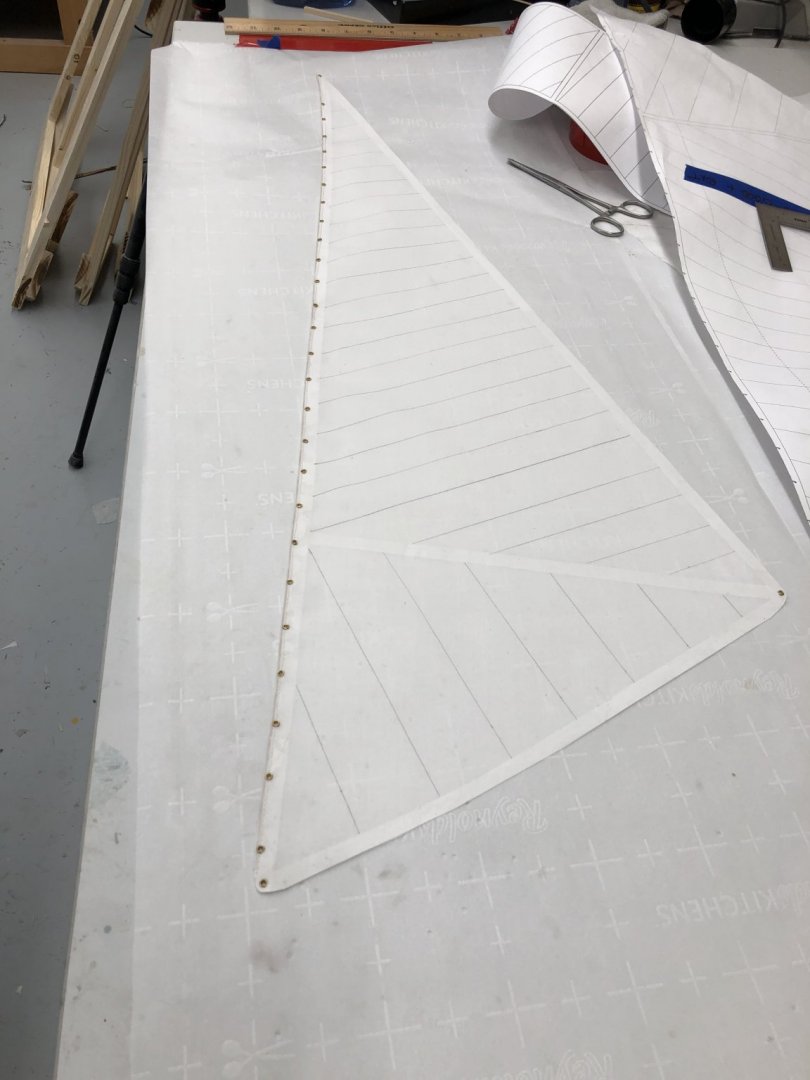
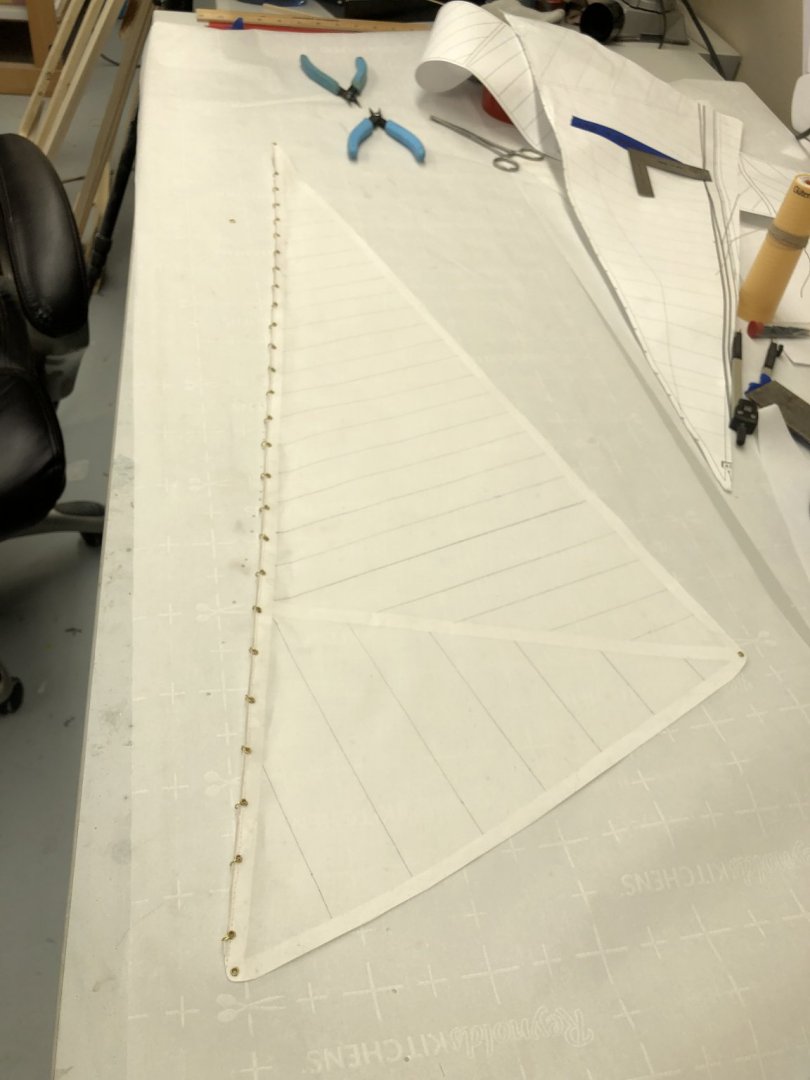
The seamstress sewed the bolt rope seam on the jib and did a great job ironing it so I could put the eyelets in. Again I got all 29 in without incident. I think adjusting the tension on the internal spring (and not hitting it too hard or too many times) was the key. With the eyelets installed I copied the seam lines from the plans onto the sail being careful to keep the side of the sail with the marks on the same side as the others. With that done I threaded the split rings into the eyelets. After using handmade 3/16" split rings on the first jib, I decided to see if 1/8" would work and show less gap between the stay and the sail. Looks like that will be the case although the jib is not mounted yet. I have decided to thread a new stay through the split rings and re-rig it on the model rather than trying to thread the split rings onto the existing stay. My experience with the first jib has convinced me that this is the path of least resistance and least manipulation of the sail. So here is the jib with the eyelets lines and with the split rings. I cannot account for the yellowish tint on the second shot - they were taken with the same lighting about half an hour apart.
-
I got all 33 eyelets in the Flying Jib without any difficulties. I did as someone in an Amazon review suggested, used the setting tool from the 2mm kit with the mandrel for the 1.5mm eyelets and had no problems. There is a screw on the bottom of the mandrel that controls the tension on the spring that retracts when the setting tool is struck. I initially had this as tight as it would go as it came from Amazon. After having to remove this to get the pin in the mandrel to reset I loosened it a b it and that seems to at least reduce the number of times the pin would fail to reset. I also adjusted the number and strength of the strikes on the setting tool. I finally arrived at four "medium" strength hits with a 22oz framing hammer would compress the eyelet enough without causing the pin to hang up. So the Flying Jib is ready to have the split rings installed b ut I am going to do the Jib first as I think it will be easier to do that without having to worry about the Flying Jib getting in the way. With any luck I will get both jibs hung tomorrow and then reset the back stays. After that it is jib sheets and DONE!