cdrusn89
-
Posts
1,601 -
Joined
-
Last visited
Content Type
Profiles
Forums
Gallery
Events
Everything posted by cdrusn89
-
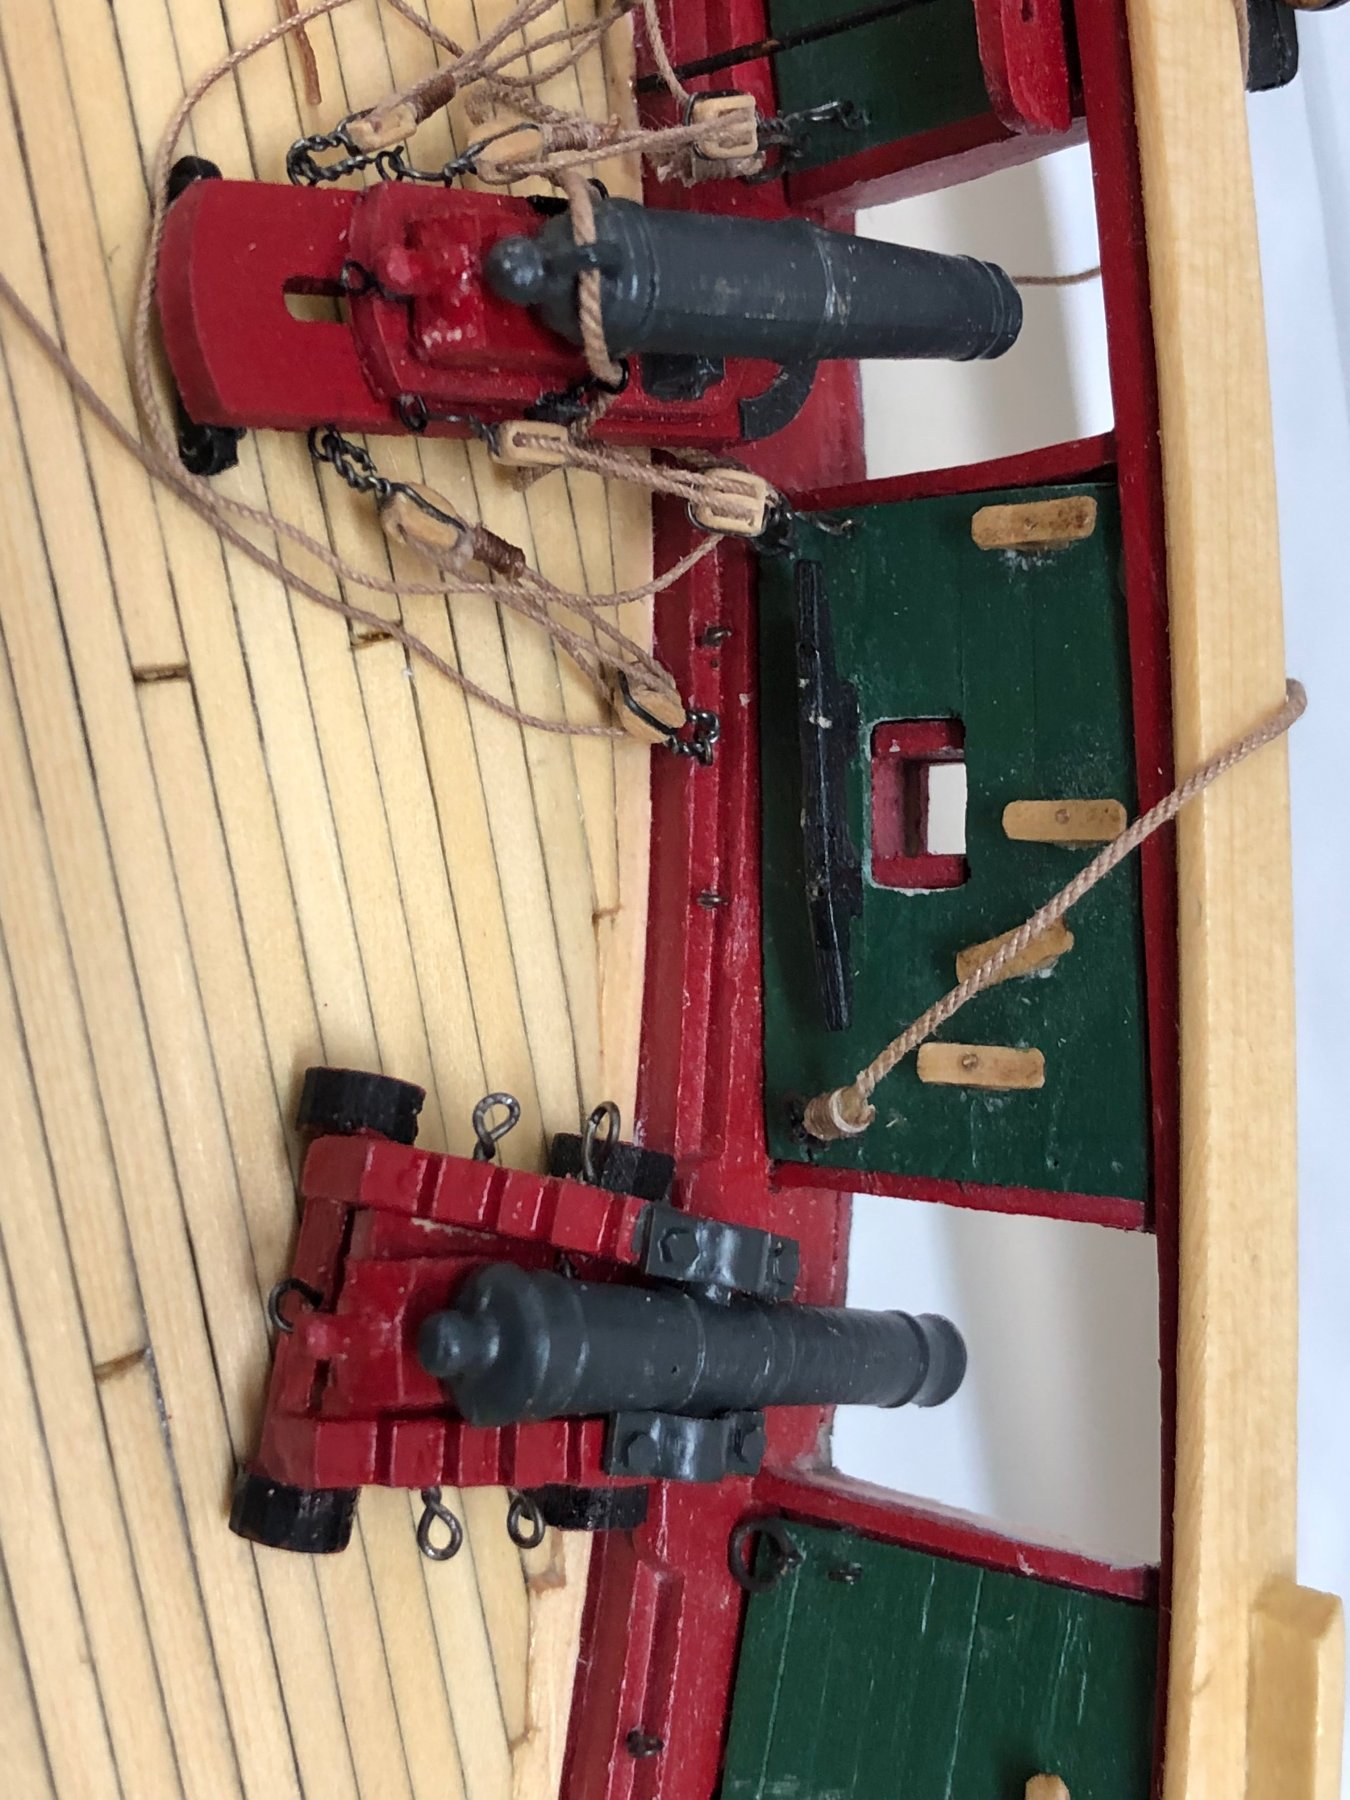
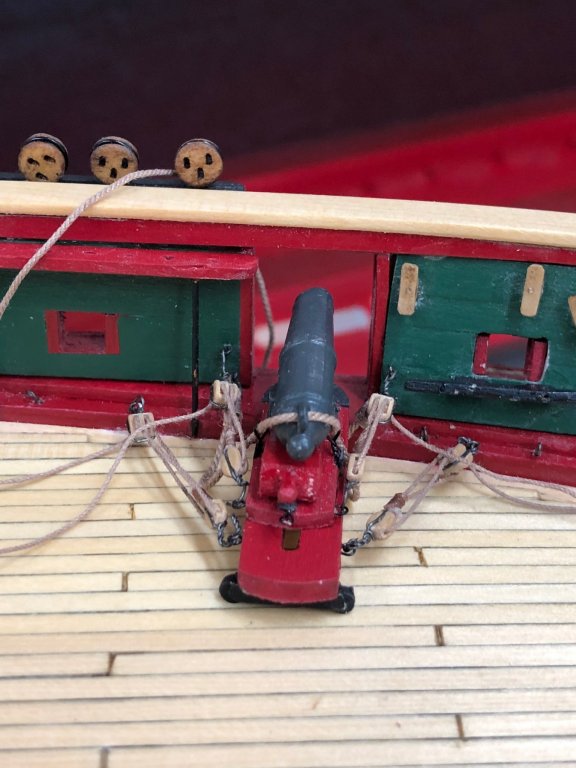
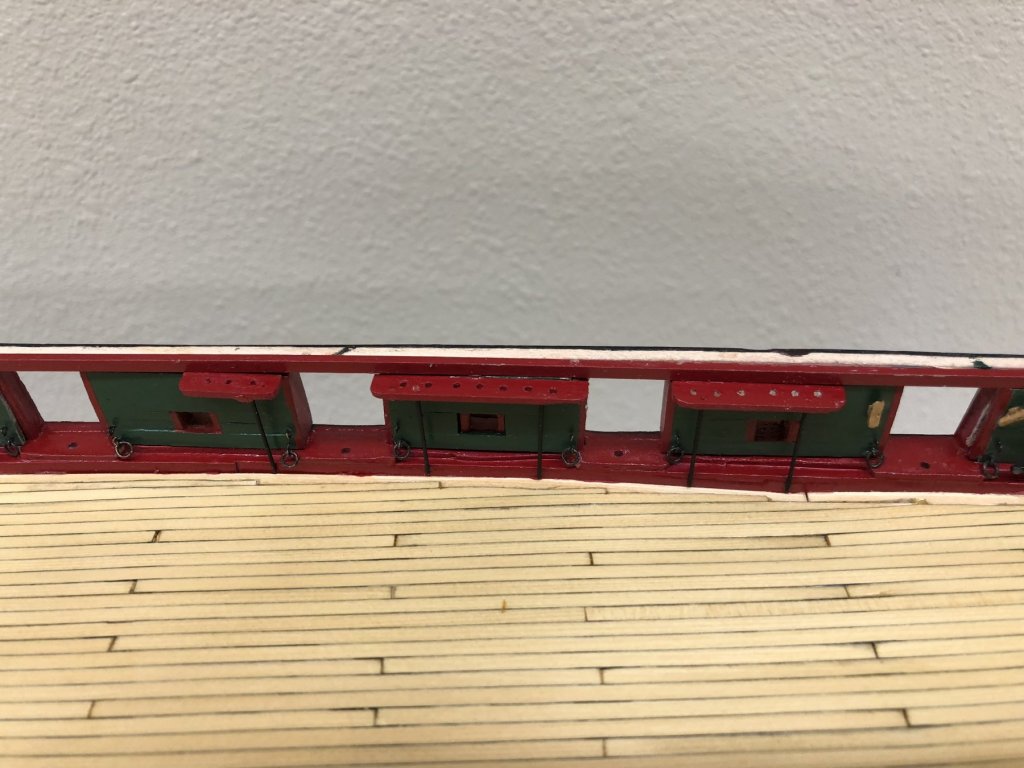
 All seventeen of the carronades have been mounted to their skids and the associated hardware installed. I need to make up the gun tackles (40 more sets of 1/8" single with becket and 1/8" double blocks) so I can get these secured to their platforms. Here is the port side long gun next to the already mounted carronade. Have to make up the tackles along with those of the carronades. Still working on assembly of the stbd side long gun. (I know the gun looks somewhat "out of square" but that is caused by the camera. The gun is pretty well square.
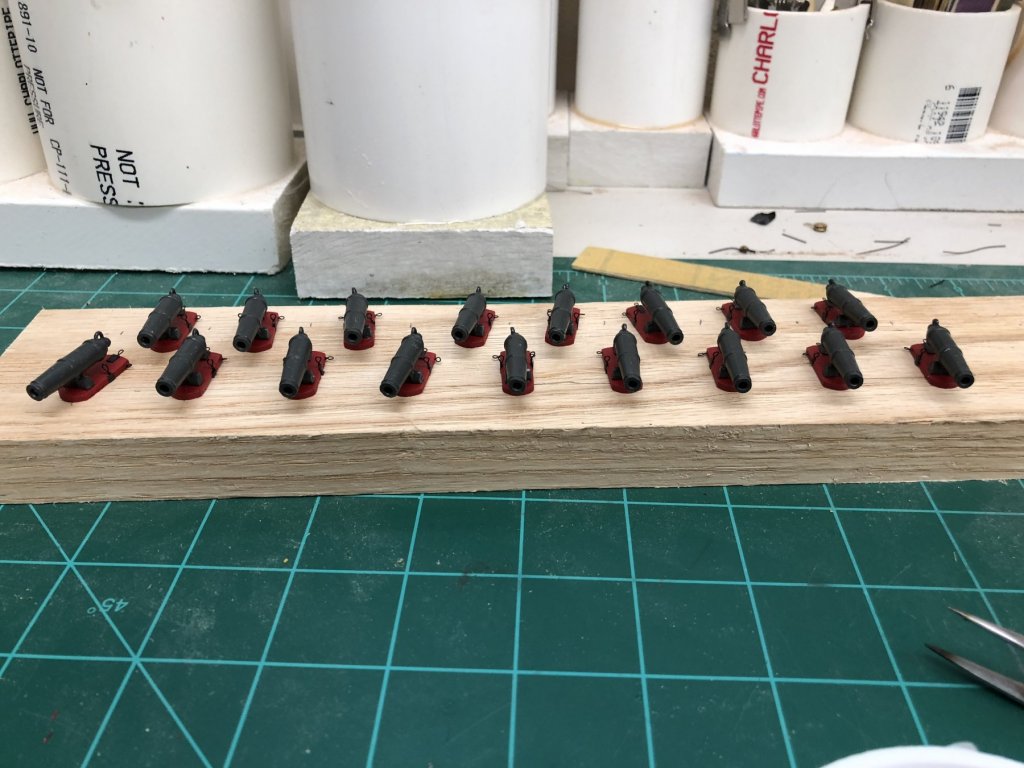

- 367 replies
-
- 3
-

-
- model shipways
- niagara
- (and 1 more)
-
Six of the seventeen (the "test case" is already competed and mounted) remaining carronades are ready and waiting. Hopefully I can get the other eleven done tomorrow and hopefully get the carronades done over the weekend. Still have not started on the second long gun but have done the touch up on the one that is finished. Pictures tomorrow (hopefully).

- 367 replies
-
- 3
-
-
- model shipways
- niagara
- (and 1 more)
-
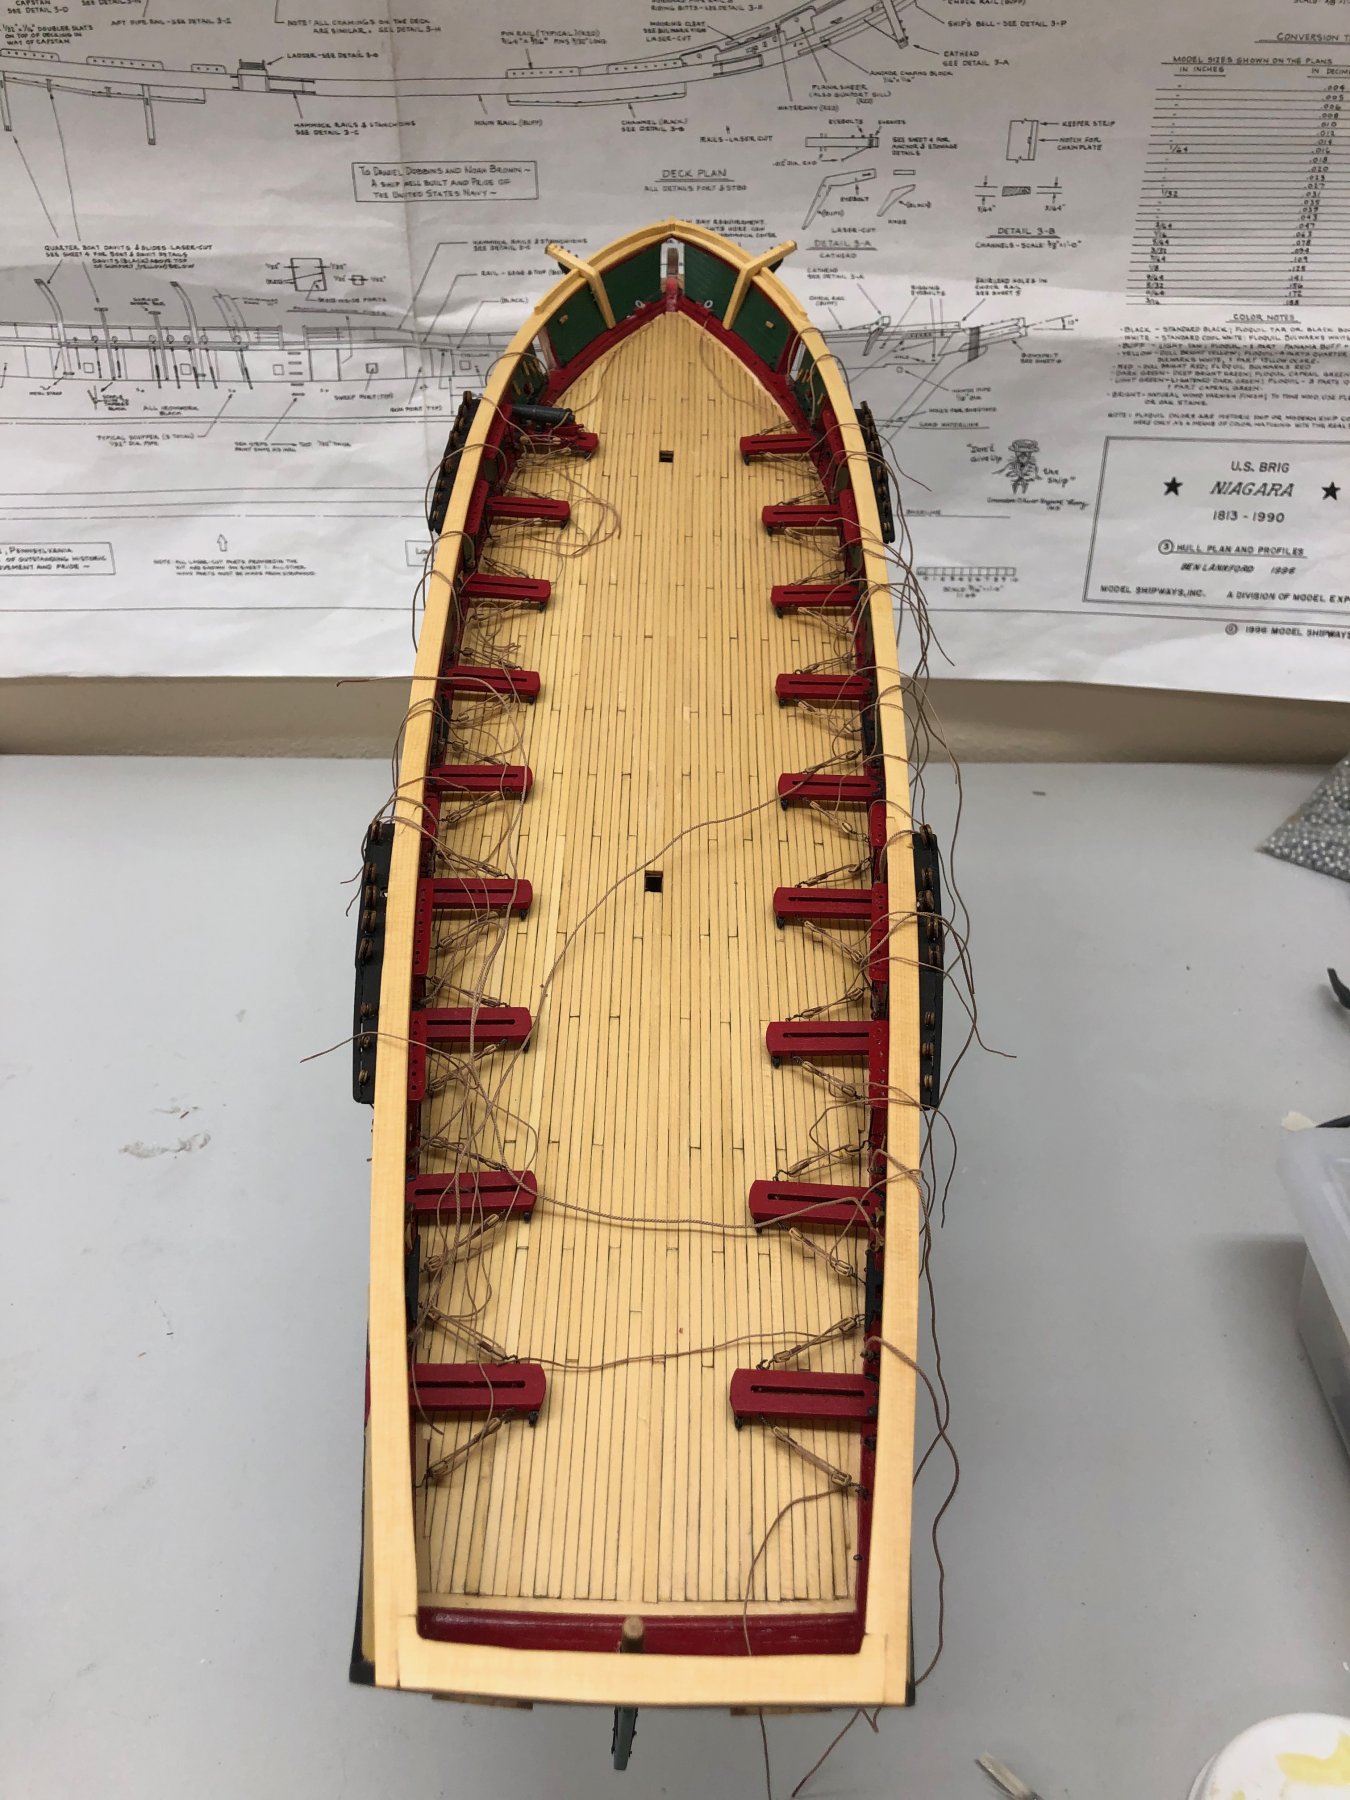
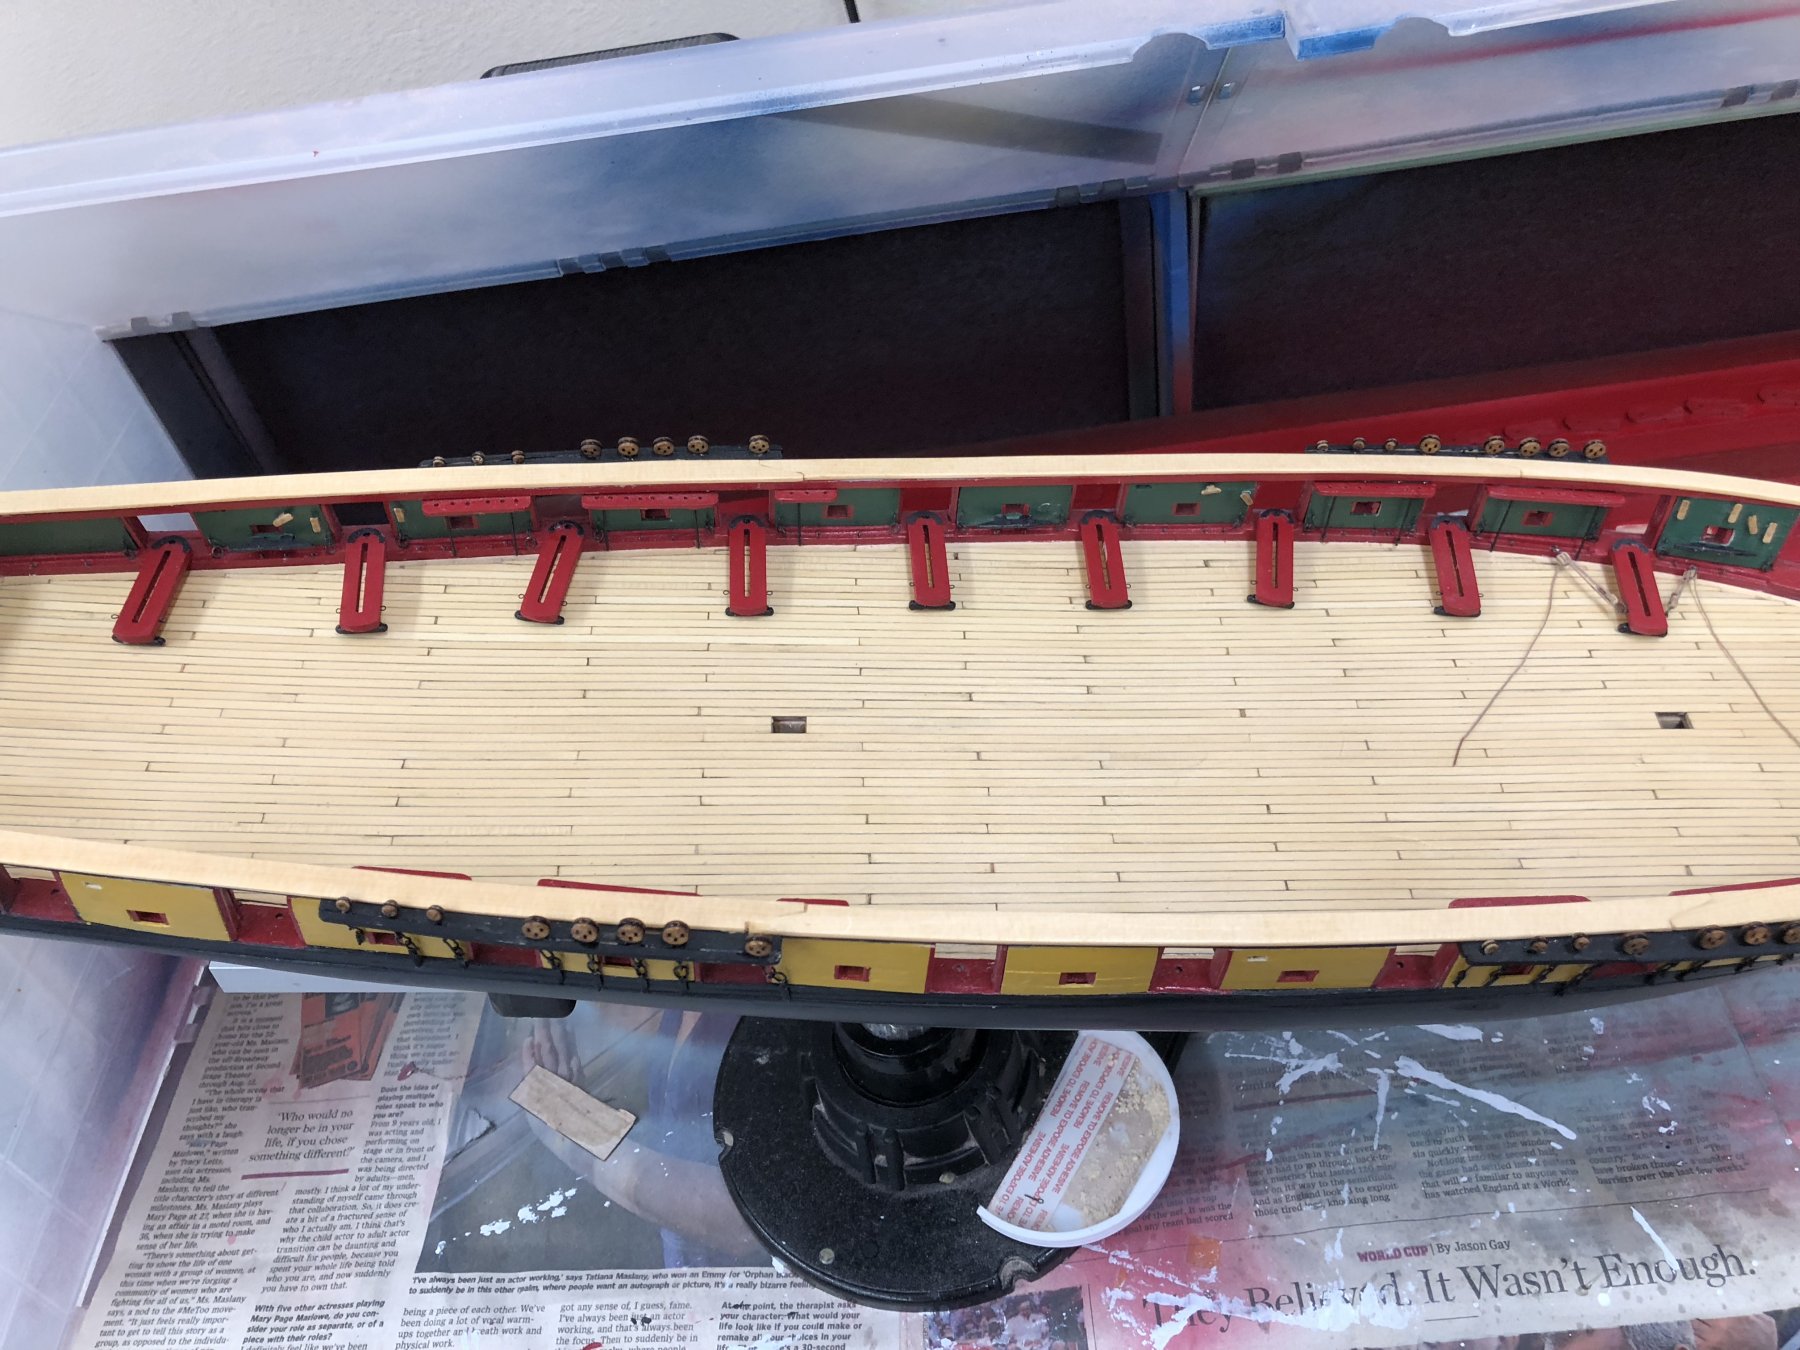
Completed installation of all the carronade platforms and their associated train tackles. Also secured one side of the breech tackle while there was no gun in the way. Working to assemble the guns onto their sliding bases and install the various eyebolts and backing plates. I got one of the long guns assembled but the paint job took a beating and it needs some touch-up before it is installed. Working on a better assemby method for the other one.

- 367 replies
-
- 1
-
-
- model shipways
- niagara
- (and 1 more)
-
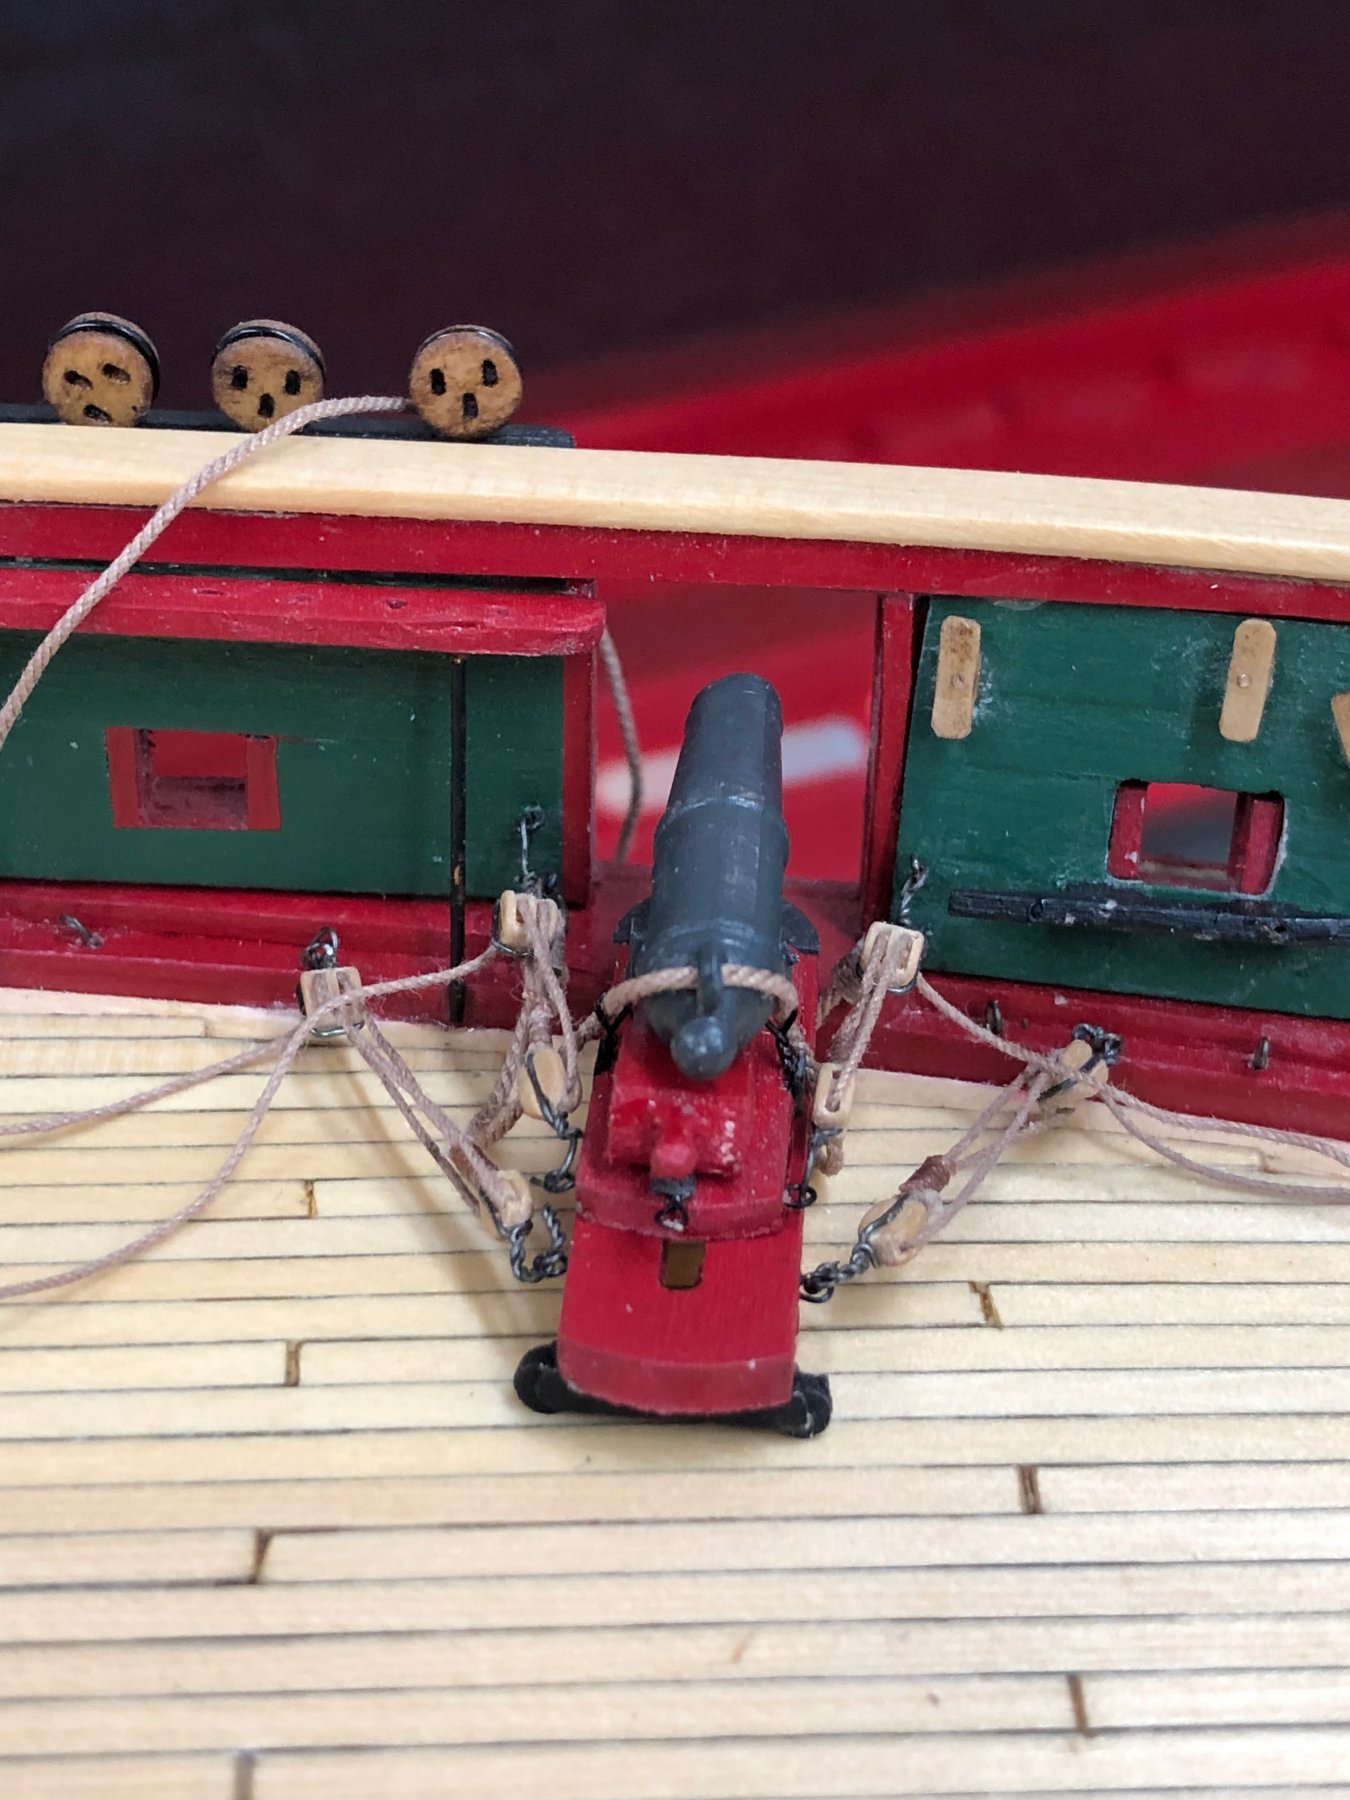
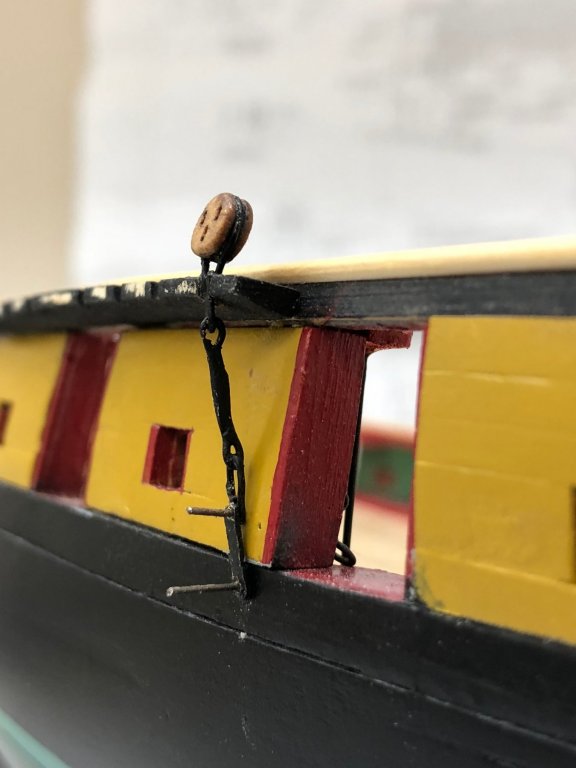
As a test of my assembly and installation technique, while waiting for the stbd side platforms glue to dry I installed a complete carronade on the port side forward. Everything went pretty much as expected and I can now proceed with the other SEVENTEEN. Having some difficulty getting the long gun carriages to follow the drawing - the sides taper to follow the taper of the gun. One side wants to be straight and other has all the taper. Working on potential solution. Here is the one completed carronade (except for the rope coils - not sure when I will get to those.
- 367 replies
-
- 4
-
-
- model shipways
- niagara
- (and 1 more)
-
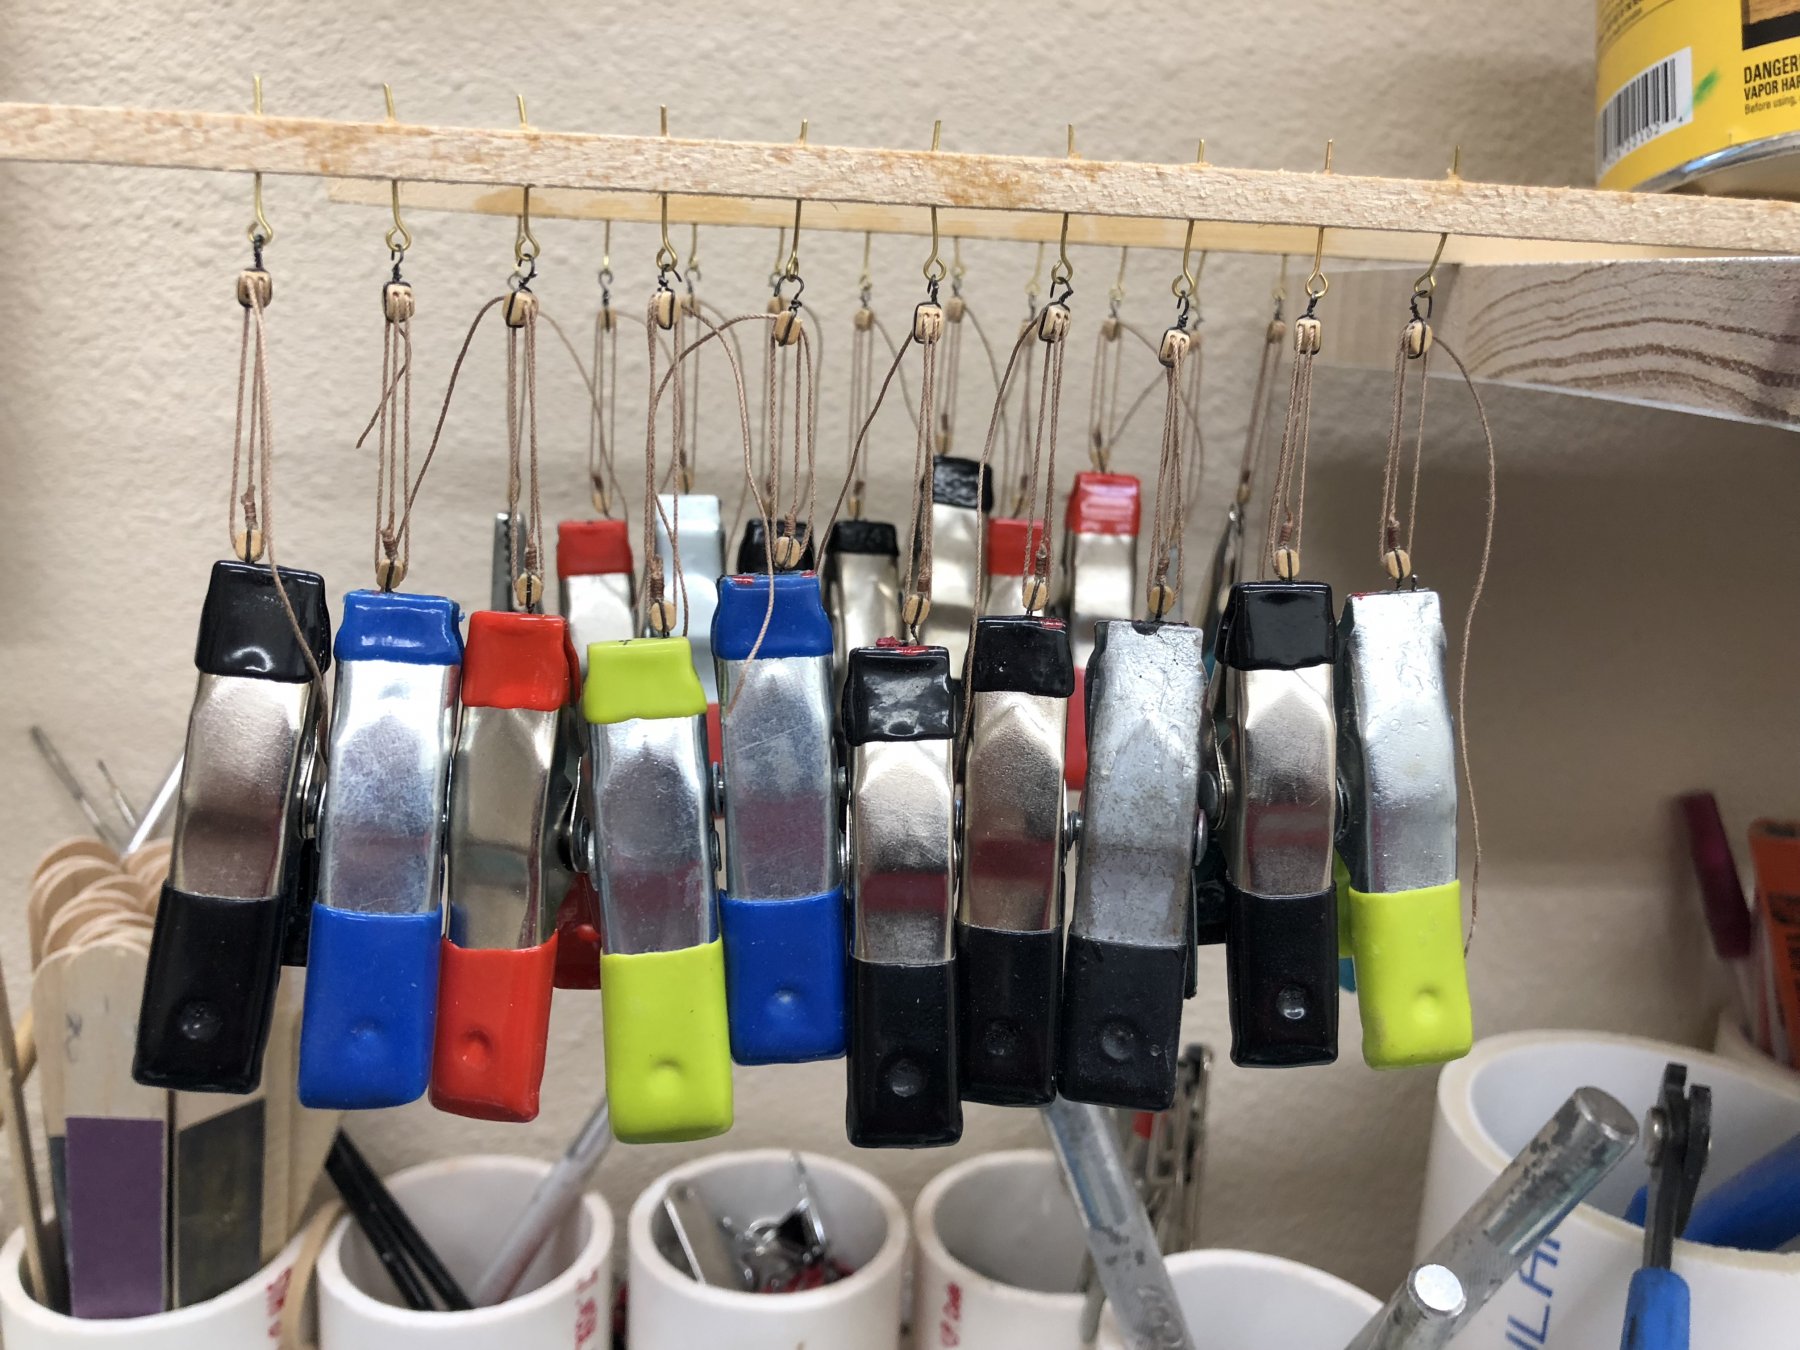
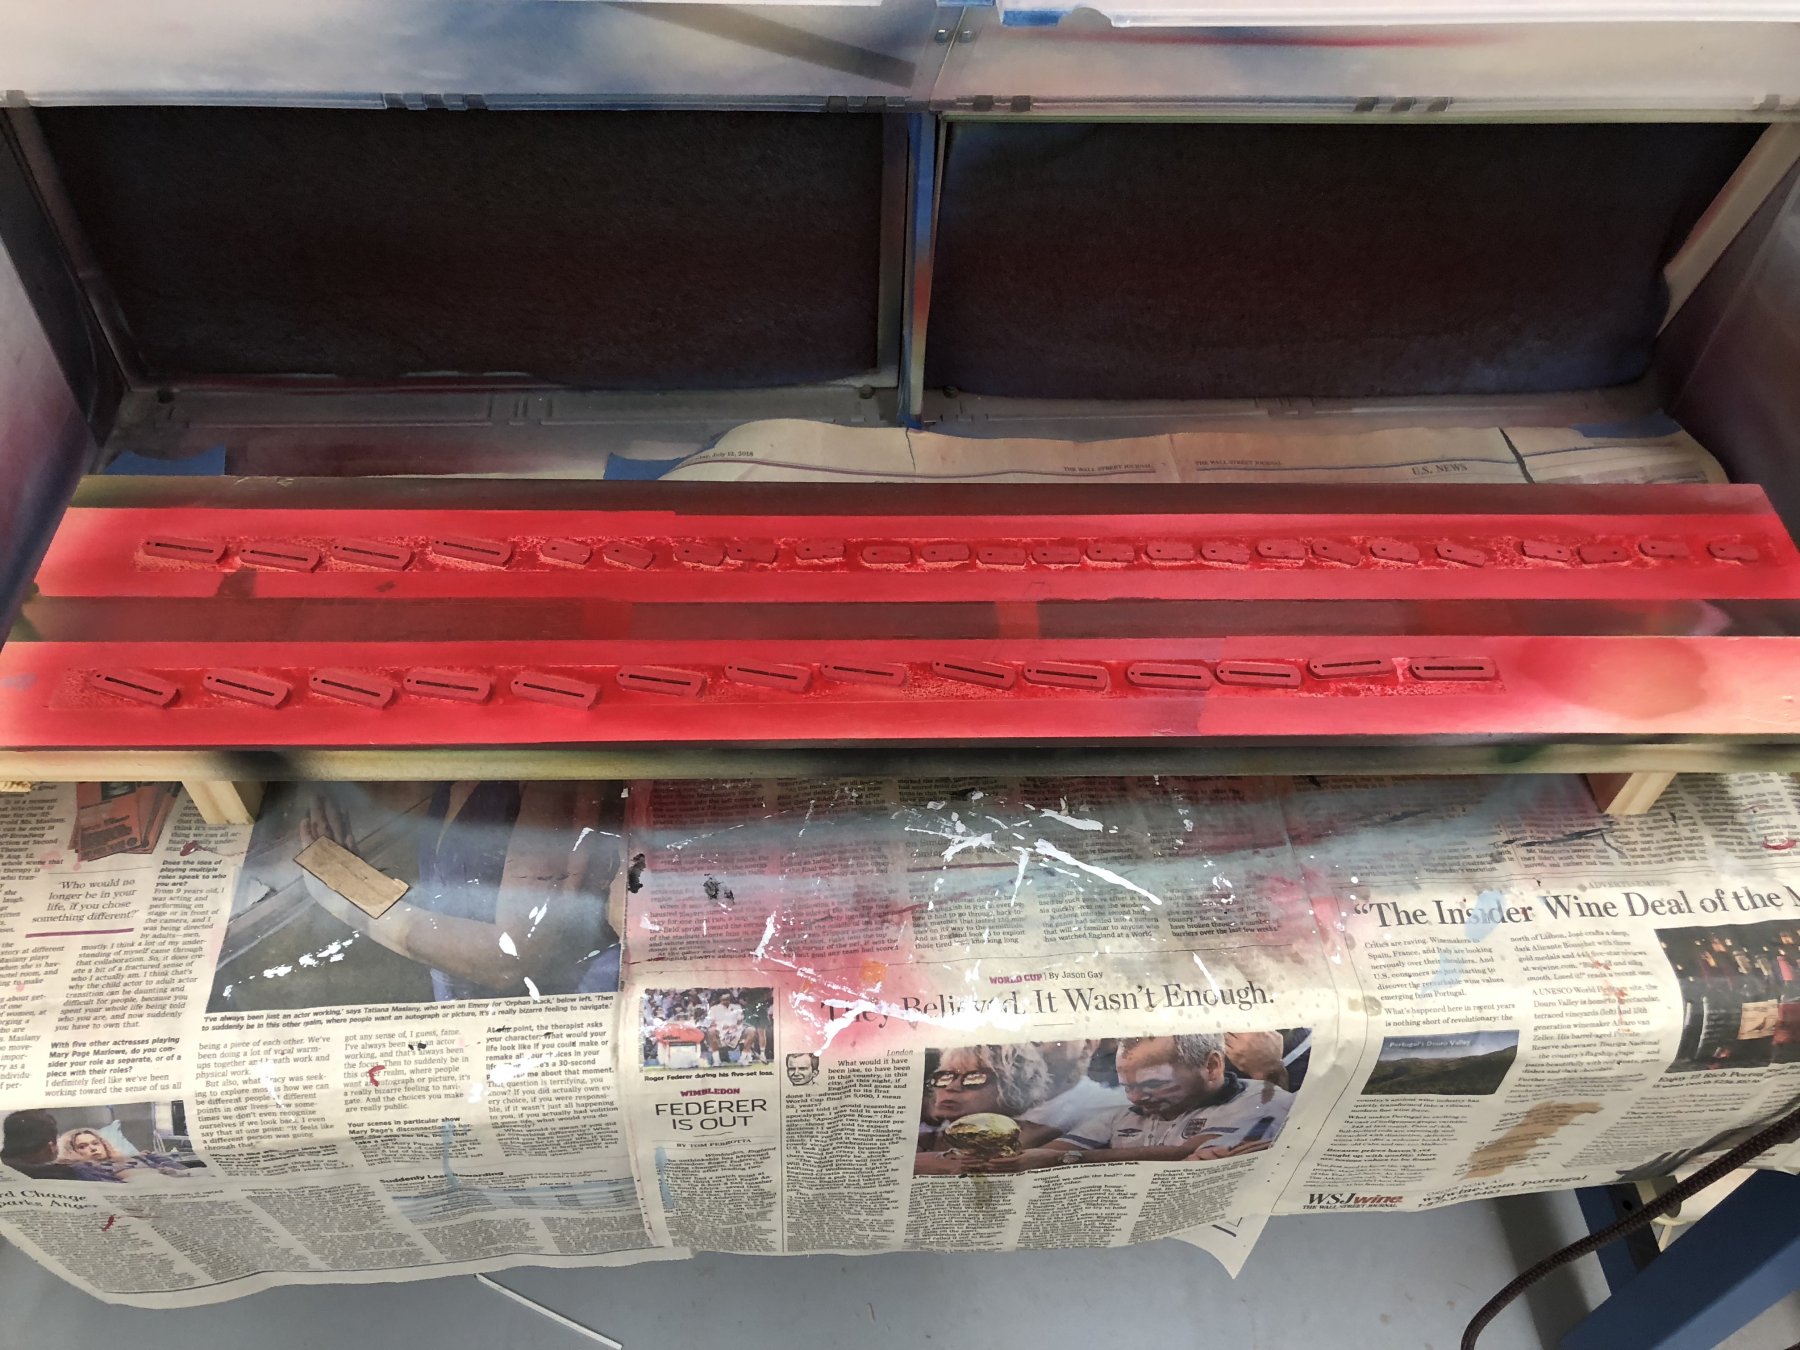
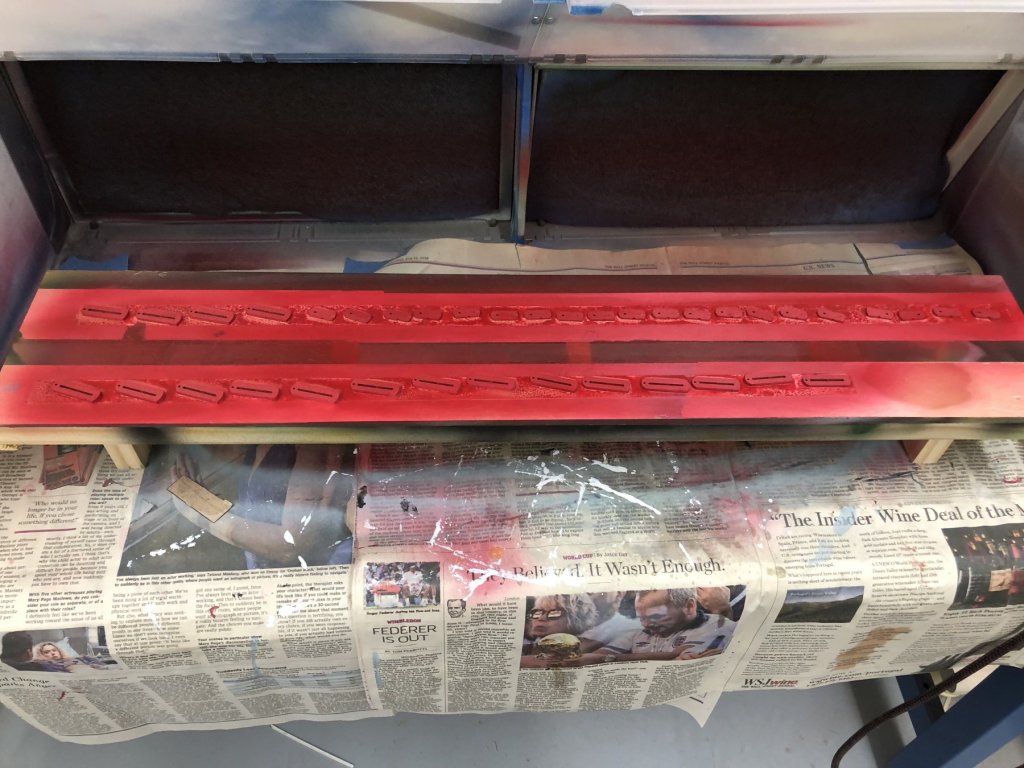
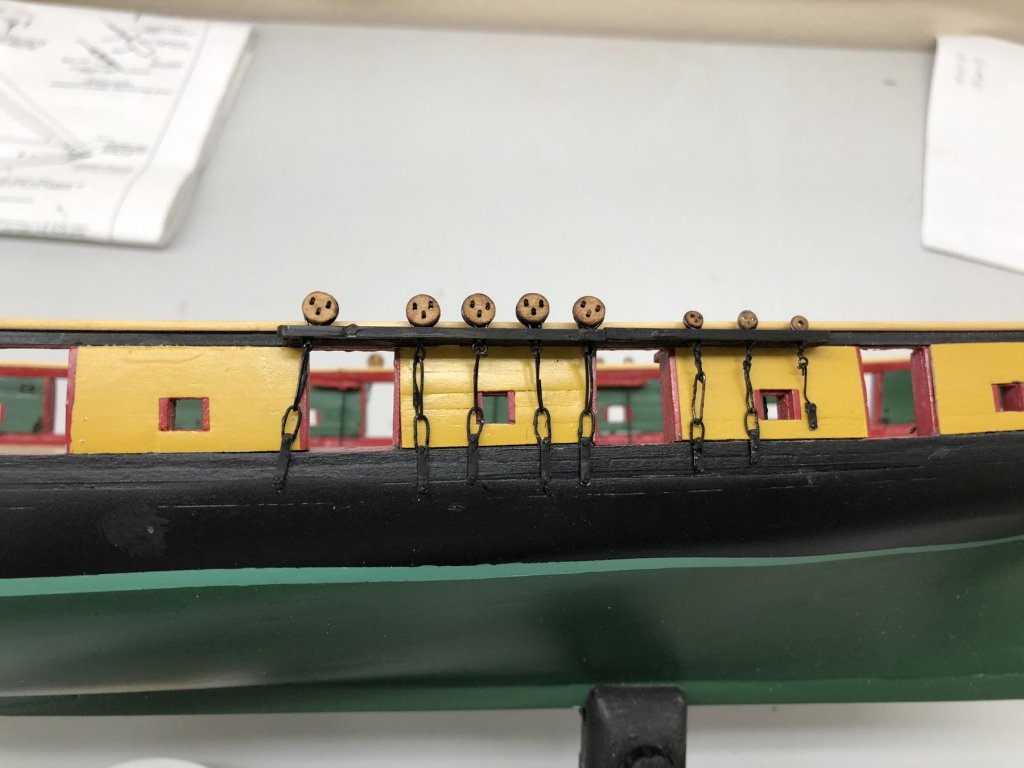
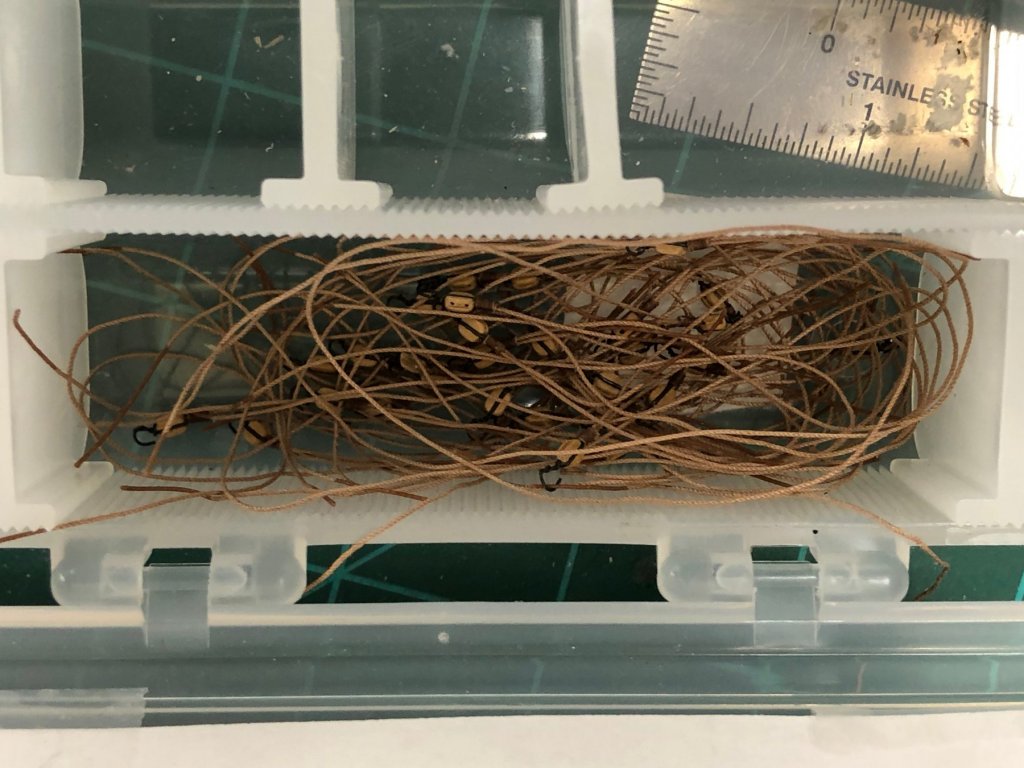
I got all the quoins fabbed and am waiting for the paint to dry. Worked on the train tackles and the carronade platforms. I got all the port side carronade platforms outfitted and ready for installation. I spent most of my time "Pre-rigging" the train tackles. I had such a hard time with the one I did "on the fly" that I wanted to make sure they were all rigged in the same manner. For my tackles, the hook opening on the blocks should be on the bottom and the line should enter the top of the double block, the bottom of the single block and back in the top of the double so the exiting line is coming from the lower side of the double block. I rigged up twenty sets and have them hanging from eyebolts over the workbench. (see photo below). I plan on leaving them there overnight so (hopefully) they will not want to get all twisted up when I install them. One question for those who have been here before - did you glue the platforms down to the waterway and/or deck before you rigged the tackles of wait until you had everything secured?

- 367 replies
-
- 4
-
-
- model shipways
- niagara
- (and 1 more)
-
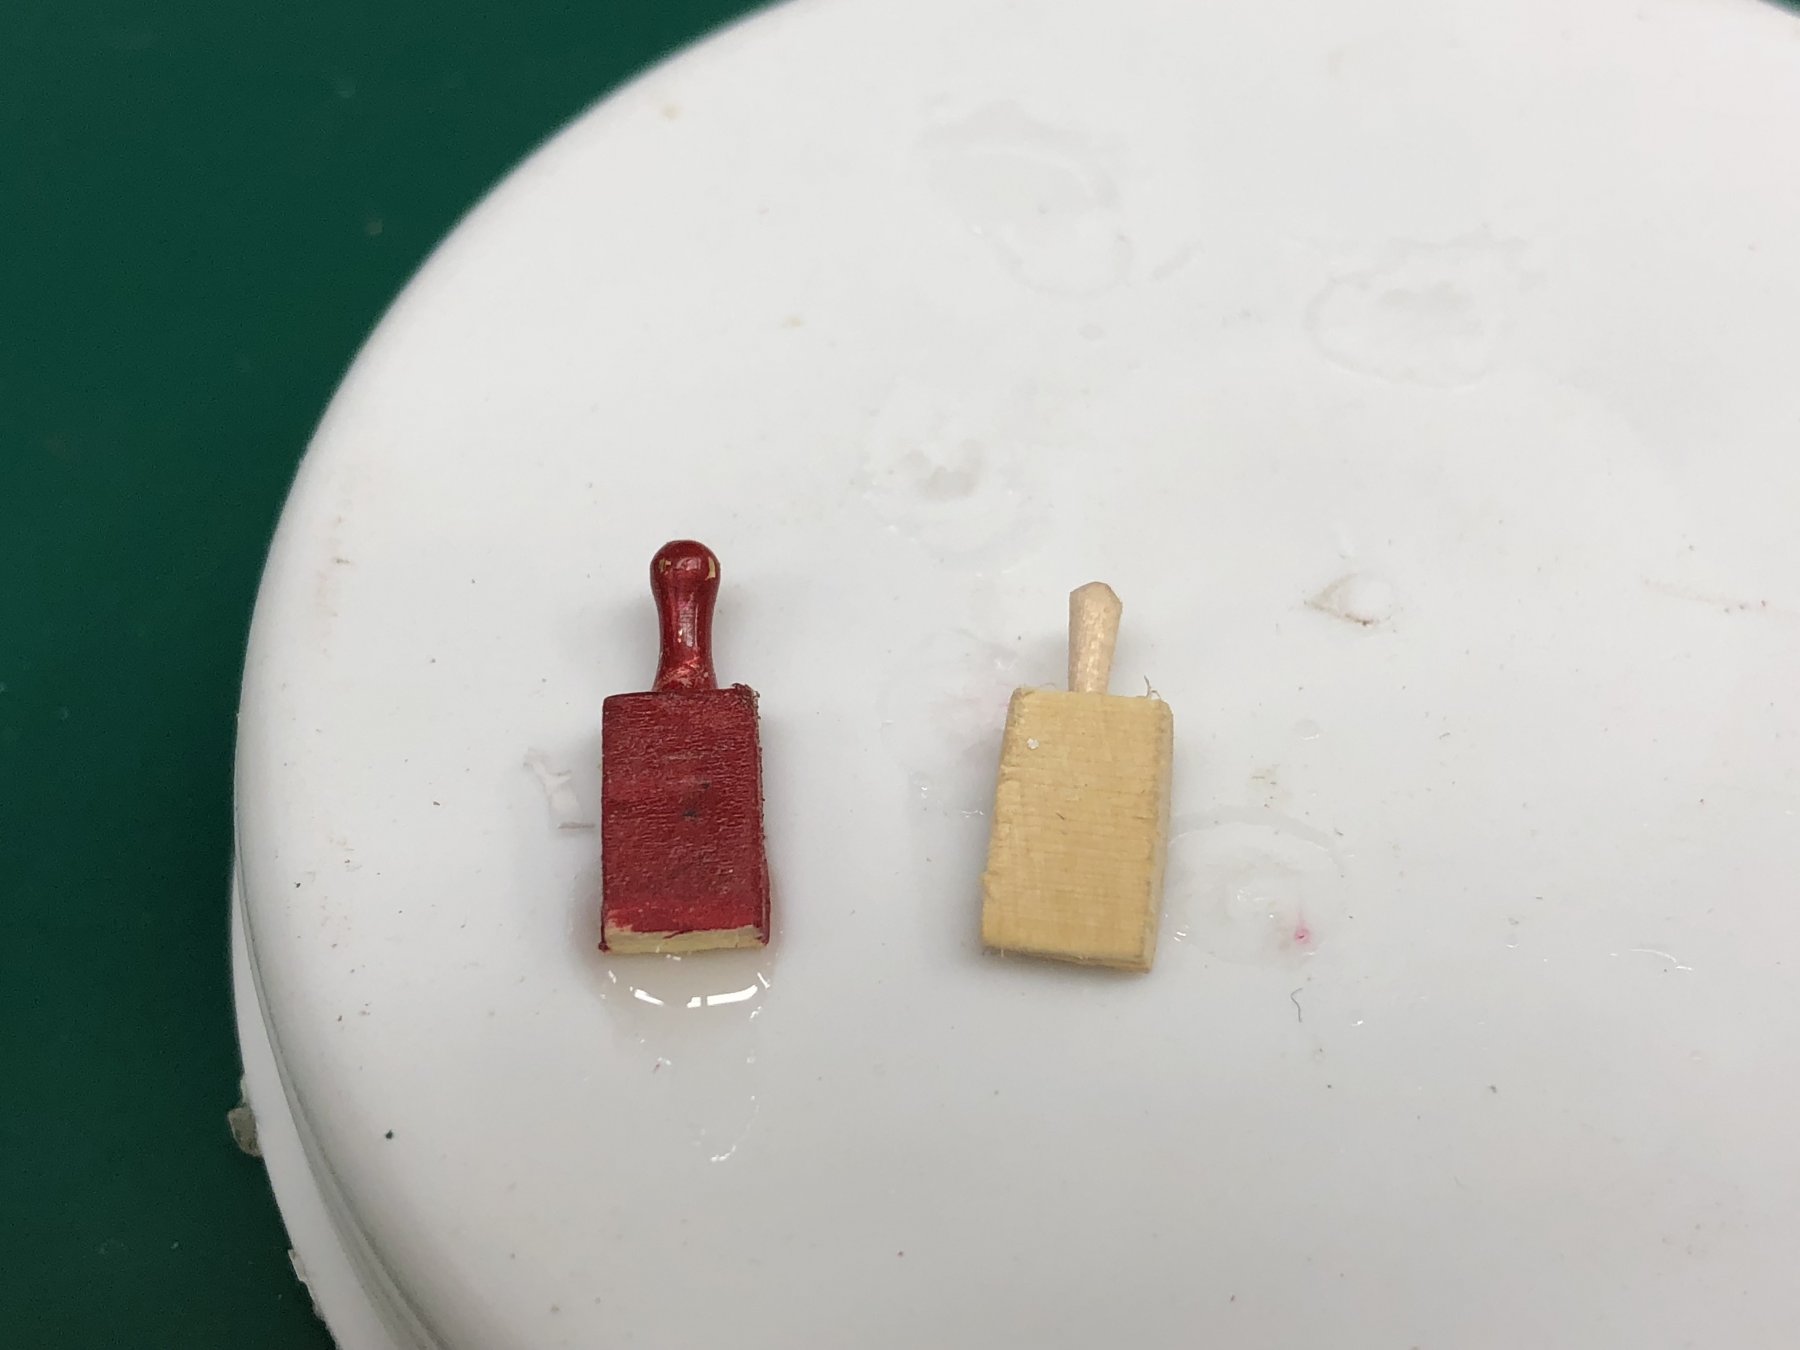
After what seemed like hours of struggle I finally got the first carronade platform in place and rigged. My intention is to rig all the platforms first and then add the guns. To make sure everything was going to fit I did assemble one gun and check fit it. That is when I realized that I had not made any of the quoins yet. I had intended to use the kit supplied belaying pins as the quoin handle but the hole required was so big it tended to split the wood so I cut the pin off and just used the handle. I got one assembled and painted but when installed on the gun the handle was way out of scale. My solution was to first drill a small, shallow hole (#72) in the quoin face then then make a larger (#62) but still fairly shallow hole and CA the end of a round toothpick in the hole and then cut and sand the toothpick to serve as the handle. You can see the difference in the picture below. I had to glue the one with the belaying pin down as the pin weighs much more than the wood part.

- 367 replies
-
- 4
-
-
- model shipways
- niagara
- (and 1 more)
-
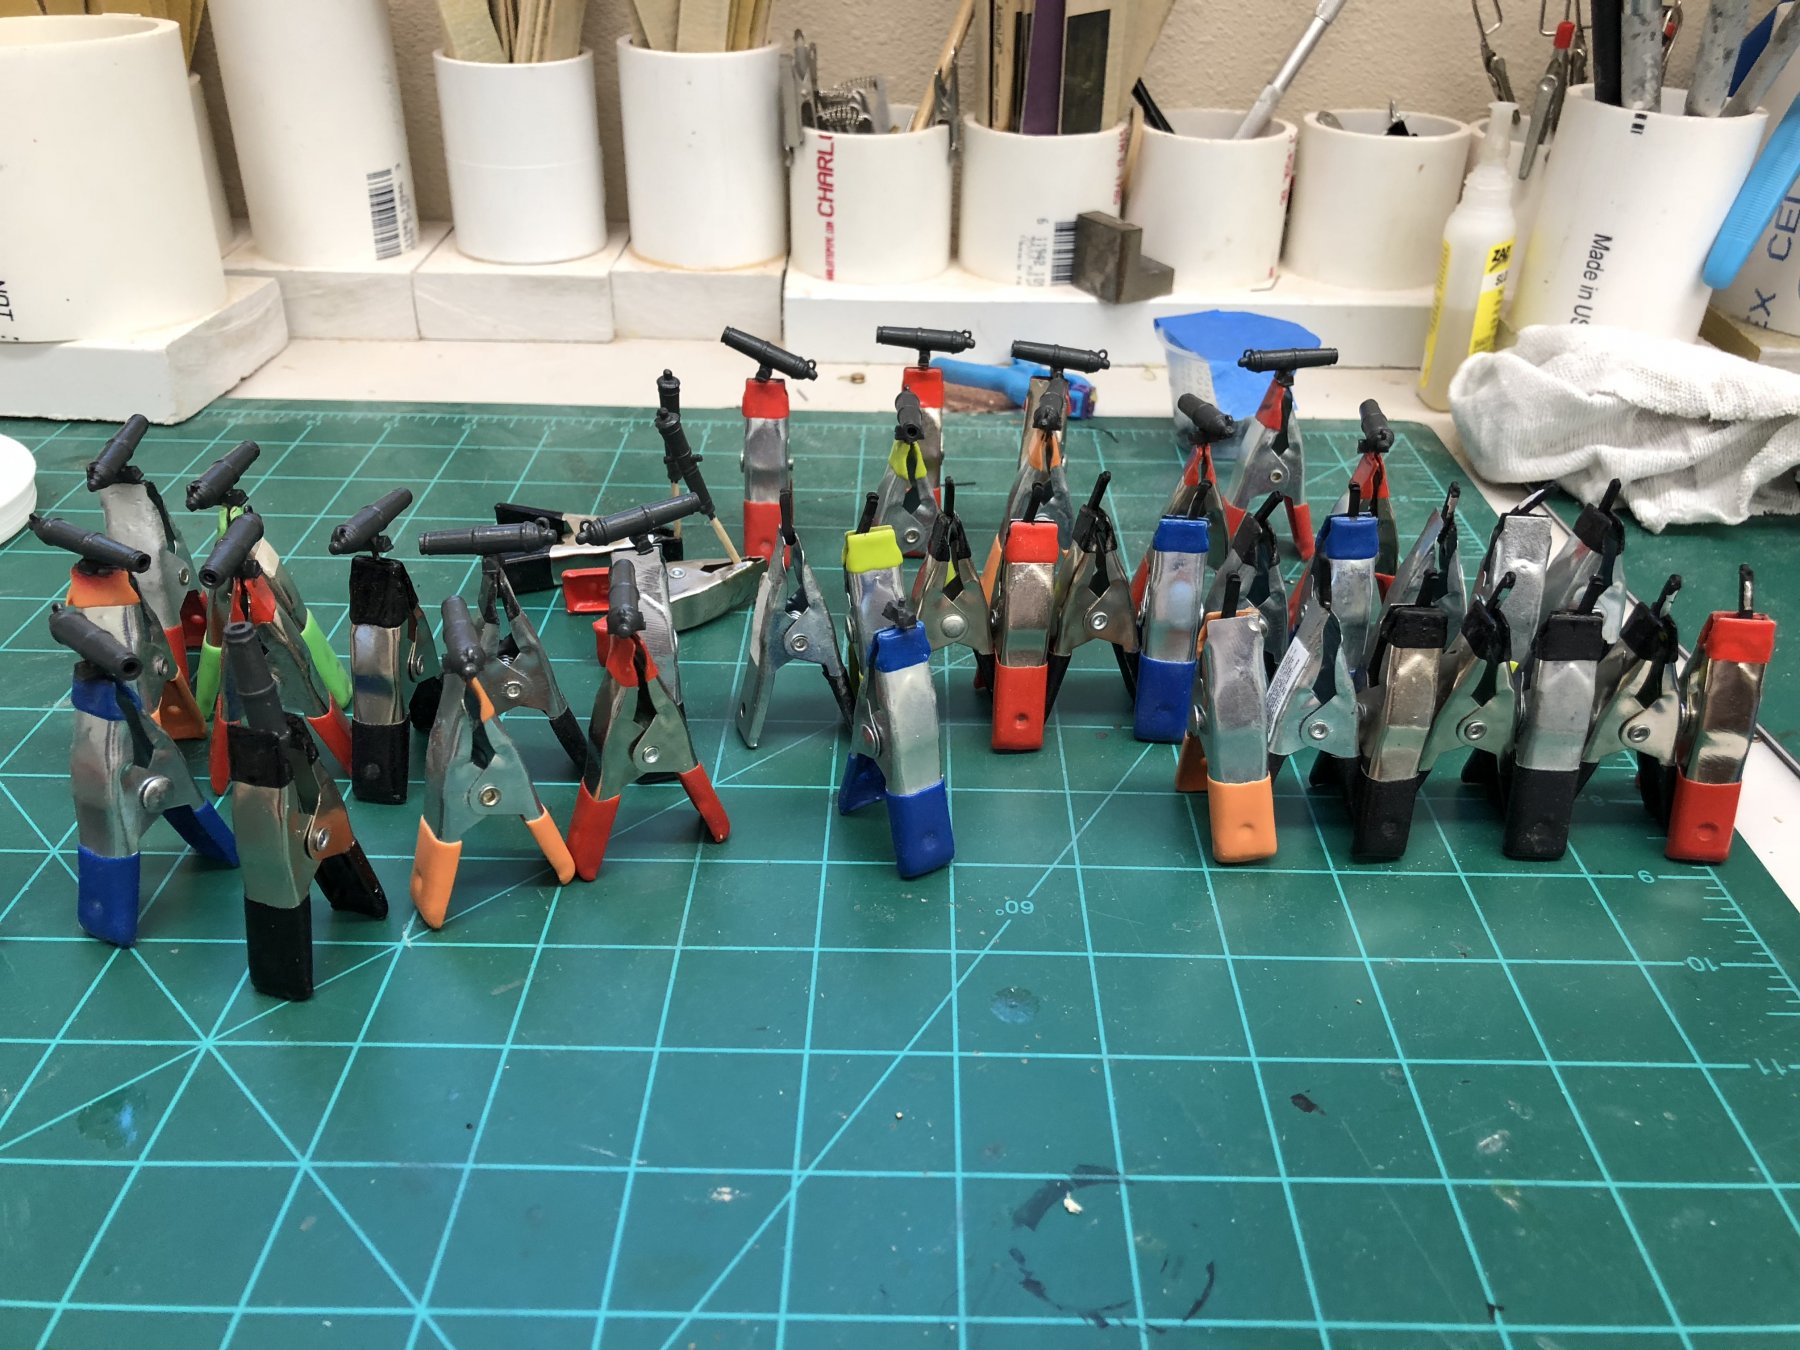
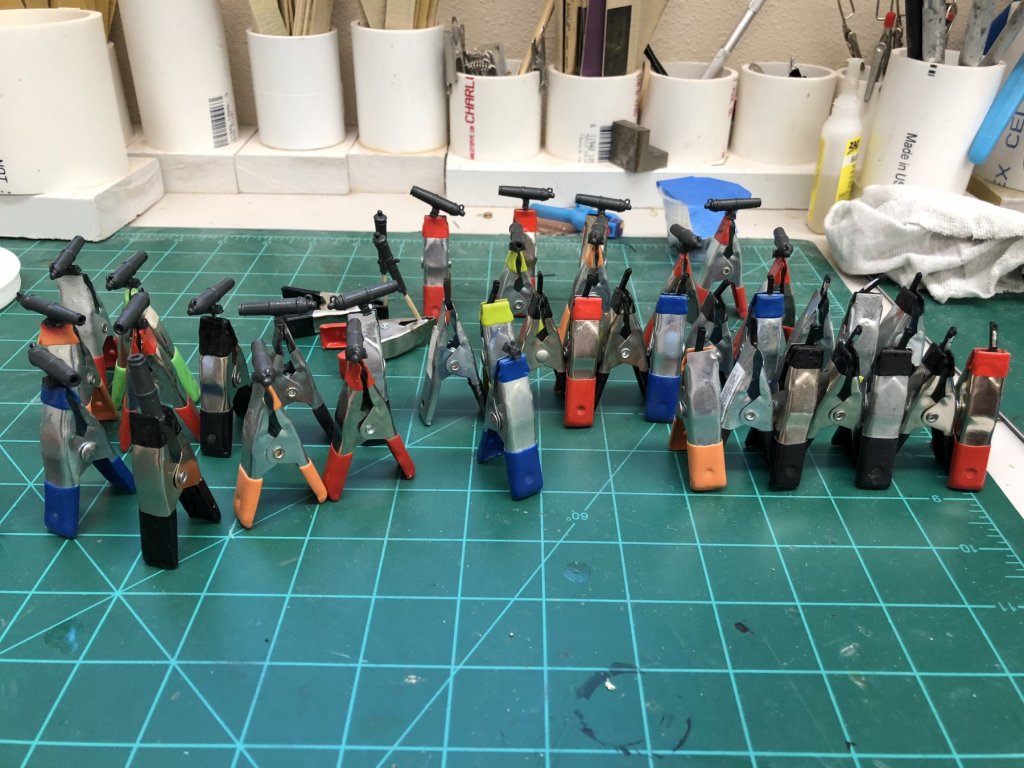
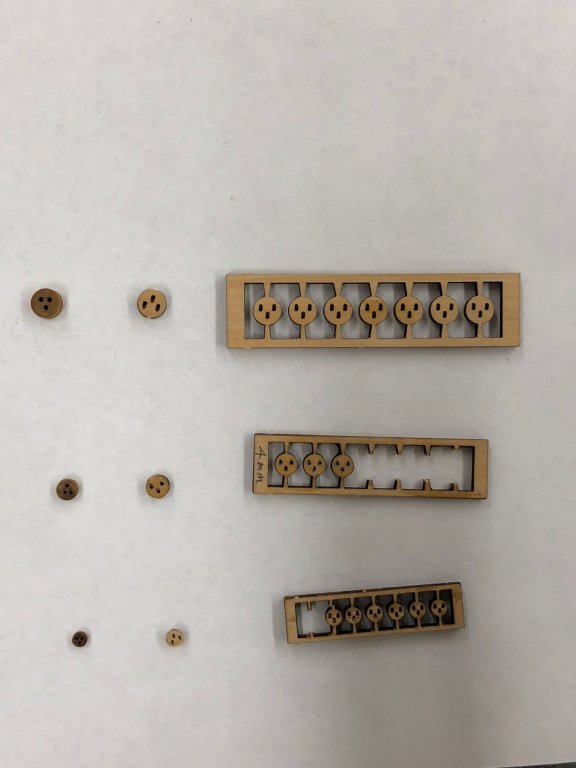
Working on setting up a production line for the carronades. Have all the carronades themselves painted (a "Dirty black" according to the bottle - looks like gray to me) with the mounting lug epoxied to the barrel. Painted all the rear "wheels" flat black and sprayed all the wood pieces red. Probably need to make some more eyebolts as each carronade needs seven (two gun tackle, two train tackle, two breech line and one outhaul tackle).
- 367 replies
-
- 2
-
-
- model shipways
- niagara
- (and 1 more)
-
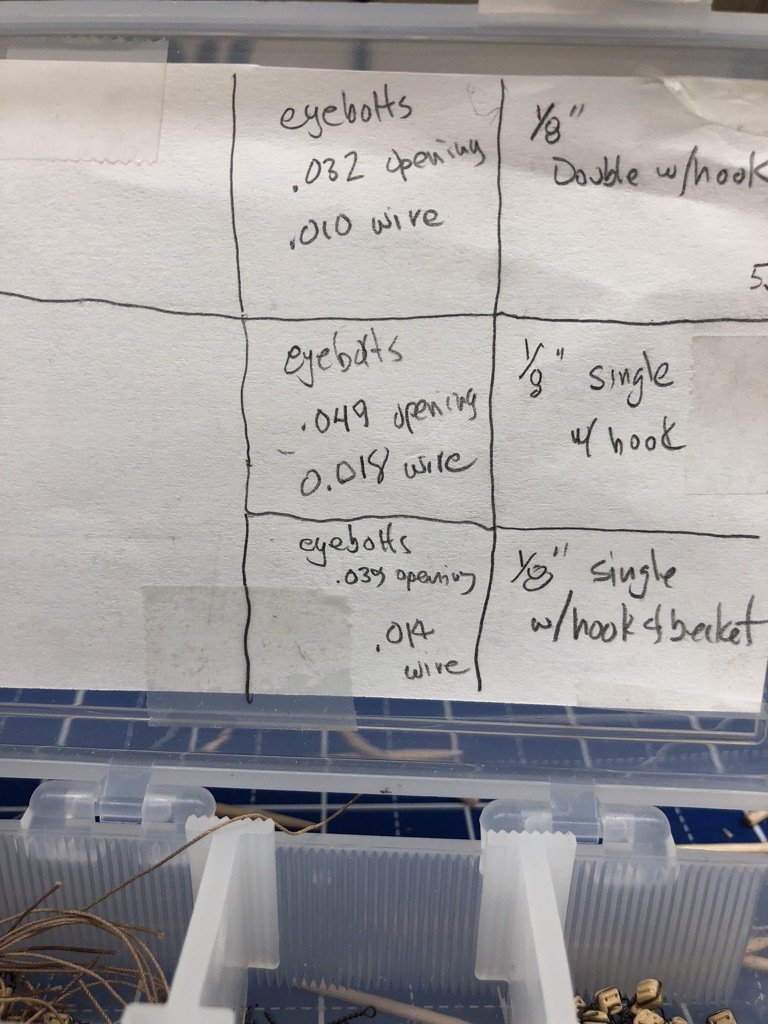
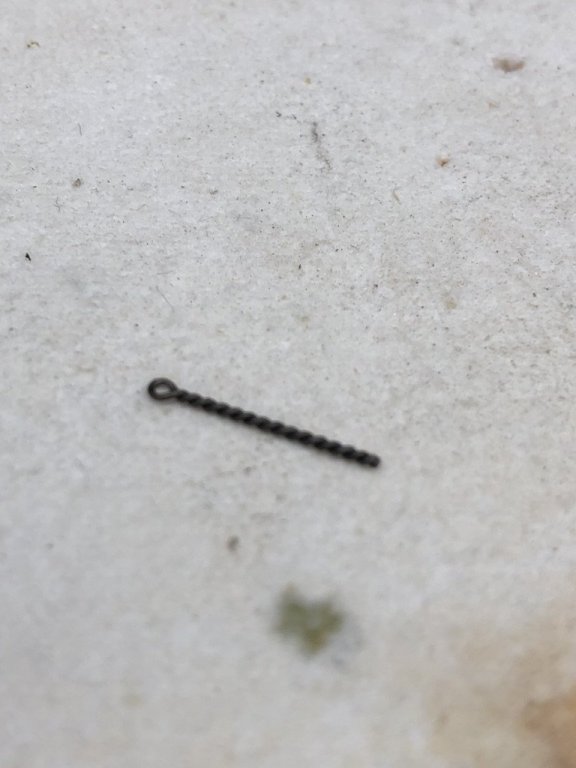
Bigcreek, As you can see below I used three different sizes of wire for eyebolts. The ones in the picture are with .010 (aka 34 gauge) annealed steel wire. I used a piece of piano wire in the sizes noted to size the eye opening. I twisted up a bunch while watching football.

- 367 replies
-
- 1
-
-
- model shipways
- niagara
- (and 1 more)
-
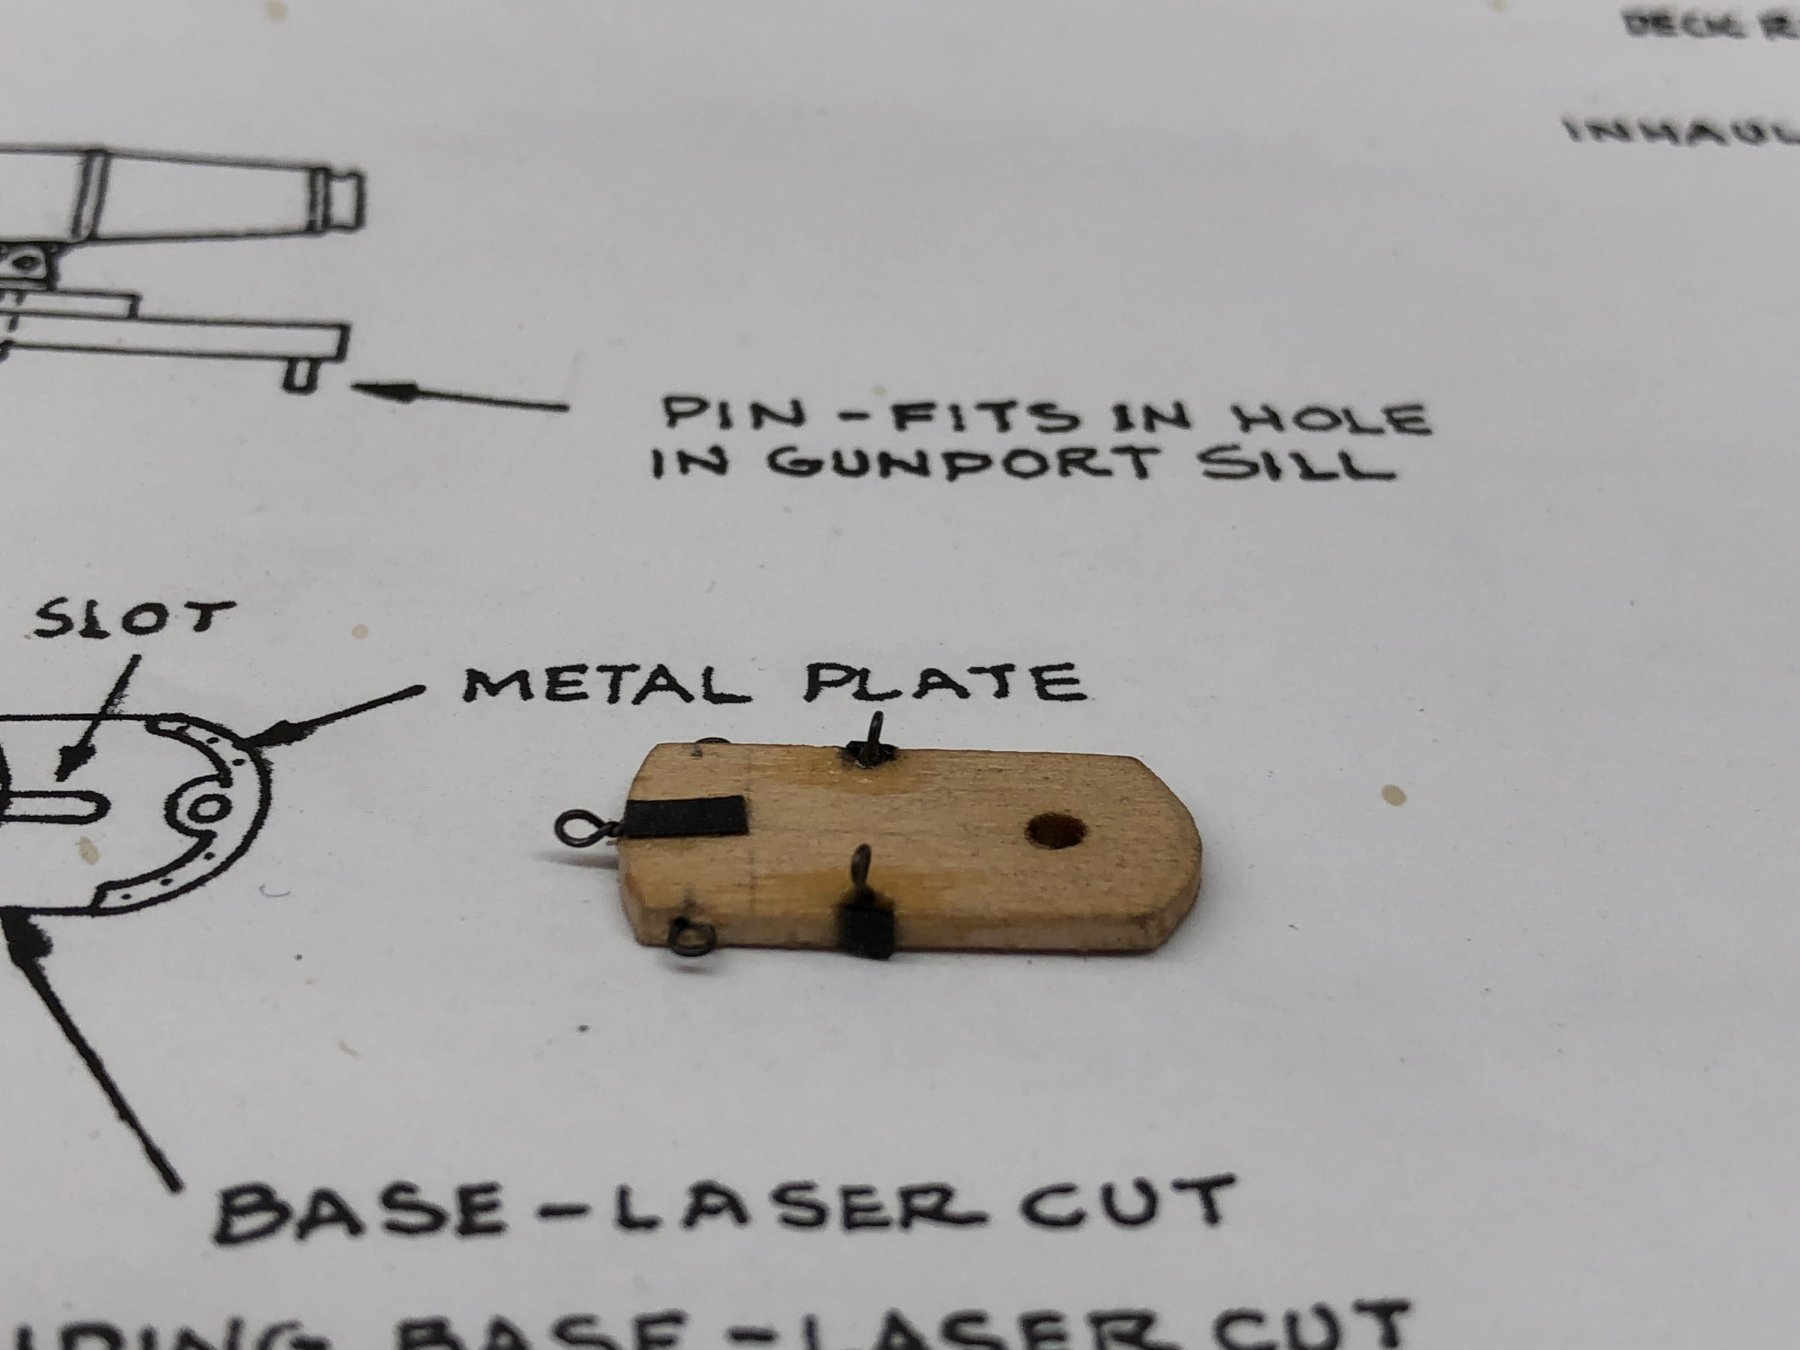
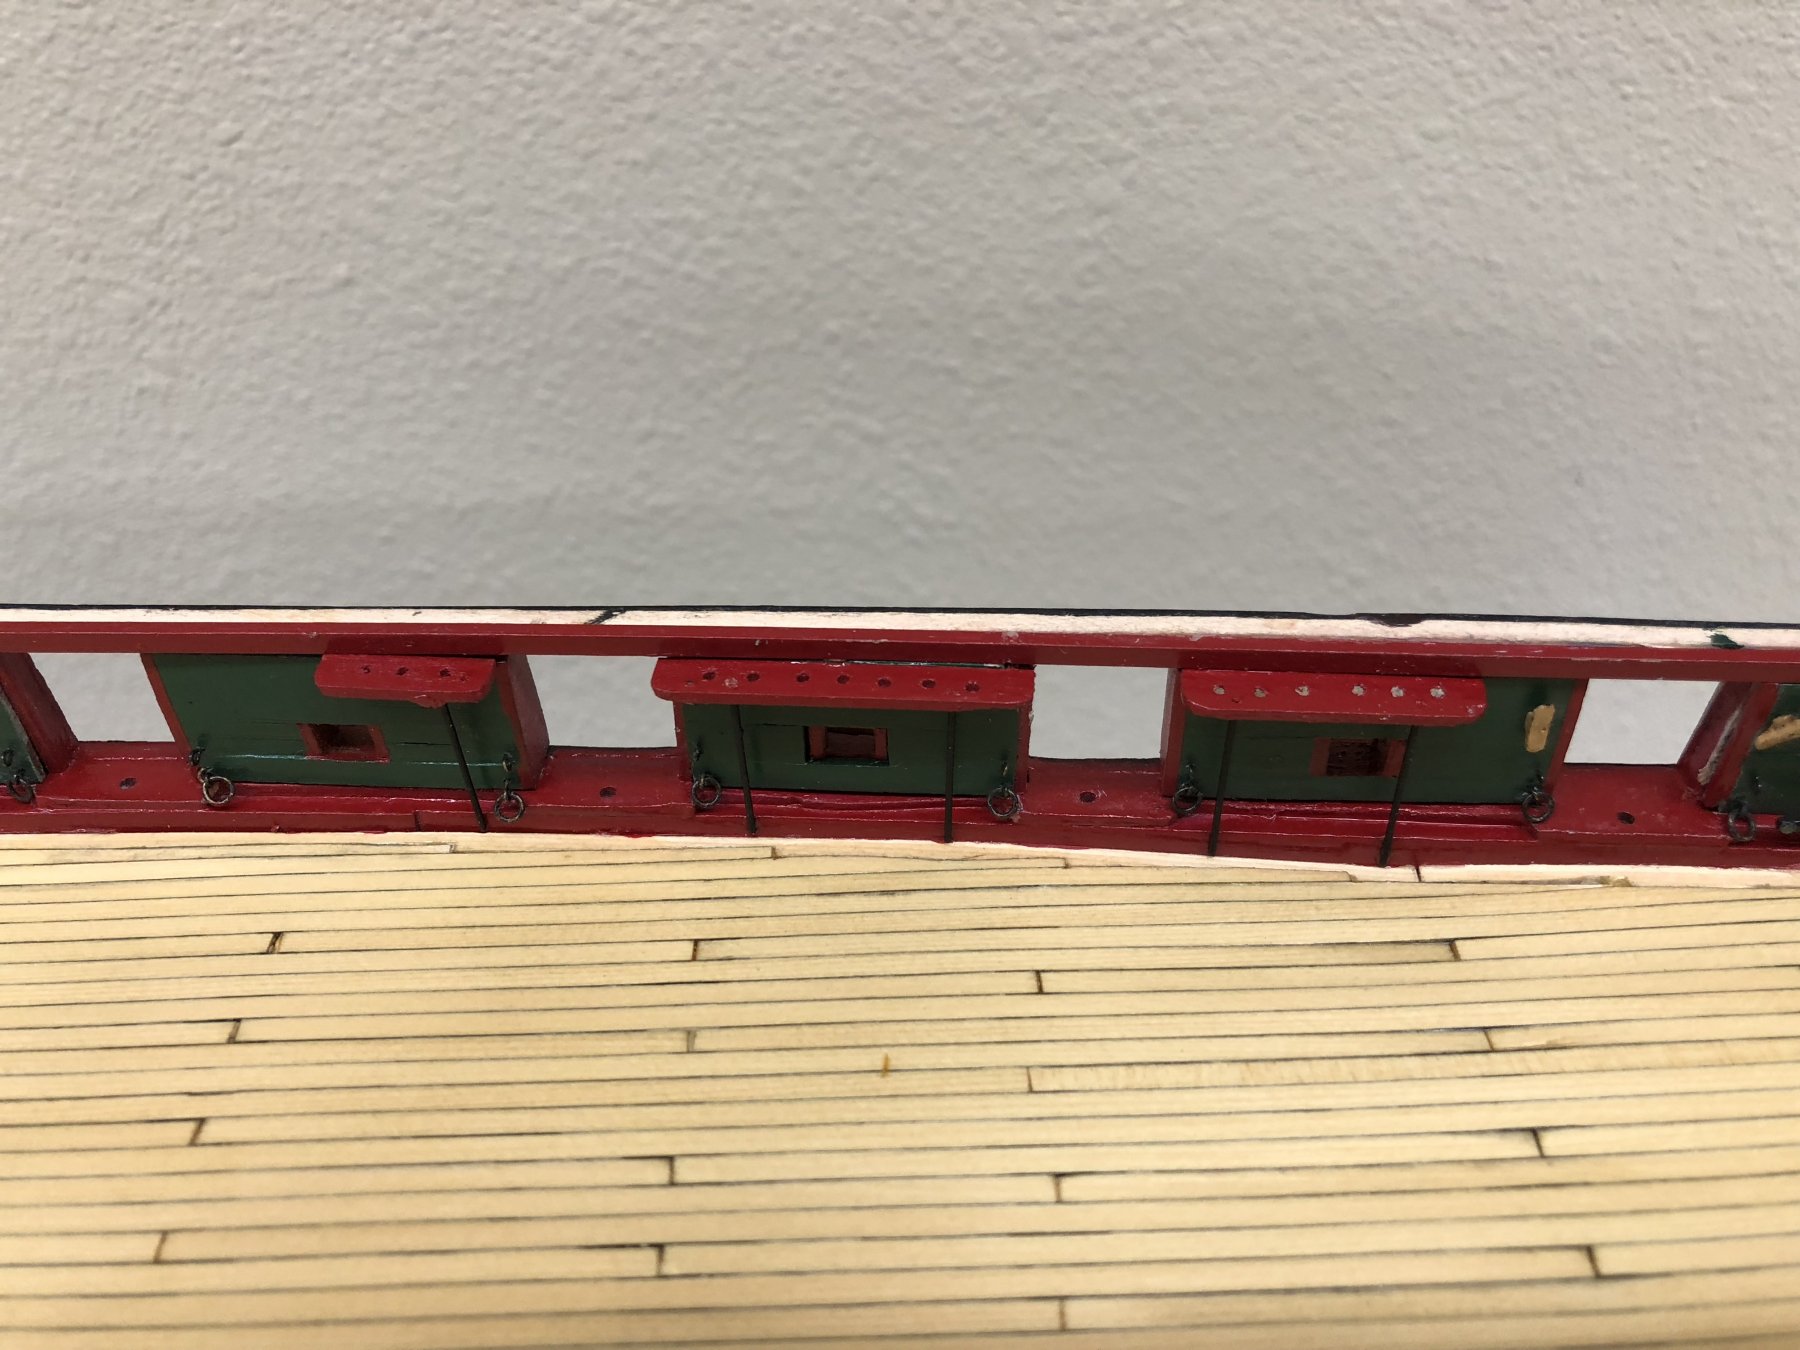
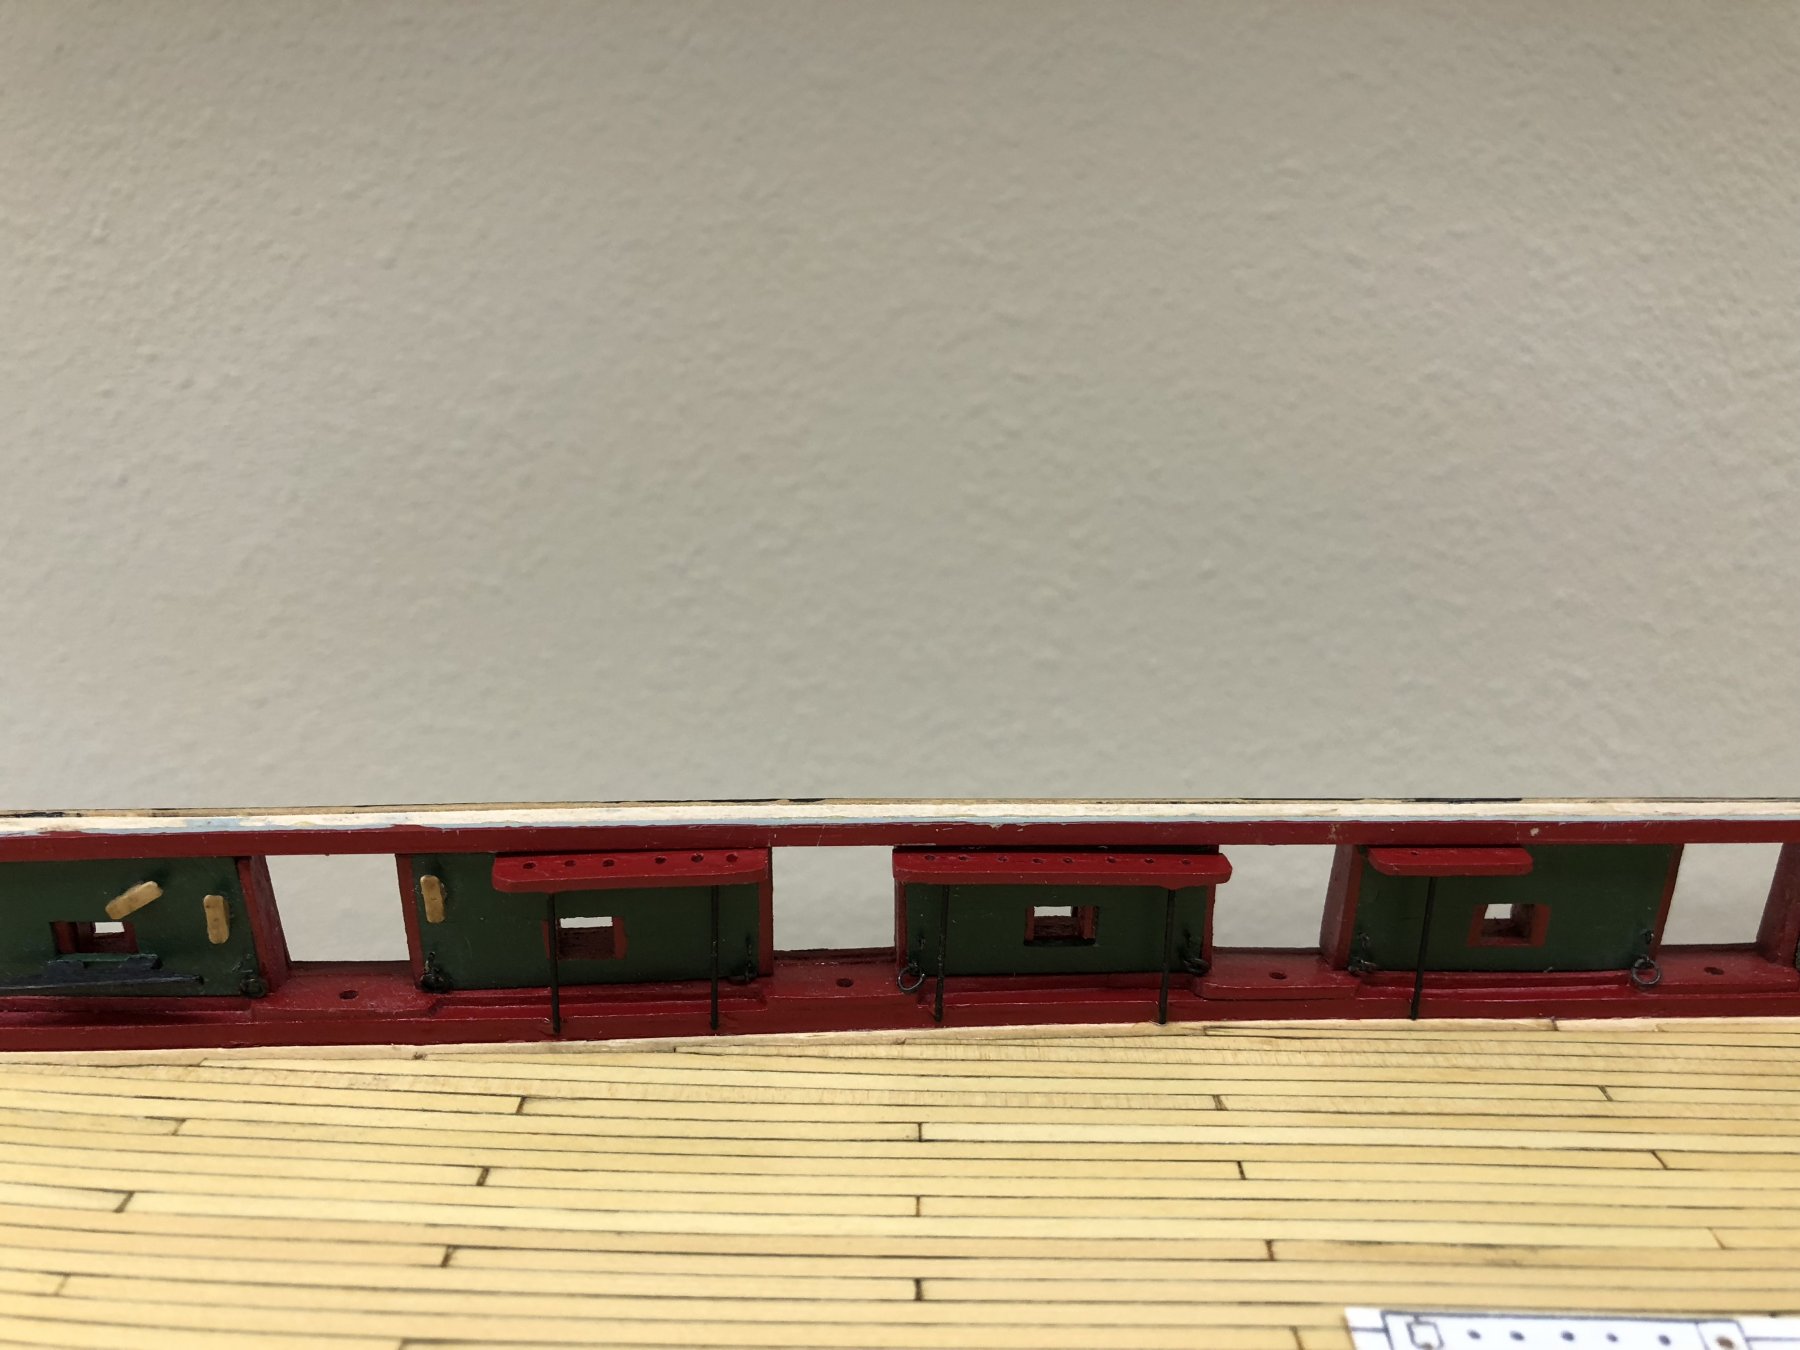
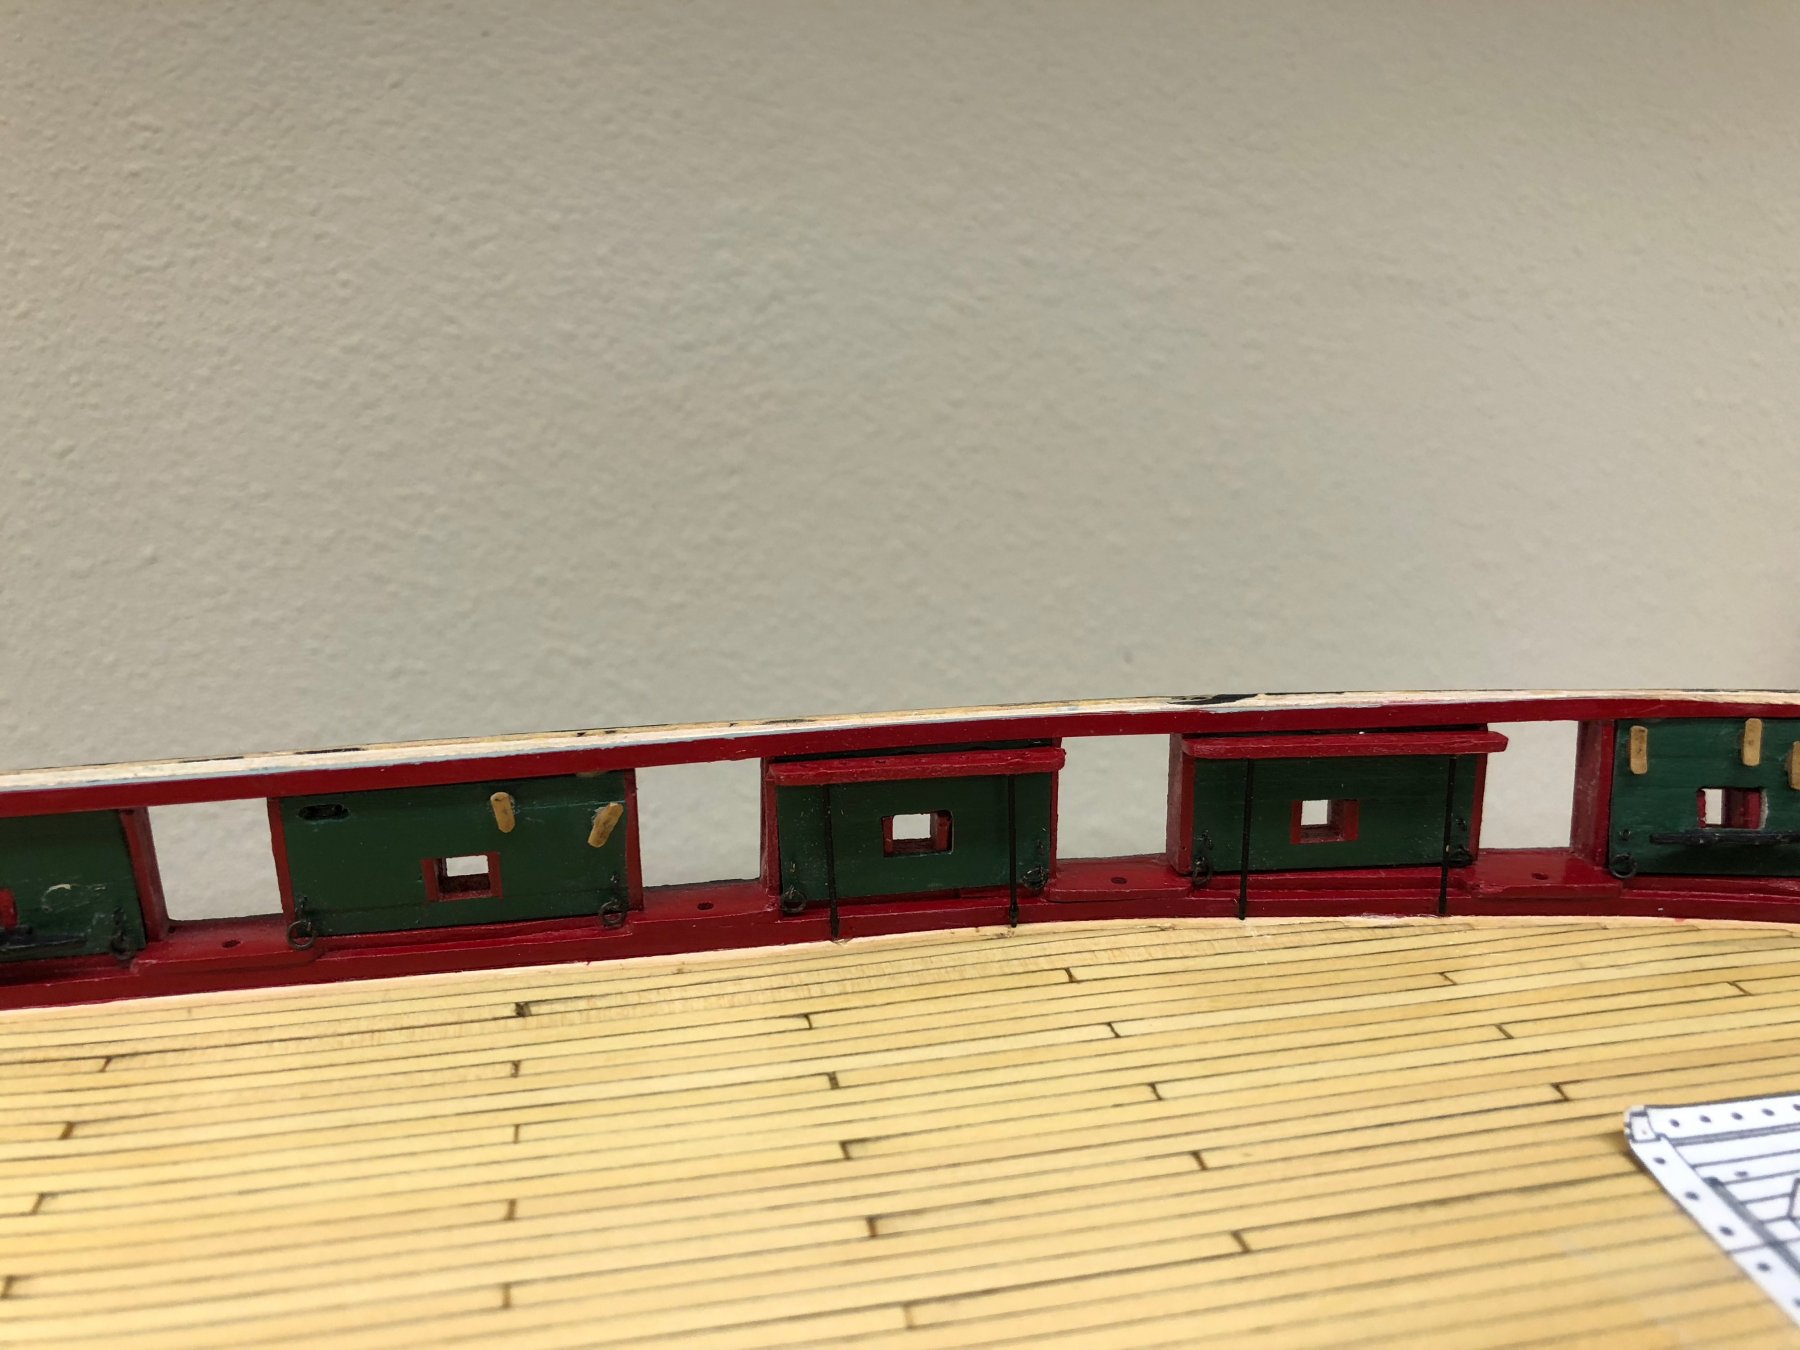
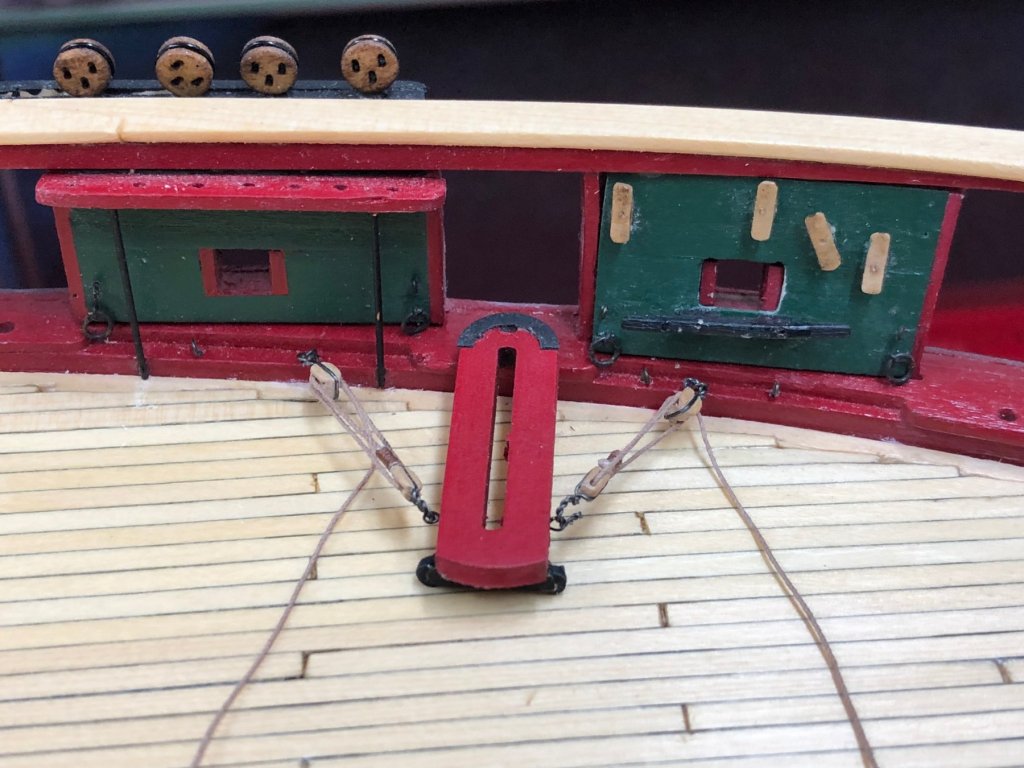
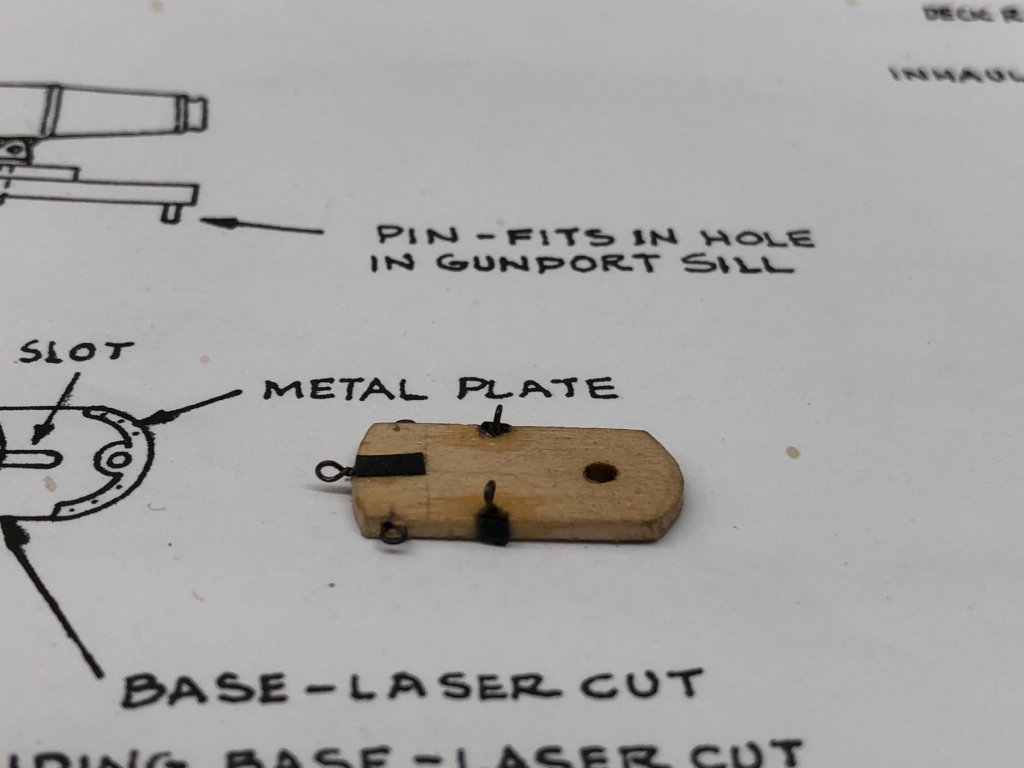
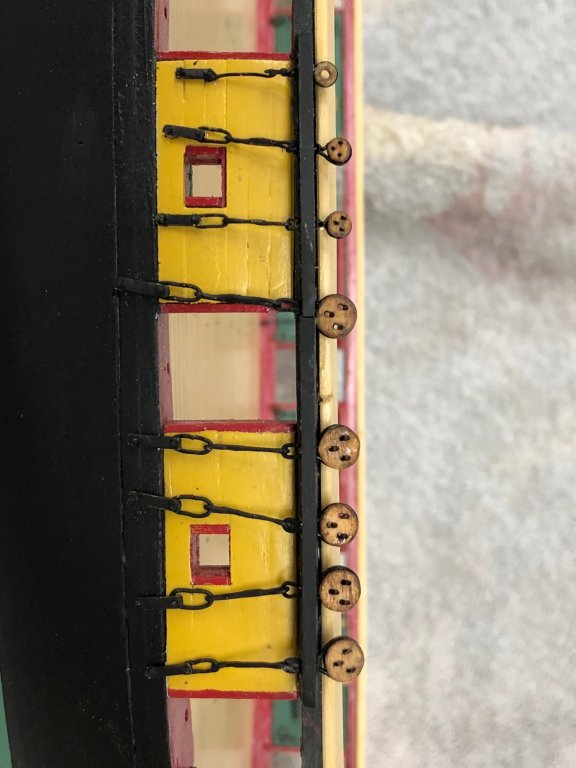
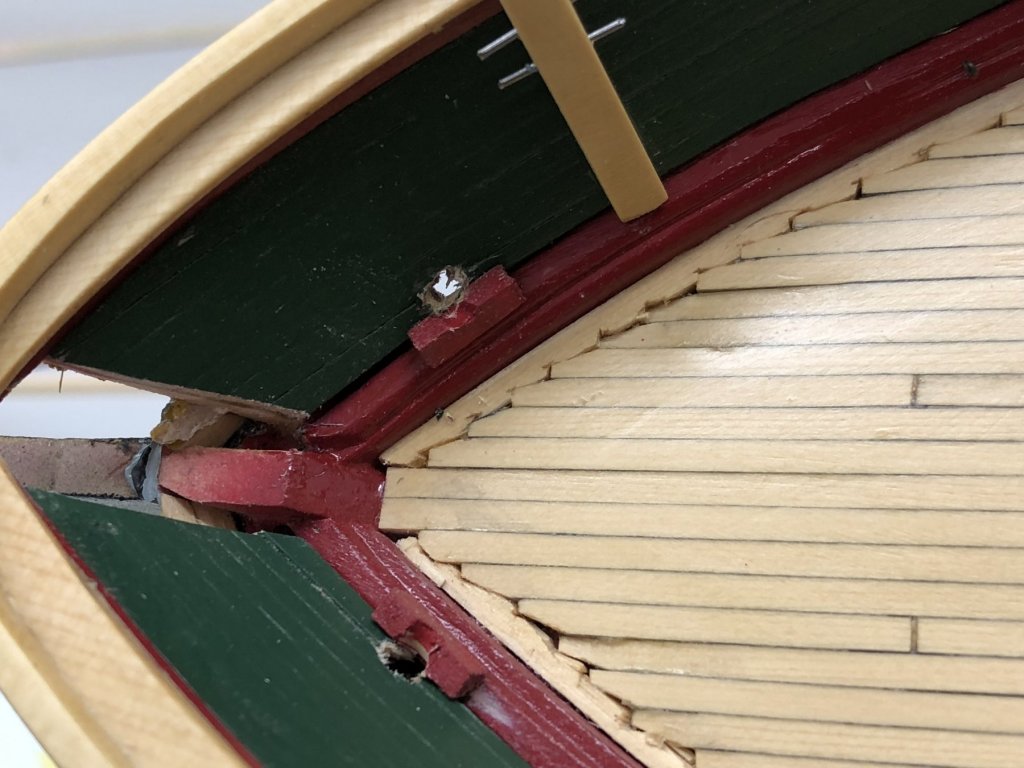
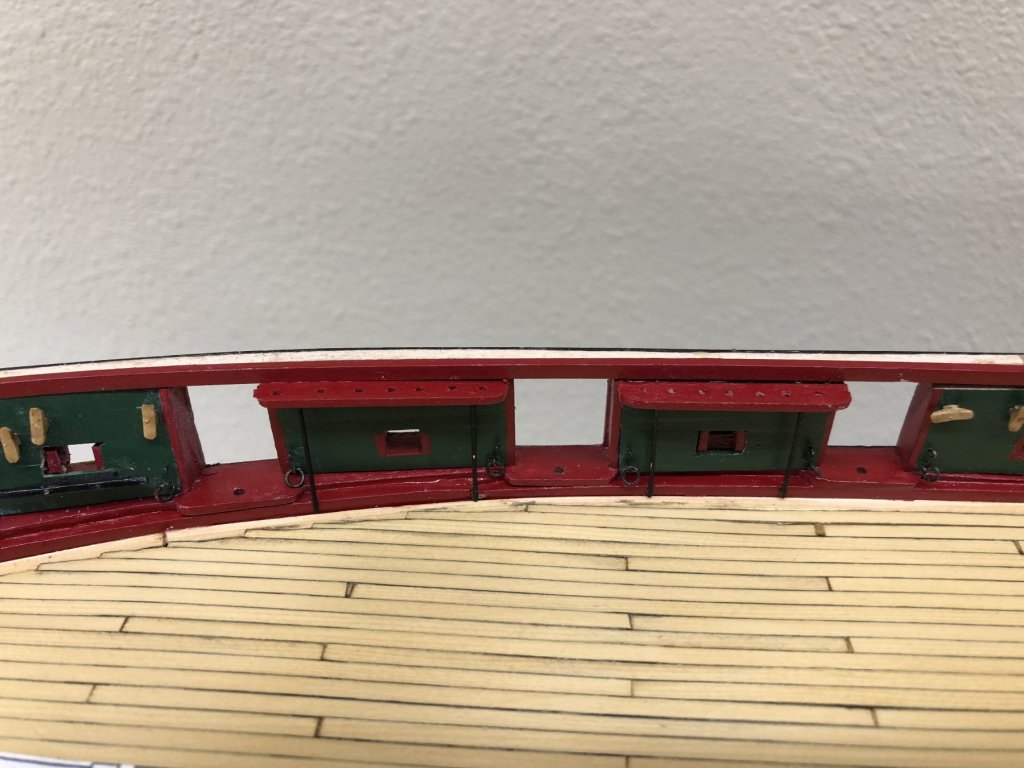
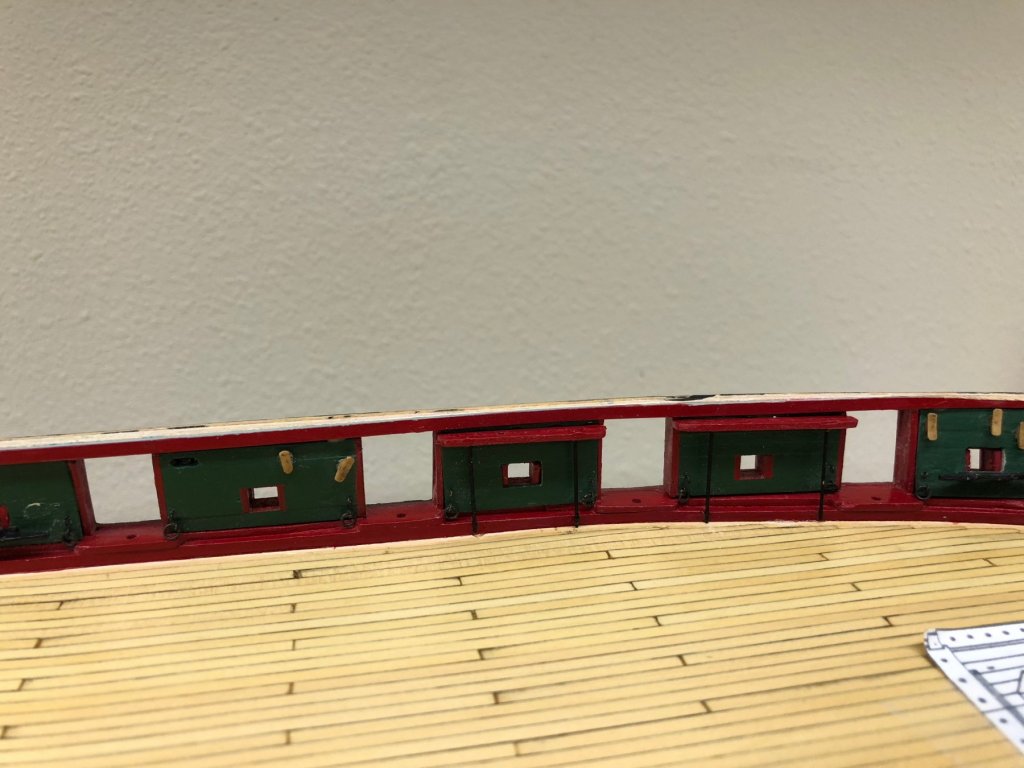
With the hull mostly complete I started putting together the pieces needed to build the carronade platforms. I am not much of a metal worker so the curved plates at the front of the platform were enough to convince me to "find another way". I got some "Laserboard" from a vendor in Arkansas that is 0.011" thick and black in color. Now to make it fit the carronade platform. I used a metal punch to cut a 1/4" hole in the laserboard and then carefully positioned the small hole in the center of the 3/8" punch hole. Not that easy as the surface where the two halves of the punch join is at least a 1/4" deep inside what is really a pretty dark hole. Even with my magnifiers and dedicated light it was a challenge (not always met). I "cheated" and drew some registration lines and an outline of the 3/8" hole using a white pencil but even with that I made a few rings that were pretty obviously not centered. I think I made twelve sets (each ring produces two semi-circular pieces so covers two carronades) to get 18 acceptable pieces. Pictured below is the "production line" for these pieces. I also took one of the platforms and built a prototype of what the eighteen would look like to see if my idea of using the laserboard would here as well. The two gun tackle eyebolts were easy. For the inhaul eye plate and bolt I carefully filed a slot in the rear of the platform (after marking how long the plate should be). The grove was deep enough to make the eyebolt flush with the top of the platform. I cut a very small piece of the laserboard and used a very small drop of medium CA to glue it over the eyebolt. Seems to look okay so I located and installed the breech line plates and eyebolts in a similar fashion except here I filed a flat groove as wide as the laserboard and then used a small triangular file to put a "v" inside the flat groove to hold the eyebolt. I figured out it was much easier to use a much longer piece of the laserboard and then cut the excess off after the CA dried rather then trying to maneuver a very small piece into a pretty specific location and orientation. Pictured below is the prototype. Now all I have to do is eighteen more after I get the platforms painted.
- 367 replies
-
- 2
-
-
- model shipways
- niagara
- (and 1 more)
-
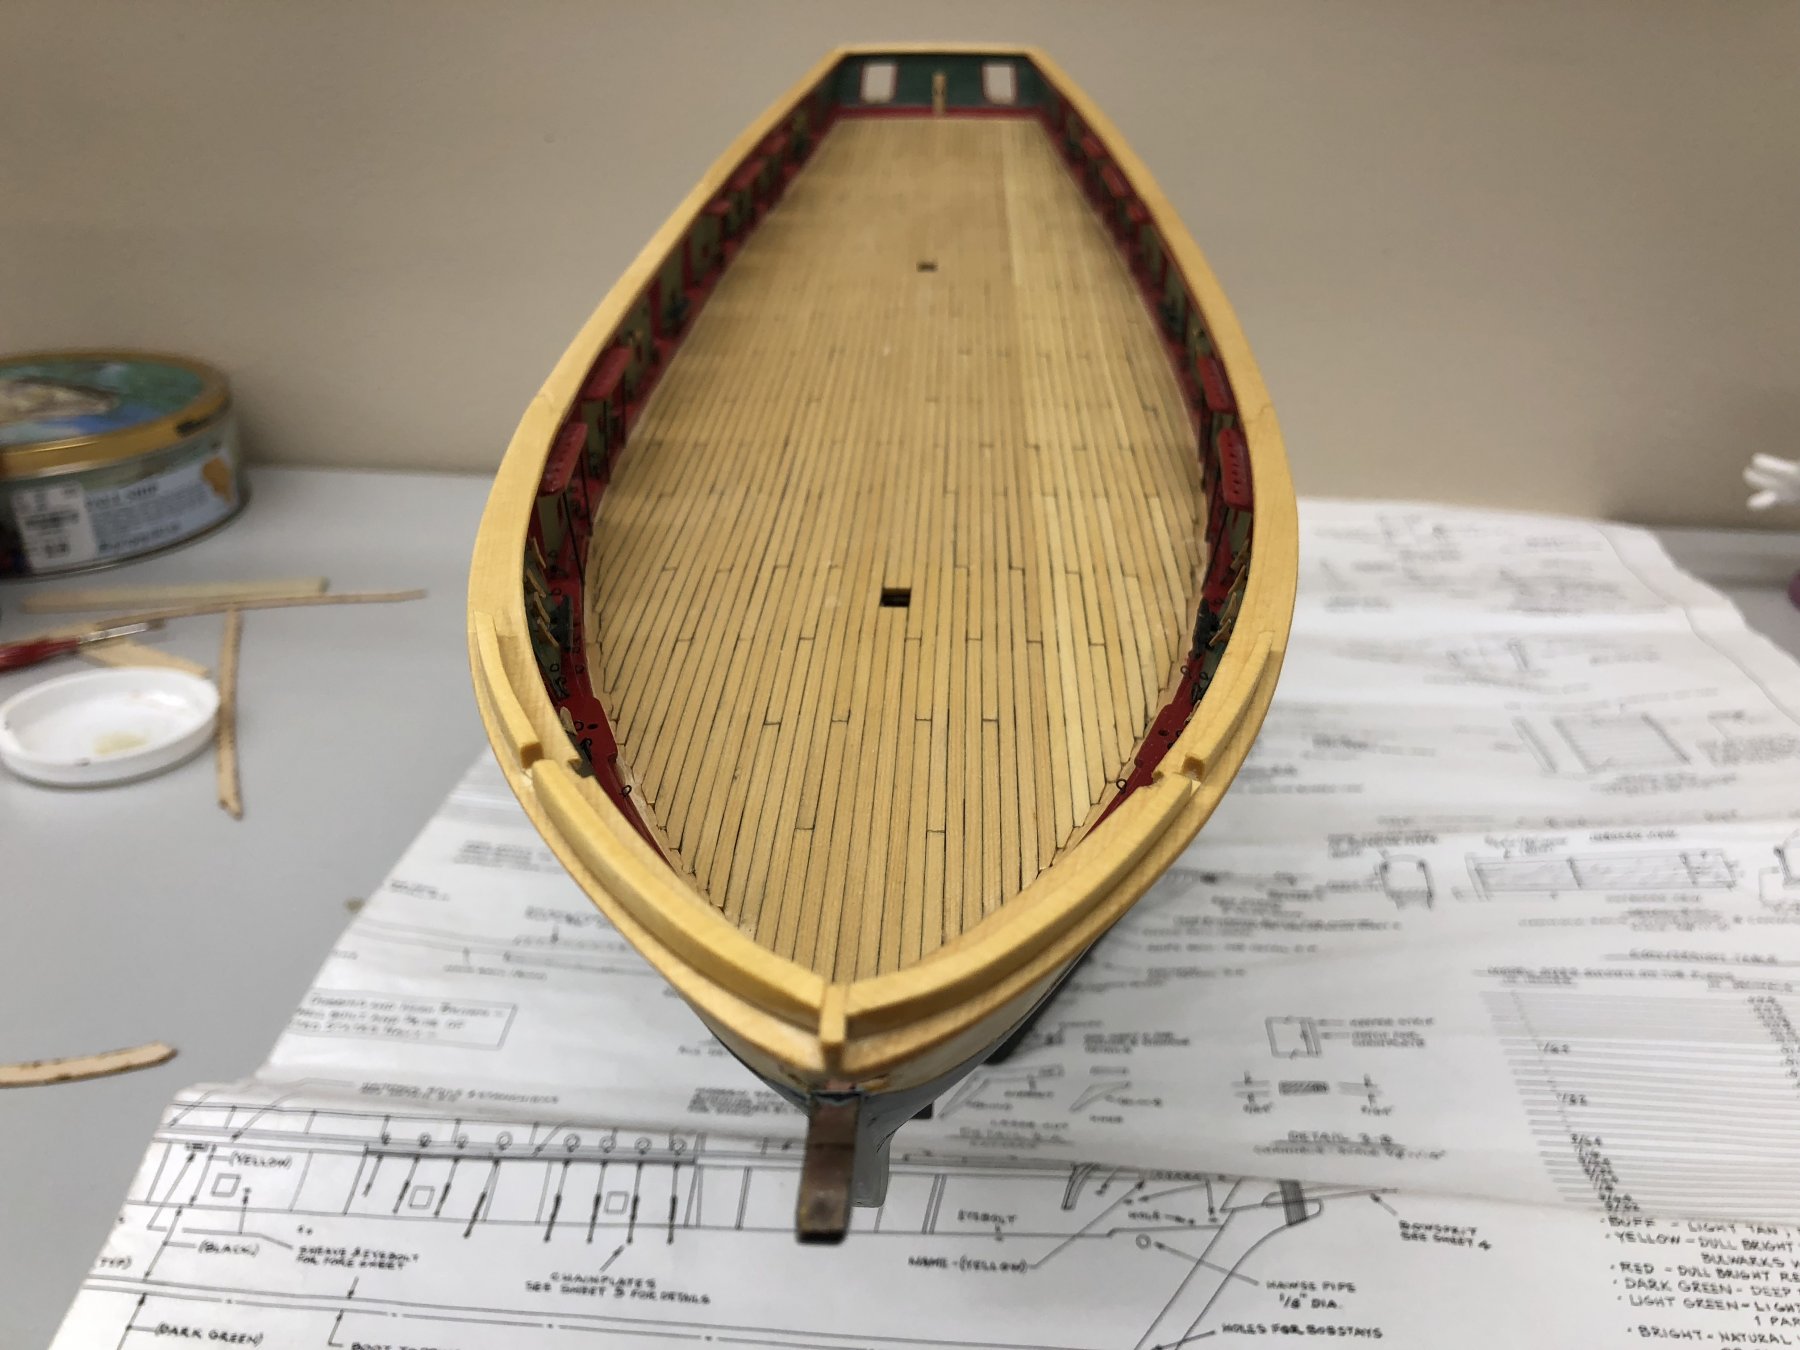
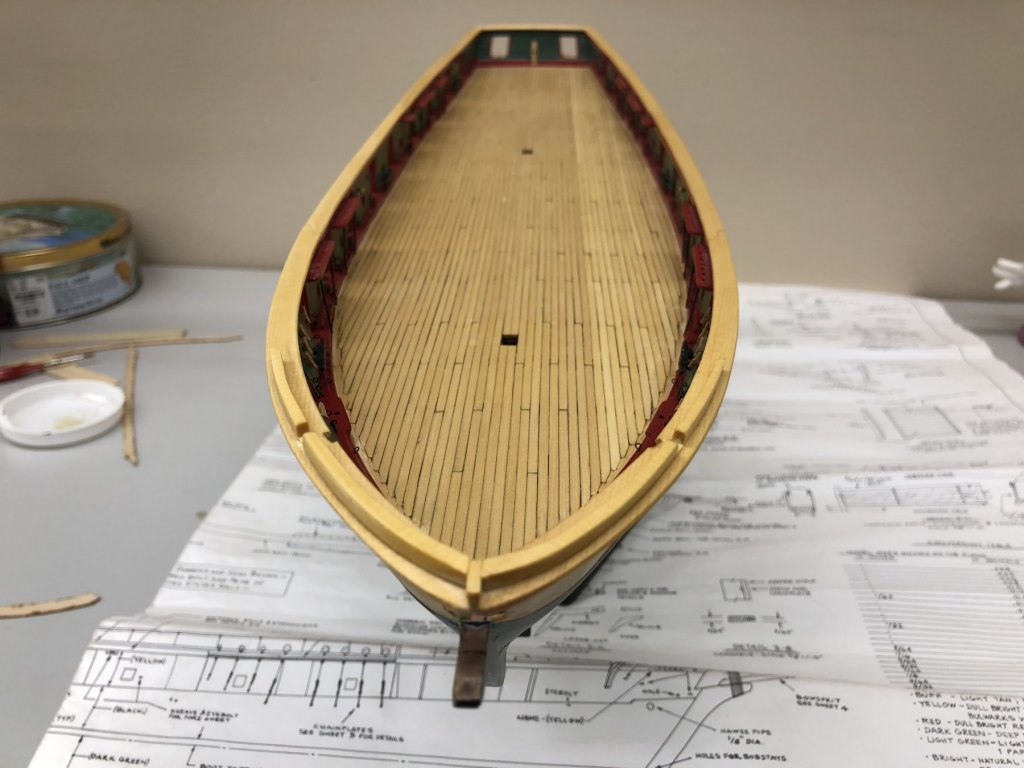
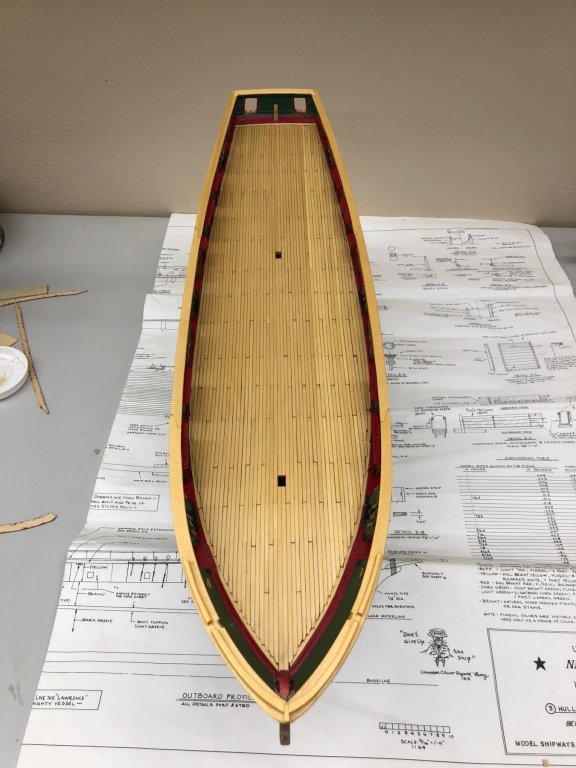
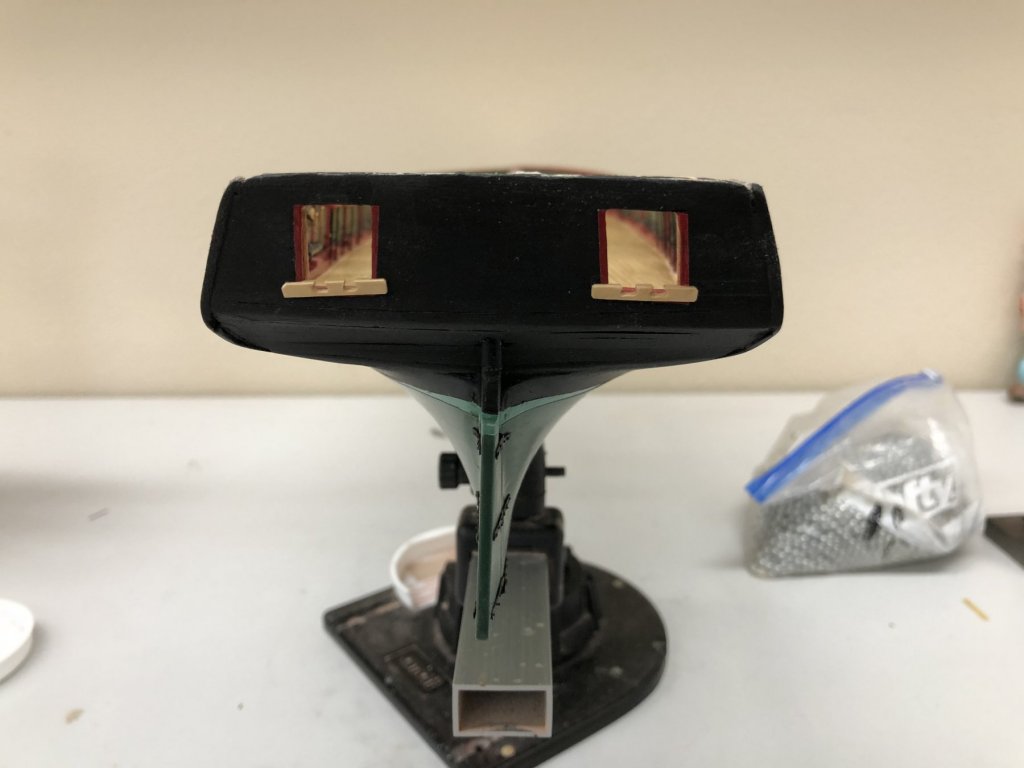
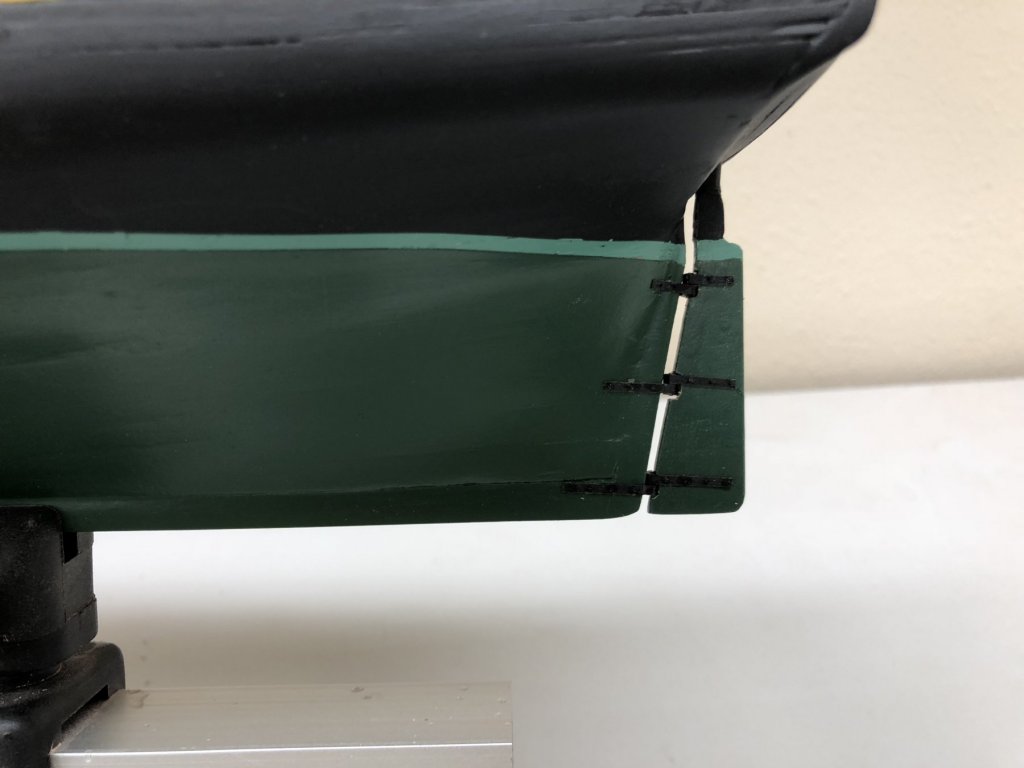
Channels are complete. Did not get the chainplates as even on the hull as I would have liked but... Have to add some additional eyebolts for the bowsprit stays, etc. but the hull and deck furniture are essentially compete. Moving on to the armament now. Think I will paint the guns, probably use a "dirty Black" which looks more like grey on the guns but seems more realistic than just flat black. I tried the pewter blackening agents but they come out more brown than black or grey. Working on the carriages and setting up a "production line" for the various things (eyebolts, metal strips, etc.) that need to be added to each carriage.

- 367 replies
-
- 2
-
-
- model shipways
- niagara
- (and 1 more)
-
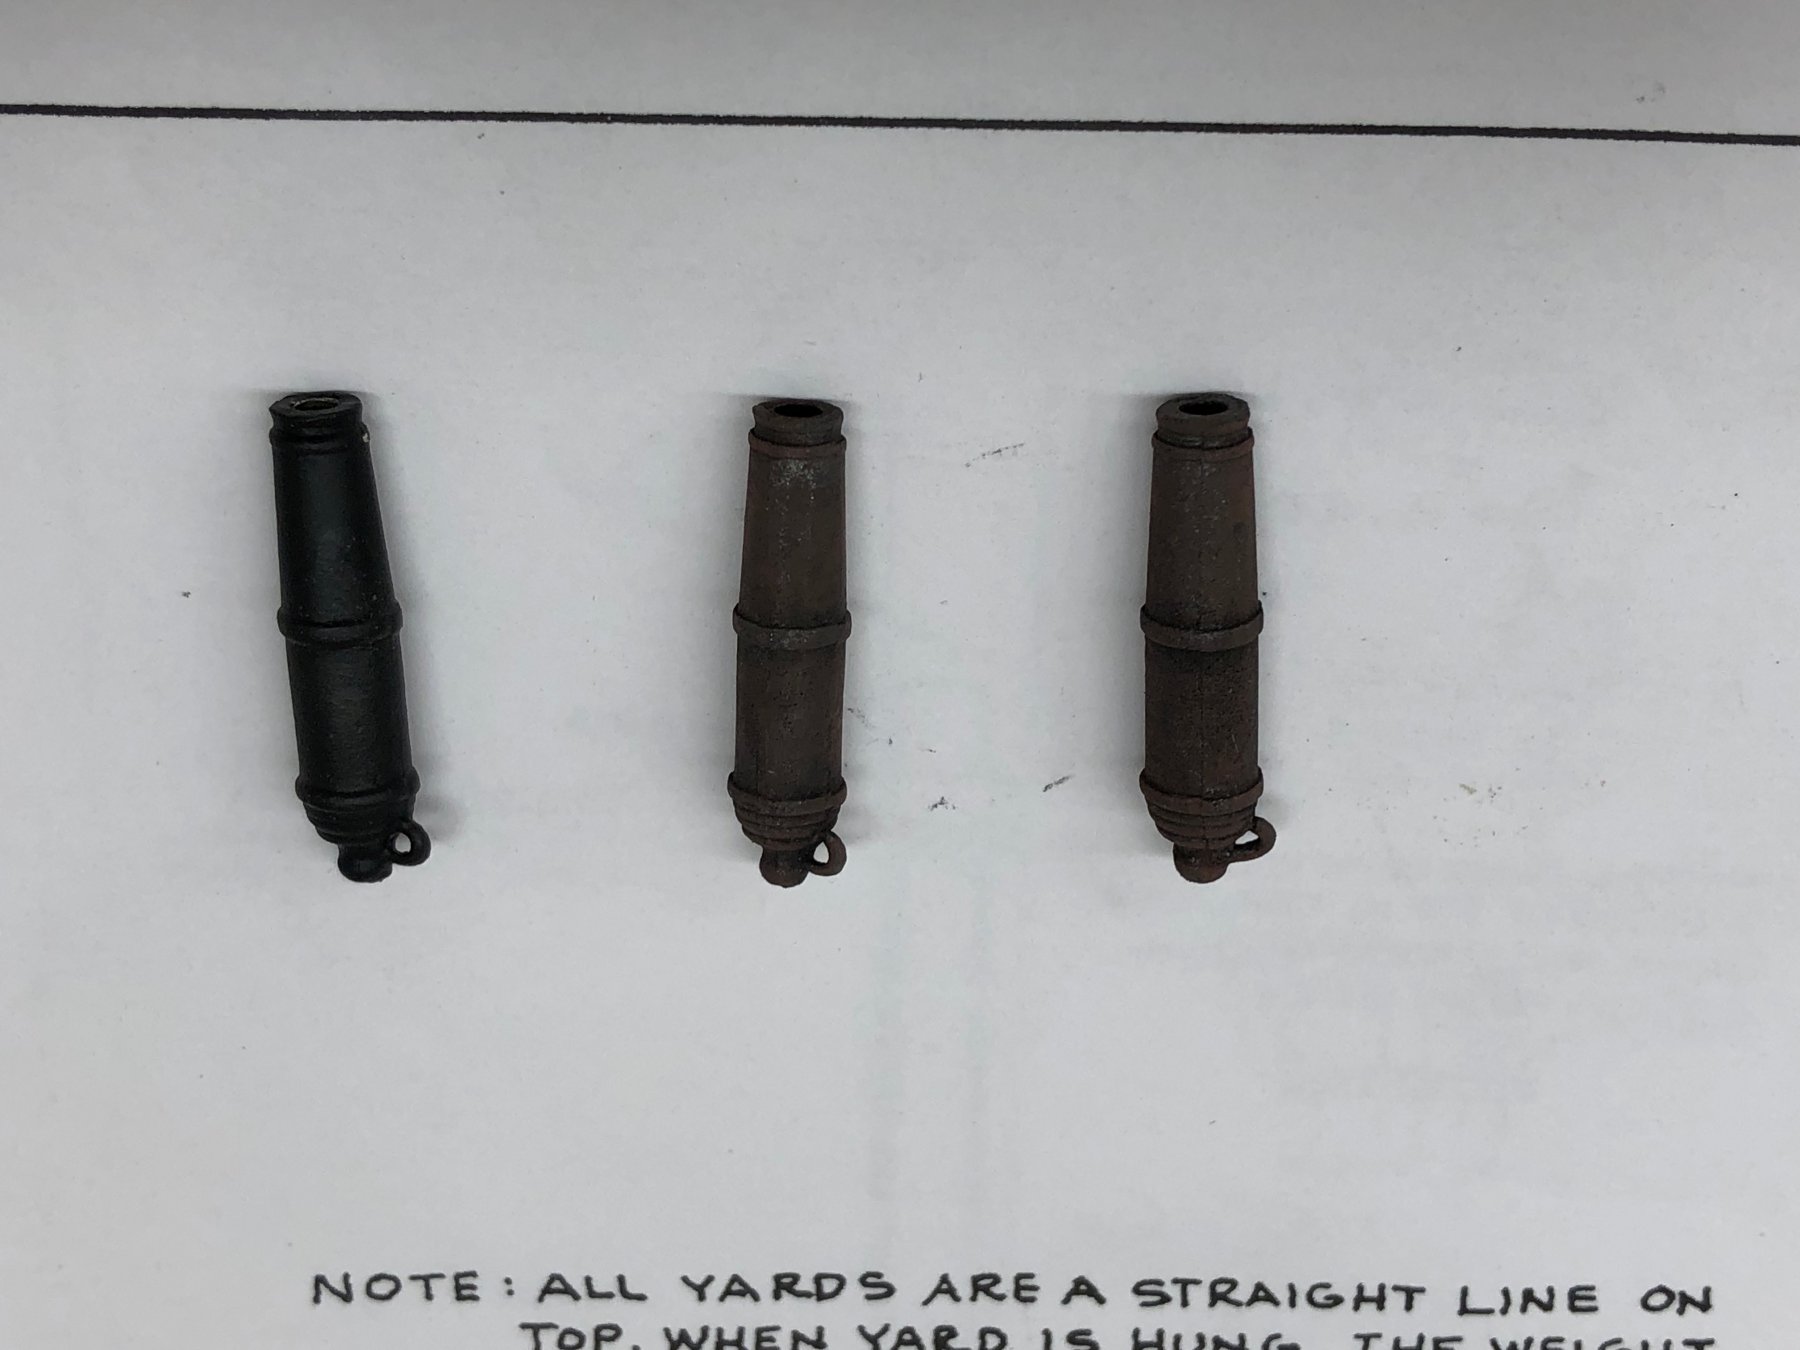
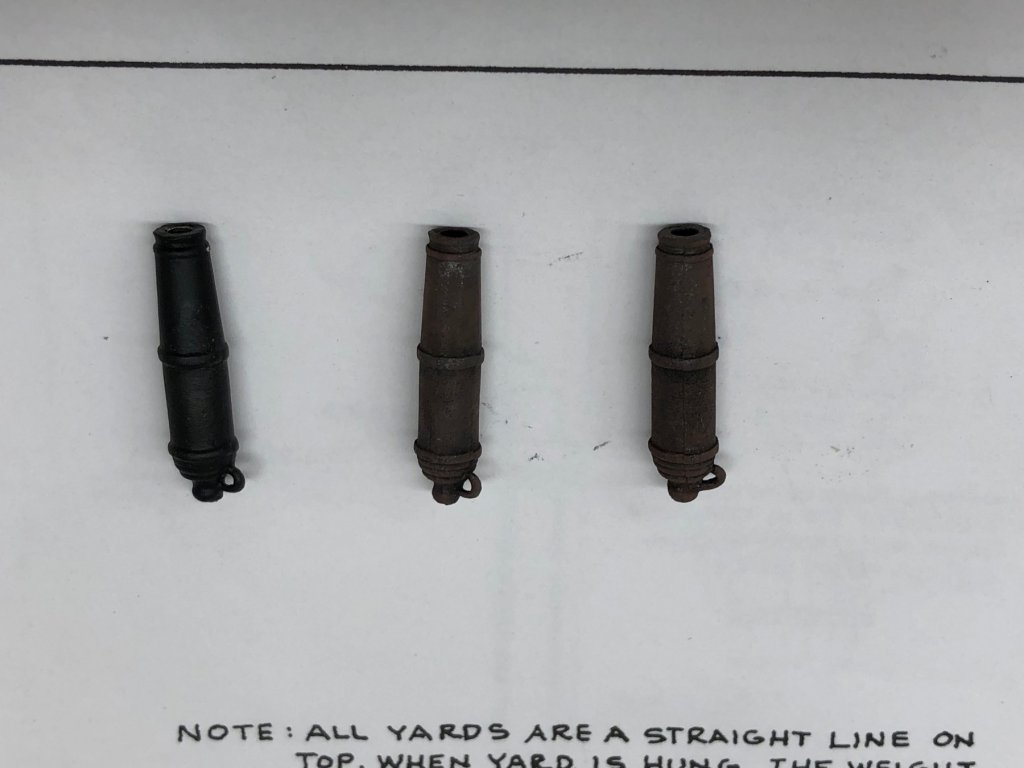
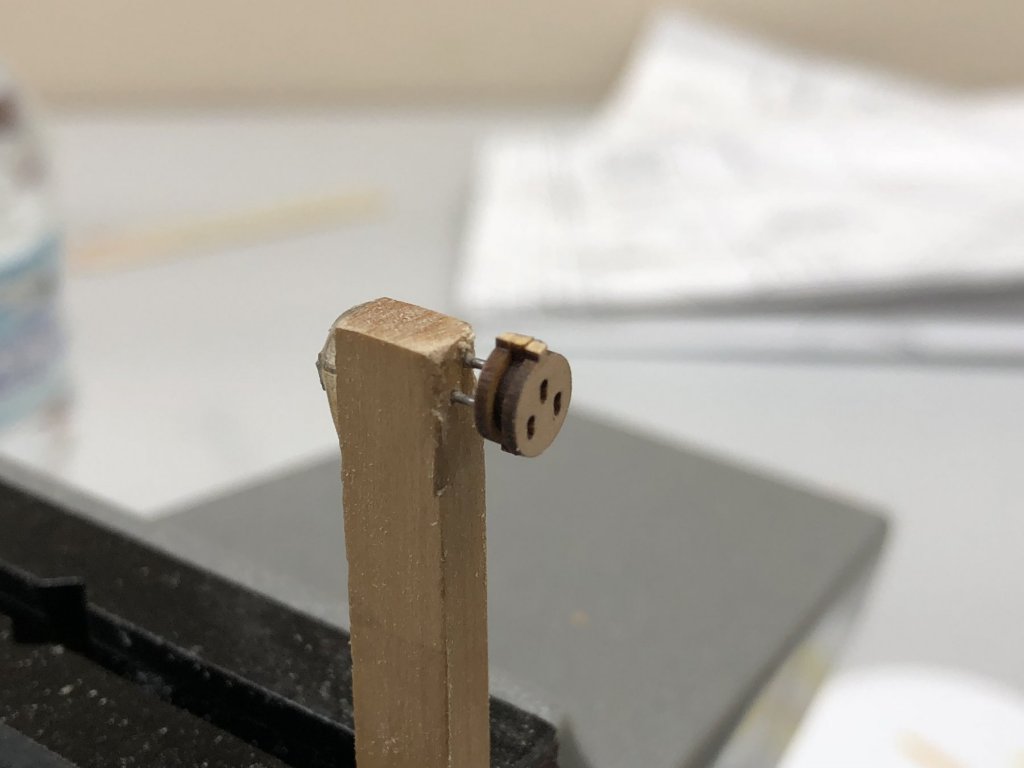
While waiting for various glues and paints to dry I took a crack at the Britannia metal cannonades to see what would work for getting them darkened. I have a blackening solution for pewter/Britannia from both JAX and Bluejackets. I cleaned three of then cannonades and did one in each solution and painted one with flat black paint. Both the ones done using the solution (two times through at full strength for 5 minutes) came out on the brownish side of black while of course the paint is actually black. It is really hard to tell in the picture (the painted one is on the left). There is nothing to choose between the two solutions as far as I can tell but using the solution allows the texture of the metal to show some where the paint covers all that up. I am going to try doing the solution three times to see if I can get a darker color and if so will go that way. I might try thinning the paint so as a fall back.
-
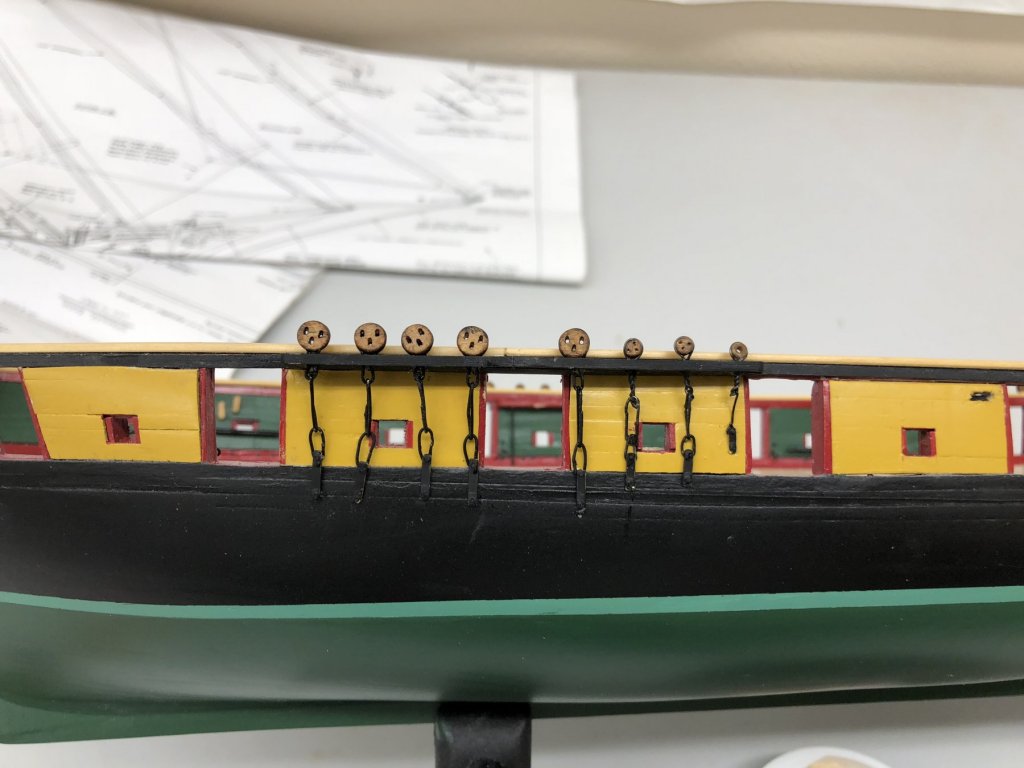
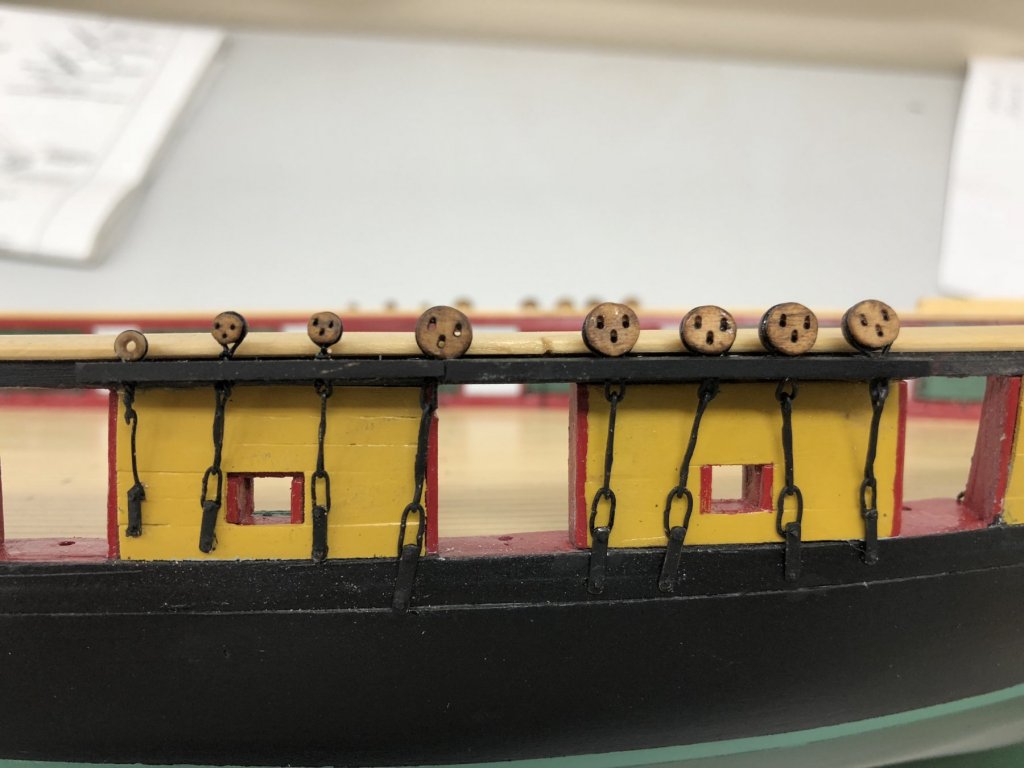
The first set (Stbd fwd) set of deadeyes (and one bullseye) are installed and the keeper strip installed. Looks pretty good, at least to me. The remaining 24 (15 main shroud deadeyes, 6 topmast backstay deadeyes and 3 topmast stay bullseyes) chainplates have been fabricated and are hanging in the paint booth for the flat black paint. I will be glad to get this behind me. I have a few more odds and ends to address and then the dreaded "armor" work begins.

- 367 replies
-
- 3
-
-
- model shipways
- niagara
- (and 1 more)
-
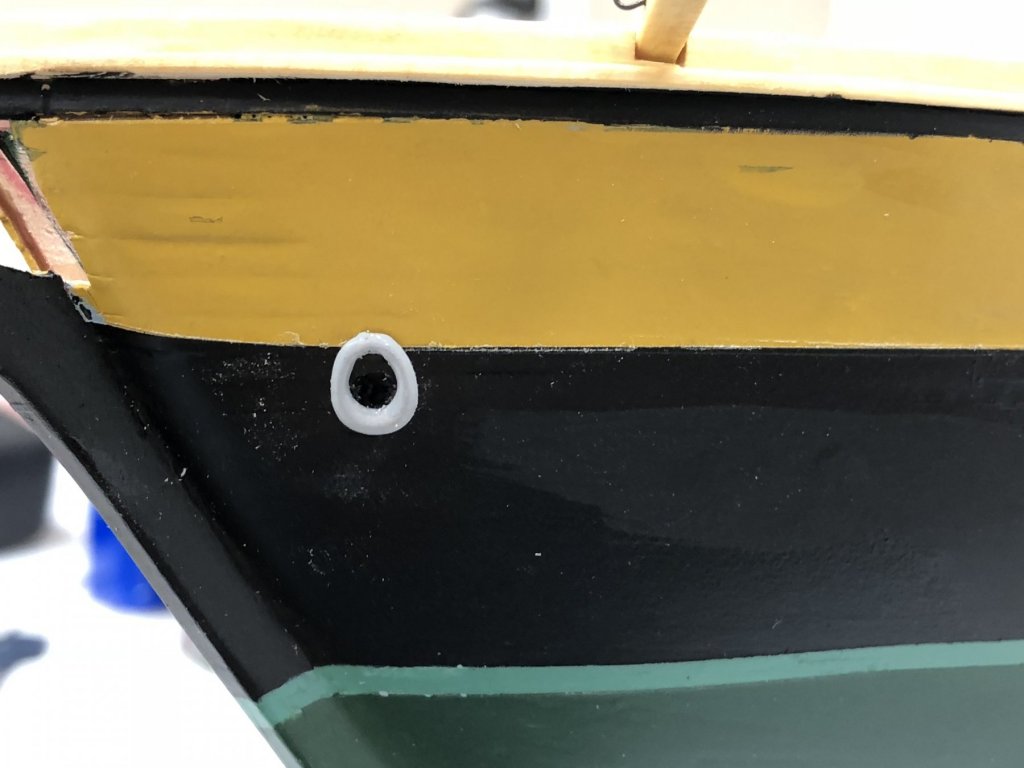
Boy, the deadeyes and chainplates are a pain. The Syren deadeyes need to be assembled, then shaped and stained. I worked for most of two days trying to make the final connection to the hull from brass rod by flattening the ends and drilling holes but had a terrible time getting the holes centered in spite of buying a new center punch. I finally decided to use 1/16" X 1/64" flat brass instead. Painted black and underneath the channels it is hard to tell what shape they are. I have the forward most deadeye on the starboard side in place as a test to see how it looks. I am building the rest of the deadeyes and bullseye for this channel now. I seem to be getting the hang of it. This is my first experience with multi-part chainplates. All my previous models just had single strap chainplates. I also got the hawse holes from Bluejackets and installed them on the hull. I painted them gray as it is my understanding that they were generally made of lead and left unpainted. Not sure where I heard that but it was fairly recently.

- 367 replies
-
- 4
-
-
- model shipways
- niagara
- (and 1 more)
-
Working on the deadeyes since I need to get the hull completed which means the channels, deadeyes and associated hardware. After reviewing other build logs and the discussion of the sizes of deadeyes I decided to use the Syren 5mm, 4mm and 3mm deadeyes for the lower shrouds, topmast shrouds and the top mast back stays respectively. Picture below shows the Syren and Model Expo deadeyes for comparison. I have all the 5mm deadeyes, assembled and ready for the block shaper to take some of the sharp corners off. As luck would have it the holder I used for the double 3mm blocks also works for the 5mm deadeyes (picture below). While not doing that I finished and installed the cat heads and bored the holes for the anchor lines. I will use Bluejackets hawse lips on the outside of hull.

- 367 replies
-
- 3
-
-
- model shipways
- niagara
- (and 1 more)
-
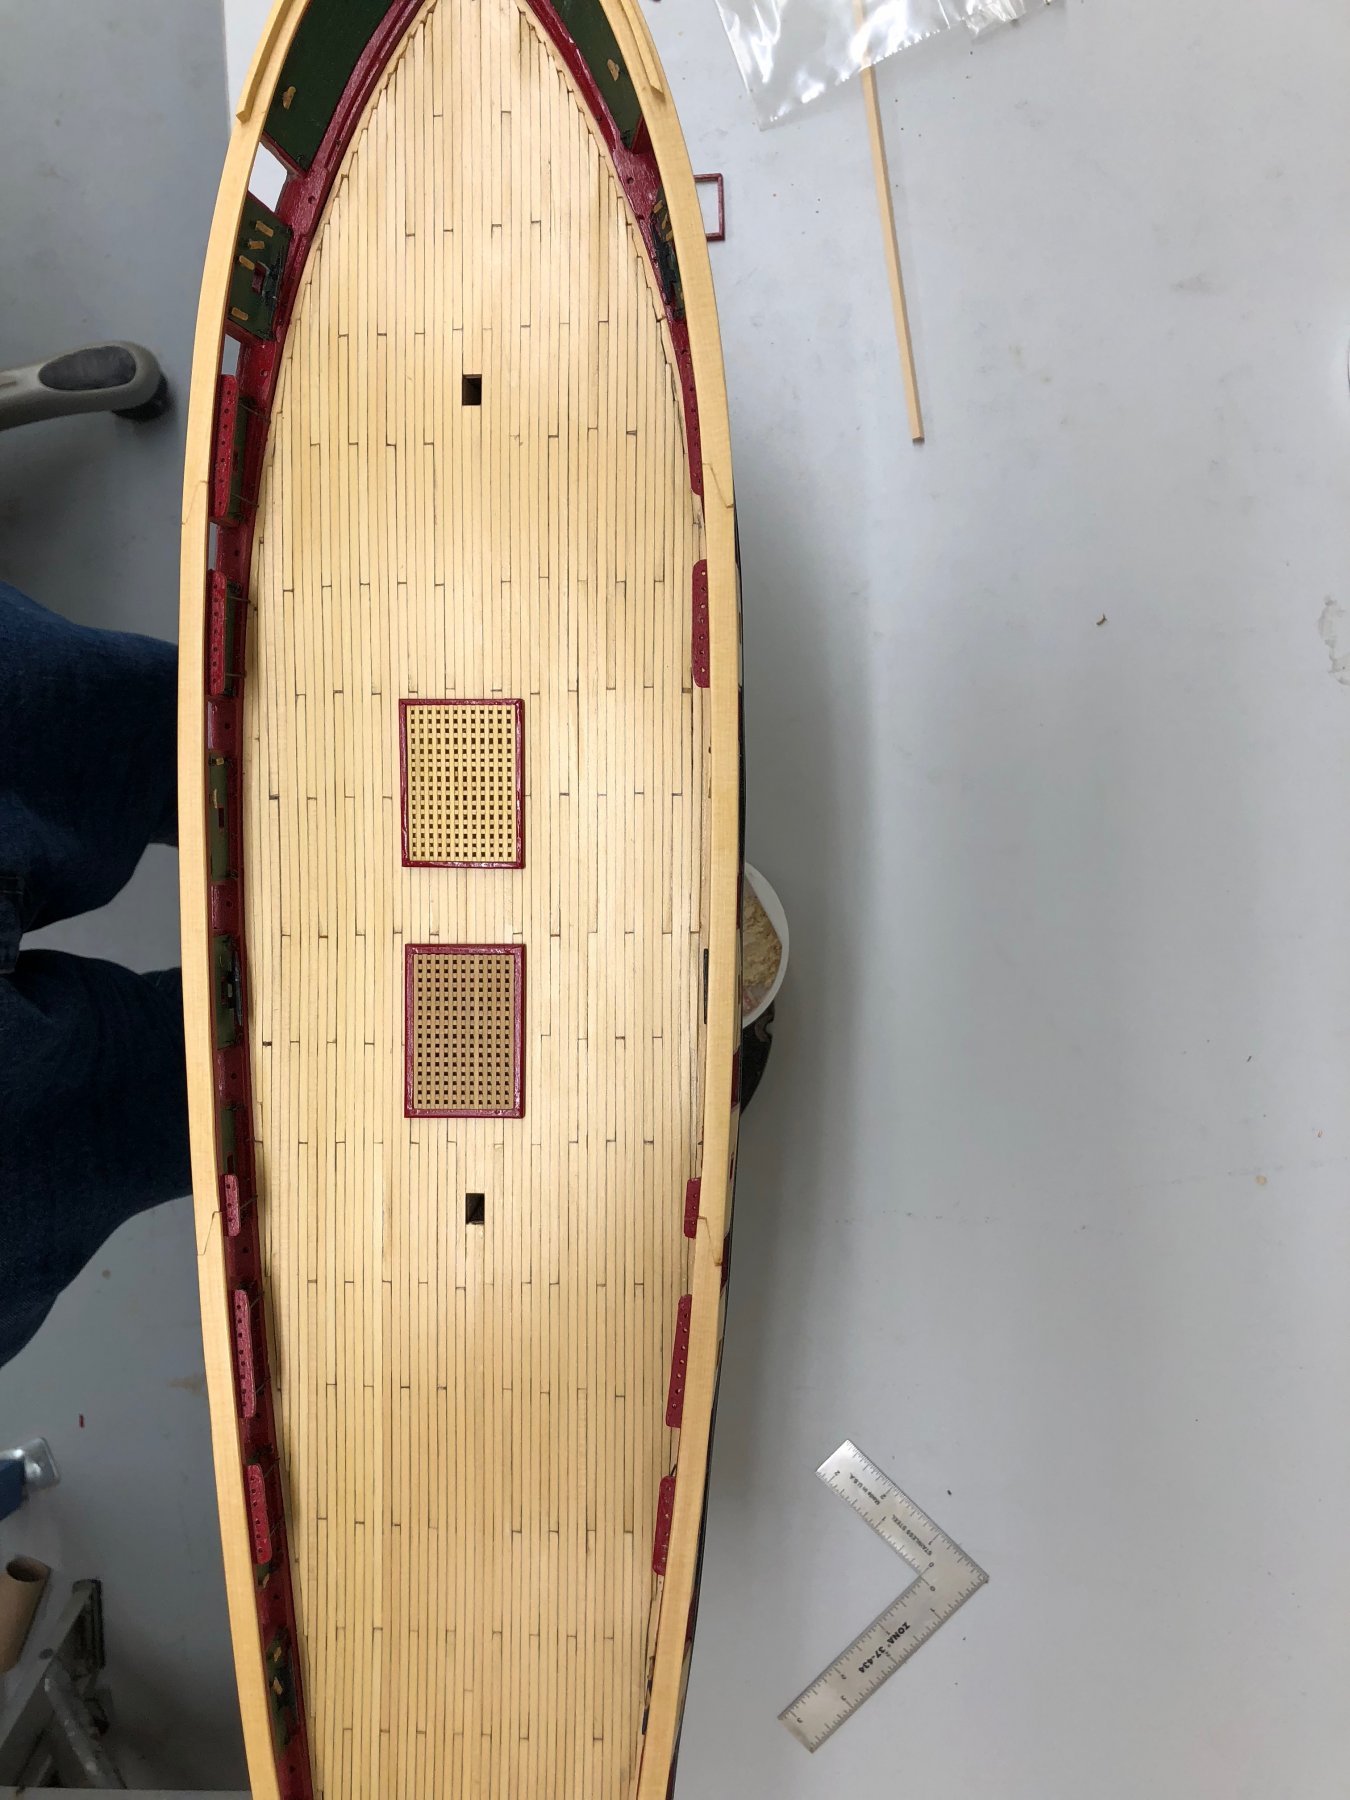
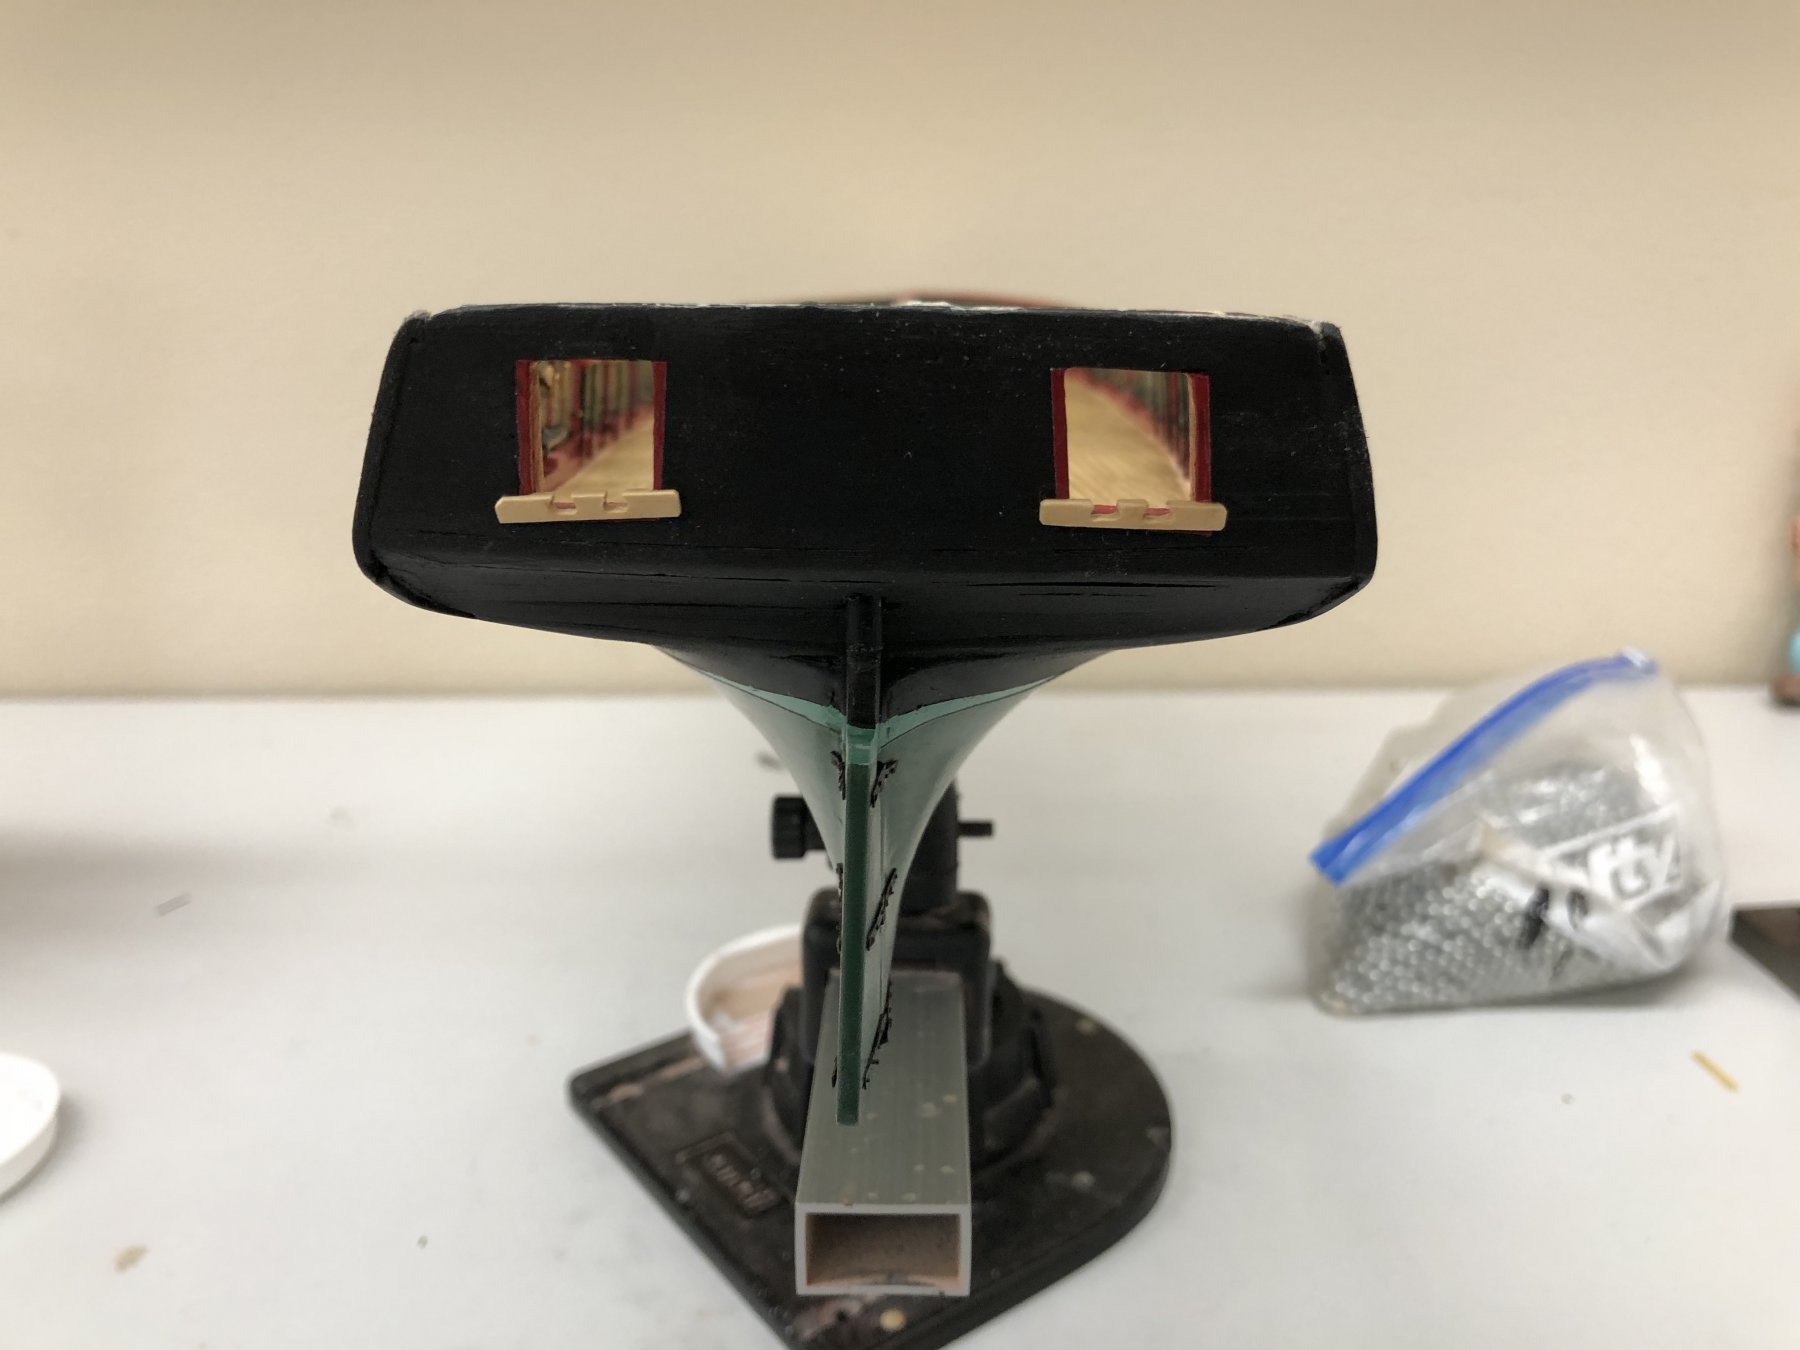
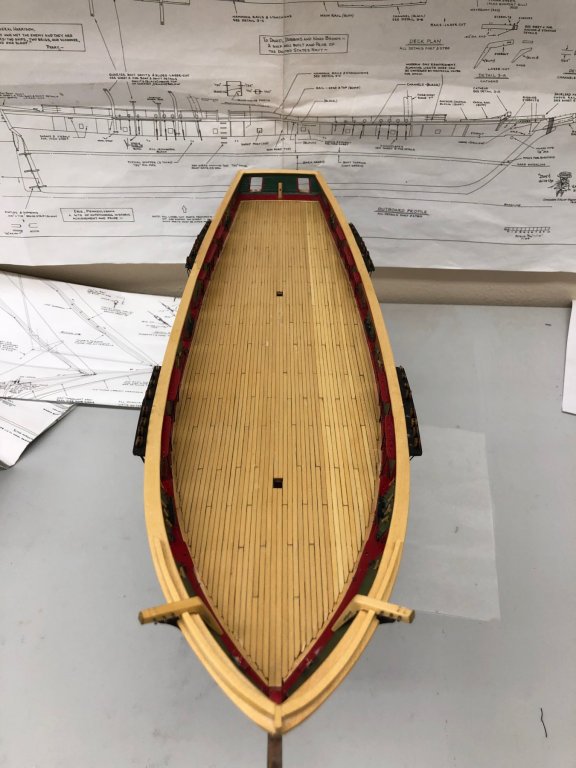
The yellow cedar grating kits from Syren were waiting when I got home from the "Great North Pheasant Hunt" (Viking Valley, MN) so I made up a few and started to convert from boxwood to yellow cedar. Along the way I changed the main hatch grating from flat to curved so had to redo the coaming as well. Finished up this afternoon. Here is how the two main hatches look on the yellow cedar deck. Now that I see together I wonder if it was worth the effort/cost... (Boxwood is on the bottom).

- 367 replies
-
- 2
-
-
- model shipways
- niagara
- (and 1 more)
-
Darrel - thanks. I got some yellow cedar grating kits from Syren so am working to get them fabed in yellow cedar as well.
-
Getting the hang of the new scroll saw is going to take a bit of practice. I did get the chock rails made (it took about five tries to get one close enough to not spend the rest of the day sanding) and installed. I then got the yellow cedar Catheads fabricated and cut out the main and chock rails to fit them in place. Once that was completed and after a final 320 sanding and paint thinner tack rag I put the first coat of Wipe-on-Poly on the main and chock rails.
- 367 replies
-
- 3
-
-
- model shipways
- niagara
- (and 1 more)
-
Jim, I have a cousin who was CO of the USS Norfolk (SSN 714) and one of the crews of the Henry M Jackson (SSBN 730) but that would have been 30+ years ago). I know the Norfolk was decommissioned a few years back (I was living in the Norfolk area at the time). Every ship I served on has long been used for razor blades or target practice.
-
Thanks Jim - one thing I have is plenty of cedar sawdust. Lets see TMC, would that be Chief Torpedoman? I spent my time on targets so don't think I ever ran across an E-7 Torpedoman.
-
Scroll saw arrived this afternoon just in time to cut the two forward sections of the mail rail from the 3/64" yellow cedar sheet. Just as with the other five pieces, I traced around the piece from the kit and then cut and sanded to the line. Made the joints after getting the correct shape. Everything looked great with all the pieces clamped on but when it came time to glue, one of the joints ended up with a 1/16" gap on the exterior and interior "corners. Since this will be finished with poly and not painted the Bondo is NOT a candidate for filling this one. I have some Elmer's wood filler somewhere - hopefully it is fine enough to fill a 3/64 X 1/16 X 1/16 opening. So, mail rail is on, yellow cedar chock rail and Cat Heads next.

- 367 replies
-
- 1
-
-
- model shipways
- niagara
- (and 1 more)
-
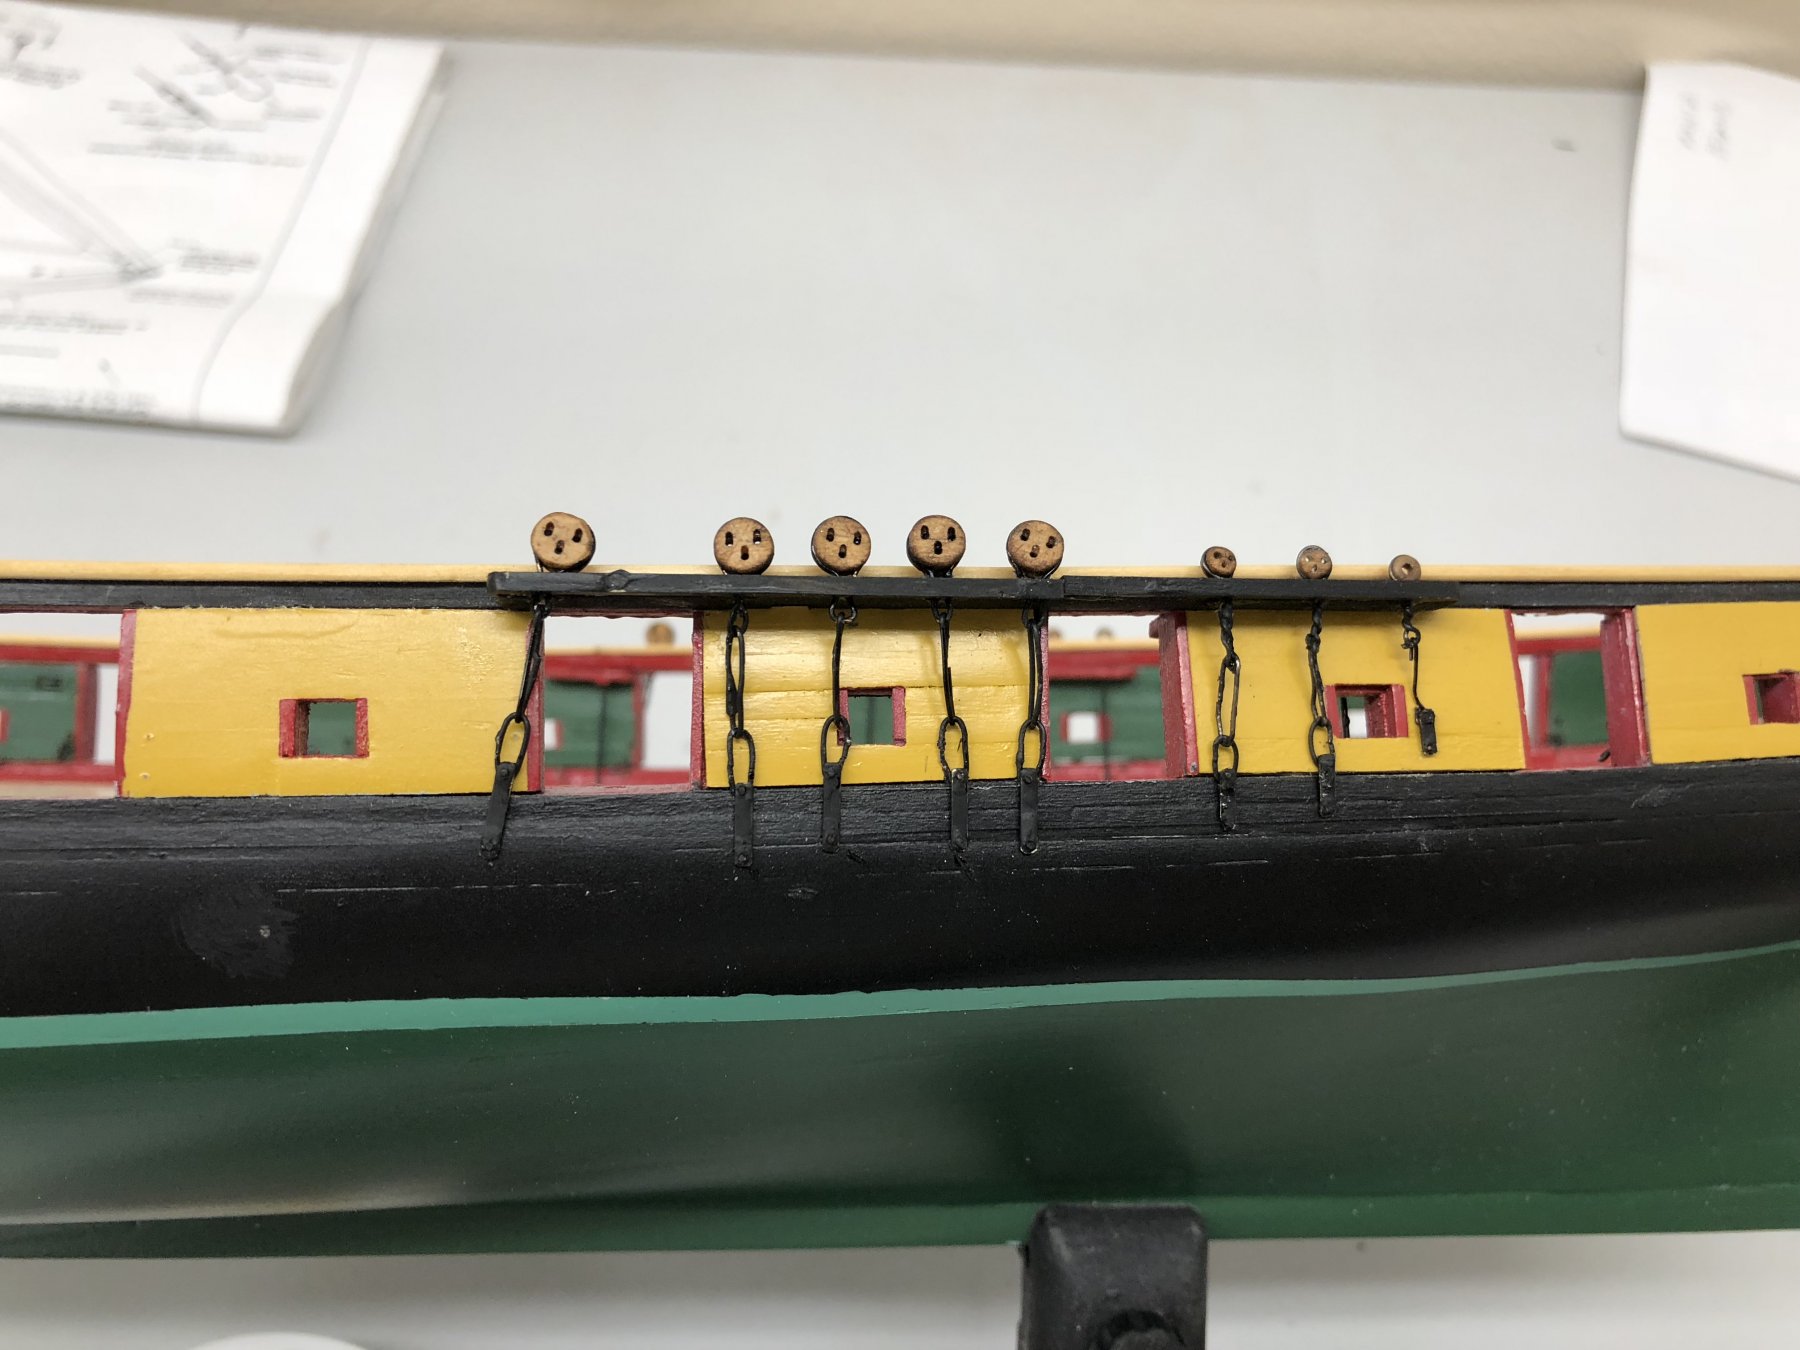
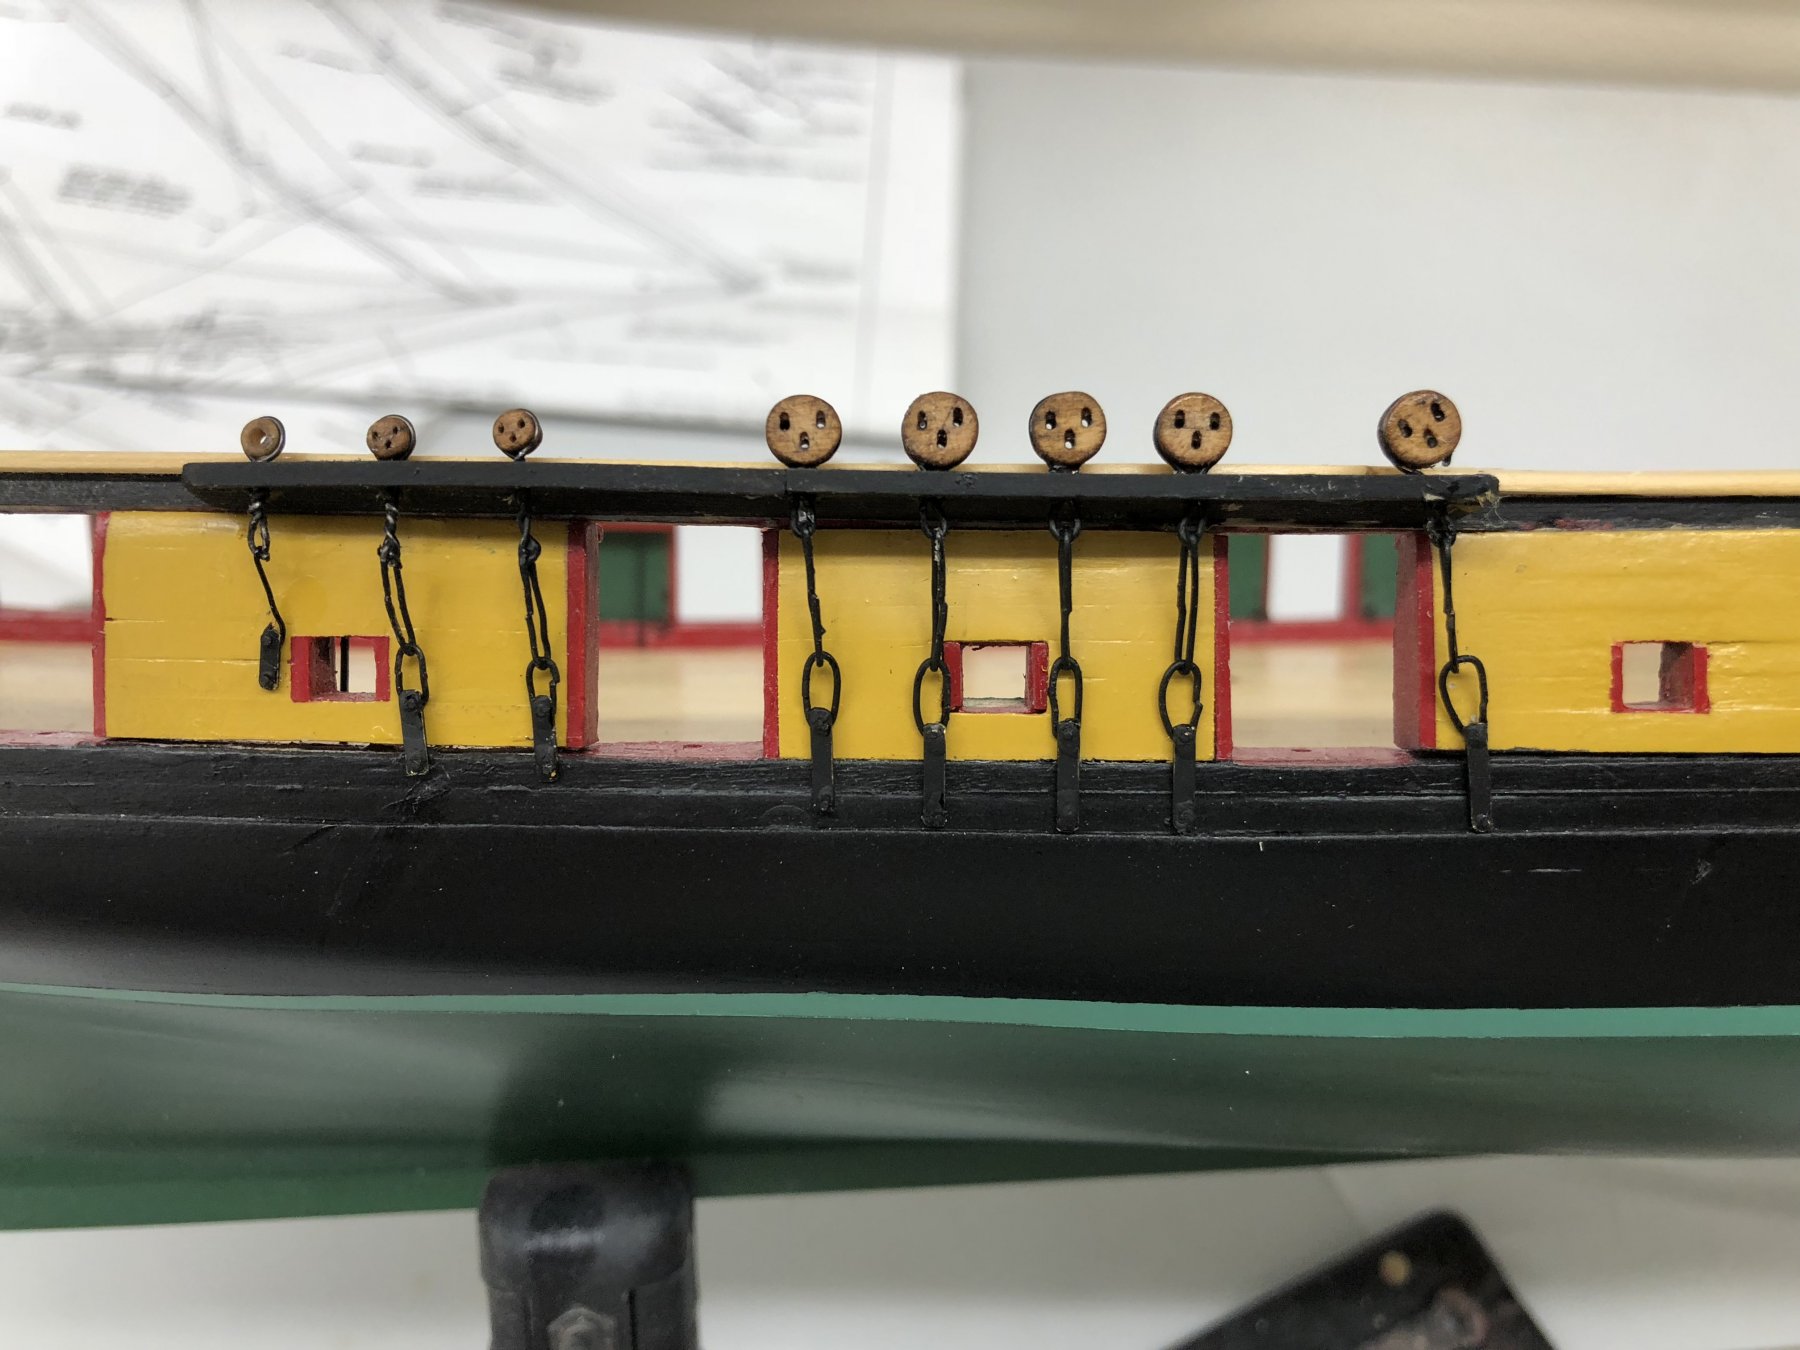
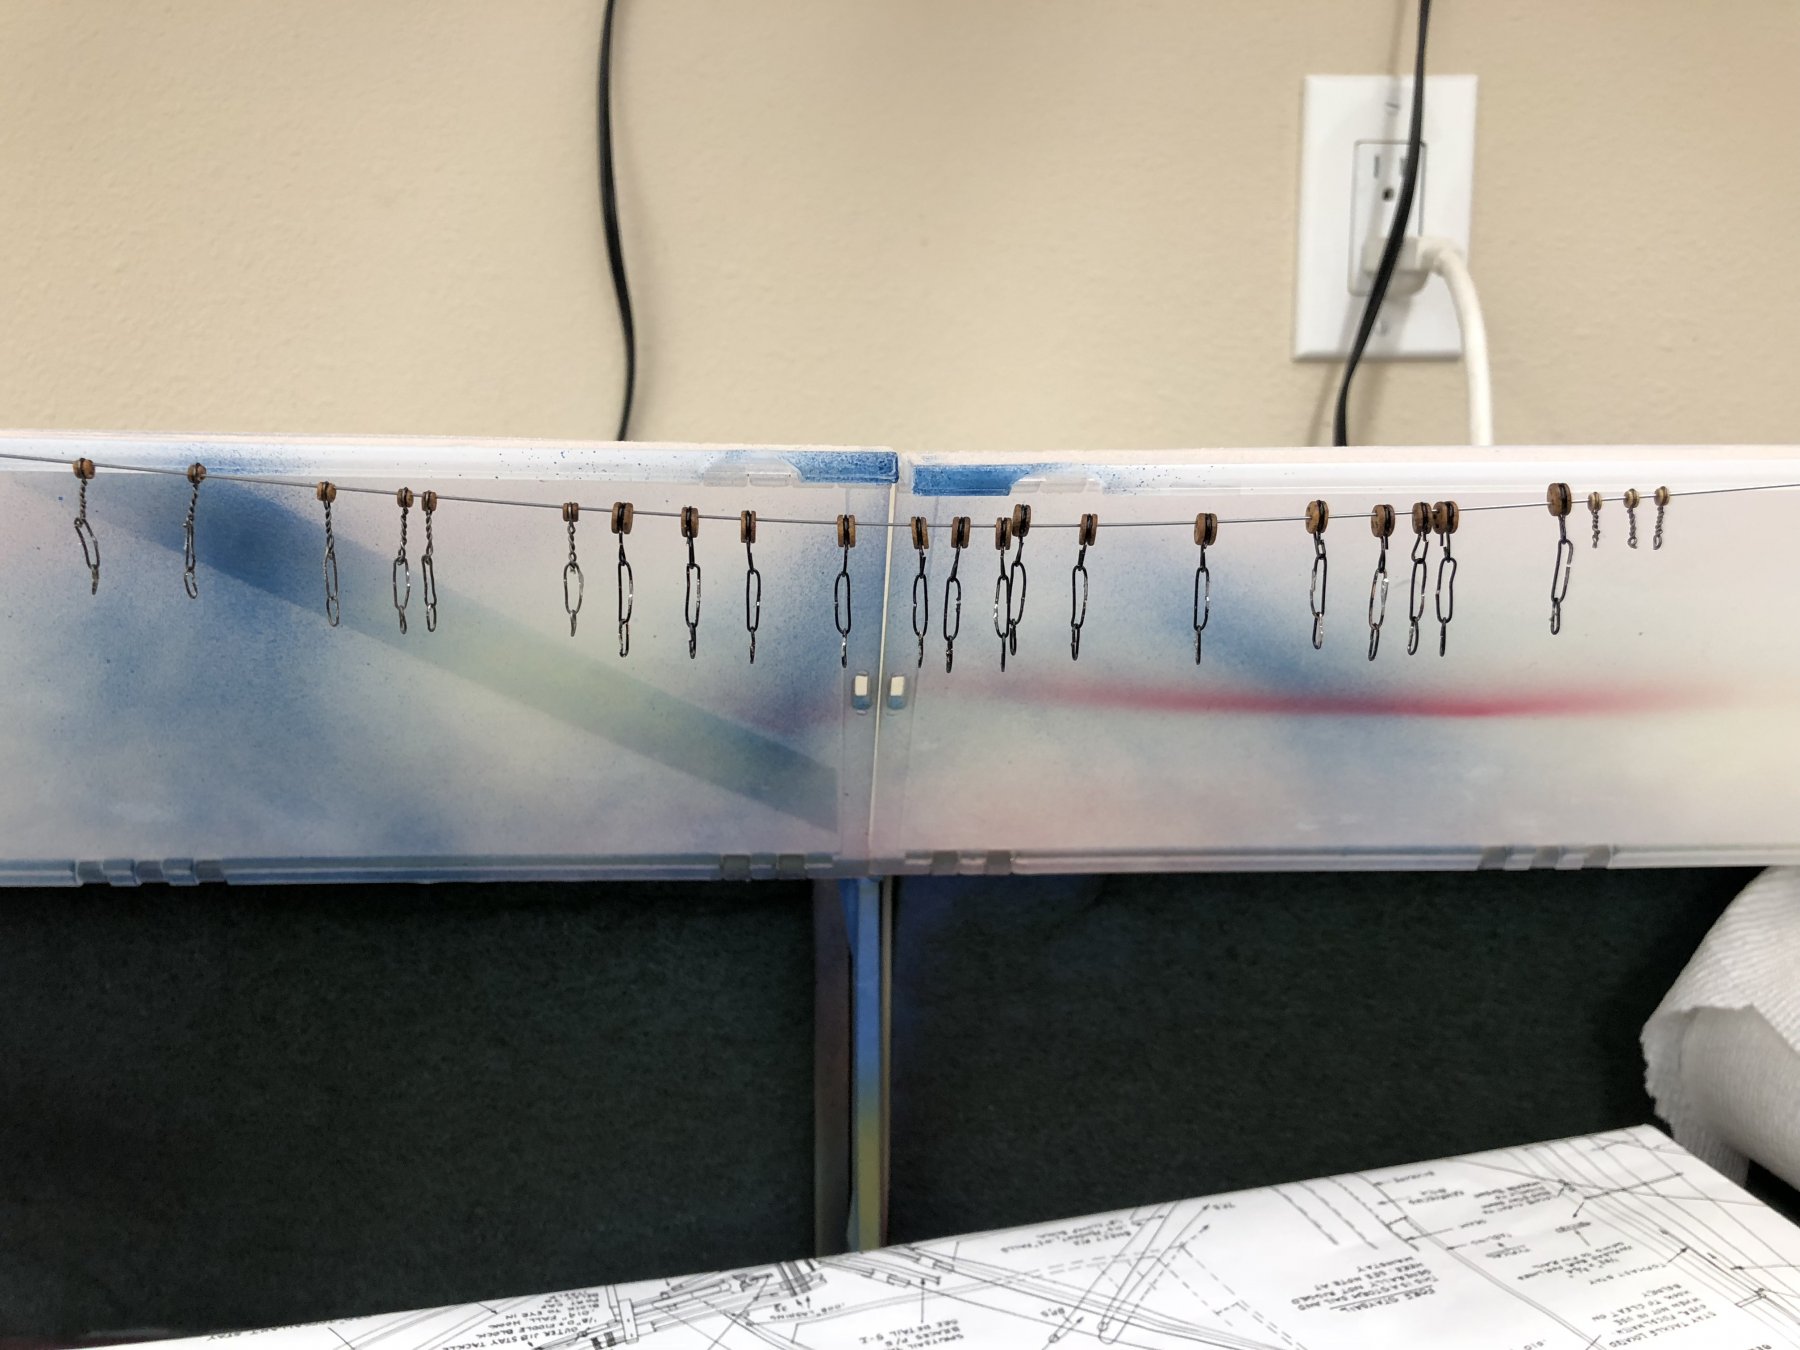
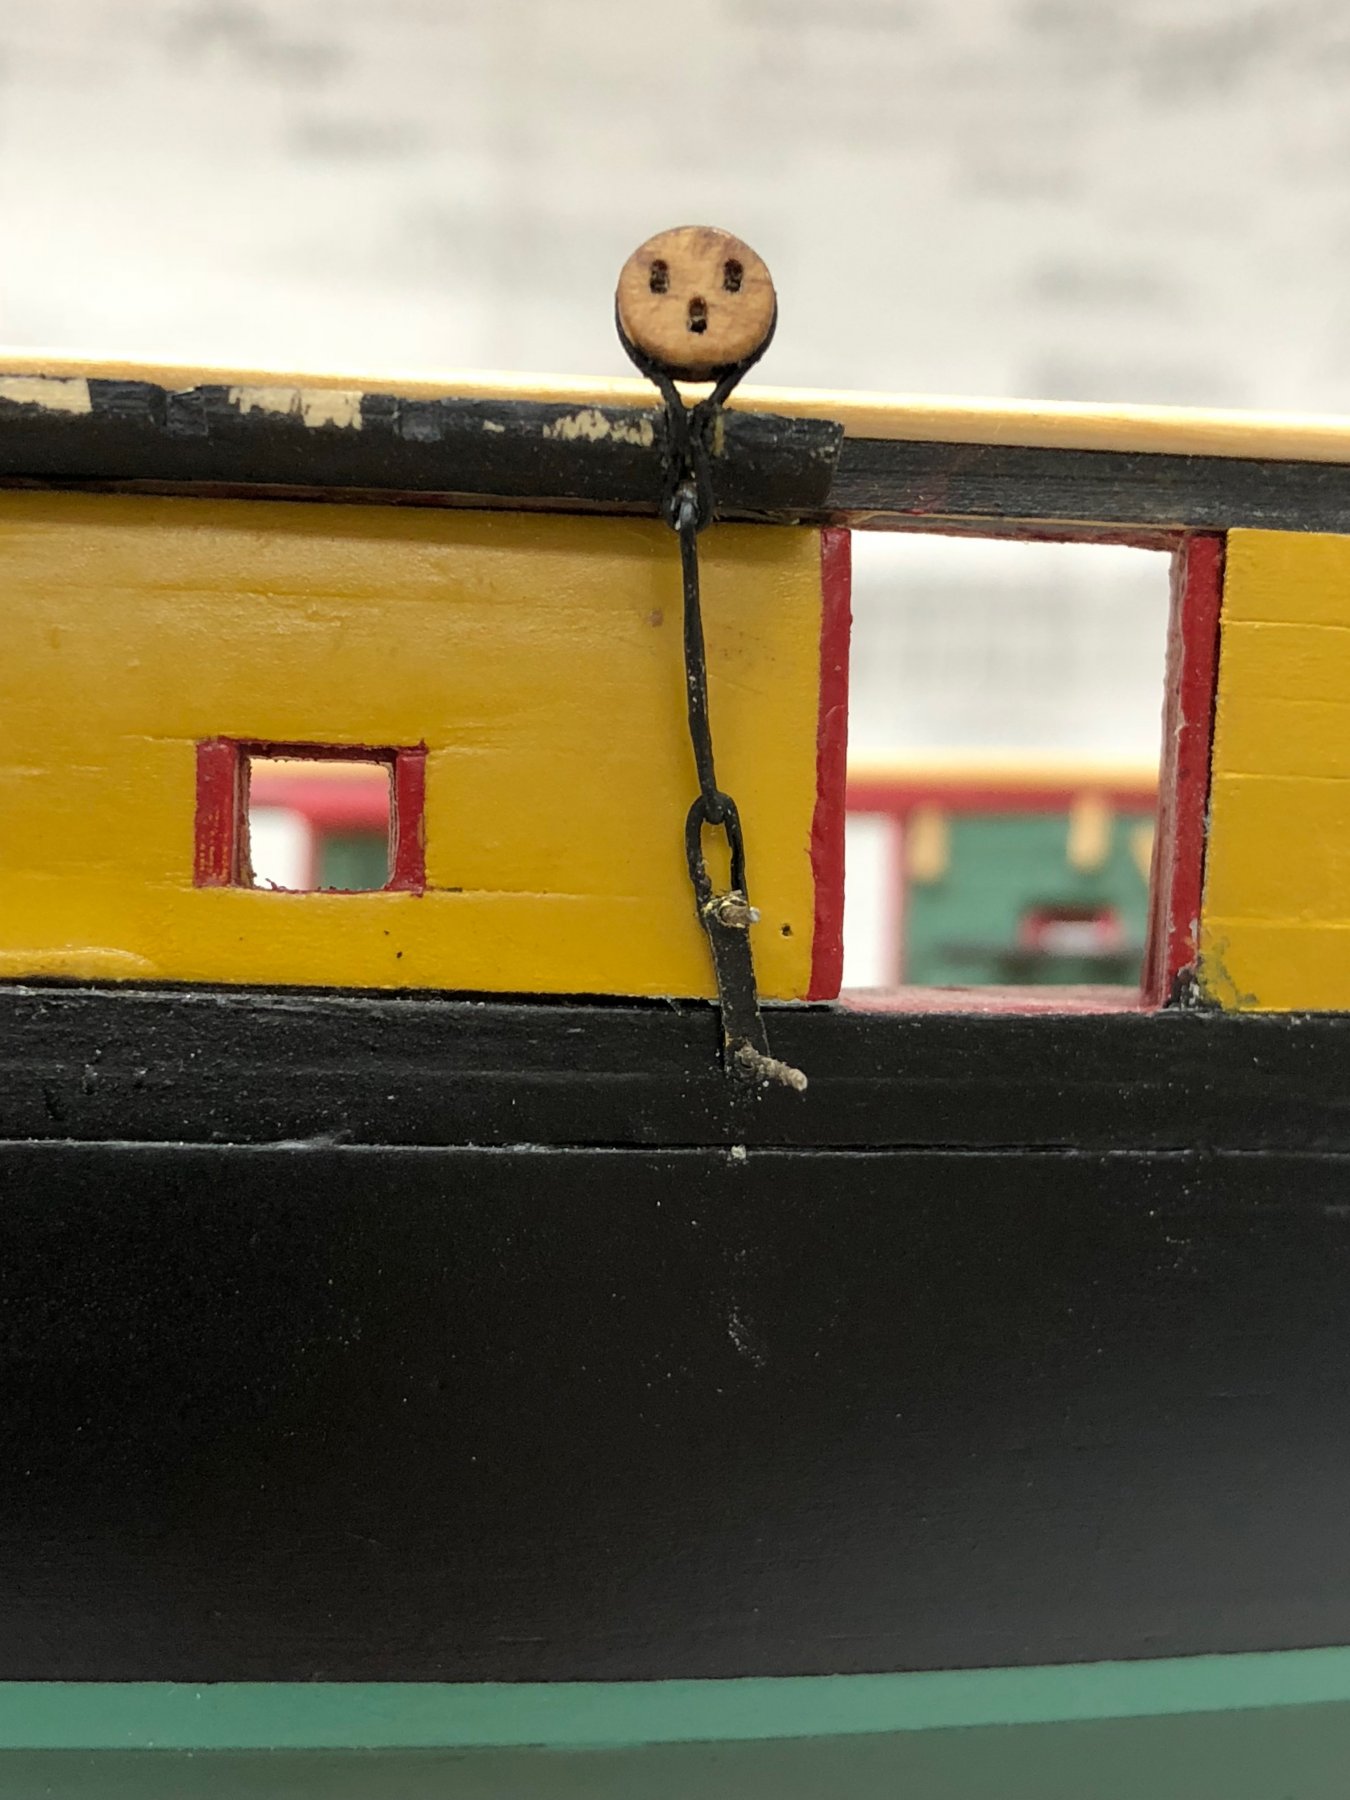
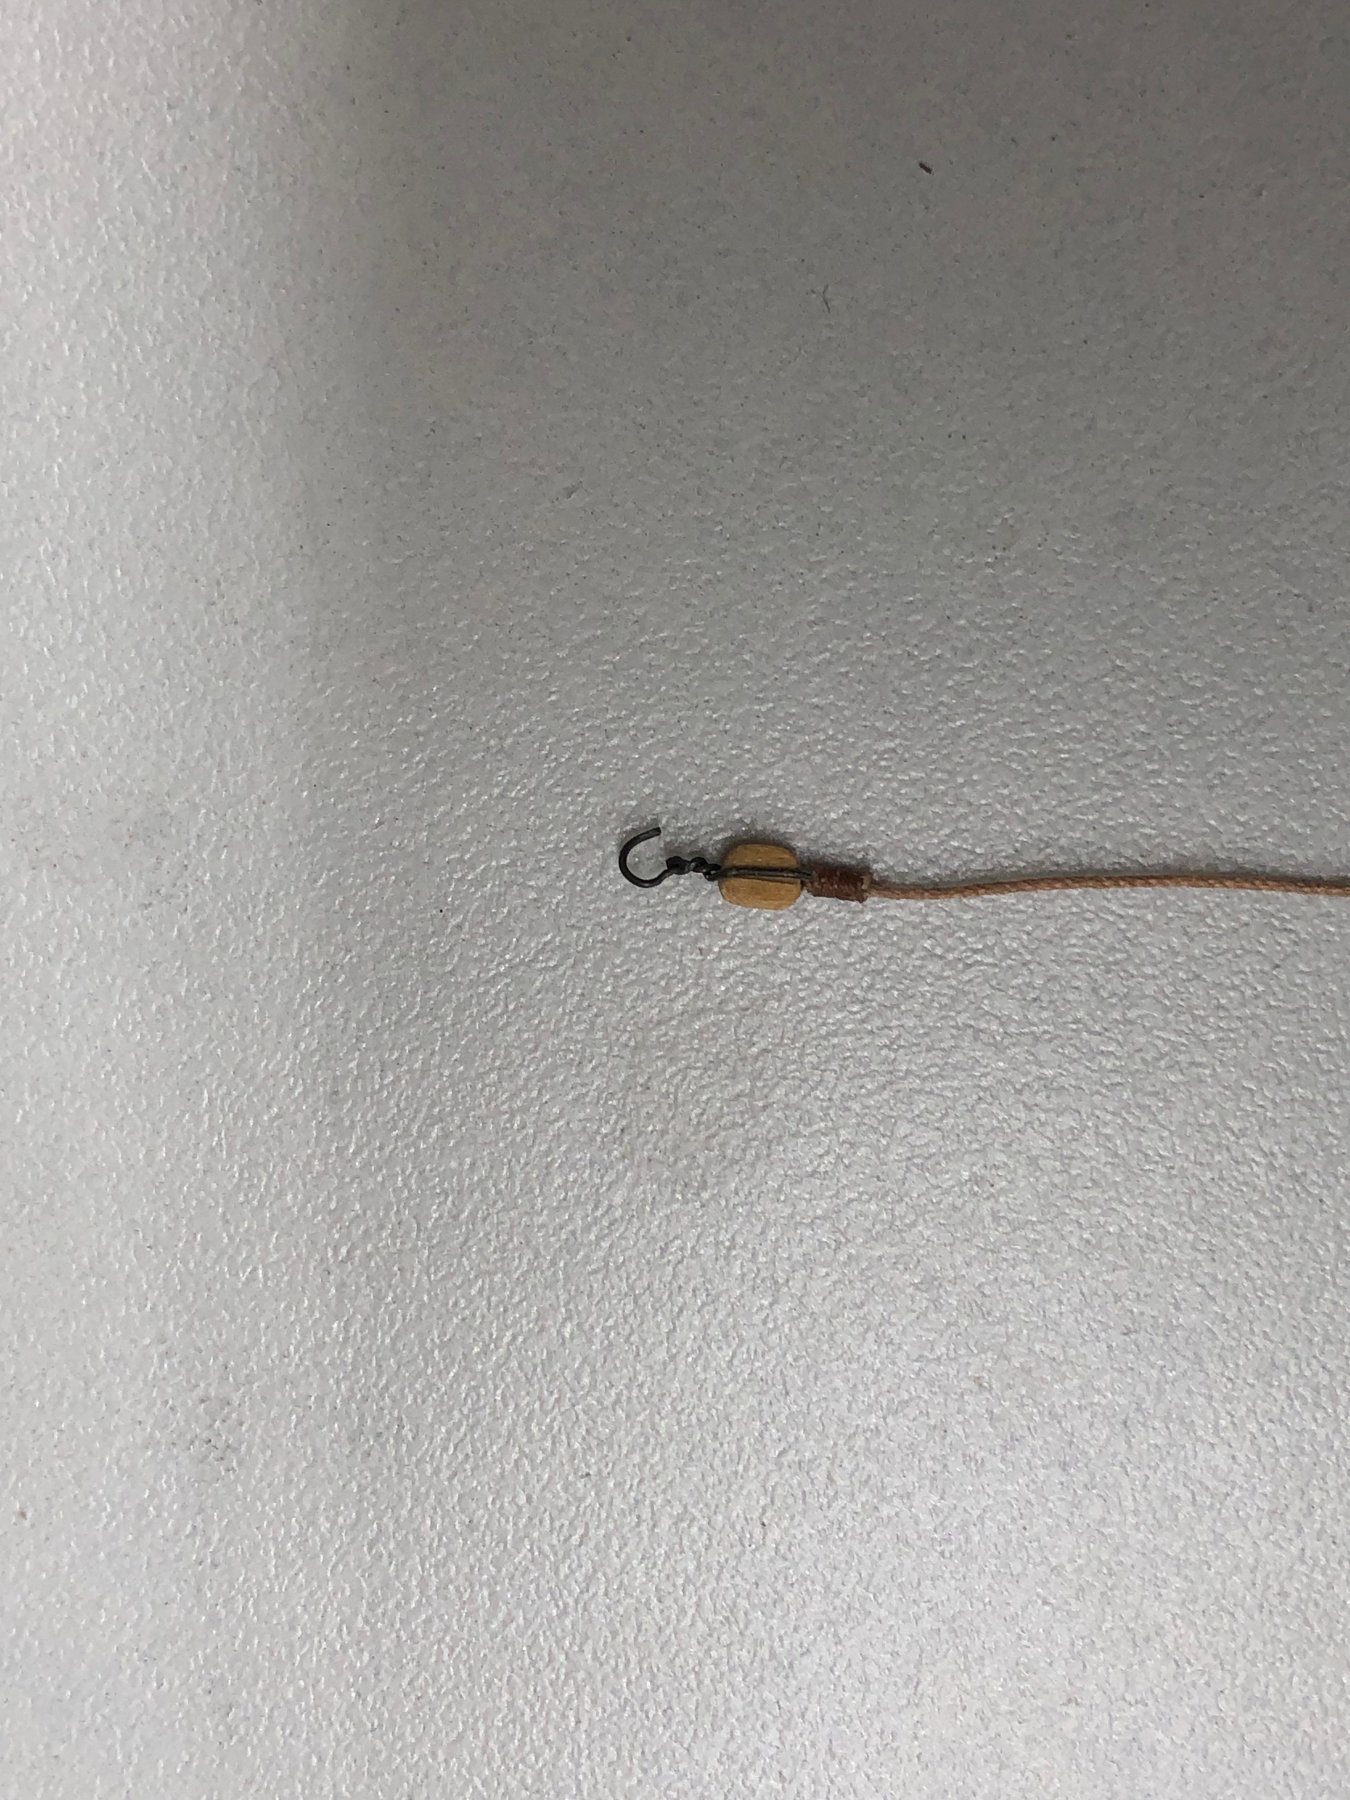
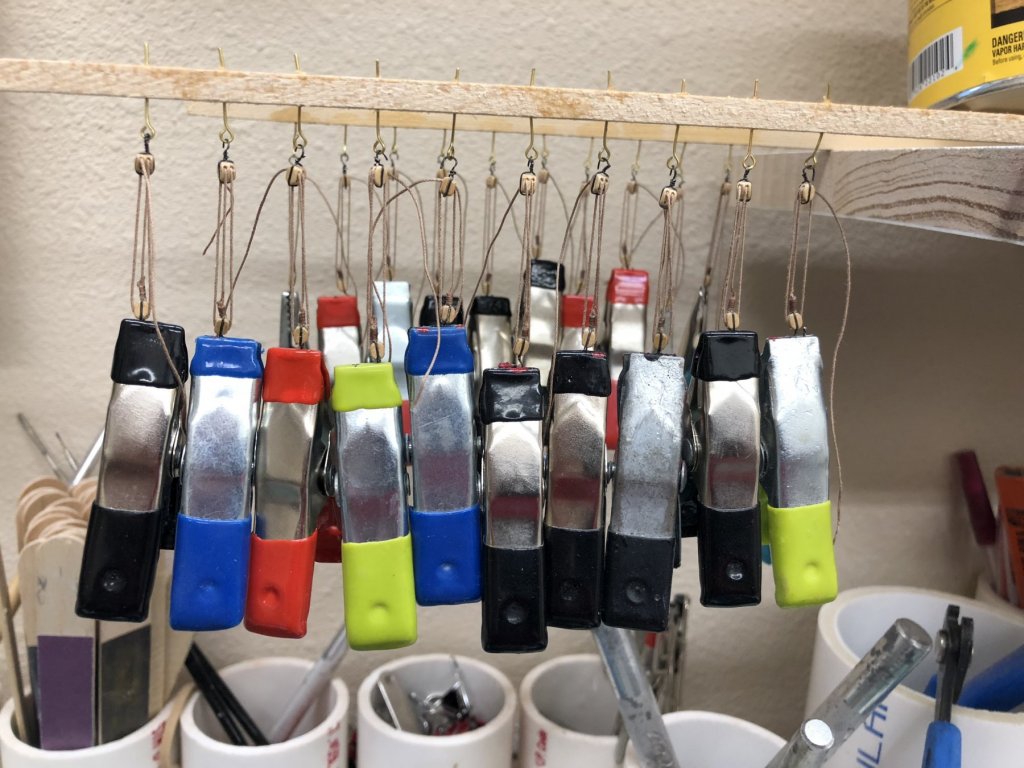
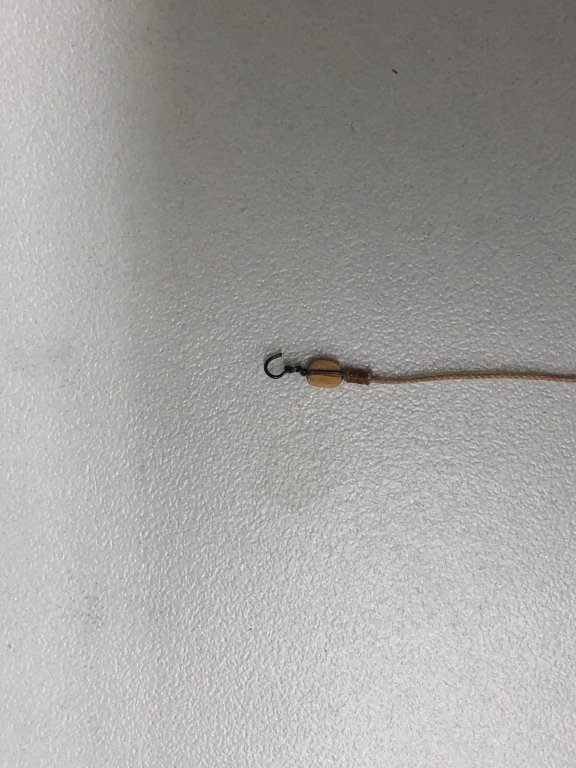
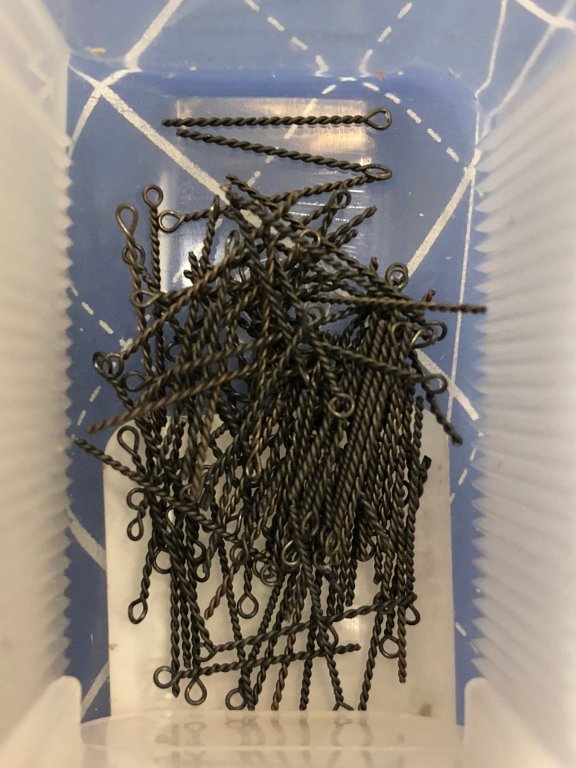
I took the eyebolts I made up yesterday while watching football and completed the eyebolt installation on the interior of the hull. There are another twenty or so that are on the outside of the hull, cat head etc. I will do these after I get the main rail installed. Scroll saw arrives tomorrow (UPS promises) but I decided to start the main rail since several of the pieces are almost straight. Nothing a disk sander and some sanding sticks can't handle. The stern transom piece was somewhat of a struggle but I got it and the two adjoining pieces on the sides aft cut, sanded and fitted to the hull. Having the gun ports makes holding the rail on really easy. No excuses for it not being exactly where you want it. So here is the hull with three pieces of the Alaskan yellow cedar main rail in place for a trial fit. Here is a close-up look at one of the 1/8" (3mm) single blocks. I used 32 ga (.012") annealed steel wire to do the stropping. I saw the "practicum" on the site on stropping the blocks using .008" black line and the 3mm hooks from Syren but thought this would be easier and maybe faster. I am only about a third the way through these (and half way through the doubles using the same wire) so I am not sure how it will all come out in the end. For the singles, I just caught the .012" light brown Syren line between the wire and the block at the bottom and then seized it when I was finished with the stropping. I cut 7" of line for each block so have about 6" left after the seizing - hope that is enough. My plan is to just take the line to the deck and cover the end with a coil of rope. Another thing to look forward to - making 200 rope coils.

- 367 replies
-
- 4
-
-
- model shipways
- niagara
- (and 1 more)
-
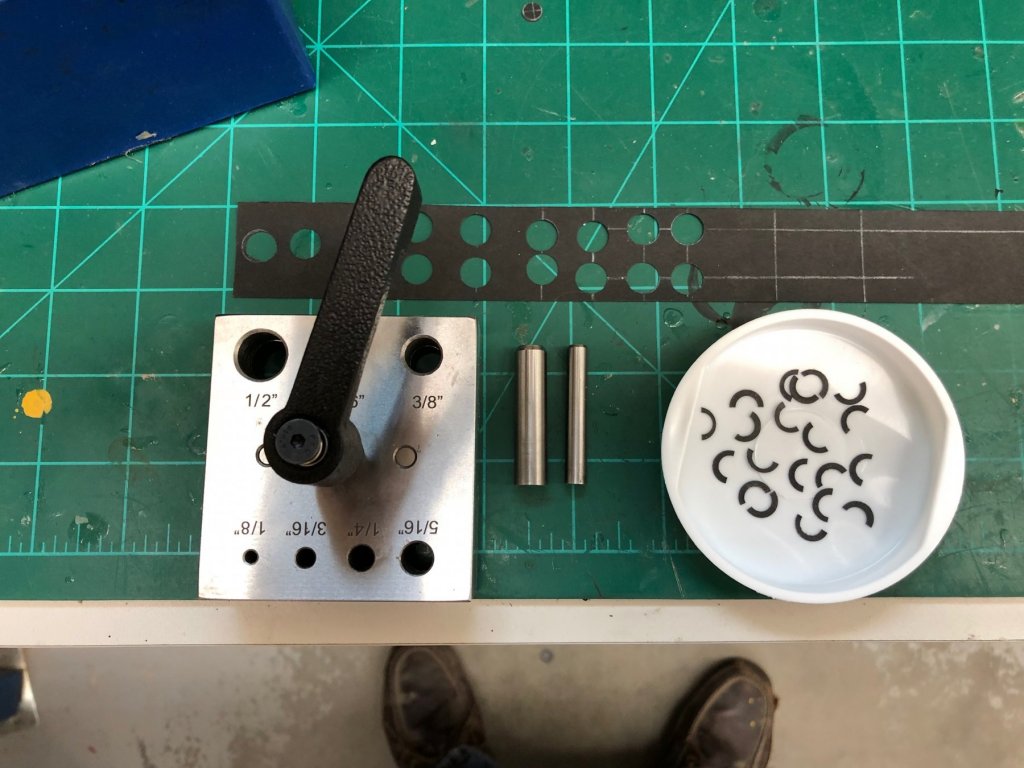
During one day of watching football (although neither of the early games on in our market were worth watching - Dolphins/Pat and Bucs/Bears) I was able to create about 100 eyebolts and thirty or so single 1/8" blocks with becket and line ready for use in the gun tackle. Only about seventy more to go - maybe I can get a few more done during the Monday night game. As I figure things I need five sets of 1/8" double and 1/8" single with becket for each cannonade (two gun tackle, two train tackle and one in-haul tackle) so that is 5 X 18 = 90 each of doubles and singles, plus three sets each for the two long guns so that is six more of each total 96 of each. I plan on making 110 as I am sure to mess up a few along the way. Next step is to install the train tackle eyebolts (and the rest of the ones shown on the plans) on the hull.
- 367 replies
-
- 2
-
-
- model shipways
- niagara
- (and 1 more)
-
Starboard side pin rails completed. Waiting for scroll saw delivery on Tuesday to start main rails. Have some touch-up to on the hull then mask and spray two coats of clear on hull below the bulwarks. Added the mooring line fair leads to the stern gun ports and found yellow dry transfer letters the correct size in Roman font to put the name on the stern (will be delivered late next week while I am in Minnesota pheasant hunting). Setting up to strop gun tackle blocks during the Pats/Dolphins game this pm.
- 367 replies
-
- 2
-
-
- model shipways
- niagara
- (and 1 more)
-
Port side pin rails installed and epoxy has set - I put a pin in each end and also some epoxy along the seam with the bulwark. Would be really bad to have one of these come loose while installing the running rigging. Stbd side underway.

- 367 replies
-
- 3
-
-
- model shipways
- niagara
- (and 1 more)
-
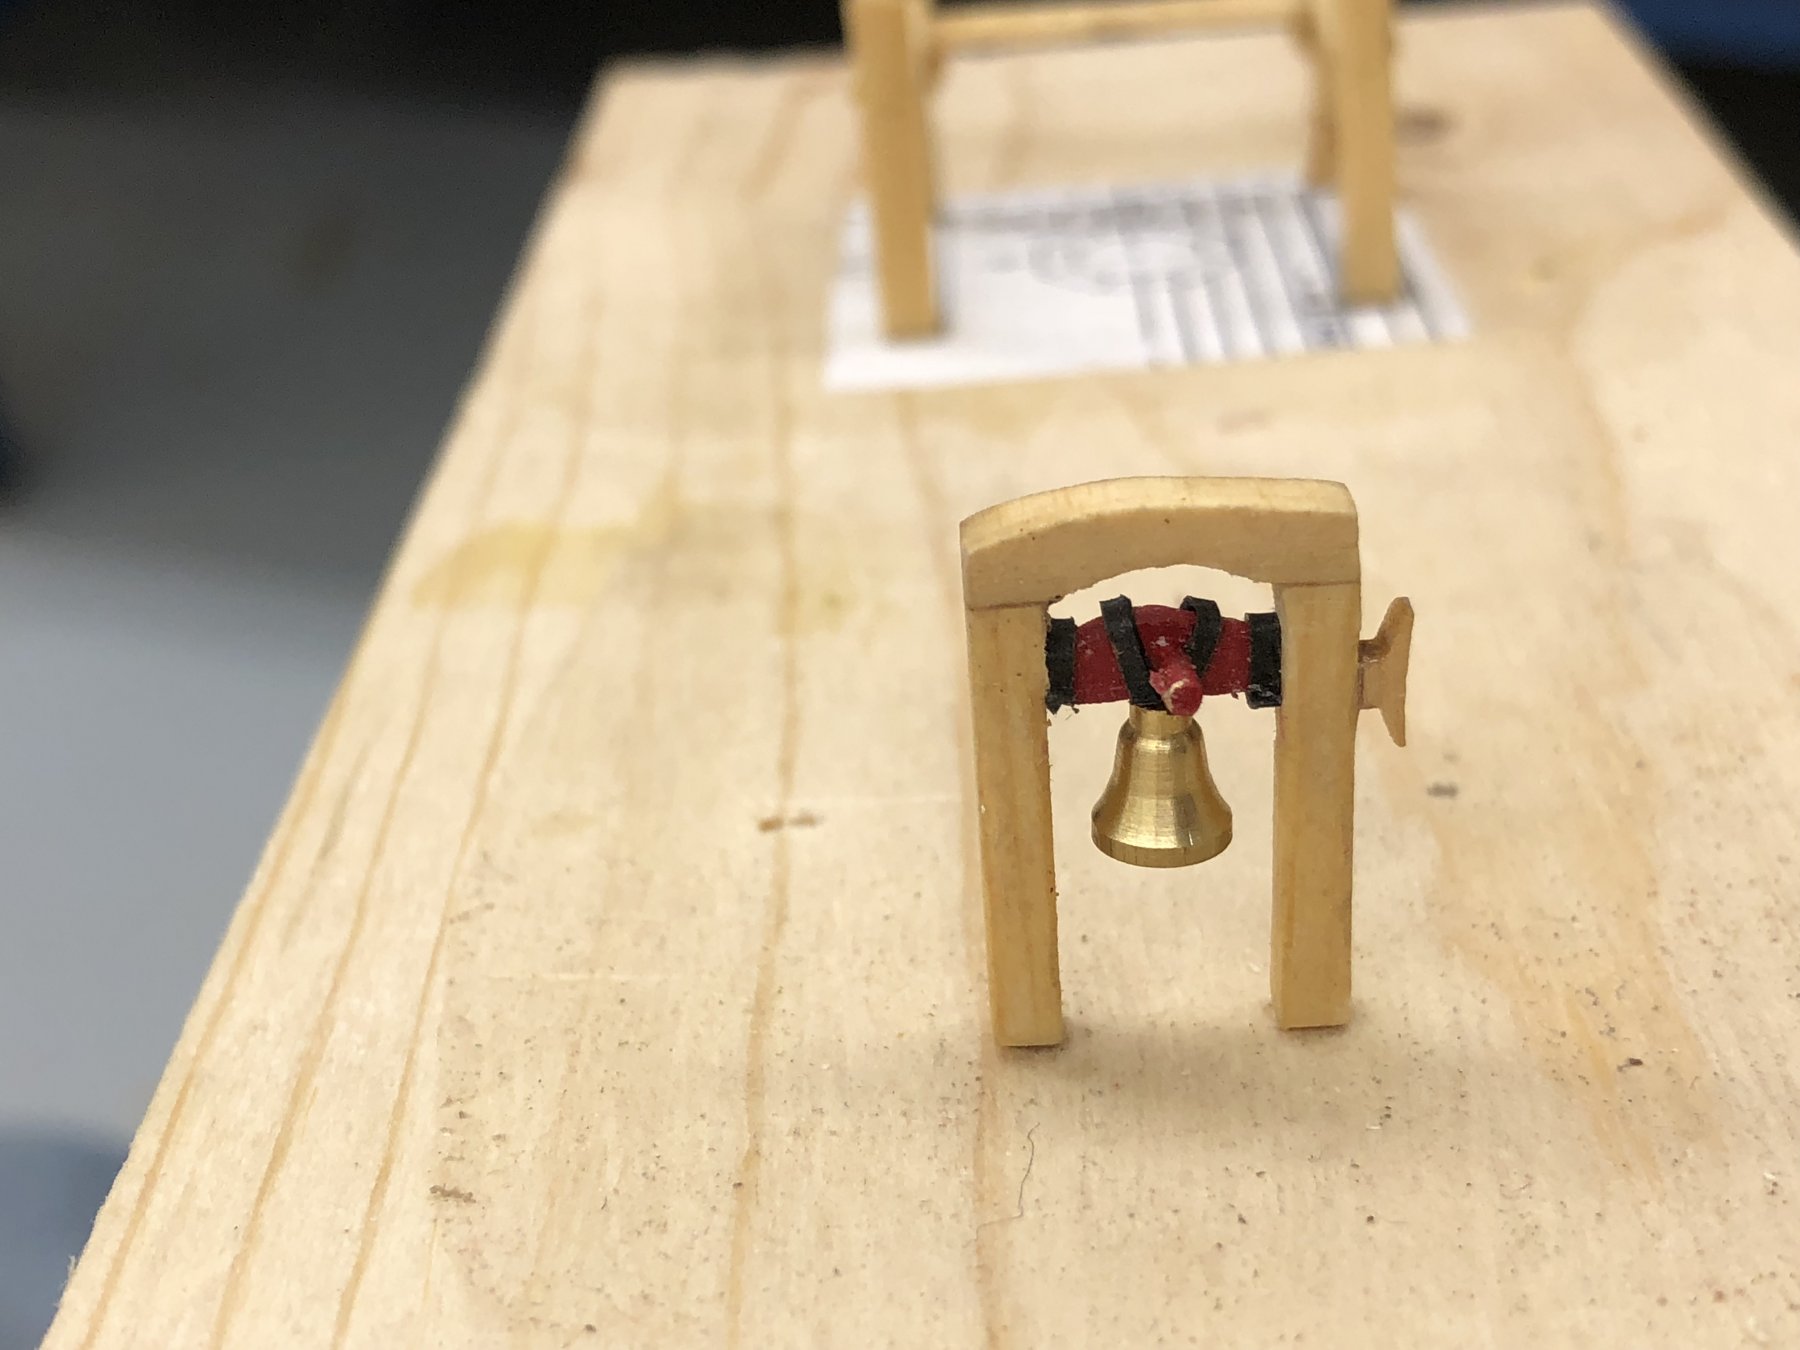
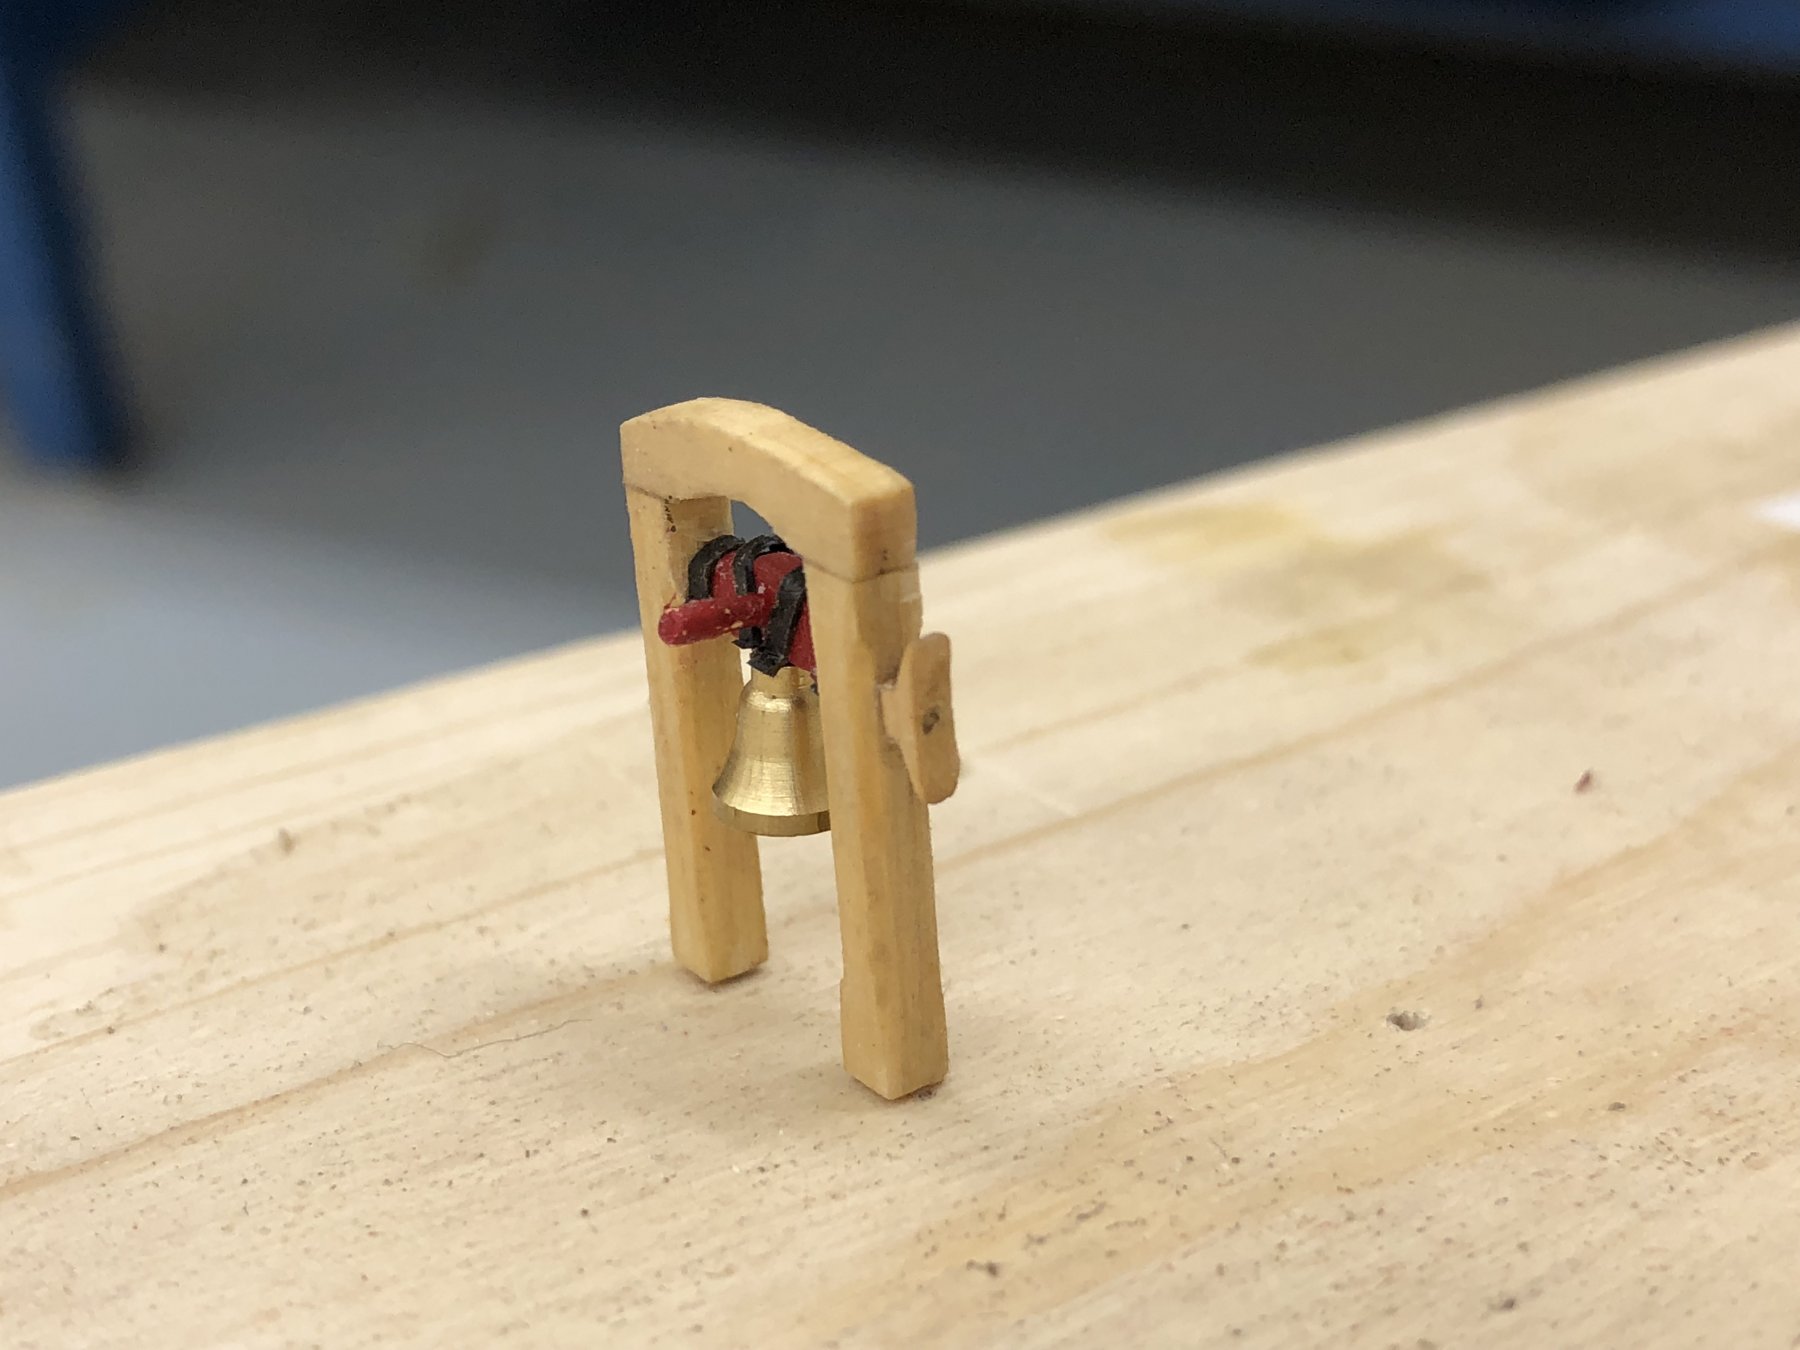
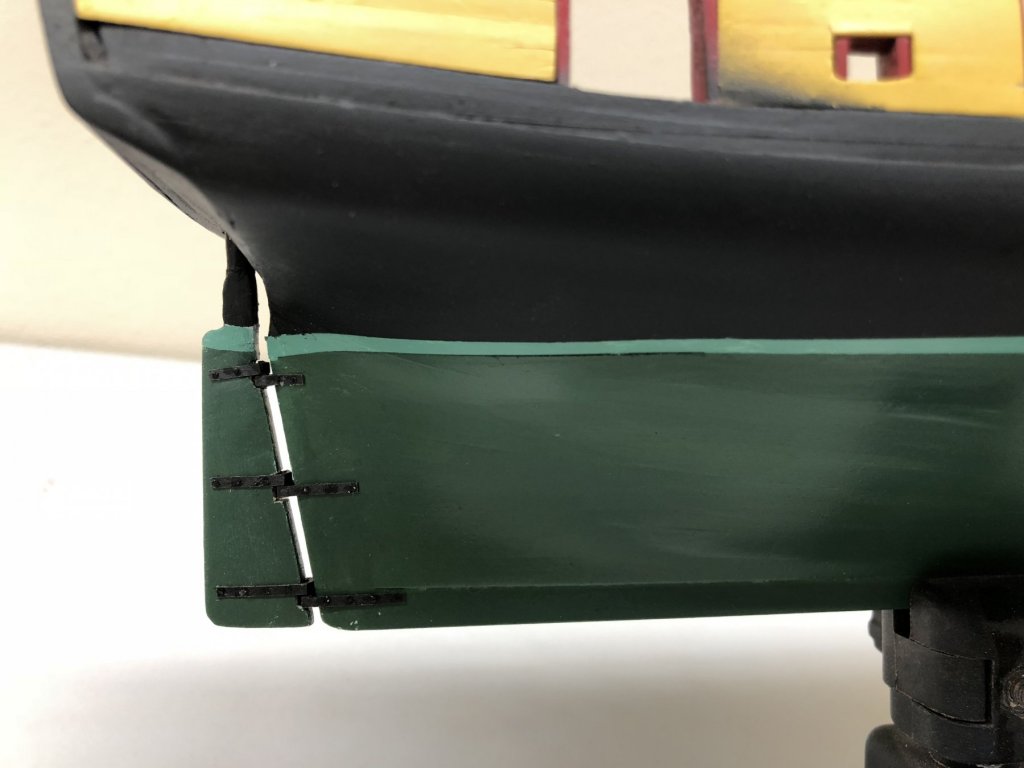
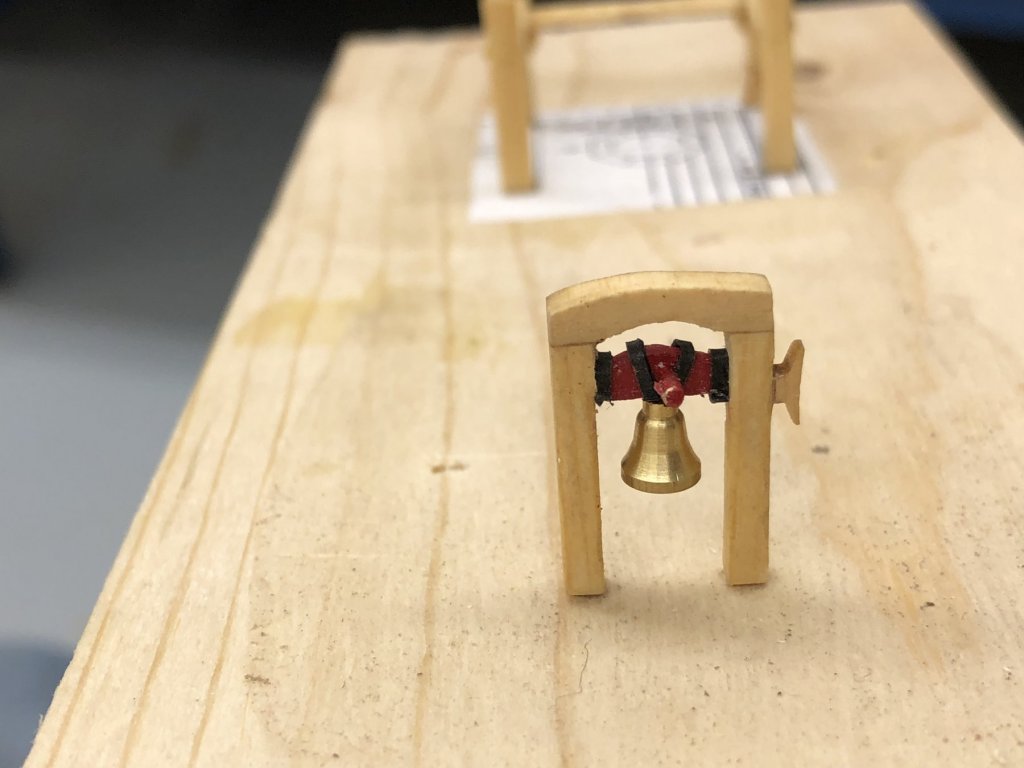
Got the rudder hung. Not much drama, just slipped the rudder post in the hole and slide it in place, drilled the holes for the wire, put a dab of CA on the end of each wire and "slide it home". Touch up with flat black paint and there you are. Also completed the "bell tower". Still working the pin rails. Made the mistake of using phosphor bronze wire for the support "iron". After I get the size correct for the rail location have to stop and paint them black, sometimes twice as the paint doesn't stick well to these. It is much easier to cut than music wire, which isn't really black either but I could probably have used it without paint. Anyway, hope to get all ten rails installed in the next day or so. Then on to stropping more blocks for the guns. Have about half of the doubles done. Only 150 more blocks to go (50 doubles and 100 singles with beckets). Speaking of gun tackle, the plans call for .016" line for the gun tackle but the Syren line comes in .012 or .018. What have others used. My choice would be to go smaller but not if it doesn't "look right". Any thoughts?

- 367 replies
-
- 3
-
-
- model shipways
- niagara
- (and 1 more)