HOLIDAY DONATION DRIVE - SUPPORT MSW - DO YOUR PART TO KEEP THIS GREAT FORUM GOING! (Only 24 donations so far out of 49,000 members - C'mon guys!)
×


cdrusn89
-
Posts
1,915 -
Joined
-
Last visited
Content Type
Profiles
Forums
Gallery
Events
Everything posted by cdrusn89
-
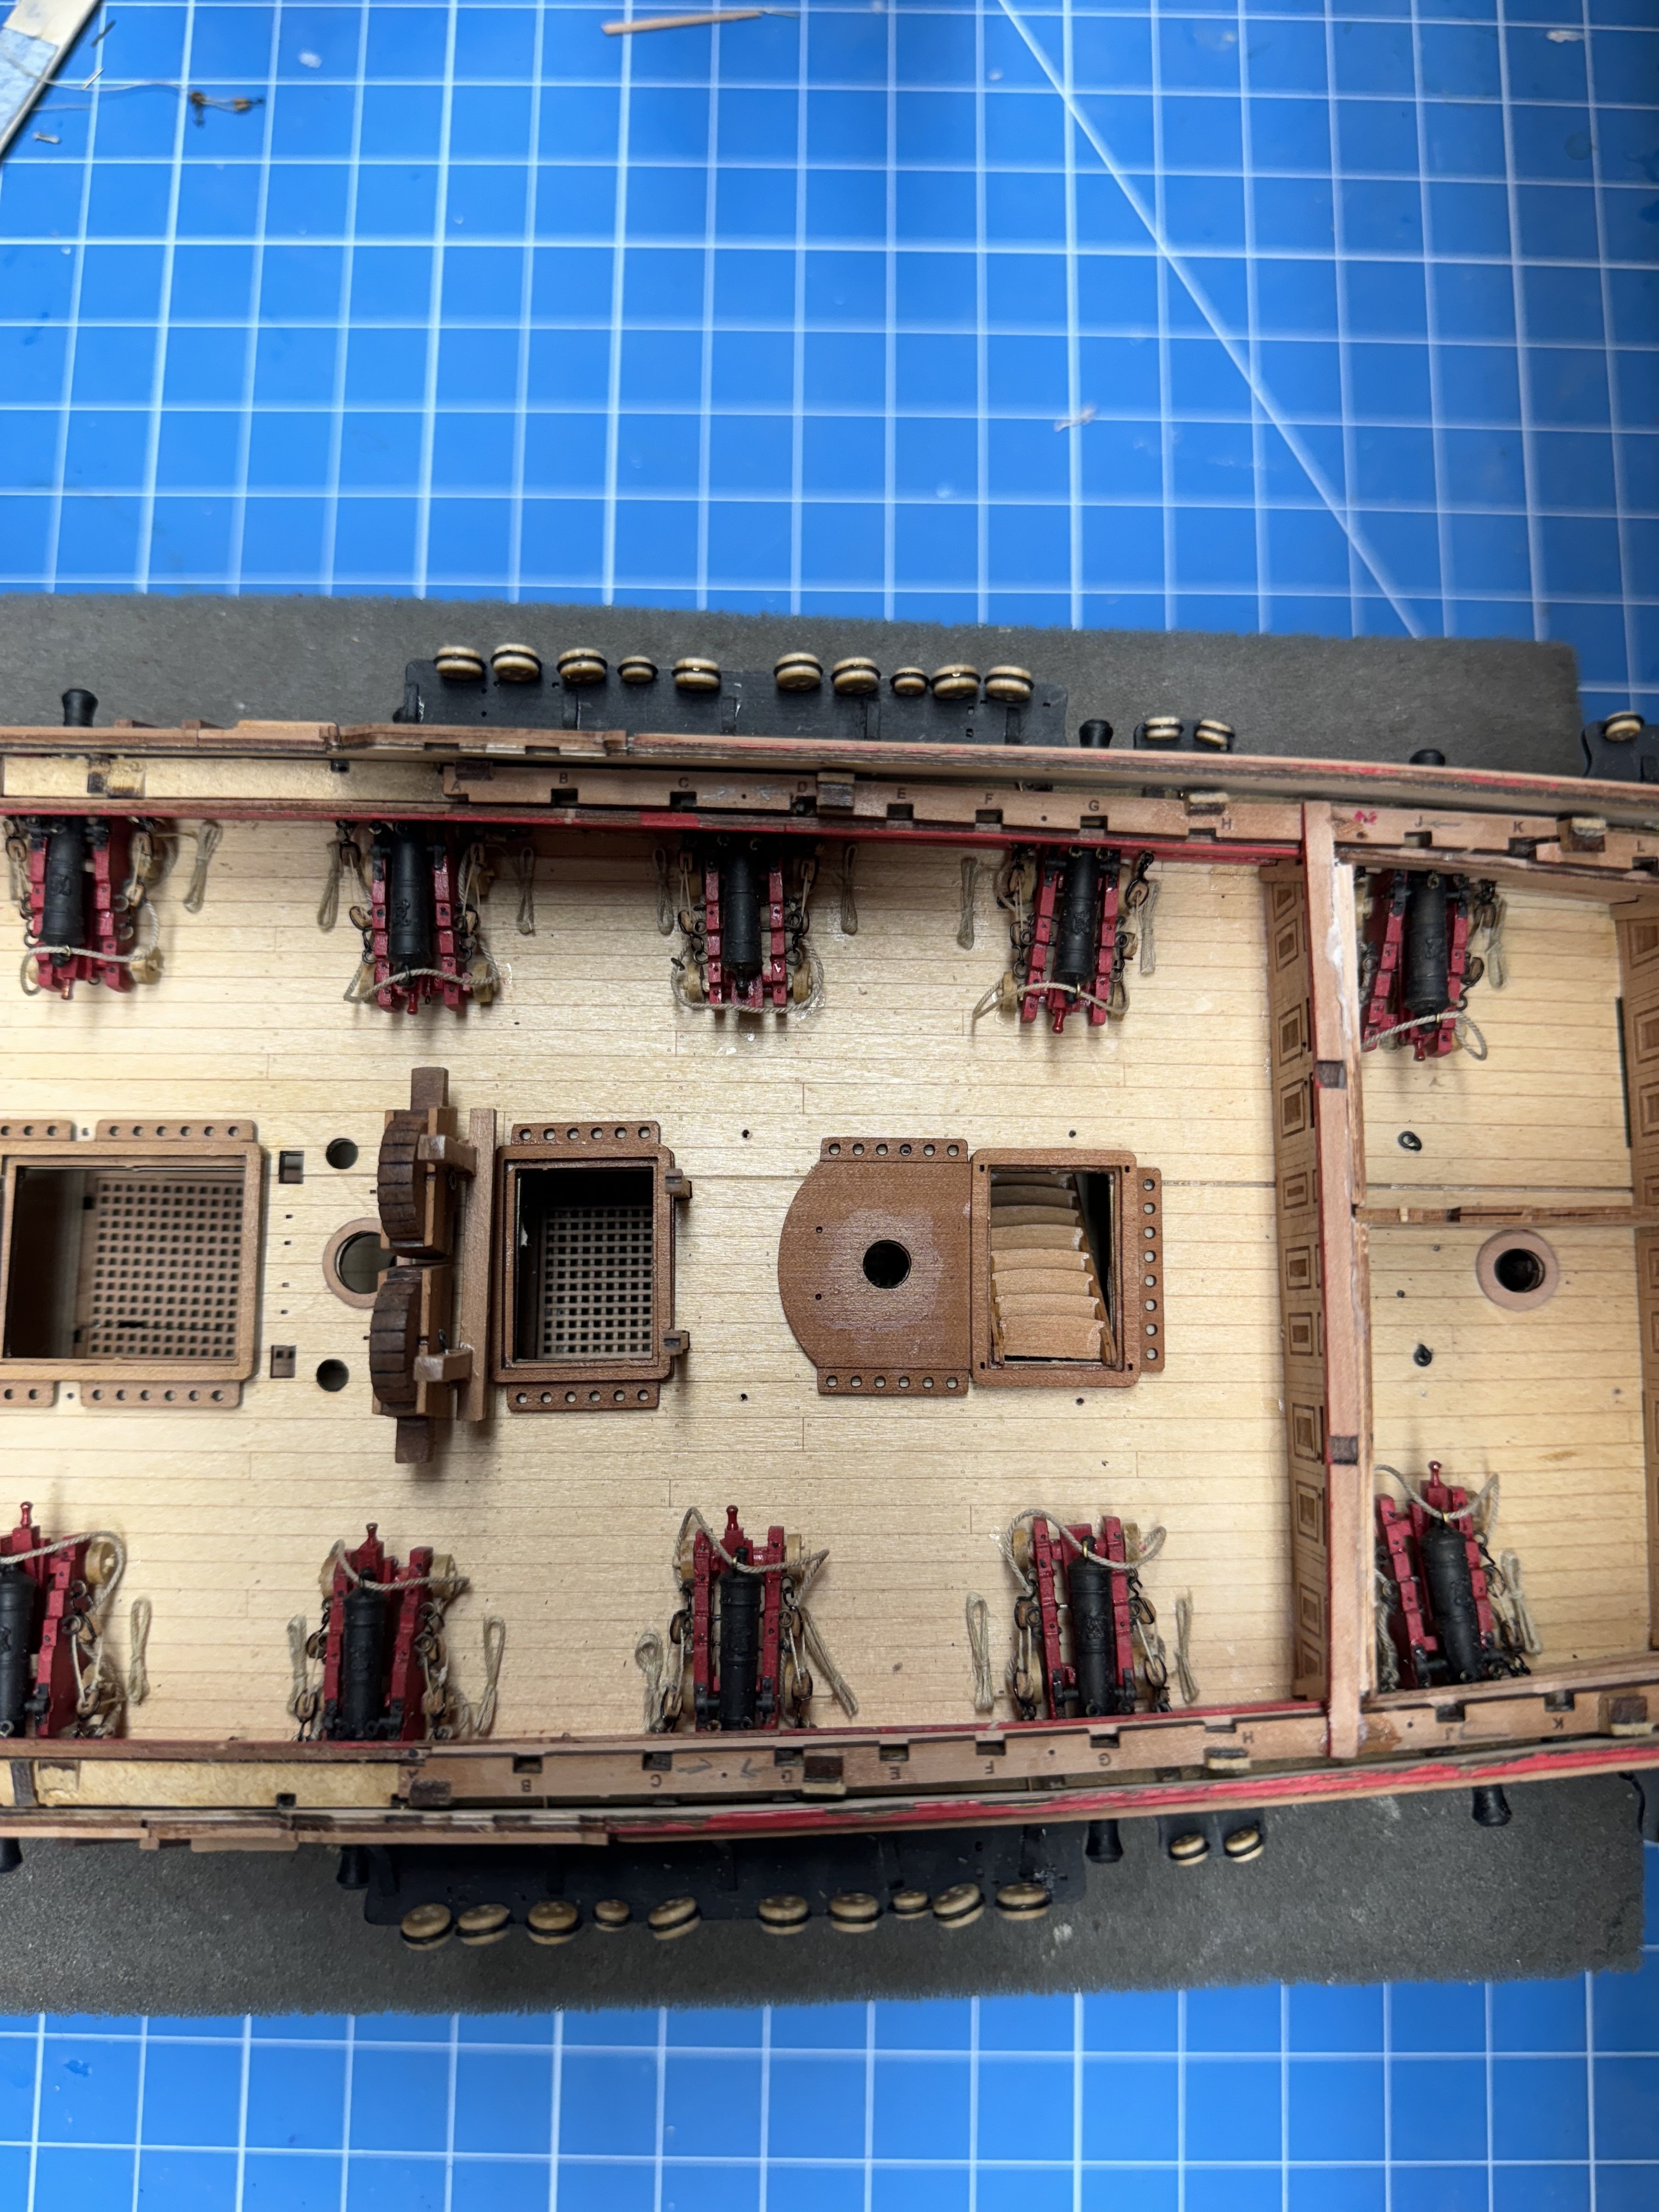
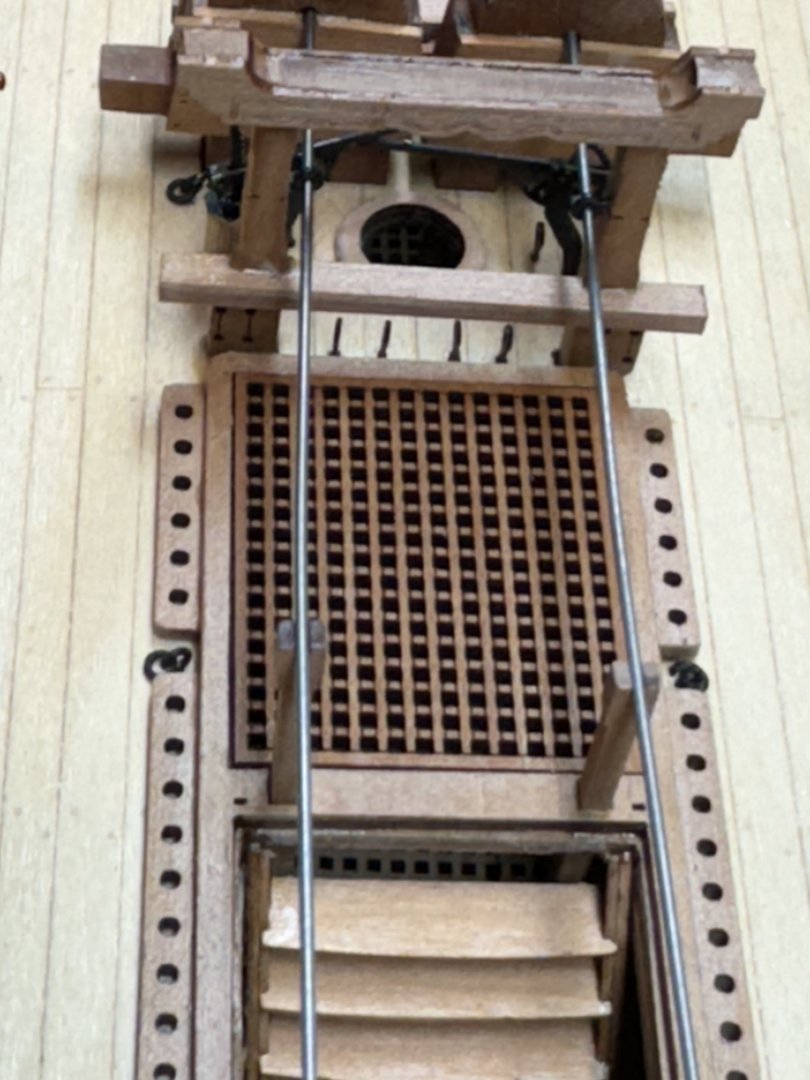
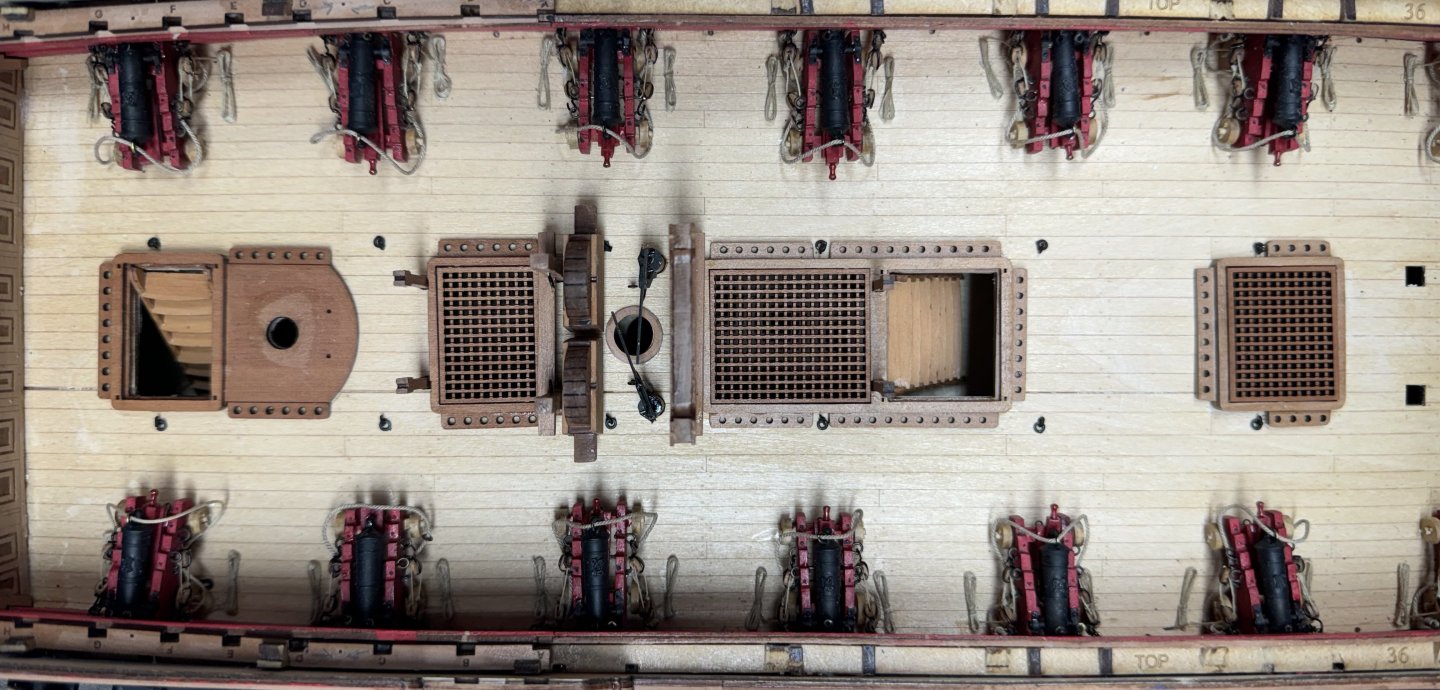
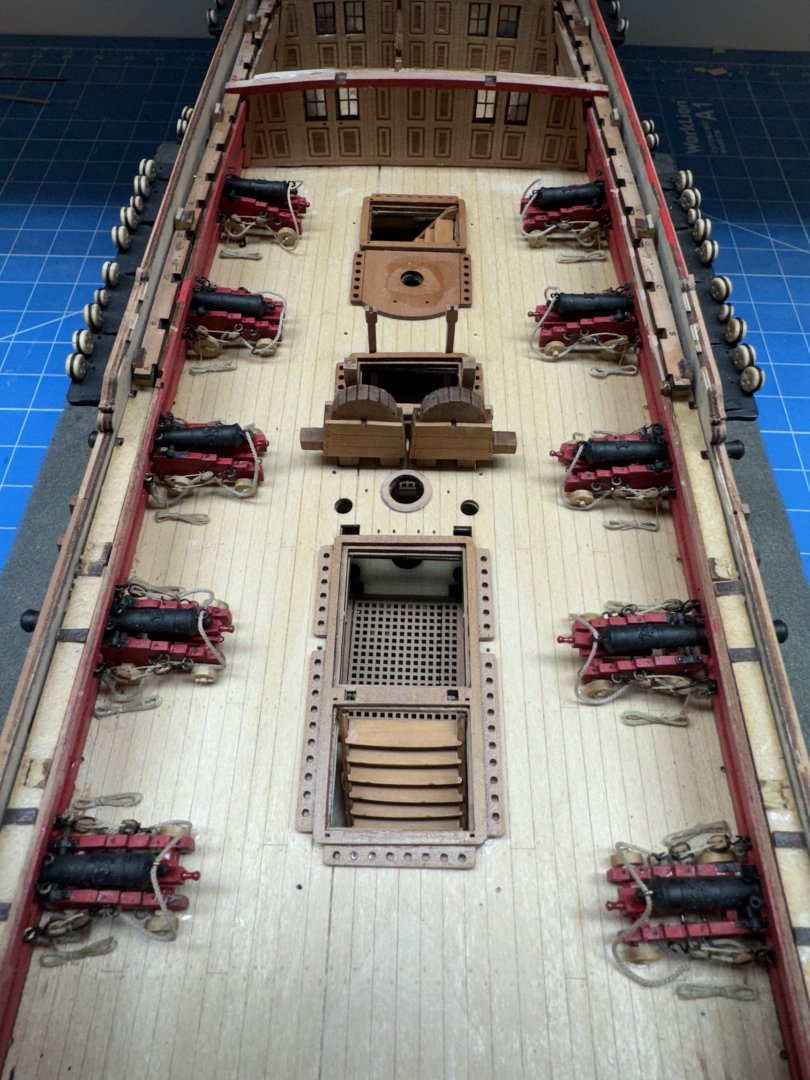
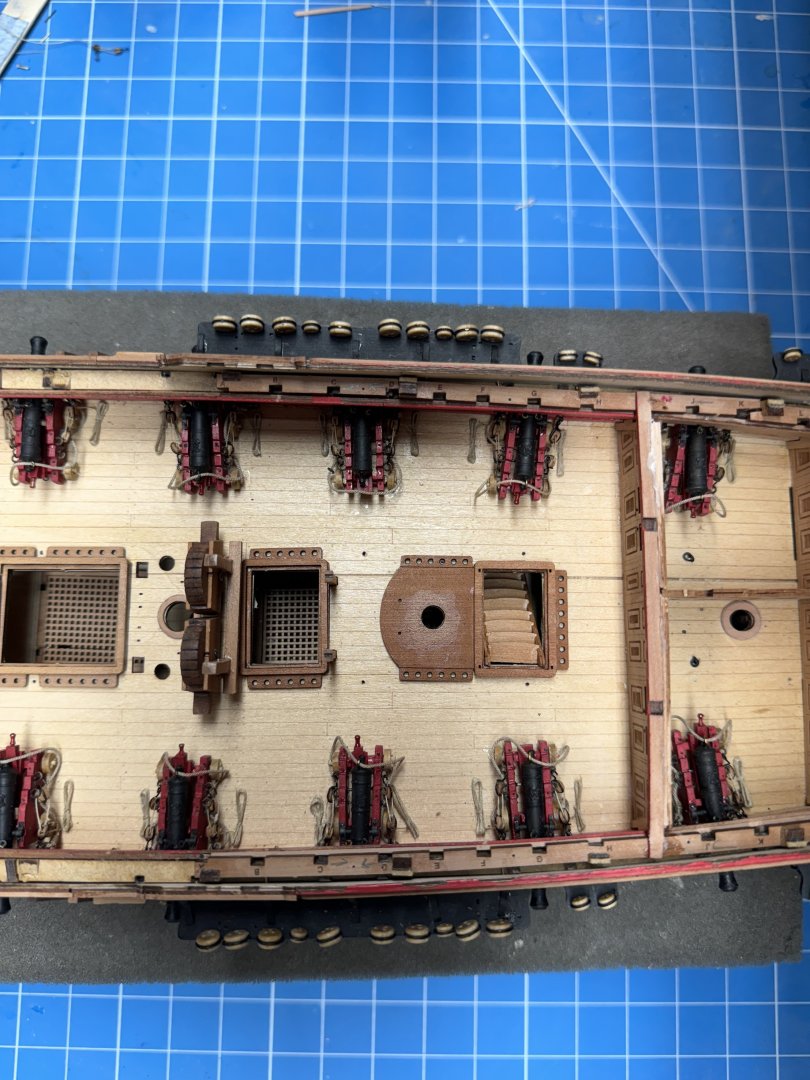
 I followed a similar procedure with the forward stanchions and Topsail Bitts. hopefully this all pays off in a few more pages when we get to the pump handles. Speaking of pump handles - I did not glue in the Hand pumps but just stuck them in their holes with the pump handles inboard. they are too delicate and likely "in the way" of something (like a hand or elbow) in the future. I will probably have to install them before the rigging but I will deal with that then. For now they are pretty much out of "harms way". I also left the hatch grating just "sitting there" for now - no sense in precluding having to get "below decks" if it is not absolutely required while still keeping any errant debris out of the lower decks.. I also installed the eyebolts around the main mast and the ring bolts in the deck behind the cannon. Next up is the stove, which is already for installation.
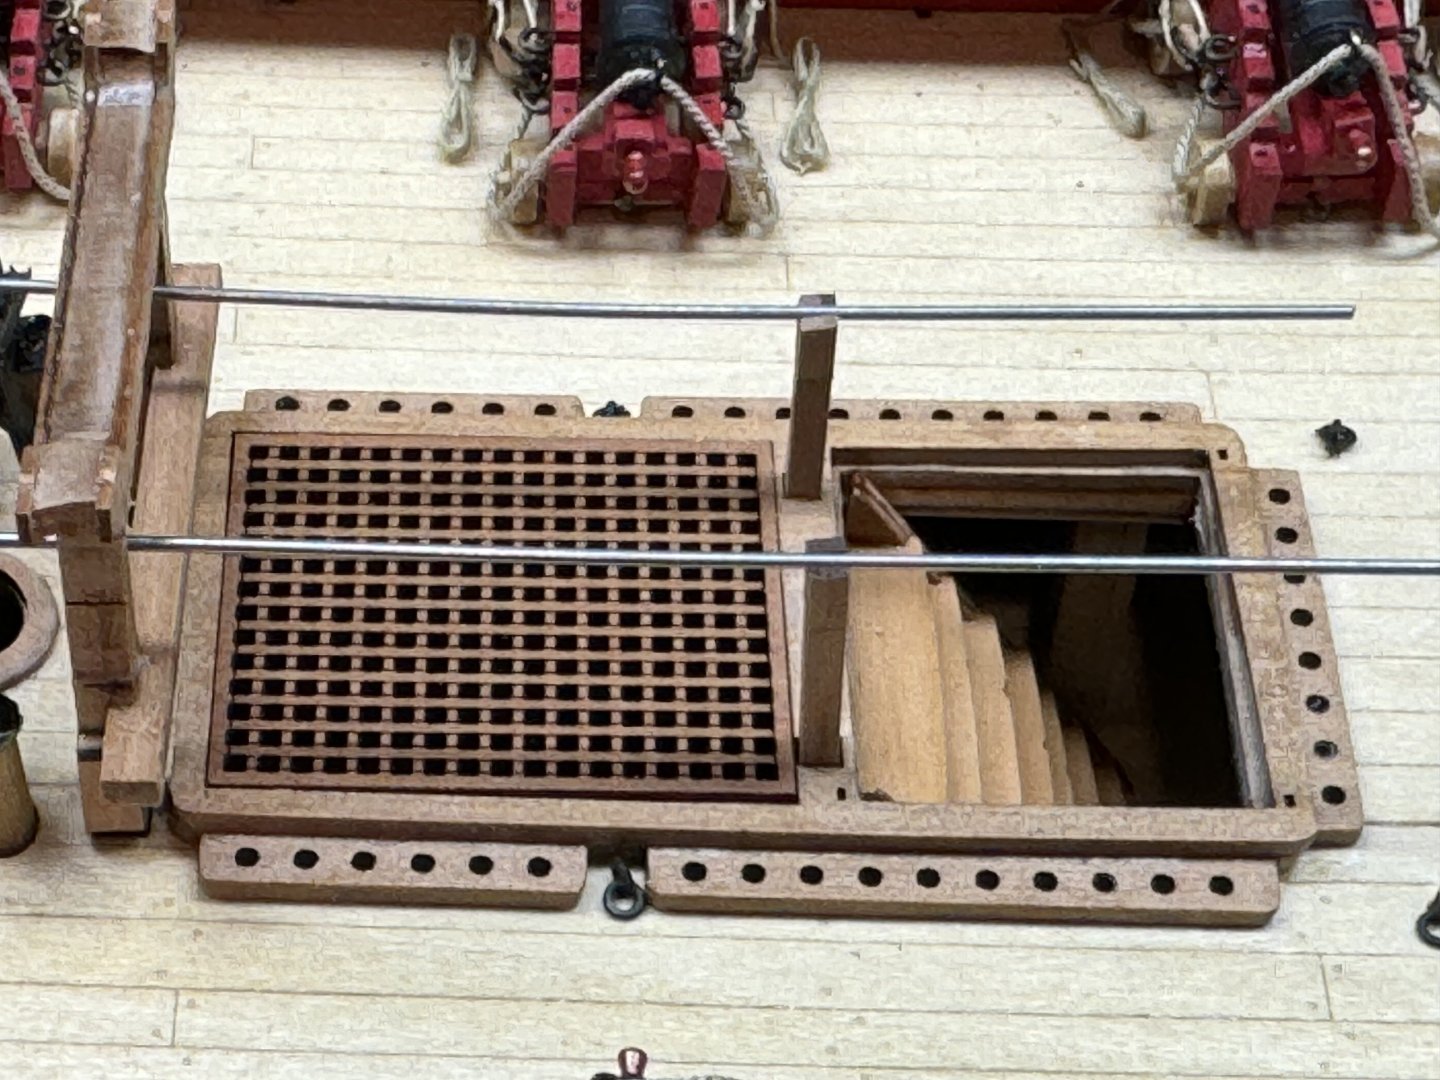
- 422 replies
-
- 4
-

-
- Vanguard Models
- Sphinx
- (and 1 more)
-
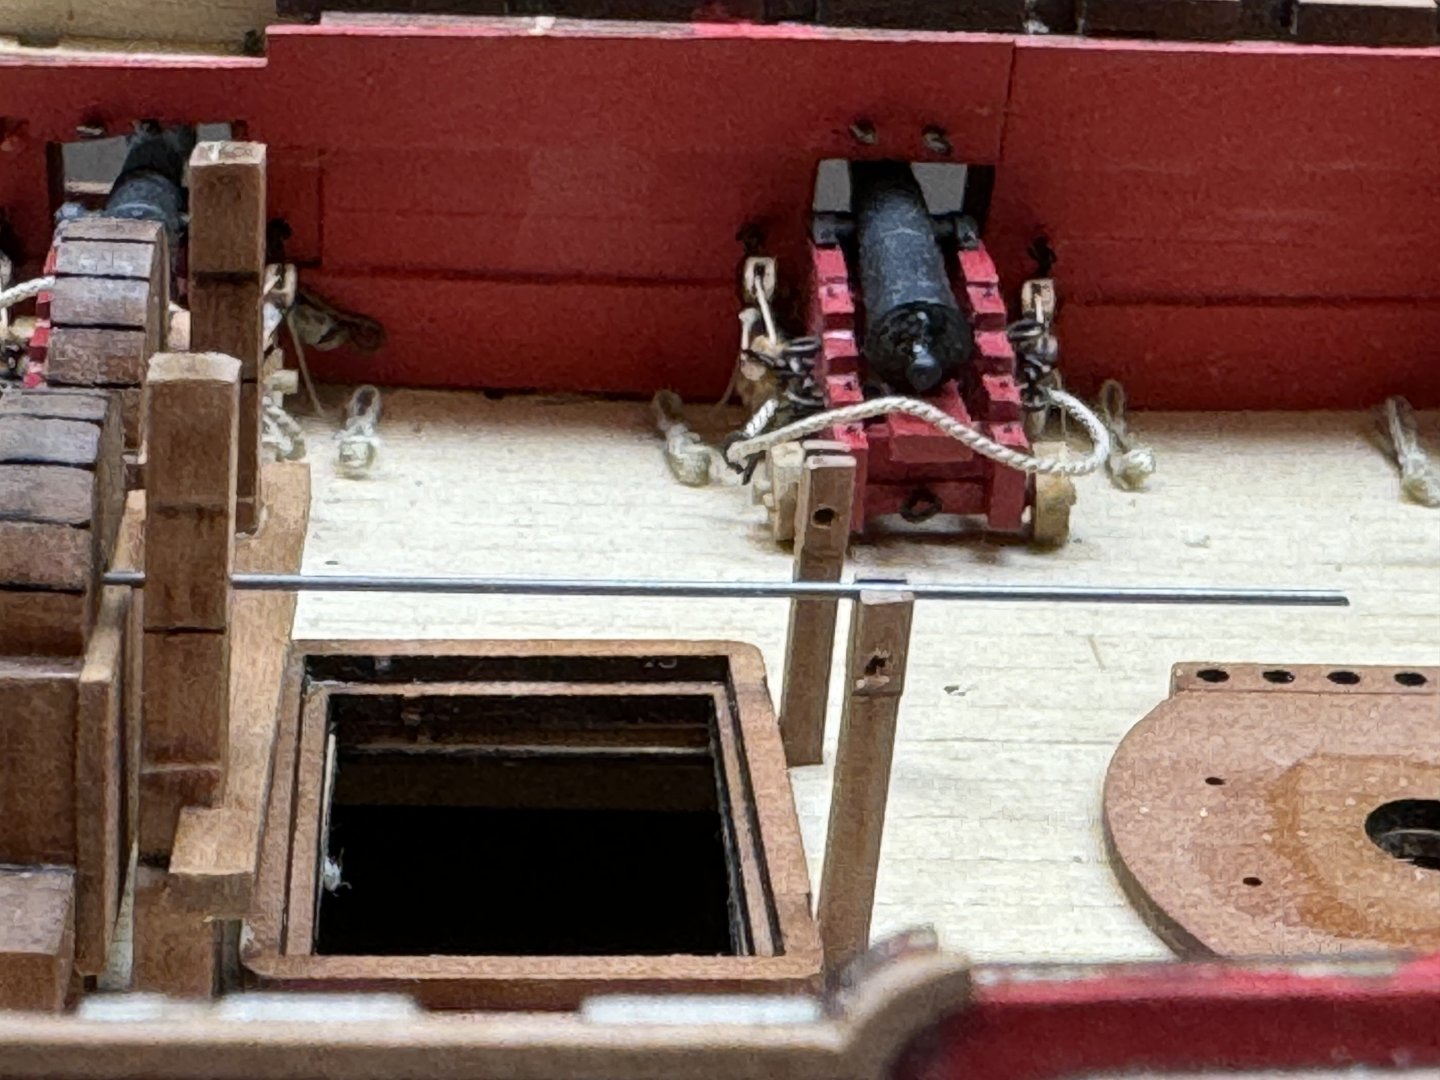
Thanks Ronald - It is certainly "taking shape". Have added the coaming and ladders to the gun deck. I assembled and added the chain pumps and the aft pump rod supports. Knowing that there will be hardware connecting the chain pumps and after support stanchions I thought it wise to check that the necessary parts were more or less aligned. Better make "allowances" now instead of trying to move things around later. So I cut a short piece of piano wire and used it to align the aft stanchion, Main Jeer Bitts and the aft side of the chain pumps. I had to move the aft support stanchion up a small bit and the chain pump down a hair to get the wire to look level. Similarly on the other side. Everything is firmly in place now so on to the eyebolts and such before I moving on to the top sail bitts. FYI - the holes in the gun deck (at least mine) need to be "finessed" a bit with a small file as even the least bit of misalignment between the ply deck and the maple deck will make getting the various pieces through "difficult".
- 422 replies
-
- 4
-
-
- Vanguard Models
- Sphinx
- (and 1 more)
-
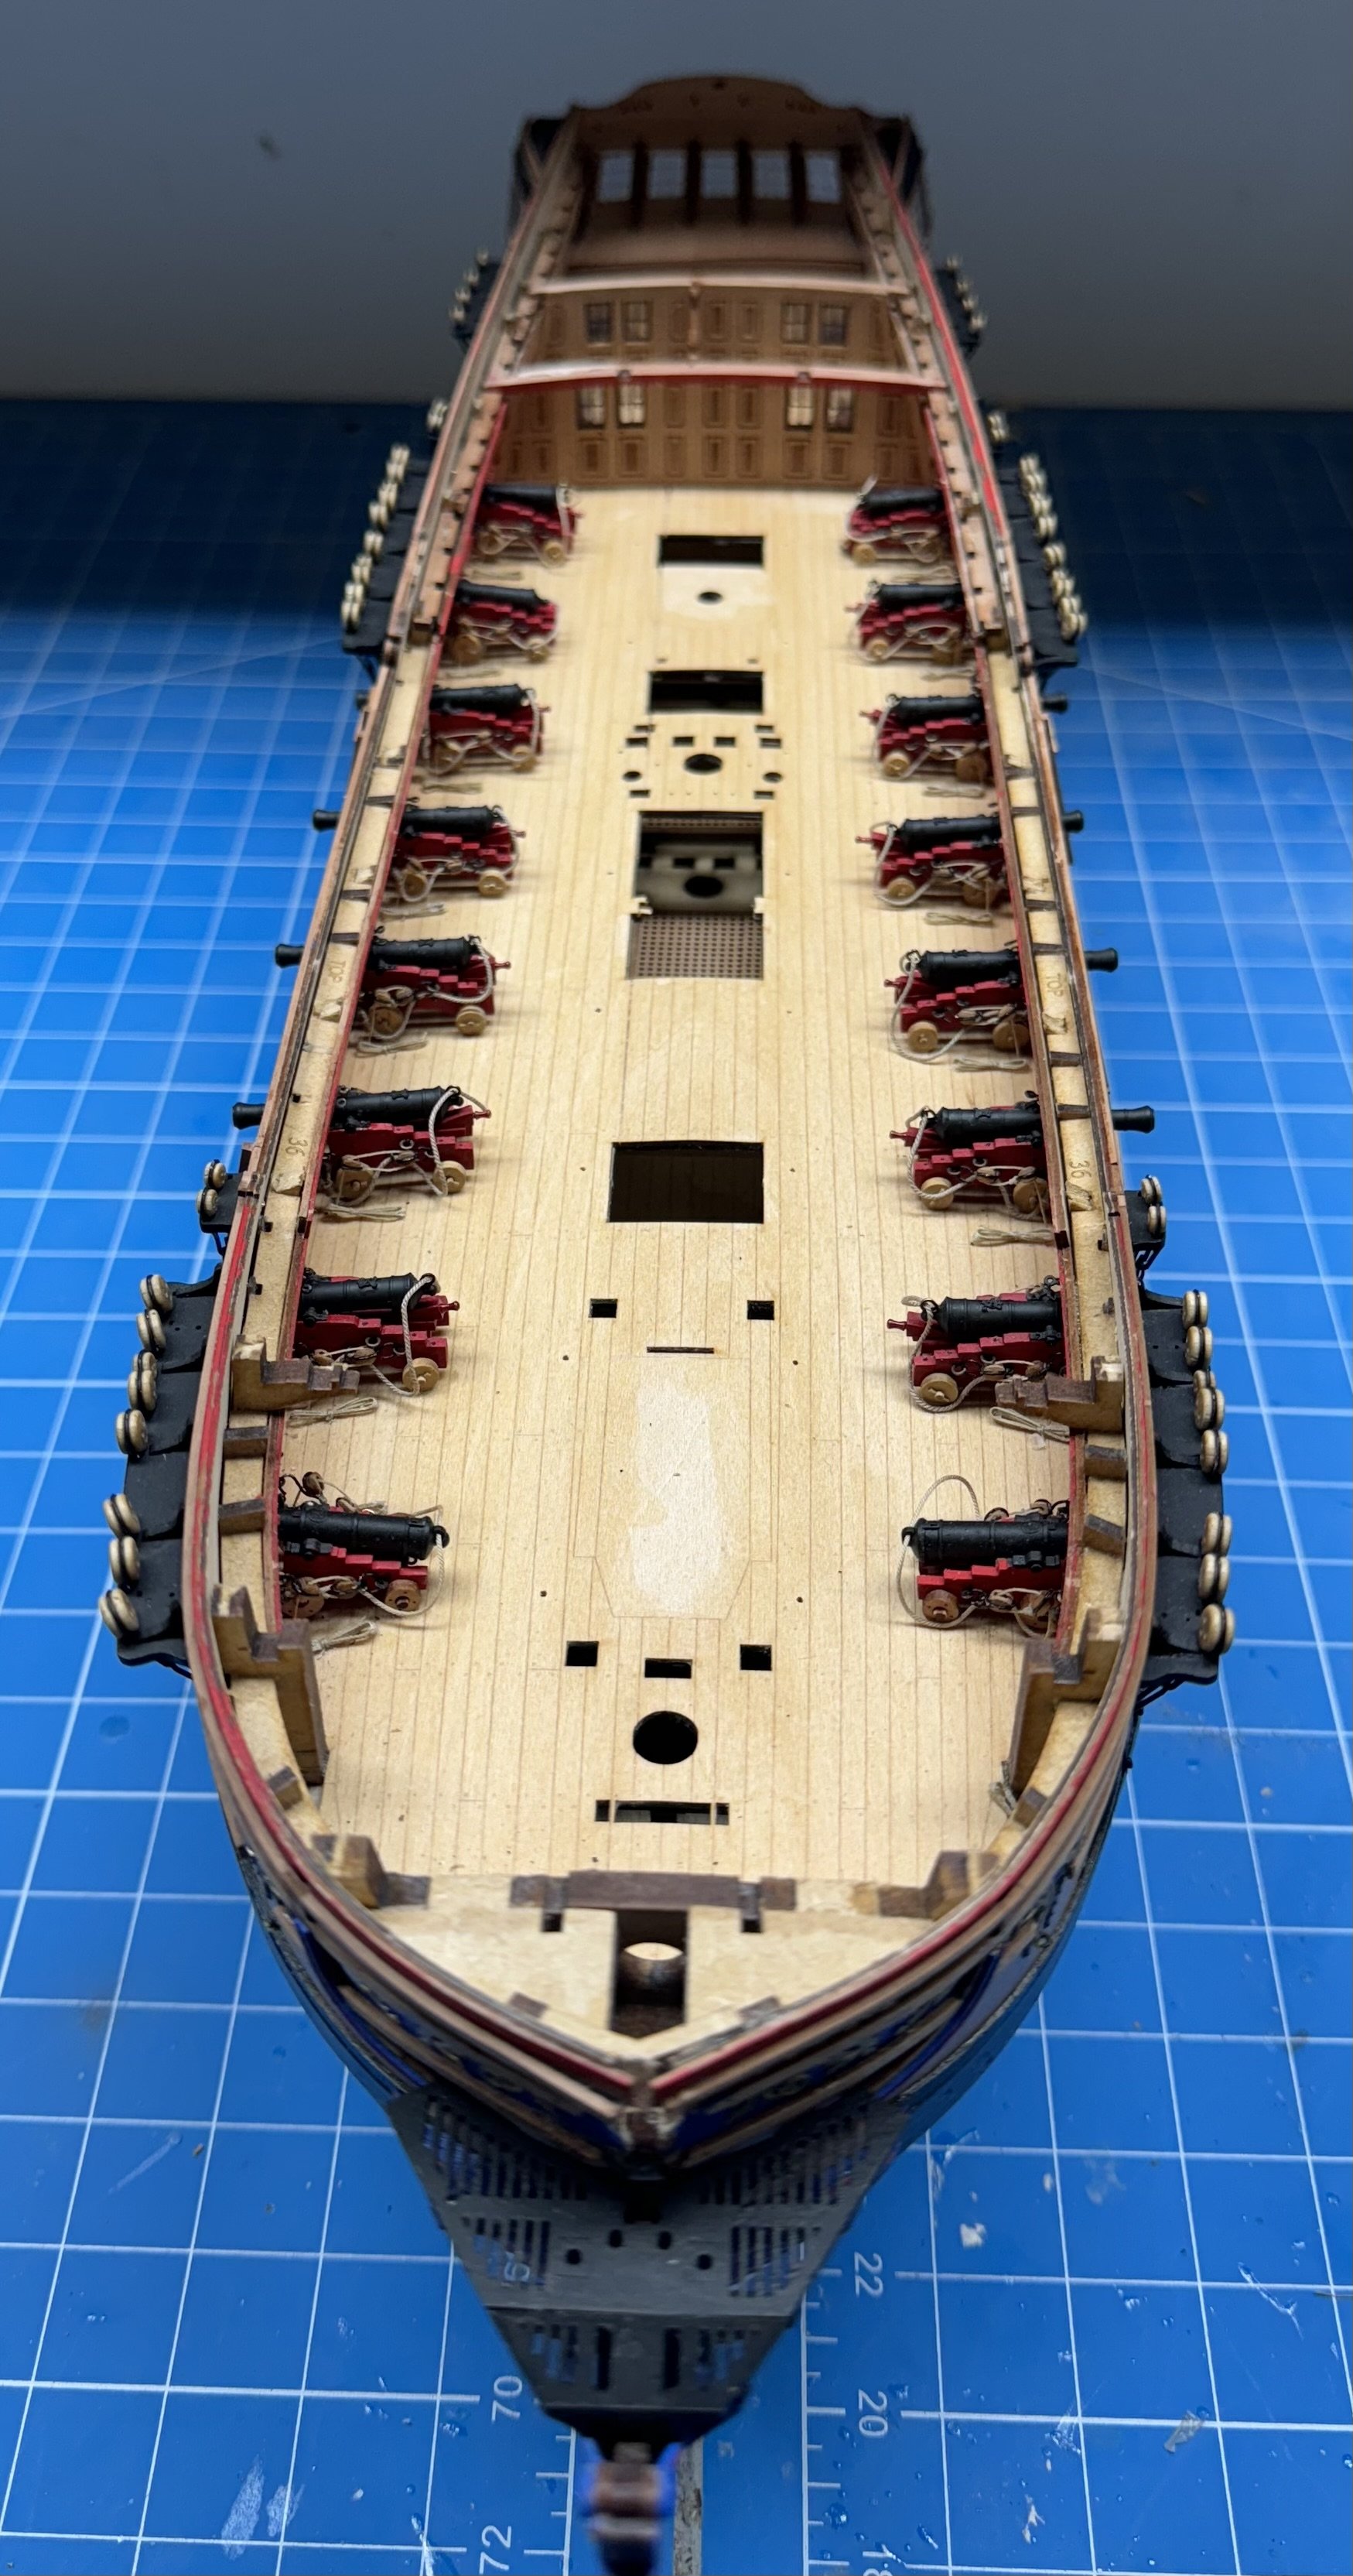
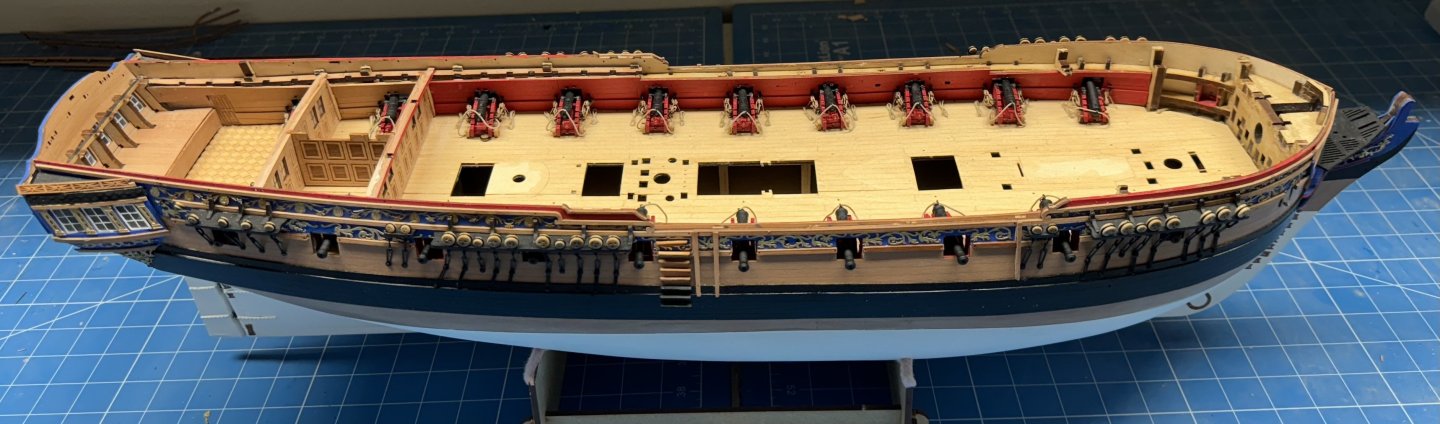
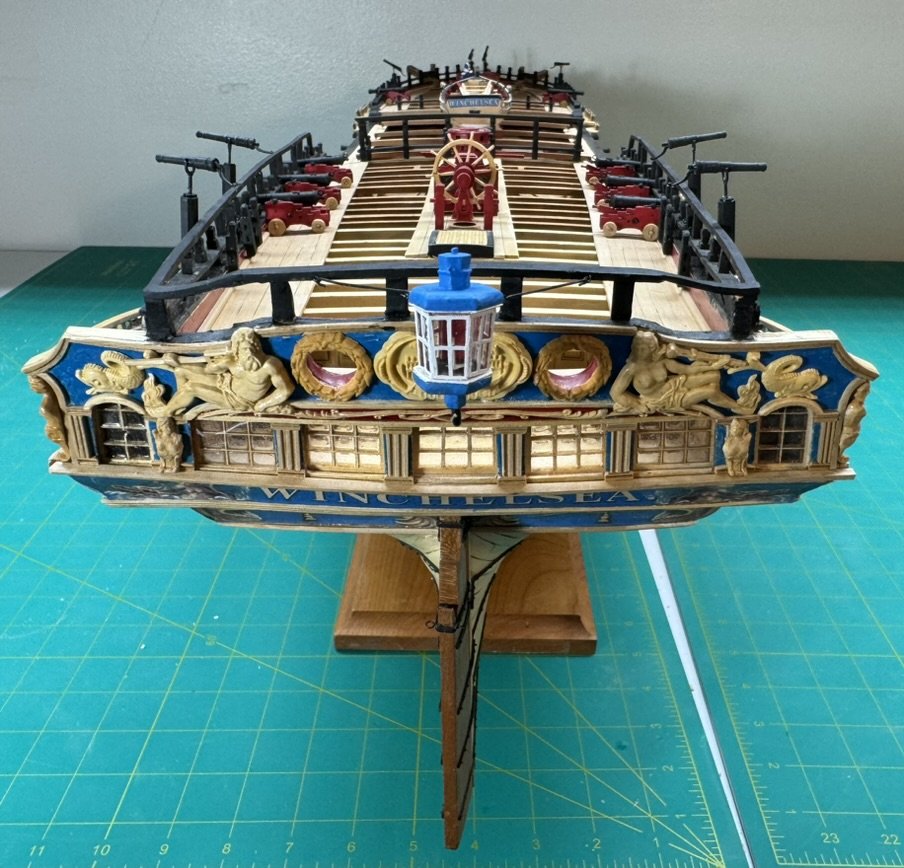
A milestone (of sorts). All the deadeyes and chain plates are rigged and touched-up, interior bulkheads outfitted and installed. Here is my version of step 349, except I have all the cannons installed and rigged. Now on to the "inerds" in earnest.

- 422 replies
-
- 6
-
-

-
- Vanguard Models
- Sphinx
- (and 1 more)
-
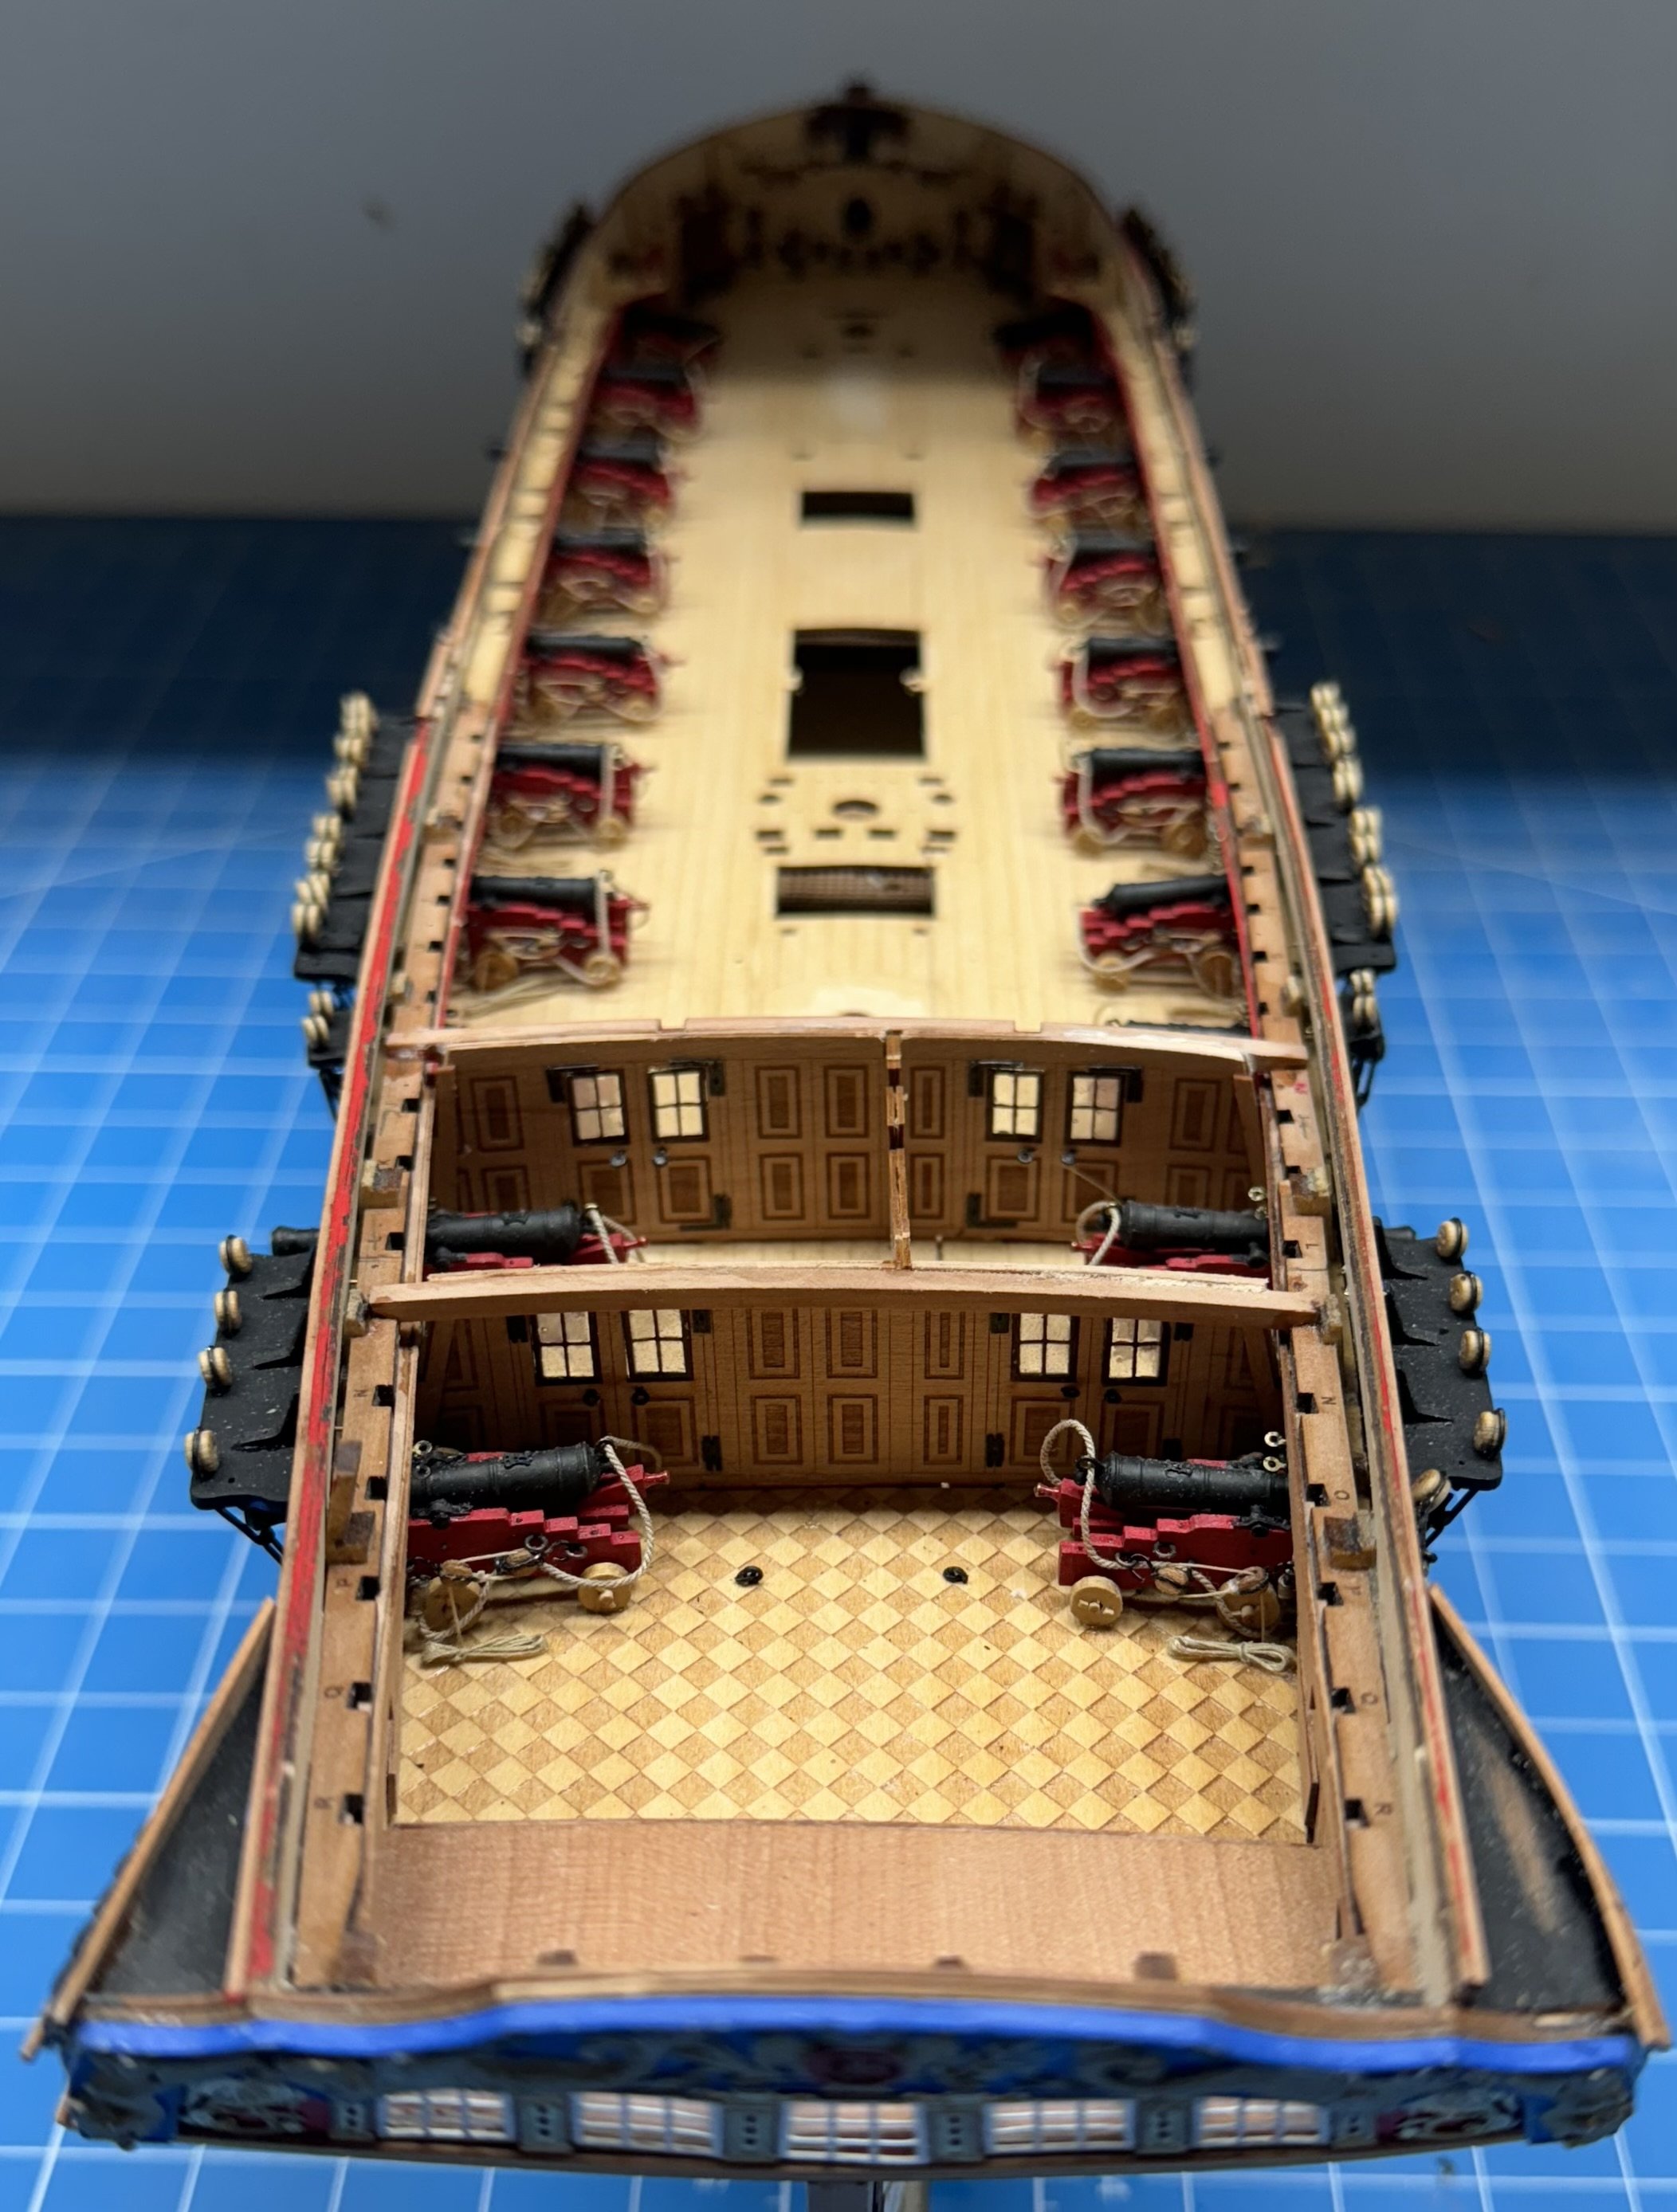
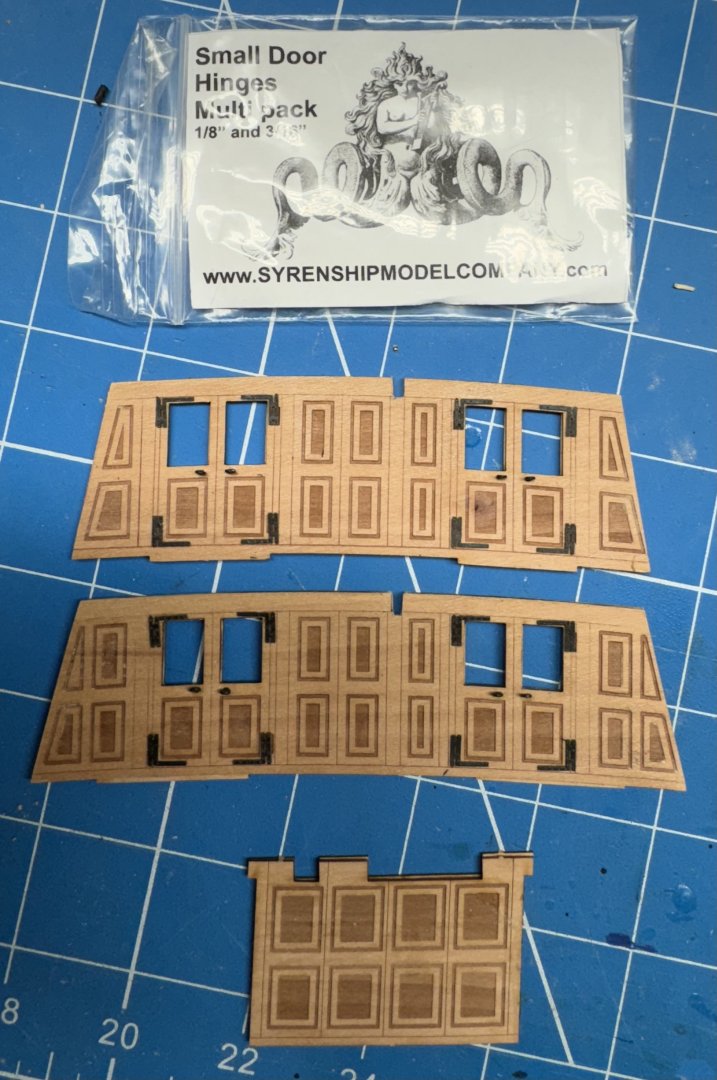
Thanks Brunnels - I thought of one m ore reason why doing the cannon now helps out - no worry about getting a chain plate in front of a cannon. Probably should not be a problem in any event but... Here are the bulkheads ready for the windows. I used the kit provided door "knobs" but used the Syren 3/16" small door hinges instead. I used the "window maker" in the window frames and will mount the windows when that is dry.
- 422 replies
-
- 5
-
-
- Vanguard Models
- Sphinx
- (and 1 more)
-
This is as far as i can go until I get the bulkheads "outfitted". I have the hinges and door knobs on and has a coat of polycrylic flat applied. Now it is time for the windows and window frames. I may try the "window maker" again since you would have to be pretty spry to actually be able to look through them.

- 422 replies
-
- 8
-
-
- Vanguard Models
- Sphinx
- (and 1 more)
-
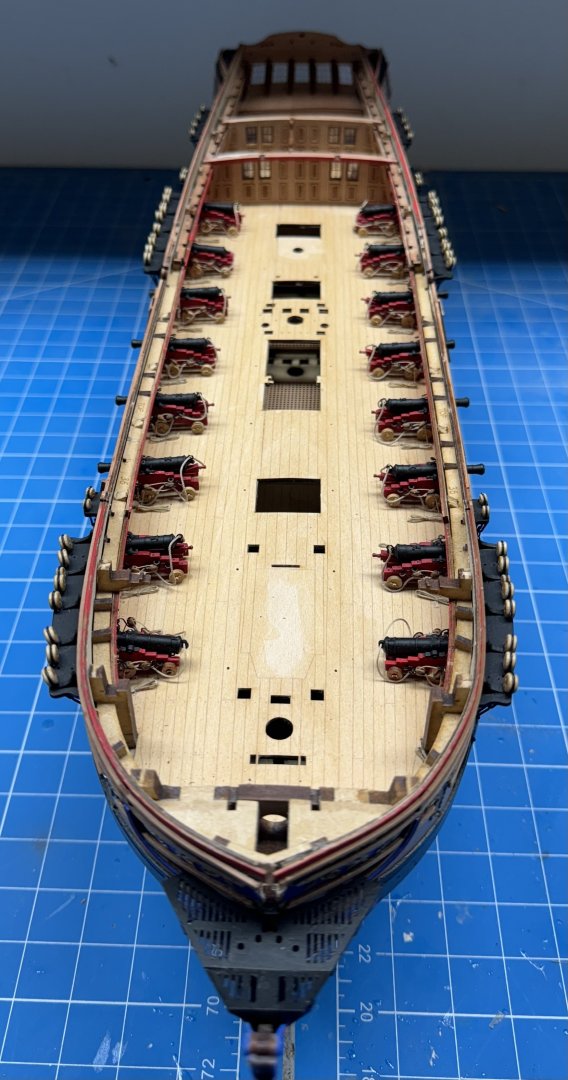
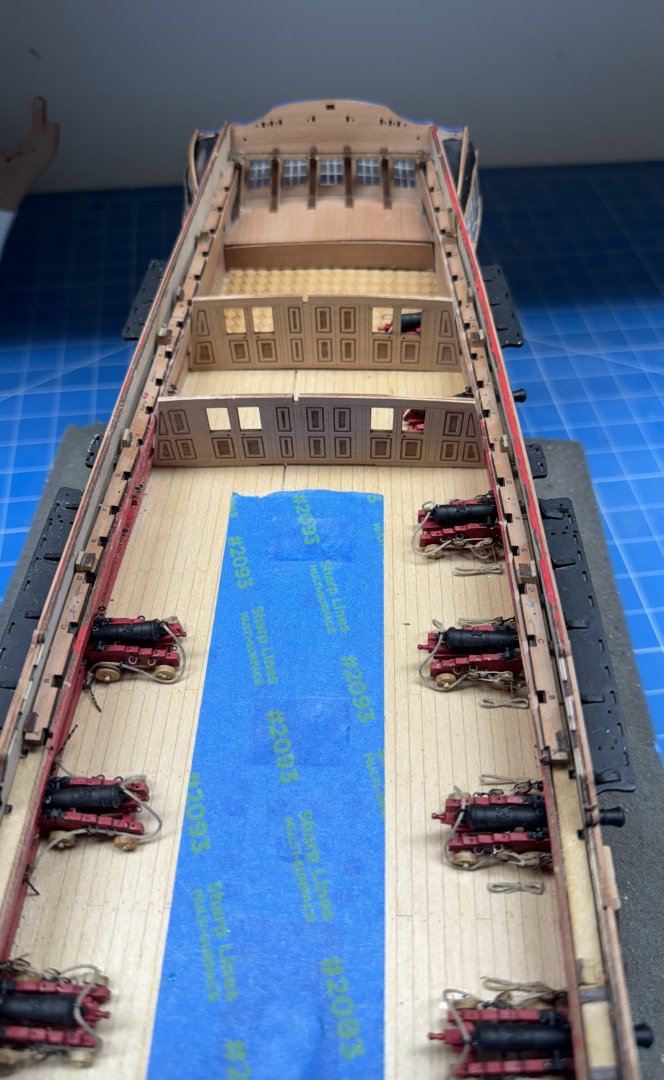
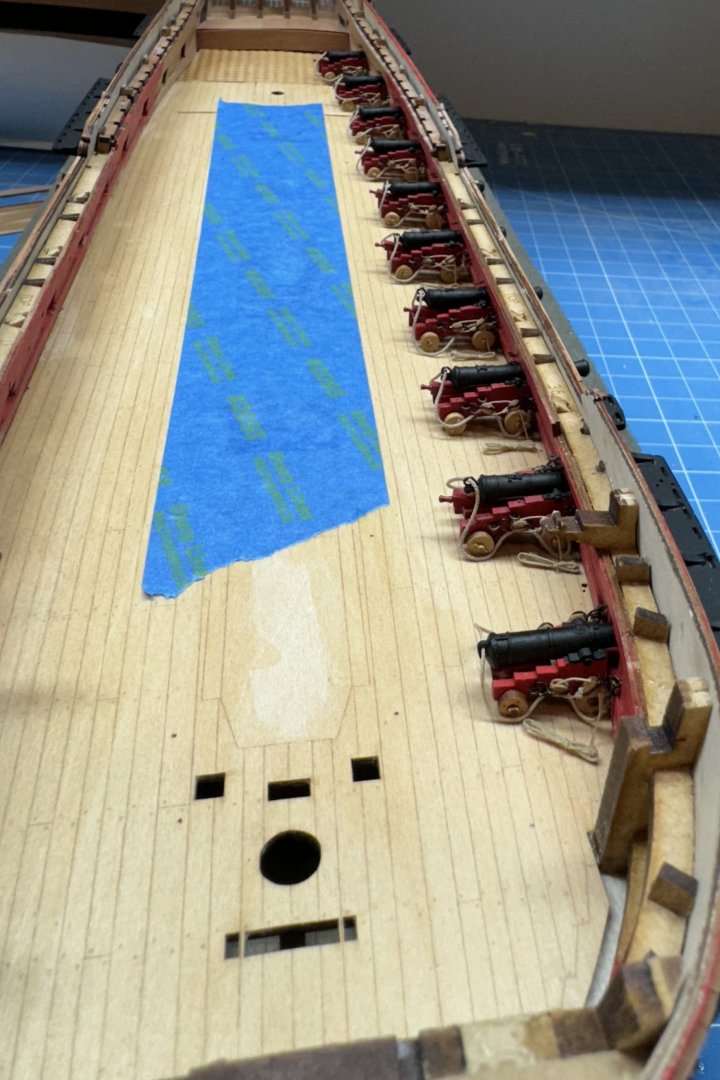
The cannon install saga continued. I started on the port side working forward to aft. After i got the first five installed I started to wondered about how to handle the last five and having enough room to get the bulkheads fitted and installed. So I glued the two bulkhead together and started fitting them (they were too wide by a mm or two) and it was quickly obvious that the 8th and 9th cannon would have made getting the bulkheads in place impossible. So I will add cannon number 6, 7 and 10 and then install the bulkheads (suitably outfitted and varnished) before putted the last two cannon in. There appears to be sufficient room to work but you never know until you try. Bottom line - yes installing the cannon before the centerline "stuff" works great BUT you have to have the bulkheads ready for installation and fitted (not necessarily glued in place) before installing the the last three cannon on one side.
- 422 replies
-
- 7
-
-
- Vanguard Models
- Sphinx
- (and 1 more)
-
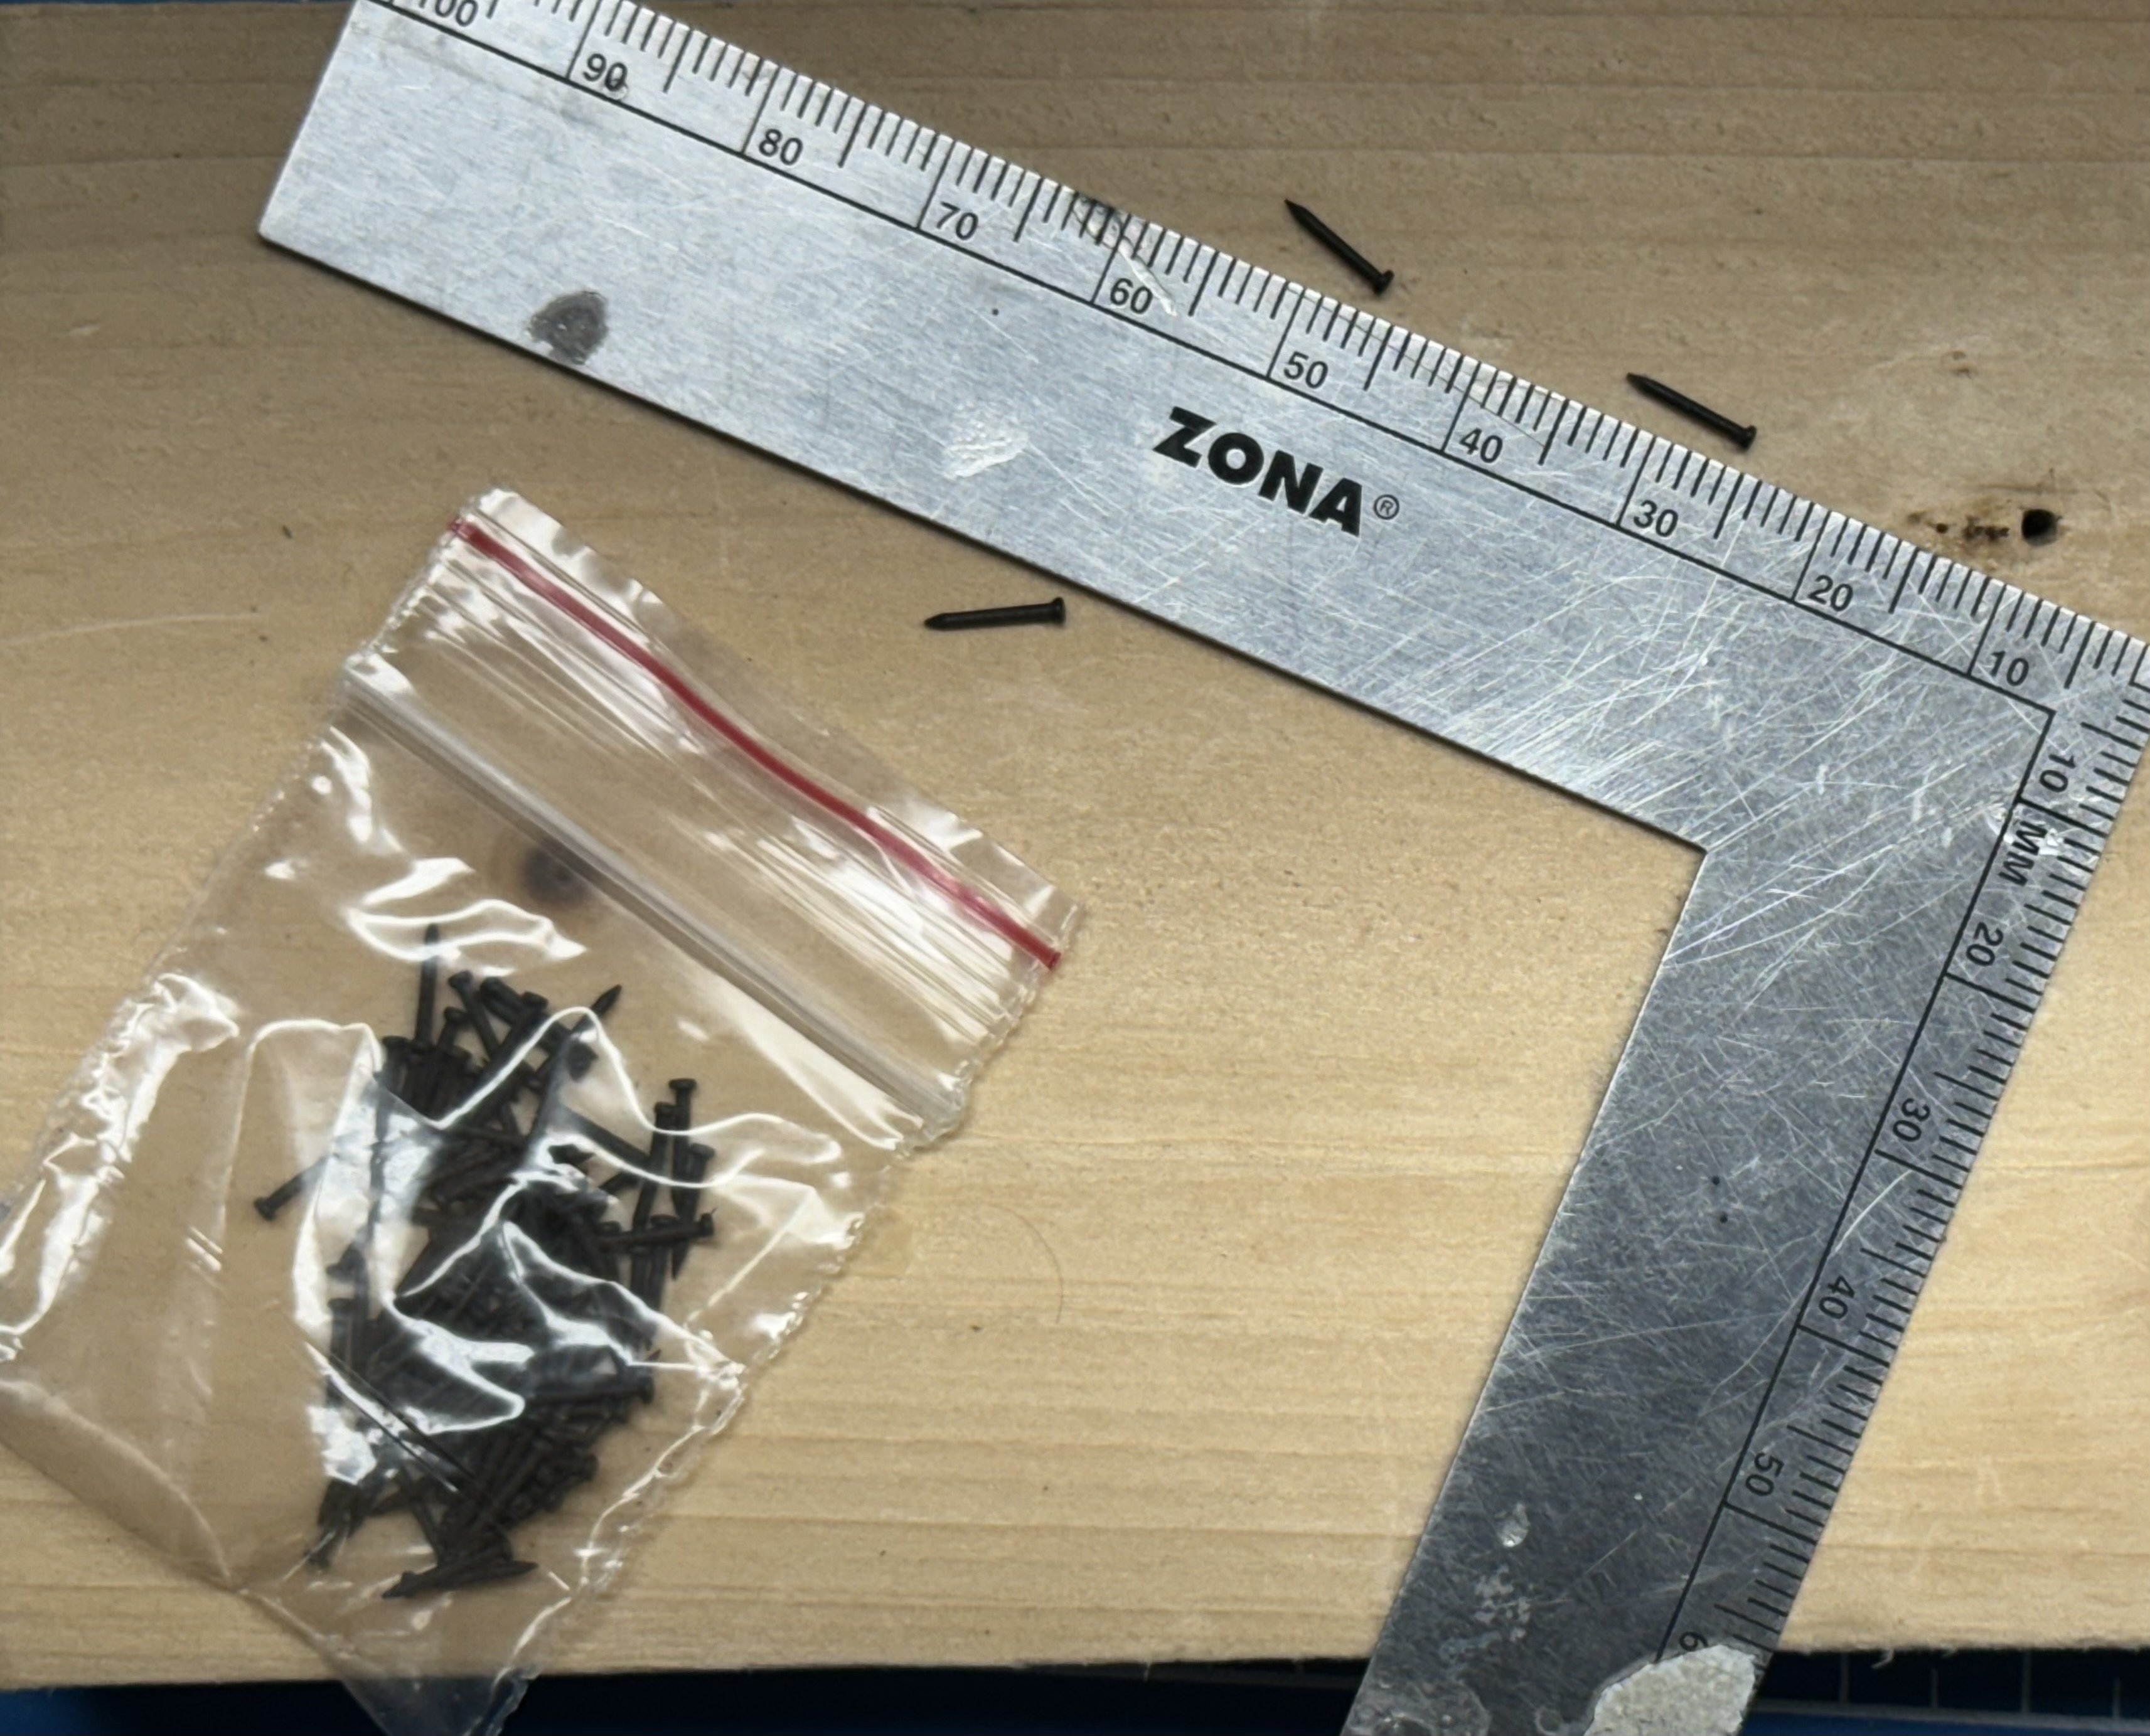
I remember someone asking where to get more pins. I got these from Historic Ships and they are 7.5mm long (a bit shorter than the ones that came in the kit) and are black and magnetic so they are not "colored" brass but of some magnetic material (iron/steel most likely). I plan on using them on the chainplates so I don't have to paint the heads of the brass ones plus they may not need to be cut off like the ones included in the kit.

- 422 replies
-
- 3
-
-
- Vanguard Models
- Sphinx
- (and 1 more)
-
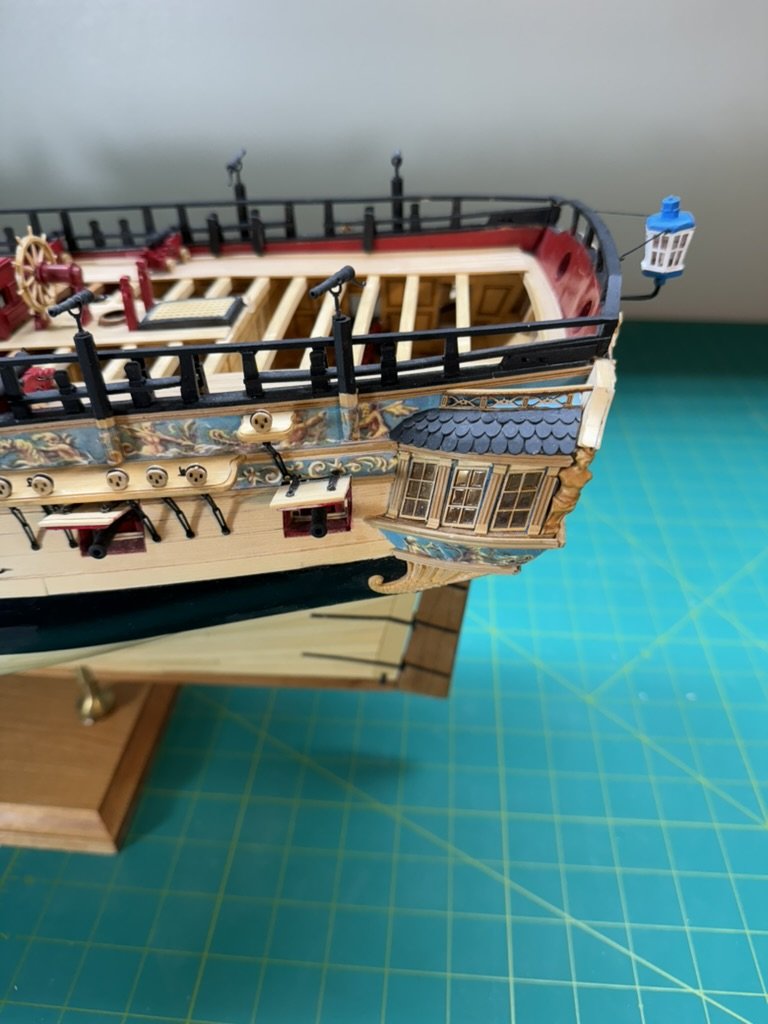
The Syren kits come in both 1/48 and 1/64 scale so the 1/64th should be the same size (more or less) as these. I did notice that there appears to be a PE version of the stern lantern on the PE sheet (PE-30). If you are familiar with bending PE into shape this might be a faster solution. I have built the 1/48th Syren stern lantern (for Wincheslea) and it takes a steady hand - you have to glue each side of the lantern to the base keeping the sides just in contact. I think it took me three tries to get one acceptable lantern. You can see the final one in these photos.
-
I can state now that doing the cannon first made that as easy as it can be. I would go so far as to say adding the eyebolts to the inner bulwarks before they are installed on the hull would have made that job easier (IMHO). I will reserve judgement for now on how easy installing the "inerds" is until I actually do it. I have many of the pieces (capstan, chain pumps, stove, etc.) already assembled and painted so it should not take long to have an answer.
-
You are a better (and likely more careful and skillful) man than I to attempt to rig the cannon with all the "interference" inside the hull I took the "chicken" way out and am mounting the cannon before I start adding the interior "features".
-
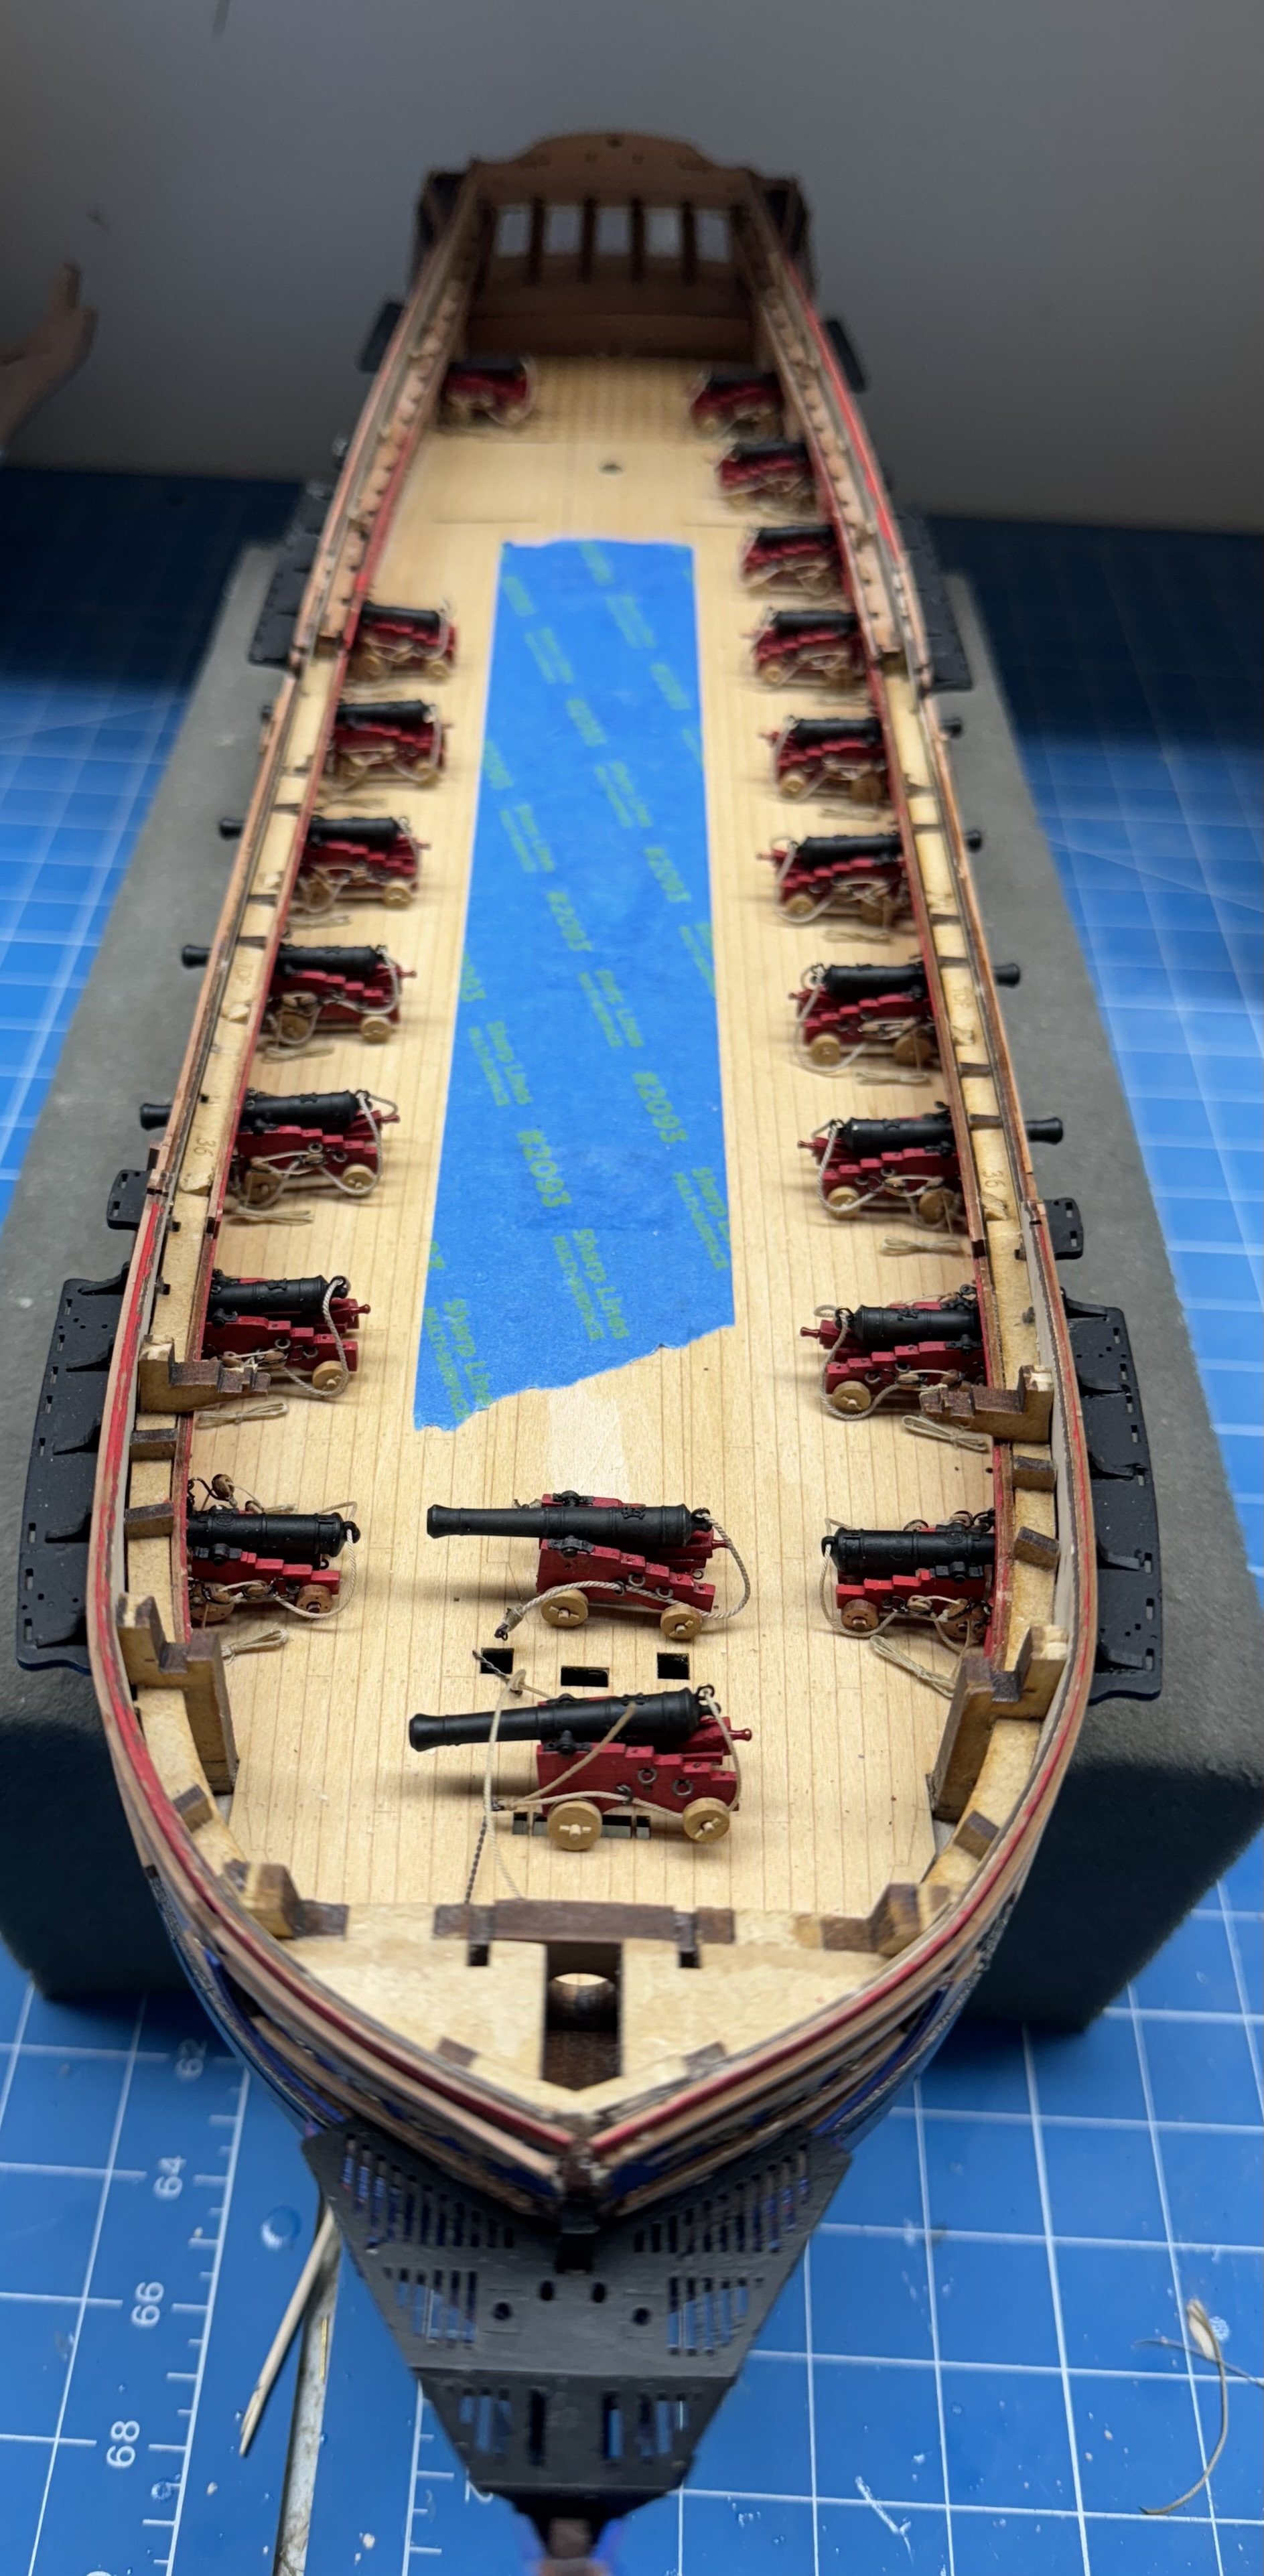
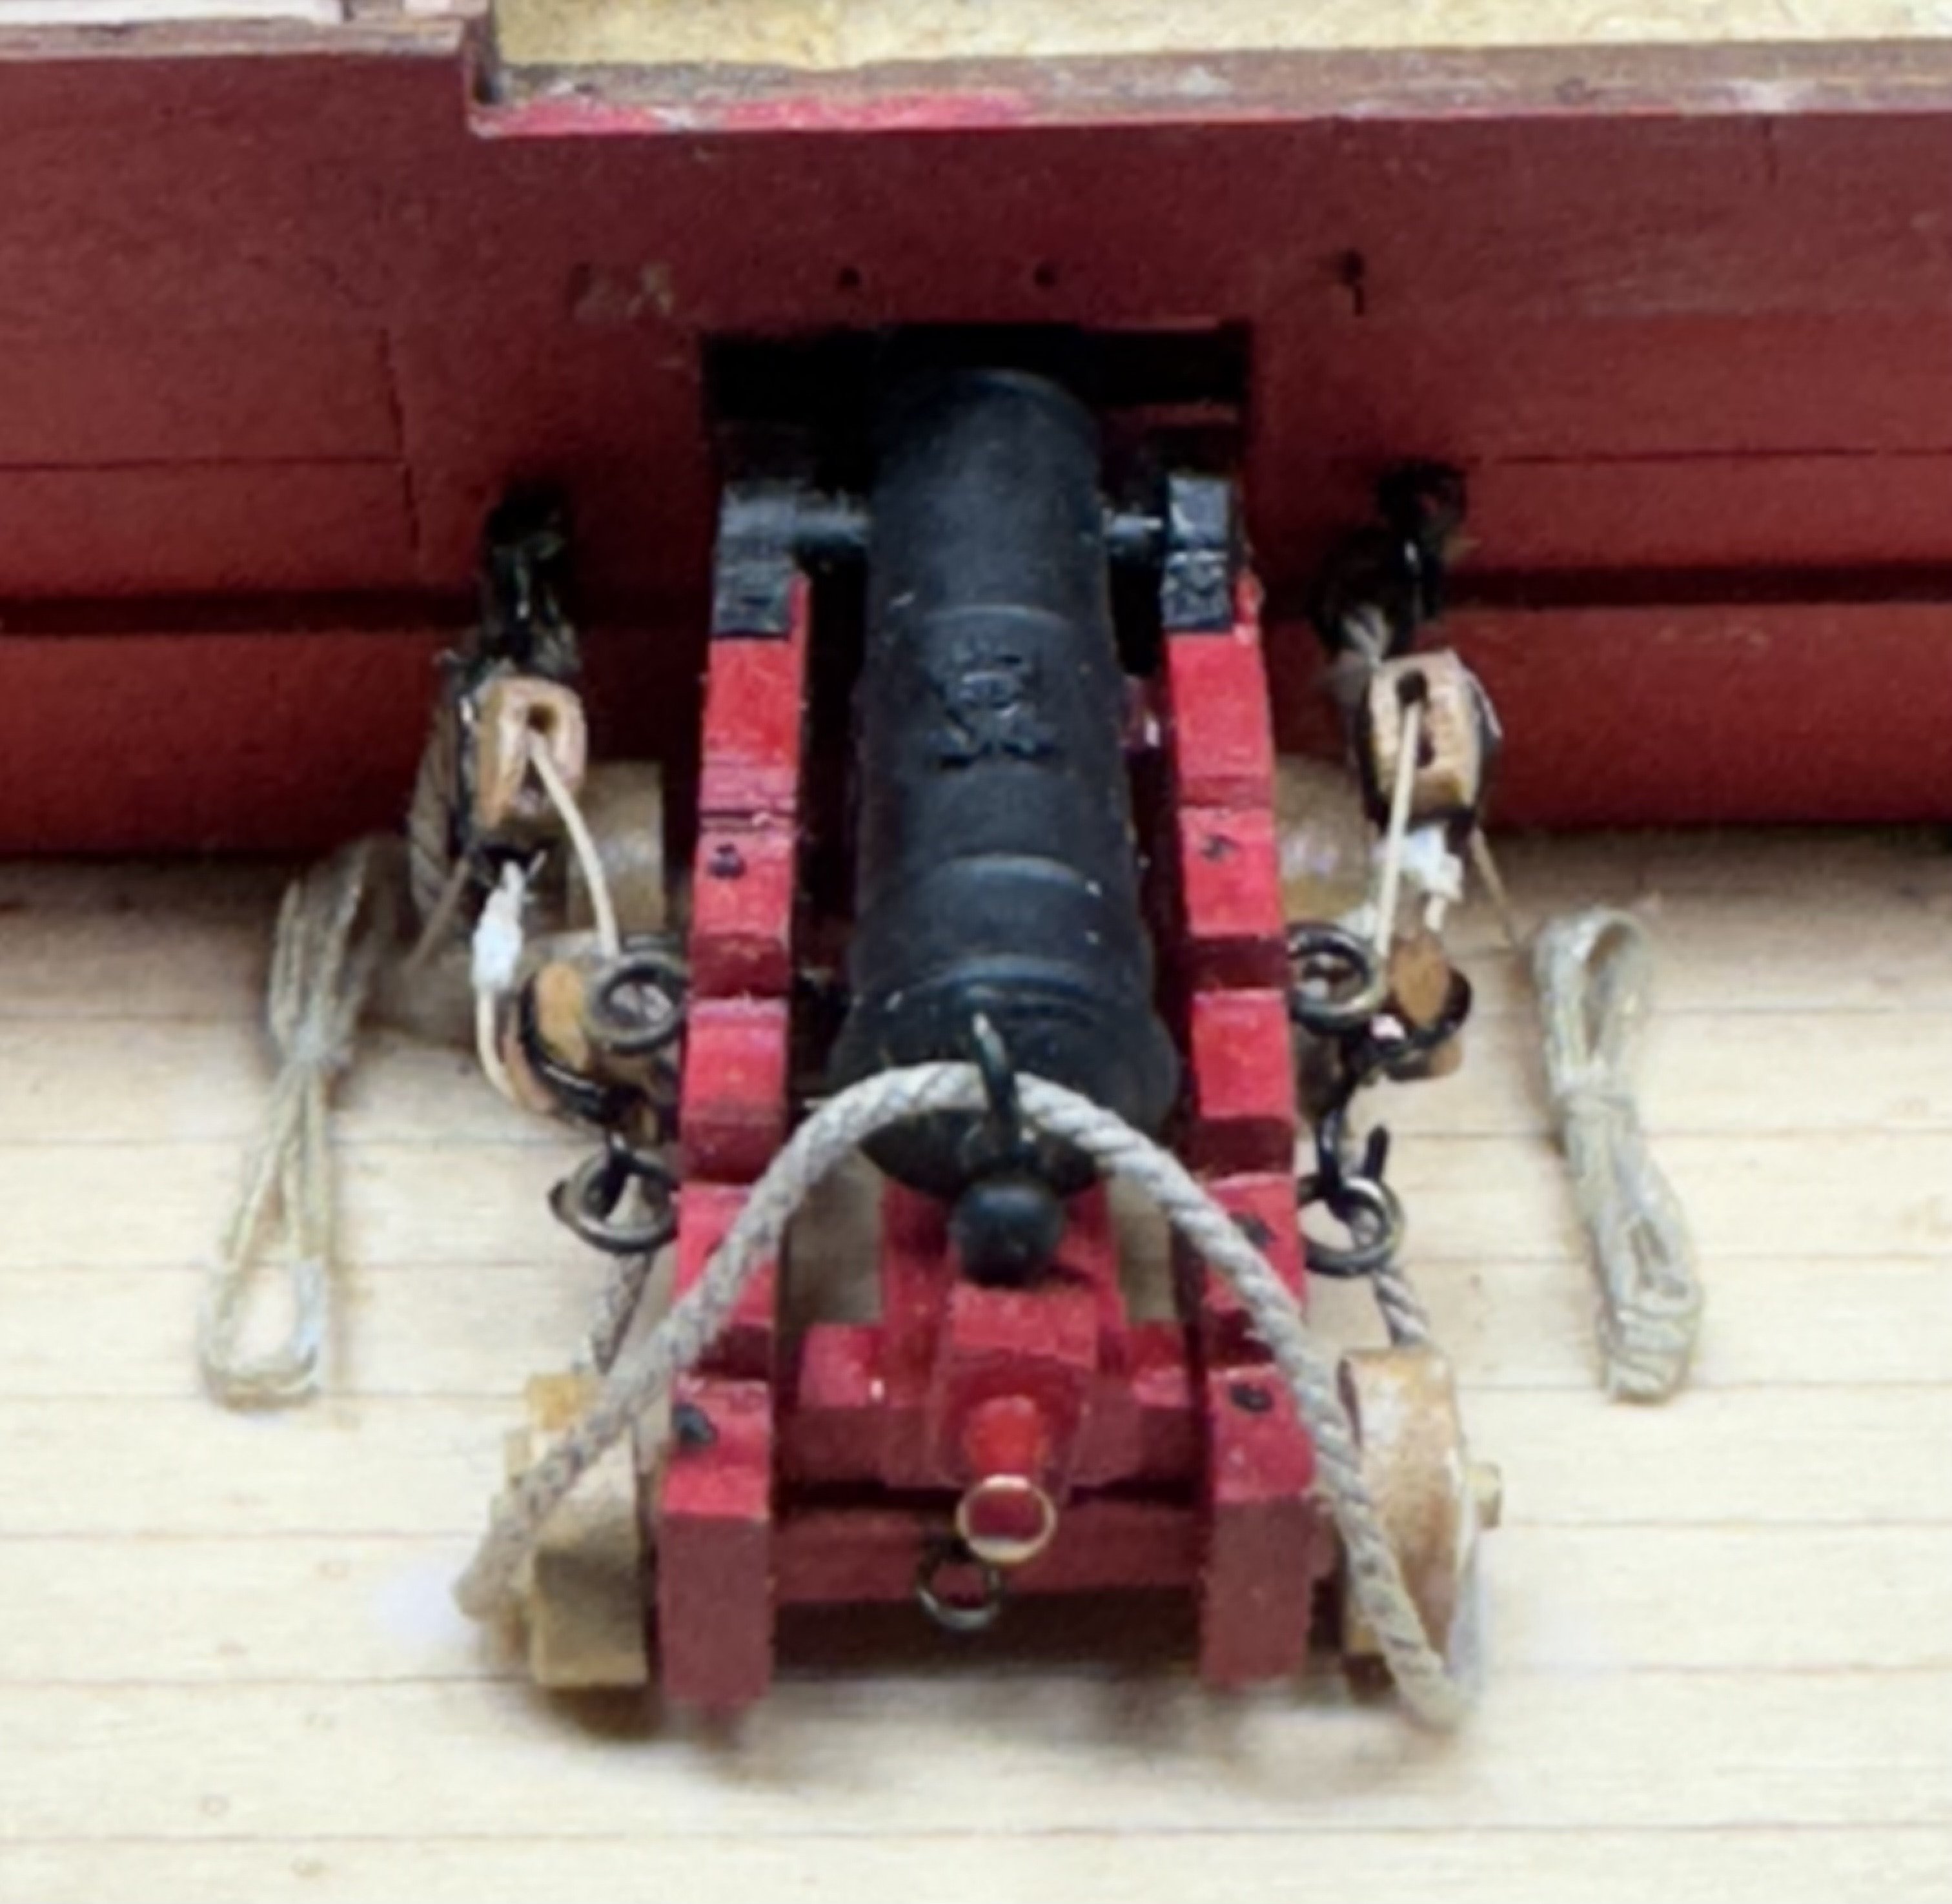
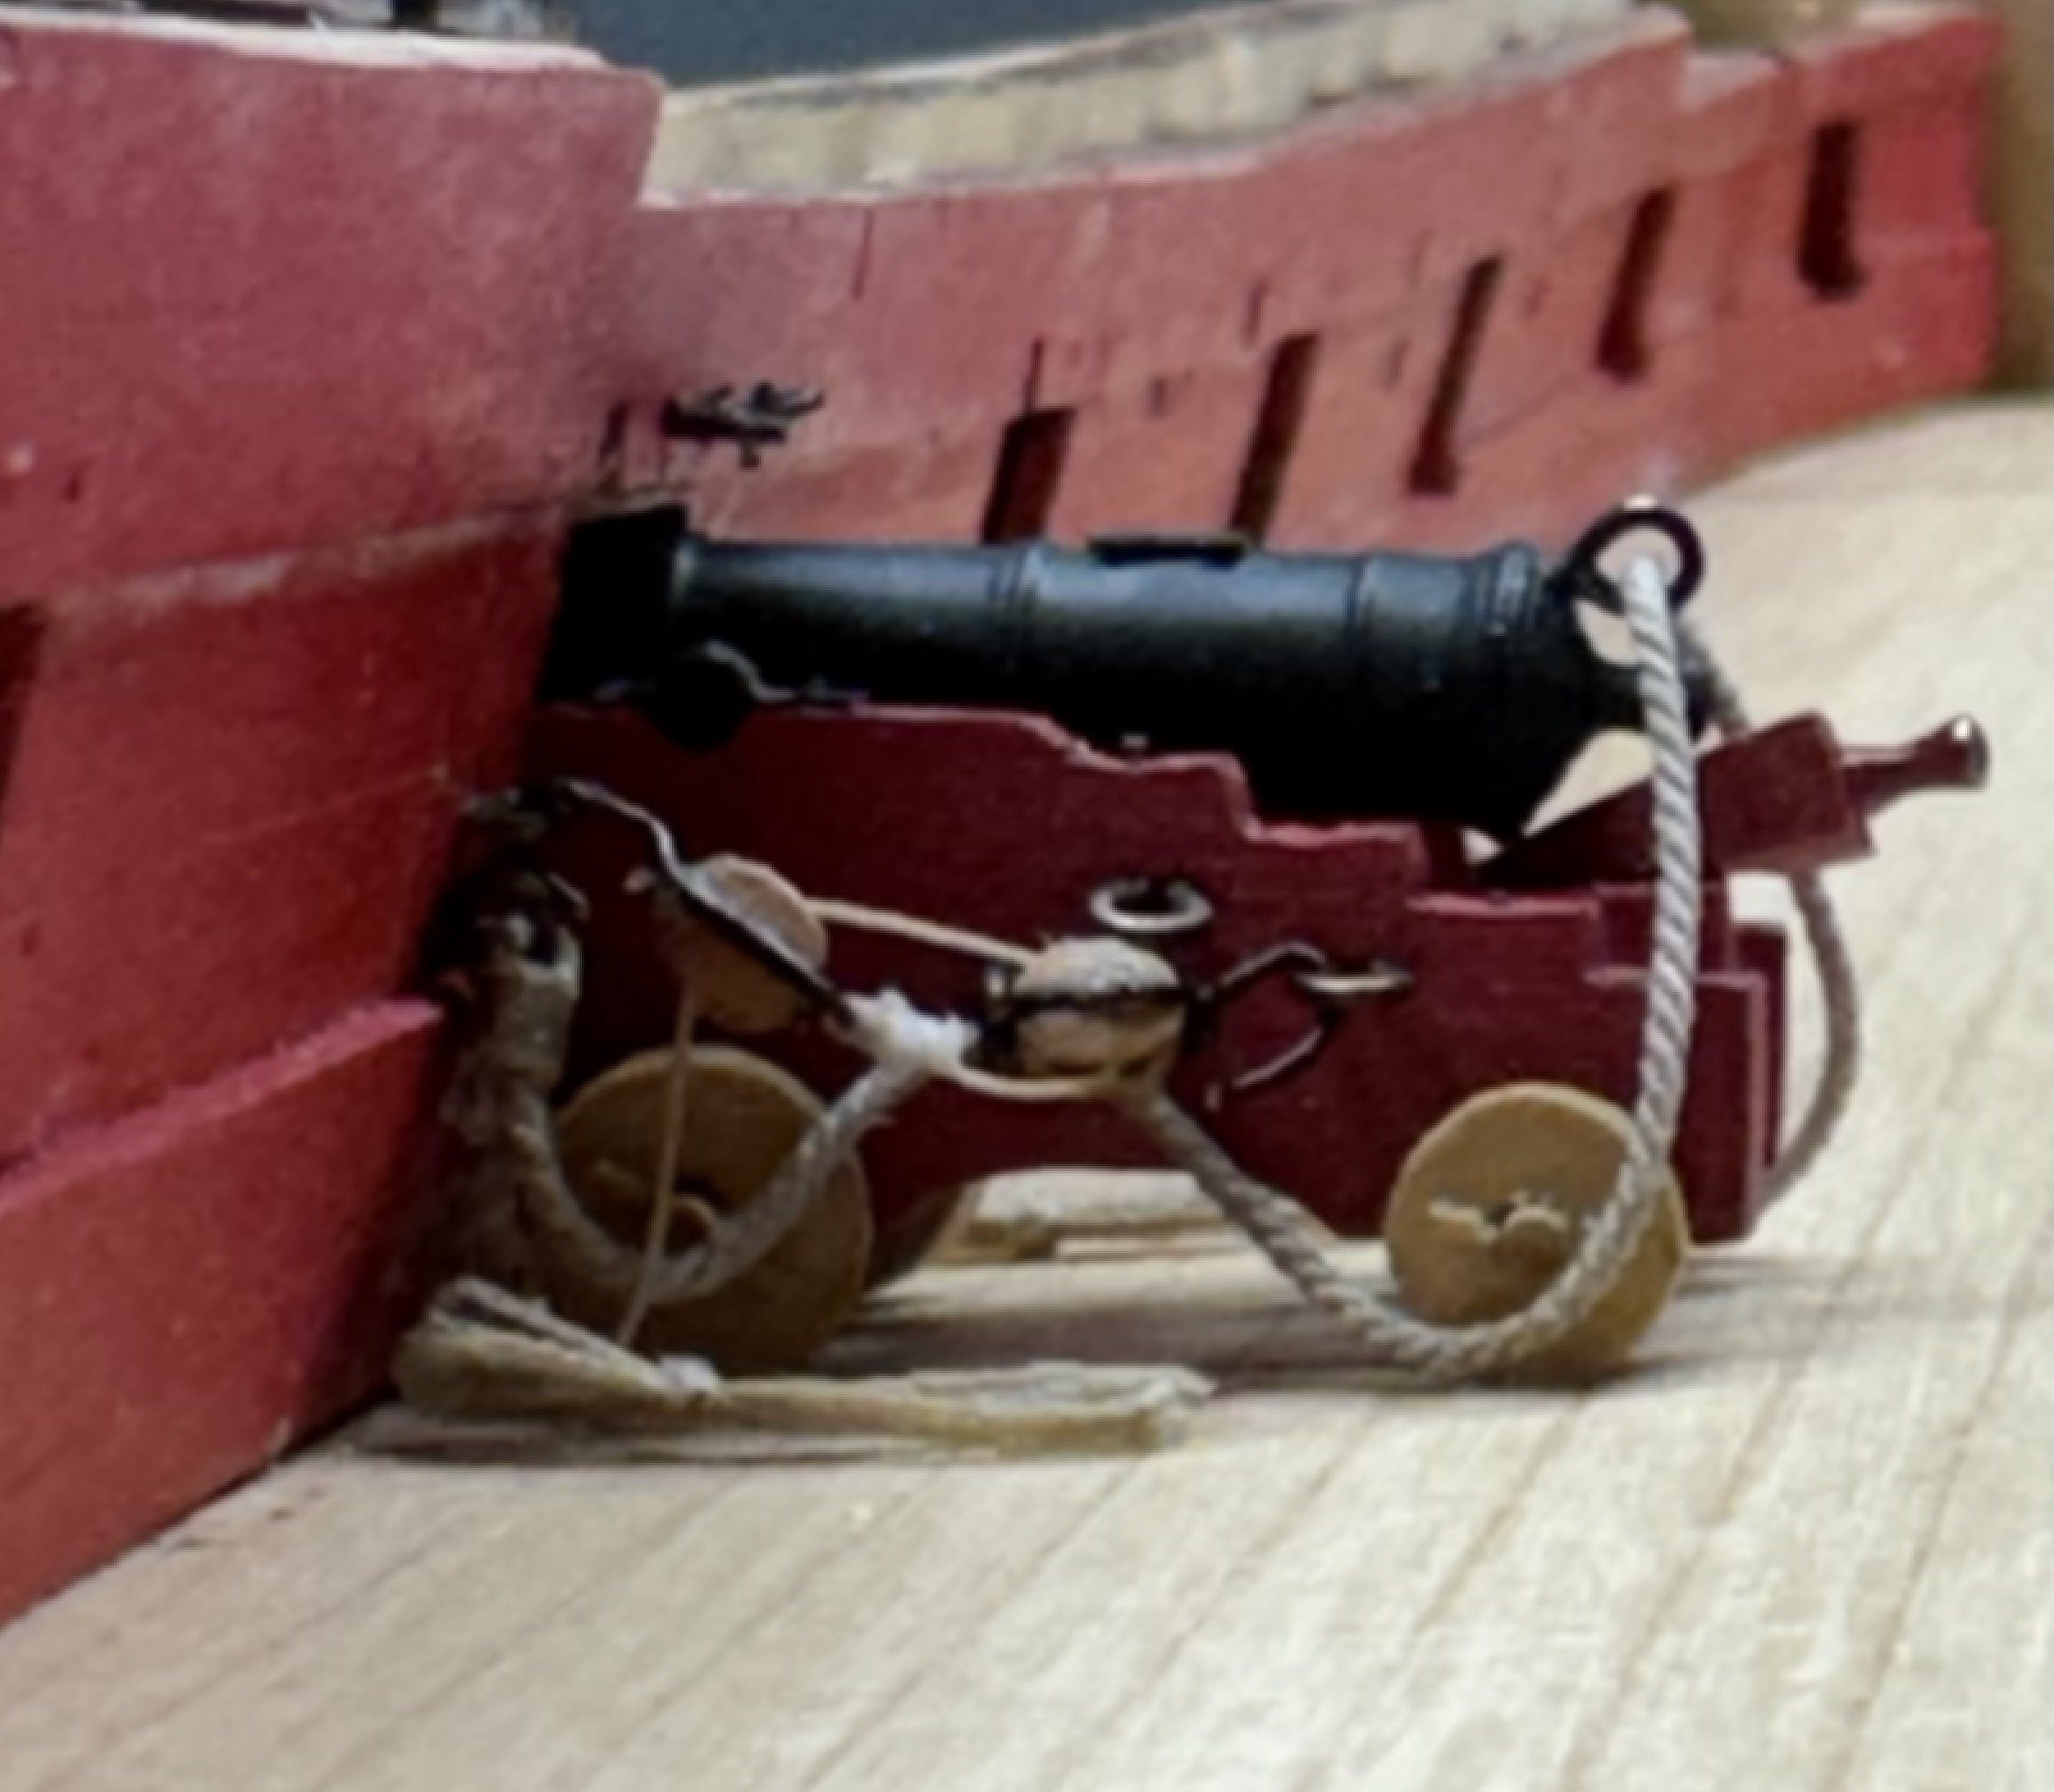
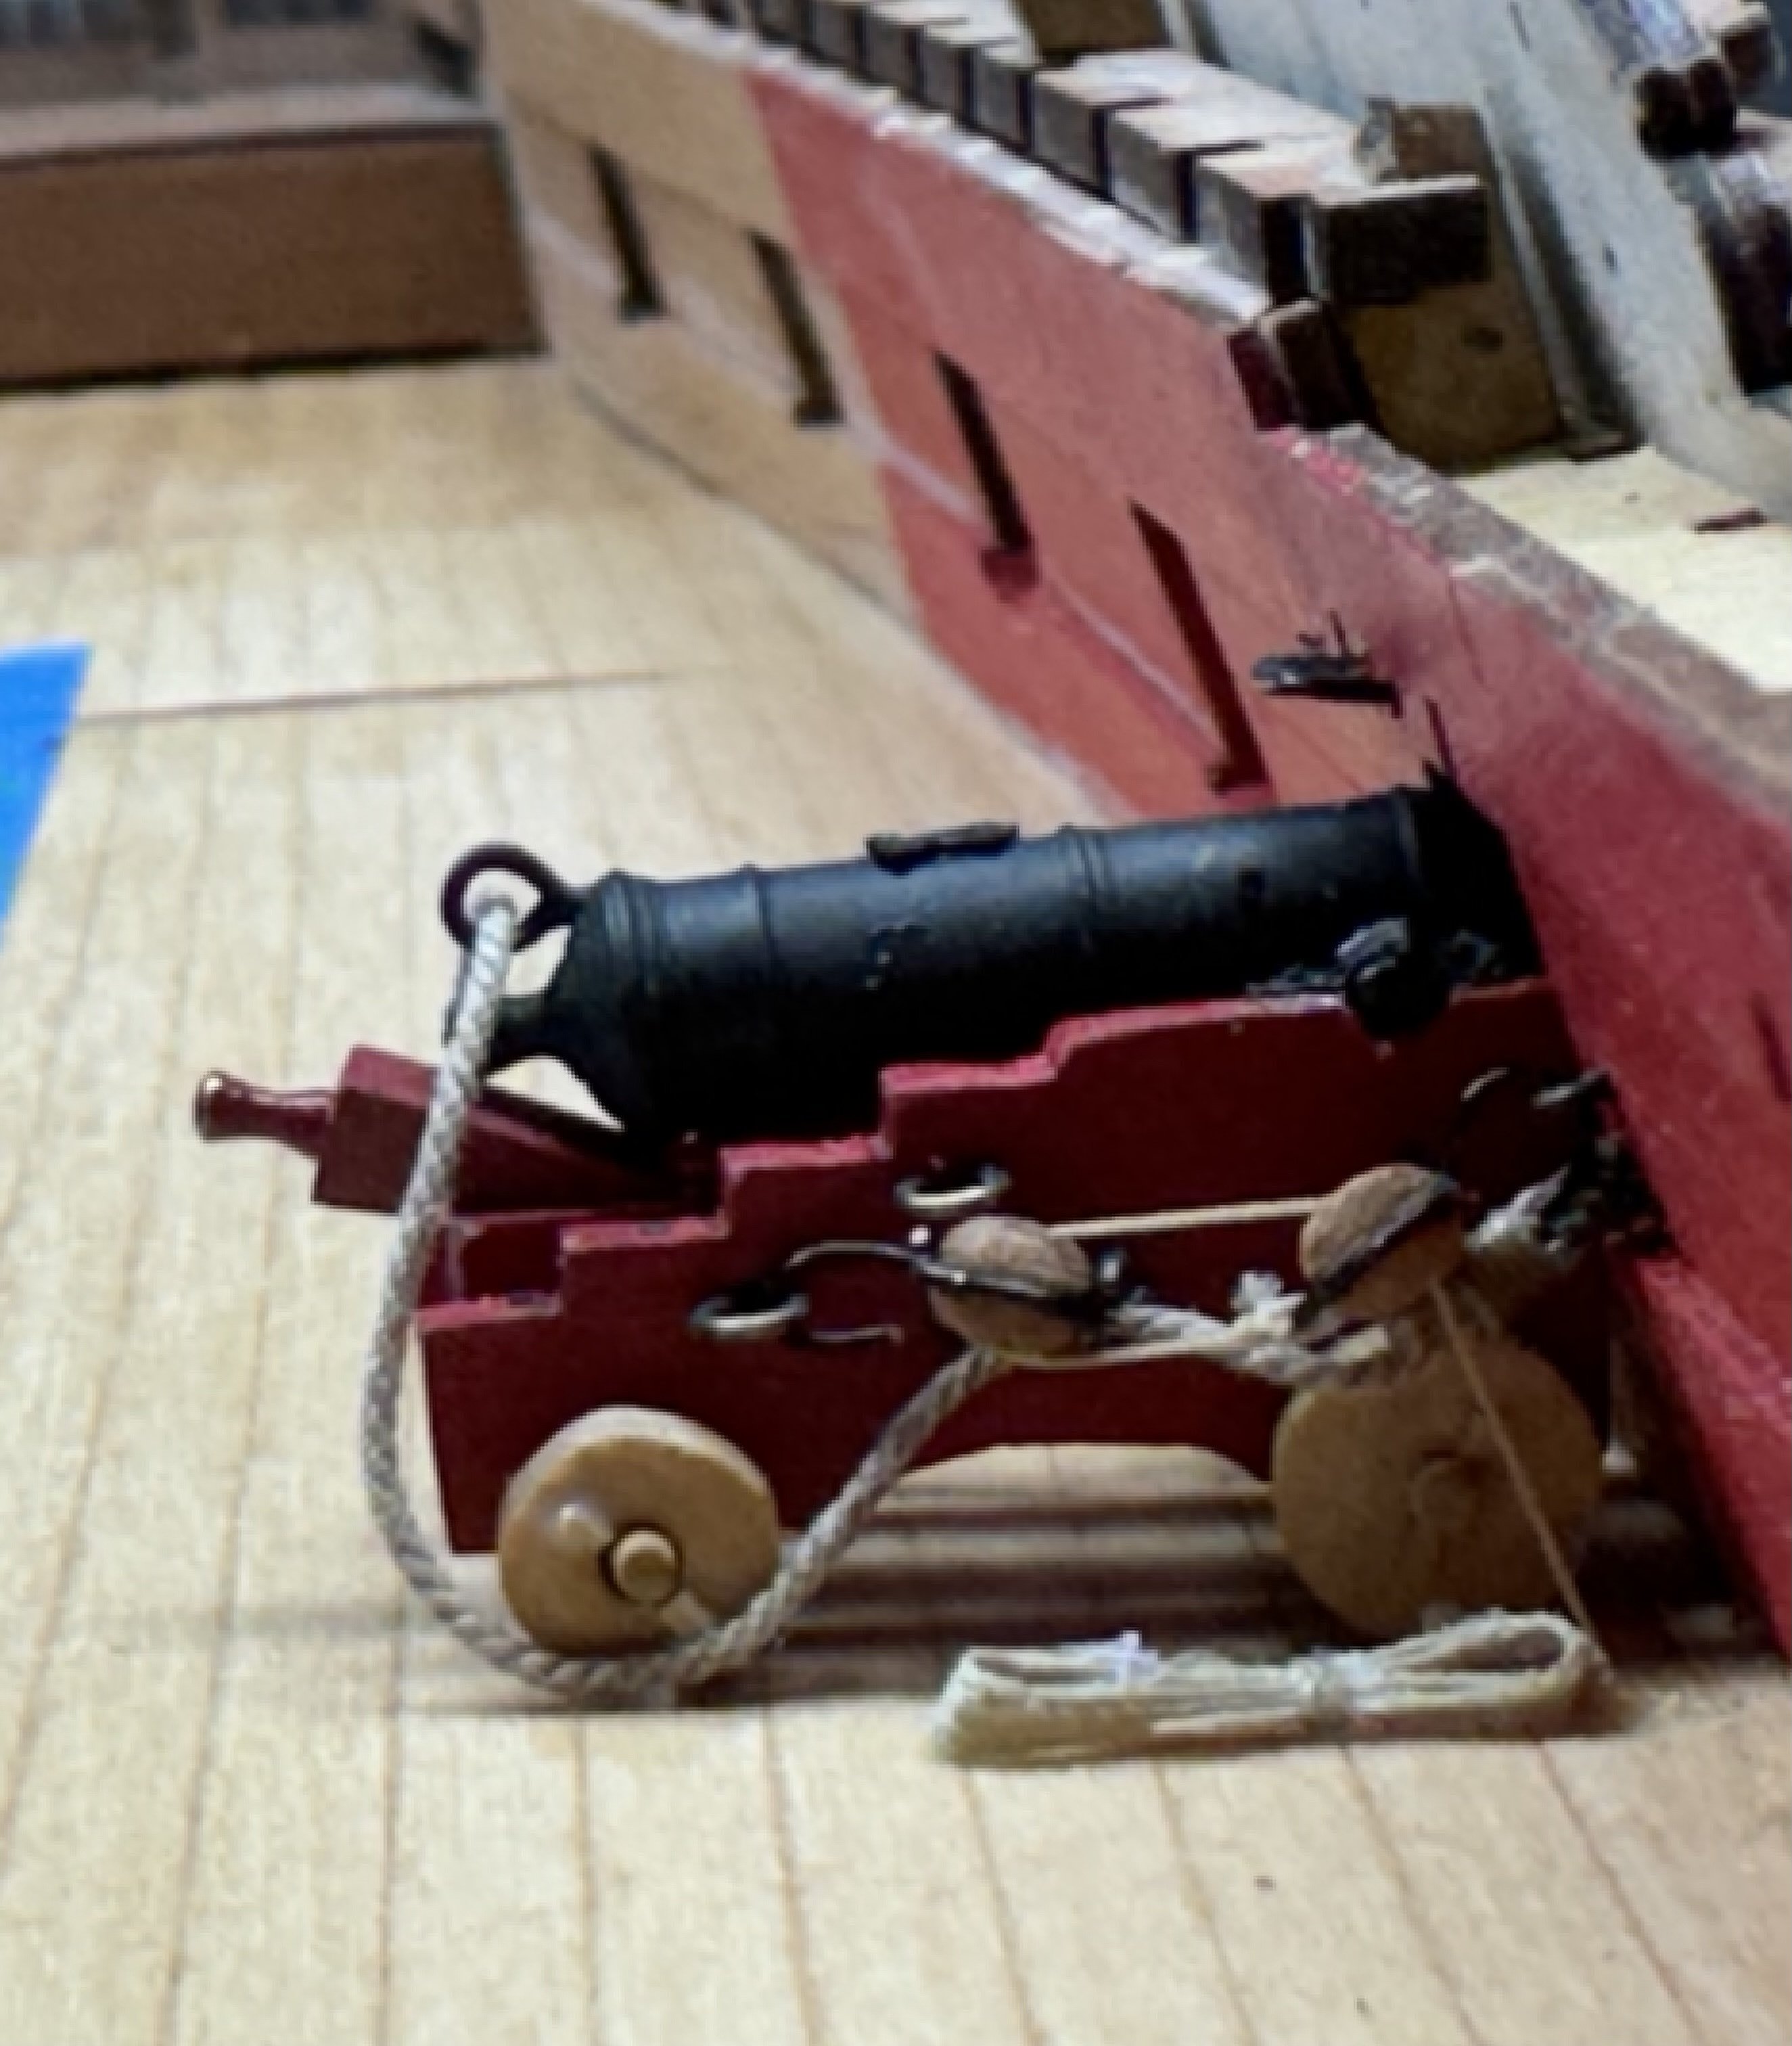
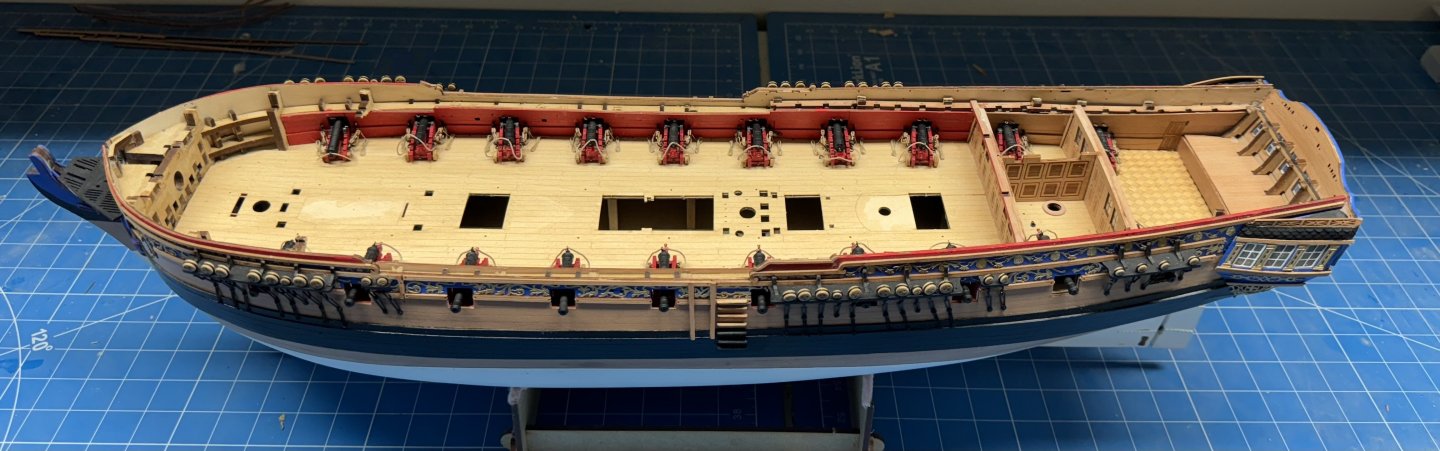
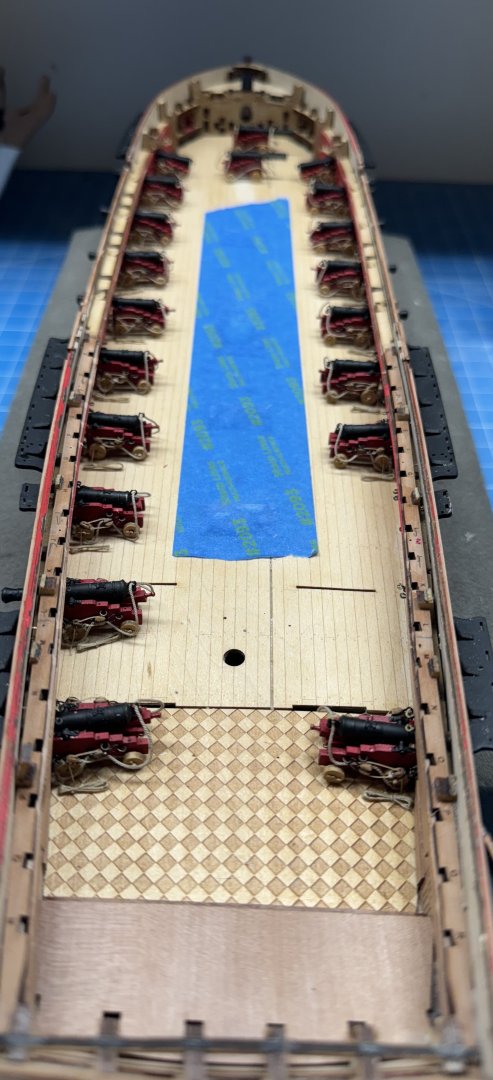
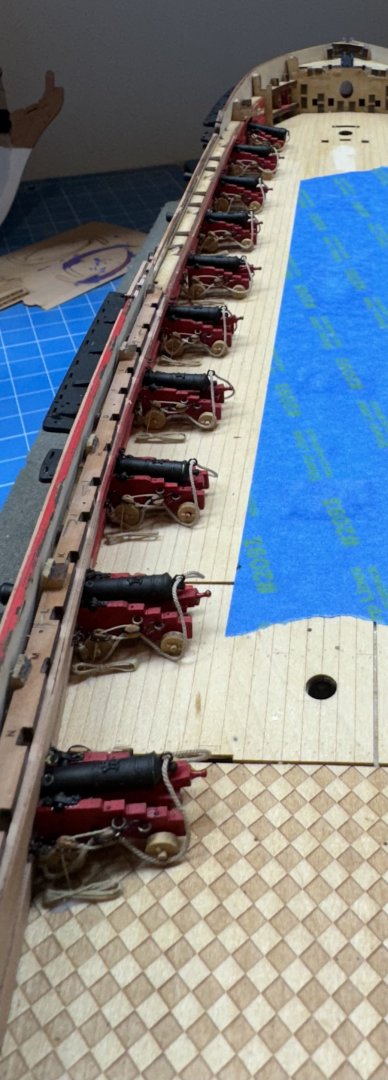
Port side cannon in place and rigged. (Blue tape is to keep debris out of the lower deck). I used one of the long 6 pounders in the forward most port because i messed up one of the long ago assembled cannon trying to get it adjusted. I will put another long 6 pounder on the starboard side to "match". At one point I thought about not installing the aft two cannon on each side until after the bulkheads were installed. I am glad I didn't decide to wait. There will be precious little run along side the aft cannon with the bulkhead installed. I would not want to try and rig the cannon with just this much space in which to work. I may pay a TBD price when I get to the bulkheads but that is yet to come.
- 422 replies
-
- 4
-
-
- Vanguard Models
- Sphinx
- (and 1 more)
-
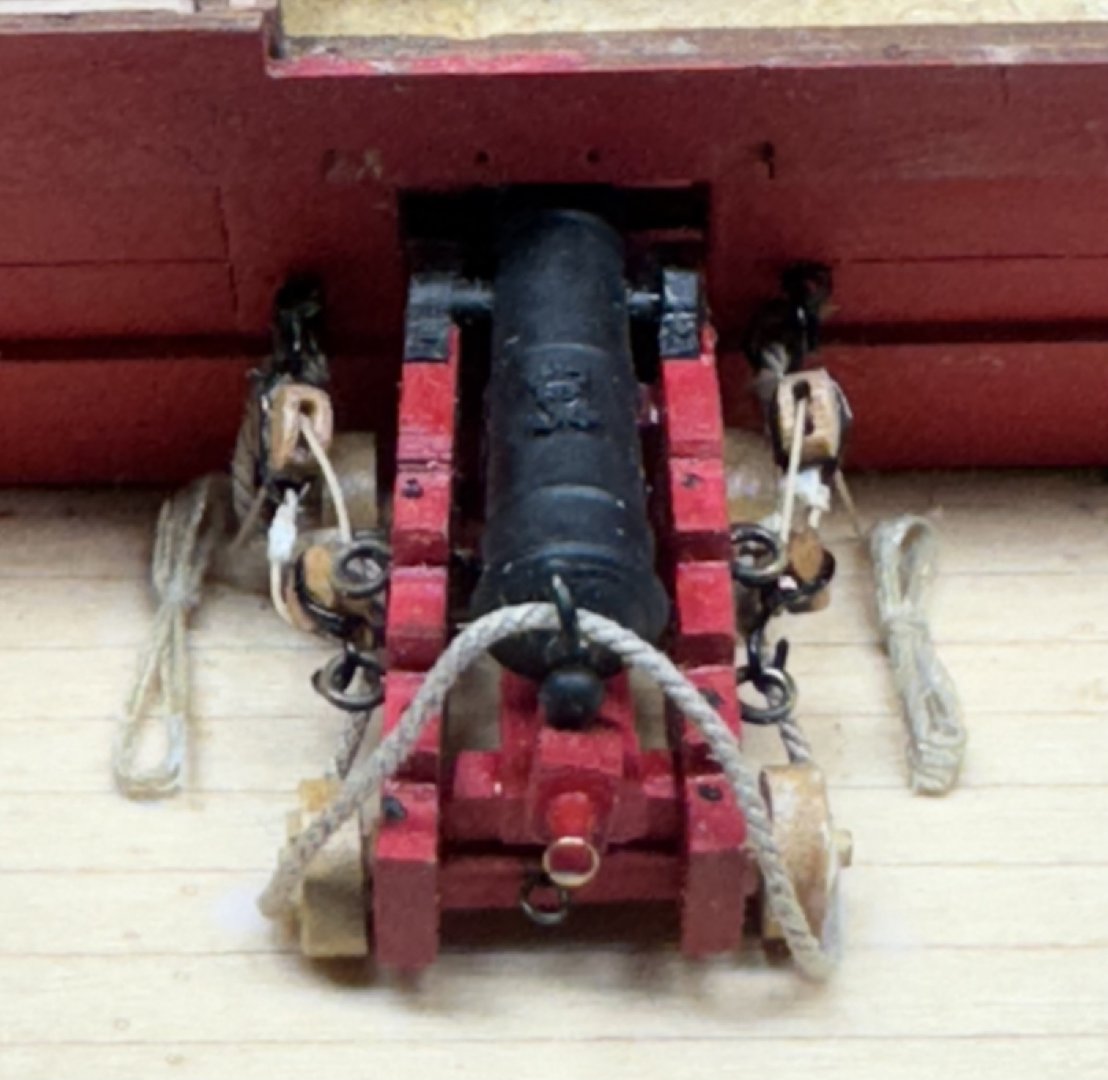
Yes, that is the general idea. I rigged the breech rope to a split ring which I then captured in a home made eyebolt (twisted #28 wire). I need to adjust the length of the breech rope with the cannon as it will be onboard the model. I use the jig to set the distance to the bulwark and the length of the eyebolts (which are way longer than the bulwark is wide. I rig the other tackle and when "tight" stiffen the line with diute PVA. When dry I can (usually) lift the tackle which has hooks on both ends off the eyebolts on the bulwark, pull the breech tackle eyebolts out of the jig and transfer it to the hull. Then reinsert the breech line eyebolts and attach the other tackle to the bulwark eyebolts, square up the carriage and put a drop of medium CA under each rear wheel. When that has set grab the bitter end of the other tackle and glue it to the deck under the bulwark block and add a rope coil. I usually have to adjust the breech rope to get the same length on each side and get the slack down by the rear wheels.
- 422 replies
-
- 2
-
-
- Vanguard Models
- Sphinx
- (and 1 more)
-
One done, 19 more to go. Although I may wait on the aft four until I have the cabin walls up.


- 422 replies
-
- 7
-
-
- Vanguard Models
- Sphinx
- (and 1 more)
-
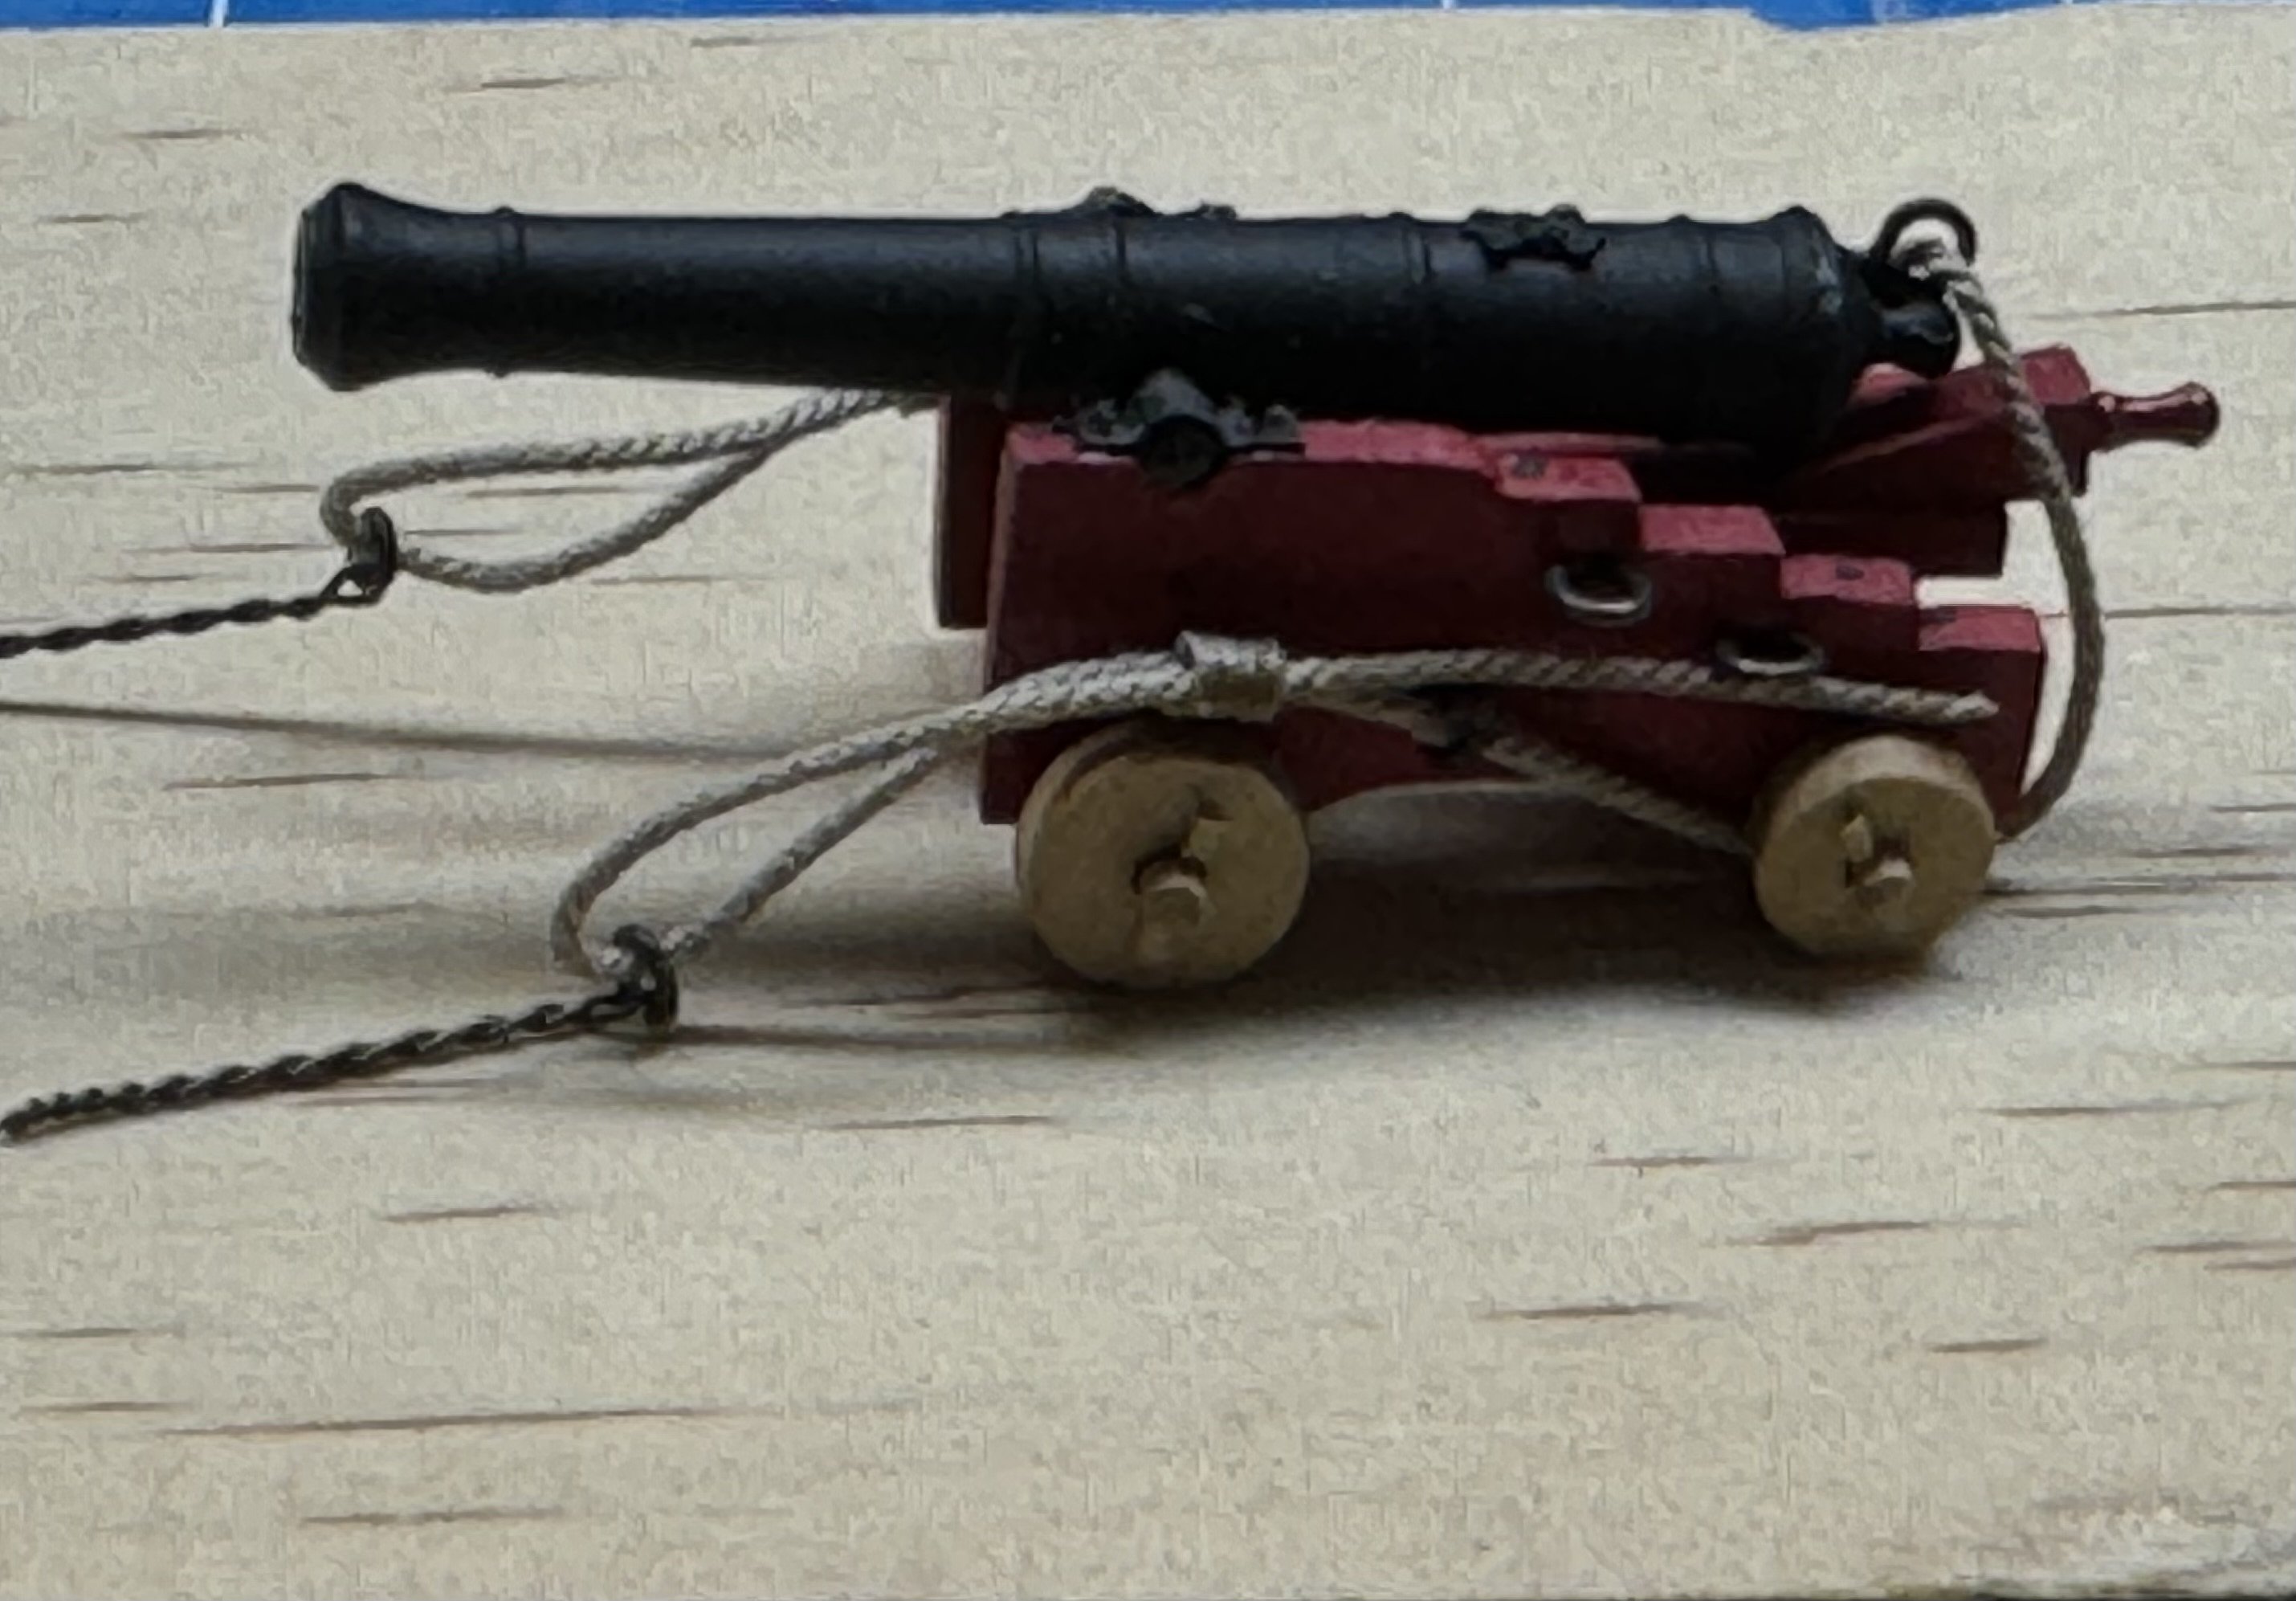
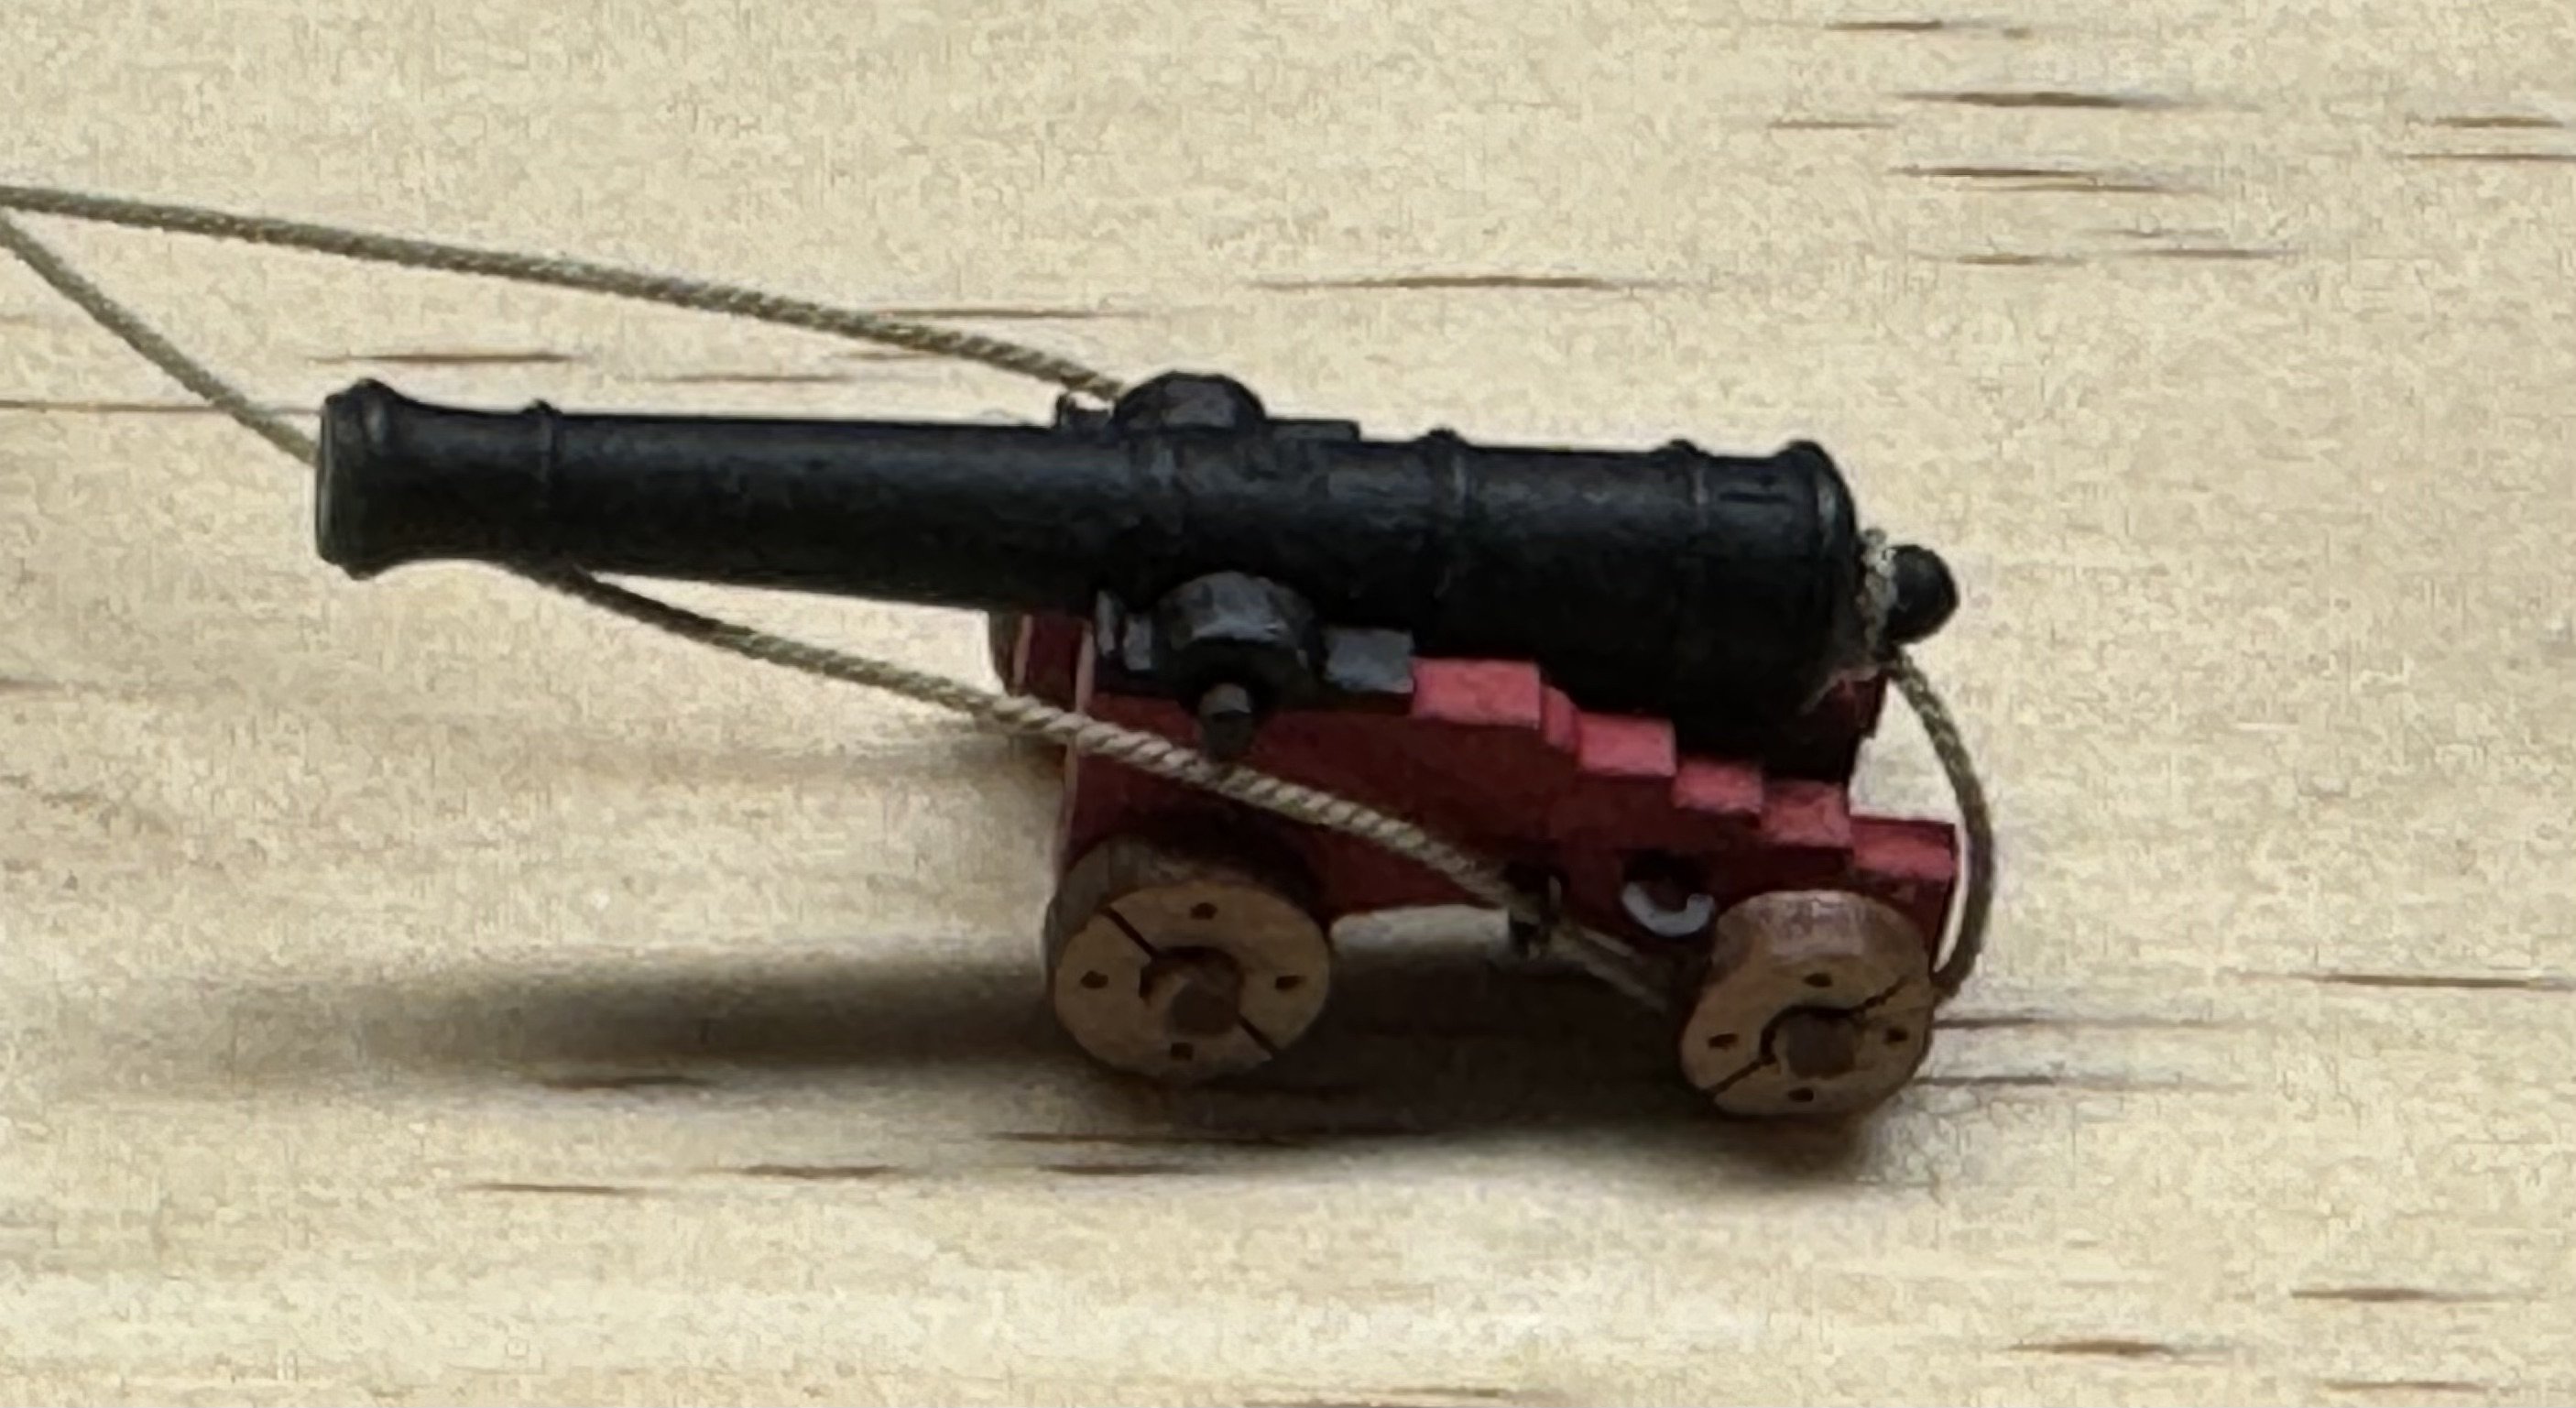
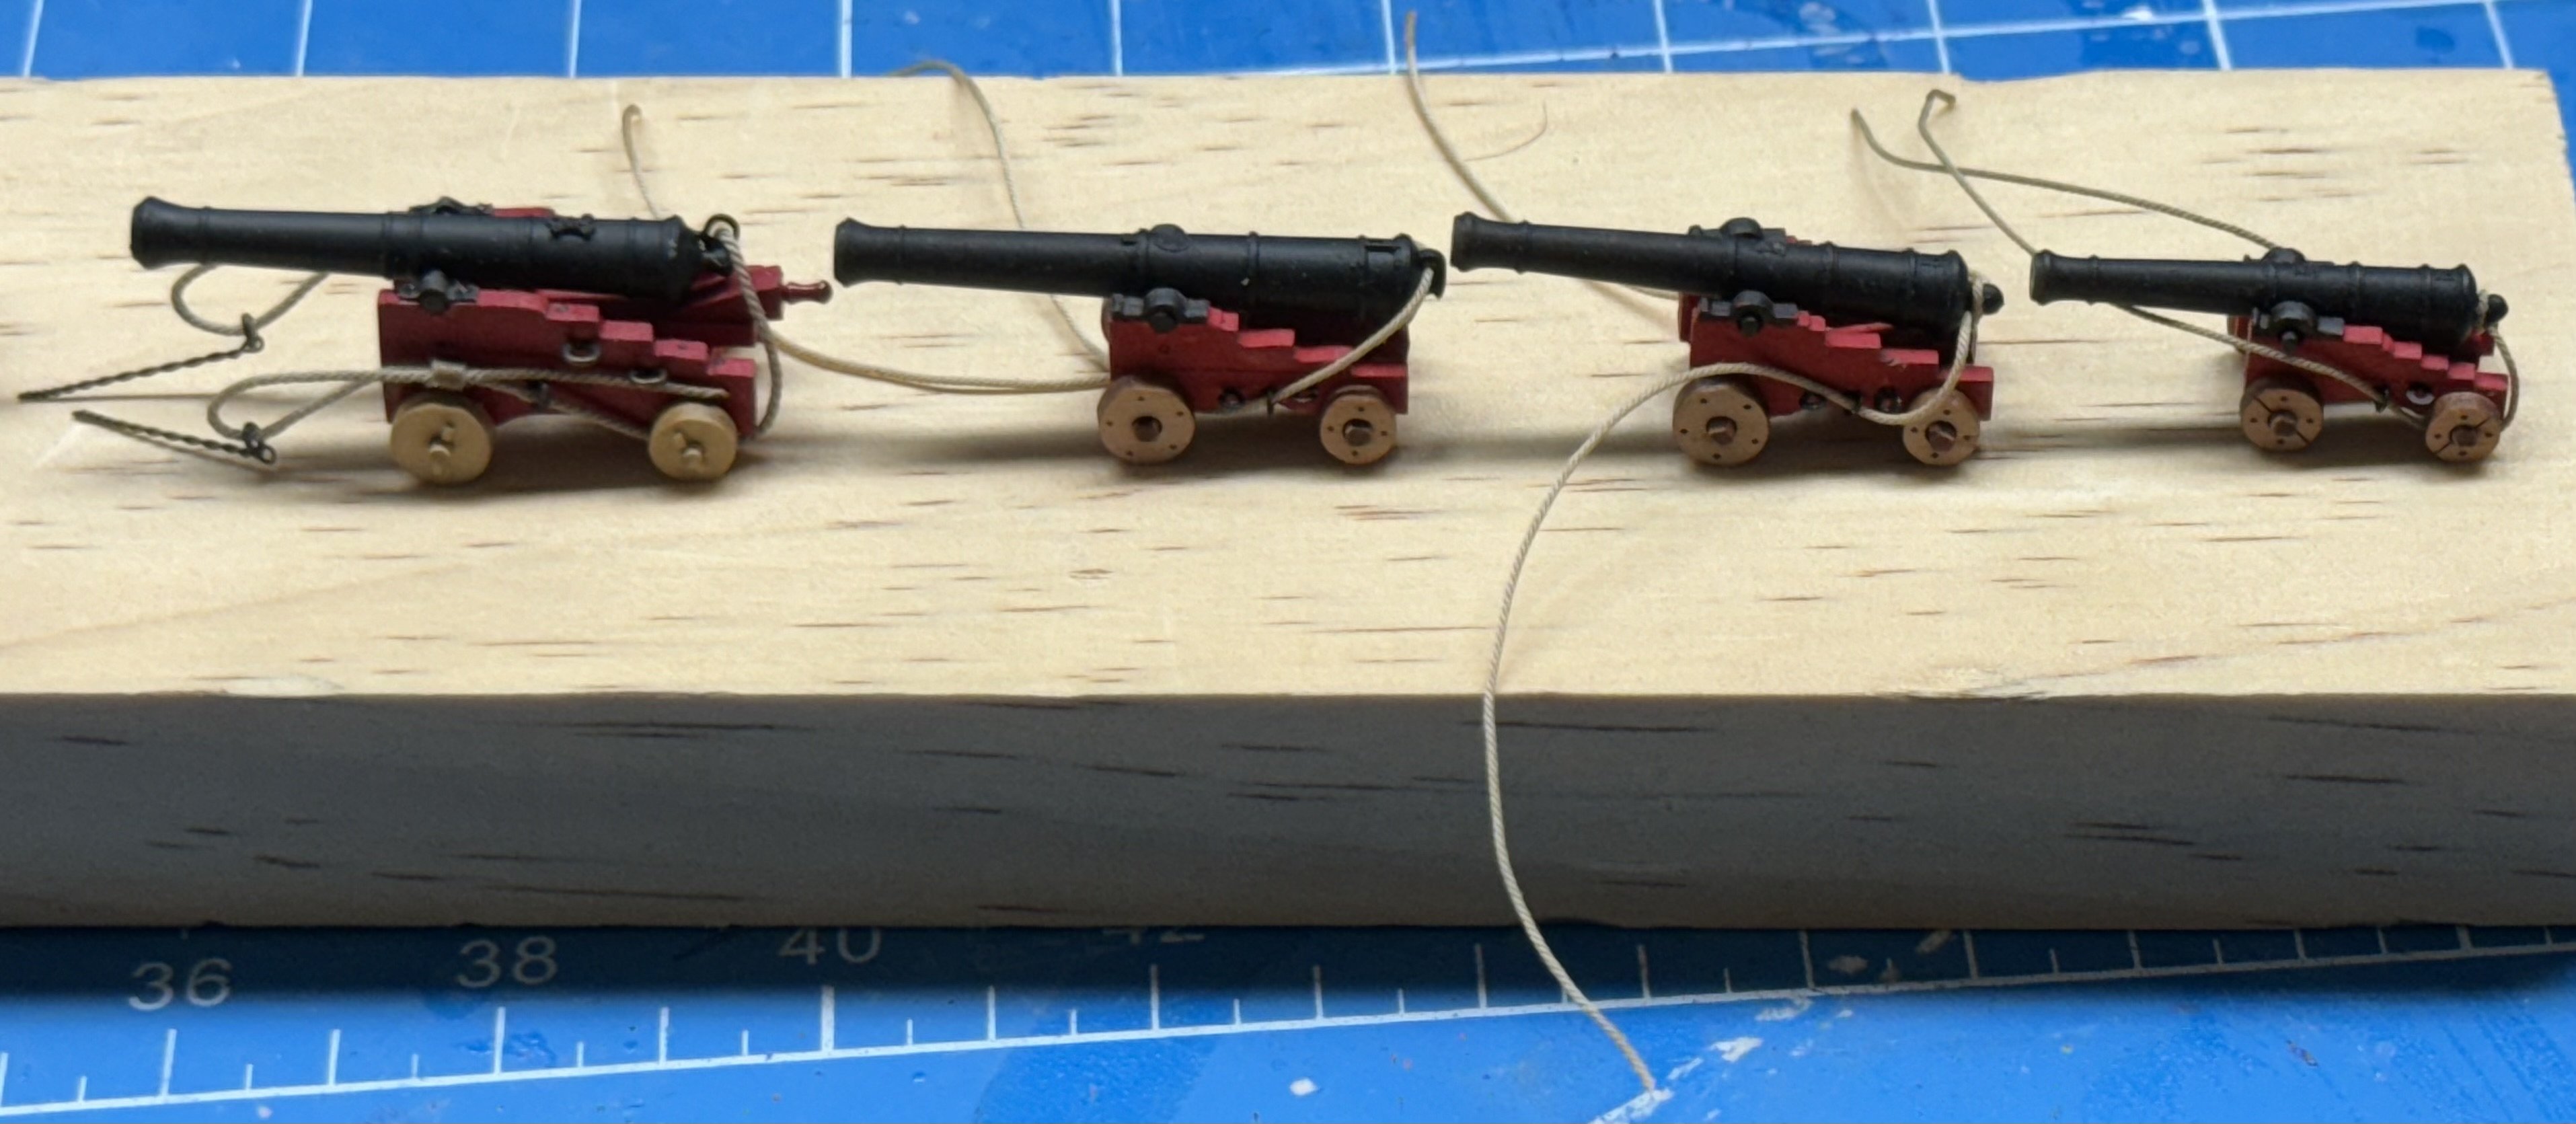
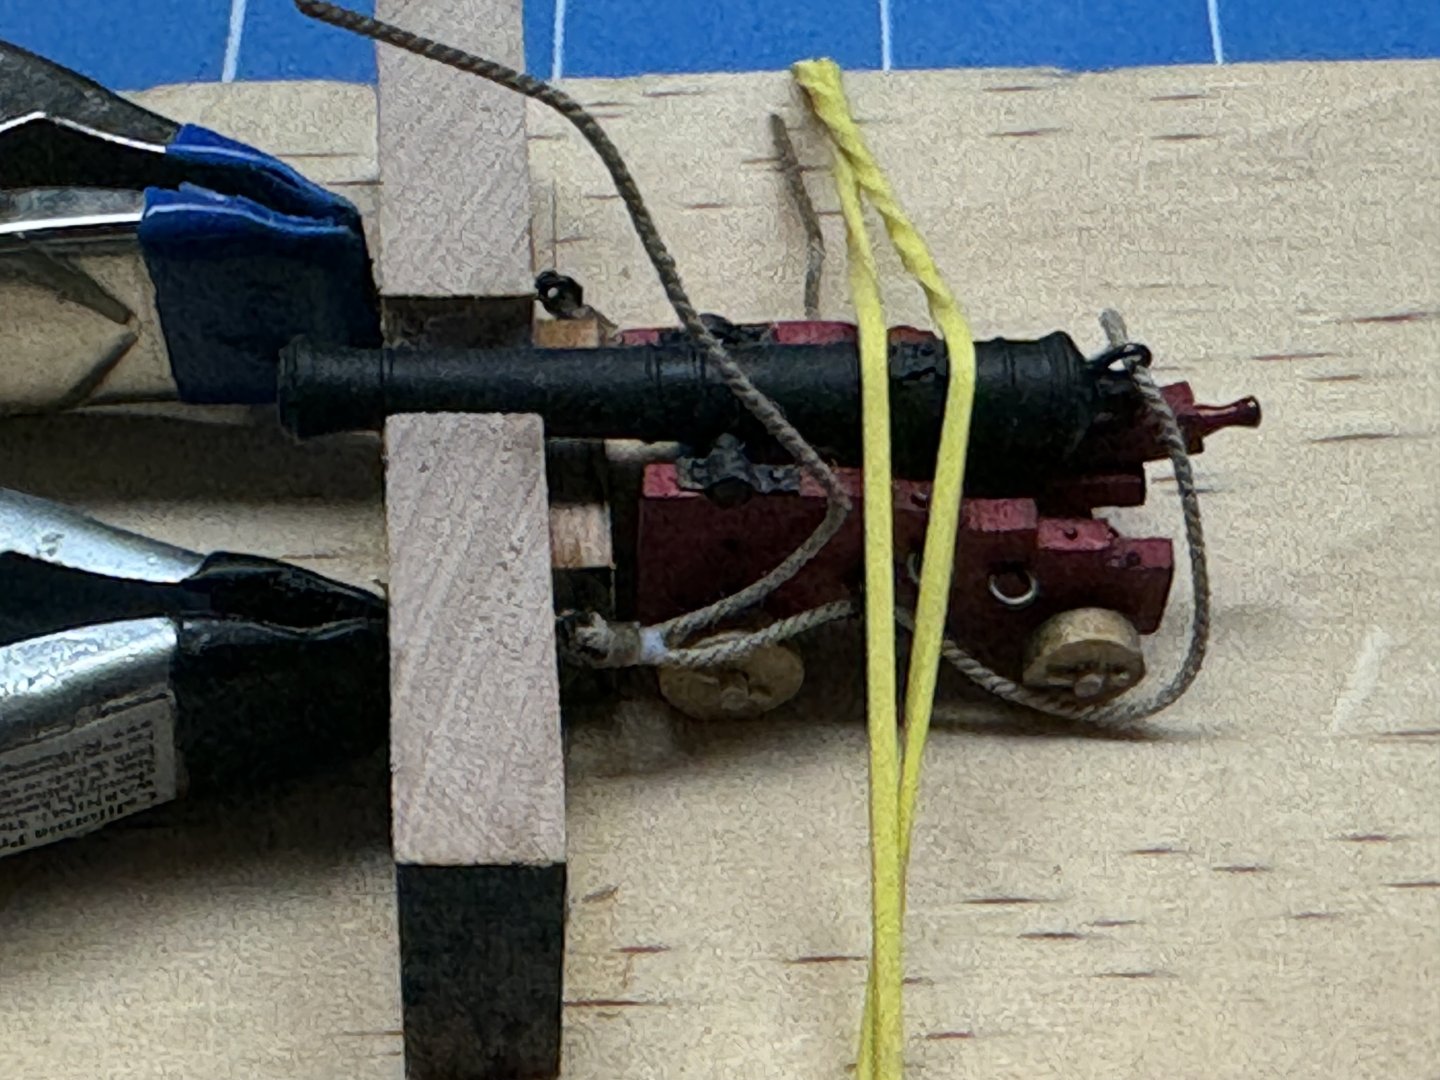
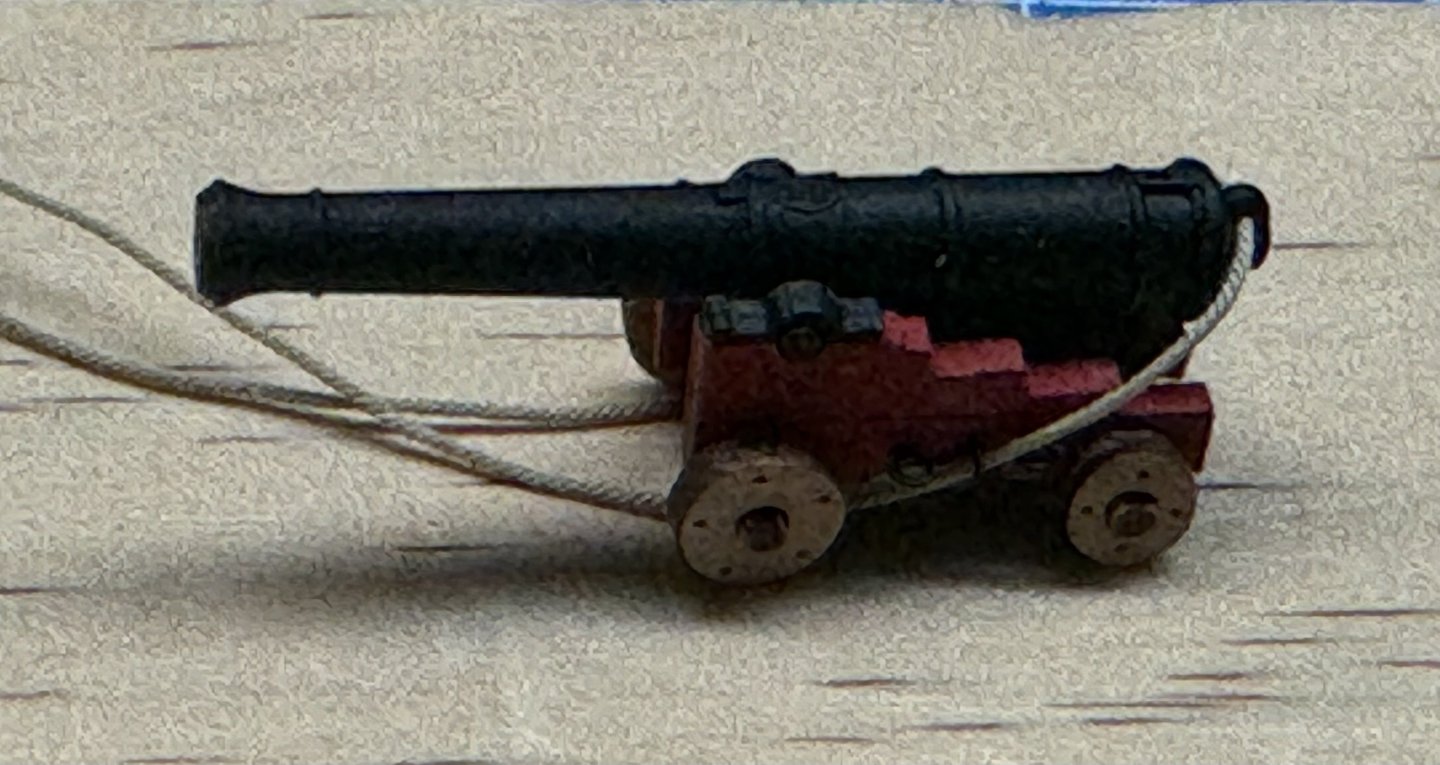
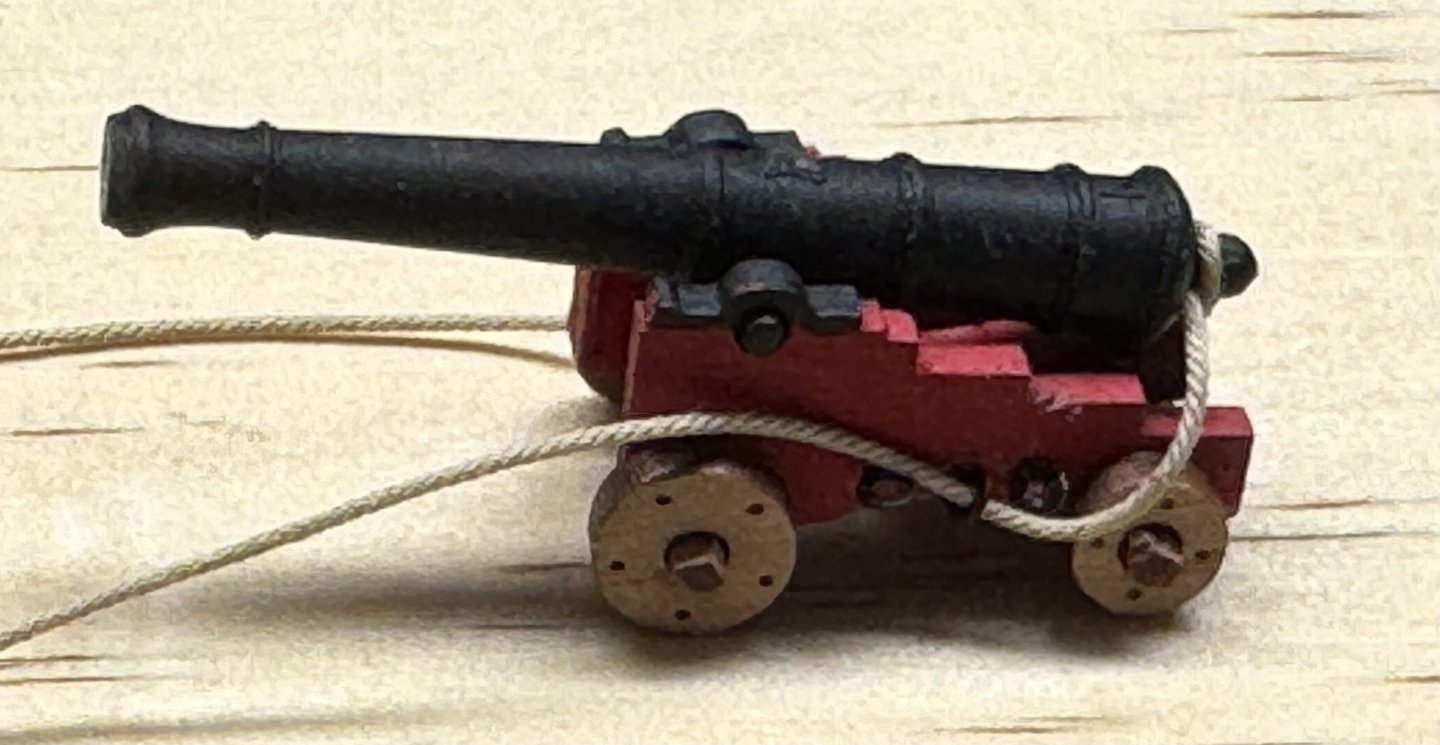
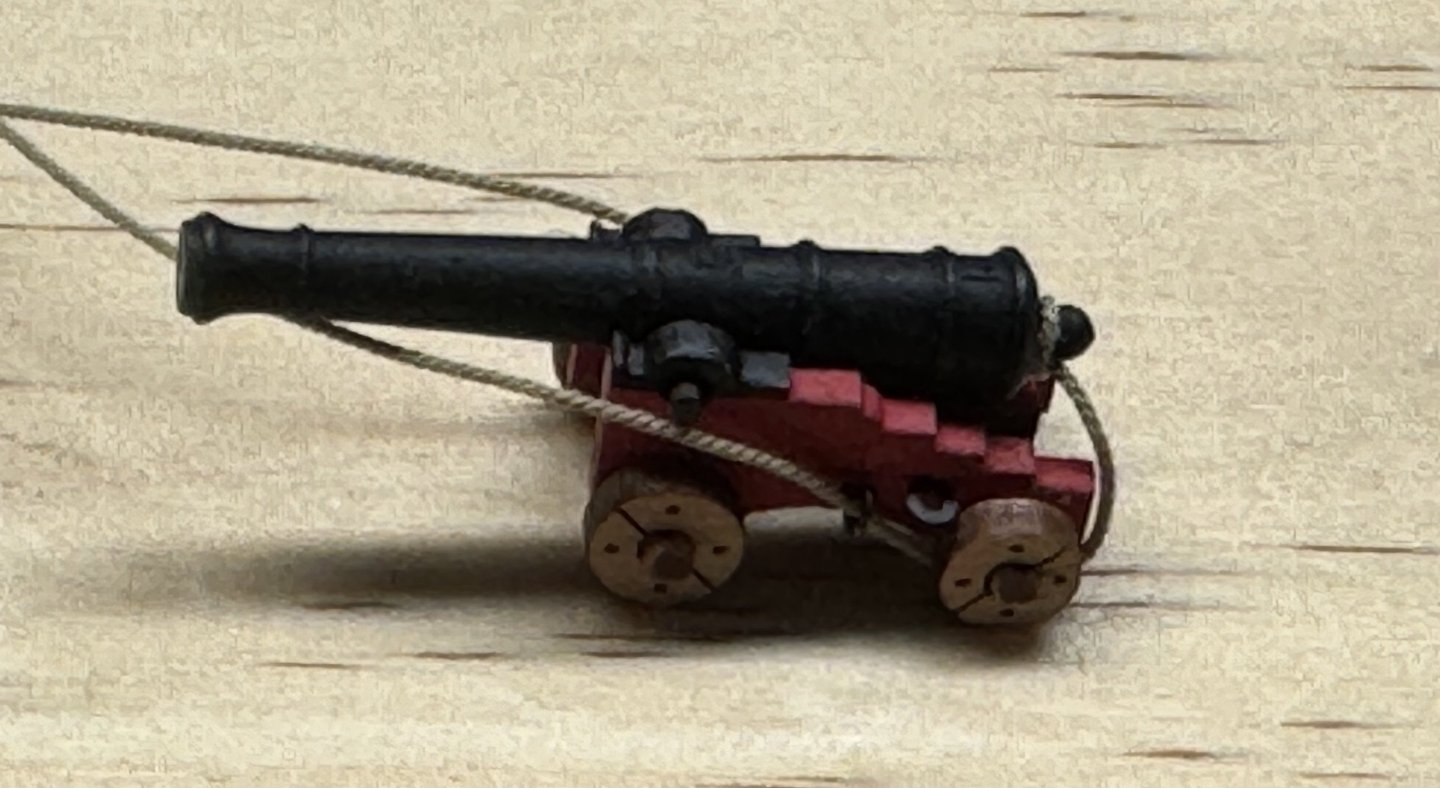
Speaking of cannon. A number of years ago when I was building Confederacy I thought it "wise" to invest in some better cannon than were included in the kit and so I built a number (should have been 26 but...) Syren cannon using the then "standard" brass cannon. I chose the "middle" size of the then Syren cannon sizes and built most of the required number. Imagine my surprise when I got the gun deck completed and the cannon were too tall to fit through the gun ports. So I built more cannon of the correct size and consigned the too tall ones to a storage box. I even had the breech rope rigged complete with eyebolts ready for installation and breech rope length adjustment. I had great fun gluing those little pieces on each wheel - 2 pieces per wheel, four wheels per carriage, twenty guns - you get the idea. I had planned on using the cannon on Wincheslea but they were too small as Winnie is 1/48th scale. So now I have Sphinx and they are going to fit. I built a jig based on Sphinx dimensions so I can fit the cannon and adjust the breech rope and cut the eyebolts so they will seat completely at the bulwark. Here is one cannon in the jig - you can see the white glue on the breech rope connection The clamps are holding the ends of the eyebolts which will be trimmed flush with the outer "wall" of the jig and the excess breech rope cut off. My plan is to do one cannon and then mount it onboard in case the technique needs to be modified. In addition to the Syren canon I also built several more sizes to have something with which to populate the forecastle and quarterdeck since nothing is provided in the kit. I built 6 pounder (long barrel), 6 pounder (short barrel) and 4 pounder cannon all by Vanguard. Here is the long barrel 6 pounder. Interesting is that is cannon comes with a loop for the breech rope to pass through while the two smaller do not. Also the six pounders (both) come with three holes in each side of the carriage while the four pounder only has two. The short barrel six pounder. and the four pounder And to give an idea of the relative size here are all four cannon in one picture. Compared to the nine pounder cannon provided in the kit the six pounder long barrel is a hair longer but not as big around. I may replace the forward most cannon with the long barrel 6s which might have served as bow chasers in the forward most gun ports.


- 422 replies
-
- 3
-
-
- Vanguard Models
- Sphinx
- (and 1 more)
-
Starboard side hull completed (except for chain plates/deadeyes). Before I do them I want to work on preparation for the gun deck cannon. I think I can get the eyebolts that I need for the guns with the hull on its side in the foam cradle and I do not want to take a chance on the deadeyes/chainplates getting messed up in that arrangement. So now to eyebolt (and there are a few cleats too) installation.
- 422 replies
-
- 6
-
-
-
- Vanguard Models
- Sphinx
- (and 1 more)
-
Certainly when a sailing ship is heading dead down wind (by and large I believe was the term) the wind comes from aft to forward. the relative wind onboard being the difference between the actual wind speed and the ship's speed. As the ship moves off that course the apparent wind (what it feels like on the ship) moves forward until with the real wind on the beam, the relative wind is now likely coming from ahead depending on the difference between the true wind speed and the ship's speed. So in many cases the apparent wind onboard would be from ahead of abeam and thus the galley doors would provide some shelter. Plus keep crew members from coming in contact with the hot stove in the event the ship moved unexpectedly while they were in the vicinity. I suspect the doors were necessary (as opposed to a solid wall) because access to the rear of the stove was required for some type of maintenance or cleaning.
-
When I decided to do the rigging for my guns Chuck did not have the single sheave 2mm blocks available. I think they are almost too small to work with, at least for my hands, so I went with Model Expo 3mm "beautiful blocks". They are "all set" (stropped with standing ends attached and hooks on the ends) ready to rig as soon as I get to the point where mounting the guns makes sense - which I think is not too far in the future. I think I am going to do that before any of the bulkheads and other "stuff" is in the way. I think I would be very likely to damage the items along the centerline if there were there when I added the guns and their rigging.
-
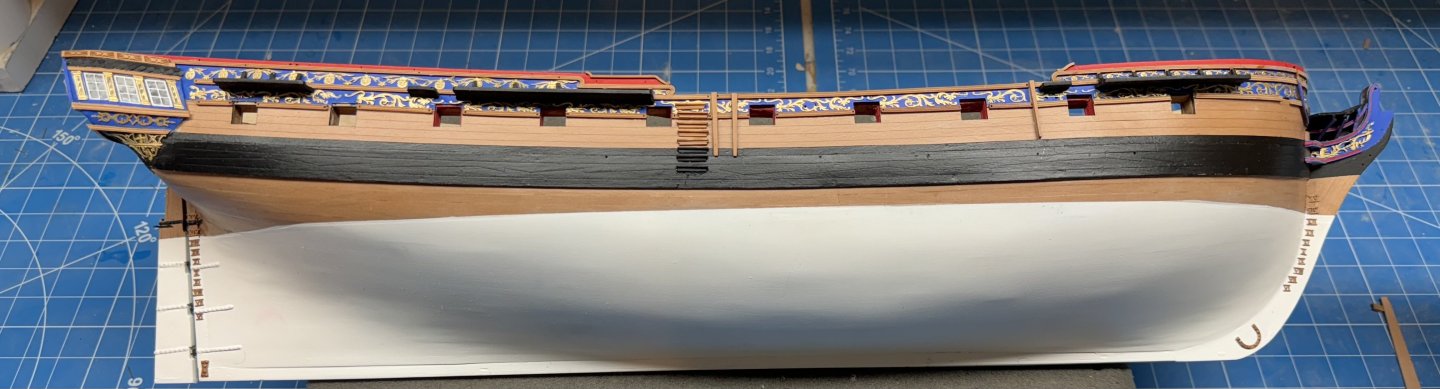
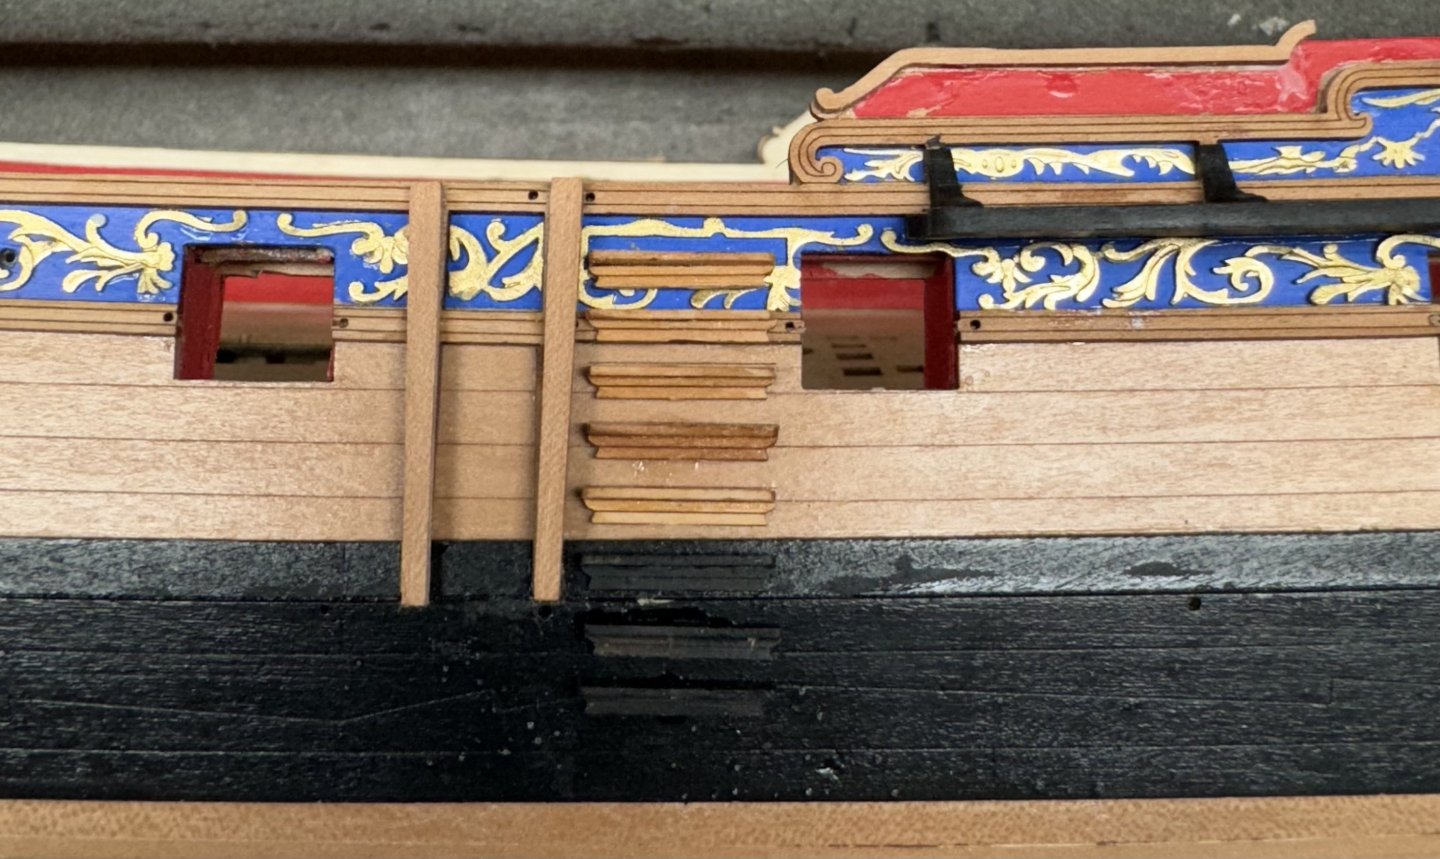
I assembled and mounted the hull side steps on the port side. The steps are 4mm from top to top as best I can measure from the drawing (Sheet 15). Also the drawings shows eight steps while the picture in the instructions only shows seven. I painted the three on the wales black but will leave the top one natural as I have no faith in my ability to paint it "to match". After some touch-up painting this completes all the hull work on this side - time to "turn it over" and work the starboard side. I considered adding the deadeyes and chain plates now but decided to wait. I ordered some black pins that I want to use instead of the brass ones to keep the touch-up painting to a minimum.
- 422 replies
-
- 4
-
-
- Vanguard Models
- Sphinx
- (and 1 more)
-
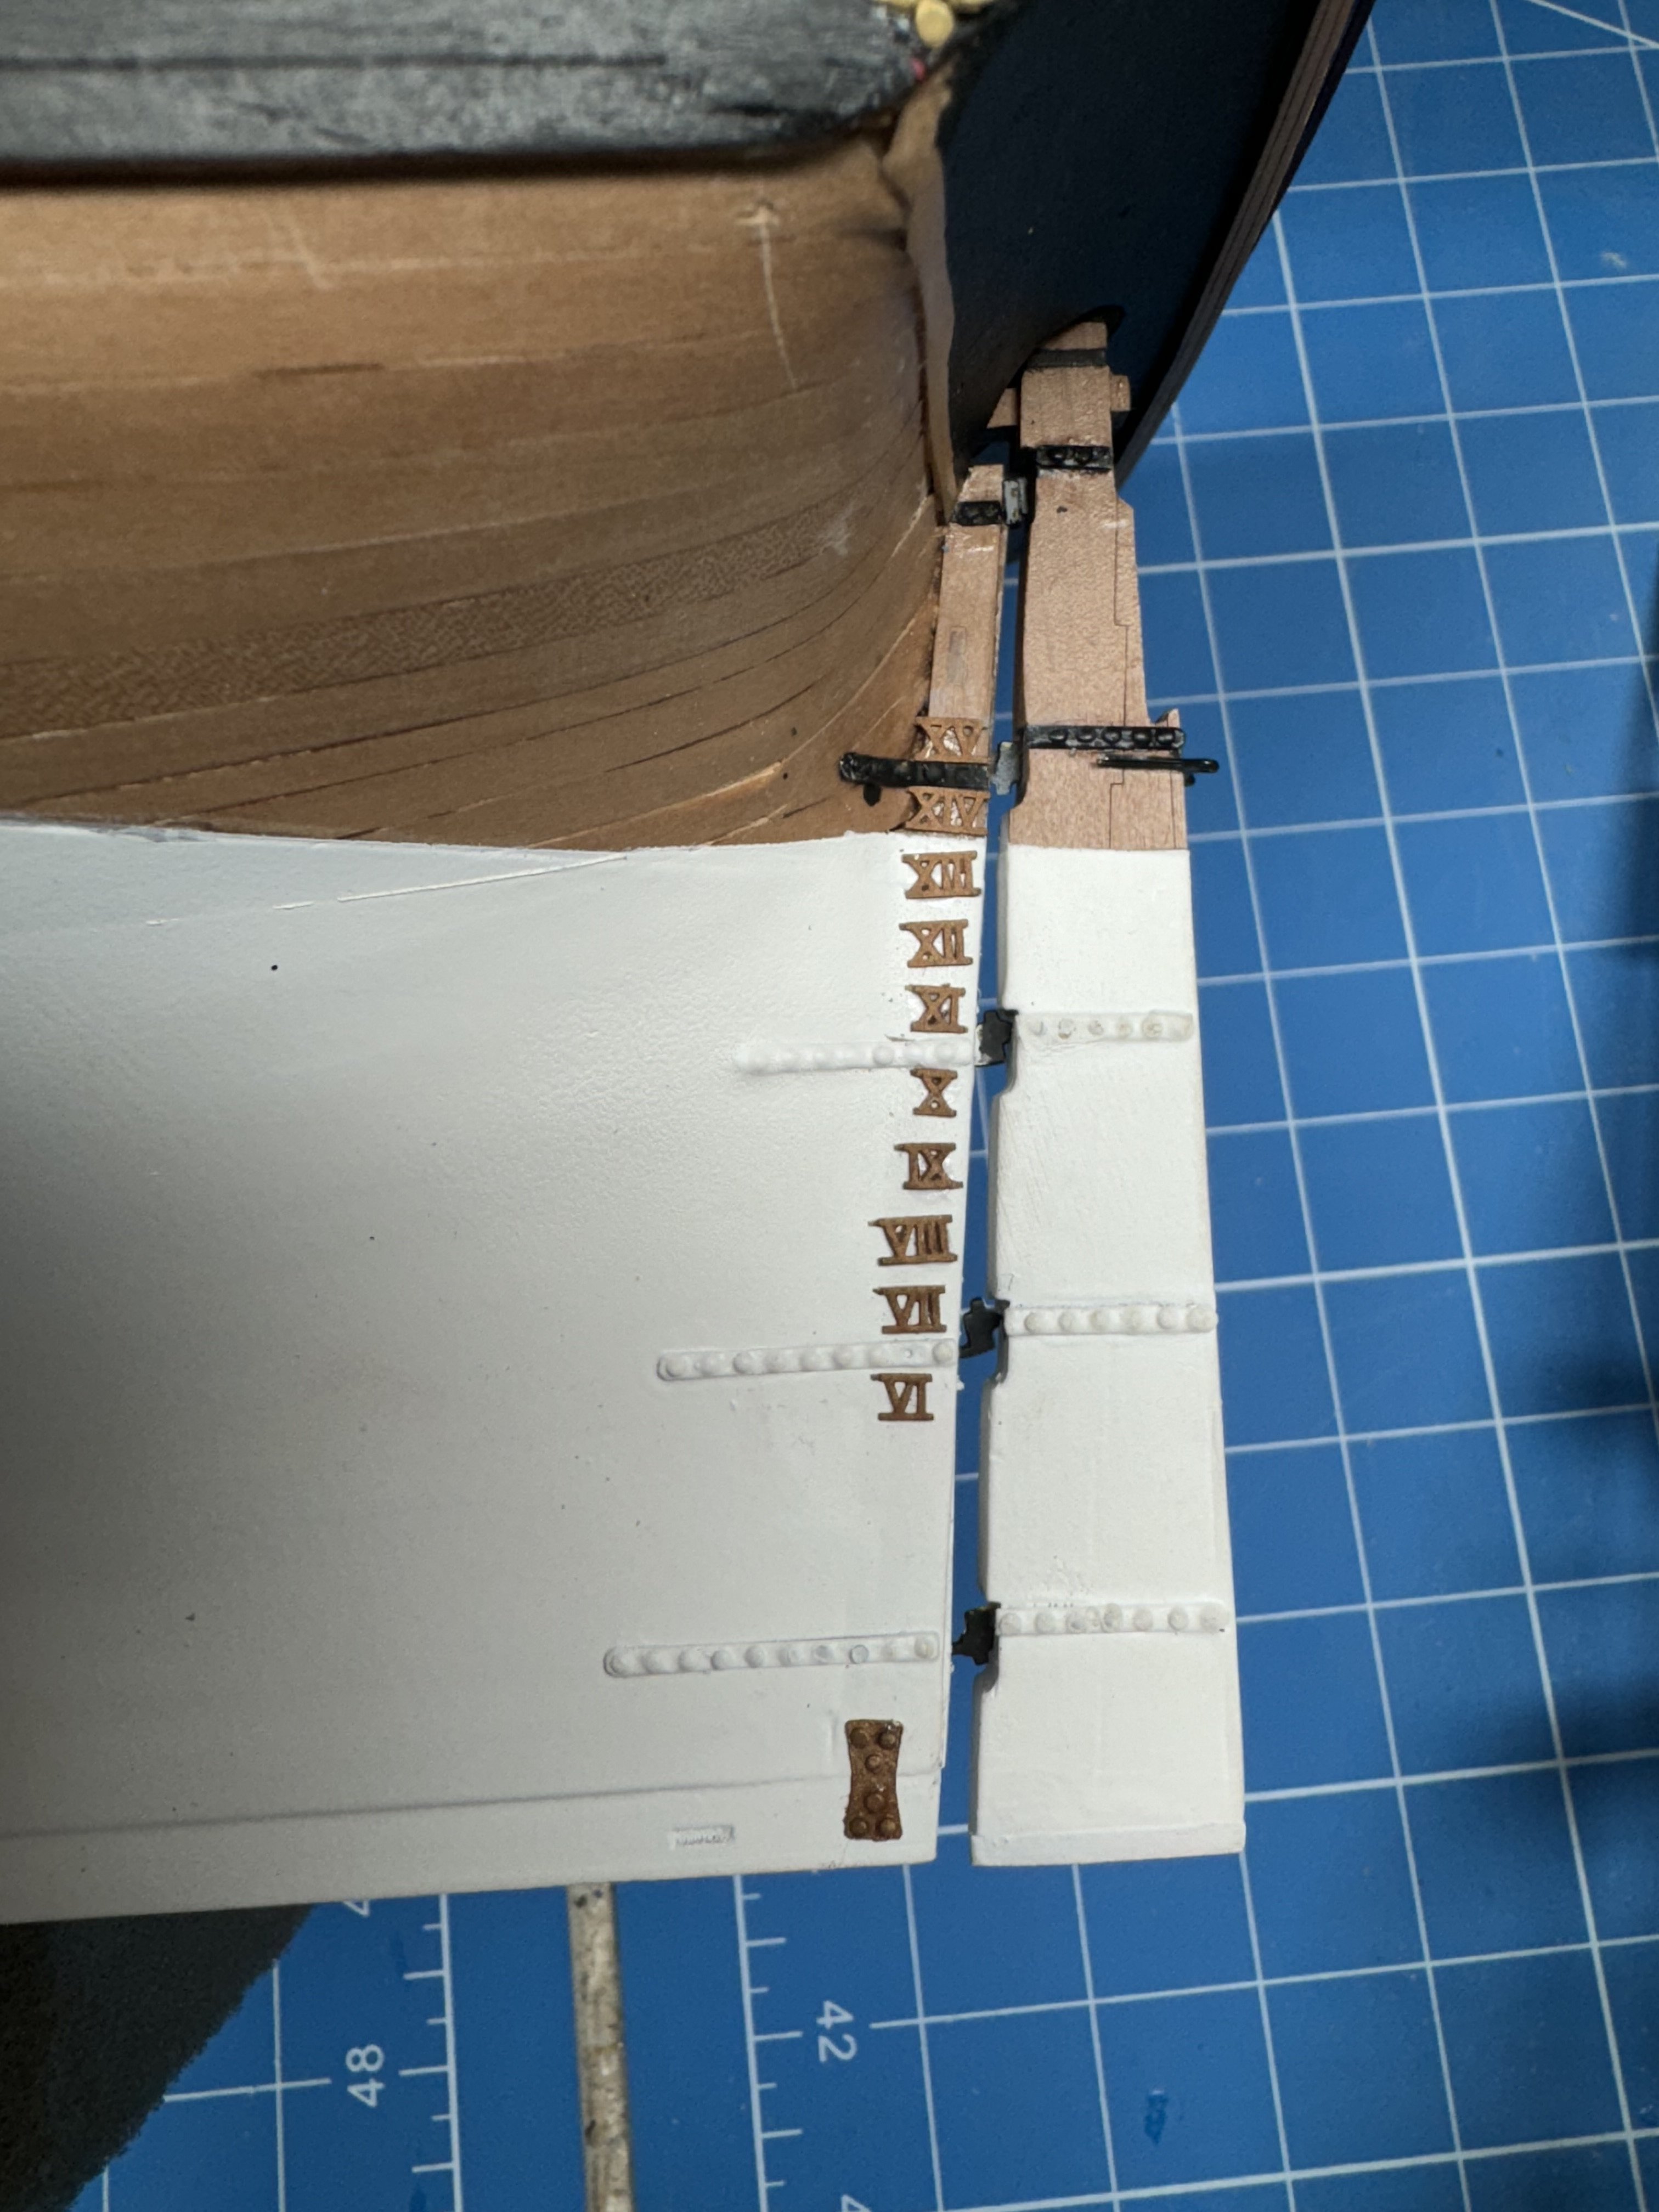
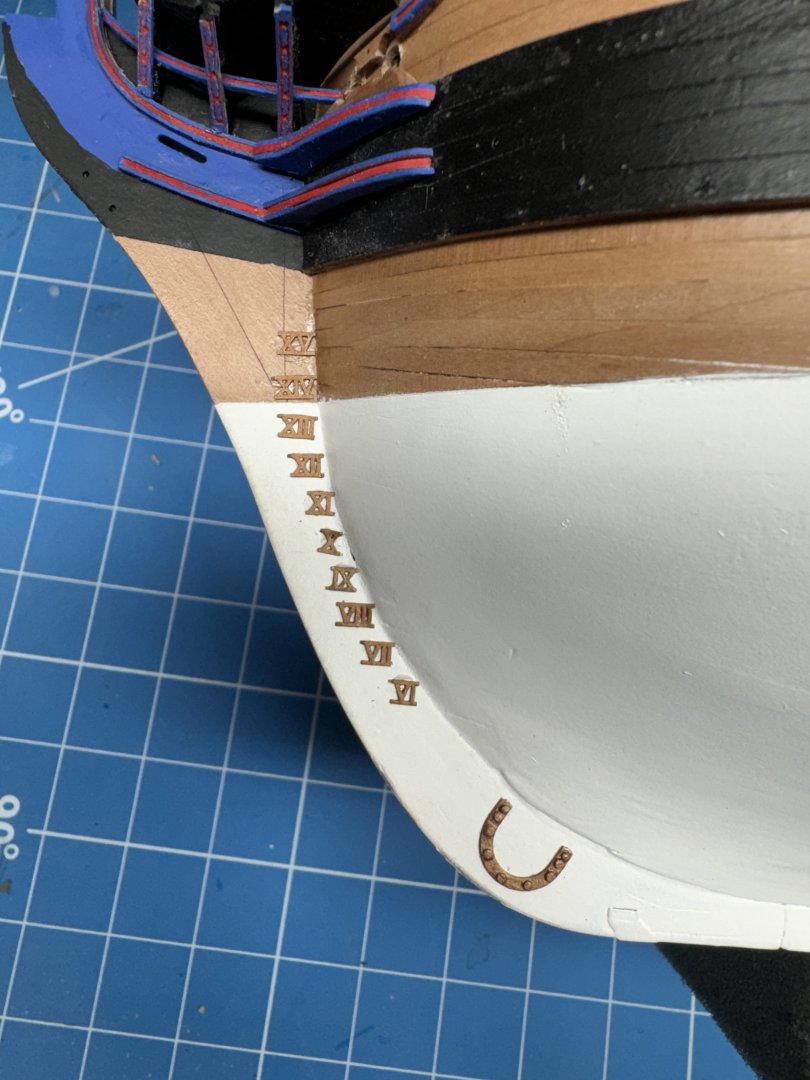
I got the numerals on without (more or less) incidents. Some of them could be a little straighter but they are so small and moving them around is not so easy. I used thick CA but still it sets faster than these old hands can move the numeral around to exactly where it should be - assuming my old eyes would recognize that if they saw it. It turns out the numbers are 5mm from the top of one to the bottom of the next. I started at the stern and fudged things around so that I did not have to try and glue one of the numerals on top of the rudder braces. I think it worked out okay - the XV may be a bit higher than the drawing (Sheet 15) shows but then I may not have the waterline exactly where it shows on the drawing. So with the stern done I measured up from the waterline to where the XV was and put the bow XV the same distance above. Then spaced the remaining numerals 5mm down - top to bottom. I think it looks okay, except the copper color sort of blends into the pear siding but...

- 422 replies
-
- 6
-
-
- Vanguard Models
- Sphinx
- (and 1 more)
-
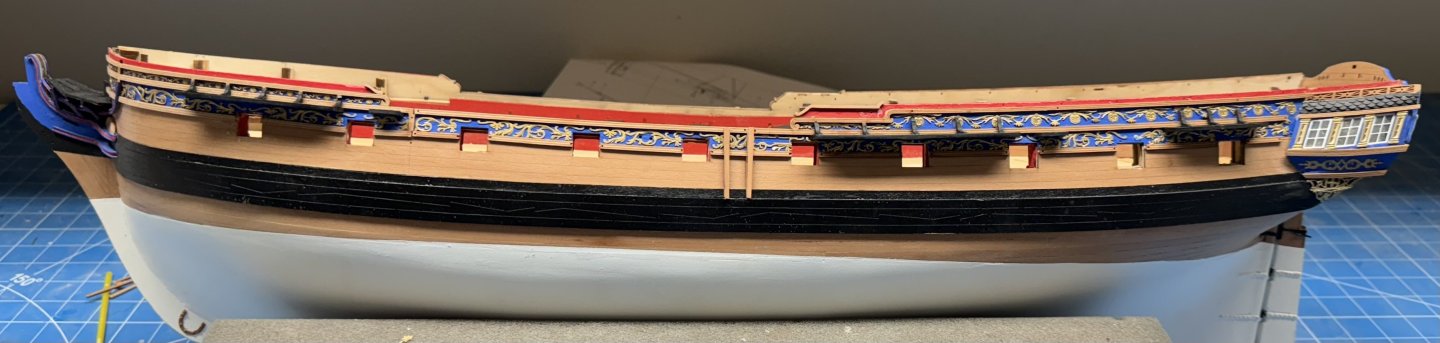
I have all the decorations completed on the port side. For those who come after I would suggest that you begin with the PE-2L/R piece as it has "cutouts" for three of the main channel knees and it is important that this piece be fitted from the forward end where the cutouts are. Don't ask me how I know but these pieces are pretty tender and it is possible to get them separated into more pieces than with which you would care to deal. As you can see if lite from above all sorts of errors under the channels become invisible. And there will be gun port doors providing additional "cover" where the decoration pieces meet above the gun ports - at least back aft. I plan on adding the draft numerals before shifting focus to the starboard (aka right) side.
- 422 replies
-
- 6
-
-
- Vanguard Models
- Sphinx
- (and 1 more)
-
Port side q-gallery decorations completed. Started working on the other decorations on this side. Will probably do the deadeyes as well as long as I am going to keep the hull port side up. I am going to have to find a better camera - IMHO this doesn't look this BAD in real life.

- 422 replies
-
- 5
-
-
- Vanguard Models
- Sphinx
- (and 1 more)
-
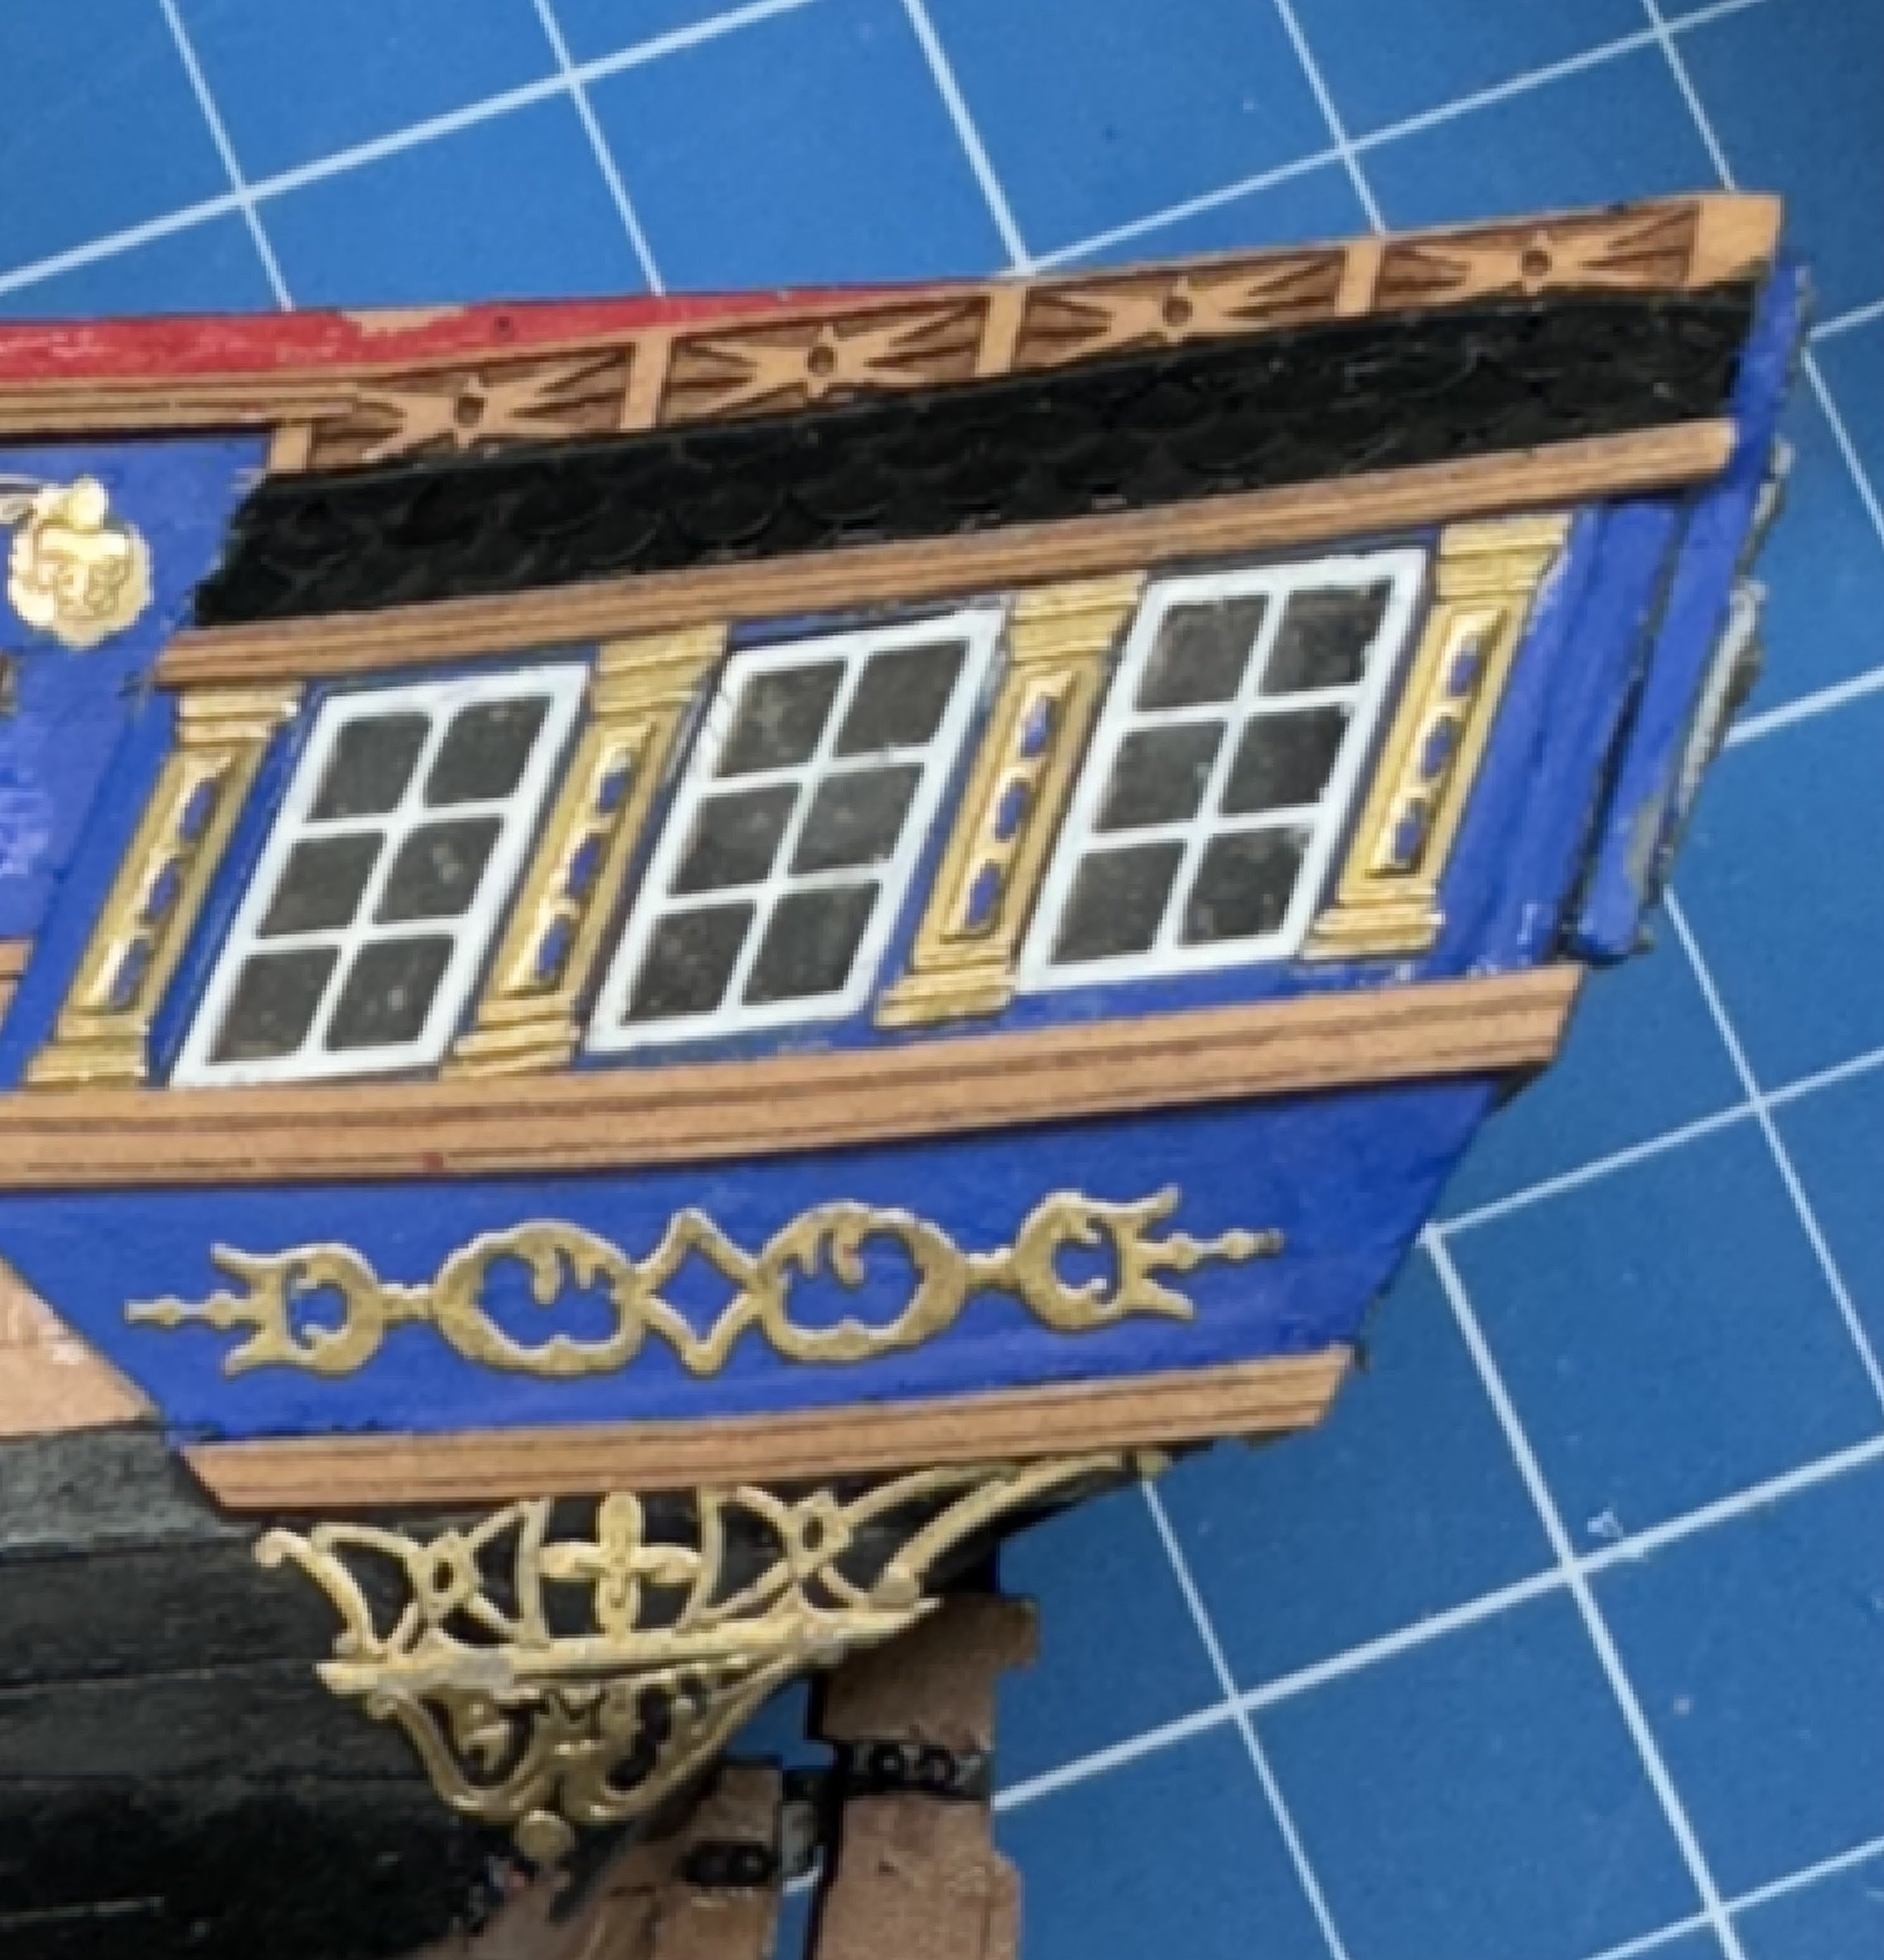
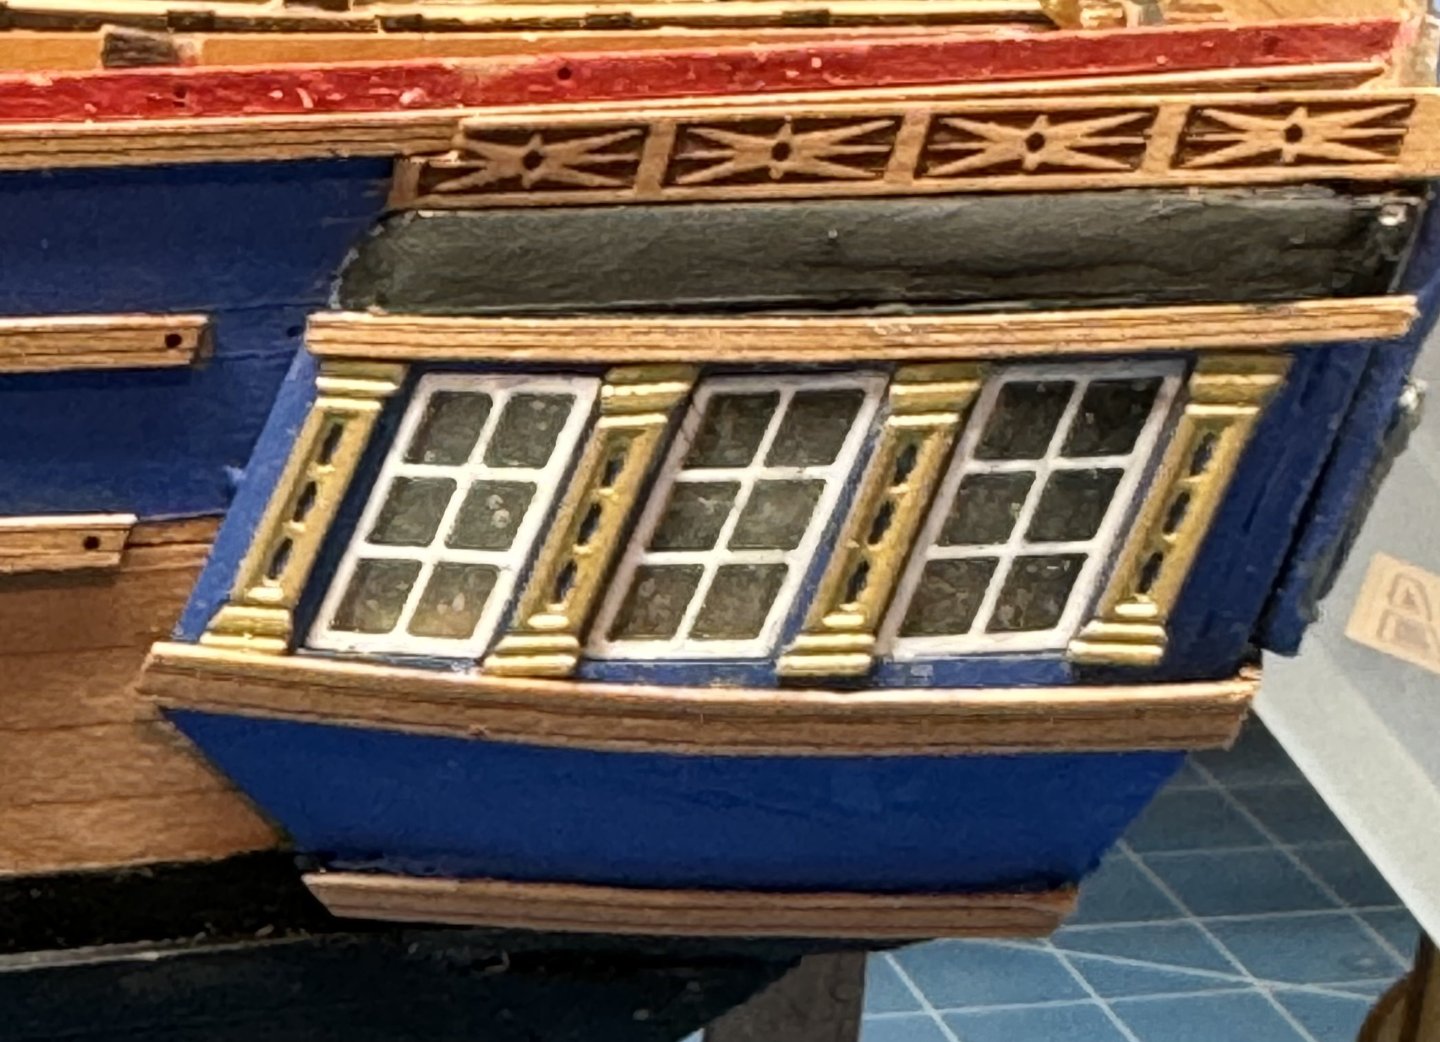
Port side q-gallery trim pieces in place. Had to touch up the paint, both blue and black. Roof panels go on next then the rest of the decorations. On the starboard side I am going to fit the molding before I add the decorations between the windows. Hopefully it will be easier to have them look like they are setting on the molding. I tried on the port side but getting the decorations EXACTLY where they need to be without some kind of reference was a bridge too far (for me).
- 422 replies
-
- 7
-
-
- Vanguard Models
- Sphinx
- (and 1 more)
-
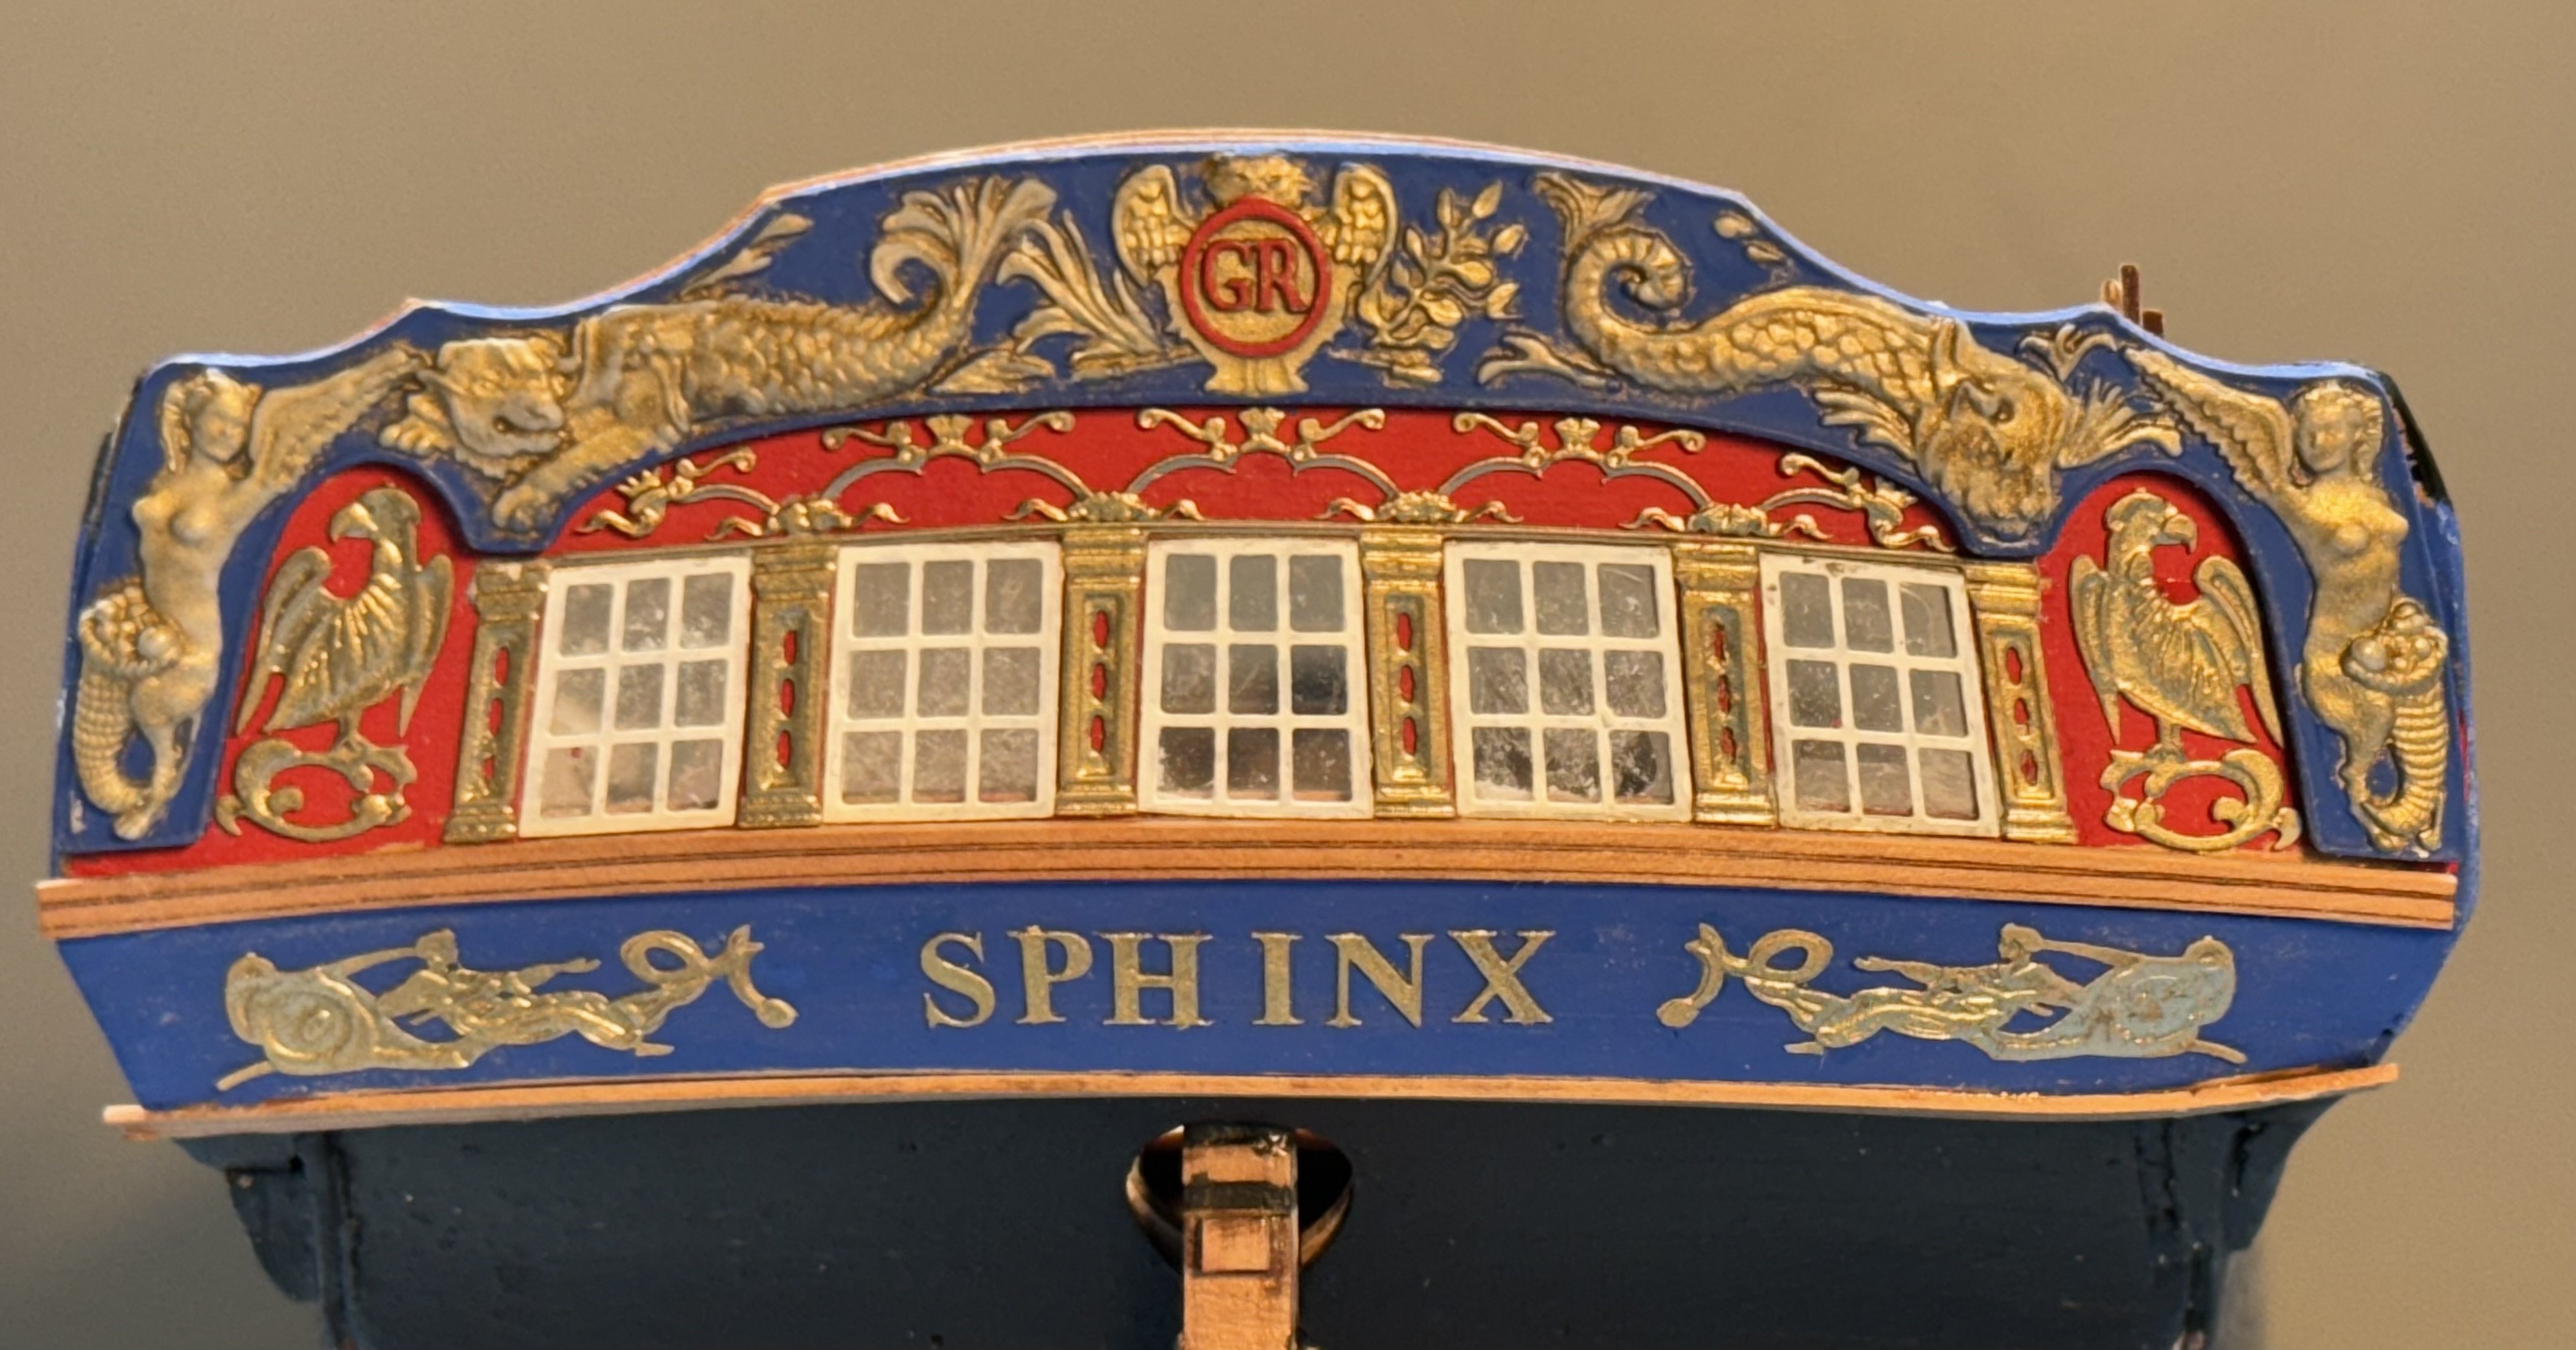
Tim, Don't think I did not "make a list and check it thrice" before I placed the letter on the hull. May try and reposition the H today. If I mess up the letter in the process I have another set so I am willing to be adventuresome.
-
The lettering was not obscured so much as to be unreadable and I believe I followed what was there but it seems like there is too much space between the later letters or the first three are too close together. I suppose I could have adopted the RN position of some years previous when they did NOT put the names of the ships on the stern. I am not going to change wjhat is there in any event. Transom decorstions are complete - on to the q-galleries.

- 422 replies
-
- 8
-
-
- Vanguard Models
- Sphinx
- (and 1 more)
-
Although I departed from the order of steps in the instructions, once I got started on the stern decorations I decided to just go ahead and "finish the job" as a famous statesman once said. I also opted to paint the lower transom to match the wales but have not gotten the seam with the hull done yet. All my really thin brushes are in the "to be cleaned" pile. Now for the "really fun" part - the Sphinx letters - I am going to turn the hull upside down for that job - hopefully the paint has not obscured the letter outlines. Would be really embarrassing to spell it wrong. Like misspelling something in Christmas lights.

- 422 replies
-
- 2
-
-
- Vanguard Models
- Sphinx
- (and 1 more)