HOLIDAY DONATION DRIVE - SUPPORT MSW - DO YOUR PART TO KEEP THIS GREAT FORUM GOING! (Only 13 donations so far - C'mon guys!)
×


Jim M
-
Posts
165 -
Joined
-
Last visited
Content Type
Profiles
Forums
Gallery
Events
Everything posted by Jim M
-
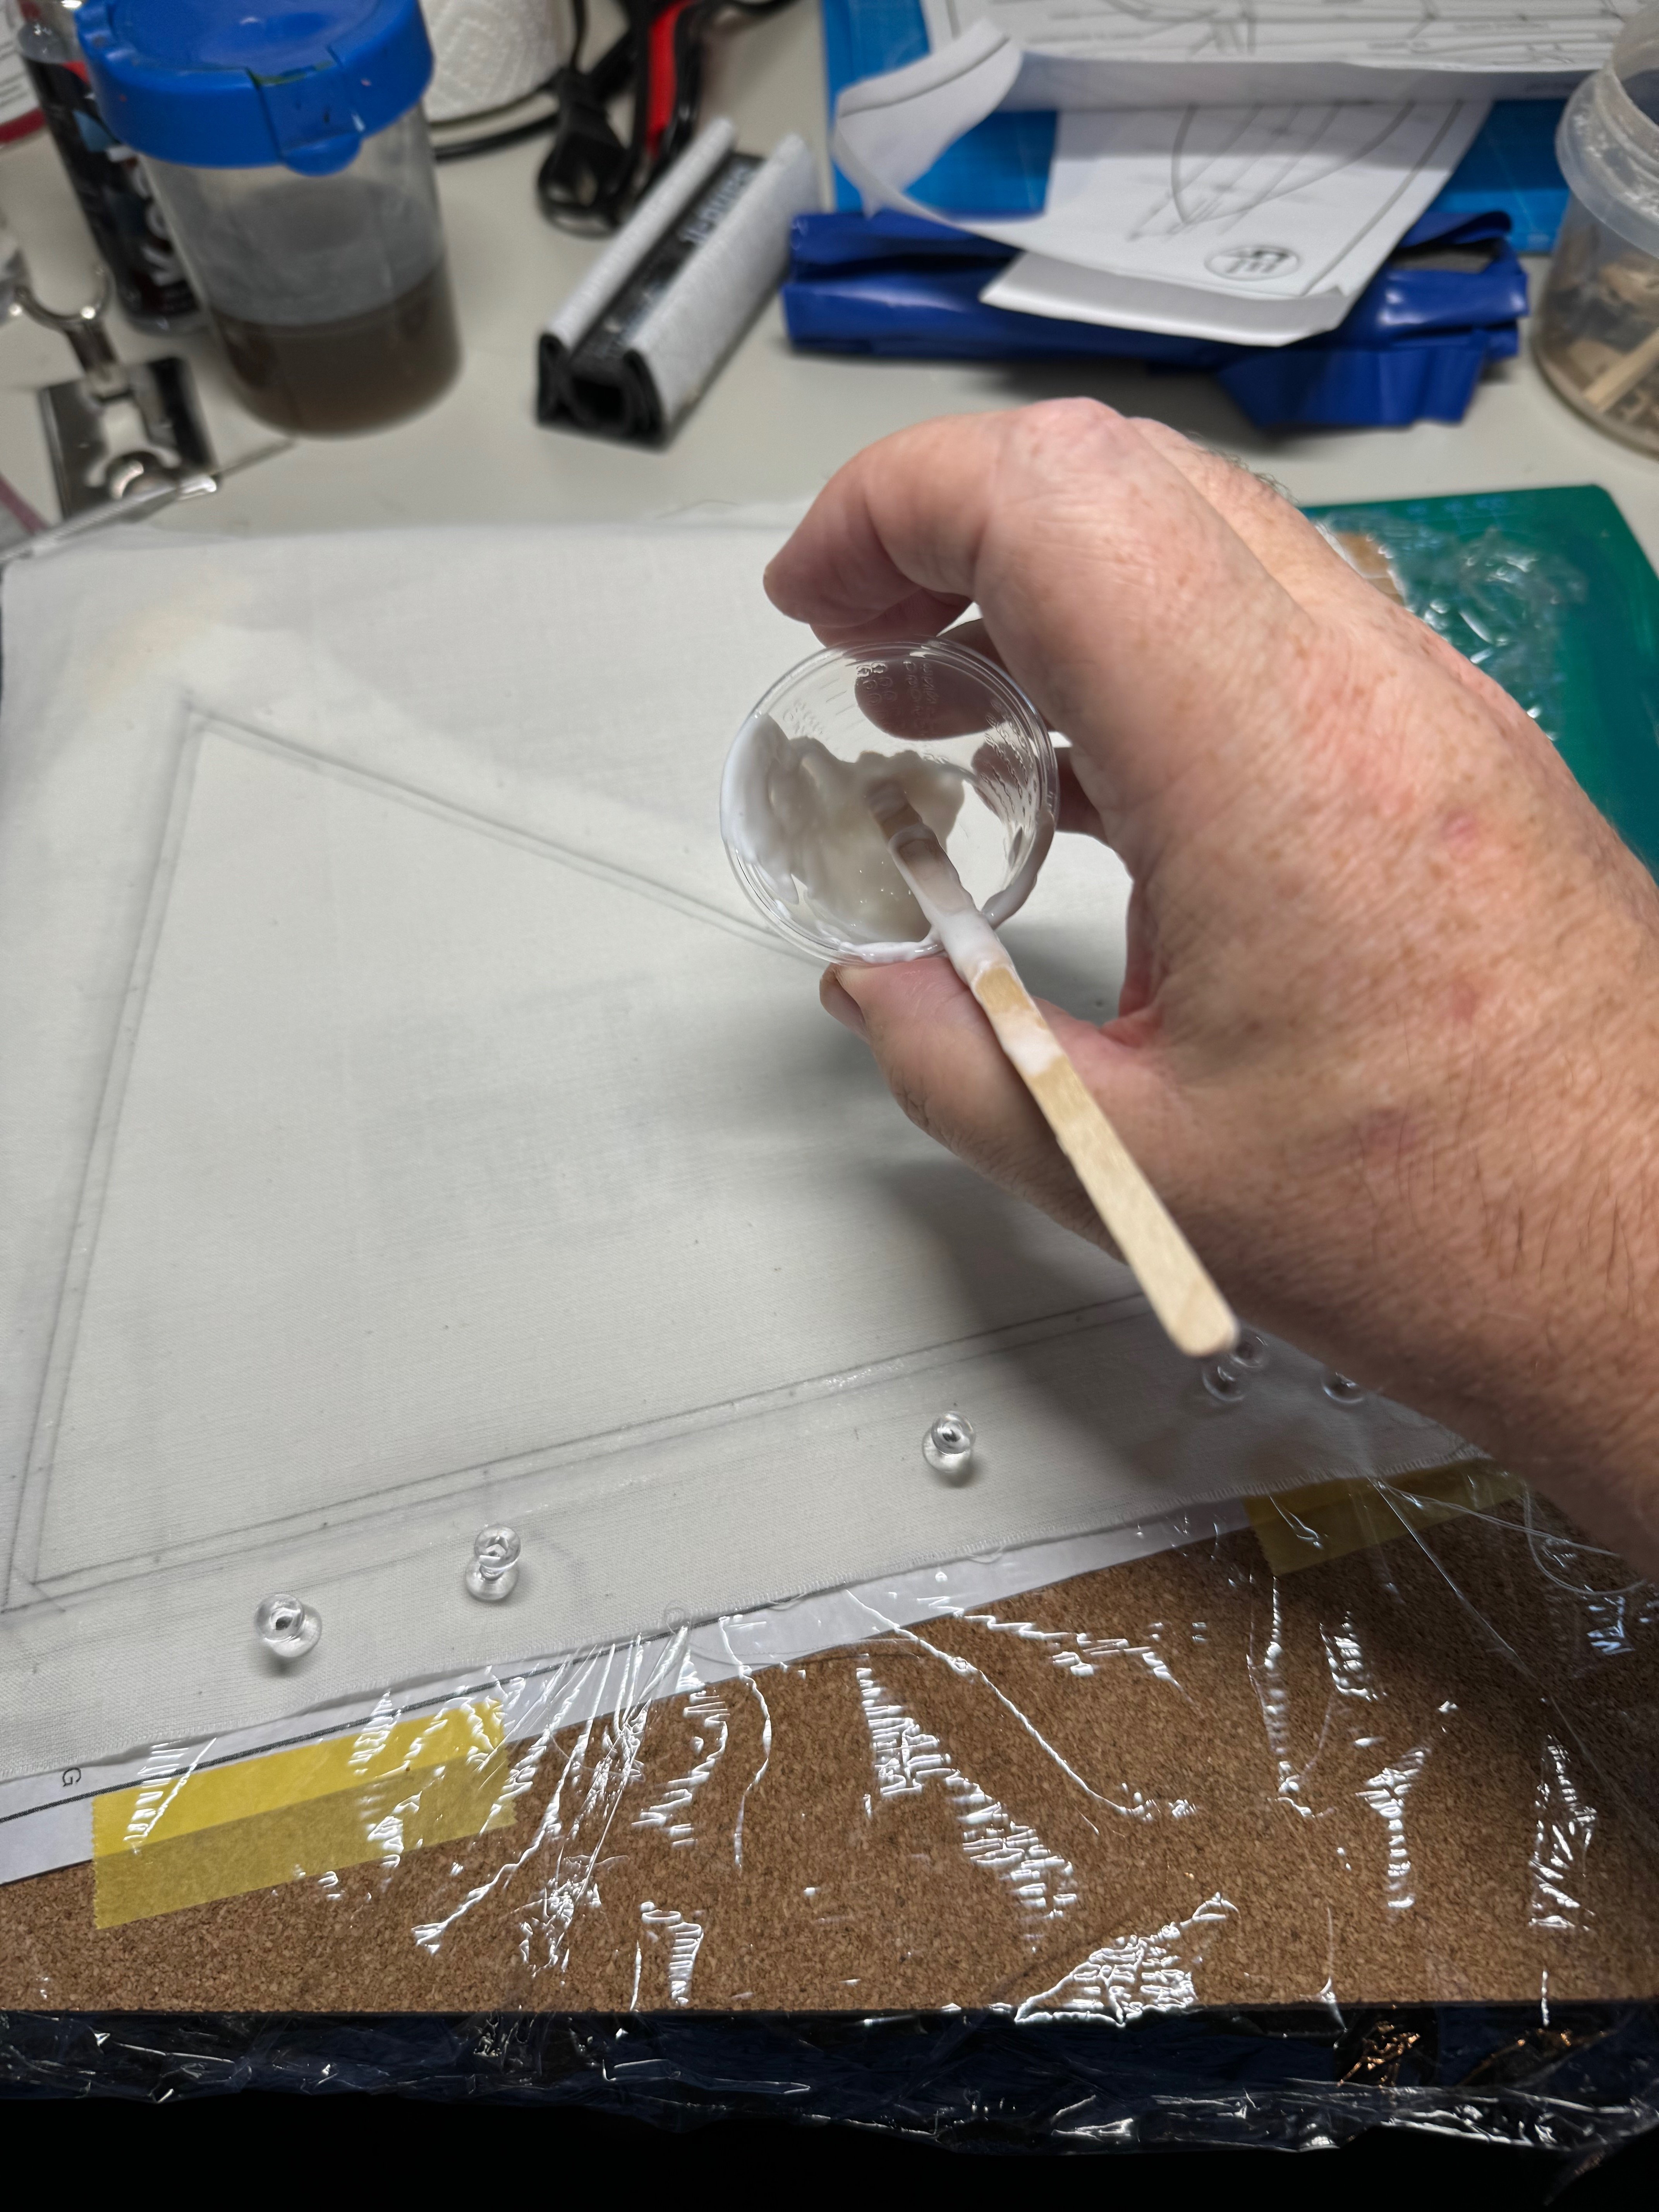
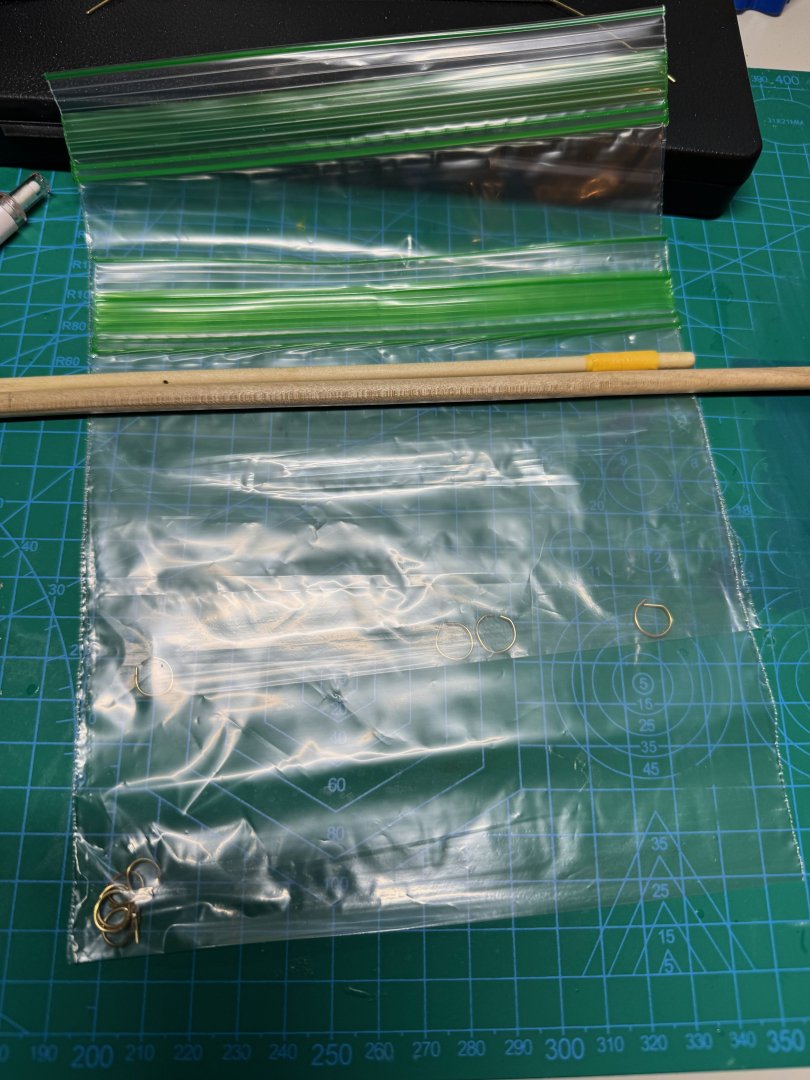
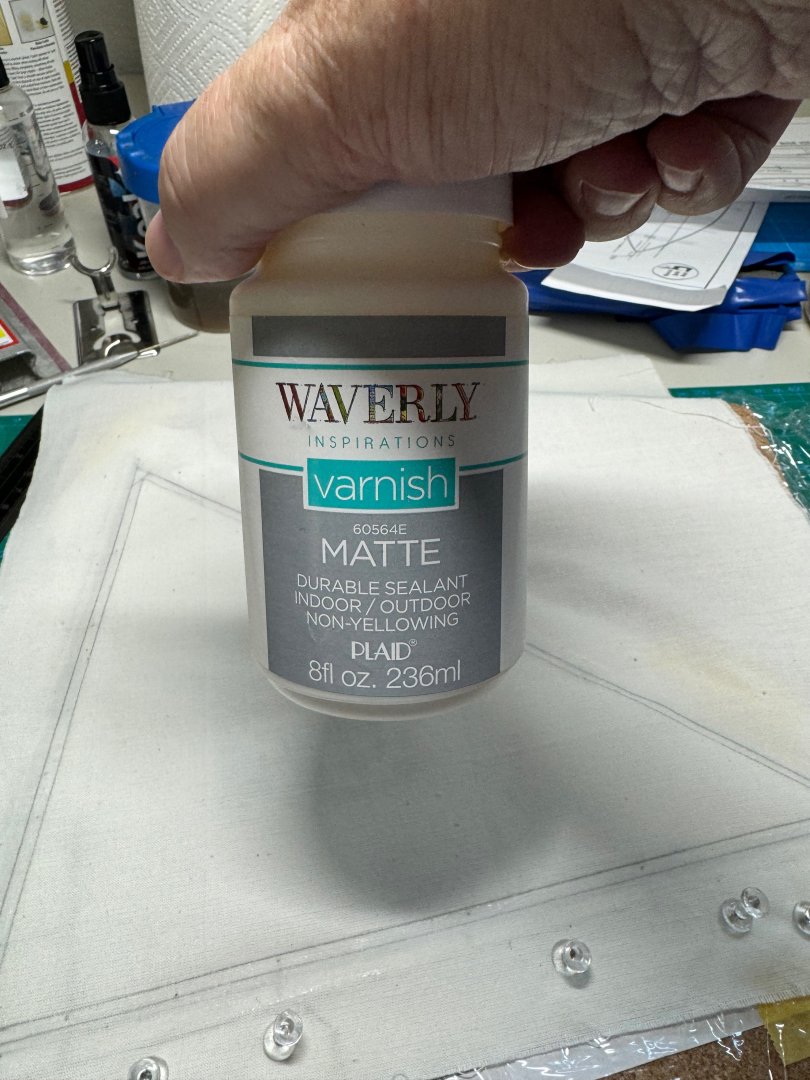
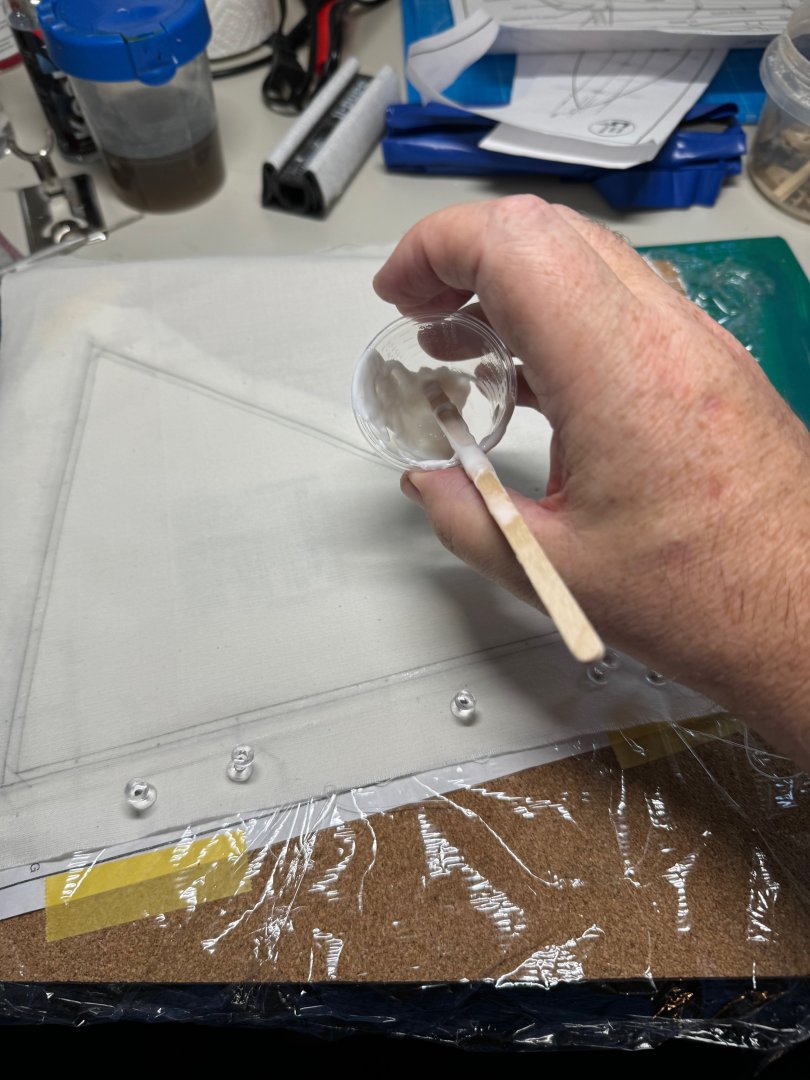
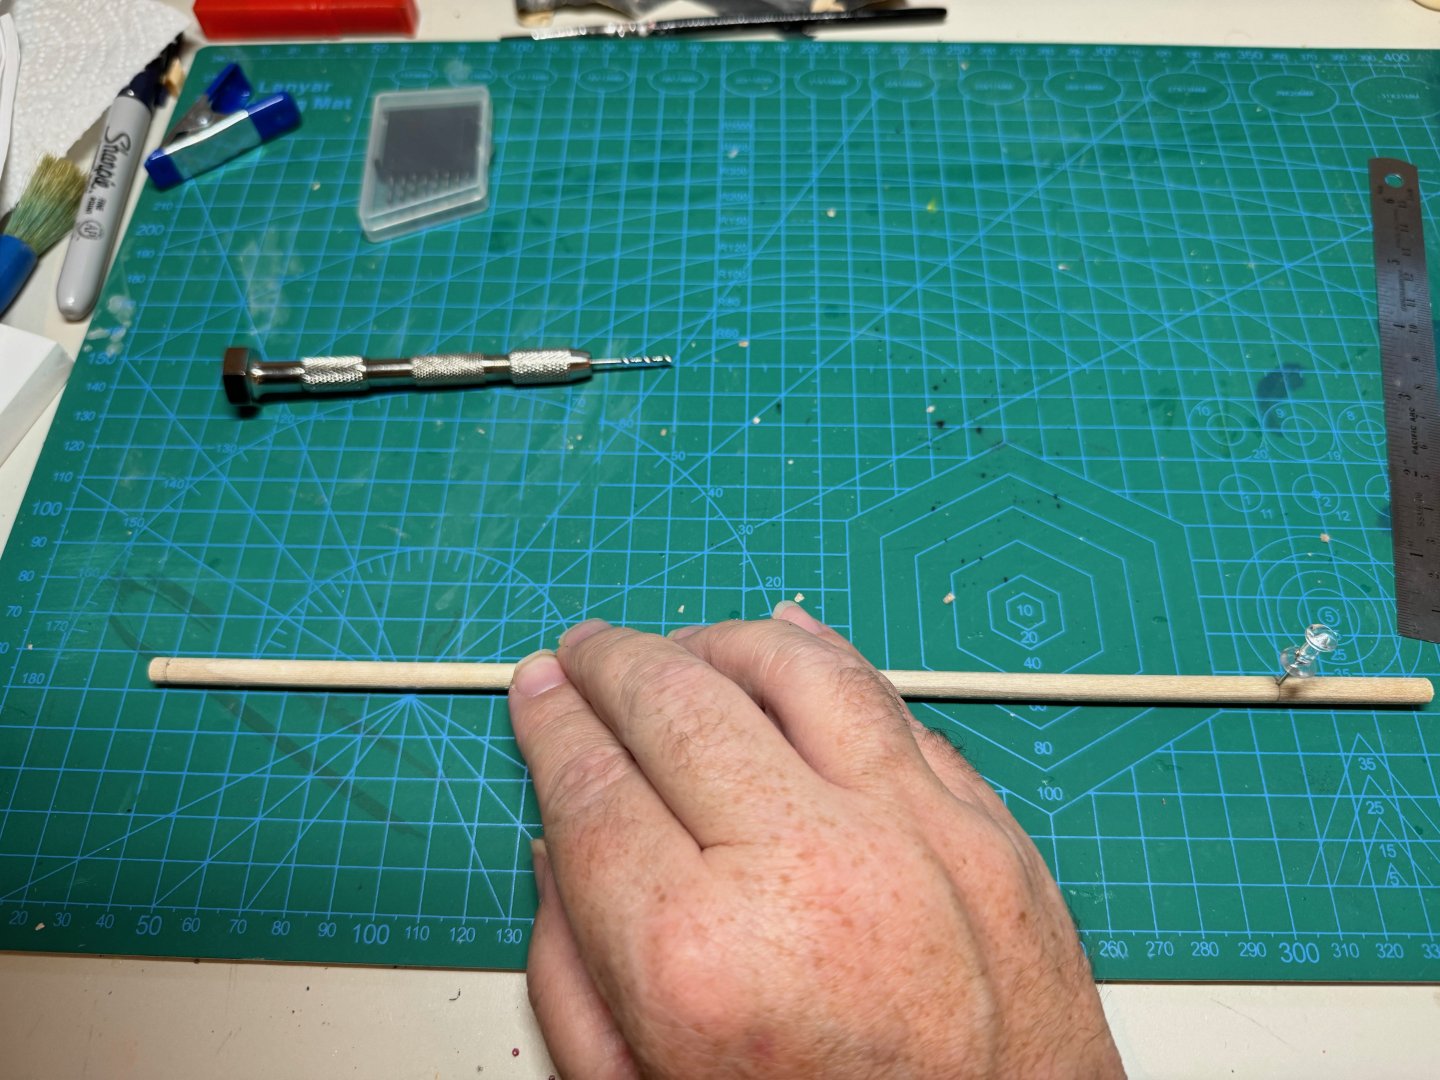
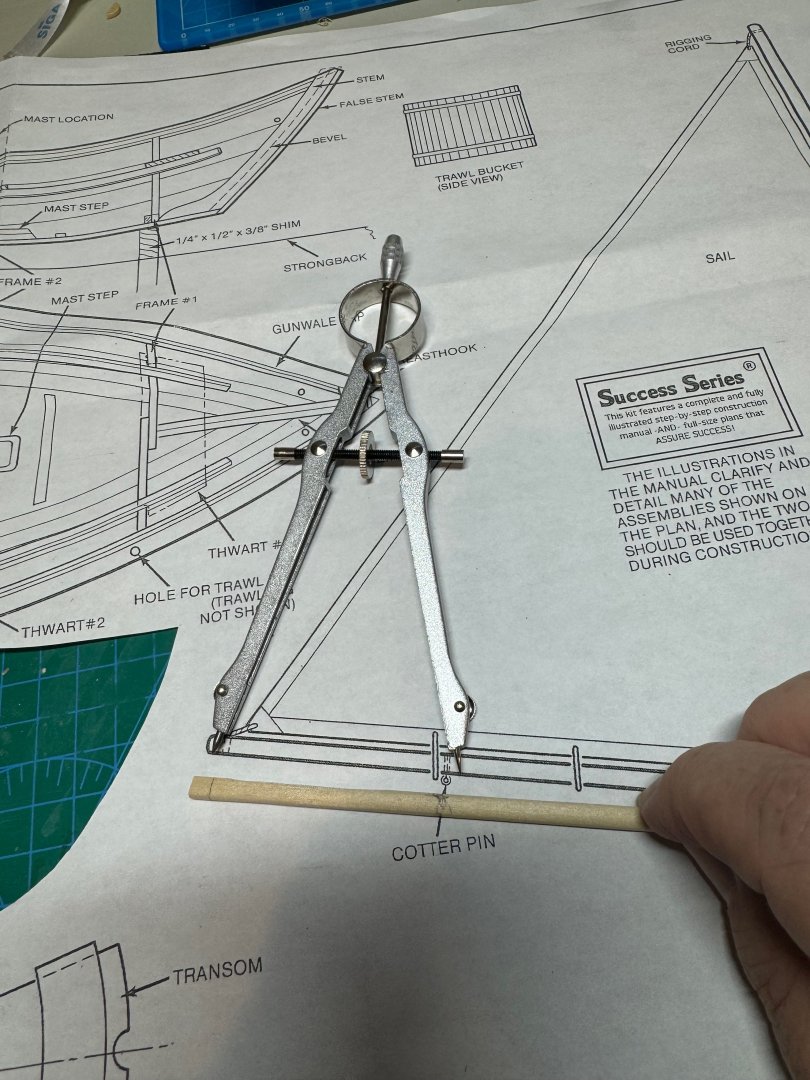
 Good evening, a minor update today. Today's focus was completing the sail for the Dory. First I mounted the sail material after ironing it to a building board over top the plans. Then I traced the lines per the plans. Per the instructions I then put some mat varish on the edges. I hung the sail up to dry. During this timeframe I then created the brass sail connectors, after wrapping the boom and mast with some tape to thicken. I cut the brass with some cutters at 1 1/8 of an inch and made hoops. I then cut out the same and well I was not overly happy with only the lines from the pencil, so I decided to thinken the edges so the sail looks more authentic. I did this by gluing on more sail cloth with some white PVA. Finally I trimmed the edges with my scalpel and then used a pin to create the holes for the rigging hoops and line. The PVA is still a little wet, and this helped hole my ruler from sliding. Here is the finished product. Next steps is to do the finish work of painting. Then final assembly. I am starting to see the light at the end of the tunnel. jim
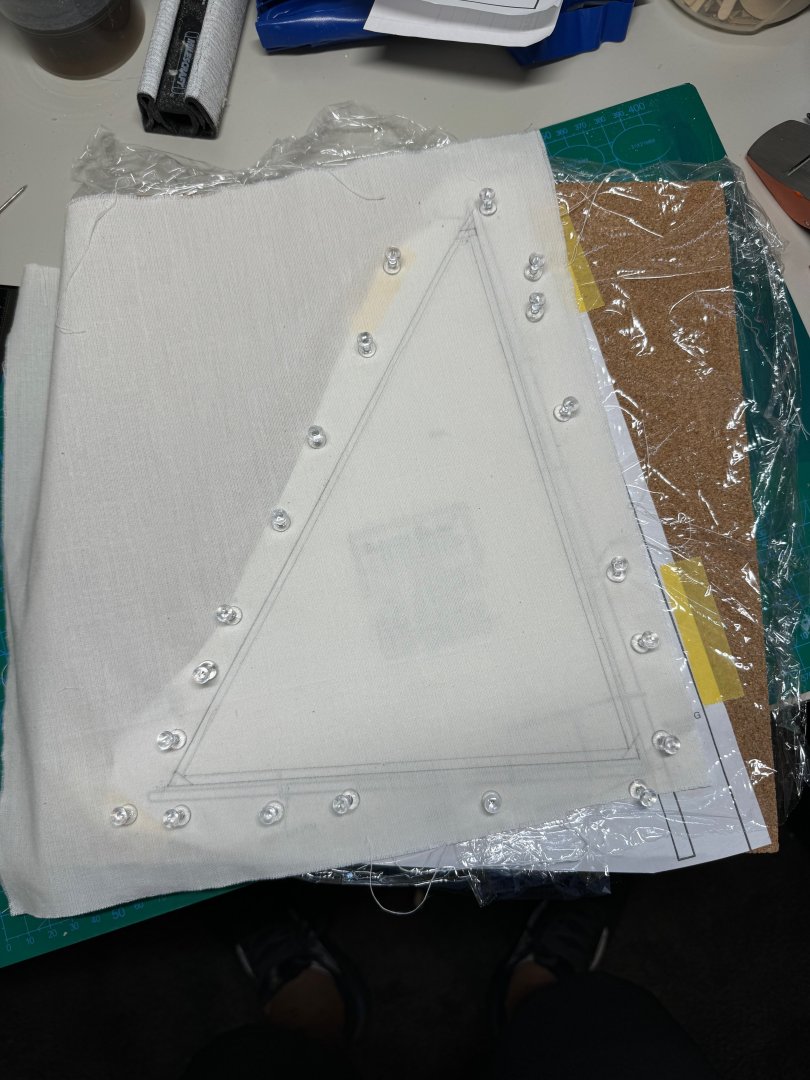


- 56 replies
-
- 5
-

-
- grand banks dory
- Midwest Products
- (and 2 more)
-
Perfect that makes sense now. Thanks @Gregory
-
Ok I think that that make sense. To summarize, we determine our plank size, and according to Toni's post, it can be anywhere between 4" to 12" for the time period. Correct? Then after we make a decision we need to run a fair line for the garboard that is parallel to the wale, and from there we can determine the size of the stern for the garboard, and stem? Is that correct?
-
@Gregory but is the 14 inches determined? if it 1/3 the. the size should be 16 inches. 12 + 1/3 * 12 = 16 is there some theory to describe this rule?
-
As I read through the documentation for the Hull project, I am confused how Toni came to 14". If the average plank size is 9", and the garboard is 1/3 larger, then the math is 12" not 14". Can someone shine a light on this please? jim
-
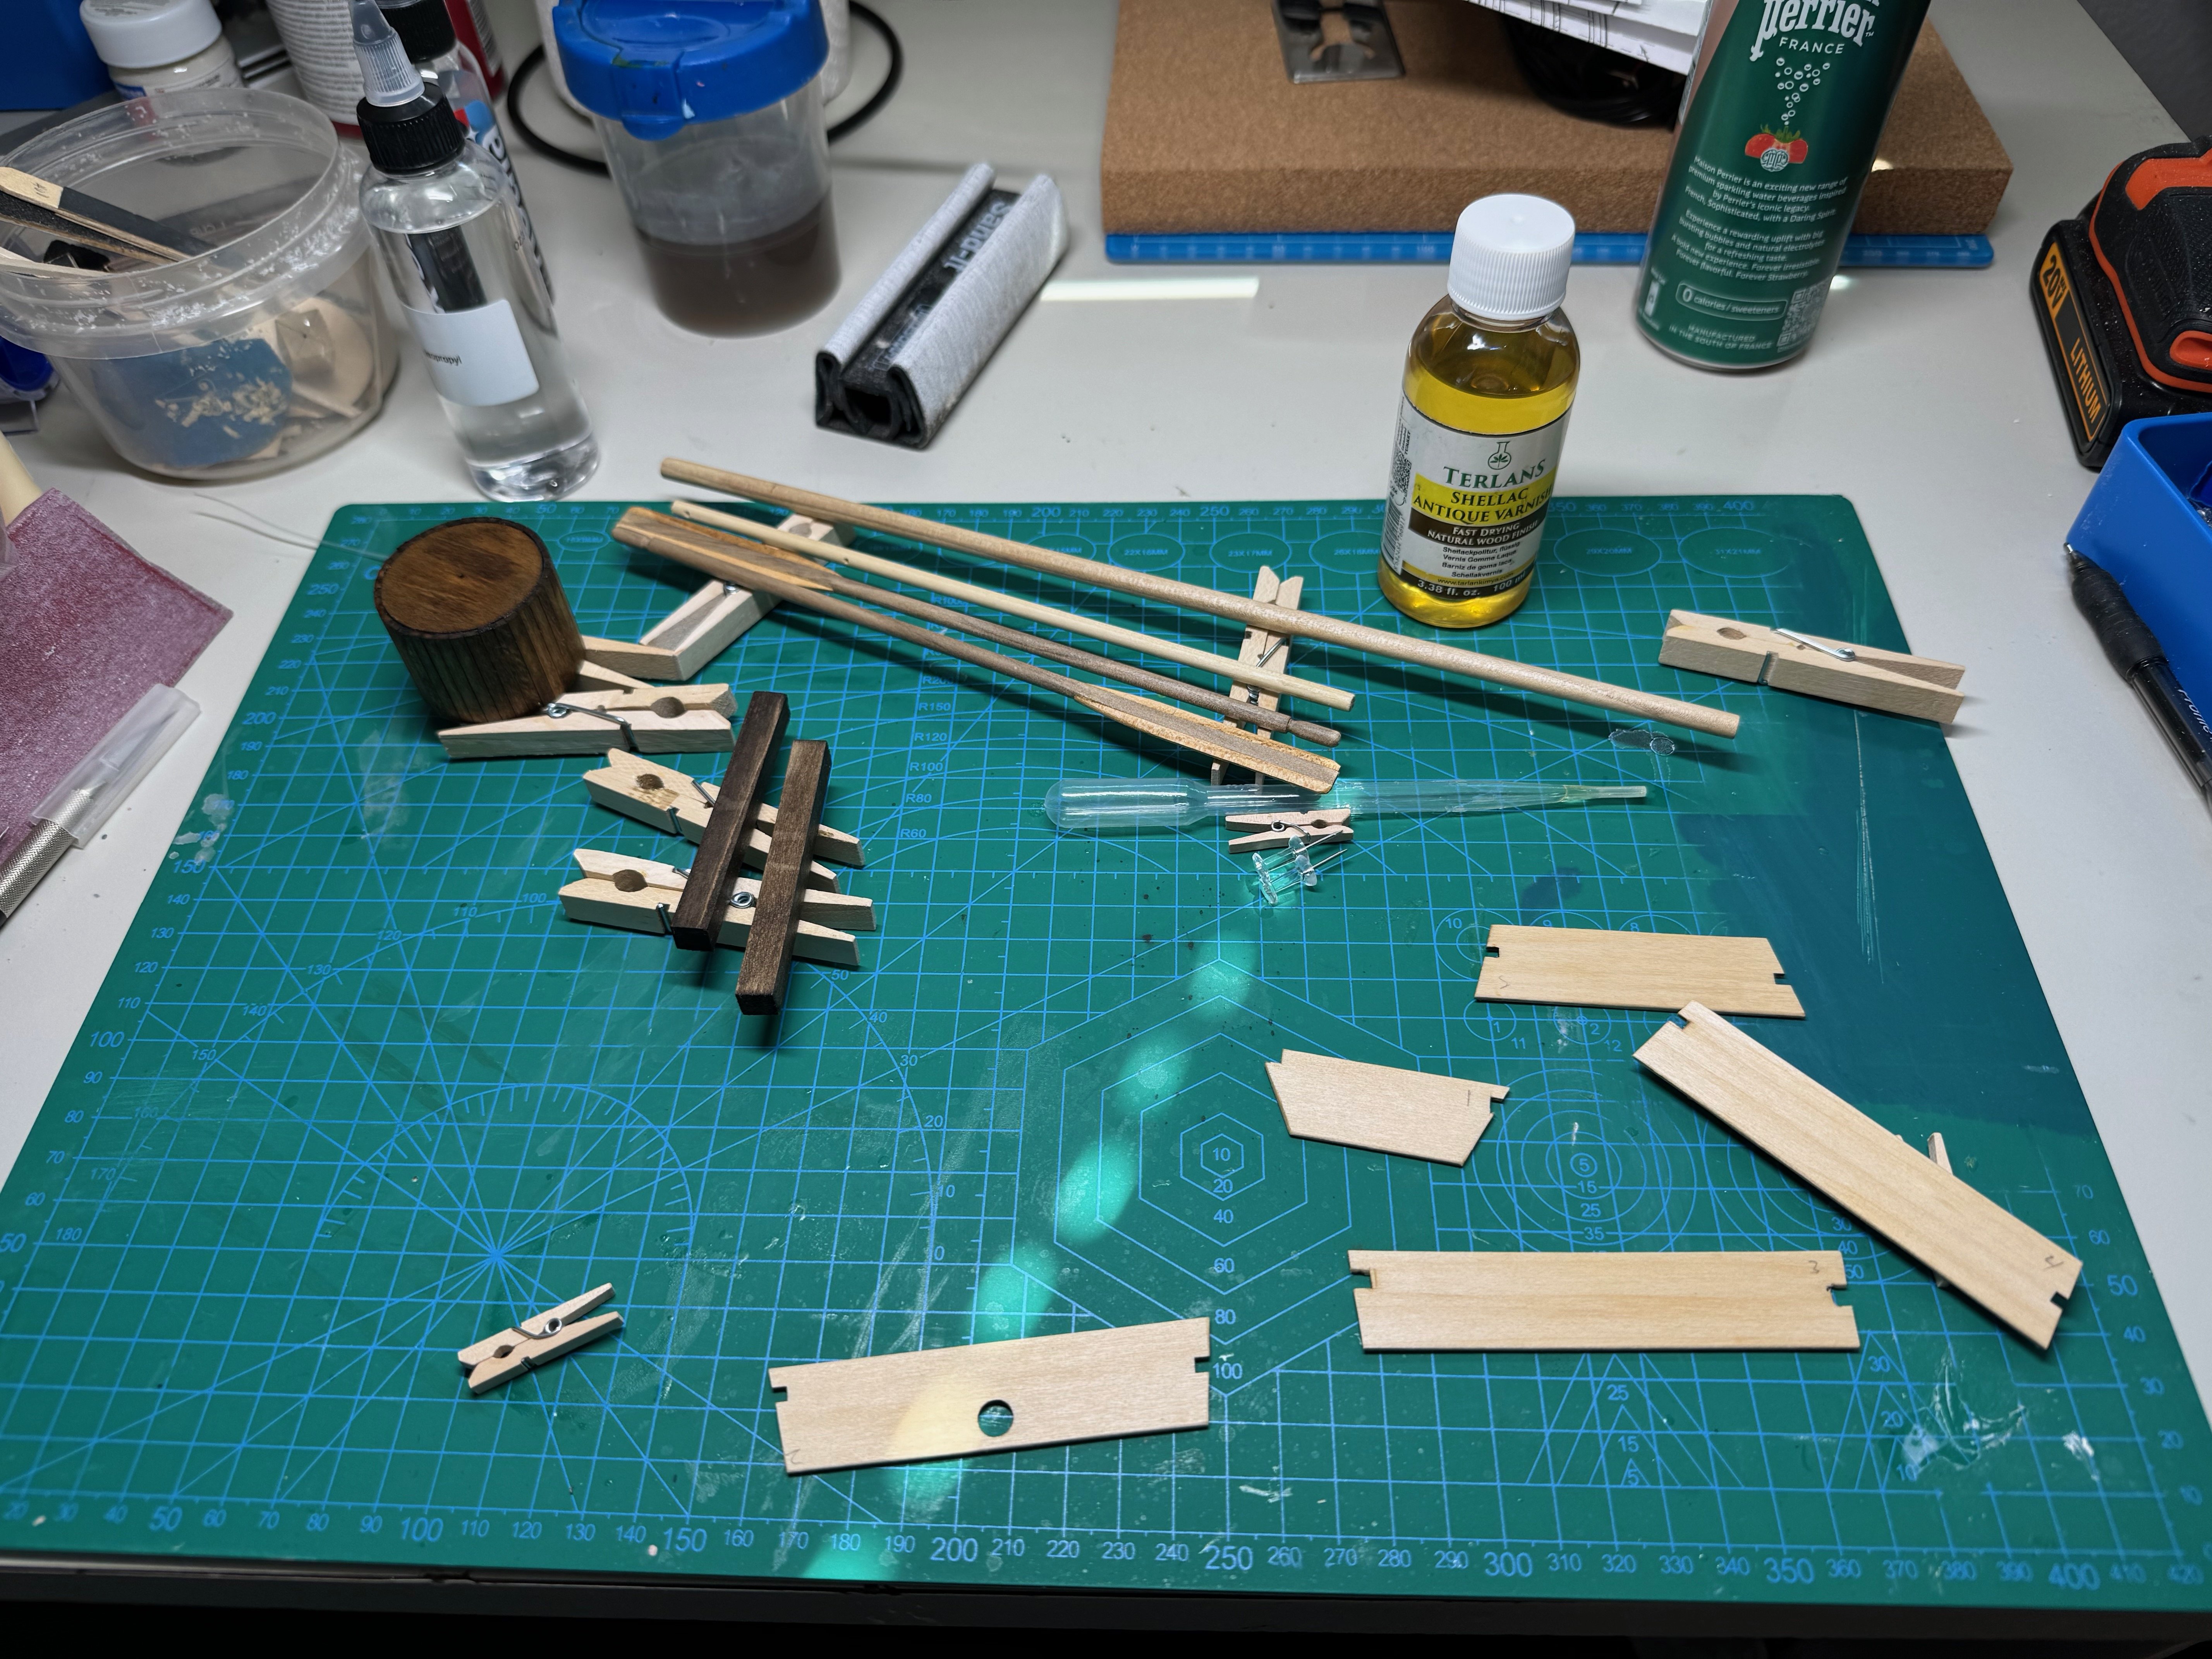
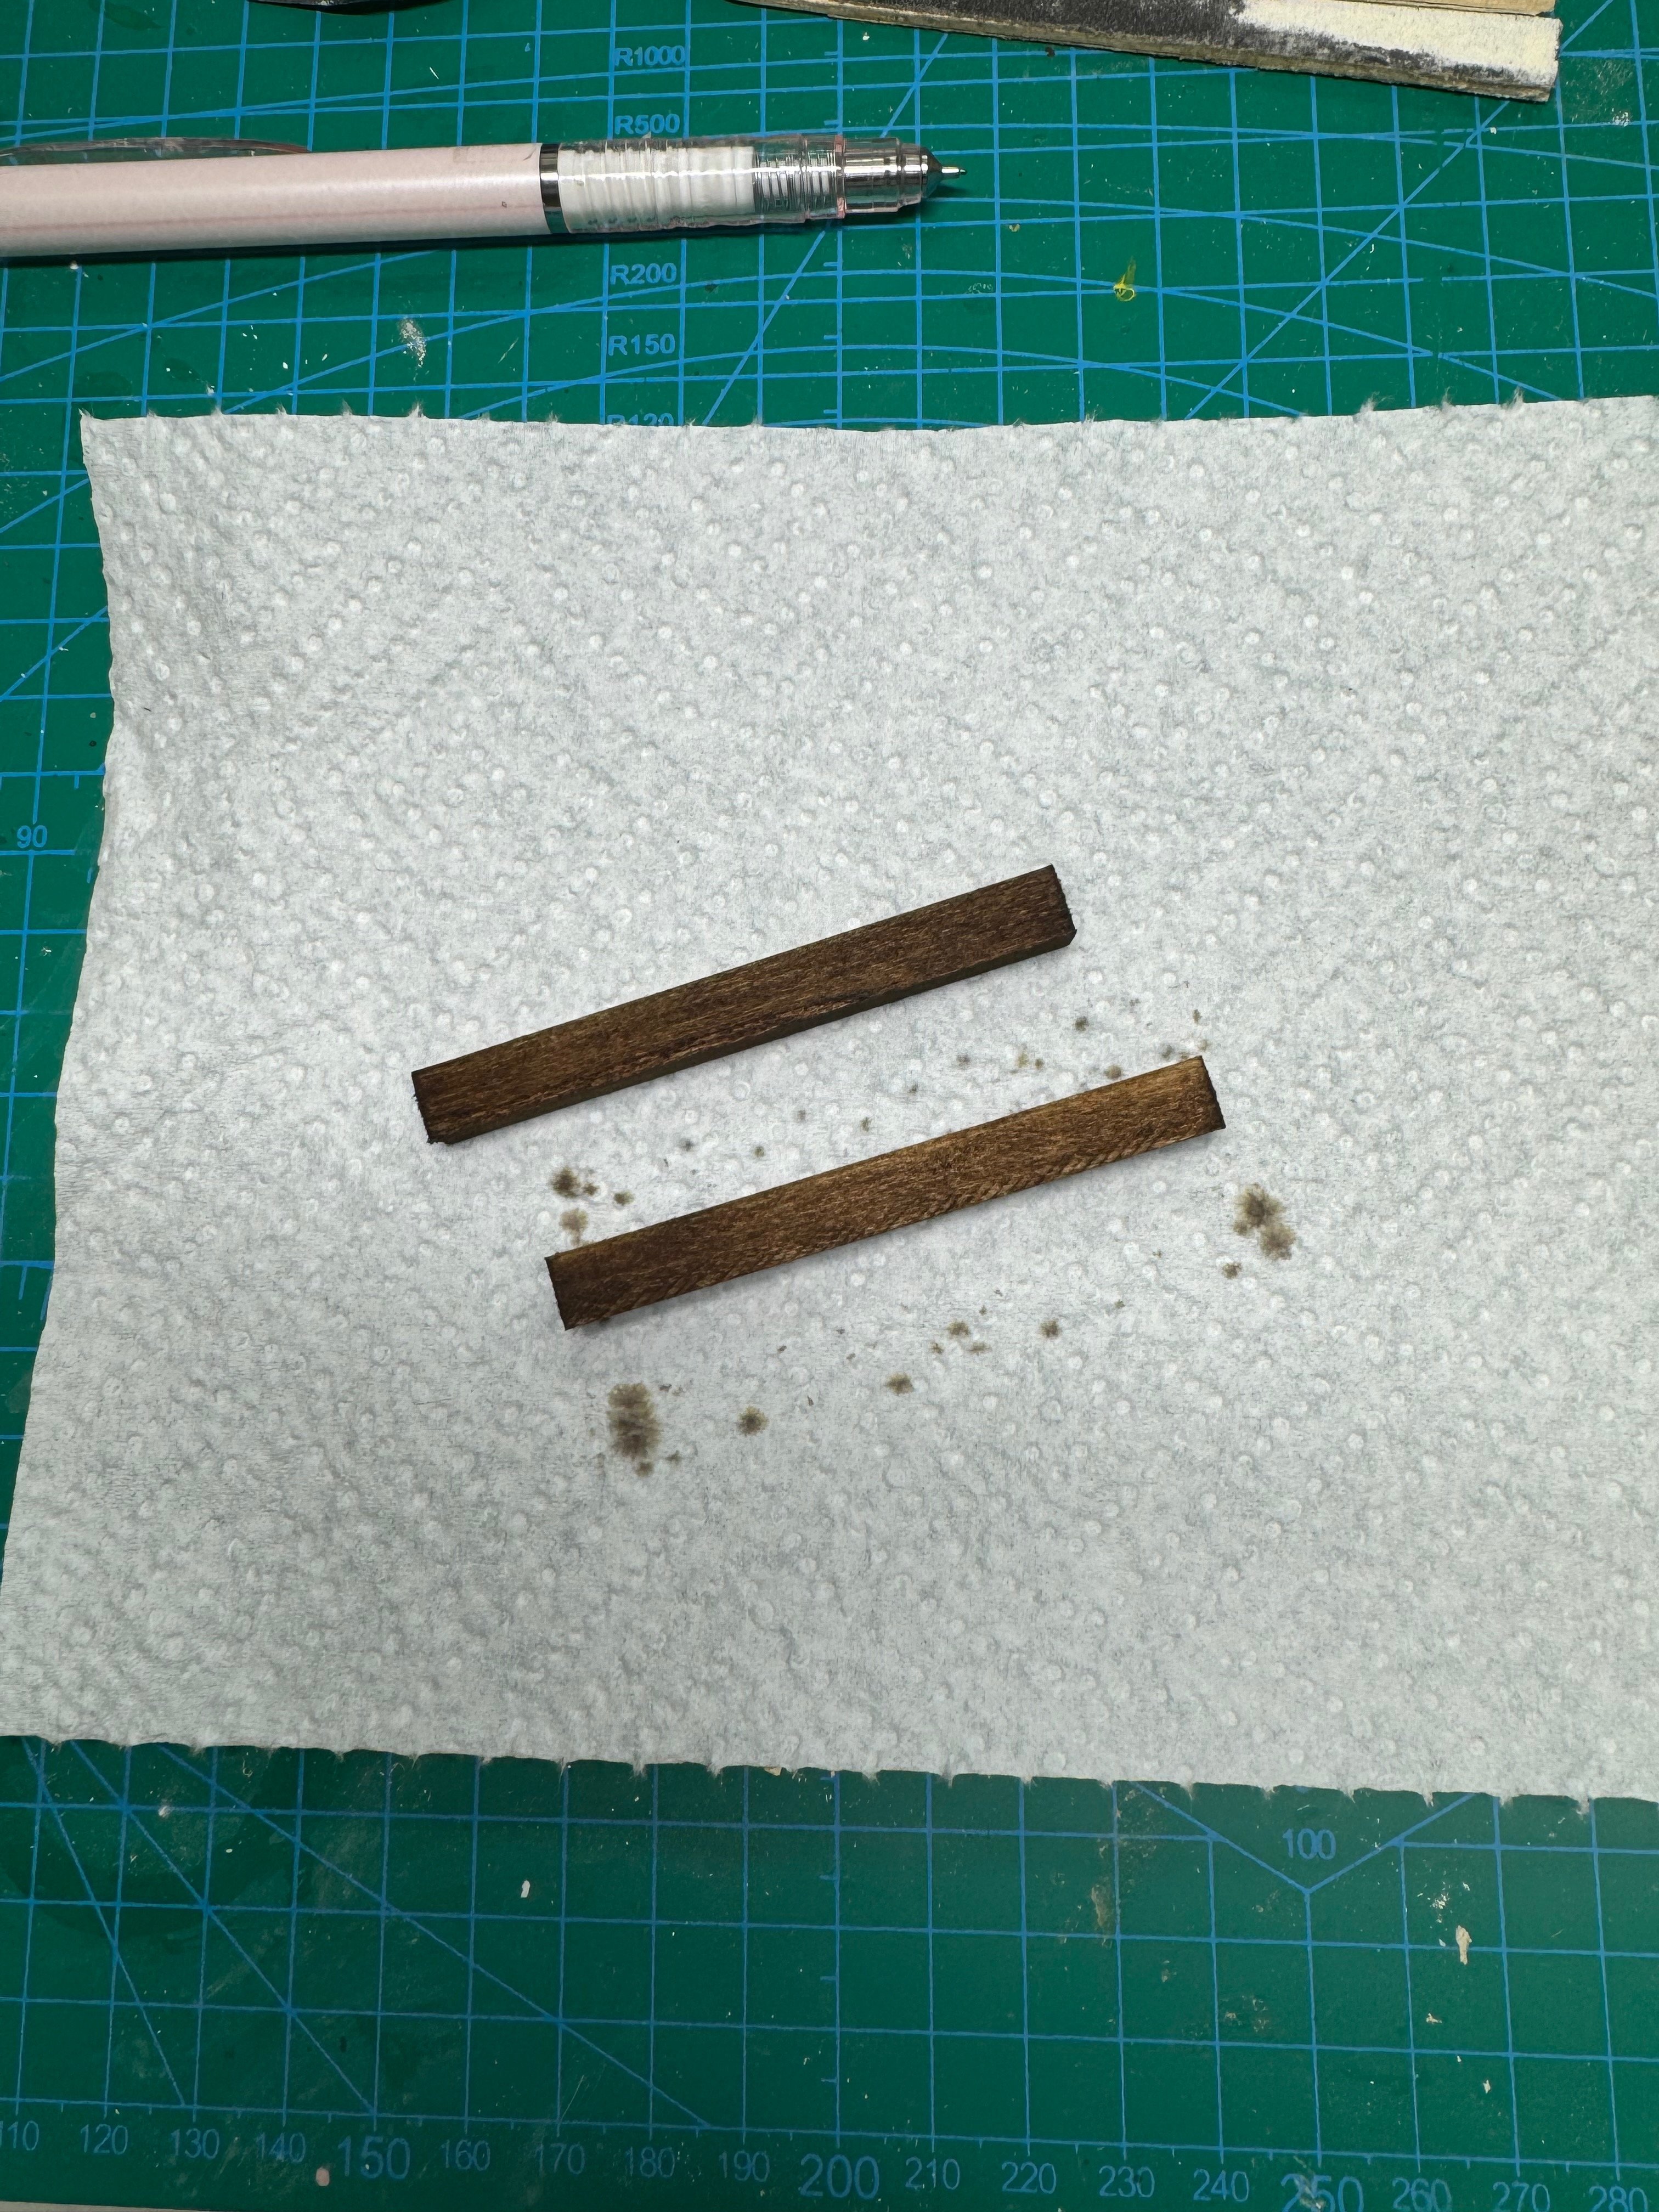
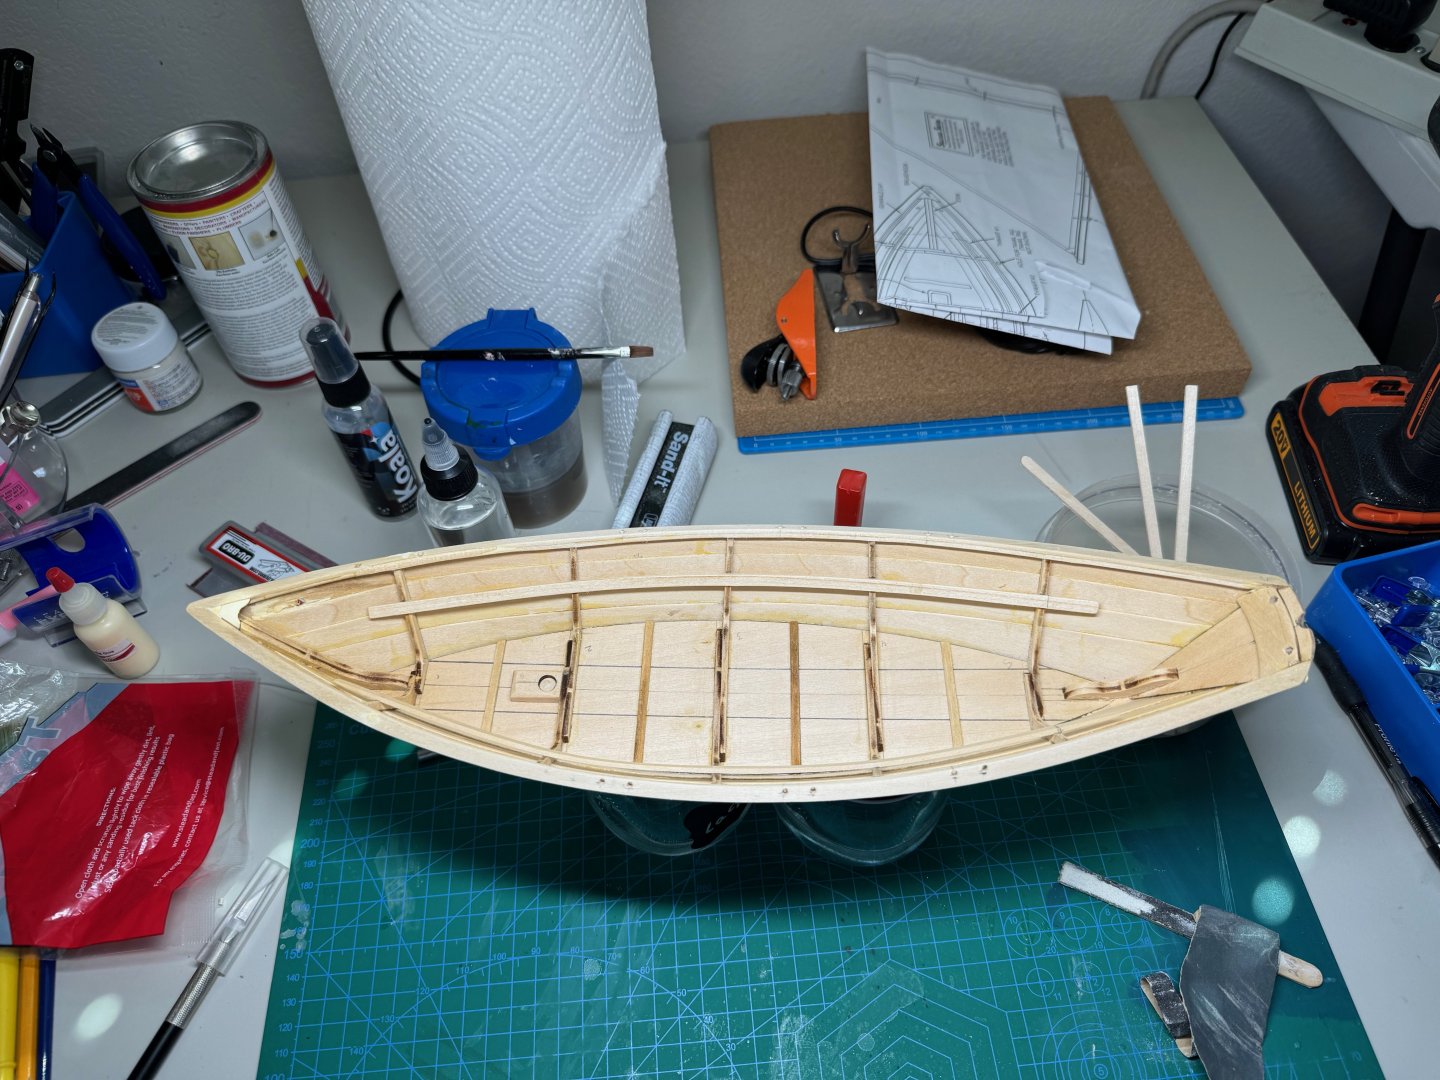
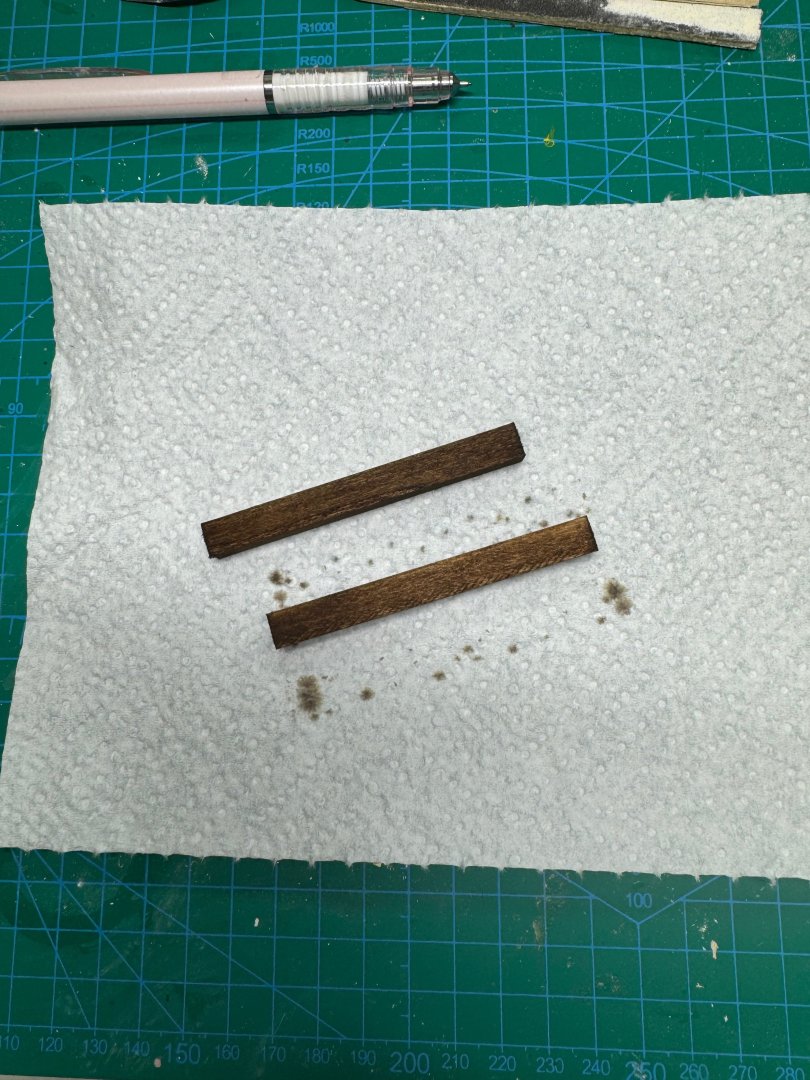
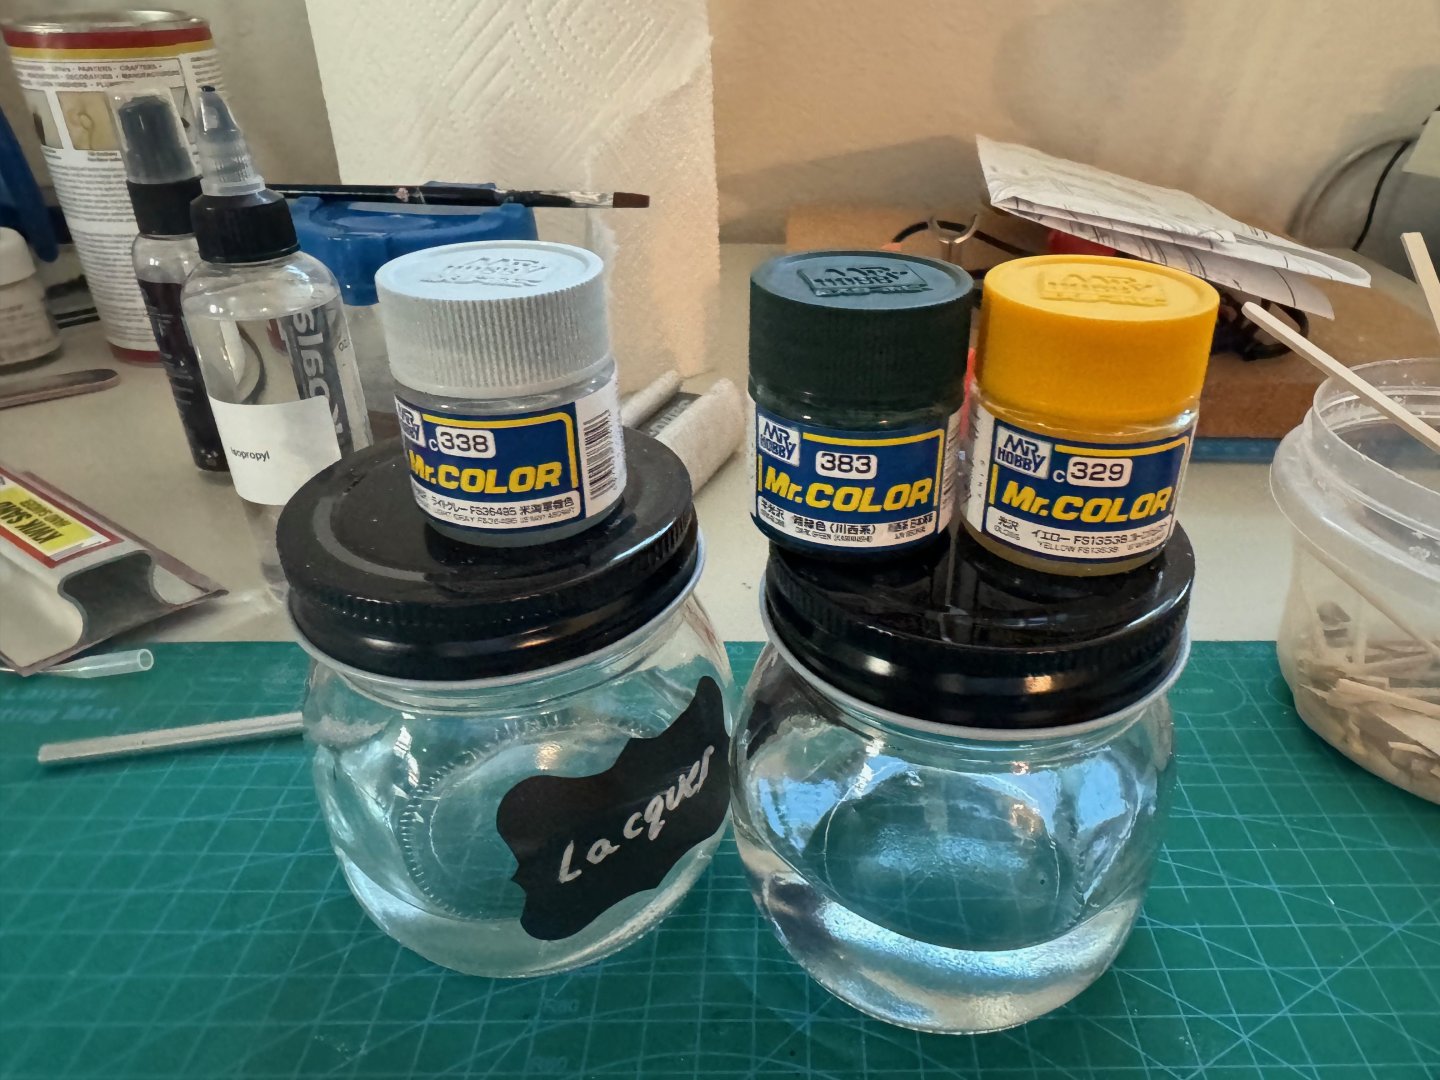
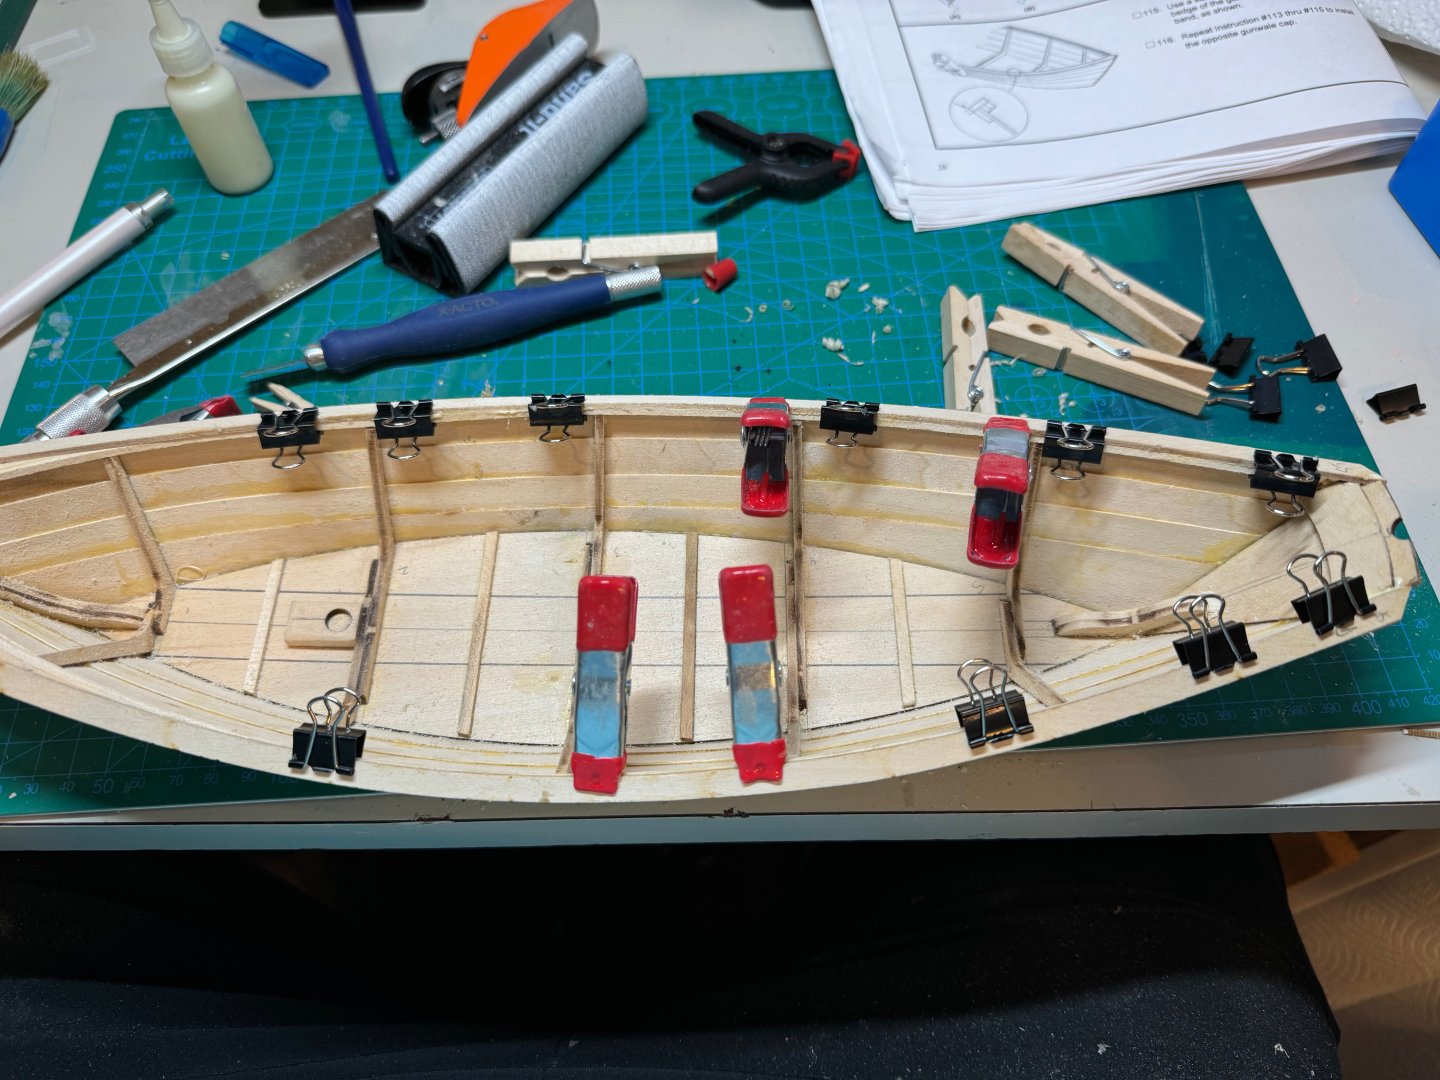
Good afternoon, a minor update for this weekend. I am moving to the home stretch of having the Dory complete. This weekend I was able to accomplish some minor prep for completion. First I stained and glued the trawl bucket. I used a combination of English Oak and Medium Oak to get the weathered look. Next I also stained the display stand (two ties) using the English Oak dye. After that, I started to fill in my mistakes and I corrected gunwale on the starboard side. I moved the trawl rig to the starboard side. I also corrected some minor holes with filler. I then proceeded to sand with 320 and 400 to get everything ready for sealing. Next I applied some shellac on the died pieces, oars, mast, main stay, and thole pins. Multiple coats where done. I then thinned the the remaining shellac with isopropyl to a 3:1 and sealed the thwarts. The plan is to prime and paint them, whereas the oars, mast and main stay is going to remain the natural color. Between coats I gave a light sanding with 1000 grit to make sure each was smooth. Finally I sprayed the Dory with a light coat of shellac (full strength) so I can seal the wood. I then proceeded with a light sanding with 1000 grit. I finally decided on a color scheme for the Dory: First I will prime the model with Surfacer 1200 grey and correct any defects. Once I am happy, I will then add Surfacer 1500 grey to the interior. The exterior I will spray Surfacer 1500 pink. This will deepen the yellow to something closer to ochre yellow. The interior will be 338 Light grey. The thwarts and gunwales will be 383 Dark green Exterior 329 yellow. The trawl rig, I am debating on Metal color 219 Brass or 214 Dark iron. This will be sprayed over a Surfacer 1500 black. I am open to suggestions. Finally I will seal with a semi-mat coat. Then the final piece is to finish the sail. I am pushing to get this into our club is hosting in November. Jim


- 56 replies
-
- 7
-
-
- grand banks dory
- Midwest Products
- (and 2 more)
-
Fantastic job @GGibson Thank you for putting on the right flag. jim
-
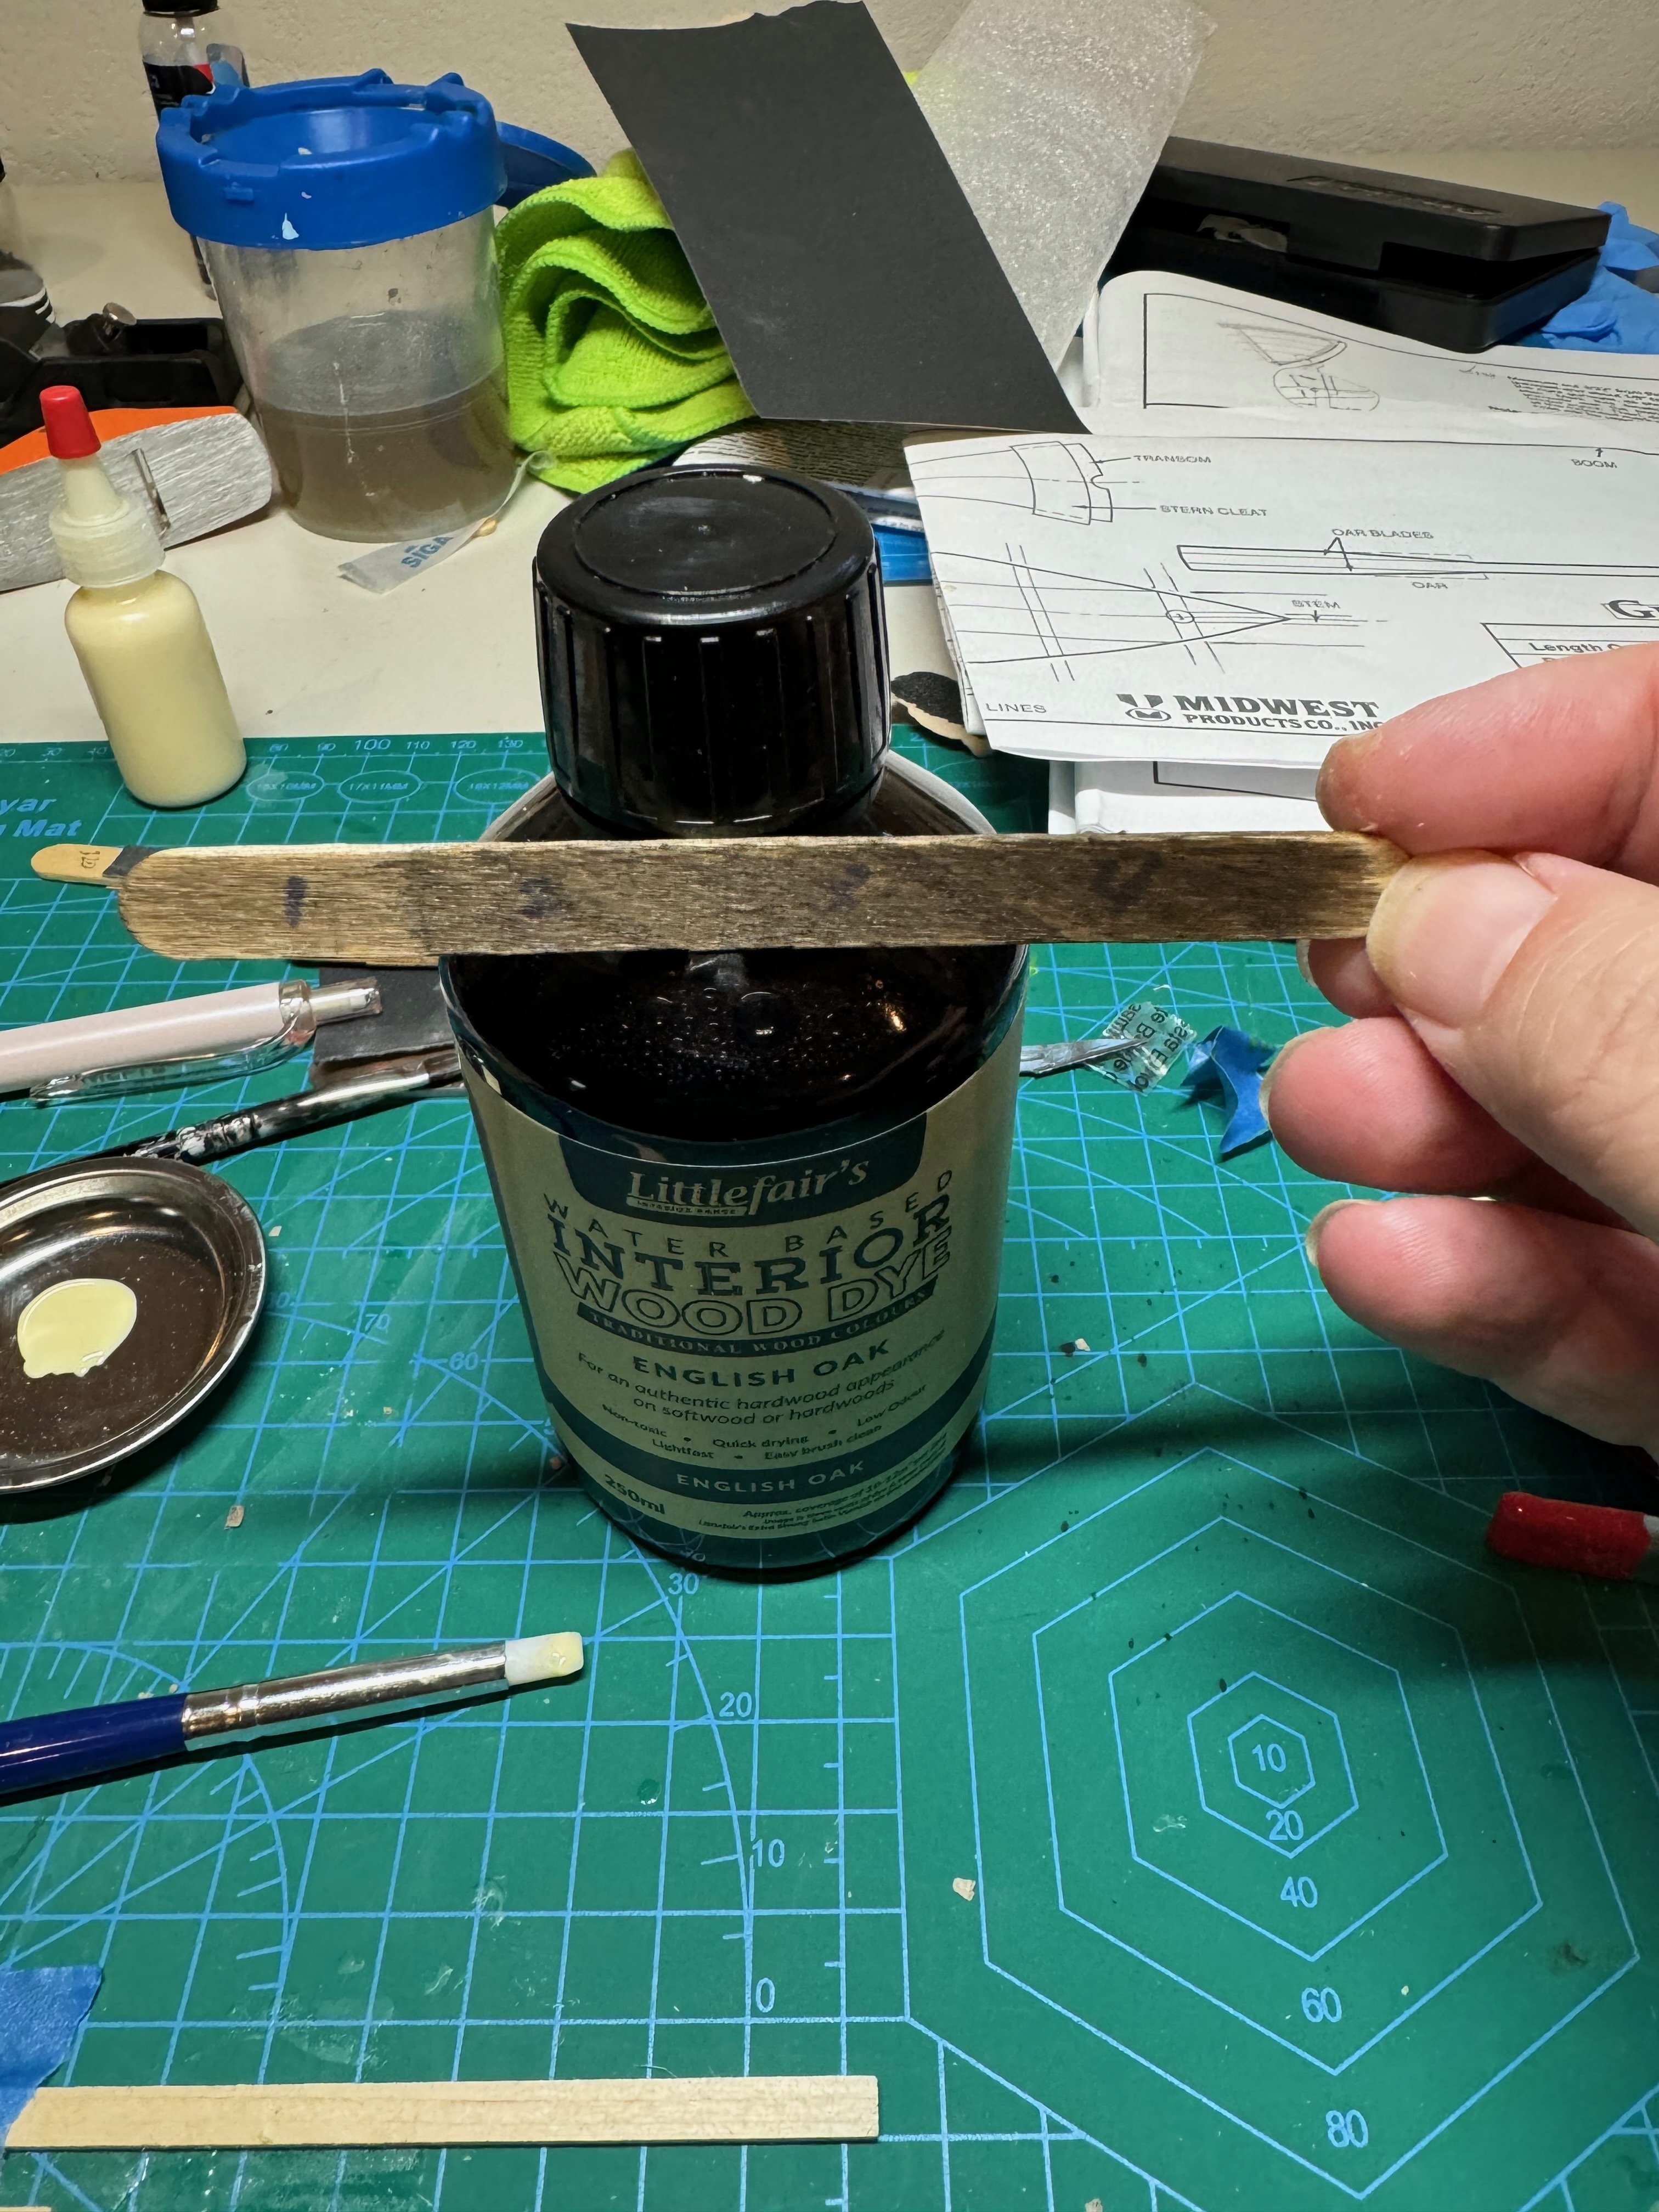
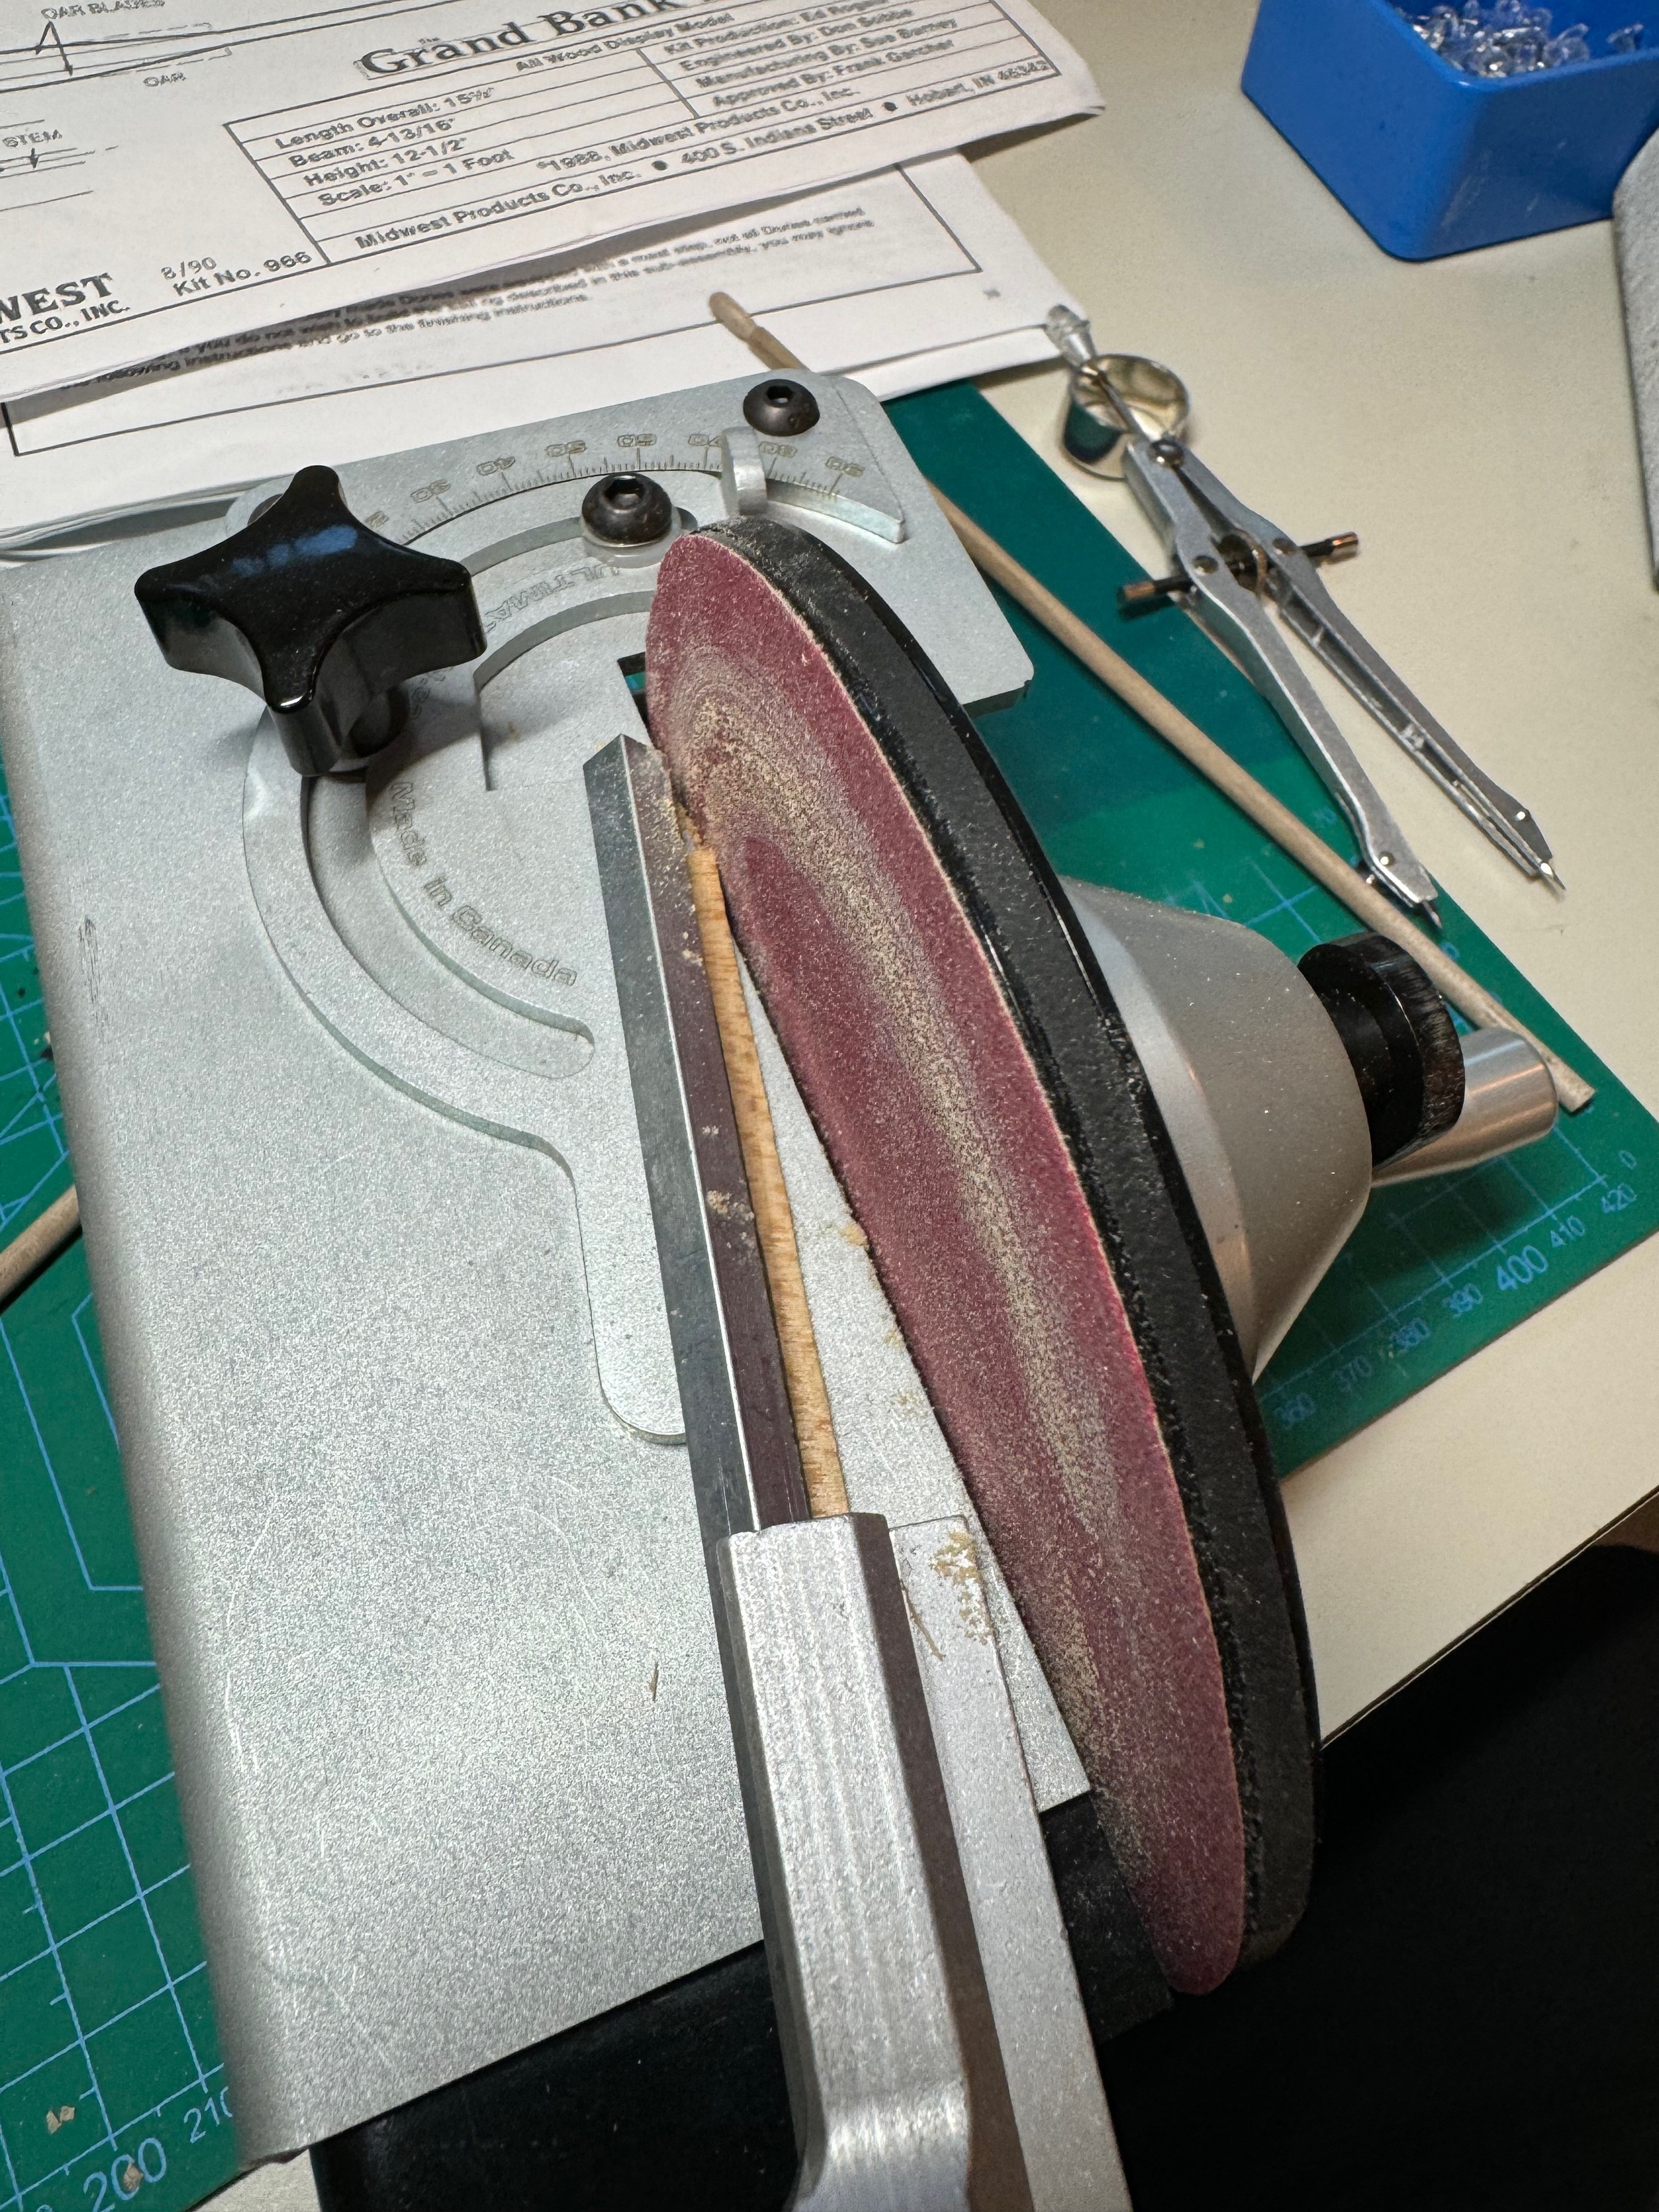
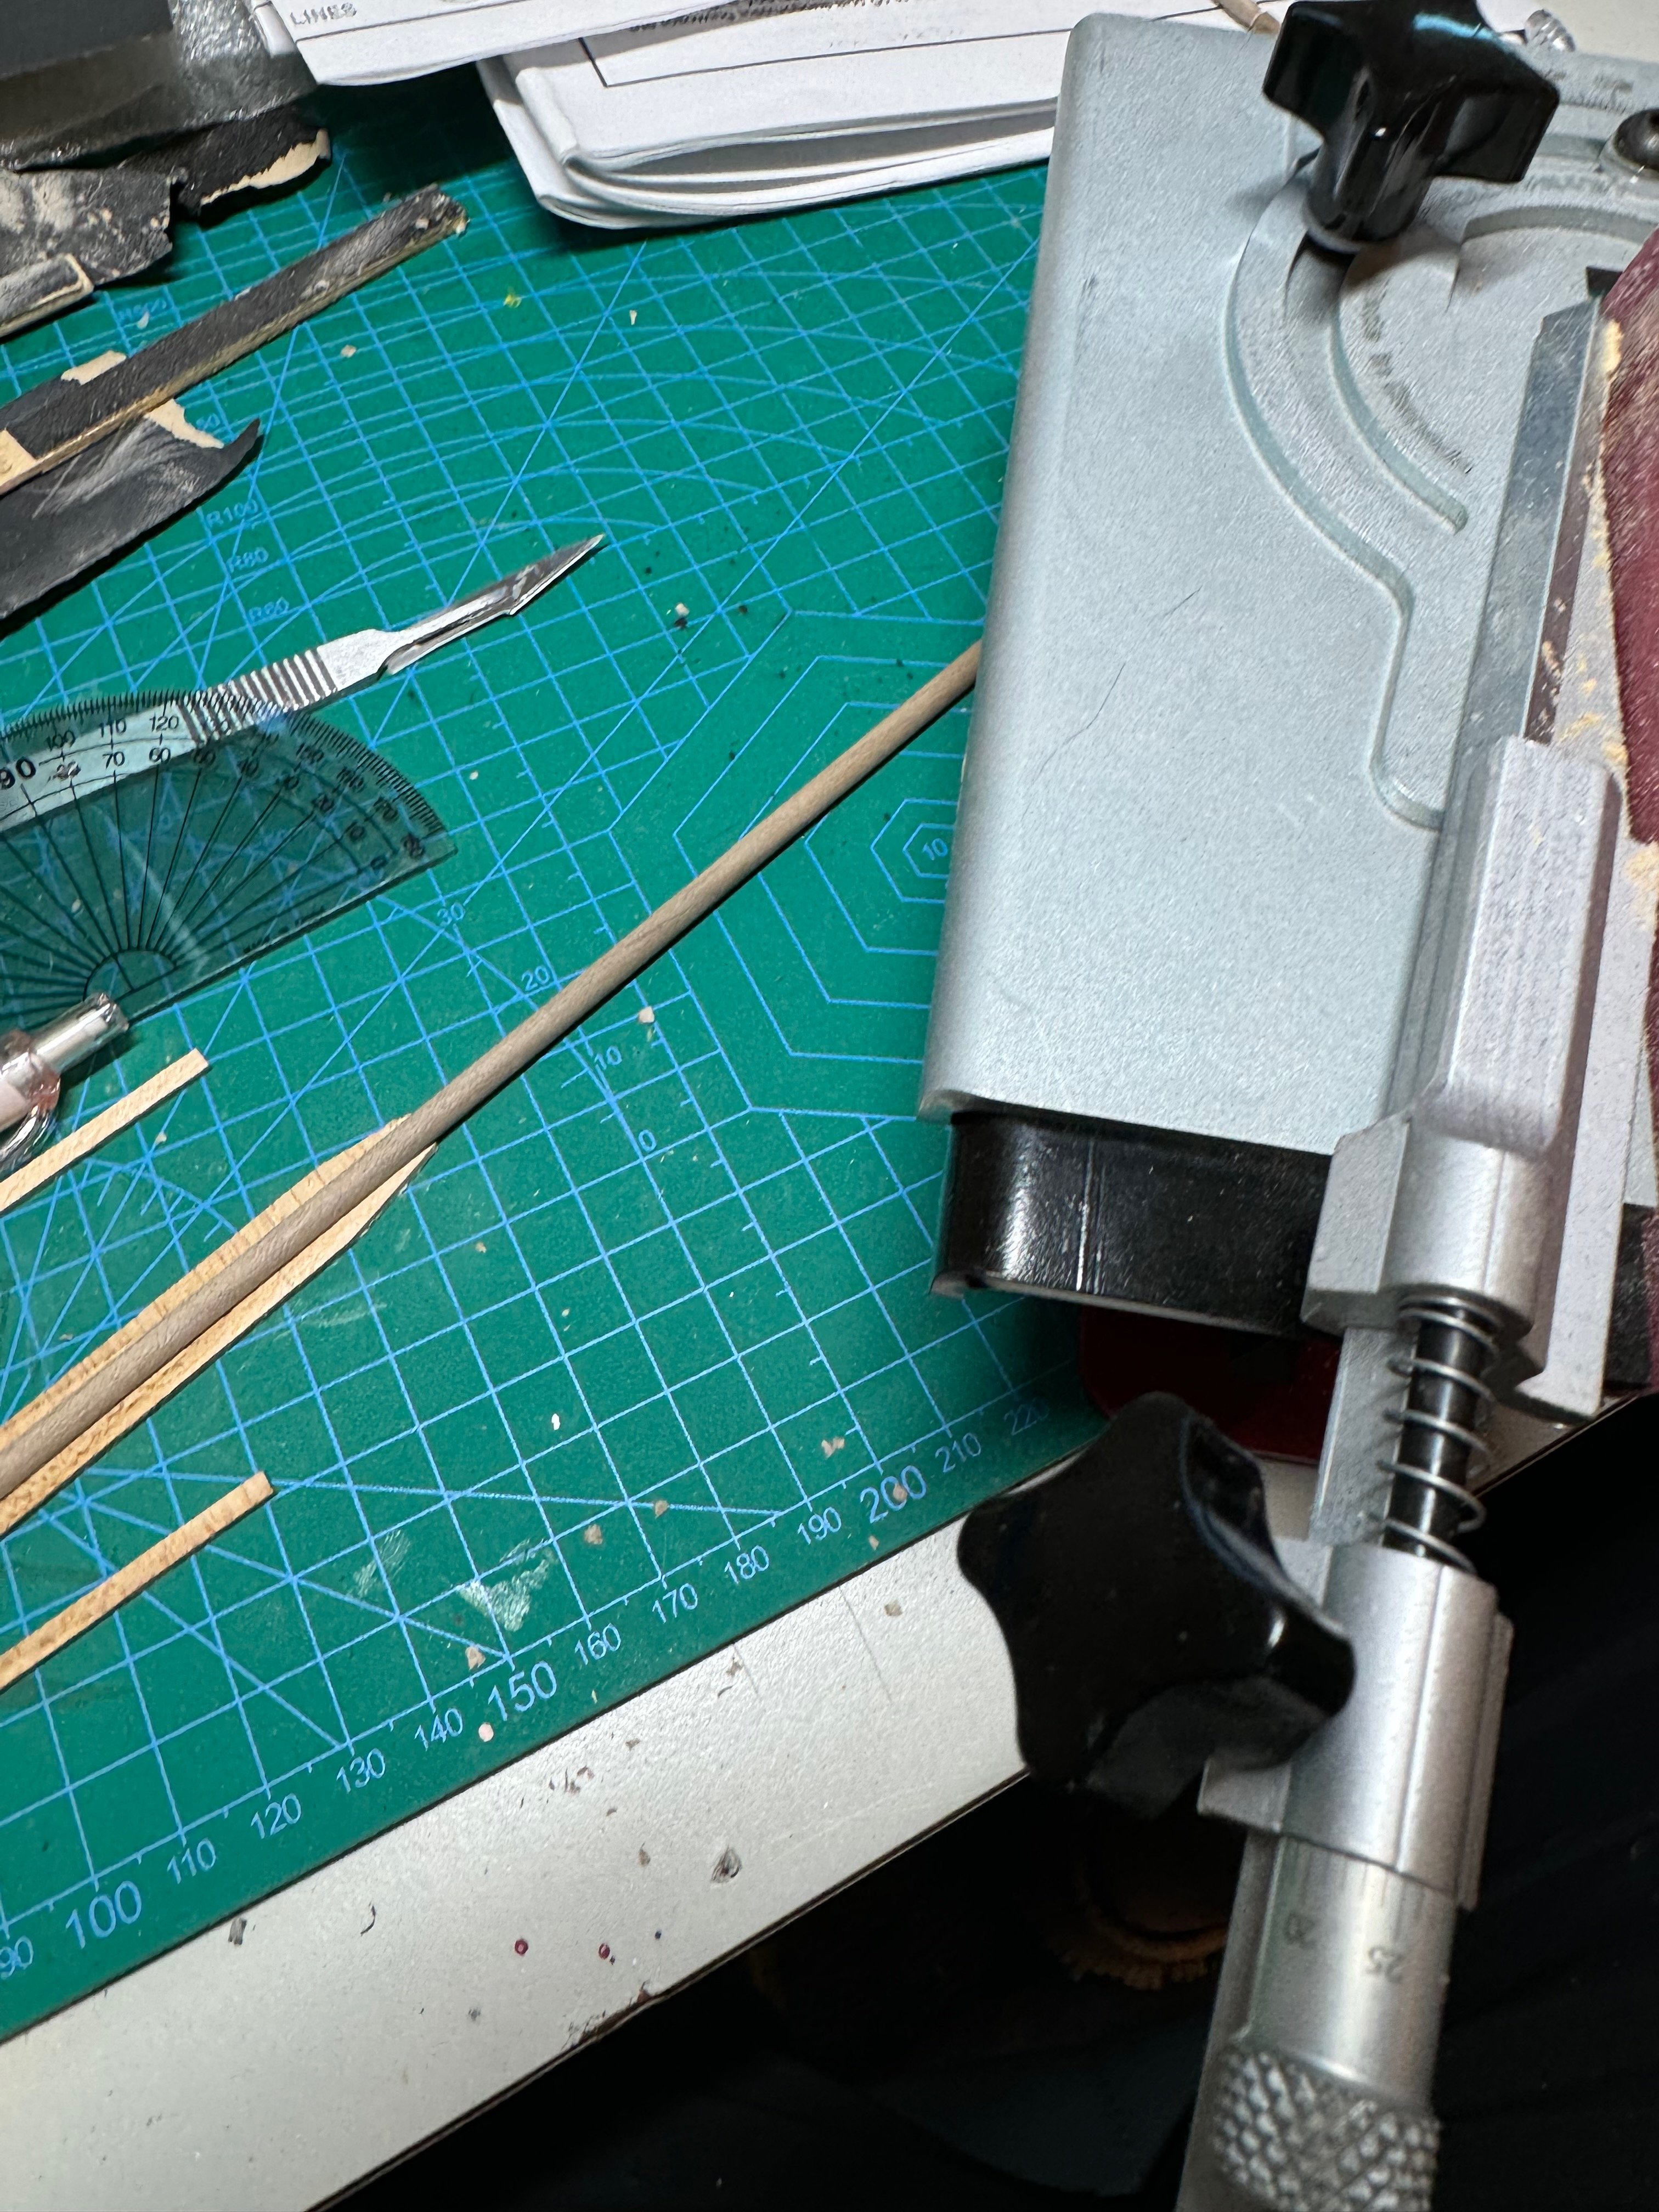
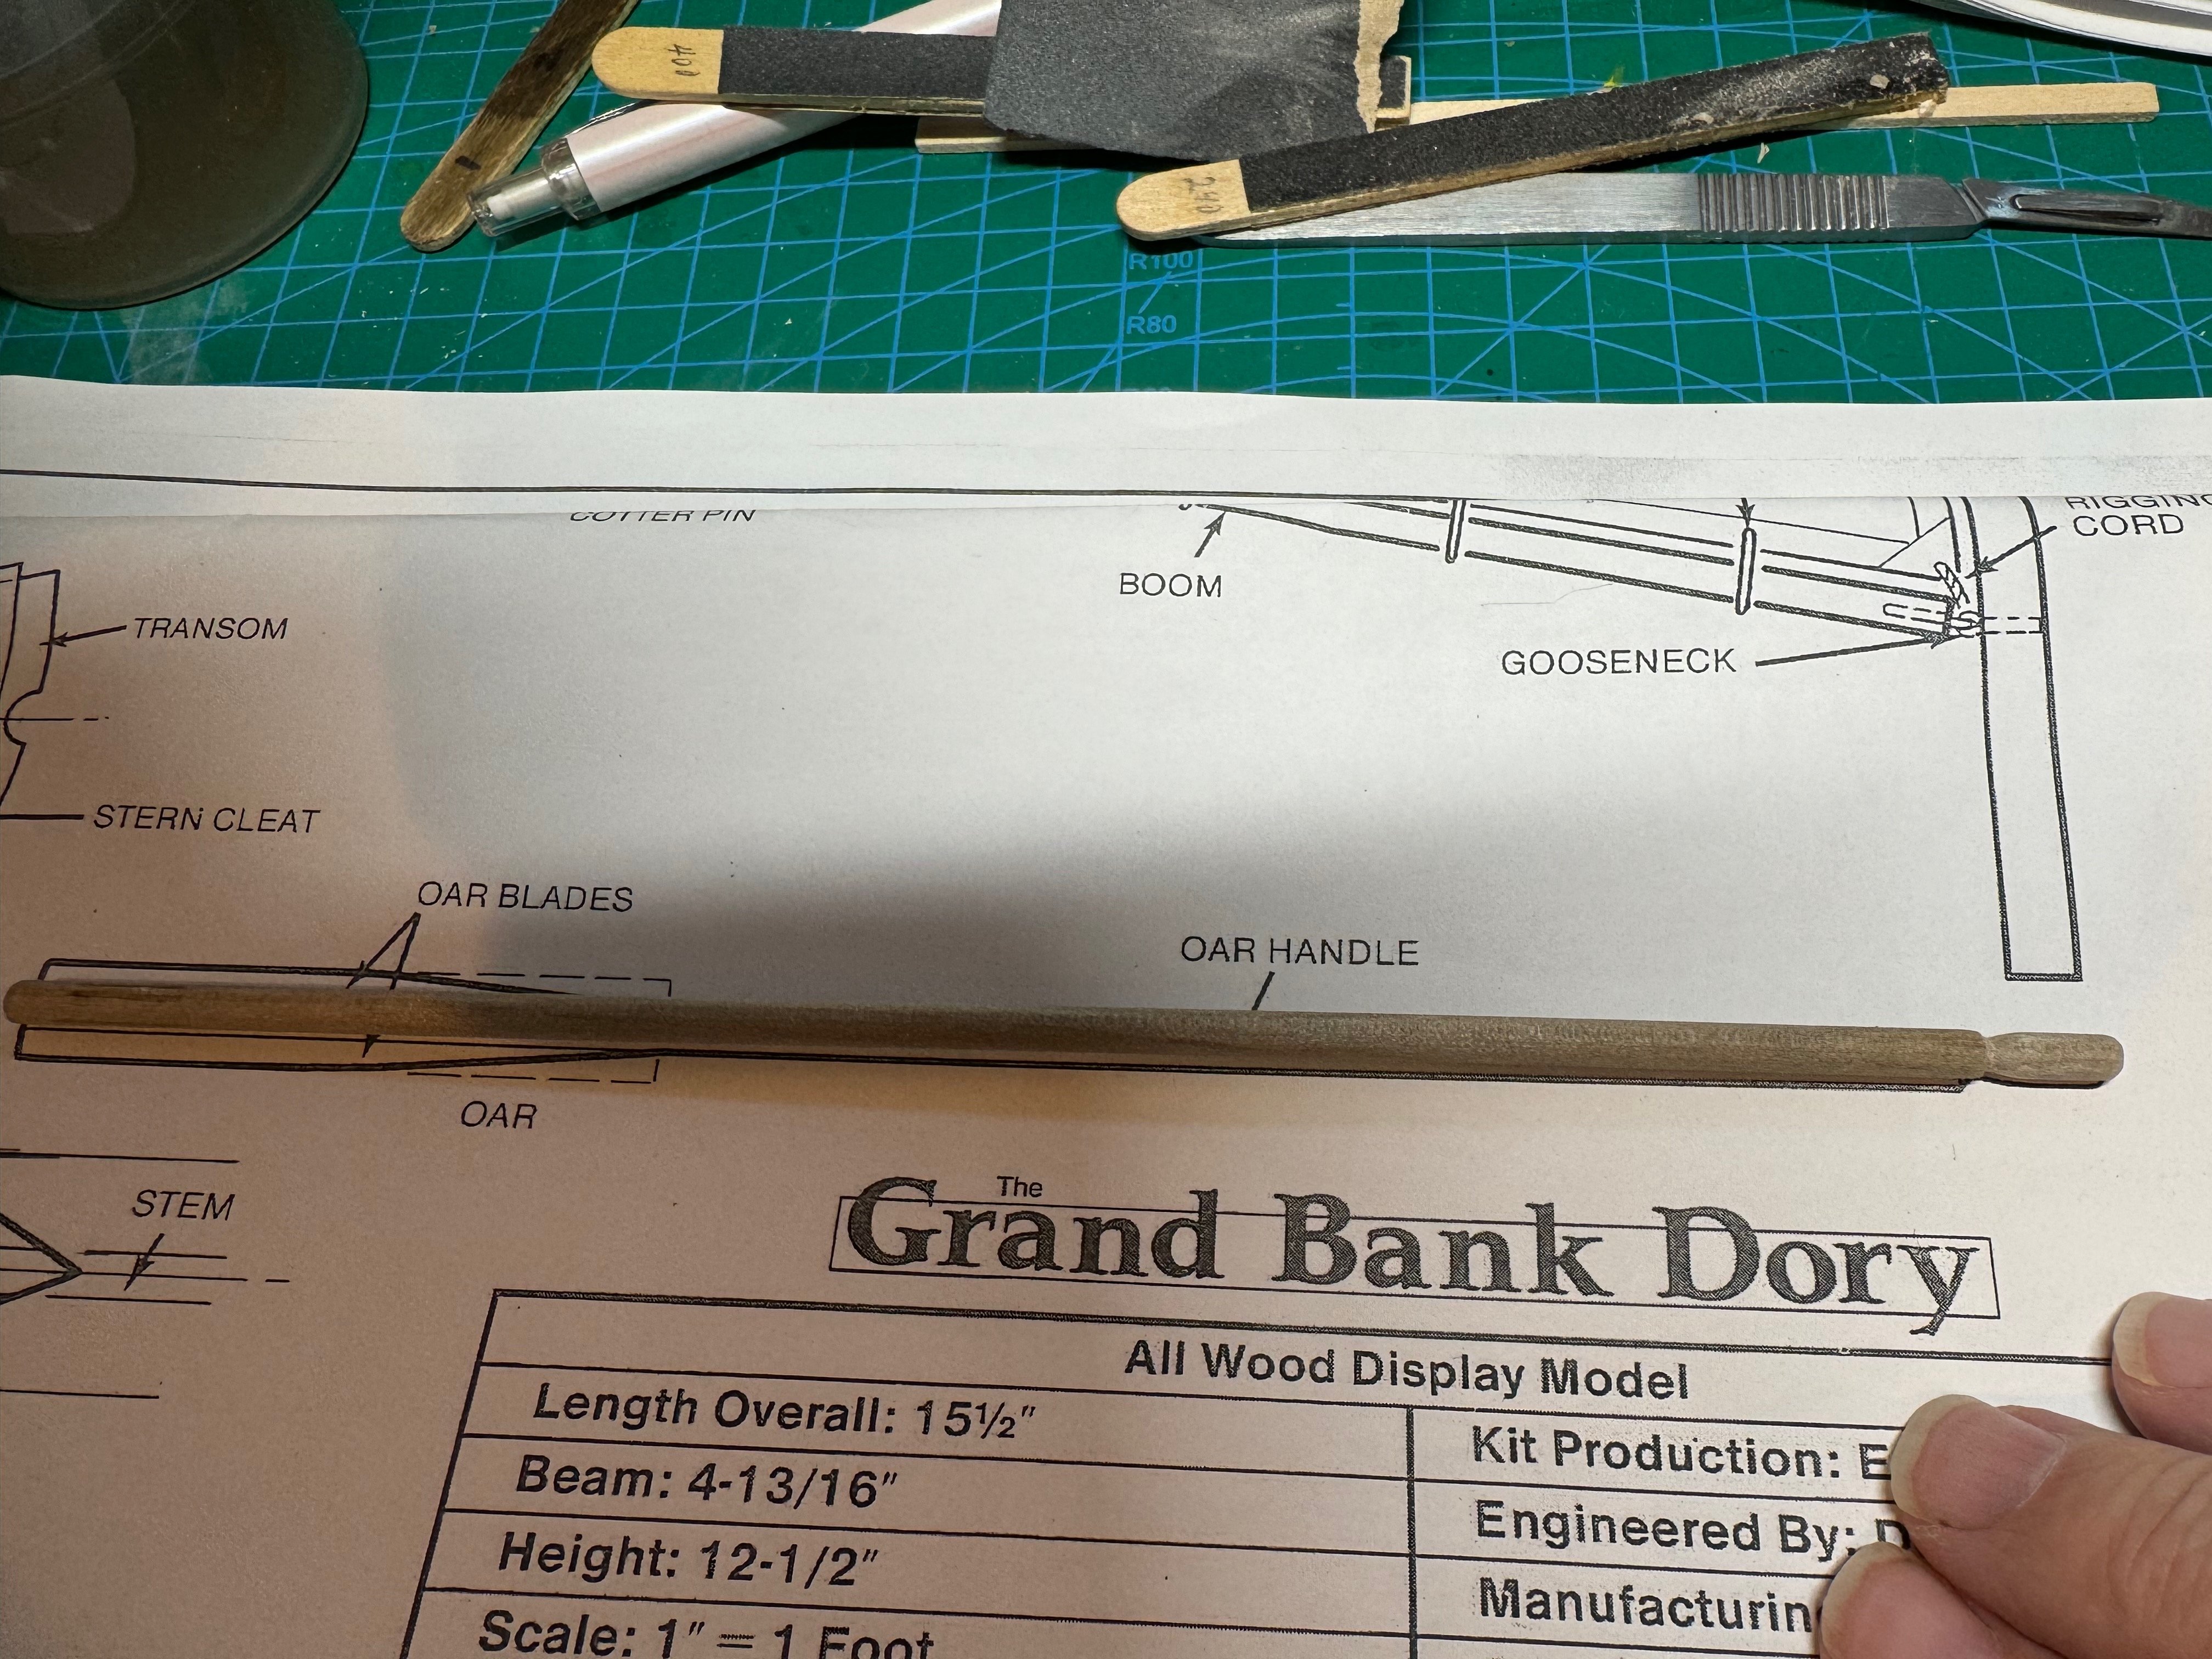
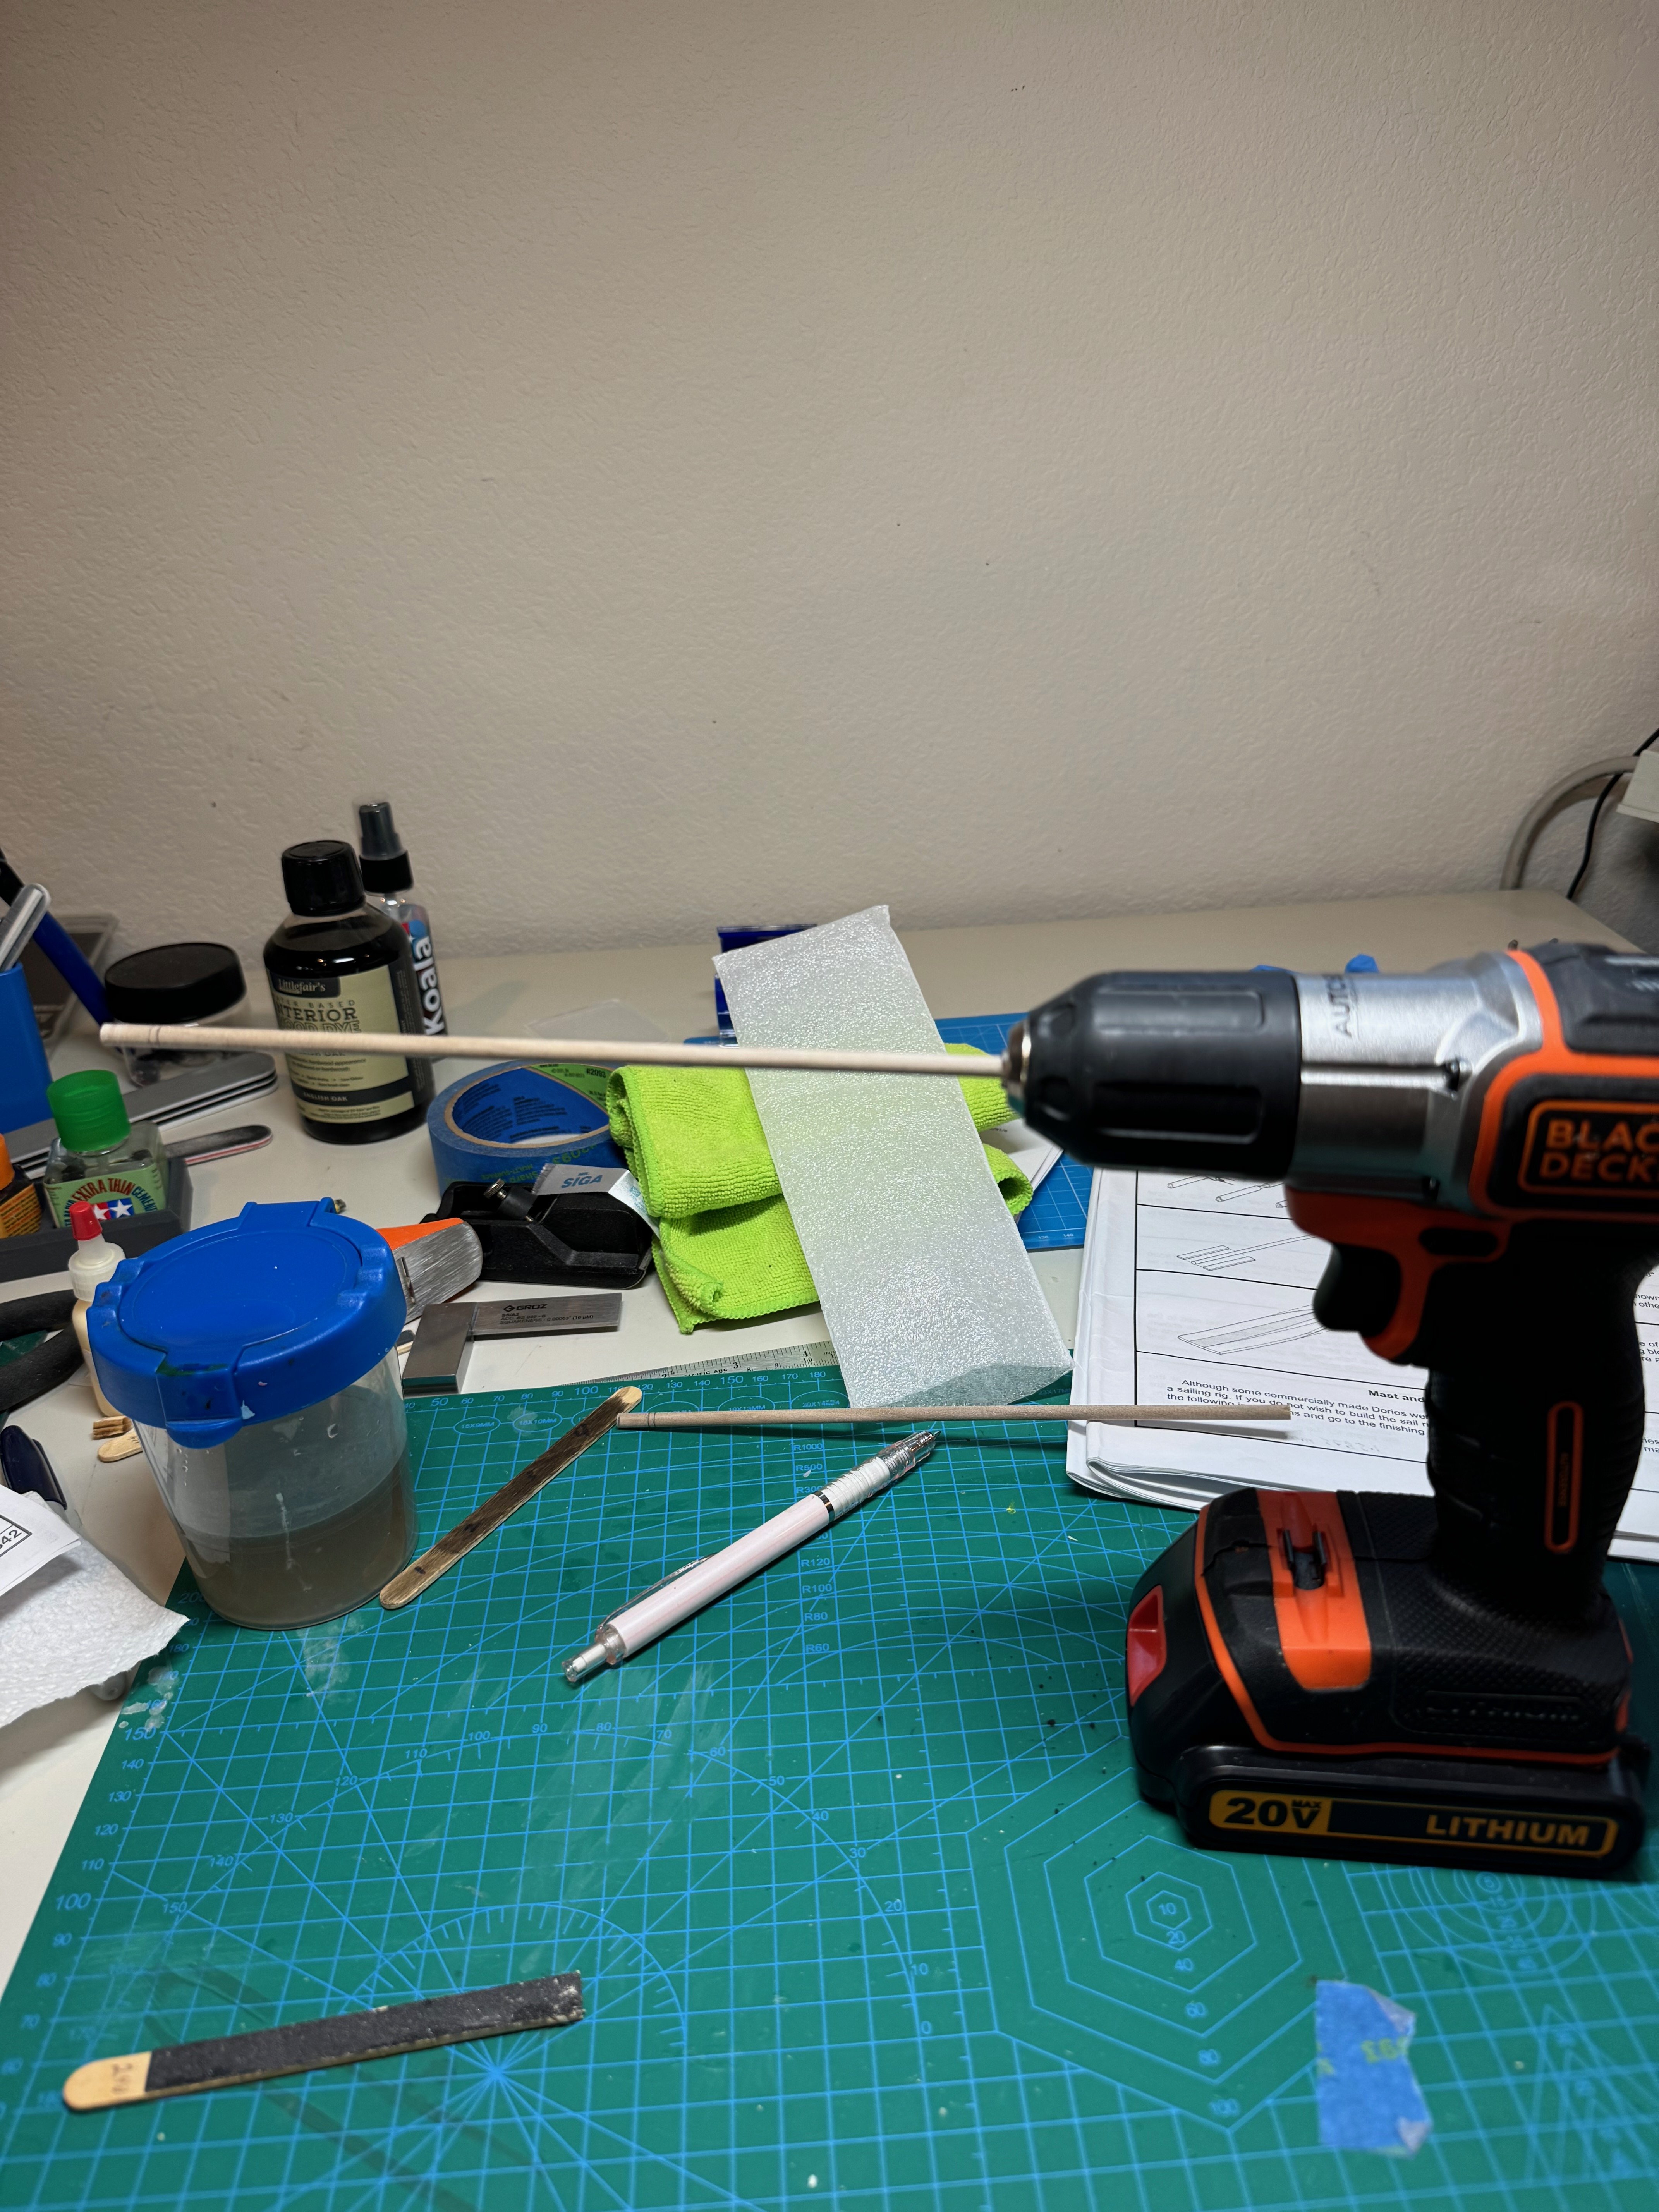
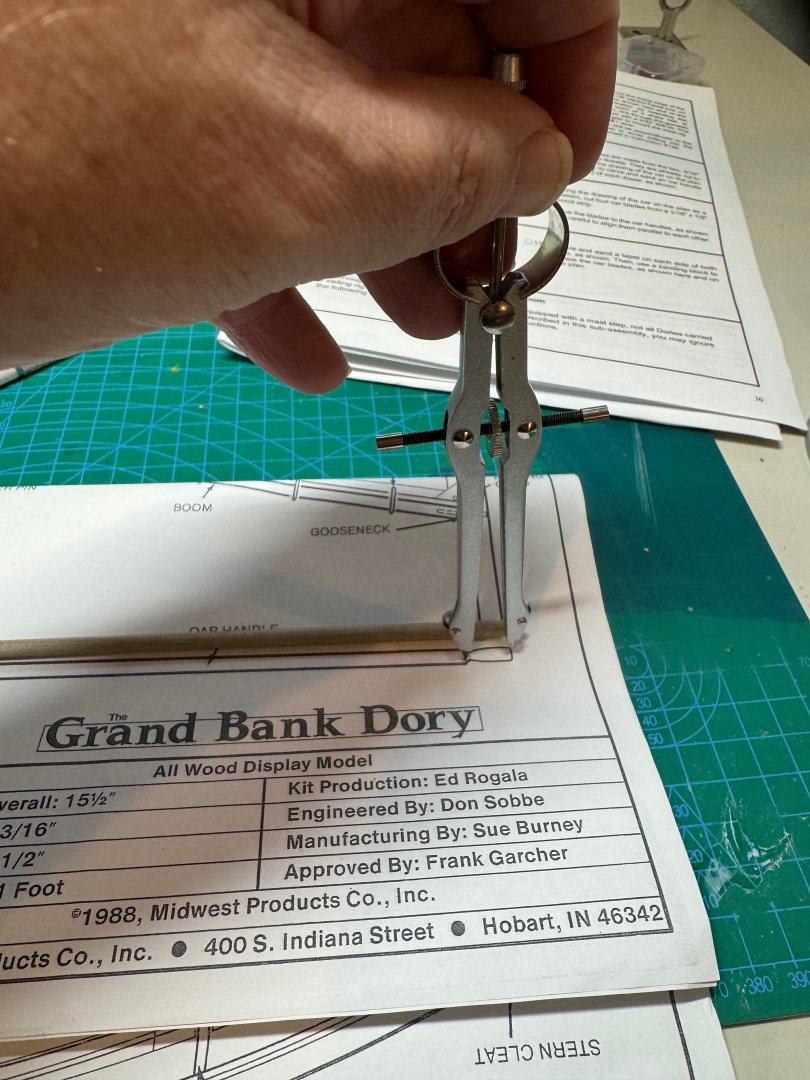
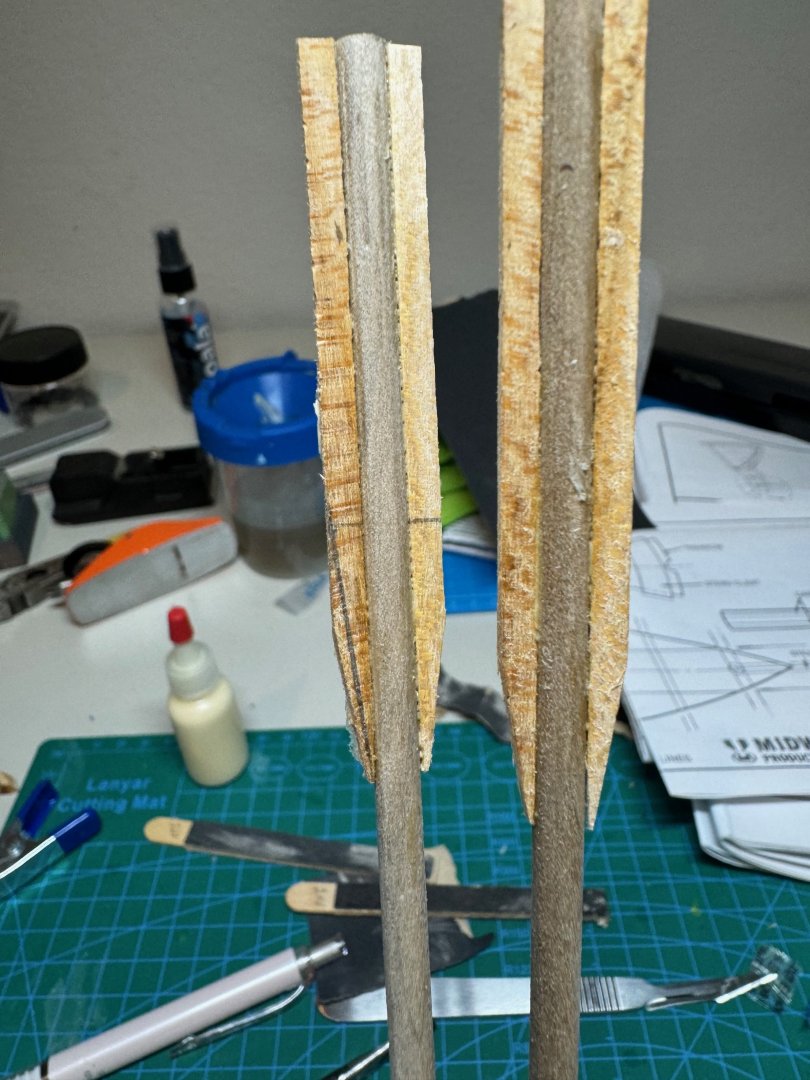
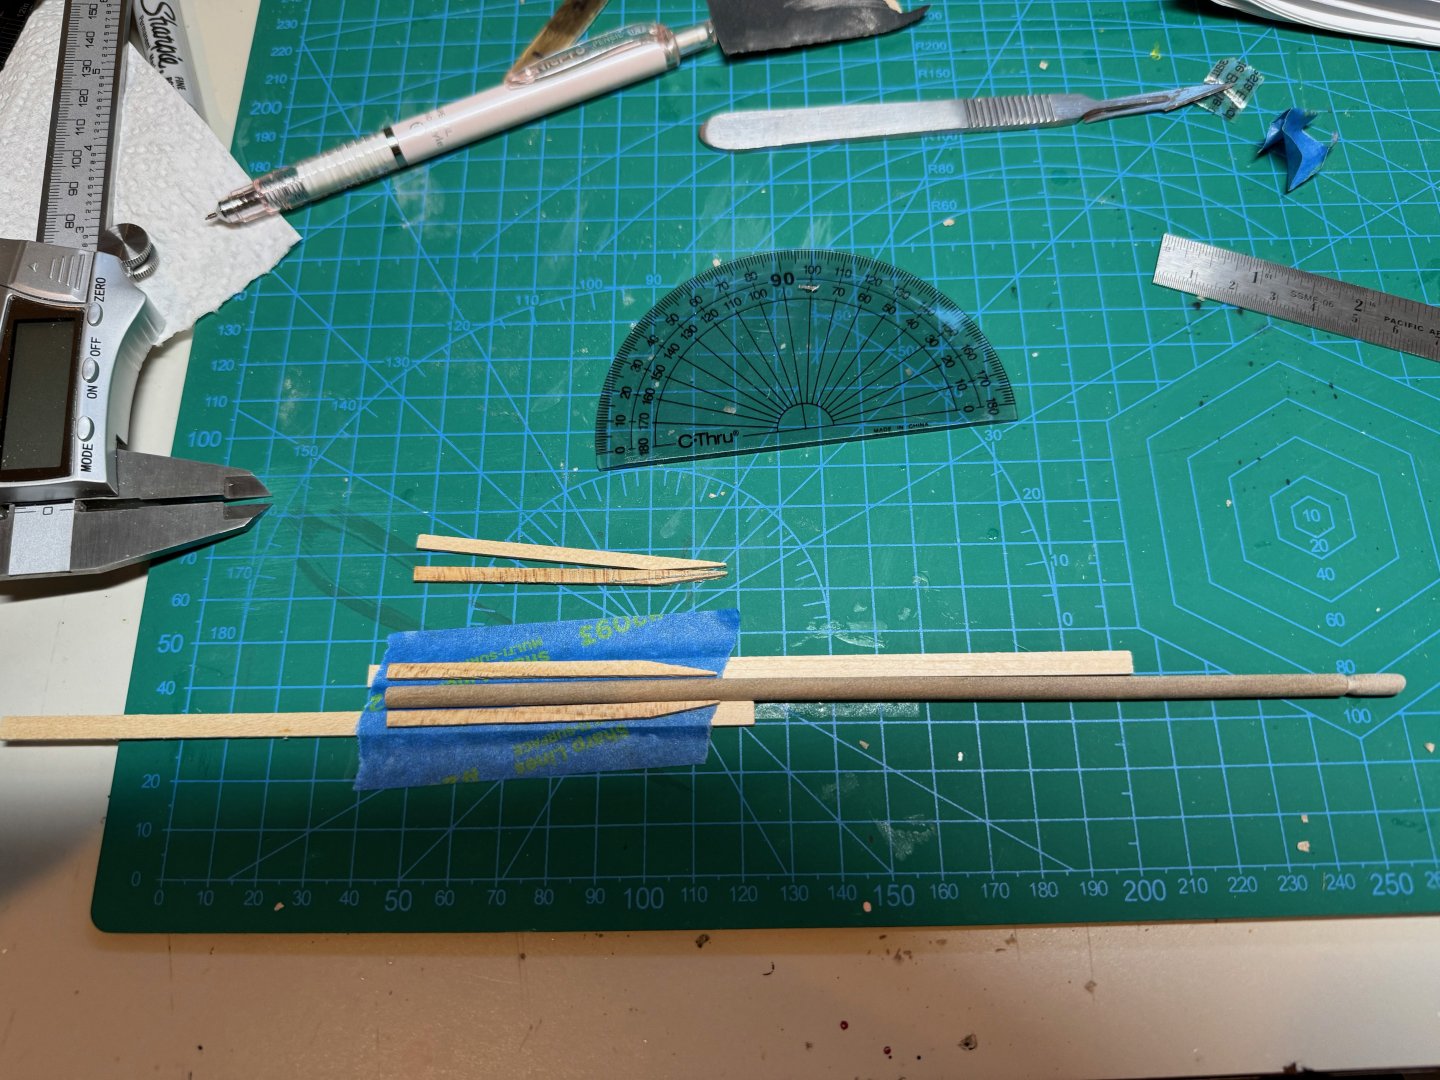
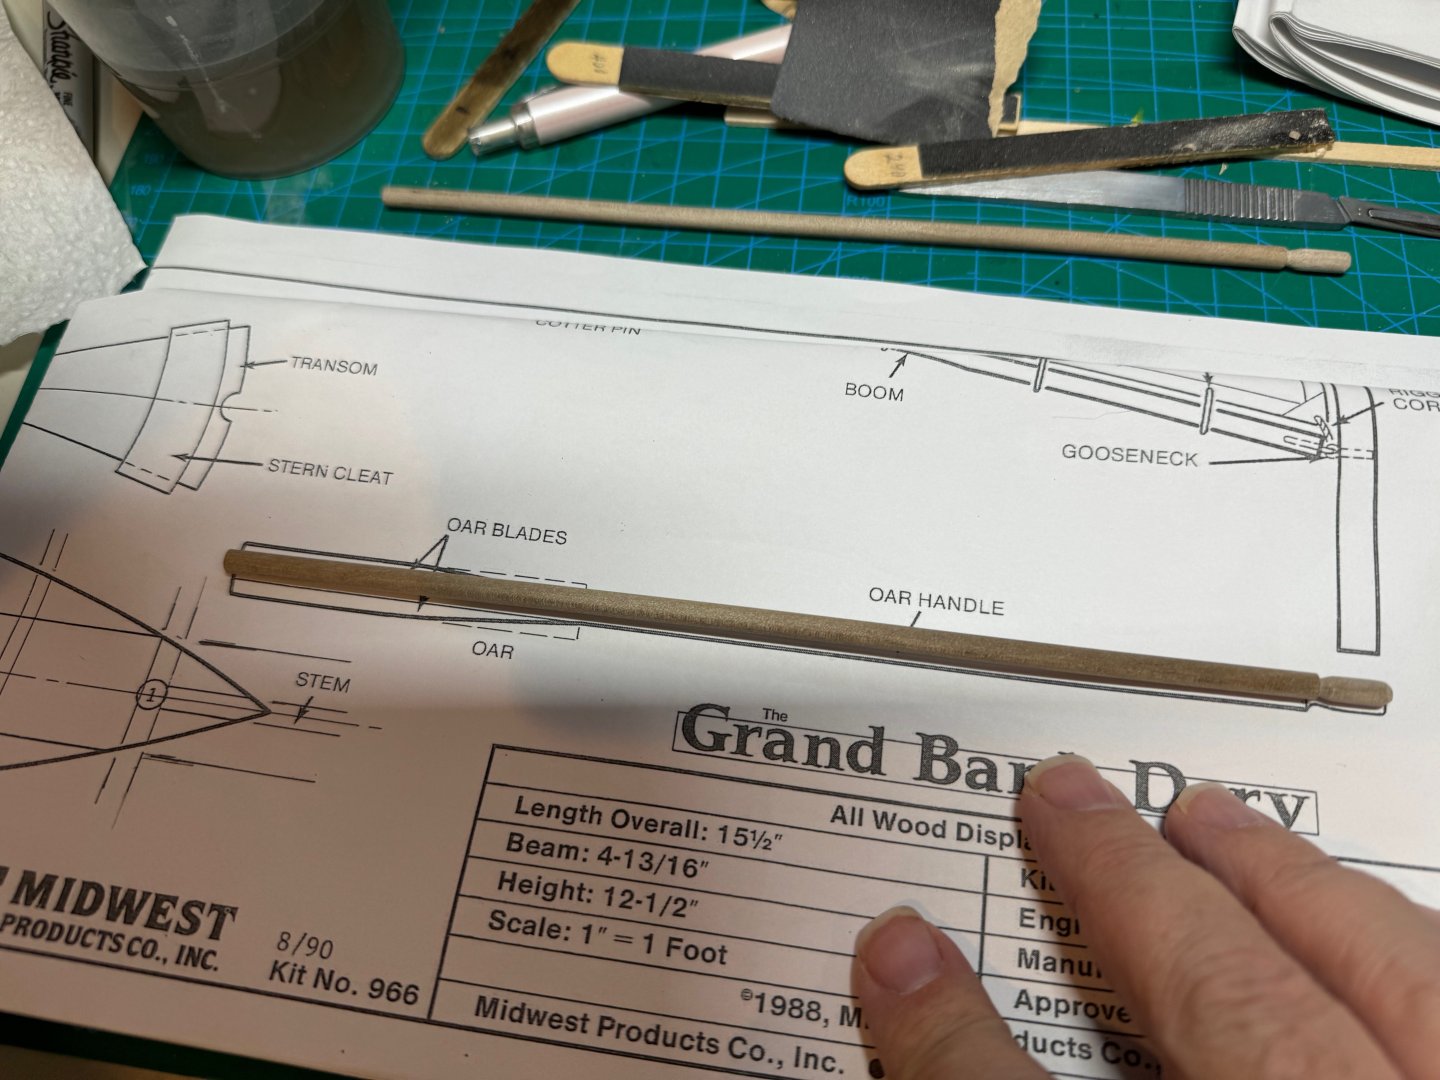
Good evening. Today was a productive session. I am getting close to painting the Dory, but before getting there. I started with testing some English Oak Stain I purchased. It is water base, and I am not to sure I really like the color. I have a light oak color coming tomorrow, so it will be interesting to see how it performs. If it does not work well then I will maybe get some of that Vetero alcohol stain for staining my trawl bucket. Next I started to shape the oars, after cutting the dowel to size. I then used a compass to transfer the transition to the dowel. I then shaped the handle by a combination of scoring the cheek cut, and carving out the handle. From there I used my drill as a makeshift lathe for sanding the handle. I then proceed to cut the oar blades, and then shape them using my sander. The angle I used was 10 degrees, though the plan was probably closer to 9 degrees. Next I created a jig out of double sided tape, and some stock so I can add the blades to the oar and that it is mostly centered so that I can do the final shaping tomorrow. This is the result after gluing. Next I started work on the mast and the main stay. Using my compass i transferred the marks I needed to drill. After drilling, I then shaped the mast and main stay using my drill. The main stay had a nasty flat spot on the dowel, so I gave it a minor taper. Hopefully tomorrow I can do the finish sanding, and then sealing of the Dory with shellac before I paint it this weekend. I am hoping to finish the sail this weekend and then seal the model with some matt varnish. The oars I am going to leave a natural color along with the mainstay and mast.


- 56 replies
-
- 8
-
-
- grand banks dory
- Midwest Products
- (and 2 more)
-
That is my plan. I am finishing my Dory, and will start the Norwegian Pram and the half hull
- 82 replies
-
- 2
-
-
- half hull planking project
- half hull
- (and 2 more)
-
@JacquesCousteau very nice. i received my kit last week and i have been looking at the documentation. Your build helps in the explanation though I am still a little lost.
- 82 replies
-
- 3
-

-
-
- half hull planking project
- half hull
- (and 2 more)
-
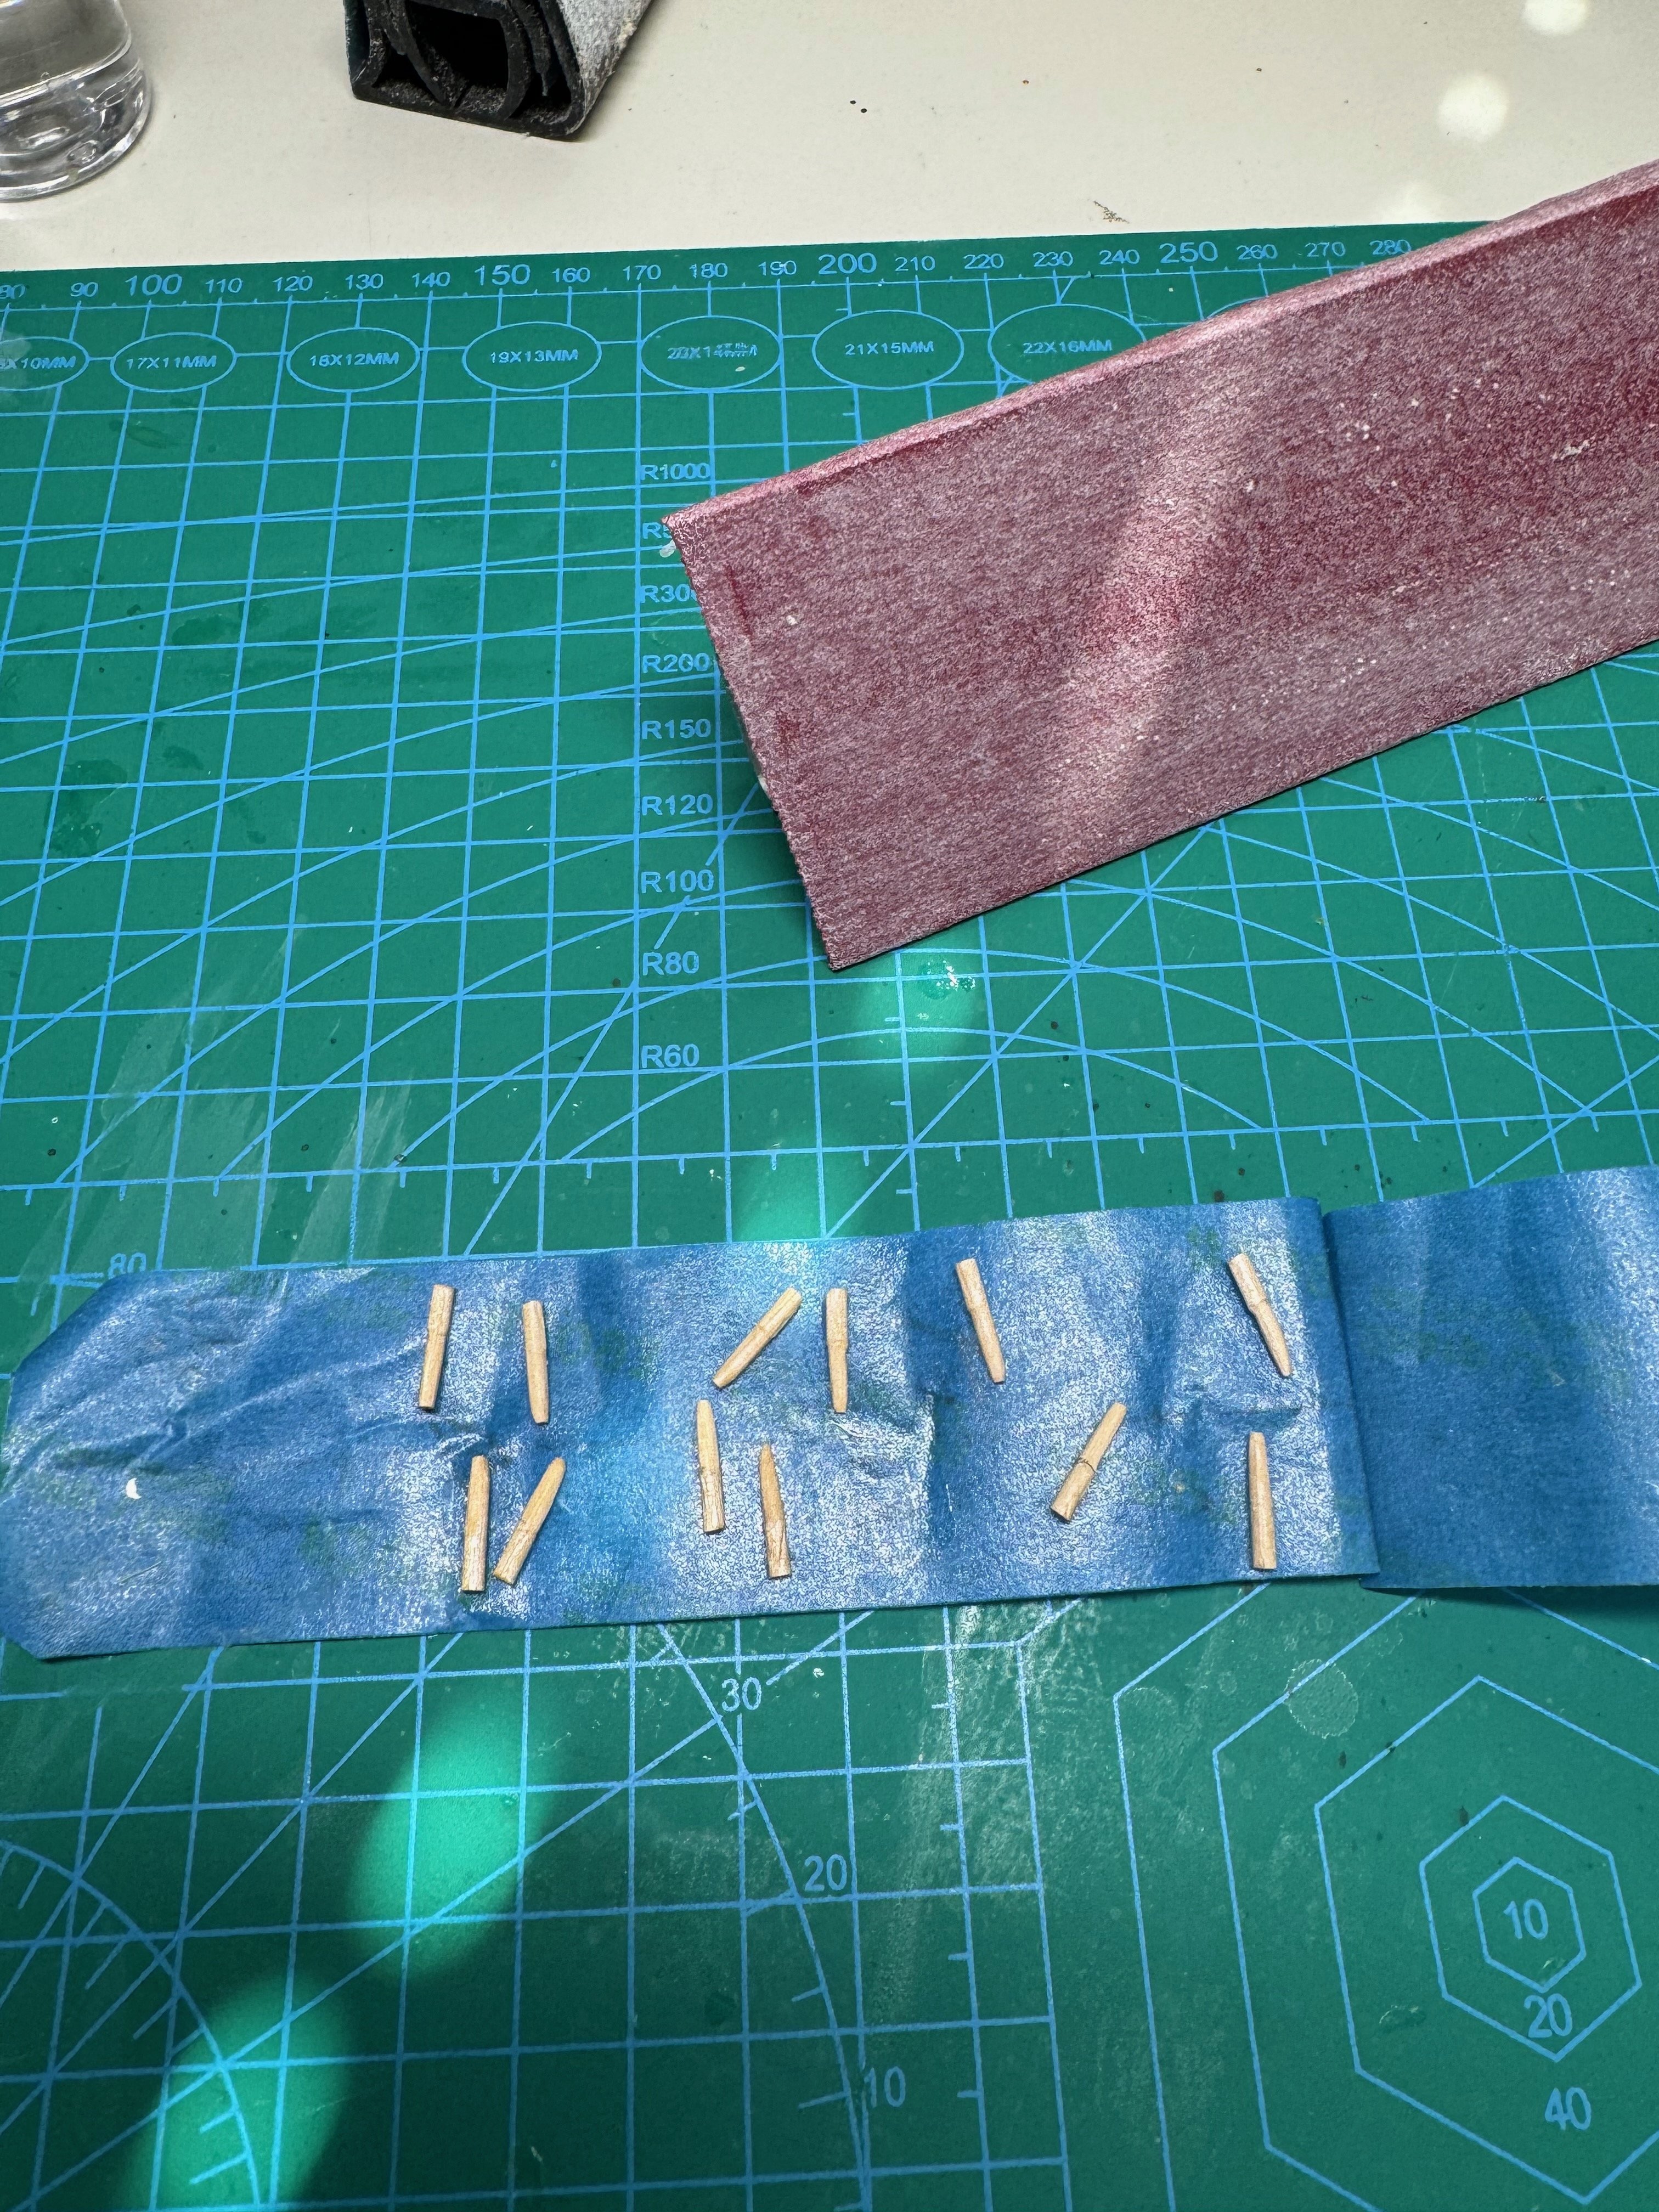
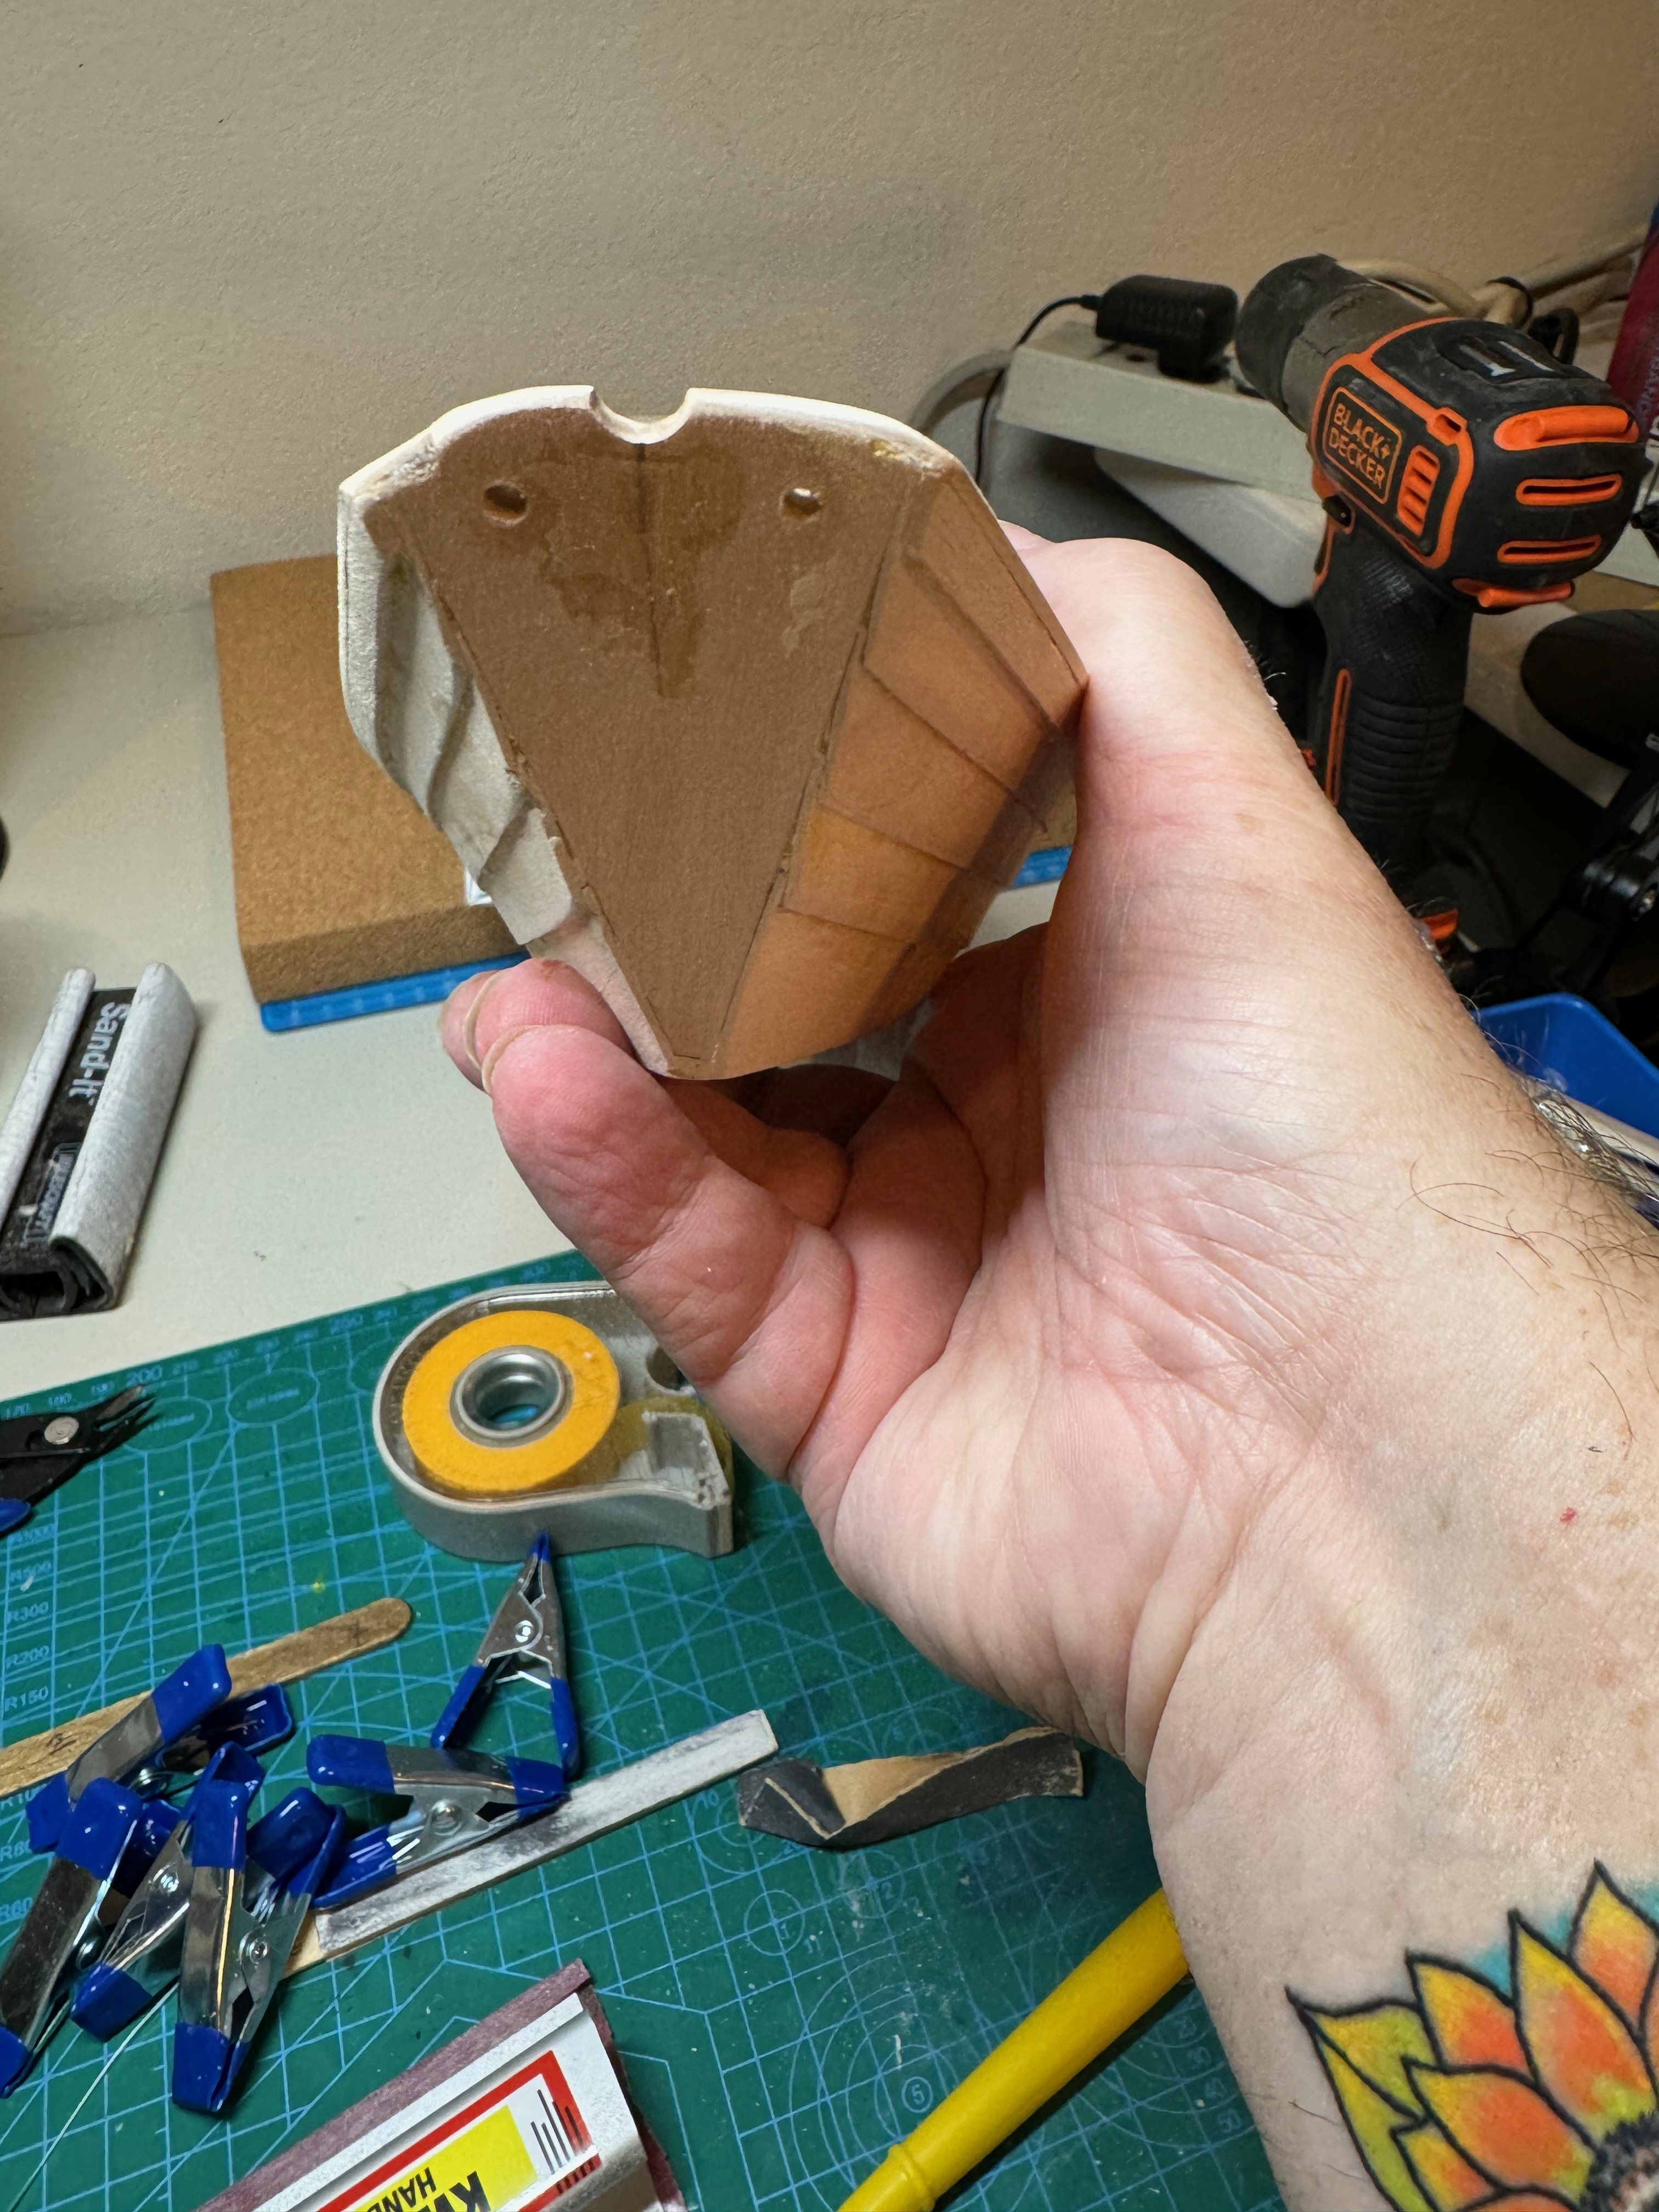
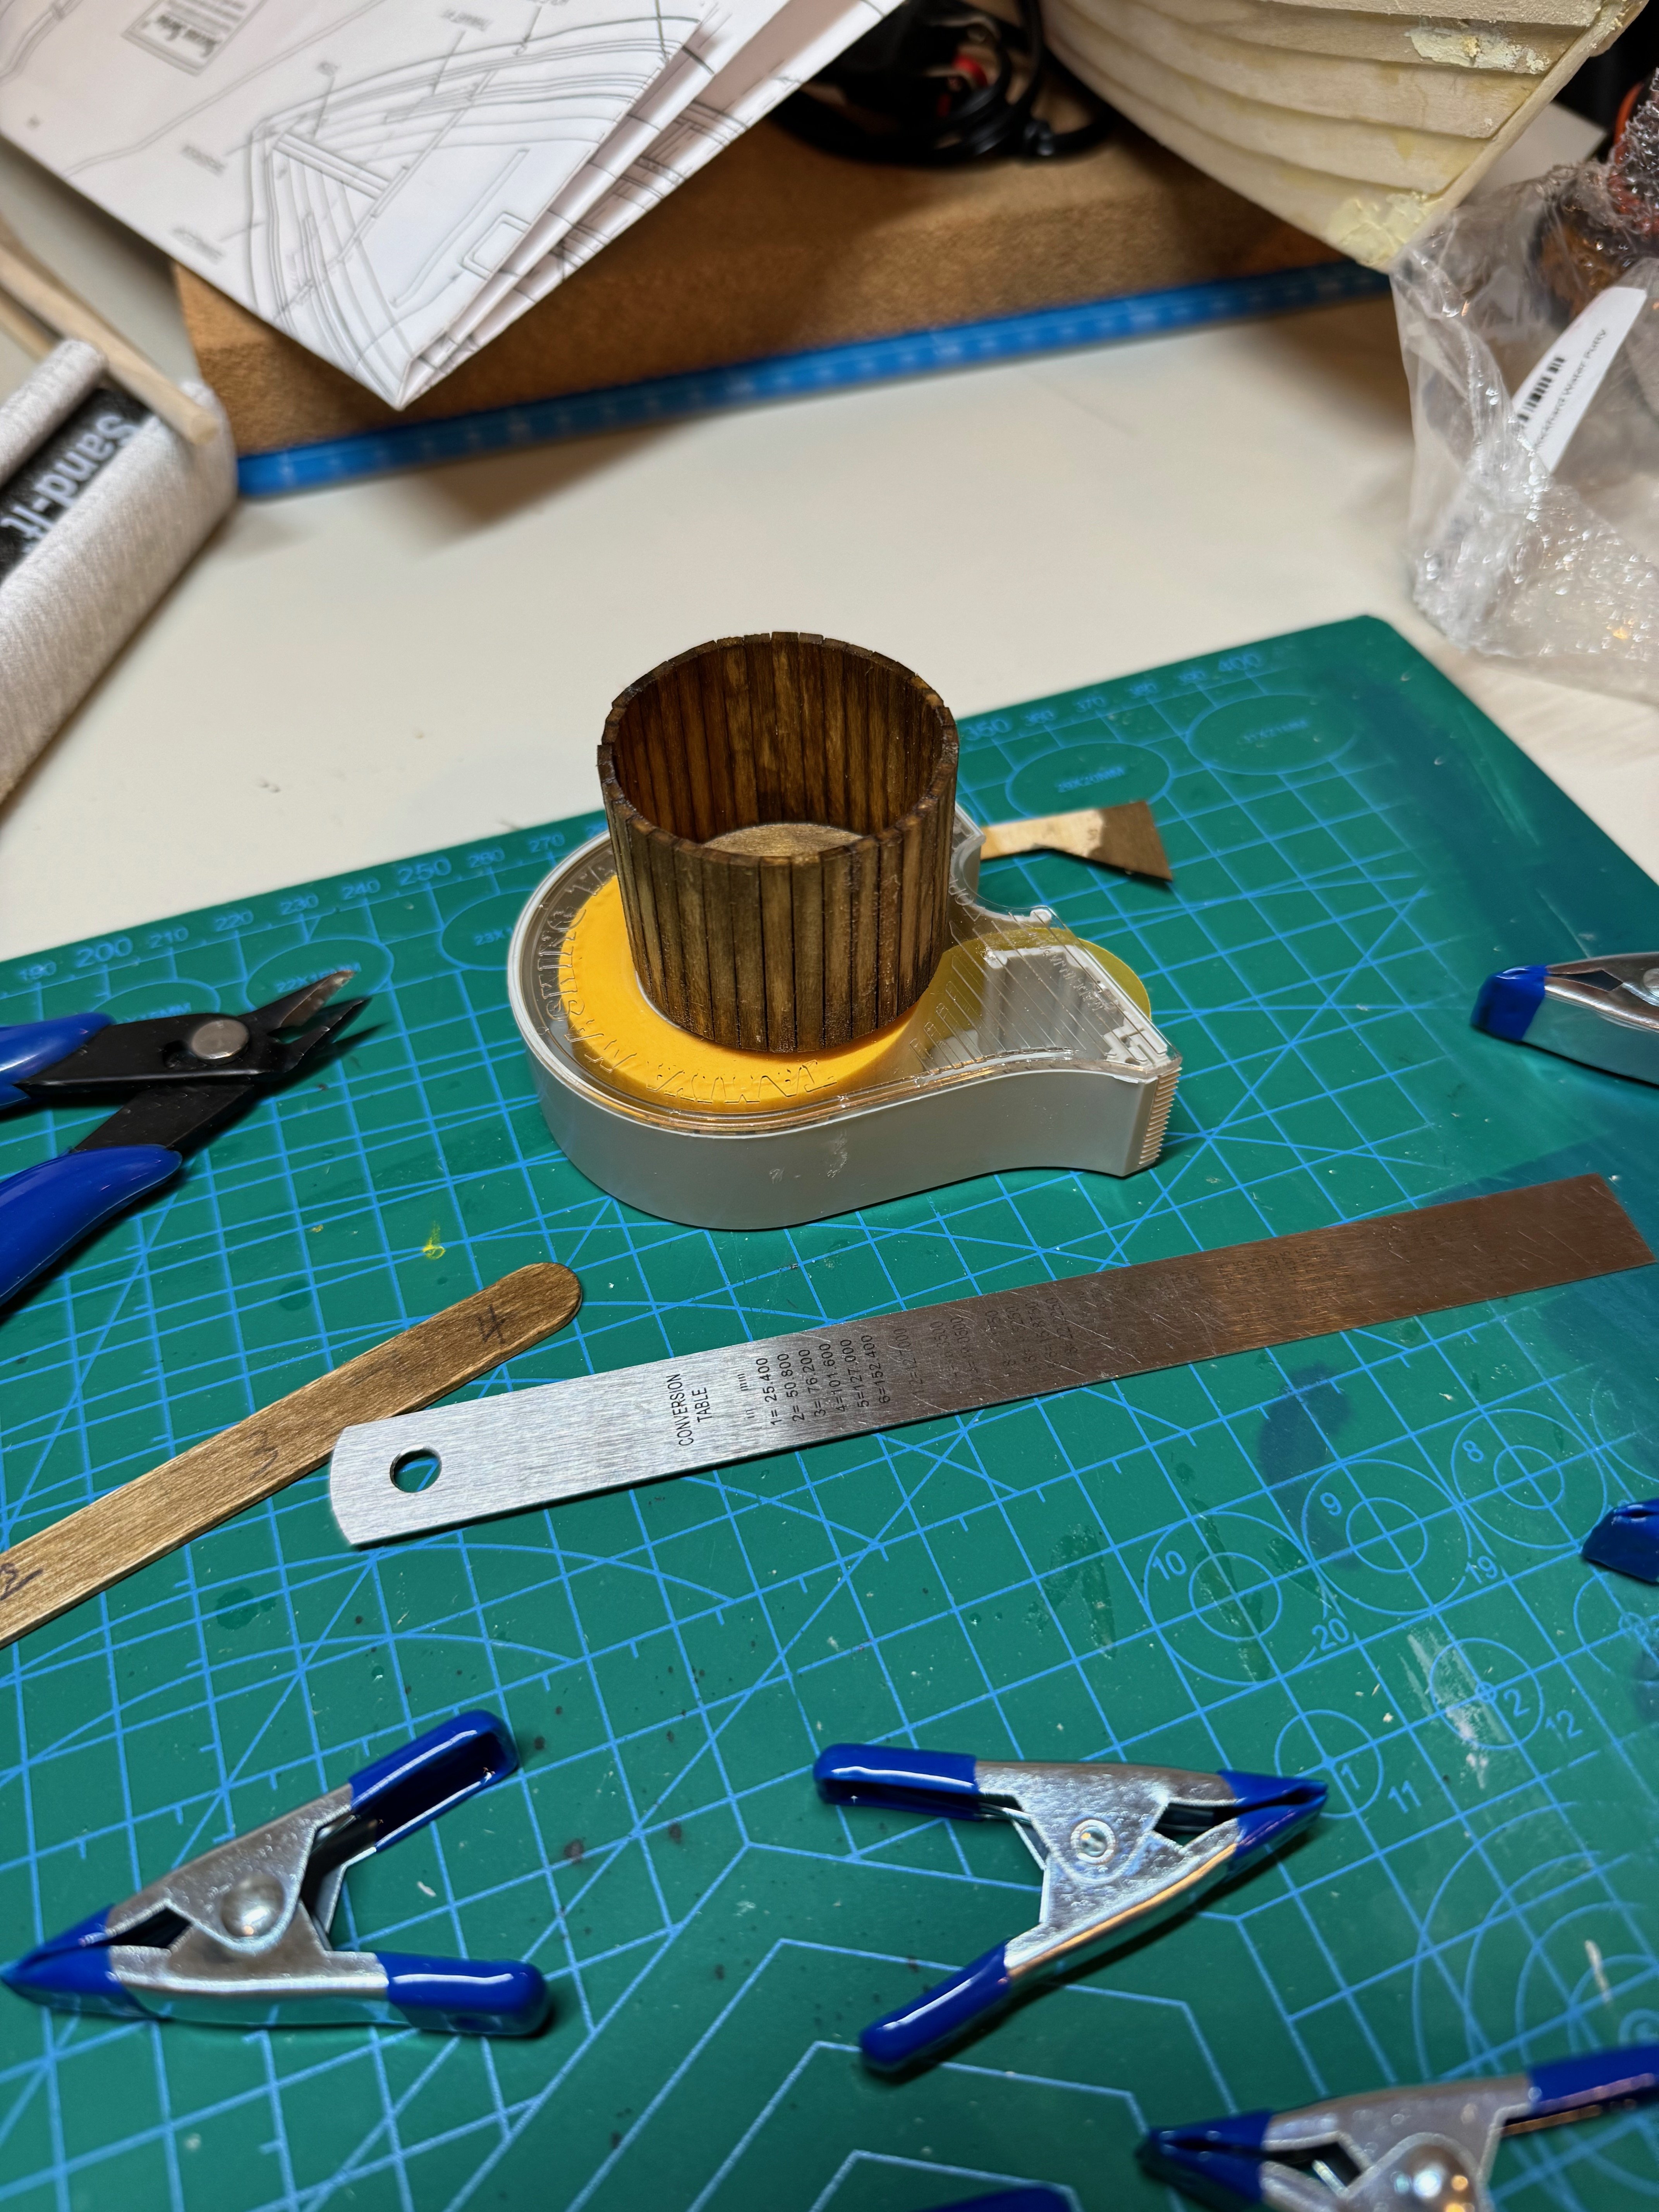
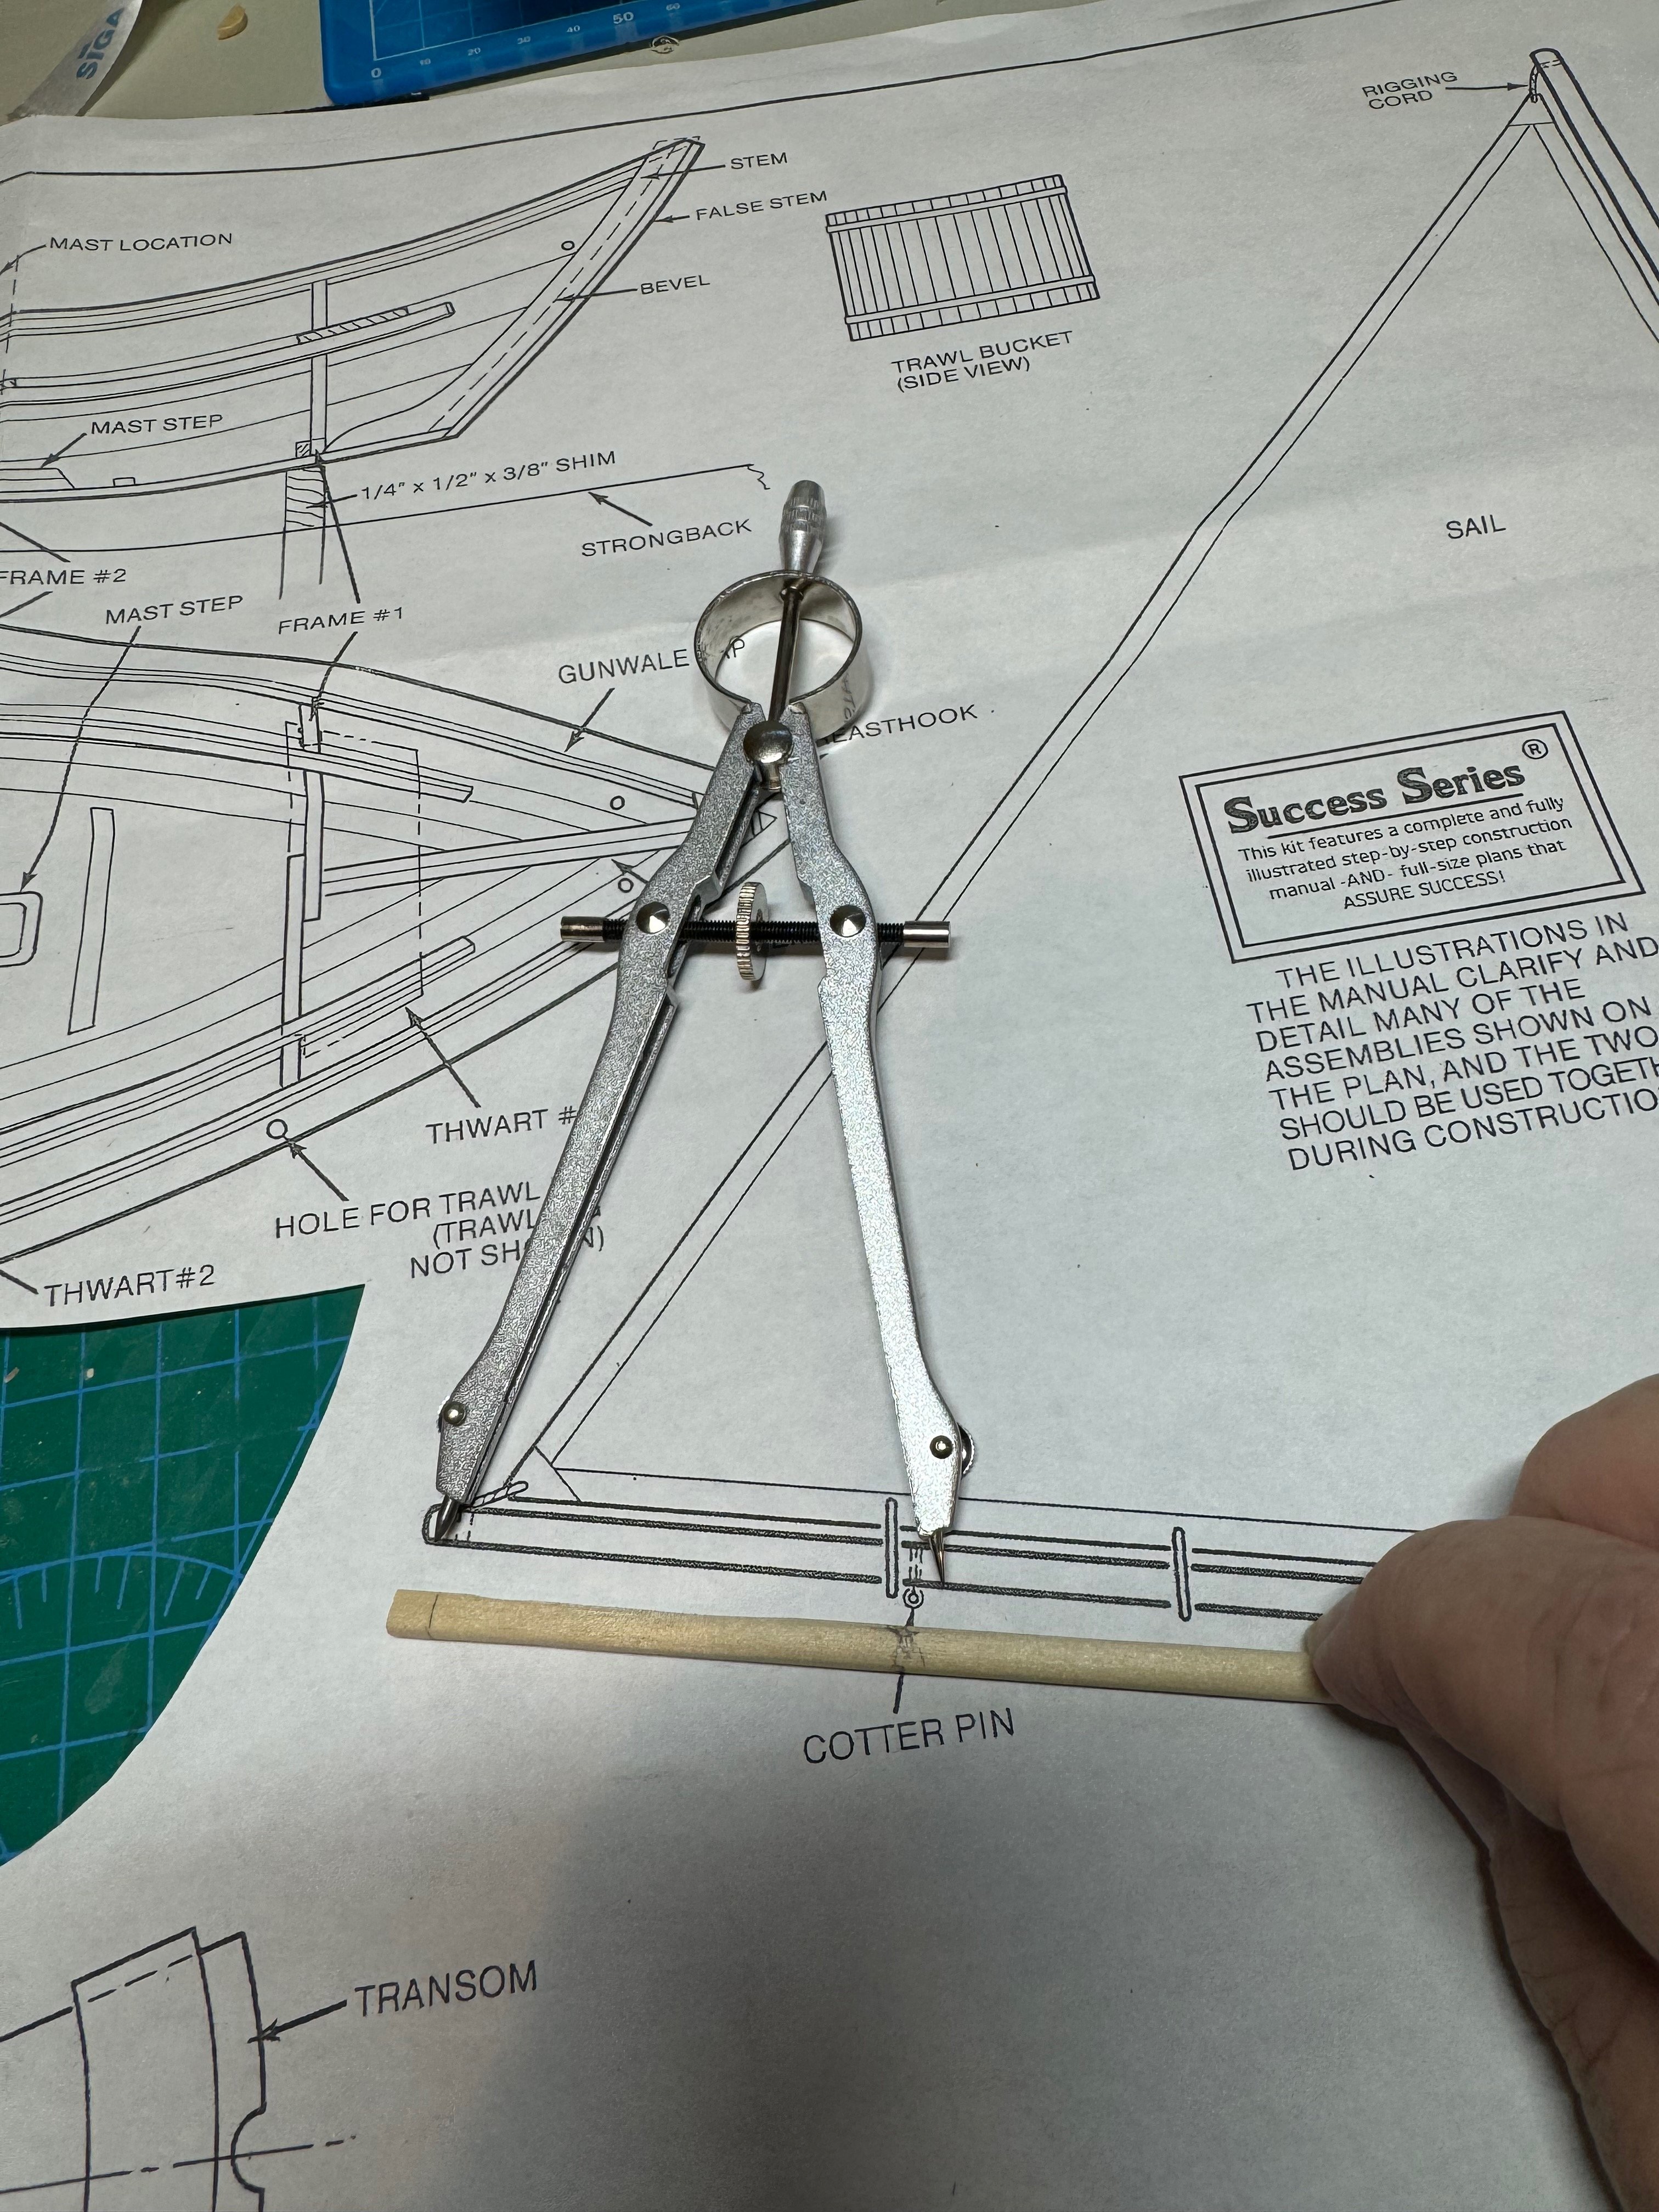
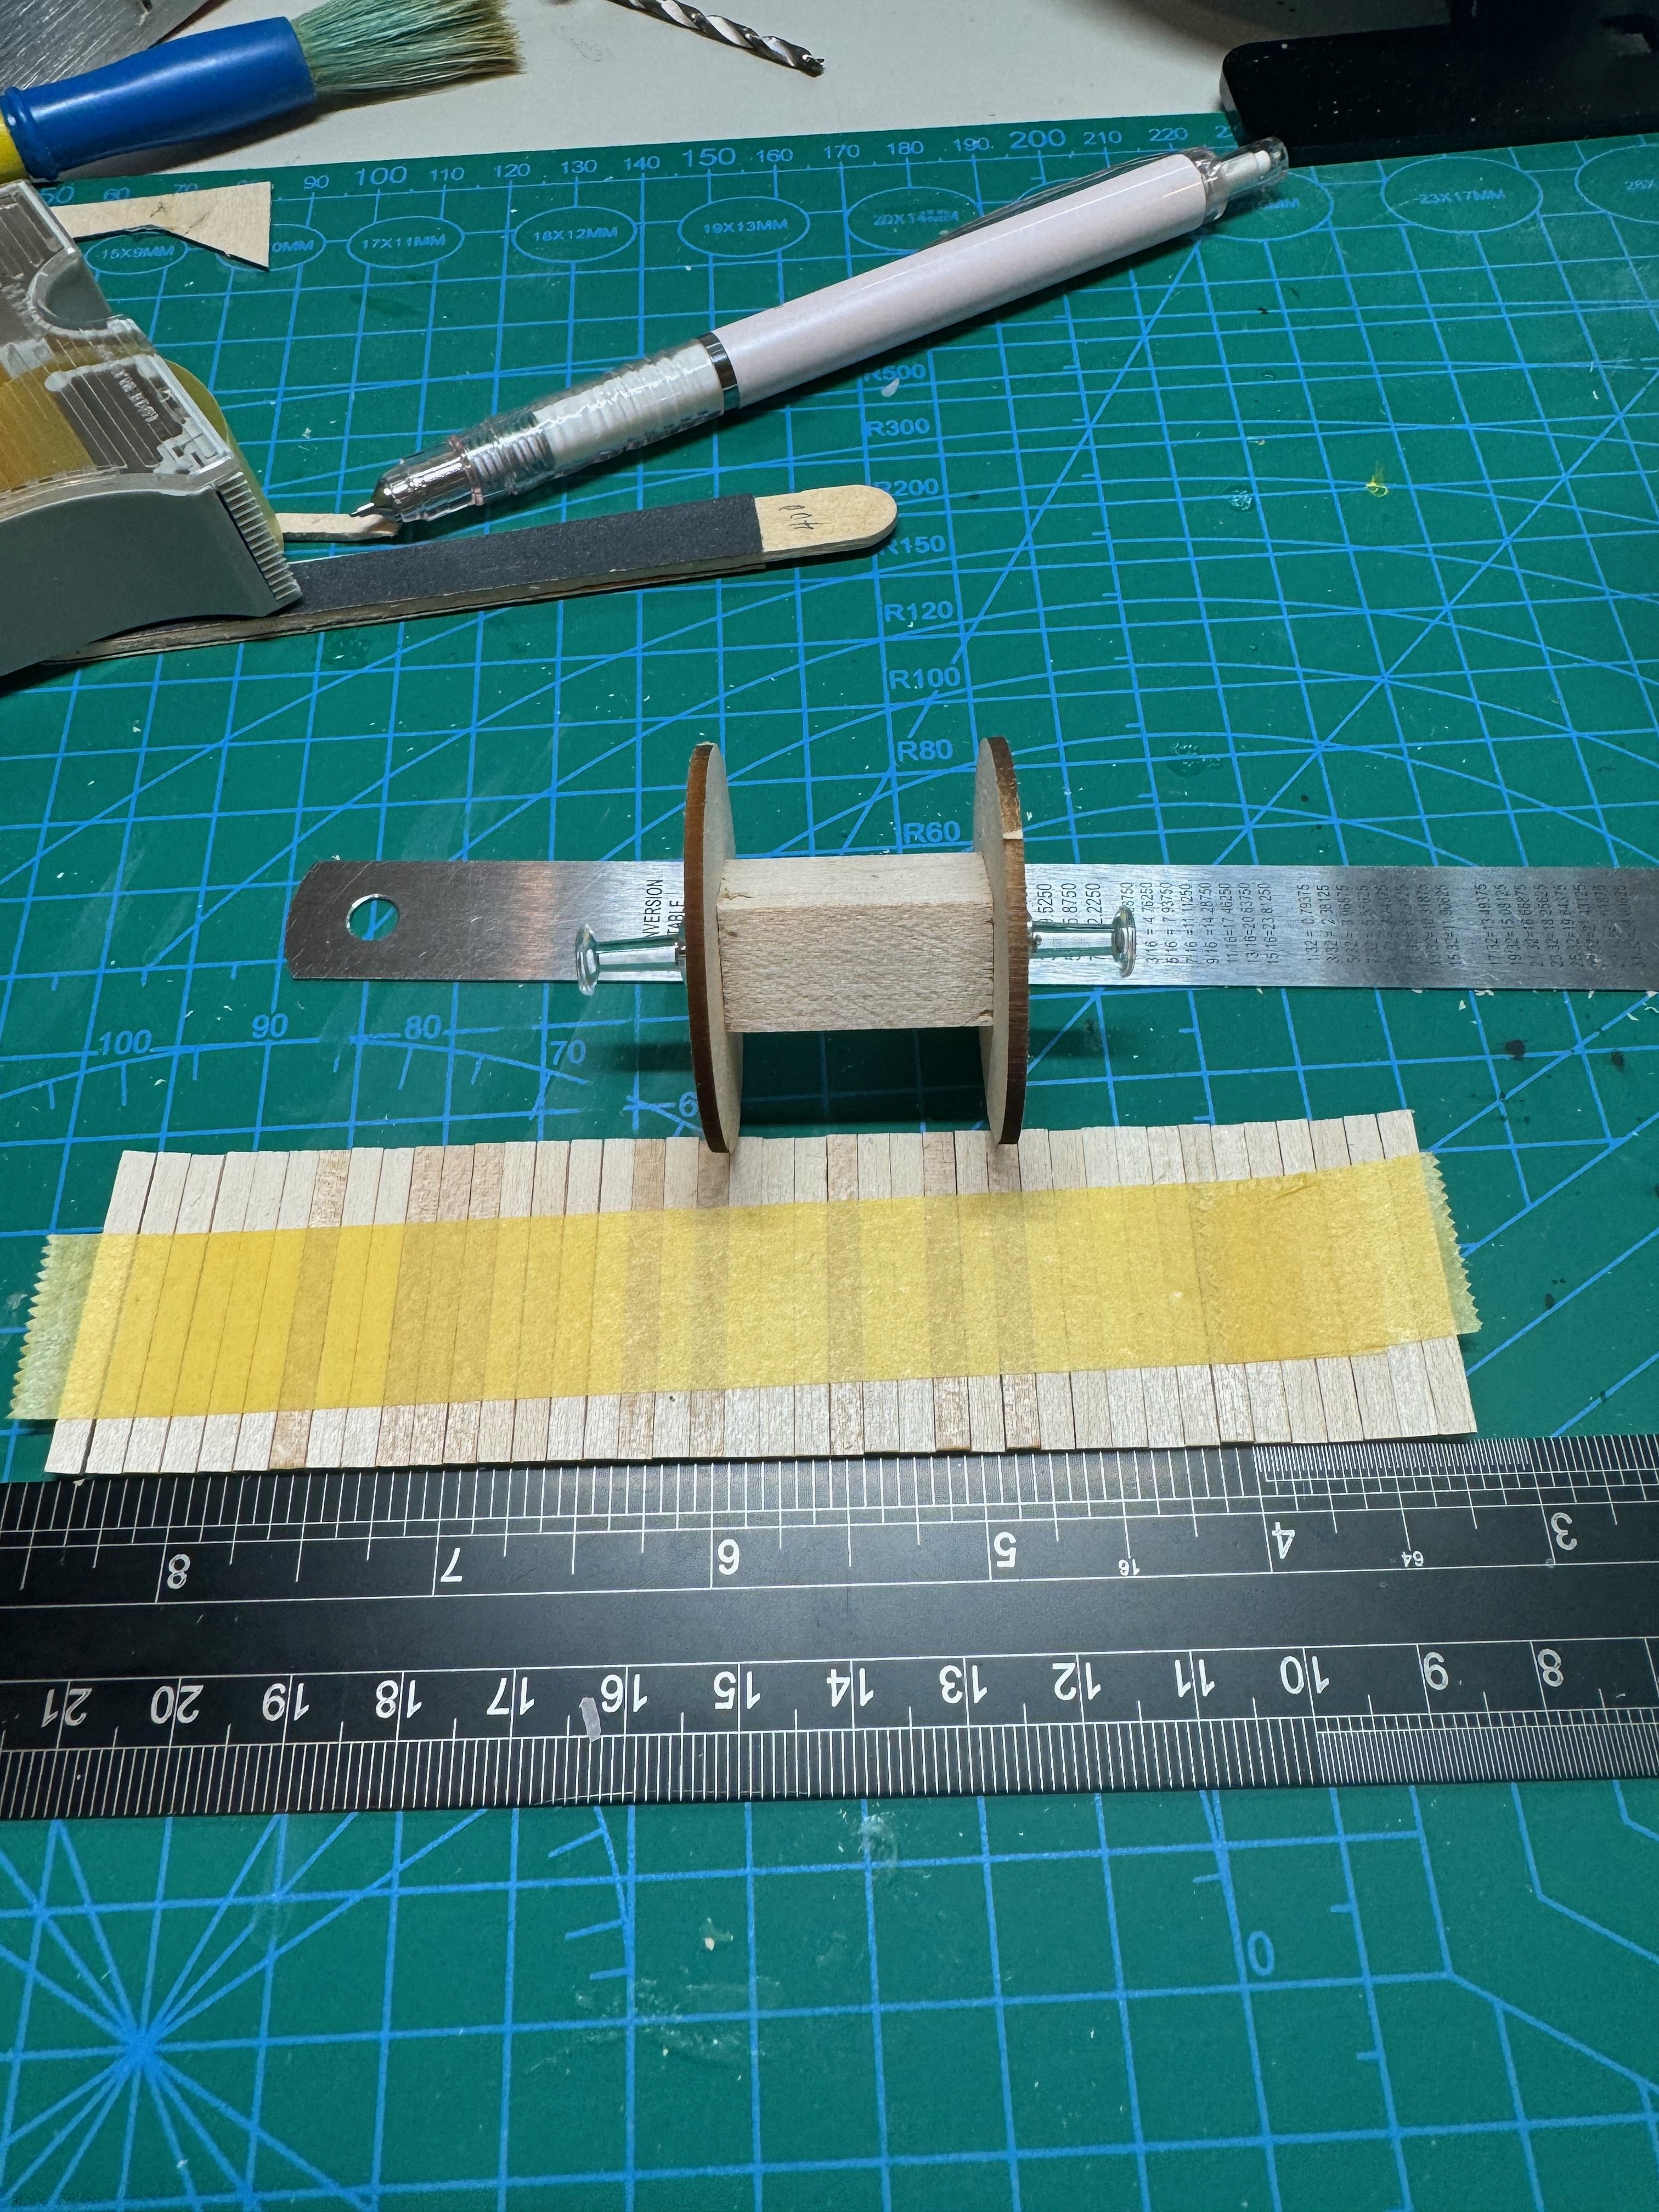
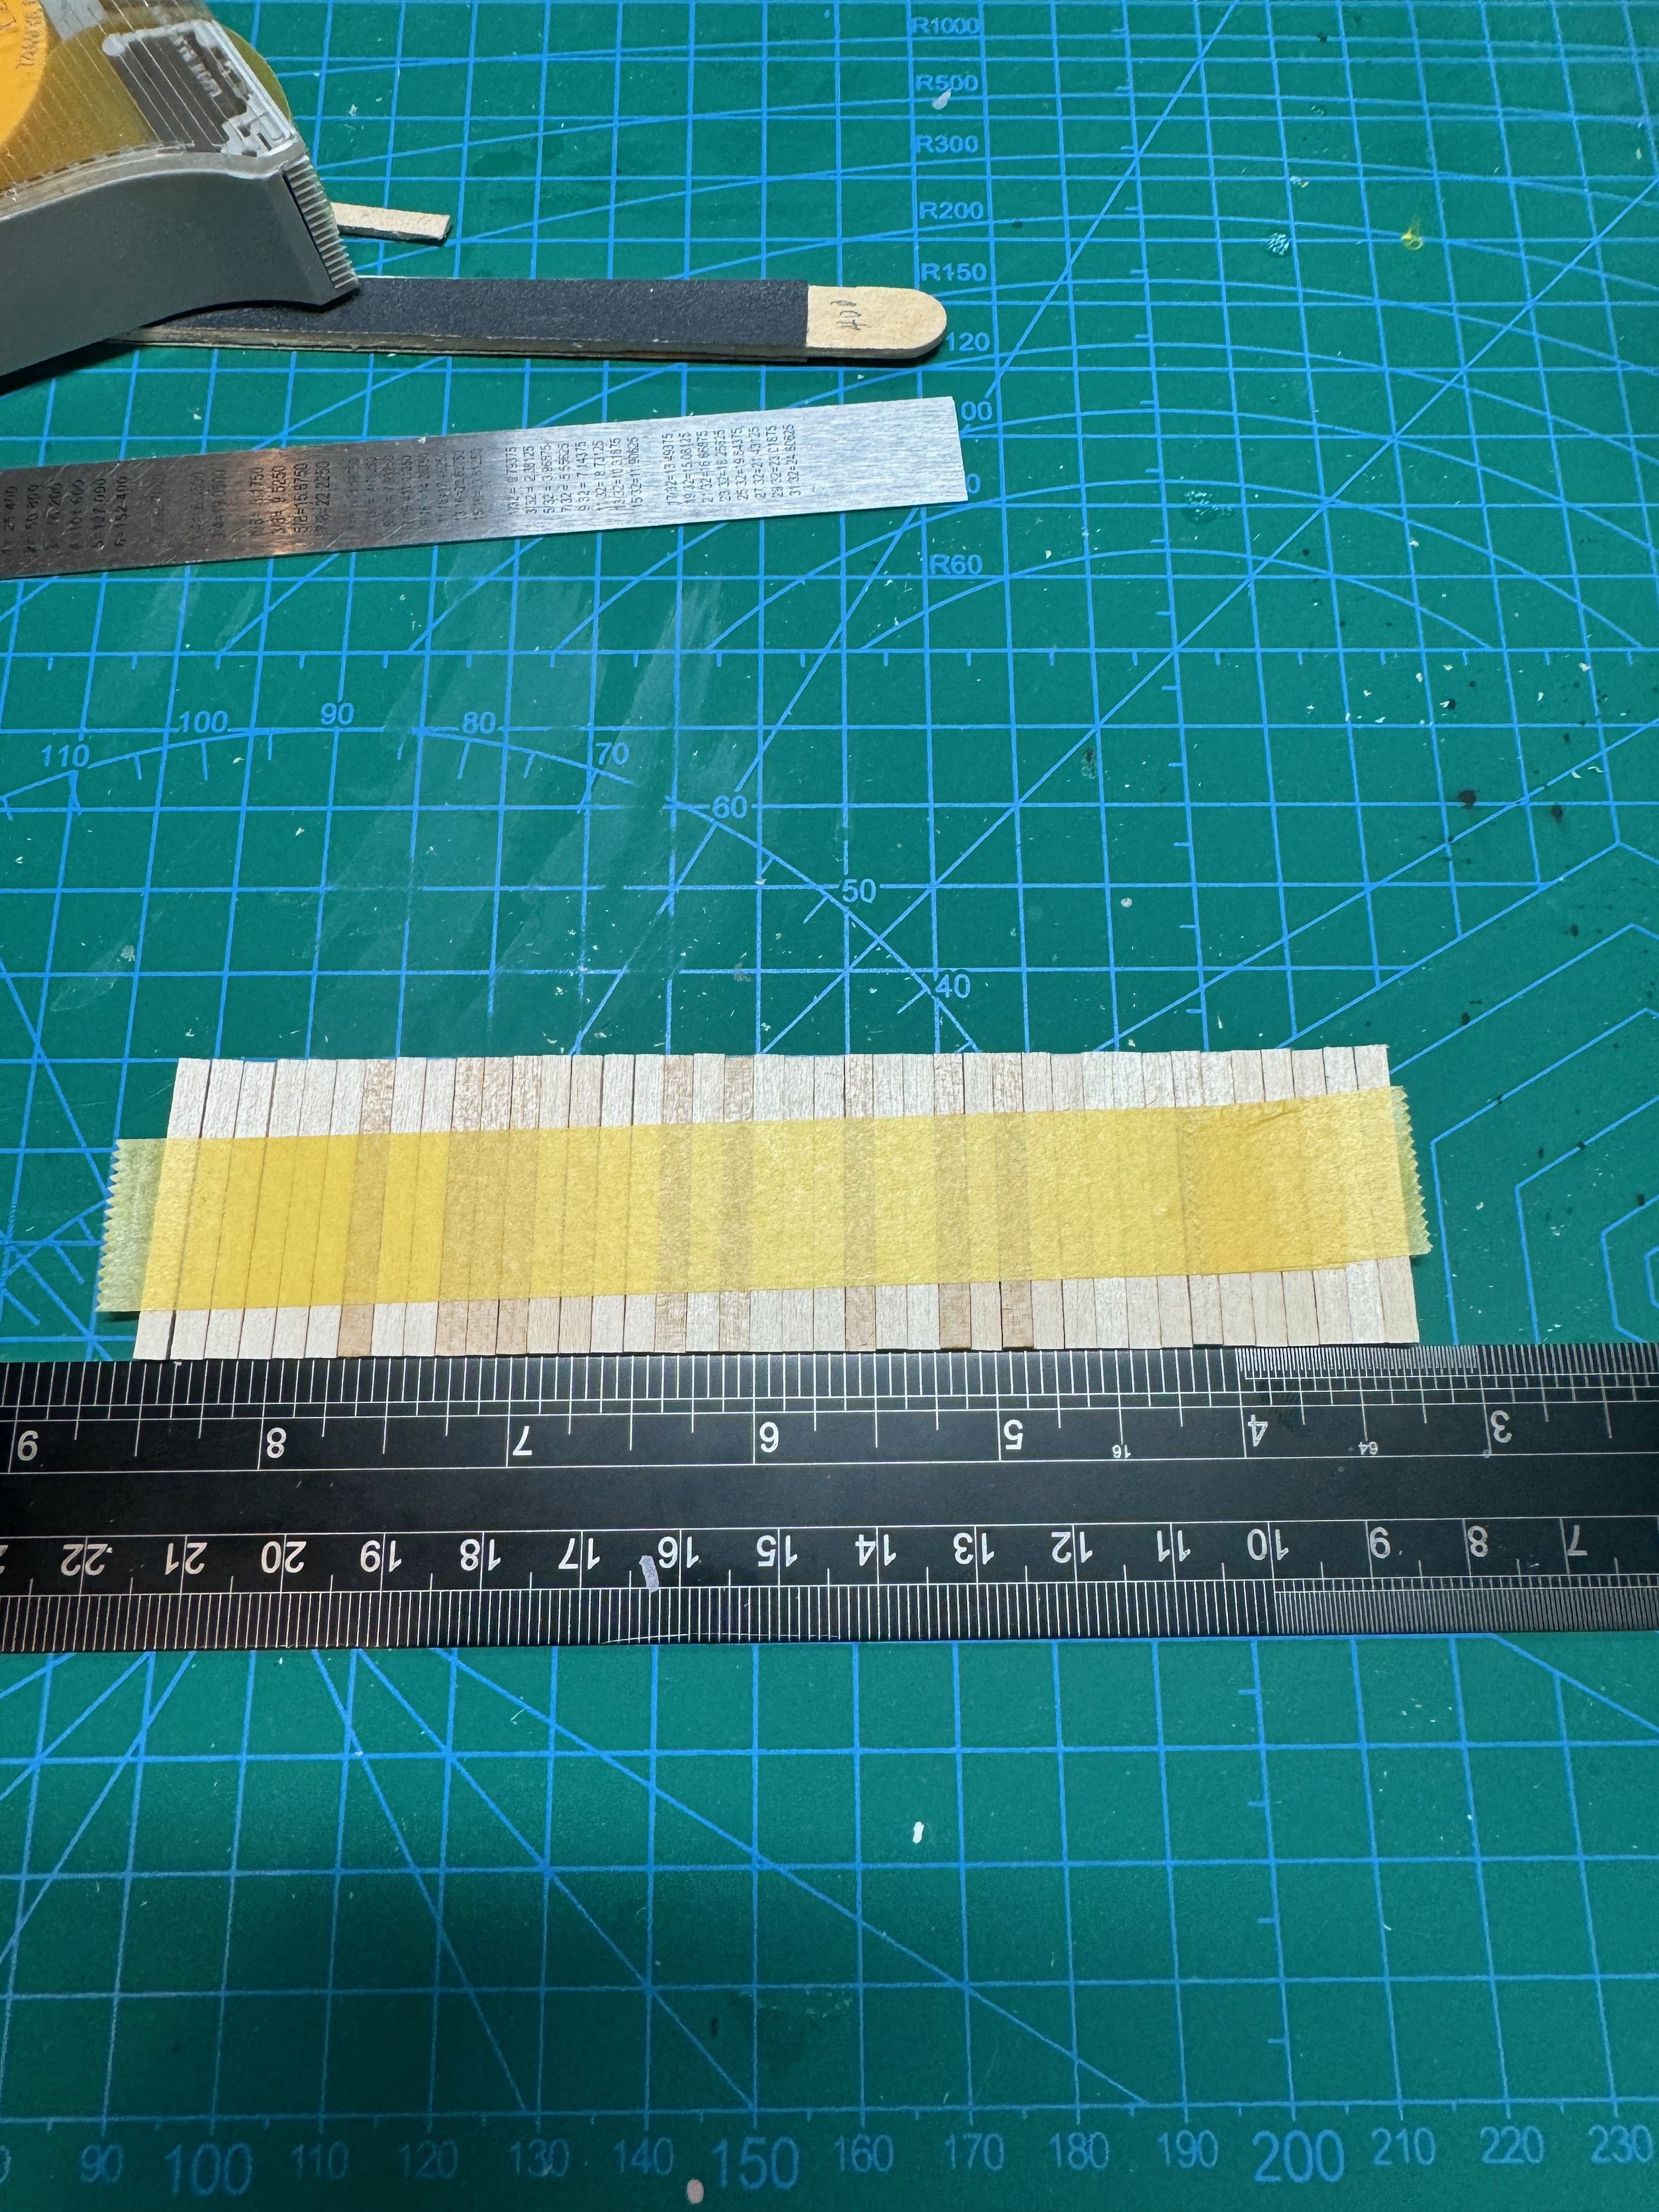
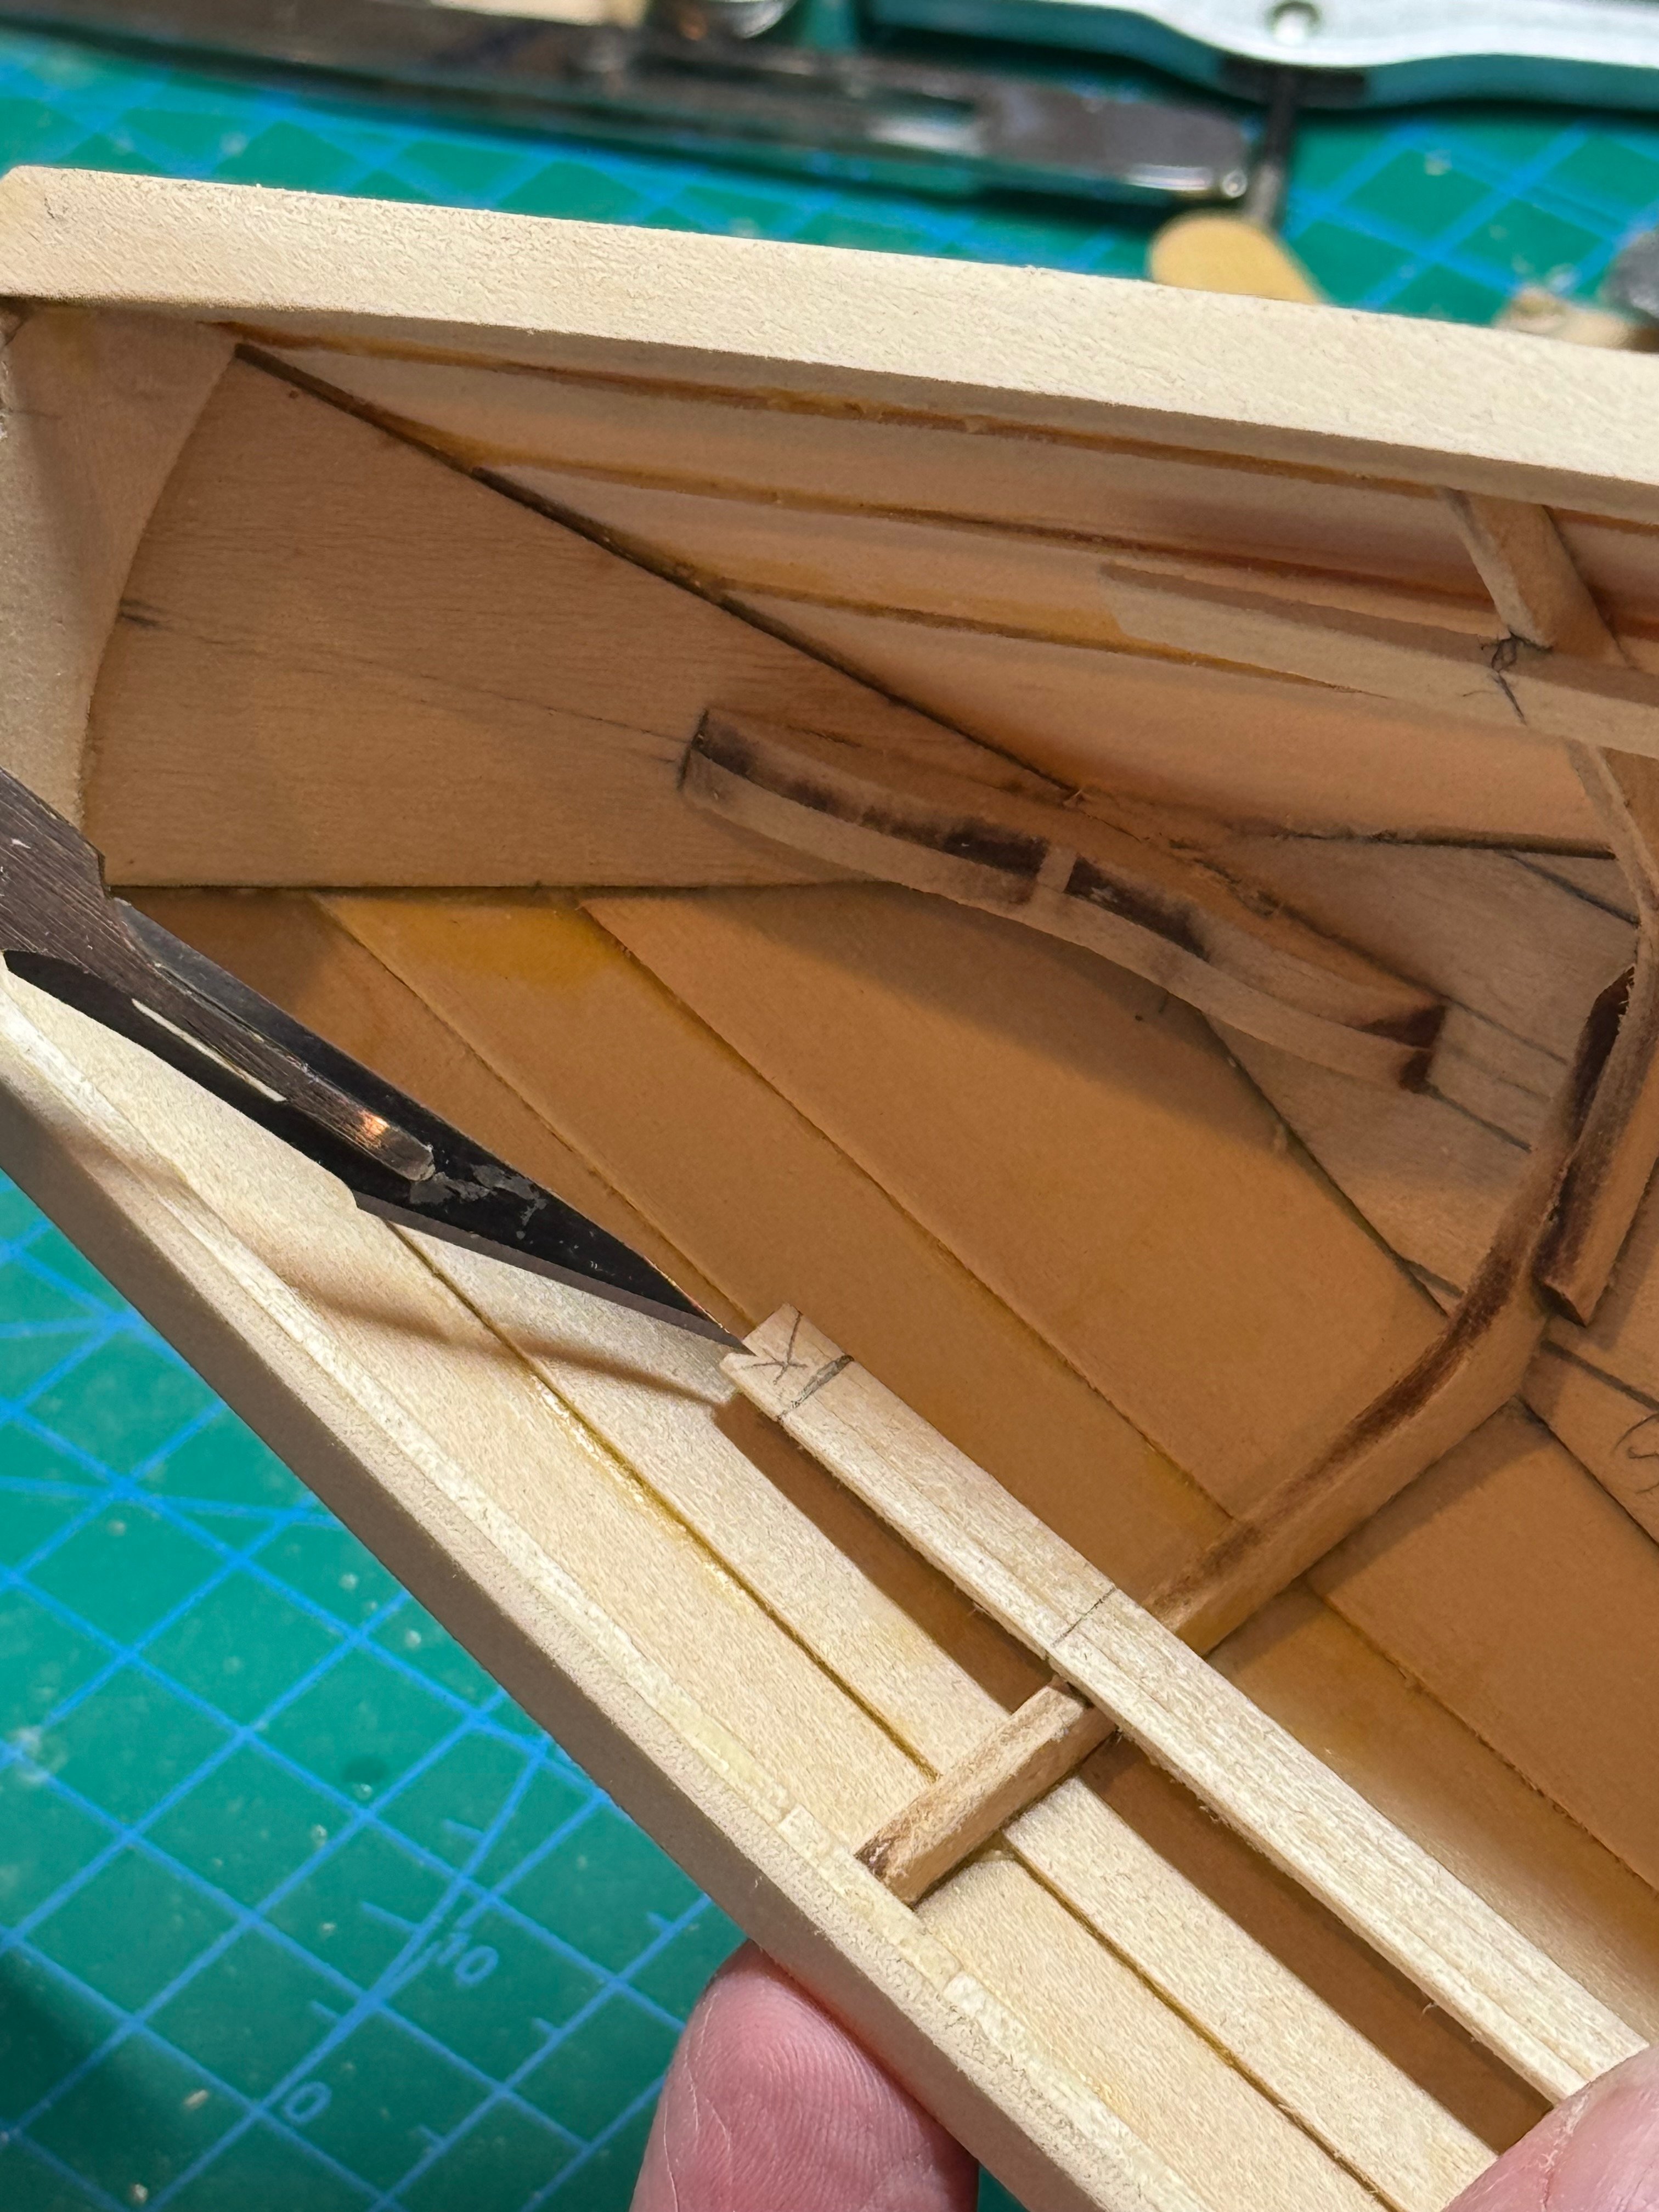
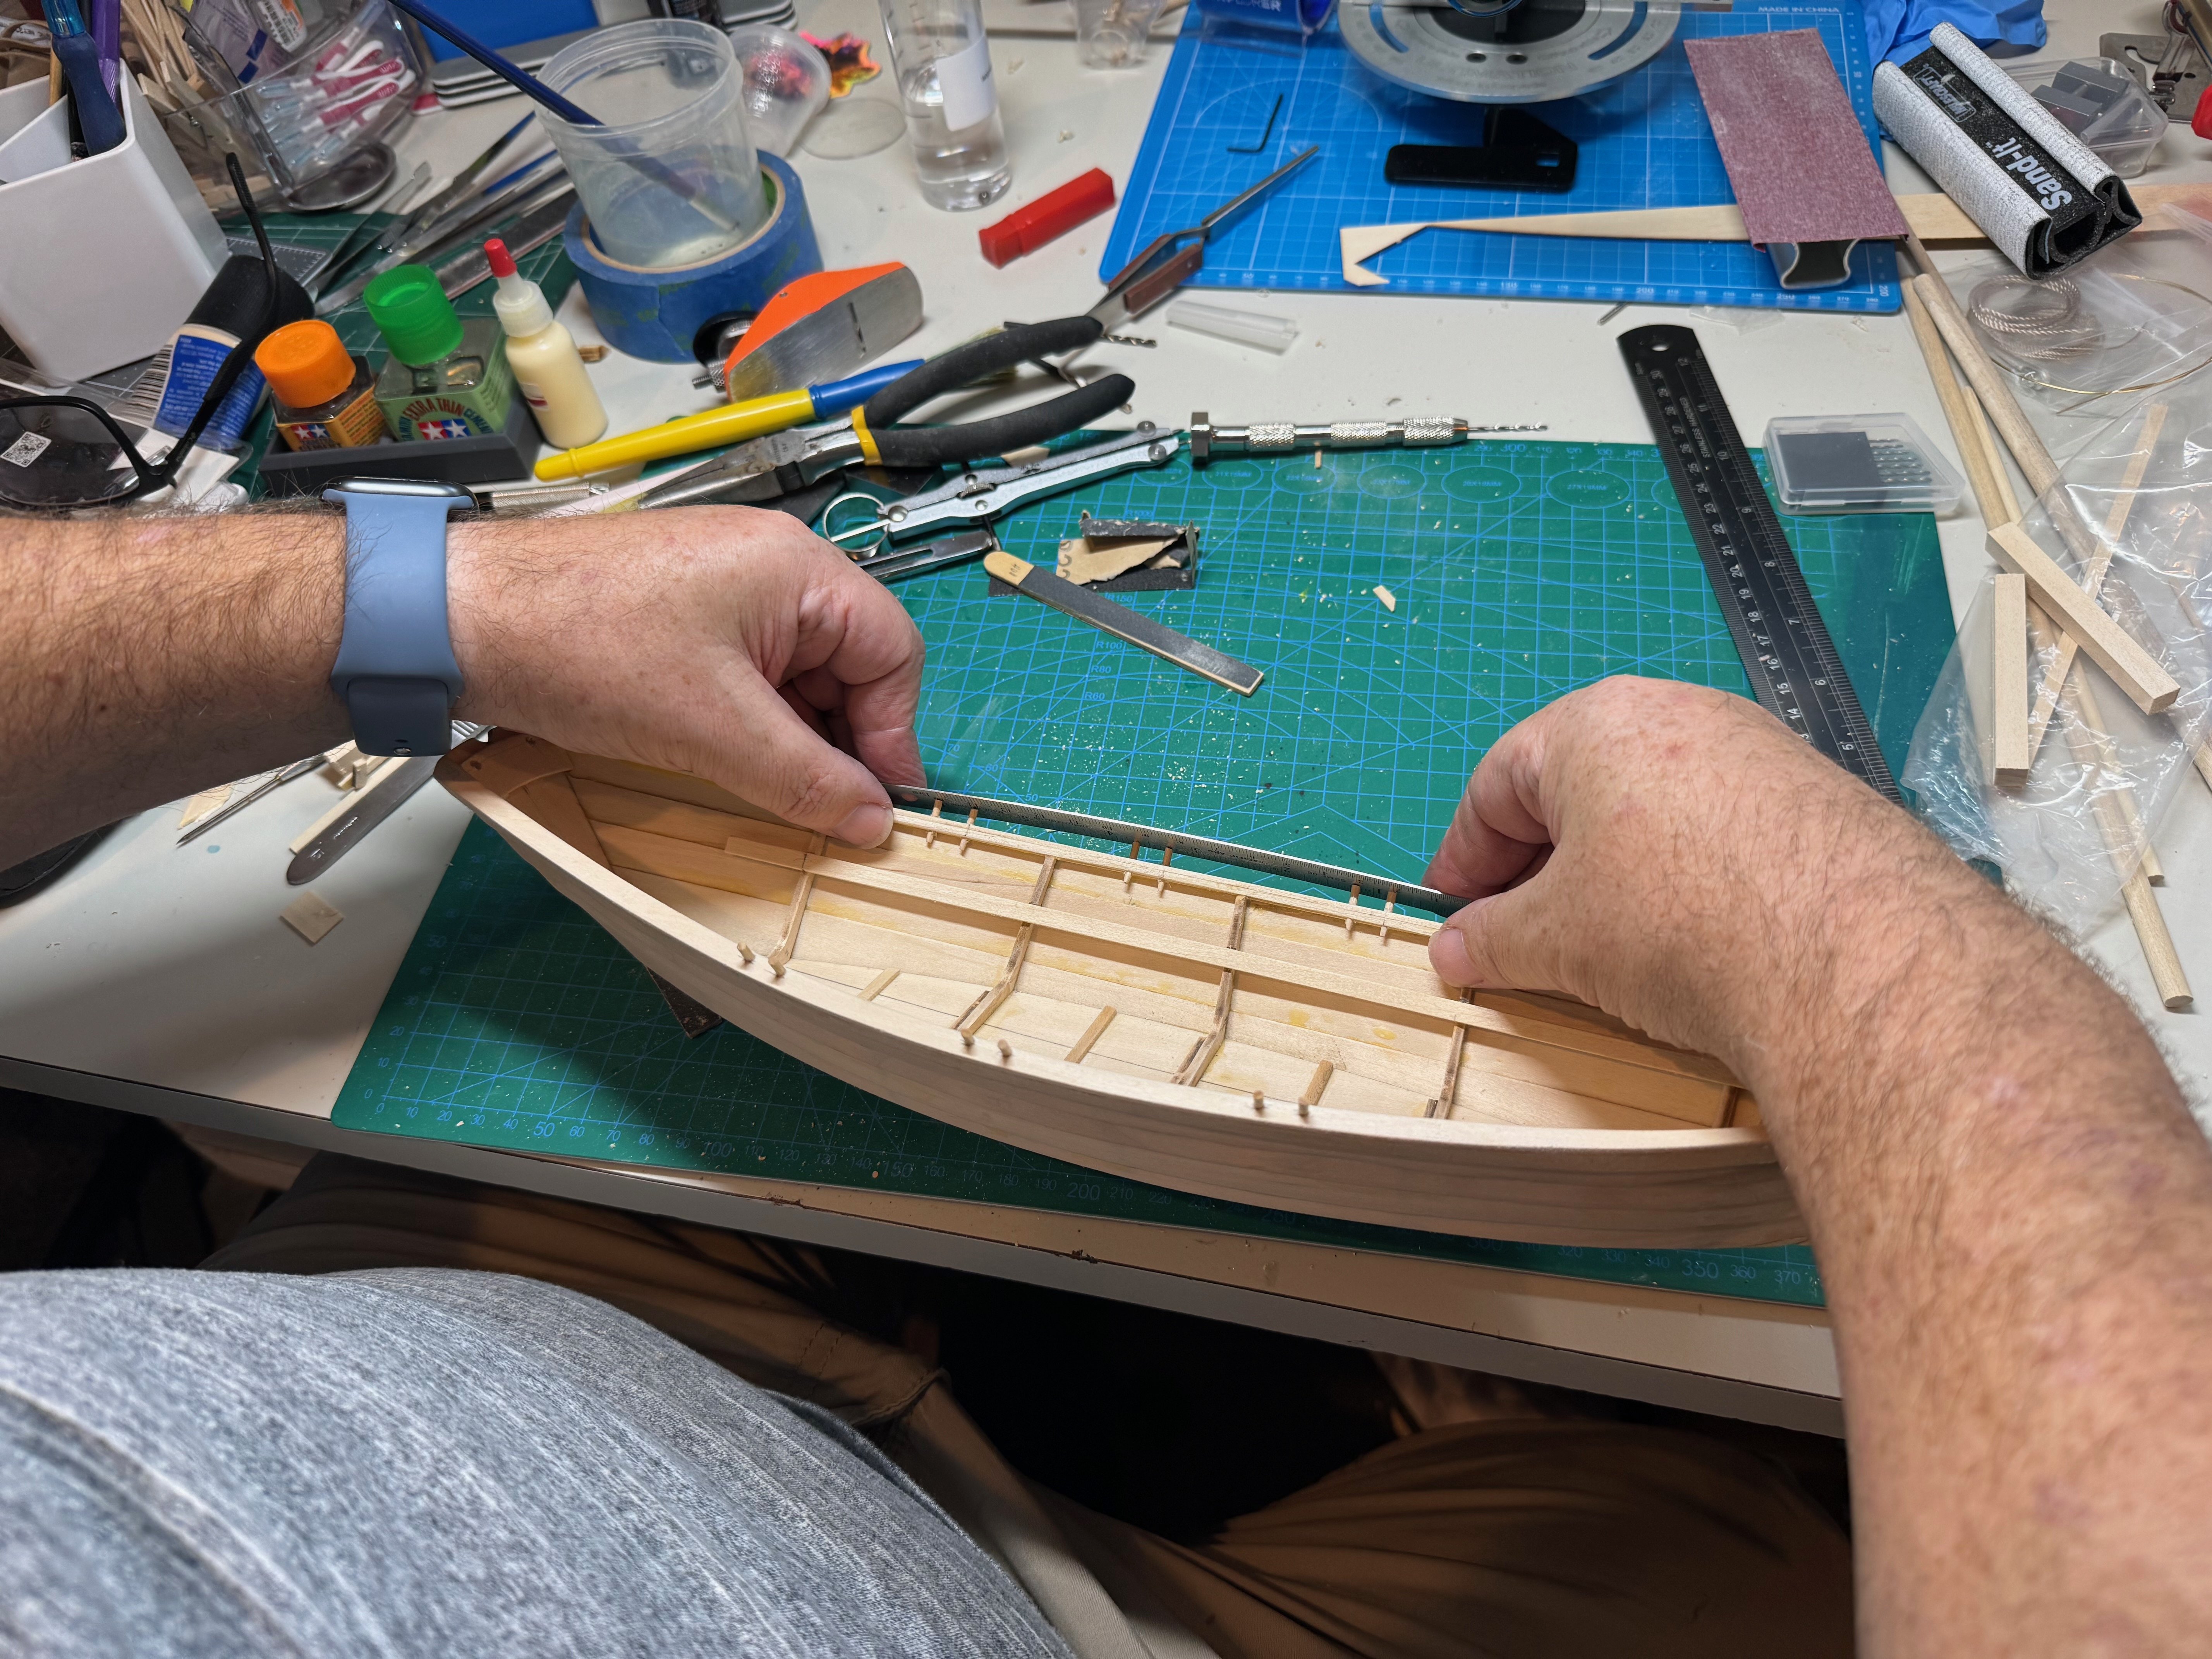
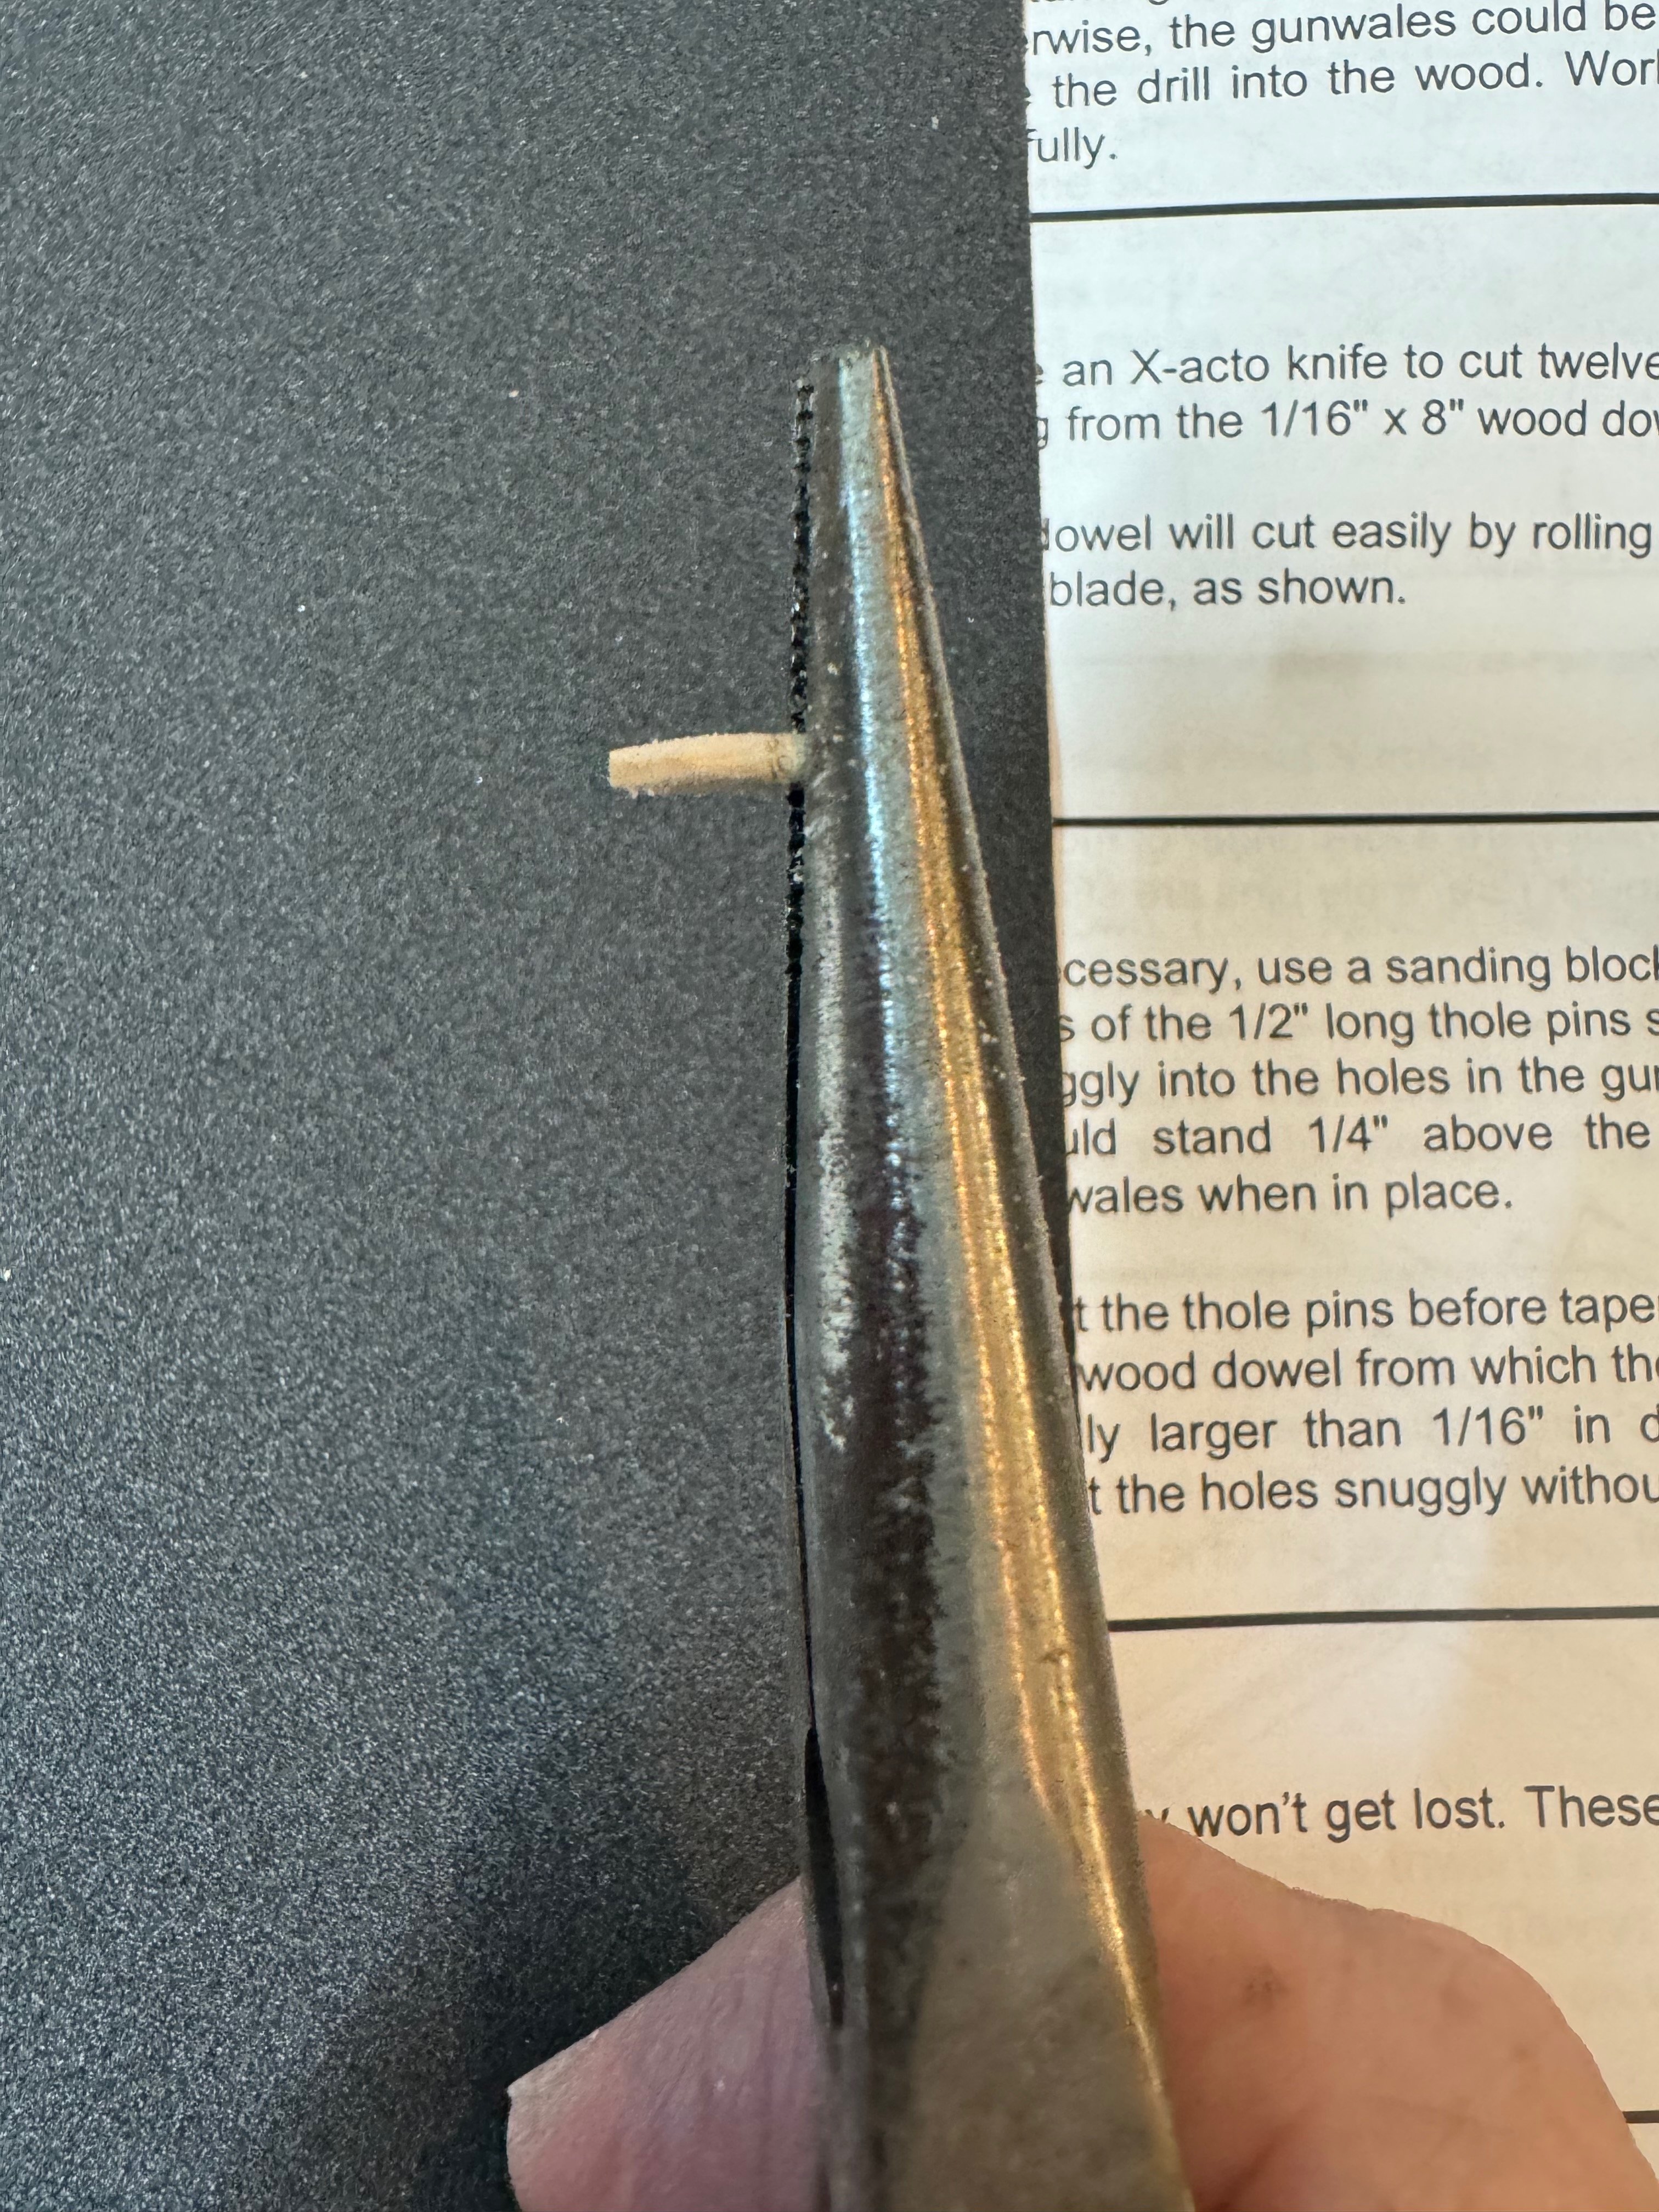
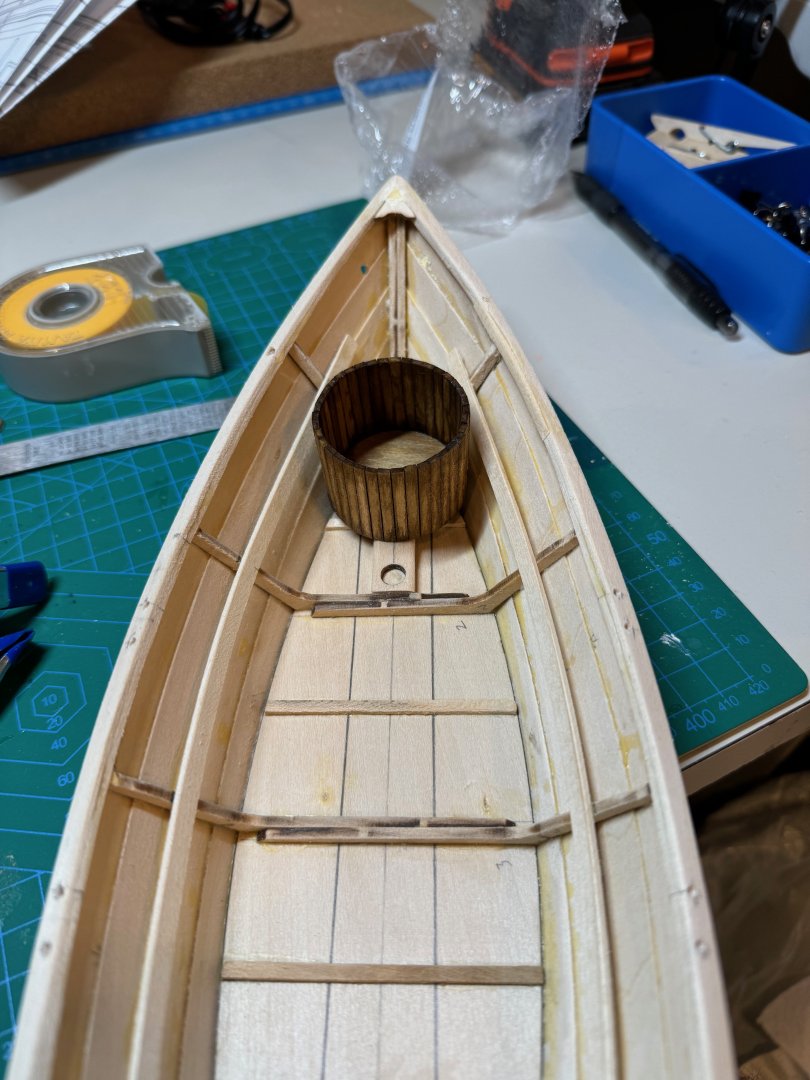
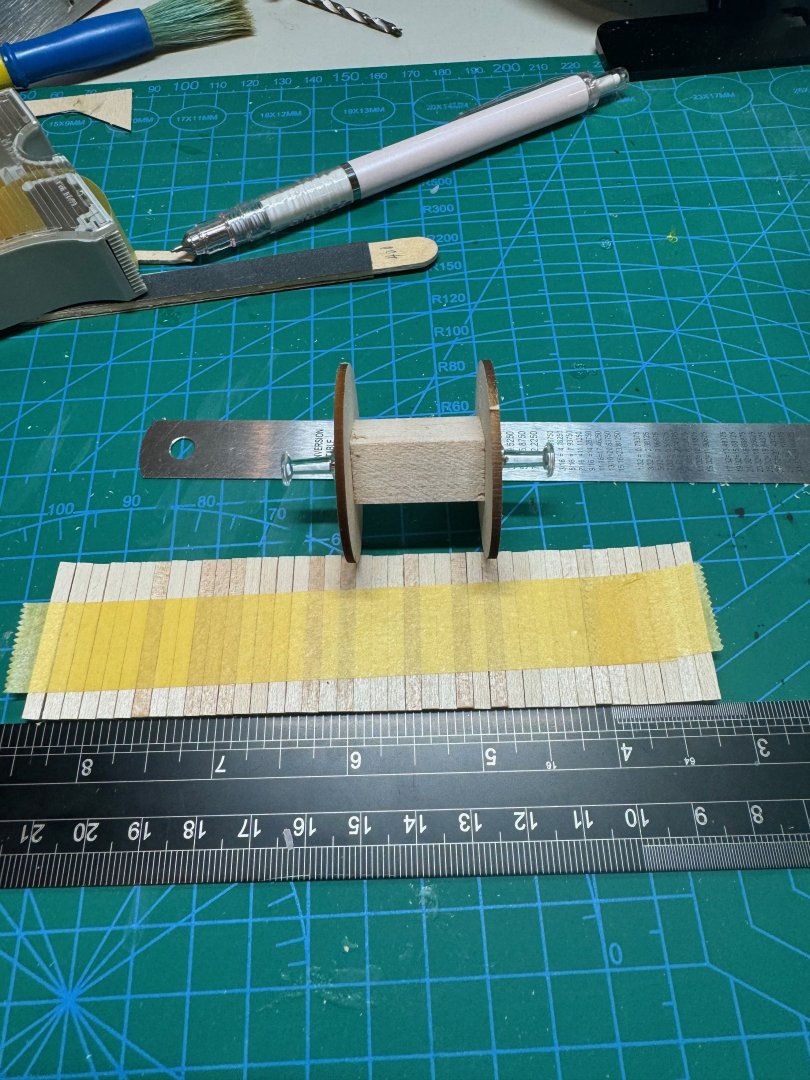
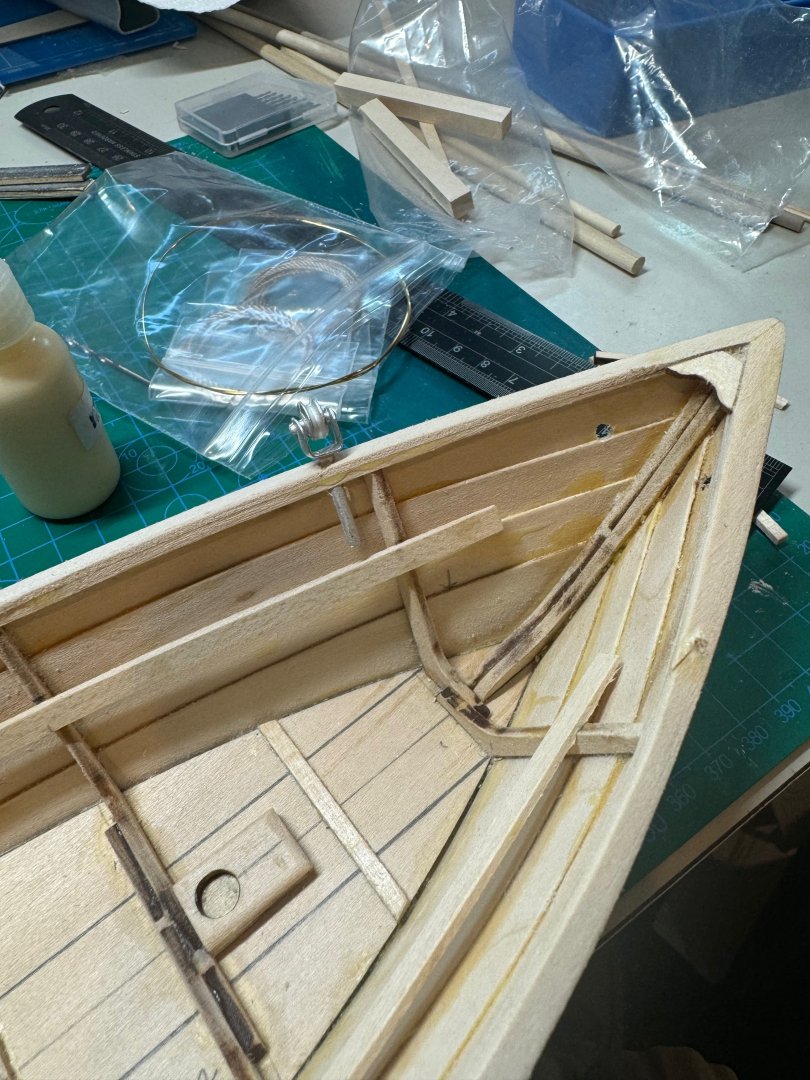
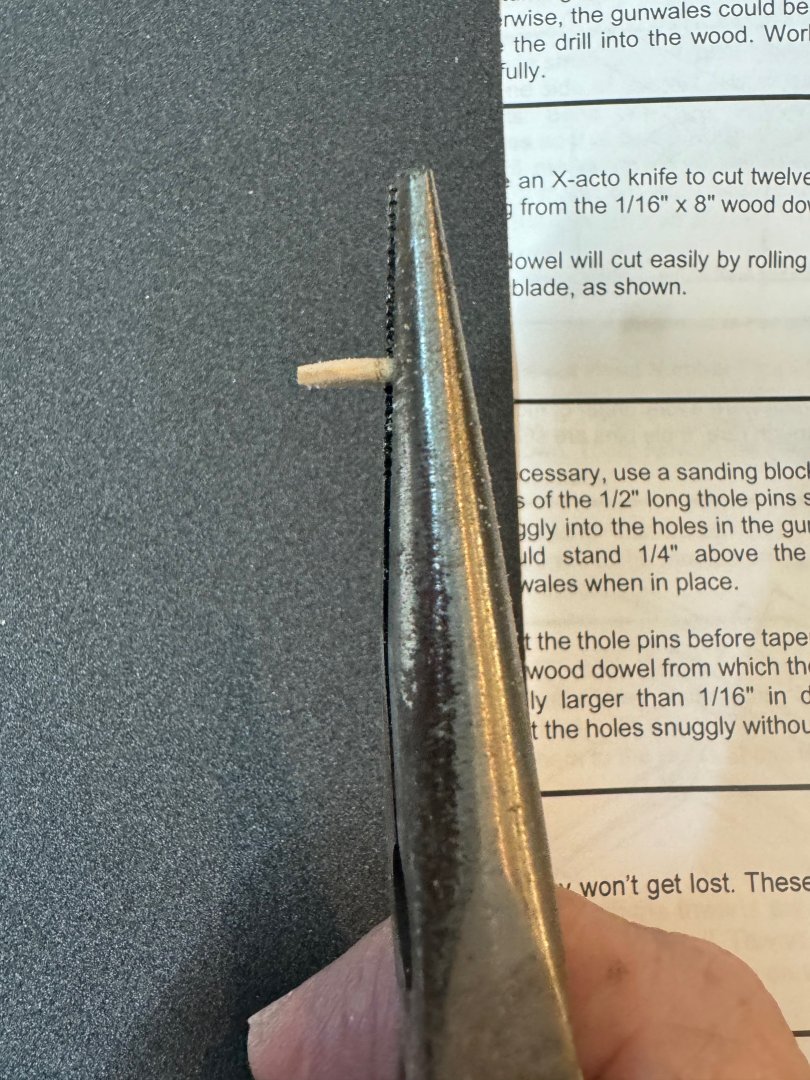
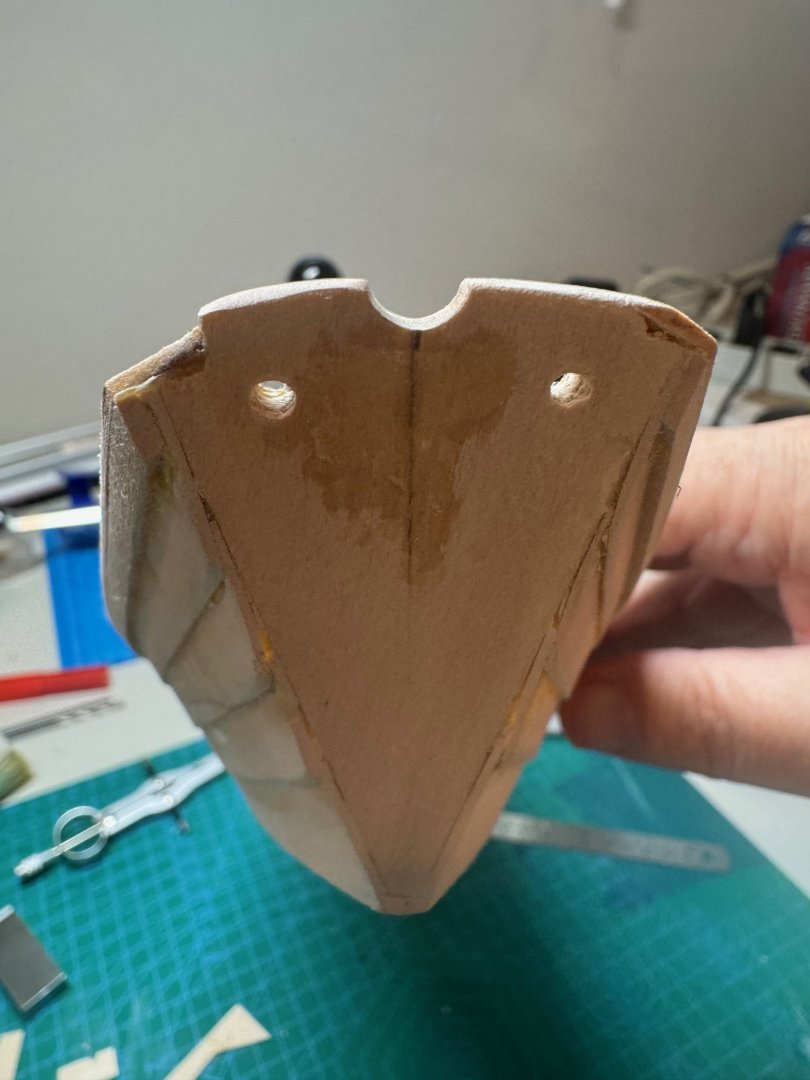
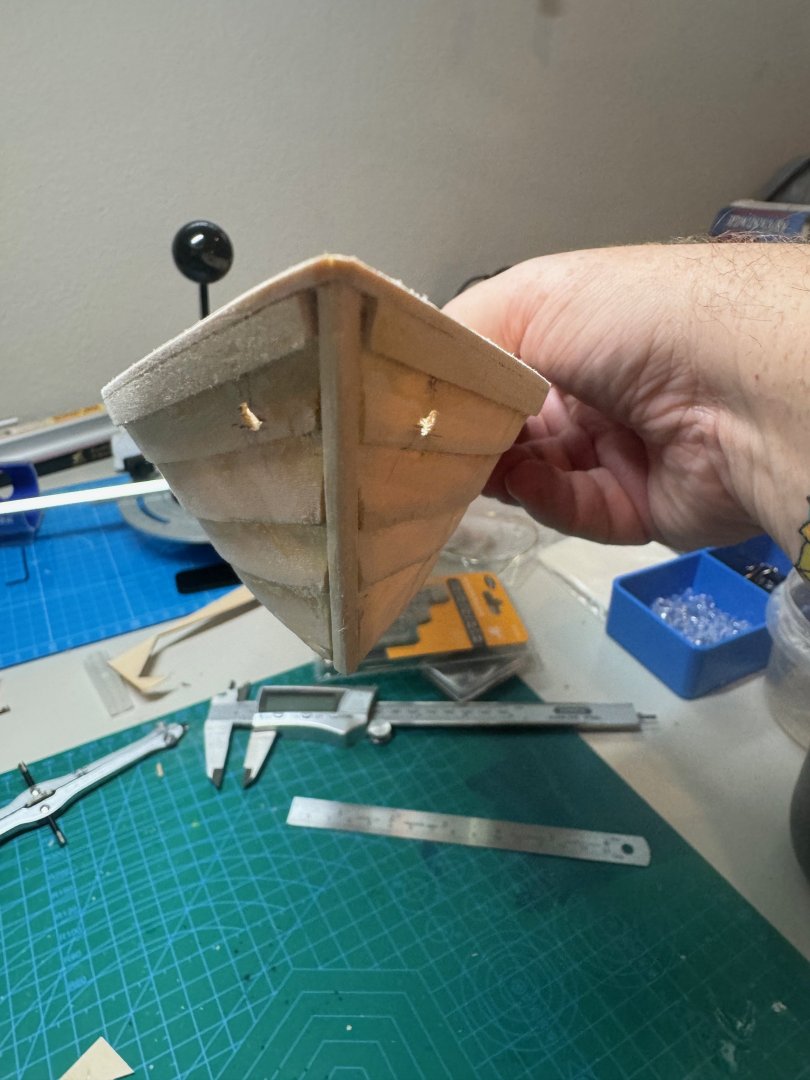
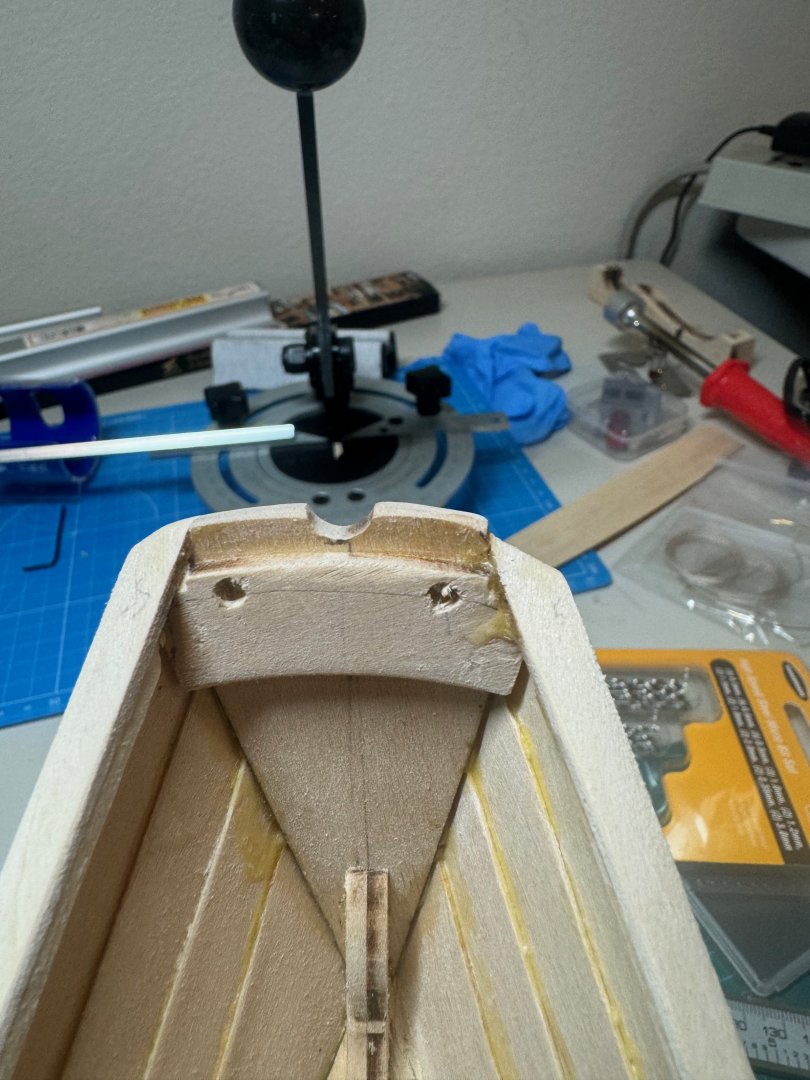
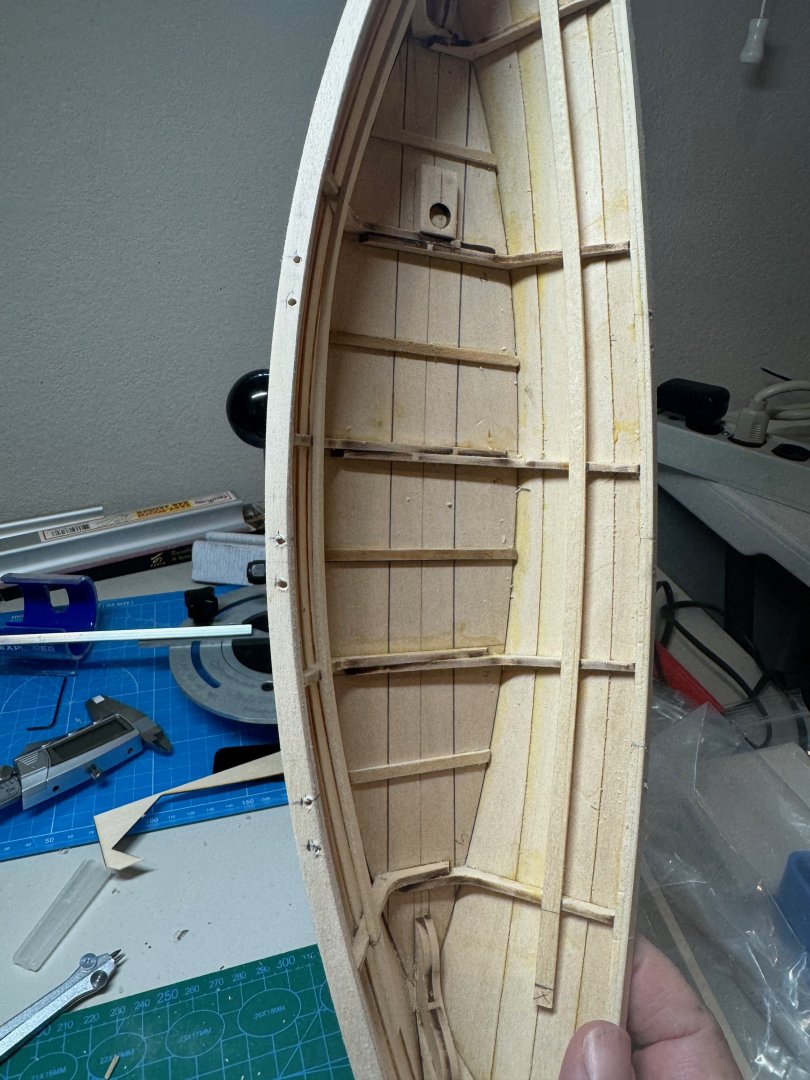
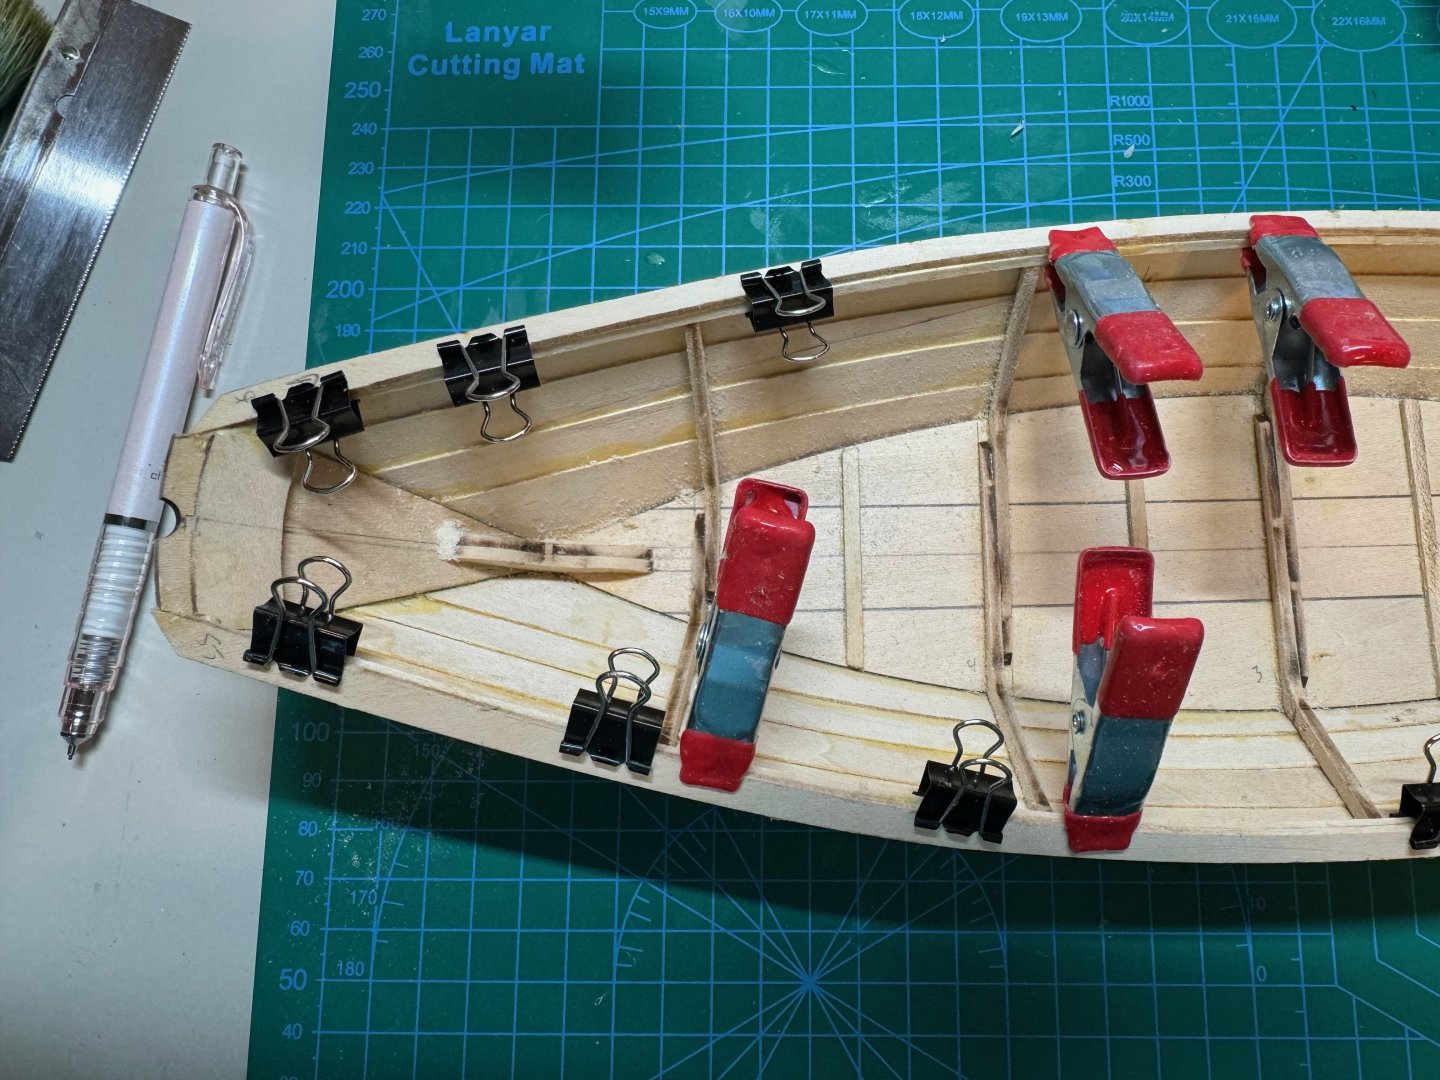
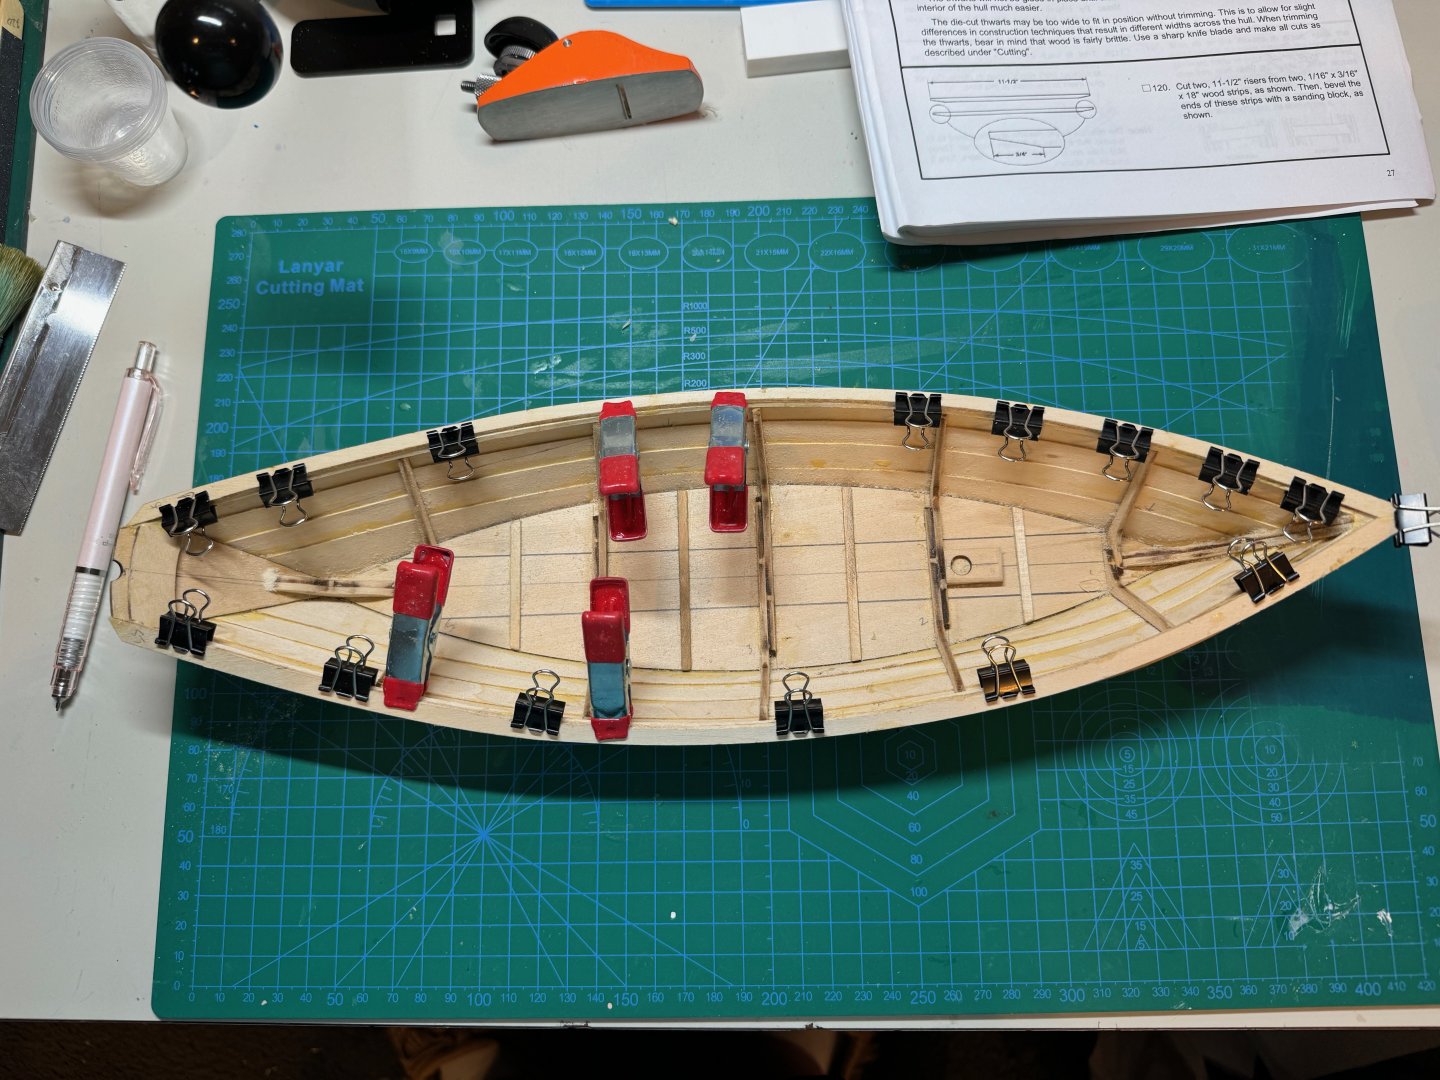
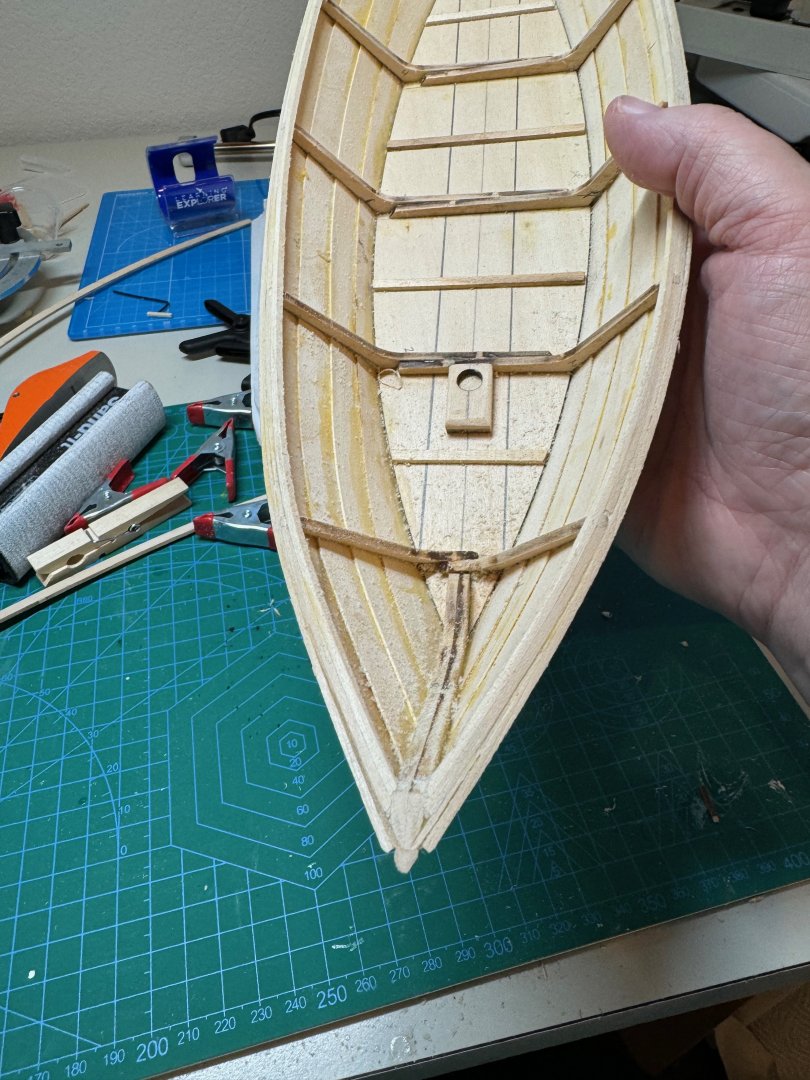
Good evening, I made some progress today, First I added the becket holes after having a minor panic attack as I needed a 2, 2.5 and 3 mm drill bits. I found them at Harbor Freight, along with some smaller drill bits for the pin vise. When drilling, I used the strong back as a backing so the holes do not explode. This was mostly successful, the starboard side at the bow was a little challenged. These holes are 3 mm. Next I rounded and sanded the thwarts, and gunwales. Last thing is we do not want our sailors getting hurt on sharp edges Next I marked off the thole posts. I did this about three times before I was satisfied that they where even. Then I drilled the twelve holes with a 2 mm bit. Then I started to make the thole pins. I used my cutter and cut them 1/2" long, Then used a compass to mark off 1/4" line. From there I was then started to round the pins. the hole size is 2mm. I found holding the pin in my pliers I was able to use a sanding stick to thin the pin. Here you can see that I was able to get pins to be even on both sides of the Dory with the dry fit. Also you can see that the ports are even across the Dory. All of the pins are pulled and on tape so I do not loose them. I will only seal them with shellac to keep the natural color. Next I noticed that one the thwart rails was longer, so I trimmed it so it was even with the port side. This error was due to me not compinsating for the 3/16" difference in the rib due to the offset. Next I drilled the hole for the trawl, it is 2.5mm. Initially I wanted it on the starboard side, but the bit split the rail, so I plugged it with a toothpick and moved the port side. Considering I am left handed, I thought a port trawl is reasonable. As you can see it fits nicely in the hole. When I glue it in, I will have it showing 1/8" under the rail. I am thinking a brass color for it. Any thoughts or ideas? Finally I started to work on the trawl bucket. I had to cut 40 1 1/4" pieces, and I used my cutter for this. I lined them up against a ruler and square and then added tape to them. I will stain them either english oak or light oak. I am waiting on the stain for this. At the same time, I mounted the ends of the bucket to its jig. Have a good evening.


- 56 replies
-
- 8
-
-
- grand banks dory
- Midwest Products
- (and 2 more)
-
Looking good Dan!!!
-
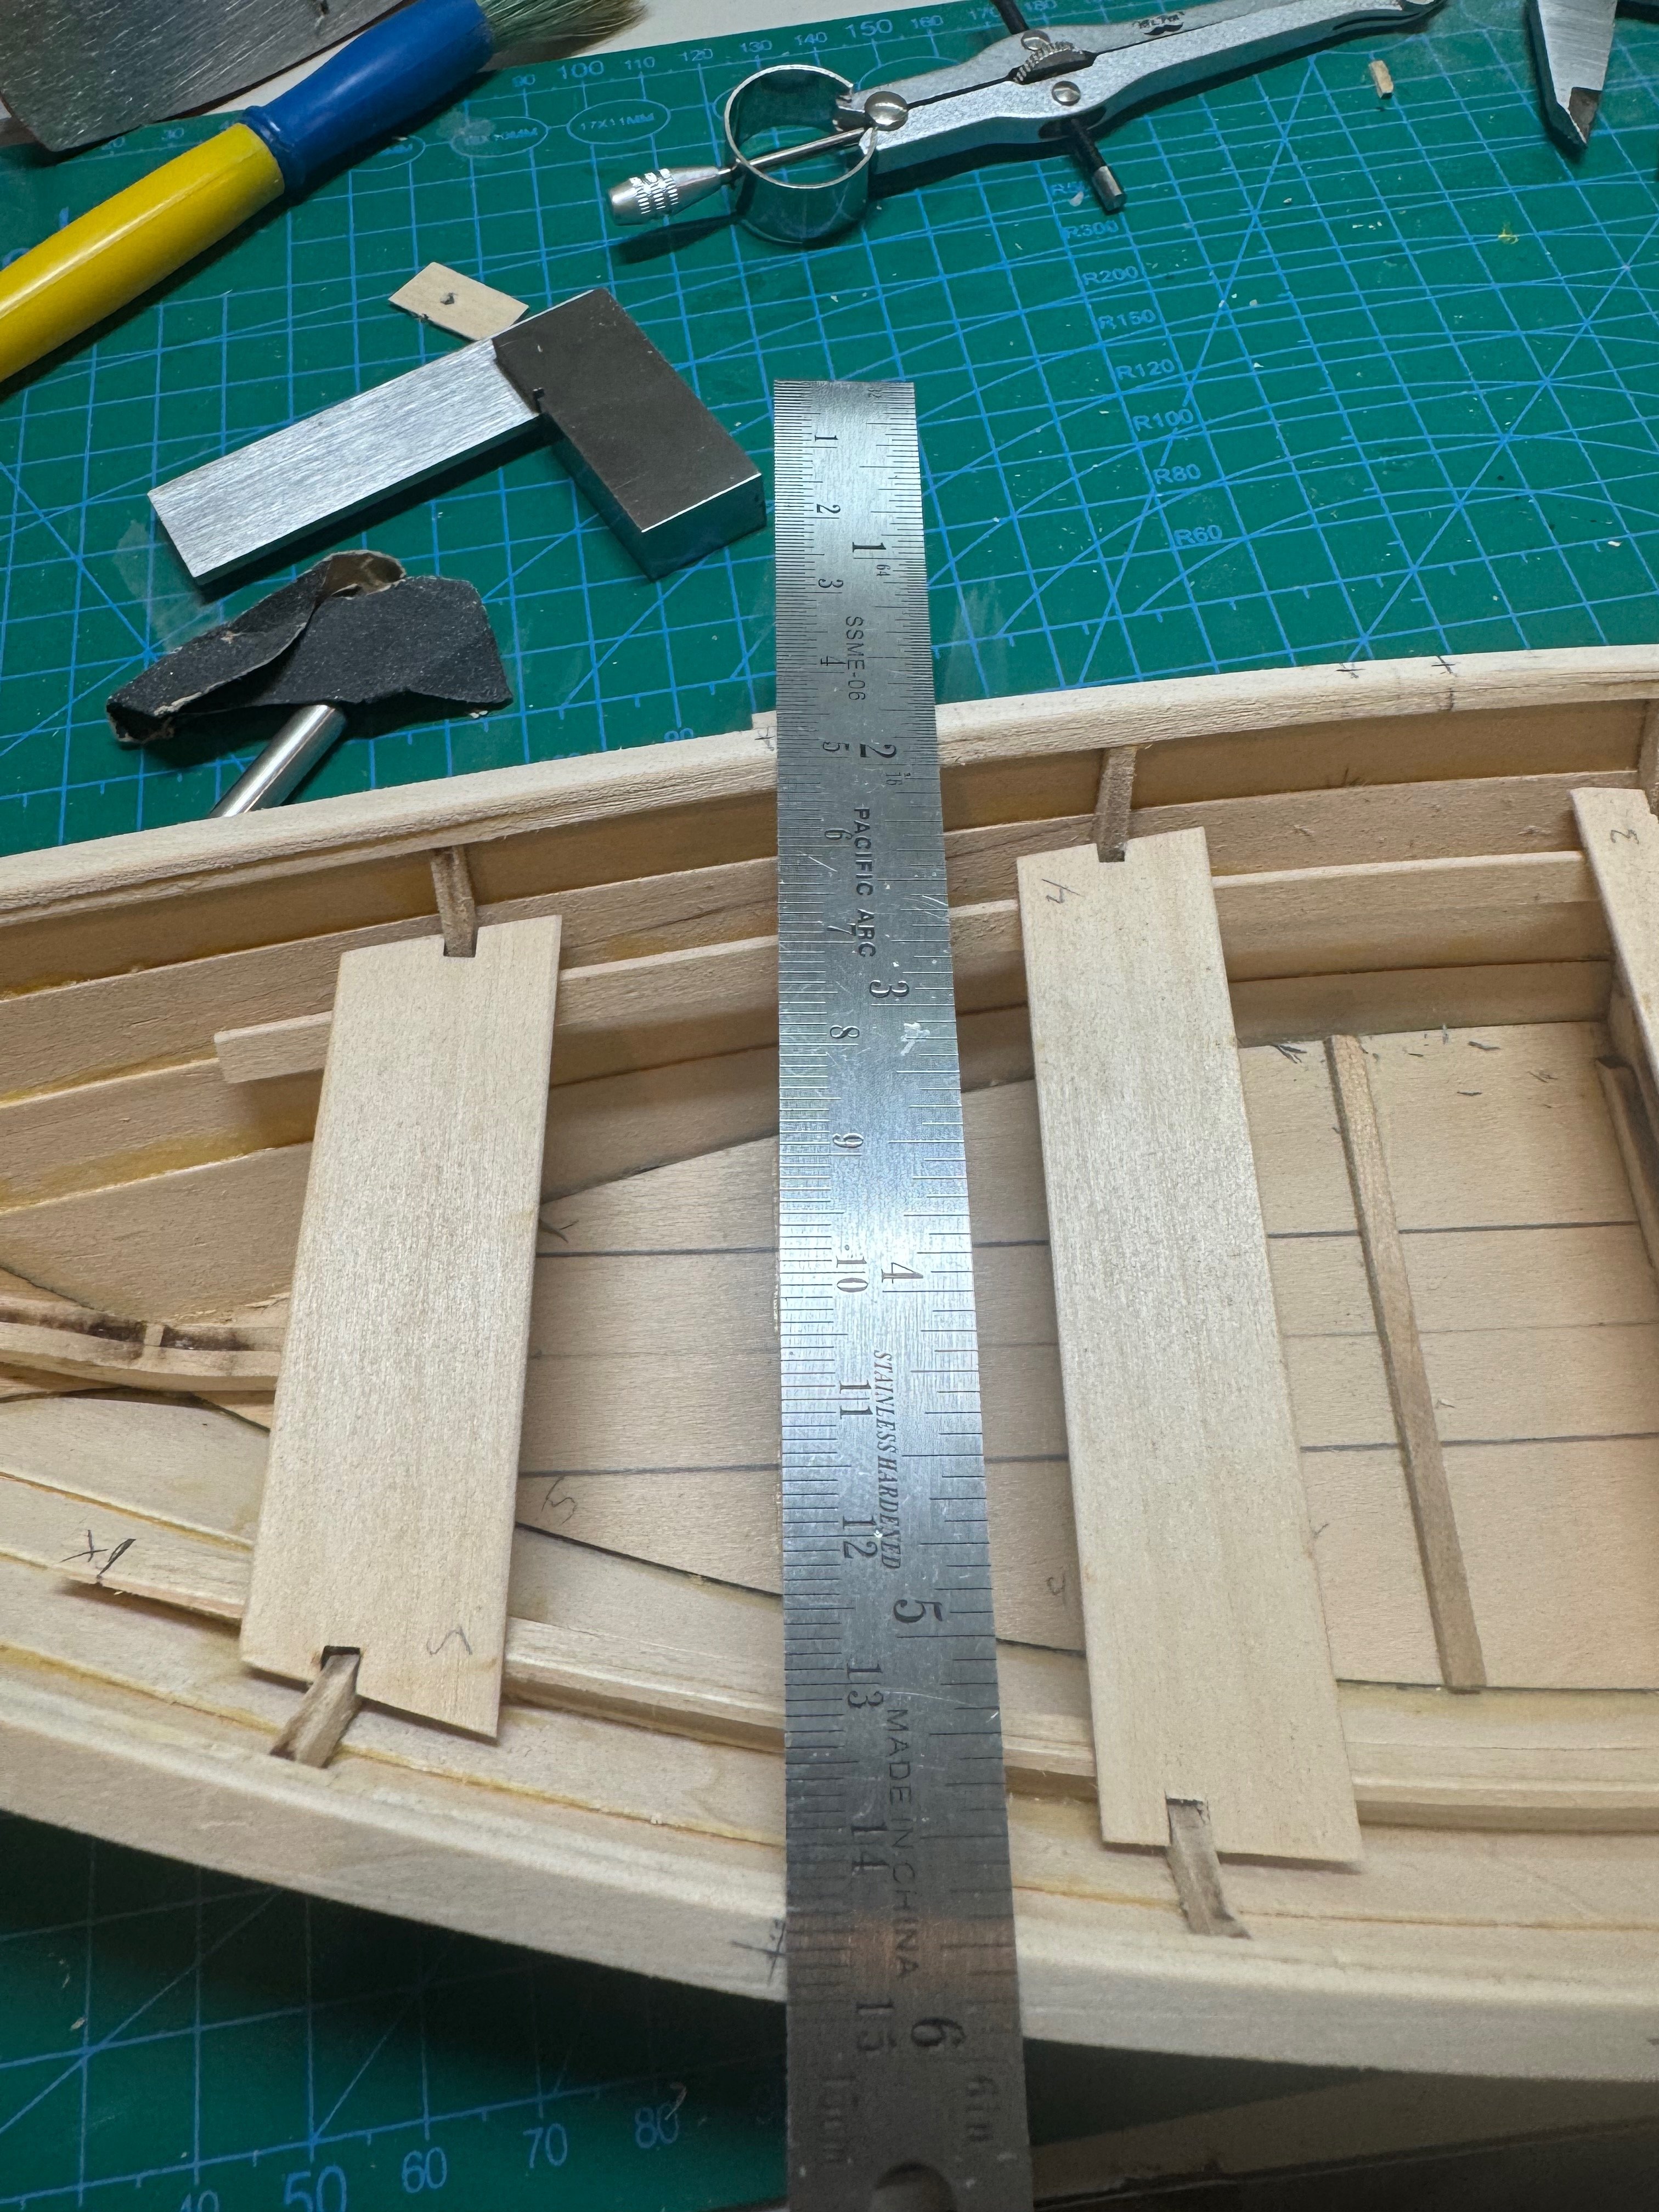
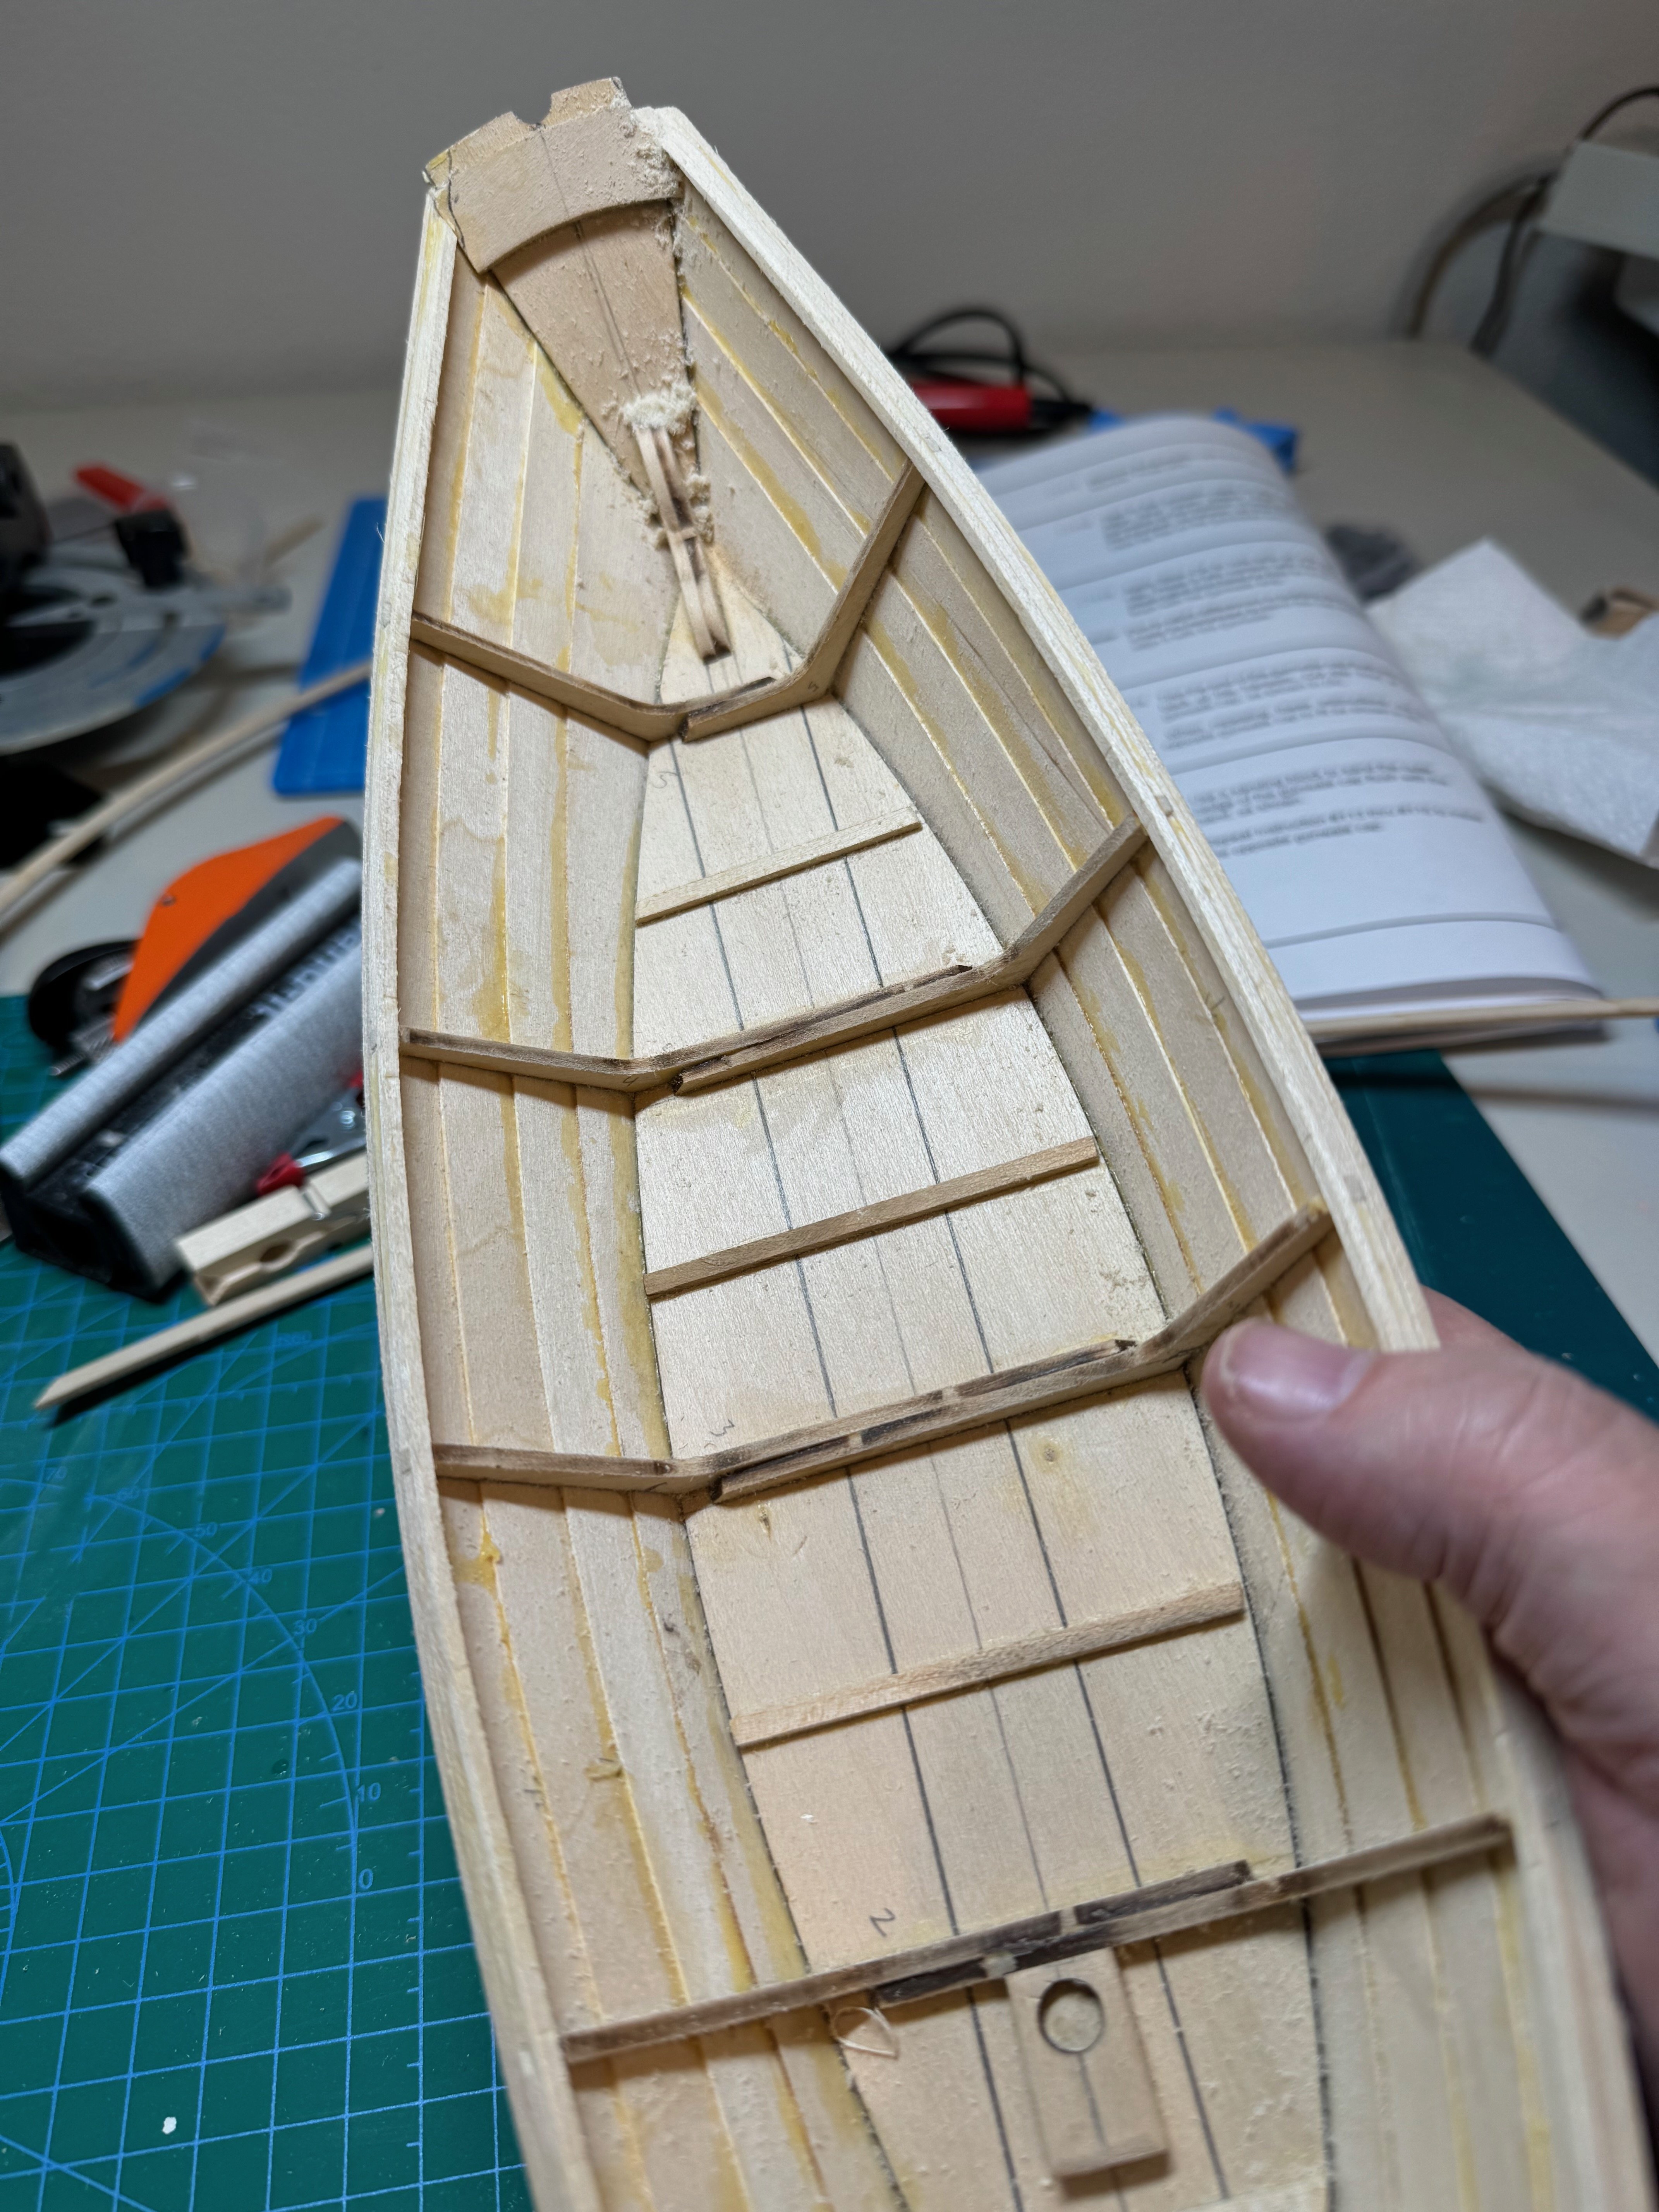
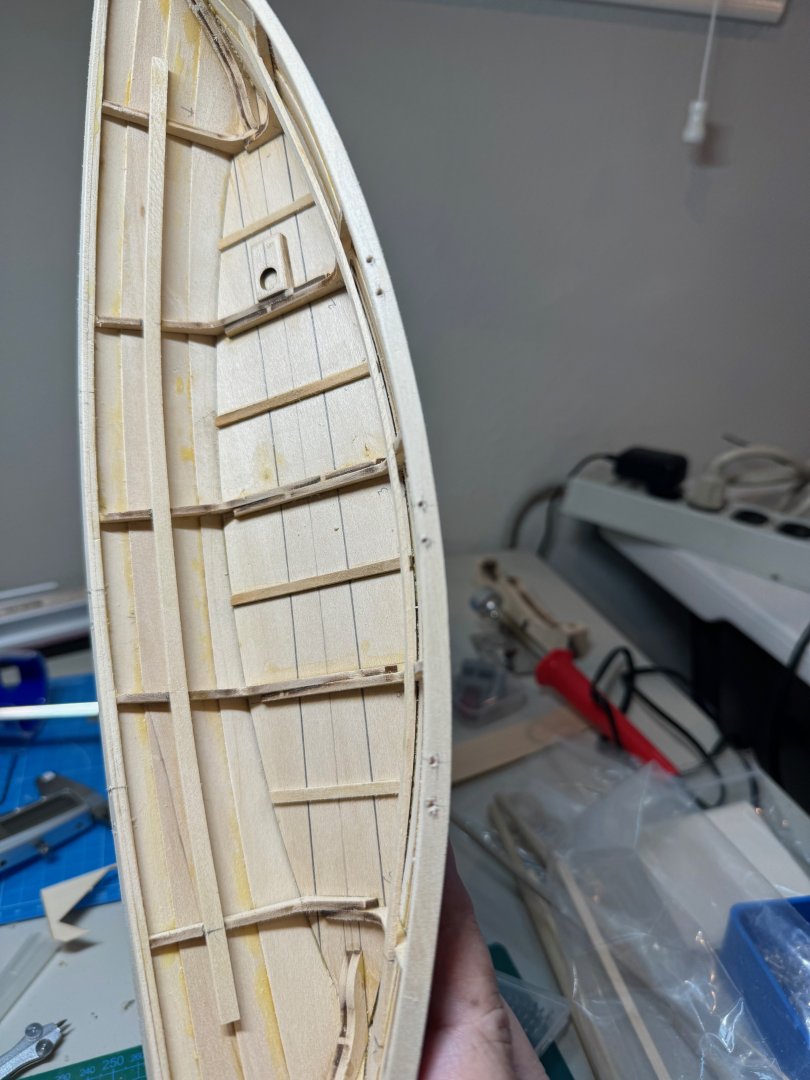
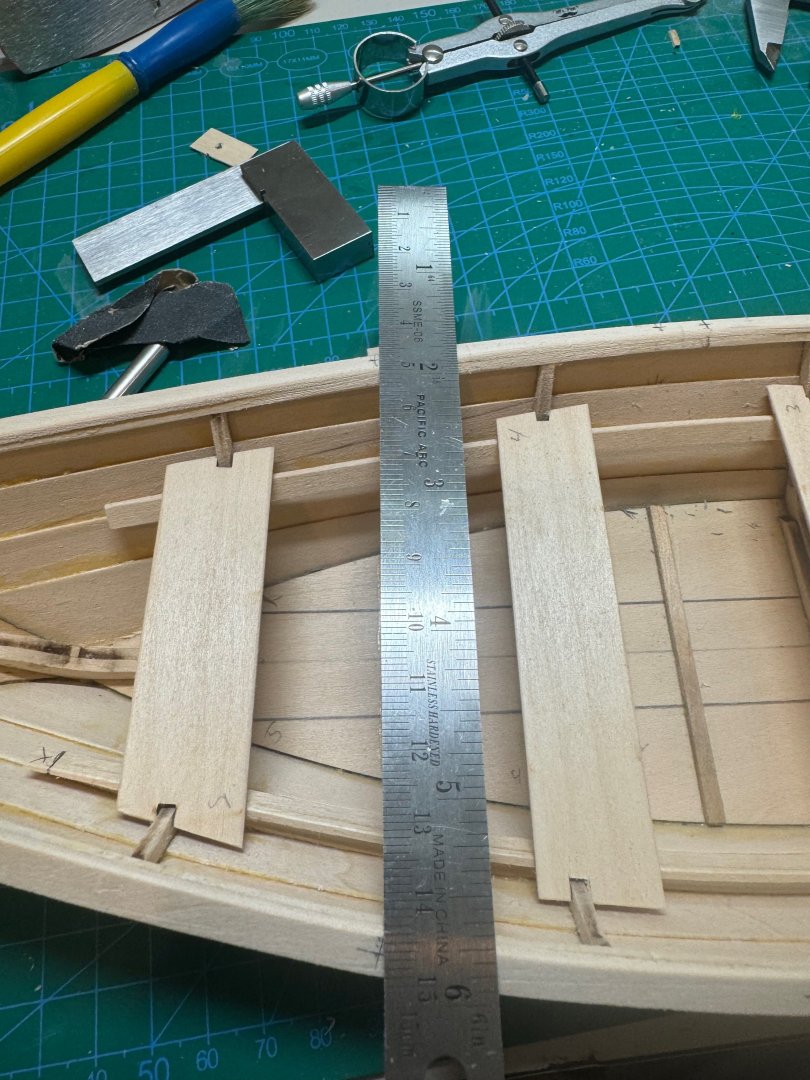
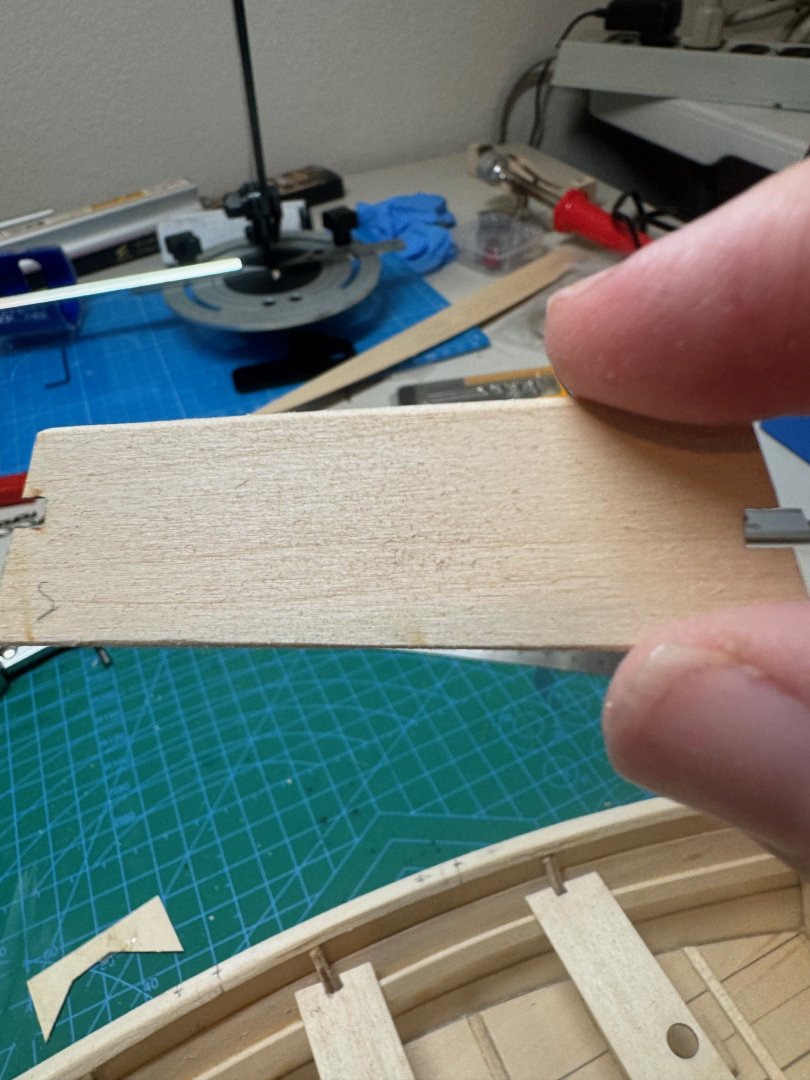
Good evening a minor update tonight. Today I fitted the thwarts and it is now starting to look like a Dory. I am very pleased that the mast is straight. As I wait for some filler and stain the plan is to start on the oars and trawl bucket tomorrow. I do have some model expo oak stain that is paint :facepalm: has anyone use this stain? I did order some Littlefairs stain which arrived this weekend. I am wondering if anyone has use this stain?

- 56 replies
-
- 4
-
-
- grand banks dory
- Midwest Products
- (and 2 more)
-
@Dan Poirier i am very eager to see your build log in this. jim
-
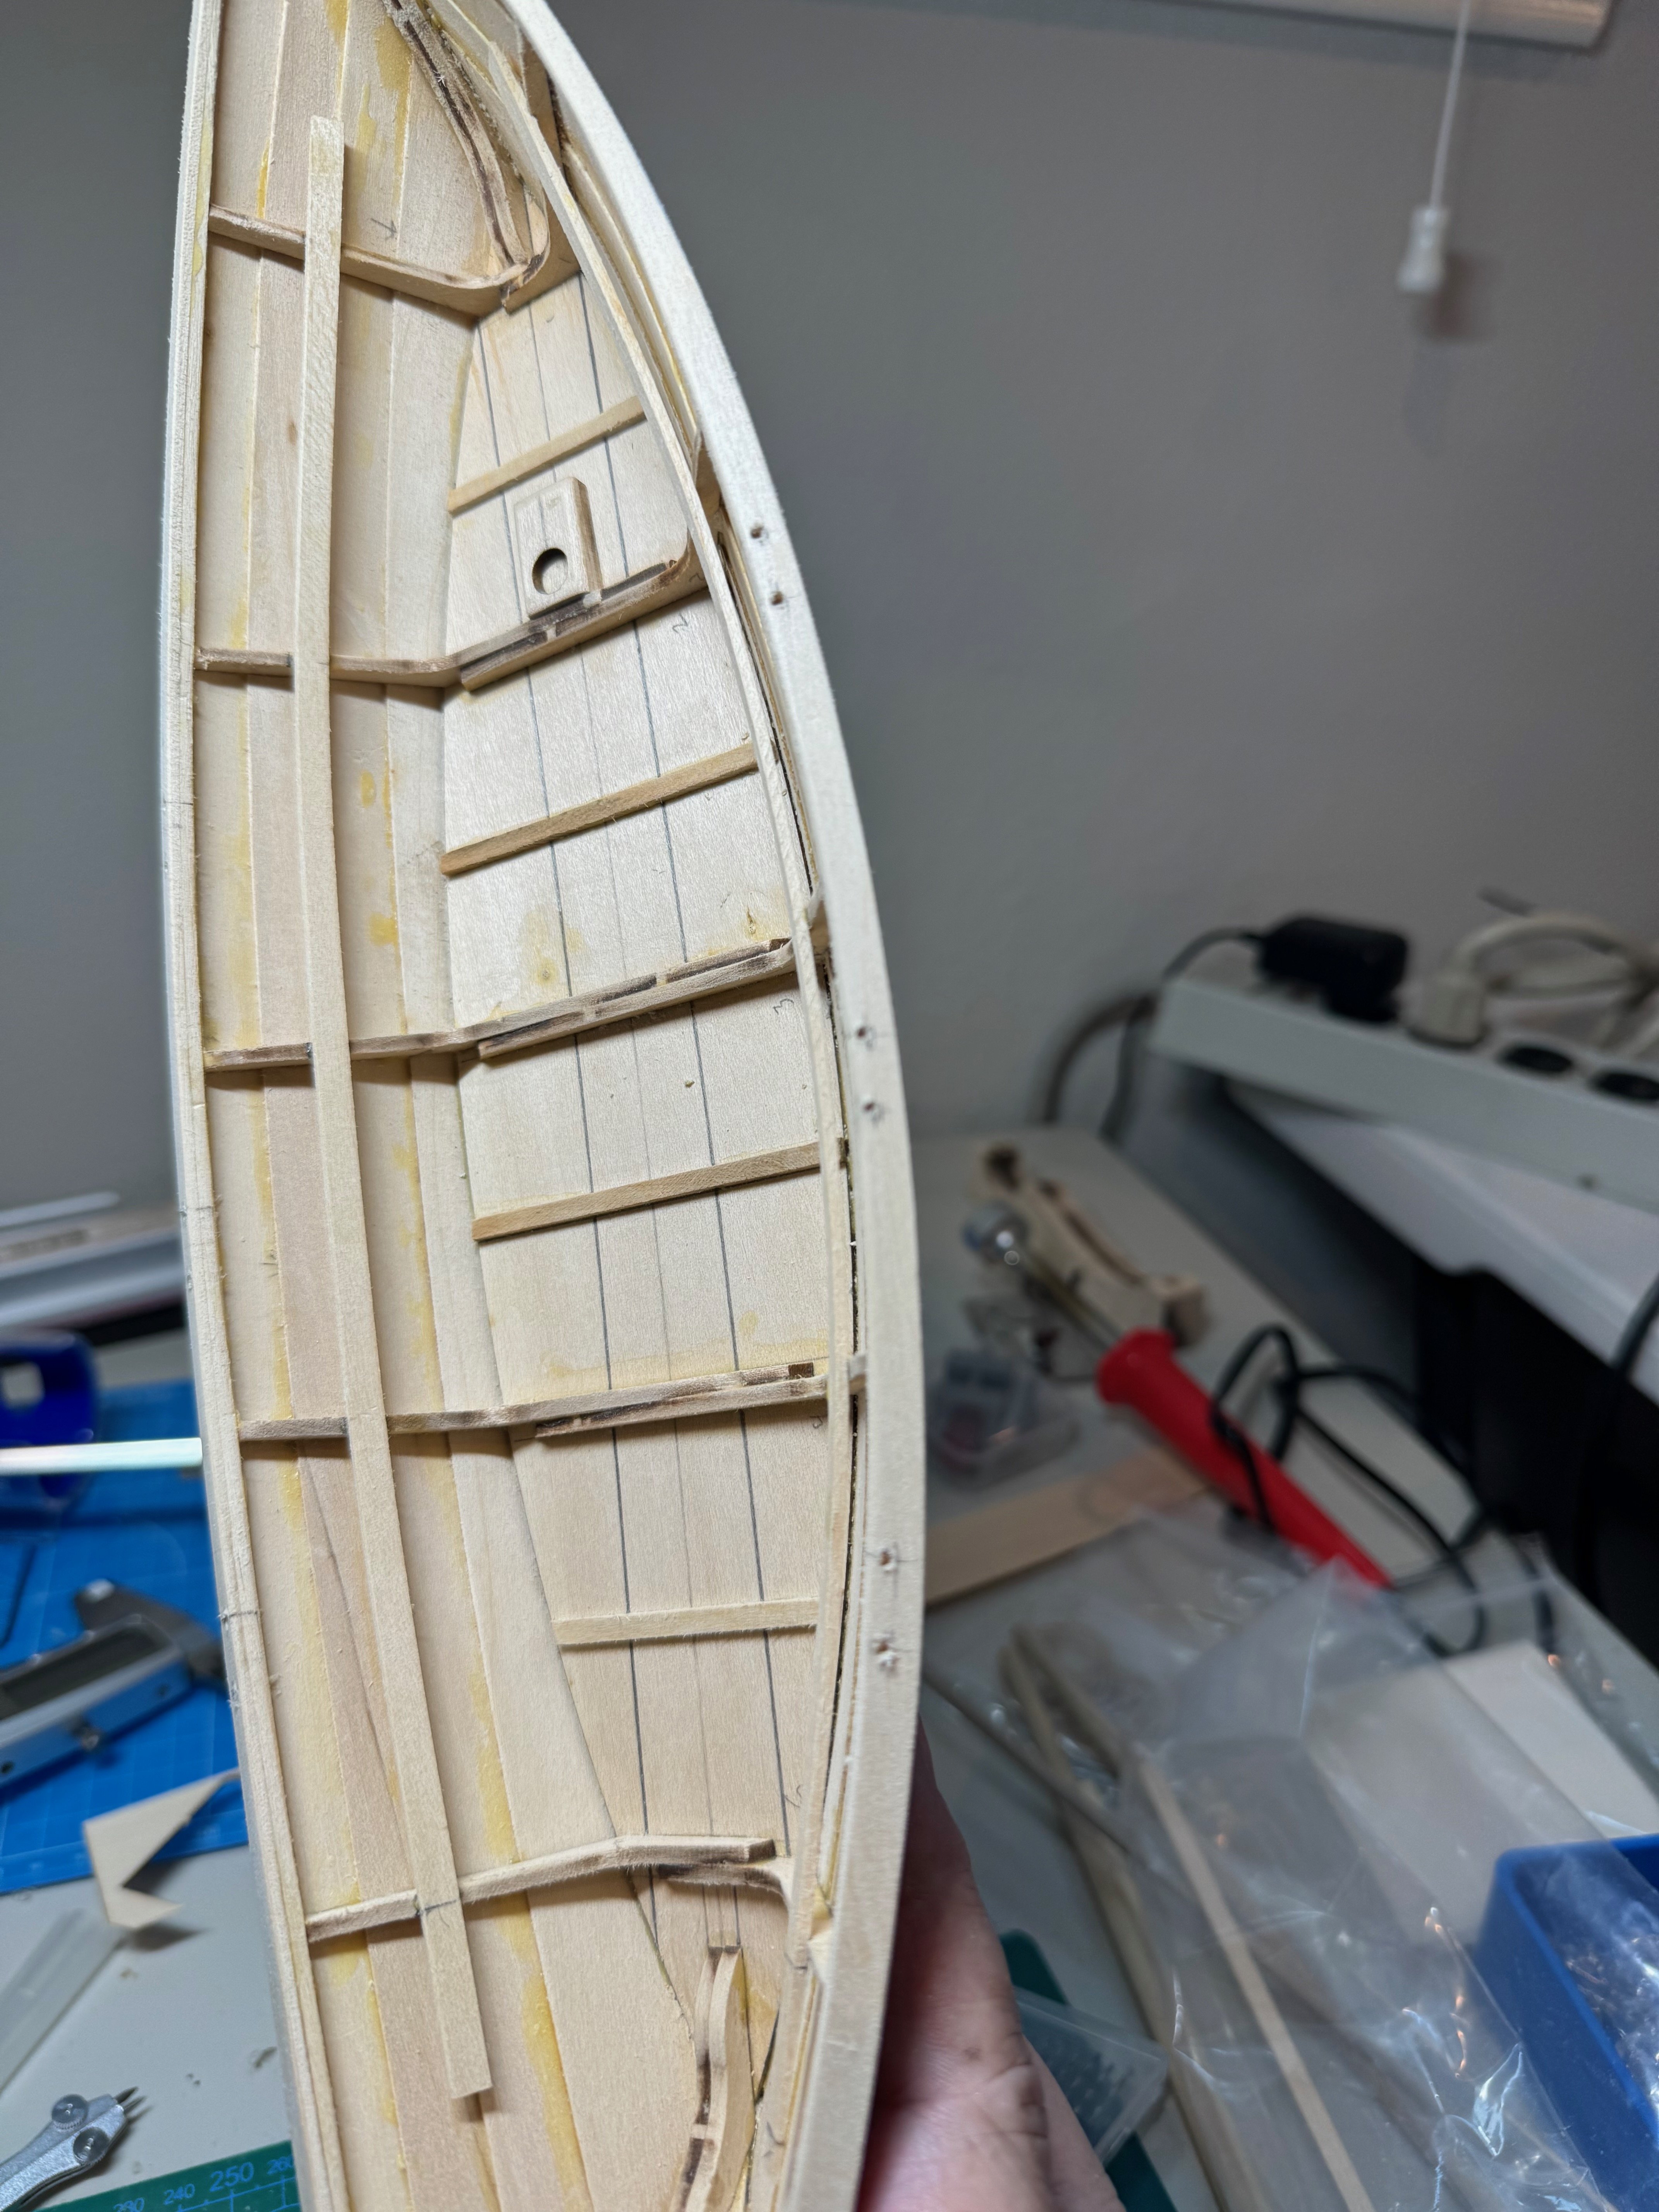
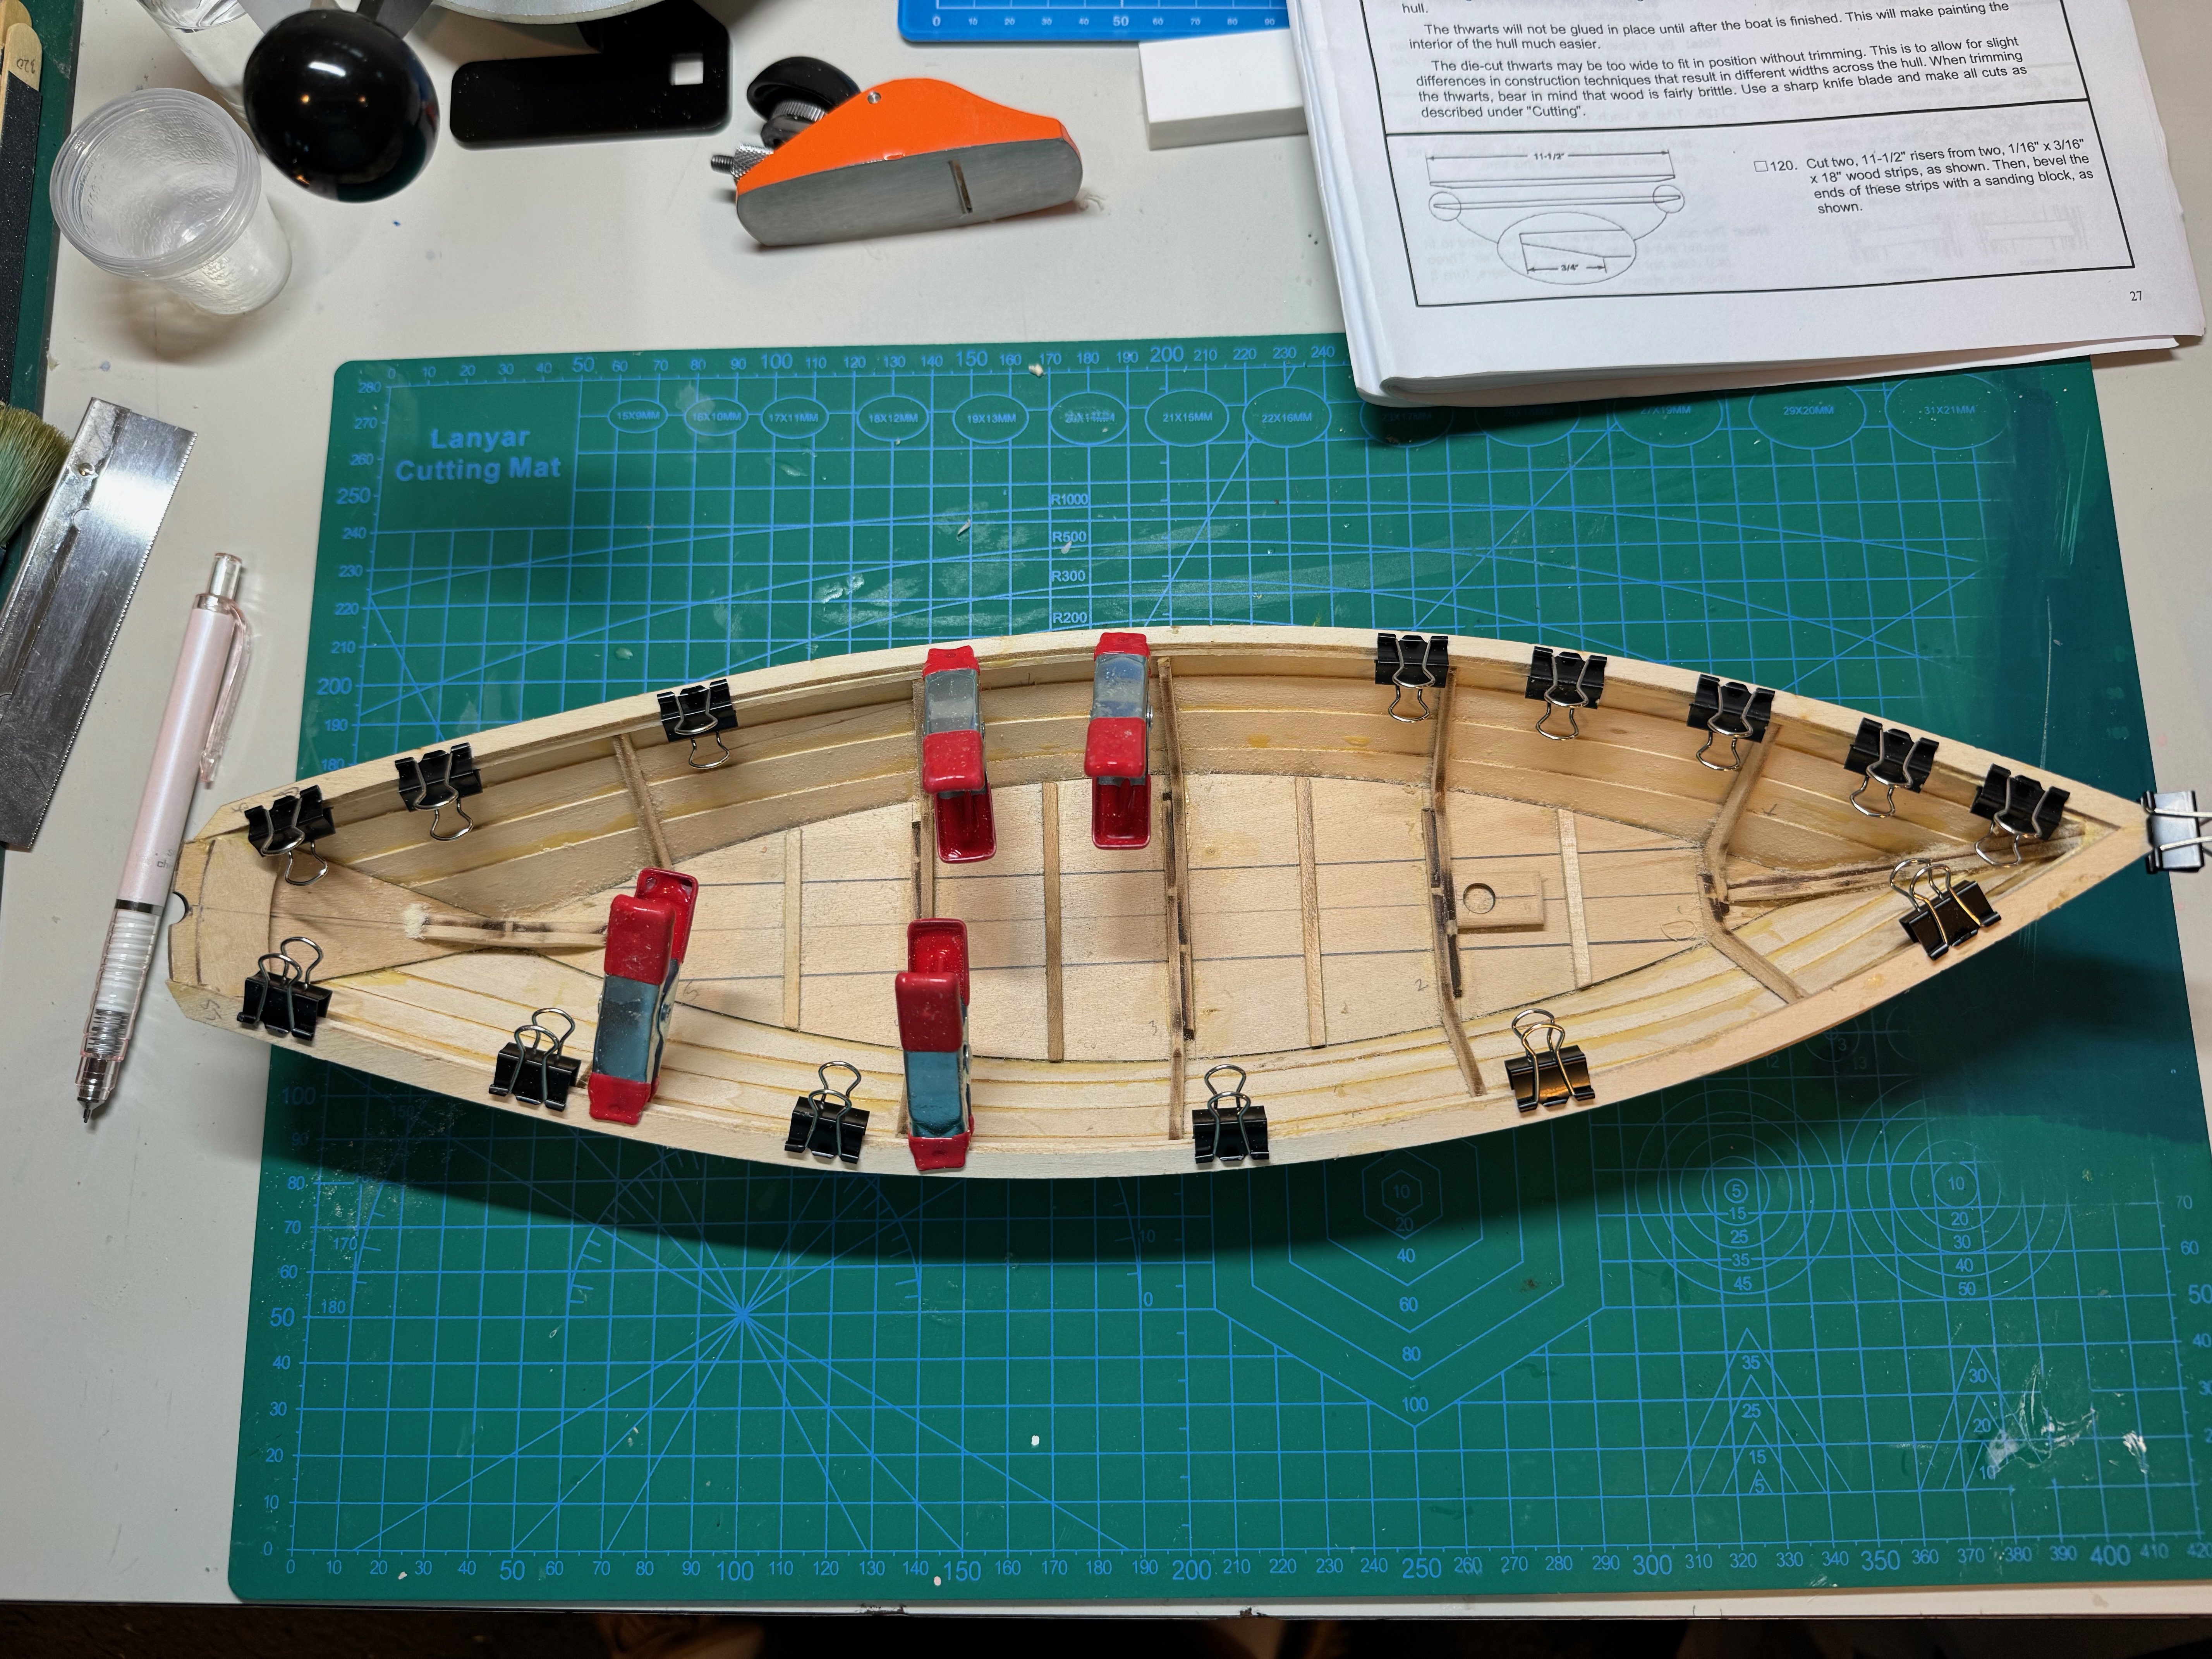
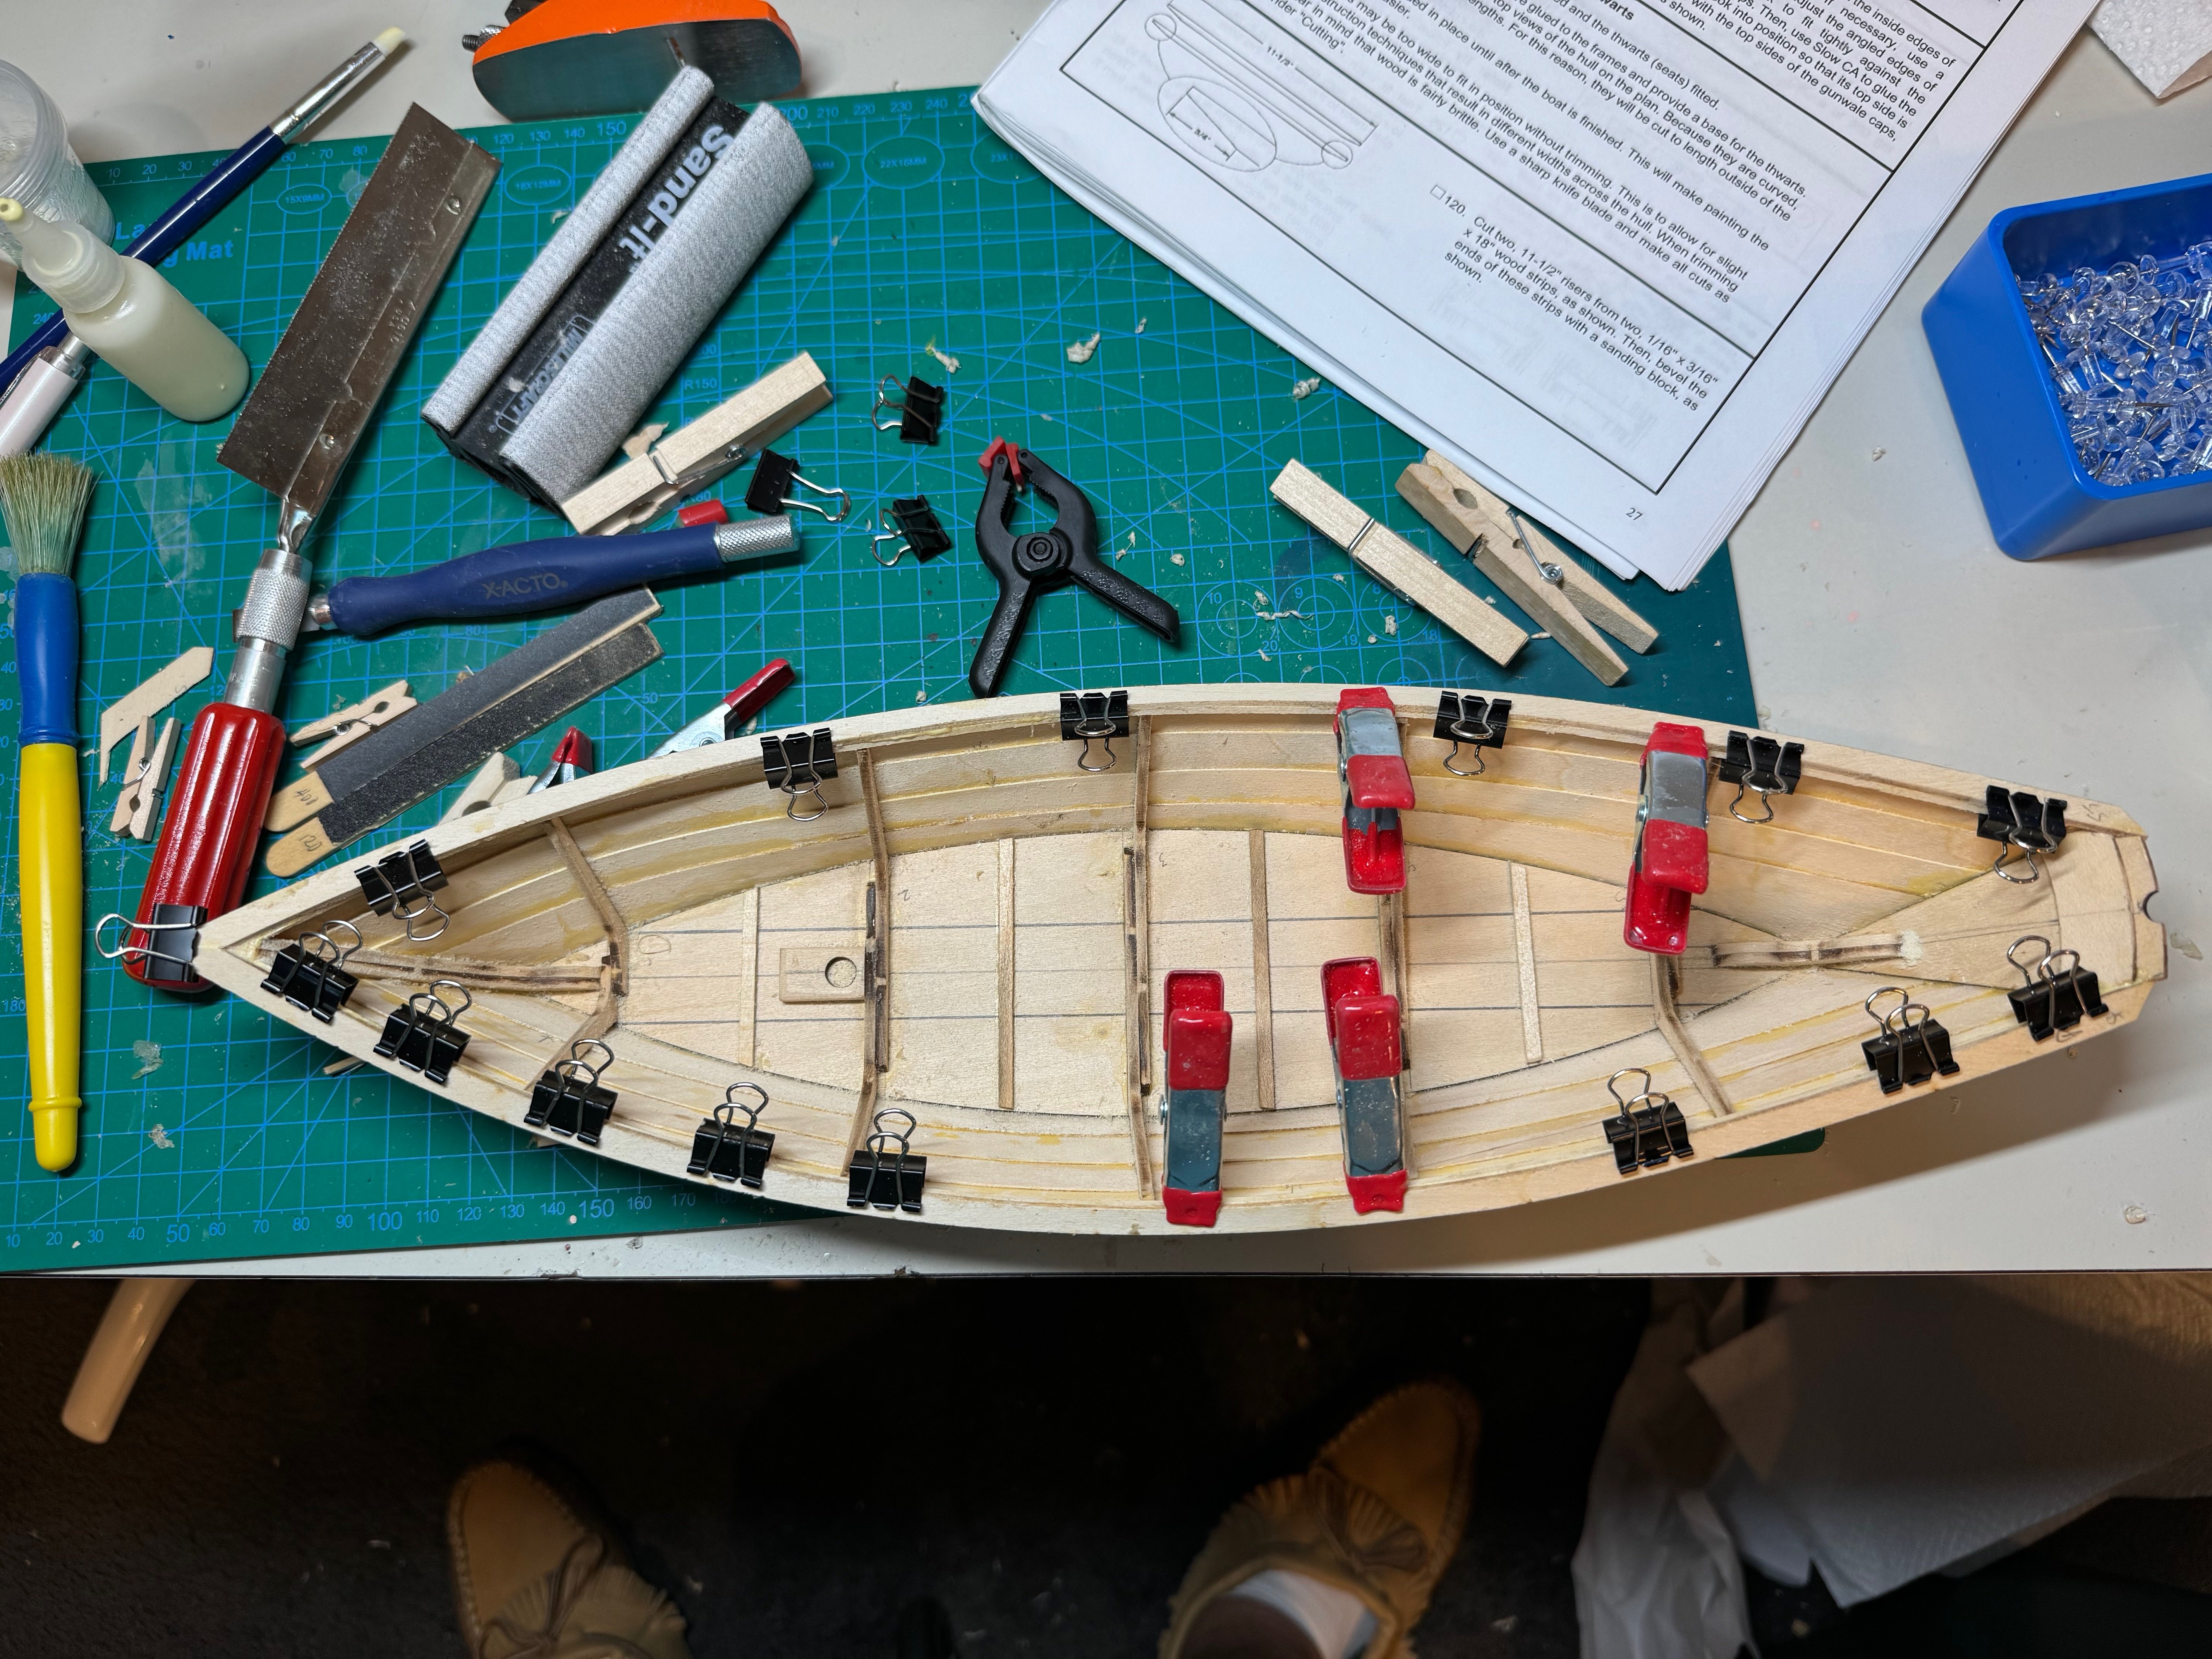
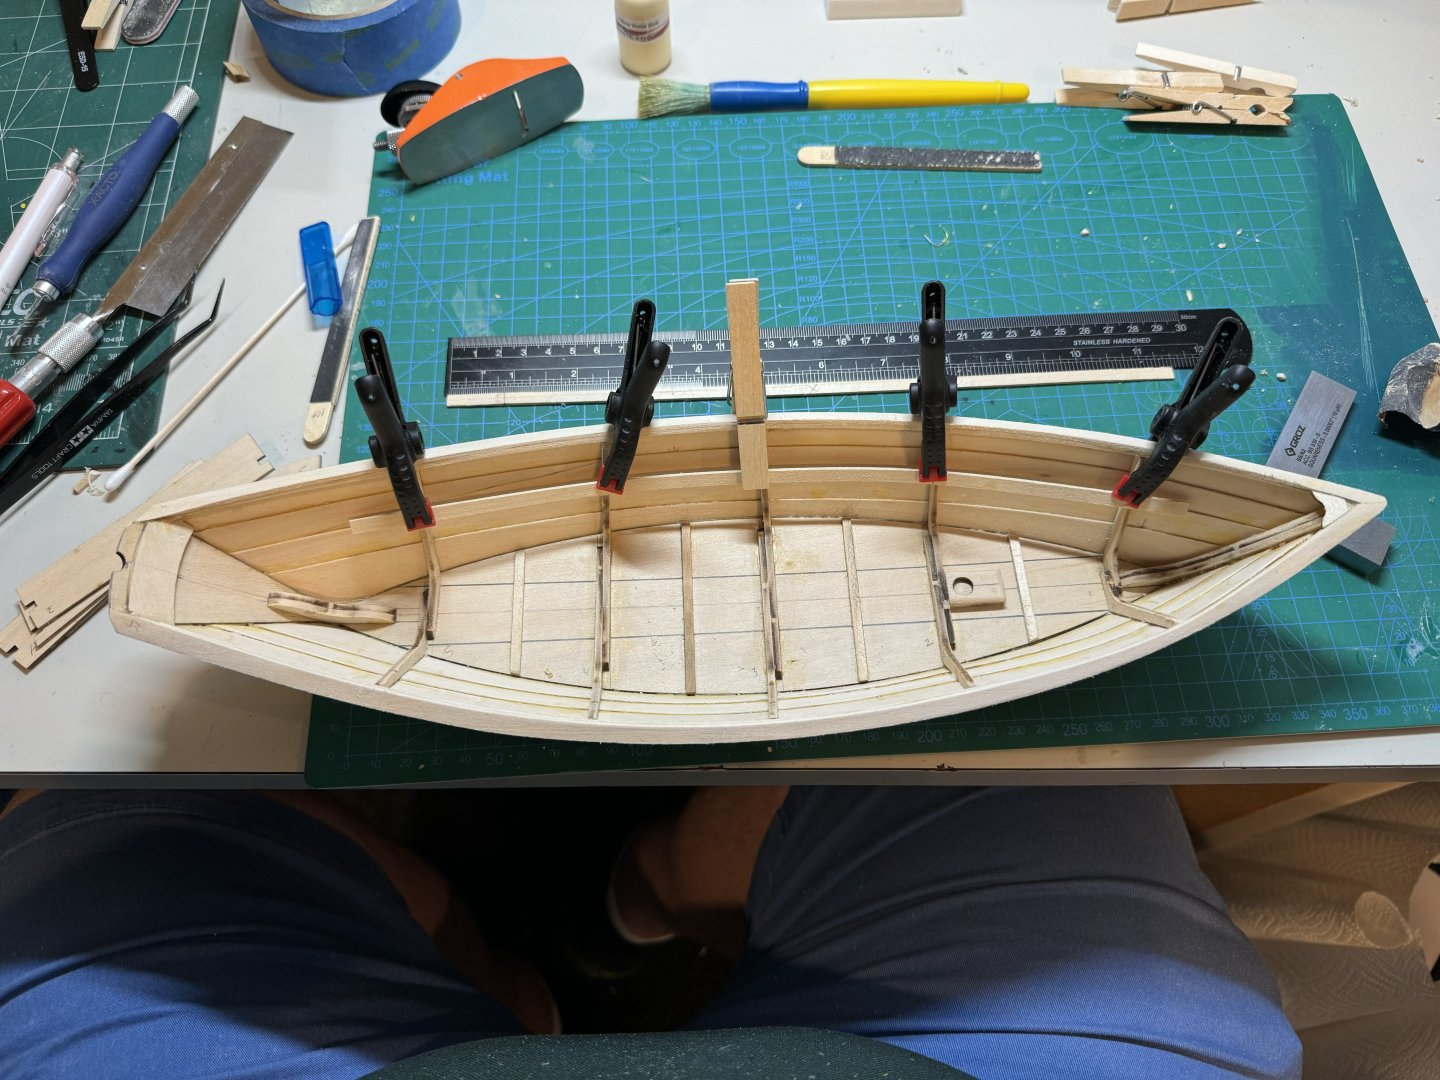
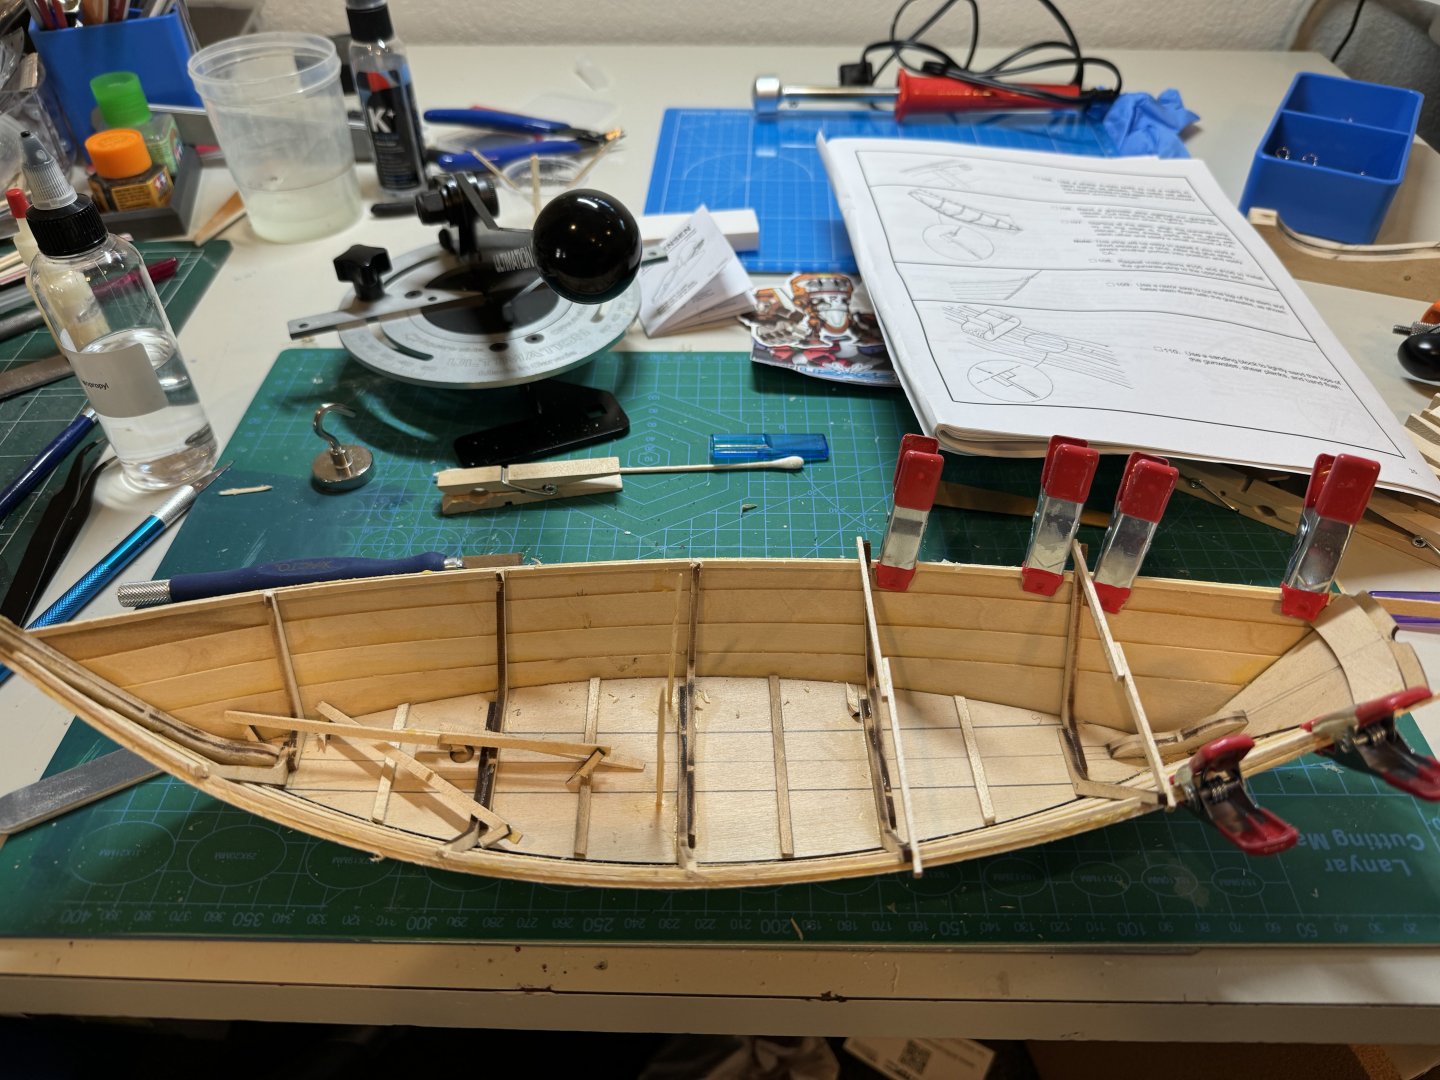
Good evening. A minor update tonight. I did some minor sanding of the Dory and then I installed the breasthook. I then tapered the risers. Finally I then installed the risers.
- 56 replies
-
- 4
-
-
- grand banks dory
- Midwest Products
- (and 2 more)
-
@JpR62 very nice model. i have this on in my inventory and i plan on building it after the Norwegian Sailing Pram. hopefully i can do the same justice are your model. definitely very inspiring.
- 57 replies
-
- 1
-
-
- marisstella
- batelina
- (and 1 more)
-
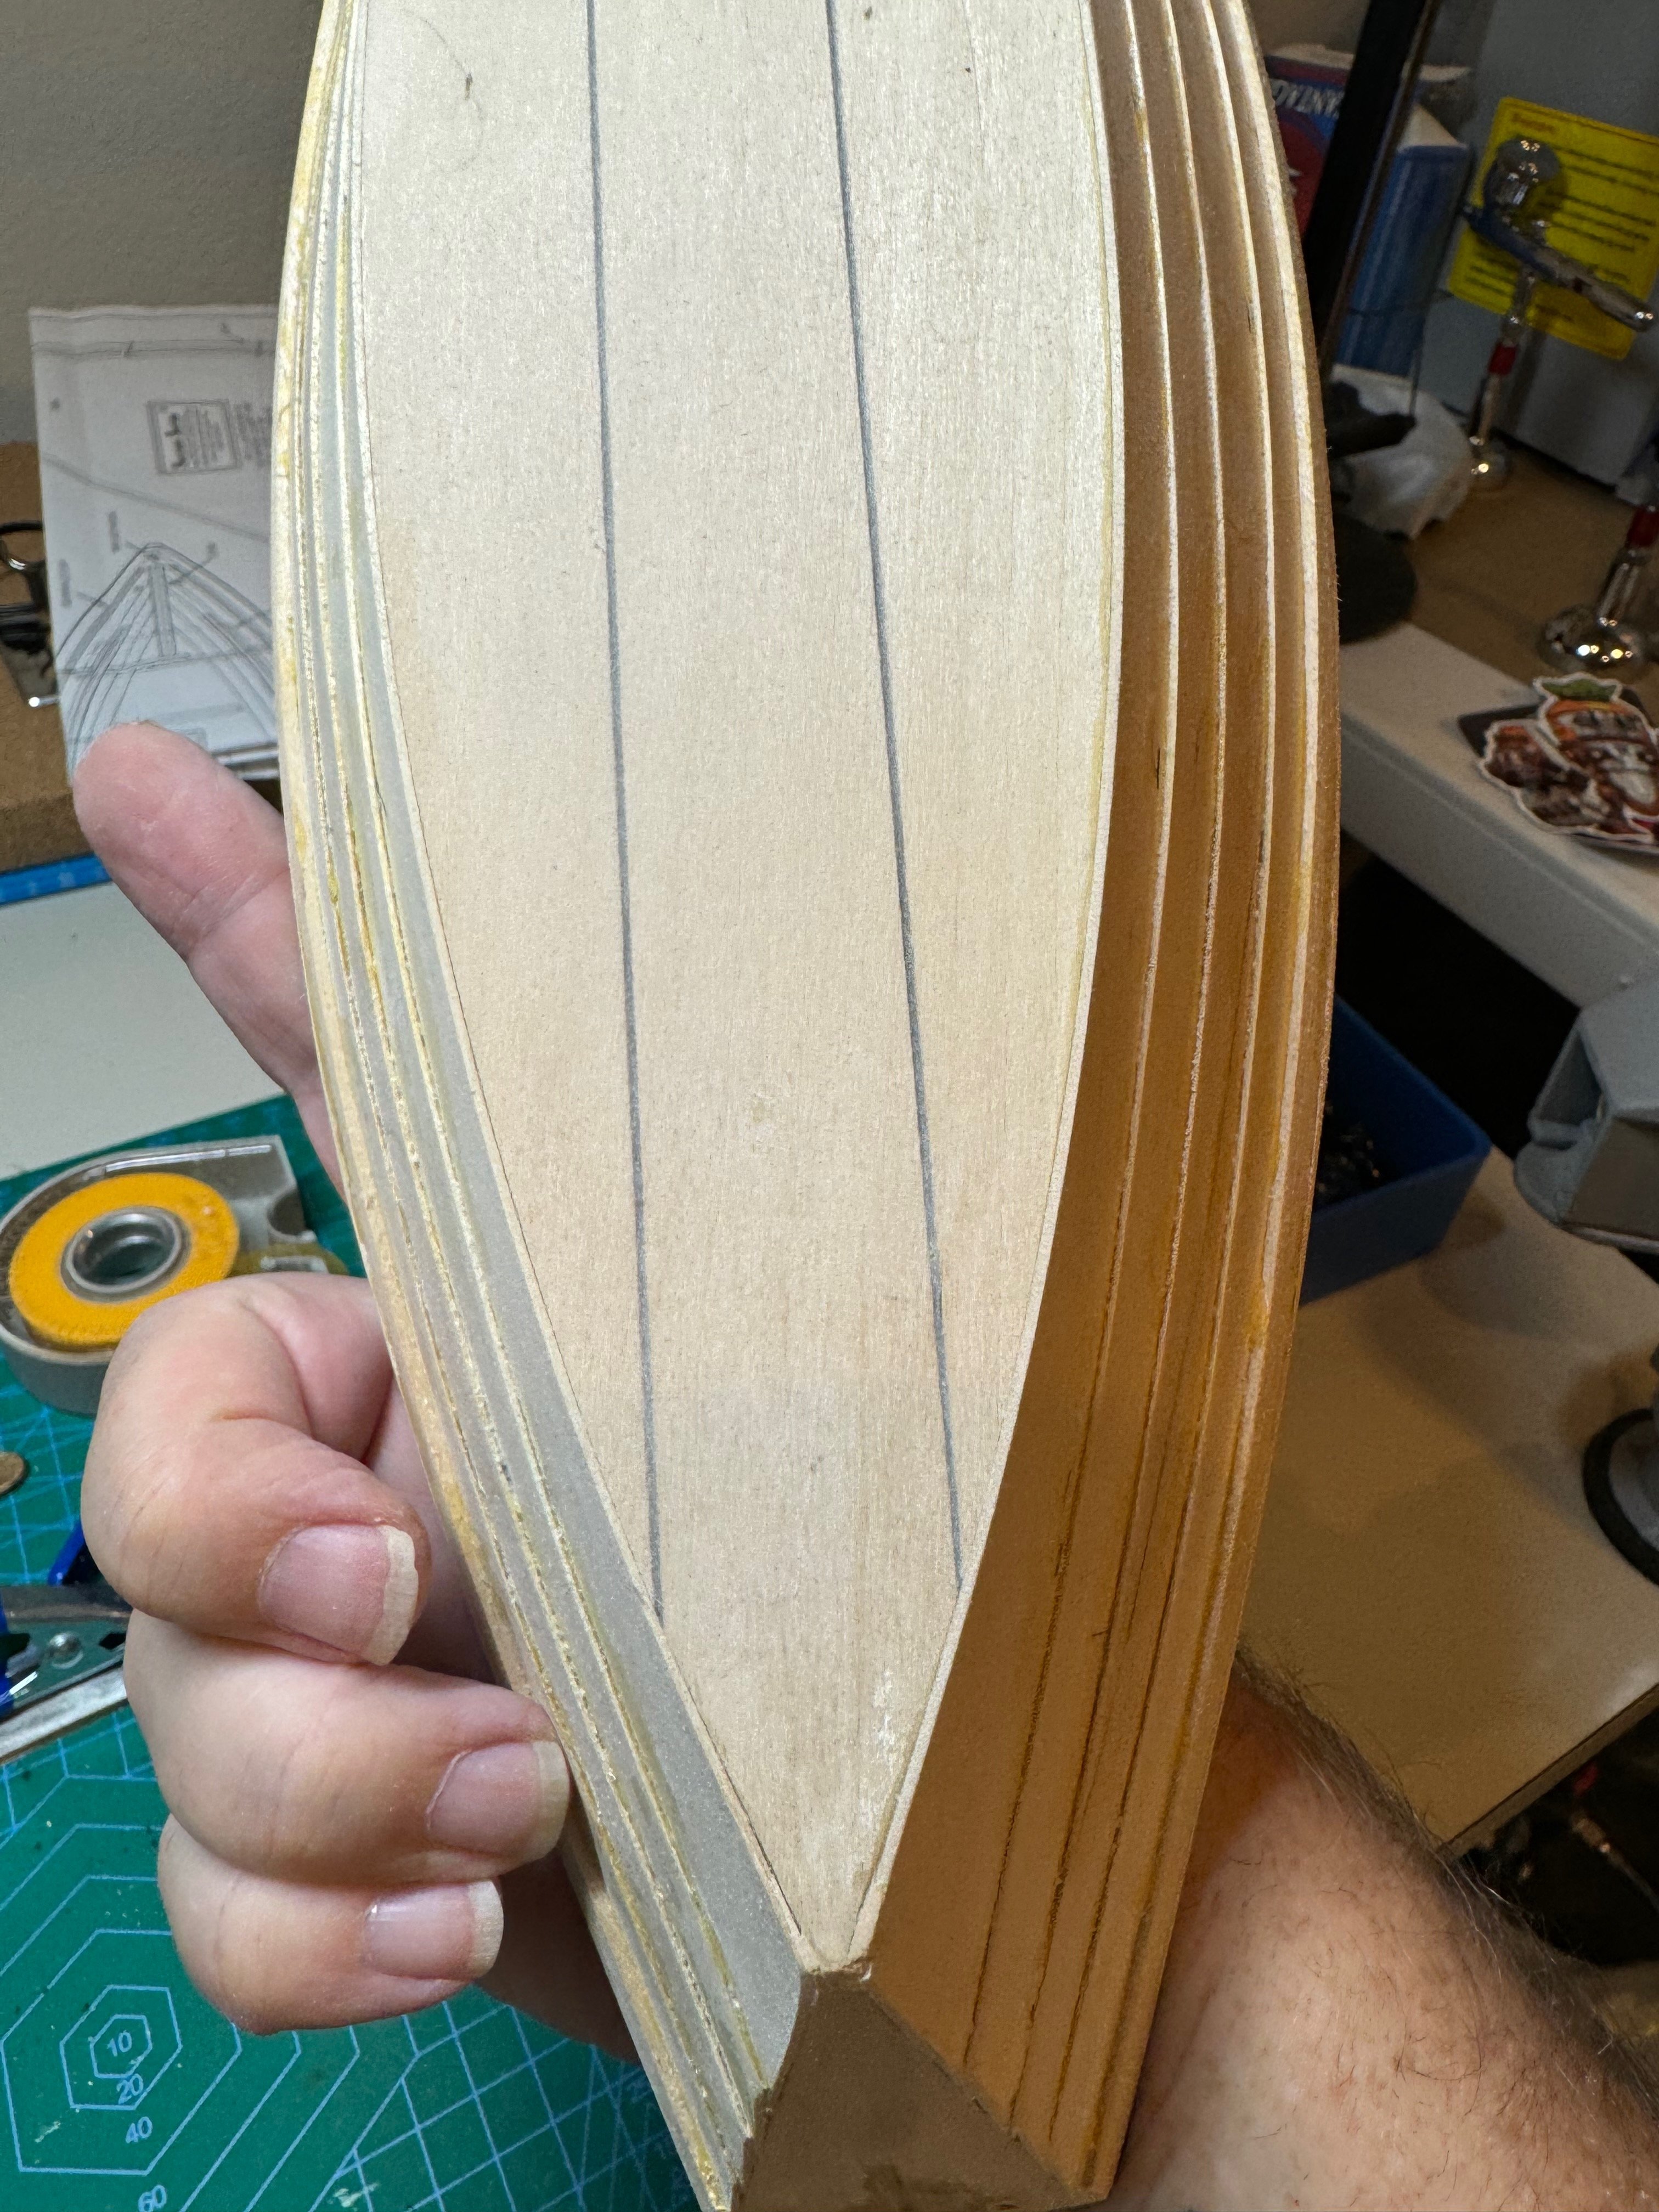
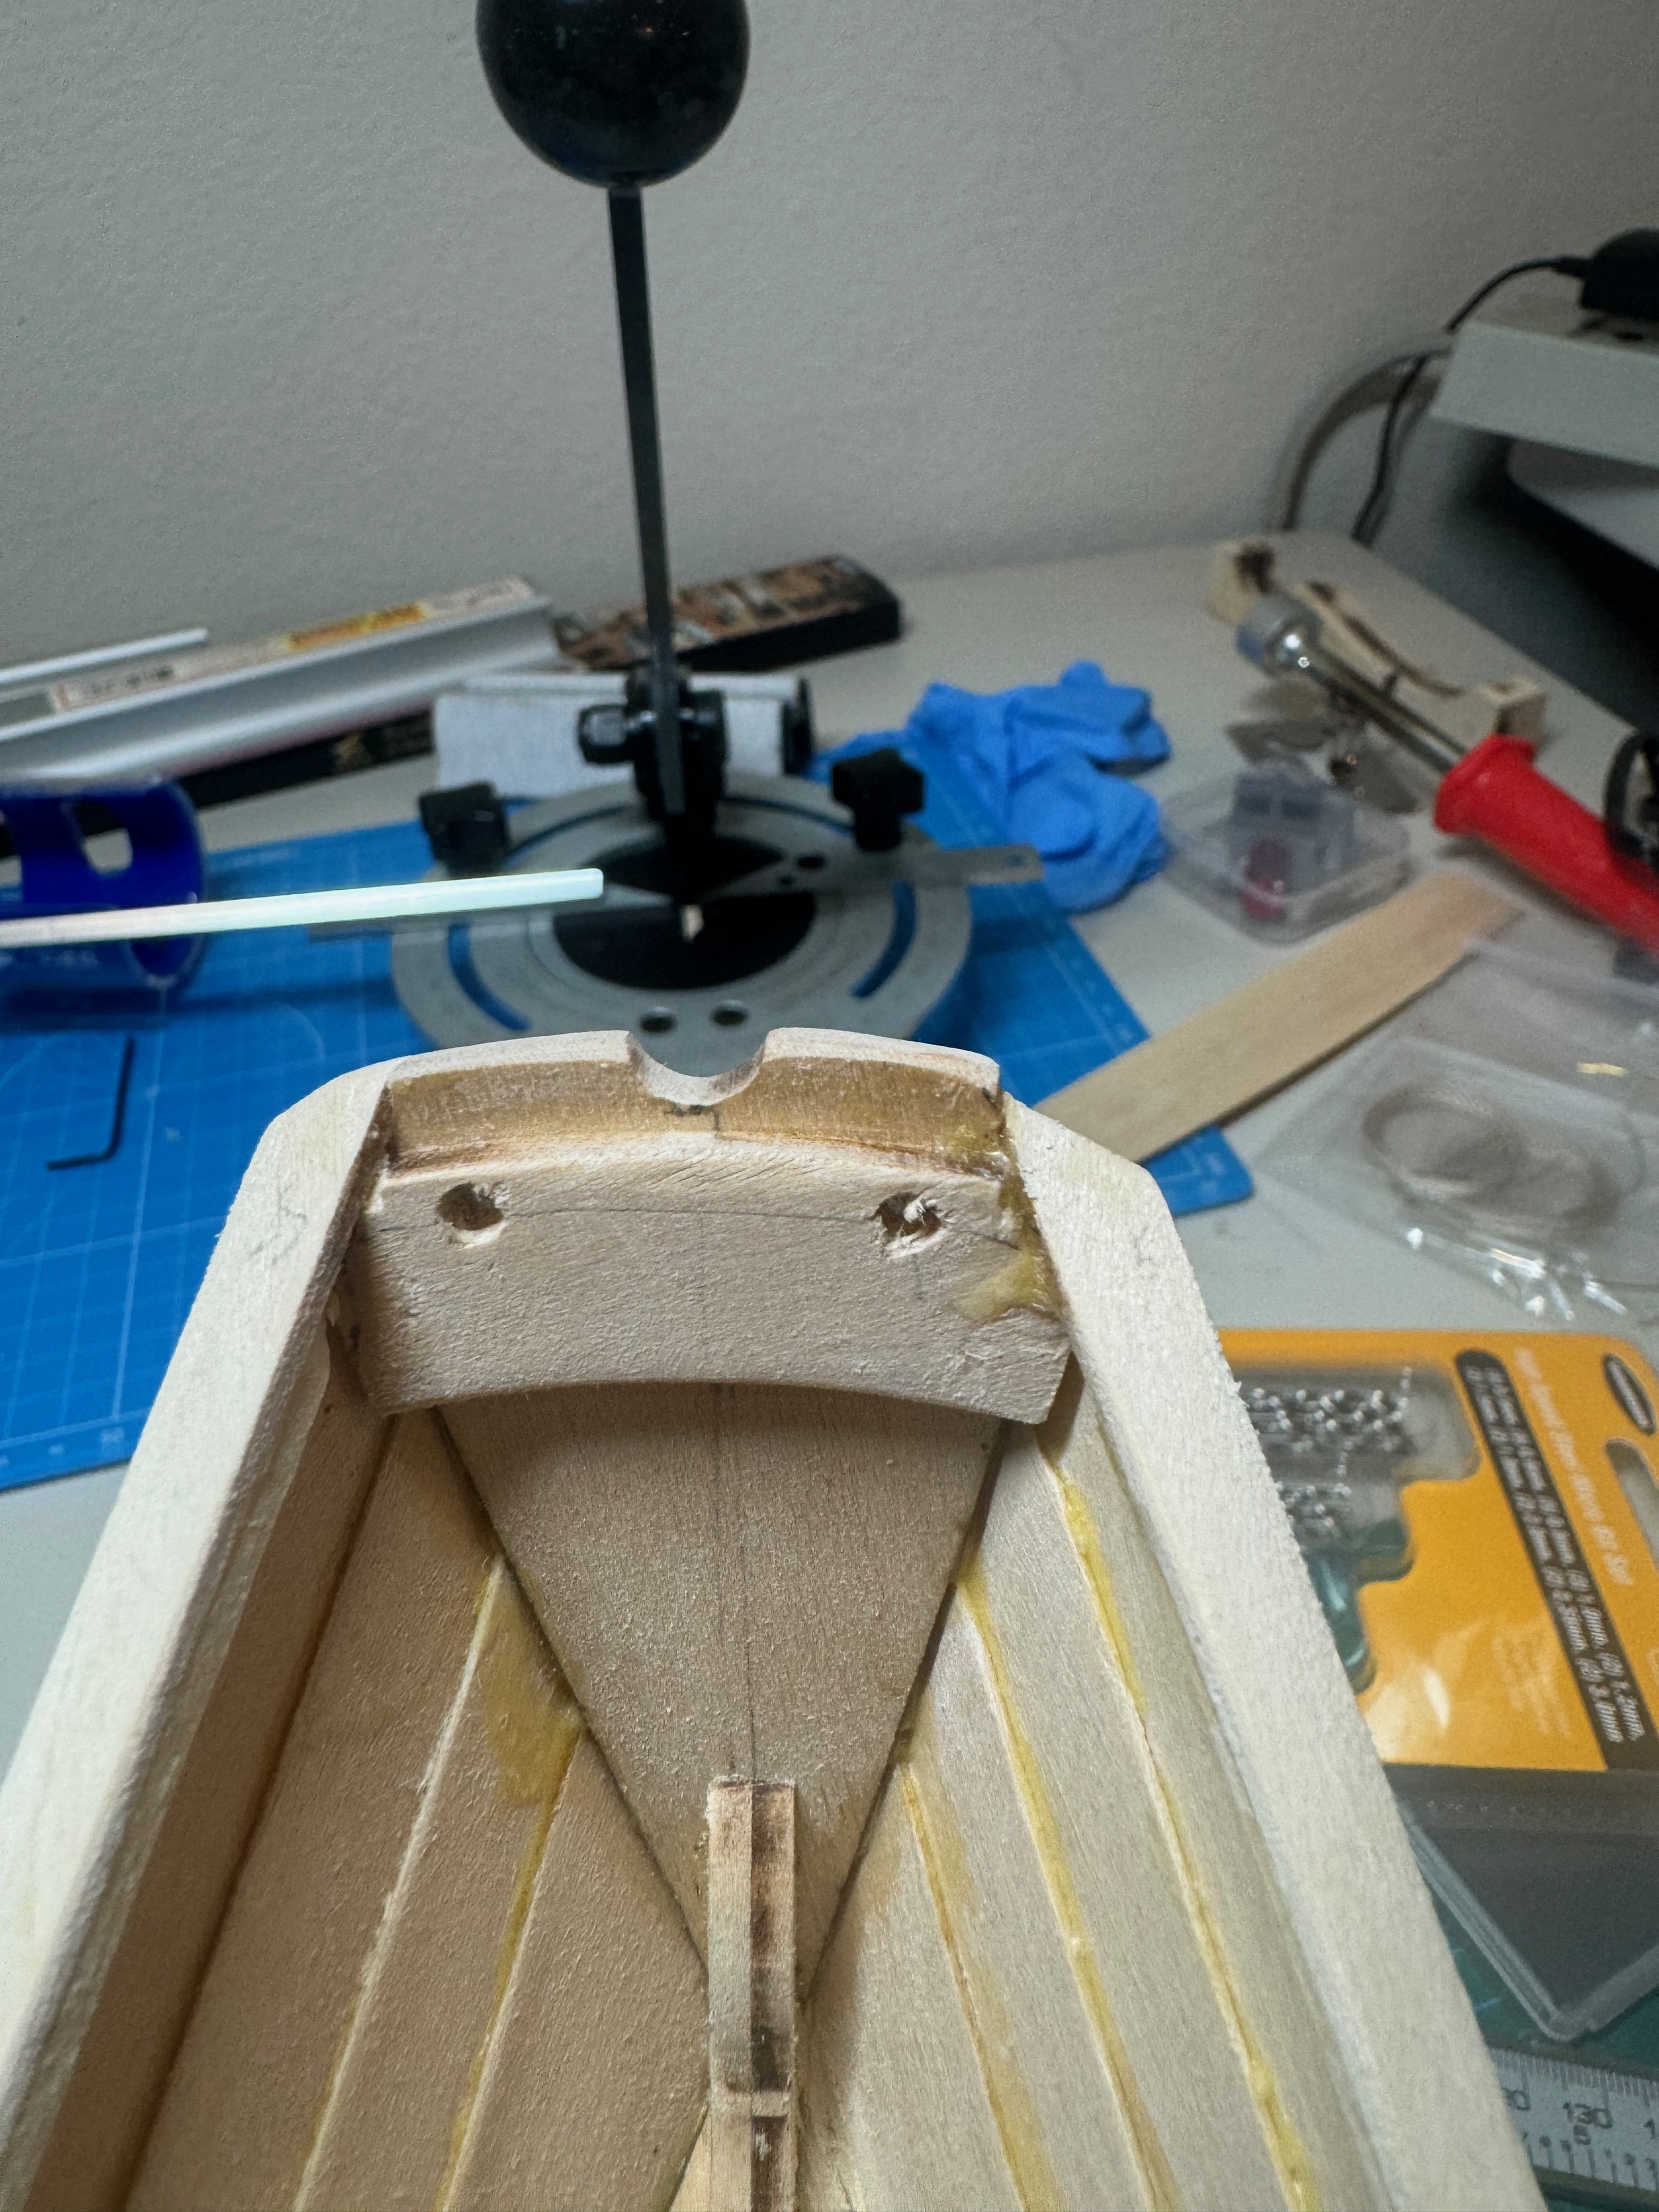
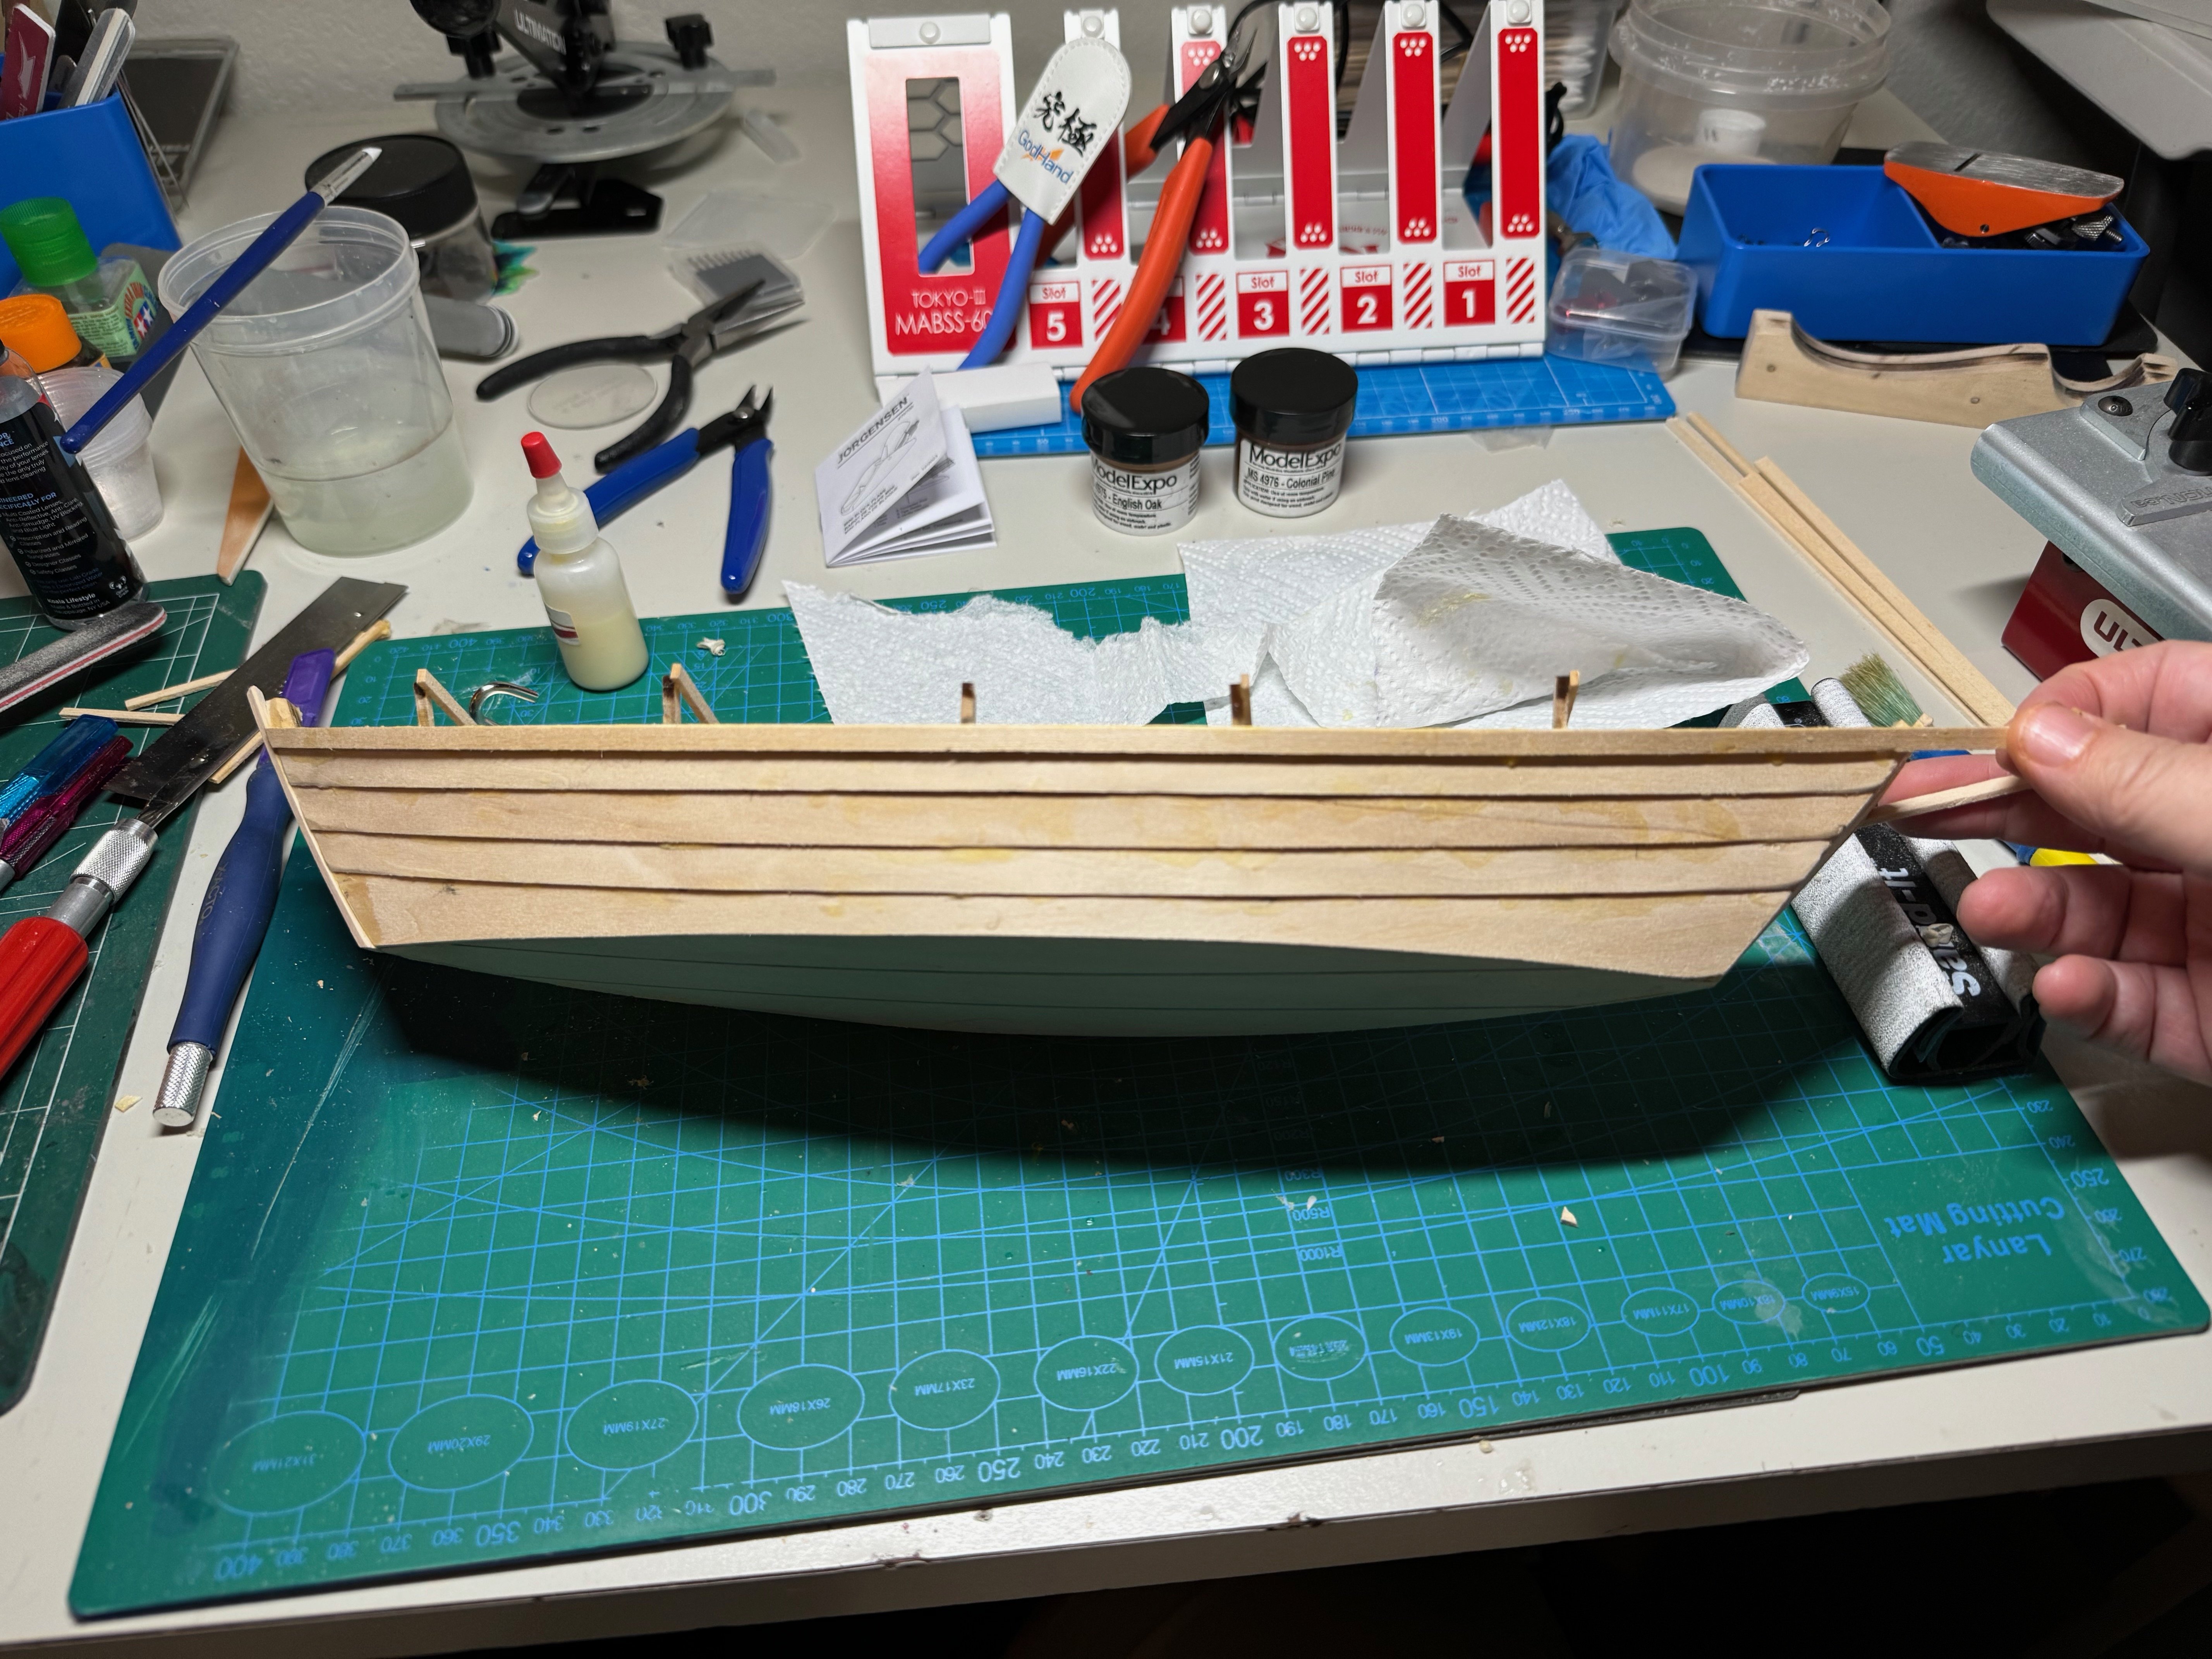
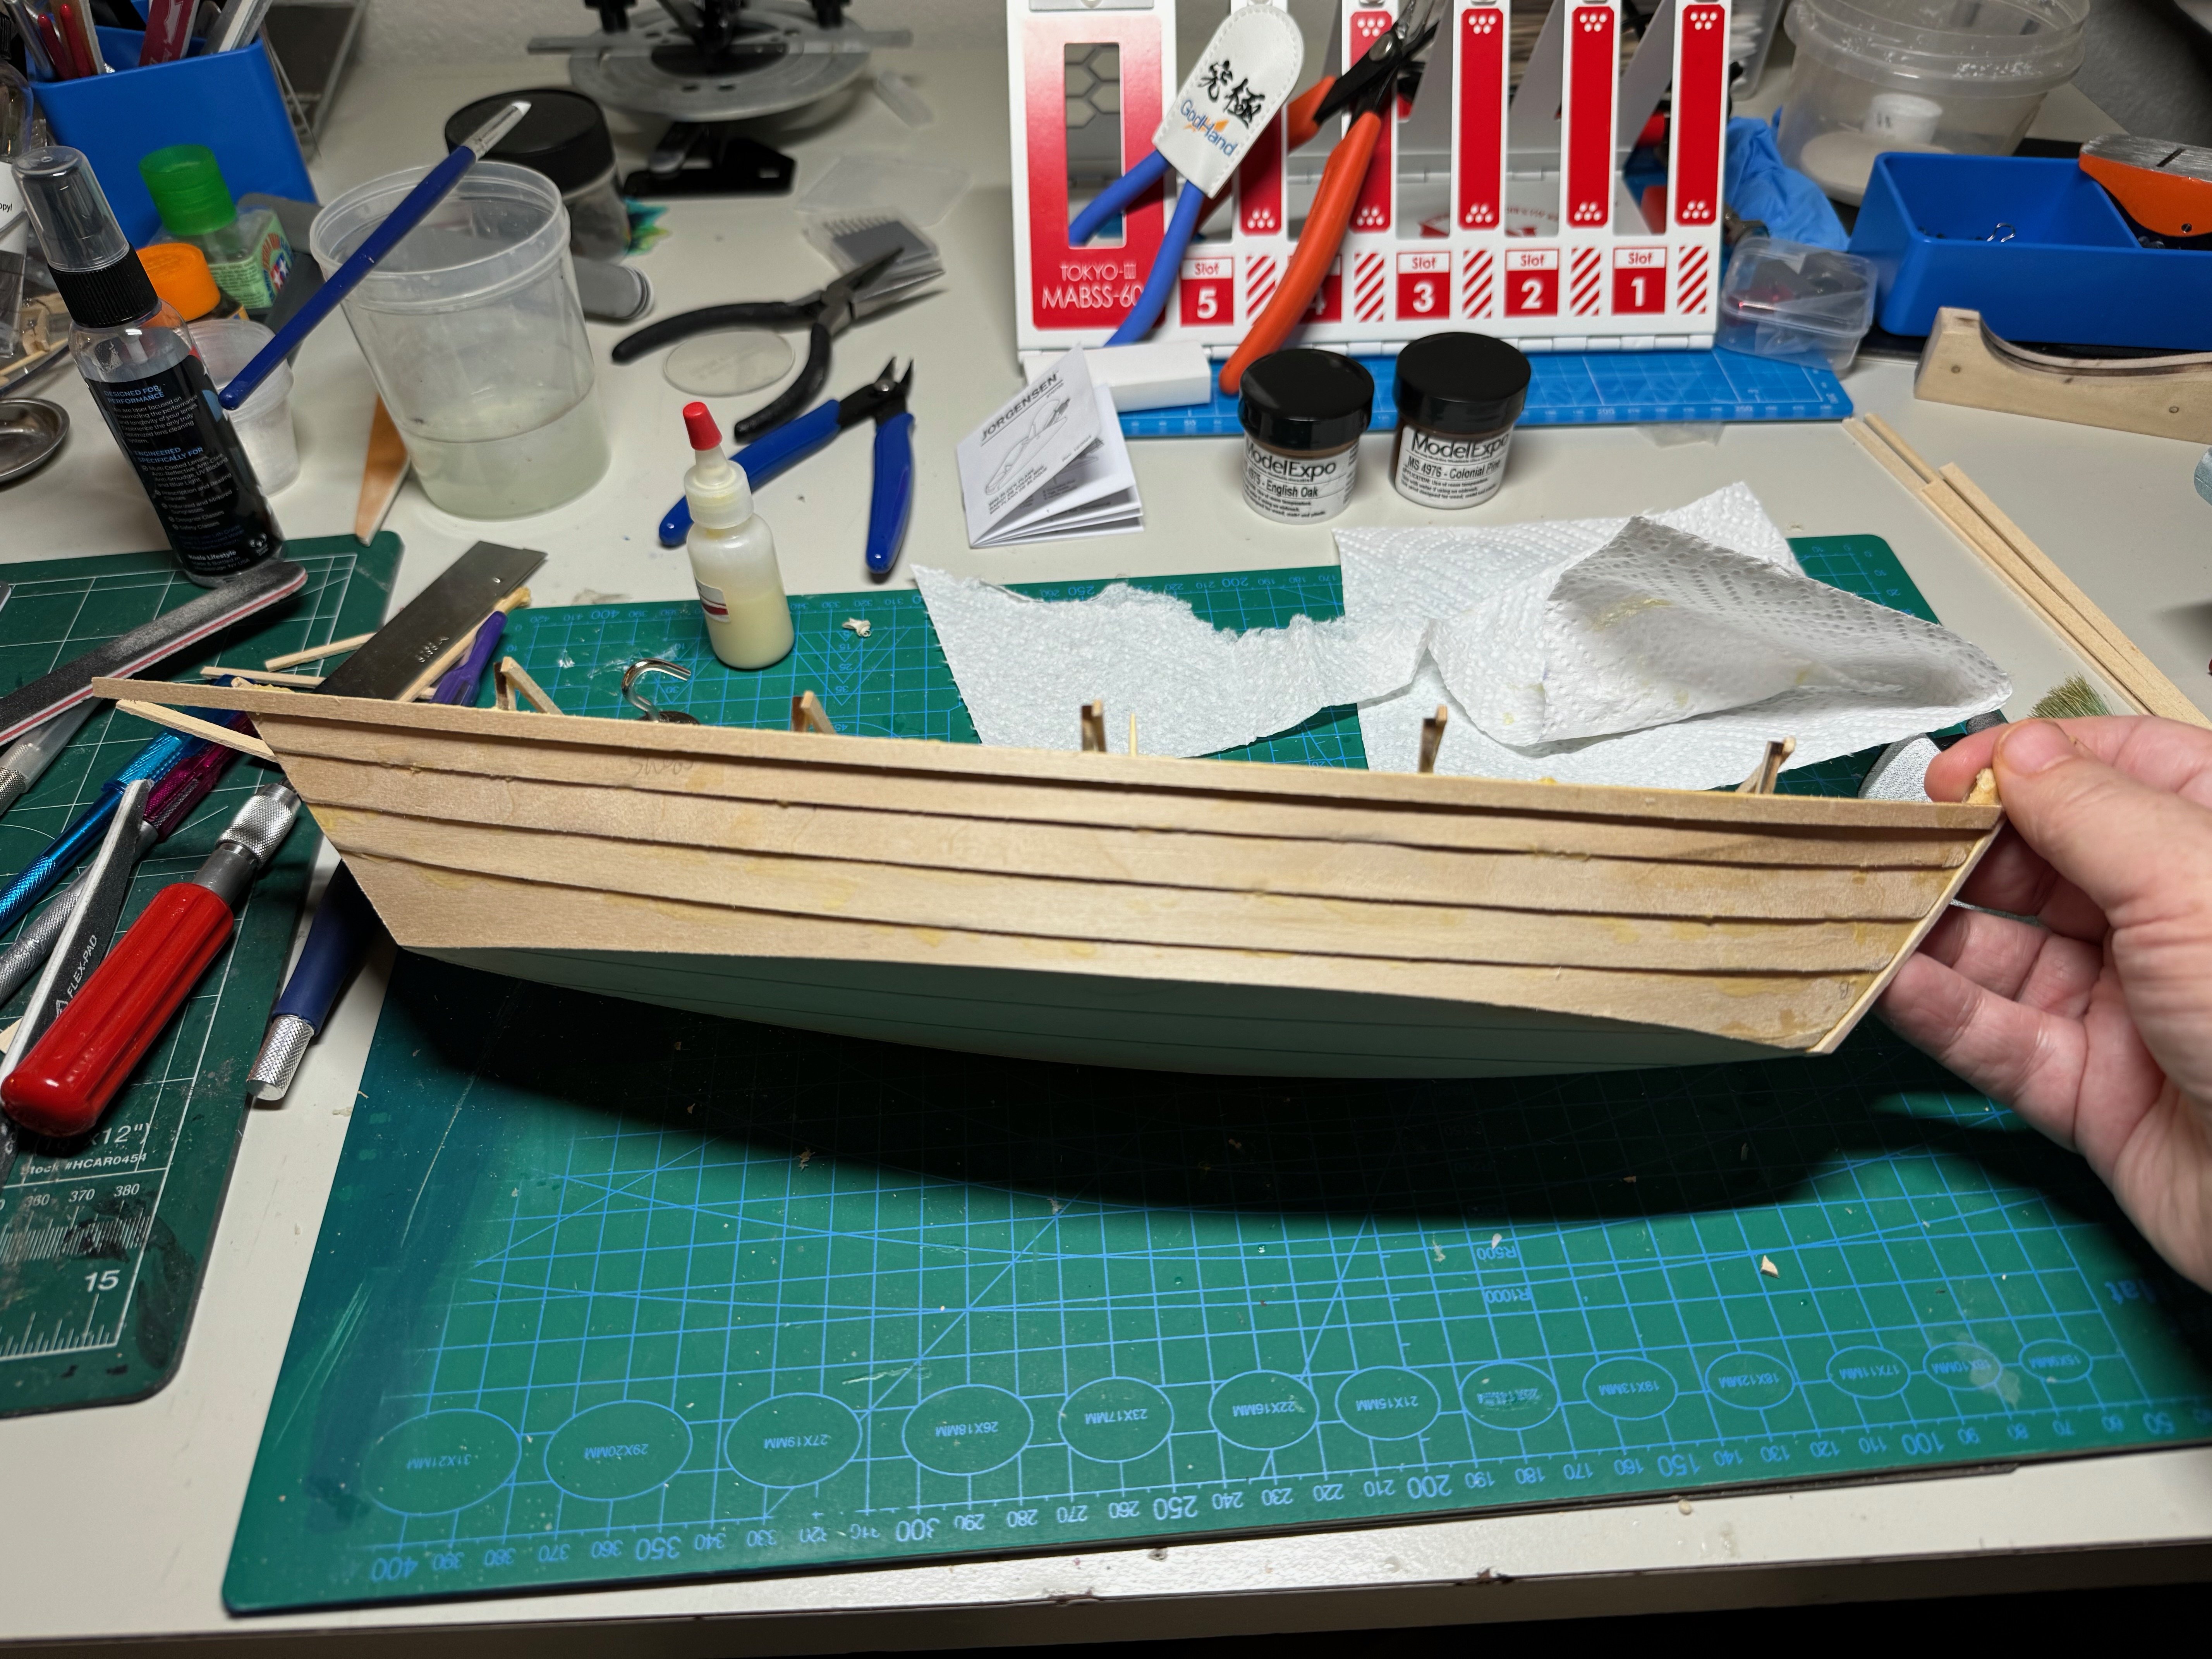
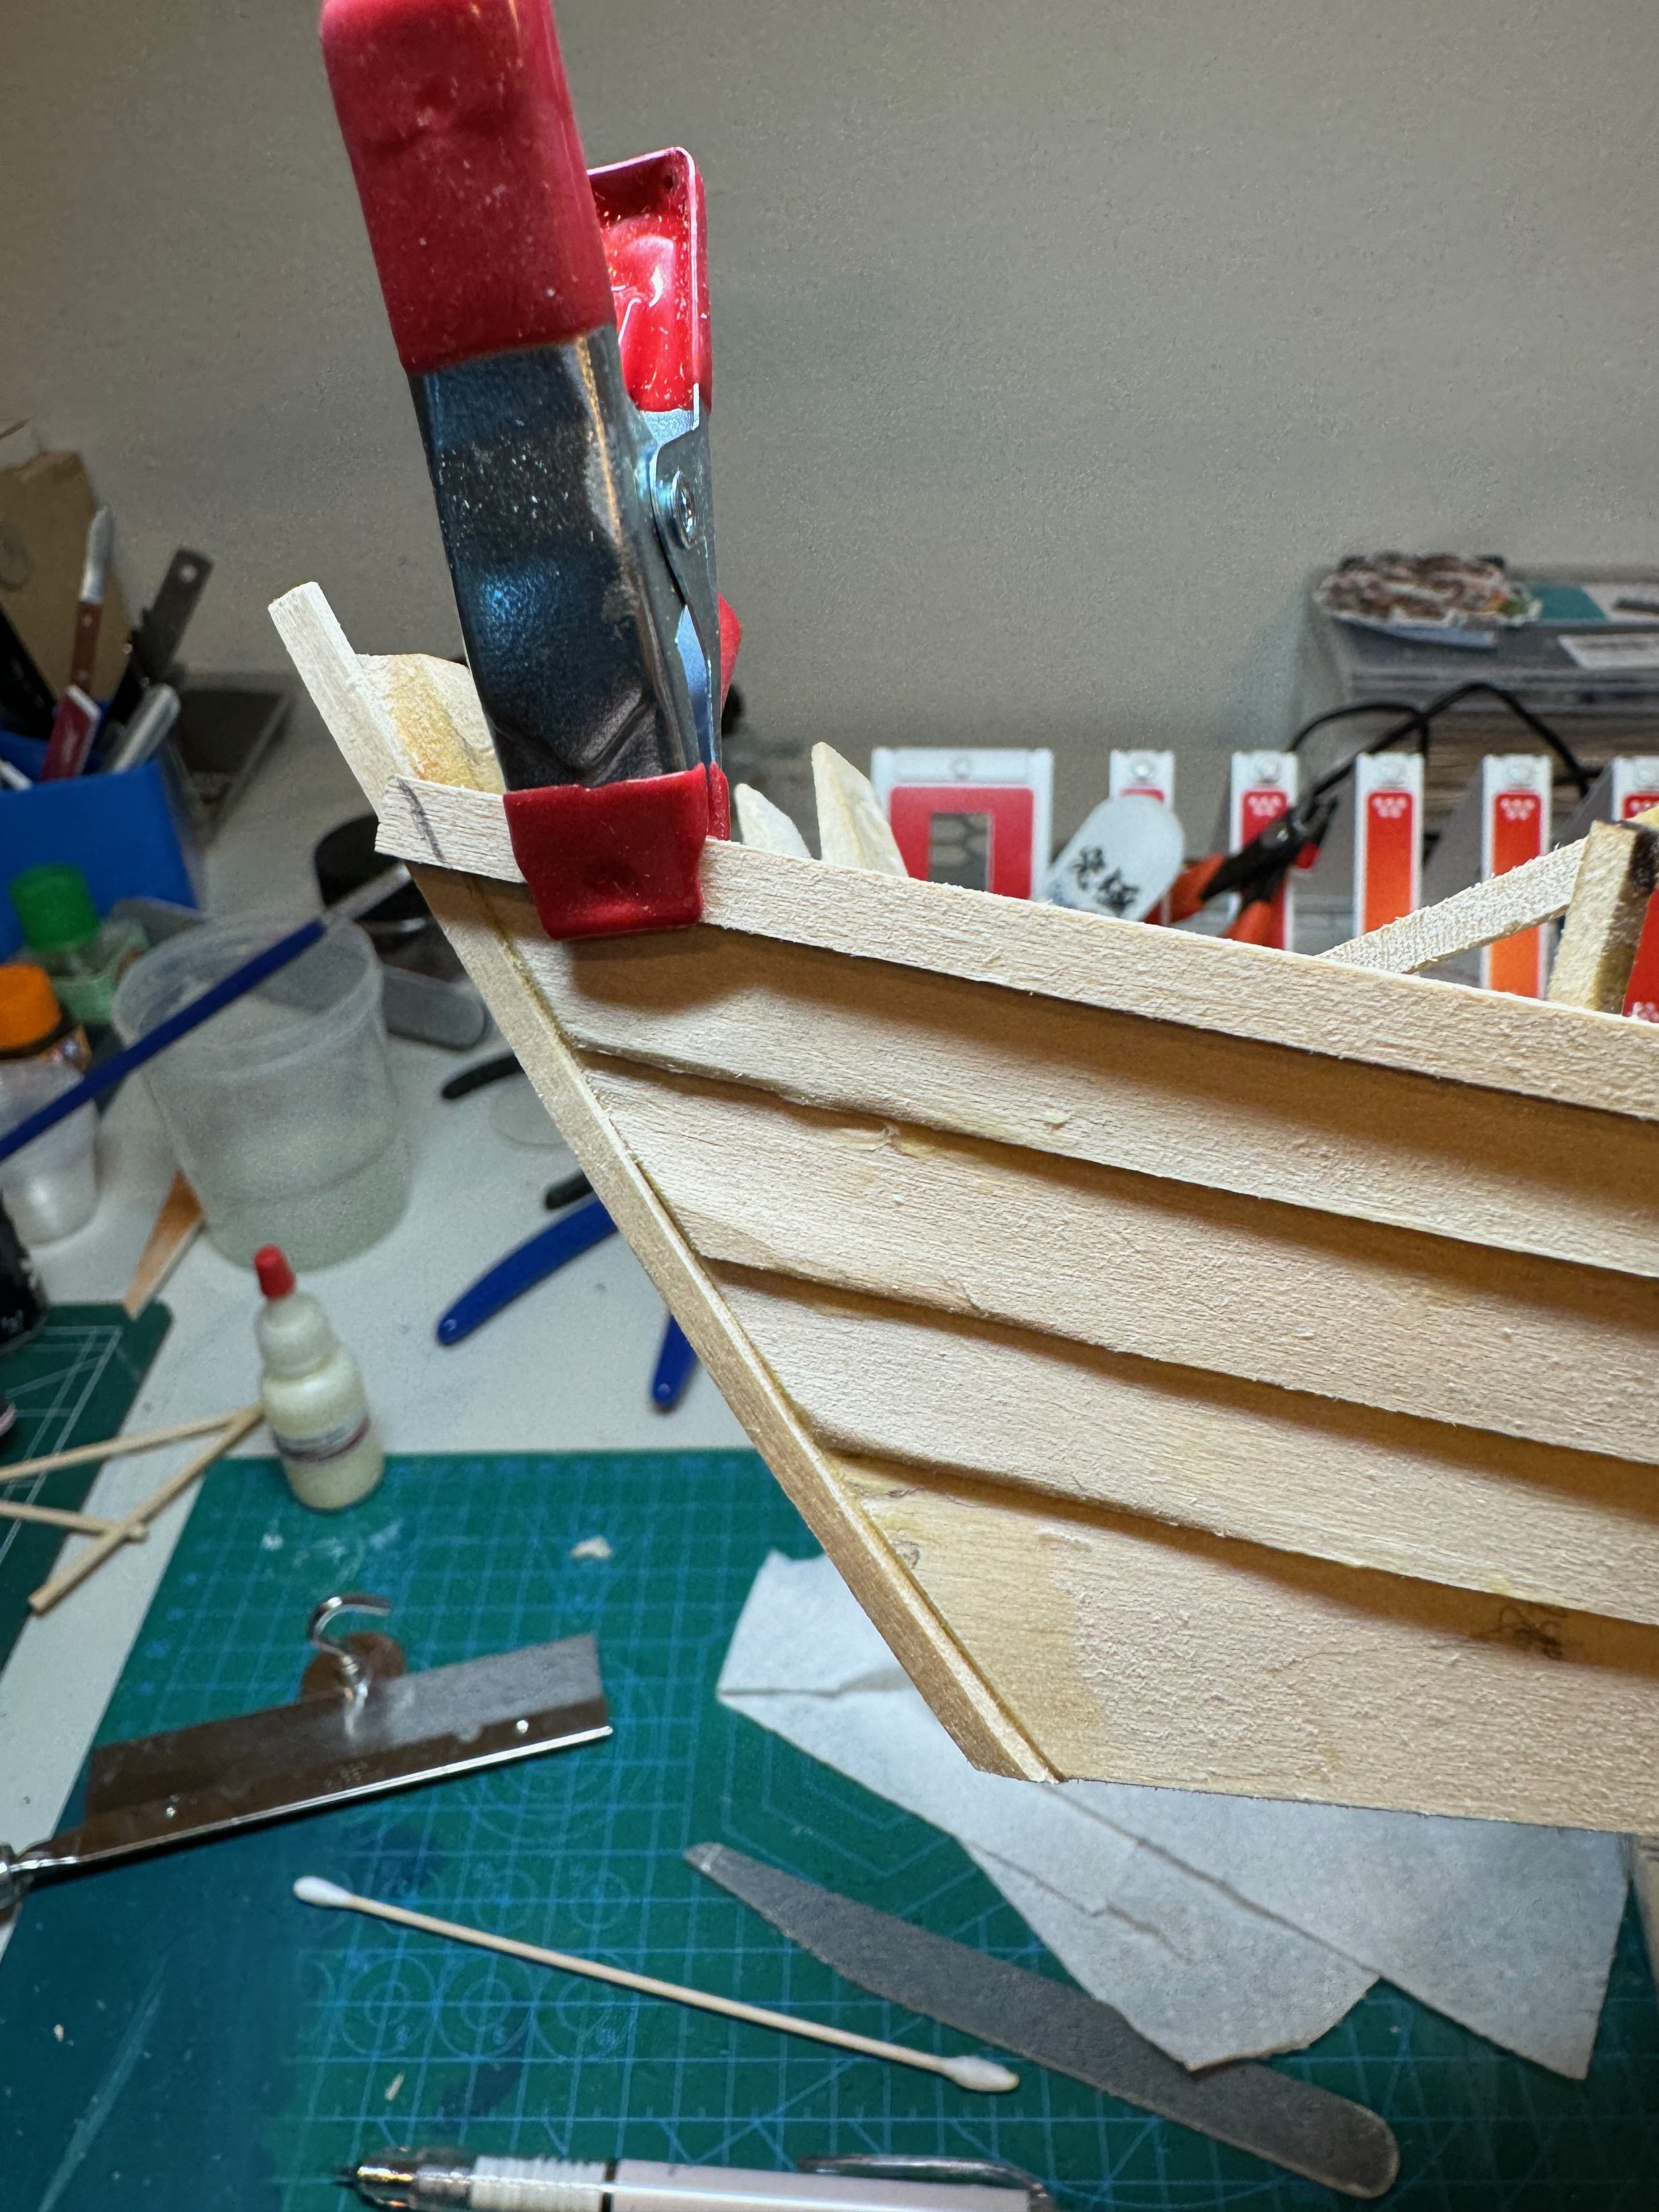
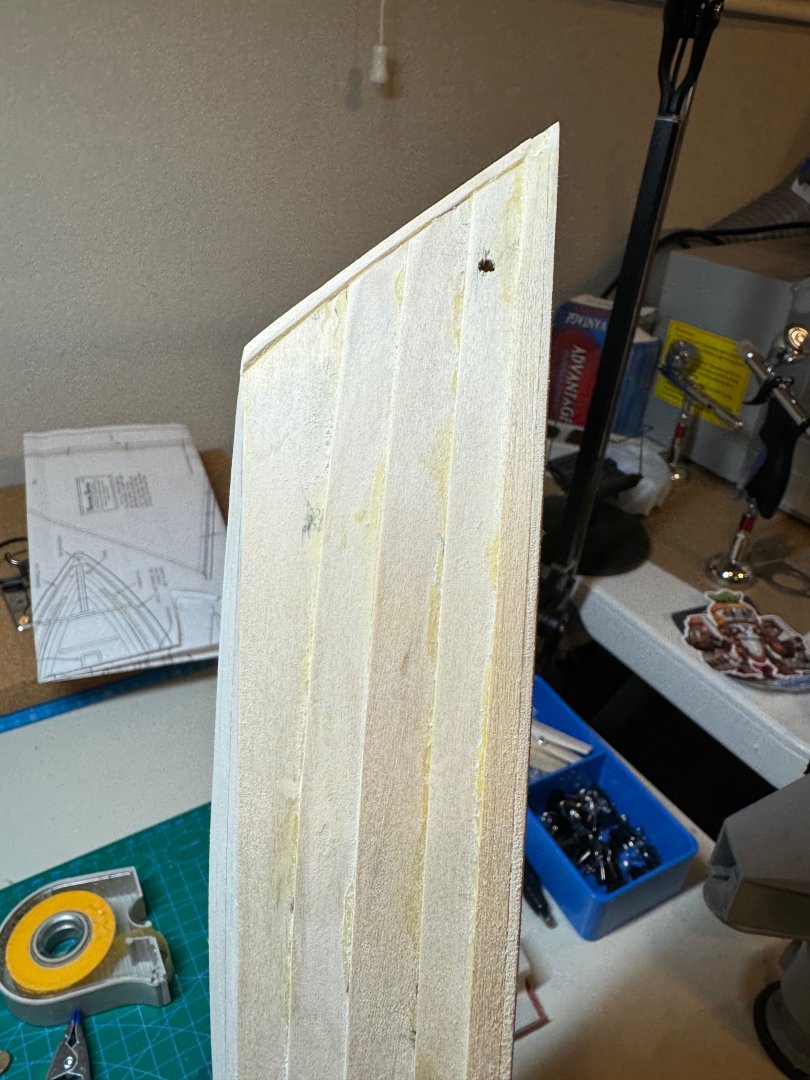
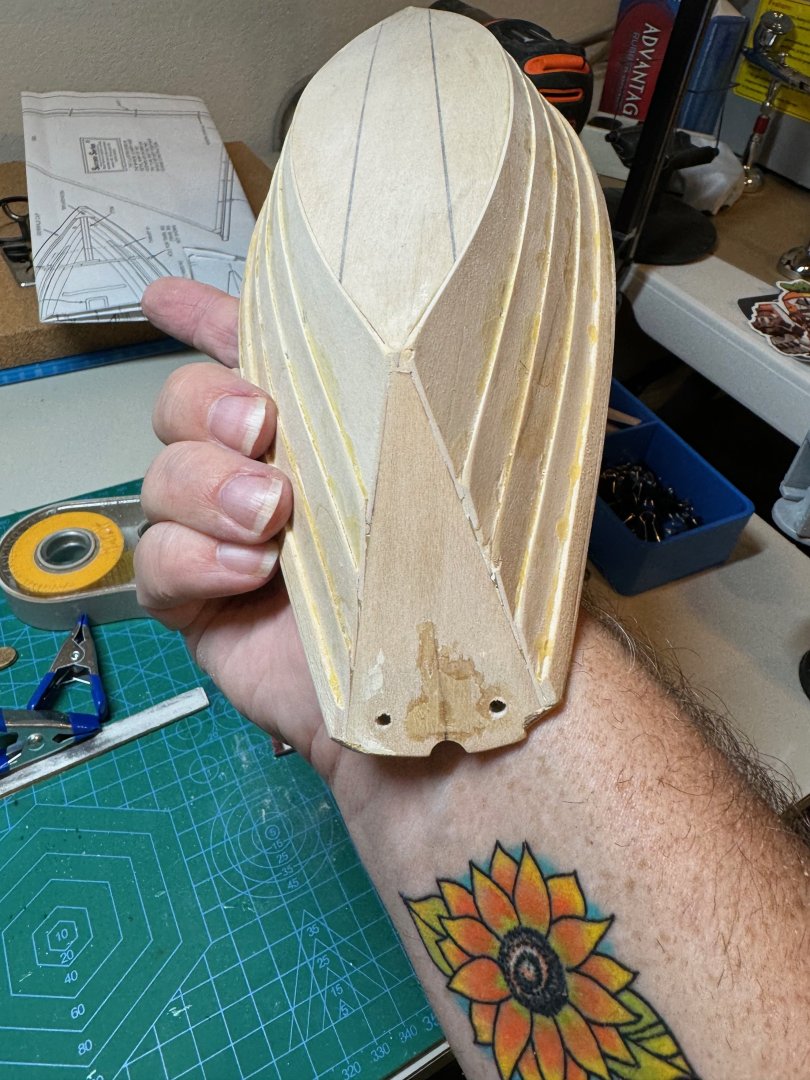
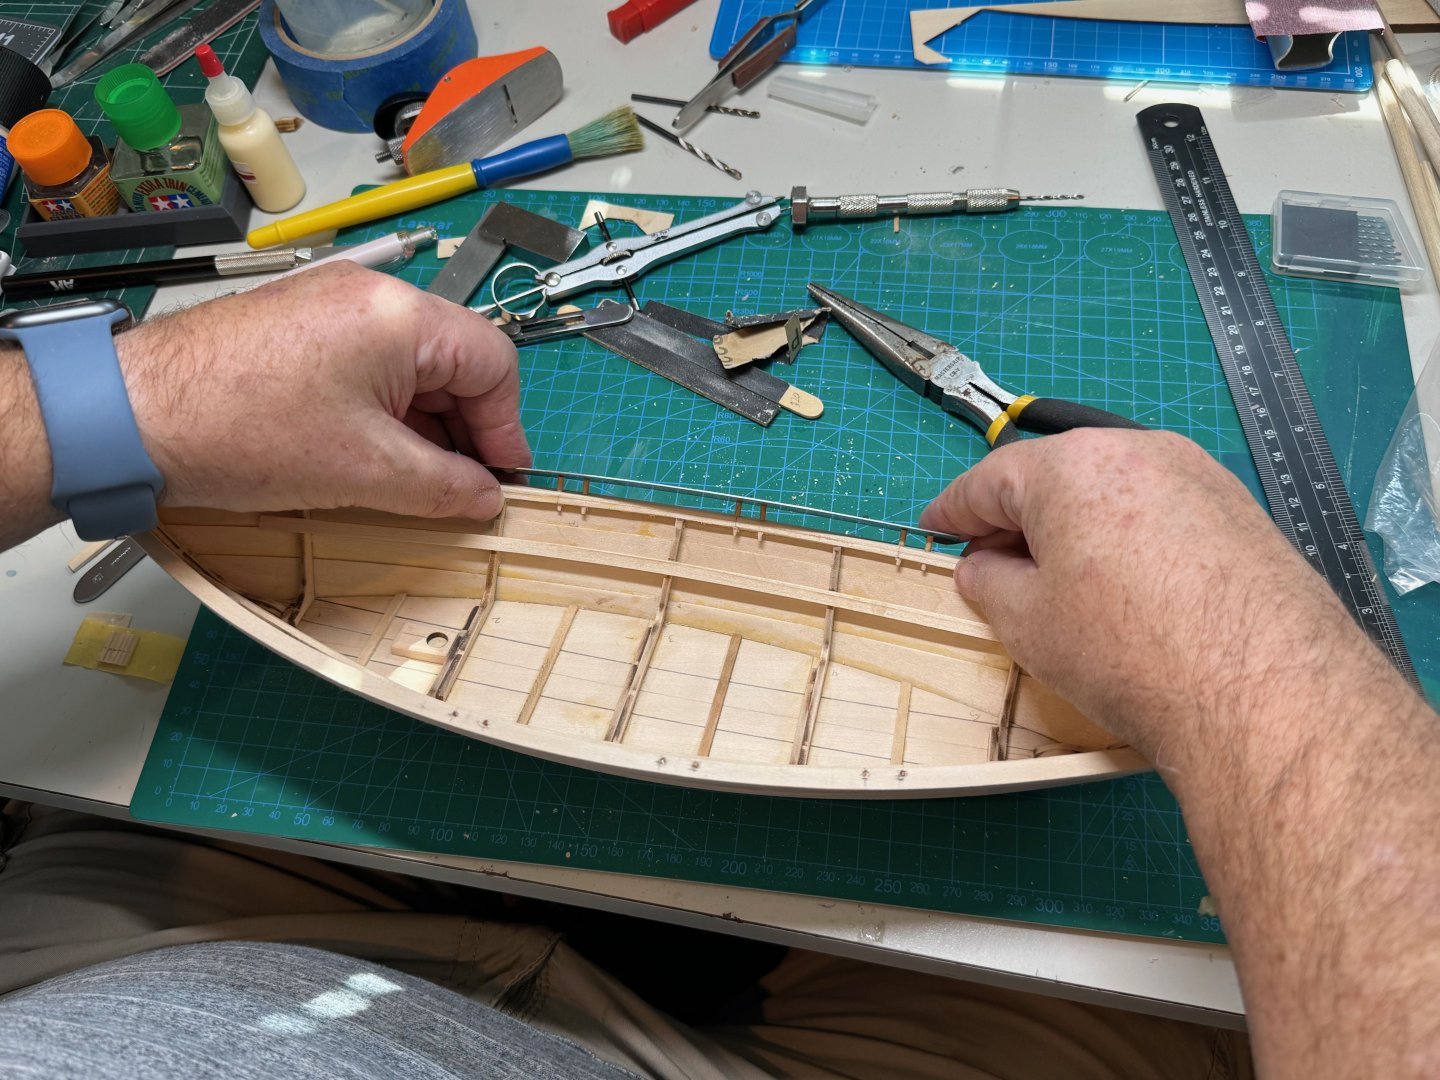
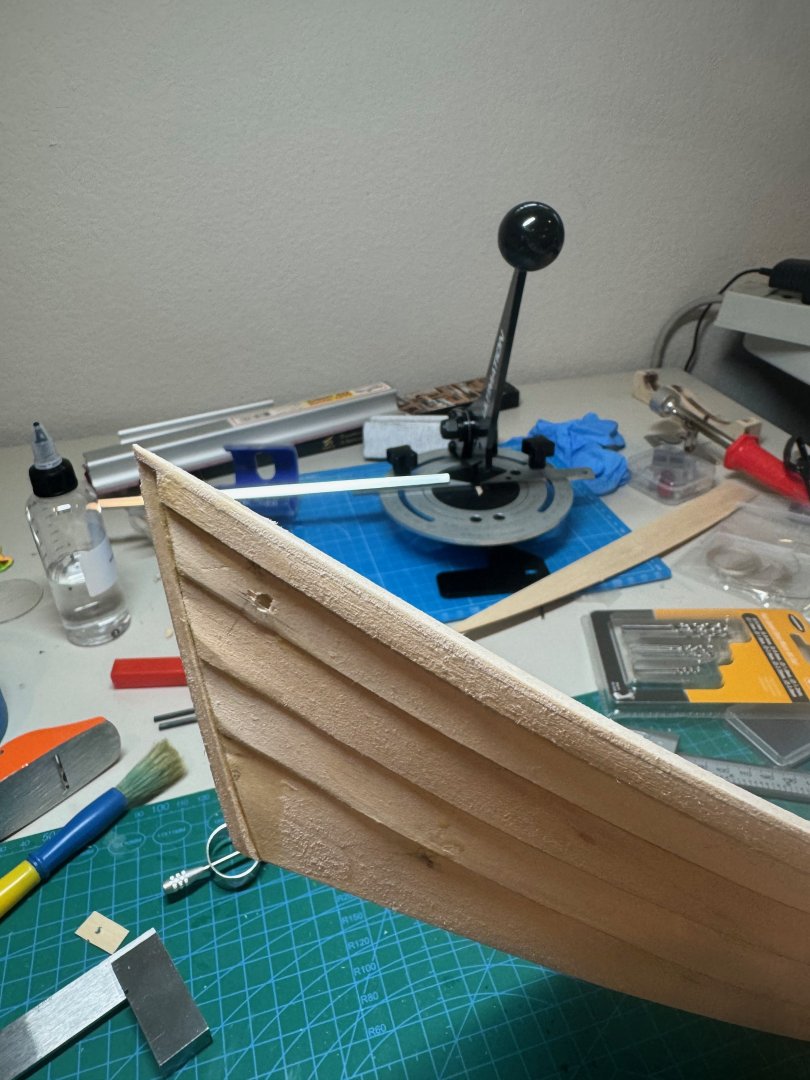
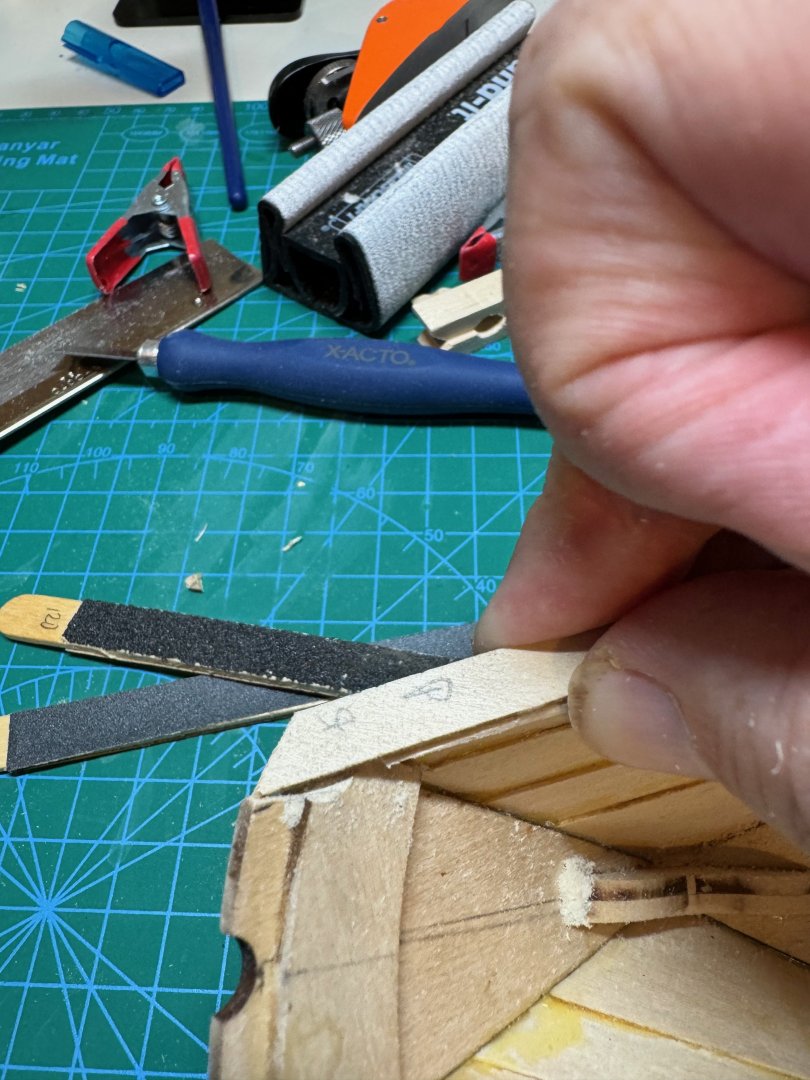
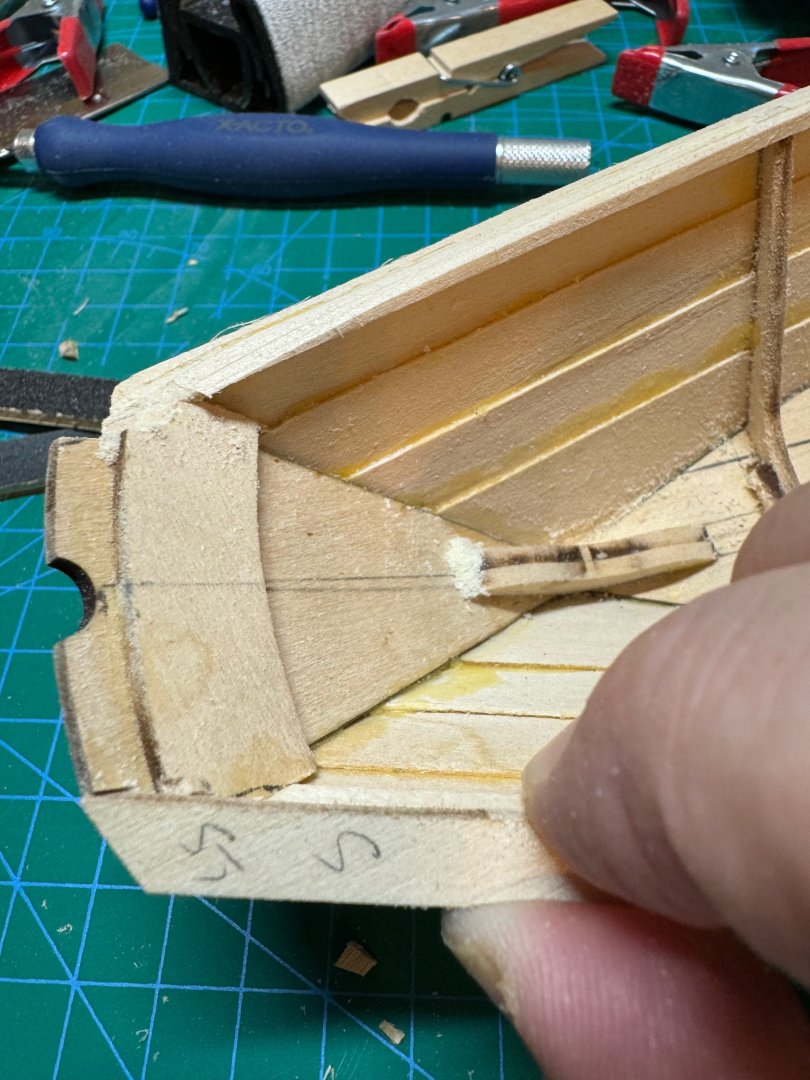
F7DBABAA-6CEC-4C6D-A744-265ADE7B2525_1_201_a.heic9FF5BC1A-2FF8-44D7-836C-88535D621B4B_1_201_a.heic9FF5BC1A-2FF8-44D7-836C-88535D621B4B_1_201_a.heicGood afternoon, I made some more progress on my Dory. I wanted to get the gunwales finished up before I leave for an extended weekend for my 27th anniversary. First I cut the bow stem to be even with the gunwales. I then planed and sanded to get everything even and smooth. Next I then notched the transom and dry fitted the gunwale cap. I then glued the cap onto the gunwales, where I will let it setup over the weekend. Cheers Jim


- 56 replies
-
- 7
-
-
- grand banks dory
- Midwest Products
- (and 2 more)
-
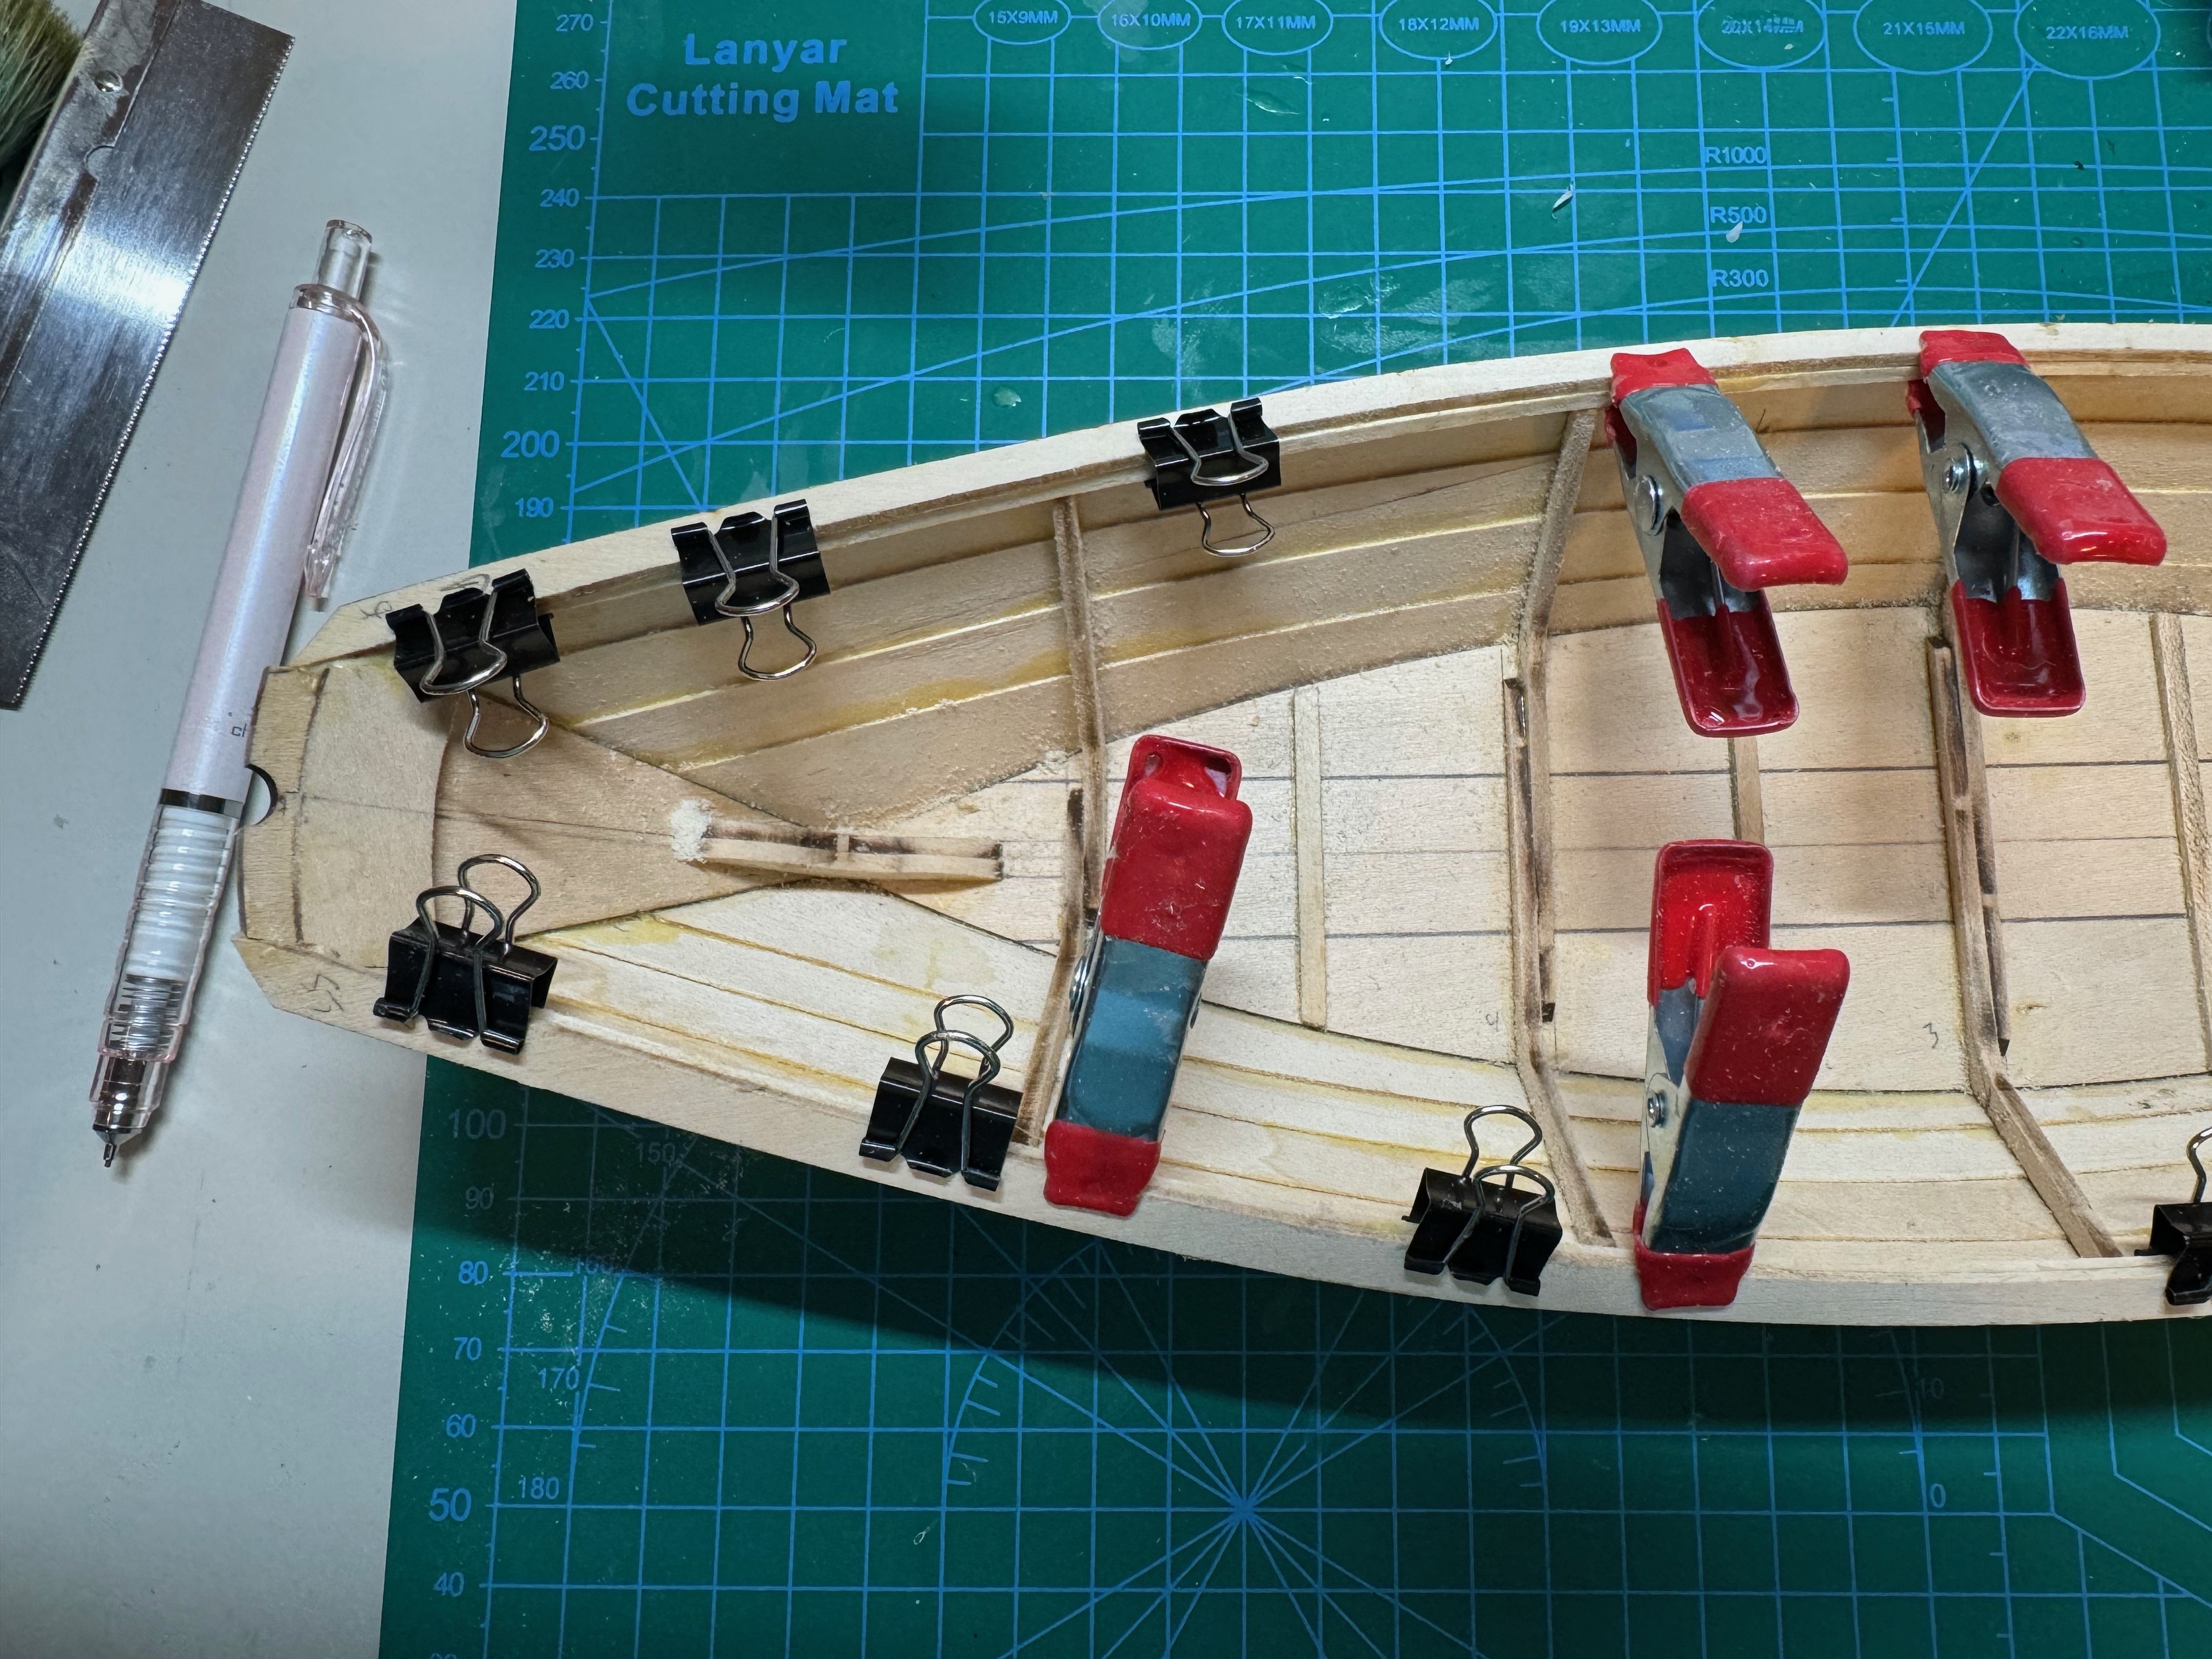
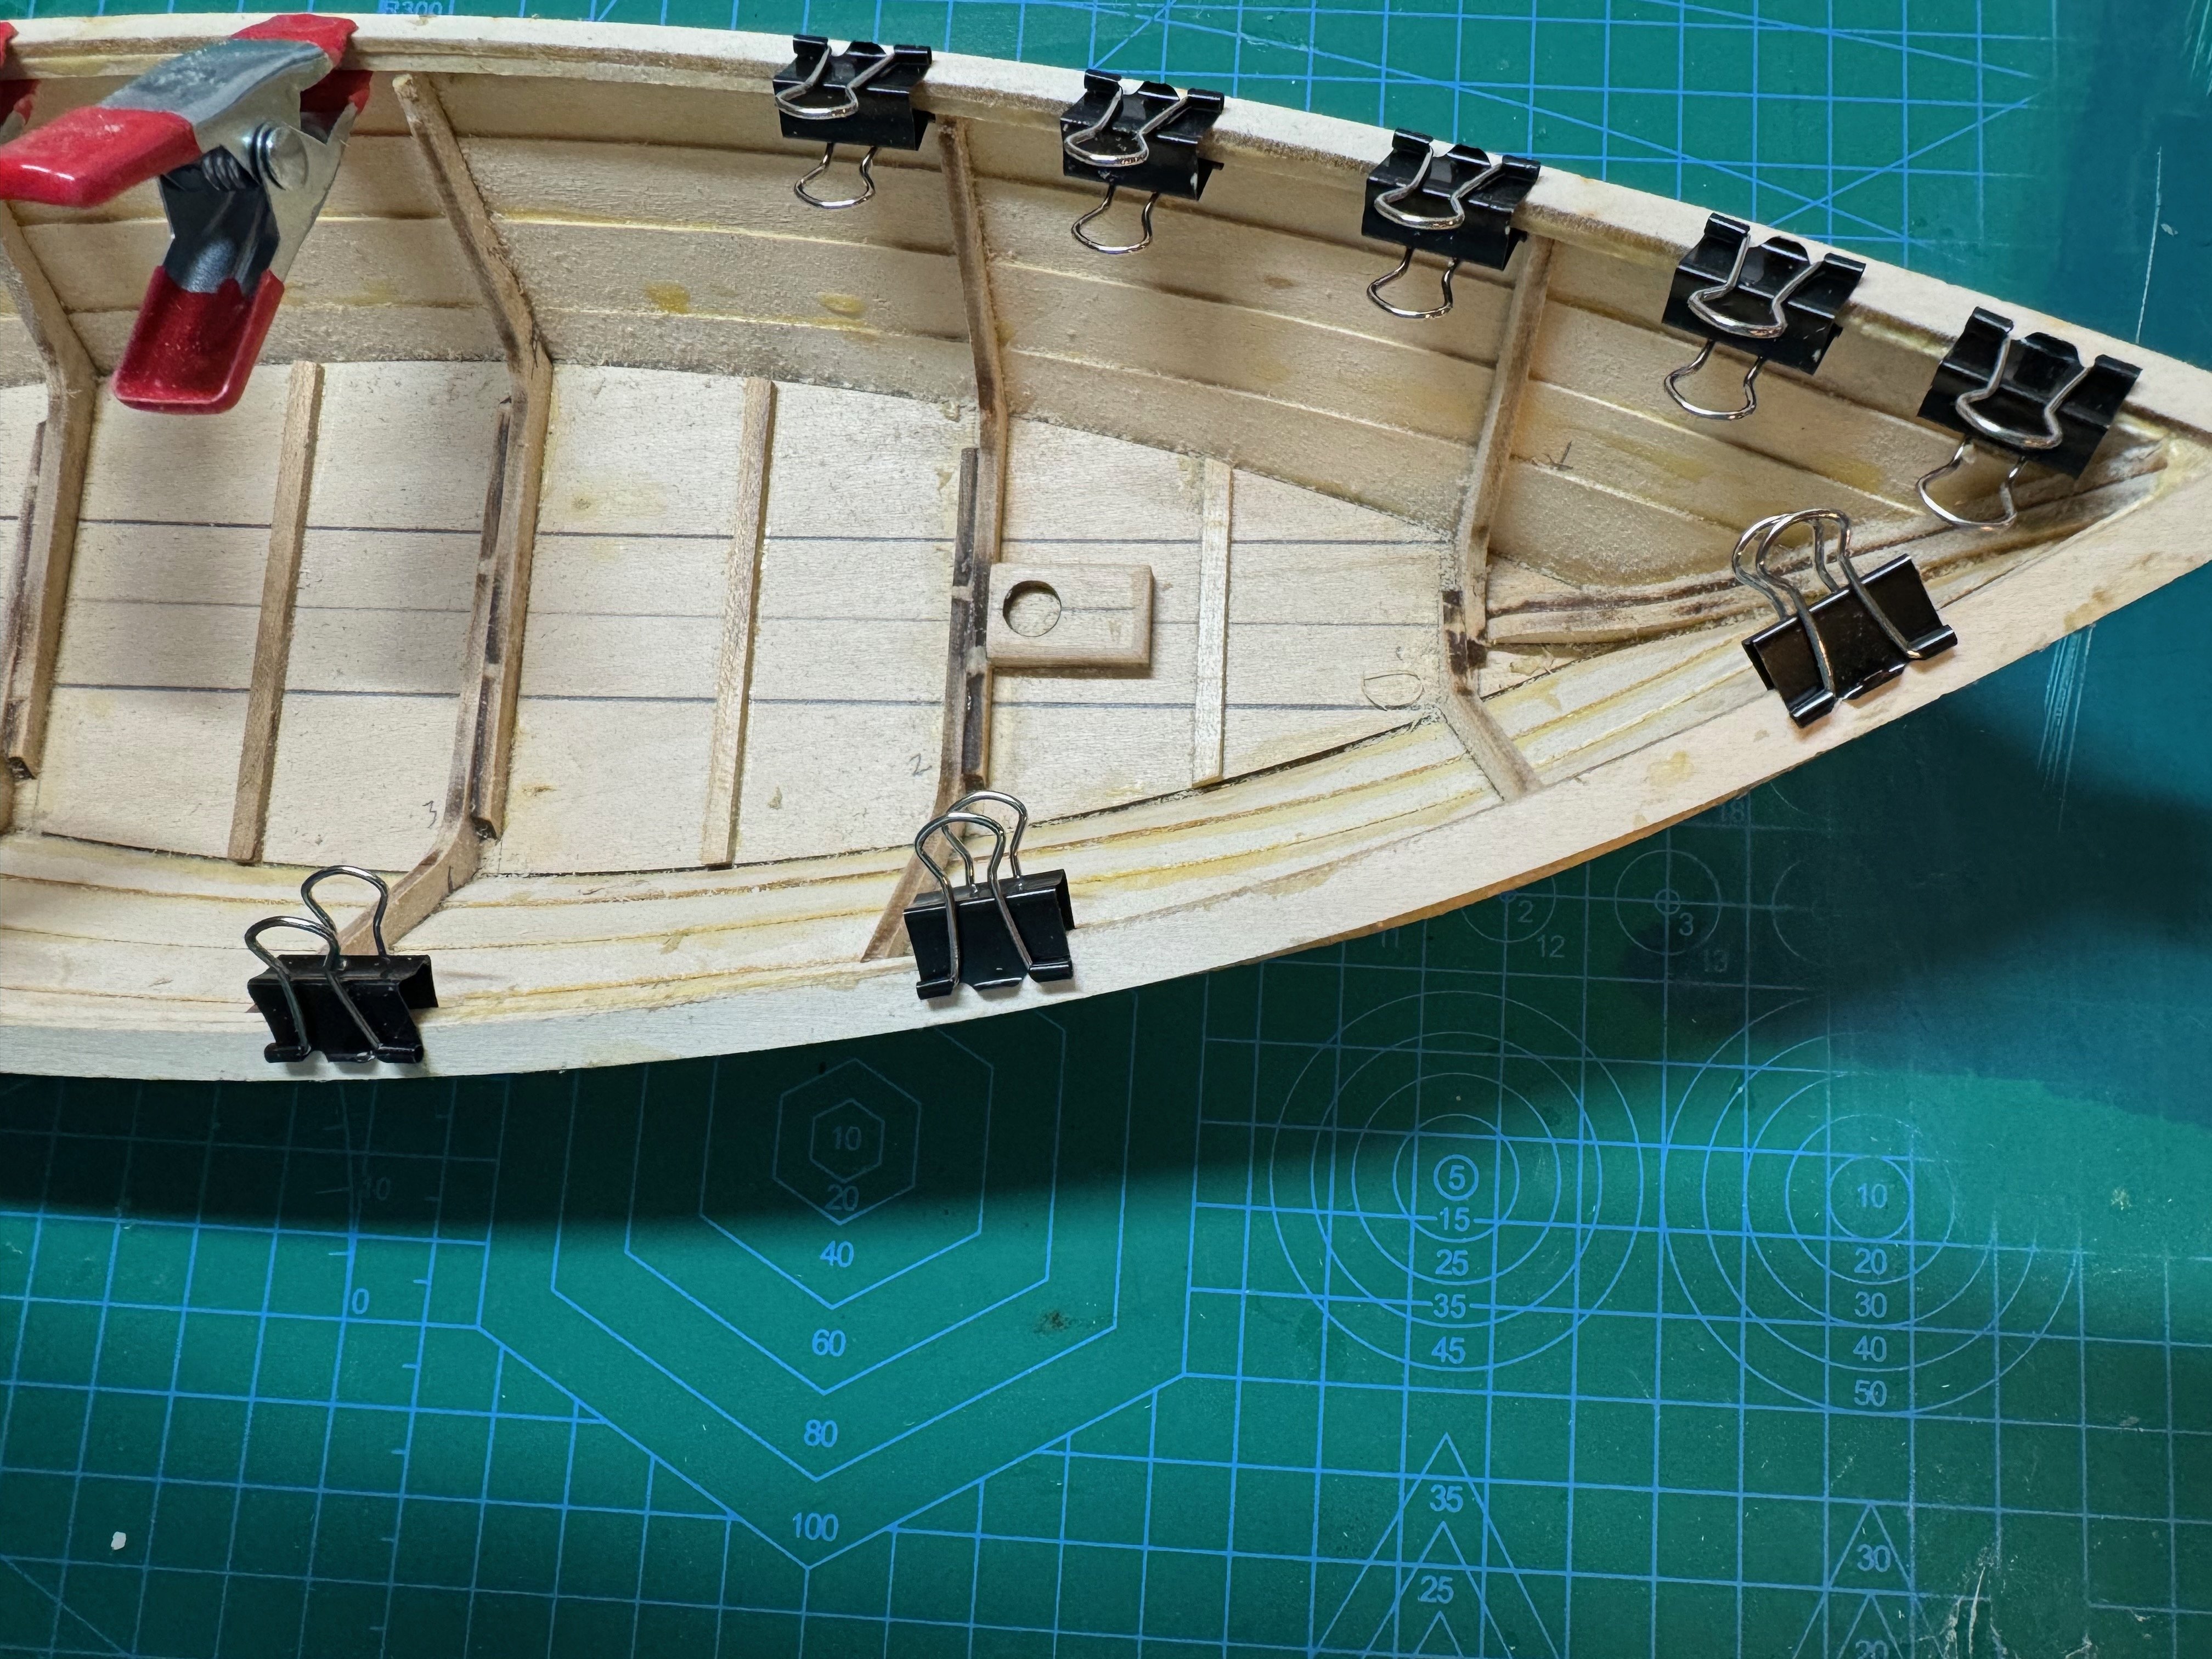
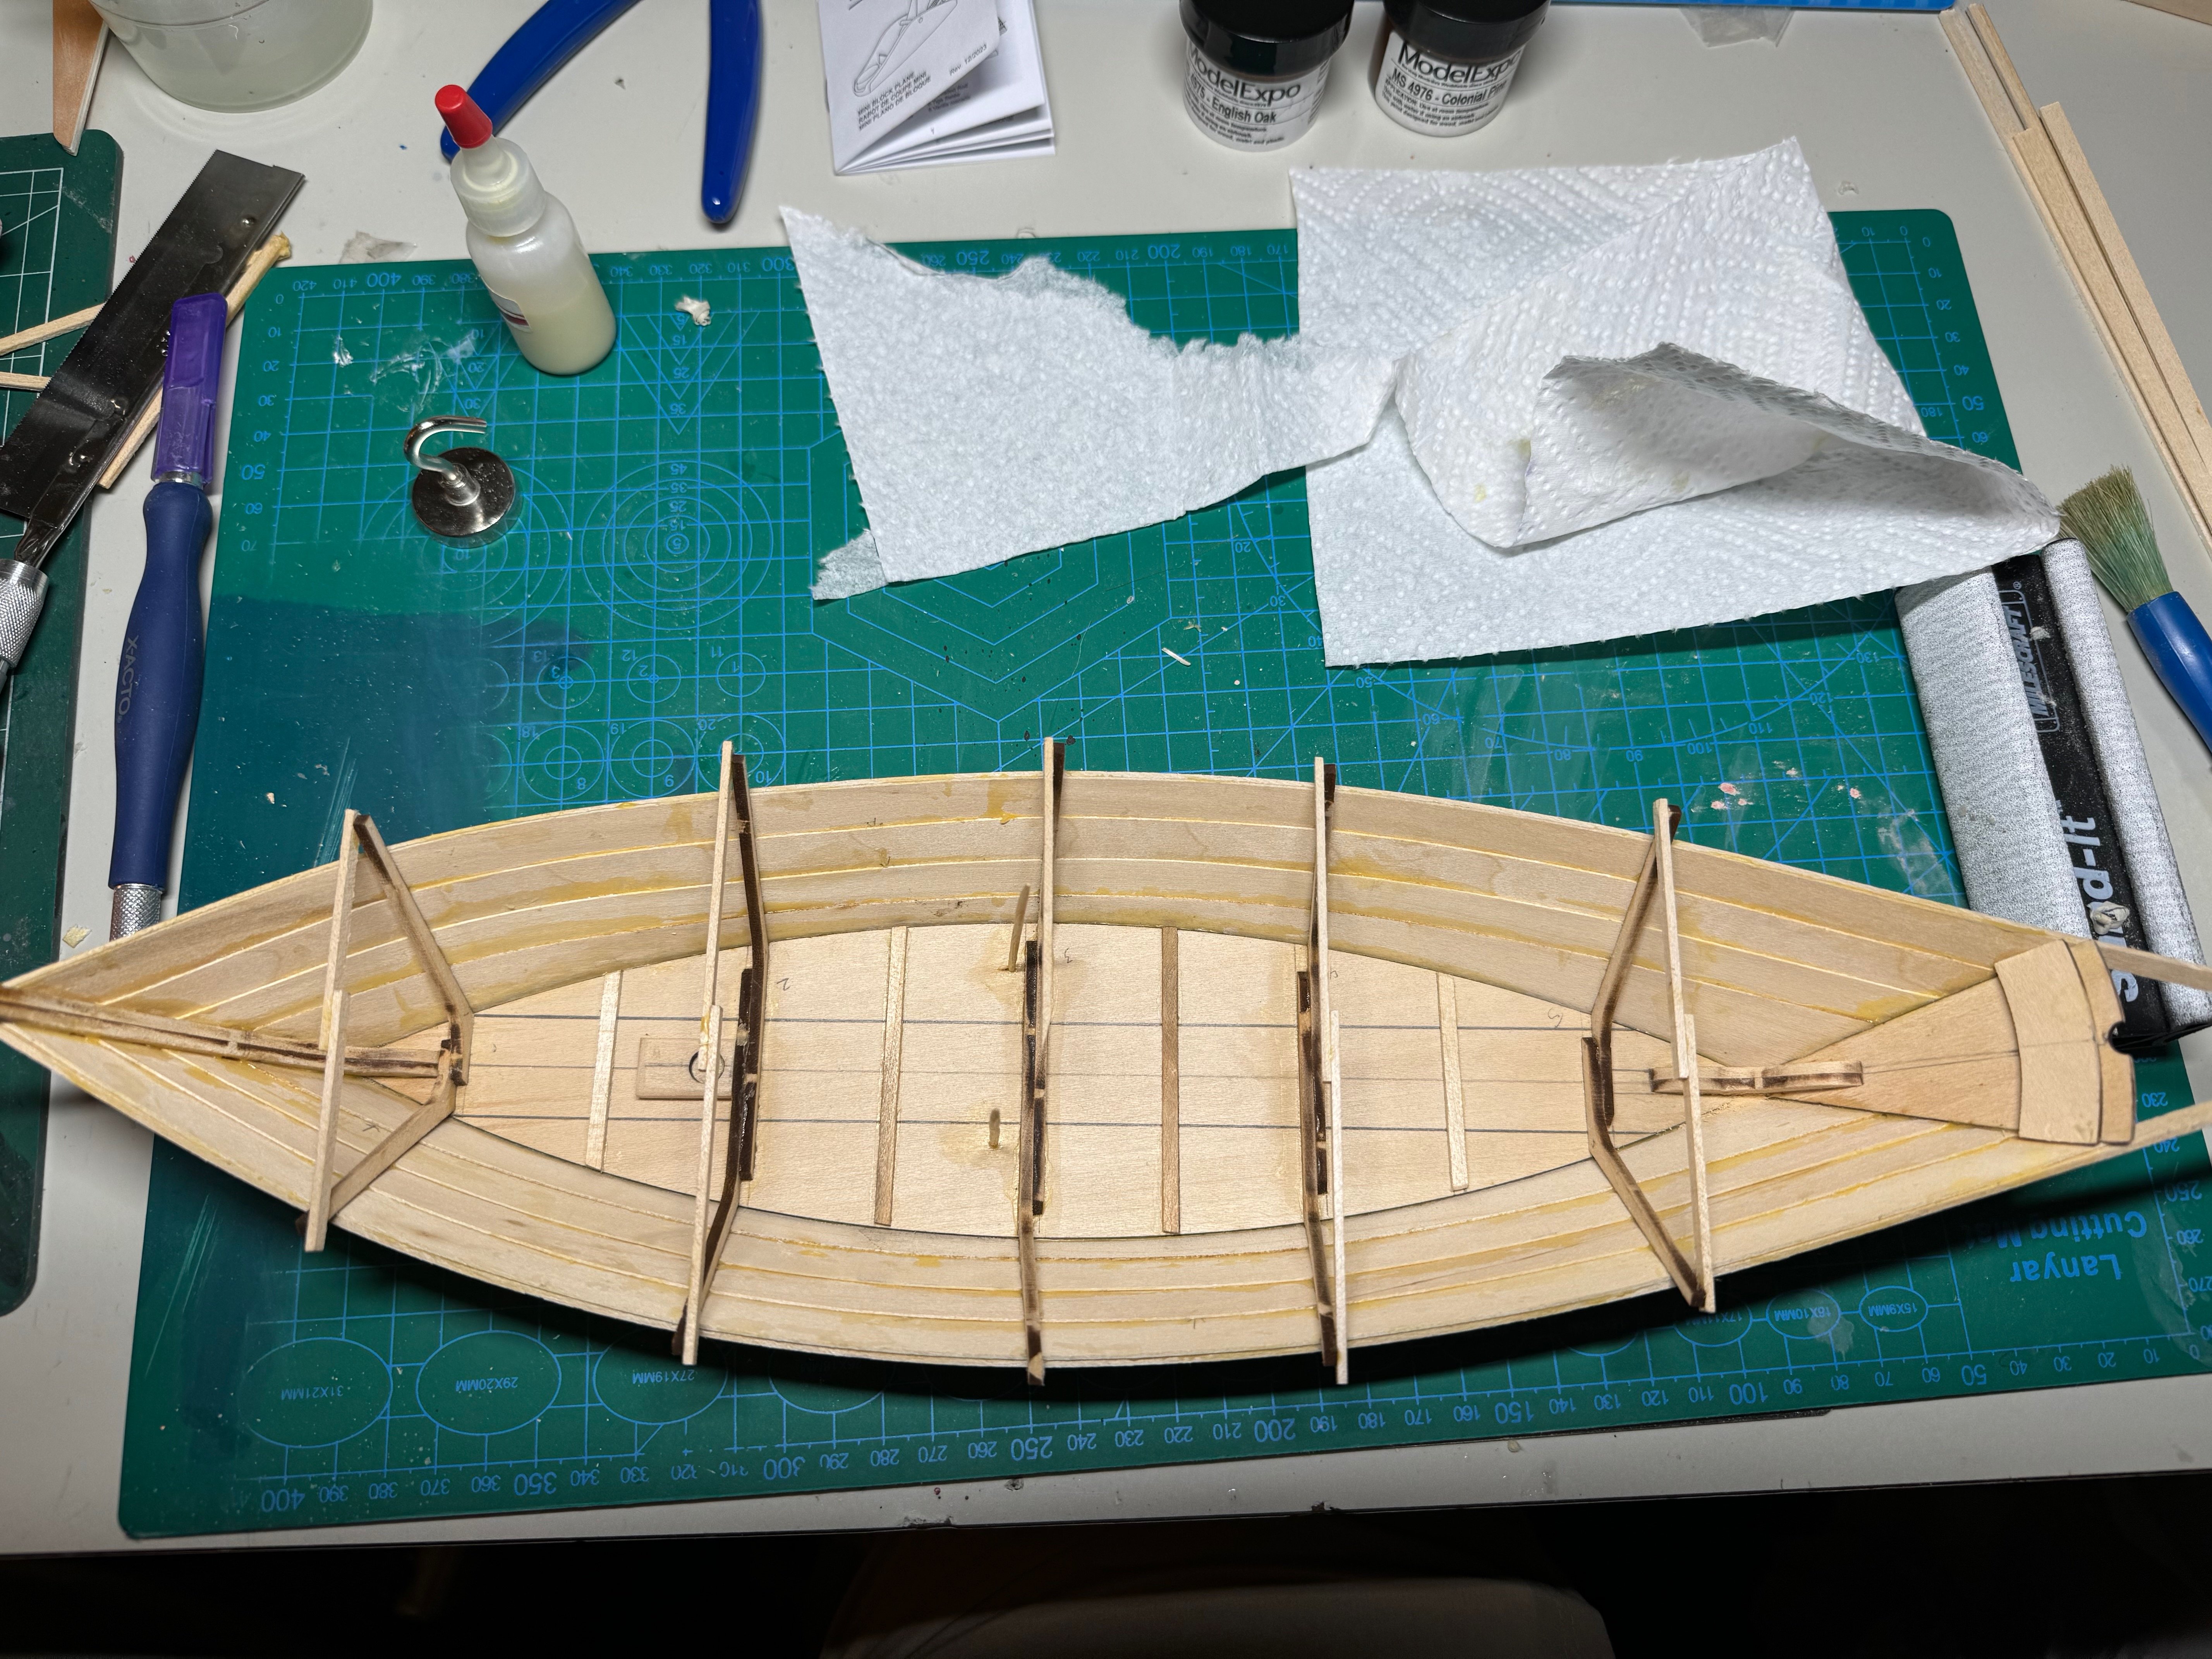
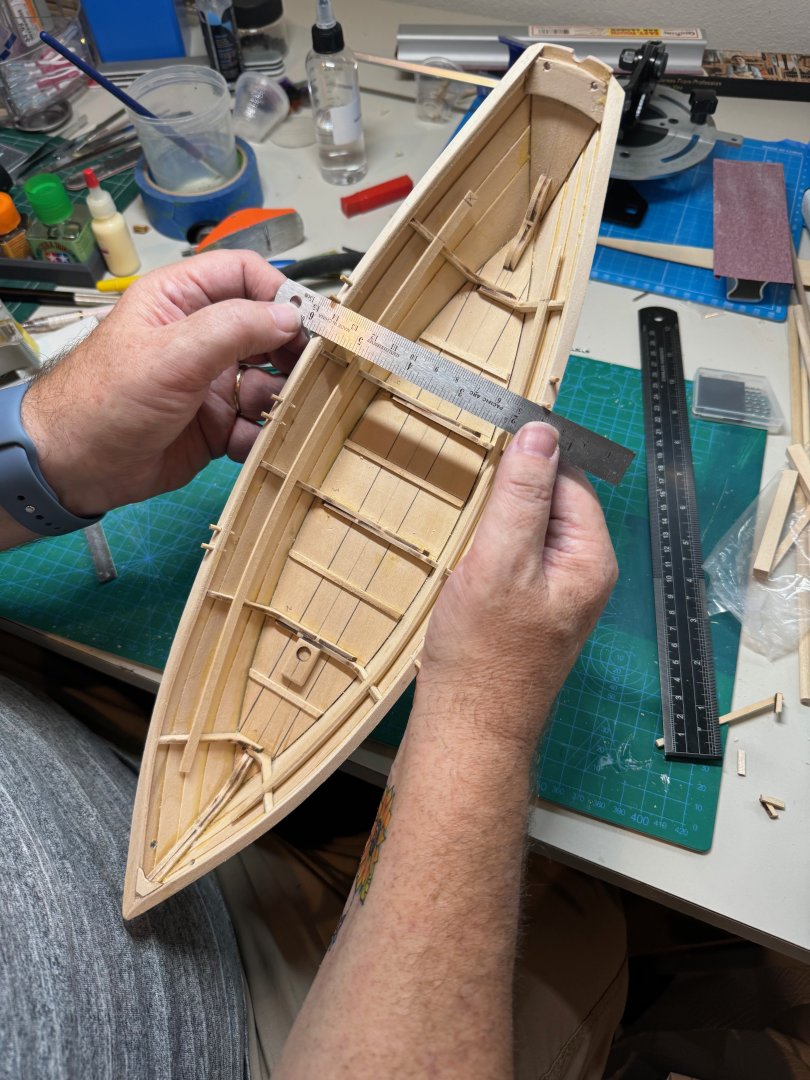
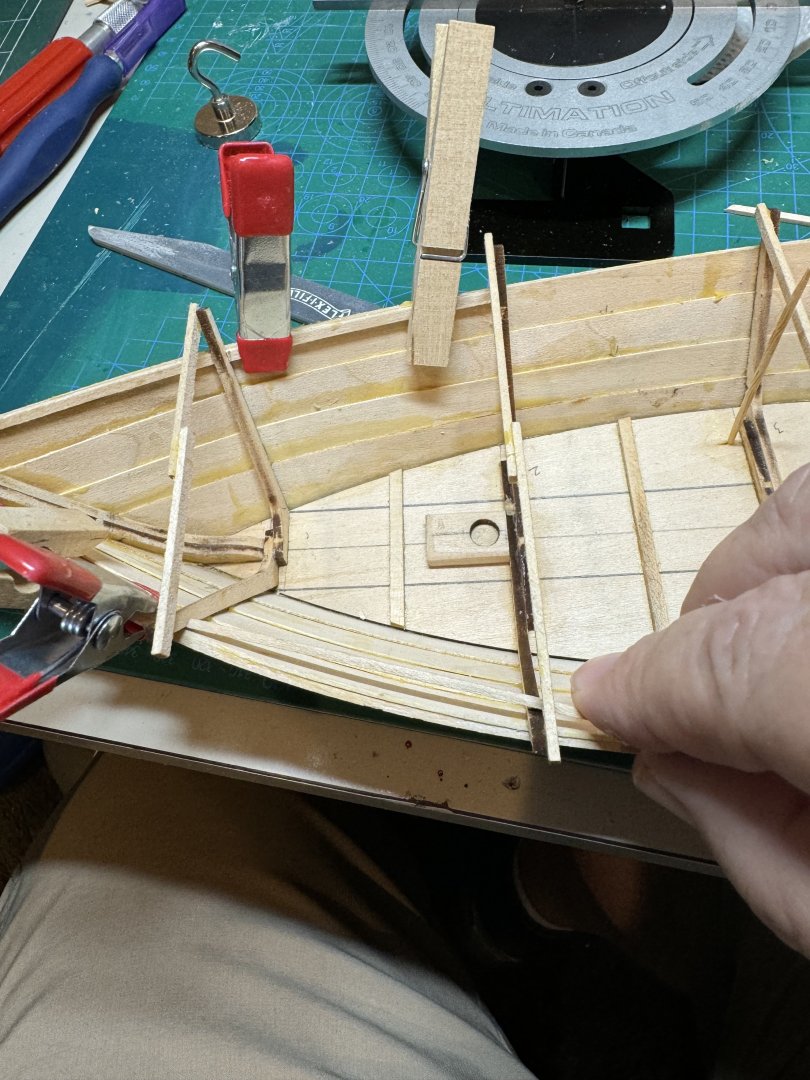
Good evening. I made some more progress on the Dory tonight with getting the gunwales partially installed. First I added the first layer of the inner gunwale between the frame. After the glue dried i then cut the frame flush with the gunwale. Next I added notches in the frames for the next layer of the gunwale. I then fitted the final piece of the inner gunwale. Finally I did some sanding and added filler in preparing for paint.


- 56 replies
-
- 7
-
-
- grand banks dory
- Midwest Products
- (and 2 more)
-
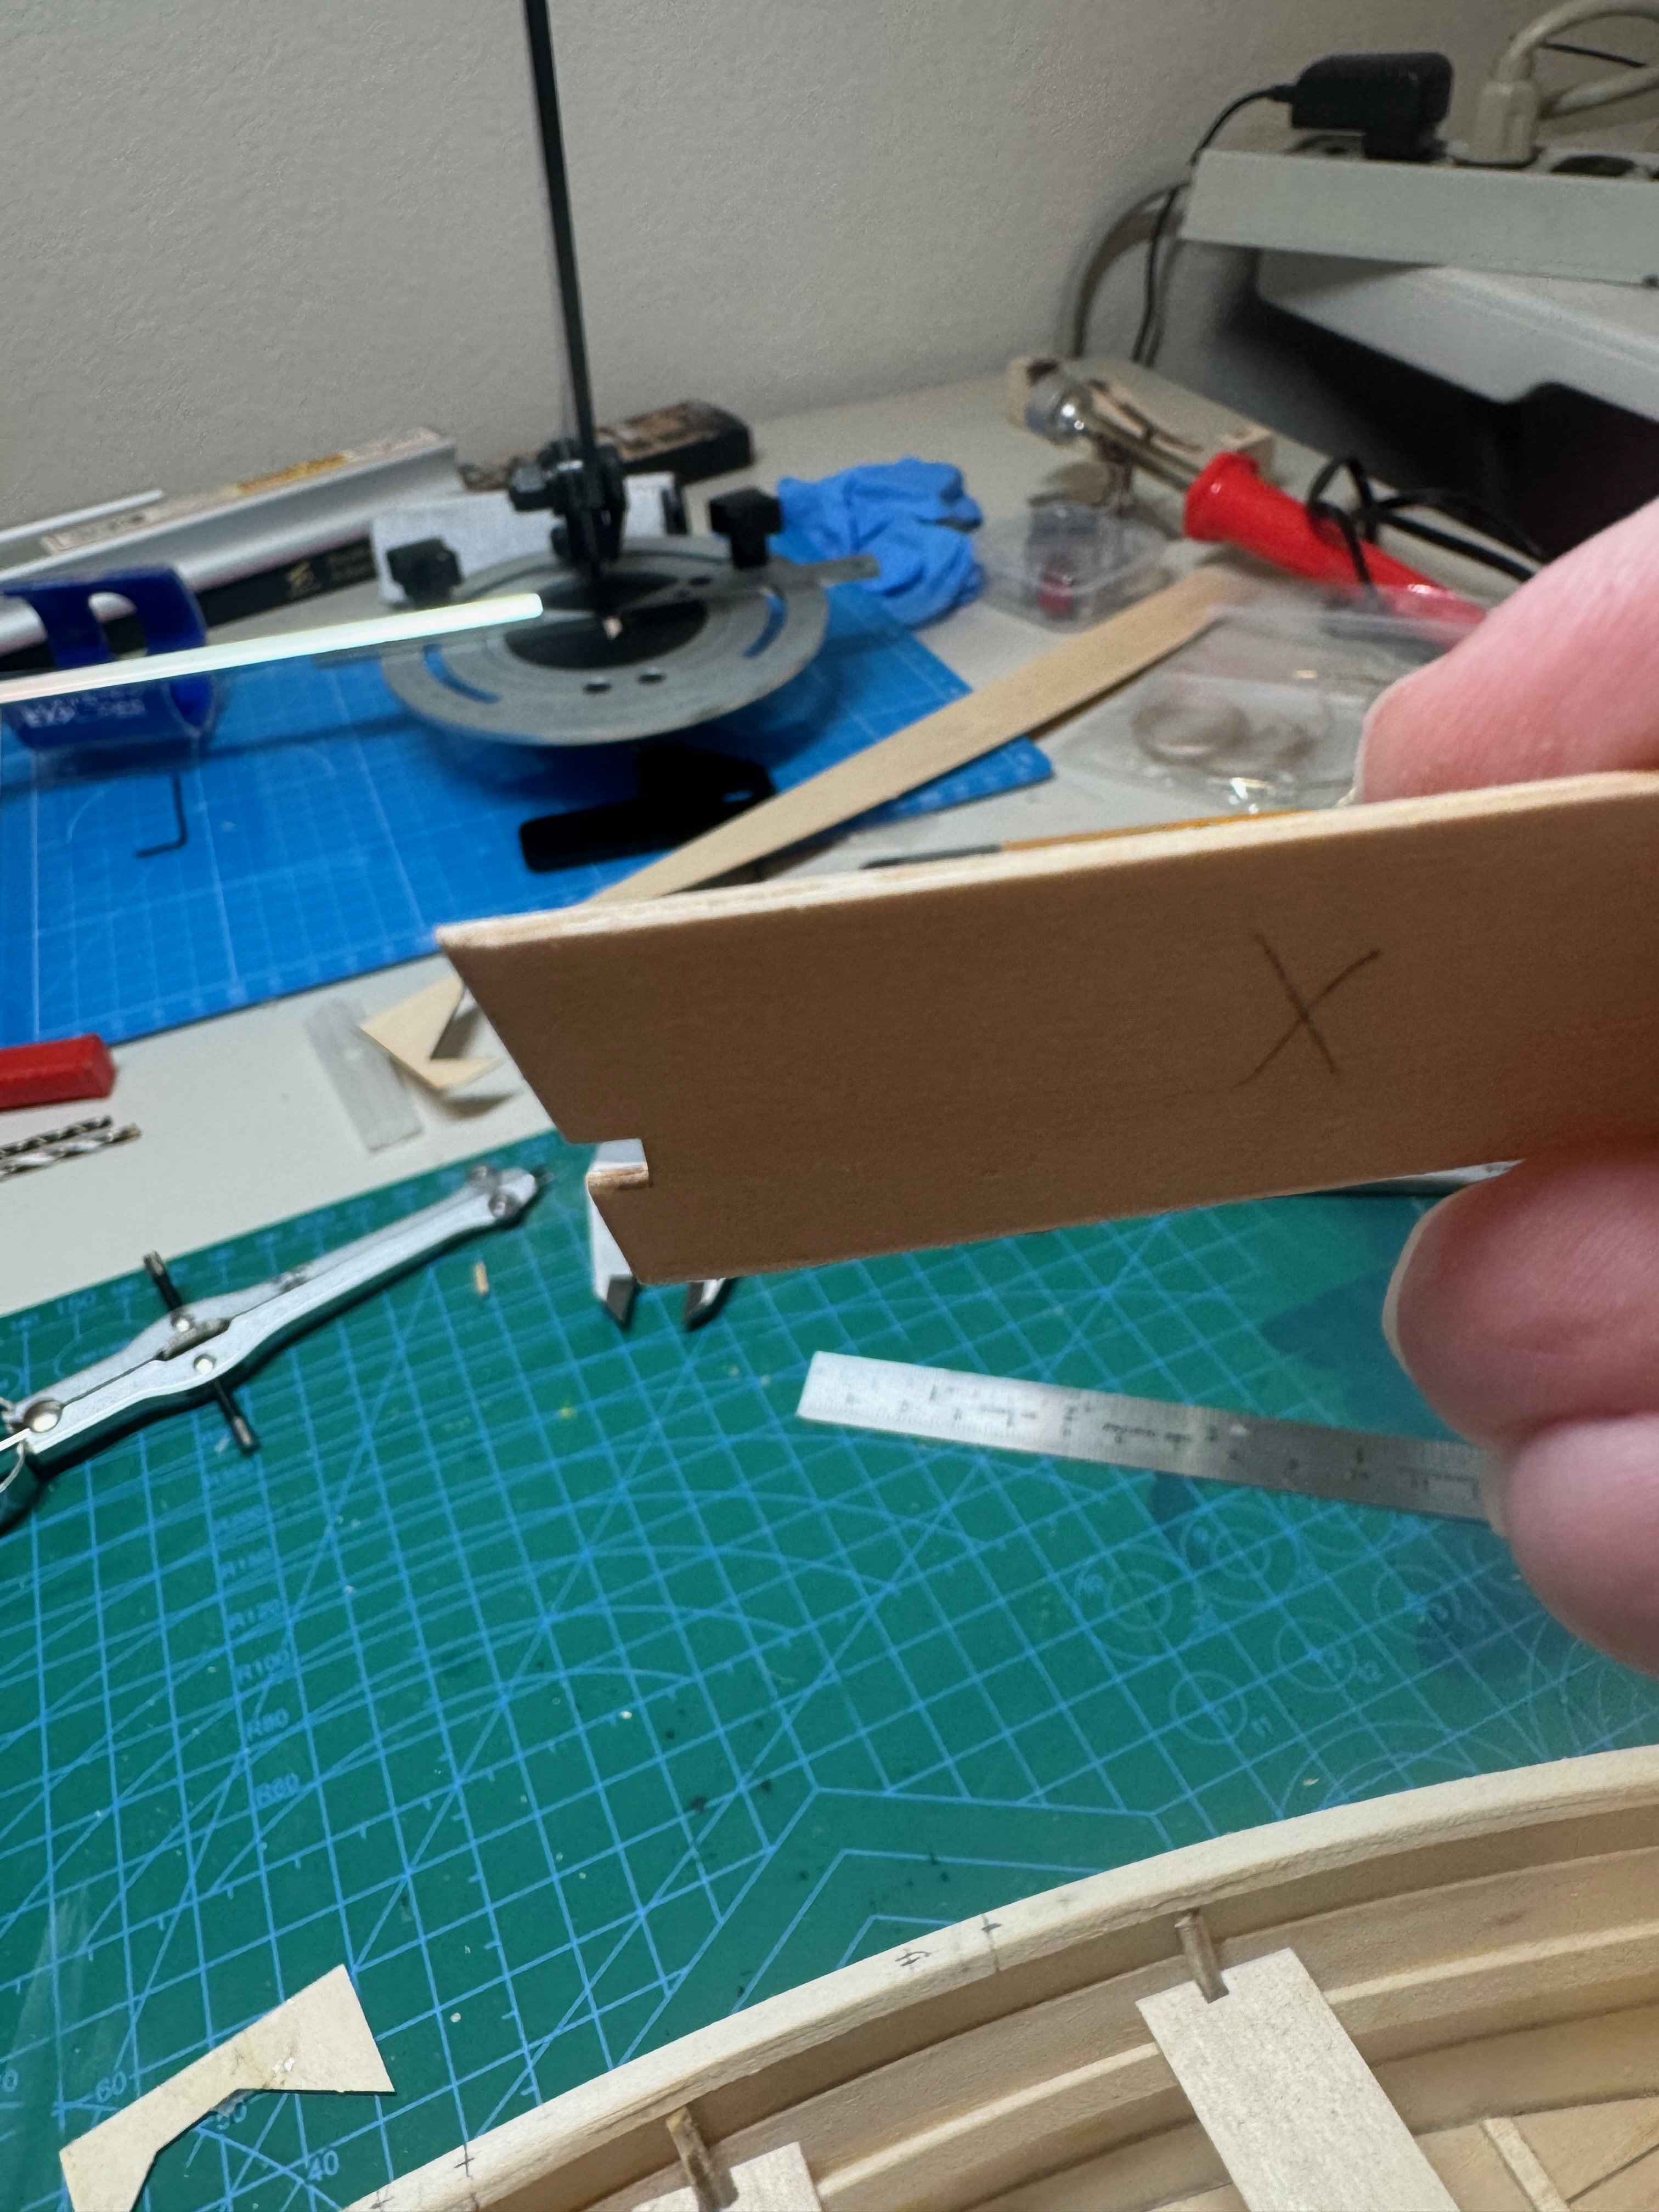
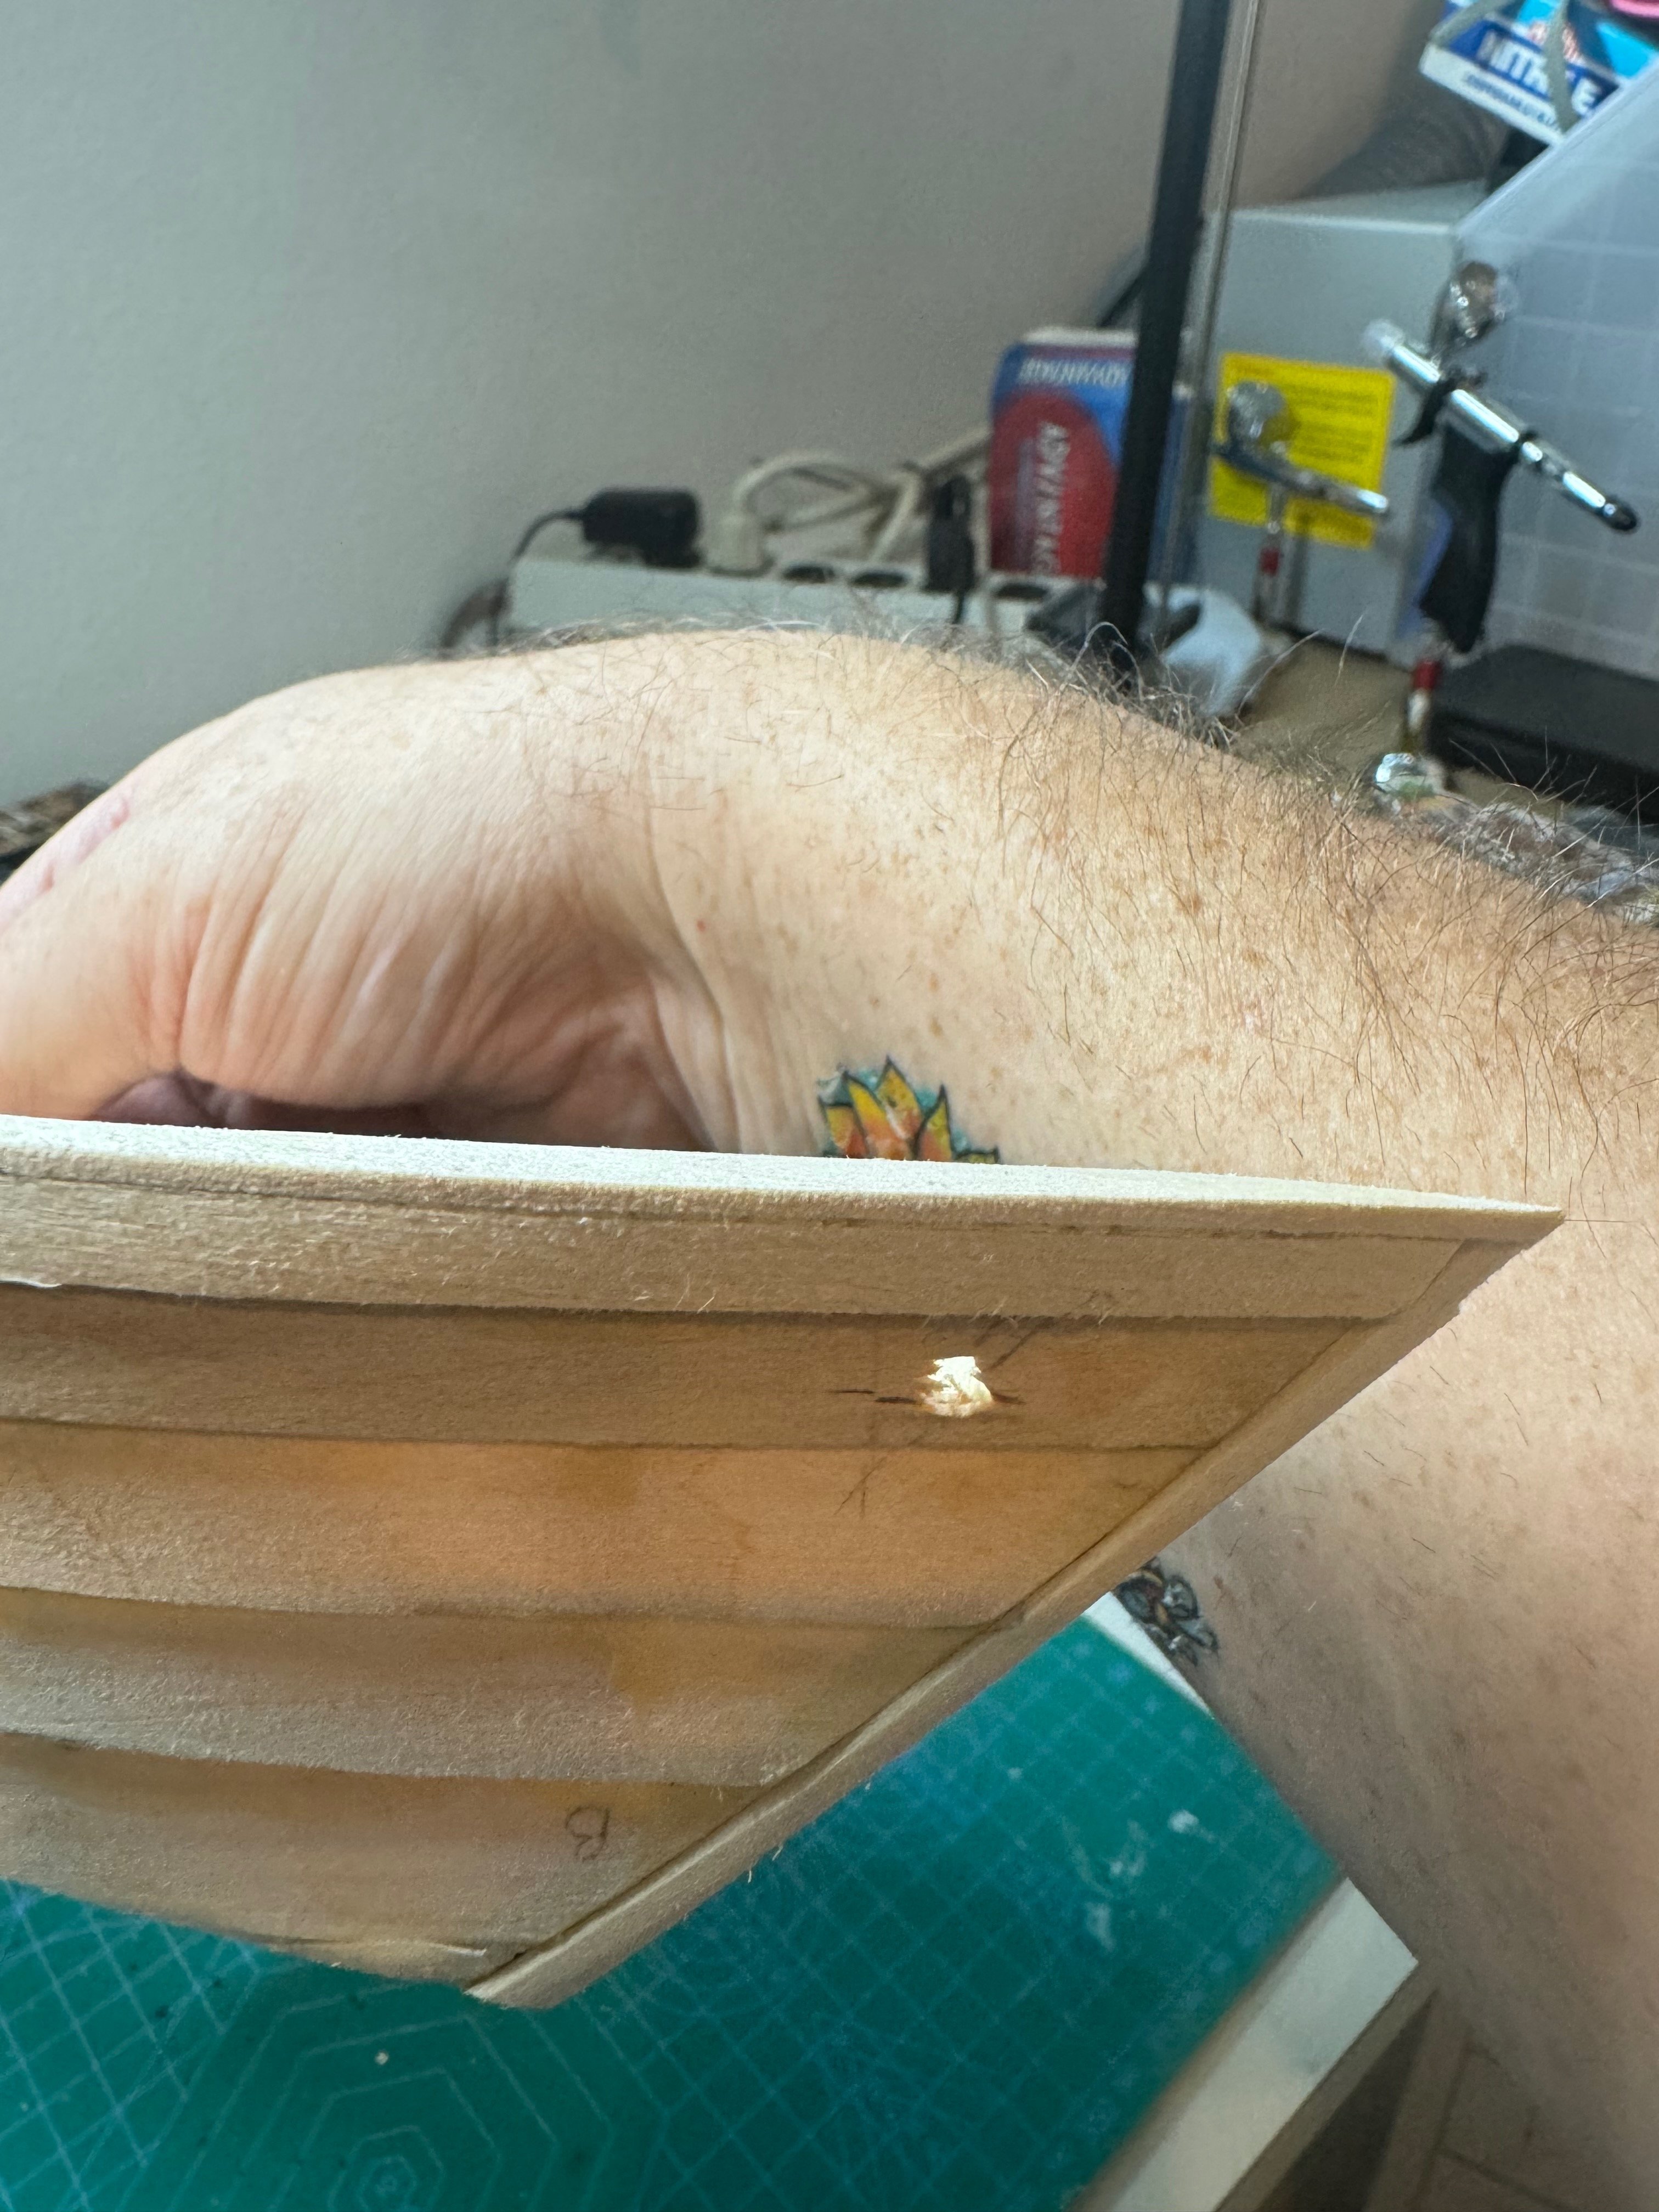
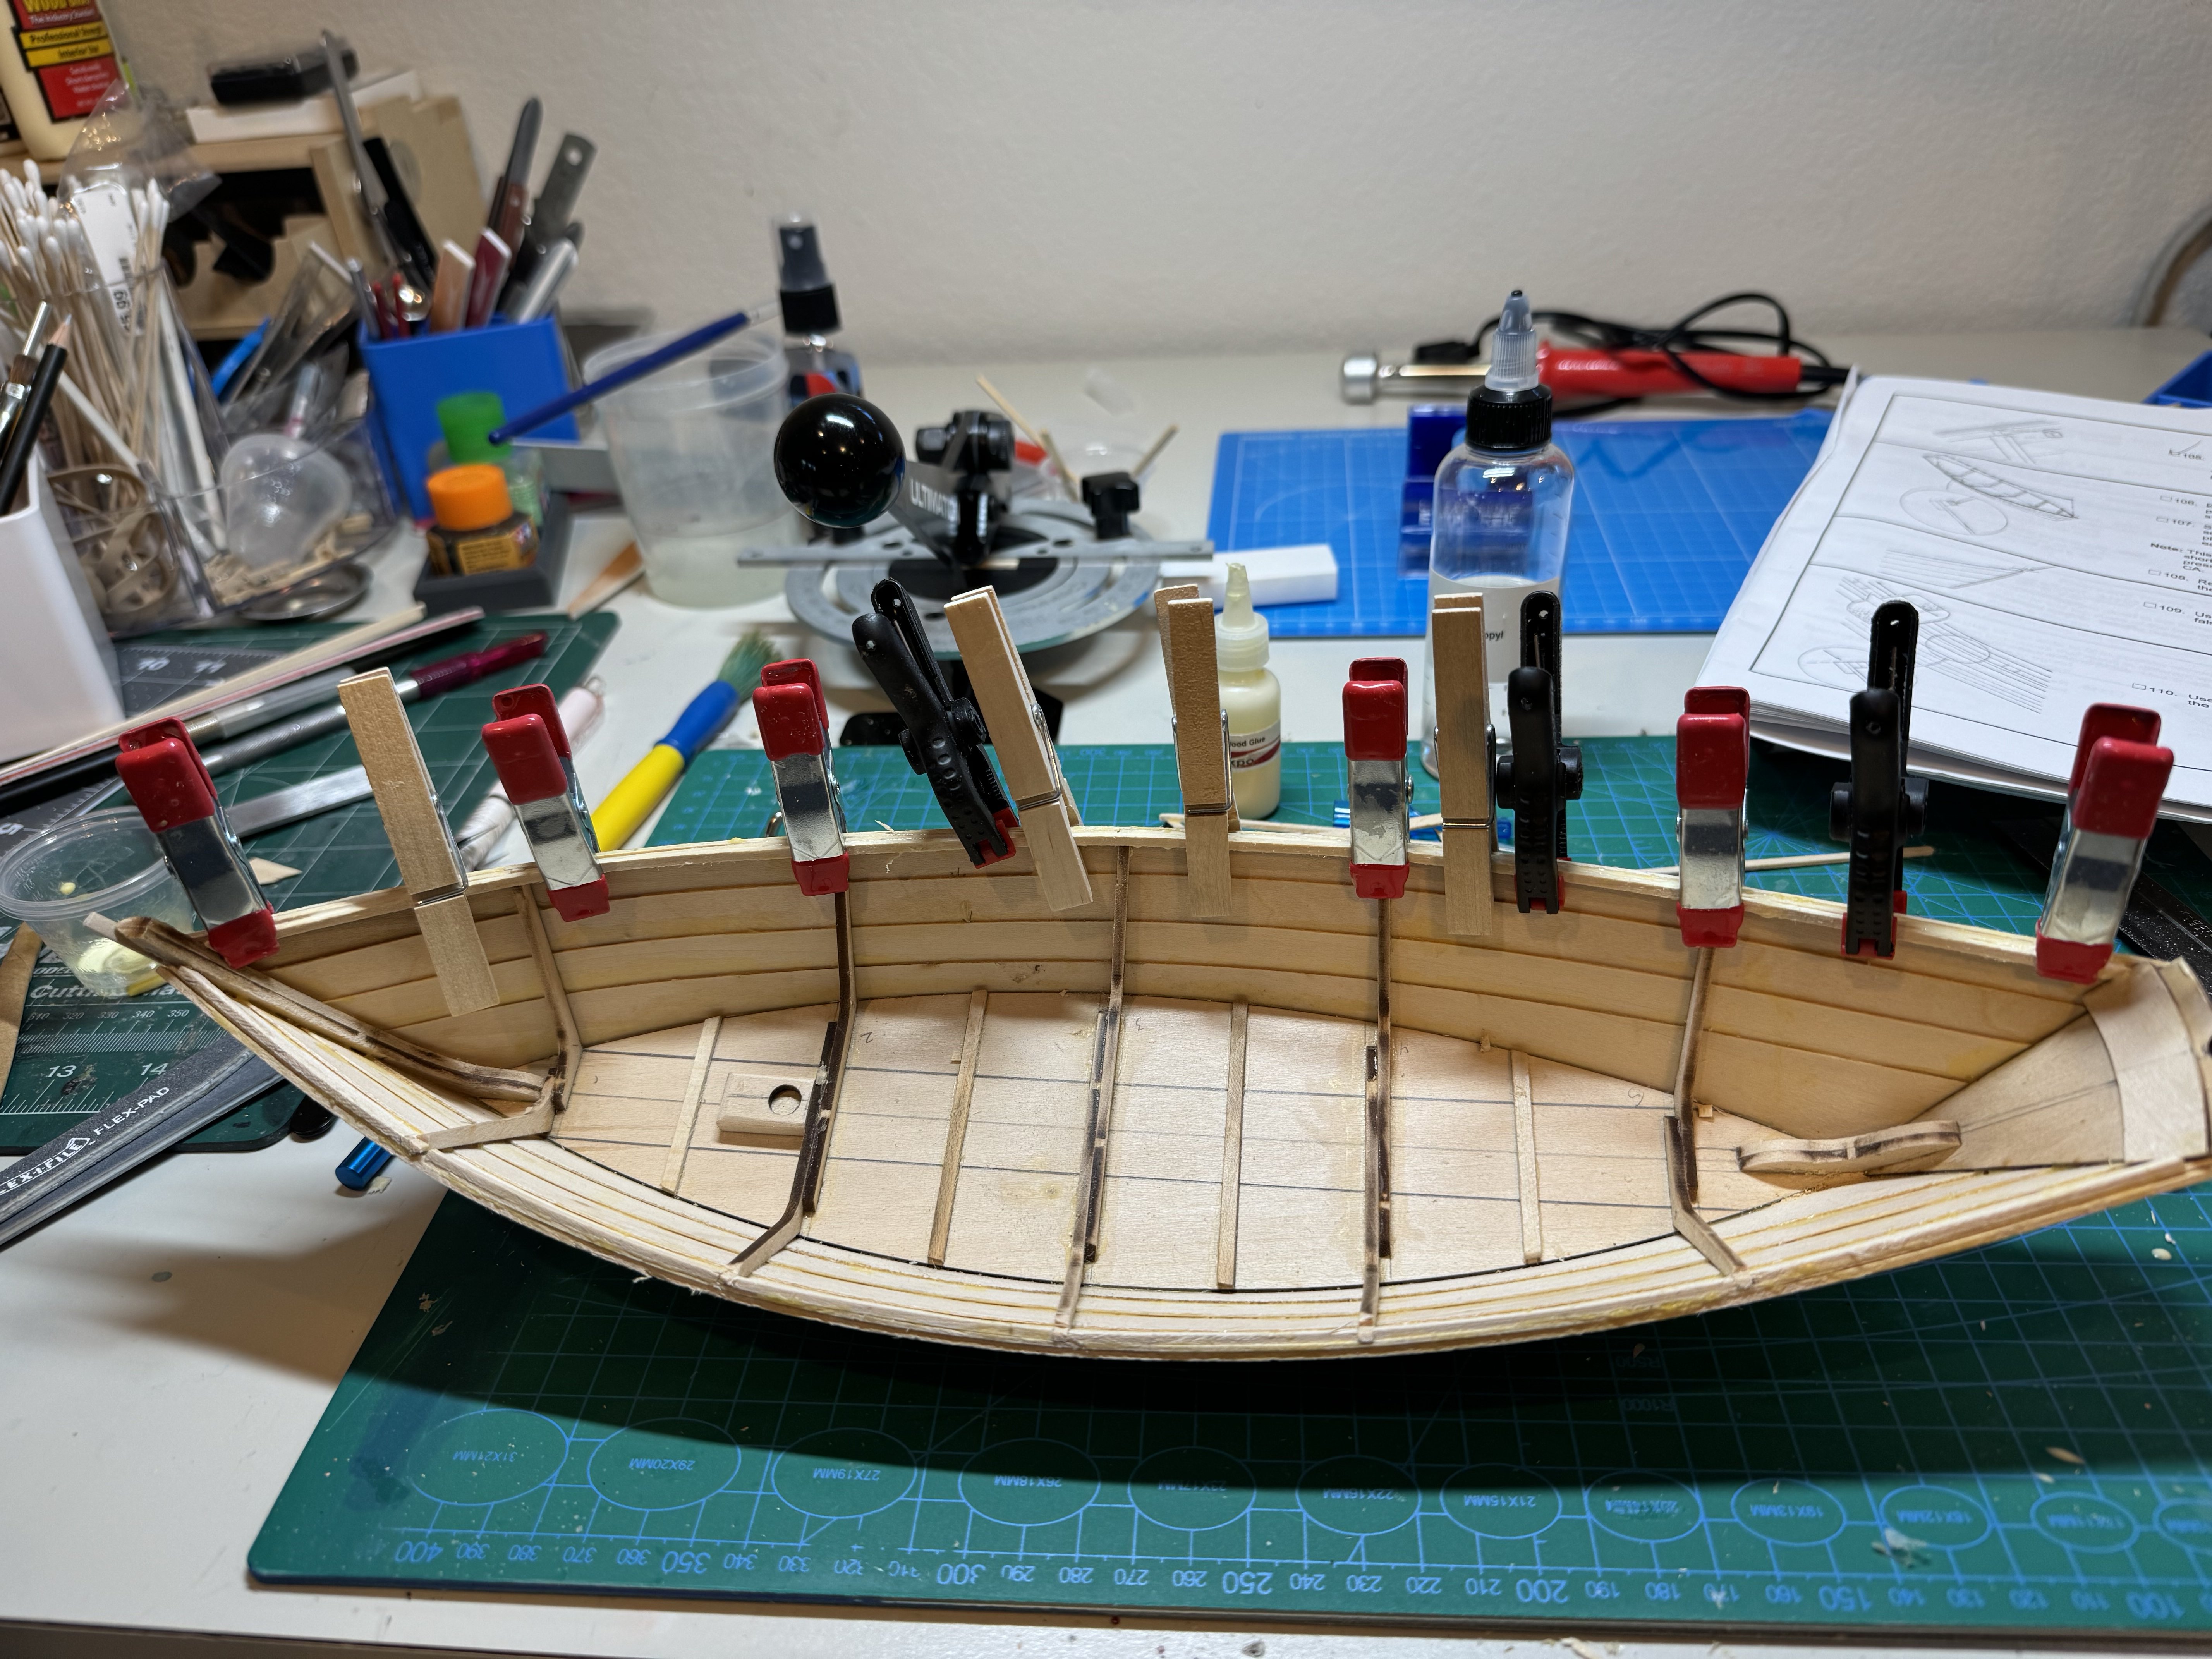
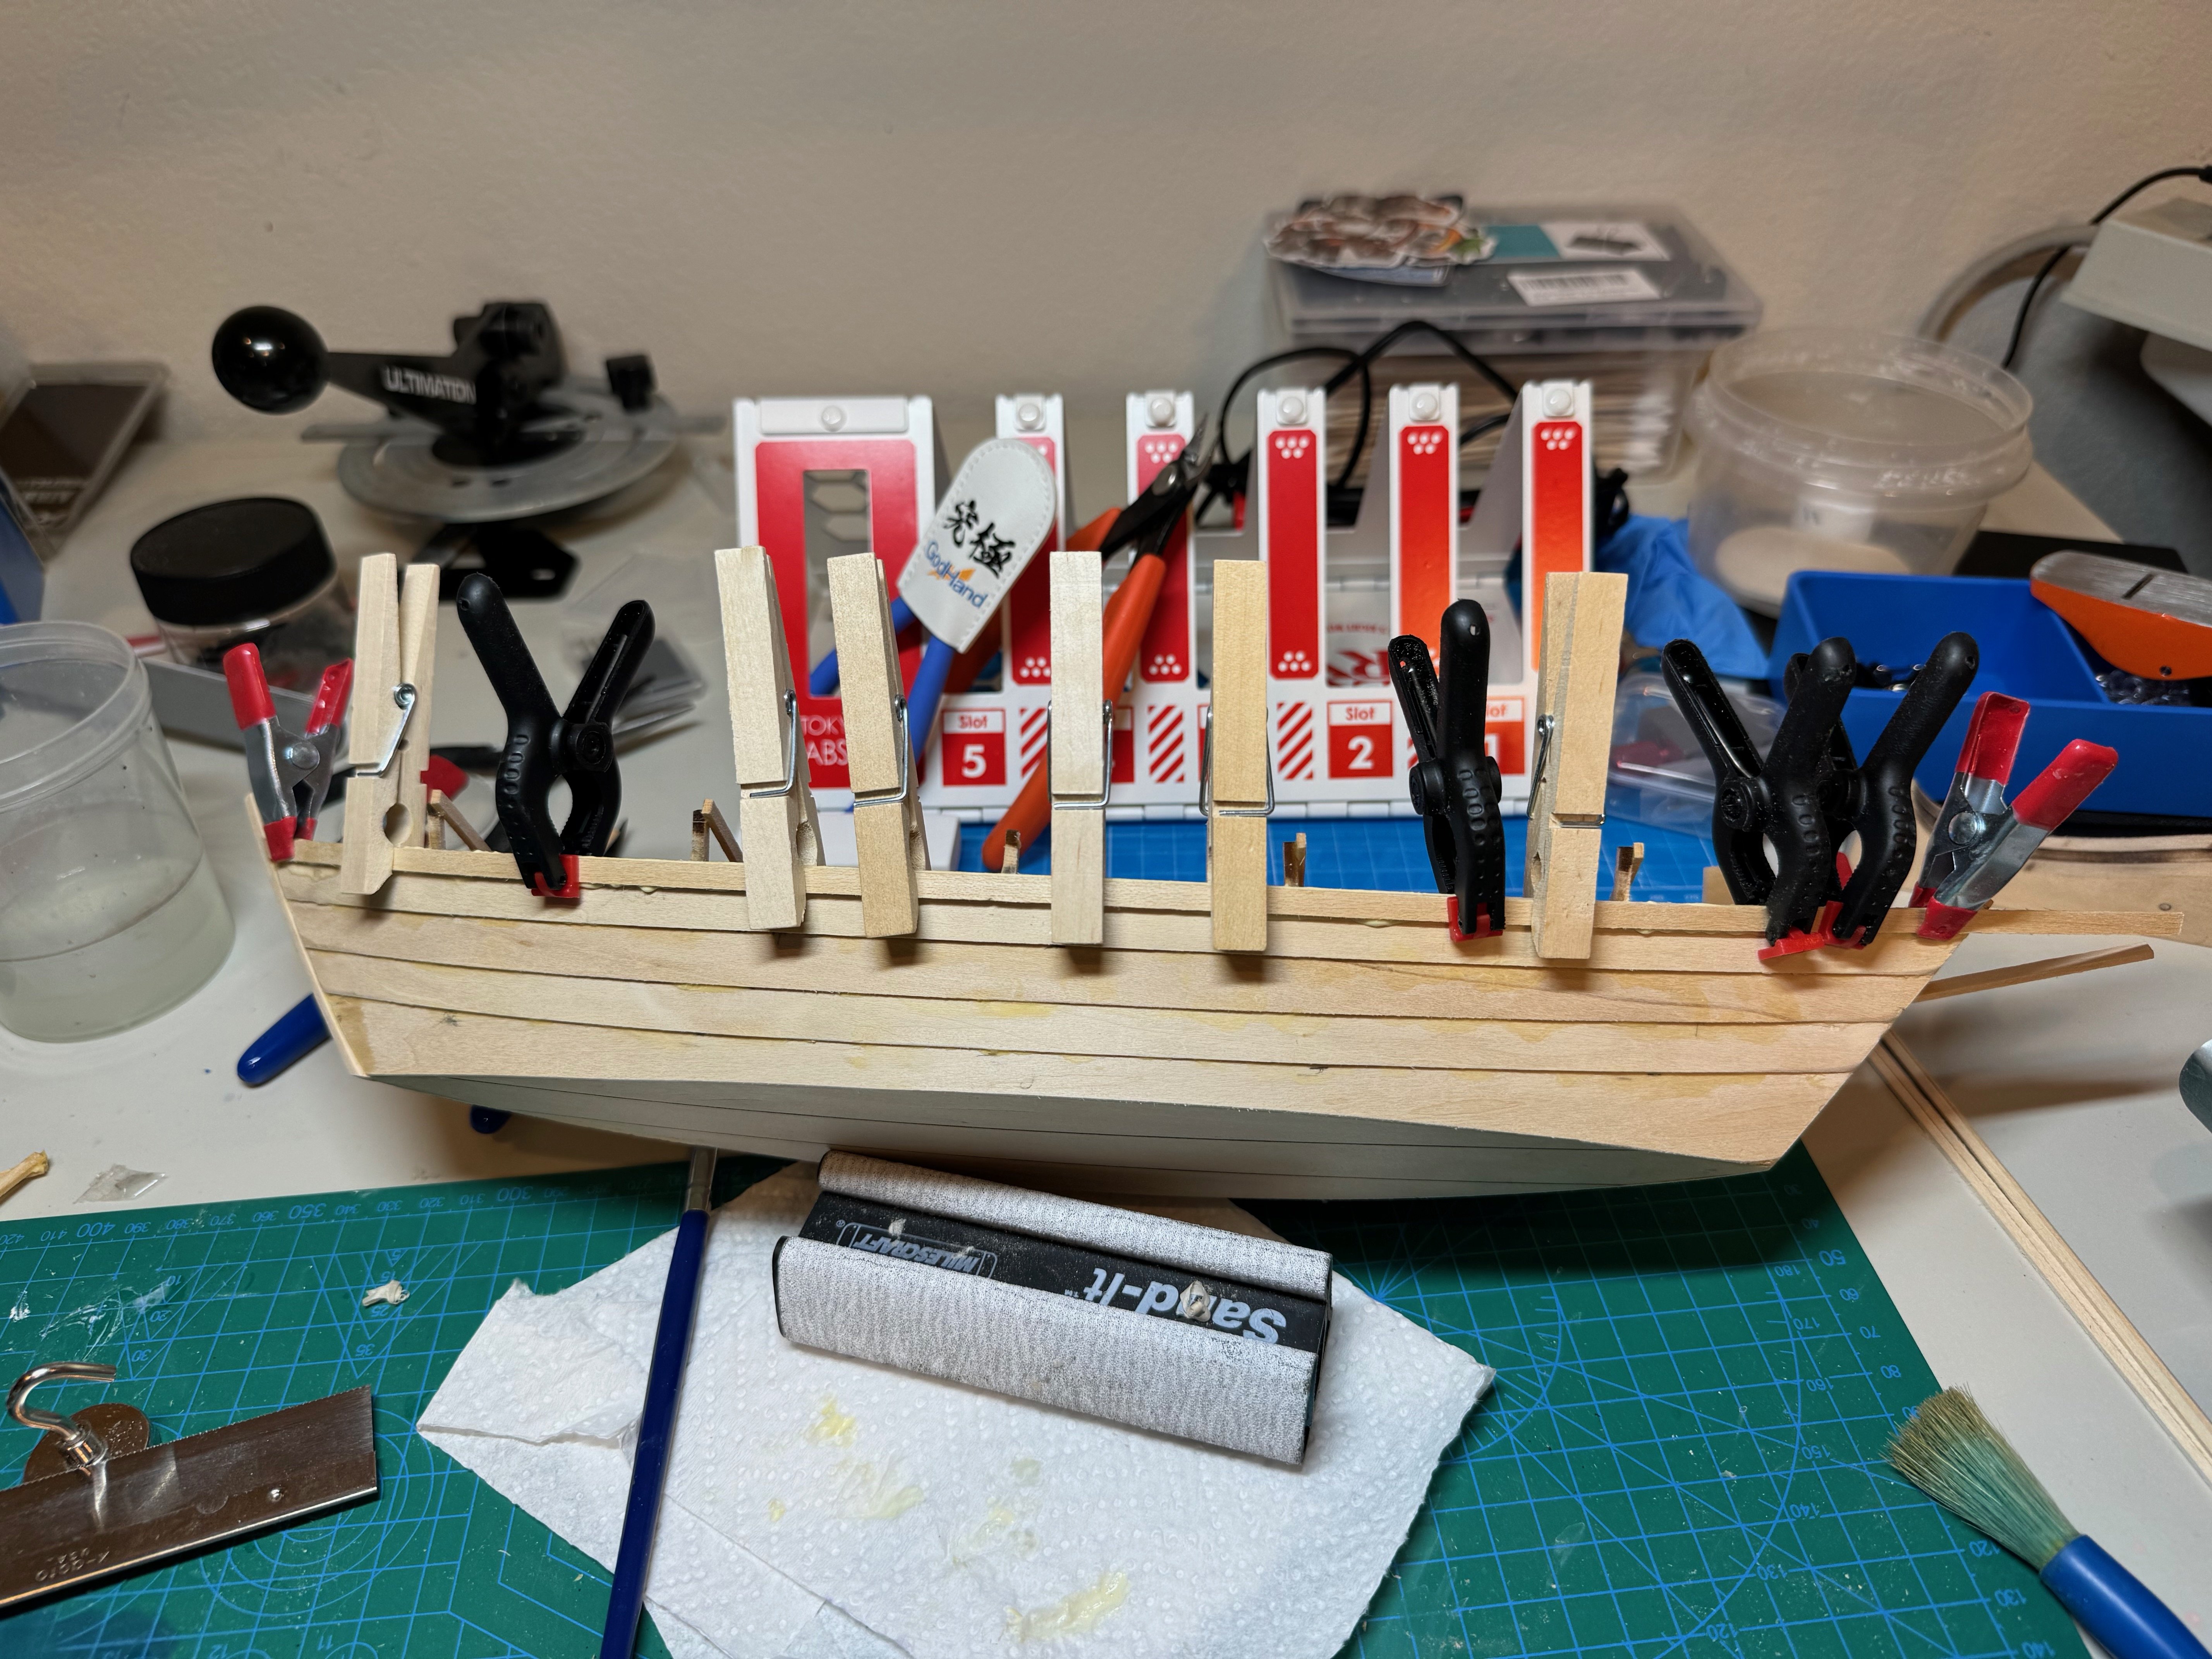
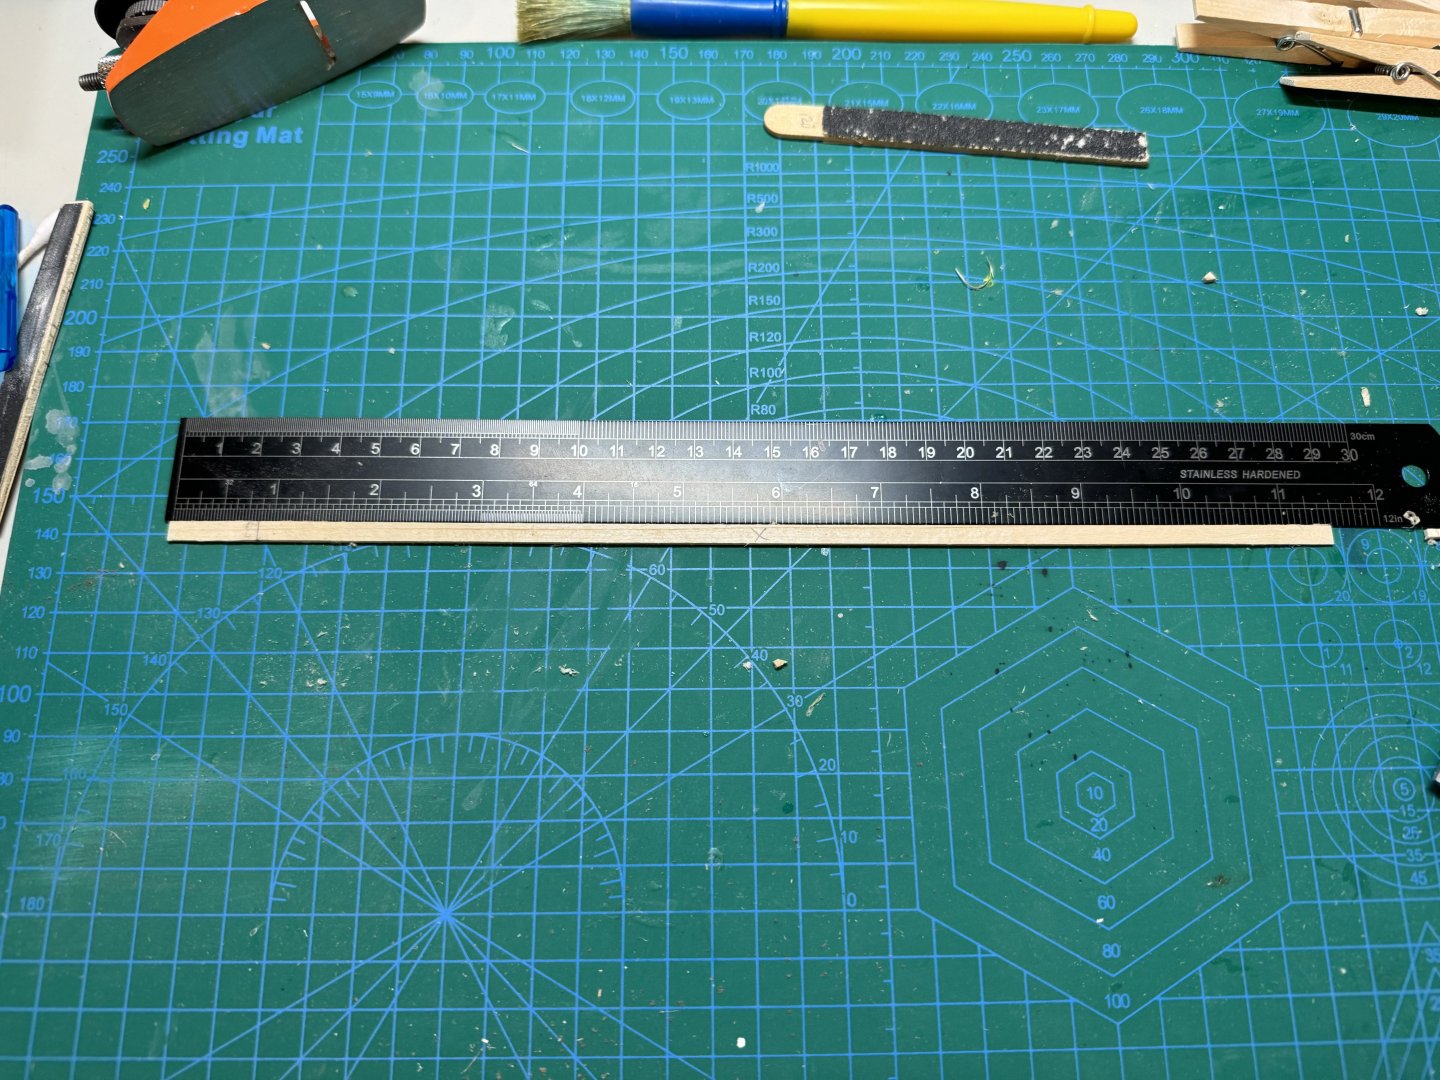
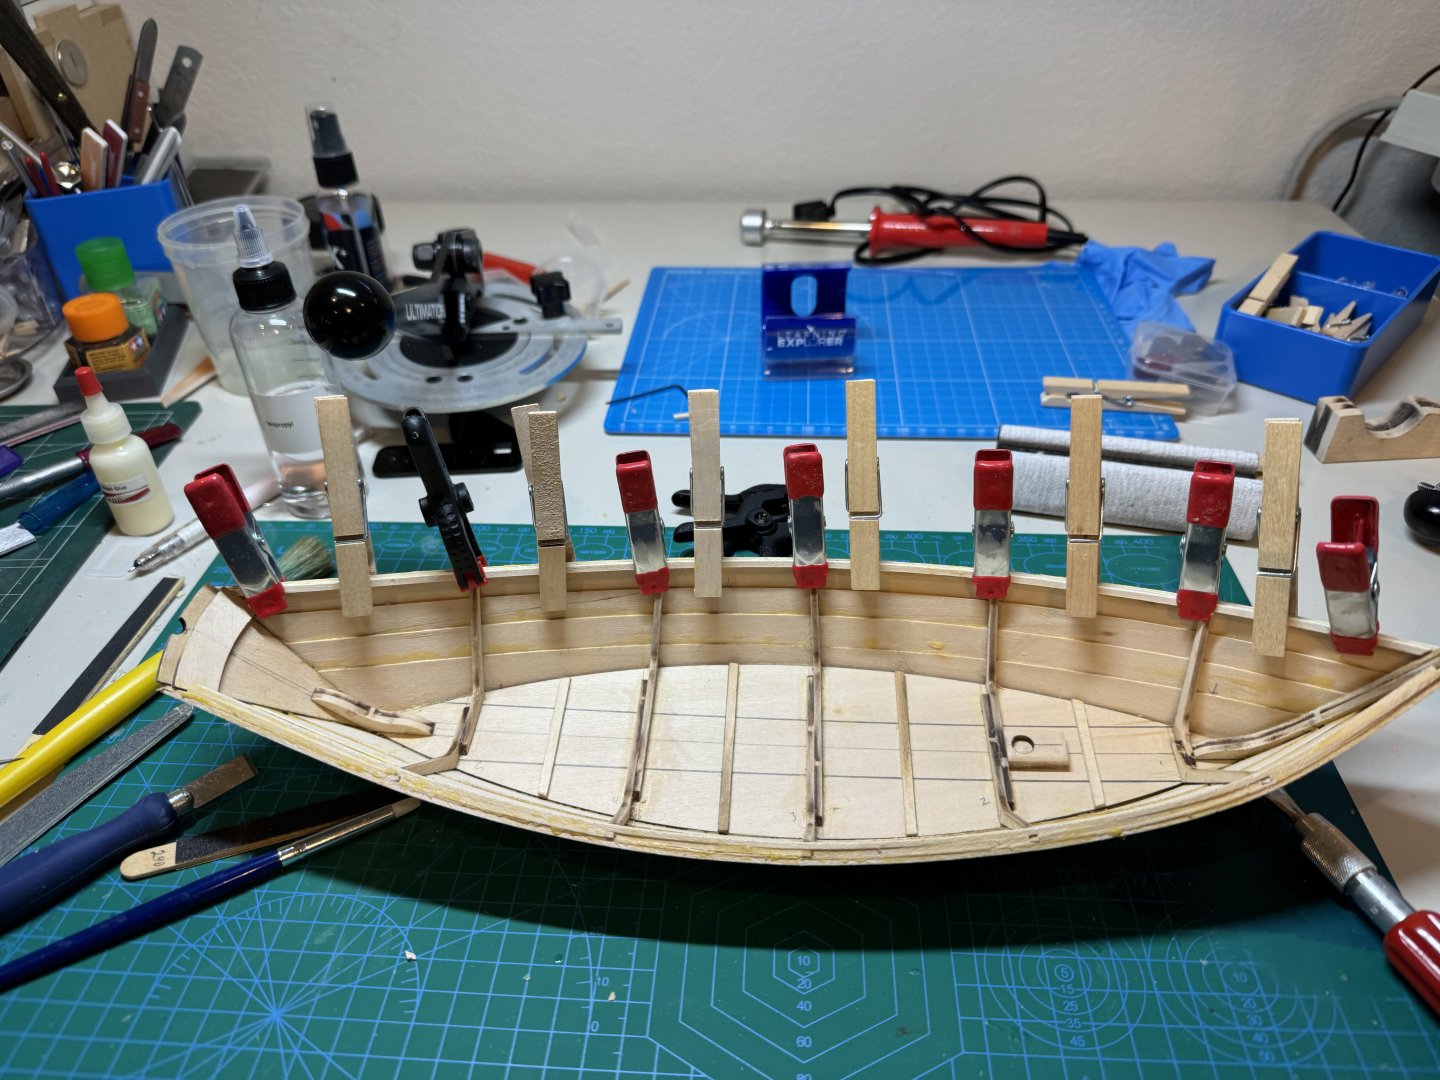
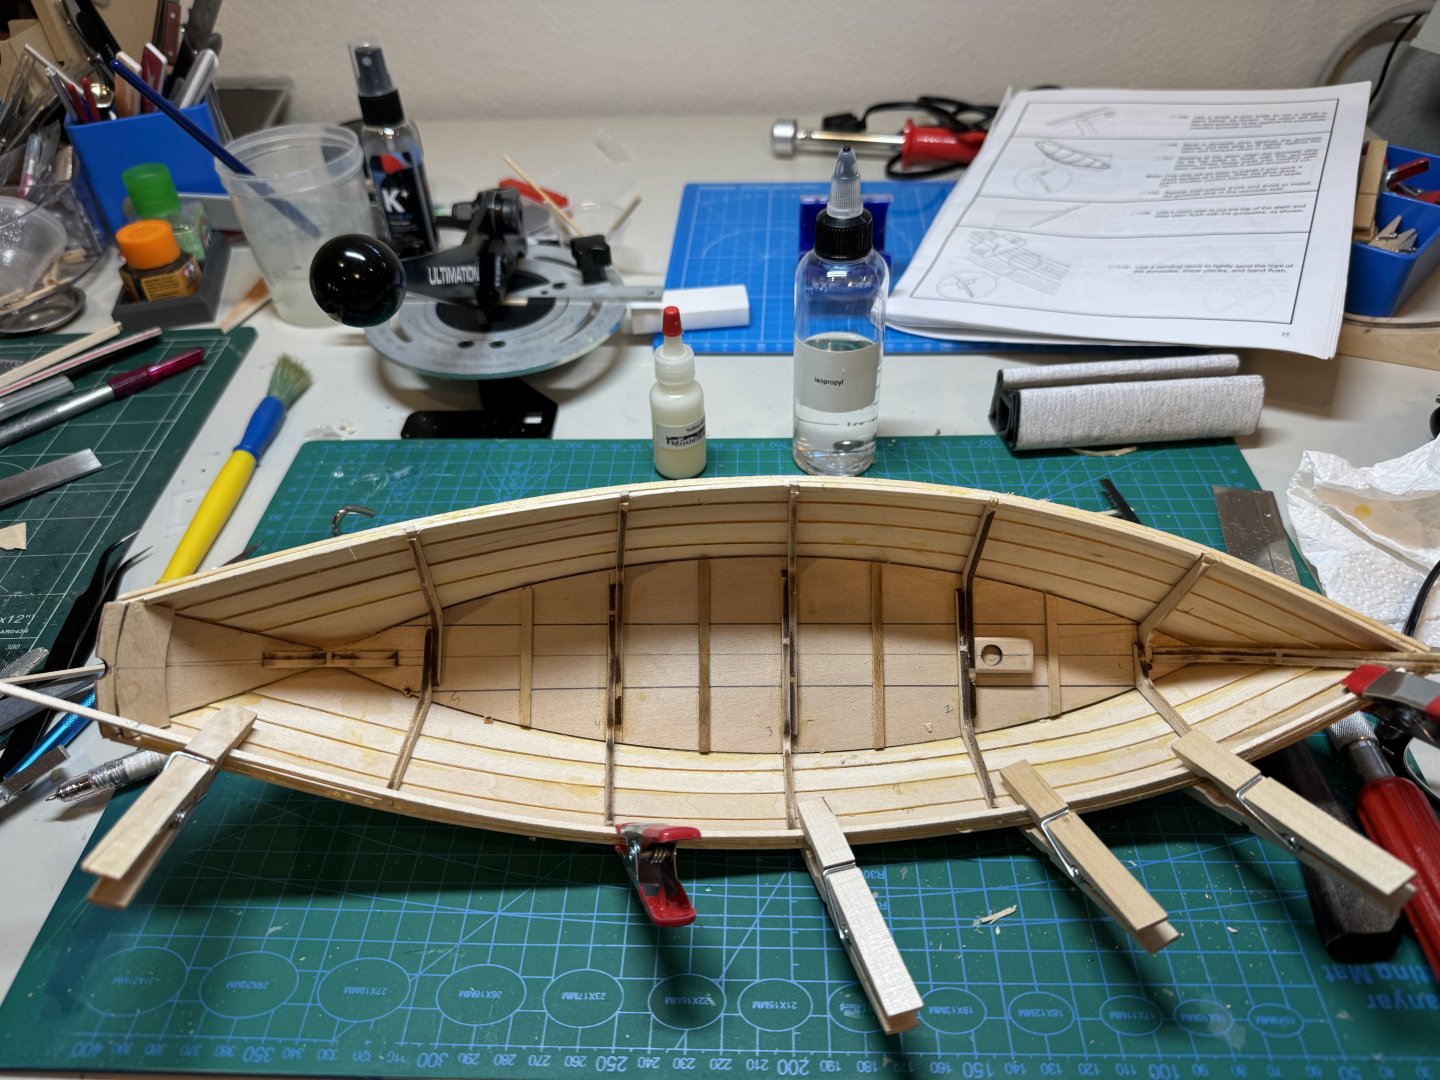
Good morning, A quick update from yesterday. I started work on the gunwales with adding the bands on the port and starboard sides. First I dry fitted the external plank and marked the bow angle. After trimming and sanding, I then glued to the side of the dory. The curve was not excessive so there was no need to use my plank bender. I repeated the process for the other side, and let it sit over night. Here is the results after removing the clamps.


- 56 replies
-
- 8
-
-
- grand banks dory
- Midwest Products
- (and 2 more)
-
Dan, are you finding working with brass pretty easy? Any tips?
- 37 replies
-
- 1
-
-
- Model Shipways
- muscongus bay lobster smack
- (and 1 more)
-
yeah i did the model shipways dory and this is a nice complement to the project and in general i would suggest this build first then move to shipwright series.
- 56 replies
-
- 3
-
-
- grand banks dory
- Midwest Products
- (and 2 more)