HOLIDAY DONATION DRIVE - SUPPORT MSW - DO YOUR PART TO KEEP THIS GREAT FORUM GOING! (Only 72 donations so far out of 49,000 members - Can we at least get 100? C'mon guys!)
×


Stuka
-
Posts
137 -
Joined
-
Last visited
1 Follower

Recent Profile Visitors
1,079 profile views


-
 AJohnson reacted to a post in a topic:
HM Cutter Sherbourne by Danny_CZ - Vanguard Models - 1:64
AJohnson reacted to a post in a topic:
HM Cutter Sherbourne by Danny_CZ - Vanguard Models - 1:64
-
Nirvana reacted to a post in a topic:
HM Cutter Sherbourne by Danny_CZ - Vanguard Models - 1:64
-
Stuka reacted to a post in a topic:
HM Cutter Sherbourne by Danny_CZ - Vanguard Models - 1:64
-
Stuka reacted to a post in a topic:
HM Cutter Sherbourne by Danny_CZ - Vanguard Models - 1:64
-
Stuka reacted to a post in a topic:
HM Cutter Sherbourne by Danny_CZ - Vanguard Models - 1:64
-
Zvr reacted to a post in a topic:
HM Brig-Sloop Speedy by Stuka - Vanguard Models - 1:64
-
Paul White reacted to a post in a topic:
HMS Sherborne - Caldercraft vs Vanguard
-
Danny_CZ reacted to a post in a topic:
HM Brig-Sloop Speedy by Stuka - Vanguard Models - 1:64
-
Stuka reacted to a post in a topic:
HM Cutter Sherbourne by Danny_CZ - Vanguard Models - 1:64
-
ccoyle reacted to a post in a topic:
HM Brig-Sloop Speedy by Stuka - Vanguard Models - 1:64
-
Ryland Craze reacted to a post in a topic:
HM Cutter Sherbourne by Danny_CZ - Vanguard Models - 1:64
-
Stuka reacted to a post in a topic:
HM Cutter Sherbourne by Danny_CZ - Vanguard Models - 1:64
-
Keith Black reacted to a post in a topic:
HM Cutter Sherbourne by Danny_CZ - Vanguard Models - 1:64
-
Stuka reacted to a post in a topic:
HM Cutter Sherbourne by Danny_CZ - Vanguard Models - 1:64
-
Stuka reacted to a post in a topic:
HM Armed Cutter Sherbourne 1763 by Nick 843 - Vanguard Models - 1:64
-
Stuka reacted to a post in a topic:
Lady Isabella by palmerit - Vanguard Models - 1:64 - Zulu
-
 Off to a good start Danny! About the planking question, There are diffirent approaches to it. Some like to create equally divided sections where you use battens on the hull. Myself I measured the length of the bulkheads using a thin piece of paper which in my case was around 6cm long. I then placed this on each bulkhead and wrote down the length of it. After I looked for the bulkheads in the middle section where the length started to decline towards the fore and aft. Cause this is where the tapering would start of the plank eventully meeting the end of it. How far the tapering goes depends on the length of the final and first bulkead divided by the amount of planks you can fit. And I try to follow the rule of not having a plank go below 2.5mm in width due to risk of it cracking once you put the pin through it. Now there are probably alot of better guides out there and threads or even advice from the veterans of this site as I myself has only planked two ships. So I consider myself still new to it but best of luck to your build!
 -
Stuka reacted to a post in a topic:
HM Cutter Sherbourne by Danny_CZ - Vanguard Models - 1:64
-
palmerit reacted to a post in a topic:
HM Brig-Sloop Speedy by Stuka - Vanguard Models - 1:64
-
Stuka reacted to a post in a topic:
HM Brig-Sloop Speedy by Stuka - Vanguard Models - 1:64
-
JacquesCousteau reacted to a post in a topic:
HM Brig-Sloop Speedy by Stuka - Vanguard Models - 1:64
-
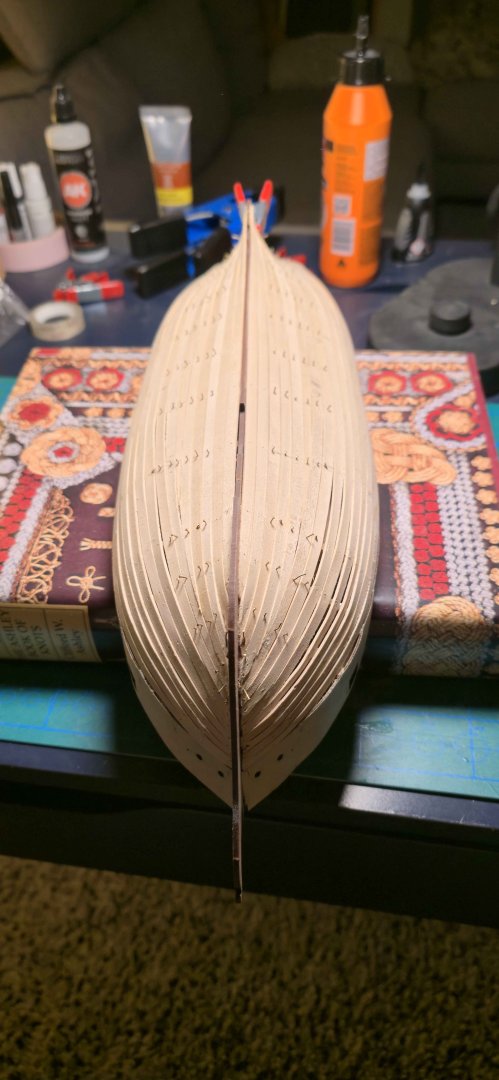
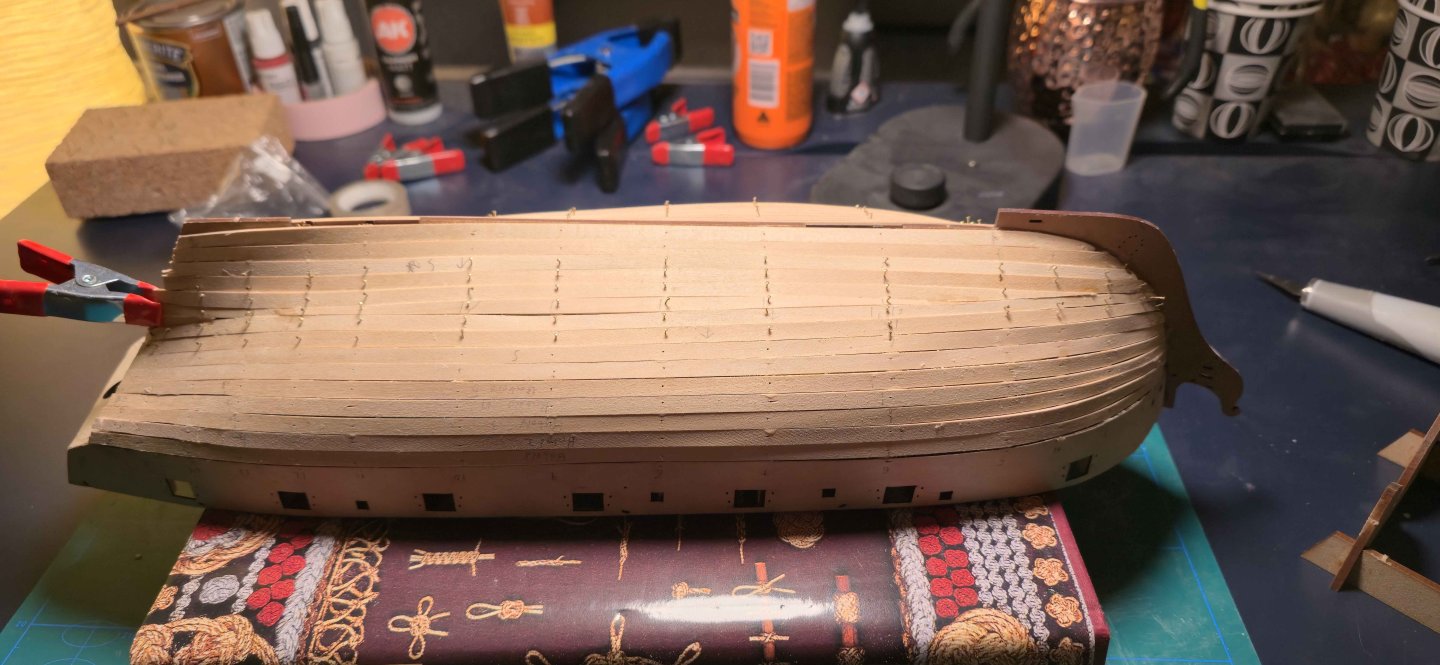
Hello again! I have been gone for half a year almost now with this build as I was procrastinating and felt low motivation due to some of the early planking results. However last two weeks my motivation built up to finally get this ship into seaworthyness, So now many planks later the first layer has been planked. Far from perfect Im afraid as I got the clinkering effect on some of the planks which I still dont really know how to counter. Some stealers where used in the aft and the final plank which Had do be sanded to fit like a puzzle piece took very long as I had to make one for each side of the Speedy. Hopefully I can really get the sanding done good with some filler to get that smooth surface, Cause I would really like the second plank layer to fit like a glove. But I suppose I cant expect to much as this is only my second model even though I wish I could do it like some people on this forum can.


-
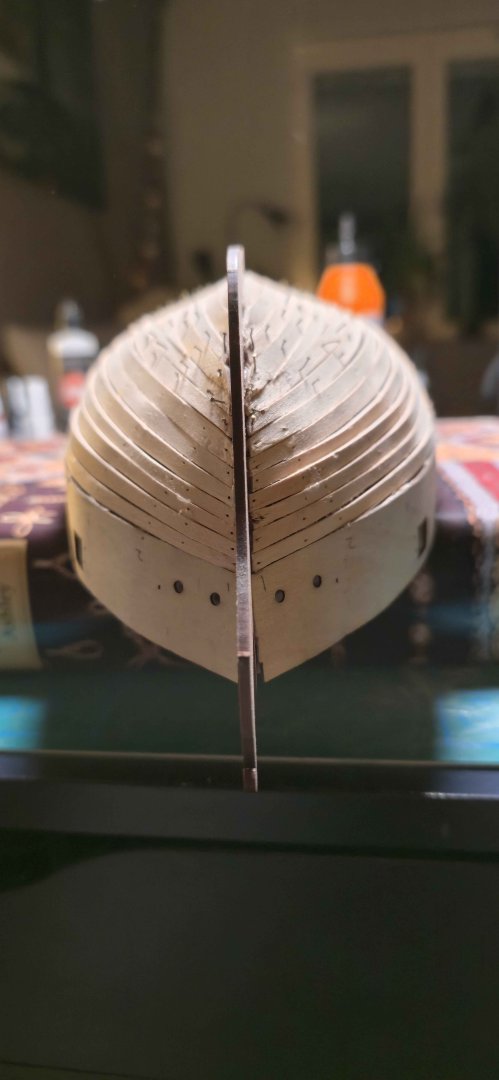
First pair of planks on, I used the plank taper suggested by Craig. And then I will probably use stealers to balance eventual gaps on the stern/stem. This gap has me worried and its caused to my knowledge by my lack of sanding on the bulwark ears causing the pattern to stick out somewhat. Had some ideas to counter it as getting some wood filler on the bulkheads most affected by this gap. But it didnt turn out to well for me so instead i will just sand and use woodfiller and hopefully cover some of it in the second planking layer.

-
I will look into it. Thanks for the advice again Craig. I will probably keep building as I see it now. But I dont have as much time on my hands. And I got other interests in modeltrains too.
-
Thanks alot Craig for the advice, It clears up alot of my thoughts. I think I will just go at it even though I might have to compensate with some stealers. Makes me wonder how people plan out their planking with the use of no stealers.
-
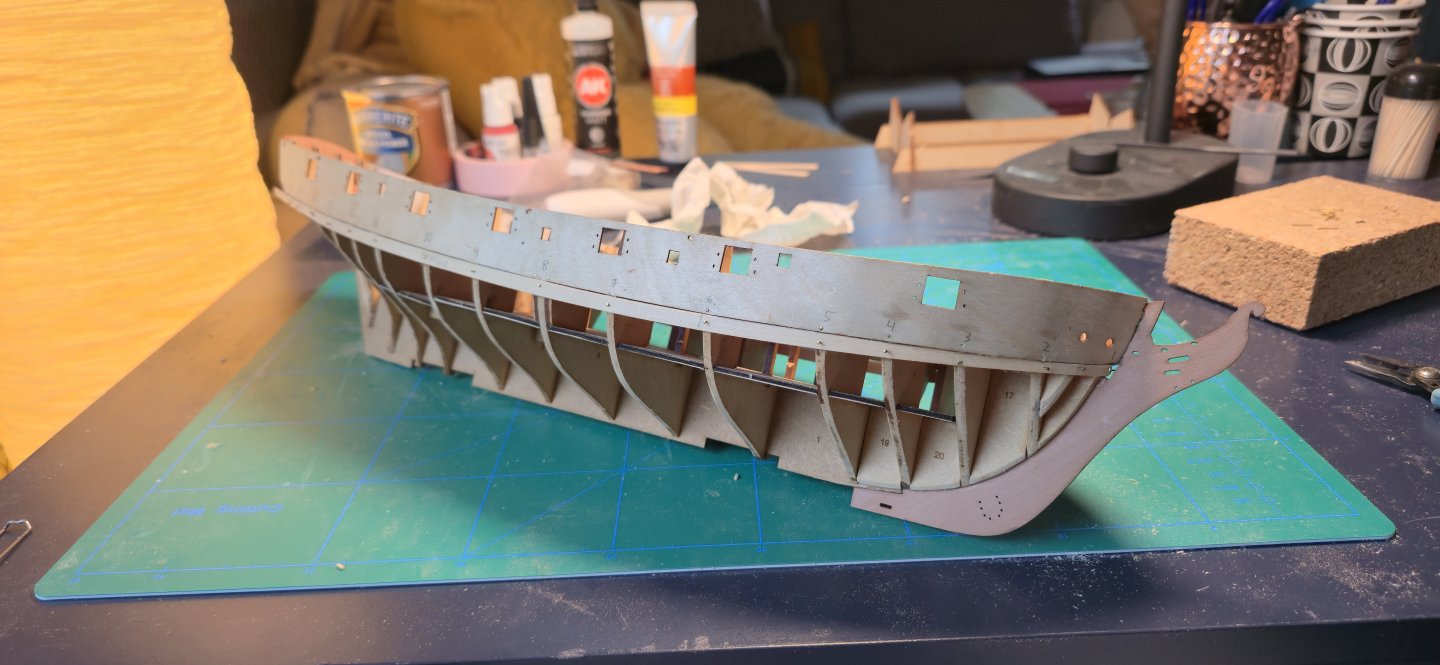
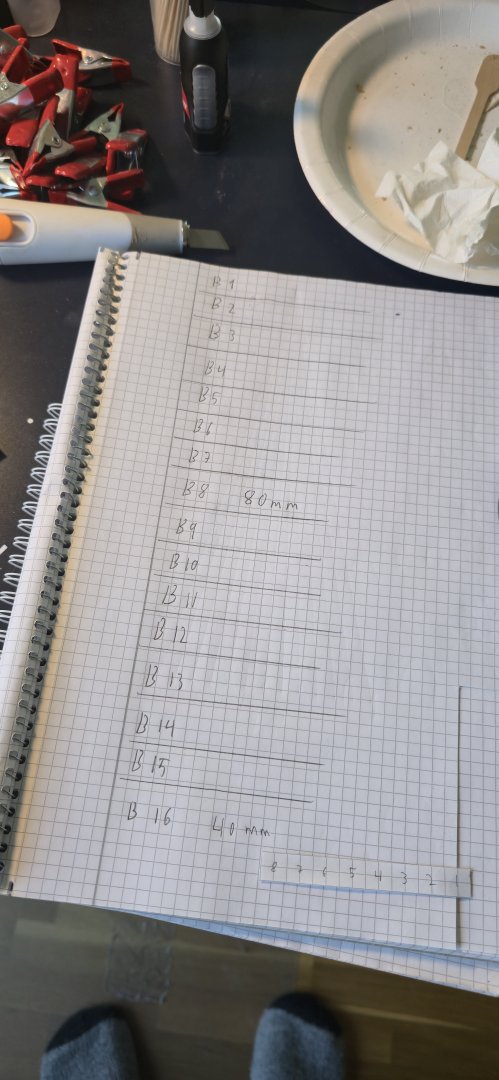
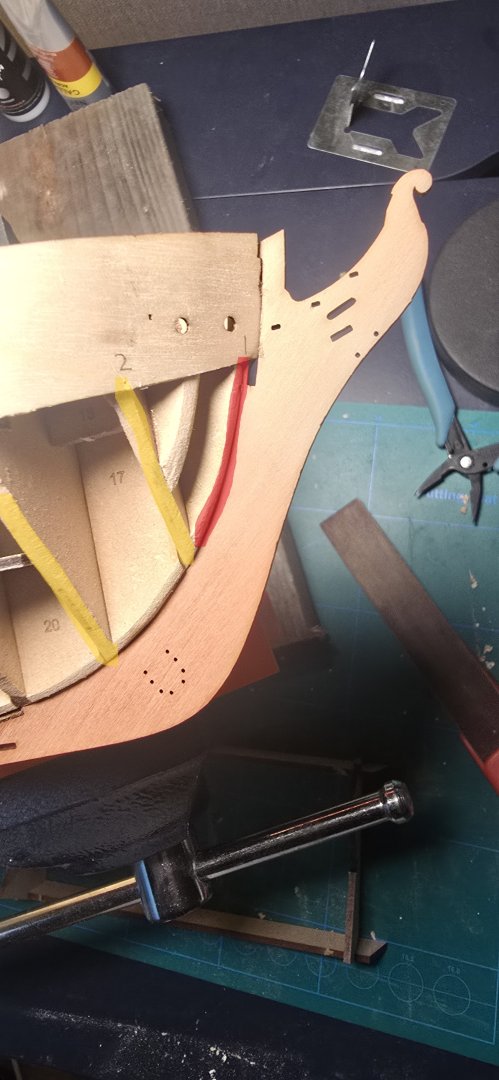
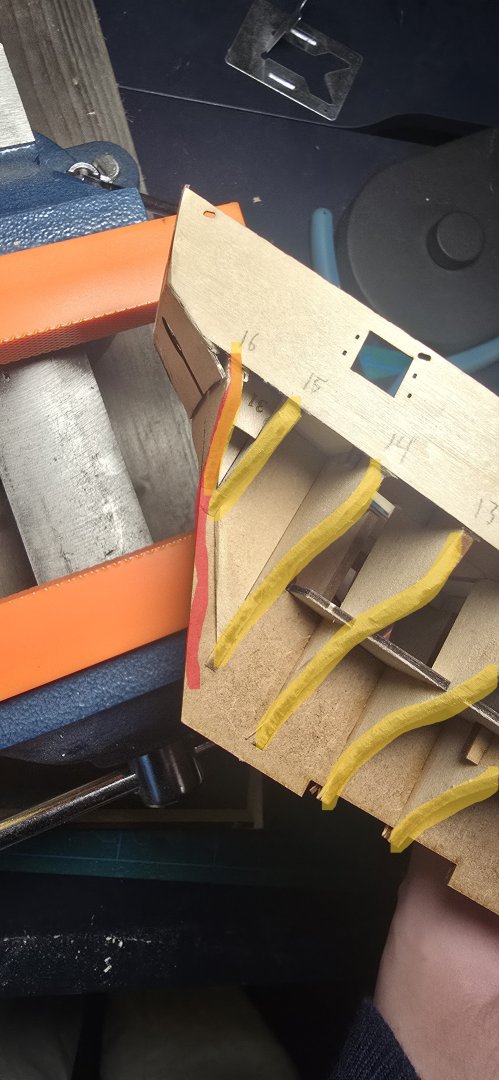
Hello Been quite busy lately im afraid, But hopefully things will settle down now for some time so I can get some progress going which have been lacking im afraid. I just sanded the remaining bulkheads and got my tick strip ready so im starting to measure the bulkhead lengths which im writing up as I go. Even though I have done one planked model now before I still get confused with where I should stop measuring the length for the stem (Bulkhead 1) area aswell as the stern one (Bulkhead 16). Marked in yellow I have the bulkheads themselves marked. The red area represents my confusion as if I should account for this area when tapering the plank widths or if I should just focus on the bulkheads themselves.? I was afterall hoping to read up some more before starting to plank this one as I would want it to become somewhat better than my Sherbourne. Most importantly I also want to better understand all the variables one should consider with the measurements for plank width on each bulkhead. Anyways plan is otherwise to now measure all the bulkheads and find out where the plank width decreases drastically compared to the full length one at 80mm (16 planks). From there I will taper the planks accordingly. I might also put up tickmarks on each bulkhead but since im unsure of how to measure the stern/stem as I previously stated I feel I dont yet understand it completely.
-
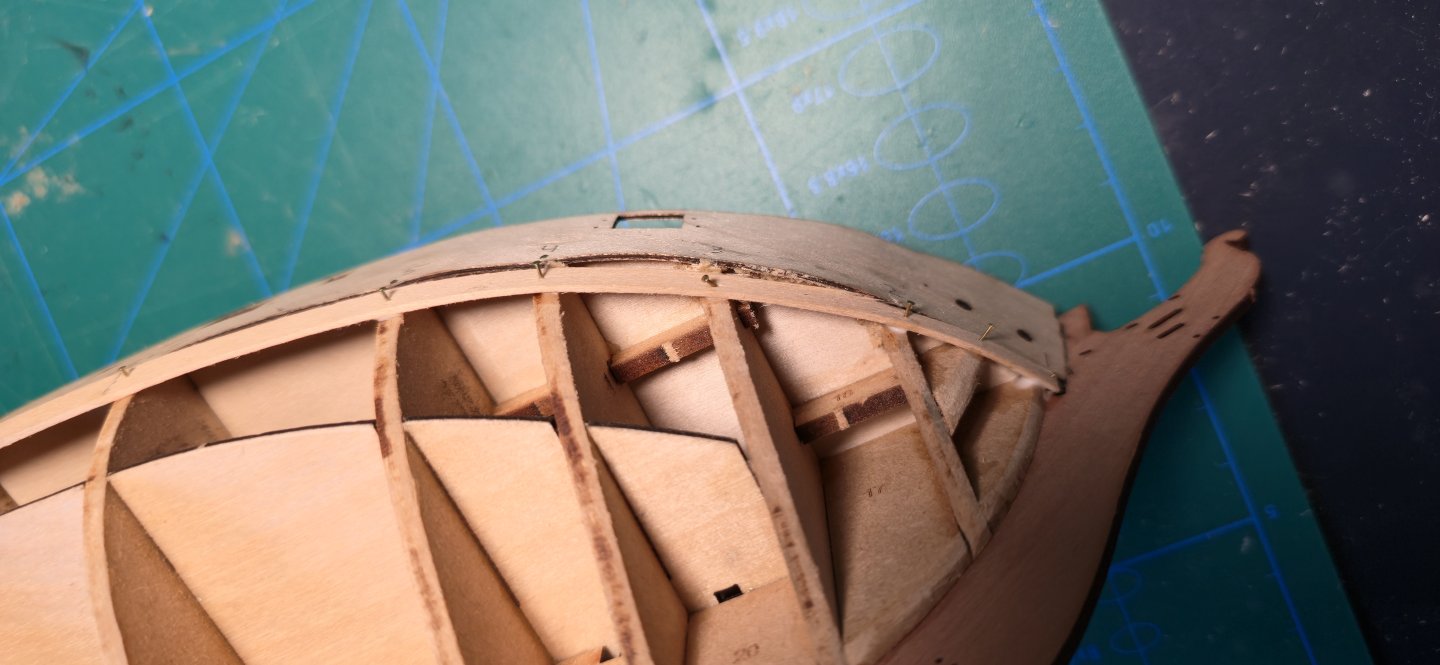
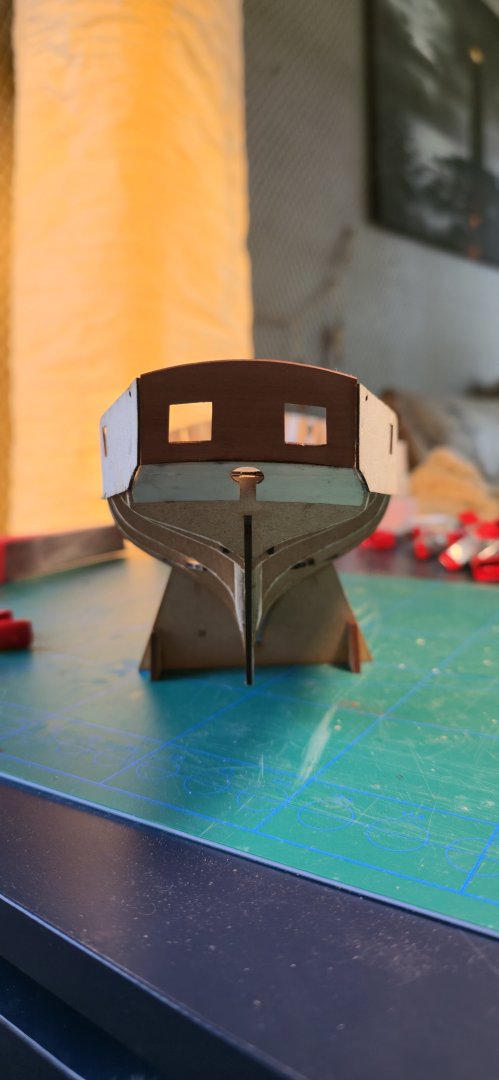
Hello, Im currently trying to mend my inner bulwark that I glued on arpund a 1 week ago. In certain areas its not completely flush with the hull so im thinking of solutions like extra PVA or even filler. The few gaps there are are very small but I hope they wont pose a serious problem. Getting the pattern seated with the indicator line for the deck proved a little challenging as everytime it was correct with the deck the bulwark was off by the stern for example. But eventually I got it on. Think from here I will use wood filler and then advance to planking as im not really sure pulling off the bulwark pattern and redoing it would be of any real change besides maybe just offering an oppurtinity for me to maybe break the part by mistake haha. But if anybody with more experience think I should redo it I will consider it. Other than this smooth progress but slow due to my work schedule.


-
Good job Dan, Looks great so far 👍
-
I dont know how others approached it but I did no serving on the shroud lines. I only did some rookie "seizings" on some areas.
- 177 replies
-
- 2
-
-
- Sherbourne
- vanguard models
- (and 3 more)
-
Thank you Ronald and good luck with your Sphinx!
-
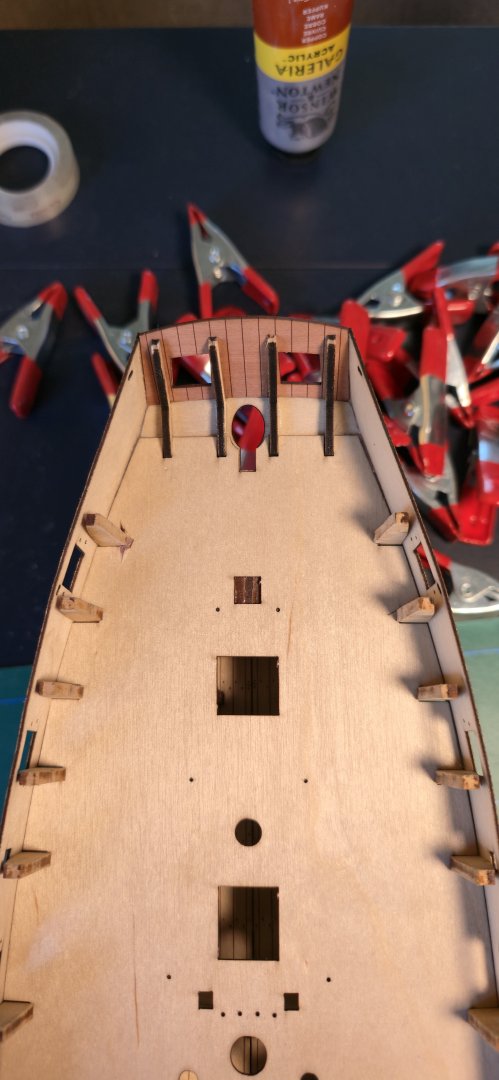
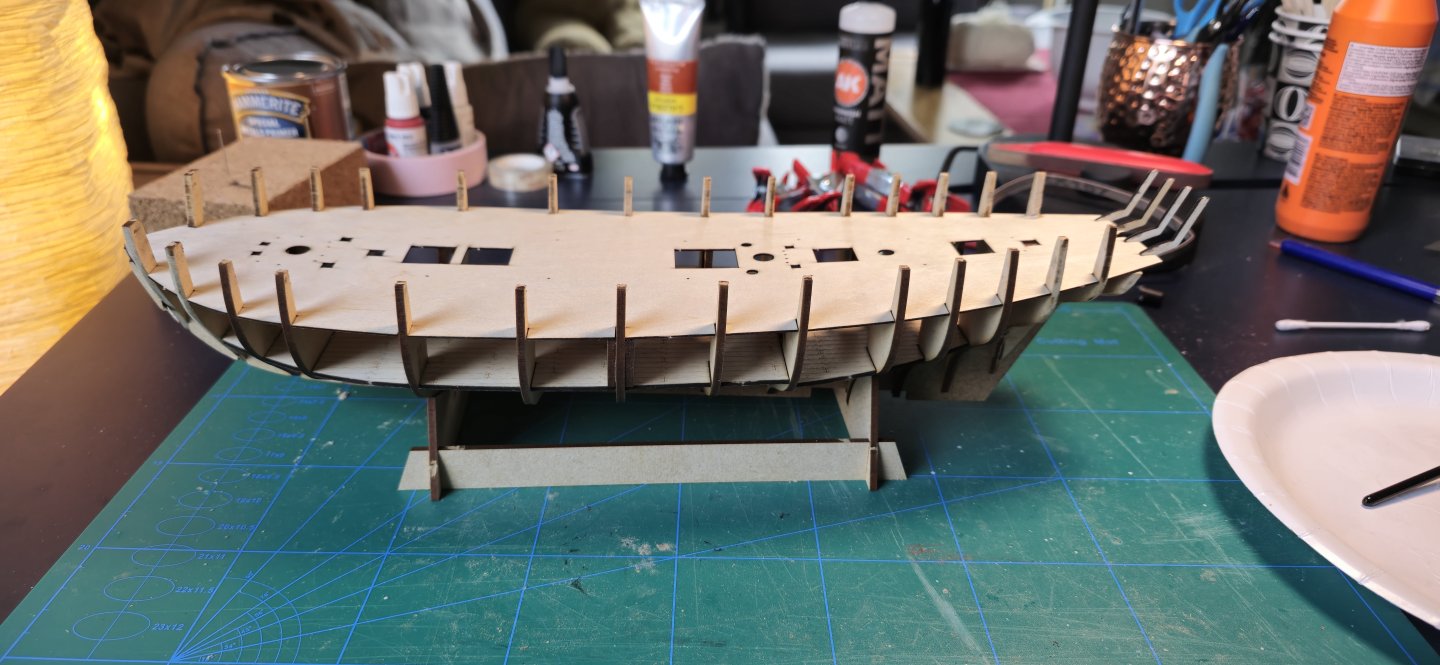
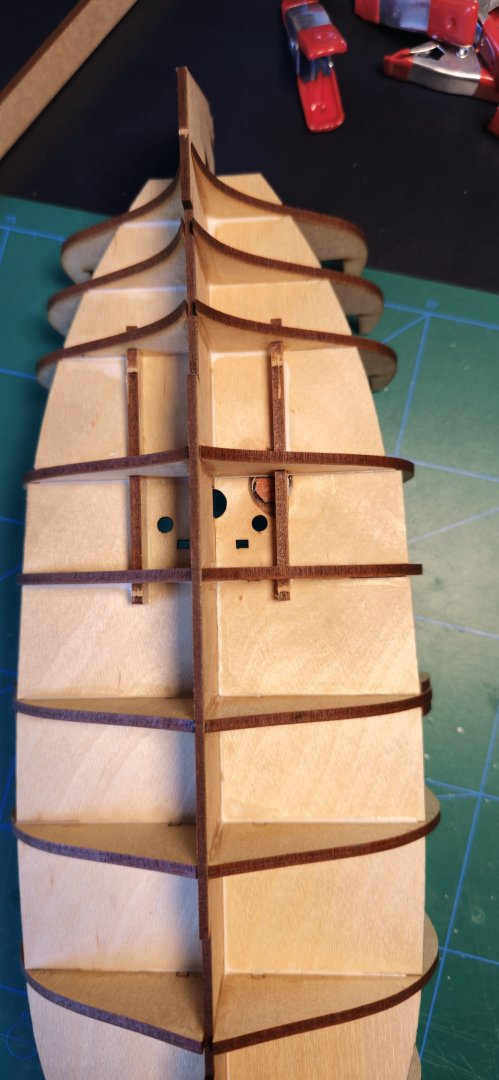
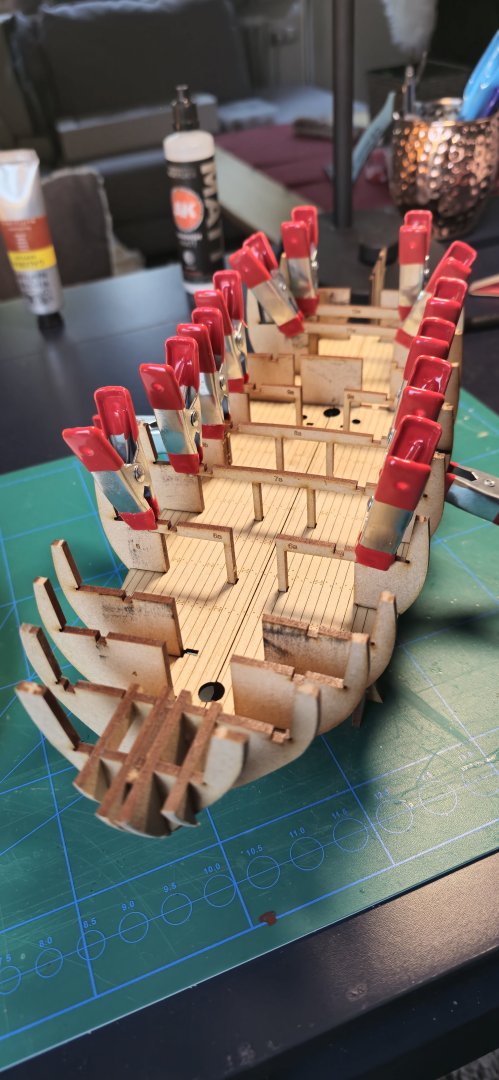
So Today I glued on the false upper deck. This was fairly straightforward although with alot of caution taken. I dryfitted the falsedeck around 3 times and I sanded the bulkhead ears where I saw resistance when I tried to dryfit the deck. Then I glued on and went for it pressing slowly on the points of tension with my thumbs carefully as to not break anything. It went pretty good I would say even though I did get some tiny "woodskin" that started to peel off in one spot close to the aft by one bulkhead. The damage in question very minor and no cracks or anything in the deck Before all this when I was brushing diluted PVA on the lower deck. I noticed this area that is discoloured and I might be overthinking this but since im not that experienced in wood. This isnt any rot or something that can spread right? You cant see a trace of it on the upper side of the lower deck so it seems small. Other than that smooth building so far 👍


-
Thanks alot Craig for all the times you came with good advice.
- 129 replies
-
- 2
-

-
-
- vanguard models
- Sherbourne
- (and 1 more)
-
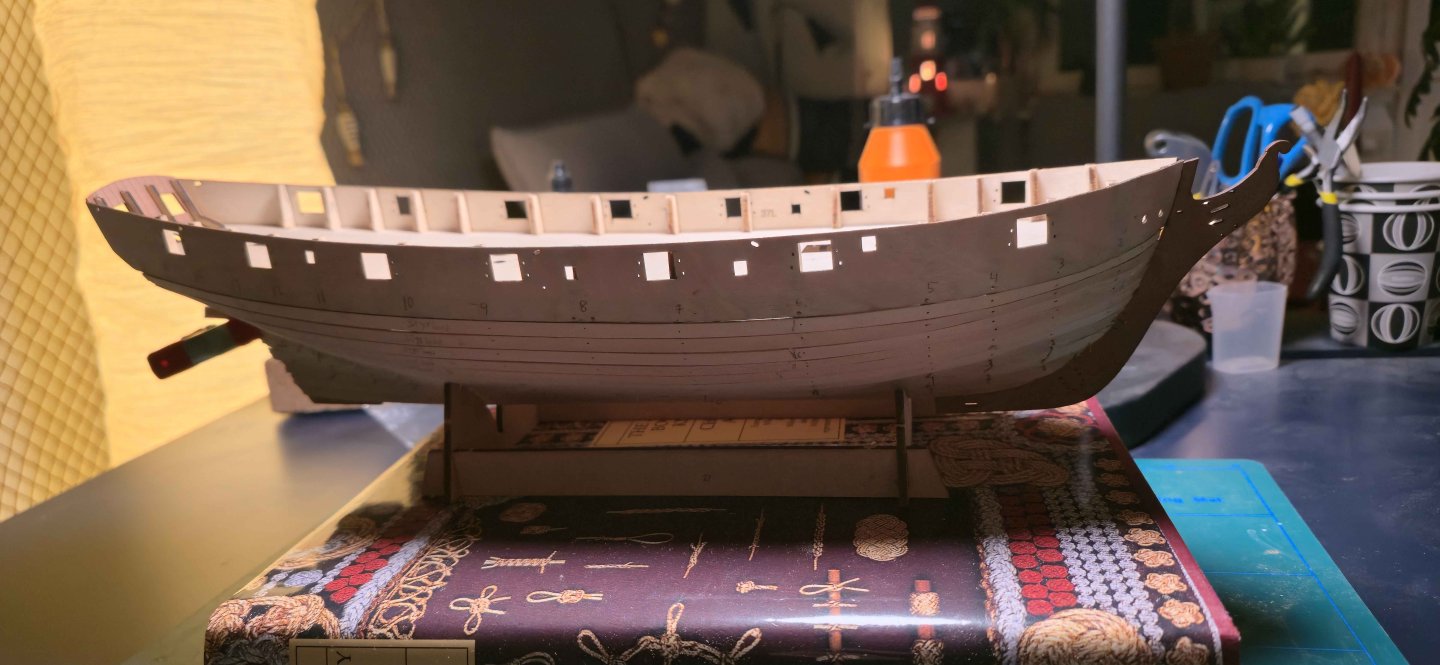
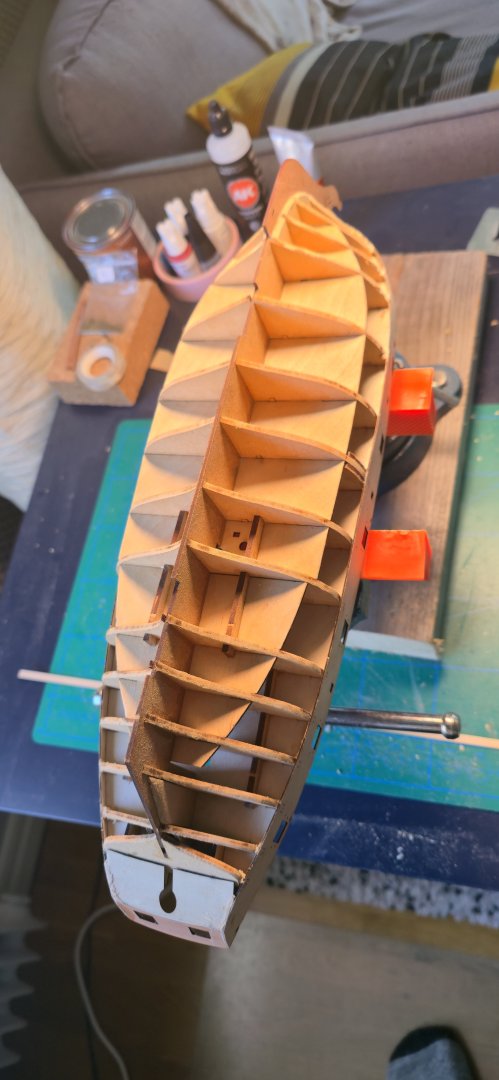
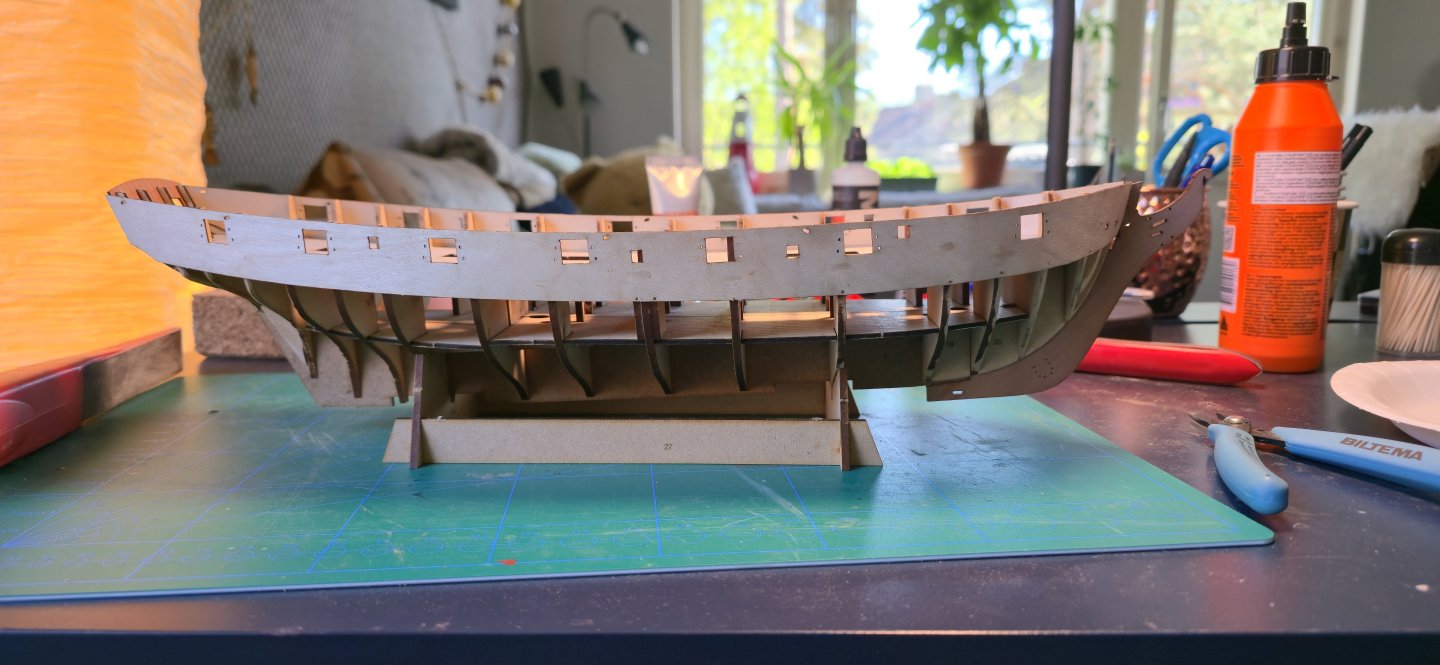
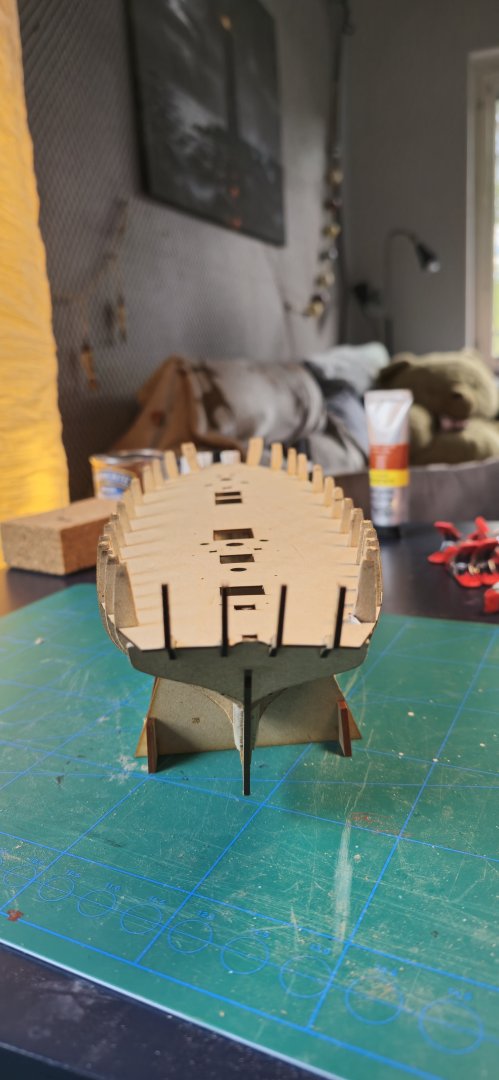
Well one thing led to the next and suddenly I have assembled alot of bulkheads along with supporting bulk/ deck beams. I also glued on the lower deck. So far the Speedy is much bulkier than my Sherbourne and it keeps getting bigger. Not even all the bulkheads are attached yet so it will be exciting to see how big it becomes in comparasion.
-
Now I dont know exactly what would be the accurate knot to use, But I personally took the Cow hitch from "Ashleys book of knots" for my Sherbourne. It looks like this.