
HOLIDAY DONATION DRIVE - SUPPORT MSW - DO YOUR PART TO KEEP THIS GREAT FORUM GOING! (Only 66 donations so far out of 49,000 members - Can we at least get100? C'mon guys!)
×


BradNSW
-
Posts
61 -
Joined
-
Last visited
Content Type
Profiles
Forums
Gallery
Events
Everything posted by BradNSW
-
Simply Superb!!!!
-
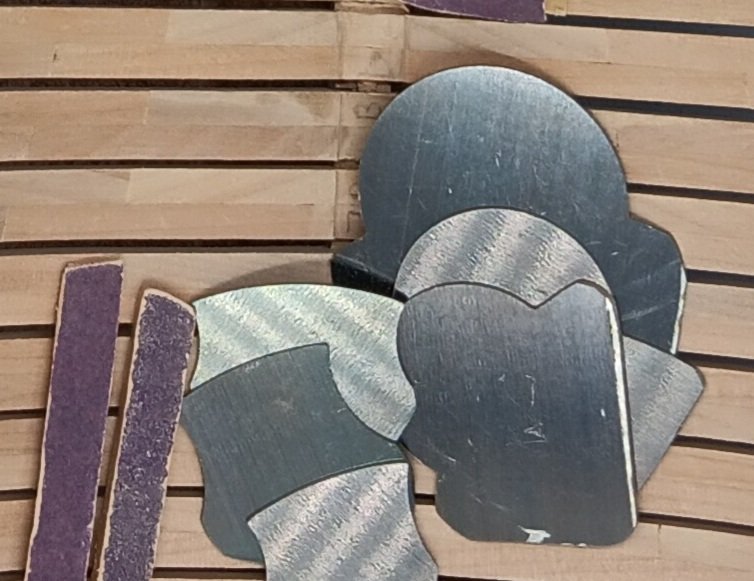
A wide variety of small scrapers with different radii are extremely helpful! I bought these and cut them down so they would fit inside the hull: Cabinet Scrapers Set of 4 Above are just a few. Hit them with the burnishing rod often and they take off material nice, quick and smooth!
-
Makes perfect sense! Looks correct too. Nice work, thanks for sharing!
- 99 replies
-
- 3
-

-
- ancre
- La Mahonesa
- (and 1 more)
-
Looks perfect from every angle! Your patience and willingness to redo created this incredibly beautiful piece of art. Your work is inspiring and humbling to many on this forum. We are now breathlessly waiting to see this shapely bow mated and faired with the stack of frames you've teased us with in previous photos. Thanks for sharing!!!
-
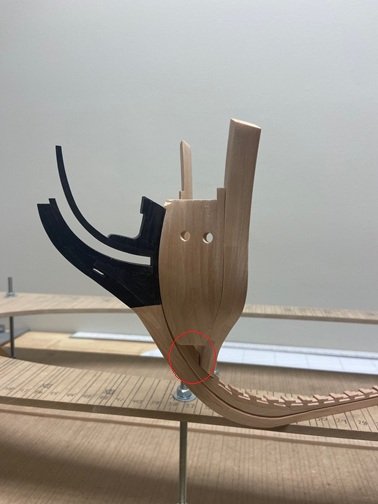
Sorry about the slip but things are looking really good and next attempt should be perfect!! What looks asymmetrical by fractions of a mm can be sanded slightly. When covered by planks it will be imperceptible. I've been fairing parallel midbody frames for 3 weeks (no power tools...just sanding sticks). A few spots are off by a sheet of paper. In the right light, they stick out like a sore thumb but covered by planking, they will be perfectly faired. Next, I'll be tackling the cant frames, and your trials and tribulations will help me immensely! I spent the last two days making a small wedge (that will fill the space circled by red). The cant frames will rest on it. Your build and attention to detail and exacting standards are inspiring!!!
-
Nice accurate work on such small carriages!! Thanks for sharing your tip on the Dremel burr for the curved cutouts.
-
That steel anvil must have been a 20lb stress test on those wonderfully crafted joints!!! Glad the Admiralty is satisfied. We appreciate you sharing in detail how you used the jig to locate and cut the mortise joints and fit the beams in!!
- 968 replies
-
- 2
-
-

-
- hahn
- oliver cromwell
- (and 1 more)
-
Everything looks clean and the joints/seams are fantastic! That pear wood is able to showcase your careful attention to detail and precise milling/construction. I hope to be able to emulate some of the techniques and details when I get to the interior!! Thanks for sharing.
-
You are nailing it!! Literally and figuratively! Now, whether to "nail" the frames?? Very few people will ever notice if you do/don't. I think planking and deck treenails are much more visible and create texture. That said, bolts were definitely there and necessary for construction. You're the builder and supervisor. I won't be bolting frames on "La Salamandre", as the space on my build is so narrow, they would be near impossible to see. Keep updating us on your beautiful and precise build.
-
HMS ANSON 1781 by albert - 1/48 - 64 guns
BradNSW replied to albert's topic in - Build logs for subjects built 1751 - 1800
Amazing how a bunch of "sticks" can become such a wonderful work of art! Looking good and thanks for sharing! -
Awesome work!! That's going to be superb. When you put a finish on it, those joints you labored over will just POP!! Thanks for sharing!
-
Looks like a "SOLID", well laid out and very accurate bed from which the skeleton will rise!! Look forward to seeing this happen. Thanks for sharing for the rest of us to learn from!!
-
Chris, I'm very excited to discover your build log! I immediately clicked to "follow"!! You are a few steps ahead of me on my current build and I am learning a lot from your pictures and posts. Thanks for sharing your wonderful and very accurate work. It is inspiring and will help me immensely!!! Keep on posting the great photos and discussion!
-
Looking awesome! Very precise joints!!!
-
Look forward to seeing the results of the steps you outlined above. I'm sure you will nail it...slow and steady! The joints in your previous post look nice and tight. Can't wait to see them with your finishing treatment. That should really make the wood grain pop and accentuate that great joinery!
-
Those frames look great! The chocks are perfect and will add much to each frame!!! Thanks for sharing. Please keep us updated on your progress and the techniques you use to get these wonderful results!!
-
Excellent progress. We look forward to watching these joints come together, step by careful step. IMO, they can make or break a model. You are several months ahead of my latest project. The mobile shipyard is still working on frames. We did have a friend deliver a package of pearwood stock to our current campground, for the keel and rising wood. So, workers here are already planning the steps and process for laying the keel and stem/stern pieces. I will continue to follow closely to glean what I can from your techniques and experience! Thanks for the great pictures and process descriptions!
-
She's going to be over a yard long! Looking great. Can't wait to see it after you get it all glued up! Thanks for sharing!!
-
I just discovered your excellent build log! I'm excited because you are a few weeks ahead of my build of the bomb ketch Salamandre. This means I can see how you complete the steps I am about to start!! Your frames look superb (I'm 75% through frame construction). I wait with anticipation to watch you mill and construct the keel. Thanks for posting such detailed pictures and descriptions!
-
Well done!! Your work is so crisp and precise. An inspiration to us all. Regarding the last photo...I'm sure it was nice to not have to go to the "head" of the ship! Especially in heavy seas. Rank had its Privileges!!
- 99 replies
-
- 1
-
-
- ancre
- La Mahonesa
- (and 1 more)
-
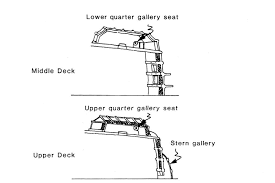
Beautiful work!! The lines and grains were so crisp and beautifully executed I initially thought I was looking at an AI image😄! Love it! Don't forget the seats of ease for the Captain, in those wonderful quater-galleries!!
-
First read the post and thought it said 1.5 years but rereading only 1.5 months! Amazed how the color mellowed and love it as a choice for the pillars! It really adds character and texture to any model when one uses different woods to highlight specific items!
- 968 replies
-
- 1
-
-
- hahn
- oliver cromwell
- (and 1 more)
-
Wow! Hours spent browsing this incredible log and I wish I could get more. Breasthooks and Hause Holes look great. I speak for all, when I say, I'm glad you are back with your tools and workshop, so we can gain insights and knowledge from your great skills and clear documentation of techniques.
- 1,215 replies
-
- 3
-
-
- sloop
- kingfisher
- (and 1 more)
-
Look forward to seeing how this ages! I'm totally into "painting" a model with different woods. I hope this one loses some of the pink/purple hue...it seems too "colorful" right now. Glad you have some months to let the color mature.
- 968 replies
-
- 2
-
-
- hahn
- oliver cromwell
- (and 1 more)
-
Hello with first question on my first build
BradNSW replied to Ratdude's topic in New member Introductions
Yep, that is where she did battle with the HMS Serapis. John Paul Jones was the CAPT of Bonhomme Richard and replied with the immortal quote "I have not yet begun to fight" when asked by the better armed Serapis CAPT to surrender. They fought for several hours, and John Paul Jones (father of the US Navy,) finally pulled alongside, tied the two ships together and boarded. A second US ship continued to fire into both ships. Eventually the Serapis CAPT surrendered and shortly thereafter, the Bonhomme Richard sank off the coast of Yorkshire, Flamborough Head (your backyard!!!) I built the Bonhomme Richard Cross Section to go with my scratch build of the HMS Serapis that I built over a 35 year period. There is a short photo summary of the Serapis build at this link: HMS Serapis Scratch Build
