


RolandR
-
Posts
51 -
Joined
-
Last visited
Content Type
Profiles
Forums
Gallery
Events
Everything posted by RolandR
-
The only way to protect your ideas, is going back 40 years when everybody was building their models in their basement and never telling anybody how they did it, except to the people that knew the secret handshake. I grew up during the time and bought books about model railroading just to find out, they were hiding the most important stuff, which almost killed the hobby around the century. i would have never bought the cross section Victory with out this websites and all the members and their ideas and helpful comments but unfortunately it will bring cheaters and con artists out of the dark. My idea of paying for the file and in my case a pdf drawing would be sufficient, was meant to pay for your work and not get the hands on your file.
-
Chuck, would you consider a payable download of the file for personal use? I thinking of the price equal to all 3 plus shipping.
-
The last to pieces have been placed in the Orlop deck and it is now officially finished. The sailors have a long way behind them, all the way from Kiev and enjoy first some fun before they go to work.


- 16 replies
-
- 1
-

-
- Victory
- Artesania Latina
- (and 1 more)
-
Brings back memory when I was 16 years old, working on the 72D alone in my room, gluing my fingers together. 47 years later, not much changed, except it is a wooden Victory Cross Section and super glue, which speeds up the time with the “finger glueing”.
-
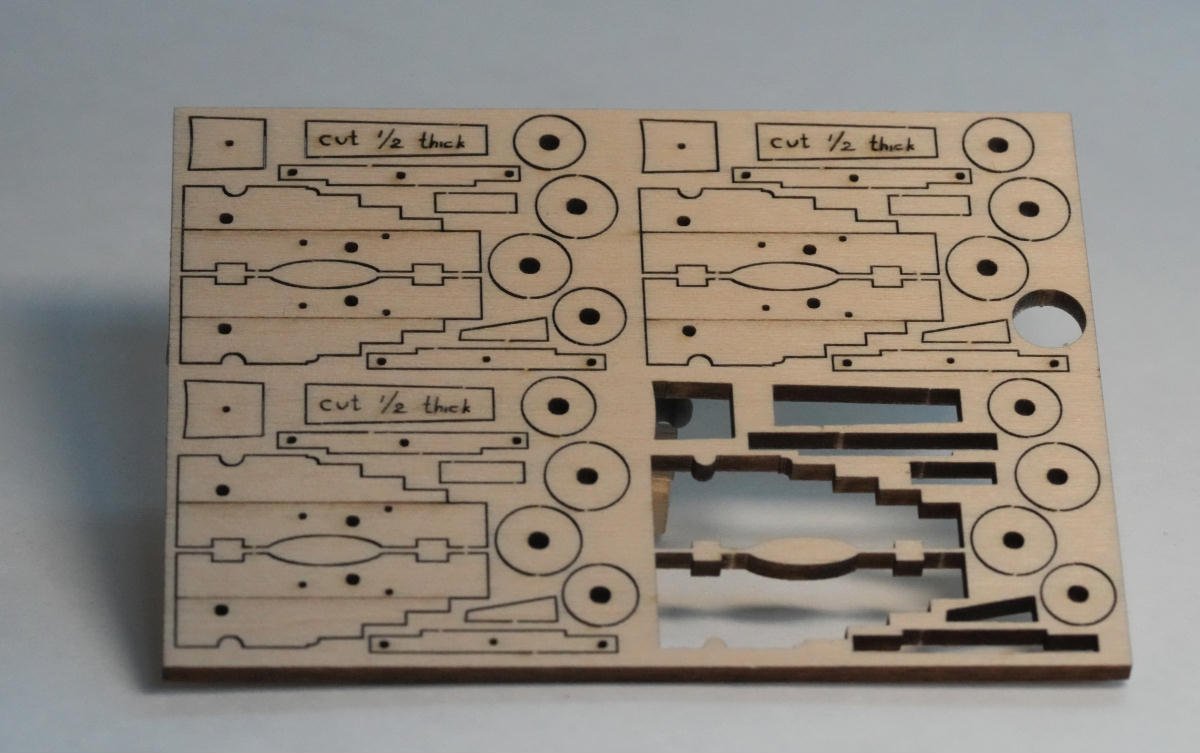
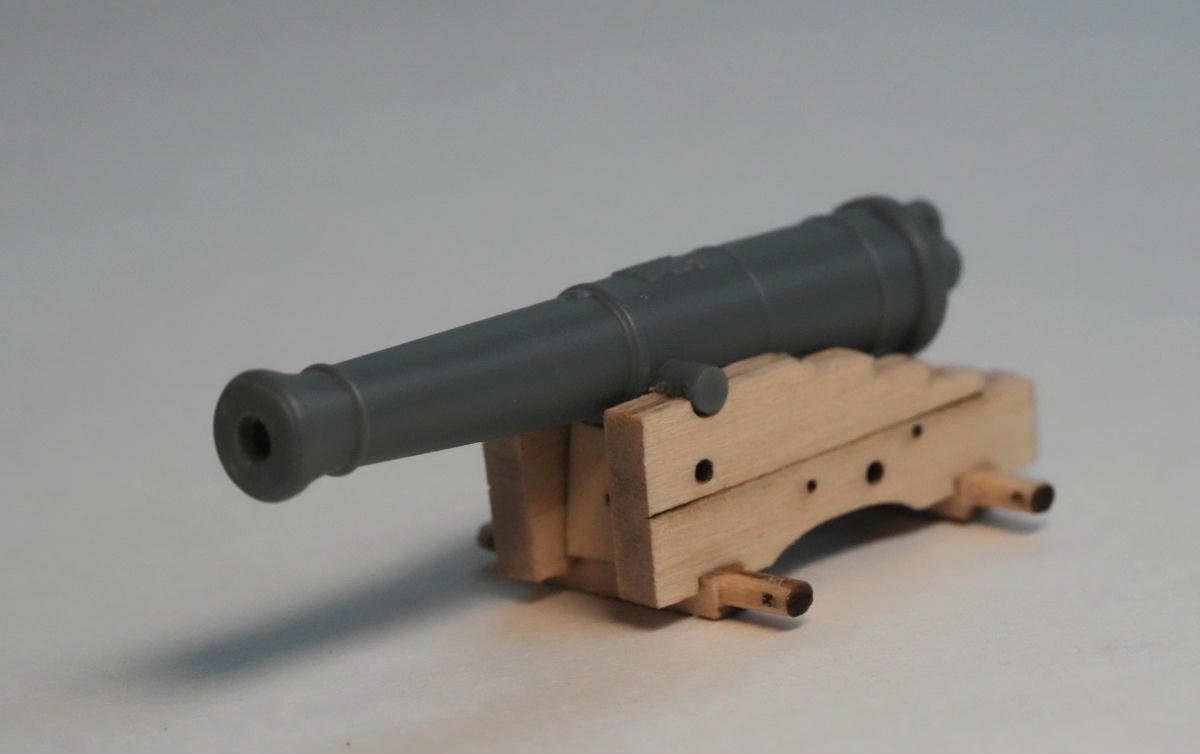
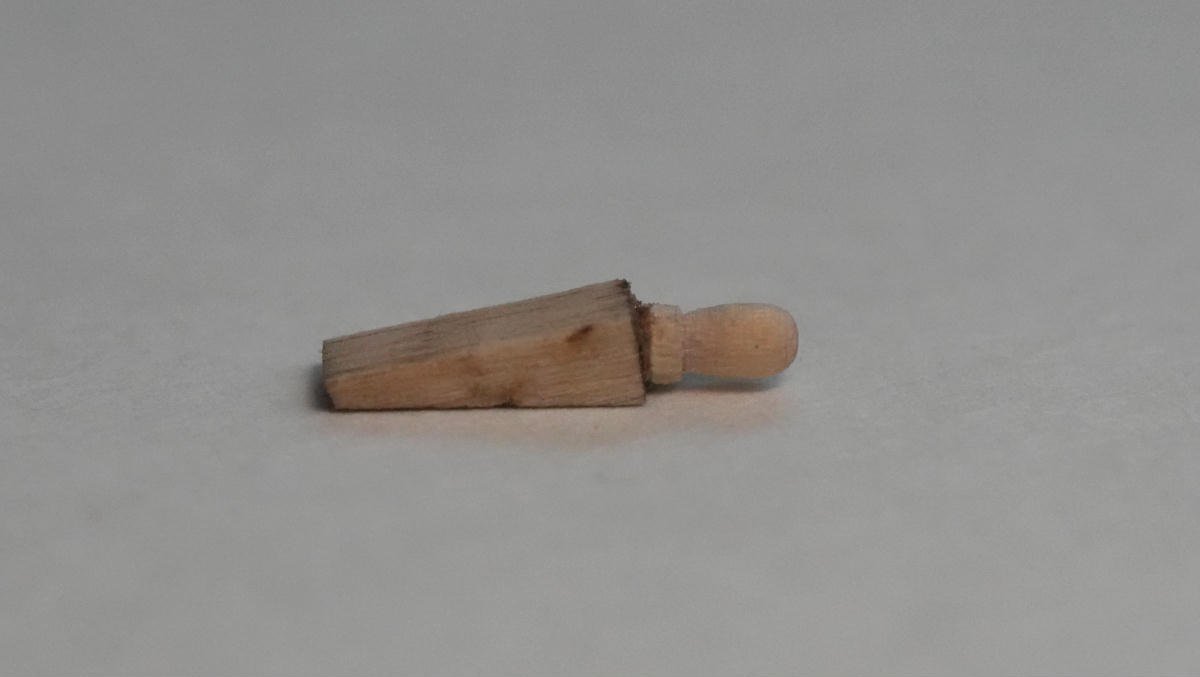
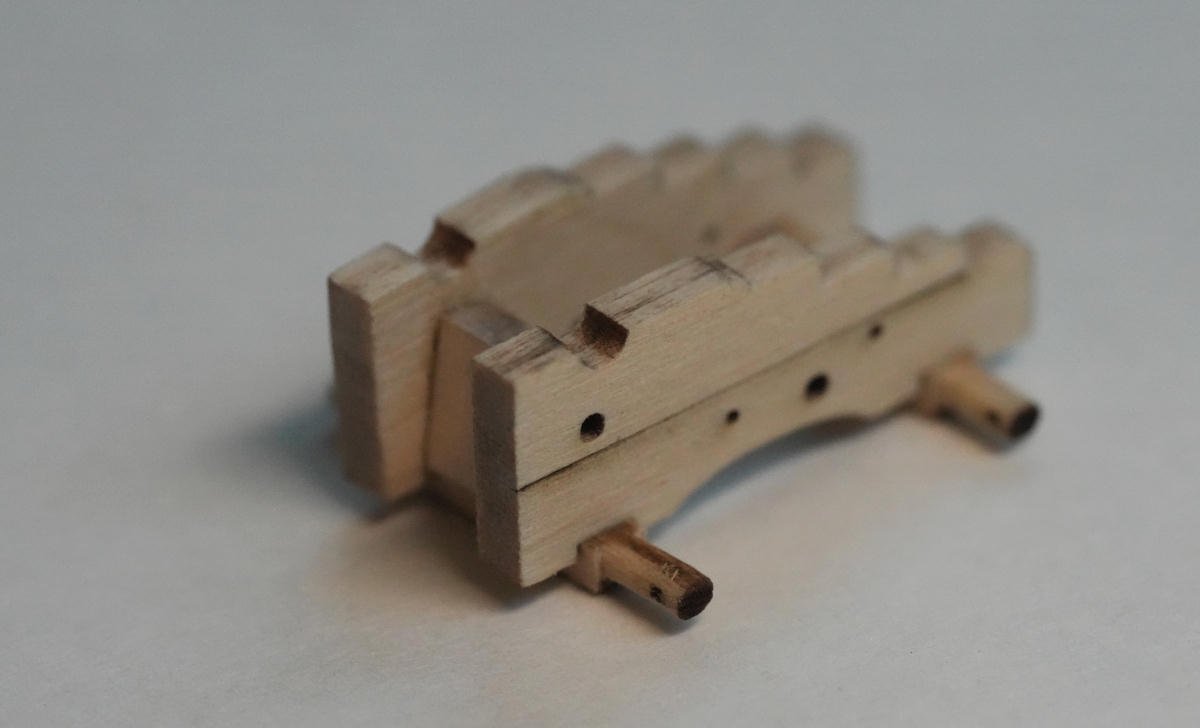
With the last pieces added to the Orlop Deck, I finally reached the lower gun deck. I have been waiting for this moment and started to design the cannon carriage more prototypical than the kit provided pieces. I also bought Model Monkey's cannon set for the Victory. I used pictures and the drawing on Chuck's Syren website (I got his blessings) to help me with the design. It is cut out of basswood with my laser. Plywood would have been sturdier but basswood gives a nicer finish after sanding. My first try with a toothpick and a Dremel drill and I was surprised how nice the handle looked. I know, the biggest thing right now is a 3D printer but after 10 years, I am still in love with my laser.
-
Wood Plank Benders - Edge Bending
RolandR replied to MintGum's topic in Modeling tools and Workshop Equipment
I don’t know if it is worth money https://www.amazon.com/GAWEGM-Wooden-Ship-Model-Tools/dp/B09VD6JY3J/ref=sr_1_2?crid=2IZ7943QJ475E&dib=eyJ2IjoiMSJ9.kRcUwgZ7l0Jbp-Y9tRdk62mksAv9zBUuele784PzuzQX35a0qAnusVjOpCmX405sPalVNxka0DucEXb1OtnV3YSAHjP69jGPPcMPNnMsIJvKyt2gfzp1mAqk0RRRue8Xd8KUf-n9K7ywLhPBTK3dudaVHV1LNRHGPkem-8EgfhoeSIHcic91FGEzxJnXZsVMt8Khwc0G8oR6XDto9WzNKv4EP0qEC_XpKGOlpVeTxvSzD14IaCEkY2tjmawiC7dwsnPFUq2vYHuvlXofZDeLTAqyDGSctJwVXTJLs4BMJ5I.G88T2M8Xr-q14ul4TDxPatvfq-csmaB4dUoZHGGFJ-Q&dib_tag=se&keywords=Wooden+ship+jig&qid=1767023489&sprefix=wooden+ship+jig%2Caps%2C195&sr=8-2 -
I agree. I just followed al log from 2013 until it abruptly stopped. Still gave me some great advice.
-
Exquisite wood working. What paint did you use for the white colors?
-
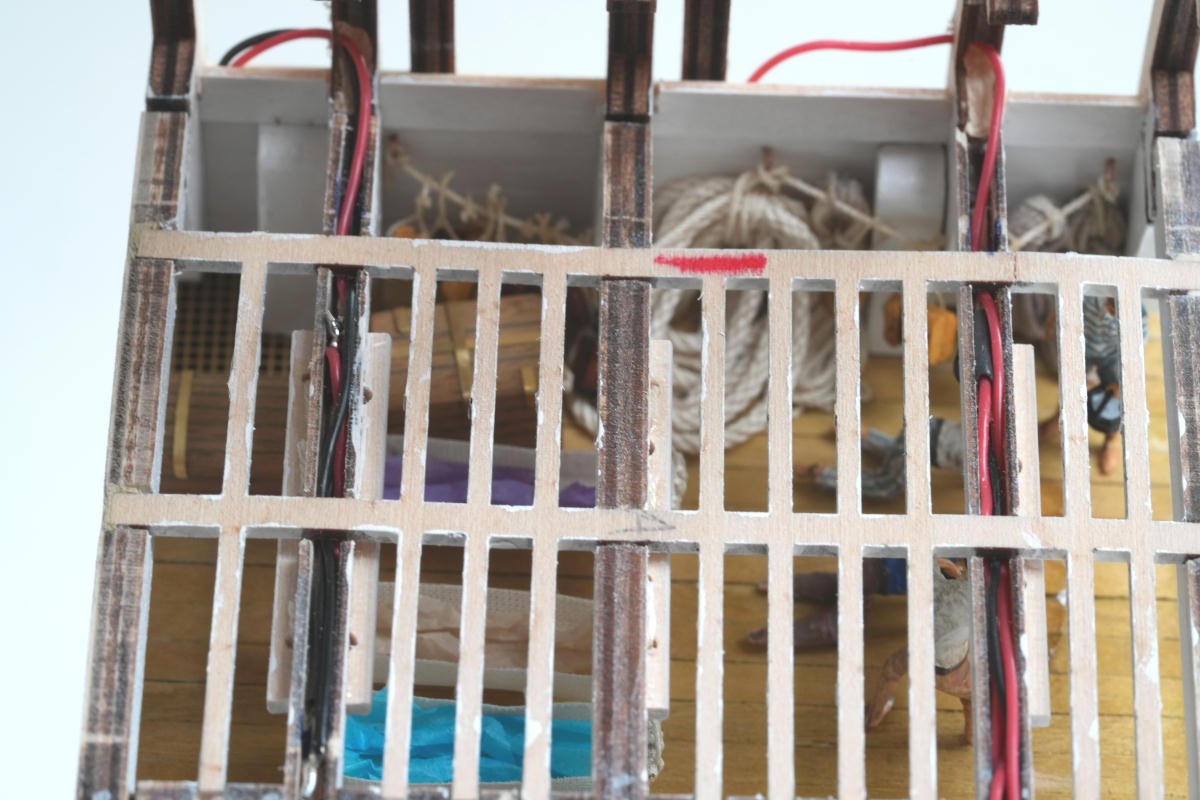
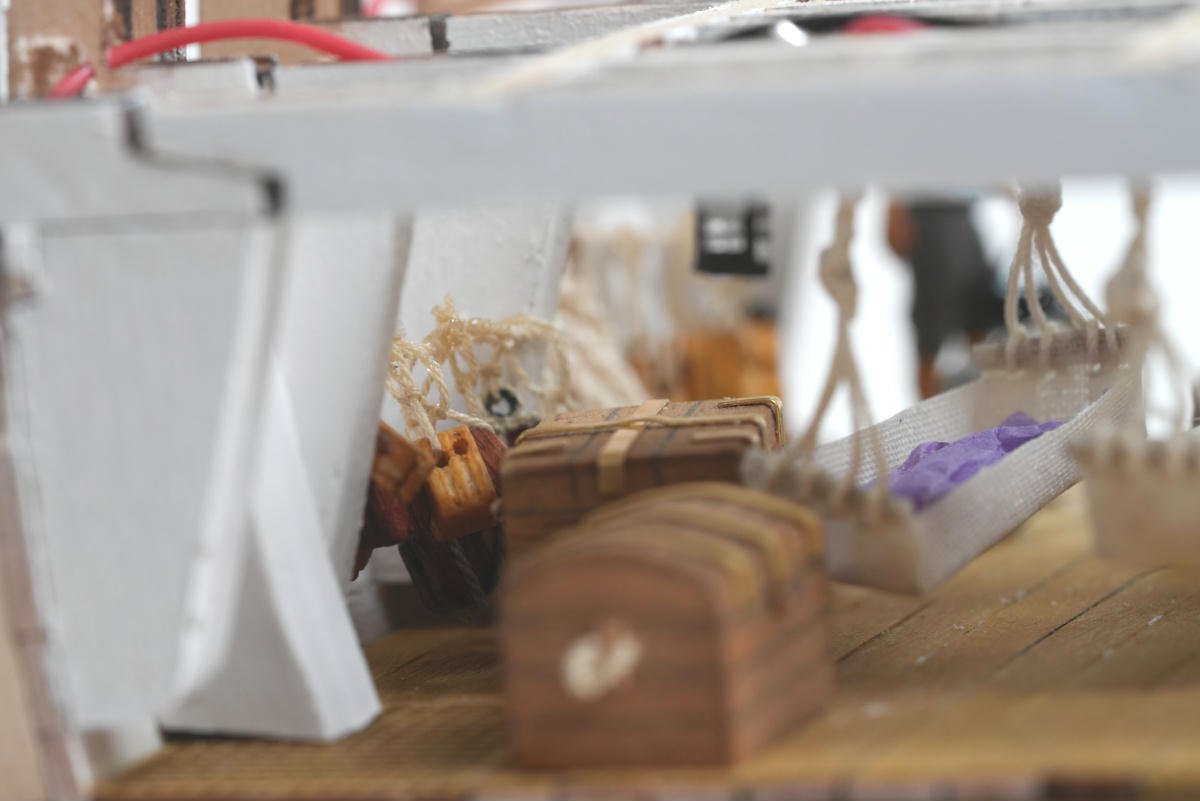
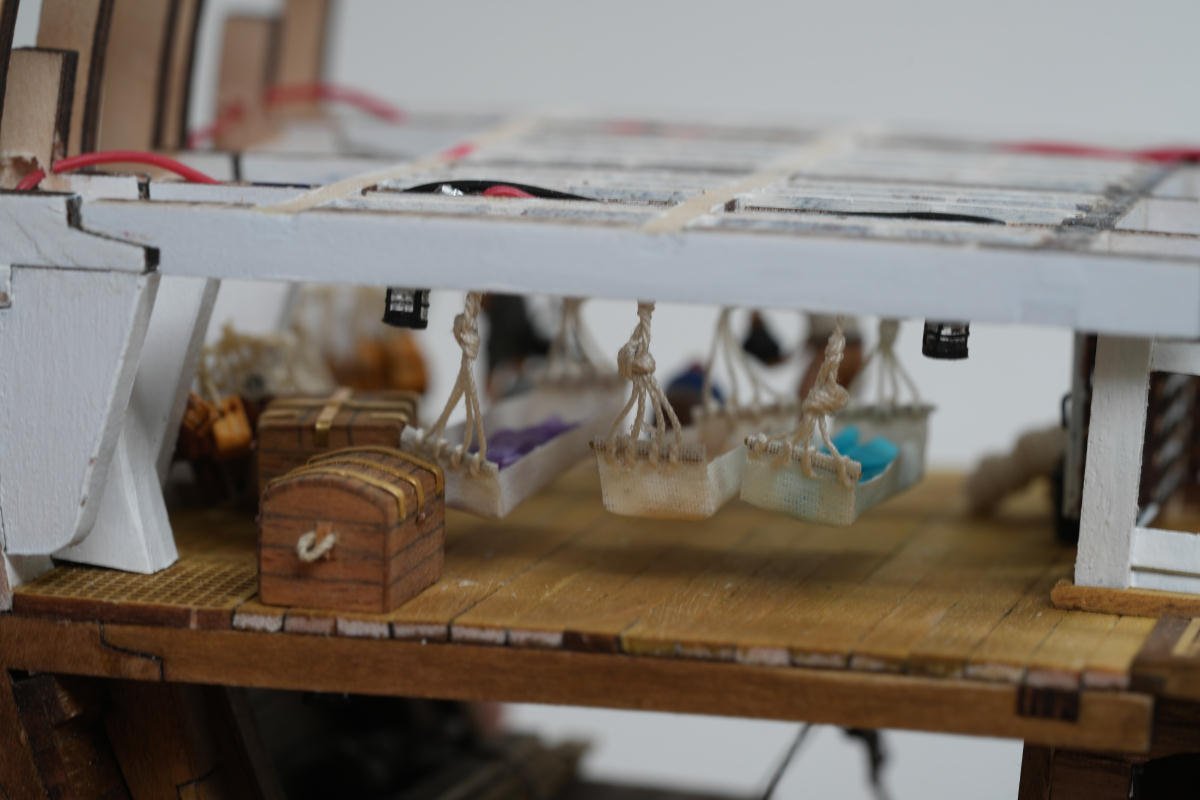
I finished the Orlop Deck. I added as many pieces as I could verify in pictures of the Victory and other ships around this time. I upgraded the hammocks a little bit but I did not work out the way I imagined. Adding additional lines made them hang crooked. Like I did in the hold ceiling, I added the missing beams. This time I laser cut a basswood sheet instead of adding individual pieces. With a few more adjustments and it will work as planed for the rest of the model. I don't know, why the supplied beams are too short but some wood filler should fix the problem. The idea of storage of spare blocks and ropes on a line, came from a photo of the USS Constitution Orlop deck. Since I upgraded to Syren 3D blocks, I wanted to use the kit provided parts somehow. Although you see that scene a lot in movies on the top deck, I moved it down. I will not have enough room on the busy quarterdeck with all the officers, gun crews and marines. I assume all decks were cleaned on a ship, especially the orlop deck with the surgeon nearby. The figures are from the Victory set offered by Woodys Model Works. Still showing of my self made ropes when ever I have an opportunity.

- 16 replies
-
- 4
-
-
- Victory
- Artesania Latina
- (and 1 more)
-
I will get my cross section Trinidad tomorrow and will watch your build closely. Did they really use those massive boulders for ballast at that time?
-
Since I am new to wooden model ship and cannot find information about the Gawegm company, I would like to know, if its a manufacturer we can trust to produce their own models.
-
Lego ist the best product as introduction to model building. If they are not interested, you can use the pieces to keep parts positioned while glueing. Seriously now. I learnt over the years, that my interest are not really shared by others, although they were fascinated at the end product. i was introduced to the hobby of plastic models by a gang of neighbor kits. Cheap daycare with rotating venues. While the hobby stayed with me for the next 40+ years, my brother had later other interests. Long story short, ask.
-
Everybody makes mistakes, even in real live ship building. I visit old farmhouses all over Europe and I am amazed how many mistakes were made back then and covered up with even worst fixes. The old sail ships will not be any better.
-
I hope, you did not lose potential customers because you will include a flag set. Would be a shame.
-
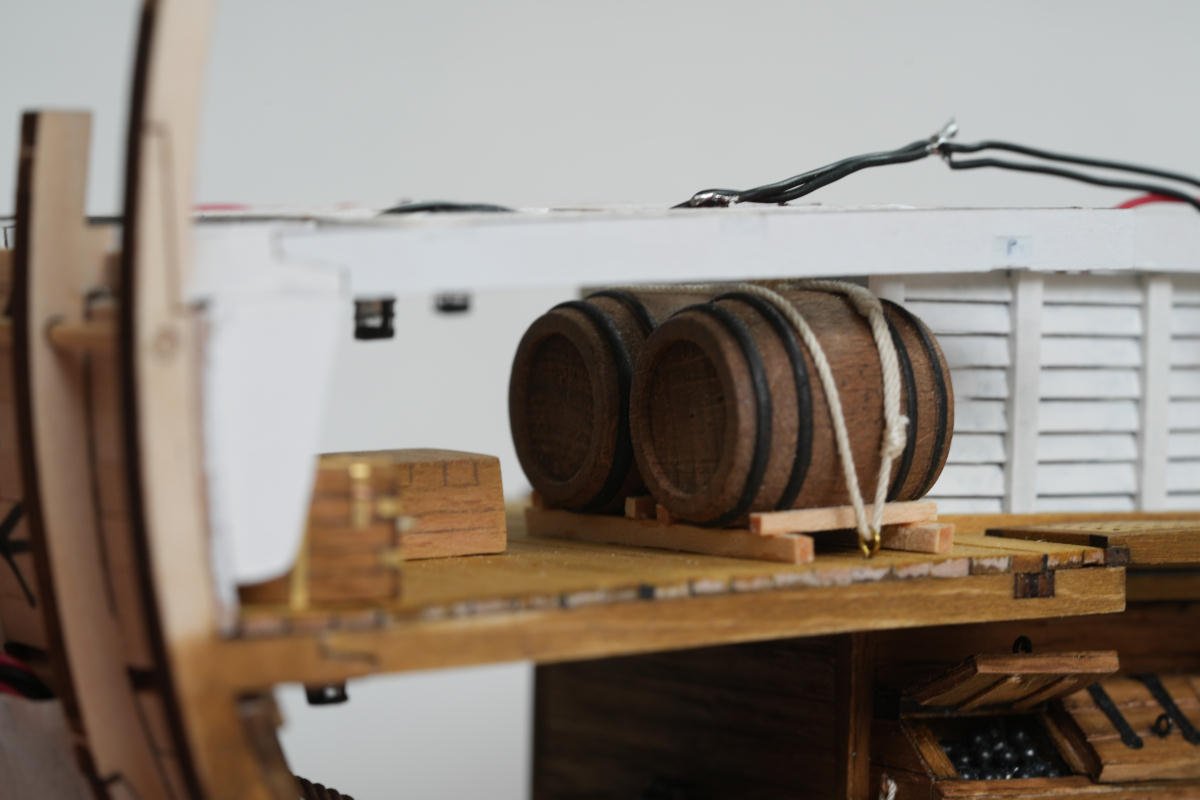
I don't know if somebody mention it before, but this is how I paint the iron bands around barrels of kit provided pieces. I use regular masking tape which I cut thinner than the distance between the bands and apply it in multiple windings. Instead of paint out of a bottle, I use an artist water-based pen. I have this one for years and it is still not dried out. You don't have to be very careful with the pen since it will not creep underneath the tape. There might be some spots that I unintentionally covered up but the pen also has 2 different sizes of tips to fix that.


- 16 replies
-
- 3
-
-
- Victory
- Artesania Latina
- (and 1 more)
-
Absolutely superb wood working and could be seen as a finished art work piece.
-
I added more cargo to the hold. I also wanted to show off my first self made ropes (slummed over the barrel and hanging next to it) although the don't look like the ones I bought from Ropes of Scale but I did not expect that anyhow. I hope, the higher I go on the cross section, the better my ropes will get. I might have to add more decks to the Victoria. Thanks to Mahuna for selling me his vertical ropewalk.


- 16 replies
-
- 4
-
-
- Victory
- Artesania Latina
- (and 1 more)
-
It is more a tutorial than a building log. As a beginner, I really appreciate it. It answered a lot of questions I had. Thanks.
-
Thanks. Unfortunately mine ended up in the hold, since I did not have the patients.too wait for the answers. I have to let my 1/72 scale sailors figure how to get them out.
-
In my cross section Victory I have some room left in the hold. I was thinking of using round dowels to mimic spare yards and booms. Would those pieces be stored pre-shaped or full diameter all the way to be shaped by the ship’s carpenter? Thanks
-
I am waiting for the day you start your 3D printer and a week later you pull out a HMS Victory in the 1/48 scale. Just kidding. Chuck, I love the details that you produce since that was the first thing I noticed when I open my first kit. The small wooden parts don’t look very prototypical.
-
Basswood Strips
RolandR replied to DGraley's topic in Building, Framing, Planking and plating a ships hull and deck
I like nationalbalsa.com here in the USA. -
question about waxing thread
RolandR replied to ford34tom@comcast.net's topic in Masting, rigging and sails
Looking at picture of HMS Victory and Constitution, ropes are not only come in many different sizes but colors. Mix and match the different companies mention above, increases the more prototypical look in my eyes. There must have been a huge color variation among the lines that have been handled by dirty hands and exposed to the weather compared to the ones still in storage. -
Bruce d thanks for the link since a found the drawing of a bilge pumpe I can use for my cross section Victory.

