westwood
-
Posts
233 -
Joined
-
Last visited
3 Followers


.jpg.d84ec4dad1d7791e855dca06210ab6f3.thumb.jpg.f45209242e851d4409eca1a09293165b.jpg)
Recent Profile Visitors
2,098 profile views


.thumb.jpg.0c4ba74a8c20632da6eafe3d432bde24.jpg)

-
 bdgiantman2 reacted to a post in a topic:
HMS Portland 1770 by scrubbyj427 - 1:48 - 4th rate 50-gun ship
bdgiantman2 reacted to a post in a topic:
HMS Portland 1770 by scrubbyj427 - 1:48 - 4th rate 50-gun ship
-
rcweir reacted to a post in a topic:
HMS Portland 1770 by westwood - Portland Scale Ship Co. - 1:48 - 50 gun 4th rate
-
westwood reacted to a post in a topic:
HMS Portland 1770 by Trussben - Portland Scale Ship Co. - 1:48 - 50 gun 4th rate
-
westwood reacted to a post in a topic:
HMS Portland 1770 by scrubbyj427 - 1:48 - 4th rate 50-gun ship
-
westwood reacted to a post in a topic:
HMS Portland 1770 by scrubbyj427 - 1:48 - 4th rate 50-gun ship
-
scrubbyj427 reacted to a post in a topic:
HMS Portland 1770 by Trussben - Portland Scale Ship Co. - 1:48 - 50 gun 4th rate
-
westwood reacted to a post in a topic:
HMS Portland 1770 by Trussben - Portland Scale Ship Co. - 1:48 - 50 gun 4th rate
-
westwood reacted to a post in a topic:
HMS Portland 1770 by Trussben - Portland Scale Ship Co. - 1:48 - 50 gun 4th rate
-
Great work, Ben! I still have a lot of work to do, but I'm looking forward to starting the framing process on my model.
-
Rustyj reacted to a post in a topic:
HMS Portland 1770 by westwood - Portland Scale Ship Co. - 1:48 - 50 gun 4th rate
-
westwood reacted to a post in a topic:
HMS Portland 1770 by Trussben - Portland Scale Ship Co. - 1:48 - 50 gun 4th rate
-
westwood reacted to a post in a topic:
HMS Portland 1770 by Trussben - Portland Scale Ship Co. - 1:48 - 50 gun 4th rate
-
scrubbyj427 reacted to a post in a topic:
HMS Portland 1770 by westwood - Portland Scale Ship Co. - 1:48 - 50 gun 4th rate
-
Pitan reacted to a post in a topic:
HMS Portland 1770 by westwood - Portland Scale Ship Co. - 1:48 - 50 gun 4th rate
-
davyboy reacted to a post in a topic:
HMS Portland 1770 by westwood - Portland Scale Ship Co. - 1:48 - 50 gun 4th rate
-
yvesvidal reacted to a post in a topic:
HMS Portland 1770 by westwood - Portland Scale Ship Co. - 1:48 - 50 gun 4th rate
-
gjdale reacted to a post in a topic:
HMS Portland 1770 by westwood - Portland Scale Ship Co. - 1:48 - 50 gun 4th rate
-
Ryland Craze reacted to a post in a topic:
HMS Portland 1770 by westwood - Portland Scale Ship Co. - 1:48 - 50 gun 4th rate
-
westwood reacted to a post in a topic:
Syren Ship Model Company News, Updates and Info.....(part 2)
-
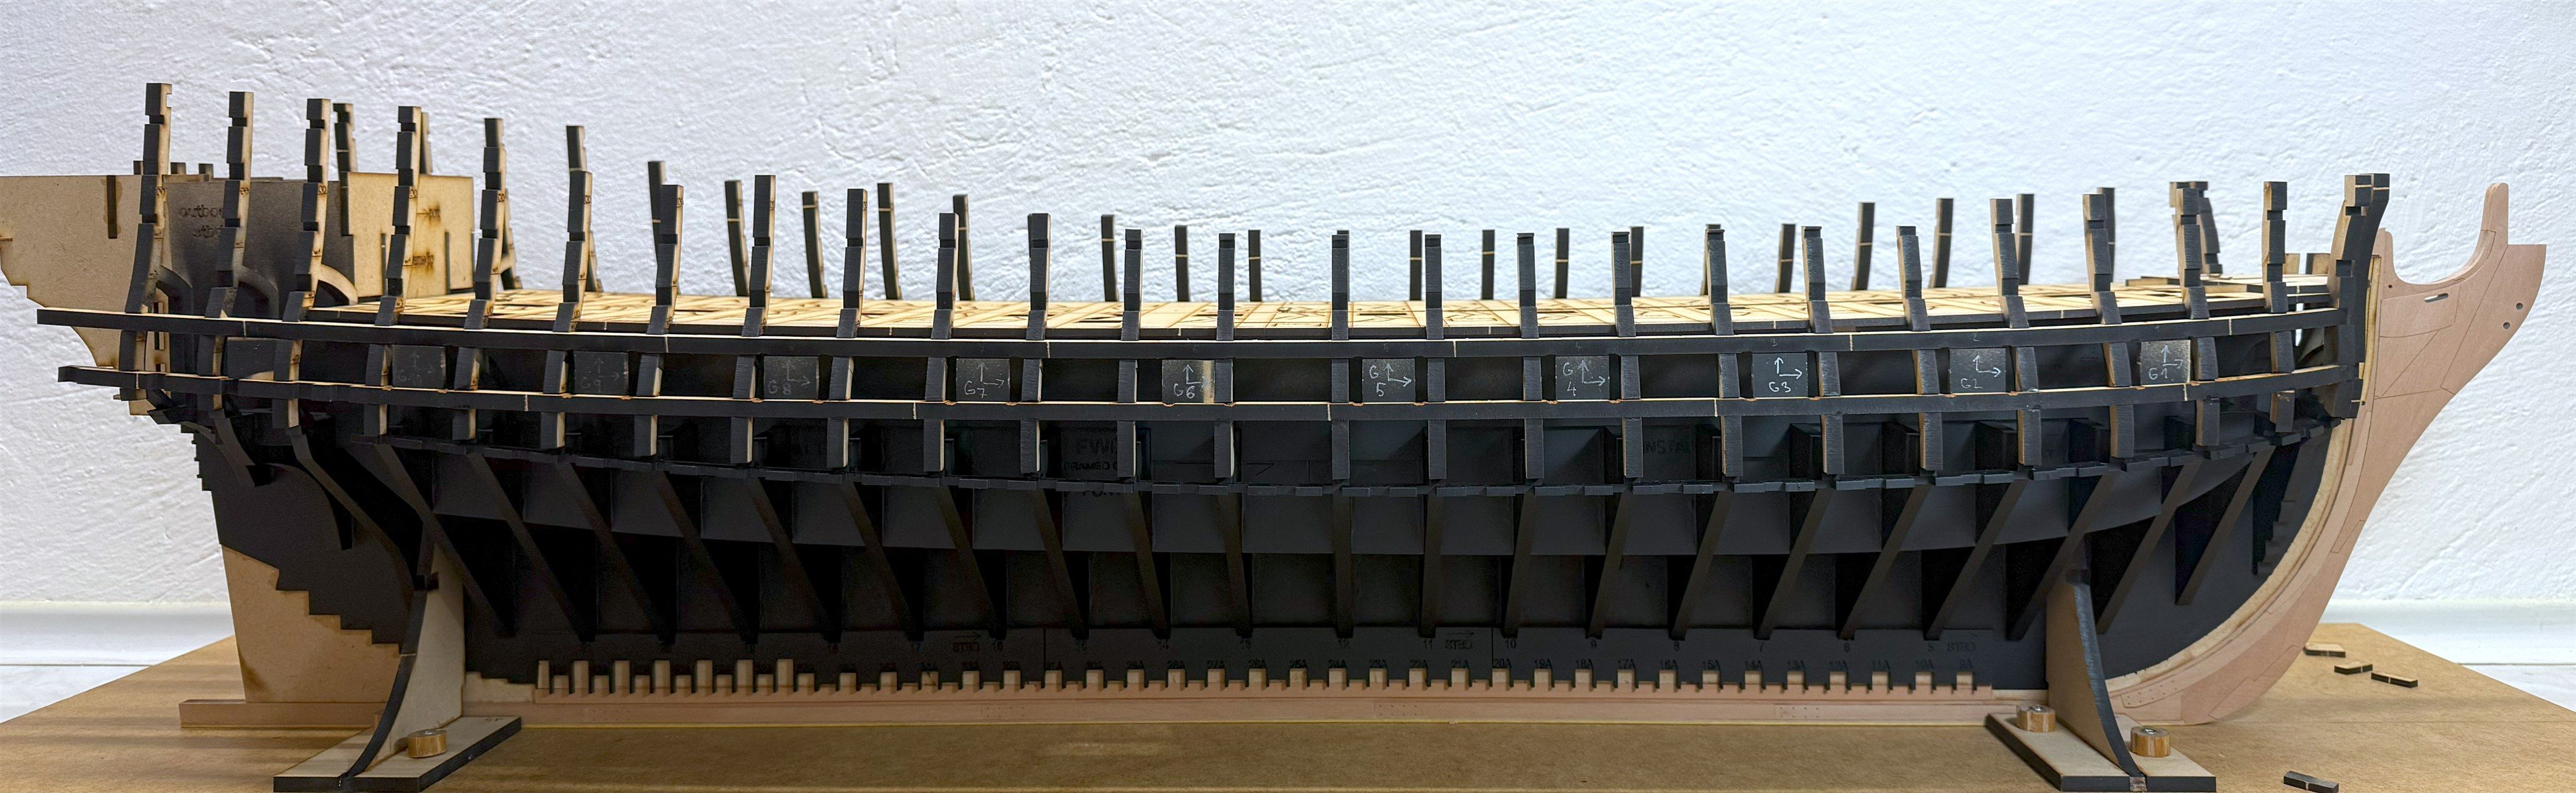
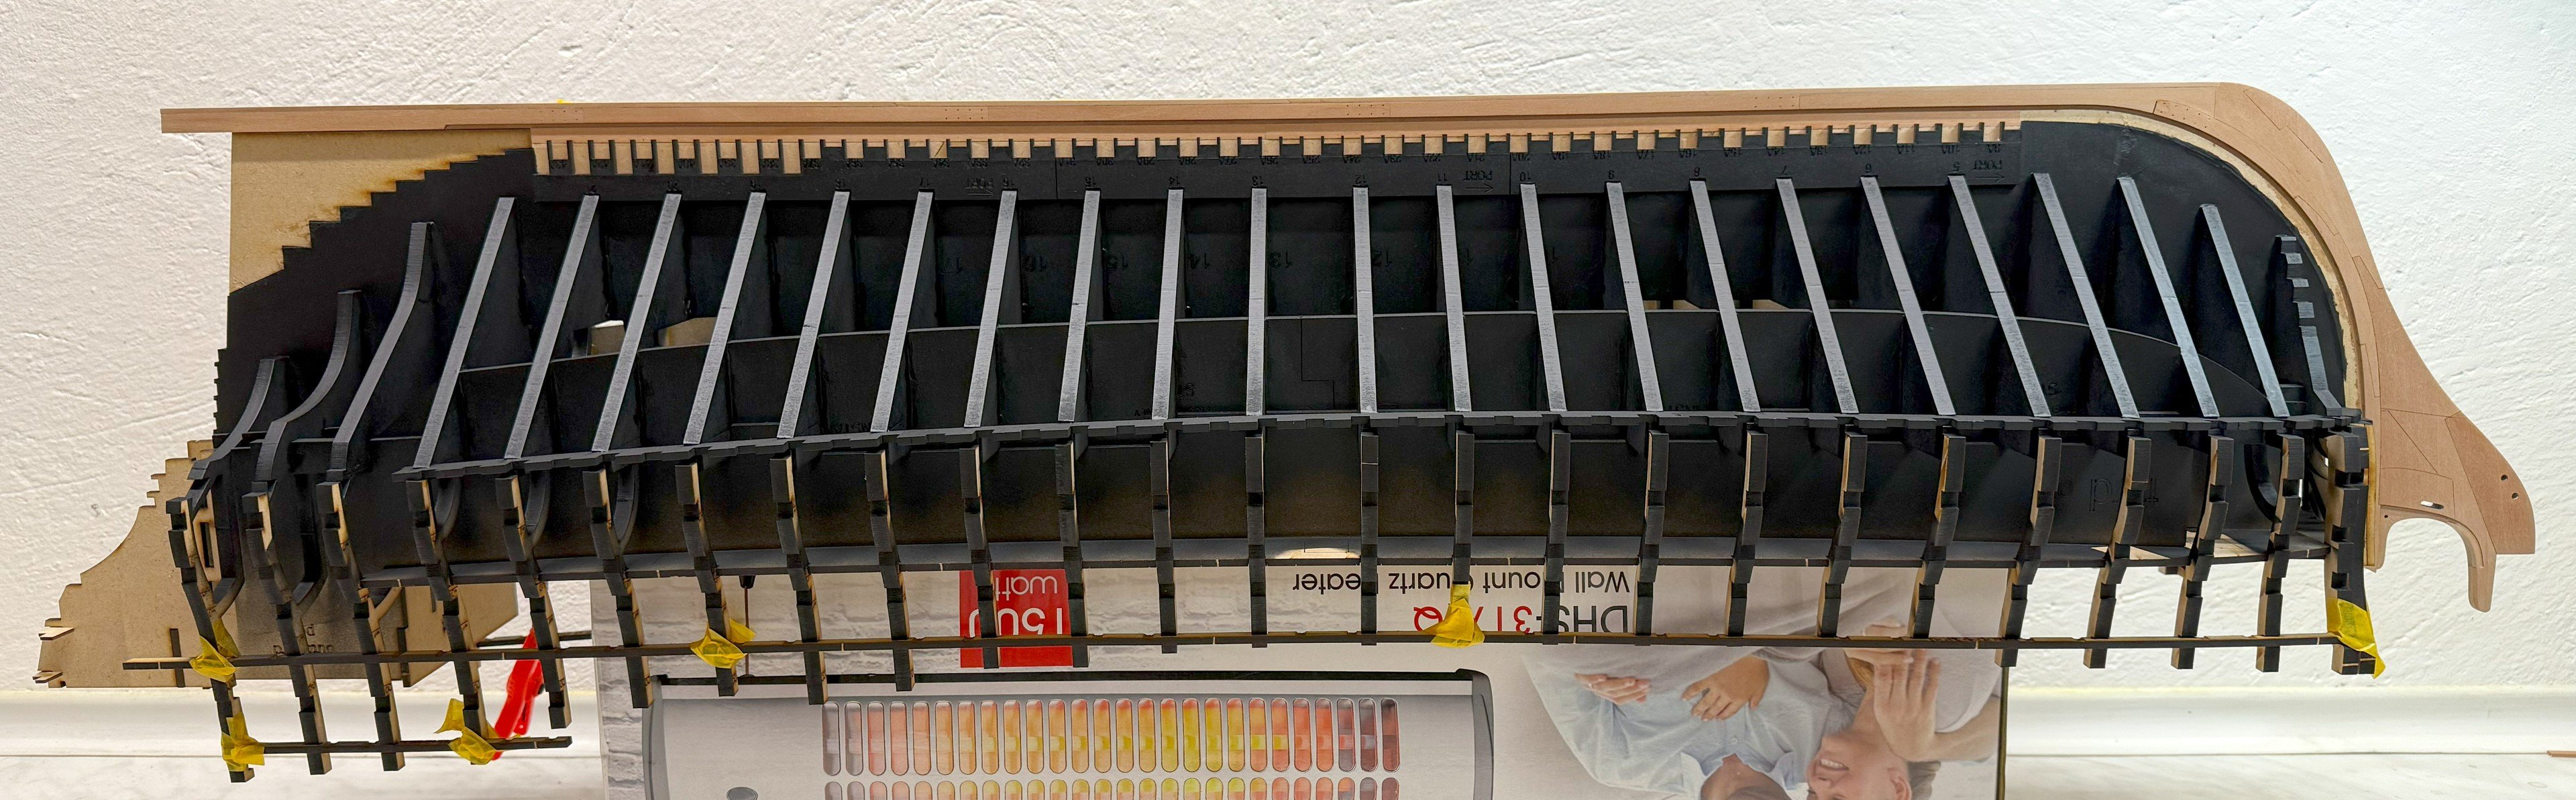
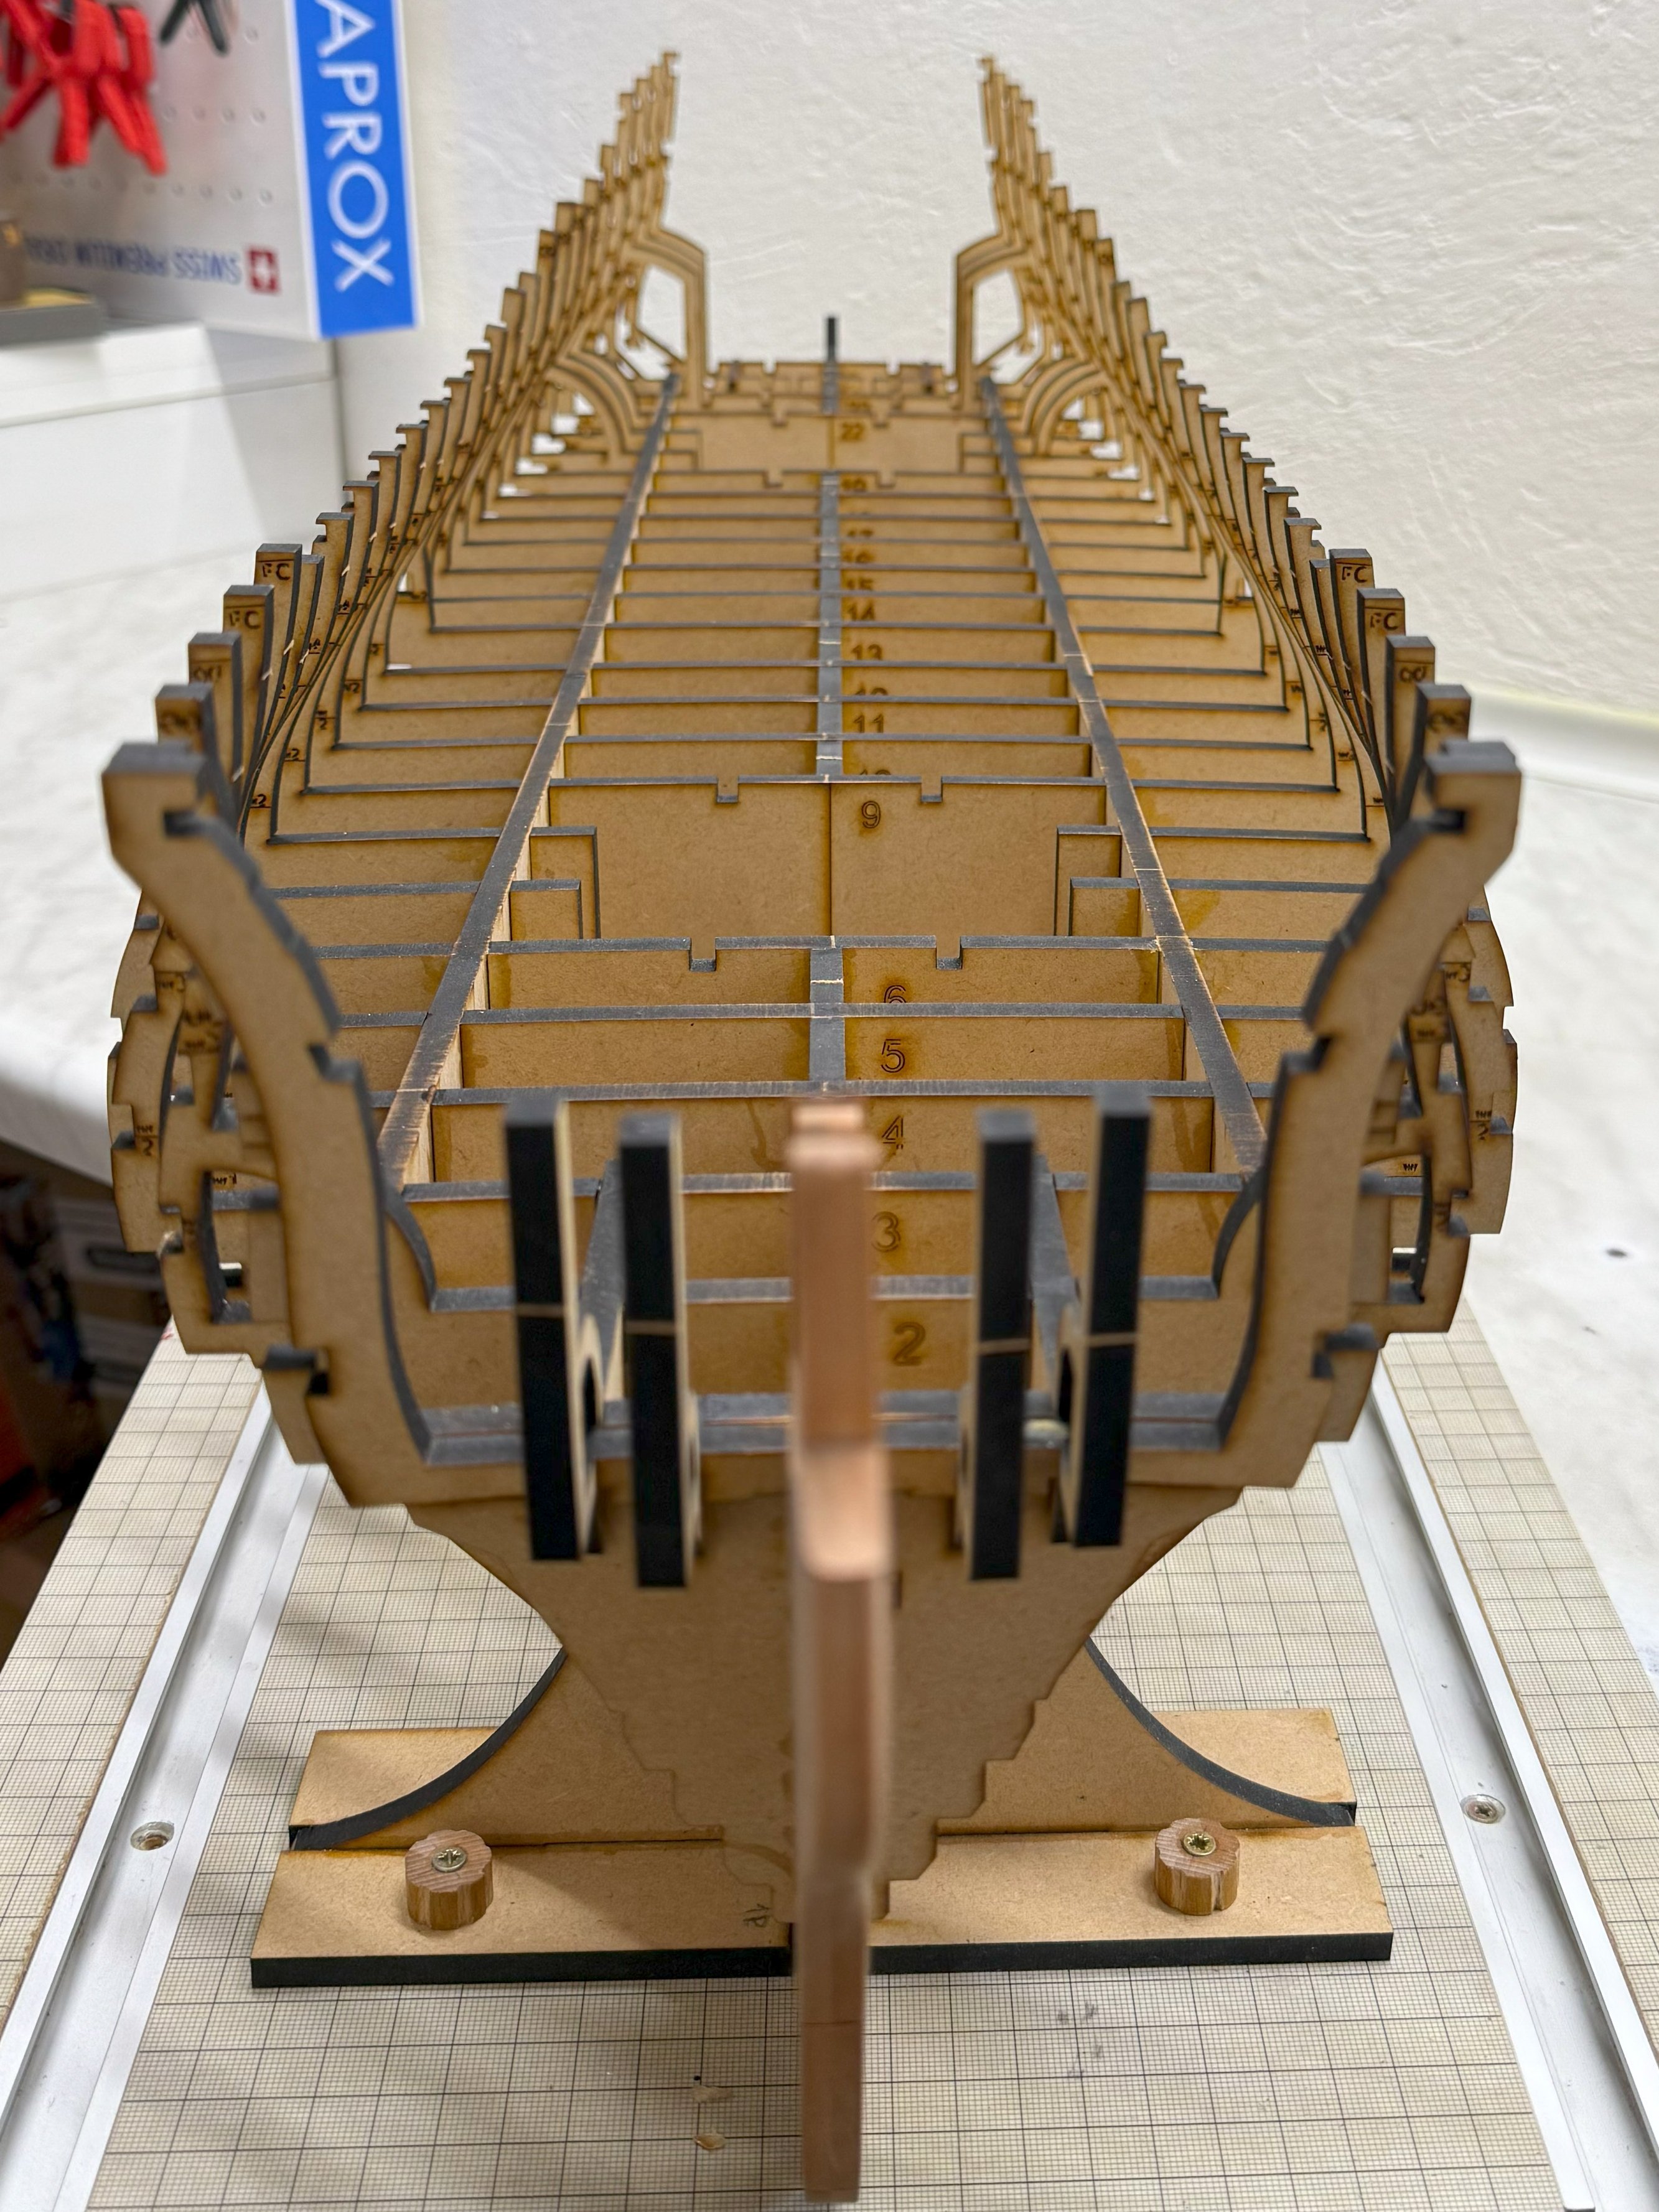
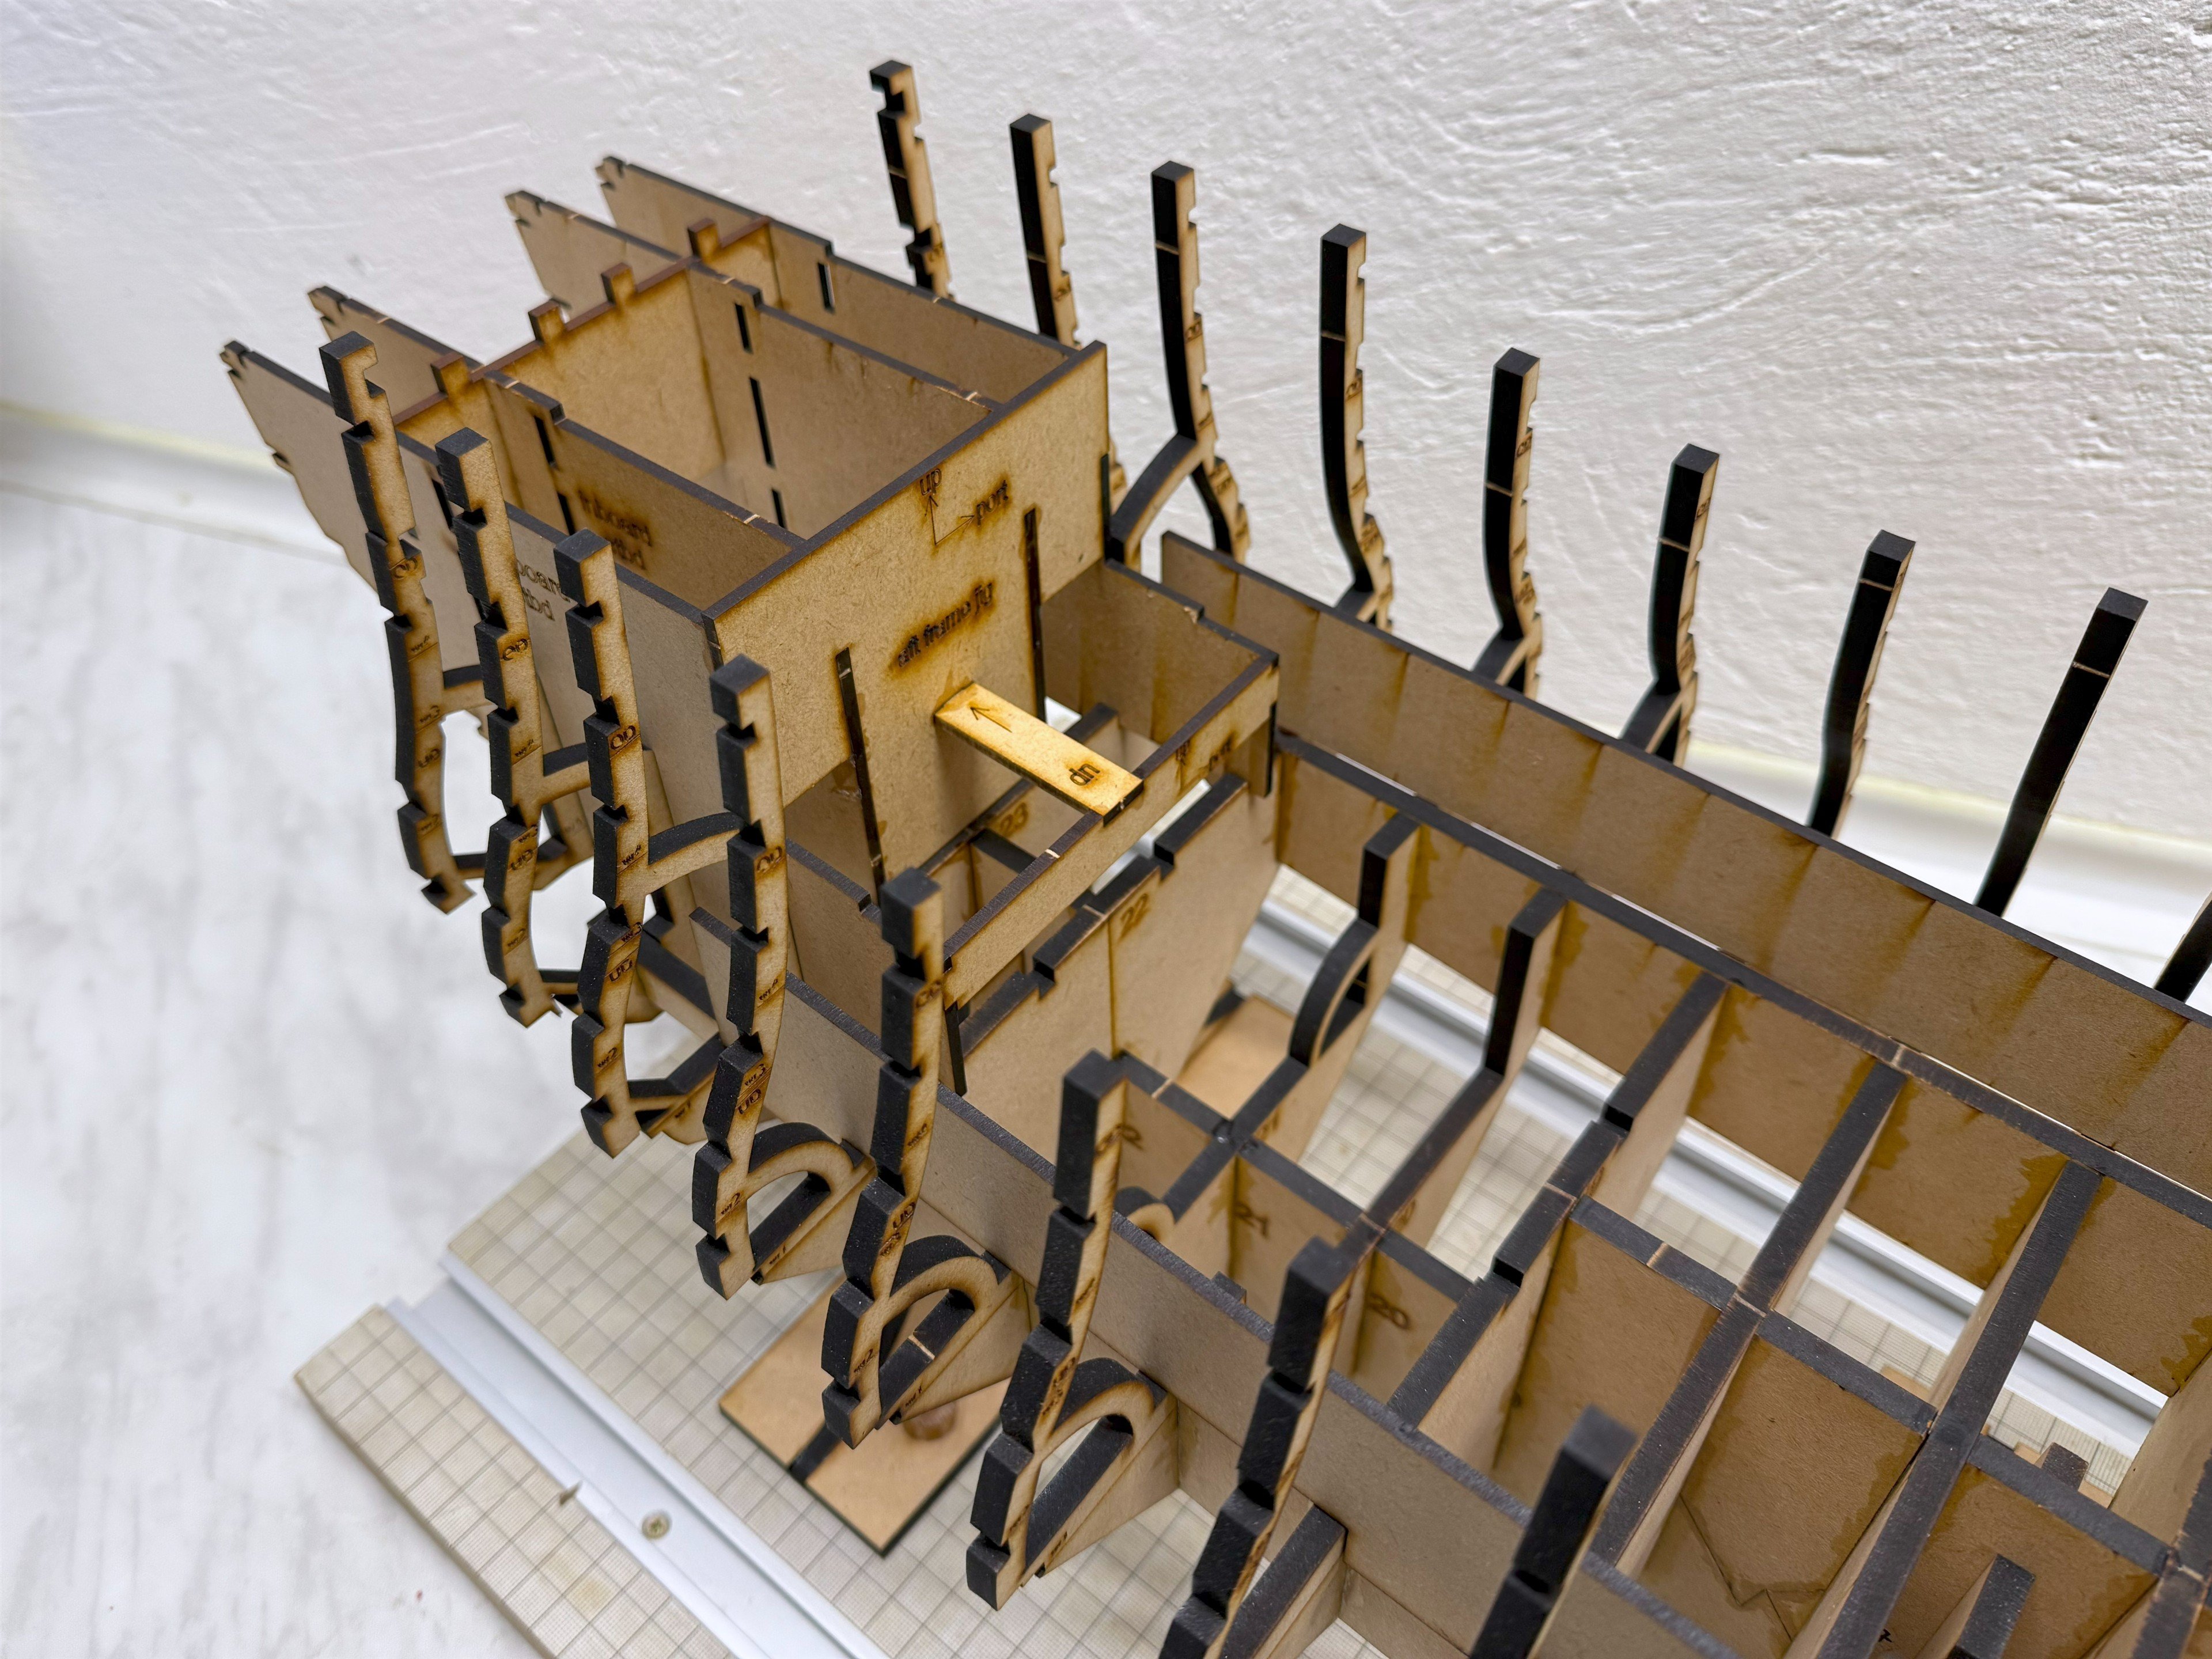
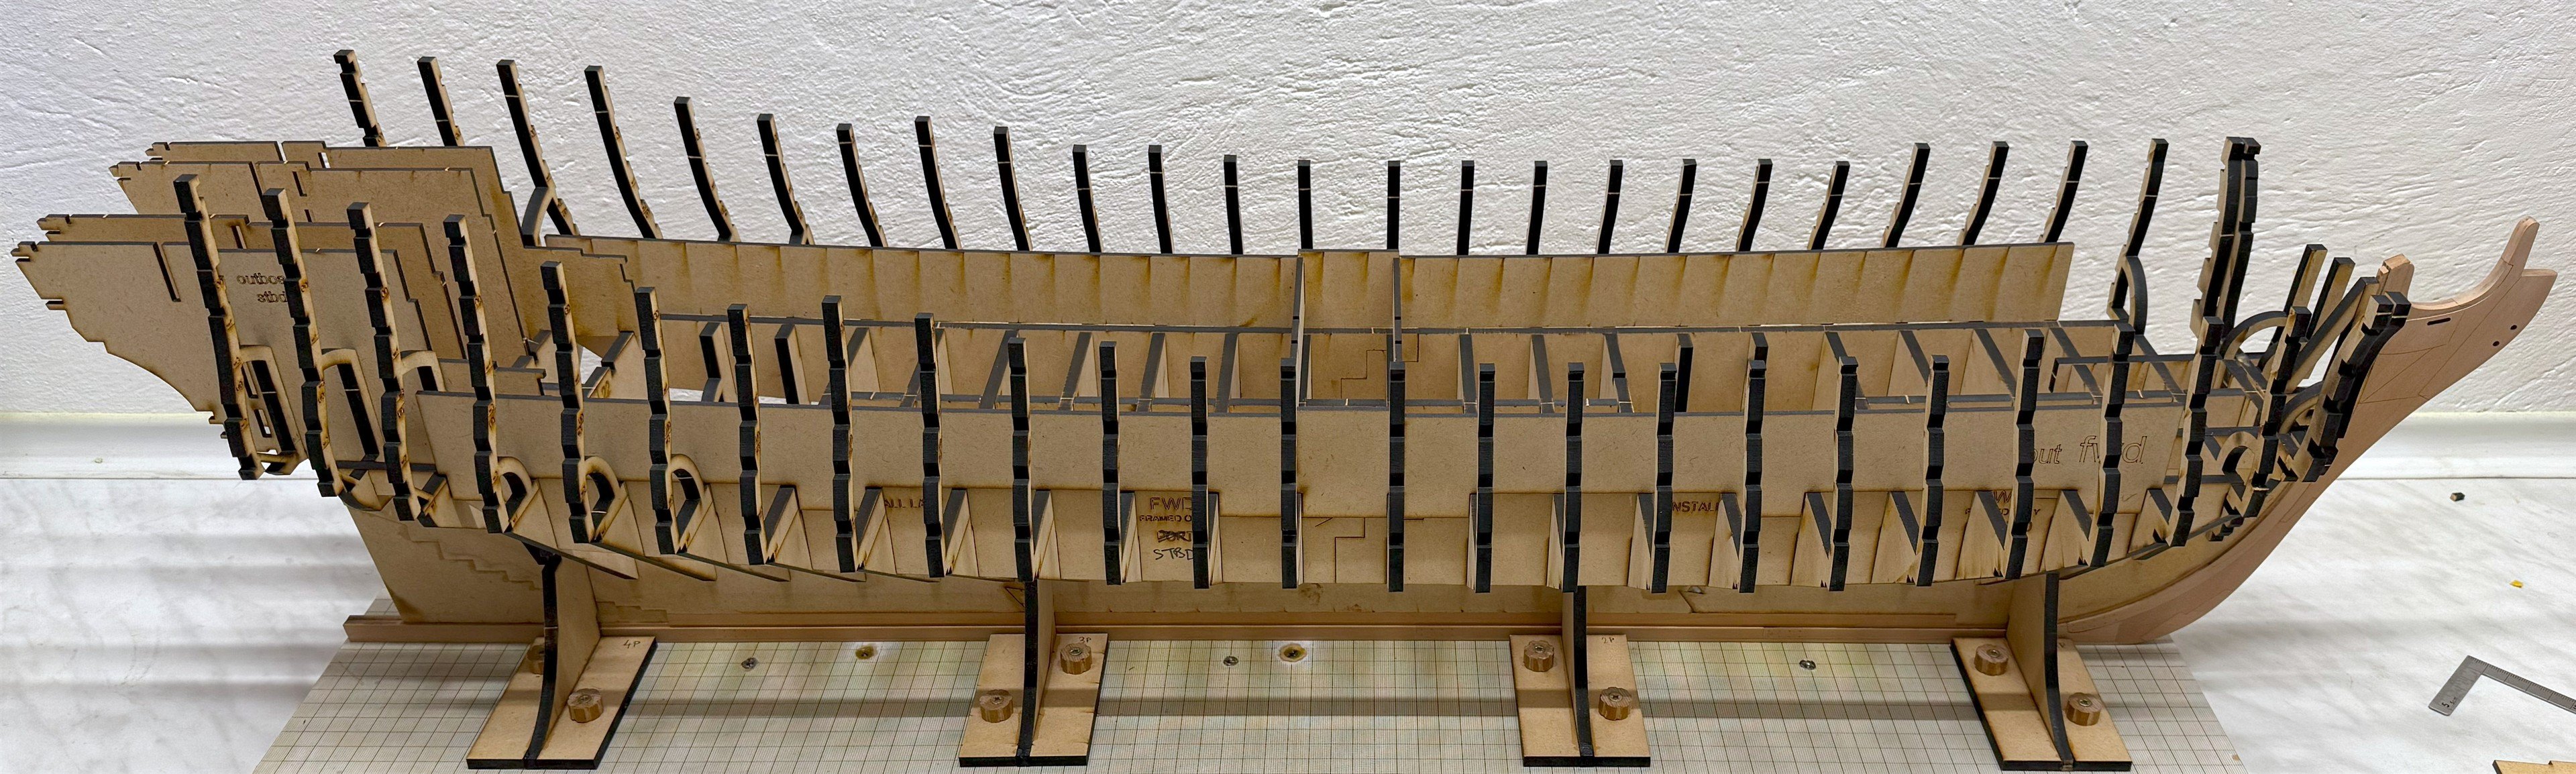
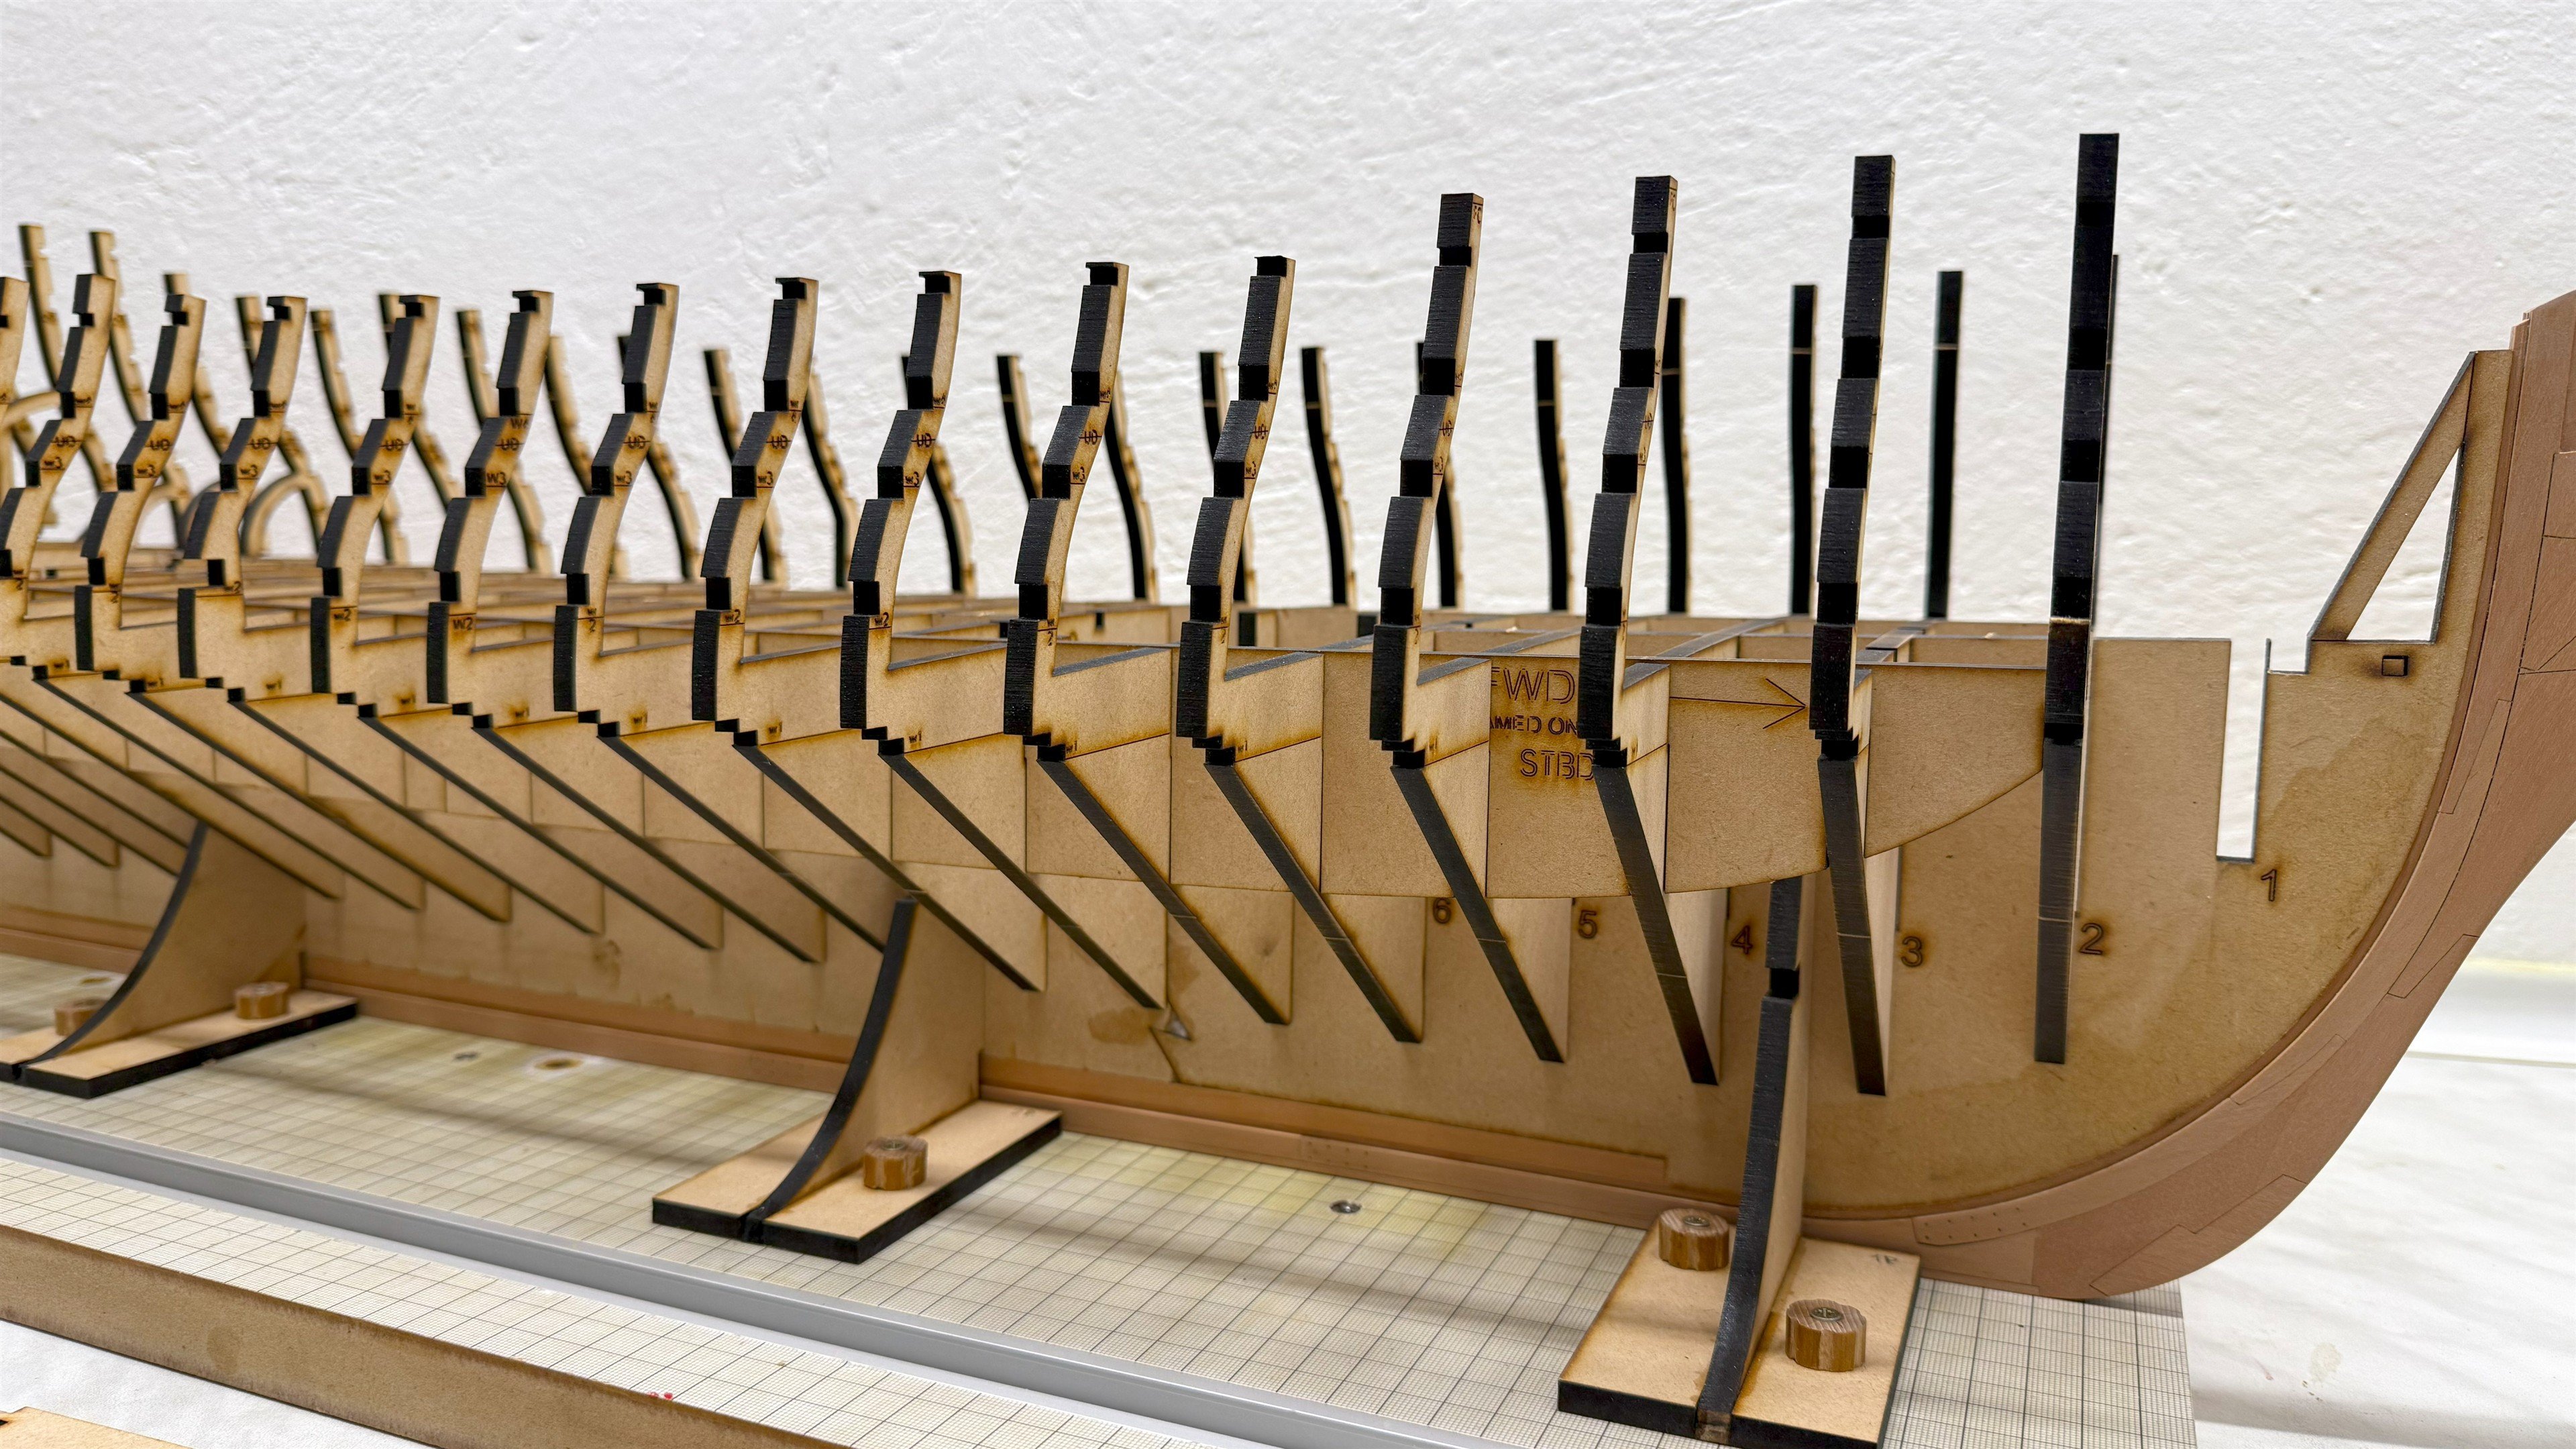
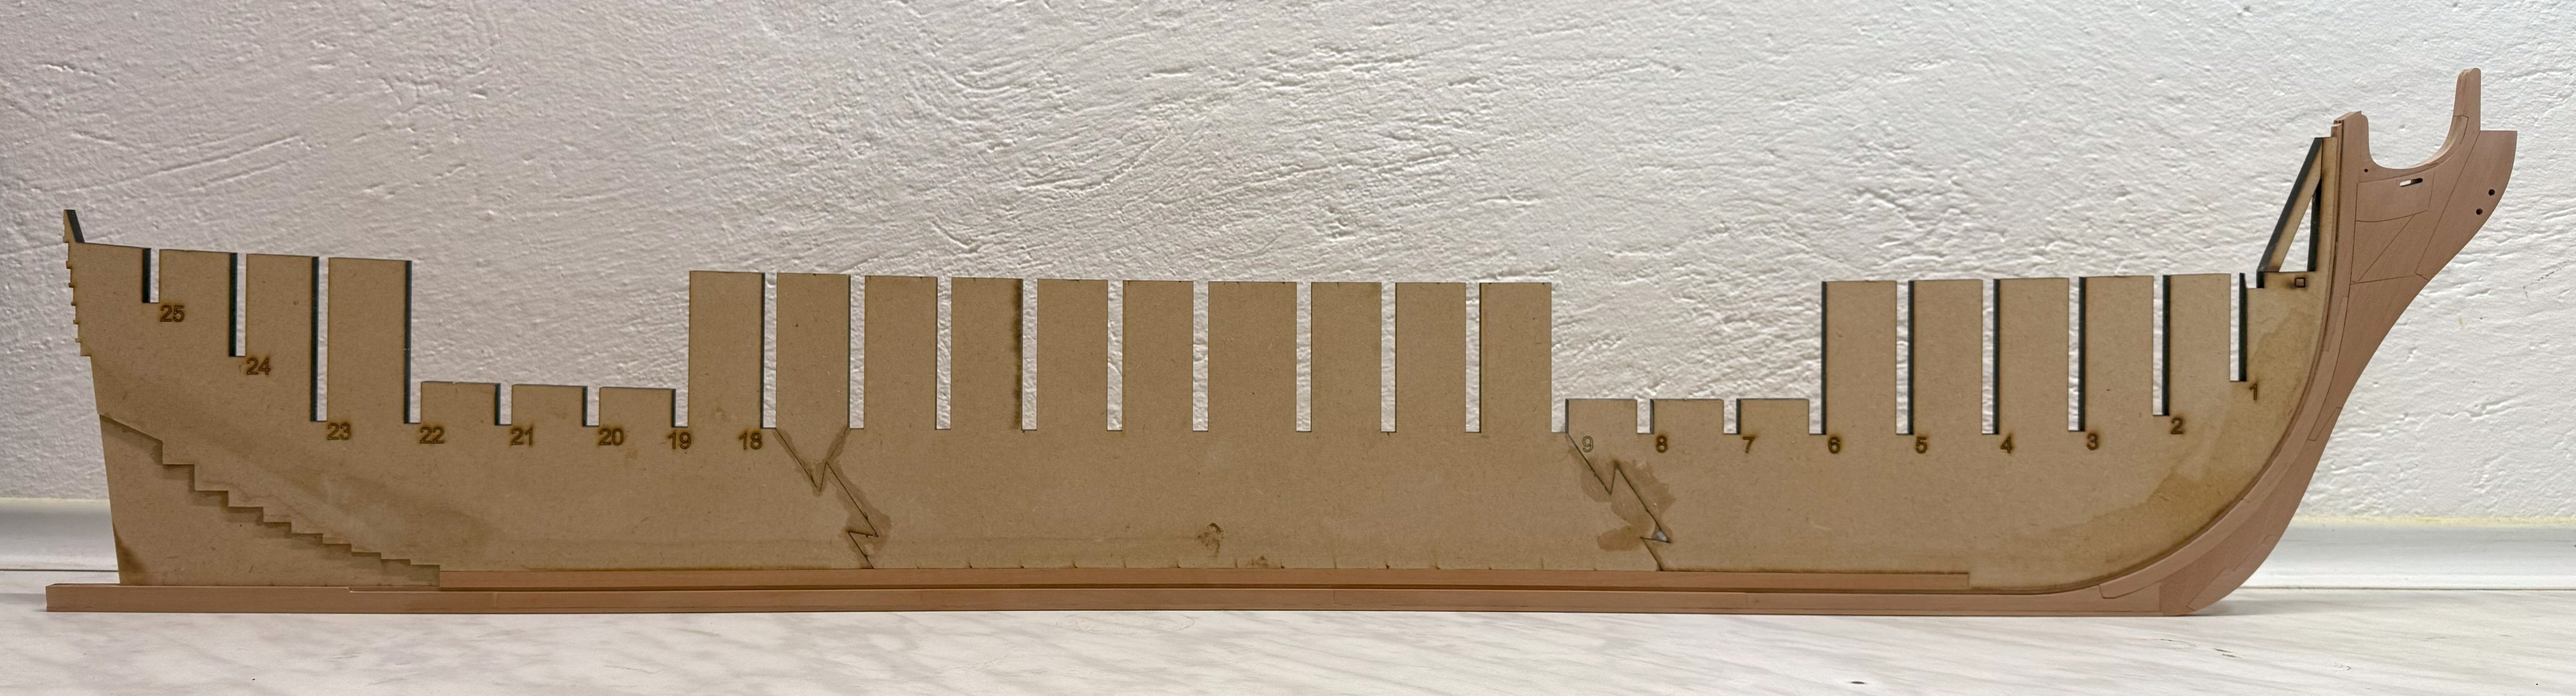
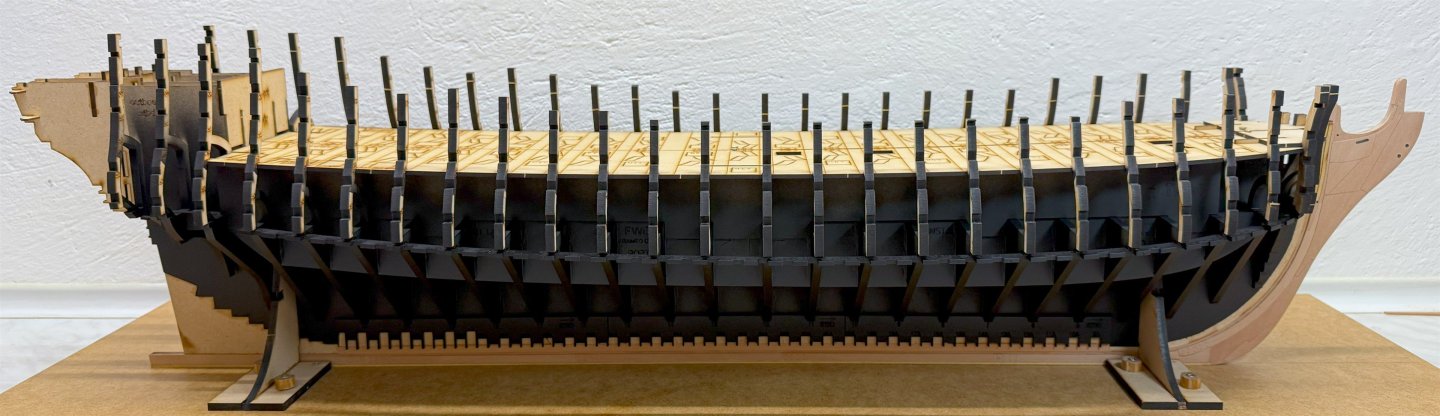
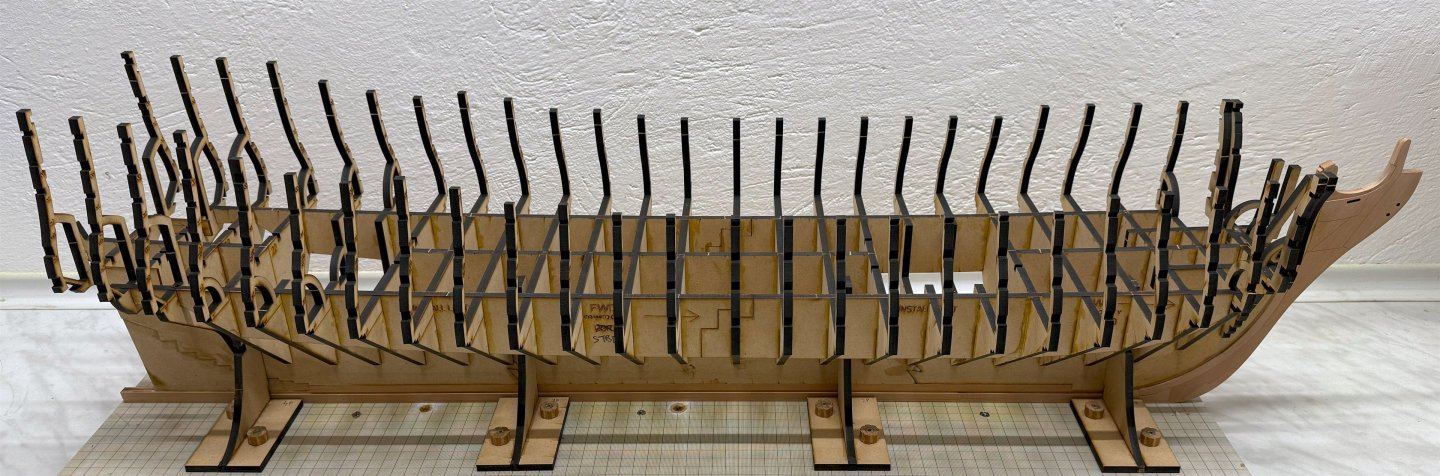
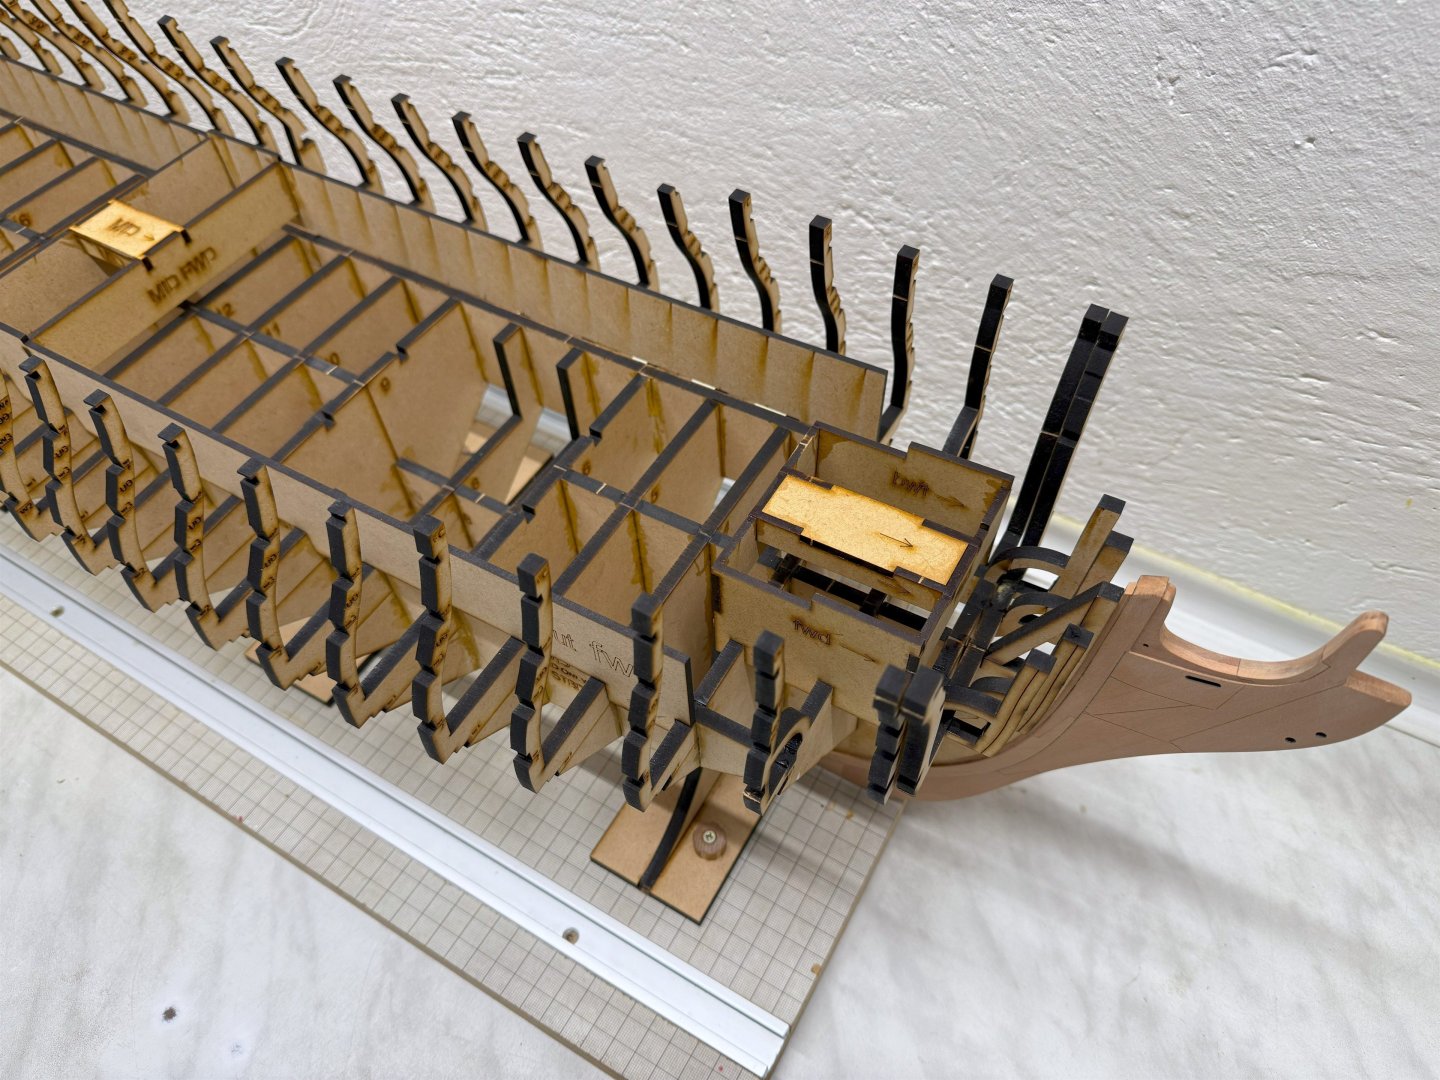
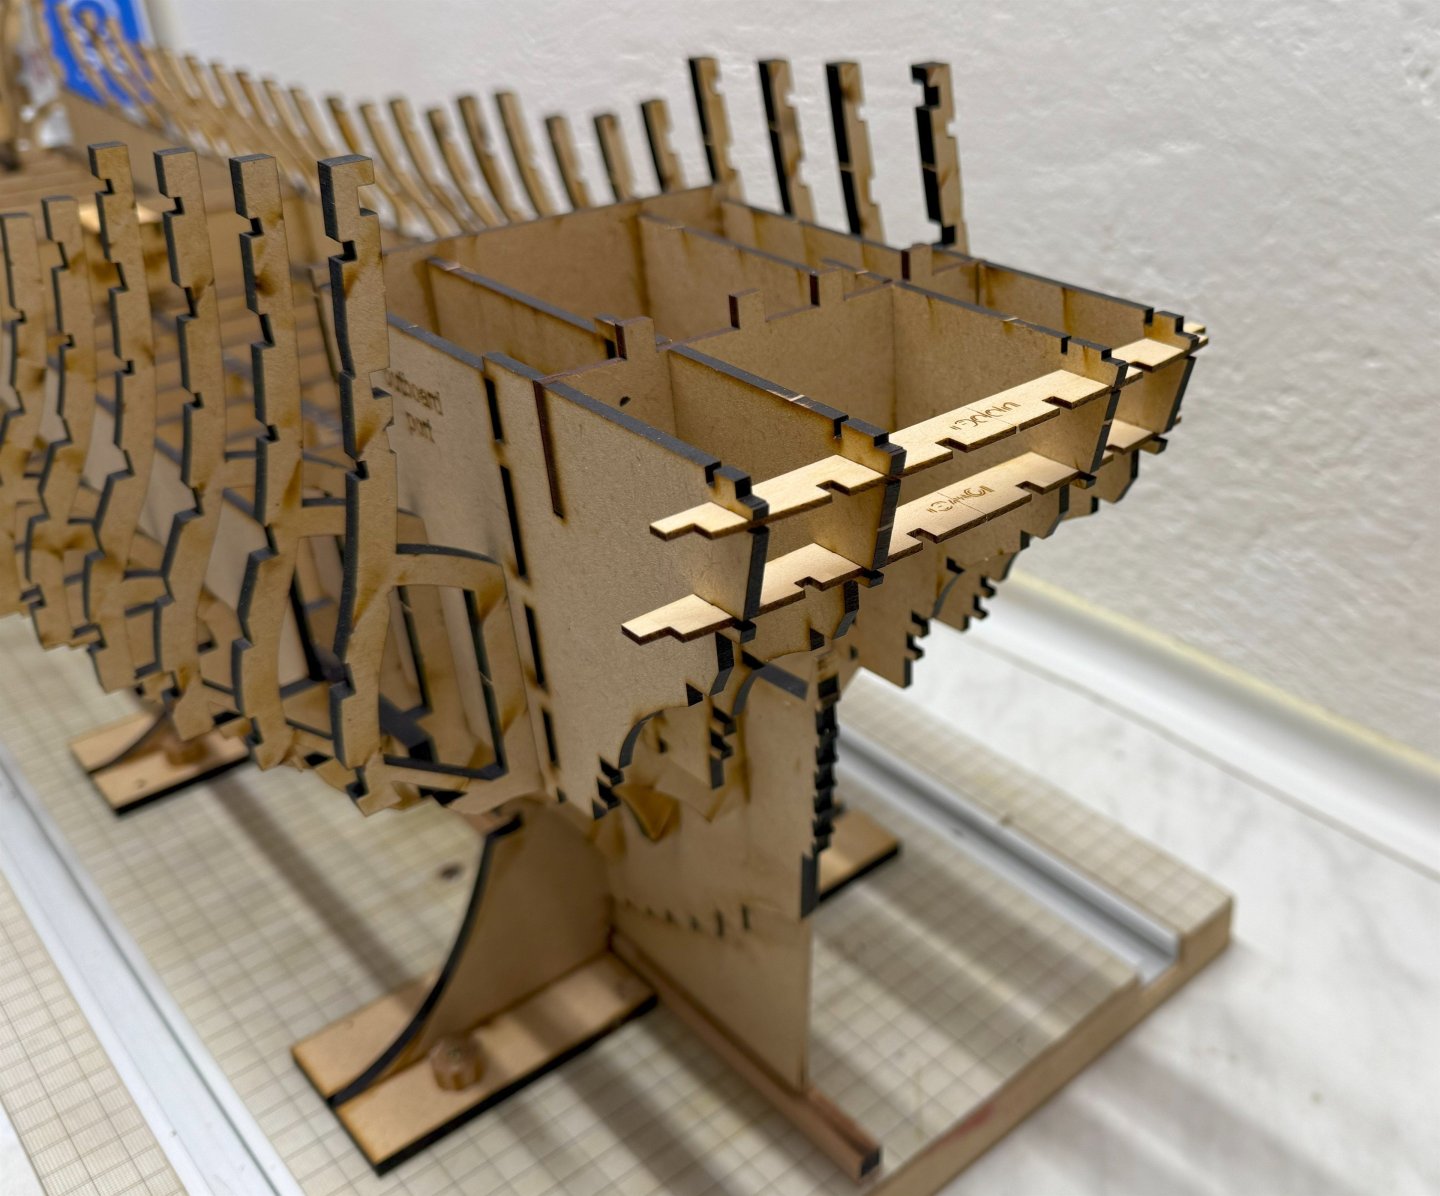
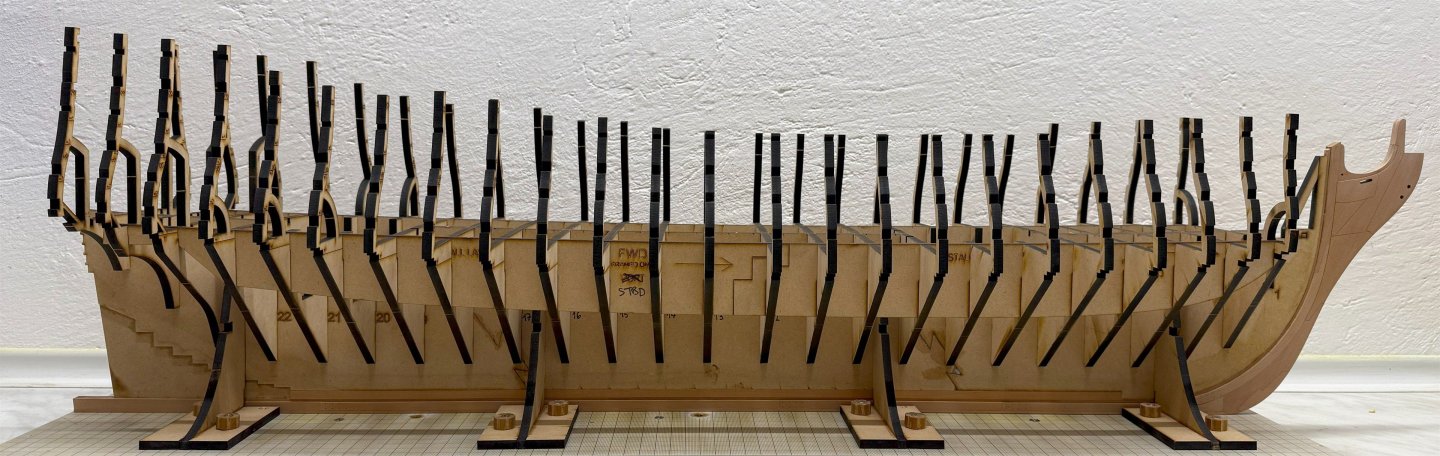
Another small update, although the manual shows stern framing first, but since bulkhead extensions are critical and fragile, I decided to start framing the gun ports first. The longitudinal pieces are cut full length, which should make for a nice smooth run, assuming all the bulkheads are properly aligned. I started at main gundeck level with STBD 1 UP. Each port also has its own template. So I'll use them to check the height before gluing the top piece STBD 2.

-
westwood reacted to a post in a topic:
Sloop Speedwell 1752 by Chuck - Ketch Rigged Sloop - POF - prototype build
-
westwood reacted to a post in a topic:
HMS Portland 1770 by westwood - Portland Scale Ship Co. - 1:48 - 50 gun 4th rate
-
ready to continue...

-
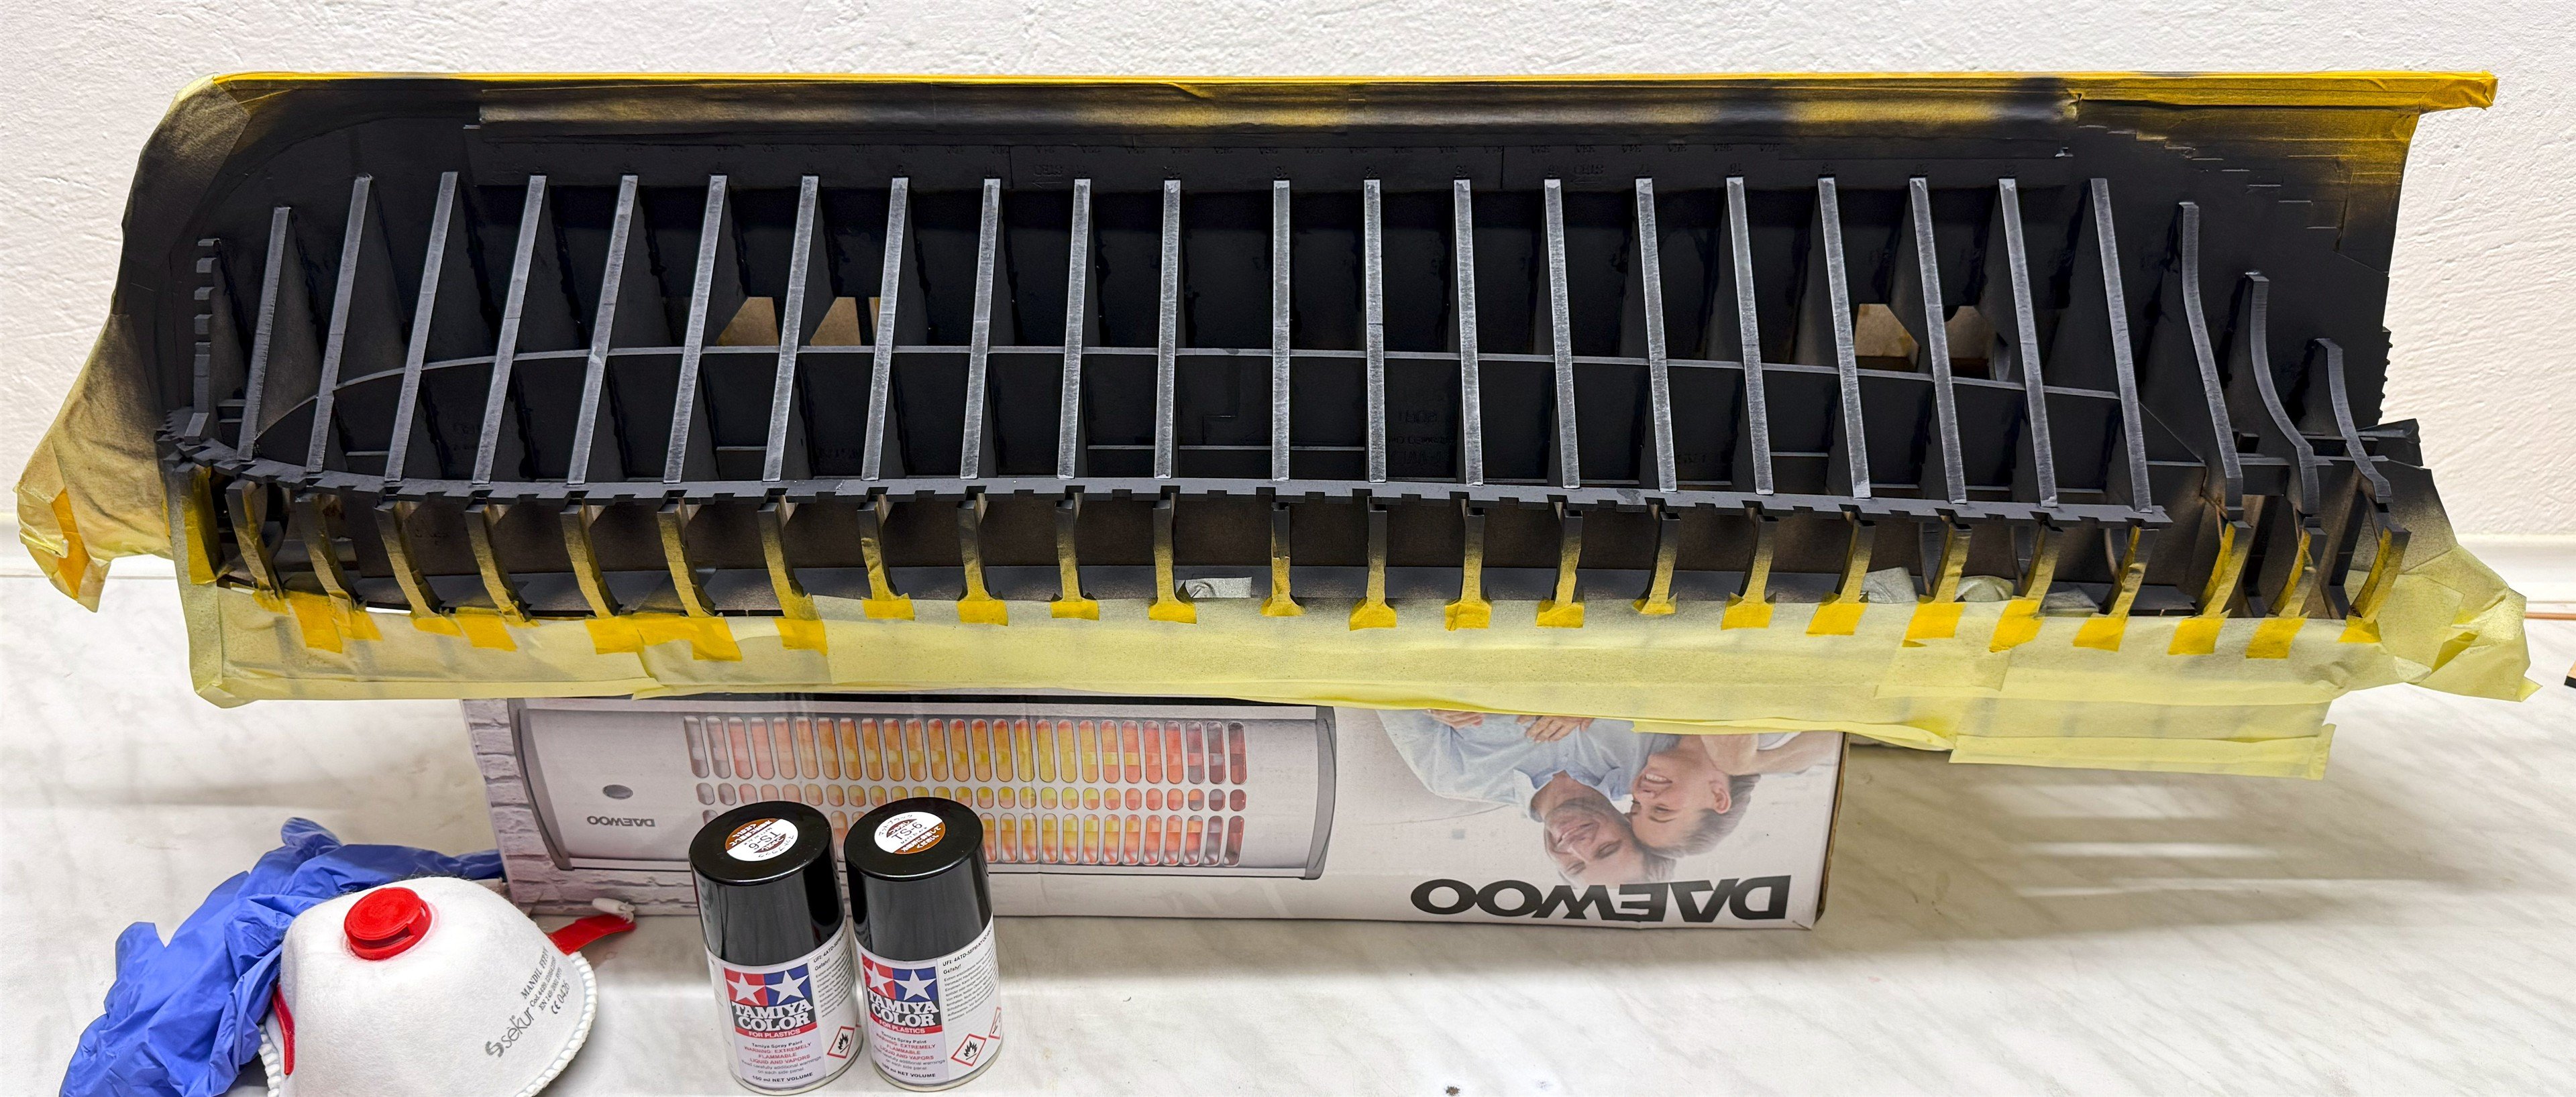
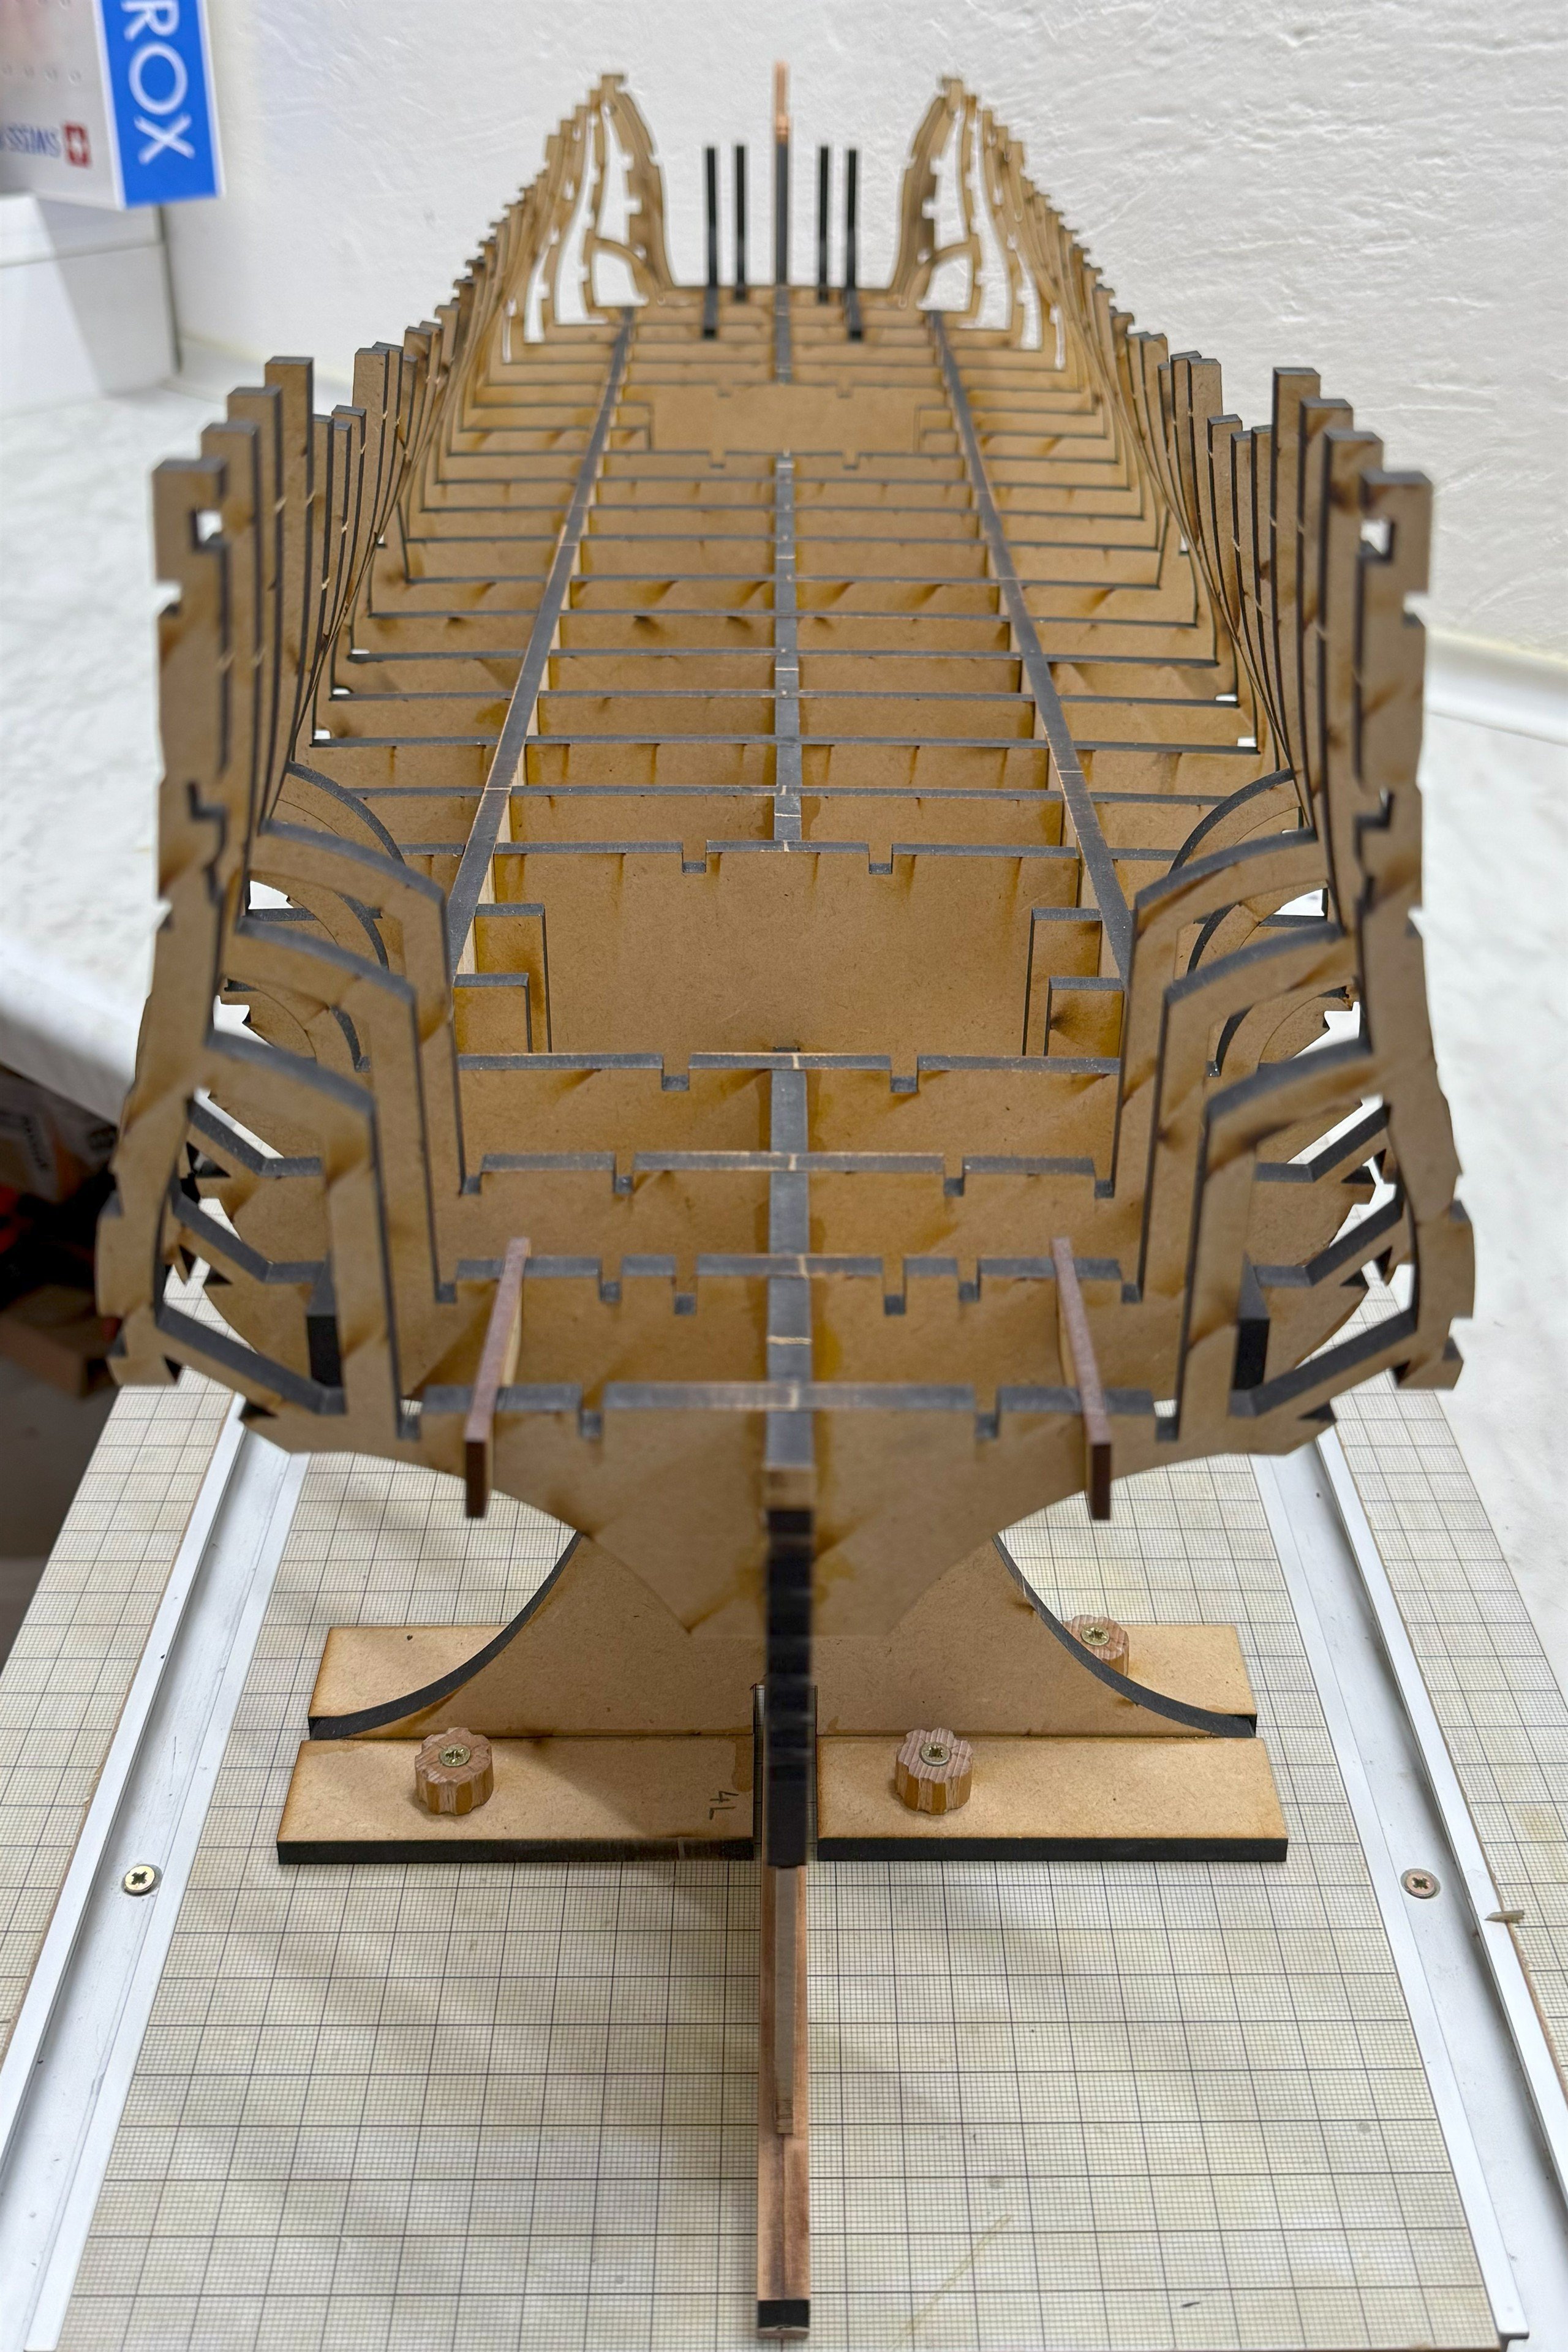
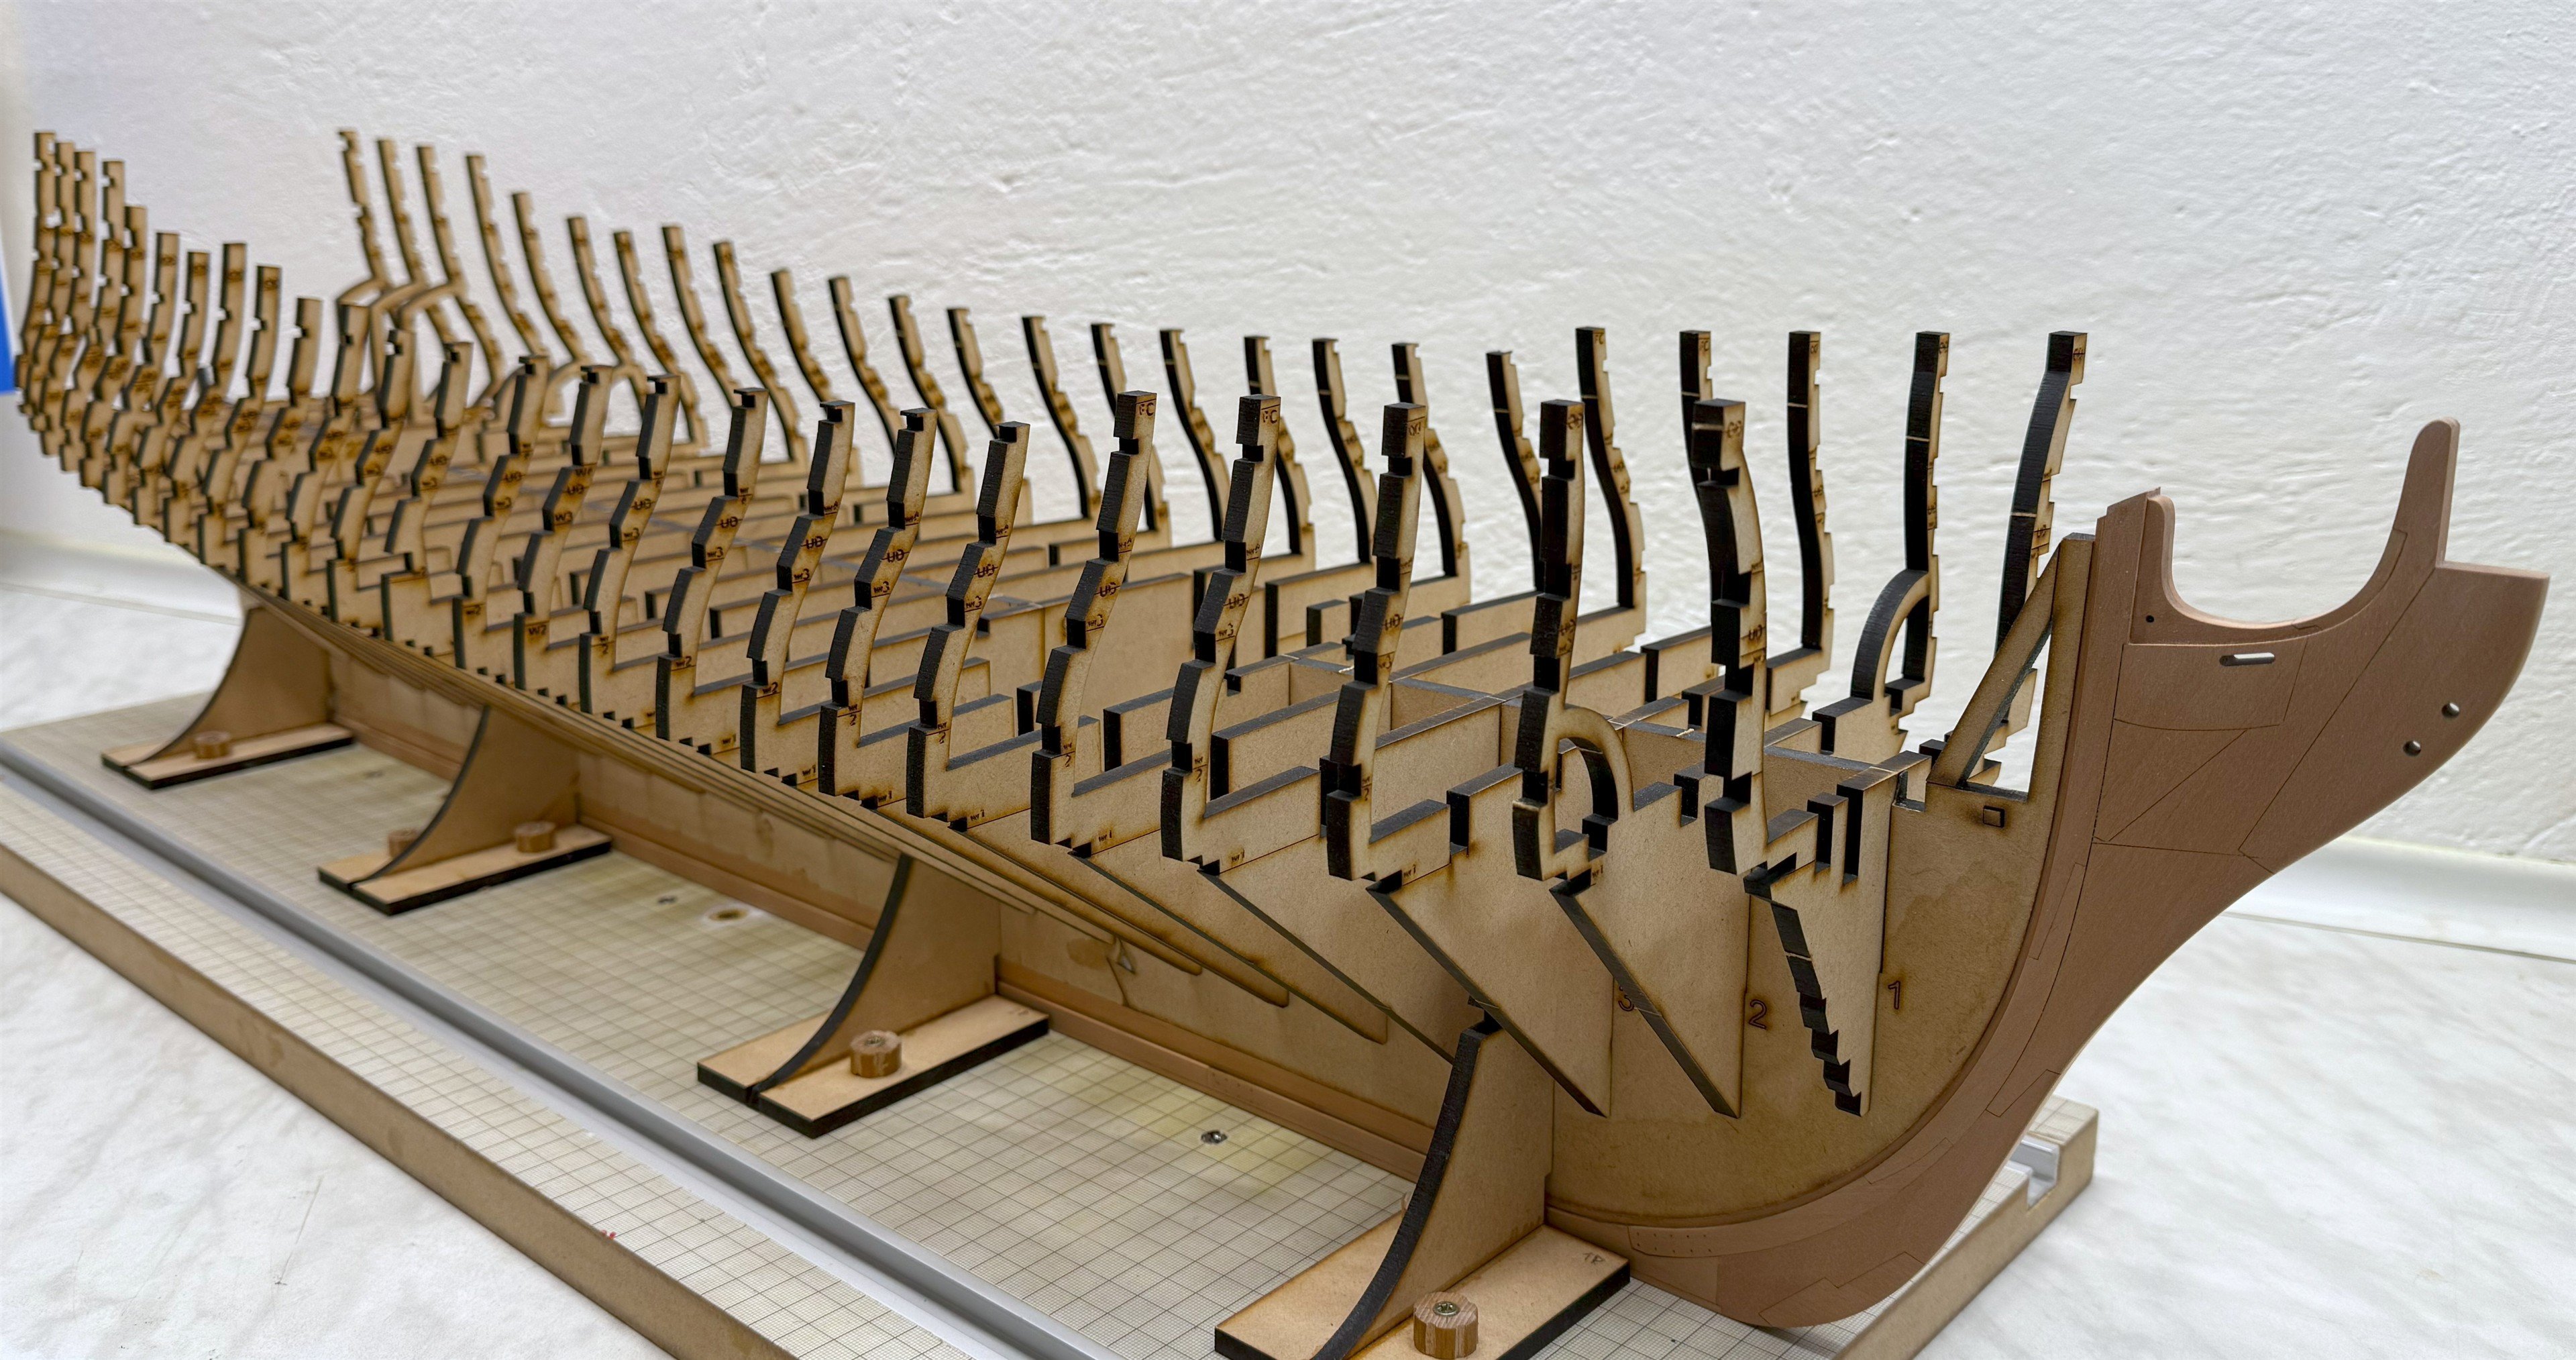
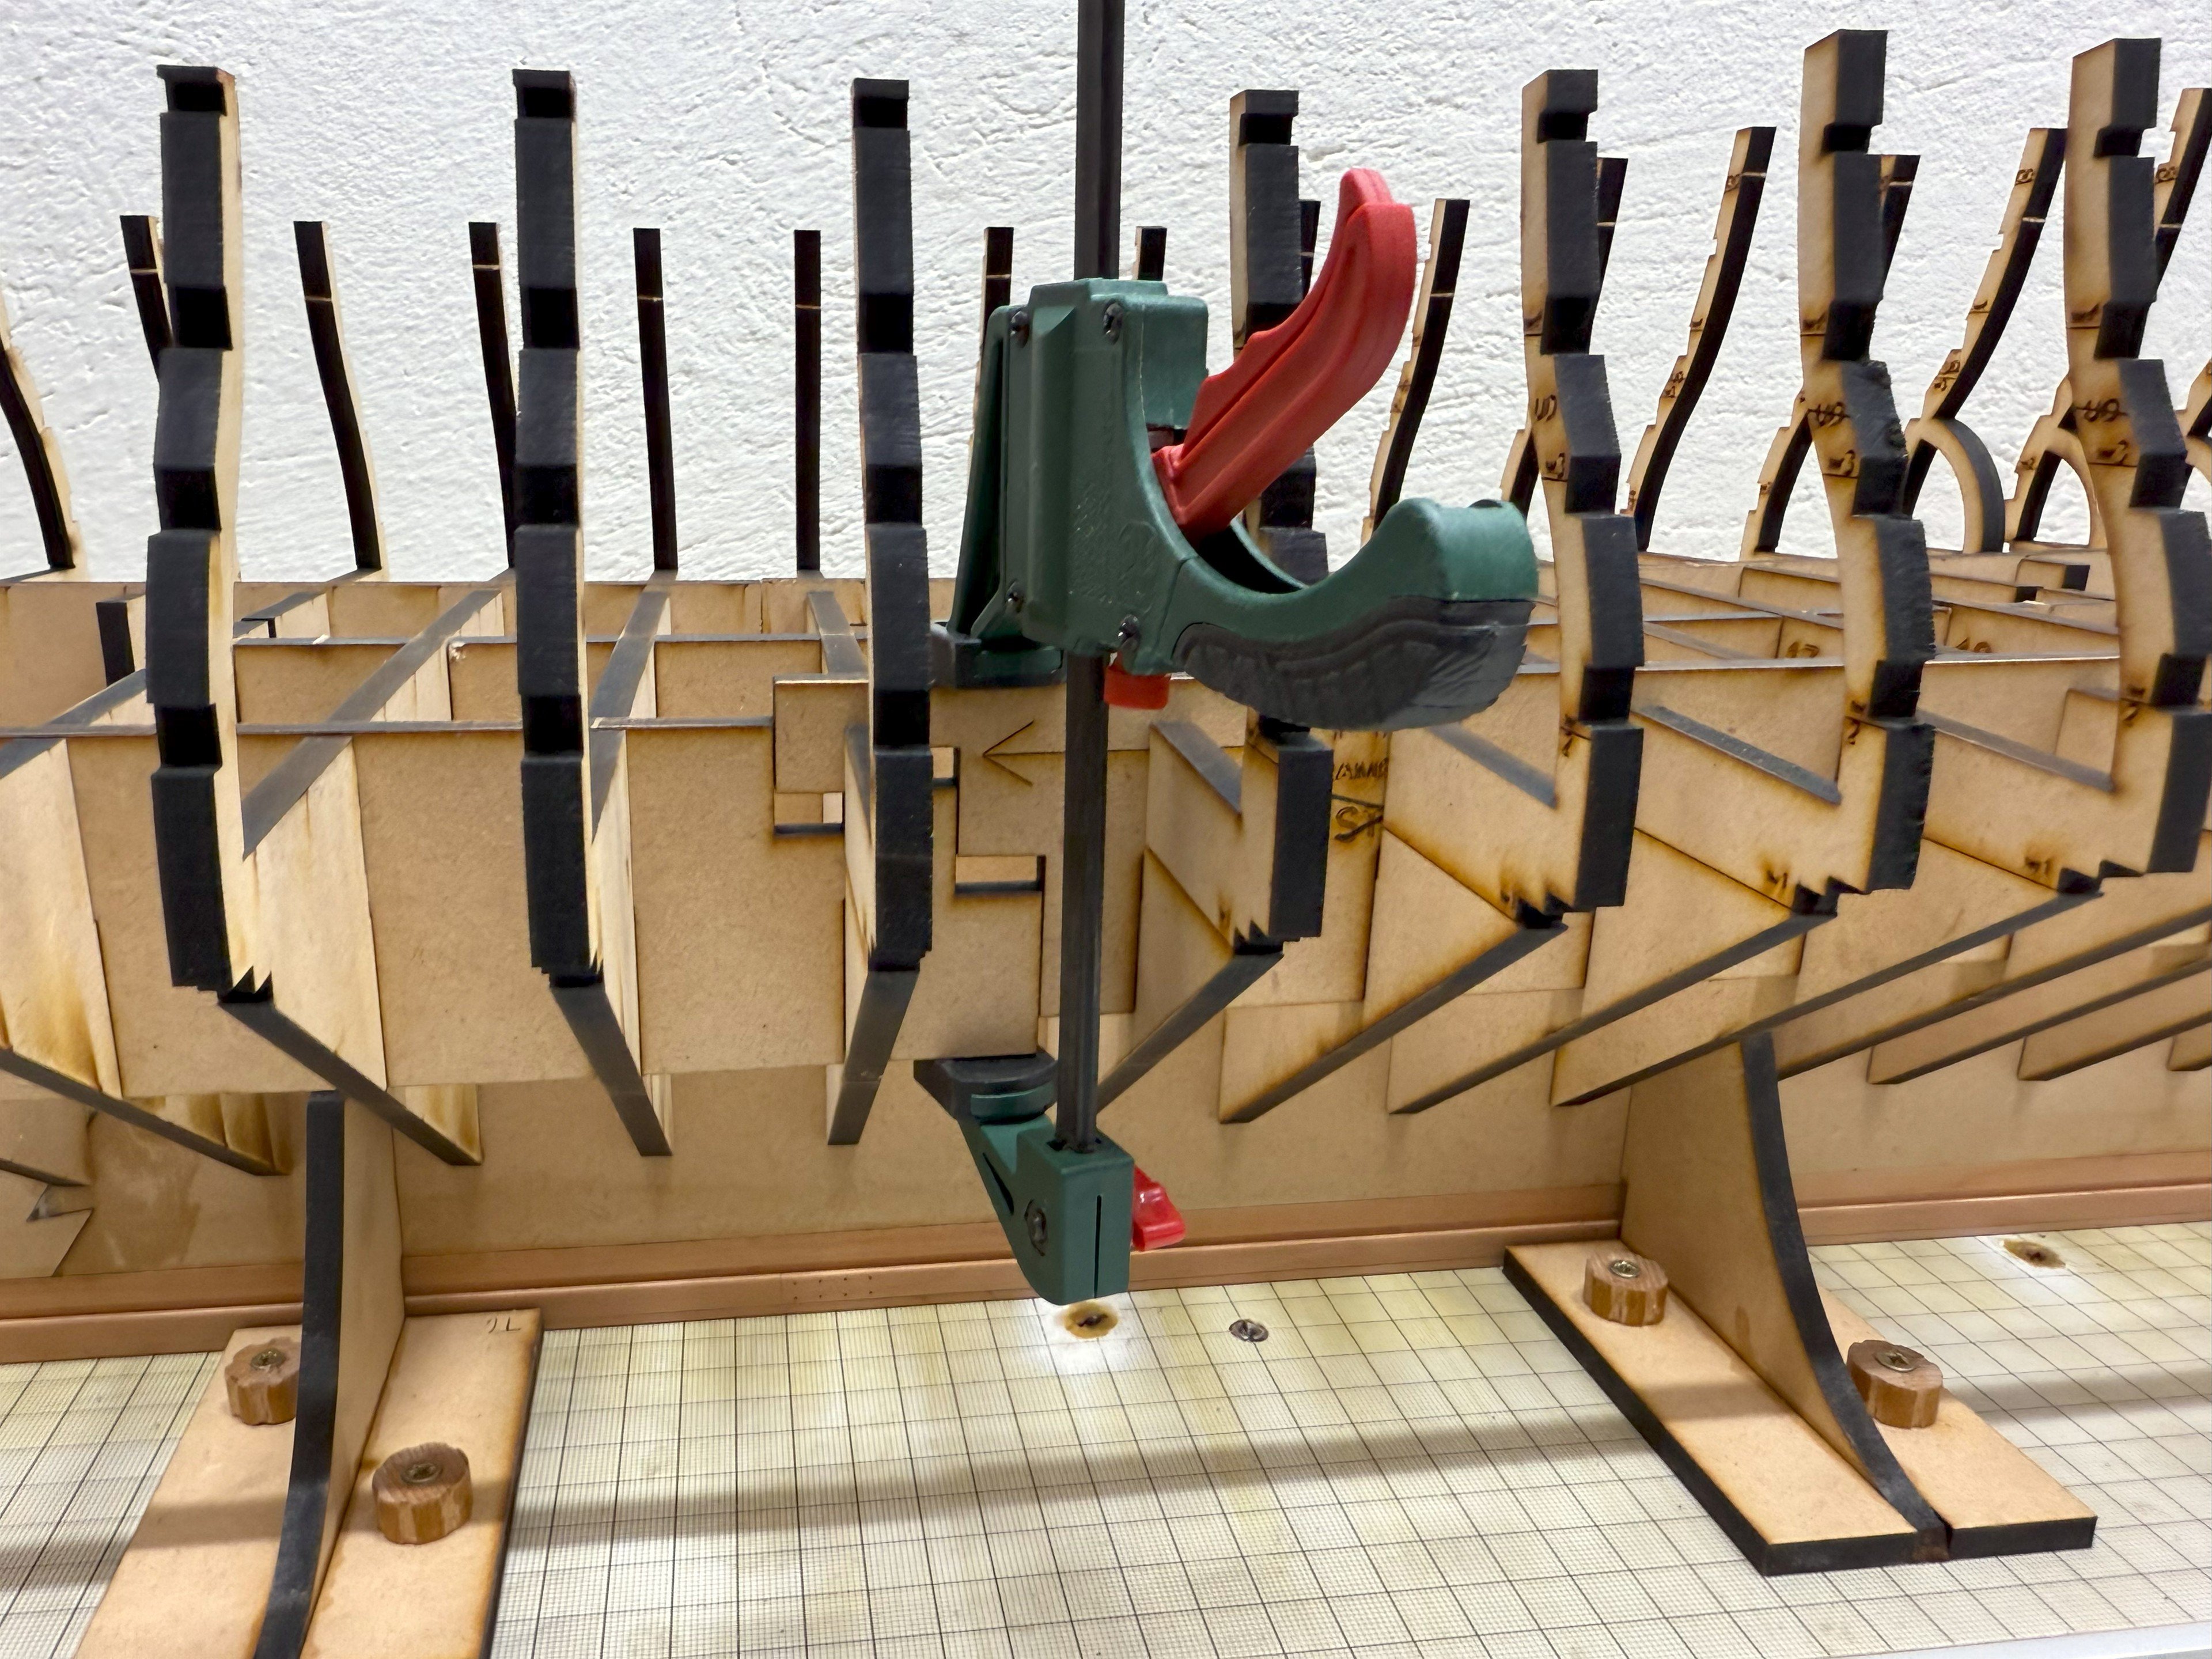
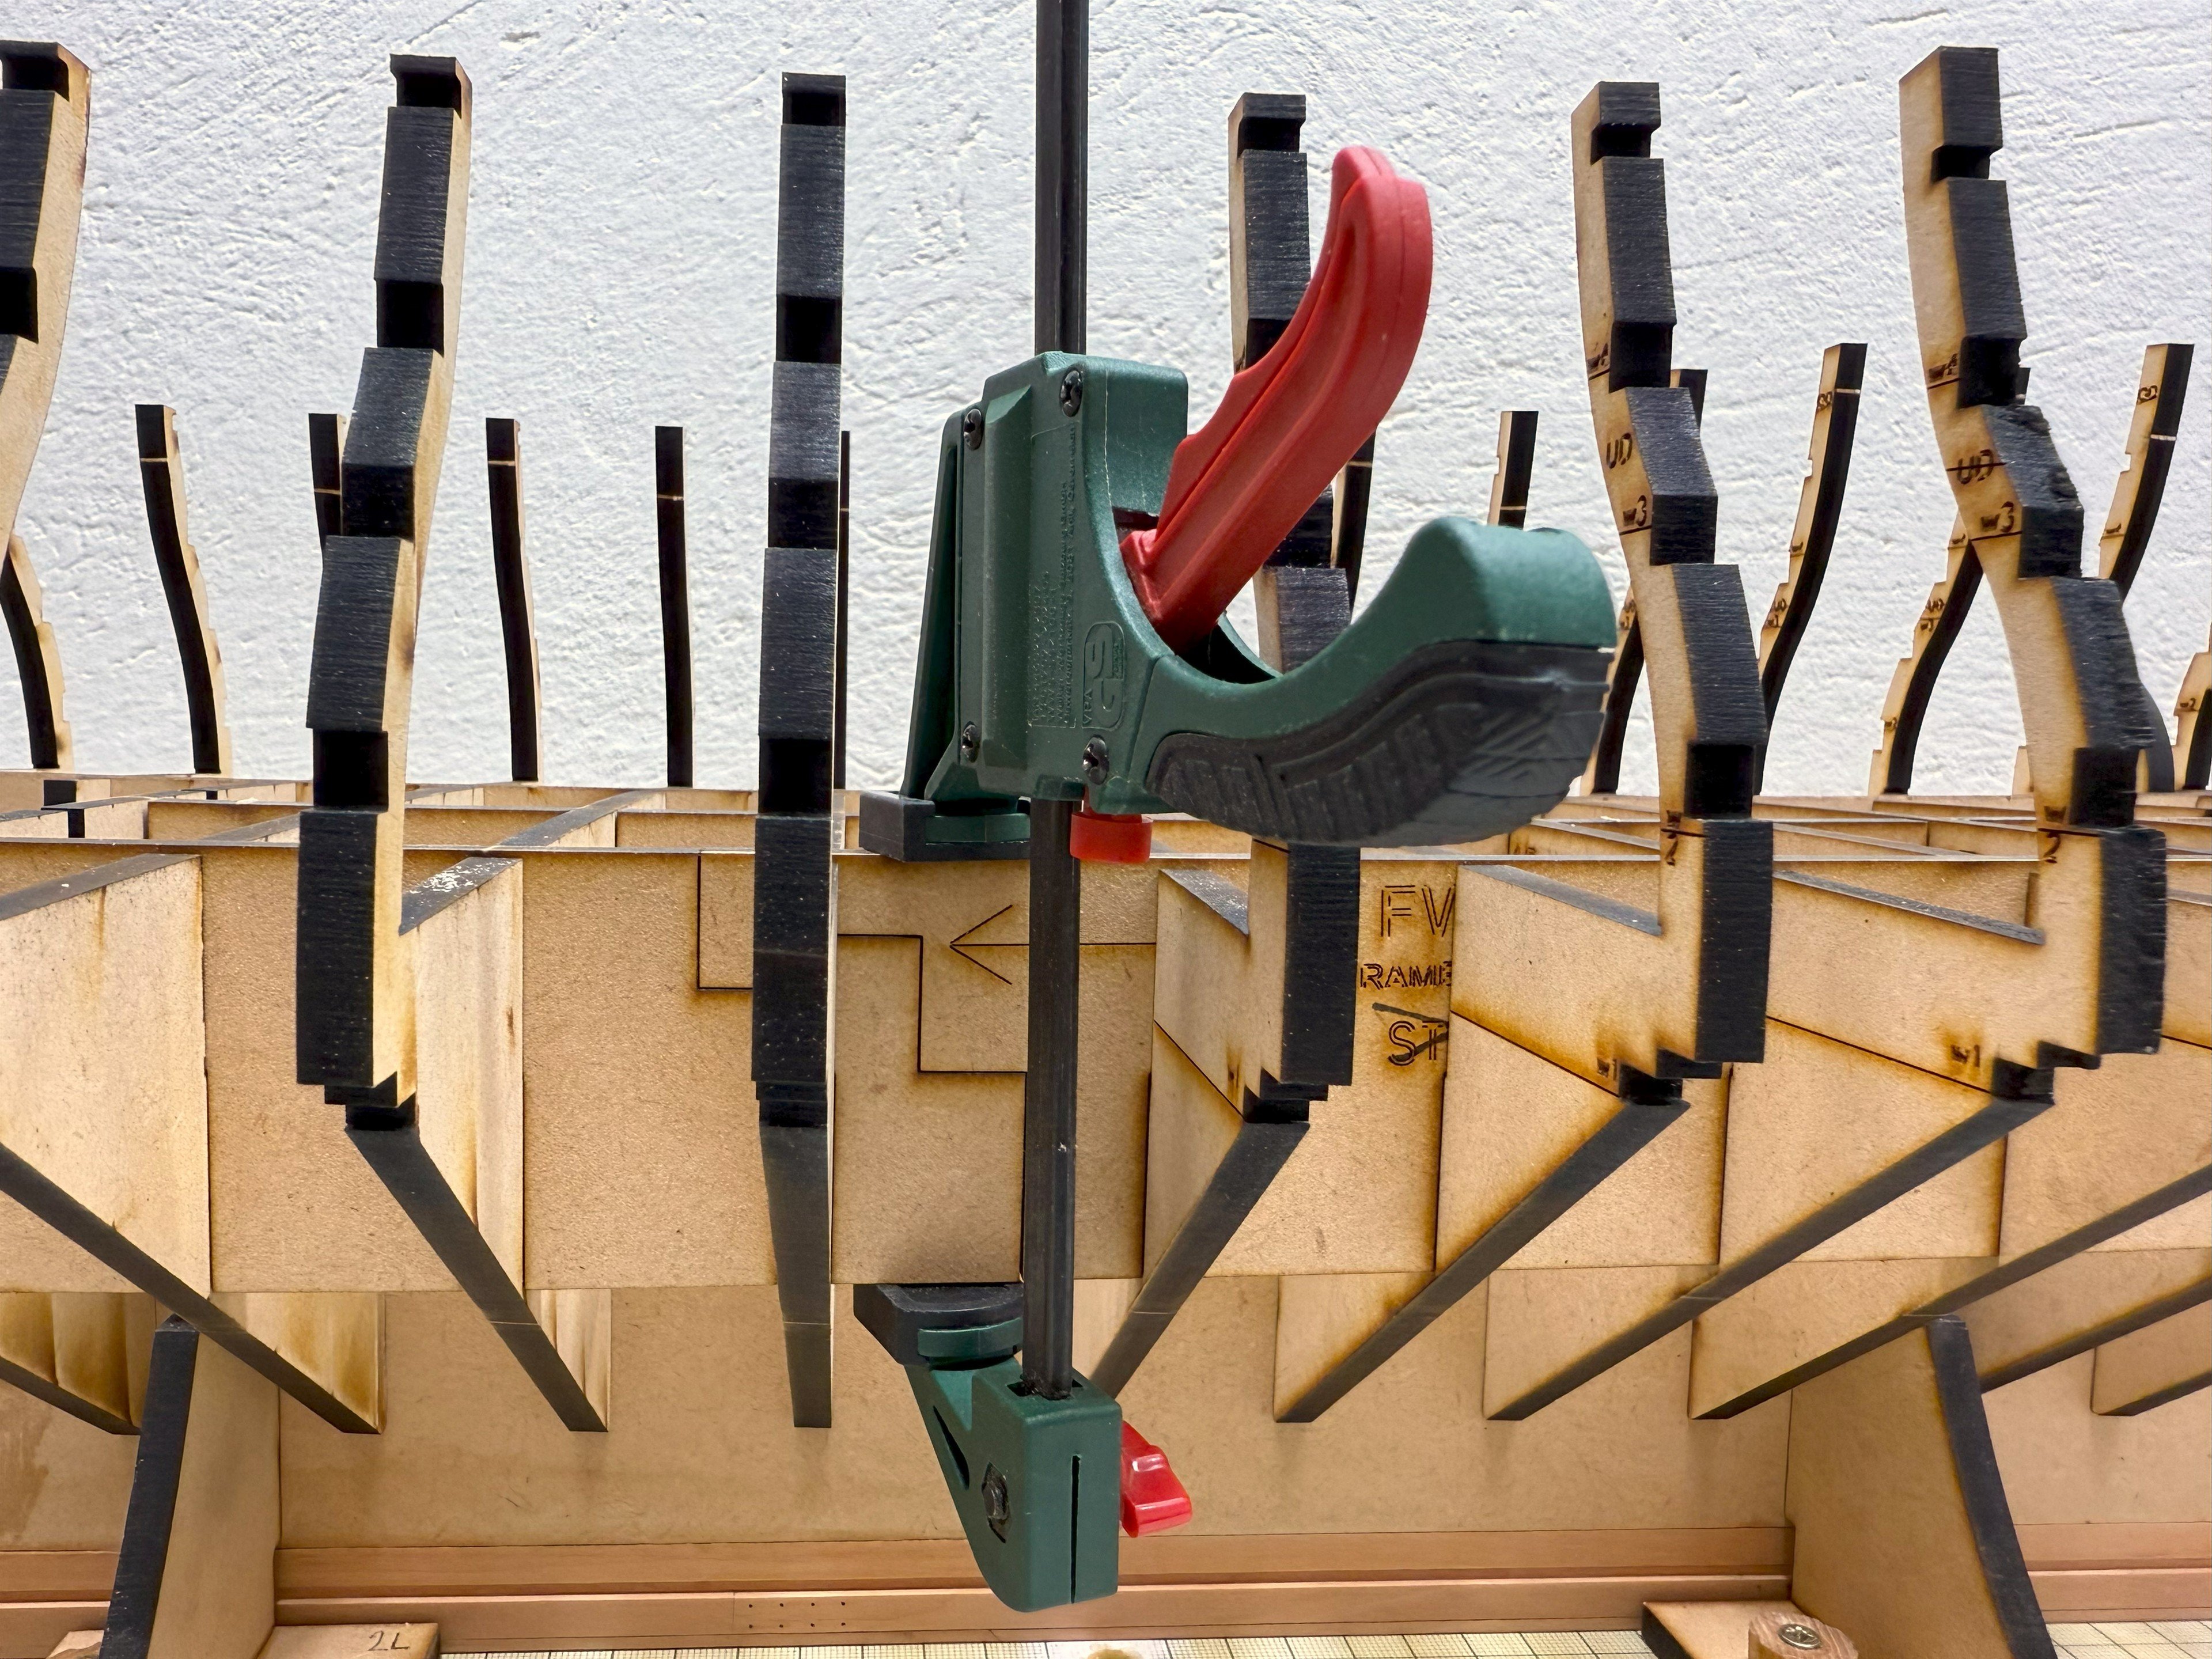
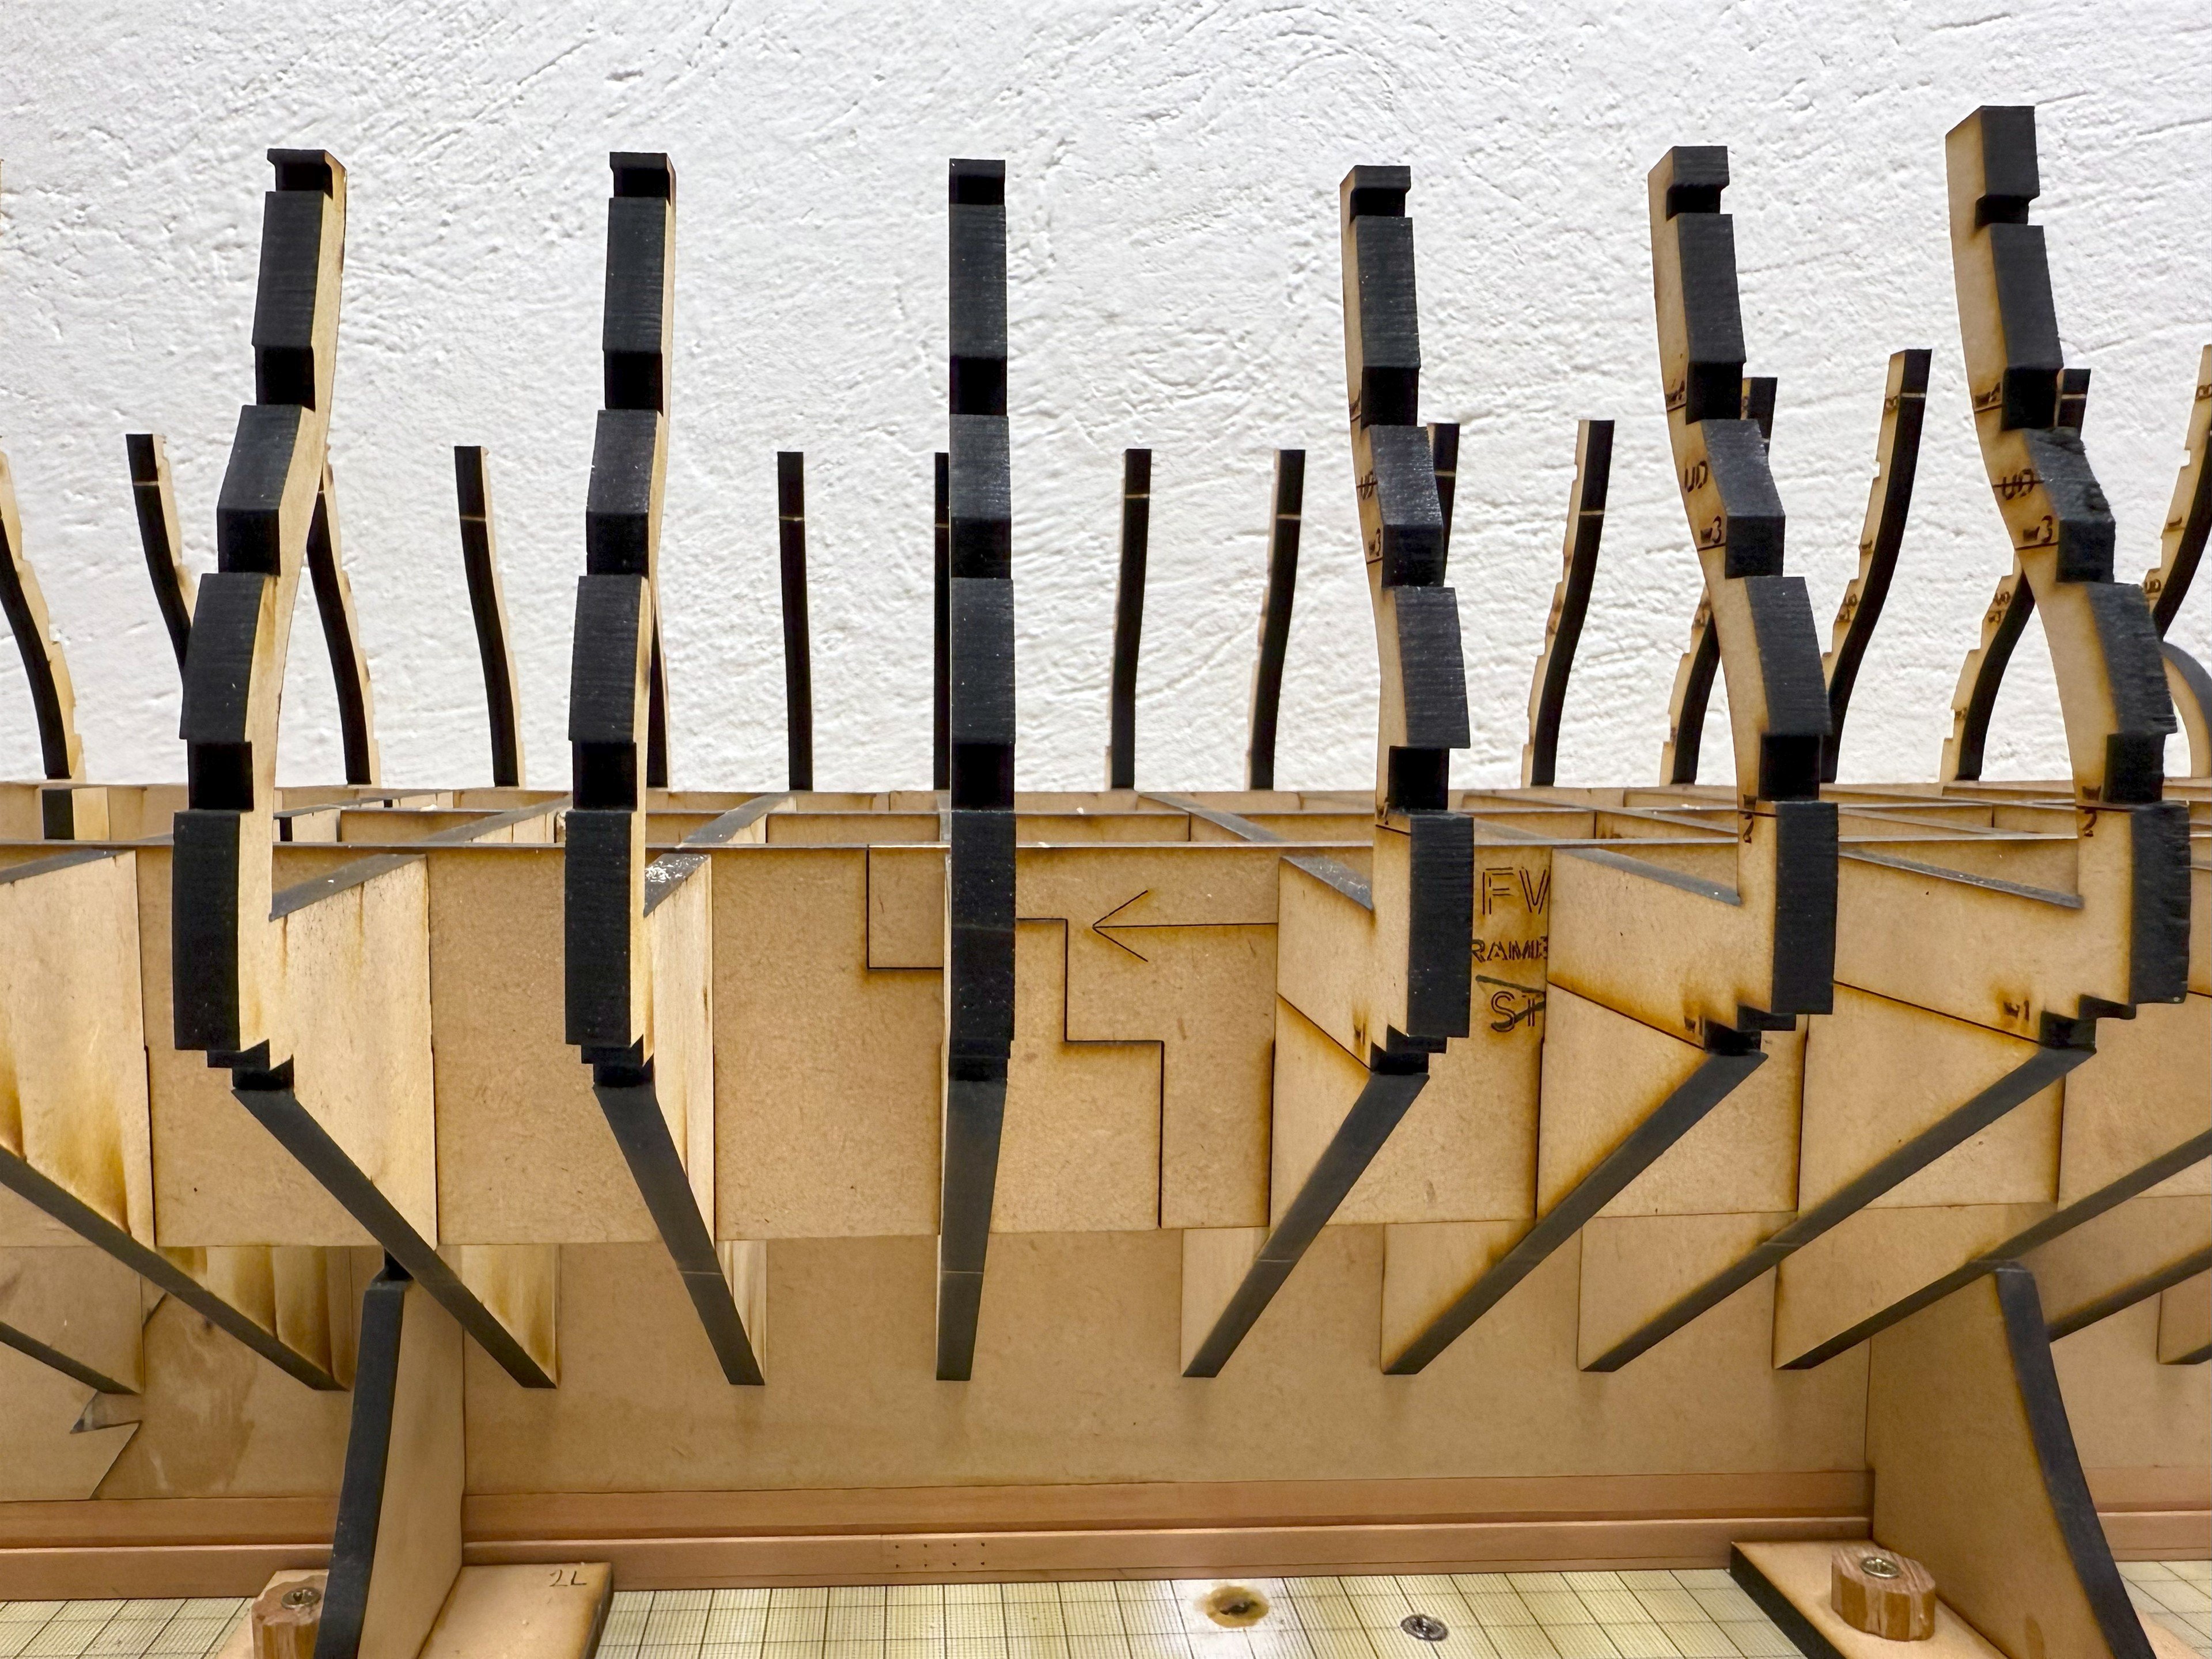
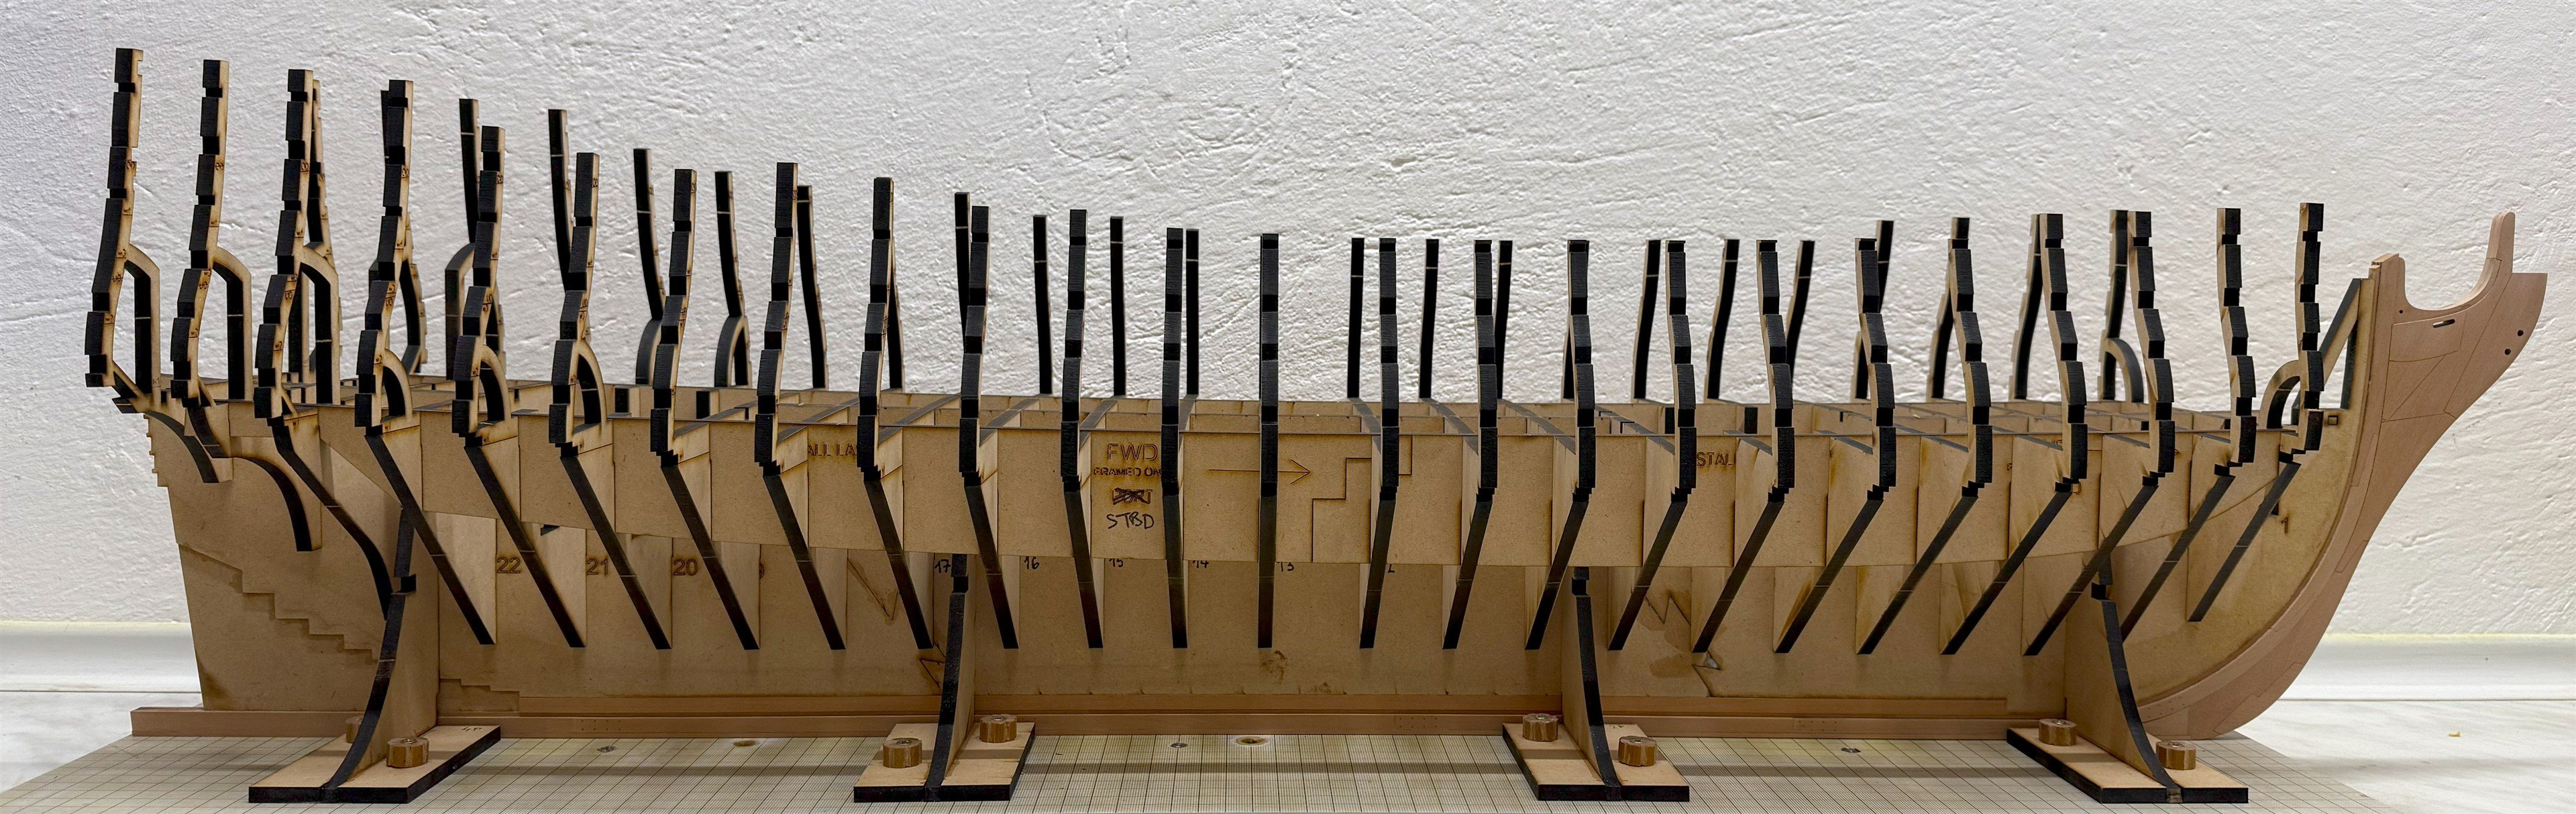
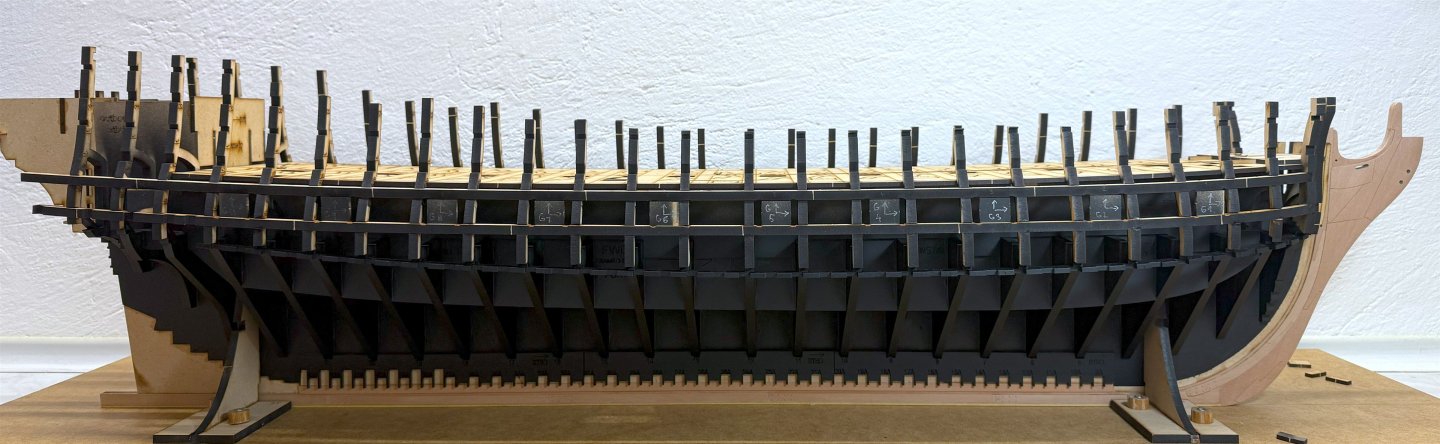
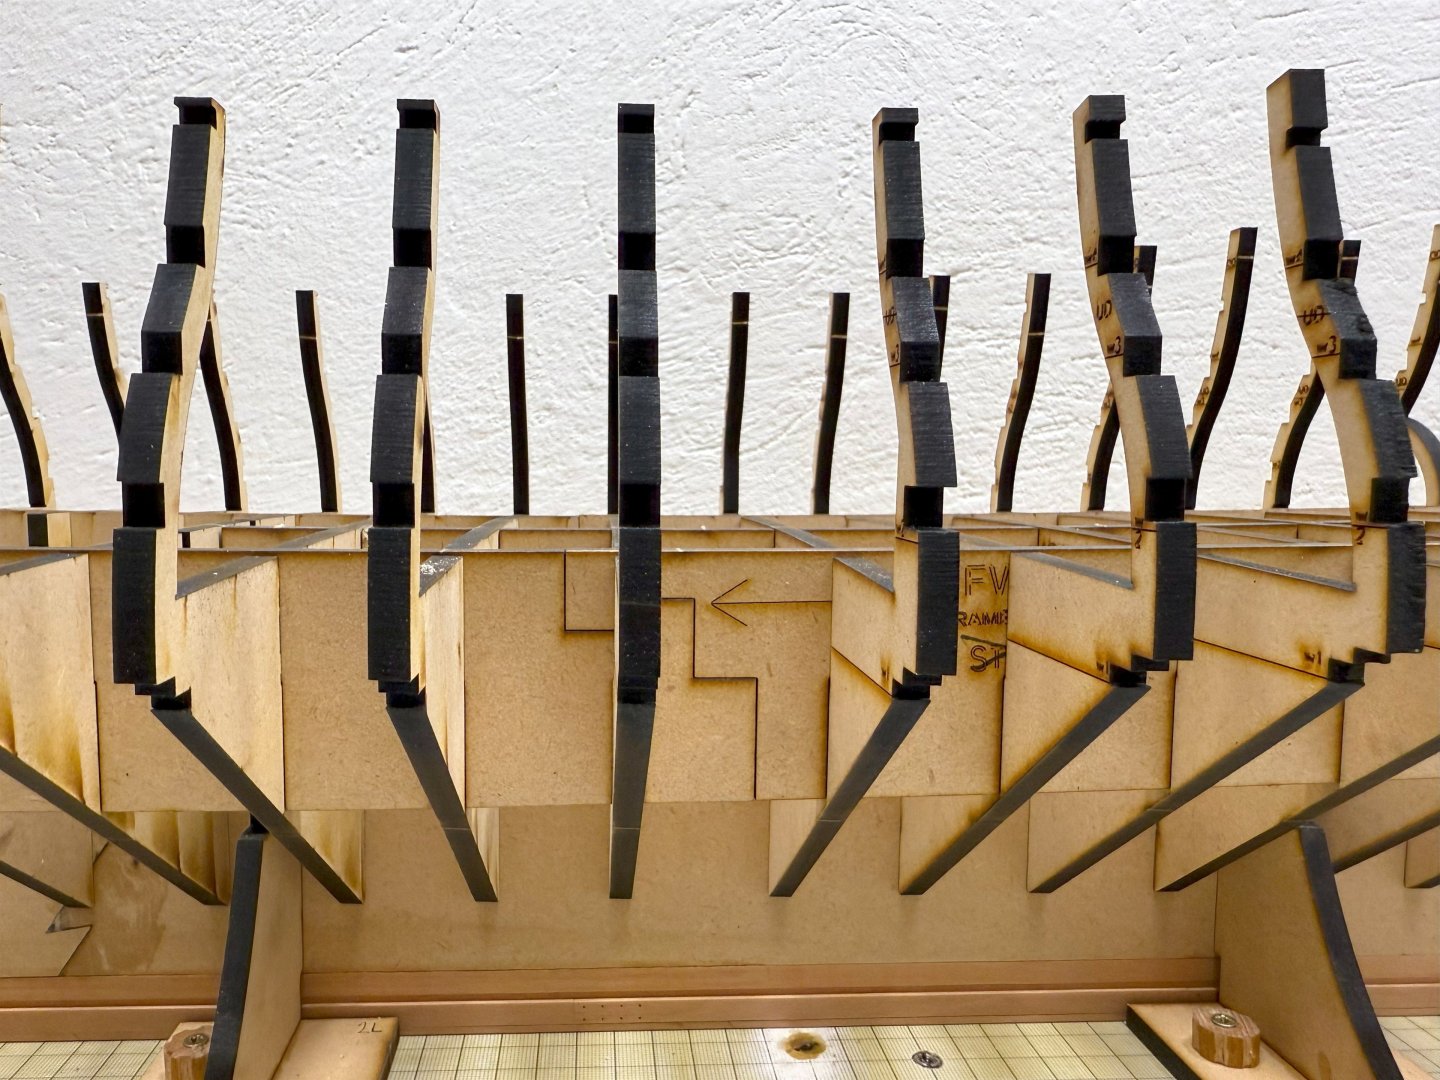
After installing the upper frame brackets, followed by masking and spraying with black paint. Unfortunately, I underestimated the amount of paint. I still had to order one more. Because of its size, I opted for paint spray and sprayed it outside. However, a quarter or more of the paint was blown off by the wind. 🙄


-
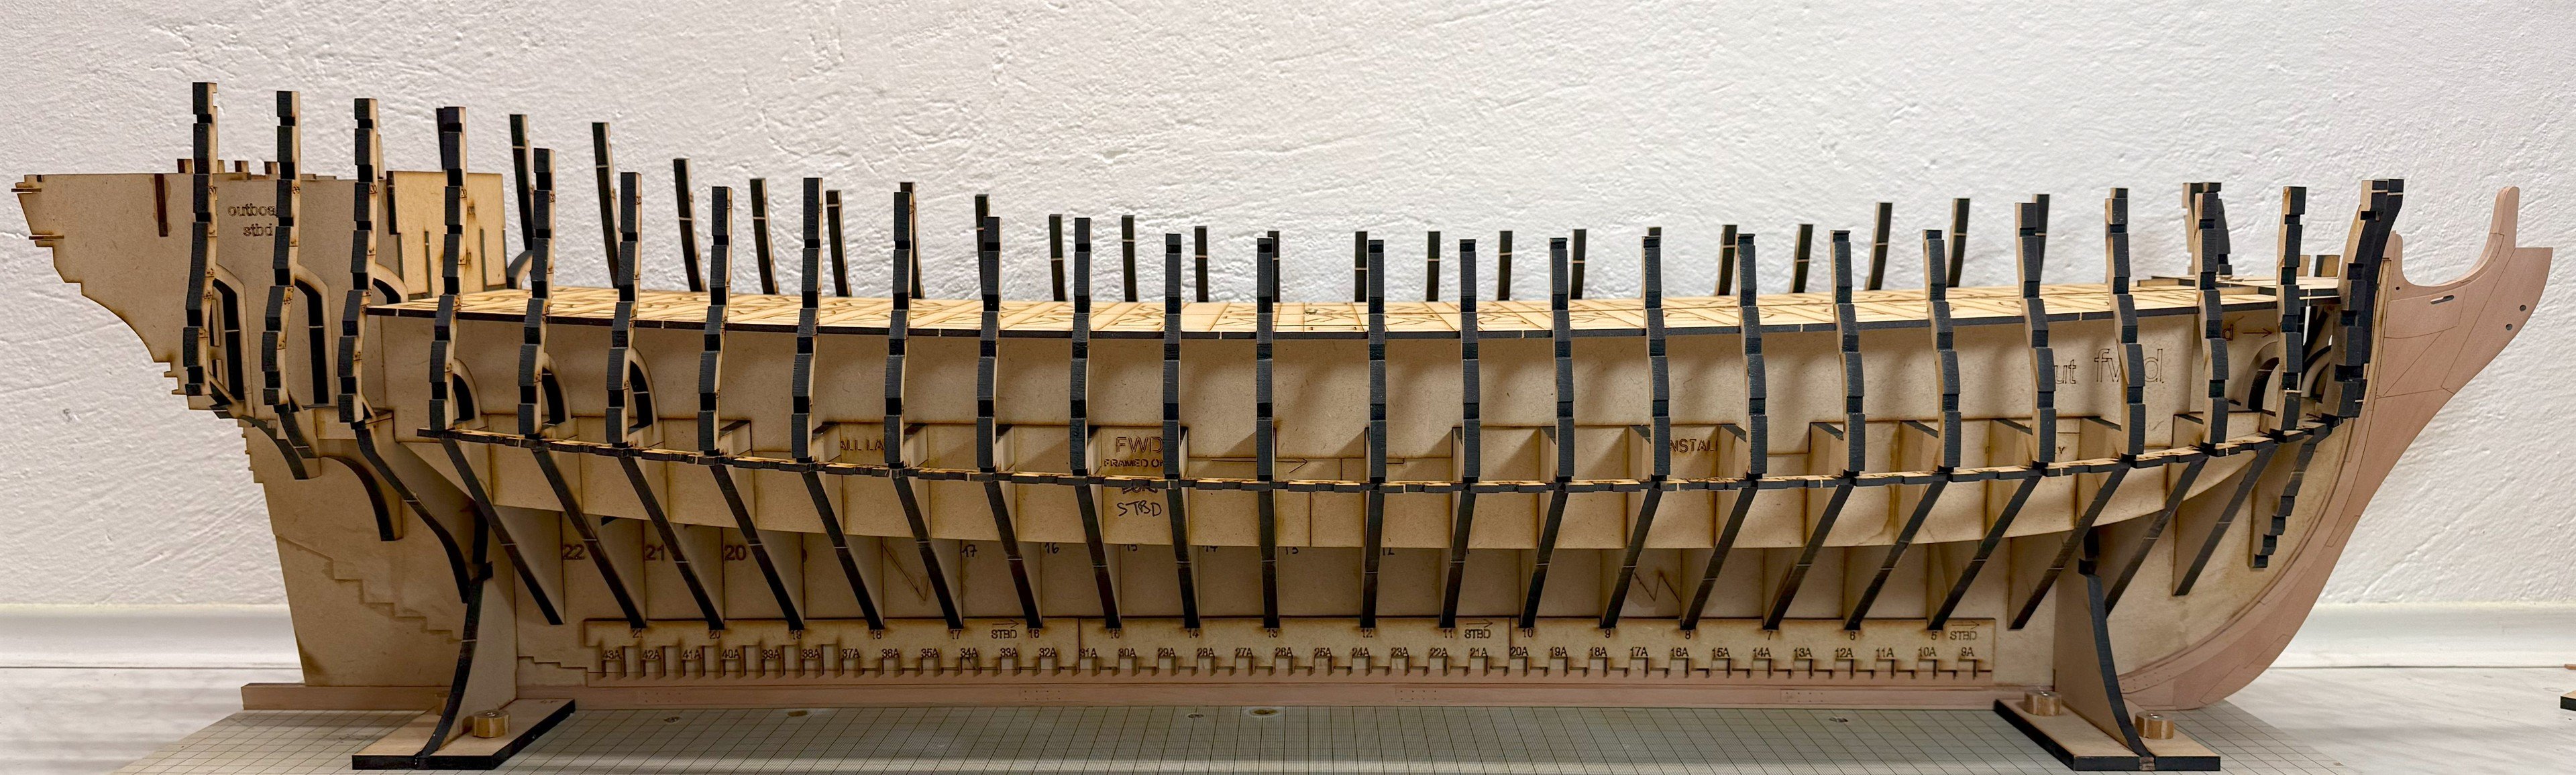
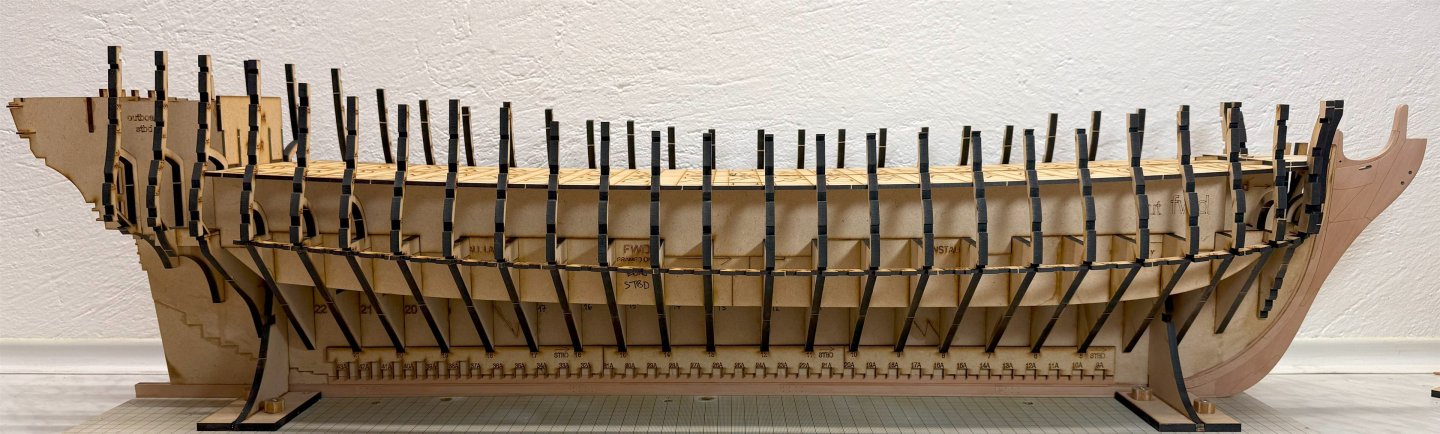
Thank you, JJ. Yes, it looks good, and I'm happy with it. However, I made some minor alignment errors, so hopefully that won't be a problem later. Today, I just worked on the lower frame brackets. And I started on the upper ones. Hopefully, I'll be able to paint the internal structure over the week.
-
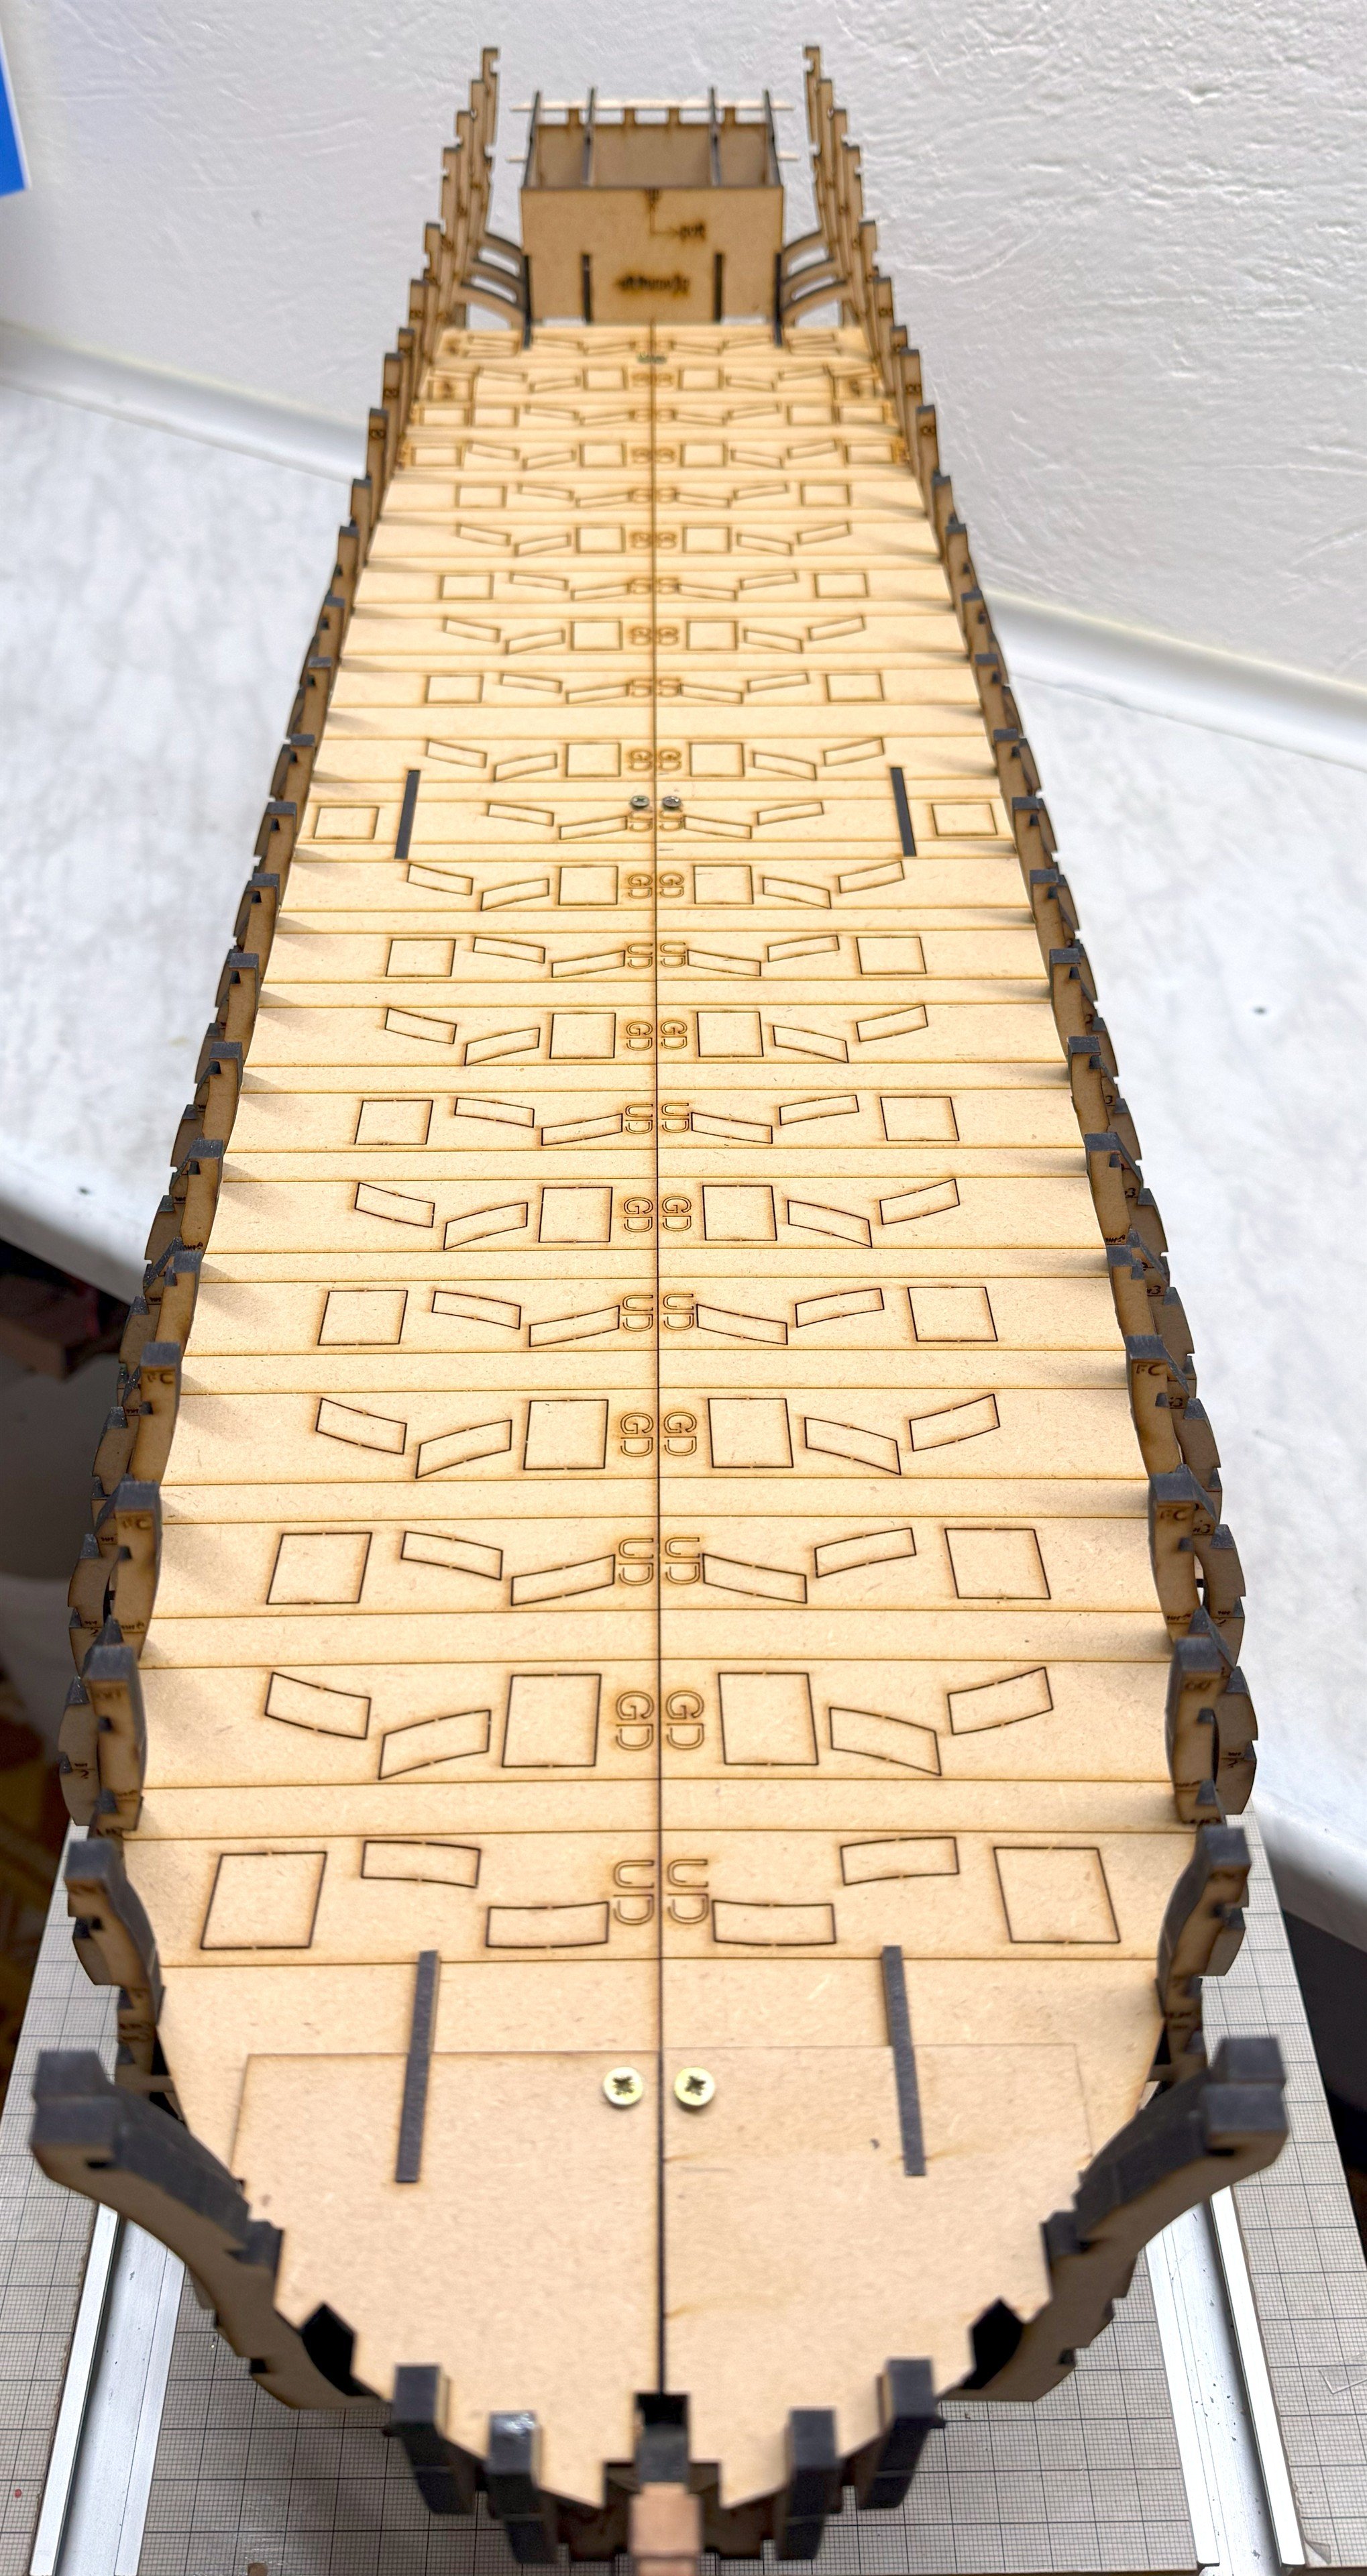
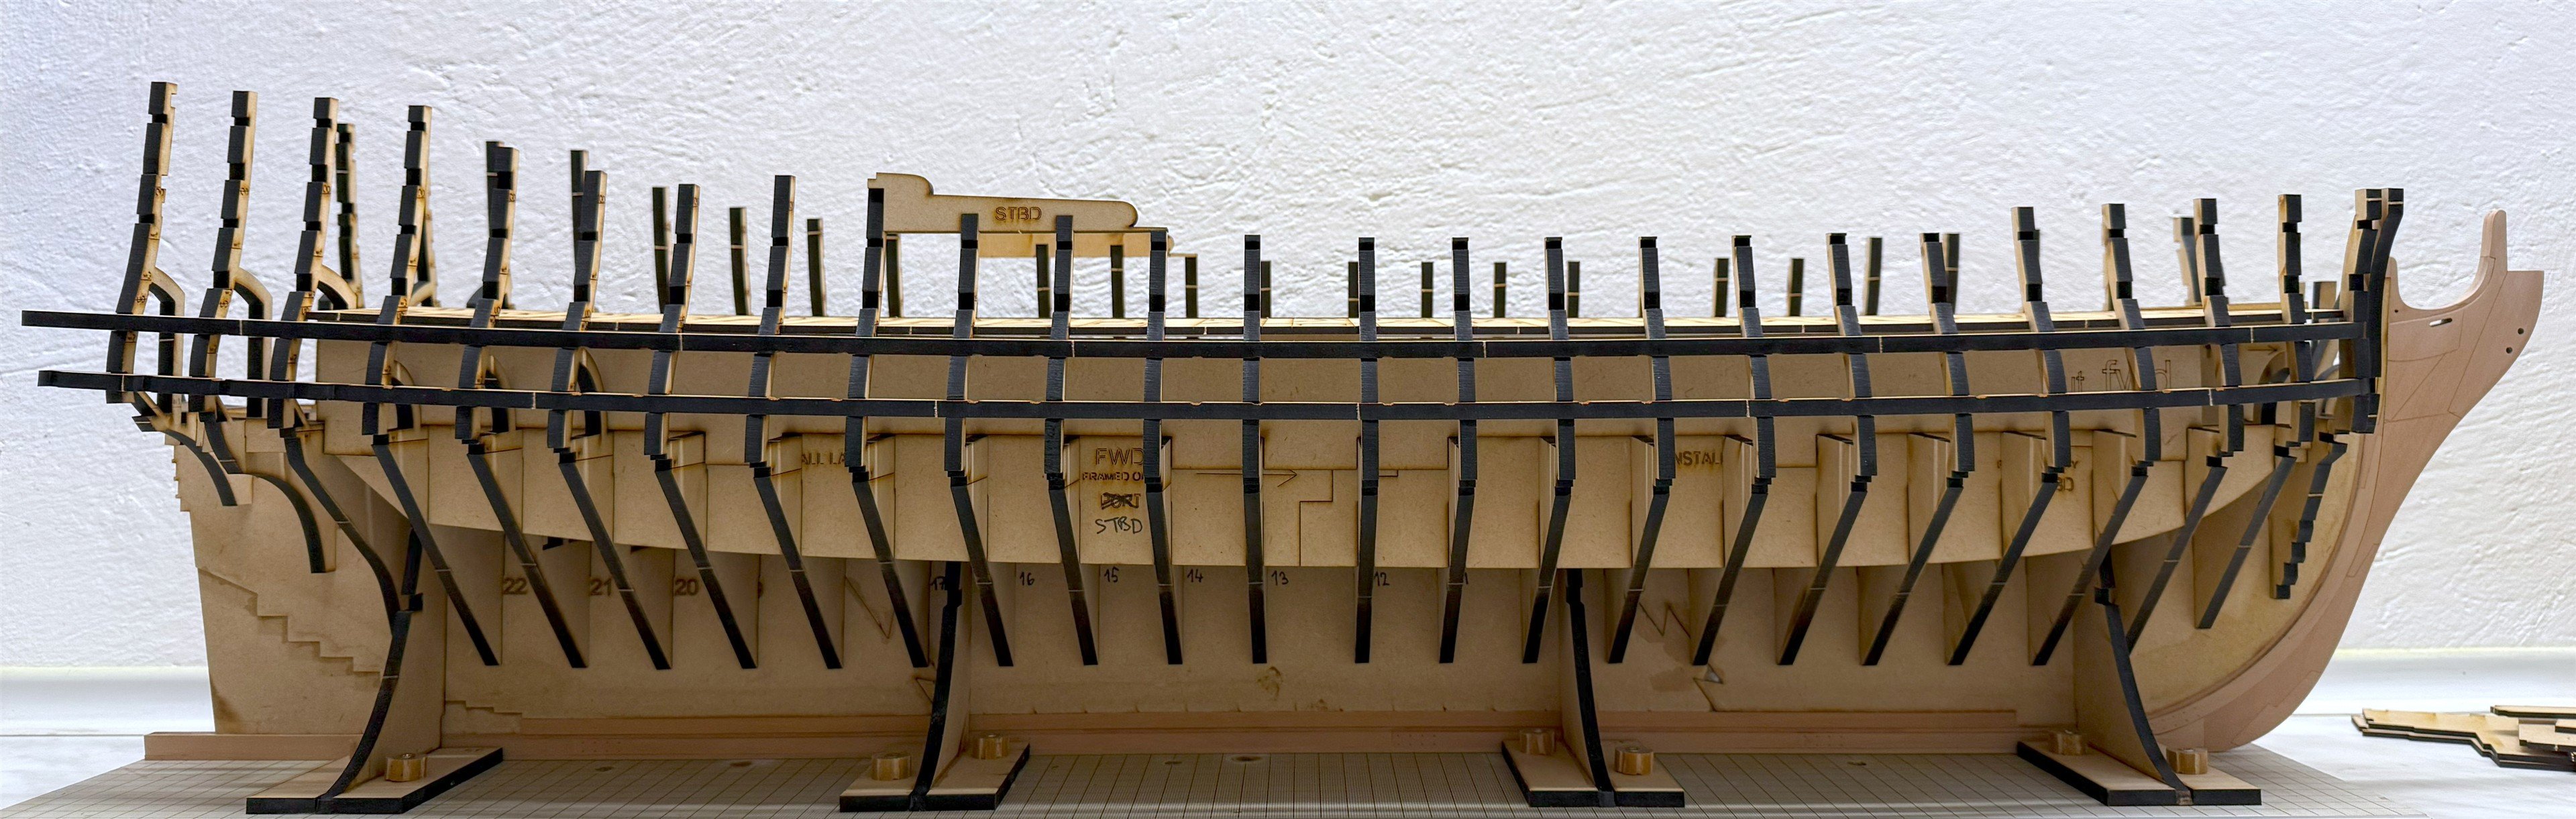
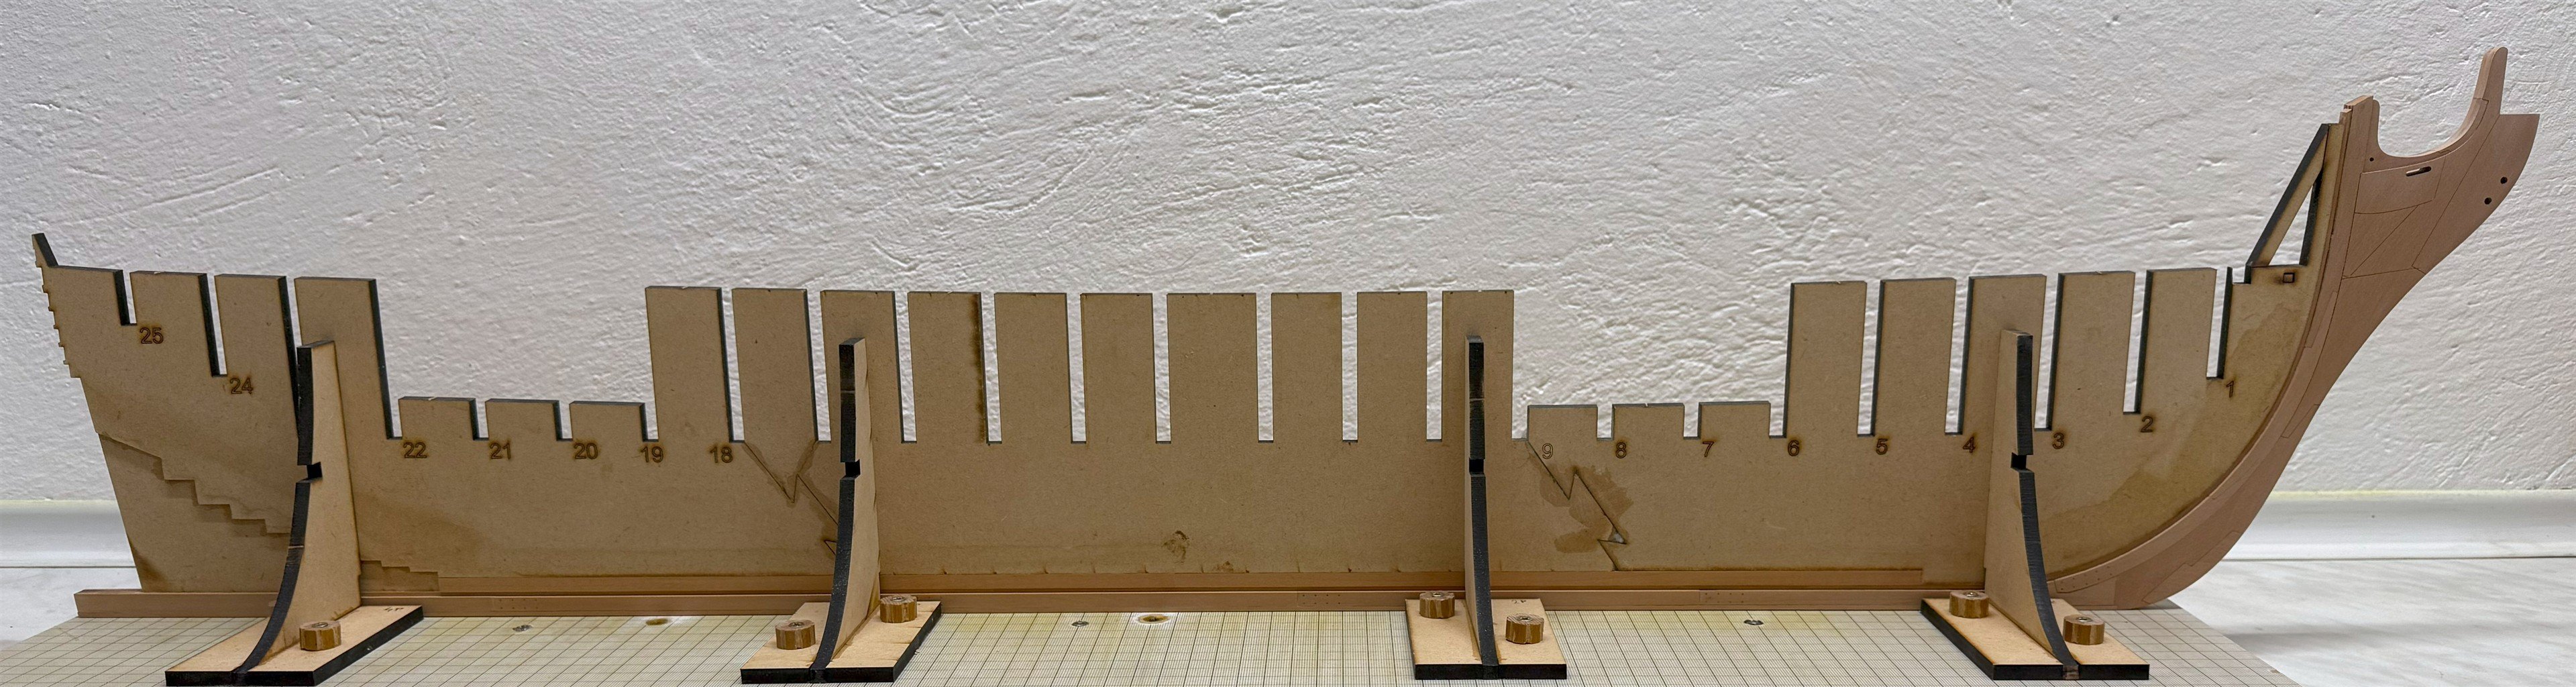
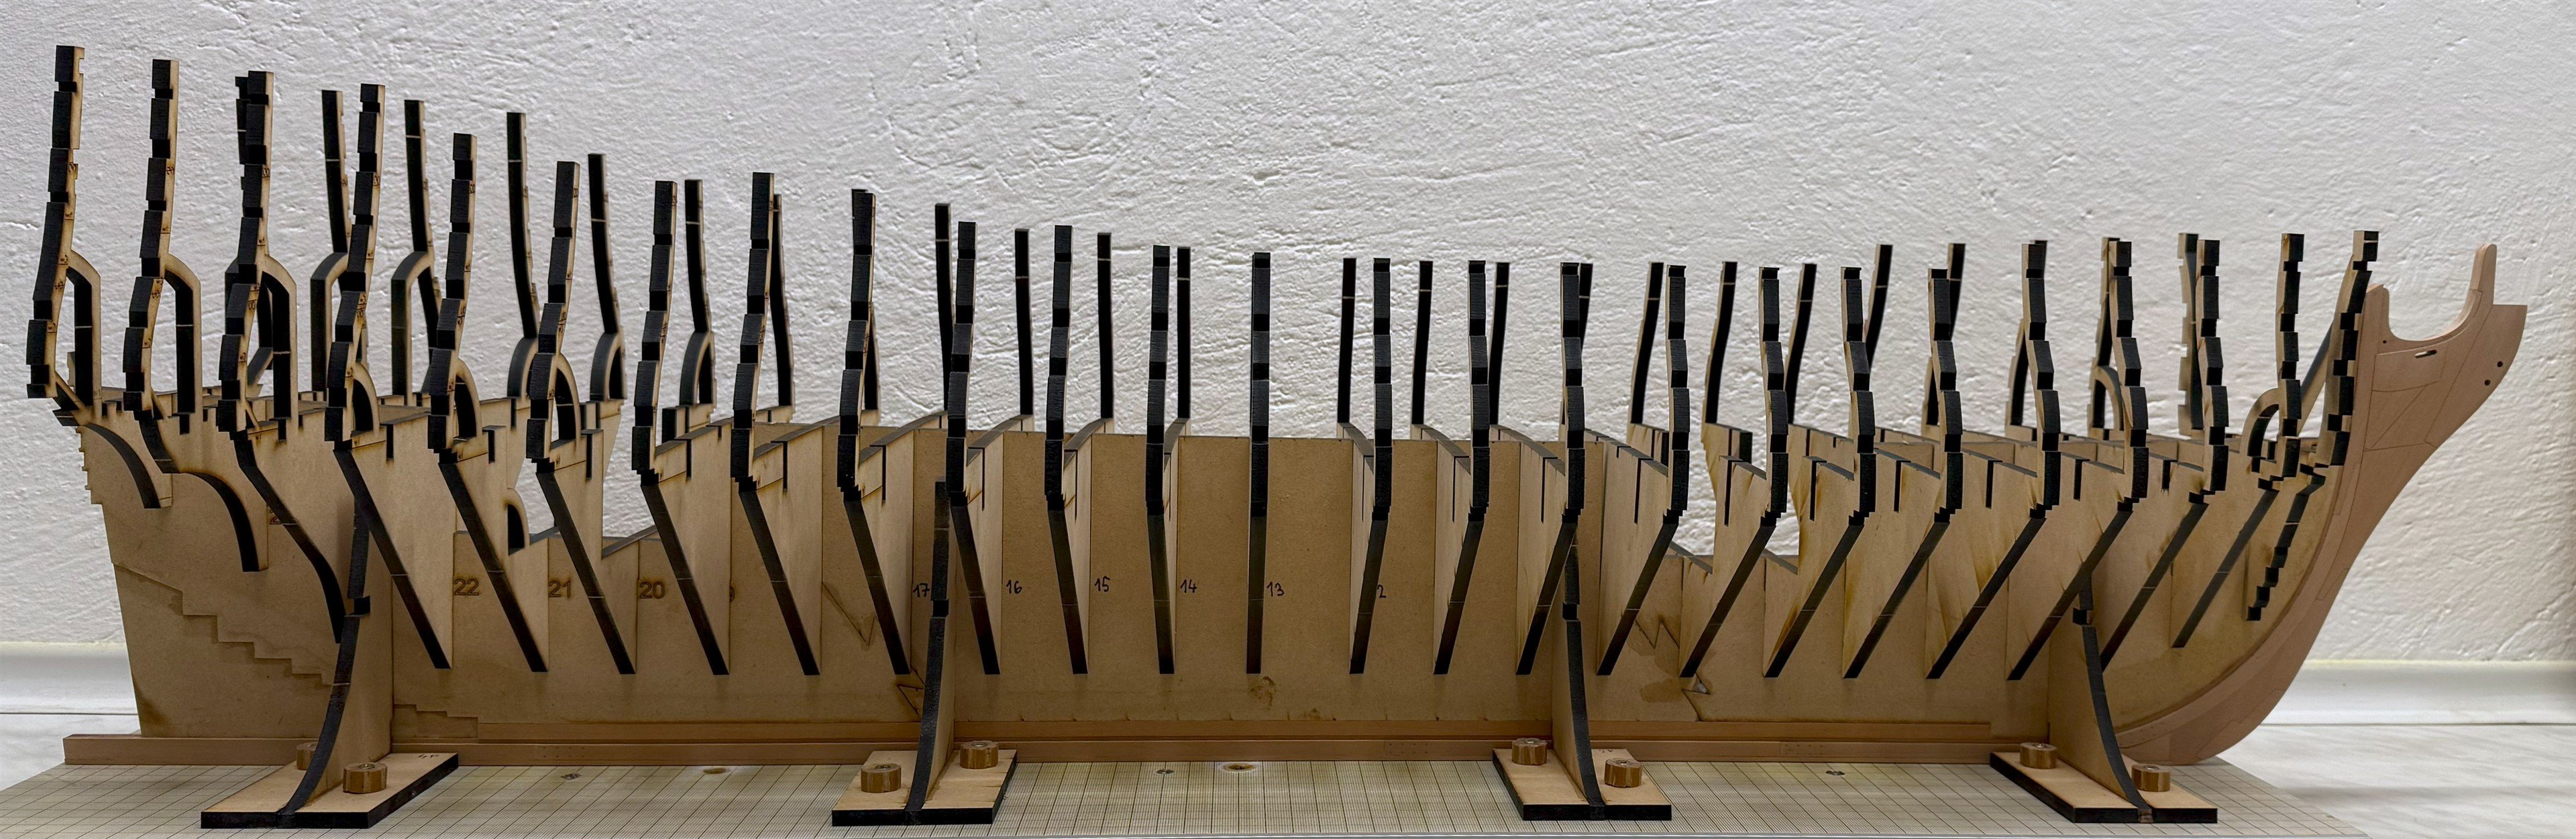
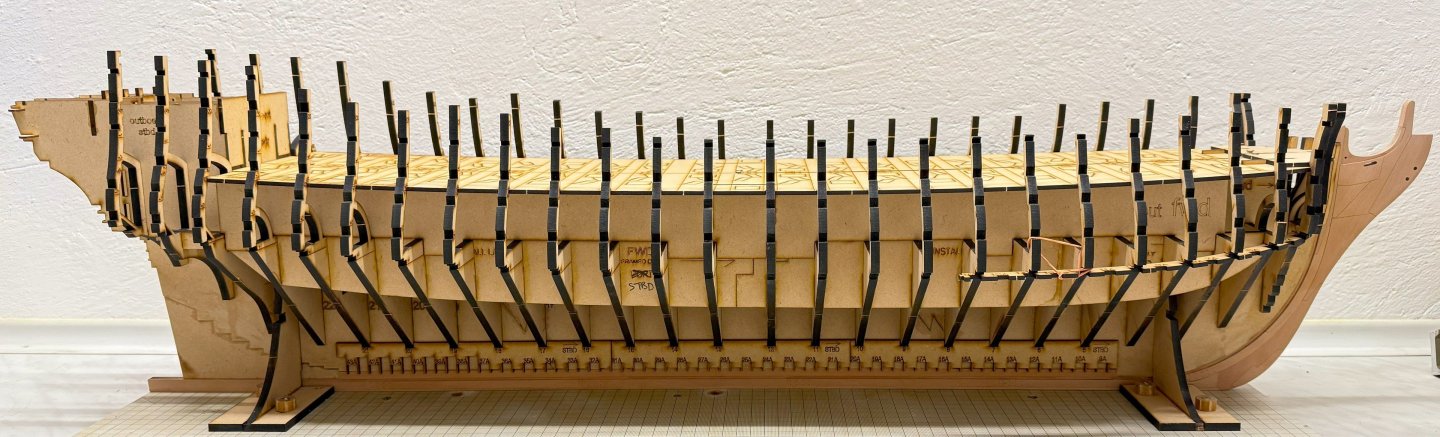
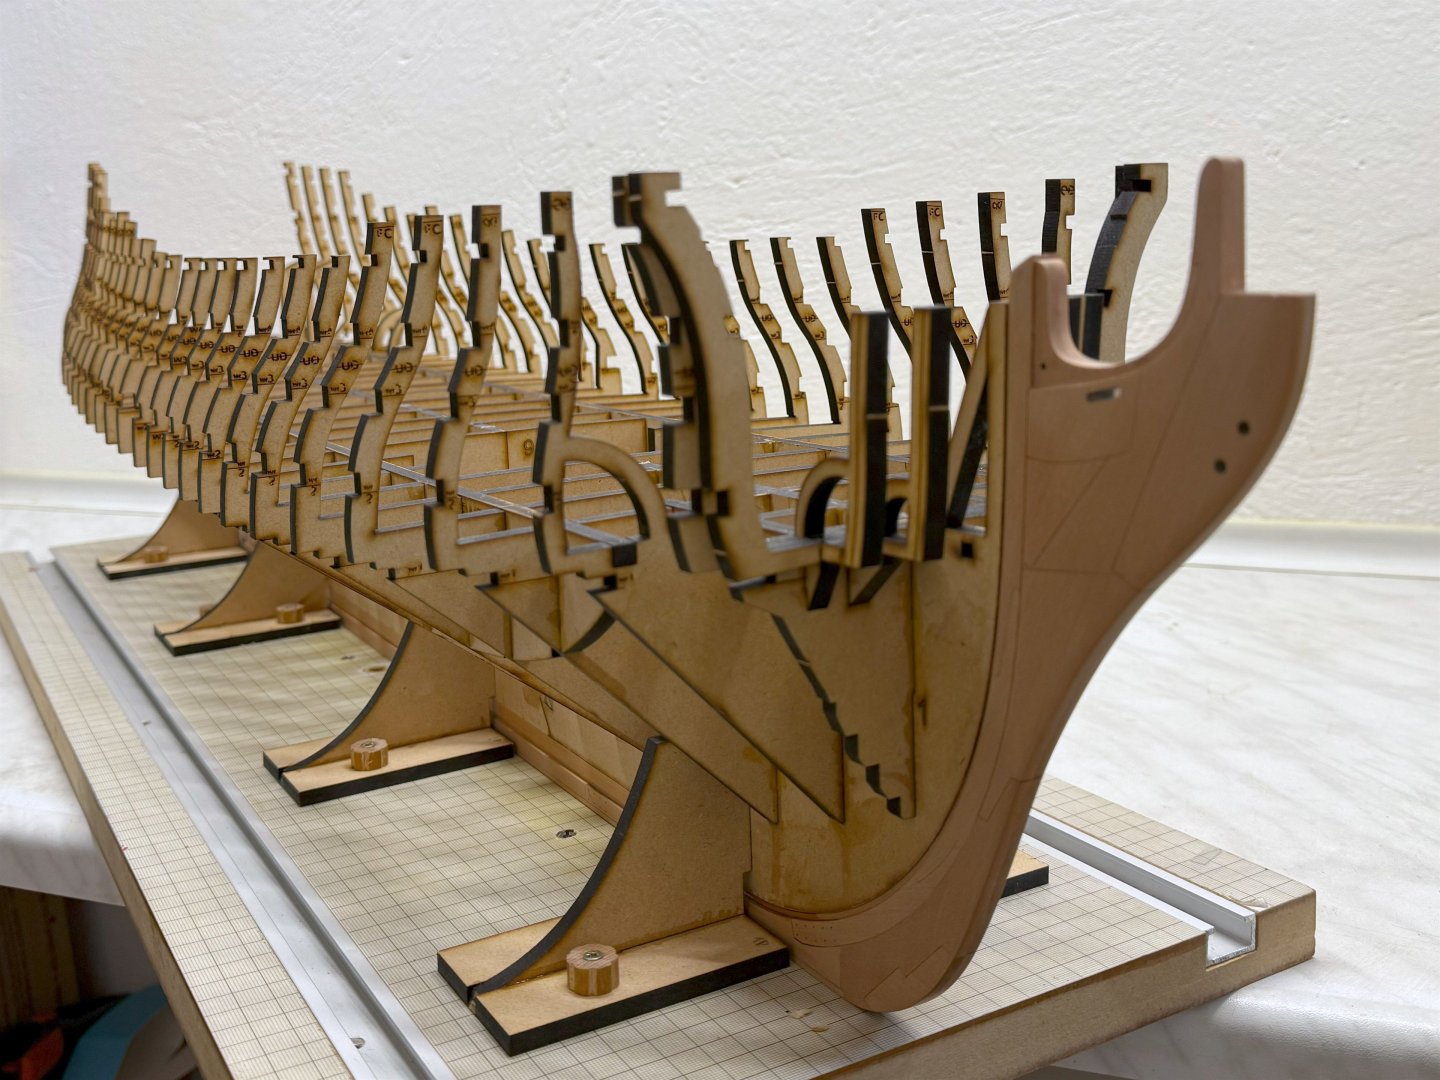
Hi guys, so again a little update. After checking if everything fits together I glued all the bulkheads permanently. Also all the support jigs are done, so I'm starting to install the frame brackets...


-
Yes, I enjoy it, too. I look forward to going to the workshop every day to build it.
-
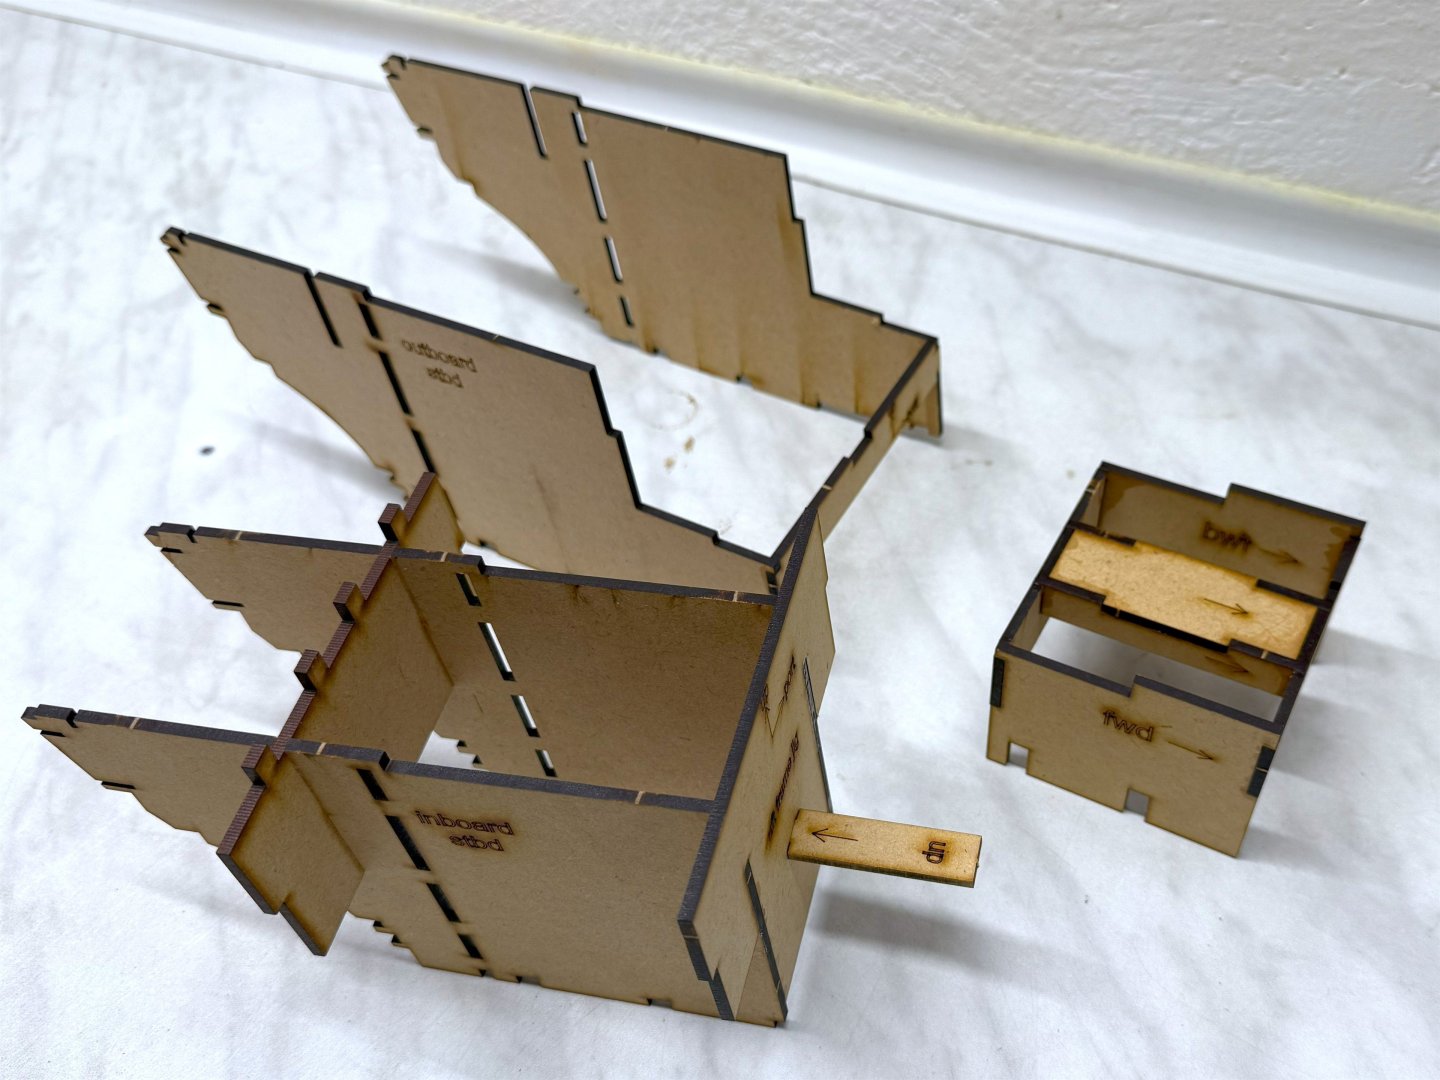
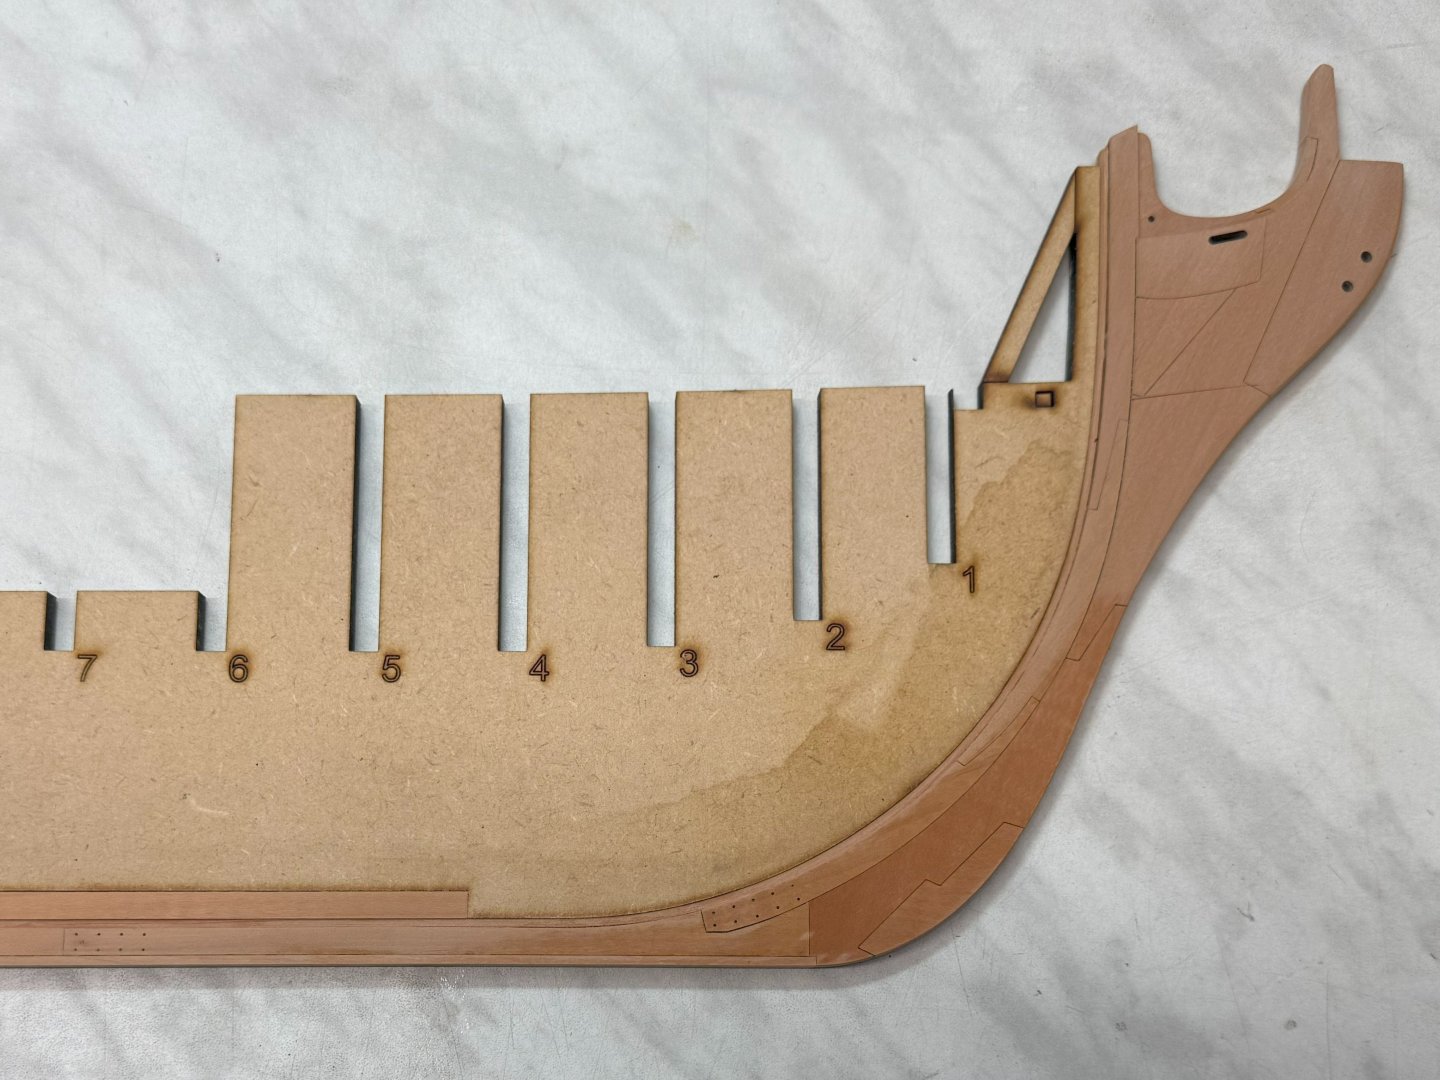
Thank you, JJ. Today, just a small sample. I installed the inner bow frames on bulkhead one. I haven't started gluing the other bulkheads yet. I dry-tested some of the other parts to check their fit and symmetry...


-
Nice progress, Ben! I'm glad I'm behind you because I can be inspired by you.
-
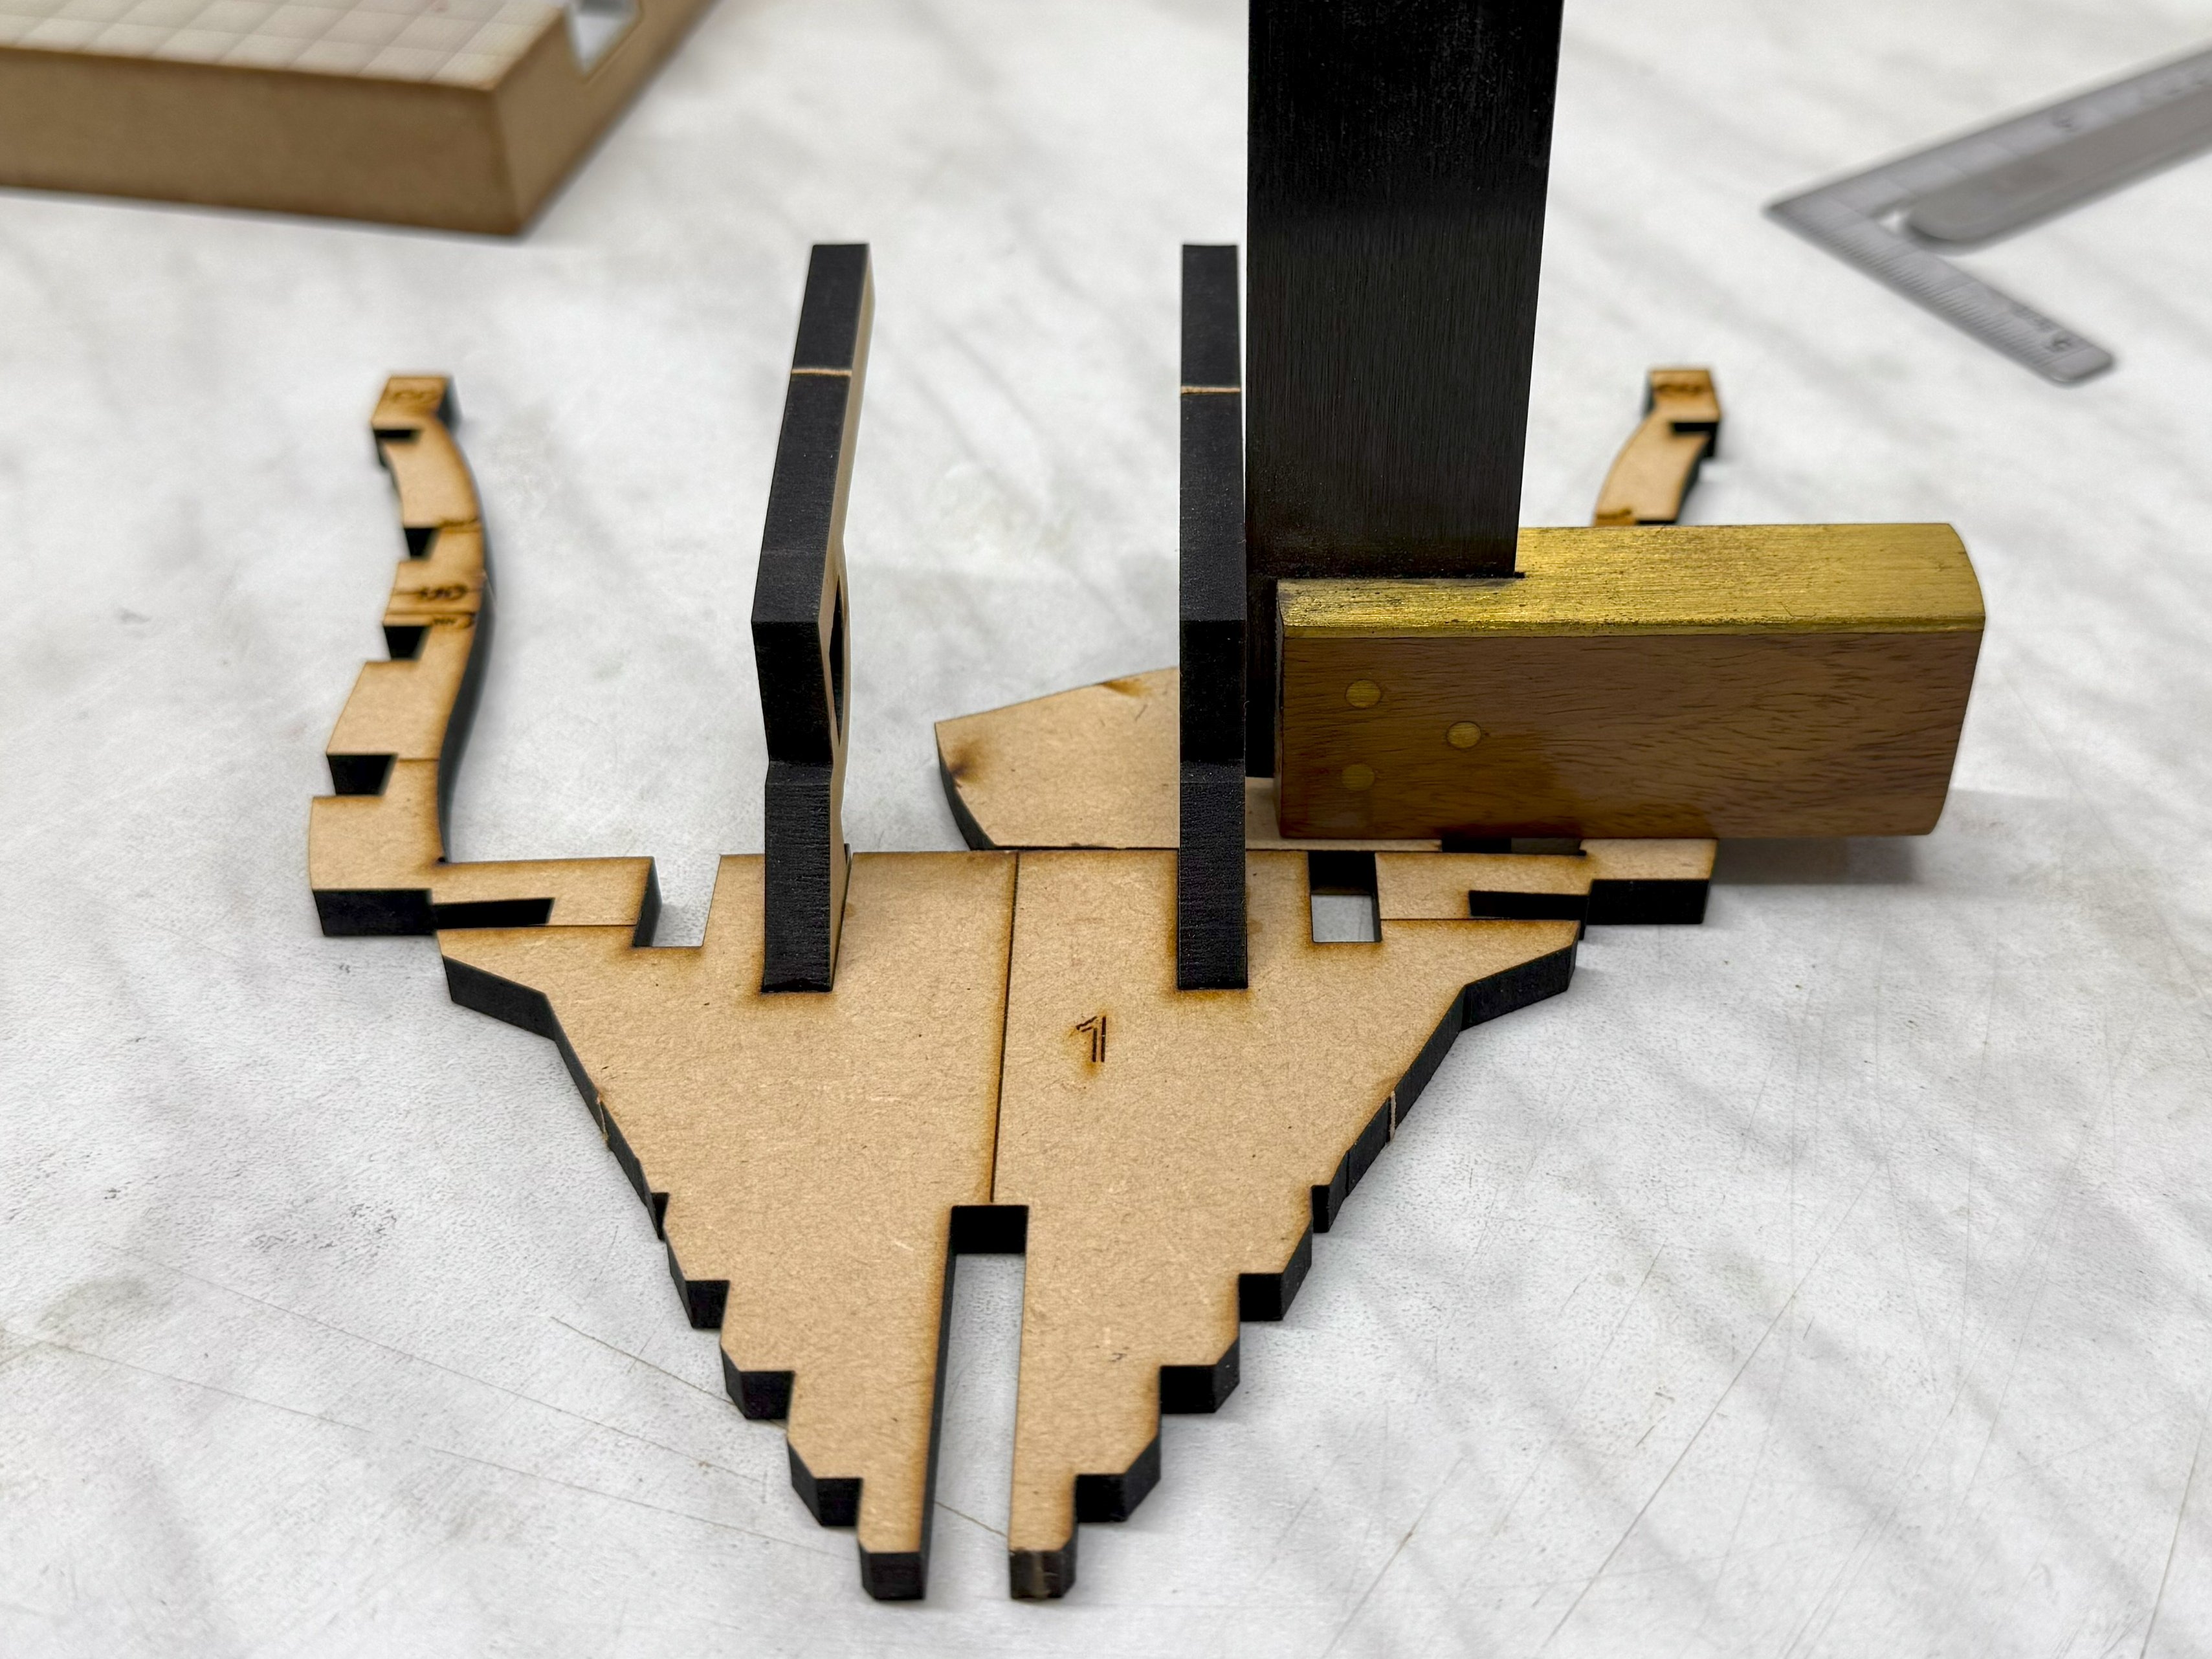
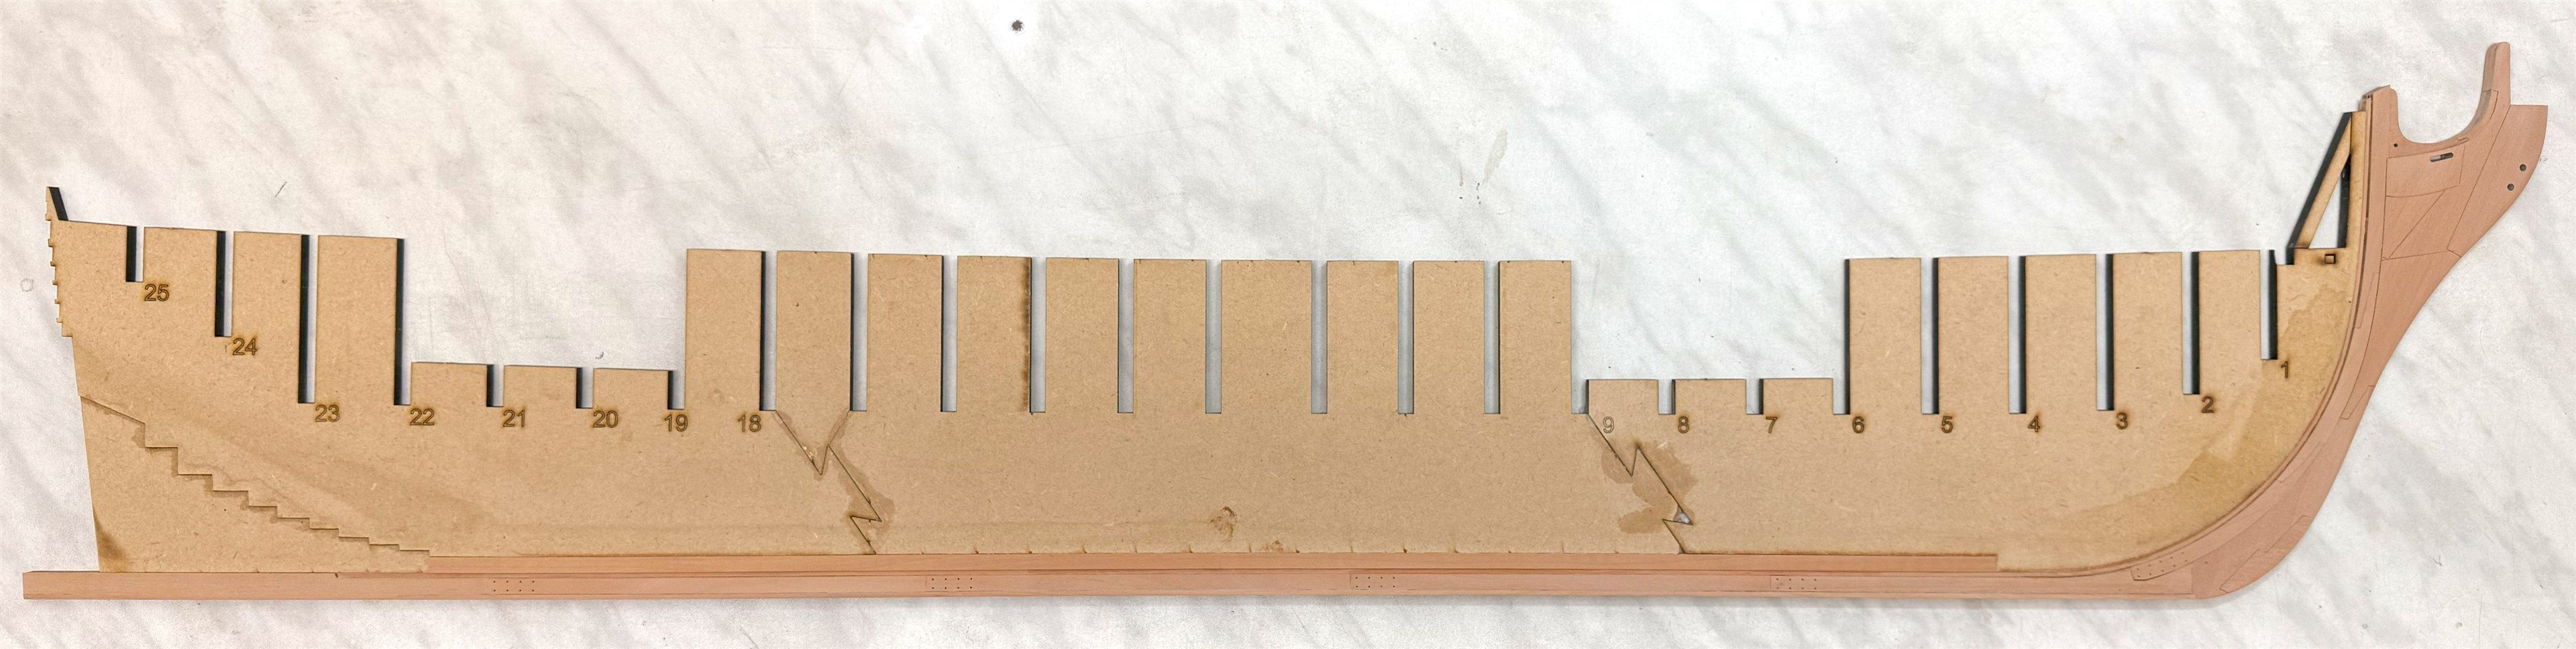
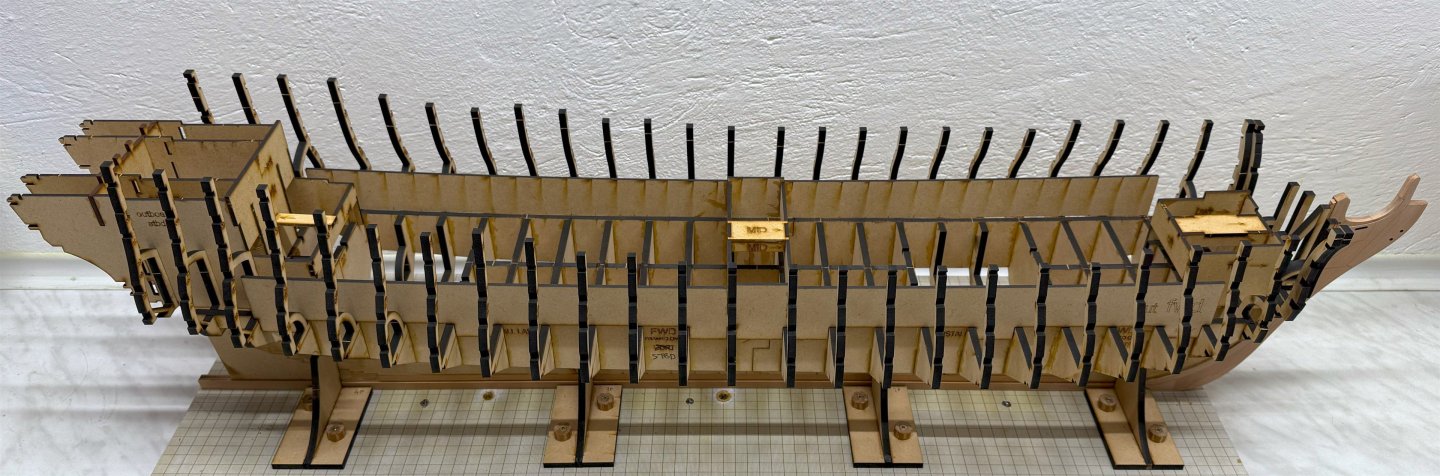
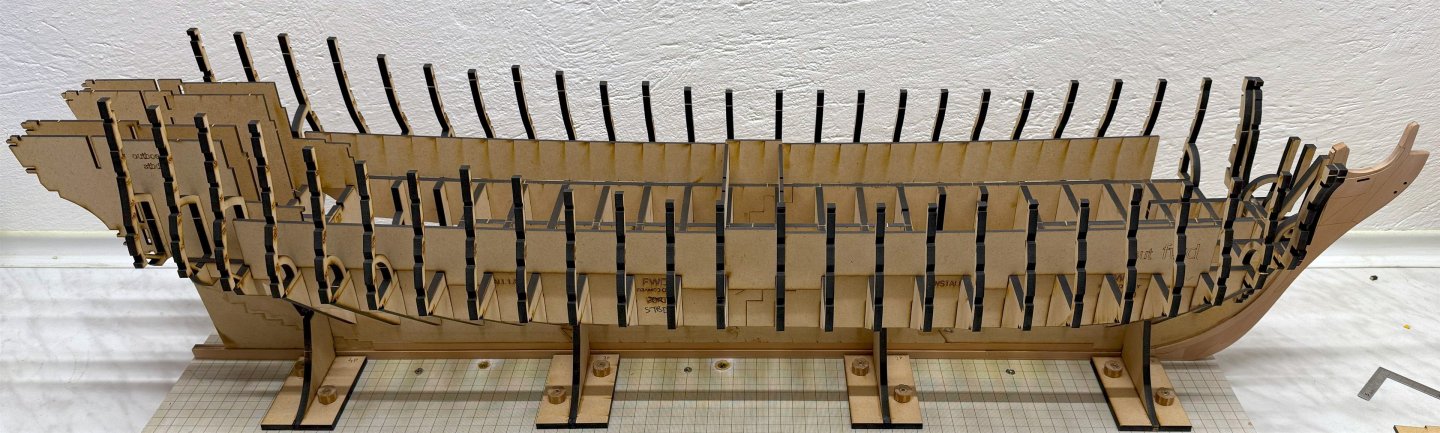
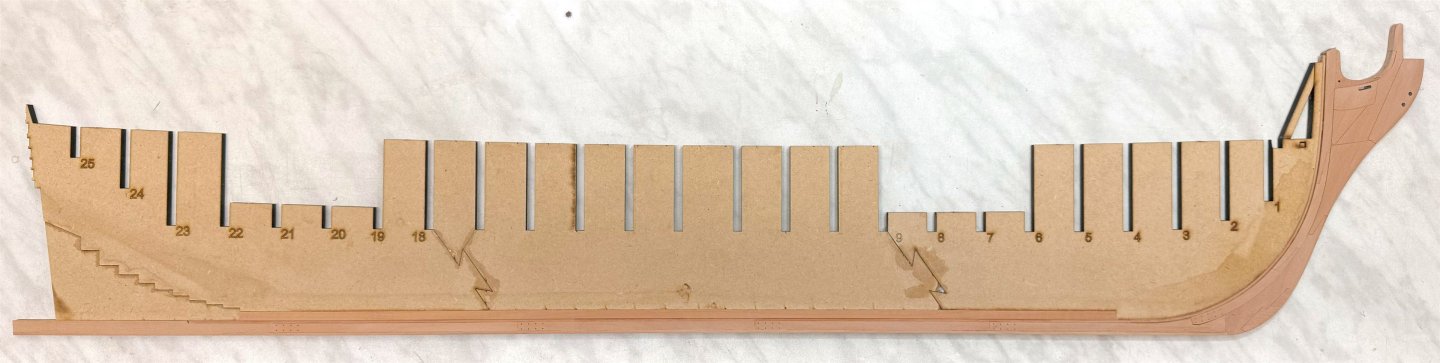
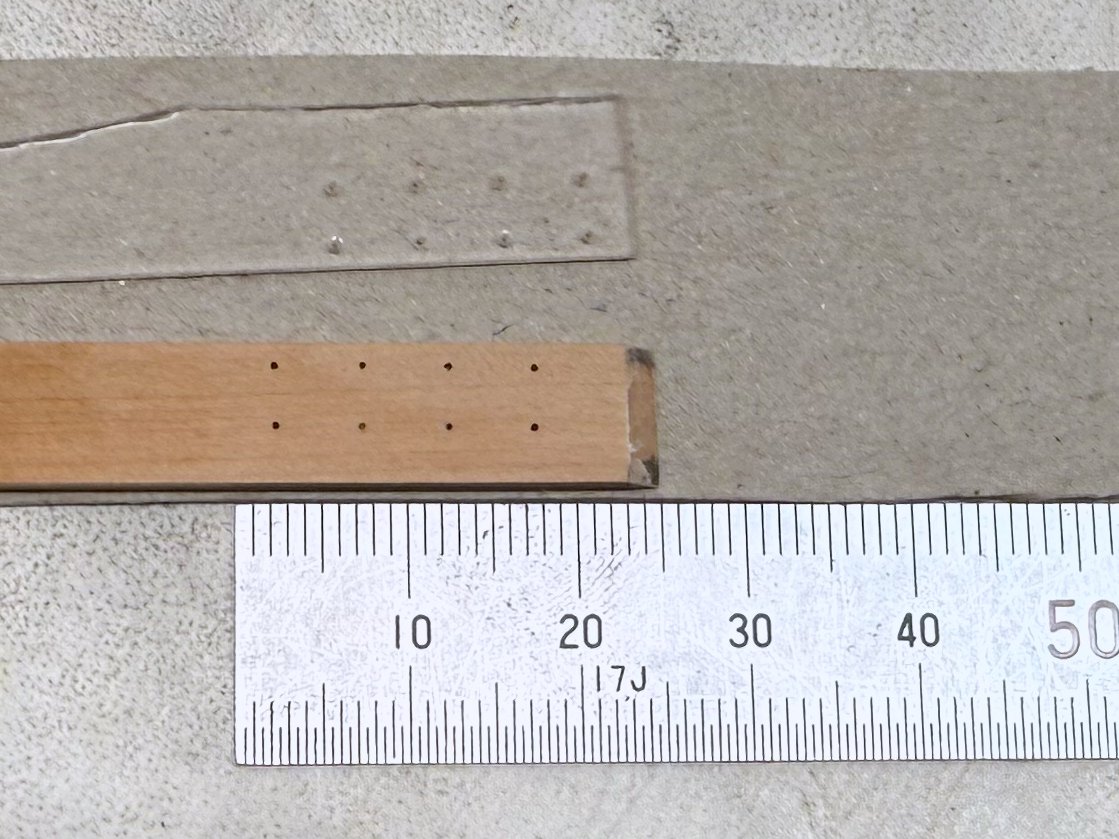
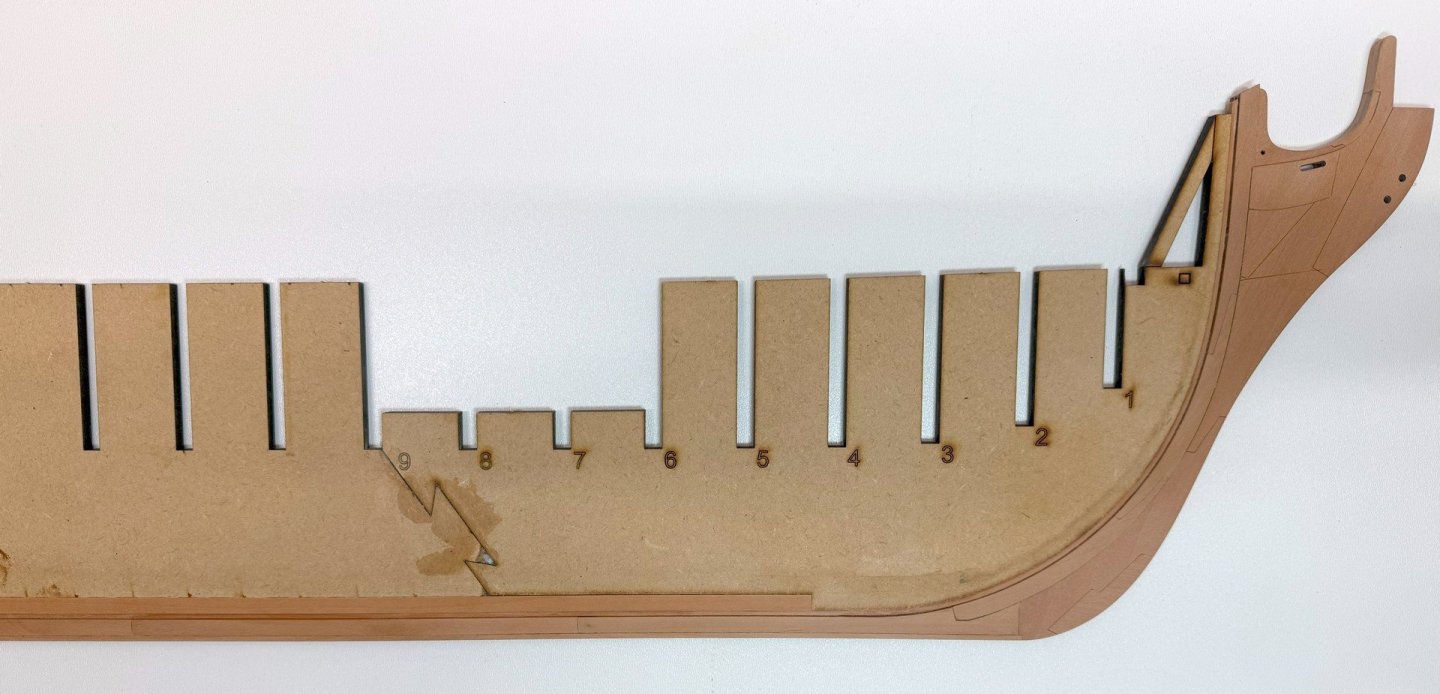
Thanks for the comments and likes guys. Today, after much thinking about whether to do it or not, I drilled and fitted the nails into the keel. Then came the next stage. Fixing it to the stand and dry fitting the bulkheads. So far everything is fitting nicely into place.


-
Hi Yves, Thank you! As I mentioned earlier, the model was designed by a longtime member of this great forum scrubbyj427 HMS Portland 1770 Prototype 1:48 - 4th rate 50 gun ship This is the first model he has designed himself, and he is doing everything in his spare time. In addition to designing the entire model, he is also working on prototypes, a build manual, and a website. The model will be released in chapters, as Chuck did with Winchelsea. The model's overall length is 43 inches (109 cm), so it's quite a beast. Ben and I are building prototypes to verify the design elements. Stay tuned, and keep your fingers crossed!
-
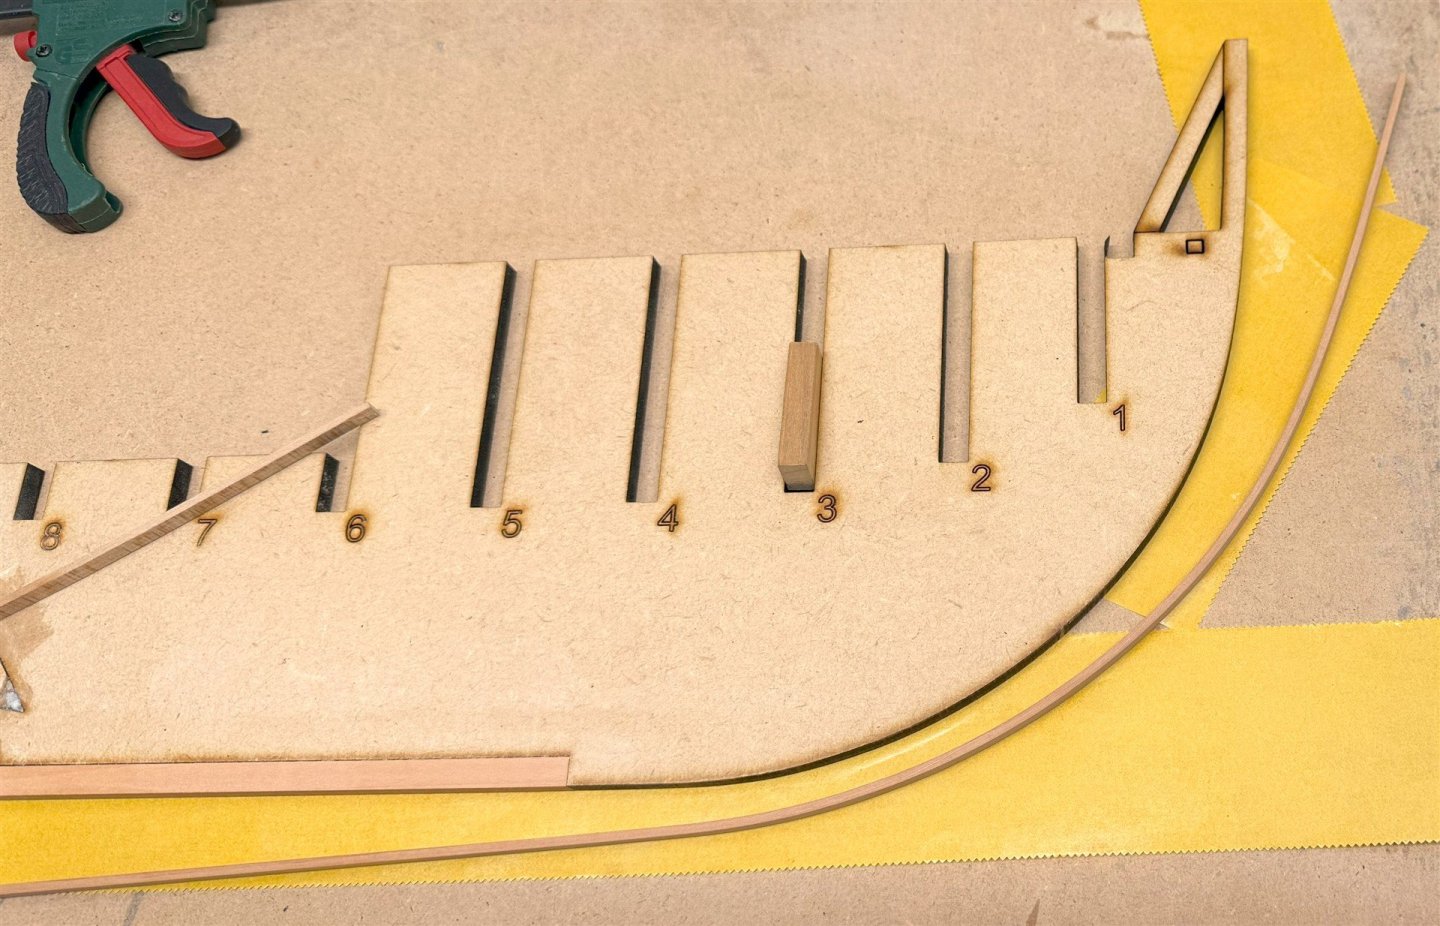
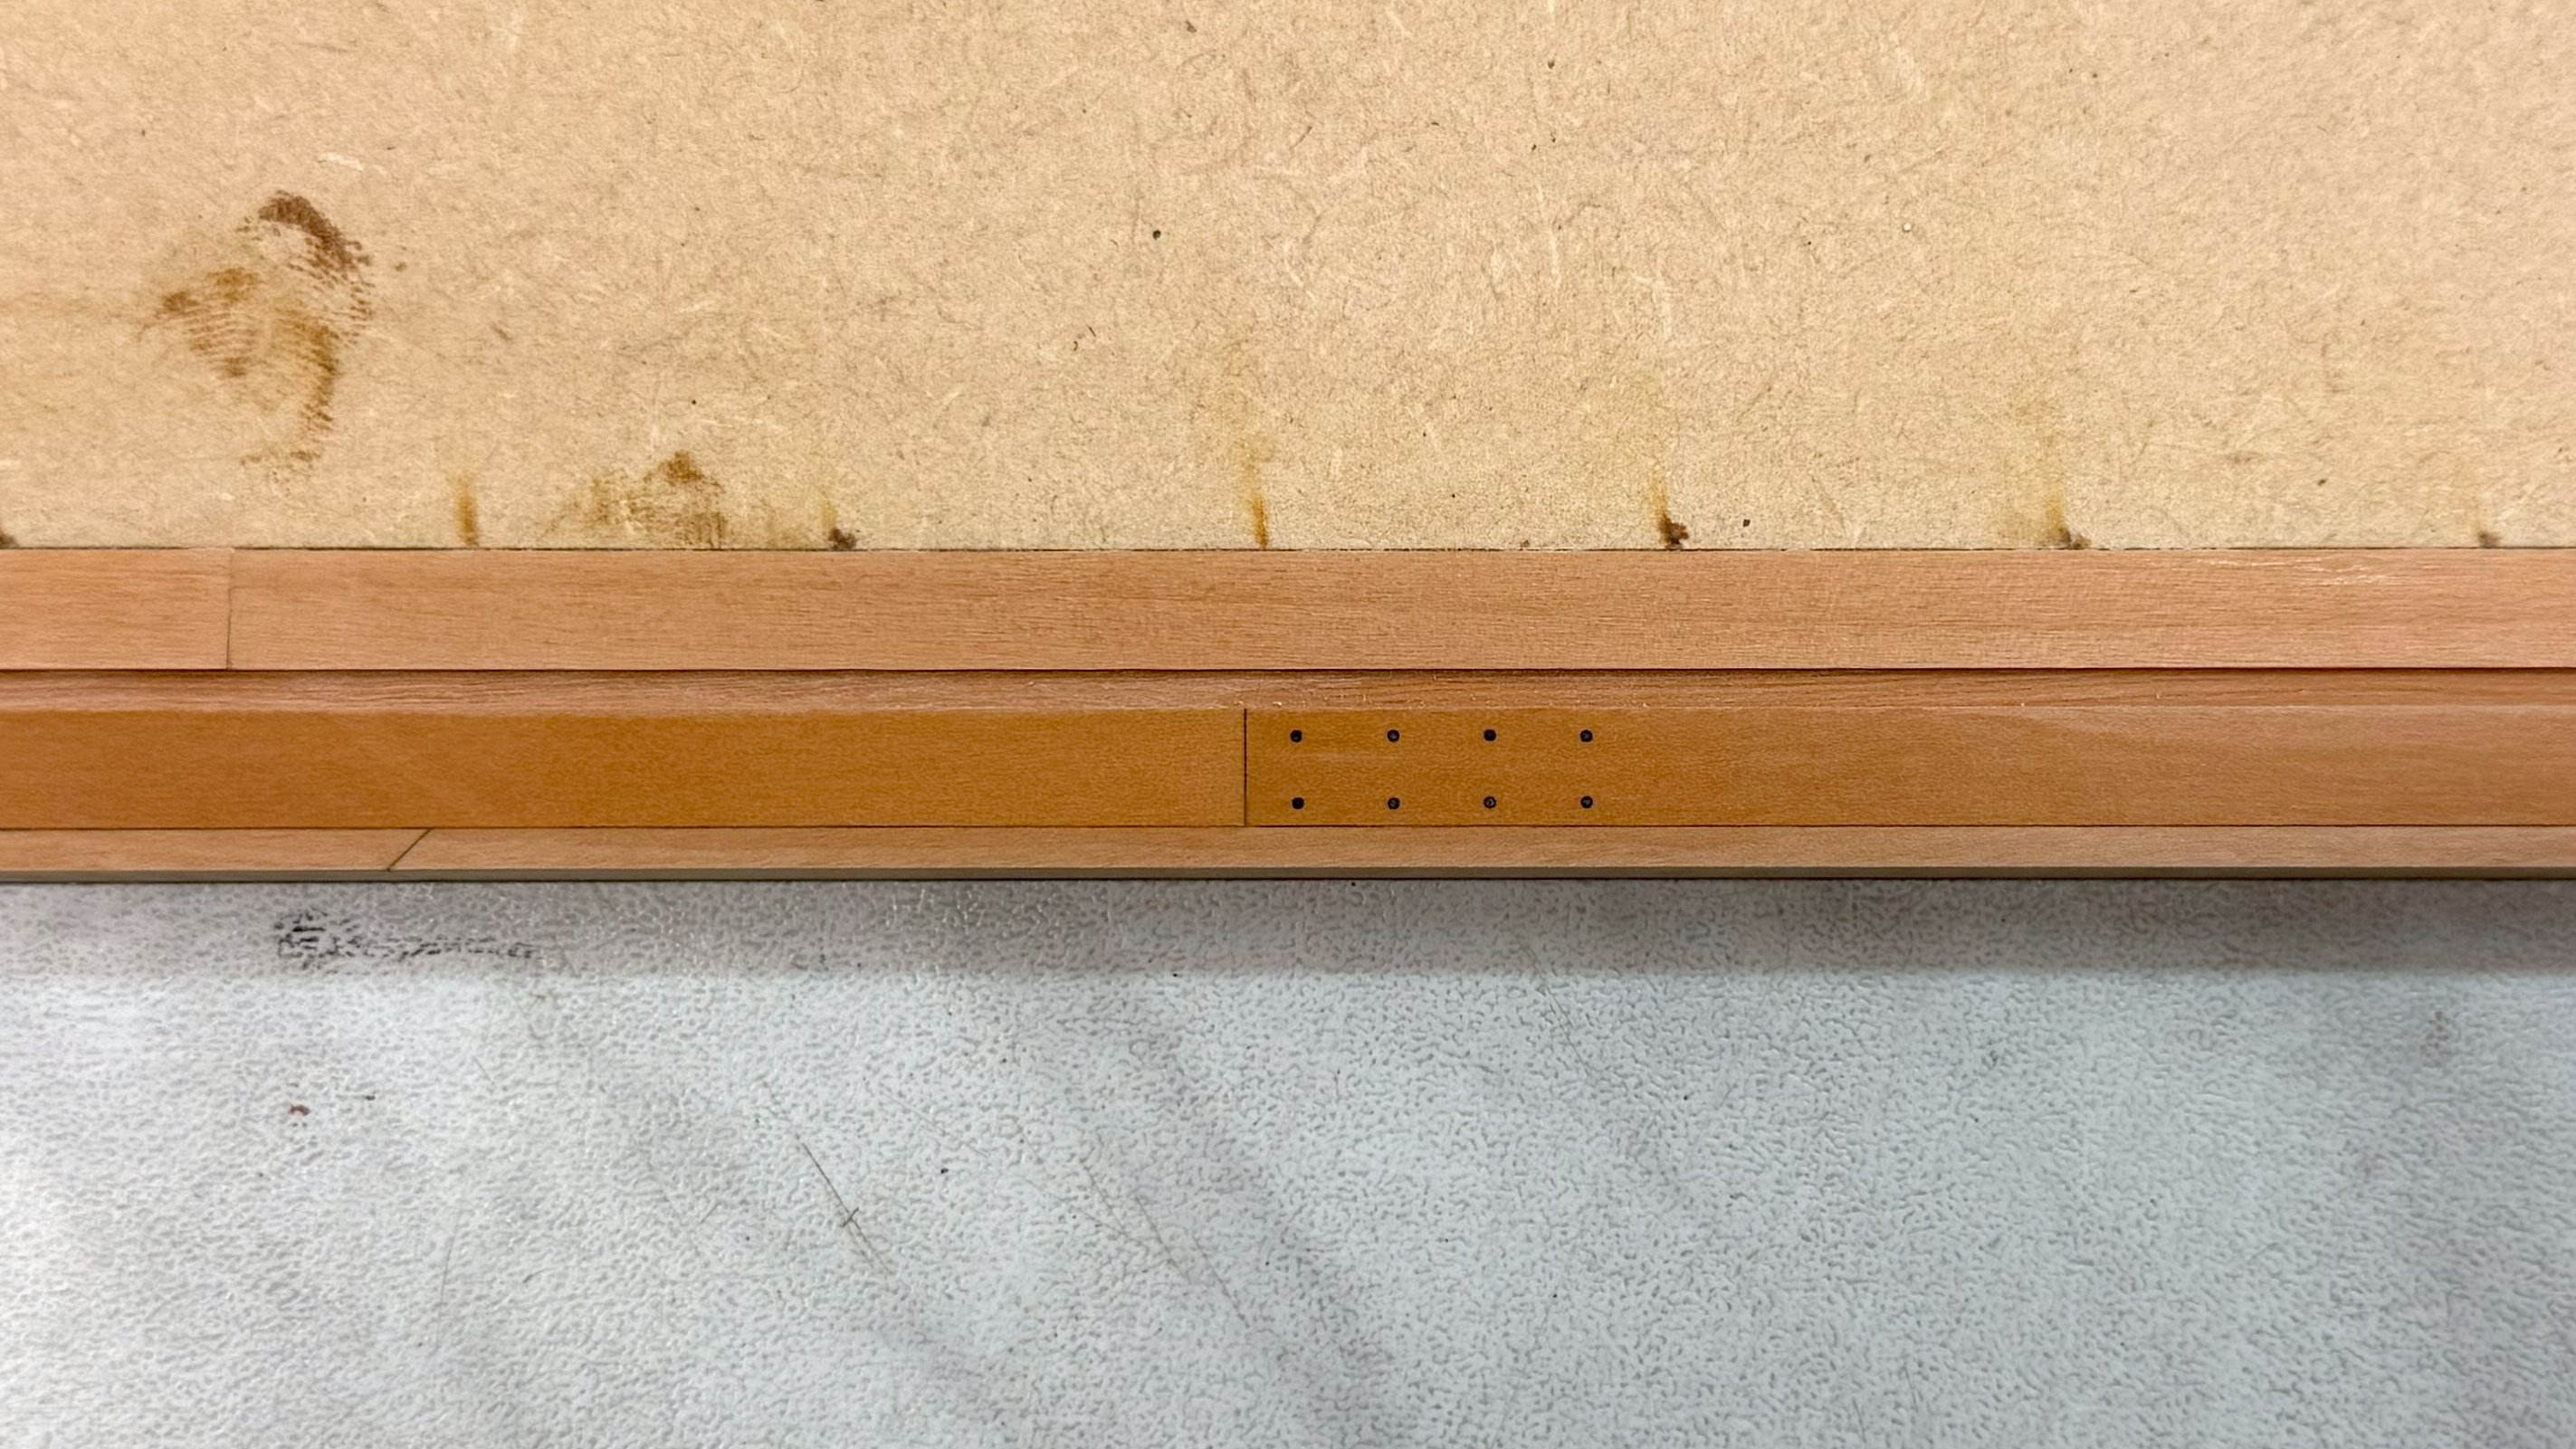
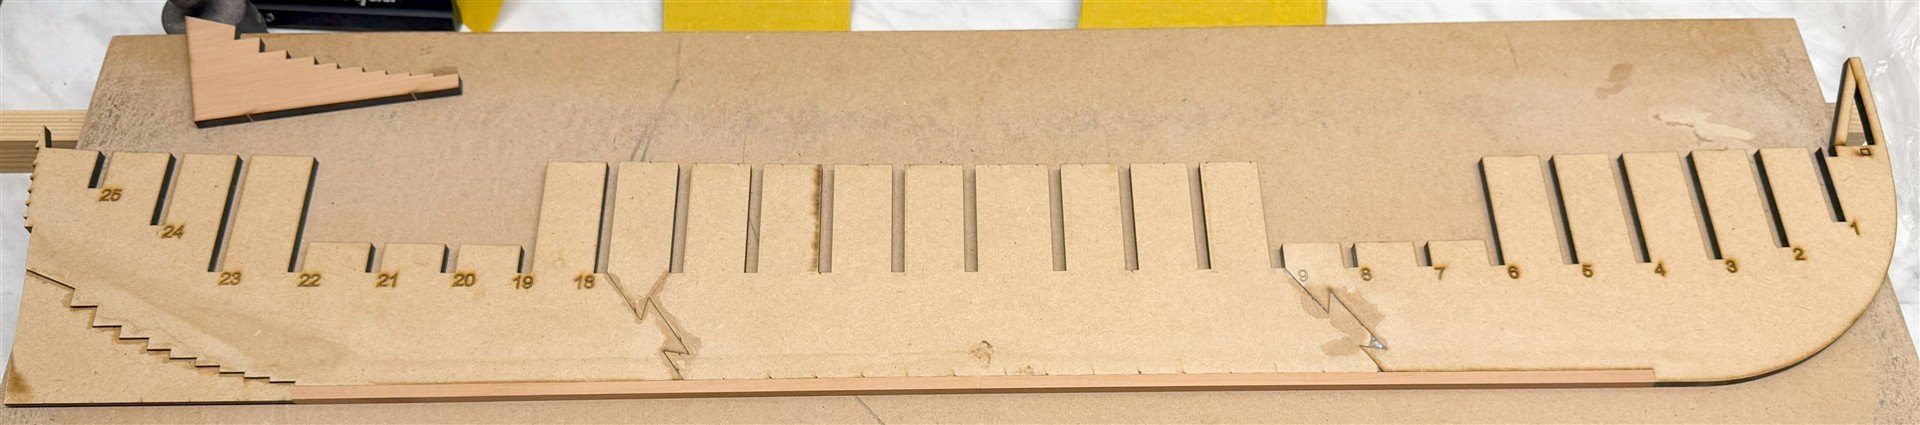
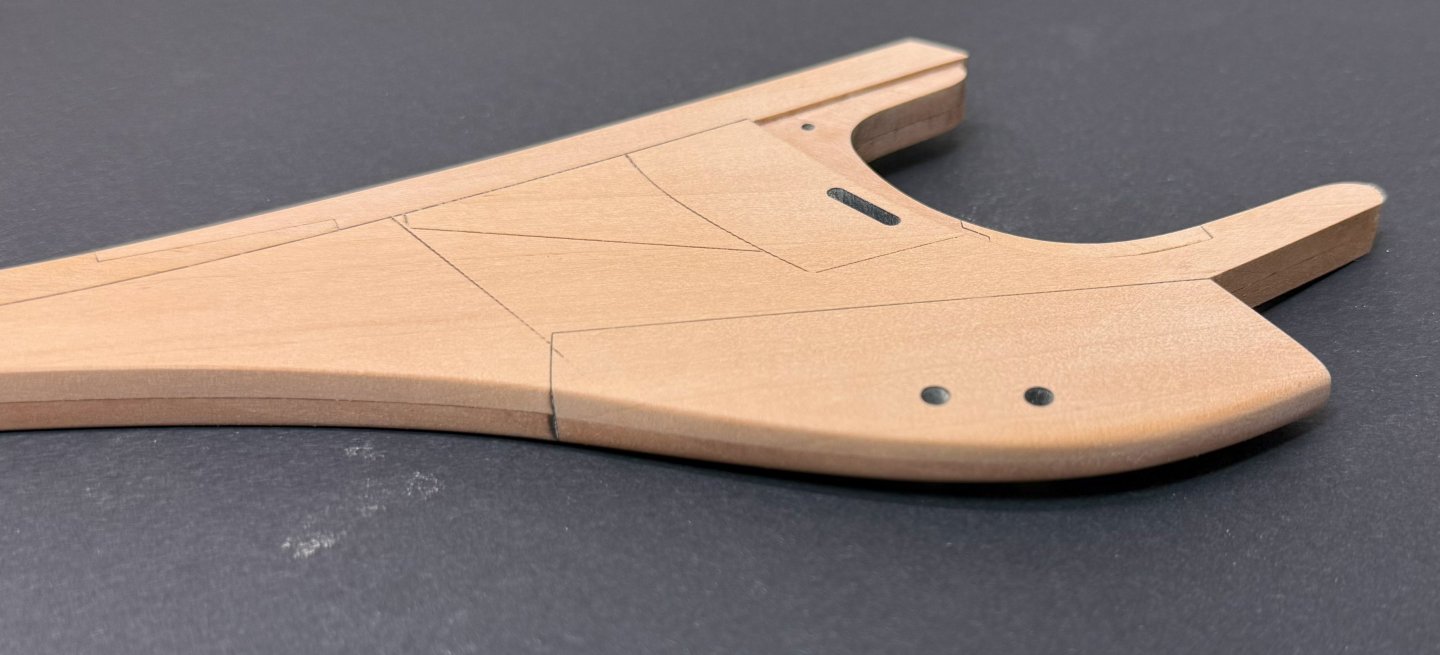
It looks like I've finished the keel. But I'm still thinking of adding - simulating nails to the keel. Here is a test with an 0,5 mm drill bit. I don't see them much on the contemporary models but I have done them on Winnie and probably will do them now. What do you think? Should I do it?

-
So, here's another update after the weekend. A lot of sanding, and finally, keel mounting.

-
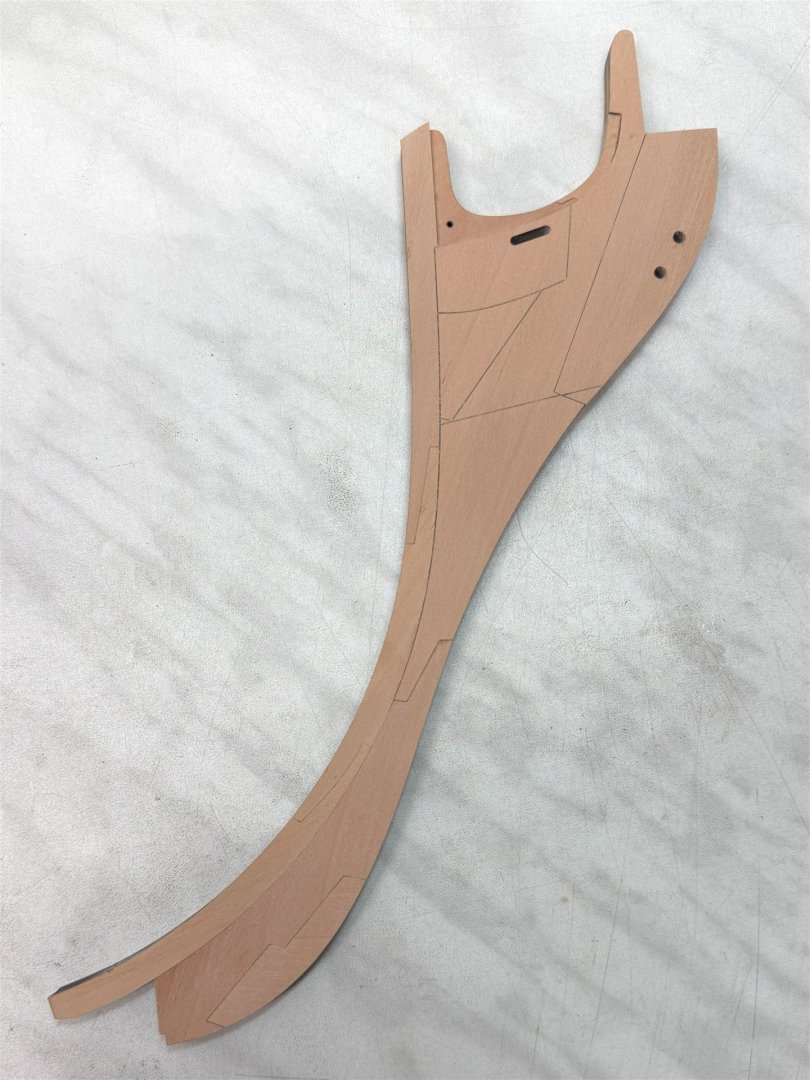
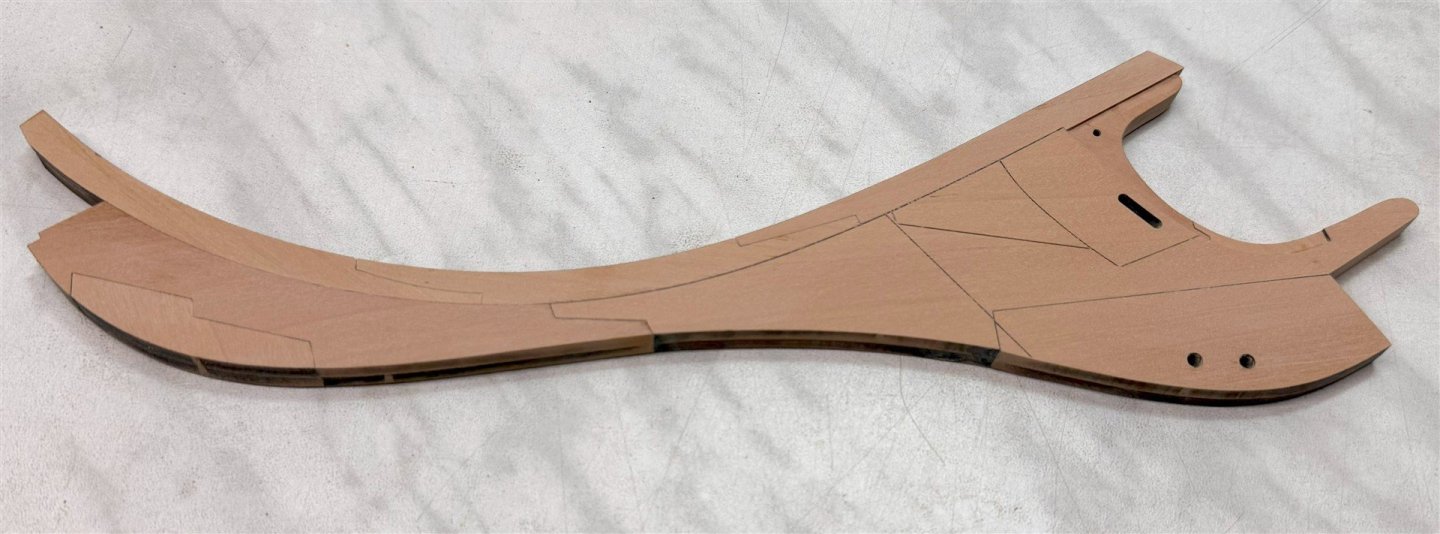
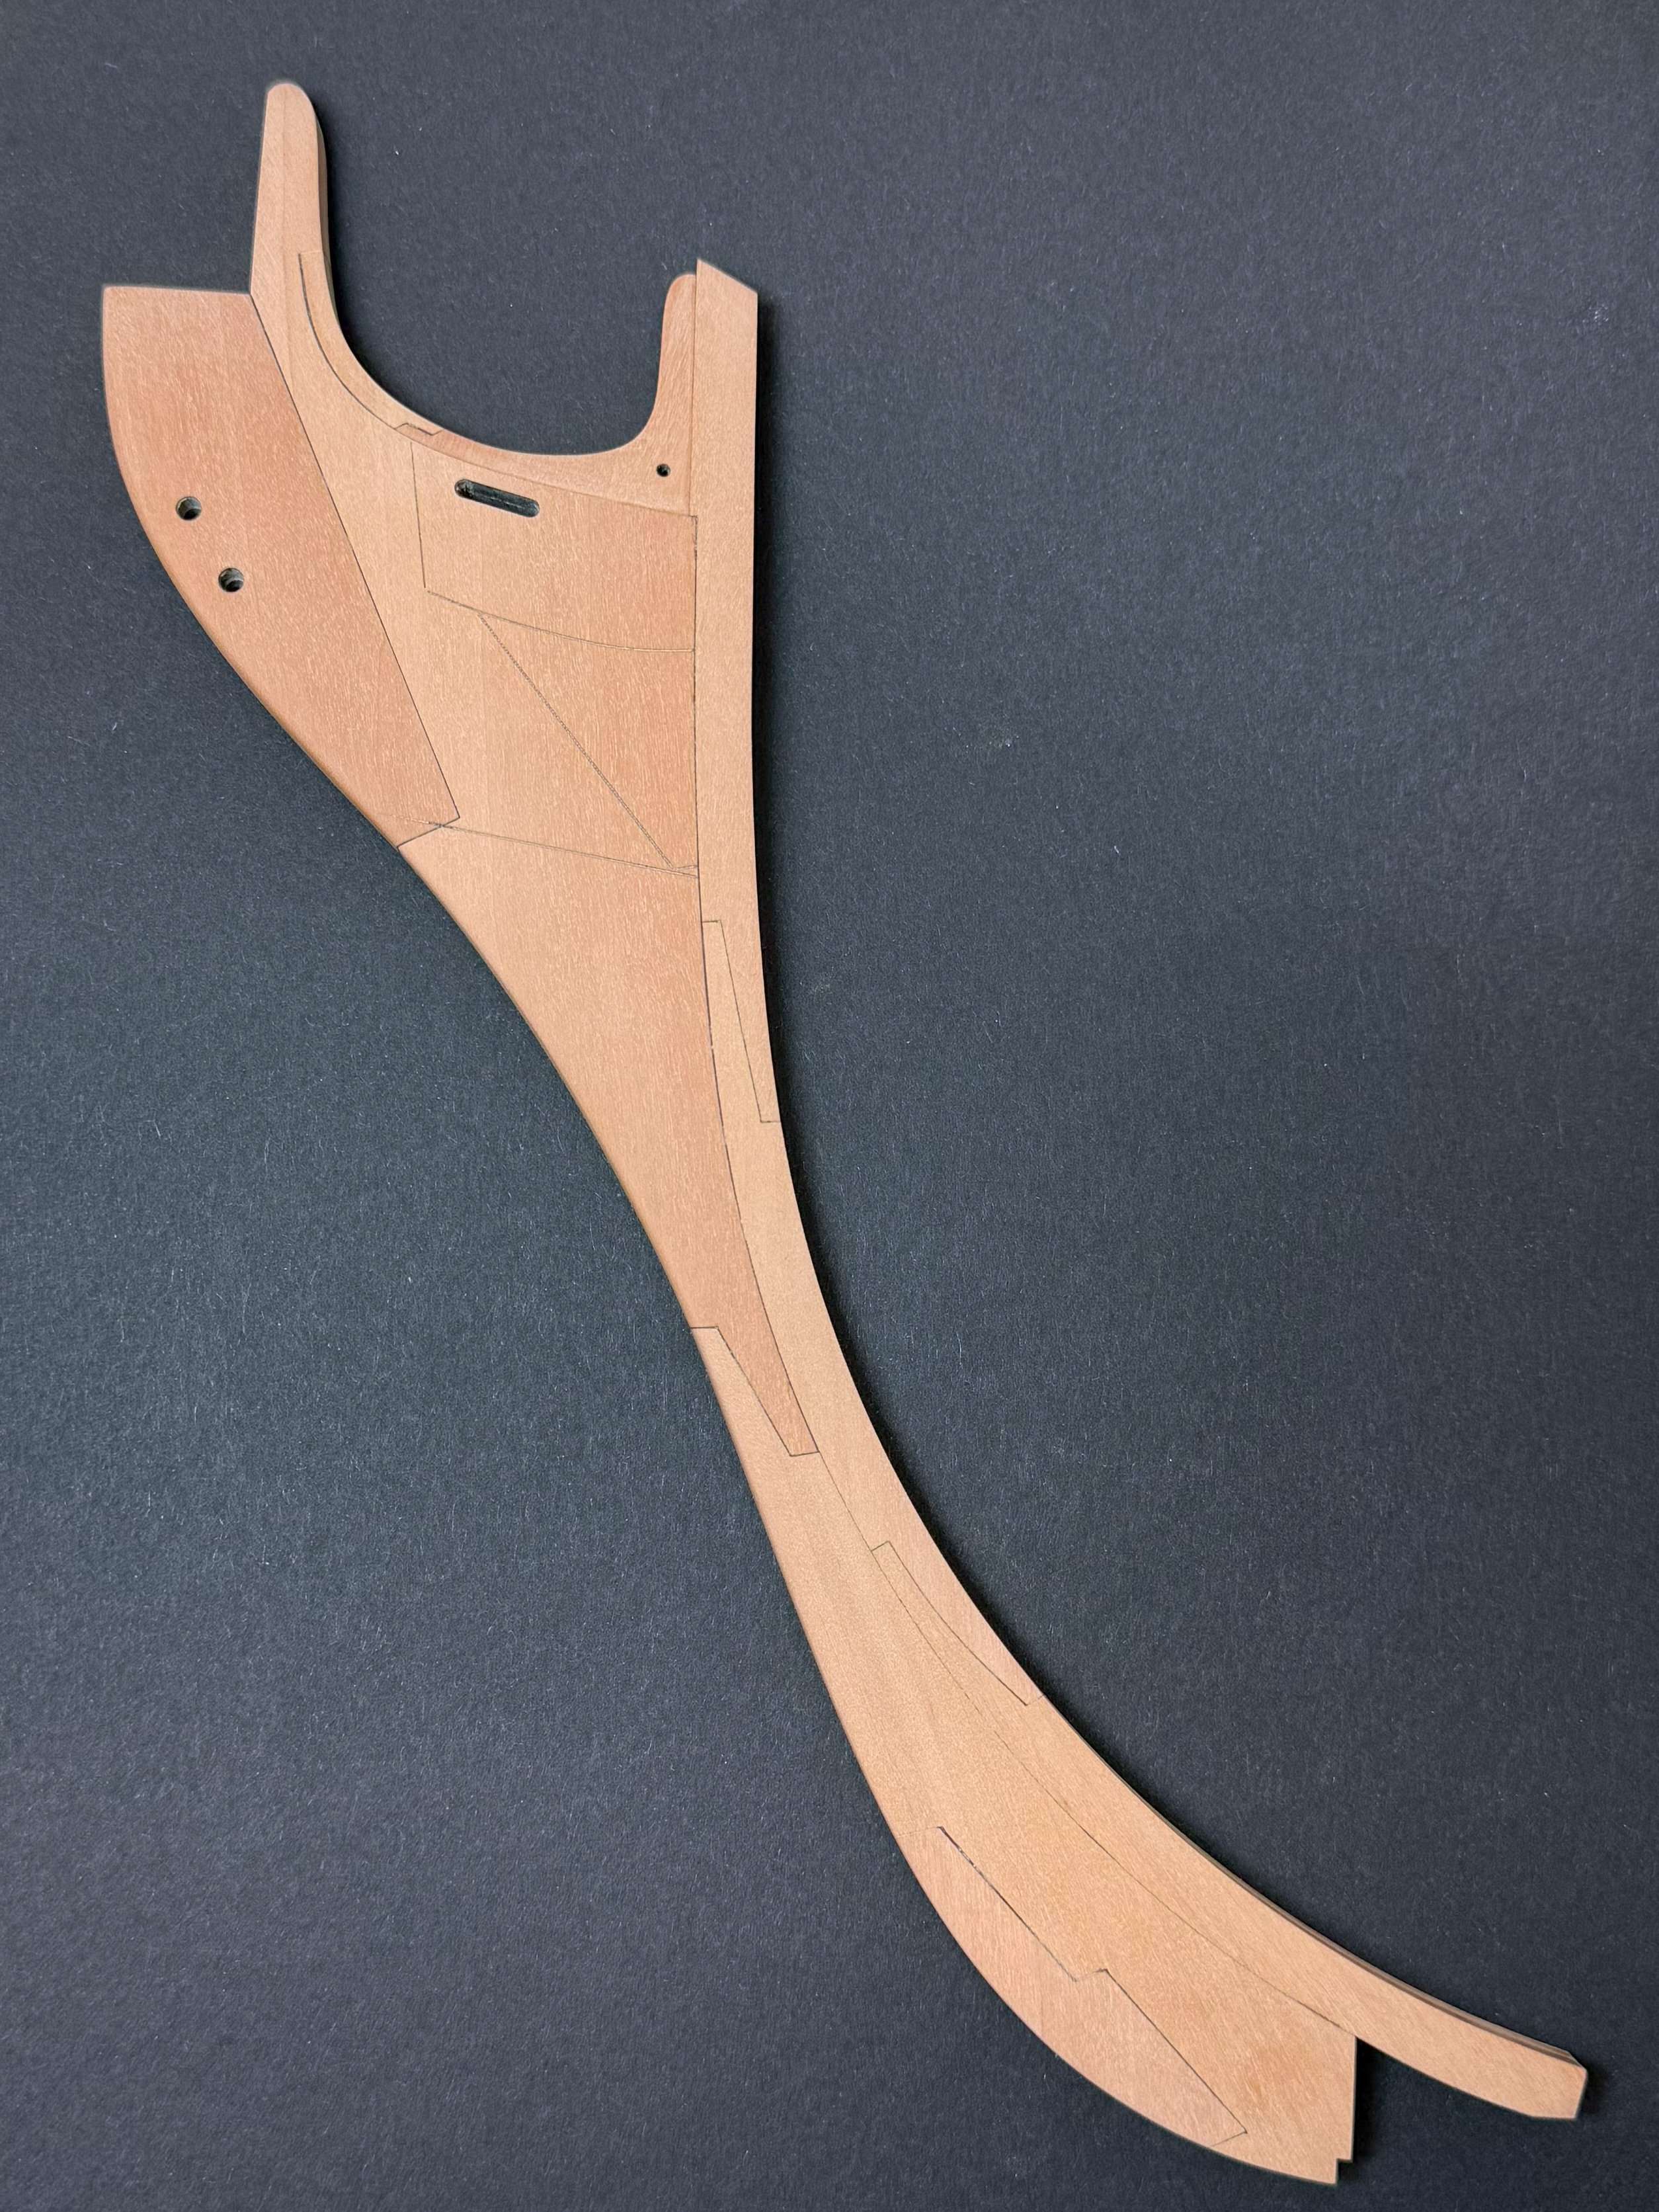
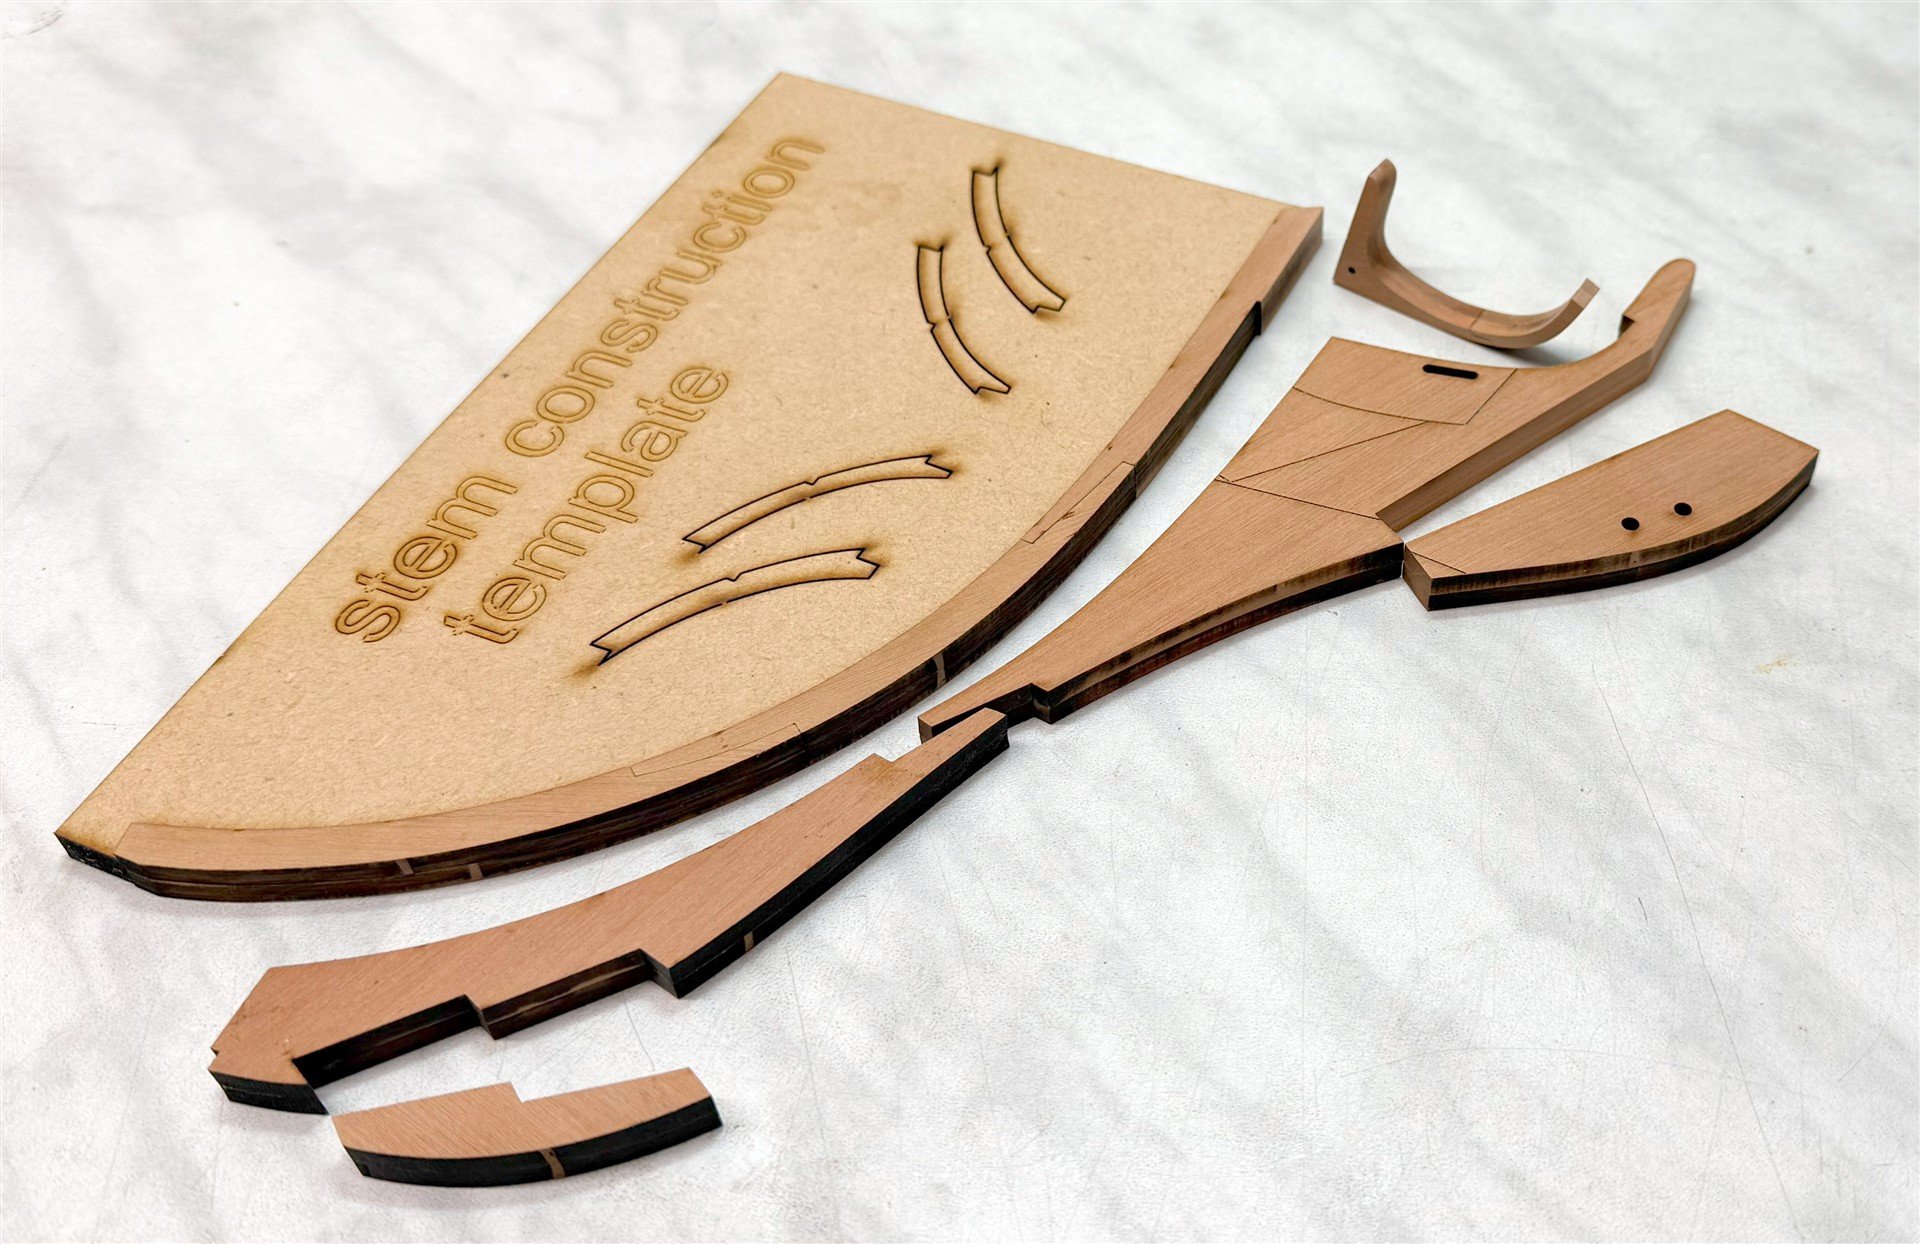
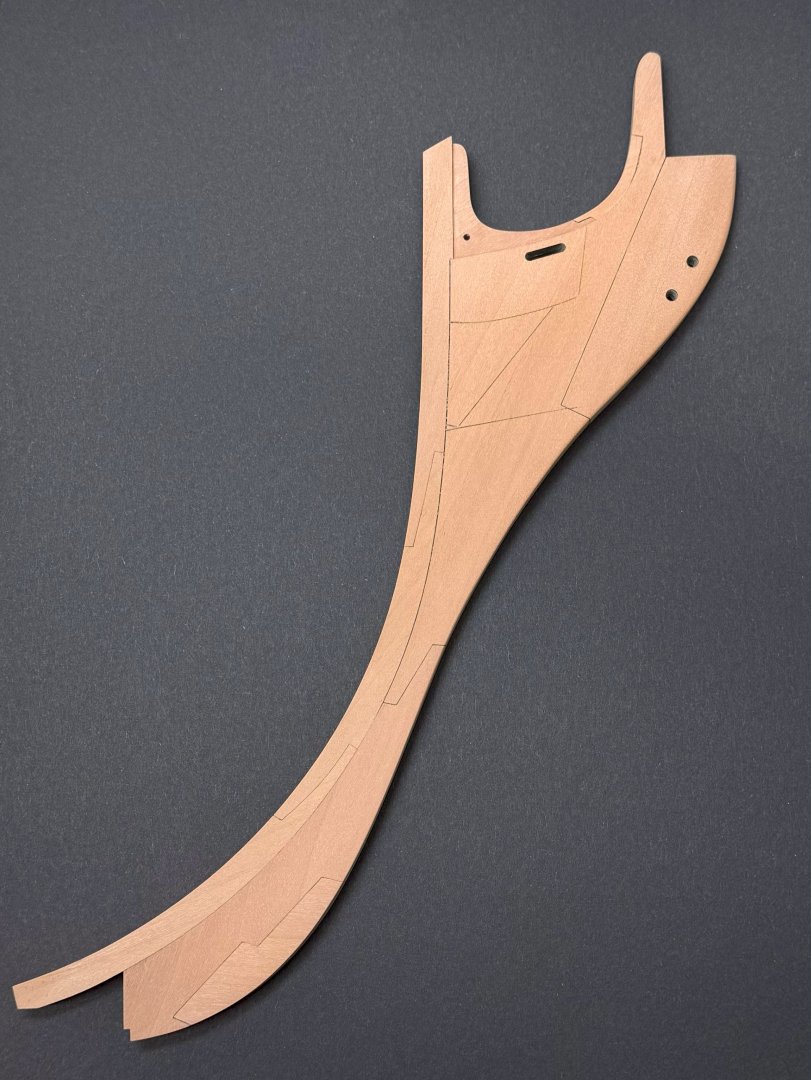
Hey, guys! I have a little update today. The stem and knee parts are assembled, so now I have a lot of sanding and tapering to do for the figurehead...