Bill Hudson
-
Posts
151 -
Joined
-
Last visited
Content Type
Profiles
Forums
Gallery
Events
Everything posted by Bill Hudson
-
Still developing the masts and bowsprit. I feel I am reaching a point where I can move on to something else on the ship. The instructions and details are very minimum so I am winging it.

-
More of the tops construction.
.thumb.jpeg.b7be8ae71510134e1a3297c1dd7c9c75.jpeg)
-
I decided to change course a little and concentrate on the mast tops. As I said before the material (plywood) is plain crap. I decided to try to build the tops more closely to correct with in my capabilities. The platform, trestle trees and cross trees are made from maple. I have yet to make the cheeks. I am not sure if this ship would have had wooldlings on the masts and if so would they have been rope or metal bands.
.thumb.jpeg.ba895d923638f9ab253183d588b6c628.jpeg)
.thumb.jpeg.98effa814c22e6f59ab1ca36f5e79d52.jpeg)
-
"Holystoning In the 18th and 19th centuries, Constitution‘s sailors began their day by cleaning the ship with the unwelcome task of holystoning the decks. A hand pump wet the deck with seawater, and men with buckets cast sand over the planks. The watch then scoured away the previous day’s dirt and grime with soft white stones and stiff brushes." The Holystone got its name from its design which was a circular ring of pumice. The handle of a broom was placed inside the ring and moved until the stone started swinging in circles around the handle. If done correctly the deck would have swirl marks in it. I will need to correct myself here. The original description above is correct, however there was also a donut like ring used as I described although I can no longer find a reference for it.
-
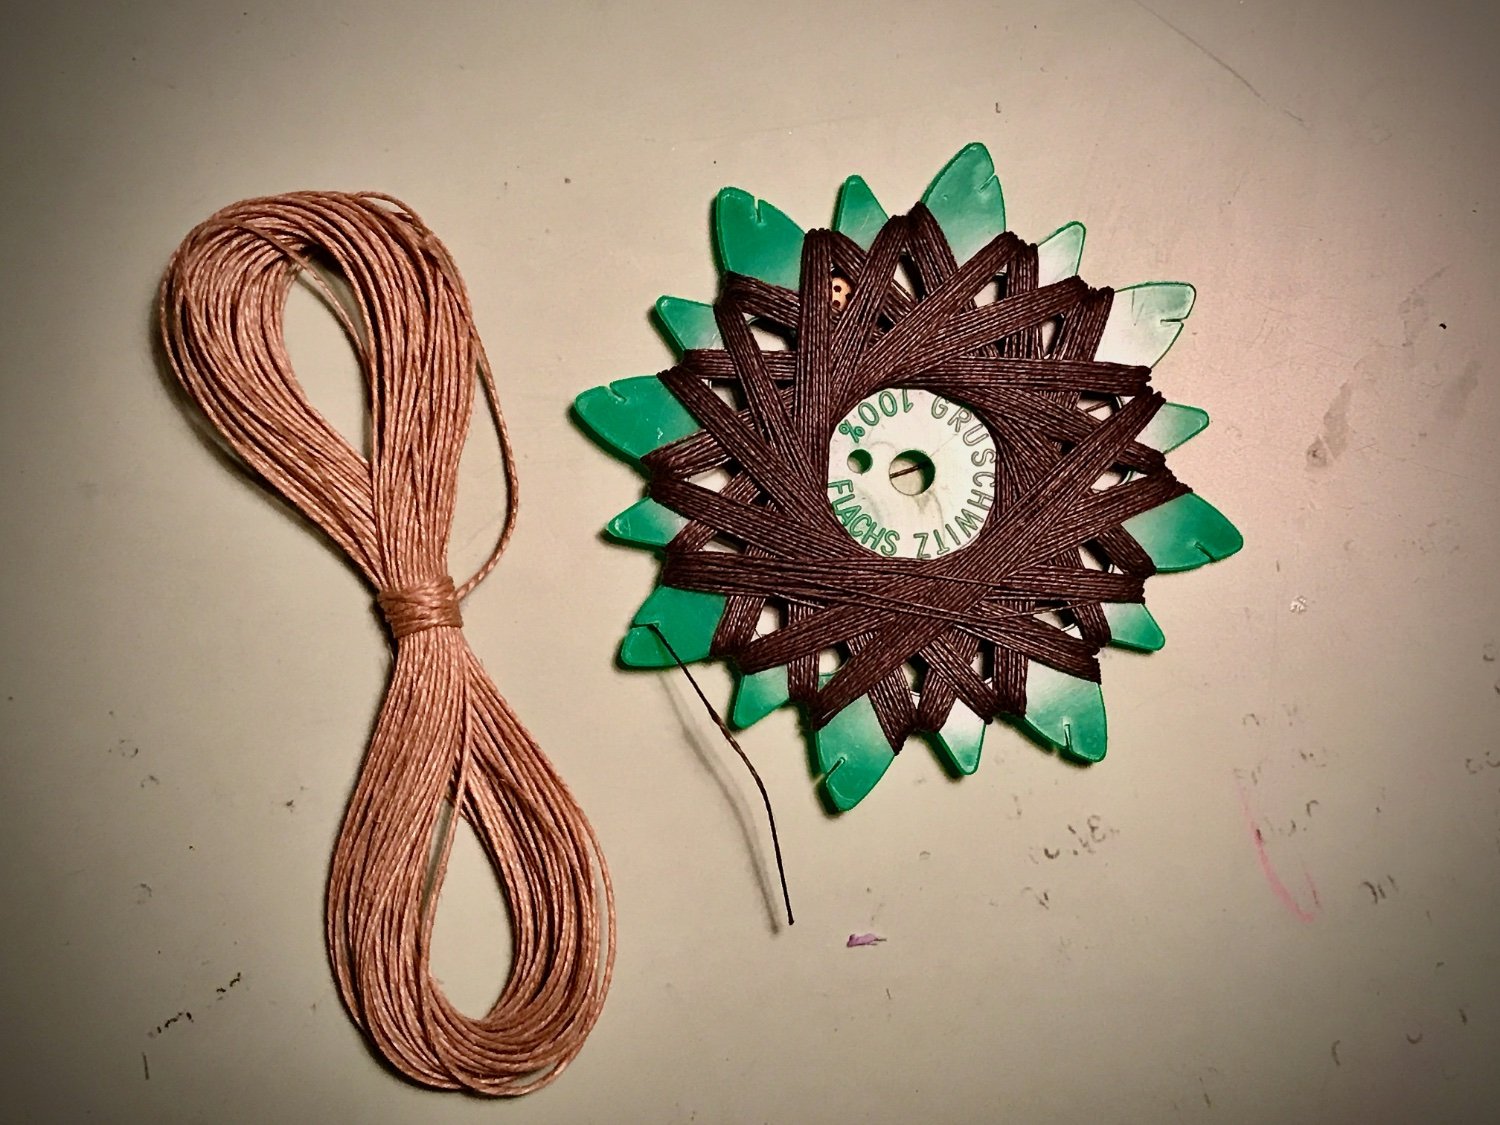
Thank you all for your suggestions. The scale this model is 1:90. I have e-mailed Syren to see if I can fined rope of that scale.
-
My very old model kit for the Marie Celeste came with two different threads for rigging. The black thread is much smaller in diameter than the light colored thread. It seems to me that the heavier should be used for shrouds but it should be back. There is nothing in the instructions detailing this.

-
Untangling and rerigging or start from scratch?
Bill Hudson replied to Rgpracer's topic in Masting, rigging and sails
I'm sorry to see the direction this ship model restoration went. From what I could see from the pictures of the ship model as found, that it was not a really complicated restoration. Time consuming yes but no need to completely deconstruct the rigging to do so. I have spent over 50 years as a professional model builder. During that time I have taken on several restoration projects for private collections and museums. I certainly do no claim to be any where near being an expert on model sailing ship building or many other things but restoration is just that; restoration. To restore a model is to take it back to as close as possible as the original builder built it. It does not mean to correct any design mistakes. -
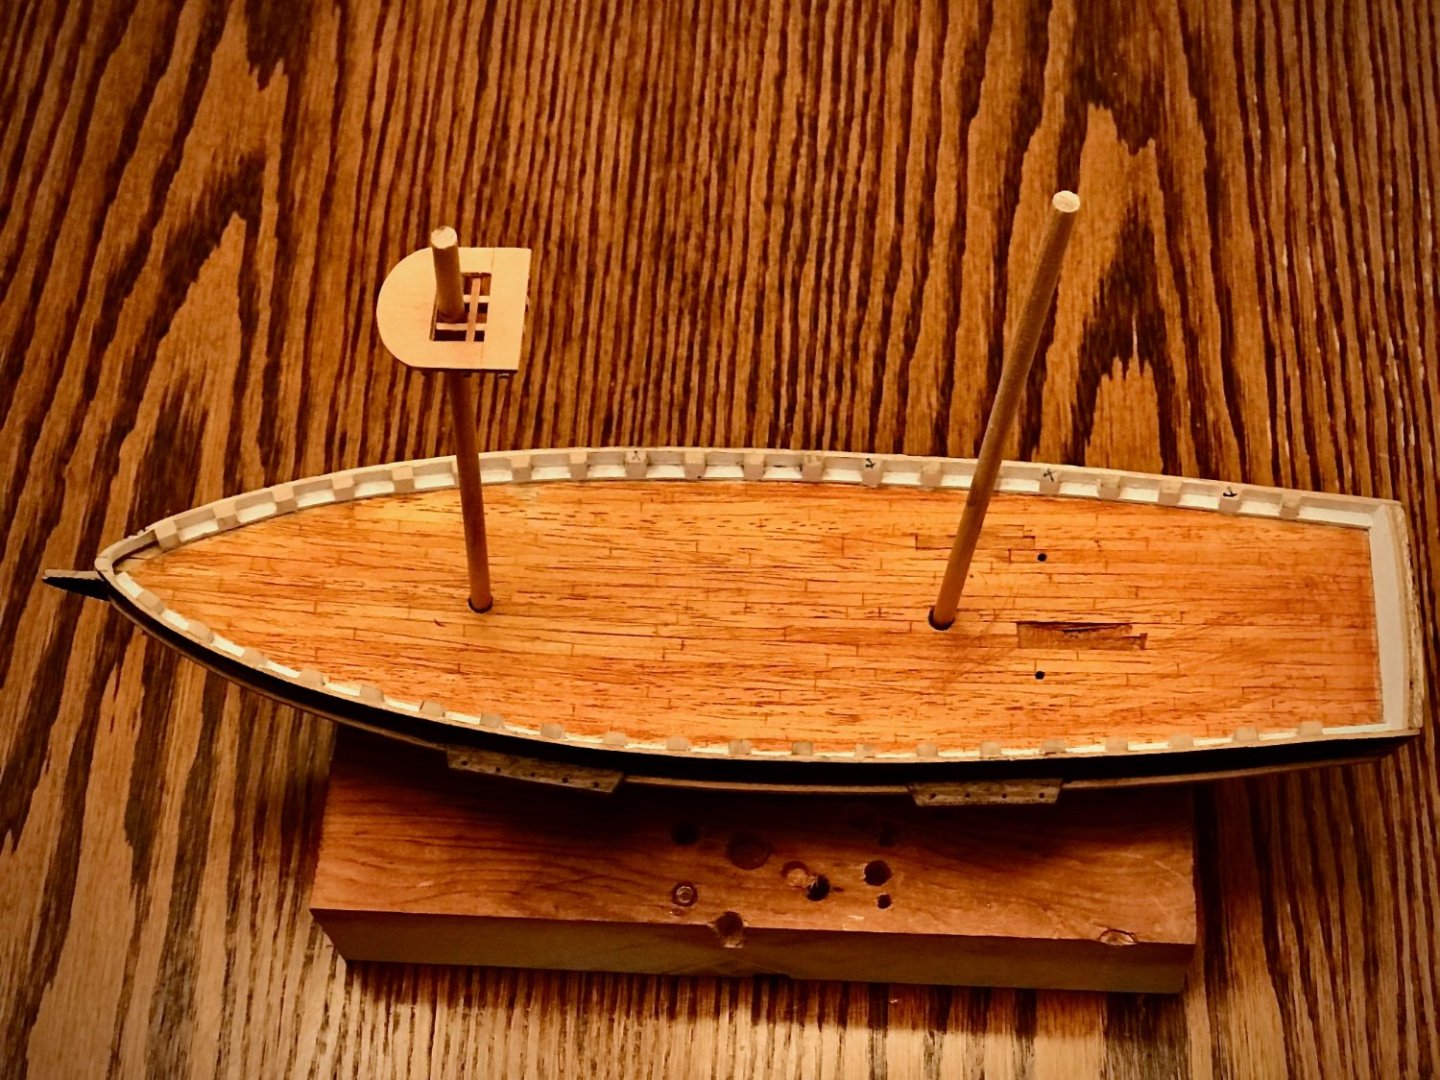
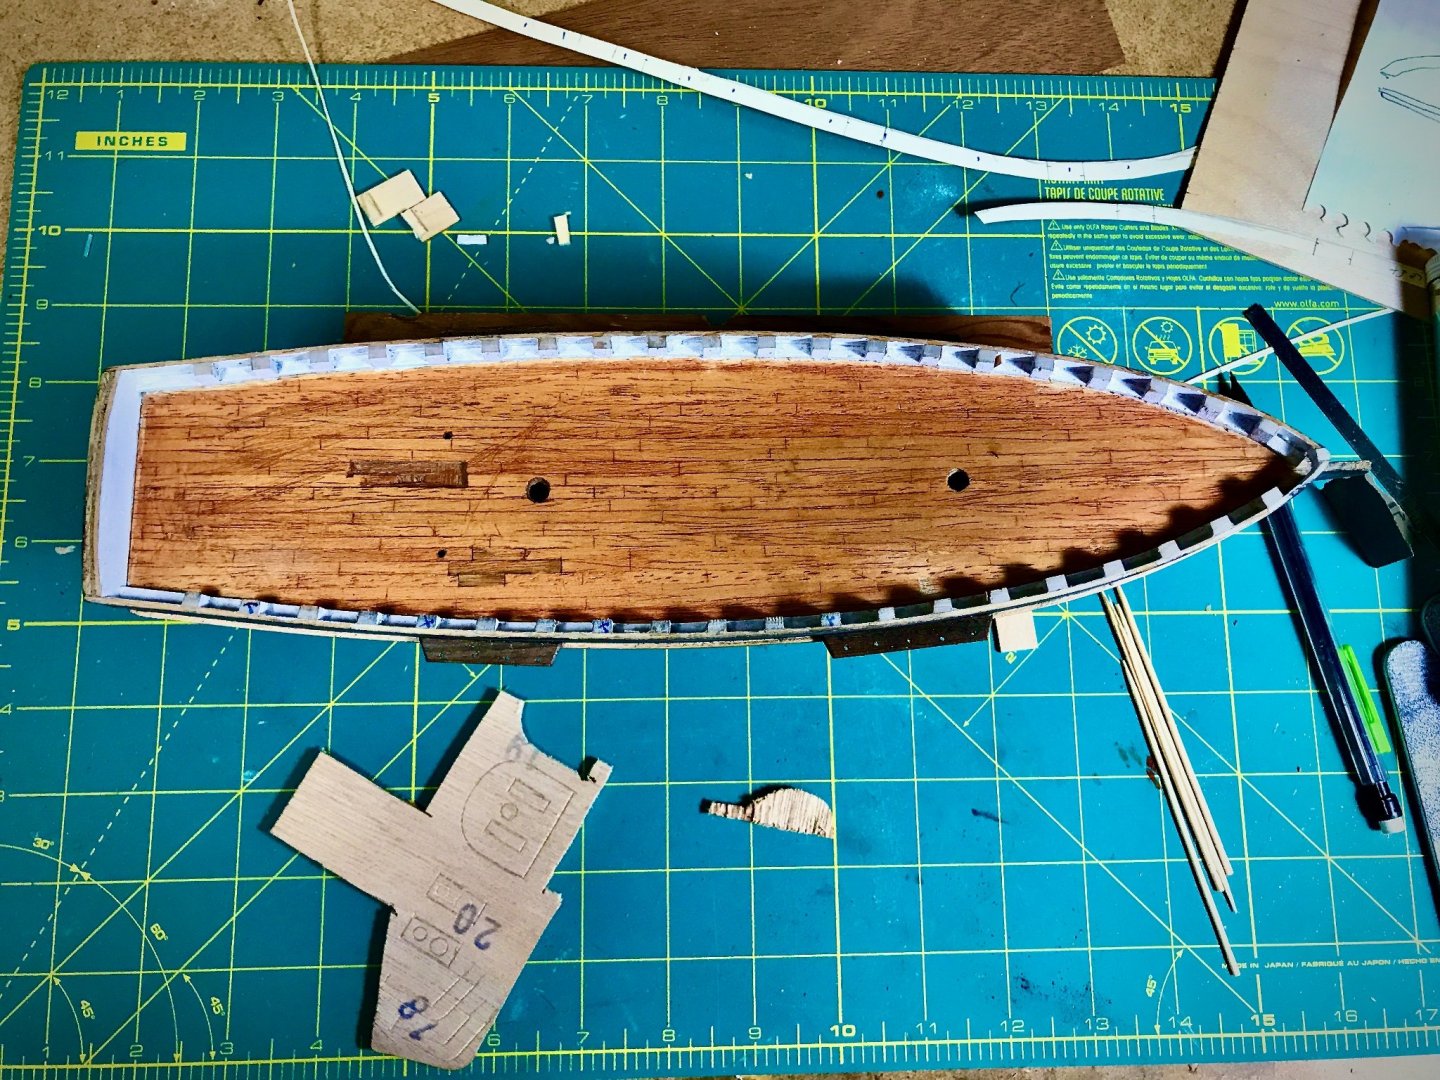
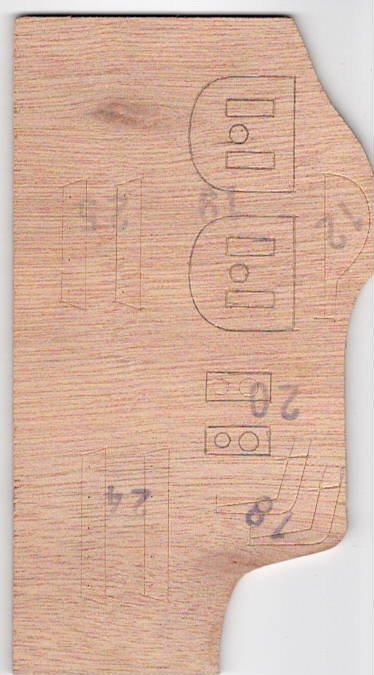
Still stumbling along on this kit. As said before all parts we're embossed on a piece of plywood. Between quality and age it is impossible to saw out the parts with out it splintering even with a backup. I found some walnut same thickness and made the channels from that. I ground through the primer to wood and tried the epoxy again. Had problems holding the channels in place while the epoxy set. I found a little bottle of very fine bronze nails about .018" (#77) shanks. I drilled two .020 (#76) holes through the edge of the channel, applied a couple dabs of epoxy and nailed them in place. Next will be making the rudder from probably walnut again.
-
I would recommend using brass beading wire or copper of the same gauge. The iron wire rusts easily. The method I use to take the kinks out and harden both copper and brass wire is to cut a long length of wire and clamp one end in a vise. Grab the other end with pliers and pull to stretch the wire some. This will give you nice straight and hardened wire. Bill Hudson
-
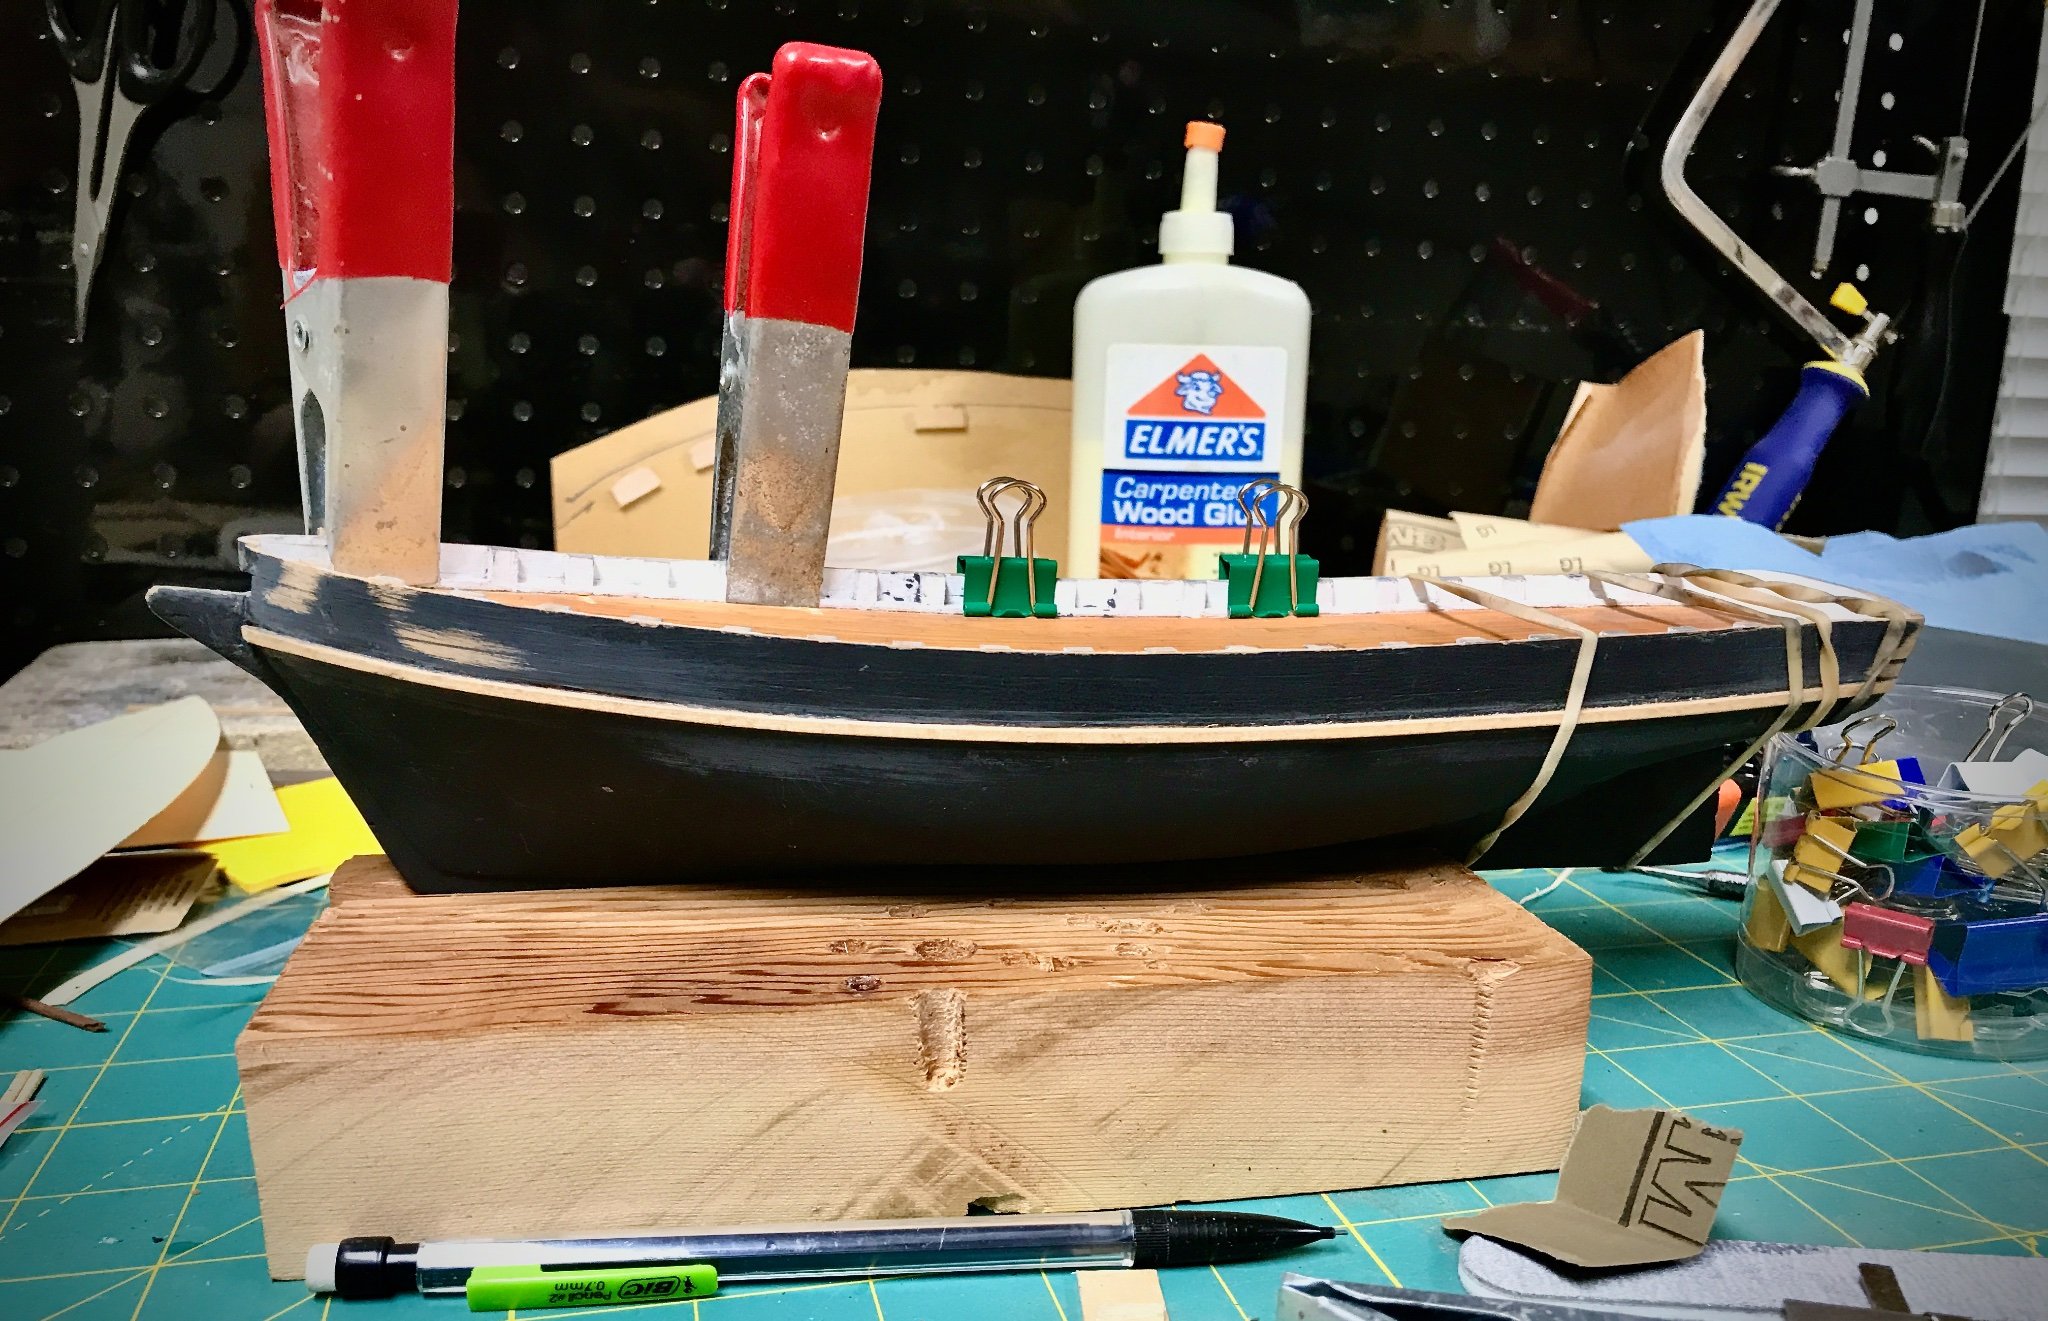
I have not given up on this ship. I will continue to (at this time) call it the Marie Celeste as that was the fictitious name. So at this point it is a factitious ship model. This forum is a great resource for information plus it has a lot of knowledgeable people willing to help. I found out, with the help from shotlocker that I was missing the sheer strakes. Since I had already primed the hull I had to scrape off some of the primer and then glue on the sheer strakes. The plywood with the stamped parts, that came with the kit, was so bad that I had abandon it. I will have to cut some new stock to make the channels and rudder. I will build up the mast tops when I need to. I have already bent the top rail (gunnel) from mahogany but will wait until later to install them.

-
Allan, If you are looking to find a kit of the MC be prepared to find a nearly scratch build kit. Unless the company has made production changes since my kit was produced all parts are just embossed on fairly rough plywood. You will have to hand saw (or scroll saw) each part from the sheets. The instruction/plan sheet is only an isometric drawing of the model with written instructions in several languages. It was a good introduction to using a coping saw for my son but also the reason he gave up building it. Bill
-
-
There seems to be some confusion over the name Marie Celeste. In 1861 the ship was originally launched as the Amazon. In 1868 it was renamed the Mary Celeste. In a fictional story the ship was called Marie Celeste. From Wikipedia: "Marie Celeste is not a misspelling of Mary Celeste.* Marie Celeste is the name of a ship in a work of fiction. It is based on a real event involving a ship called Mary Celeste. The author changed the name when writing the story, and the change has caused confusion to the extent that many people believe Marie Celeste to be the name of the real vessel. It's not a misspelling; it's a misunderstanding."
-
-
I guess I should've been more clear. I am still on the Marie Celeste. Those furnished with the kit are pretty bland. The stock sheet is quite rough so would like start from scratch wit proper bracing.
-
I have been trying to find details mast tops. I don't seem to be putting the correct search questions.
-
Making Brass Masts for 1/700 warships
Bill Hudson replied to dcicero's topic in Metal Work, Soldering and Metal Fittings
I am fortunate that I was able to accumulate many accessories for both the Sherline lathe and mill. Had a Sherline dealership until they cut all dealers off. I guess they felt our discounts cut into their profit. -
Making Brass Masts for 1/700 warships
Bill Hudson replied to dcicero's topic in Metal Work, Soldering and Metal Fittings
Roger, for short tapers I find Sherlines taper attachment works fine. It mounts on the cross slide and cuts from the back side (tool upside down). Here again I use the step method and have cut some longer tapers.
-
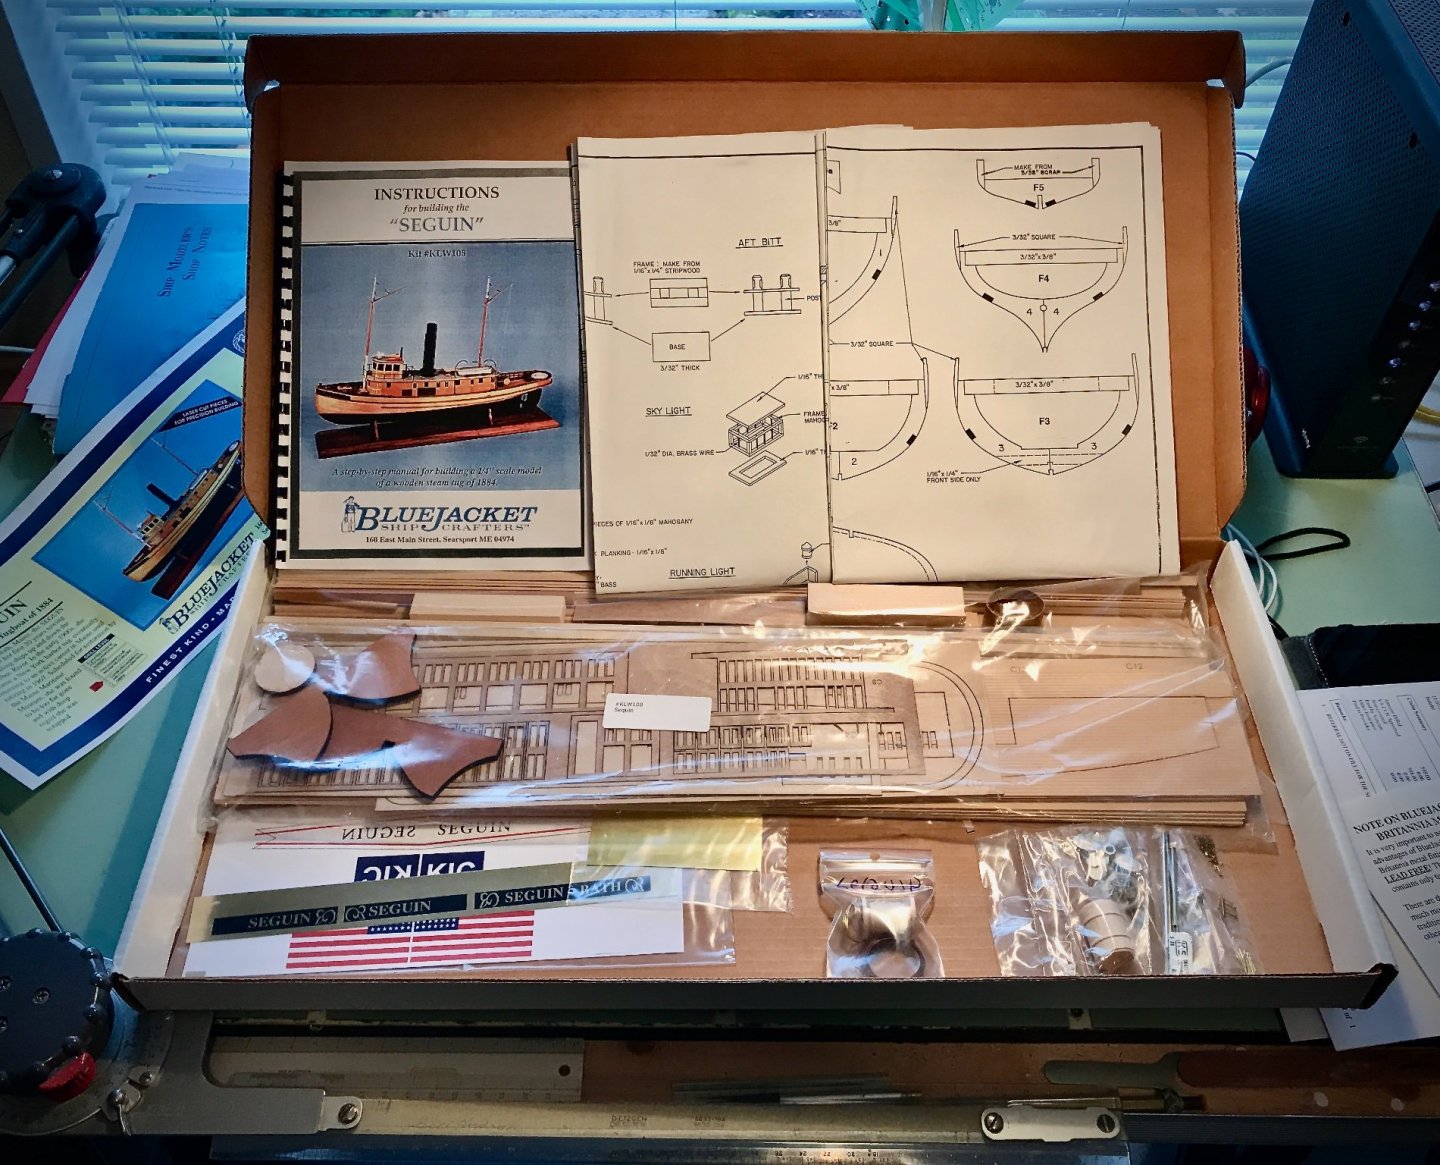
Quite a few years ago I did some work on the Destroyer Escort kit. I designed and made the patterns for the hedgehogs and other accessories. I took some of their ship model kits in return; one being the Seguin. When we moved the kit ended up on a very high shelf in a closet. I just discovered it last week. I am not sure what to do with the kit; build it, sell it or trade. Discussions and suggestions welcome. Bill
-
Which Ship Modelers Shop Notes
Bill Hudson replied to Dave_E's topic in Modeling tools and Workshop Equipment
My Ship Modeler's Shop Notes is probably the first edition as it is neither #1 or#2. It is copyright 1979. That was the year I bought it at The Maritime Museum in Astoria, Oregon. Sadly it is just paper back with no spiral binding. Many of the pages are coming loose. I will have too rebind it some day. Lots of interesting information. -
Making Brass Masts for 1/700 warships
Bill Hudson replied to dcicero's topic in Metal Work, Soldering and Metal Fittings
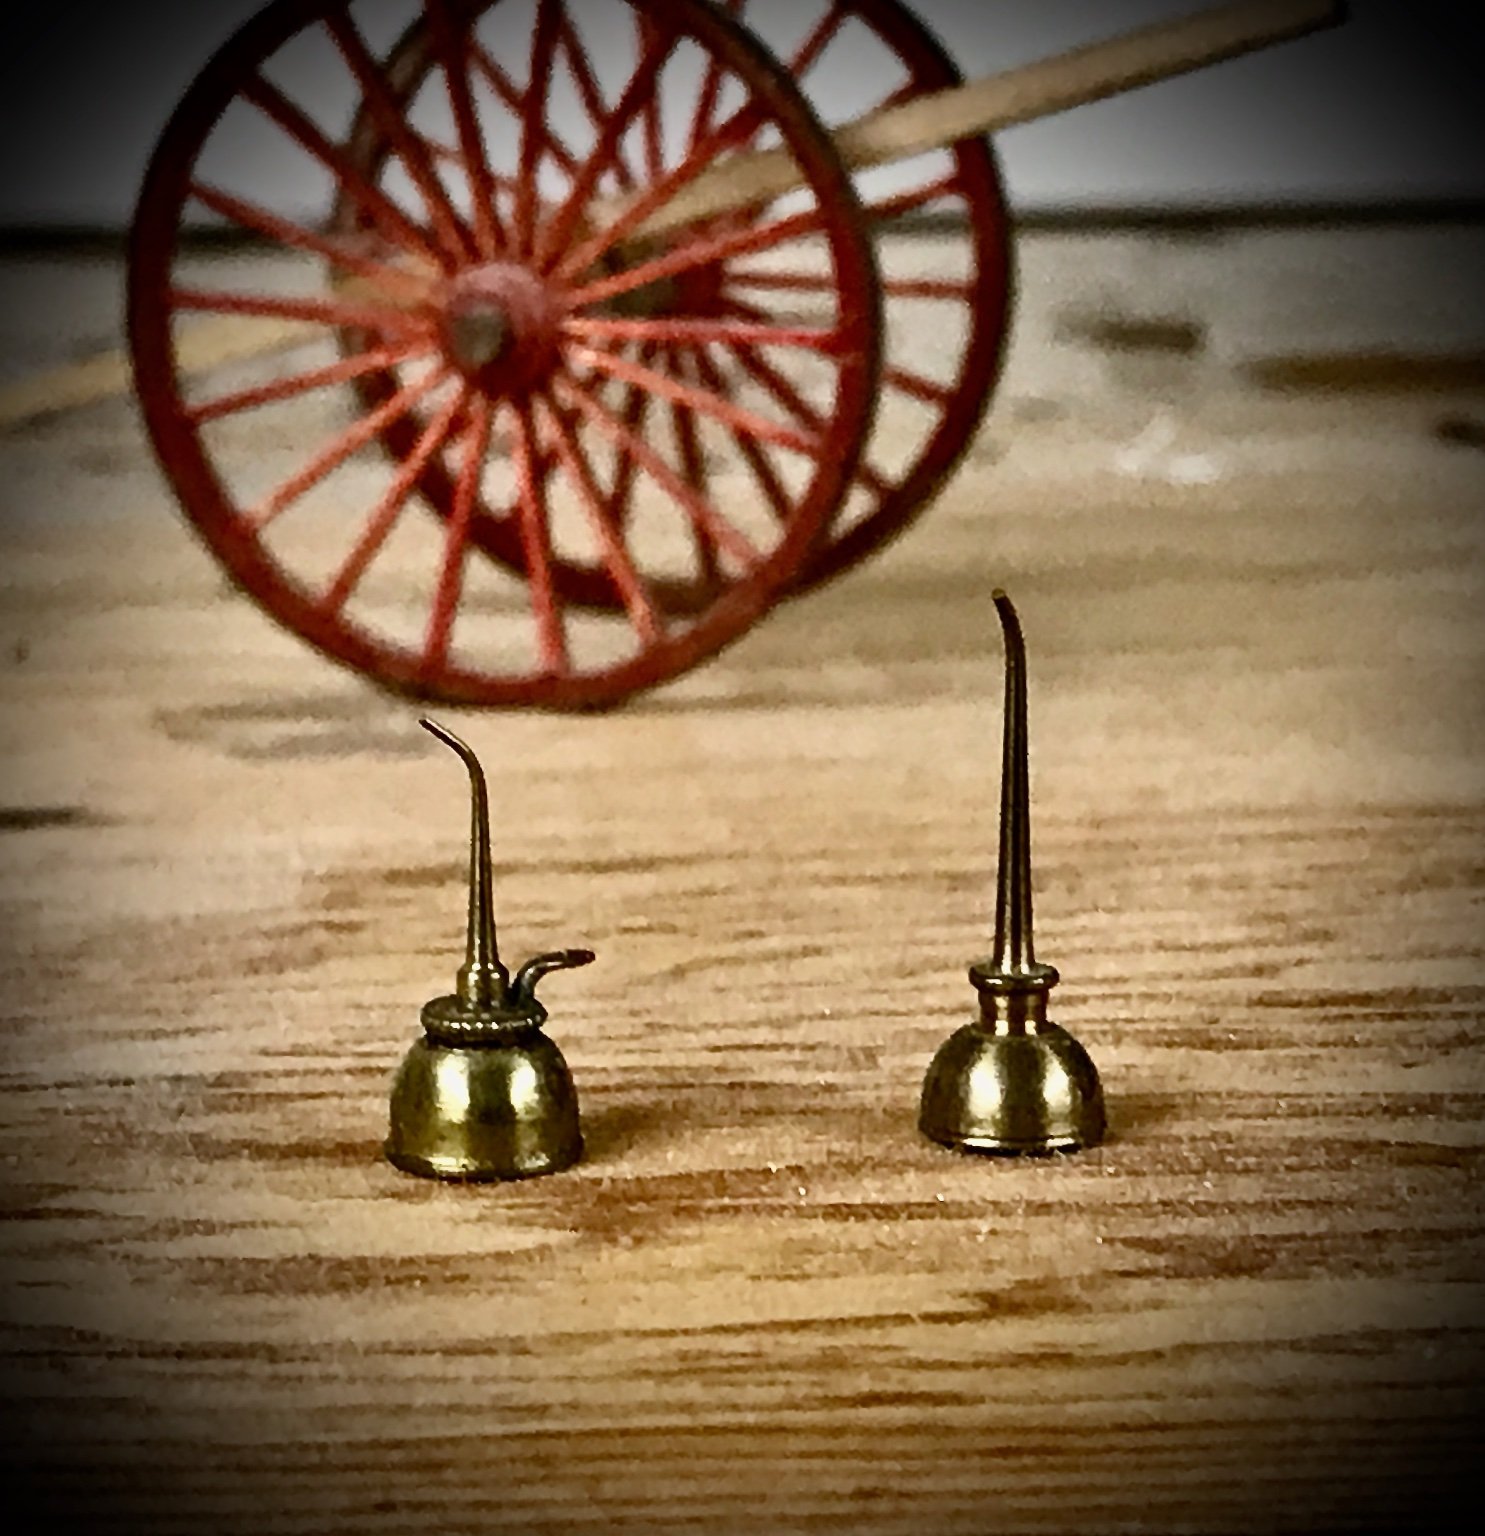
Fairly accurate tapering can be turned on the Sherline. These tiny oil cans (copies of actual full size cans), about 1/4" diameter at the can's base, were completely turned on my Sherline Lathe. For turning tapers I use the step method. The material is divided segments. I calculate the diameter of the taper at the base of each step. I start with the stock back in the headstock protruding about two inches beyond the chuck jaws. I make the first turning to near the diameter of the taper at that point. I continue this until have cut alter taper points. Then I finish it off with a file.
-
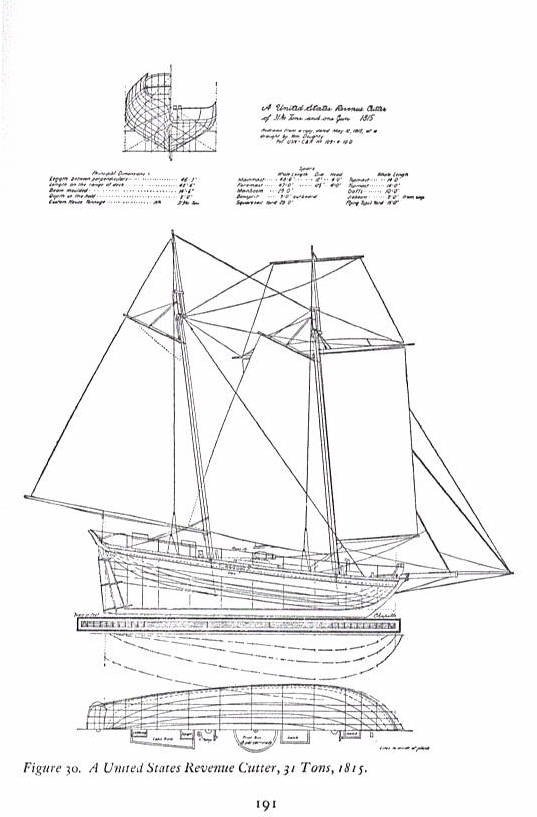
31 ton Revenue cutter sails and rigging
Bill Hudson replied to Bill Hudson's topic in Masting, rigging and sails
Thank you Mark and Jager. I would like order the plans for a future larger model but right now I am a 90 year old living on a very tight budget. This is just a whim project to fill in some time with no intent to make it absolutely accurate to scale. At 1/16" = 1'0" would mean one inch approximately would be .005 if I am calculating correctly. At this scale tapers of masts and spars would be hard to get very accurate. I could get close but I'm not going to drag out my micrometers. I just want to have a little relaxing fun. -
I am starting to develop a model of a 31 ton Revenue cutter using Chapelle's drawing from History of American Sailing Ships. I plan to build it at the size of the drawing. Hoping to find a bottle that size to put in into. I am not rigging or sail person so I do not know how accurate the drawing is and am not clear from the drawing how the rigging attached to the ship. Suggestions. I found rigging for a larger cutter here but am not surest is the sMW.
-
Colorado Anglers 102 Vice
Bill Hudson replied to Laggard's topic in Modeling tools and Workshop Equipment
I can't tell from your pictures but I believe this vise has a lever at the rear that can be pushed down to draw the jaws tight. If they jaws do not tighten as much as you would like you should able be able to screw the leaver in to draw the jaws closer. I have used seven different fly vises for model making. Depending on how heavy the vice is constructed you can clamp a thin metal piece in the jaws to aid in filing detail. It is also a handy aid for rigging. This not a top of the line vise, probably around $25. But is looks fairly rugged. -
Colorado Anglers 102 Vice
Bill Hudson replied to Laggard's topic in Modeling tools and Workshop Equipment
It is a fly tying vise. The hook end of the hook is held in the jaws while the fly is being tied.

.jpeg.dfbfaaec7ff6f0f70e786723d63dec7a.jpeg)

.jpeg.13f974264be7b1b9441707a99f112784.jpeg)
.jpeg.3b9b2b7d15817f35f95c4fee3deaac30.jpeg)