Bill Hudson
-
Posts
151 -
Joined
-
Last visited
Content Type
Profiles
Forums
Gallery
Events
Everything posted by Bill Hudson
-
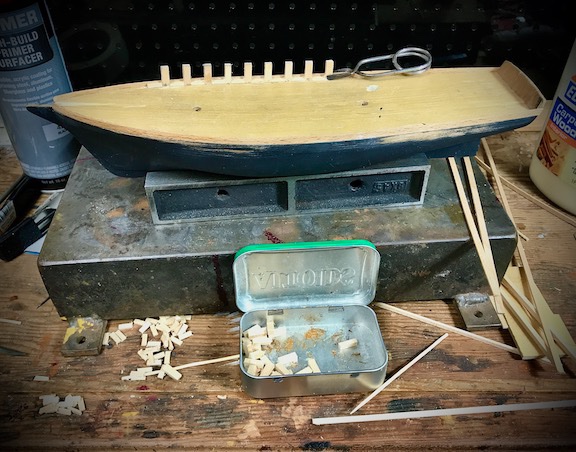
Although it is still a little rough I have decided to use the old deck. I was able to sand (could not find a Holystone to scale so used sand paper) out many off the dings and nicks with out sanding through the thin deck material. I was able to remove some planks from the area where the cabin will be mounted to patch the large hole that was in the deck; I'm not sure if I want stain it with a light stain. I can experiment a little under the cabin and cargo hatch locations. Bill
-
Home, bench top laser cutters.
Bill Hudson replied to Bill Hudson's topic in Modeling tools and Workshop Equipment
Thanks for the feedback. It is more a curiosity for me. It seems to me to be the ticket for producing parts for scratch building of ship models. Bill . -
I am wondering if ny one is using a laser cutter in their ship building. Are they compatible with Mac? Dose one also need a computer drawing program? Thanks Bill
-
Looks good Phil. We are almost neighbors. I live in Eugene. Bill
-
Veszett, I have hopes of being able to salvage some the decking that would be removed when I install the cabin. There are couple of spots where decking is missing or there are some very deep marks that appear to be from clamps and too deep sand out. The decking material is only about 1mm thick. Thank you for your feedback. Bill
-
I finally have the bulwarks done.I bulked up the transom by planking in it inside. I was hoping I could save the deck but its is too scarred up from years of knocking around. So a new deck is also on my punch list. Bill
-
Very slow going. Finally figured how to do the bulwarks, at least a way that works for me.
-
Thanks Keith, Do you know if they ship/mail to USA? The only contact fo them seems to be via phone. Bill
-
The plastic ships wheel in my Marie Celeste kit is too damaged to save. I need a source for a new one, 1/2" diameter; all of the sources I have checked so far are too large. I may have to resort to making one from scratch. Bill
-
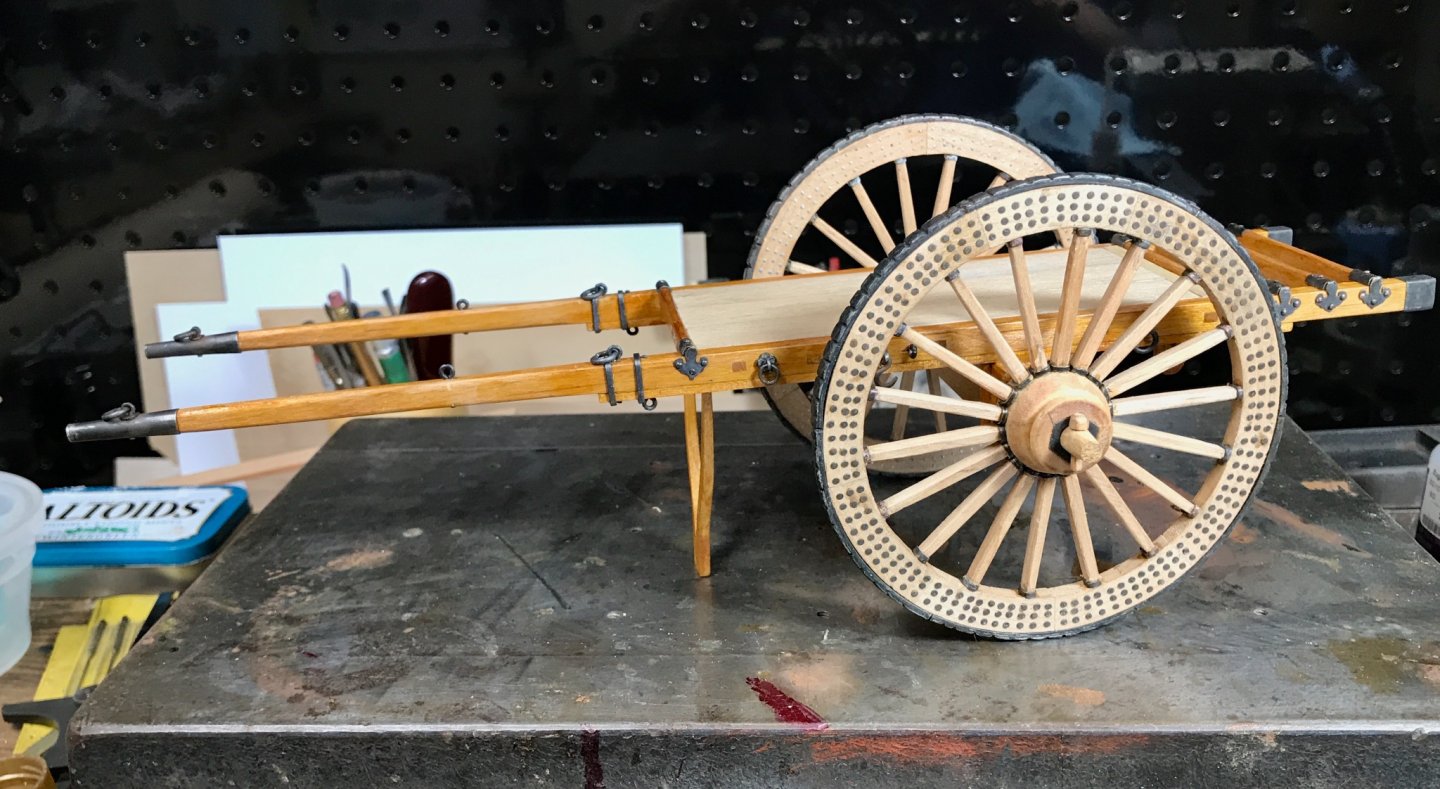
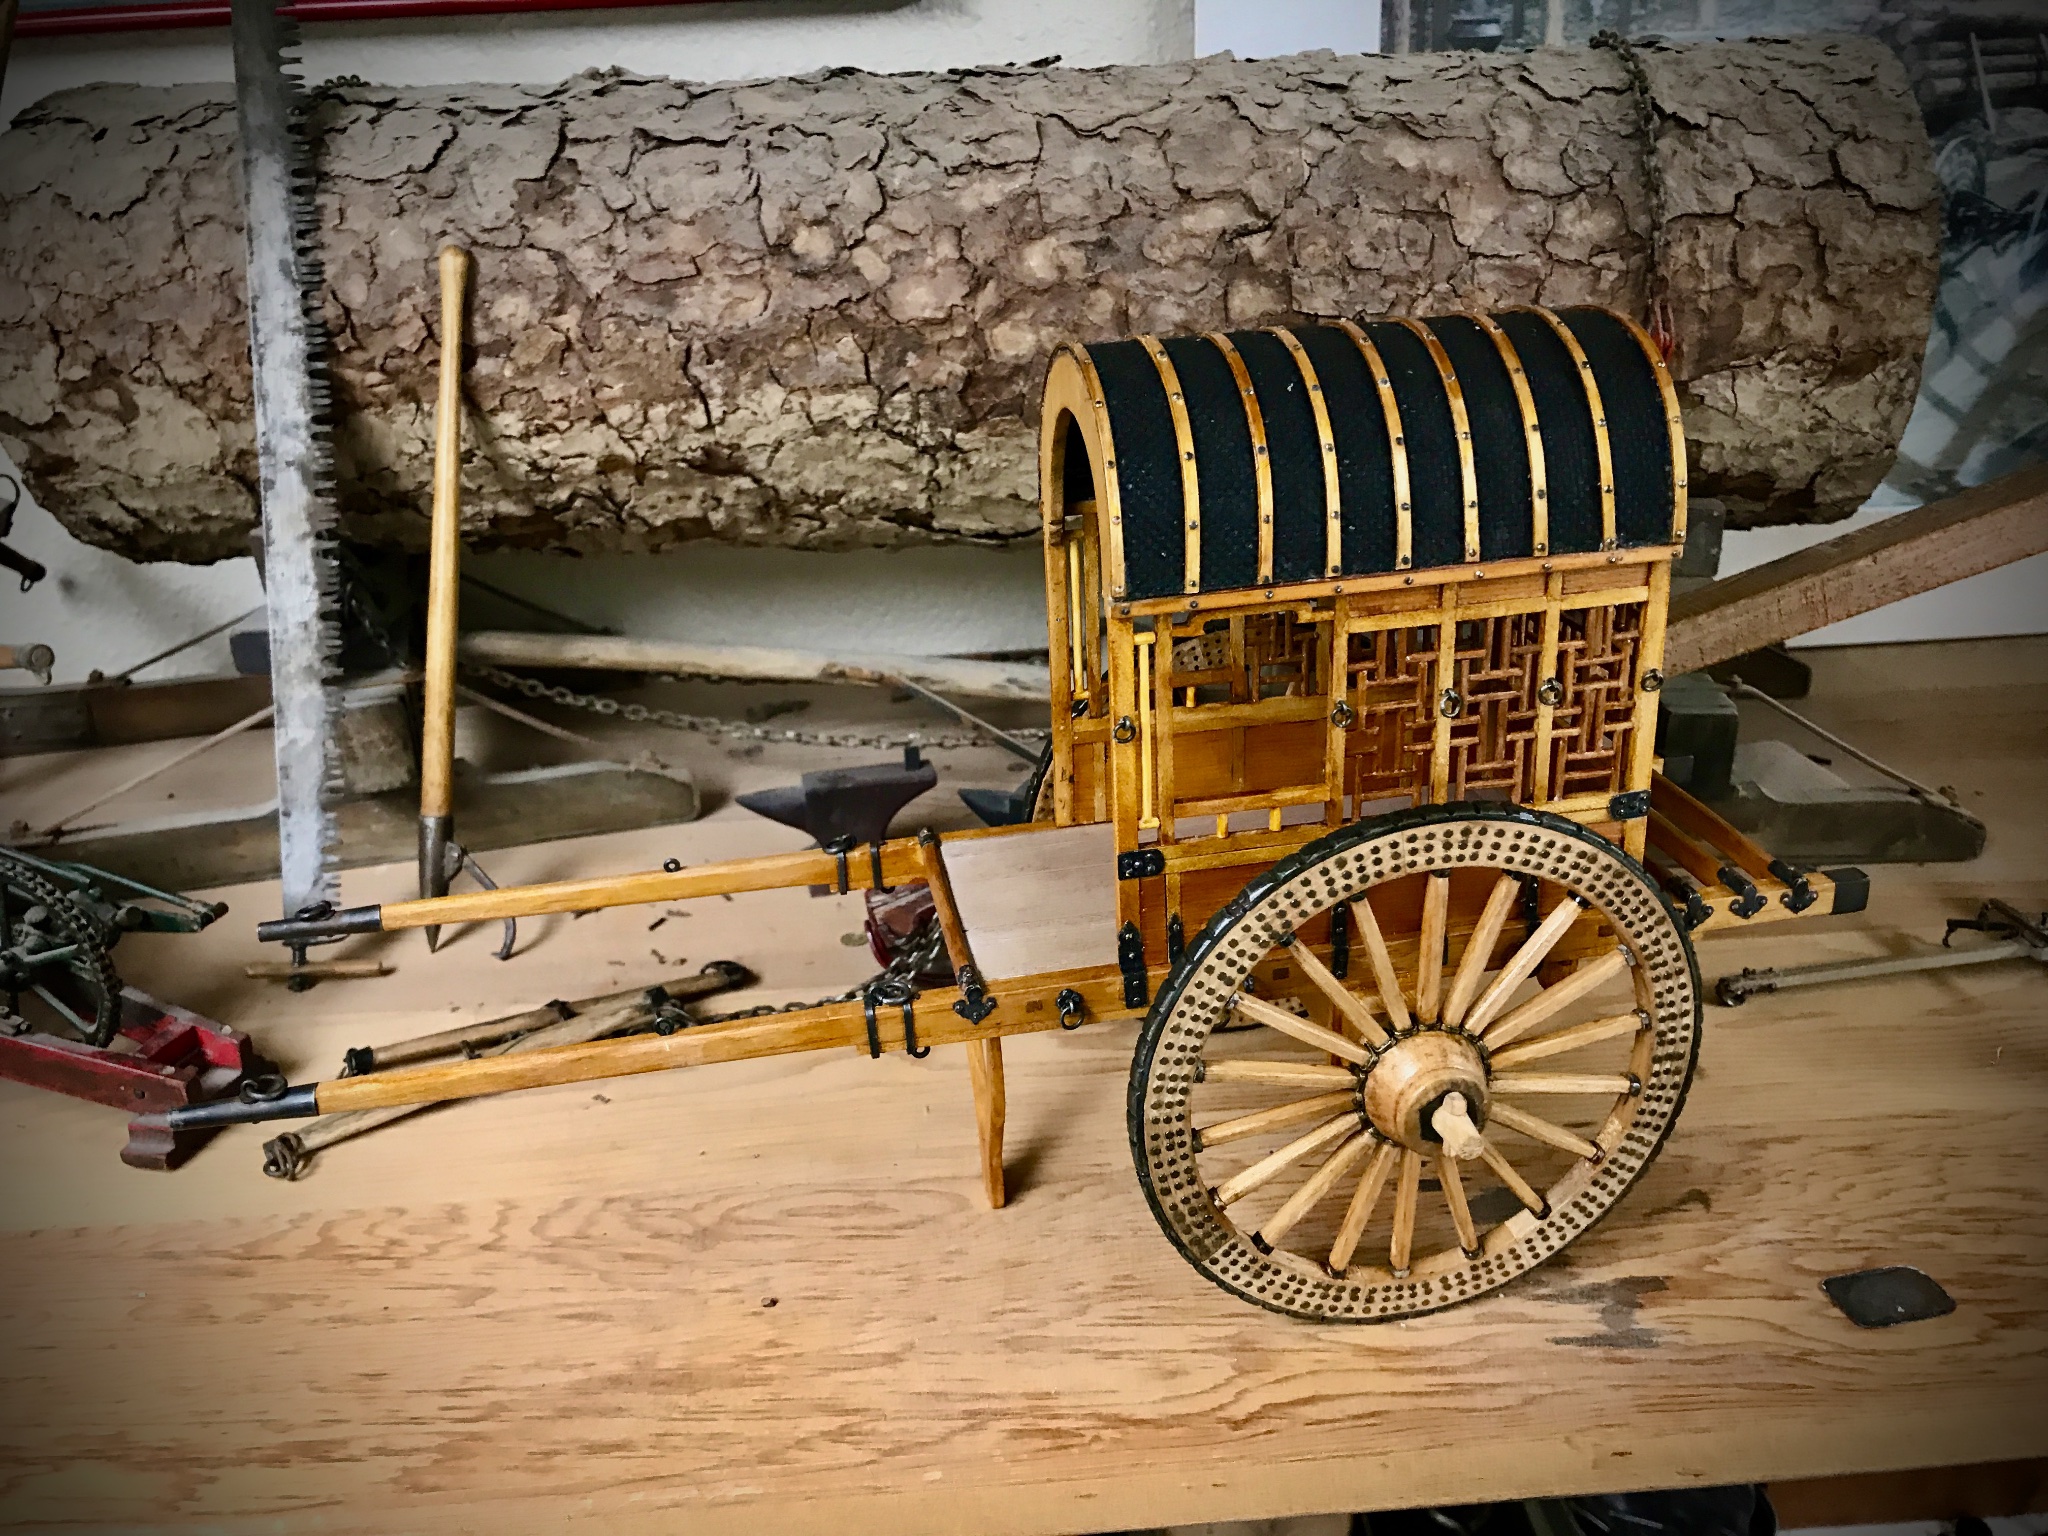
Ancient Mongolian Ox Cart by Bill Hudson
Bill Hudson replied to Bill Hudson's topic in Completed non-ship models
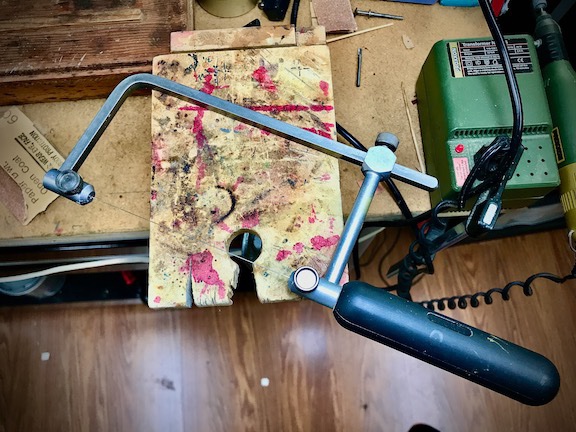
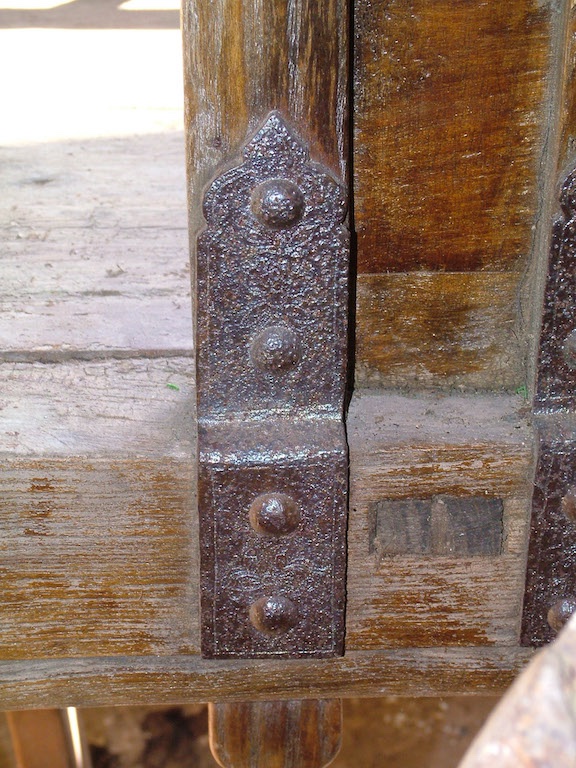
The metalwork is an important part of this model but much is hidden behind the wheels. My Gorbet jewelry saw (one of my favorite tools) got a lot of use on this model. The saw frames I purchased through Reo Grande Jewelry supply. (No affiliation except as a customer). I use very fine blades for this thin metal. The hooks and rings are formed from black iron utility wire. The end cap son the shafts are formed from .010 tin. This brings this model build to an end. If there are any questions or comments I would be more than happy to hear them. Bill


- 13 replies
-
- 16
-

-
Ancient Mongolian Ox Cart by Bill Hudson
Bill Hudson replied to Bill Hudson's topic in Completed non-ship models
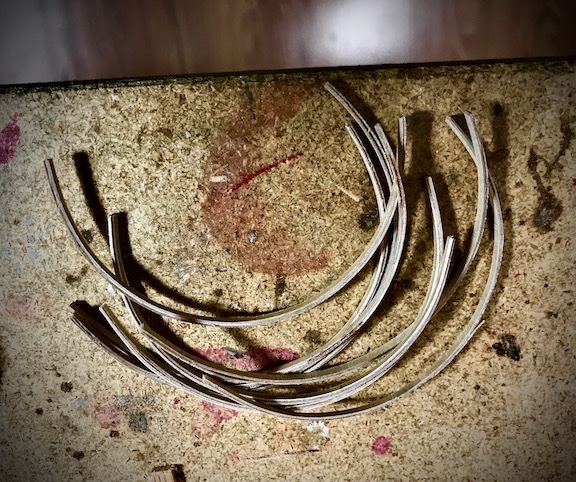
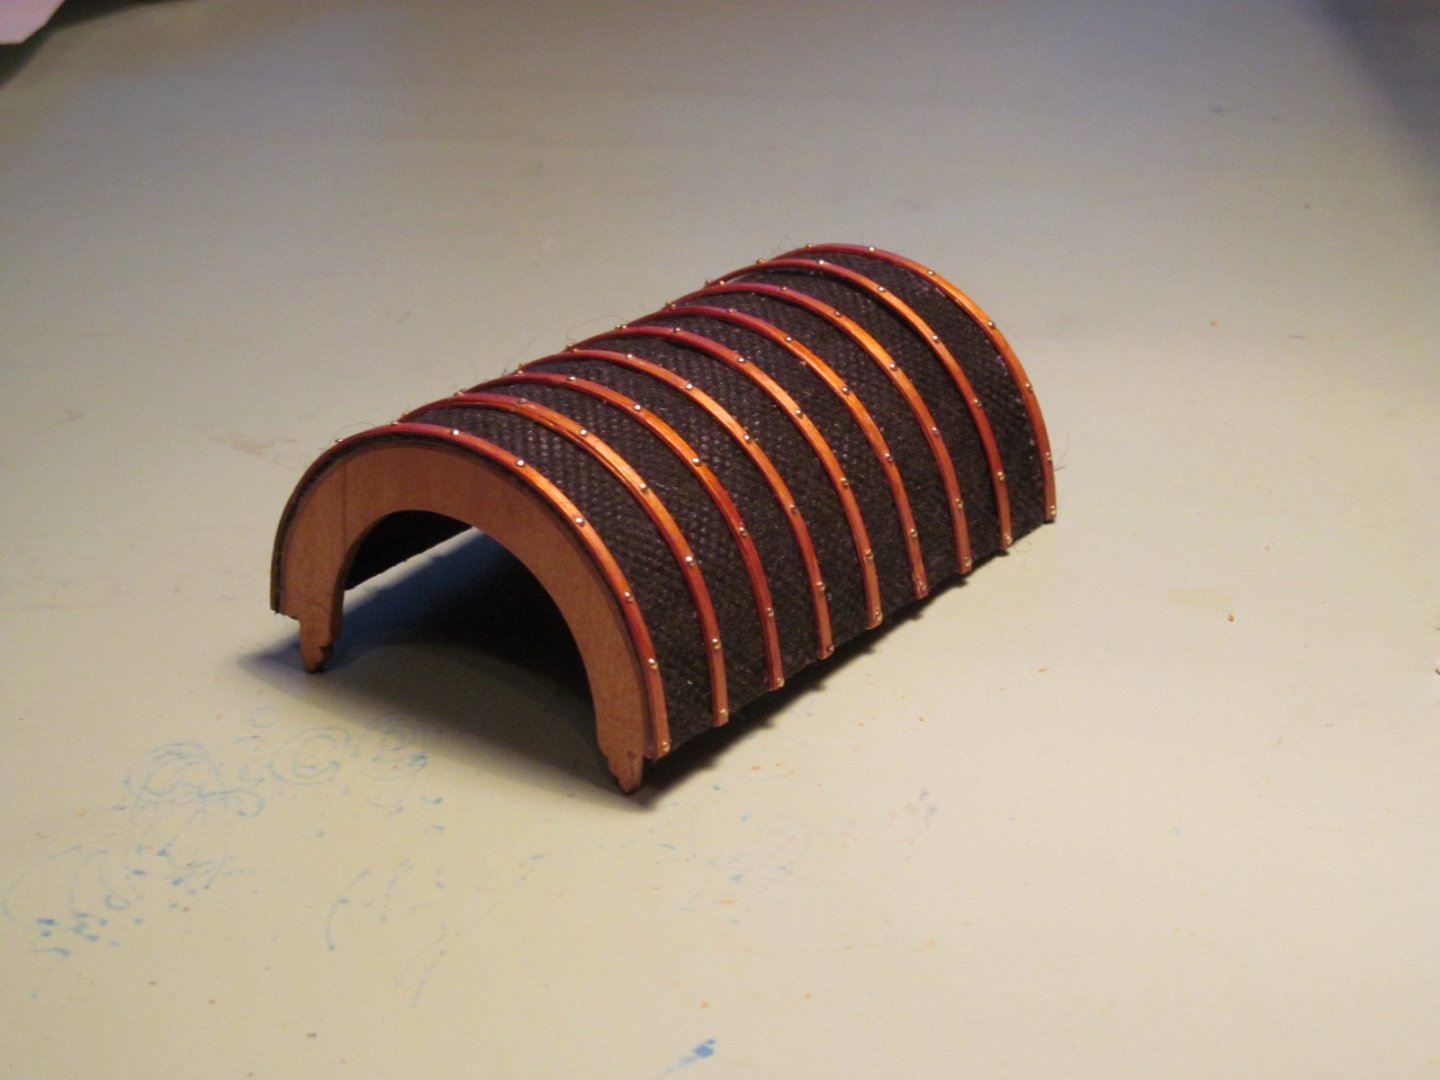
Finishing out the top. For the fabric I used a patch from an old BBQ grill cover. To make the outer bows I laminated strips of veneer in a special former. I used carpenter's glue for gluing up as it gave me time to adjust the veneer in the former. \\\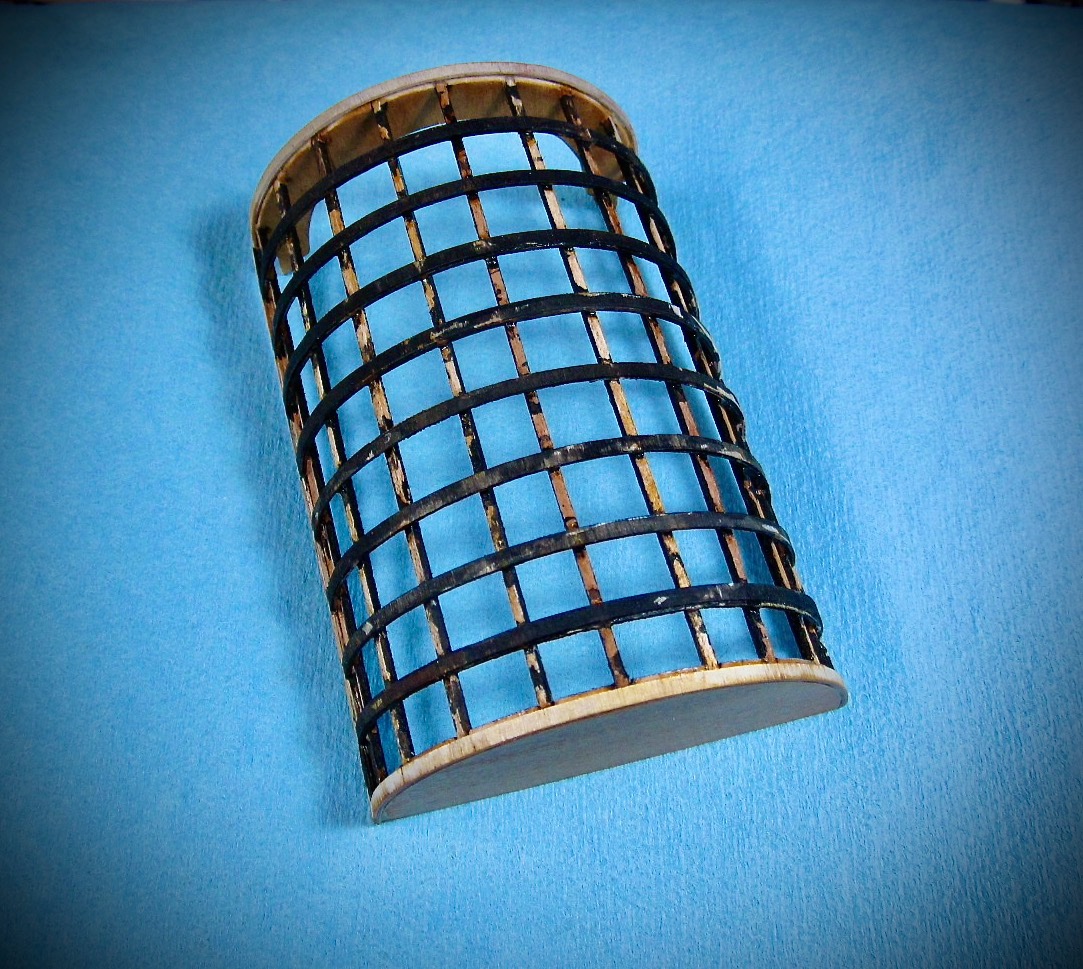
.jpeg.fc15610f580440217c6f21a9cb38120f.jpeg)
-
Ancient Mongolian Ox Cart by Bill Hudson
Bill Hudson replied to Bill Hudson's topic in Completed non-ship models
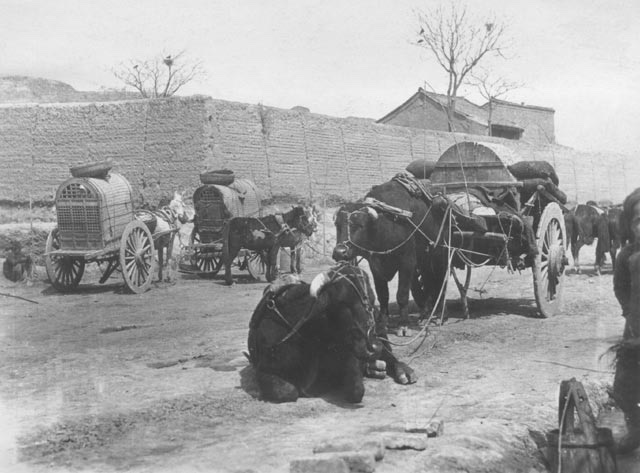
A little break to post some of then photos of the original cart that I was working from. My friend Brian from UK sent me field drawings with measurement and loads of photos.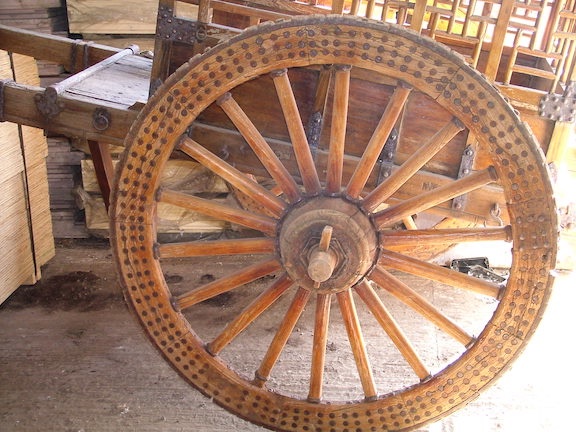
-
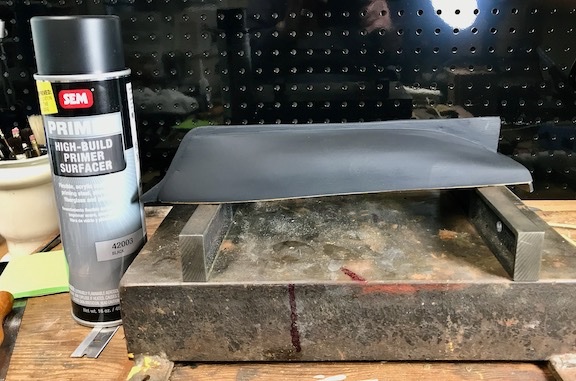
I sprayed on several cots of high build primer. I buy it at the local Industrial Finishes store. ( have no affiliations with this primer producer). It sprays on in a heavy coat. Once thoroughly dried it can be sanded down to the wood leaving any flaw filled with primer. It took several sprayings and sanding to cover up the voids in the planking. With progressive sanding with finer grits it is possible to achieve a very smooth base finish.
-
Ancient Mongolian Ox Cart by Bill Hudson
Bill Hudson replied to Bill Hudson's topic in Completed non-ship models
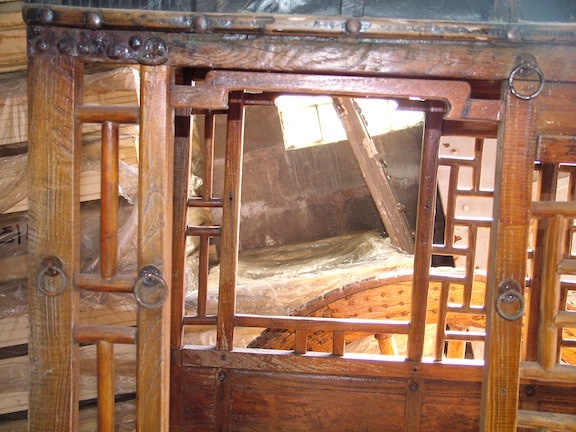
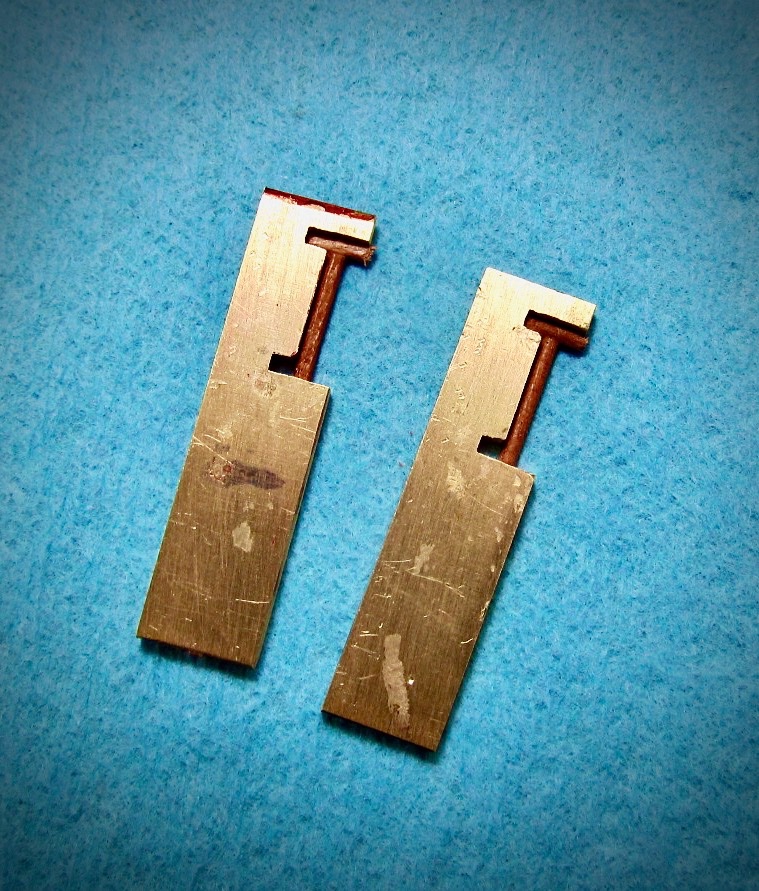
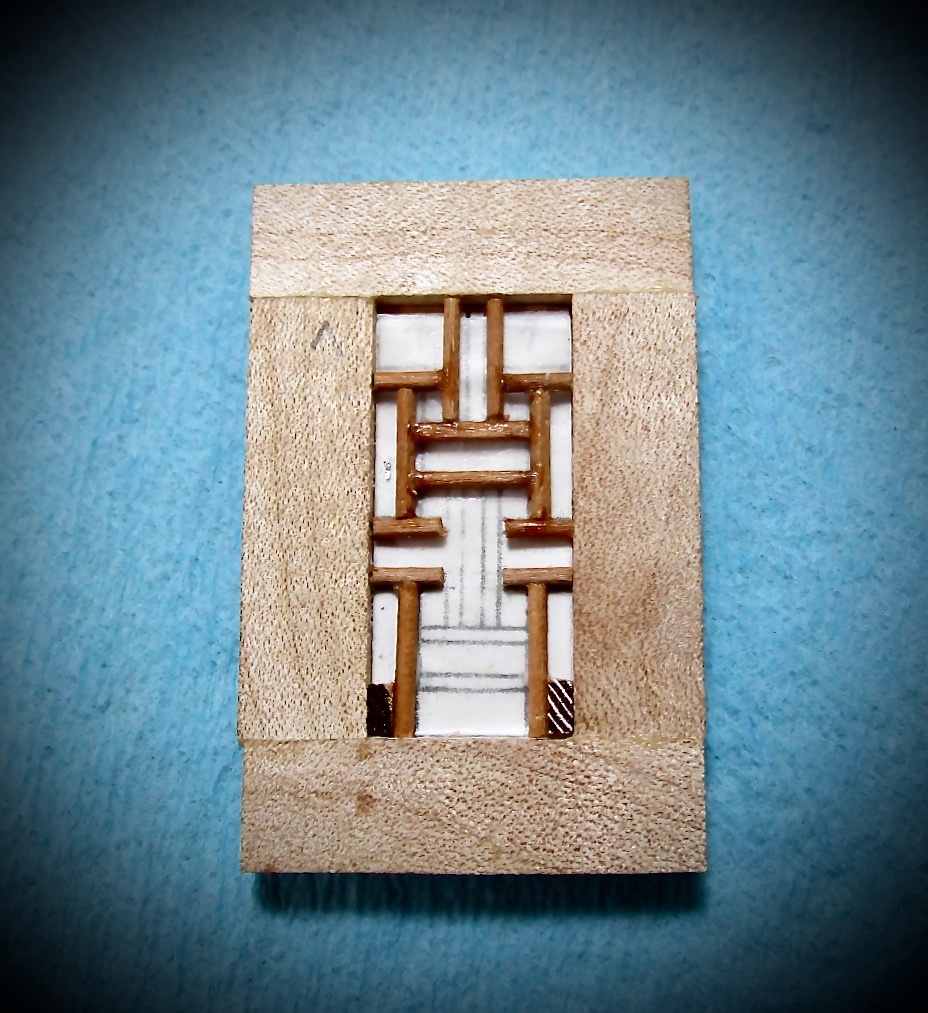
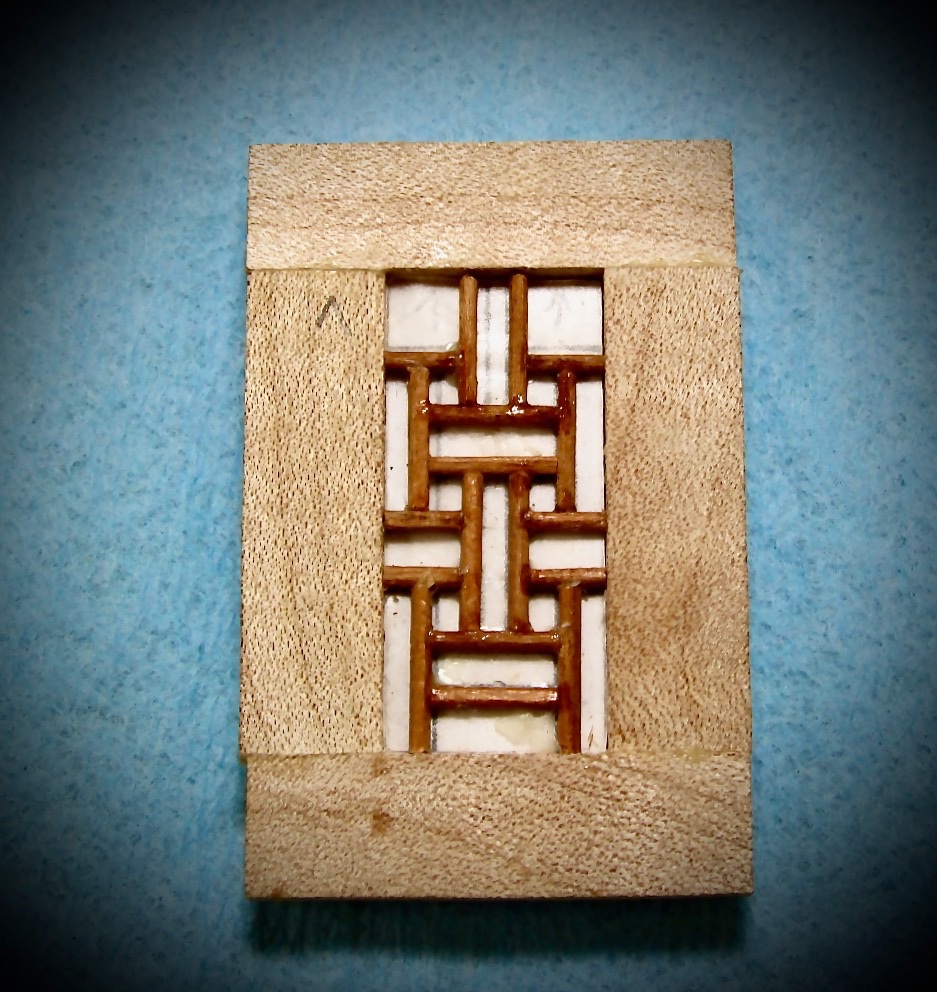
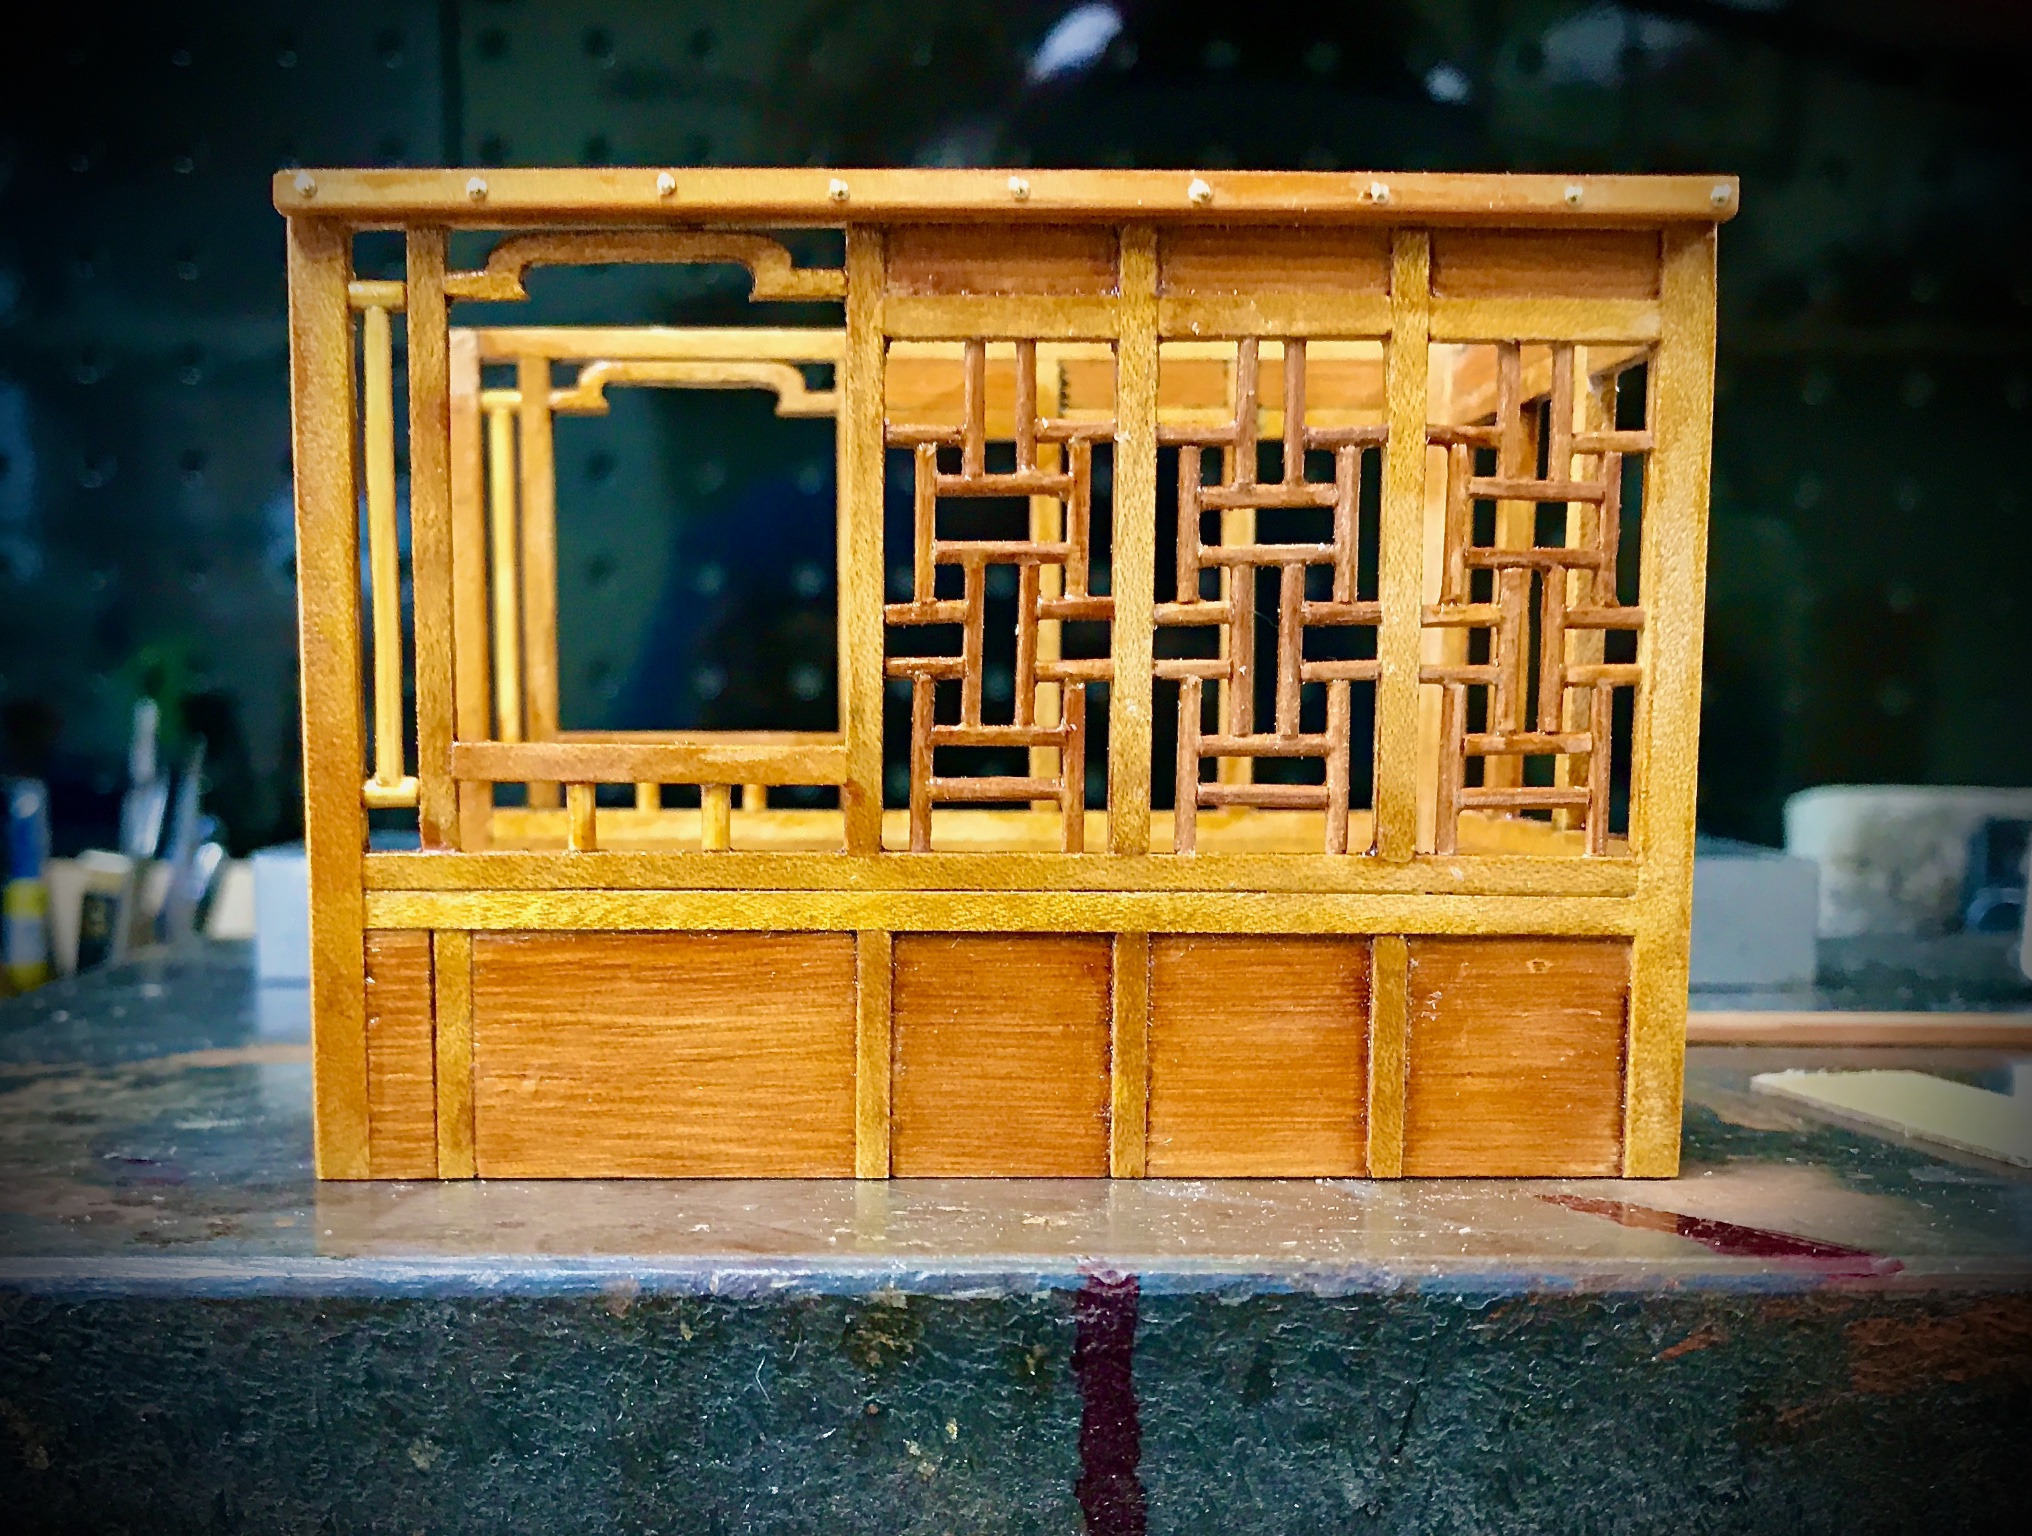
The lattice works made up from two basic parts. T shaped and H shaped. I made metal jigs to build each part in so that they would be the same. Then each part is glued together in an assembly frame.
.thumb.jpeg.86d2449a22fd29b4fc11b43a3033ff94.jpeg)
- 13 replies
-
- 12
-
-
Ancient Mongolian Ox Cart by Bill Hudson
Bill Hudson replied to Bill Hudson's topic in Completed non-ship models
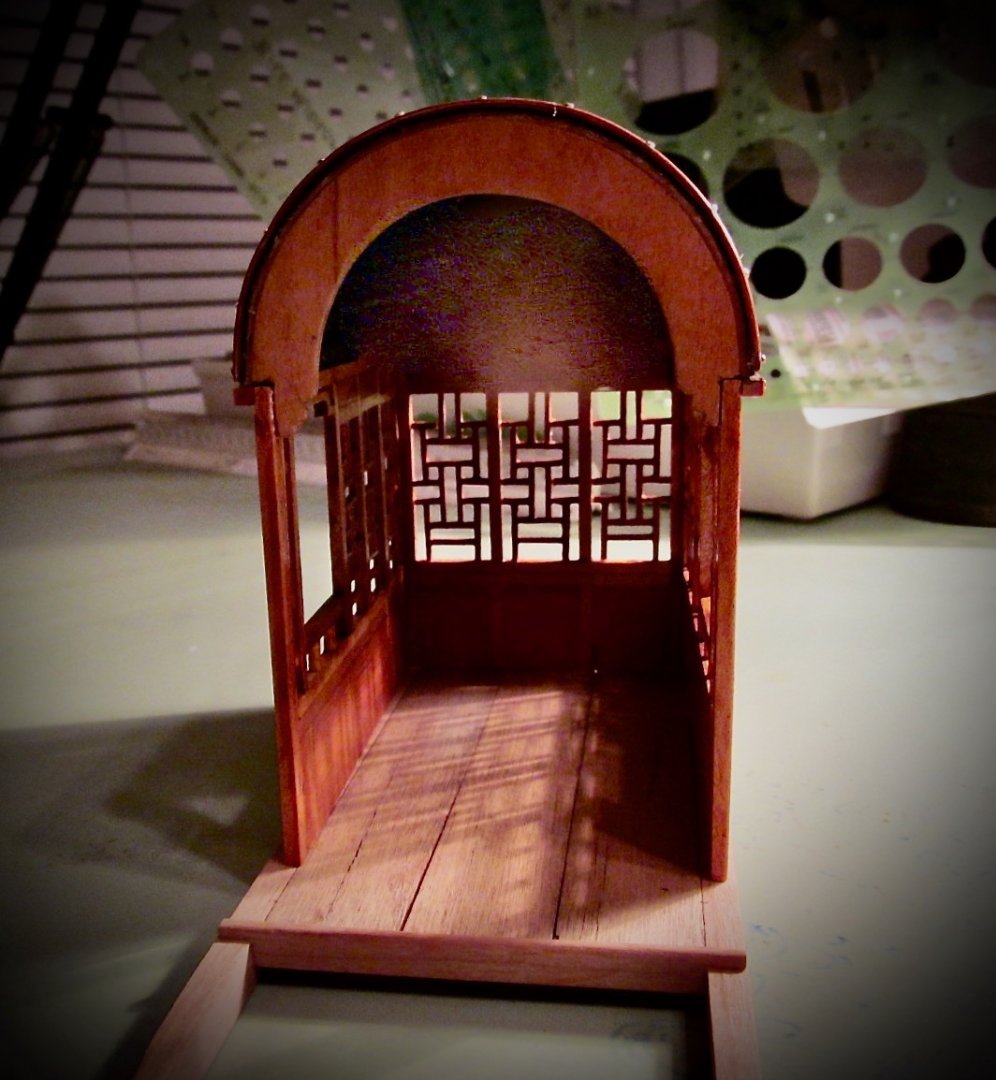
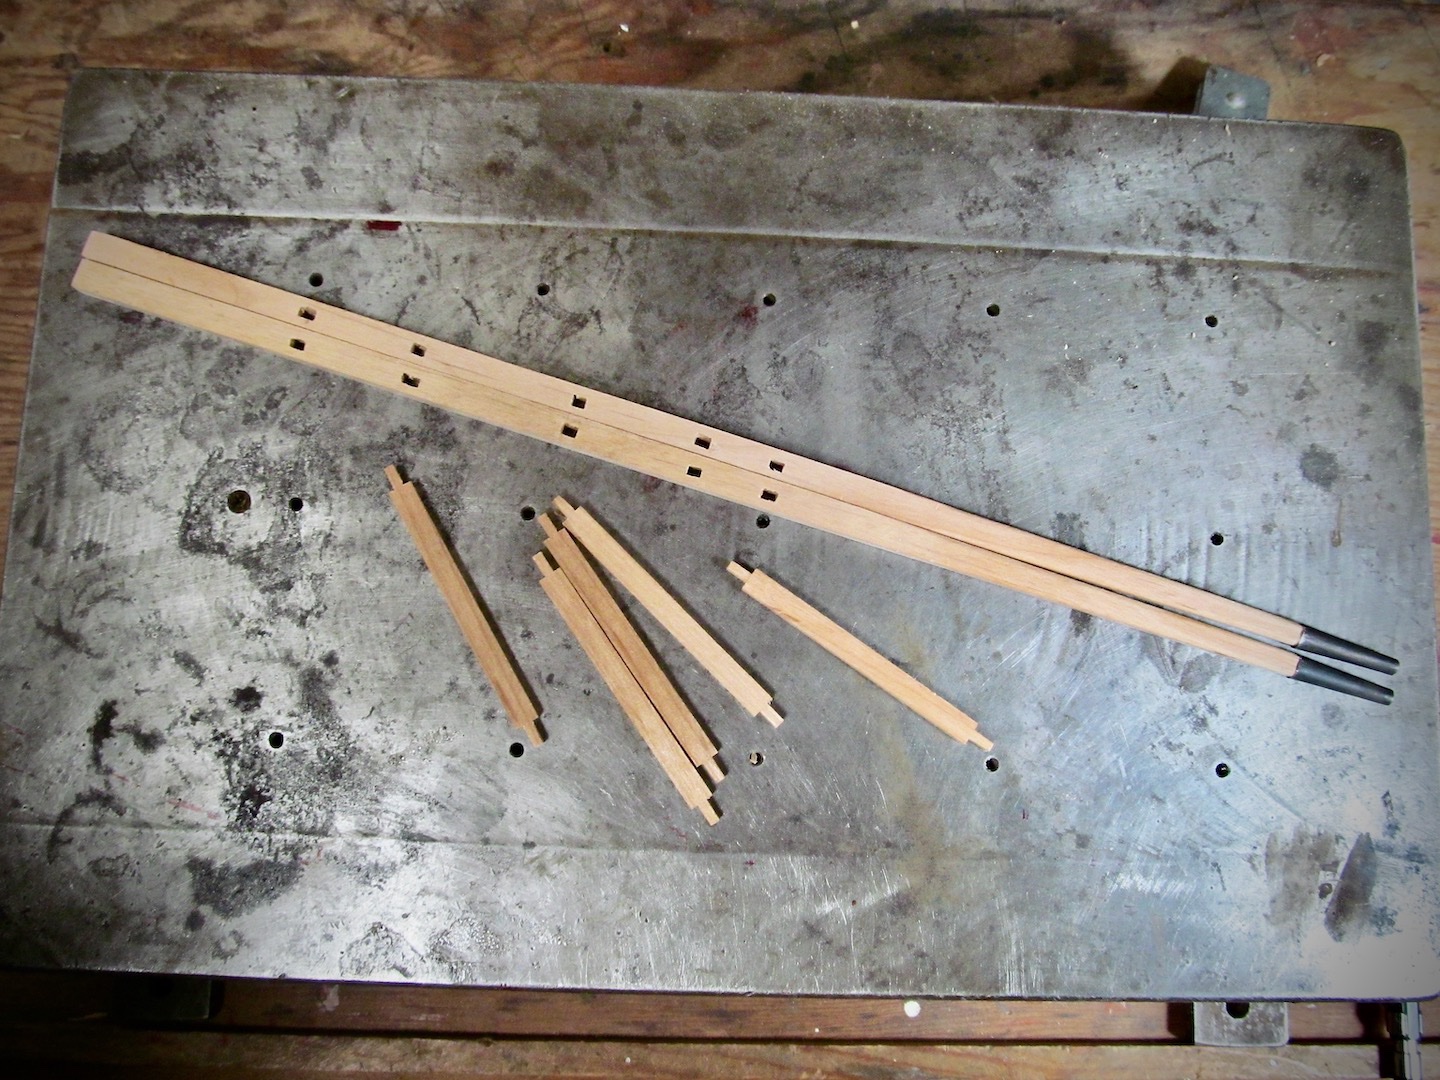
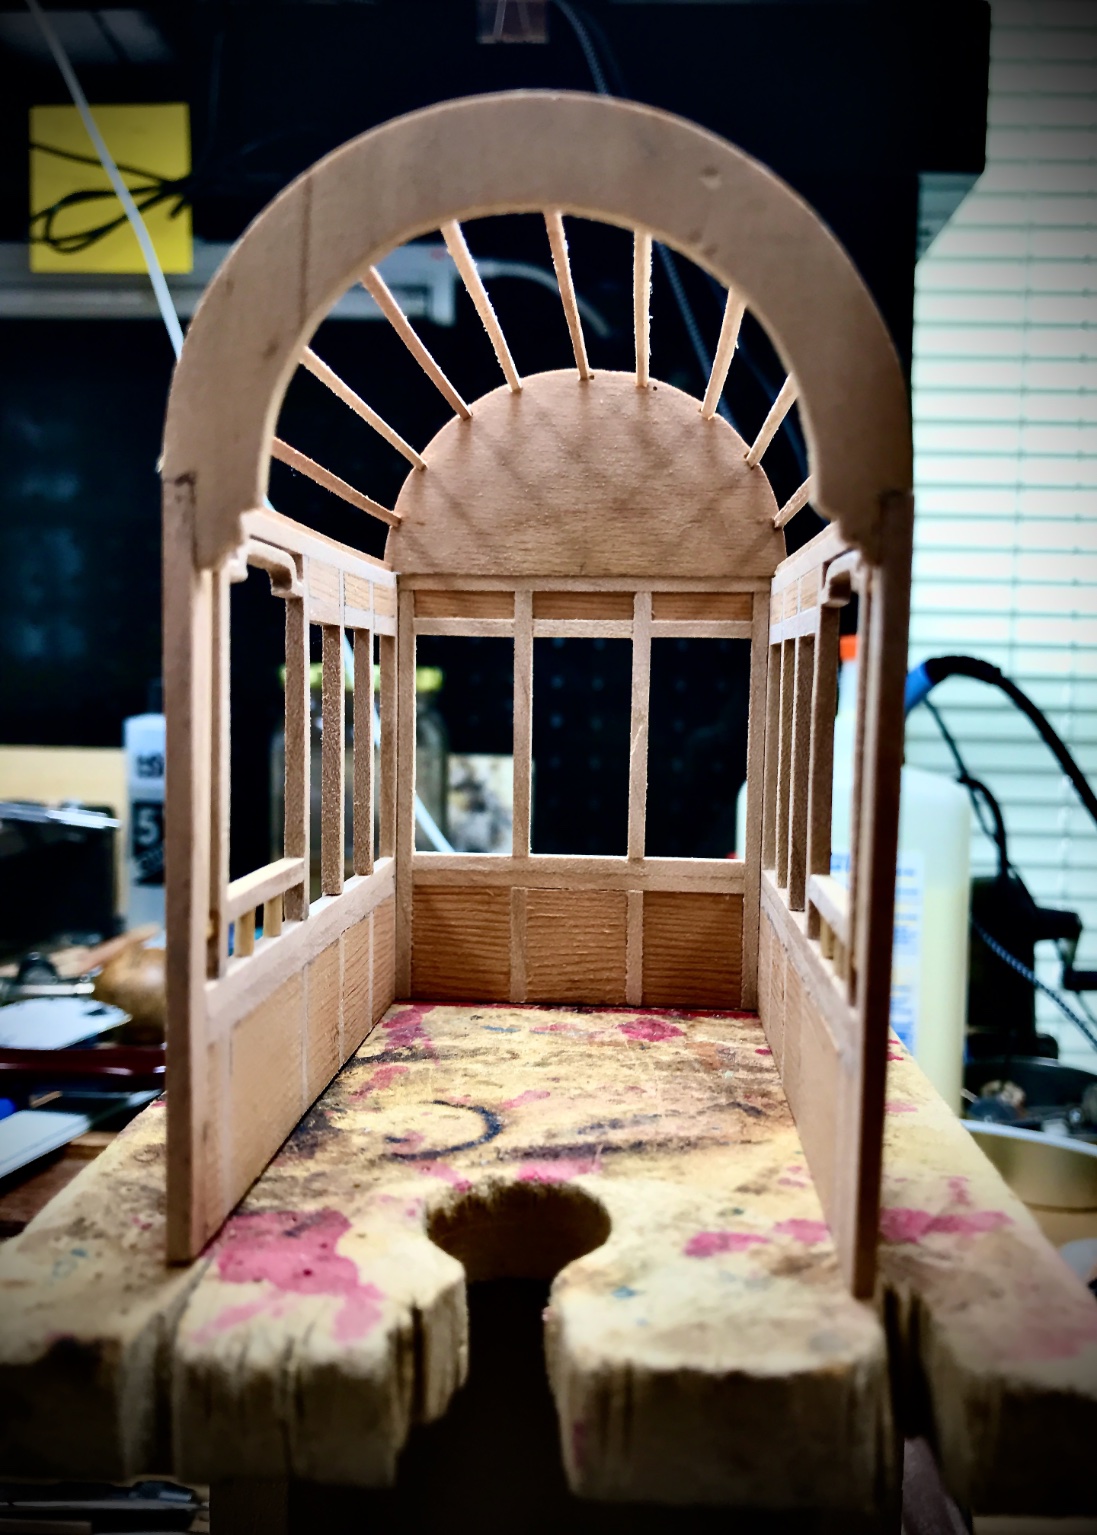
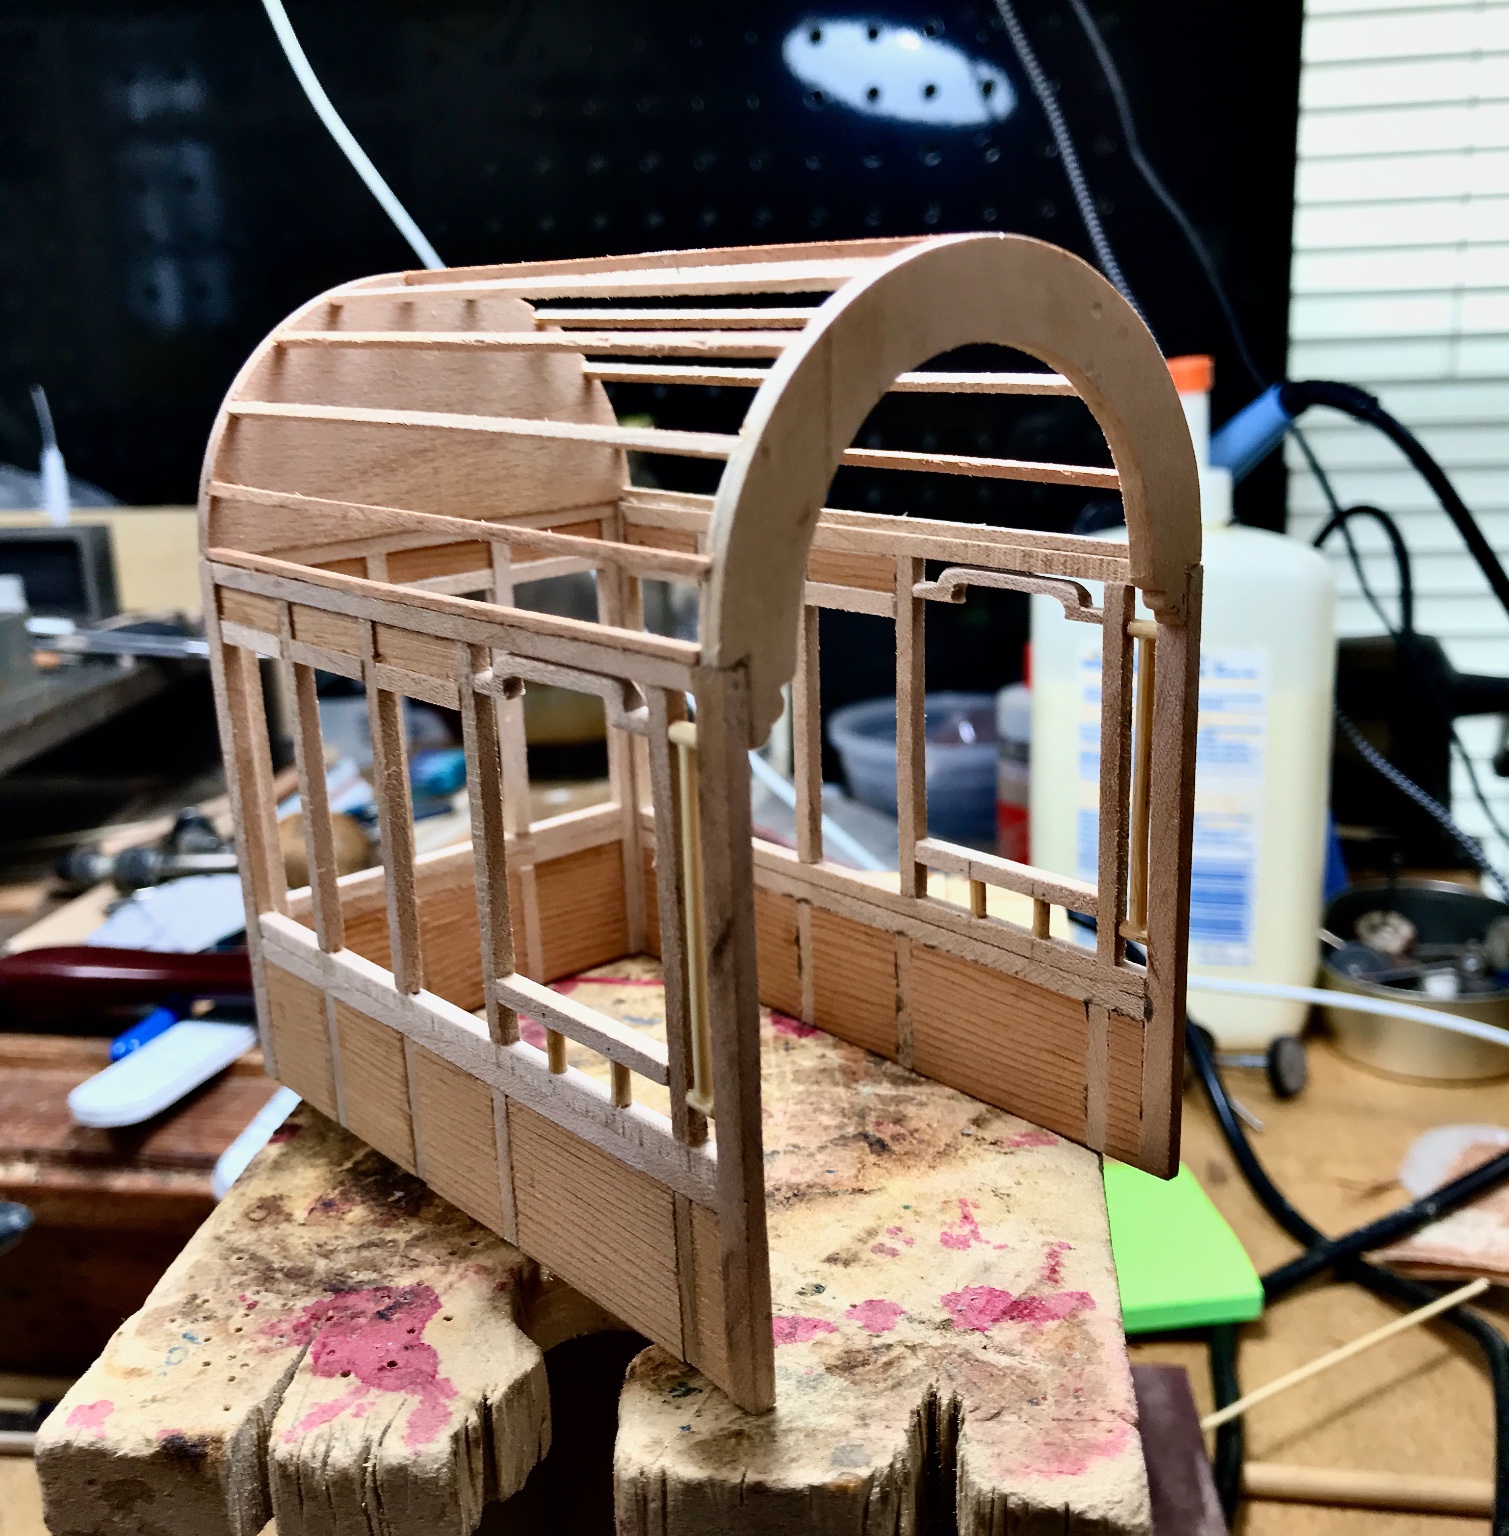
Building the cab next. Pretty straight forward like a stick model airplane build.

-
Ancient Mongolian Ox Cart by Bill Hudson
Bill Hudson replied to Bill Hudson's topic in Completed non-ship models
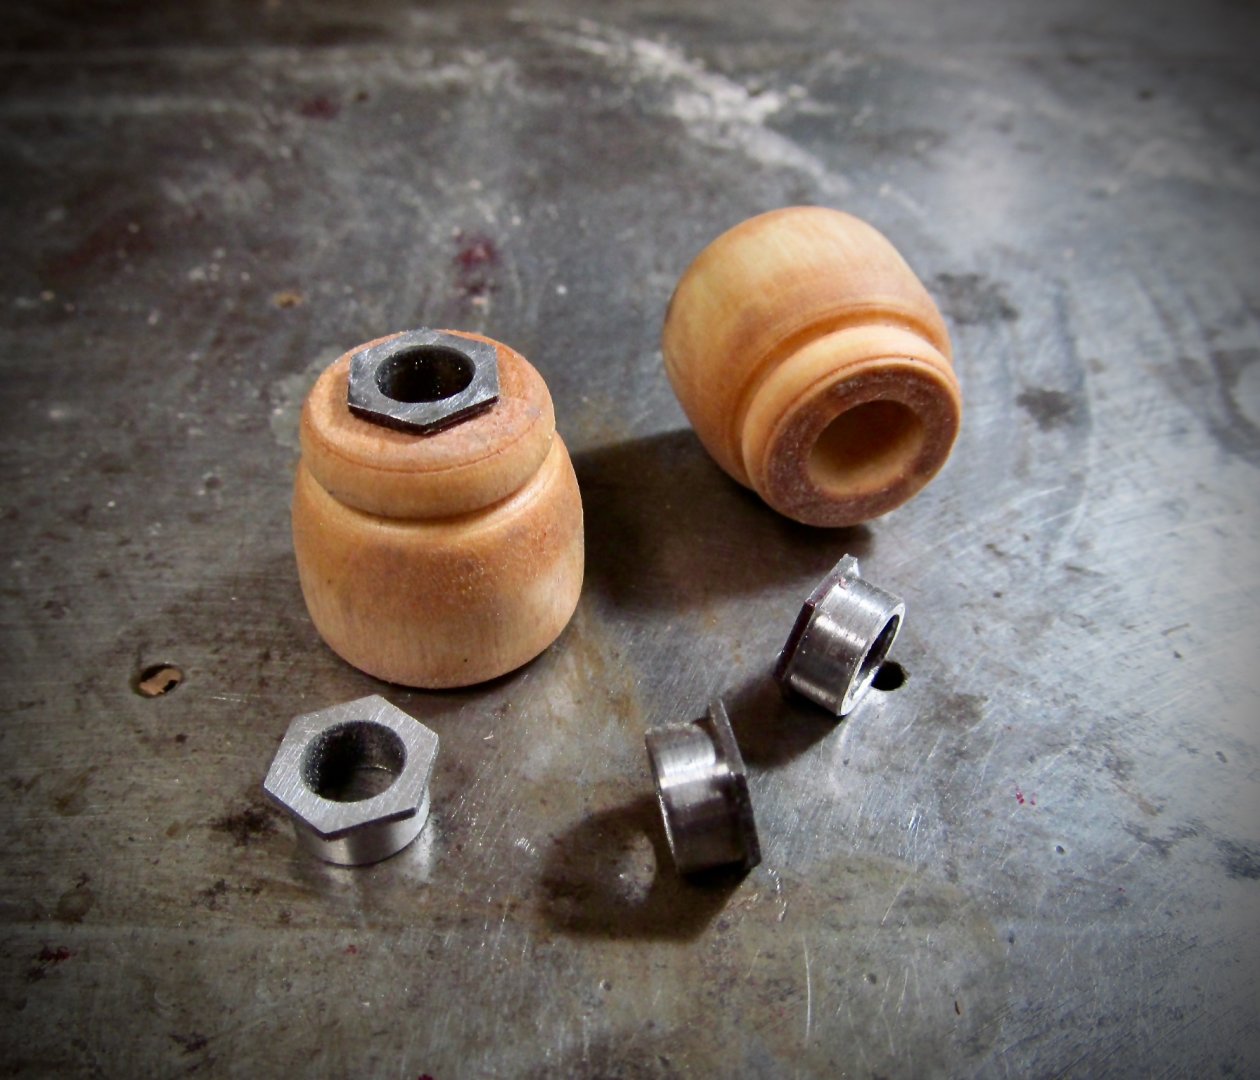
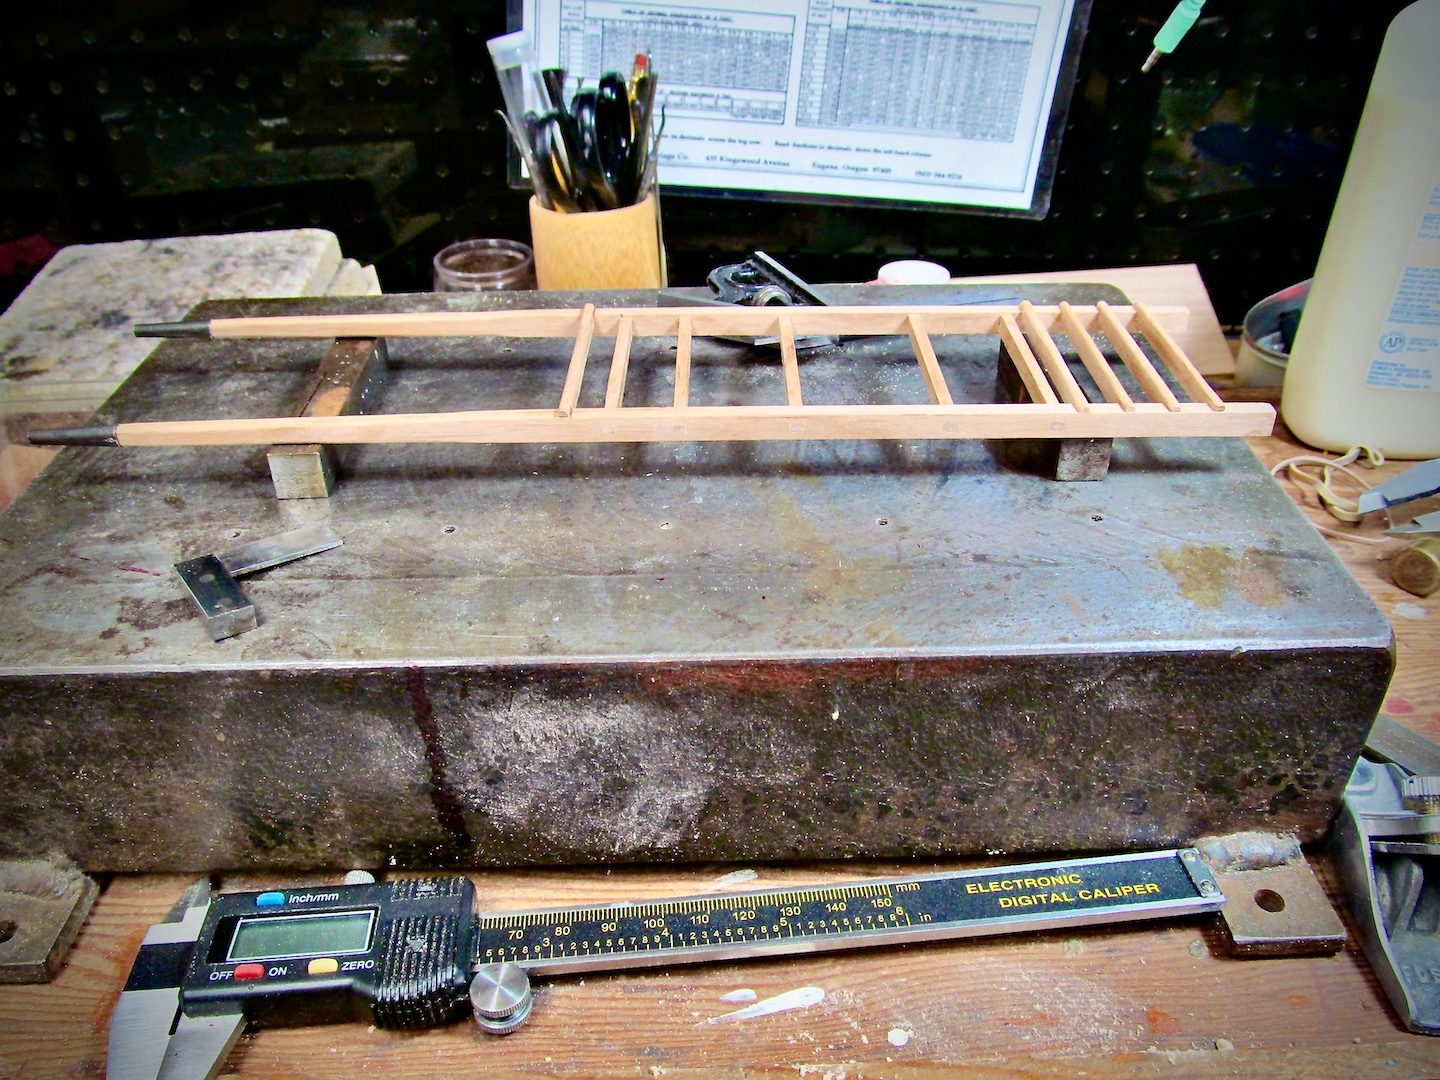
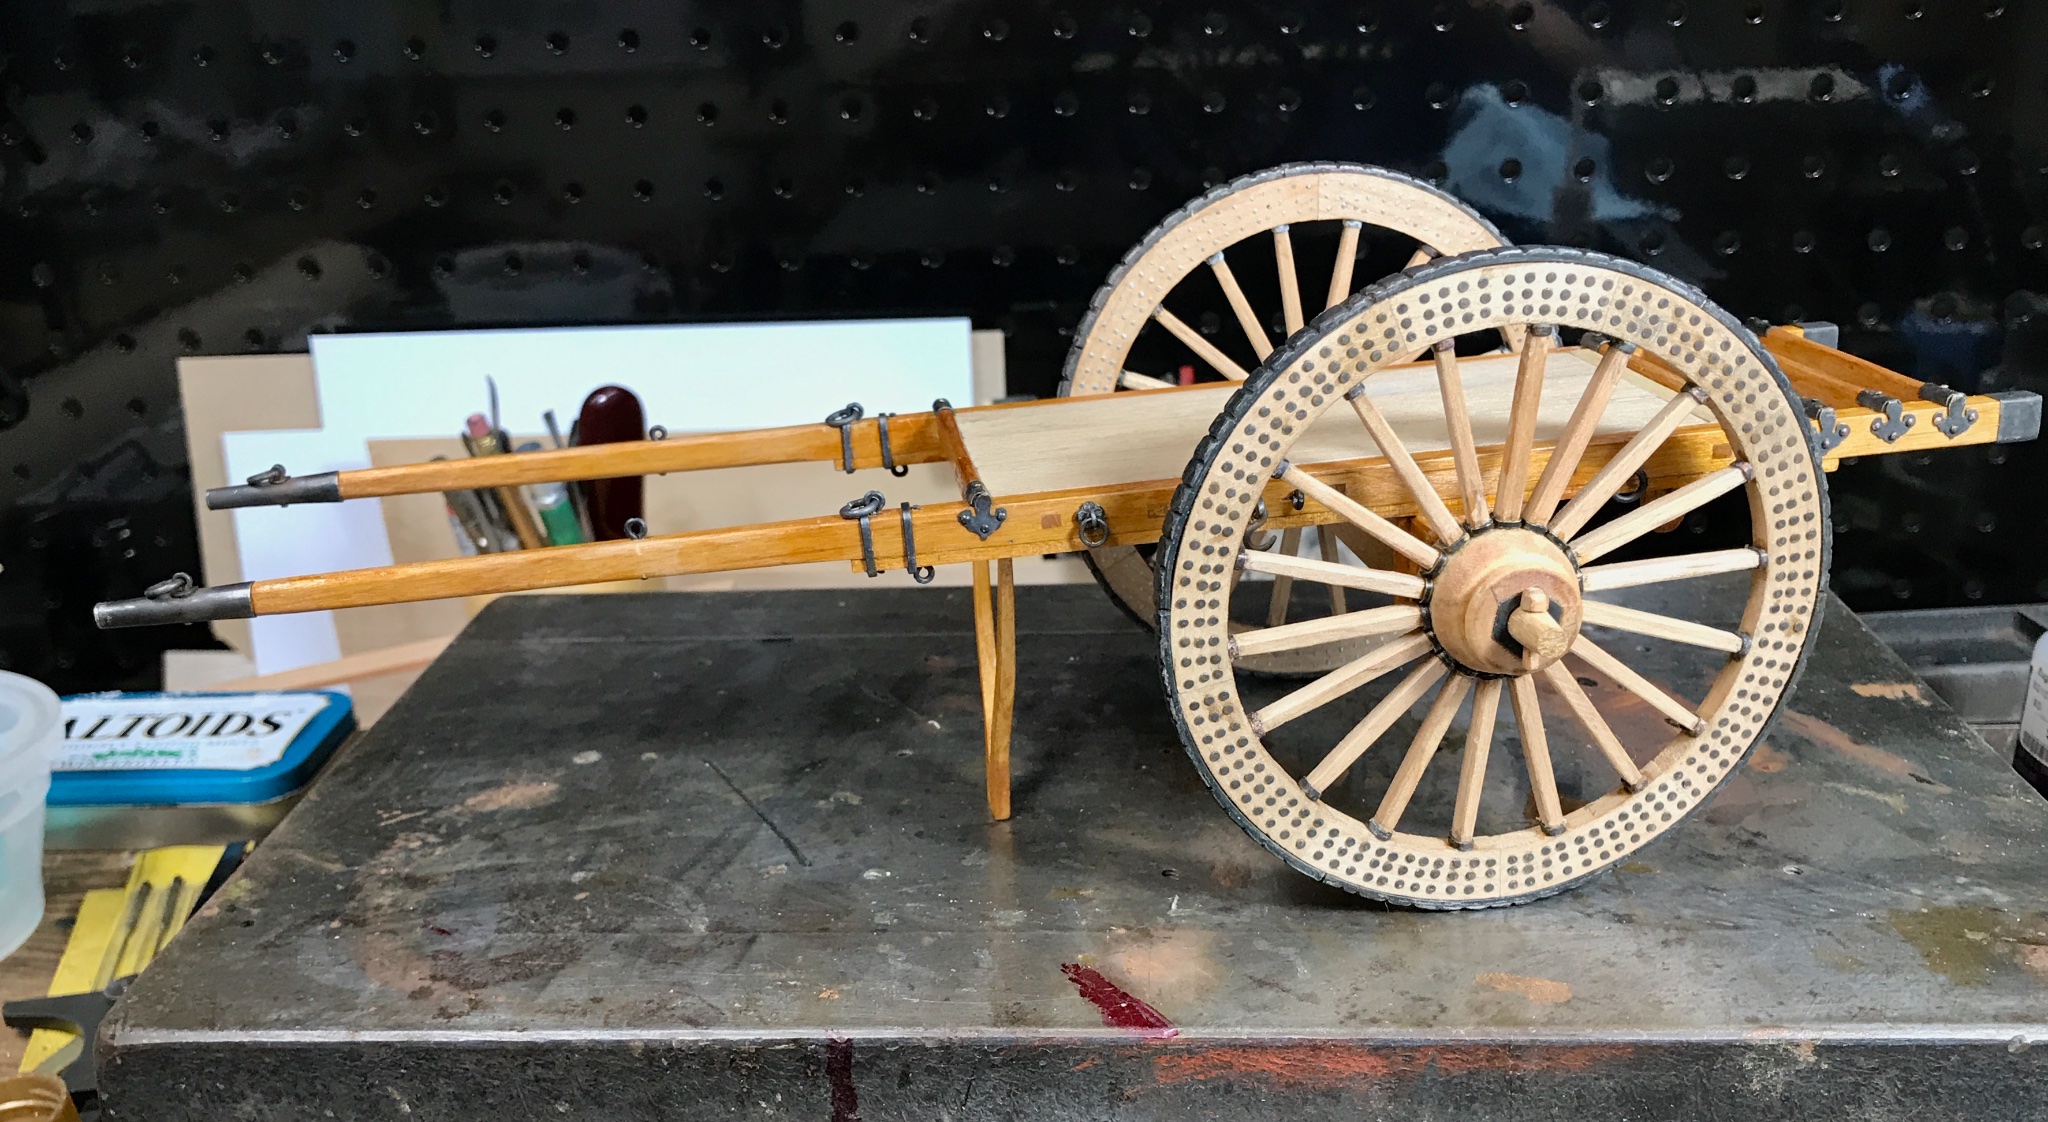
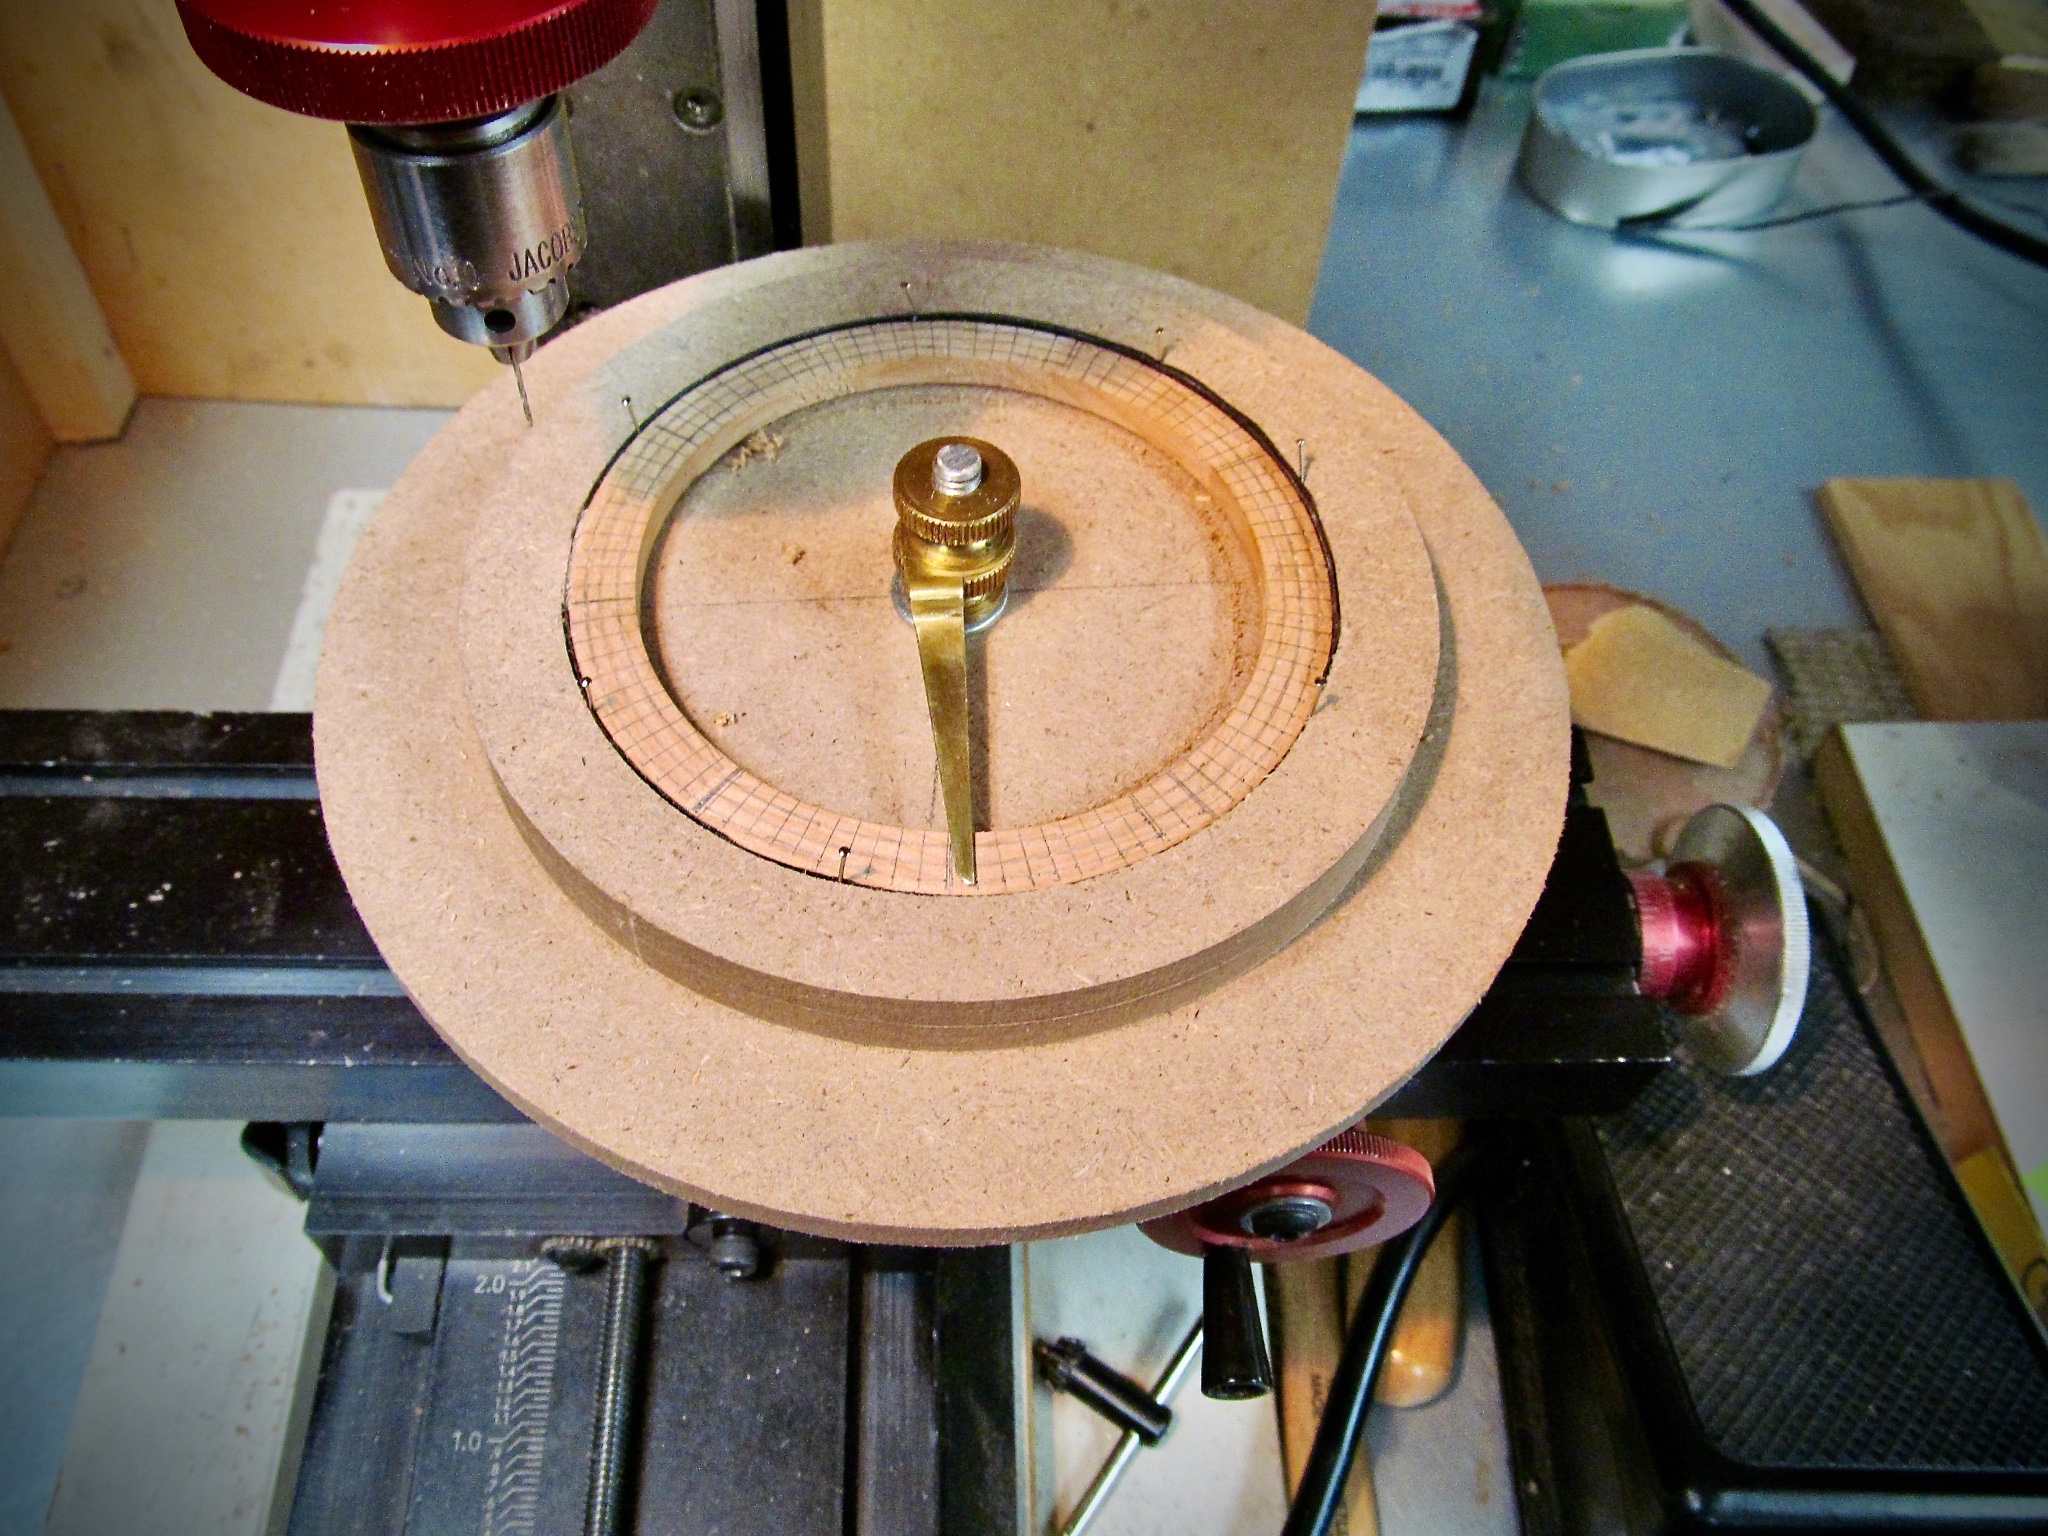
Making the wheels. Not having a large enough lathe to turn the wheel rims I had a special plate made to mount on my rotary table for my Sherline Mill. An indexing jig was made to mount on the rotary table plate to locate and drill each of the 200+ nail holes in the sides of reach wheel. The nails were turned down from antique miniature tacks. The wood used for the wheels is white oak for the fellies (rim) and Red alder for the hubs..thumb.jpeg.3d7681a3d28a74e7844ebd78304e9d58.jpeg)
.thumb.jpeg.9156528e840ff9a389132ab231e0d442.jpeg)

.thumb.jpeg.ea7bdf71b68998352cec50849130b841.jpeg)
.thumb.jpeg.6c010eb26ee21e361c8a88f1ae40db00.jpeg)
- 13 replies
-
- 13
-
-
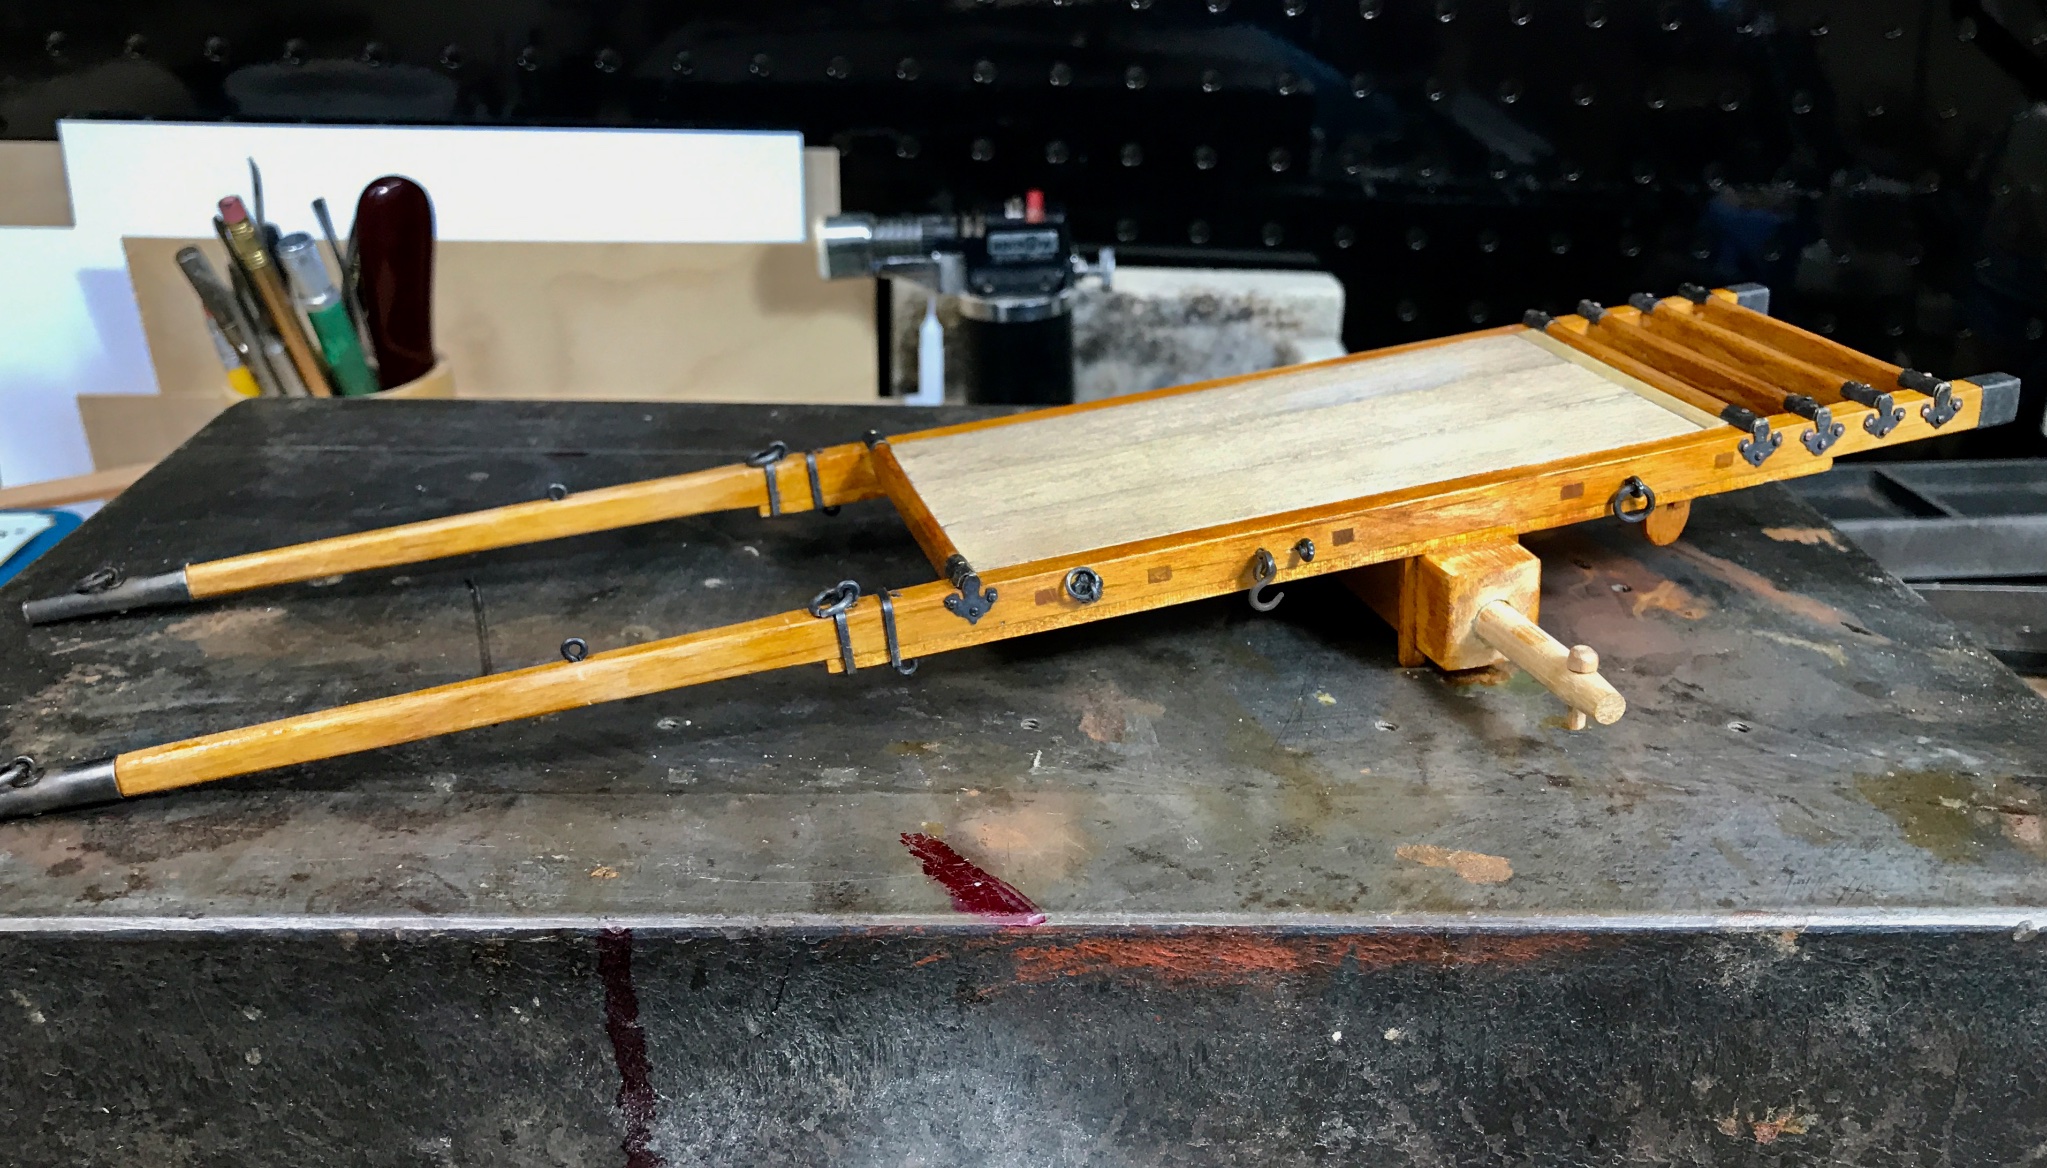
Ancient Mongolian Ox Cart by Bill Hudson
Bill Hudson replied to Bill Hudson's topic in Completed non-ship models
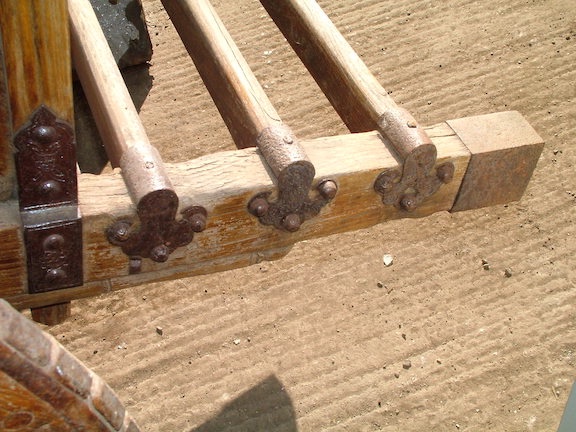
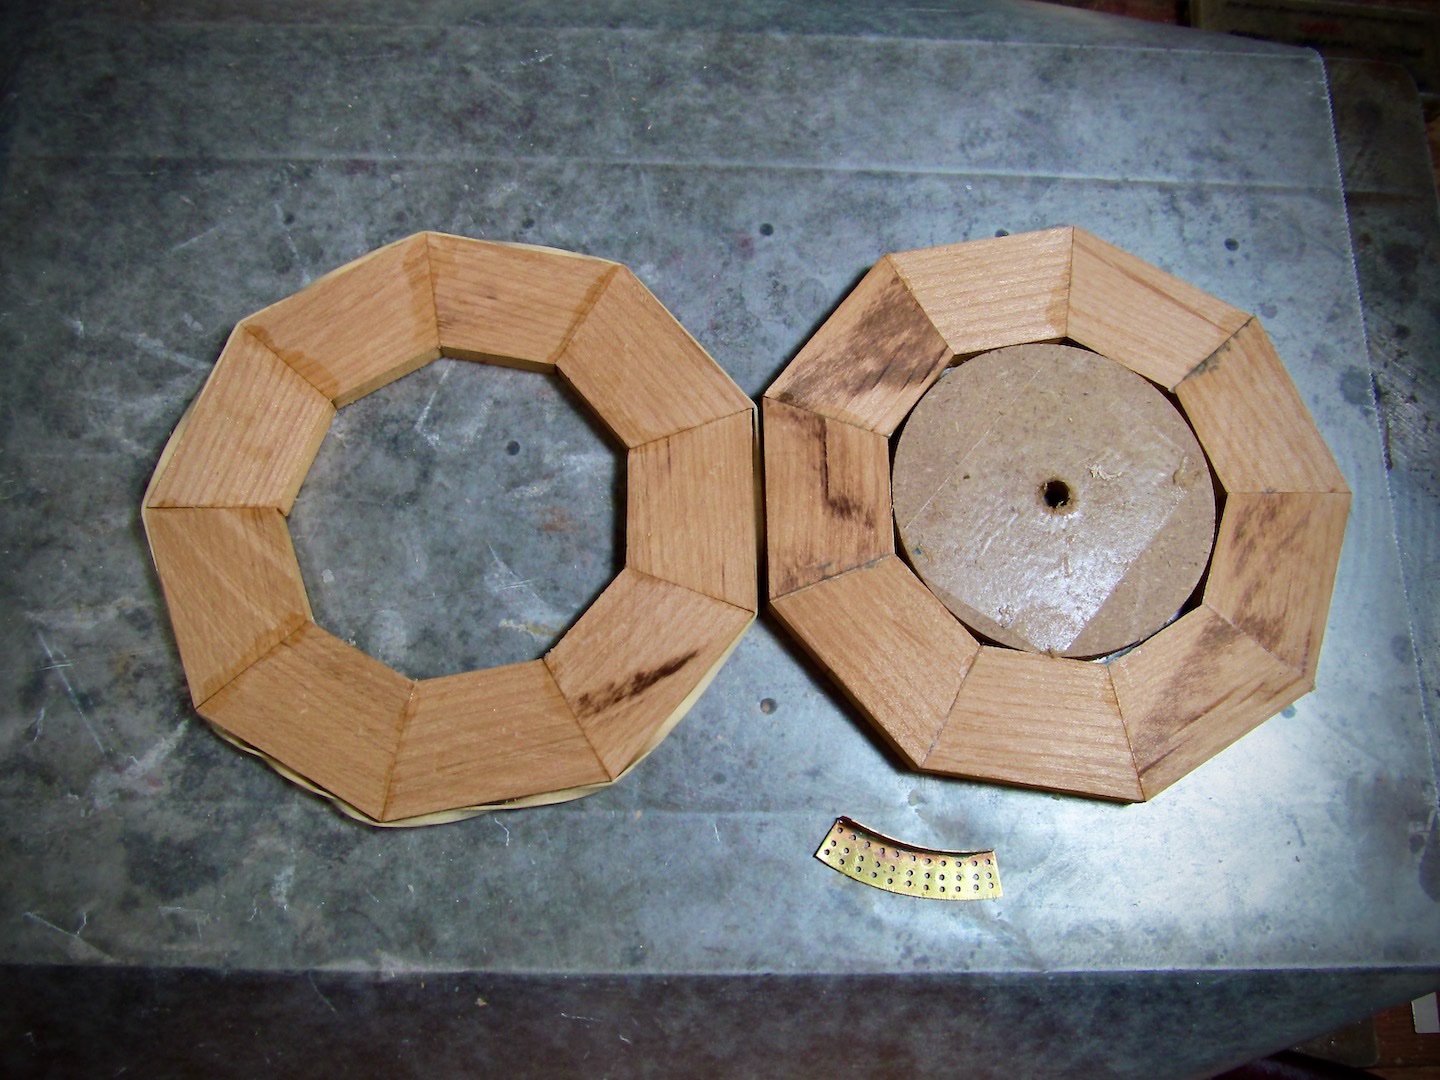
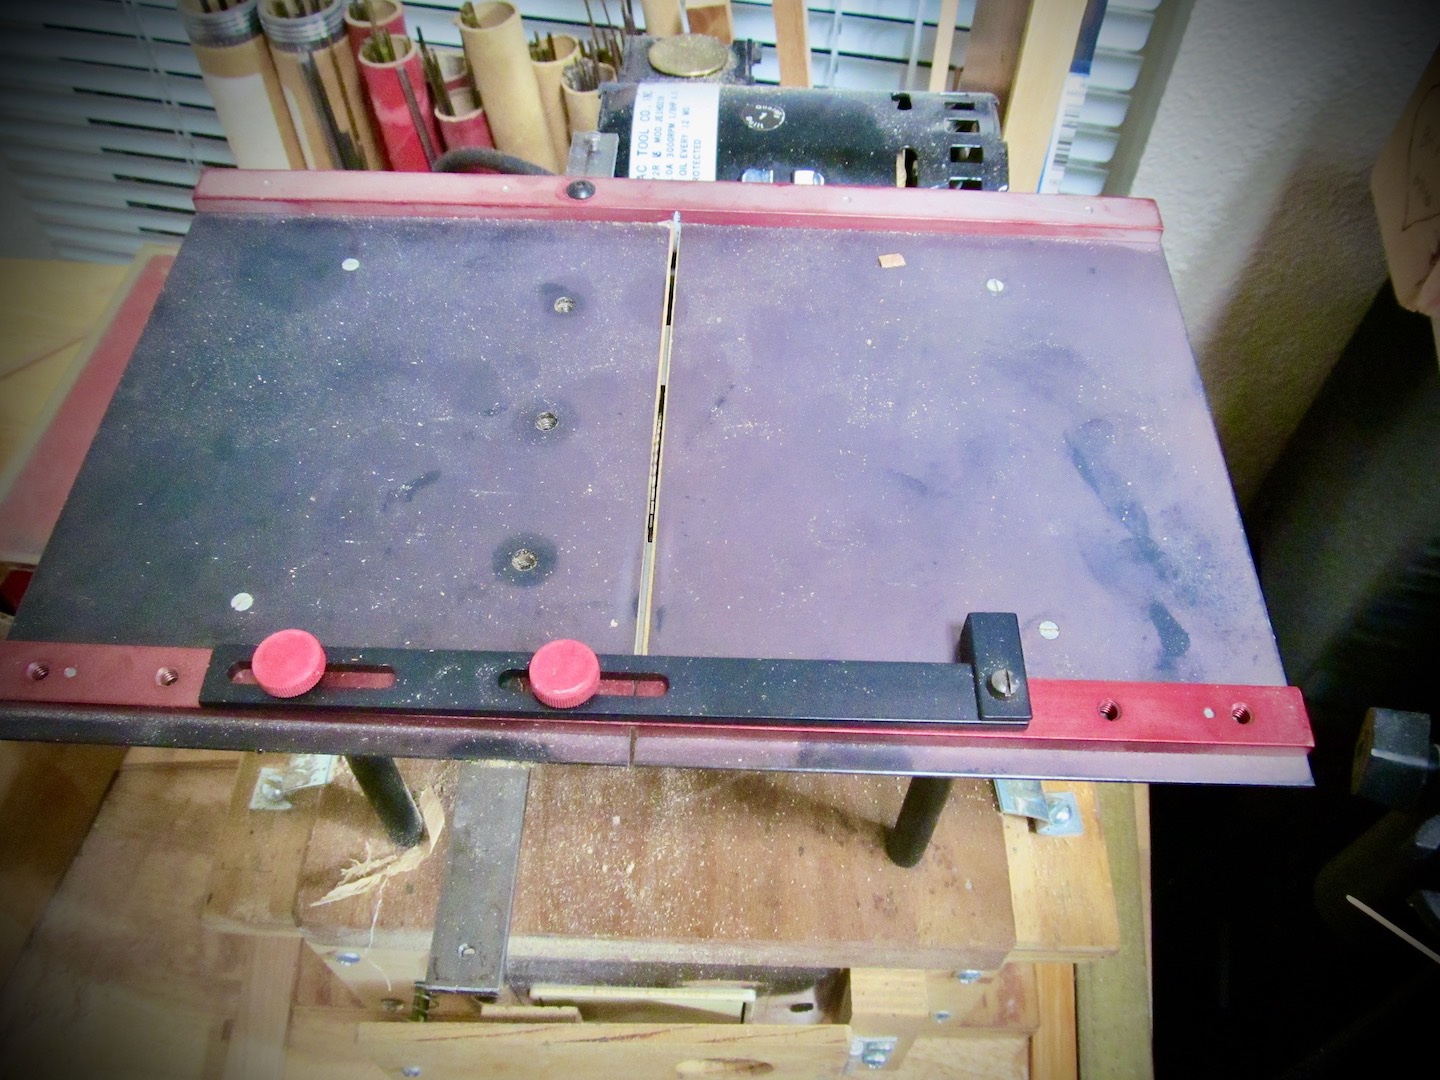
Construction of the frame. Photos are pretty much self explanatory. The little saw is a Preac. Only a few made. Uses slitting saw blades. The wood used for the frame is Western red alder.
.jpeg.82efb647d4b90b90fc4f3db7d4740444.jpeg)
-
Ancient Mongolian Ox Cart by Bill Hudson
Bill Hudson replied to Bill Hudson's topic in Completed non-ship models
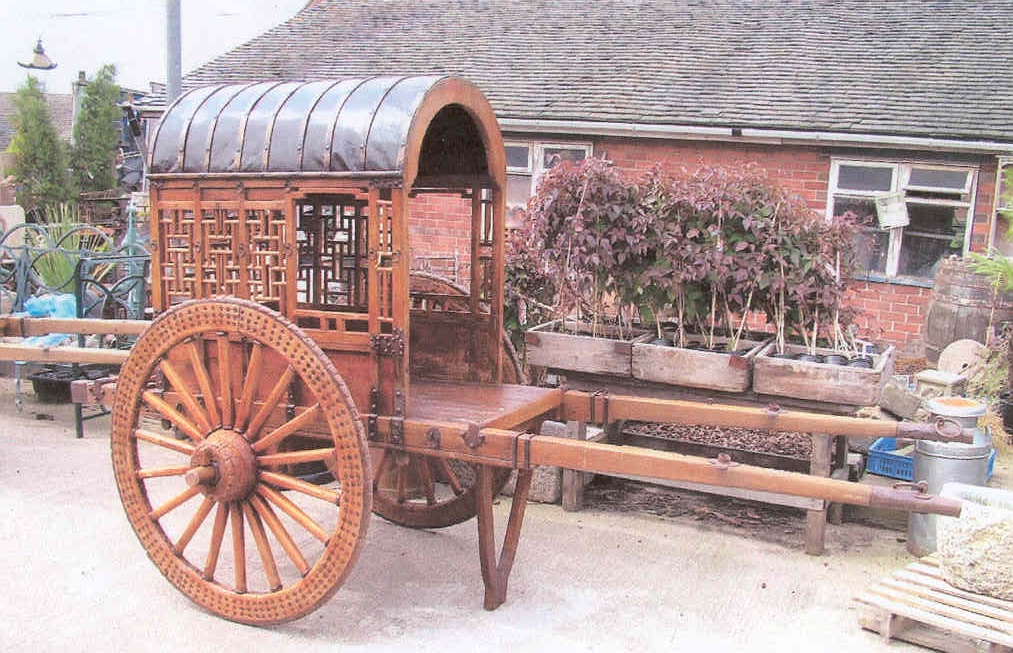
The finished model. 1/12th scale..jpeg.26303406aa74cc371585995dcdcfe81c.jpeg)

- 13 replies
-
- 13
-
-
Almost a year long project, I recently finished the build of this cart. Follow the build here.
-
So far the going on this project seems slow. I finally got the planking finished. The planking material is a little too thick to make the twists needed at the bow. I used spackle as a filler. I think it will take quite a bit of sanding to reach a smooth surface. Bill
.jpeg.24eba11c5870042f03f16f6602170b27.jpeg)
-
I'm not an advocate of using filler but the model of the Marie Celeste that I am trying to salvage. The hull planking is about 3/4 of the away to being finished. It is obvious that I will need to do some filling to get the hull looking fairly good. What is the best filler to use for this job? Thanks, Bill Hudson
-
Glue question
Bill Hudson replied to Peanut6's topic in Building, Framing, Planking and plating a ships hull and deck
Over my years of model building I have had my best luck with plain old Elmer's Carpenter's Wood Glue. I save milk carton or milk jug lids and use bamboo cocktail sticks for most of my glue jobs. I squeeze out a couple of good size drops of glue in the lid. The glue, fresh out of bottle is a little too liquid but it will become thicker but will set up quickly in the joint. You can control the thickness by adding a couple more drops to the lid. If you set aside for a while a scum will form. Just peel the scum off and add a little glue. If left over night, the glue in the lid will harden and turn yellow. Just pull it out of the lid and start again.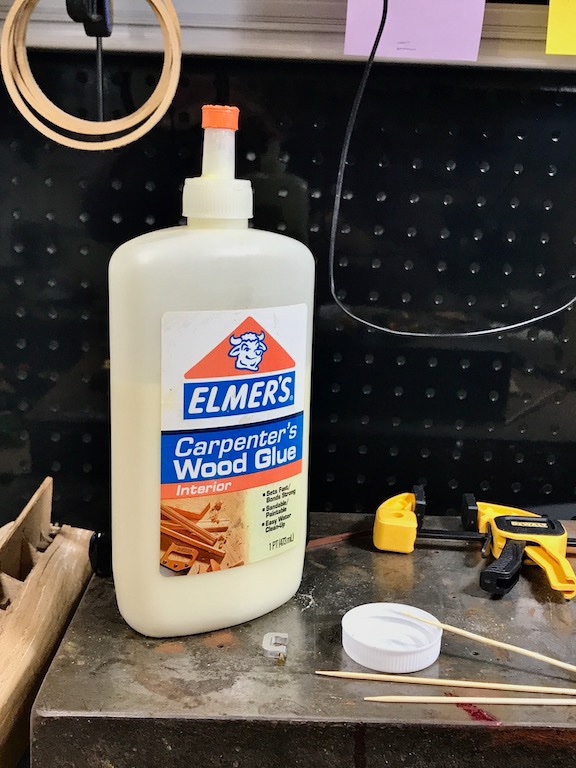
-
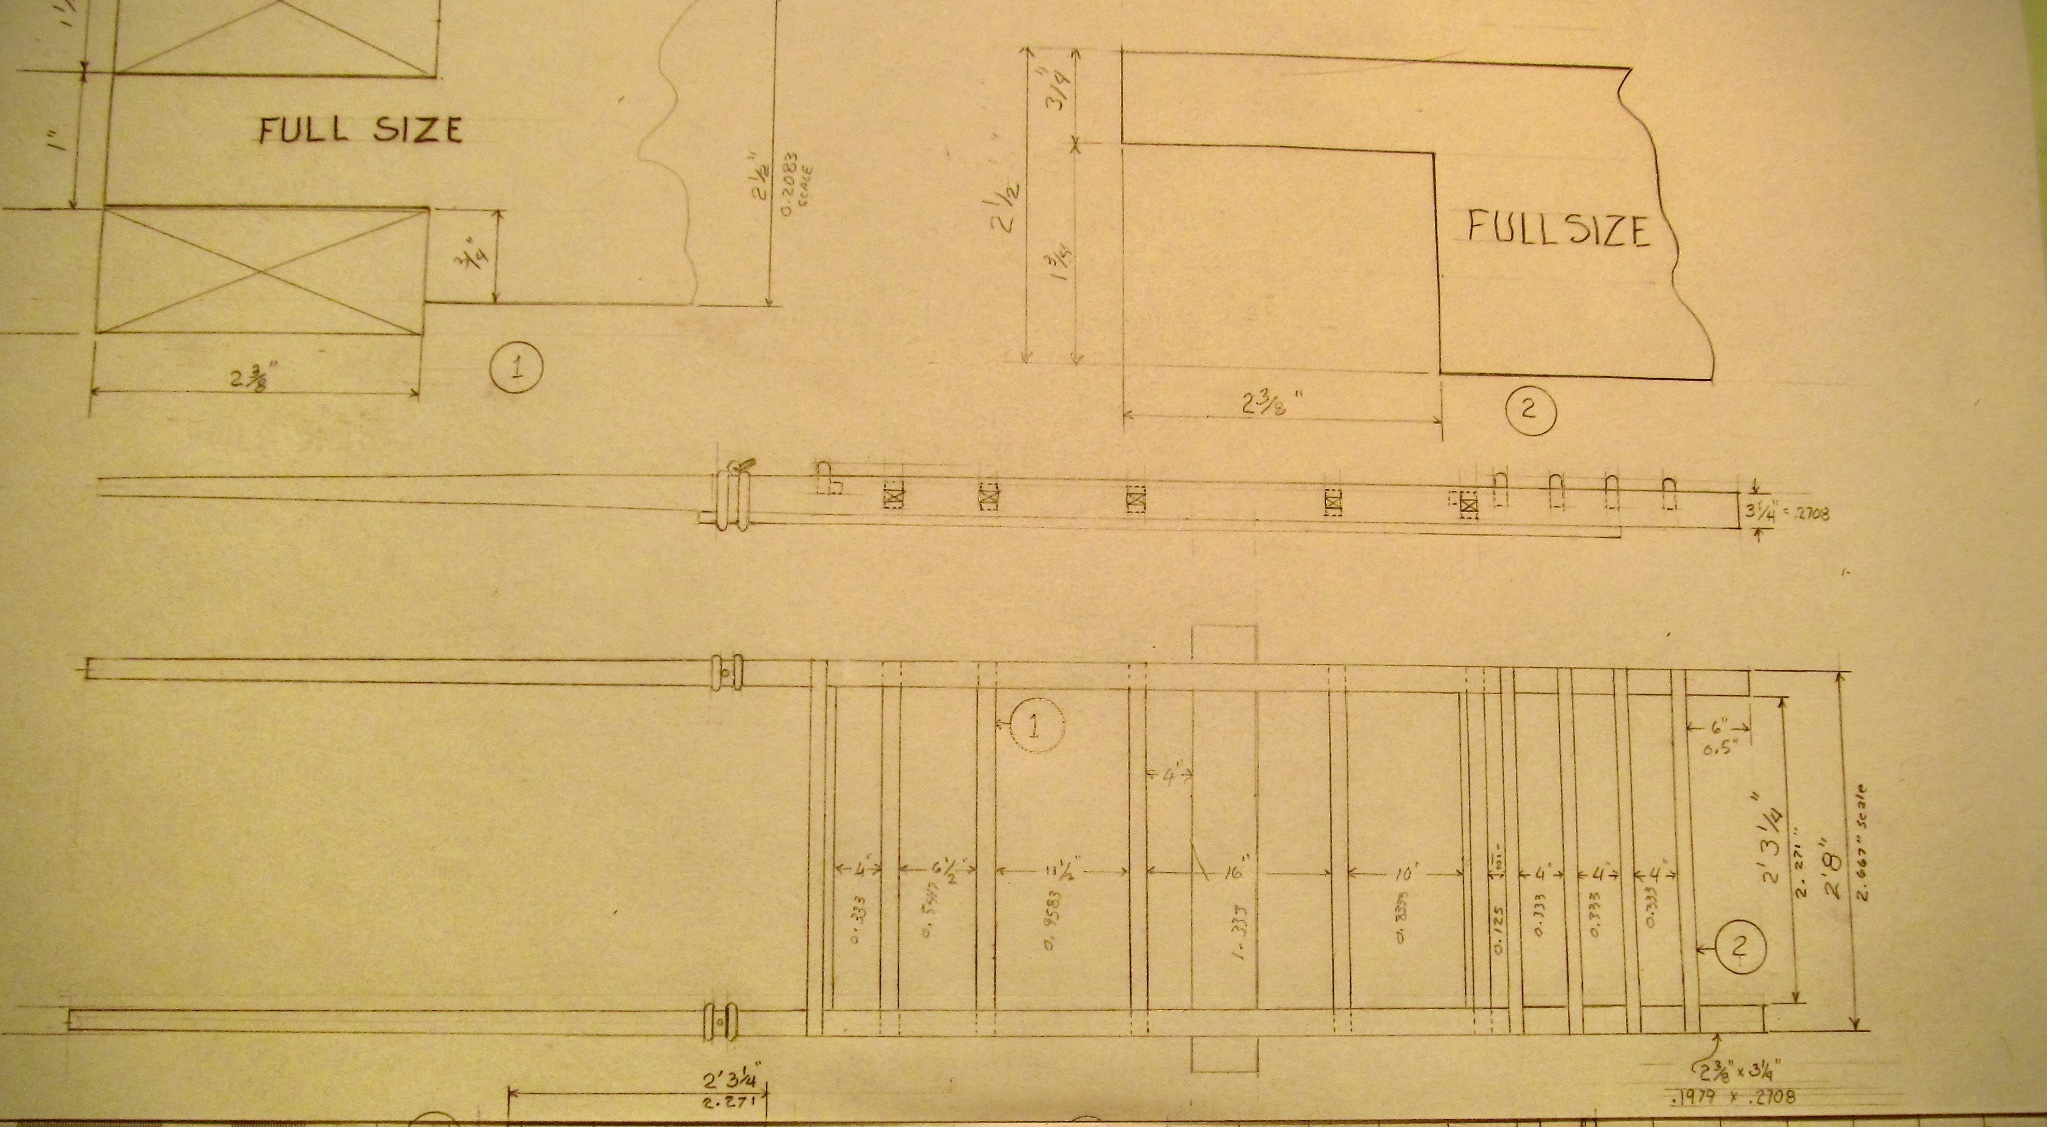
Going through the instruction sheet. I do not find any thing bout how to anchor the bowsprit to the deck. the instructions says glue it to the deck. Some how the does not seem the best way.
-
I got off to a slow start today. Was going to finish the planking but discovered the last plank that had been installed was sort of an S shape. I decided to take out some of the major curve. Then the tremors hit my right hand and I had to stop before I could get a nice cut line. So far it is looking pretty crude. But I should be able to refine it better the next session. It would have been nice if I could've pulled off that plank and taken my little plane to it. As much as I don't like using filler I think I am going to have to fill-in a lot of joints. Any suggestions which type of filler is bast for hulls? Any one eve use spackle?
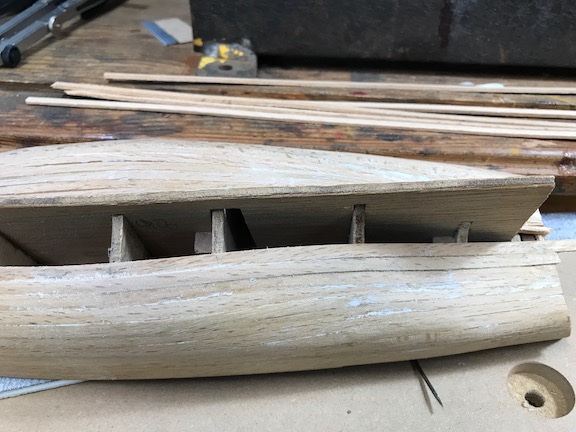
.jpeg.66528f2905affea46900d152840d39b5.jpeg)
.jpeg.6446a20972502e3f8f9b58f307a881de.jpeg)
-
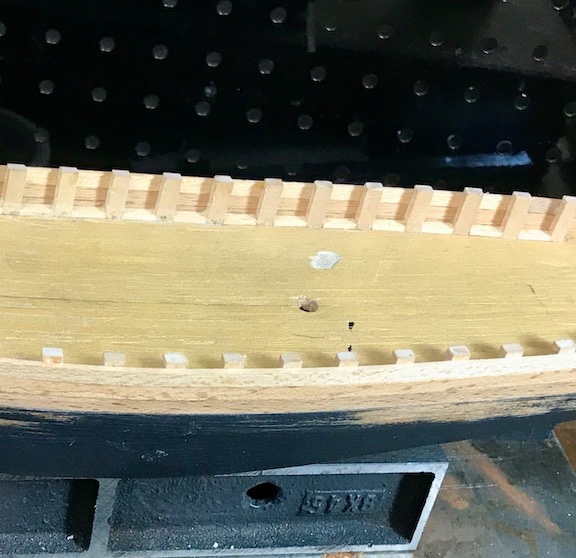
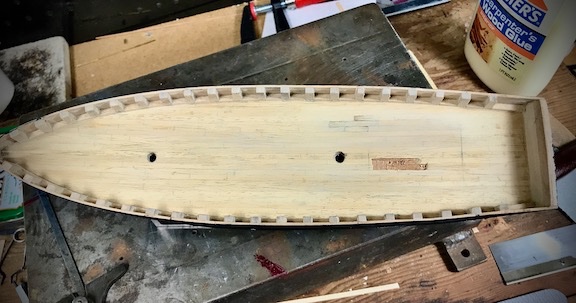
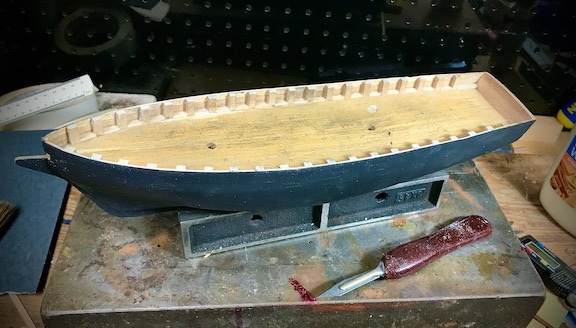
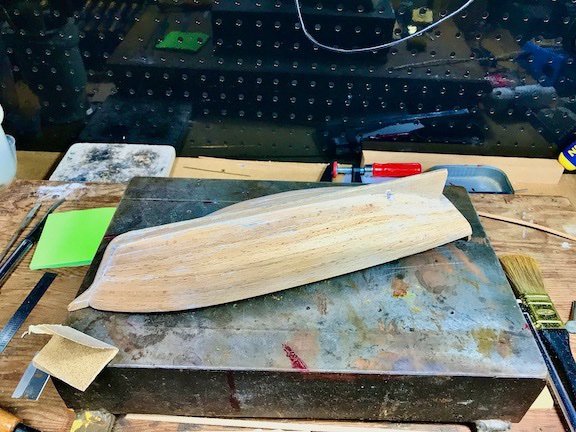
Thank you Hakan and Veszett, I'm feeling the same way. I will keep the planking. Our son grew up to be a wonderful and talented man. He will turn 61 at the end of this month. My wood options, from my wood bin, are cedar, cherry, Western red alder or white oak. But now thatI I am keeping the planking intact, I will have enough planks left in the box to finish. Bill


.jpeg.e7b990735123dd9eafaceb4f802905a8.jpeg)
.jpeg.a1b3d244d51beeccd1e3cbd41b048caa.jpeg)
.jpeg.47a59a794364834dd88da6cc7f1bf2dc.jpeg)

.jpeg.e743b8ab4e371b519b1b587700eabc29.jpeg)
.jpeg.5593f7fc6746dd2a1b6953497d2079f5.jpeg)