johnegert
-
Posts
69 -
Joined
-
Last visited
1 Follower
(1).thumb.jpg.57c0e00bf78a9afe89f1982f1d25516c.jpg)
Recent Profile Visitors
849 profile views


-
 Sasha131 reacted to a post in a topic:
Why not paint your ship?
Sasha131 reacted to a post in a topic:
Why not paint your ship?
-
Sasha131 reacted to a post in a topic:
Why not paint your ship?
-
CaptainSteve reacted to a post in a topic:
SMS Trinkstein by dafi - FINISHED - diorama - Stone on Soil - Flush deck frigate of the Austrian Mountain Navy
-
 Thanks, Dave----- whenever anyone says "I merely did....." whatever, I know lots of sound work went into it, as with your efforts on this valuable history. As it often happens, life has interfered with progress on my thread. I had every good intention of rolling along at top speed and getting all work done in a timely manner. As is said in Japan, " Speak of next year and the Devil laughs". But, I will soon show at least minimal progress and as we say on this site, if you want a fast hobby, get a Hayabusa..... john
 -
SYS---- Check your stern gallery and see if the two scrolls above the figures are backward, i.e. whether the scroll curves are going in the wrong direction. I'll bet a bunch of finished Caldercraft Vics are reversed like this---- the part bears only a vague resemblance to the proto--- a weak effort by JoTika. I would hope some more advanced Vic builders than I can tell us what they did. My first reaction(based on photos only) is that the scrolls are also upside down, but they would need some cannibalism to correct, including some judicious de-bulking. Check Wiki image below---- maybe I've gone insane. john http://upload.wikimedia.org/wikipedia/commons/thumb/1/1a/HMSVictory.jpg/800px-HMSVictory.jpg
-
Nenad---- Yeah, some kind of motor tool would be close to the first tier of tool purchases. This is an area where much opinion exists as to the best bang for the $$--- my own favorite is the Proxxon 12 volt system, which I went to after buying a couple of dud Dremels. If $$ is not such an issue, Foredoms have set the standard for many years. For the Criminally Insane, the dental quality drills, i.e. Ram, are the best thing going, and allow one to do their own root canals as a sidelight. For years, it was the ship modelers dream to grab an old dentist's belt driven drill, but I doubt these are out there much anymore. There are some crazy-cheap models available, but I'd be a little leery of them----the quality is too inconsistent. Variable speed is good, single speed is not as good. Shop around for bargains on name brand sets, and check my dear Widget Supply for attachments. And, as always, check the opinion/review comments on Amazon which range from the eminently reasonable-- like mine, of course--- to the totally psychotic. Note that most of the poor reviews come from geeks who try to over tax these hobby tools on full size locomotives and bridge girders. Tinyellie!! You're right! A good makeup box will provide many fine tools, including the airbrush that you insist upon using to color yourself dayglow orange!! john
-
Aerosol paints
johnegert replied to Q A's Revenge's topic in Painting, finishing and weathering products and techniques
A whole new world, eh Mikeai?? AND, the Blessed Rev has a big compressor so that he can get a small portable tank ( or even an inner tube--- I had a big tractor tube for awhile that drove the Ex-Admiral into a sputtering rage) and refill it as necessary. I see the model H kits with all three tip sizes for around fifty bucks USA. Add a 25 buck tank, and maybe an el cheapo regulator, and you're in business for well under $100. As said, a huge leap forward.... john -
Rev--- out of curiosity, let us know the shipping $$. john
-
Aerosol paints
johnegert replied to Q A's Revenge's topic in Painting, finishing and weathering products and techniques
Revenge----- Rattle cans are OK for painting, but if you enter the world of airbrushing, you will never look back. The colors available are light years ahead of stock spray cans, and the refinement of the final texture of the surface is far superior. This may cause the heavens to storm around here, but I would invest in a Paasche Model H set, the simplest of all, and the workhorse for many AB artists who go back to it in spite of their super-techno stable. There is a steep-but-short learning curve which requires practice on old card board box sides, etc., but you'll quickly master the basics. Also, a simple Harbor Freight-type small compressor is a must-- never mind the overrated "Airbrush Compressors". I know the initial expense and learning period seem daunting, but you'll feel a gigantic rush of progress in your modeling. john -
Revenge--- Model Expo shows it as available for $12.95, don't know what it costs to mail to you. This still rates as, pound-for-pound, the best book on the mysteries of spiling and other daunting aspects of this art. john
-
Thanks for your kind attention, Fellers----- Gregor---- the Cutter is a fine little model-- I've built a couple and they sold right away. As for primer, even a rattle can of sandable primer does a good job. If I'm worried about it, I'll airbrush. Michael---- That is indeed a Juno, and behind it a schooner modified to Pickle appearance--- I had in mind a little Euryalus/Pickle type diorama. I'll take some photos and see if they're presentable, given my "correct the crap I just did" painting style.....AND, thank you for those Victory pix-- that is a project I have on the bucket list--- add that last bowline and keel over dead( hopefully not face down on the ship!)--- a genuinely monstrous undertaking. Drux---- I wouldn't call attention to yourself on this bogus "humor" issue. Several members have not found my gibberish especially funny. For God's sake, don't expose yourself to the dangers of Penalty Points !! john
-
No doubt, Brain.... this love for miniatures must be some kind of genetic kink. Did you know Vita and Dot Koreshoff?? I met them in 1974--- those guys really flew the art by the seat of the pants down there and came up with some lasting principles that I'll bet you guys still follow. Is Deborah K. still active?? I know she left the art for years. I grew up in L.A. Ca. and was lucky enough to know all the old timers. Check "Albuquerque Bonsai Club" online for an 8x10 glossy suitable for framing, and my complimentary autobiography..... john
-
Oh, Boy!! Finally a bonsai-related question--- sort of. Sugi pine-- not a pine--- is often called Japanese Cedar-- not a cedar-- but falls in the genus cryptomeria. The wood is quite beautiful and wonderfully aromatic, so it gets used for drawer and closet linings in Japan. I have a bunch of trivets made of sugi that really perfume the air when you set a hot cast iron teapot, etc., on them. The wood is light and a bit soft, yet pretty strong. Its much like US red cedar, and spruce--- often used for instrument tops. As to its use on model ships, it may be too splitty for final planking, but should be nice for deck furniture, or applications where softwoods are suitable. Grsjax, you may just decide to sit and smell that smell when you go to saw it up! john
-
Brian--- Yeah, compared to you guys and your 1:64 it is tiny. And, as I said above, anything even marginally too large on the model looks like a bashed thumb. This gets to be a real problem when it comes time for blocks, especially. .003 on the model= 1 inch on the proto (duh), so we'll be into the Small Parts wire inventory, and the fly fishing supplies. john
-
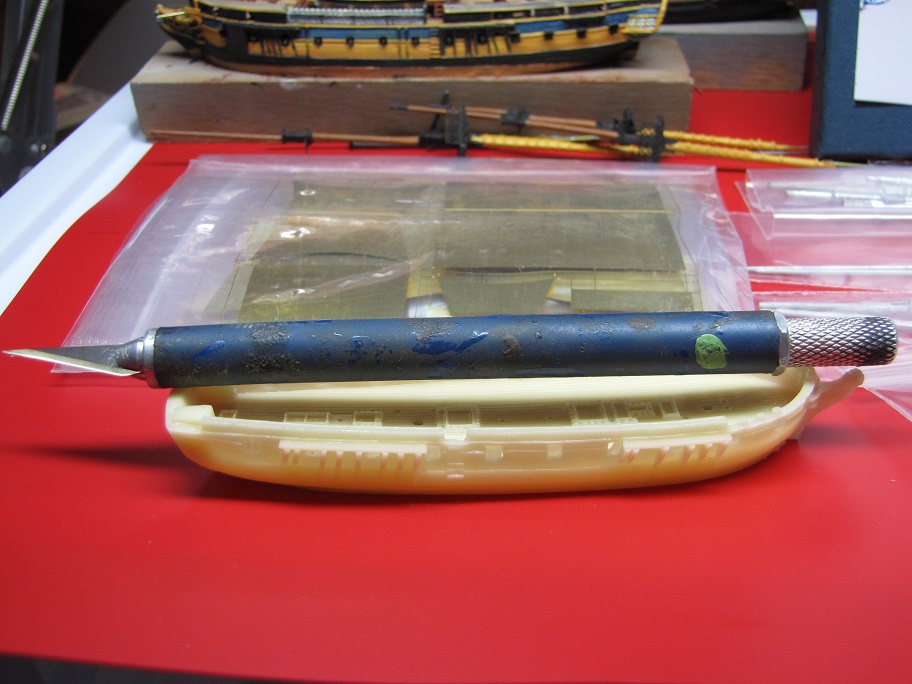
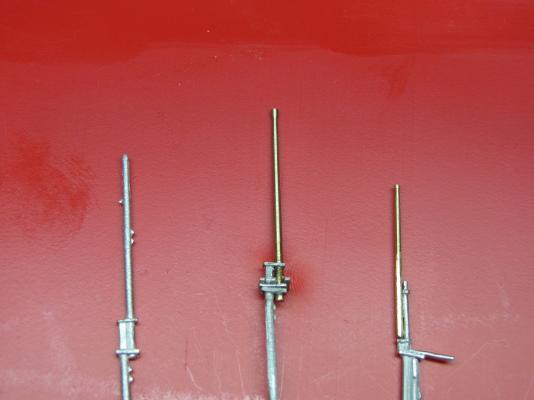
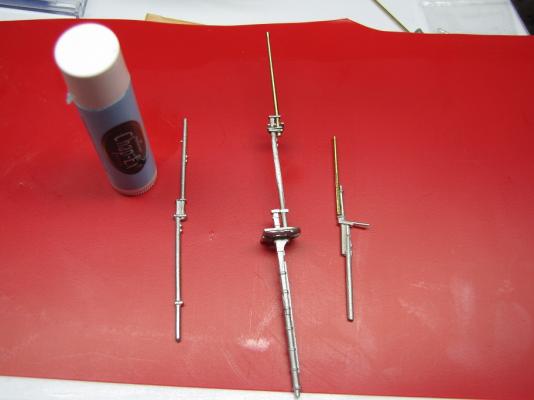
Step Two--- a few kit improvements. The masts and yards on this Langton kit are made of white metal, which, though holding detail well, is dangerously soft. As you can see, I replaced the top gallant masts with brass. This has two salutary effects-- It allows a lighter size with better taper, and helps prevent the insanely easy accidental bending of the masts during handling and rigging, which distorts and weakens the white metal to the point of trash. Wood is as good or better, but since everything will be painted anyway, I used some brazing rod I had around. The first pic shows the original on the far left, and the "improved" fore mast and bowsprit on the right. The photo shows me some little bends already introduced in the tops which will have to be fixed. There is also a fair amount of detail to be added/ corrected, but these are the bones. As said before, nothing gives a miniature ship away in photos faster than heaviness at the top--- hopefully, I have begun to prevent this. Meanwhile, I have scraped and sanded the little bit of flash from the hull, and filed out the gunports. Next time, I will have primered the whole mess and we'll get into strategies for painting. john
-
Pett---- No real disagreement--- I think anybody who works in wood-- or any material, really---- must, sooner or later, come to at least a basic mastery of the tools of the craft and their care and feeding, or else be fated to be behind the curve of improvement in their chosen gig. But it is a small but significant lifestyle change. I hung out in the pre-computer graphics world for a while, and those people went through literally thousands of blades with no care whatsoever to their design or properties--speed/competition ruled all decisions. But in our world, at the top of the ladder, will be those whose level of care will lead them into many learning curves. I admire you, Pett. OK I just went over to work and put a bunch of new blades into my little cryotreatment ewer with liquid nitrogen. Let's see what -300f will do to 'em. john
-
Sam--- Does it say "zirconium nitride coated"?? My package trumpets that fact....As said, I seem to be getting better mileage, but still break off the tips on #11's with disgusting regularity. Yeah, you start to wish they'd leave well enough alone-- gimme 100 SS #11's, and quit screwing around, eh. john
-
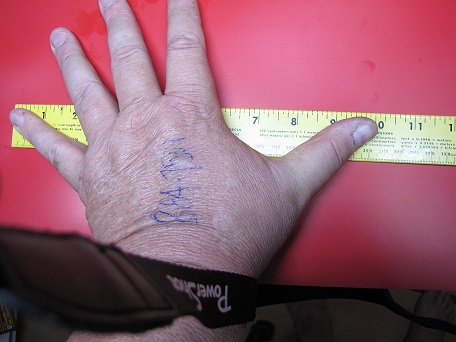
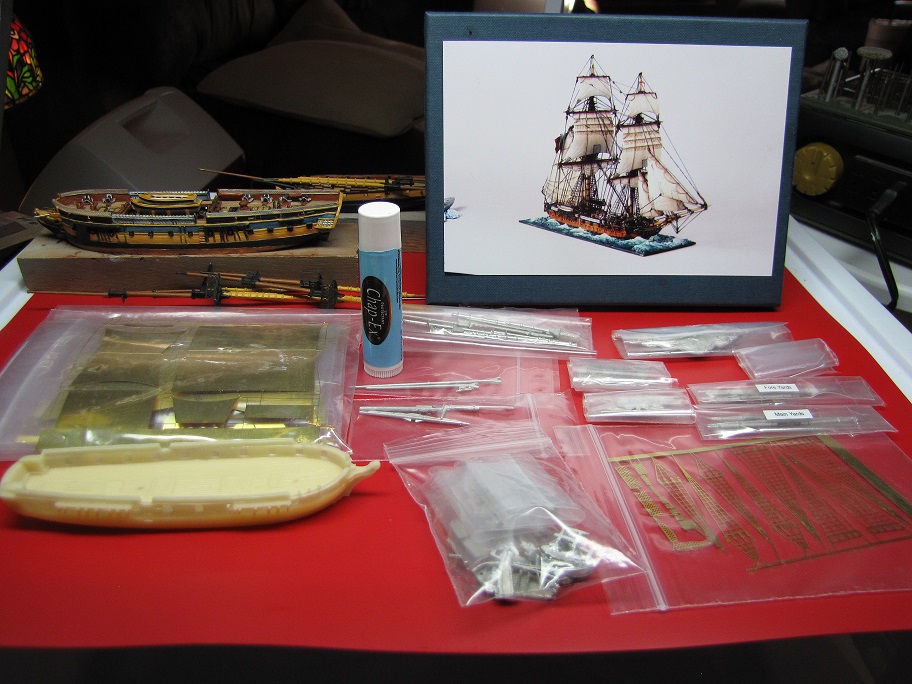
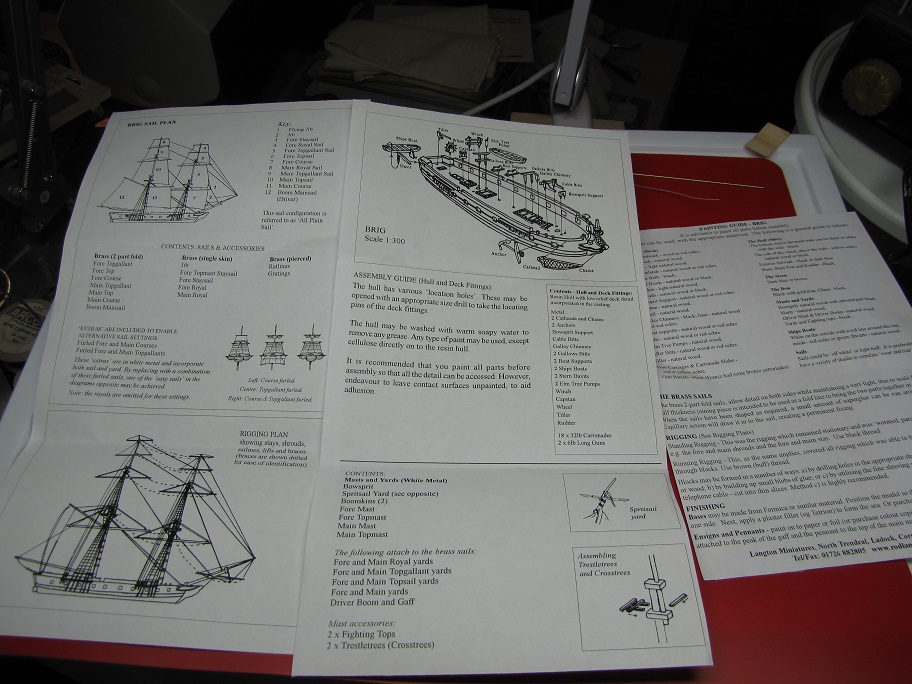
All right, ye bilge rats....in response to a rapidly diminishing number of requests, here comes the build log you've been dreading. If God is both patient and willing, this log will cover the constructing, painting, rigging, and display of a somewhat generic HMS Cruizer class brig-rigged sloop of about 1797 in 1:300 scale. All of the historical heavy lifting has been done by Dave Fellingham----over on the Nautical History thread-- a great piece of research. All I can do regarding this history is to reiterate that the class was probably the most numerous of the Royal Navy, and that with its 16x32lb Carronades, it was fast, seaworthy, as mean as a frigate at close quarters for far less cost to build, and 1/3 the crew. The kit is made by Langton Miniatures, known best for 1:1200 wargame ships. Why Rod and Carol Langton ventured into the 1:300 swamp with these complex models is a mystery to me--- anybody who makes one of these things and bashes it around in a game should be neutered forthwith. Suffice to say that I love both company and product-- when I first saw the John Westwood built ships on their website, I was hooked. The books that pertain specifically to what is called "extreme miniatures" are: 1) Two wonderful titles by Donald McNarry-- "Shipbuilding in Miniature" and "Ship Models in Miniature". Every modeler's library should have these, especially since they are all but free on the used market. 2) "Ships in Miniature" by Lloyd McCaffery a curious fellow who may set your teeth on edge a bit, but who is a crazily skillful builder.3) I also admire Phillip Reed's books, especially "Period Ship Modelmaking". Of course, all other good model ship books are useful, but these are specific to small scales. A couple of general comments apply for "The Short Ships". I've found that if anything on these teeny-weenies is out of scale, it looks like hell. Better to suggest or omit detail if you can't get it down to size. Also, one of the things that really makes a small waterline model great is a strong sense of "taper", ie, a heroic effort to not let the topmasts, bowsprit, and yards look too beefy--- a problem which limits the realism of small scale. The question "why not scratchbuild" is probably pertinent here. I've done a bunch, but just don't feel the urge to set up for that work anymore. Part of this is living in the sticks and not being able to find raw materials--- even the model RR store in Albuquerque shut down-- there is no bigger buzz-kill for me than not having what I need. These kits solve most of that problem---as you will see. OK--- The pix...#1 is the box laid out--- note chapstick for scale, and little in-progress waifs in rear. #4is the hull, which at this stage looks like a dead albino anchovy. #3 are the plan sheets-- plenty good though not exhaustive. #2 is intended to dispell the notion that one needs delicate hands to do this work--mine,as you see, look like mutant tree roots from years of US football.(Note also phone # of Fly-Tying shop in Alb. scrawled on hand-- a fine source of wire, etc. for minis). This is more a mental challenge than a physical one. Please be critical. I've gotten into some patterns of sloth and carelessness which I hope will improve with this log. The next installment will show a few efforts to improve the basic kit. john