

klimi
-
Posts
144 -
Joined
-
Last visited
Content Type
Profiles
Forums
Gallery
Events
Posts posted by klimi
-
-
Nice model, keep building
Pavel
-
Oh what a speed of your build. Congatulations. I´m currious on your next model.
Cheers Pavel
-
-
Nice and celan work Ilhan, like your details
Pavel
-
Hello again,
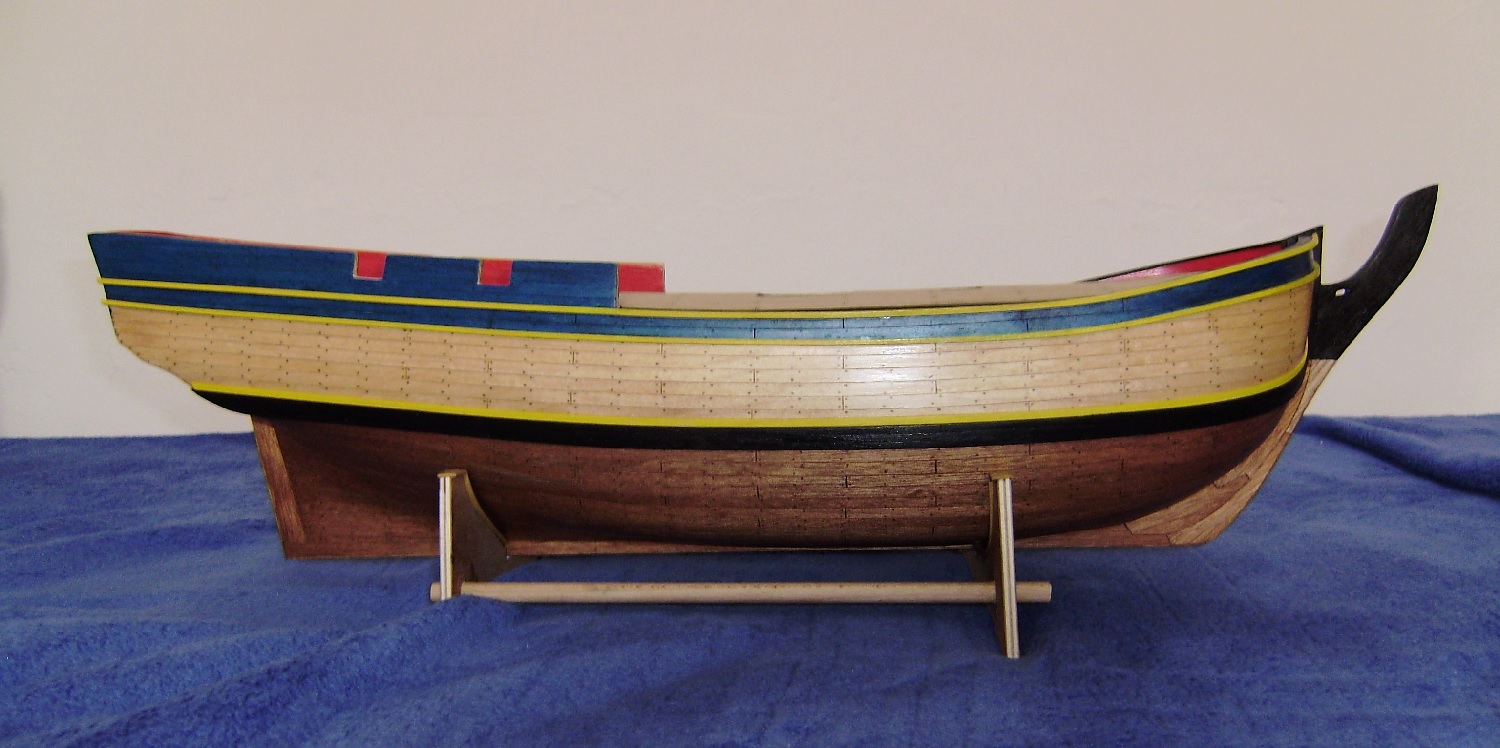
I repaired one side and i think, that it is fair done. I tryied to make a patina. First time i painted a wood thin layer of color and then i used a grafity powder after that i did second coating.
I think that i know, how i wanna go on. I wish that my model will be look like realistic, so i try make a each part not so clean and certain direction roughly trimmed. Like on the old ship. I will see.
Next step will be make a second side and then windows.
and here are next pics.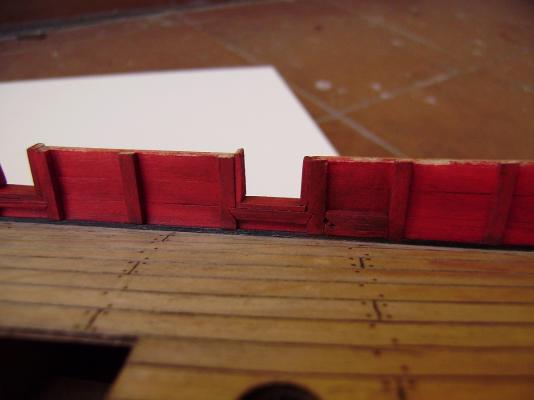

-
Amazing model, is nice to see your model done, because your model is for me nice inspiration
 i´m looking forward for your next build. And do you not really try to make own scratch build?
 -
wooow incredible work, keep working, i looking forward on the next pics. Your carving work is absolutely amazing.
Pavel
-
Hello Nenad, is nice to see your progress. In summer i was a little bit busy and i just checked a few topics here. Mostly i was looking on the pics and i like, that you improve Cutty Sark on the highest level what is possible for you to do. I´m lazy to read all replies now, but i gonna follow your adds. Good luckPavel
-
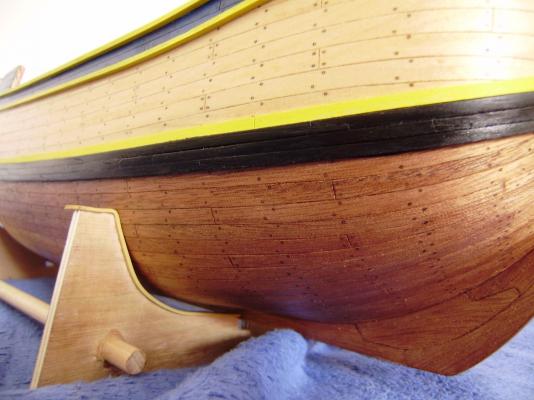
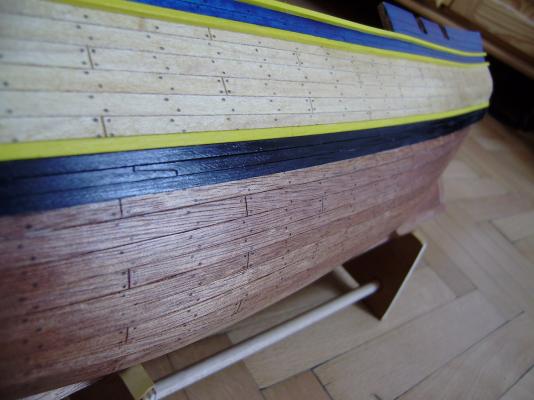
Thanks Hamilton, but i´m not satisfied with wales aroud the bow. Because it doesnt follow the planks. I think, that i can try cut the yellow plank out and if will be plank under it in good condition, then i´ll cut out the others. I´m a litle bit afraid out of this, so that the hull stays good.
-
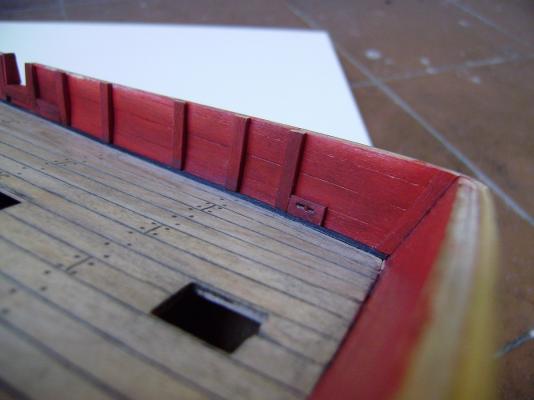
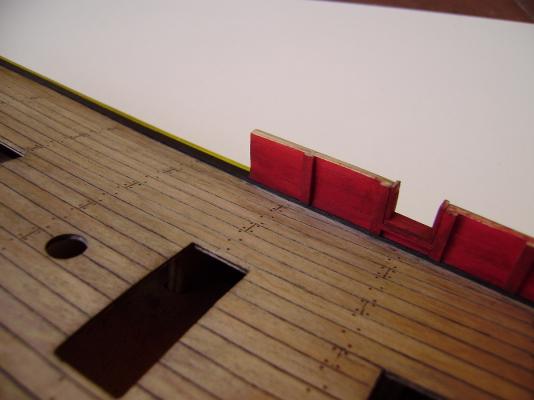
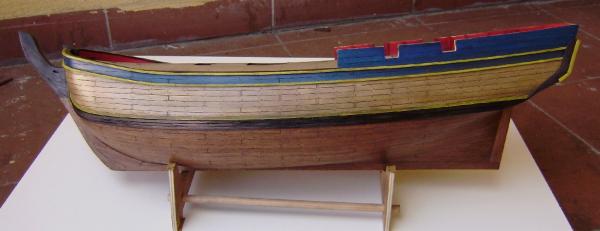
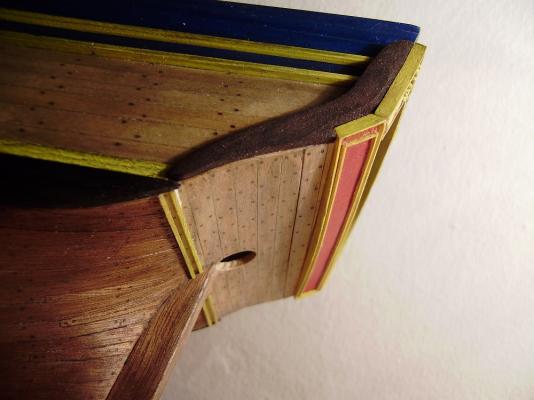
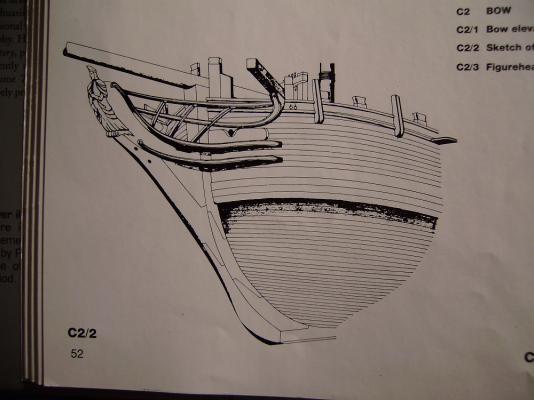
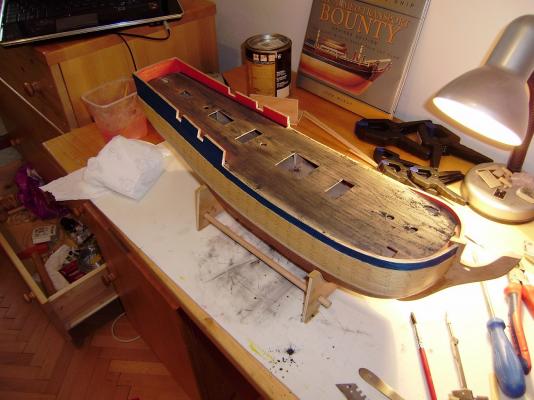
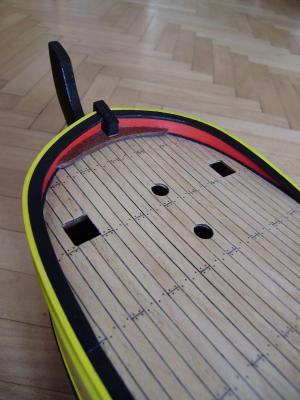
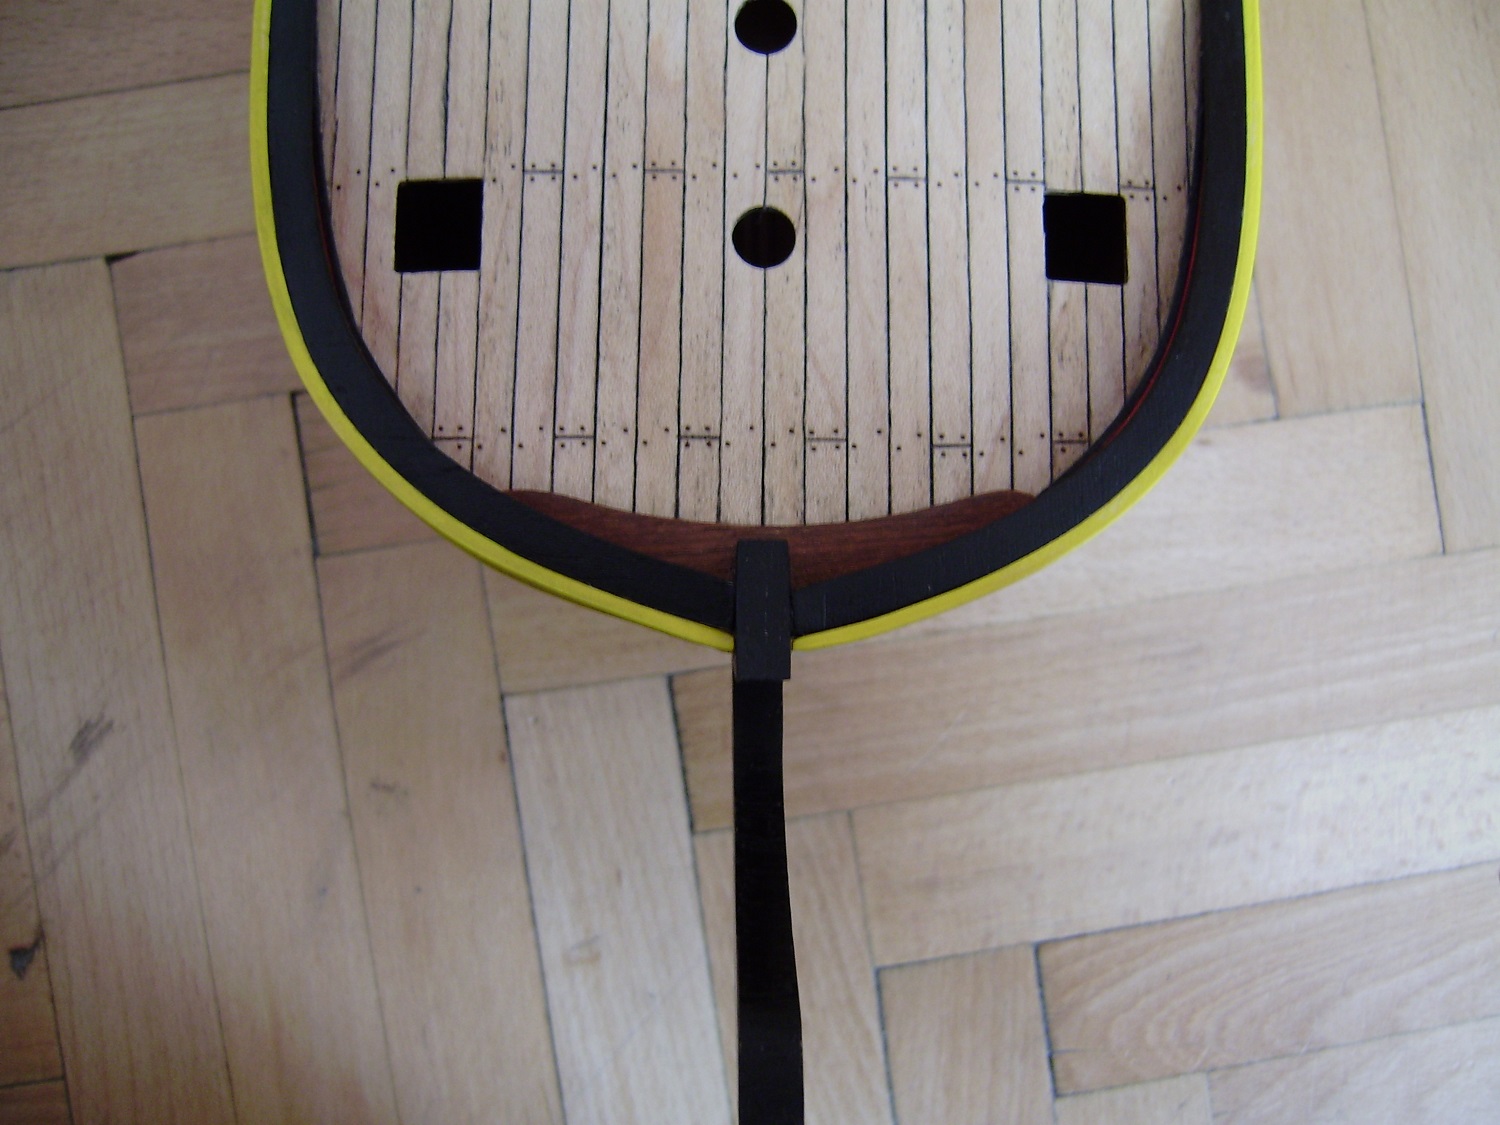
After a long time I returned to work on the model. The first thing I started to fix the planks at the stern . Now it is well aft beam '' '' or as I call it, however, remains on the other side.Followed by a couple of attempts on the windows and in the end I tend to think that the window frame will make a 1 mm slats and bars in the middle of 0.5 mm . Does anyone here from you proven method in terms of build bars? There seems to me the best opportunity to stick 3 longitudinal slats and then between 8 to fit the pieces. 7Furthermore, I wonder whether I should redo a few other things. The first is the plating of the hull at the bow . Firstly, I do not like the way I finished more than the tip is in the plans , which show that those boards are connected almost horizontally . So I thought in the last part of the dividing cut and stick below . I fear , however, that there is quite chances of spoil it , even though covered with planks could be replaced, which is just about the time, but the result would be more satisfied.Another thing is the thickness of the wall , which is also the plans thinner and also a black board on board is connected to the step smoothly and not what is with me. Which I would like to address cutting red planks and grinding and then stick it again , or make new ones. Thus, there would be room for a black board even if it looked smooth.Now I am waiting Resolved second beam at the rear and then about going into repairs.


-
very beatiful work, i love how you did planking, is excelent.

Pavel
-
Hi Sparrow, very nice model, i´ll follow your progress, i´m looking forward for next pics

Pavel
-
NenadM: Yes, I think so, because work on hull was long and it looked, that it is infinity, but a few steps back, when I glued beams, the hull came out. I´m looking forward on details on deck, but most, on masts and rigging. But this work is fine, is kinda meditation, if it can say.
-
Hello NenandM, I think that in your situation don´t care, if you have such free time to work, because I like your technique and good step one by one good fugured out.
Pavel
-
Hamilton : Yes I did, in the first paragraph is it writthen, that this ship is my first. I made some planes and basic ship as a child, so this kind build is my first. But now is my work slow down, because i´m gonna do last exam and than i am going on summerjob and also i wanna enjoy summer. but i wish to still working on the ship.
Pavel
-
-
Thank you alot, i´m pleased by that, you like it.
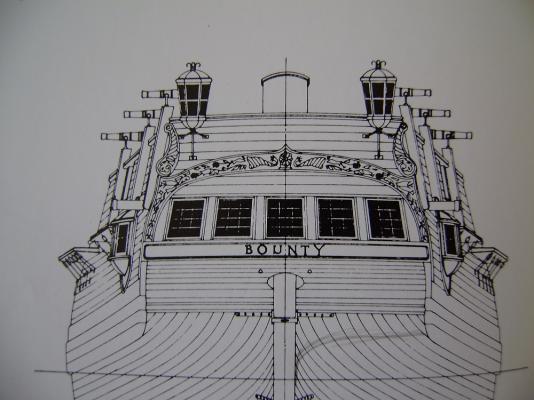
Frank: eavour, what are here. The limewood and the yellow planks I did dirty by graffiti powder. It looks more natural, mainly the yellow color, it looks not as plastic. Next move is a stern, make a windows, and a down part with title Bounty. The windows i wanna do, that i´ll make a drawing of windows. On the paper i will glue a planks, it hold the right shape and than make it out and from behind glue a foil out of disket.
DSiemens: Thank you, think, that carving isn´t so hard, I carved the piece to the basic geometric shapes and after that i was using sand paper. I am looking forward until i will make a figurehead, it will be harder than those basic pieces.
Pavel -
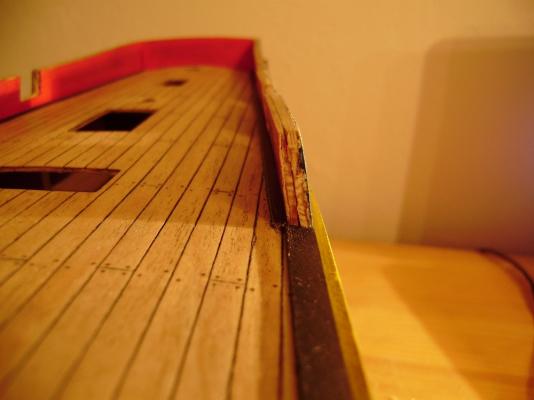
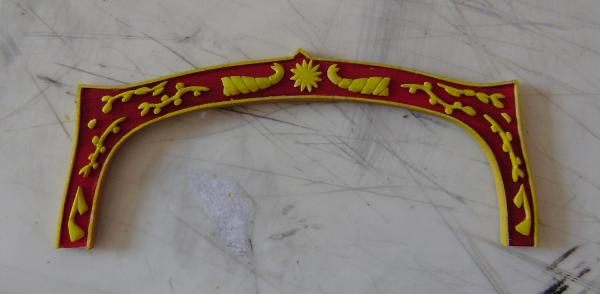
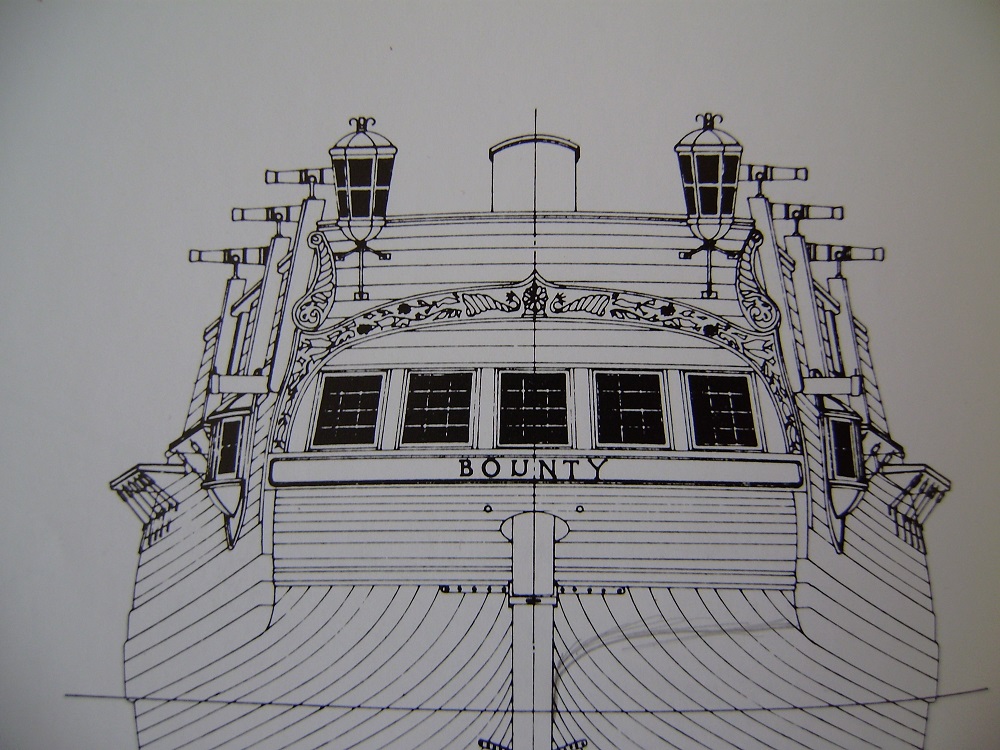
Continuing in the decoration, it was quite good, just not able to do absolutely accurate ornaments, so I tried to do something a little credible. I would like to optat that will be more rewarding first stick ornaments on the vault or arch of the stick first and then fit the
- janos, riverboat, aykutansin and 1 other
-
 4
4
-
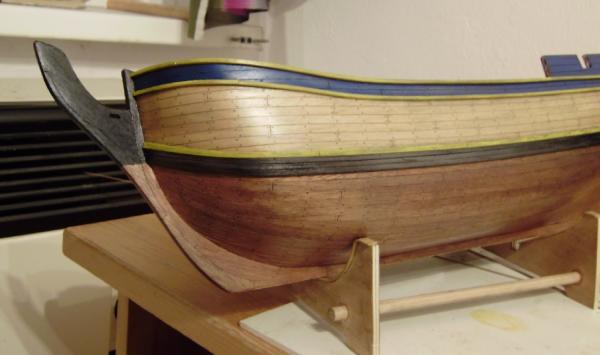
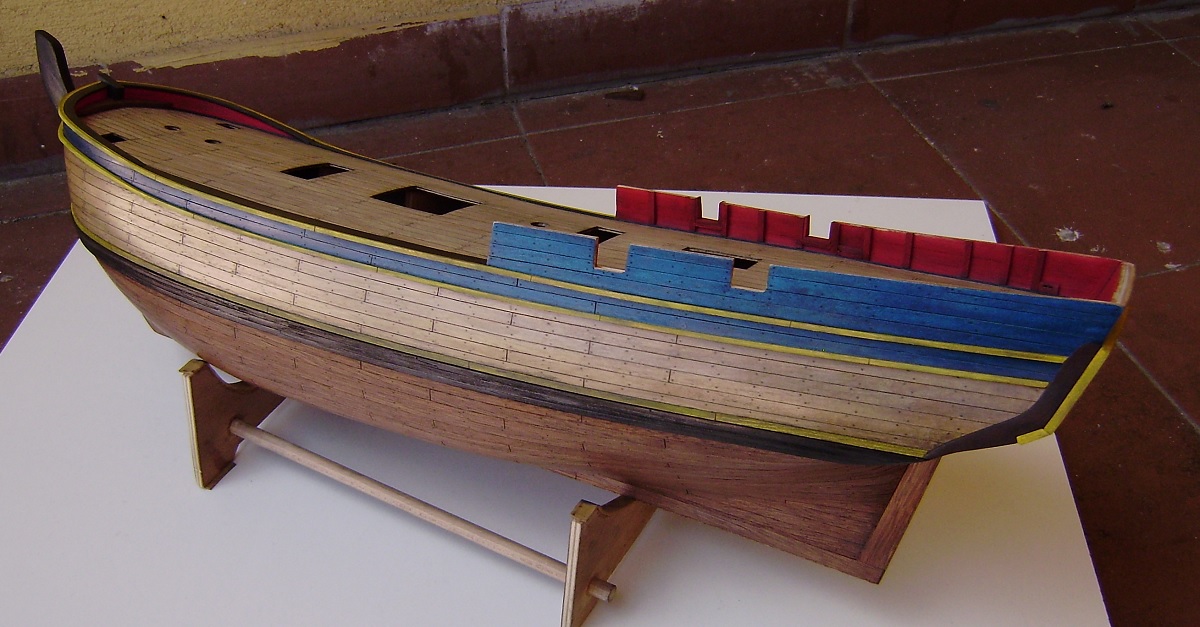
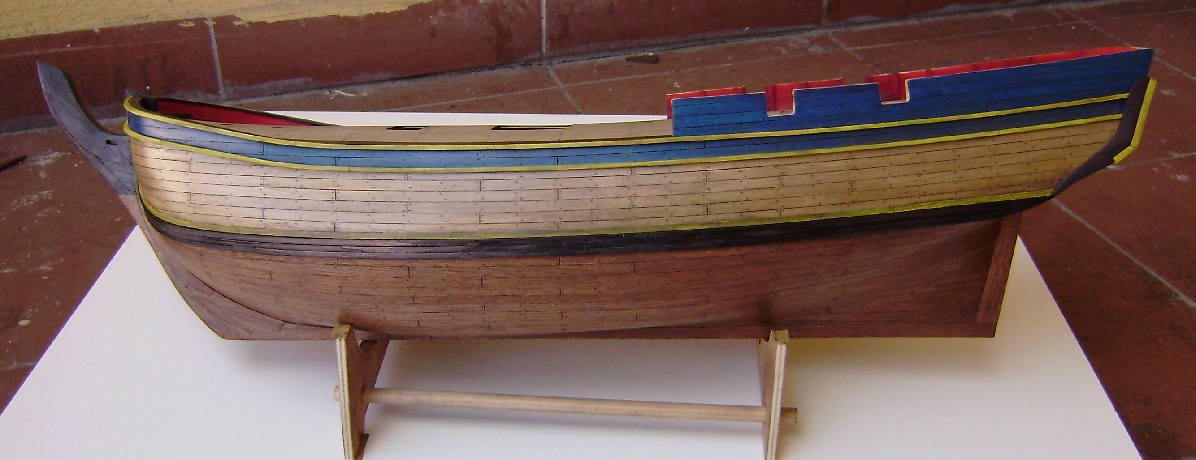
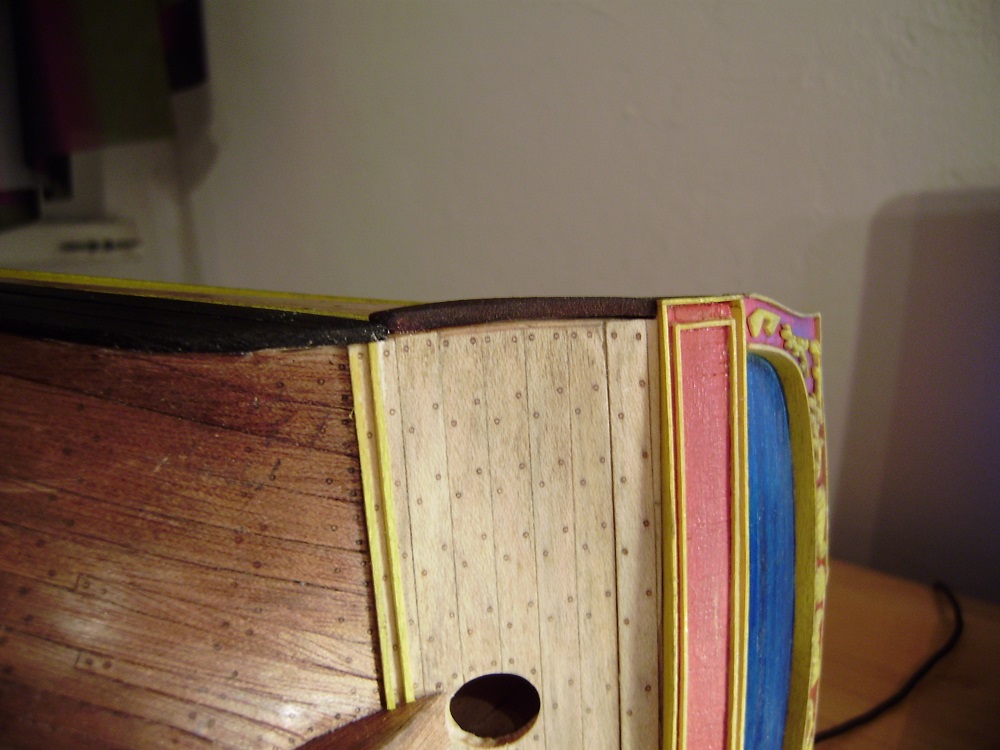
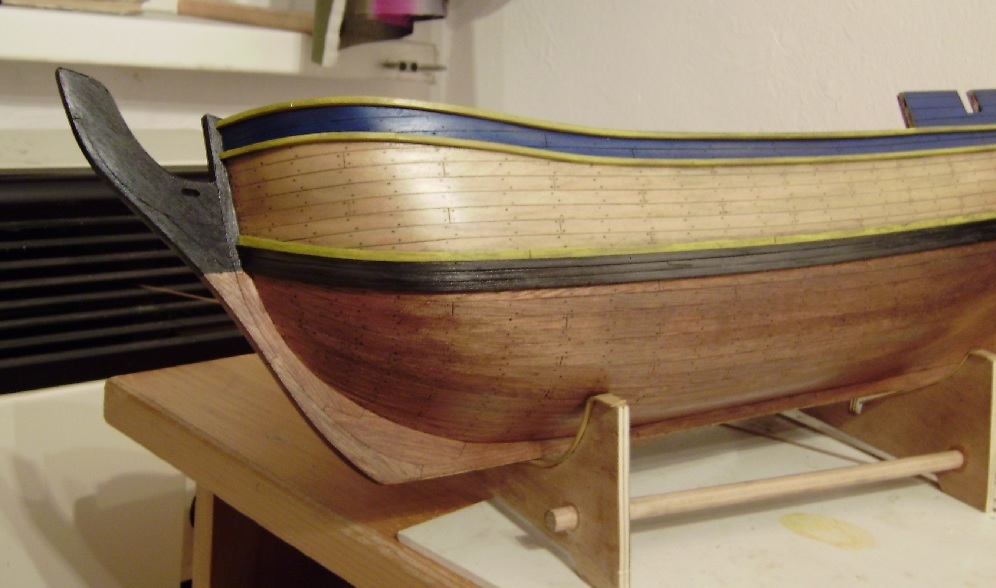
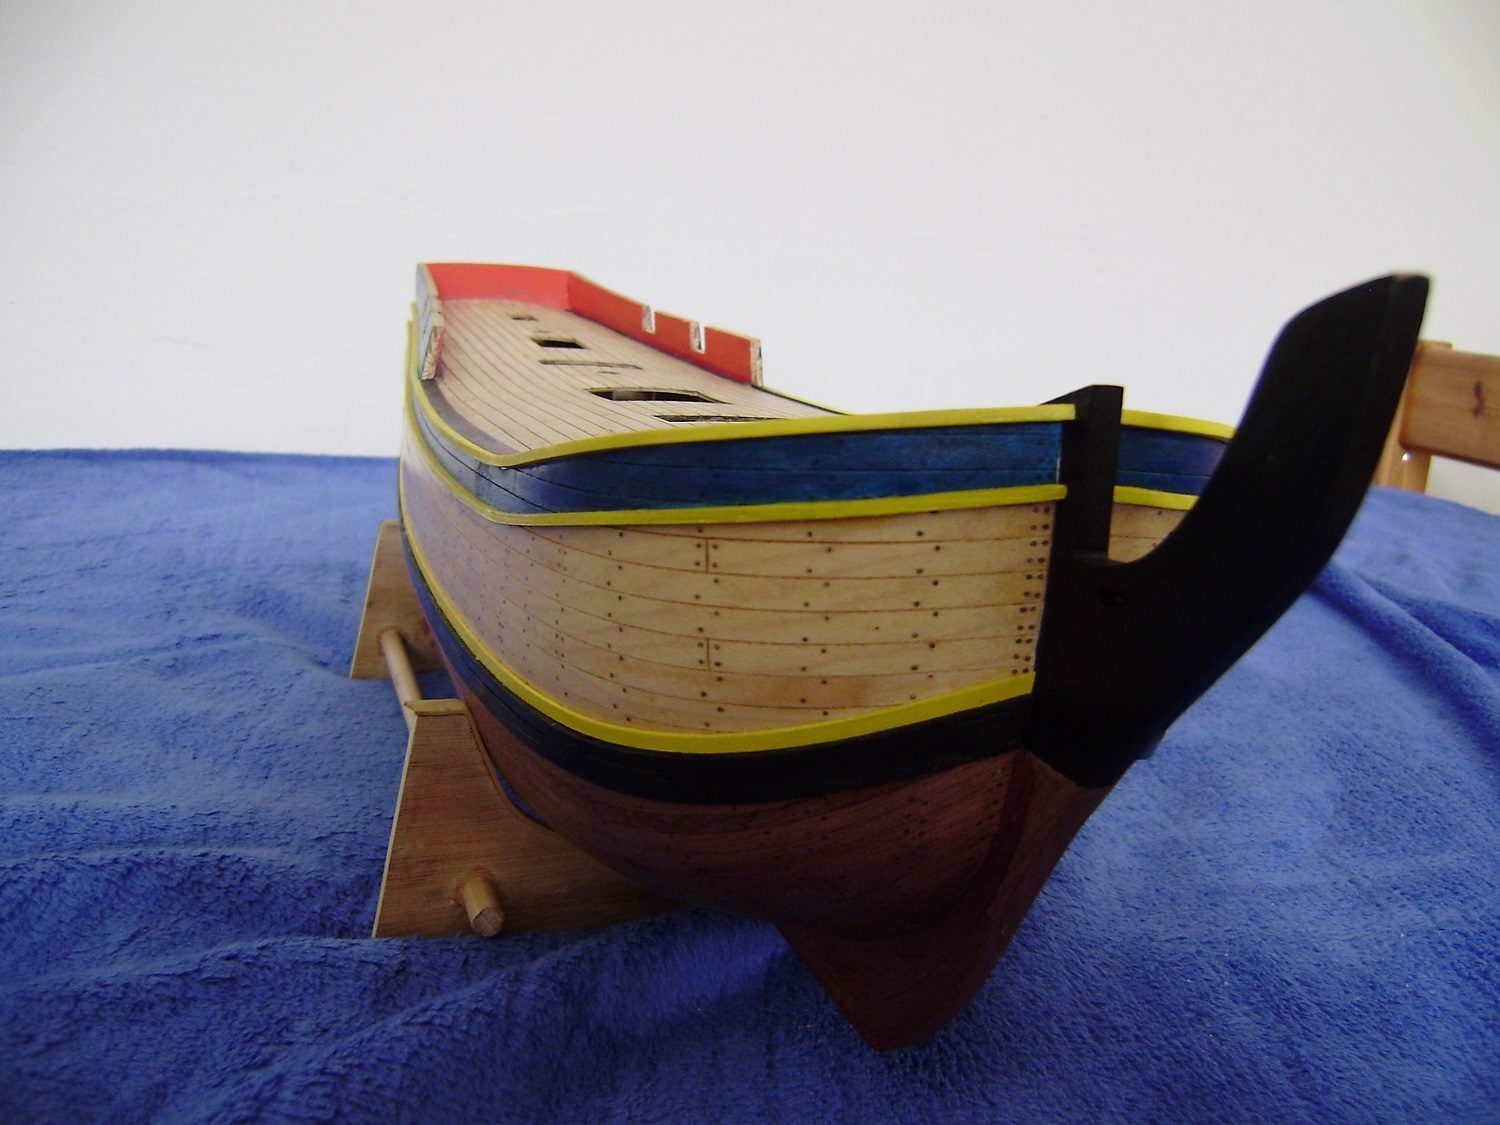
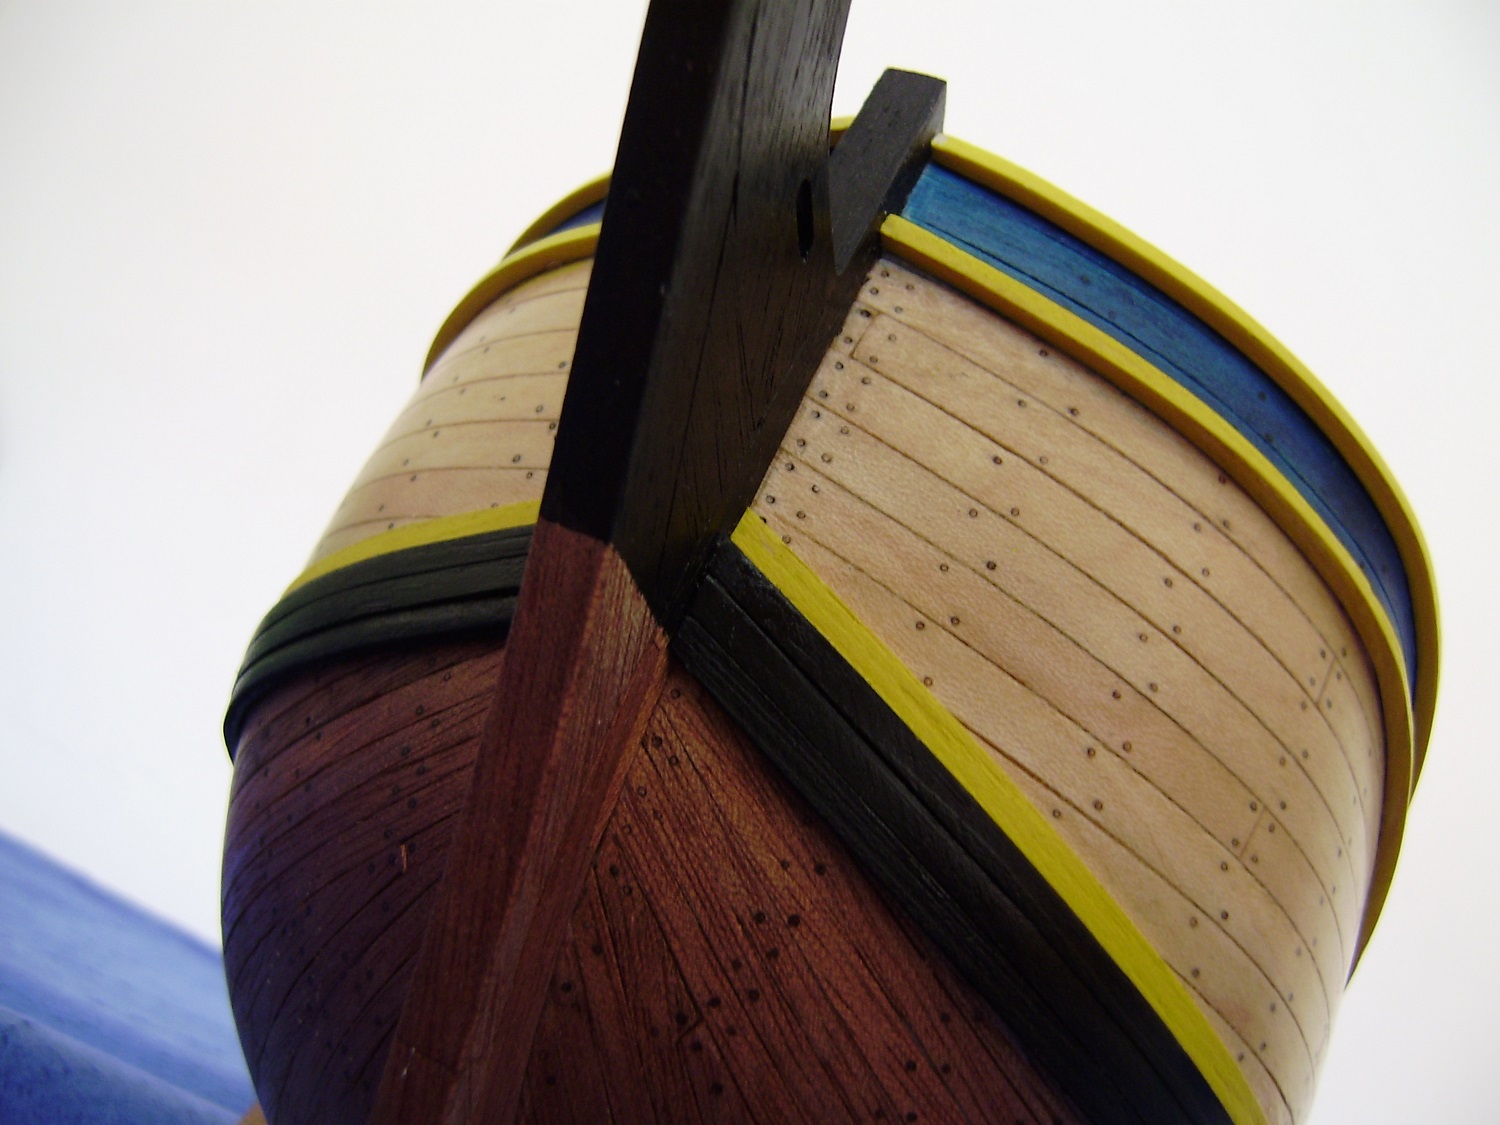
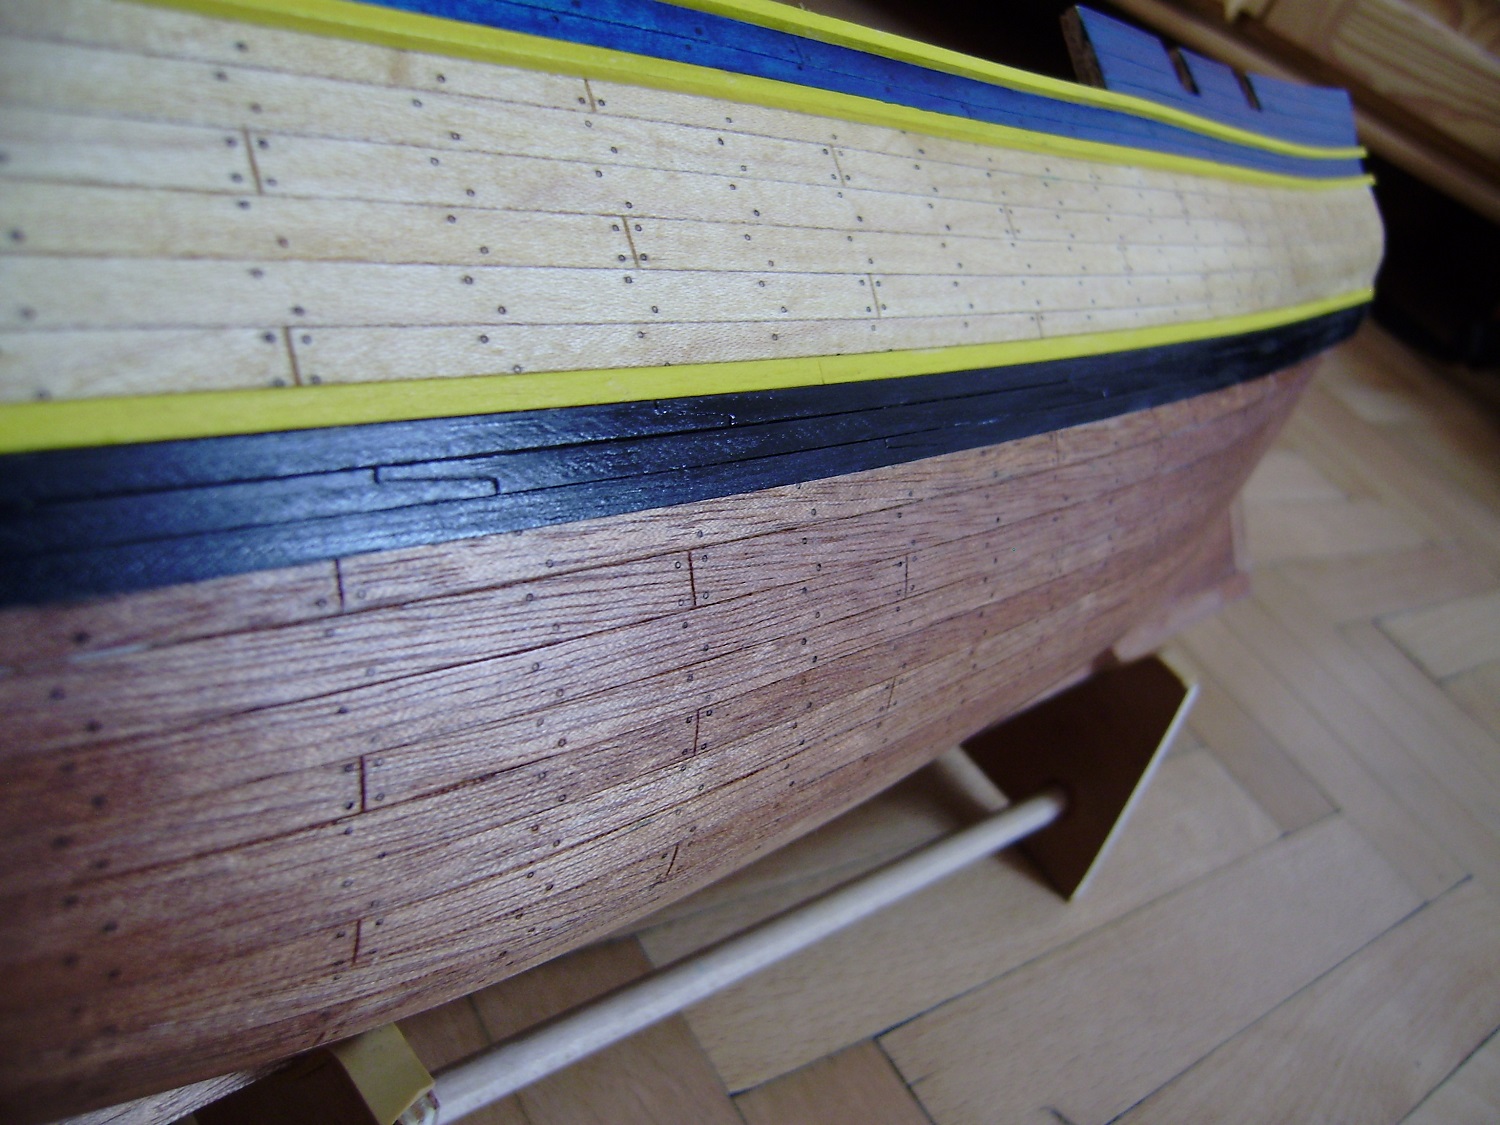
So again a bit further, since the last post I tweaked imitation tarring on board. Following the example of one guy who showed progress on http://modelshipworld.com/index.php?/to ... ils/page-5. First I applied aboard graphite powder, spread it on the deck brush and then wipe with paper surpluses. Next, I painted the deck with oil and let dry for about 5 minutes and then scraped the blade of the knife and eventually married again with oil. The result, I think it is much nicer than when I had split boards made only pencil.I also did a "railing" on the front, it is carved out of balsa wood, it was ultimately the easiest way to do it.Finally, the stretching rails around the body. With them I proceeded as with planking when I shaped wet latičky around the trunk and then dyed and glued, super glue, which I again spotted on scraps of paper. The black slats, I tried to indicate division and so I just gently took a scalpel, painted, glued and then a completely resurfaced the part where a lot exceeded. Otherwise, I did not want those substances were completely flush, because if it previously did so with some bullshit.


- archjofo, ross, Mirabell61 and 3 others
-
6
-
Nice details Andy, good luck with rig
-
Hi Dan, nice to see next bounty here
I´m also on bounty progress by scratch, I´m looking forward your build and I wish you fun too. -
-
Crazy idea but great done model, it´ art and craft
-
Amazing work, what else to say


Dutch Two-decker by SuperSylvester - 1/50 scale - from plans of Heinrich Winter's Hohenzollern model
in - Build logs for subjects built 1501 - 1750
Posted
Very immpresive work, I really enjoy your build, looking forward on next pics