
HOLIDAY DONATION DRIVE - SUPPORT MSW - DO YOUR PART TO KEEP THIS GREAT FORUM GOING! (Only 24 donations so far out of 49,000 members - C'mon guys!)
×


samueljr
-
Posts
340 -
Joined
-
Last visited
Content Type
Profiles
Forums
Gallery
Events
Everything posted by samueljr
-
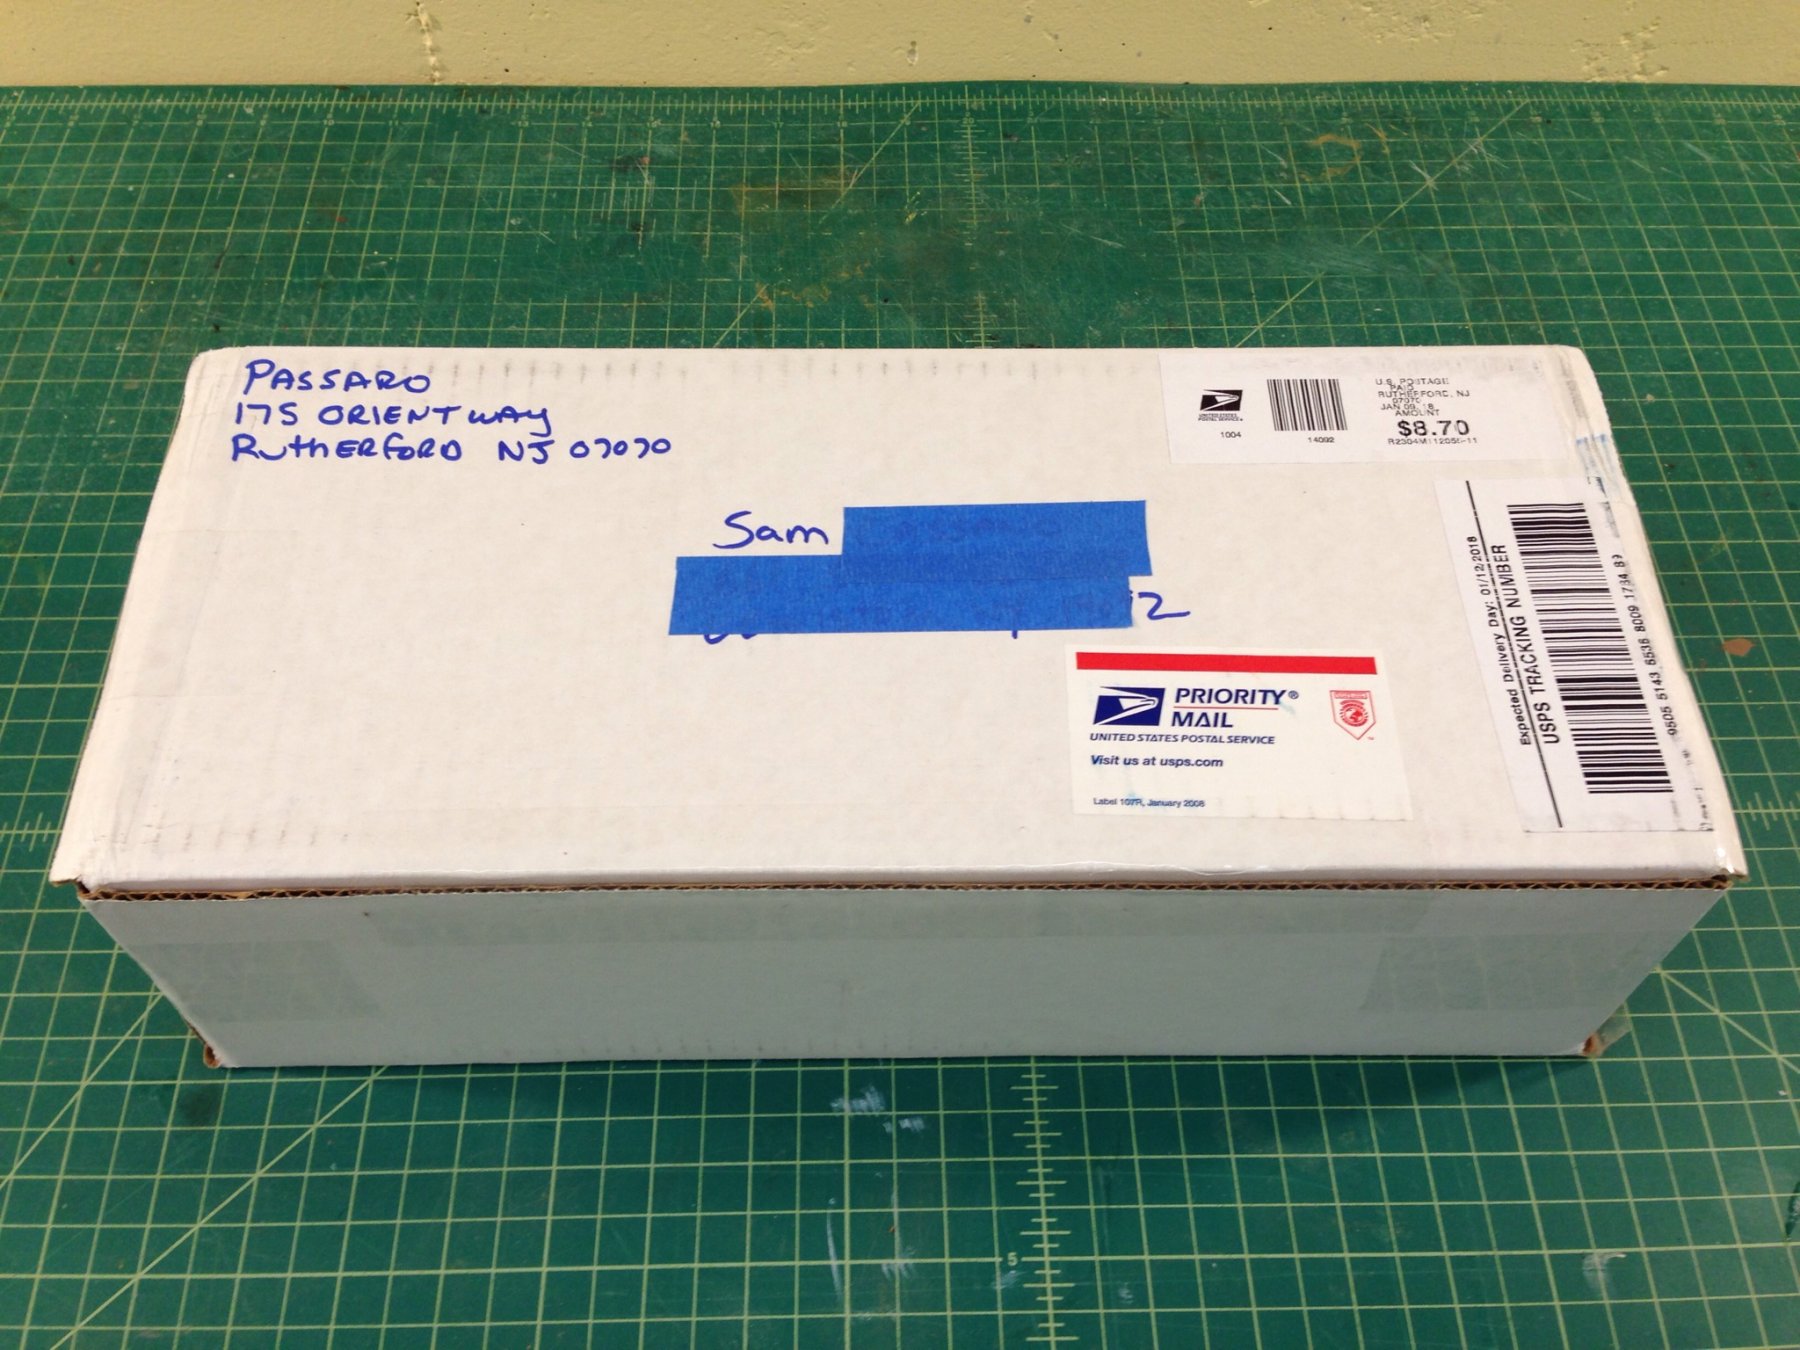
You mail them out yet?............... (Last one - promise)
- 269 replies
-
- 3
-

-
- Queen Anne Barge
- Syren Ship Model Company
- (and 1 more)
-
What number was I? Just wondering............
- 269 replies
-
- 5
-
-
- Queen Anne Barge
- Syren Ship Model Company
- (and 1 more)
-
Joel Couldn't say it any better myself. Sam
-
Thanks Bill It's really one of those details that has been so ingrained into the psyche of builders that if strict adherence to scale were followed there'd be a case for no heads at all. Don't know how that would be received by the general public. Sam
-
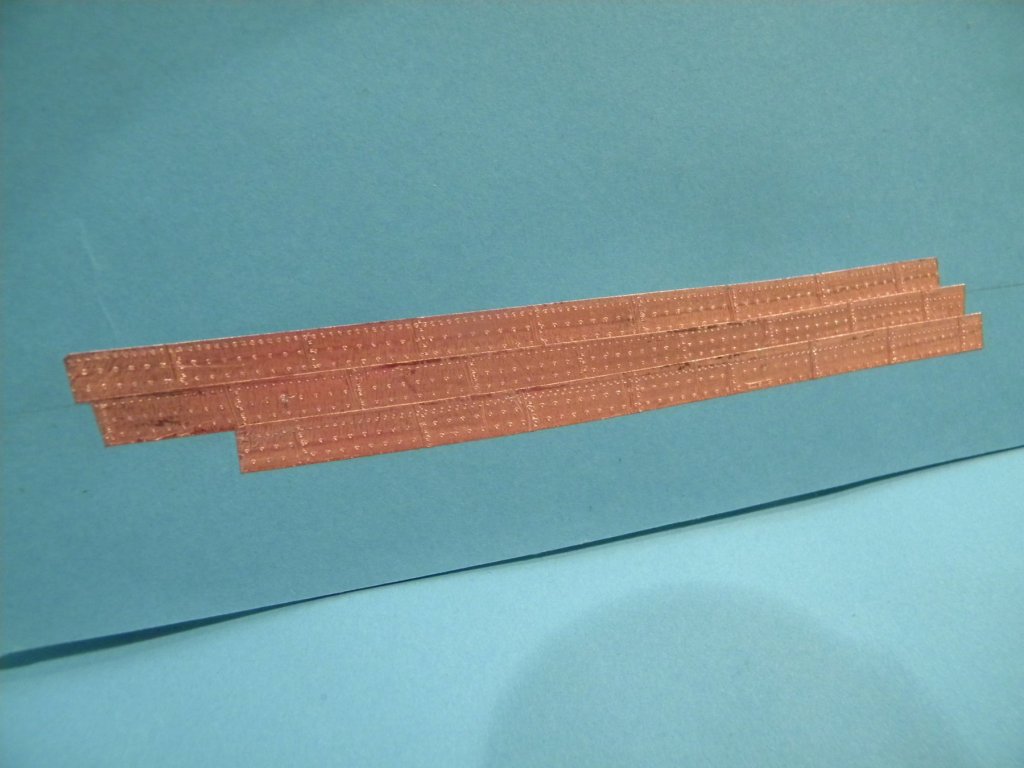
Not convinced yet but thought I'd put this out here. I followed the same process as the first application but this time I limited the field to two lines of nails and was much lighter with the pressure I applied when working the wheels. The pics are (obviously) before and after dull coat. There are a couple of spots that have to be touched again with the dull coat but I wanted to wait to allow the first coat to fully dry before I touch-up. Sam
.thumb.JPG.59603d9ebfcd488f38c1f959ca970aa6.JPG)
.thumb.JPG.1b60be2b82cc0aa63e0975a6164f6c36.JPG)
.thumb.JPG.cf32b46e8091eafd6aa806ec031725fa.JPG)
.thumb.JPG.d89484f94808c6f84a741d5767ddef3e.JPG)
-
I'm going to work up a plate with a very light nail pattern Stay tuned Thank's to all Sam
-
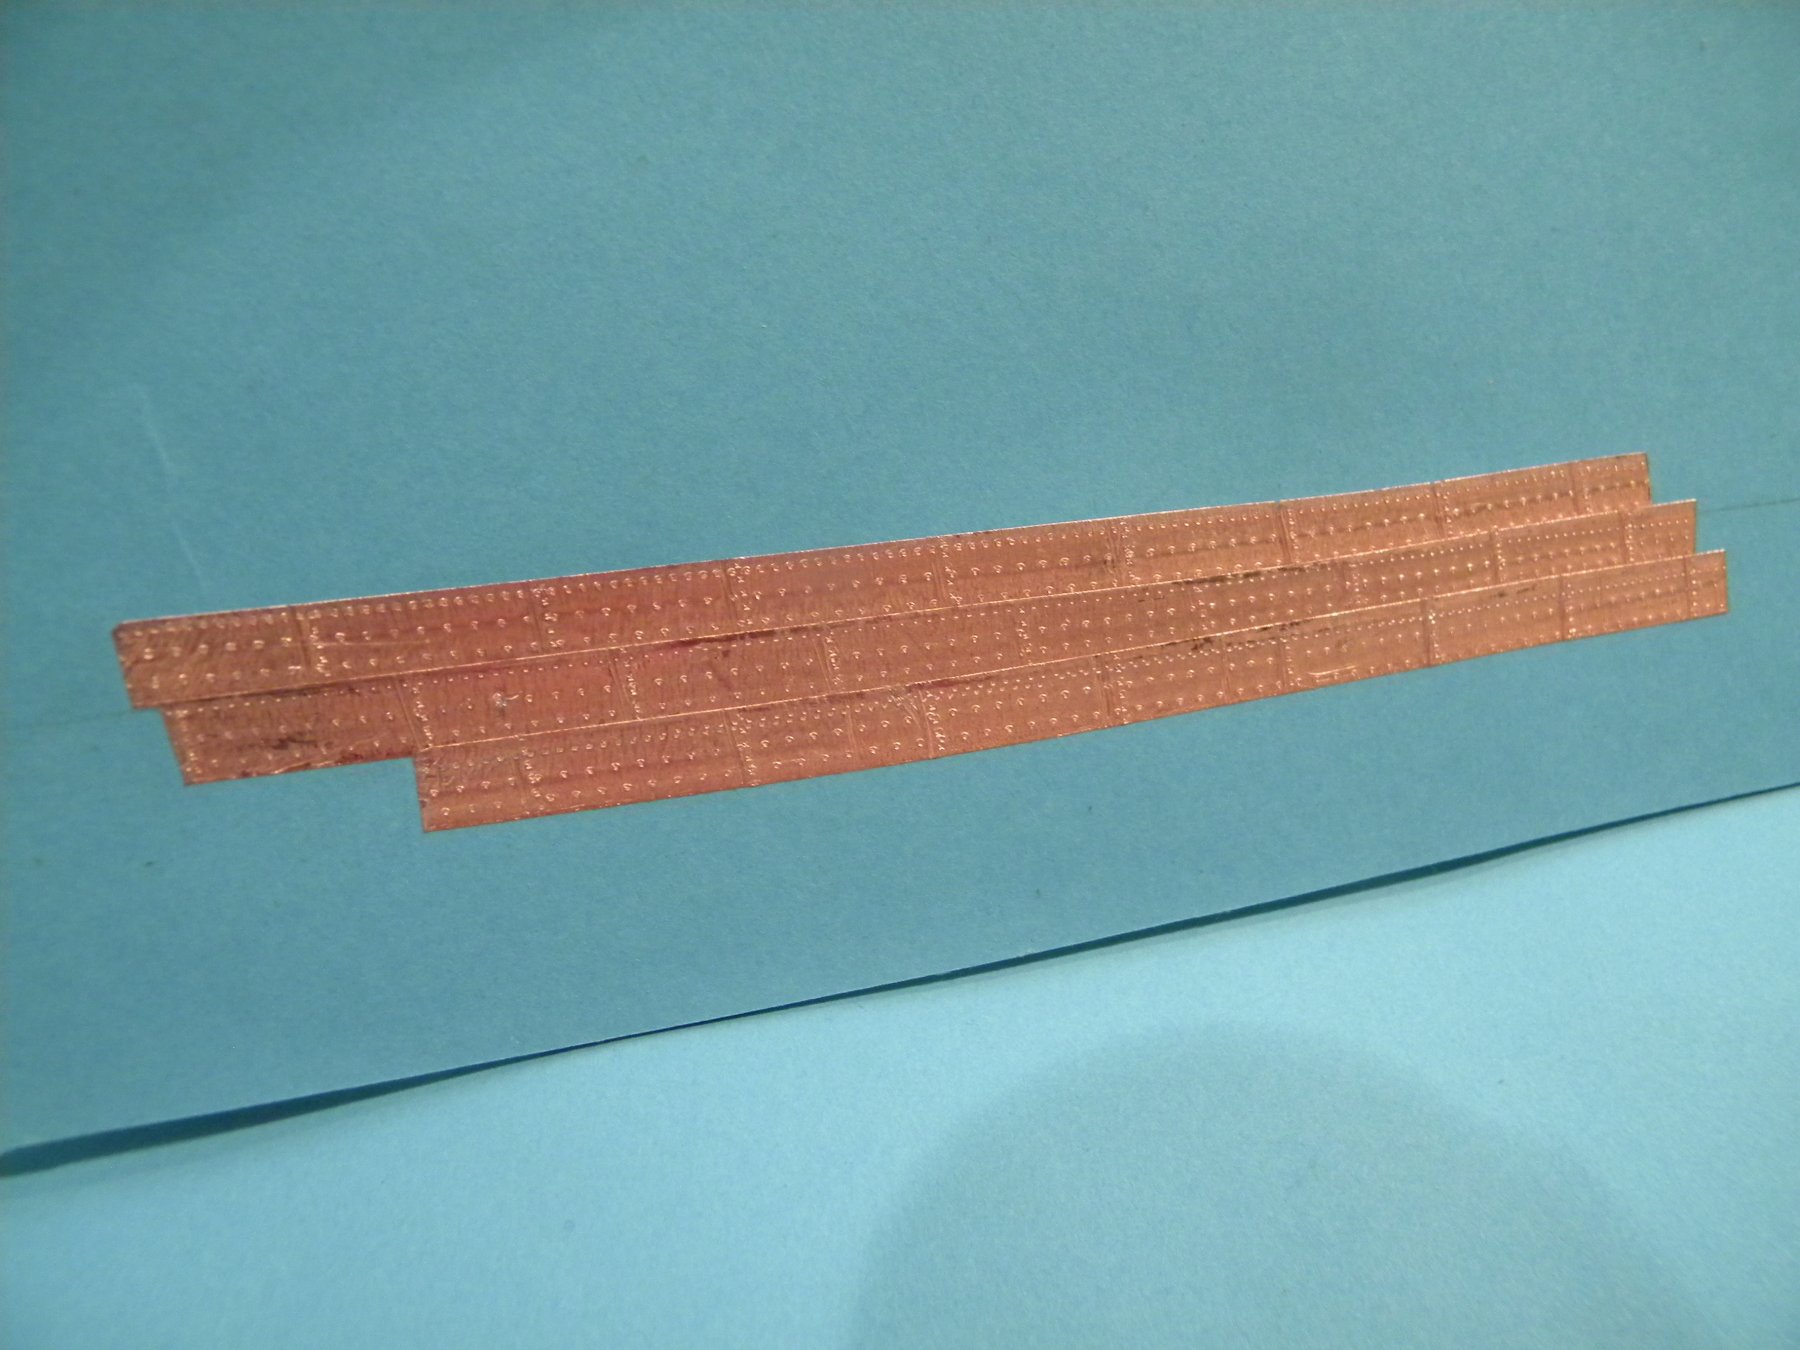
Thought I'd try a reduced nail pattern test for the copper. There is still a tighter small nail line along one continuous edge and perpendicular for the end of the plate. I only used two rows for the field. Instead of burnishing the strip between my fingers I used a small dental tool to smooth the pattern. The darker spots are where the spray on dull coat was rubbed off a bit. I've not used a ponce wheel for this effect previously so I'm still experimenting. Rob, thanks for the pics of the copper plates. I believe they are from the '27 (?) rework so I'm not certain if the pattern is considered accurate to the 1812 era. If anyone knows for certain please hop in. ????????? It continues............ Sam
-
Thanks for the input Druxey and Rob. I would have to agree - I am not sold on the final look (that's why I've only done the short side to date and have not made any more strips) The ponce wheel is aggressive. I'm going to mock-up some strips with the perimeter markings and then with the medium size wheel in the field with only two rows and see how that looks. I'll post them ASAP. Thanks - Sam
-
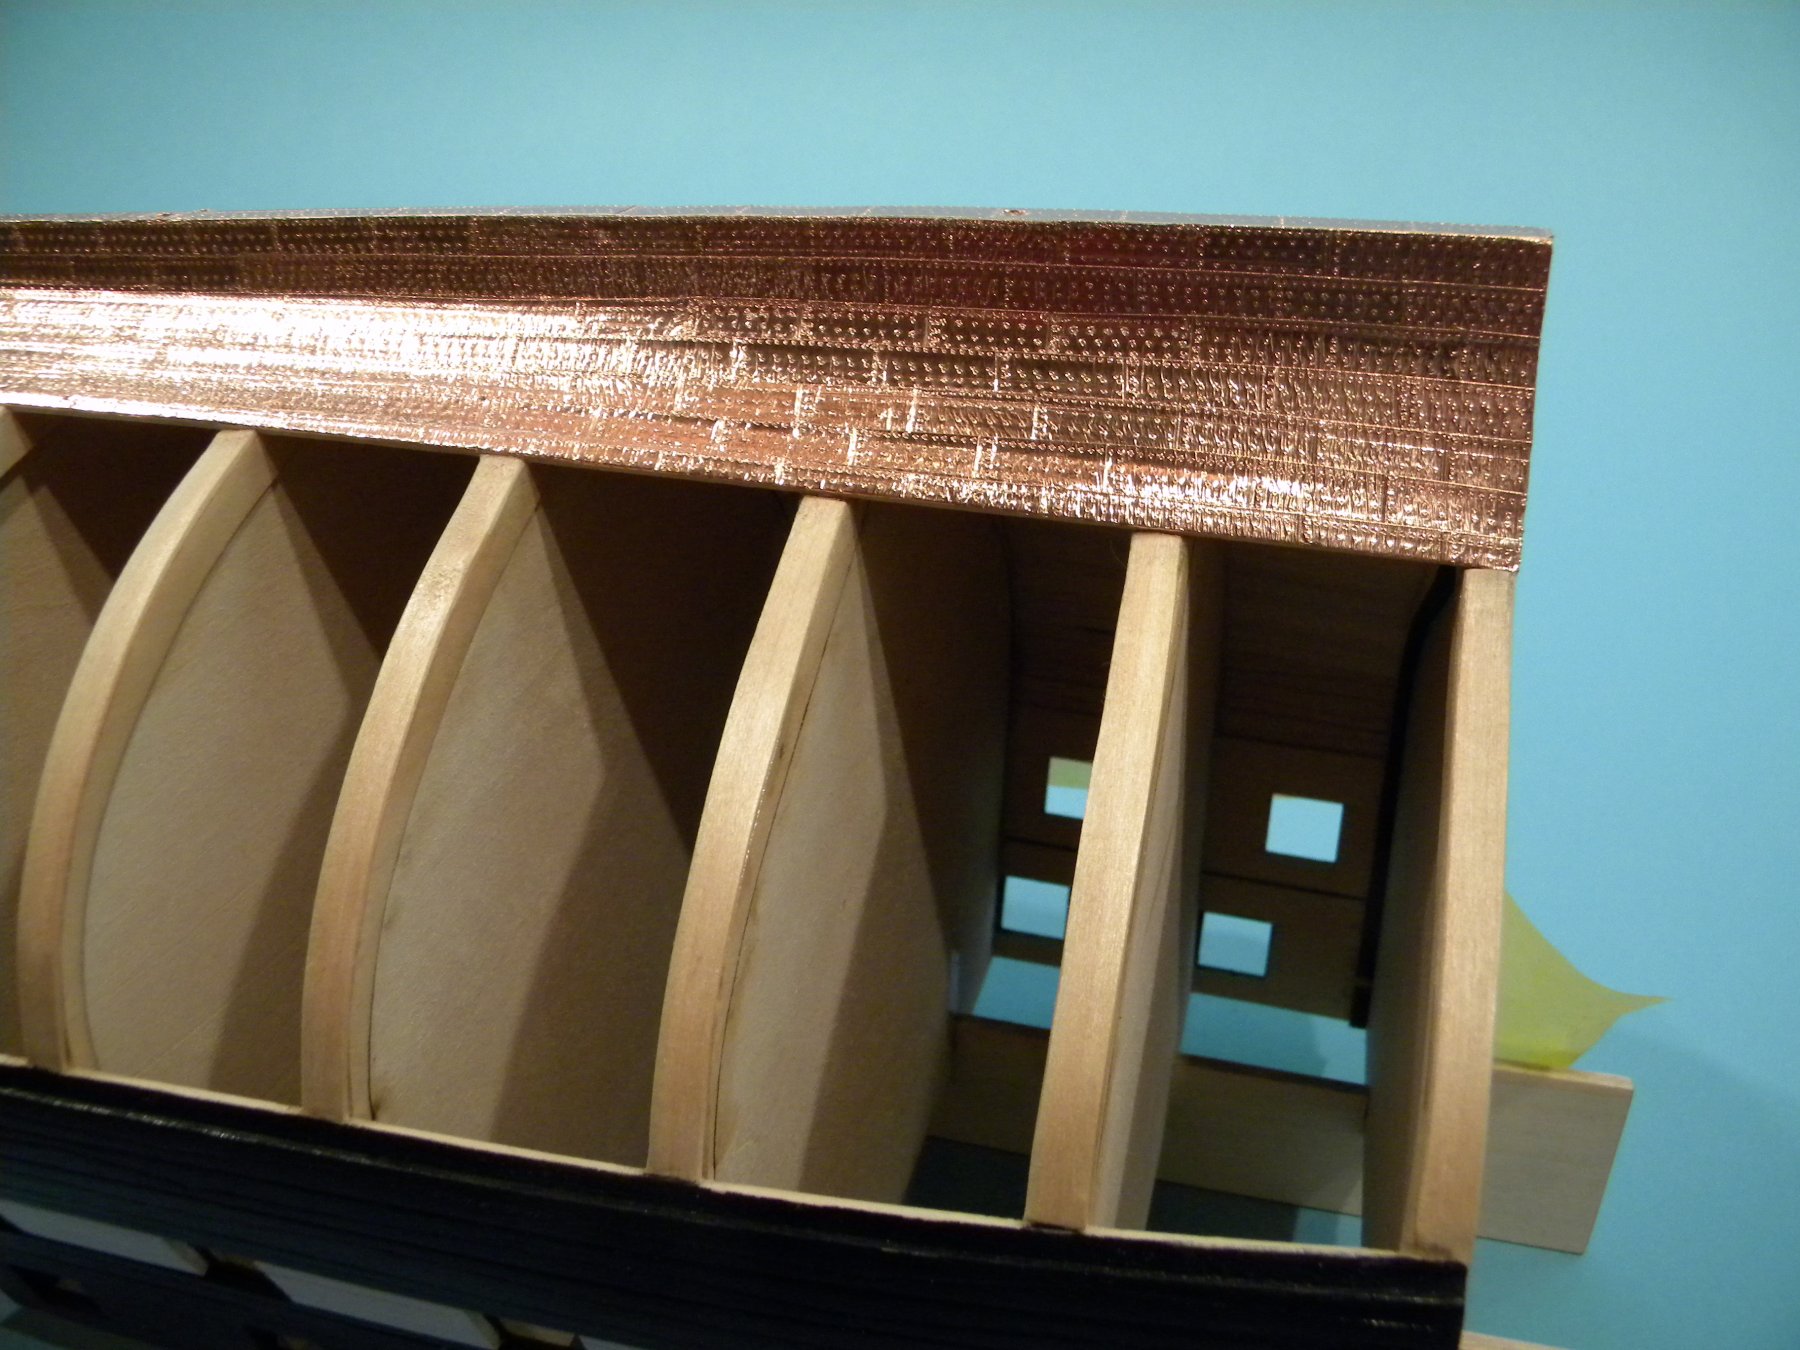
Well an update on the copper - Before I started I drilled two holes in the bottom of the keel for mounting pegs, screws or some type of rod. I haven't decided yet how I'm going to set the hull as it's somewhat awkward in size. It's about 9"-3/4" lonng, 6" wide (on hull) with mast and yard it will be about 35" high and 19" across. I'm not certain where the center of gravity will be. The holes give me the option of pedestals (my personal favorite) although the keel is a 1/4" thick so any commercially available offering would have to be modified. Or I can design some type of brackets/stand that will balance the weight. TBD. In approaching the copper I considered a couple of different options, available stamped copper plates or the use of tape in some way. I've used both previously with good results but I thought I'd keep this build a little more organic and make the finish mayself so tape it was. Upon selecting tape, I was faced (as we all are) with how to best represent the nail heads (pattern). The scale 1:78.6 leaves little option on trying to represnt the actual pattern but does offer the chance to get a repetative look. In embracing my mantra of change I chose to use a ponce wheel set rather than the press method of creating a die with a small block and multiple filed off nail/pin shafts. So I ordered the three wheel set from Micro-Mart. I took a cue from both XBEN and RAFINE going forward. XBEN's CONSTITUTION build is magnificent and his approach to using two sizes of wheels is spot on. I followed a similar approach in laying the pattern out with a small close set row along one edge and then a perpendicular row to represent the vertical edge of the plate. I deviated here though in that I did not seperate the strip (1/4" copper tape and 7/8" plates) I took the back side of a #11 xacto blade and embossed the joint line vertically on the tape. For the field nails I ran three rows of the largest wheel. I then enbossed the strip between my fingers to smooth it out. I've seen RAFINE in his builds use strips as opposed to individual plates and dreading the thought of several hunded plates (even on the reduced surface areas) I decided to try strips. The copper tape is finicky when peeled from it's backer paper after a certain length so I went with two 5" or so strips for each starke to make it manageable. The first strips covered bottom of the keel. I then laid the next strips on working progressively from stern forward and up. When done I capped the bottom edge of the keel. I do not like the bright finish on the tape so I applied a light coat of Testors' dull coat lacquer and used a blow dryer to speed the set. I've found that when heated as drying the lacquer will flatten the color out and leave a more "old penny" copper color. ??????????????????
.thumb.JPG.eb0d4c0d512224cc35df25279fc0cfcc.JPG)
.thumb.JPG.d91b3a2b0bc3ed24b7bdb55a115ba956.JPG)
.thumb.JPG.4a176c112d3637a65ee1499a382ebde7.JPG)
.thumb.JPG.e258669b93dac26ab4d8de39ea3e5005.JPG)
-
Started copper - just pics tonight. Don't know if I like it or not. Still has to be sealed which will knock brightness off of it. Details tomorrow. Opinions? Suggestions? (giving up boats is not an option - LOL!) Thanks - Sam
.thumb.JPG.762a7e0f21b080eea7315773d0fe23fd.JPG)
.thumb.JPG.b5095283147847defee6f55af1a3afc9.JPG)
.thumb.JPG.1ab92251e1eda70c1a3ad0910a844f5c.JPG)

.thumb.JPG.58983c835e0a44117809b9bc5d1d90f4.JPG)
-
The next step in prepping the bottom of the hull for copper is leveling and smoothing it out. Even though great care was taken in planking and sanding, the basswood still has minor imperfections that could show through the thin copper tape. The bottom was "washed" with an almost liquefied water based wood filler. This achieved two tasks; one filling in any imperfections and raising the grain of the basswood one final time. Once the surface was dry it was lightly sanded and wiped down. The feel to it at this point is almost glass like. There are a number of different theories regarding surface prep for adhesive copper tape, ranging from no prep at all up to using a a coating of some type of paint or gesso. Keeping with my philosophy of new approaches on this build I've decided to use a brush on primer that has a leveling property to it. It was brushed on (very lightly) to the point where the wood is almost visable through it. Once dry it will be sanded and wiped down. This should leave a smooth defect free surface that will provide good adhesion for the tape. The pics show only through primer application. I'm going to allow 24 hours dry time before final sanding. To be continued.................
.thumb.JPG.bcebda1b60fbe9e3570fdd9153c4670c.JPG)
.thumb.JPG.51c632f49d6ddc5fe786d59e0629f7b8.JPG)
-
The starboard side is now completed. After finish sanding, painting and sealing the ends of the planks (which in the previous post) had been left long were cut and sanded flush with the bulkhead face. This was done to ensure that none of the paint would get on the surface of the bulkhead (frame) which will be left with a natural finish. I'm now working on (deciding) the next steps in the process of my build. I'm drawing some of the detail items inboard and experimenting with copper nail patterns. I've just purchased a set of ponce wheels and am considering using them to simulate nail heds as opposed to the previous (I've followed) "press" method of a small block with pins/nails filed off and pressed onto copper tape. Stay tuned.............
.thumb.JPG.982b023ea94a82aaae31d8227c8f228b.JPG)
.thumb.JPG.538c8ebfe7767d0496d699a53bf23f8f.JPG)
-
Steve Just caught up on your LONGBOAT build. One of the best out here and the coolest presentation. NICE! Sam
- 165 replies
-
- 2
-
-
- finished
- model shipways
- (and 1 more)
-
The starboard side is (rough) planked up to the bottom of the rail. It bears noting that even though pre-sanded, the commercially obtained basswood strips' thickness is inconsistant. They will be sanded progressively until a uniform and smooth surface is achieved. This will involve going thorugh about 4 - 5 grit levels to remove material and return an acceptable surface for finishing. The gunport stripe and wales were finished in the same manner as the port side. The anchor stock planking joints once painted are passingly visable. Anything heavier would be structurally threatening to the ship! Sam
.thumb.JPG.411b181eae7c4d7396c8fe738f8c7b78.JPG)
-
Bob Good to hear from you. Great job on GRANADO (wouldn't expect anything less from you). I'm trying a different approach to the build's appearance in regards to my approach to finishes. From an engineeriing perspective the build is incorporating and blending some different methods. The two longitudinal pieces serve a couple of purposes. Besides aiding in the initial alignment of the bulkheads they provide rigidity to the structure during planking. Because they are higher than the bulkheads the hull can be inverted for planking below the wales and/or coppering without risk to the structure. They will be released along with the inner bulkhead tongues, like Syren’s (Chuck’s) 18th CENTURY LONGBOAT. In essence what began as a plank-on-bulkhead becomes a hybrid of sorts and morphs into a plank-on-frame with the entire inner belly of the hull wide open. Each deck level will be built sequentially (for the most part) Orlop upwards to Spar Deck. The process/method arriving at the open hull is unlike any cross section available on the market (I think). As far as being a kit – anything’s possible……………. Thank’s for checking in – keep in touch Sam
-
Joe I've got about 2 dozen different colors (both marine and railroad) but no roof brown........ Sorry Let me take a look at my drawer and I'll see what I can part with Sam
-
Thank you to all the likes. I am attempting to modify my building style on this project. I am obligated to using basswood for a number of reasons, but am attempting to achieve a smoother finish than I have on previous builds. Generally I embrace the grain of the wood (not the "fuzzies" so much) and allow the paint and/or stain to react natuarlly to the wood hoping to arrive at a more natural or realistic appearence. This time out I am sanding progressivly (although still not enough for some people) through 4 - 5 grit levels. I am also sanding (very lightly) between coats of paint which have increased from my normal 2 - 3 thin coats to 4 - 5 coats finished with a wipe on poly. It's producing a tighter result. So far, so good ( I think).............. Sam
-
The port side finished being planked , sanded, painted and poly'd. Starboard - just getting started.....................
.thumb.JPG.21e8cb6e7e0f90e25148634bf67b64b2.JPG)
.thumb.JPG.33a6d224e8a4a86552942a5e8301d2ed.JPG)
.thumb.JPG.63fa38bbc188fb7c1b02a2e2da2e60dd.JPG)
-
The next step(s) on the port side is the run up of planking from the gun port stripe to the underside of the rail. This was accomplished in three steps; First, four 3/64" x 1/16" strips were placed above the stripe arriving at the bottom of the spar deck gun ports. Second, an assembly of 2 each 1/8" x 1/16" and 3/64 x 1/16" strips were glued together and then measured individually to fit between the gun port opennings. I find this easier than measuring and setting each individualy. Third, two 3/64" stips were glued up to the unserside of the rail. They will be cut/sanded to length, progressively sanded smooth and then finished with several coats of thinned paint and wipe on poly. Next - repeat all planking above the wales on the starboard side................
.thumb.JPG.2e6c150c6fd25b141a272f8318beabc8.JPG)
.thumb.JPG.ce6a0caa1969cc27d8ec29396834018b.JPG)
.thumb.JPG.bfb9e0e8f728a073f88db52d759103f7.JPG)
.thumb.JPG.747f3b0265cd6fe8fbadacb45878adc8.JPG)
-
Joe (Thistle17) Yes, the acrylics were thinned as I was using them. A small dalop of paint was sqeezed out and my brush was dipped into water and then into the paint. Just a small portion of the paint was worked at a time until I had the consistancy that I wanted. Also if the paint went on a little too heavy I would wet brush it to spread it out. A gauge was that if I could see the paint filling in the joints between strakes it was too thick. It's best to practice a bit on some scrap. I too am a former Floquil user. I loved their solvent based paints and still have a quite a few left. I don't have much need for them as the color palette of my more recent projects have been limited. Sam
.JPG.3b488c2fe7386f6e95e3d711ccdc0080.JPG)
.JPG.c11eda6fcf3c64b820ff0f715b3ea50e.JPG)
.JPG.b6abfcb8603712fb51be78c8c4da3a5c.JPG)
.JPG.2c01053c7f6366f8baa50018919efdd8.JPG)
.JPG.b7dd67a39ea659a9b80aada347ef830e.JPG)
.JPG.5b2c9e0ffae8543ed118311c7f0892c4.JPG)
.JPG.48210e76c8310ab261eb9ebb7e282f47.JPG)
.JPG.e476752db0b5df9bff4704435c7b7bd3.JPG)
.JPG.a4c99ea2f248c31ed7b07b575e0f47ea.JPG)
.JPG.b13a7b5aac33d6b76474a9d9c9114995.JPG)
.JPG.5b105b04ad28da55564c81c71cb98bbd.JPG)
.JPG.ca1cce09209b557e19fa347017485465.JPG)
.JPG.53d5bd5c69acb7dc1bbe6205d3e78cf3.JPG)
.JPG.8e15fe70db77c5a0f04857a75e95d85c.JPG)

.JPG.a8eadecd1f9988d219f4f6a1a027b20d.JPG)
.JPG.225c3d9ccec9558d64ed66fd80926dce.JPG)
.JPG.6fbef7ca8769a9e71a391cf8a1f22489.JPG)
.JPG.3e640de11badff2109bd4ca0f1ddd0e6.JPG)
.JPG.35035ea8aa137cfc9f61d8952edec1e7.JPG)
.JPG.f2e20c7b4dbc0f7a261fcf8cd973a0d0.JPG)
.JPG.f73030904b6a9093573b39373c29ad77.JPG)
.JPG.e4ab489c80110ab34ea0cc1957e12f55.JPG)
.JPG.206a6d448696aedfa3f1a75db83589ee.JPG)
.JPG.3f3eef58ea603eaf7bdfbb534296a5e2.JPG)