HOLIDAY DONATION DRIVE - SUPPORT MSW - DO YOUR PART TO KEEP THIS GREAT FORUM GOING! (Only 24 donations so far out of 49,000 members - C'mon guys!)
×


samueljr
-
Posts
340 -
Joined
-
Last visited
Content Type
Profiles
Forums
Gallery
Events
Everything posted by samueljr
-
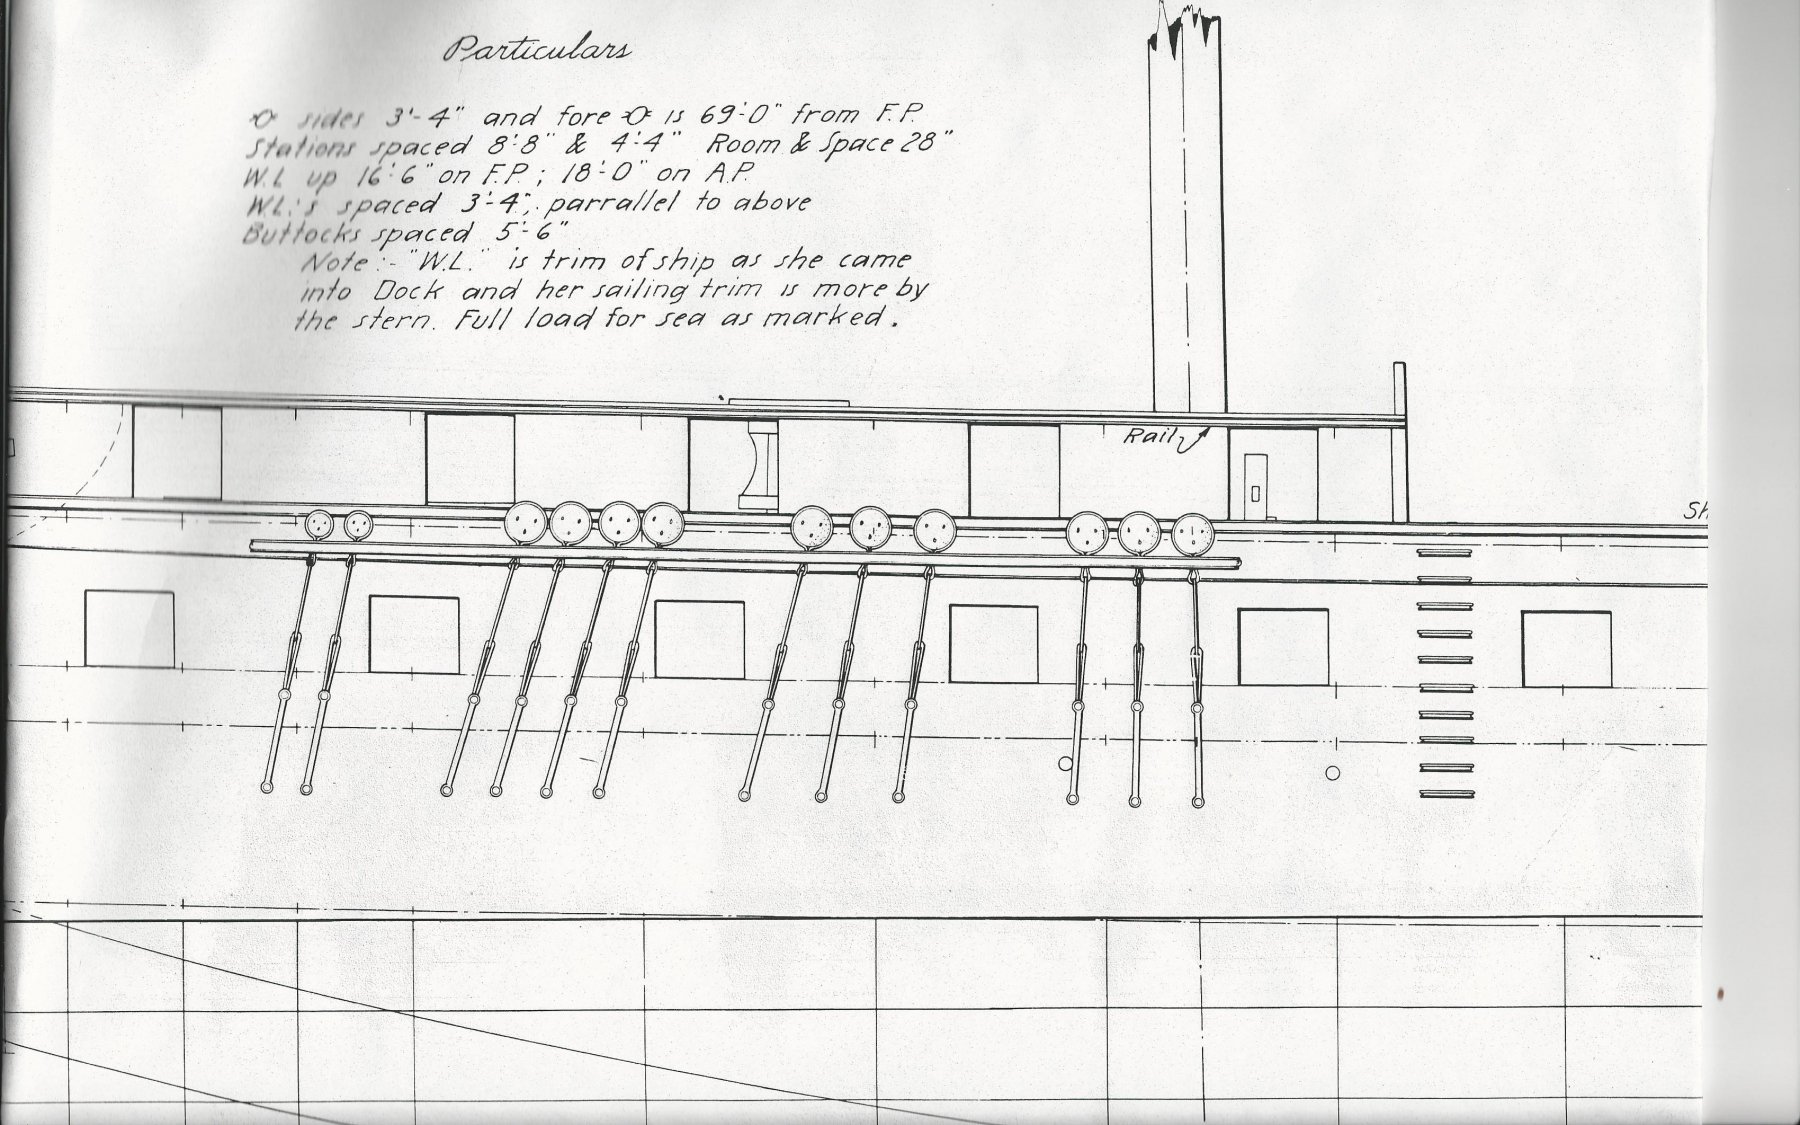
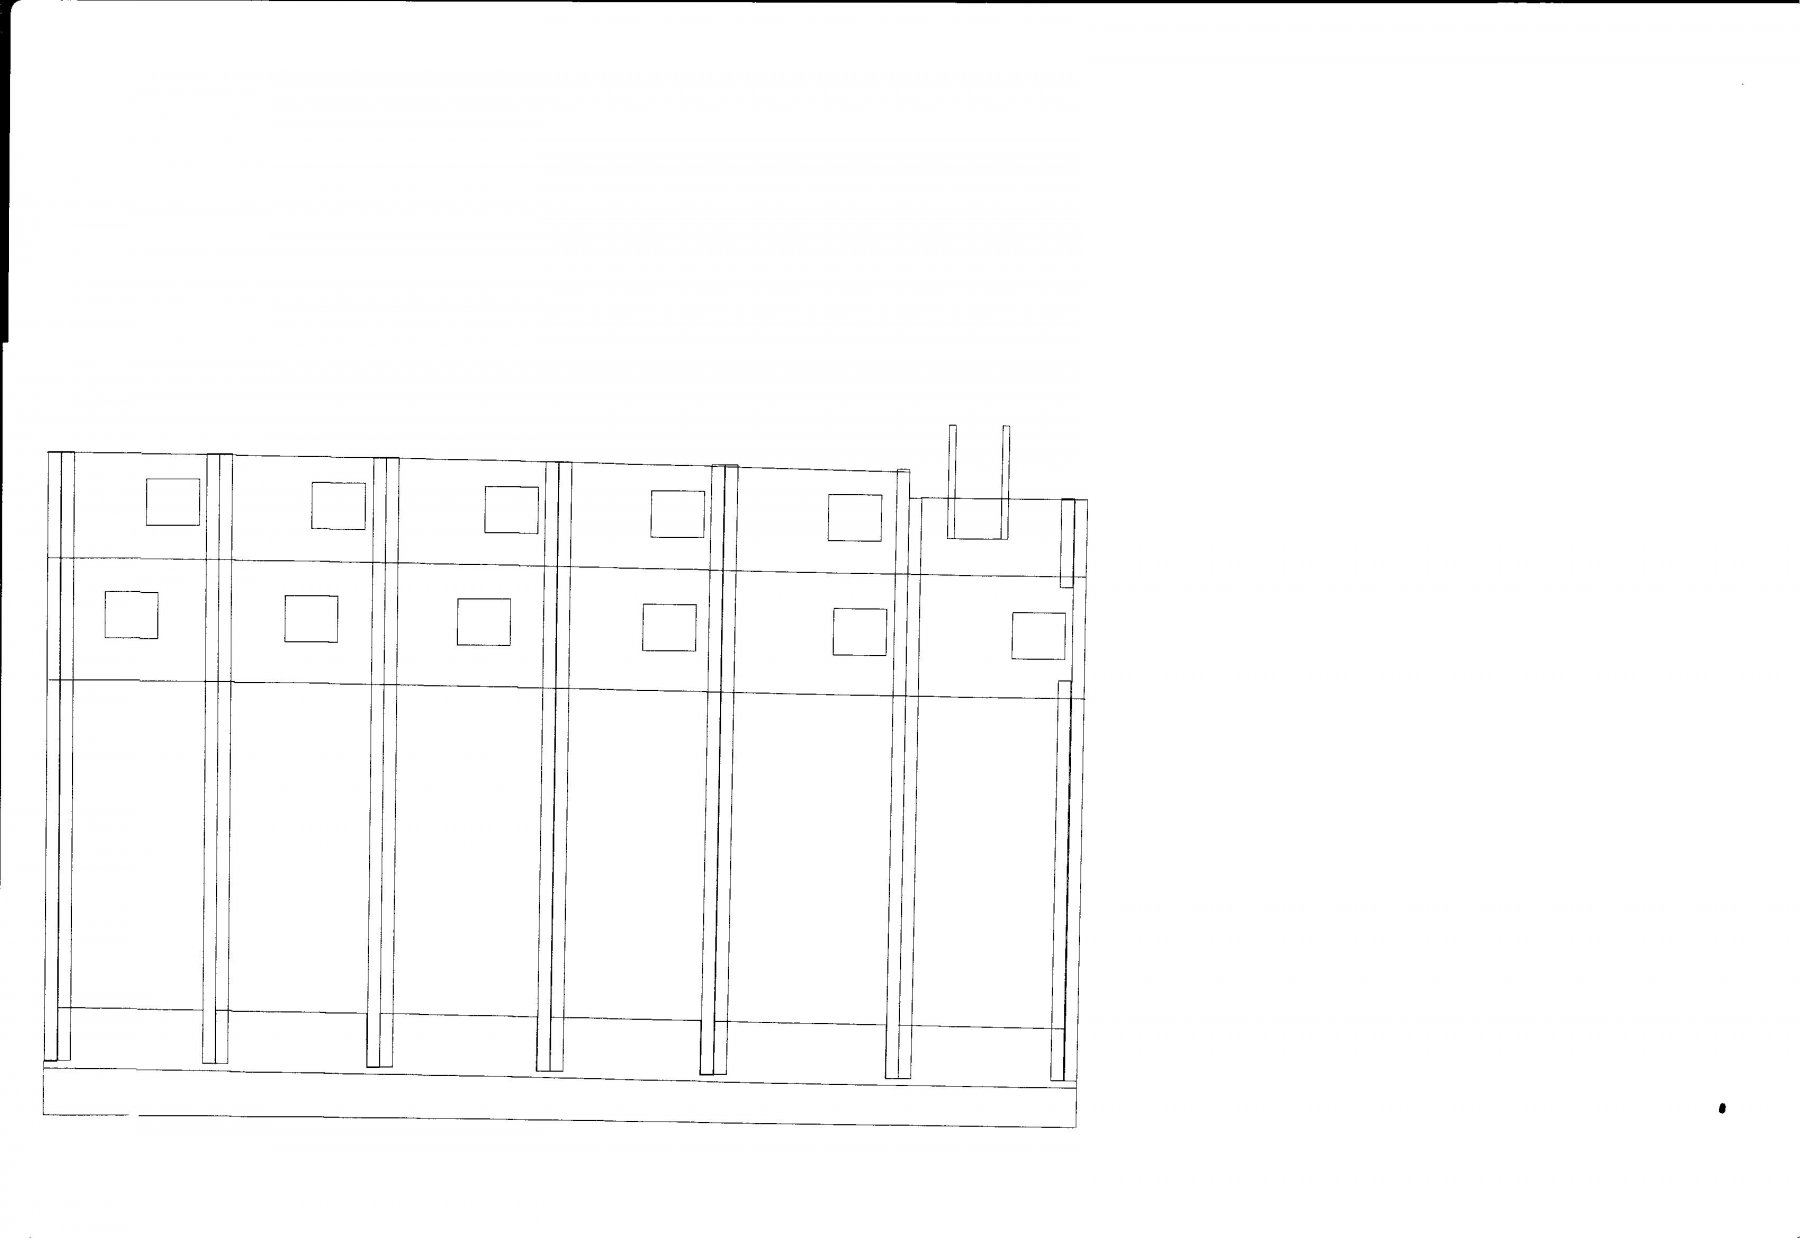
THE PRESIDENT'S port alignment as per the Admiralty Sam
-
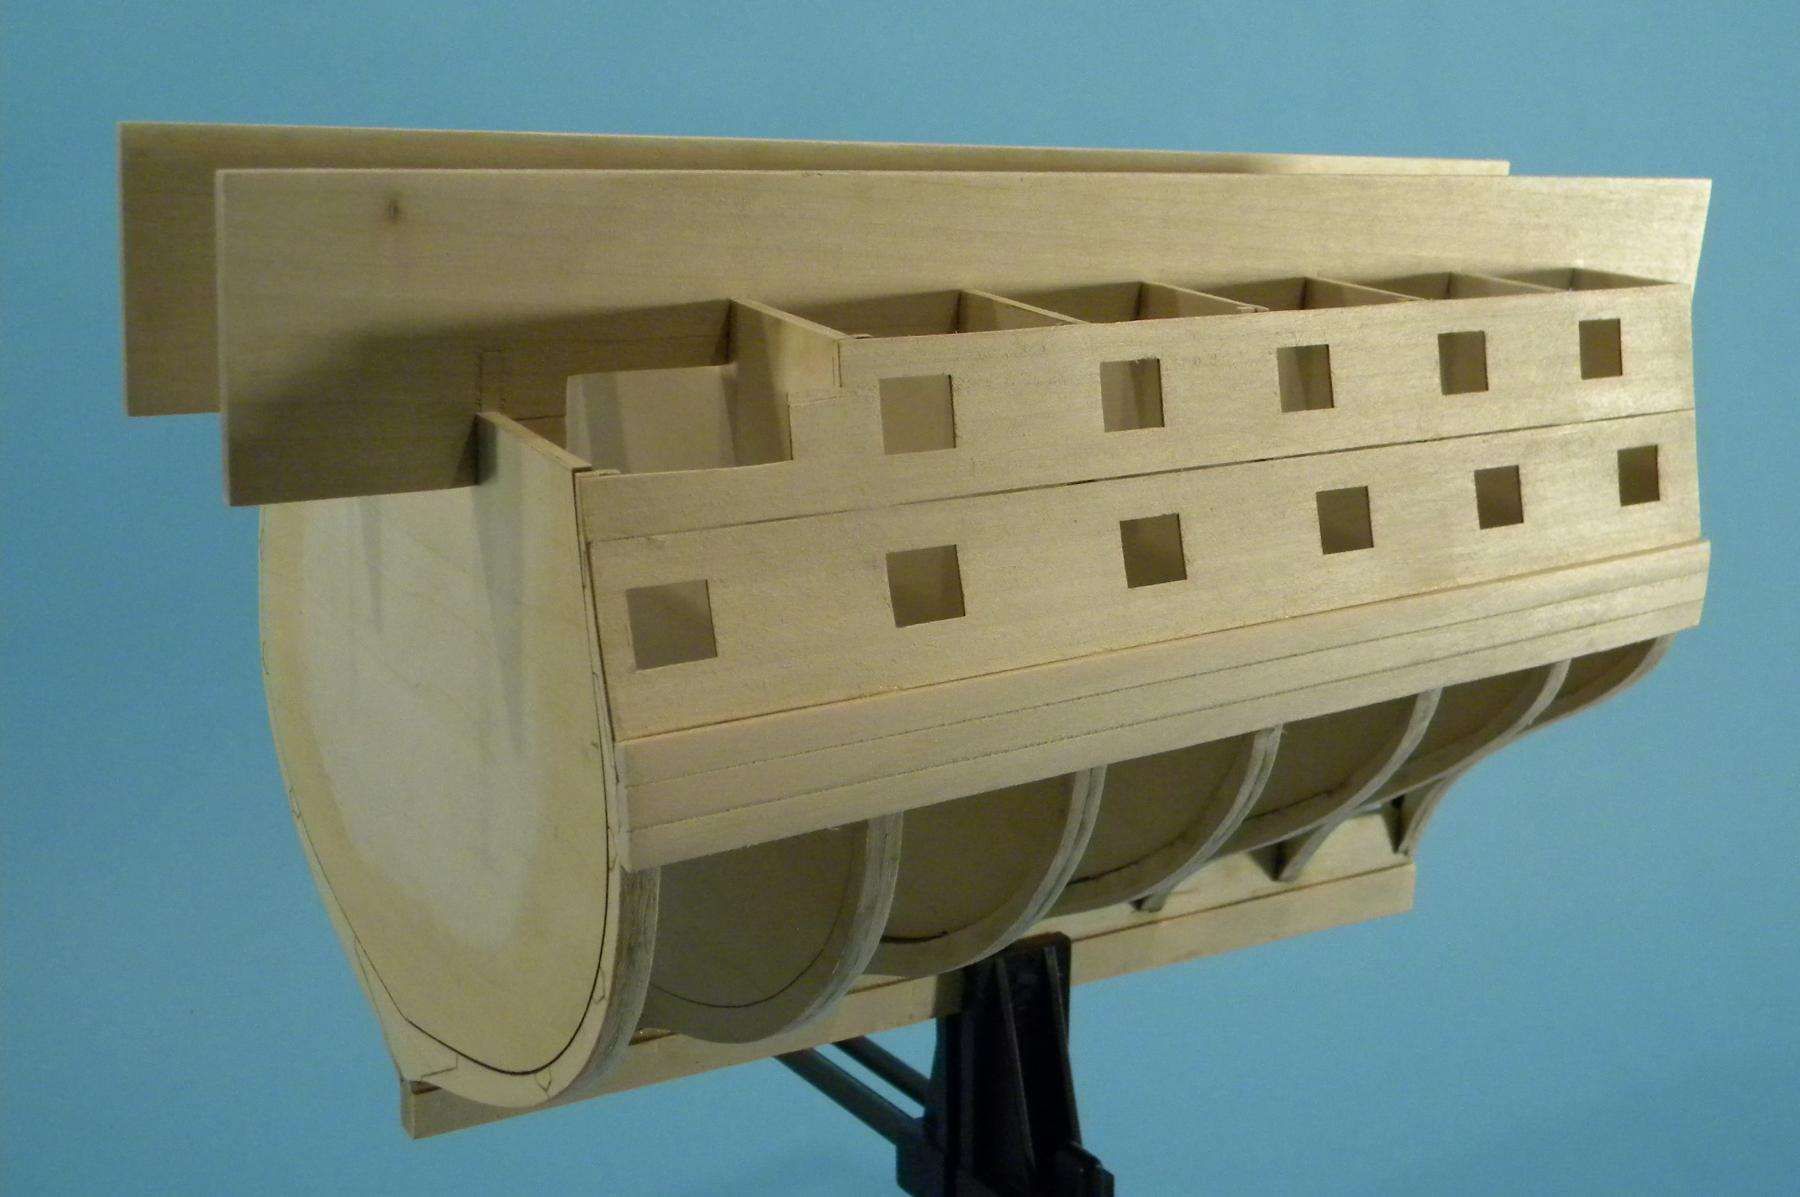
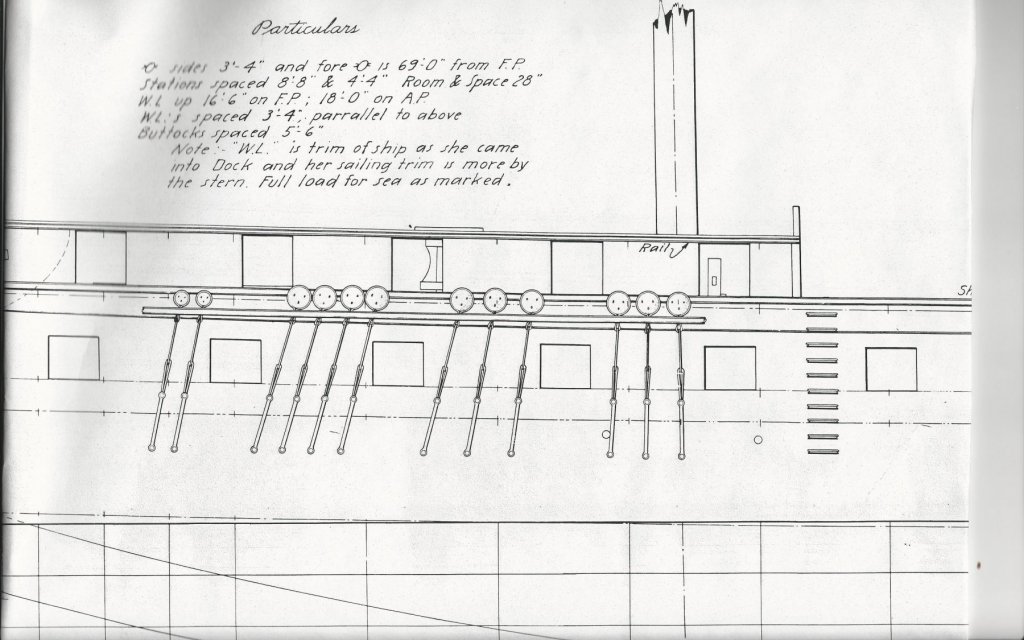
My thanks again to everyone for their interest and likes. The journey has just begun. There has on several occassions been coment on the gun port alignment. It could be the angle of the photographs (for that I apologize) but the ports are not in line. Although they are not in the usual staggard sequence from deck to deck which most of us are used to, they are correct as per the source material (the drawings of the PRESIDENT after capture as per the Admiralty) I've attached an image of the drawings used for the build here and will later this evening upload an image of the PRESIDENT's port alignment. Thanks - Sam

-
Thank you to all for the likes. Patrick - I'm not that fast - it's only Port side. I still have to repeat everything on Starboard......... LOL! Sam
-
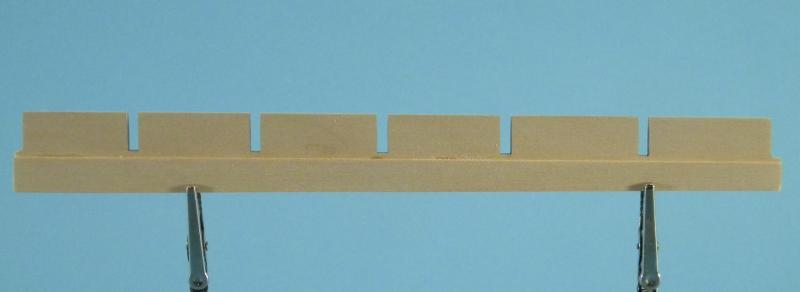
As stated in a previous post the gun port stripes consist of 4 - 1/8" x 1/16" strips glued together off of the hull, progressively sanded and painted with several thin coats and then with a coat of wipe - on poly. They were cut to length (the reveal is on 1/32" on each side) the edges were painted white and then they were glued into place. The first and last piece(s) were left just a bit long and then sanded back into the hull. Next Up - Planking the rest of the side
.thumb.JPG.8b5fa94c951e99bd6e611b32dd8976f7.JPG)
.thumb.JPG.0cb4c1da5fca61fada19afd598271f1d.JPG)
.thumb.JPG.e0e28d0da272a416d1d0a7b611d73636.JPG)
.thumb.JPG.0efb477626b714fe6b0792ee665b9767.JPG)
-
Thanks For The Likes!
-
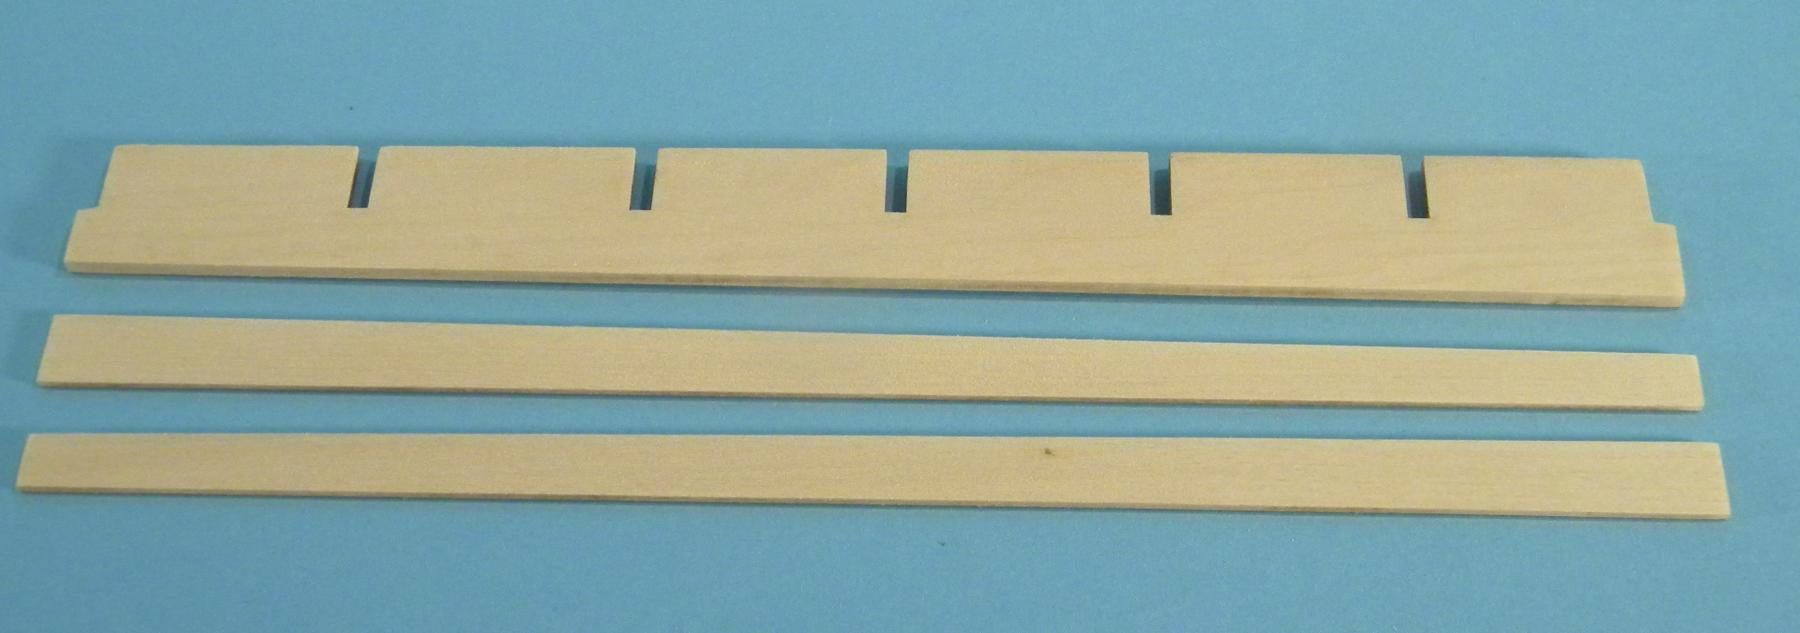
The next area moving upward are the gun port stripes. To get a crisp paint finish a number of steps will be/were performed off the hull and prior to installation. The area(s) around the gun ports and their inner edges were painted. Additionally 4 - 1/8" x 1/16" strips were painted white, while 1 - 3/16" x 1/16" strip was painted black. All surfaces were sanded progressivley. The strips and hull area were given several thin (water consistancy) coats of paint with a very light sanding between coats (600 grit) and wiped down. After the final coat of paint a finish of wipe - on poly was applied. The colors used are Artist Acrylics, Titanium White for the stripe and instead of a deep or stark black (such as Mars Black) Paynes Gray was used. It is a duller black, almost sooty in apearence. The white strips will be glued together off of the hull and then cut to length to fit between the gunports. The black strip will cap the installation. This will create a sharp definition between the black and white surfaces. Next up: installation of the strips
.thumb.JPG.d2468a3c821b8d589adc5eddbd527055.JPG)
-
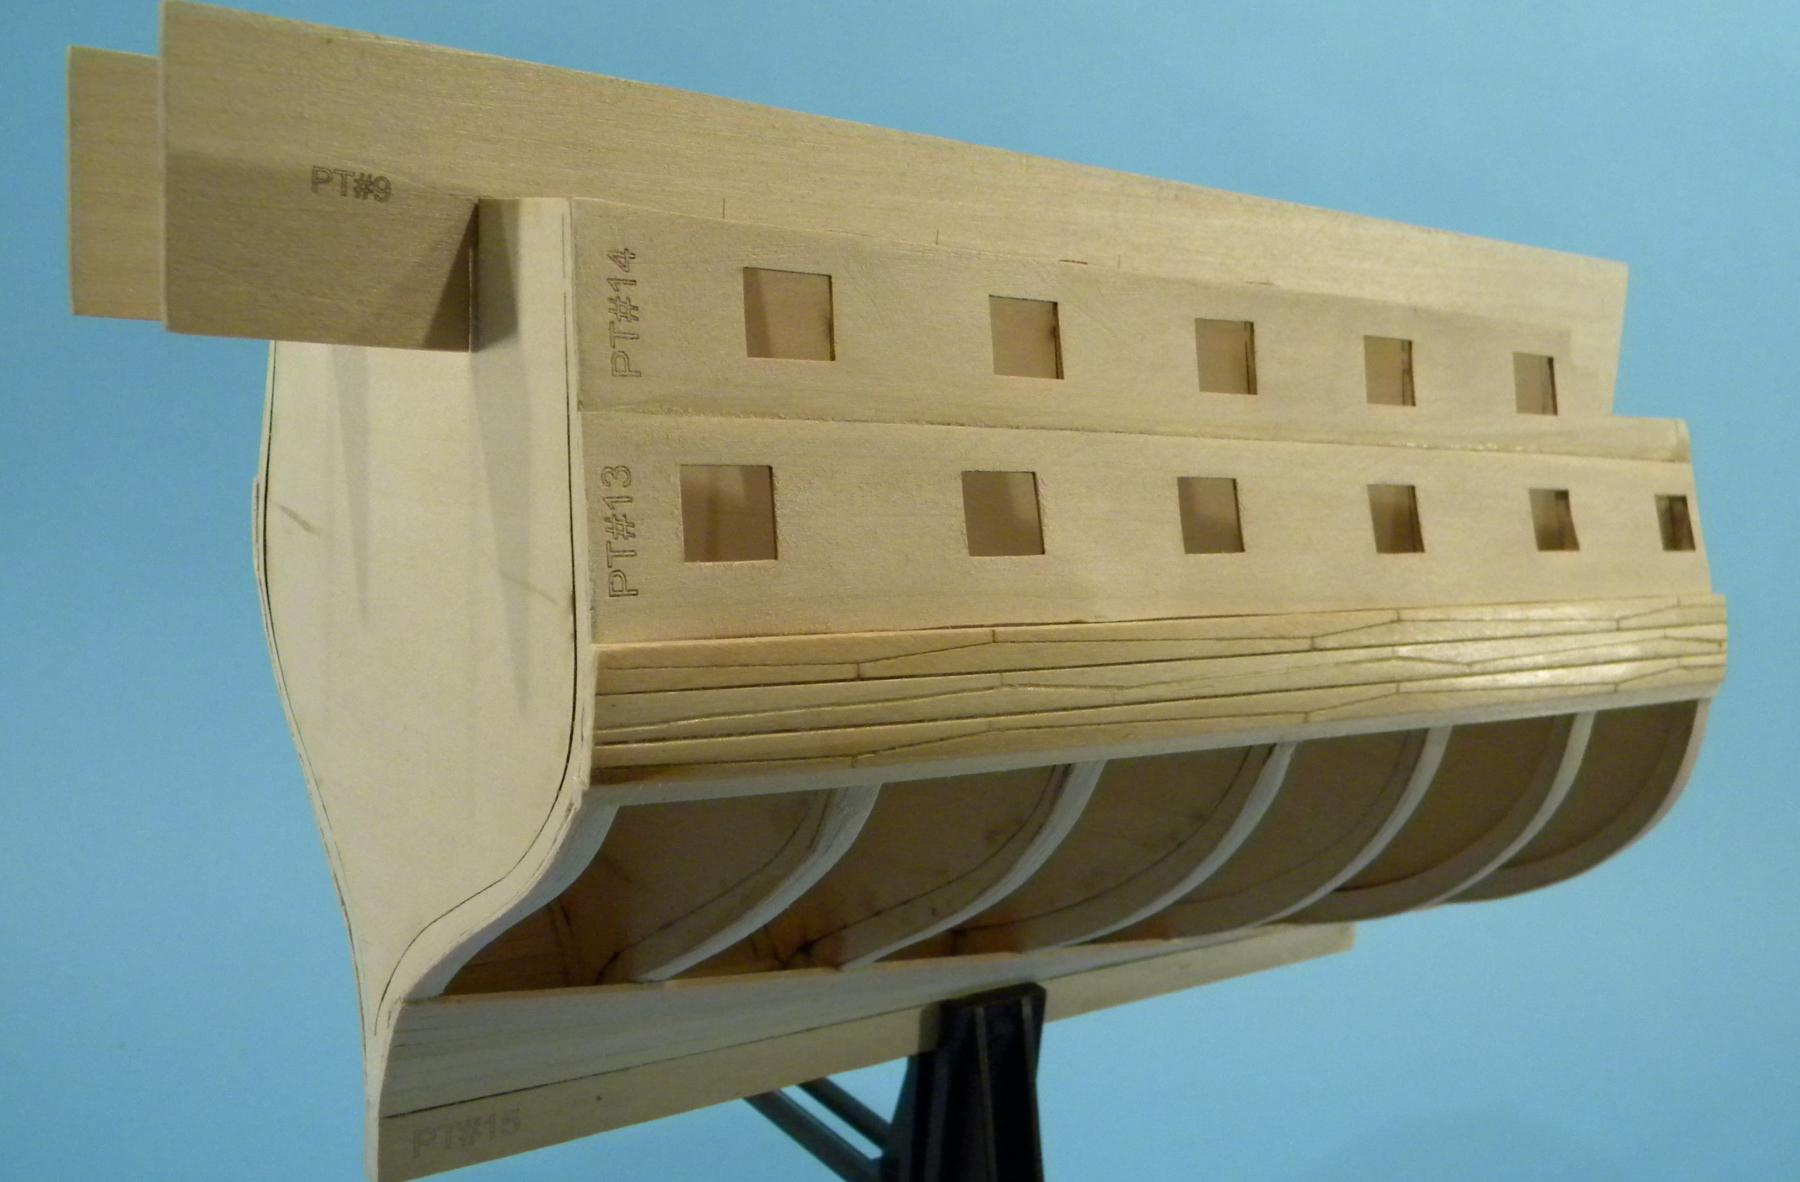
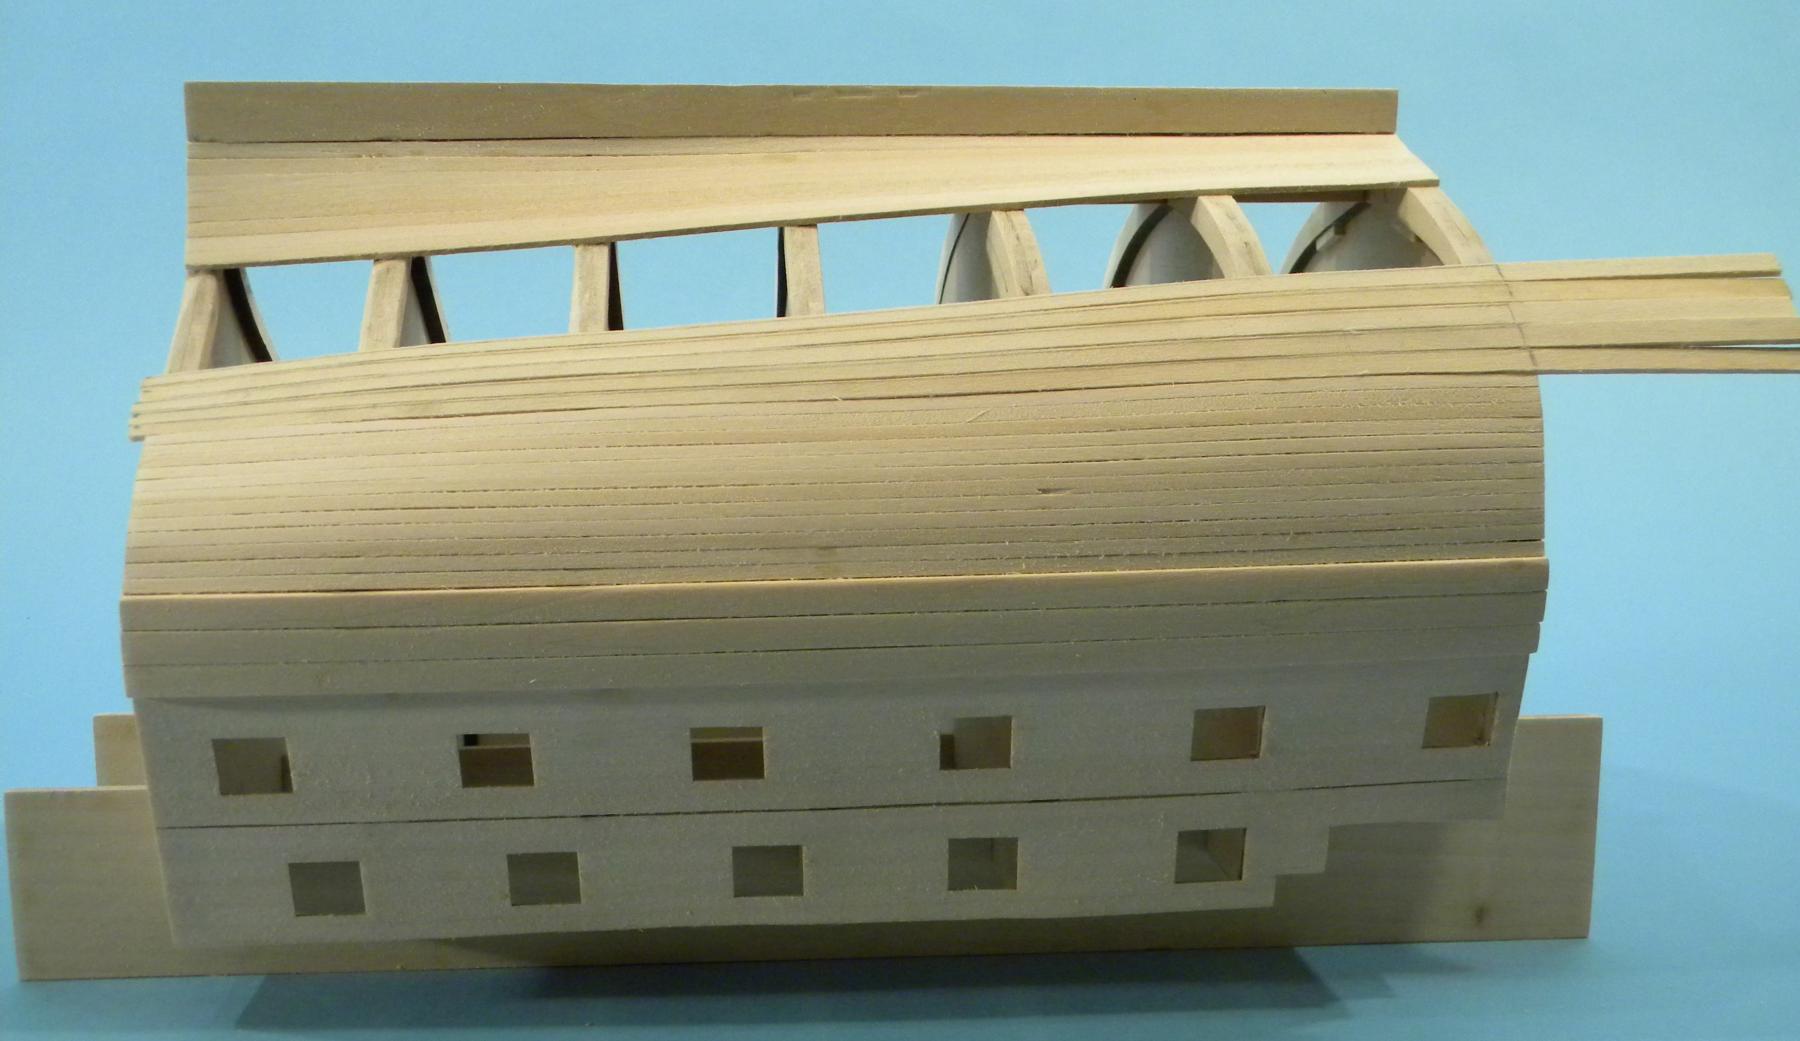
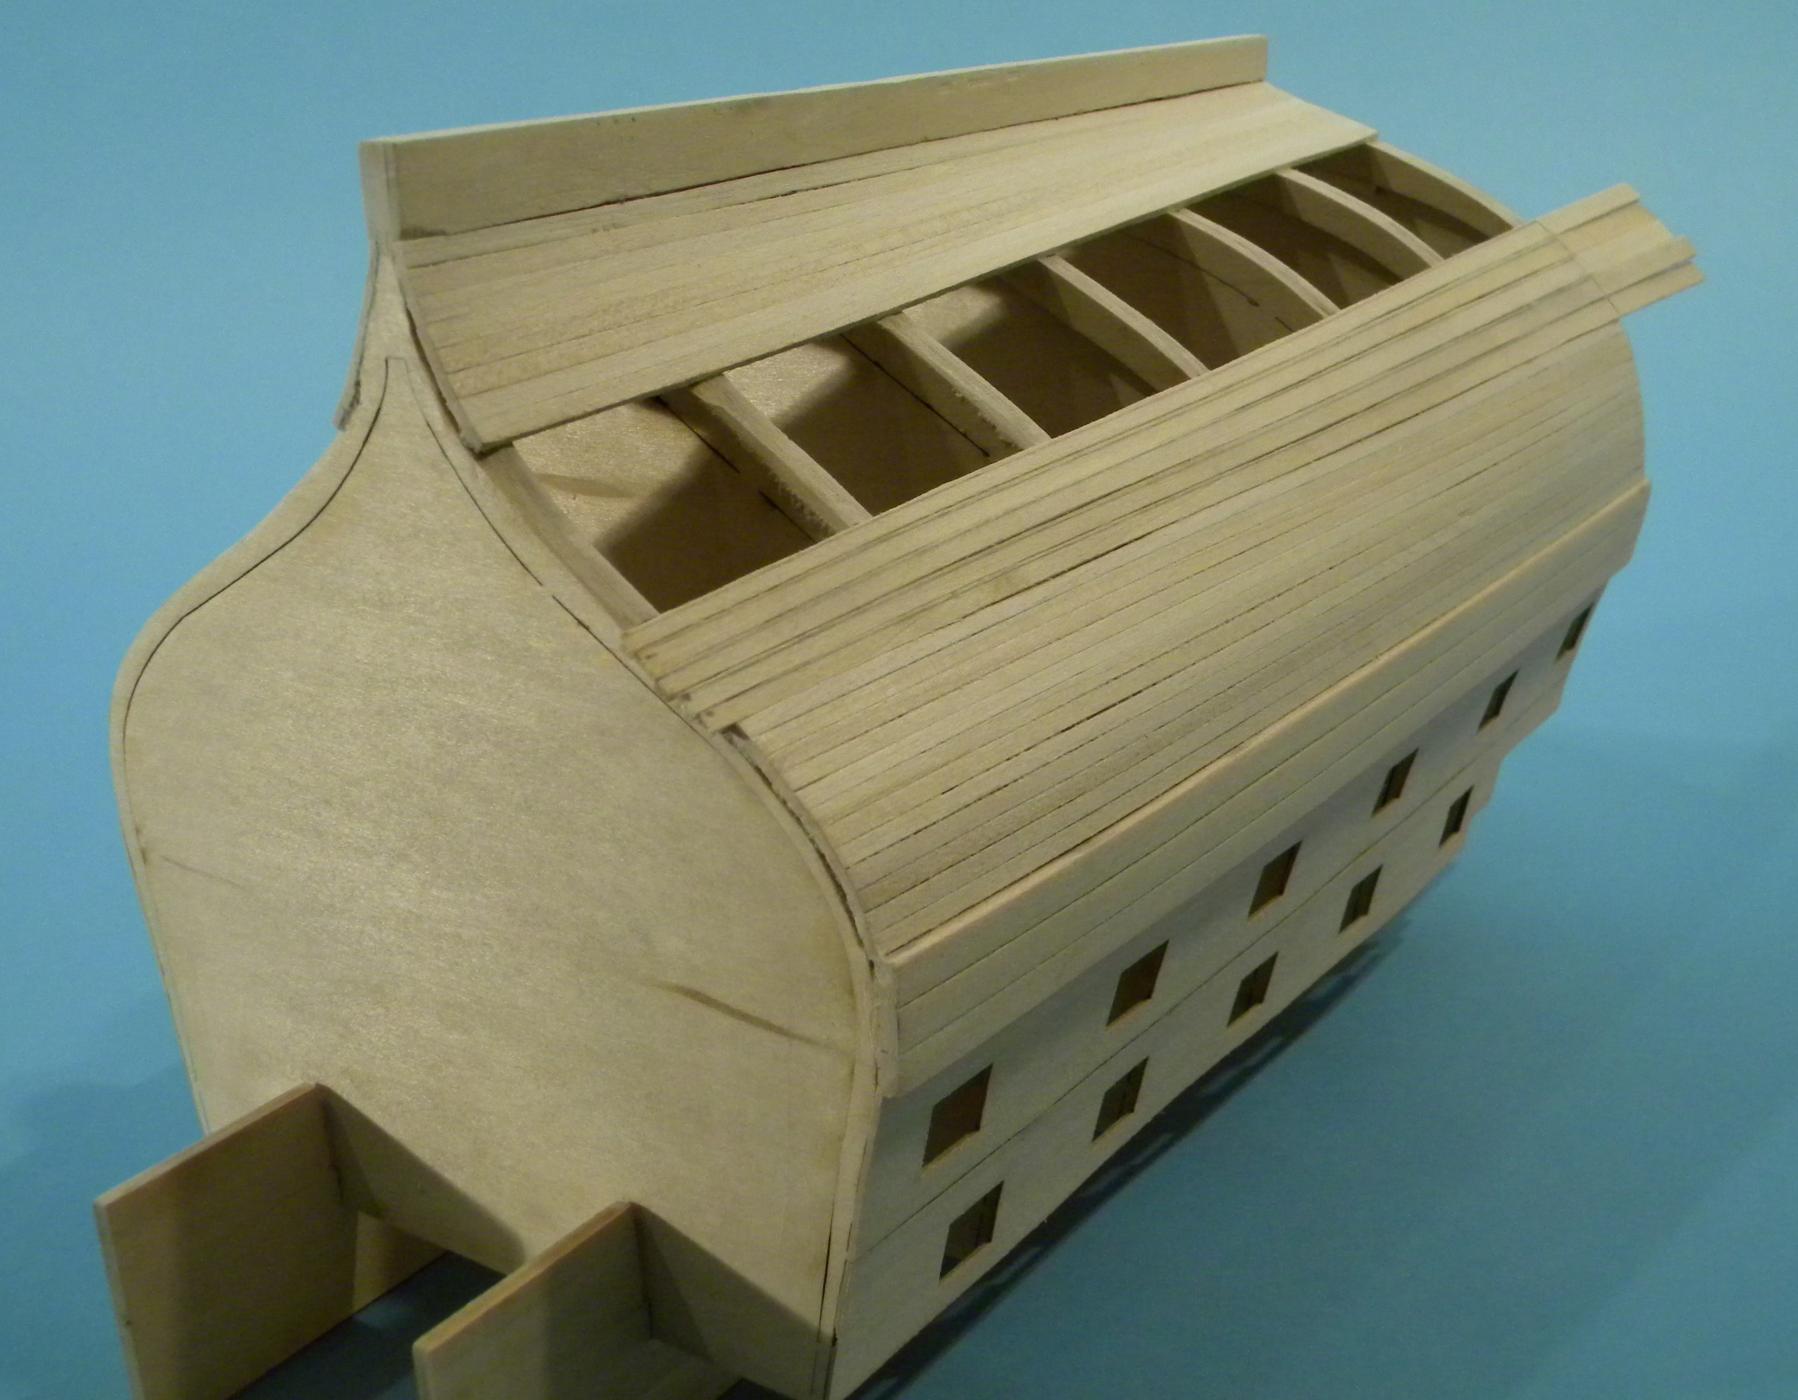
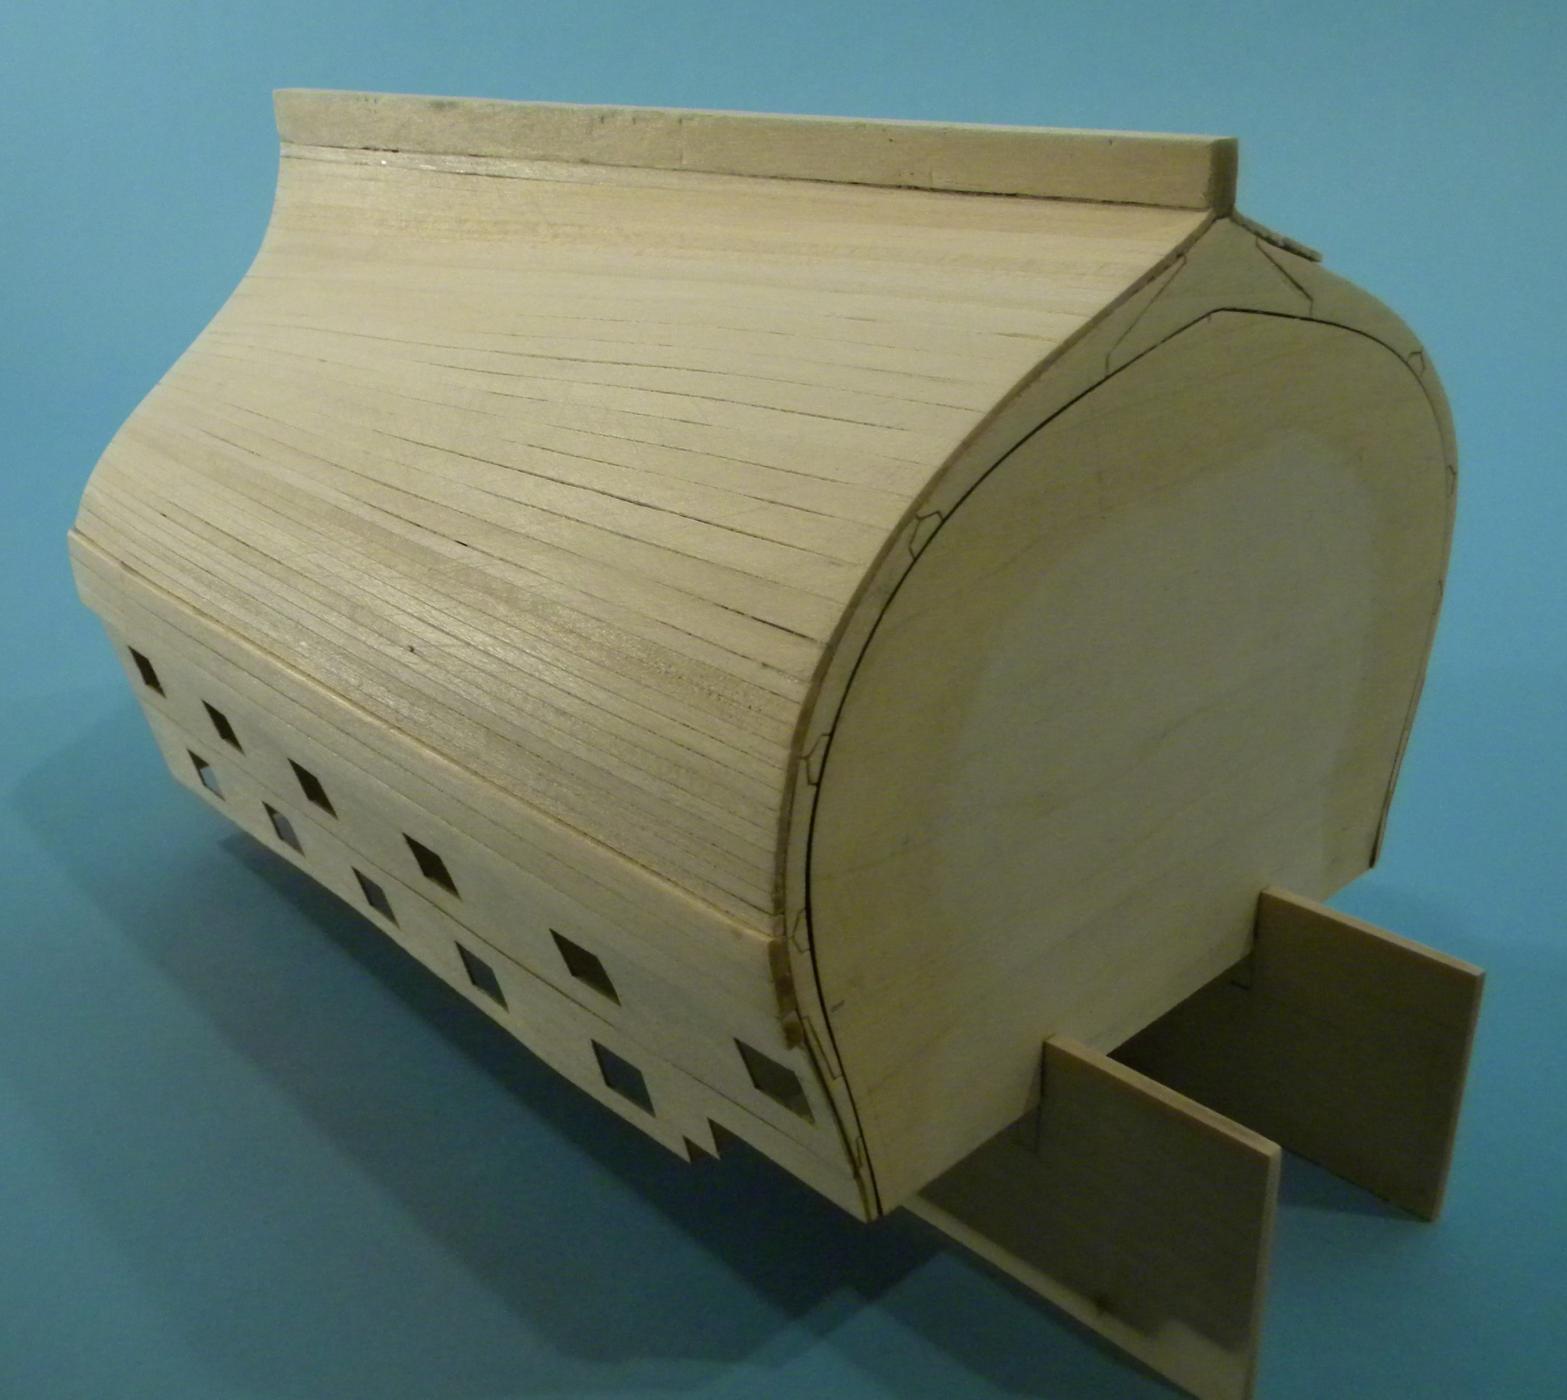
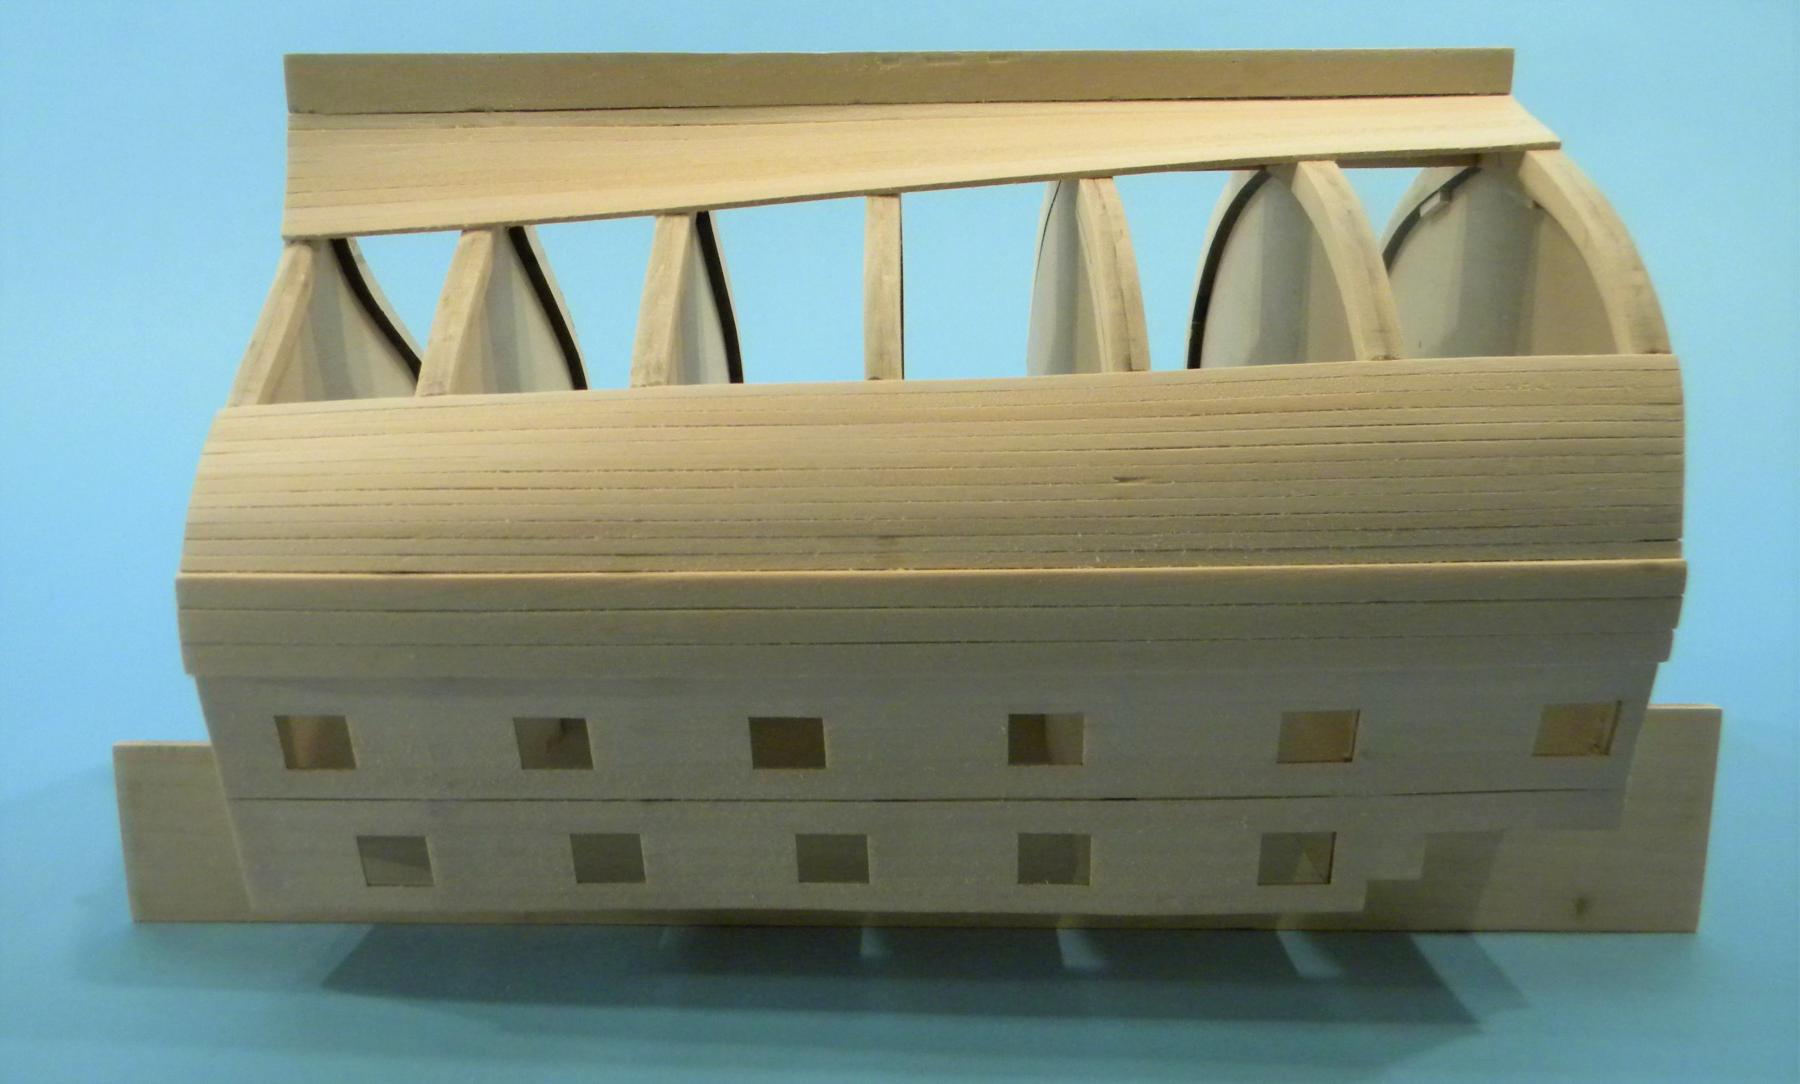
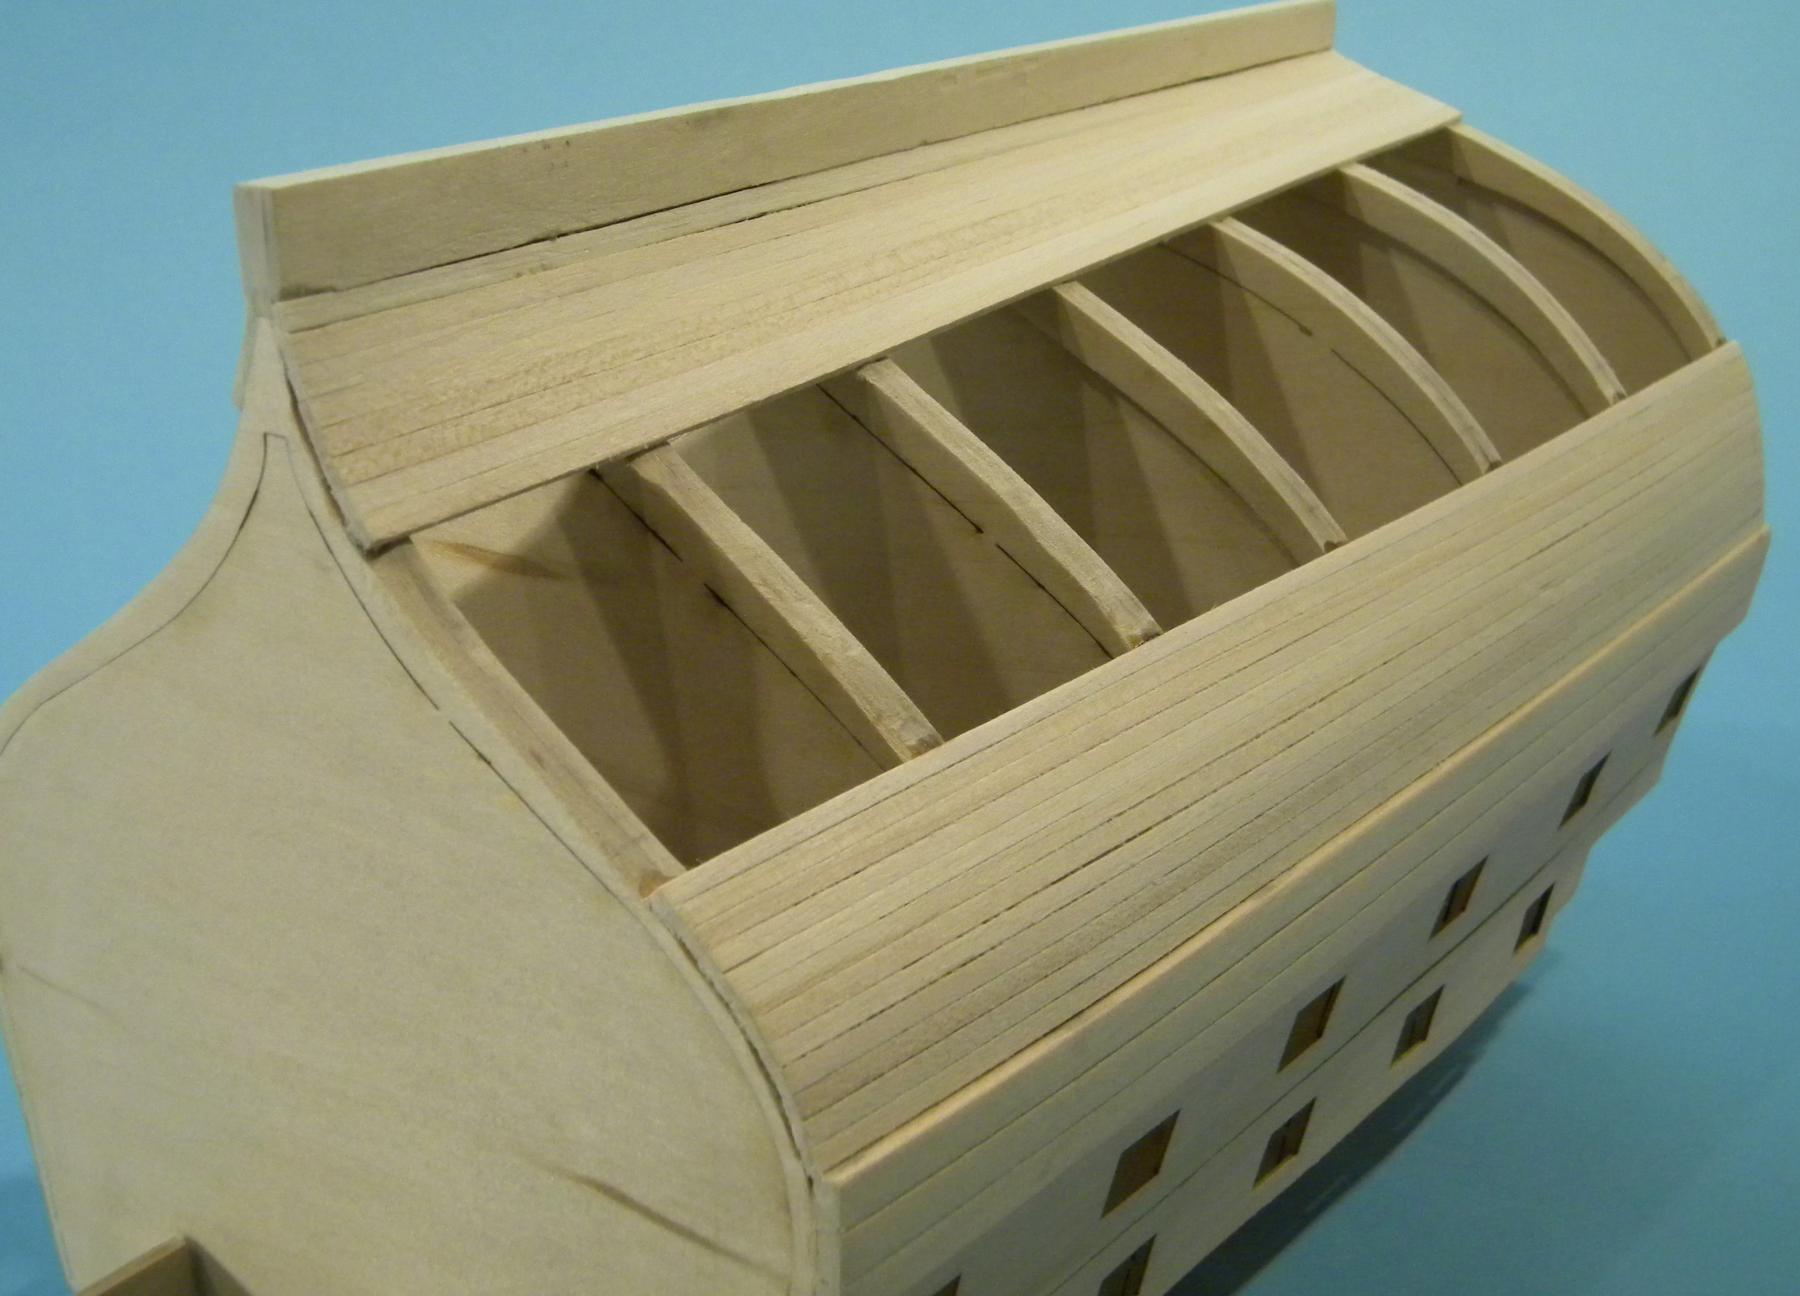
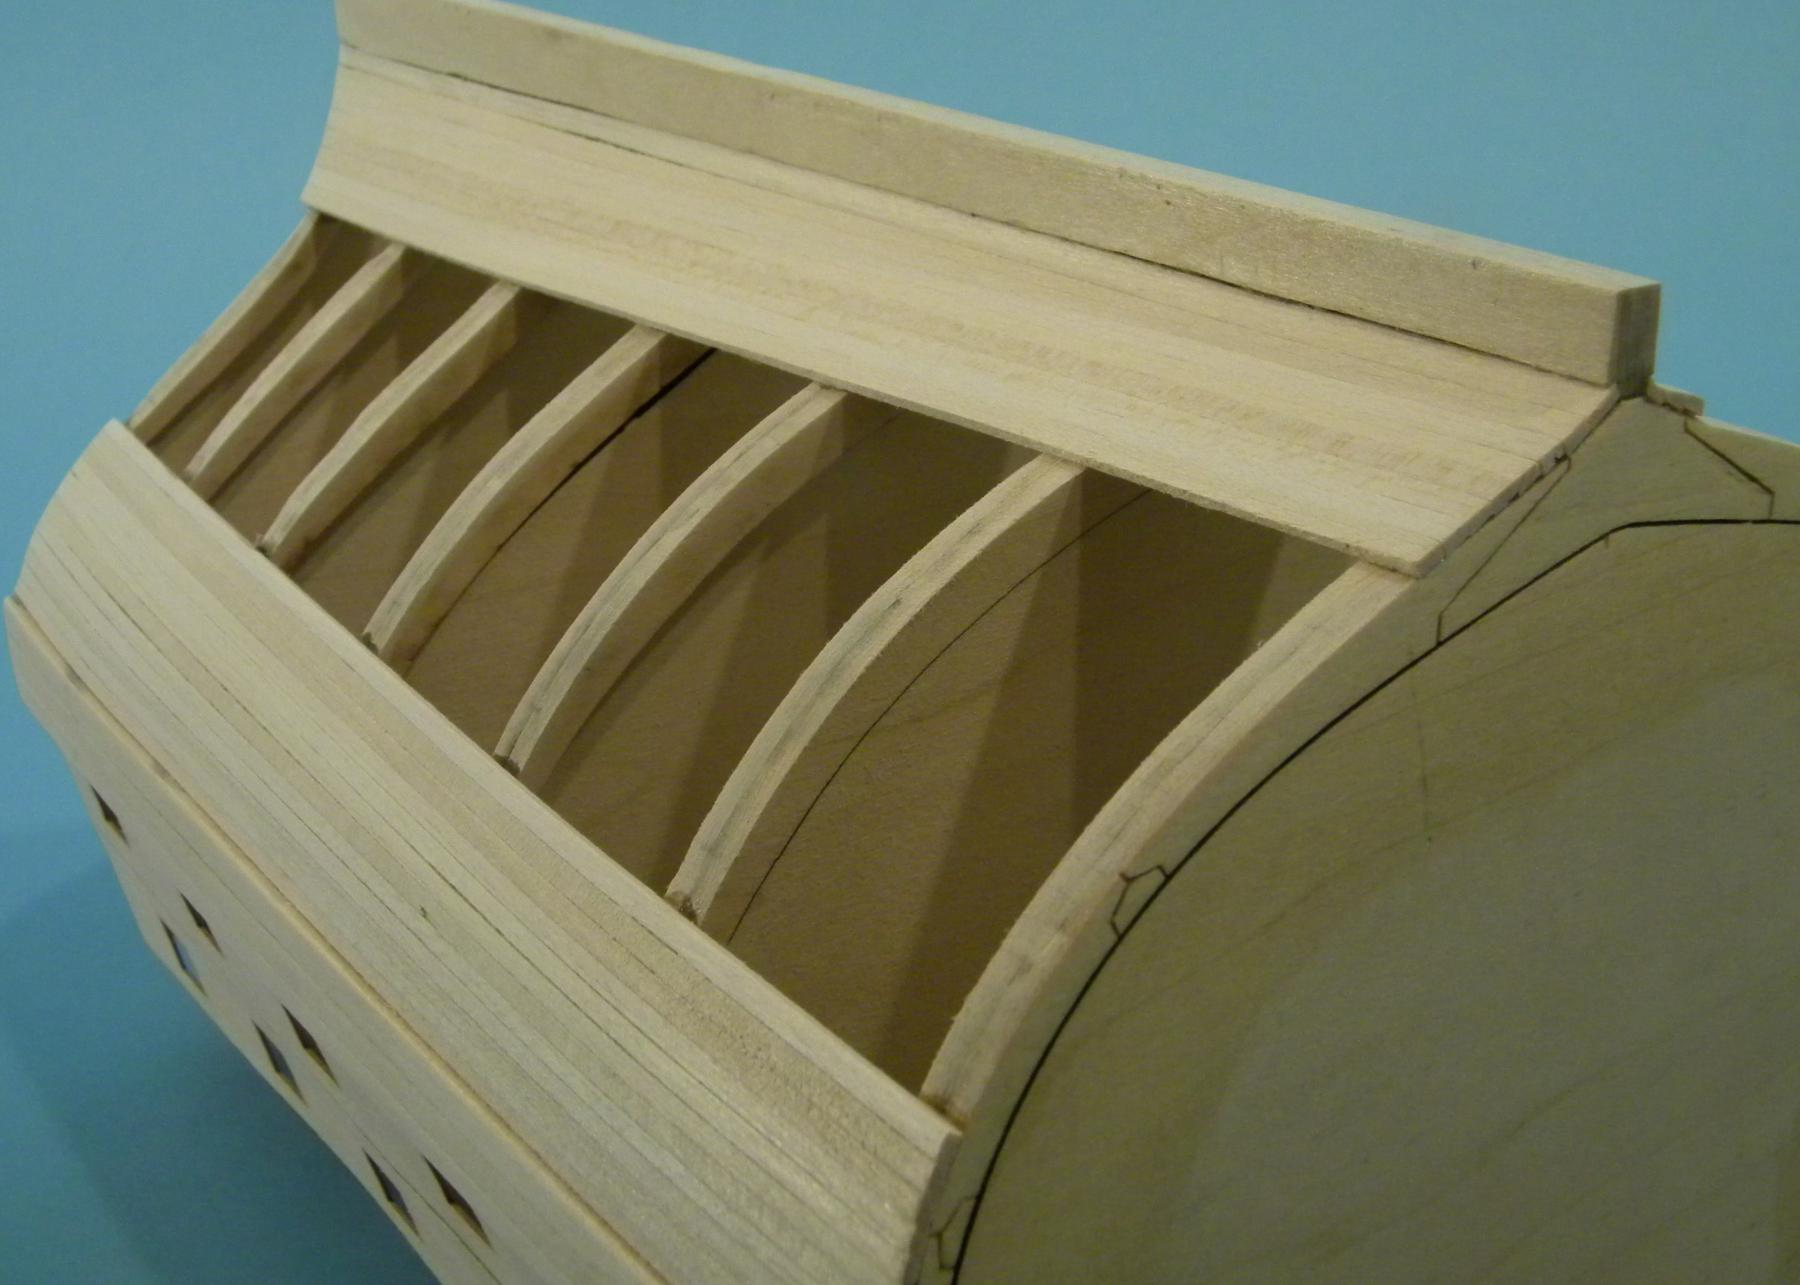
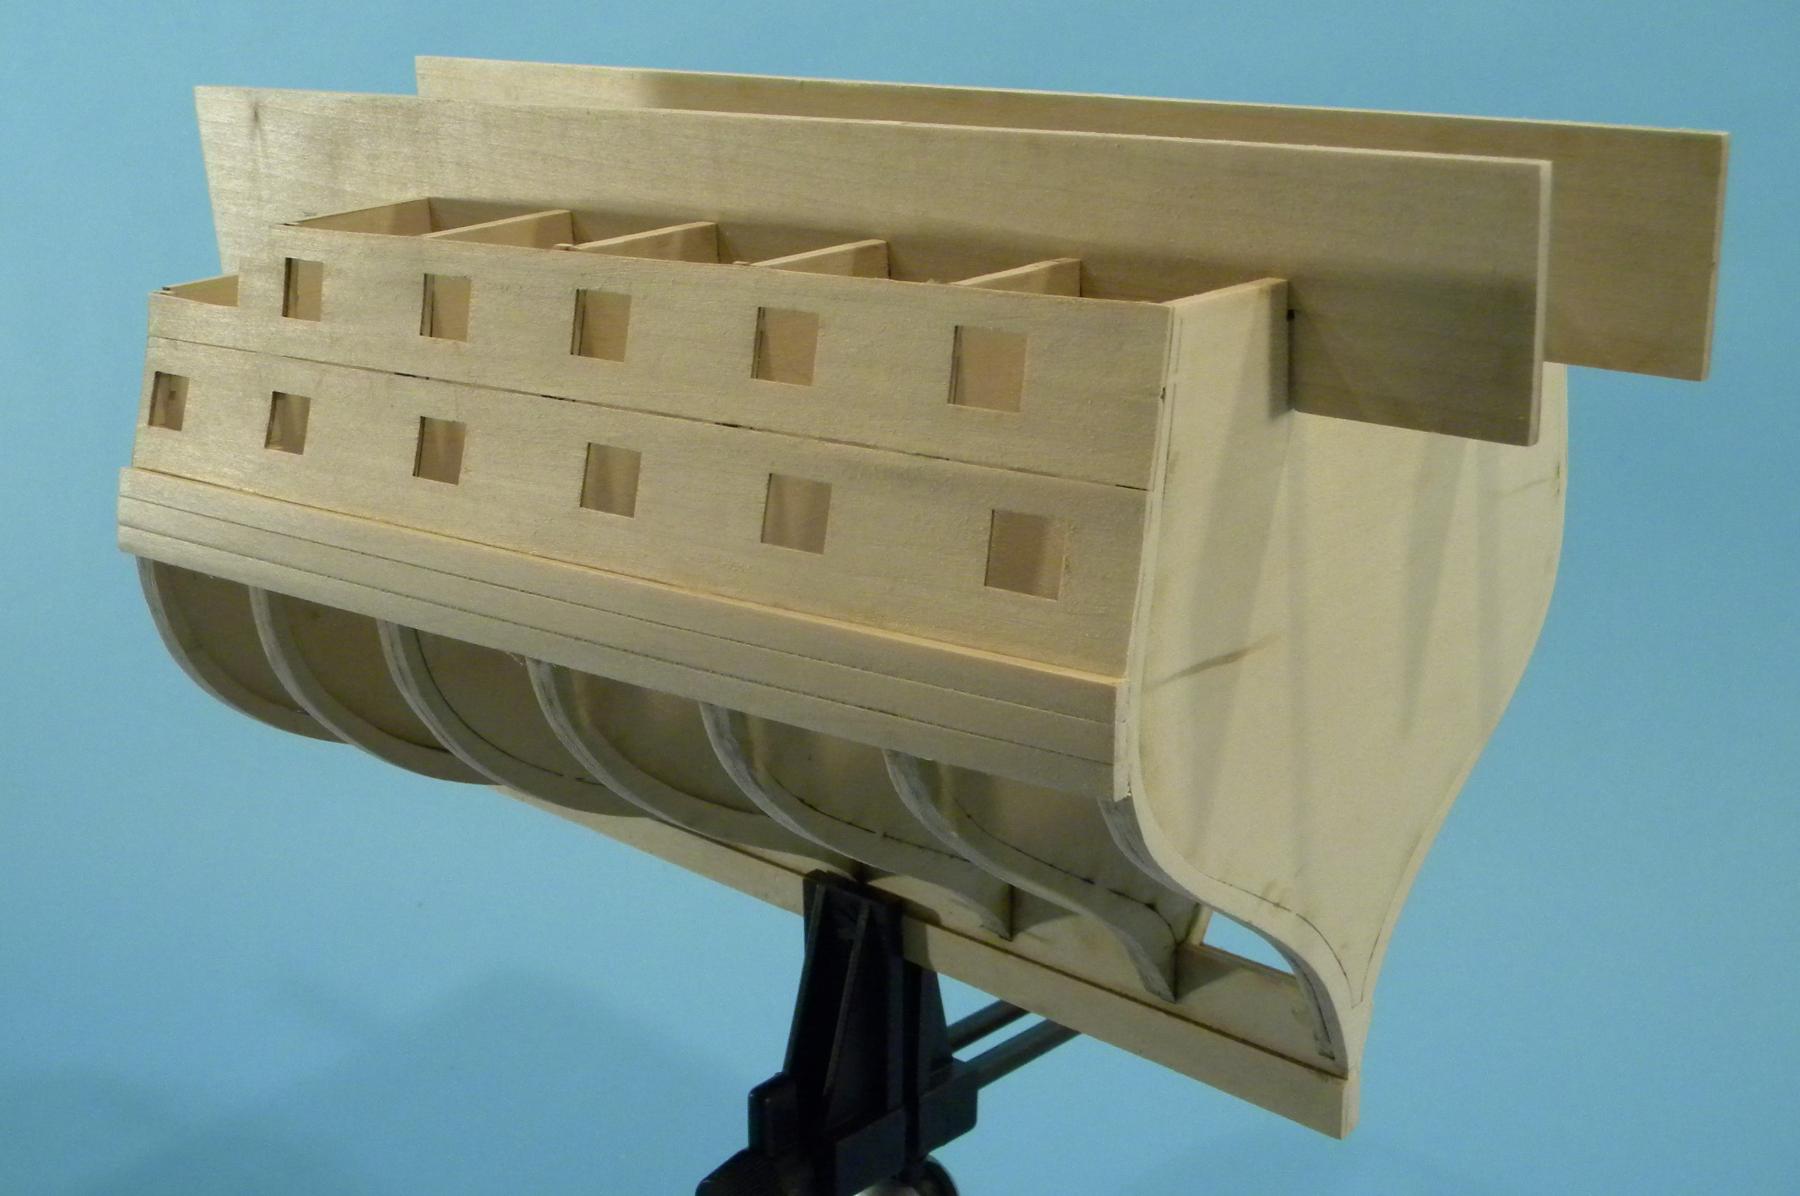
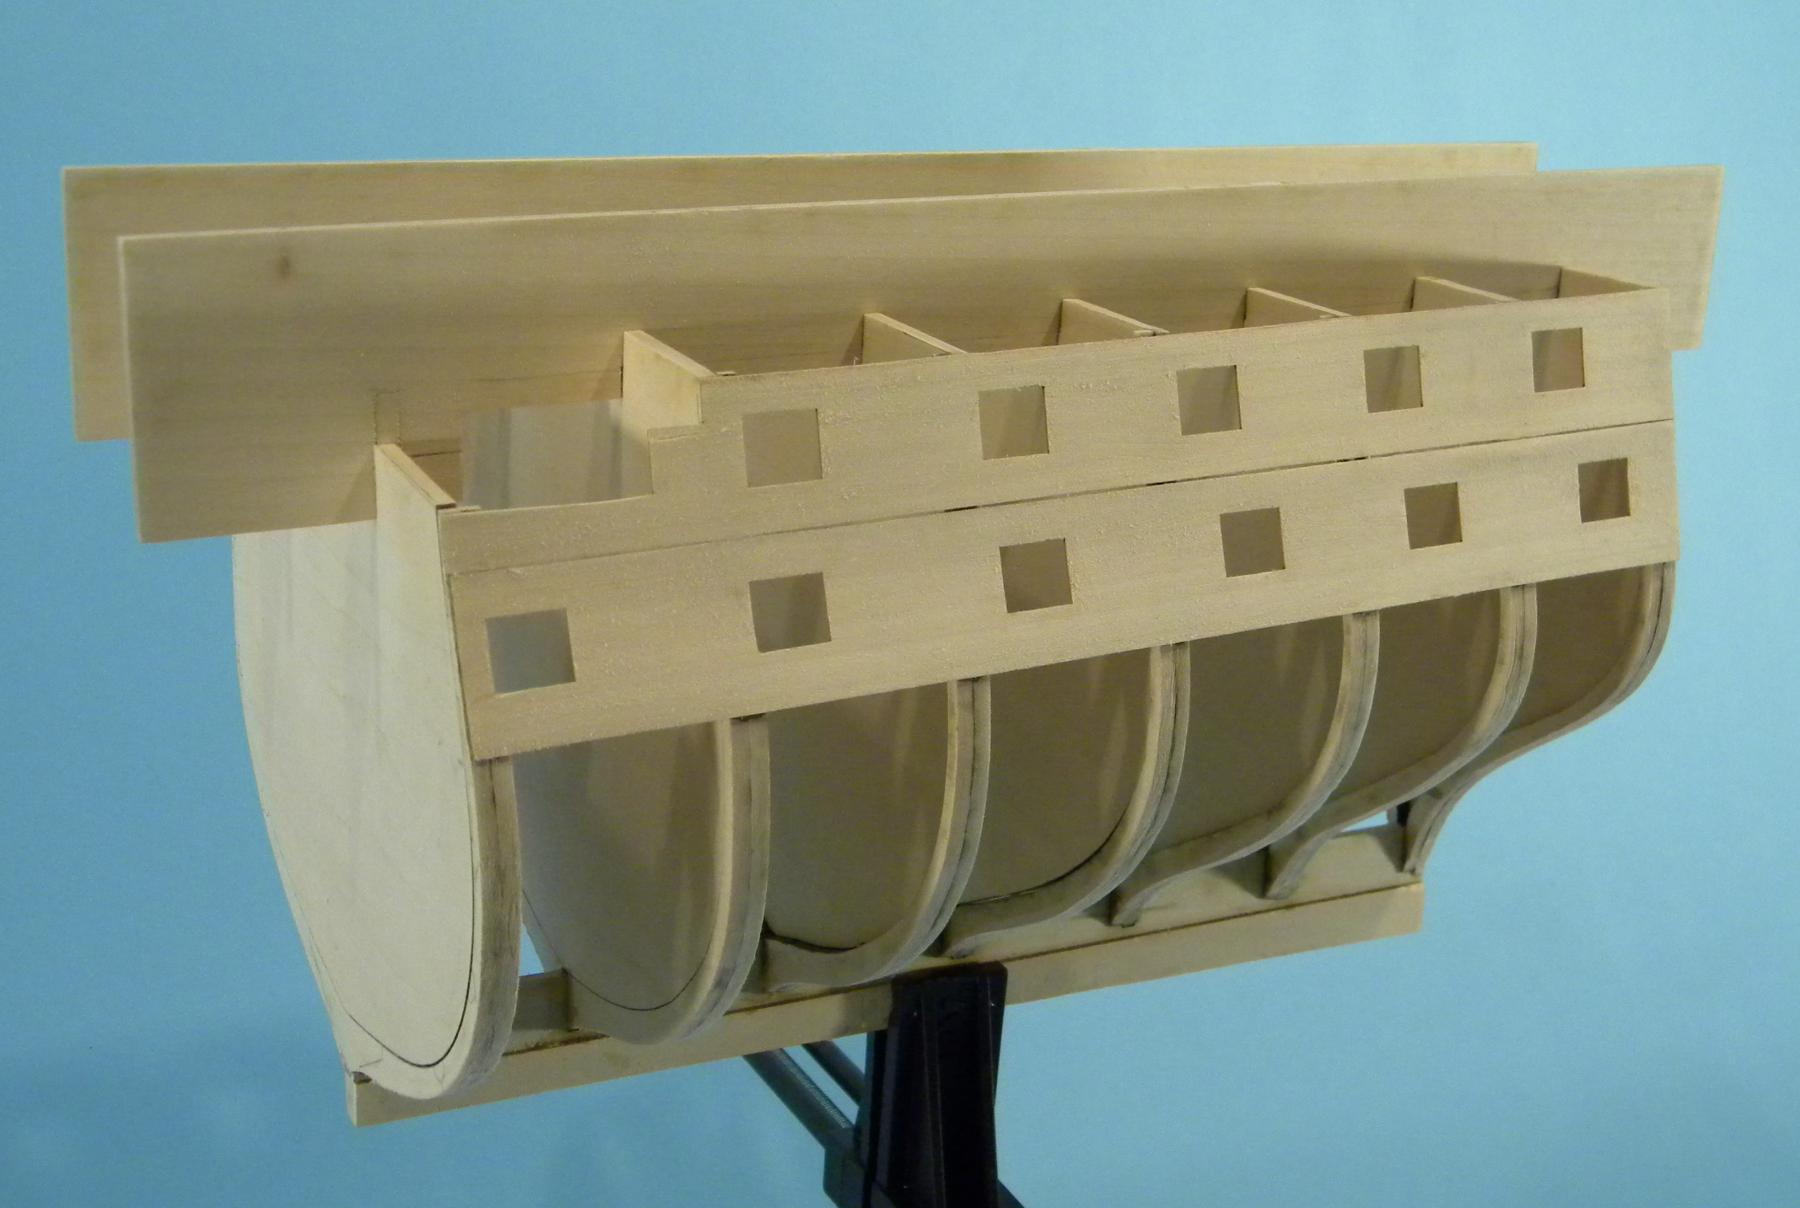
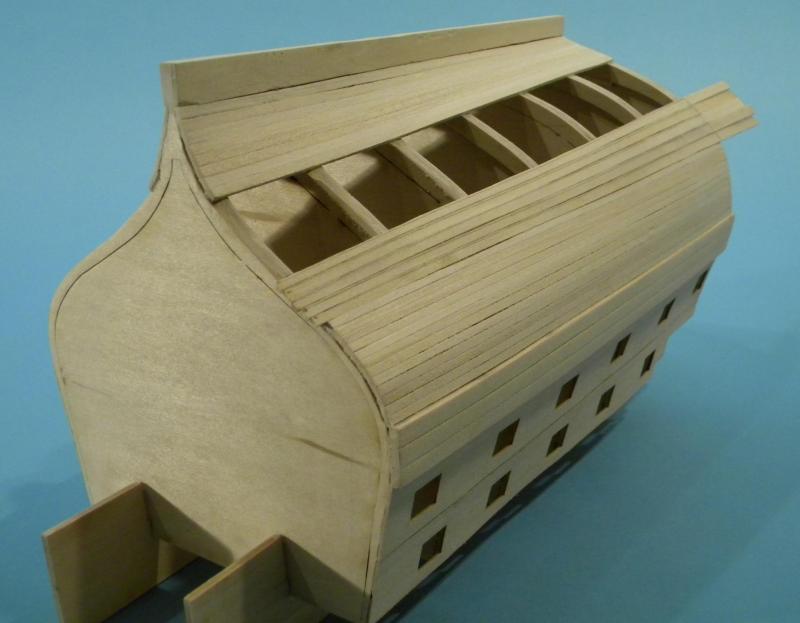
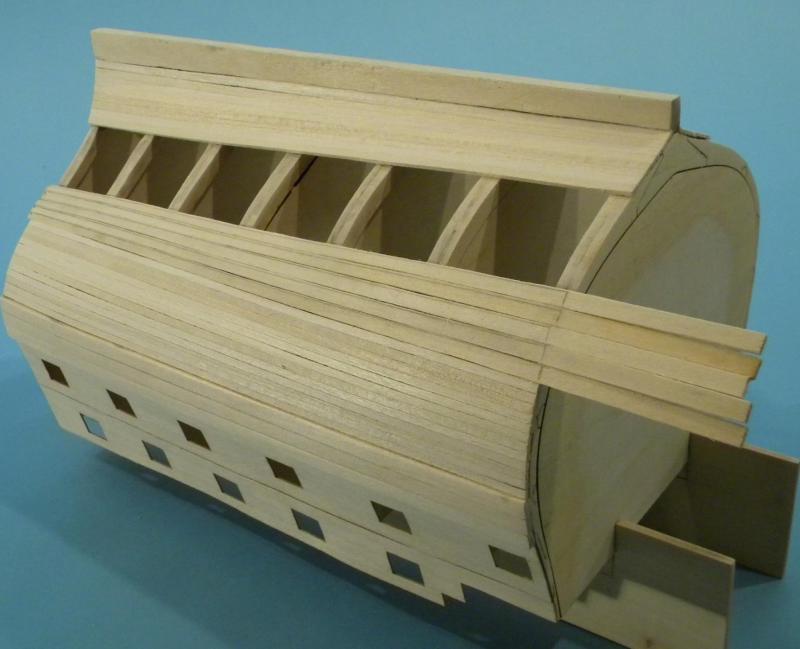
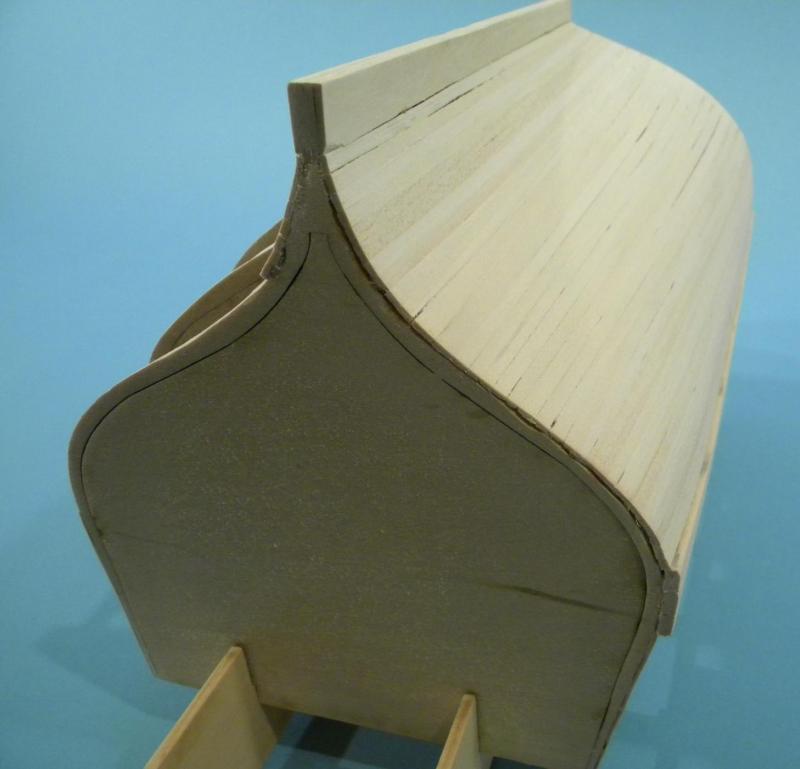
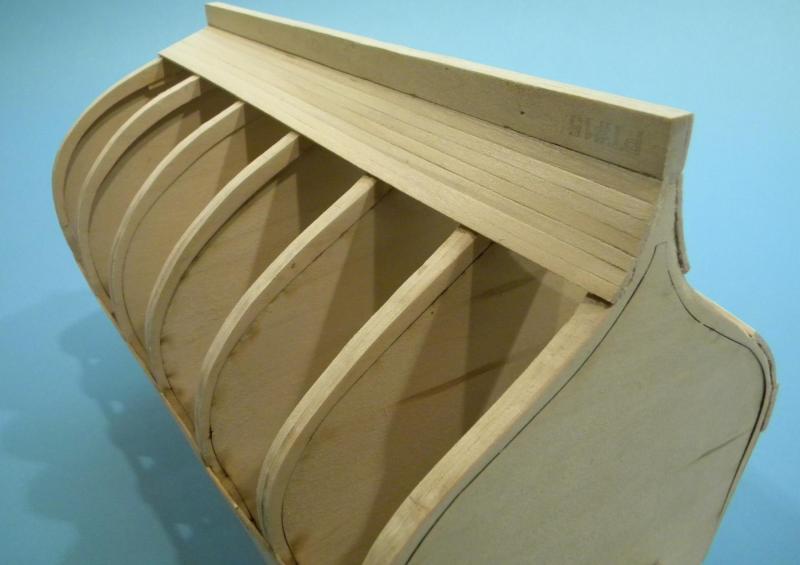
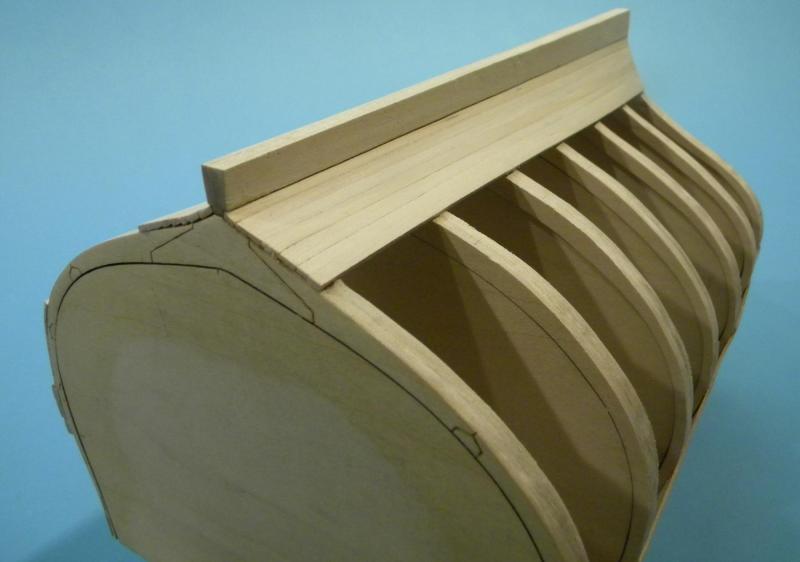
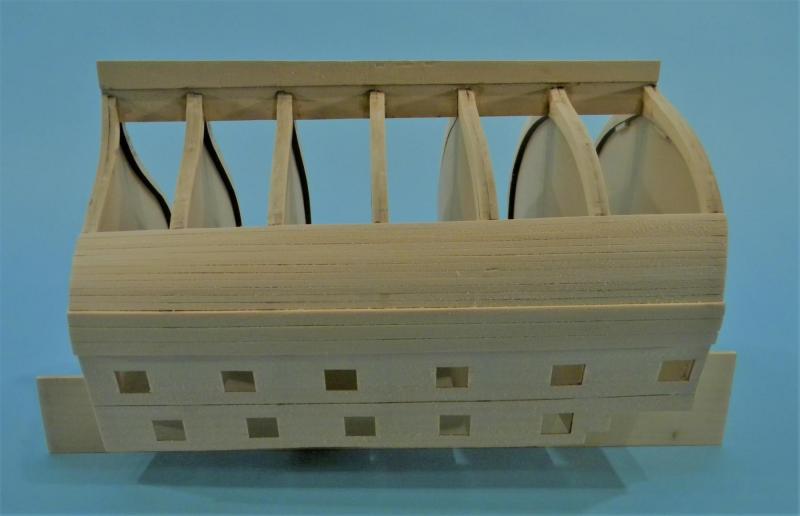
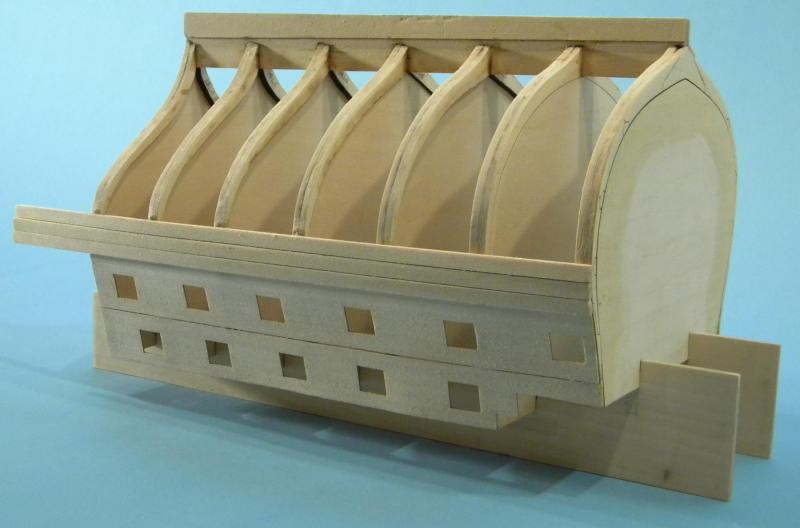
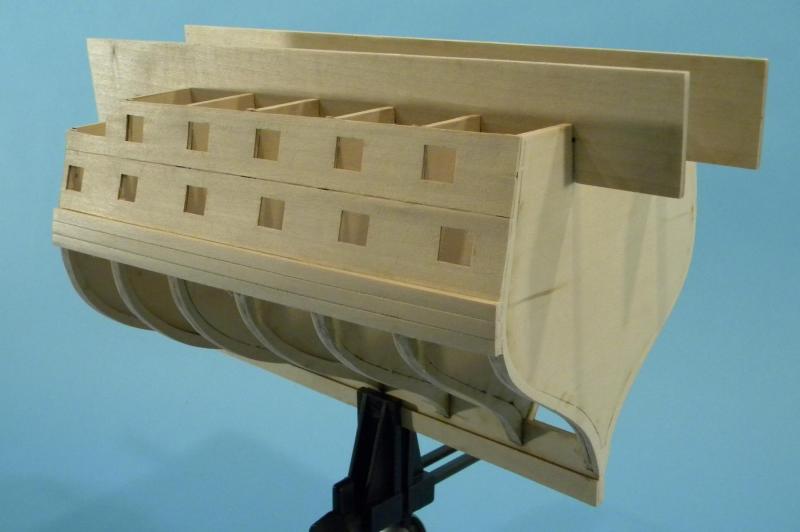
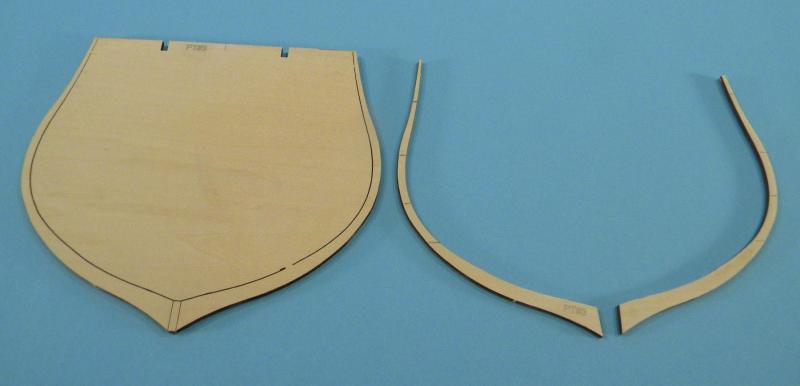
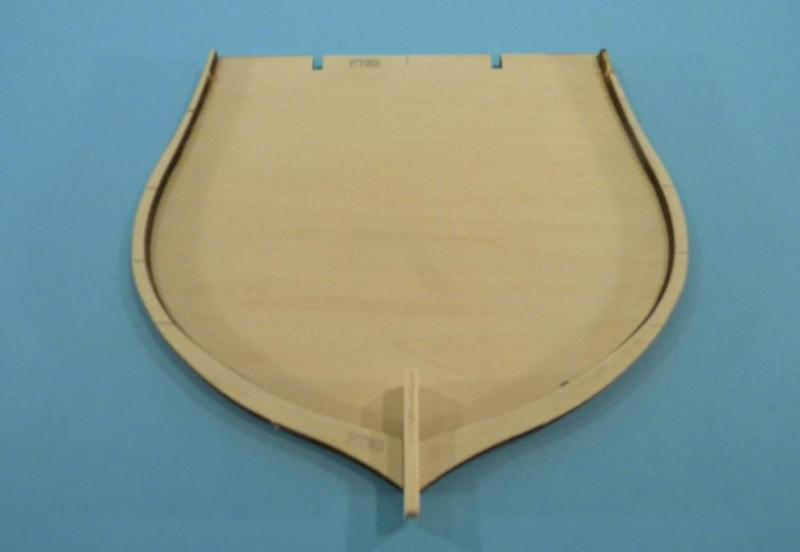
For those of you who have asked my apologies for not responding sooner, the source material for the build are the plans of the PRESIDENT after capture and the deck drawings of the UNITED STATES. There will be some additional sources as the build progresses all on the recommendation of acknowledged experts on the subject. A cradle was created for the hull out of plywood. Felt was glued onto the surfaces to offer a soft resting place and hold the hull firm. Above the wales I placed 3 - 3/16" strakes. All 1/16" thick. They arrive just short of the gun port openings (apprx. 1/32") creating the sill reveal. Once the inner tongues are removed the gunports will be fully framed internally. As all with the lower planking theses strakes were pre-sanded.
.thumb.JPG.dca7cb0c8294569eea879811e438a22e.JPG)
.thumb.JPG.e75d44ca4085b017e83cab0de3ae835d.JPG)
.thumb.JPG.c21b0d0894423869f68a264bed228eee.JPG)
.thumb.JPG.d0c58e66cf89e18ceb2922715c5219fc.JPG)
-
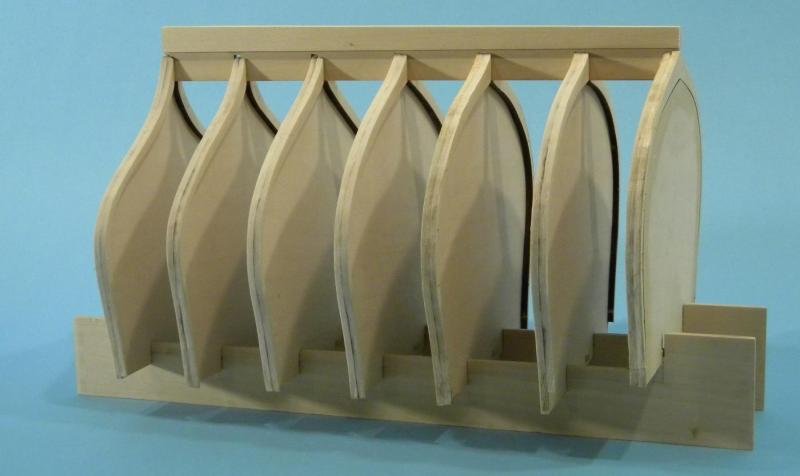
For all those who have asked the build is the CONSTITUTION c. 1812 in 1:76.8 scale. Tim Igoe is working with me on the project (testing my design) and will be producing a concurrent build thread. Should be fun (famous last words) Sam
-
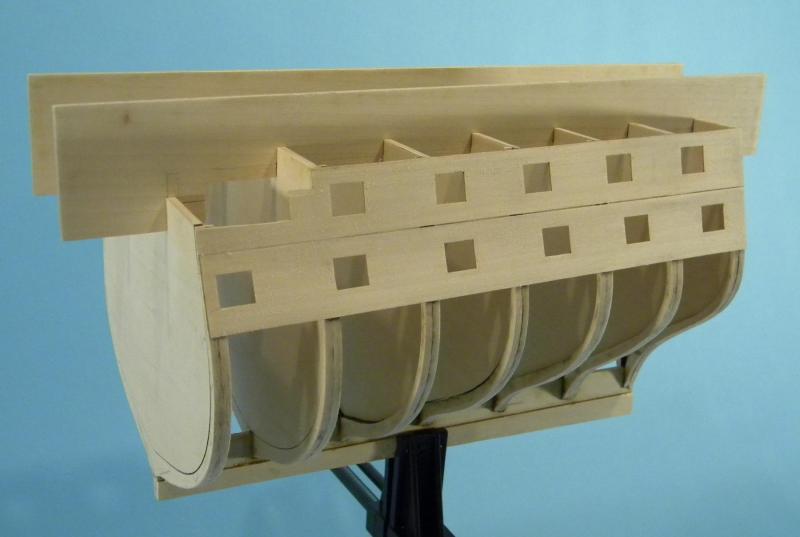
Allen Thank you for your interest. The wale is actually not parallel to the gun ports. The angle of the photos (even straight on) is skewing the perspective a bit. Also, the scale of the build (1:76.8) is an OK size but a distance of say 2" is barely 1/32" so it changes are slight. The gun ports actually rise moving fore to aft about a 1/16" of an inch as well. The source material for the build is an acknowledged historical source(s) endorsement by a recognized and accredited organization. The build is 9"-3/4" long, 6" high (hull) and 5"-3/4" at beam (6"-3/4") at widest point. Height when masted will be approximately 34" with a main yard (w/stunsils) at 19". The keel in scale is only 12" deep from bottom of garboard strake. Much work to do............. Samuel
-
Thank you Omega 1234
-
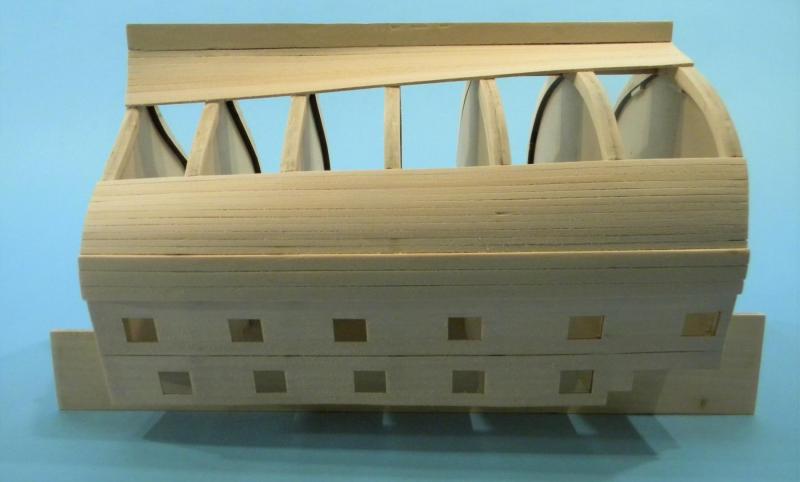
My mistake CORRECTION - A thin veneer was added to the edge of ech bulkhead/frame for a finishable surface - SCJR
-
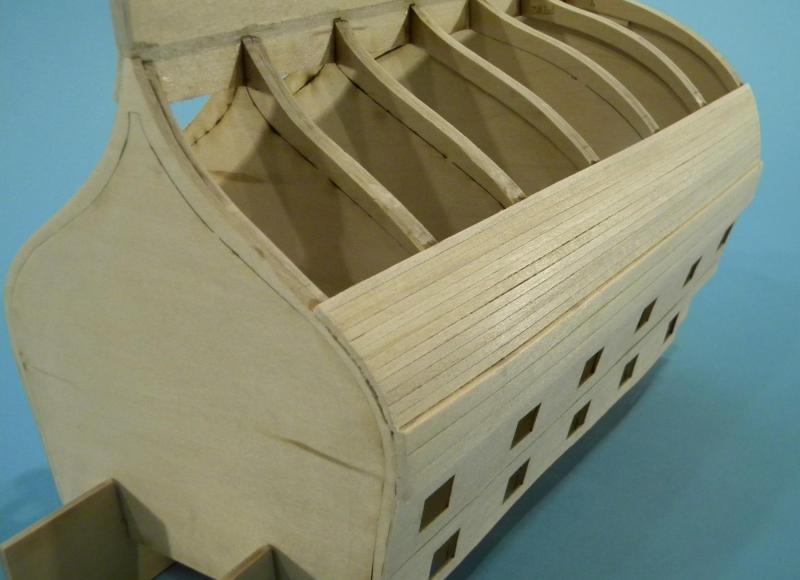
Starboard side. Wales are installed. They feature a laser etched/embellished anchor stock planking detail. This will be repeated on Port. The wales, (for photgraphic detail) have been given a coat of wipe-on poly to highlight the etch. When finished they will be painted black. There is one 3/16" strip installed below the wale. From that point down to planking band "C" the hull on Starboard will be left open for view of lower deck details. A thin veneer was added to each bulkhead/frame face between the wale and band "C" providing a cleaner surface for finish (either paint or stain) Next up: Above the wales


-
Thank you for the "likes". More to come soon............
-
Port side middle band ("B") is comprised of 11 planks. The planks are 3/16" forward tapering to 1/8" aft. The first 5 are installed and the spacing/measurements are checked to assure the planks are running true. The remaining planks are tapered and installed with the 11th plank being un-tapered until it is installed to make any adjustments necessary for inconsistencies in taper of previous planks. The entire side below the Wale is sanded with a series of progressively finer grade of sandpapers (4-5 steps) from 80 to 600 grit. The entire hull is then wiped down with a tack cloth and blown with compressed air.


-
Thought I'd switch sides, band C is installed on Starboard. As with Port, the Garboard strake is beveled from 3/16" to 1/8" length wise. It is then beveled on edge to tuck into the rabbit formed by the additional piece added to the Keel (former). The remaining strakes are all at 1/8".
-
Thank you - I will Samuel
-
Lower band of planking. 1st plank (Garboard is 3/16" aft tapered to 1/8" forward). It is beveled to seat into the rabbit created by the side pieces on the former (keel). It is then followed by 8 strakes of 1/8" x 1/16".


-
First band of planking below wale on Port side (12 x 1/8" x 1/16")


-
Wales (Port)


-
CONSTITUTION CROSS SECTION c. 1812 in 1:76.8 scale

-
Chuck Maybe I missed sometime ago but when you're spinning the stock in the drill what's holding the drill and what's stabalizing the wild end of the stock? Sam
- 1,051 replies
-
- 2
-

-
- cheerful
- Syren Ship Model Company
- (and 1 more)
-
Bob, Super as always. Love the way you handled incorprating the knees onto the deck. I actually flirted with the idea of a totally un-planked deck and then using a clear sheet of plastic/styrene to allow all deck componants to be placed as normal. The idea was dismissed but I think there's "something" there if the trend continues for open decks............... Any way great work as always. Any progress on the head rails? Let me know if you need something. Sam
-
Stuntflyer Great tip and method! Nice work too......... Sam
- 109 replies
-
- 1
-
-
- 18th century longboat
- model shipways
- (and 1 more)
-
Bob, I'll PM you tonight to see what images/files you'll need Sam
-
Floyd, How'd it go with the Club? Sam
.JPG.ef260aea7e5bef893f8d7ec3b6bffac2.JPG)
.JPG.17f3637051f9c08cc4459f99be377438.JPG)
.JPG.12d7c0dabeaa3fe2bcd8b8df2bea8724.JPG)
.JPG.0fb0b4c7dc4cf95beba3aa53b3081dd4.JPG)
.JPG.488b0bc71b267e74a66572ebcb788eda.JPG)
.JPG.8157089a1a95fa7046979384e4342c48.JPG)
.JPG.47949e7ccb4015cfe556a232ac68e209.JPG)
.JPG.62940b15acb24e3f0b4a1e8b5eedde3e.JPG)
.JPG.cbbf6744e6b5e8c819de91c2755bb582.JPG)