-
Posts
4,106 -
Joined
-
Last visited
Content Type
Profiles
Forums
Gallery
Events
Everything posted by glbarlow
-
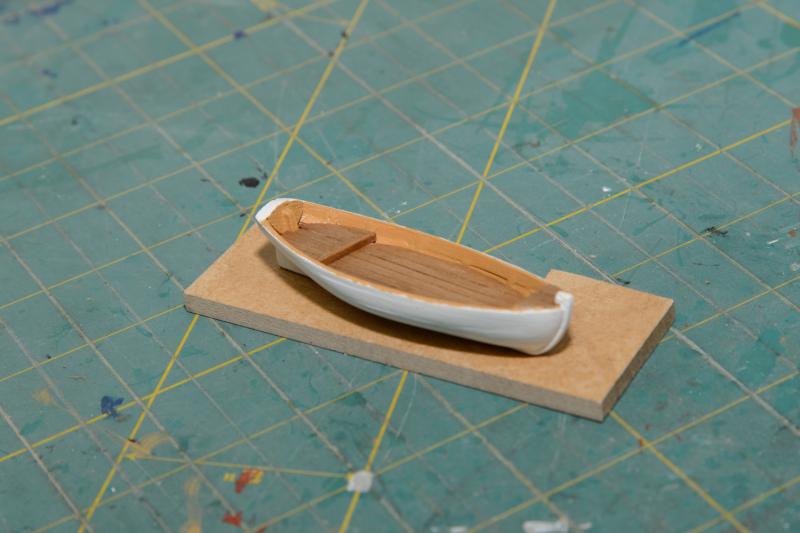
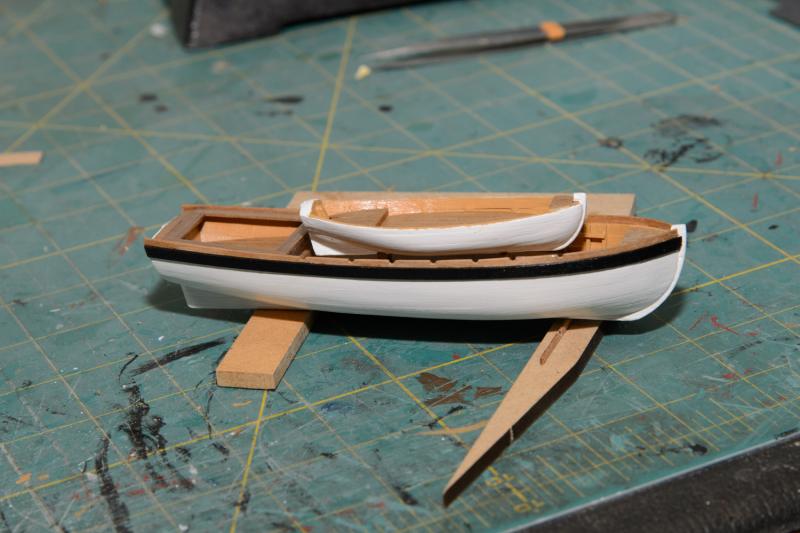
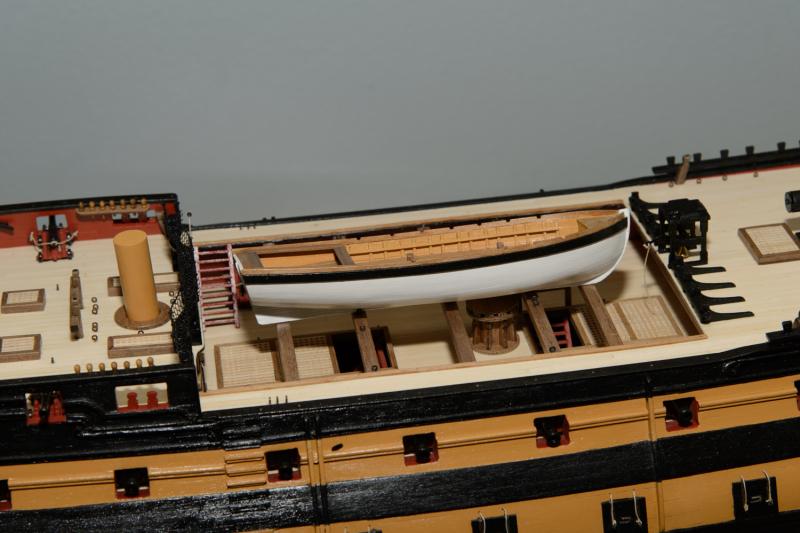
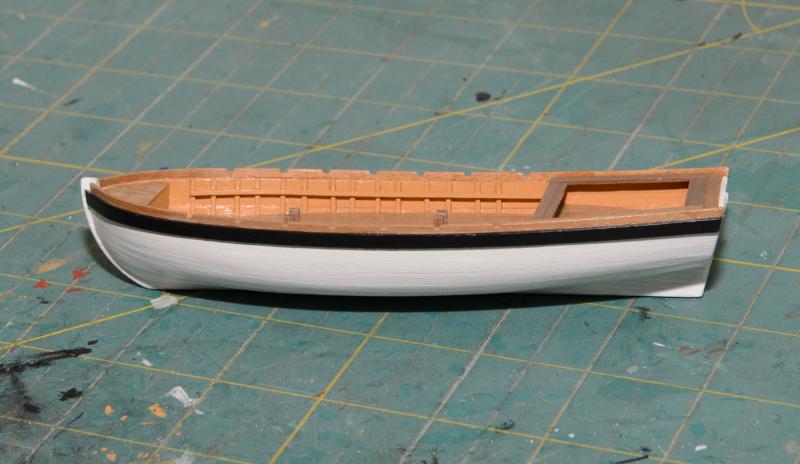
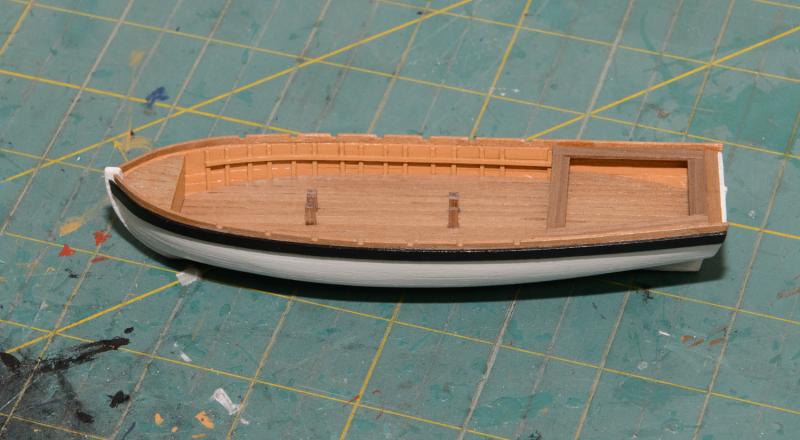
I finished the barge. It was fun to build a small boat after so much time spent on the Vanguard. I think it turned out pretty well. The pillars in the center are where the cutter will eventually sit once mounted on the Vanguard. They will be completely obscured by the cutter, they are purely functional. I have two variations from the plans: -I used 1x4 instead of 1x2 for the rear benches, just seemed more proportional to me plus I flush mounted them instead of the plans overlap approach. I likely won't repeat either of these on the smaller boats, but I think it looks good here. -I used 1x3 (I have lots of wood stock from previous models) on the wales instead of 1x2, the larger black wale is much more impactful on the barge. Here its resting (not mounted, don't have the cradles on yet) in its future home aboard the Vanguard. Aside from the cradles, there are rails and hammock holders yet to be added to the ship. I did mount the boat tie-down eyelets on the beams before they were added to the ship. With the largest boat completed for whatever reason I elected to make the smallest next, the cutter. Planking this was actually more challenging than the barge, not much room to work. It looks so tiny compared to the Vanguard. its still a work in progress, I have several more steps and touch up work before its completed. Visible here, and also on the barge, I added a 1x2 strip on the front of the upper bench area deck to match up the two levels. Its largely hidden by the bench, but it is a visible and worthwhile addition. While this is cosmetic the next modification is significant. The plywood floor, covered by decking strips works fine in the barge. It did not in the cutter. I found after fitting it that only about 1 mm of sideboard was left, not even enough room to mount the benches. It just wasn't going to work. I dug into my wood stock and used instead a 1/32" strip as the floor again fitted with decking strips provided with the model (which I didn't use on the Vanguard). The completed deck is 1mm thick instead of 3mm. That 2mm made a huge difference on this small boat. I may have to repeat it on the remaining two boats, I'll see when I get there. Ultimately it will rest sitting on top of the barge. Even it seems to dwarf the cutter, I can imagine how small a couple of sailors felt rowing this thing around the Vanguard in real life. That small strip the bow of the barge is sitting on was my practice board for cutting the rowing divots. I mentioned I was worried about this in my previous post. I found the edge side of my diamond flat file worked just fine. Just had to go slow and mark the locations and measure the depth carefully. The practice helped. This is a good point for another shout-out for Caldercraft Admiralty paints. I like the colors and it goes on and covers so easy. I can't imagine using any other paint, though I have to order it from the UK so I order in bulk. All my work is finished with a water based poly to protect it for the long haul. The camera flash makes it more shiny than it actually shows. I'll most likely continue with the other two boats before returning to finish up the ship. But its about time to knock off for the Christmas holidays.
- 101 replies
-
- victory models
- amati
-
(and 2 more)
Tagged with:
-
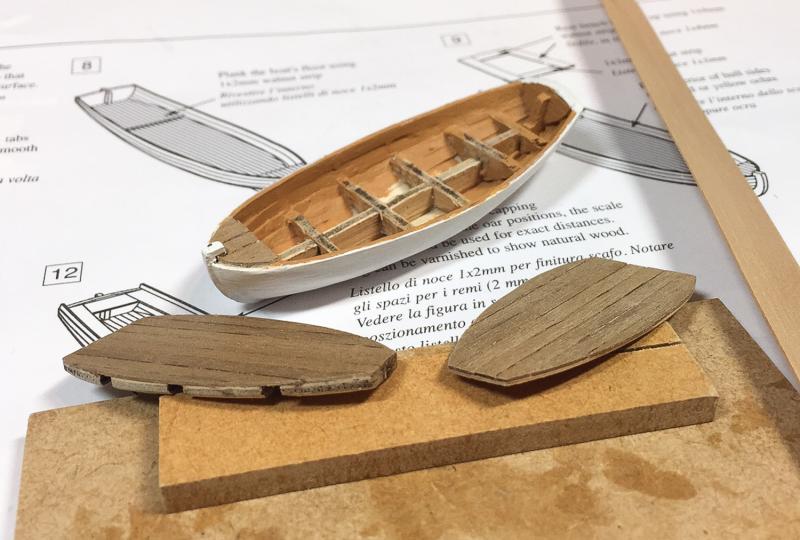
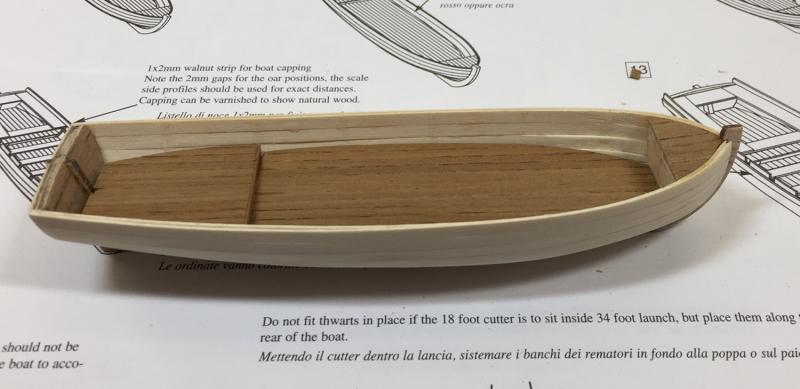
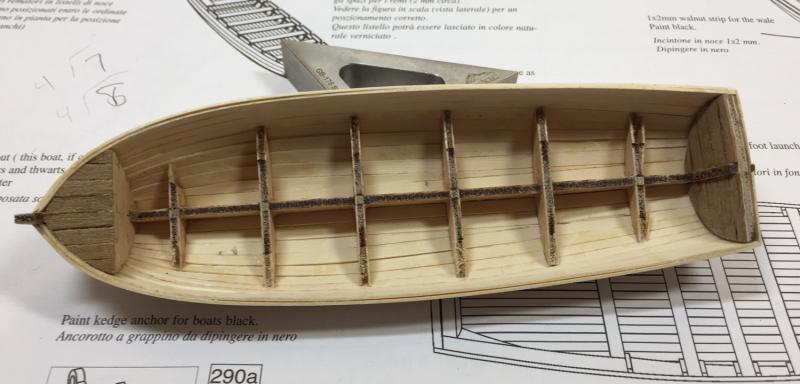
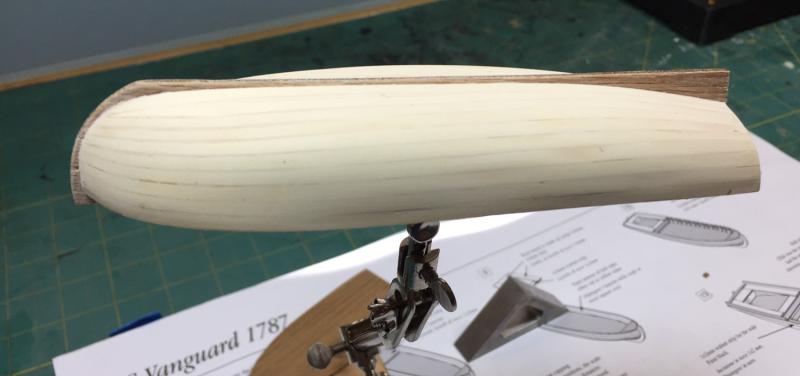
After finishing the headrails it was time for a change of pace. Here is the start of the barge, largest of the four ship's boats to build. The supplemental book provided with the model is very helpful and clear on how to build these. I'm using 3mm x .6mm Ash, the same I used for the deck. One because I have a large supply from Hobby Mill (sadly no longer in business) and because its easy to work with. The instructions call for 3mm x .5 strip, but I found no such wood in the kit. 3mm is the right size, anything wider would look out of scale and double planking with .5mm makes the hull plenty strong. The only thing about using thin wood like this (vs. the usual 1mm) is you can't sand your way out of bad planking to a smooth finish, or at least you have a lot less room to do it. Hull strength is something you get to verify when you snap out the supports. I made this easier by lightly sawing both sides of the support at the base of the "U" I didn't take a photo before removing them but the instructions photo is clear. Still sanding to do on the inside. As I often do, I ignored the instructions. In this case I didn't glue in the deck support, doing this made planking it outside the boat very easy, quick, and neat. By being able to remove the deck, it will be much easier to add the ribs and thwarts as well as paint the inside. I can do all that then finish by gluing the deck into the finished product. It had been so long since I planked the ship I had to re-teach myself how to spline. I'm thinking this is going to be harder, not easier, the smaller the boat gets, so I'm glad I started with the largest boat first as the instructions suggest. Kinda fun working on this small scale after so long on the huge ship. I'm not sure I'll enjoy notching out the rowing slots (the instructions show the photo, but not a good way for doing it) for the eight sides I'll eventually need, I'll have to figure out some way to do this simply and easy to repeat.
- 101 replies
-
- victory models
- amati
-
(and 2 more)
Tagged with:
-
It's a pretty standard on metal etchings like that design to paint the flat parts to match its location and the raised points to stand out, including the flat metal surrounding is the only way they can manufacture such a small ornate part without it breaking apart. My point about heavy is driven by the fact I won't be rigging the bowsprit as you've done in your model. I am thinking about perhaps adding some French Blue into the bow area, but I'll decide that later. I think you may have gone a bit too black on your main headrails, its getting lost in the rigging. I on the other hand I may be going a bit to yellow ochre. I do like how you tied the metal decorative piece into the cathead.
- 101 replies
-
- victory models
- amati
-
(and 2 more)
Tagged with:
-
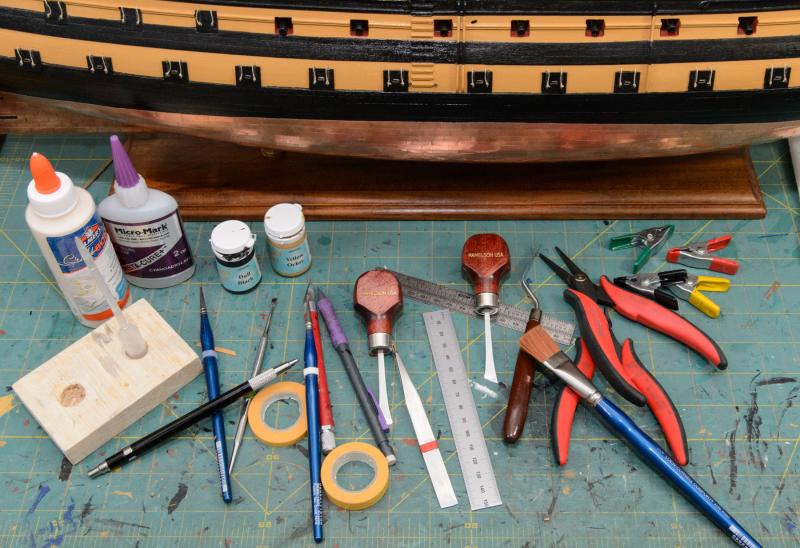
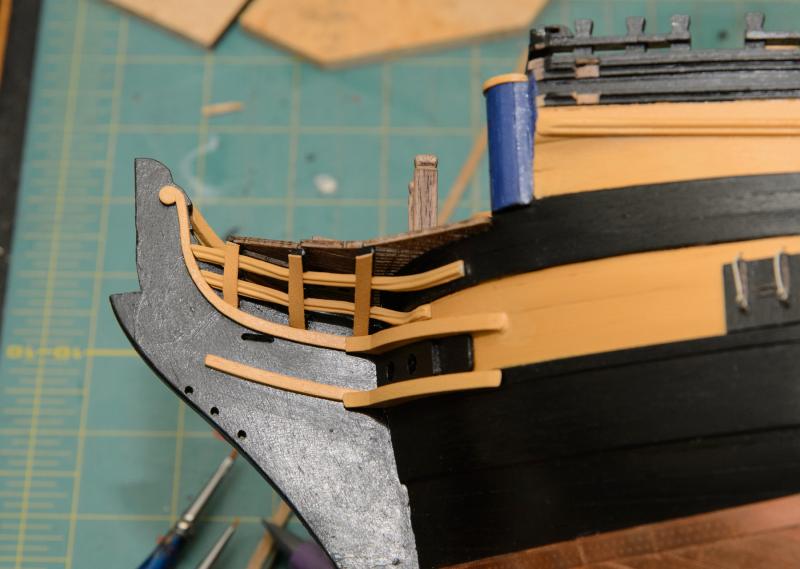
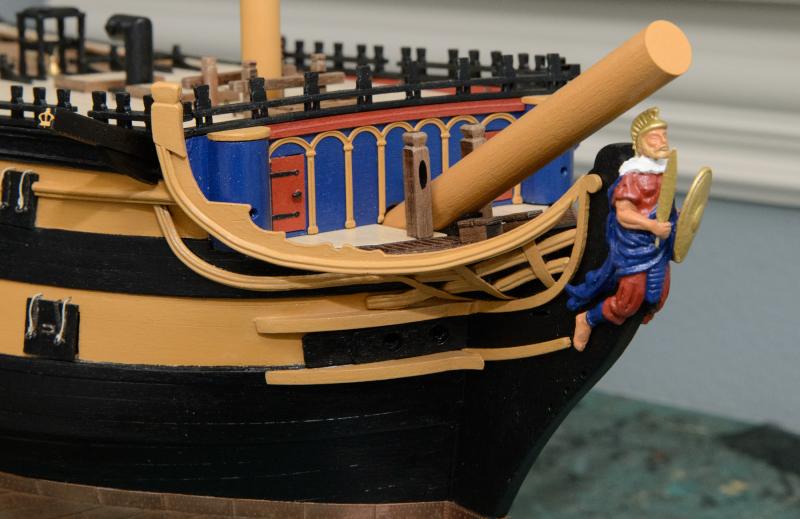
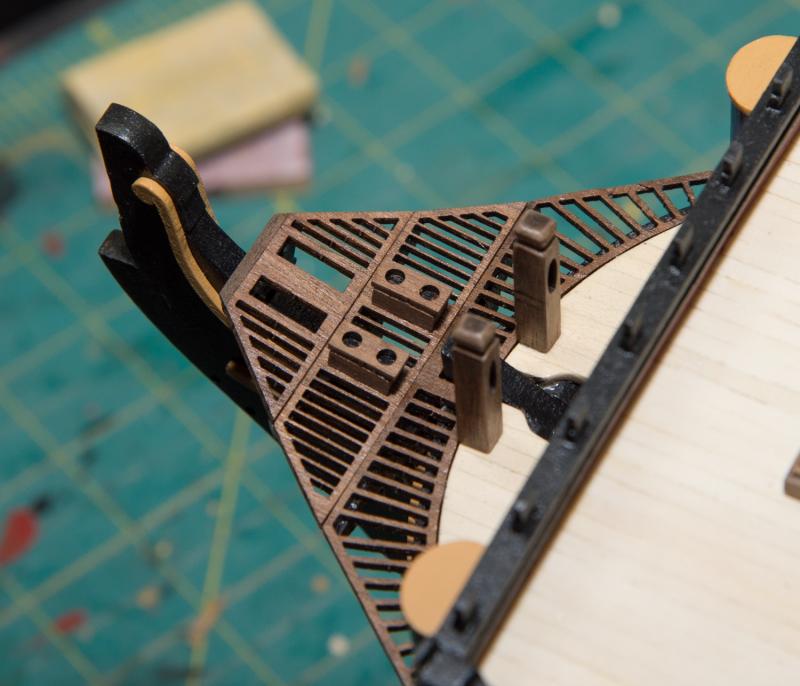
I always included in-progress photos in my long lost detailed Pegasus build log and noticed I’d done it to a lesser extent in this log before my two-year break. I thought I’d offer that again for the head rails portion of the Vanguard. Mostly because while the directions are helpful in showing where things fit, they don’t help much with the actual work. I’ve included a photo of the tools I used, all of them to one extent or another were used just for the headrails. The 6 metal decorative strips required for the headrail assembly have to be bent in multiple directions, for those fitting into the headrail frames, 4 changes of direction are required. Pliers can’t be used on the soft metal (as I discovered as I threw away the first attempt), it’s a lot of finger strength. Wrapping the metal in multiple layers of a cotton cloth and lightly using the pilers with the cloth buffer helps for the more difficult turns, but it’s important to keep a flow to the pieces, not sharp bends and turns. It’s just a series of trial and error until finally a fit of the right length and form to lay curved naturally on the hull, into the channels of the frames, and finally onto the stem. What I learned is preparation is everything. Take the time to make the channels in the headrail frames deep enough for the metal trim – this avoids having to file the metal later. Also make sure the angle and slope of the channels go flow with the metal, so as to not force awkward bends to get a fit. I again found myself doing a lot of trimming to the small forward frame for this to happen. Also remember it’s a fragile area and hard to get a grip – I can attest to this by the break shown in the photo of the topside wooden grid – fortunately I can go back and fix it, but I came close to disaster more than once forgetting what I was holding onto while fitting the metal. I don’t have a perfect match on the lowest stem piece. I could trim it and may yet, but right now I think it looks better as it is than if trimmed down. This is an example of what else I learned. I don’t recommend following the order in the instructions. I fitted both of these pieces properly, if they were by themselves, but when it came to matching them up I couldn’t do it in a satisfactory way (beveling the one piece on the hull or having the piece on the stem mounted lower, but not aligned with the hawse holes). Had I not already installed the stem piece first I could have adjusted. As it was, after it was installed it was too late. I maybe could have torn it all off and likely remade pieces, but just not that big a deal to warrant the work. Wood filler of course would just look sloppy. So my order was stem pieces, hawse hole assembly, cheeks, frames (after ensuring the trim fit in the channel off the model). metal pieces on the frames, main headrail piece, cathead (aligned to main headrail), final metal hull decoration piece aligned to cathead. This worked for me other than that bottom stem piece as noted above, which I could have solved with more testing and dry-fitting. Other notes: I chose not to cut into the larger yellow rail in fitting the cathead. Mine is pretty tall, it would look sloppy to cut that rail down to the hull as I did the two black hull rails above. So I trimmed the cathead support piece to fit as its shown and ended the metal decoration piece into the yellow rail. From a normal viewing distance, it looks good to me. I chose a gentler curve for that same decoration piece, just aesthetics, to me a sharper U shape wasn’t to my liking. As you can see, to make the main headrail less two dimensional I fitted a metal decorative piece on top – I like the look, ties it altogether for me. A big change I made: I used a 3mm x .5 wood strip to cross over the metal pieces on the frame. I highly recommend this. I did it for two reasons; the recommended 1mm thick piece looked heavy (see below) and I liked how I could fit the end into the gap between the stem piece and headrail frame and how it curved into place at the top. Frankly it was just easier and is a nice look. I considered painting those strips French blue, but elected not to. I like the all yellow ochre look (plus despite the photo on the box cover it’s what the directions call for). There is also a decorative metal insignia/decoration that fits on the stem, again I may not add for the ‘too heavy” reason. I’ll decide later. So what’s this “too heavy” thing? As I’ve noted I’m not adding mast and riggings to this model. Without all the rigging that goes with the bowsprit to offset, I need to balance the model a bit. This whole model is a therapeutic exercise for me. Based on past models I know I have the skills to build and I like sharing information to help others learning the craft, so I hope this helps others a bit. While I don't worry about changes I make from a historical perspective, I do all I can to make my work crisp.
- 101 replies
-
- victory models
- amati
-
(and 2 more)
Tagged with:
-
I've always done my rigging first standing then running and both of those center outwards driven more by the belay point than the line itself. It gets really tight at the end no matter what, I learned to belay lines with tools. My favorite is a 3mm dowel with a large eye needle glued into the end and the end of the eye cut off making a two pronged pitchfork. With that I can guide the lines onto the belay point.
-
Yep, I can create fun stories to go with it. I have my historically accurate Pegasus on the shelf - this one is just to low stress way to pass the time
- 101 replies
-
- victory models
- amati
-
(and 2 more)
Tagged with:
-
Yep, and I'm sure you knew yours was correct.
- 101 replies
-
- victory models
- amati
-
(and 2 more)
Tagged with:
-
Thanks for the comment ASATbut no room on the shelf for a 3' high model, barely room for a 3 foot long one :-) One thing consistent about building models is often the result doesn't necessarily recognize the large about of work it took to get there. The four cheeks were not event close to being a fit to the bow, it took a lot of sanding and fitting just as I expected it would. I guess the kit maker decided you can take curve out but you can't put it in. Seems though it could have been a little closer. The top cross piece for the top grid (not sure what the nautical name is) also took a crazy amount of filing and shaping, almost half its original height, to keep the third and foremost pice of grid to have a reasonable cure and match the eventual headrail trim that will cover it. The three grid pieces also weren't long enough to fit (I realize this is all due to the variance we all create as we build our models, not a design fault (well maybe the cheeks....) Fortunately for me, a small strip of 1.5 x 2mm made it a perfect fit and sorta looks like it was supposed to be there. Now for more complexity and trial of patience to get the rest of the headrails to fit properly. I started the sanding on the bow of the ship as you can see in the photo and I have some more adjustments to make on the lower cheeks, but it was time to quit for the day.
- 101 replies
-
- victory models
- amati
-
(and 2 more)
Tagged with:
-
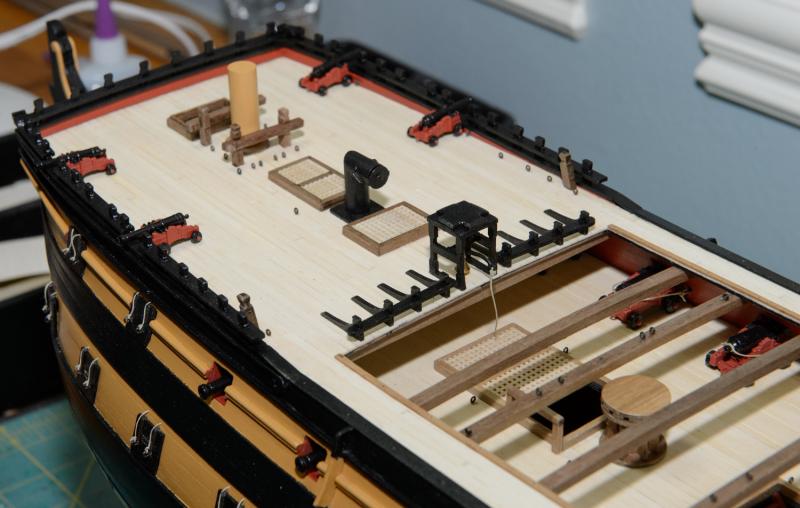
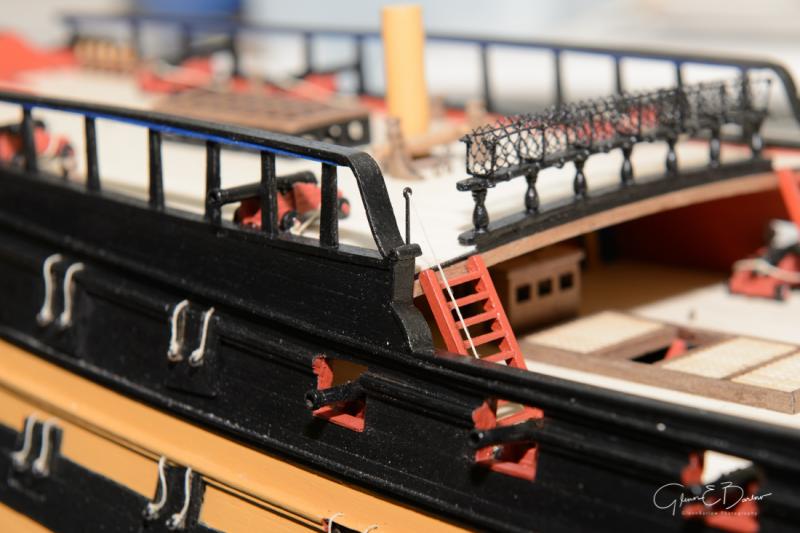
After another brief layoff I finished the cap rails and the forecastle deck furniture. (the cannons are just sitting for the photo, not installed yet). Nothing very complicated to any of it, just a bit tedious building the stacked rails. The plans were very helpful here with the recommendation of using 2x2mm strips to keep the proper distance between the lower and upper rail. I used my Byrnes saw to cut a long strip exactly 2x2 (none of the included strips are perfect) then cut that into enough 1 inch strips to fit between every stanchion. Not the easiest thing to glue together, just requires a bit of patience. There are still hammock holders and rails along midship, I have pre-drilled the holes but won't install them until the very end, otherwise I'd be knocking them off as I worked on other areas. I may install a piece of angled rail from the back of the top rail to the rail below, but the plans don't call for it and I'm not sure its needed - I'll think about that later. Other than those handrails and of course the ships boats I'm essentially finished with the deck. Now I move on to the headrails, that will involve a lot of sand, fit, adjust, sand, fit, sand .... to make it all come together. Yay for more to do...
- 101 replies
-
- victory models
- amati
-
(and 2 more)
Tagged with:
-
Hi Chris, it was the curved area on the hull below there rail. As shown on this image I ended up making them from 5mm walnut strip (cut down to 4mm to match the laser cut pieces in the kit. A little tricky for such a short piece, but that's what makes it fun. I was just expecting it ti be a kit piece for some reason I had a two year lay-off on this model, not taking it all that seriously as I did the Pegasus - just therapeutic wood work. Do you have any new kits underway or recently finished? I followed Caldercraft for years waiting for them to finish the Surprise kit, I guess they just gave it up.
-
Turns out that unlike Pegasus there were no such parts - I ended up making the ½ curved pieces myself, it all turned out fine as shown in my build log.
-
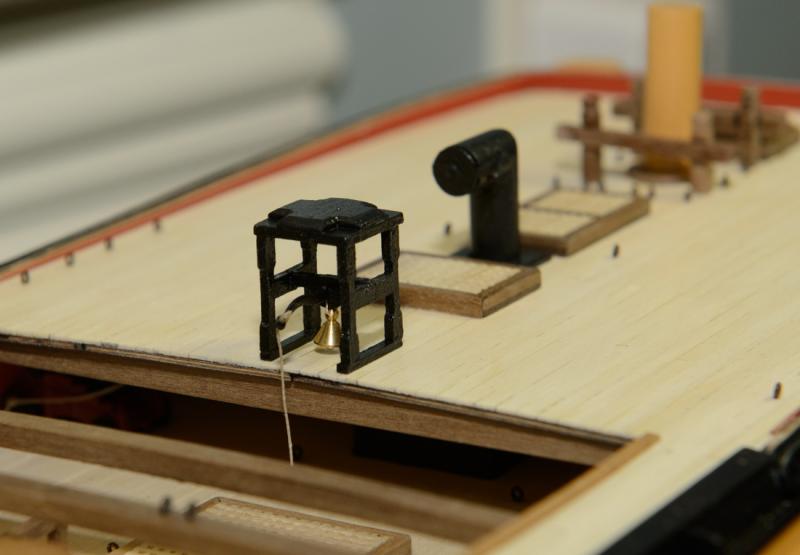
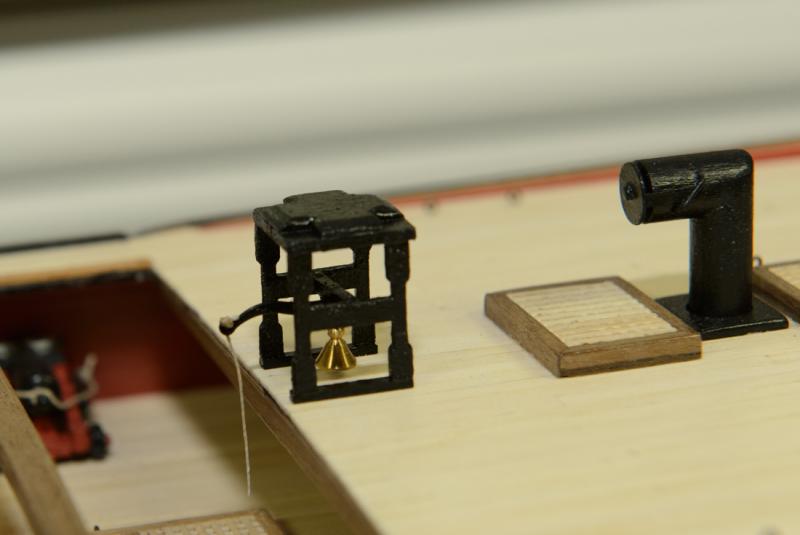
Small victories. I'm thinking the guy at the Amati kit assembly plant noticed he was out of the right bell for this kit and found one in the next bin over and thought "this one will be ok." After the very tricky assembly of the bell assembly - keeping it square involved a precisely cut block using my Byrnes saw and a few metal squares that so faithfully serve me for all deck furniture - I realized the bell was different from the one shown on the plans. So I had to first determine a way to connect it to the assembly, which I did by tying it with .01 thread. I thought I was good until I then realized the bell was longer than the distance from the yoke to the deck (and no I didn't invert the assembly, the distance is exactly the same either way). My first thoughts were not kind ones, after I was done with those thoughts I did what we modelers always do - improvise. Simply adding a 2mm strip to the bottom gave the bell the clearance it needed - barely. It also had the positive affect of providing a more stable base for when I install it (if I installed it now I'd be sure to break it installing the forecastle cap rails, its a very fragile little thing.) All part of the fun.
- 101 replies
-
- victory models
- amati
-
(and 2 more)
Tagged with:
-
Thanks Bill, good to know its helping someone. I feel like I'm writing myself a letter most of the time - but its fun and it is in fact a log. Truthfully, depending on your interests of course, I much more recommend the Pegasus or even the Granada over the Vanguard. This thing is sooo big. I wish I'd made an off-line copy of my Pegasus log, it was much more instructive and detailed. It got lost in the great crash of this site, not sure why I wasn't keeping it as a soft copy....of course I'm not keeping an off-line copy of this one either :-) I realized it might be helpful to include a photo of that first trim piece installed since I talked about doing it. I included the dry-fitted figurehead as well. I also dry-fitted each of the three cross-trees and did the necessary trimming to fit then painted them off the ship. I decided not to install them yet to keep from my breaking them. That's because just as I started to install the large curved head-rail I realized I had to stop work. I need to do the forecastle cap rails first in order to get the right fit where the head rail joins the hull - so off I go on a new direction. More proof that half of construction (on any level I'm sure) is thinking a few steps ahead.
- 101 replies
-
- victory models
- amati
-
(and 2 more)
Tagged with:
-
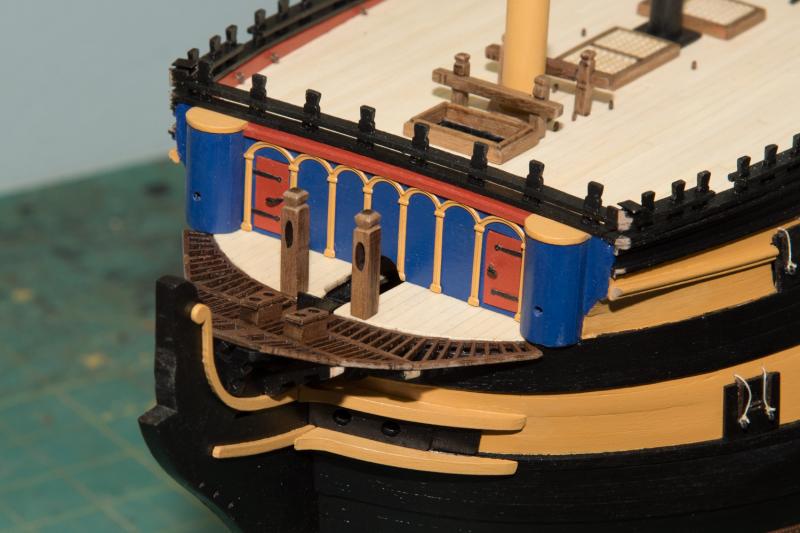
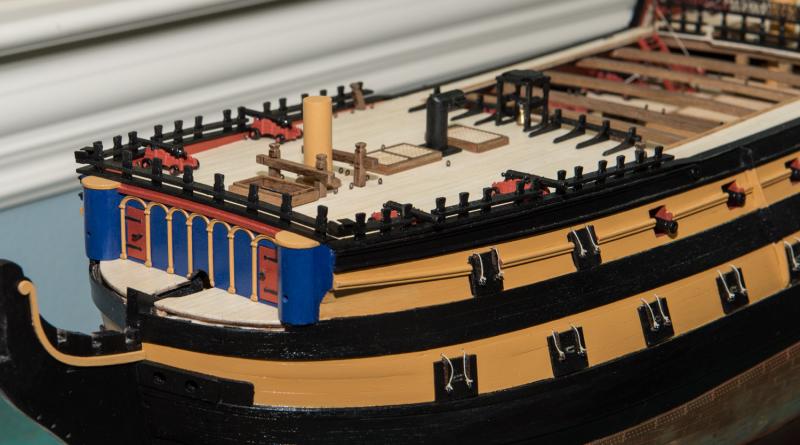
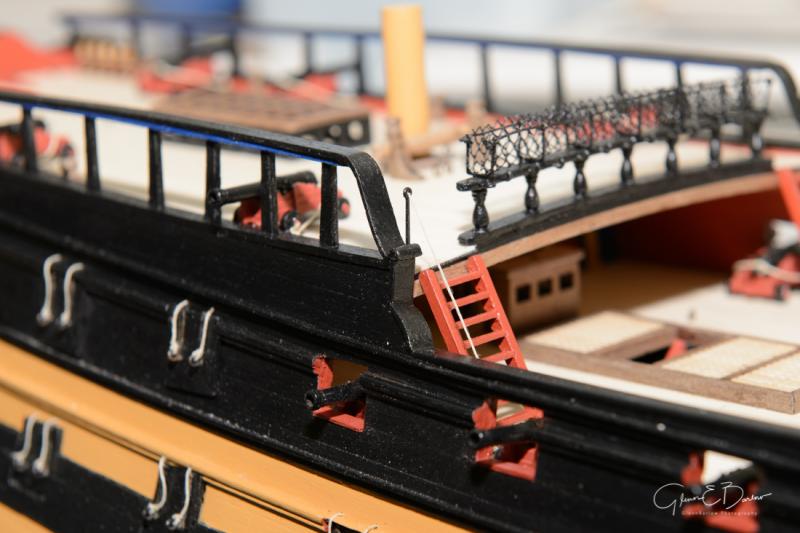
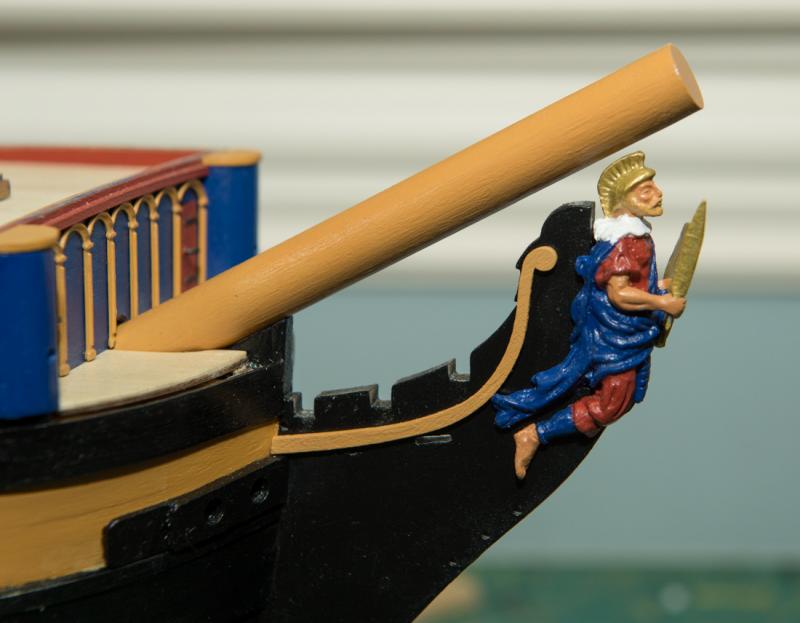
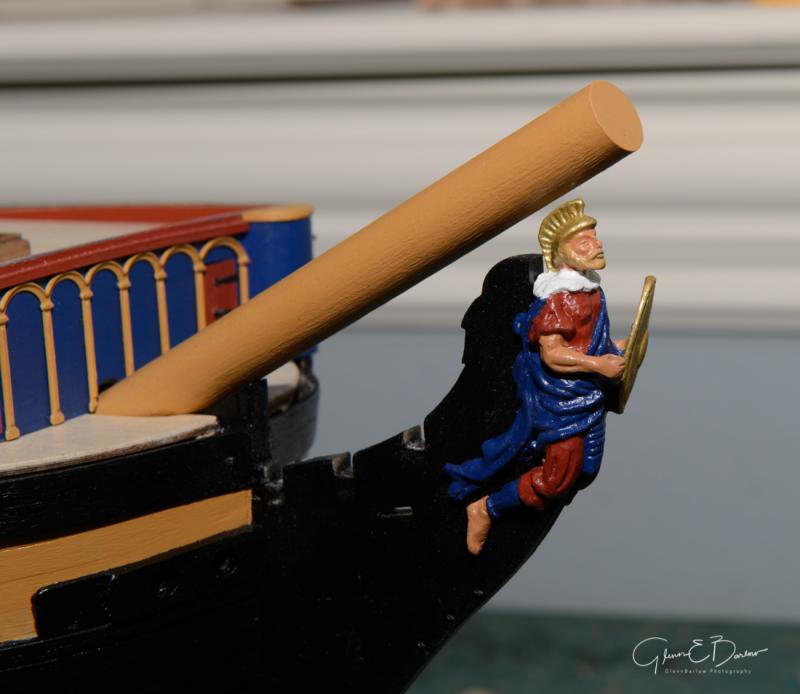
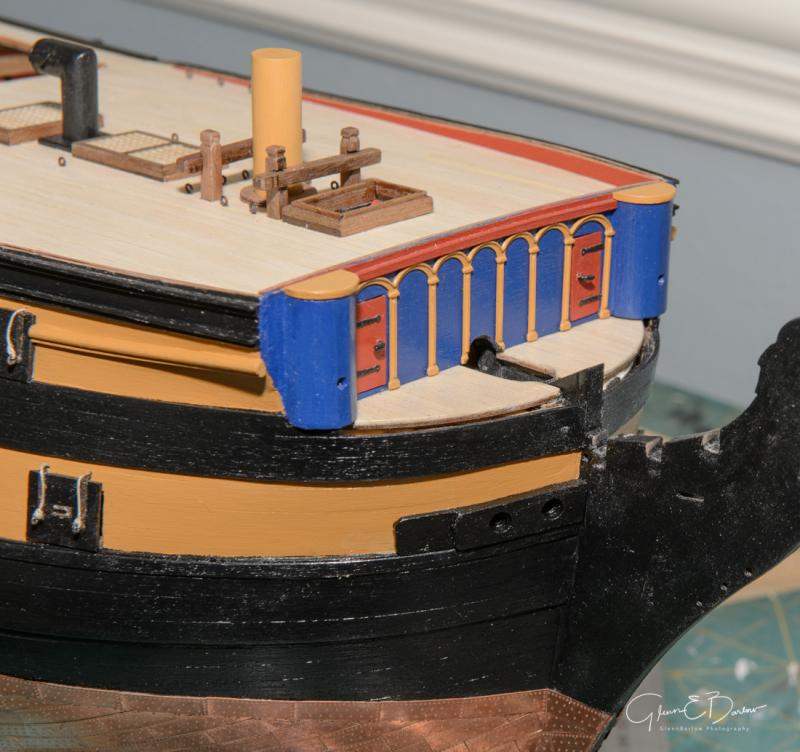
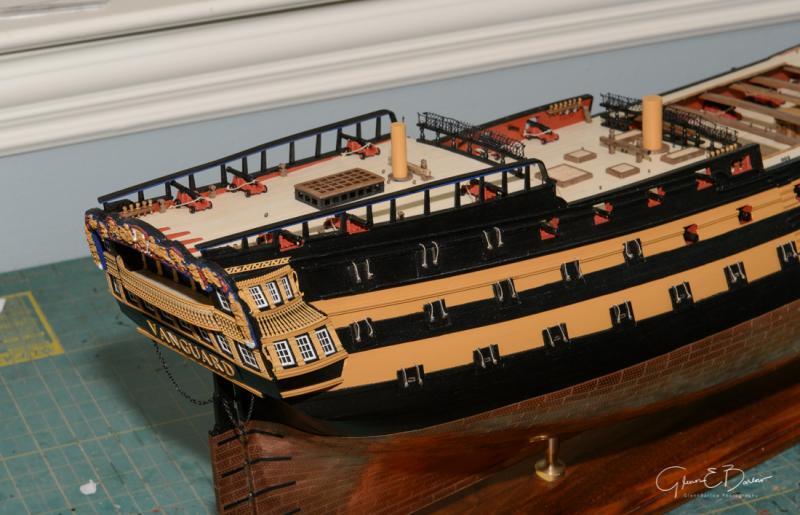
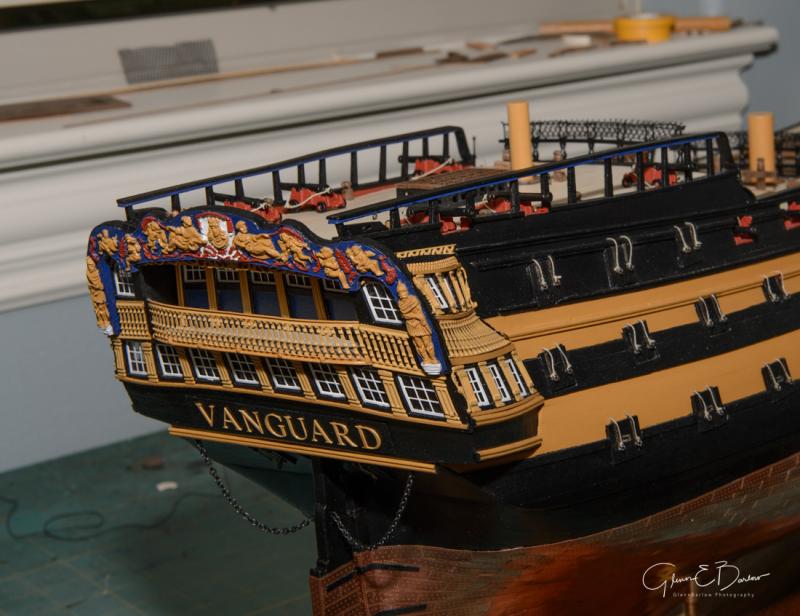
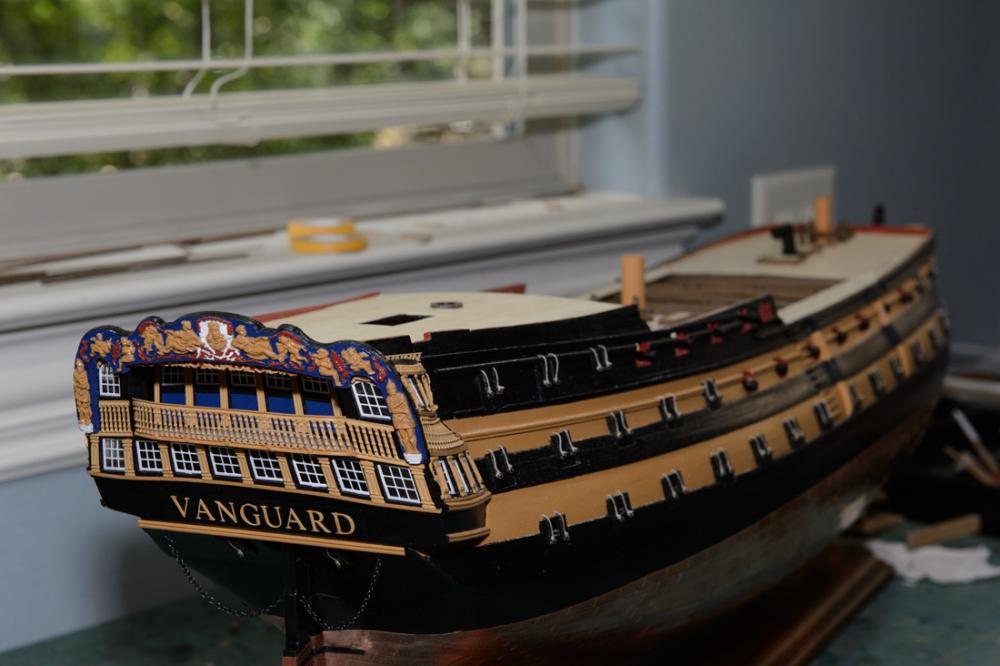
I have noticed having a nice camera has its drawbacks - I see things in these photos I didn't and don't see when I look with my eyes... Instructions are like Italians and red lights, merely a suggestion. I decided at some point to work back to front so now my model is essentially finished from the quarterdeck to the stern rail. I haven't looked at the instruction book in a long time. It is a bit of a pain though as Amati provided an instruction book, a second book for the hull (or some of it), and the plans. Some things for the hull are in the plans and some in the hull book - the instruction book isn't much help. I had panicked a bit when I couldn't find the curved railing that bridges the poop and quarterdeck - that's because unlike the Pegasus kit, there wasn't one. I'm pretty happy with how it turned out, though curving about ½ inch of 5 mm wood isn't the easiest thing to do. One discovery I made is that the supplied laser cut rails are about 4mm, so thanks to my trusting Byrnes saw I could trim the portions of the rail that that called for 5mm strip. Those dedicated to accuracy will note I used cannons on the poop deck and not carronades. Due to not having a place this model other than a bookshelf, it won't have masts (I ran enough string on Pegasus and prior models to be content...) I didn't like the look of the carronades - thus cannon. I also thought the cannon balls made the deck look busy, so my ship is on a humanitarian mission and is unarmed. I did leave the stubs loose though in case someday I go crazy at seeing a ship with no masts. Cutting and fitting the poop deck rails is an exercise in patience - with the curve of the stern not exactly matching the curve of the rails (close, but some bending required) I couldn't build them off the ship, so it was bottom up, lining up the stanchions with the top pieces as I went. What fun. All in all I'm happy with the results of the back half of the ship - it may not be accurate but its pretty enough to occupy a bookshelf. I'm leaving the hammock holders and stanchions for mid ship until after the ship's boats are installed and I'm not as likely to bend or knock them off while working on the bow. On previous model build logs I've been asked about the paint. I'm a total fan of Caldercraft Admiralty paints. They claim they are historically accurate, whether that's true of not they are nice shades, cover well, and go on easy. I've turned my attention to the bow, and again ignoring instructions. As everyone who's build a model knows this is a tricky area. I spent a day dry-fitting and testing how things would go together including the bowsprit and the figurehead. I was amazed and how much carving, modifying, and filing I had to do to simply get the figurehead to fit beneath the bowsprit. I had to lower the "seat" (front notch) and extensively file off the back of the guys fur collar (of course after I'd spent hours painting him). I did this after discovering the best fit was with the head and neck flush with the stem, not above it. I'm very glad of dry-fitting - it would have been so much harder to "fix" the fit if the headrails were installed (as would have happened if I had followed the directions). In this photo he's just dry-fitted, I may have to tilt him a bit later. It's a fact of modeling that every bow and stern on every model turns out a bit different. I discovered the first trim piece (the curved yellow one with the circle at the top) was going to be a tough fit. Turned out for me it was 2.5mm too long. I found the best way to get a good and accurate fit was to first install the howser hole trim boards - those I had to trim down by 1.5-2mm to get the proper height. They really are the anchor point of every other part of the head rails, I don't know why the instructions would say to put the other stuff on first when its so much easier to start with the howser trim (which to follow the curve of the bow requires some fun bending). That done it was much easier to fit that trim piece the instructions had said to do first. I'm not happy to see how far off the four cheek pieces that come next, they aren't even close - so its back to sand-fit-sand-fit-sand- oops don't go to far, can't put it back. Back to the sanding I go.
- 101 replies
-
- victory models
- amati
-
(and 2 more)
Tagged with:
-
Never mind - I finally found in your log that you created that by bending some 1x5mm board. It just seems surprising to me they'd create such an obvious curve on the model and not provide a part to fit it. And as significantly the neither manual included with the model nor the plans ever say or show anything about it. My Pegasus had a similar height shift on the hull and there was a part for it. Not cool Chris Watten and Amati, not cool So now I know I need to make something. Thanks for the trouble...
-
No, not part 180. I have the poop rail end. Refererring to the cap rail itself. It steps down just where that rail handle ends, the drop is curved. And about ¾ inch from top to bottom. I thought it easier to attach a photo. I don't know why it's upside down, lol. Thanks again for the help
-
Referring to the small, short curved pieces that connect the longer rails where the hull changes heights. I see them on your model but can't find them. It seems that like the larger curved piece connecting the poop deck rail to the deck they would have to be on a 5mm sheet but I don't see them, nor are they numbered on the plans. Thanks for replying, you have a great model.
-
Where did you find the curved pieces for the cap rails? I cannot locate them in my kit.
- 14 replies
-
- vanguard
- model shipways
-
(and 1 more)
Tagged with:
-
Surely I'm missing something in my Amati Vanguard kit. There should be 6 curved pieces that are part of the cap rails 2 curving from the poop deck 2 near midships, and 2 from the forecastle. I see them installed on other Amati Vanguard build logs but I cannot find them in my kit or on the plans showing the parts. Can someone point me where to find them in this kit? I must be looking right past them, its quite frustrating knowing they must be there somewhere
-

Can i live without a BYRNES TABLE SAW
glbarlow replied to shihawk's topic in Modeling tools and Workshop Equipment
I have both the Byrnes saw and disc sander. They are more than worth the cost, spending money on any other saw is a waste. I find many uses for both and frankly don't know what I'd do without them or how I did anything before I got them. There are 4 pages of replies as testament to how good they are. The answer to you question is yes, you absolutely need them. -
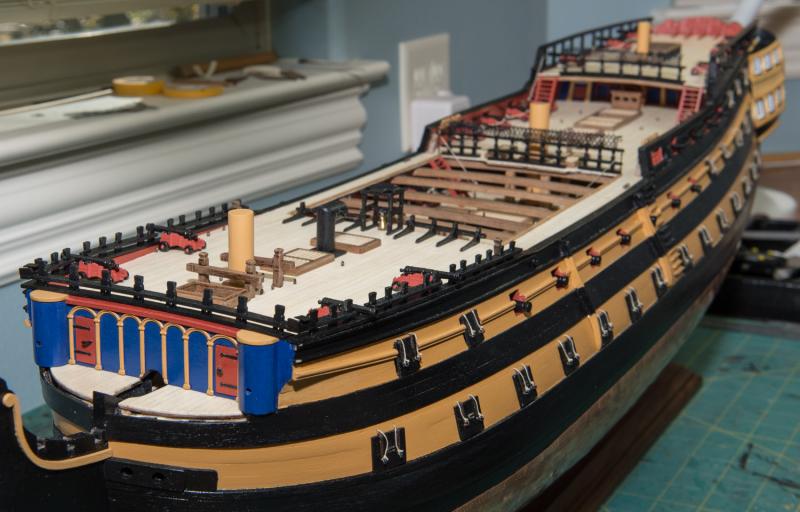
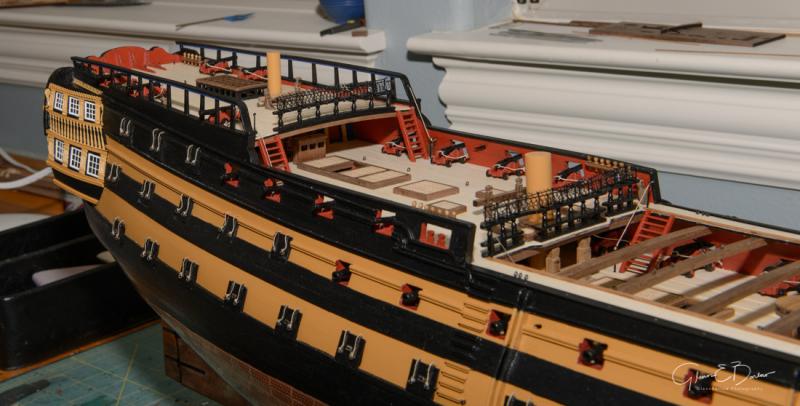
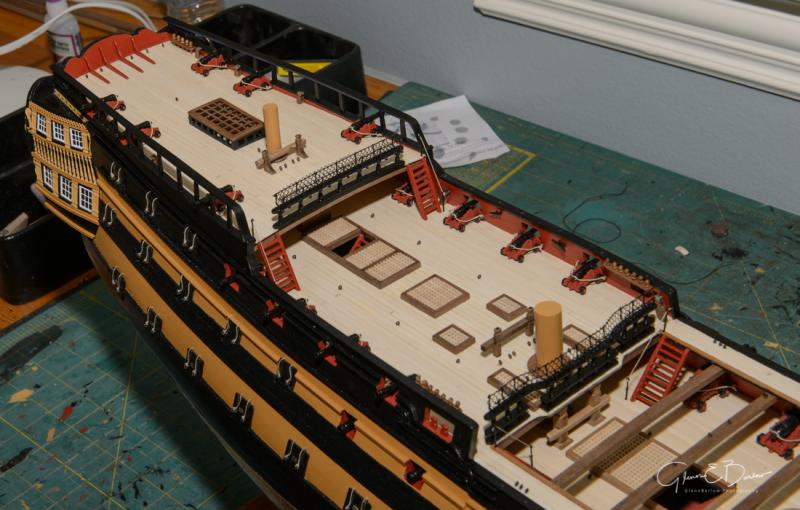
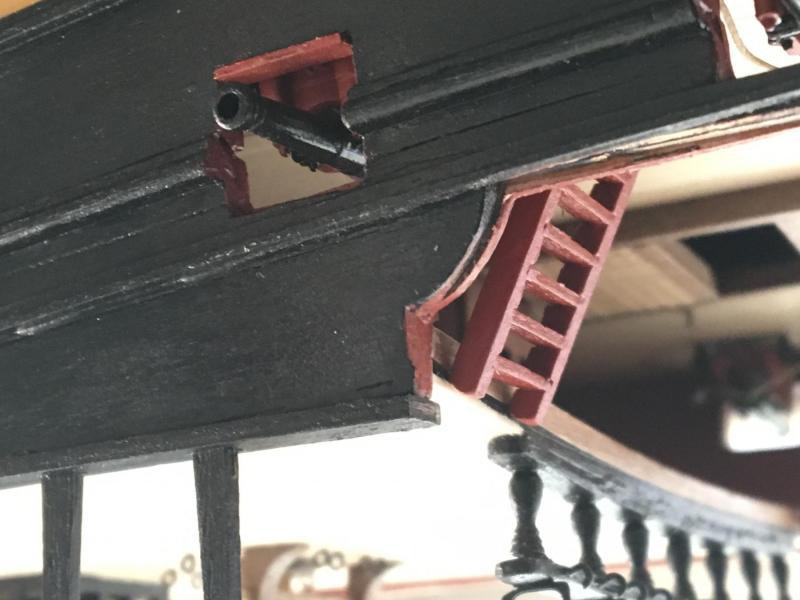
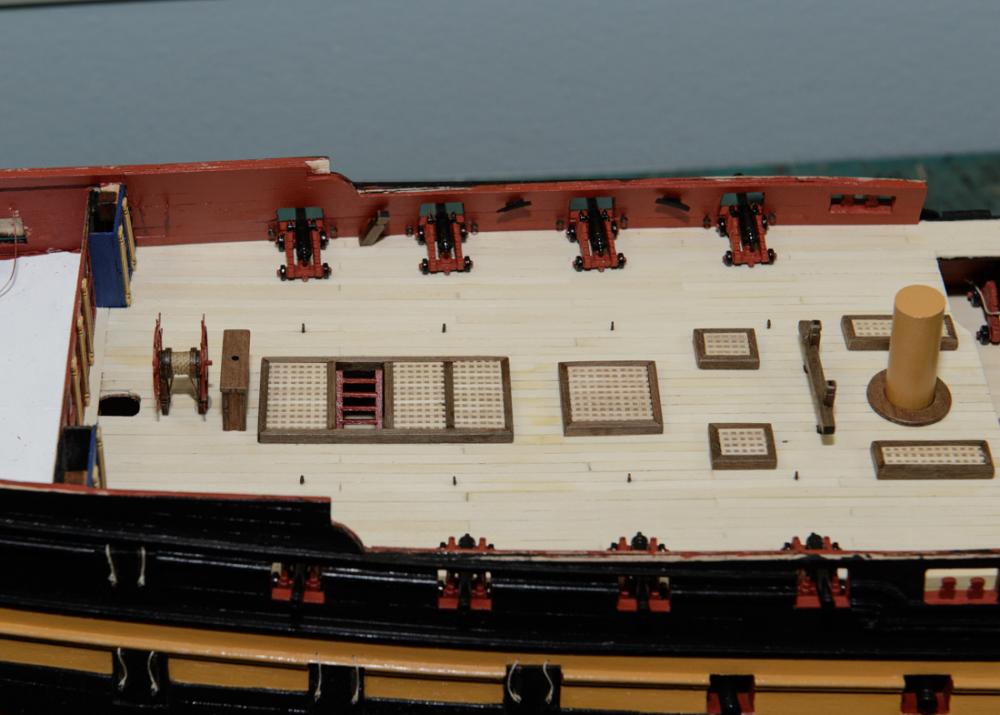
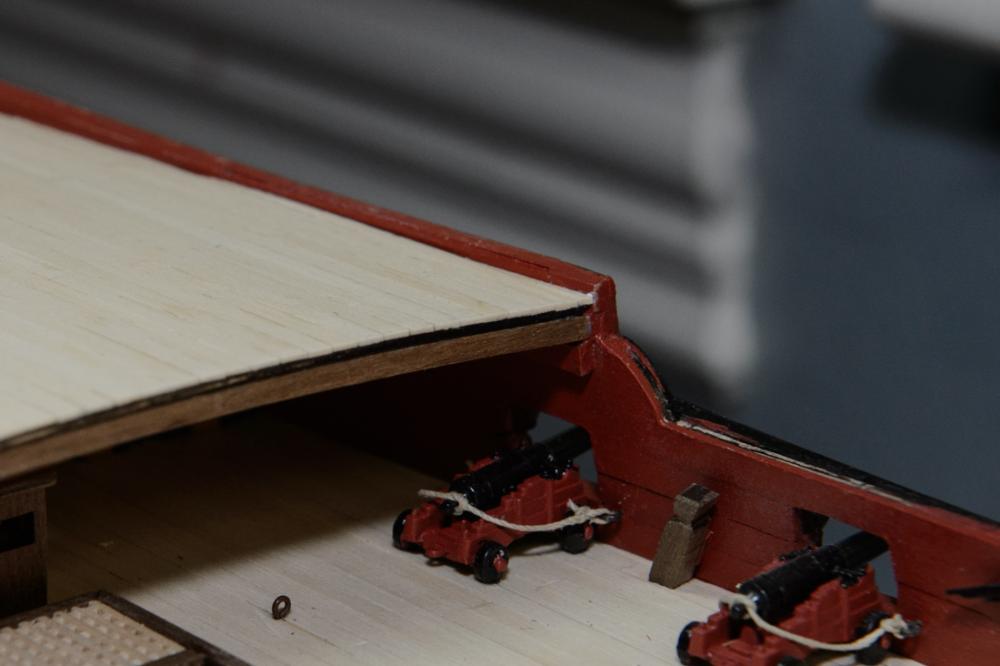
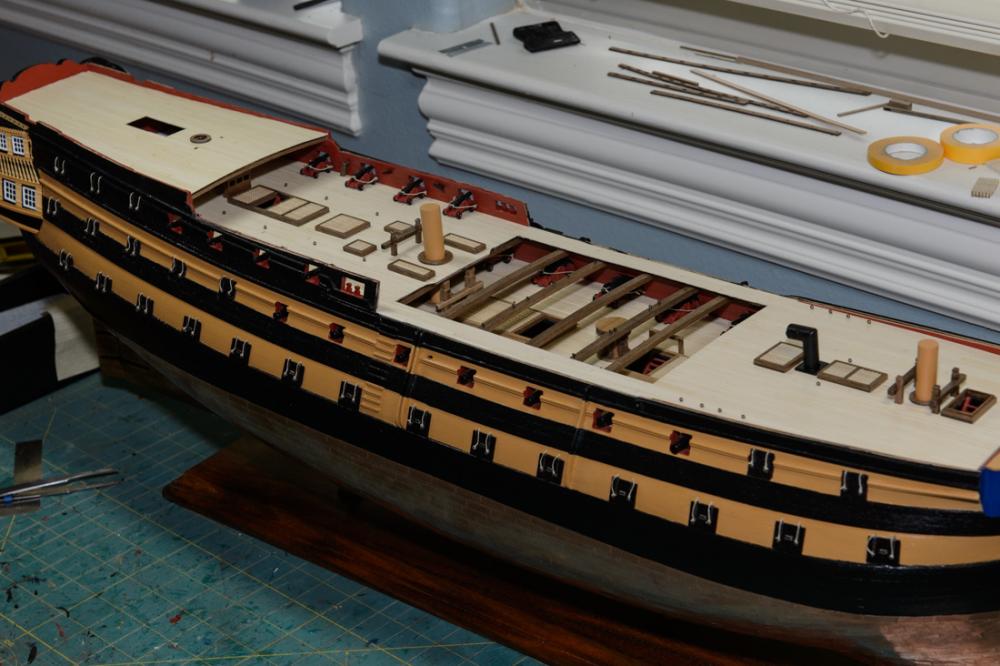
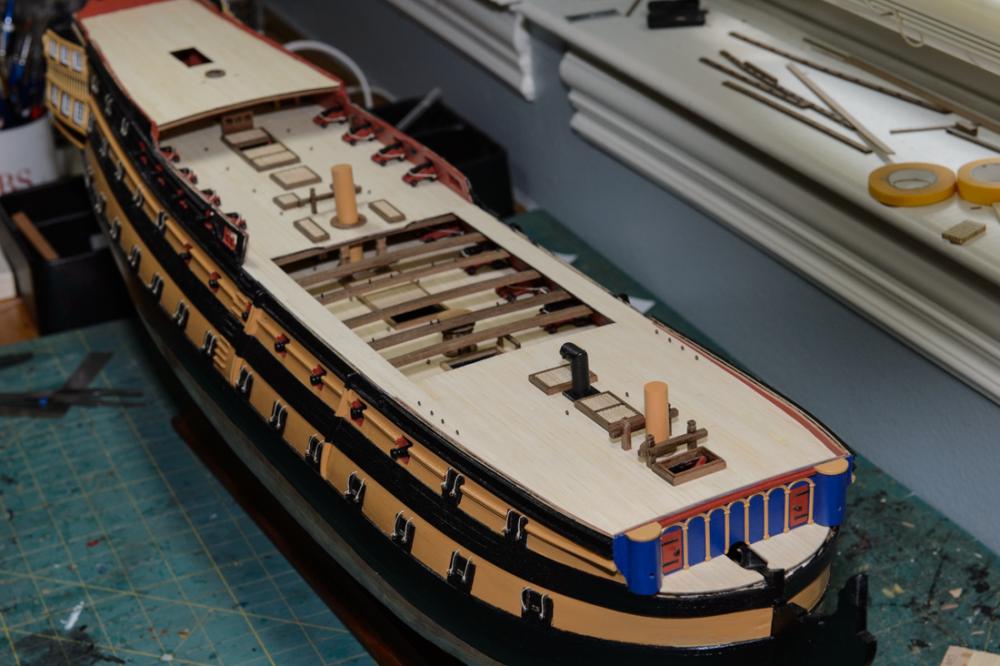
Continuing to making progress. The Vanguard is now fully decked and the main deck is finished. Next step is the various rails on the forecastle and poop deck plus the cap rails and finishing up the poop deck furniture. As you can see in the photos for now I'm not planning to add the masts, so I have stubs cut to finish off the mast holes. These aren't glued in so I can come back some day and add them if I want. Its simply a case of not having a place to put a finished 3 ft long, 3 foot high model. Plus I've been there, done that with my 7 prior models. This one is just about building a '74 on a relaxed pace without the extreme attention to detail and accuracy of models like my Pegasus. I deviated from the plans with the support beam for the poop deck. Like I had to do with the beams where the boats will sit and the finished beam for the forecastle, I cut a notch in the bulwarks the exact right height and width required to match the beam and decking. I added a rope to the wheel that wasn't mentioned in the plans. Not sure why, now that the poop deck is installed, it will never be seen again - but I feel better about myself :-) I also decided on simple breech rope rigging for the cannon - I've done the full blocks and tackle on my prior models, but it required ordering custom blocks. The ones supplied with the kit are way out of scale for this purpose in my opinion, with as little as the cannon are seen and this 1/72 scale of this model I am content with the simpler approach. If I didn't mention it earlier, the decking is 4mm ash supplied by Hobby Mill. I like the its bright natural color, I've used this on my last 4 models and will continue to use it for any future models. The discoloring is more pronounced in the photos than it actually is, this comes from the water based Poly I use to seal and finish all painted surfaces. It also doesn't shine like it appears as a result of the camera's flash. The bulwarks were done with swiss pear, also from Hobby Mill mostly because the 4mm width seemed more to scale - but then it was painted red so this expensive wood's nice color is lost. Still the right choice - the 5mm walnut just looked to big (its used on the gun deck, but that really can't be seen much now). The cabin bulwark matches the color scheme I chose (or made up I guess) but again its lost from view with the poop deck installed. Its a really big model, with all the wood, pain and glue now on it, its also getting pretty heavy. I'm glad I modified the hull way back in the beginning to better anchor the mounting screws. If I'd just followed the plans and put them just through the keel the model would have split off the mounting base a long time ago.
- 101 replies
-
- victory models
- amati
-
(and 2 more)
Tagged with:
-
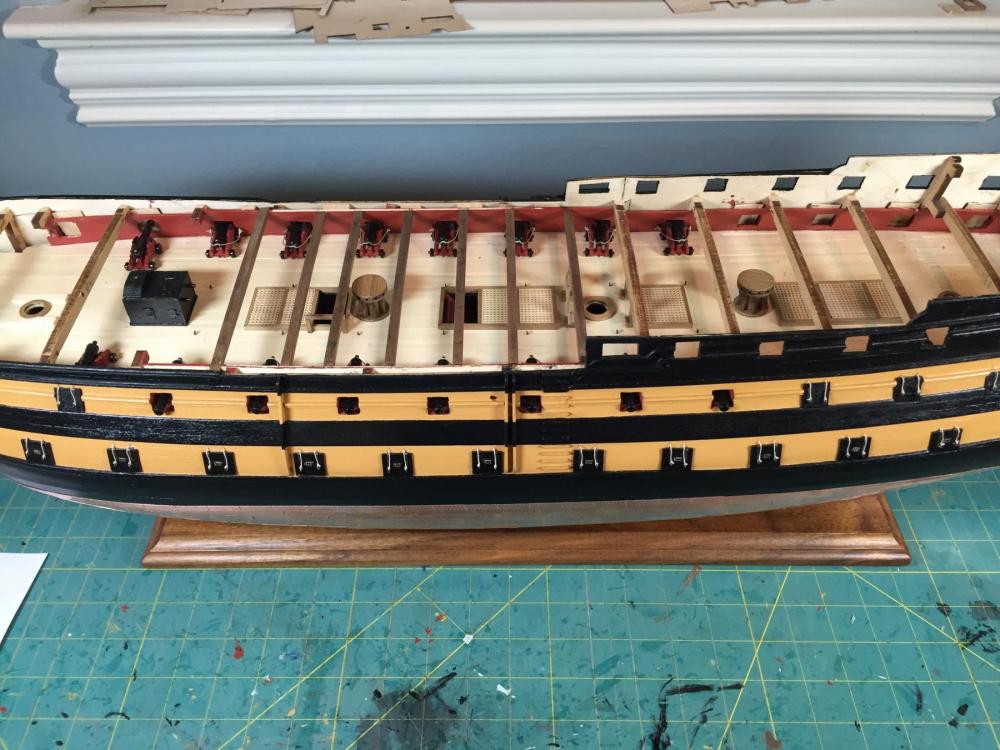
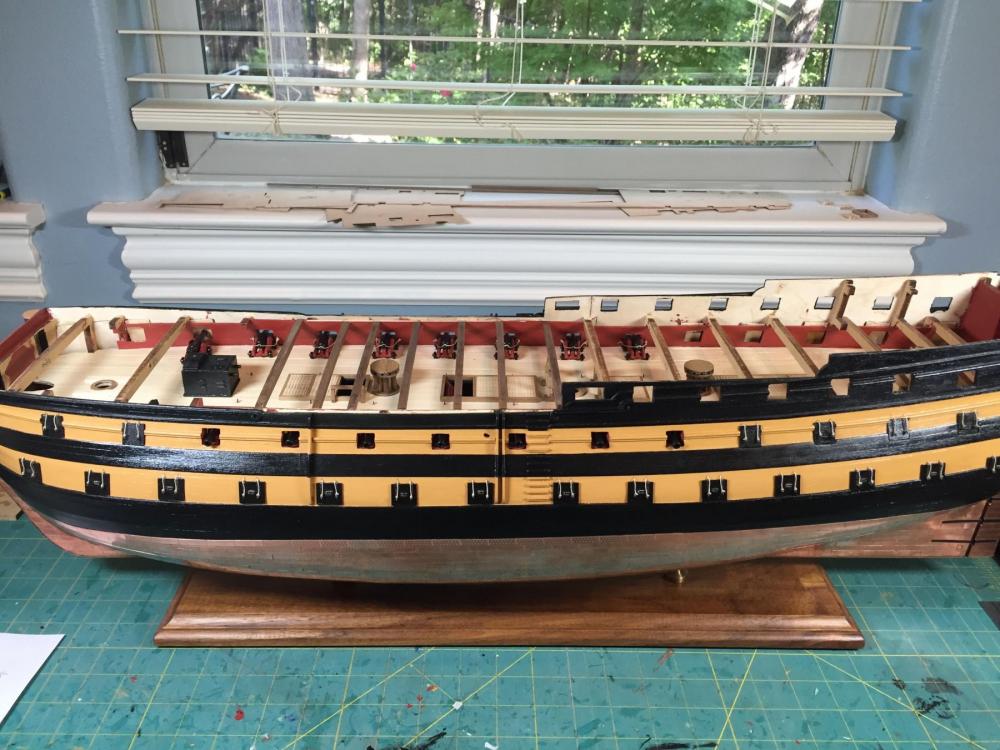
Turns out I needed only about 25 copper plates to finish - so about $50 and 3 weeks later I've finished the coppering and have plenty of copper for some other project. It's weird that I had enough for the starboard but not enough for the port. If anything I was more efficient on the port. Oh well, its done. The ship is very heavy now. I've finished the upper gun deck - as far as I'm coning to finish it. I've decided I've built out enough cannon kits in my life so only those gunport that didn't havet lids have cannon mounted, plus a few extra for whatever you might be able to see once the main deck is installed. The gunports with lids are closed and will remain that way. I did all the cleaver work of open ports on Pegasus. Vanguard is enroute with no imminent threat of attack so the ports are closed:-) If you look close at the photos you'll see some plywood spacers between the outer hull and inner bulkhead. These insure both hulls have some extra support and were helpful in holding things steady when the gunports were cut. The cross beams that will remain exposed by the main deck were a bit of a challenge. There is no "kit" way of mounting them, basically they are force fit between the bulkheads which is fine if you ship is built perfectly, unfortunately mine isn't so I had to sand a few to make them squeeze between the bulkheads. Gluing, aligning to the plan measurements, and not wrecking the bulkheads took some pre-positioning and dry-fitting to get it all right. I did two things to help myself. I did the measurement work to determine where the ship's boats tie downs need to be and drilled those eyelets in before installing the beam. The cradles are a bit tall, I figured I'd break one in the remaining build process so I'll not install those to later. I wasn't comfortable with the "squeeze fit" for the beam that supports the forecastle of the main deck. So using the stock the beams came from I created a new beam that was long enough that I could cut notches (very carefully to get the right depth) into the bulkheads. I'm now confident this beam will support the weight and any pressure I might apply during the rest of the build. It also took a bit of sanding on the edges of the beams after installation to ensure the main deck is flush to the deck amidships. If there is one absolute of modeling it is that dry-fitting is an essential skill as in pre-planning what is easier now that later (which the instructions or plans never offer) like the eyelets for the ship's boat's tie downs. It's not that it can't be done later, its just that its so much easier to do some things before installation (or before the installation of something else that obstructs the path getting to it). So now on to the main deck. My two year break is apparently over.
- 101 replies
-
- victory models
- amati
-
(and 2 more)
Tagged with:
About us
Modelshipworld - Advancing Ship Modeling through Research
SSL Secured
Your security is important for us so this Website is SSL-Secured
NRG Mailing Address
Nautical Research Guild
237 South Lincoln Street
Westmont IL, 60559-1917
Model Ship World ® and the MSW logo are Registered Trademarks, and belong to the Nautical Research Guild (United States Patent and Trademark Office: No. 6,929,264 & No. 6,929,274, registered Dec. 20, 2022)
Helpful Links
About the NRG
If you enjoy building ship models that are historically accurate as well as beautiful, then The Nautical Research Guild (NRG) is just right for you.
The Guild is a non-profit educational organization whose mission is to “Advance Ship Modeling Through Research”. We provide support to our members in their efforts to raise the quality of their model ships.
The Nautical Research Guild has published our world-renowned quarterly magazine, The Nautical Research Journal, since 1955. The pages of the Journal are full of articles by accomplished ship modelers who show you how they create those exquisite details on their models, and by maritime historians who show you the correct details to build. The Journal is available in both print and digital editions. Go to the NRG web site (www.thenrg.org) to download a complimentary digital copy of the Journal. The NRG also publishes plan sets, books and compilations of back issues of the Journal and the former Ships in Scale and Model Ship Builder magazines.


