HOLIDAY DONATION DRIVE - SUPPORT MSW - DO YOUR PART TO KEEP THIS GREAT FORUM GOING! (Only 13 donations so far - C'mon guys!)
×


glbarlow
-
Posts
4,106 -
Joined
-
Last visited
Content Type
Profiles
Forums
Gallery
Events
Everything posted by glbarlow
-
 A build log book, that’s thorough and a great idea.
 -
This is my next build for later this year. Good luck on your build and thanks for starting a log.
-
50 hours is about how long it takes me to lay the first plank😂🤣
-
I’m well acquainted with internet search engines, but thanks. Just like your link doesn’t produce any pear wood filler other than furniture scratch wax sticks, nor did mine.
-
Hey, two Glenn's both spelled the right way:-) Congrats on Speedy, hope you're doing a build log. I won't be able to get to it for a while but looking forward to building mine too.
-
Yes I know that trick, hard to do it in much volume and to keep it clean. That can be the fall back but still hoping to locate some pear wood filler. Its not a common wood in the US so not likely a Home Depot opportunity. Thanks though.
-
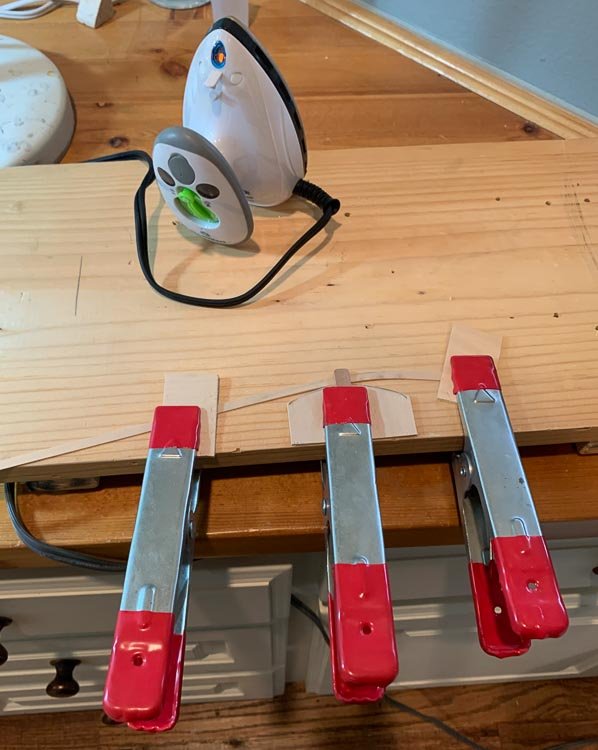
I completed one side of my model (no drop plank, still not sure why or when I’d need one, historical points notwithstanding) I’m quite pleased with the results. I’ve become pretty good at plank bending with my travel iron. Amazing how much sideways twist I could get with this process. Measuring really helps understand how to fit and where to bend. Thanks Chuck!
-
I have a question about building with Pearwood for those of us with less than perfect skills. Where can I find Pearwood wood filler? It has a distinctive color, natural or walnut filler would stand out. I realize if i make no mistakes I won’t need it, an admirable goal i will set for myself, but...
-
I have my Speedy on hand and will be starting it soon, so watching your build.
- 436 replies
-
- 2
-

-
- vanguard models
- alert
- (and 1 more)
-
my suggestion is to bring it forward to align with that center keel piece, a little extra space at the stern isn't going to hurt anything, it will be planked over on top across the back. My two cents without knowing the rest of the build plans.
-
Promise, I'm following your tutorial and will do the lining off process as best I can. I'm going to learn this on the little model I'm working on now so I can transfer the knowledge the HM Speedy later. I'll read everything and watch the videos multiple times - and see how it all comes together. My hull is pretty much the standard cutter shape. I appreciate your making the time to answer my dumb questions.
-
Chuck, I’ll try to limit my dumb questions but I am determined to relearn planking using your method. So sorry in advance... 1. May I ask you to explain the drop plank and how to install a simple version, is it critical on a small model or can/should I just start bending planks below the Wales. 2. What’s the best way to determine the curve and start/stop point of the garboard plank? I’ve always done one but they haven’t been pretty... 3. And...I bought a French curve (and artist tape and wide low tack tape, I’m all in😂) but must profess I have no idea how to use it to transfer the curve with it? I hope you don’t mind the questions, every time I watch your videos I marvel at how that plank just lays there so perfectly.
-
Thanks for asking. I’ll likely do one here when I start the HMS Speedy later this year. The second time around on the planking may be more informative. I’m looking forward to building this Chris Watten kit. I’m working on figuring out Chuck’s method, but haven’t sorted it out just yet. For example I bought a French curve because he shows one in his marking the ship tutorial to transfer the curve but so far I have no clue how to do that 🤣😂. I will have questions once I get into the second planking this coming week. I enjoyed and learned from your Vanguard build as well, as I recall we were both building her at the same time. I still wish I’d kept an offline copy of my Pegasus build, it was my best effort at a log..gone in the great systems crash.
-
square dowels are ones that are not round and answer that age old question of how you fit a square peg in a round hole - just jam it in there.
-
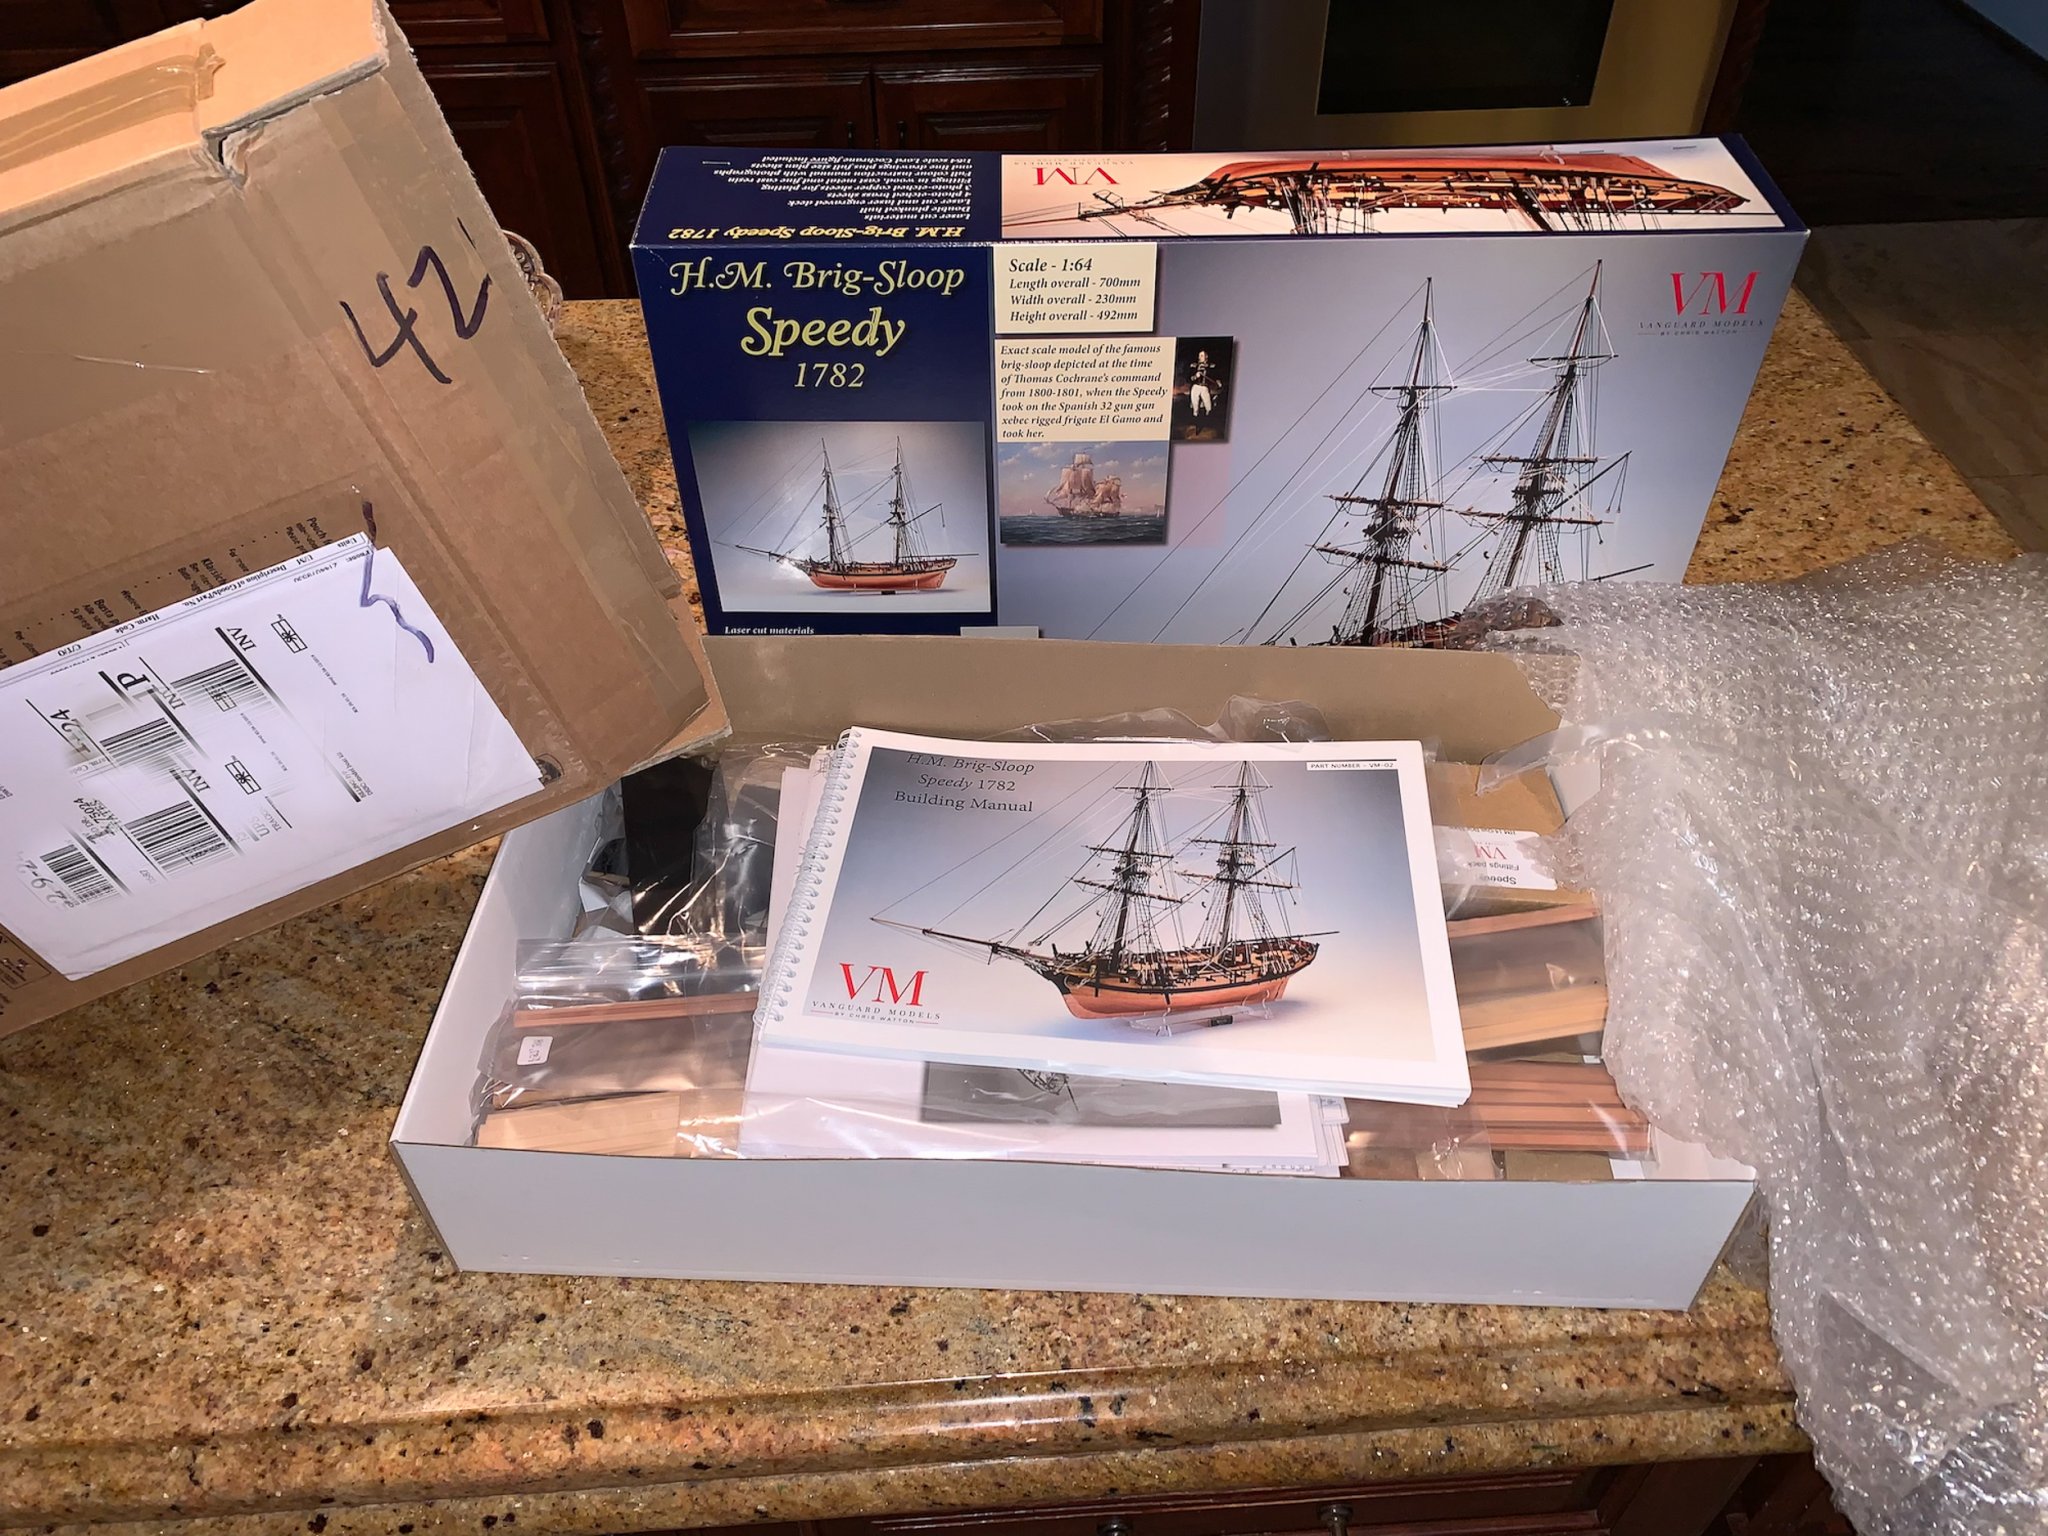
I placed my order for Vanguard Models HMS Speedy from here in Texas on January 24th, it arrived today, the 29th. That's pretty exceptional service coming from the UK. If anyone has reservations about this kit, please allow me to help you set them aside. I've unboxed a lot of kits including the very expensive Amati Vanguard. I've never seen a kit so well packed. The heavy duty cardboard outer sleeve ensured there was not even a crinkle on the kit box. Everything inside was wrapped in separate plastic bags or boxes and all that wrapped in bubble wrap so nothing was moving around inside the box. I have never seen pearwood before and wasn't sure what to expect, I've still only looked, not worked any of it yet, but it seems marvelous - a major major step up from the standard walnut. The laser work is top notch as well. I had a few reservations when I saw Chris was doing that at home now, those were completely unfounded. The upside of doing his own is he can do it exactly the way he wants and include what he wants... and so he includes a lot of detailed stuff. I've never seen this quality of an instruction book and I'm not limiting that to models, I suppose the manuals that came with my BMW are more detailed, but that's about it. The details in the plans are exceptional as well. Modelers can and should buy this kit without reservations. This is a whole new league of model kits. I'm going to be really tempted, for the first time, to build the kit just as it is with what came in it. I really don't think I need to replace anything. Admiral Cochrane dropped by my Pegasus to say hello. I put him alongside a silly little stickman I did years ago to have some personal reference as to the size of people on the ship (it never stayed there, don't judge:-). Looks like I was pretty close seeing him next to the admiral. Nice Job Chris (and Chris’ wife who packs the boxes)!


-
You may want to score your split with a slight saw cut on both sides. You’ll be breaking off all the tabs later, scoring will make that a little easier.
- 436 replies
-
- 2
-
-
- vanguard models
- alert
- (and 1 more)
-
That makes sense, I encountered it doing the practice runs. The strip is longer than the ship, so no problem with wasting the front.
-
That's great Chuck, thank you very much!! I need to go experiment with my new Chuck planking station ( I need smaller clamps, I have really big and really small:-). I have plenty of walnut strips to sacrifice. I just ordered artist tape from Amazon, that makes so much more sense than trying to draw lines or placing "battons." Next up, marking the ship just a piece of scrap wood, I may need to remake the curve piece. I did this on the fly just to see how it works.
-
Thank you Chuck! I've looked at so many other techniques and after 8 models have my own, but mine kinda kinda sucks 🙂 . I practiced bending on my new planking station yesterday and determined what I next needed to know is where to put the peak of the curve. I'm sure I'll find that in your videos, I appreciate it! One quick question, so you don't see the need to edge glue the planks as well as attaching them at the bulkhead?
-
I'm guessing they must be here someplace, can anyone direct me to Chuck's video tutorials on planking? It's time to up my game and relearn how to do my second planking's, I found one on You Tube and immediately constructed my "planking station" but I need a little more info. Help with a link would be appreciated
-
Edge Gluing Planks?
glbarlow replied to turangi's topic in Building, Framing, Planking and plating a ships hull and deck
I think that's a preference, not a rule. All my models are planked using CA. One trick I use is to put a little CA in a gap then quickly sand it and the area around it, just a little bit. The result is almost transparent, not museum perfect, but it works - certainly on an area be painted. -
I contacted Amati by googling their address back 5-6 years ago when I built the Pegasus. It wasn't a quick process but they did mail me the parts I needed.
- 1 reply
-
- 1
-
-
I’m also a photographer. Even basic cameras have white balance settings. Vane noted you probably have it set in Auto, meaning the camera adjusts and has different color balances often even for the same “scene,”. Just change White Balance to any fix3d setting such as Daylight (colder, or bluish) Cloudy (warmer or yellowish) or Flash. The words don’t mean anything, just choose which you like best and consistently use it on every photo. Easy...
-
I have insufficient patience for white glue when planking, all mine is done with CA. The thrill of it all, get it right in 20 seconds or ... not...
-
Just ordered mine as well. As an aside, you’ll enjoy your time with Granado, she was a fun build for me.