


DelF
-
Posts
1,409 -
Joined
-
Last visited
Content Type
Profiles
Forums
Gallery
Events
Everything posted by DelF
-

Working Comfortably on Upper Rigging
DelF replied to capnharv2's topic in Masting, rigging and sails
Brilliant! Has the Admiral noticed you’ve commandeered her ironing table, amongst other things?! -
Thanks to both of you for your replies. I'll give acrylic paint a go, using Frankie's described method.
-
I'd be grateful for any advice folk might have about the practicality of using acrylic paint instead of acrylic ink to dye rigging. Having read advice on the Forum from Mahuna and others, I decided to experiment with acrylic ink mixed with isopropyl alcohol. This has worked well and, like Mahuna, I've decided to use various combinations of black, brown and raw sienna for the standing and running rigging. Incidentally, I'm using DMC Cordonnet thread spun up on Chuck's Rope Rocket. My problem is sourcing ink at a reasonable price. I've found economy size bottles of black and brown, but raw sienna ink only seems to be available in small 30 ml/1 fl. oz. bottles. However I've found raw sienna acrylic paint in 150 ml bottles for the same price as the much smaller ink bottle. I've googled the difference between acrylic paint and ink without much success - from what I can gather the ink has finer particles and greater fluidity which makes it a better choice for airbrushing. However other sources say paint can be used to dye fabrics. Before I shell out on some paint and test it for myself, does anyone have experience with using it to dye rigging successfully, and are there any specific techniques involved? Thanks Derek
-
Many thanks - I look forward to seeing your build log.
-
I agree with everyone else Javier - your work is superb. I’d love to see more examples, and details of your construction techniques (I showed my wife your pictures and she is now asking why I can’t make my models as small as yours as they would take up so much less space in the house!). Best wishes Derek
-
Black wire for eye bolts/rings
DelF replied to Johnnyreg's topic in Metal Work, Soldering and Metal Fittings
I find the black coated wire a bit too shiny for my taste. I've tried black iron wire (from wires.co.uk) with some success. It's a dull dark gray, rather than pure black, but to my eye that looks more realistic for ironwork. Others have pointed out that iron rusts, but so far I've not had that problem. A coat of matt varnish should keep the air and moisture out (I hope!). Derek -
Thanks for the tip. I looked for it on Amazon just now and saw that it is free to read if you subscribe to Kindle Unlimited. It’s a while since I’ve found a new maritime author so I’m looking forward to reading it. Derek
-
Surprisingly good tweezers...
DelF replied to monkeysarefun's topic in Modeling tools and Workshop Equipment
Got mine - really good value. Thanks for the tip! -
Pandora by marsalv - FINISHED - 1:52
DelF replied to marsalv's topic in - Build logs for subjects built 1751 - 1800
Stunning! I particularly like your rigging. -
Thanks Jim. I’ll follow your advice.
- 7 replies
-
- 2
-

-
- serv-o-matic
- serving
- (and 1 more)
-
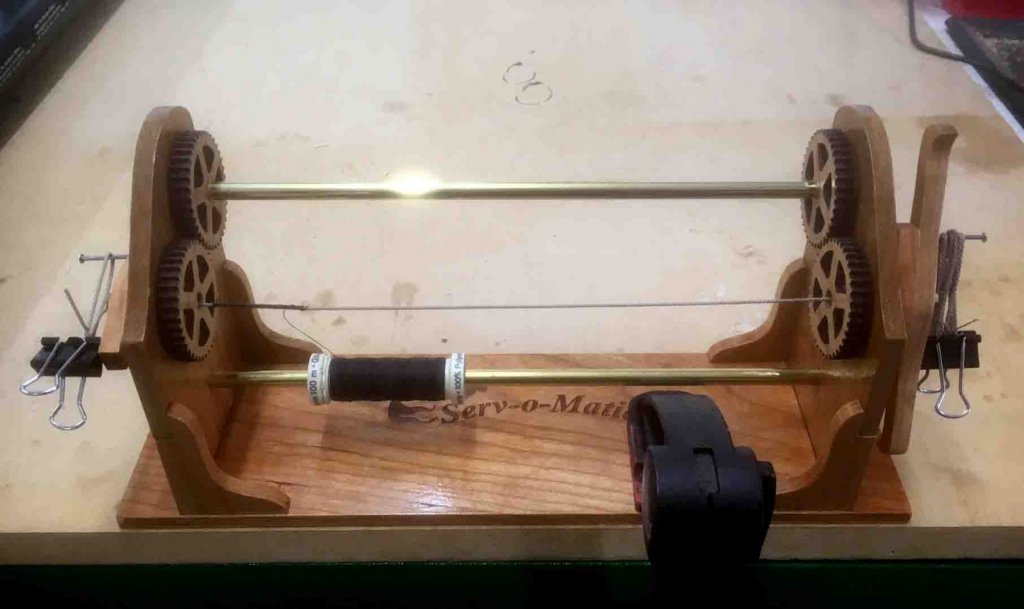
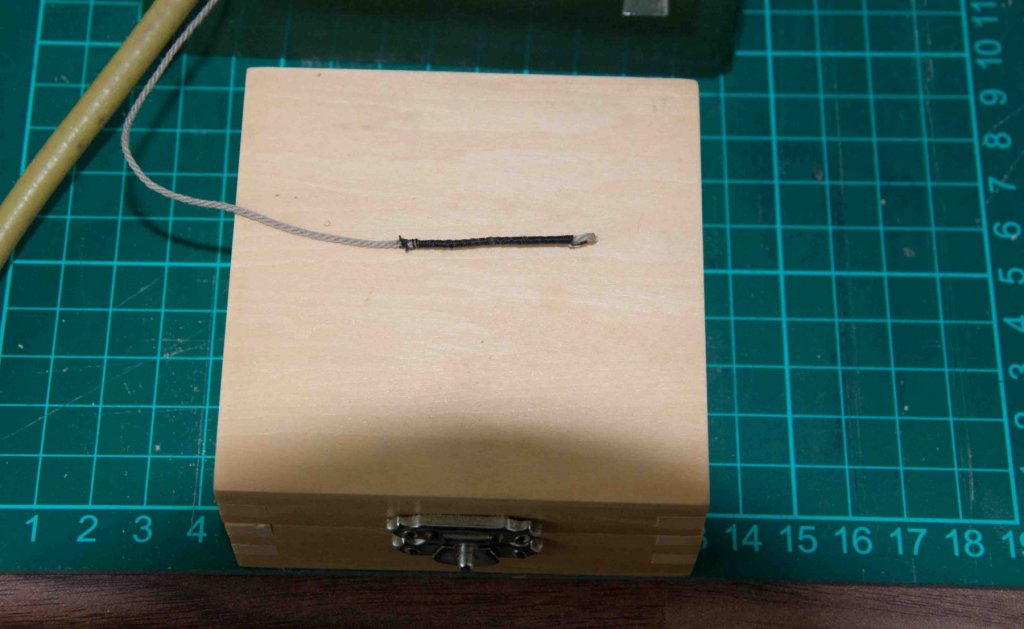
I've just had my first go with the Syren Serv-o-Matic. As with the Rope Rocket that I used for the first time last week, I cleaned off the laser char and applied a couple of coats of varnish. I really felt this was worth the trouble, to bring out the fine cherry. As with the Rocket however, I made the mistake of assembling the components before varnishing them. I was too impatient, and assembled both machines before realising it was then harder to apply the varnish - especially without gumming up the moving parts. I should have followed Chuck's instructions, which as usual are comprehensive and well illustrated. A couple of points I would emphasise from my own experience. First, it really is vital to ensure all the gears move freely - to the extent that they almost feel loose and sloppy. If you watch Chuck's short Youtube video you'll get an idea of how everything should move, powered by just one finger. Another point Chuck makes in the instructions that I would echo is the importance of getting the right tension in the rope being served - too loose and it is difficult to get the serving thread to lay on properly; too taut and the rope will pull the handles in to the machine ends and make the gears too stiff to turn freely. I quickly found there is a knack to serving. It's not super difficult, but it does need practice. I experimented on a piece of light coloured rope for contrast, which tends to highlight the mistakes. I'm not sure how easy it is to see in the picture, but the serving starts out a bit gappy and lumpy on the lefthand side, then gets better towards the right as my technique improved. Also, I should have used a less 'hairy' serving thread. Being hand powered, it's a simple matter to put mistakes right; as soon as you see a gap, or you overlap the serving thread, you just reverse direction to before the error and then continue. In summary, another useful addition to the workshop which I'm looking forward to using in conjunction with the Rope Rocket. Derek
- 7 replies
-
- 4
-
-
- serv-o-matic
- serving
- (and 1 more)
-
A lathe for masts and spars
DelF replied to Don Quixote's topic in Modeling tools and Workshop Equipment
Kopeikin - those little Veritas planes are great. I've found their miniature spokeshave as good, or even better, for initial shaping of square and eight-sided stock.
-
A lathe for masts and spars
DelF replied to Don Quixote's topic in Modeling tools and Workshop Equipment
I agree a lathe is a nice-to-have rather than essential, at least when it comes to wood. I use the v-jig method to produce eight-sided from square stock before turning on the lathe, as I find it gives me a good 'feel' for the wood. One advantage of a lathe is that it makes the production of small turned components easier, for example: Not impossible without a lathe, just easier with one. Having said that, the thing I find hardest is producing identical components - but that's more to do with the workman rather than the tool (sometime I'll get round to re-doing one or both of the columns!). Incidentally, much of the rest of the work on this component was done with a Proxxon micro-mill and rotating table. Another great little tool. Derek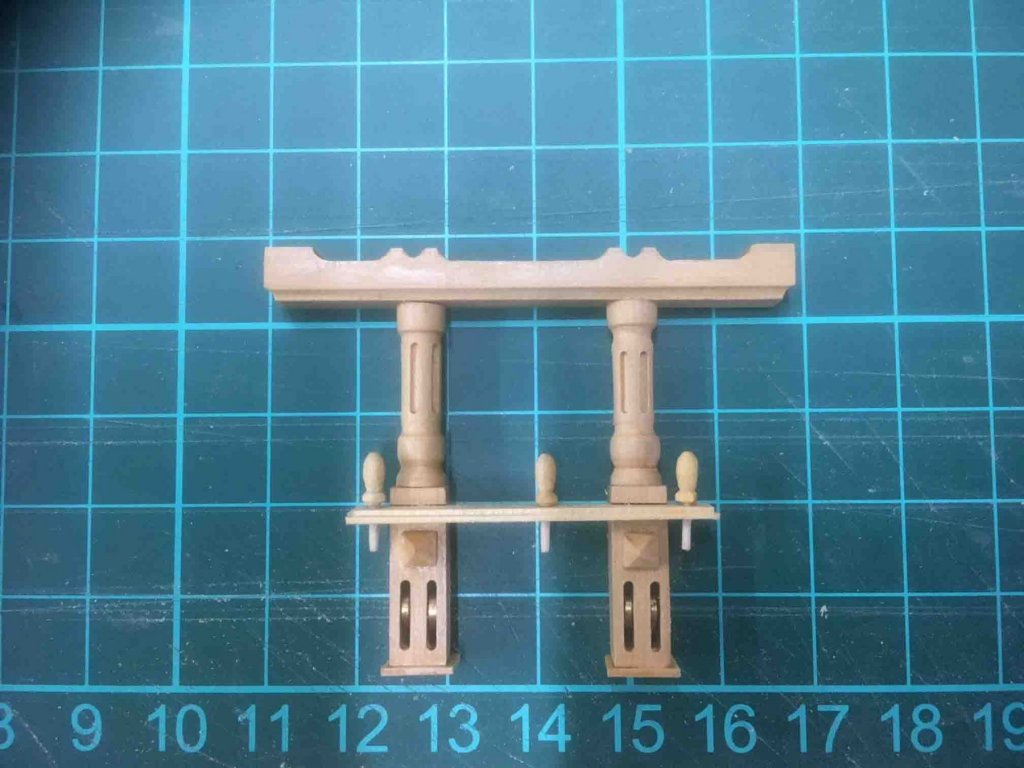
-
Just seen this - stunning. Love the seaman in the Hawaiian shirt!
-
A lathe for masts and spars
DelF replied to Don Quixote's topic in Modeling tools and Workshop Equipment
If you don't want to spend a fortune, the Proxxon spar lathe has a hollow headstock to take long masts. Take a look at Blue Ensign's Pegasus build, which shows the beautiful spars you can produce on this little machine https://modelshipworld.com/index.php?/topic/15526-hms-pegasus-by-blue-ensign-finished-victory-models-164-scale/&page=4&tab=comments#comment-482414. I can also recommend it based on my own experience. I've got a larger 'proper' lathe that I can use to rough out spars, but I finish them on the Proxxon - more control on smaller diameters and easier to use sandpaper, I find. Derek -
Surprisingly good tweezers...
DelF replied to monkeysarefun's topic in Modeling tools and Workshop Equipment
Me too. Thanks! Just £2.84 with free p&p in the UK. If they're no good I'll give them to Senior Management for her beadwork. -
I'm another Veritas fan (Father Christmas was particularly kind this year!). My smallest is their inset plane. Although it's designed to fit into a wooden body that you make yourself (to suit the job in hand), I've found it works really well on its own as do all the Veritas tools. Just today I used the spokeshave to round off the front of a top, and the 1/8" chisel to turn a round hole in a mast cap into a square hole. I use them so much I rarely put them back in their cases. Probably a bad habit. Vaddoc - personally I use a Trend fast track https://www.amazon.co.uk/Trend-FTS-KIT-Fasttrack-Sharpening/dp/B00309W78G/ref=sr_1_1?ie=UTF8&qid=1517936915&sr=8-1&keywords=trend+fast+track+sharpening+system&dpID=41iZoB4fF0L&preST=_SX300_QL70_&dpSrc=srch . Although designed for full-size tools, it works on the miniature plane blades if used with care. Derek
-
French polish
DelF replied to DelF's topic in Painting, finishing and weathering products and techniques
Even more beautiful! I'm looking forward to reading through the rest of your website - it looks most interesting. -
French polish
DelF replied to DelF's topic in Painting, finishing and weathering products and techniques
Beautiful! Purely a guess, but is that large metal vessel something to do with whaling? Derek -
French polish
DelF replied to DelF's topic in Painting, finishing and weathering products and techniques
My mother used to keep a pumice stone in the bathroom to rub the hard skin off our feet, but I'd never associated it with ship modelling! I hadn't realised that Liberon has wax in it. I had noticed that something milky had settled to the bottom of the bottle before I used it and I stirred it in. Perhaps that contributed to the silky finish? Derek -
French polish
DelF replied to DelF's topic in Painting, finishing and weathering products and techniques
Hi wefalck, and many thanks for a most informative post. It amazes me how much knowledge there is on this site - I particularly enjoyed the snippet about polishers and their foibles. I do like a deep shiny look, but on furniture and musical instruments, not ship models, where I prefer a more subtle look. I like the sound of the Clou sealer and will try to obtain some to add to my list of finishes to experiment with. -
French polish
DelF replied to DelF's topic in Painting, finishing and weathering products and techniques
Thanks again vaddoc. I found your sealer for £3.78 incl. delivery and have ordered it. The first search I did on Amazon UK came up with the same product at £36.71 + £3 p&p ! -
French polish
DelF replied to DelF's topic in Painting, finishing and weathering products and techniques
Oops! Just seen your reply vaddoc so now I’m I two minds again. I think more experimentation may be the order of the day. I’ll certainly try tung oil and sanding sealer as you suggest. I suspect I may struggle with the latter. I’ve got spirit based sanding sealer, but the only water-based product I can find (at least on a quick Google search) is ridiculously expensive. I’ll keep looking. Thanks again for your information and advice. Derek -
French polish
DelF replied to DelF's topic in Painting, finishing and weathering products and techniques
Thanks Chooflaki, that’s exactly what I wanted to know. I think I’ve now got enough confidence to use it on my model. If my camera skills improve enough I may even be able to post a picture! Derek -
French polish
DelF replied to DelF's topic in Painting, finishing and weathering products and techniques
Thanks for the replies guys. The instructions on the bottle say it should be applied with a polishing cloth like Jim says. However I used a brush like Fatfingers and found it went on fine. Just one coat gave the lovely subtle effect I described (on well prepared, smooth boxwood). I suspect more coats would produce too glossy an effect for a period model. I’m particularly interested to hear that french polish is neutral. I’m still worried that the bare polish might not last over time, so I might experiment with various topcoats (matt acrylic varnish perhaps?) to see if I can protect it without losing the effect. Thanks again for for the very informative and useful replies. Derek


