HOLIDAY DONATION DRIVE - SUPPORT MSW - DO YOUR PART TO KEEP THIS GREAT FORUM GOING! (Only 13 donations so far - C'mon guys!)
×


DelF
-
Posts
1,409 -
Joined
-
Last visited
Content Type
Profiles
Forums
Gallery
Events
Everything posted by DelF
-
 SpyGlass - thanks, now I’m in three minds! Blue Ensign - what you say about the stern planking needing to be horizontal to attach to vertical frames makes perfect sense. I’m afraid I was following the instructions, but not thinking enough about the result. On the other hand Chris has researched the ship extensively and there may be a good reason why Speedy doesn’t follow normal practice. I’ll see what I can find out. Thanks for spotting this apparent anomaly and pointing it out. Derek
 -
Thanks Norway. Now I'm in two minds again! Derek
-
Hi SpyGlass Thanks for the comments and advice. you're making me lean towards PVA and no caulking. However I may try using dabs of CA to "spot-weld" planks in position whilst the PVA dries. I didn't chamfer the first planking - the strips seemed to fit together quite snuggly without it, at least in most areas. I will chamfer where necessary on the second planking. And you're right, I do leave the planks to settle after wetting and drying. Although I find boxwood is more stable than other woods in that respect, I find it holds the curve better if I leave it clamped up for a few hours. Derek
-
Stunning work. I followed your Royal Caroline build with great interest, but have only just discovered this one. You have moved to an even higher level with Le Gros Ventre. I also find it very encouraging that you achieve so much with Proxxon tools. I bought their micro-mill when I saw you using it on the Caroline - you should be on commission! One question. I've just read through your log from the beginning and in the first post you said the ship had no orlop deck, but now you are building the orlop. Is the apparent contradiction because the orlop is removable, and so not recorded as a deck? Derek
- 589 replies
-
- 3
-

-
- le gros ventre
- cargo
- (and 1 more)
-
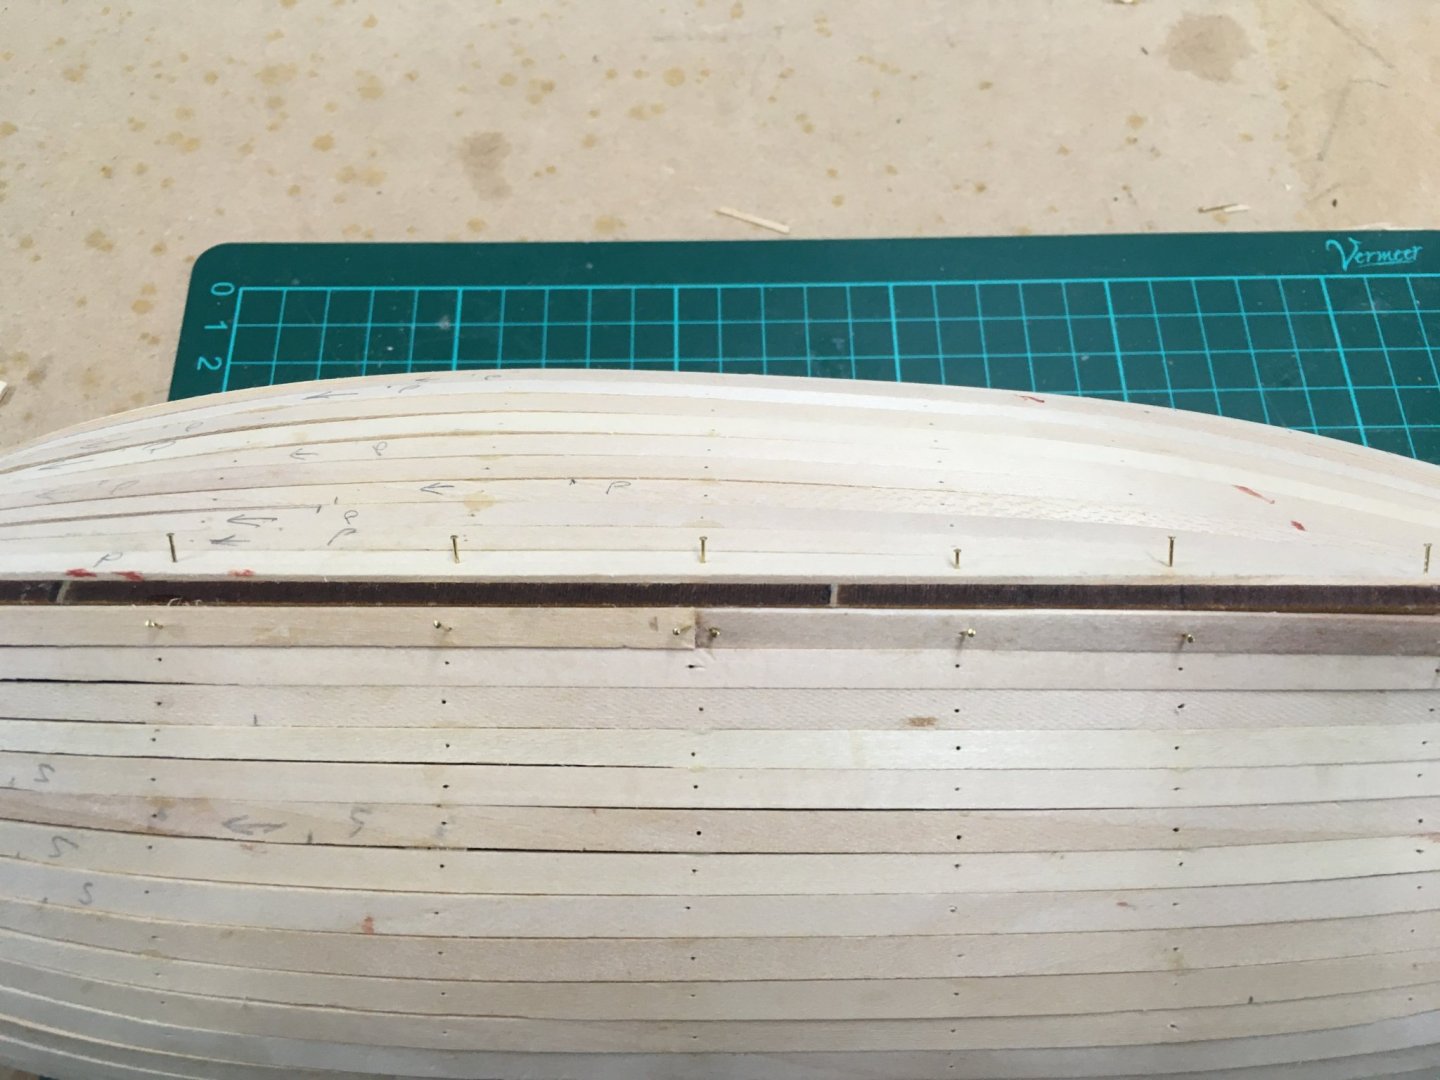
I've started the second planking - exciting stuff! I always like it when I get to parts of the model that will actually show, like these stern planks: Boxwood is a real pleasure to work with and it's commendable that Chris has provided it as an option. As Vane has mentioned in his log there is some colour variation, so I'm going to try to get the most uniform strips for the planking that will show. However I don't think this will be a problem as there are 60 strips to choose from and many will be hidden by the coppering and the wales. Next, I fitted the first strake each side. As described in the instruction manual, the top edges of these strips follow the guide marks etched in the plywood gunport templates: Before final fitting I wetted them, clamped them to the model and blasted them with a hot air gun to try to set the shape. I had to set them higher up on the gunport templates to give the clamps something to sit on, hence the extra pencil marks on the photo. Like Vane, I want to use edge bending and other shaping techniques to get the planks to sit as well as possible. For these first two I also used pins, as they won't show beneath the wales. I'm still not sure about gluing. Chris recommends medium to thick CA for all second planking, including the edges. It clearly works for Chris, but I'm not sure I trust myself to keep the stuff off the front faces of the planks (and my fingers!). I used my normal wood glue for the first two lengths, and I'll ponder a bit - and do some testing - before deciding what to use for the rest of the planking. My other quandary is what to do about caulking. I used the standard pencil-along-the-edges technique, but now that the stern planking is finished it looks too black and uneven to my eye. If I can't find a way of toning it down I might leave it off. I believe caulking at this scale should be subtle to the point of near-invisibility. I used an HB pencil - I'll experiment with something a bit softer/less black. I can see the second planking taking some time, but that's not a problem; I'm enjoying it, and this kit's too good to rush. Derek

- 725 replies
-
- 8
-
-
- vanguard models
- speedy
- (and 1 more)
-
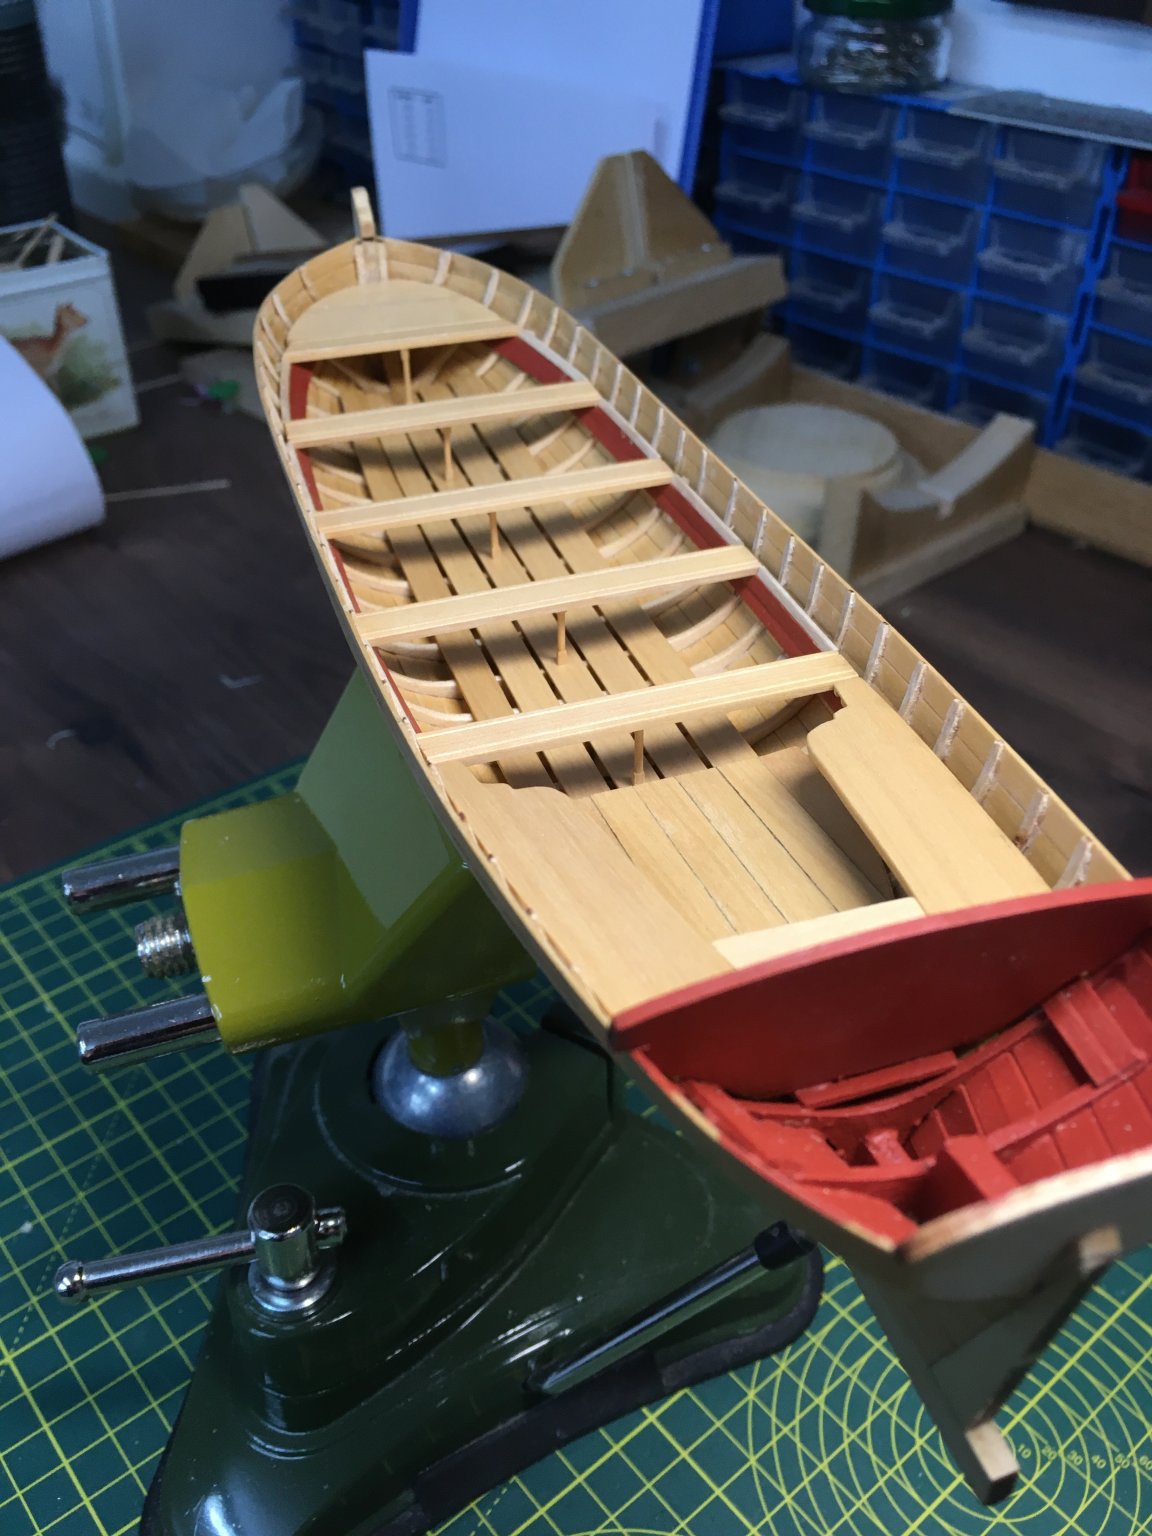
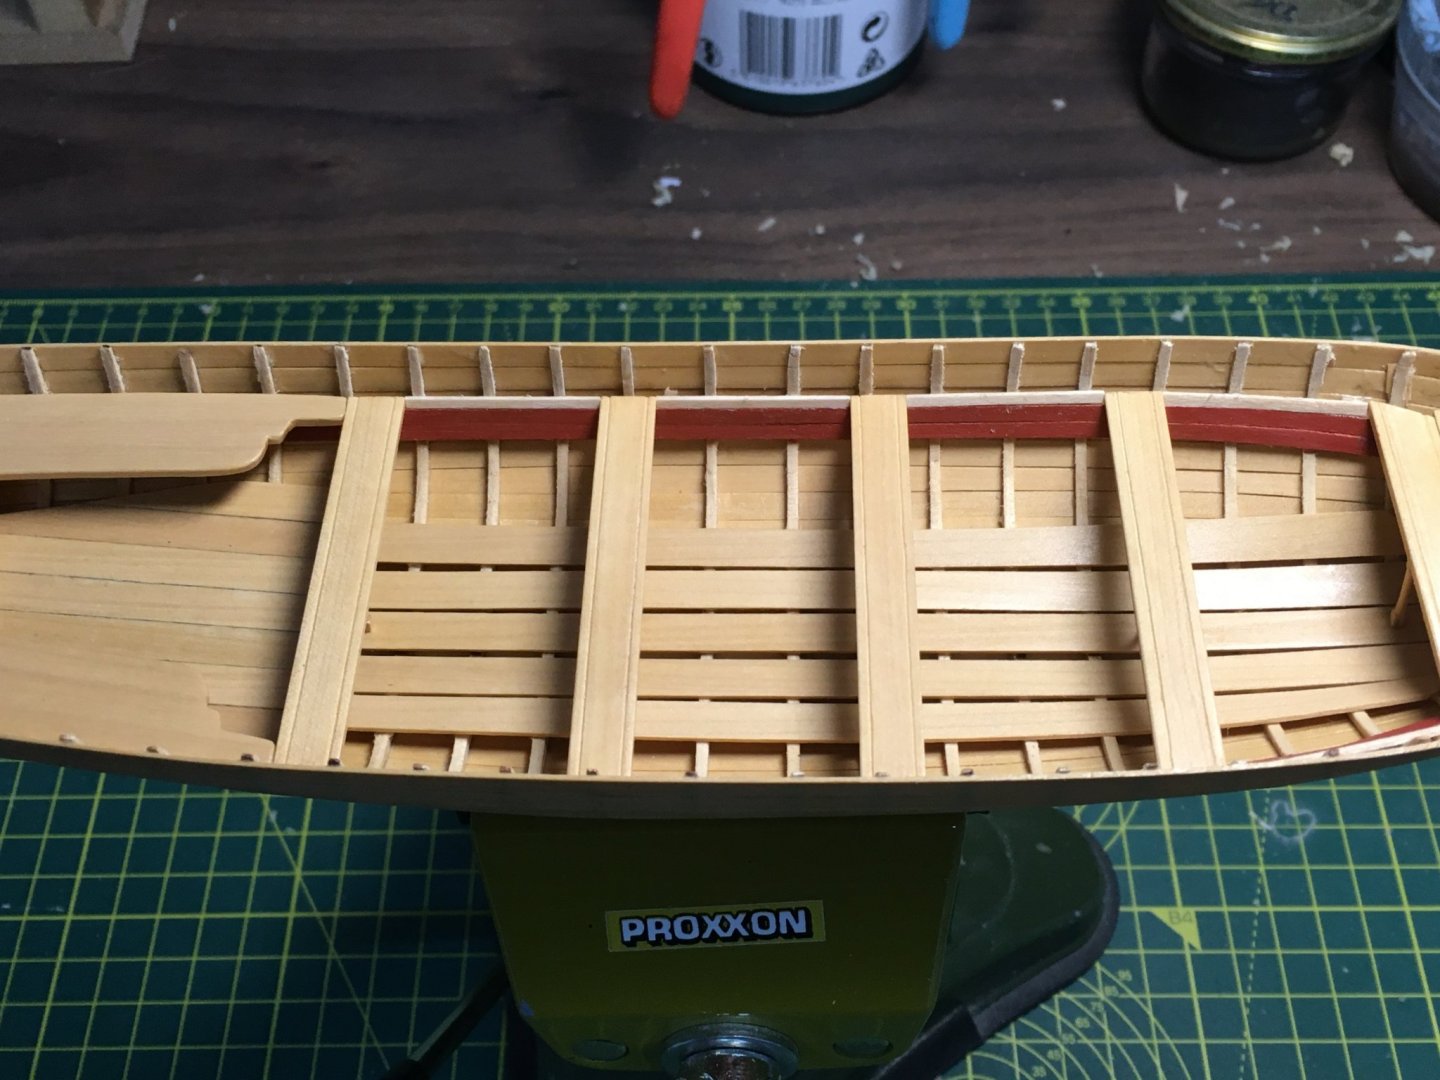
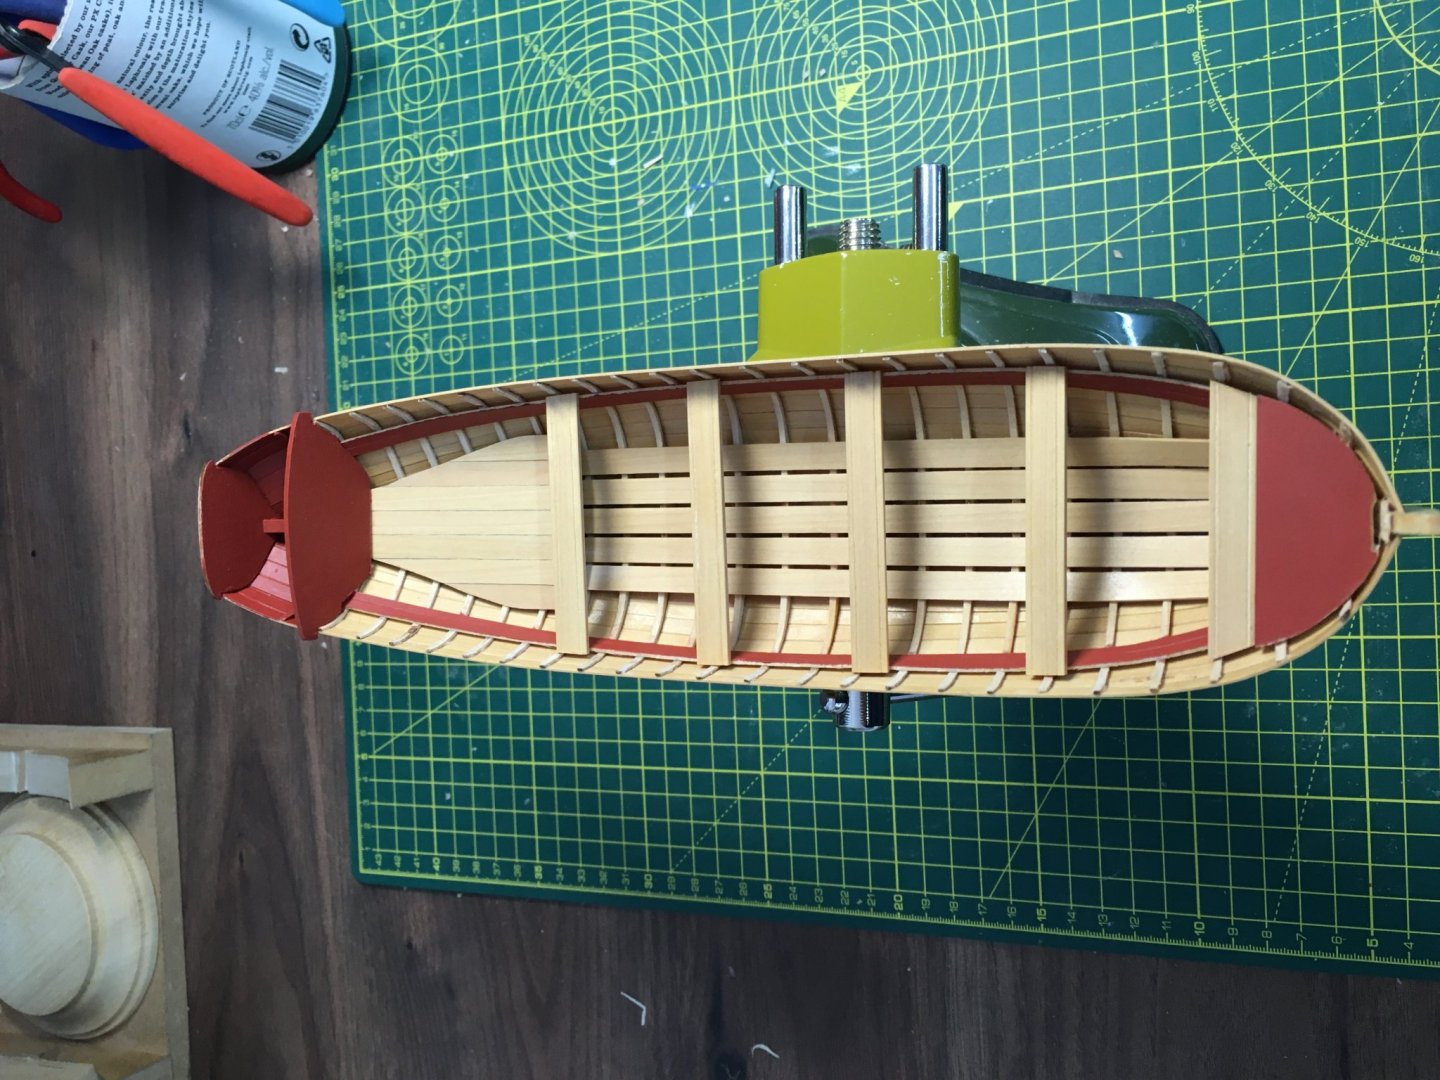
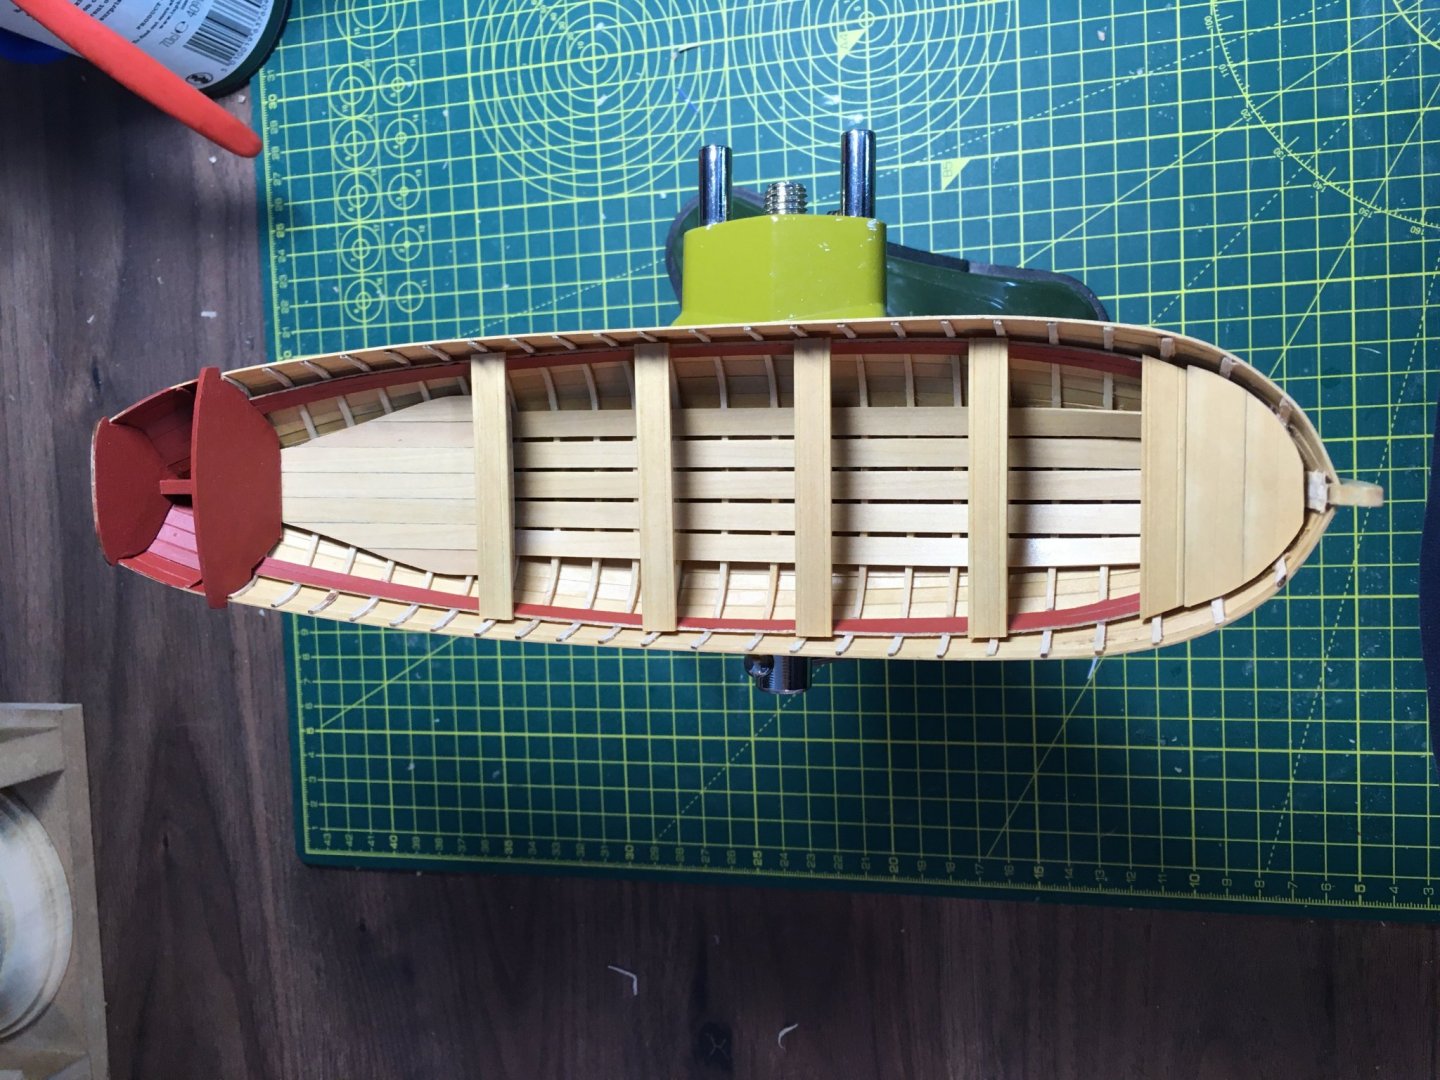
To fix the thwarts I read that some builders used spacers to get them evenly spaced and square. Similar idea, but I used the filler strips that I knew I was going to have to cut anyway. I just measured the total gap between the thwarts, divided by four and cut eight strips of basswood. I'm using the kit-supplied wood as the planking above the thwarts will be painted. I dry-fitted to make sure I'd got the measurements right, and the whole lot went together well. Next I had a go at turning some stanchions to support the thwarts. Nothing fancy - I just chucked strips of 1/16" square boxwood in the lathe and turned the middles down with a file. I'm happy with the stanchions, but looking at closeups of photos is often a chastening experience. I can see from these pictures that the frames showing beneath the risers could do with a fair bit of tidying up, which of course I should have done before fitting the thwarts and stanchions. Blast. Next job (apart from trying to sort the frames), will be completing the internal planking above the thwarts. Derek

- 77 replies
-
- 9
-
-
- model shipways
- pinnace
- (and 1 more)
-
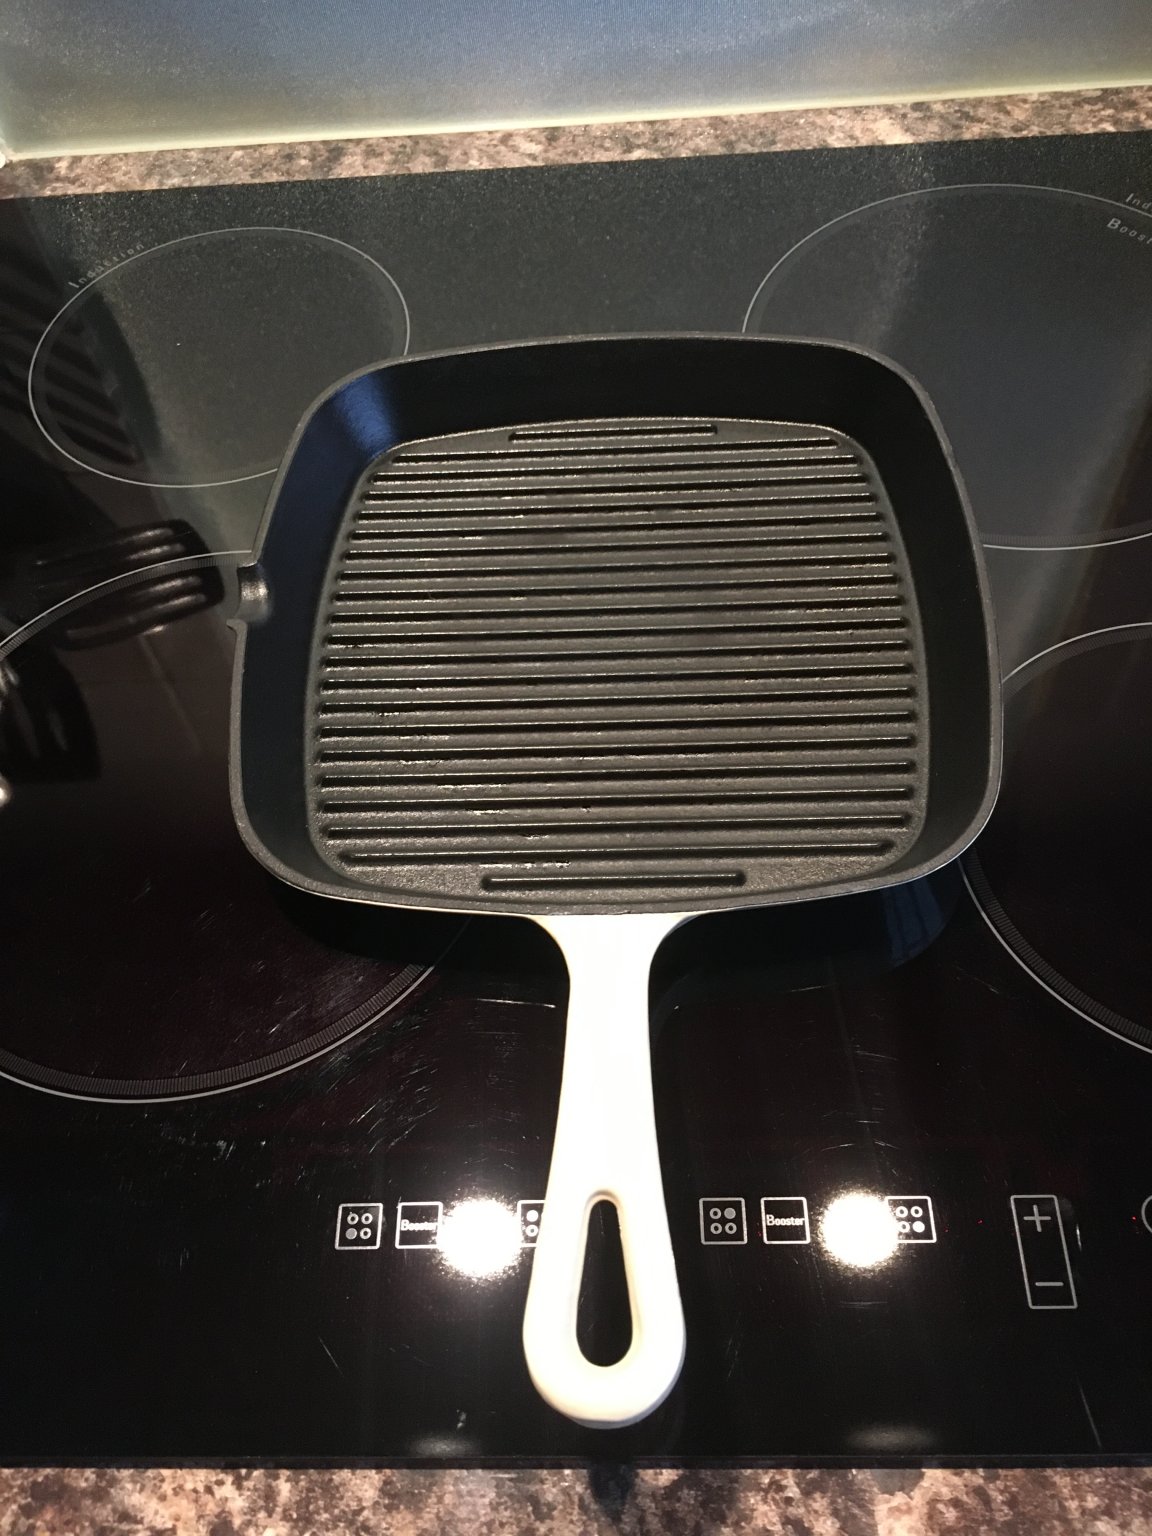
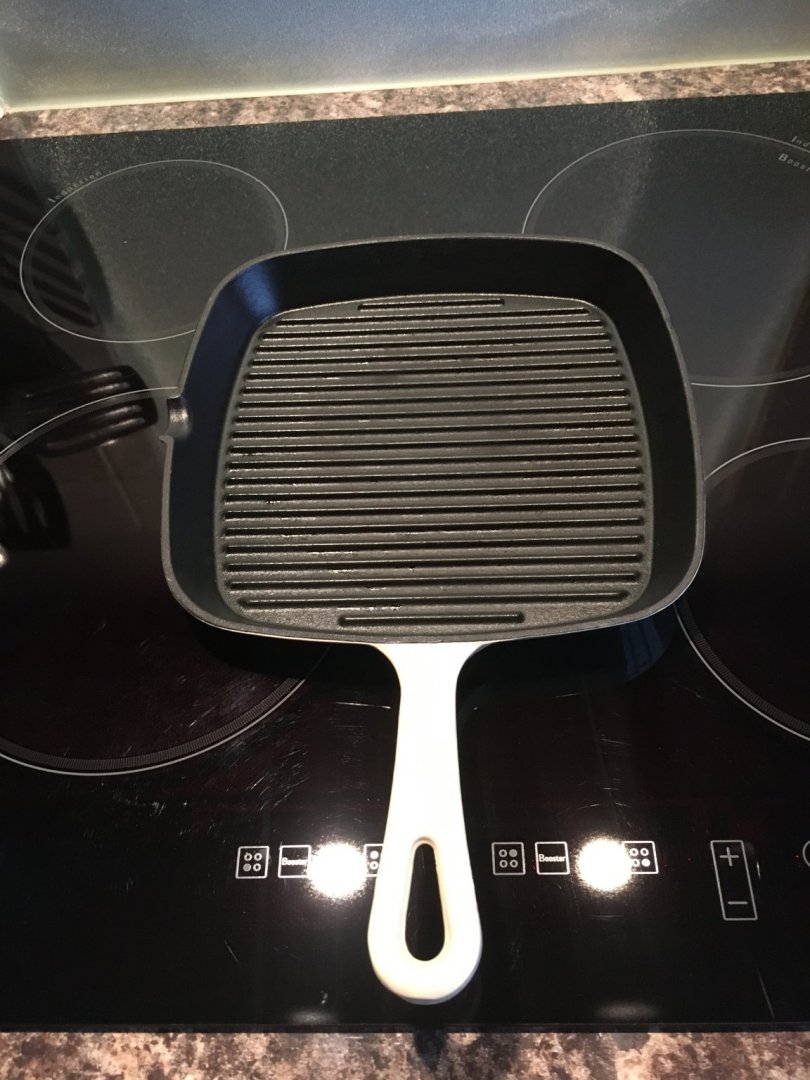
Getting back to the more serious topic... Here's my cast iron skillet, in which I could make square(ish) cornbread (if I knew what cornbread was ). Derek
-
Yves I agree - Chris is a top notch designer. I'm amazed that he can produce such great kits in his spare time! I hope he gets the success he deserves. Are you considering Alert or Speedy, or are you waiting to see what else Chris is developing? I assume you're also looking in on Vane's log - he's way ahead of me? Derek
- 725 replies
-
- 1
-
-
- vanguard models
- speedy
- (and 1 more)
-
Thanks guys. Chris - I wasn't complaining, honest🙂! I was happy with the material provided and managed fine, even though I snapped a strip. I was impressed that you had designed it so that the hull required an exact number of whole strips at midships - it certainly made fitting the final strakes easier. I might try an electric sander next time, at least when doing first planking where you can fill any mistakes. Derek
- 725 replies
-
- 2
-
-
- vanguard models
- speedy
- (and 1 more)
-
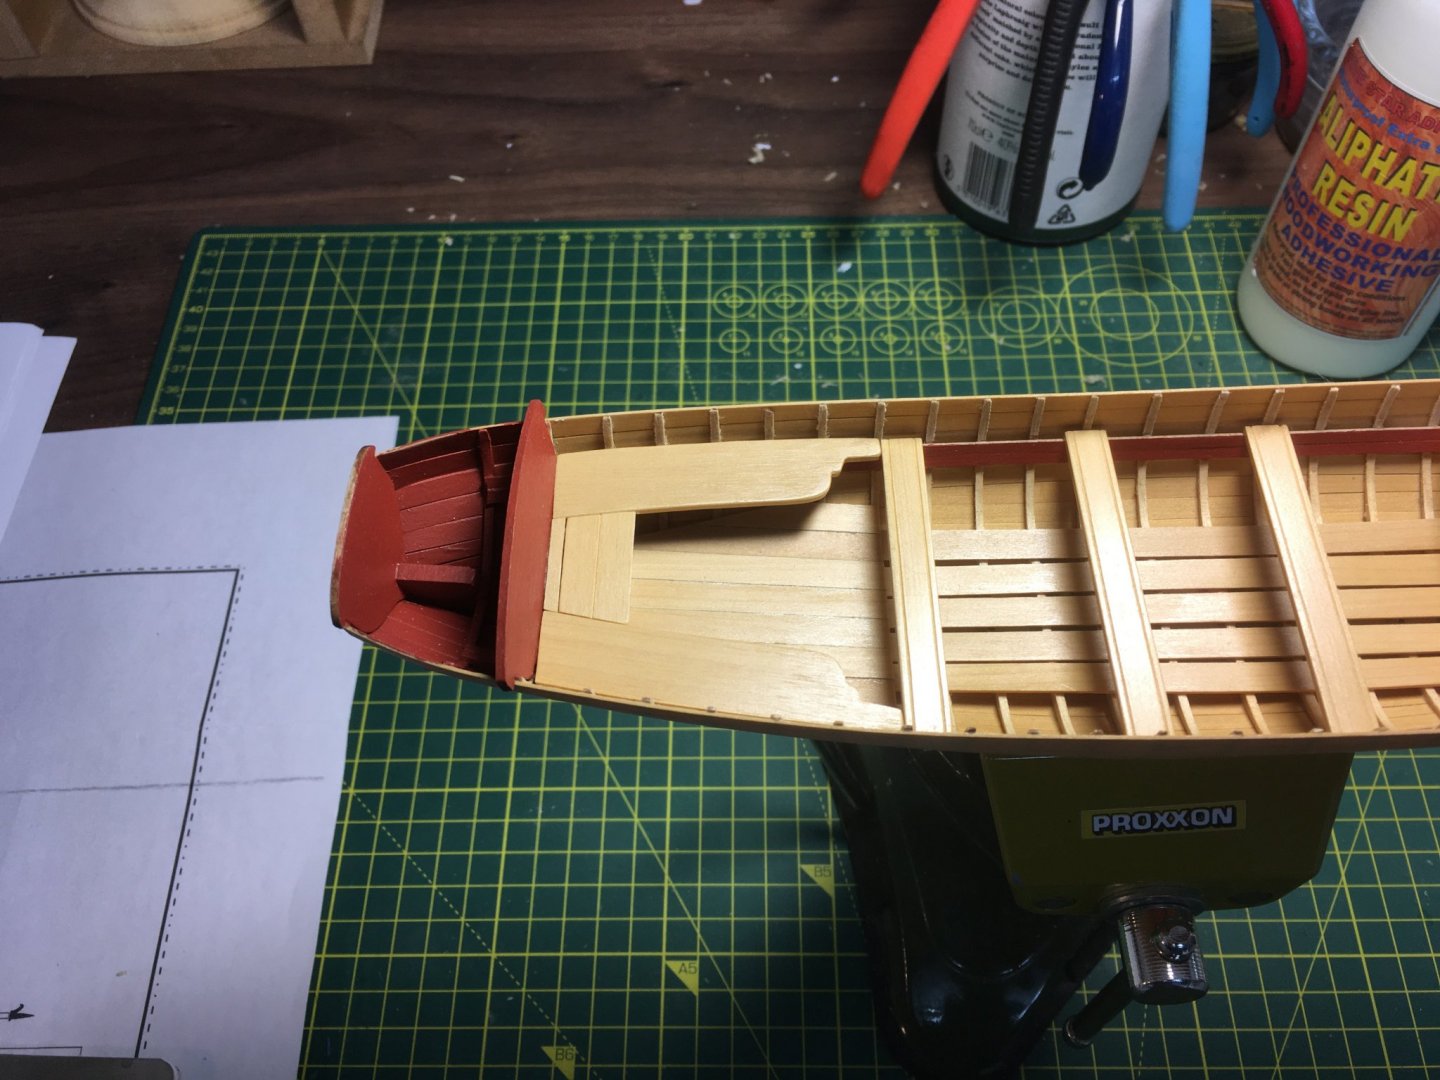
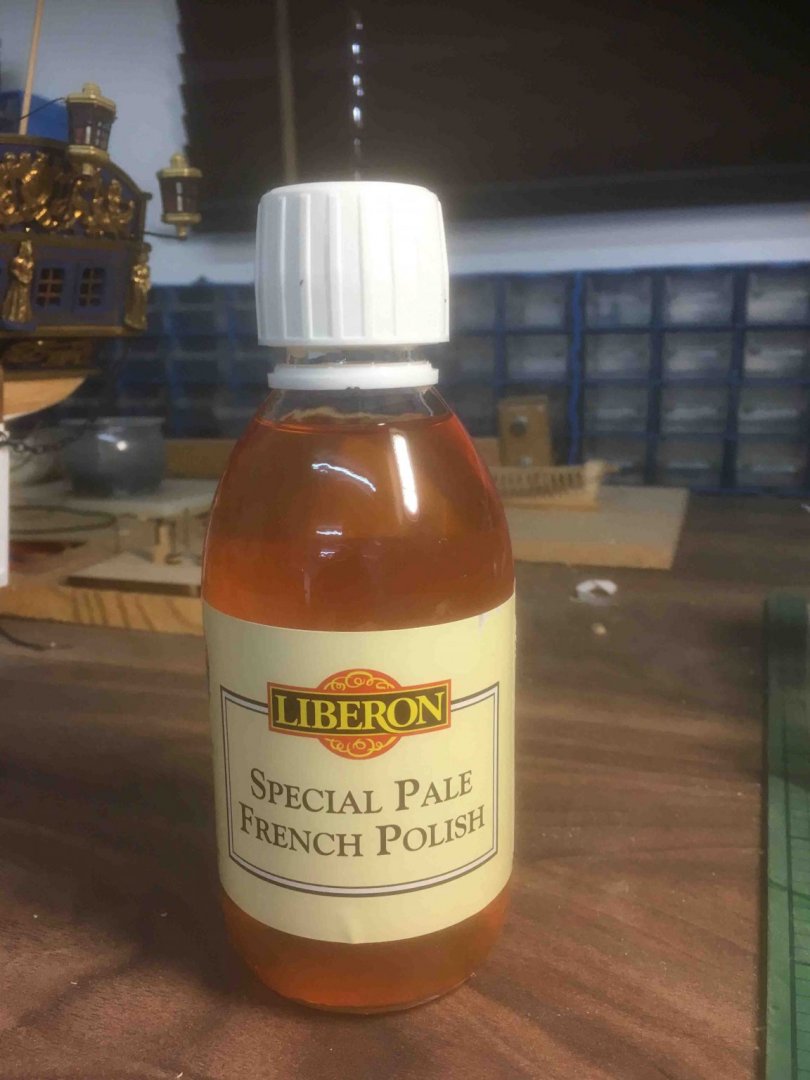
Thanks Steve and Blue Ensign. Having seen your work, compliments from you two are much appreciated. A little more work on the cockpit area, fitting the front of the trunk, cockpit seats and the trunk lid. I made these components from some small spare pieces of 1.5mm boxwood which fortunately were a reasonable match for the timber I used for the thwarts and other unpainted planks. I used the kit-supplied seats as templates, just tweaking them slightly to get a snug fit. For trunk front, the lid and the piece between it and the rear seat back I followed Chuck's suggestion and fiddled with pieces of card until I got the right shapes which I then transferred to the wood sheets. I scribed a line on the lid to give the impression of two planks joined together. The hinges will follow later. I've given all the unpainted surfaces a coat of french polish. I started using this on my Royal Caroline, and think it gives a more subtle sheen than polyurethane, although it will require several more coats to give proper coverage. This is the one I use (I just brush it on - no messing about with special french polishing pads): Next job (in between the Speedy) will be fixing the thwarts in place and planking above the riser. The latter will cover the tops of the frames where I didn't bother sanding off the 'fur'. Derek
- 77 replies
-
- 8
-
-
- model shipways
- pinnace
- (and 1 more)
-
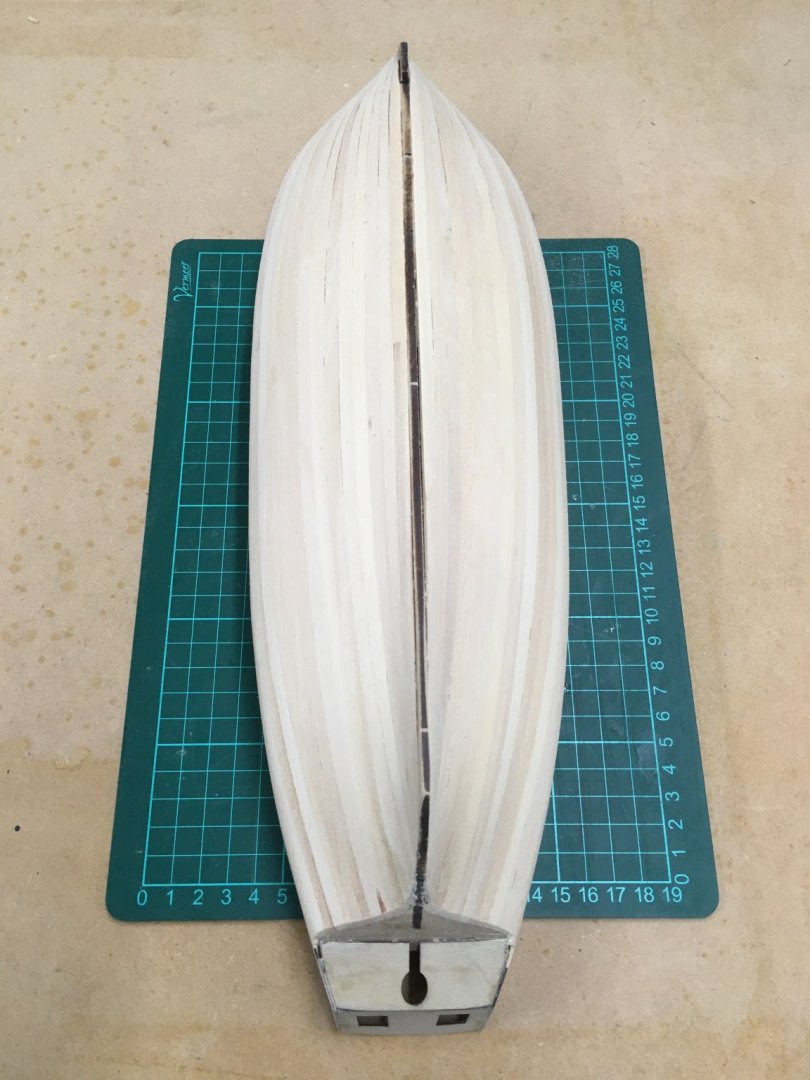
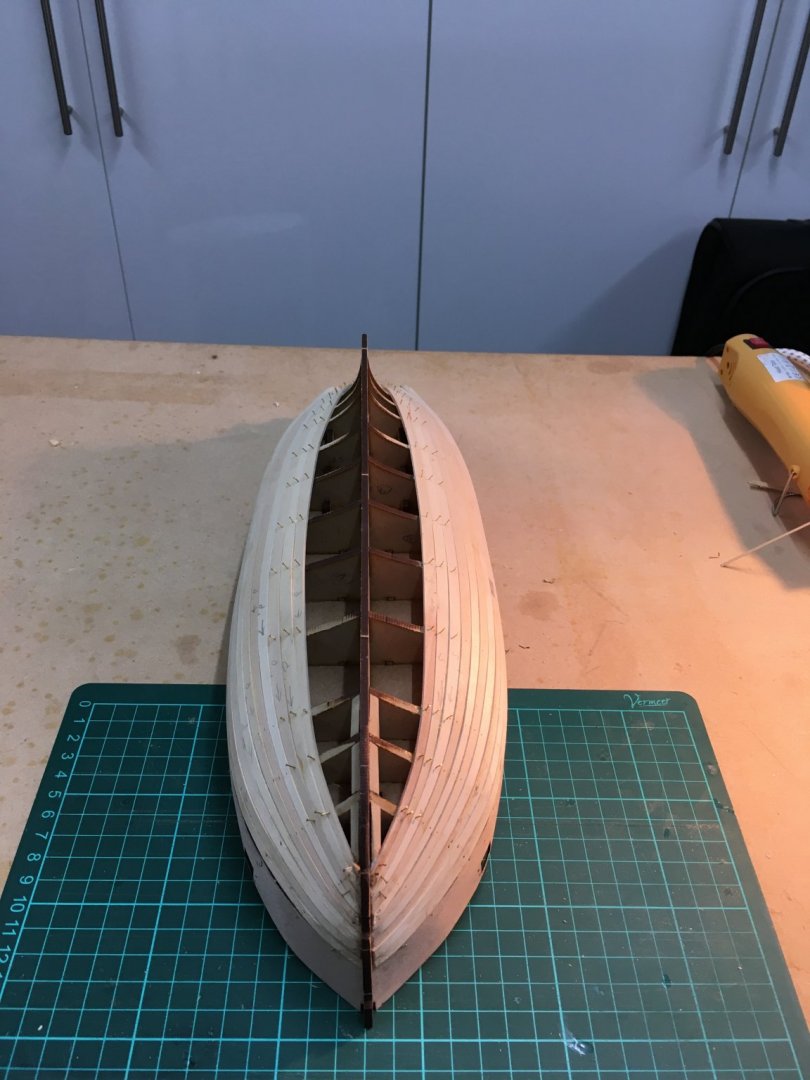
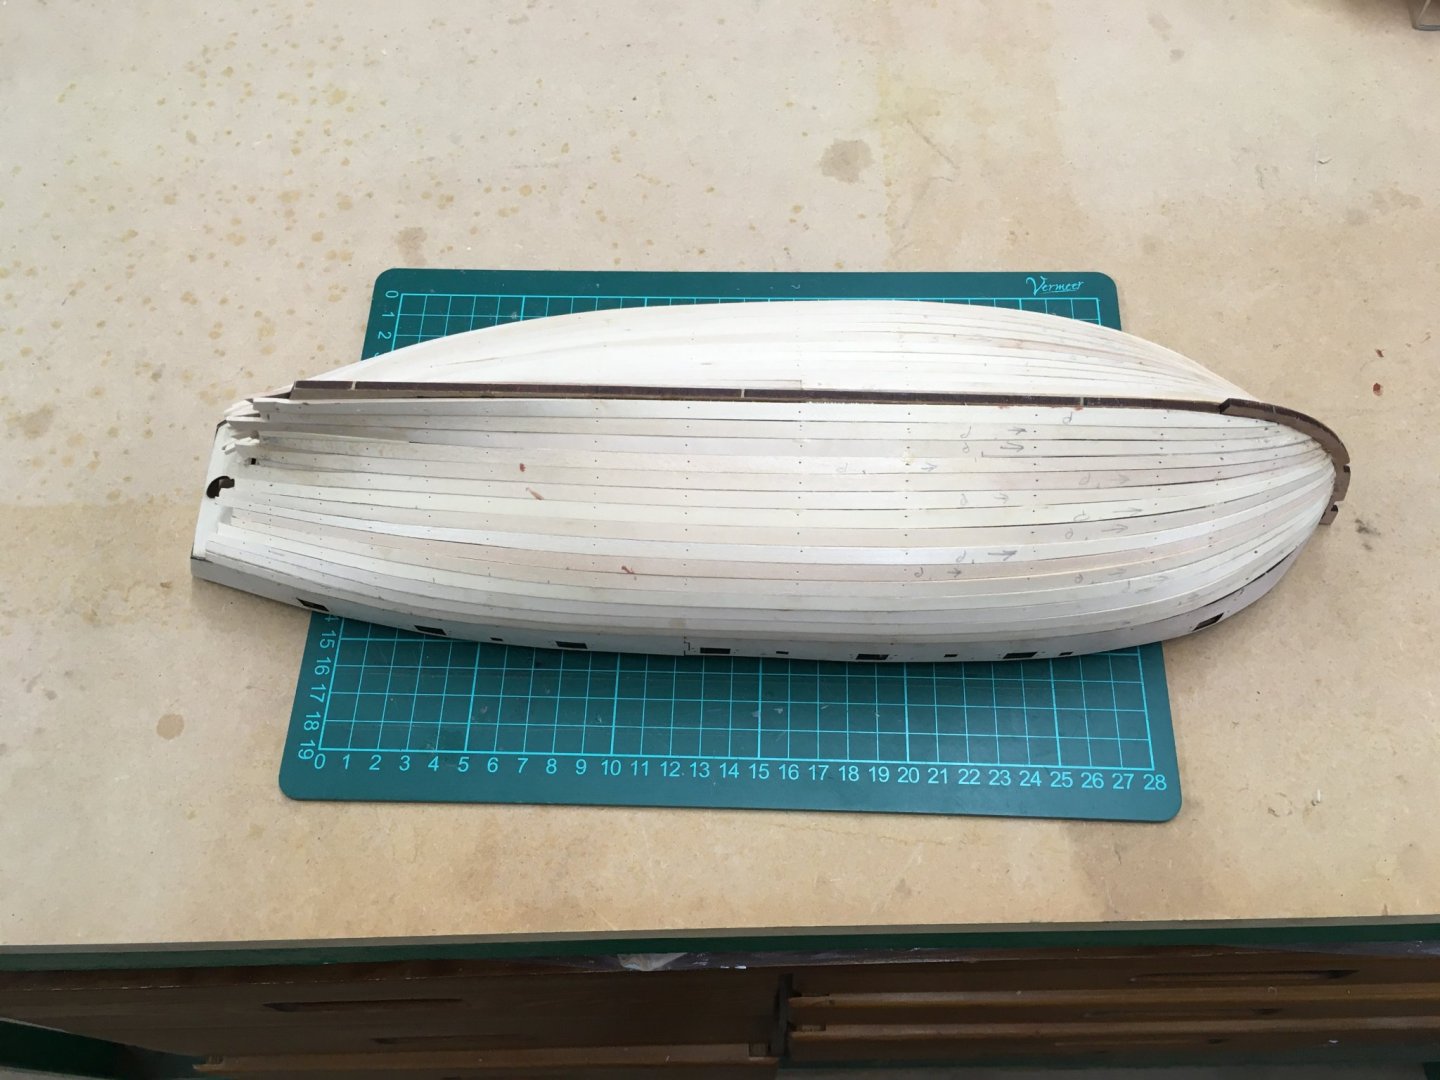
Thanks Vane. I'm hoping that taking a bit of time with this layer will make the second planking and coppering easier. I've more or less finished sanding now: I'm reasonably happy with the result, although I may try to thin down the stern area a bit more. As you know, Chris recommends sanding this down to about 1.5mm so that when the second planking is added it will sit flush with the stern post. Chris also says it will take about an hour to sand the hull. I've no idea how long it's taken me, as I find I can't sand solidly for any length of time. It's not a physical thing - I just prefer to take my time, sanding slowly and with plenty of breaks. I know that if I went at it hell-for-leather and tried to get it done in one sitting I'd mess it up. I like leaving it for a while and coming back to it periodically with a fresh pair of eyes. I used to treat model building as a challenge where the aim was to finish as quickly as possible - now I try to take my time and enjoy the process (at least that's what I tell myself when I find I can't catch up with you even when you've been away for a fortnight!😀). Derek
- 725 replies
-
- 13
-
-
- vanguard models
- speedy
- (and 1 more)
-
Great work so far Vane - I don't think I'll catch up with you at the rate you're progressing! Like you, I'm in two minds about using the laser engraved deck. On the one hand the detail and precision is great; on the other hand, I'm worried that the laser char stands out a little too much. I might risk a light sanding to tone it down a little. If that doesn't work, I'll use it as a template and lay my own deck. I quite enjoy decking, and I've got a reasonable supply of fairly uniform boxwood, so it'll be no hardship. And I like Gregory's suggestion about tissue paper, which sounds like a good way to go. Derek
-
accurate-armour micro saw
DelF replied to michael101's topic in Modeling tools and Workshop Equipment
I used a saw blade on a Swann-Morton scalpel holder to cut the frames out on my pinnace build (18th Century Pinnace). It was quite rigid and worked fine, albeit on soft basswood. Derek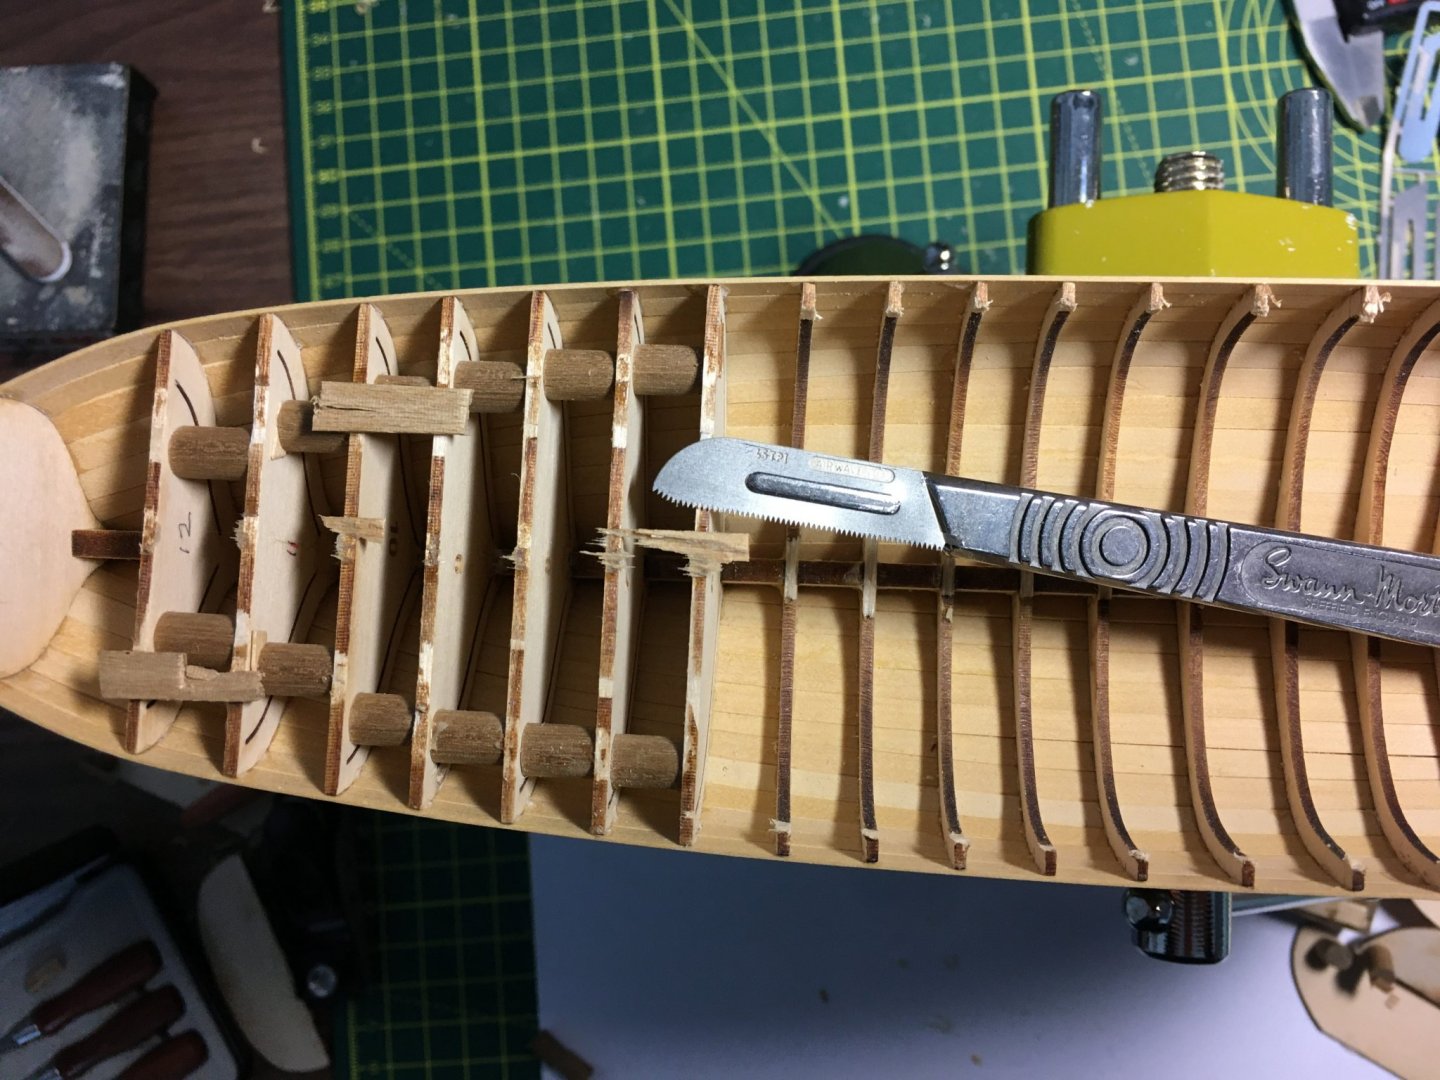
-
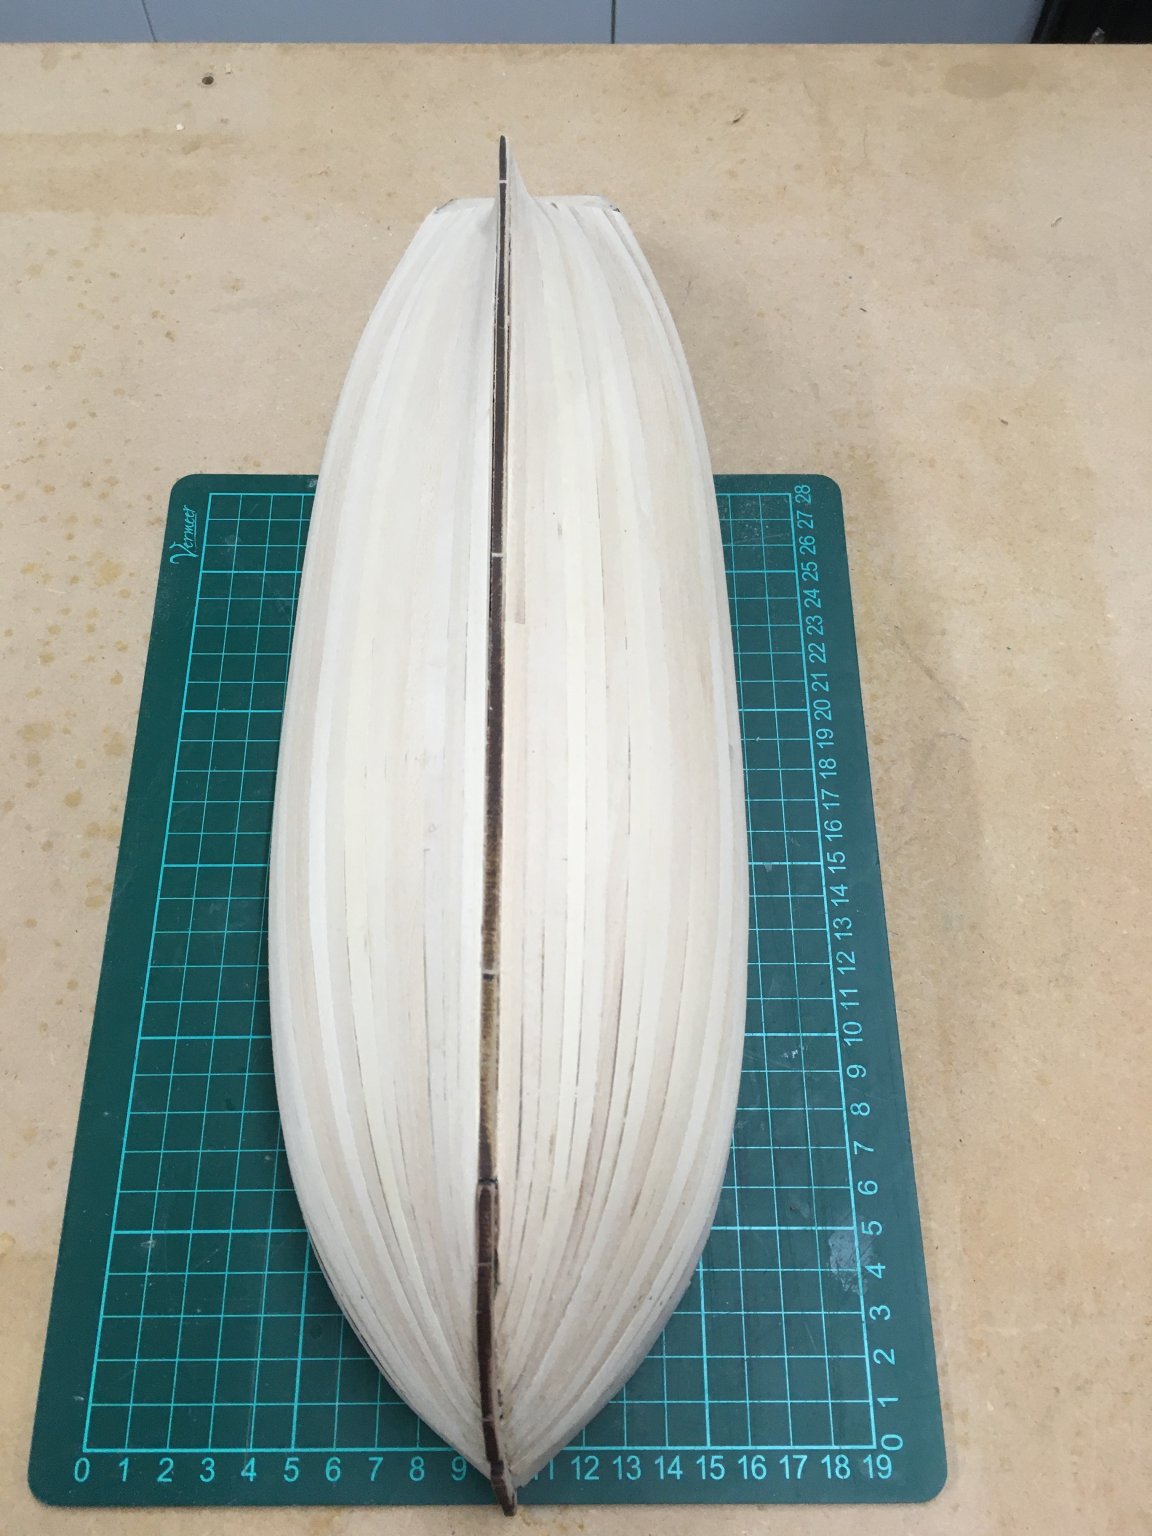
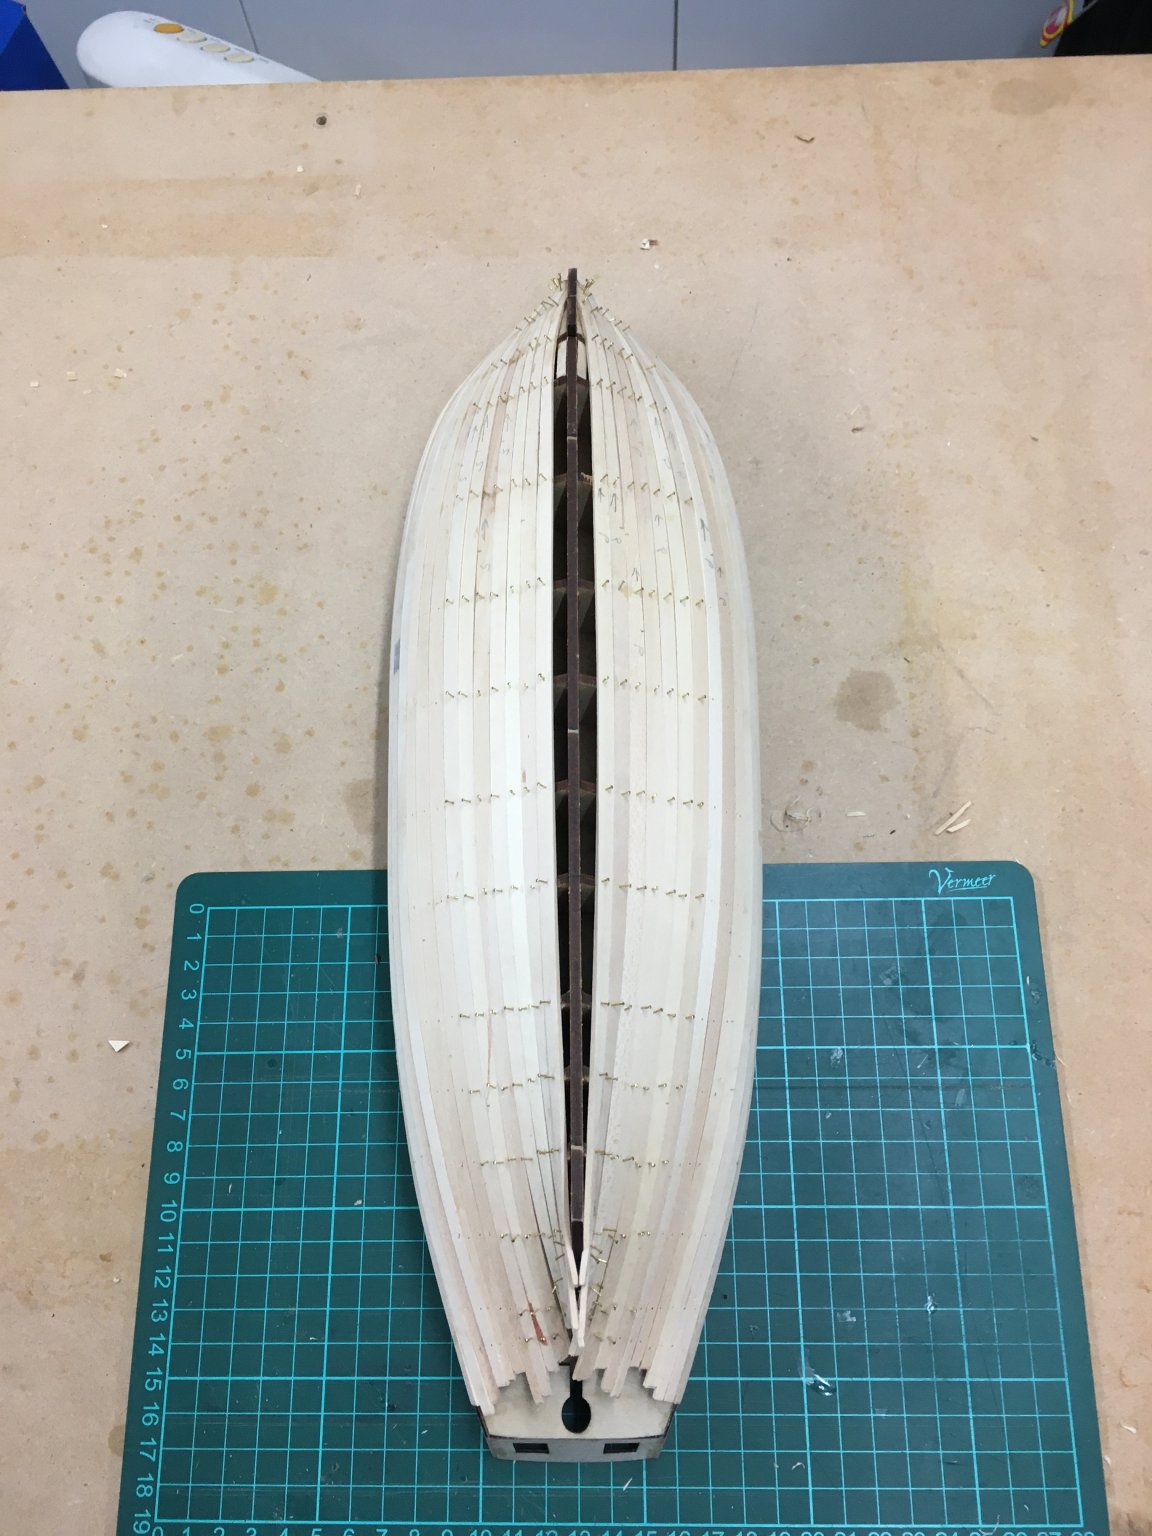
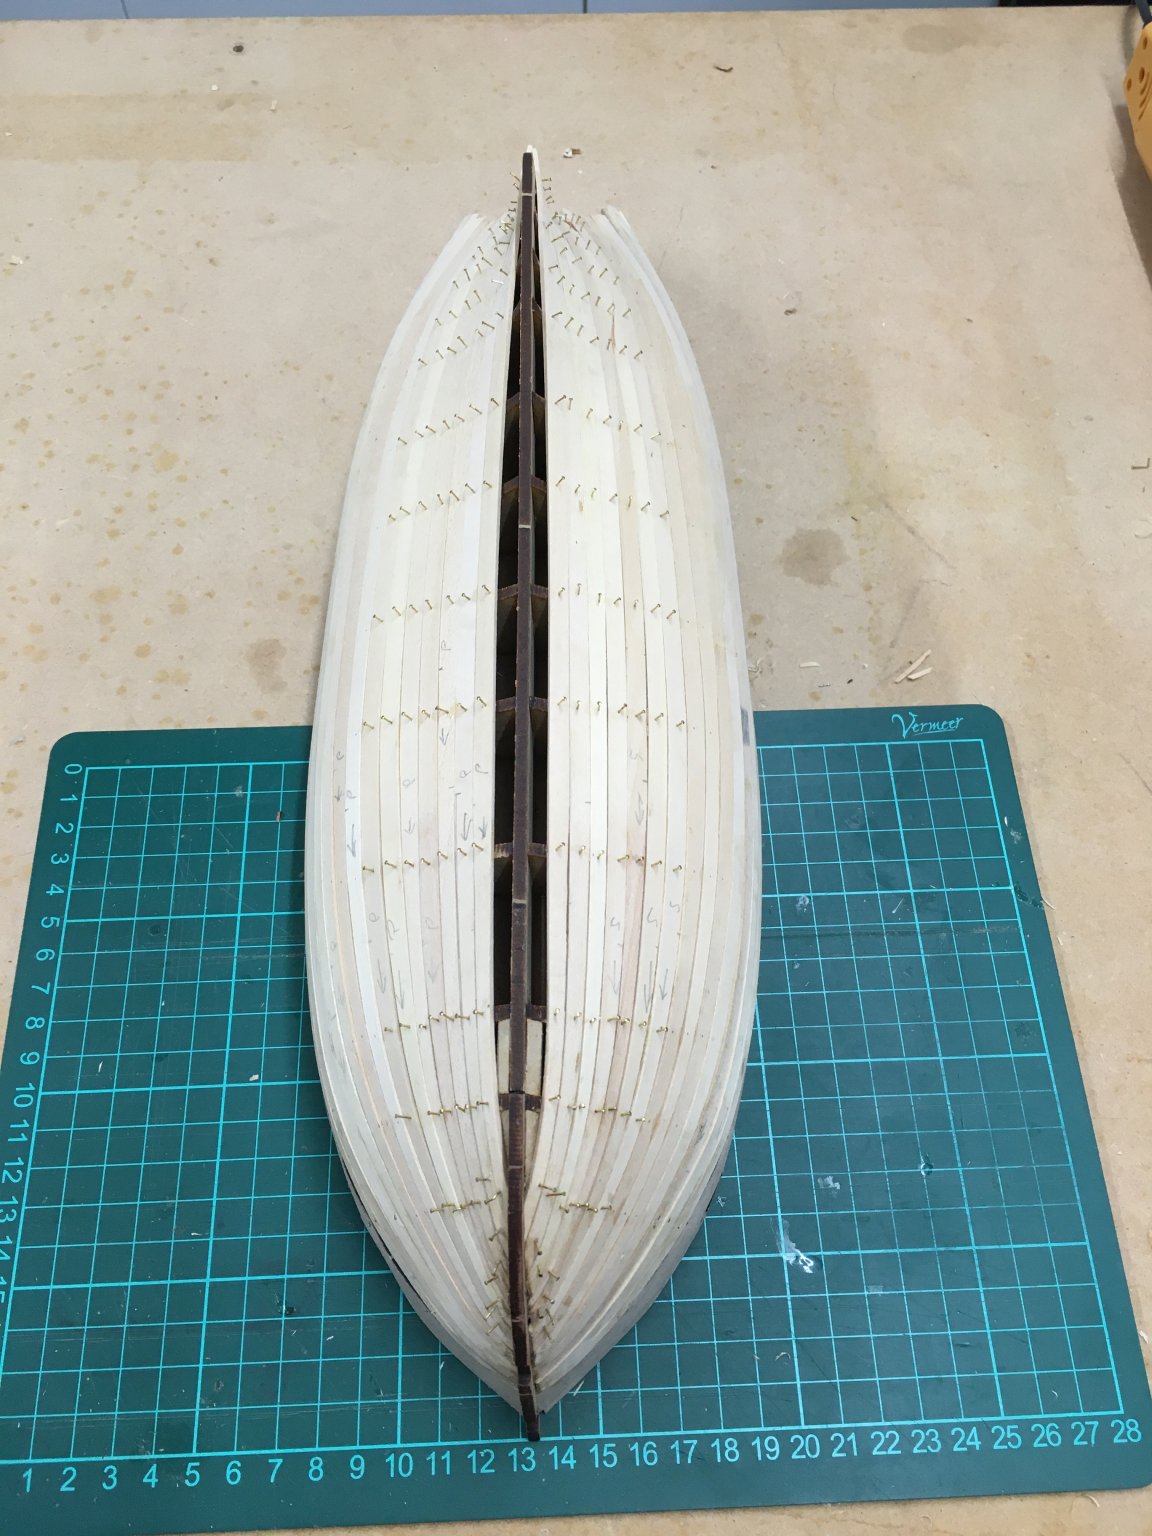
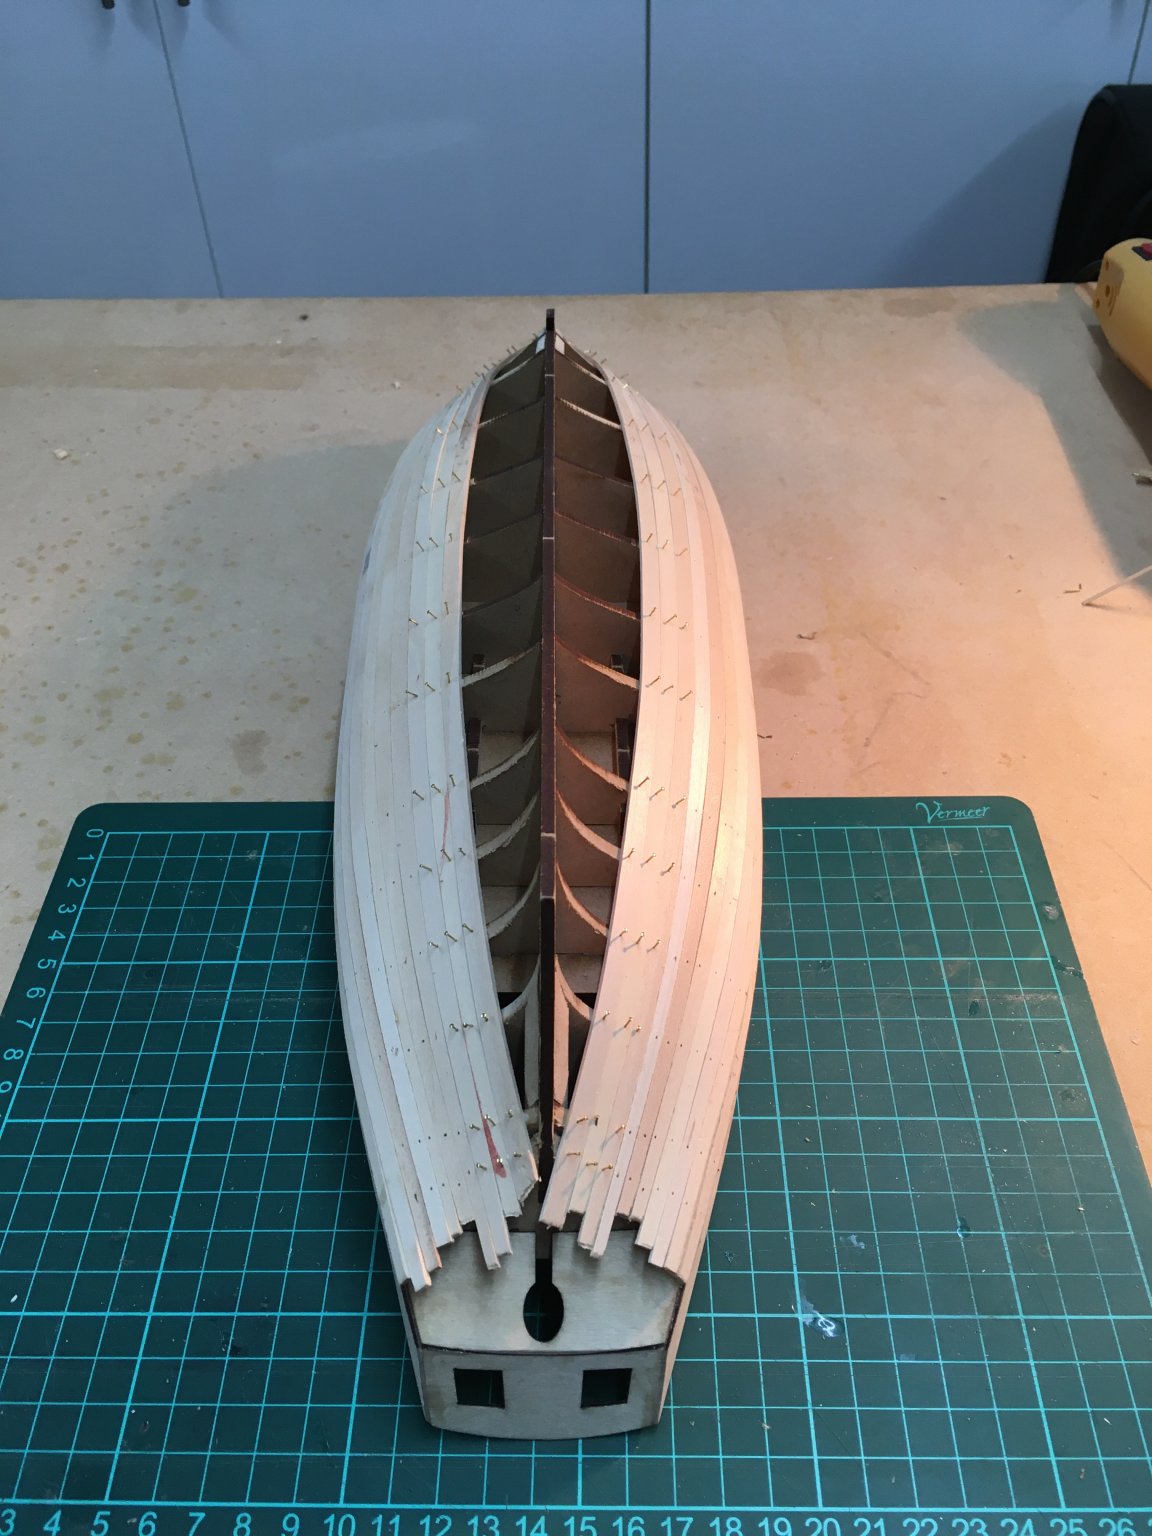
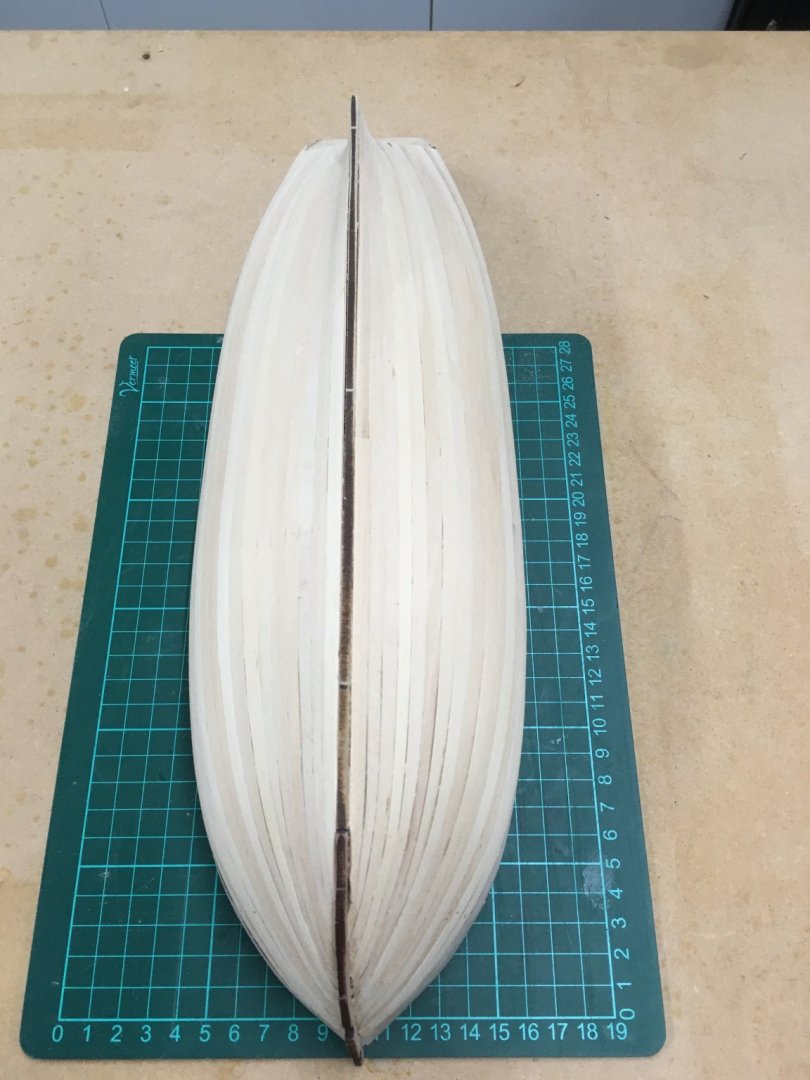
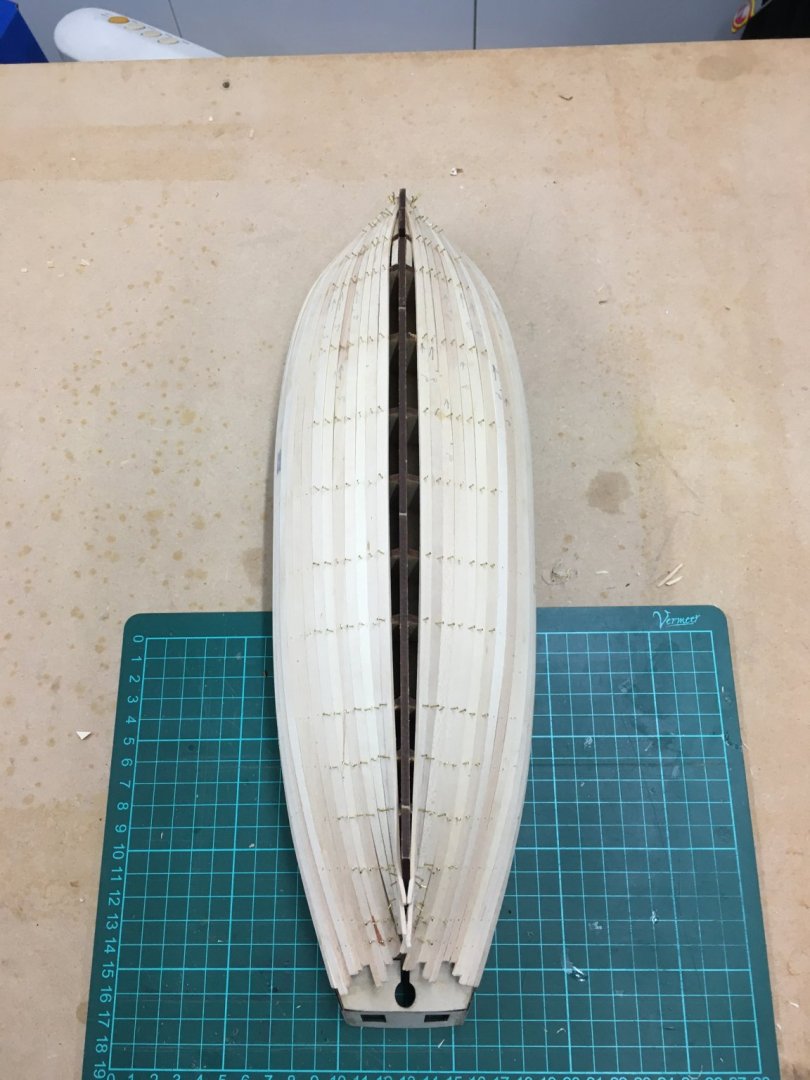
The planking begins! It's a long time since I've done a double-planked hull, and I'd forgotten how (comparatively) easy the first planking is, when you don't have to worry too much about historical inaccuracies such as triangular stealers. However I did try to lay the planks as well as I could to minimise sanding and filling later on. The supplied limewood (aka basswood?) 1.5mm timber worked well. Chris recommends soaking in warm water for 30 minutes before tapering with a craft knife and steel rule, in order to ensure that the knife follows the rule and not the grain. However I found that wasn't necessary if I used a sharp scalpel and I did all my tapering without any problems. However I DID soak the ends of each strip by dipping them in recently boiled water for a couple of minutes, so that I could pre-bend them. I clamped the soaked strips to the hull and blasted them dry with my hot air gun. This got them close to their final shape and made final fitting with glue and pins much easier. The first four strakes on the starboard side: Progressing nicely: Finished and ready to sand: The 1st planking requires exactly 30 full strips, and the kit supplies exactly thirty. Unfortunately I'd snapped one strip in an early and unnecessary edge-bending experiment. However this wasn't a problem, as I was able to complete the last garboard strake with two shorter planks. In summary, the kit design makes planking comparatively straightforward. For example the larger than usual number of frames and the ease with which they can be properly faired, and the use of strategically positioned filler pieces that help to support planks in the bow and stern areas. I found the small pins supplied particularly good at holding planks to the frames whilst the glue dried. I had been a bit worried the pins wouldn't hold in the MDF frames but they were fine. They were so sharp I stabbed my fingers several times trying to pick them up - yes, the red patches on the hull are blood! A couple of spare planks would have been nice, but certainly not essential. Next job, sanding. Derek


- 725 replies
-
- 13
-
-

-
- vanguard models
- speedy
- (and 1 more)
-
I've continued to use boxwood for the internal timbers (apart from the frames, which are the kit-supplied basswood). However I decided to use basswood for painted components such as the risers, seat back and the front platform. For the risers, I found it difficult to get the supplied strip of 1/32" X 3/16" basswood to follow the curve of the sheer, especially up in to the bow area. I ended up cheating by using two narrower planks on each side, which were much easier to bend. Chuck recommends following the line of the third external plank to ensure that the risers are the correct distance down each frame, and level on both sides, because so much else depends on this measurement. For example to ensure the seats sit level, and that there is sufficient space for the decorative frames fitted later on. However I had used my own, narrower boxwood strip for the external planking so rather than follow the third plank down, I had to measure the equivalent distance on the inside of the pinnace and put a pencil mark on the frames. However I decided to keep the rowers' benches unpainted, as I'd done with the 1:48 pinnace for the Caroline, and when I dry fitted these they just didn't look right against the red front platform... ...so it had to go. I used Chuck's method in the pinnace instructions to scribe a shallow groove near the edges of the bench seats, using a blunt-pointed scriber just to give a bit of added definition. I'll get the stern seats shaped and in place before I fix the rowers' benches, to make sure I get the spacing right. Meanwhile, my Speedy build has reached an interesting stage - I've just finished the first planking (it's great not having to worry too much about super-accuracy and triangular stealers!) - so the pinnace might have to take a back seat for a day or two. Derek

- 77 replies
-
- 10
-
-
- model shipways
- pinnace
- (and 1 more)
-
Your explanations are why your logs are so useful to those of us with less experience. I usually pick up something new - most recently your use of microporous tape to simulate mast coats in Post 55. Keep up the good work! Derek
- 335 replies
-
- 3
-
-
- alert
- vanguard models
- (and 1 more)
-
Many thanks for the recommendation. I looked the book up on Amazon - they had several sample pages via their "Look Inside" facility and the first picture I saw was my little Chester lathe (a Sieg clone) which virtualy sold it for me! I bought the kindle edition, which means I can have it readily available to refer to on my tablet whether I'm in the house or the workshop. I haven't read it all yet but what I've seen so far looks very useful. Derek
-
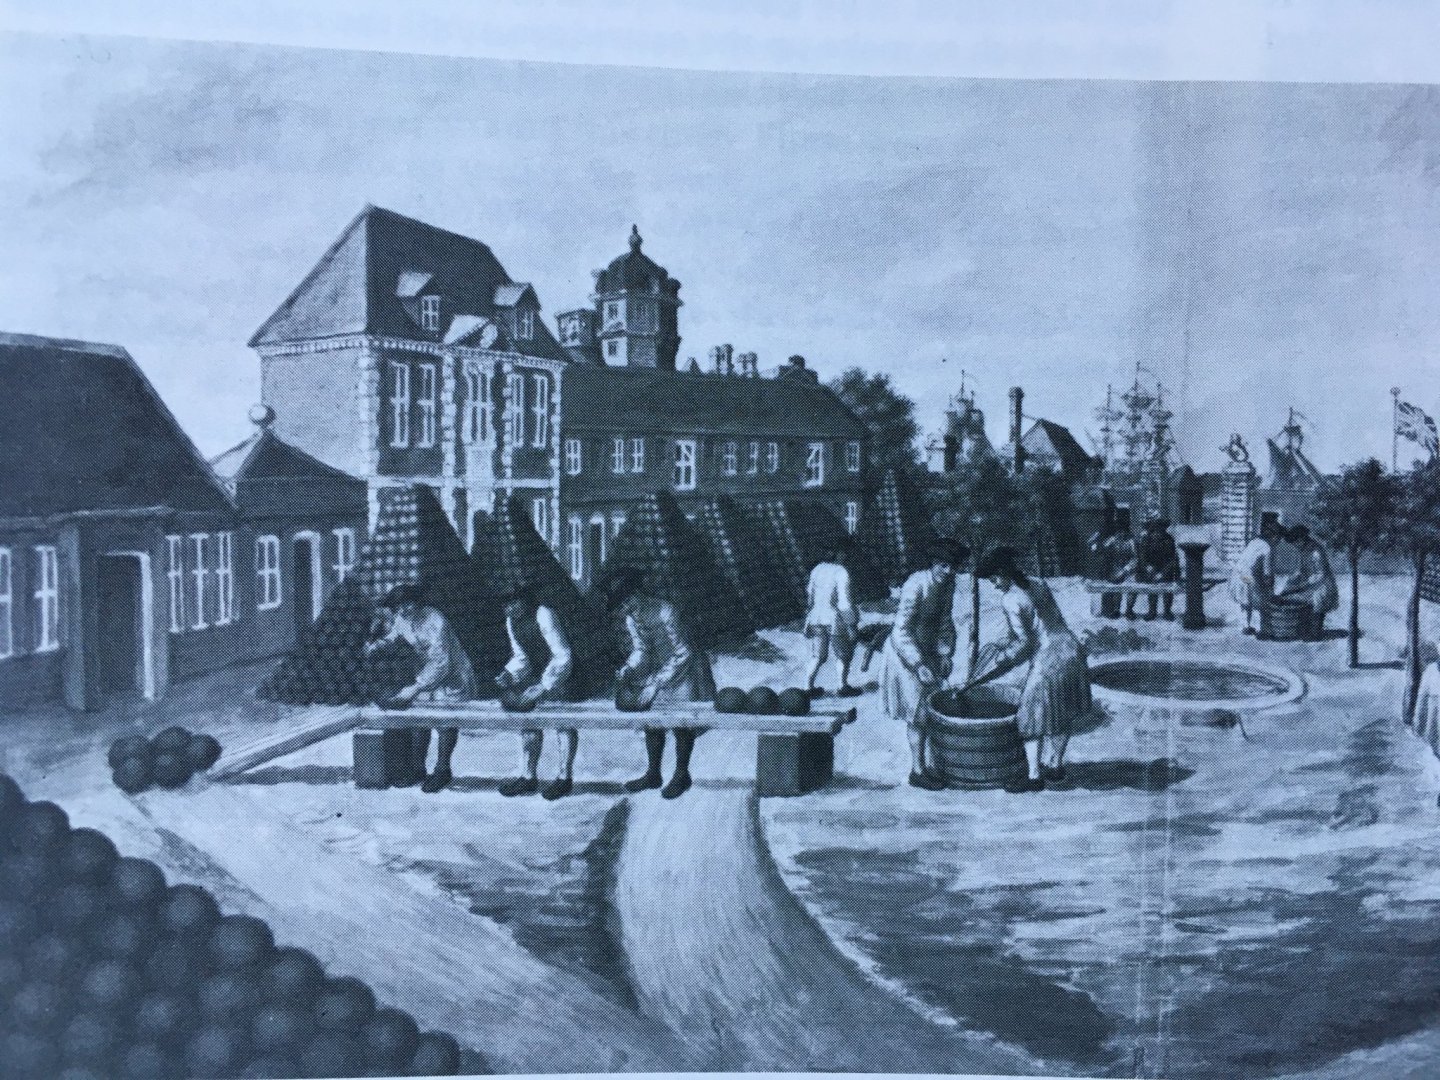
This picture from NMM shows workers at Woolwich Arsenal in the 18th century. Difficult to tell, but it looks like they're either cleaning/finishing very large shot, or possibly breaking shot out of their clay moulds. Derek
-
Brian Lavery, in The Arming and Fitting of English Ships of War 1600-1815, states that iron cannon balls were cast in clay. He also reports that by the 1780s a 74-gun ship had 2,800 rounds of ball shot, plus 166 grape, 84 double headed, 115 langridge and 173 canister. 2,800 rounds of ball equates to around 38 per gun. Sounds a lot, but I would imagine it would soon get used up in an extended action or on a long and active cruise. Lavery also believes that the practice of chipping rust off shot stopped with the introduction of the carronade which required tightly fitting, accurate balls. Instead, balls were painted black to protect them from rust. Thanks to tmj for raising an interesting topic. Derek
-
I thought shot towers were just used for producing shotgun pellets. The height of the tower determines the diameter of the pellets, so if it required an 80 metre tower to produce 3.8mm pellets then I guess a tower producing 32lb cannon balls would need to be several miles high🥴. I suspect they were cast in moulds, but it would be interesting to know more. Derek
-
I agree. I did a lot of bulkhead shaping off the model (as recommended by Chris) and found it much easier than when everything is glued together. Derek P.S. Good luck with the house move. I look forward to your Speedy log when you get settled in
-
I’m sure you’re right. I think part of the problem is that I’ve recently been planking the MS English Pinnace, which is 1/24 scale and single planked, so errors are more visible and you can’t fix them with filler and paint. Derek
- 725 replies
-
- 1
-
-
- vanguard models
- speedy
- (and 1 more)
-
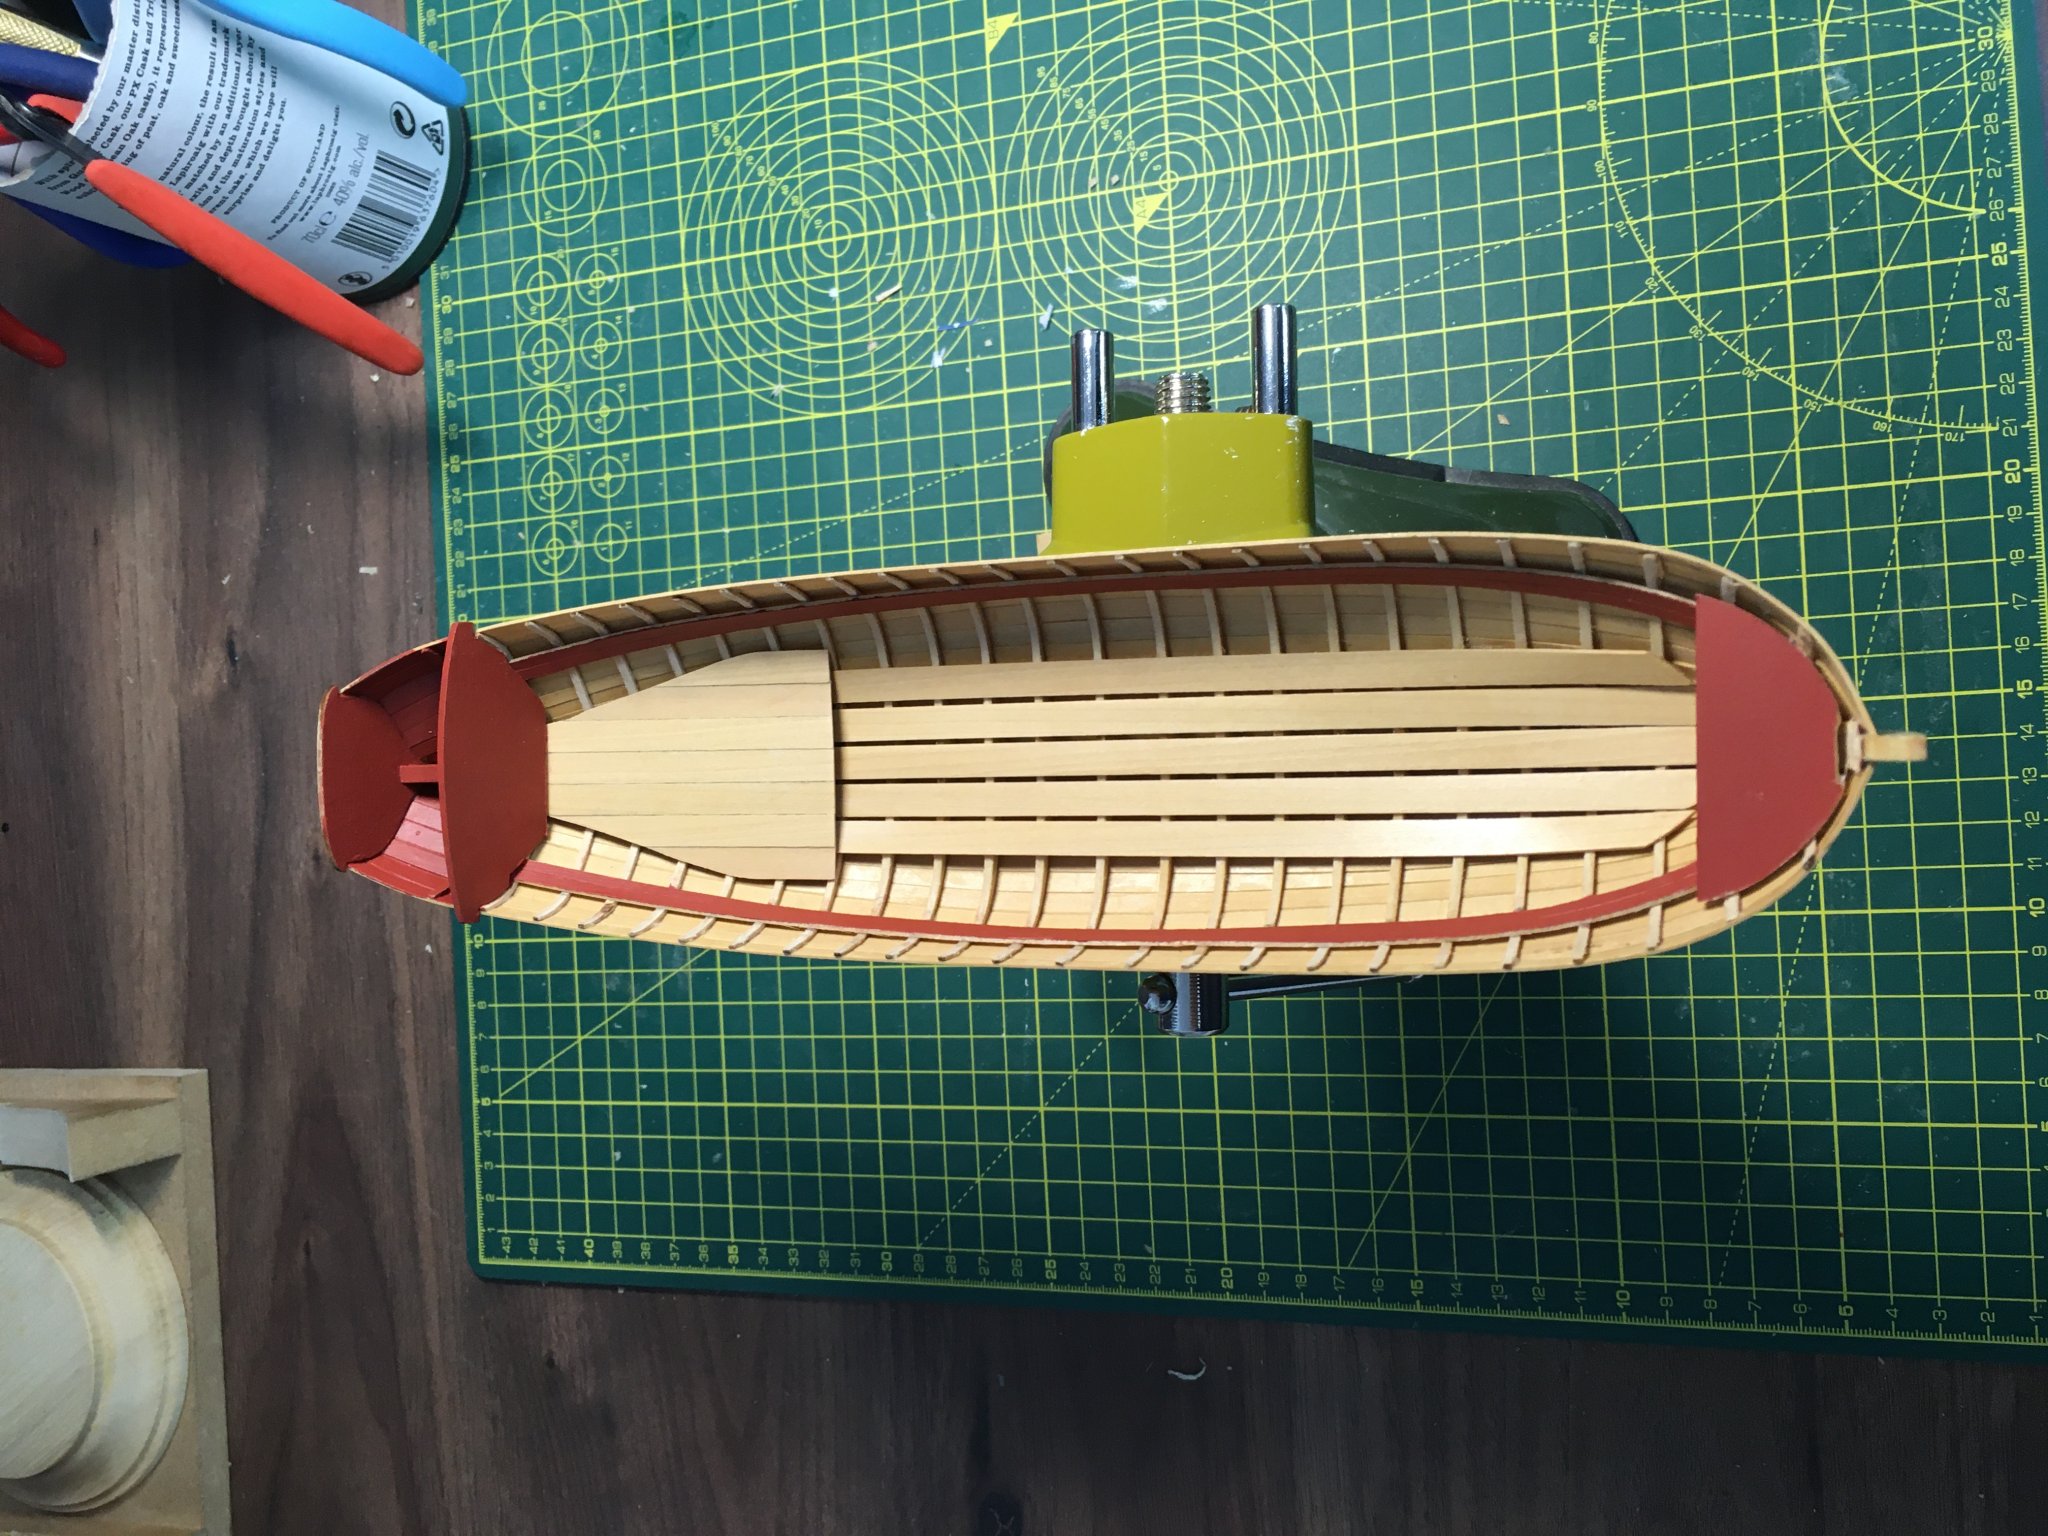
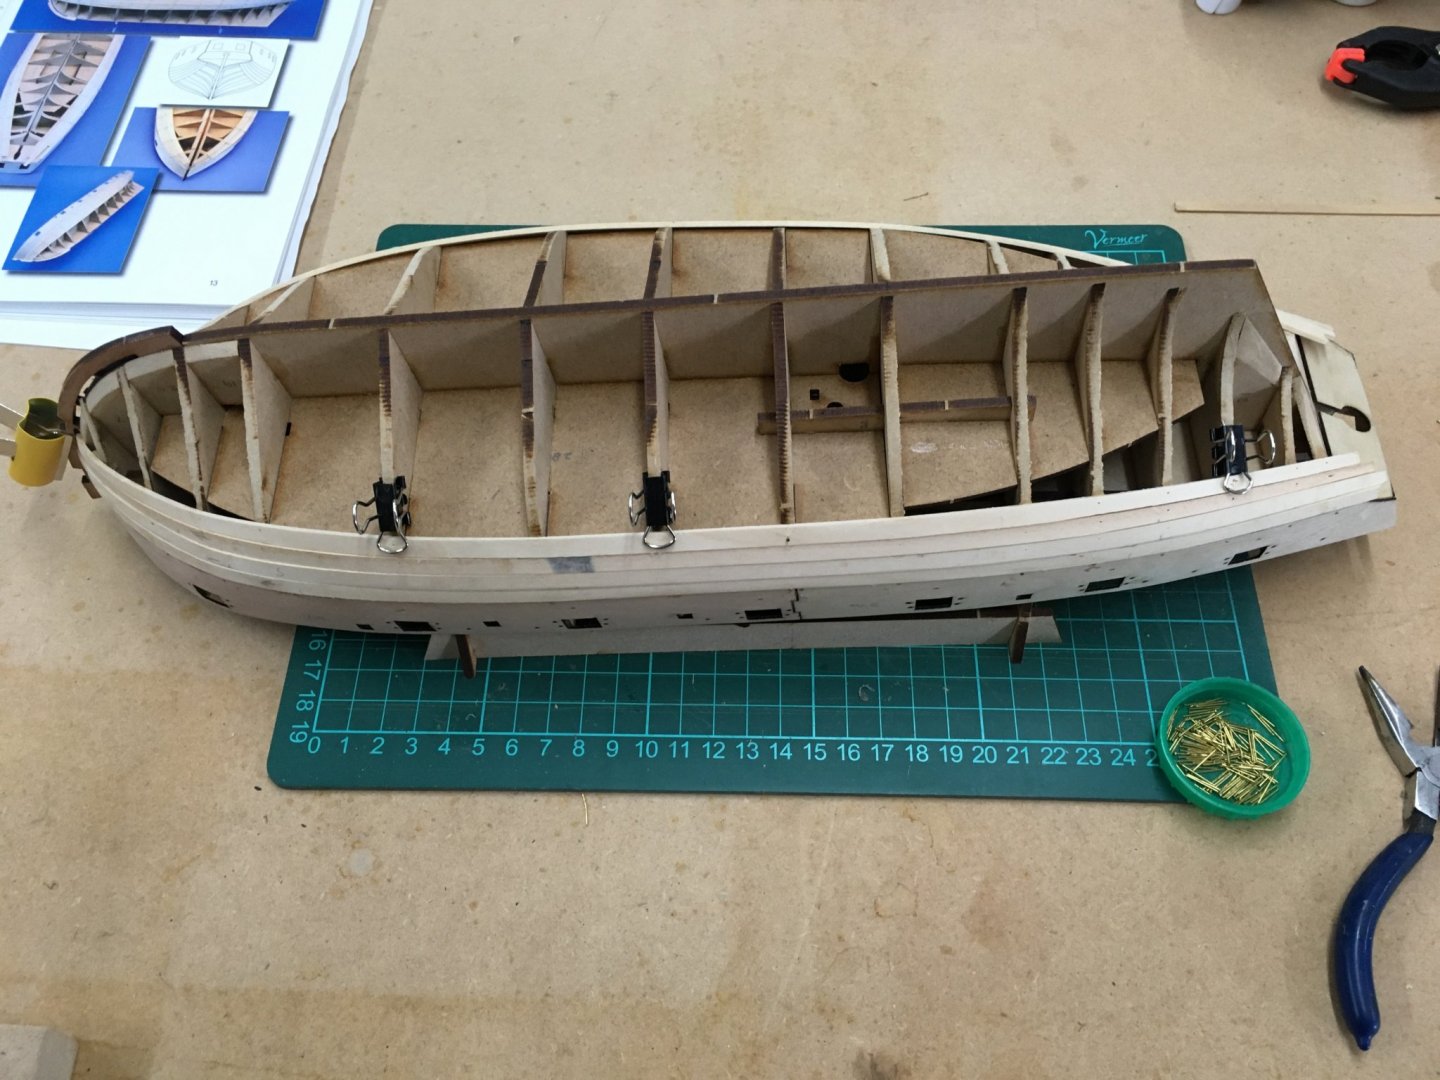
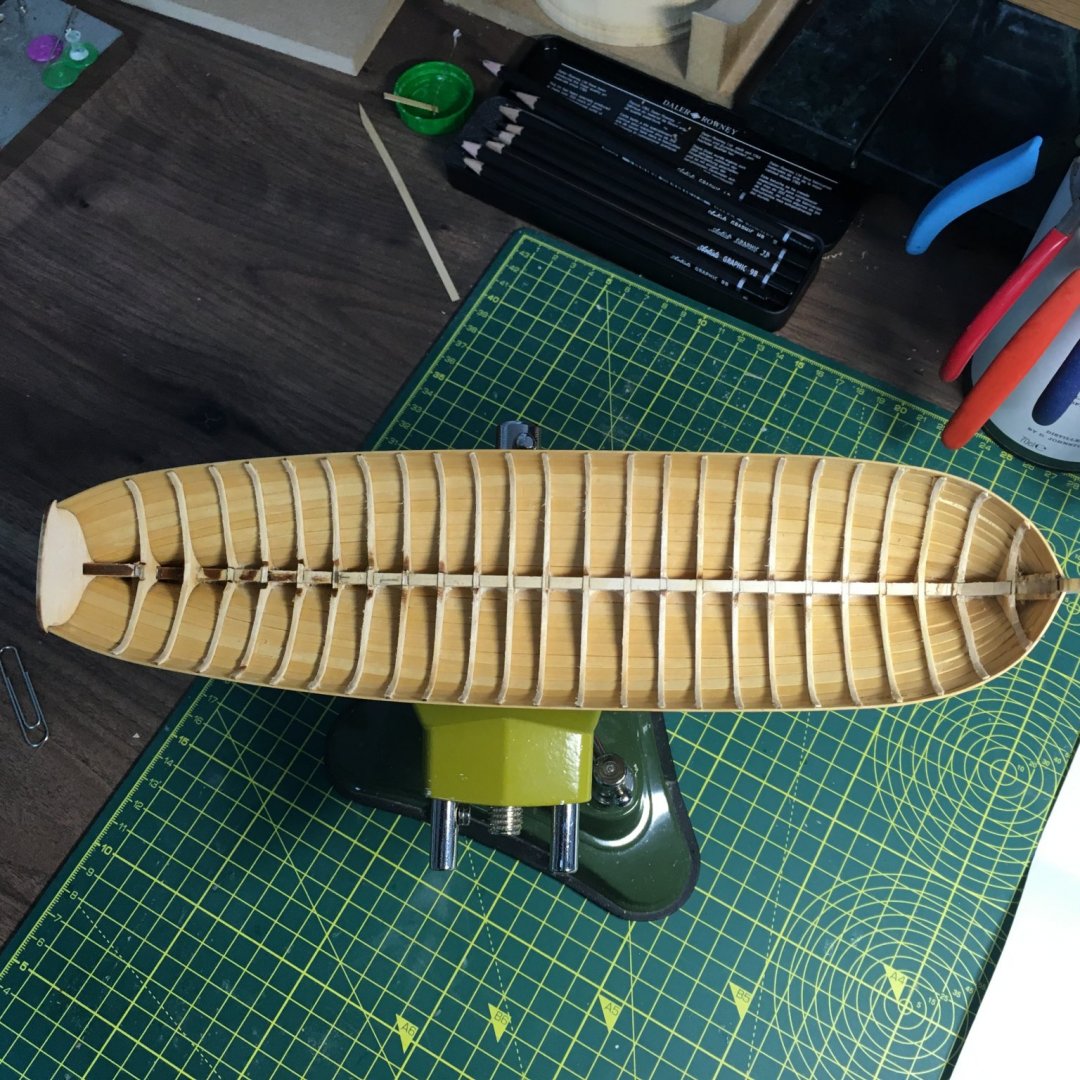
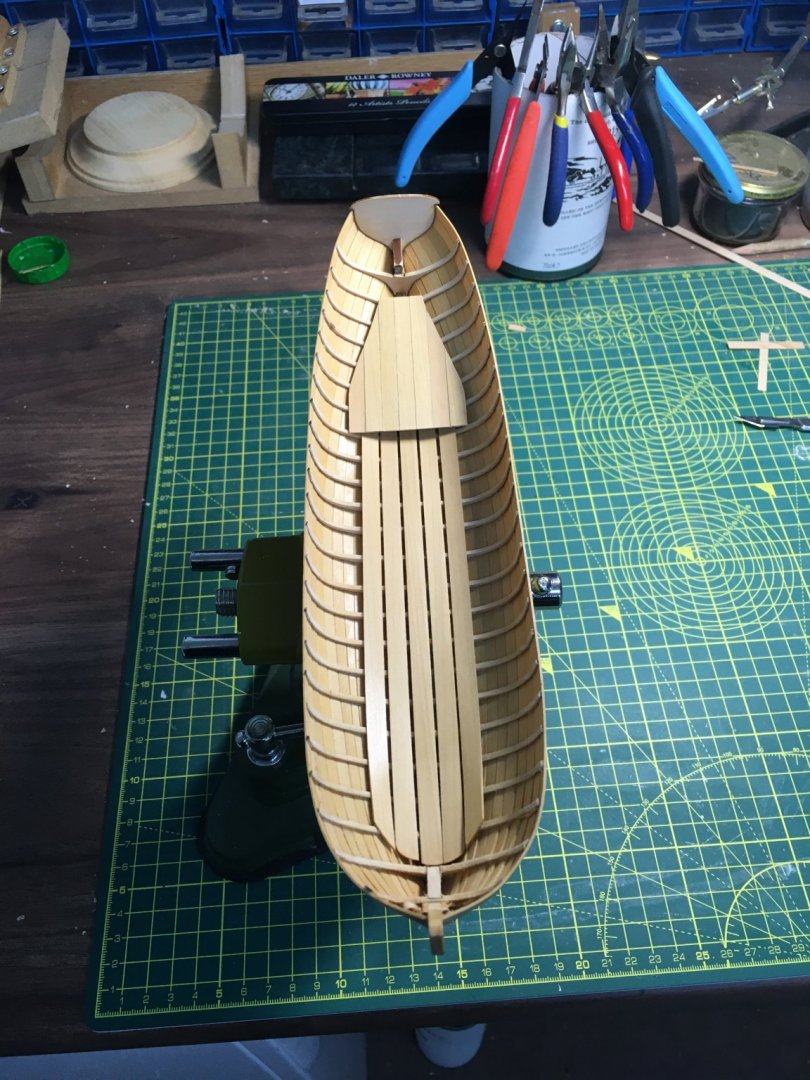
Digging the garden to shed the extra Christmas pounds didn't go so well as my knee is now in a brace, so it's back to the model! Actually, I've also started work on HMS Speedy from Vanguard Models (Speedy log), and have really enjoyed swapping between the two projects as glue dries and so forth. I eventually got the frames down to what I hope are reasonable dimensions - any thinner and I'm worried they'll break. They're still waiting for final sanding in this photo. Next step, fitting the floor boards... ...and the rear platform. Both went relatively smoothly, although I'm not satisfied with the spacing of the floorboards in the bow area. I found it awkward to twist the planks to match the changing levels in the bottom of the model, and if this are isn't hidden later on I'll redo them. Derek

- 77 replies
-
- 10
-
-
- model shipways
- pinnace
- (and 1 more)
-
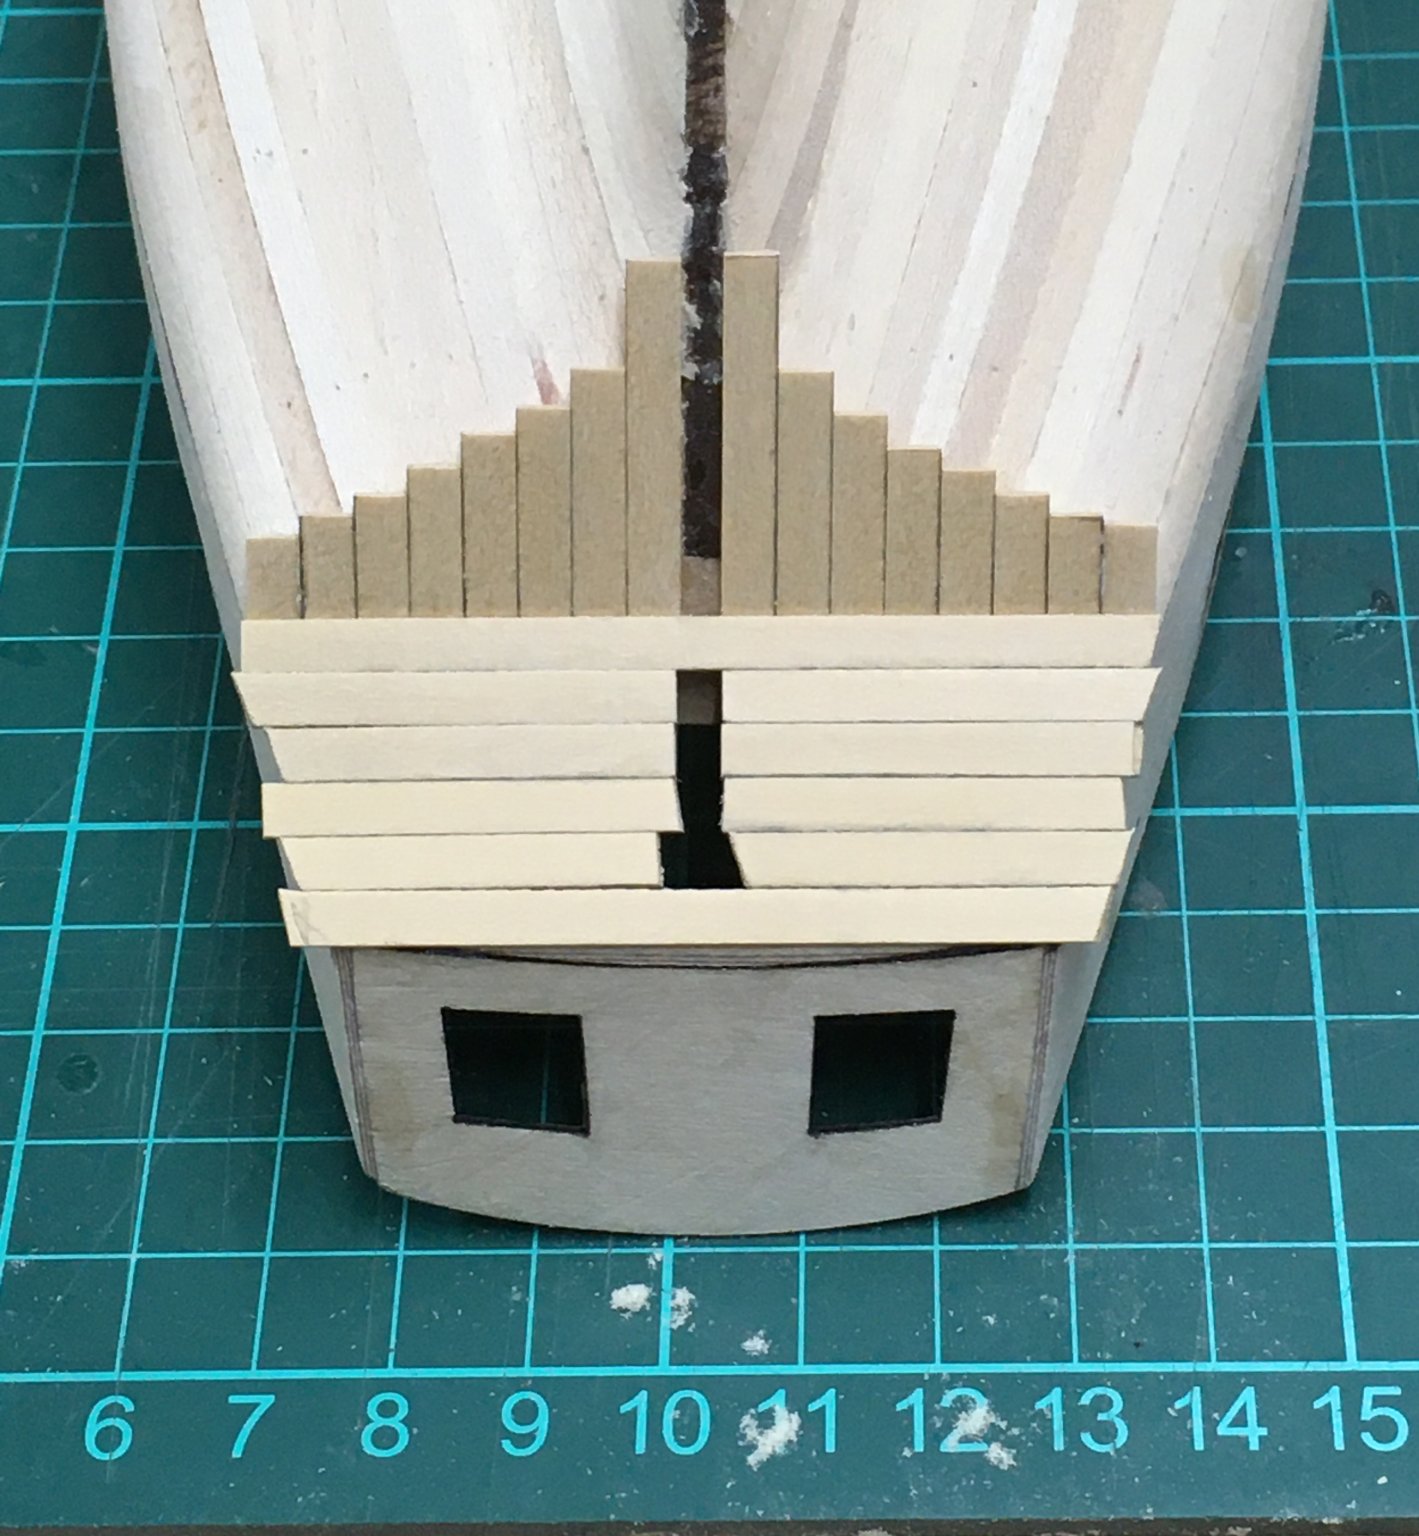
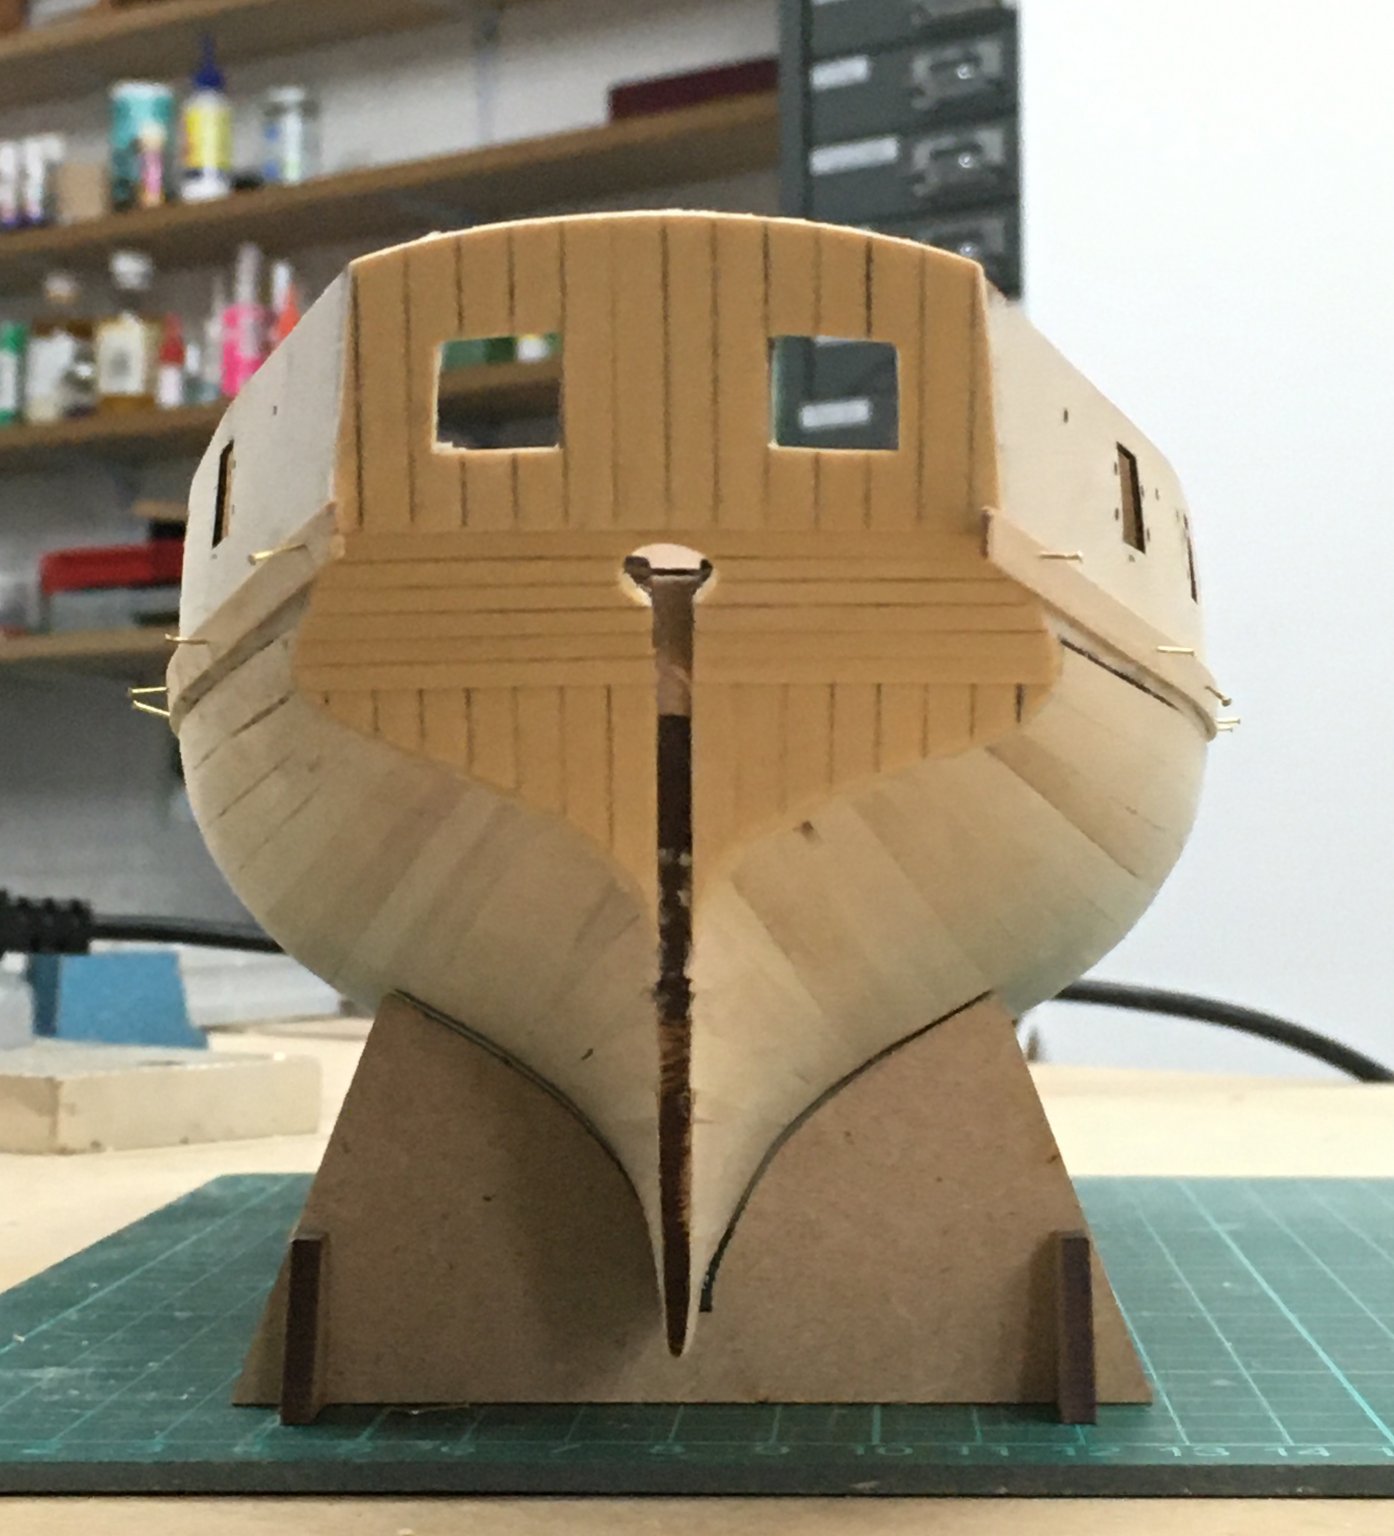
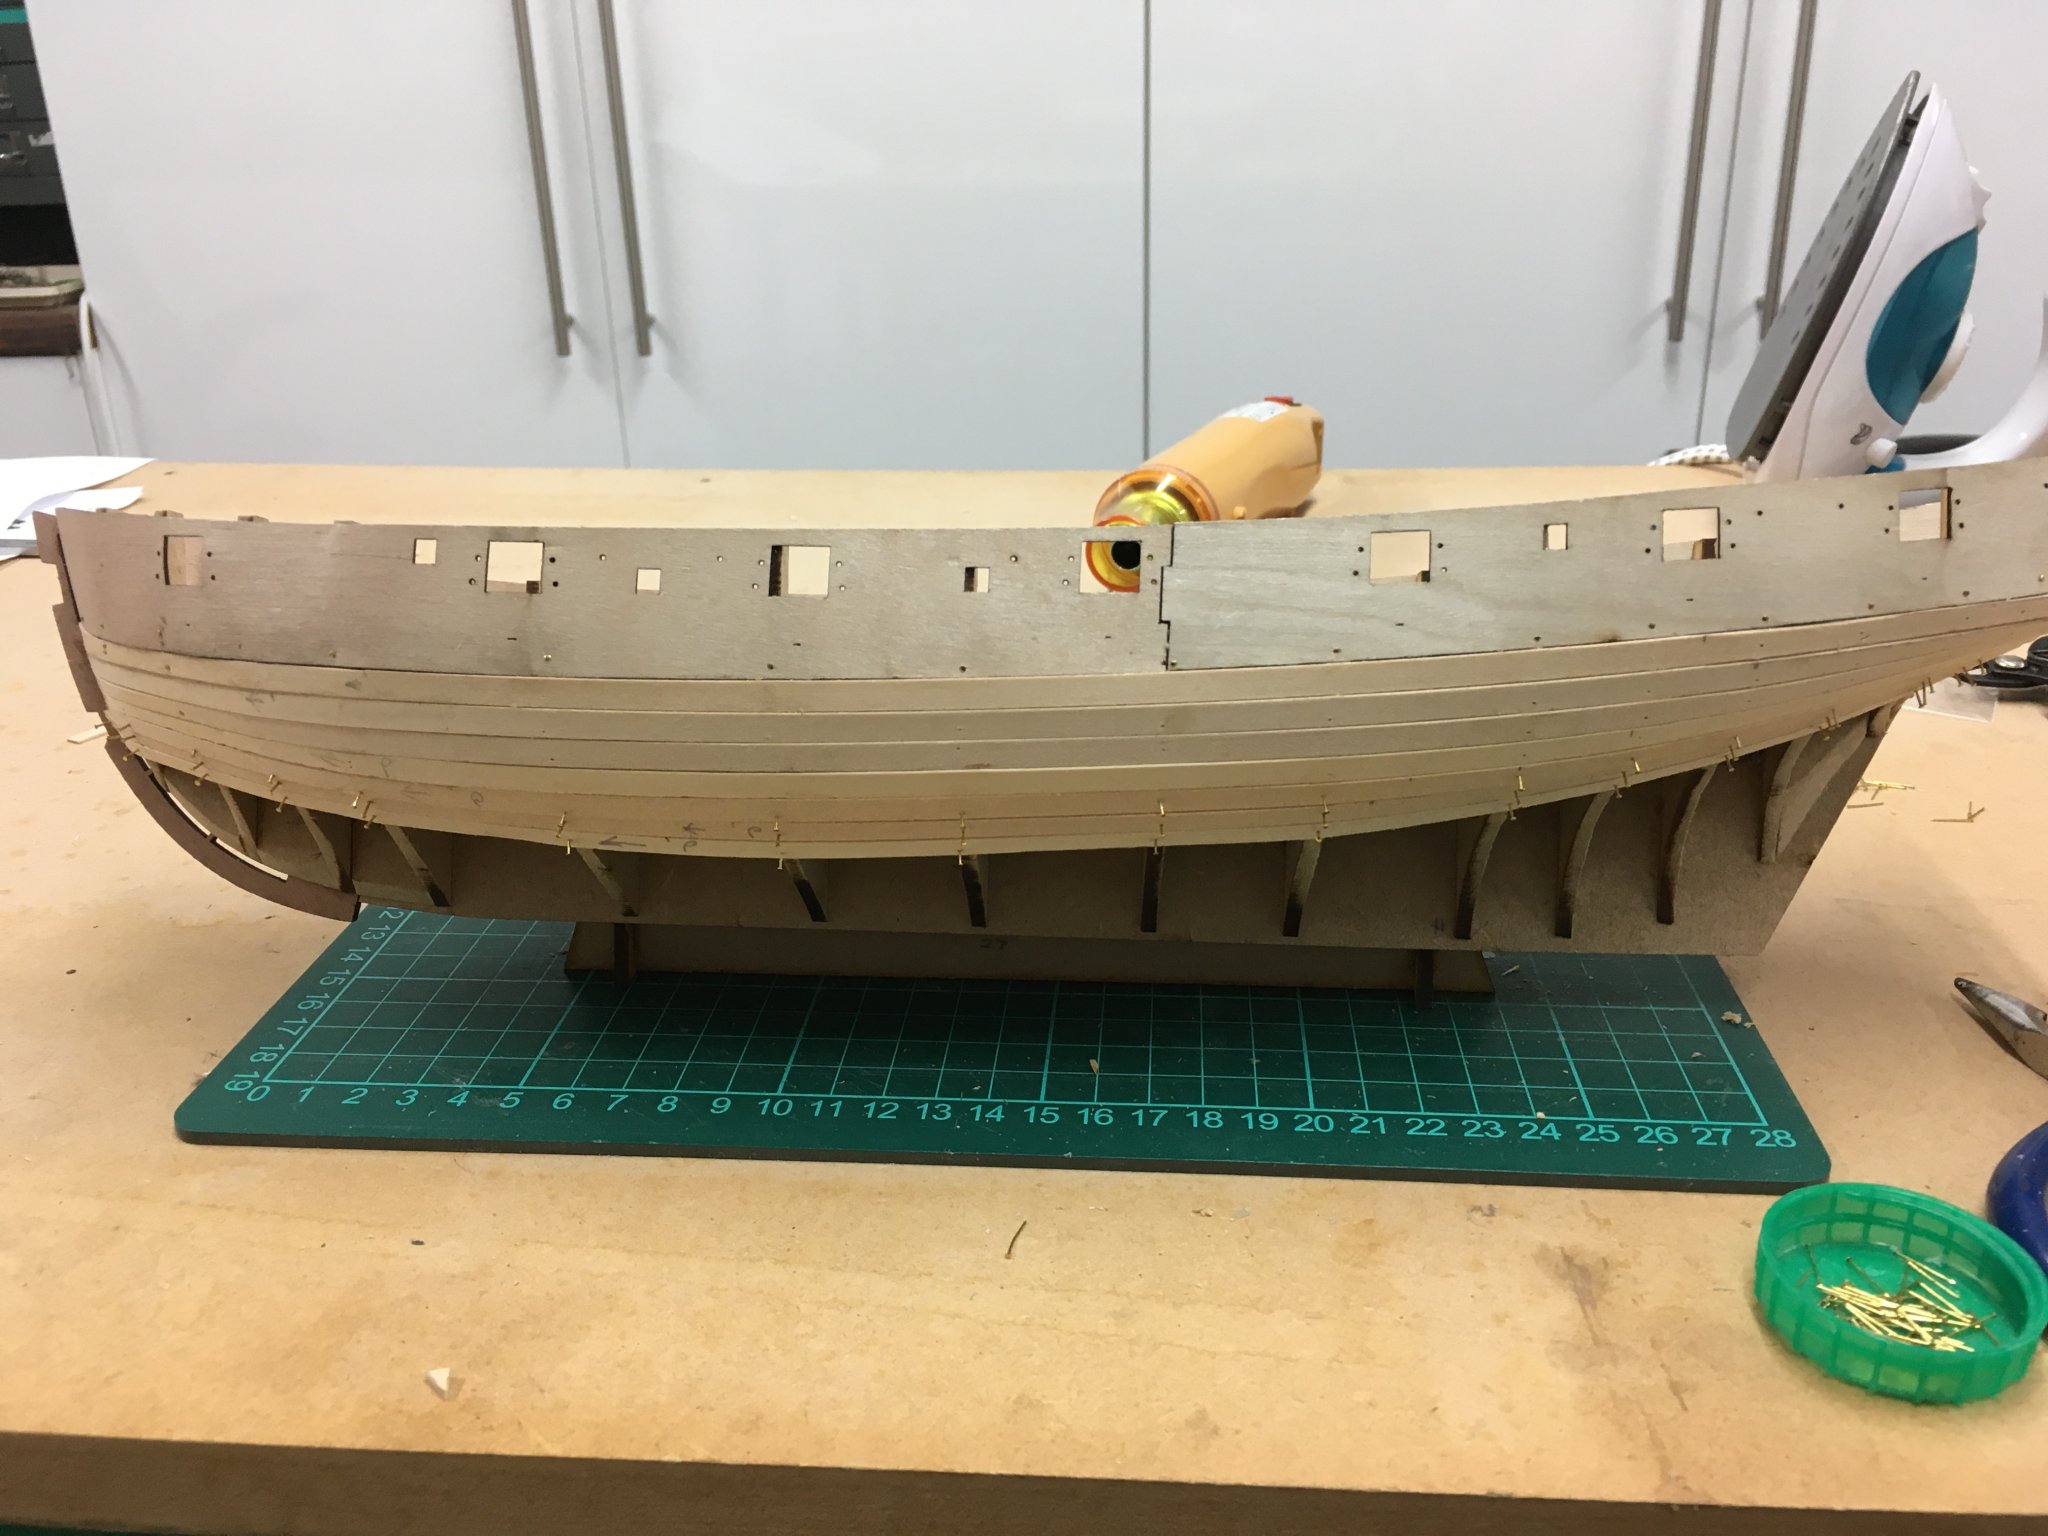
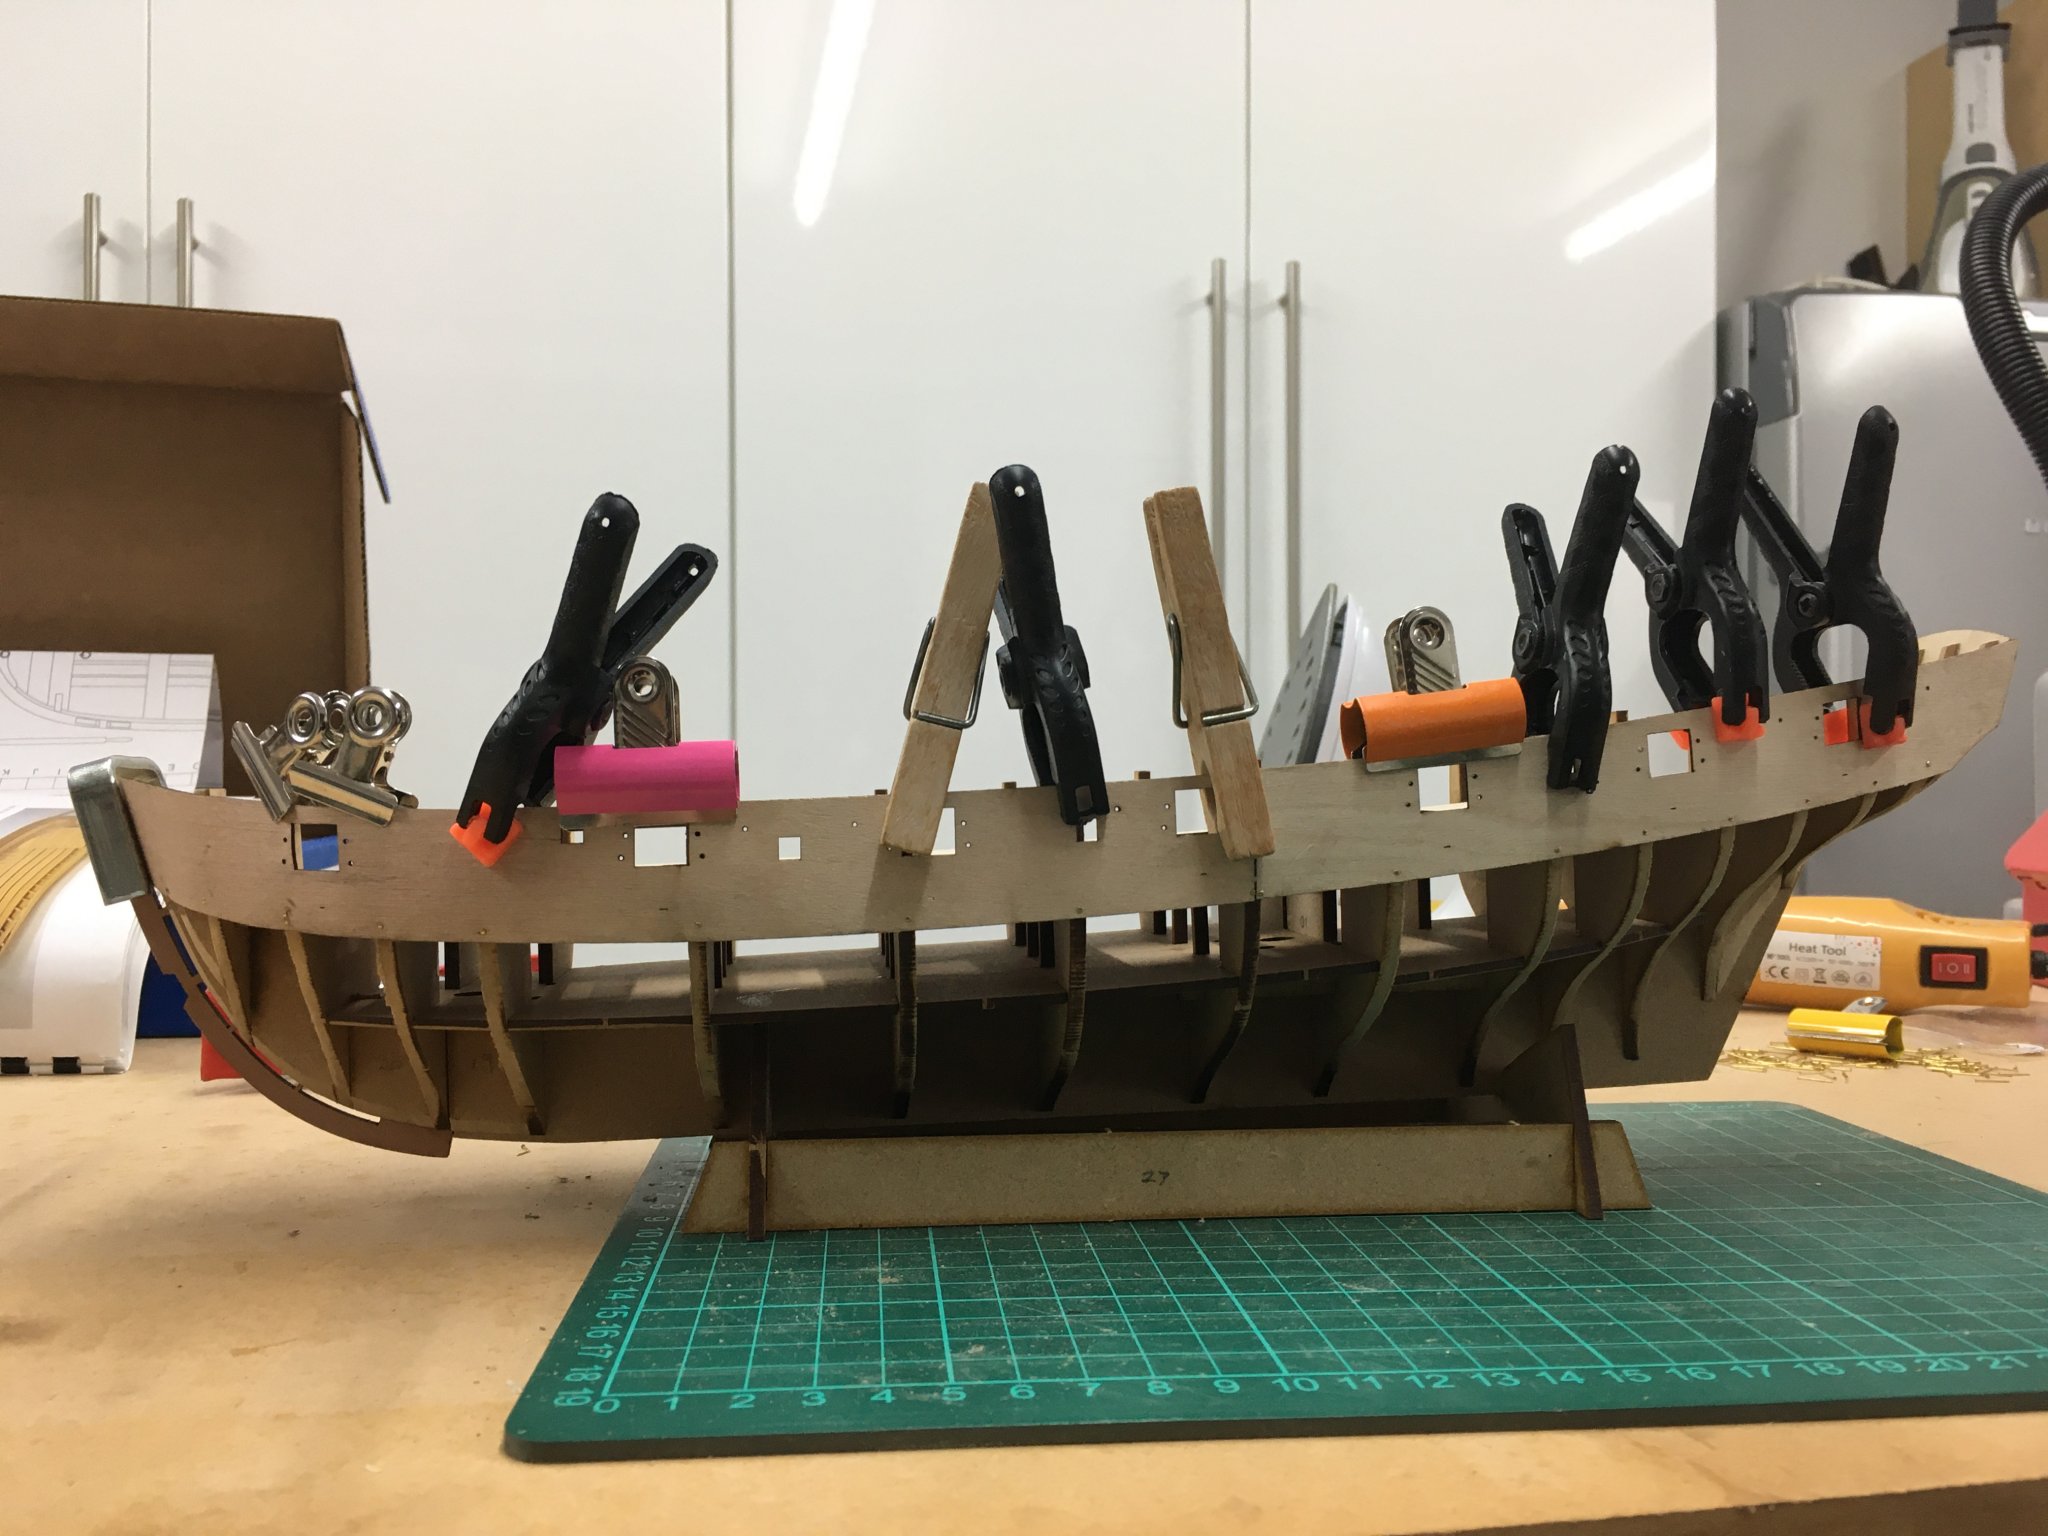
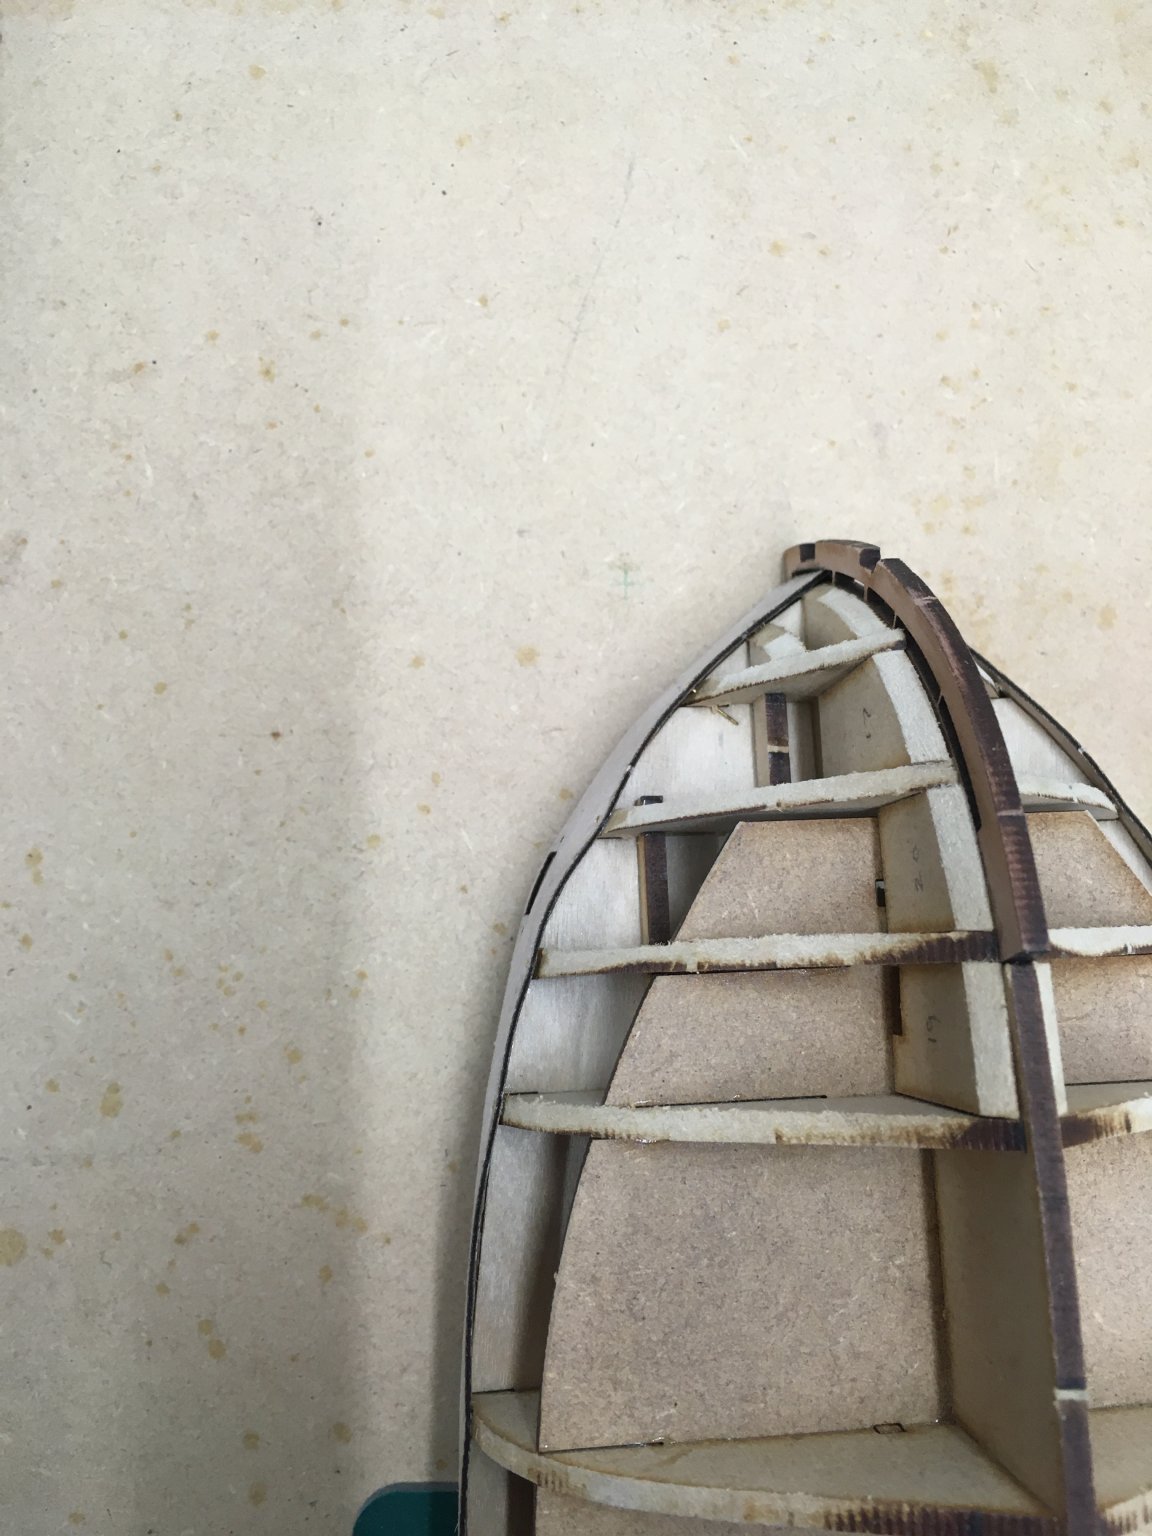
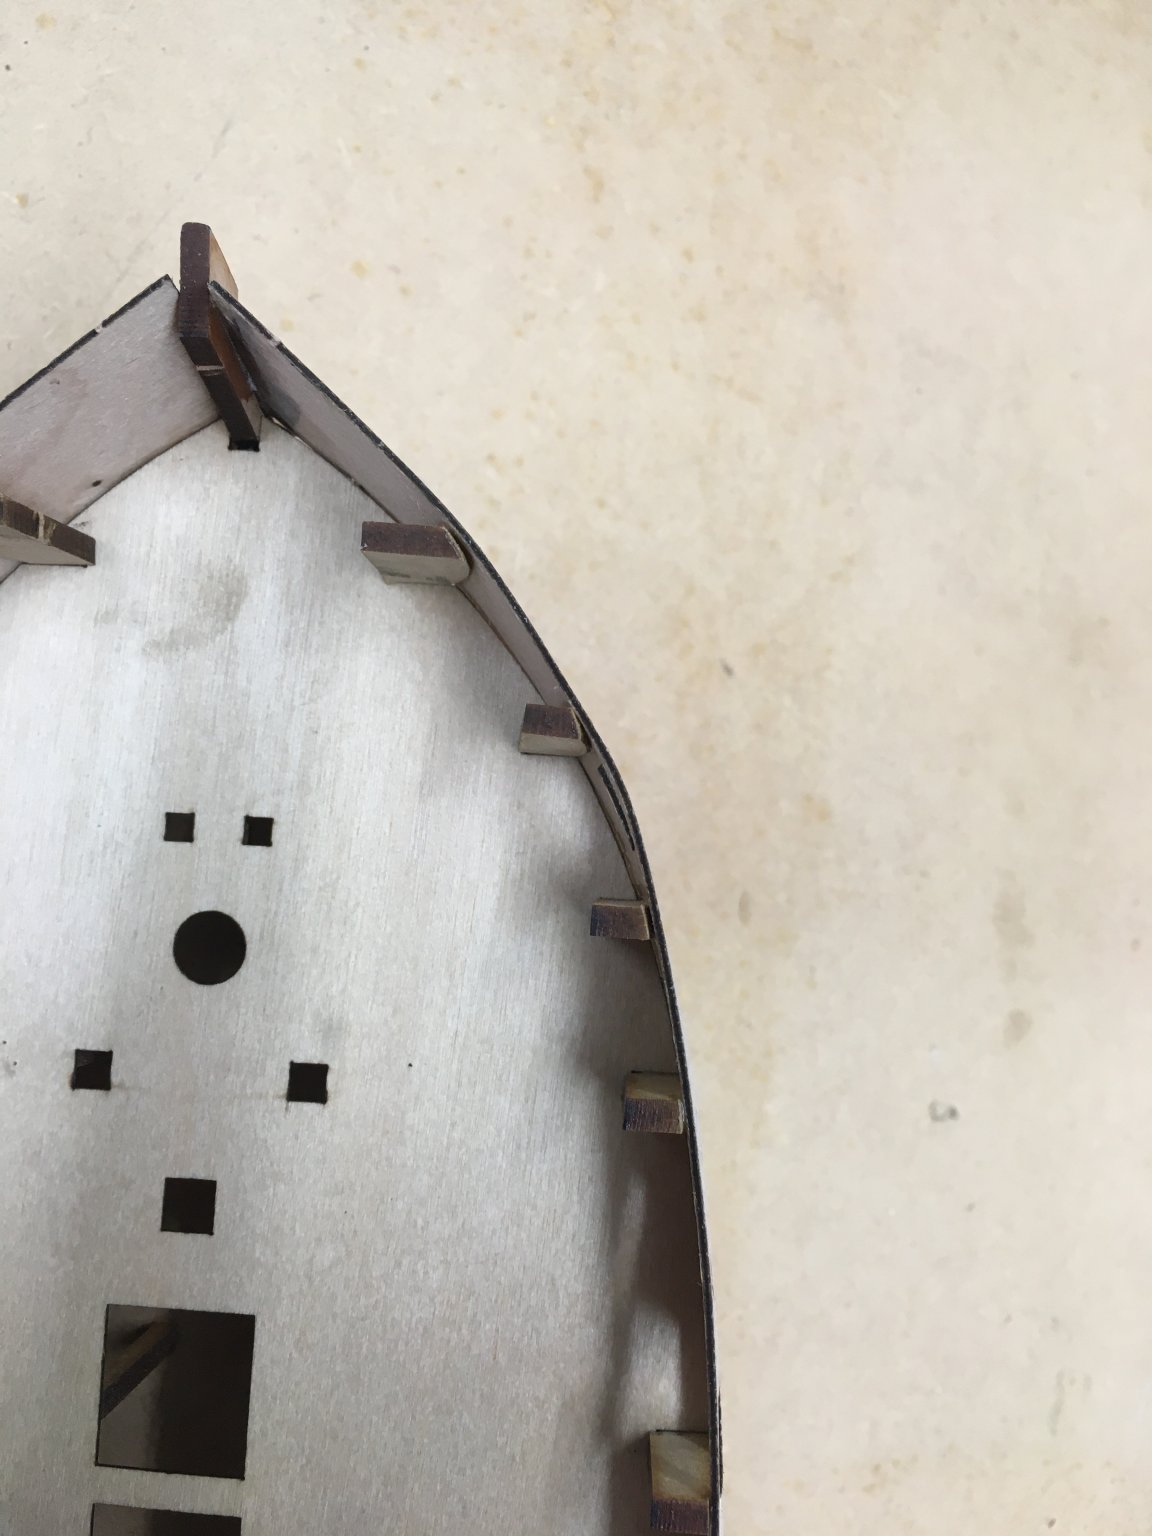
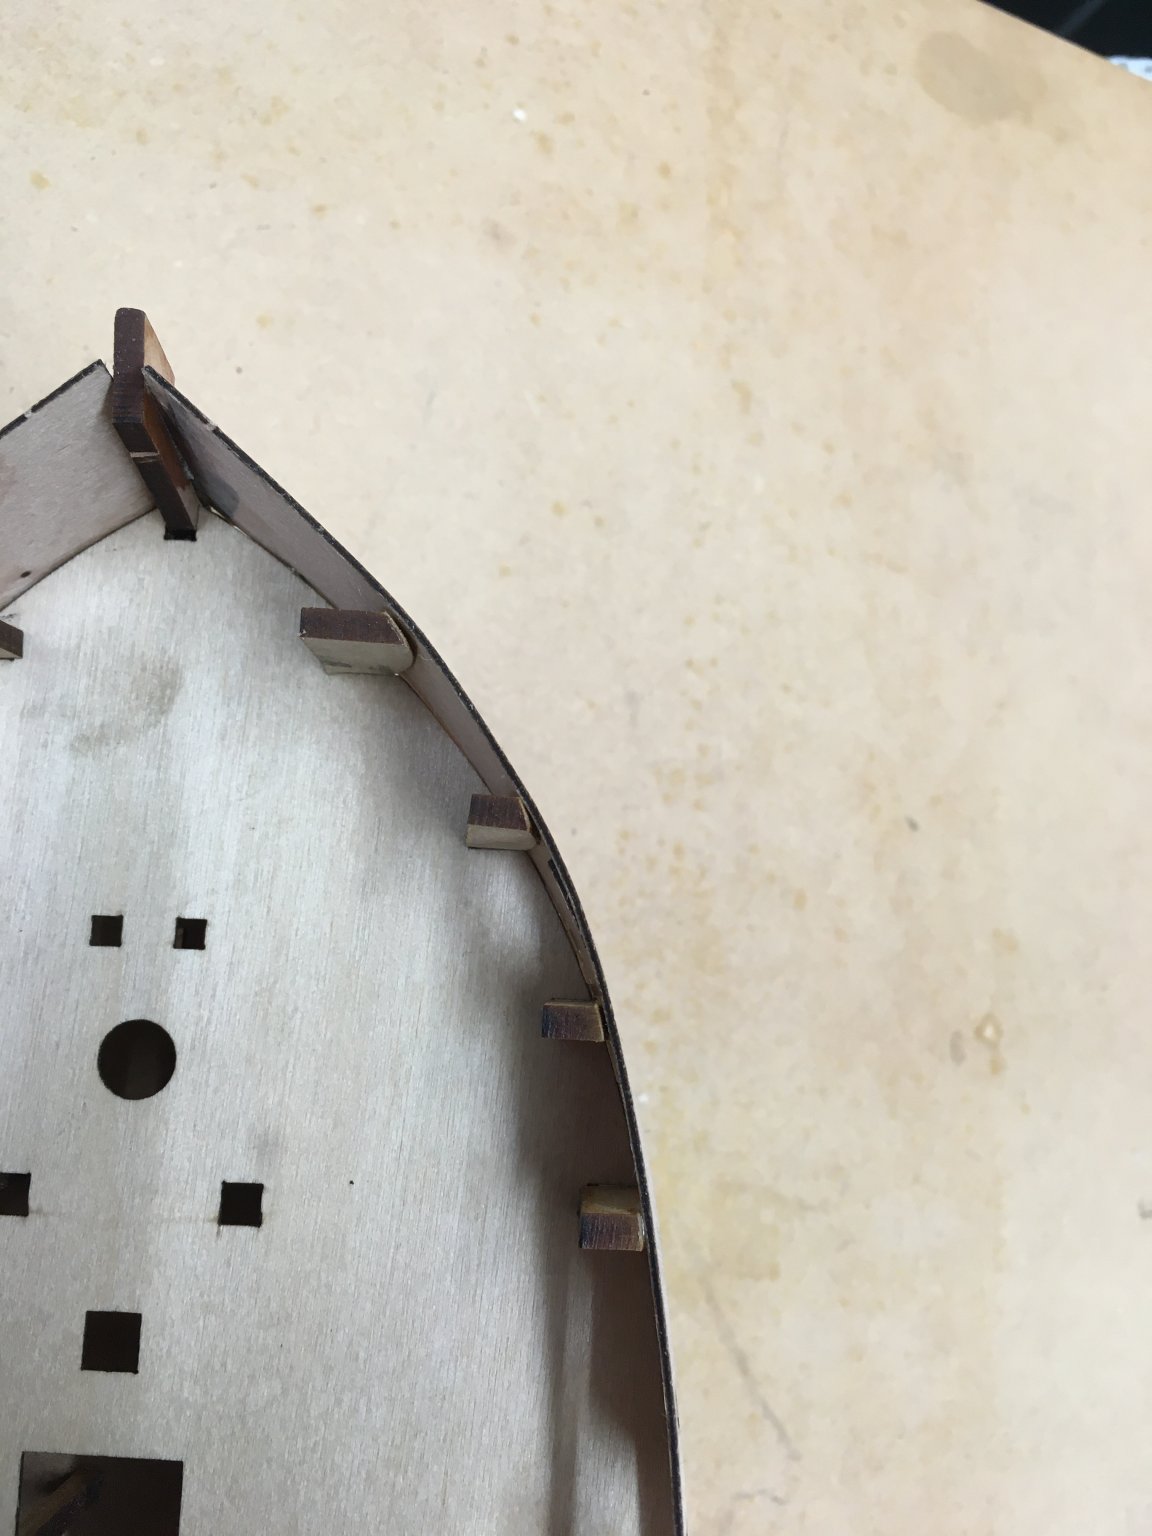
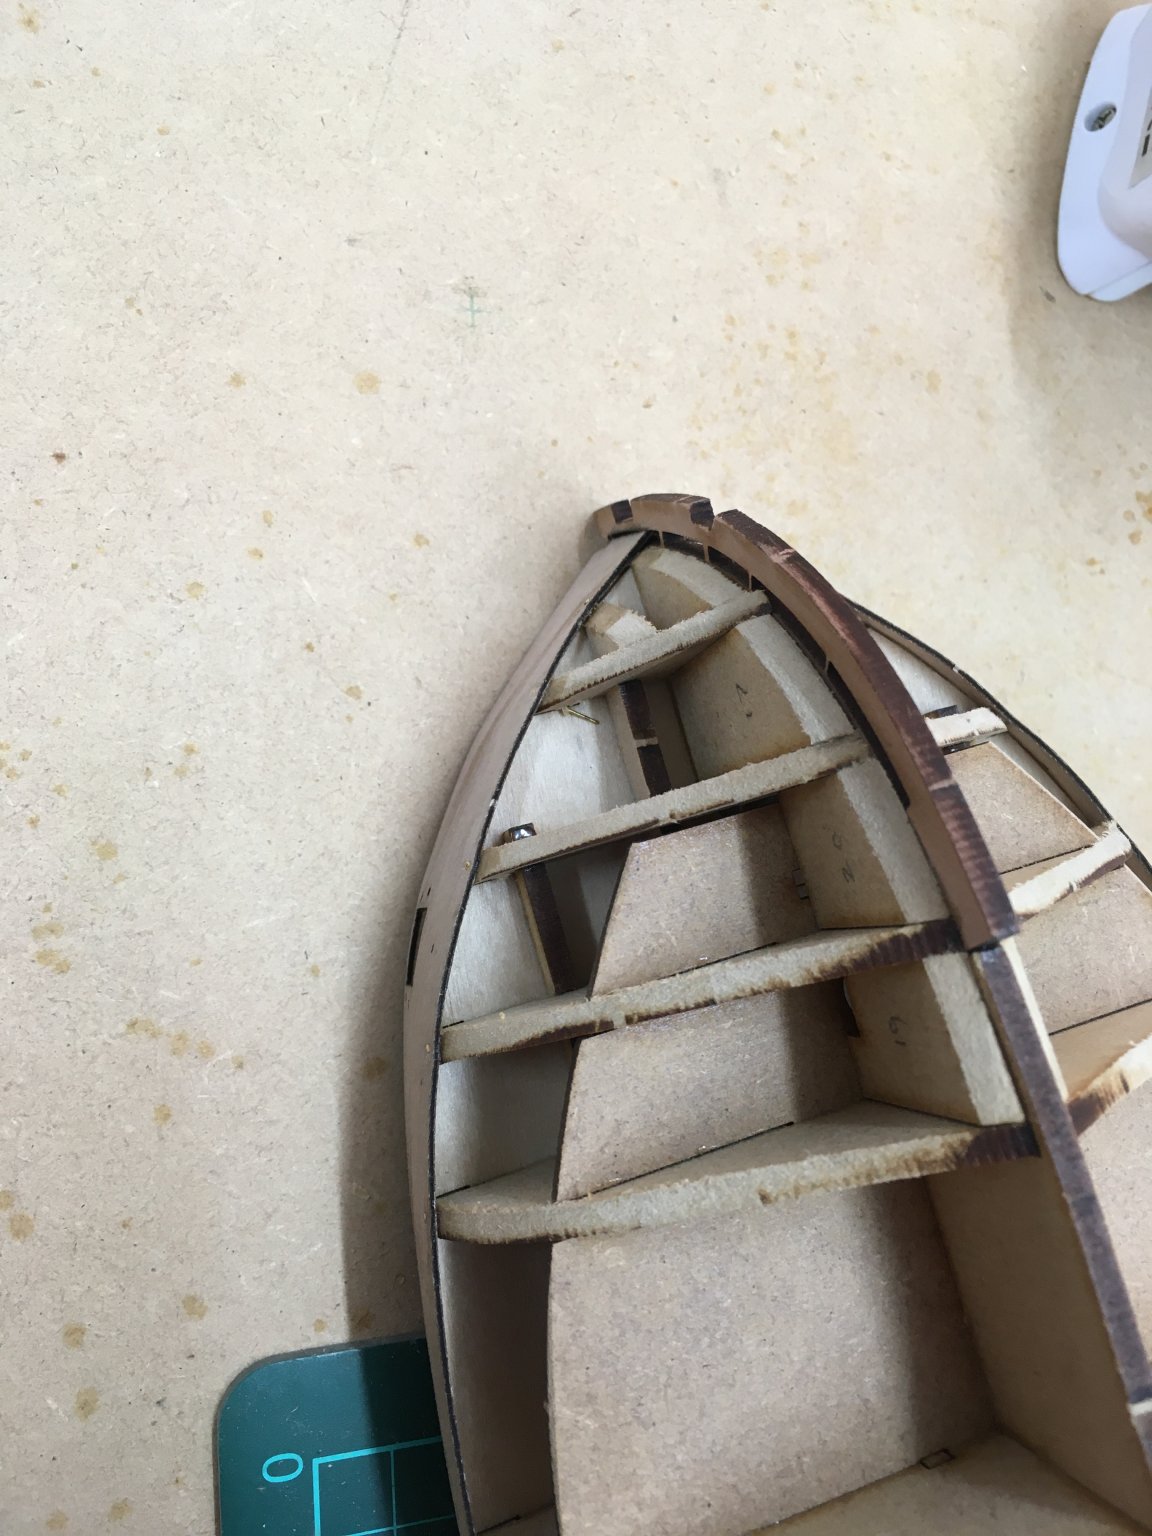
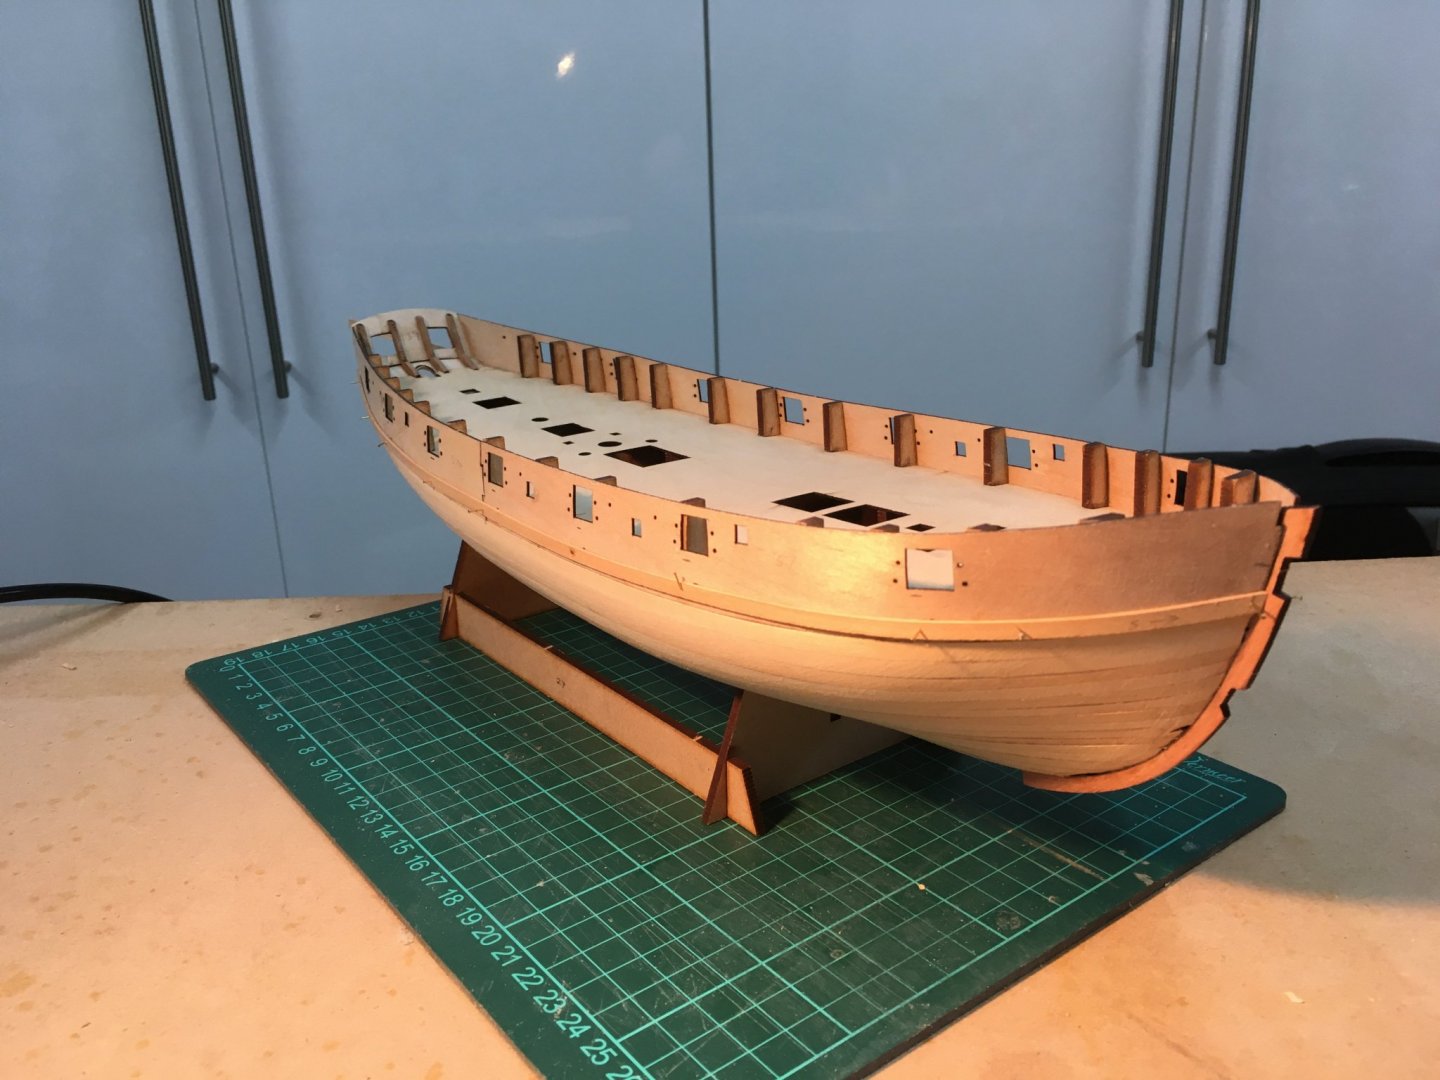
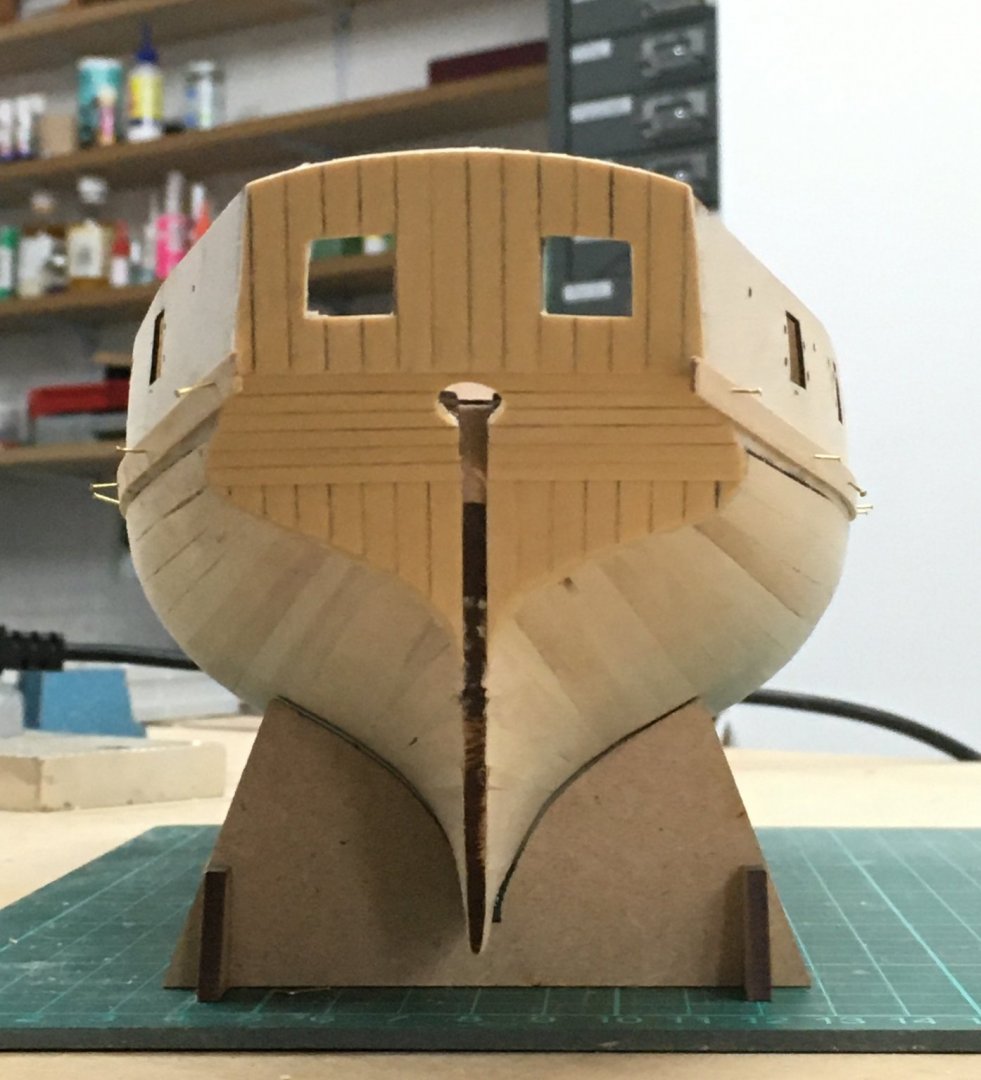
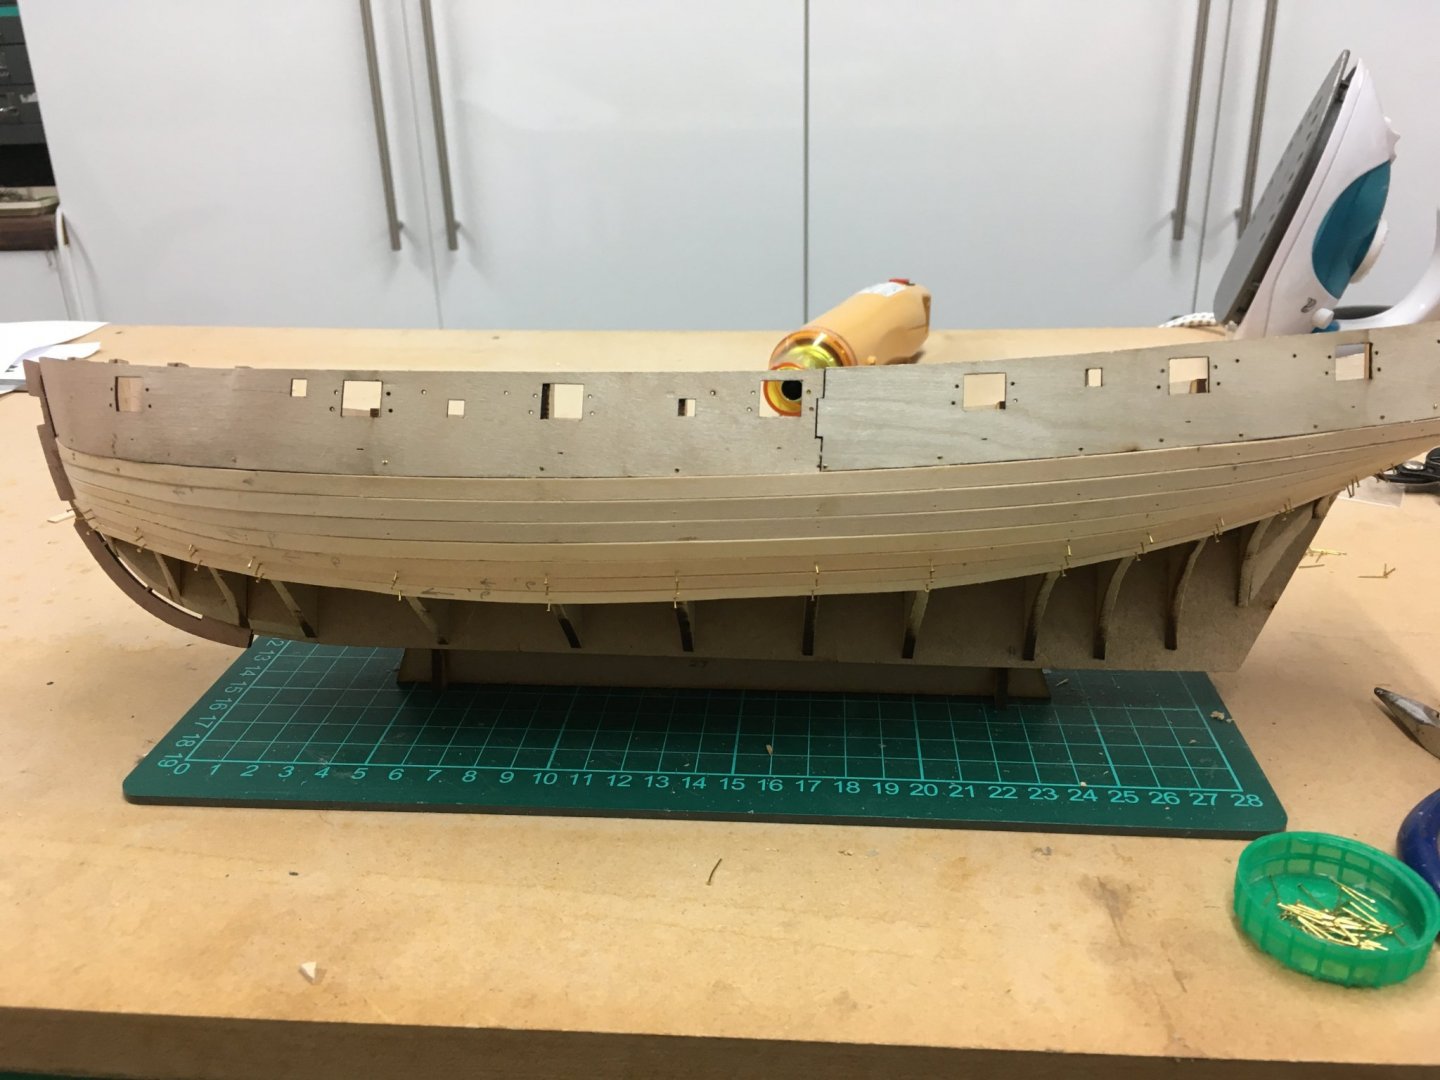
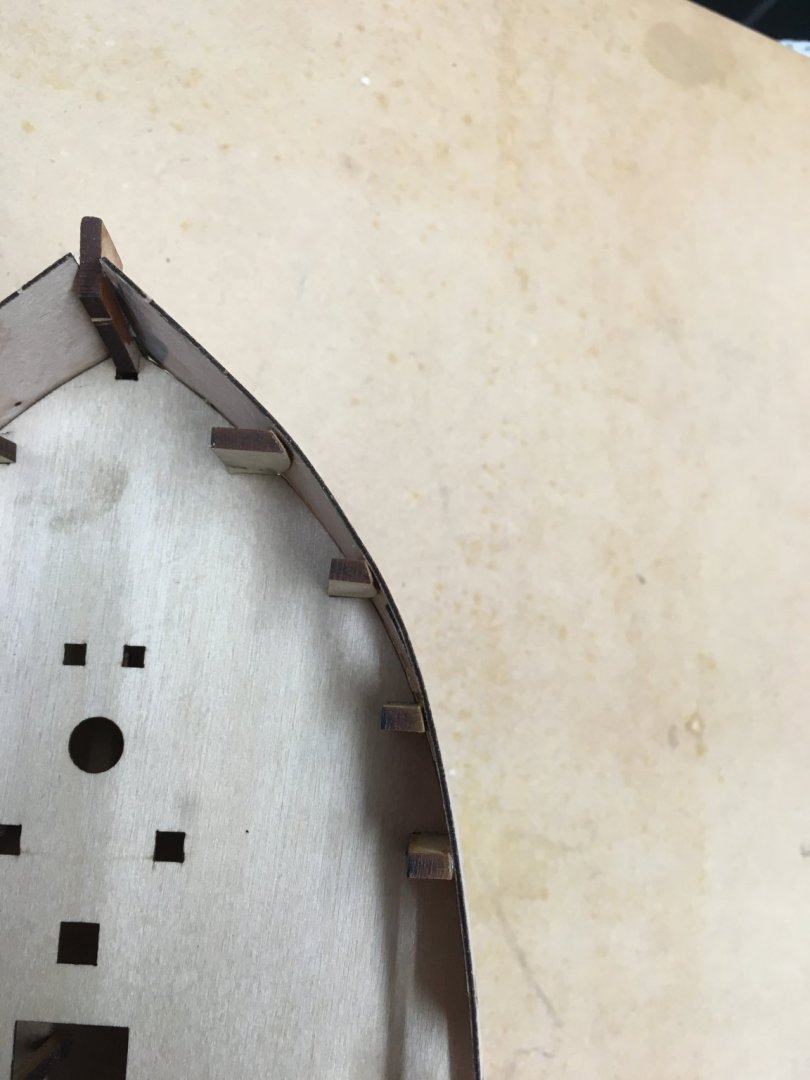
I struggled with the gunport patterns. I suspect it was me, as the instructions are quite clear and Vane managed to fit them with little difficulty as described in his log. Bending them lengthways was no problem - they're only 0.8mm thick and soaking them in warm water as recommended works fine. I clamped them wet to the frames and used a hot air gun to set the curve. My difficulty came because I also had to bend the strips edgewise. I should stress that I'm not talking about edge bending as recommended by Chuck in his planking videos - this is unnecessary for the Speedy gunport patterns as they are already curved to follow the sheer. Rather, I'm referring to the bend needed across the width of the strip in order to follow the tumblehome. This is particularly pronounced near the bow. I followed Chris's recommendation in the instructions to clamp the tops of the patterns to the tops of the frames and to pin the patterns at the bottom to hold them against the frames. To hold them tight against the frames I found I had to drive the pins right in - the heads are really small so I should be able to plank over them without causing bumps. Either that or I'll file them flat. This shows the port patterns clamped and glued in place (I must buy more clamps!). The real difficulty came because bending these thin sheets in two dimensions caused them to buckle. The next pictures show the top and bottom views of the front starboard pattern: I was reluctant to resort to sanding and filling on such a scale, so I resorted to my trusty travel iron, wetting the offending areas and trying to flatten them on maximum heat. The result was acceptable, I think. Not perfect, but should be sortable during planking. I'm probably making more of this than it deserves. I suspect that's because the kit so far has fitted together so neatly and easily that I'd forgotten that model ships inevitably require a degree of skill - they're not made of Lego bricks that snap together perfectly. I'll be interested to see what other Speedy builders make of this part of the construction. Roll on planking! Derek


- 725 replies
-
- 14
-
-
- vanguard models
- speedy
- (and 1 more)