HOLIDAY DONATION DRIVE - SUPPORT MSW - DO YOUR PART TO KEEP THIS GREAT FORUM GOING!
×


JohnB40
-
Posts
196 -
Joined
-
Last visited
Content Type
Profiles
Forums
Gallery
Events
Everything posted by JohnB40
-
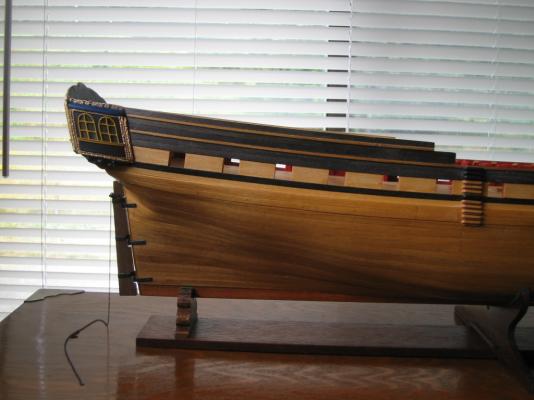
 Greetings to all, Before any further work on the hull I want to drill the hole for the bowsprit to pass through the forecastle/beak head deck. I should have thought about it and addressed this like Mike did at the bulkhead assembly stage. Once again it seems that every different plan or ship model I look at has a different location shown. Below is a rough side elevation of the three possibilities I have seen... Corel's plans appear to place it as in #1 Chapman's plans seem to point to both #2 and # 3,I find it hard to tell (maybe in the middle?) Any opinions of where the bowsprit should be in relation to the vertical front of the forecastle and the bow deck on the Unicorn or any other beak head frigate would be appreciated. Thanks again for the schedules you emailed Ian. I'm glad the unicorn now has its defense mechanism back in place. John
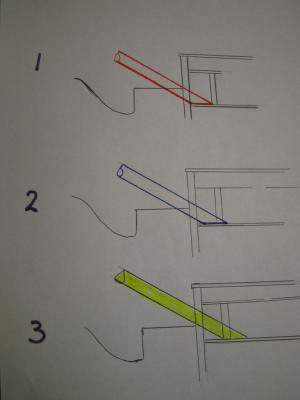
-
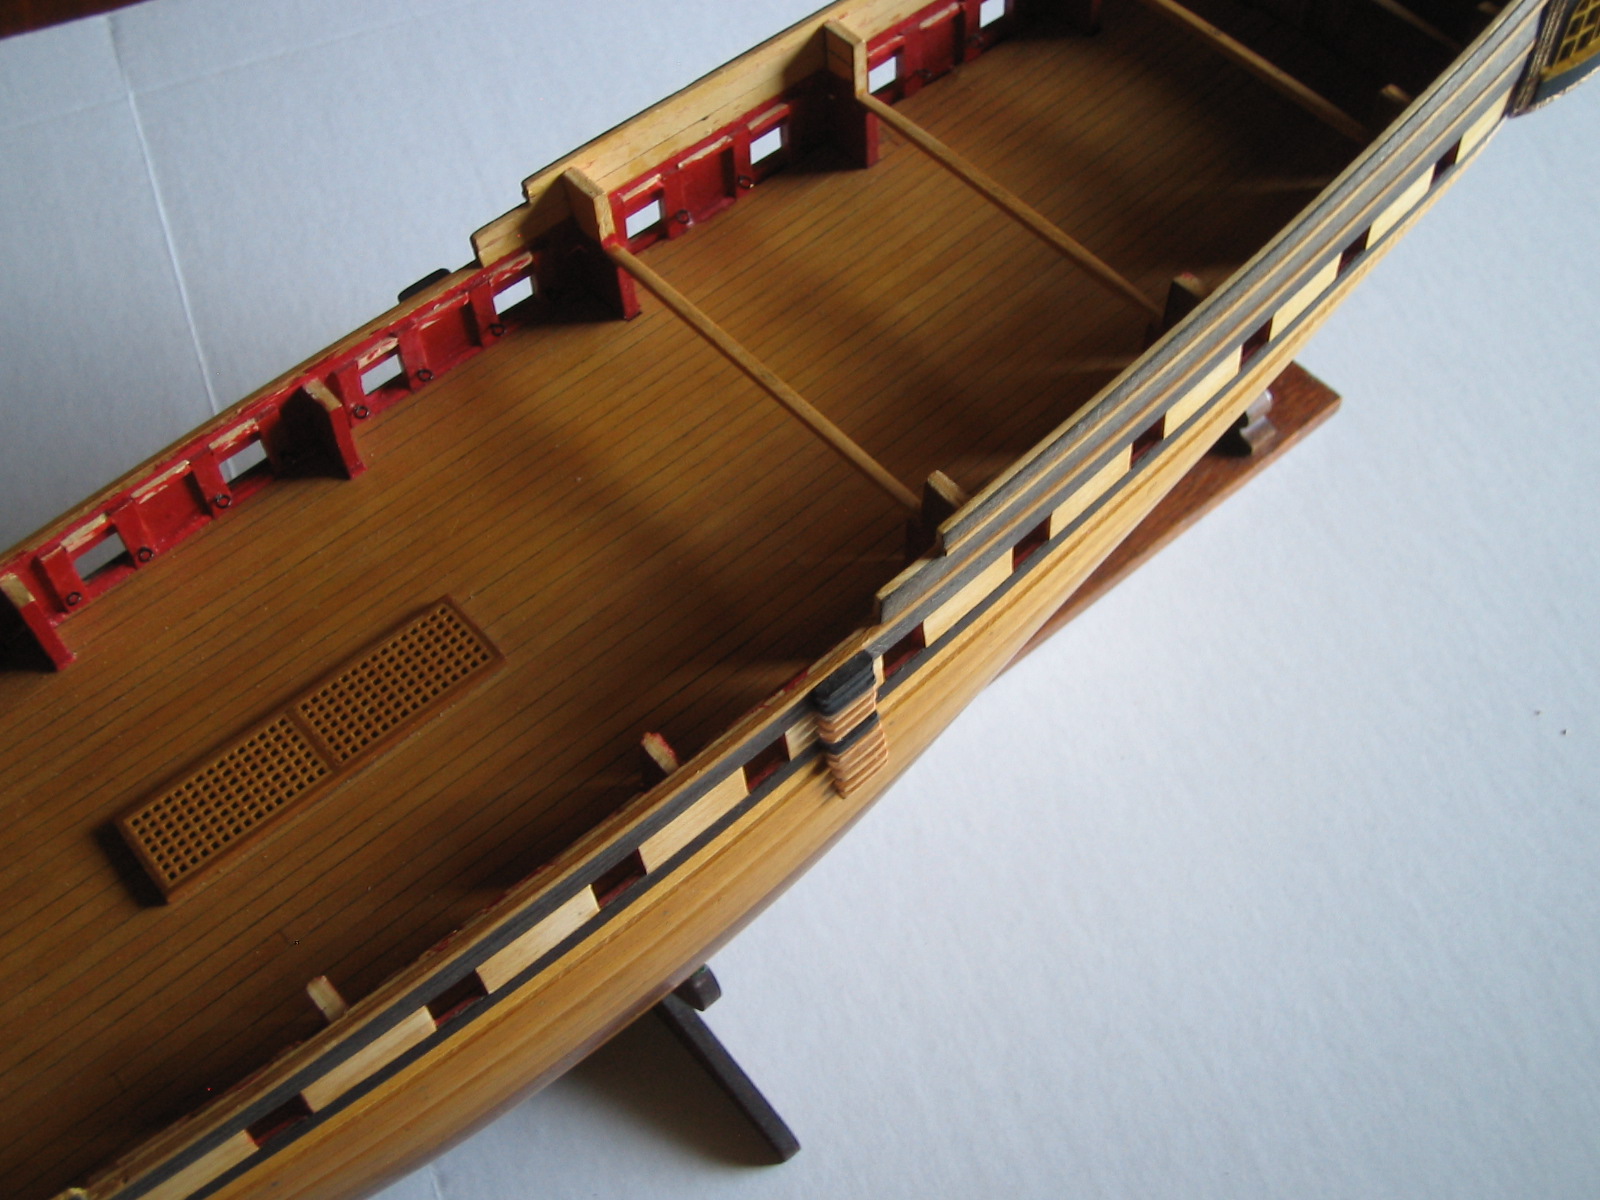
Hi Ian & Mike, Thank you for your feedback and information,which cleared a path to see the way forward. Mike,I'm afraid it is passed the point for alternating the position of the transom/galleries on the hull,they are epoxied in place. I would end up having to re plank the whole stern and rear upper works of the hull. The answer lies in raising the quarter deck,so that it is 30mm between the decks...This will give me a rise of 5mm from its present height at the waist. I will still have to sweep the aft end of the deck up,but this will raise it to where the cabin ceiling would be without looking odd. This will also shorten the height of the solid bulwarks,so all the quarter deck gun portholes will end up being close to semi circles. I will cap this with a uprights and railings extending all the way aft to the transom. This will also give the appearance of lowering the windows in relation to the top of hull. I will use Dan Vidas' amazing construction of the gangways on his Vulture as an example for finishing the quarter deck step up and gangways. I also would like to cut bulkhead #16 down in height so the quarter deck runs straight to bulkhead #17,eliminating the flag lockers. I will have to see if this is possible as I want to place the tiller and tackle in view on the quarter deck. Thanks for talking me off the ledge.....This model might not end up exactly historically accurate but it will be a lot better than Corel's vision of it. John
-
Hi Ian and Mike, I have been sat at my work table for quite a while trying different crude mock-ups on the alteration to the quarter deck on my Unicorn....Now my brain is pudding. The only way that looks pleasing to the eye by having the correct height in relation to the windows/great cabin ceiling is to cut the quarter deck as suggested,(by the main mast as in Ian's waist mod) and raise the height of it off the gun deck,sweeping even higher at the stern. I have a couple of questions I hope you both can help me with. I know you have discussed the heights of the fore and quarter decks in one post,but I can't seem to find it. I was reading your posts Ian,and you made a reference to not being able to construct the step up from the gangways to the quarter deck (and if there is one,the foredeck)? .... What height of such a step-up do you think would be? How high would you estimate the quarter deck should be off the gun deck to be in the models scale of 1:75? I am measuring this at just under 6' in Corel's plans,is this about right? I am working on the assumption that the above scale is 4mm to 1ft,is this correct? How high would you think the foredeck would be off the gun deck? I saw on one of latest posts on Mike's log the picture of the Lowestoft...I think this is really close to how I think the Unicorn would look,especially the upper works with the open bulwarks and quarter deck gun port framing. Maybe the Lyme is closer,but with old my eyes I can't make out much,if any detail in the plans Mike supplied. If there were solid bulwarks,I think they would still be topped with a railing I also believe the Unicorn would have had the tiller on the quarter deck as shown on the second side elevation drawing in Mikes post # 149. John
-
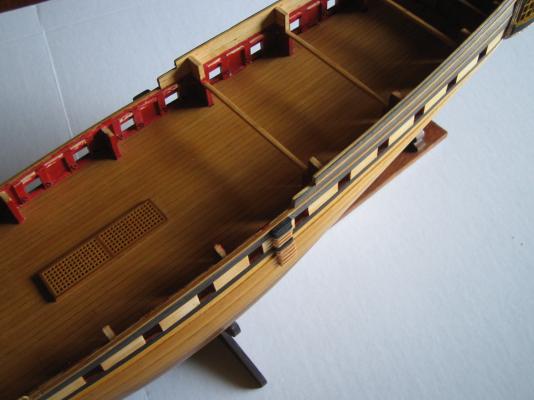
Mike, You Idea for raising the quarterdeck using the walnut uprights after the first planking will work very well. You will have to be careful once you remove the plywood uprights as the single planked bulwarks will not have any additional support until the outer hull and inner bulwark planks are in place and as such will be susceptible to damage from handling. In fact I would think about waiting to cut out off the ply uprights until after you have second planked the area above the gunports,which will also give you a reference point of where the planks should be fitted from As to painting,I have always painted the bulwarks red in all my models,especially the lower decks,as I think it makes them stand out as opposed to being a nondescript background. The gun carriages are another matter which I have been mulling over for about a year now and have still yet to make a decision on,I am leaning towards leaving the in the natural walnut. John
-
Hi Mike, I think the carefully thought out alterations you have set out in your latest posts will greatly enhance your build,if I was not so far along with my build I gladly copy your ideas exactly. Ian is spot on regarding your eyes being drawn to the companion way and false deck below. After seeing your deck plan,I am thinking I might construct a prefab companion way similar to Ian's and drop it in place,the stairs/ladder leading down into darkness. Whether you chose to build as the Unicorn or Lyme is a personal choice....One I would procrastinate about indefinitely. I also wish I had the foresight to drill the hole in the beak for the bowsprit at the bulkhead construction phase,the correct alignment is so much easier at that stage. I look forward to your plans for waist area....... My old eyes have a hard job reading the Lyme plans. John
-
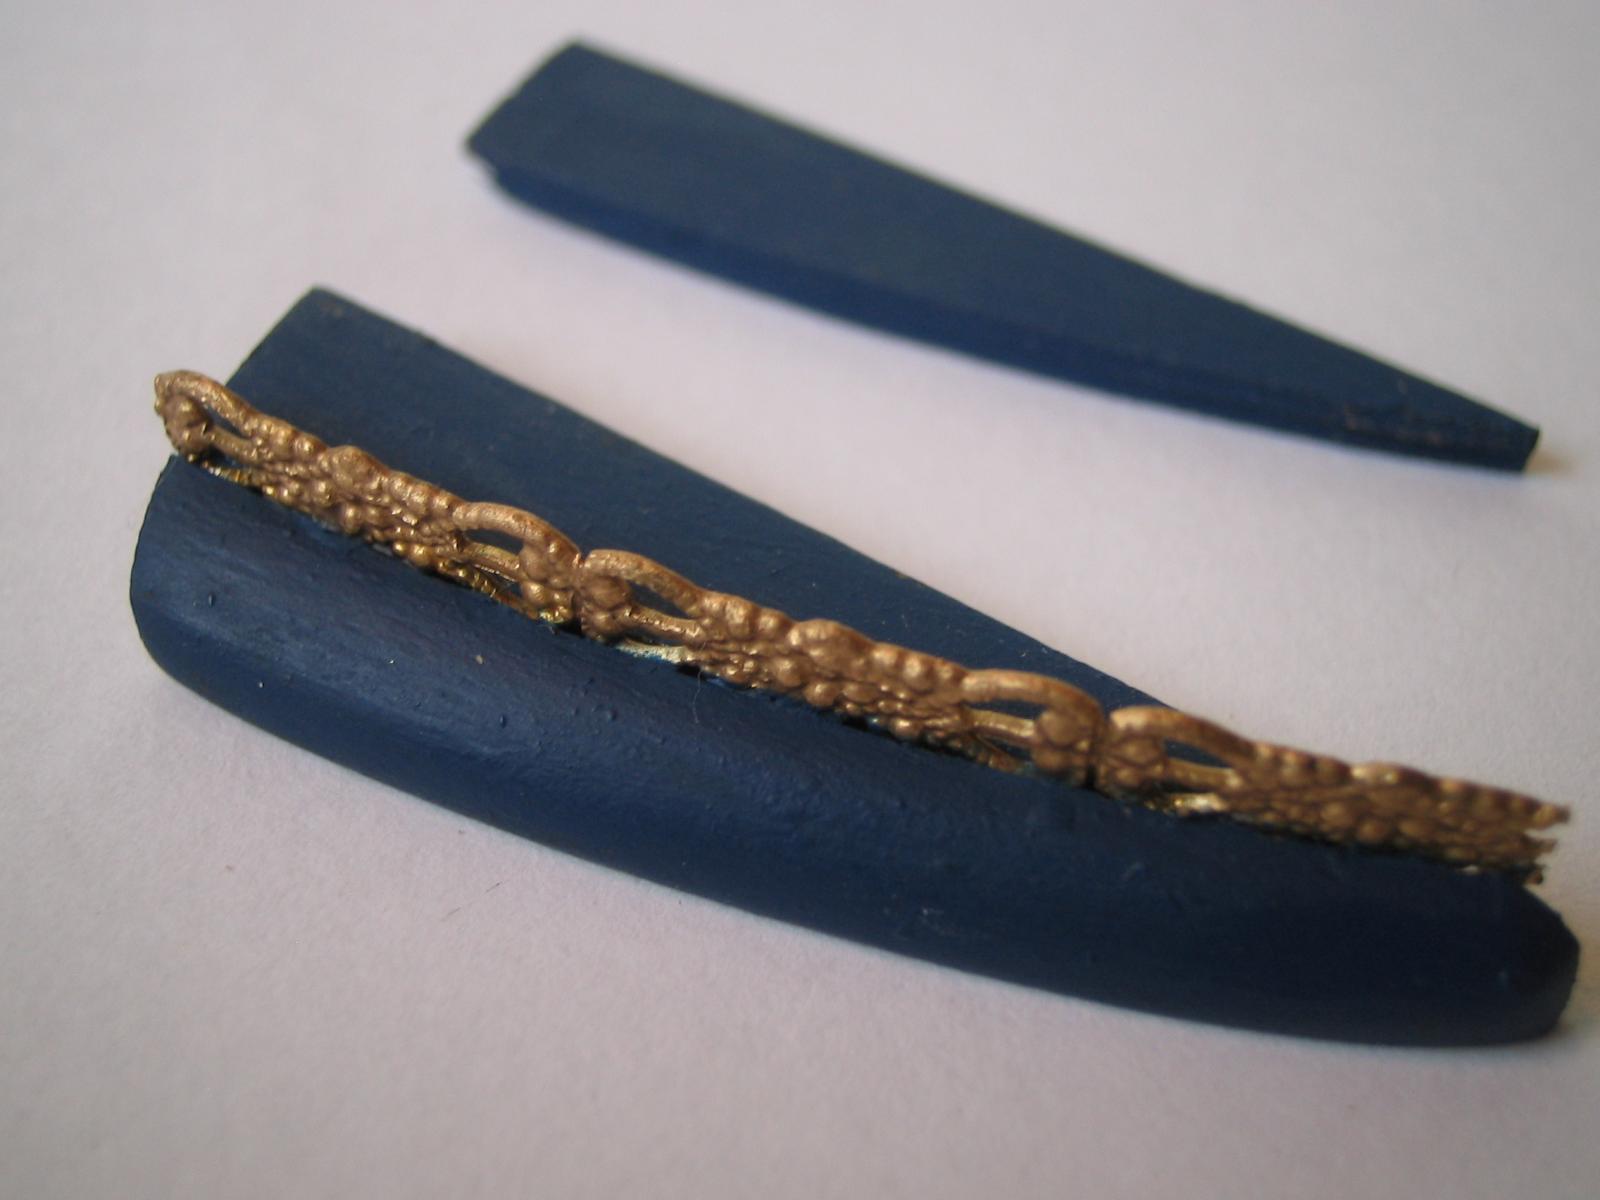
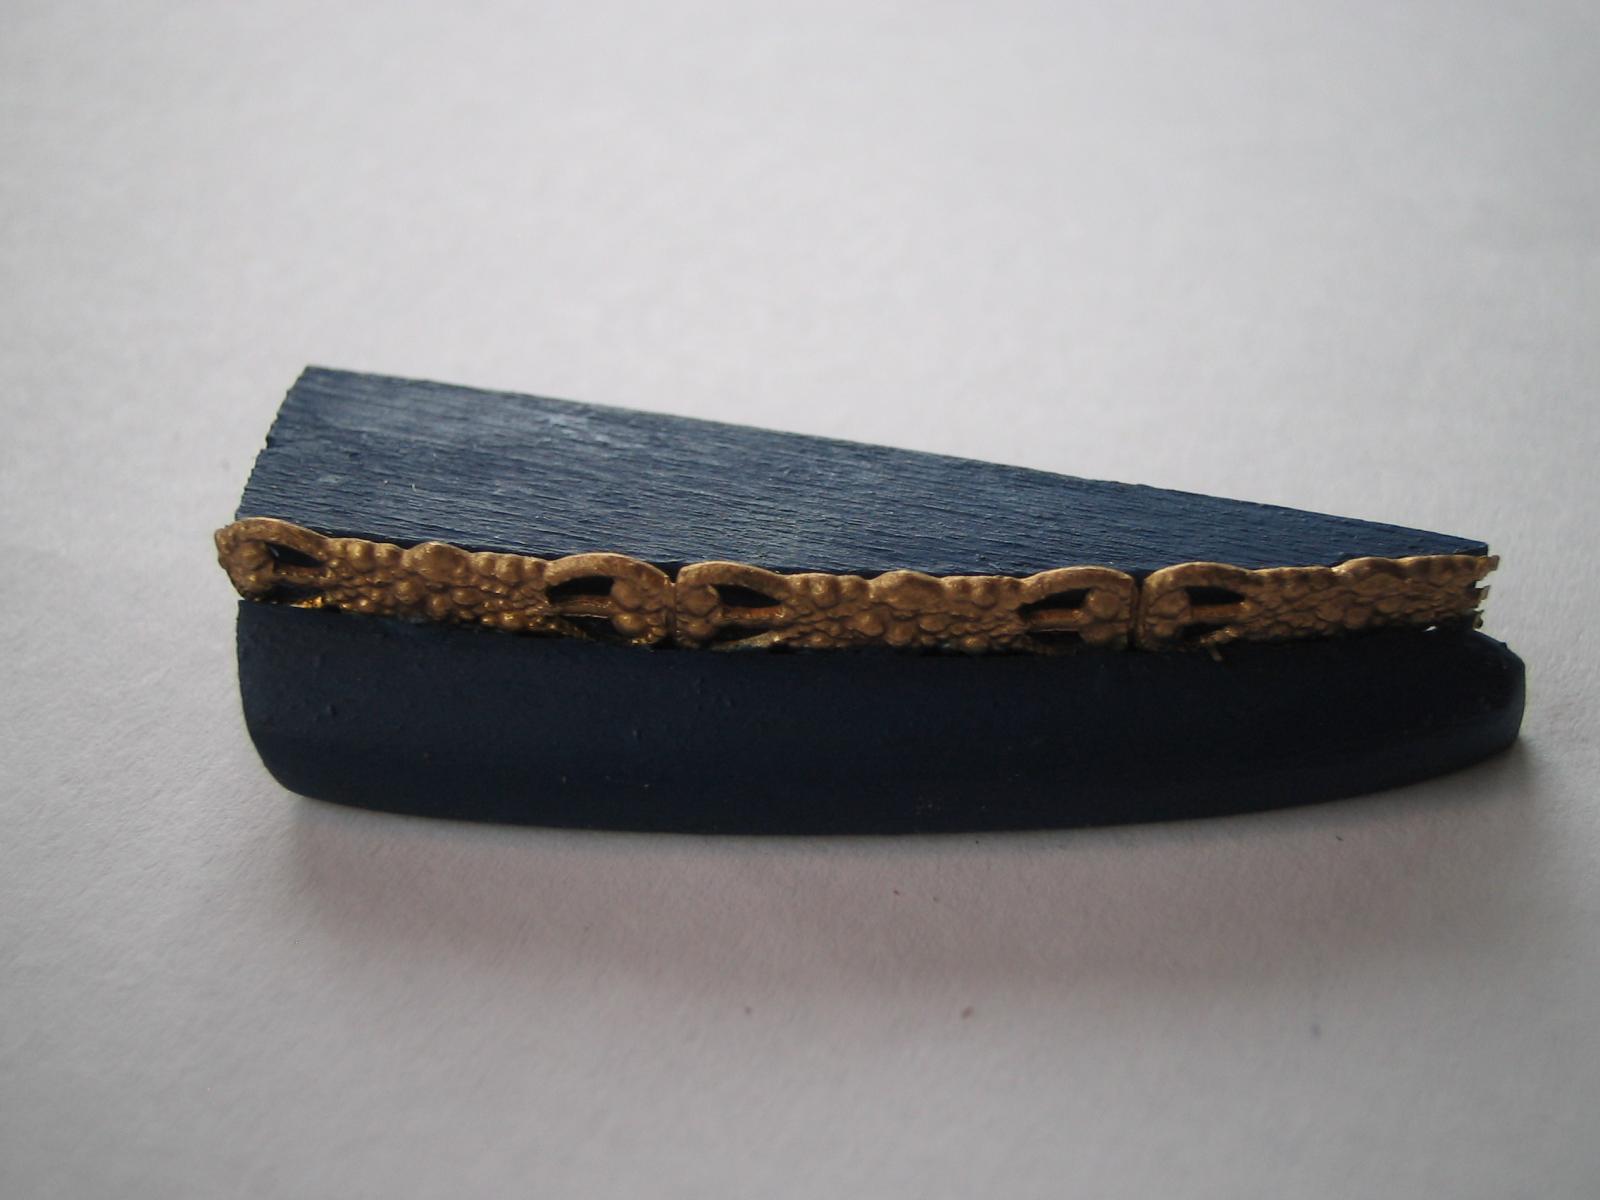
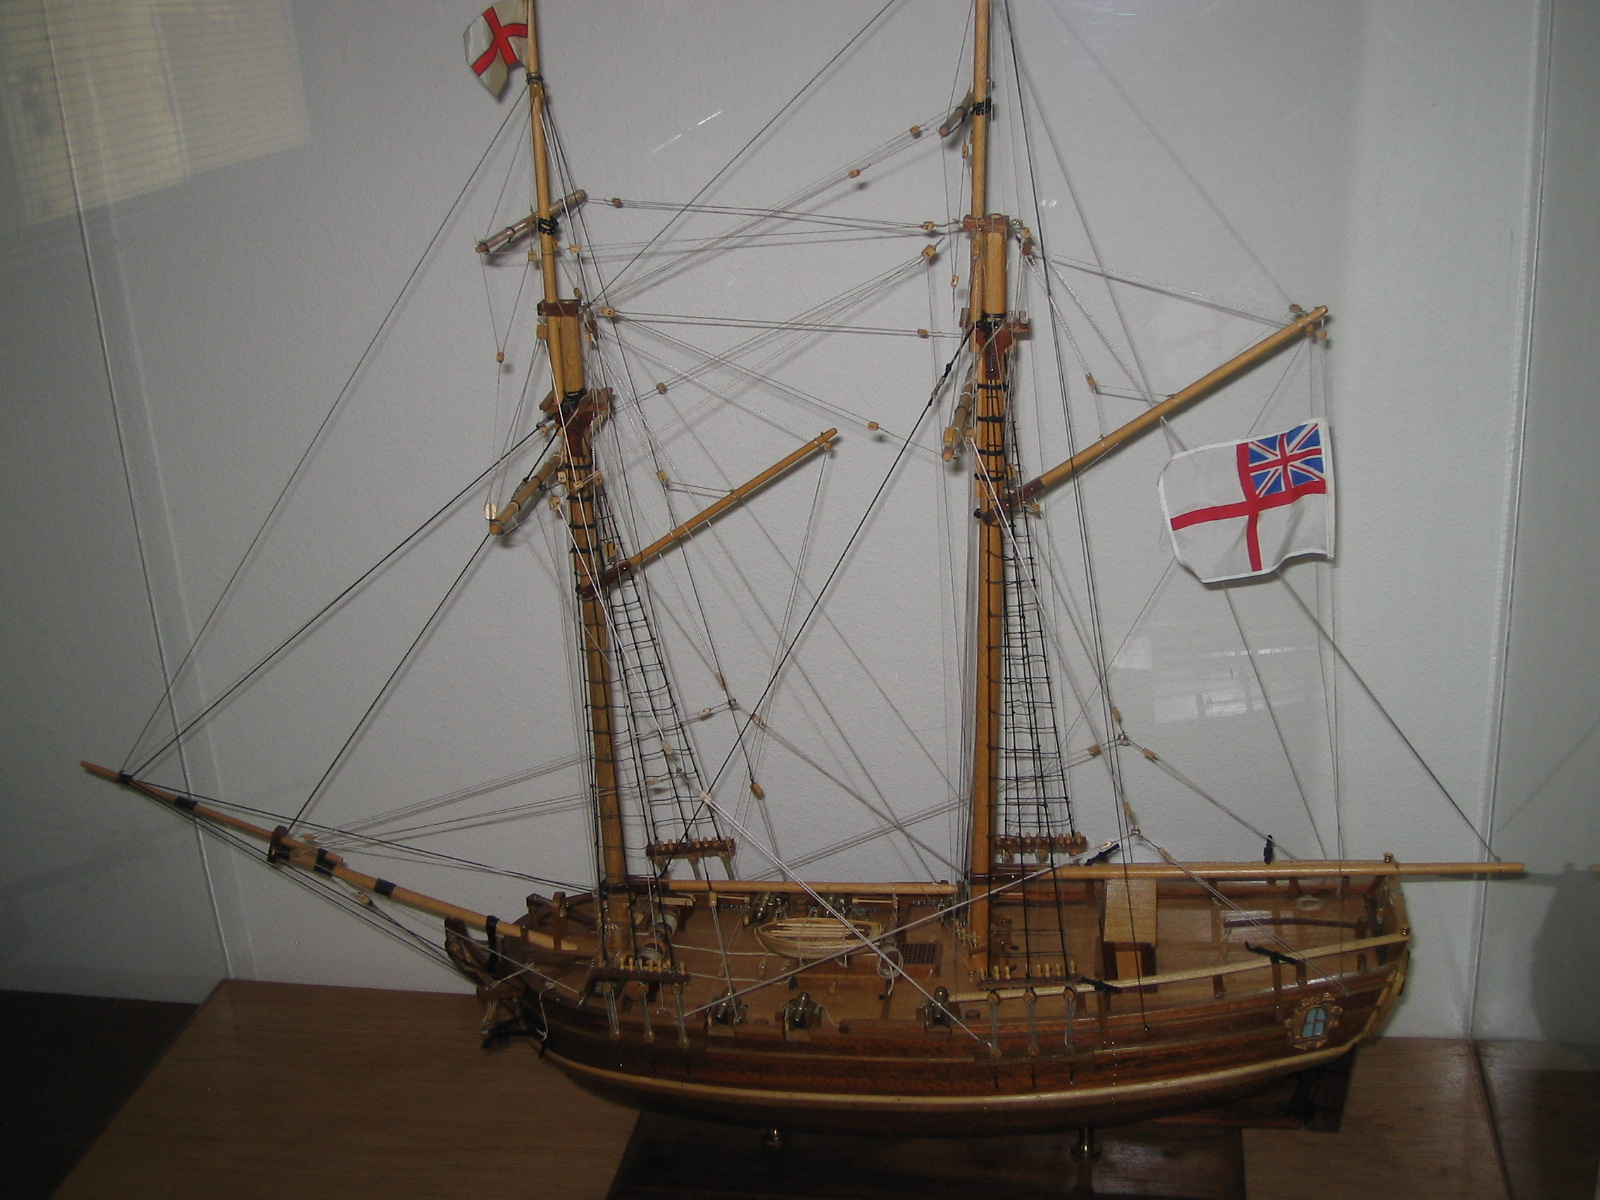
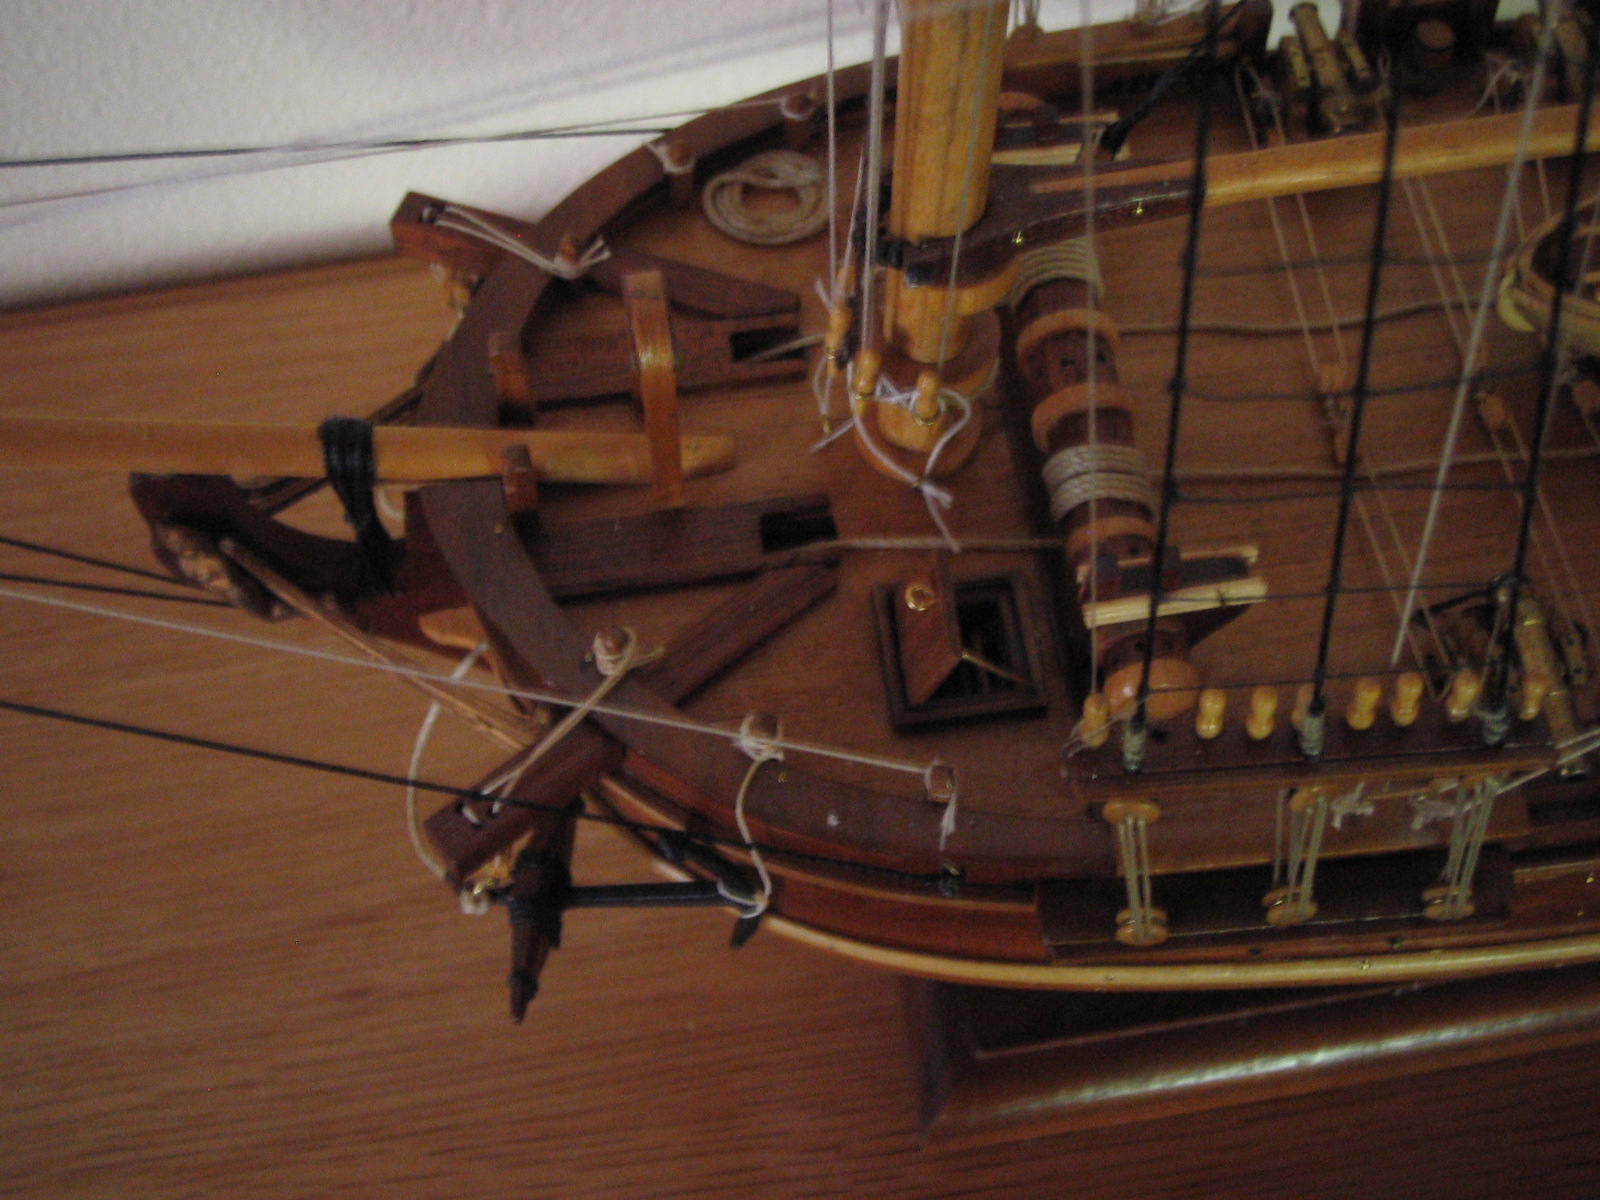
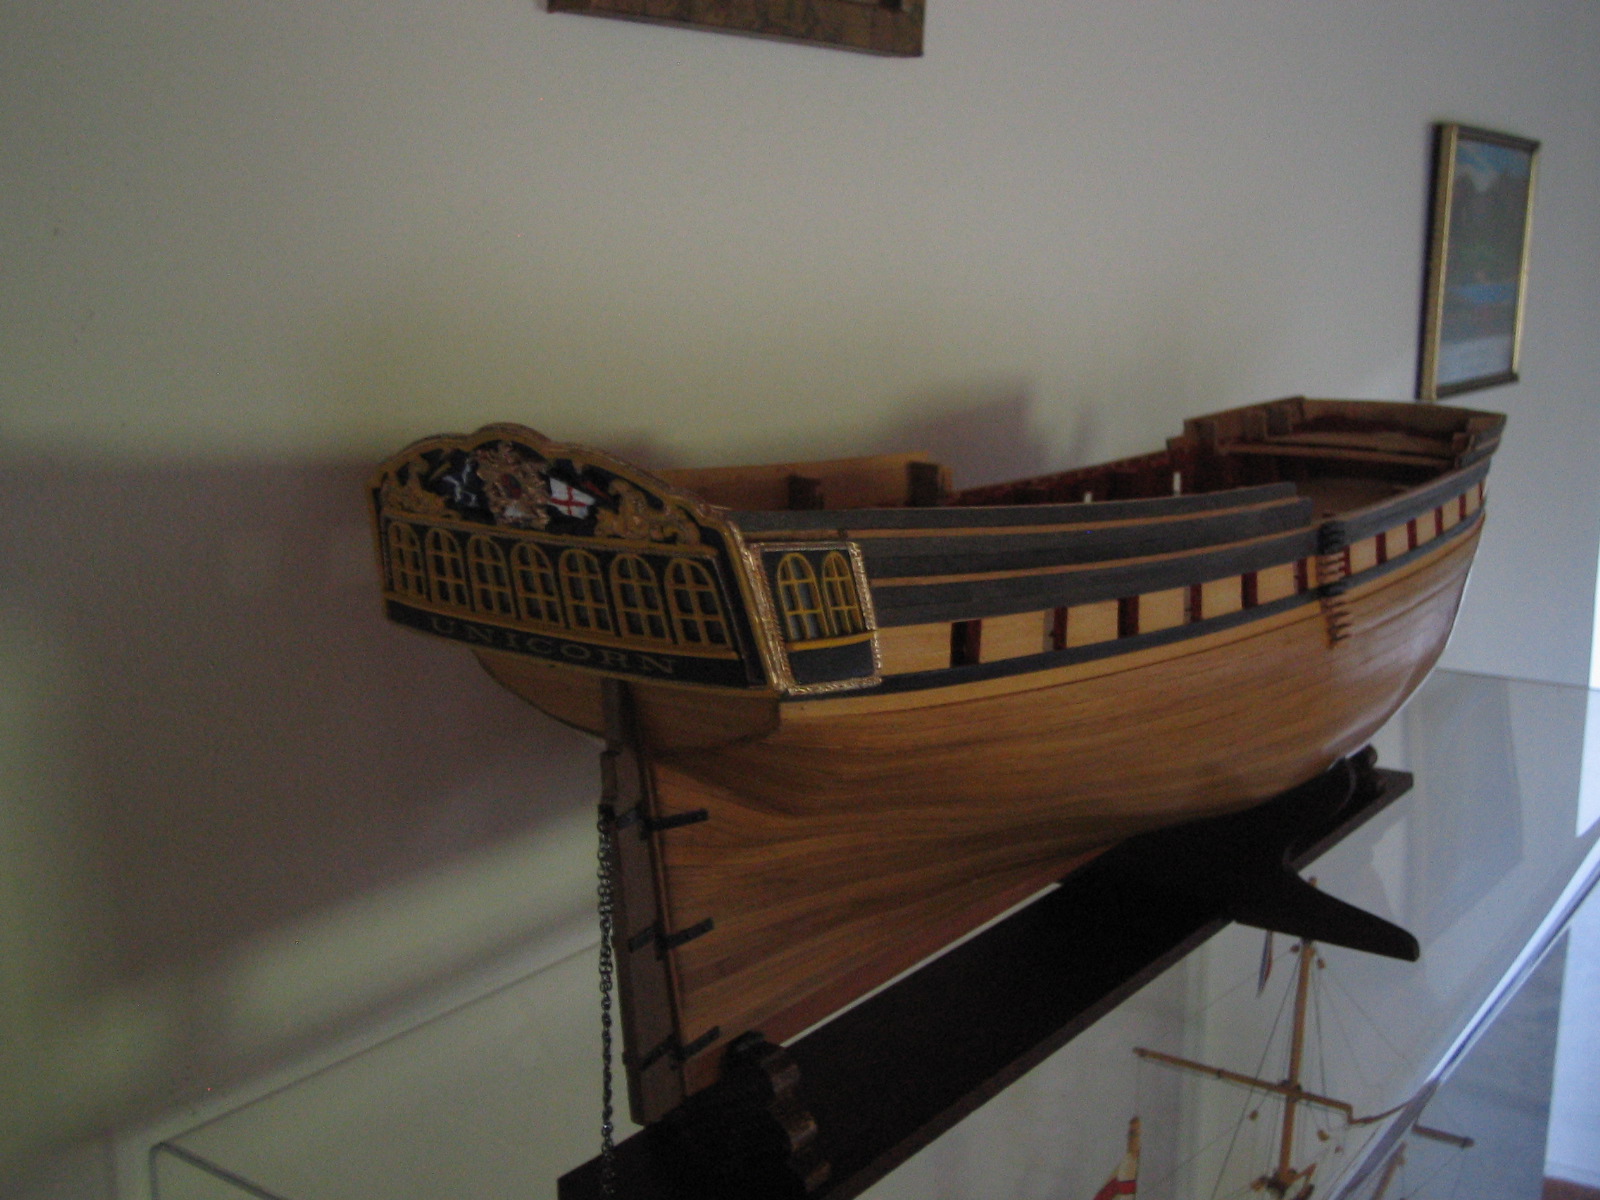
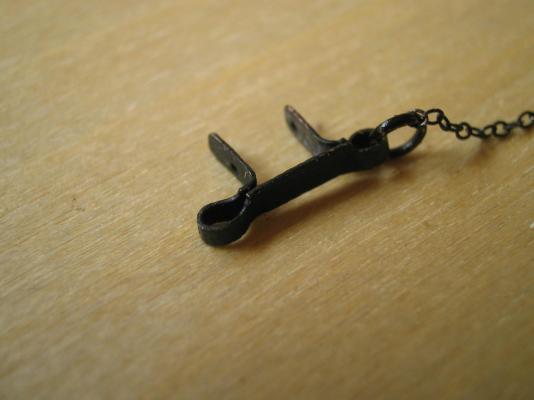
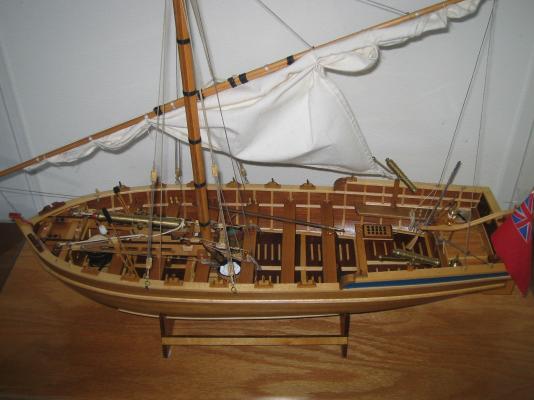
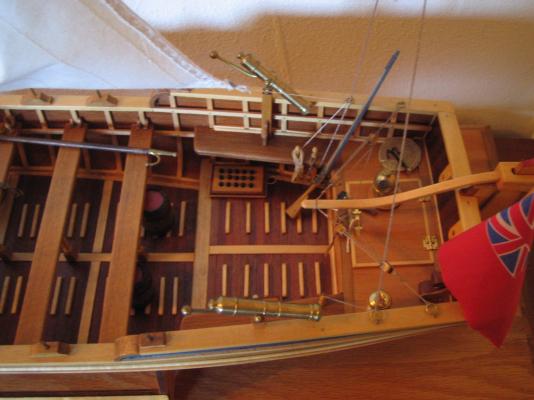
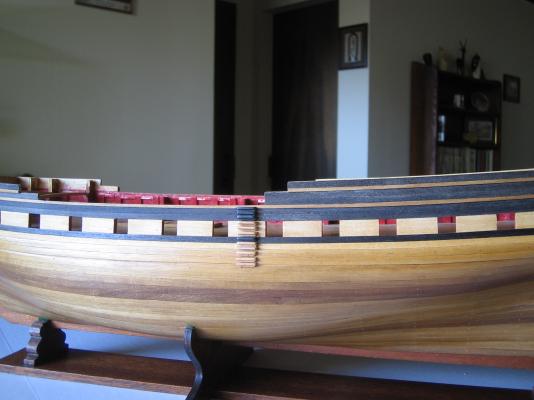
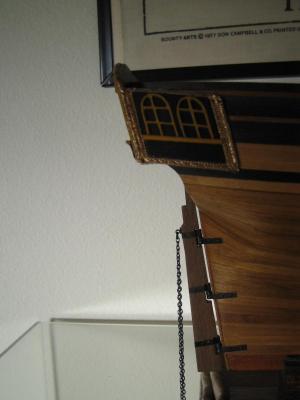
Greetings to all, Back working on the Unicorn and I have just about finished the stern. I ended up rejecting the strange white metal blobs topped with melted crowns that came with the kit as the gallery roofs.There was no way I could see how they could be made to work....The opposite sides were even different shapes and sizes. I made new ones as best I could........ The bottom of the galleries were then fitted,completing the gallery/transom area of the stern. ... Also thanks to viewing Ian's latest fine metal working skills I made a spectacle plate for the rudder. I don't have Ian's patience,so luckily I found some 1mm link chain on ebay. As I said in a previous post I intend to use a raised false deck from the lockers to just about where #15 bulkhead is,to a height of where the cabin ceiling would be in relation to the the windows (about 4mm). Ian discussed this earlier and thought it would interfere with the deck furniture,I have thought about it and think I can make it work . I will place the skylight on the false deck and move the ships wheel rearward to just in front of the false deck,where the pump is in the plans. The pump and shot holder can be placed on another part of the deck. There would still be room to work the rear quarter deck guns and their tackle. I will have to do a mock-up with the deck temporarily in place to see how it looks. I could even go a little higher with the deck to near the height of the bulwarks and incorporate a covered tiller........ Failing this I will have to raise the whole quarter deck which seems to open up another massive sized can of worms..........I want to send this ship down river to the Ordnance Dock. John

-
Hi Ian, The rudder and chains look really good....Thanks for the baton idea for hanging the chains. John
-
Hi Mike, I know how you feel regarding the kit,I too shelved it for a while for the same reason. However,I have rethought about it and decided I can construct a nice display model of a 18th century frigate,albeit with some inaccuracies. I am going to approach future construction with this in mind. As you saw in my build log I'm working on the transom/galleries. The windows are too high in relation to the deck,my way of rectifying will be to use a false deck a few mm higher than the main deck from the lockers forward to where I figure the great cabin would end and live with it. I paid too much for this kit to abandon it now......Have you priced it lately? I think with the new equipment you have recently purchased,your experience on the Badger and with scratch building alterations,your skill can make the kit into a very fine model. We all might of been happier with the kit if we hadn't seen Chapman's drawings. John
-
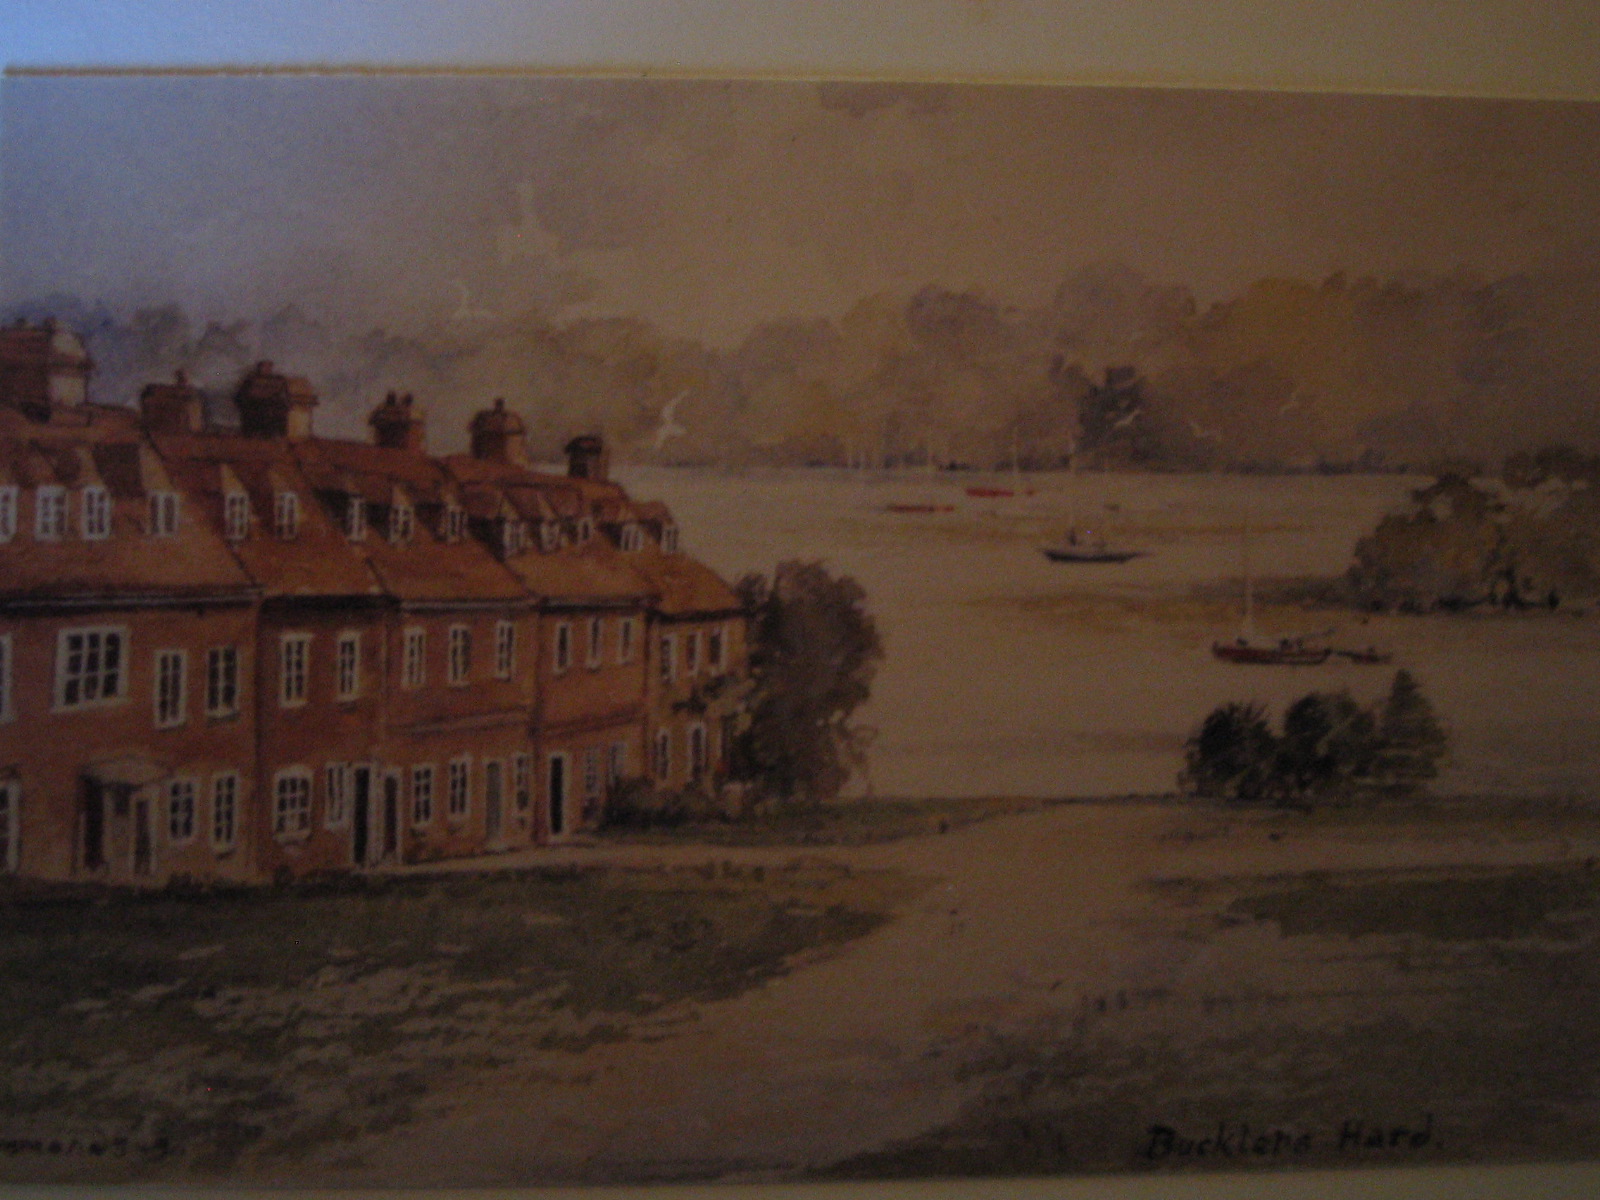
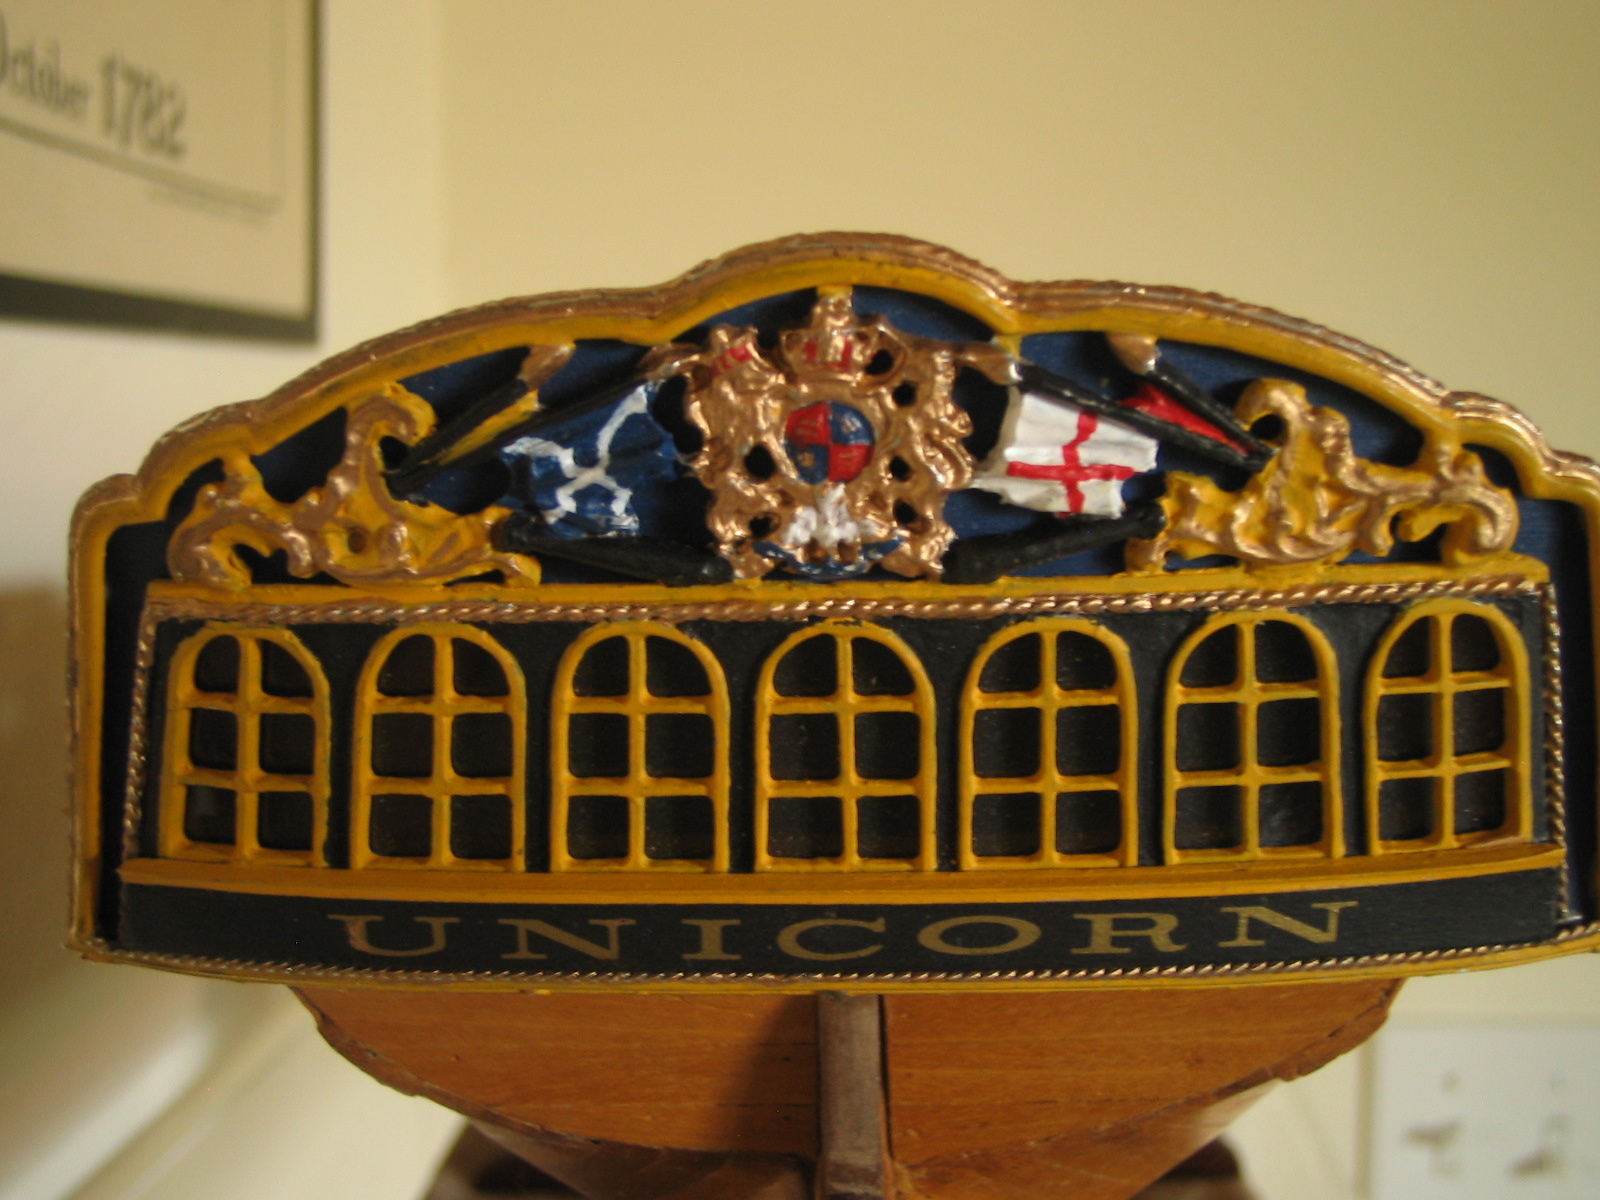
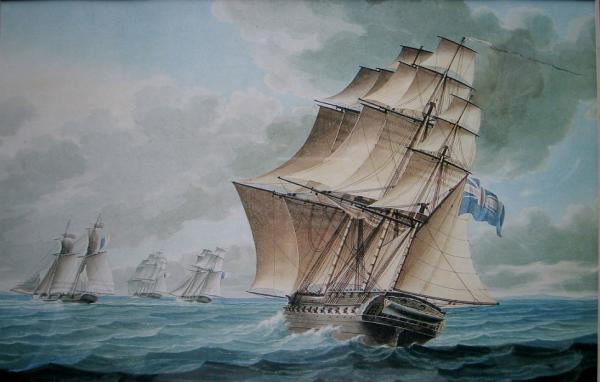
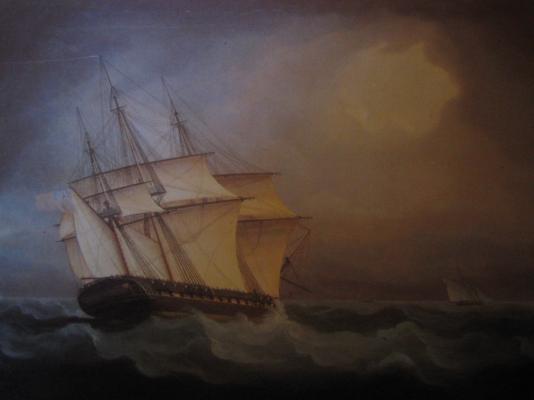
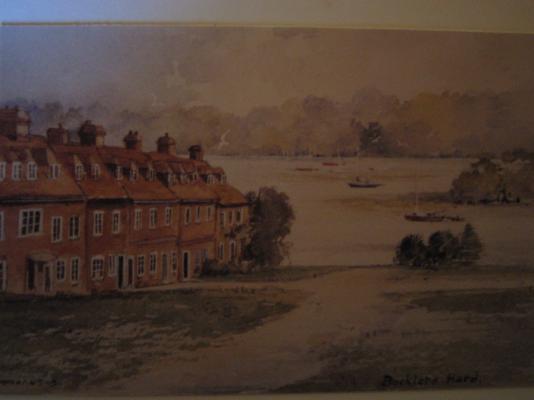
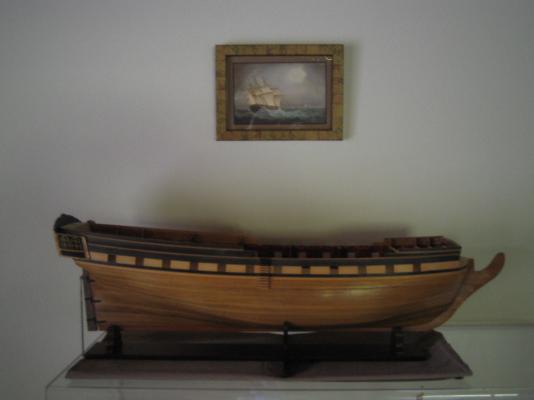
Hi Ian,, The picture you asked about is actually one of a few post cards I bought at Bucklers Hard,Hants,which I visited on one of my trips home to Poole in the early 90's. I framed them when I returned to the States. It is well worth a visit if you have never been there,it has a really nice small museum. HMS Agamemnon was built there. Titled "British Frigate In Pursuit Of French Cutter In The Napoleonic Wars" by Thomas Buttersworth 1868 - 1842 This is one Bucklers Hard Itself,the Shipwrights and families lived in the row houses which were in two rows facing each other across the open area where timber and materials were stored The ways were on the river bank by the 3 small trees. Adams the Master Shipwright lived in the last house by the river. As for the other models built,I have two left out of the five I have built. Two I gave to good friends (Golden Hind & Swift) and another (Le Hussard) to my neighbor,a doctor as thanks for saving my life a couple of years ago. The ones I have left are.. Halifax. 1:35 Scale by Robbe.. Armed Launch 1803 1:17 Scale by Panart My wife is very understanding regarding my decor......The .hanging picture is a framed tea towel (also from B.H. gift store) I don't know how to add these models to my profile. Regards John
-
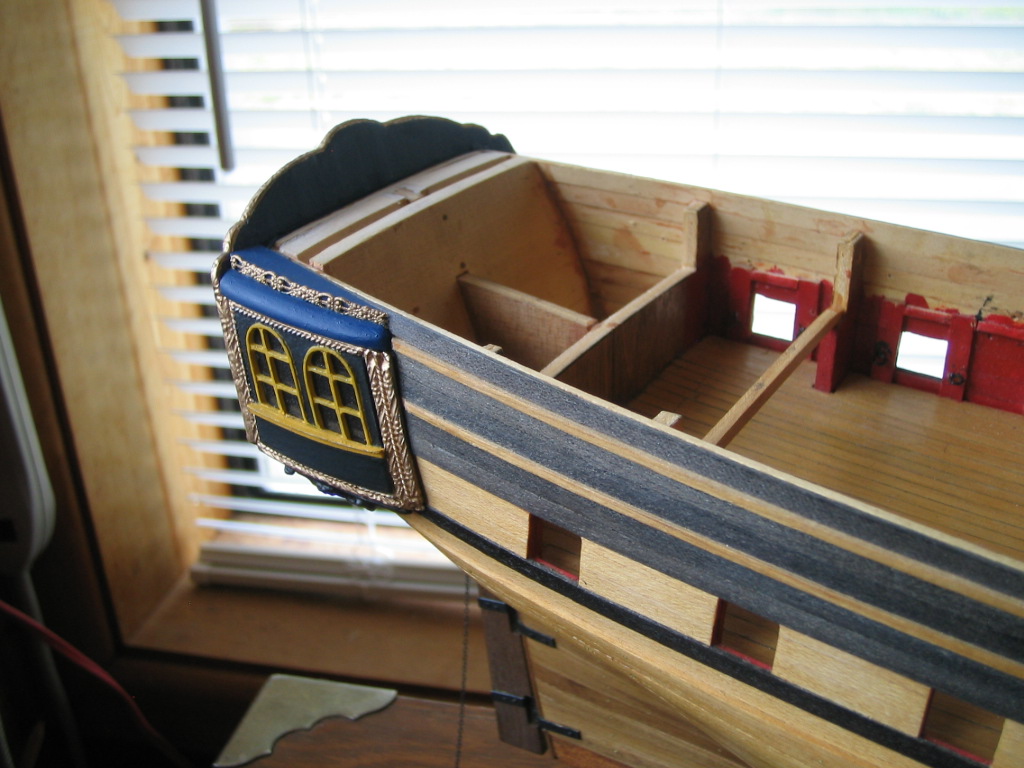
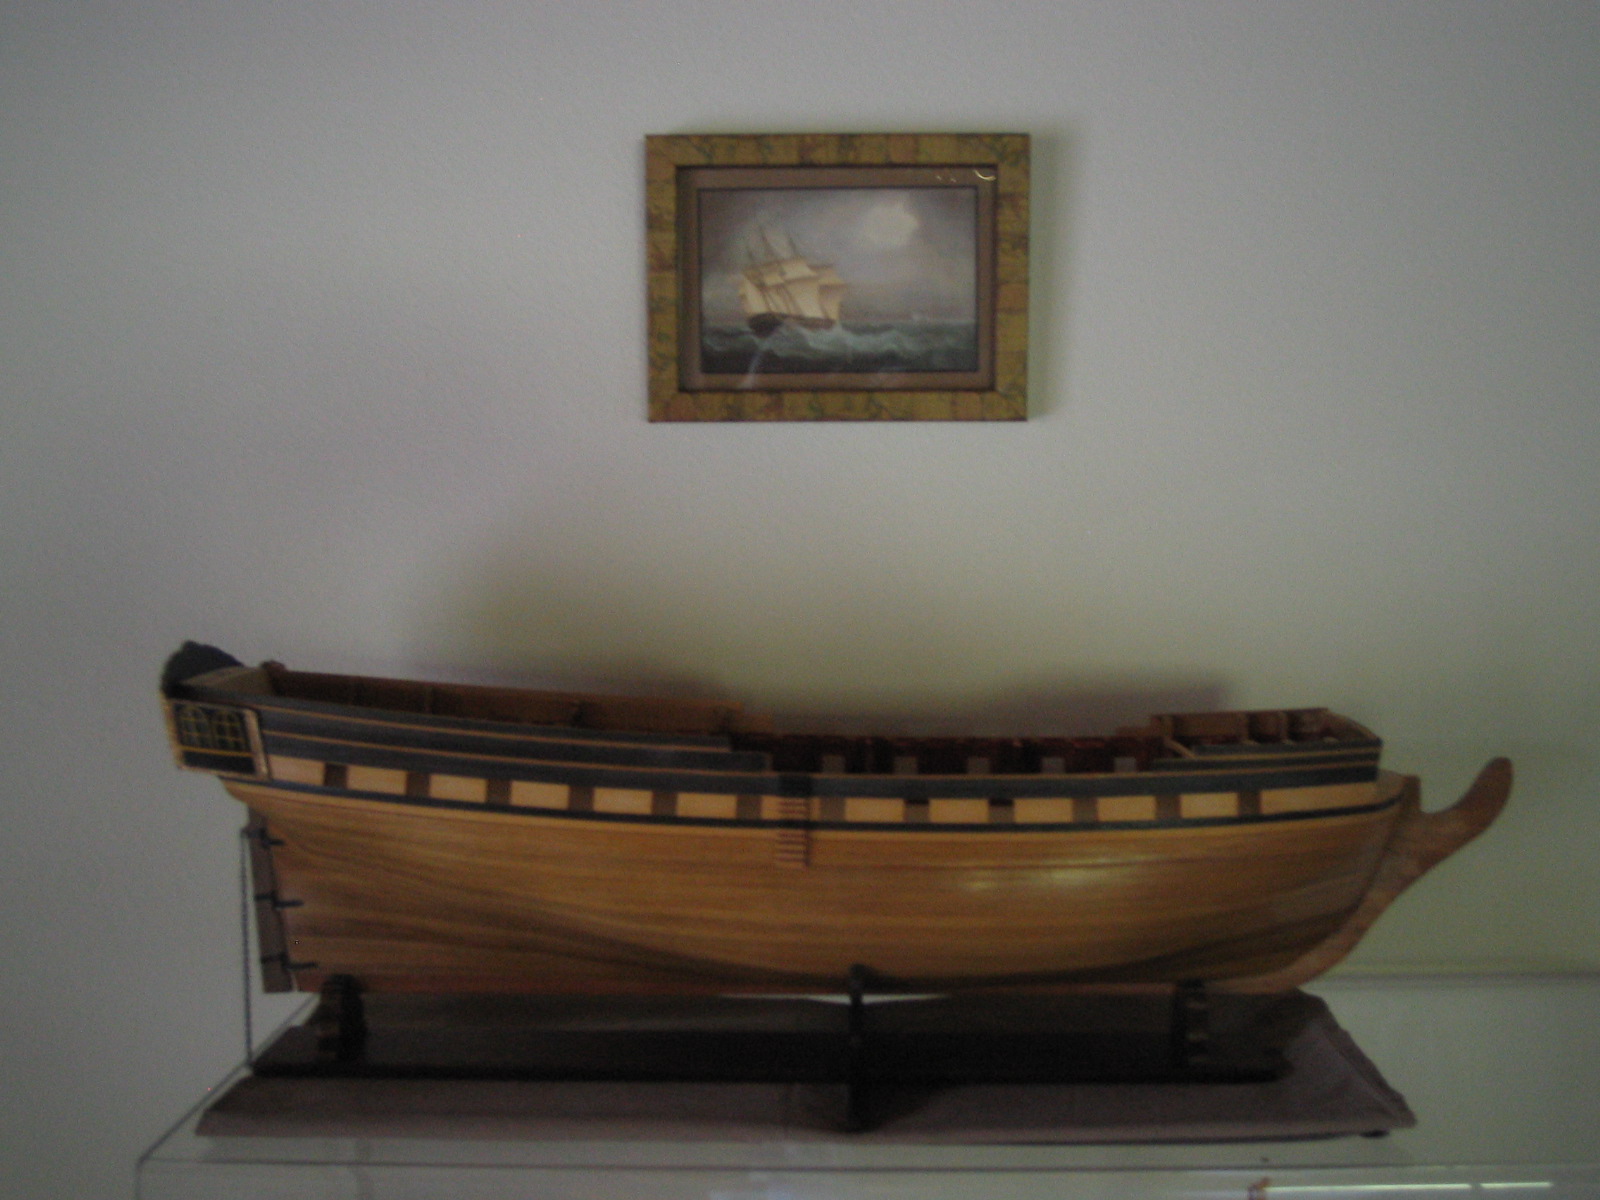
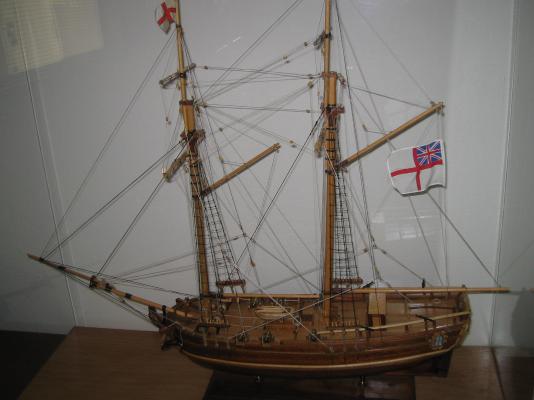
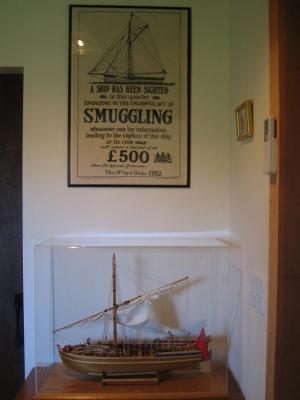
Greetings to all, I decided to start a build log for my current work on Corel's HMS Unicorn. I started this kit a long time ago,nearly completing the hull planking before taking a hiatus. After retiring and moving to a house with a small work area I started on the project again. This was also spurred on by finding this forum and reading the posts of others like Ian and Mike,who worked their way through the problems found with this kit,which was one of the reasons work ceased. I have now finished the hull and gun deck planking. The rudder. . I am working on the transom and galleries. Next the gallery roofs and bottoms need to be finished. I will post the progress of the build in more detail from this point forward. John


-
Greetings Mike, I admire your fortitude in putting the flaws of Corel's kit to rights.......Soon you are going to have to move your build log to the scratch build forum. John
-
Thank you Ian for the info. Another vote for the boxwood effect.....Well worth trying.. Regards, John
-
Hi Mike, The new keel is a fine piece of work........I don't think there is going to be much of the original Corel kit remaining when you are finished. The new sander is a mighty fine machine also. Regards, John
-
Hi Ian, I think the transom and gallery work turned out great. Turning the top arches of glass panes into decorative ones looks more like Chapman's stern elevation,I think Mike also interpreted it this way. It also puts the cabin ceiling in a more realistic place height wise than boarding up the bottom row of panes. As to painting,it is your personal choice mate,I had to paint mine because of the pot metal material of the part. I think guilding on the natural wood looks nice,but again Mike is right,it depends on how much other painting you are going to use. You could try painting the just flags to get an idea of how you feel about it,you can always strip it with some lacquer thinners. I have a couple of questions for you......... Do you think it is a good or bad idea to finish off the transom and galleries before placing the guns on the lower deck and fitting the upper deck,or wait until most of the hull and upper works are finished? Could you please explain to me where you think the holes in the stem for the anchor hawsers should be? I know you wrote about this in one of your posts but I can't seem to find it. Regards, John
-
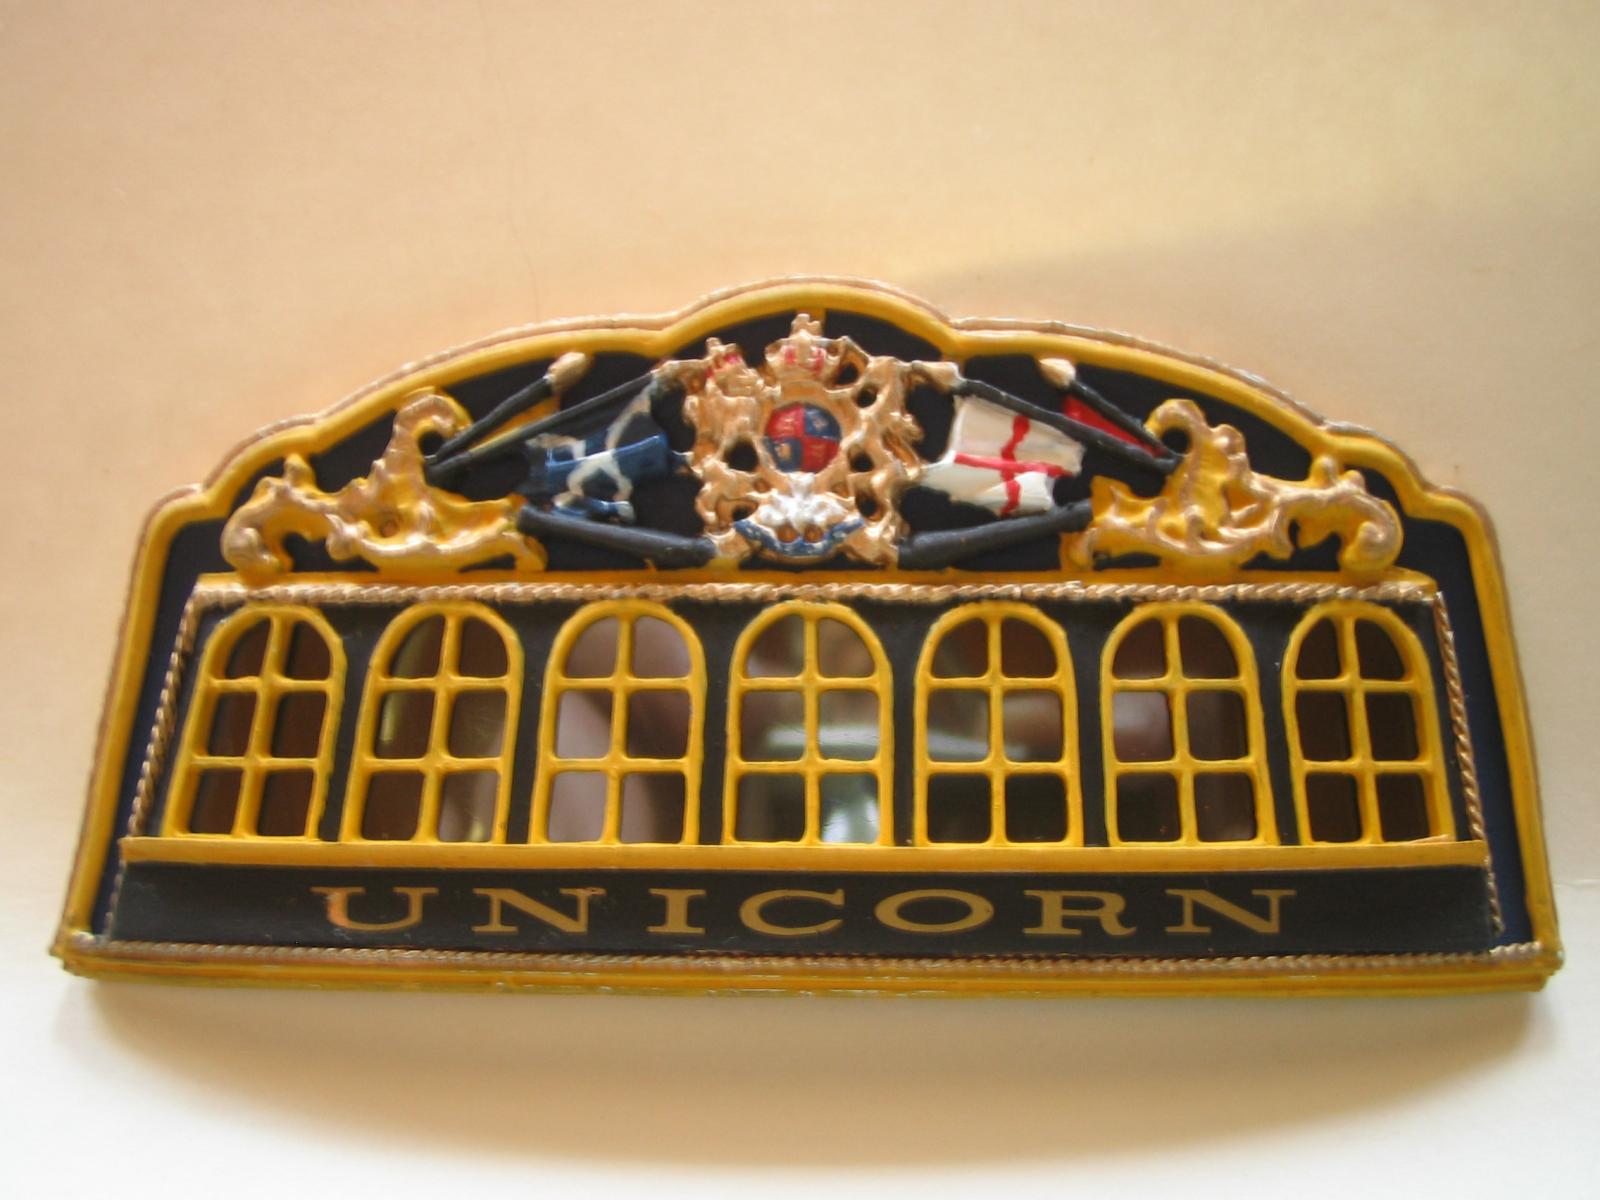
Hi Ian, I found the colour scheme for the transom decoration whilst googling about one evening. I entered 18th century Royal Navy,George ll heraldry,coat of arms,amongst many other searches and eventually up popped one with the royal coat of arms with just 2 flags behind. I think it was from William lll reign.It had St George's cross and the Scottish Saltire..... This made sense to me. For the flags behind,I just thought of the yellow royal scots flag and red ensign would be appropriate. I should have bookmarked it as I sure can't find it again. John
-
Mike, I used Dry Transfer Decals made by Woodland Scenics..... www.woodlandscenic.com They have different fonts,I chose EXTENDED ROMAN R.R.-GOLD. There are 5 sizes of letters per sheet. I then used DullCote spray for protection and to take the shine off. Ian, I am thinking ahead to when I follow your waist modification,which I think looks brilliant. Are bulkheads 4 through 10 where they come through the gun deck really obvious due to the narrower width of the waist walkways? If you had done the mod before the top deck was in place,would you have removed them? Take care, John
-
Hi Ian, It looks like we have been working on the same part of the Unicorn lately. I have decided to use the Corel's pot metal transom,I just couldn't see my way to making a scratch built one. I would rather spend the time opening up the ships waist as you have done. Your work is a real pleasure to view. As I discussed on Mike's build log,I went ahead and shortened the window length by boarding over the lower set of panes. The transom is now curved with a backing of 2mm basswood sheet cut to contour. I will use veneer strips on the forward face showing above the stern rail to finish that side. I now have to sand bulkhead 17 to get the right 16 degree rake and curve for the transom to mount against. I plan to use the same approach on the gallery windows. Take care, John
-
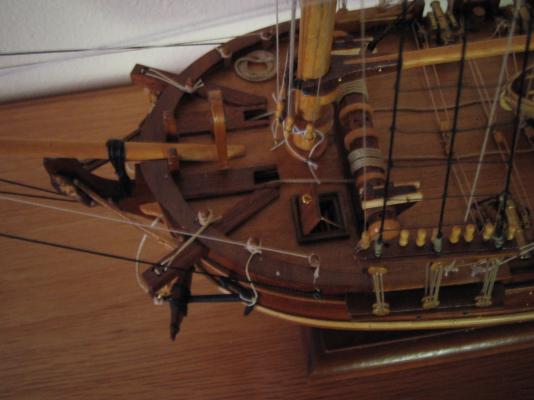
Hi Mike, I have not really given a lot of thought about the actual transom part construction yet. I had sidetracked into spending a bit of time cleaning up and painting the pot metal one as a diversion whilst planking the hull. If I use it I know I will later regret using it at a later date,so I will explore what is involved in building a scratch built one. What wood sheeting are you going to use to construct your transom? I guess you could steam it and bend it round a form like a big sauce pan with the right radius. I went ahead and added the .25" filler blocks on the front side of #17 last night using lashings of CA glue. I now have a solid area nearly forward to #16 to begin shaping. I intend to start with the angle off vertical first,then the curved contour,carefully using a block hand sander. As a rough guess using a template with the center of #17 as the highest point of the curve,the outer part of curve by the galleries will cut back into the hull planking on the sides about 5/32"/4mm forward of it present position. This is the best compromise I think I can make in making the stern/transom area shape acceptable without major demolition. John
-
Greetings gentlemen, Thank you for the 'welcome aboard the Unicorn club' Mike,I think Ian is right about the stern post. Now that it has been pointed out it seems obvious that this part was ommited by Corel,and by adding it the rudder would move aft along the counter and look like it is in its proper place. All my other ships had a stern post,I thought it odd Unicorn did not,but trusted Corel's plan (foolish me). I did put some what of a post in by channeling in a groove in the end of the hull planks and inlaying a 3mm walnut strip in place,I wish I had made it wider. Still thinking out the transom problem. If I decide to keep the stern demolition to a minimum this is my idea ....Leave bulkhead 17 in place and glue 2 x 0.25" thick basswood panels cut to the profile of #17 on the forward face of said bulkhead. Two are needed because the bulkhead on the front edge is divided by the keel board. There is room to slide these in the gap between #16 and #17,CA glue them to the bulkhead and inner planks and clamp them. They will be strongly secured by the keel plywood board,the inner hull planks and bulkhead #17. I think there will be enough thickness of material that with careful sanding the curve of the transom can be produced. I will have to change the rake of the transom to 16 degrees somehow,probably by shimming. I am intending to start a build log but it will take some time as I am a mid twentieth century luddite and not really computer savvy. Regards,John
-
Greetings to all, I'm glad to have found this forum and the wealth of knowledge contained within it. I have enjoyed looking at others work for a while and decided to return to the hobby. I am back on Corel's Unicorn after a hiatus of 4-5 years and have just finished the last bit of outer hull planking where I left off. I really stopped working on it (apart from a bit of bad health) when I started to look at the stern-transom area. The scale of the windows seemed off and well...it just was odd to look at. I have built 5 ships in the last 30 years and you kind of get an eye for something not flowing right. I thank Ian and Mike for spending the time and effort to put Corel's flawed kit to rights. Your Ideas seem to be the solution to the problem I am about to start work on transom now,the hull is complete to bulkhead 17, including the rudder. This is my plan based on what Mike and Ian have written, I would appreciate any feedback . I want the transom to have the correct radius,which I have now formed. My way around the ballroom sized windows is to cover the lower level of panes to the bottom transom decoration with a thin piece of basswood,painted black,topped with an L shaped sill running the full width of the transom . With a bit of file work and careful grinding you can get the panel flush with the windows and the sill will give it a finished look. I will epoxy this in place. I intend to place the ships name on the panel and the windows will keep their arch. If there is a slight difference between where the deck/cabin ceiling should be I can live with that Your thoughts on using bulkhead 16 for the Transom backing seems the way to go.....Is that bulkhead at 16 degrees Mike? I plan to carefully saw down the hulls stern parallel to bulkhead 16,removing 17. Then take a panel of 1/4" basswood shaped in the profile of bulkhead 16. Radius its rear face to match transom. Glue in place to #16 and mount the cast part in place. I will have to see what will need to be done to blend in the curved lower transom area by the rudder. I will sort out the galleries and their windows later. The only problem I can see the hull is a little bit wider at # 16 making the galleries a little narrower which I don't know if I'm that bothered about. Does this seem a feasible plan of action or will it make things worse in your opinions? Regards John