JohnB40
-
Posts
196 -
Joined
-
Last visited
Content Type
Profiles
Forums
Gallery
Events
Everything posted by JohnB40
-

Switched from X-Acto to Excel blades......
JohnB40 replied to CPDDET's topic in Modeling tools and Workshop Equipment
I have also found hobby and craft shops are limiting their selection and stock on blades. Many on line charge a lot in shipping fees,making the final price really expensive. I recently came across https://widgetsupply.com/ They have a good selection of Excel blades and other supplies. I have placed a couple of orders with them,which arrived promptly (same state),with reasonable shipping rates. -
My experience with John Garcia is your parts will arrive in within a week or so. Model Expo customer service is outstanding as far as I'm concerned.
-
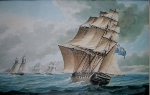
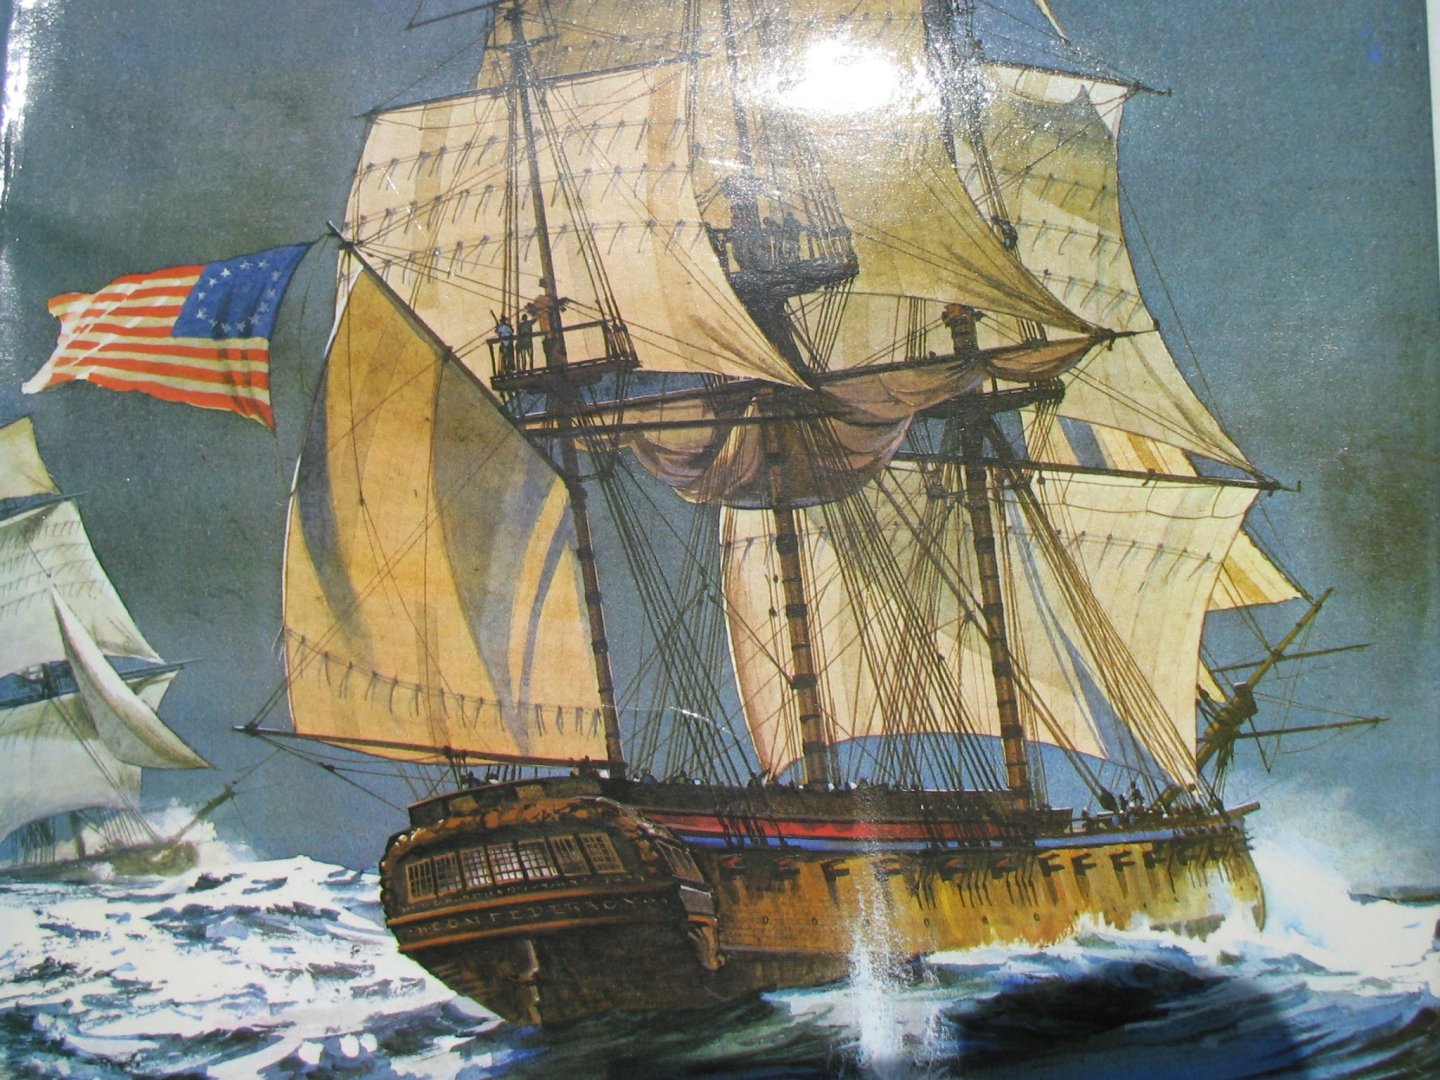
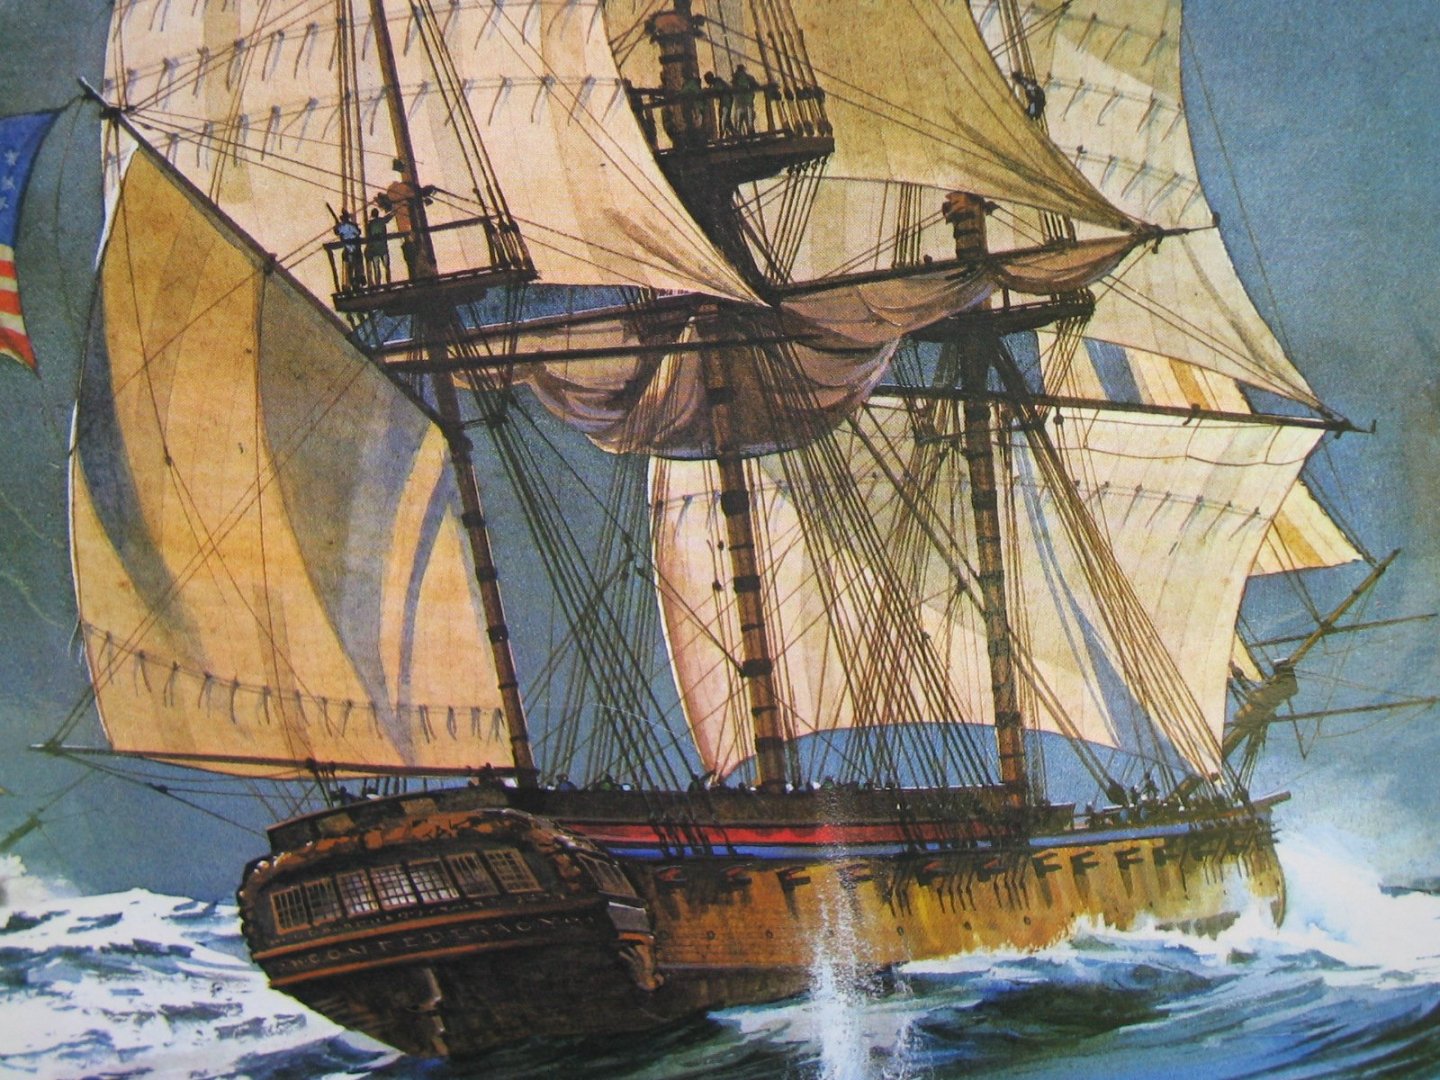
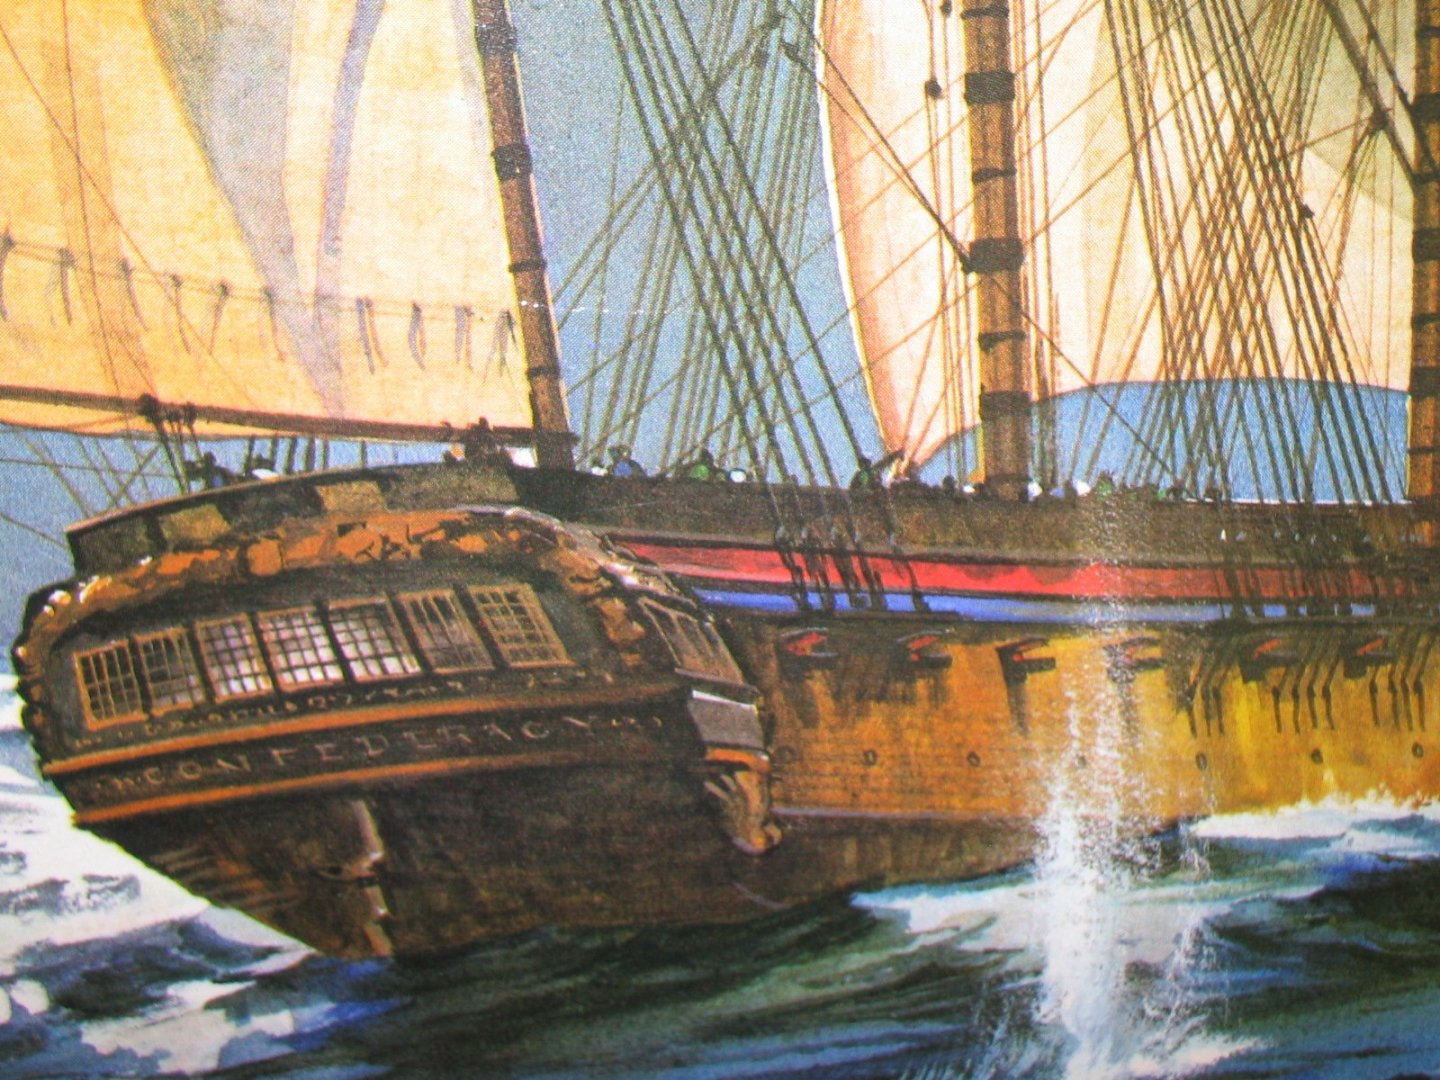
Hello Christian, Very nice work on your Confederacy. I am also building the frigate,although at a much slower pace than you. I was at my library's bookstore yesterday and spotted an old book on the shelf "Sailing Ships of War 1400-1860" by Dr Frank Howard,for two dollars. I bought the book and when I got it home I noticed something familiar about the ship on the cover art. Sure enough it was a painting of "The Continental Frigate Confederacy (32 guns) and HM ships Orpheus (32) and Roebuck (44) off the Virginia Capes,14 April 1781". It was painted by Geoff Hunt. I thought you might find it interesting,especially the hull colours. Regards, John
- 550 replies
-
- 6
-

-
- confederacy
- model shipways
- (and 1 more)
-
I saw this in the Guardian...I hope the link works. https://www.theguardian.com/uk-news/2019/oct/14/restored-19th-century-ships-figureheads-to-go-on-display-in-plymouth
-
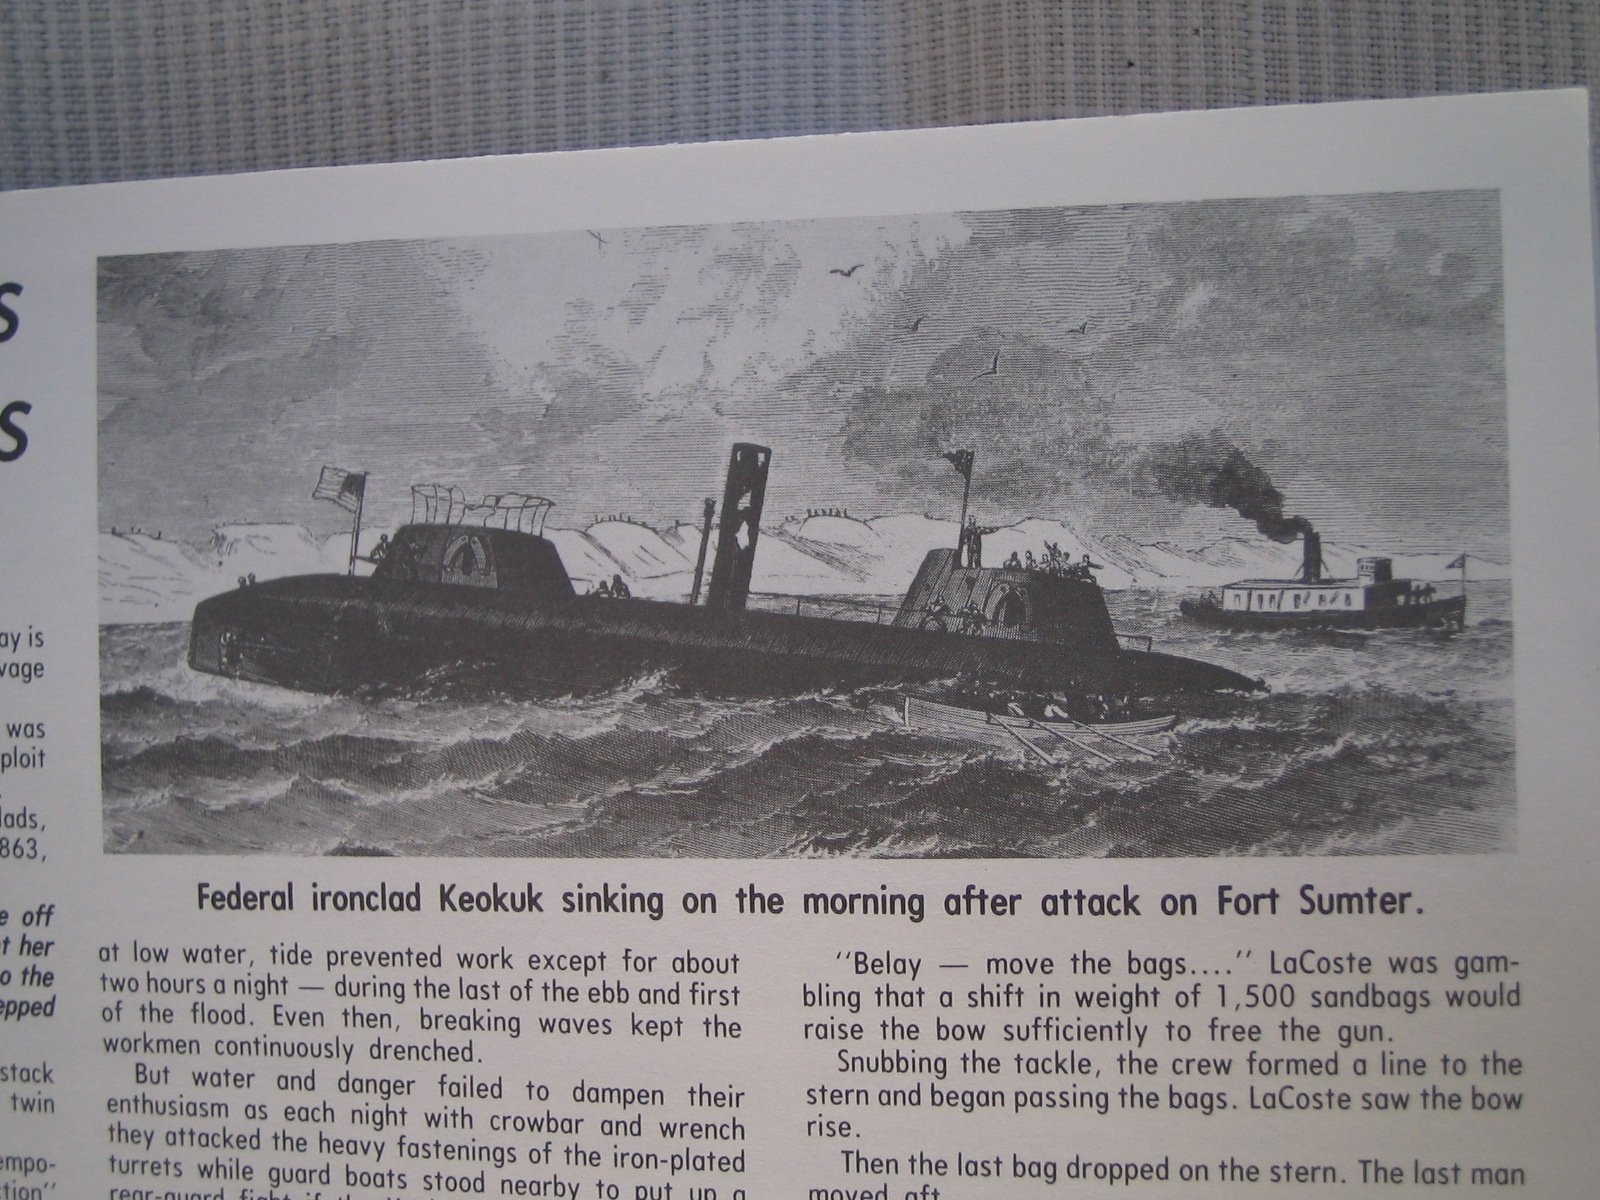
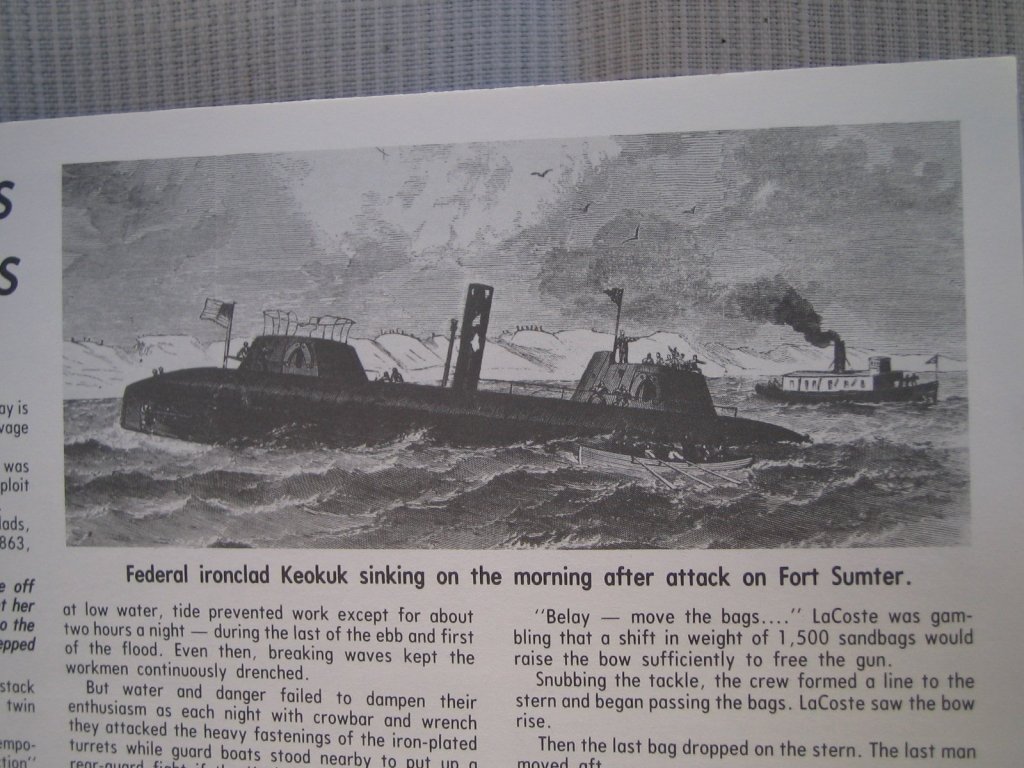
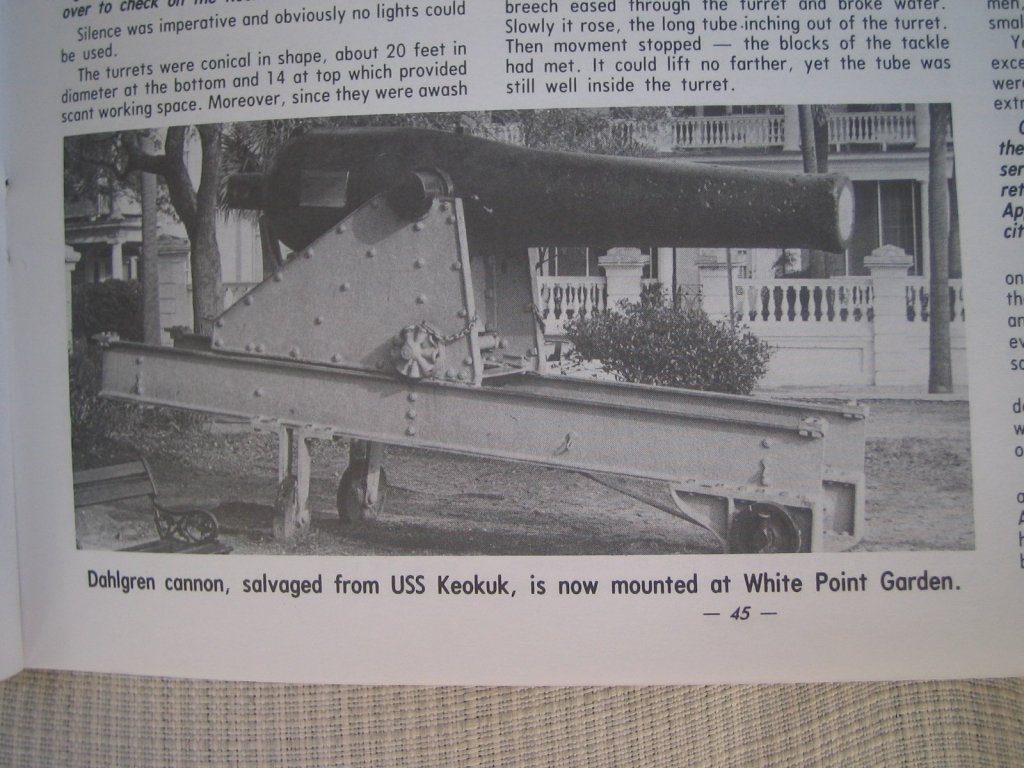
Hi Glen, I was at my library's book store this morning and purchased a book on Charleston during the civil war. There is a chapter on the ironclads attack on Fort Sumter. Here are a couple of pictures of the Keokuk from the book.....
-
Plank Bender....
JohnB40 replied to dvlp47's topic in Building, Framing, Planking and plating a ships hull and deck
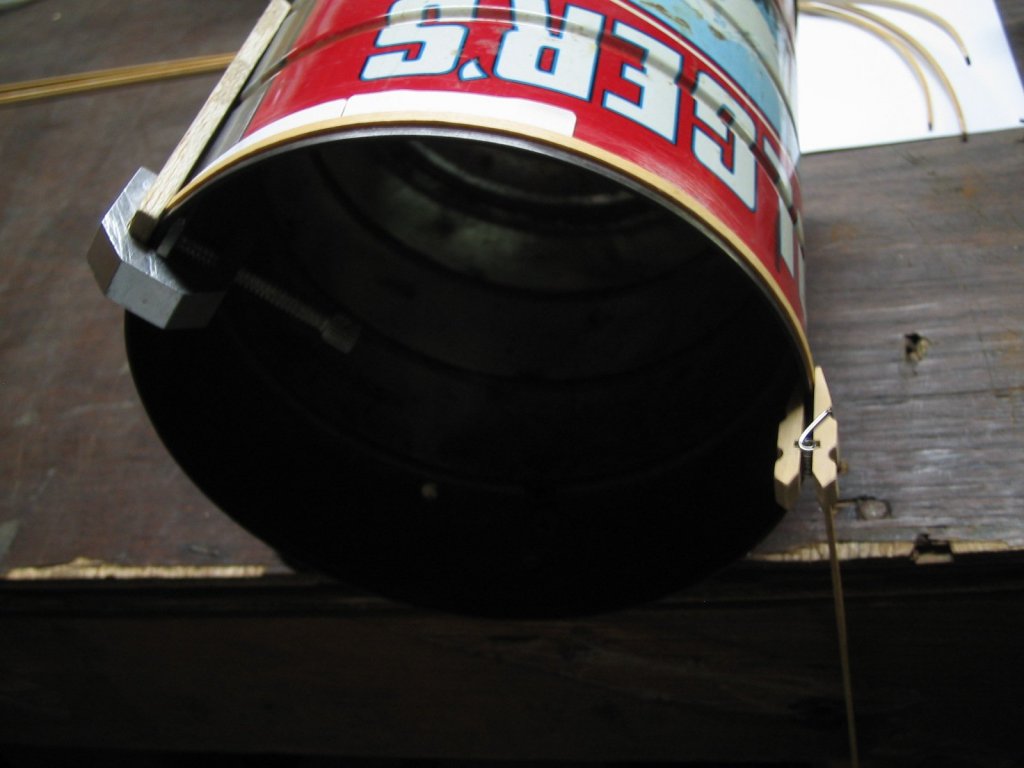
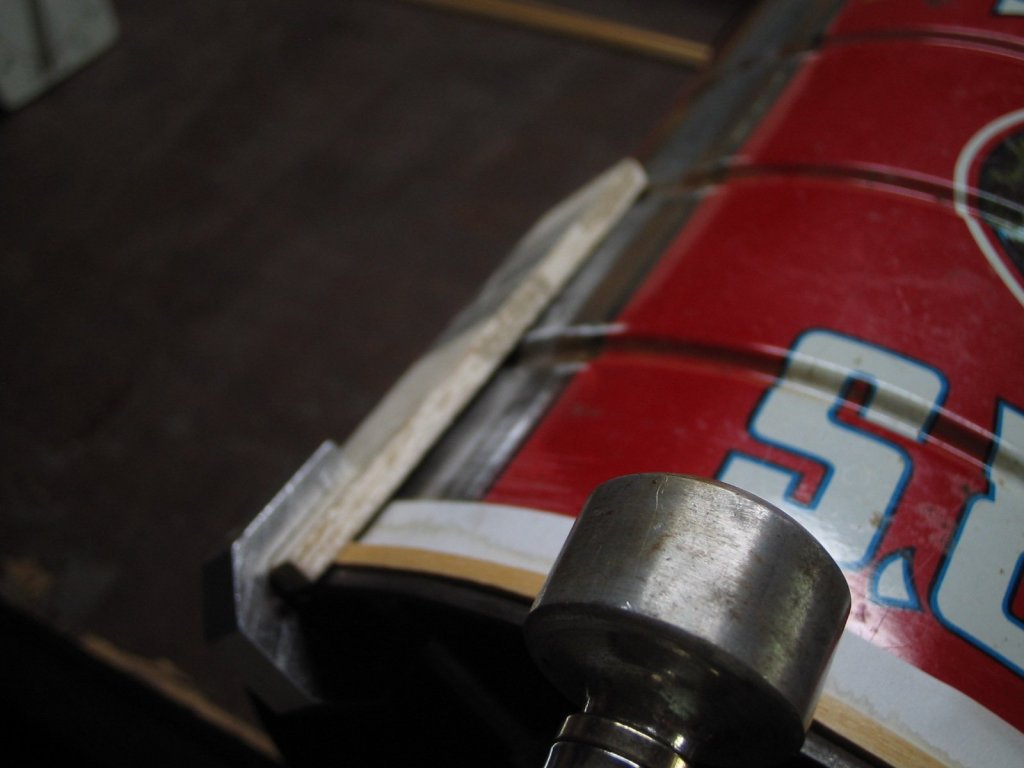
I have used a soldering iron type of plank bender and a compact hairdryer for plank shaping in my builds. I have had my iron type for nearly 20 years of reliable service. When I had to form quite a few planks for the bow of the Confederacy,I remembered GaryKap's note in his log about using a one pound coffee can/tin ( a hard thing to find in this 12 oz world) for the 6" radius. Attached the can to my work bench. Soaked the planks for 10 minutes in a tall jar. Clamped one end of the planks to the can and using the bender worked them around the the can until the point where they matched the curve + a bit for spring back. I then clamped the other end at that point. Finally used the hair dryer to completely dry the plank. The can also heats up and drys the opposite side. I also use the electric iron to twist bend the planks for the stern runs. Wet the planks, clamp to bulkhead at the start of the run,heat and form to shape required.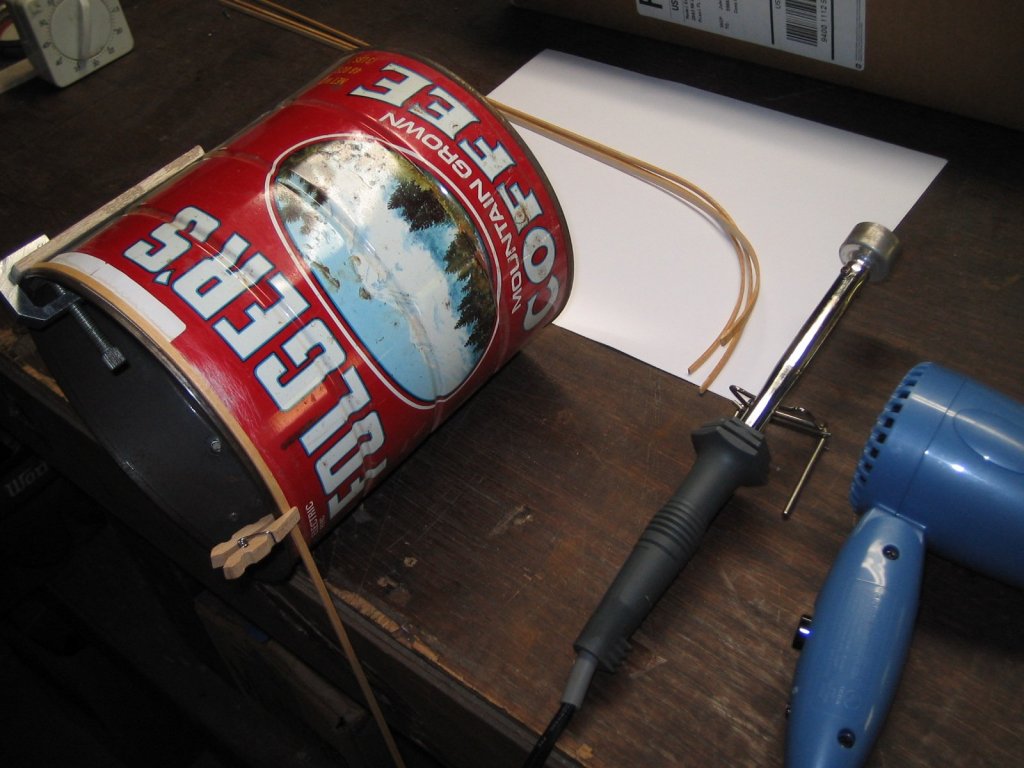
-
Stunning work Danny....... I'm a retired Jag mechanic,so I have had a long love/hate relationship with V12's. I used to go to the Reno air races and there is nothing like the sound of a Merlin hammering full throttle overhead.
-
Hi Dennis, I can't believe I have somehow not found your build of The General till now. I have enjoyed catching up,very nice work. I have read books on the "chase" and it is interesting to see a detailed view of the locomotive. John
-
Nice one Danny.
-
Very nice Danny....Looking forward to the Merlin build
-
Another outstanding build Greg. Again,your attention to detail in that tiny scale is second to none
-
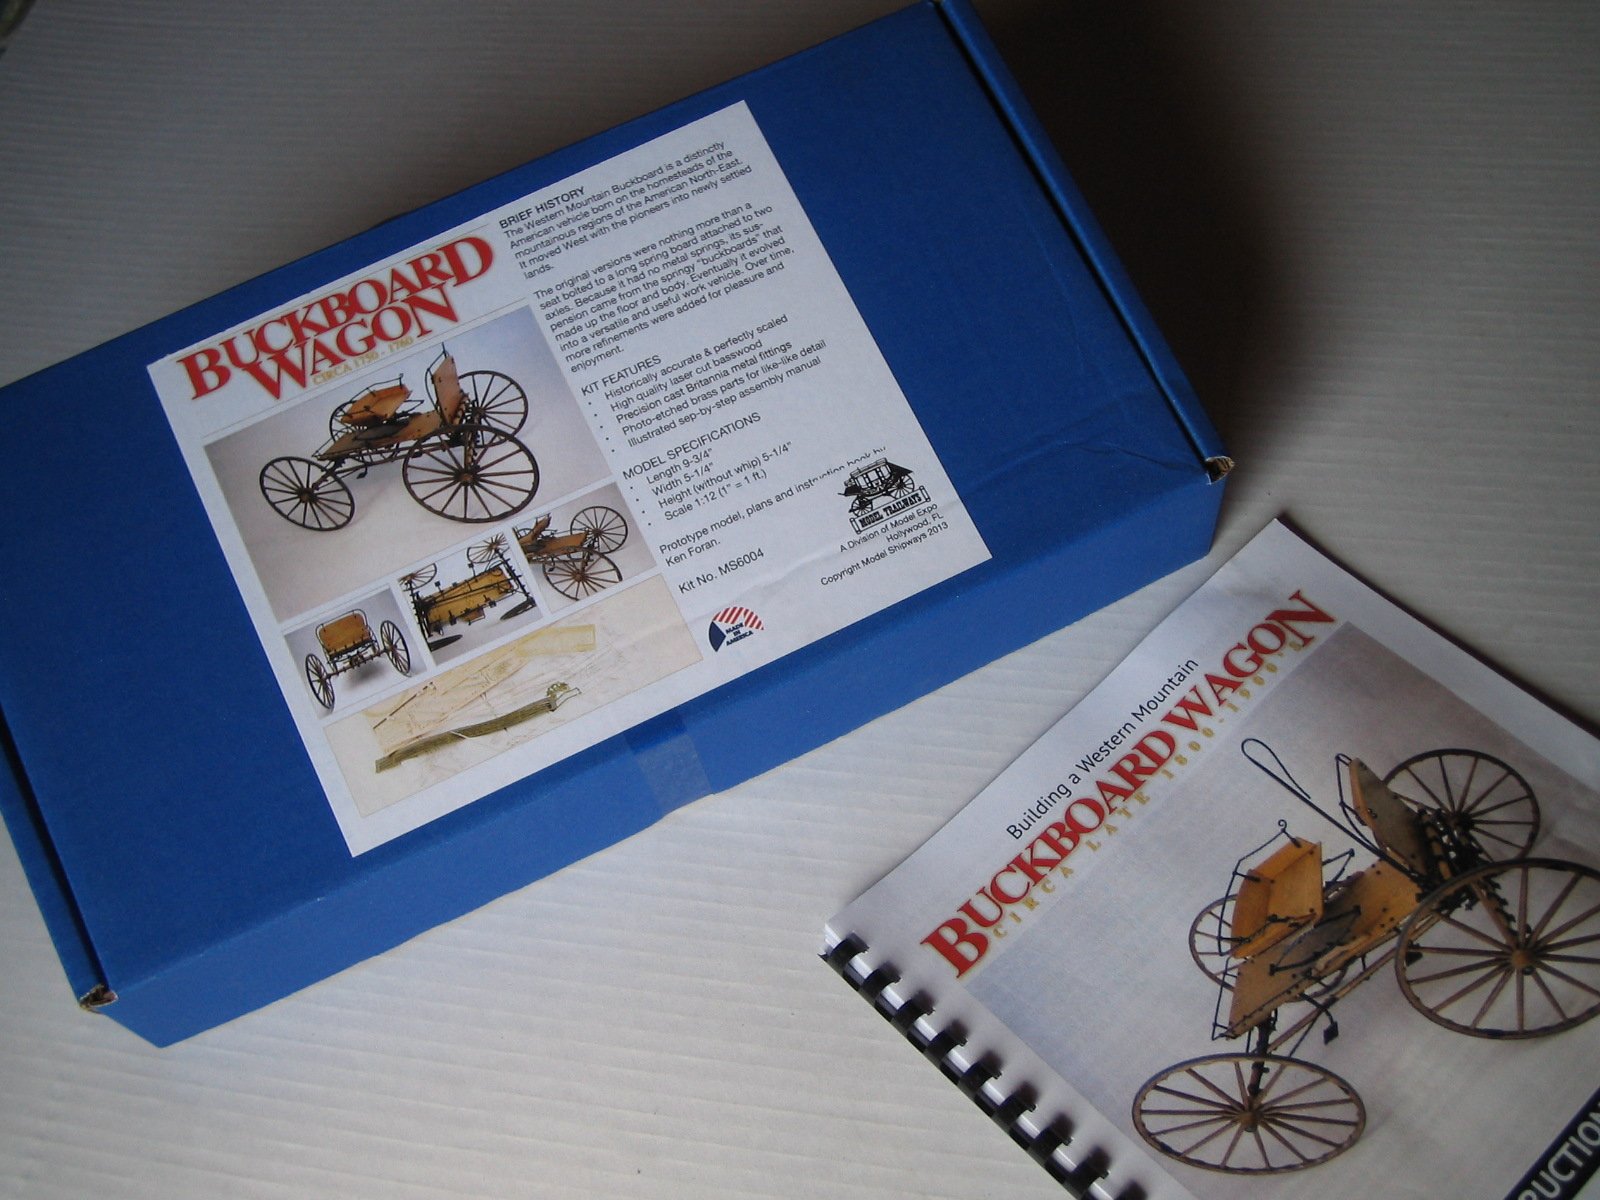
Buckboard Wagon by JohnB40 - Model Trailways - 1:12 Scale
JohnB40 replied to JohnB40's topic in Non-ship/categorised builds
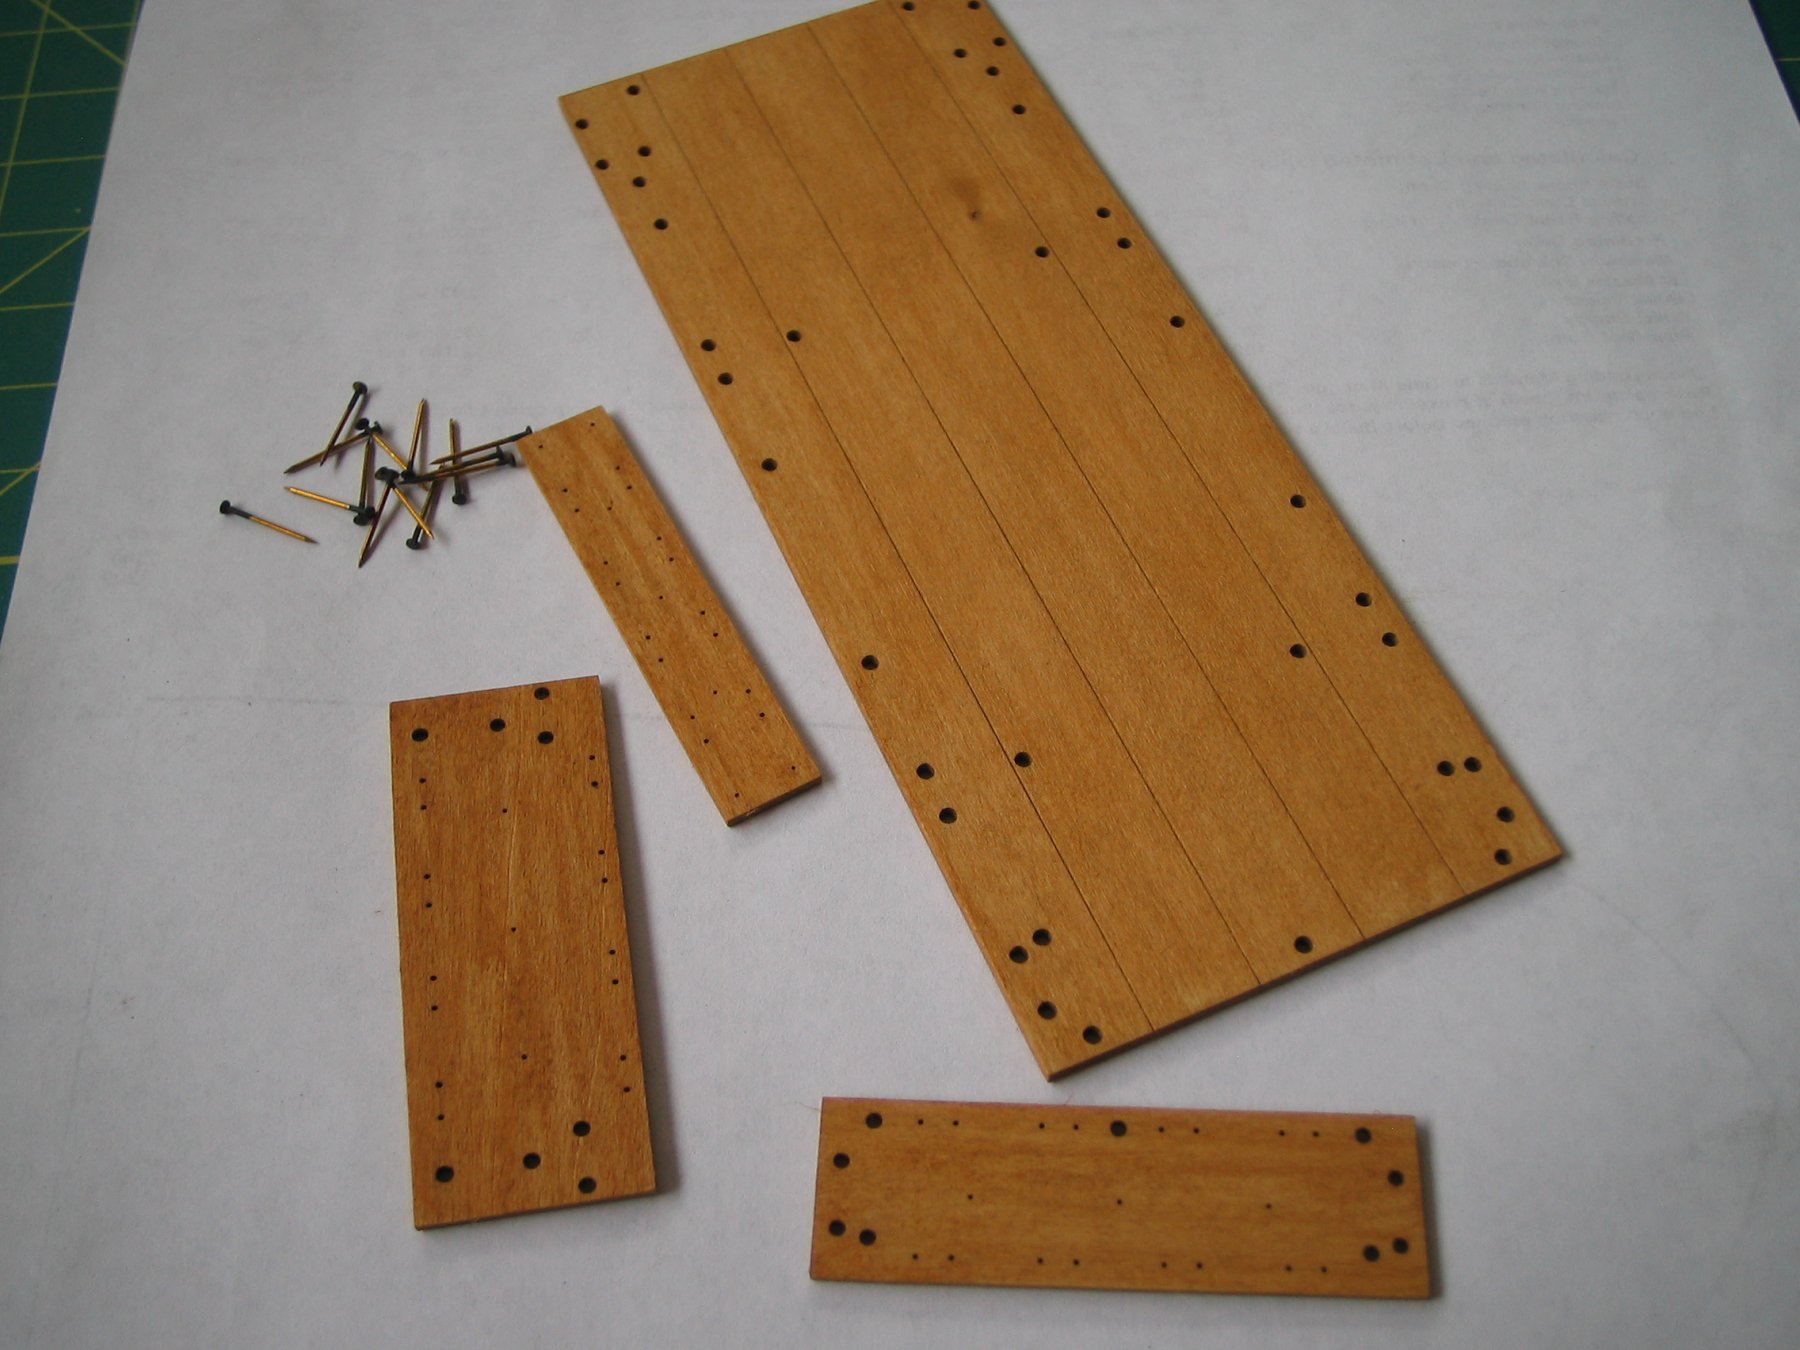
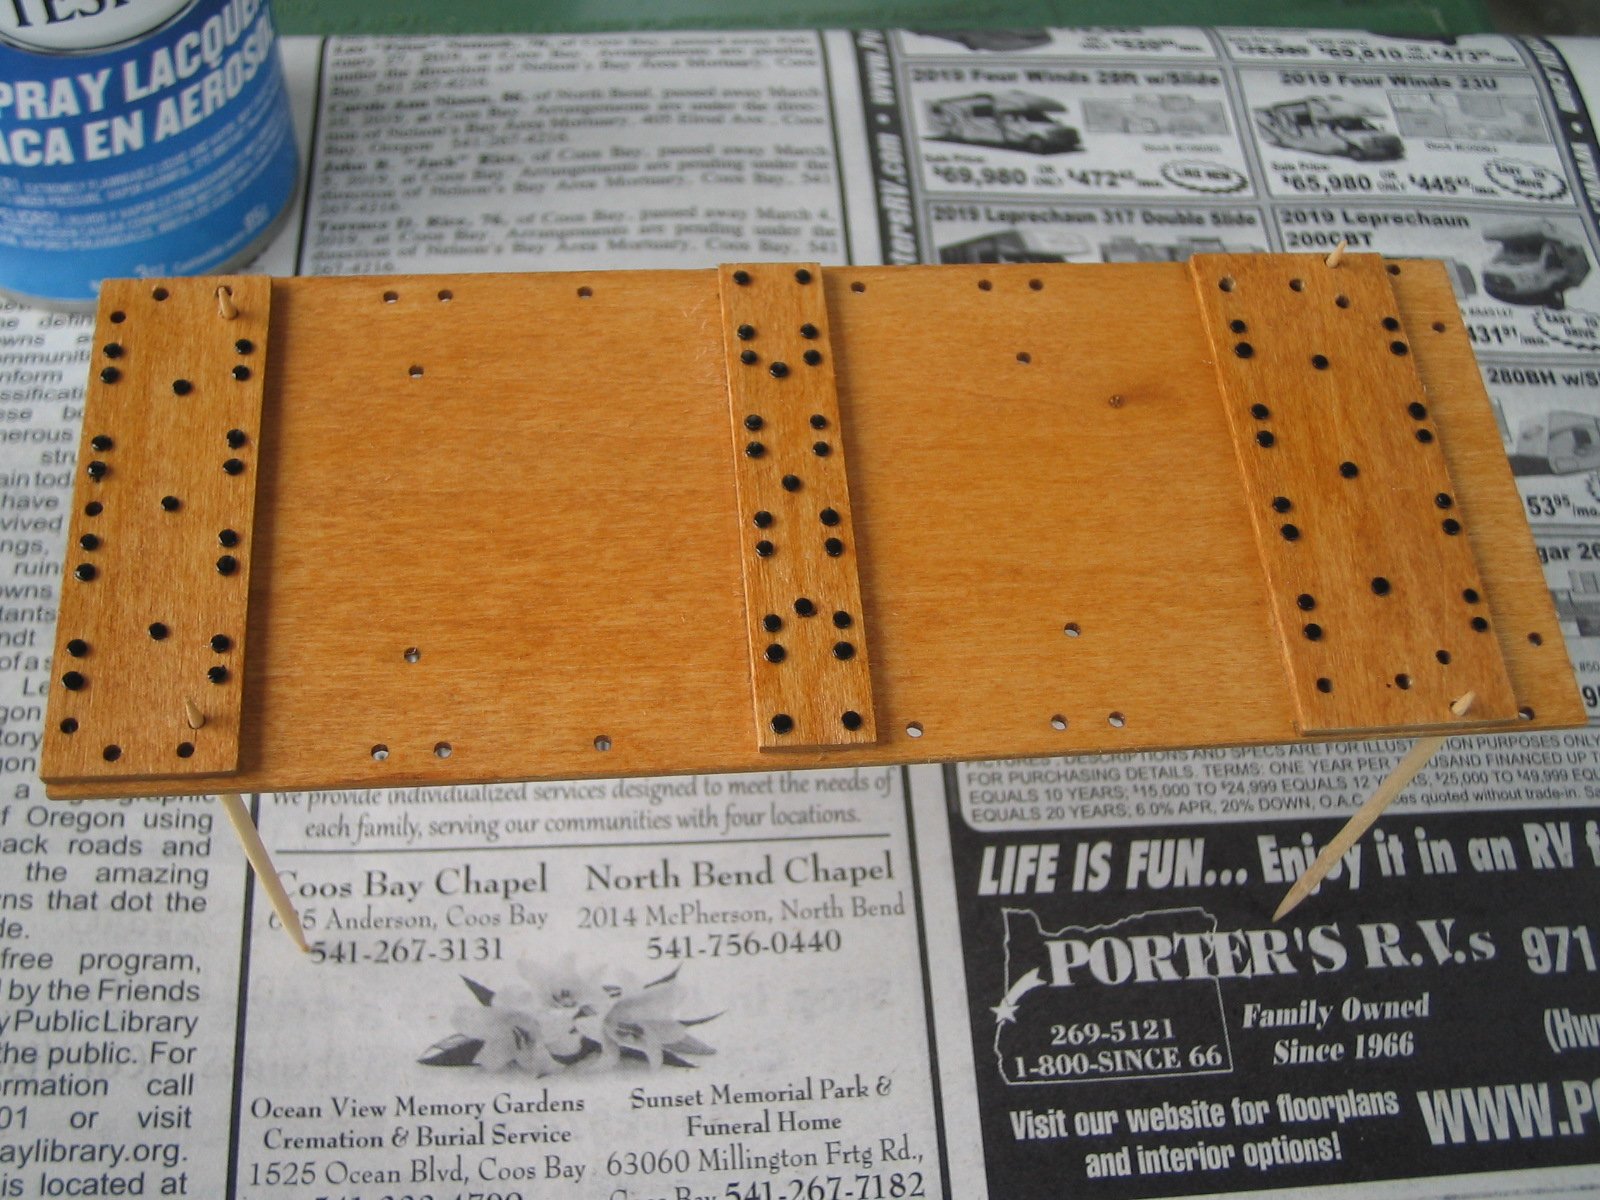
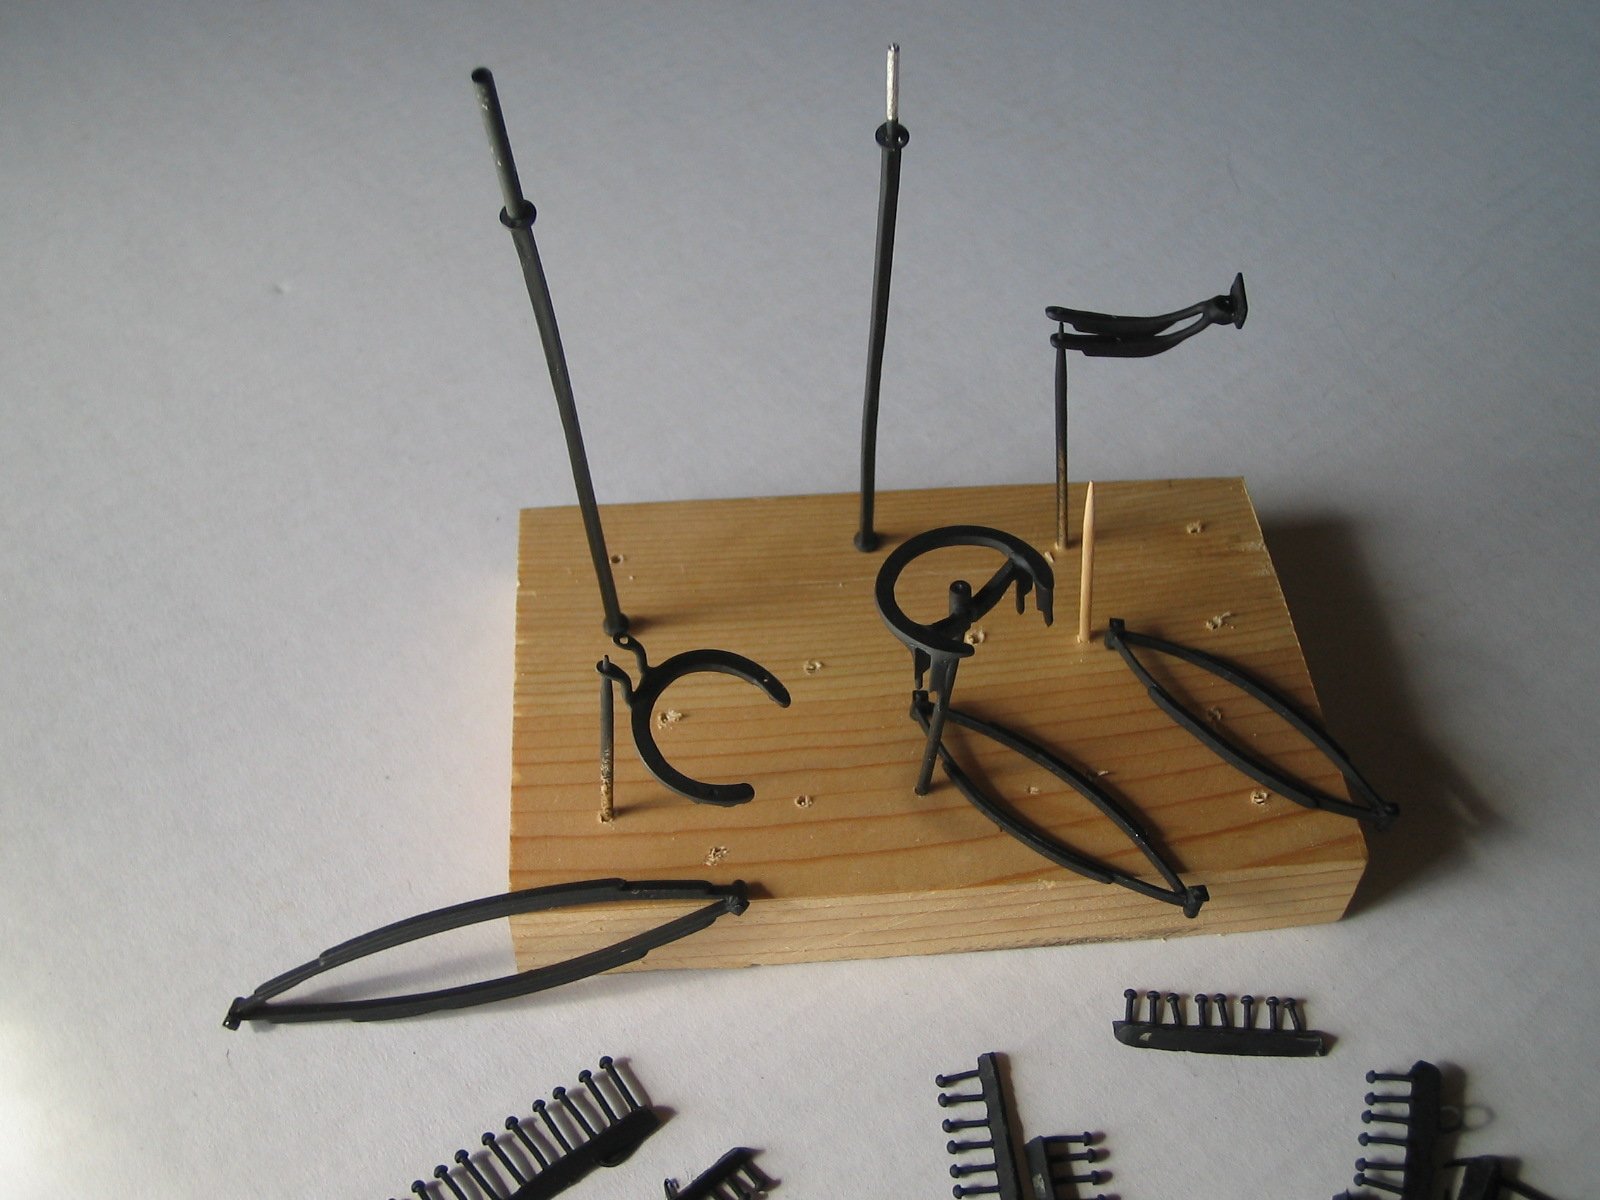
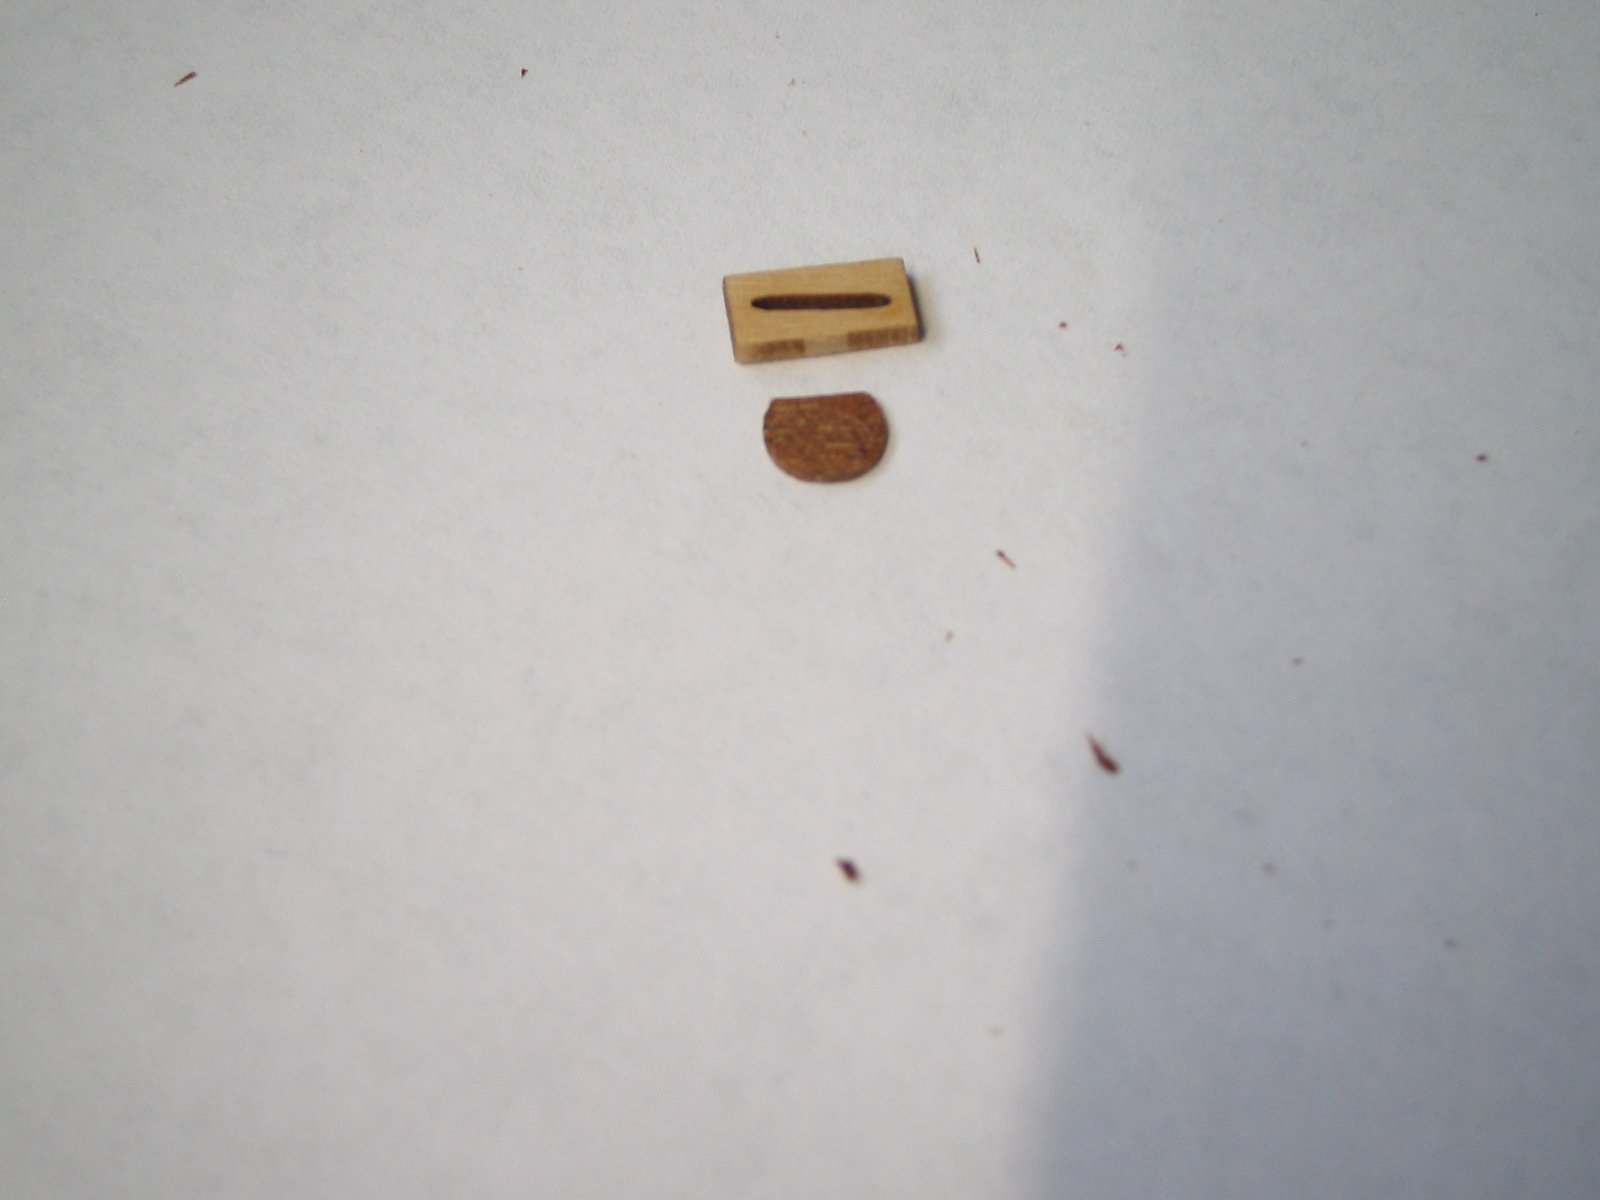
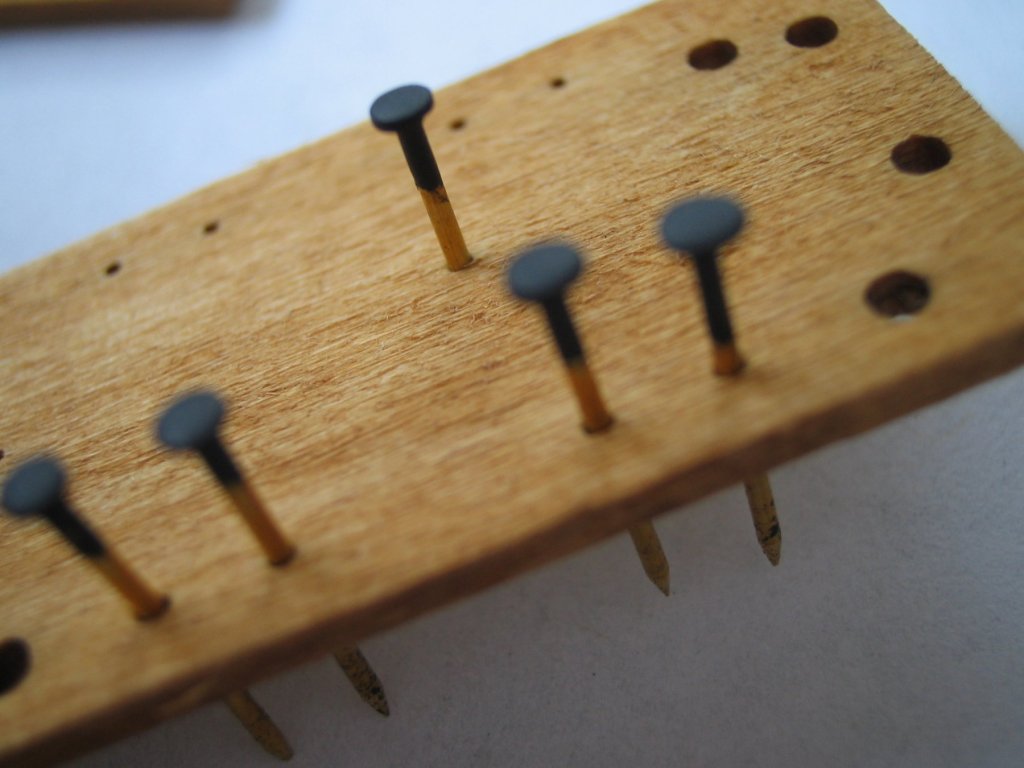
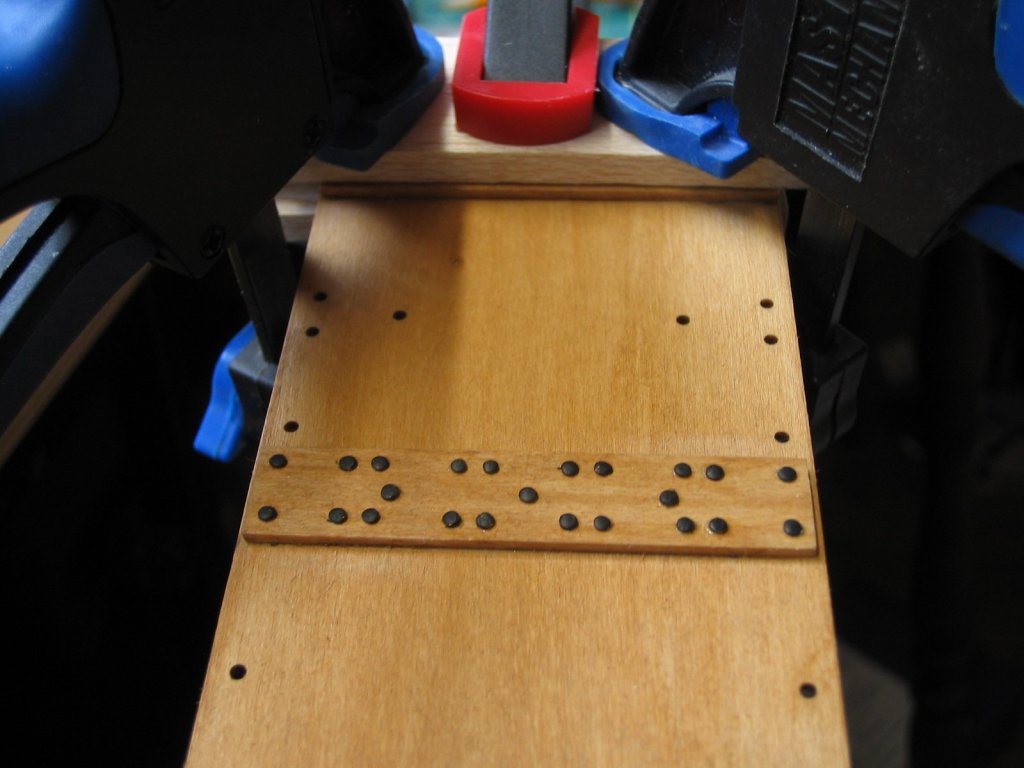
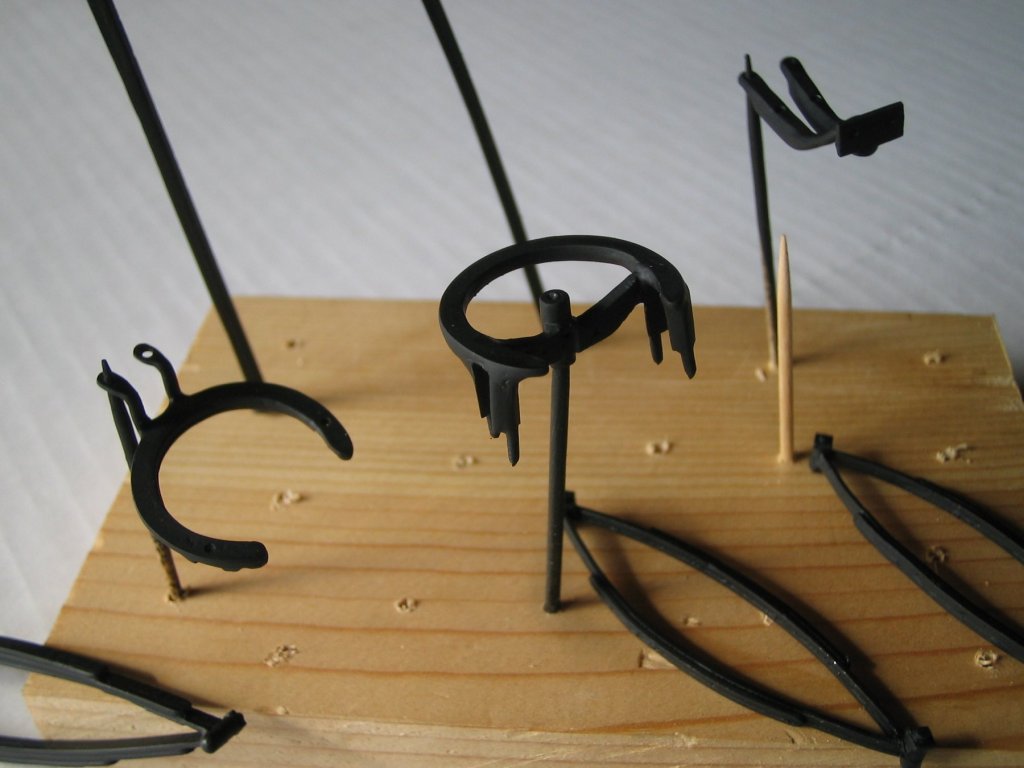
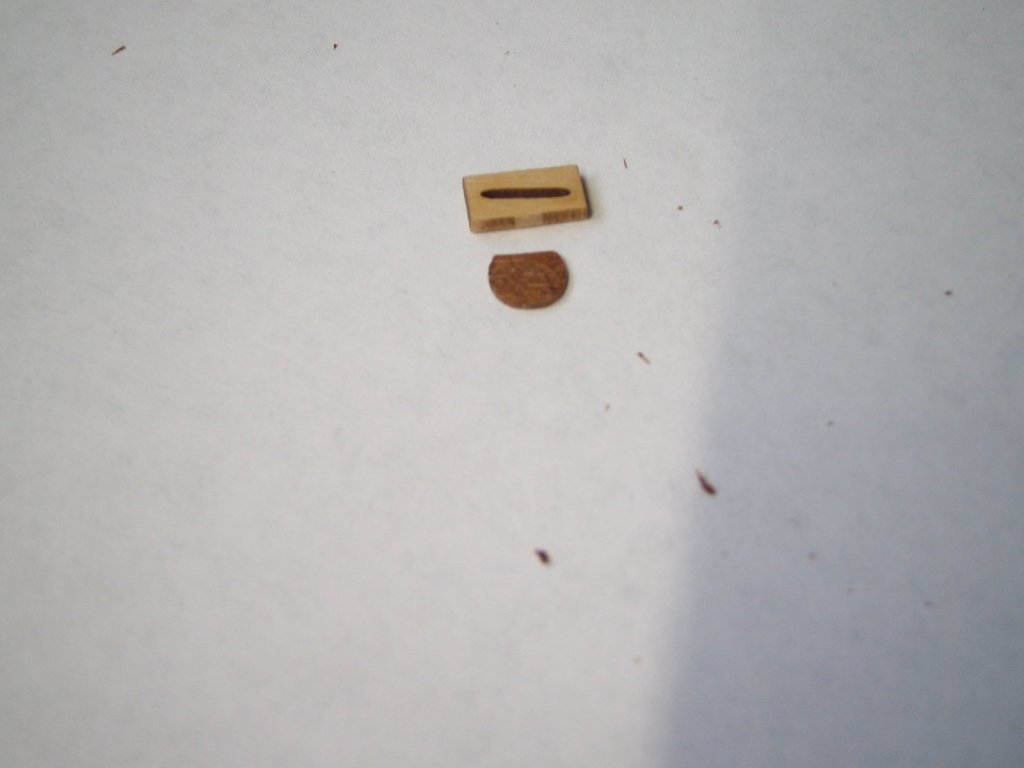
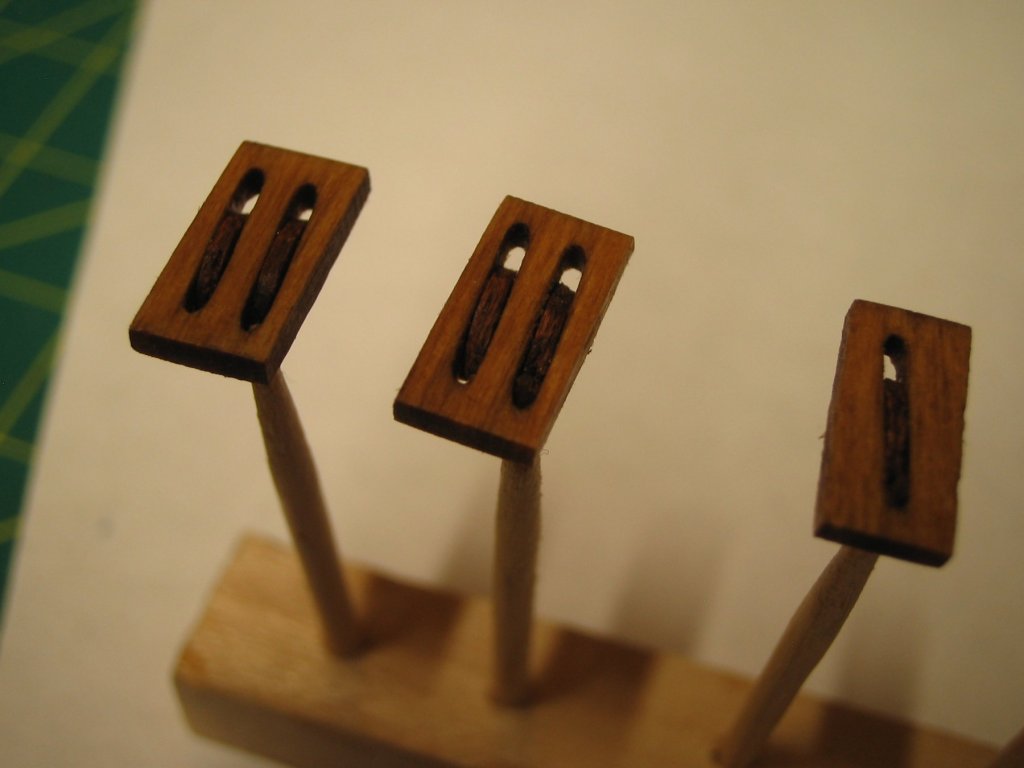
I've been busy lately,but now have some time to get back to hobbies...Spent a fair bit of time prepping the cast parts for the kit. I have removed all flashing,reshaped and painted them with matte black primer. I have finished some with matte black top coat,but many need drilling before assembly ,so I will wait until that is done to finish off the rest. I have now assembled the wagon bed. The kit supplies laser cut wood panels and nails to simulate the screws holding the cross braces in place. For some reason I painted the heads instead of using Brass Black. The nails are pushed through with a tiny drop of CA applied on the shank. They are then clipped off as close as possible and then filed flush with a mill file and sanded. The cross braces were aligned to the bed using brass rod through the corresponding laser cut holes and bonded together. I stained the wood with General Finishes water based golden oak. It is my first experience with water based stain after years of using Minwax oil based. I like the results. I am thinking of using it on the Confederacy build as I have only used oil based stain on the counter,so any slight difference in shade will not be noticed. The bed was finished with Dulcote. The seat assembly comes next....But I need to do a little more hull planking on the Confederacy before.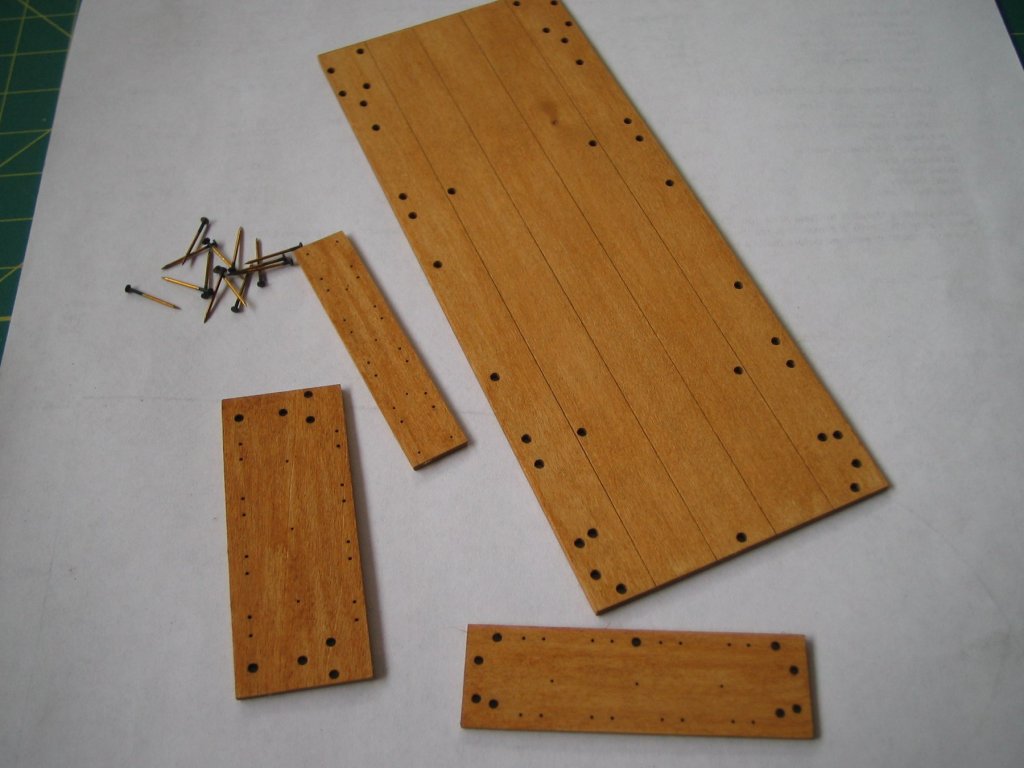

- 4 replies
-
- 10
-
-
Hi, If you email John Garcia at jgarcia@modelexpo-online.com I'm sure he will send you another figure head. Get the part number from the parts sheet.
-
Buckboard Wagon by JohnB40 - Model Trailways - 1:12 Scale
JohnB40 replied to JohnB40's topic in Non-ship/categorised builds
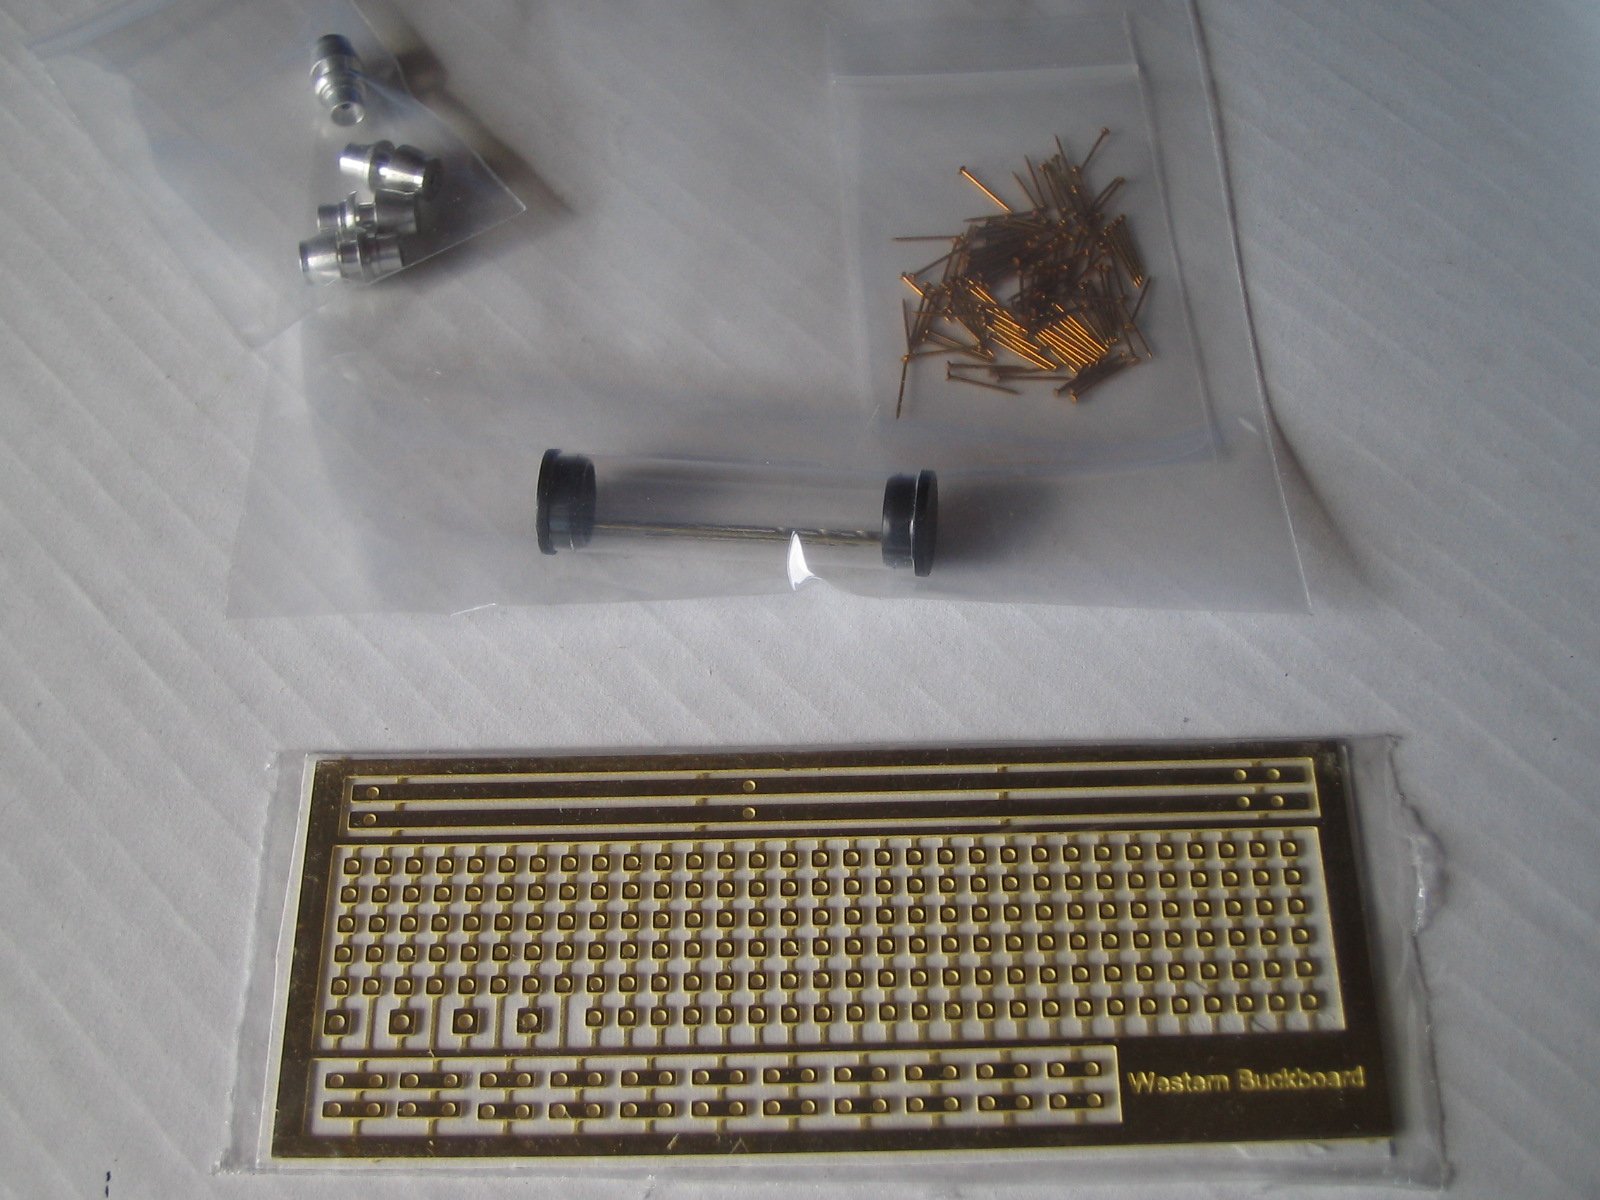
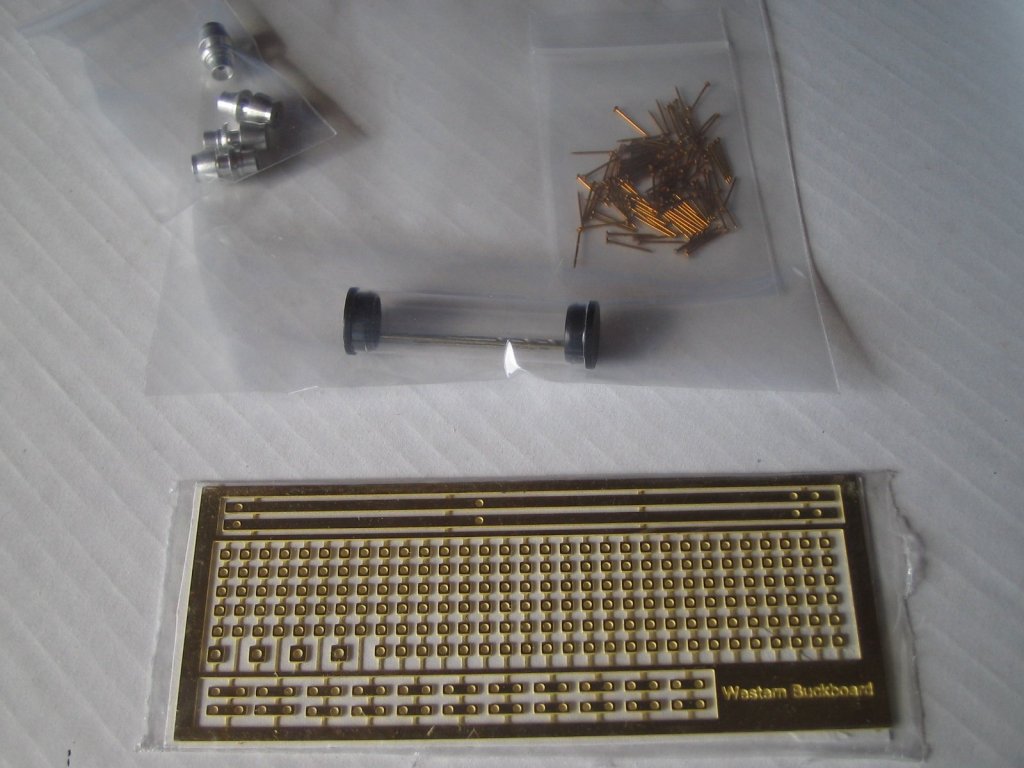
The first thing on the agenda is cleaning up the castings. There is a lot of flashing and general roughness to take care of. With the larger parts such as axles etc I used small amounts of JB Weld to fill in voids and imperfections. When cured,I cut it back with files and fine sandpaper. Then the castings are then cleaned in alcohol and sprayed with flat black primer. When all the cast bits have been through this process,I will use a finish of flat black enamel. I am unsure if I can use the cast rails for the seat/bed,or will have to make my own like Dan did on his stagecoach build. It will take a bit of time to get through all these small pieces. I will use Brass Black for the PE parts.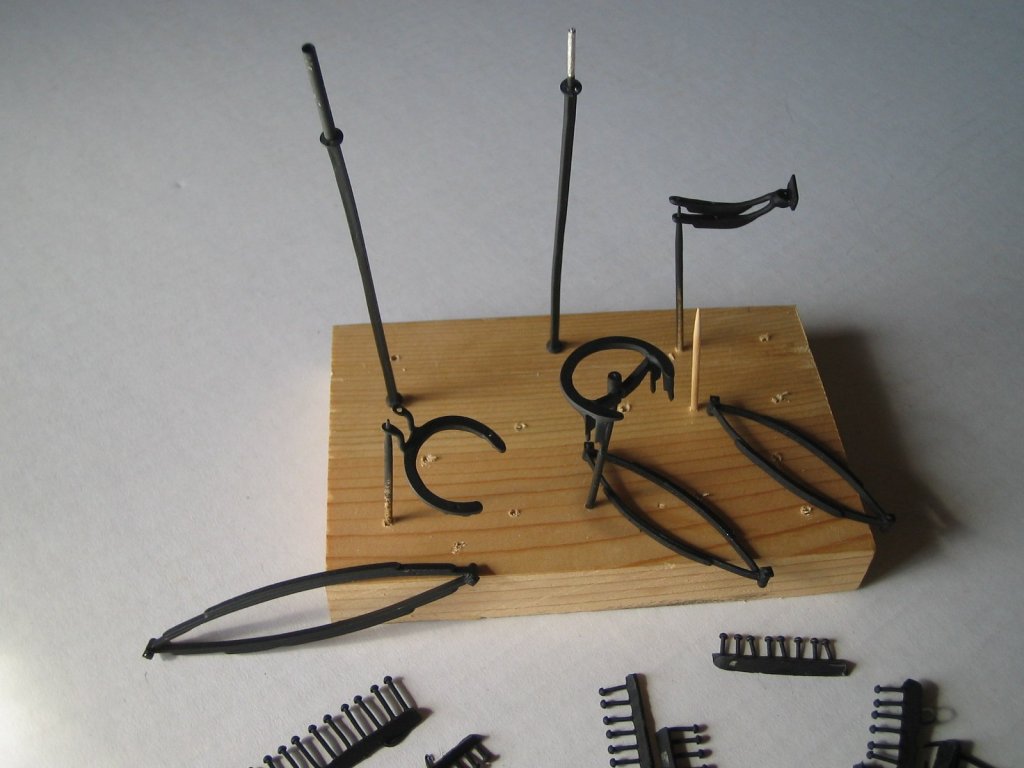

- 4 replies
-
- 10
-
-
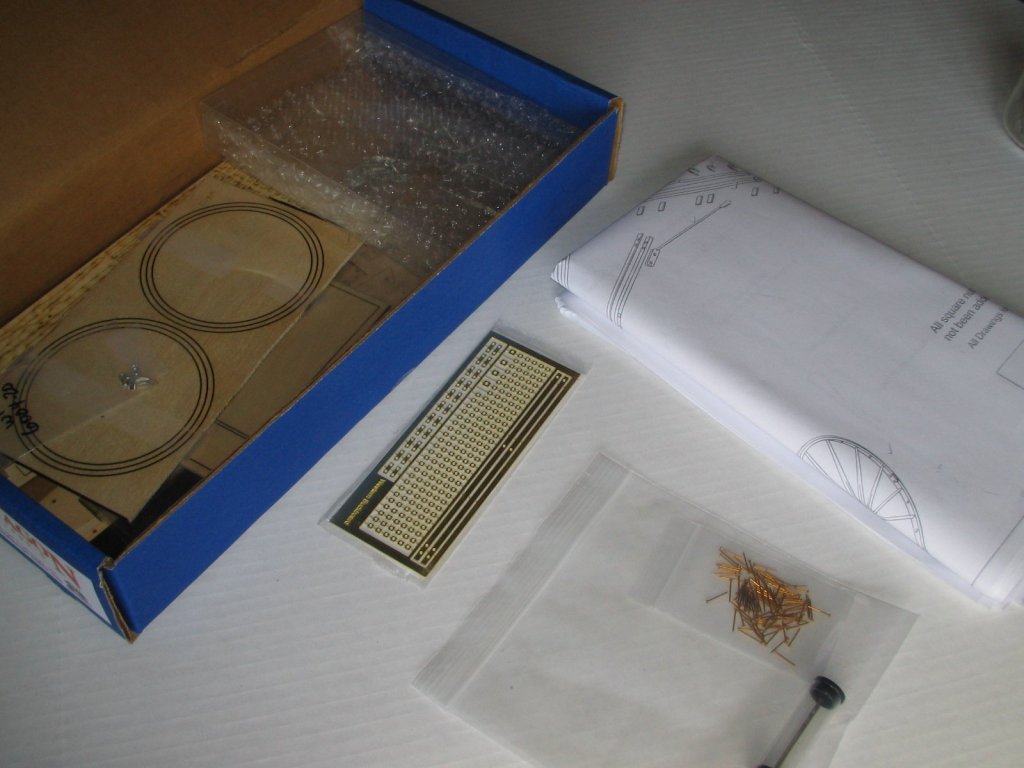
Greetings to all I needed a break from the hull planking on my Model Shipways Confederacy build. I really enjoyed building Model Trailways Chuck Wagon during my last hiatus and wanted to try another "wagon of the west". I always liked the look of MT's Buckboard,so when I saw it on sale I ordered it. The kit is nicely put together with good plans,instruction book,laser cut wood parts.photo etched parts and cast parts.

-
Well done! I have thoroughly enjoyed following your build and find your work second to none. You must have amazing eyesight to achieve that level of detail in that small a scale....I would be blinded if I attempted the same.
-
Early Swift, Virginia Pilot Boat ,1805 model
JohnB40 replied to Keith Black's topic in Wood ship model kits
It was also my first plank on bulkhead model ship I made.....That was in the last century! -
New here. Possibly in over my head.
JohnB40 replied to NicholasJ's topic in New member Introductions
Welcome to MSW Nick, Le Hussard was my third build. It is a very nice model and I think a good one for your first attempt at constructing one. It is double planked which makes it easier to rectify mistakes in the first layer of planking,before adding the outer finishing planking of the hull. The instructions certainly look more comprehensive and easier to follow than the older version. Go slowly and walk away for a bit if it gets frustrating. Any problems or questions will be gladly answered and helped to resolve by the forum members. One thing I try to keep in mind that this is a hobby and not a job. Work at a pace you feel comfortable with. I don't want to admit how long I have been working on my present build! John -
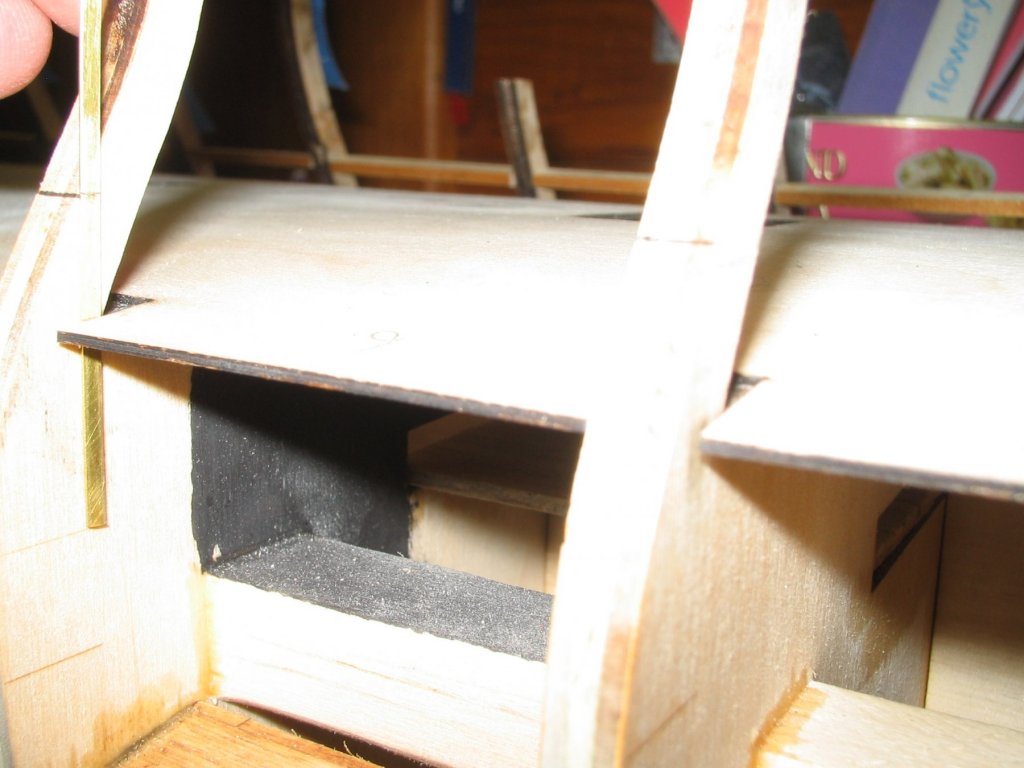
The hull sheaves were then made. I laminated some thin scrap hardwood. When cured I used a hole punch to make simulated sheaves,these were trimmed to fit in the slots of the frames. They were then stained golden oak. Once they are fitted to the hull I can start the planking........

-
The gun port frames were painted ochre using diluted coats of artists acrylic paint.
-
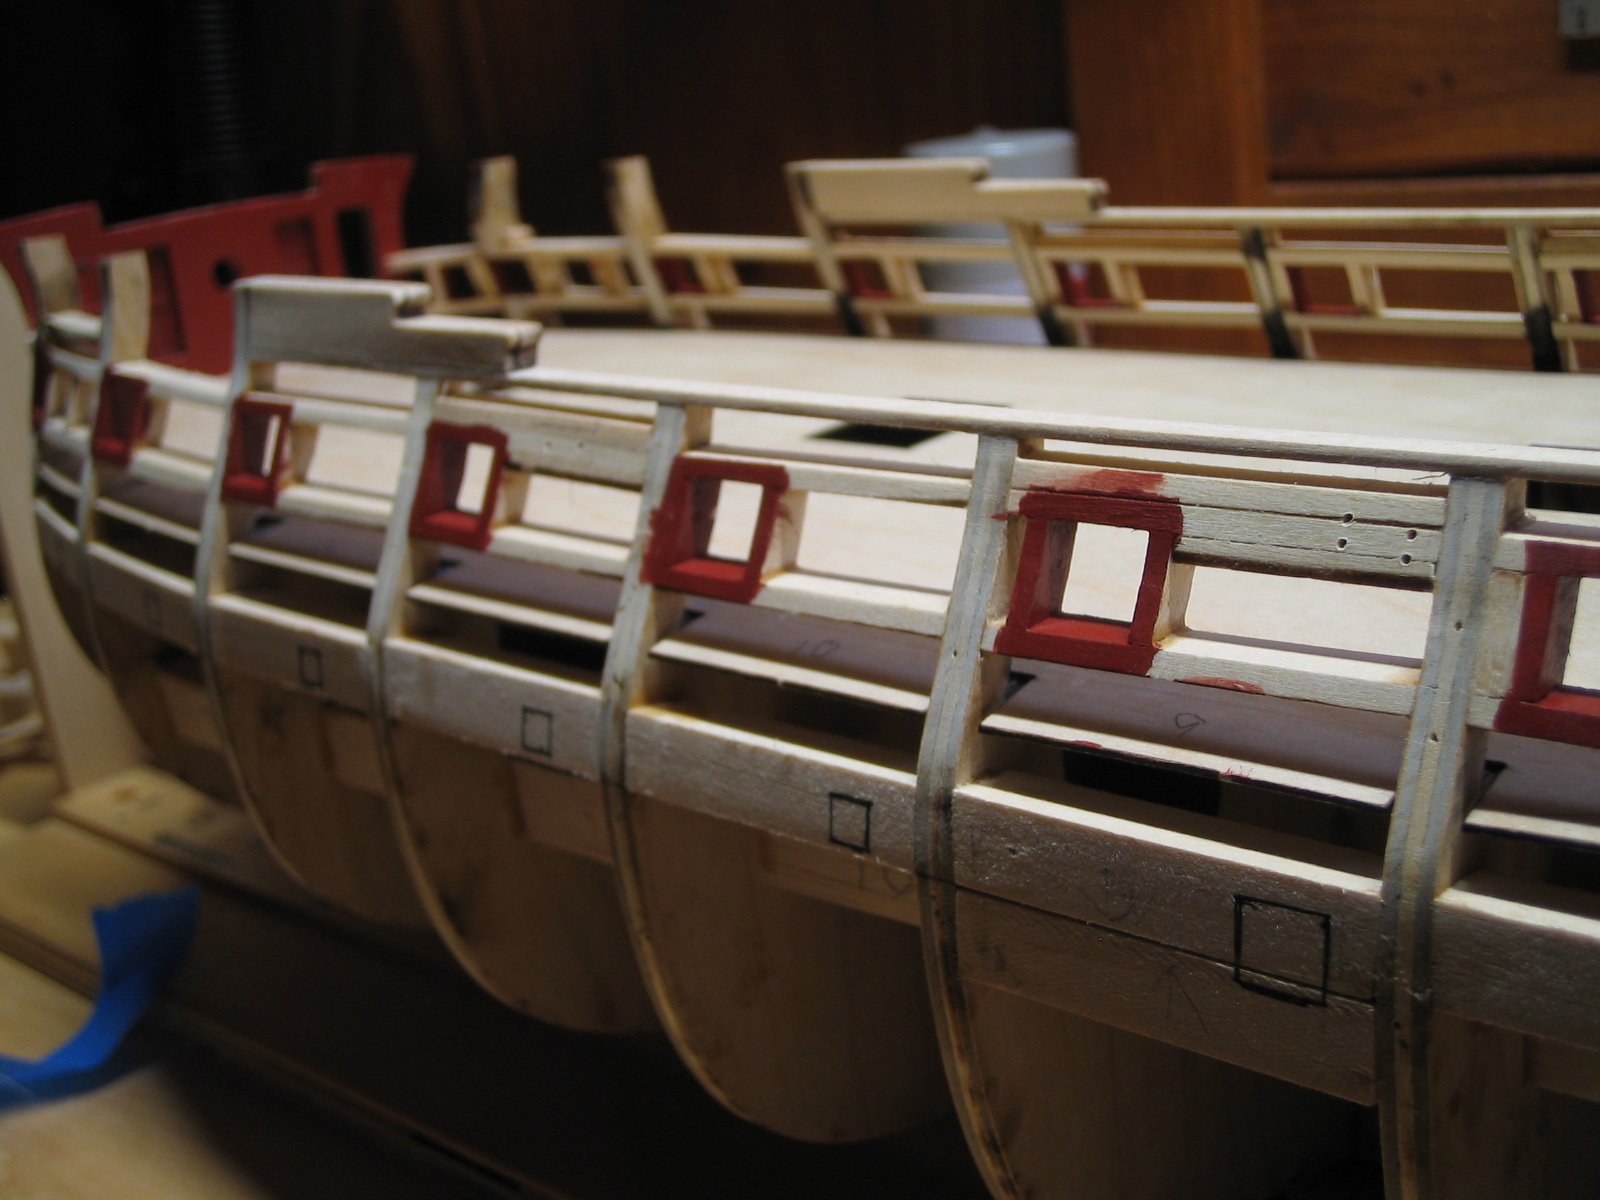
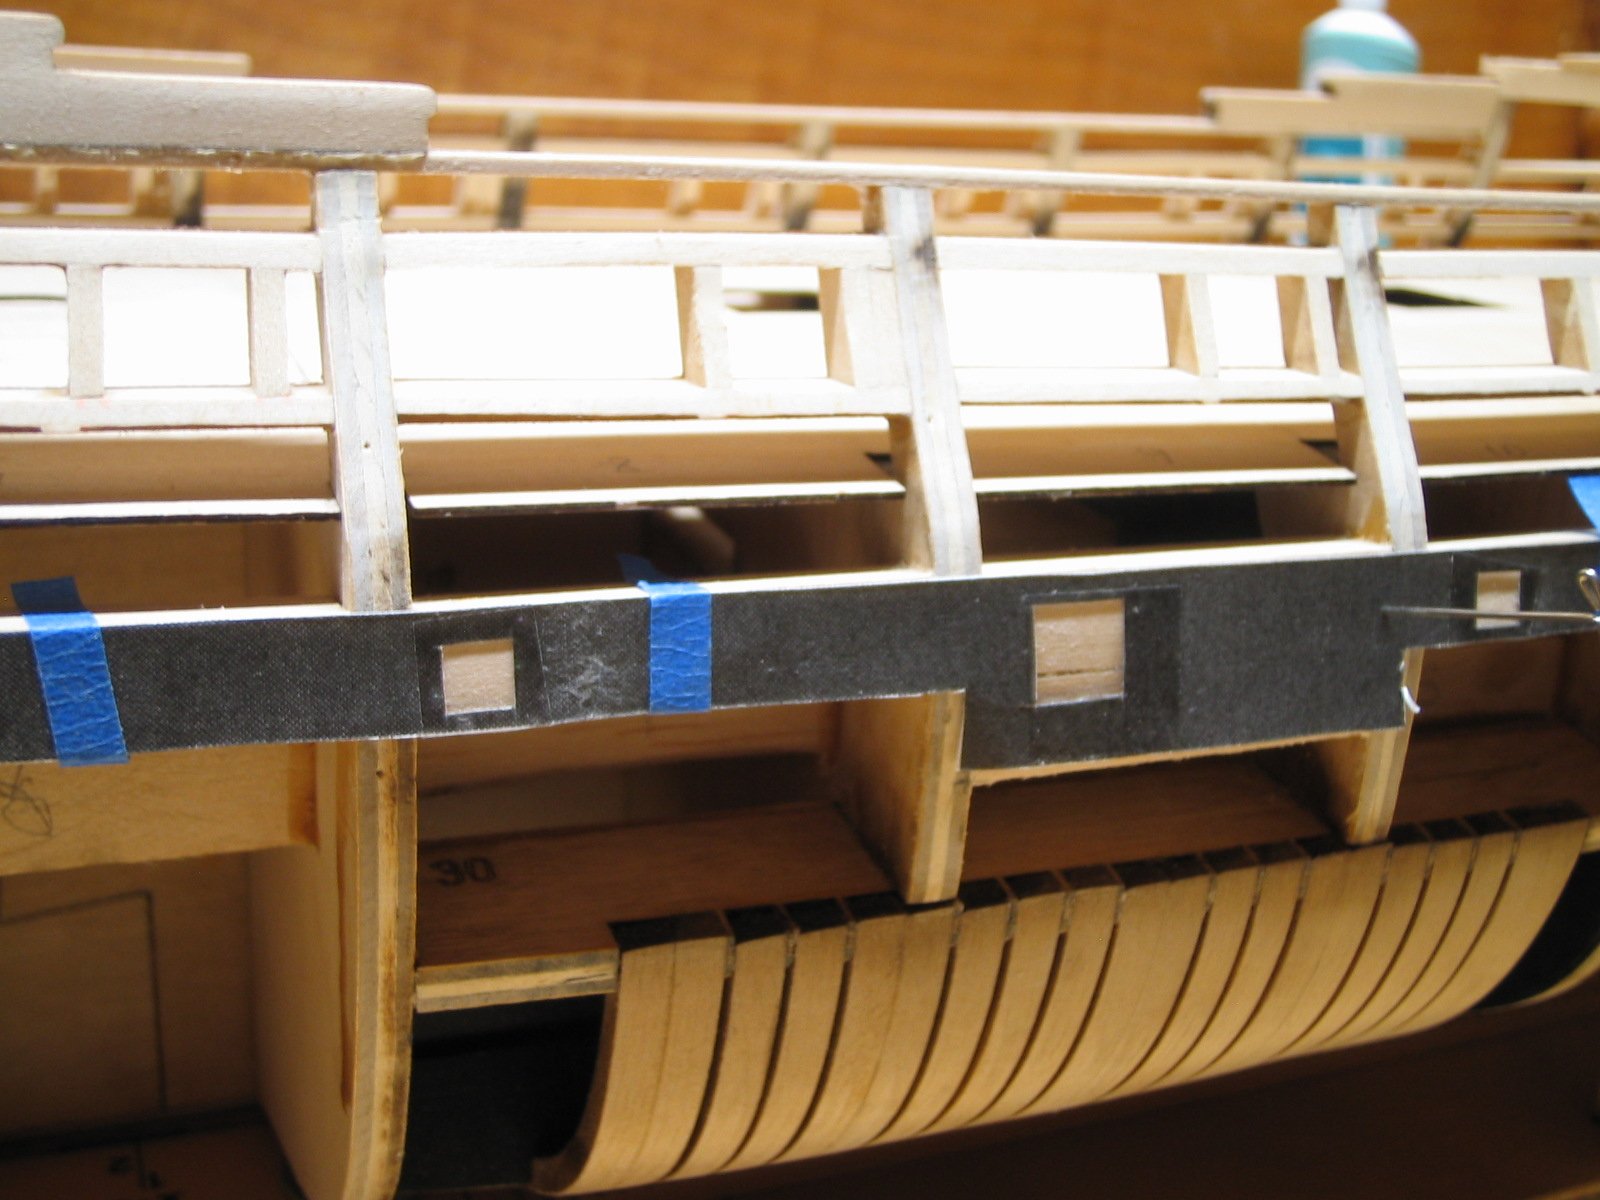
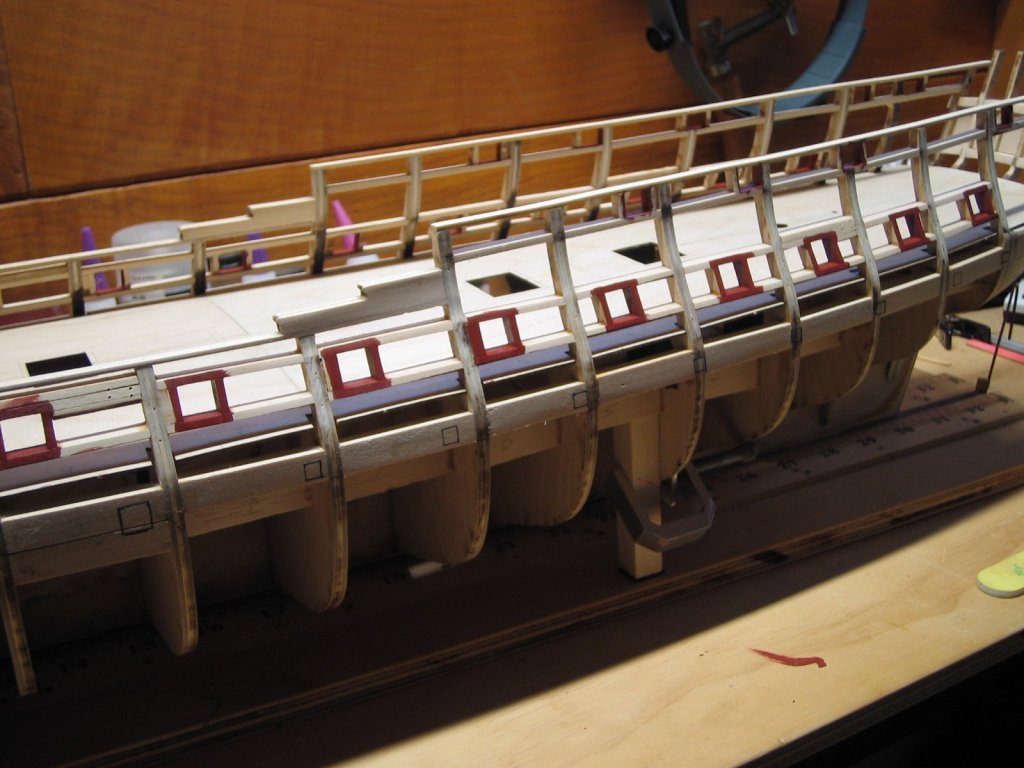
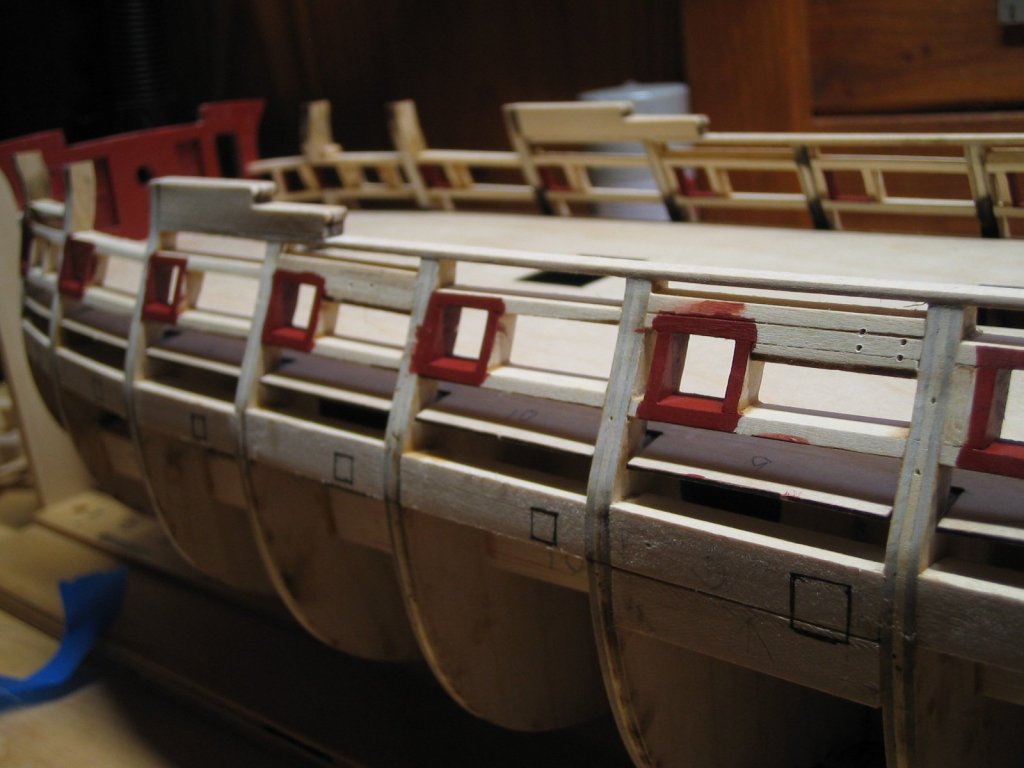
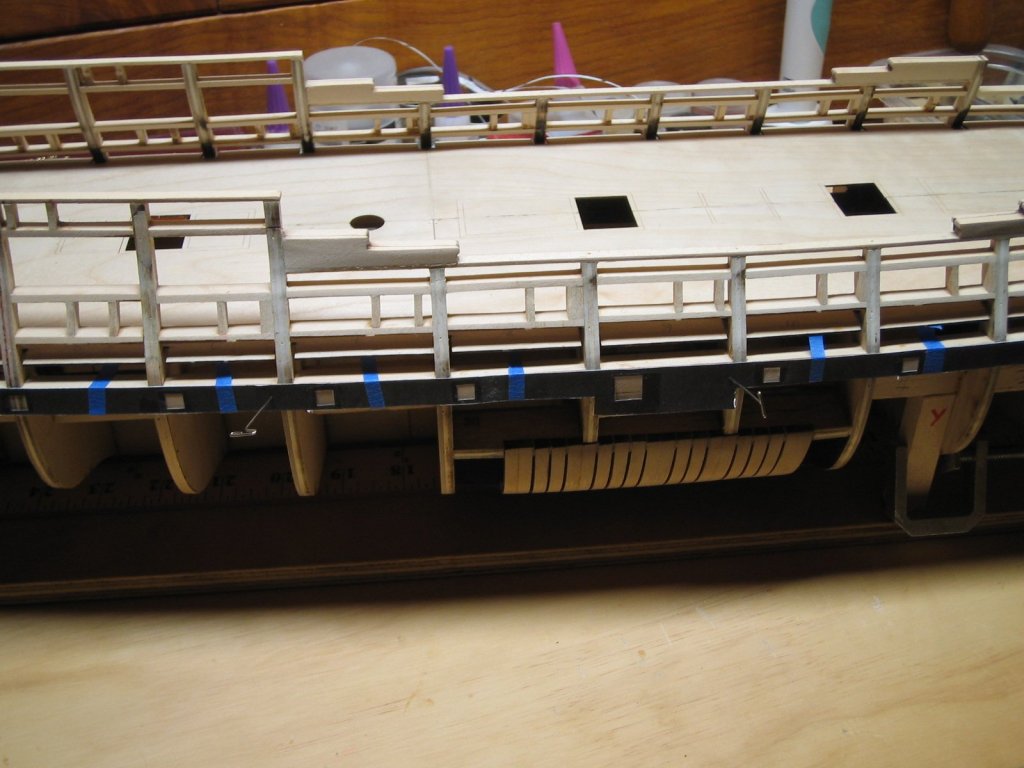
Greetings to all, Well the rainy season has started in Oregon,so it is time once again for inside hobbies. I'm back at my workbench continuing my build of the Confederacy. Before my hiatus I finished the sills,lintels and uprights framing the gun ports. I also finished fairing most of the hull after fitting the Hance pieces. I fitted the sweep ports framing blocks using a batten aligned to the bulkhead marks and then faired them to the hull. Before cutting the sweep port templates from the plans I reinforced the area around the port cut-outs with clear tape. This made a more defined edge for the port outline which was marked on the framing.

-
Purpose of tall mast on bow of riverboat
JohnB40 replied to Shotlocker's topic in Masting, rigging and sails
I read a book about the US Army's campaign against the Sioux/Cheyenne in 1876. They were able to operate so far from their forts because they had the riverboat Far West at their disposal for supplies and communication. The Far West was a 'Missouri River Boat" which had a shallower draft than the Mississippi river type. In the book it explains the procedure if it ran aground or came upon a sandbar. The crew would erect strong timber pylons in the river ahead of the bow,they would then use a large bow spar and a steam driven capstan to lift the bow and dip the stern deeper. At this point they gave the engines full steam and the stern wheel would push the boat up and over the obstruction. I don't know if this procedure was used on boats like the L E Lee -
Acrylic colours for artists
JohnB40 replied to TomJonas's topic in Painting, finishing and weathering products and techniques
I started to use artists acrylic paints in tubes after reading reviews on the forum. I have found them a lot easier to use and when thinned and applied with multiple coats give the best finish for brush applications. I had problems with coverage at first,but a nice knowledgeable lady in our local artist supply store set me straight. There are two types of this paint...Transparent and opaque. I hadn't a clue about this,but it is on the tubes for all to see. The type to use is the opaque one. She also recommended using M Graham & Co paints (or other quality premium paints),which is what artists use for painting on wooden panels. For priming I tried thinned gesso,but found it obscured detail and was a pain to sand. I settled on thinned wax free shellac,thinned 50/50 with 99% isopropyl alcohol,but I'm sure Tamiya primer will work as well. -
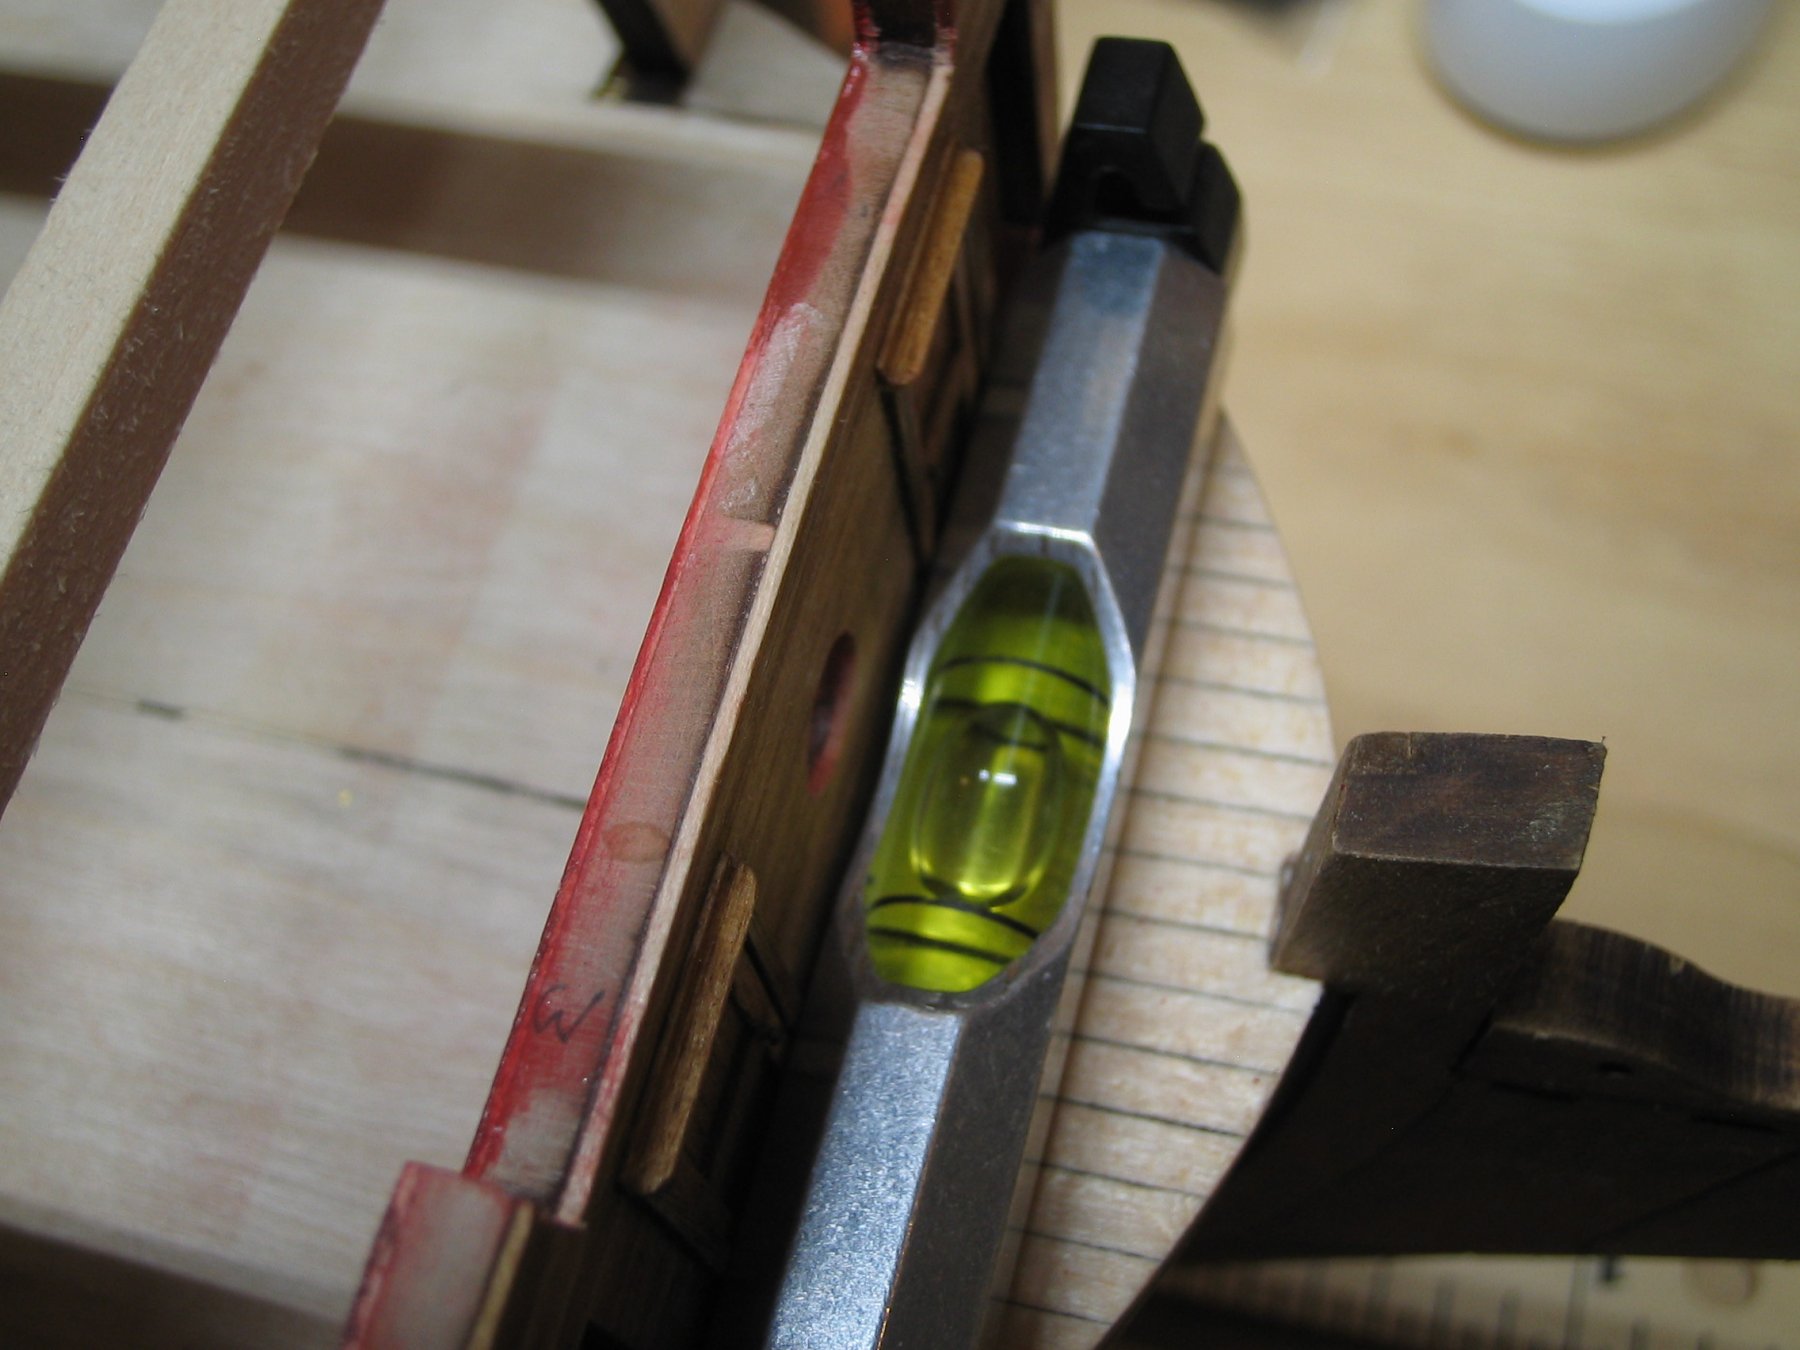
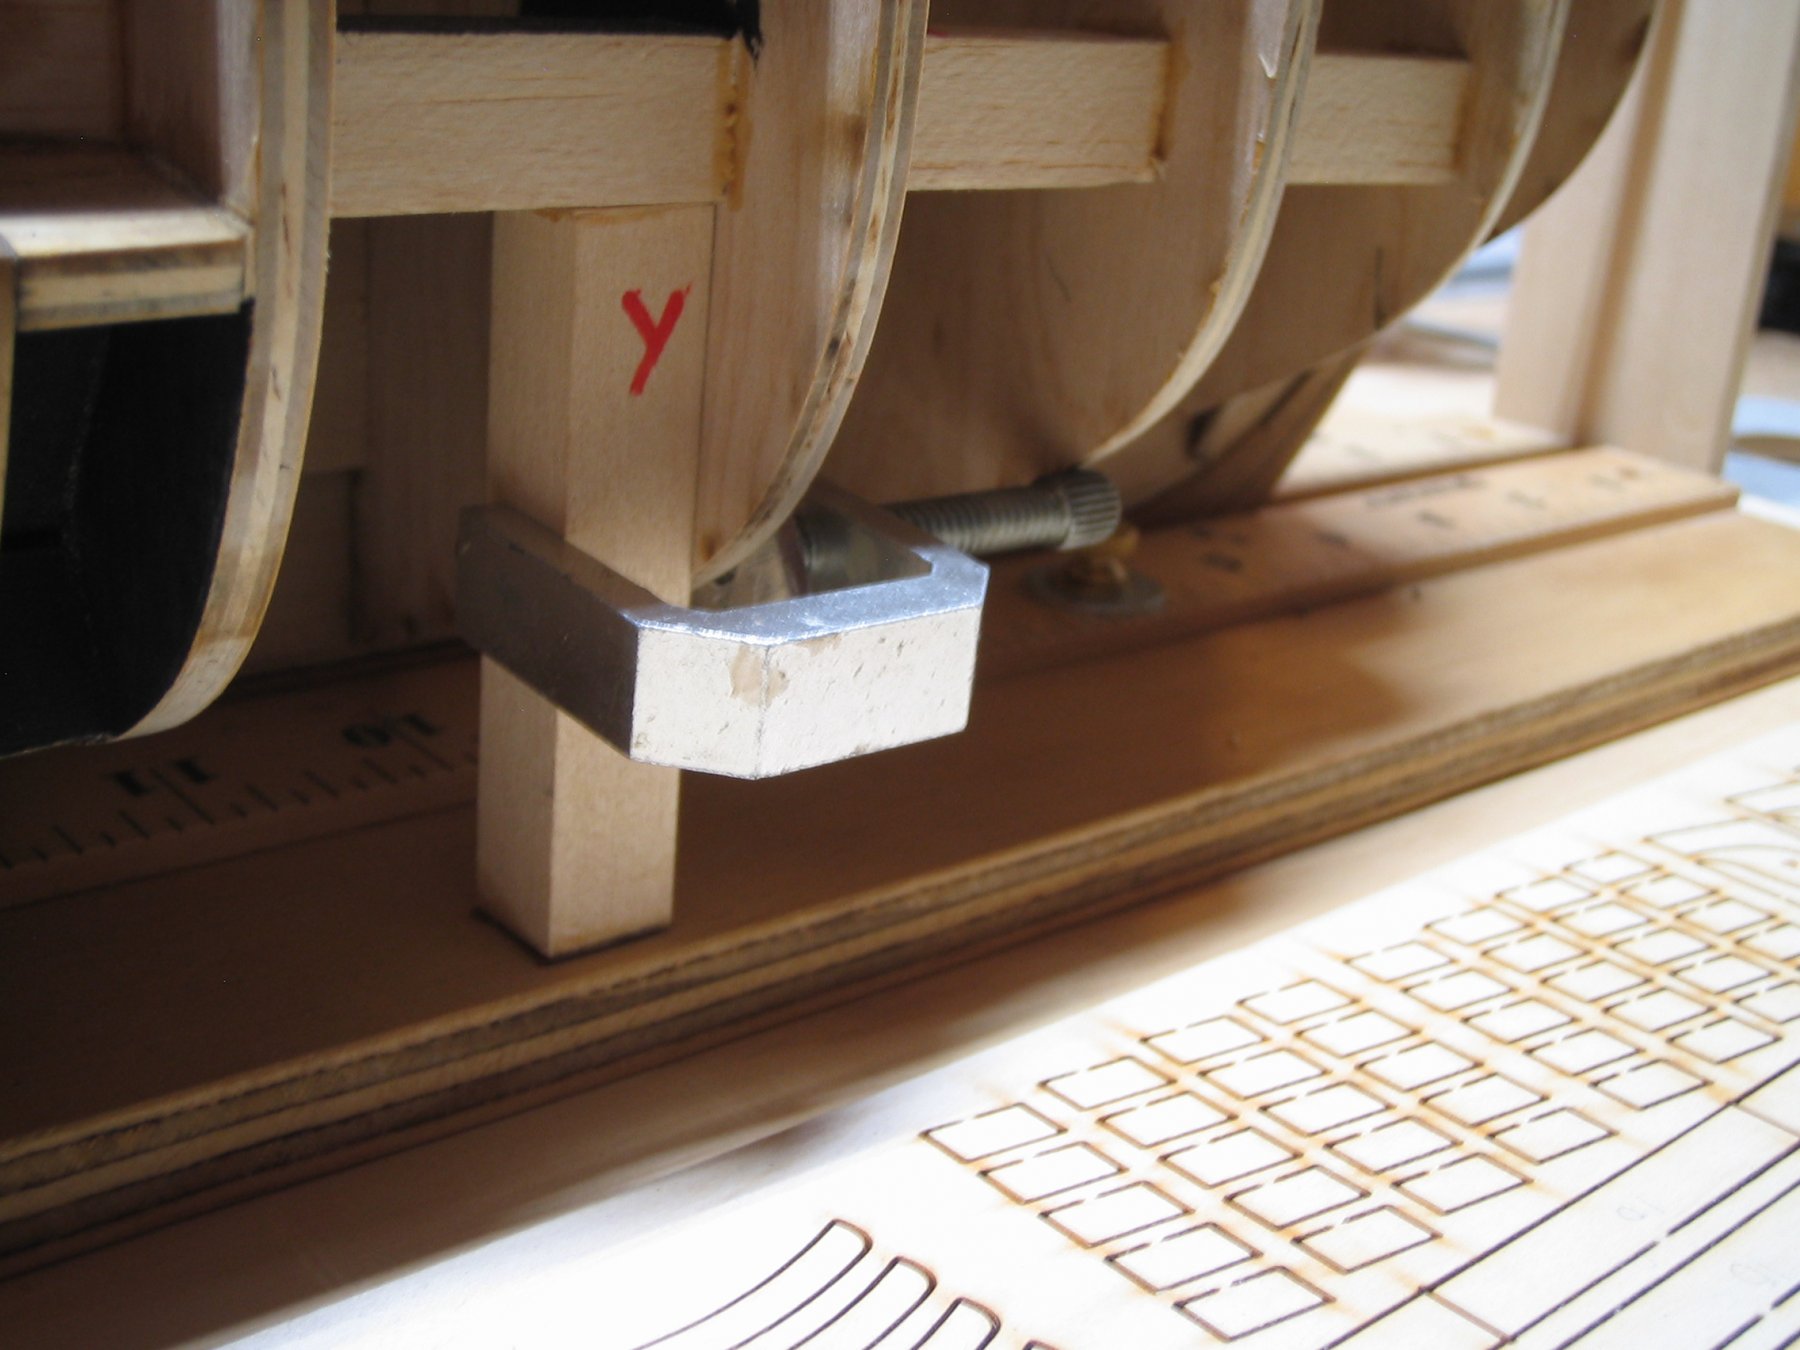
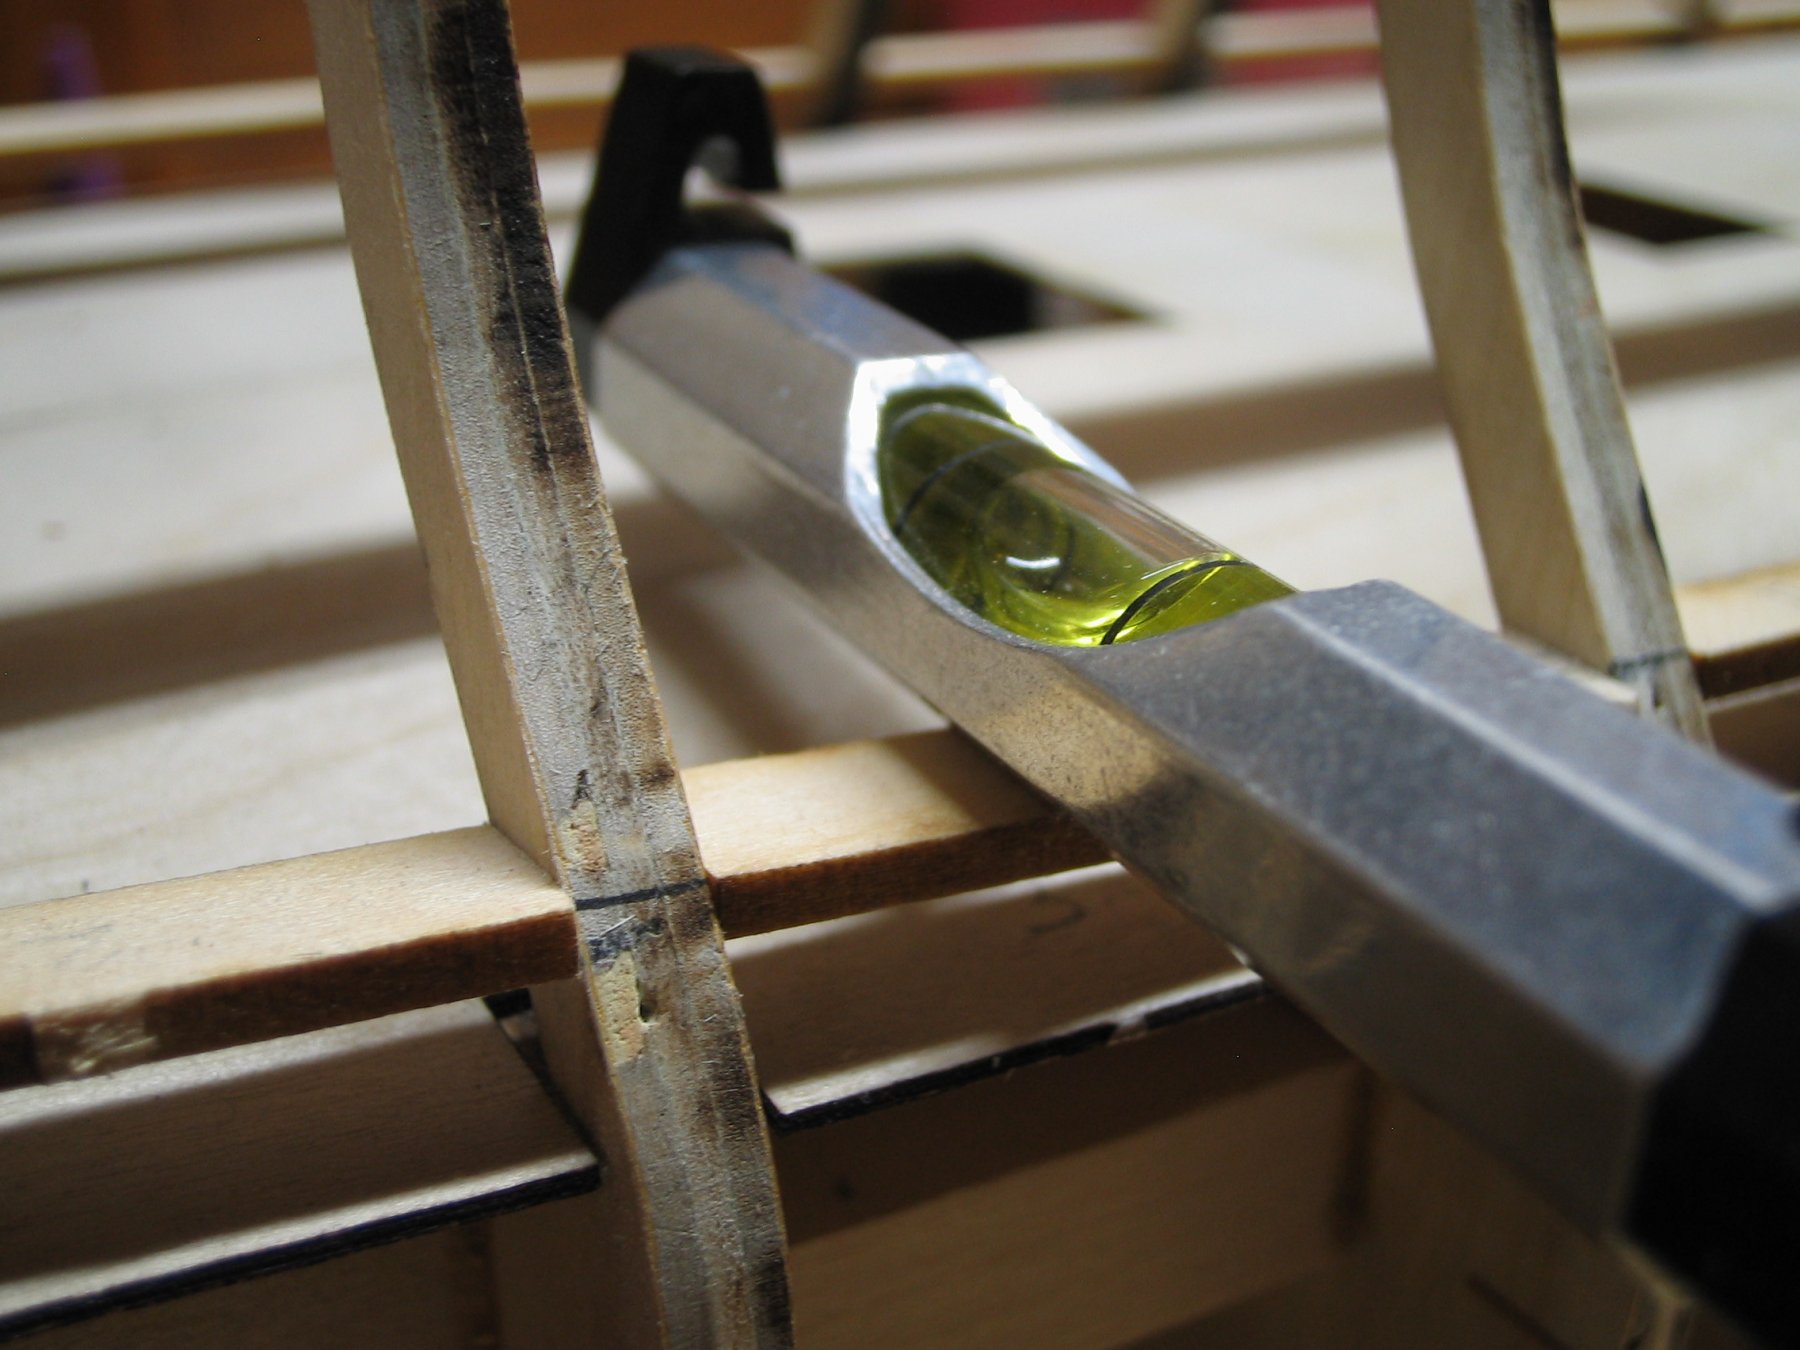
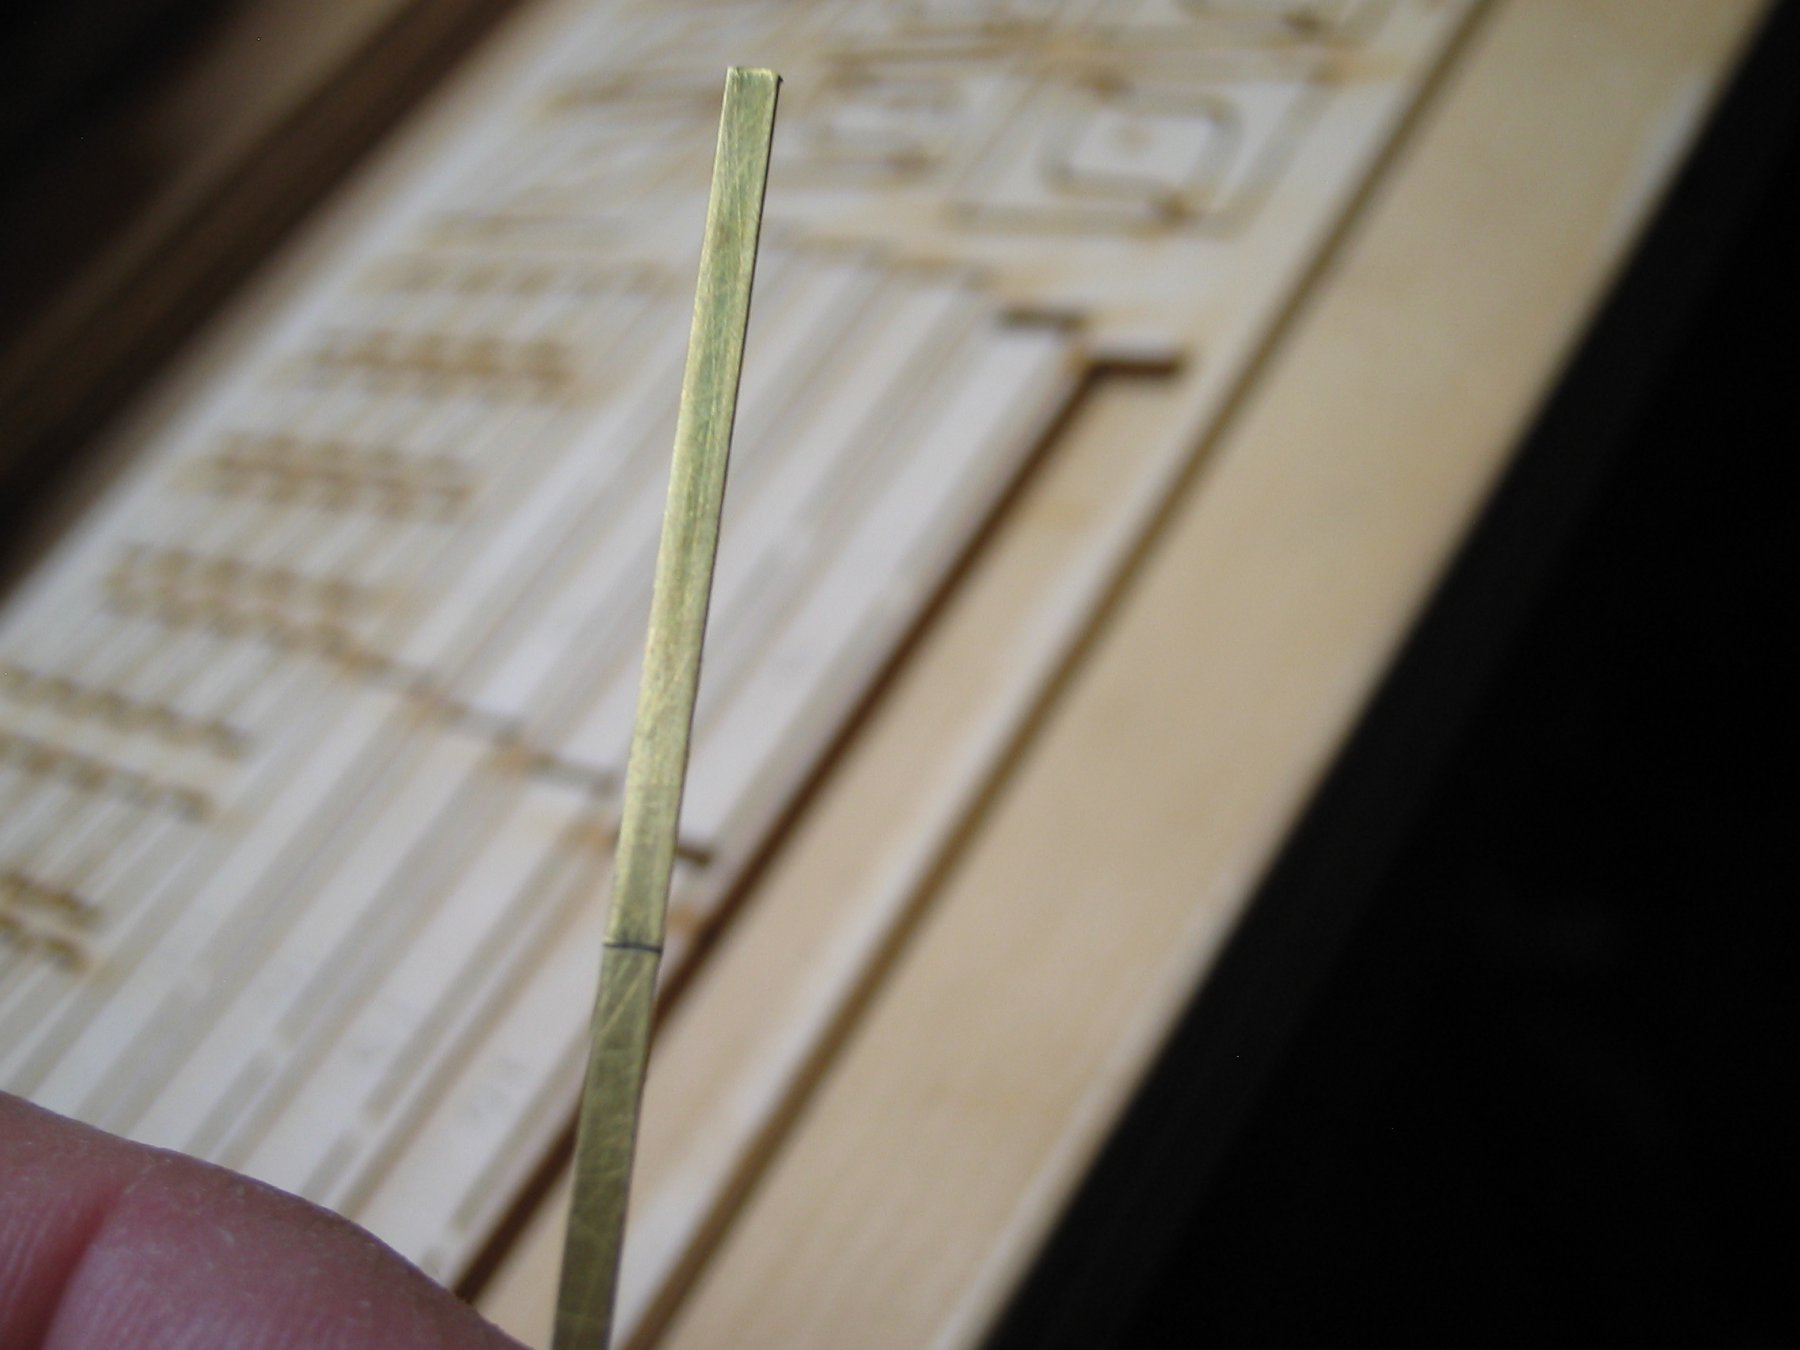
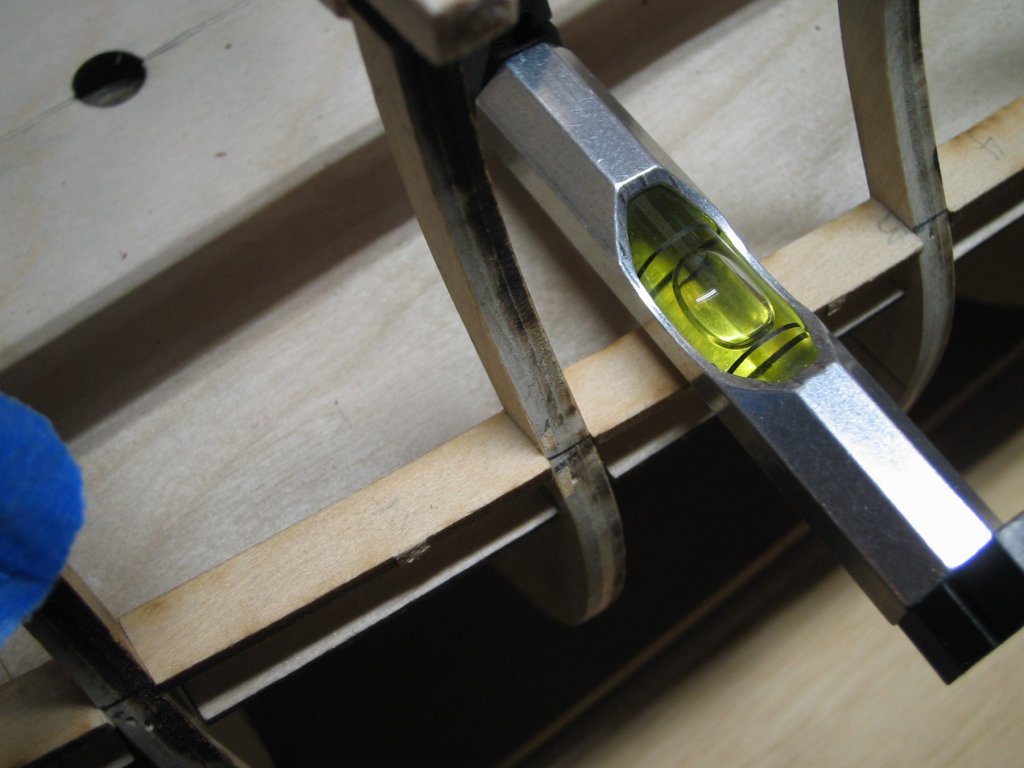
Today I started on gun port framing. I had previously checked the laser marked guidelines on the bulkheads against the plans to verify. All checked out OK. I used a strip of 1/16 x 1/8 x 36 balsa to align the bulkhead marks,check the run of the sills and mark the outboard face of the bulkheads. I found it was easier to use balsa as it formed a curve better than basswood.The sills were trimmed to the correct length and marked in sequence from the aft forward. The false deck was also numbered at their corresponding place between the bulkheads. When I started to lay the sills,I found it hard to establish when the sills were level as the curve of the deck and bulkhead were confusing my trifocal eyes. The only way I could see overcoming this was to make sure my building bench was perfectly level. I then made sure the ship was level in its building jig. I used a couple of small levels on the beakhead deck and other points to check this. I shimmed the upright supports of my jig to get it spot on and then clamped them. I then aligned each sill with the bulkhead marks,used a 2" level to lay each sill in place. Each was leveled and aligned as I went forward. I can now use spacers to put the lintels in place and know and they are laying parallel and level to each other. As an additional check I made a small gauge from thin brass with a mark scribed at 1" which I could fit between the slot in the false deck and the bulkhead and double check the position of top of the sills. I will start on the lintels tomorrow.....


-
Surprisingly good tweezers...
JohnB40 replied to monkeysarefun's topic in Modeling tools and Workshop Equipment
I got mine today....Thank you