HOLIDAY DONATION DRIVE - SUPPORT MSW - DO YOUR PART TO KEEP THIS GREAT FORUM GOING!
×

JohnB40
-
Posts
196 -
Joined
-
Last visited
Content Type
Profiles
Forums
Gallery
Events
Everything posted by JohnB40
-
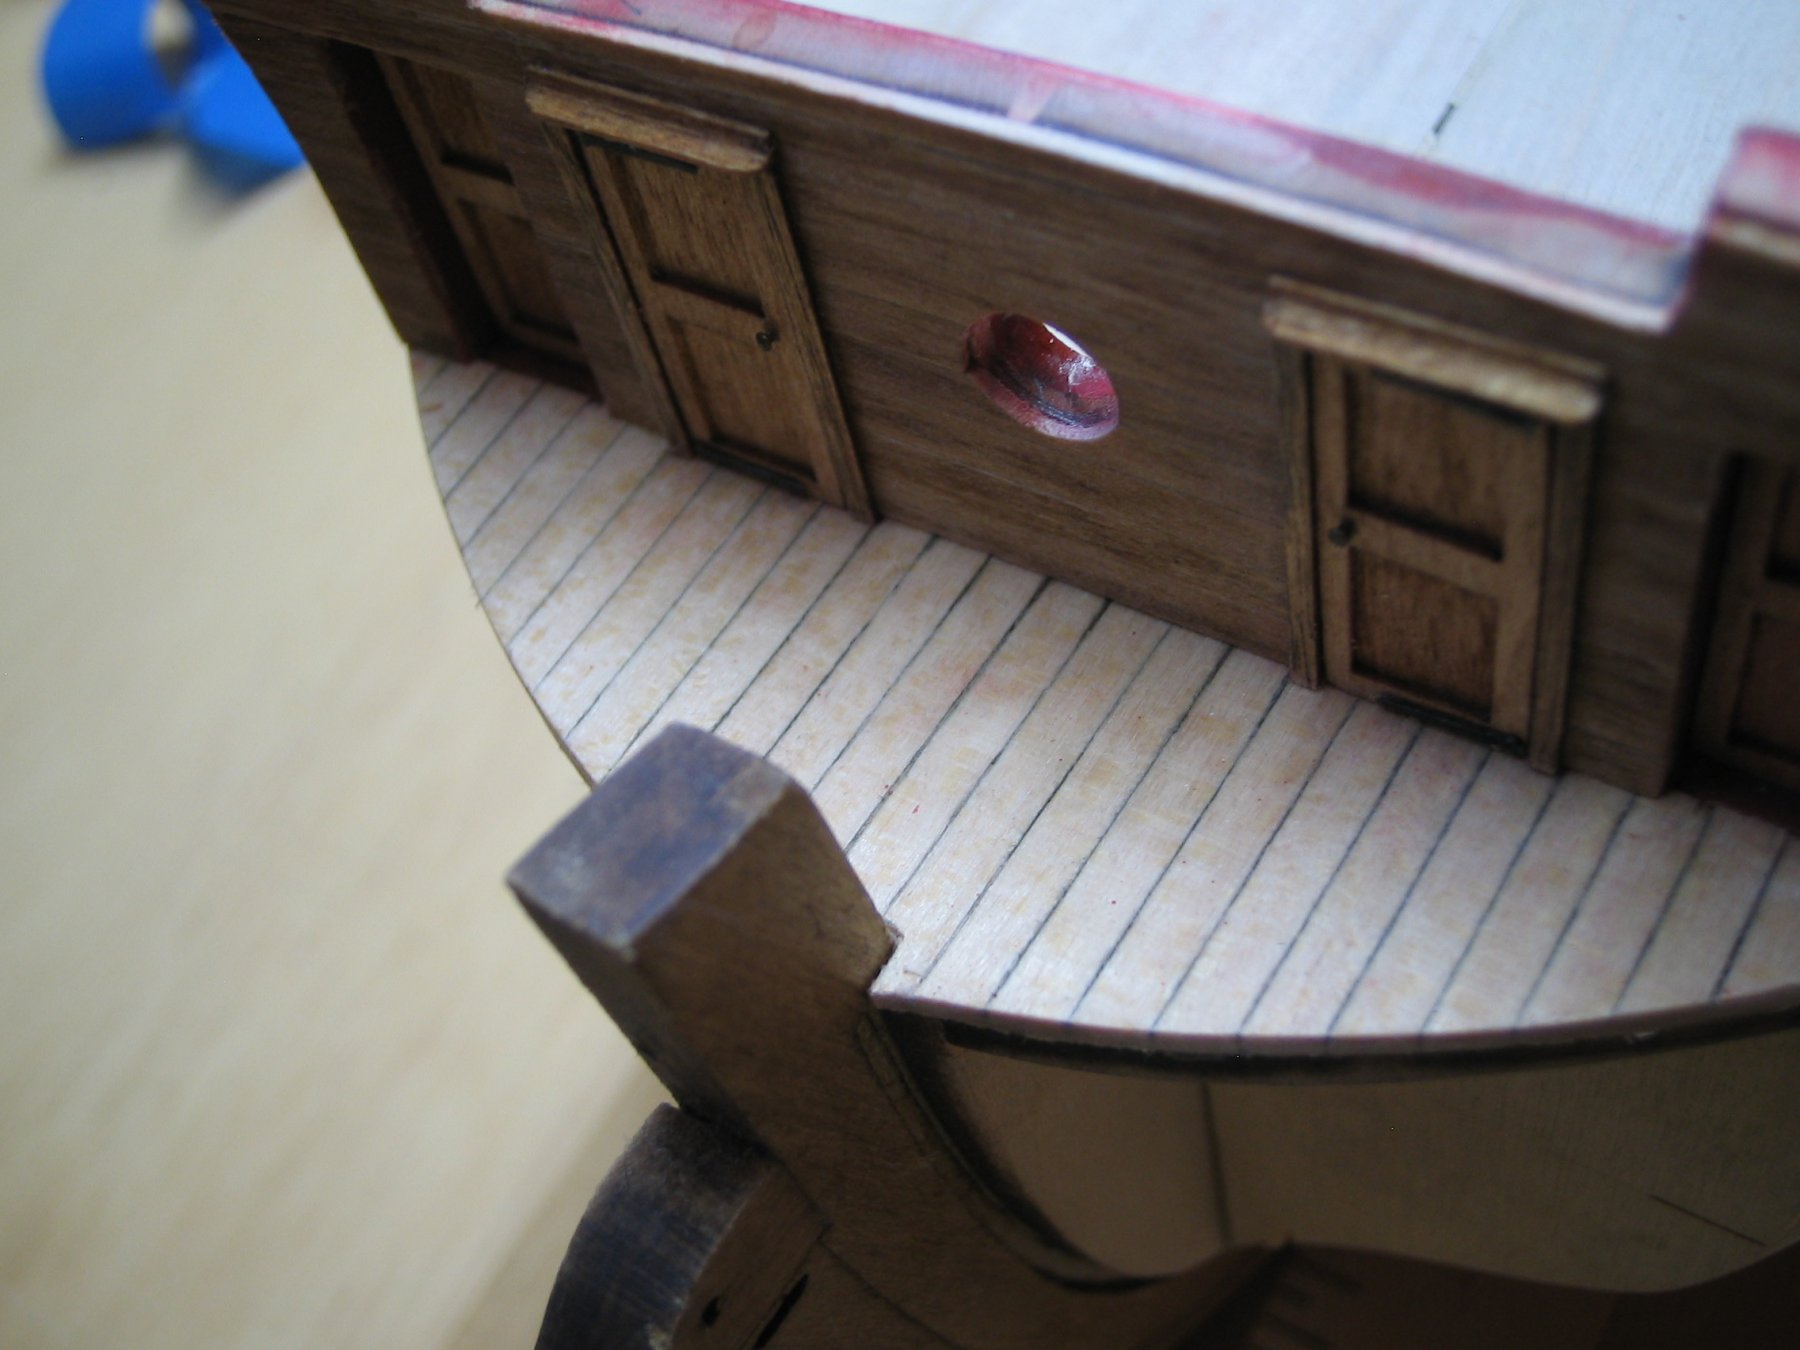
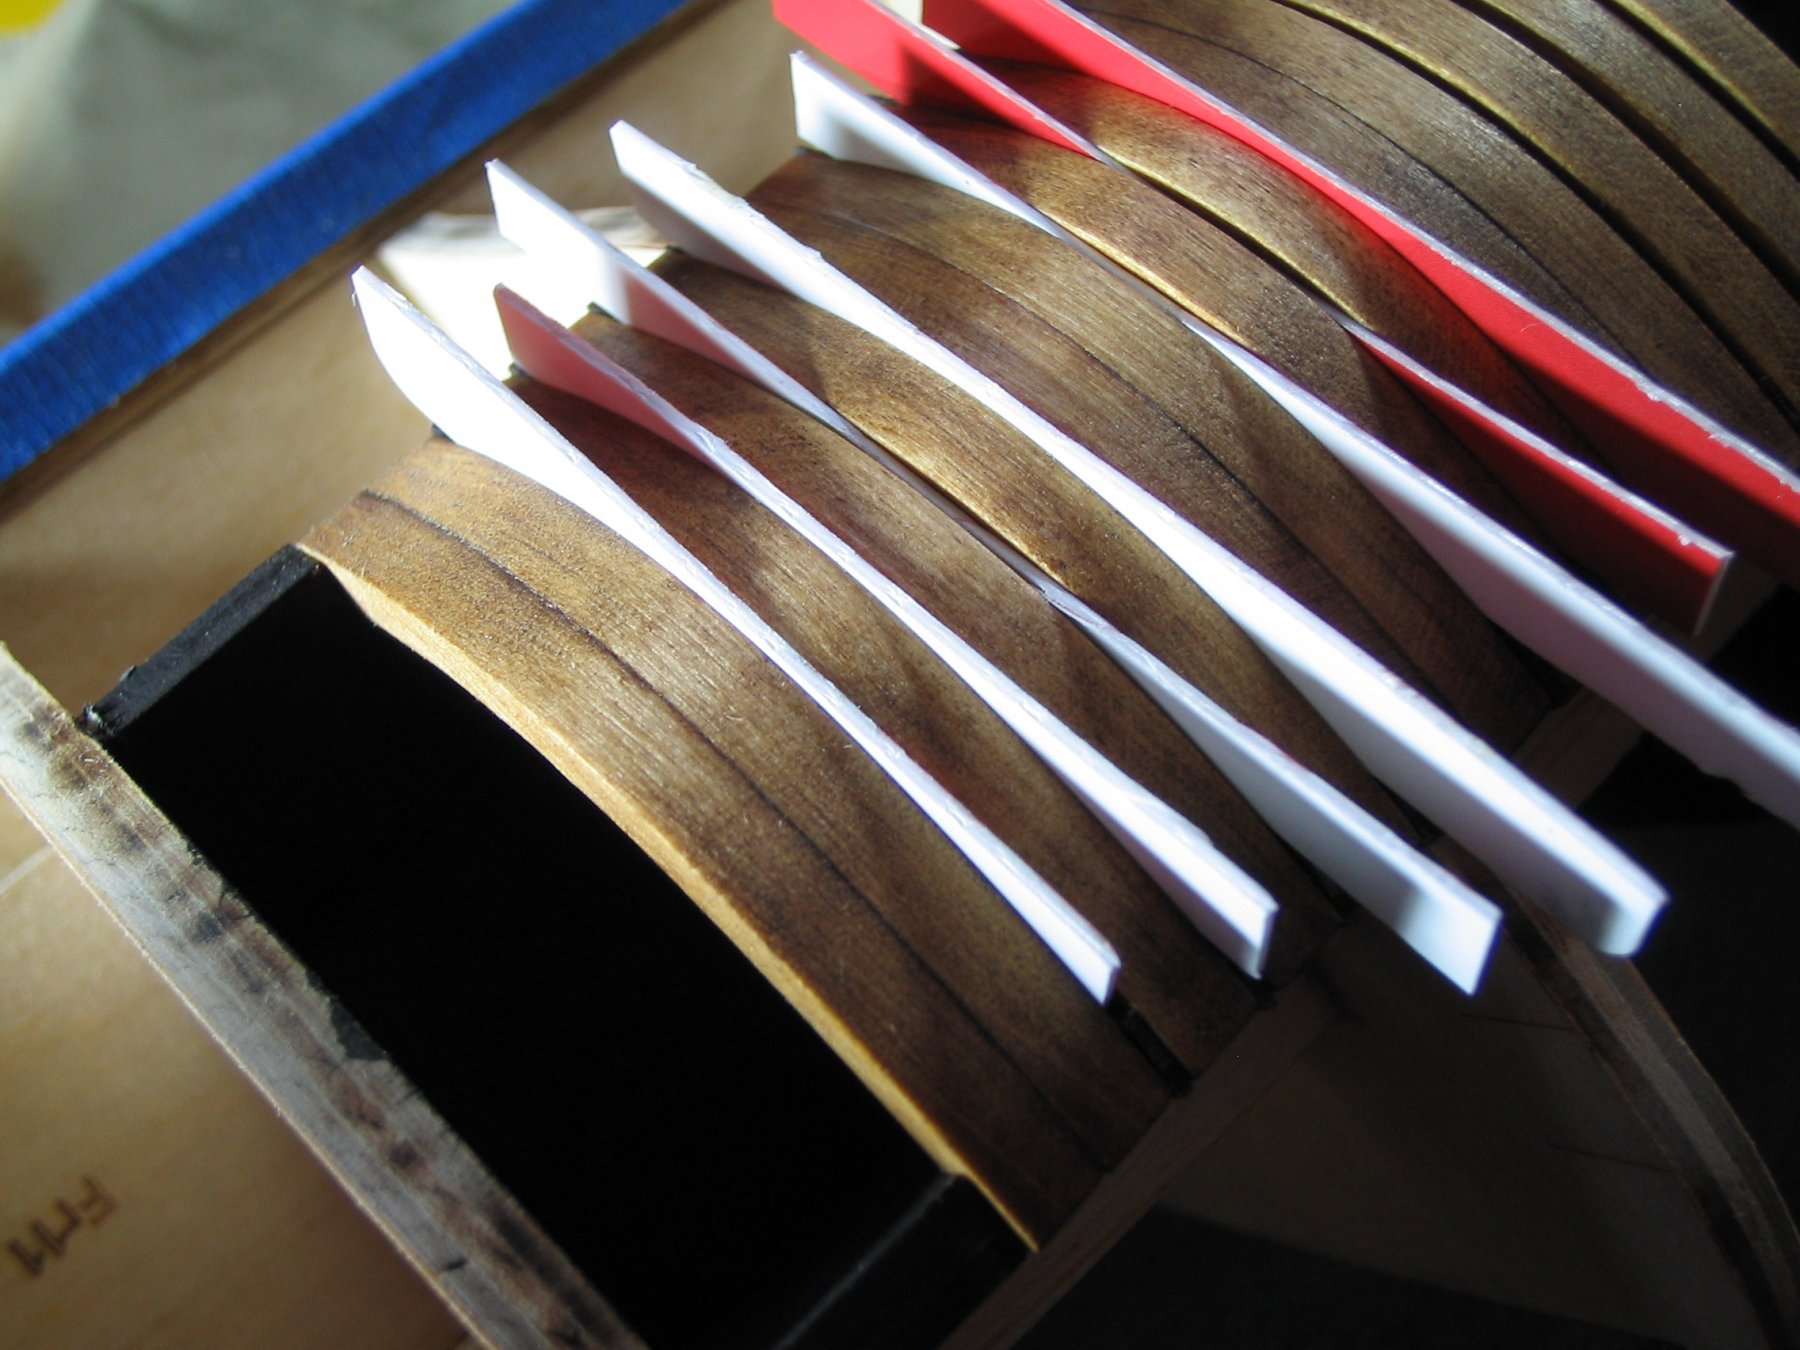
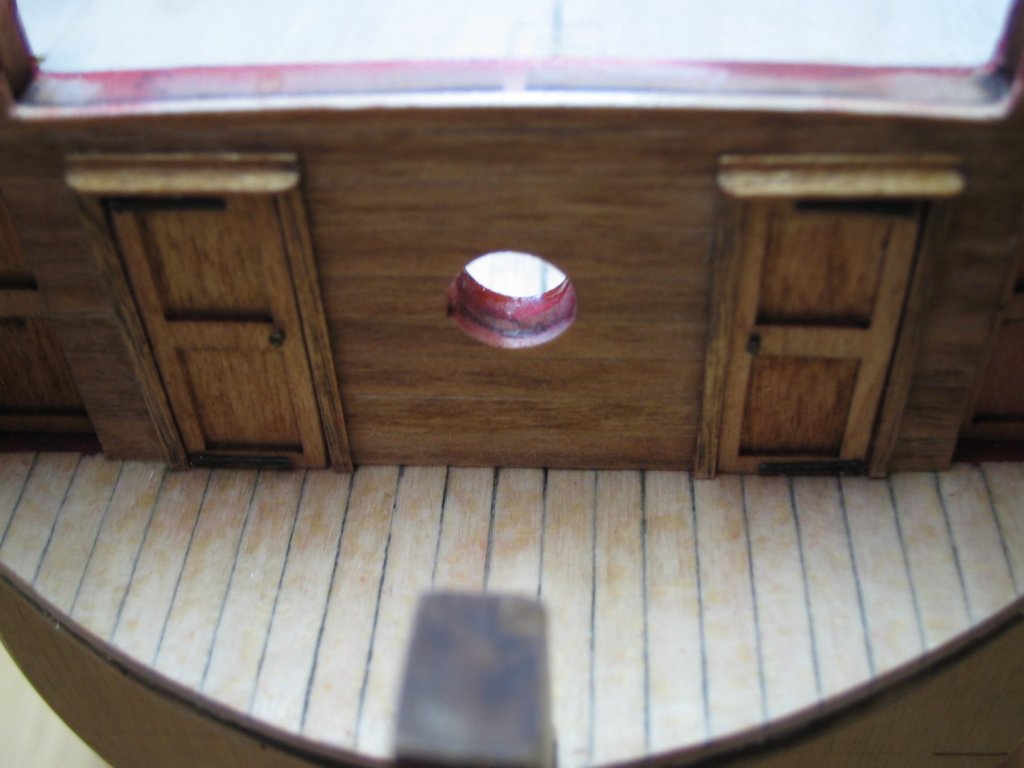
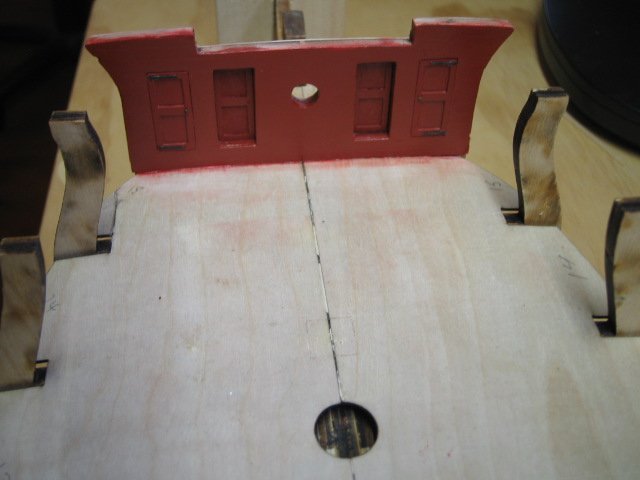
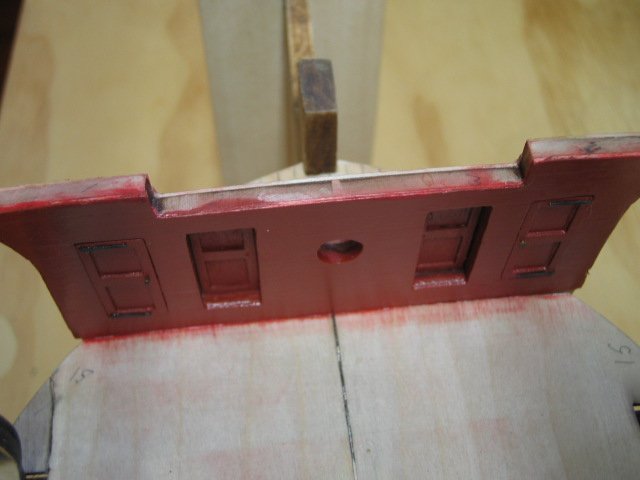
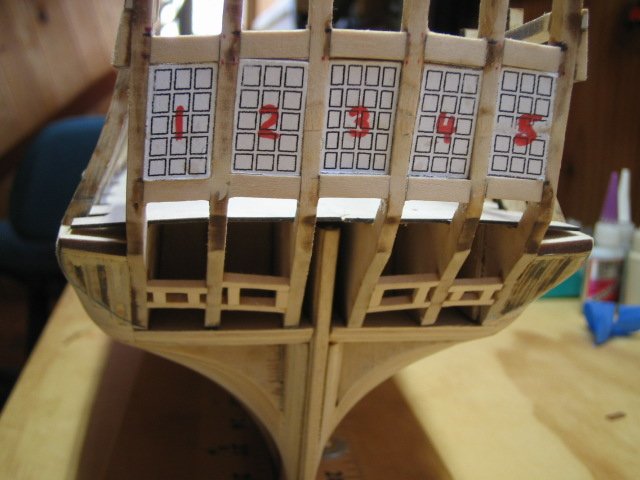
 The next task was to lay the four sections of false decking. I spent quite some time aligning the sections,making sure the joints were as tight as possible and the center joints were true to the center line of the bulkhead former. I used clamps on the outboard side and 1/32" brass brads down the center line,which were removed and holes filled after PVA had set The beakhead deck was planked,a #2 pencil used to create caulking. The beakhead bulkhead was planked on both sides. After looking at this part of the construction I decided to add some details like the doors ,hinges,frames and doorknobs. I thought it would be better done now owing to the small parts and easier access The inboard side was painted and hinges and doorknobs added. I couldn't decide whether to frame these doors...I might go back and do them. It took me a long time to decide on the interior bulkhead paint color. I chose an ochre acrylic artist paint in the end. I think this is more realistic color for the period after looking at many models on the NMM website. From what I read ochre pigments (from mustard yellow to brick red) were mixed with linseed oil to paint period ships. Bright red pigments for paint were not formulated until the late 1800's. I will be using Dulcote to matte down the paint.
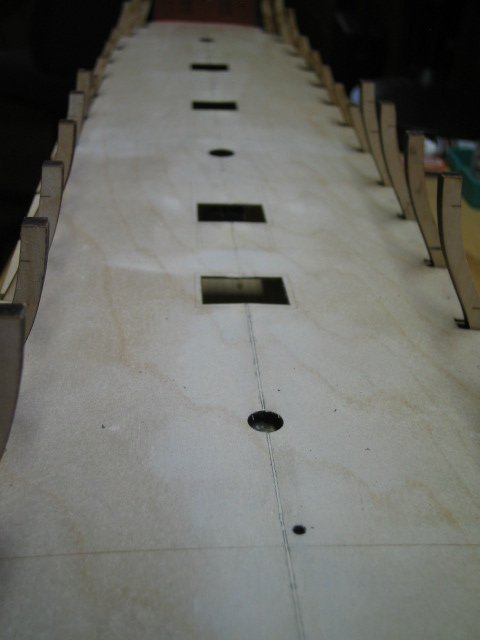

-
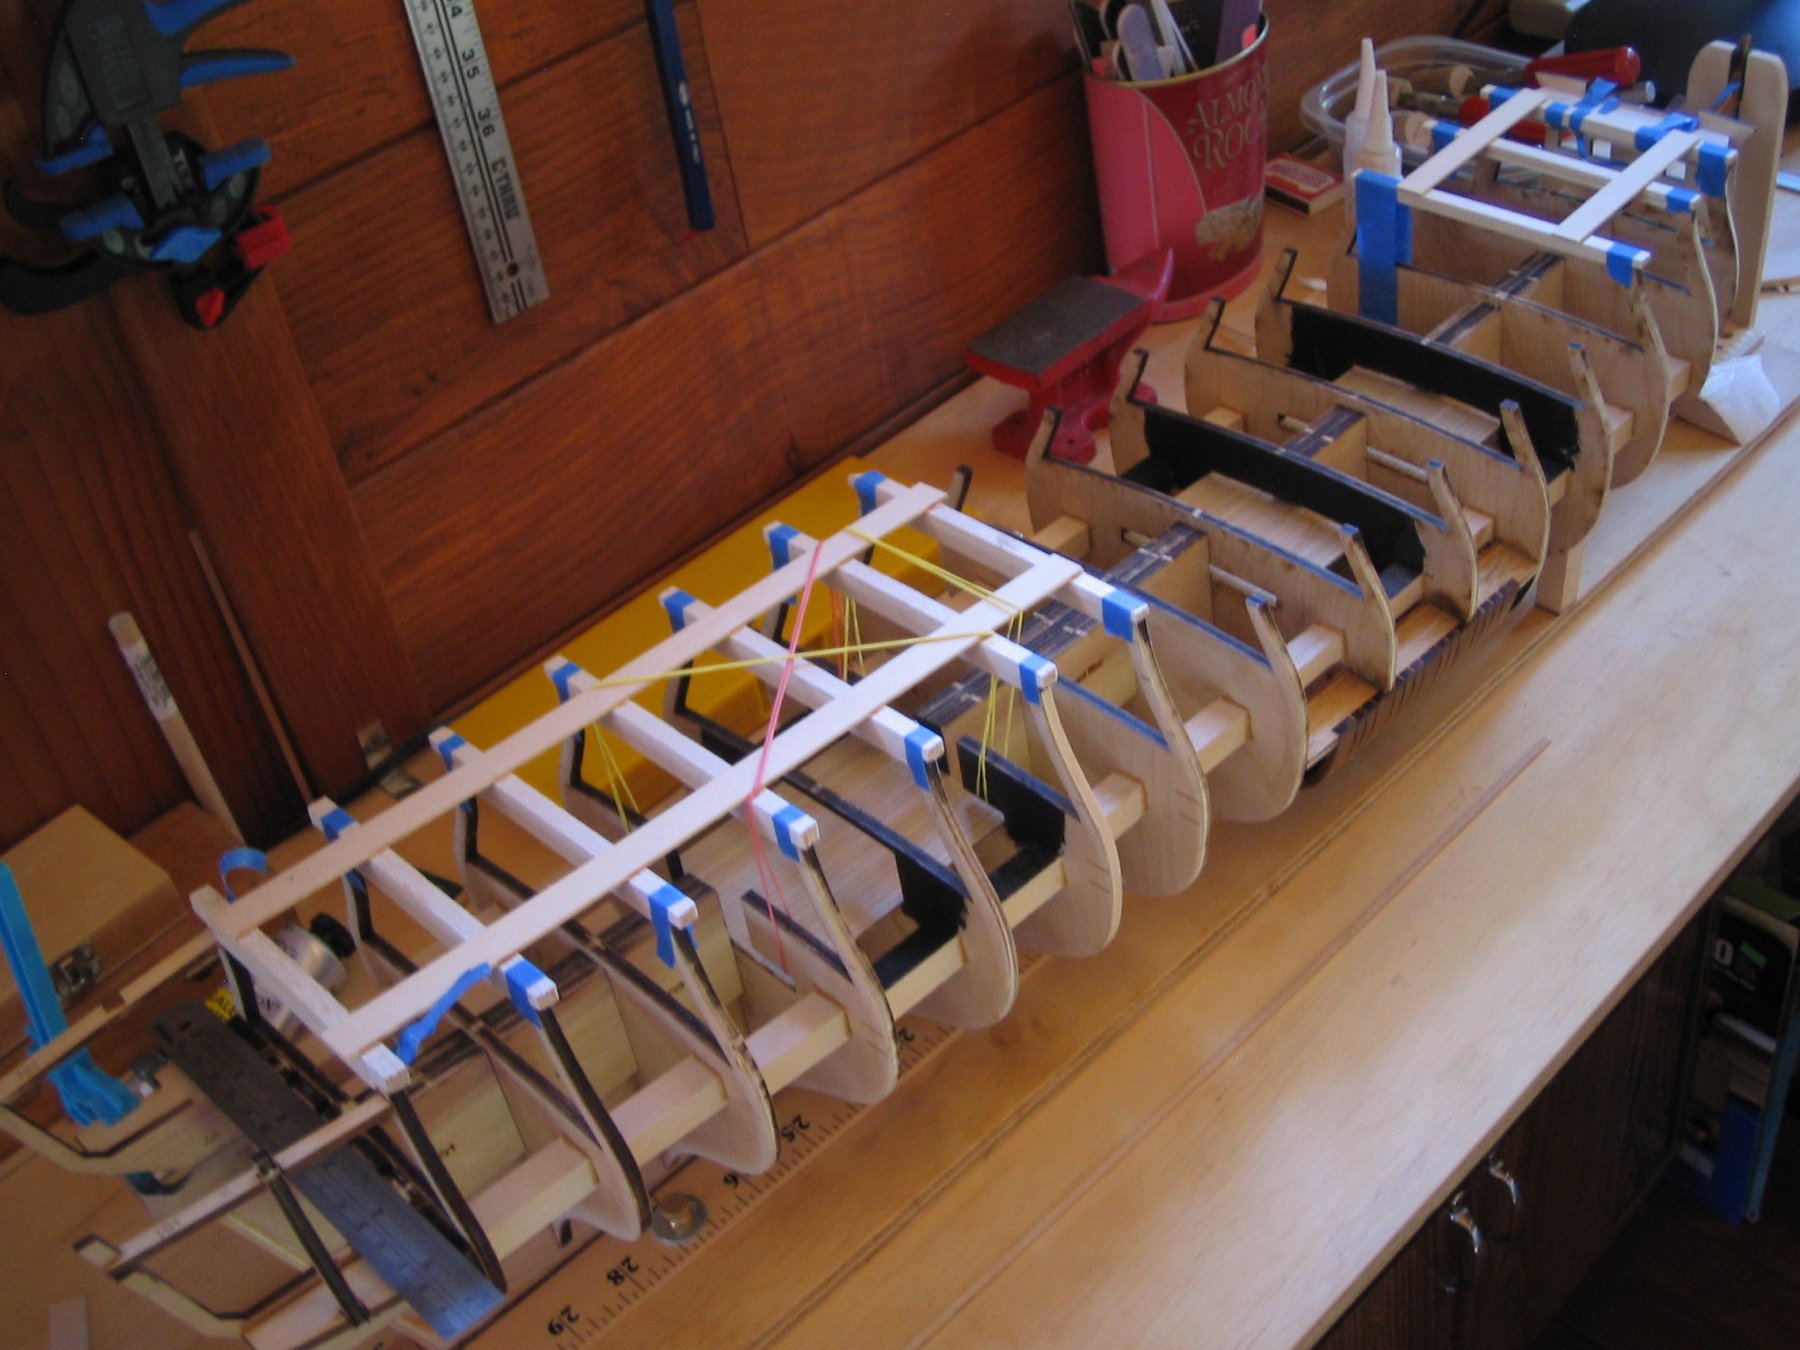
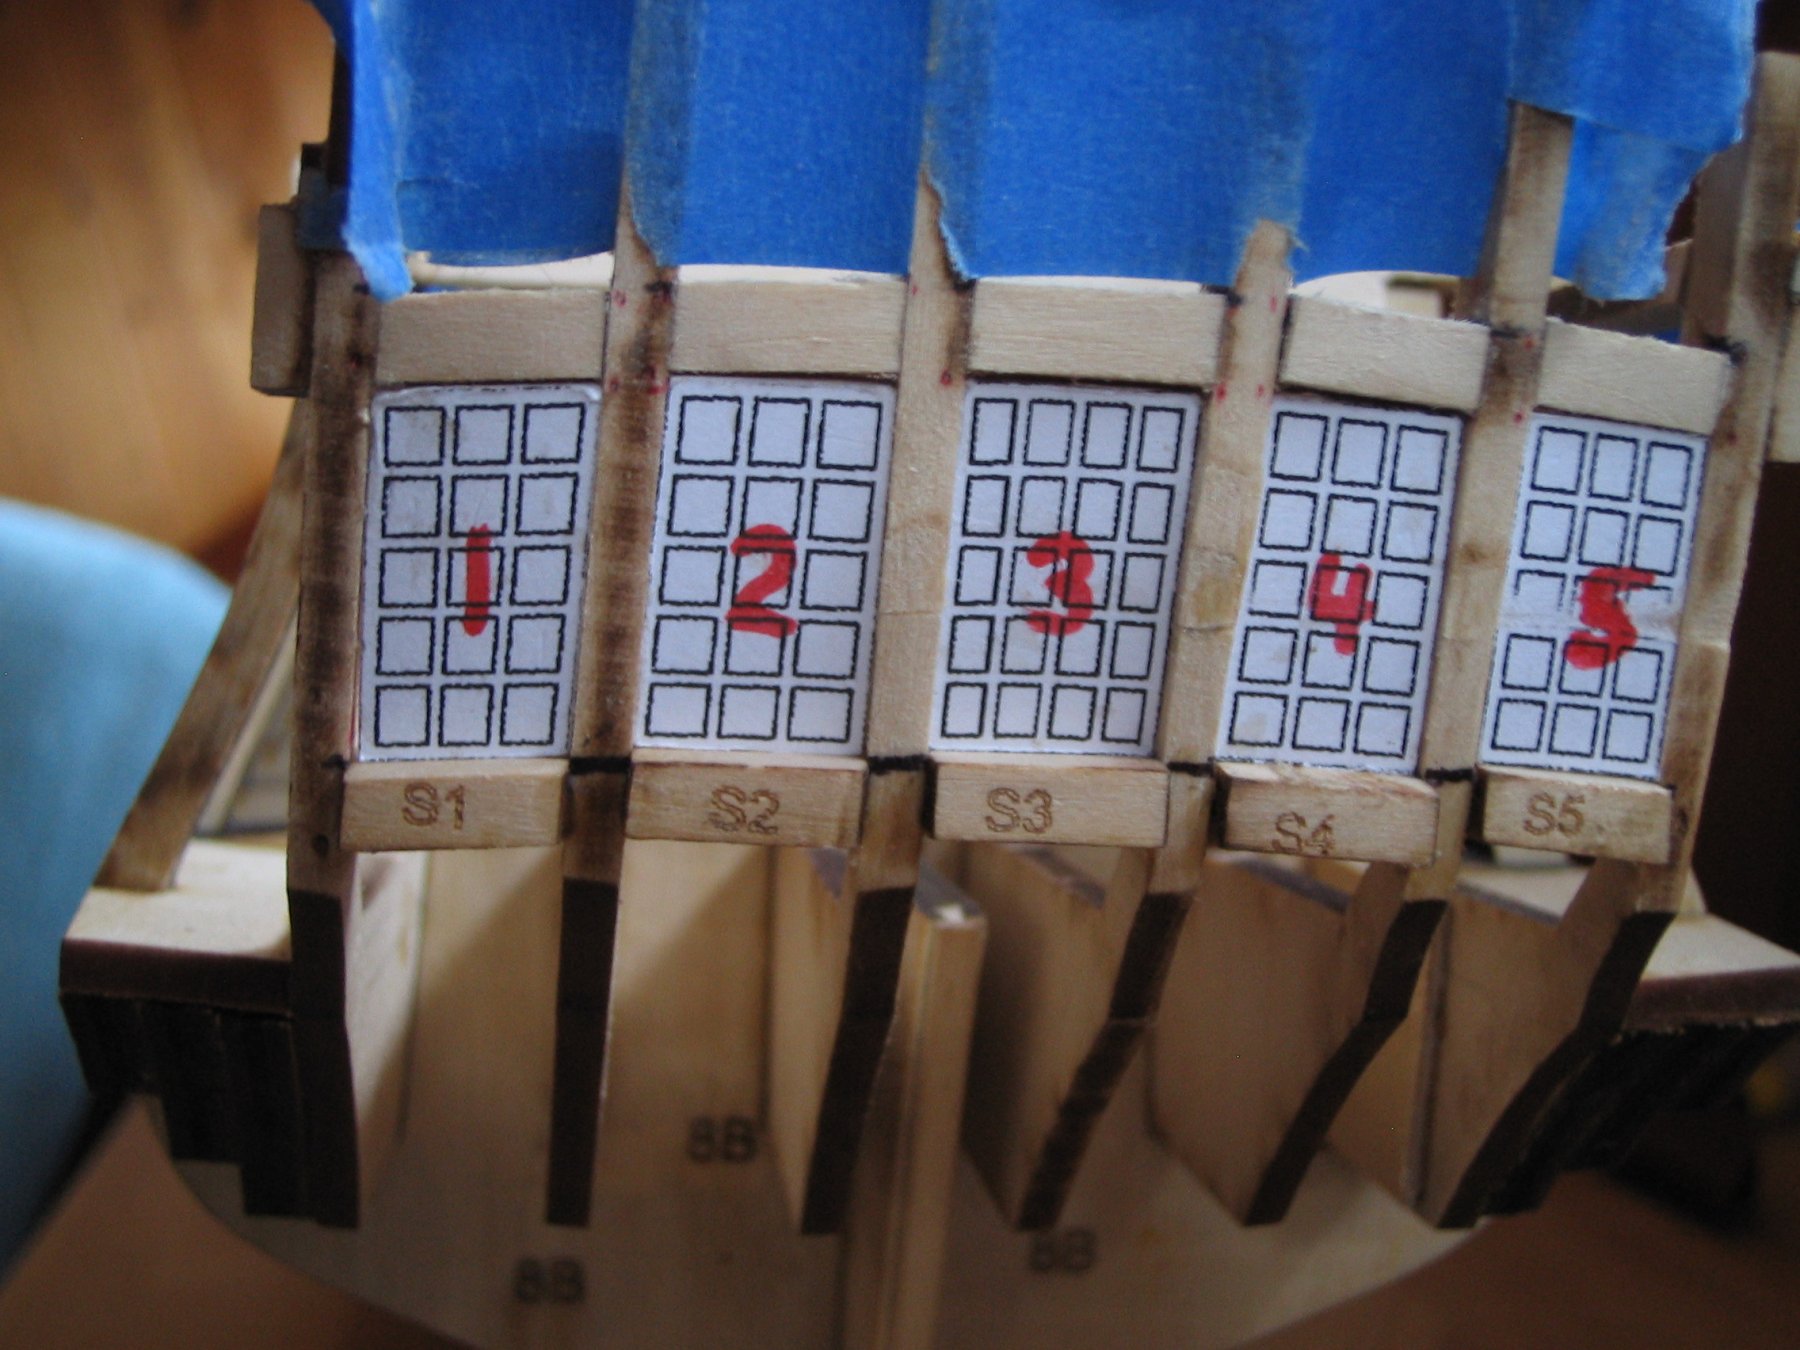
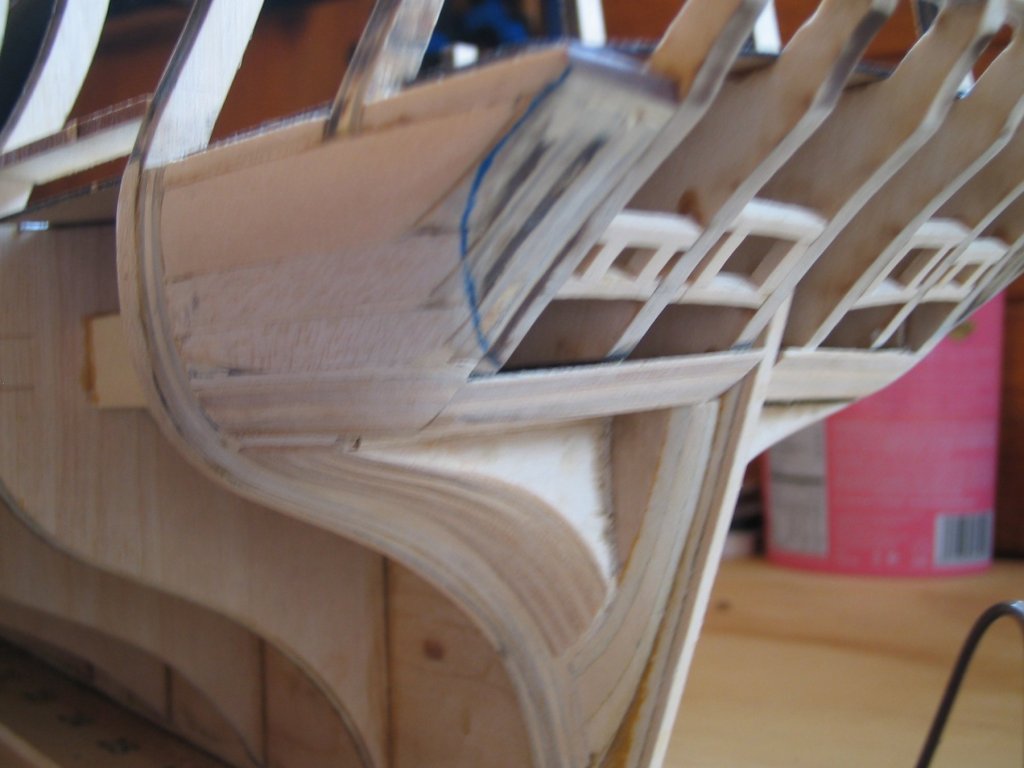
Greetings to all, I have decided to restart my build log for my present project.... Model Shipways USF Confederacy. My 2 previous attempts disappeared from the forum without a trace and I'm hoping that 3rd time is a charm. I won't go back to square one,but will continue on from the last point I was at,which was completion of the stem,keel,false decks and bulkhead formers. The only thing I can add to this part of the build that might be useful to others was the use of AARP cards to keep a uniform distance between the exposed frames while glue sets. 870 kb · Done The bulkheads were then faired and a start was made on the stern framingand followed by fitting the rear lights sills and lintels. These were faired to the curve of the transom. The final fairing of Bulkheads 7 & 8 was finished too . The large and small aft facing ports framing was added and faired to follow the curve of the counter.


-
Looks very nice Gary. You have been making great progress with the build. I'm just about to fit the battens to frame the gun ports. So at my present pace,I should be where you are about this time next year!
-
Looking good Gary,starting to look like a frigate. Nice progress on the construction. I'm still messing around with stern,just a bit more filling and fairing to go. Seems like I have been at this for quite some time.
-
My condolences for your brother, Gary. I hope your family can still have a fine thanksgiving,even under the present sad circumstances.
-
My condolences for your brother, Gary. I hope your family can still have a fine thanksgiving,even under the present sad circumstances.
-
I'll post the pictures again. It has not been a good digital day.


- 12 replies
-
- 19
-

-
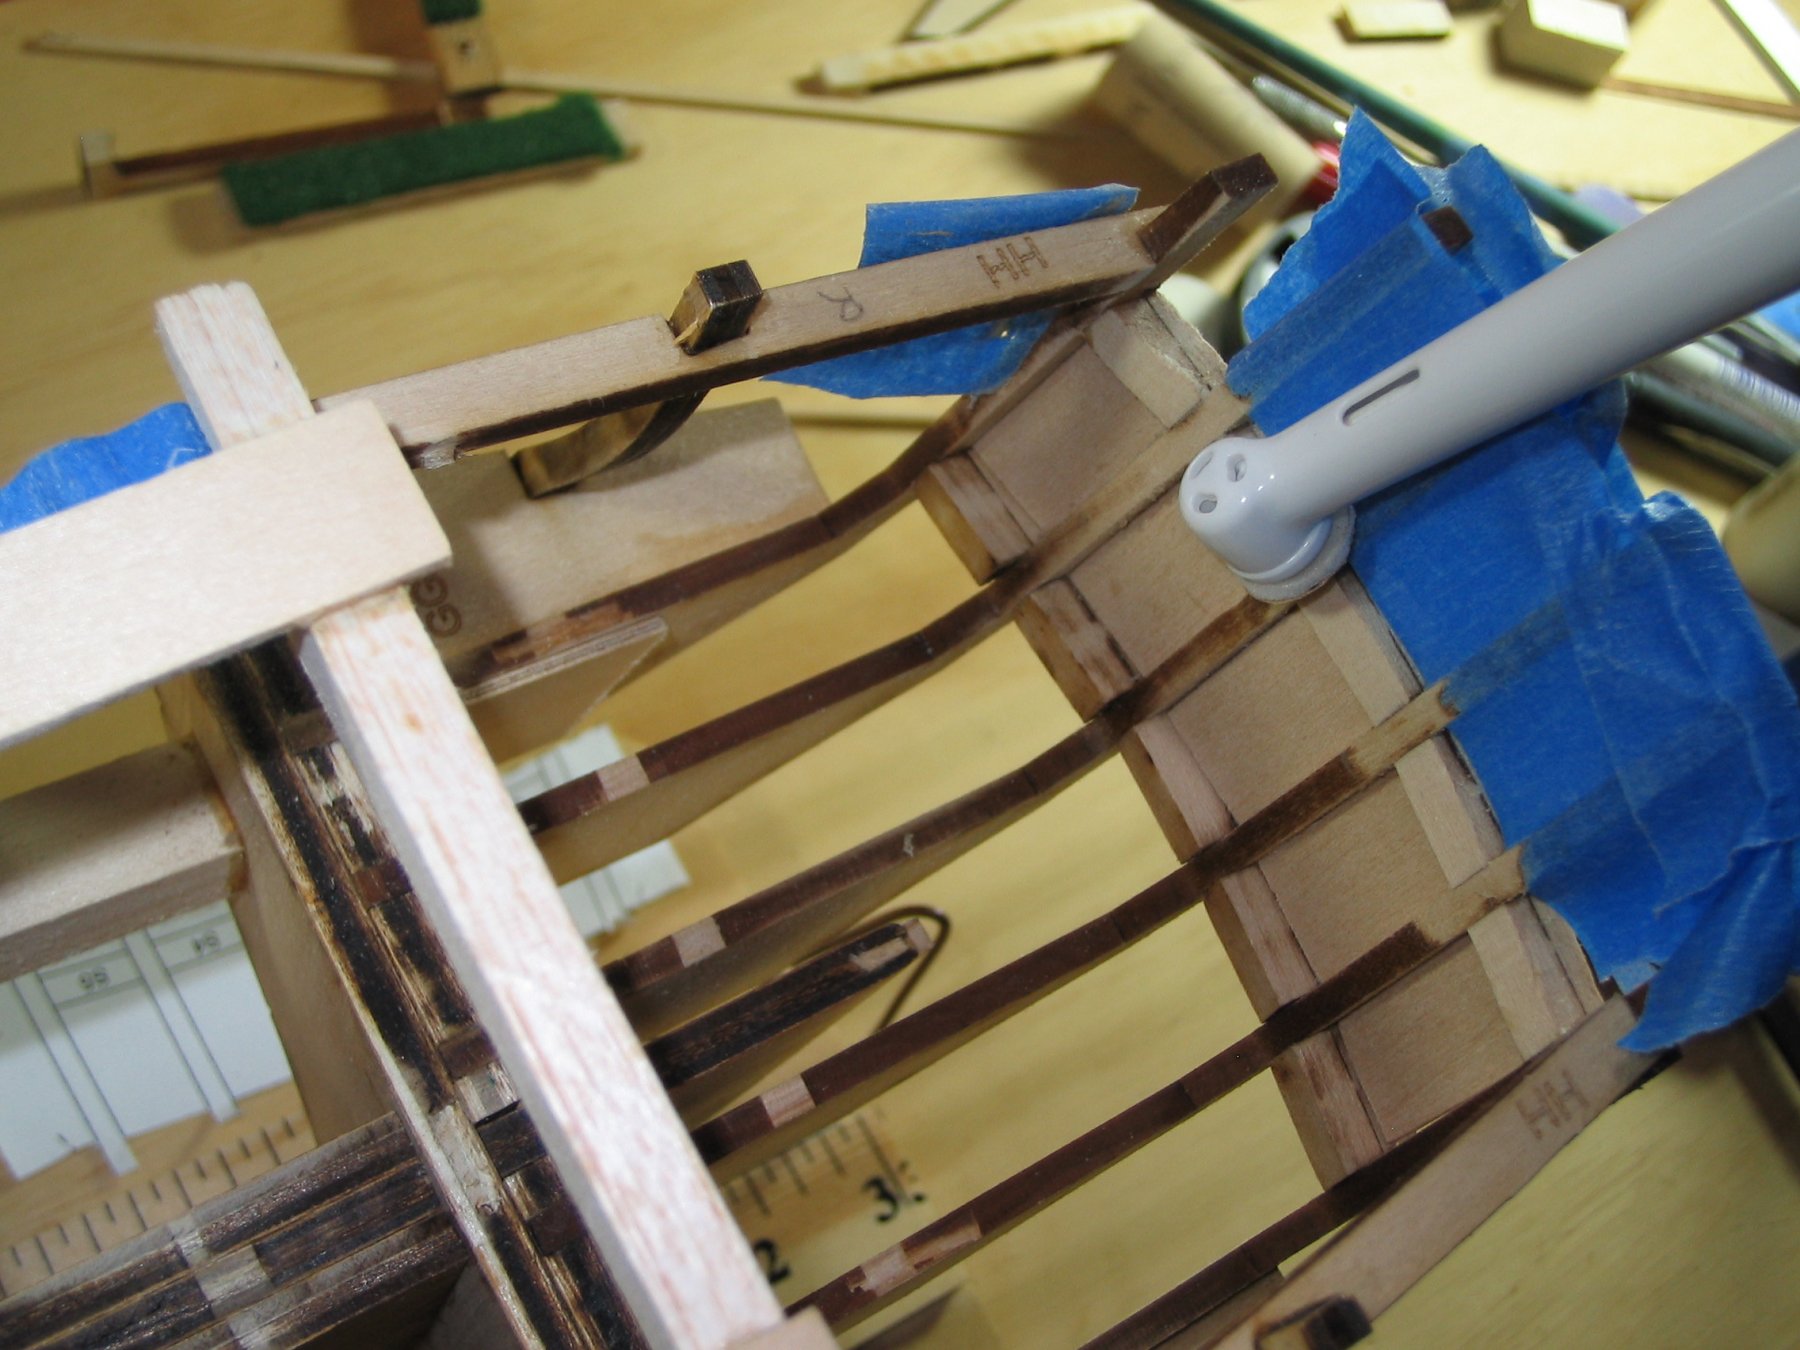
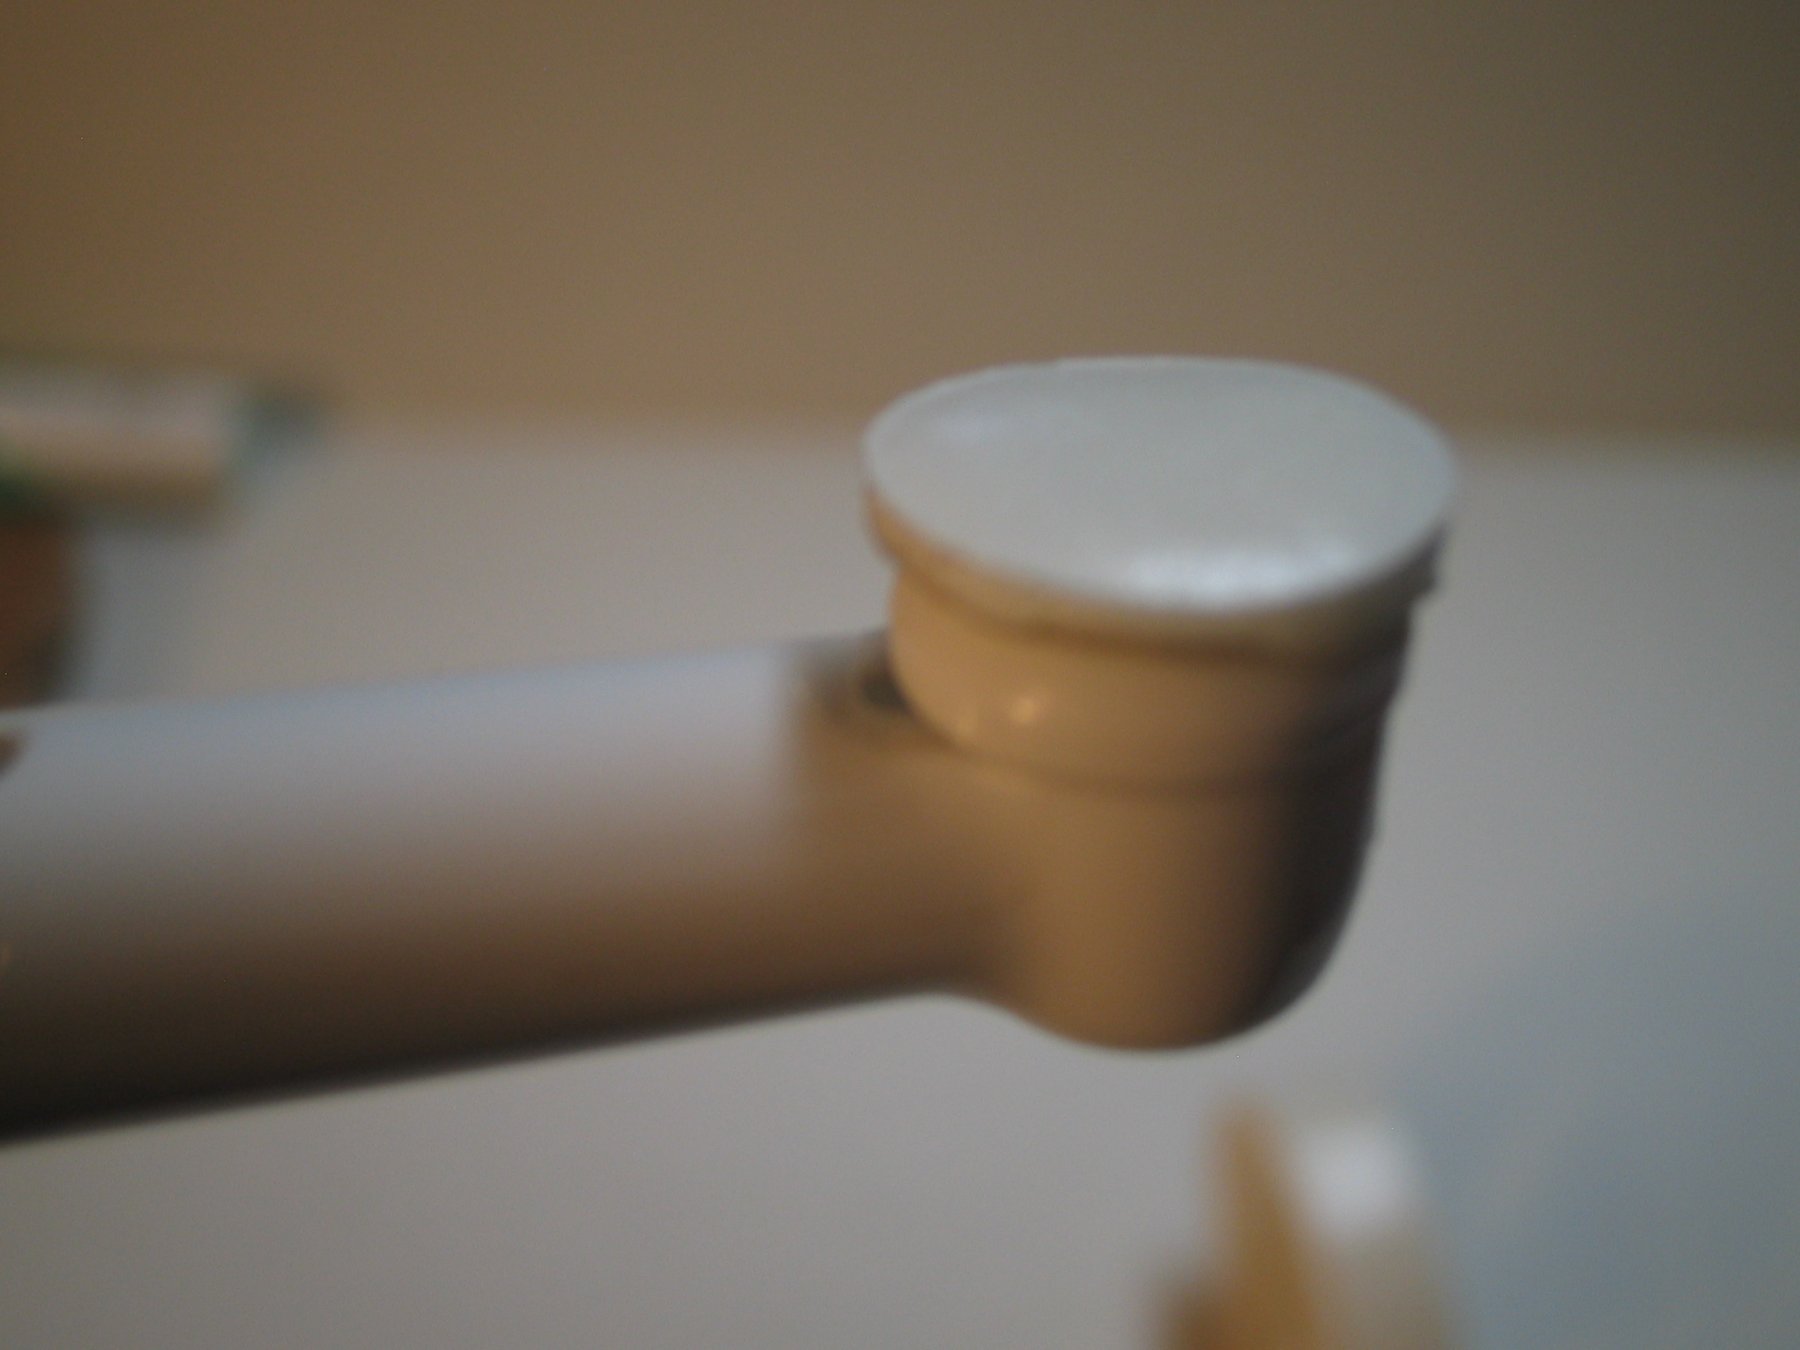
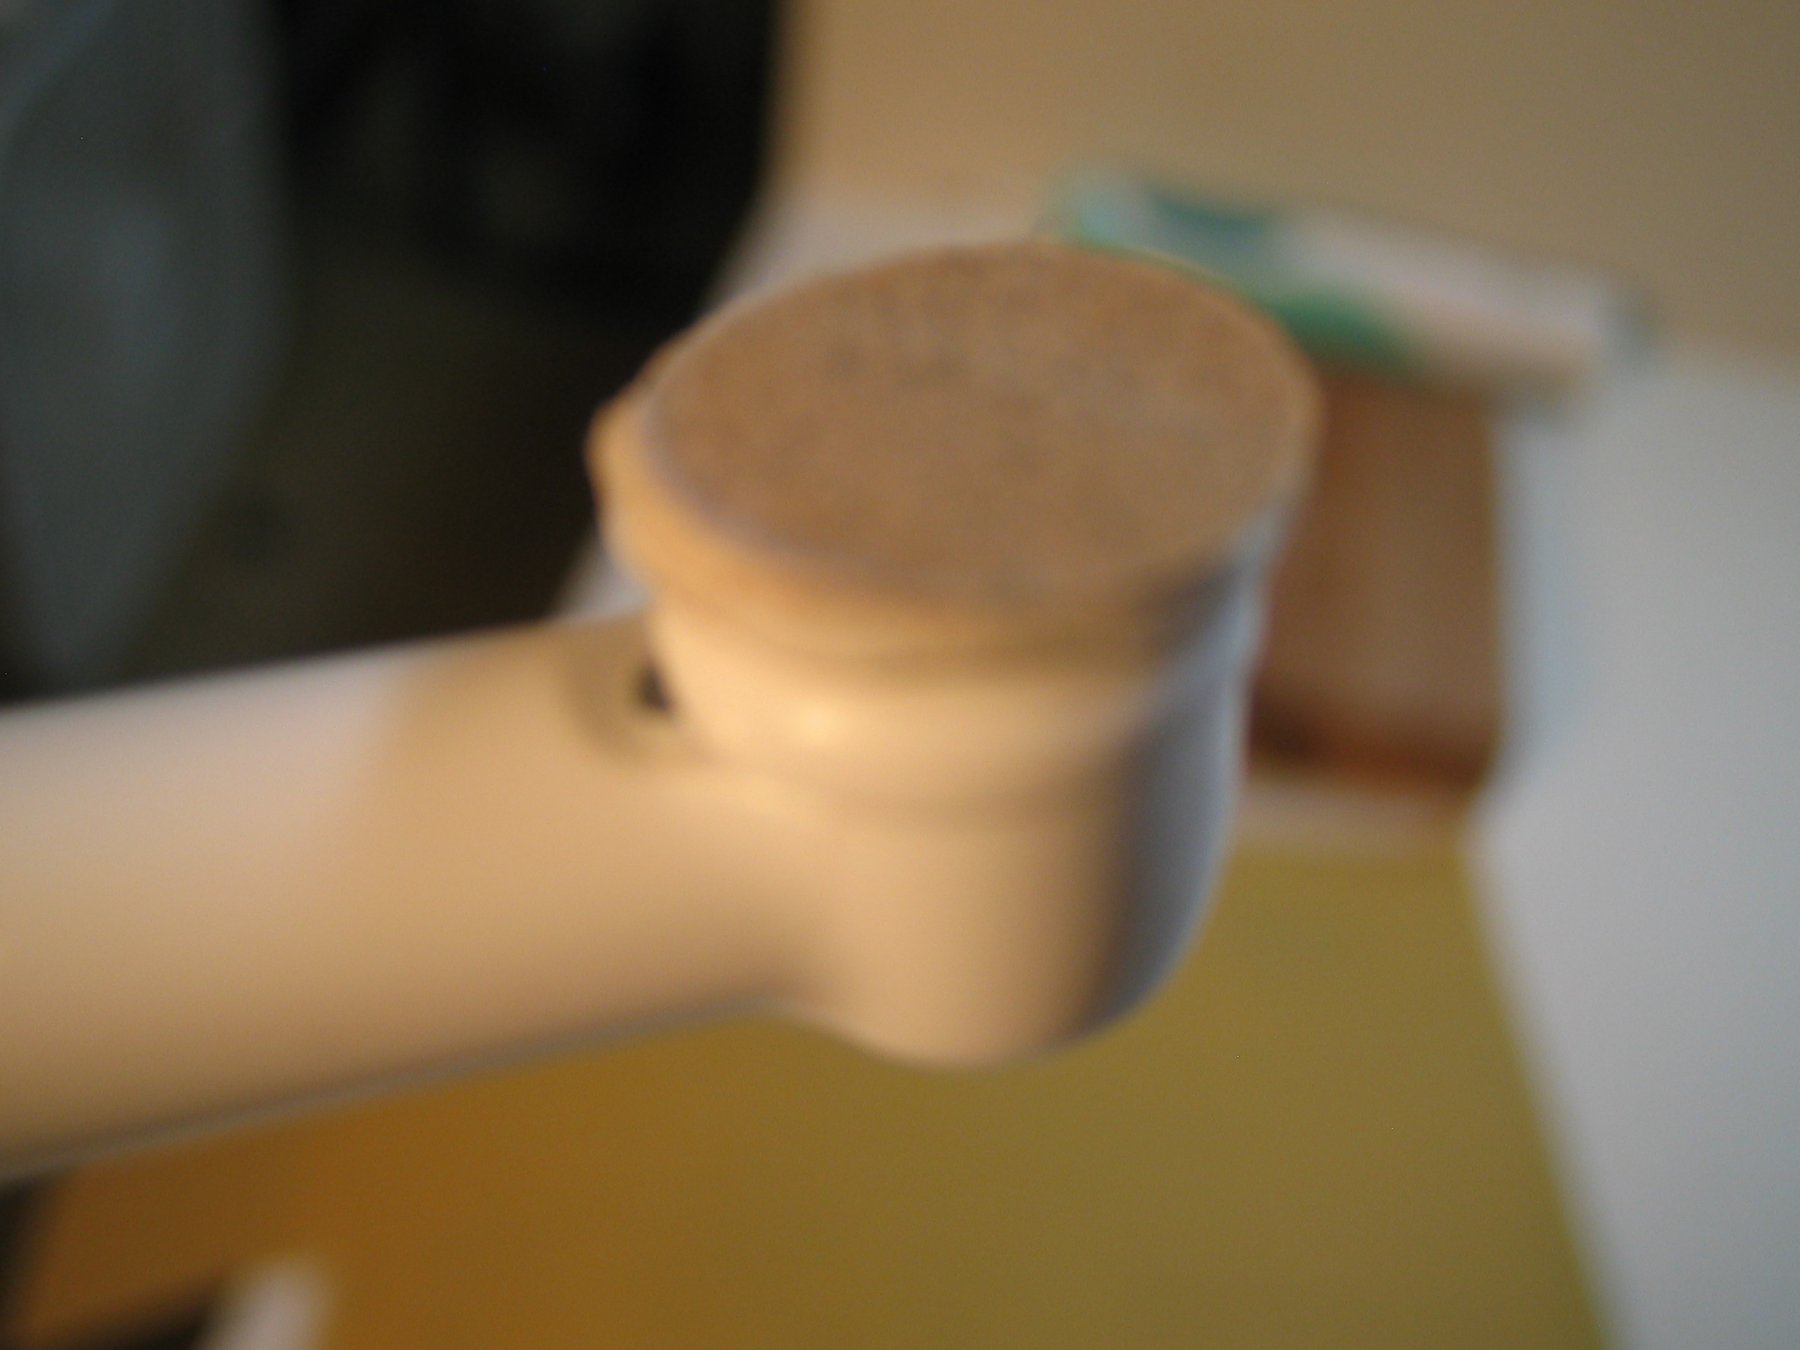
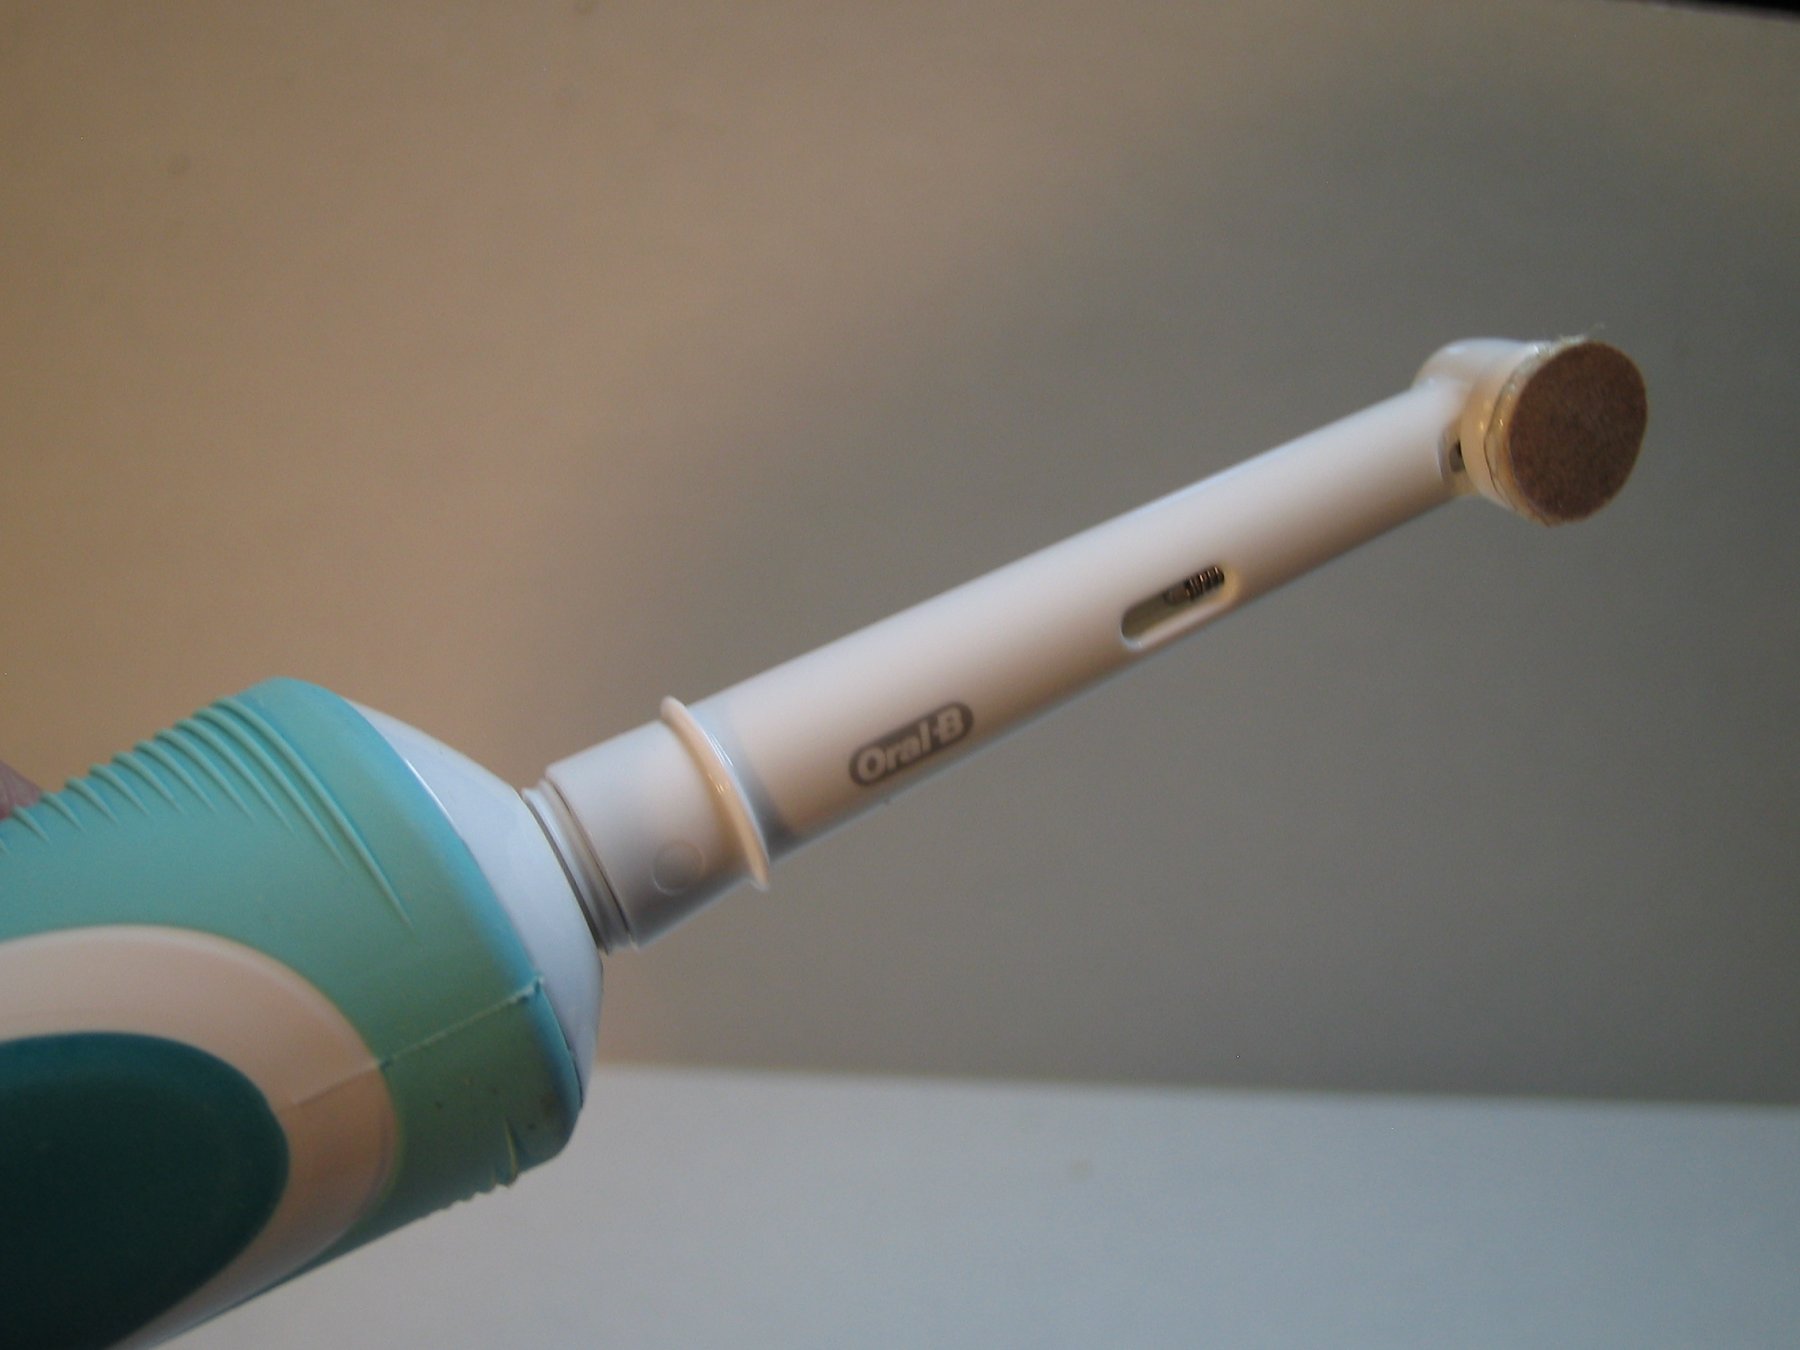
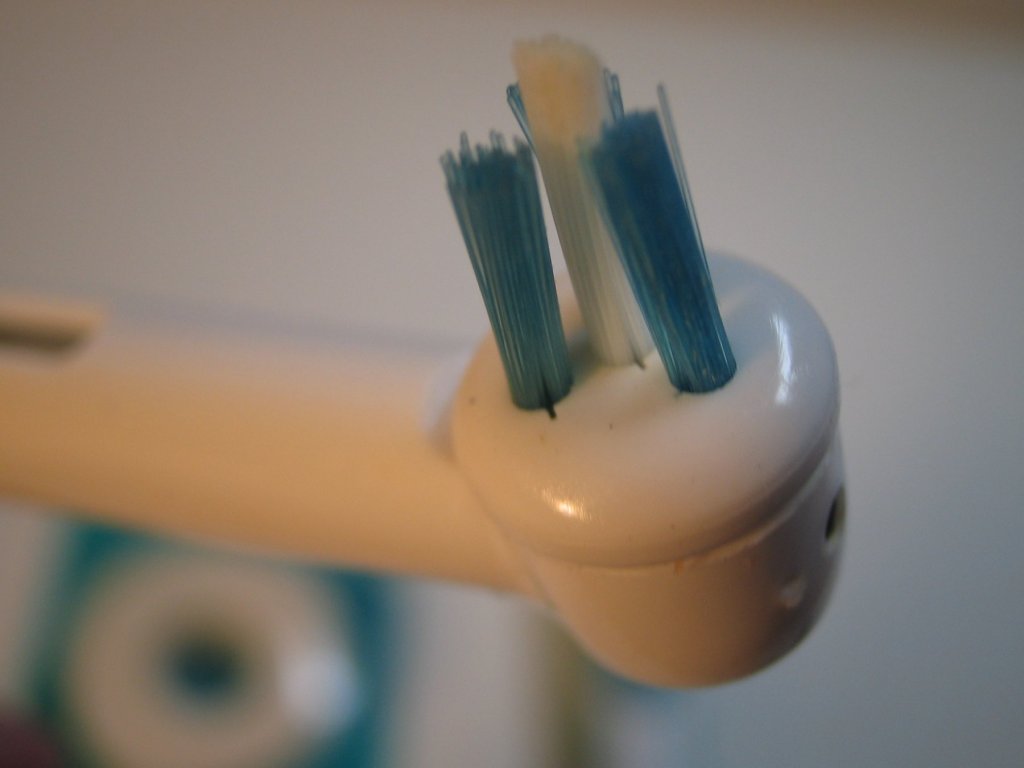
Yes you can indeed......I am really chuffed with the way it works. I can use a fair bit of force and it keeps sanding away without problems. The long neck and small head can get into some really small places with ease. I have been using these Oral B brushes for years on my teeth.they are powerful,last a long time per charge and go on for years. I wish I could use it to sand away those extra pictures that are not supposed to be there,as I can't edit them away
-
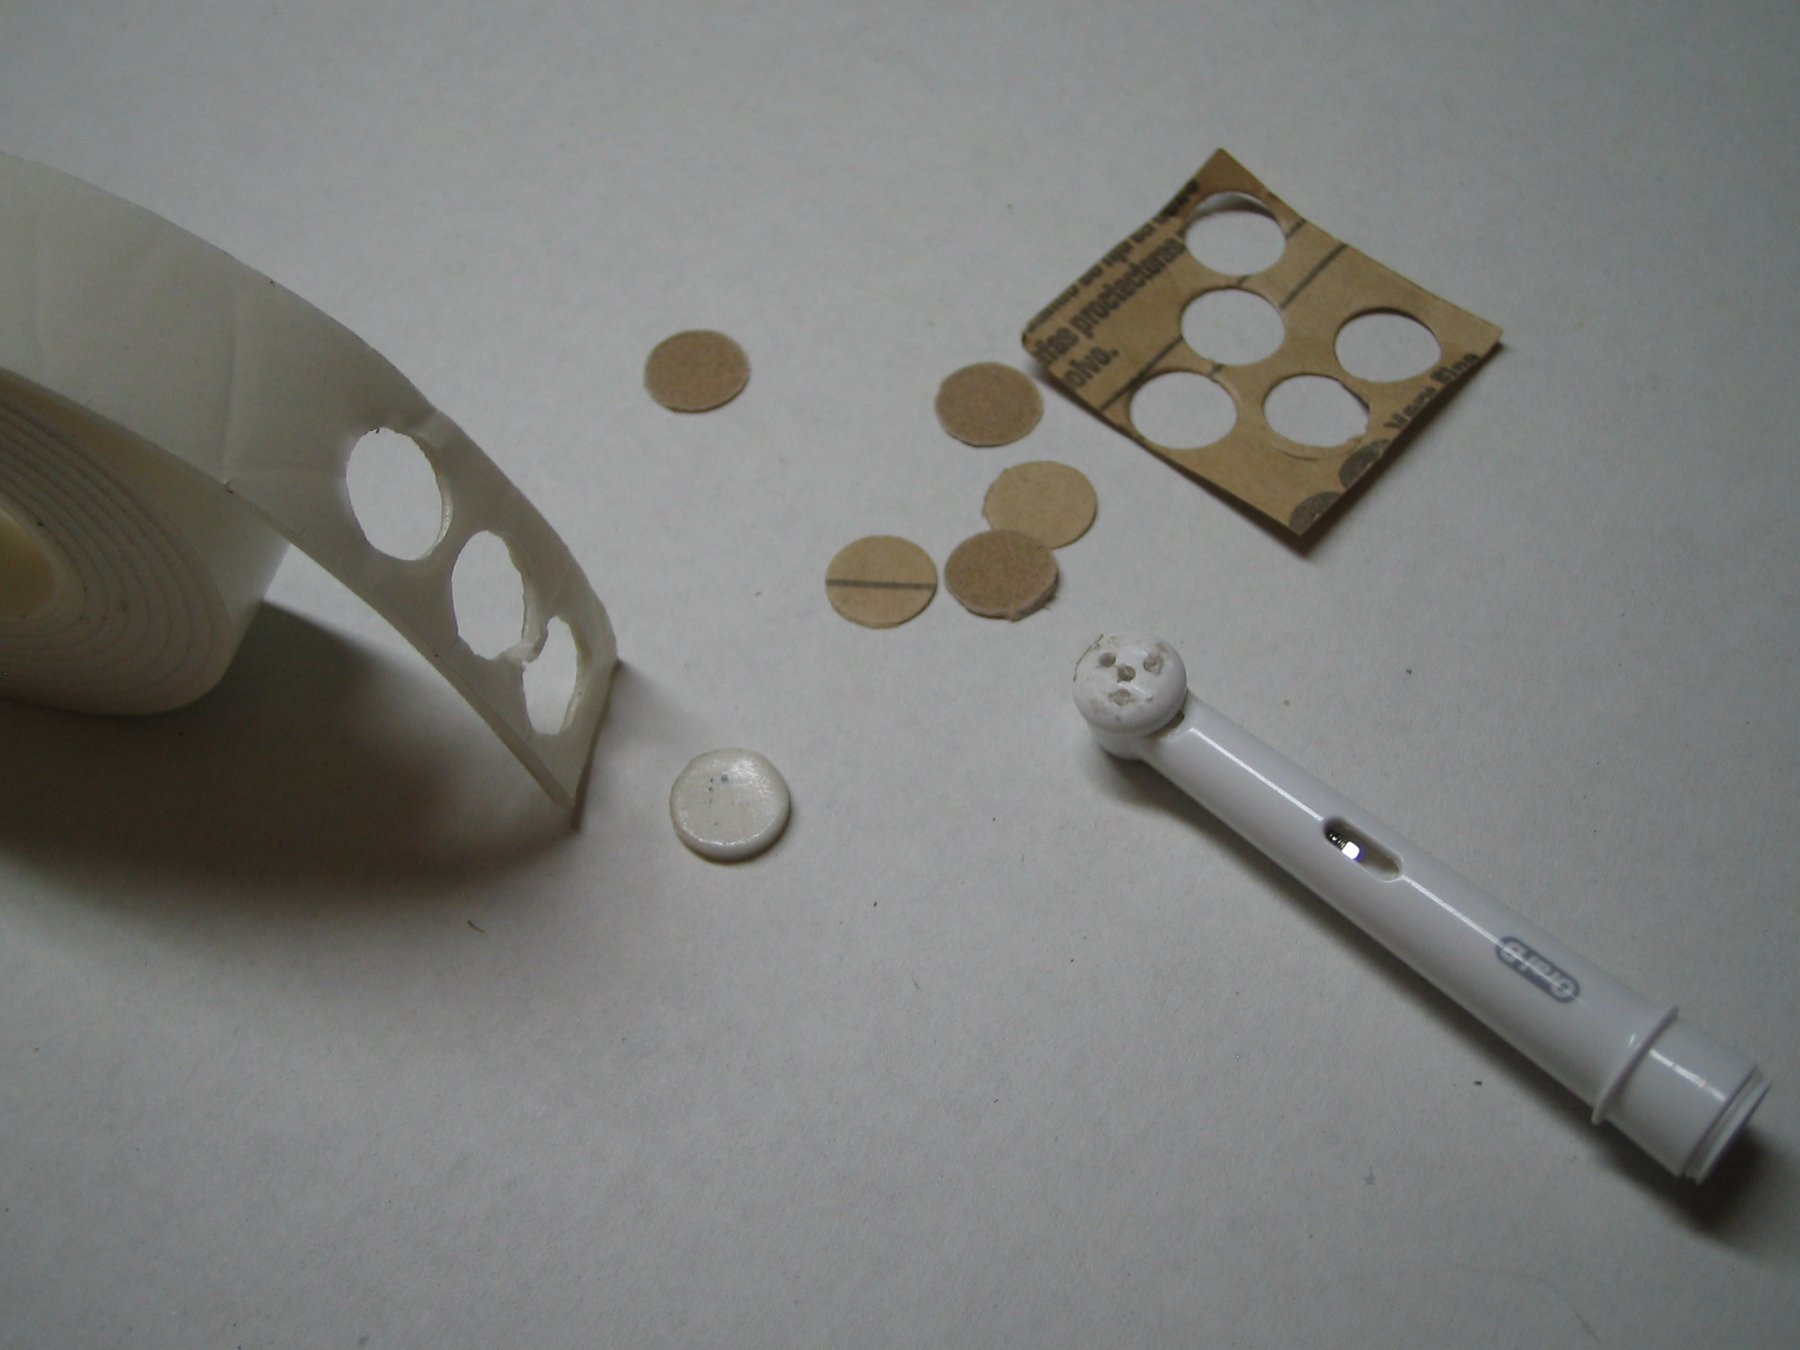
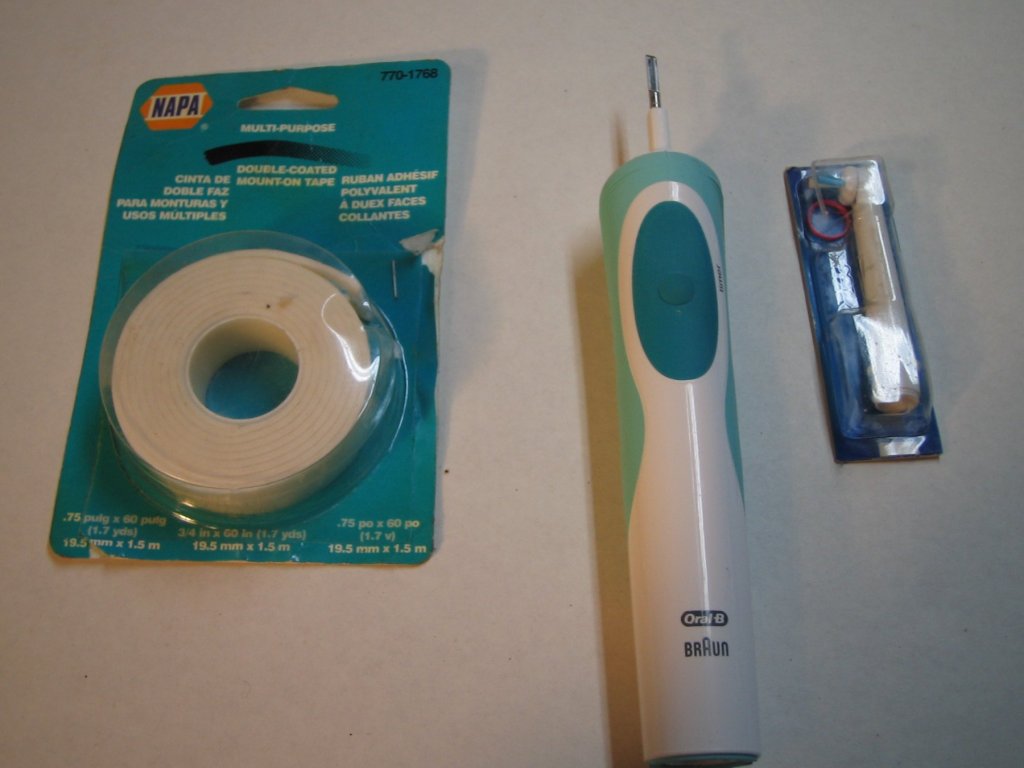
Greetings to all, I have been doing a lot of sanding lately fairing the hull and constructing the stern on the Confederacy. For fine details like the lintels and sills on the windows I thought a detail sander would be a help. Besides the expensive prices,I found MicroMarks on back order and Proxxon's PS 13 to have quite a few bad reviews. Whilst looking on line I found the idea on U tube of using a n electric toothbrush. On my next trip shopping I found an Oral B rechargable one for $10 and decided to give it a try. What else was needed was some double sided tape,sandpaper and gasket making punch kit. I used a smaller headed brush my wife had than the one that came with the unit although that one would work fine,it is just a bit larger .Then removed the bristles with pliers I used the 7/16" punch from the gasket making kit I punched out some some tape and sandpaper discs. Mount the double sided tape to the head ....mount sandpaper disc to tape and detail sand away. It works surprising well
-
I agree with Mark,sand down and fill in the gaps in the deck. It has been a long time since I built the Swift.... If I remember correctly the hull is double planked. The first basswood layer makes it easier to rectify mistakes,once again filling and sanding to make a good shape and surface to glue the outer layer of veneer to. Take your time and don't get discouraged over mistakes. When you are done they won't be noticed.... It will be the over all look of the whole model your eyes take in. You will have learned a lot of how-to knowledge in the process.
- 9 replies
-
- 2
-
-
- first build
- swift
- (and 2 more)
-
Welcome to the forum dooder85. My first plank on bulkhead model was the Swift. It is a nice kit and makes a very nice finished model........I think it is a really good choice for an initial build.
-
Hi Mike, Very nice work so far. I like the idea of a ship build that is not a warship for a change. When Woodland Scenic lettering.... I used a really thin board in the right shape and color. Then sprayed it with Dullcote (if unsealed), transfered the letters and then another thin coat of Dullcote. Thanks for the info on inserting text
-
Hi Gary, I'm following your and Dirk's stern assemblies very carefully and book marking them for future reference when I get to that part. "I will at least continue to check the hull for "fairness". " Point taken... I have ordered a small machinist square and a couple of Machinist 1-2-3 square blocks from Amazon to help myself get the bulkheads at a true right angle to the Bulkhead former. I'll have to wait until they arrive to continue with chapter 2,but with my eye sight plowing ahead would probably end in disaster.
-
Solder and brass blackening
JohnB40 replied to Cabbie's topic in Metal Work, Soldering and Metal Fittings
For some reason I couldn't edit my previous post to add.. I would use 0000 grade steel wool instead of 1500 grit paper to prep non flat items such cannons -
Solder and brass blackening
JohnB40 replied to Cabbie's topic in Metal Work, Soldering and Metal Fittings
Greetings all, I messed about with the preparation and application of B.C. Brass Black for a while on one of my builds and finally found a way to get good results with it. -
That is some great construction and progress Gary
-
Dremel Drill pess adapter
JohnB40 replied to Derek C's topic in Modeling tools and Workshop Equipment
I have had one for a few years now and find it works well for modeling purposes. You can also use it as a stand to hold the Dremel when using the flex shaft attachment. I use the 4486 keyless chuck with mine. -
Gary, That is a brilliant idea for temporarily reinforcing the bulkhead extensions. Your construction is proceeding very nicely indeed. I contacted John at Model Expo about the plywood in my kit and he said new material would be shipped... I will start my build log when it arrives. It will be nice to have building log still in the somewhat early stages of construction to check in on about what lies ahead.
-
Hi Gary, I just ordered the Confederacy this morning from Model Expo. I will follow your log with interest as I proceed with my build.
-
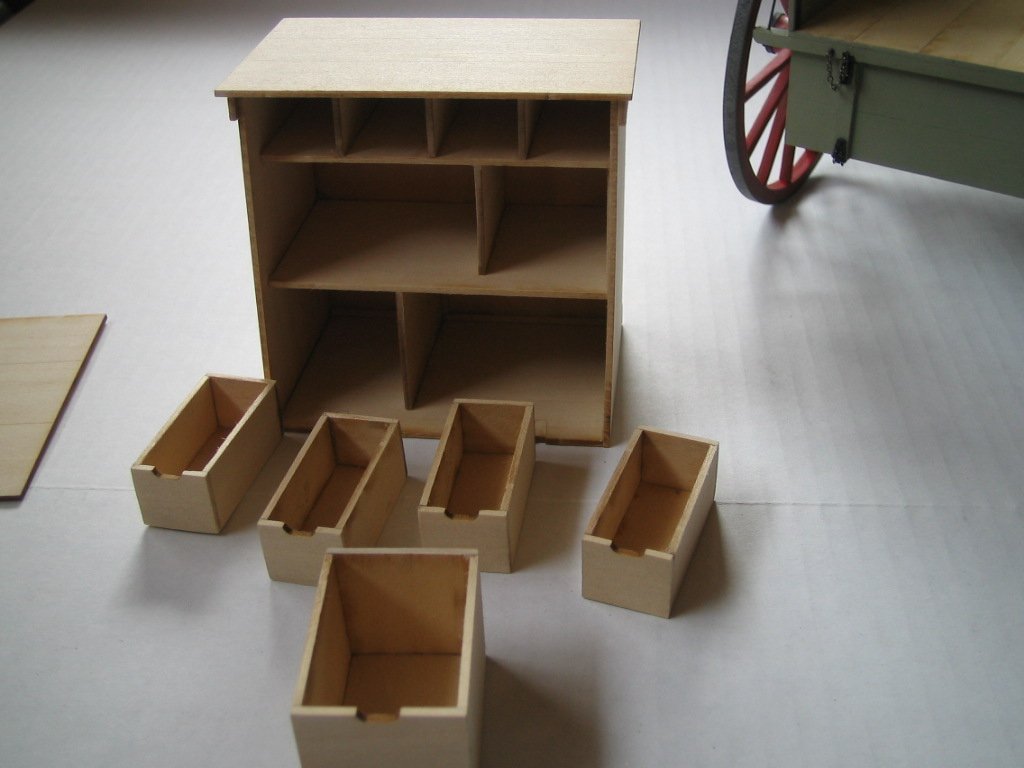
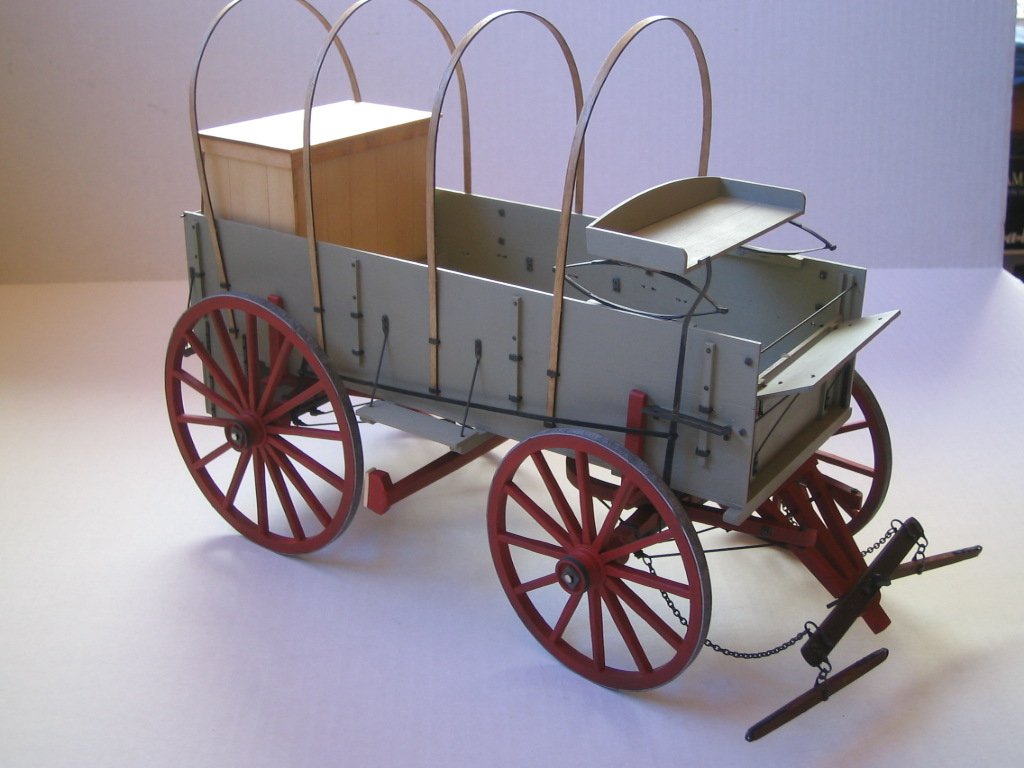
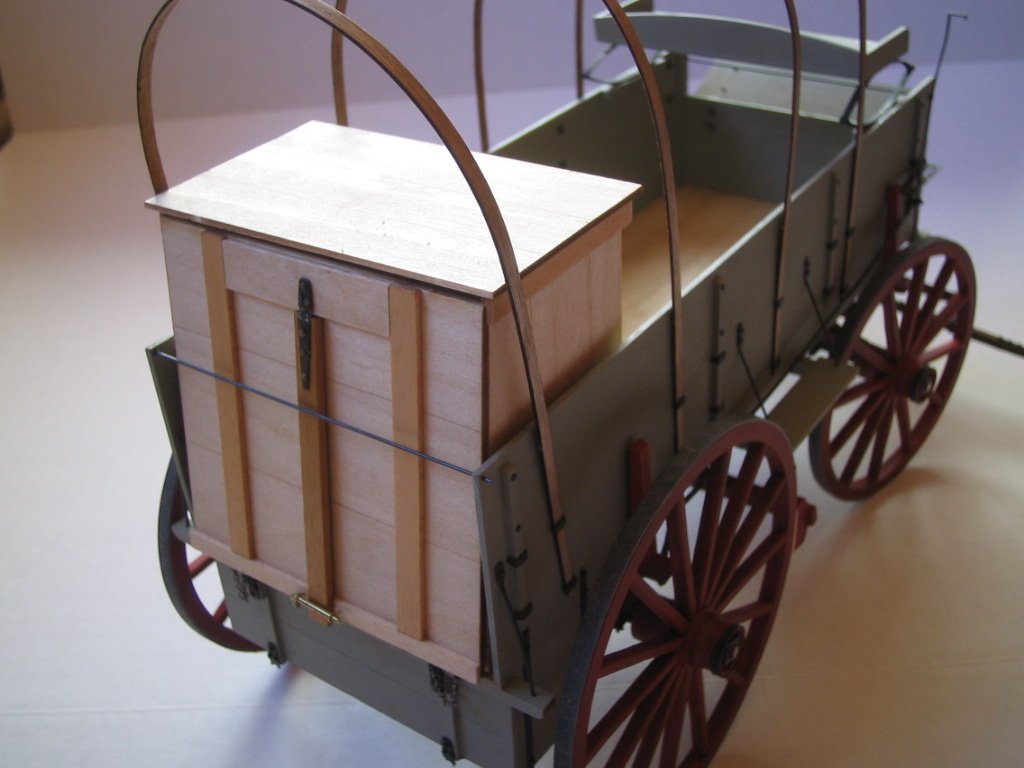
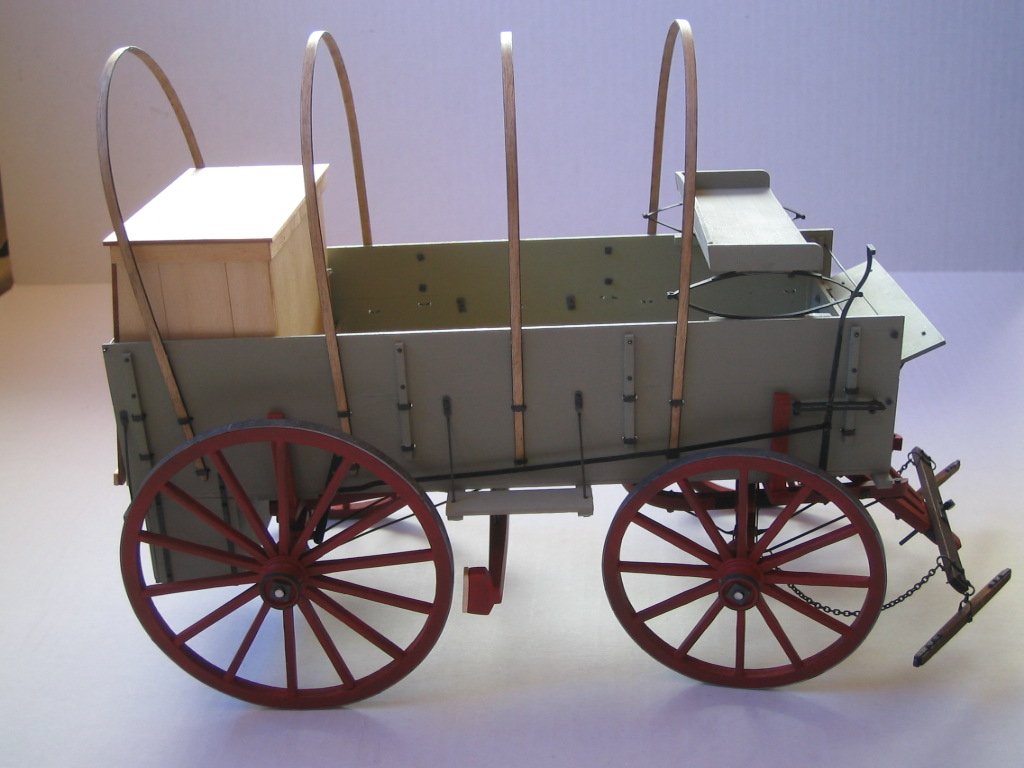
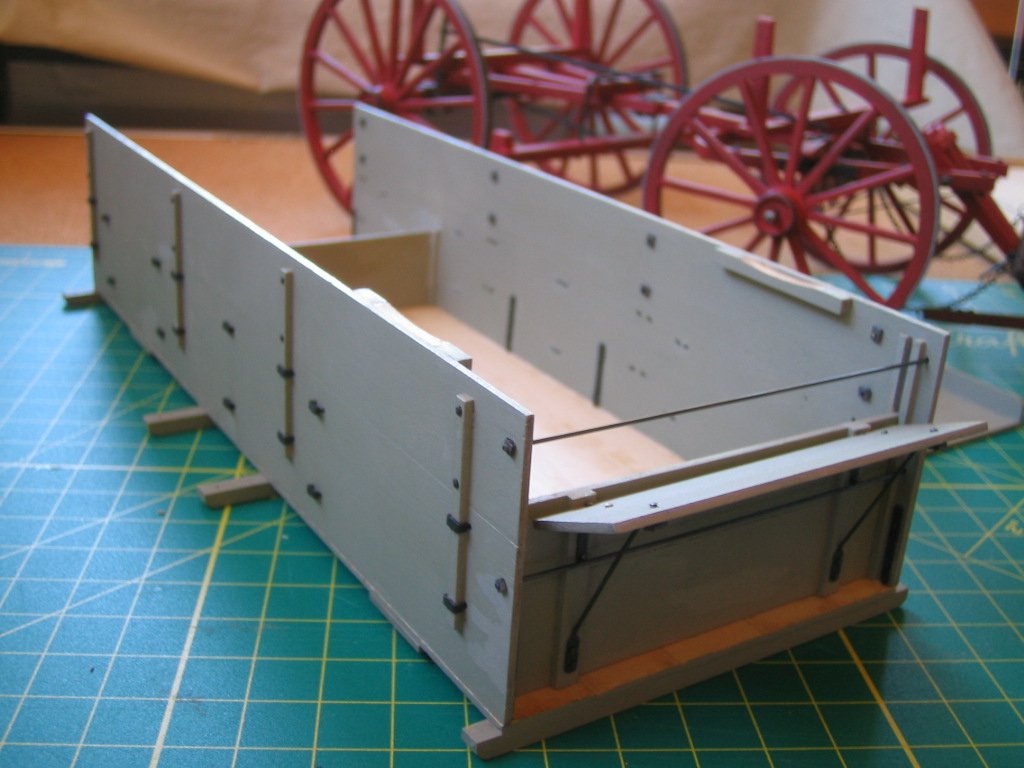
Greetings to all, Well the diversion into wagon building is completed. I have enjoyed building the kit,and it is now back to the ship construction for me. It was nice to have a project that could be completed in a shortish period of time,as I have been working to make Corel's Unicorn into a reasonable rendition of a 'first frigate' for quite a time. I have left the canvas cover in my wife's hands. I decide whether to attach it fully covering the bed or folded up when she is finished.
- 29 replies
-
- 13
-
-
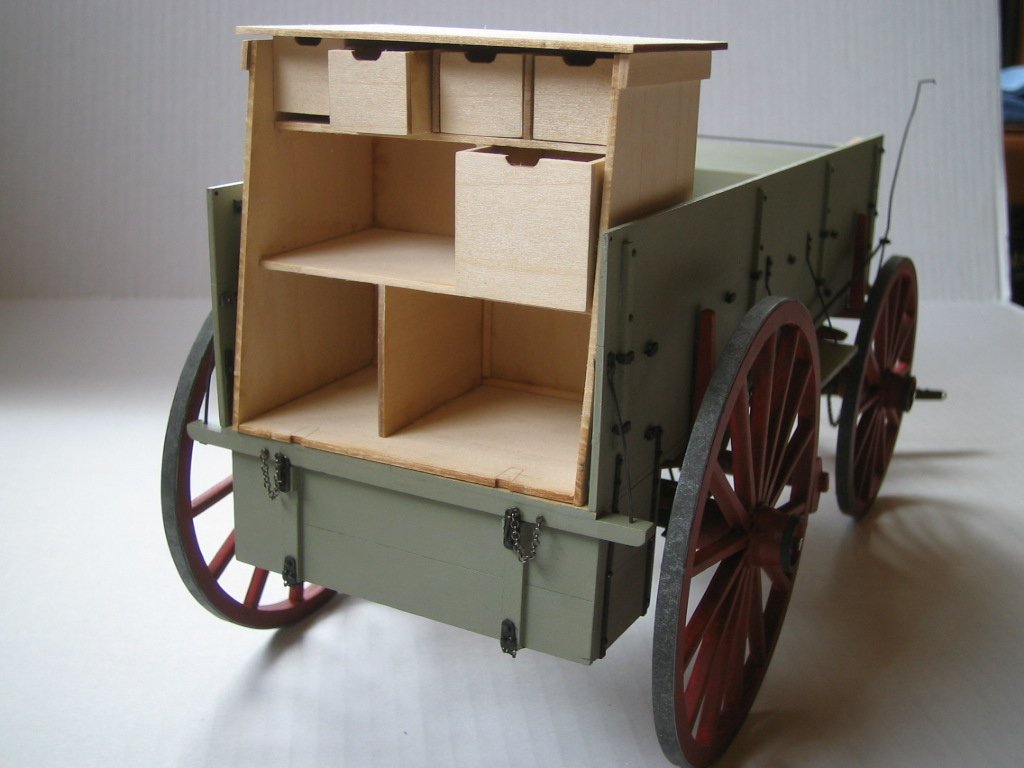
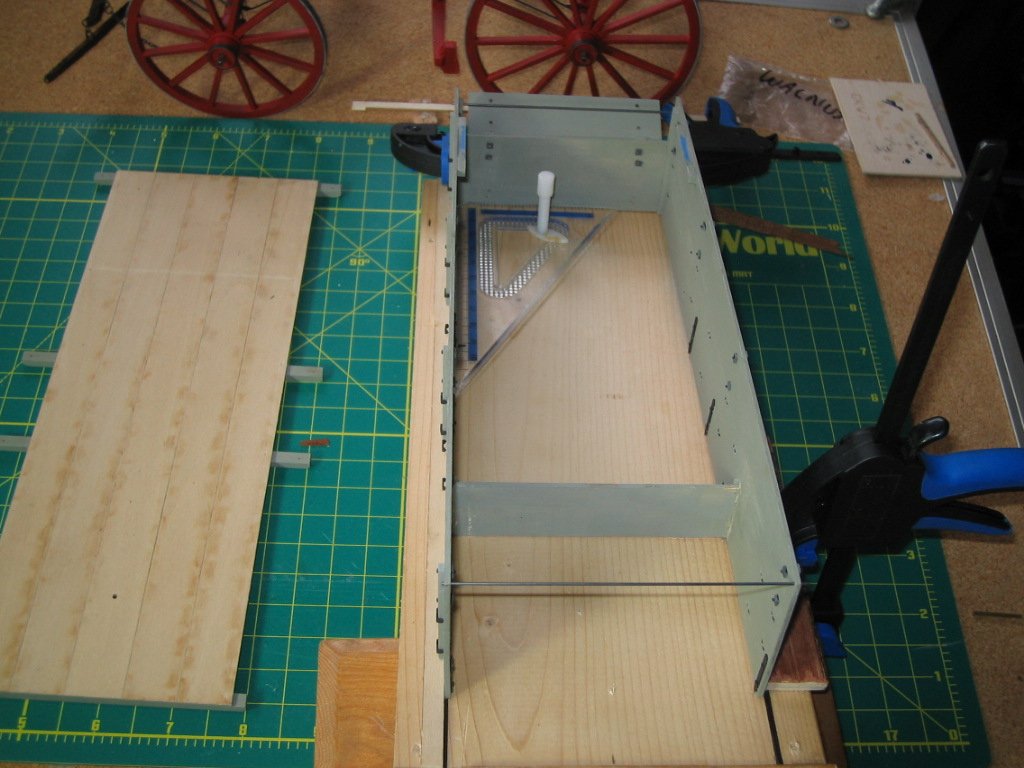
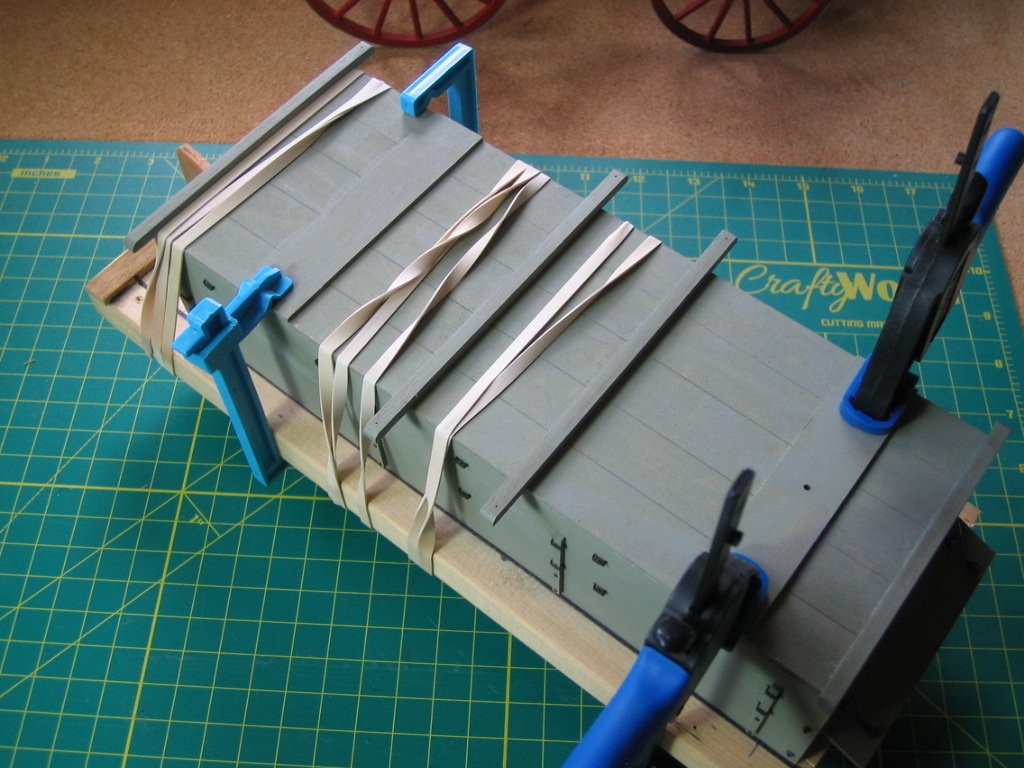
I then used the right angle jig to glue the components together using Titebond 3 and JB Weld's Woodweld epoxy. It is the first time I used Woodweld and I think it is a good product. It sets up in 6 minutes and is fully cured in 1-3 hours. An added bonus is it dries a tan colour and is easily painted. I kept everything square,used clamps and rubber bands and was pleased everything went together well. Just a few more bits of ironwork to add on and then on to the chuck box........
-
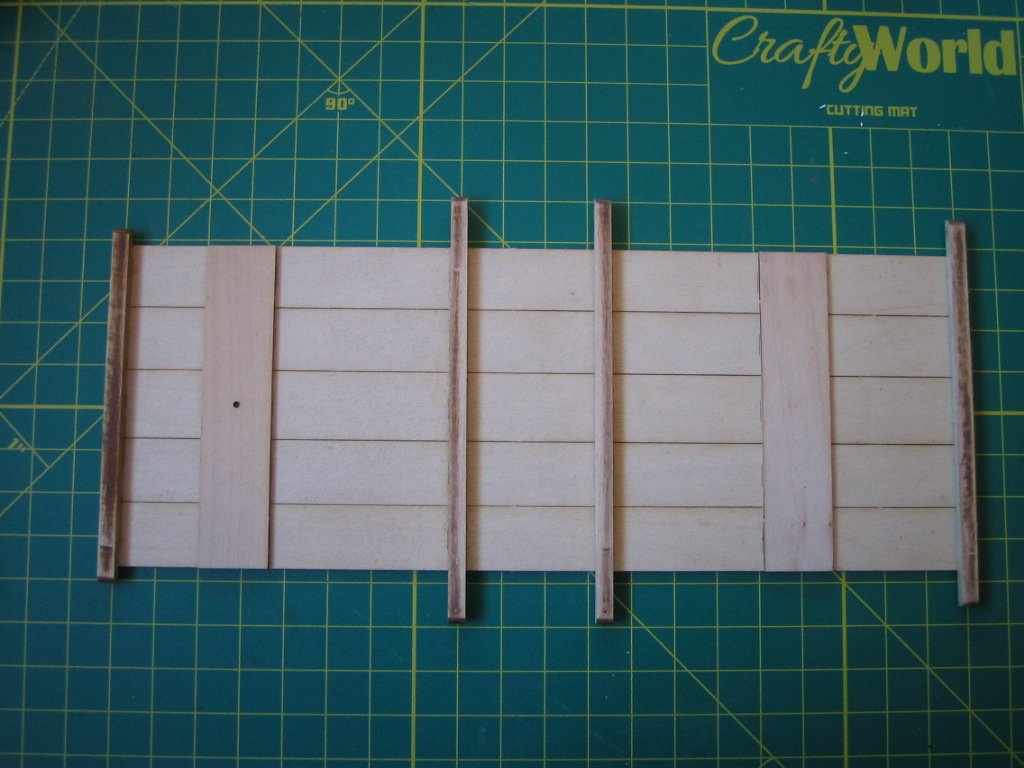
Greetings All' Some progress made on the wagon bed. Components were painted beforehand,masking the surfaces to be glued.
-
Dennis Bus by Mike Dowling - FINISHED - OcCre
JohnB40 replied to Mike Dowling's topic in Non-ship/categorised builds
Very nice Mike -
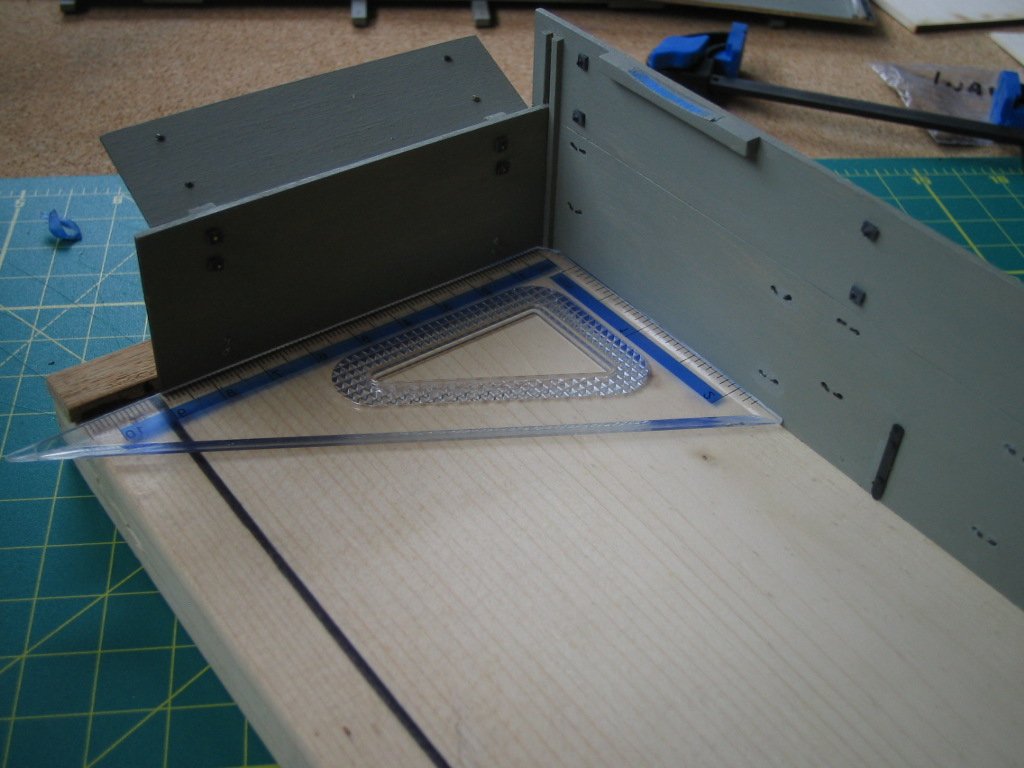
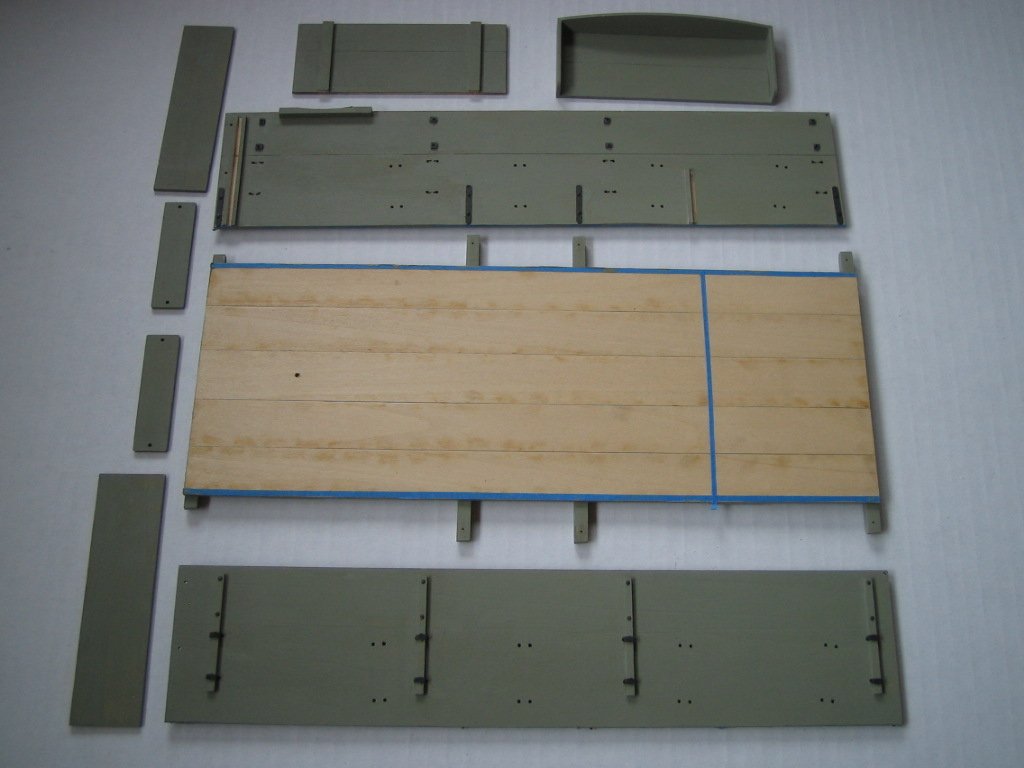
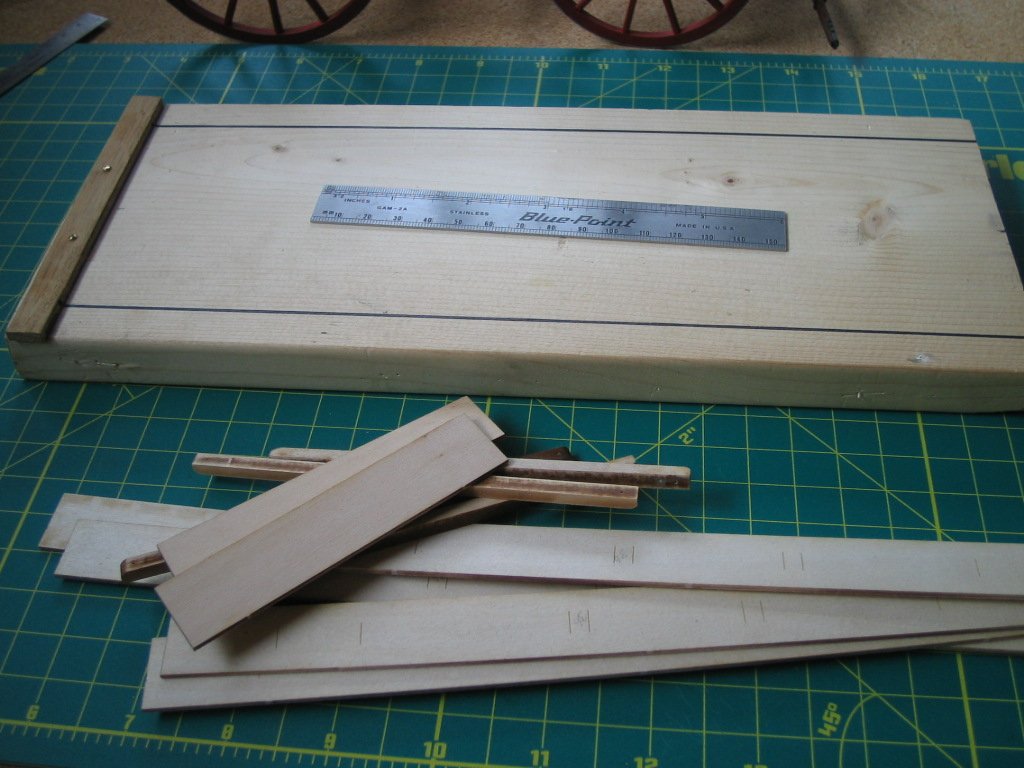
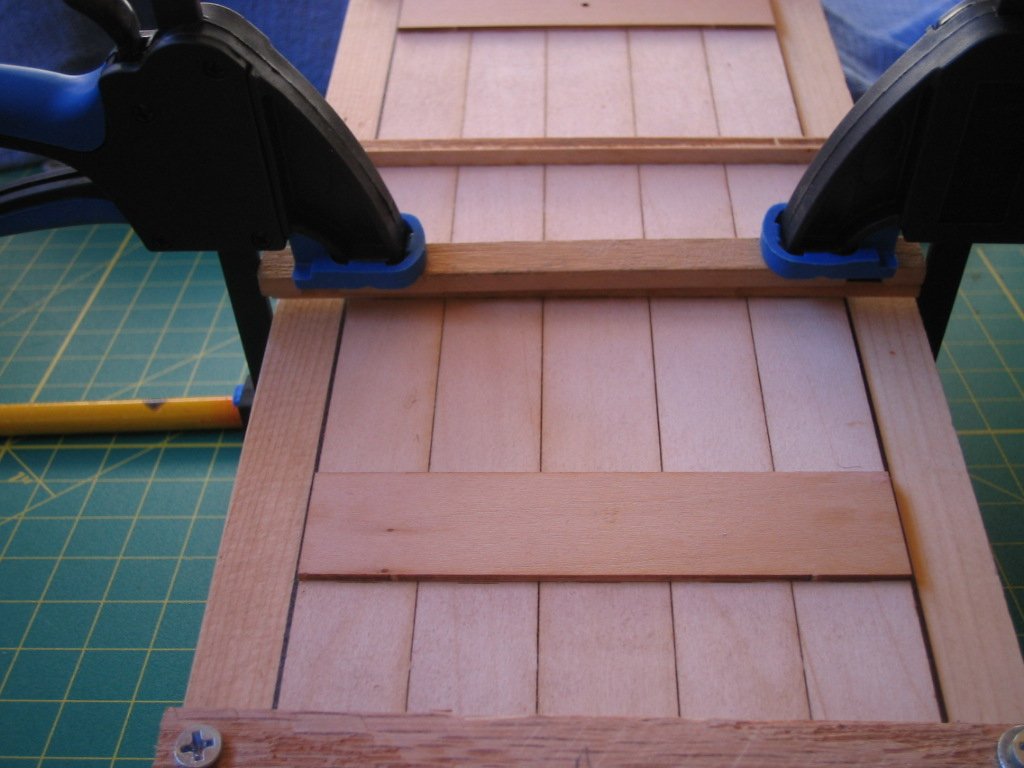
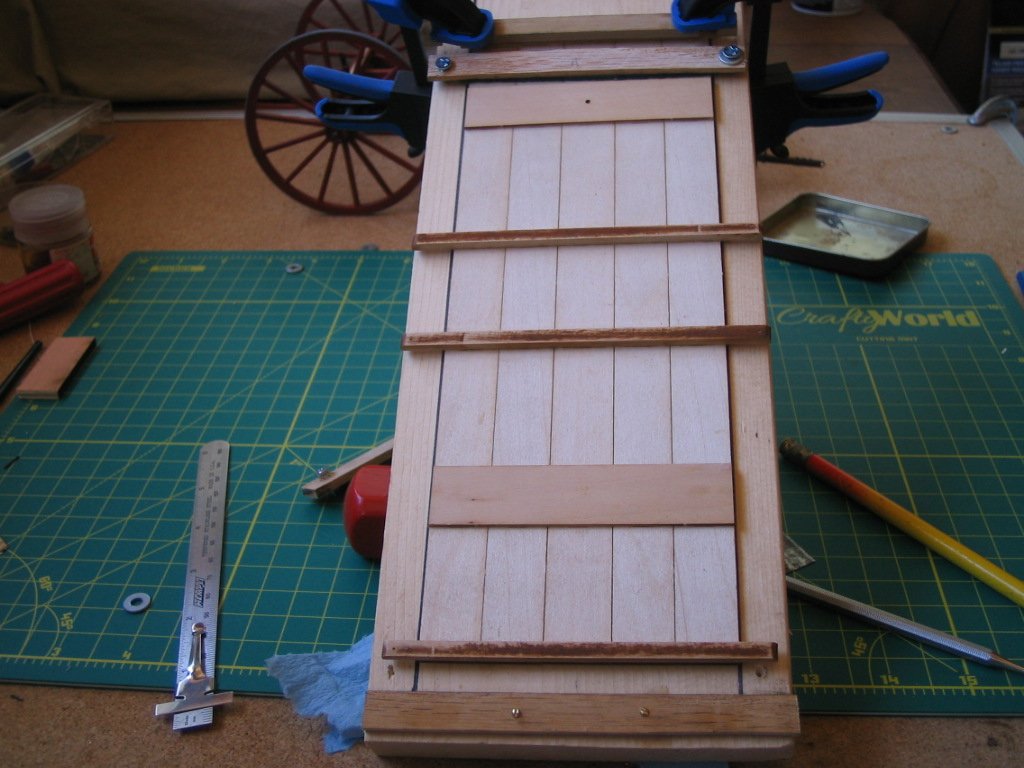
Greetings to all, Thanks for the likes,and thanks Dan for the advice. Some progress on the wagon box so far. The box bed floor is together ready for sealing and finish. I wear glasses because besides other issues I have an astigmatism. The prescription to rectify this is ok for general use/reading,but causes weird parallaxes when focusing close up. As a result I needed a guide for keeping objects at right angles etc. I made a jig for the wagon box using a just milled piece of squared pine. I attached a back stop for the floorboards parallel to the end and then drew in 2 lines perpendicular to it the width of the bed. Using this as a guide I laid the boards in position and clamped them down. I was then able to glue and clamp the sills and cross beams in place one at a time,checking for alignment and squareness from several points. I let it set up and released the clamps and was glad all was as it should be,even though my eyes were telling a different story. I reckon I can use the jig for for the rest of the bed to keep everything true.
-
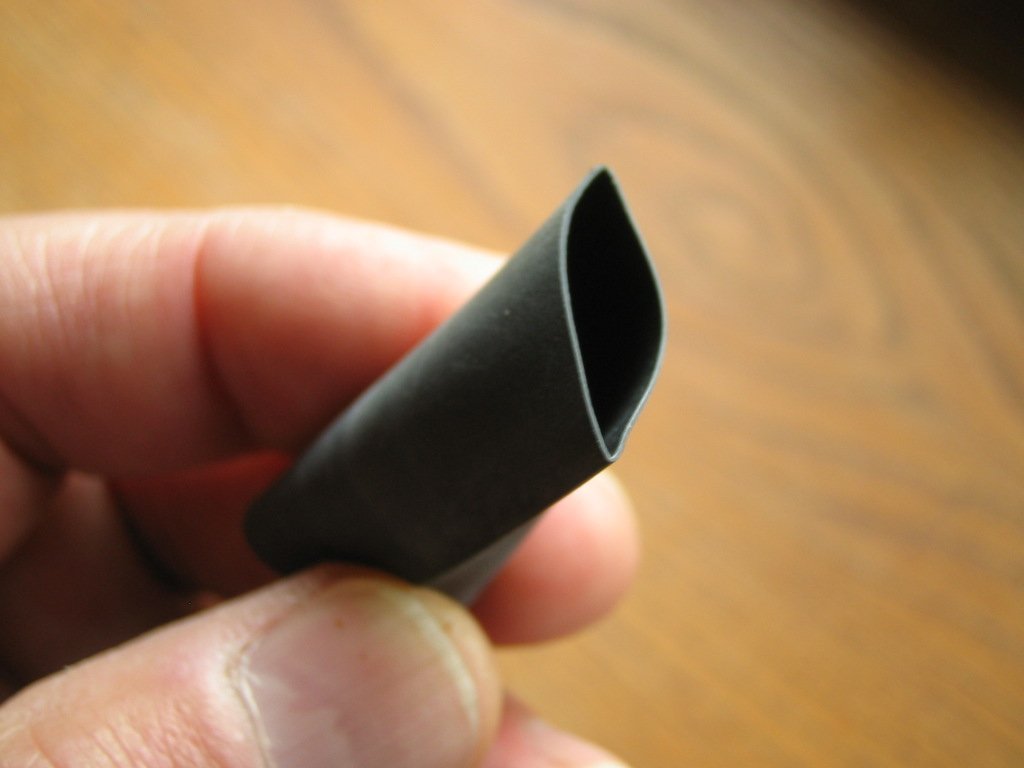
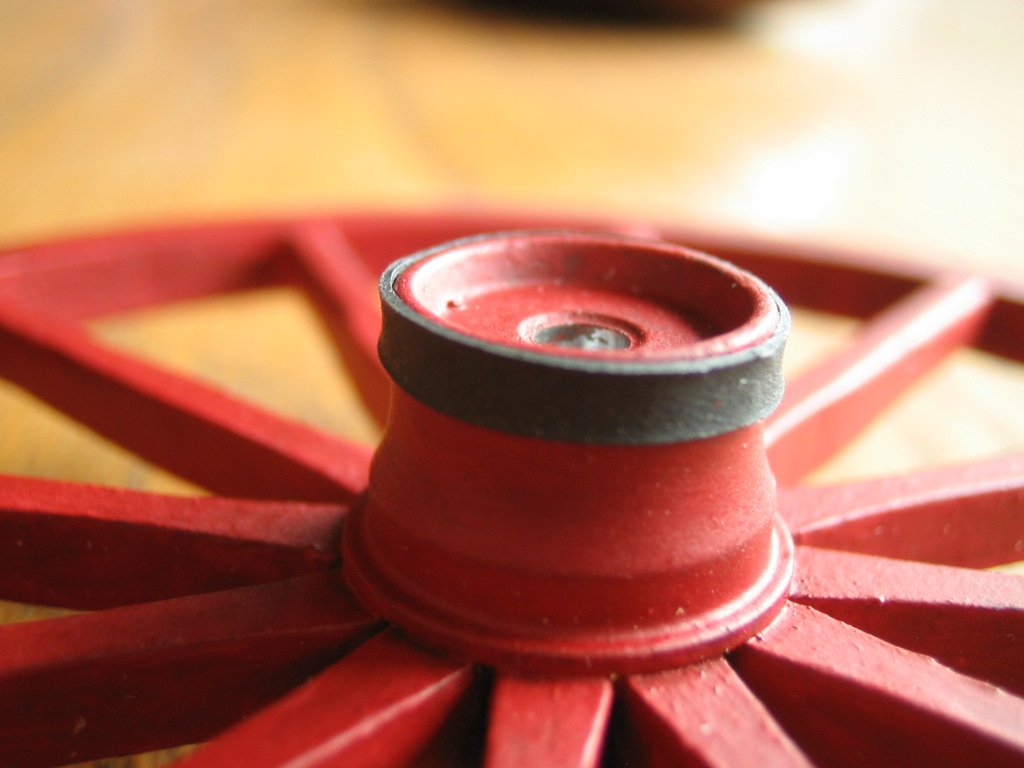
Greetings to all, Thanks for the likes and replies. A bit of nomenclature confusion over the wheels. I used shrink tubing on the wheel hubs and not the rim iron tires. After assembly and painting,I did a web search looking for pictures of 19th century wagon wheels. The wheel hubs were wood with iron reinforcing bands to help stop them splitting. One was on the outer end of the hub and one was further inwards where the spokes join the hub. There was probably more on the inboard side too (no photo found). I ended up just doing the outers as it was impossible to paint or use the tubing for the spoke band without making a mess of it.