JohnB40
-
Posts
196 -
Joined
-
Last visited
Content Type
Profiles
Forums
Gallery
Events
Everything posted by JohnB40
-
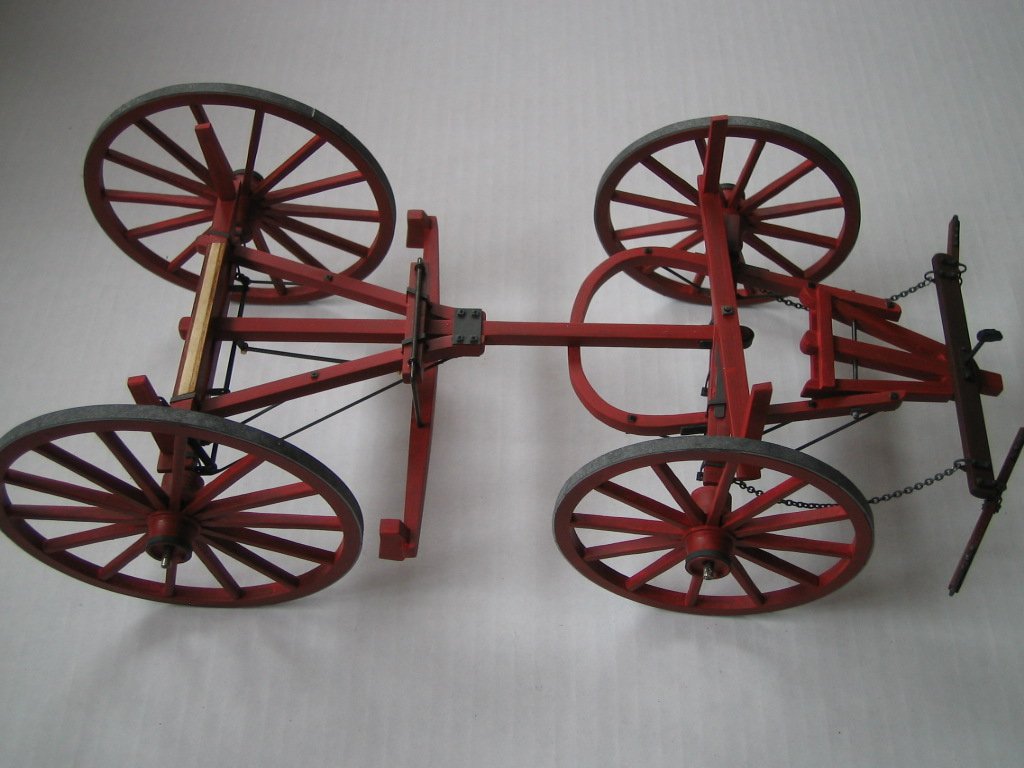
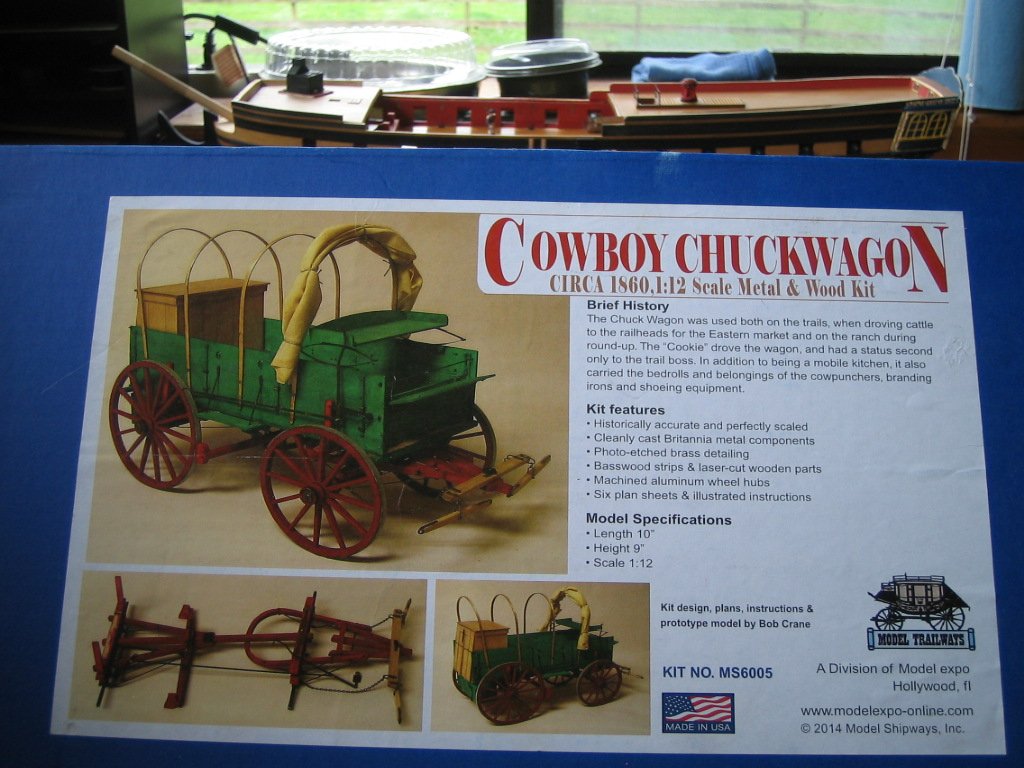
 Greetings to all, Some more progress on the chuck wagon... The jig supplied with the kit made the wheels construction easier than I anticipated. For the outer bands on the hubs I cut shrink tubing to the correct width and used a heat gun to shrink in place The chassis is complete with the exception of trimming the axle shafts to the correct length and fitting the axle nuts. For some reason presently unknown to me the instructions list this as the last thing to do after the wagon body is complete. I will stick to this as every time I don't follow instructions it never ends well. Moving on to start the wagon bed construction tomorrow. .
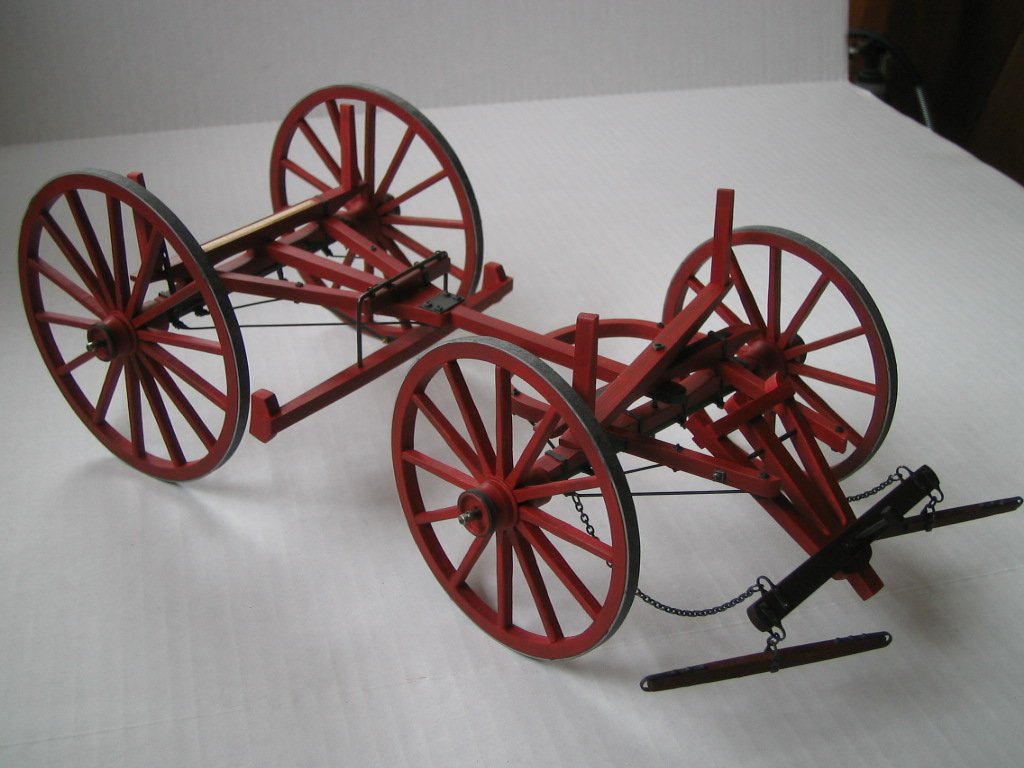
-
Greetings all, The fore and rear hounds are now completed on the chuck wagon. I will be starting on the assembly of the wheels next. Model Expo sent a new laser cut ply sheet for the wheels to replace the defective one...Great customer service. Building this kit reminded me of a visit to the Gene Autry Museum Of The American West in LA. One section had a display of old 'Salesman Models' from the later 19th century. These were highly detailed scale models of Items ranging from plows to wagons,which traveling salesmen would use to show potential customers their products. My wife had to drag me out of there.
- 29 replies
-
- 10
-

-
Mike, Very nice chuck wagon indeed. I am looking in on your Dennis Bus build,I always associate that company with fire engines. I built the Airfix Type B many moons ago. I boarded up the windows and painted it khaki for the #10 Ypres route
-
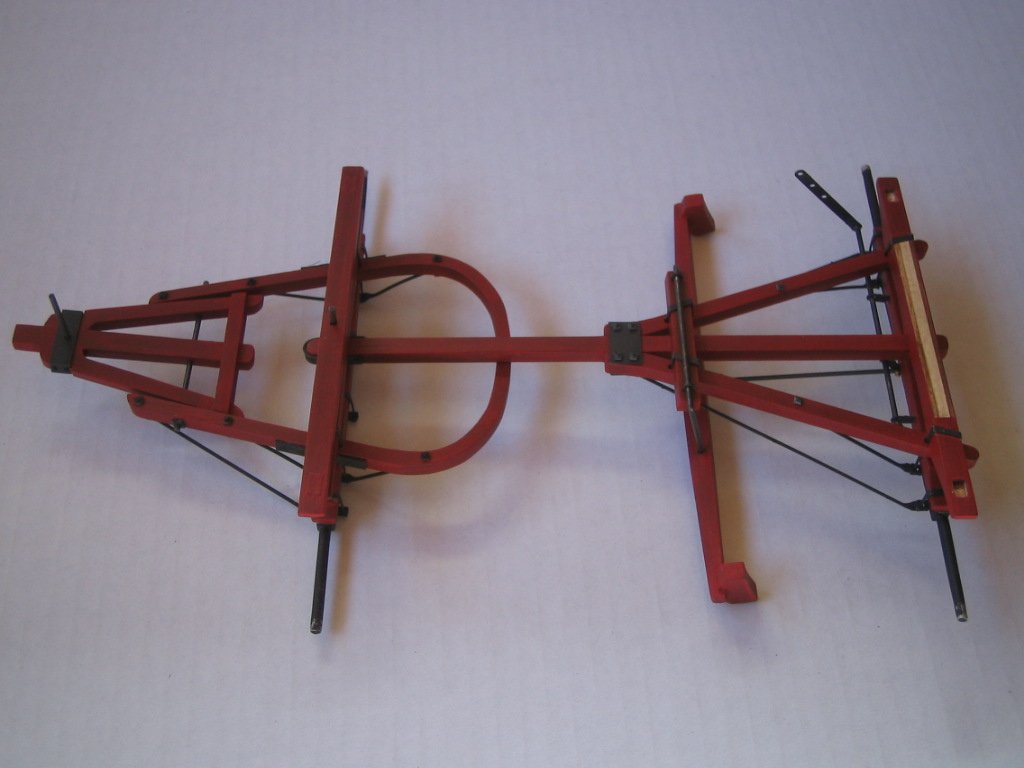
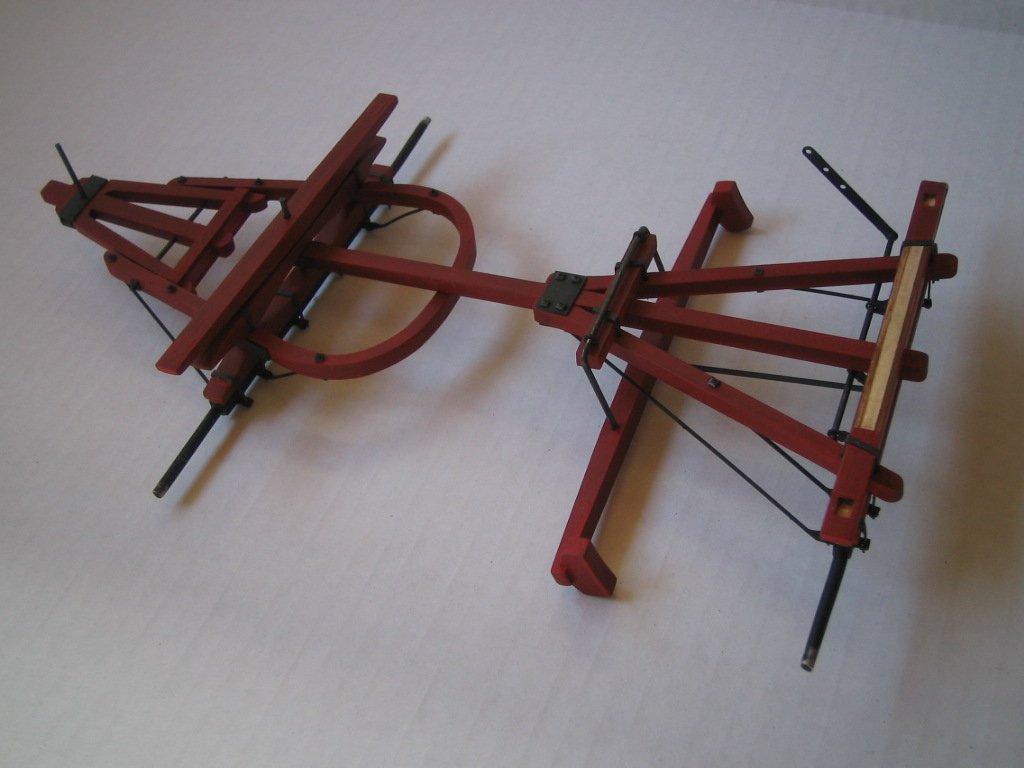
Thanks for the likes on the build so far. The rear carriage (hounds) now has the iron work installed. The parts went together well. The only finicky part was fitting the gasket material square nuts. I found a piece of small diameter brass tubing in the scrap box and used it to push the nuts down in the bolts after applying a dot of CA glue. The brake mechanism parts are prepped and ready for installation. Will be starting on the front hounds next.
-
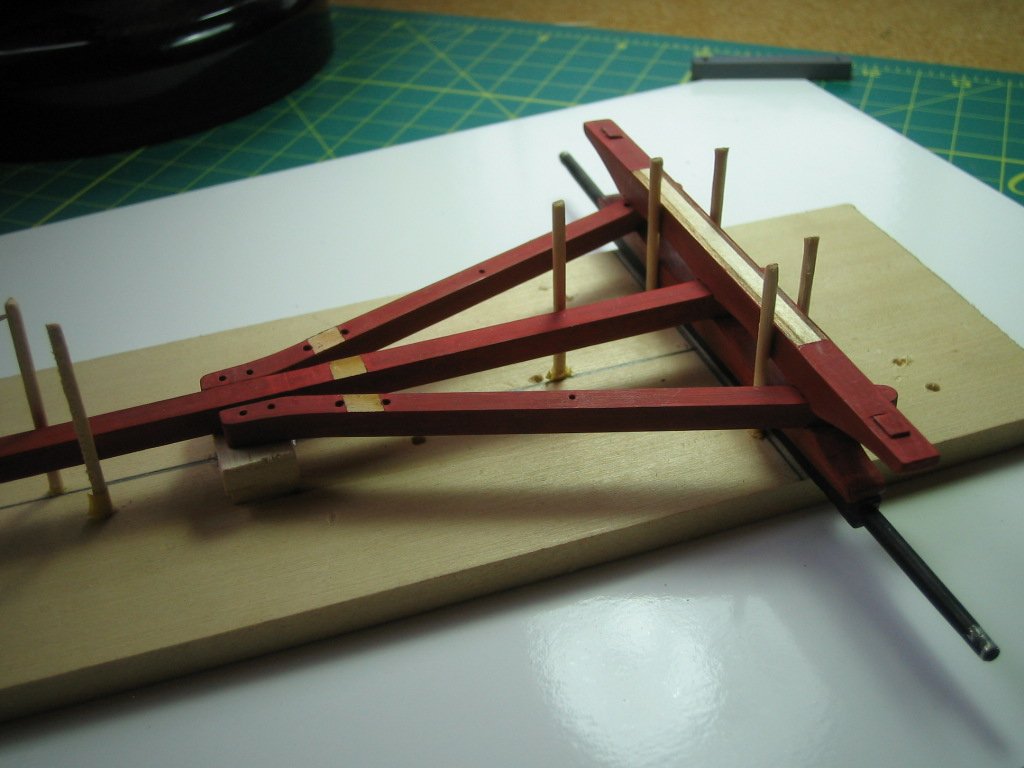
The parts of the rear axle assembly are painted and ready for assembly. With the painting finish,I went back and forth on whether to to go with a new off the showroom floor or a has been on the Chisom trail weathered look. My wife settled it for the latter option by saying its not a "circus wagon". After primer,I used thinned flat red with a spot of black mix and used fine sand paper and rubbed with a piece of leather to give it a sun bleached,well used look. I went over to an old red barn and tried to replicate the look of the paint on it...They must have used the same red oxide,skimmed milk and lime paint on the wagons. I epoxied the axle to the axle bed. To keep everything squared and aligned while gluing I made up a jig. The ironwork comes next.....
- 29 replies
-
- 11
-
-
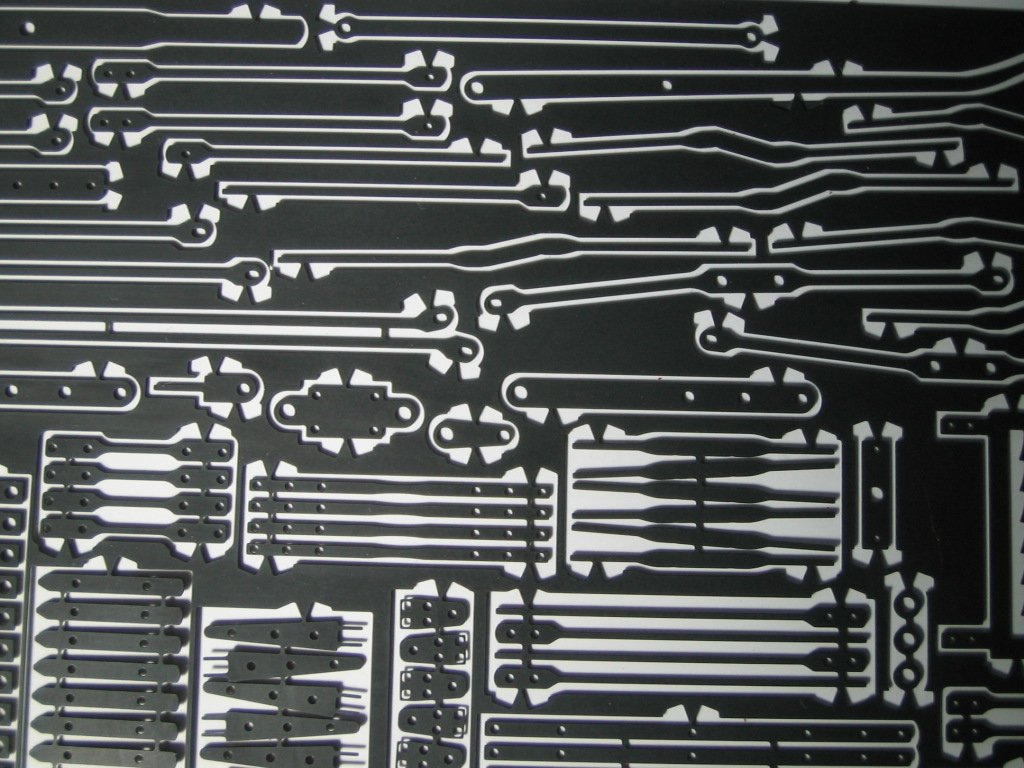
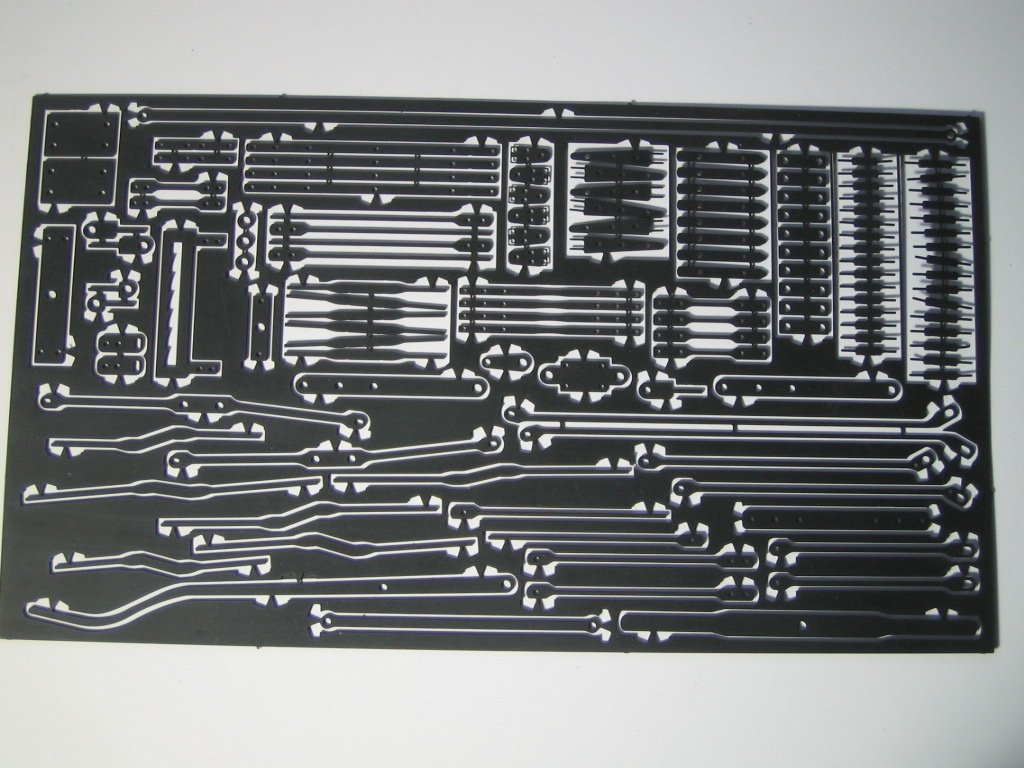
I need some of the etched brass parts to assemble the rear axle assembly. I decided to blacken the whole sheet instead of the just the parts as needed for each assembly . This is also the safest way to store them till needed. I searched the forum for blackening tips and after reading up,went with the following. I started by carefully by sanding the front and rear surfaces with 1500 grit paper.My wife donated an old 8" x 8" baking pan. Using latex gloves,I filled this with enough acetone to just cover the sheet and cleaned off any photo resist and oil left on it. I left the sheet to dry,rinsed the pan and refilled with white vinegar. I left the sheet in the vinegar for 15 minutes,agitating and lightly wet sanding the surfaces again with the 1500 grit ,followed by a thorough rinsing. I then immersed the sheet in a solution of 7 parts water to 1 part BC Brass Black for 10 minutes. I removed the sheet,rinsed,wiped the film off and returned to the pan to repeat the process twice more until it was a uniform black after the film was rubbed off. It was then rinsed and returned to the pan with a baking soda solution,then rinsed again and left to dry on a paper towel. I am really happy with the results. I have used BC Brass before but I was never happy with the result,it was always crusty and not uniformly black. I now know it was not the product at fault,but bad prep and impatience on my part
- 29 replies
-
- 12
-
-
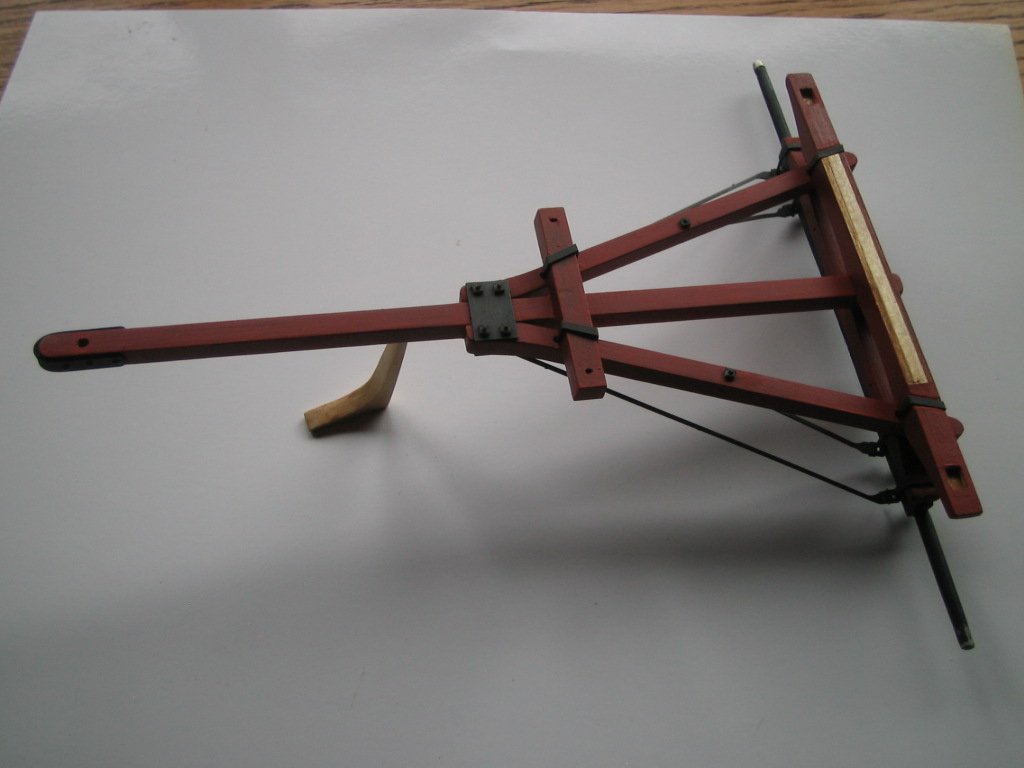
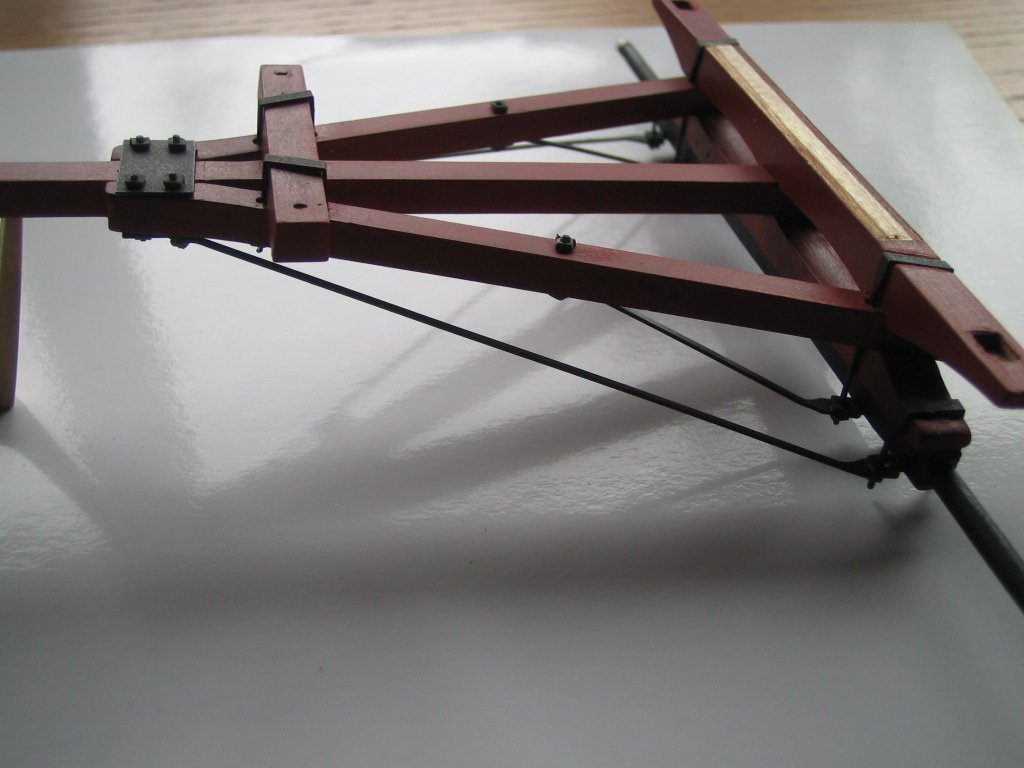
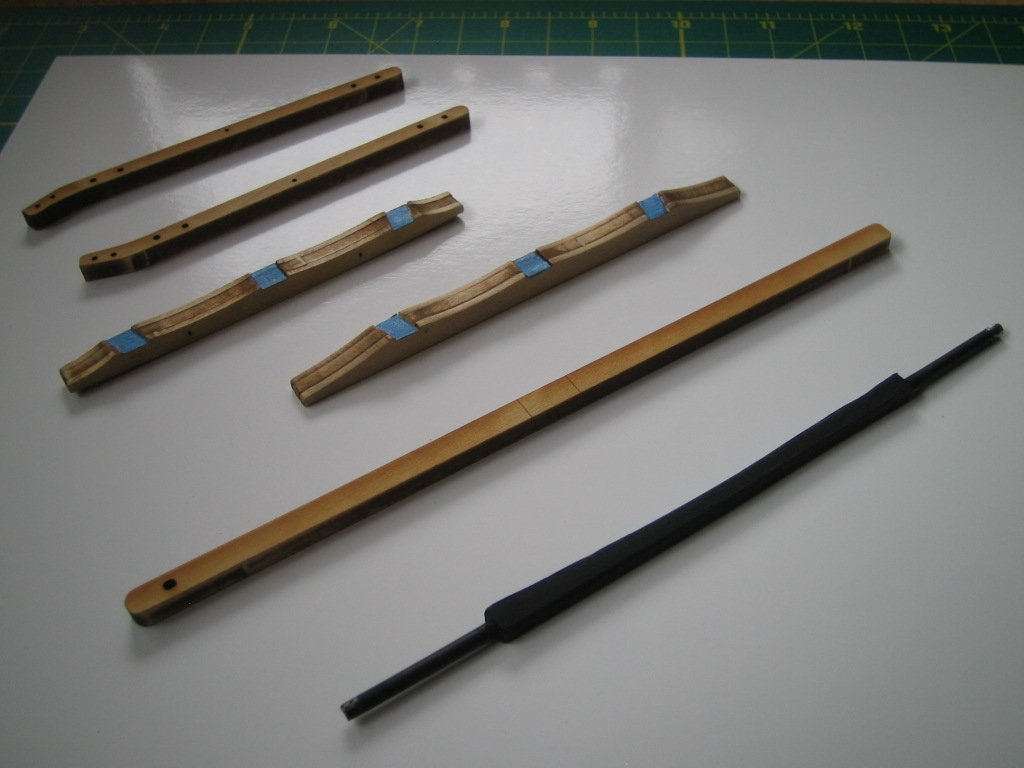
Started on Rear axle assembly. Turned down the axle shafts to fit hubs. Followed Dan's #11 blade scraping method,followed by polishing with 600 grit paper.Then primered,painted black and sealed with Dullcote. The other wood parts Have been trimmed,sanded and sealed with Dullcote. I am trying the Dullcote as a sealer/primer after reading online how it is popular with model train layout builders. Seems to work well,lays really flat,dosen't lift the grain and sands easily. I will know for sure when I paint the parts red tomorrow. I masked areas to be glued in the hope to be able to paint and then assemble as I go with minor touch up as needed
-
Hi to all, Decided to join the 'Wagoneers' over here on shore leave after seeing Dan's and the other wagon builds in progress. I needed a break from the Unicorn for a while and wanted to try my hand at something different. I chose the Chuck Wagon partly because I live on a cattle ranch and partly for nostalgia from old films. I really like the Kit,instructions,and the plans. All the parts with exception the ply sheet used for the wheel rims are first class. The ply is kind of rough with splintering and gouges on top and bottom surfaces,which I don't think can be rescued with filler. I will send an email to John at Model expo to see if replacements can be sent.
-
" just white PVA wood glue. The aluminium wheel hubs don't really do more than hold the spokes in place - the spokes are glued to each other. No problems with anything not sticking " Thanks Dan.... The Chuck Wagon kit arrived today. I'm looking forward to getting started tomorrow.
-
Hi Dan, I am really enjoying watching your progress on the stage,as I have with your other builds. I too have side tracked for a while from shipbuilding and ordered Model Trailways Chuck Wagon. I look forward to its arrival and starting a new project that won't take years to finish. I have a question on your wheel construction...What adhesives did you use? Regards, John
-
Hello to all, I have decided to paint the wales on my Unicorn build matt black They look odd being natural walnut as is the rest of the hull,with black upper works. I have given the hull a coat of WOP (non acrylic) about a year ago to seal it (painfully slow build progress). I never have much luck brushing on acrylics,so I bought some Billings Boats enamel paint and thinners. I have lightly sanded the wales with #400 and would appreciate any hints about painting over WOP. Will enamel adhere to this finish ok in the long term? I plan to thin the enamel and multi coat. Any suggestions paint to thinners ratio? I will be using Tamiya masking tape to mask the wales. Is there is a better tape to use to prevent bleeding under the tape even with burnishing? A lot questions I know,but I have been staring at this for a while and can't seem to get on with it for fear of making a mess.....Thanks for any tips.
-
Hi Ian, Once again you have outdone yourself with the current construction. The swivel guns and mounts are marvelous examples of miniature modeling in their own right. The quarterdeck round portholes look great the way you set them in the cap. I guess we can never know if there was any kind of decoration surrounding them,but looking at the Lyme plans,in the case of that frigate,I would say not. The top rail and swivel gun posts will finish off the quarterdeck very nicely. As to where the the rail should end...I think I will throw a spanner in the works and suggest an option between one and two as in the second photo in post #511 of the sixth rate NMM model. With the last fore rail post in line with the end of the quarterdeck,or as close as you can place it so it is equidistant to the the other posts. From that point the curved down section should end just behind the upper cap scroll as in the NMM photo and Chapman's plans. This would work with where I ended my quarterdeck,maybe it would for yours. Work on my Unicorn goes on at a snails pace,with long periods of inactivity. I hope to return to it with more enthusiasm in the near future,in the meantime I will carry on enjoying your log as you post it. On another note. We have had a bad winter weather wise on the Oregon coast,heavy storms one after another. We had a lot of trees come down in a particularly strong one a fortnight ago,one of which was a neighbor's 40 year old pear tree. He knows of my modeling hobby and I mentioned in the past how pear was said to be good material for model ships and carving. He just dropped by this morning with a load of small planks 18 x 4 inches in 1/4 and 1/2 thickness and said he would cut some square sections of various dimensions when he had some time. I don't know what sub species the pear tree was or how it compares to Swiss pear,but I have it all drying in the workshop. Most of the tree was unfortunately rotten. Regards, John
-
Hi Ian, One side of my forecastle was like your quarter deck. I placed a clamp to the other side and steamed the area carefully,tightened the clamp a little and repeated until it matched the other side. I then drilled through the center into the lower planks and used two brass rods to secure it in right position.I hadn't yet placed the inboard bulwark planks so when added they added extra strength to keep it in position. With yours I would use threaded rod through the round gun ports on opposite sides with suitable sized washers,ground like rounded end rectangles to spread the load and nuts. You might have to move one or two of the gun carriages to find the best ports to use. Then gently steam the 'off' side and tighten down on the nuts a bit at a time until you draw it in to match the other side. I would then let it rest with the rods in place for a while (24 hours?). Then drill vertically into the center of the bulwark planks and into the hull ones below and pin it with 1/32" or 1/16" hard brass rod with a coating of adhesive. For extra strength especially over the brass cannon ports,I would add thin planks (0.5mm?) running the full length of the quarter deck both sides on top of the existing plank-sheer. It would make a nice base for the bottom of the open rail assembly. If you placed the brass rod in the right places you could leave them 1/8" or so proud of the thin added plank-sheer planks and use them as anchor tenons for the uprights of the railings. The swivel gun uprights will also add strength to the whole assembly...... I hope this makes sense. My Unicorn has only 4 round ports on the quarter deck shown in the plans.
-
Ian, Wow.........Wonderful stuff indeed! Happy New year to you and yours
-
Happy New Year Mike, I have been away for the holidays so it is nice to catch up on your Pegasus build.......Great progress and lovely construction on the hull and counter planking,you must be well pleased to have finished this major phase of the build.
-
Hi Ian, Thanks for inspiration to get going on the Unicorn again. The ships wheel is a lovely item,made to your usual high standards. I think your ideas for moving the wheel behind the mizzen mast,with a exposed tiller is sound,especially if you are going with a lanteen sail on the mizzen.None of the models or plans of contemporary frigates I have seen show a deadlight or anything resembling the shot holder. I could be wrong but I think this is down to artistic licence on Corel's part. The only problem I can see is what kind of damage will happen to the deck planks on removal and how to remedy it. The tiller and its tackle would pose no problem added to the flag locker,which once again I'm not so sure should be there. It is a shame Chapman's drawings do not include the Deck plan. I think your diagrams and notes would be a great asset to all forum members. Now the colder weather is here it will keep me indoors more,I hope to make further progress on my effort. I have a lot of sub assemblies scattered around my bench I need to a affix on the ship. My time this summer has been spent with our Golden Retriever puppy. It took my wife and I 63 years till we decided to get a pup....I had no idea of how much time and work that it would involve! I look forward to further developments....I'm also glad Mike is also back in the shipyard.
-
Hi Ian, I'm glad you are back,I hope you have had a enjoyable summer. Once again you have outdone yourself....The capstan is an object of beauty and amazing construction.
-
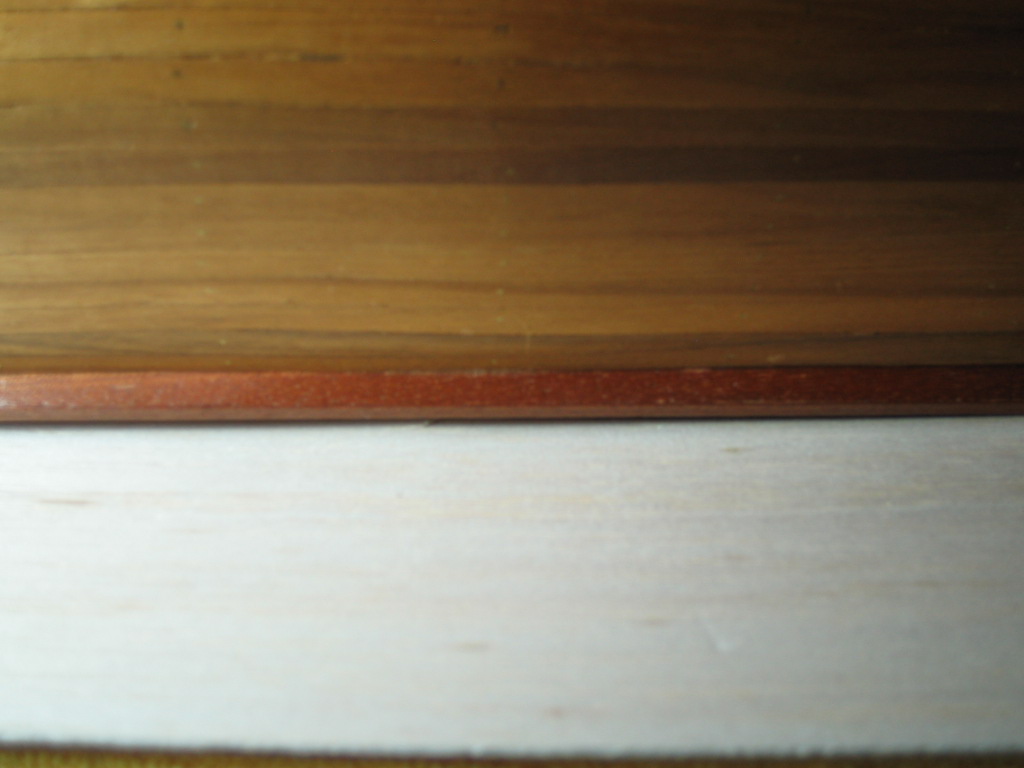
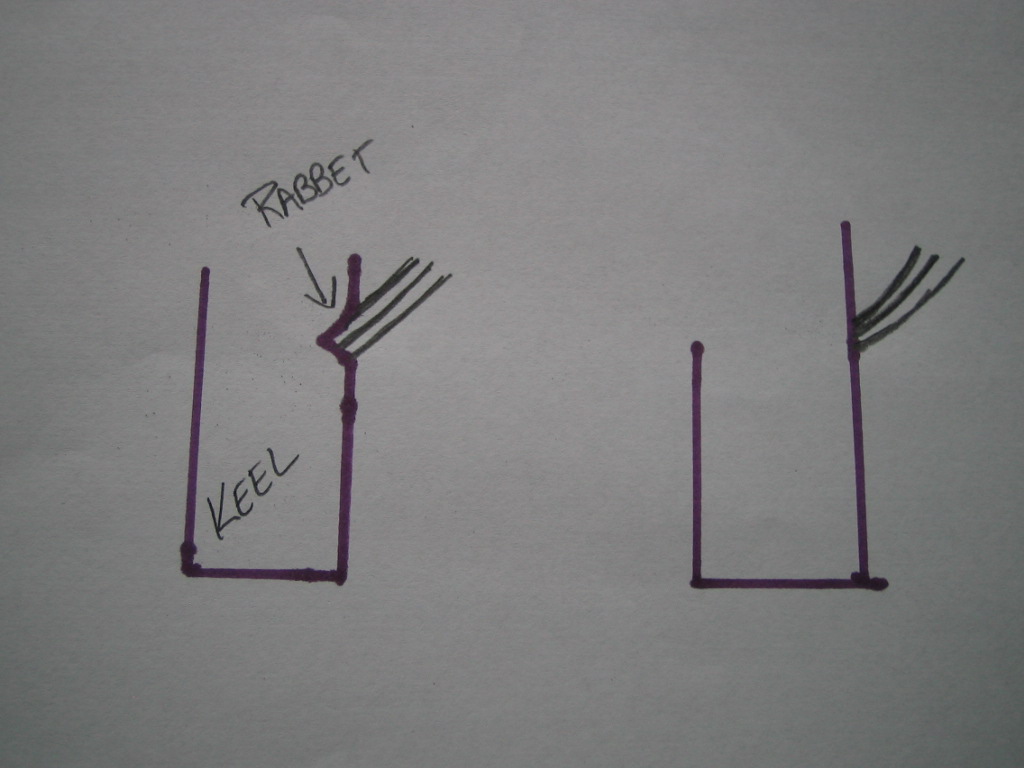
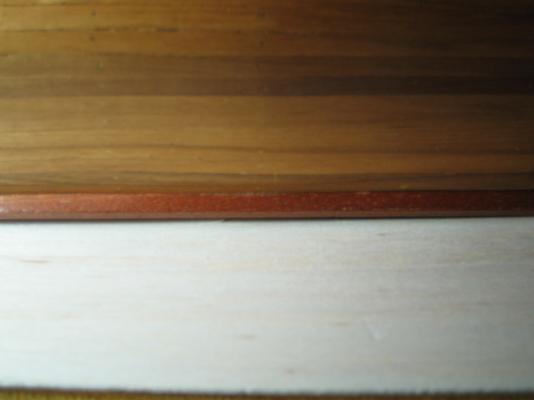
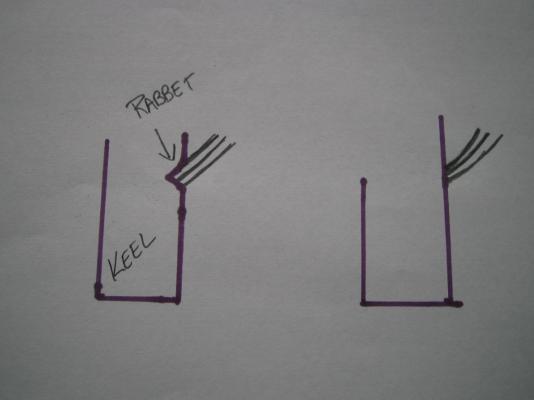
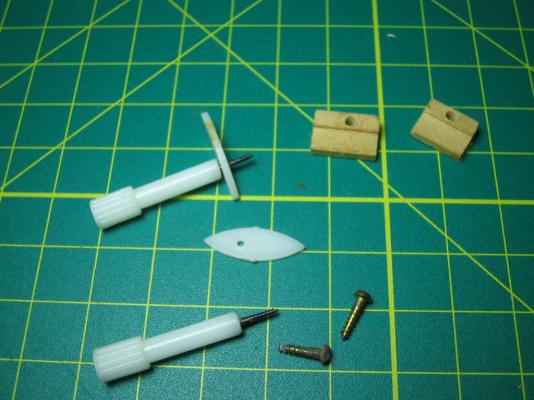
Hi Ross, For the second layer of planking I used plank clamps,some shop purchased,some home made as seen below. I know how this isn't a great deal of help to someone on a ship in the Indian Ocean,but you could make the wood part of the clamps by using a strips of the basswood first planking off cuts. Glue sections together offset to form the L shape,cut to 10 - 15mm length, drill a small hole and you would end up with something like the wooden ones shown. That brings the problem of the tiny screws which are probably out of the question finding on a ship,but maybe you can find drawing (push) pins on board and use those to secure the second planks to the bulkheads. Each new plank would cover the holes from the clamps used on the plank before. The Unicorn is different in the planking to other double plank ships I have built,as those had thin outer planking like veneer which were a lot easier to work with. This thickness of the two planks is what also what makes that plank to keel joint difficult. I did this phase of construction a long time ago before joining the forum and didn't have the expertise of the members to draw on. The proper way to do this is to make a rabbet (or rebate) in the keel.This is a groove,in this case a V shaped one cut all all along the keel and up the stem where the last planks join the keel. This makes a nice blended joint. I however laid the first layer planks angled on the edge where they butt to the keel. I then used a 6" thin steel rule to protect the keels veneer and used a wide bladed craft knife to scrape the planks thinner towards the keel and shape the joint. The second planking was done in the same fashion and I ended up with something I could live with....I'm glad this is on the least viewable part of the ship though. The next build (if I ever finish this) I will use the rabbet joint. I hope this helps
-
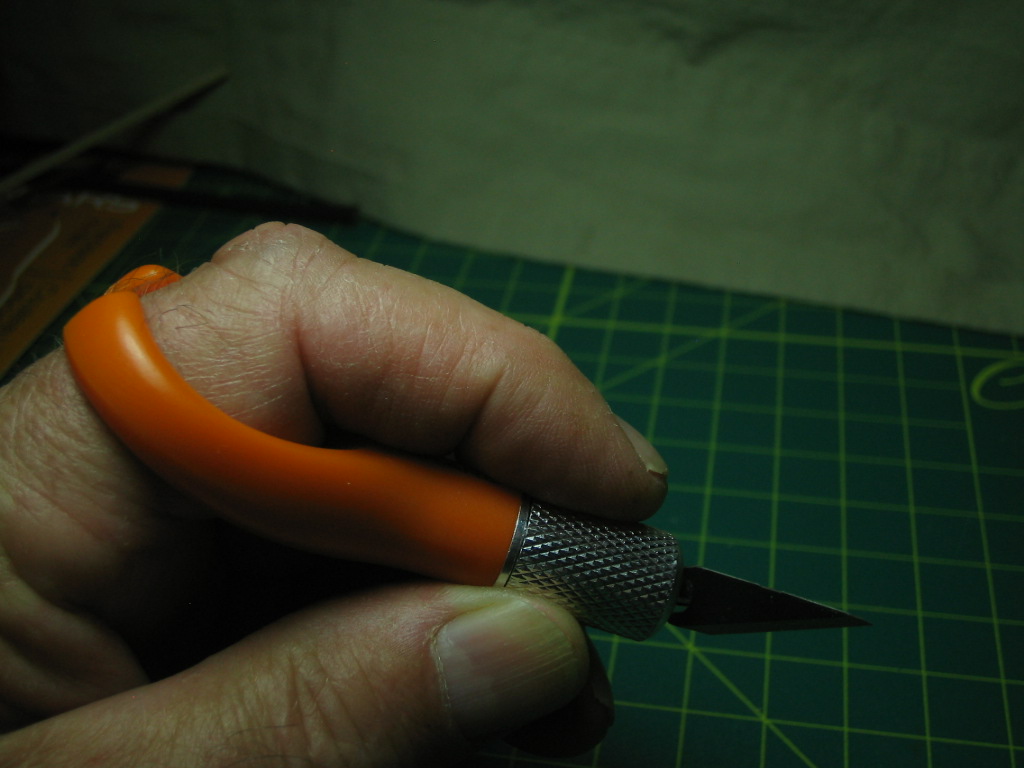
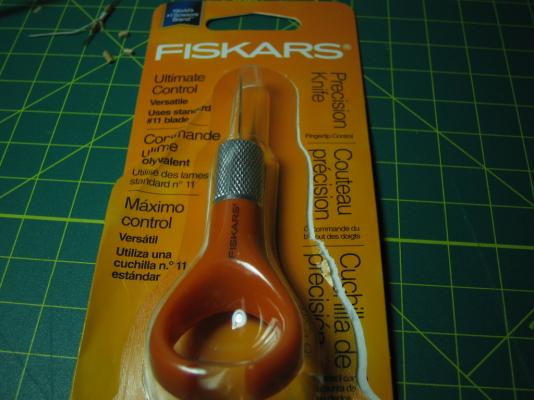
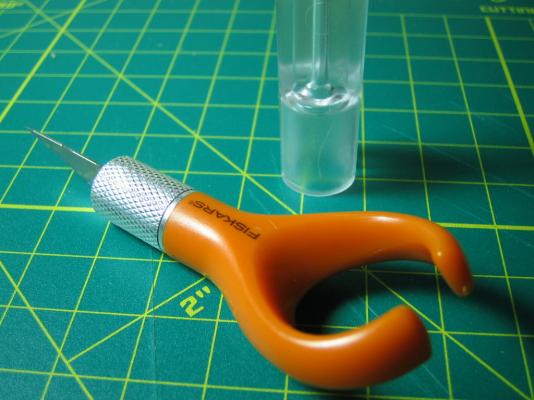
Greetings all, I was at the local Bi-Mart today following my wife around when I spotted these,and decided to give it a try for the princely sum of $4 It works really well,allows great control,and is like a having a razor sharp forefinger.

-
Hi Ross, Welcome to the forum and Club Unicorn. The plans for the Unicorn do not show gun port lids,but they can be seen on contemporary models at the National Maritime Museum. You should check out Ian Major's log,if you have not done so yet,as he (and Landlubber Mike) have done a lot of research on the ship. Ian has gone with lids on the rear three and two front gun ports,which seems about right to me,I intend to do the same on mine. I hope this helps
-
Hi Dave, I was just into ships brick and iron hearths.I hope this link works........ https://books.google.com/books?id=djwmMDm48uwC&pg=PA197&lpg=PA197&dq=ships+iron+firehearth&source=bl&ots=851V7UvB19&sig=YydgVzHXpsVD7ZgDmVeiQvOSd9U&hl=en&sa=X&ei=EL6QVZiVBIuzogTTv4PYDw&ved=0CCEQ6AEwAA#v=onepage&q=ships%20iron%20firehearth&f=false
-
Thank you gentlemen for the kind replies and likes. Ian, I don't know if you noticed my cheating on the capstan? I added to the height by adding red painted copper sealing rings (left over from my days as a Jag mechanic) to the top. Mike, I headed to the shops and bought a cheap kiddies set square kit and a 1/8" and 1/4" drill bits in 6" lengths. You need the longer bits to get clearance past the stem. I secured the keel in a hobby vise and using the 30 degree set square with the 1/8" bit in a pin vise,carefully drilled a pilot hole. As the bowsprit passes through the beakhead deck with its top surface at the very bottom of the first bulkhead,I marked a point 3/16" forward on the deck as a starting point. I also stopped drilling often and looked down from straight on top to make sure I was drilling in line with the keel. Once I was happy with the pilot hole position,angle and depth,I used the 1//4" bit to carefully enlarge the hole. I did the final fitting using some fine sandpaper wrapped and taped on (if I remember correctly) on a pencil until the bowsprit dowel was a snug fit. You can visualize what is needed by cutting a small piece of the 5/16" dowel at 30 degrees and positioning it on the deck and tracing the outline,the hole is an ellipse in shape. I hope the helps
-
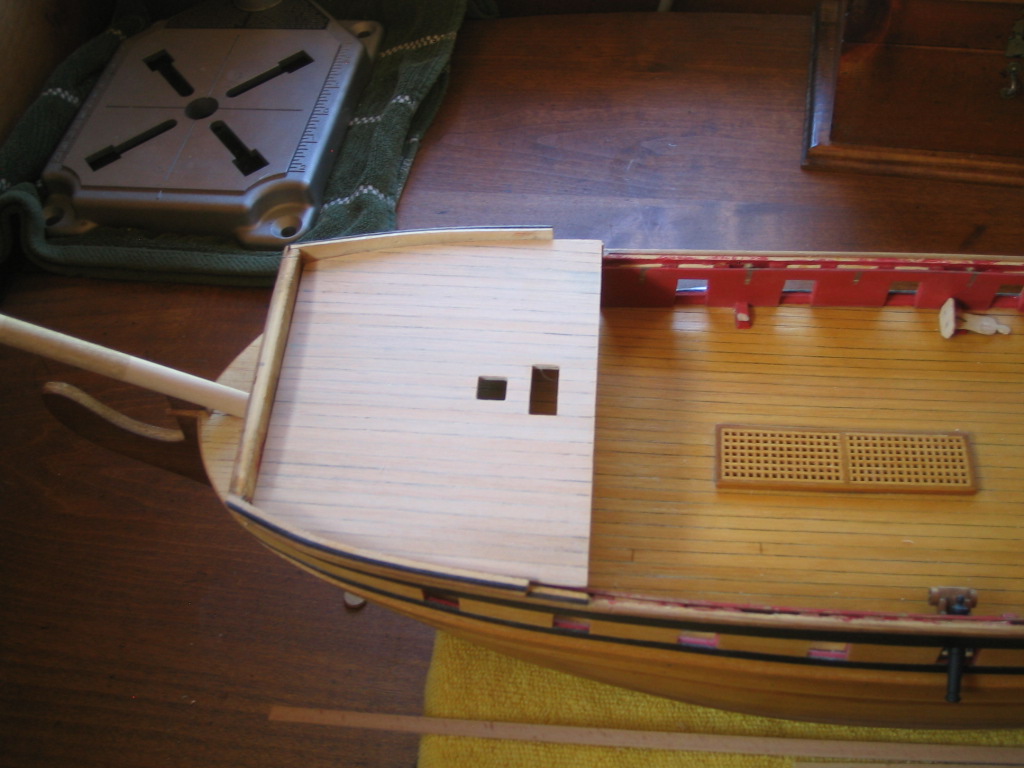
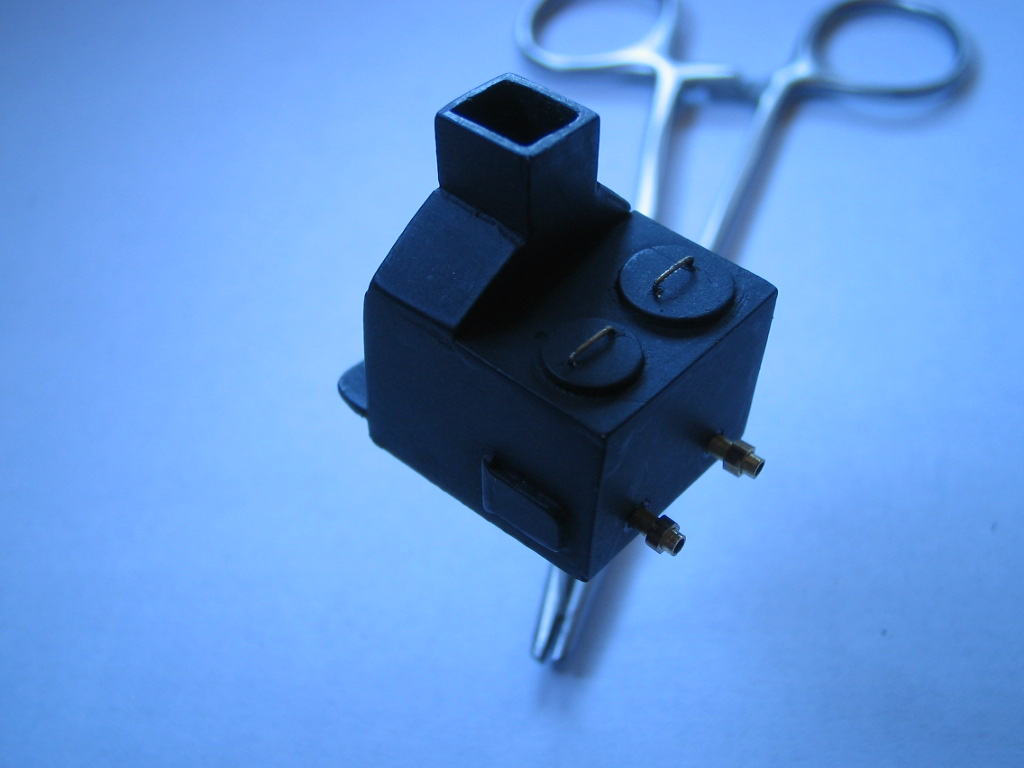
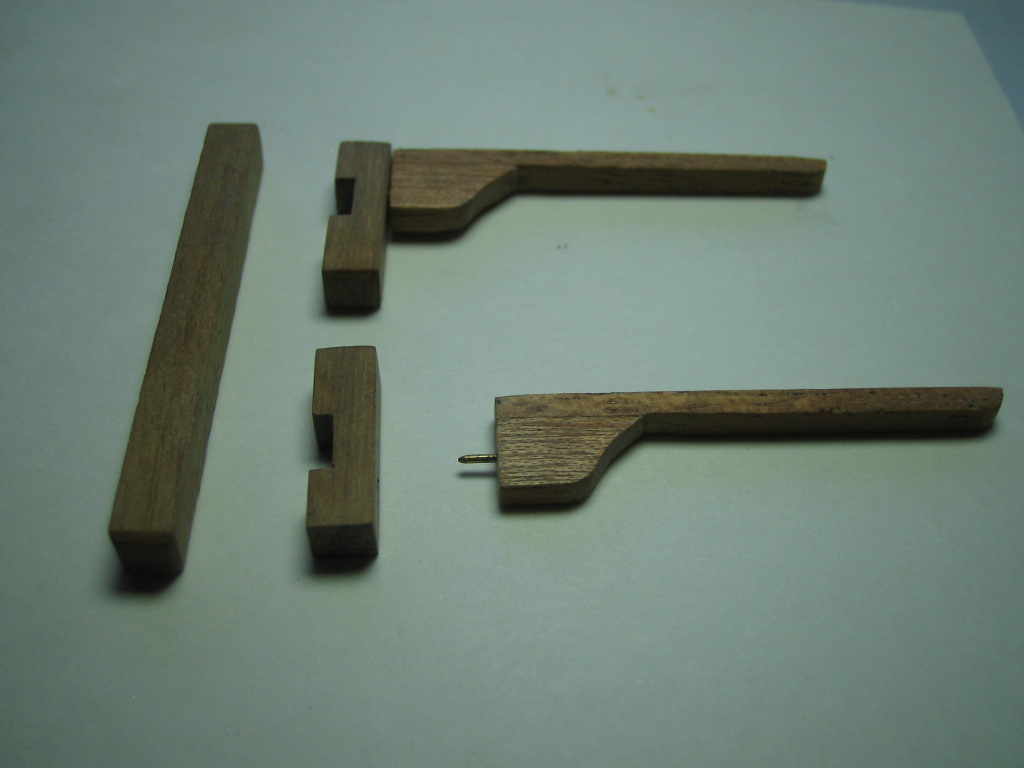
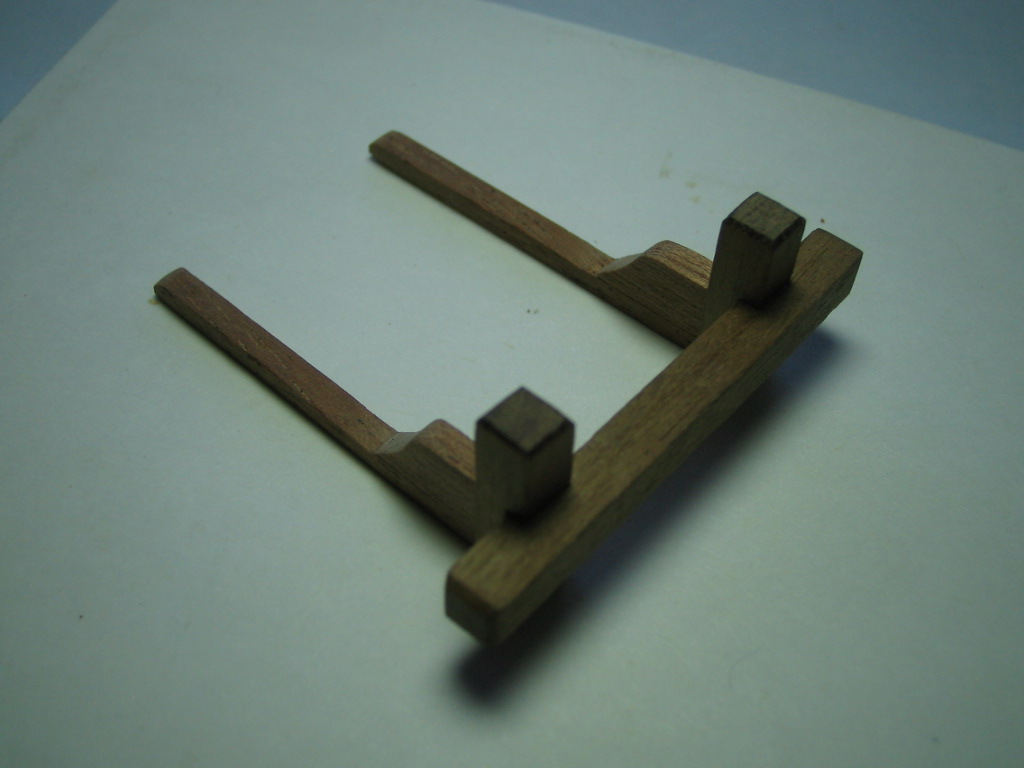
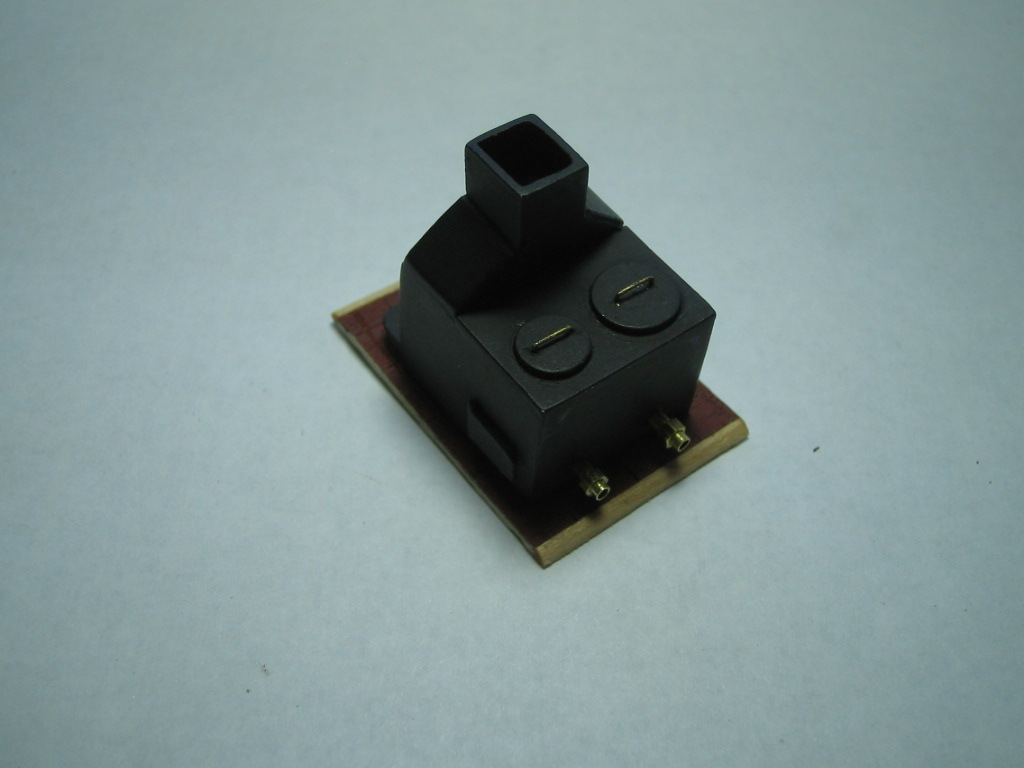
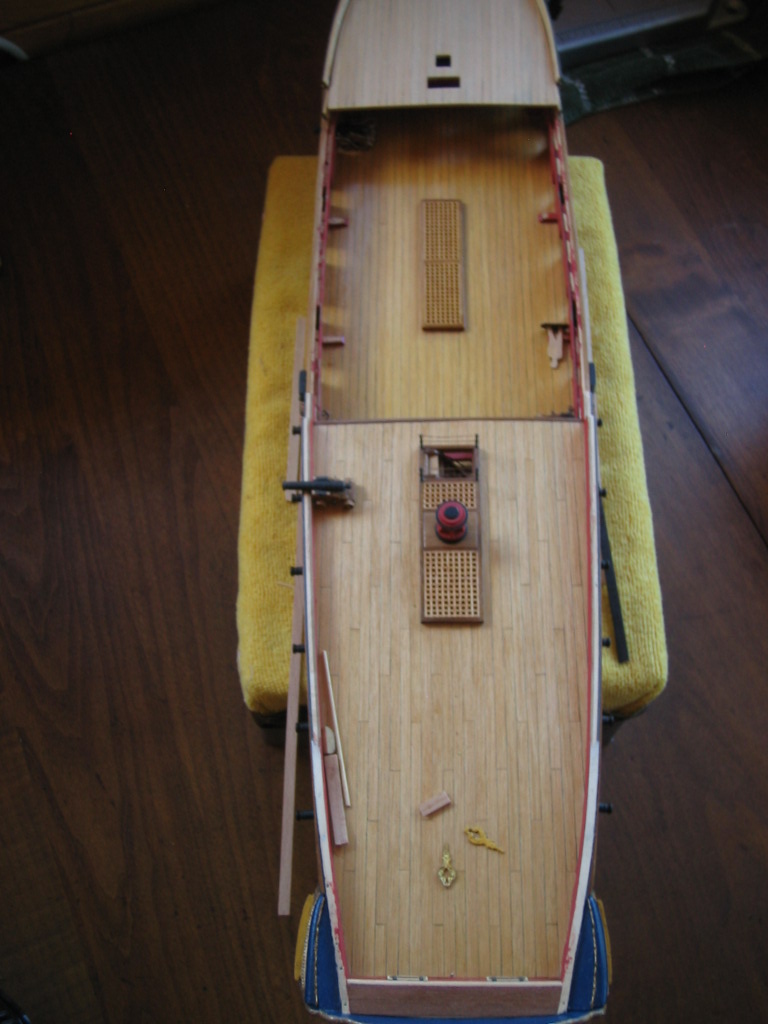
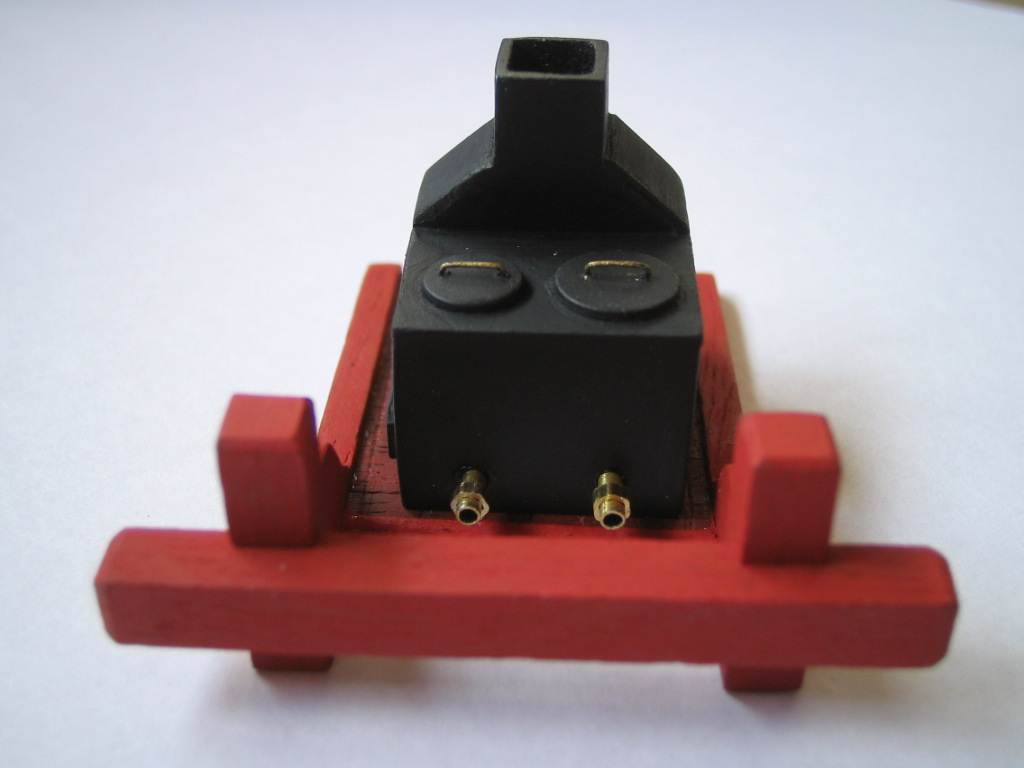
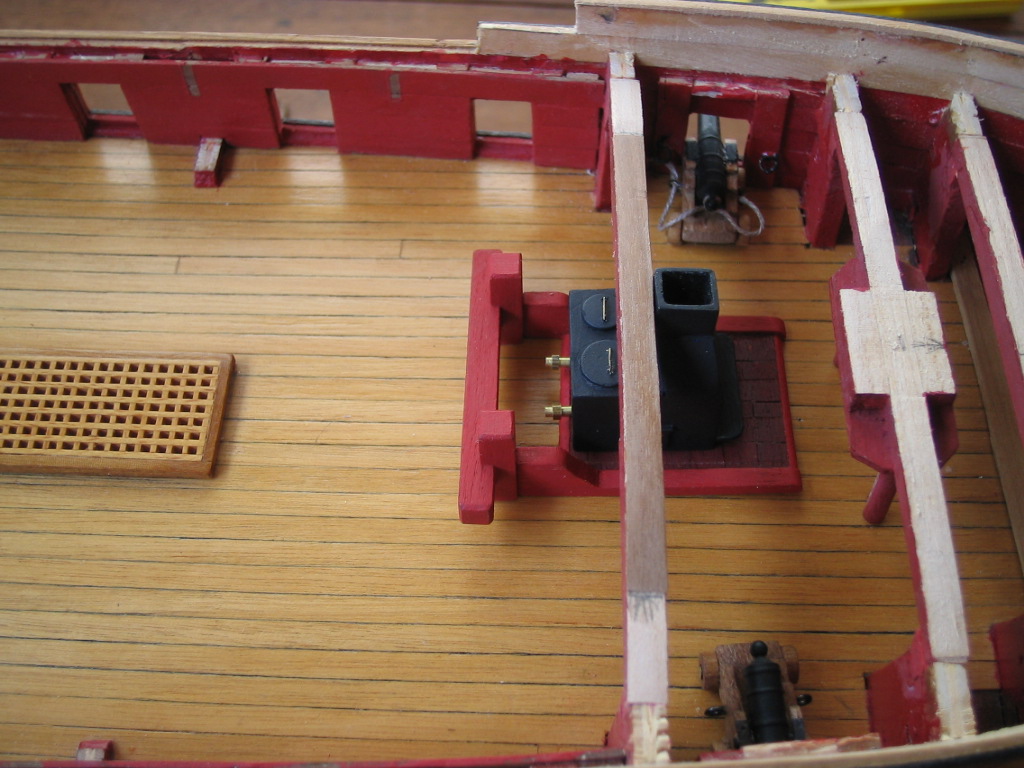
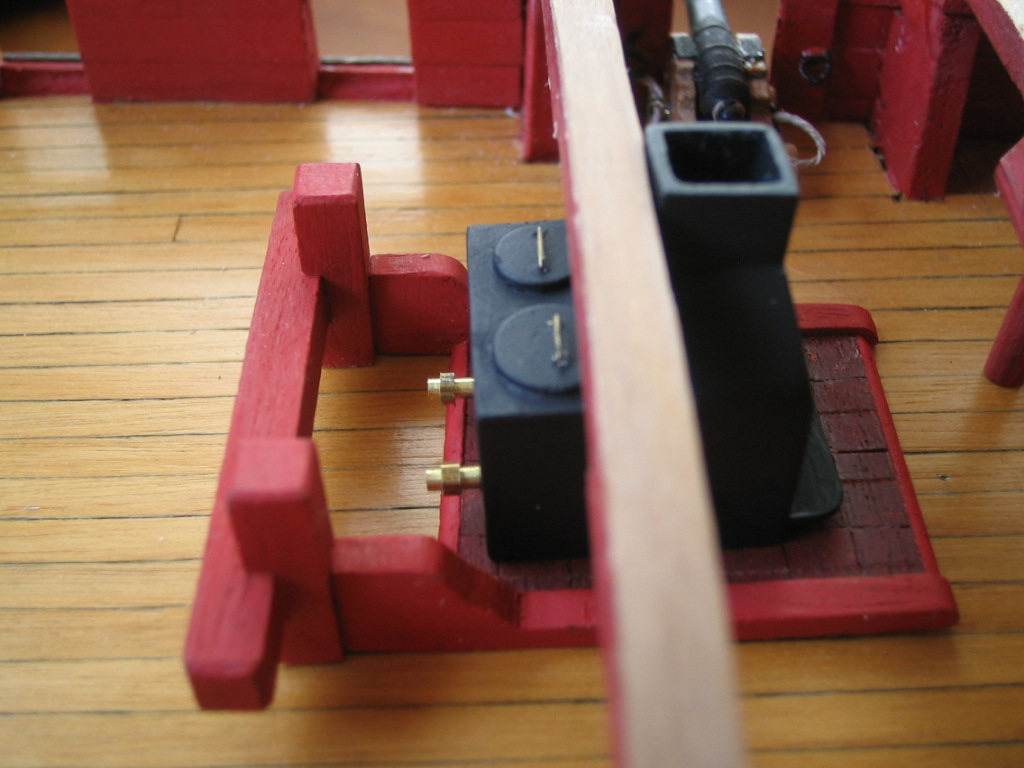
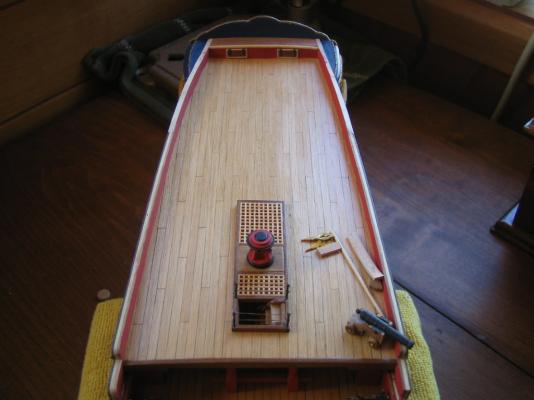
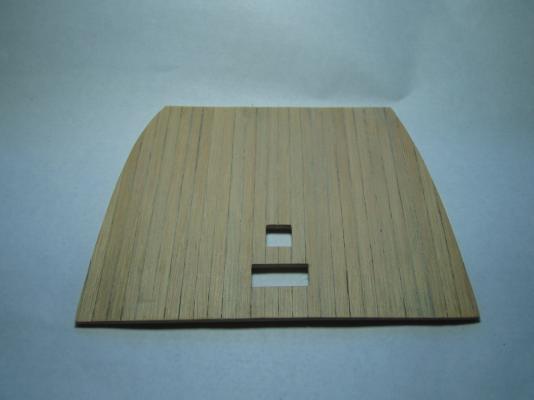
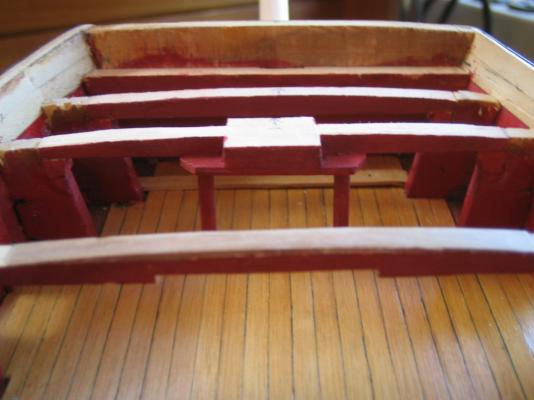
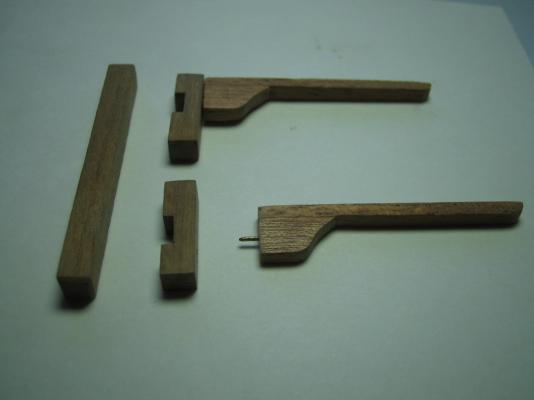
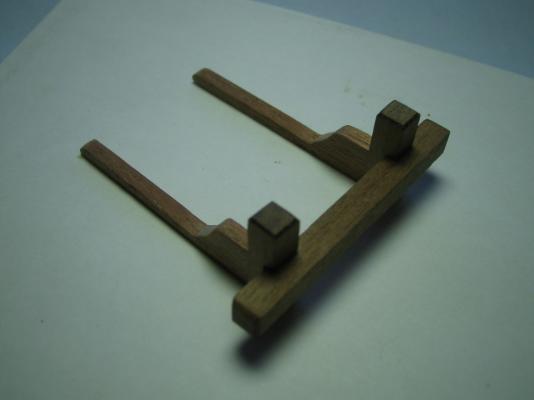
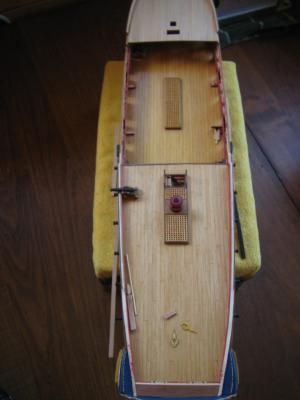
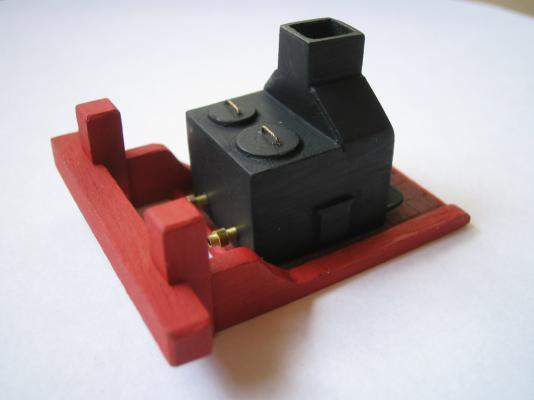
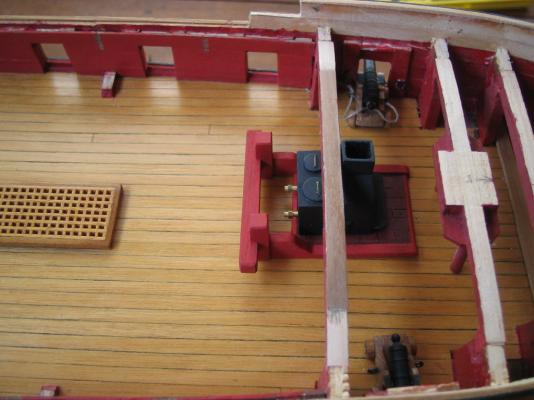
Greetings all, Time to update the log with some painfully slow progress on the Unicorn...... I was intending to finish the quarterdeck plank-sheer and railings before moving on. I purchased some Fiebing's black leather dye and stained the wood needed in preparation. I really liked the results,the dye doesn't clog the grain like paint and leaves a nice deep even black finish. I cut the pieces needed for the quarterdeck and then realized I was getting ahead of myself. The plank-sheer would have to be constructed for the whole ship,as doing it in sections as I went forward would make the curves and joints difficult. So I had to put the foredeck in place. As I have tossed Corel's supplied one piece deck, I was stuck on how long my foredeck should be. Ian was a great help in supplying me with information and side elevation views of contemporary ships. The foredeck extends rearward to the right point now but is two scale feet shorter because Corel's fore most bulkhead is two feet back from where it should be. JPG] Ian also mentioned the foremast was too far back on the deck by two scale feet. I will move it forward,but this puts it right above one of the deck support beams.I had to alter said beam so the mast can be put in place and and leave support for the deck. The hole should be right in the middle Now I have to finish the internals of the forecastle before the deck can be fixed in place. The guns are already assembled,just need rigging and fastening in place. I did need to construct a iron hearth stove and riding bits. I constructed the stove using .030" styrene. I would have like to use a more organic material for this but,I needed something I could cut easily and had a smooth surface that would look like Iron. Now the riding bits. I am only going to make and use the rear one. Thanks again to Ian for his plan of the bits in his log Here is the finished assembly and its position. To be continued.......


-
Mike, Great progress and construction skills on the Pegasus. The pearwood really is a lovely colour for ship models. Have a great 4th.
-
Mike, Welcome to Corel's castings of the Unicorn's rear galleries......We at club Unicorn have all been there mate. The main problem is that the angle of the stern bulkhead and the angle at where the side and rear gallery castings meet are not even close. This results in the side galleries pointing downwards at the front. I added thickness to that rear bulkhead and curved it a bit more whilst filing the angle (off vertical) to try and get the side galleries to run parallel with the planking. I got it to a compromise position which I could live with. I had to move on,or I would still be messing with it to this day. I got concerned about loose cannons when working on the gun deck. I ended up securing the guns to the deck with glue and running a 1/16" x 5/16" hard brass rod through the carriage and deck. I then used thick CA glue to secure the barrels to the carriage and then glued thin black cardboard strips over the trunnions. When all was cured I tried to move the guns with a fair bit of force and they stayed put. You can't see the rod when looking at the guns in place.
- 51 replies
-
- 3
-
-
- first build
- corel
- (and 1 more)