Some Idea
-
Posts
1,159 -
Joined
-
Last visited
8 Followers


About Some Idea

- Birthday 08/10/1967
Recent Profile Visitors
5,345 profile views


-
 Some Idea reacted to a post in a topic:
Ring Bolts
Some Idea reacted to a post in a topic:
Ring Bolts
-
KARAVOKIRIS reacted to a post in a topic:
Le Rochefort by Some Idea - 1/24th Scale - First POF Build
-
KARAVOKIRIS reacted to a post in a topic:
Le Rochefort by Some Idea - 1/24th Scale - First POF Build
-
KARAVOKIRIS reacted to a post in a topic:
Le Rochefort by Some Idea - 1/24th Scale - First POF Build
-
serikoff reacted to a post in a topic:
Le Rochefort by Some Idea - 1/24th Scale - First POF Build
-
 serikoff reacted to a post in a topic:
Le Rochefort by Some Idea - 1/24th Scale - First POF Build
serikoff reacted to a post in a topic:
Le Rochefort by Some Idea - 1/24th Scale - First POF Build
-
serikoff reacted to a post in a topic:
Le Rochefort by Some Idea - 1/24th Scale - First POF Build
-
yvesvidal reacted to a post in a topic:
Le Rochefort by Some Idea - 1/24th Scale - First POF Build
-
Keith Black reacted to a post in a topic:
Le Rochefort by Some Idea - 1/24th Scale - First POF Build
-
 Hi Gary I buy all of my brass from eBay as you can get just about any size for a reasonable price. I have made all of the fittings for this project - Hope this helps - Mark
 -
Hi Paul if you anneal the rings again before cutting they cut very easily with a saw. I’ve found that very sharp and small snips are far easier and do a similar job Mark
-
yvesvidal reacted to a post in a topic:
Le Rochefort by Some Idea - 1/24th Scale - First POF Build
-
Thanks Tonphil1960 🙂 Thanks marsalv 👍 Thanks Gary 🙂. I’m not sure what you mean by hardware. Do you mean the solid brass or the actual fittings?
-
Fantastic work Chris you’re framing looks perfect
-
Thanks very much Alan - I would say that your idea of a lanyard is probably spot on. It would be so easy to lose the cover at that point on the ship.
-
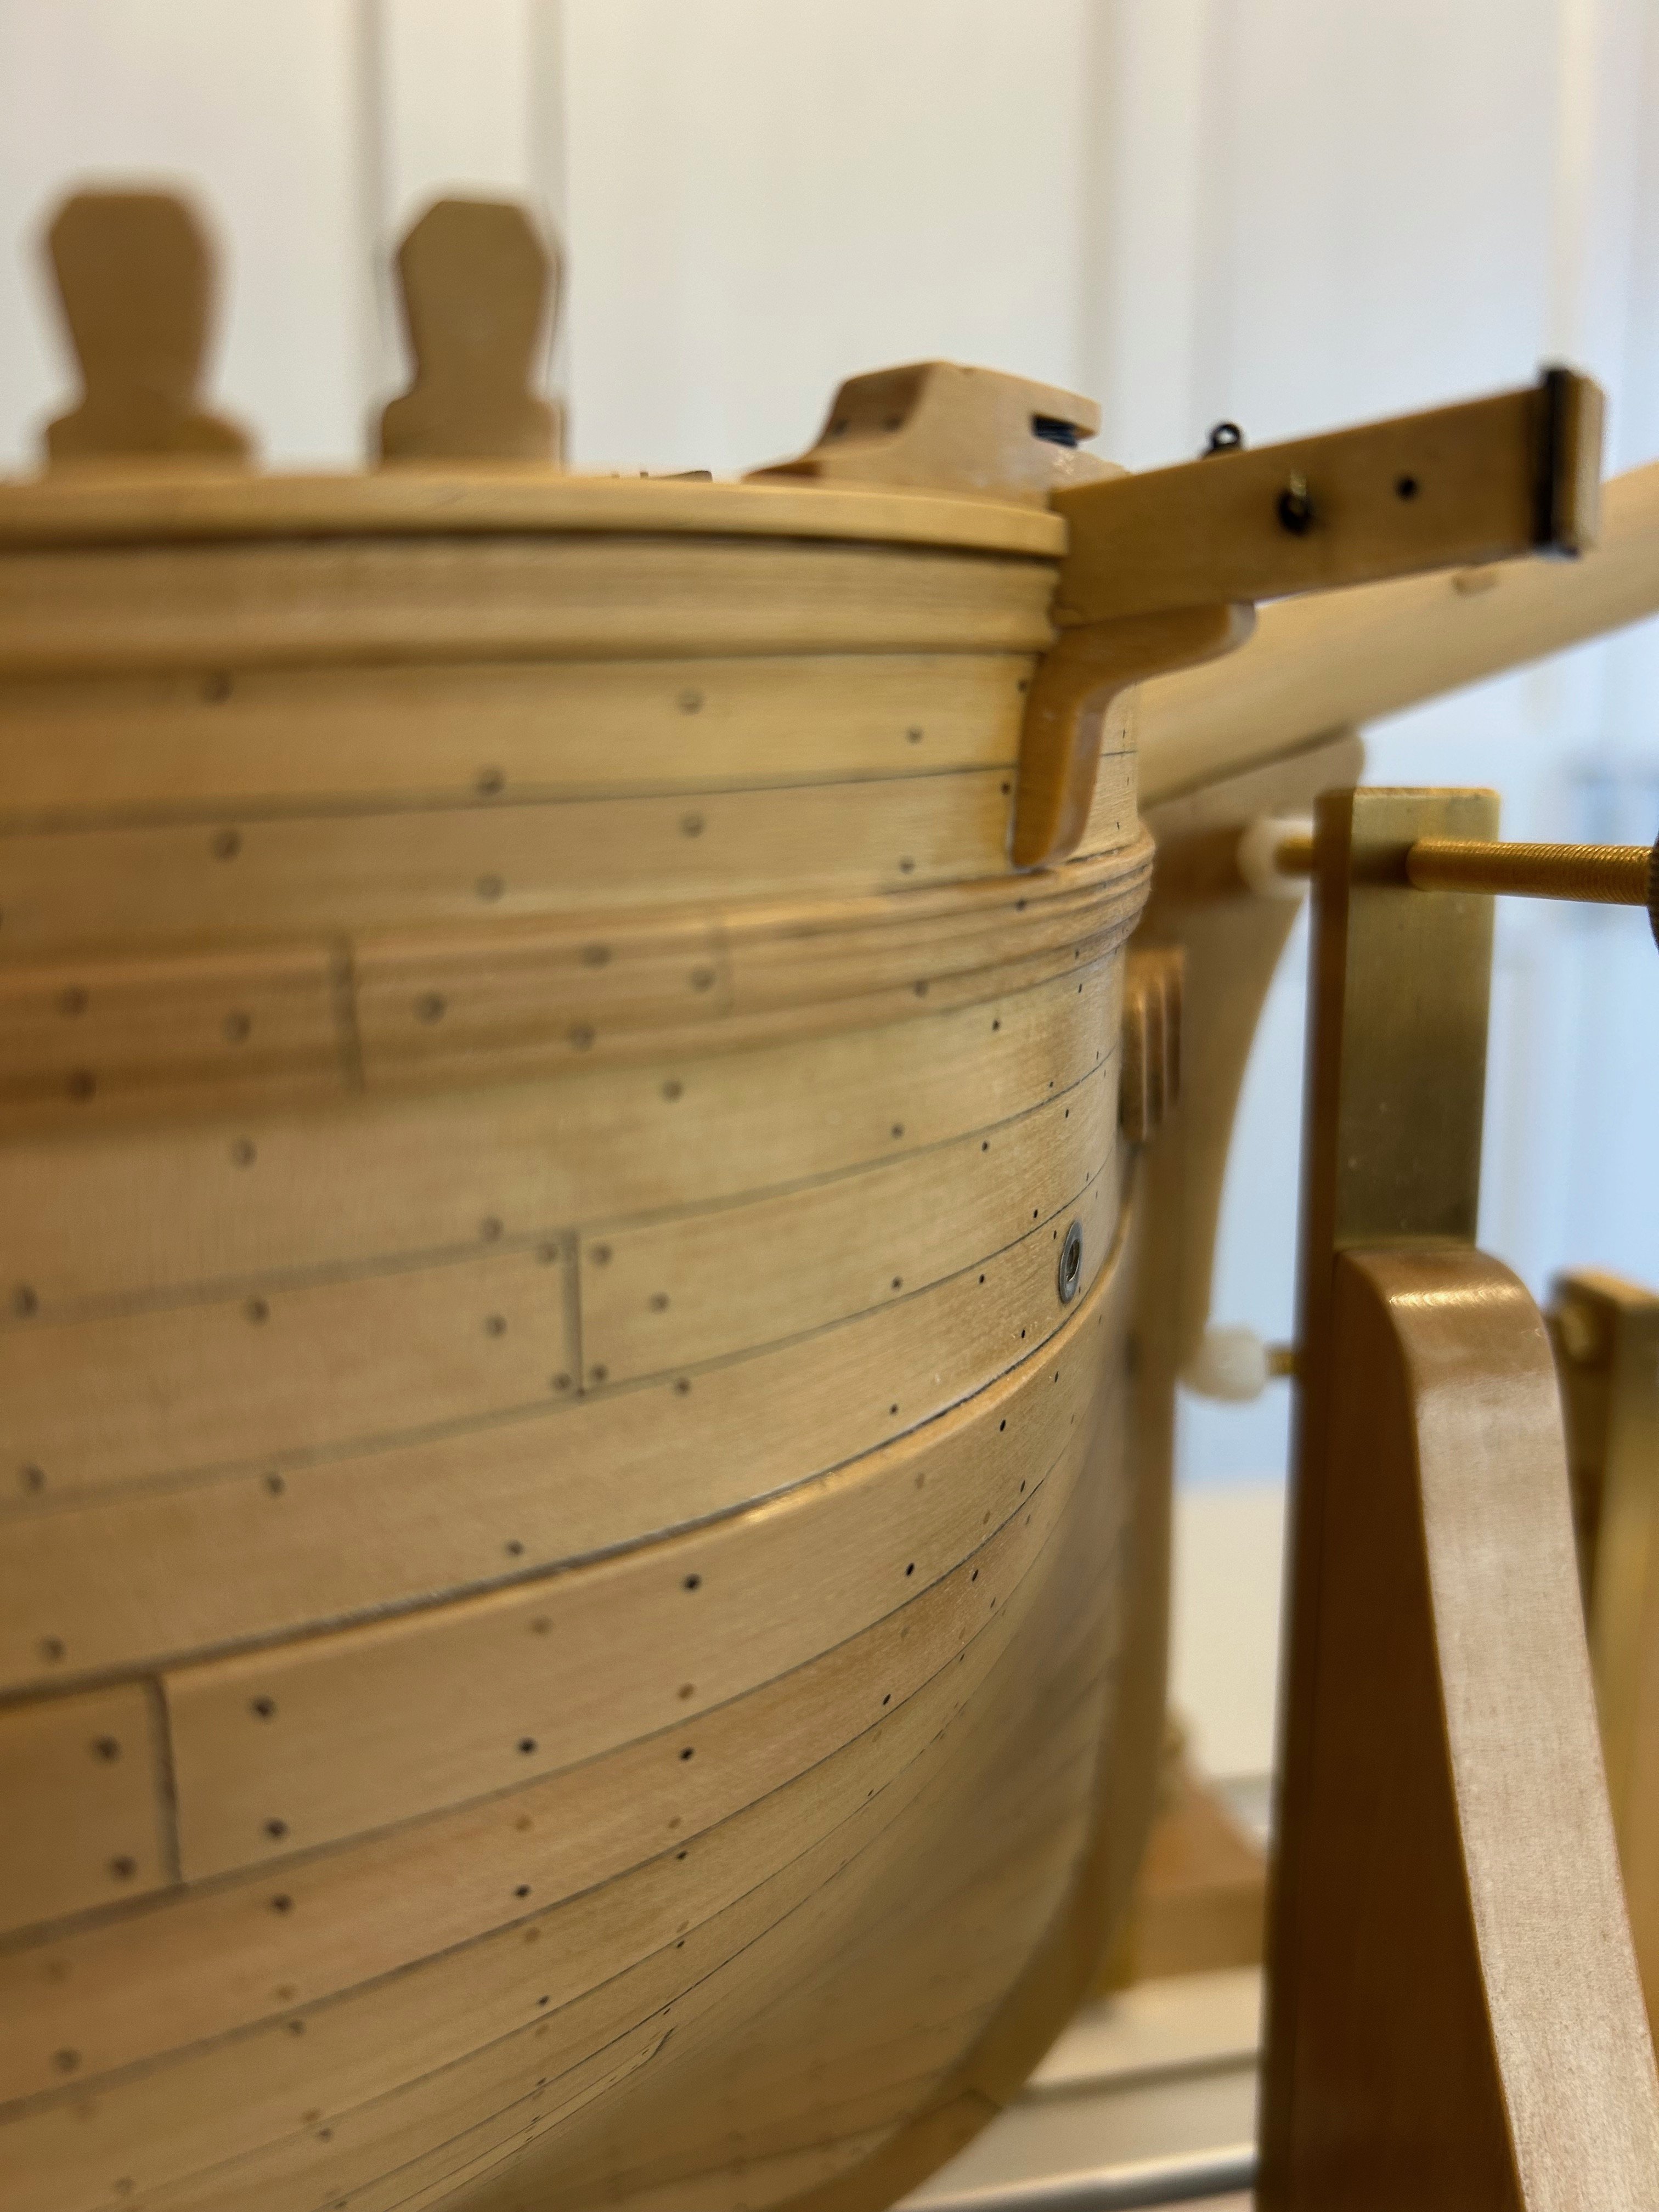
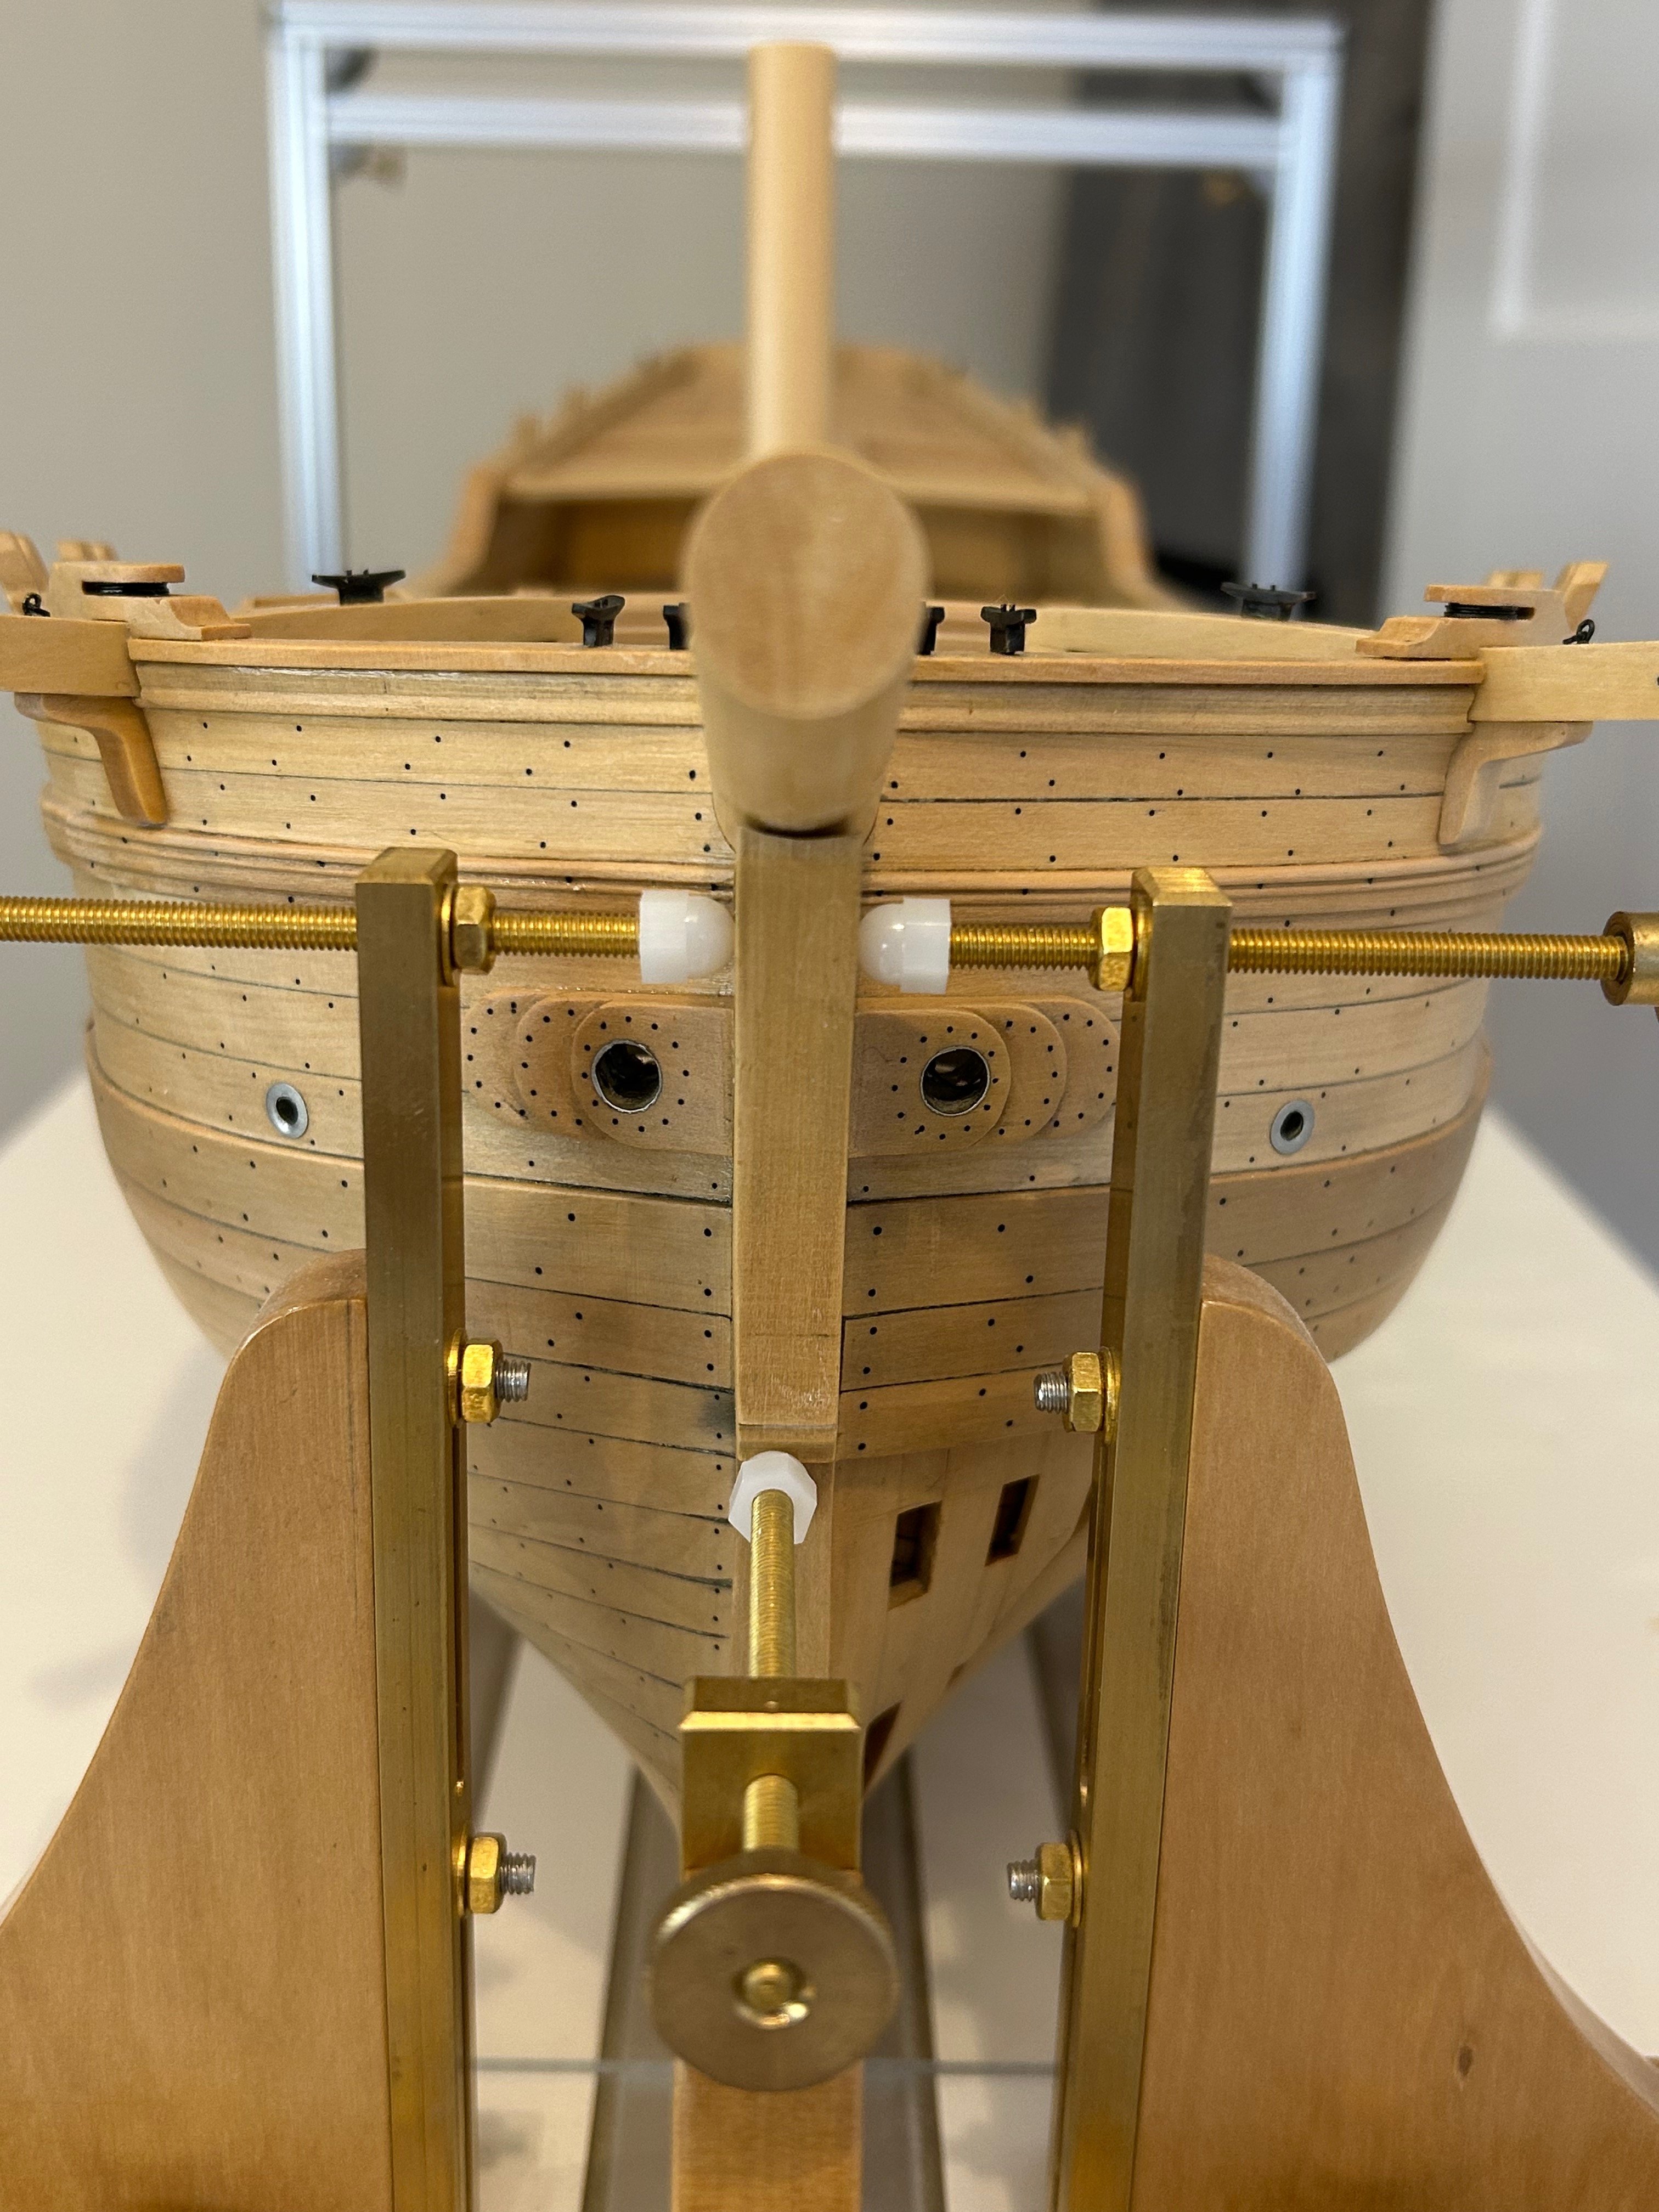
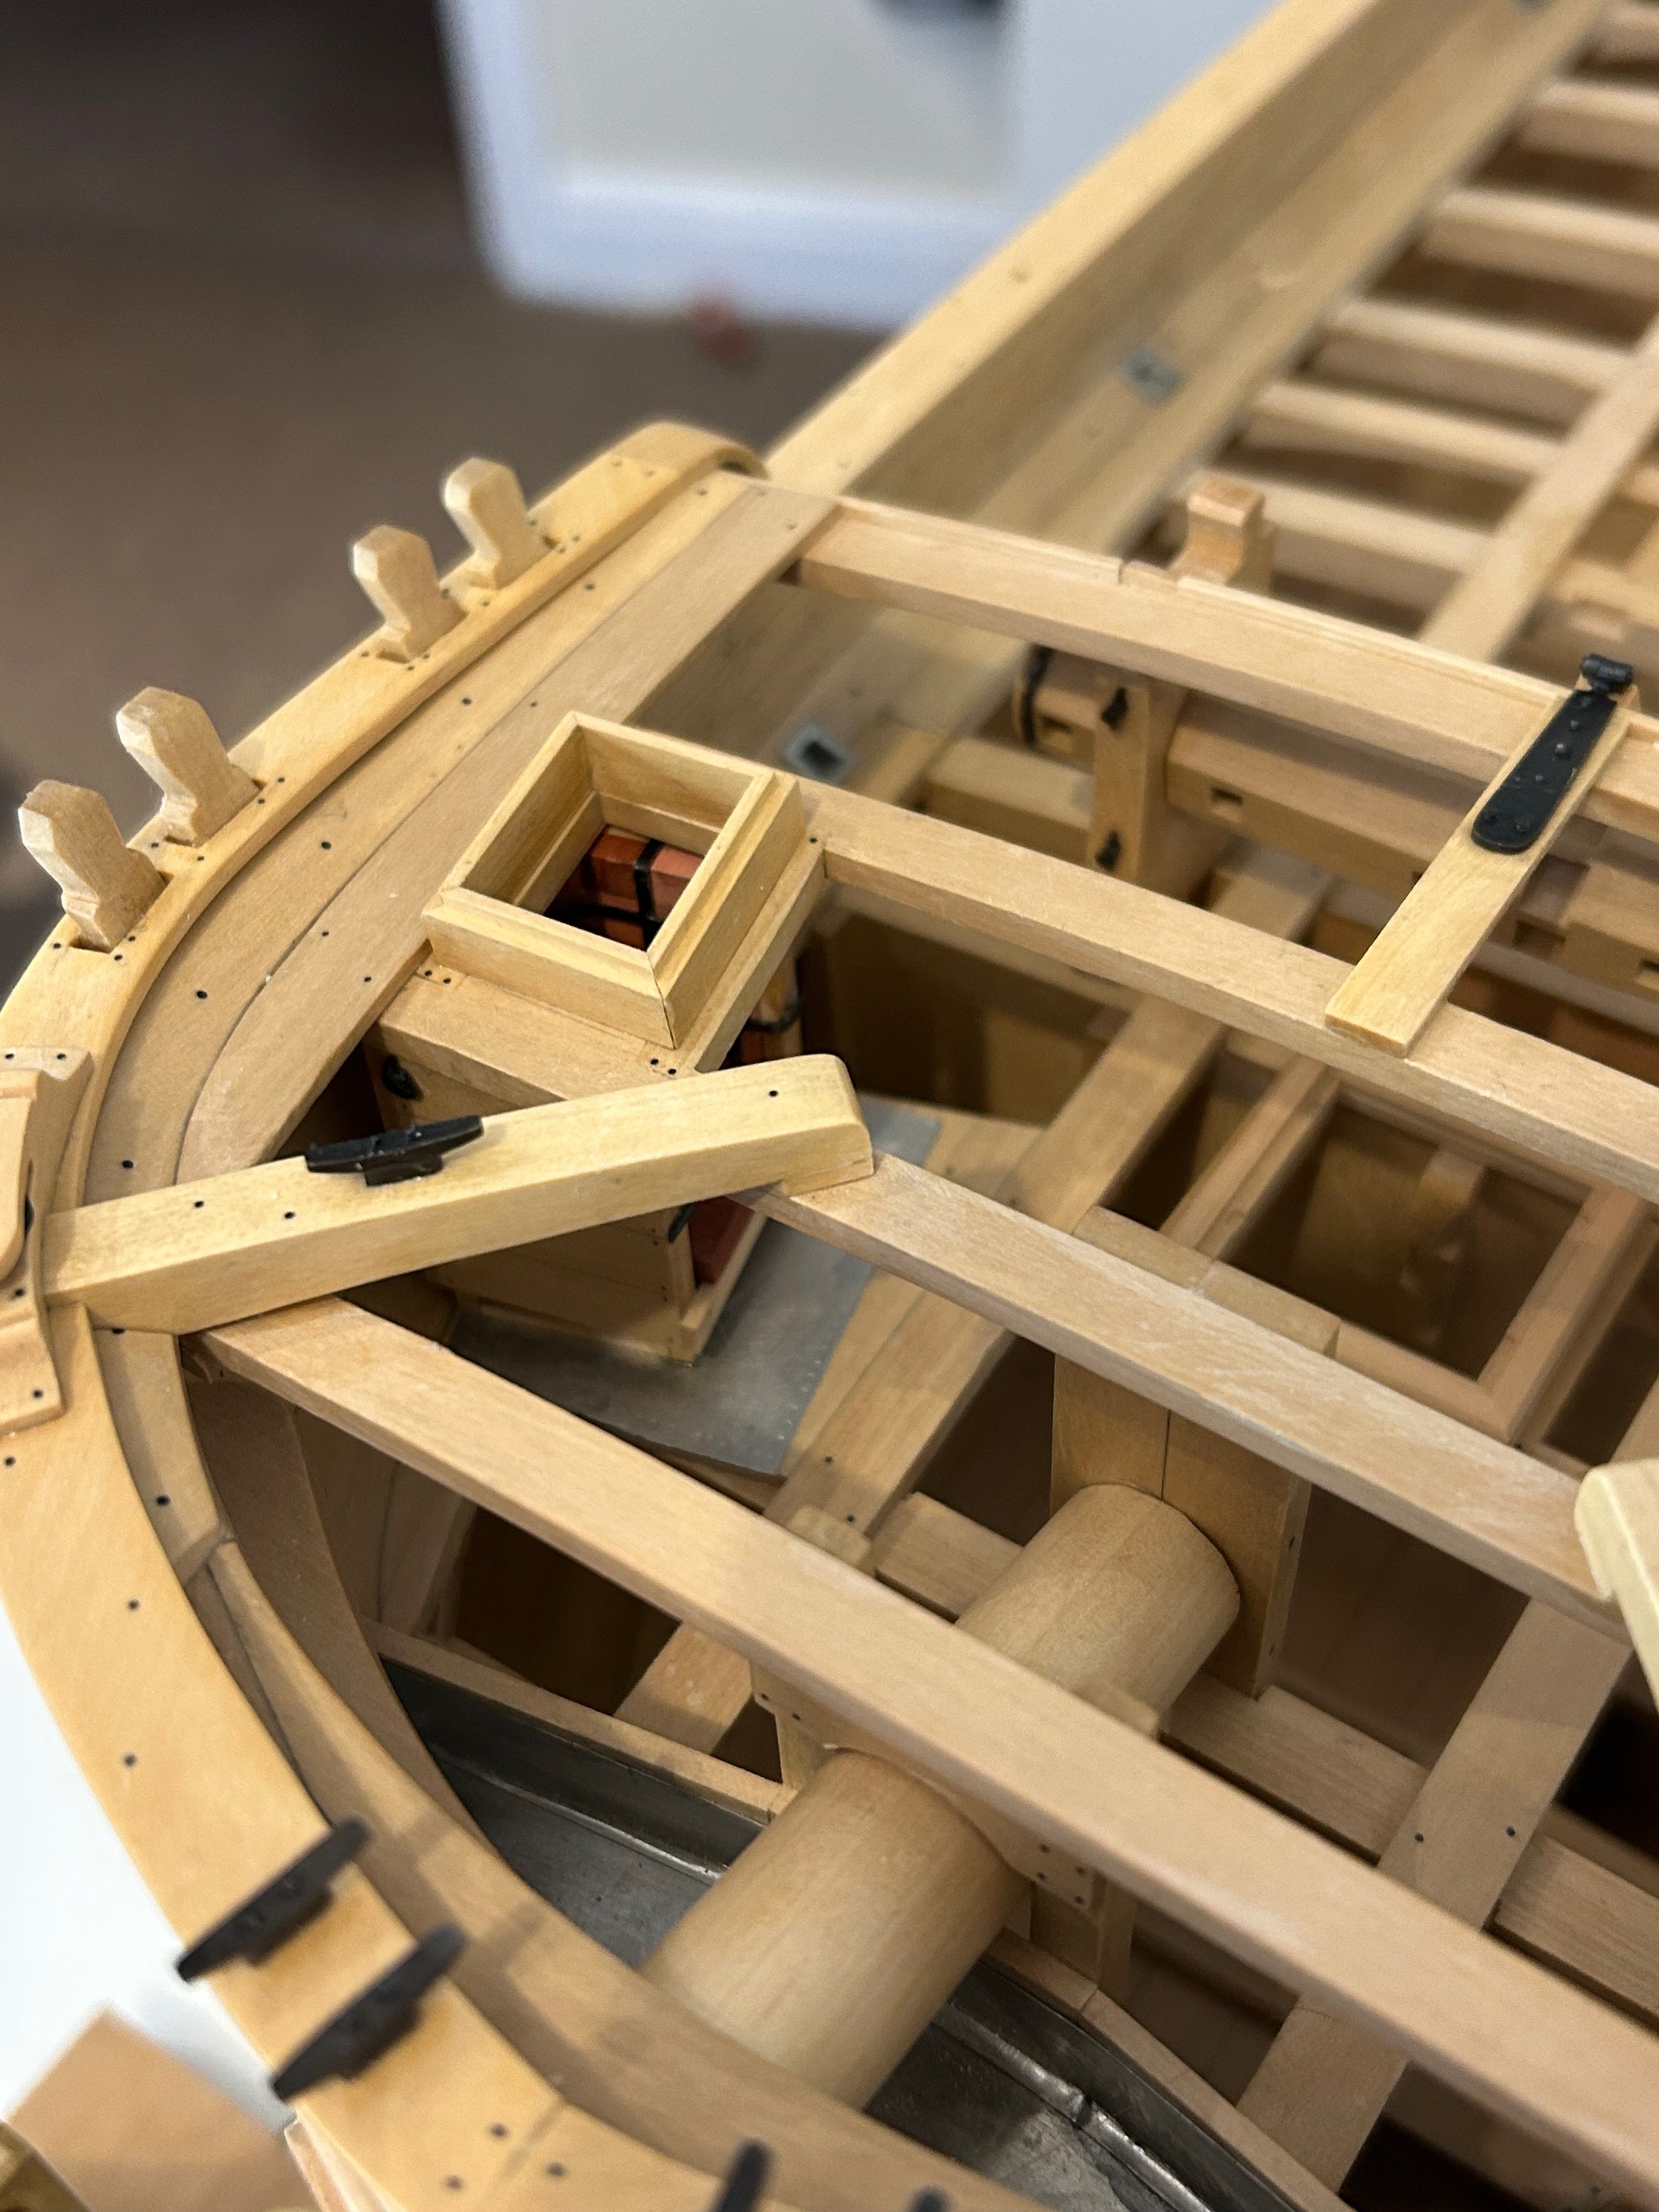
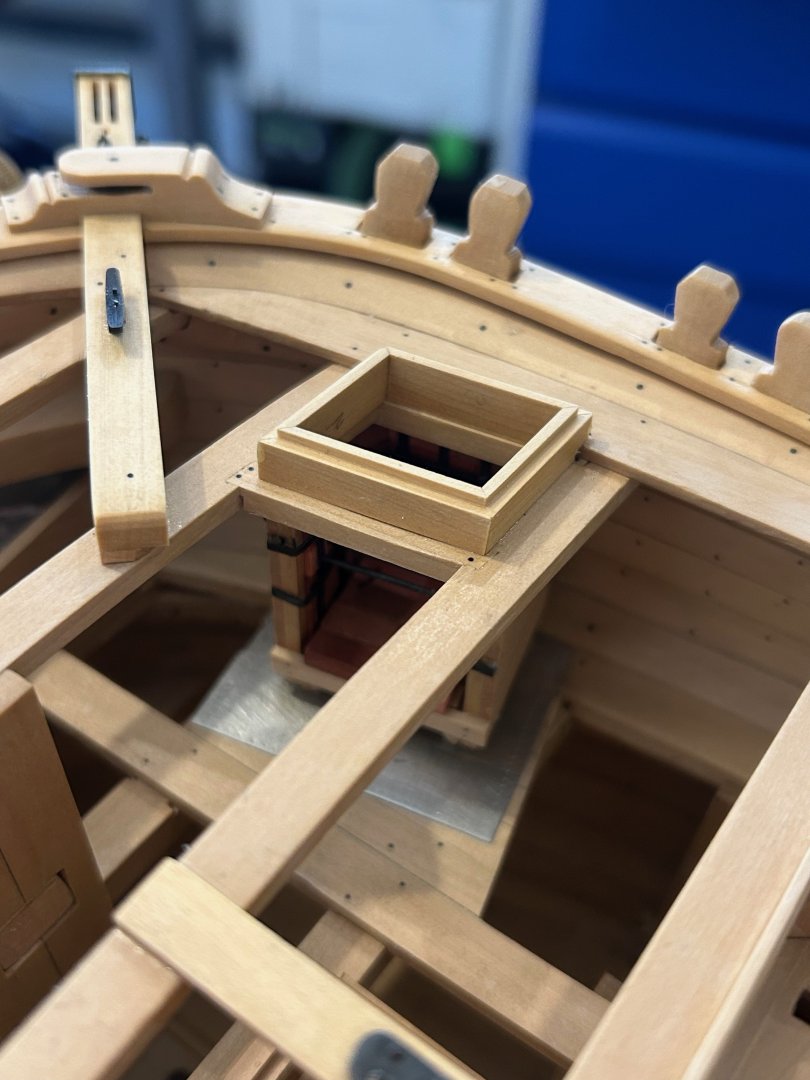
Thanks Andreas I'm following your fantastic build too. Only a little update this week. I completely forgot to make the supporting knees for the catheads; I only realised this when I was taking stock of the drawings and where I was now. They are so simple to make I think it took less than 20 minutes for both of them. However the fitting was a good couple of hours as like the catheads the knees are cut into the moulded and rail and partly the planking too. I just took my time but I think they finish the catheads off really nicely. Next I made the frame of the offset hatch just above the stove. This is a different construction to the other frames on the ship which I guess is this way due to it being higher up on the ship. I really wanted to get angles right on this frame as it's one of the first things you see when you look at the forecastle deck. I'm not going to make the cover for it as I like the open look so that you can see the stove below. Now apart from a few ring bolts I think thats the forecastle deck finished. My next task is definitely the pin rail Cheers Mark


-
If you want a nice polished finish close grained hard wood is probably the best for this. Personally if I want a really polished finish I work my way down the sand paper grades to 400 and then finish with a grey scotch pad. It's the scotch pad that gives the polished finish but is not a good surface to glue onto. If you want a mega polished finish Foredom sell pink coloured sanding discs which are 1600 grit. They really make wood shine but can only do small areas
-
Good to see you back - those little Veritas squares are great I use mine all of the time
-
L'Amarante by marsalv - 1:36 - POF
Some Idea replied to marsalv's topic in - Build logs for subjects built 1501 - 1750
Precise woodwork and lovely brass work; what's not to like! here It will be nice to see the stove sat on the area you have prepared too. -
I think you're right I can just imagine them smashing holes through for a quick build! Hi mate - yes it does rotate within its stocks. Hi Chris the actual hinging part is 3mm wide - 1mm per part. The hinge pin is 1mm.
-
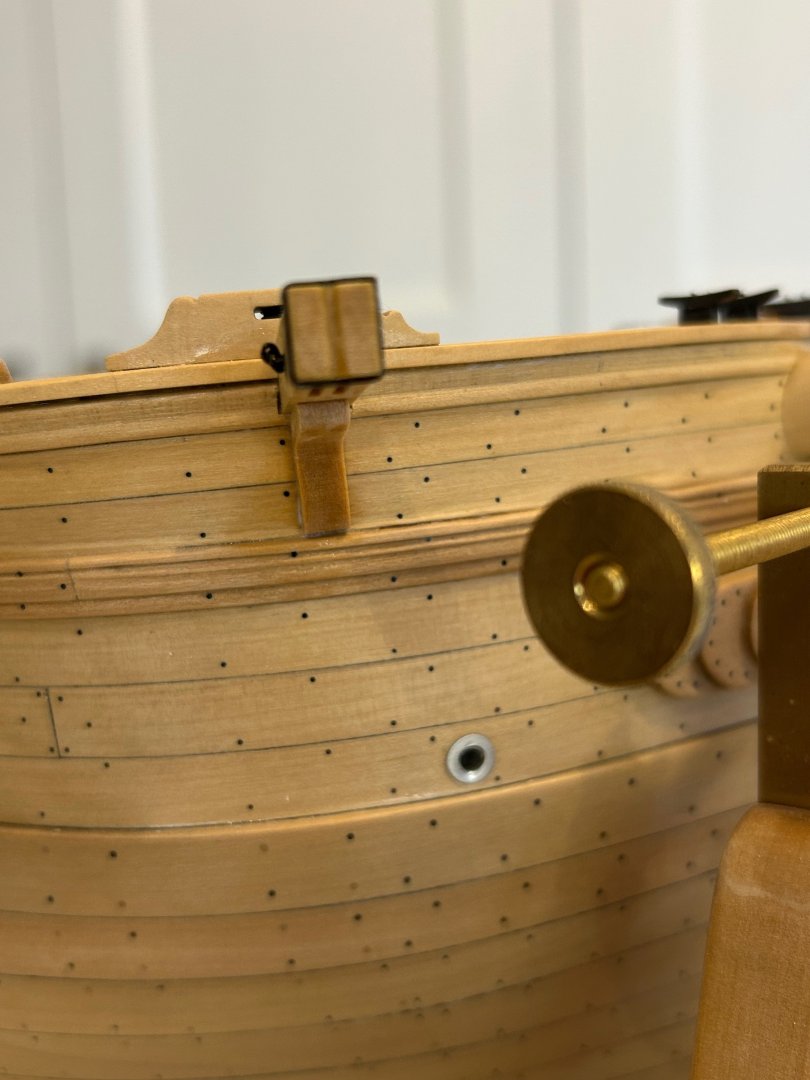
Some more work done and this time it's the windlass pawl which is a very simple mechanism on this ship. Firstly I made the hinge out of brass but I forgot to take any photos of the actual process. It was quite simple really as all I did was to silver solder some 2mm tube onto some 1mm plate and then put it in the milling machine. The only issue I could foresee was that the holding point in the vice was very small so only light cuts could be taken. I also had the machine running at 10k rpm which lessoned the vibration during cutting. Why is it I always drill one hole out of line? I wouldn't mind but I centre punched it too........ The pawl has a wooden piece that it is recessed into - its this wooden part which locks into the windlass. Finally the completed installation and I'm glad to say that it did fit into the windlass My next job will be the hatch surround on the forecastle deck and then the pin rail. Thanks for all of the comments, likes and help Mark


-
Andreas that really is such precise lovely work - congratulations so far.
-
What lovely carpentry and all by hand too - you certainly have skills with hand tools.
- 32 replies
-
- 4
-
-

-
- NRG Capstan
- NRG
- (and 1 more)
-
Gregory and druxey - thanks both for the information. Your ideas should definitely improve my efforts so I'll give them a go.
-
Thanks very much Keith