HOLIDAY DONATION DRIVE - SUPPORT MSW - DO YOUR PART TO KEEP THIS GREAT FORUM GOING! (Only 69 donations so far out of 49,000 members - Can we at least get 100? C'mon guys!)
×


muzzleloader
-
Posts
127 -
Joined
-
Last visited
Content Type
Profiles
Forums
Gallery
Events
Everything posted by muzzleloader
-
Walt I separate small thread into three pieces. It is tedious and the resultant thread is weak but VERY fine. I use a rope walk to hold the spindles that the threads are wound onto and untwist the thread my hand. Mark
-
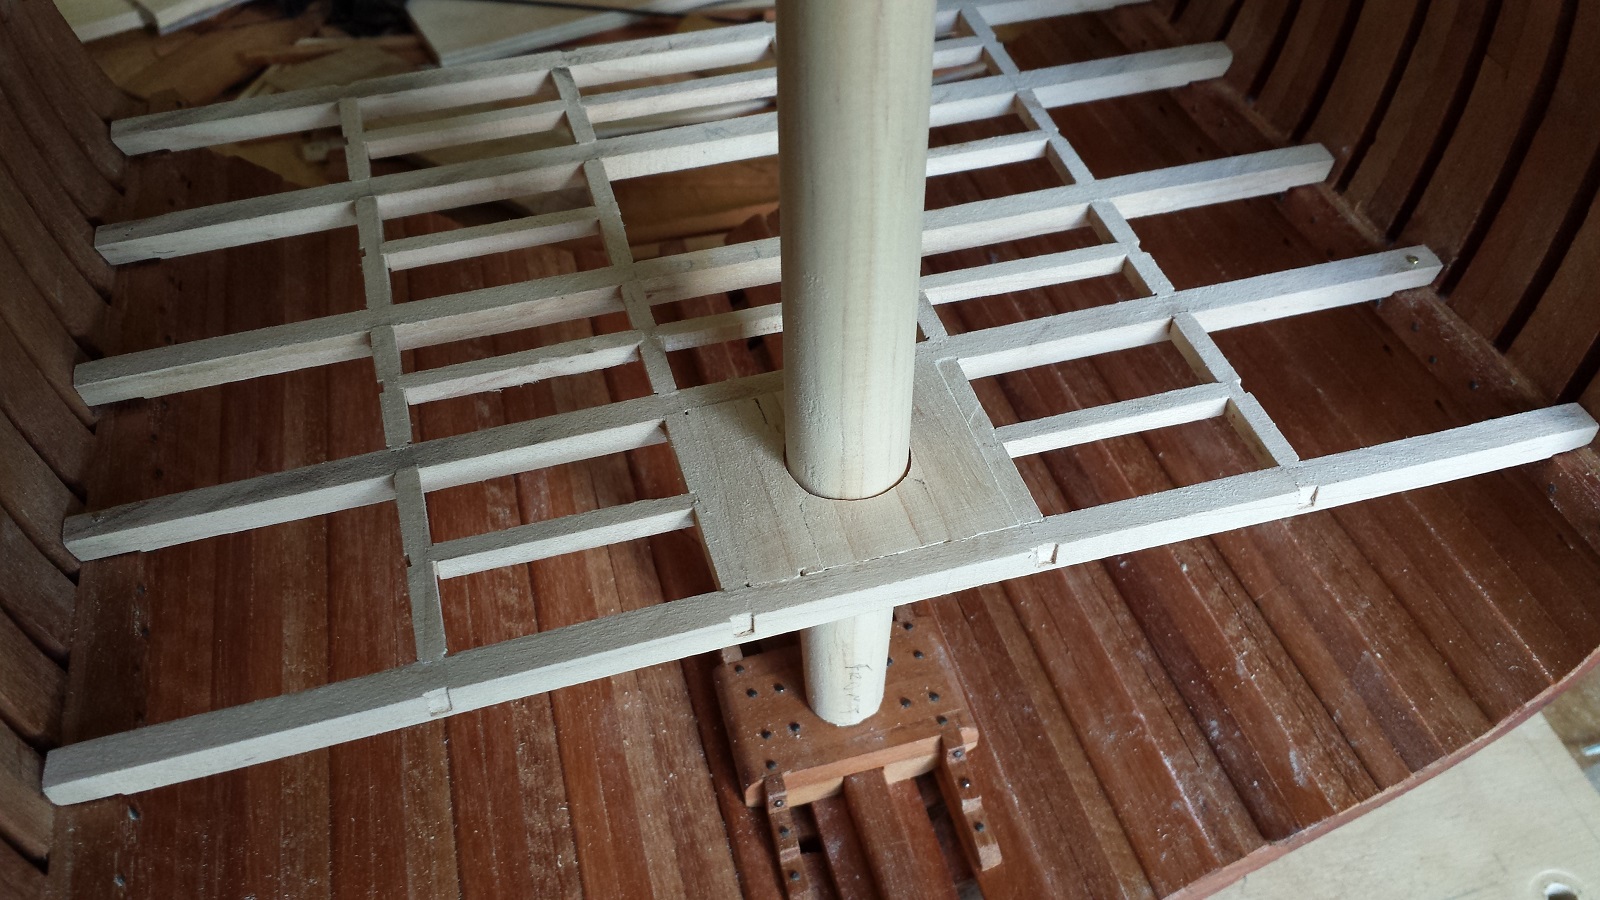
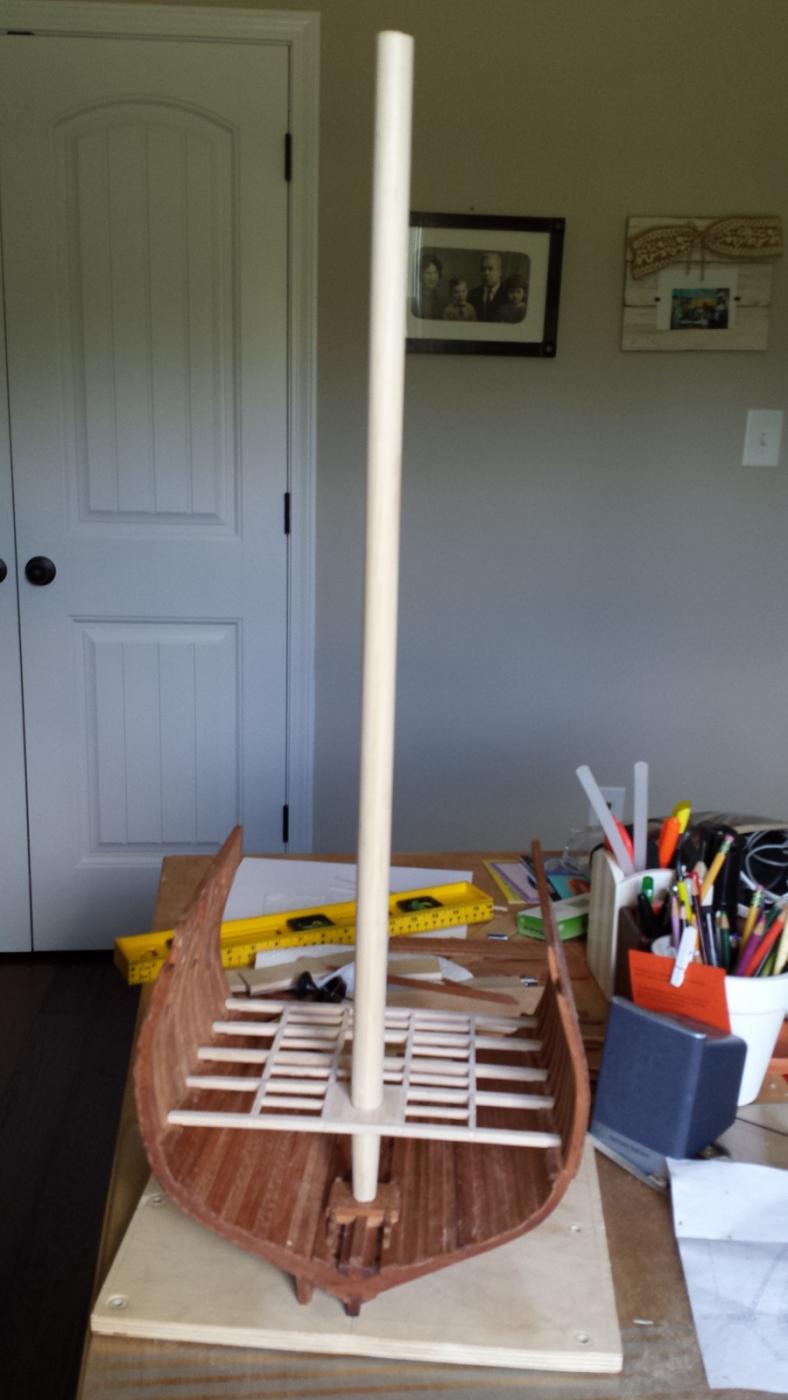
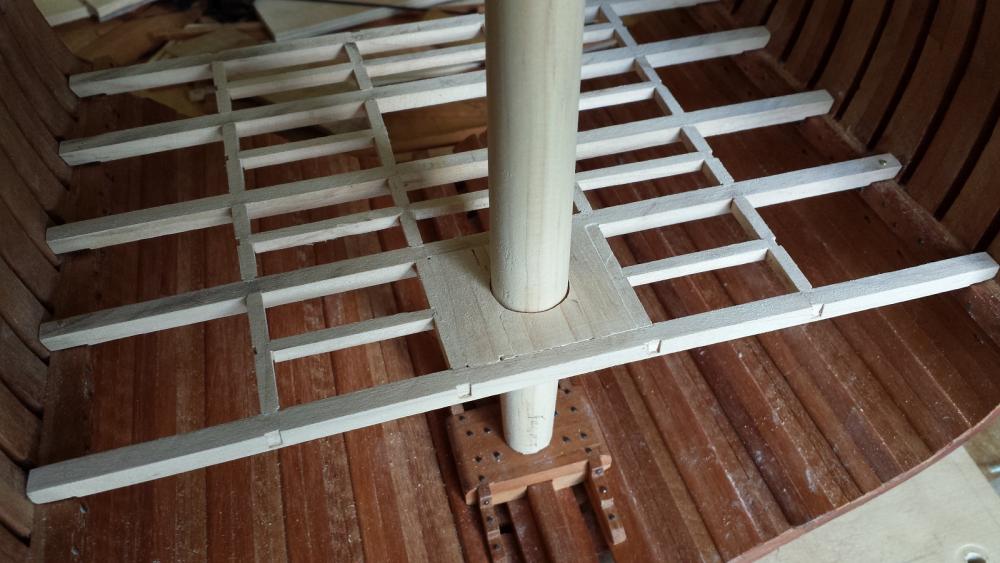
It's been a while. Just spent a week visiting family on N.C. and two weeks visiting in Portugal. All I've done is shape the lower end of the mast and install the lower deck mast support. The lower deck mast support The mast fitted. I will have to enlarge the whole in order to fit wedges. The mast is a 3/4 inch pine dowel. 27 1/2 inches tall. This thing is larger than I expected.

-
I have an old craftsman. I bought it used about 10 years ago. I find I always use it at full speed and use a vacuum instead of the blower (your going to vacuum all that dust up later anyway). Invest in some good blades. It really makes a difference. I use Olson Precision Ground Tooth blades. The ones the big box stores sell do not last. Even Olson's cheaper blades don't last as long as their good ones. Mark
-
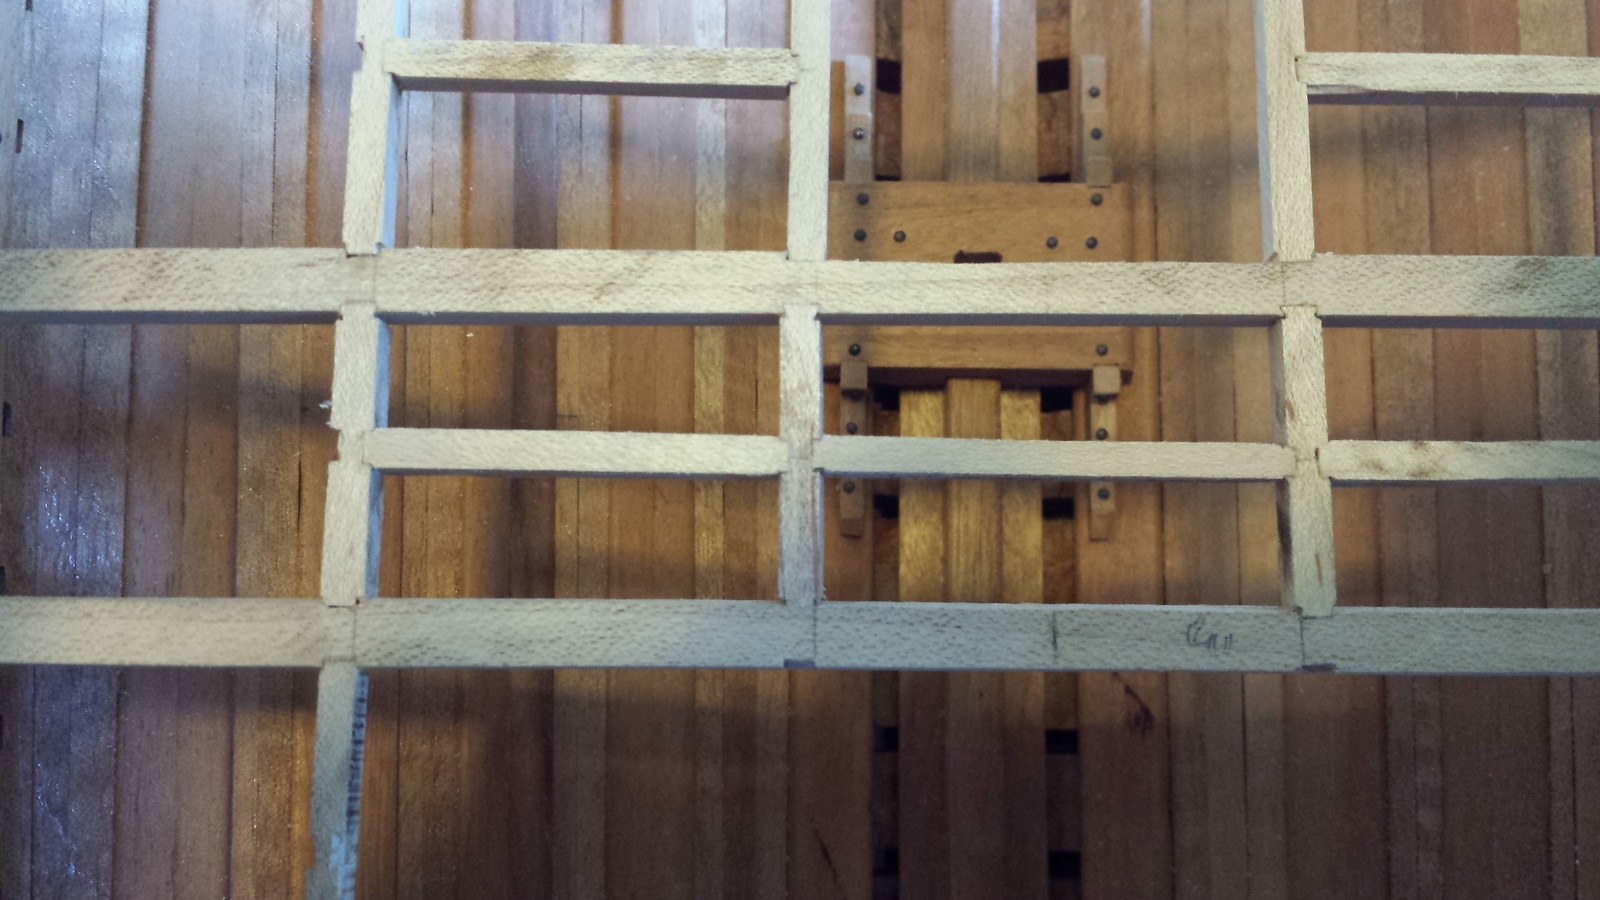
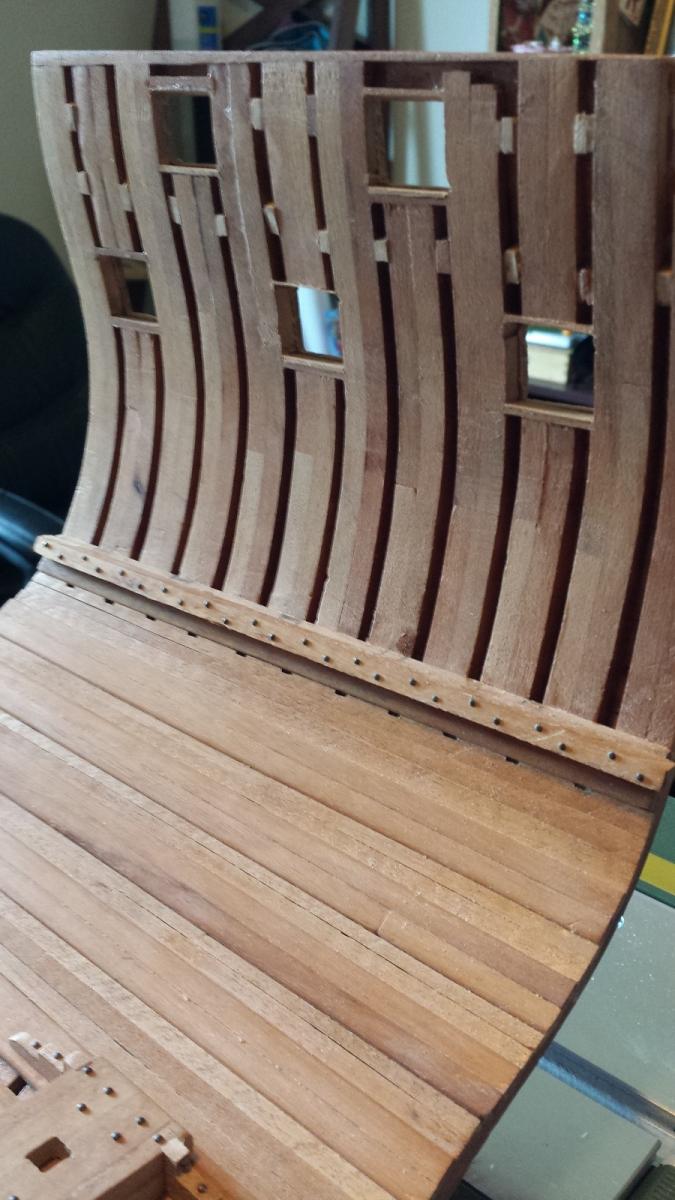
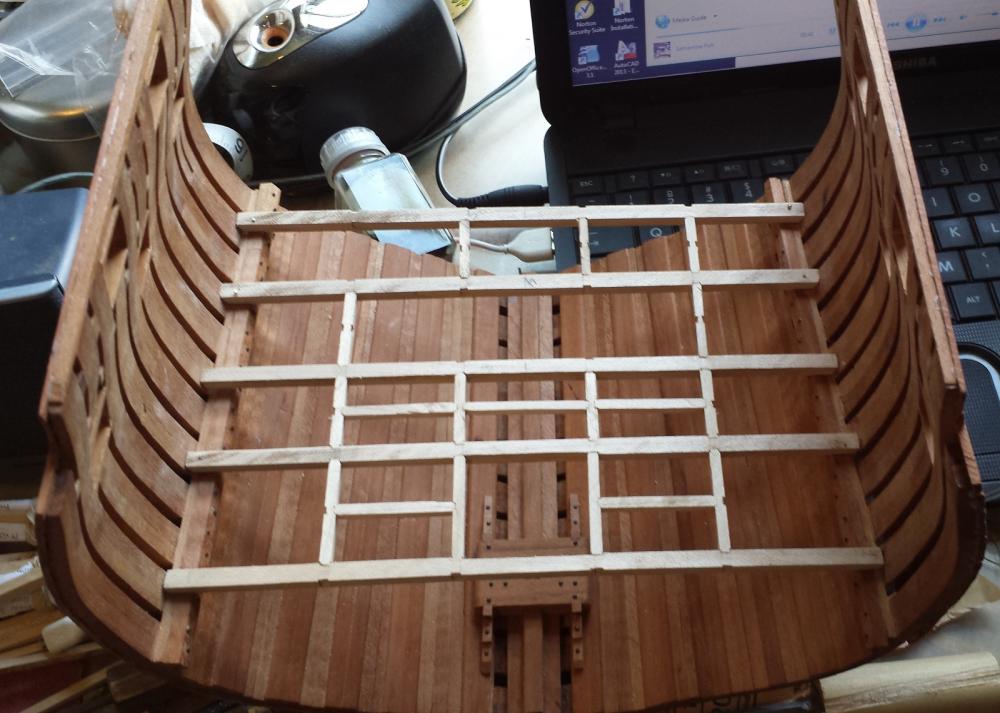
Here is what I cut with that fancy chisel and a couple of jewelers files. I cut the slots for the short beams and pinned the cross beams to the hull. The small beams are then cut to fit and glued in. close up of the joints I'll hopefully get better with practice Mark

-
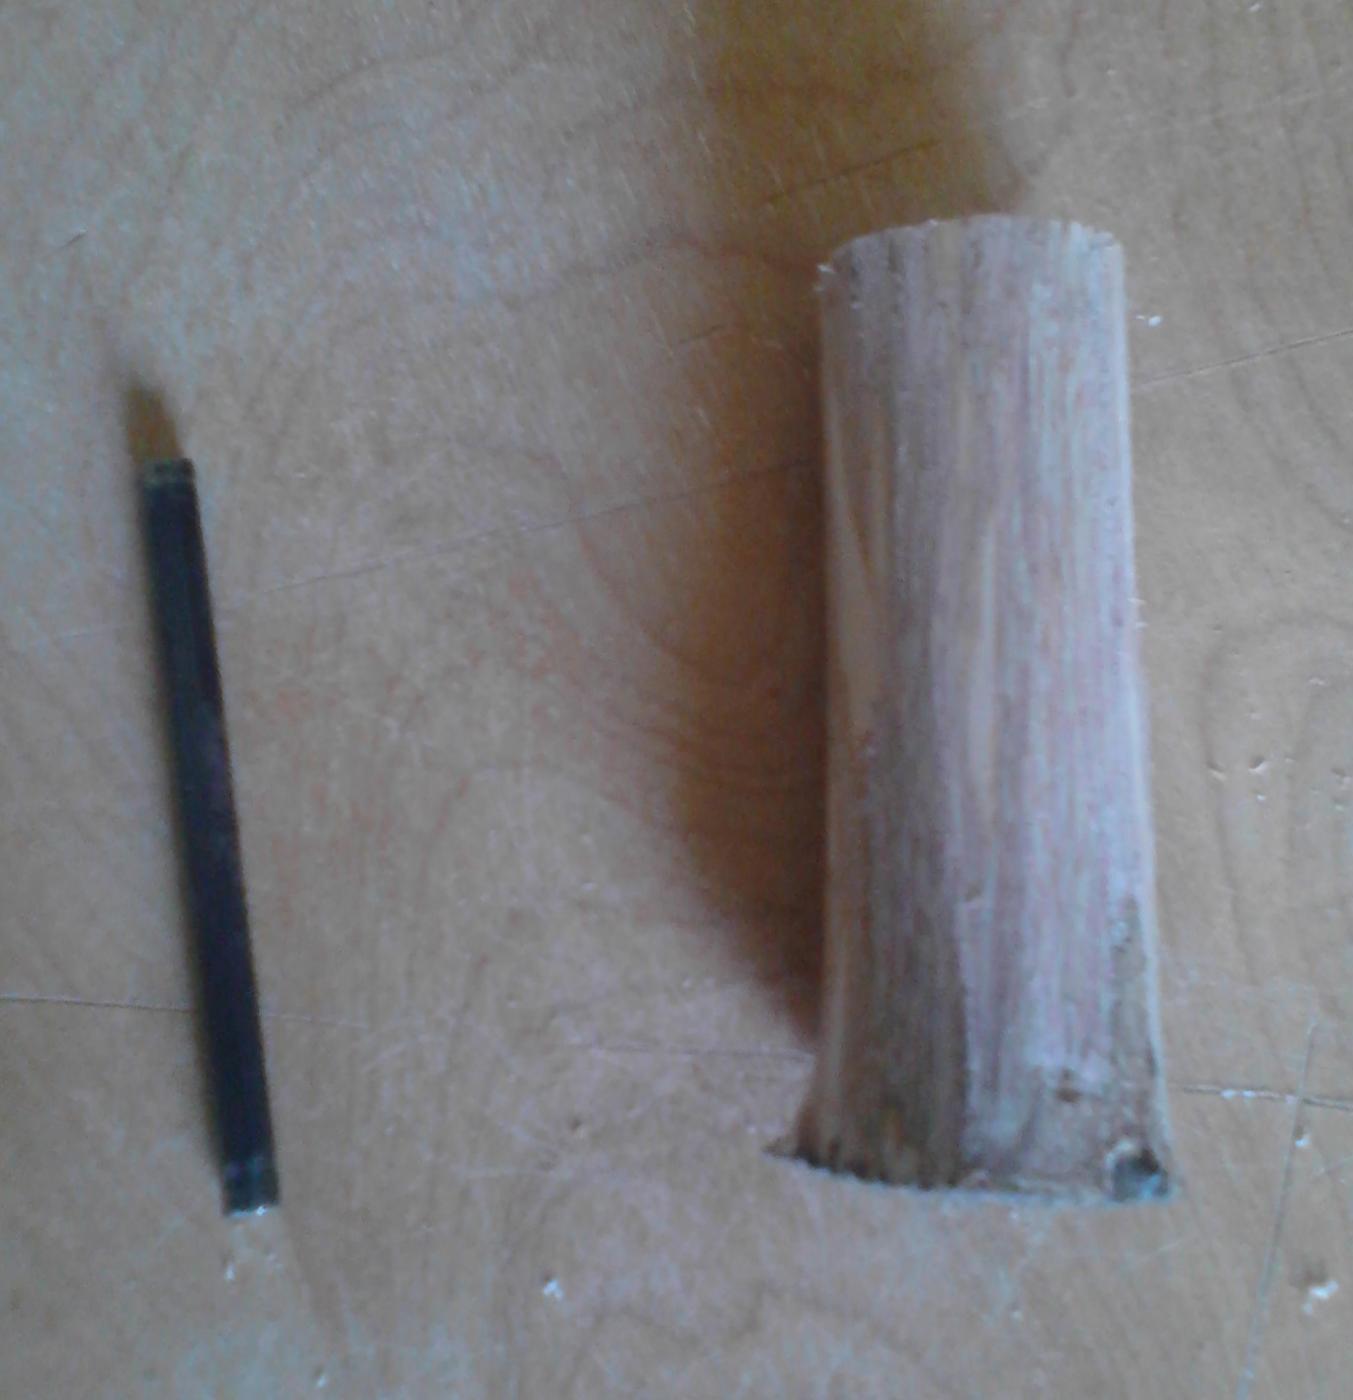
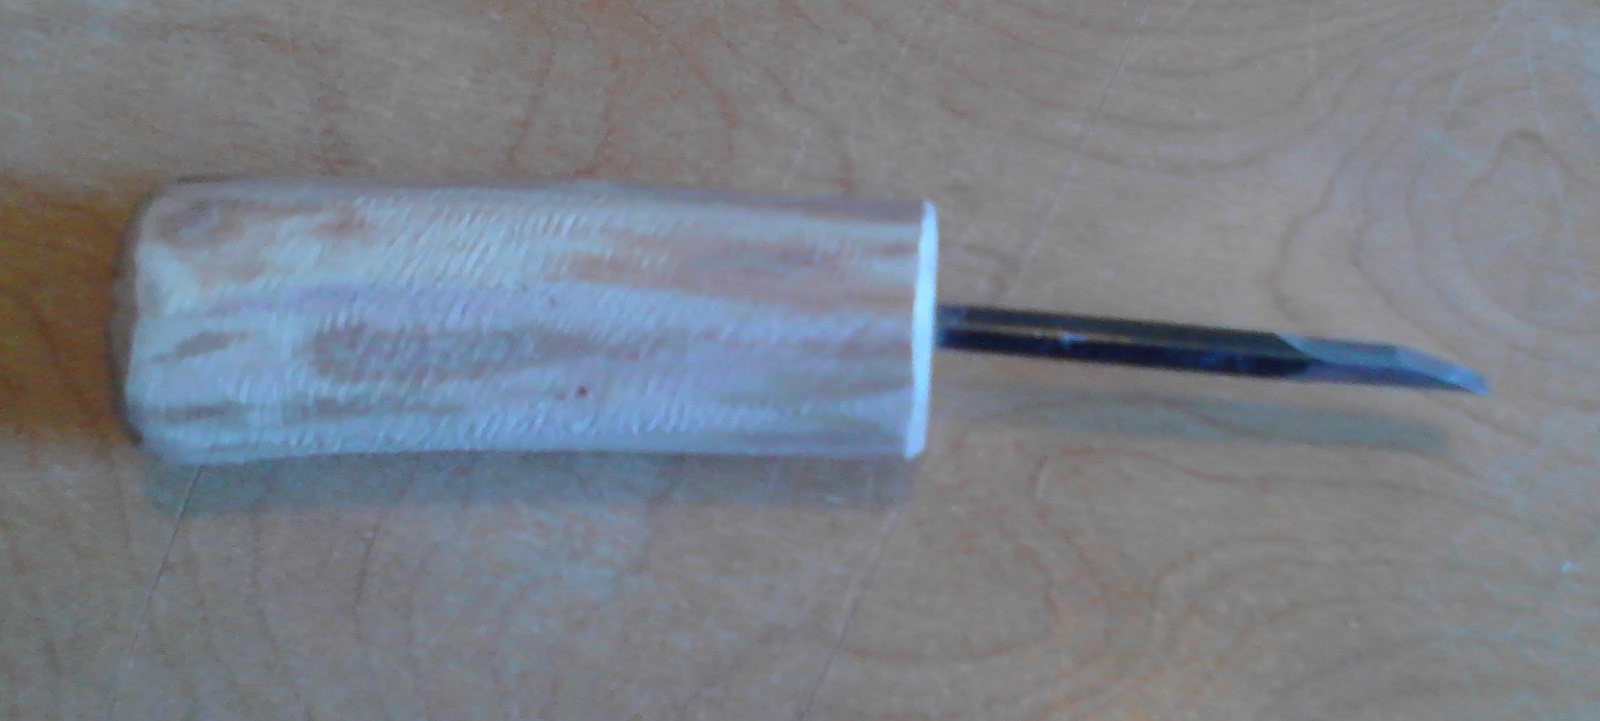
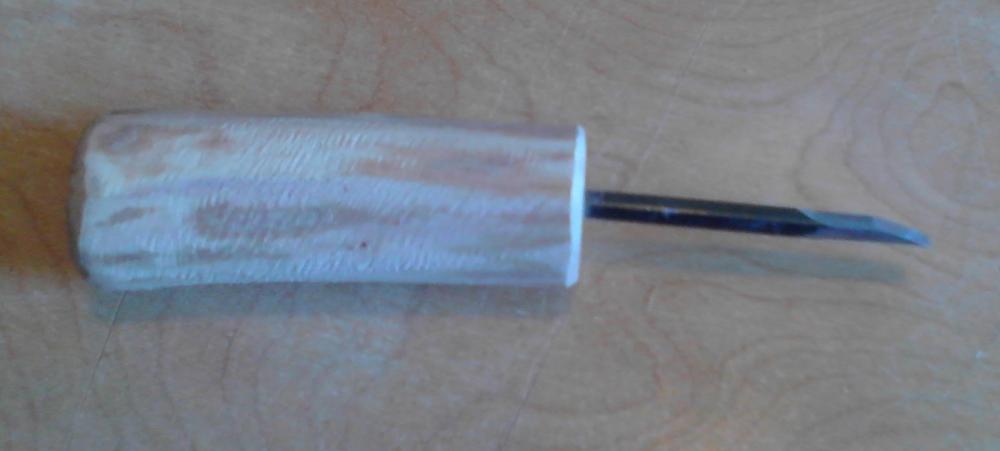
It's been awhile but I have not been completely idle. I started cutting the slots for the smaller deck beams and found I it easier to use a tool the size of the cutouts. So I made one. I used small allen wrench and a piece of wood. I don't have a grinder so had to use a cutoff wheel in the dremel. a 2 1/2 inch piece of allen wrench and some scrap after about 1/2 hour work The steel is usually fairly good so they hold a decent edge. There are a lot of places where a bent chisel can get into places that a straight one won't. And if you mess it up nothing lost. Mark

-
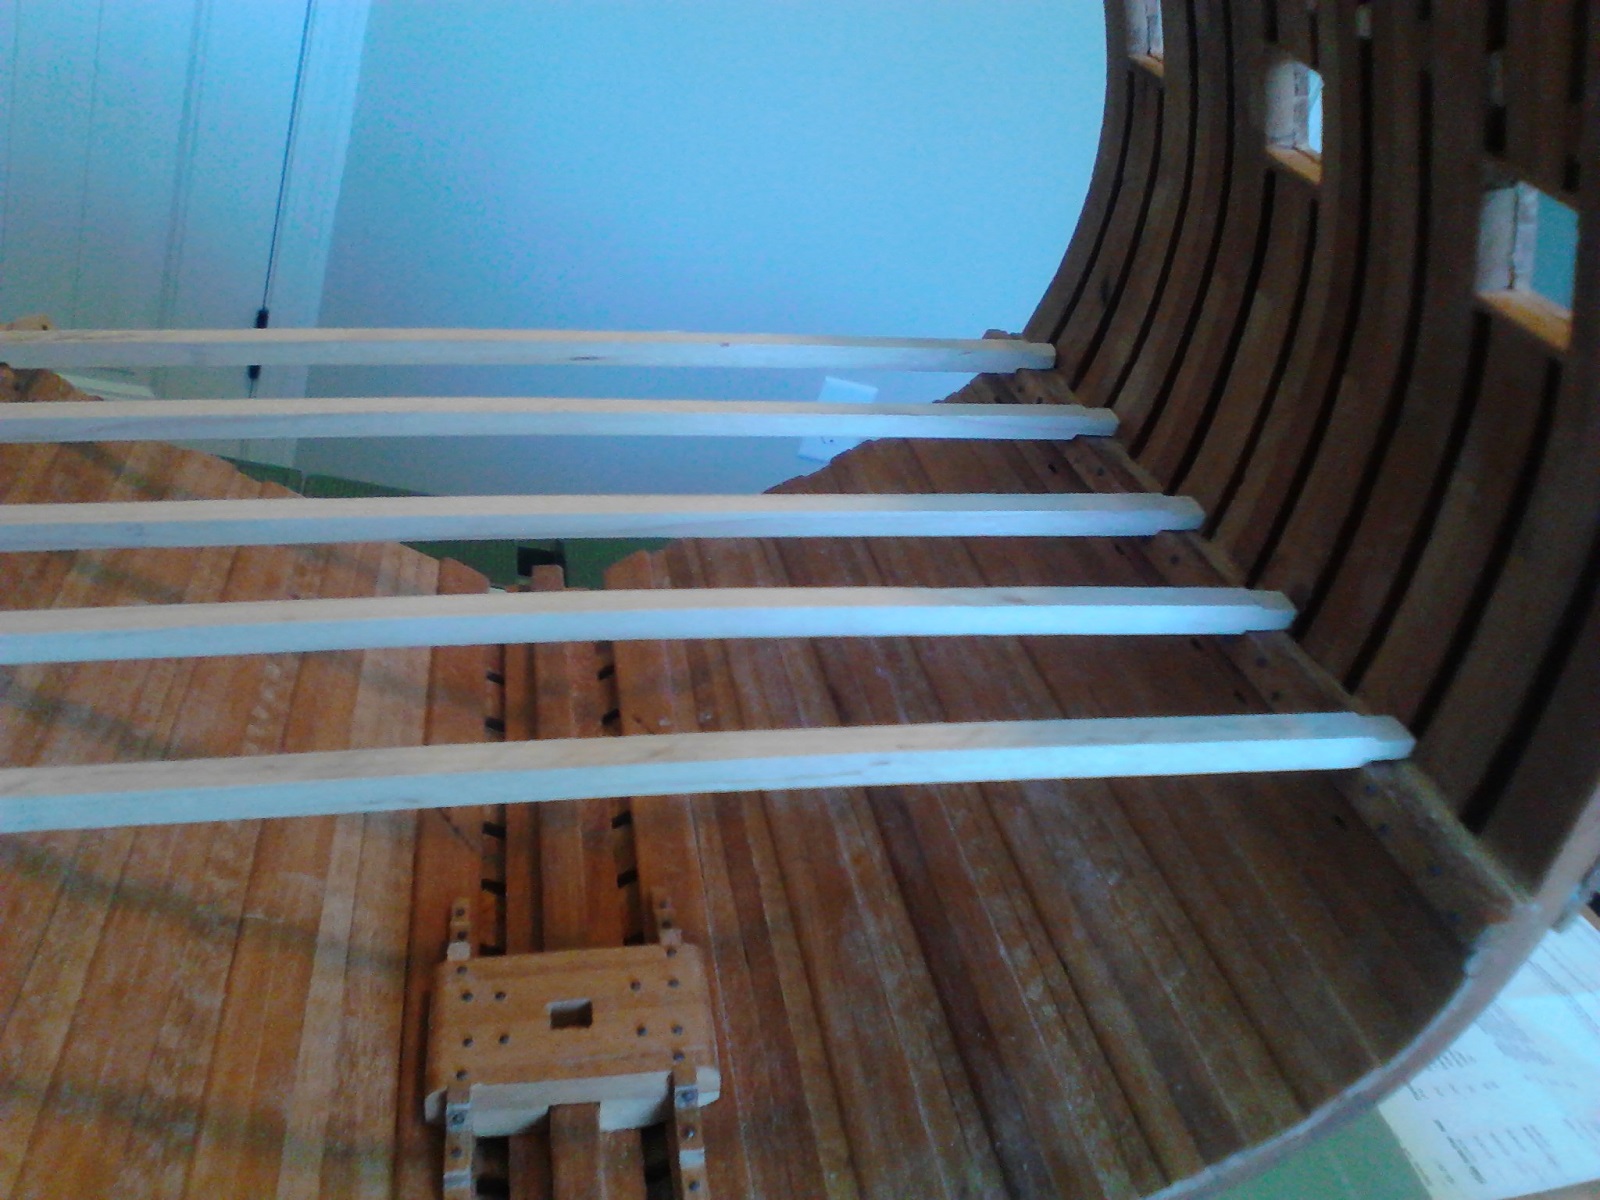
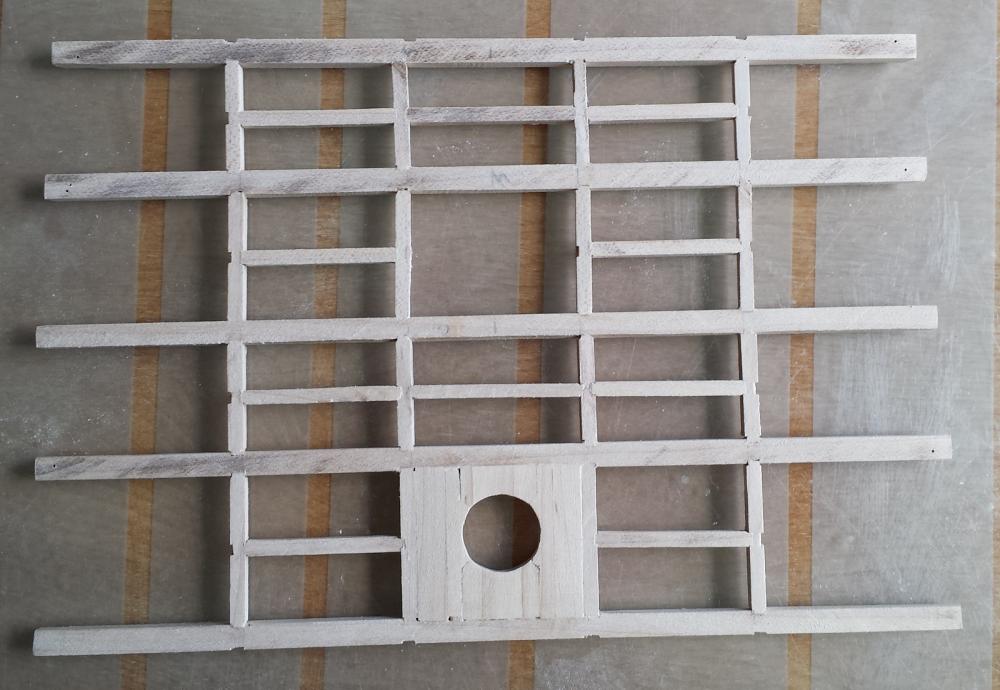
Five small pieces made and dry fitted. They are the lower deck main beams made of maple. The maple had to by soaked for several hours before it would hold even a small bend, 4mm at the center. Progress is slow but steady. The honey do list never seems to get any shorter.

-
Tools and Supplies for My "Shipyard"
muzzleloader replied to daveward's topic in Modeling tools and Workshop Equipment
I use Titebond II. If you need (and you will) it can be removed with alcohol. I think Titebond III is pretty much permenant I use Titebond III to make cutting boards. It does not let go!!! -
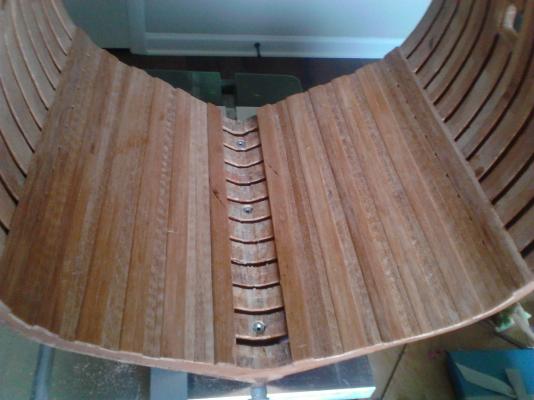
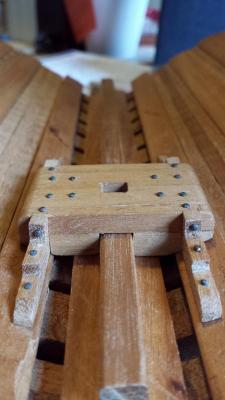
It's been several weeks since an update but I have not been totally idle. Until I started this update I did not realize how long it has been. I have planked the lower inside of the hull. Finished the lower deck hangers and the mast step. Planking below the first hanger and between the stringers These are vents there is one between each rib. Damn. The keelson was too small. The keelson and first stringer have to line up for the mast step to fit correctly. So out it comes and the new one goes in. You can also see the 8-32 nuts imbedded in the frames. And here is the mast step. The second one. The first one I tried building and then fitting it. This one I fitted the individual pieces and then glued them together and did the final fitting. The lower deck hangers. The nails are the ones that come with kits. I got lucky and they are the right size.


-
bigcreekdad I use gun oil on my models. I have been using Woodstock Gun Oil. Don't think I can get anymore. It darkens the wood a little and brings out the grain, Also if you use several coats it leaves a bright finish but it can be buffed if you don't like the shine. Mark
-
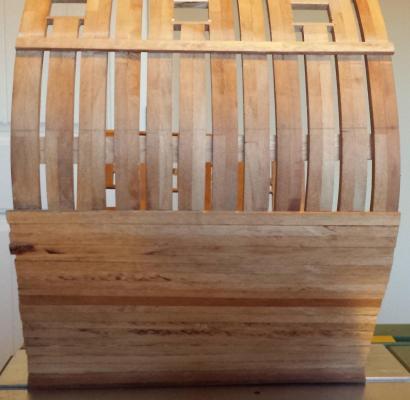
Now to catch up with the build progress. First checking and final adjustments to the top and bottom gunport sills. Next I planked above the wales. And the planking is done. Sanded to 320 but no finish applied yet. It's amazing how nasty it looks before it's done. The final fitting of the gunports will be done after the interior is planked. The visible ribs are finished. There is one coat of sanding sealer and so far and two coats of an oil finish. I'm using Woodstock Oil Finish. It's made for gun stocks but I'm not sure it's available anymore. I got this bottle over twenty years ago. This picture shows the difference with and without the oil finish added. Finally for today the stringers. All of them are made of two pieces side by side. That's it for today. Hopefully I'll get the planking below the first hangar done tomorrow. It depends on whether she who must be obeyed has anything planned. Thanks for looking Mark


-
Jason Seeing the actual ship is a two edged sword. First: you can't cheat, and there are a lot of details on the modern ship that do not seem acurate to the original. For example the rebuilt ship has a hydraulic capstan under the original lower deck capstan. I wont be including the bathrooms. On the other hand there are a lot of things I would never see on the plans. Mark
-
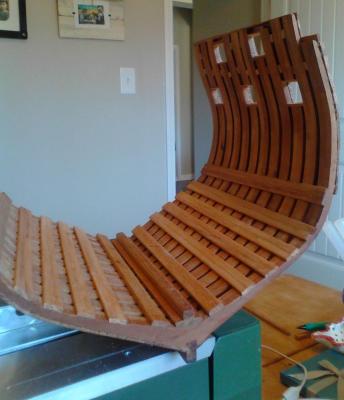
The planking below the wales is finished. starboard side port side Now it goes outside to be sanded. Thanks for all the likes. It's nice to know someone is watching!! Mark
-
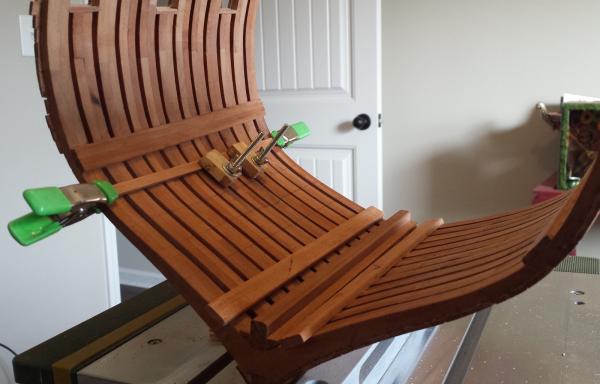
I've started planking one side. This side will be fully planked. The other will show the ribs below the waterline. All of these are the same size because they will be covered with copper plate.
-
I got back from a trip to Lisbon yesterday and hit a gold mine while there. The plans for the Fernando e Gloria do not show any of the interior structure. I have the companion book to the plans about the reconstruction. It has some of the interior layout but they to small to by of much use. The book states that the plans are available at the museum. So while in Lisbon we went to the museum to ask about the plans. They called Sr. Fernando and he came down to talk to us. When we explained what I wanted he smiled and took us to his office. He had five folders full of the original plans for the reconstruction. There are even prints of the spikes used to attache the deck planking (the gun and weather deck use different sized spikes). He didn't have a copier large enough for the plans but let me take pictures of any thing I wanted. Four hours and over 100 pictures later I was one happy camper. Some of them are a little blurry (I was using our phone) but I can clean them up in the computer. I would think every museum has the plans for the models they have on display if they are built by the museum. The museum in Lisbon has plans of almost all the models on display for sale. They also have a workshop where they teach classes a couple of times a year. If you live near a museum Ask. The Lisbon museum also has a nautical research library. I haven't used it yet but will in the future. Thanks to all the MSW artists whom I have stolen ideas. jigs and techniques from. Mark
-
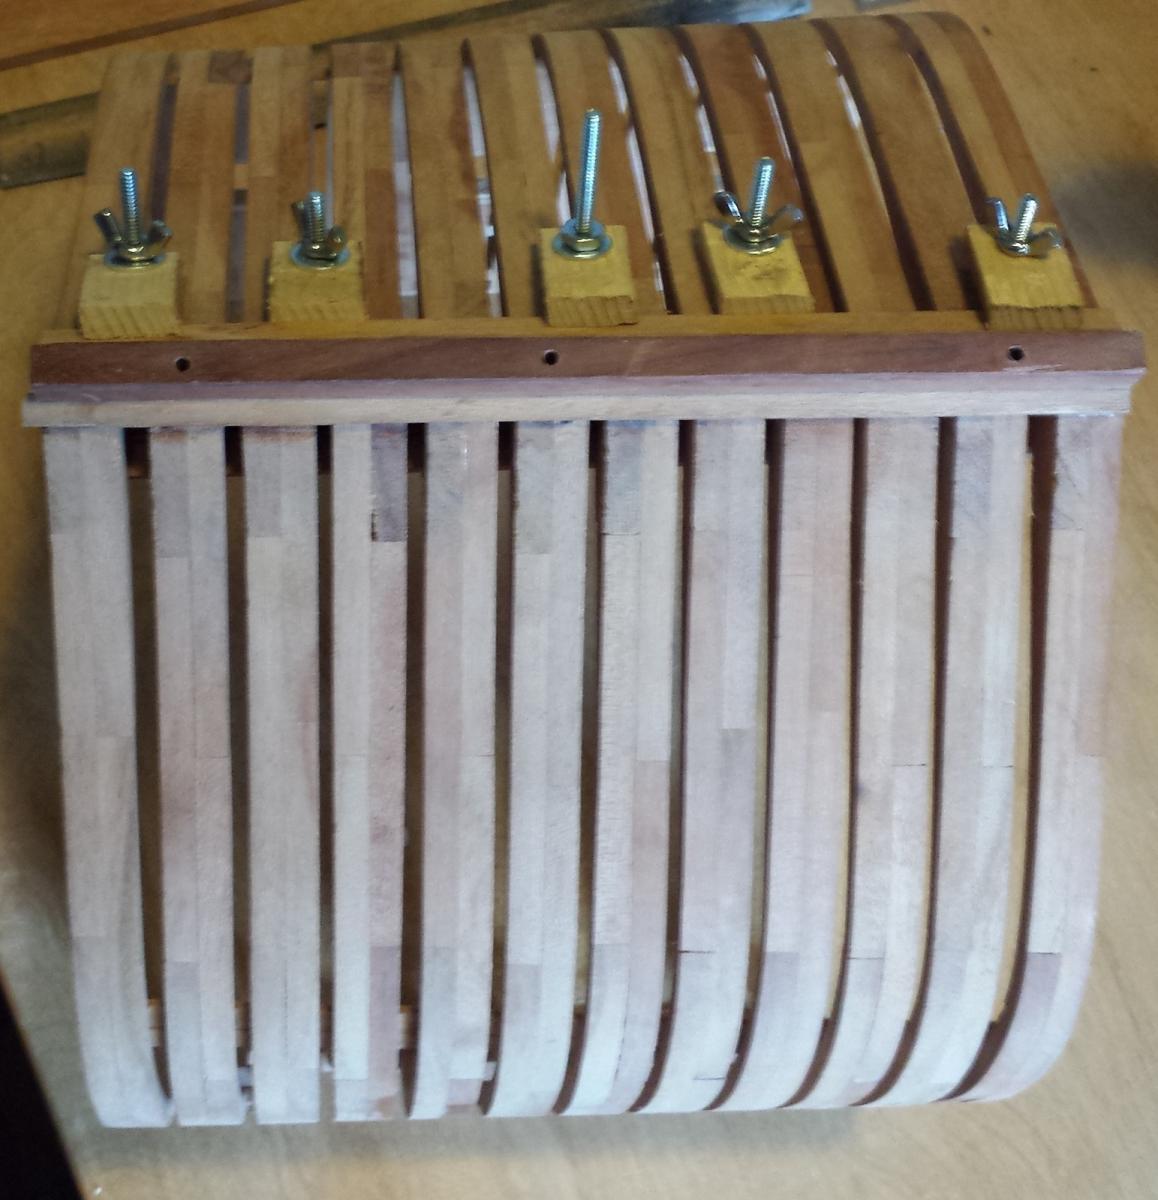
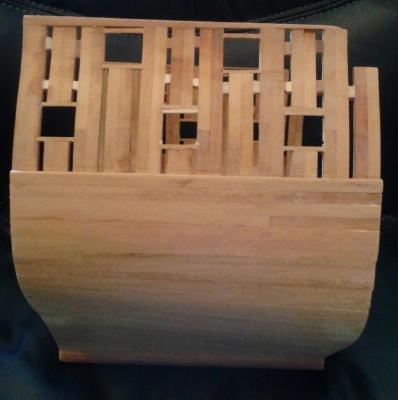
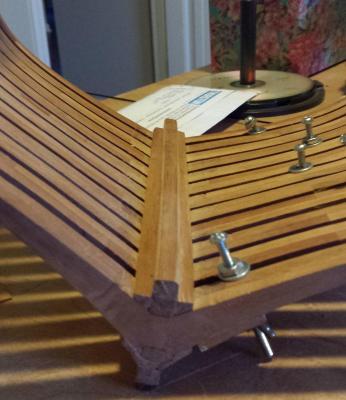
Installed the garboard strakes and the next plank up on both sides. The pencil lines are the layout for the different thickness of planking. The holes in the keel are for bolts to mount the model. There are nuts inlet in the frames. There is also a board a over the keelson. I don't know what it's called. That's it for today. Thanks for looking.


-
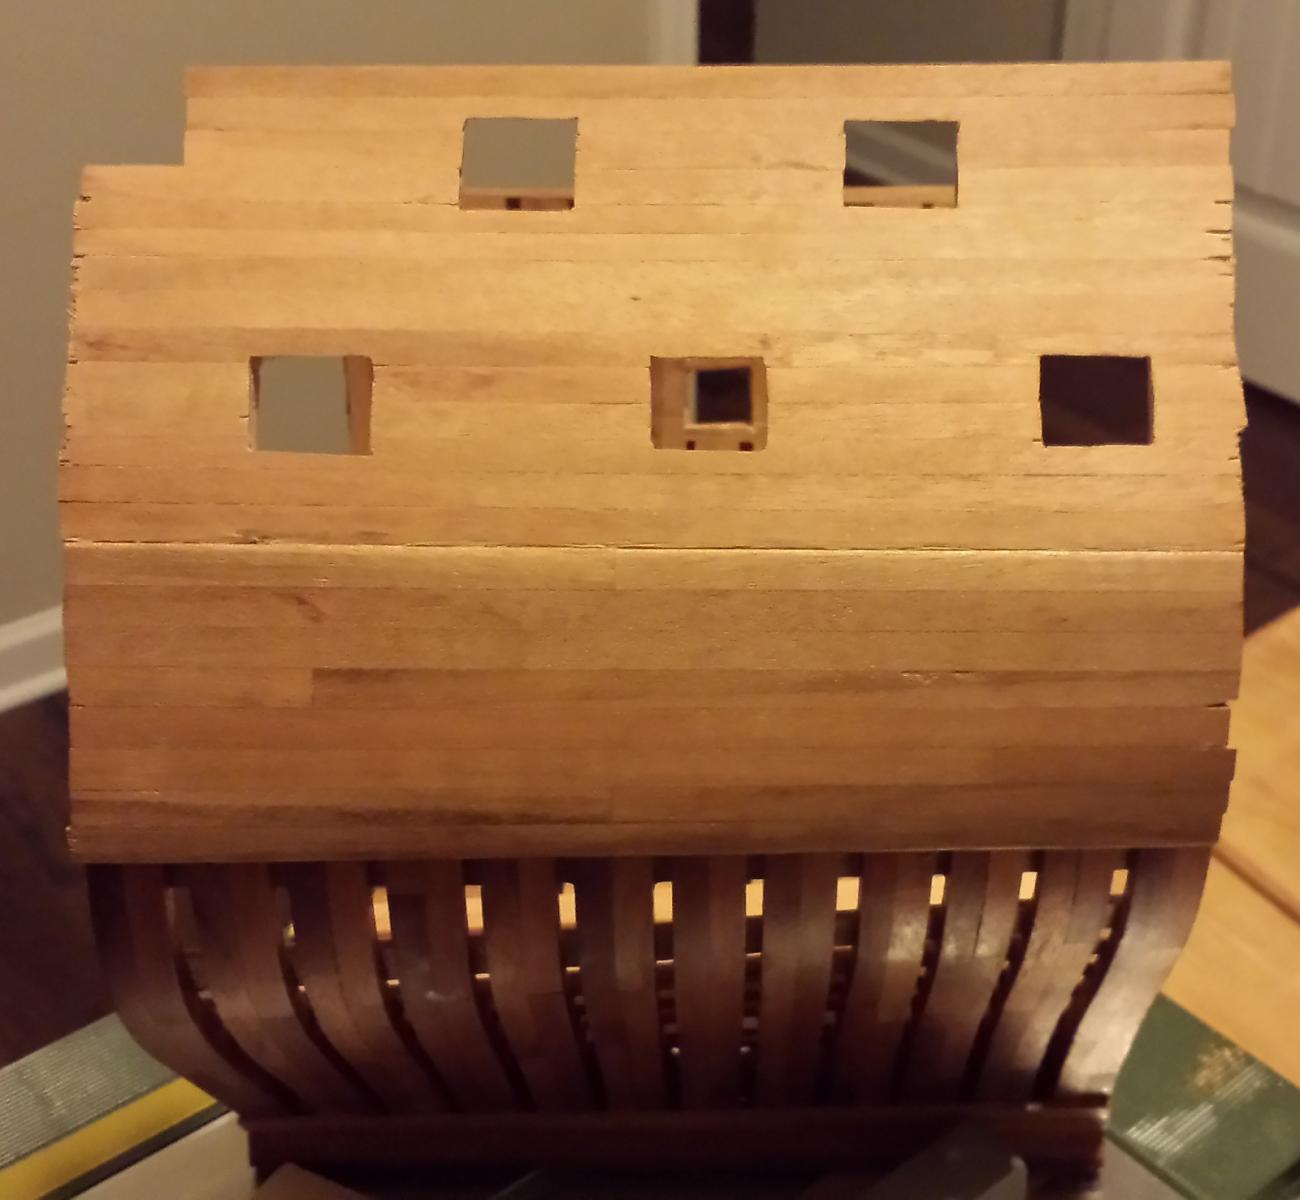
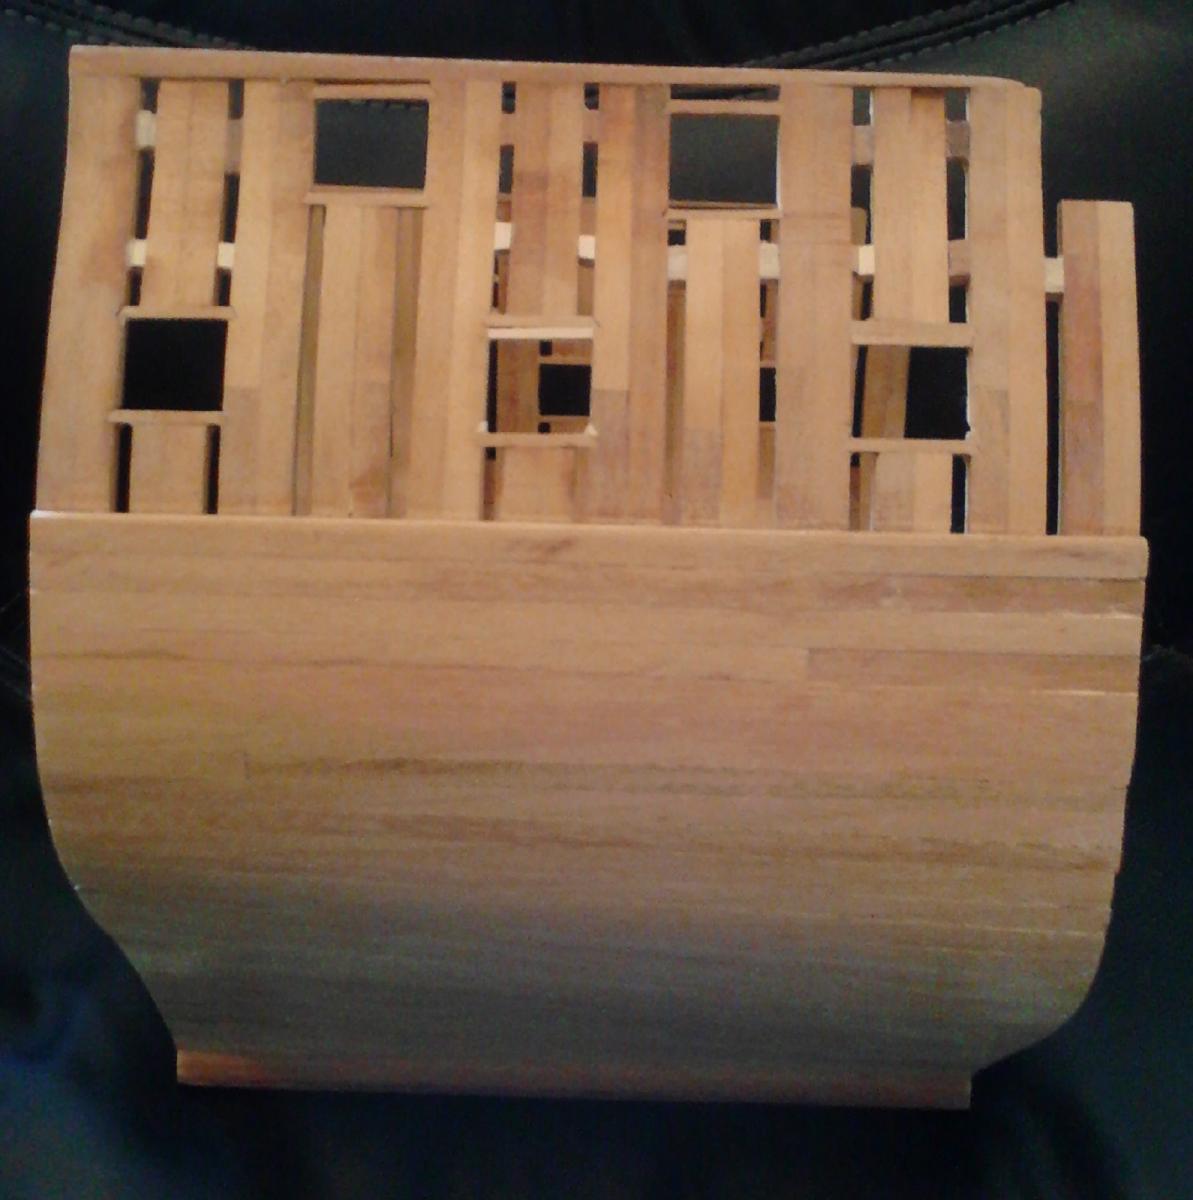
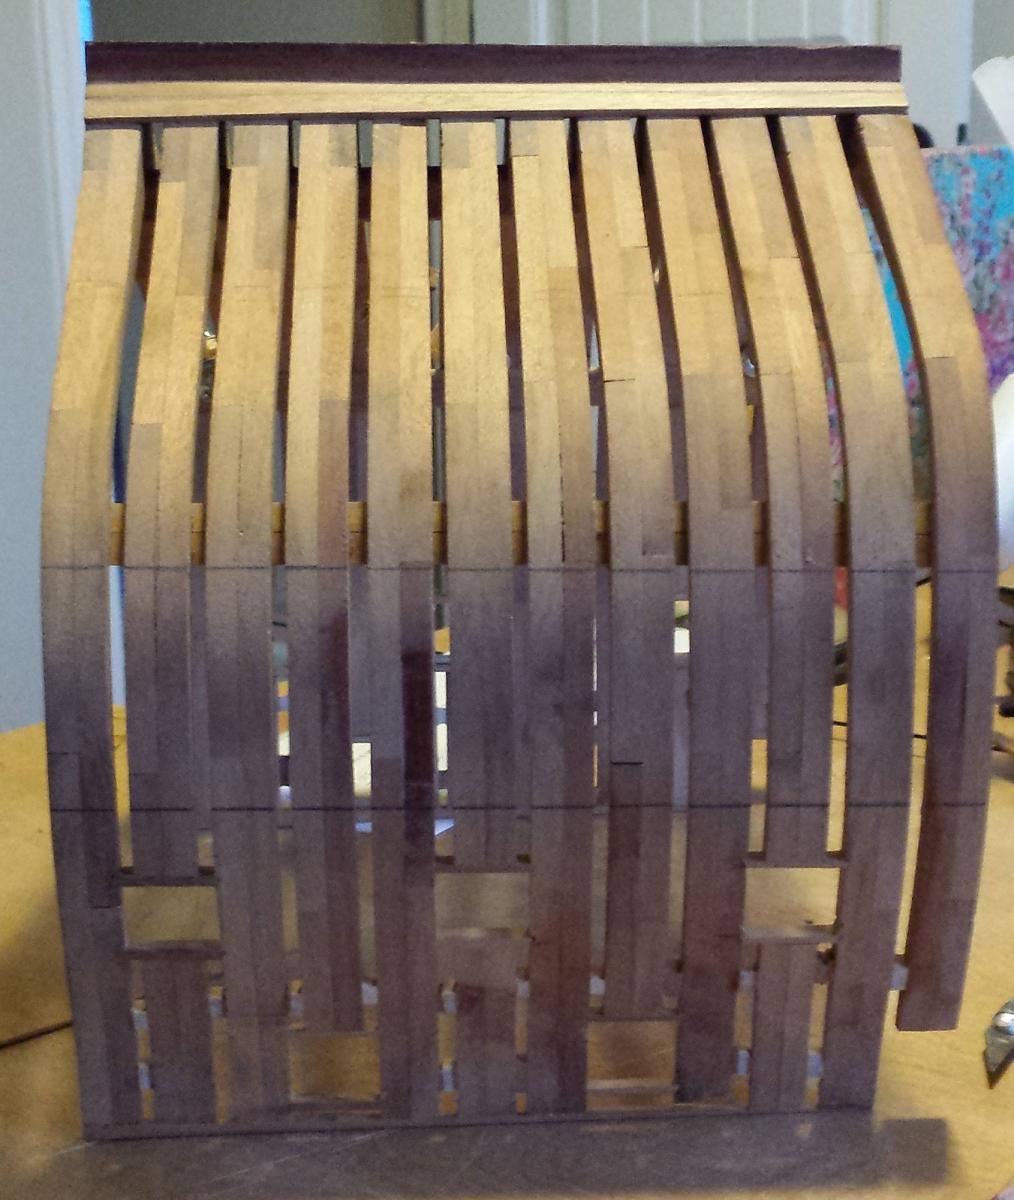
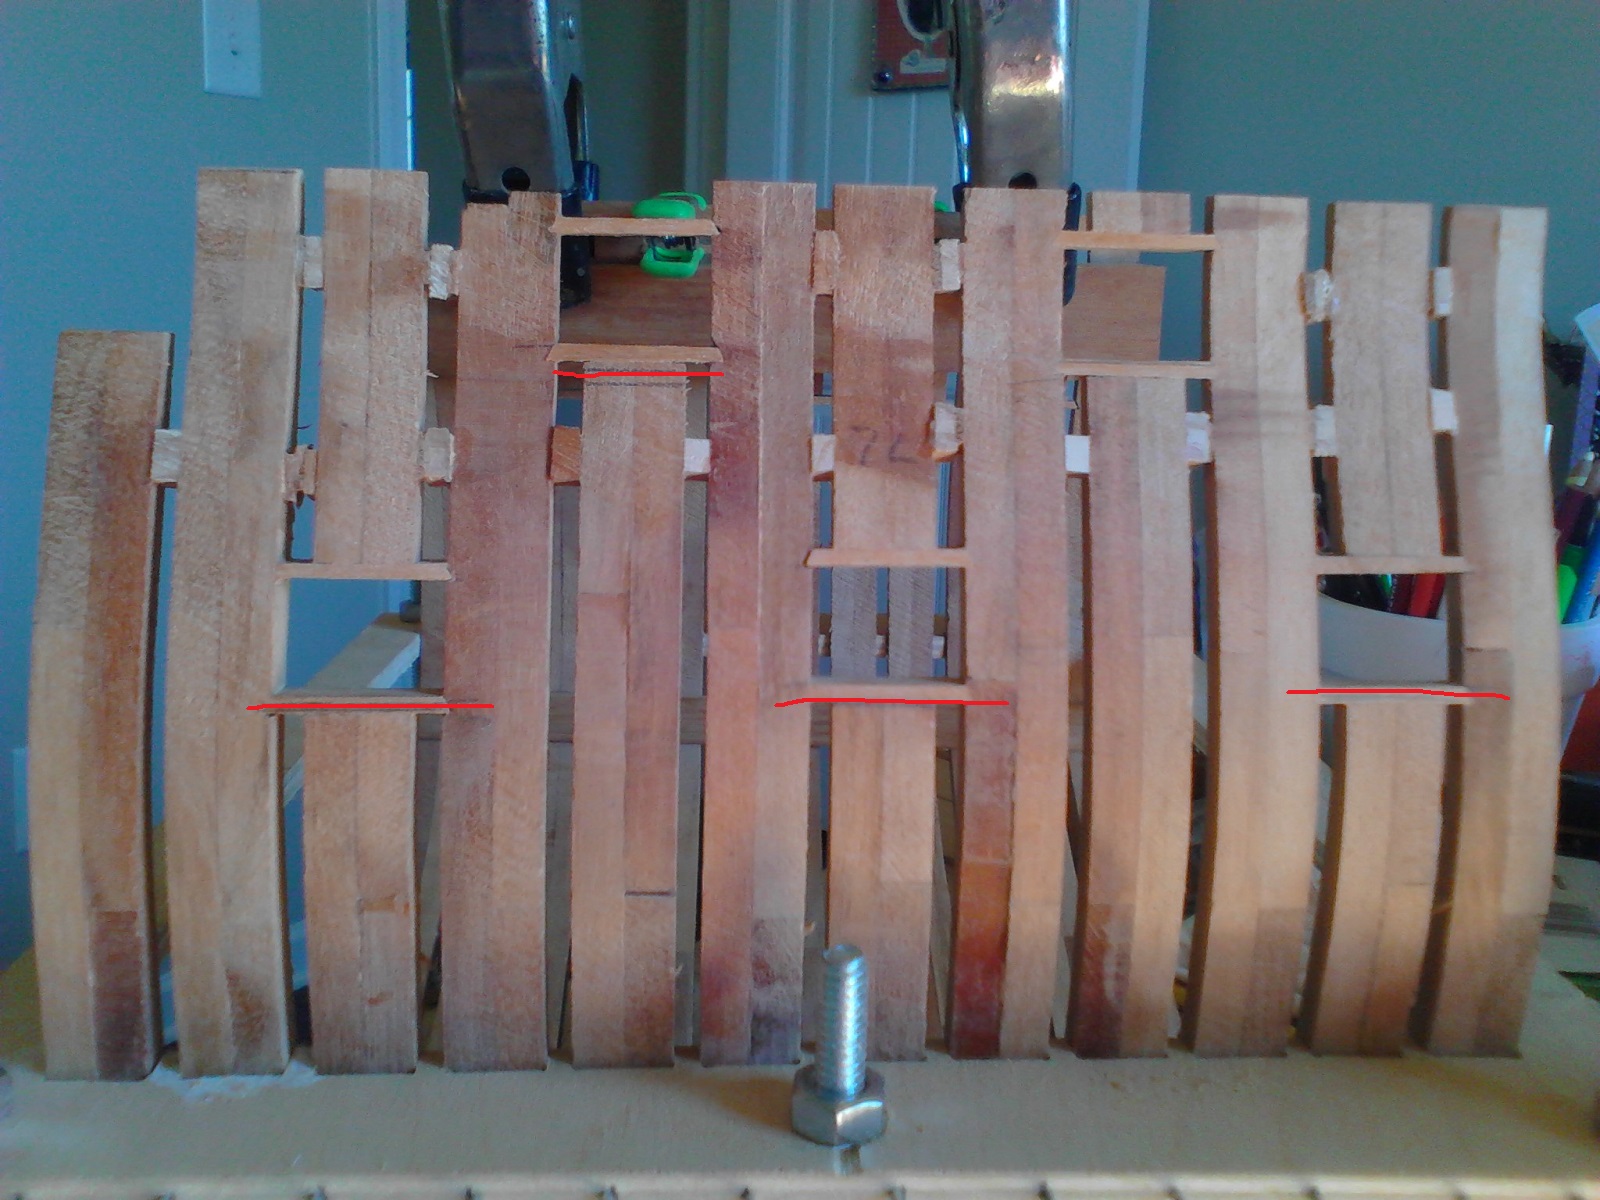
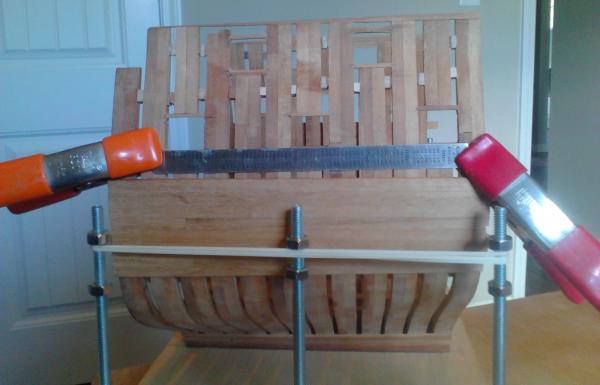
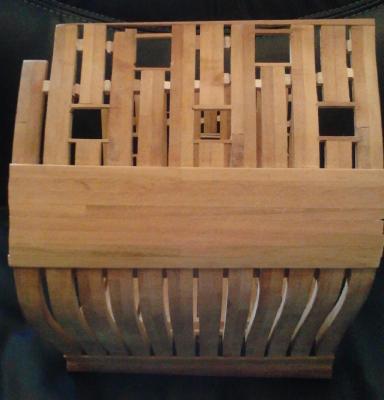
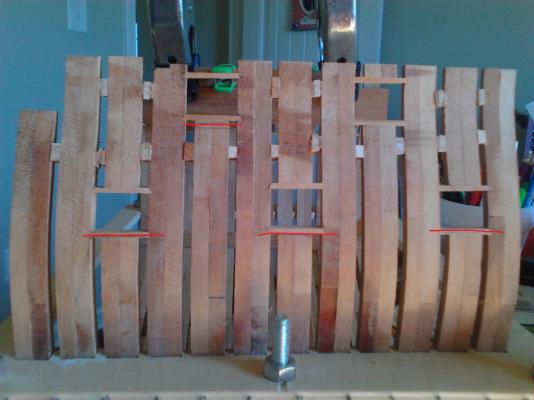
Well I messed up. 6 of the 10 gunports are wrong!! I think when I measured I did not allow for the thickness of the frame pieces. The red lines show where they are supposed to be. CUT EM OUT. I also cut the tops of the frames too short. I leveled them out and added a piece to the top. When the planking is added they will not be visable. Next it comes out of the build frame and I pull out the large files and sandpaper and get everything faired up. I hope.

-
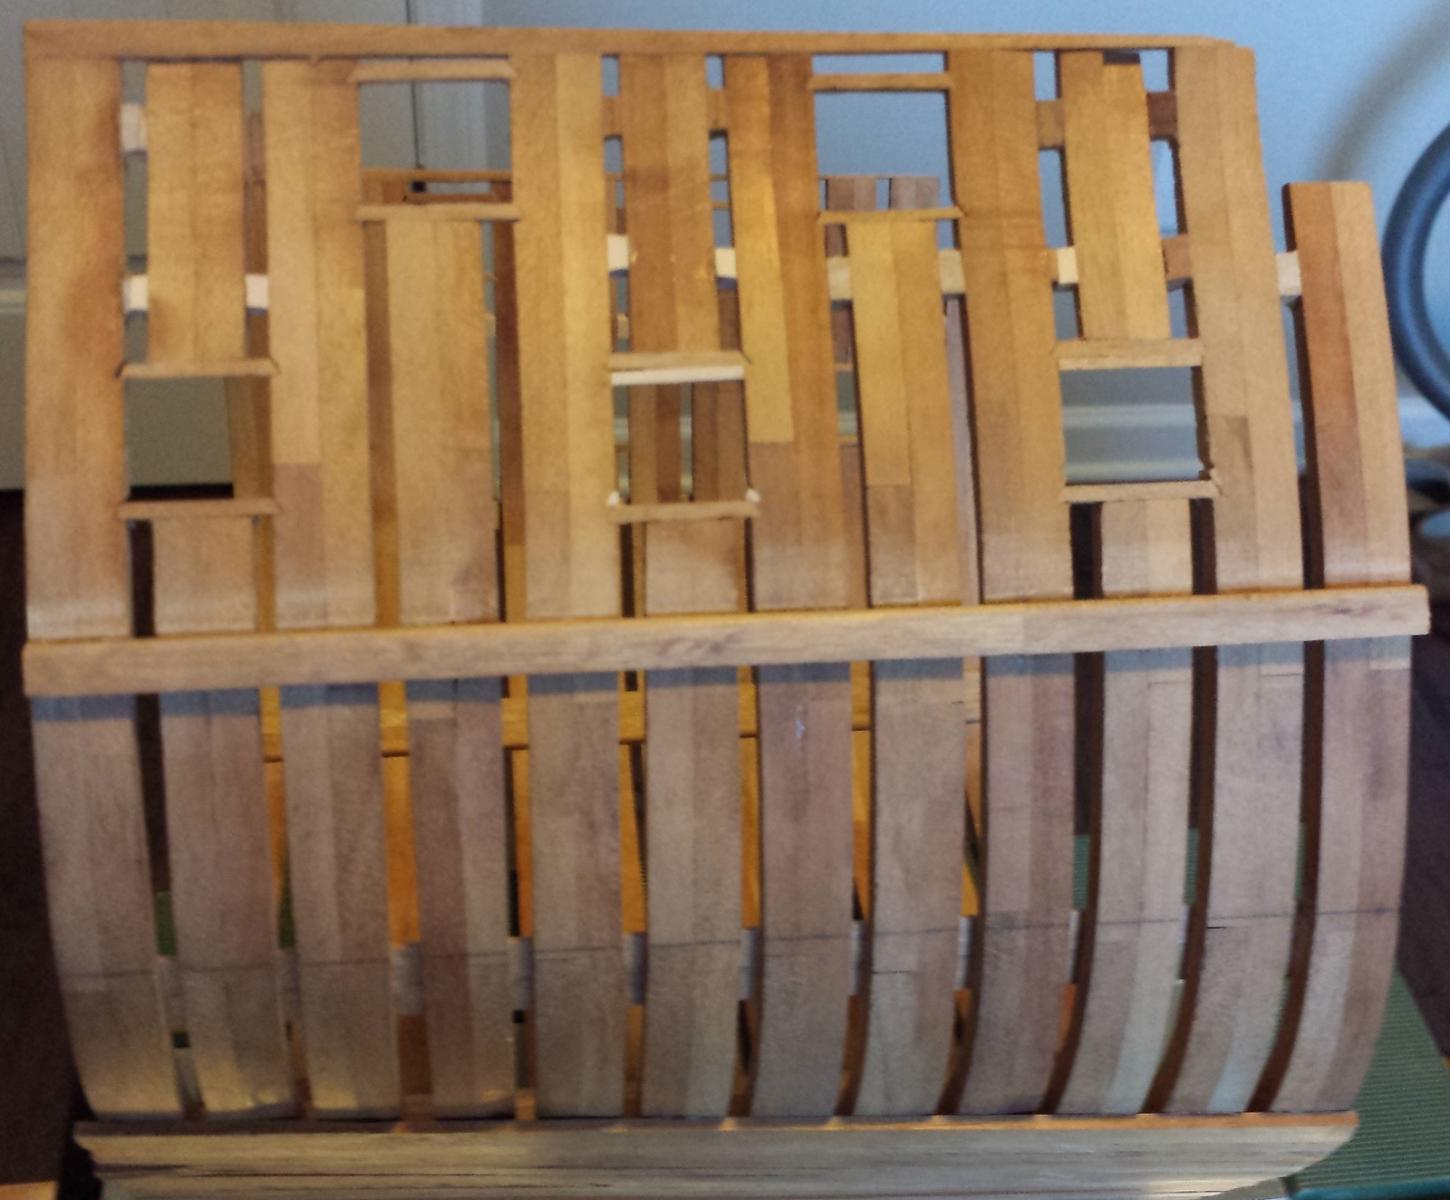
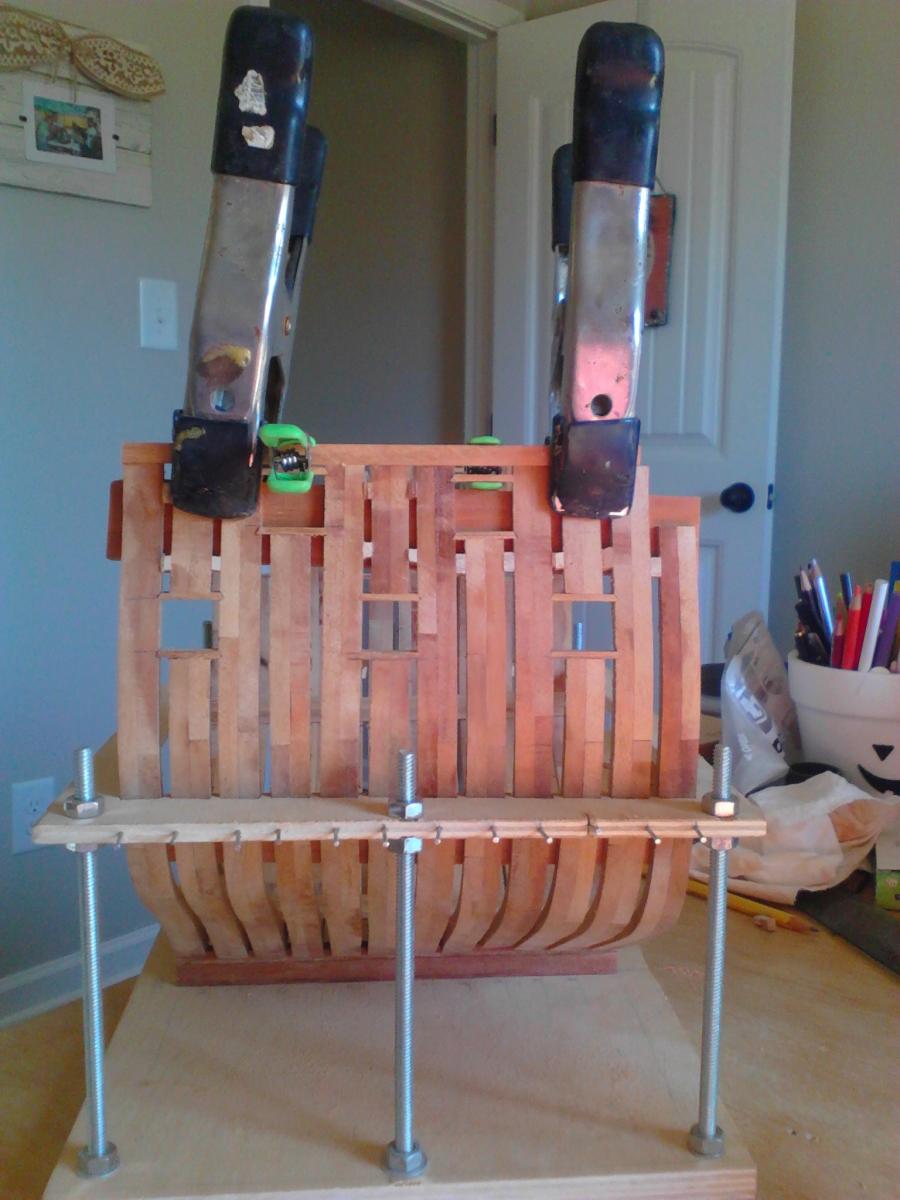
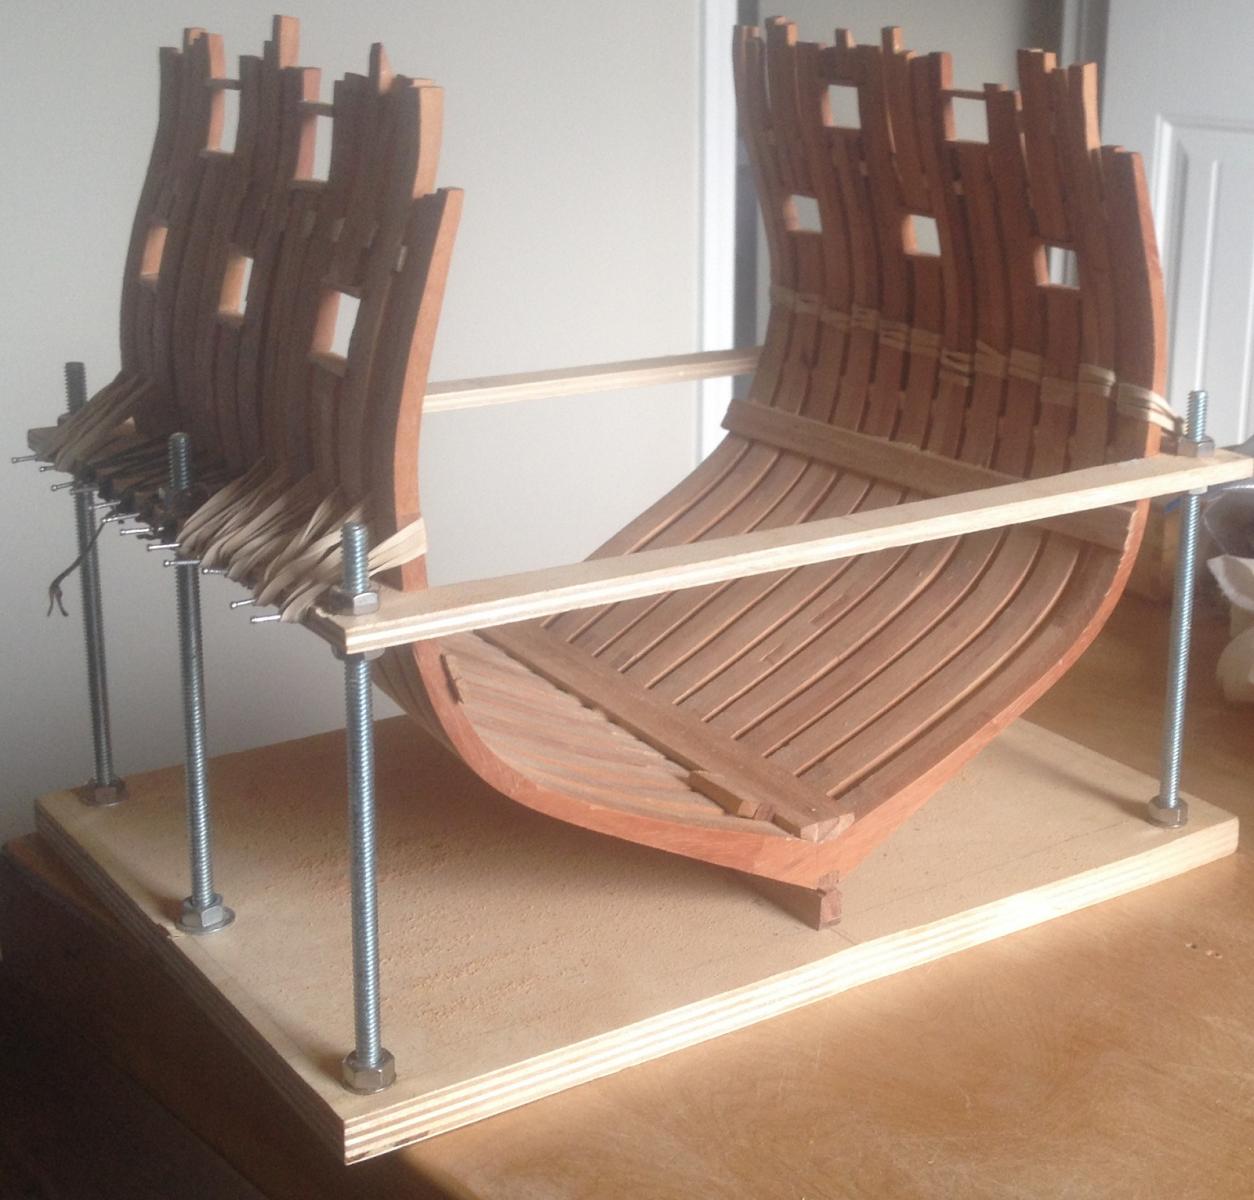
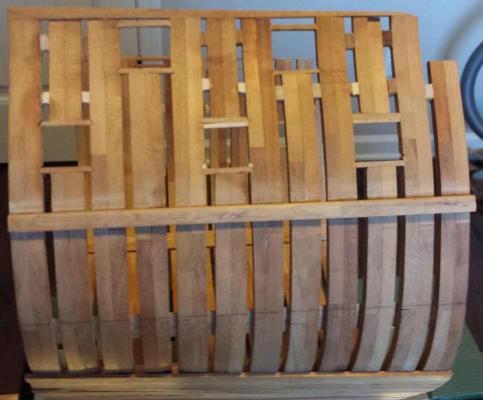
I agree and because of there small size you can do them in a larger scale and get a lot of detail. The gun ports are framed. Now the model comes out of the frame so it can by faired. This is going to make a LOT of dust.
-
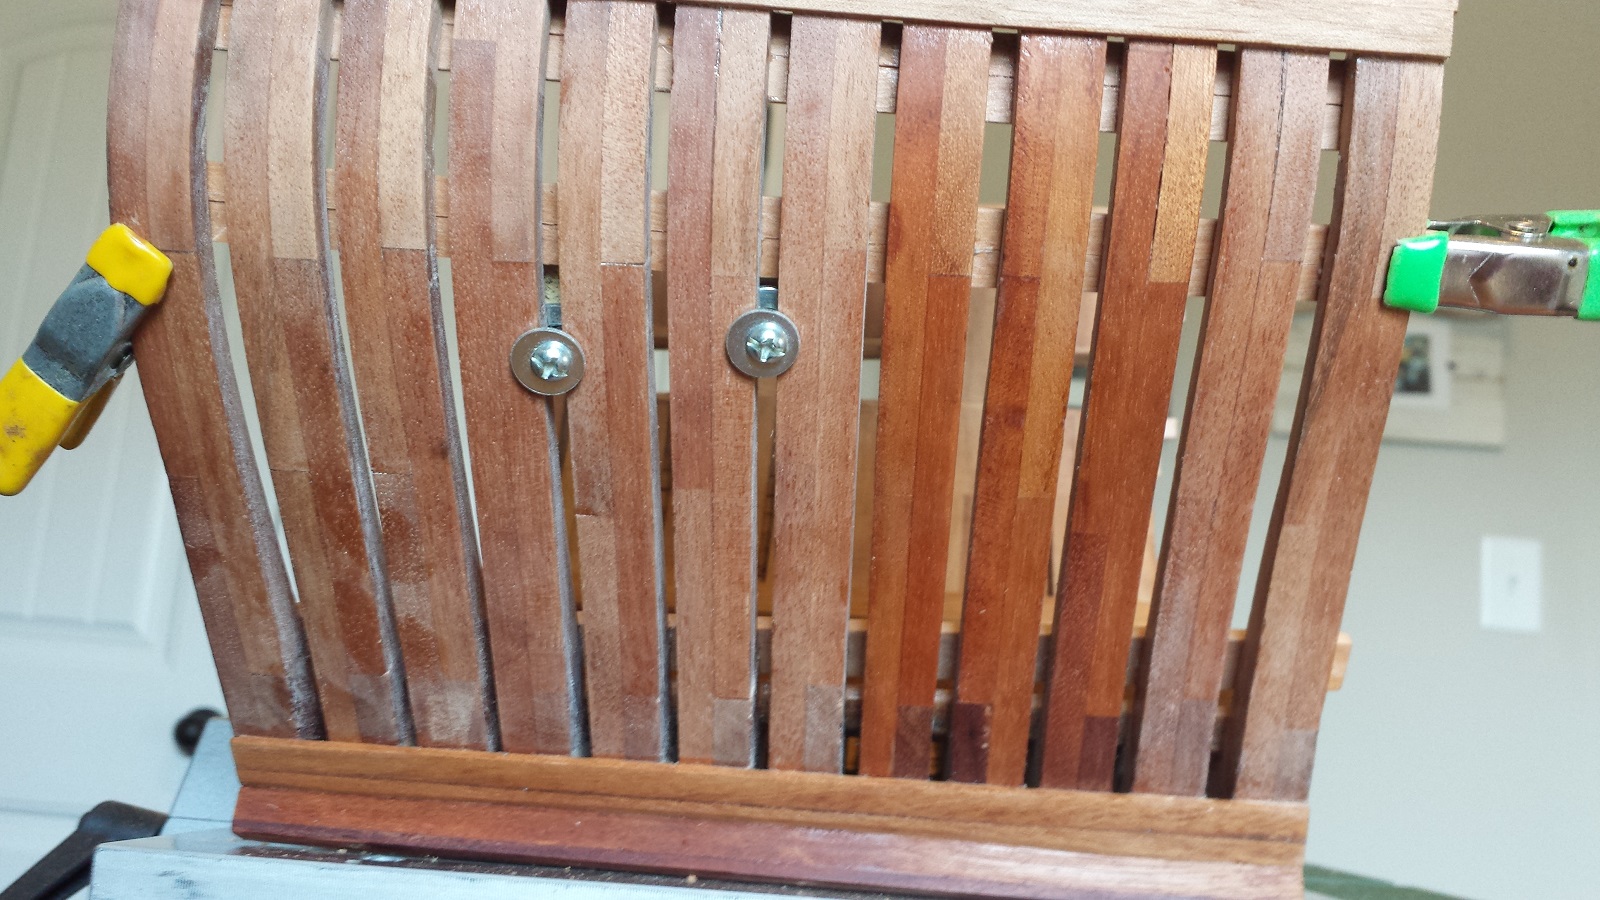
The interior is sanded smooth and the keelson and first limber strakes and lower deck clamps installed. Now things are stiff. I tried to install bolts in one of the frames but after sanding I couldn't see them so did not do the rest. also started the gun ports. The small light colored pieces are there to stiffen the upper works. It's nice to see some progress. Mark
-
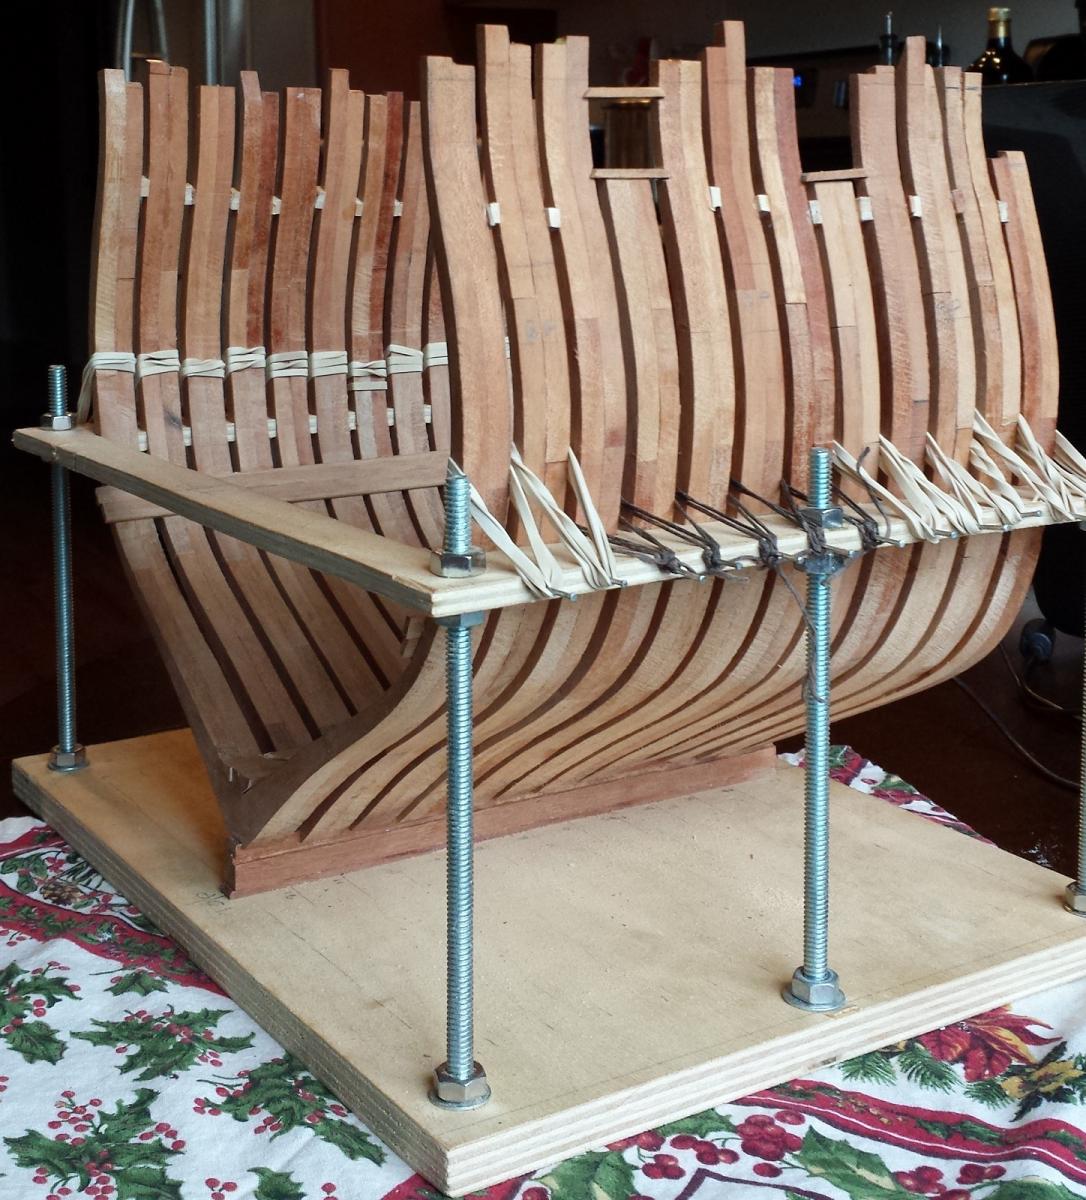
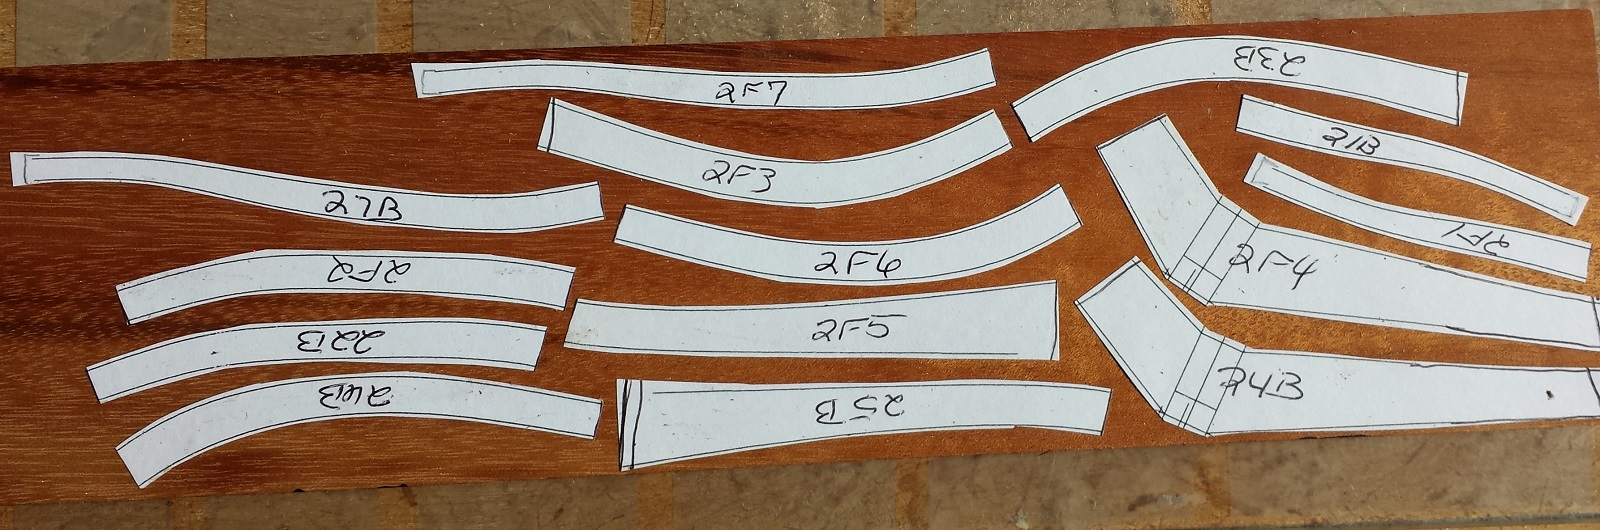
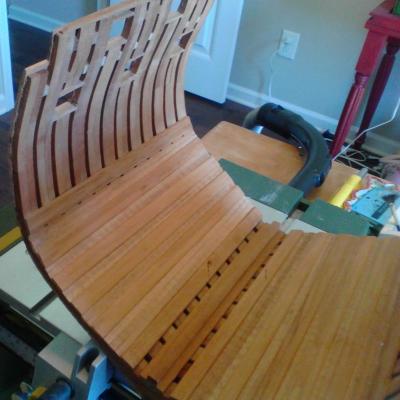
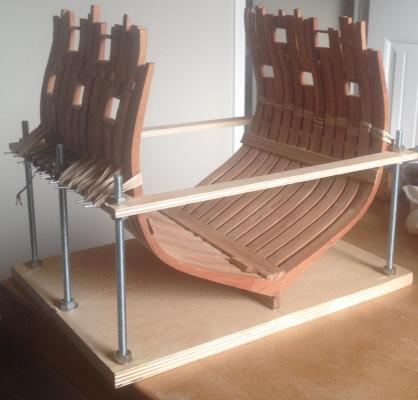
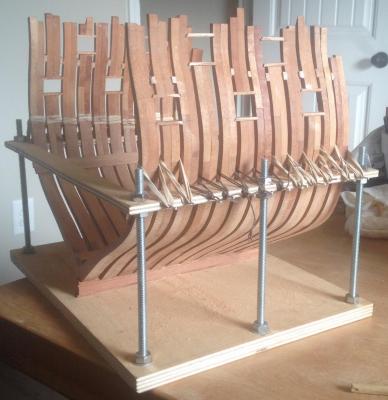
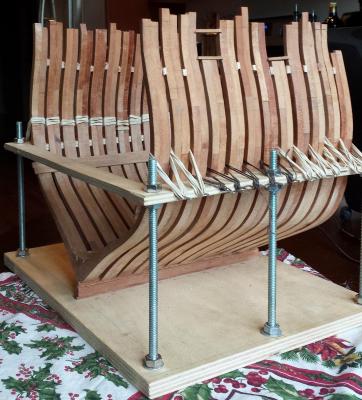
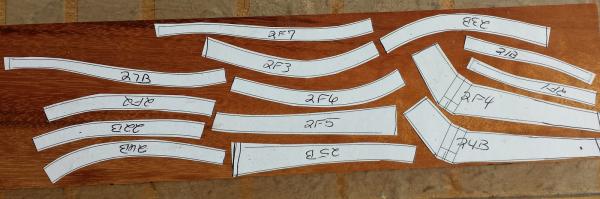
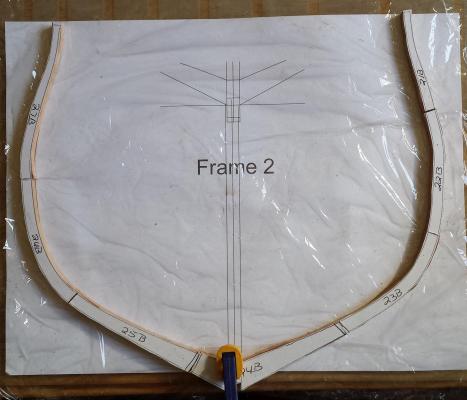
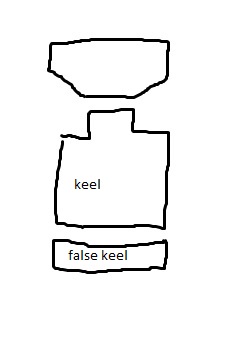
Dom Fernado II e Gloria was launched in Daman, India in 1843 and fitted out in Goa and took her maiden voyage to Lisbon in 1845. She remained in active service until 1878 then remained anchored in Lisbon until 1963 when she burned to the waterline during repairs. She remained sitting in the mud until 1993 when a five year reconstruction was begun. She was open to the public for Expo 98 and is on permenant display in Cacilhas south of Lisbon. D.Fenando was constructed of teak and the frame layout is different from the norms for Europe. They are doubled and the fore and aft are mirror images. All the frames are the same width with the gaps between frames all the same. The plans and a book about the reconstruction came from the Maritime Museum in Lisbon. I then scanned them joined the scans with Photoshop and imported them into Autocad. The book has some good pictures of the construction and plans not included with the regular plans. Unfortunatly the pictures and plans don't always agree. The photos show a frame in the middle of each gunport but the plans don't so I decided to go with the pictures because that is how the ship is actually built. The frames and made of Brazilian Cherry the decks will be maple and everything else will be whatever is in the wood pile. This is my first build log and I'm no writer (that's my fathers job) and our best camera is the phone of she how must be obeyed, so here goes. What you see so far is about a year of computer work and making sawdust. These are the pieces of the No. 2 frame. All the other frames are the same layout. The fore and aft faces are mirror images of each other. The pieces where ruff cut on the scroll saw and the joints where done with a sled on the Proxxon table saw. I don't have any pictures on the keel but is built up differently than usual. There is a false keel, keel and top. The rabbet is just an angle cut in the top of the keel then the top is placed on the keel. There are no notches for the frames. They are just placed on the keel and bolted down. Almost forgot, the section is from the boarding ladder aft to the capstan and includes the main mast. Enough for today. As always comments good, bad or indifferent are always welcome.
-
AUTOCAD 18 DELUXE
muzzleloader replied to yamsterman's topic in CAD and 3D Modelling/Drafting Plans with Software
Mick follow this link to an article in the NRG database. It is a VERY good article on using cad programs http://modelshipworldforum.com/resources/plans_and_research/DraftingShipPlansInCADwayne.pdf There are also other articles on using cad programs. Mark -
When I need really small thread I unravel the larger stuff. It can get tricky. If you use the nylon/cotton tread the nylon is inside the smaller treads and is the same color as the whole tread. I use it for seizing and sewing on bolt ropes. Mark
-
Welding a broken bandsaw blade. Bad idea?
muzzleloader replied to qwerty2008's topic in Modeling tools and Workshop Equipment
I remember bandsaws with a grinding wheel and welder built into the machine. But that was 50 years ago!! Mark -
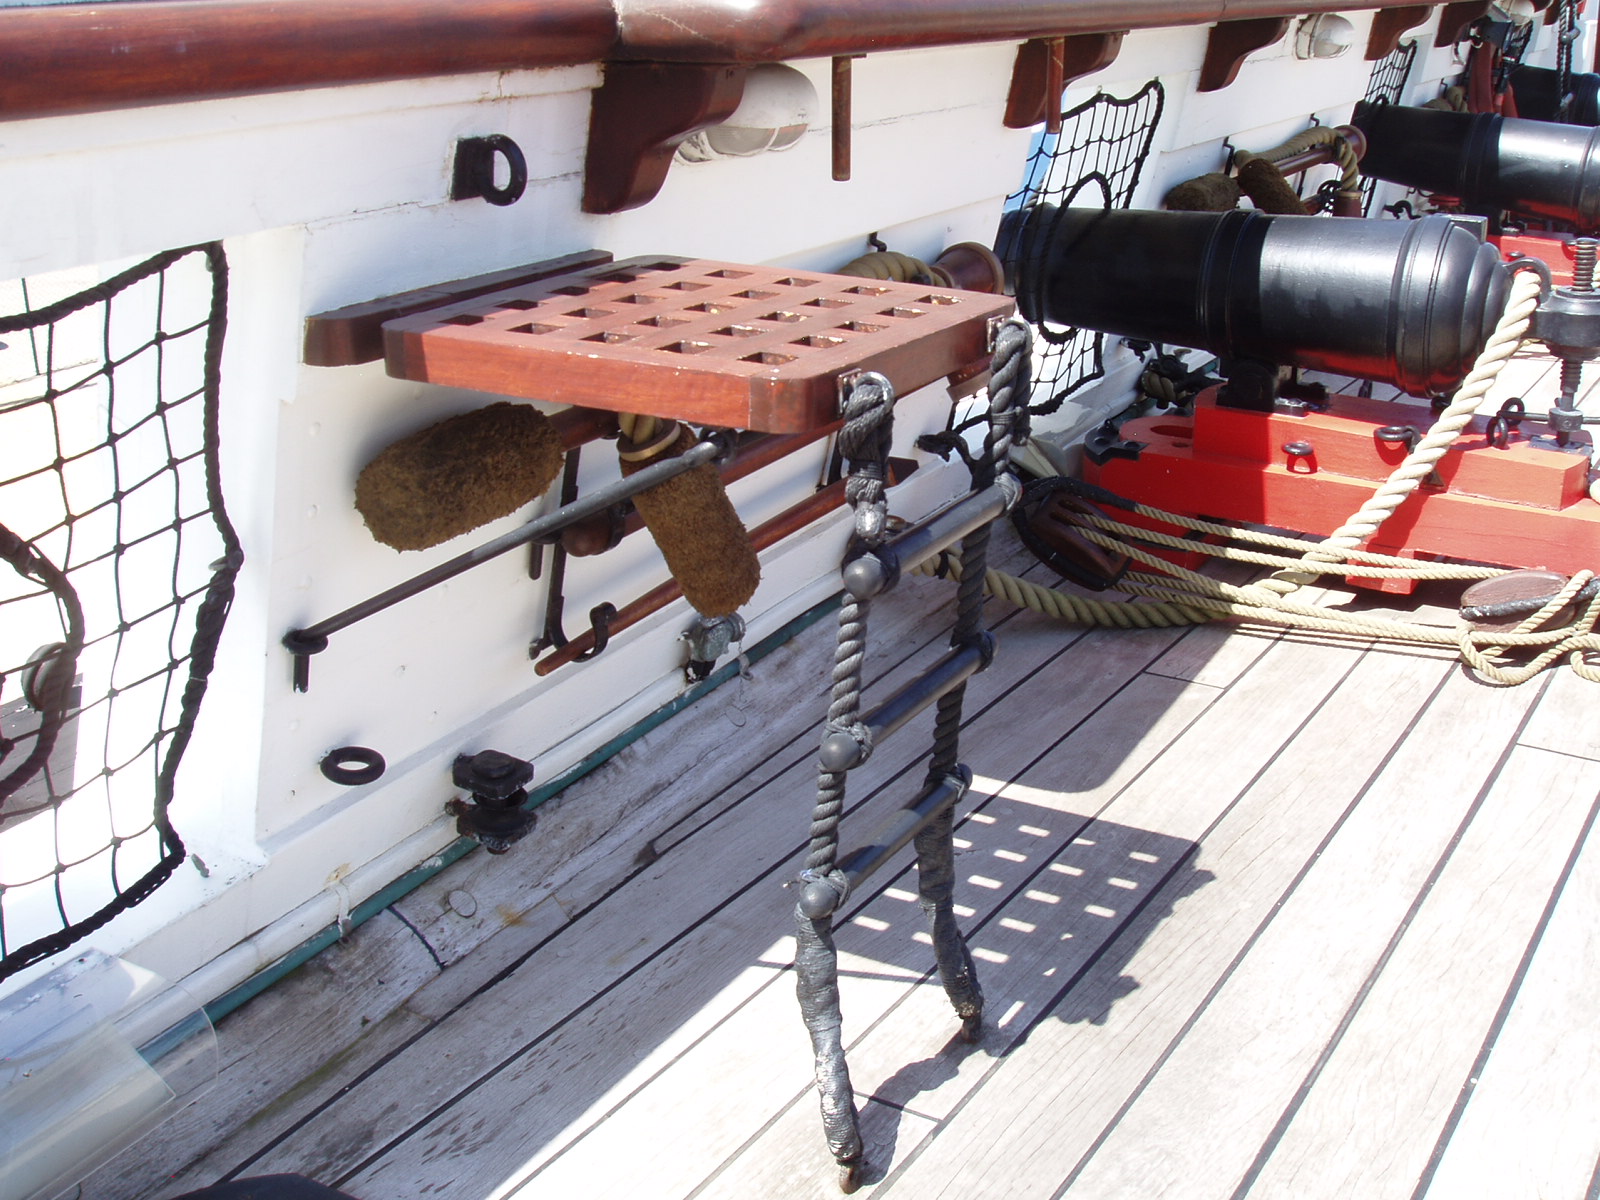
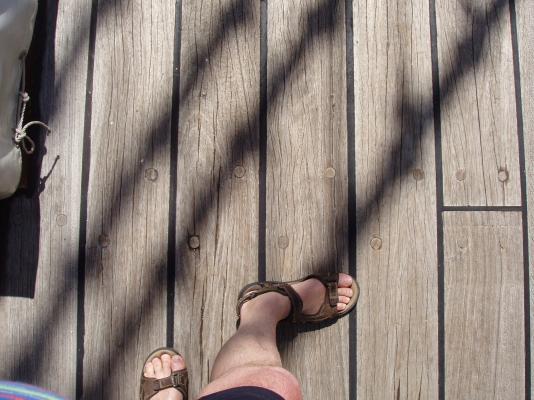
Hamilton This is the deck of the D. Fernando II e Gloria built in the 1830's she is in Lisbon. That's my size 8 in the picture.

-
Need sharp scissors
muzzleloader replied to USS MAURY's topic in Modeling tools and Workshop Equipment
nail clippers mostly because you already have them Mark -
I think what you are trying to do is decoupage. Should be lots of how to's on the net. Mark