


olliechristo
-
Posts
412 -
Joined
-
Last visited
Content Type
Profiles
Forums
Gallery
Events
Posts posted by olliechristo
-
-
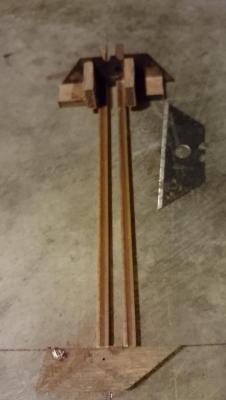
Okay, not a operation I would recommend, but she survived her keel lift
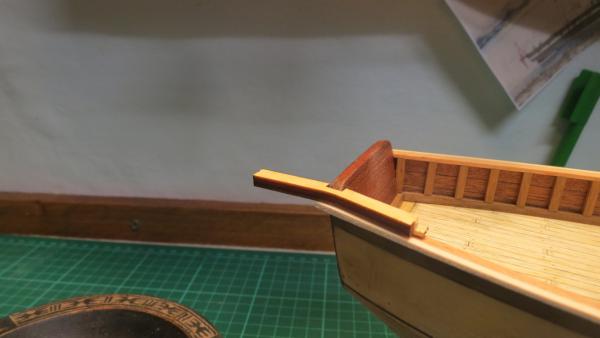
 The things we do.. I am happy. Thought i may as well do the bowsprit socket while were here..
Some of my reasons for doing this op were - I feared that drilling the three 1.5 mm holes in top of keel with such little room was going to be nasty - The bowsprit sits next to keel and I think it would look strange if it was higher than keel top. It's angle needs to be about 5 degrees so siting it lower is not an option.
I decided i needed to follow the grain of existing timber for splice and also managed to align cut to meet just before thinnest point at tip of the deck, no saw cut seen from inside hull.
I think it looks better, its a compromise and of course your always going to notice it if you look close, so i'm not going to focus on it, from a foot back it looks fine.. Phew.. Onwards .. Ollie


-
Thanks guys.. I thought you may say that John.. I have already done it, couldn't help myself.. Some serious deliberating and I took on some serious surgery... I surprised myself at how it went and happy with the result really. Didnt take that long..I didnt cut or break anything i didnt want to.. I am a bit mad I know but at least i know it
Pics coming soon.. Havn't touched the transom yet but it will be an easier fix if i decide to do it.... Ollie -
-
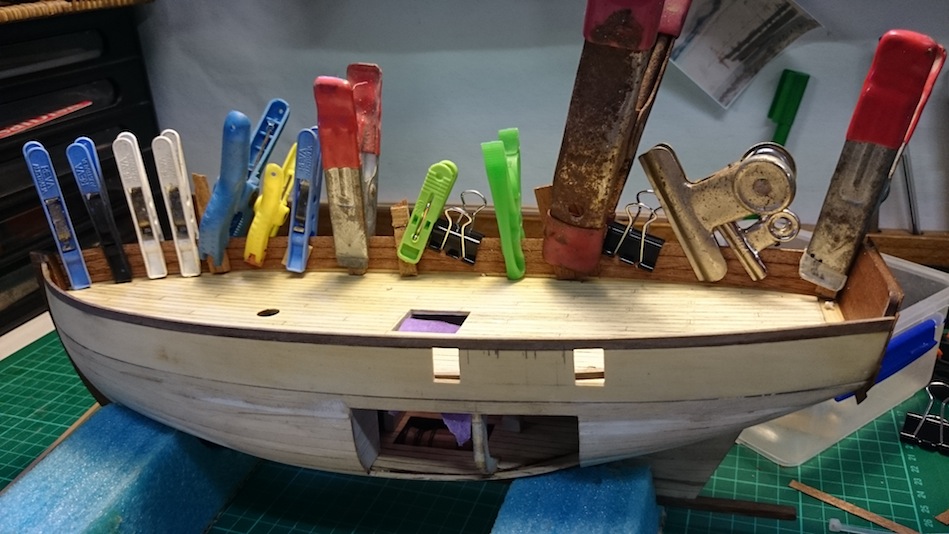
Well, Another few hours spent... I have added my cap rails and extensions.. I am a bit dissapointed my keel at bow seems to have fallen a bit short of where it should be.. Stern could be a bit higher above rails also.
 I dont know how that happened, I made my scratch built ones the same as kit supplied.. I shouldn't have cut it until now perhaps, i would next time.. as done with keel at rudder post, a valuable lesson for all..
 I may try to fix this or let it go.. Any thoughts? Regards Ollie


- egkb, Aussie048, avsjerome2003 and 1 other
-
 4
4
-
-
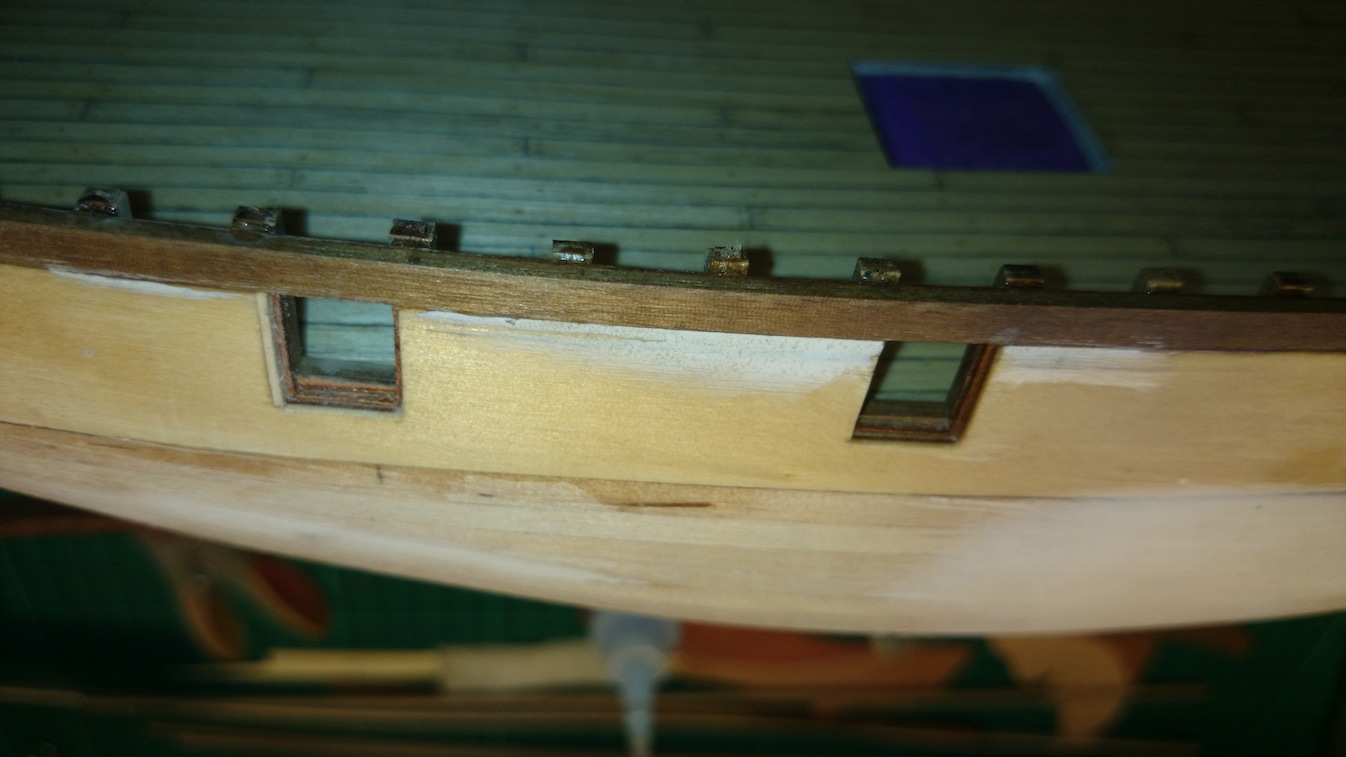
Hi all. Okay another 3 hours, wasn't happy with gun ports linings and another bit on frames where they met transom. So i fixed them so i was happy...
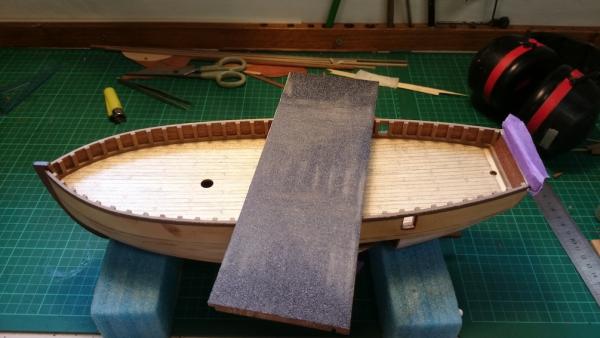
You may notice i left my frames proud of bulwarks because i knew there was no way i was going to cut them as accurate as i need... So i made a sanding pad with fresh 80 grit quality wet and dry paper and worked them down nice and flat all over now.. ( pad will get used for lots more sanding yet:)
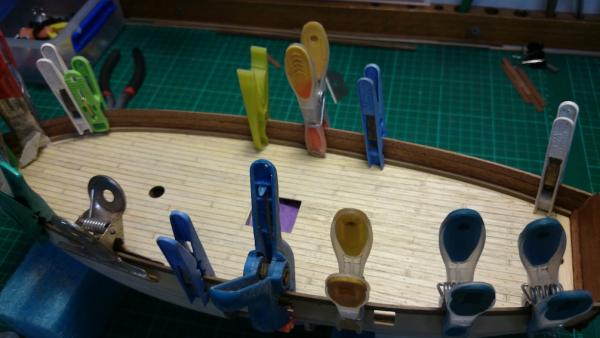
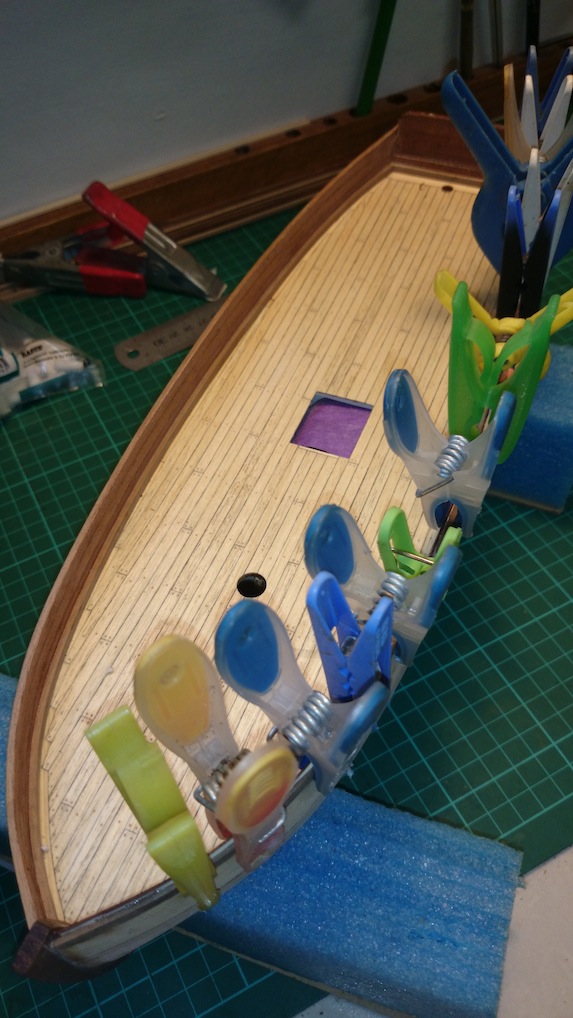
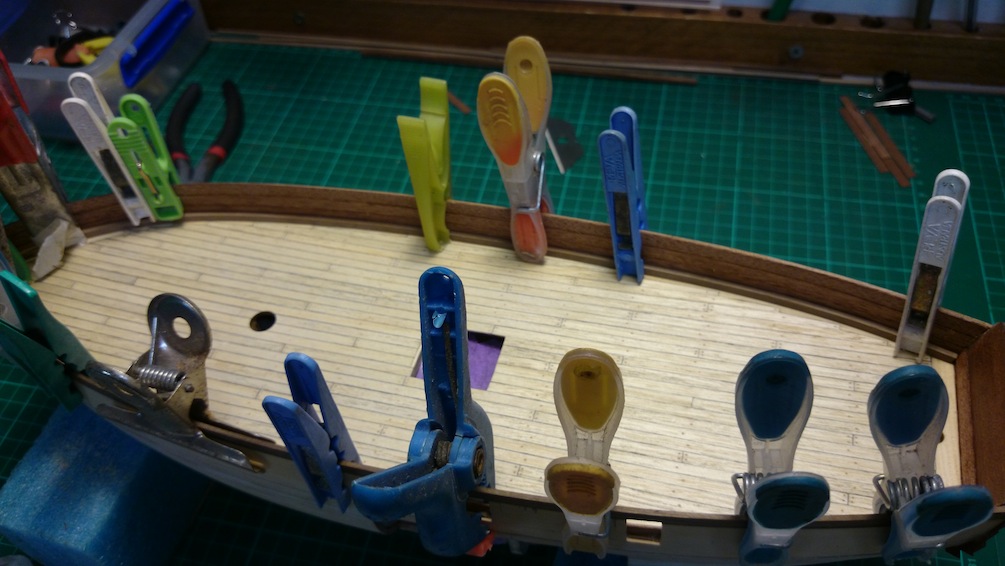
I have cap rails bending and use the soak, bend, dry technique. The ones in bowl are getting a head start.. Steam didn't seem to be that advantageous to me.. The square objects are lead weights.
5 days straight of rain here and plenty more to come, so good ship building weather.. Regards Ollie


- Aussie048, ringbolt2013, egkb and 1 other
-
4
-
WOW, onwards and upwards.. This is great Danny, I love to make crappy things fantastic, it gives you a buzz, not to mention what you are doing for friendss/fam.. I take my hat off to you.. She looks great...
Have you kept a tally of how many hours this has or will take? Would be very interesting also.. Warm Regards Ollie
-
Thanks mate, your support is much appreciated. I have high expectations of myself and i can already see how second build would be so much easier.. The beech seems okay to bend, will pre soak and bend like i have the walnut.. Only thing is doesnt look like any other tinber on the ship and the lime wood which joins onto and extends over the bulwark edge is quite a lighter shade.. Think im just going to go with it though. Regards ollie
-
Thanks Tom!
 They have supplied flexible beech and limewood for cap rails.. Ollie
 -
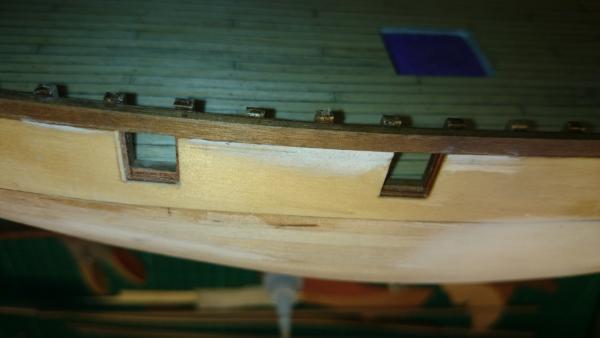
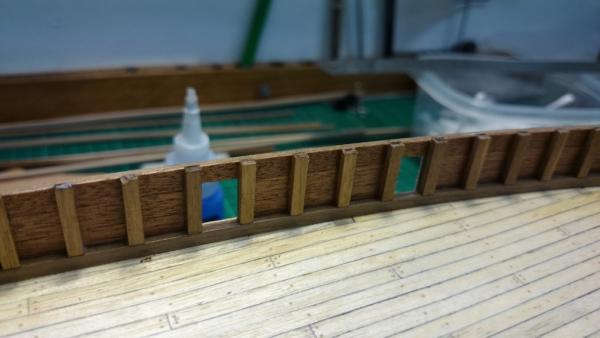
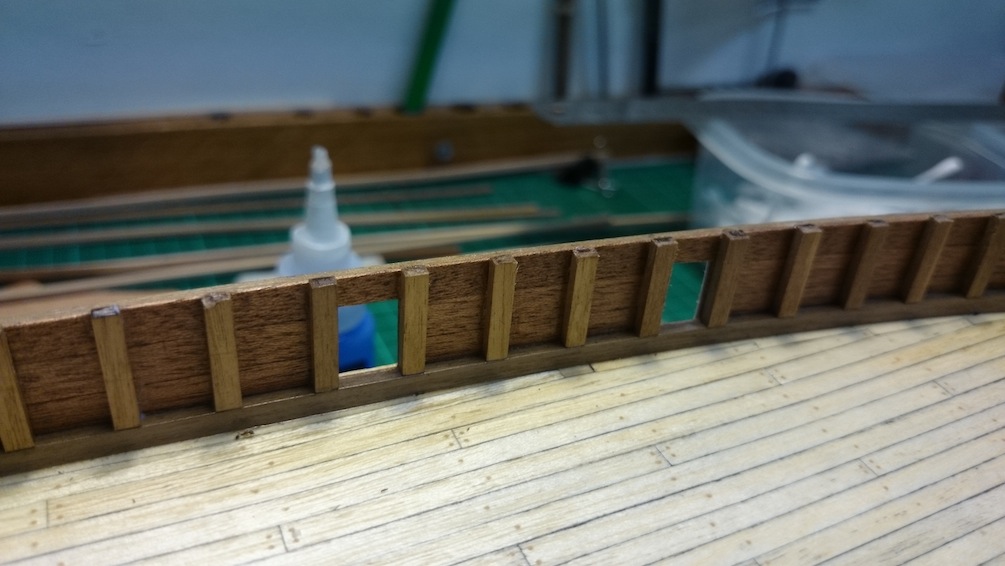
Well small update, about 5 hours more. Frames added to one side and three gun ports stops added sides and bottoms, a bit tricky getting the frames layout to suit ports, but looks okay where it finished at bow and stern i think, ... now to do frames on other side and add cap rails etc.. happy crafting all.


- ringbolt2013 and egkb
-
2
-
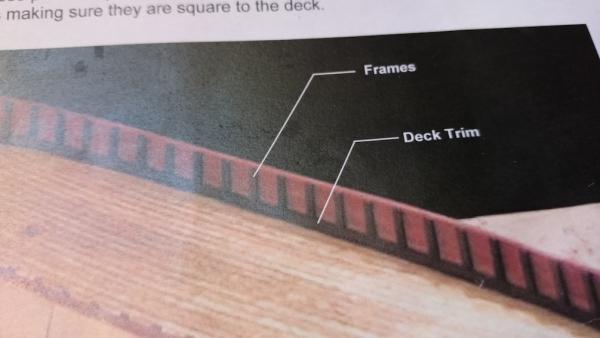
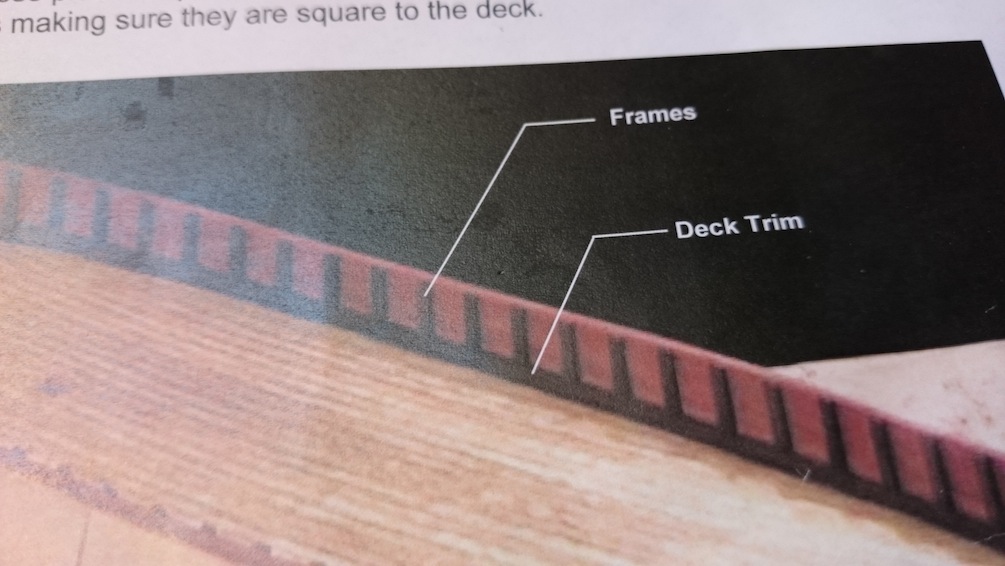
Thanks guys but i'm a bit lost with this discussion also.. I was concerned that so much of my margin plank got covered by deck trim. I also wondered why "frames" appeared above deck trim, I imagine that would continue through hull deck... Anyway it doesn't really matter I am just moving forward and doing what the instructions say at this stage.. I am happy with how it all looks and trying not to be too pedantic.. After all this first build should be a learning experience..
 Regards Ollie
 -
Well its been a bit slow in the shipyard with 10 hours spent since last post.. I am really taking my time to make sure i get things right.. lined bulwarks and added bulwark extensions.. will update again soon.. Ollie


- ringbolt2013 and egkb
-
2
-
Pygothian, we lost you, hope that man flu wasn't serious... Ollie
-
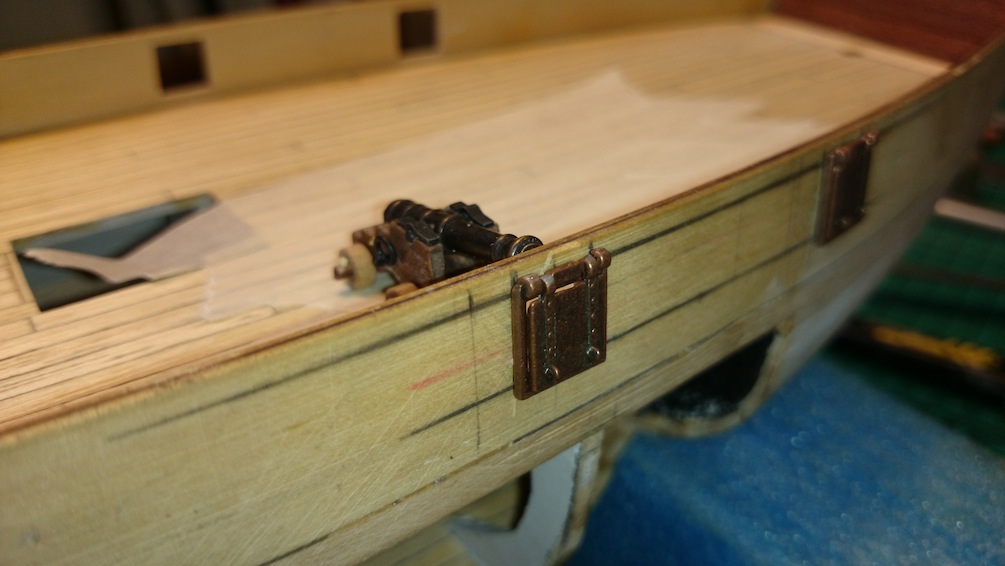
Yes, don't worry guys, as I said i want to scratch build the ports.
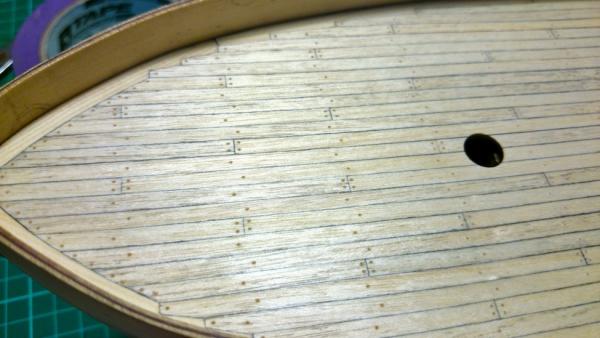
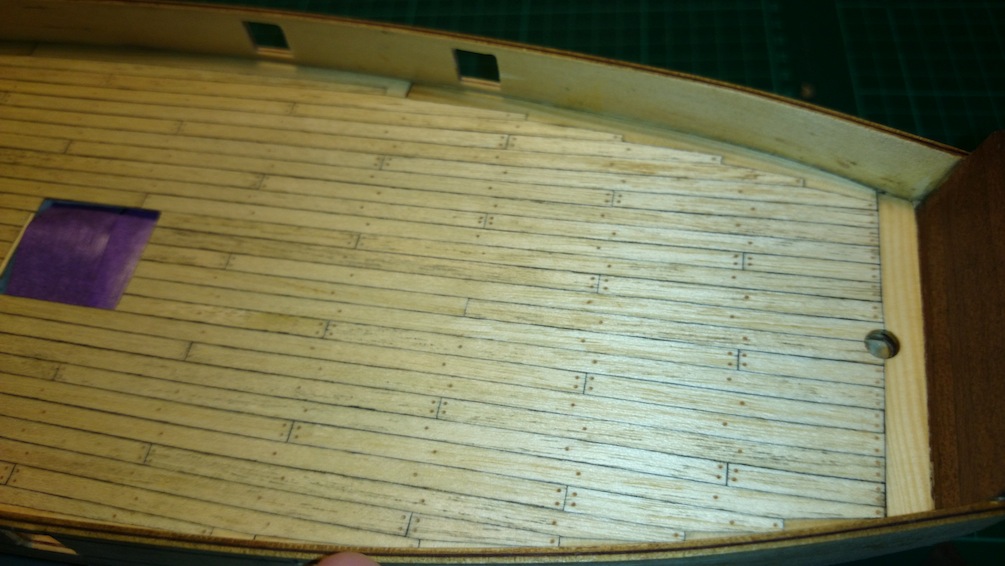
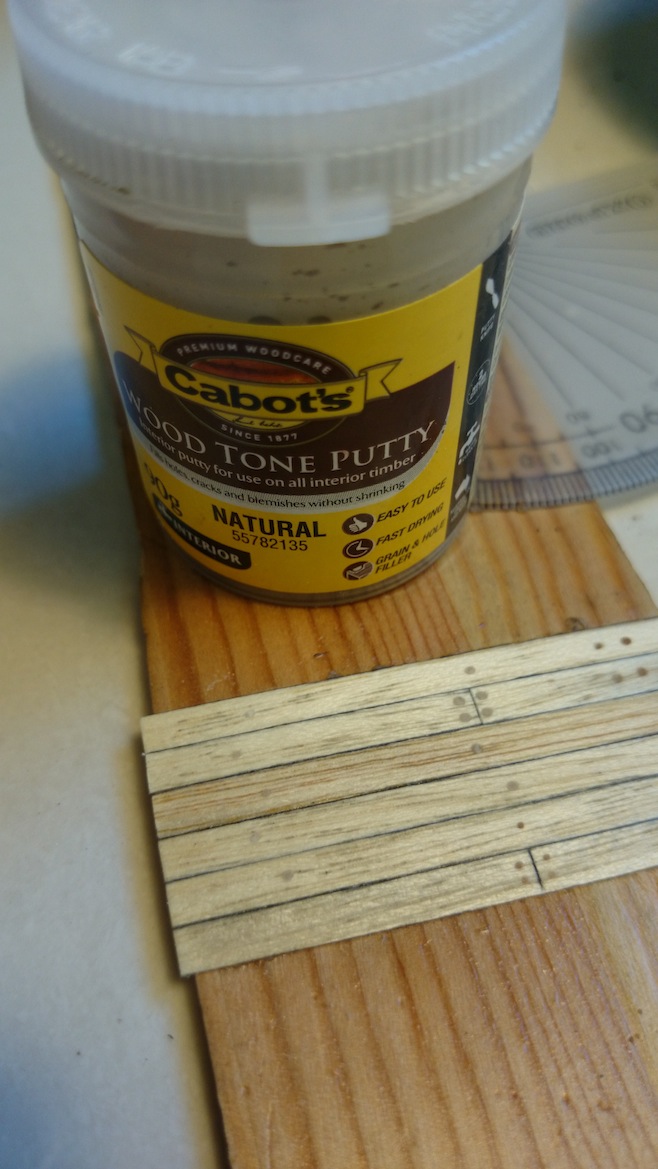
I trialed many fake tree nails before biting the bullet and I'm happy with result... 0.6mm holes, darkened up the natural putty with cedar.. They look more subtle in real life.
From what I can gather about tree nails is.. They really are a just representation of something, it is no use making them the same color or even close to the same color as you will not see them, but you want them dark enough to show up.. Its a happy medium thing. Just be sure you trial them with your chosen varnish as this obviously changes the putty color completely..
My best tip would be to varnish before drilling and puttying tree nail holes.. It firms up the timbers fibres and you get a neater hole, plus the putty doesn't get all in your grain and caulking..
Ollie

- Aussie048, ringbolt2013 and egkb
-
3
-
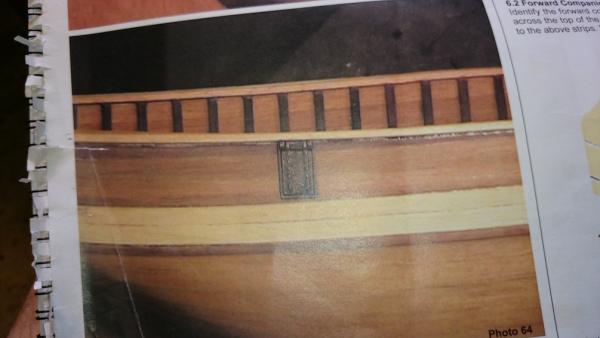
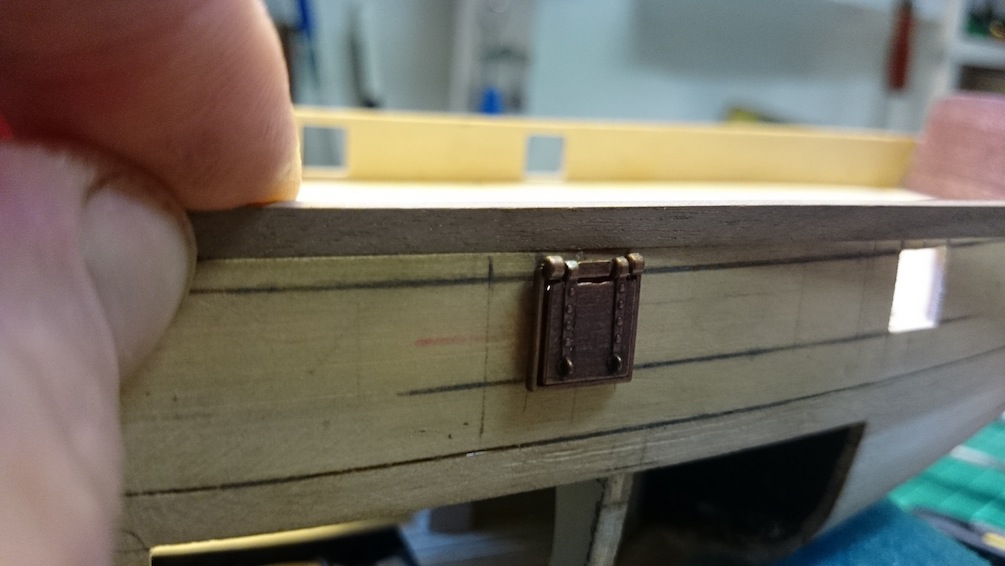
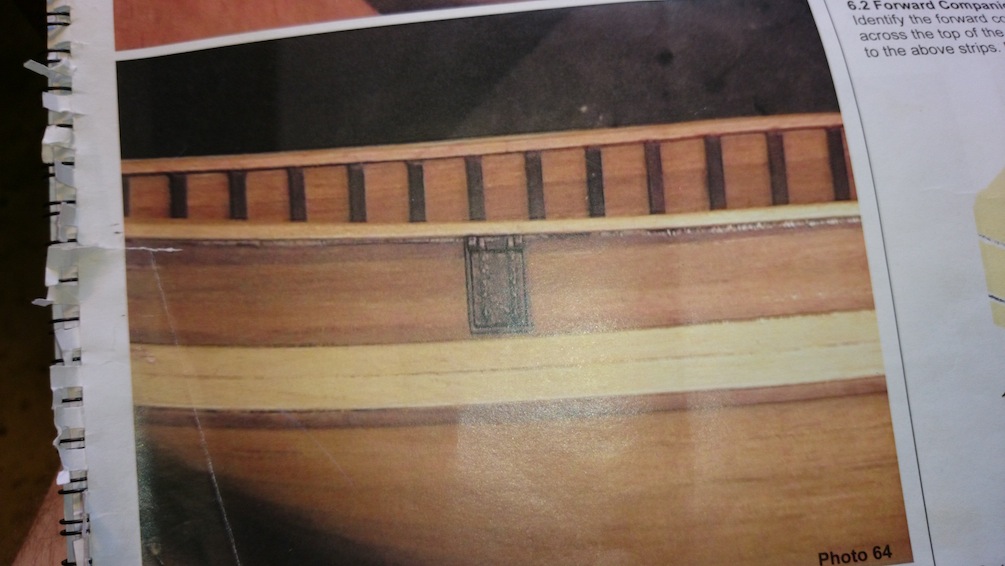
Hi all, I'm working out gun ports... So I can carry on with lining bulwarks.. I have some conflicting diagrams. The supplied die cast ports are square, diagrams show rectangular....
I am wanting to make my own as i believe they are made of wood.. Trying to work out the lining of them and such... They will be cut up to bulwark extension once fitted which is 2x4mm walnut as height is needed for cannons.....
I am also pondering the finishing of bulwarks.. The 'deck edge' is 2x3mm walnut over 0.6 mahogony as diagram shows but it covers up a large proportion of margin plank.. (2.6mm) Is this okay?
If uprights are supposed to represent frames why would they terminate at deck 'trim'.. Is this authentic? Regards Ollie


-
No I havn't john. I will do, i think the toothpick may have flared the 0.5 a little.. I've got 0.6 also will do another test batch.
-
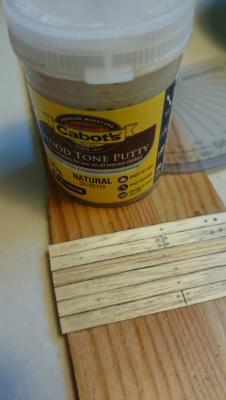
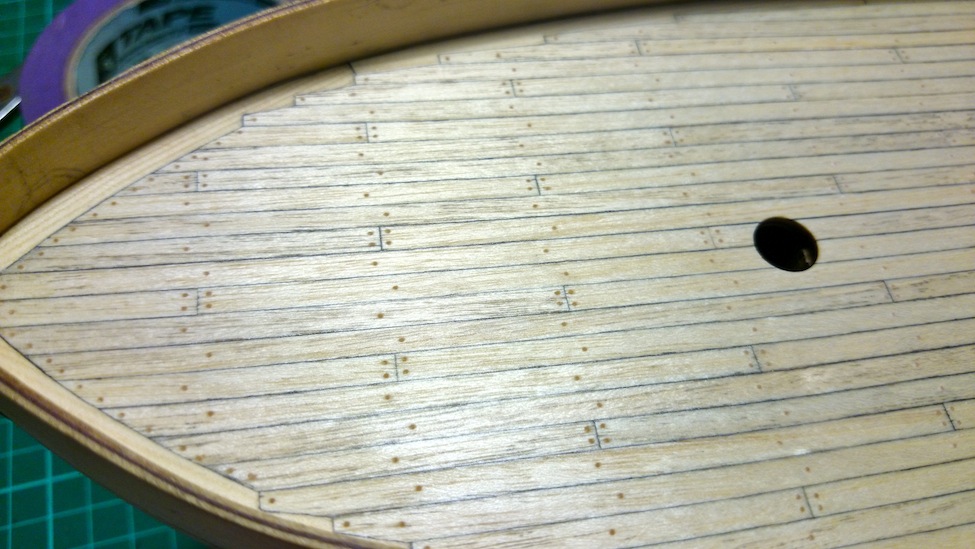
Thanks for the compliments guys.. After looking at various logs and pictures I have decided to do tree nail..
I have chosen a Natural color as it was the lightest and i like "Cabots" Brand. It shows up a bit darker than decking, blends in from a distance but nice up close.. The left hand run of single plugs are 0.8mm holes and i think this suits... Regards Ollie
- ringbolt2013 and egkb
-
2
-
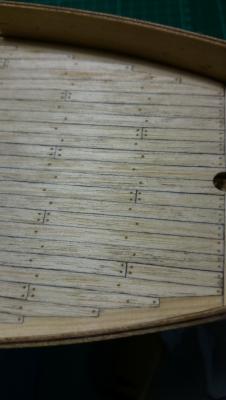
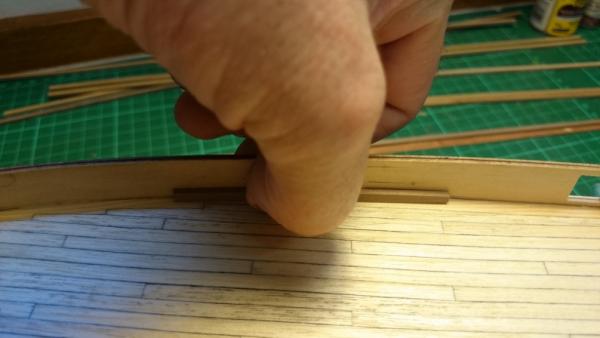
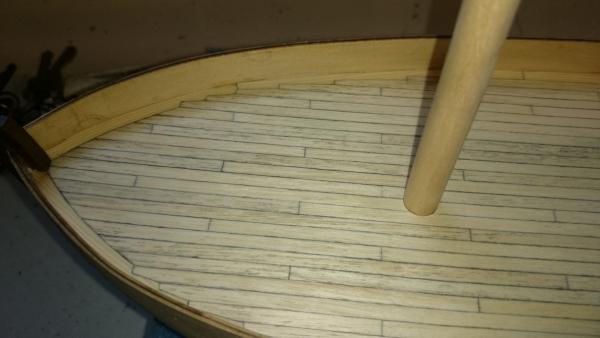
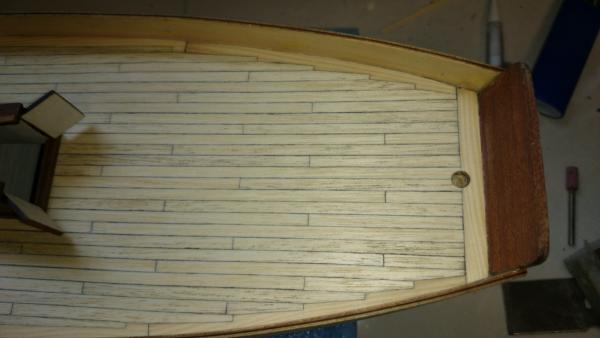
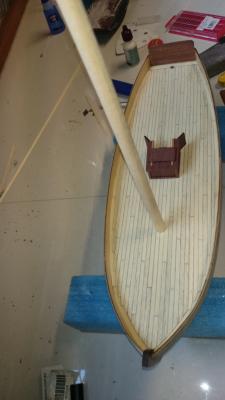
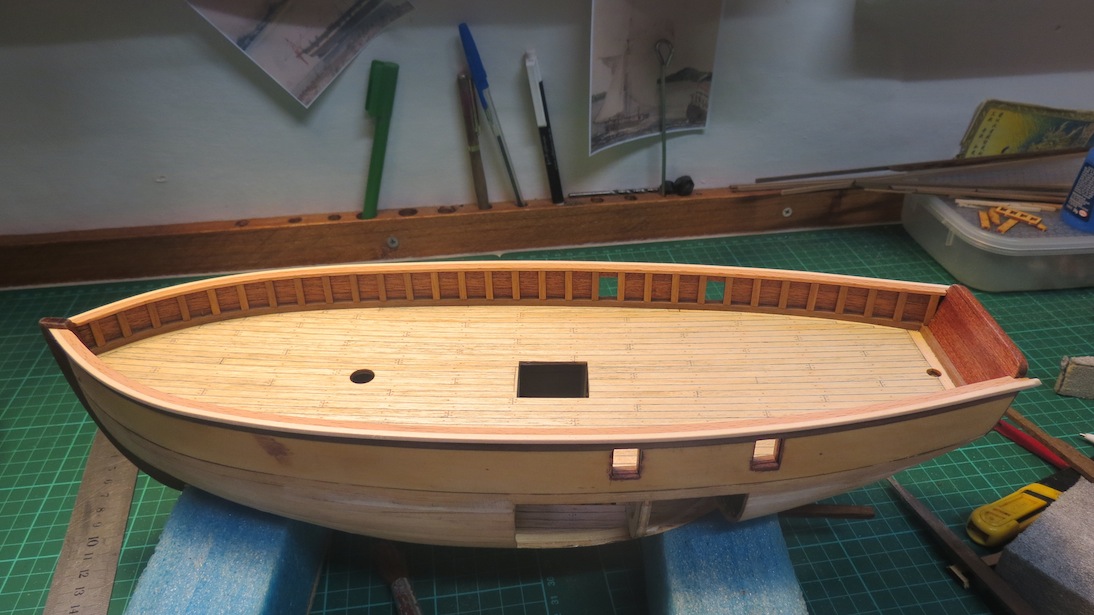
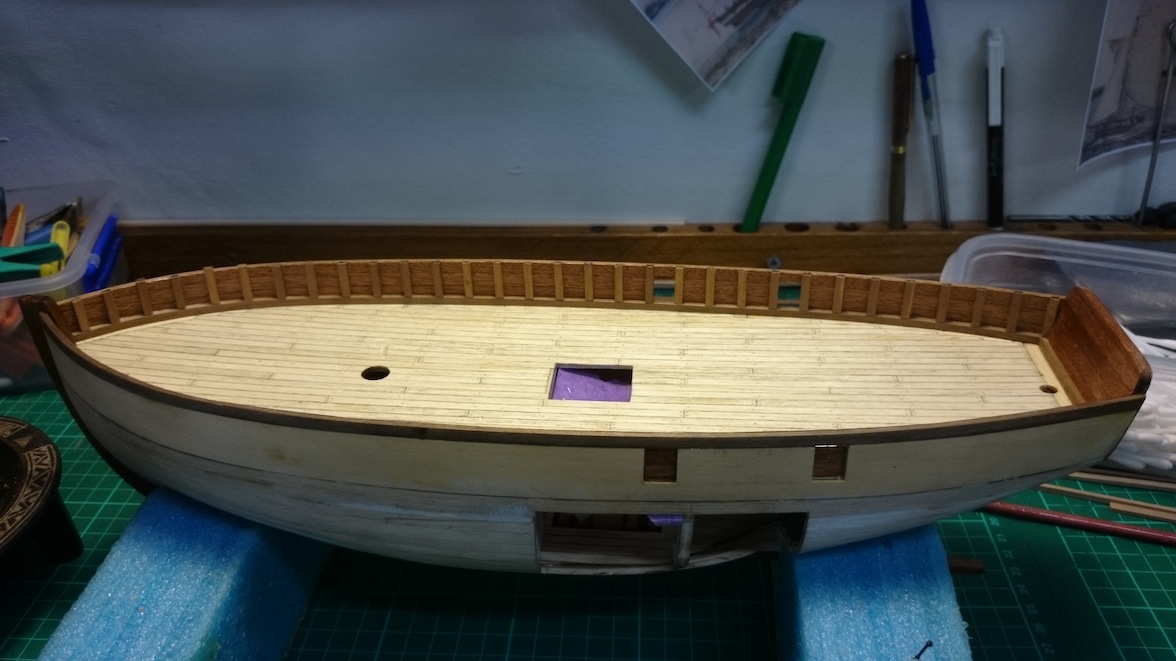
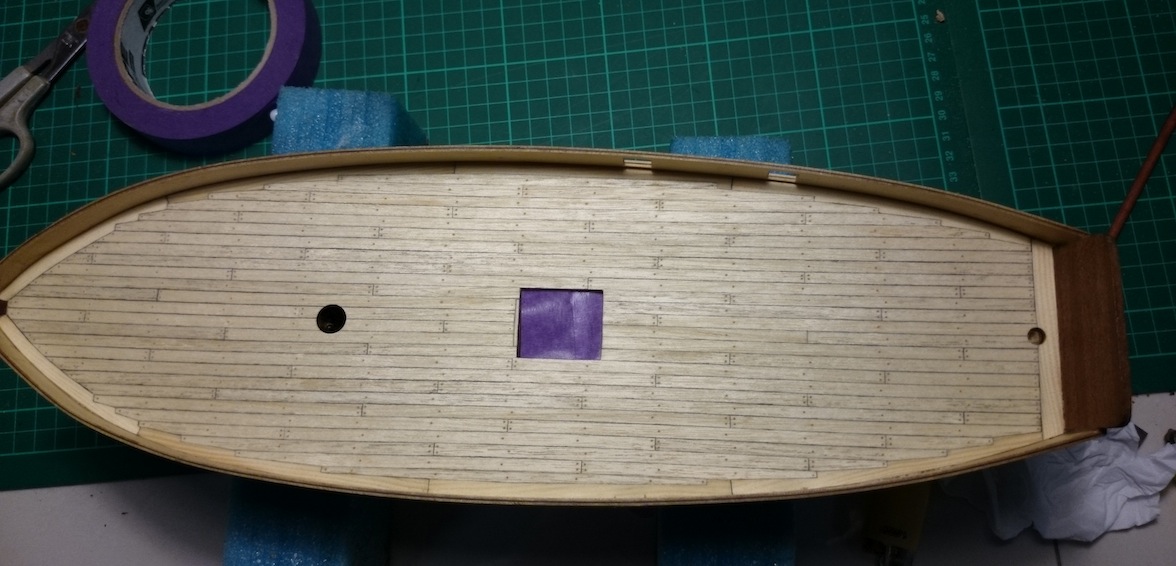
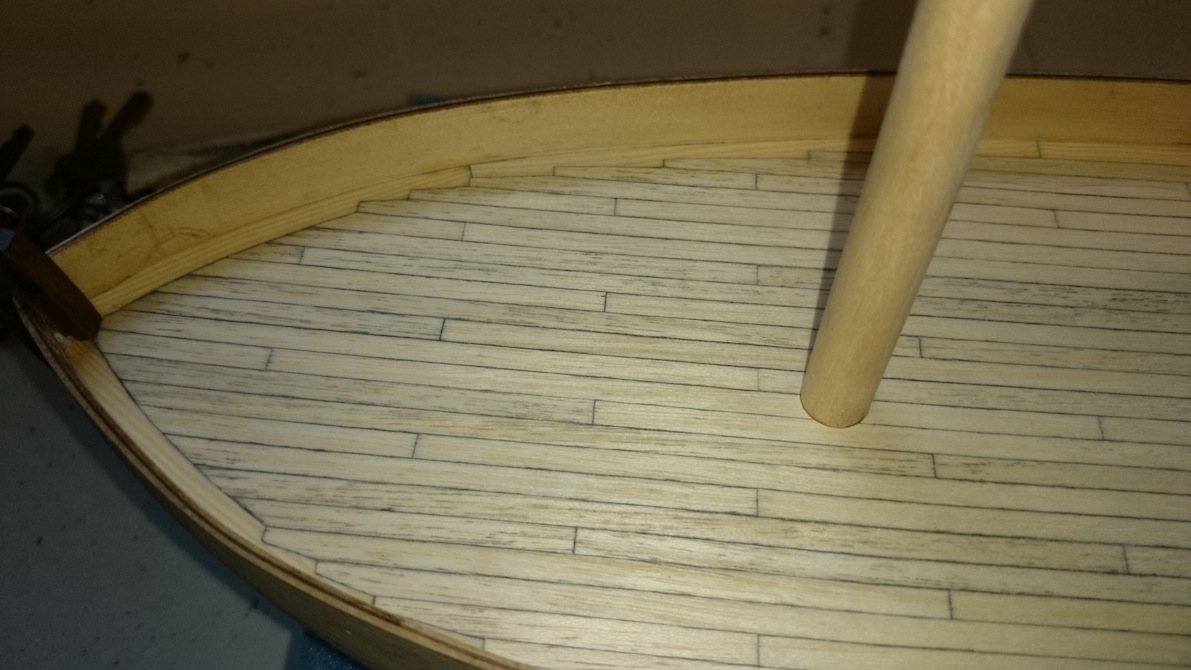
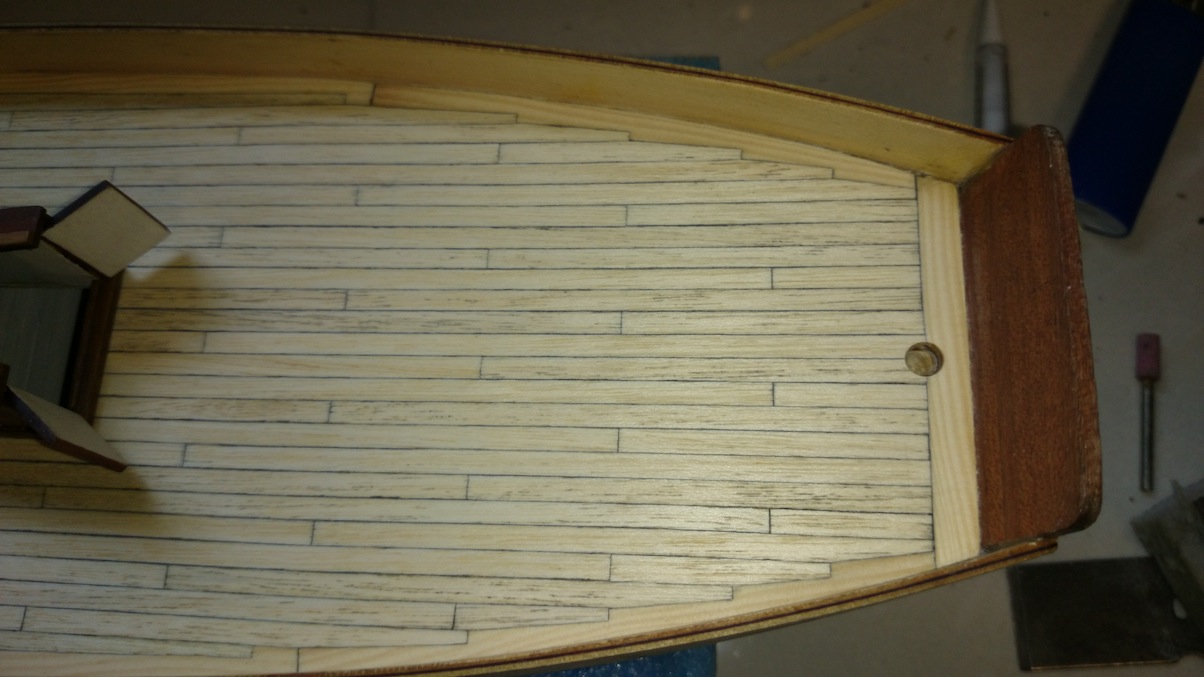
Thanks Tom and Jeff.. Back into it.. I have done about another 4 hours on various tasks... I have finished deck planking, felt good putting that last plank in even though it was the trickiest.. .Very happy with result and i have to thank those who helped me..
I ended up with some with black from the pencil going into grain of some planking but i actually don't mind the effect...
I have scraped flat, sanded and satin clear coated, (still wet in some photos so looks glossy)
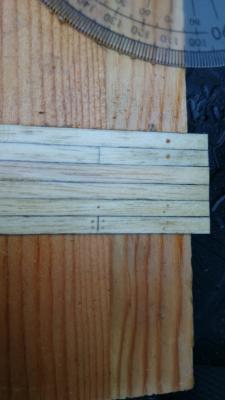
I also tried some tree- nailing with wooden tooth picks on my trial deck.. interesting how dark they come up after finishing... (because its end grain)
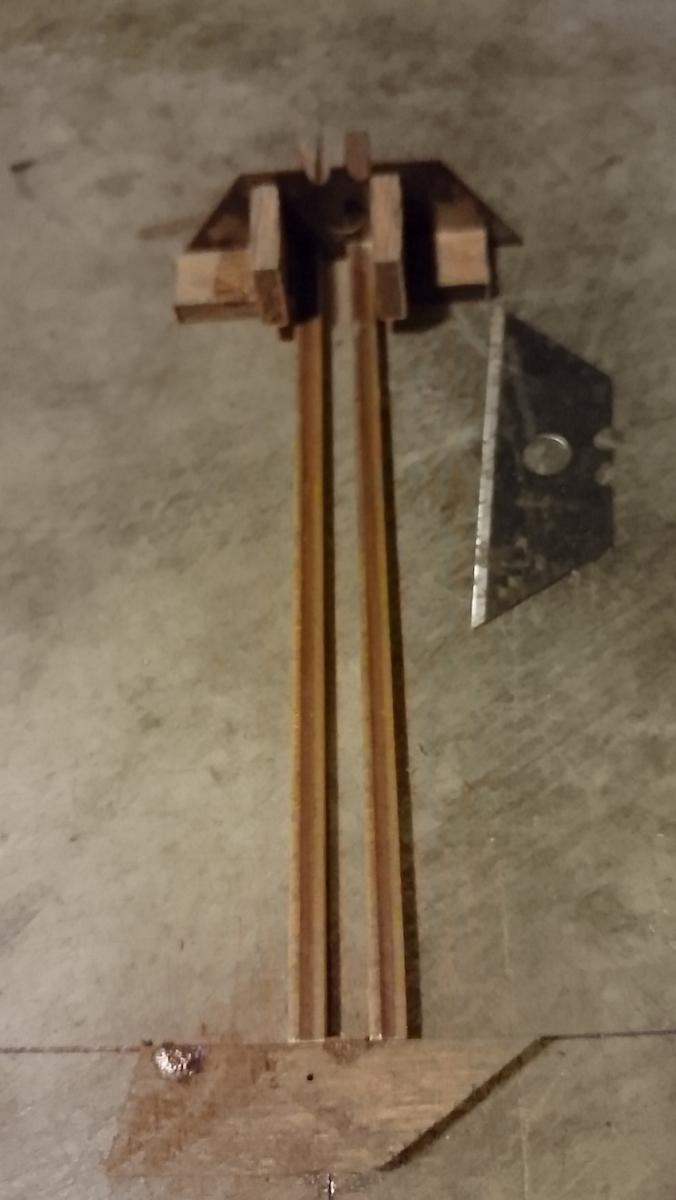
One trial is 1mm holes and other is 0.5 mm.. I would like them a bit lighter.. Will get some putty and other tooth picks tomorrow.. Still deciding.... will try more techniques.. Also showing my jig for cutting deck planks,, worked well, always square and good for trimming.. Ollie
- egkb and ringbolt2013
-
2
-
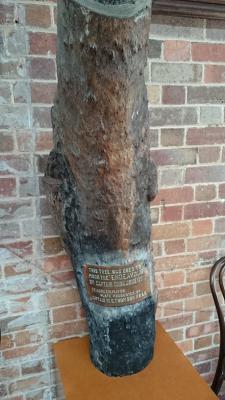
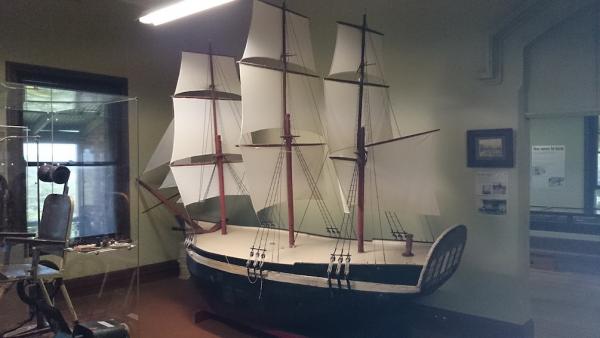
Hi all, no modelling for a bit.. As some of you may know the profile picture I have is of the mermaid in the Endeavour River, Cooktown.. Far northern Australia.
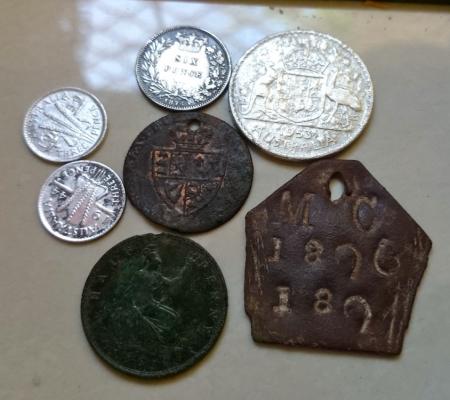
Well that is where i have been since xmas, staying with friends not far from the river.... Great to get away.. I got a chance to bring a little history home with some metal detecting finds, my oldest coin 1862 British Ha'penny... .
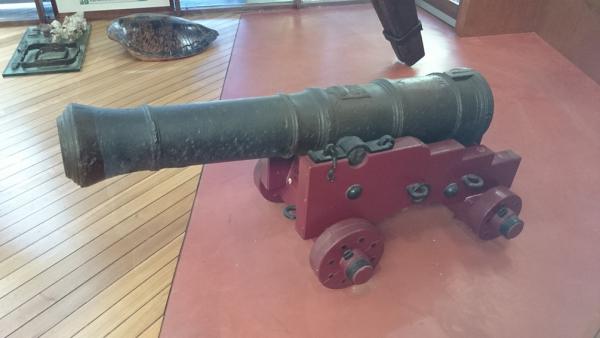
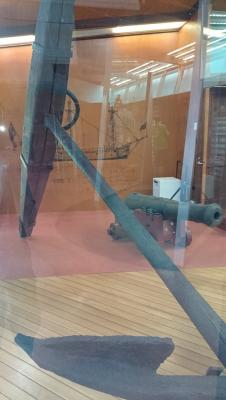
I also got to check out the Captain Cook museum and got to see the real anchor and cannon from the Endeavour.. And a piece of the tree he supposedly tied to... Lots of great old shipping and mining objects... It all got my imagination juiced up and keen to get back to the model.. Thought I might share some of my adventure with you.. Ollie

- ringbolt2013 and egkb
-
2
-
-
Thanks John and Jeff, I appreciate your compliments.. Jeff I am thinkin I will leave tree nails out, I think at this scale they would be pretty tiny and if colour was matched to decking they would be basically invisible. Thinking perhaps do the fake nails with micro drill and putty if at all..what do you think off that? Ollie
-
-
Also. You may notice where planks ended on a small piece i made plank a little longer, I gather it is not good to have little pieces of deck if can be avoided.. I could be totally wrong on that one... Could be amended. Ollie
-
Thanks Guys, really enjoying the deck... Adding another 4 hours to log...
I am wondering about gangway and skylight. Is it most realistic if decking goes underneath or do they sit on top of the decking like most other deck fixtures such as windlass?
Thanks for looking and Merry Christmas and holiday season to all. Happy crafting.. Ollie


- kiwiron, JerseyCity Frankie and egkb
-
3


HM Colonial Cutter Mermaid by olliechristo - FINISHED - Modellers ShipYard -
in - Kit build logs for subjects built from 1801 - 1850
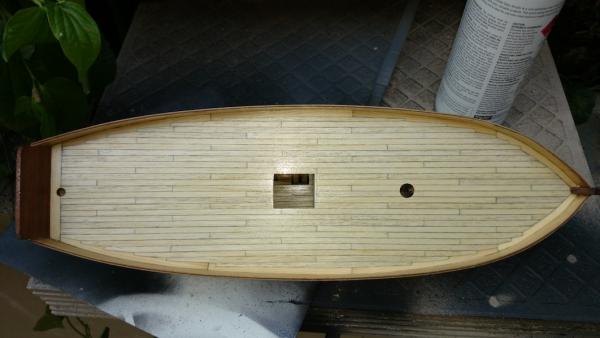
Posted · Edited by olliechristo
Okay and some after shots.. and comparison