


olliechristo
-
Posts
412 -
Joined
-
Last visited
Content Type
Profiles
Forums
Gallery
Events
Posts posted by olliechristo
-
-
Thanks Tom, John and Jeff
 Cheers.. The Blackbean has been seasoned for at least 40 years and I have access to a stockpile of old floor boards that are anywhere up to 140 years old.. My mind wanders thinking about how old the felled tress were.. From a demolised old building in the early eighties, building was built about 1910..
Back to the build, 5 hours spent on the windlass and very happy so far... I used some different timbers to give nice contrasts and made the hexagonal shafts from a wood that is fairly soft to be able to puncture round holes into square..
Im not sure if I am going to add top bar or not.. I added notches in tops of 'stands' for lack of better term. I figure this is where rope could be tied off if needed and like the look of it.. .. But now it would defeat the purpose if i have the bar running along top, Im thinking that maybe it was just an easy way to give the kit windlass strength anyway..
It is also obvious that the barrel is hexagonal to grip rope and tapered to wind rope on evenly.. I gather it only needs to accommodate five or so winds of anchor rope?
Really enjoying myself and love that you guys are helping to nudge me towards a great ship.. regards Ollie
-
That does look tricky, I think you have done well and looks really good, second one with pen looks much better without any doubt.. Ollie
-
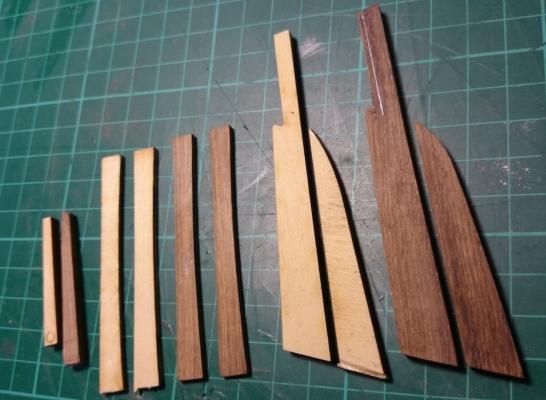
I have spent another few hours today and built pretty much the last blackbean items (unless i build windlass also). The stern post. rudder, Channels and tiller.
Happy with the result, didnt really take that long..
I am in thinking mode about the lass and will build her this week i think. I am going to follow the design of the 'Harriet'..
Those large scale models are just wonderful... Thanks John
 And yes I have a square drill bit in the kit somewhere
I am thinking about what timber to build the windlass out of now...
Thanks to you all, for helping me and i hope this thread can help many more..
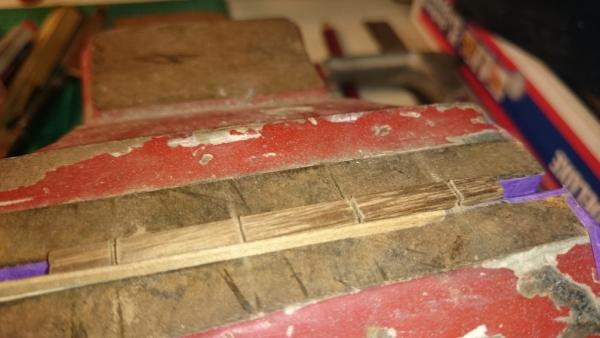
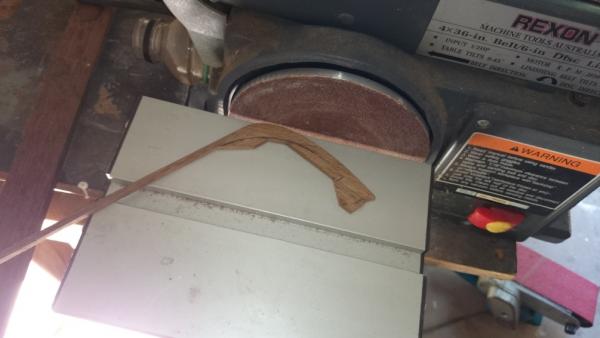
I added a picture of how i cut the grooves in channels..(quite hard wood) I made sure i had a simple depth limit.. I used a metal hacksaw blade so hitting the old vice is no drama and with a quick sand the groove comes in at the required 1mm wide by 2mm deep. Ollie
- Alfons, WackoWolf, ringbolt2013 and 1 other
-
 4
4
-
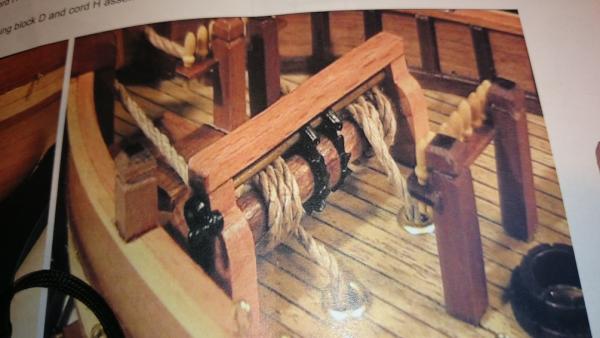
That's great John.. I really appreciate your recommendations.. Any more pictures to help with the vision of how it should be would be greatly appreciated.. I had a feeling this windlass was not really that accurate.
The square holes for spikes look like a tricky operation,, any techniques for getting such a small square hole? Regards Ollie
-
S.Cole.. I think you are dead right.. Nice observation, I hadn't noticed that... That wouldn't be very handy would it?
 The ratchets seem to be facing right way to stop anchors falling down at least..
 -
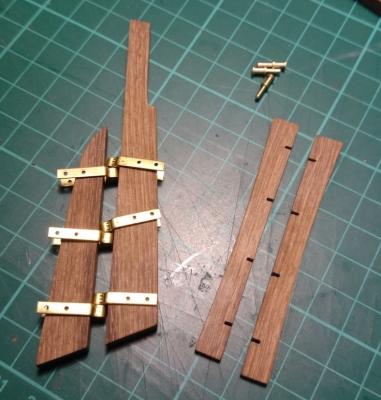
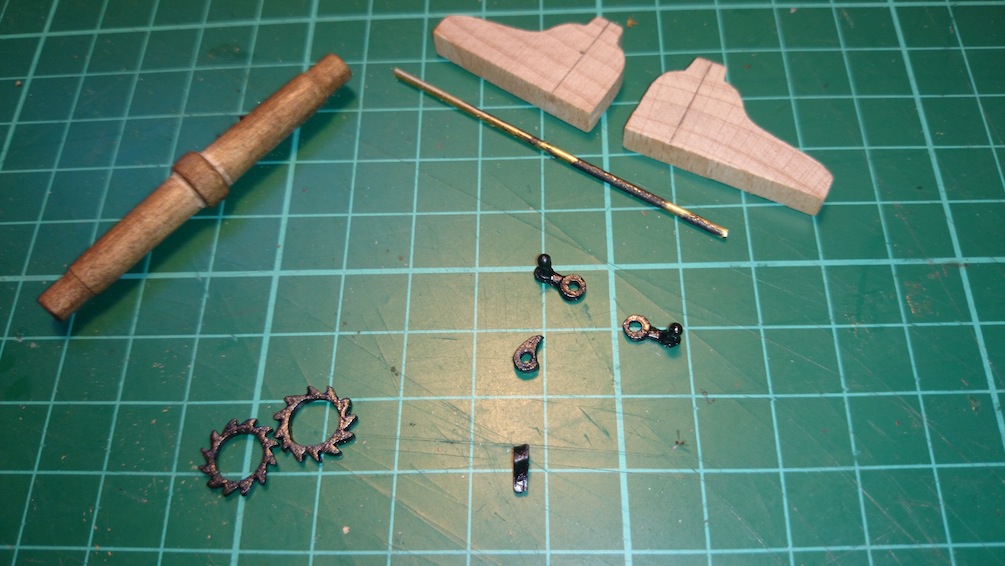
Now I am just working on some smaller items for deck etc.. I am putting together anchor winch.. I tried fitting the ratchet wheels and they were not quite round, made the mistake of trying to squeeze one with pliers and shattered it into four pieces.. Oops.. Not made of brass... They are a bit rough on the casting so repaired and sanded and repainted.. Must be made of cast alloy of some sort...
Now I am looking at instructions and I am pretty sure they have this built wrong in their diagram.. The handles should be attached to main shaft that holds anchor rope.. not the brass rod above that has lugs for ratchets... Turning that would not wind rope.. I assume the brass rod should have a handle to release anchor when needed.. Thoughts? Thanks all... Ollie

- ringbolt2013, JesseLee and egkb
-
3
-
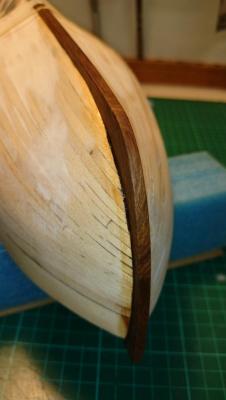
Yeah it sure does John.. Its hard to show in the pictures how well it fits and very straight. I'm a happy modeller at the moment..
-
-
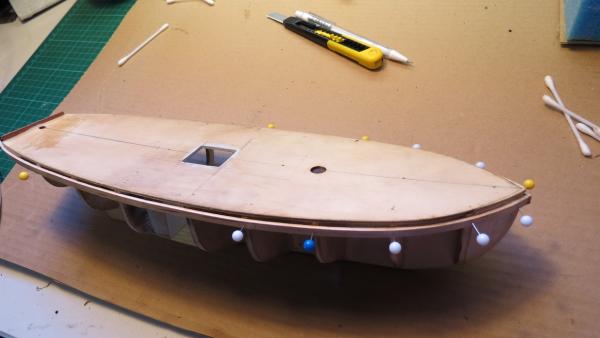
Thanks Tom, John ans S Coleman. You guys are too kind

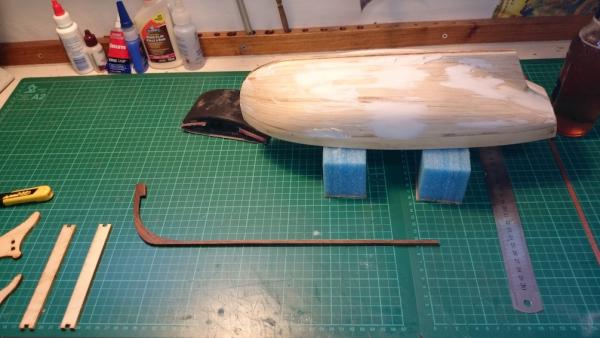
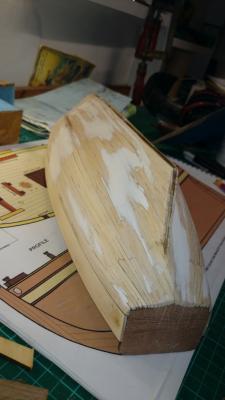
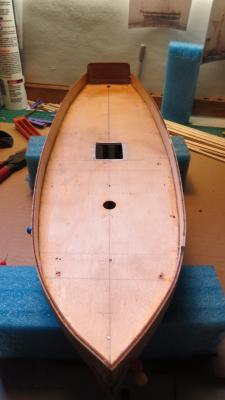
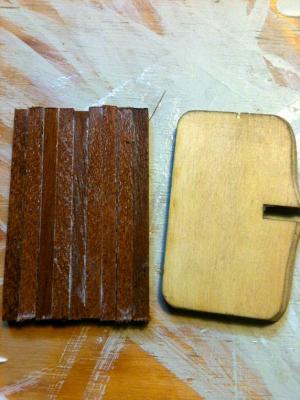
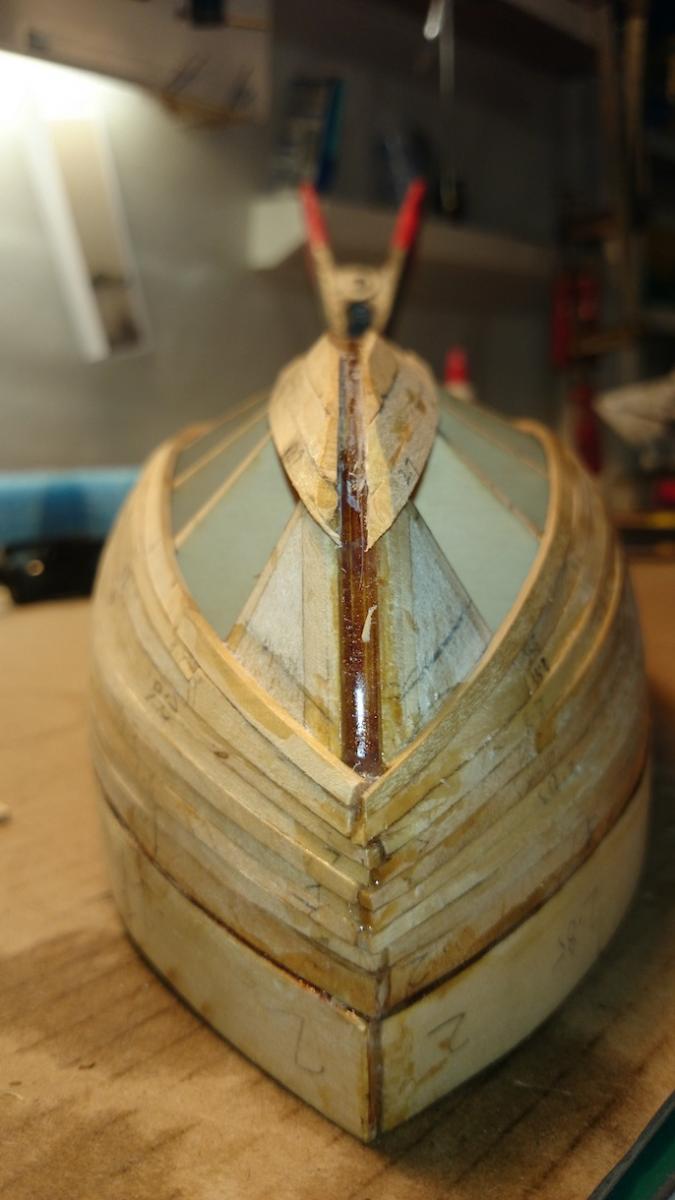
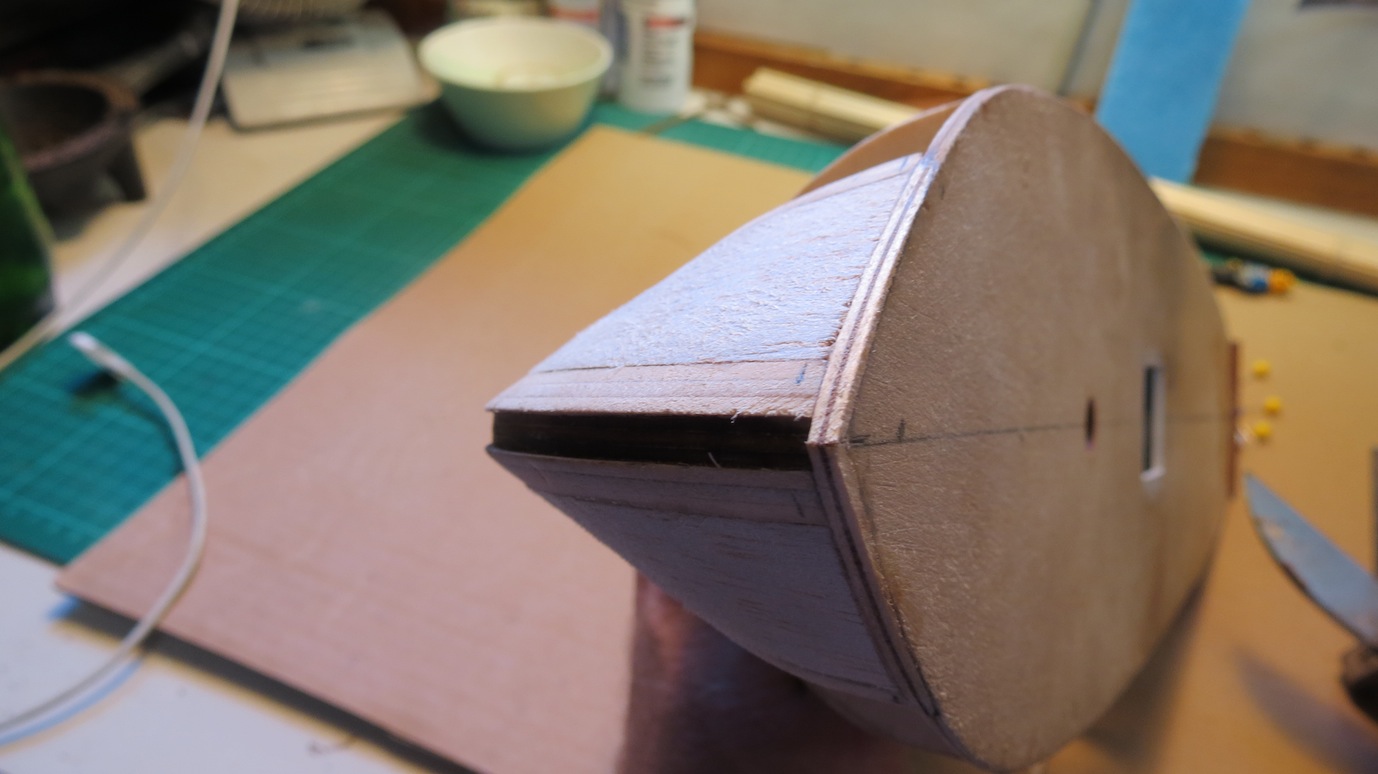
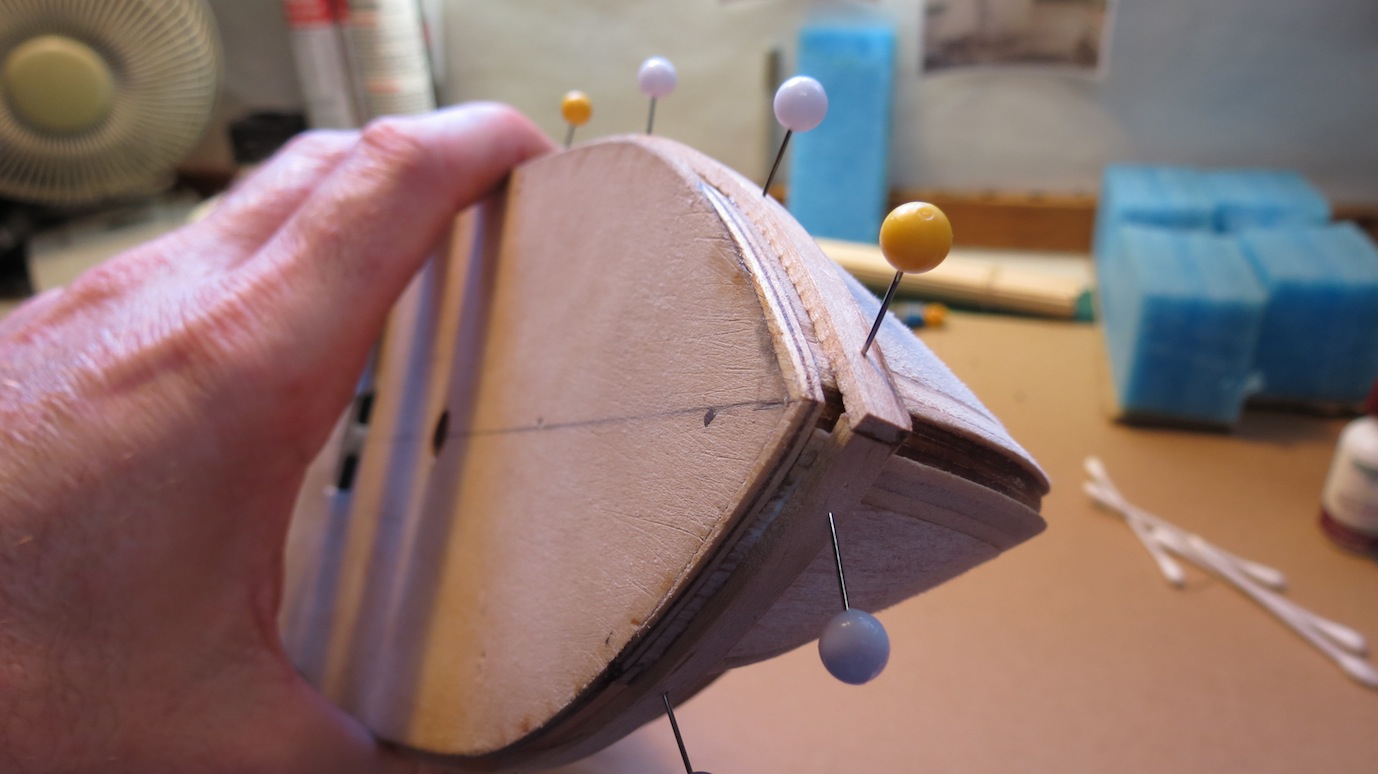
The cutting away of planks and epoxying of keel in place went really well.. It has made sure the mermaid is really strong..
I grouped multiple cutting discs on the dremel until i got to required thickness for my scratch keel..
Cut it out ever so carefully and dry fitted many times..
I feel i have really turned a corner now and i'm slowing down and thinking about the next few stages.. I wont be tree-nailing deck as i think it is too small a scale and im thinking about the planking and gun ports etc..
Also thinking about scuppers and if i should do them or not.. probably just on the painted side...
Thanks for looking and commenting all. Ollie


- ringbolt2013, JesseLee and egkb
-
3
-
Thanks Rowan,,, Thanks Jeff.. Yes Jeff, I think i will do as much as I can before second planking, it seems popular to cut out gun ports and such before final planking also... Its hard to show up hulls lines in photo but it feels and looks almost right, a bit more sanding... Thanks again.. Ollie
- ringbolt2013 and Jeff-E
-
2
-
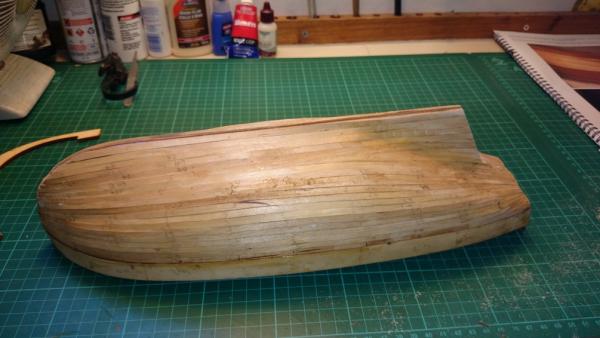
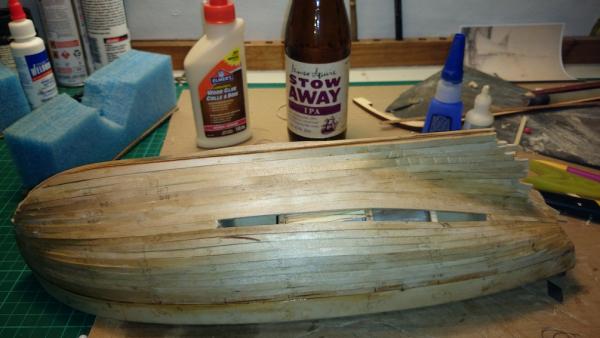
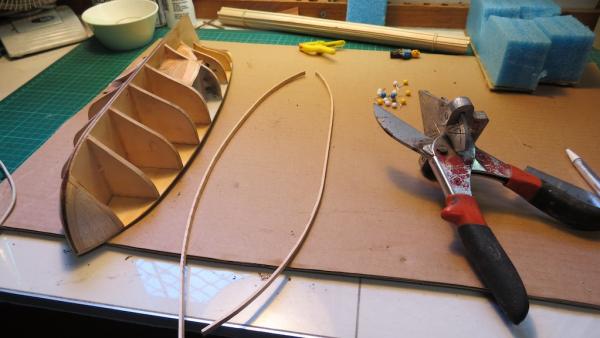
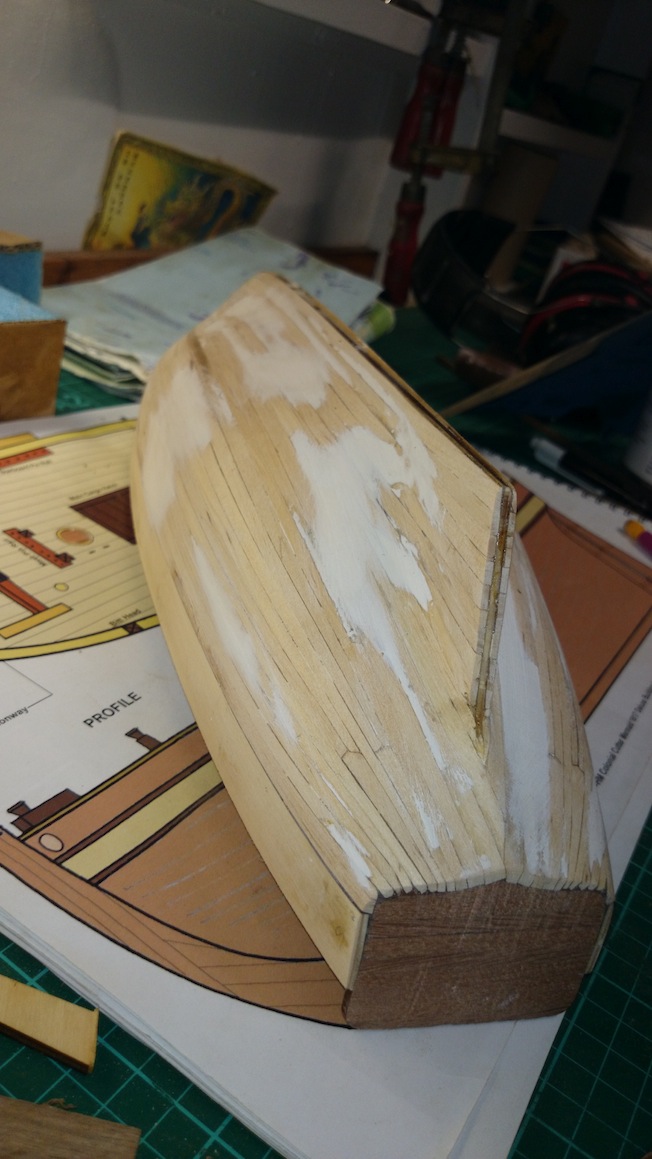
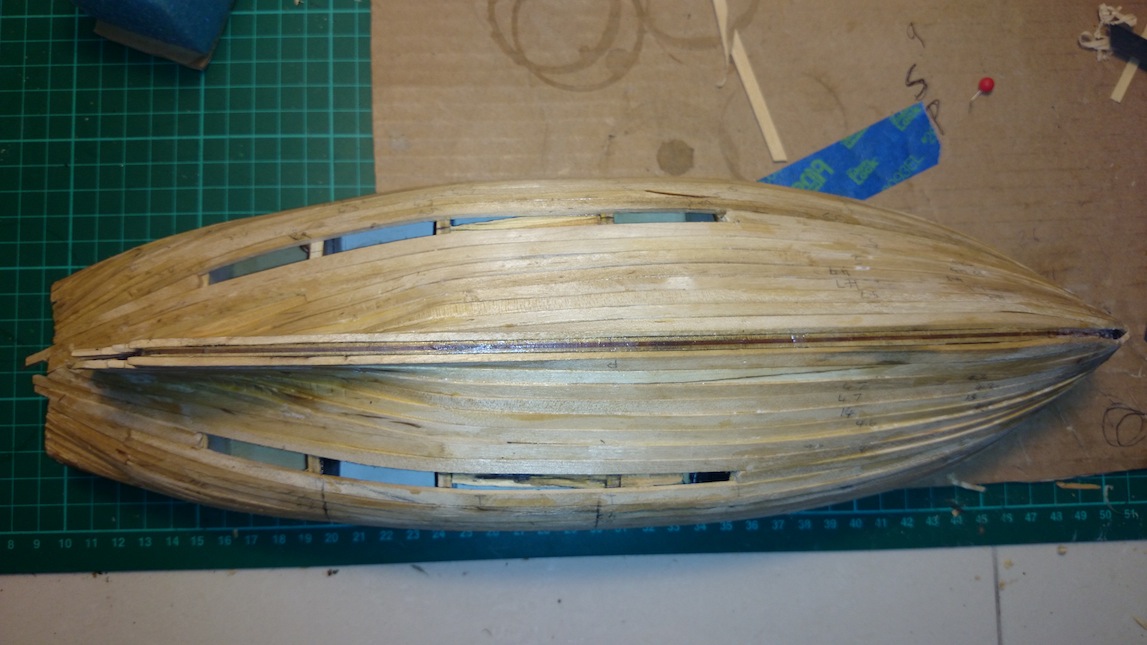
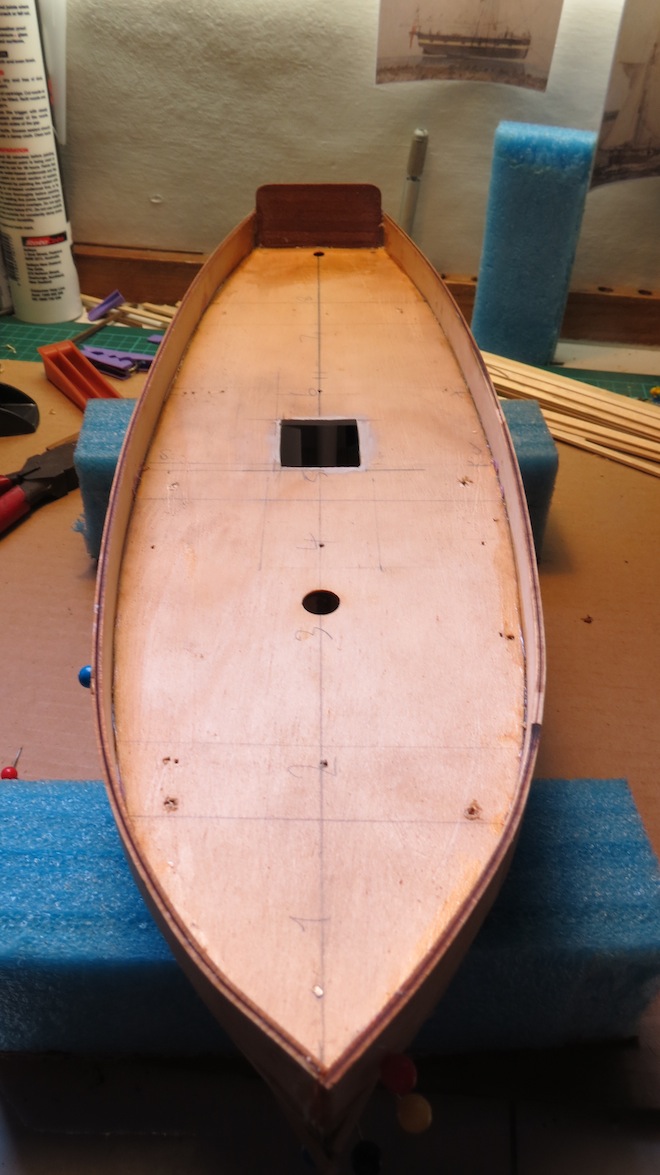
Okay, Spent another 5 hours, Finished first planking,,
 And sanded and fixed any dips in shape of hull with heavy duty filler.. Would rather build up than sand off too much... Amazing how strong the hull feels now its closed up..
I have cut up some "Blackbean" (Tropical rainforest hard-wood) http://en.wikipedia.org/wiki/Castanospermum
....To make my false keel and rudder etc.. Very happy with how it is progressing and it feels really nice running your hand along the hull.. Thank you all for your support so far..
A question while i am here, Do most of you make your rudder to be able to move? It doesn't say much in kit, but does say to drill hole through deck for tiller? Regards Ollie


- ringbolt2013, JesseLee, Pygothian and 1 other
-
4
-
Thanks guys, this makes perfect sense to me, the plans said to do it afterwards and i was scratching my head.. I can see that experienced builders, pretty much throw the plans in the bin.. I'm not knocking the kit at all, just has some vague moments and I am so glad to have this forum to steer me in the right direction.. I could have bought the in depth dvd but i'm a glutton for punishment... And i like the way you guys roll.
About ten hours since last mention.. I have almost finished the first planking and i have probably made some errors in the way i did stealers I have learned heaps and am thinking the second planking should be easier in some ways. It bends and twists quite easily obviously.. Putting faith in myself
I'm keen, i'm excited, learning and happy to get onto the next stages by the weekend. My extra lot of deck planks arrived today so things are rolling in the shipyard... Ollie

- JesseLee, ringbolt2013, aliluke and 2 others
-
5
-
-
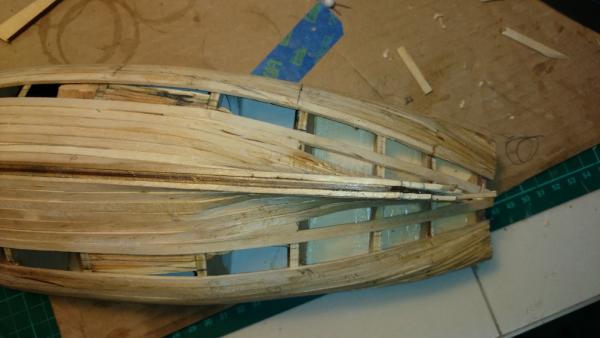
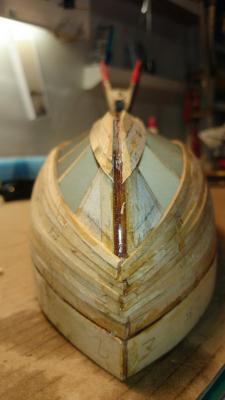
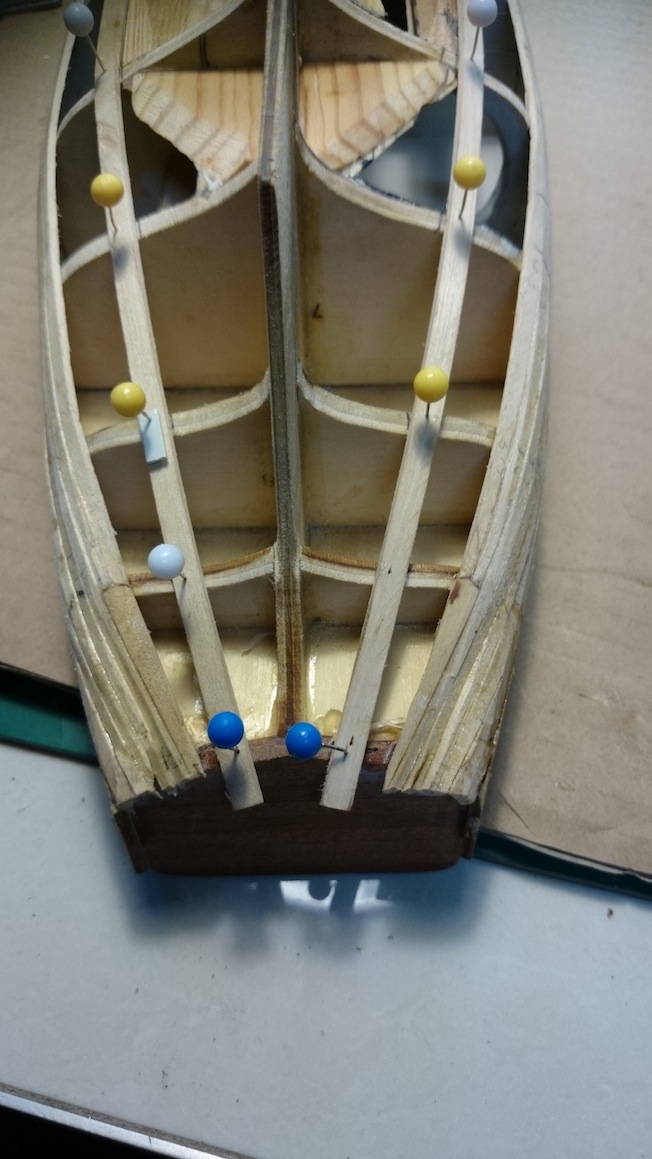
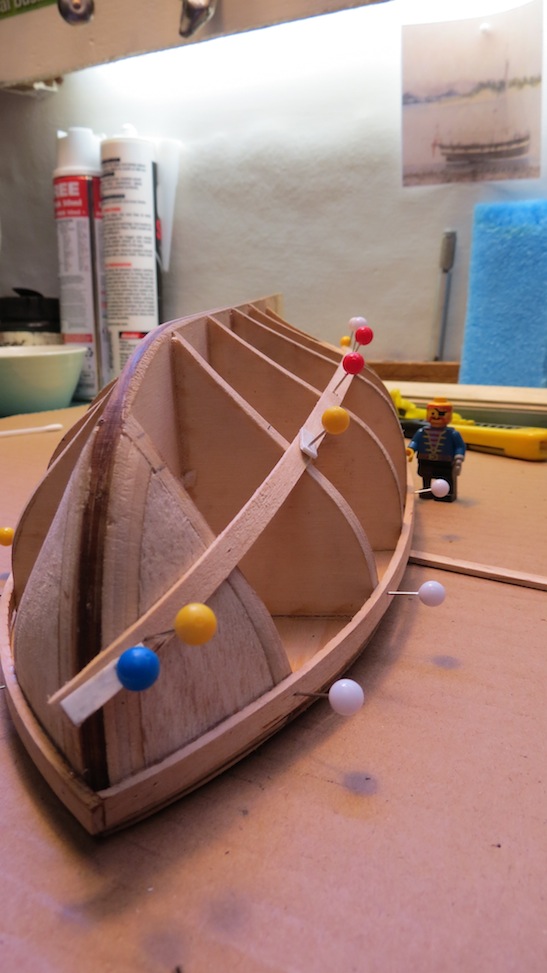
Hi all, still here, still plodding away at my first ever planking, learning heaps.. I have added garboard planks and starting to get my head around how to finish keel and rudder post etc... Any personal preferences in putting keel before second planking or after? Enjoying it and taking my time as advised.. Thanks all, Ollie

-
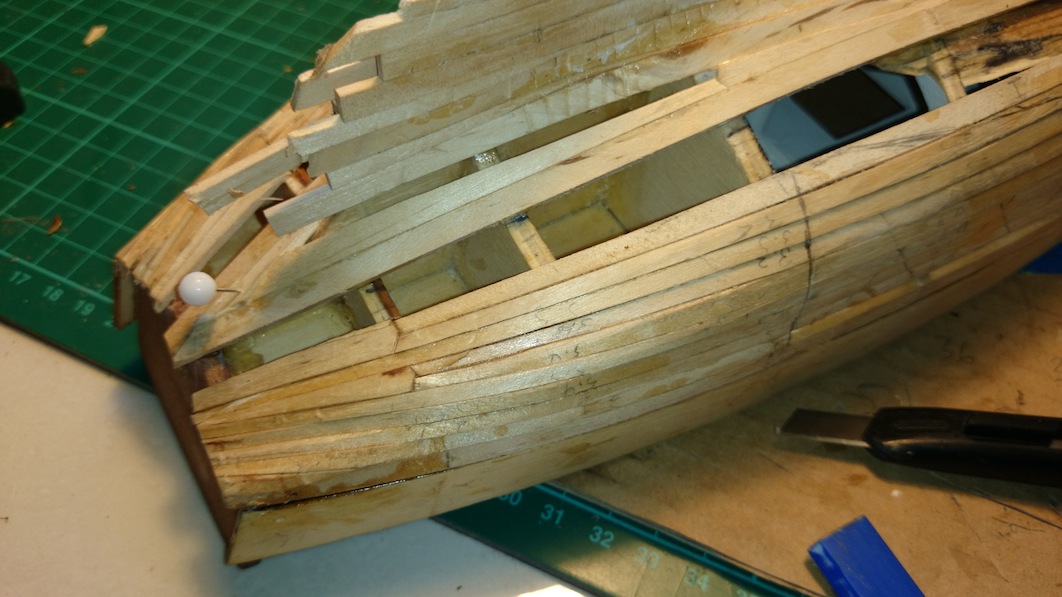
About 4 hours since last mention of time.. Well i have been plodding away at first layer planking and learning lots, didn't realise it was such a process.. I am aiming at a plank each side after work and maybe two like today.. Lots of other duties call.
You may notice i added my first stealers as it is already getting pinchy at stern..
I am enjoying the challenges, glad i got a beginners kit
Happy crafting all Ollie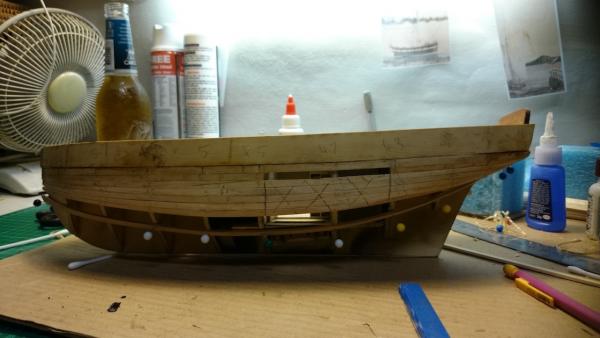

- ringbolt2013, egkb, Auvergne and 1 other
-
4
-
-
A couple more hours spent, a few more planks on and a big clean up and some thought and planning..
Well, in regards to the planking, i really don't have enough knowledge to say if it would be one or the other.. I didn't even know these terms..
What i can say is it would look really good clinker style, although it may present some problems for coppering, although im only coppering the painted side.
The cut-away side could have clinker, hmmm... I get the best of all world with this model and get to try out most techniques and finishes.. And im not even sure what side will look best for display in the end.. i am planning to put sails on her too, not sure if i will have them up or down though... So much to enjoy,, really gaining even more appreciation for some of the amazing builds on here. it sure is a labor of love, skill and patience... Regards Ollie
-
Oh Jeez Im not sure Tom.. I hadn't even thought about that, but i know I do want to really take my time on the second planking... Any suggestions welcome on the planking..
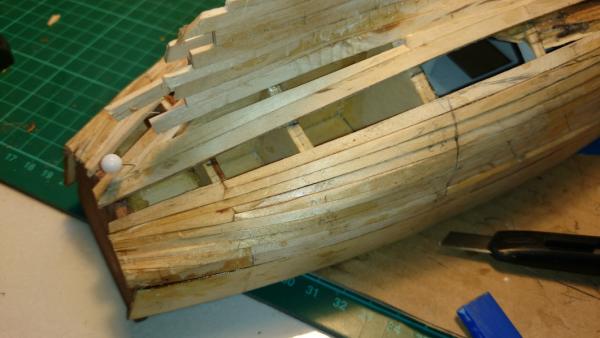
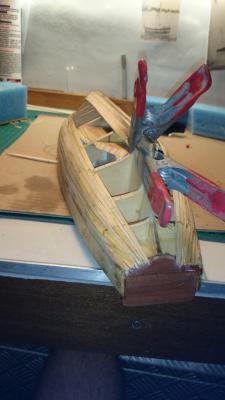
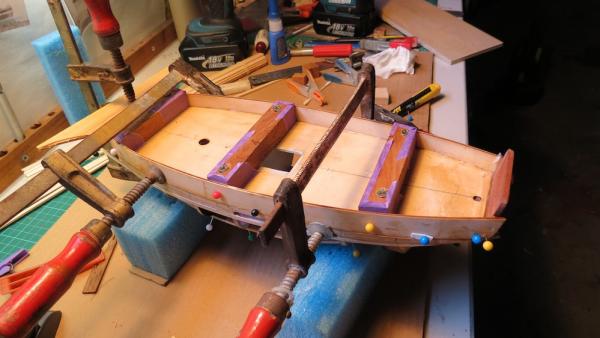
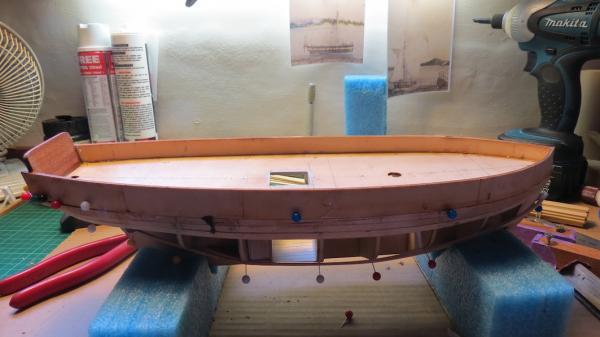
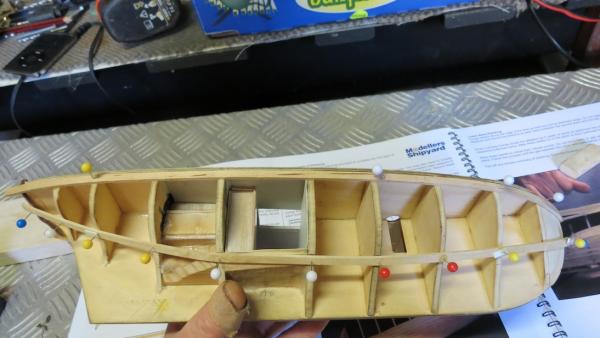
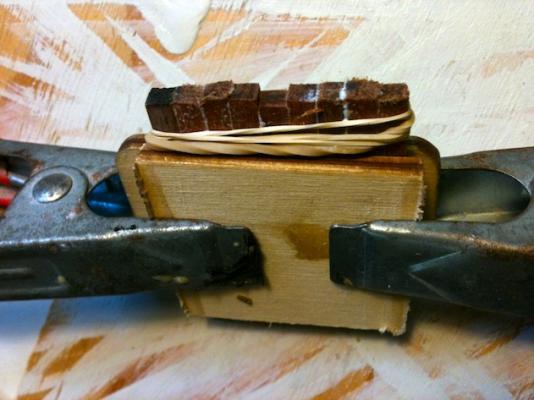
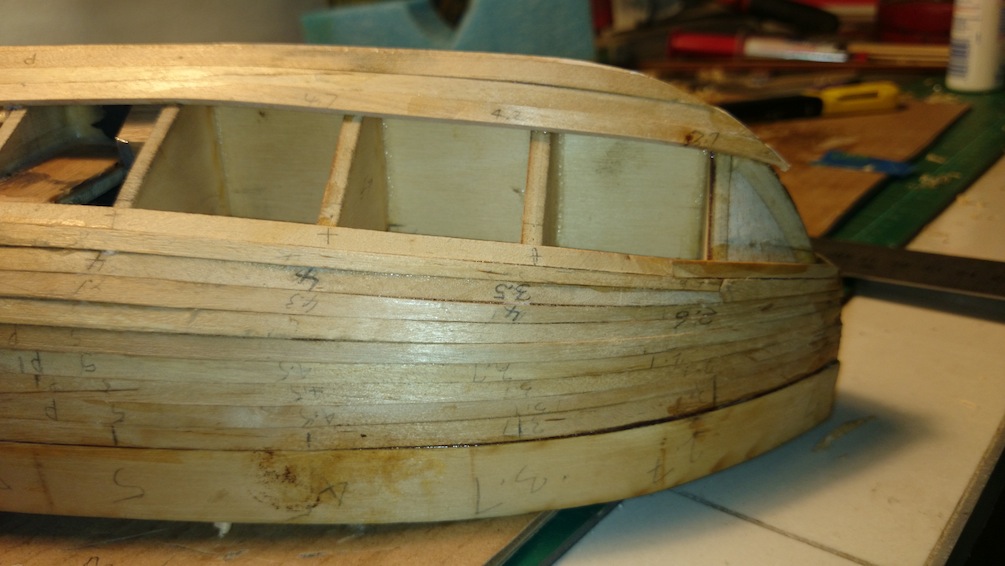
So spent about 6 hours since last mention.. I soaked my supplied 3 ply bulwarks and bent in jig last week, they didn't really come up that well after their 24 hr drying time.. They sprung back a lot so i gave them a second round with a bit more curvature at bow....
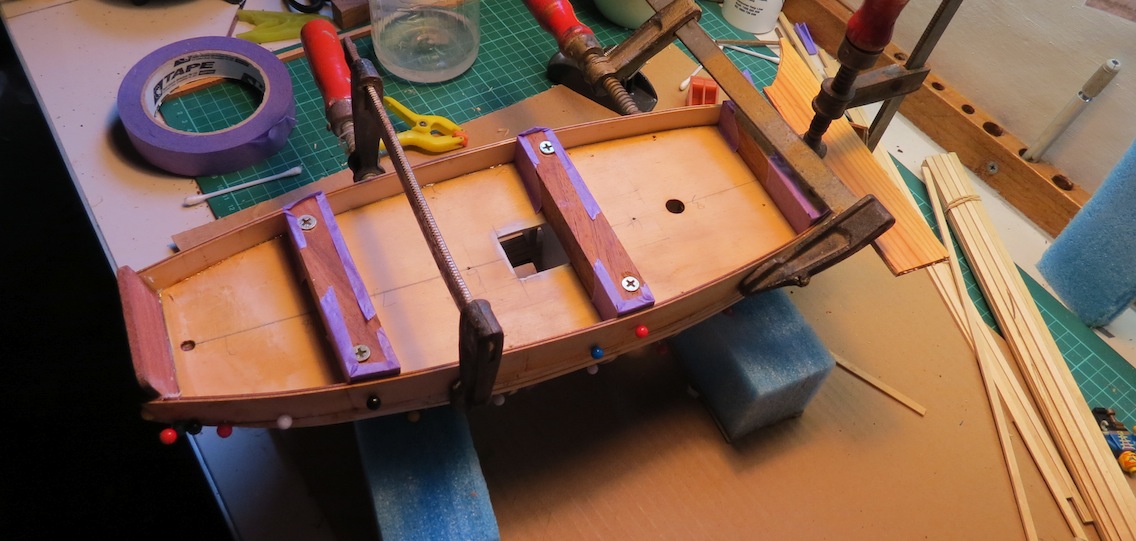
I wanted to get my bulkwarks on after doing a few planking runs so I could make sure everything was tidy in interior and not have epoxy dripping down into finished work.. Jeez that stuff is hard to get off. Getting the bulwarks to sit right was no easy task and keeping the epoxy from going everywhere was the main worry.. I was also concerned about keeping the bulwarks standing plumb and square consistently with deck and hull. So i made the three supports which kept it all straight whilst also giving something to prevent clamps over squeezing hull... I am happy with the way it cured and it seems really strong...
Thanks for looking.. Ollie

- egkb, Auvergne and ringbolt2013
-
3
-
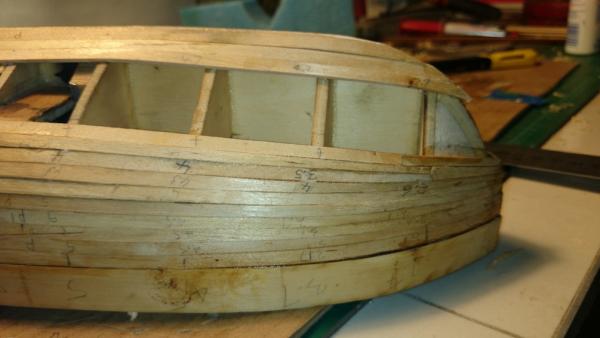
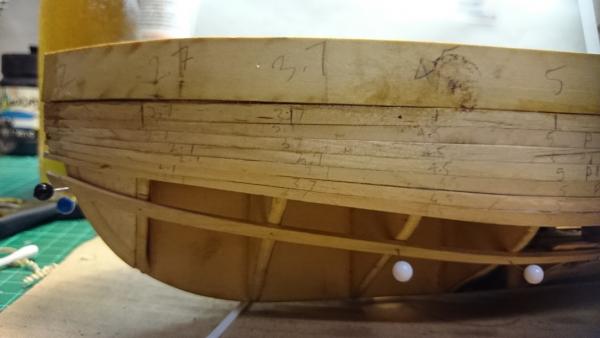
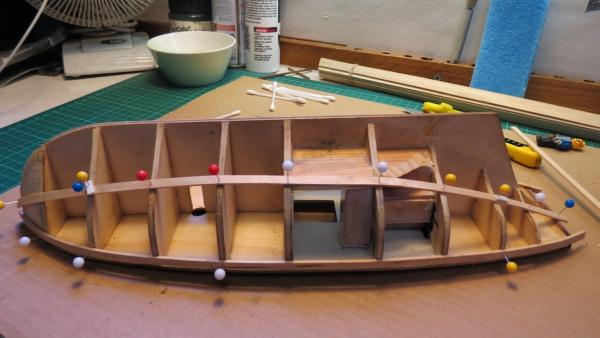
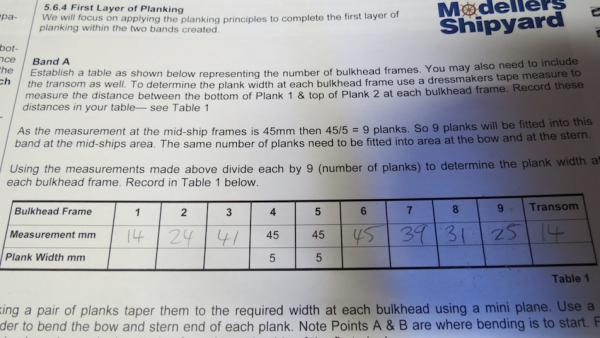
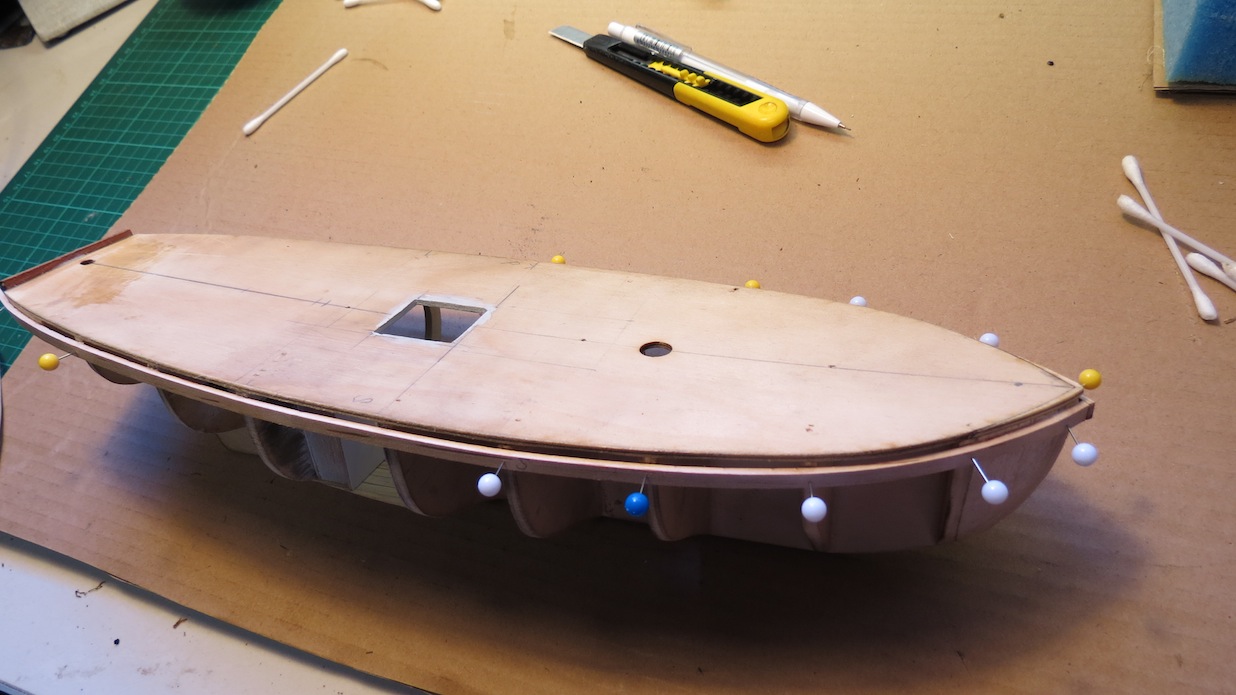
Hi all. I have made a milestone and started planking.. I added bow filler blocks of balsa to aid in bending and some shims were needed on ply deck at bow..
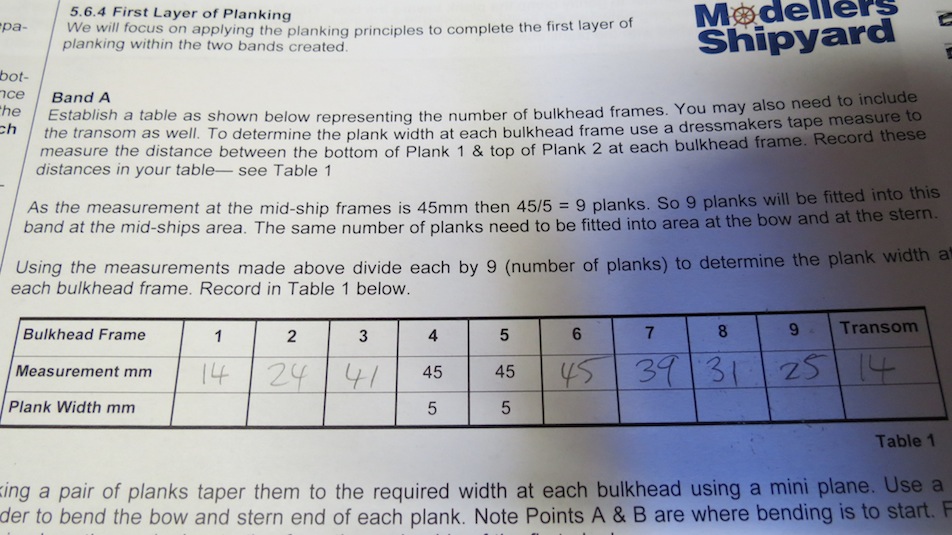
I am happy with my progress and i think i am doing it right with the tempory plank.. Measurements for the first side showing.. I am guessing you want to try make the other side suit as much as possible ? (in regards to measurements.. esp at bow and stern)
I am also wondering about false keel and if its best to fit it over first layer planking or do you scribe it in and fit to ply frame? (I will be scratch building my false keel) Thanks all.. Ollie


- Auvergne, egkb and ringbolt2013
-
3
-
Hi all, have probably spent about 15 hours since i last mentioned time spent..Got a bit lazy on that. I want to be able to get a rough idea of hours at the end..
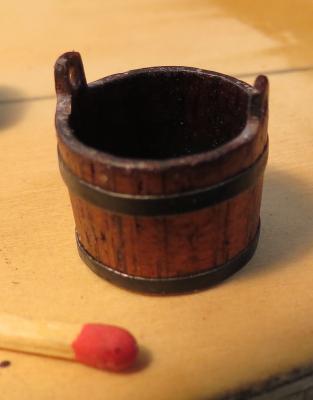
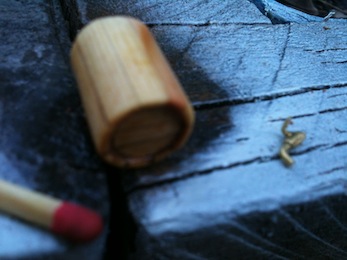
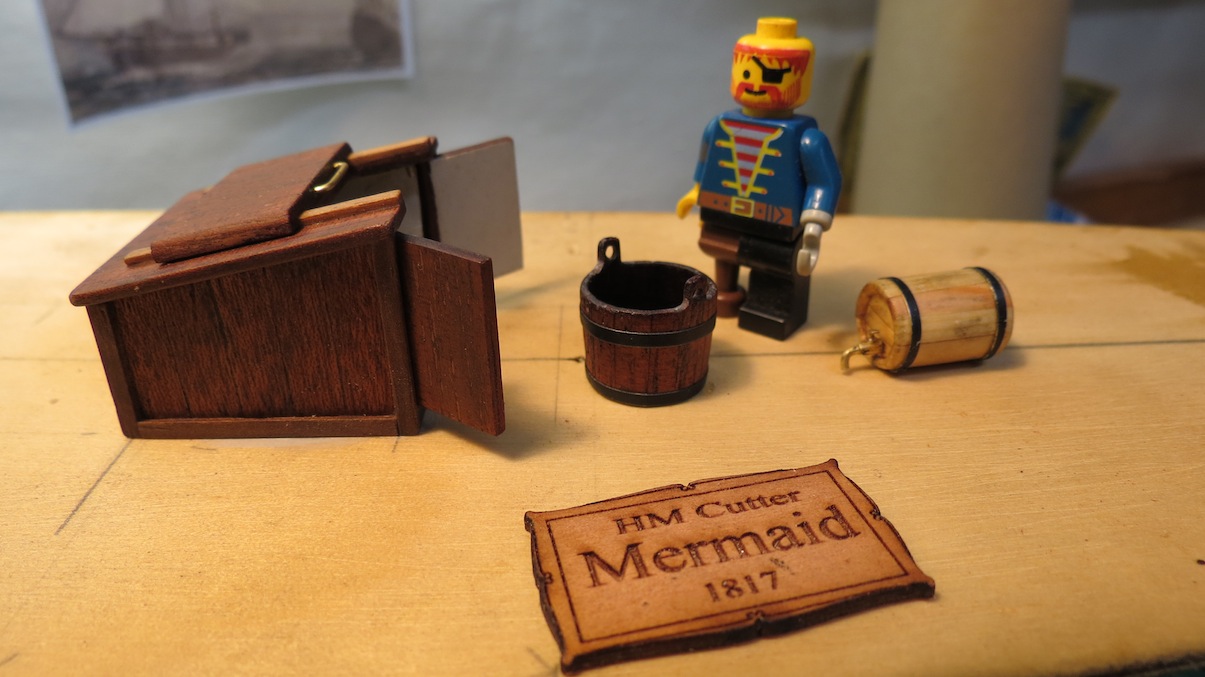
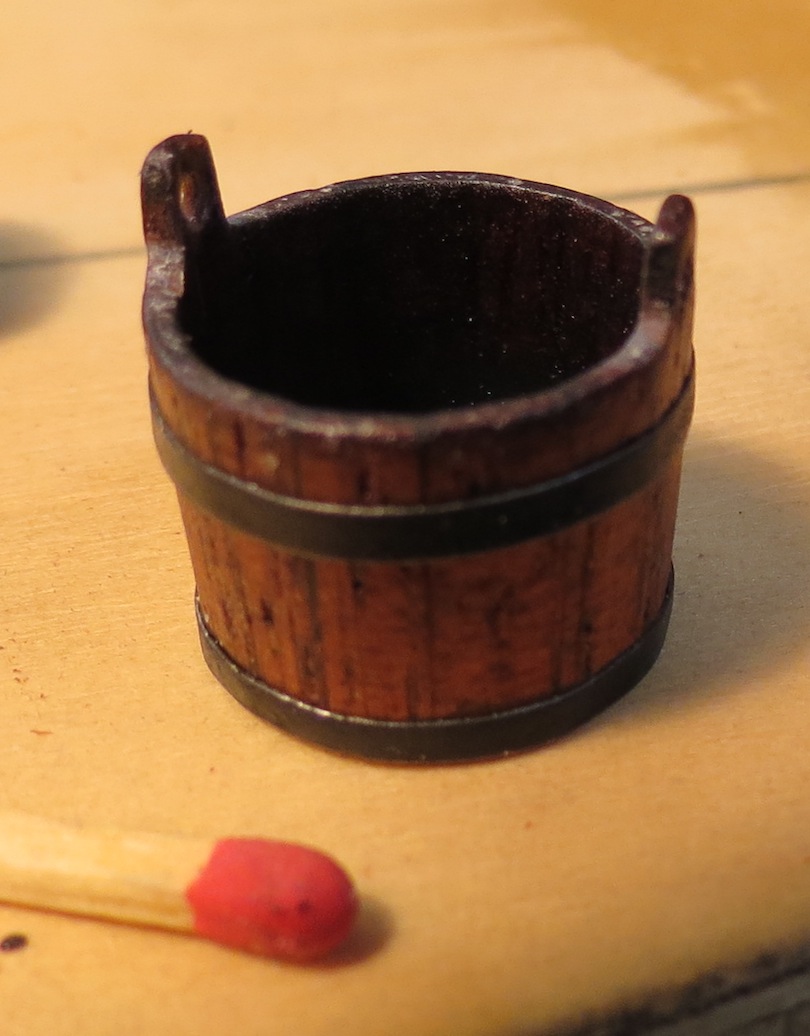
So i wanted to show you how the bucket came up.. It underwent much sanding and ended up nice, the aluminium bands are harder to bend around the tapered circumference (easy on the water cask).. But went ok at this scale..
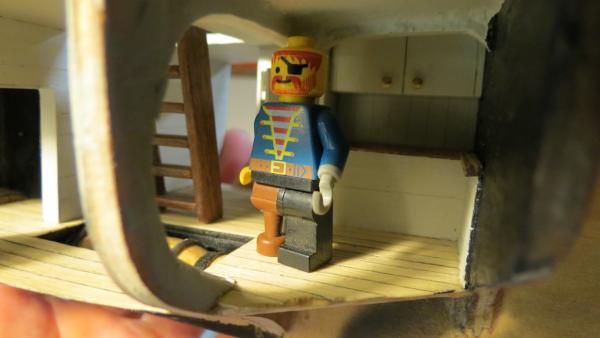
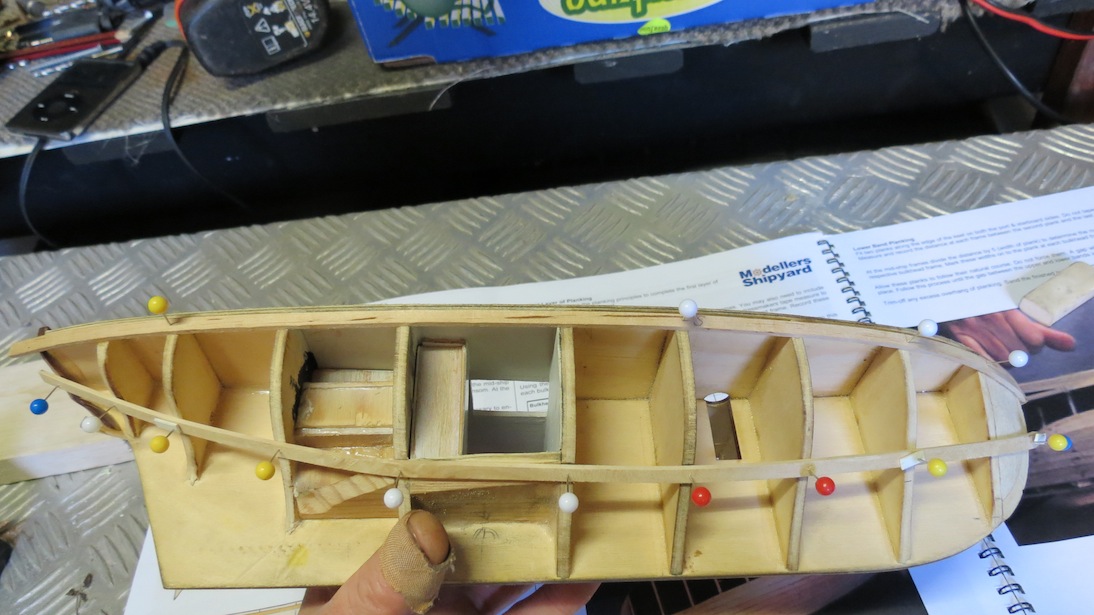
I decided i need a scale figure, and thought i wonder how a lego man sizes up... Well he is a TALL fellow... just over 6 feet tall or about 190cm.. He just fits nicely under deck and gives me a better grasp on my items and they all look good for scale I think.. Ollie

-
Thanks ZyXuz..
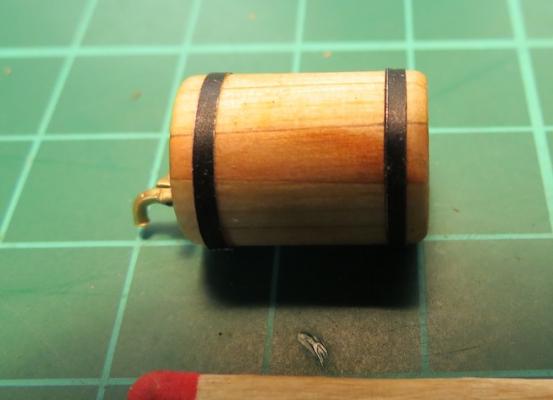
I get lazy and use my phone to take photos when i should get out the 16mp Canon, which i did just now.. Detail cant hide then So I thought i would share this technique i just came up with to make a bucket.. (I really dont like the look of those churned out by the thousand ones..)
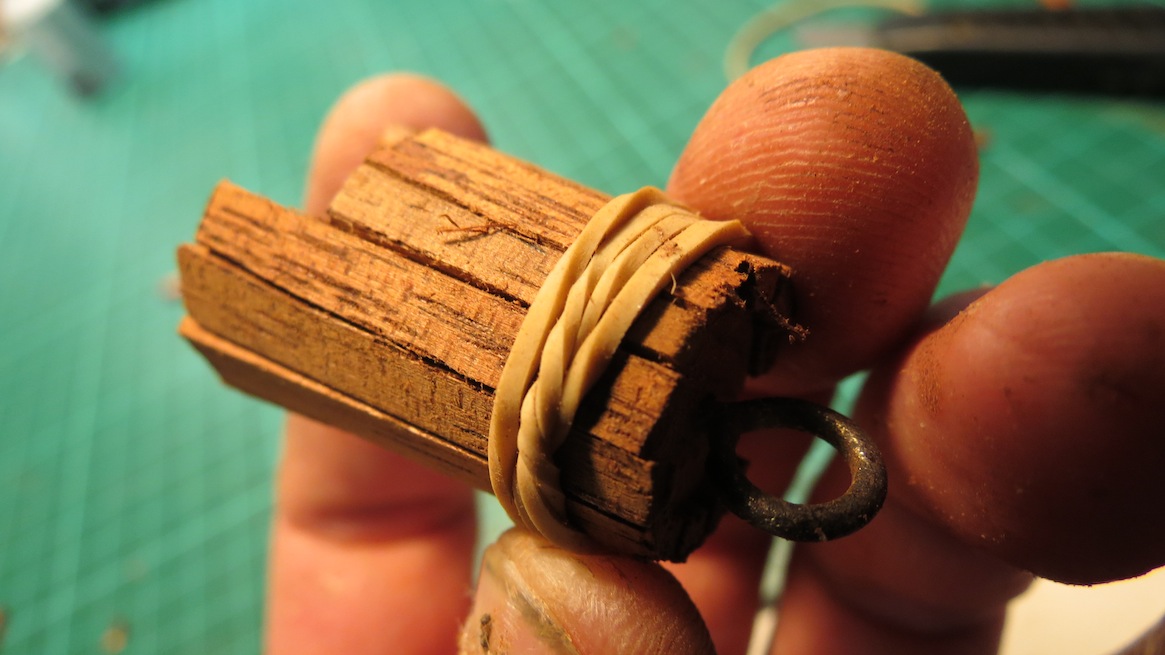
So i found a nice size tapered lid off a epoxy tube and screwed the base to that and waited till everything was in position with bands to hold it tight, then I "spot weld" with CA and it popped out no worries after a few minures., just dont over do glue at this stage... Then i sanded inside round and mixed Araldite 24Hr super strength to coat the inside.. Tomorrow it will under go trimming and sanding down to a much thinner thickness..
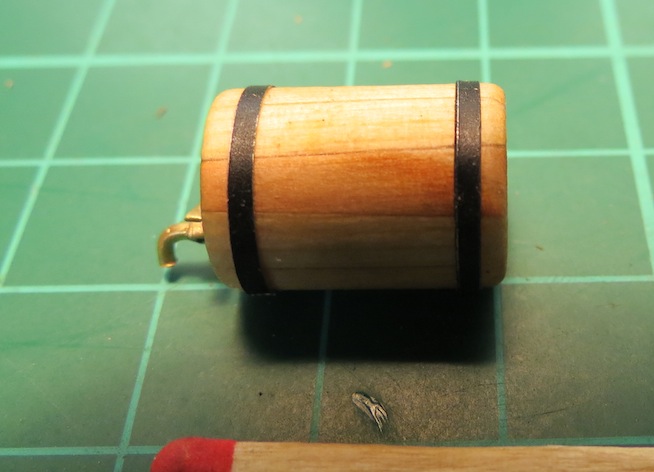
Also a close up of water cask.. This time i cut the bands from aluminium cans in about 2mm strips and sprayed matt black before glueing on, then satin clear coated the lot... Cheers again all commenting and helping .. Ollie
-
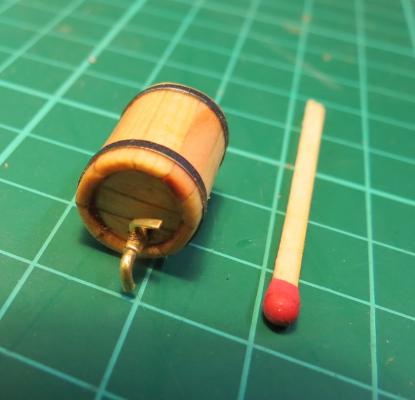
I have been building one of the final items for interior... Drinking vessel (cask) you tell me what it's called..

Made a tap out of brass but think i will redo it in the style in picture.. only took 10 mins.. Attatched a picture of them in the Endeavour replica...
Thanks all. and happy crafting. Ollie

- egkb, WackoWolf and ringbolt2013
-
3
-
Thanks so much for that Tom, it really got my imagination going... And i did not know about the rum in water... or any of that really... You can imagine it would be a crazy place to work and live..
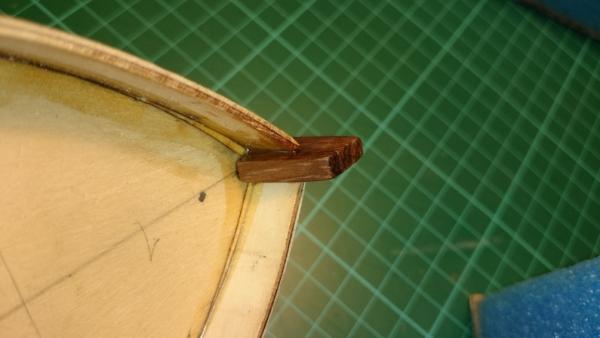
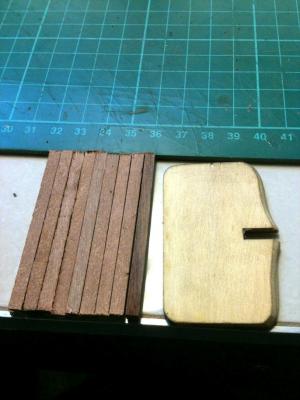
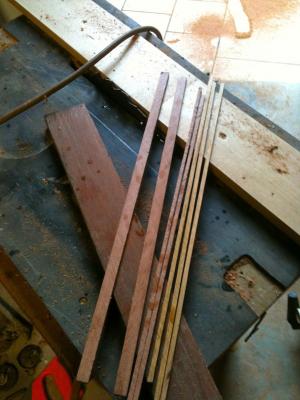
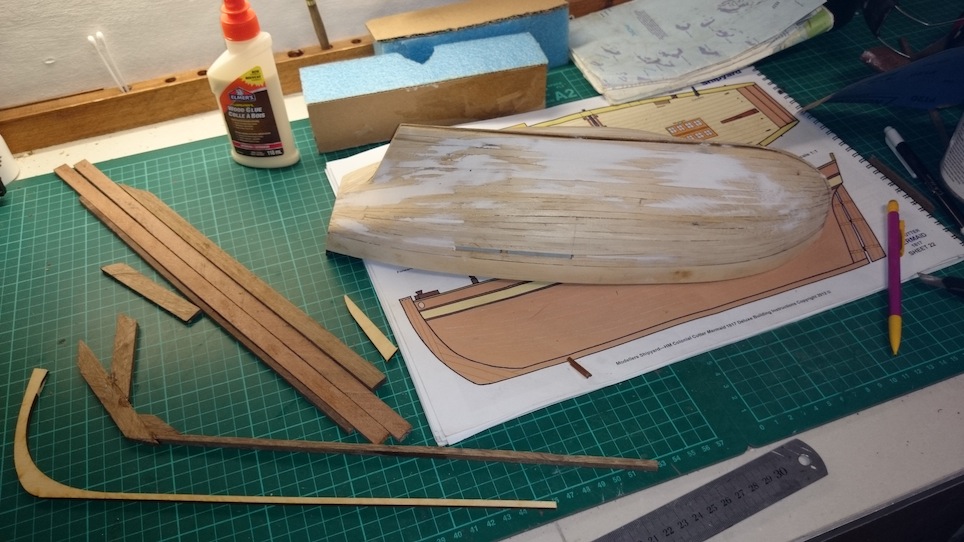
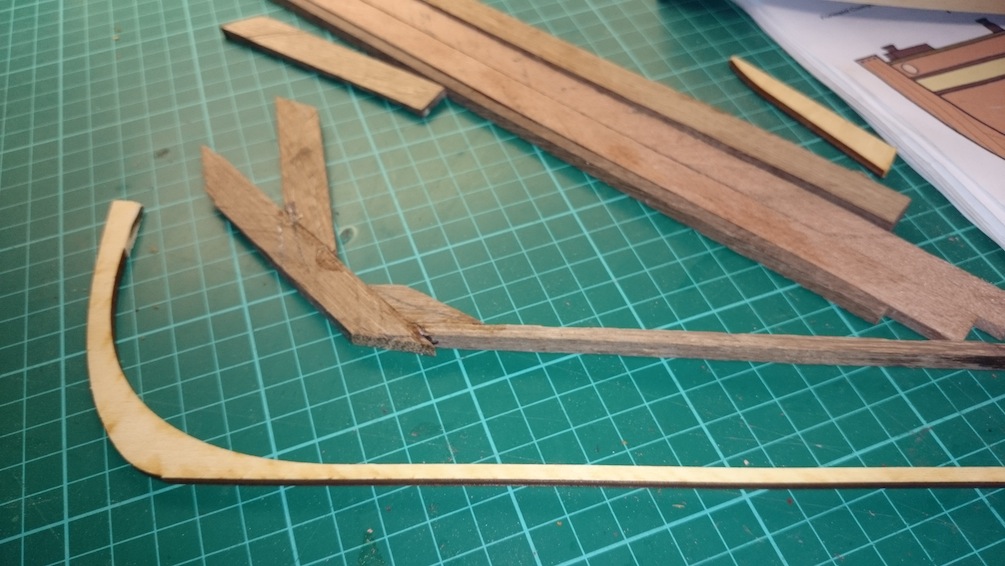
So i have decided to make the stern post out of solid timber instead of supplied ply as it will have some parts showing and it seemed like the original was a bit narrow in regards to deck and bulkheads.. for some reason... Please tell me if this is not a good idea if you think so.. I think it is..
I cut some fine grain hardwood down to 5x5 mm lengths and glued with wood glue...
-
Thanks guys, your mateship (http://en.wikipedia.org/wiki/Mateship)%C2'> is helping me to maintain momentum
Cheers... John E. I am indeed passionate, this vessel surveyed waters just off the coast where I was born and live (The Great Barrier Reef) She was weecked in 1829 and lies as a heritage listed site just off the coast on the same waters she opened up... Discovered in 1999..
Pygothian, thanks mate,, it is my first wooden ship, but probably did my first ship model at about age 12 (first plastic kit), now 32. have done numerous plastic kits like Revelll and tamiya.. Planes, cars helicopters, a aircraft carrier.. And a few remote control boats.. Have had a few years break though... Have also done a fair amount of general carpentry and general building of all sorts.. have always wanted to build a wooden ship and .. This is her...
.Have made some more small steps and interior is very close to done.. Planking here we come!!!
Thanks all. You are all inspiring.. Regards Ollie


HM Colonial Cutter Mermaid by olliechristo - FINISHED - Modellers ShipYard -
in - Kit build logs for subjects built from 1801 - 1850
Posted
I started out making the ratchet mechanism.. I took a valve adapter for a tyre pump (thought it may be brass but was obviously alloy.. . Some careful filing with various files and etch primed and enamel painted.
The shaft is stainless and i need to work out next stages for tomorrow afternoon..