SGraham
-
Posts
538 -
Joined
-
Last visited
Content Type
Profiles
Forums
Gallery
Events
Everything posted by SGraham
-
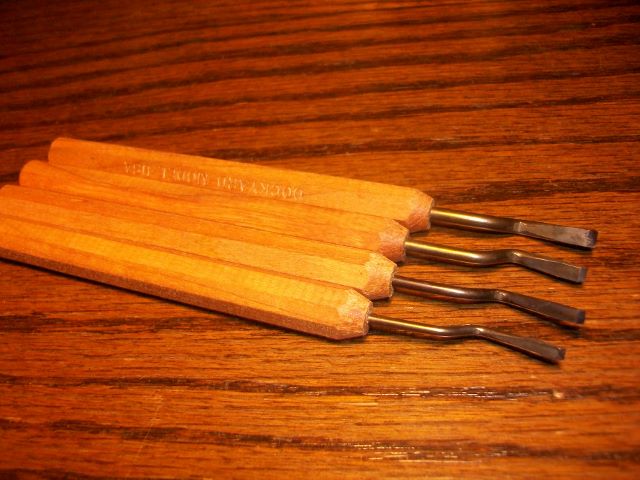
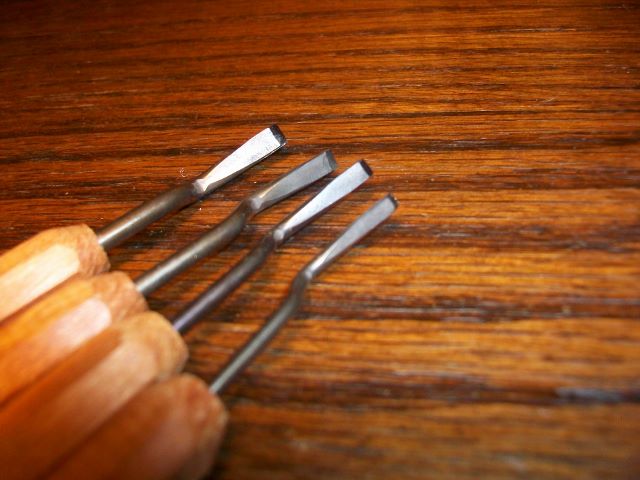
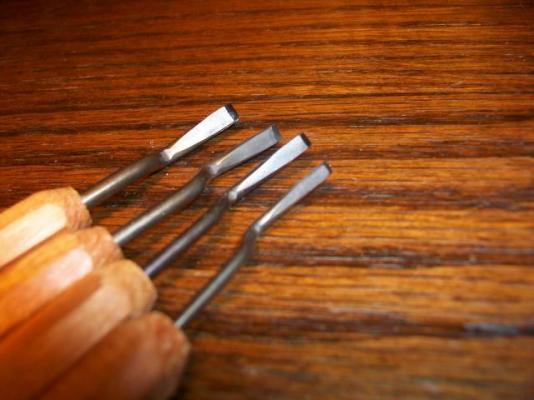
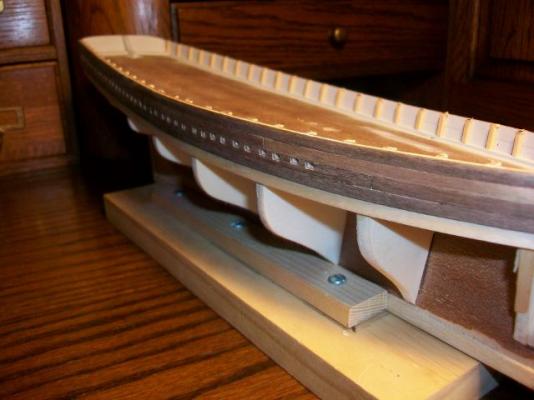
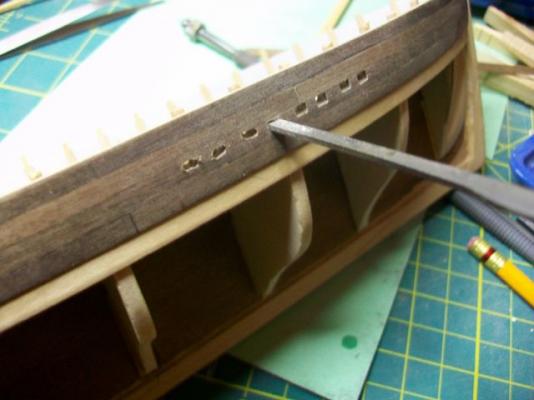
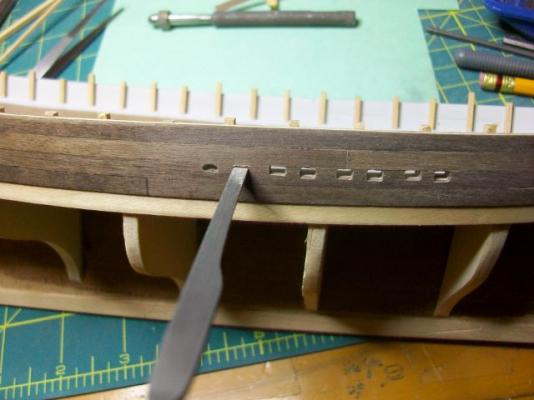
 Thanks Andy, and thanks, S.os., for dropping in. I appreciate the words of encouragement. This boatbuilding can get downright engrossing. My cherry-wood handled Dockyard dogleg micro chisels came today, a mere two days after placing my order. I thought I'd mention that I got them from MDI Woodcarvers Supply. They sell the group of four chisels for $37.75. It's the cheapest price I could find. I'm going to go try them out on some scupper anomalies.
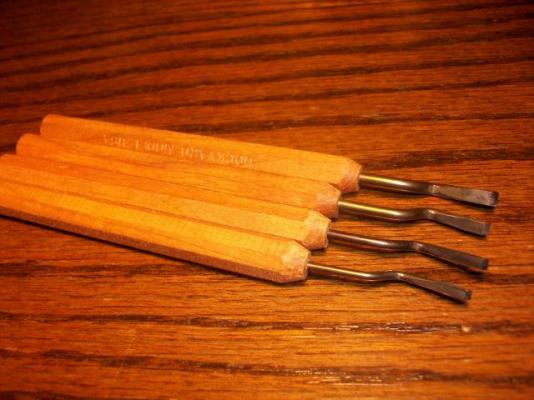
- 569 replies
-
- 4
-

-
- shenandoah
- corel
- (and 1 more)
-
Anyone Use True Oil?
SGraham replied to Tyrnac's topic in Painting, finishing and weathering products and techniques
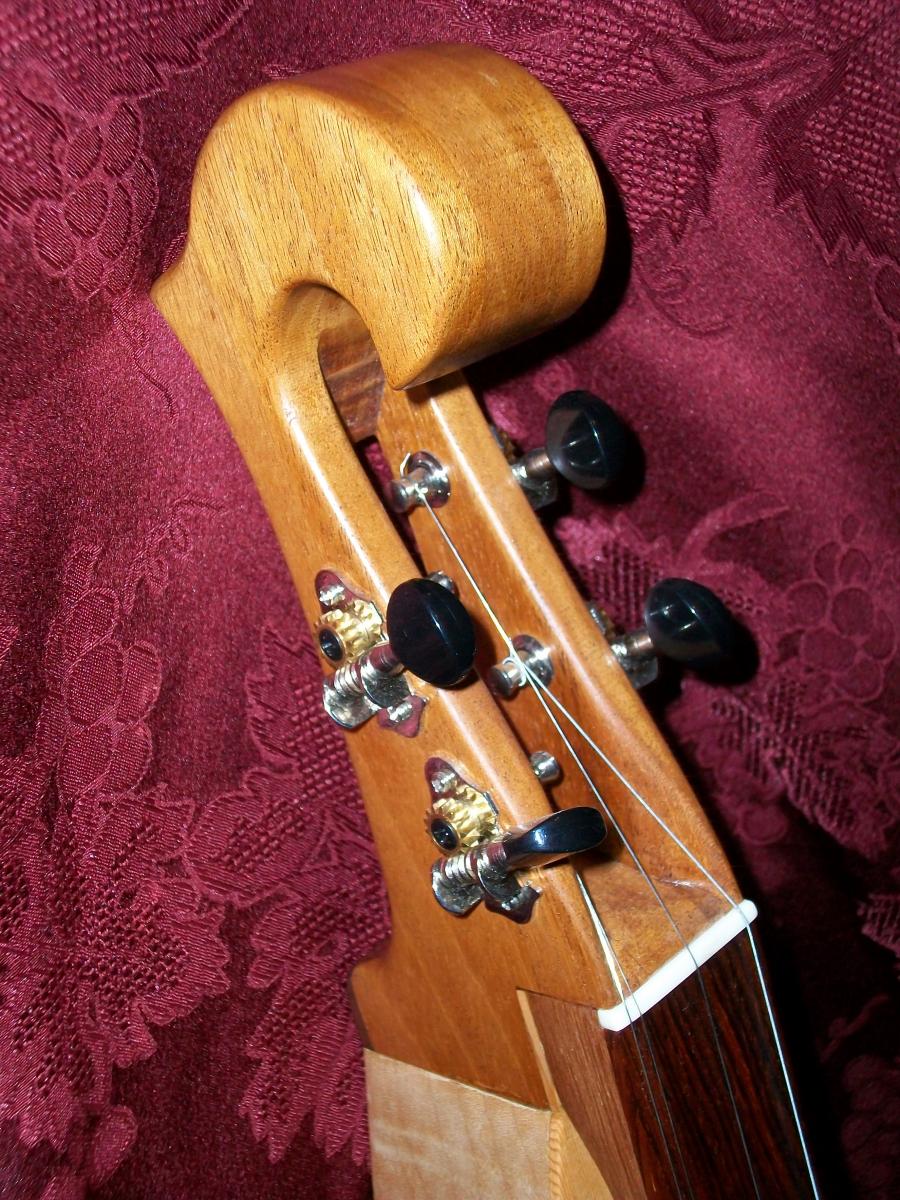
Hi Tyrnac, Tung oil comes in both high and low gloss. True oil will build up to a fairly glossy finish with enough coats. Just put on one or two coats and you'll have a satin finish like the dulcimer headstock in the photo. If matte is what you want, go with a low gloss tung oil. Even high gloss tung oil will look pretty much like a matte finish with only one coat. Tung oil is easier to find. I've only found True Oil at gun shops, but I think you can buy it online from a place like Cabelas. Good luck in your search. Steve -
Anyone Use True Oil?
SGraham replied to Tyrnac's topic in Painting, finishing and weathering products and techniques
I know this isn't a boat, but it would probably float all right for a little while. This is what True Oil looks like. This is 2 coats lightly rubbed out with #0000 steel wool. It's got a nice satin lustre. I'm not a fan of high gloss--I just can't manage it very well. Regular linseed oil, by the way, takes a very long time to dry. True Oil dries hard in a short time. Hope this helps. Steve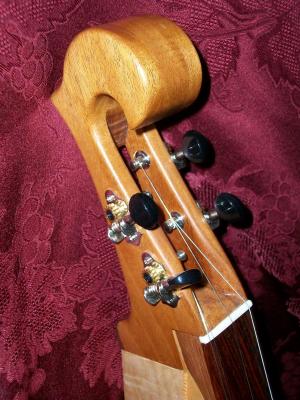
-
Anyone Use True Oil?
SGraham replied to Tyrnac's topic in Painting, finishing and weathering products and techniques
Hi Tony, I've used True Oil extensively on musical instruments. It goes on very smoothly and dries fast. It's pretty idiot proof, so I like it a lot. I've also used tung oil quite a bit. True Oil will build up to a glossy sheen faster than tung oil. If you're rubbing it well onto small parts it probably won't need buffing. On a hull you'd want to buff it lightly with #0000 steel wool to get an even lustre. Why don't you try some True Oil on one small part and some tung oil on another? Then you could compare. They won't look very different, but you can figure out which you like working with better. On a model base or display case, where you really want the grain to pop, try rubbing on a coat of shellac first. You'll sand it down in minutes. Then add top coats of oil. Amazing finish. Steve -
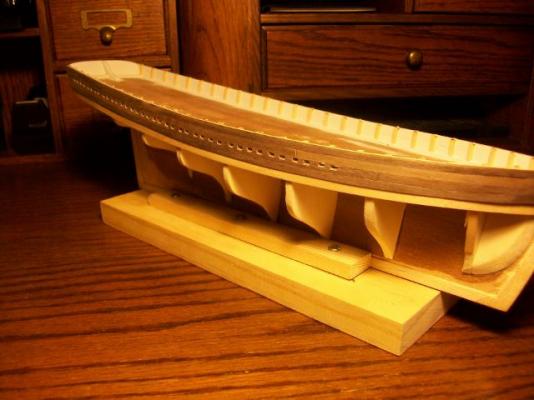
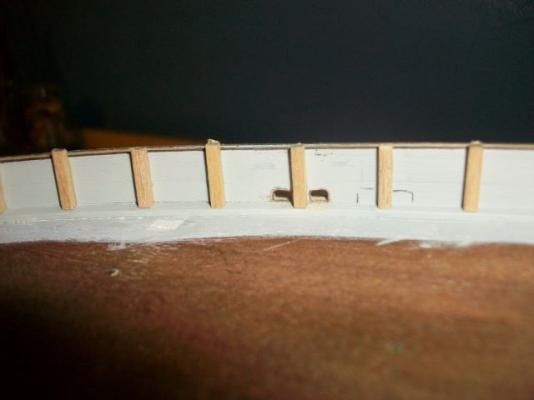
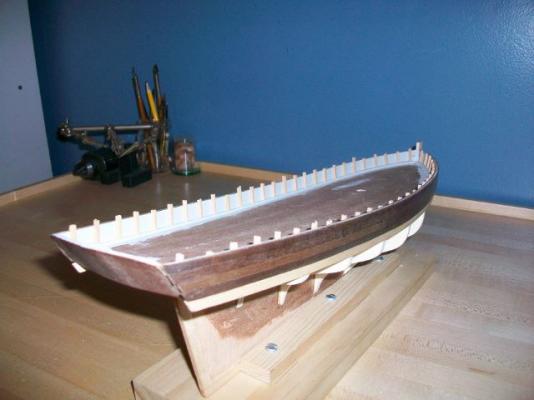
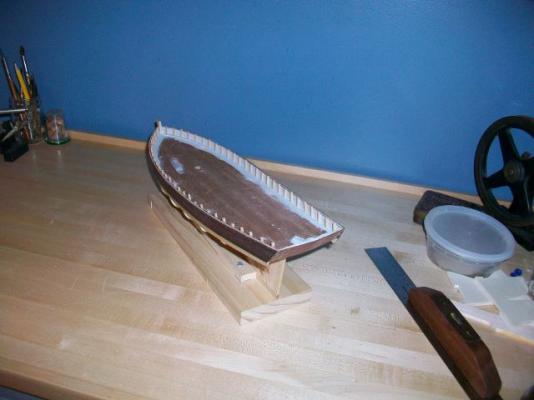
Well, tonight I cut all 38 of the port side scuppers. Until the micro chisels arrive, I'll call it good enough with the scupper work. Tomorrow I'm going to begin the planking process, starting with the garboard. Cover me--I'm going in. Steve
- 569 replies
-
- 2
-
-
- shenandoah
- corel
- (and 1 more)
-
I love the shape of that mast step! Steve
-
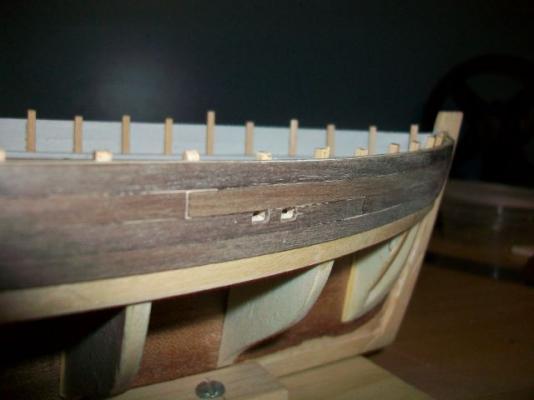
Thanks Sam, J, and David. Patience is the word. If the scuppers do grow into gunports, she'll be a one-deck, 60-foot-long 76-gun terror of the seas. Steve
- 569 replies
-
- 2
-
-
- shenandoah
- corel
- (and 1 more)
-
Well, I've got the 38 scuppers on the starboard side rough cut in. They're sort of like snowflakes--no two are alike. I made the big mistake of reading the thread on micro chisels in the tools section. Now I've got some Dockyard dogleg micro chisels on order. Here we go, a little further down the slippery slope. When they arrive, I'll clean up the edges of the scuppers inside and out. I'm waiting until tomorrow to start on the port side.

- 569 replies
-
- 3
-
-
- shenandoah
- corel
- (and 1 more)
-
HALF MOON by jct - FINISHED - Corel
SGraham replied to jct's topic in - Kit build logs for subjects built from 1501 - 1750
That's looking nice. I like the dark stain. It's got a real old timey look to it, like an old ship's hull that's had regular applications of pine tar. Steve -
Beautiful work, Bob. That hull has lovely lines. Steve
-
HALF MOON by jct - FINISHED - Corel
SGraham replied to jct's topic in - Kit build logs for subjects built from 1501 - 1750
The walnut veneer looks good. Steve -
Hi Sam. Very nice to meet you. You're the first local boatbuilder I've met. I bet that old equipment was fun to use. I drive by the brewery in Irwindale every day on my way to work. That Enterprise of yours has some real pretty scarph joints around the transom. Very impressive. Your furniture making background shows. I'll be following your build as well. Thanks for stopping in. Thanks for the kind words Bindy! Your Leudo is an inspiration. Steve
- 569 replies
-
- 2
-
-
- shenandoah
- corel
- (and 1 more)
-
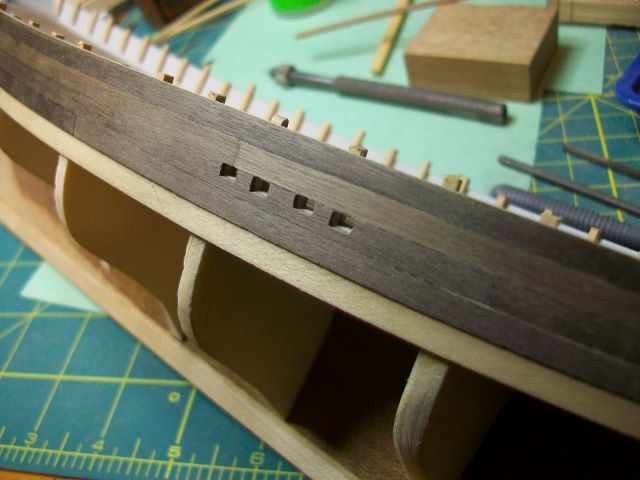
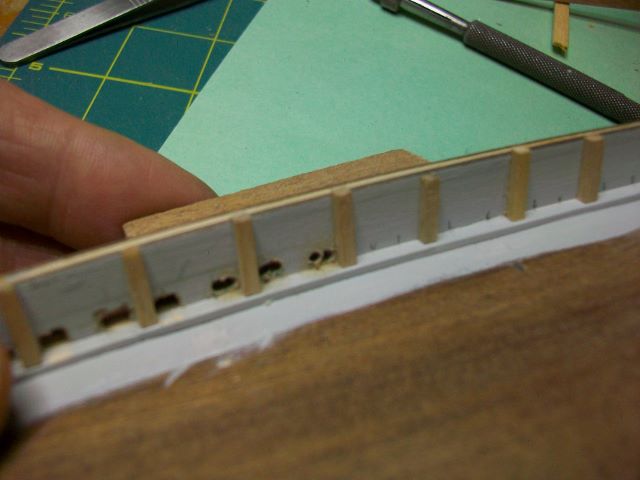
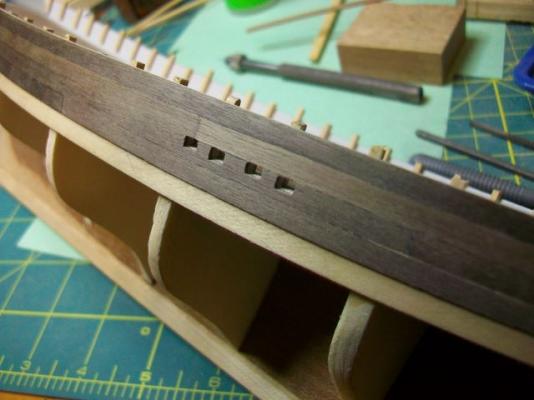
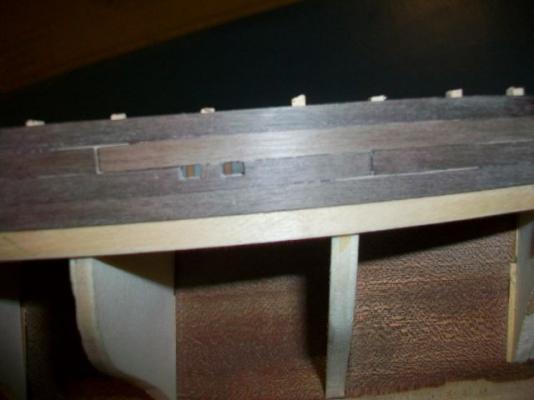
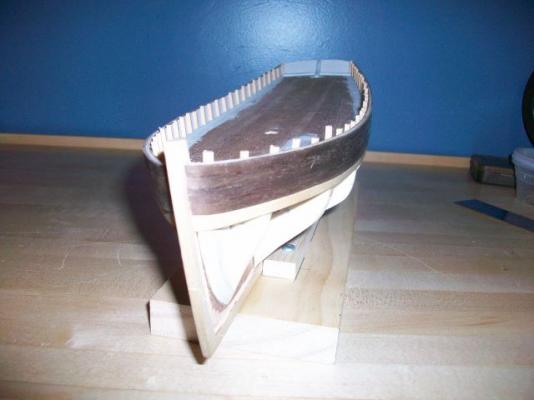
I promise not to show a picture of every scupper I cut, but I thought someone might want to see how I'm going about it. I'm drilling a pair of holes from the inside of the bulwarks out, with a block of wood backing the drill hole to prevent tearout. Then I'm carefully moving the bit sideways to merge the two holes. Next, I work with the ground-down flat file from the outside of the bulwarks in. The edges of the holes need some straightening out. I've got a small triangular file that I think I'll be able to do that with, but first I'm going to get everything rough cut. These six scuppers took me about twelve minutes. At this rate, I should be done with scupper cutting somewhere around Easter---2015.

- 569 replies
-
- 4
-
-
- shenandoah
- corel
- (and 1 more)
-
The paddleboard sounds like a lot of fun to build. Your kids will have a blast with it I'm sure. I love paddling, but I do mine in an old folbot. Do you live on that lake? Yes, use the little brass nails to nail down the deck--with glue too, of course. I use a tweezers to hold them and a small tack hammer to pound them in. Holding the nails with needlenose pliers works too. When your deck is installed, you'll like the look of the cambered deck. Steve
- 55 replies
-
- 1
-
-
- corel
- shenandoah
- (and 1 more)
-
Hi Andy, What you're noticing is the camber in the deck. It's supposed to be like that. The tops of the frames are radiused--high in the middle to lower at the edges. This is to simulate the deck beams--the crossways pieces that hold up the deck. They are radiused like this to direct water to the edges where the scuppers are so it can drain off the deck rather keep sloshing around. It's the same reason they put a crown in the middle of a road to shed rainwater. Go ahead and glue the deck to the frame tops. Keep at it; you're ship is looking great. Steve
- 55 replies
-
- 1
-
-
- corel
- shenandoah
- (and 1 more)
-
Thanks Nils. I appreciate you stopping by. I agree; I love the lines on the old cutters. Thanks for the kind words, Bob. I just took a look at Lettie G. Howard. Beautiful craft, and clean workmanship. Maybe I shouldn't have looked. I've got a set of plans for the Elsie (I've had them since the '80s). I also just picked up Chappelle's American Fishing Schooners. It's got some detailed sketches of Elsie's equipment. Looking at your log got me to thinking I might like to scratch build her. I have a feeling that if I do, I might be starting down a very slippery slope. Besides that, I have a couple of very nice kits awaiting my attention. But building from scratch looks like a lot of fun... Steve
-
Tung Oil Finish?
SGraham replied to cdogg's topic in Painting, finishing and weathering products and techniques
In the immortal words of Stephen Maturin, "he who would pun would pick a pocket!" -
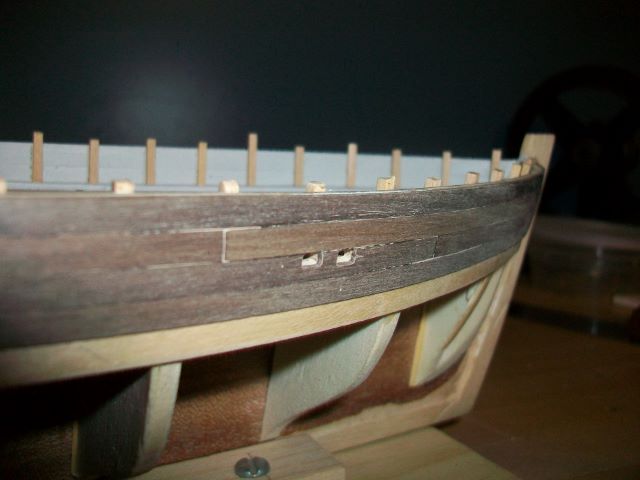
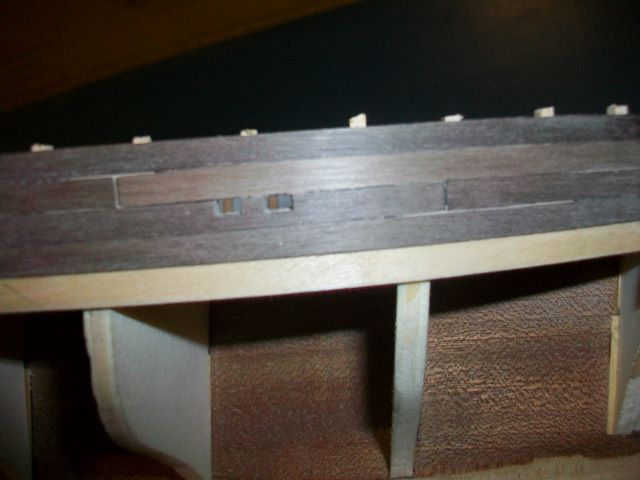
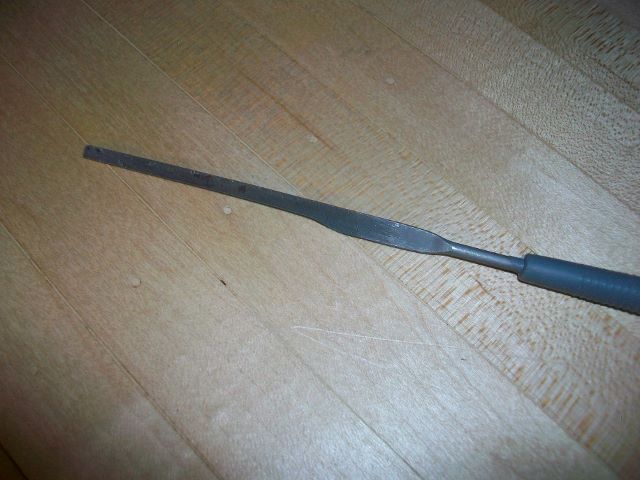
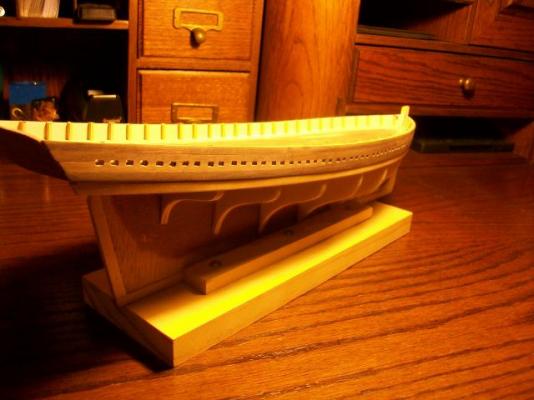
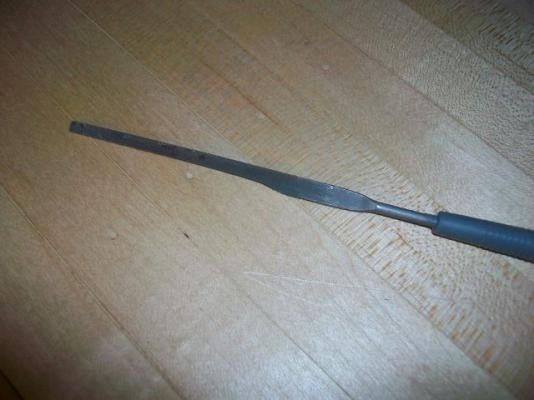
This afternoon I began cutting scuppers. It took me an hour and a half to get this first pair done. Actually, that included a whole lot of bad practice runs on scrap. I couldn't figure out how to cut nice clean rectangular holes that were small enough. All the instructions say is, "These aren't easy to cut." Helpful. All of my needle files are too big for the job. I finally ended up and grinding down a flat needle file to half its original width. Now I can drill a set of 3 small starter holes close together and then clean them up with the file. Here are the results--and the file. I may get cleaner holes as I progress and learn. Only 37 more pairs to go! Steve
- 569 replies
-
- 4
-
-
- shenandoah
- corel
- (and 1 more)
-
Hi again Andy. Figure A on Plate 5 is showing you the way Corel recommends that you fair the outer edges of the frames. I think David's idea of a flexible batten with sandpaper glued to it is more effective. I tried it and it went very quickly. Like he says, though, watch out not to take off too much. I did and had to replace it in places. The two hieroglyphs below letter A are a bird's eye view of the frame ends bearing the numbers next to them. "16" is a bird's eye view of the planking that goes below the bulwark (2 strakes only) (see figure B, #16). Look carefully at the dotted lines on the ends of the frames in the figure. They are showing you the approximate angle you'll need to bevel the frame ends at to get the planking to run smoothly against them. Hope this helps. Steve
- 55 replies
-
- 1
-
-
- corel
- shenandoah
- (and 1 more)
-
Looking great, Andy. How's the kink in the keel? Steve
-
Tung Oil Finish?
SGraham replied to cdogg's topic in Painting, finishing and weathering products and techniques
You know, Casey, another product that dries hard enough to buff out in a few hours is True Oil. It's a linseed oil based wipe on gunstock finish. Beautiful stuff and you can control the luster with the amount you buff. Smells good too. Steve -
Tung Oil Finish?
SGraham replied to cdogg's topic in Painting, finishing and weathering products and techniques
Hi Casey, it's really up to you how many coats you put on. It sort of depends too on how thirsty the wood is. On a hard wood like walnut, boxwood, ebony, or mahogany I like one coat and then buffing out with the steel wool afterward. I'm not sure how many coats you'd need on basswood. On a softer wood like spruce it takes at least two coats to get an even finish. If I'm doing more than one coat, I like to buff out in between coats. I use the high gloss tung oil. Even though it's called high gloss it needs several coats before it reaches a high gloss luster. With only one or two coats and the buffing, it gives a wonderful satin luster. Hope this helps. Steve -
Tung Oil Finish?
SGraham replied to cdogg's topic in Painting, finishing and weathering products and techniques
Casey, A tung oil finish can be slightly uneven after it dries. It can be buffed out after it cures with #0000 steel wool. It evens out the luster very nicely. Steve -
Andy, which letter section on Plate 5 are you wondering about? Steve
-
I've got the frame tops installed. They still need some filling, sanding, painting, and trimming. After that come the scuppers--the vast multitude of scuppers--the veritable plethora of scuppers...I'm still thinking through how I'm going to cut them. I don't own any needle files the right shape. Dressel arrived in the mail today, so that means there's a garboard in my near future! I apologize for the poor quality photos. My picture taking skills you could stick in my left eye and I'd never feel them. Thanks for reading! Steve
- 569 replies
-
- 3
-
-
- shenandoah
- corel
- (and 1 more)