SGraham
-
Posts
538 -
Joined
-
Last visited
Content Type
Profiles
Forums
Gallery
Events
Everything posted by SGraham
-
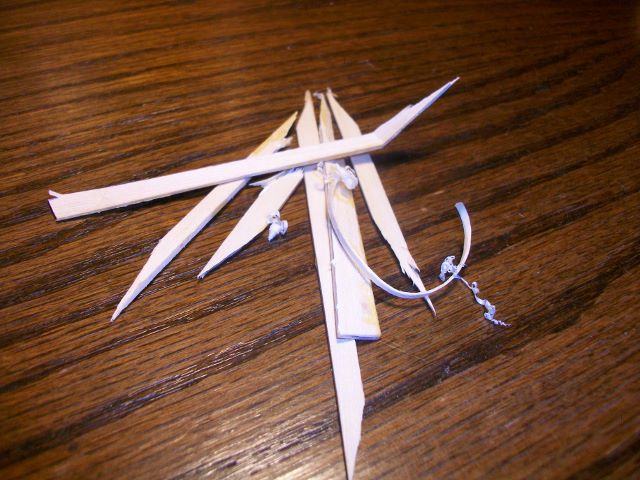
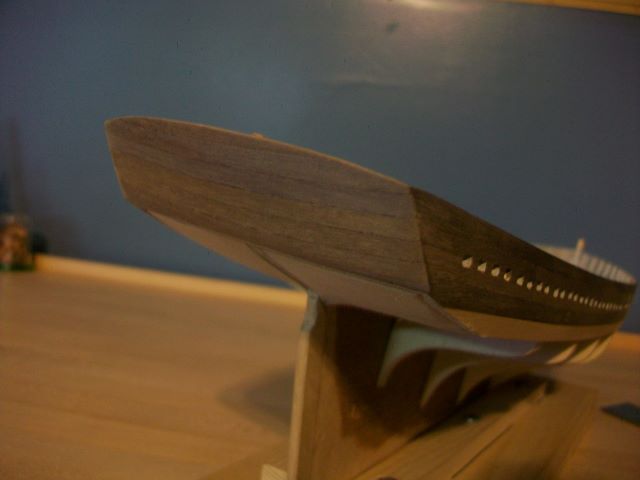
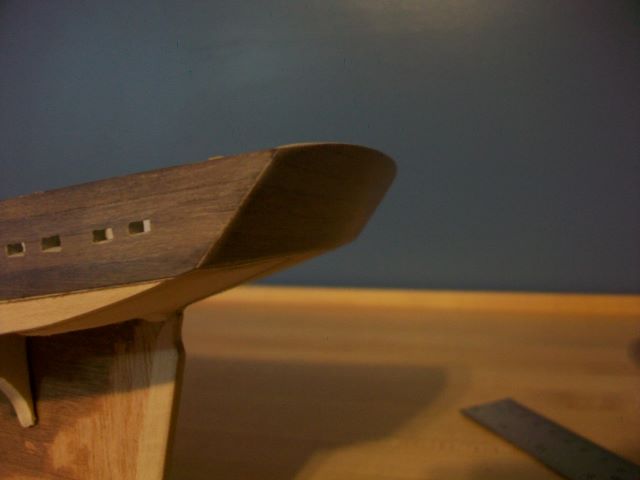
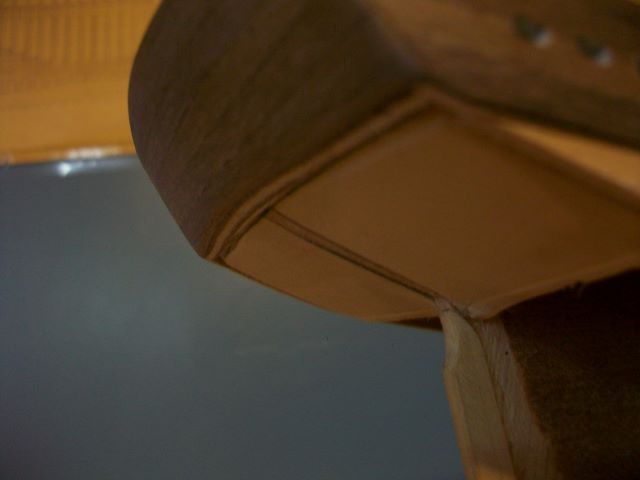
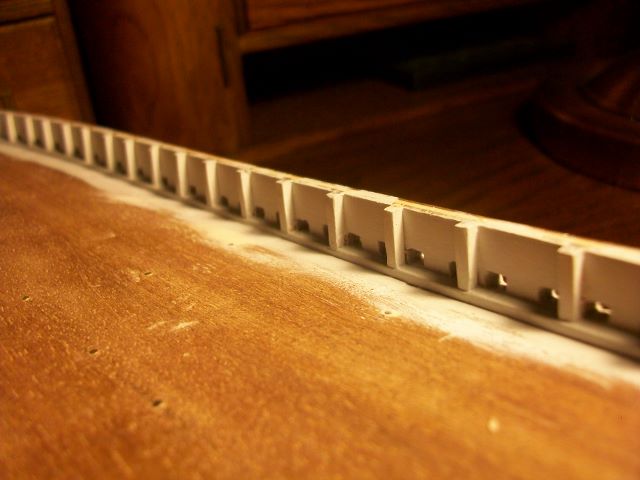
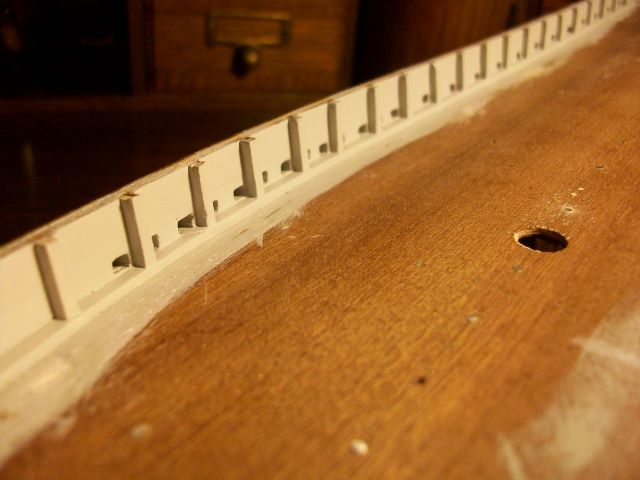
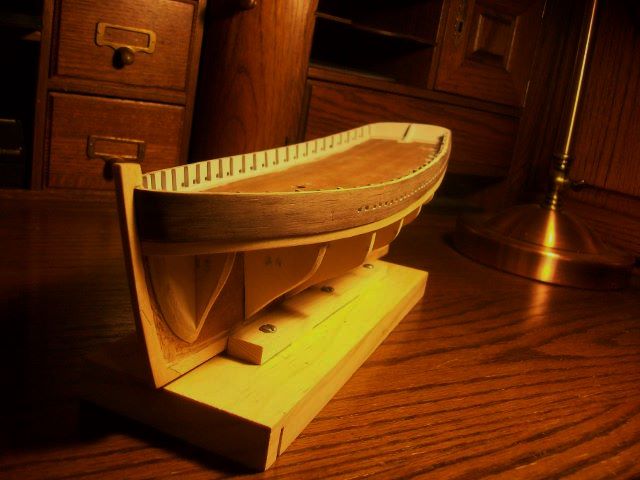
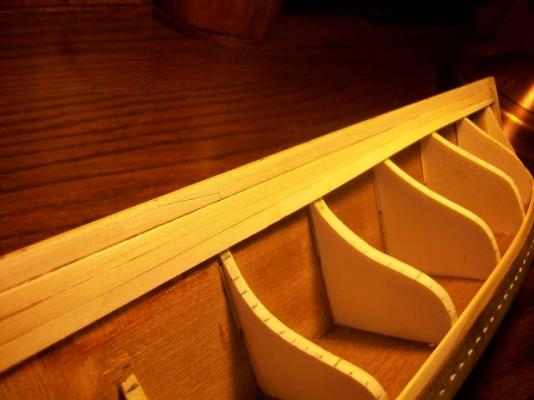
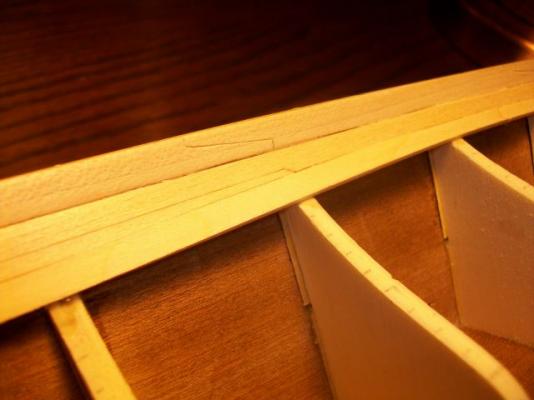
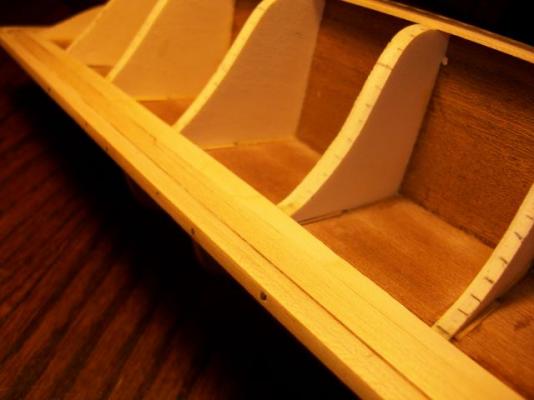
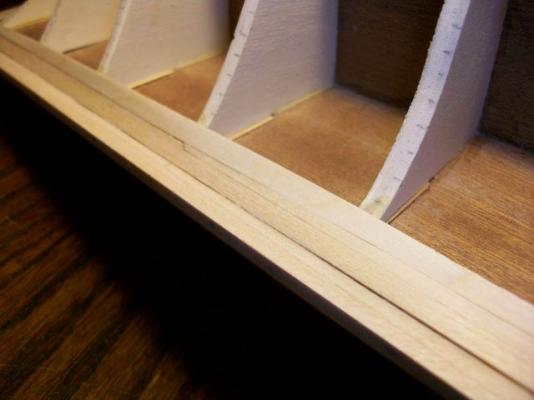
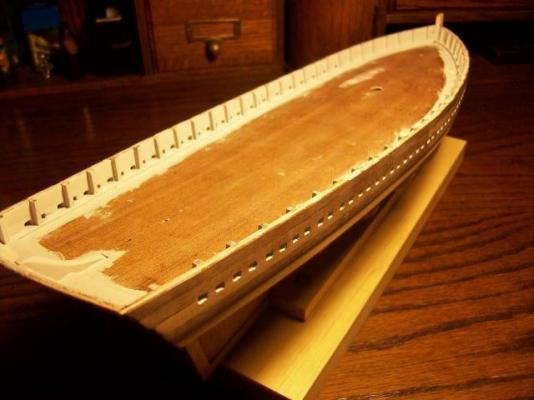
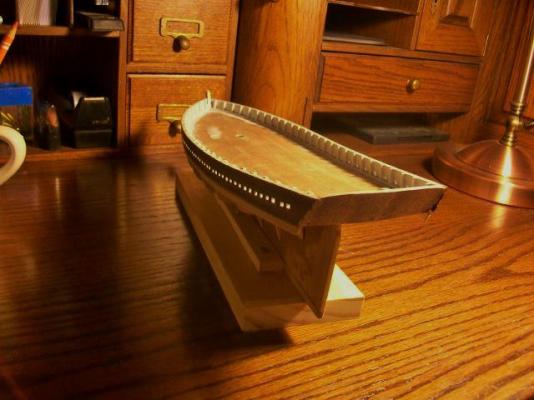
 A little more got done at the Glacial Progress Boat Works. The first photo is my very first garboard strake. Please enjoy the artistic arrangement of the splinters. The problem I ran into is that the keel of the Shenandoah drops steeply down as it goes toward the stern. This leaves a lot of room to make up for. On the plans it shows a number of stealer planks at the stern. They come all the way forward to amidships. The first stealer sits right above the garboard, which is notched to take it. I decided to try it this way. Here are the results. The planks are too thick at the sternpost, but I'll thin them out at the final sanding. Thanks for reading! Steve
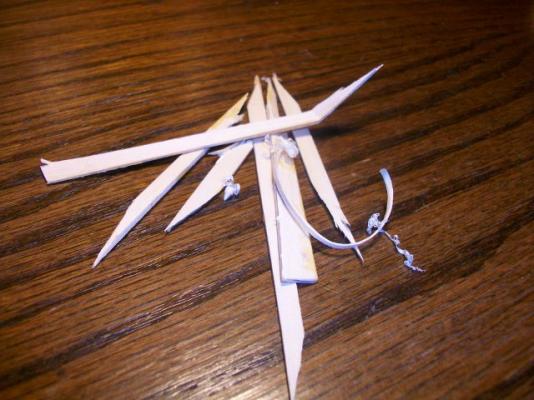

- 569 replies
-
- 5
-

-
- shenandoah
- corel
- (and 1 more)
-
HALF MOON by jct - FINISHED - Corel
SGraham replied to jct's topic in - Kit build logs for subjects built from 1501 - 1750
Nice save, J. The veneer looks good, and so does the stem. Thanks for posting the pics. Steve -
"Art Tape"?
SGraham replied to SGraham's topic in Building, Framing, Planking and plating a ships hull and deck
Thanks Augie and David. Steve -
"Art Tape"?
SGraham replied to SGraham's topic in Building, Framing, Planking and plating a ships hull and deck
Thanks for the recommendation, RMC and Bindy. I'll certainly try the Tamiya tape when I get to the painting stage. How dear is it, Bindy? I think clean lines would be worth a bit more money. I'm going to use the art tape for lining off the hull to plan where the planks are going to run. I figure this roll is going to last me a long time. Steve -
"Art Tape"?
SGraham replied to SGraham's topic in Building, Framing, Planking and plating a ships hull and deck
I tried the art supply store and they had never heard of the stuff. Then I ran over to Staples and they had it. If any of you try to find it there, it's not with the rest of the tape--it's in the poster making section. Steve -
Thanks Bindy. I agree with you about the beauty of glaciers, but as transportation they leave something to be desired. Your little Leudo is looking great. Nice fix! Steve
- 569 replies
-
- 1
-
-
- shenandoah
- corel
- (and 1 more)
-
Thanks Sam. I think this is going to be put on a plaque and hung on the wall above my shipyard. Steve
-
Thanks for the comments J and Andy. They're encouraging. Andy, you're planking the hull already! Go for it. On the transom, I think you can let the planks run right past the bottom edge and leave them long as they dry. Then, after the glue is cured, you can trim them and you'll have a nice tight, clean joint. Did you have to heat the planks to get that bend in them? Thanks for sharing the pics. Steve
-
Andy, you've been really busy! The Shenandoah is coming along at such a pace! You're going to leave me in the dust. It's looking good, and +1 for wood putty. That's a cool paddle board. Is this the first time you've done a stitch and glue hull? I've never done one--I've only seen others do them. Thanks for the pics. Keep 'em coming. Steve
-
HALF MOON by jct - FINISHED - Corel
SGraham replied to jct's topic in - Kit build logs for subjects built from 1501 - 1750
Great fix, J. Those are some nice, square, sharp corners. Steve -
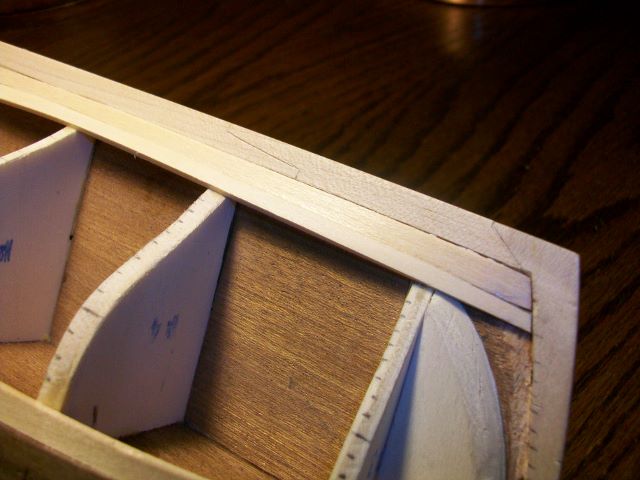
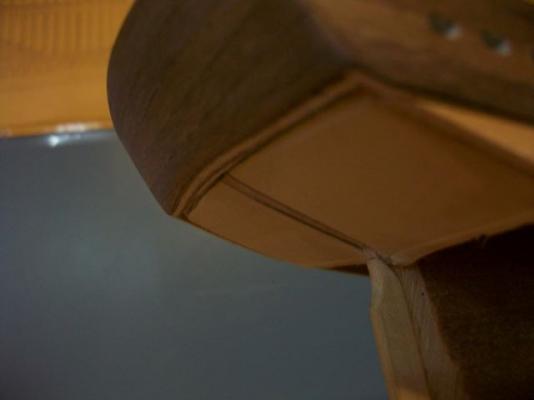
Hi Andy, I posted some shots of this area on my build. See post #88. I hope it's helpful. I beveled the bottom of the transom so that it lies on the same plane as the filler pieces forward of it. The planks will attach to the lower edge of the transom. I cut a rabbet on mine. So far it's making it easy to get a clean-looking edge on the stem where the planks attach. I'm sure there have to be other ways to get a good, even joint there without cutting a rabbet. Being new myself, I just don't know them. Hopefully, someone will chime in. Steve
- 55 replies
-
- 1
-
-
- corel
- shenandoah
- (and 1 more)
-
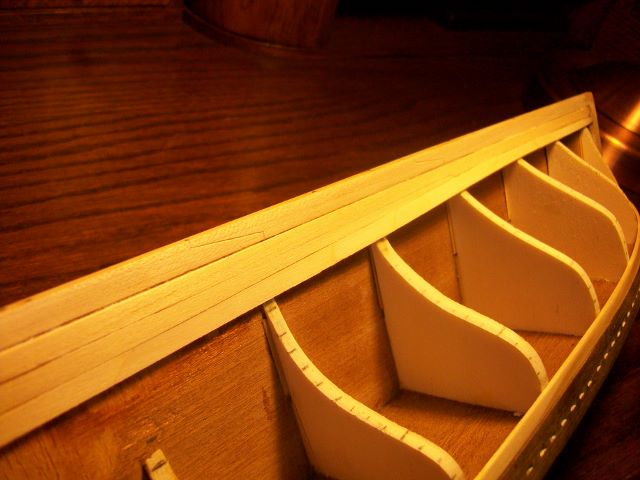
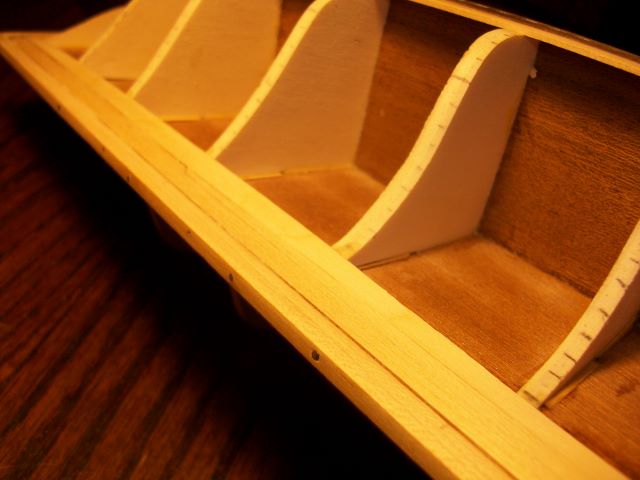
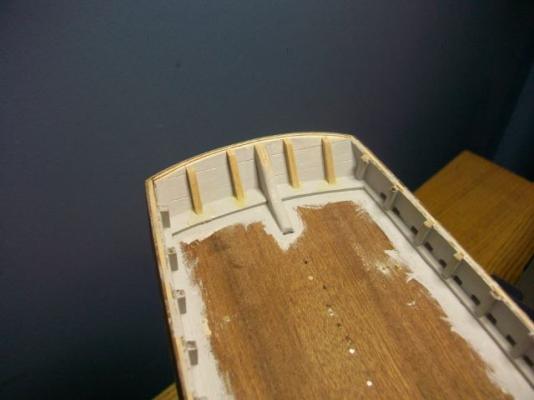
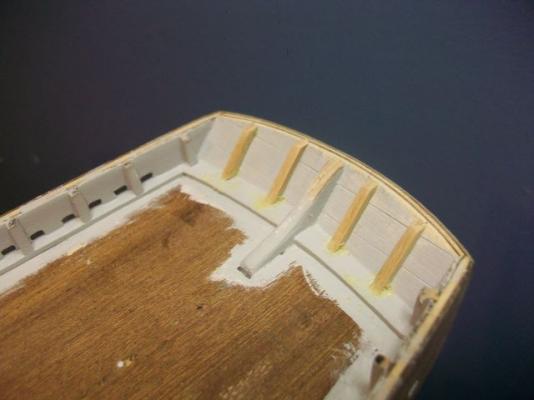
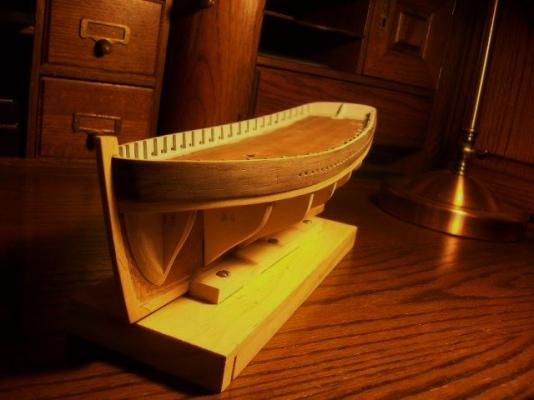
Welcome again to Steve's Glacial Progress Boat Works. I decided to add the transom stanchions and plank the outside of the transom before moving to the hull planking. There was a question about how to handle the area below the outside-bottom edge of the transom. I beveled it with a file so that it would lie on the same plane as the filler pieces that sit forward of the edge. This way, planking should travel across the filler pieces and attach to the bottom edge of the transom smoothly. I tried to add some pics showing the bevel. Also, I learned from reading other logs on this site that the transom should be planked BEFORE planking the outsides of the bulwarks. Good thing to know. Oh well...next ship. I suppose it doesn't matter much on this one since there will be a piece of trim hiding the joint. I'm going to add treenails to the upper sides and transom when the hull is all planked up. The filler on the stanchions should be dry by now. Off to sand and paint. Thanks for reading! Steve


- 569 replies
-
- 3
-
-
- shenandoah
- corel
- (and 1 more)
-
HALF MOON by jct - FINISHED - Corel
SGraham replied to jct's topic in - Kit build logs for subjects built from 1501 - 1750
Thanks for documenting this setback, J. I find it encouraging (sort of in the misery-loves-company vein). With the attention you're giving those ports, I bet they're going to come out looking great. The new planking will give you a clean slate to work with. Steve -
Looking real good Jesse. I'm going to have to start saving sawdust. That's a great idea.
-
Thanks for the kind words. I'm off to buy some art tape tomorrow and then hope to begin lining off the hull. Steve
-
"Art Tape"?
SGraham replied to SGraham's topic in Building, Framing, Planking and plating a ships hull and deck
Thanks everyone for the suggestions. Yes, it was art tape. There's an art supply store near me that I'll try tomorrow. Thanks again! Steve -
I'm getting ready to plank the hull of my Corel Shenandoah cutter. In Chuck's planking article he says that he uses art tape for lining off the hull. What is art tape and where do you find it? Thanks! Steve
-
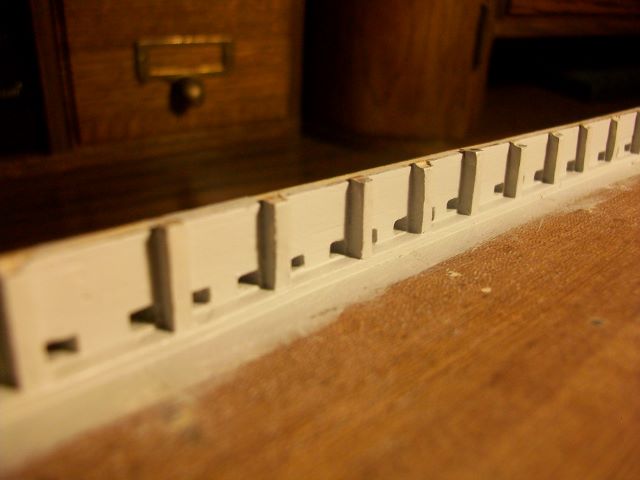
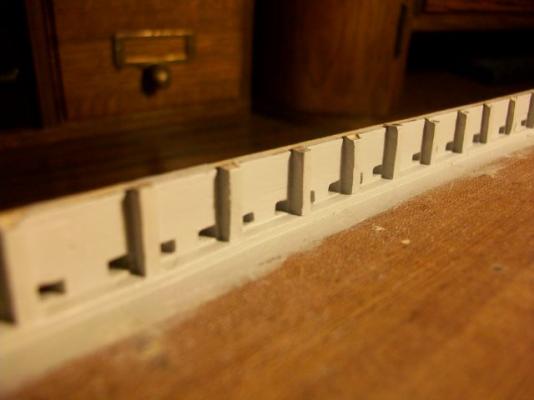
All right, I'm done with the scuppers: tall, short, long, square, trapezoidal, oval, straight, tilted, amorphous blobs, I'm done with them. They are what they are. Now it's finally time for the garboard. I'm heading out to the saw to cut a couple of basswood planks. Thanks for keeping me company during the long, tedious scupper cutting process.


- 569 replies
-
- 6
-
-
- shenandoah
- corel
- (and 1 more)
-
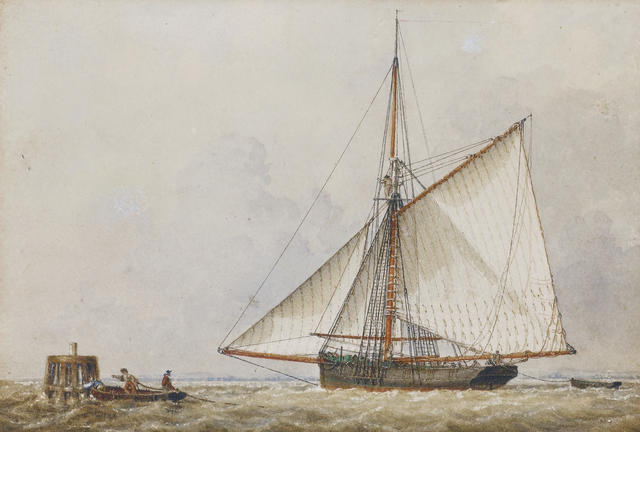
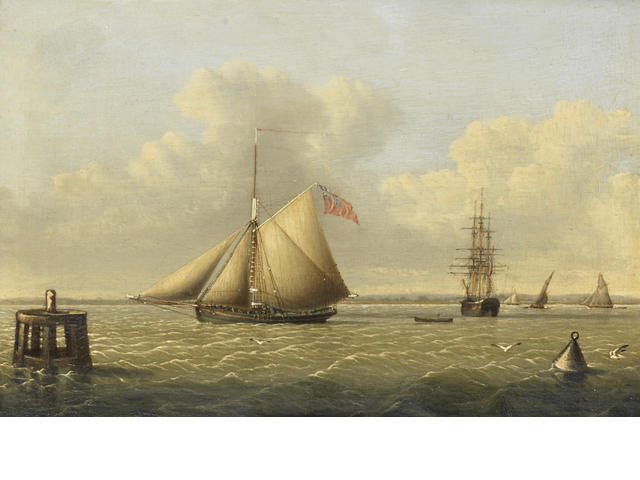
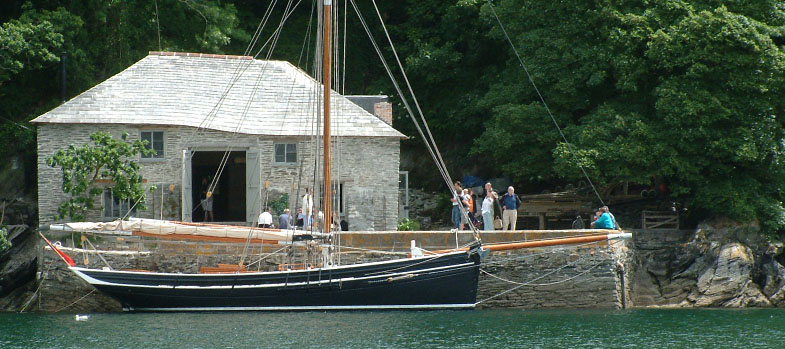
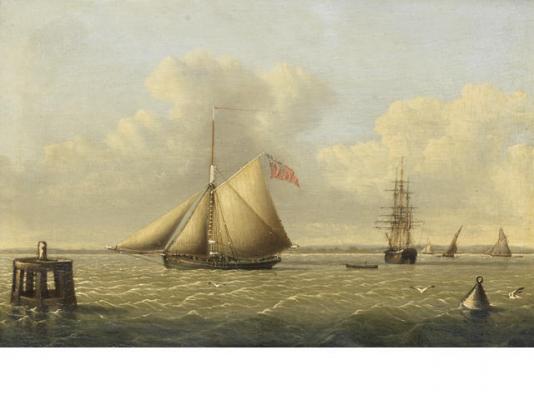
I did an image search on trading cutters and came up with these. The paintings are by John Ward of Hull. The photo of the old hull at the bottom is of the Kate, a trading cutter launched in 1884. If you can zoom in, there are some nice details, including how the wales fair into the stem. These might be helpful for anyone building the kit.

- 569 replies
-
- 2
-
-
- shenandoah
- corel
- (and 1 more)
-
Jesse, those are clean scarf joints. Are you thinking of trying to hide them when you glue them up? Or were you referring to other seams? Steve
-
With a planer you can only go down to a certain thickness. With a drum sander you can get the wood paper thin. I use a planer to dimension bigger stock. There's also a handy tool called a Wagner Safe-T Planer that goes on your drill press. With care, and with the blades nice and sharp, you can bring wood to thin dimensions. It's quite cheap compared to a drum sander. Steve
-
Thanks Bindy! Somehow, the bare hills in the burn areas that hang right over the town stayed pretty much intact throughout the storm. There's a lot of mud in the streets right at the foot of the hills, but that's about it so far. God is good. Steve
- 569 replies
-
- 1
-
-
- shenandoah
- corel
- (and 1 more)
-
That's a wild set of finger joints on that paddleboard deck.
-
Thanks for the comments, J, Sam, and David. I intend to find out just how well those chisels hold an edge. So far, pretty nice, but I'm only taking miniscule slices off relatively soft wood. Yes, it got real wet and muddy today here today. I hear they evacuated 1,000 homes in Glendora and Azusa. I haven't seen it rain like that in years. Nothing like January 1969, of course, when Mt. Baldy nearby got 50 inches in 9 days. Steve
- 569 replies
-
- 1
-
-
- shenandoah
- corel
- (and 1 more)
-
Hi Andy, Did you bring that surgical tissue pick up home from work? The cutter is looking real good. I especially like how you've beveled the frames. That from-above shot of the bulwark bent along the frames shows the beveling nicely. Your ship is really coming along. Steve