HOLIDAY DONATION DRIVE - SUPPORT MSW - DO YOUR PART TO KEEP THIS GREAT FORUM GOING! (Only 24 donations so far out of 49,000 members - C'mon guys!)
×
SGraham
-
Posts
538 -
Joined
-
Last visited
Content Type
Profiles
Forums
Gallery
Events
Everything posted by SGraham
-
 The full moon photo is very nice, but that photo of the blood moon is spectacular! Wow, I've got to stay up for the next one. I just plain forgot and fell asleep for this one. Steve
 -
Did you take those, Andy? Steve
-
We had a totally clear sky and I missed it. I was told it was more of a grayish orange rather than a blood red. Oh well, there will be another in six months.
-
Thanks for sharing the pics, Joe. That ship has lovely, lovely lines. Steve
-
HALF MOON by jct - FINISHED - Corel
SGraham replied to jct's topic in - Kit build logs for subjects built from 1501 - 1750
Those decks look great. I like the variations in color and the gleam when viewed from just the right angle. They look used--not fresh from the showroom floor. This ship is really coming together. Thanks for sharing the pics. Steve -
HALF MOON by jct - FINISHED - Corel
SGraham replied to jct's topic in - Kit build logs for subjects built from 1501 - 1750
I'm looking forward to seeing the deck after treatment. Steve -
Great sawdust collection, Jesse! Your Maid is looking drop-dead gorgeous! I've found that the only sawdust-as-fillers I can't see at all are ebony and dark oily woods like rosewood, teak, desert ironwood, etc. Steve
- 607 replies
-
- 1
-

-
- scottish maid
- artesania latina
- (and 1 more)
-
HALF MOON by jct - FINISHED - Corel
SGraham replied to jct's topic in - Kit build logs for subjects built from 1501 - 1750
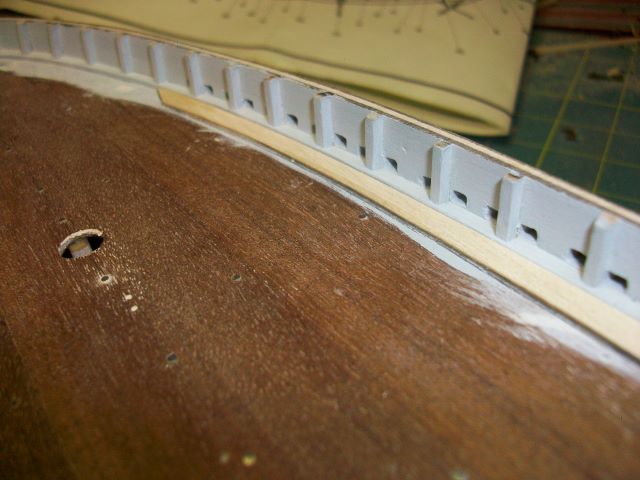
That's some precision fitting of the waterways. Looking very good. What stain did you use for your decking? Steve -
Thanks for the kind words, Sam and J. Lots of learning involved and some more splinters for my scrap pile. I've got company coming tomorrow, so the deck will have to stay unfinisherd at least until the weekend. Are you guys going to stay up to get a look at the blood moon tomorrow night? Steve
-
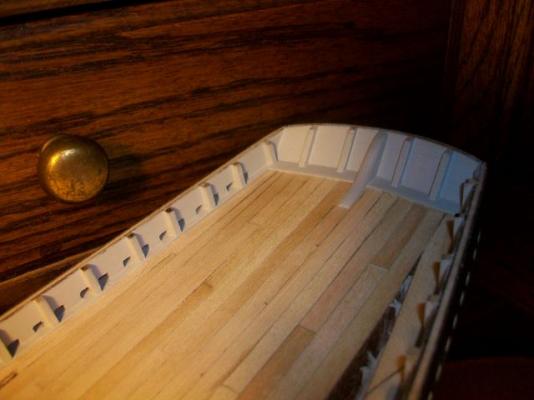
One more plank to go on the starboard side of the deck. If the waterway there looks a little ragged, that's because it is. I glued in a plank that was too narrow and proceeded to munch up things a bit getting it out. Here are some pics. Steve

- 569 replies
-
- 6
-
-
- shenandoah
- corel
- (and 1 more)
-
That's a good idea, David. I've got one of those and will give it a try. Steve
-
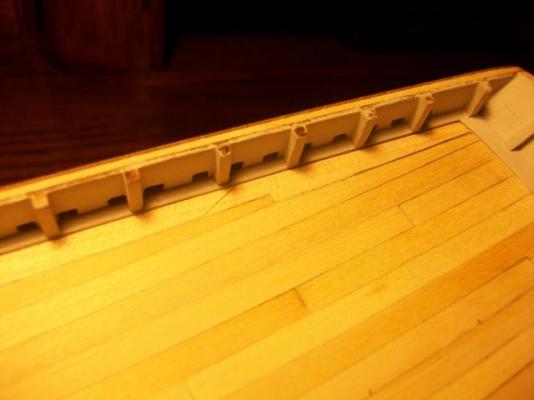
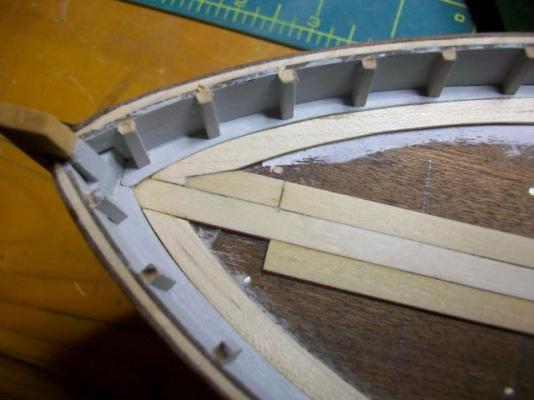
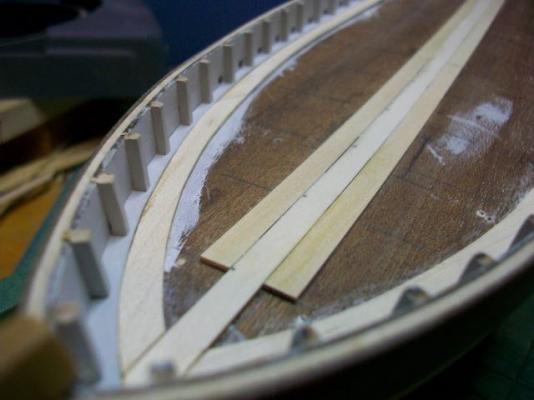
Still joggling away... The little mark on the second plank from the left is what happens when your knife blade breaks from being pushed too hard. Oh well, it's going to be under the starboard cathead...I hope. Ahem...make that the port cathead.
- 569 replies
-
- 6
-
-
- shenandoah
- corel
- (and 1 more)
-
Thank J and Jesse. I've gotten a couple more joggled planks done now. It's just a little bit easier than I expected it would be--and a lot more fun than hull planking. Steve
- 569 replies
-
- 1
-
-
- shenandoah
- corel
- (and 1 more)
-
Thanks, Dave and Bindy!
-
Thanks Sam. Using a knife instead of a pencil for layout is a great idea. Steve
-
Then I repeated the process to the left of the center plank. And there's my first joggle. Other than the short planks, I'm pretty happy with how it came out. I learned that it really helps to have a sharp pencil and sharp knife blades. Thanks for reading! Steve
- 569 replies
-
- 4
-
-
- shenandoah
- corel
- (and 1 more)
-
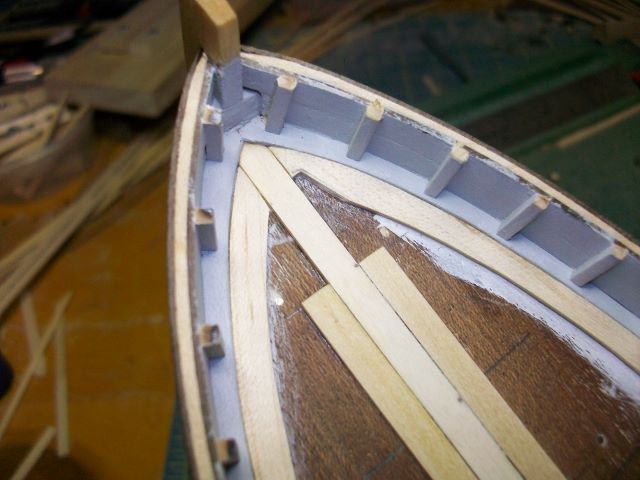
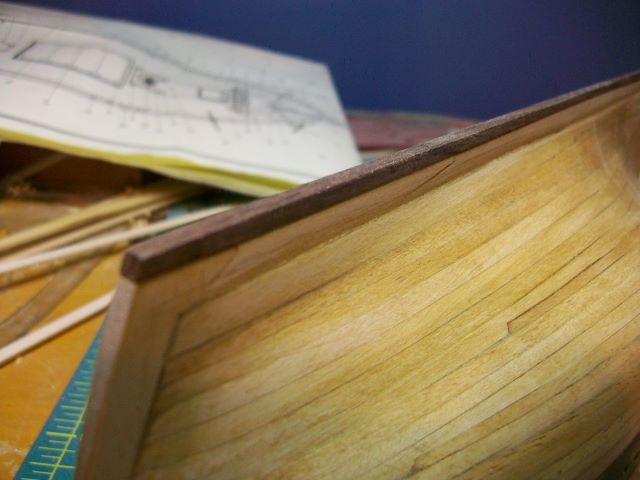
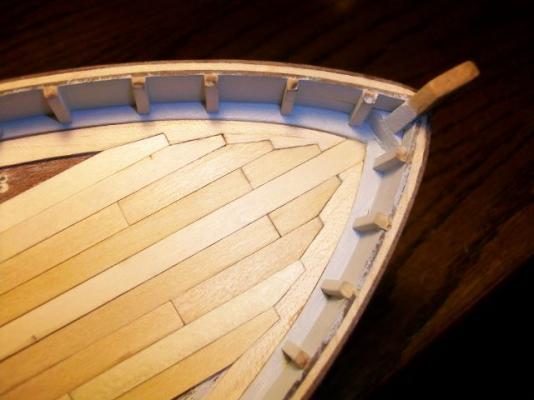
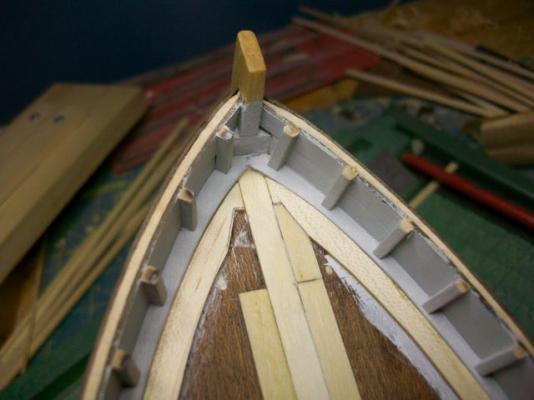
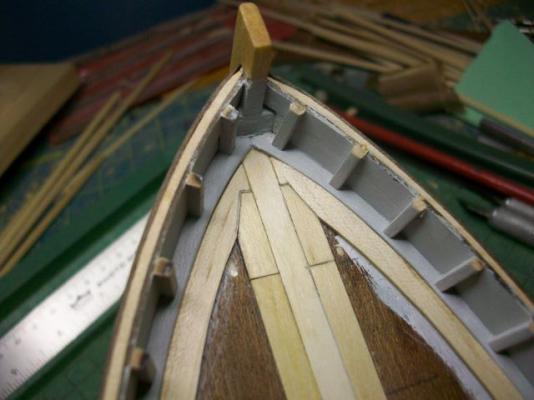
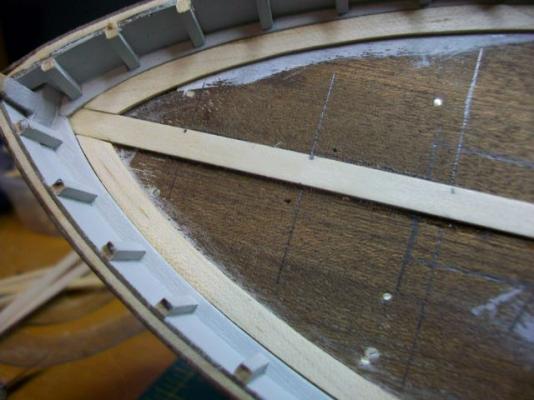
Next, I addressed the joggled plank at the starboard side of the center. It's really short. I probably should have just made the plank behind it longer, but it is what it is. I measured a piece of planking that would extend from the plank behind it to the middle or so of the margin plank at the inside edge. After a short perpendicular leg, the outside edge tapers down to meet the lower edge of the margin plank. After cutting out the plank, I used it as a template to mark where to cut the margin plank. I made sure to cut inside the marks to make up for the thickness of the pencil lead.


- 569 replies
-
- 2
-
-
- shenandoah
- corel
- (and 1 more)
-
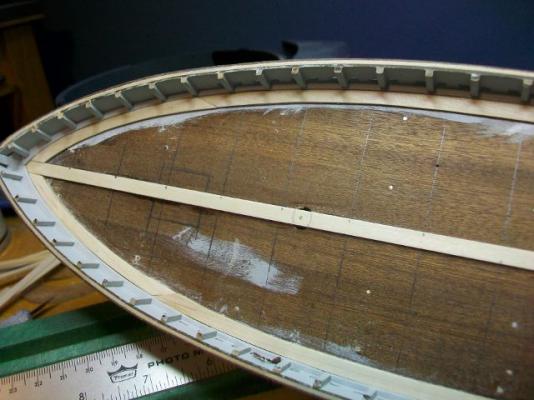
Next, I added a plank on the starboard side of the center plank. It begins at the first station aft of the bow. Then I did the same on the port side of the center plank. After that, I ran these two rows of planks all the way aft to the transom.
- 569 replies
-
- 2
-
-
- shenandoah
- corel
- (and 1 more)
-
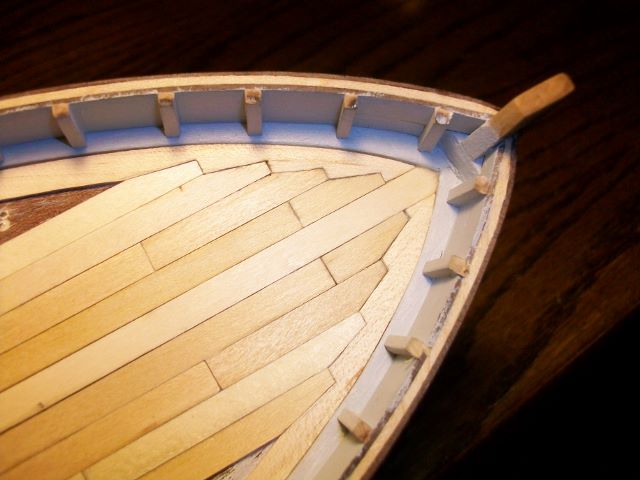
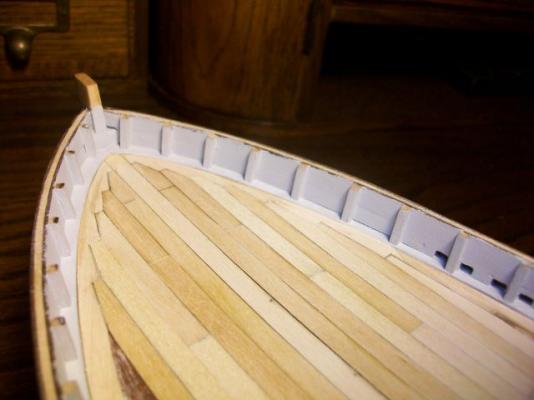
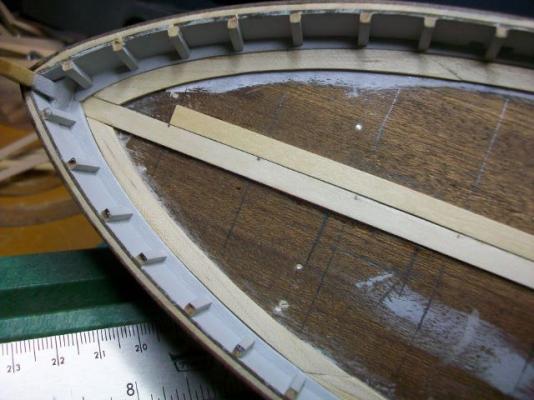
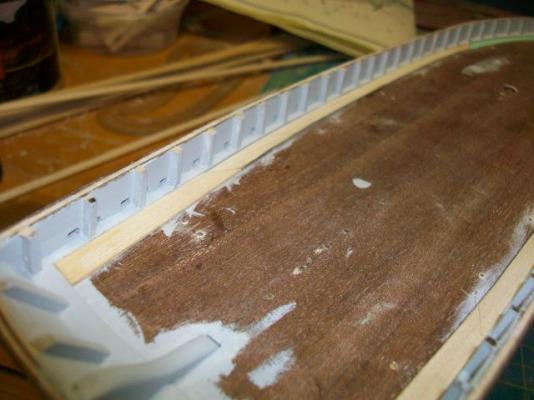
So, it's time to get joggling. I looked up a discussion on margin planks in the planking section and found some helpful tips. I first laid a center plank and then measuring from the bow end of this plank, marked off lines 24mm apart. These will be the stations where the planks will begin. They're 120mm long, by the way. I'm doing a 5-plank pattern. I have no idea why--it's the first time I've tried this and I've got to start somewhere. Here's the sub deck marked and ready to go with a big fat margin plank to give me lots of room to joggle. Steve
- 569 replies
-
- 4
-
-
- shenandoah
- corel
- (and 1 more)
-
A styrofoam cup! Why didn't I think of that? Thanks for posting that photo. Steve
- 607 replies
-
- 1
-
-
- scottish maid
- artesania latina
- (and 1 more)
-
I'll precut the tapers into the deck planks and then notch the margin plank to take them as I go. Doesn't sound too hard, but that's how it is with this hobby. You get pulled along by appearances. How many of us would have bought a kit that advertised, "For only $79.95 you can build this ship four times over and have thousands of hours of fun"? Steve
- 569 replies
-
- 3
-
-
- shenandoah
- corel
- (and 1 more)
-
Thanks J. I've got the margin plank glued in place and am busy cutting 120mm planks. When I've got a pile I'll start joggling. Sounds odd, don't it? Steve
- 569 replies
-
- 1
-
-
- shenandoah
- corel
- (and 1 more)
-
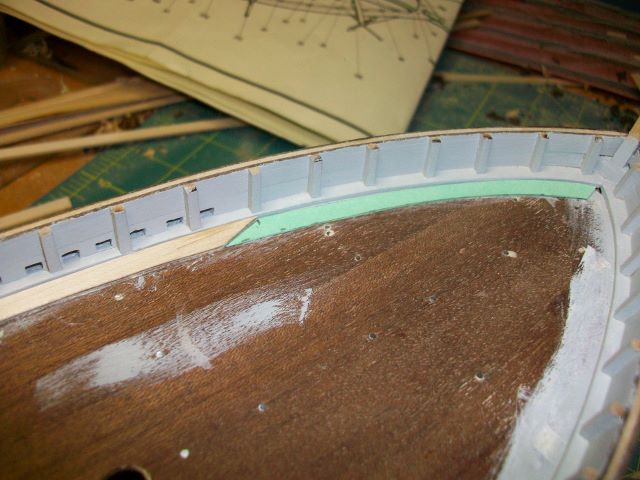
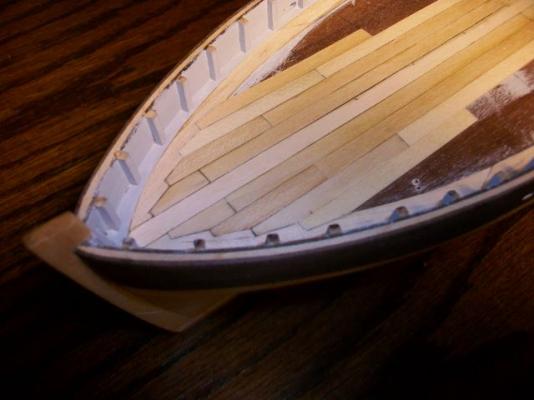
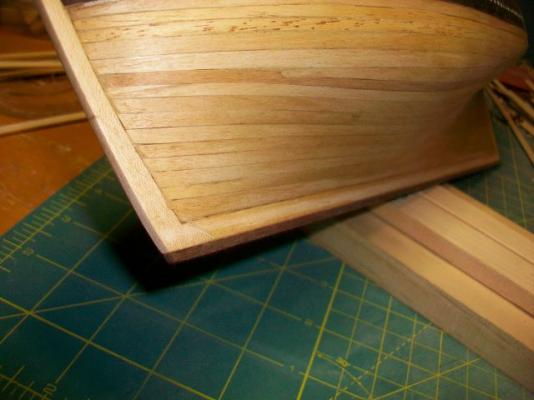
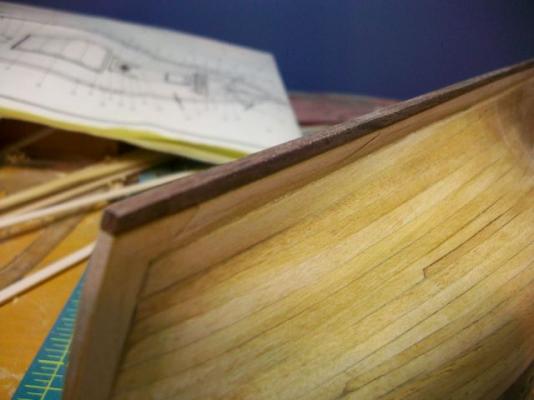
Still inching along. Here's the sole of the keel made from an odd scrap of very dark mahogany. It's the color of black walnut but it's really soft. It still may need some thinning. I made a dulcimer from this stuff and wasn't impressed with how it sounded. Still, it's pretty--which is all moot anyway since it's going to get painted. But on my next build, I'd like to make a dark keel sole from this stuff and leave it unpainted. Also, I've begun fitting the margin plank. Although the plans do not call for it, I'd like to try joggling the deck planking--if that's what it's called. I'm making the margin plank from maple. It'll add a subtle contrast with the plain vanilla deck planking. I'm using green card stock to make patterns for the curves.


- 569 replies
-
- 7
-
-
- shenandoah
- corel
- (and 1 more)
-
HALF MOON by jct - FINISHED - Corel
SGraham replied to jct's topic in - Kit build logs for subjects built from 1501 - 1750
It's fun watching the waxing Moon! Steve