Jean-Pierre
-
Posts
269 -
Joined
-
Last visited
Content Type
Profiles
Forums
Gallery
Events
Everything posted by Jean-Pierre
-
First of all , my sincere congratulations for the excellence of your build. It is also a pleasure to follow the construction of a model that has rarely been featured. I have always been interested in that type of ships and have built a few, mostly in plastic. Of course I built the Colombus ships by Heller, the Catalan ship by Imai and bought a few others that I ...did not build. Among these was a Portuguese carrack, which happens to be exactly the model you are now building. I do not know if you have had the opportuny to research your model and if you did or one of your followers did, but this is what I found. There were several reconstructions of the Santa Maria over the 19th and 20th centuries, one of them was made and remained moored in Barcelona Haven until a few decades ago. The plan to this reproduction wer used as the base for ALL the plastics kits I know of: Revell, Heller, Imai... And as you probably know, the trend among plastic kits manufacturers has often been to make different models out of one mold, and Heller's Santa Maria gave birth to a spectacular carrack: I do not remember exactly the name given to this kit dated from late 1960's I think. I bought this kit and the Santa Maria was immediately recognisable. To the original they had simply added all the typical deck construction typical with this carrack. It seems that the Mamoli kit even took over the beautiful, colourful colour scheme of Heller's kit. Personally I never managed to find a carrack painting or drawing showing lateral rear castles. Also the draught of carracks sem to have been rounder, daaper than above models. Do you have any other information? In the meantime, I wish you succes with you project, after this excellent start.
-
Beautiful build indeed. I also built a model of Pen Duick long, long ago, but it wa another kit manufacturer, and the model was much simplified: its only merit was to offer a second planking of real mahogany. After much research my model turned out pretty accurate, with 2 exceptions. First, a gave the mast a little quest, while the real one is, I fear, quite vertical. The second "mistake" was to not include a 2 blade screw. I see this screw isn't included in this kit either. But your model looks so beautifully accurate, that maybe you may wish to include this detail? Excellent job anyway!
- 122 replies
-
- 3
-

-
- Artesania Latina
- Pen Duick
- (and 1 more)
-
Thank you for your answers. Now I cannot imagine that it is currently possible to buy anything from Russia (payment transfers!?) Too bad!
-
I found this kit on You Tube. The box presentation is one of the best I've seen, with all parts laser cut (even the scrollings, beautiful blocks, a separate kit to build the ship's boat, with wooden (reusable trays for all the smart parts. All building steps are detailed drawings, so that the original language should not be a problem. Really worth having a look! The only problem is that this masterpiece kit apparently comes from... Ukraine, and I suppose the people there have more crucial problems on their hands than model building. Has anyone heard of this kit, and knows about its availability, ...or has news of the author?
-
Hello Martijn, Thanks for your kind compliments on my model Fine to read that you are still in business with ship building. I of course tried to gather any possible information on flutes and on the Sergal kit built models in particular. I also downloaded plenty of build pictures, and I have to say that your build log was probably the most helpful to me. So thank you for the information, and congratulation for your fine model. Mine is still unfinished: shame on me! I did have some thoughts about the thickness of the upper masts, which I had to unglue and thin down a little. Work has been suspended at this level. I also do not like the whaling boats but am still doubting how to improve them, and if I could (and should) make 2 more of them. And then, if I get so far, I will also want to have a dinghy on deck. And ... I hope to restart work on the model in the coming days (?!)
-
Strange marketing: a website that announces 2 ghost ships, while another model comes unannounced on the market: not the best way to increase sales, I'd say. Maybe they send their Hermione as an appetizer?! But any new model (not a copy) appearing on the market should be seen as good news!
-
Strange indeed: the Hermione never appeared on Disar's site. But Artesania Latina does have an improved version of their Hermione kit. I suppose it could be this kit he received !? And I fully agree with you that the Santiago de Compostela by Disar is one of, if not THE most elegant Spanish galleon available in kit: you definitely should already have started your build log!😋
-
I agree with the shroud thickness: maybe it's the depth of the groove that insufficient, and that is easy enough to remedy. A little problem for me is that this model of stanchions has been seen on so many models, but that's a detail. However they would look much better (on the stern) if they would follow the like of the rest of the parts instead of being perpendicular to the gallery. And again, I see this rather as an easy challenge for the modeler to correct. I have been a lifelong plastic modeler, where weathering is one of the standards of excellency, I guess. In this case, it is obviously excessive, but the way they have managed to antique the models I find quite pleasing. overall, I find these models absolutely beautiful, compare for instance to the bulky Santissima Trinidad, which is almost always represented with gloss finish and shining brass (which for me does not fit to a true model of a real ship, but rather to art woodworking): again a matter of choice. But once again, I agree that this is too much. I really look forward to seeing more pictures of the built ship, and of course, of a build log
-
About the use of standard items, this may be the case here with at least some of them (the stanchions for example) Also, their shrouds look a bit on the heavy side, but they still look nice. One problem for sure will be the size of the models, but this will be on par with the 3 deckers by Artesania and Occre, I suppose. I also guess Disar models can be bought online at Spanish shops like Guinea Hobbies, for instance...
-
While looking through the online catalogs of various model makers, I fell upon 2 apparently upcoming new models by this Spanish manufacturer: the 70 gun Glorioso, and the 112 gun Principe de Asturias. There are a few lovely pics on their site of quite a bit weathered or aged examples (which is in my opinion a premiere in a ship manufacturer's site). No prices mentioned. What is also interesting is that apparently they incorporate wooden decorations (also new for European kits!?) Does anyone know more about these kits and their release date? More info on https://www.disarmodel.com/23-nivel-5
-
Could be...but the logo on the box mentions "Gunze wooden ship model series". Could be that Gunze Sangyo once had the good idea to bring wooden kits on the market (like Imai did). Now the kit features a lot of photo etch parts, which was not common in the time they edited their beautiful Lusitania kit.
-
I was wondering if anyone has seen or heard of this kit, of which there is a build log on youtube: This is one of a part build. Do not know who the makers are, even if it is Japanese or Chinese. Pretty sure it is not a pirated model. But it looks spectacular, and is of a rarely seen period. Would like to hear your comments. And this part shows the box cover:
-
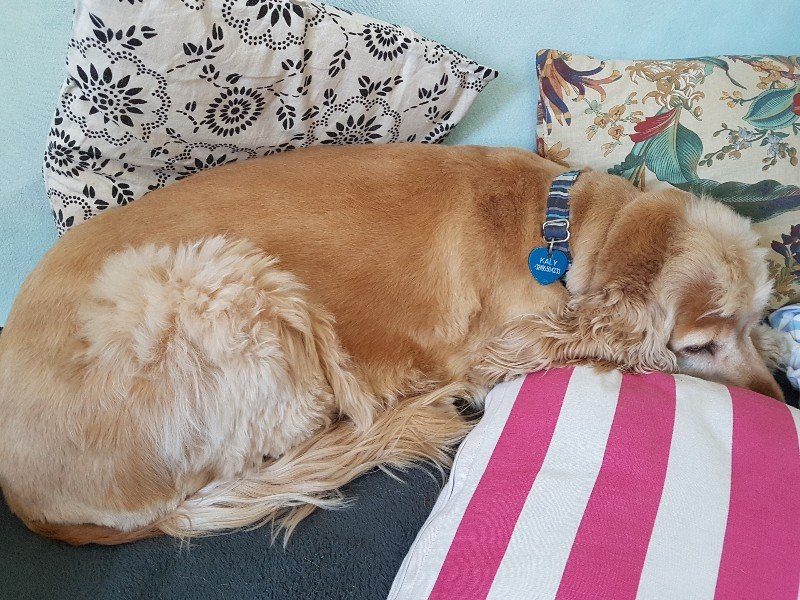
Actually, a canine advisor, as you can see, is a rather cool companion and is moderately interested in running through your work table, while a cat... I'm not sure. The model as seen on the latest pics, has changed a bit since then (but not enough, alas). First, the upper mast as on the picture, are too thick in my opinion, as they had been made too close to the plan and the kit pieces measures. They were ripped apart, rescraped and I now still have to realign them to the lower masts (not easy!) Then I also did the standing rigging of the lower masts (new blocks for the stays). This worked rather well so far. I now have to glus the upper masts, and rig them of course. Then (or in the meantime if it gets too boring!) I will start work on the whaling boats, and possibly on a dinghy to put on deck.
-
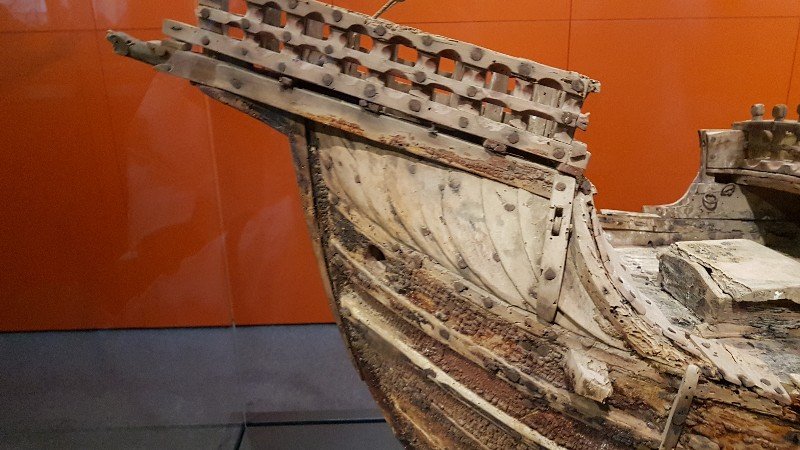
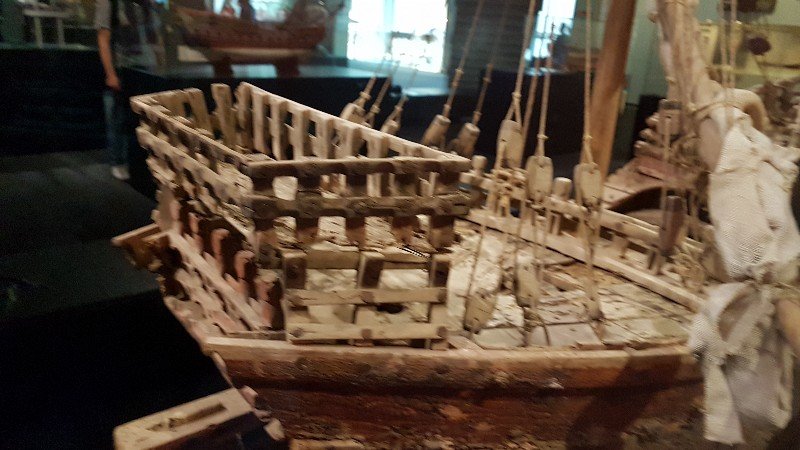
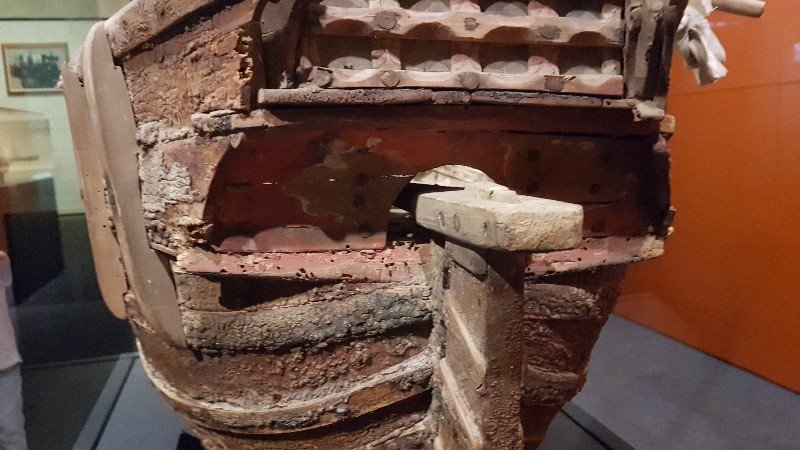
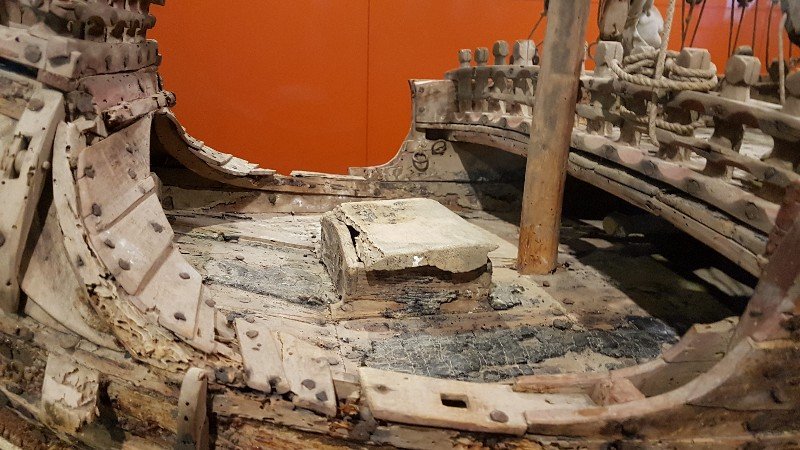
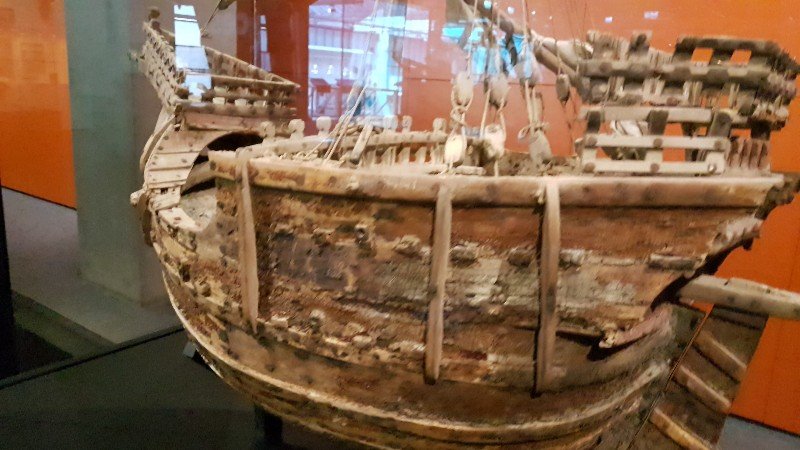
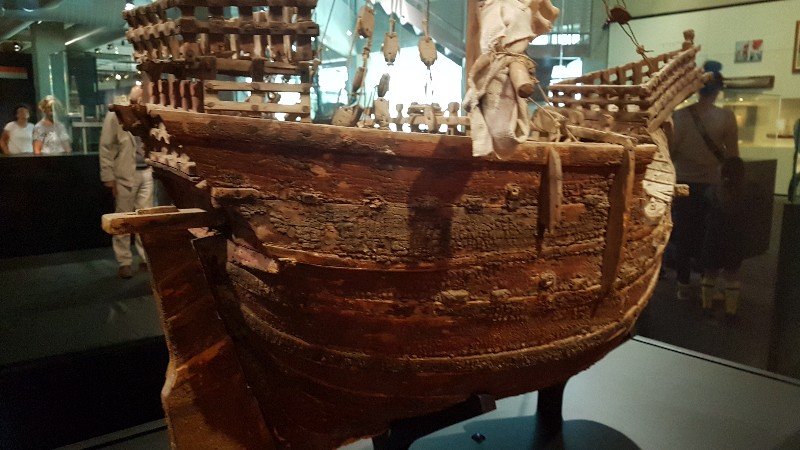
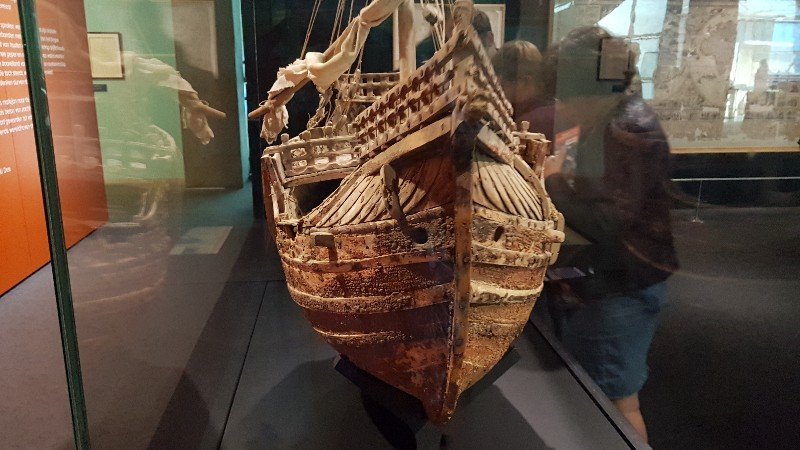
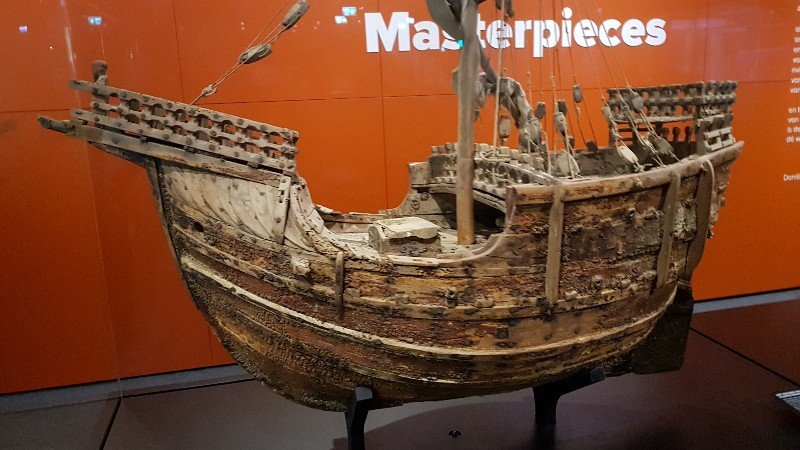
So I think the best way to go is to stick with the model, which is quite well detailed by the way. Of course quite a few repairs were made during its life: mast and sails probably were not as per the original. Also the catheads were moved around, with the result that the starboard one is probably in the wrong place. Also, the model does apparently not include any rudder hinges. The much damaged hull surface does show traces of red paint, and watch the rear where there was a painting, probably some religious theme.


-
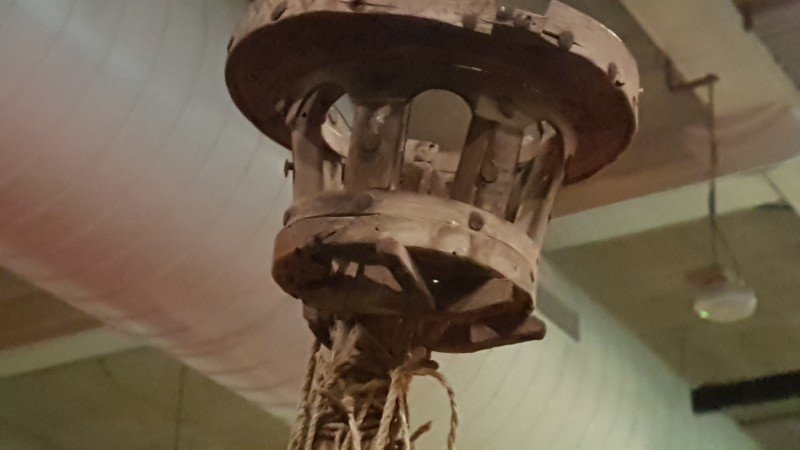
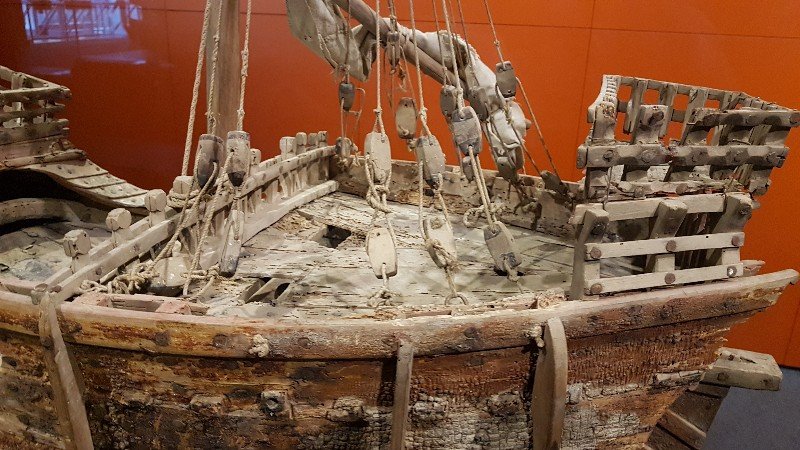
I do love the ship you are building here. I personally built decades ago this very ship from a plastic kit by Imai (an easy build by the way). A question: did you make some inquiries about the original model? I f you want some information or pictures of it I will glad publish them here. By the way, I went to Rotterdam a month ago and made some picture of the "original", of which I enclose a pic. This model is in my opinion one if not the most important historic ship model, as with the exception of a few Egyptian antiquities, it is is the oldest REAL scale model, and the only 15th century period model. It has always been THE source of inspiration for the best Santa Maria models, among others. It is to be noted that many authors suspect that the model's proportions are not correct (too short in length) and it seemed to have at the origin have been fitted with 3 masts, then the foremast was removed, and finally it was left with just one mast. I wish you a lot of fun with this build. JP
-
There have been some awful delays in this building again. I have assembled and glued the mast into their place. Problem with this kit is that the materials and given dimensions do NOT allow a good alignment of the topmasts. Furthermore, the holes for the topmasts are way too large, and the naive builder that I am made as a result, topmasts that were much too thick. I yesterday dismounted the topmasts and carefully scraped a fair amount of wood and, ok this will do for me. I just need to finish the shrouds, then the ratlines, then the stays.
-
And "Pirate Pete" has done an amazing job (*) by writing building advice on their models. I downloaded his series on the Derrflinger as the model he built is far better than the original! It is lucky that all the work he put in his writings is not to be lost. (*) I got that expression from some prominent American citizen...
-
If this is true, then that is the kind of news that makes my day. They were/are among the best.
-
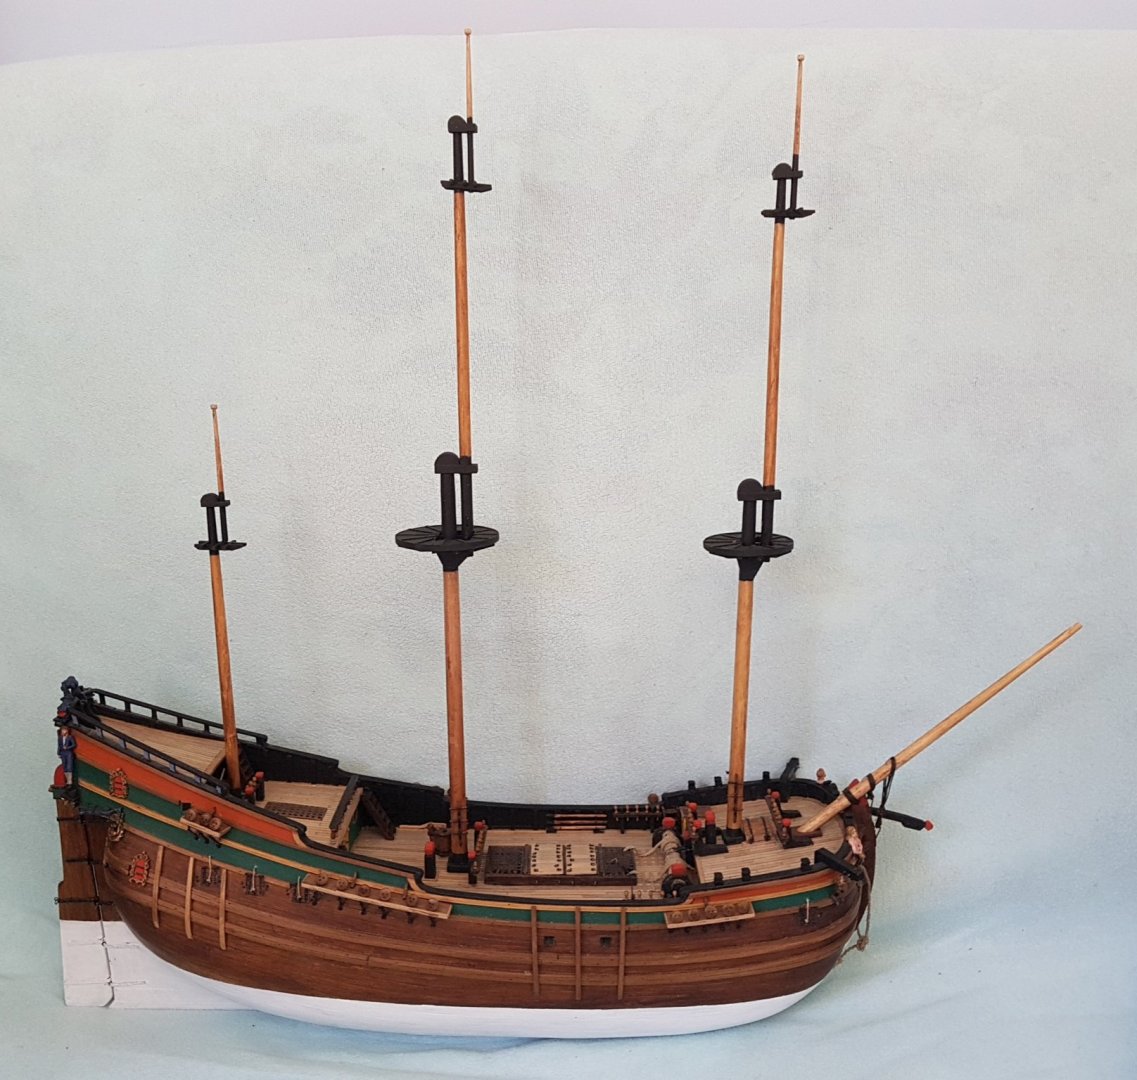
I am now facing the masts and the rigging. As I have decided to add the vertical belaying pins, I luckily will have some spare belaying points in case I decide to add sails. Indeed a problem arises that I had not thought of: this model is supposed to be rigged only without sail. Now on a real ship, most of the blocks needed to manoeuvre the sails would be present on the various spars and on deck: I shall have to buy some extra stock. The masts themselves needed quite a bit of trimming: the kit proposed mast rake was not correct on the fore and main masts. The upper mast also would not run parallel with the lower mast, due to mast caps that were quite a bit oversize. Everything seems OK so far as can be seen on the pics below. I also submit a picture of my technical advisor Kaly, a cocker lady.
-
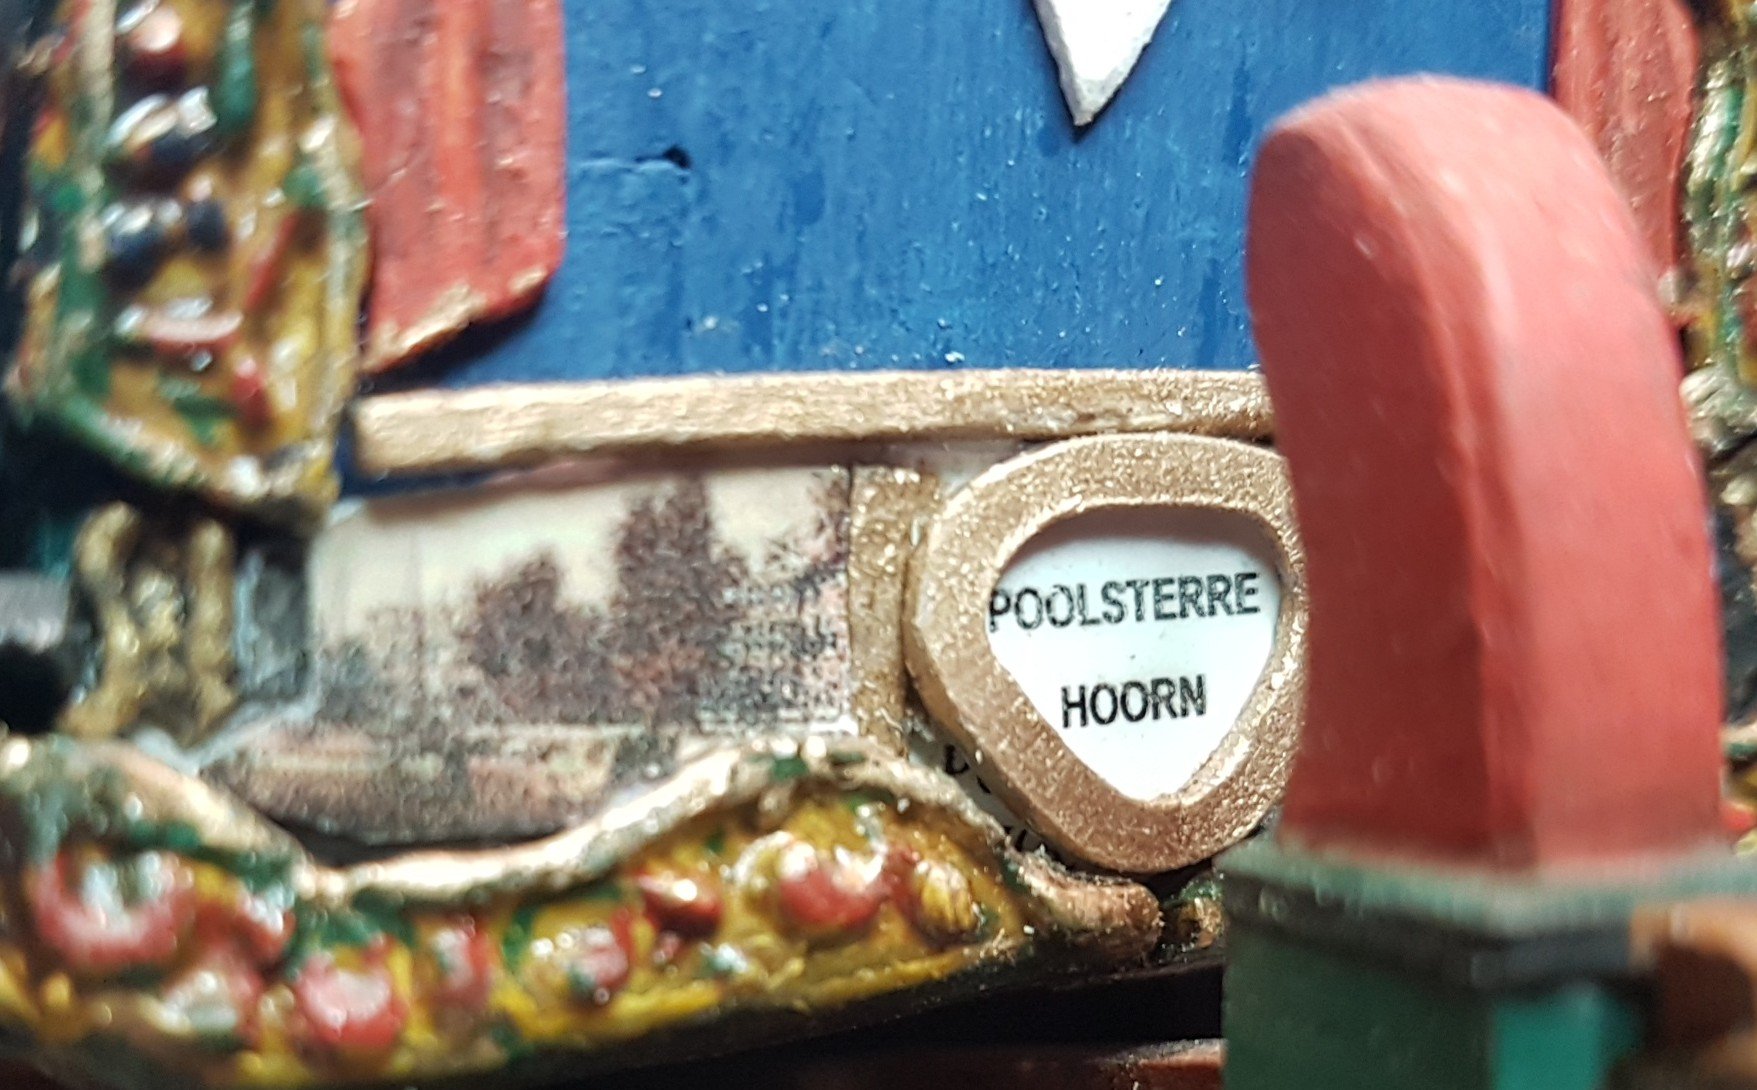
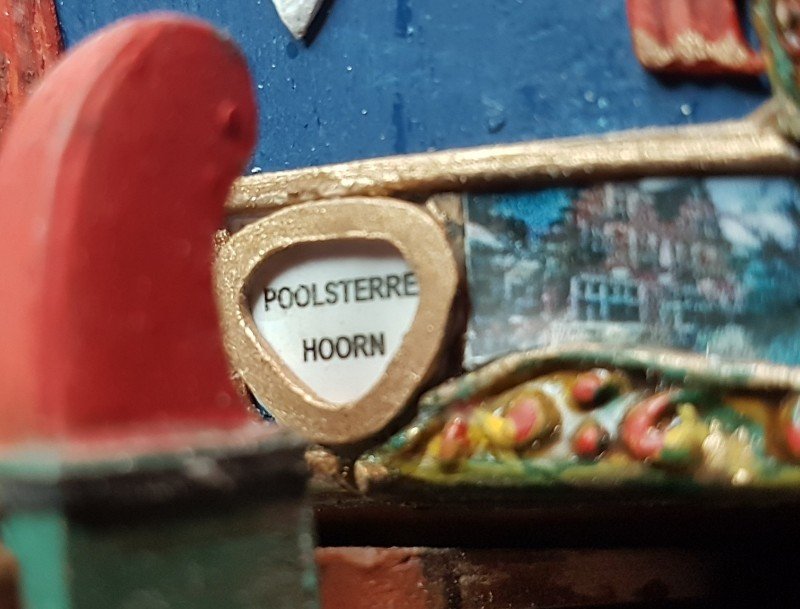
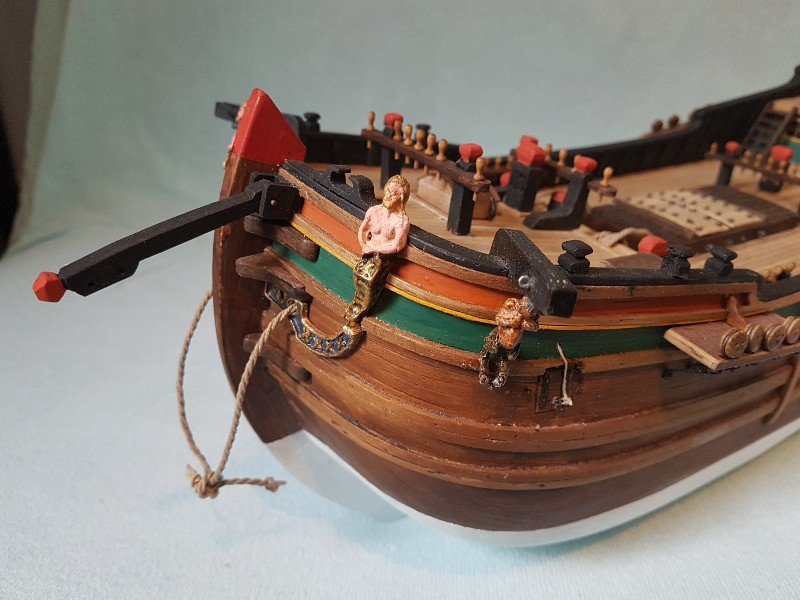
I have listened to the linguistic experts about this ship's name, and decided to rename her more correctly (see pics) By the way, Sergal had placed some ovals in the rear deco of the ship. It can hardly be seen but I framed a few portraits in them. These portraits are taken from the famous 17th century Dutch portrait painter Jacob cats (but the quality of these paintings is admittedly difficult to appreciate here. The landscapes are 17th century landscape paintings of the city of Hoorn.

-
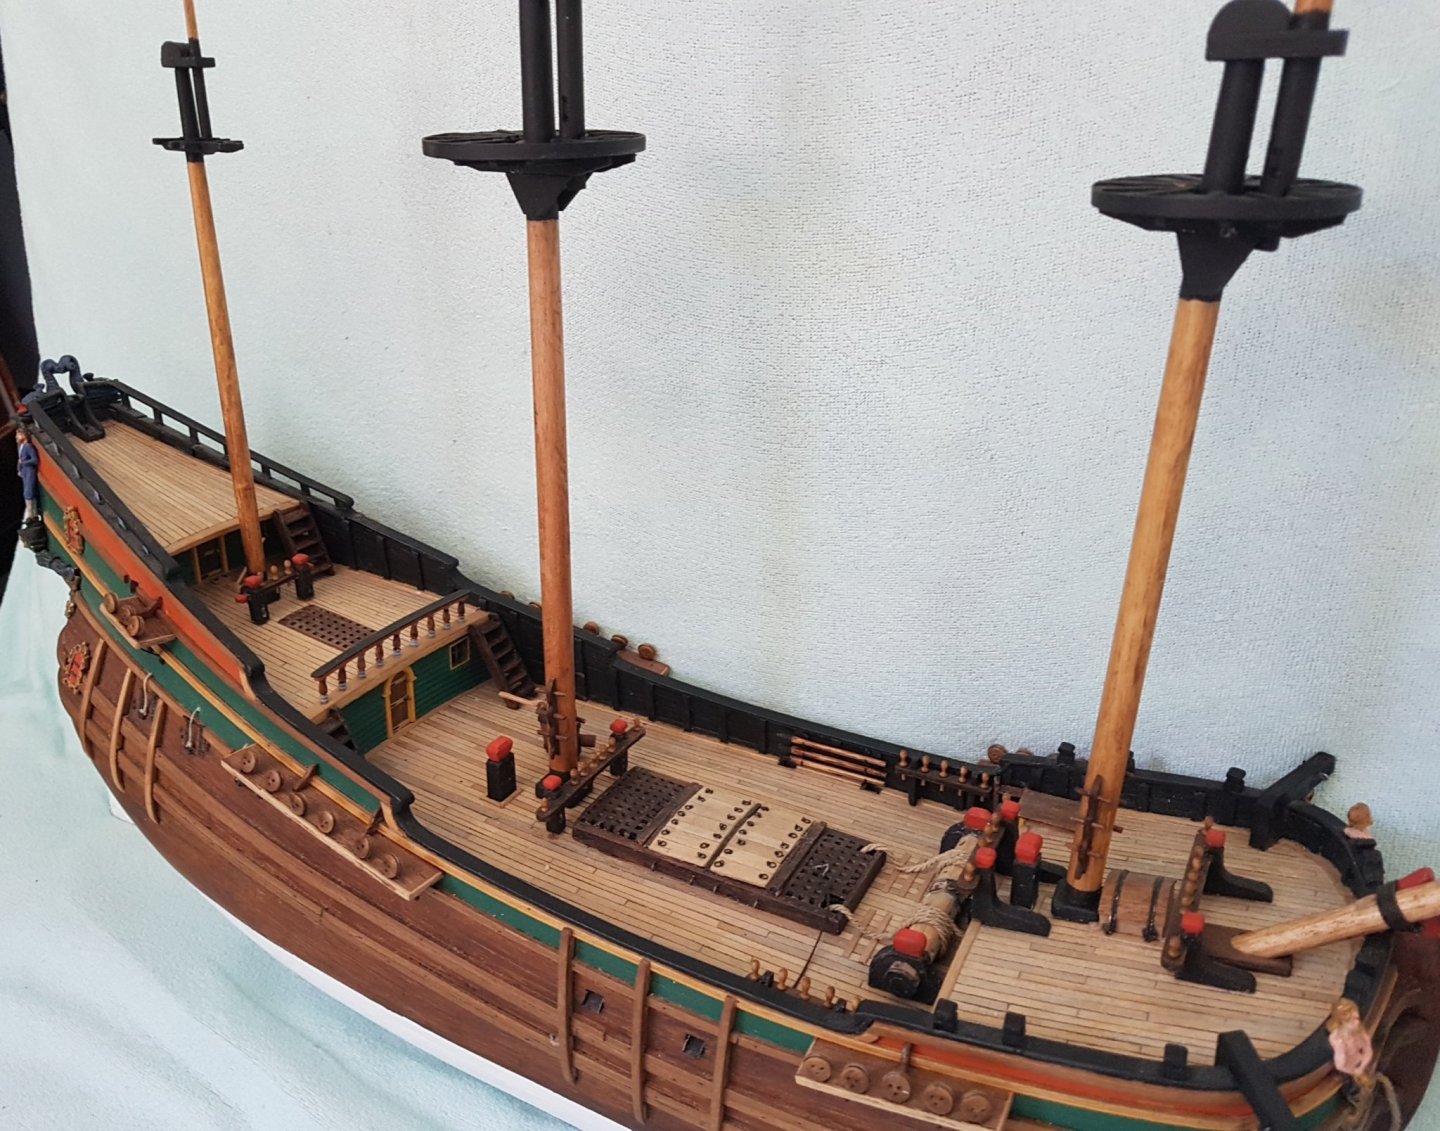
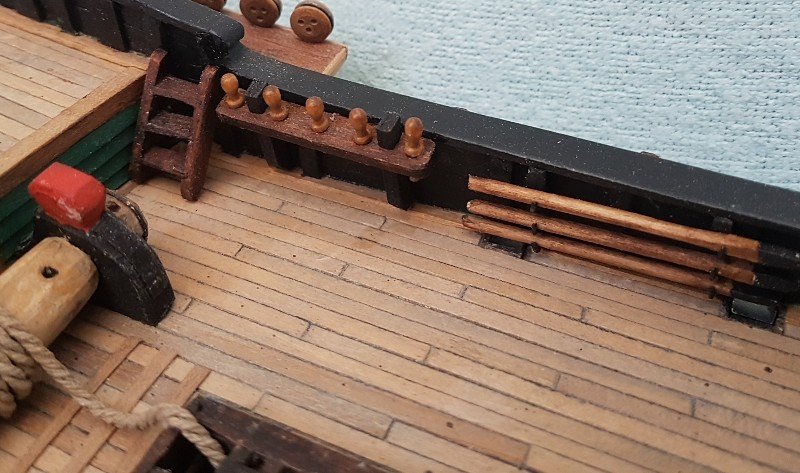
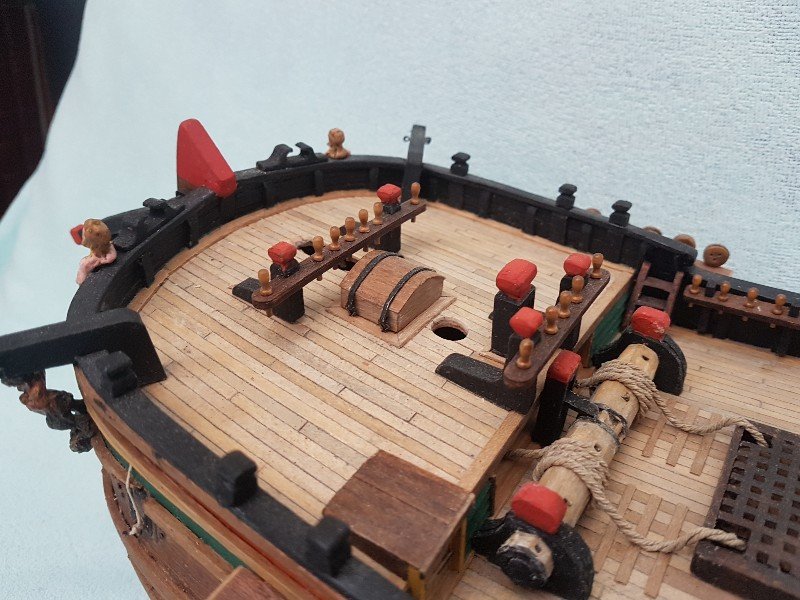
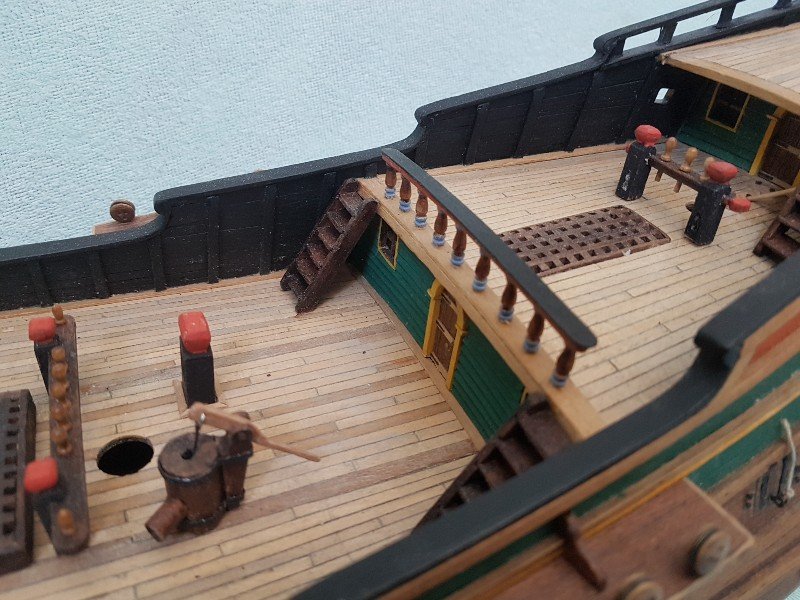
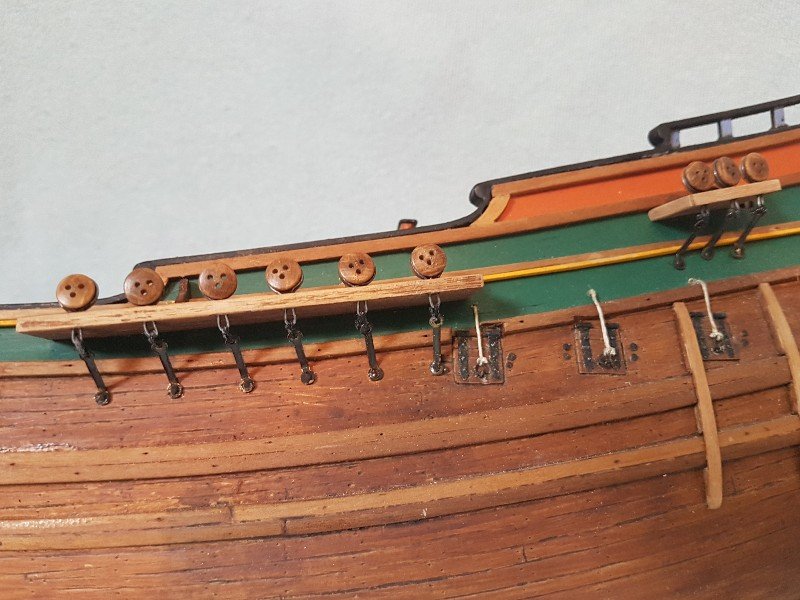
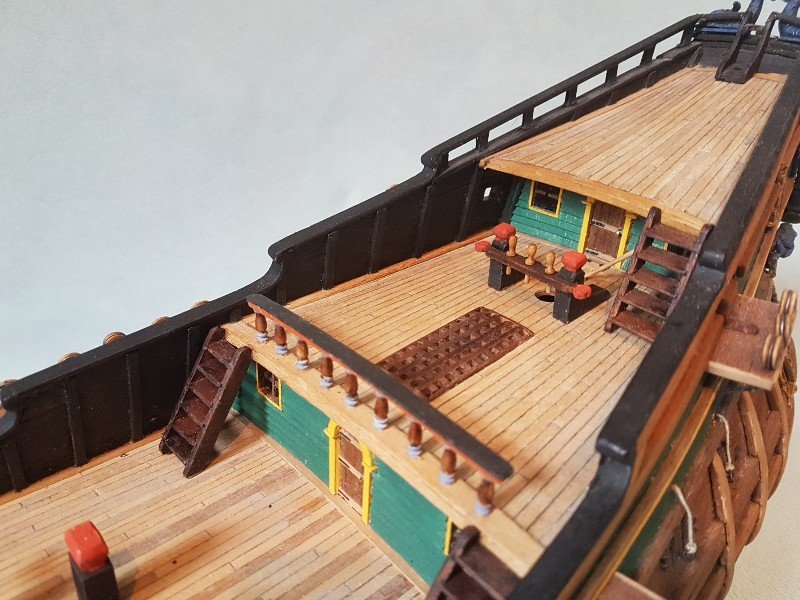
I am currently working on the masts. Not a small job anyway, as I found it difficult to align them properly. And as I am not a dedicated user of sophisticated machinery, I brought all masts to the right shape with a Stanley cutter blade and abrasive paper: and I dare say they look fine, and sufficiently well aligned. But before I glue the 4 masts on the deck, I did some changes and "improvements" to the deck. First I followed the advice of Marcus, and removed one of the water pumps. Then I glued the anchor cables. I had also made 6 winch bars and mounted 3 of them each side, in the only place still available. Then I had an aesthetic problem with the various pin rails. Some had "shouldered" feet, and others didn't but looked too high (see pics above). The shouldered rail at the mizzen mast received the straight feet of the ones behind the bow, and these, like the ones at the main mast, were shortened by 0,5cm. The pin rail near the bow got shoulders, as most of the lines attached to it would go to the bowsprit. By the way, you can see on one of the following pics a few woodworm holes. These were all made in a couple of hours, an some extensive insect spraying seems to have killed the poor little beasts.
-
Thanks for your reply, Marcus. Alas, in the meantime, I had built with success, a PAIR of pumps, and I could not resist to glue them on both sides of the mainmast. I suppose that the 2nd pump would also be on the main deck?
-
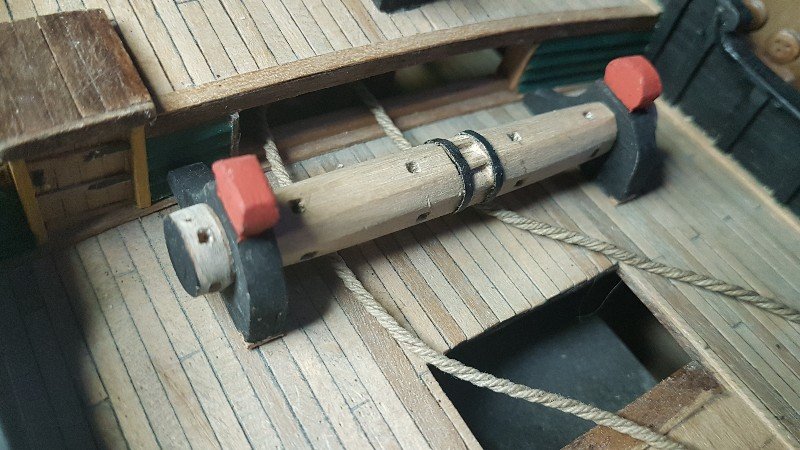
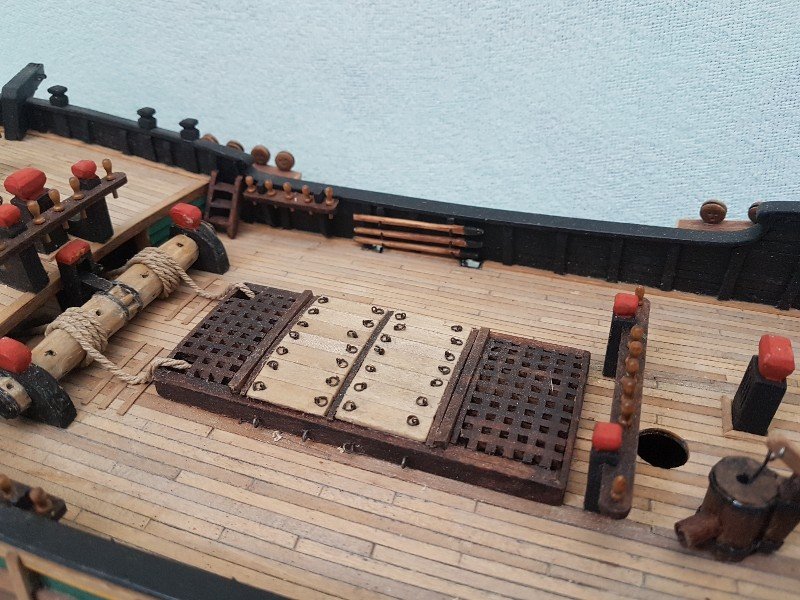
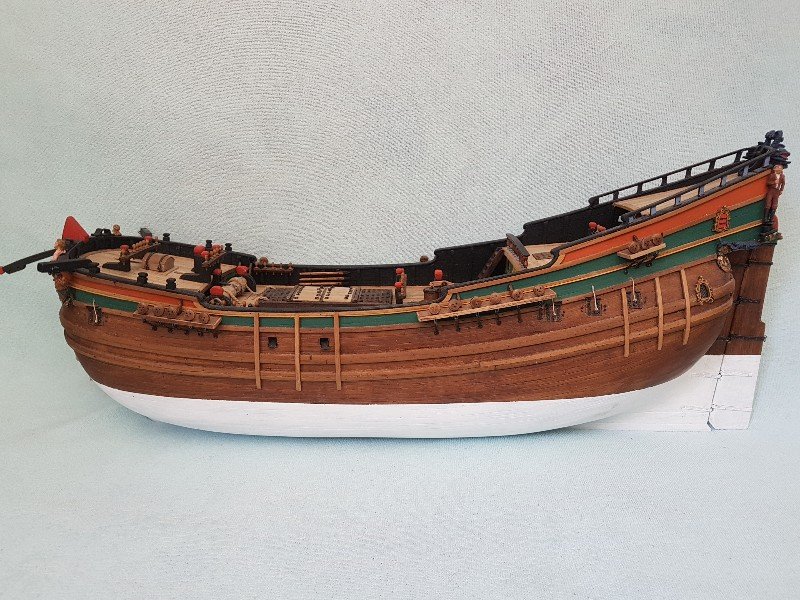
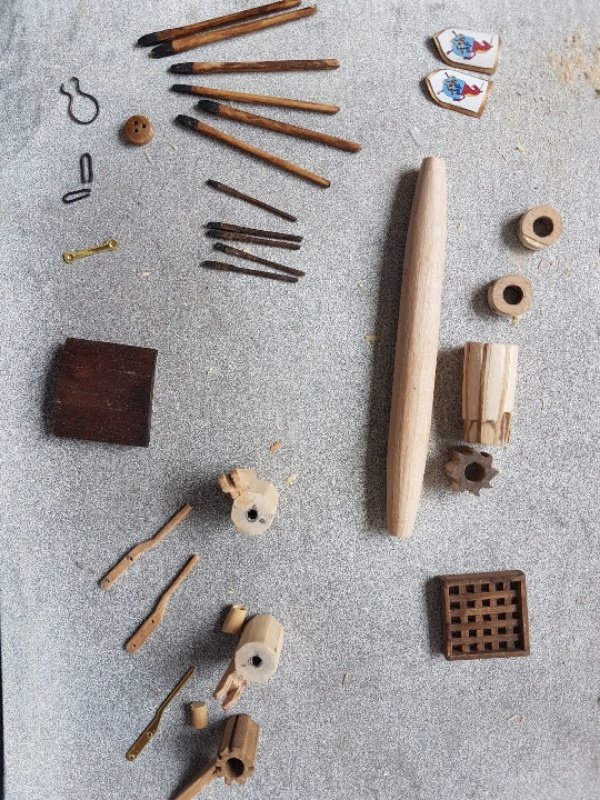
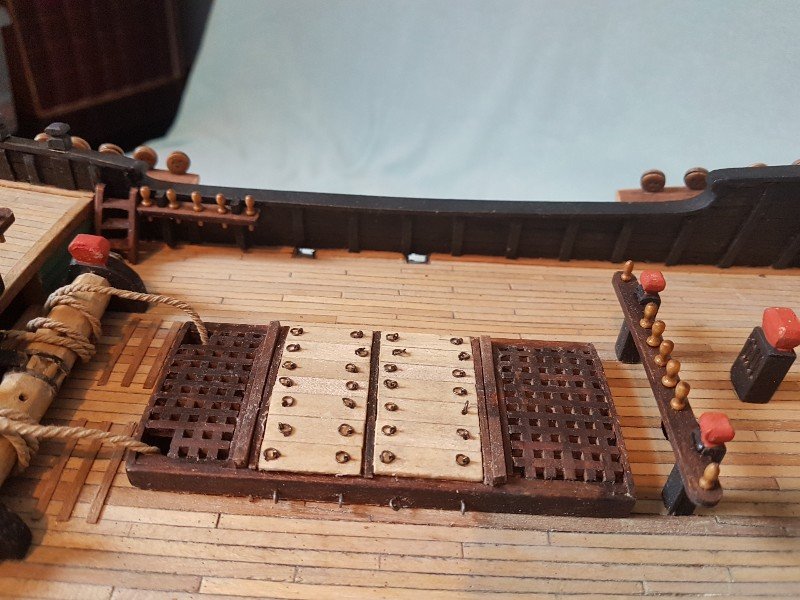
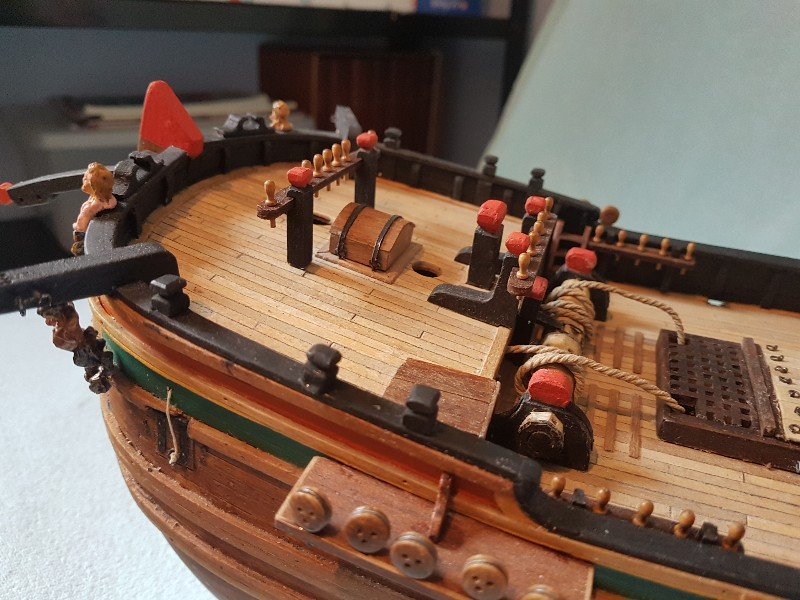
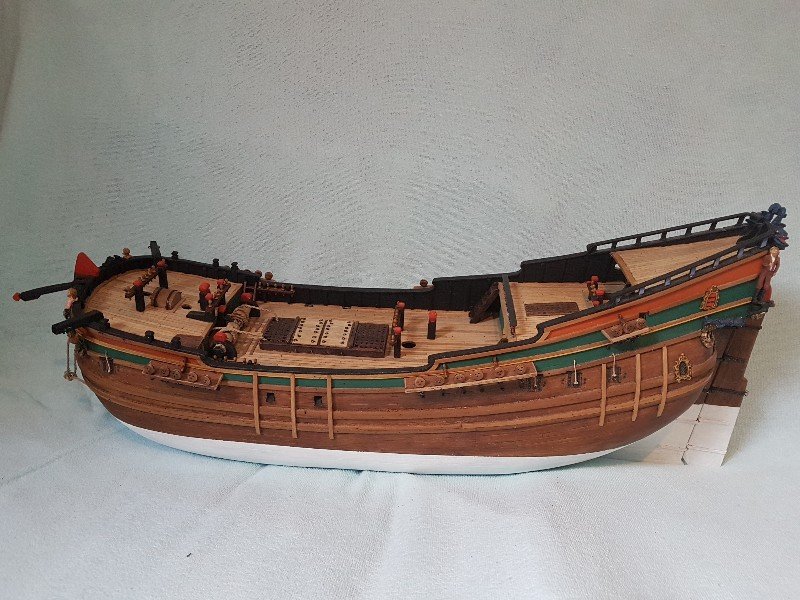
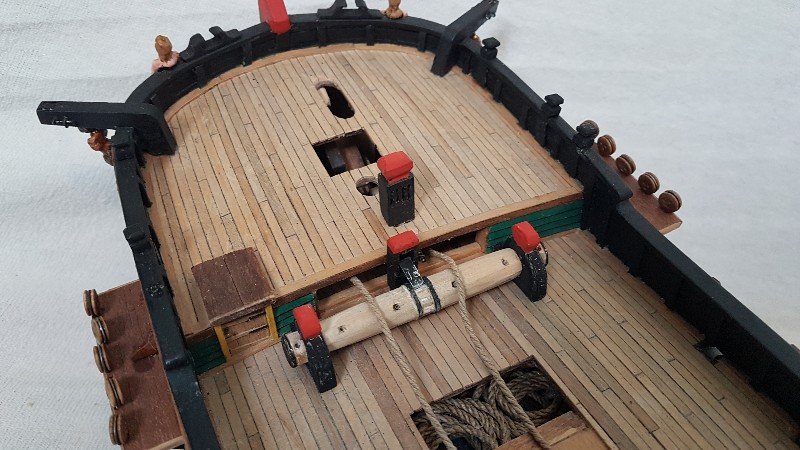
Quite a few things have been done, and this log was quite difficult to find. I had to face a number of problems I had never encountered before. First I had (have??) wood worms in my deck. I sprayed the whole ship 2 or 3 times (in- and outside) and look each morning anxiously if i don't notice any new wood dust heaps. Grrr... Then I think I may be happy with my winch. I had previously made a couple of attempts you can see on one of the following pictures: One with a round drum, which i felt i would never succeed to make octogonal and then another attempt was made based on the kit parts, but that soon proved unfitted. I finally used a stick of square stock. The square hole were drilled round and then made square with a suitable nailhead. But then I made the wrong decision to cover it with a coat of matte varnish (old enamel range by Humbrol) and it all turned white. I used various ways to get a darker shade with the available materials, but Luckily, part of it will be covered by the anchor rope. So far with some unexpected problems. On this picture, you will find some of my trials and fails. First the City of Hoorn coat of arms: my first two examples were either uncentered or just too large. Then you have, clockwise, the rejected winch drums and flanges. Then a skylight which I built during my first build seesion, and which I don't remember where to put them. Then, on the left a rather successful attempt at better pumps, next to the kit pump. Then a roof which iss too large to be placed before the fore mast, and above these, two sets of winch bars, the small ones are way too small, and maybe the larger ones are in fact ... a little too large. I have enlarged the pic to show the fairly ridiculous chains provided in the kit: no way for me to make anything solid with those rings. But I have noticed that these chains were (on paintings), much shorter than what the kits suggests you to do. See the end result. I also made the various deck furniture pieces. I tried to make better staircases but failed. These are from the kit Questions to 'specialists ': I wanted my model to have 2 water pumps, 1 each side of the main mast: does that make more sense than just one of them. Problem: I have already built them both, but let authenticity prevail! The majority of flutes pictured on the web do not have mast bands! I want to follow this trend (the easy way?): what do you think. And in this case, the mast probably was a one piece wood piece, probably pine ? Then there would be numerous wood knots visible, no? Here are some pics of her actual status:

-
I did some more work on the winch to hopefully make it look a little more civilized and finally glued it in place. It is good from far (away), but far from good, I am afraid. Anyway it is a large improvement on the kit winch.
-
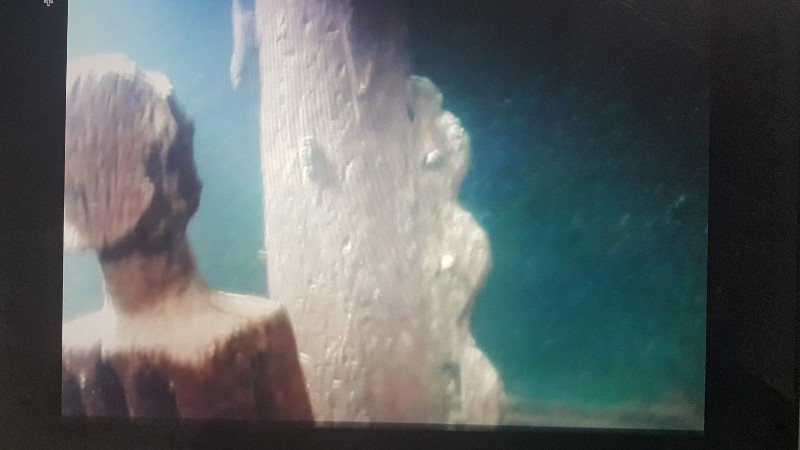
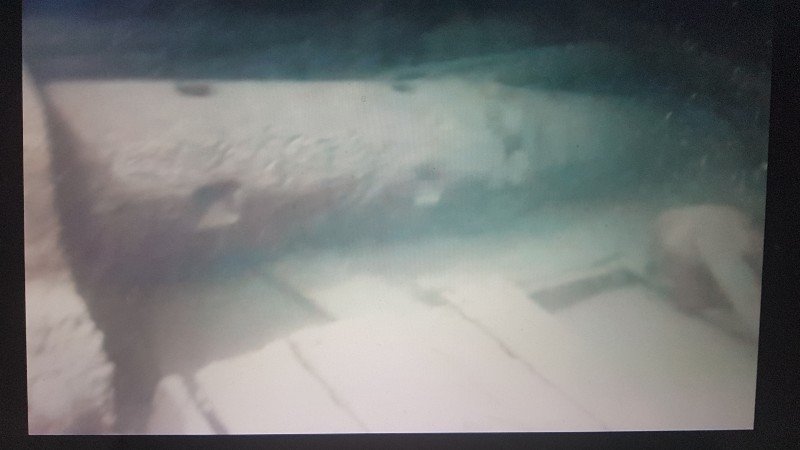
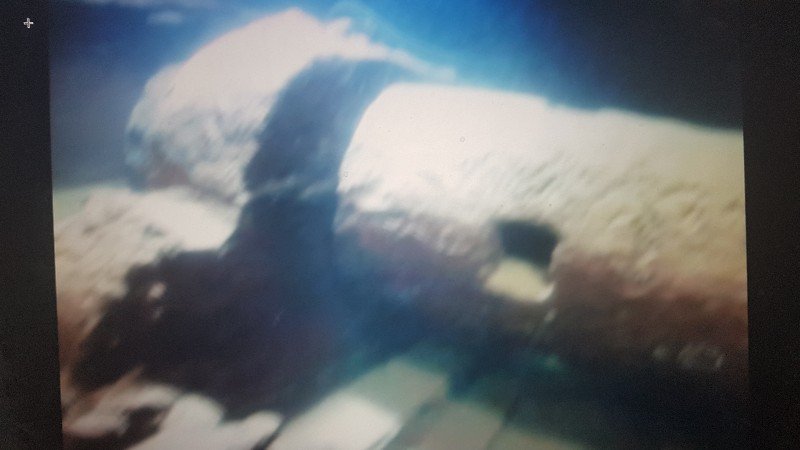
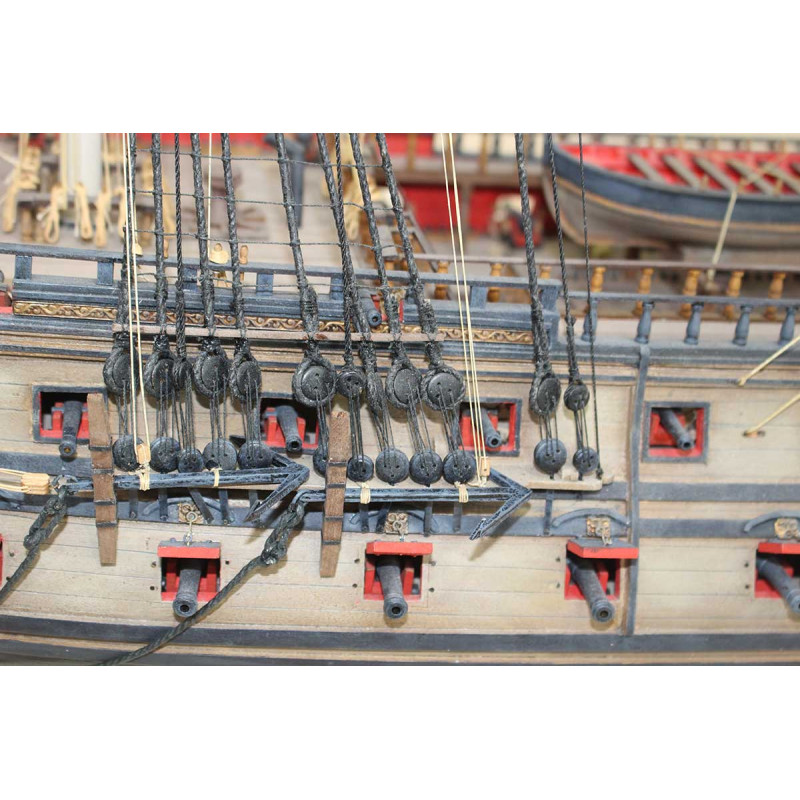
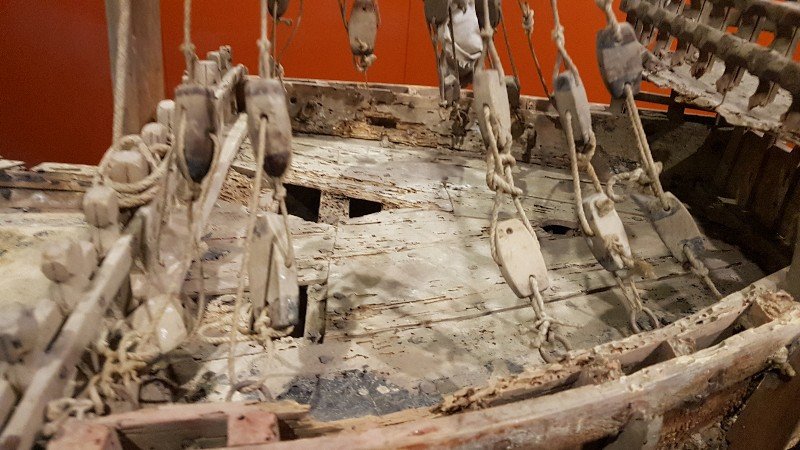
Thank you for your kind comments. Jan, you are right about this kit's winch. It makes no sense. It should be said that this kit seems more aimed as a decoration item than as a historic replica and as such, she is beautiful. Still, for me, the model was interesting just because of the possibilities for improvement. About the winch, here are 2 underwater pics of a flute's winch. Difficult to discern if they were taken backwards from the bow or otherwise. Anyway, after many clumsy trials with a piece of round dowel, then with the kit pieces, I finally used a square dowel that I made more or less octogonal I would have made the winch from side to side, but then I would have had problems with the access to the forecastle, PLUS I still want to build a ship's boat and therefore need the winch to be as close as possible to the forecastle to have enough place for it. Another question: I have seen on various models of Dutch ships a vertical pin rail along the mast, with 2 to 3 pins and a pulley there under. Should this replace the classic horizontal pin rail before each mast? See picture from the ship wreck.