HOLIDAY DONATION DRIVE - SUPPORT MSW - DO YOUR PART TO KEEP THIS GREAT FORUM GOING! (Only 20 donations so far - C'mon guys!)
×


The Gimps Chimp
-
Posts
172 -
Joined
-
Last visited
Content Type
Profiles
Forums
Gallery
Events
Everything posted by The Gimps Chimp
-
Hi Dean, your plans look like an Occre kit, how are you getting on with them? I find they can be a bit of a challenge at times. Chimp
-
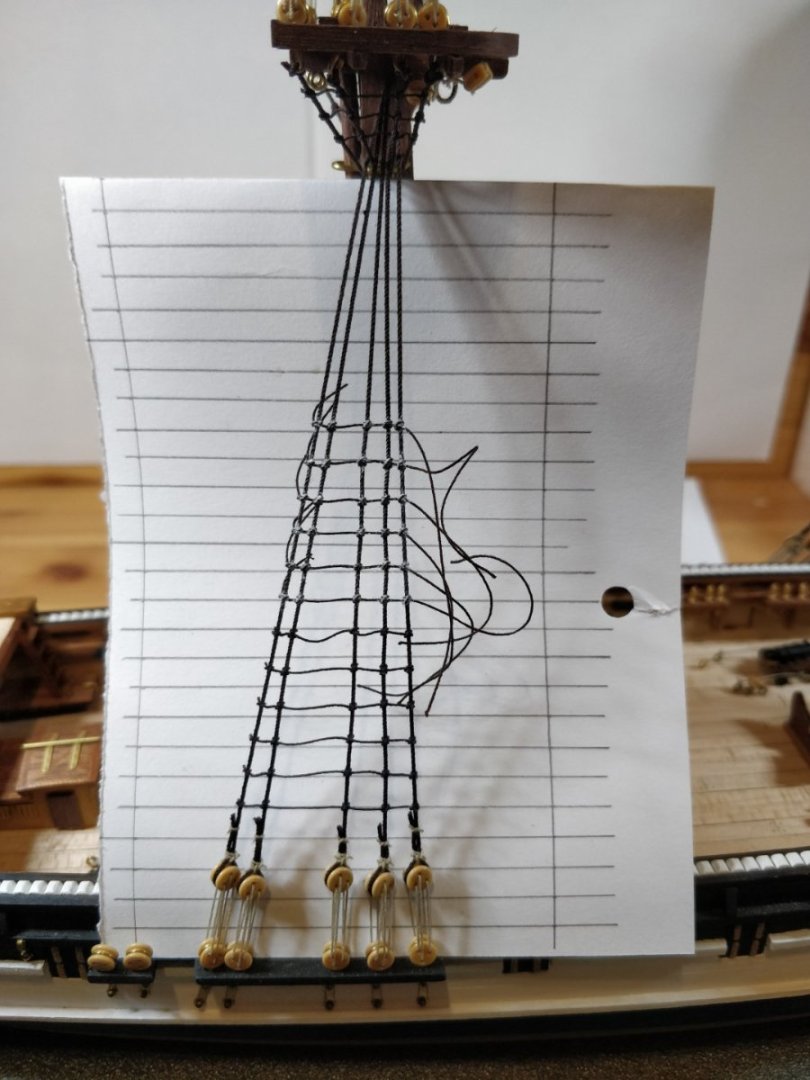
Hi Dean, on that same sheet you should have 3 more views labelled A, B and C. They will be what you see when looking from the direction of those arrows. A is looking up the mast, B and C looking down. Regards Chimp.
-
 Coming together nicely Kiwiron!
 -
Many thanks for your words of encouragement SHJ. It's always good to get positive feedback Chimp
-
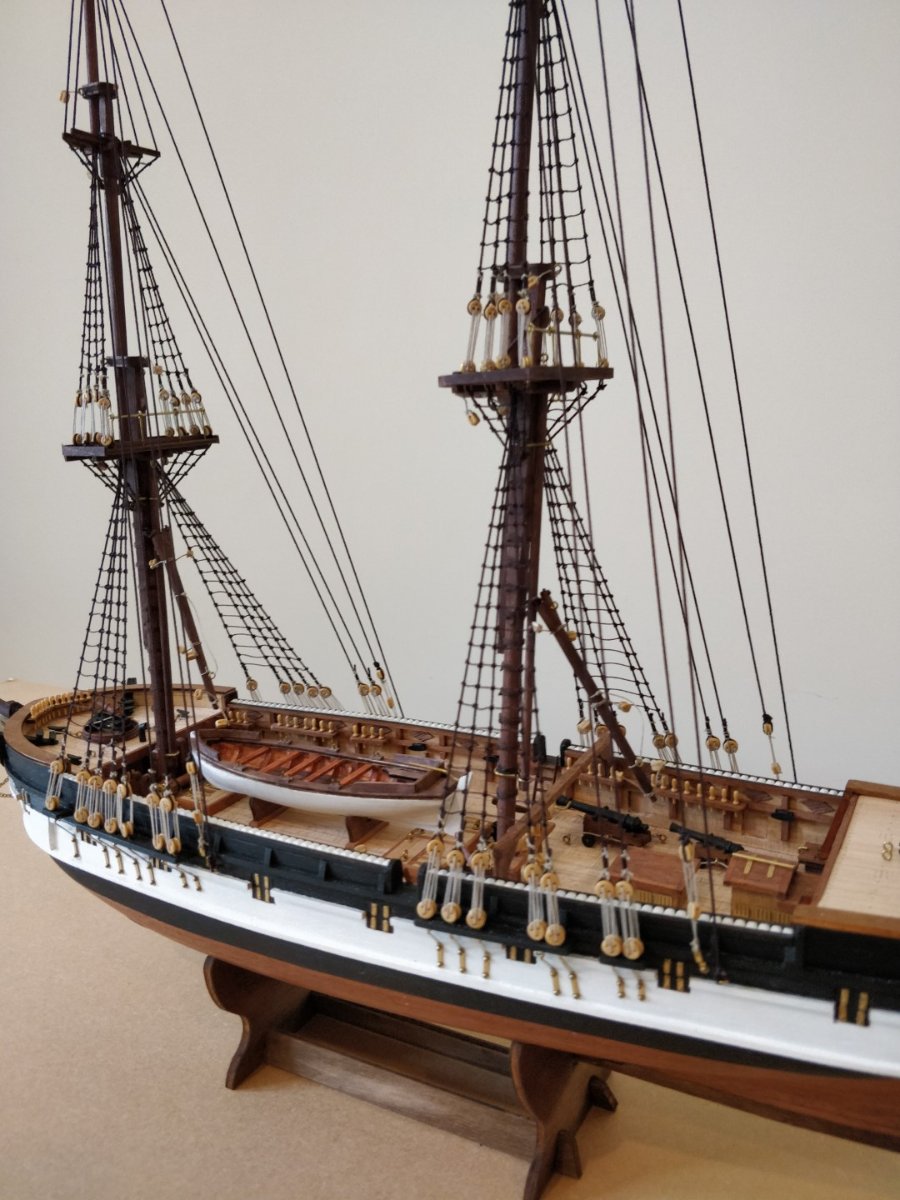
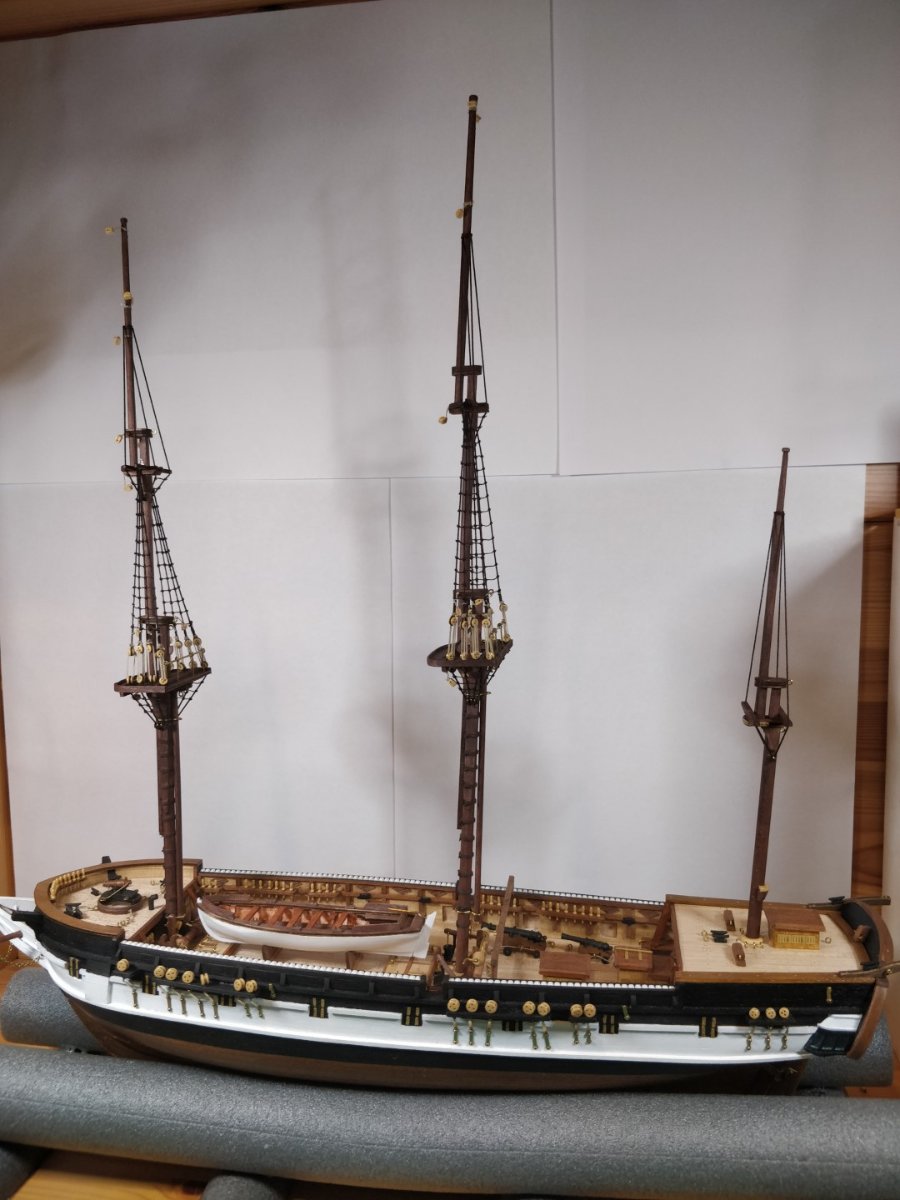
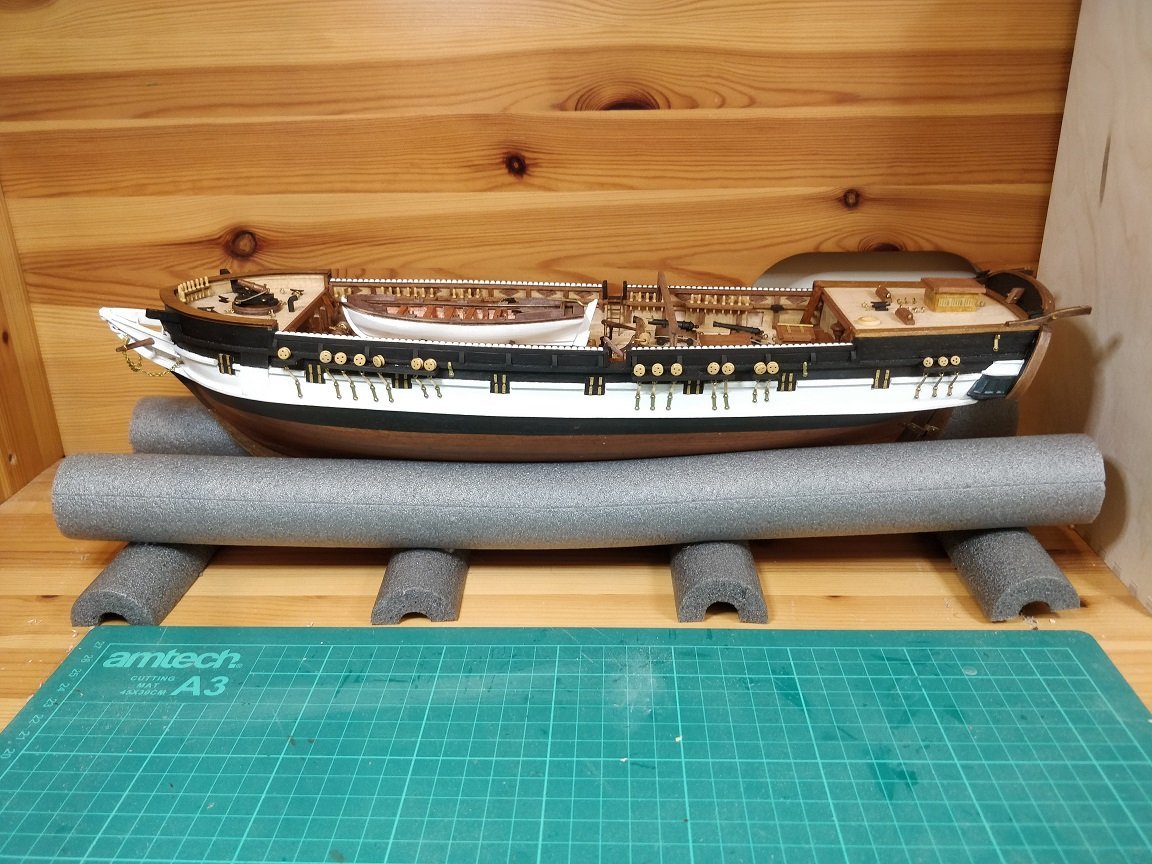
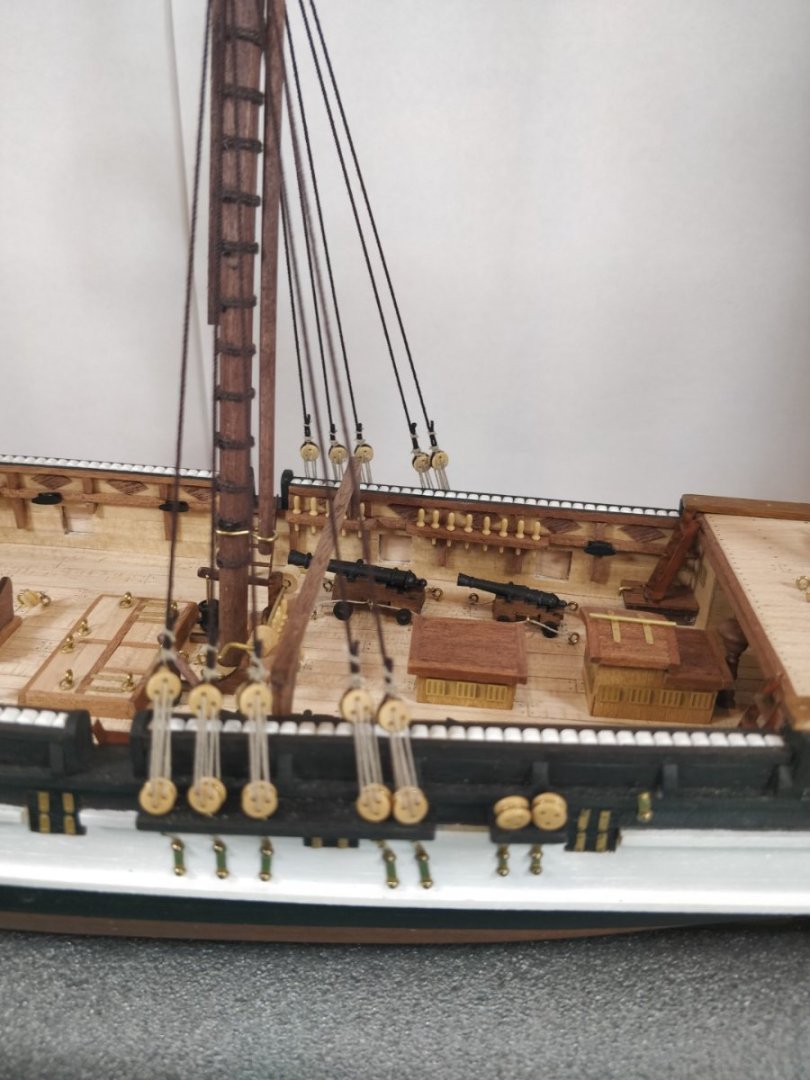
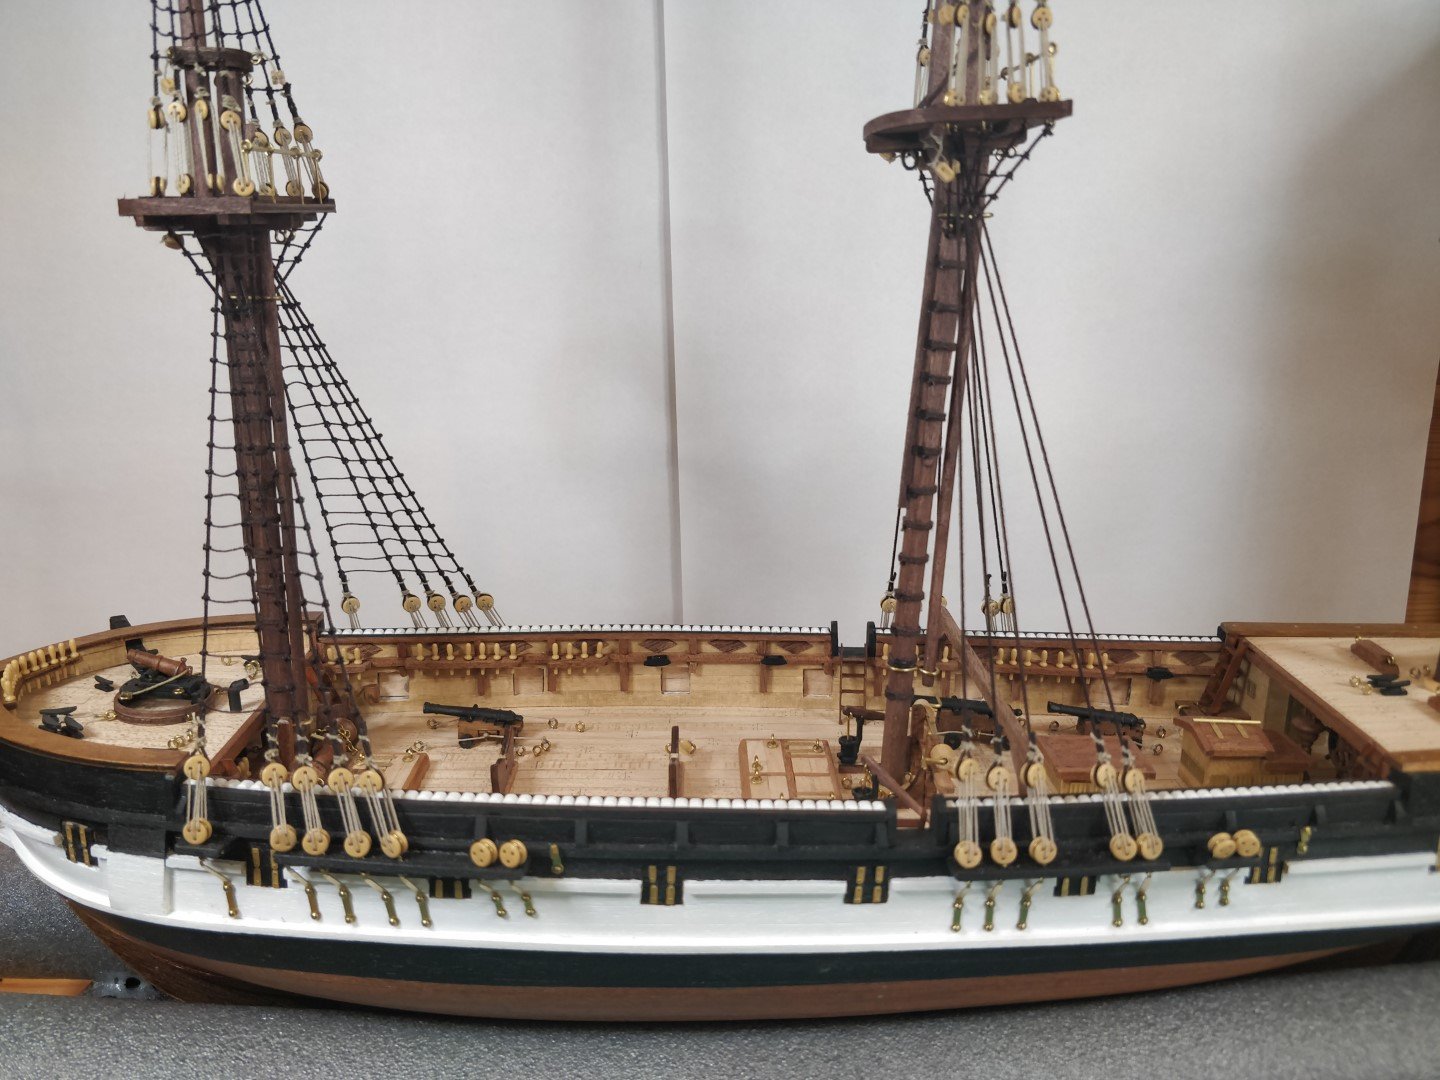
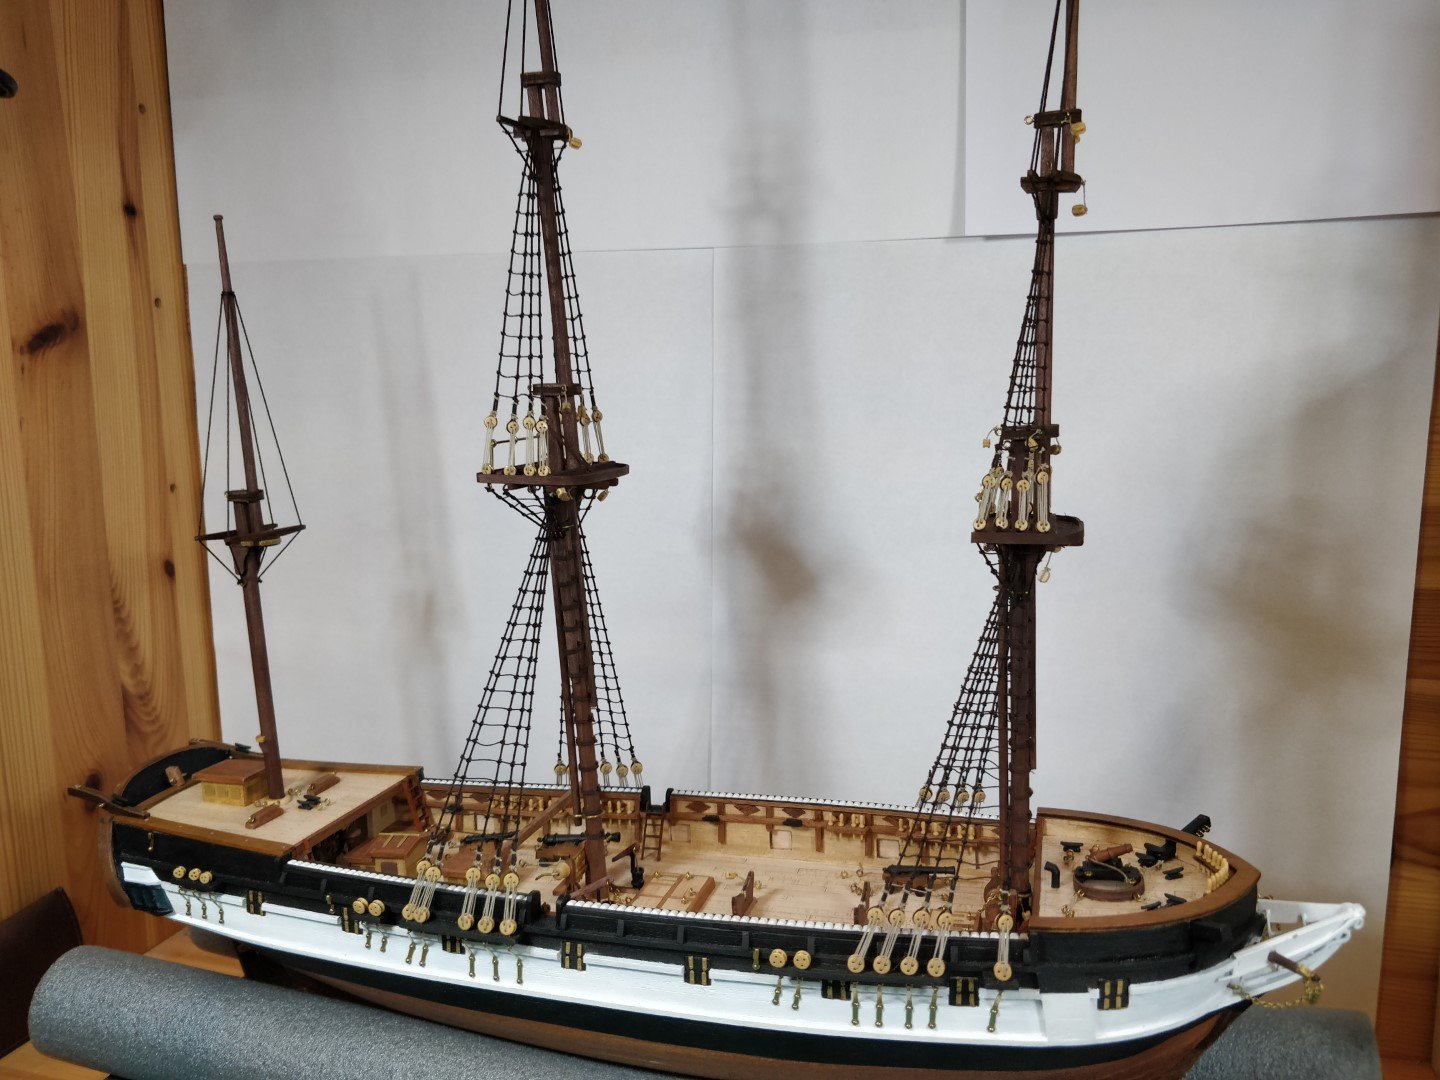
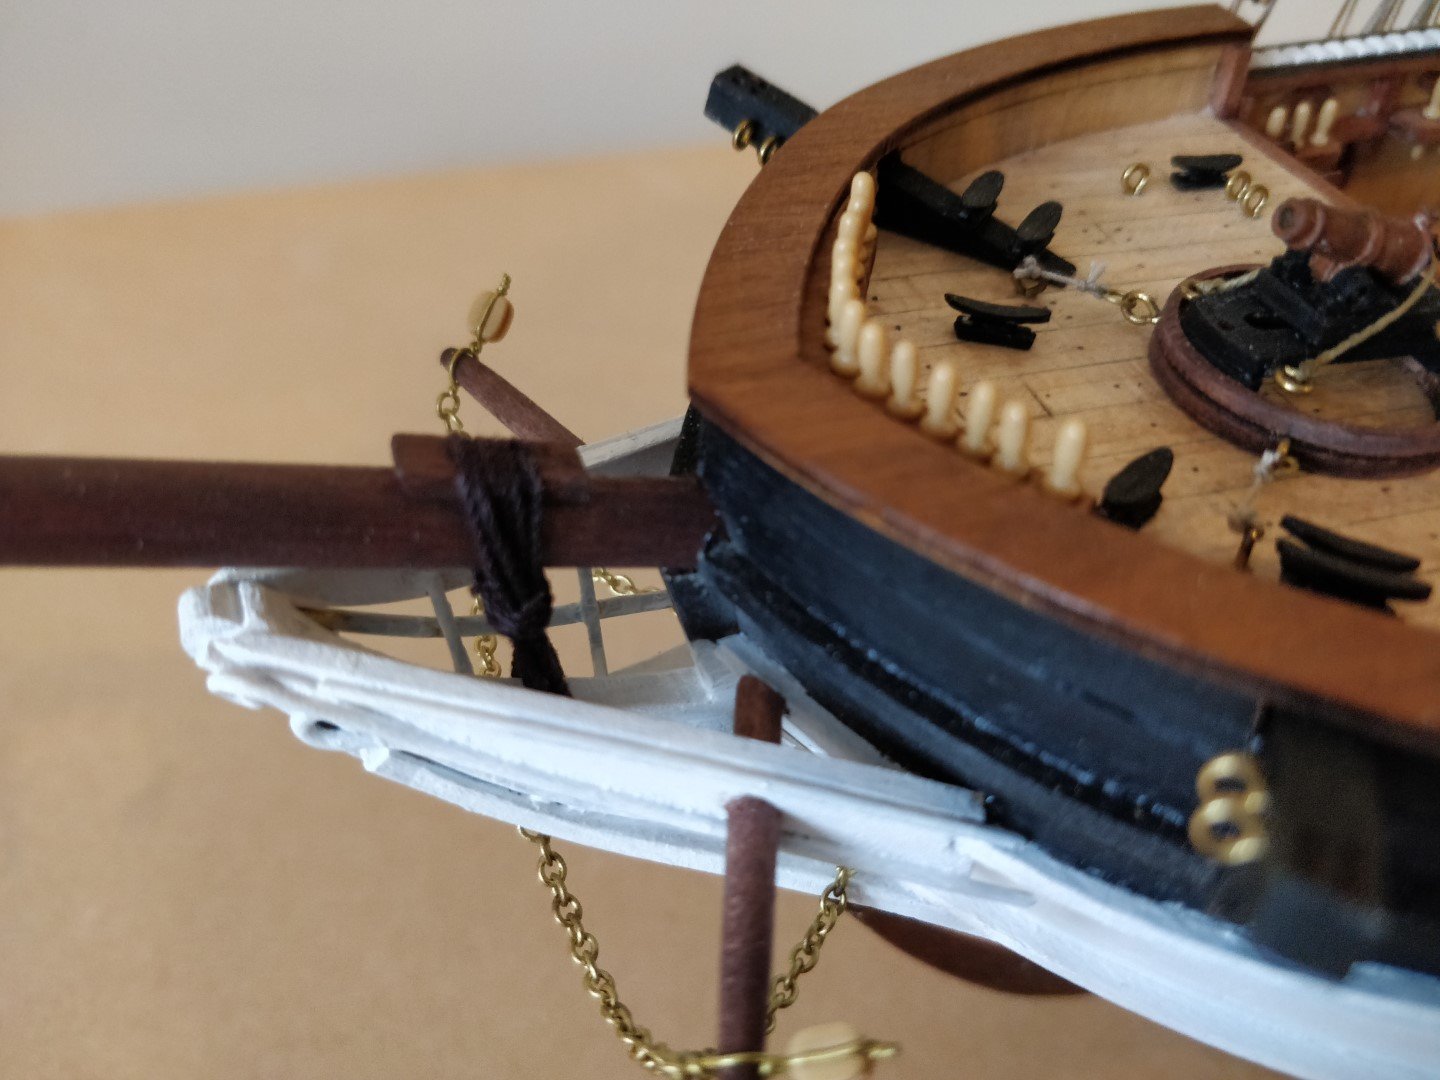
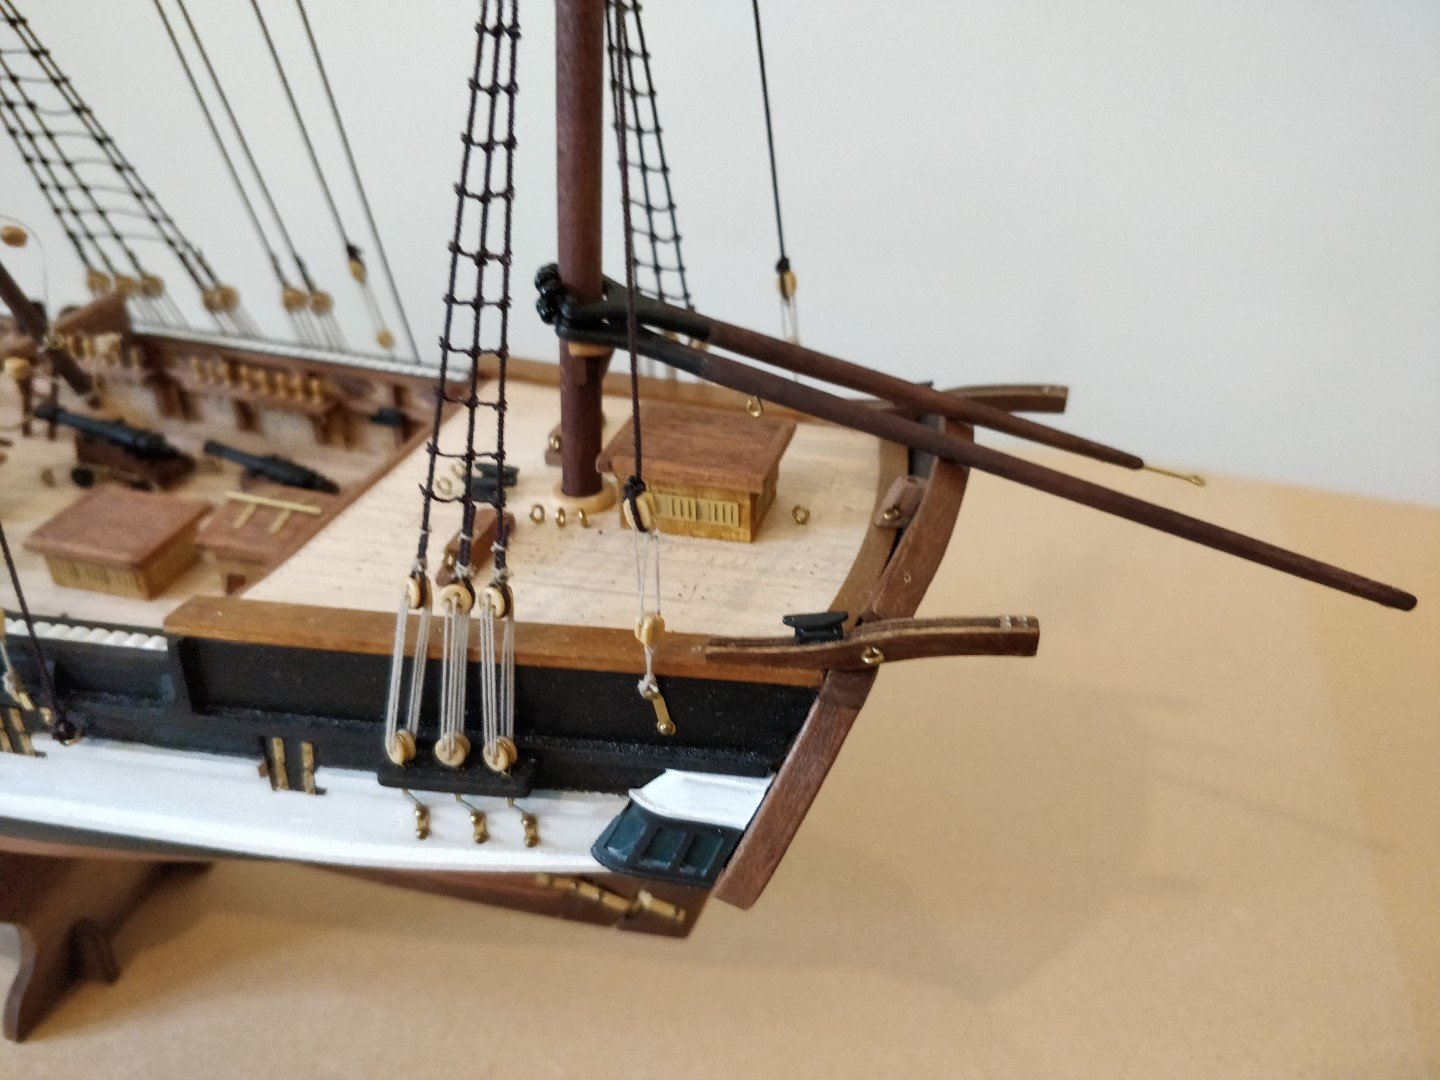
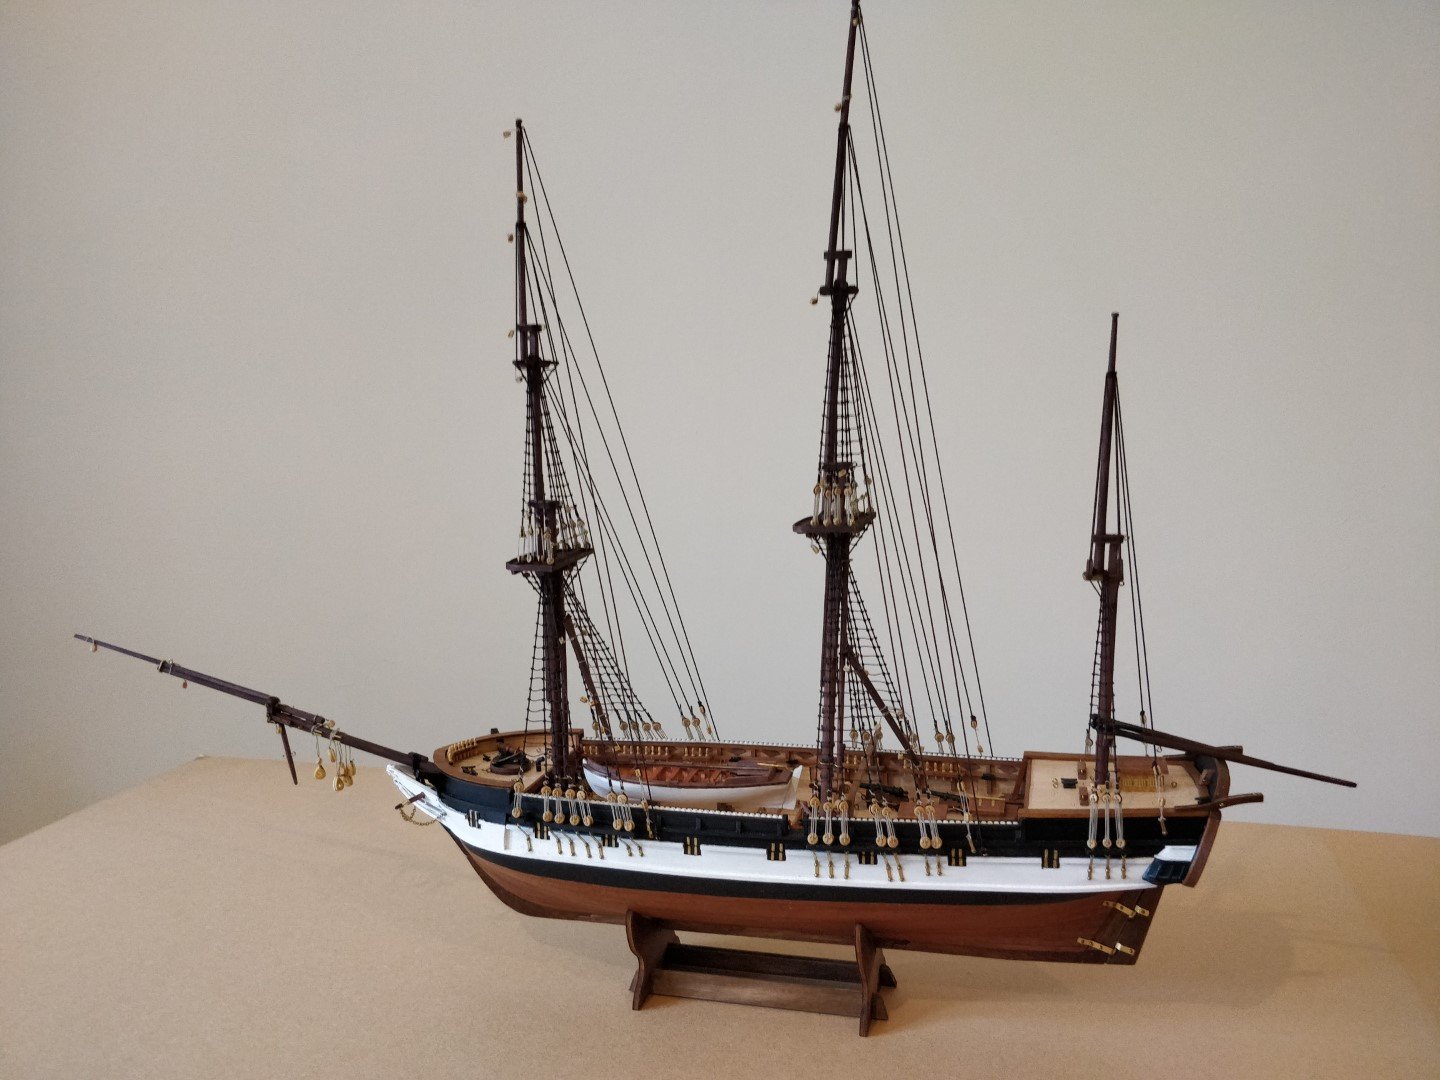
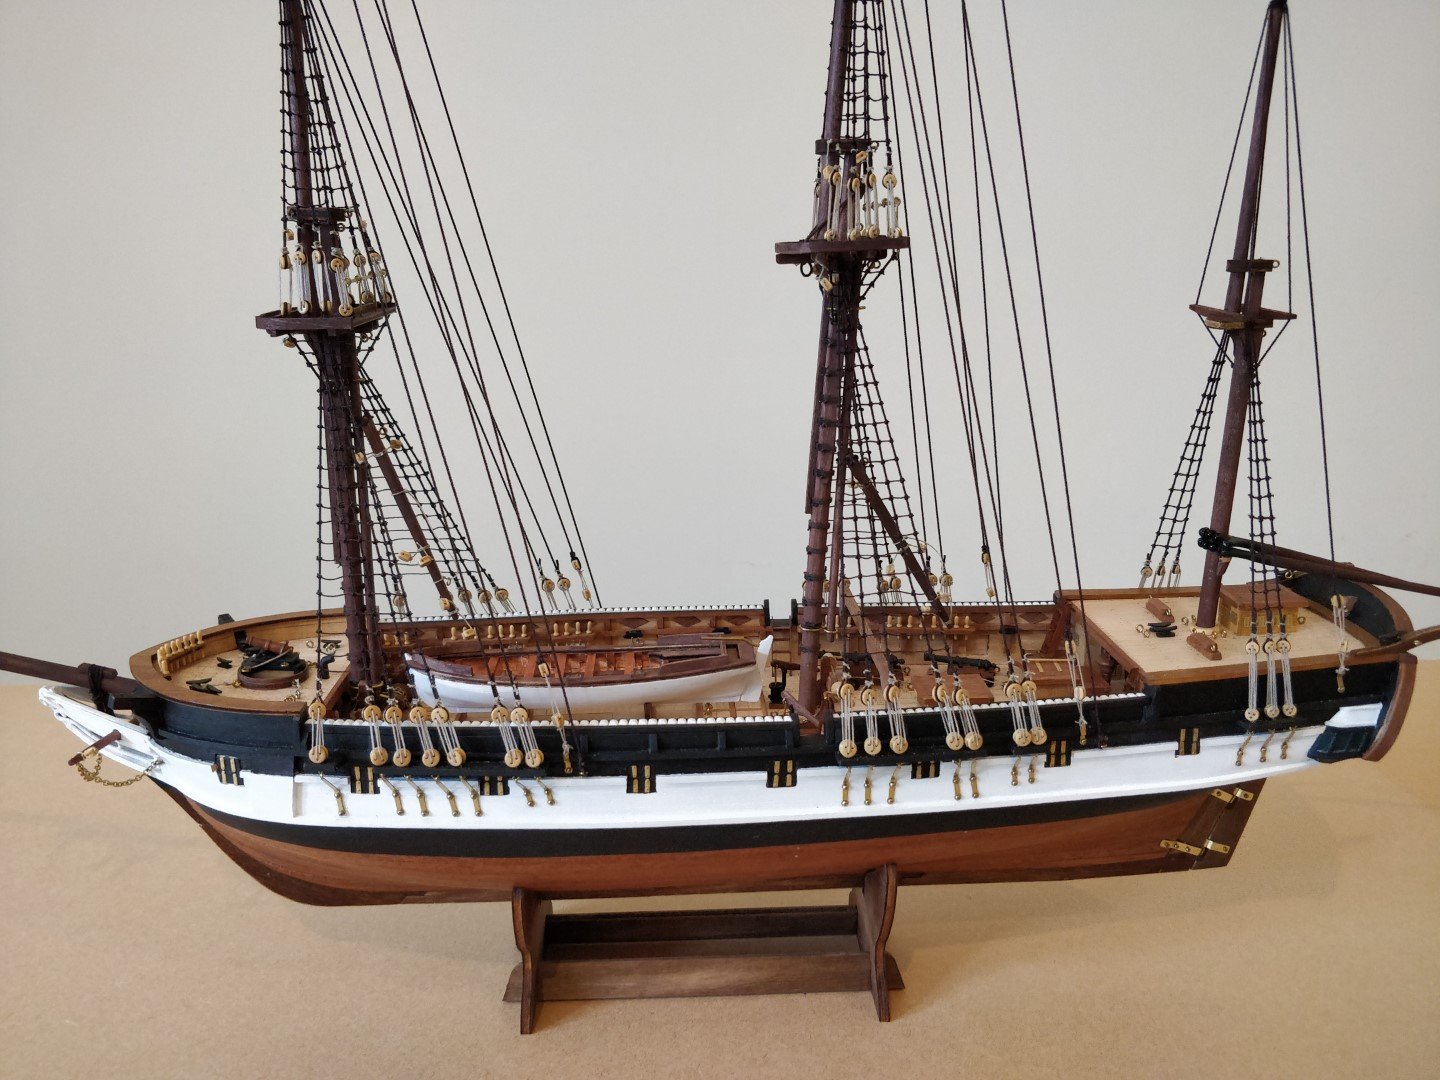
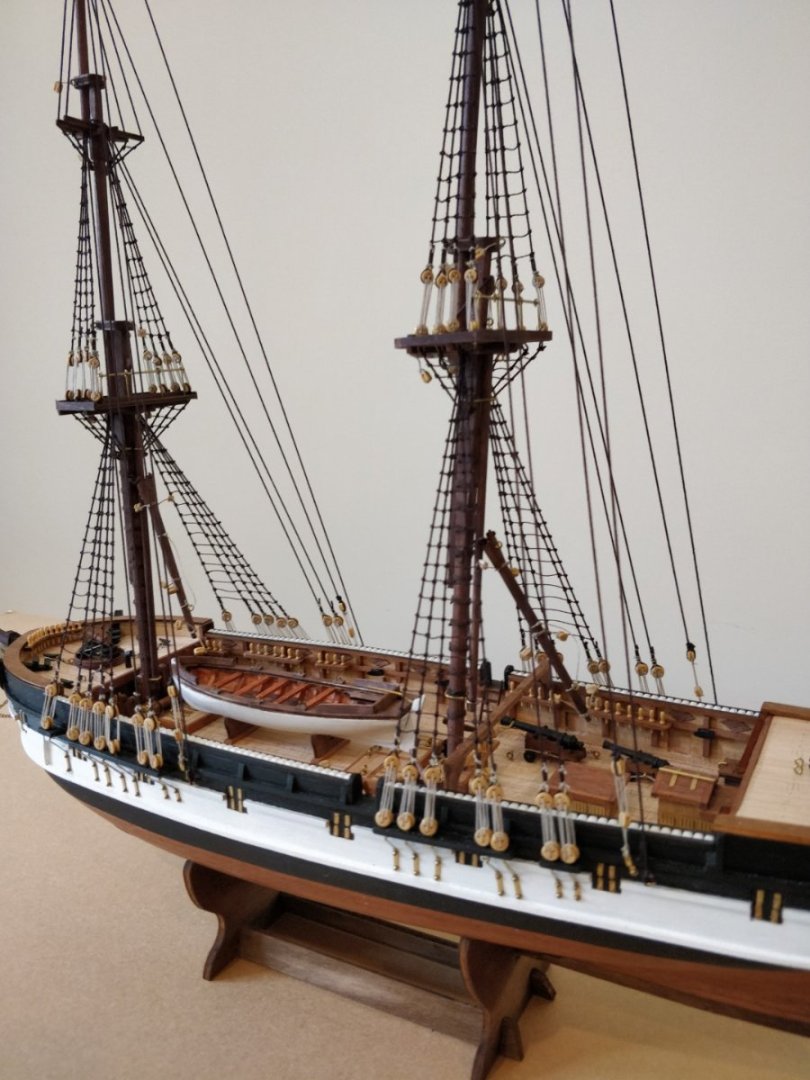
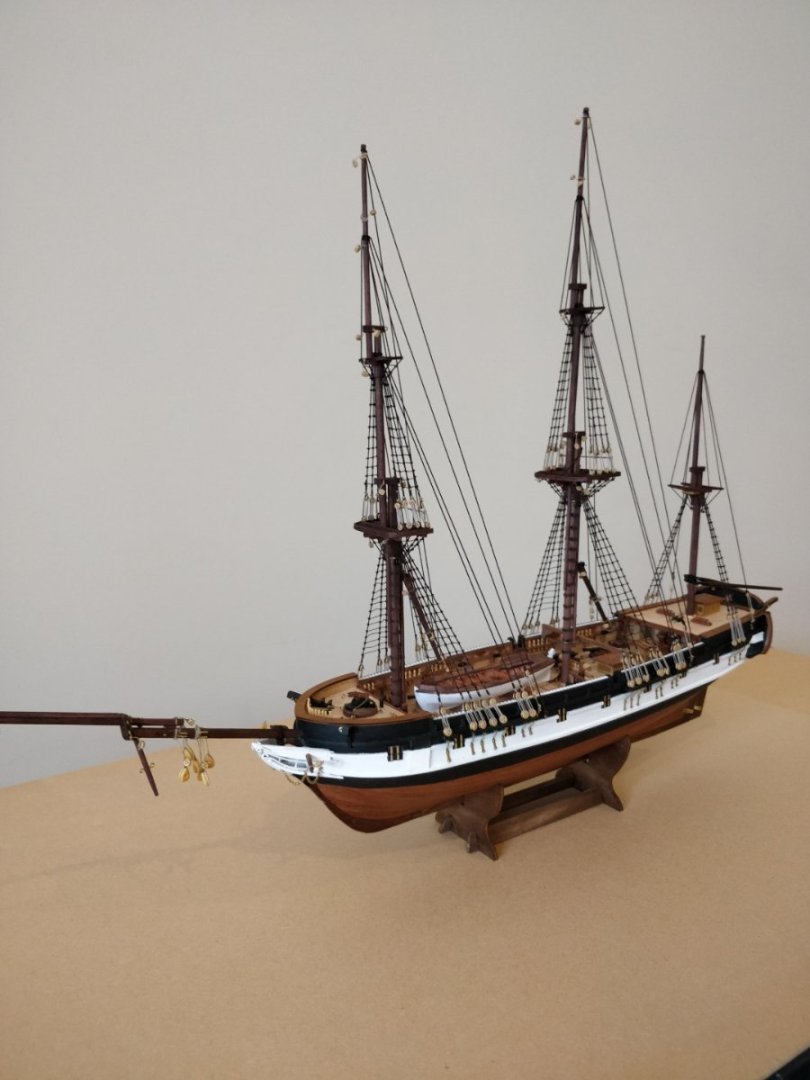
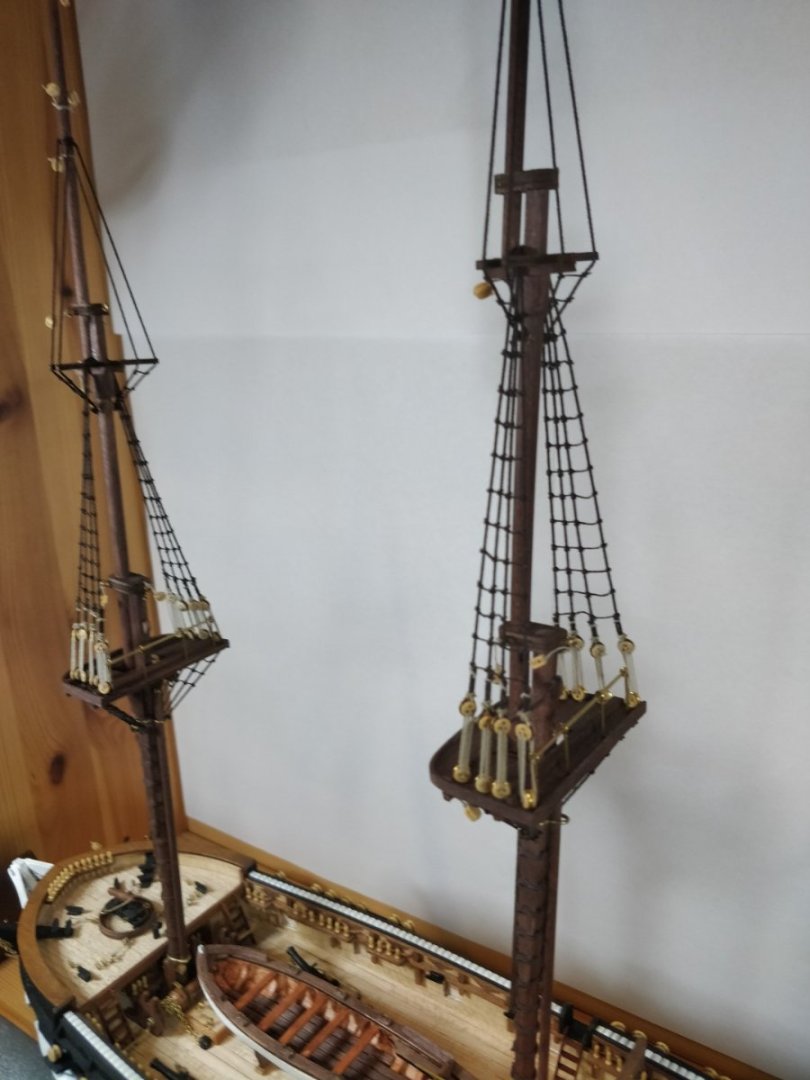
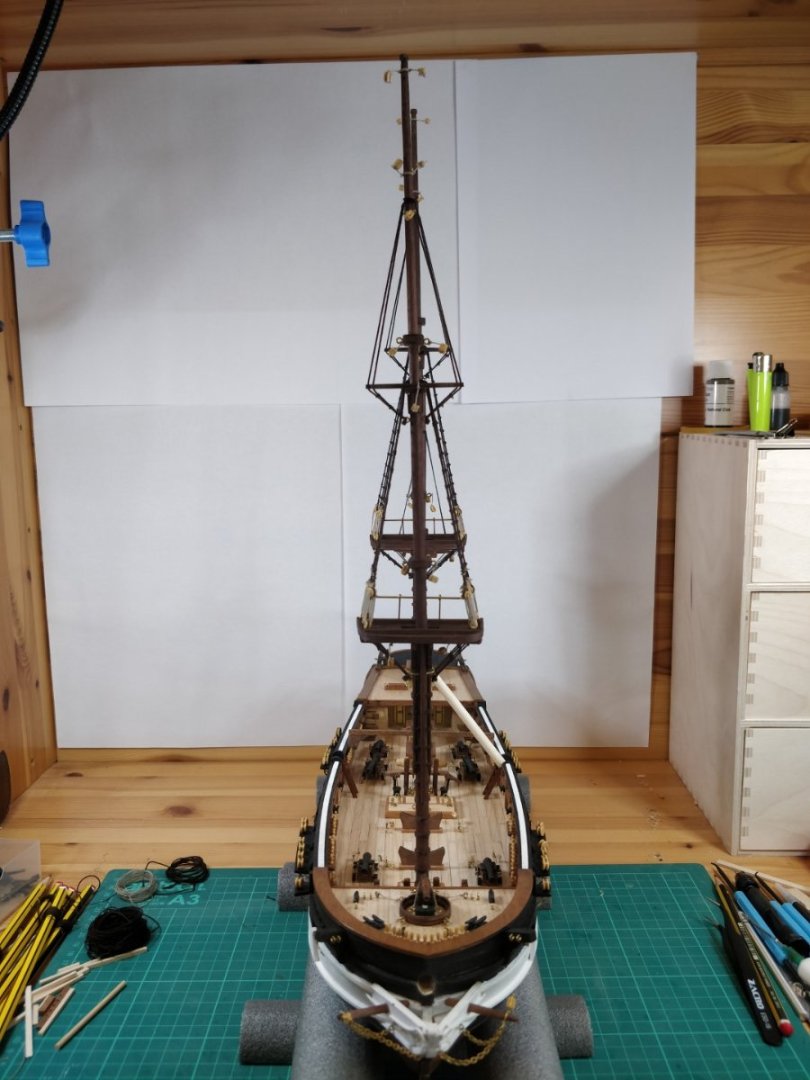
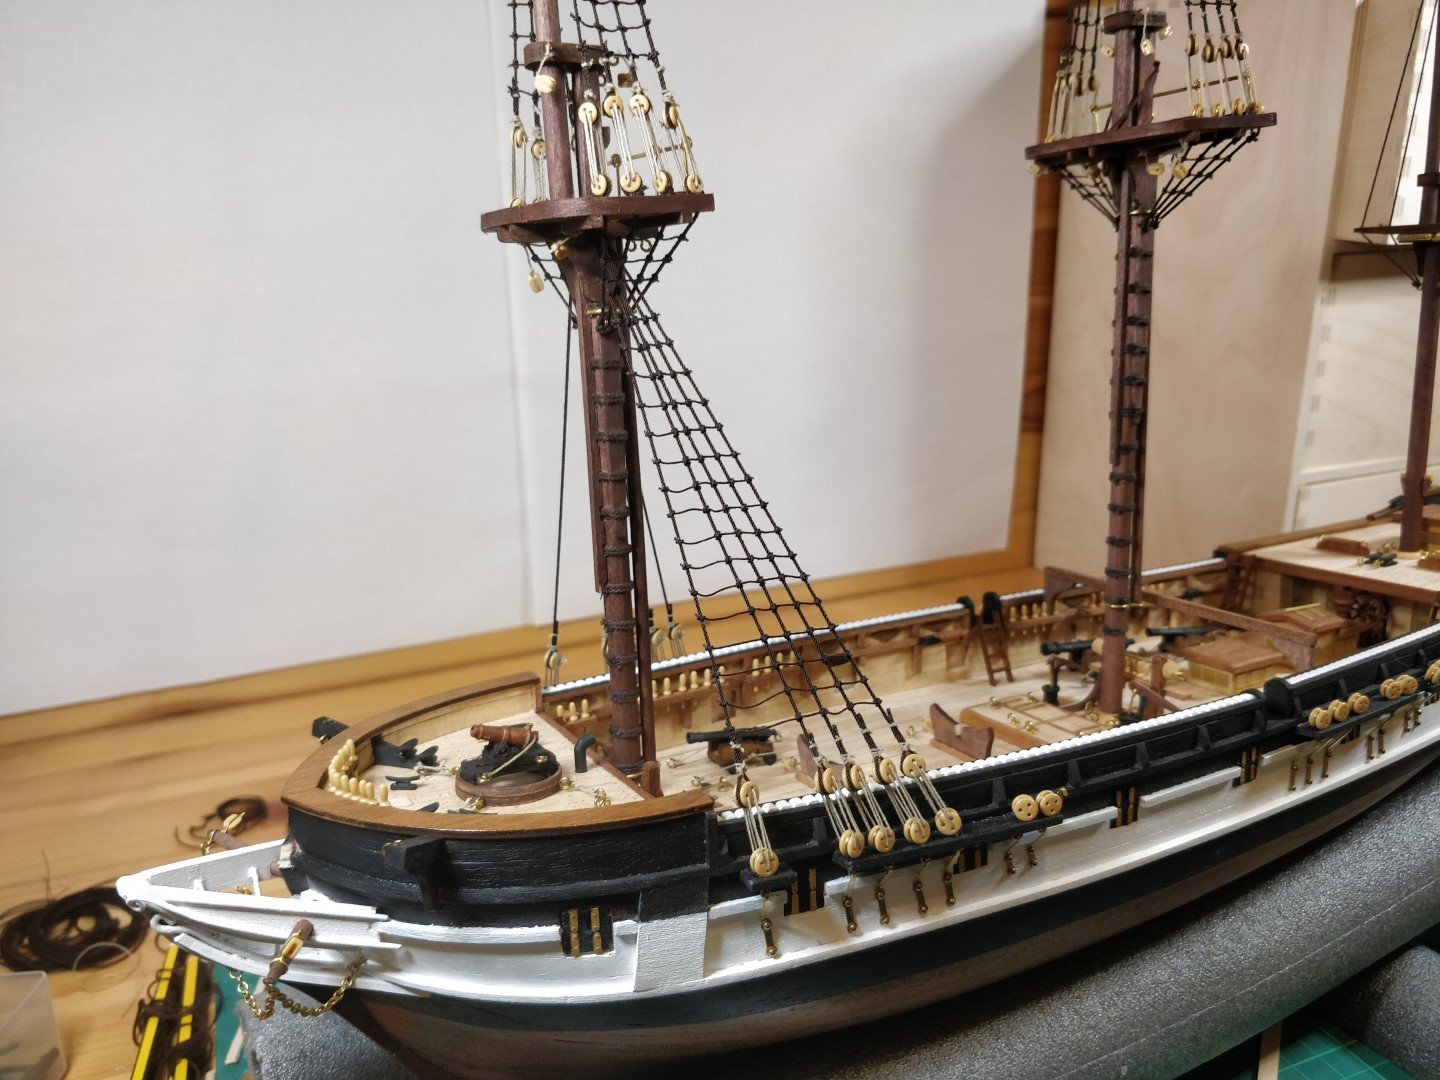
I guess I'm long overdue for an update, so here it is. I finished the ratlines on the foremast then moved onto the main and mizzen masts. As you can imagine there's not much to say here as it's just a repeat of the fore mast. I then fitted the backstays for the three masts. This again is not the sequence shown in the instructions or the videos but I feel it's a more logical order. I then decided the time was right to fit the bowsprit. This was a big decision as with the bowsprit fitted it makes the ship too long to comfortably sit on my very restricted work top and would now be prone to getting damaged as I manipulate the model. However, it has to be fitted at some point in time and now felt right. The bowsprit had been made many months ago and was rigged using the kit supplied thread. I've since discarded the kit thread and make my own rope as I wasn't happy with the quality. Having said that I've decided to keep the original rigging of the bowsprit for now. If it looks too much out of place I might decide to replace it. With the bowsprit glued in place I fitted the gammoning which went well. I then made and fitted the three gaffs to the masts and the boom to the mizzen mast. These were straightforward but a word of warning if fitting the mizzen gaff and boom after the mizzen shrouds and backstays. Make sure you fit them pointing aft. I know that sound obvious and it makes me look a fool, but I fitted them pointing forward, as it was easier to tie the thread around the mast. I then realised even pointing them upwards they were both too long to spin around to point aft as they caught on the backstays. I felt such a fool and had to cut them off and start again. I thought I would take a couple of photos of how she is now as I'm starting to feel I might be on the home run. Next I need to rig the bowsprit and finish the standing rigging. With the winter months approaching I should get time to finish her off before the end of the year Regards Chimp

-
Hi Allan, Many thanks for taking the time to add further clarification. What you describe makes perfect sense, it's just unfortunate that the drawings make the issue a little confusing for people like myself with only little knowledge of such things. I guess that's what we're all doing here, some teaching and some (if not all) learning. Thanks again for clearing things up. Chimp
-
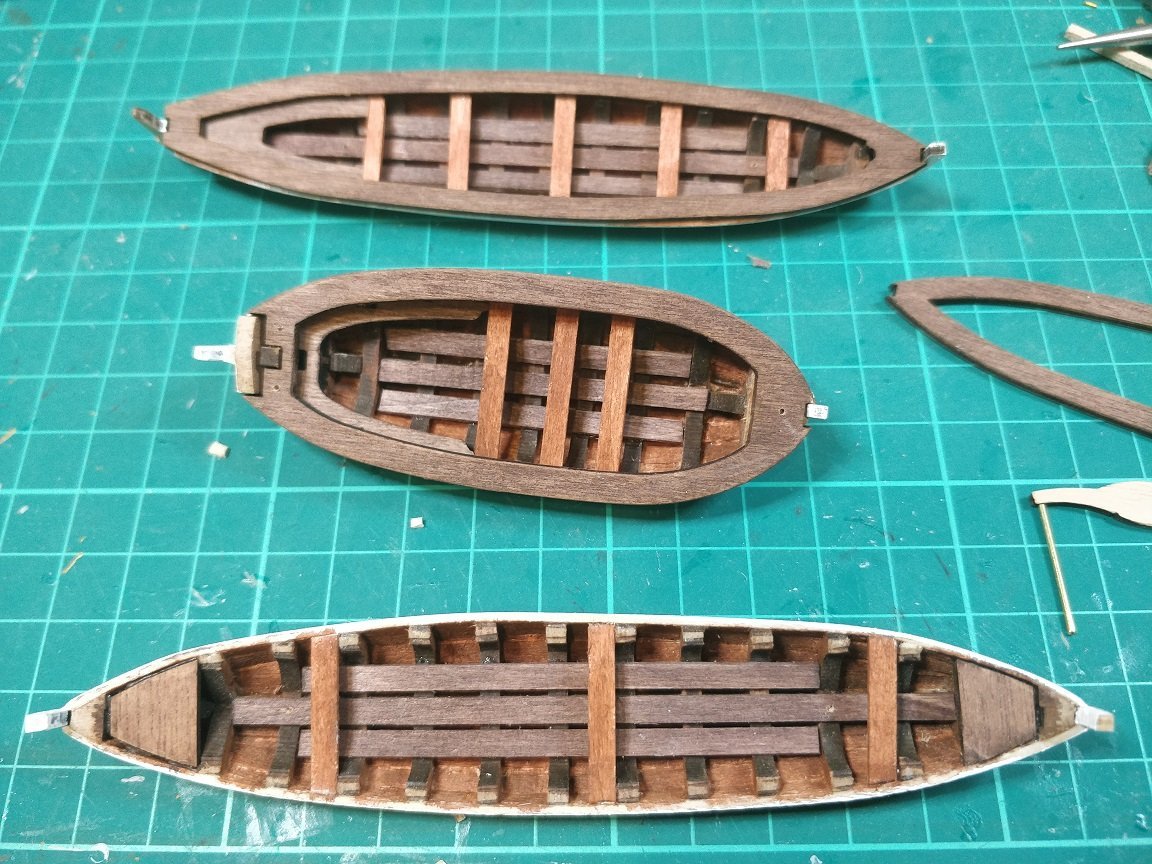
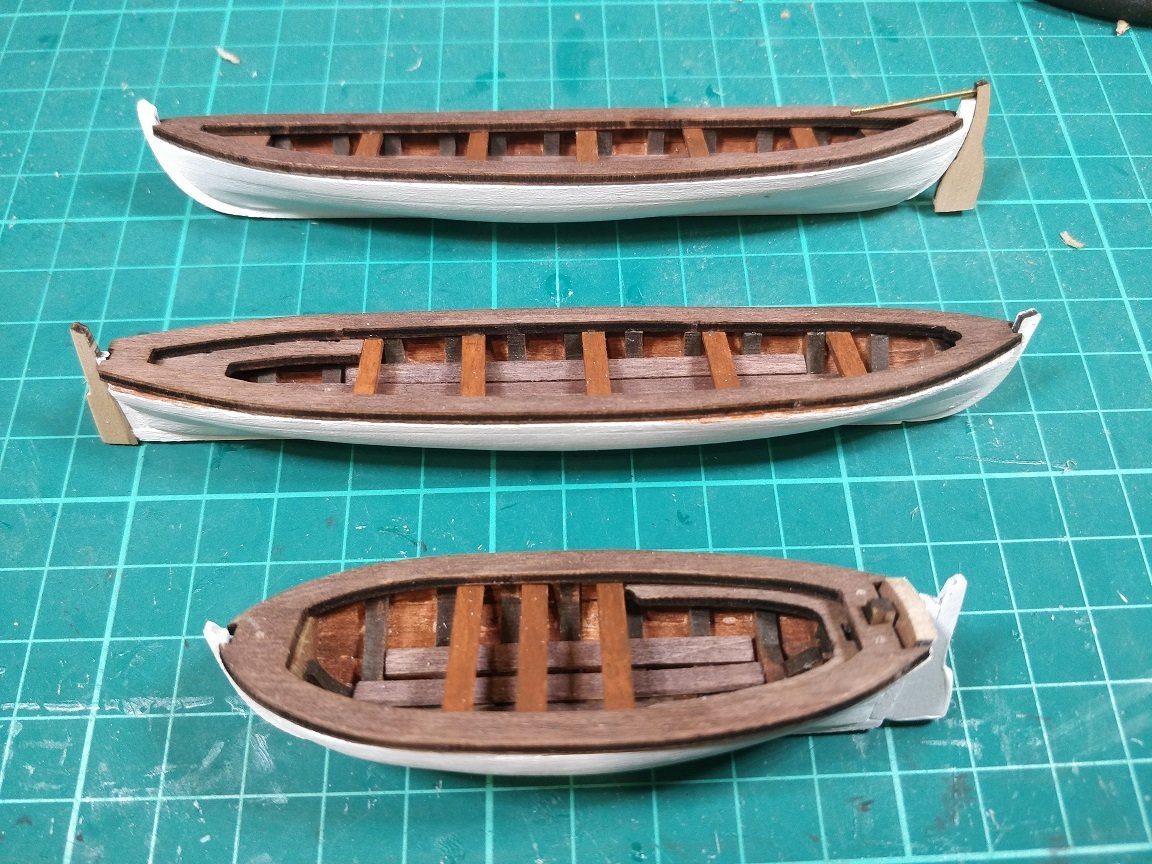
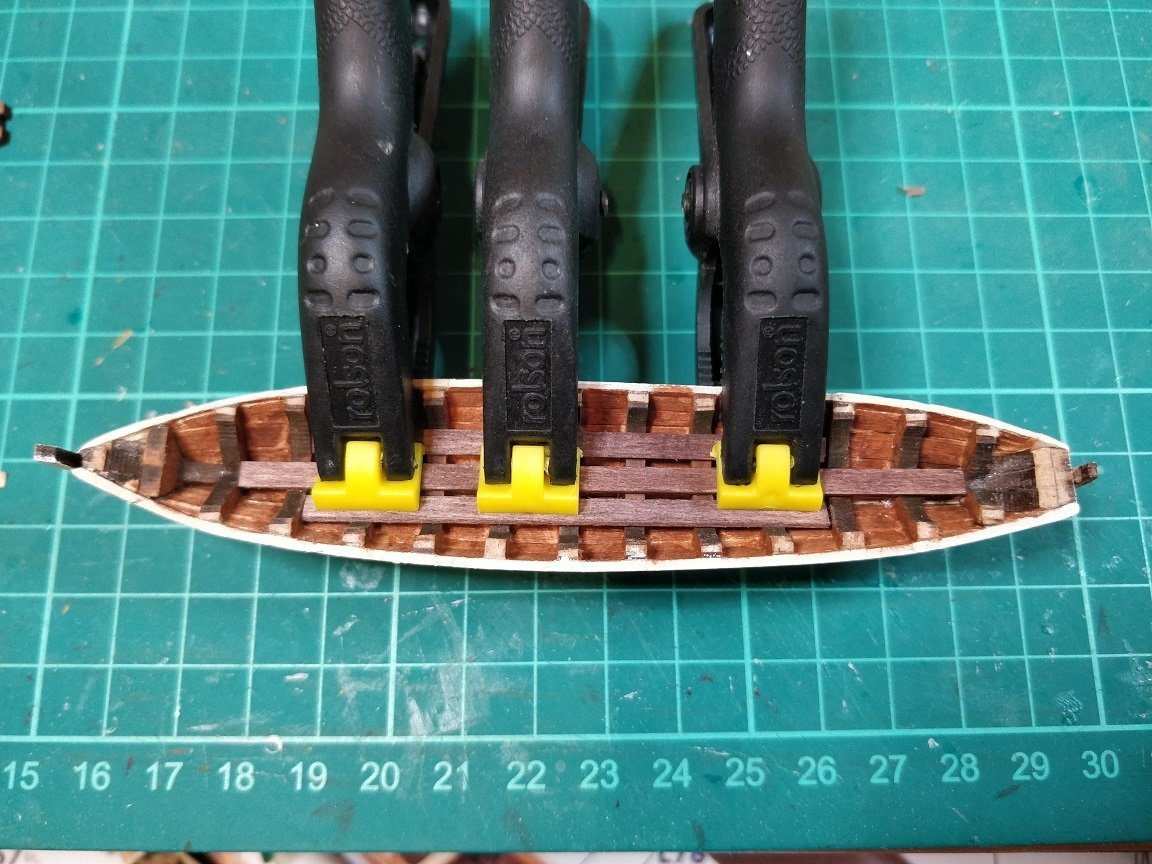
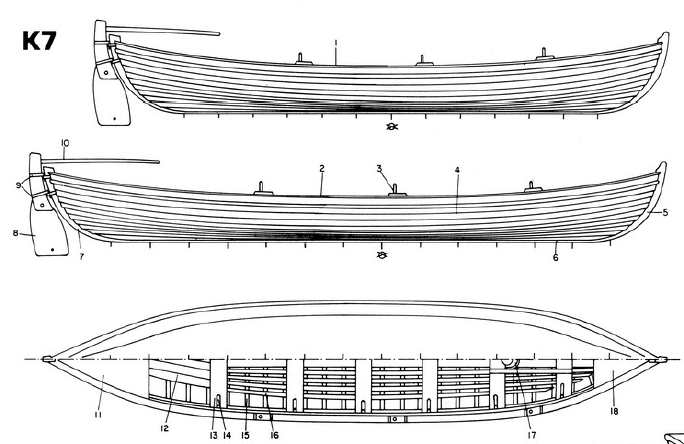
Hi Allan, I was interested by your post regarding tholes and thwarts on small boats, though it took me awhile to understand as I'm not very knowledgeable in nautical terms. I'm sure that what you say is absolutely correct and I don't mean to question your post, but to understand the true picture. I'm also in the process of making these boats for the Beagle and in complete ignorance followed the instructions supplied by the manufacturer. I must admit I've found the supplied instructions to be limited and lacking in many areas during my build. I also make reference to the AotS for the Beagle, which I have taken to be far superior in detail. It looks like the manufacturer has also followed the AotS of this occasion as the two appear to be consistent. Looking at the 26ft yawl it shows the following: Have I misunderstood the drawings. It's difficult to know from the plan and side view if the tholes alternate. To me it looks like they don't but I can fully understand why they should. Has the AotS got it wrong? The whaleboats show a single thole as follows: This also has the problem of not showing alternating tholes. Best regards Chimp

-
Hi Penfold, You've made a very nice job of that small boat, I know how difficult they can be. The whole thing is starting to take shape, you're doing some good work there. I'm watching with interest Regards Chimp
-
When I had problems with one of their kits they wanted me to deal through the supplier. There wasn't any problems with getting replacement parts but they said it was easier for them to always deal through the suppliers. Your build is coming along well Kiwiron. I'm keeping an eye on it as I'm thinking of adding it to my list of future builds (if I can find the space) Chimp
-
Hi Michiel, Looks like you're making good progress with your build and all is looking nice. I too have found the scale of many of the items haven't been quite right, some like the pins to be well over sized. Having said that I've pushed on through with a view to completing the build. For me, I'm using my build as a learning experience and have many mental notes for my next build. I have found the kit supplied rope to be next to useless as it's very hairy. I've tried to improve it with rubbing on wax and even burning off the fuzz but now I make my own (which has been a pleasurable experience). I would suggest you consider your options here too. Chimp
-
Hi Penfold, Many thanks for your kind words of encouragement. I'm trying to keep focused but at the moment the progress is slow but at least it's steady. It's about time I posted another update. Chimp
-
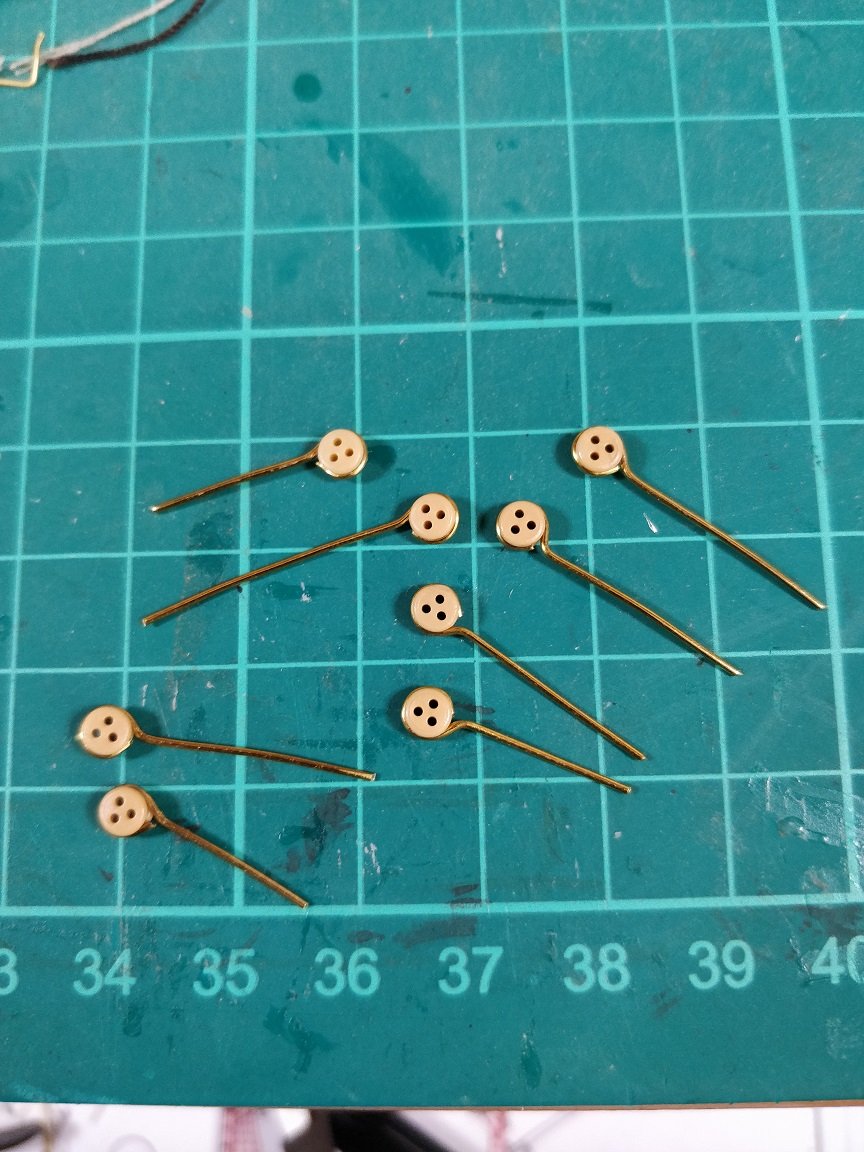
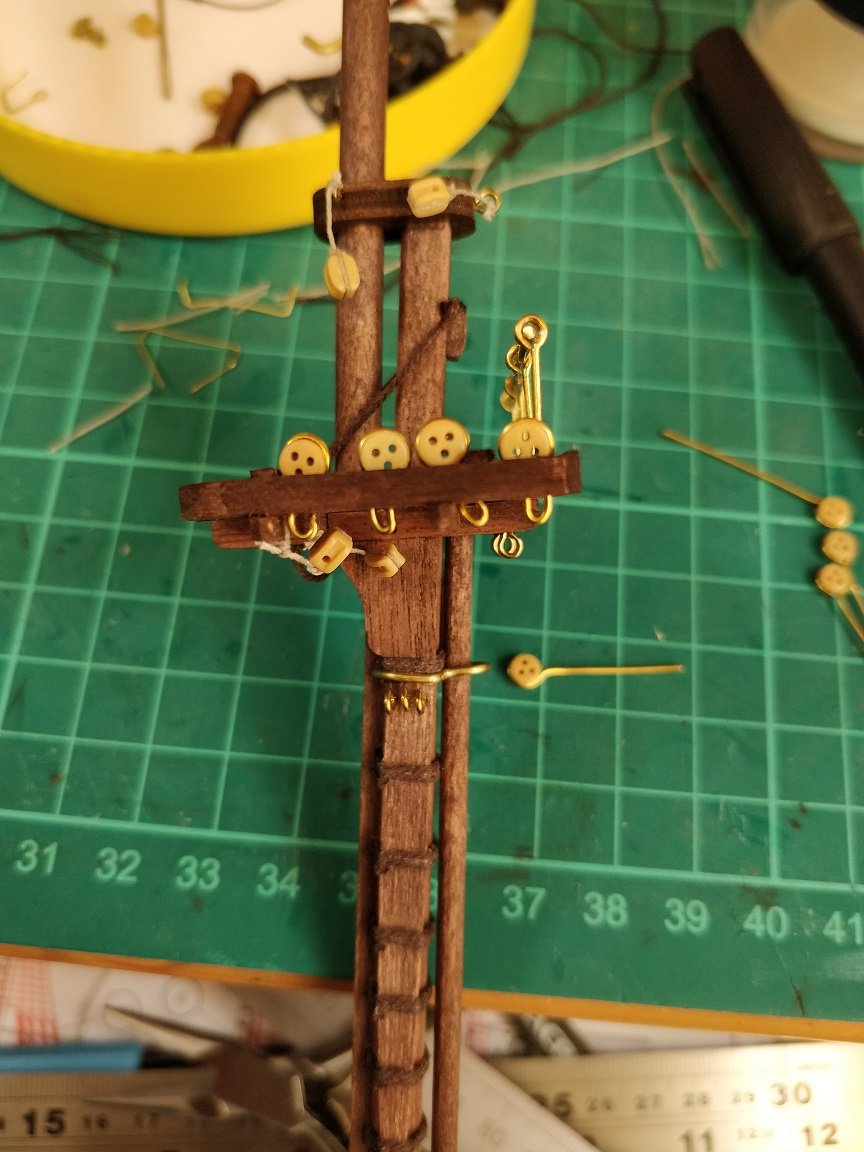
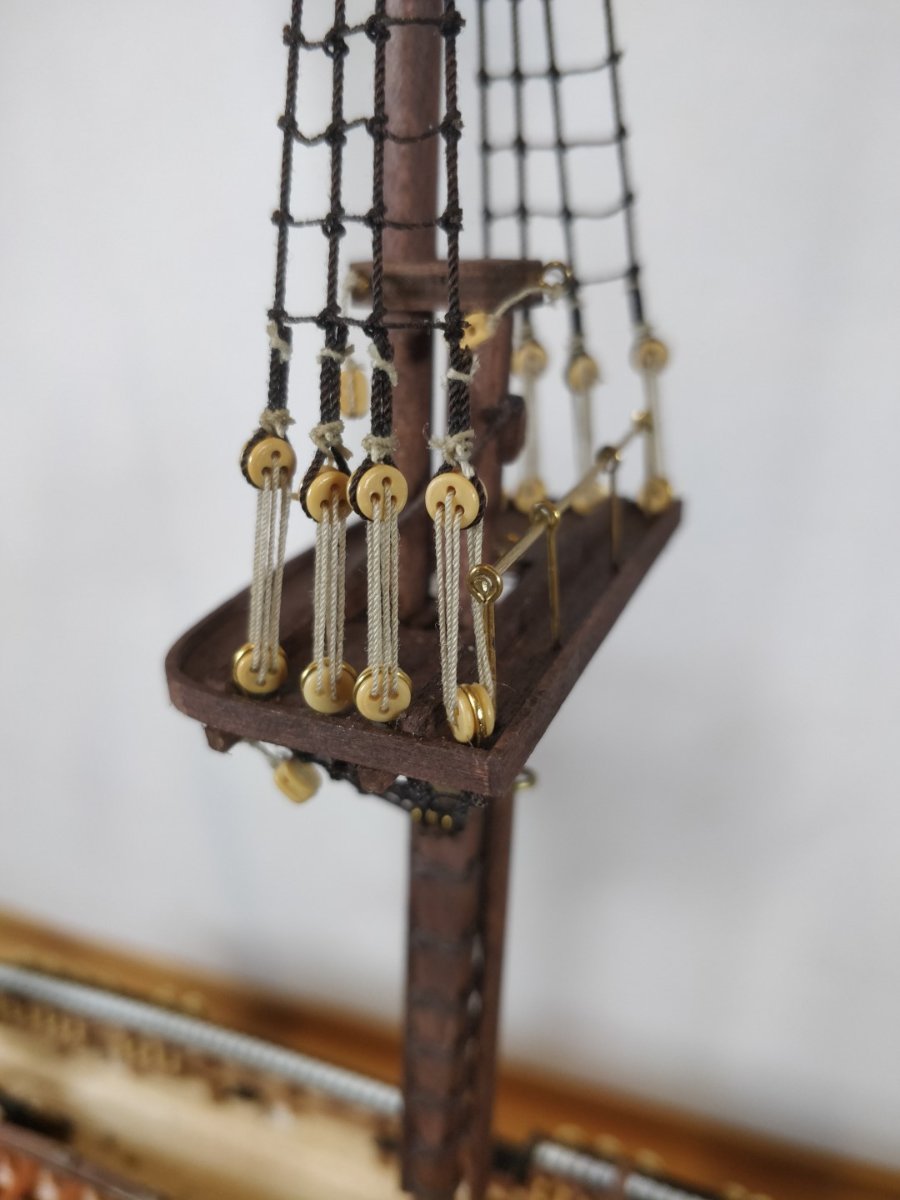
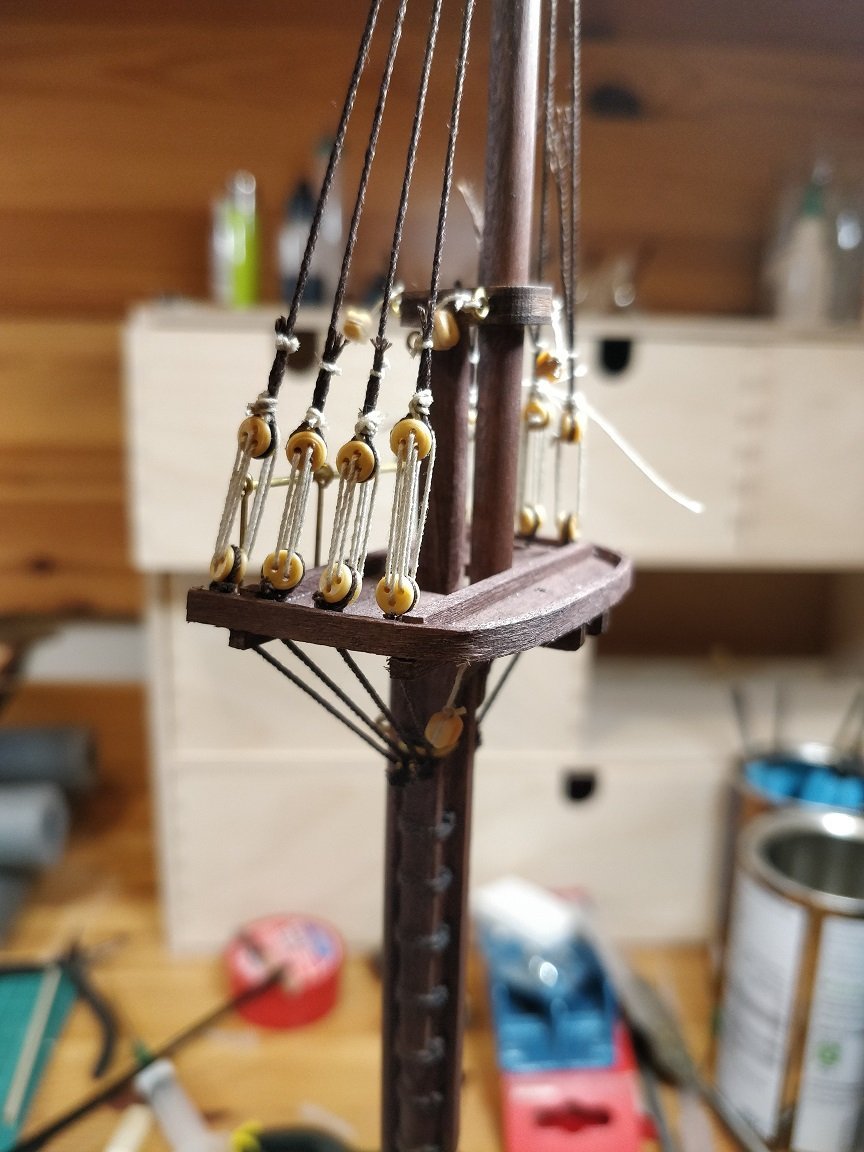
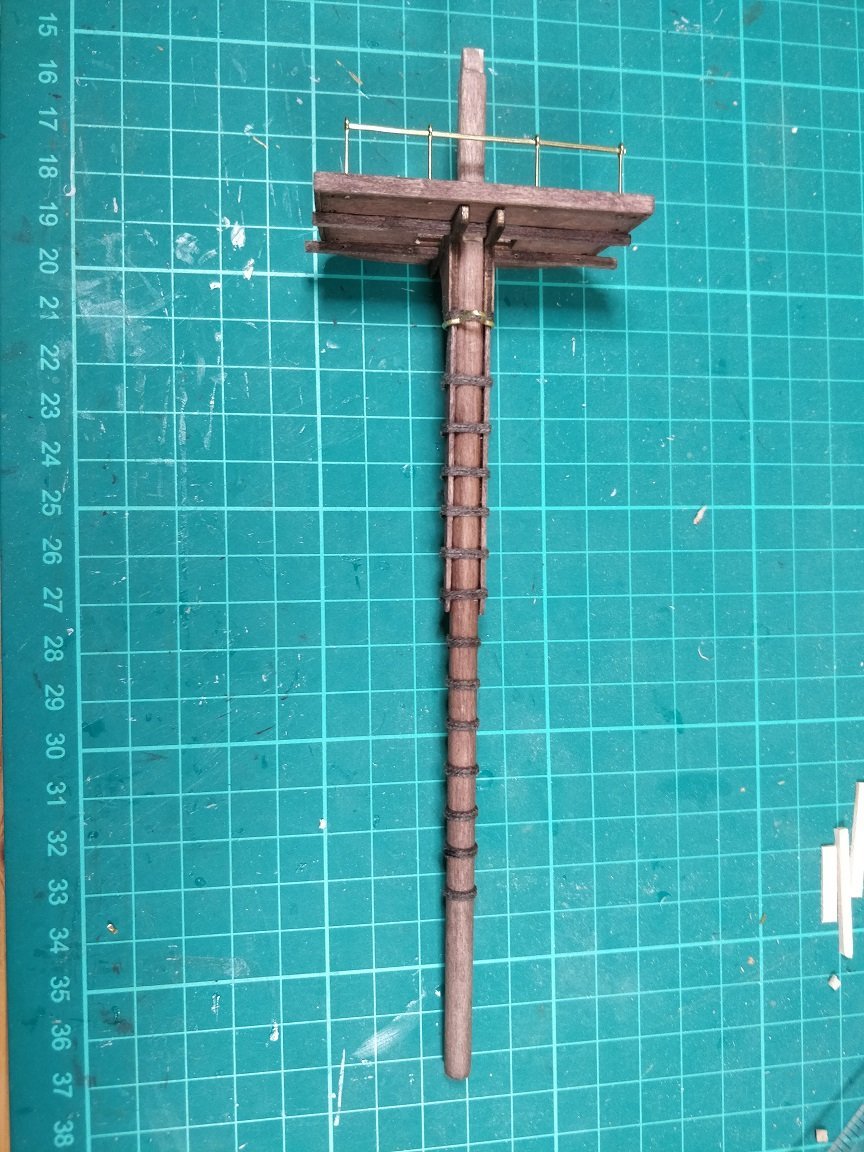
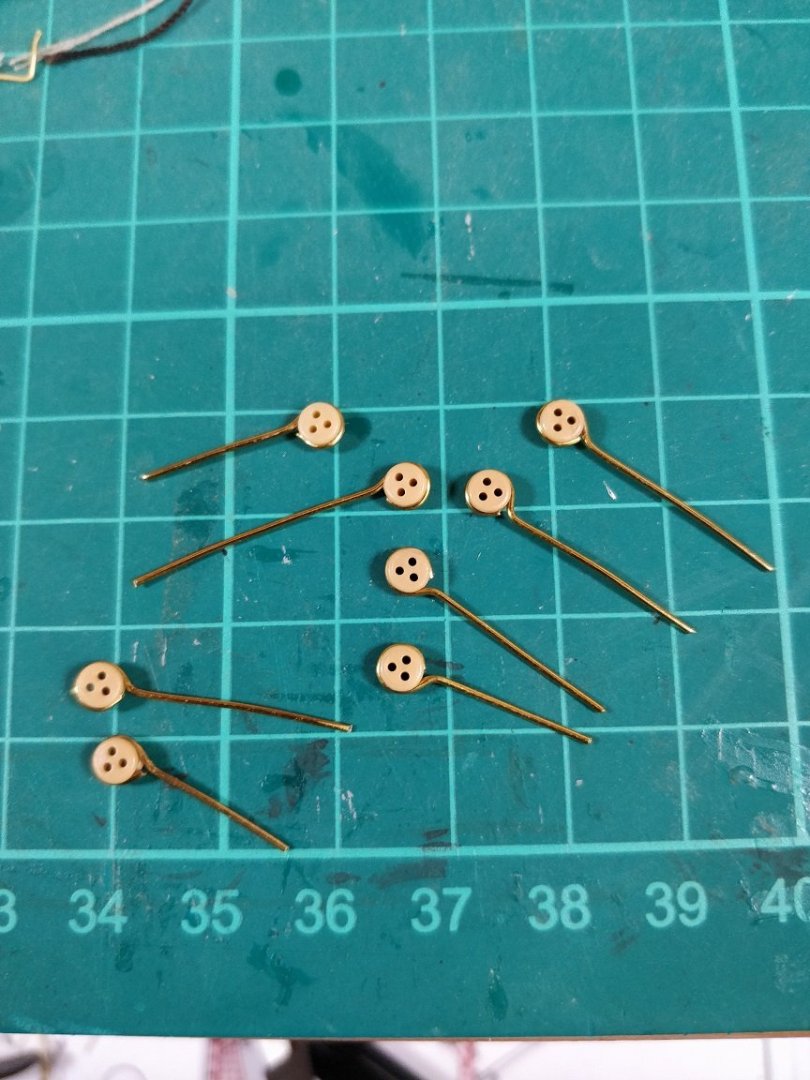
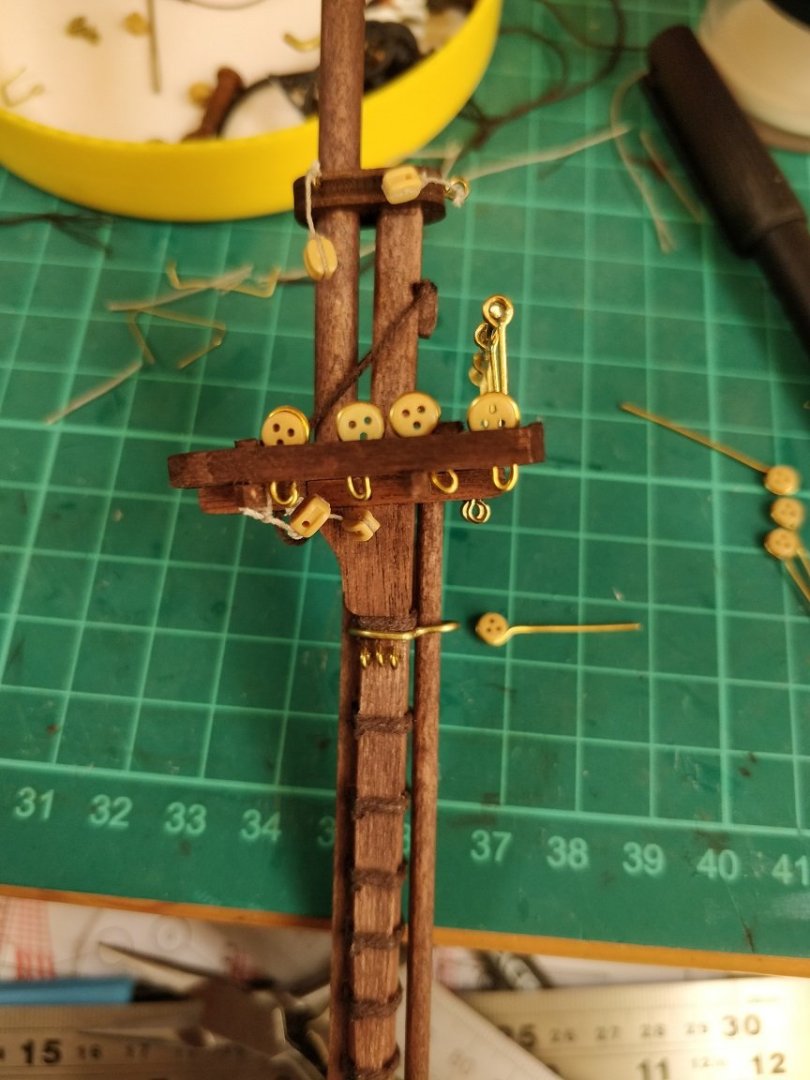
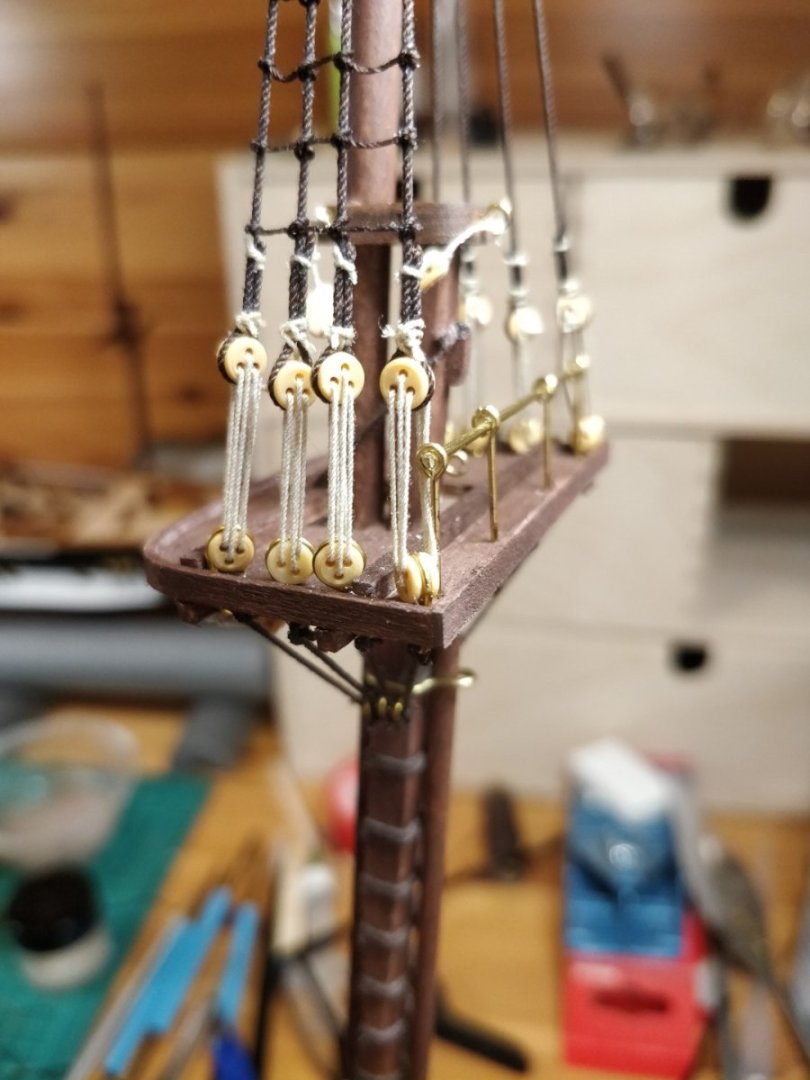
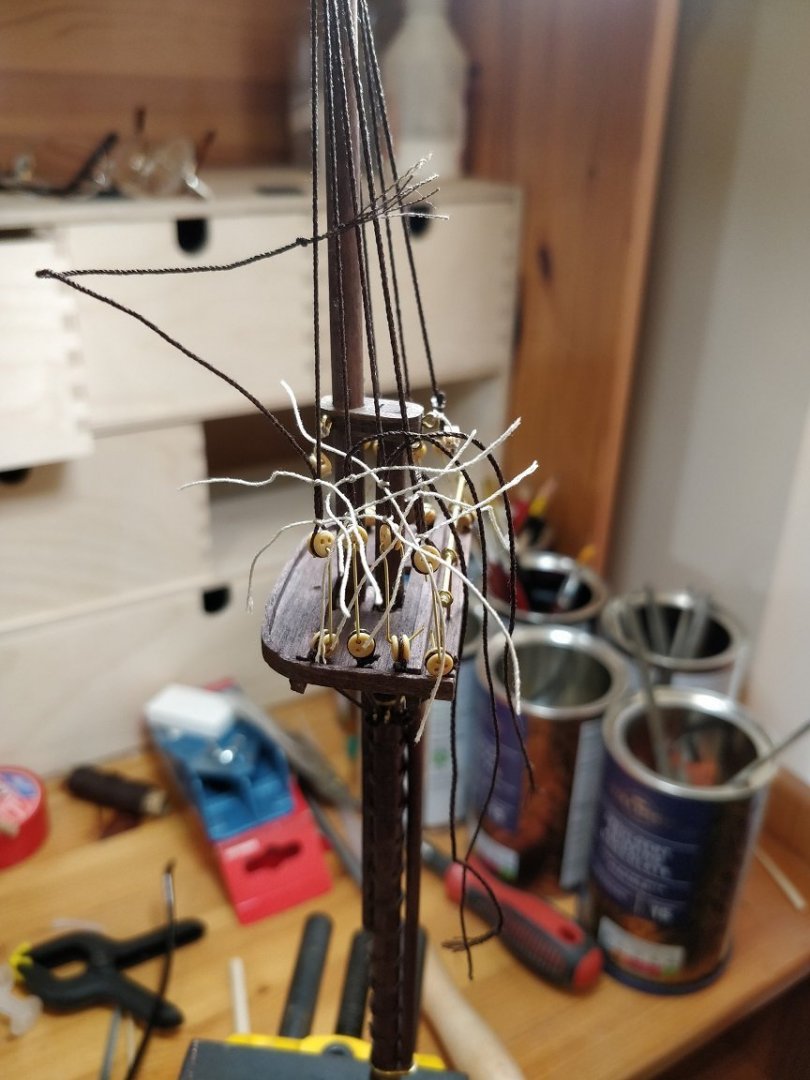
Here is the latest progress with the rigging. After finishing tying the ratlines on the foremast I then moved onto the main mast. This time rather than using 0.5mm thread to fix the deadeyes I thought I would change to 0.7mm brass wire, which I have plenty of. I know this inconsistency may look a little odd but I don't think it will look too obvious on the finished model and I'm keen to try different things. Always with a view to learning for the next model. As far as I can tell the futtock iron and strap should be metal anyway. I started by making up the deadeye straps using the brass wire: Everything worked well with the brass wire holding the deadeyes but I'm not sure the alignment of the pre-drilled holes in the mast top was quite right which meant the deadeyes and wire ended up at an angle which messed up the spacings a little. Maybe if I had used thread there would have been a little more compliance but I don't think that would have changed the effect of the spacing of the deadeyes. With the deadeyes fitted I continued rigging the topmast. As you can see from the photo above there is another issue with the pre-drilled holes in the mast tops. The handrail clashes with the rigging. I've just had a look at the plans and it looks like the holes for the handrails aren't pre-drilled, so I could have made them a bit shorter than shown in the instructions, which would have avoided the clash..... be warned if you're looking to make this model. So all that part of the rigging was done off the ship. Then it was time to fit the masts to the ship. With the masts fitted and aligned it was then on with fitting the fore shrouds. Top ensure a consistent spacing of the deadeyes I made a pair of jigs to keep the deadeyes at a set distance. I saw this on someone's build log the other week. Sorry for not having their name to hand. With all the main mast shrouds fitted it was then back to tying the ratlines. At this rate I should have all the shrouds and ratlines finished in the next week or two, which I know is slower than most but I work on the principle of 'Slow but sure'. Chimp


-
I think it's, from left to right, 25ft Whaleboat, 25ft Gig, 23ft Cutter and Dinghy. Chimp
-
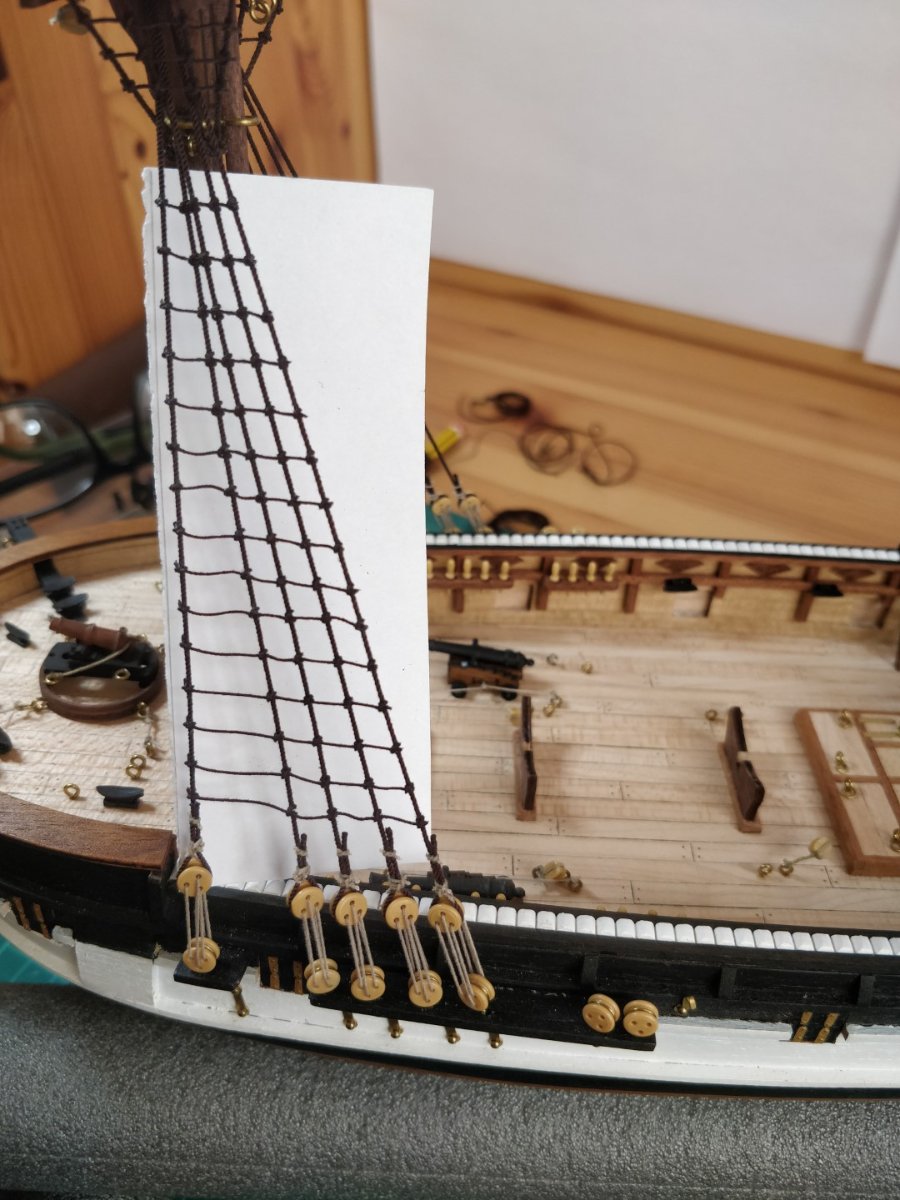
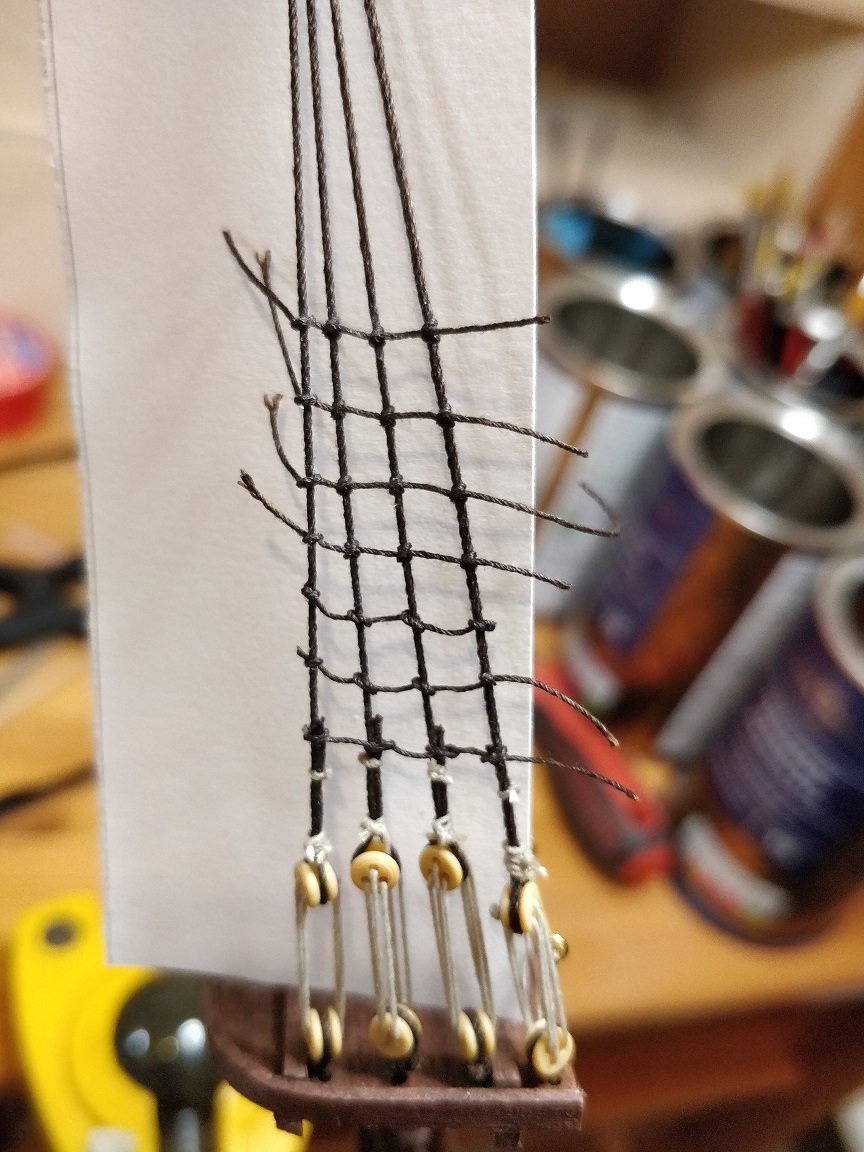
I've now started with the rigging, not my favourite part of the build but it's got to be done. I was going to fit the yards to the masts as shown in the videos but thinking about it, I felt it would be easier fitting the shrouds and ratlines without the yards fitted and before the masts are fitted to the ship. I might be wrong but I figured it would be easier having the mast sat in the vice rather that fitted to the ship. I would be interested to hear what other people think. I started on the foremast by fitting the futtock shrouds, which according to the AotS for the Beagle should be chains but OcCre don't supply enough chain for this and show 0.5mm thread. Before I go any further I should state that I make my own rope using a 3D printed ropewalk, which I'm now getting quite proficient at. I currently have 10 km of Gutermann Mara 100 polyester thread, so making rope isn't an issue for me. After the futtock shrouds I fitted the fore topmast shrouds and deadeyes. I then spaced the deadeye pairs using some 0.7mm brass wire. This was to try and achieve a consistent spacing between the deadeye pairs. I know it looks a mess but none of the ends have been cut off. After cutting the ends and lashing the deadeyes it looks a little better. Then I needed to progress with tying the ratlines. This would be the first time I've done ratlines and was worrying about it taking so much time and effort to get the clove hitch right. It was then I stumbled on a tutorial video on YouTube which explained everything and makes it so easy. There video can be found here: After tying a few lengths it was starting to take shape. By the time I was finished it wasn't looking too bad and to be honest, it didn't take too long (much to my relief). I know I still have much to learn and there's still plenty of room for improvement, but after this little success I'm actually looking forward to progressing with the rigging!! I'm hoping by the time I've finished this model I might have a clearer idea about what I should be doing. Chimp


-
Congratulations Dave, that's a fine looking model. You should be very proud of all the excellent work you've done there. Outstanding workmanship and a first build too!! Any thoughts about a display case? Chimp
- 362 replies
-
- 3
-

-
- Amati
- Lady Nelson
- (and 2 more)
-
Hi E Z Breeze, Will you be starting a build log? I've found it useful getting feedback about my build from more experienced builders, and it's useful for others who are starting their builds - as it sounds you have found. I would recommend starting one. Don't worry about putting your work 'out there' for others to see. We're a friendly bunch and we all started somewhere . It's a great learning experience. Chimp
-
Hi Penfold, Looks like you're making good progress. I found the second planking somewhat easier than the first. Looks like you're on track to making a very fine model Chimp
-
Hi Allan, There is nothing in the kit which identifies these items as hammocks. However, in the AotS for the Beagle the space which these items sit is marked as the 'Hammock rail'. Regarding relative size of components I think you are spot on. Again, looking at the AotS for the Beagle we have the following: Regarding the number of hammocks detailed in the kit, in relation to the size of the crew, I wouldn't want to comment. I think there's a lot of 'artistic licence' applied in the design of these kits. Regards Chimp

-
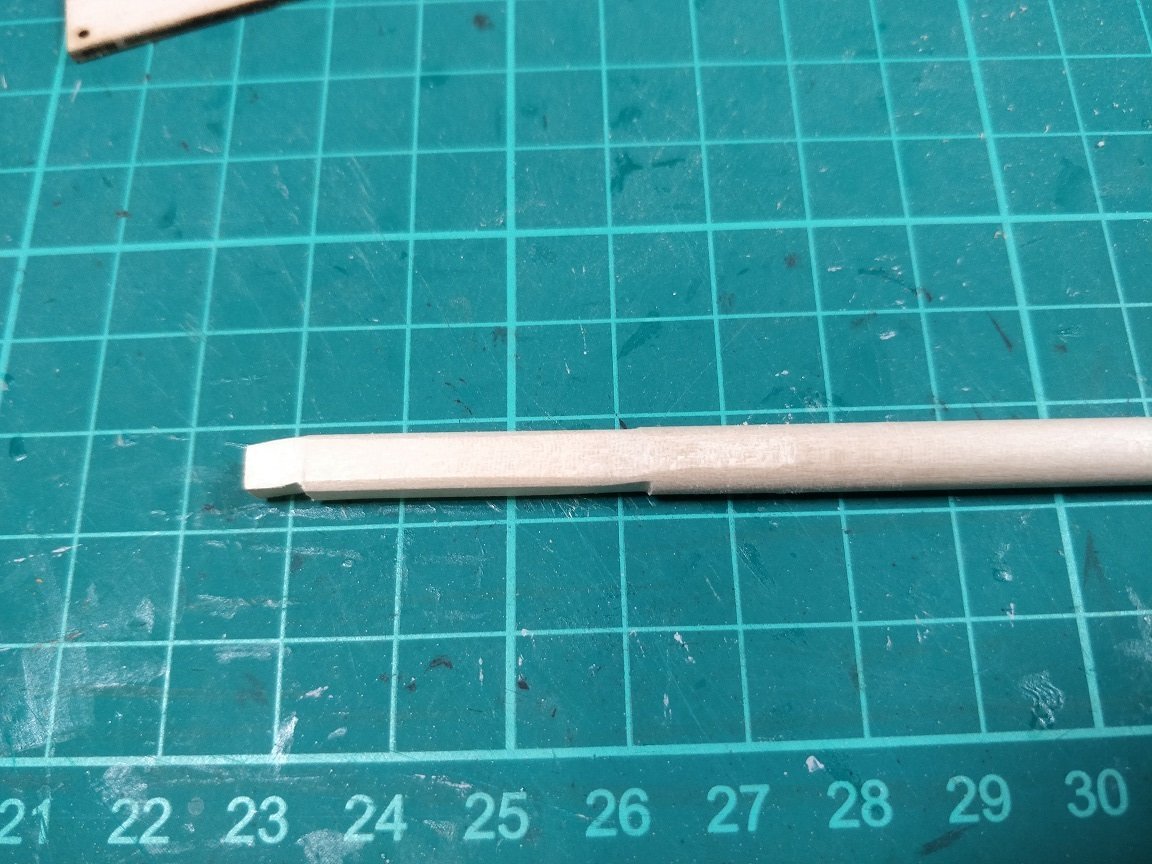
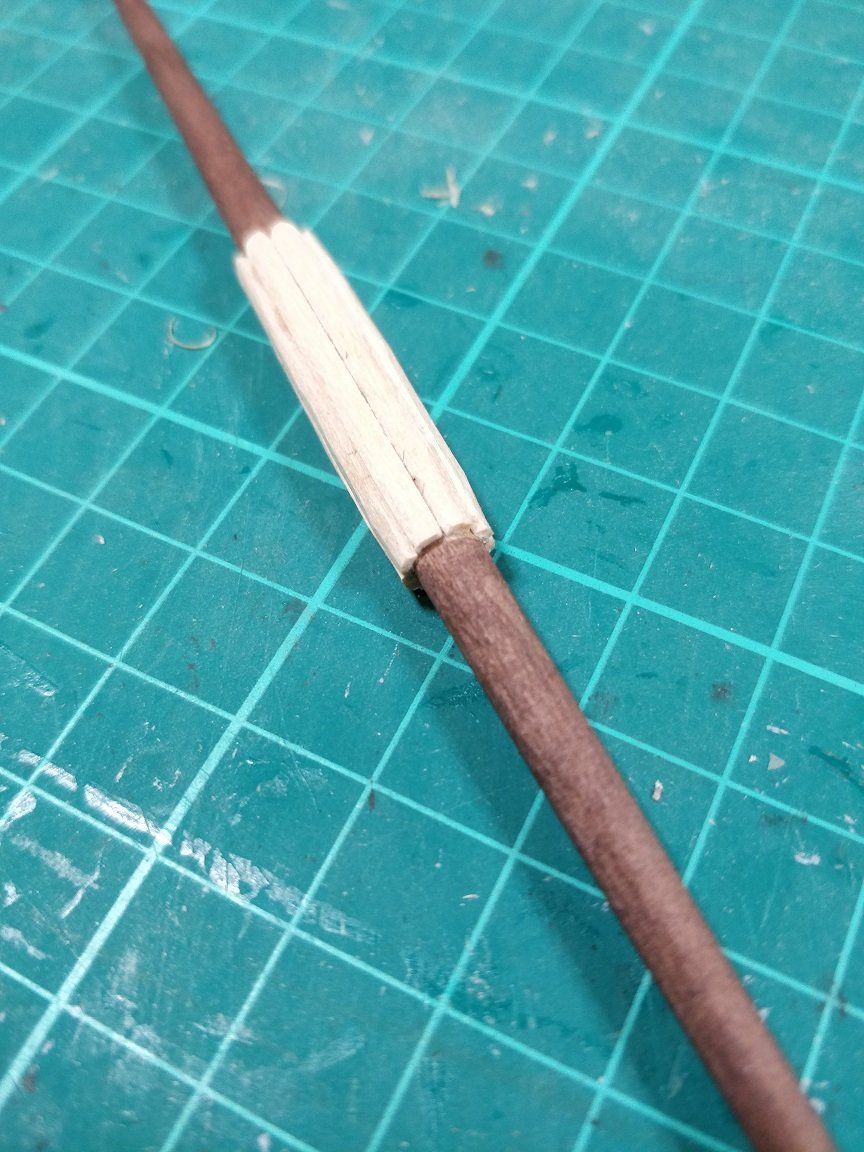
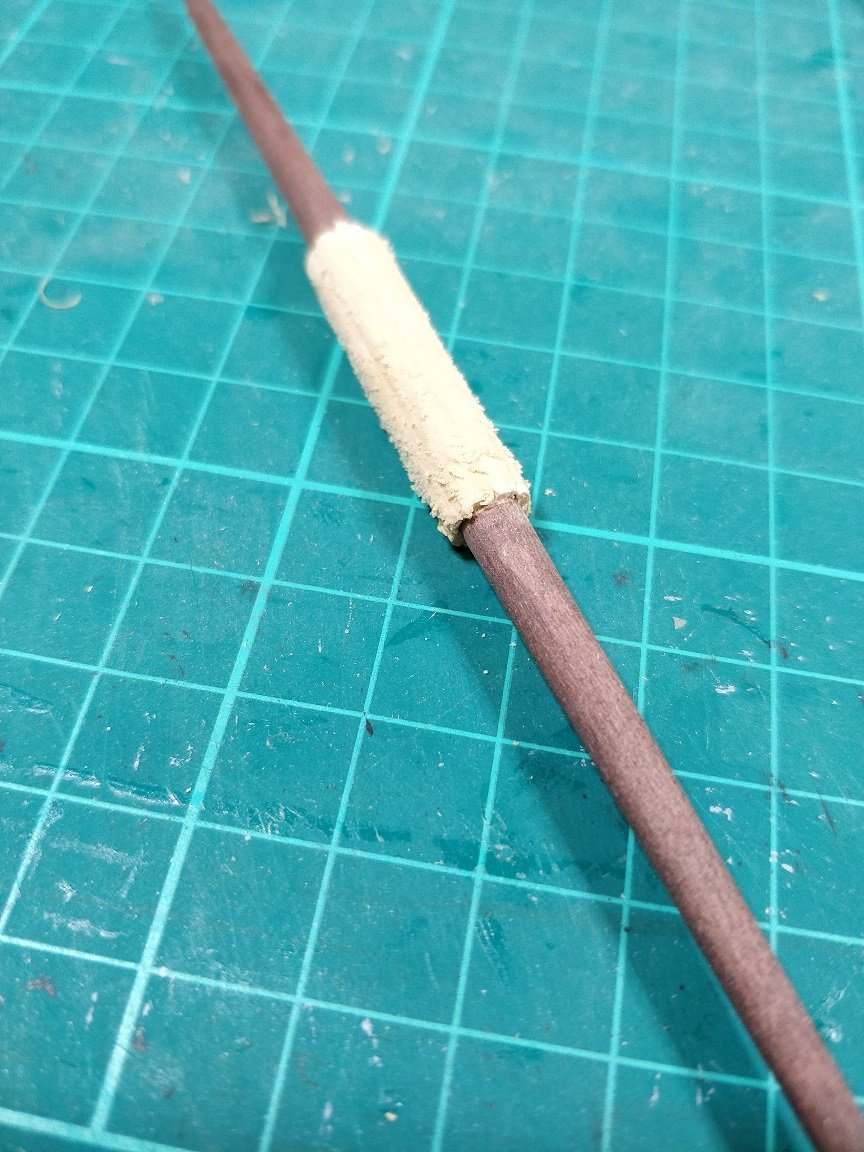
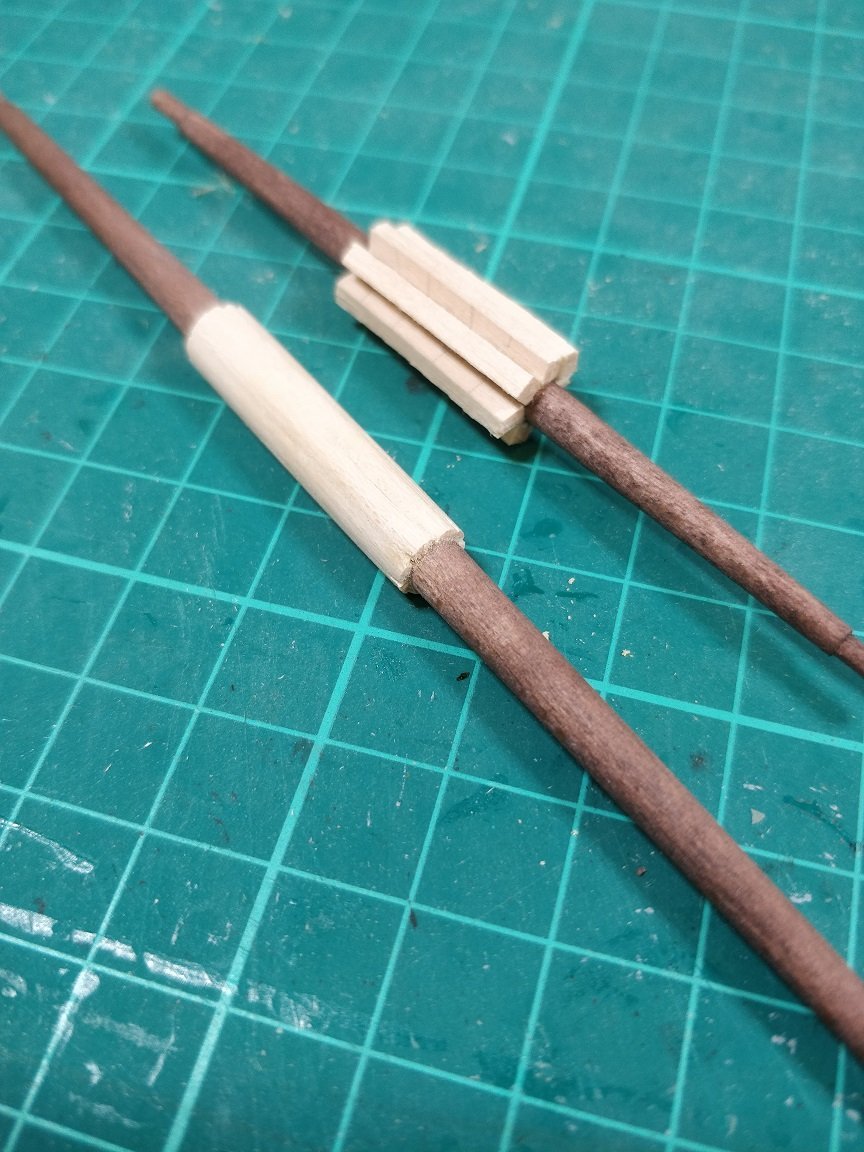
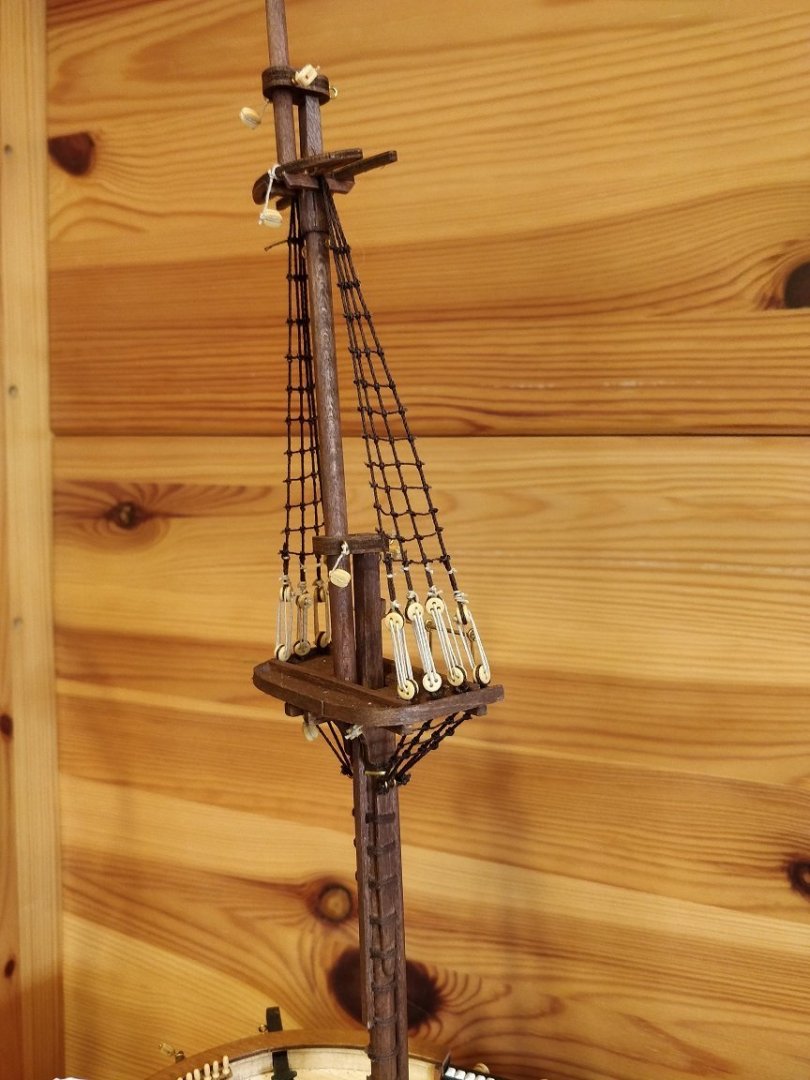
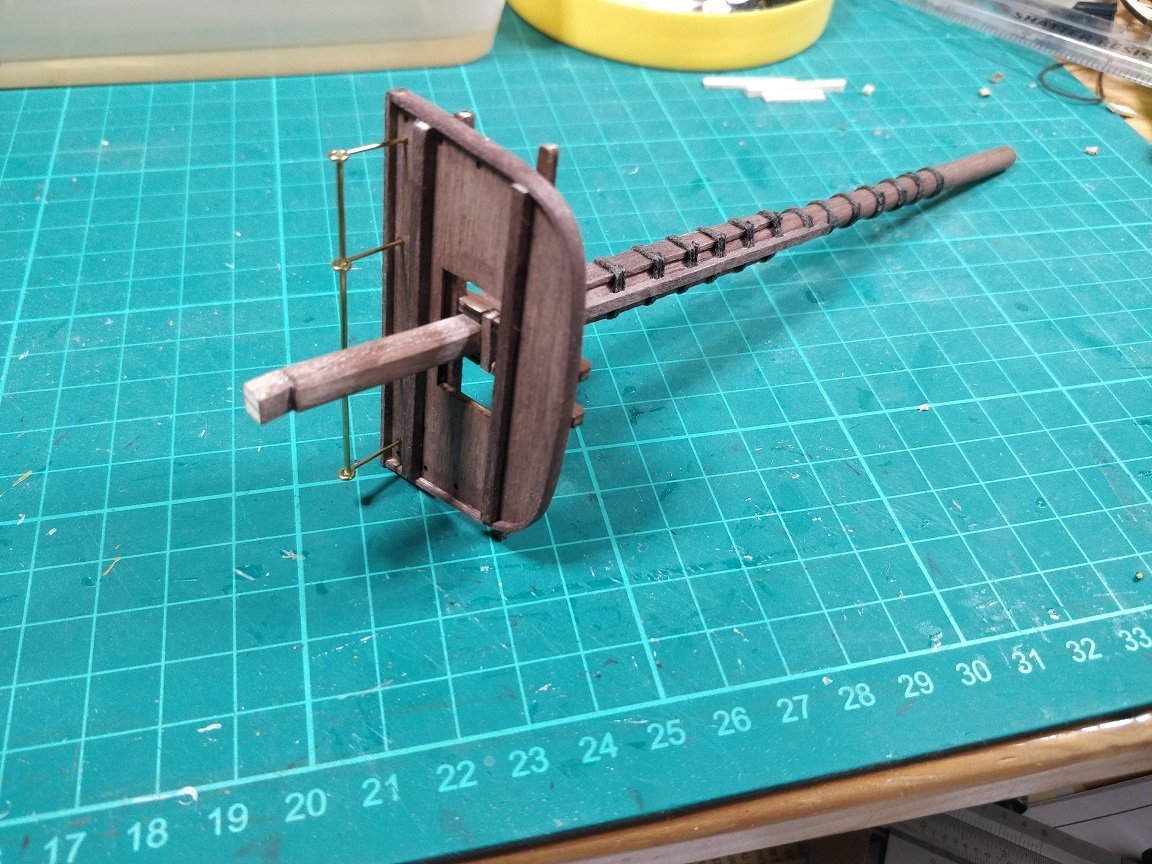
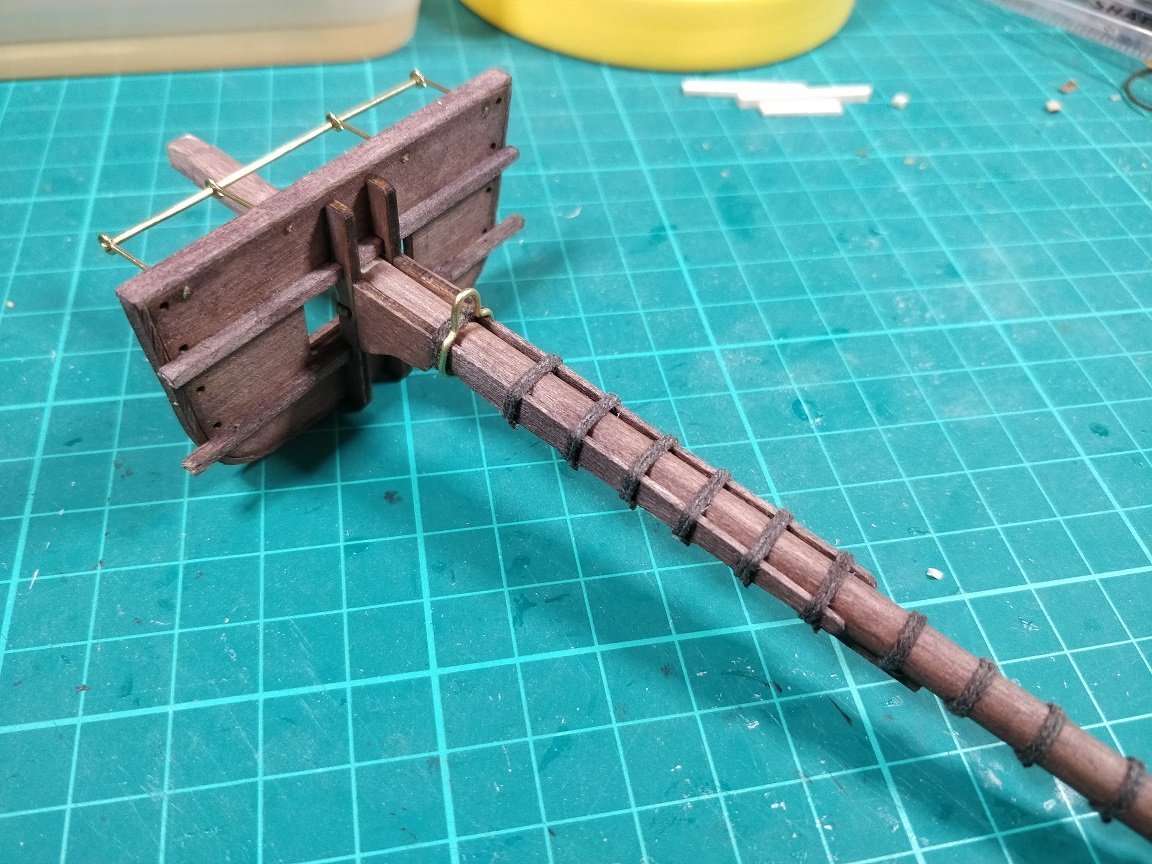
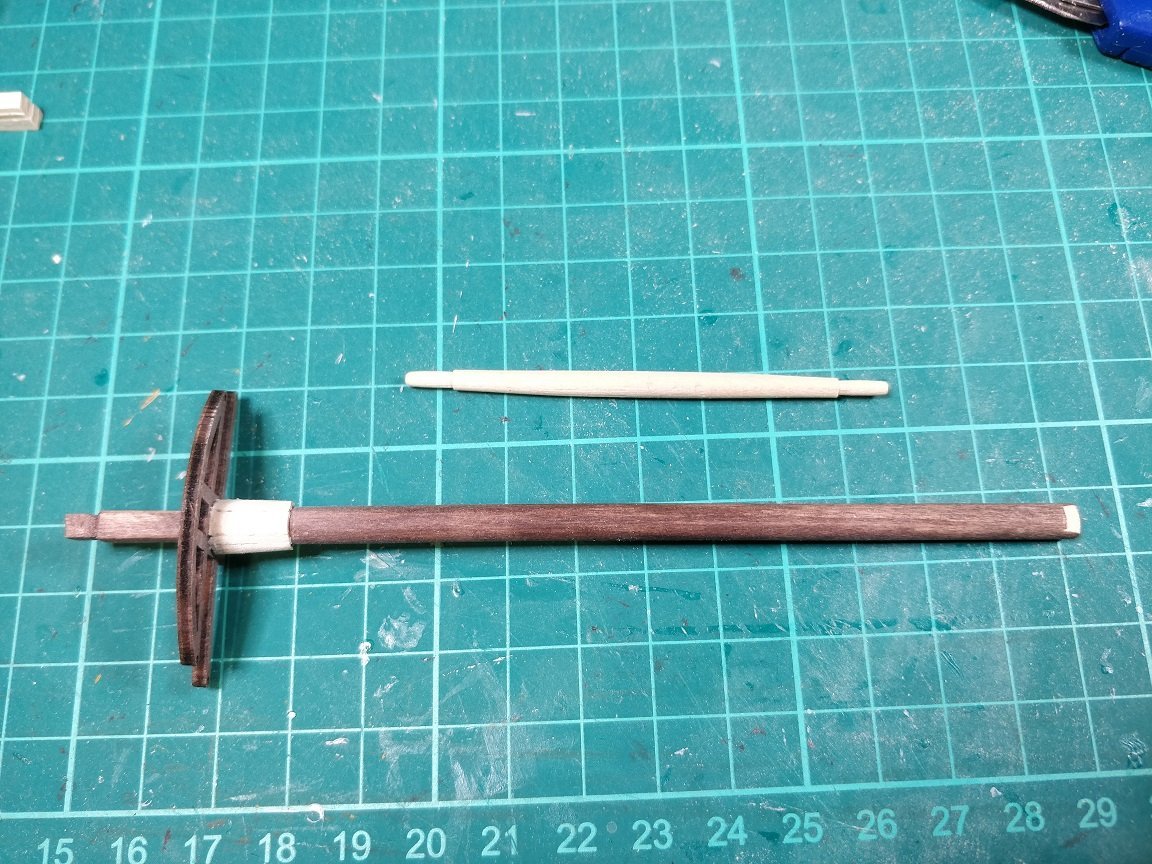
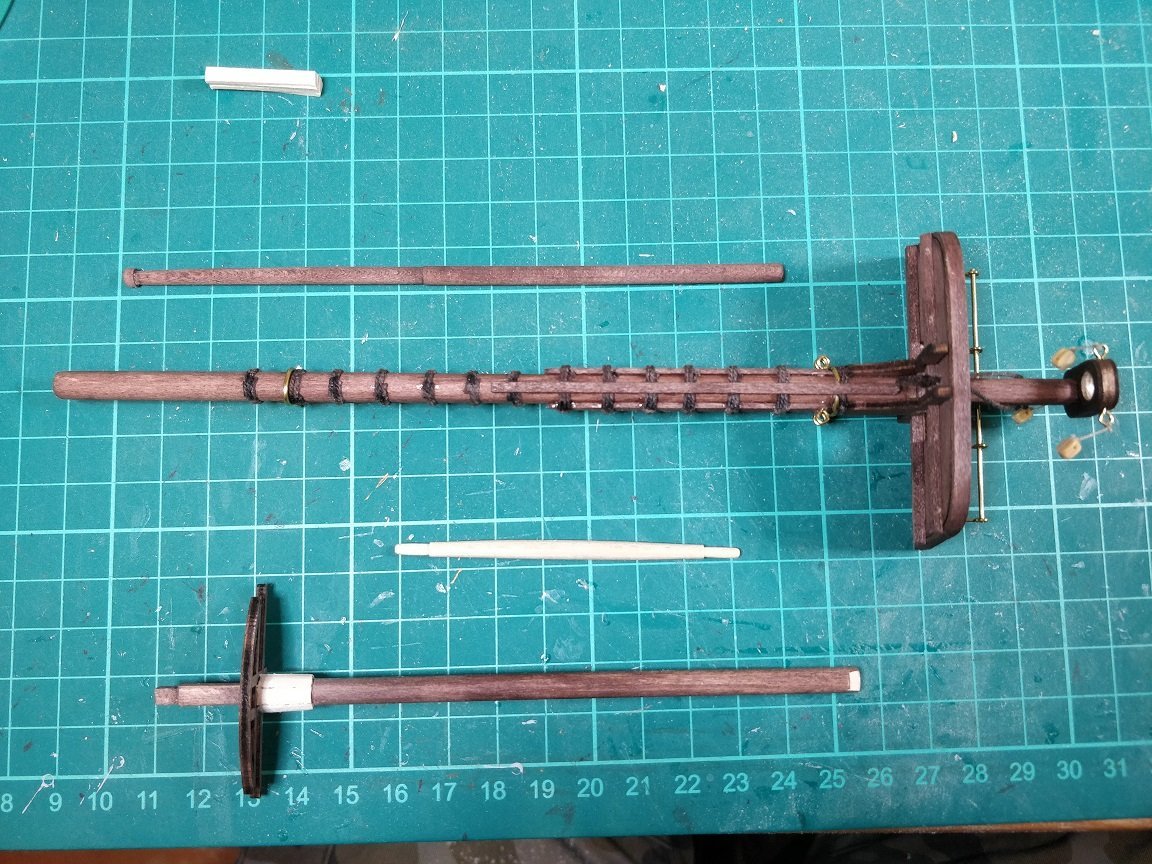
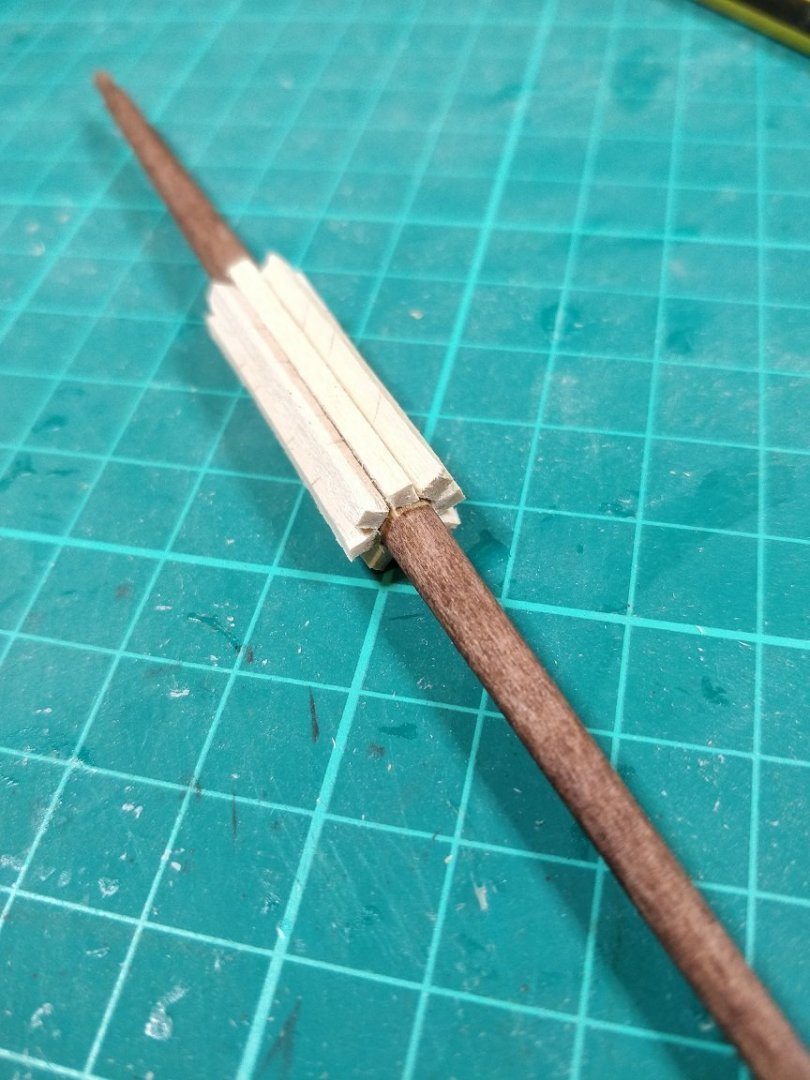
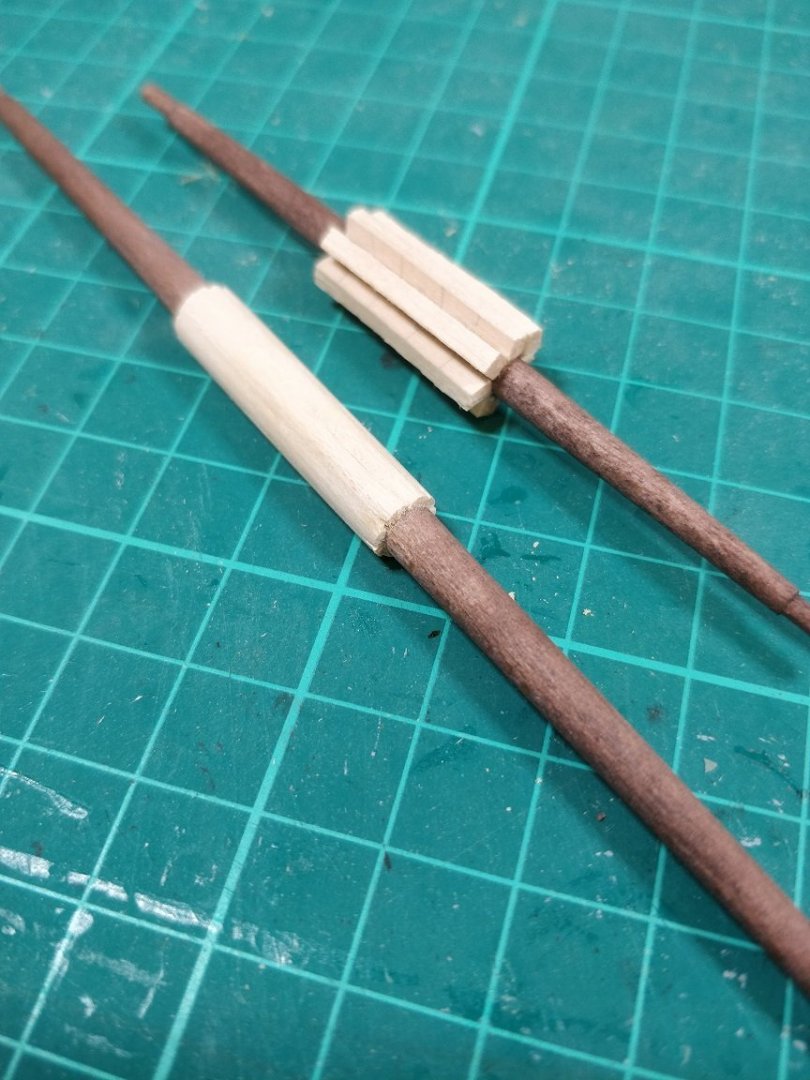
More progress. The parts which I had stained in the last post have now been assembled. This now forms the lower section of the main mast. There weren't any major issues here, just the need to make sure everything is true and aligned and at the correct angle remembering that the main mast is angled back slightly and the platform needs to sit horizontal, so isn't at 90 degs to the mast. Luckily the instructions have 1:1 drawings to align to. I then made the upper parts to the main mast. Next I started making the yards. After tapering and staining each yard there is some cladding to be added to the centre section. The instructions indicate this should be done using 1mm x 3mm limewood. I'm not sure why but I'm running short of this size and it's clear there won't be enough to use it on all the yards. Looking at other build logs this is a common problem. However, I do have plenty of 2mm x 5mm limewood left over from the first planking. So much that I could probably plank another hull, if not more. So what I've done is to cut this to the desired lengths for the cladding then cut it down the centre and glued it side on to the mast, as shown in the next photo: Once the glue has dried I then gently trim the depth down to about 1mm (or less): Once both ends have been cut down I then fill any gaps with wood filler, leave to dry and sand flat. I'm happy with the result. Using 2mm wide lengths gives a better coverage on the mast than the 1mm x 3mm would do. Now it's on with the rest of the yards..... Chimp


-
Looking at the AotS for the Beagle, it shows three bolts for each pintle on the rudder, spot on Allan During my build of this kit I've found so many areas where there has been a deviation from 'reality'. Like Clementine, I view the building of my kit as a learning experience, hopefully with better things to come. Chimp
-
When I did mine I started with a small hole and enlarged it with a rat tail file until it was the correct size. Chimp
-
Hi Clementine, I agree, now would be a good time to varnish the hull. I used a Vallejo matt varnish on mine which didn't change the appearance. So much so that I did one side and let it dry. By the time I came back to do the other side I had forgotten which side I had already done. I now have to do both sides again to make sure I do it all. This is what I used on mine: Chimp
-
There's been a small amount of progress since the last update. I've been working on the small boats. Progress is slow and steady. I've also started to work on the main mast. The first job after cutting the lower main mast section was to shape the top tenon to ensure the main mast cap sits at the correct angle (horizontal). I thought this was going to be difficult and may need a few attempts. As it was it was quite easy. I guess I got lucky and did it right first time. Then I've assembled a selection of parts and stained them ready for assembly. I know I'm not a quick builder but I now feel I'm getting back into the swing of things. Completing the masts will then take me into the process which I'm not looking forward to.... the rigging. Maybe I should try and make the most of this last bit of the build. Chimp