HOLIDAY DONATION DRIVE - SUPPORT MSW - DO YOUR PART TO KEEP THIS GREAT FORUM GOING! (Only 20 donations so far - C'mon guys!)
×


The Gimps Chimp
-
Posts
172 -
Joined
-
Last visited
Content Type
Profiles
Forums
Gallery
Events
Everything posted by The Gimps Chimp
-

Ropewalk: A Cordage Engineer's Journey Through History
The Gimps Chimp replied to BenD's topic in Nautical/Naval History
What an interesting documentary.... Thanks -
Allan I've also asked myself the same question. Is it just indicative of hammock storage, was it just intended for hammocks, would it have been used for the storage of other items? How big is a hammock (and bedding) when rolled up for storage? What's clear is there isn't a lot of room for 74 people so I'm sure the space wasn't wasted. Chimp
-
Hi Allan, Many thanks for your comment. I'm not in any way an expert on such things but my understanding is that the OcCre kit represents her as a survey ship after she was modified in 1825. According to that well known 'source of truth' Wikipedia: "On 27 September 1825 The Beagle docked at Woolwich to be repaired and fitted out for her new duties. Her guns were reduced from ten cannon to six and a mizzen mast was added to improve her handling, thereby changing her from a brig to a bark (or barque)." This also appears to be consistent with the Beagle AoTS. Chimp
-
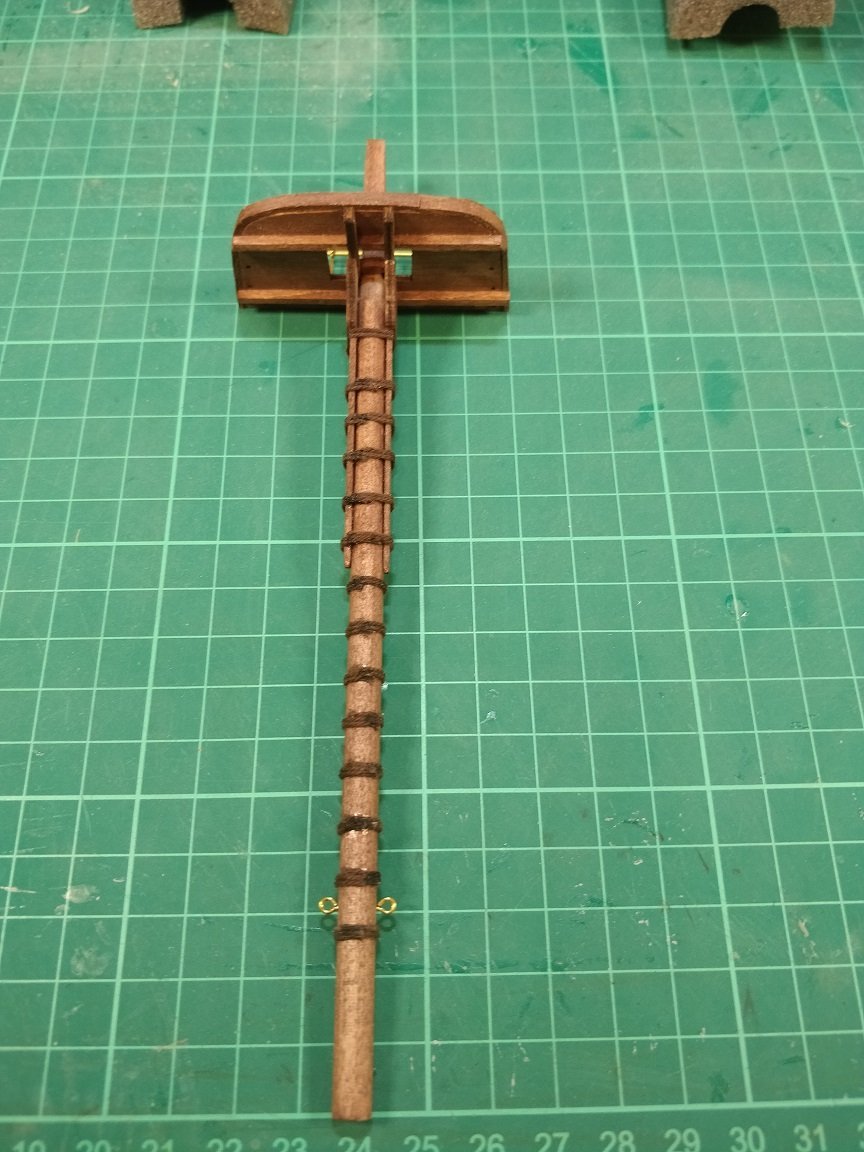
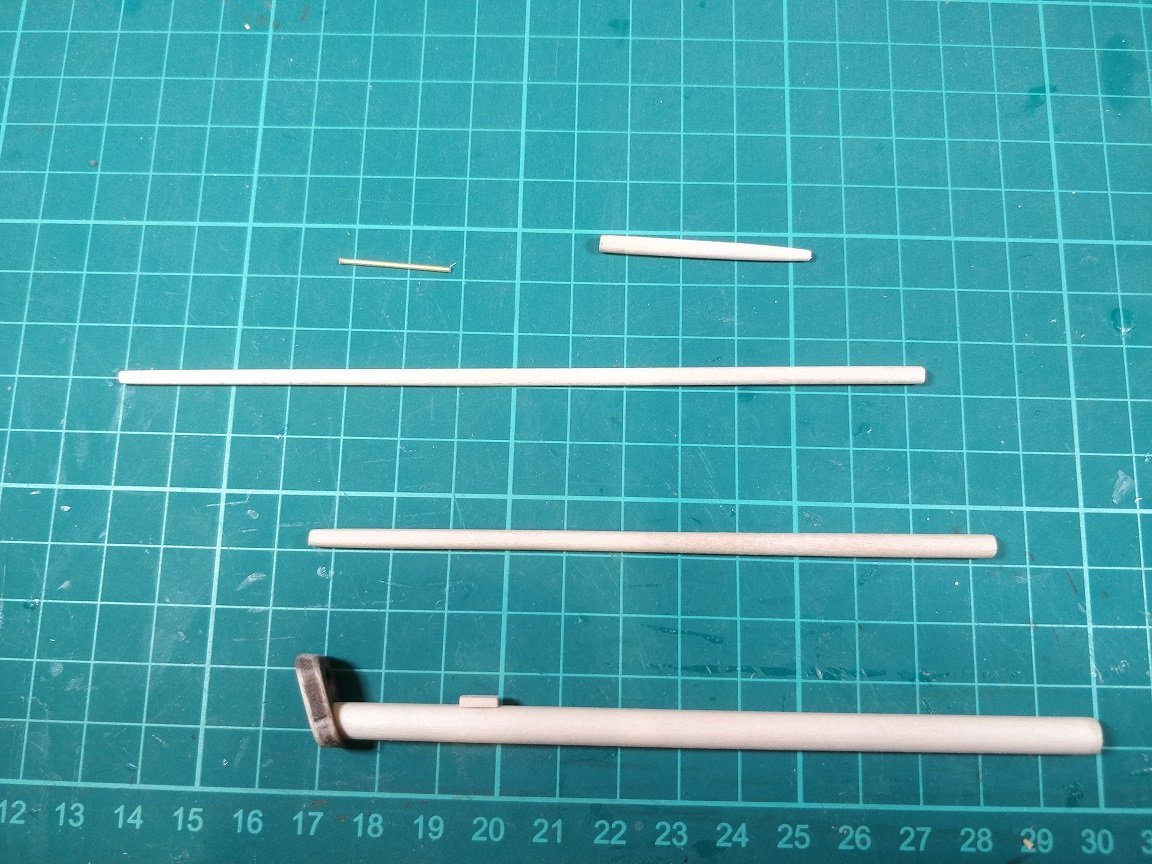
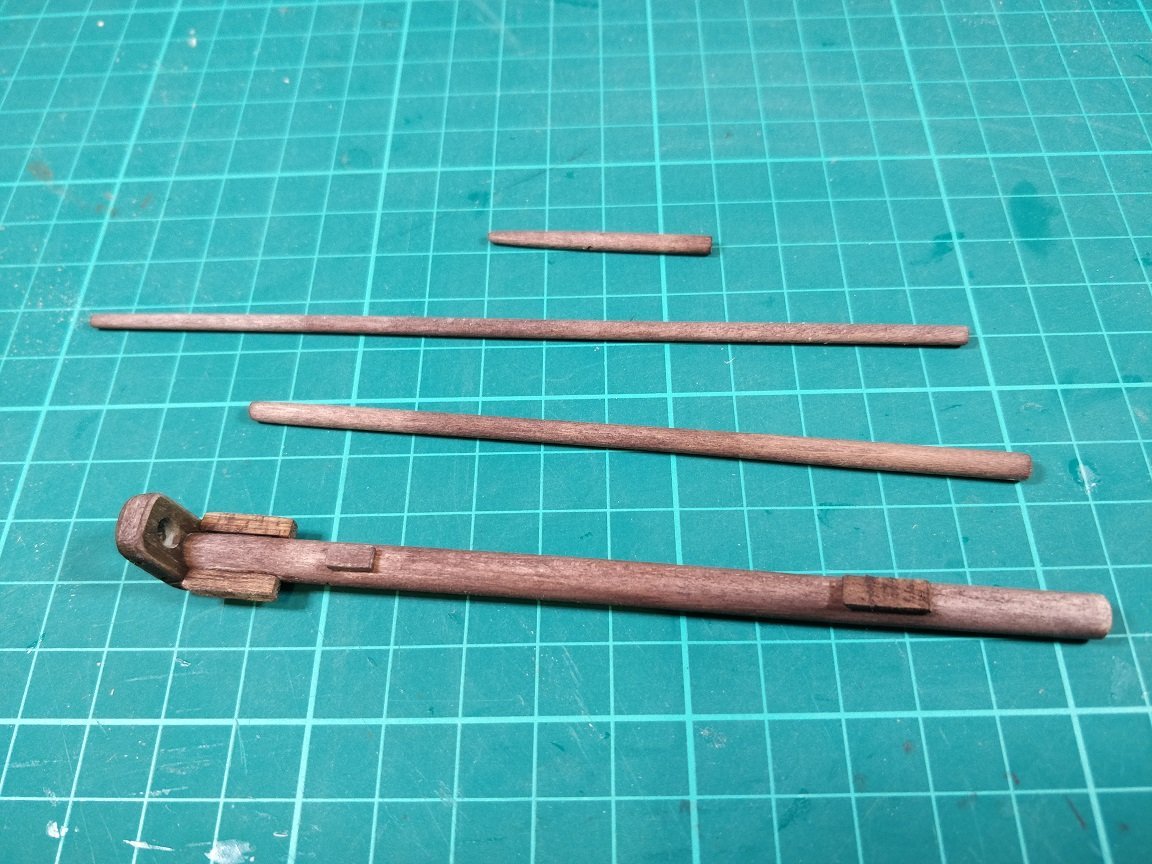
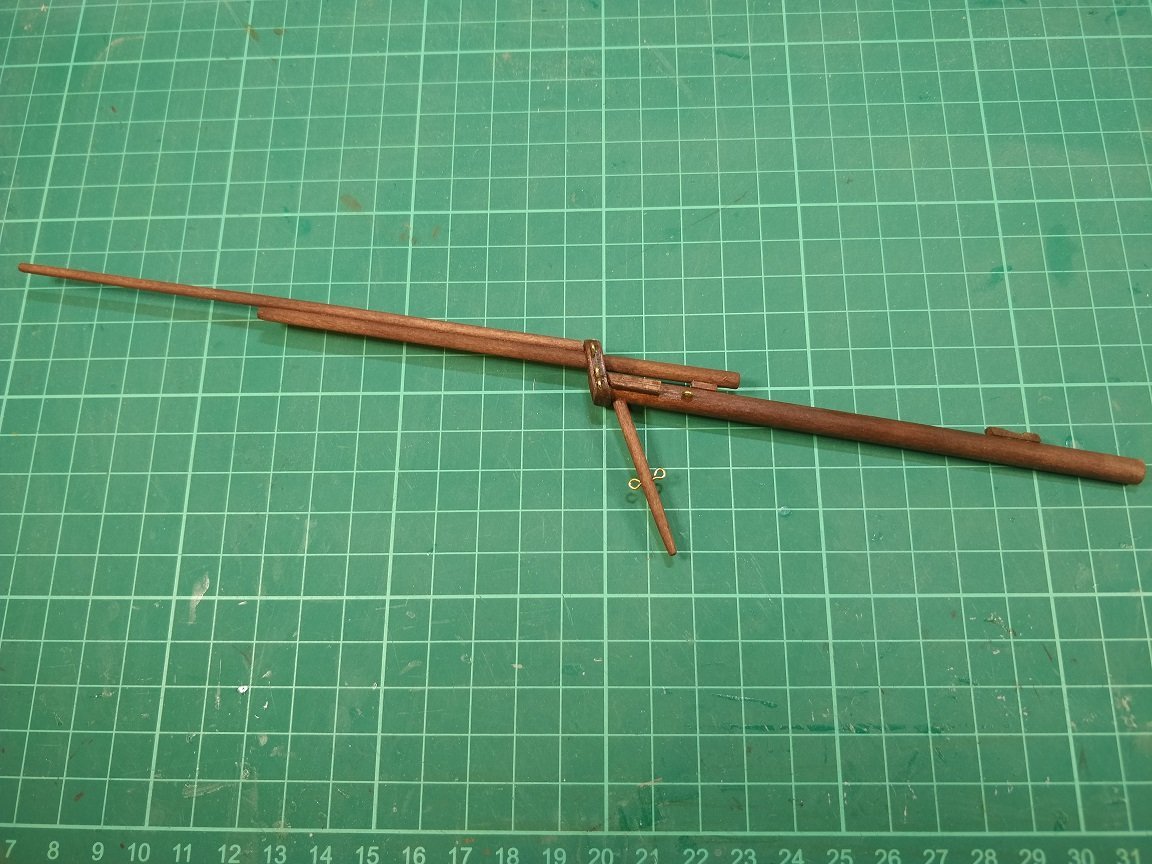
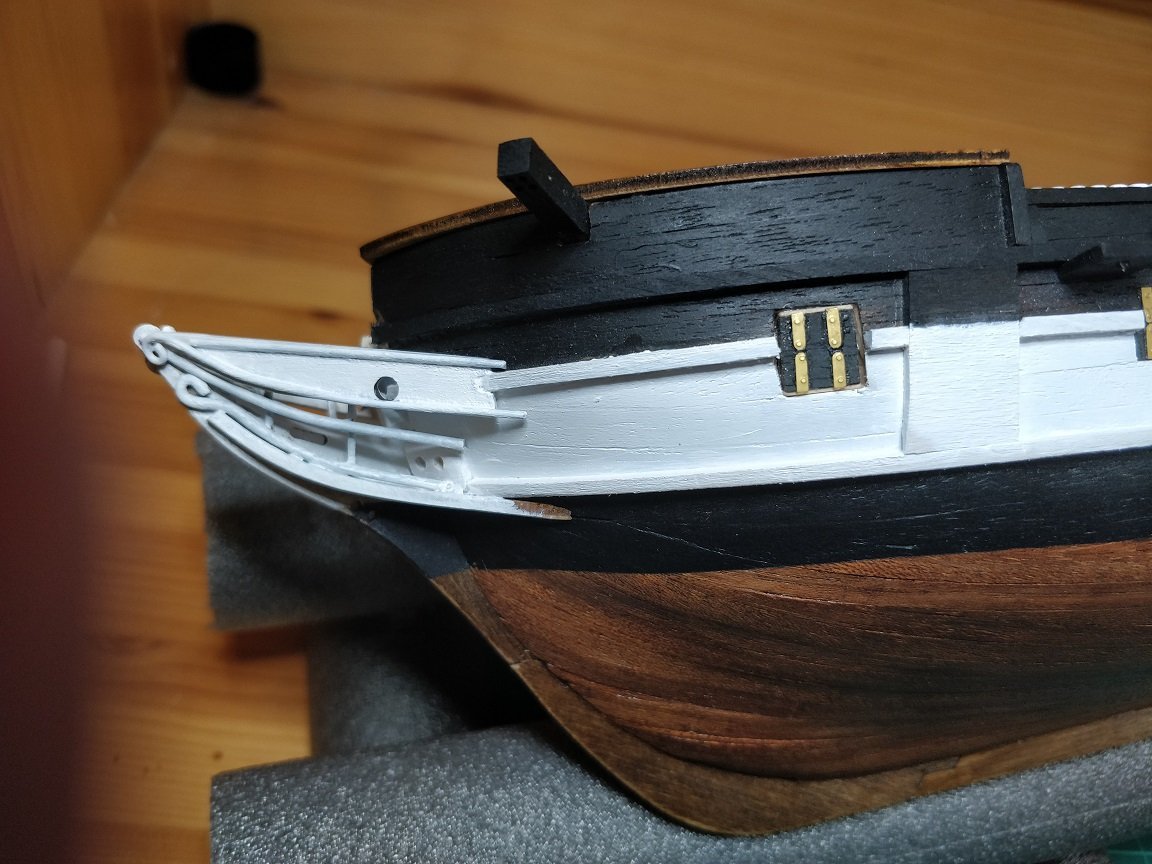
Over the past week I've fitted the channel supports for the deadeyes and started to makeup the deadeyes and chains. I then realized that some of the chains won't be vertical but will be angled. I don't want to follow the instructions here as it's clear the instructions are wrong, which has luckily been pointed out a few times in other build logs. Therefore, to enable me to workout what angle they should all be I've decided to start building the bowsprit and masts. These won't be permanently fitted just yet but will be temporarily positioned so I can get the right angle for the chains. I'll then remove them and complete the deck fittings. I started with the bowsprit as that looked easier than the masts. I used a David plane to get the taper before sanding smooth. I must admit, I find that process very rewarding. There were quite a few small holes that need drilling and I did worry that one slip here could mean a couple of steps backwards. Again I shouldn't have worried as it all went to plan. Then on with the masts, starting with the foremast: I'm currently about halfway with the foremast and things are looking okay. Let's hope I can keep the progress over the coming weeks. Chimp


-
Hairy/fuzzy rigging thread
The Gimps Chimp replied to The Gimps Chimp's topic in Masting, rigging and sails
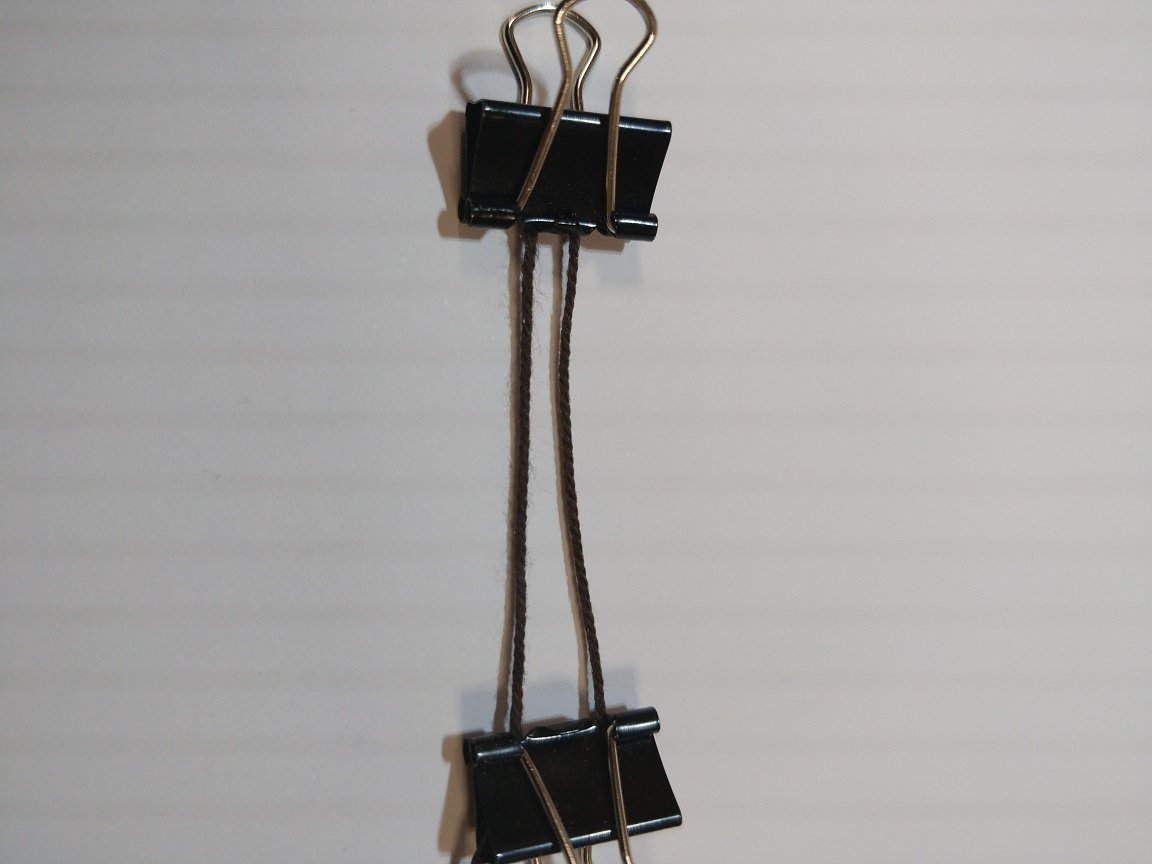
Hi guys, many thanks for your replies. It sounds like a common issue. I think the thread supplied with the Occre kit is particularly hairy. I've taken a screen grab from another build log of the same ship to show what it's like: I've just ordered some beeswax to give that a go. If that doesn't help then maybe I'll have to order some from a supplier that I know are better. Looking at Gutterman polyester thread they don't appear to give thread diameter but weight e.g. 25g (0.9oz). Does anyone know how to convert or have a lookup table? Chimp
-
Hi guys, Sorry if this has been asked before but I couldn't find an answer anywhere. I'm currently building the HMS Beagle kit from Occre. The rigging thread seems to me as being overly hairy/fuzzy. I've previously build a kit from Caldercraft and the thread was much cleaner/smoother. As I will be investing many hours on the rigging I don't want to get through it only to be disappointed with the result. I have considered purchasing some Caldercraft thread from a supplier but wondered if there was anything I can do with the thread I have. I've seen some posts which talk of using beeswax on thread. Will this solve my problem? I've seen other posts which state beeswax shouldn't be used. In the following photo I show some original 0.5mm thread (left) alongside similar thread which I've passed over a flame to burn off the hairs (right). Although much better I don't think this is the solution to my problem as I tried it with some 0.15mm thread and it quickly disappeared in flames. Many thanks Chimp
-
Hi Rob, many thanks for the advice. I have actually already drilled and filed the hole for the bowsprit. Making that hole didn't come easy to me as I didn't know what or where I was going. Turned out I had nothing to worry about as I was only really opening a hole in the planking. I'm now making the bowsprit, a little out of sequence according to the instructions. Photo's in my next post. Chimp.
-
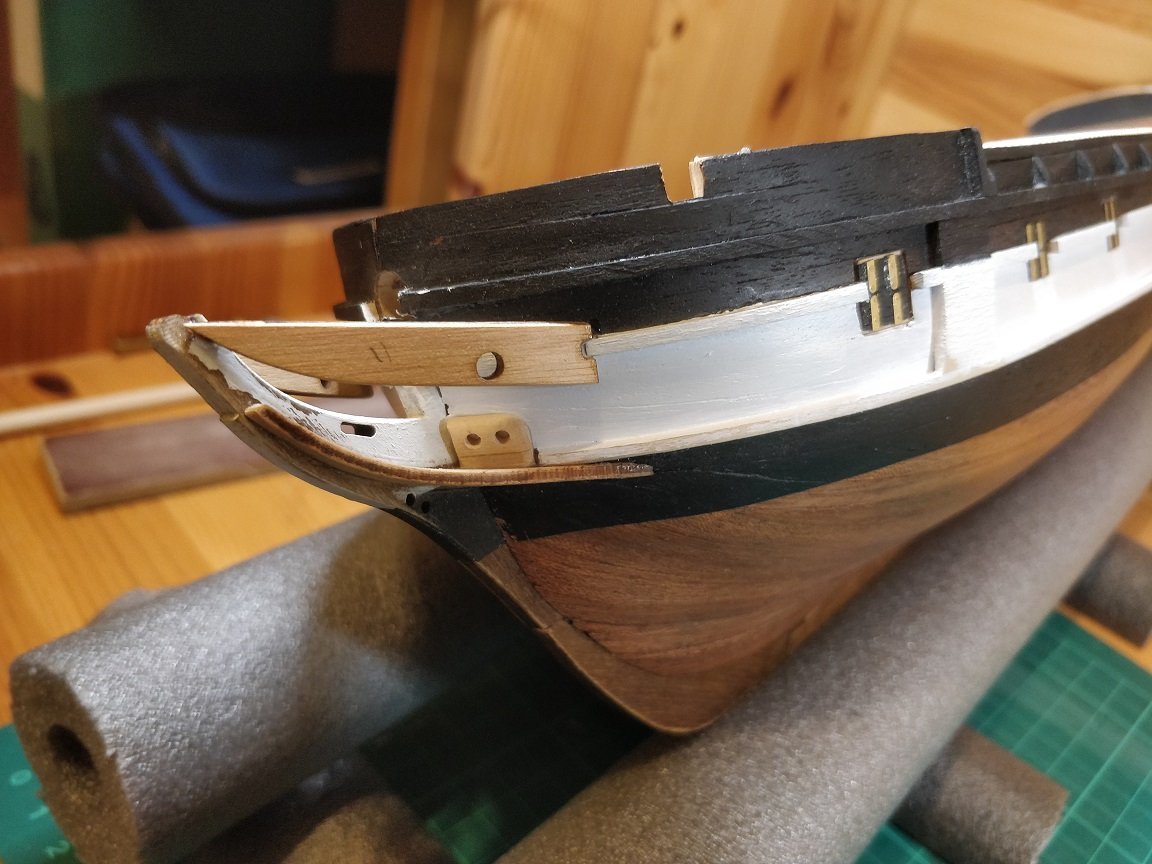
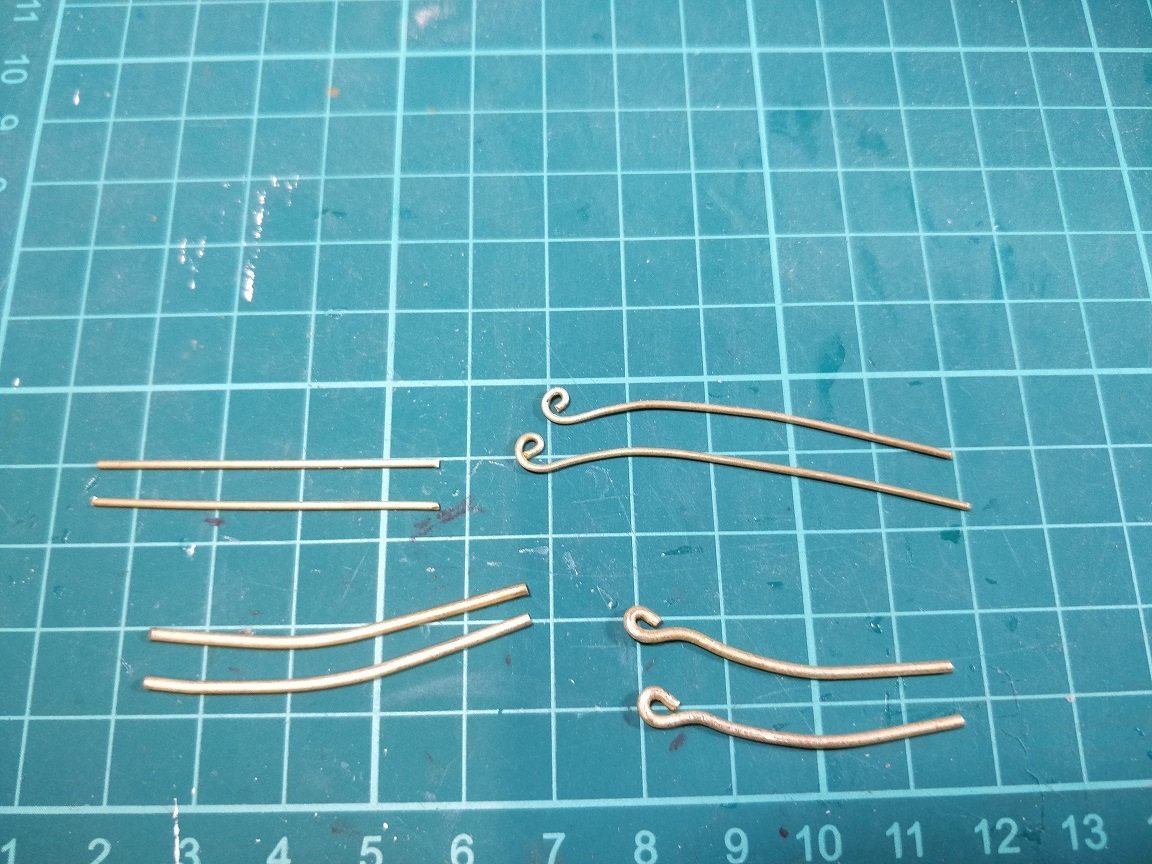
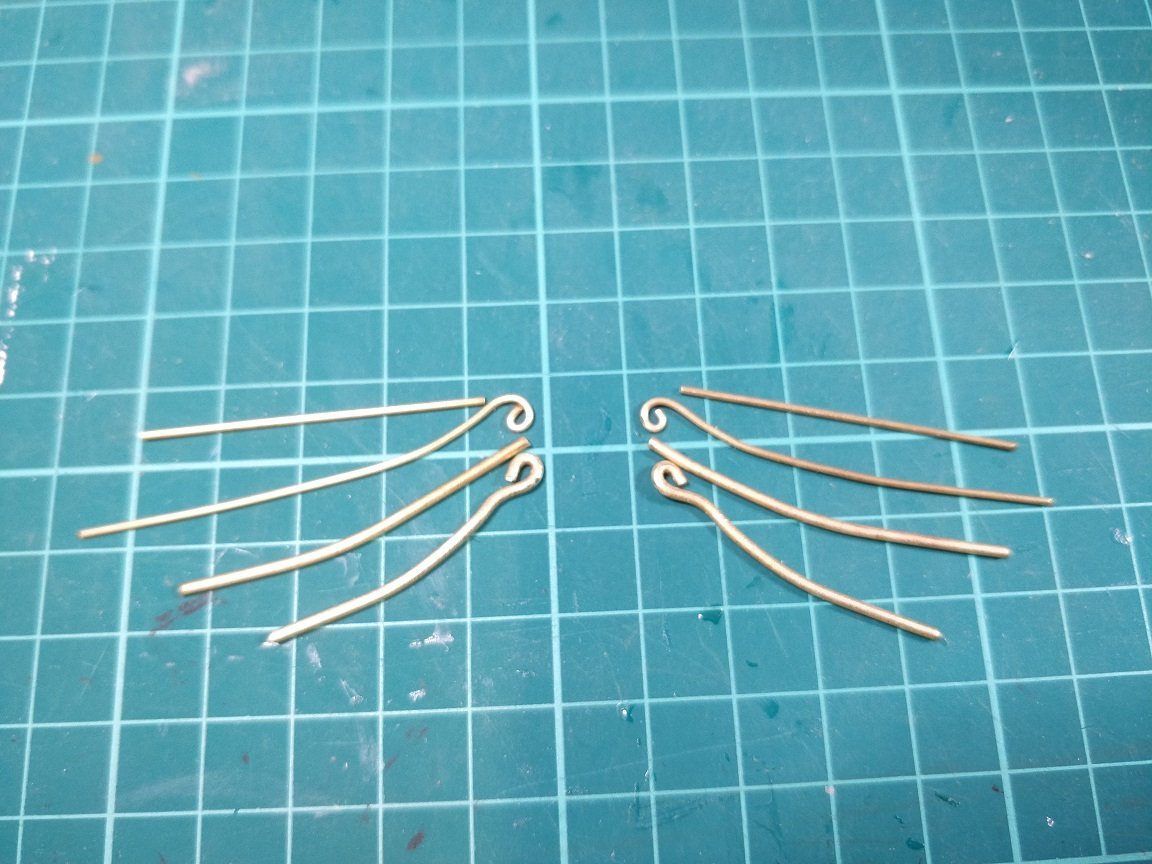
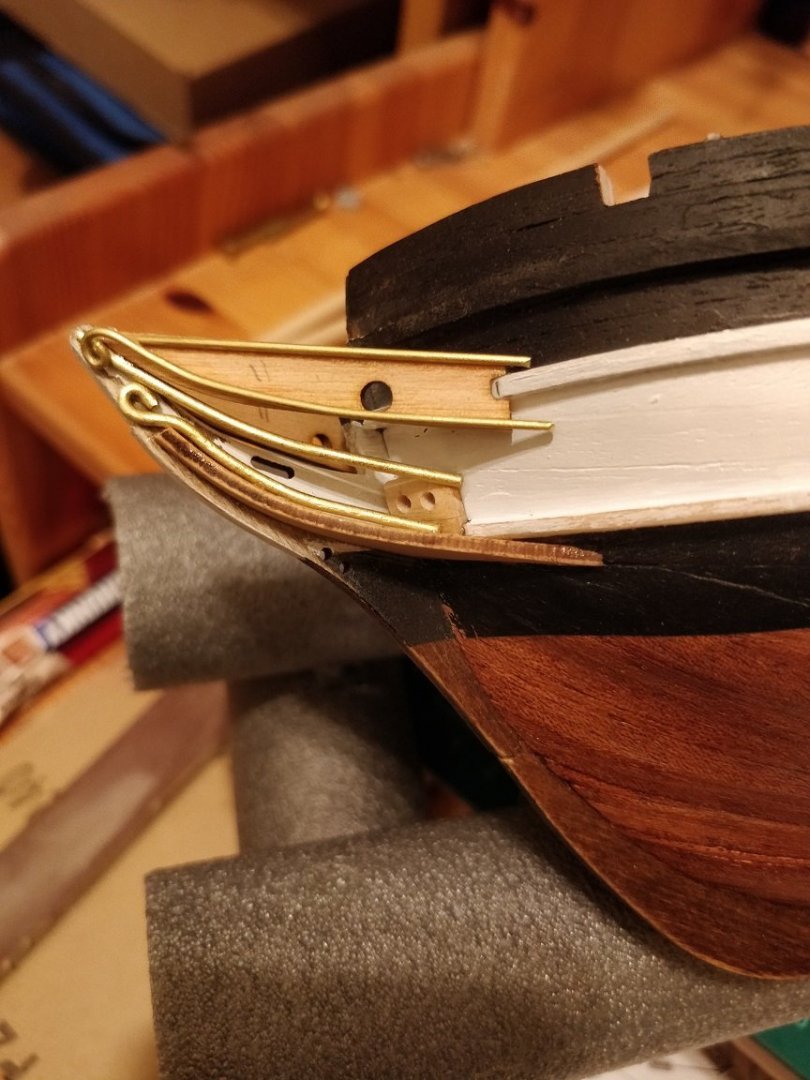
Gun port hatches are now fitted, that was straightforward. Some needed a little trimming to fit but that's expected. I've also started looking at fitting all the bow details. The instructions aren't best I've seen and there is still some confusion in my mind as to whether they are consistent, as I've often found the instructions and assembly photos do tend to conflict with each other. Anyway, I think I've ended up with something which looks half decent. These are the brass sections after cutting and bending This is what it looks like after releasing my glued fingers from the bow. Not perfect, but I'm happy with it. It will be interesting to see what it looks like after painting, if I can now get the brush in to paint it!!

-
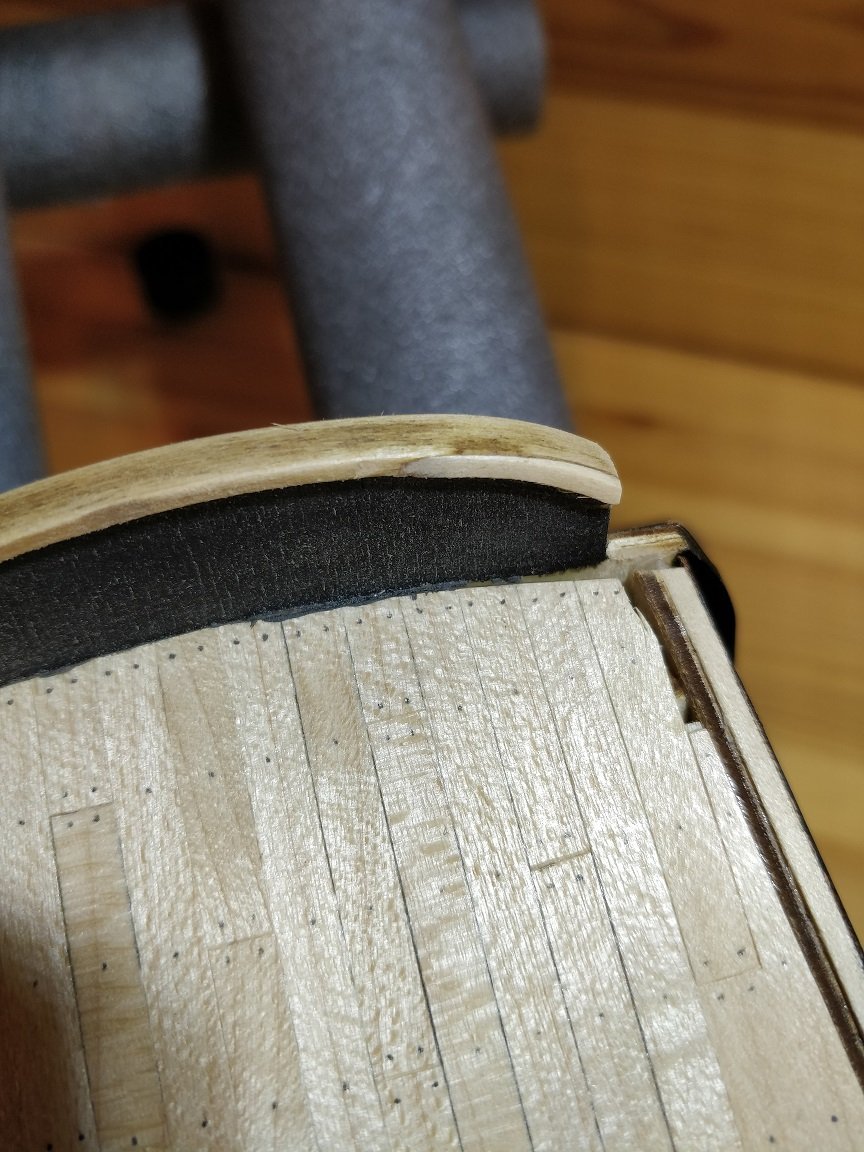
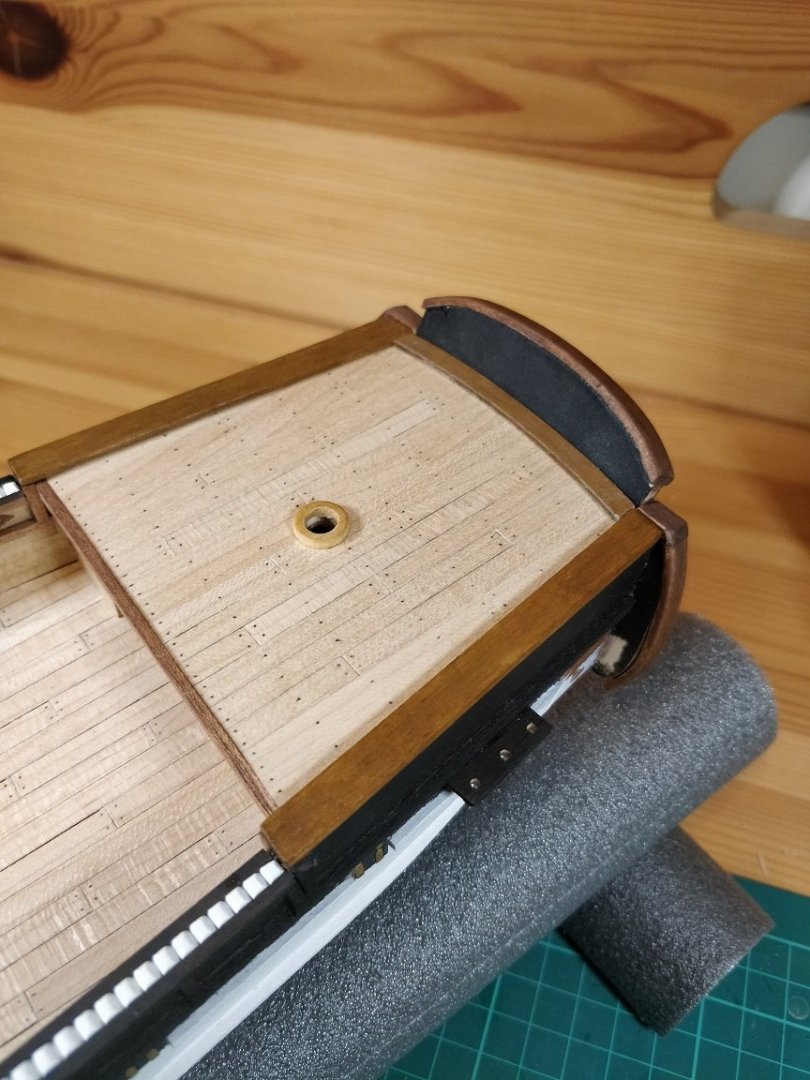
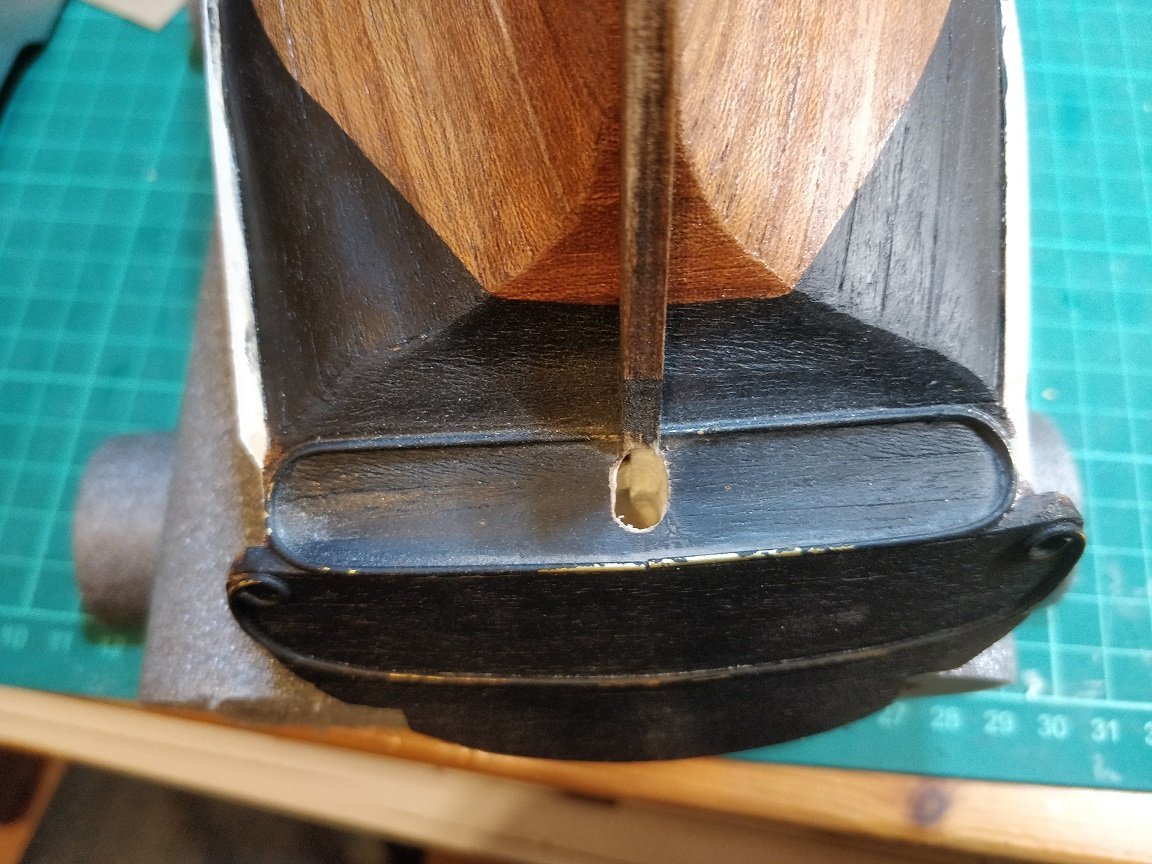
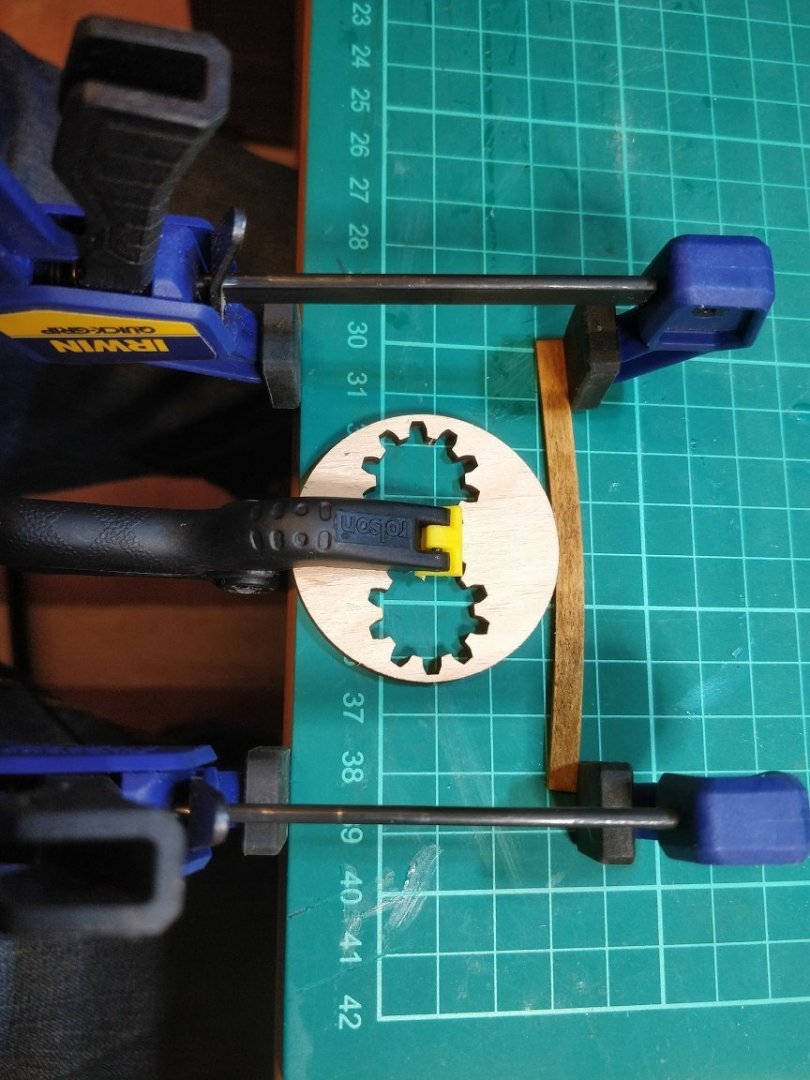
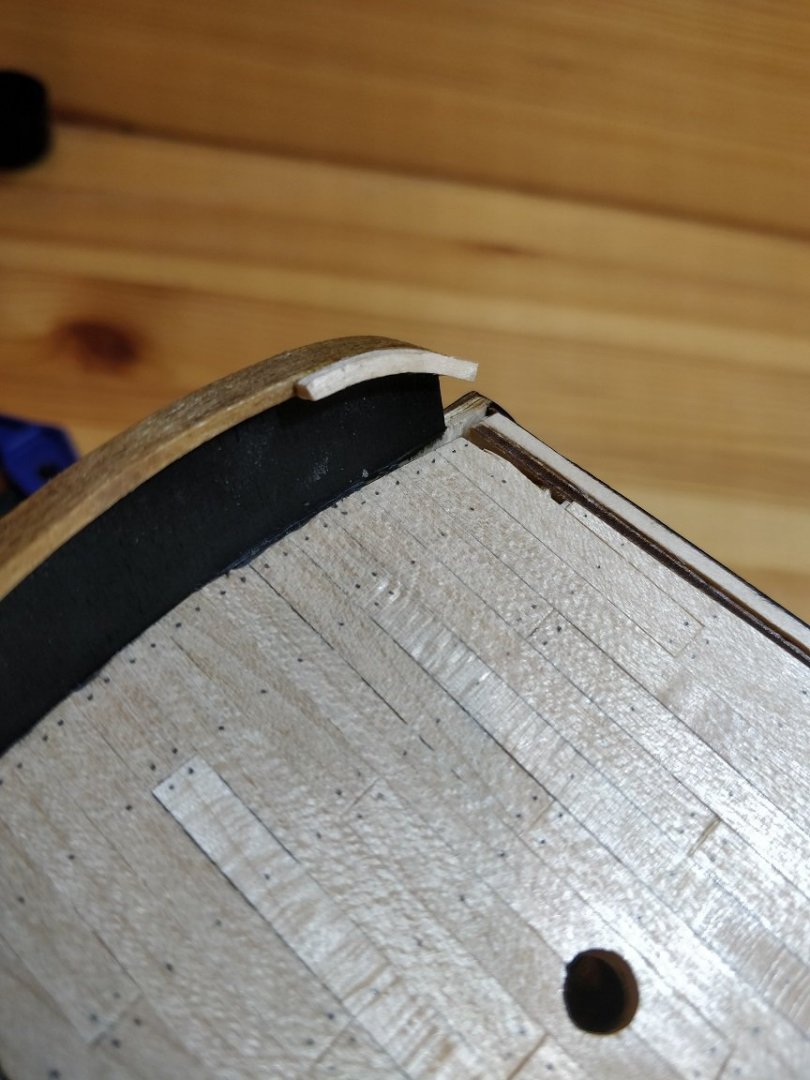
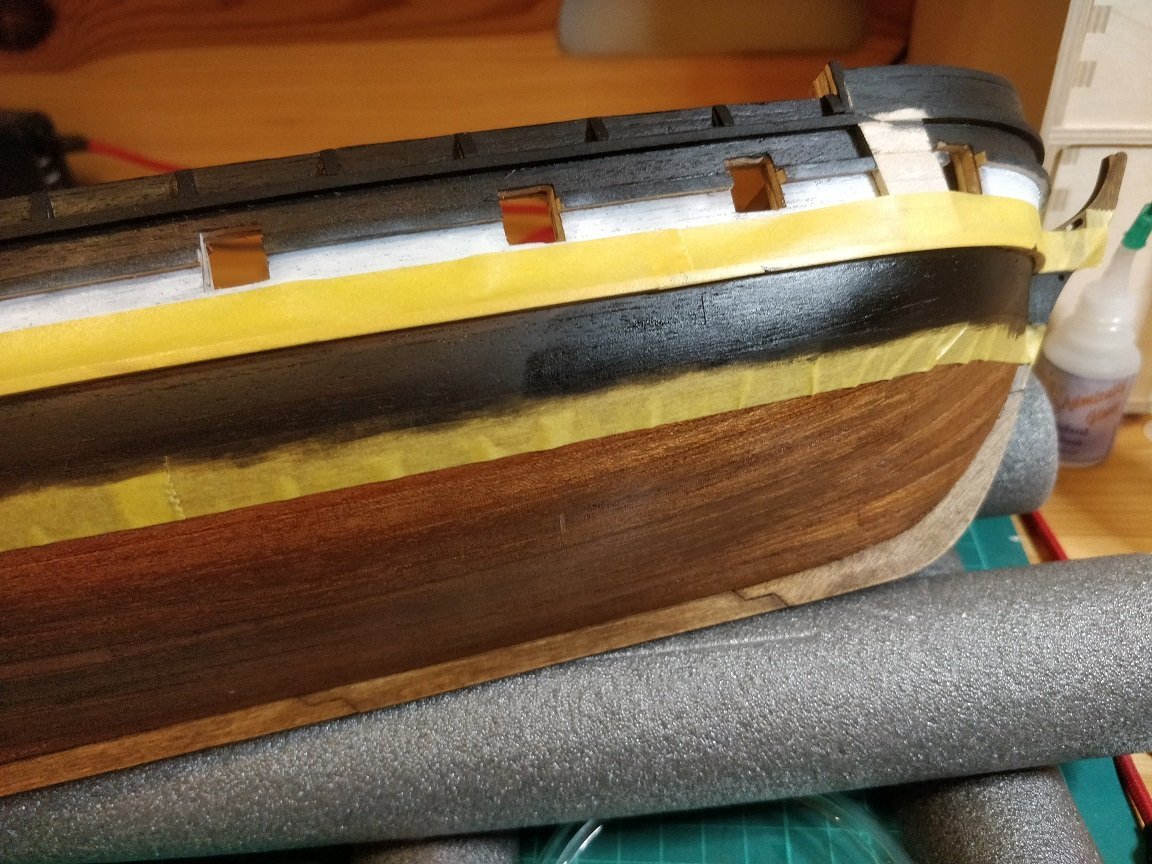
After spending time making sure the surface of the hull is clean and smooth the next step requires you to drill a 5mm hole through it! Just a little bit unnerving to say the least. It's to allow the rudder to fit up into the hull. I need to become more confident during these times but after spending so much time and effort on it I worry that doing something silly can set you back weeks. Anyway, I overcame my fear of doing something wrong and got on with the task in hand. As it turned out everything was fine. I suppose that's given me some confidence for the next time I've also spent some time on painting the hull so she's starting to look like the Beagle. One area which I've found particularly challenging has been the wooden trim around the stern. The piece on the top does need to bend in two directions, vertically and horizontally. The vertical bend isn't a problem. The horizontal bend, whist retaining the vertical bend becomes a challenge. My first attempt failed. Thought the best approach would be to make the first bend the horizontal one. That was performed around a piece of scrap wood. Then I fitted it to the hull by gluing just the center section using CA glue. When dry I then applied water using a paint brush and gave time for it to soak through. I then glued further out from the center, until eventually got the full length attached. Even then I wasn't happy that I had got the correct amount of horizontal bend on the port side. To remedy this I glued on a piece of scrap wood and when dry I shaped to look correct. It's not perfect but I'm happy with the result. The side pieces were also a challenge but with tighter bends. I applied the same logic and technique to this problem and I think they came out okay.


-
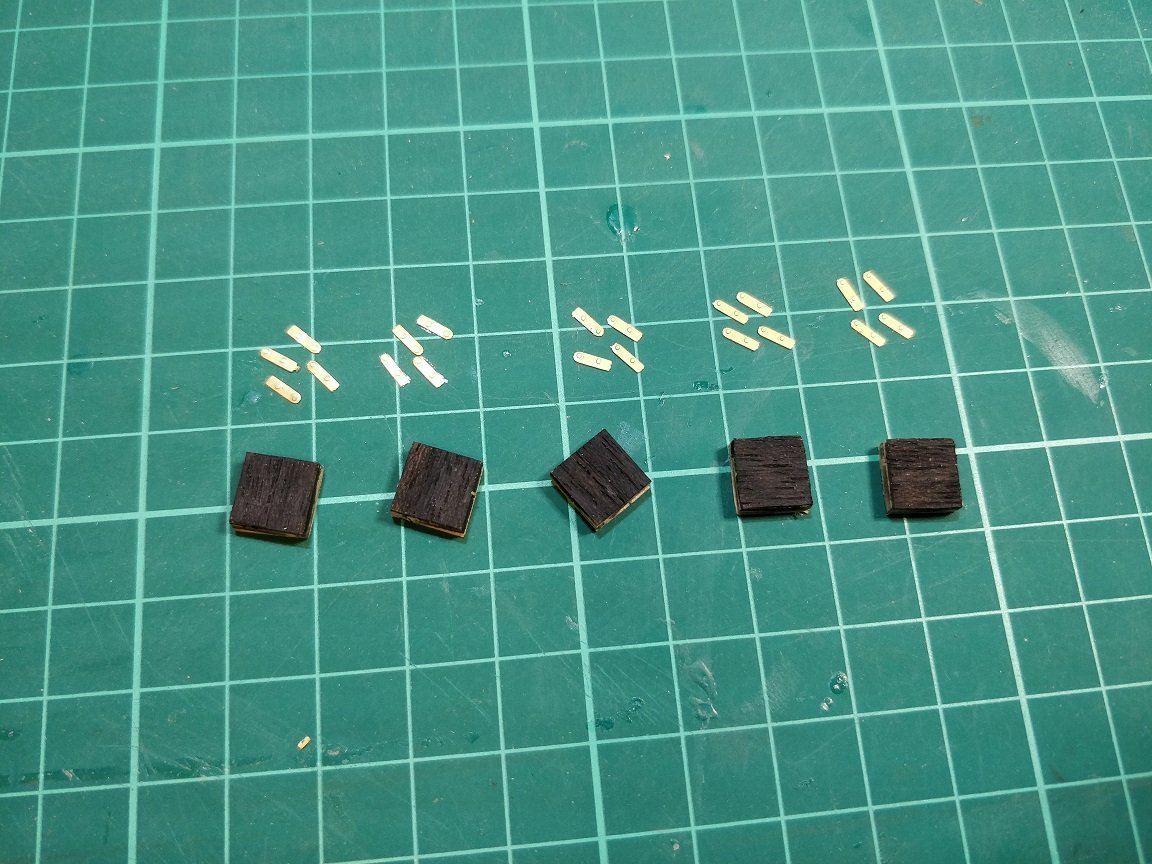
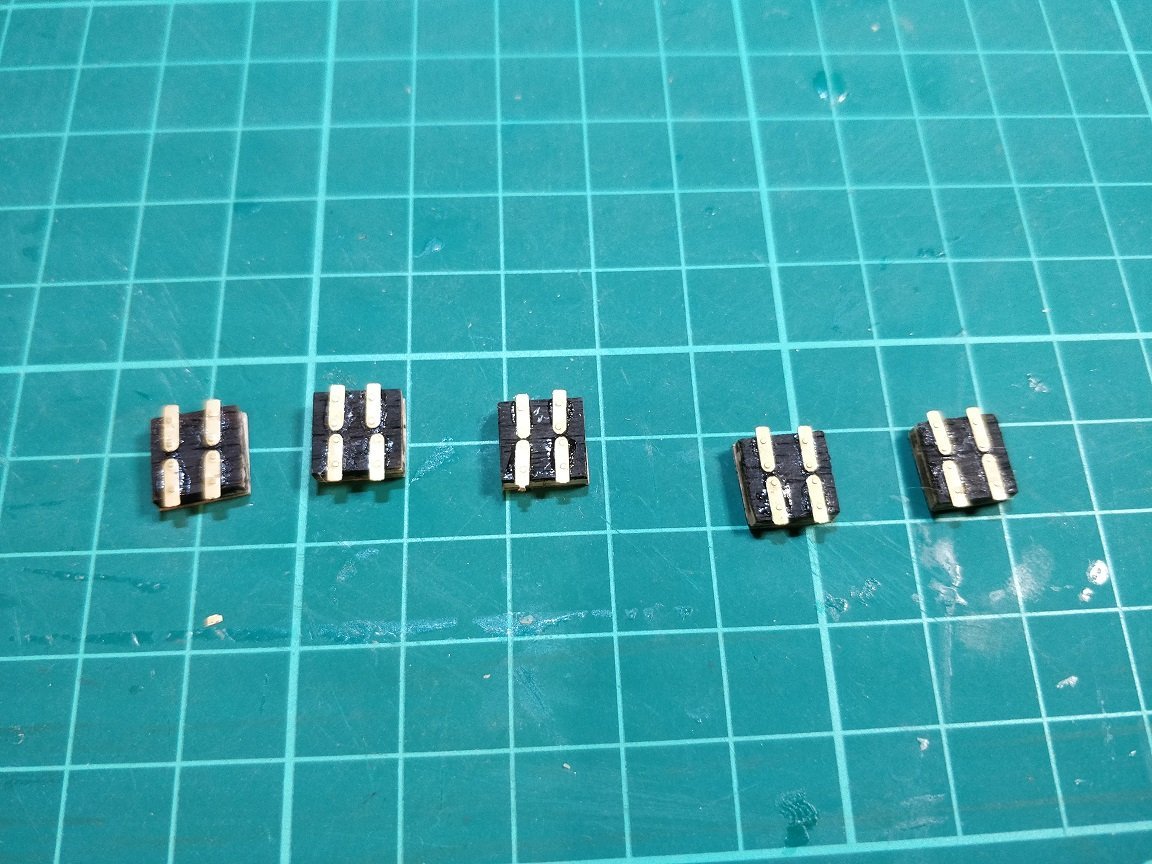
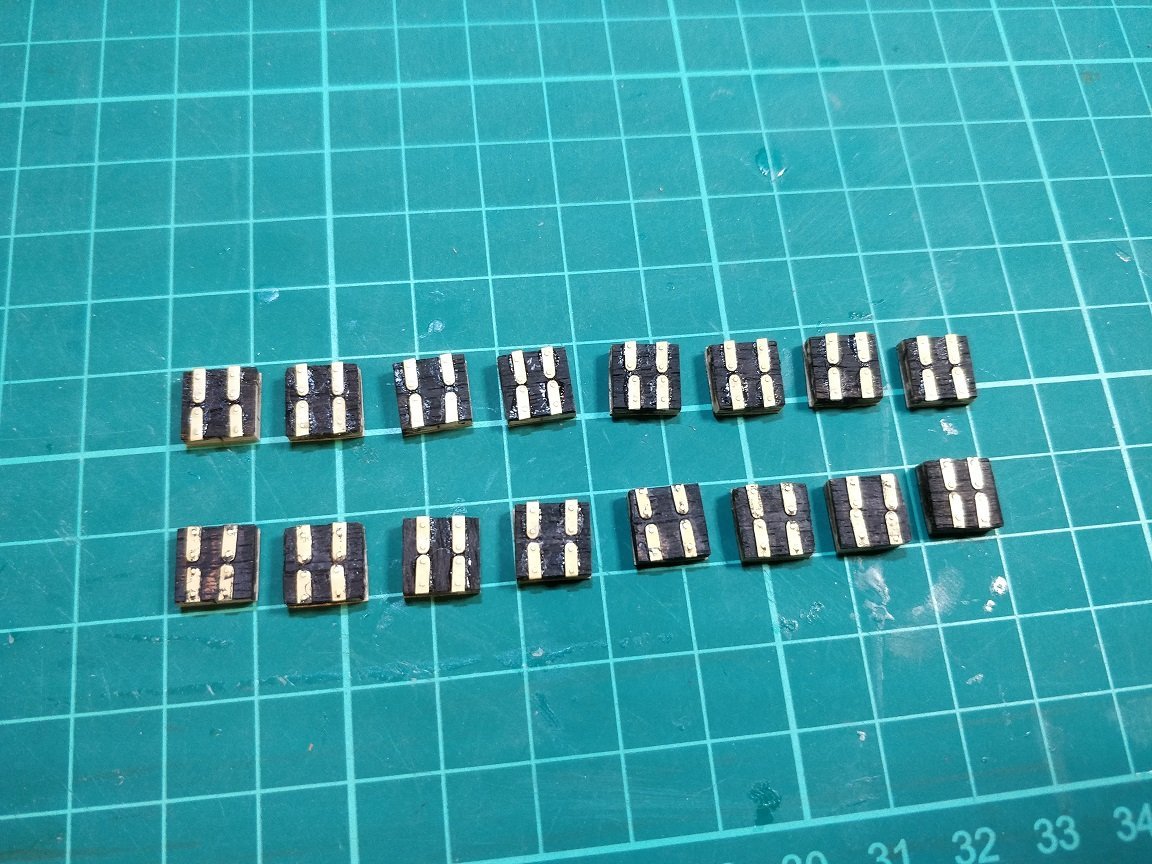
The next step has been to make up the gun port panels. Luckily I had saved these when cutting out the gun ports at the start of the build. It would have been easy to see these as scrap wood and to throw them away. Covered them with Sycamore for the inner face and Sapelli for the outer. The outer face was then painted black before fitting the hinges. I found cutting the hinges from the brass sheet a bit difficult as my side cutters were too bulky to fit in between the tightly packed fittings so I had to cut away much of the outer sheet which was really too thick for the side cutters. Anyway I got them all cut out okay. I got the hinges glued onto the gun port panels. They're not perfect and could be better but I think they're good enough. The hinges are longer than required so needed to be trimmed to the right size which was straightforward to achieve. They will require a bit of a touchup with the black paint to try and hide evidence of the glue. Chimp
-
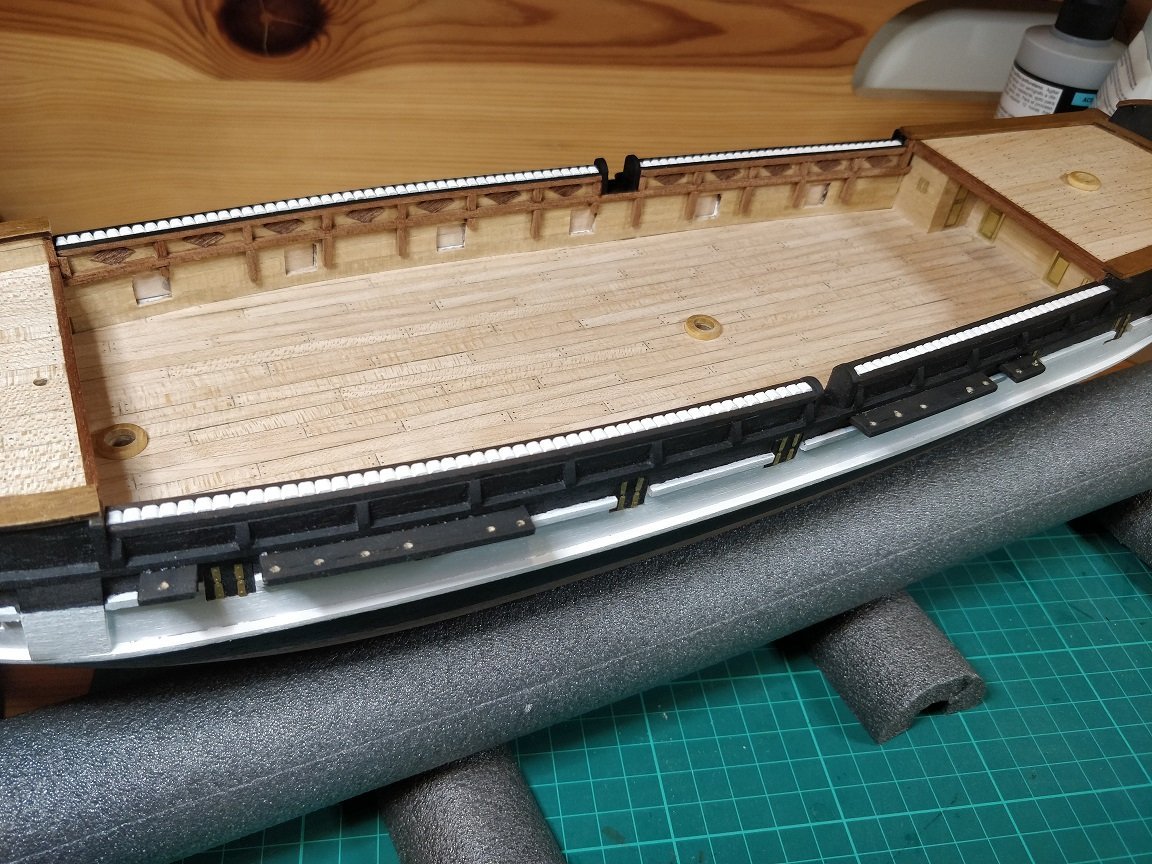
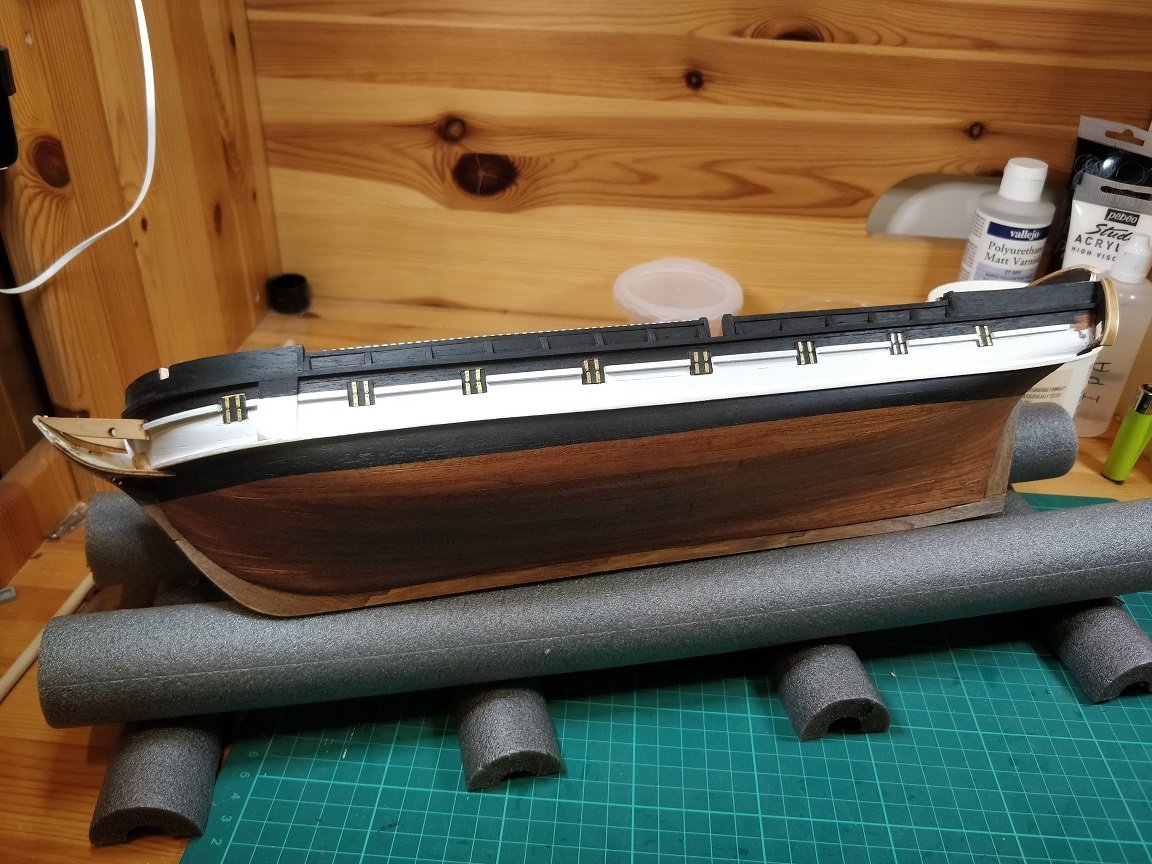
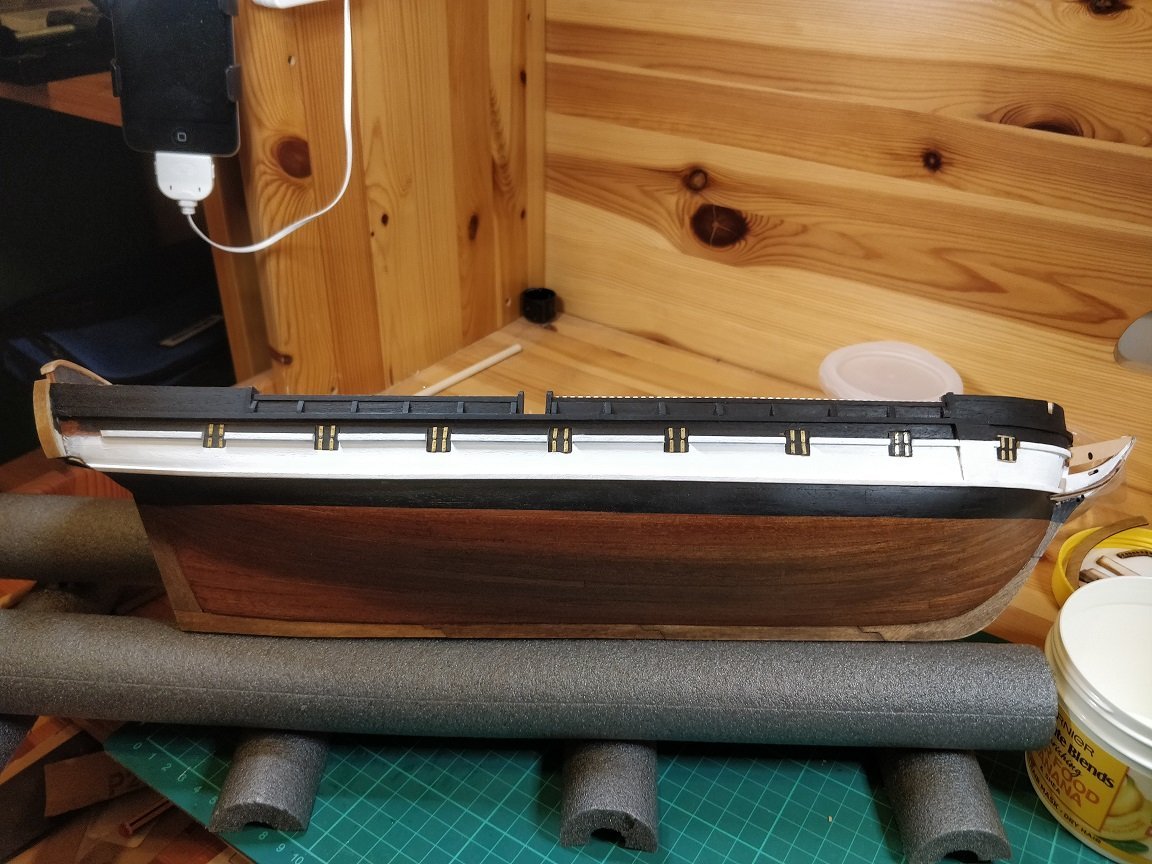
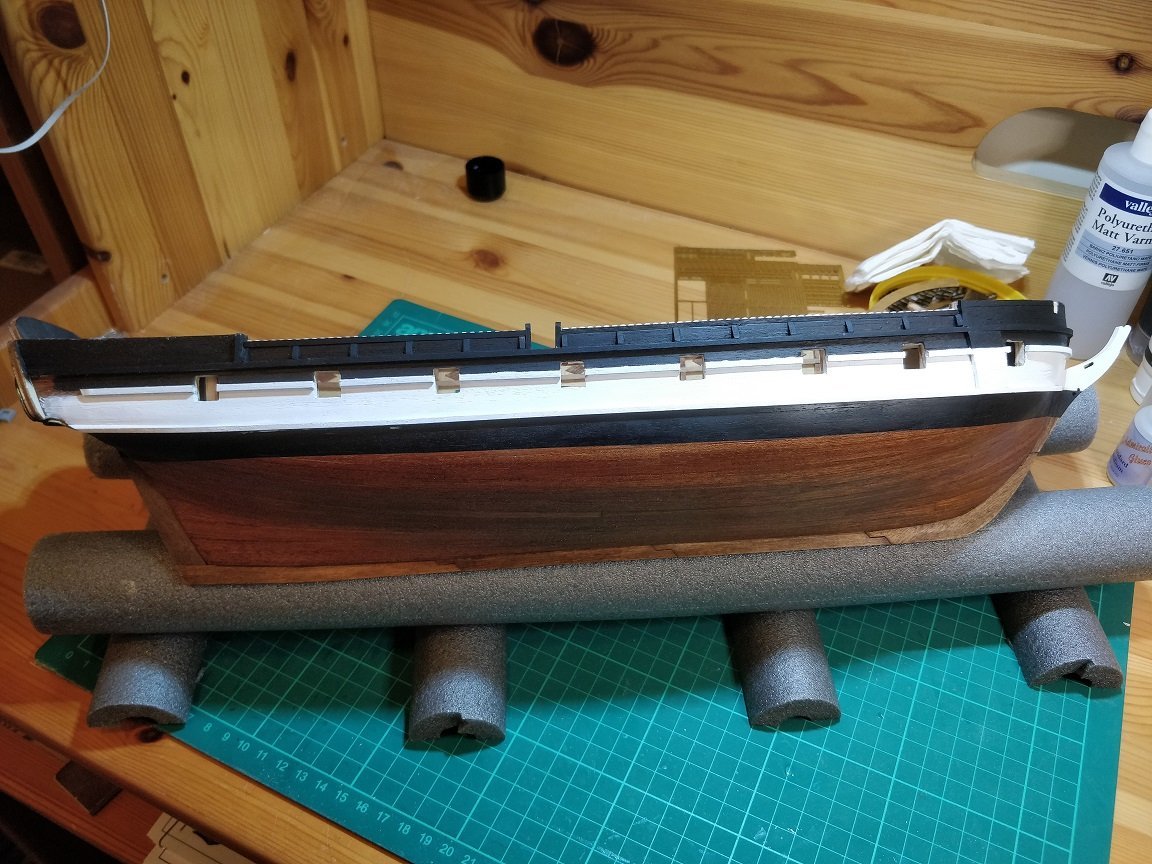
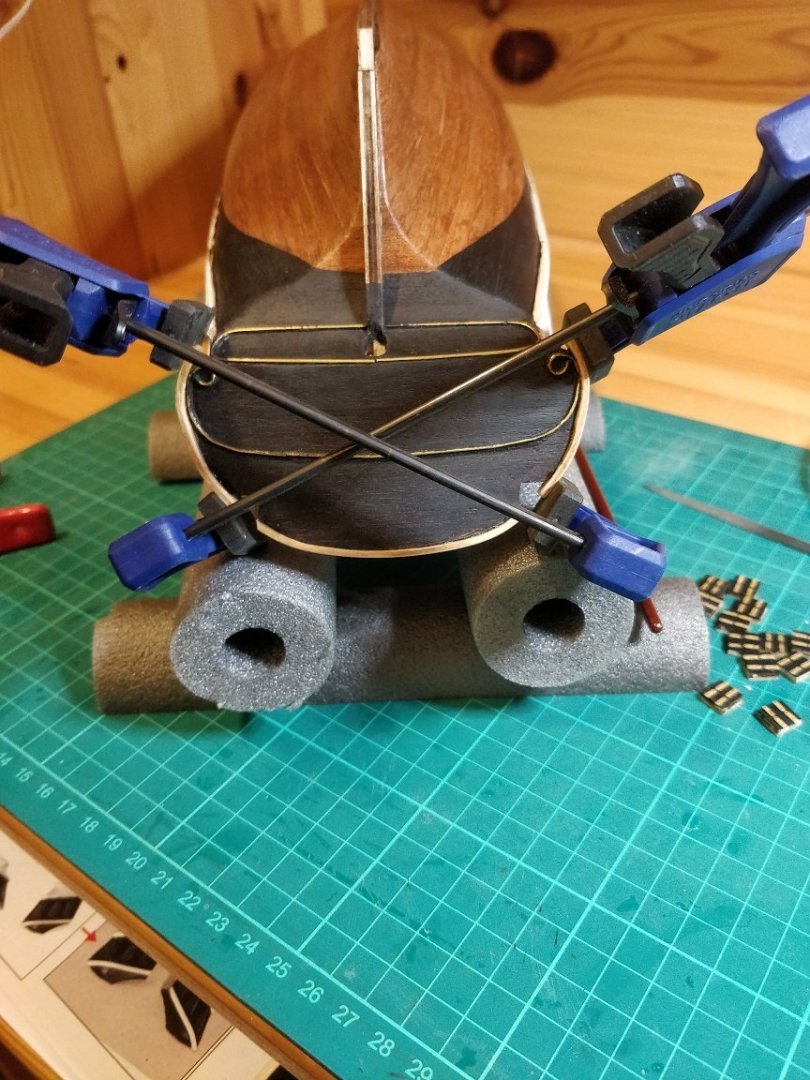
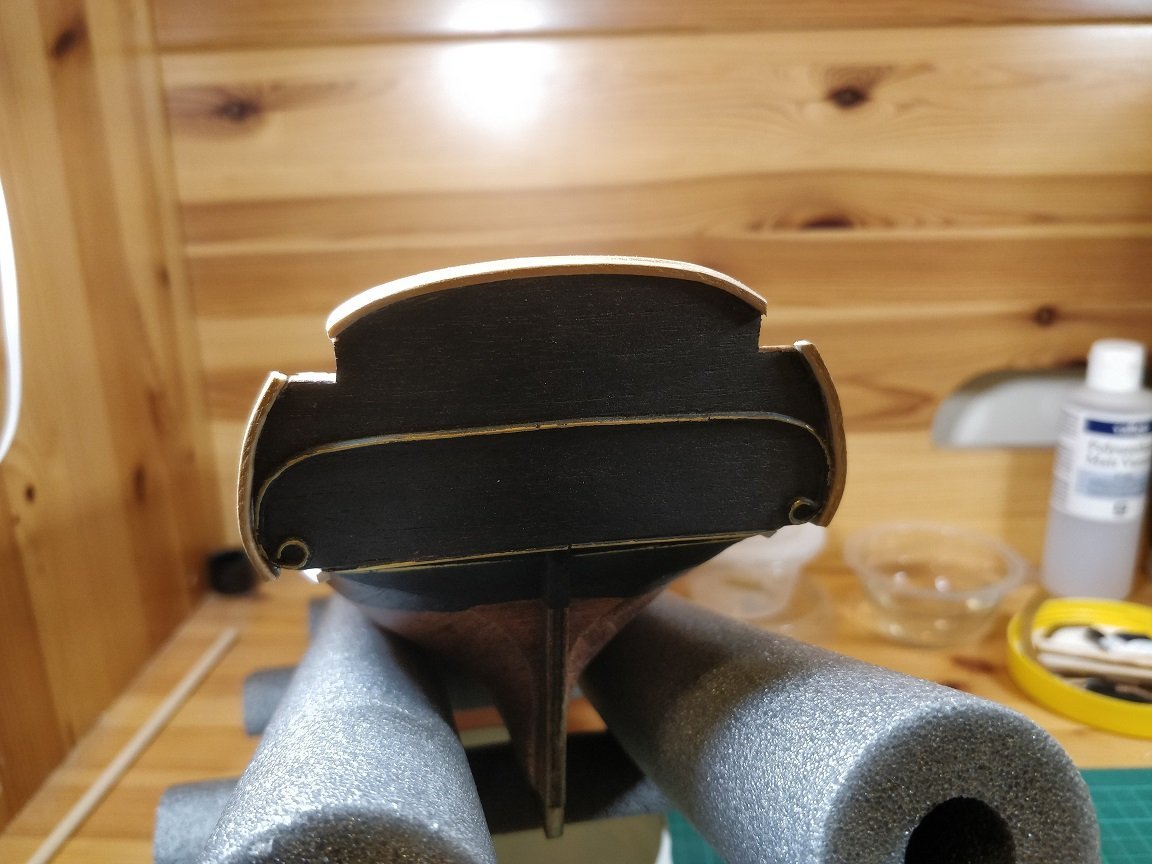
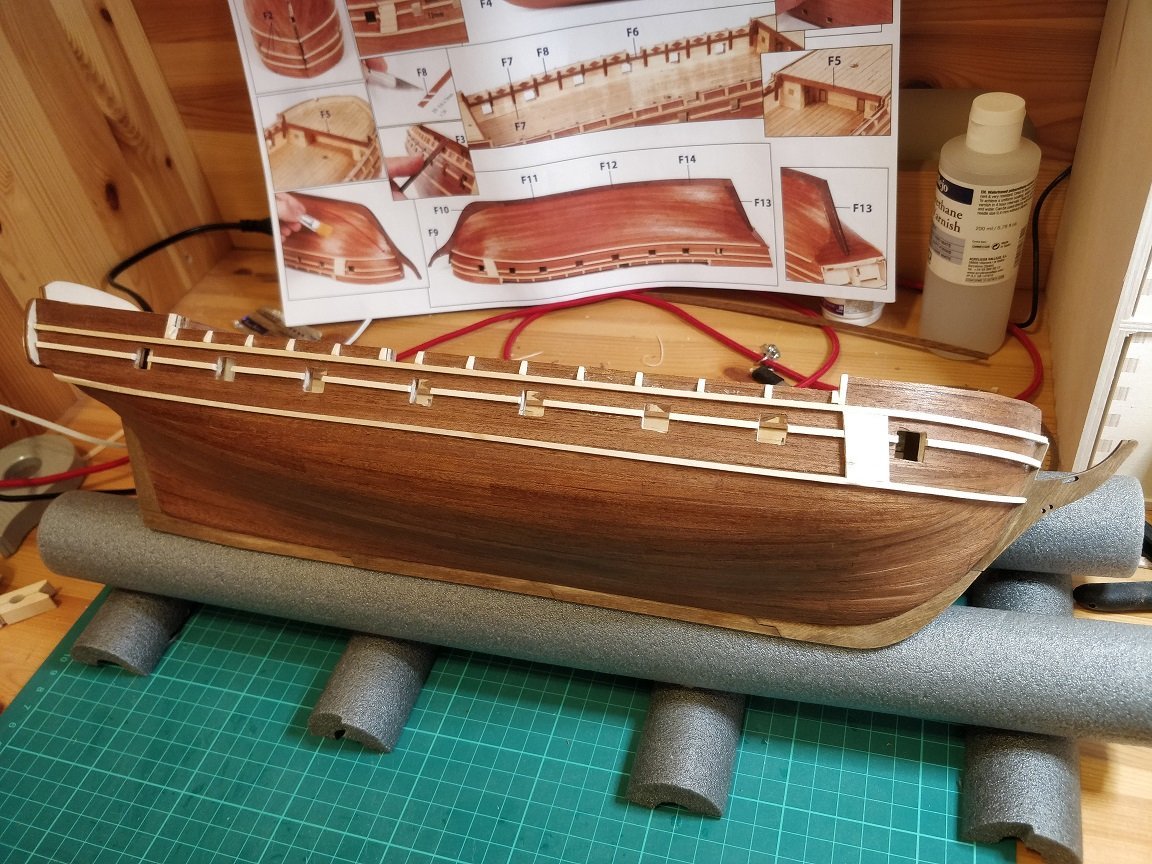
Hi guys, After a bit of a break I'm "back in the saddle". The break was due to many reasons, nothing untoward just so much other stuff going on. I suspect I have a couple of months of relatively intense building before I get waylaid with other stuff. However, I'm absolutely adamant this build will be completed. Picking up from where I left off, I now have all the second planking complete. The ship has had a couple of coats of paint and I'm currently working on the deck fittings. Here are some photos to show where I currently am with the build:
-
Excellent work, that's a fine looking model........ Well done!!!
-
Hi Pete, You are making such rapid progress with this model. (I'm just getting to the end of the second planking with mine. I'm hoping to pick up the progress in the coming weeks. Work has been a bit busy recently ) Good to see that not only do you have great speed but the quality of your workmanship is extremely high. This build log is providing some fantastic insight into what lays ahead for me. I shall be following your progress very closely as you advance with the rigging. Keep up the excellent work. Chimp
-
I guess the chemical reaction doesn't scale to 1:60. How easy would it be to achieve the result using paint?
-
I'm I right in thinking the Beagle was copper bottomed in the later part of it's history? Chimp
-
Hi Pete, You are making fantastic progress with this model, at this rate you should have it finished in a couple of weeks time. Mine by comparison is taking much longer as my time is very limited unfortunately. I like to think I'm building it in real-time I found the work on the small boats quite a challenge in their own way too. The quality of your workmanship is excellent and when finished you should have a mighty fine model of the Beagle, which you can be rightly proud of. I continue to watch with much interest as it's providing me with knowledge, ideas and inspiration for my own work. Keep up the excellent work! Chimp
-
That second planking is looking nice and neat and clean. Excellent work
-
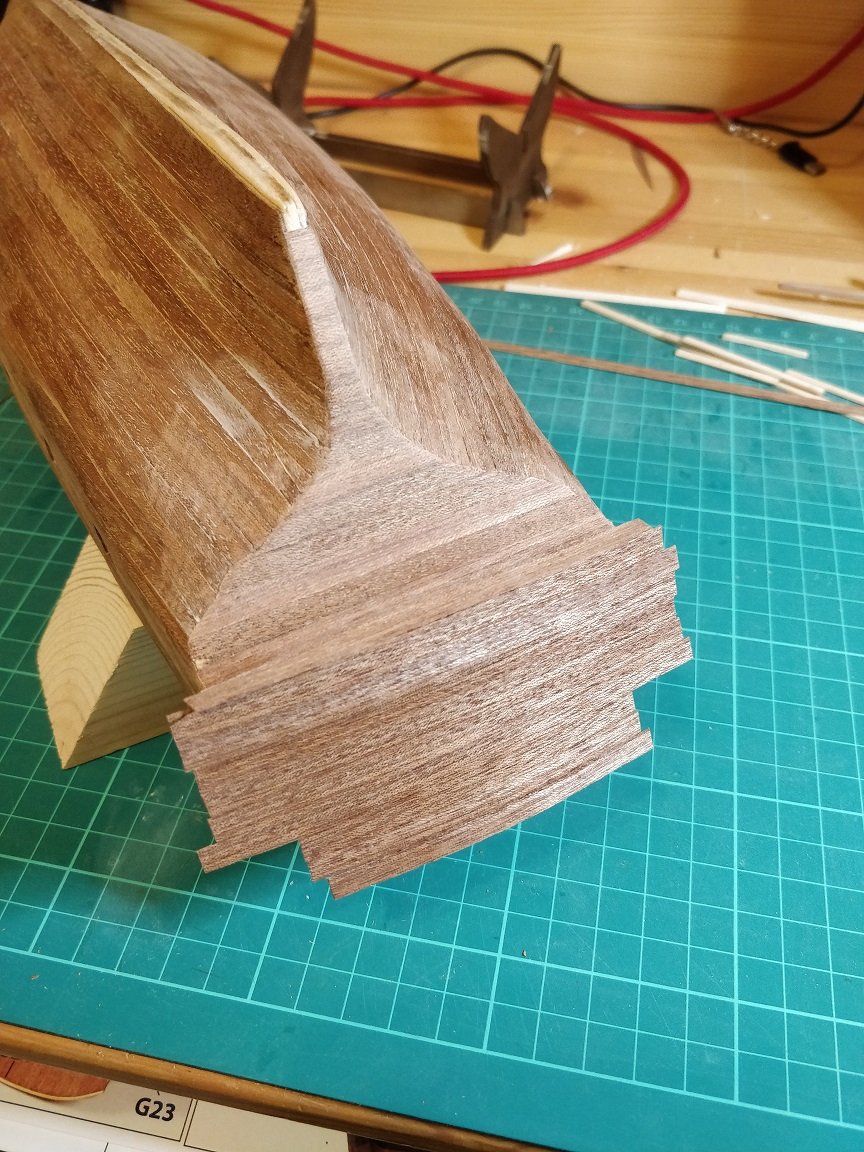
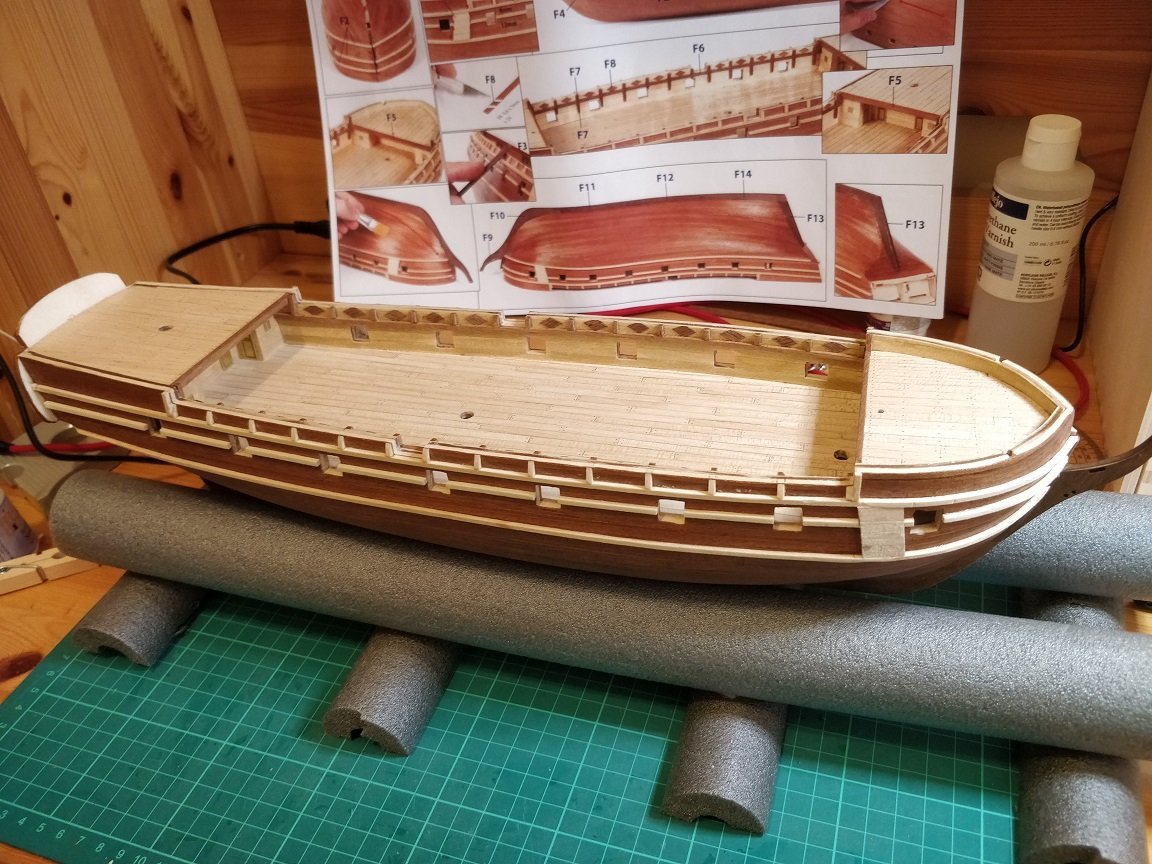
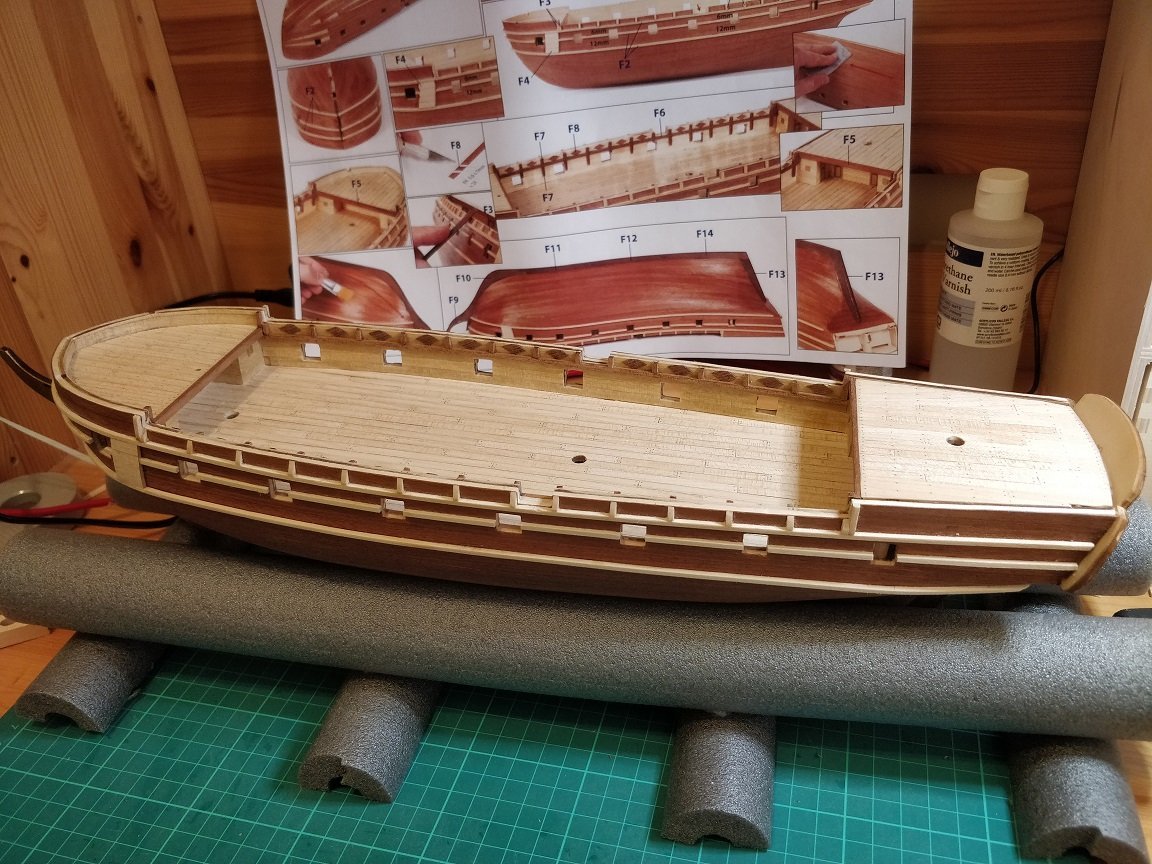
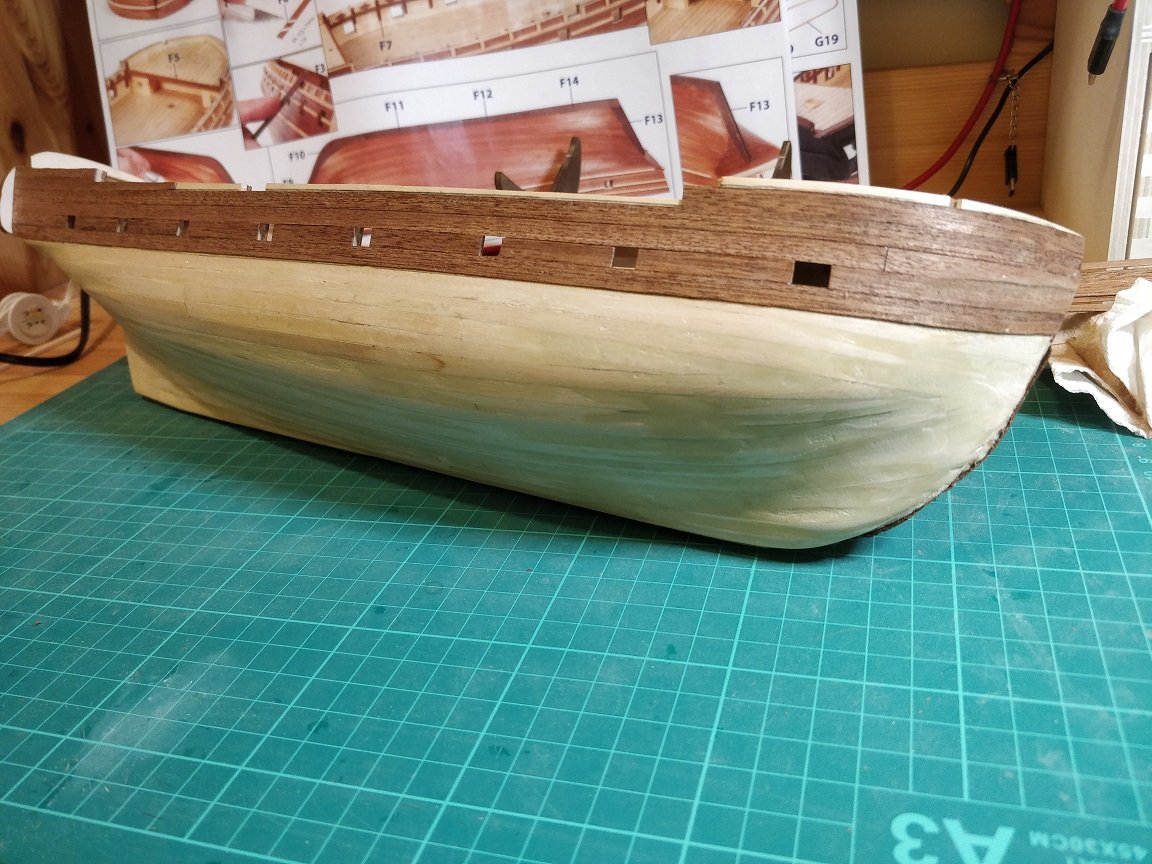
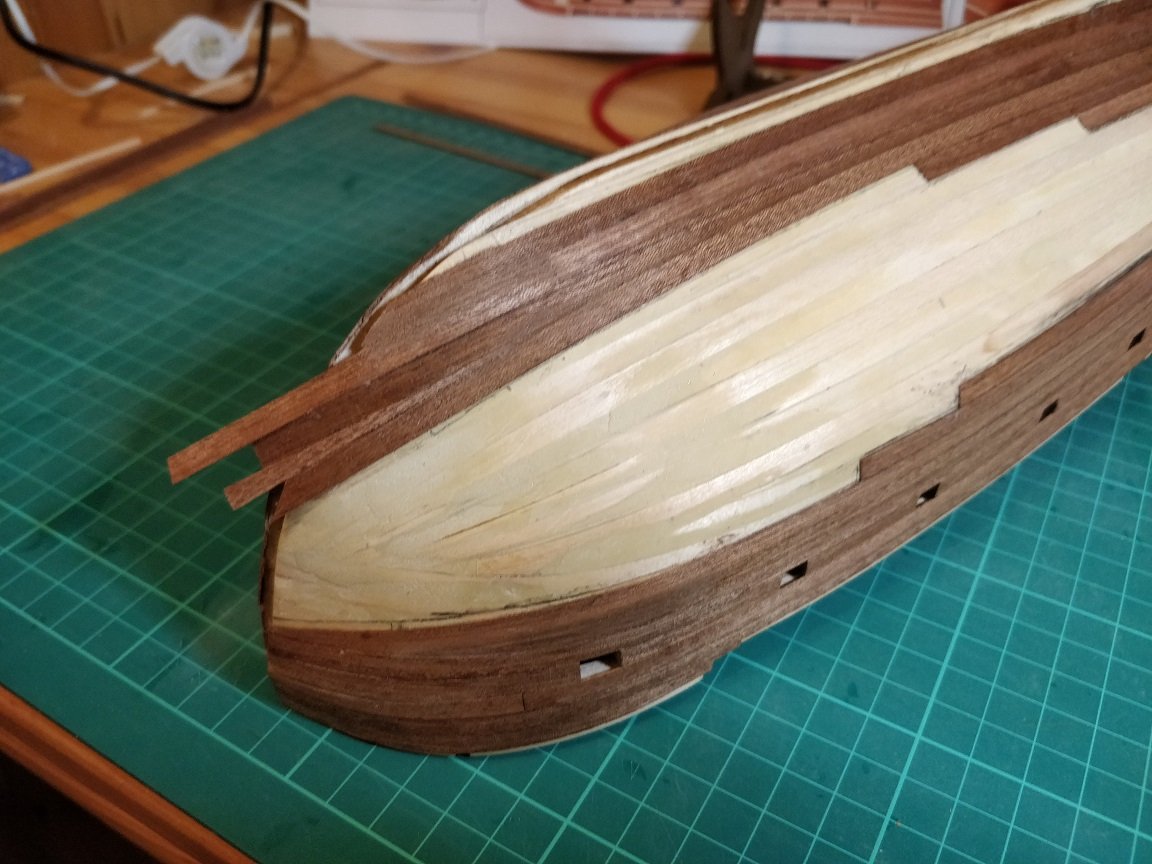
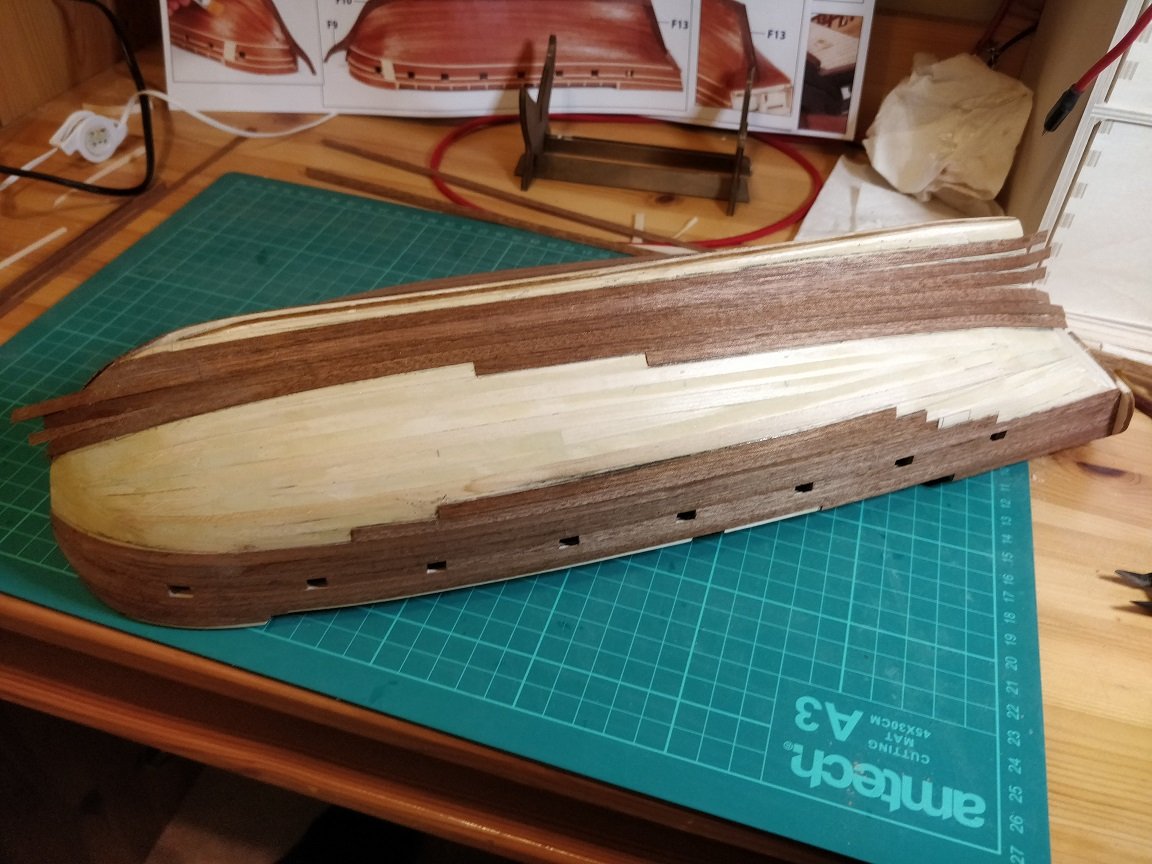
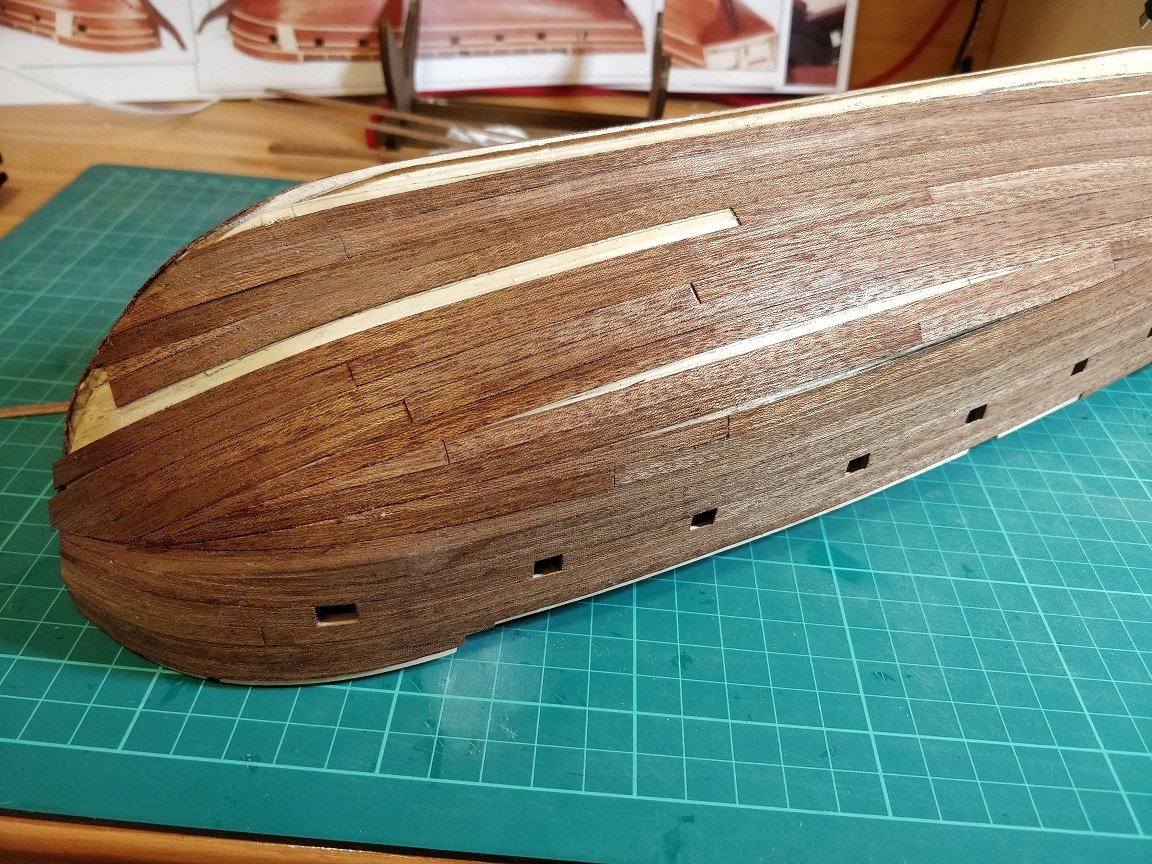
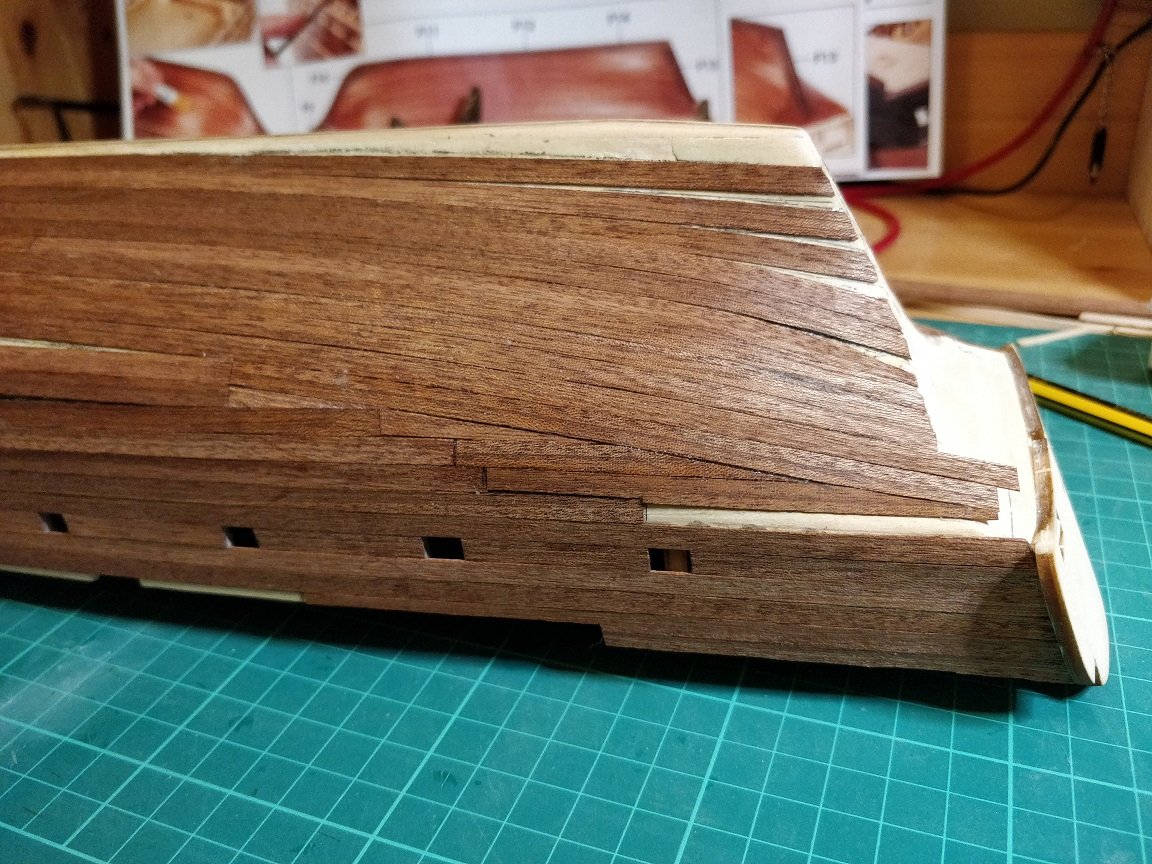
Time for another update. Progress has been slow for the last couple of weeks but I'm not too worried about that. It's due to the change in the weather. As it warms up the garden starts to come back to life and there is so much to do to keep on top of it. With regard to the Beagle, all I've managed to get done is the second planking on the starboard side and the stern. For some reason the starboard side was more demanding than the port side but I think that was down to how I progressed and the order in which I chose to plank. There will clearly be an optimal order but I have no idea what that is. Starting with the bulwarks is probably the best as these are consistent and lay flat and even, without any tapering to be done. When you drop below the bulwarks things become more demanding and shaping of the planks is required. The instructions show what looks to be a fairly random sequence and random length to the planks but I'm sure there's some logic to it. Whatever you do I think you end up cutting small pieces of veneer and making it fit. Luckily it cuts easily and with a bit of practice you can get a good close fit. And where it doesn't fit perfectly there is always filler Chimp


-
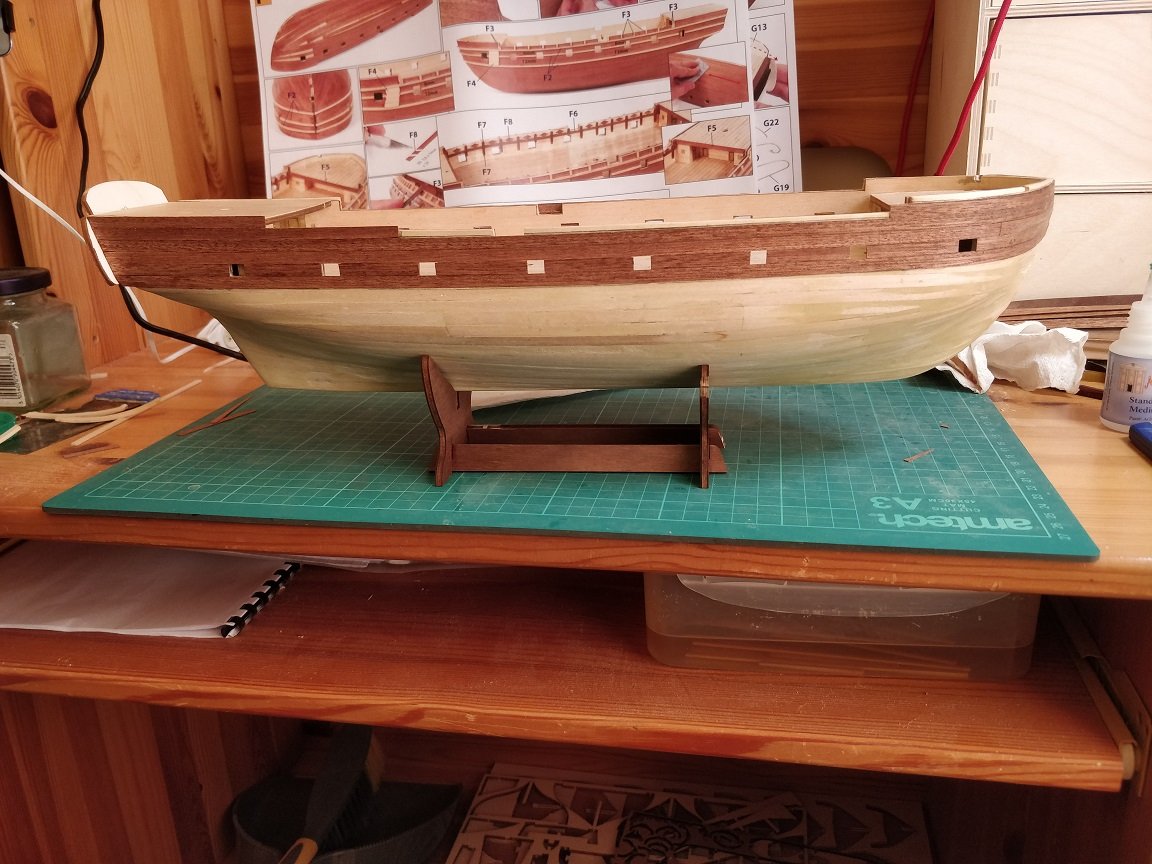
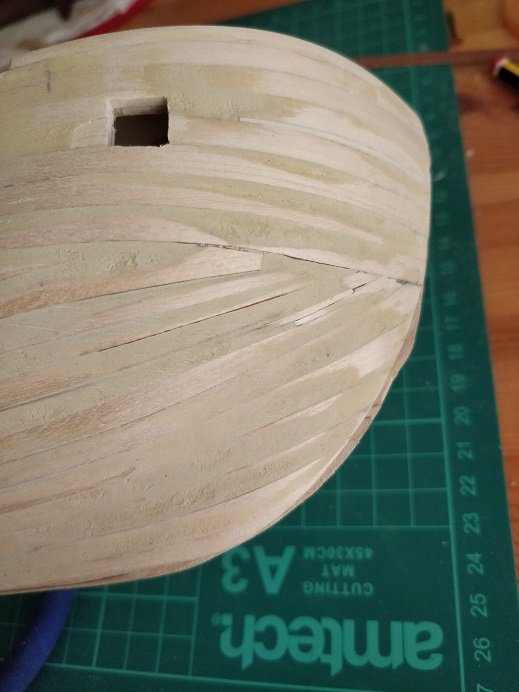
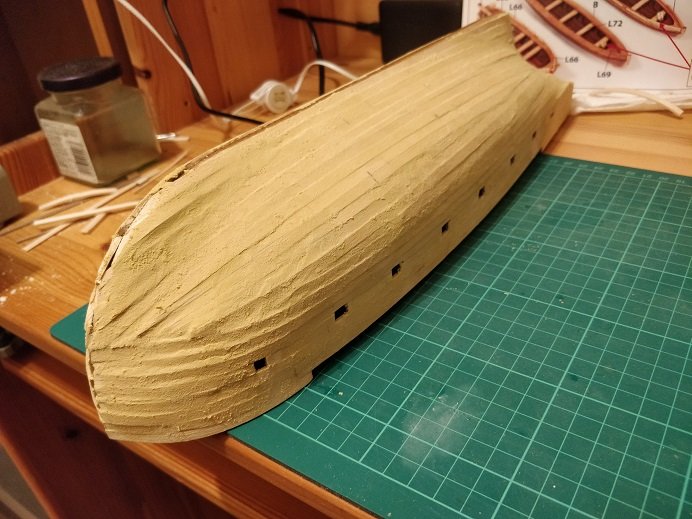
Remember the first planking only needs to be smooth and is a base for the second planking. Adding wood filler will increase the height of the low plank edges. The high edges can then be sanded down. This should leave plenty of material for the second planking. Here are a couple of photos of mine which look bad to start with but turned out okay after filling and sanding. Chimp

-
Hi Krupi, The planks are 2mm thick so you will be able to give it plenty of sanding without it getting too thin. It's looking smoother than mine did and I managed to get that smooth with a combination of wood filler and sanding. I'm sure you've got nothing to worry about. I guess you plan to remove the pins holding the planks in place. I never used the pins in the kit but used a combination of notice board push pins and foldback paper clips. Chimp
-
No worries . It took me way back to my school days when my reports would have "could try harder" written on them. That was a long time ago now. I thought I had got better. I guess it doesn't hurt to keep trying a little harder. Chimp
-
Excellent progress, looking fantastic Chimp
-
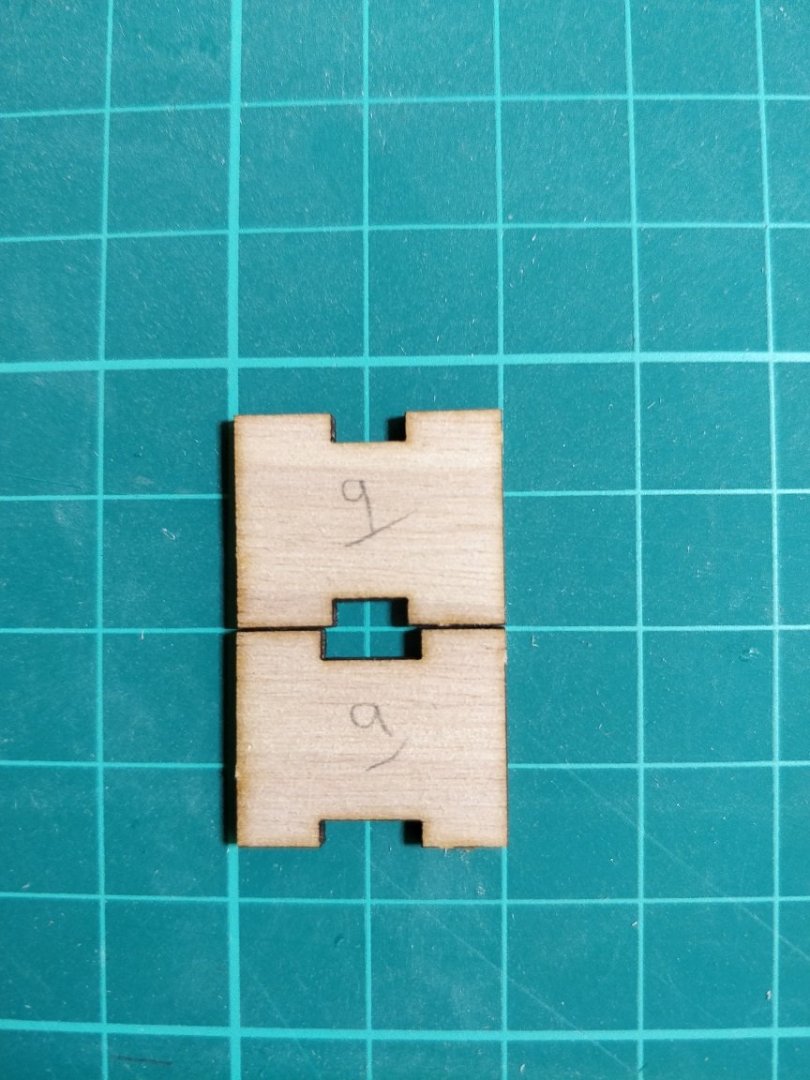
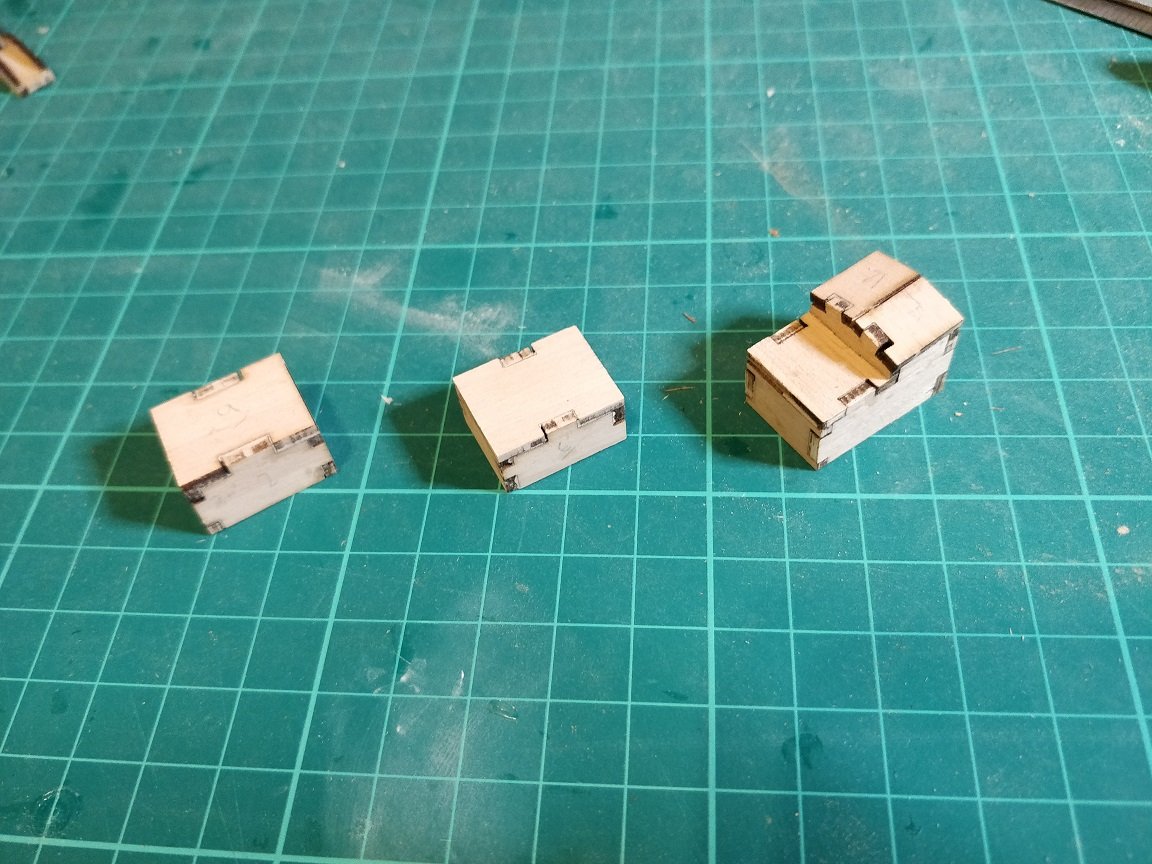
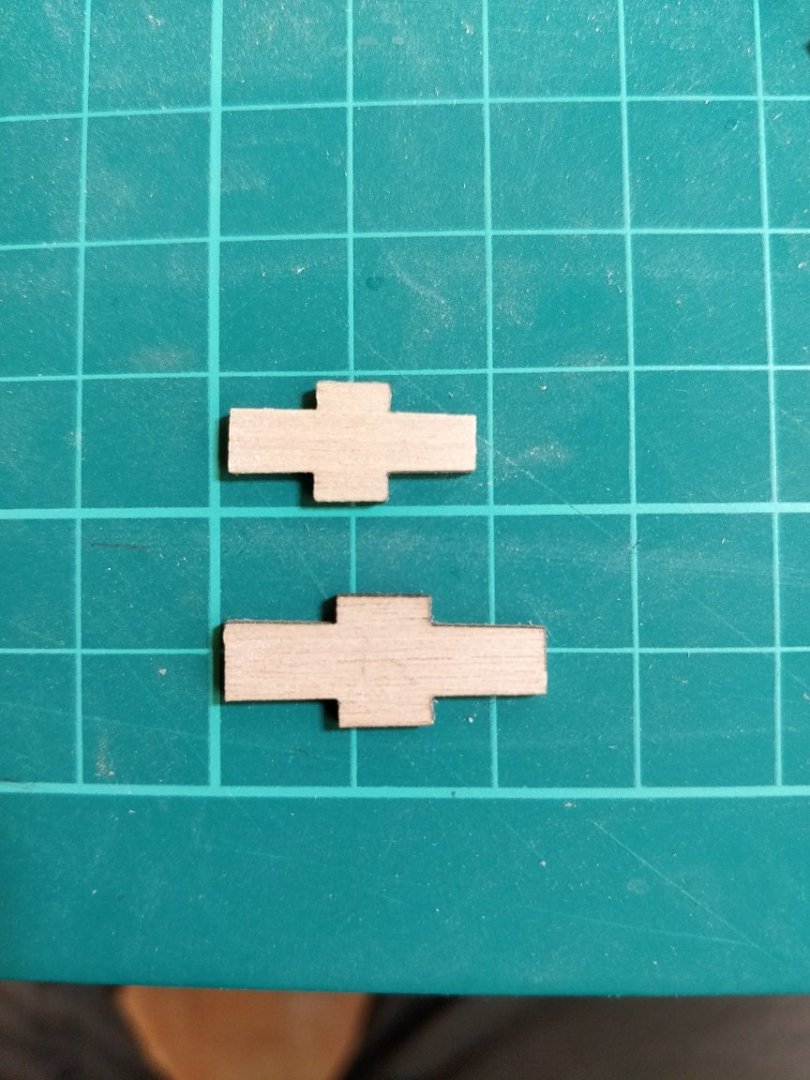
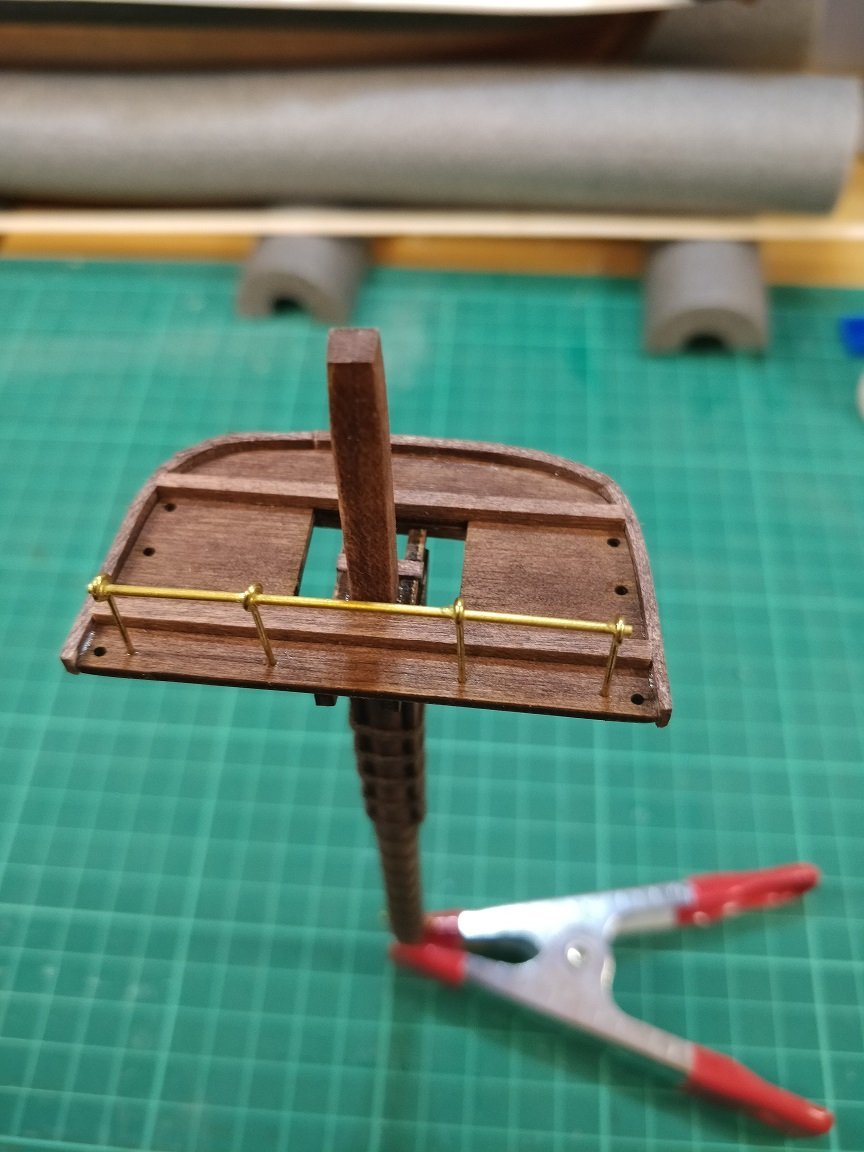
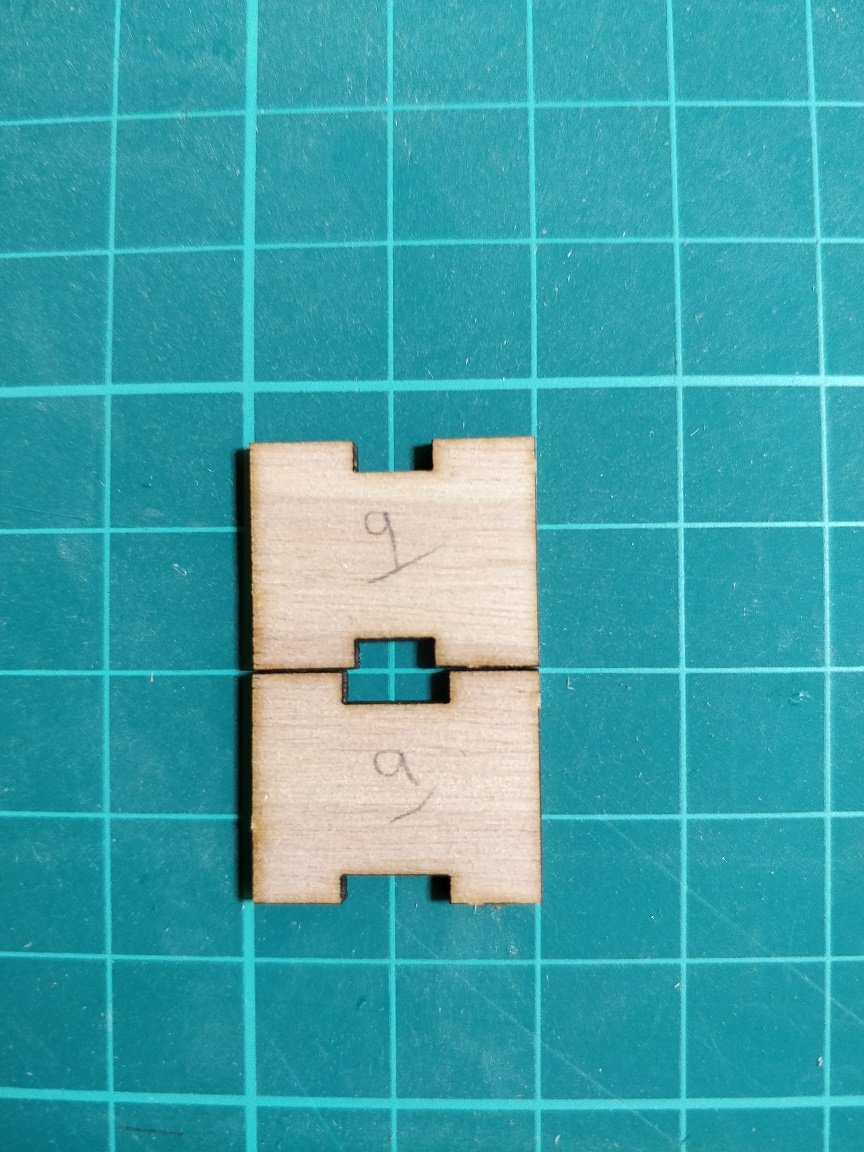
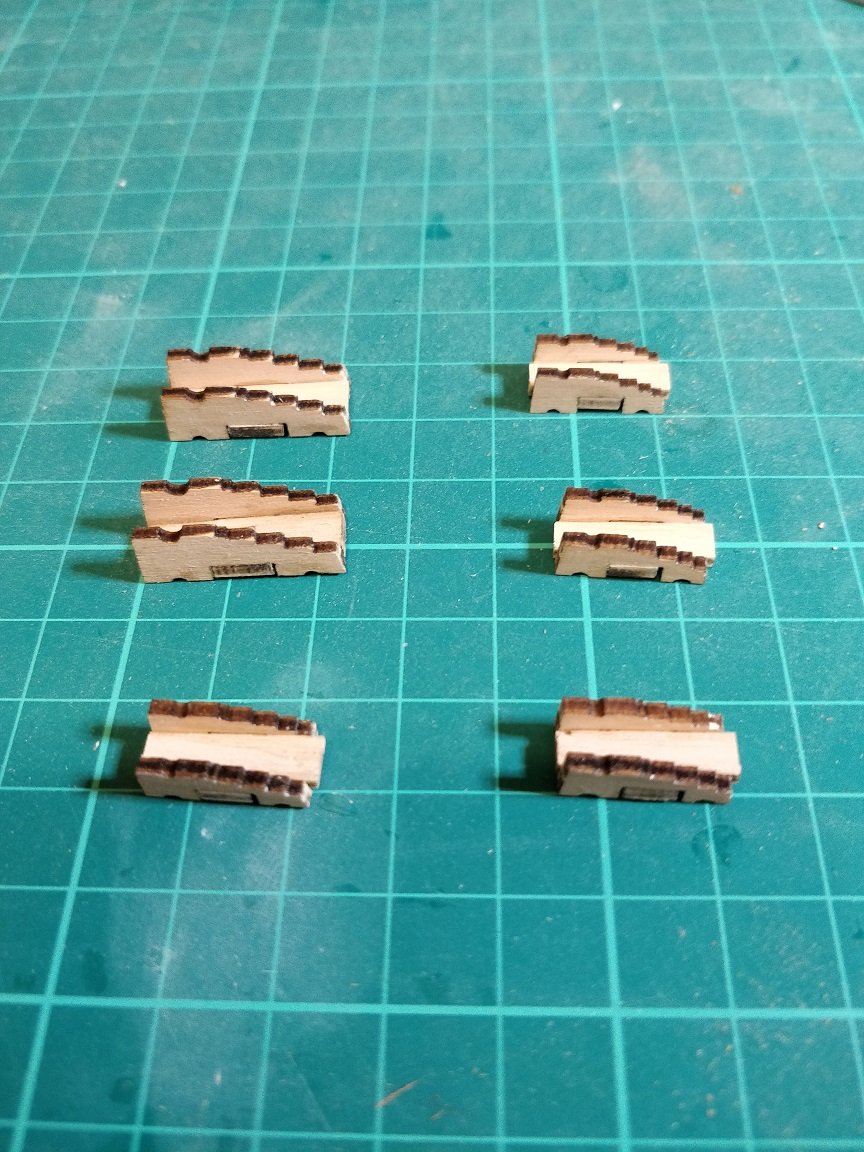
Just a quick update on other parts of the ship I've been working on with a couple of points to watch out for. Before cutting out any parts I number them in the sheet so I can easily tell which parts they are. When working on the skylight deck structures I found that two different but similar parts had the same number. This isn't a major problem but might save you a bit of hassle modifying both parts to fit. They are both the roofs of the two skylights. here they are assembled: The other thing I just caught in time was the bases for the cannons. I hadn't realised they are very slightly wedge shaped (wider at one end compared to the other). I think I'm right when I say the narrow end is for the muzzle and the wide end for the breech. Even after I decided that was the way it should be I still nearly assembled them the wrong way round Regards Chimp