
.jpg.f4fa790b1fa2f0e00e3d149ed7bdd37c.jpg)

shipaholic
-
Posts
517 -
Joined
-
Last visited
Content Type
Profiles
Forums
Gallery
Events
Posts posted by shipaholic
-
-
Wow Slog, those chain assemblies look brilliant
Steve
-
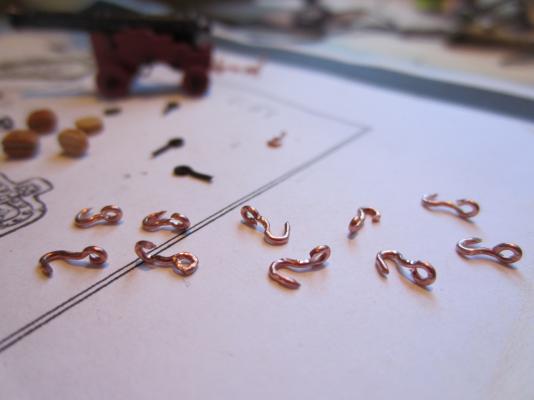
What gauge copper wire did you use for the hooks please, I also ordered cannon barrels from Chuck, I hope I can do as good a job as you did...
Hi Mike
I got the copper wire by stripping some electric cable, you know the white cables that run though the walls of your house, don't know what guage it is but it is 0.65 mm thick.
-
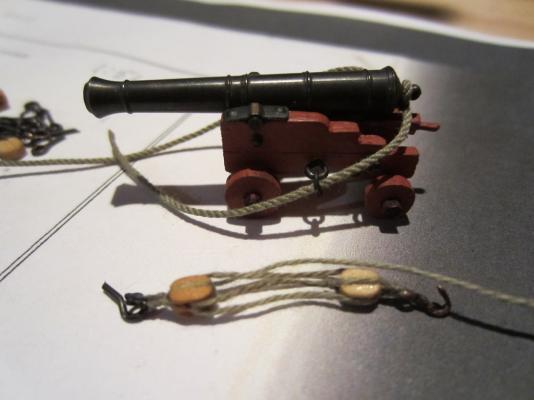
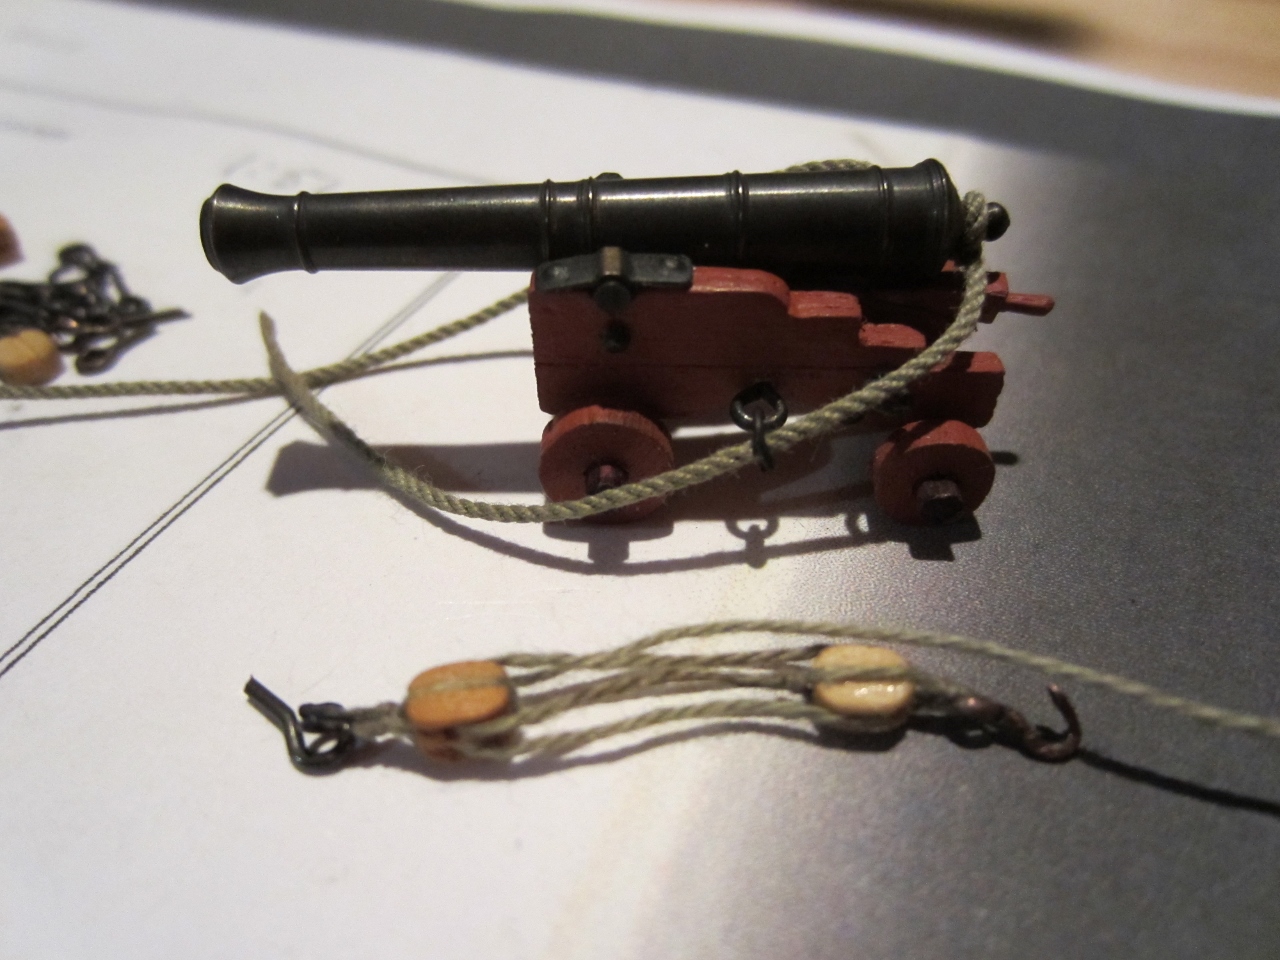
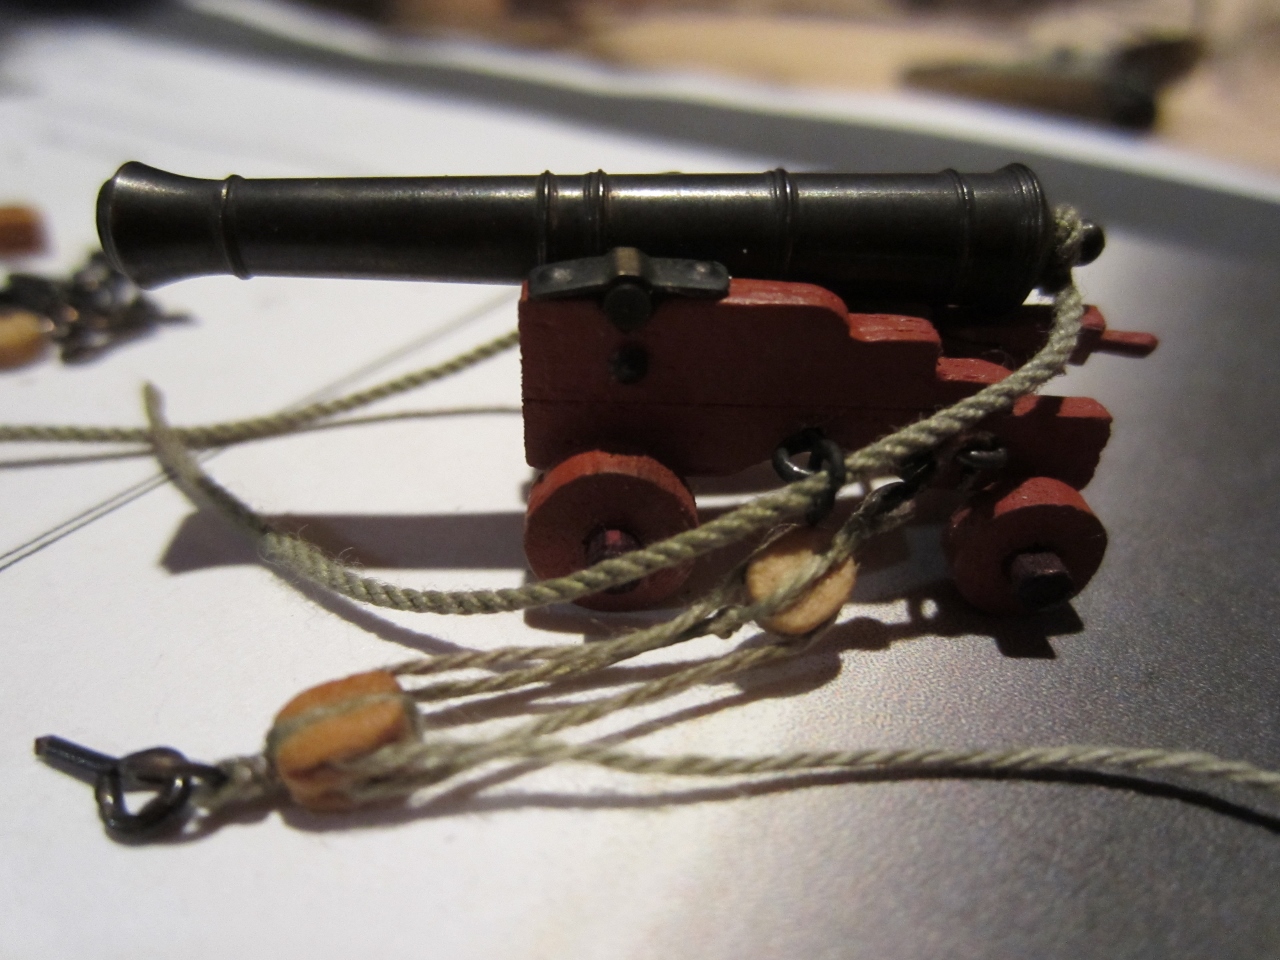
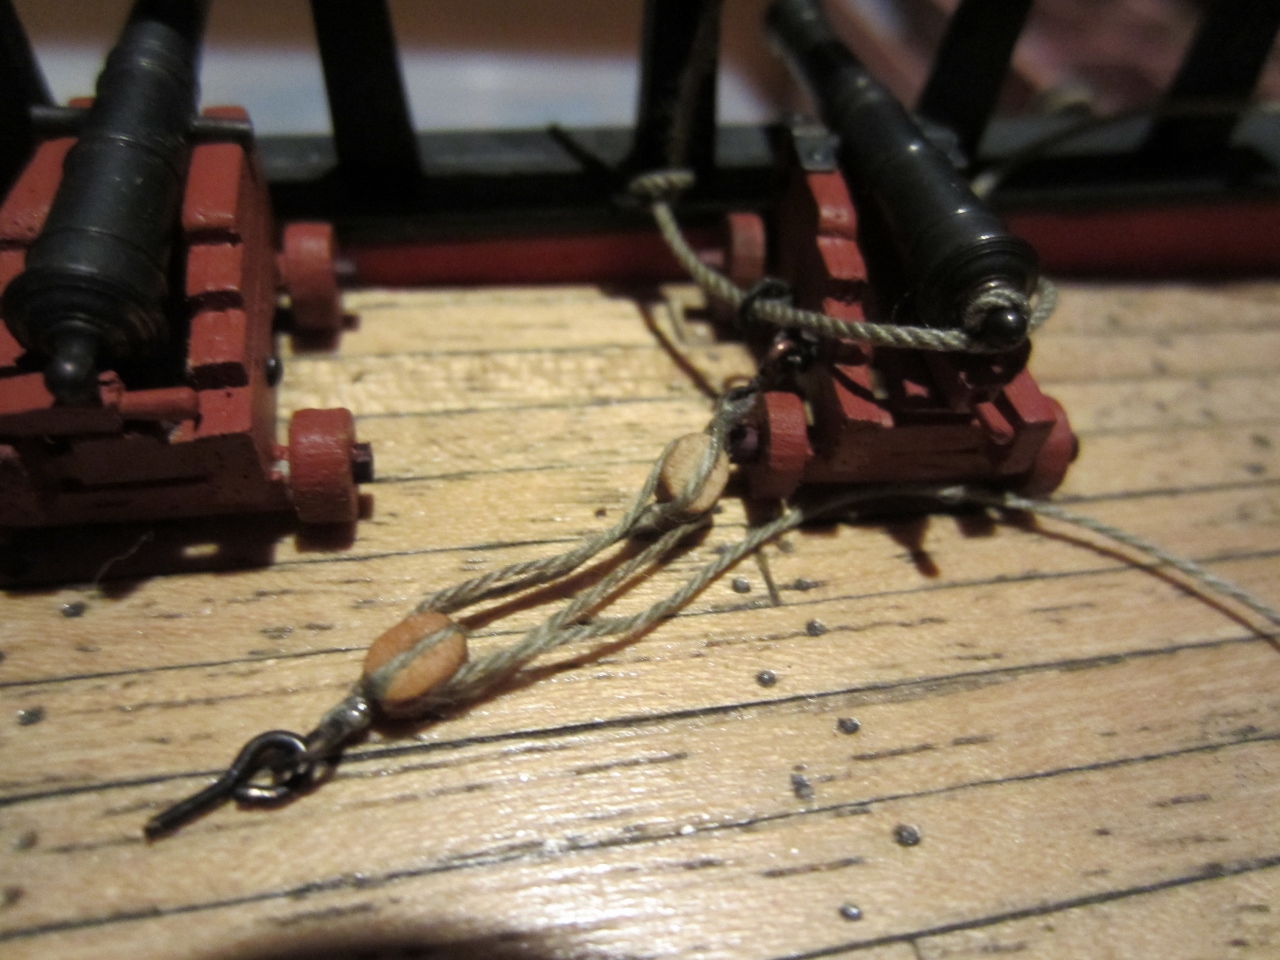
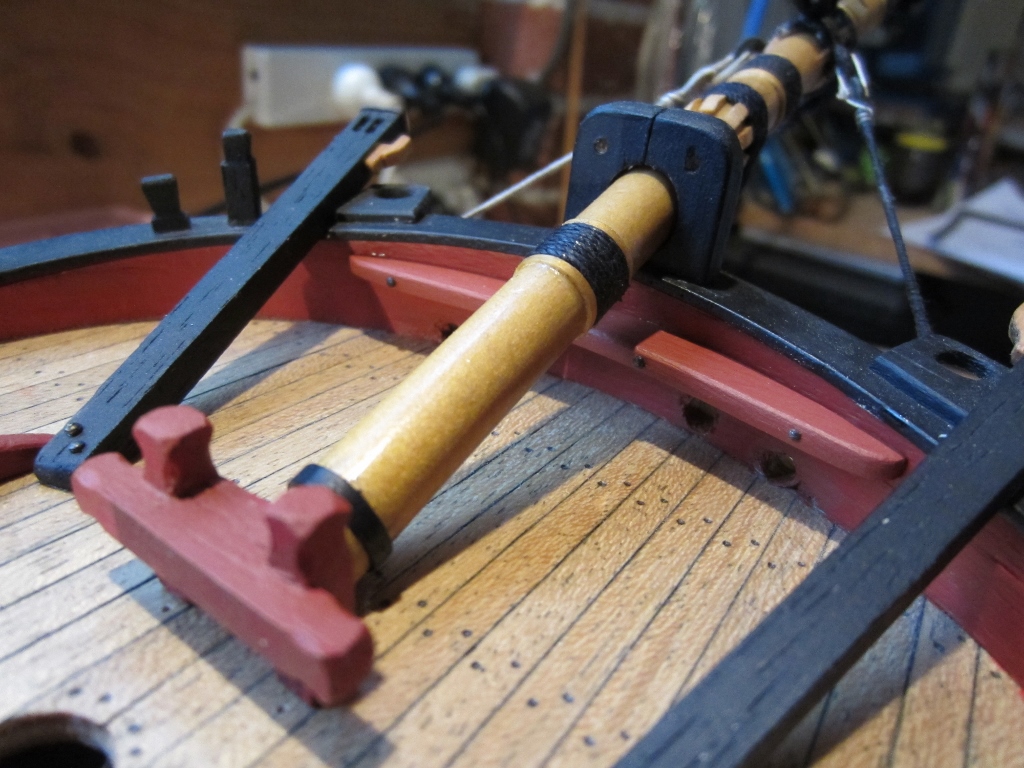
So do the tackles replace the retaining ropes or do the ropes stop the cannon and the tackle pull it back???
Mick
Hi Mick
The thicker rope looped around the butt of the barrel is a recoil rope. The tackles either side are for hauling the gun out after loading, there is also another tackle to be fixed to the back of the gun carriage for hauling it inboard for loading. Yeah the OcCre/Eaglemoss instructions only include the recoil ropes.
Steve
-
Your cannons look great. Hate to suggest the magnification required...but 3mm or 2mm (best) blocks will unclog the assembly. The bugger is that they are extremely hard to assemble! This is my cannon assembly at 1:48 scale with 3mm blocks. They burned me out but I was pleased with the look.
Cheers
Alistair
Yes Alistair, those blocks I used are 4mm, I have some of Chucks 2mm blocks that I bought for the gun tackles but I think they look too small, I will buy some 3mm ones and see how they go.
Cheers
Steve
-
Thanks Mick, Chuck
Chuck, those single blocks on the tackle are yours, the doubles are mine (only because yours havent arrived yet). Those hooks are so hard to get right cos they're so small.
Mick, yes I am intending to fit all guns with tackles, gonna be a lot of work!!
Steve
-
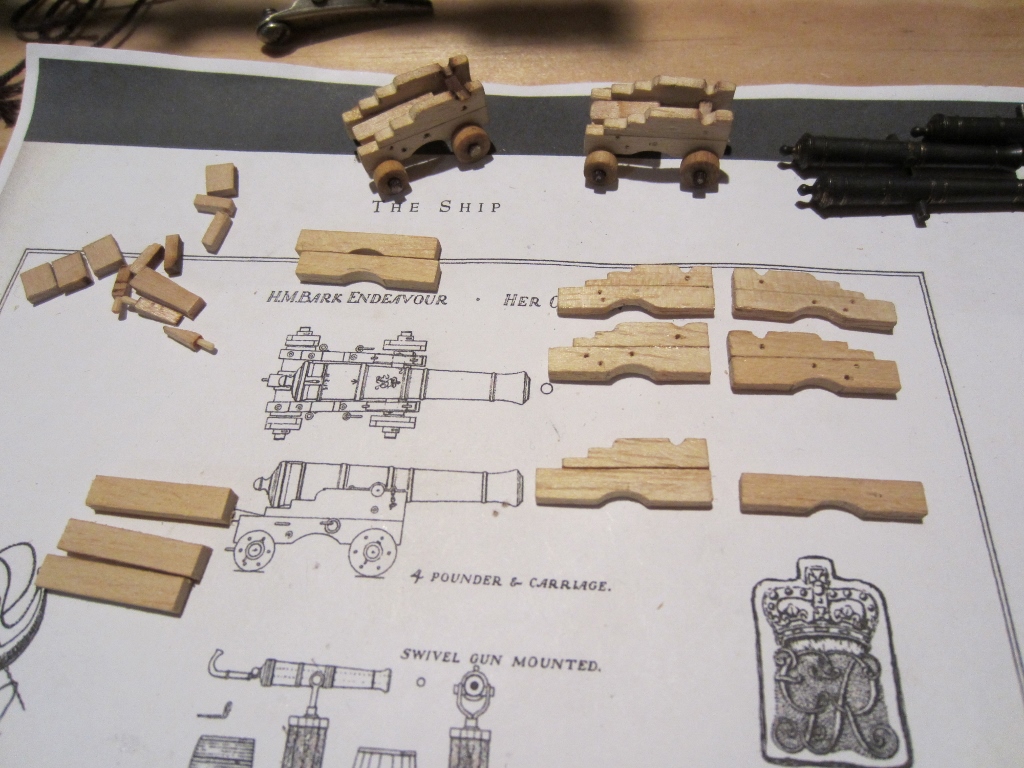
Thanks Mike, yeah those gun barrels are real good, I got them from Chuck at Syren.
Steve
-
-
I had a go at makiing some hooks today, had to make 12 for the gun tackles. I used copper wire I stripped out of an electical cable. I used round nose pliers to shape the hook and ring and flat nose pliers to bend to shape, after a bit of practice I got the hang of it, but still really tricky because they are so small.

- lambsbk and fnkershner
-
 2
2
-
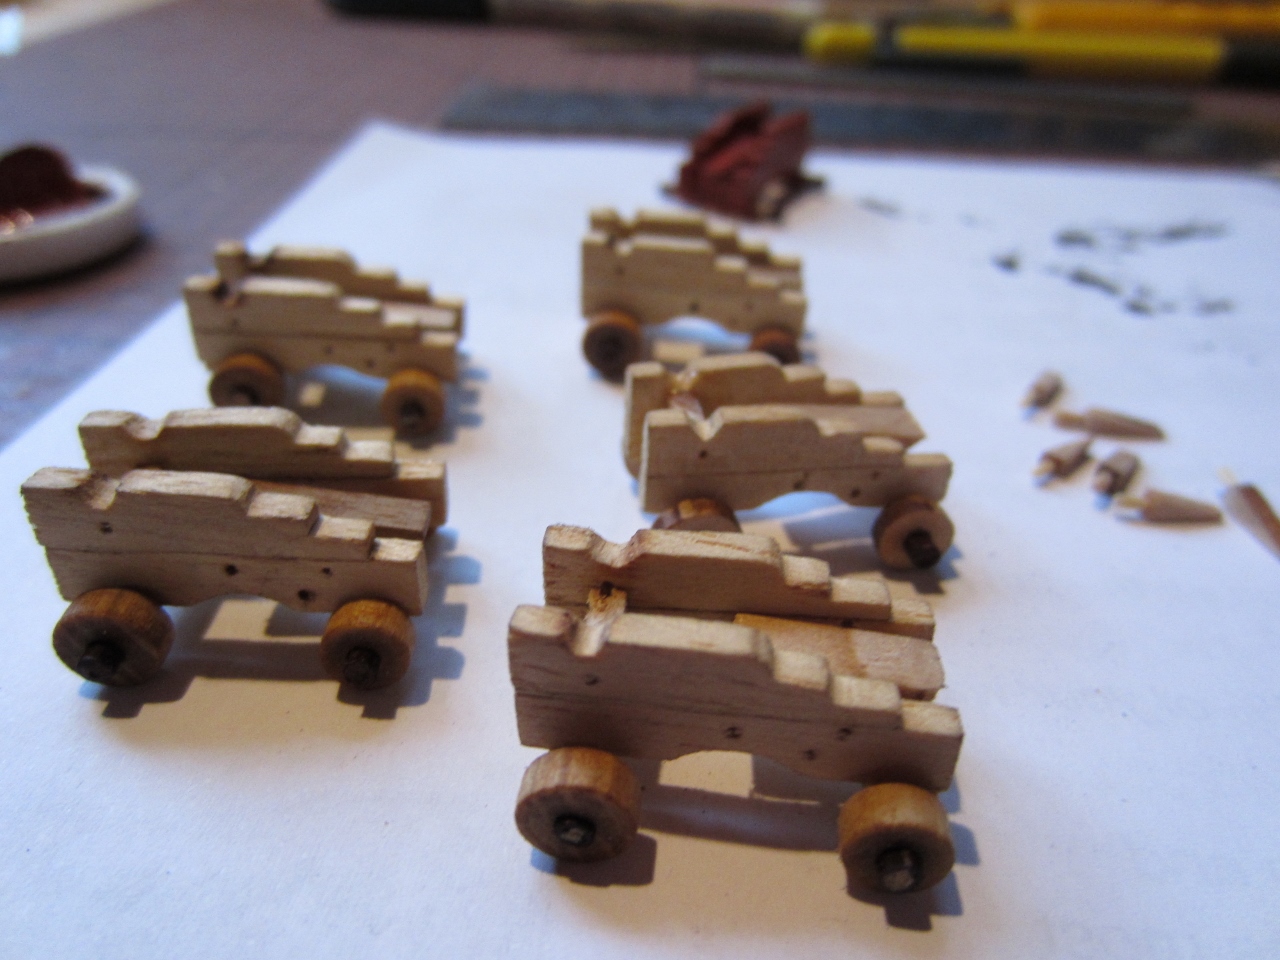
I finished all the woodwork on the gun carriages, they look a bit rough in the close up pics, I have started painting them. Next job after painting is to fit all the eyebolts, rings, bolts and then the tackle. A lot of work these guns.

-
Hi Mike
I wondered what happened to you, can't wait to see your updates.
Steve
-
Hi Mick
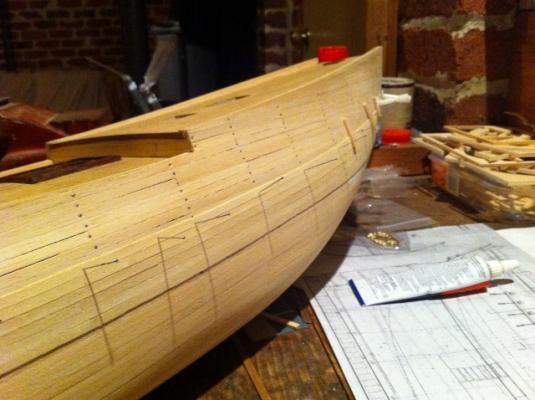
I just used the planks as they were supplied, 250mm long, but made sure I staggered the joins.
Steve
-
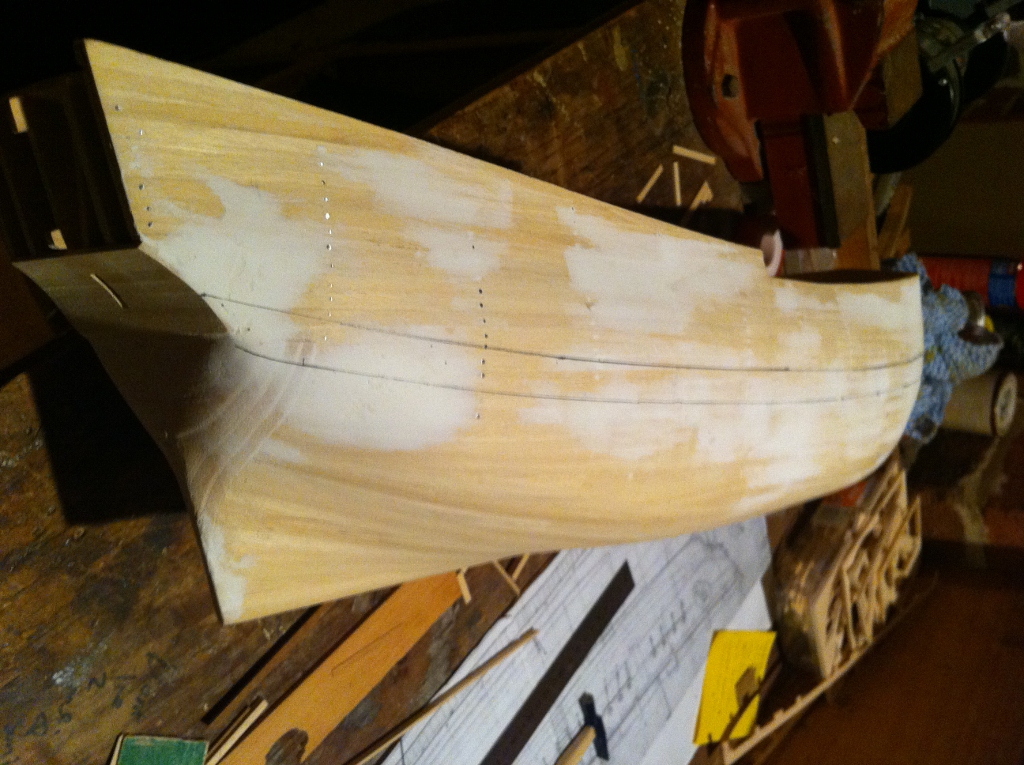
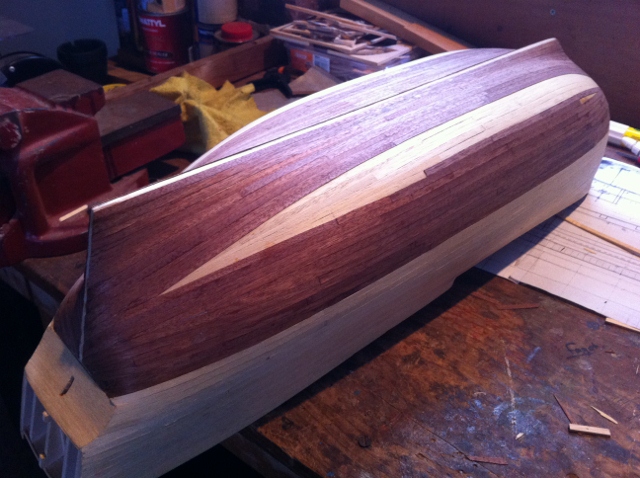
Hi Mick
The dark bottom planking was layed without pressure just following the curve of the hull. The upper planks on the sides was a different matter, I was trying to get them to curve upward to follow the lines of the ship and being such thin wood the planks just wanted buckle so I had to coerce them to stay flat by using lots of pins and clamps. I used PVA glue for the planks but every two inches I put a spot of CA for quicker grip.
Cheers
Steve
-
Hi Mick
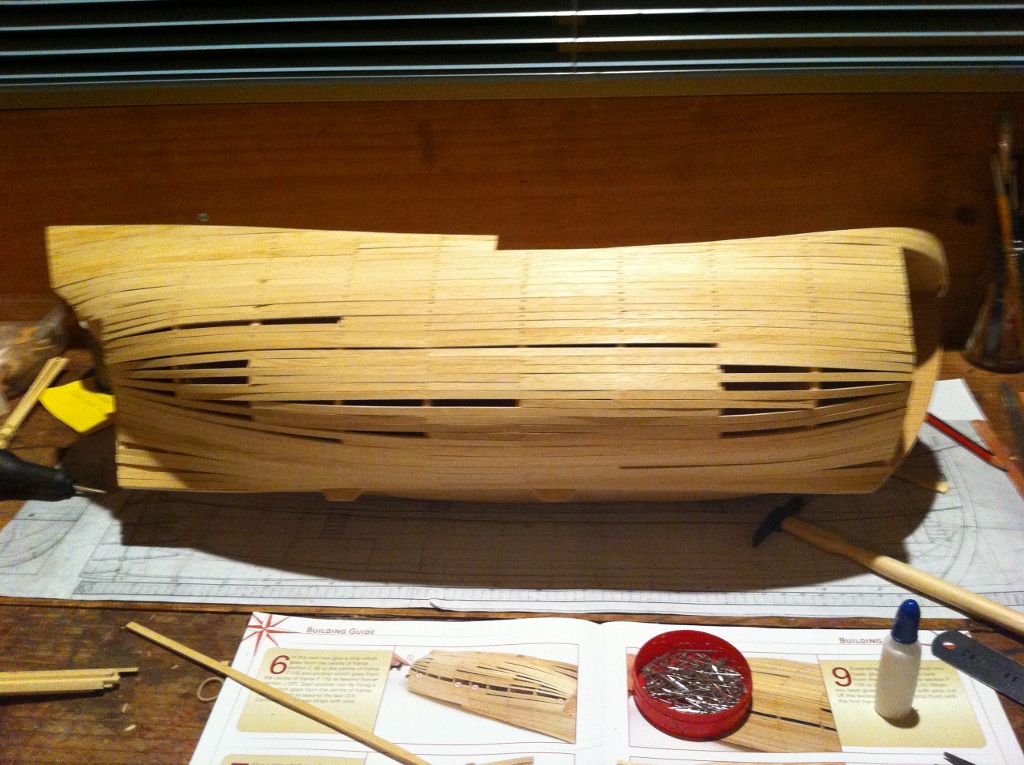
I dug into my archive and here are a few pics of my planking from a long time ago, I pretty much followed the instructions for the first layer and the darker bottom planks, the planks on the sides I layed to follow the lines of the ship instead of just hrizontal. You need to cut a fair few planks to a tapered shape to fill in the gaps, its a bit tricky getting them exactly the right shape and its really noticable when you don't on the dark planking, a bit of trial and error sometimes.
Steve


-
-
Hi Slog
I laquered the blocks first with varnish stain which makes them waterproof so the blackening liquid doesn't stain the wood. I intend to laquer all the blocks on my model, when I built my AL Endeavour I sanded each block to shape individually and laquered them, a lot of work but they look pretty realistic. I'll be using Chuck's blocks on this model so not so much tedious sanding this time

Steve
-
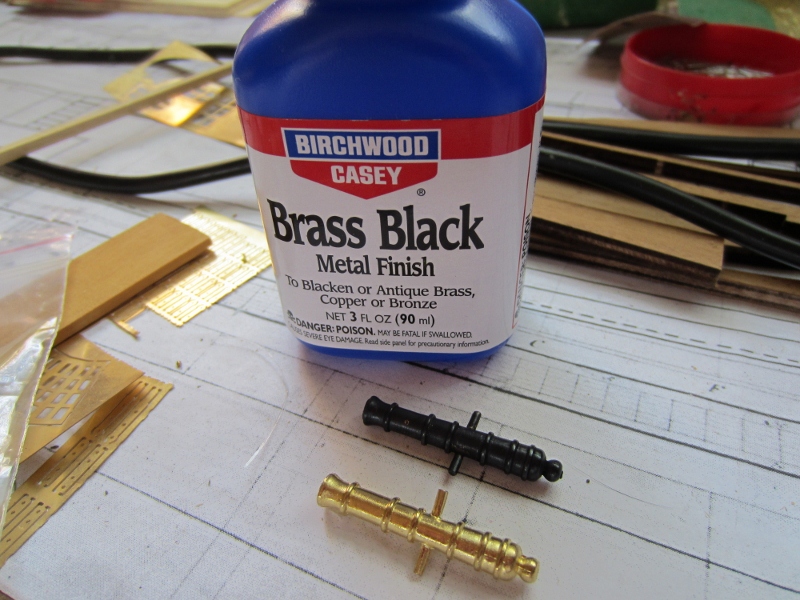
Hi Slog
This is what I use to blacken, I bought it online from a gun place called Magnum Sports
Cheers
Steve

-
Hi Mick,
Yes the OcCre and this kit are basically the same, except your OcCre kit probably has different instructions. My Endeavour is almost a scratch built model using the kit as a base, I have modified lots of things, bought different fittings and scratch built lots of parts so it looks a lot different to an Endeavour built from an OcCre kit or Eaglemoss partwork. I have gone back and basically researched the ship myself and I am basing my build on the original plans (draughts) drawn when the Endeavour was rebuilt for Cook's voyage in 1768. There are two main other references for Endeavour used by modellers and kit manufactureres these are the books "Anatomy of the Ship - Captain Cook's Endeavour" by KH Marquardt and "HM Bark Endeavour" by Ray Parkin. Both books contain invaluable information about the ship but I don't believe they are 100% correct, the fact that they disagree with each other in so many details and differ from the original 1768 plans in many ways leads me to that conclusion.
Planking, yes planking the Endeavour is difficult because of its shape, so you need to use lots of stealers and tapered planks. I still have lots of pics taken during my planking effort if you want me to post them let me know. But agin I didn't follow the instructions entirely because I fitted the planks on the sides above the main wales so that they curved like the planks on a real ship which made the task a bit more difficult.
Cheers
Steve
-
Hi Mick
I think cannons look more realistic blackened instead of painted, give them a good buff with a rag and put them in the blackening liquid again. It usually takes two goes to get them blackened properly.
Cheers
Steve
-
Hi Alistair
Thanks .
The hooks are just copper wire, I blackened them after fitting to the block, that way the blackening isn't scratched off when bending the wire to shape with the pliers
Steve
-
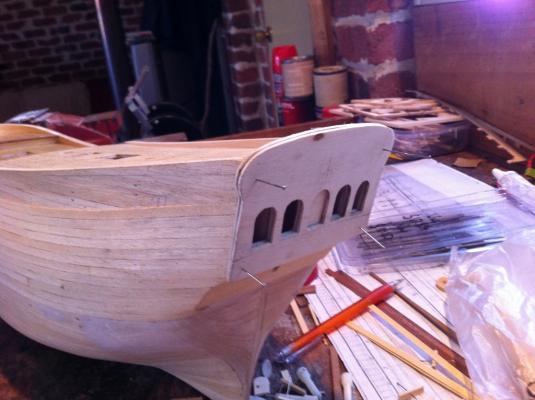
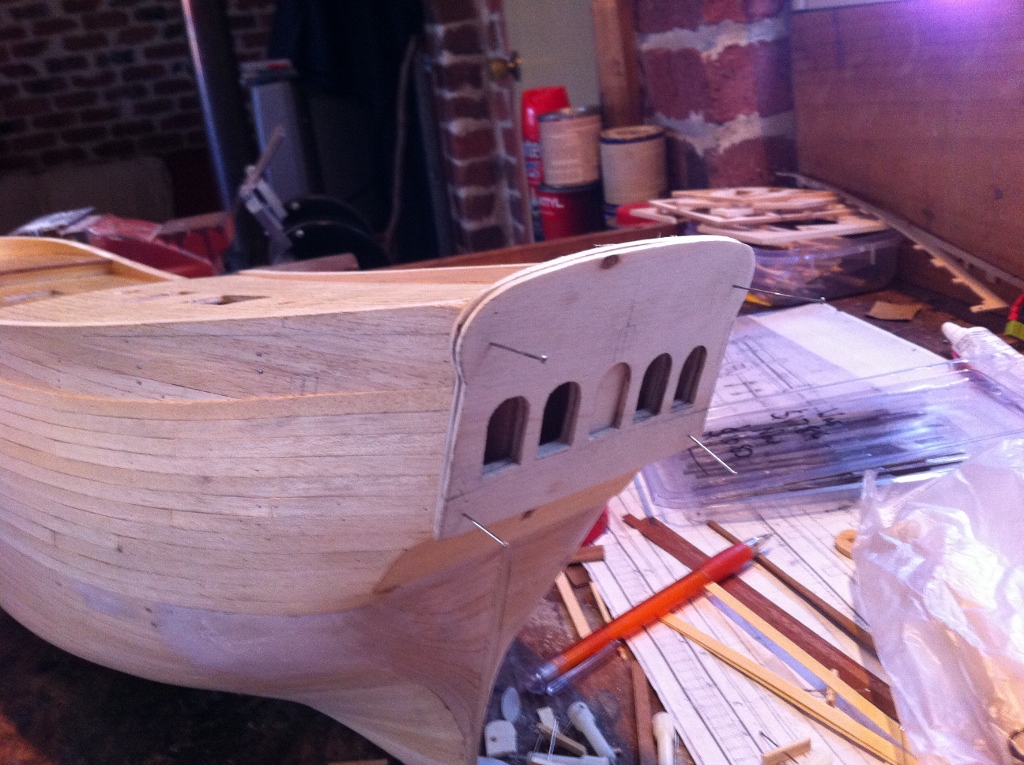
I fitted the breasthook to the bow. This is the bow arrangement that is shown on the 1768 draughts. The knighthead is shaped as suggested by Parkinson's sketch. So the whole bow arrangement is completely different to what is shown in the AOTS and similar to Ray Parkin's drawings.
Steve

-
Hi Mick
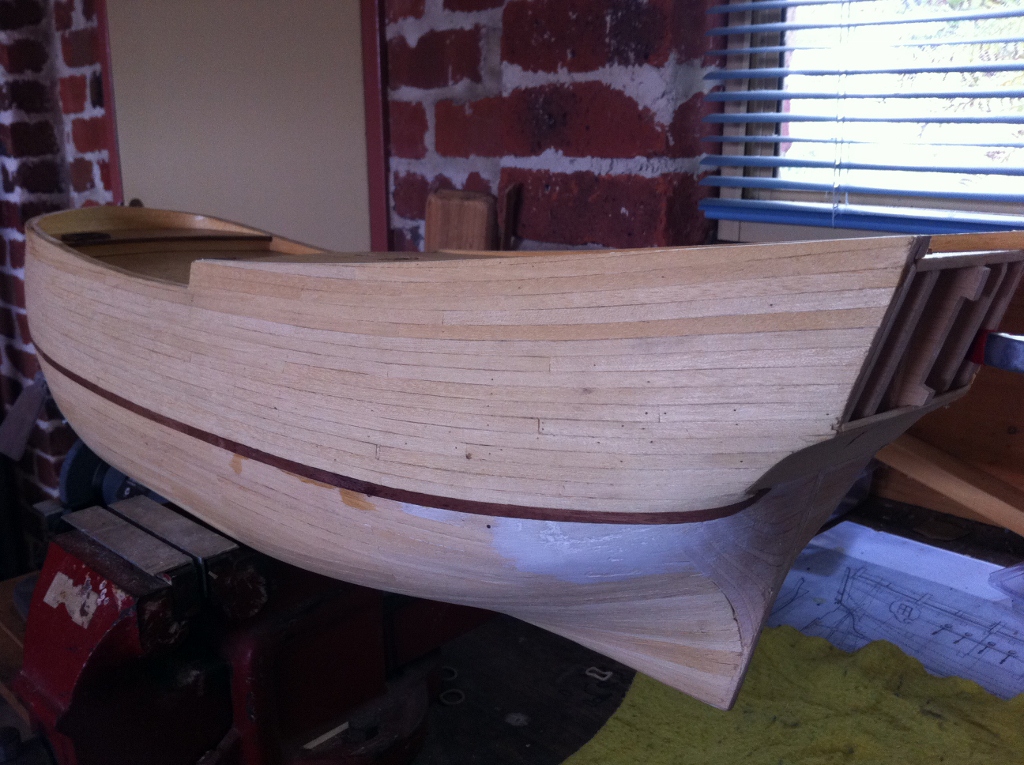
Its best if you stain/paint the planks after fitting them, no matter how good you fit them they will still need to be sanded. Once sanded, stain the planks a colour you think looks right, it doesn't have to be the orange/yellow colour the instructions say. (Don't get me started about the instructions for this model) then mark out where the upper rubbing strake goes with a pencil and paint above it with blue paint. Sand smooth and paint the strake before fitting then when fitted it will cover the boundary between the stained planks and the planks painted blue, no need for masking tape. Fit the main wale, sand smooth and then paint black, you will need to use masking tape when painting the main wale.
Hope this helps
Steve
-
Hi Slog
I previously bought a serving machine from a supplier in the US for $35 but it was almost useless, Alexey's is a bit more expensive but worth it
Steve
-
Looks good Slog, when I did mine I wasn't sure whether to put blocks on the tiller, the AOTS shows blocks on the tiller arm but Ray Parkins drawings don't. Toss a coin. The Replica vessel doesn't have them and that's an actual working ship so it must function okay, I guess it comes down to how many blocks are required to do the work of swinging the tiller. I bought some 2mm blocks from Chuck to do my cannon, they are really small, too small to do my cannon tackle at 1:51, maybe okay for yours at 1:60. Theyre really nice blocks though, worth the money. When I built my AL Endeavour I was sanding each block individually to shape with an emery board and applying varnish.
Cheers
Steve
-
Gidday Mick
One thing I did was stop using the nails half way through because I though it might make sanding the planks difficult (I later found out I was right) and switched to using dress pins hammered in to hold down the planks until the glue dried then pulled them out with pliers. A bit more time consuming though.
Steve


HMB Endeavour by shipaholic - FINISHED - Eaglemoss - 1/51
in - Kit build logs for subjects built from 1751 - 1800
Posted
I managed to spend a bit of time on the ship today. I finished off the inner bobstay. I also redid the gammoning using rope made on my ropewalk, and it looks much better I think. I have decided not to use any black rope on my model, I will use the tan rope and blacken it with thinned black paint, I reckon it gives a more realistic look.
Steve