
.jpg.f4fa790b1fa2f0e00e3d149ed7bdd37c.jpg)
shipaholic
-
Posts
517 -
Joined
-
Last visited
Content Type
Profiles
Forums
Gallery
Events
Posts posted by shipaholic
-
-
Hi again Slog,
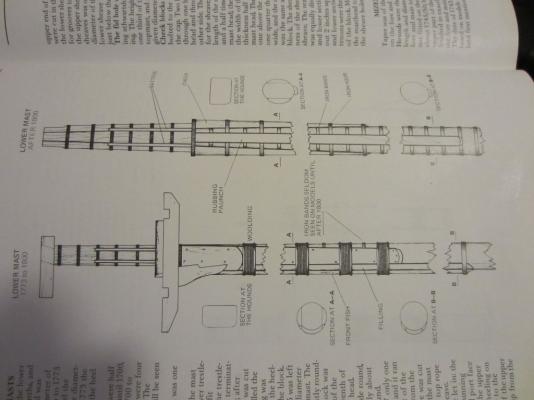
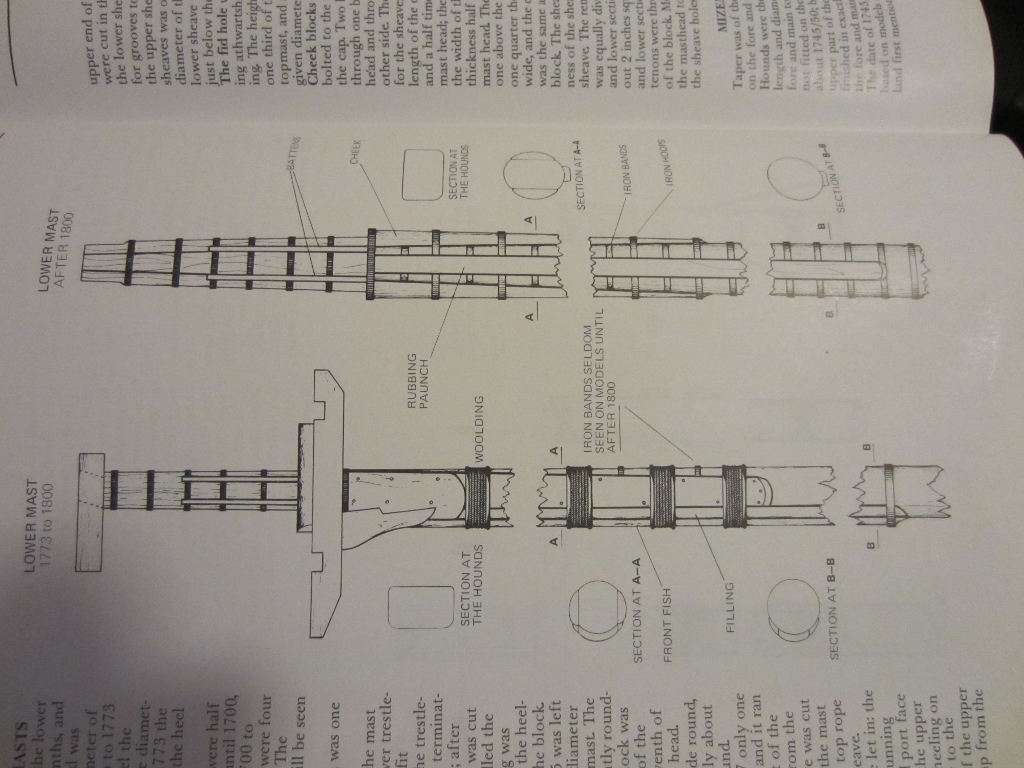
Your new post appeared whilst I was still posting mine. Here is a pic from Lees' masting and rigging of English ships of war that shows sections, the Endeavour didn't have a front fish. Hope it helps.
Steve
-
Hi Slog, looking good.
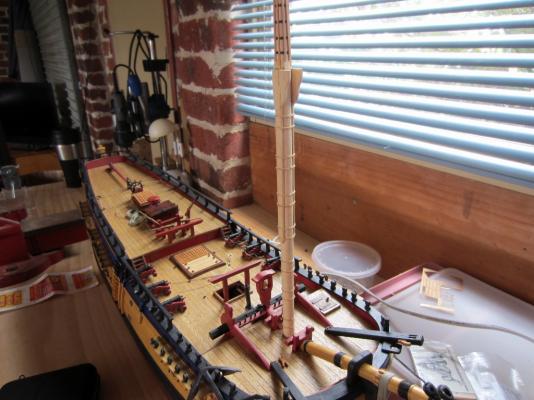
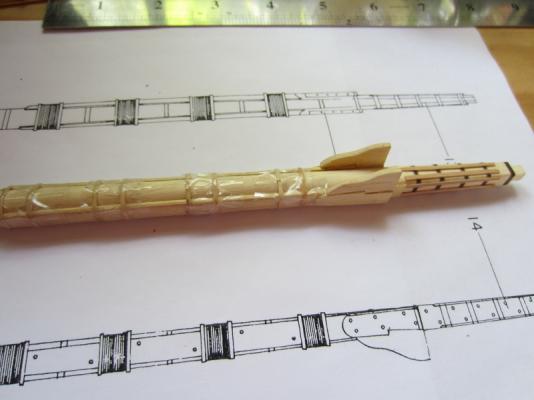
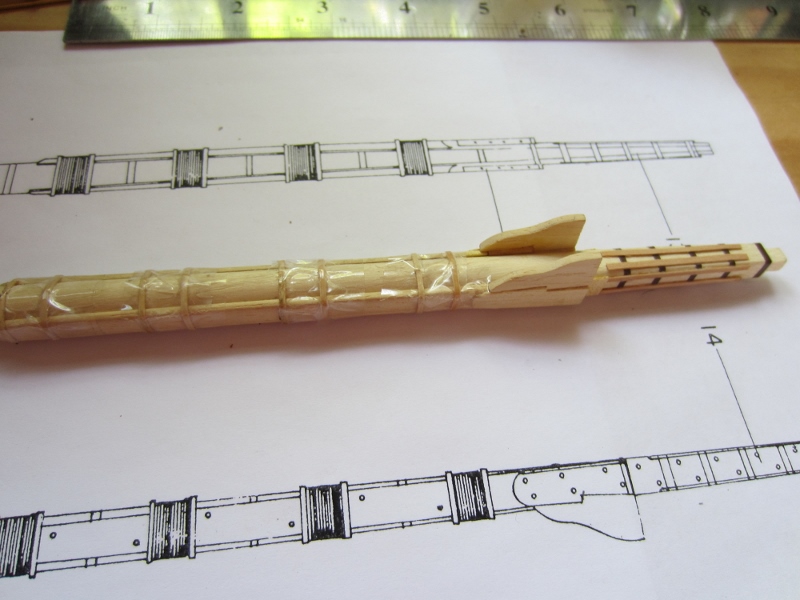
Actual masts were fairly complex and yes instructions with kits are usually vague. Here is how I did my masts - they are tapered along the length but the sides where the cheeks go are also sanded flat. The cheeks themselves also have a taper both in thickness and width, the bottom being flat and the top curved. The curve on the fore and aft of the mast is gradually reduced so that it becomes the flat square section above the top. Confusing eh? In the pic there's a shadow on the mast plus the grain makes it look like theres a bit of a hump but it does taper gradually.
Cheers
Steve
-
Awesome Slog! can't wait to see it all put together on the masts
Steve
-
-
Yeah looking good Greg
-
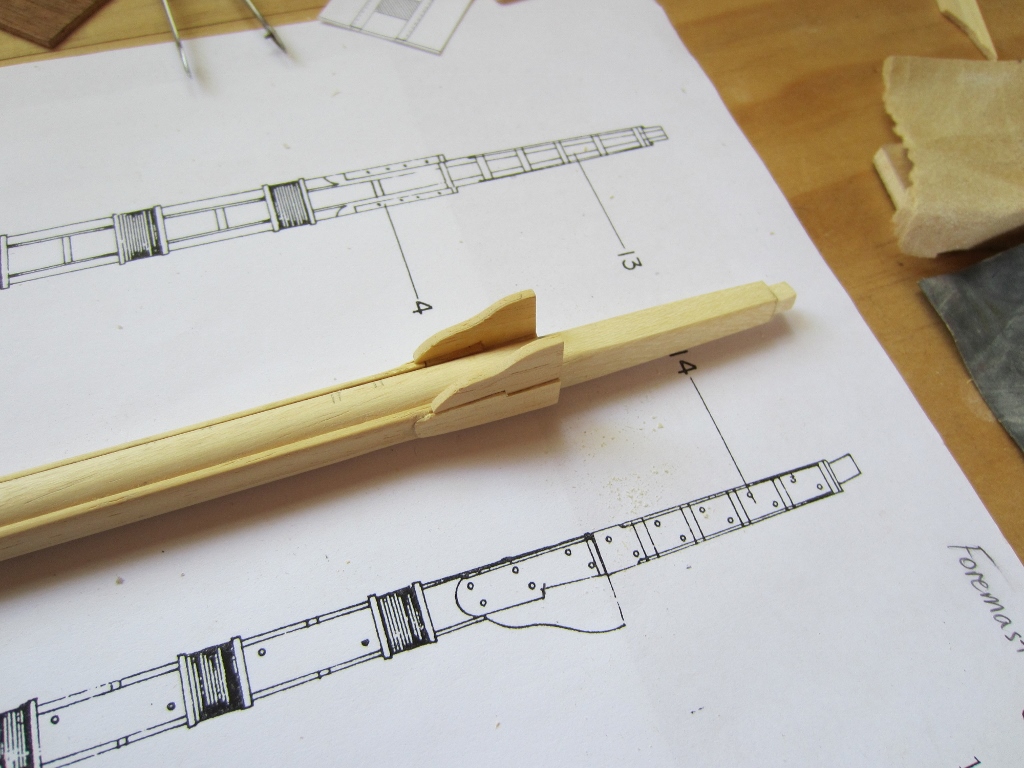
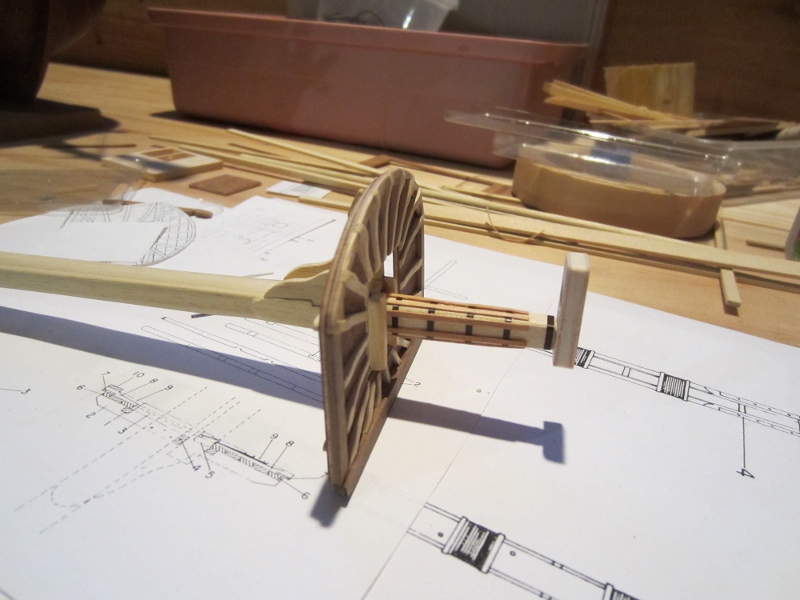
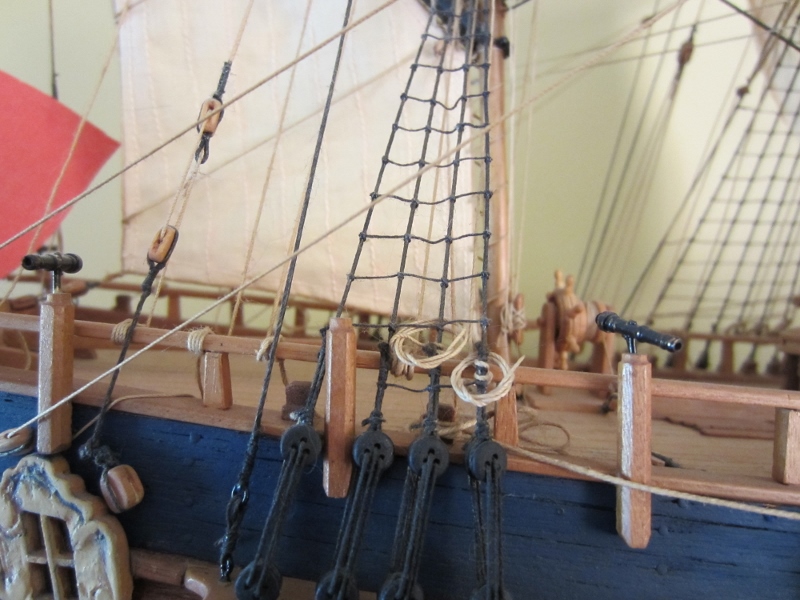
More pics of the foremast
- tarbrush and Captain Slog
-
 2
2
-
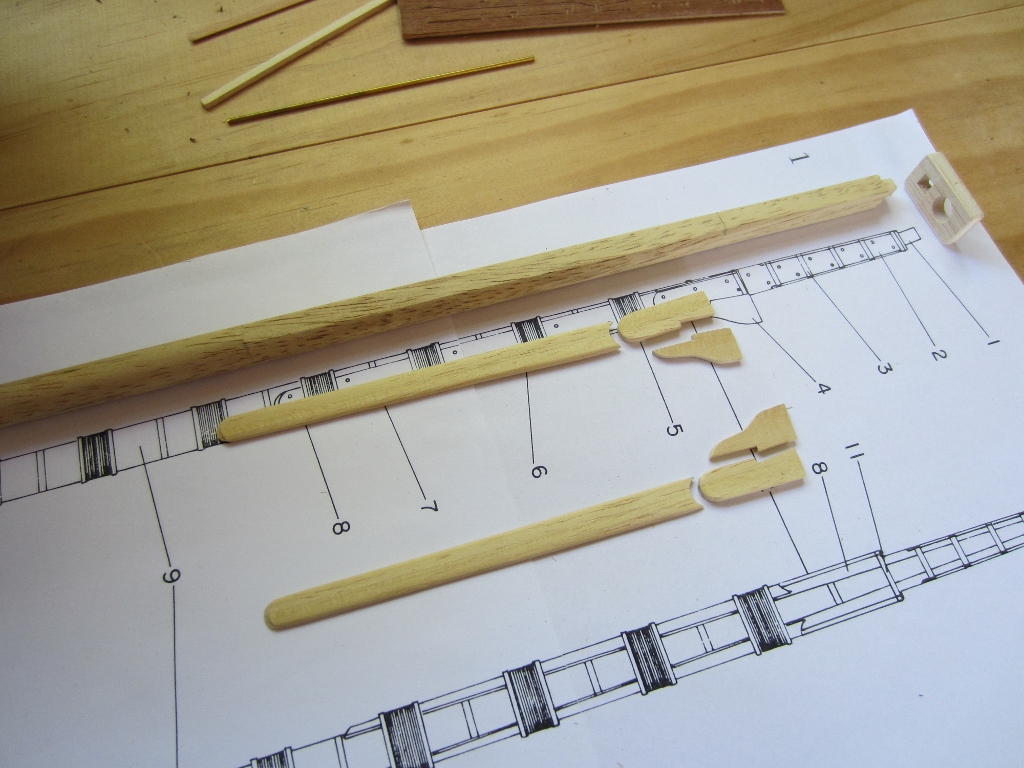
Today I am fitting the wooden hoops either side of the woolding on the foremast. I am using iron-on wood veneer edging that I got from a hardware shop. I peeled off the heat sensitive glue layer and cut it into thin strips then soaked them in hot water to soften the wood. I used PVA glue and held them in place with cellophane tape until the glue dried

- dashi, UdoK, Captain Slog and 1 other
-
4
-
Hi Slog
Gee the photos look good.
I think you should try option 2. The stem should be level or almost level with the gunwale. If you have a Dremel or similar it should be easy to sand down the stem then clean it up with a file.
Steve
-
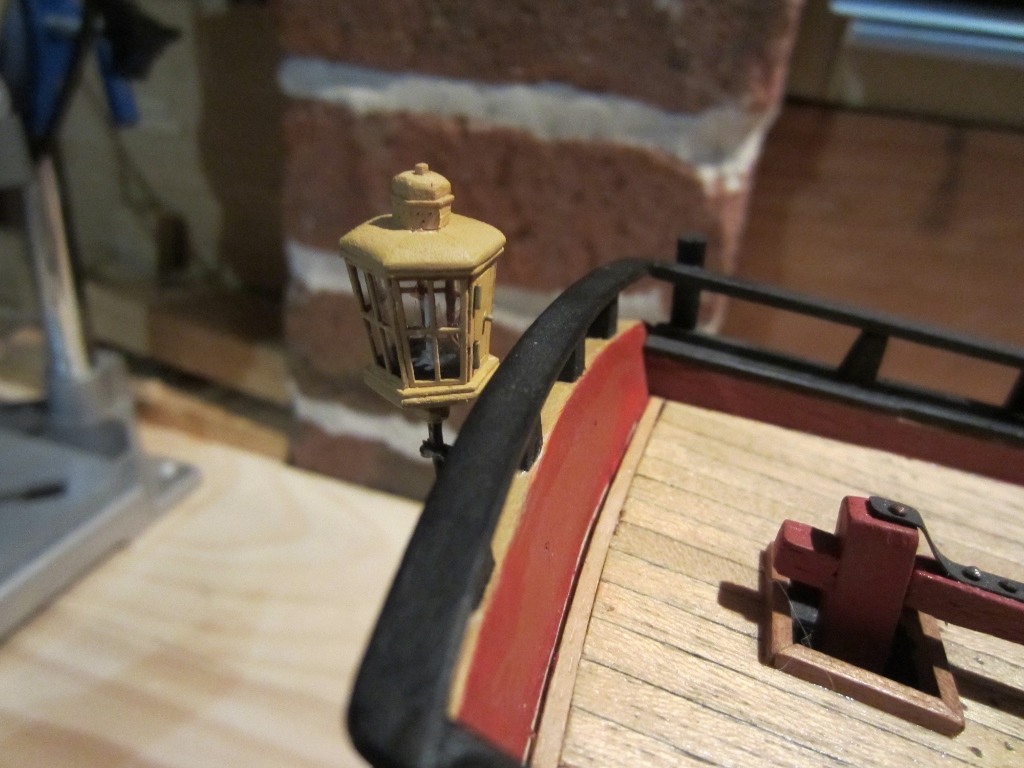
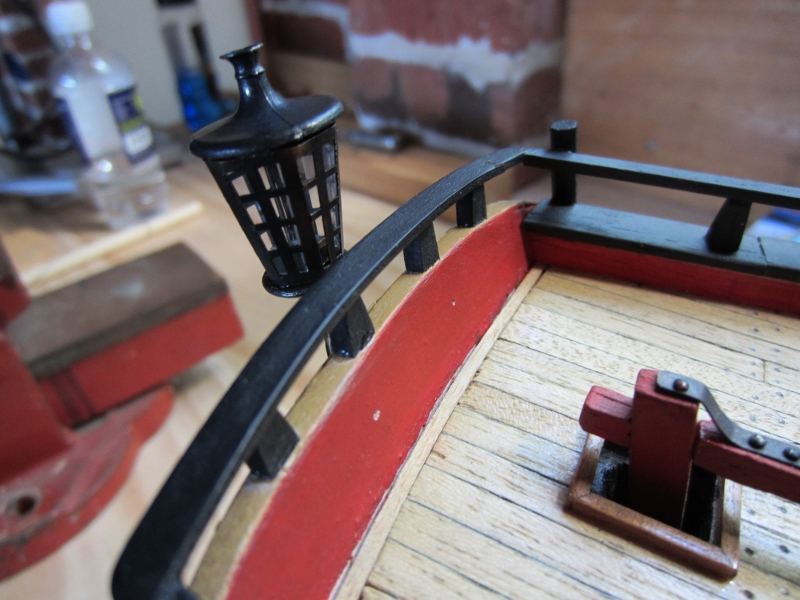
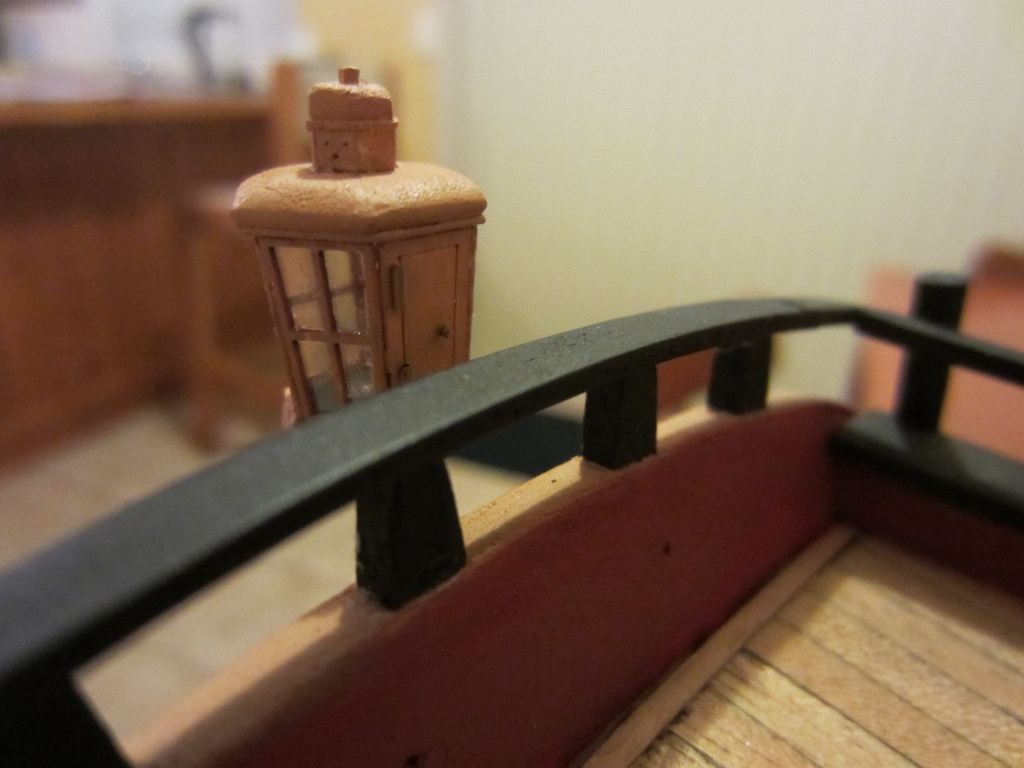
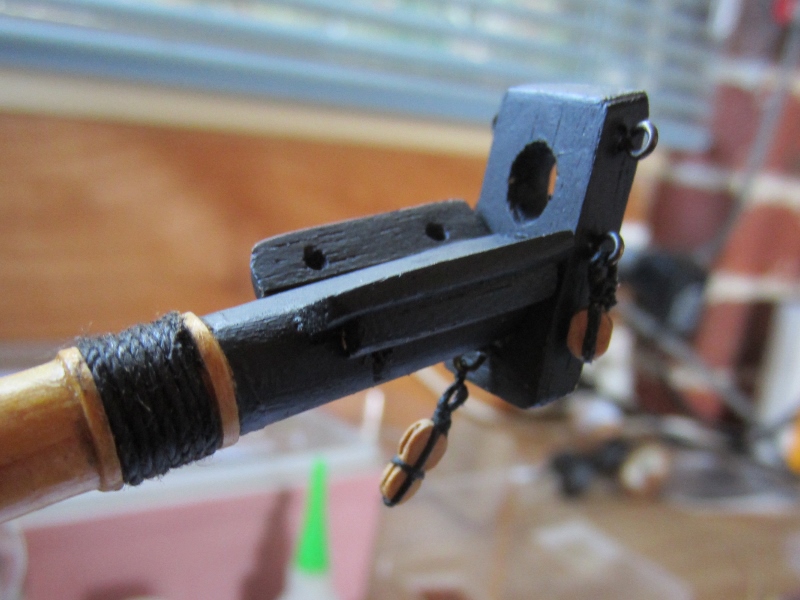
Hi guys, it's the 1/4 inch scale lantern
-
Everyone likes pics, so here's another one
- Captain Slog, hamilton, captgino and 2 others
-
5
-
-
-
Another shot of the lantern, you can even see the candle inside.

- captgino, Captain Slog and tarbrush
-
3
-
-
Nic work Slog. I think Caldercraft have skimped on detail with the anchors to make things easier, the stocks should start to taper at the inner iron band and should taper both ways so that the ends are still square but half the width of the centre of the stock.
Steve
-
Hi Ron
The bulkheads bear no resemblance to the position of the deck beams on the real ship so don't try to line the nails up with them. That lower deck is good for practice because you can't see most of it once the weather decks are on, you can only see whats visible through the hatch openings. Re your question on camber, on mine the centre of the deck is about 2mm higher than the edges at the fore end of the quarterdeck and flattens out a bit as it goes aft.
Cheers
Steve
-
Thanks Mick
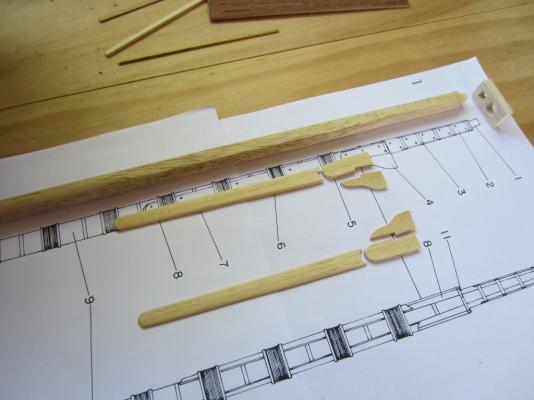
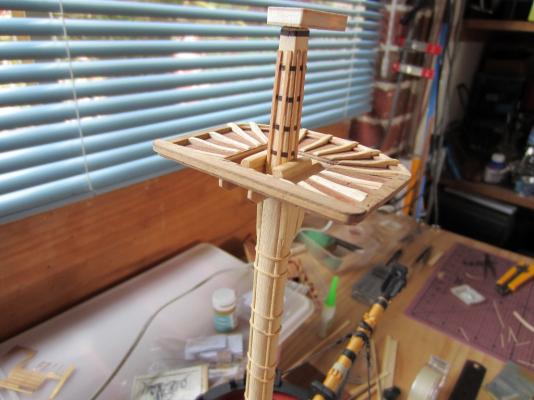
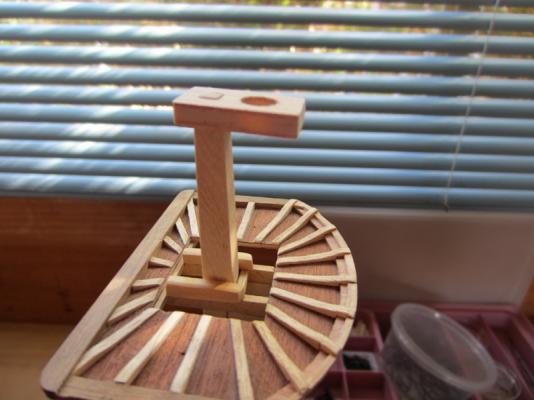
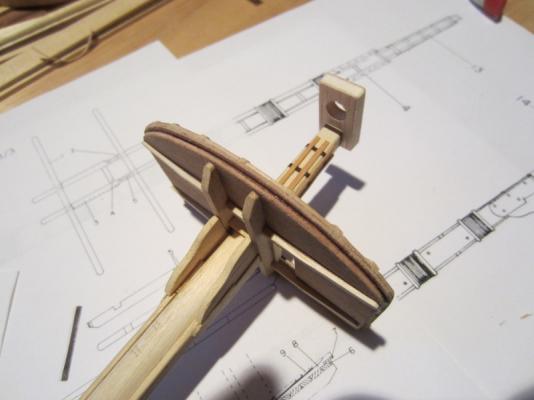
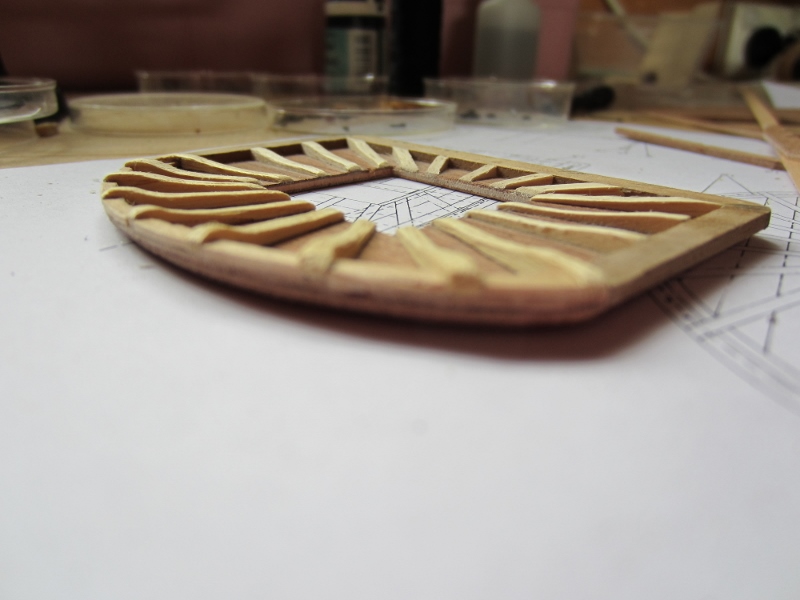
Yes you hit the nail on the head, scale is so important and just about every kit suffers from some sort of problem with the scale of certain parts. I didn't use the trestle trees and bibs supplied because they are slightly big, I used the pre-cut ply top supplied but I had to trim it slightly to get it the right size and shape.
Cheers
Steve
-
Thanks for all the compliments guys. Cheers.
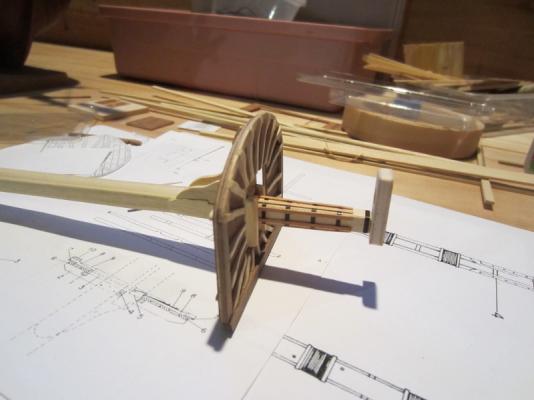
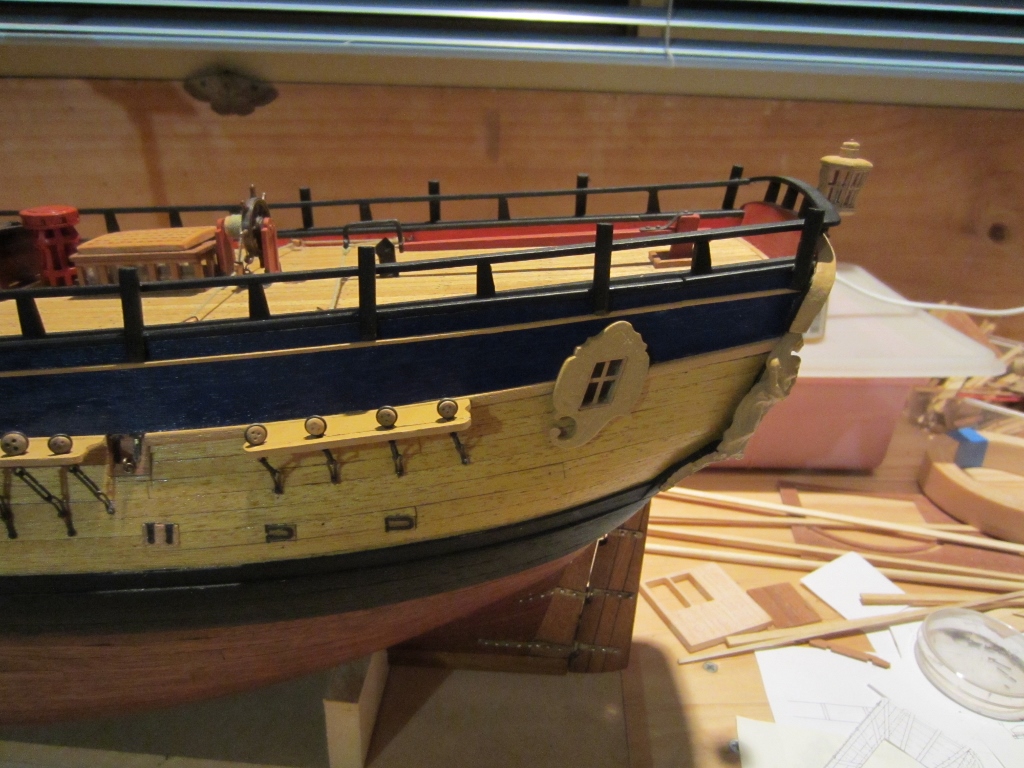
I've been working onthe foremast today. I have sanded a curvature into the battens on the top because I've seen photos of contemporary models that are like that and it looks better I reckon. For the mast head hoops I used car pinstriping that I cut down to width.
Steve

- Captain Slog, kiwiron, Dfell and 4 others
-
7
-
Hi Ron
Looking good so far. Your Occre is basically the same kit as my Eaglemoss.
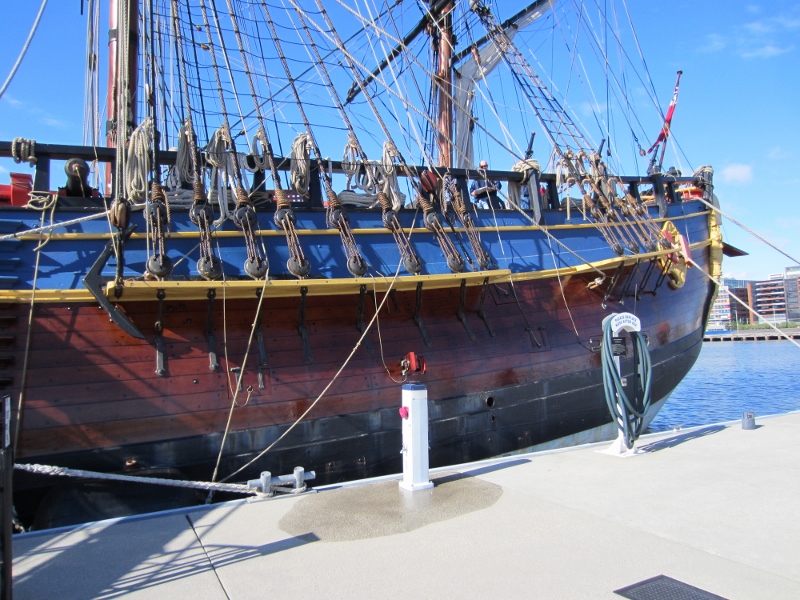
My two cents worth on the planking - I didn't cut them to 65mm because it looks wrong. I used 160mm planks (the length they were supplied) in a four shift pattern. Below is a photo I later took on the Endeavour replica showing a four shift pattern.
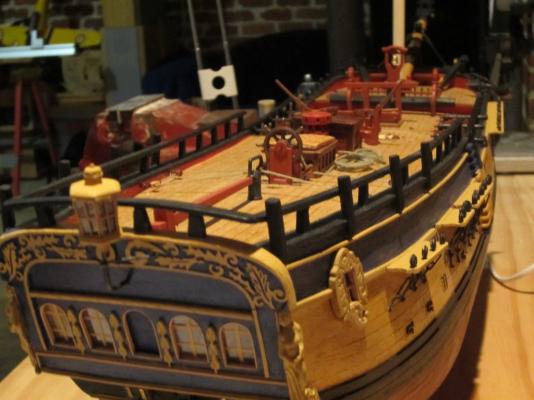
Also, now is a good time to do a modification that also make your model look better, give the decks a camber. If your OcCre is the same as mine then it doesn't have deck camber, but its easy to modify the deck beams to make them curved so that the deck has the correct camber.
Cheers
Steve

-
-
Hi Denis
Sorry, yeah I see now, I wasn't disputing you, just intrigued how you might have known about Endeavour's colour scheme. Yeah the SOS models I have seen are black.with lots of gold decoration and a red band at the top. Sorry for clogging up your log with this Ron.
Steve
-
Hi Ron
Sorry I am back again but re colours.
All I will say is before you do any painting do your research on the colours before you start.
My SOS was blue on the box from Mantua !!!.
But after researching the colour was BLACK, well did I get e-mail after e-mail asking me why did I paint it BLACK.
All I am saying Ron don't go on what the kit says or recommends OK. It is a shame that the kit makers don't do the same research after all we are paying them for accurate replicas of the original ship are we not !!!.
Good luck with your research .
Denis.
Denis.
Hi Denis
I'm intrigued, which part are you saying should be black?
I have researched extensively to try to find out what colour the actual Endeavour was, without luck. I have painted my model of the Endeavour based on what was common practice at the time based on contemporary models made back then but still cannot be sure. The live work of the upper sides could have been black, blue or even blue and red.
Cheers Steve
-
-
Hi Greg
I reckon they should be level, ie parallel to the waterline, makes sense because they are ladders. Here is a photo of the replica and they look level on her. I did my AL Endeavour with them level. Just chalk it up as another one in the long list of mistakes/errors in the AOTS.
Cheers
Steve


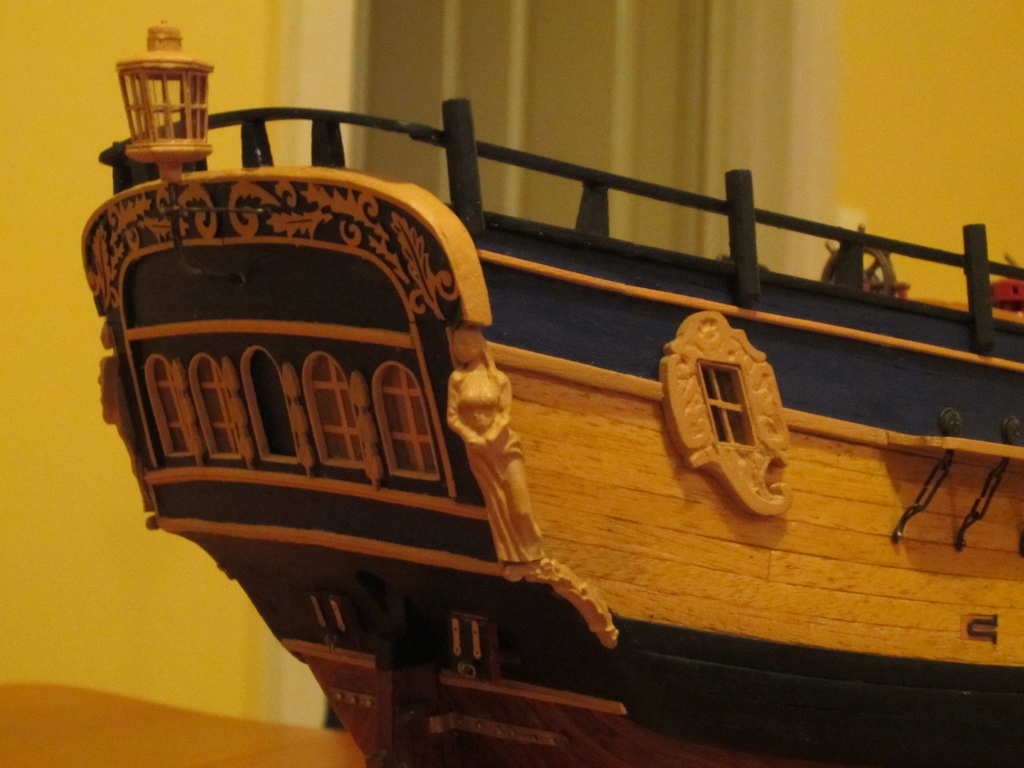


HMB Endeavour by Captain Slog - Caldercraft - 1:64
in - Kit build logs for subjects built from 1751 - 1800
Posted · Edited by shipaholic
Hi Slog
No the flattend areas arent quite as wide as the bibs. It has to be a bit of a trade-off because you are starting with kit supplied round section. I compromised with mine a bit hoping that it won't be noticed once its painted/laquered and hidden under the top.
Steve