HOLIDAY DONATION DRIVE - SUPPORT MSW - DO YOUR PART TO KEEP THIS GREAT FORUM GOING! (Only 20 donations so far - C'mon guys!)
×


rameyke
-
Posts
48 -
Joined
-
Last visited
Content Type
Profiles
Forums
Gallery
Events
Everything posted by rameyke
-
 Well i finally made progress that looks like progress. I picked up some wood at home depot and, following the guidance of folks on MSW, i built a build board. It may not sound like much, but wood work does not come naturally to me. After mounting my BF on the board, i dry fitted al the bulkheads and then glued them in, one by one. I know... Witjout pics, it didnt happen :-) so tomorrow i will post some images
 -
If you PM me your shipping address, I have the sails from my AL Swift (newer version). I decided not to install them on my build. I can send them to you.
-
Is it really supposed to snow? We rode around 30 miles this morning. it was cold when we started. But it warmed up around noon. I cant believe we are in for snow. Though, i will be happy if Colorado rivers have more water than laat year
-
Thanks Augie. I am headed to home depot today after I ride (bicycle training for the Triple Bypass this year). I am going to pick up some wood to build a building board and possibly a new grill
-
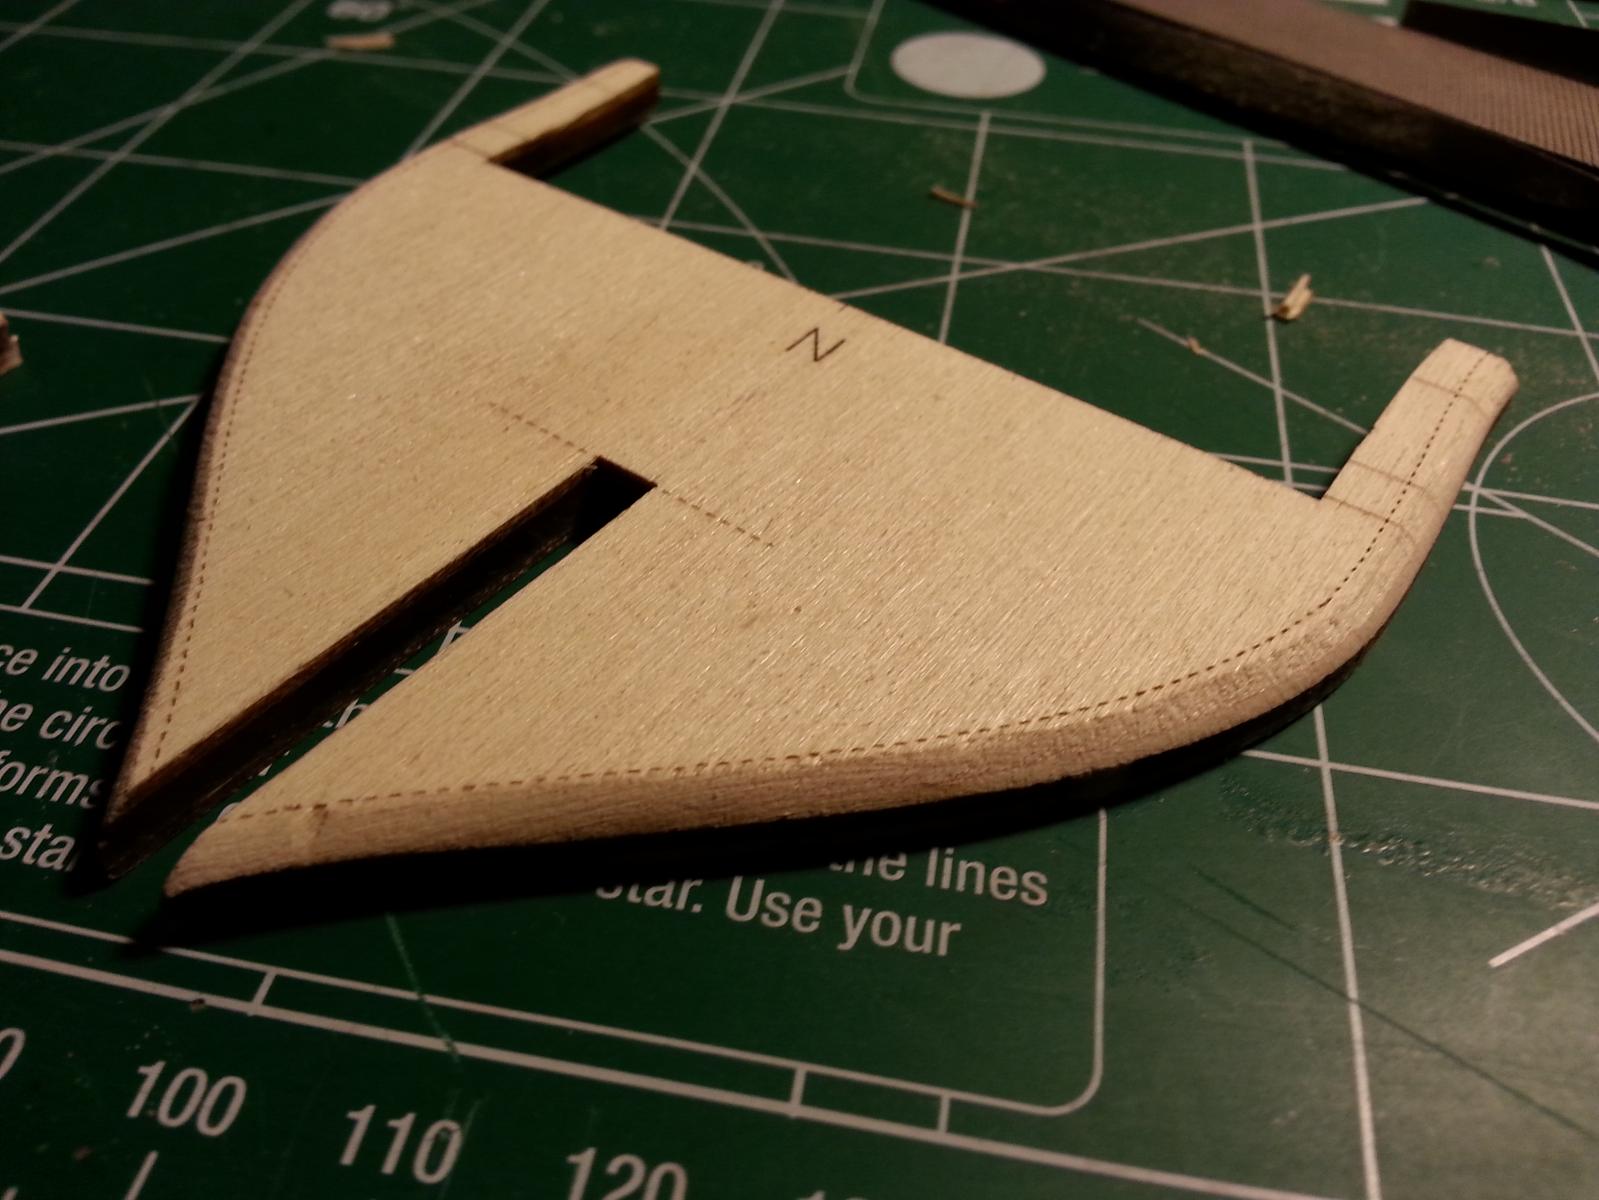
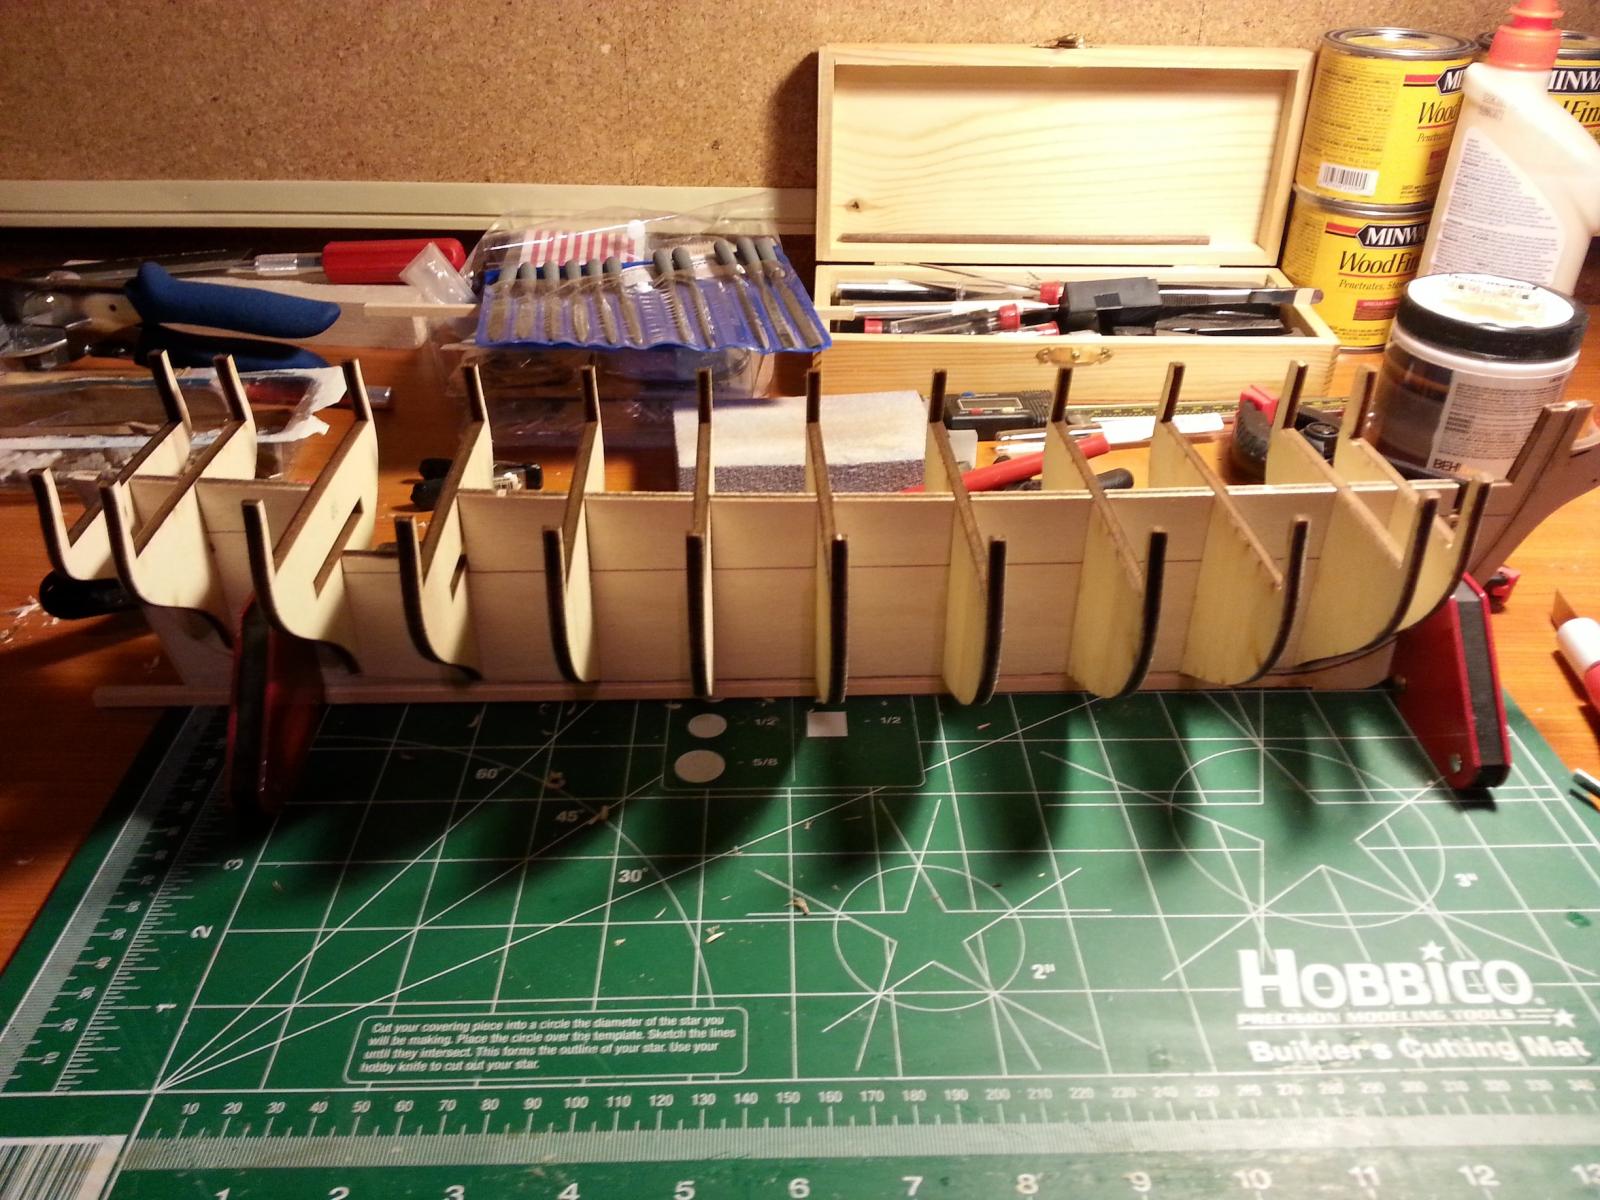
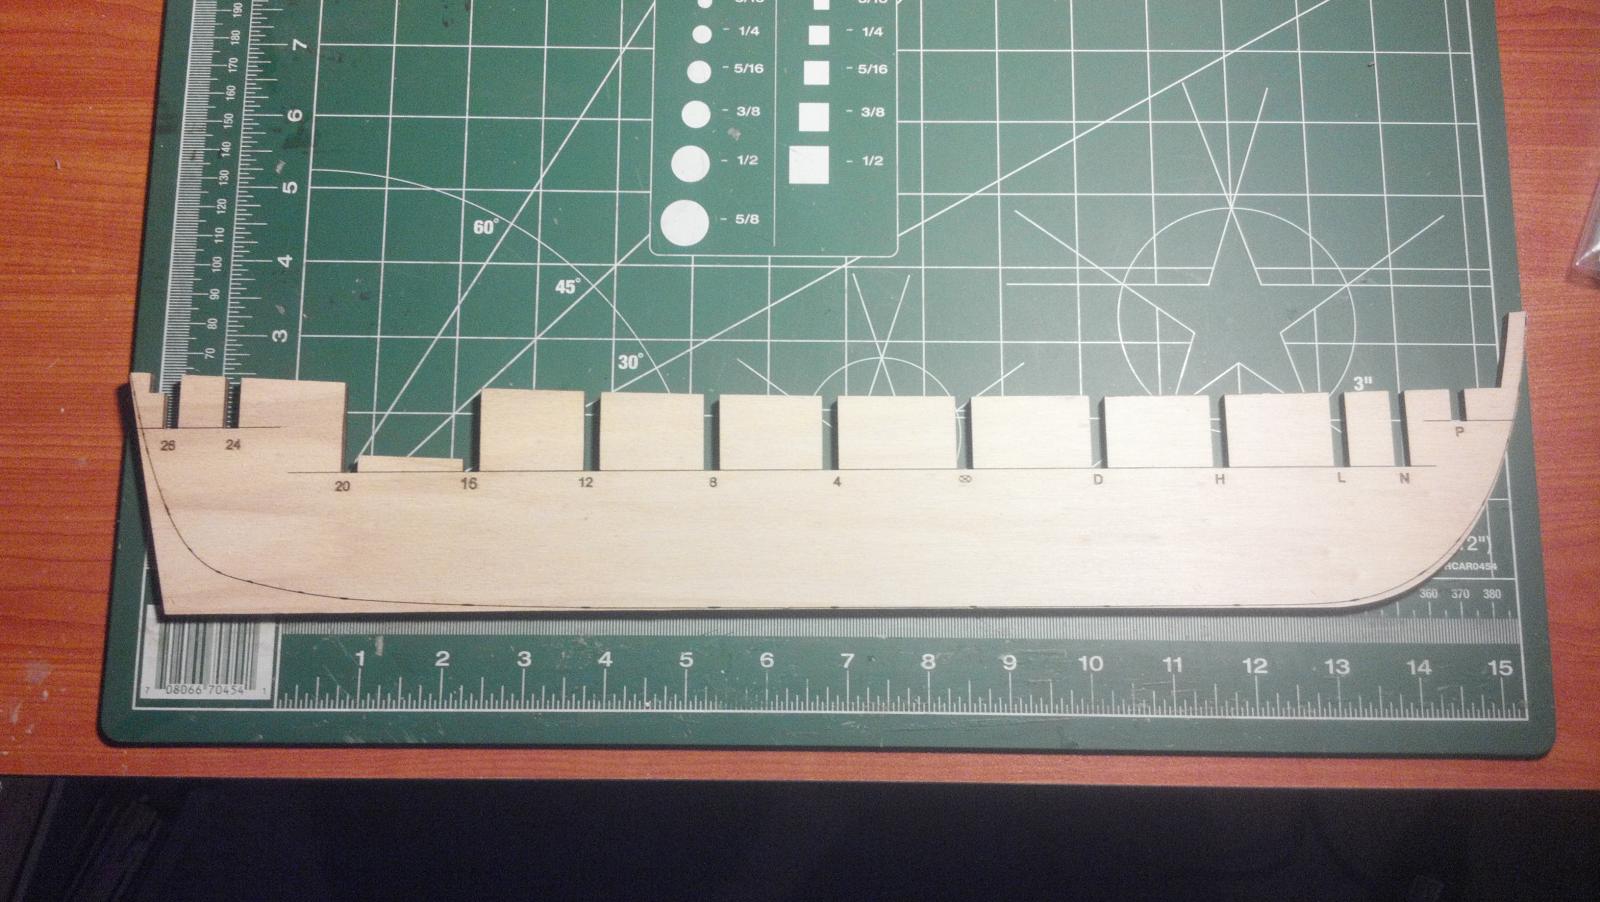
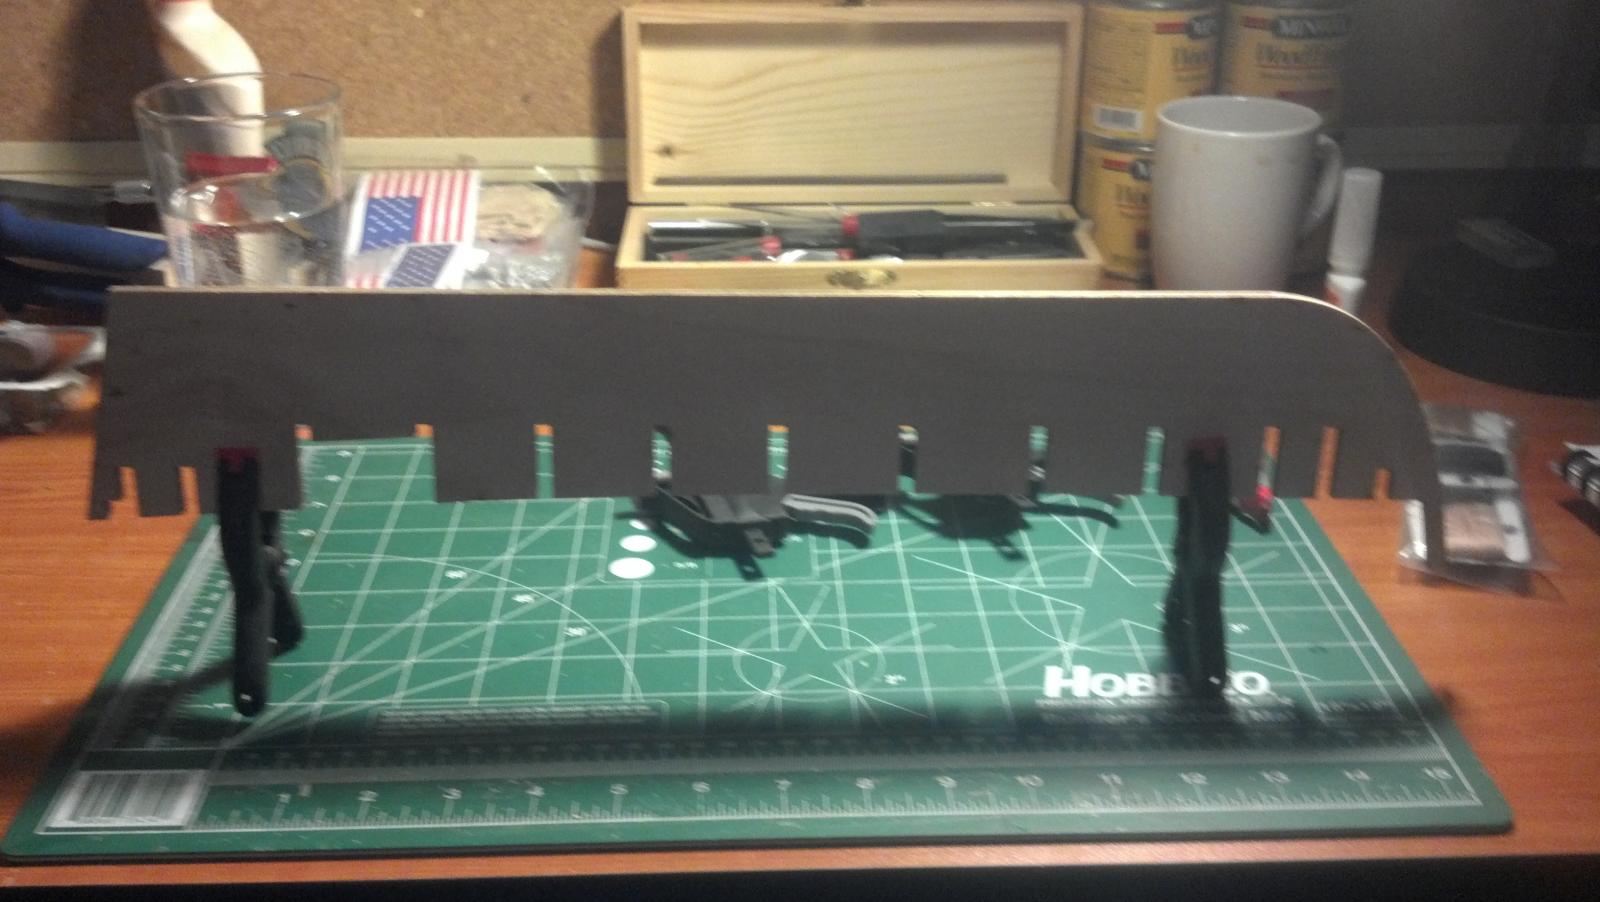
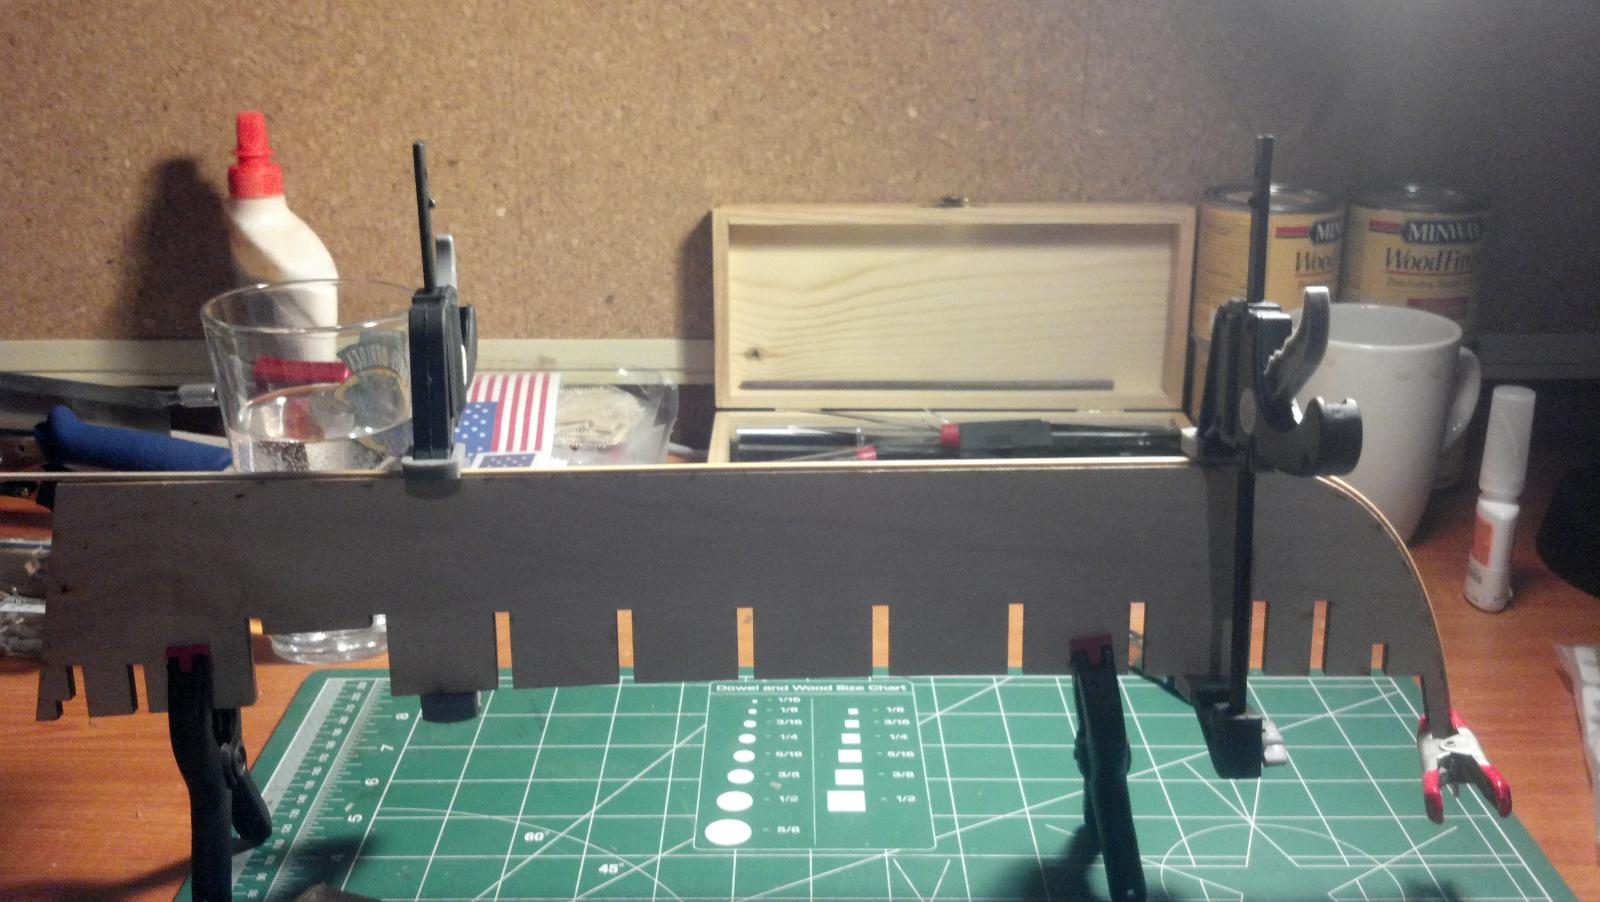
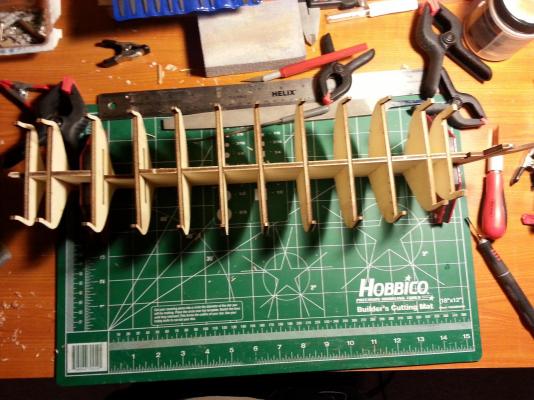
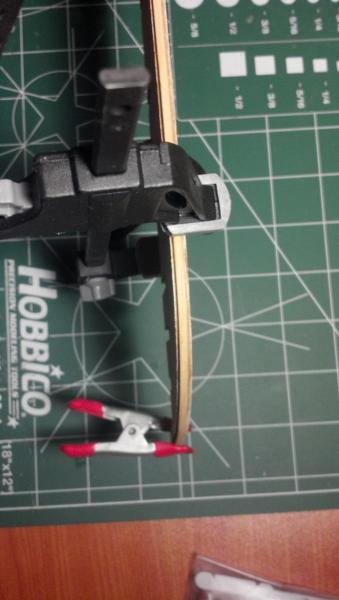
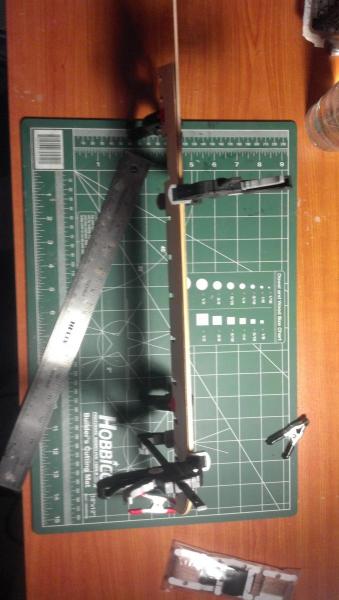
PROGRESS!!! Last night I got to work on the Syren a little. I checked to make sure the keel and stem were properly glued and dried (enough time has gone by, the glue better be dry by now). I cut all the bulk heads out and carefully sanded the char marks off. I then did a rough faring of the bow and stern bulkheads and did a dry fitting of the bulkheads. That is where I stopped. I need to get some angle aluminum or some small squares to ensure that my bulkheads are squarely aligned when I glue them in permanently. Here are some pics. First bulkhead that I faired The stern end with bulkheads dry fitted

-
Dude this build is IMPRESSIVE. I just walked thru the entire log. I enjoyed the BS / Banter. And the build itself is gorgeous.
-
You guys are absolutely right. I just feel a little frustration when i see these great logs and then think of my ship sitting there. I know that the first few steps of the build are not that exciting and its not a race. I am hopeful this weekend will be a bit more productive. Thanks for the support.
-
This may be a dumb question, but on the Syren kit, and I am sure other kits as well, the yards can be painted black or left natural. My question is what was the purpose of painting them black on the real ships? I love the look of both the natural finish and the black painted ones. I am just curious. Thanks Ken
-
The spacers are a great idea. I also like the aluminum angle idea posted. I cant seem to find squares small enough for this purpose, so this would be an easy solution for me.
-
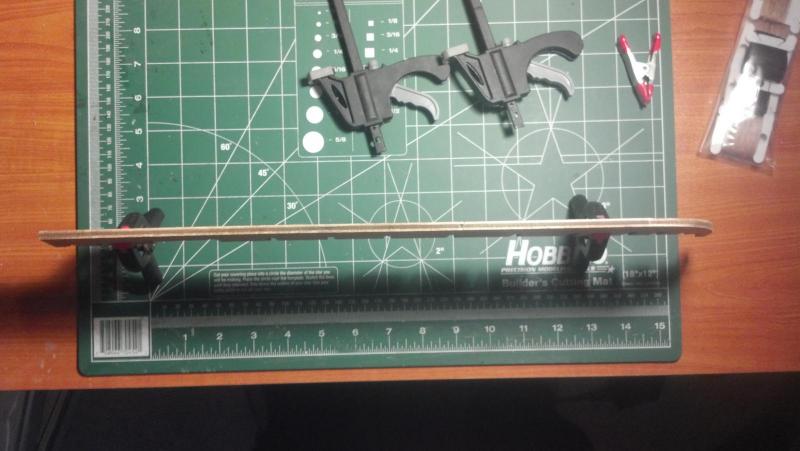
Floyd, thats a really good idea. Over the past few nights since I got back from Tokyo, I have managed to carve and sand the rabet strip. Last night I finally got the stem installed. I am hoping to install the keel tonight before I head out of town again for a few days of work. I think I have the most boring build log on the forum at this point....Weeks with no update, then I update without images. Maybe I can start some rough fairing on the bulkheads. At my current rate, I should be done with my Syren sometime around 2020
-
Great job so far, she's looking really good. I wish I could make the kind of progress you and the other builders make. Chair pulled up and I will enjoy watching. Ken
-
The past weekend did not see any work done on the Syren. But on the other hand, I am in Japan this week for work (very last minute trip). Its beautiful over here right now and the cherry blossoms are in full bloom. Unfortunately I am spending most of my time here in an office building. Hoping next weekend sees some work done.
-
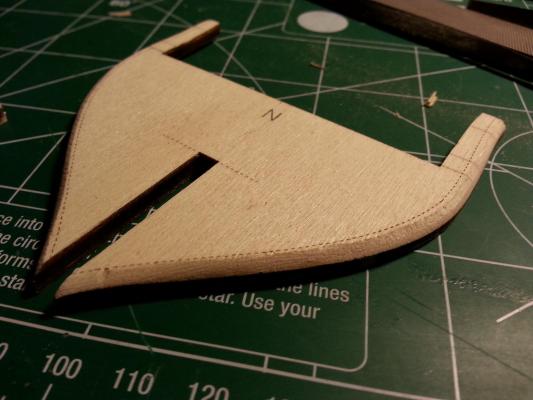
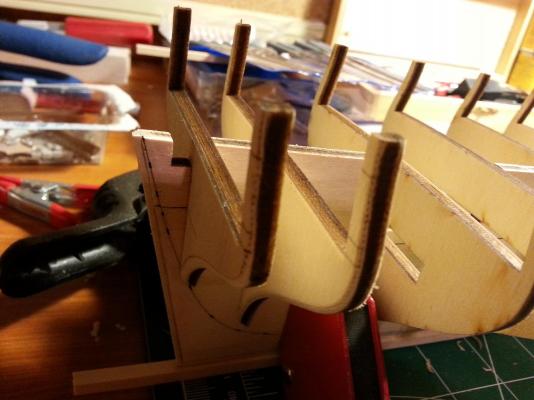
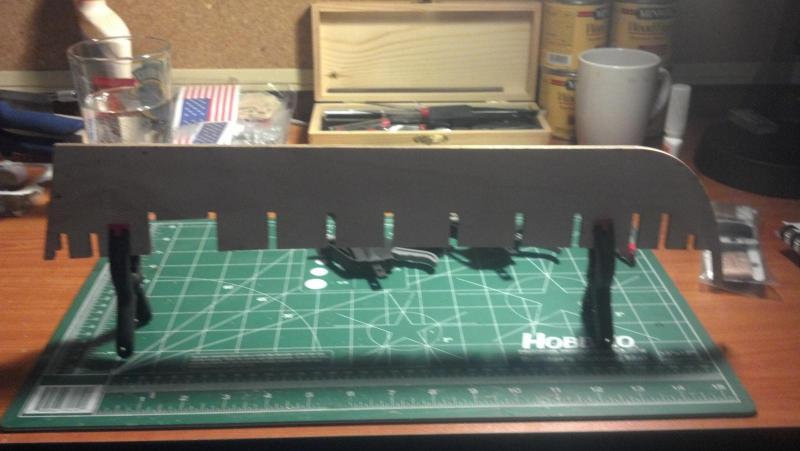
My build is proving to be slow. While I was hoping to get some work done on the Syren over the weekend, I ultimately decided to help the Admiral (who is a high school teacher) teach her students how to cook. So I spent most of my weekend grocery shopping and teaching a 2 cooking classes to a bunch of teenagers. That was fun and they were good students. Back to the build. Yesterday afternoon I decided to pull the bulkhead former out and get the rabet started. According to Chuck's manual, I first did a very light sanding to remove the char marks. While sanding, I soaked a piece of 3/32 x 1/16 strip of wood. This was then bent and clamped to the BF to dry.... And thats where I left off. I had to go teach the same kids from above how to make sushi. Teens with sharp SHARP knives is a scary thing. Anyways, what I lack in progress, I tried to make up for in pictures. After carefully removing the BF from the laser cut wood. Just inspecting it and taking the requisite picture of my first progress on the ship. Looking at it and while it was laying on its side, I notice there is an ever so slight curve in the BF. It is so slight that I think adding the filler blocks between the bulkheads will straighten it. To give an idea, if I put a metal straight edge against it, the apex of the curve is between 1 and 2 mm away from the edge. I dont even think this qualifies as a warp. Just a couple clamps holding the rabet former to the BF til it dries Tonight, if I have time after work, I will glue this piece on and...well...wait for it to dry again . If nothing else, ship modeling teaches patience and the art of watching glue dry. Thanks for watching Ken

-
Vallejo paints makes an acrylic version of this in both their Model Color and Game Color lines. It comes in a dropper bottle too. So its really easy to apply directly where you want it. I have used their paints in my other hobbies and think they are great. I have not tried it on rigging, but I imagine if Testors Dullcote works, then the Vallejo Model Color Matte varnish would do well with easier clean up and no smell.
-
Your swift is looking really good. I recently finished the same build. I dont know if mine looks as good as this one. keep up the good work. I will be watching this progress.
-
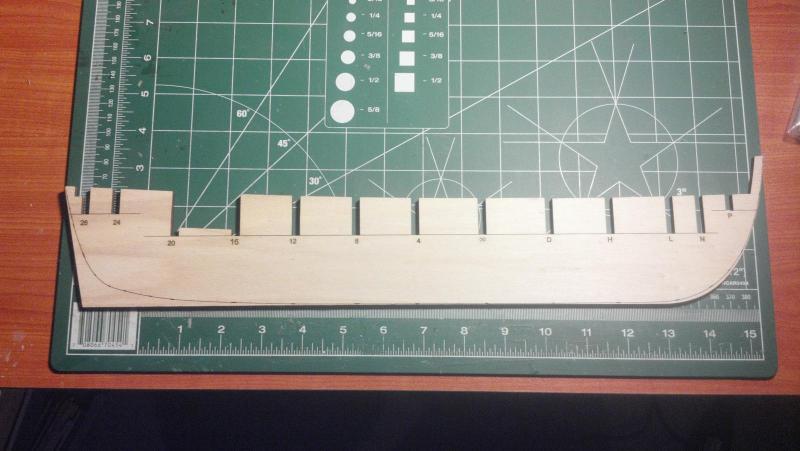
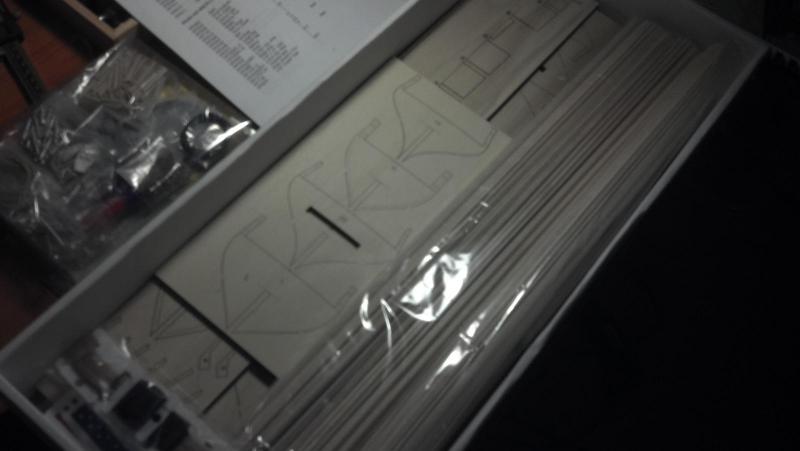
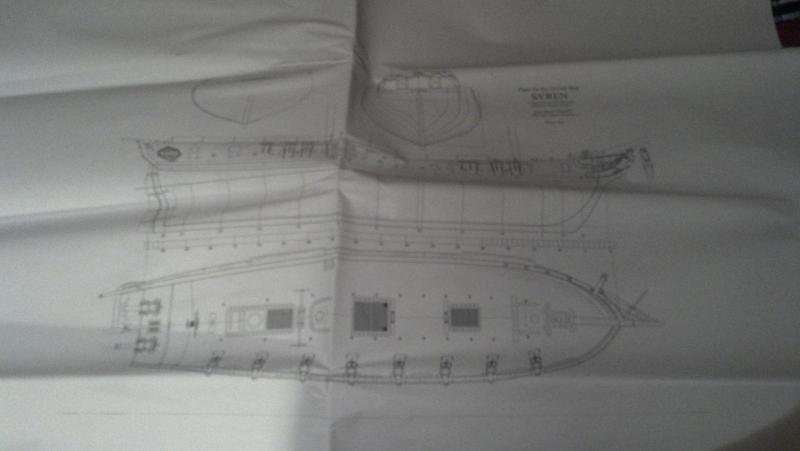
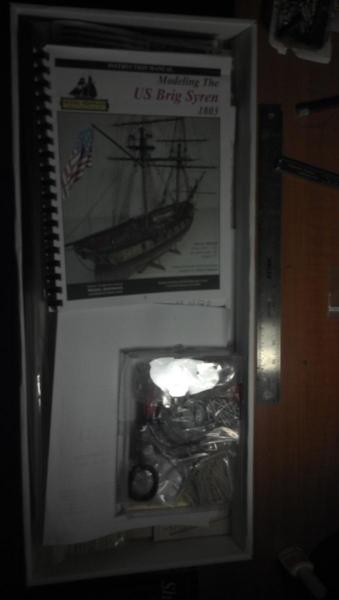
Well, the time has finally come for me to start on my Syren and get a log started. I have worked on one other ship to date: The Swift by AL. That one took me a few years of working on it off and on. I am hopeful that I can make a little more consistent work on this lady. Last night I finally opened the box. The Admiral, bought this kit for me as a birthday present last July and it has patiently sat on the shelf waiting for me to finish the swift. I have read the manual that Chuck provided many times since I got the kit. Last night, i performed the standard inventory of parts and came up complete. Though I honestly did not count out the 320 nails that the kit specified or measure the lengths of rigging line. But everything else was counted and measured. I then labled each of the bundles of wood with the dimensions. I have to say, that 3/64" dowel is TINY and took me a little time to find. I would like to figure out a way fo building a simple organizer for the wood so that I dont end up with a big pile of assorted strips. I am thinking something as simple as a bunch of PVC pipes capped at one end that I can lable and store the various sizes of wood in. Thanks to the members of this site, I have a few ideas for a keel holder and just need to get to the store to get some supplies. Here are some obligitory opening the box pictures: And a final one of my shipmate, Eva, that "works" with me all day and then hangs out with me when its time to work on my model. She's an 11 month old pup that we rescued... But I am really wondering who rescued who. Thanks for looking in on my Syren Log. I hope that I can keep at this and provide consistent updates. The Admiral is working all next week and traveling with her students, so it will be quiet around here for me and Eva to try to get some work done...We'll see how that goes. Ken


-
Does the beeswax also "knock down" the fuzziness of the line or are you using a different product for that? Thanks