HOLIDAY DONATION DRIVE - SUPPORT MSW - DO YOUR PART TO KEEP THIS GREAT FORUM GOING!
×


RMC
-
Posts
933 -
Joined
-
Last visited
Content Type
Profiles
Forums
Gallery
Events
Everything posted by RMC
-
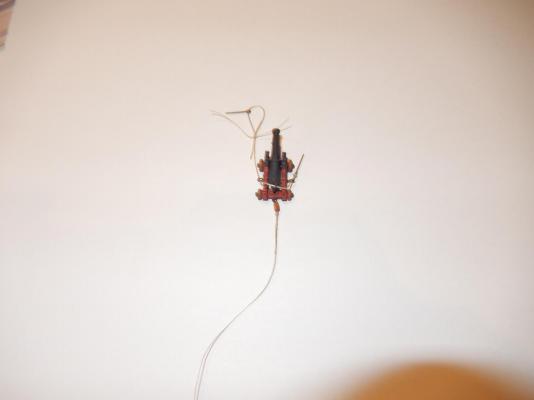
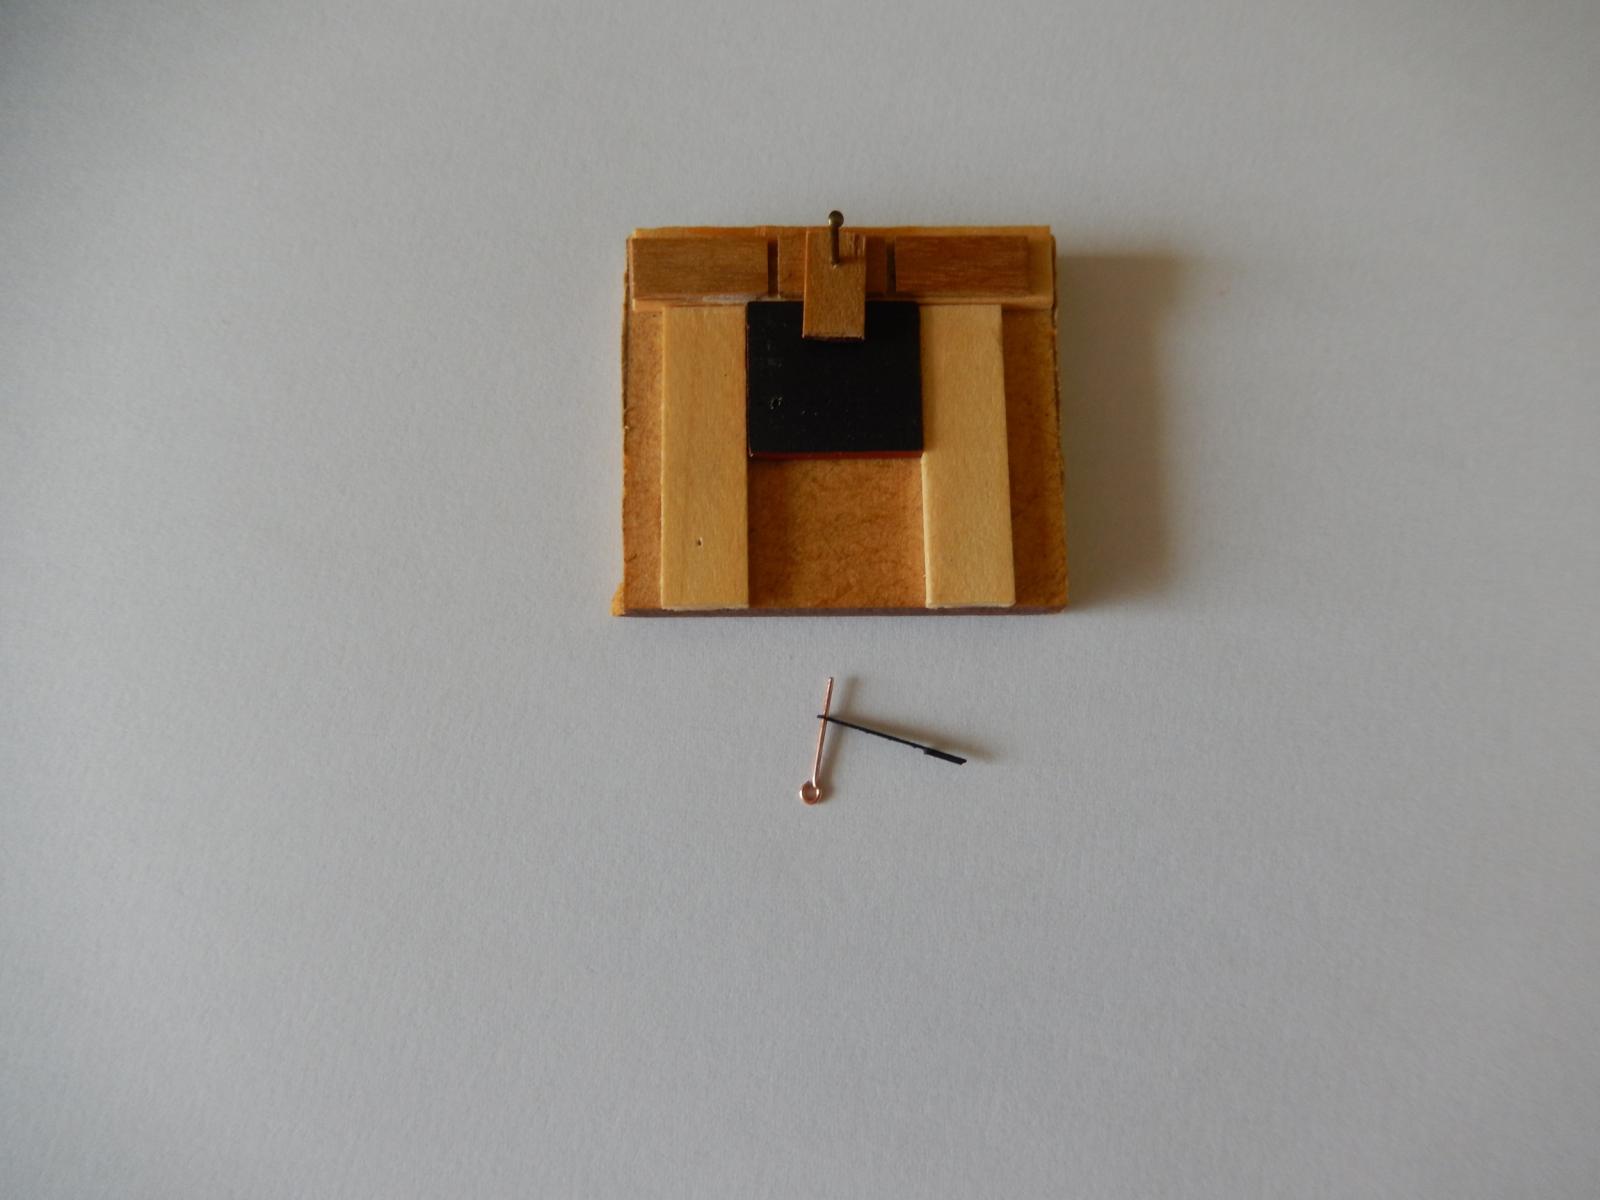
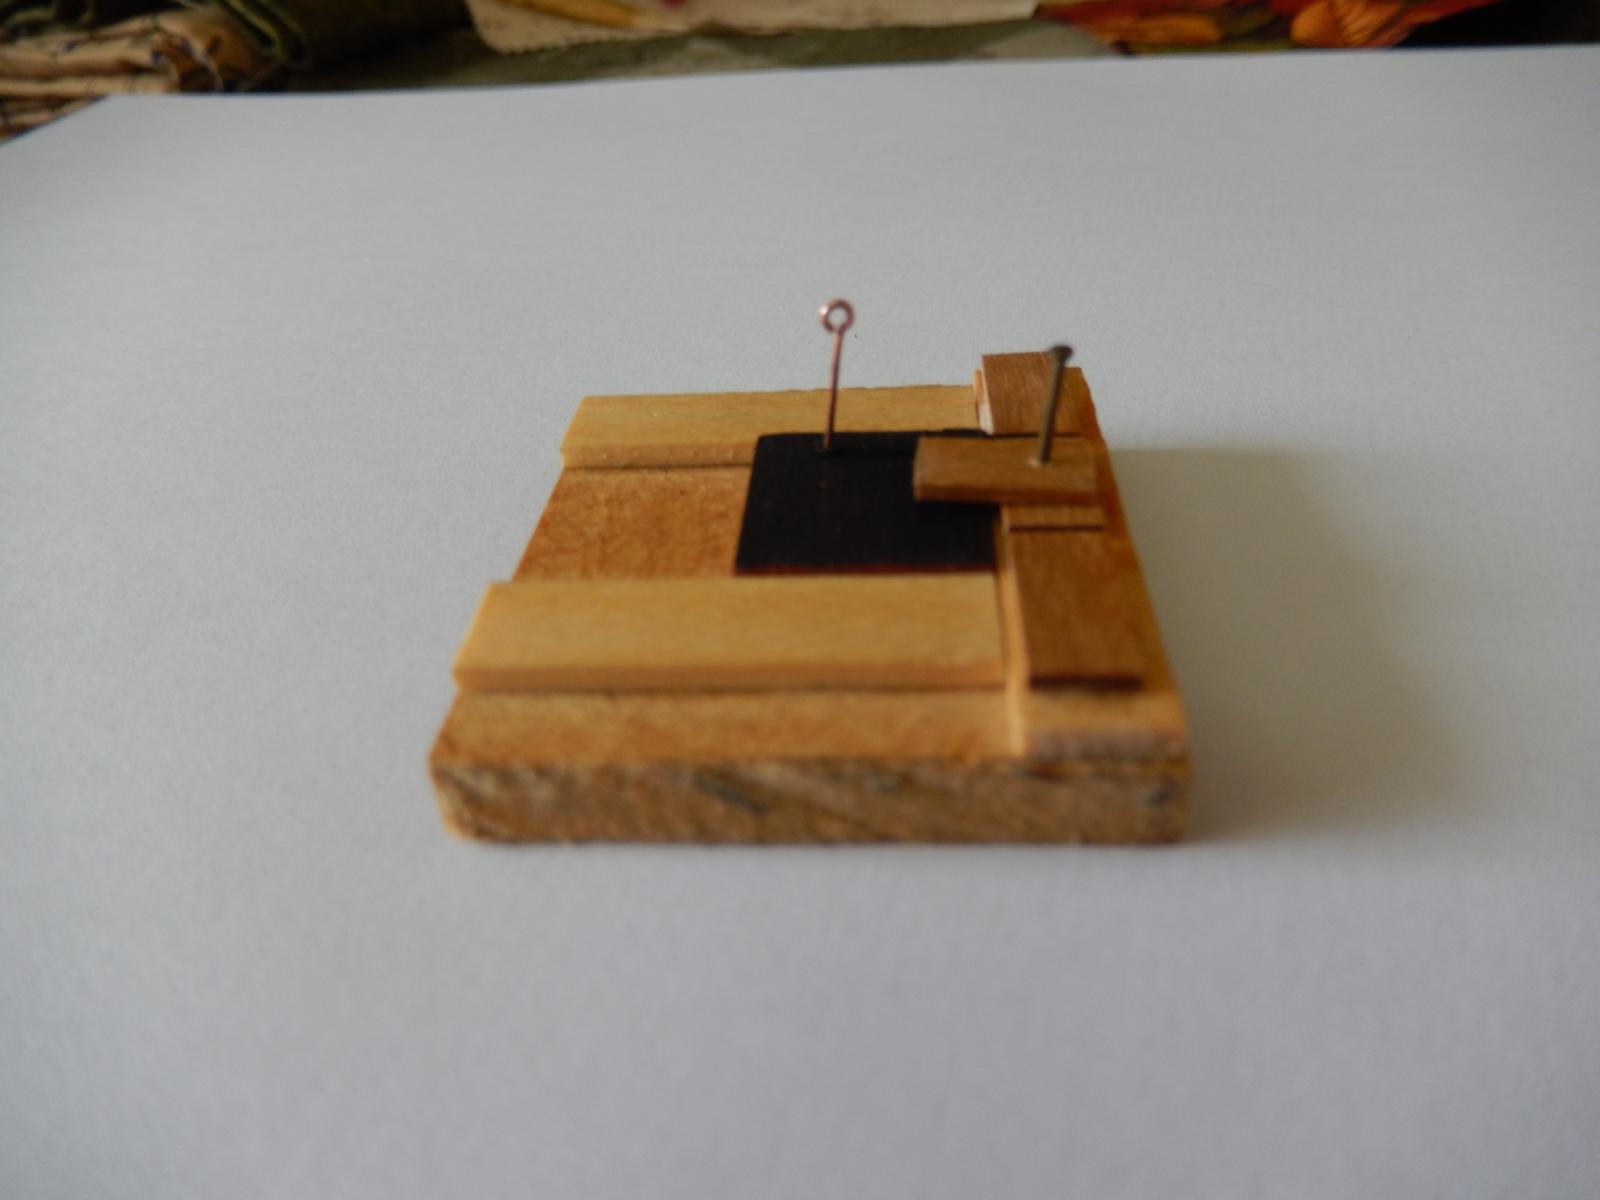
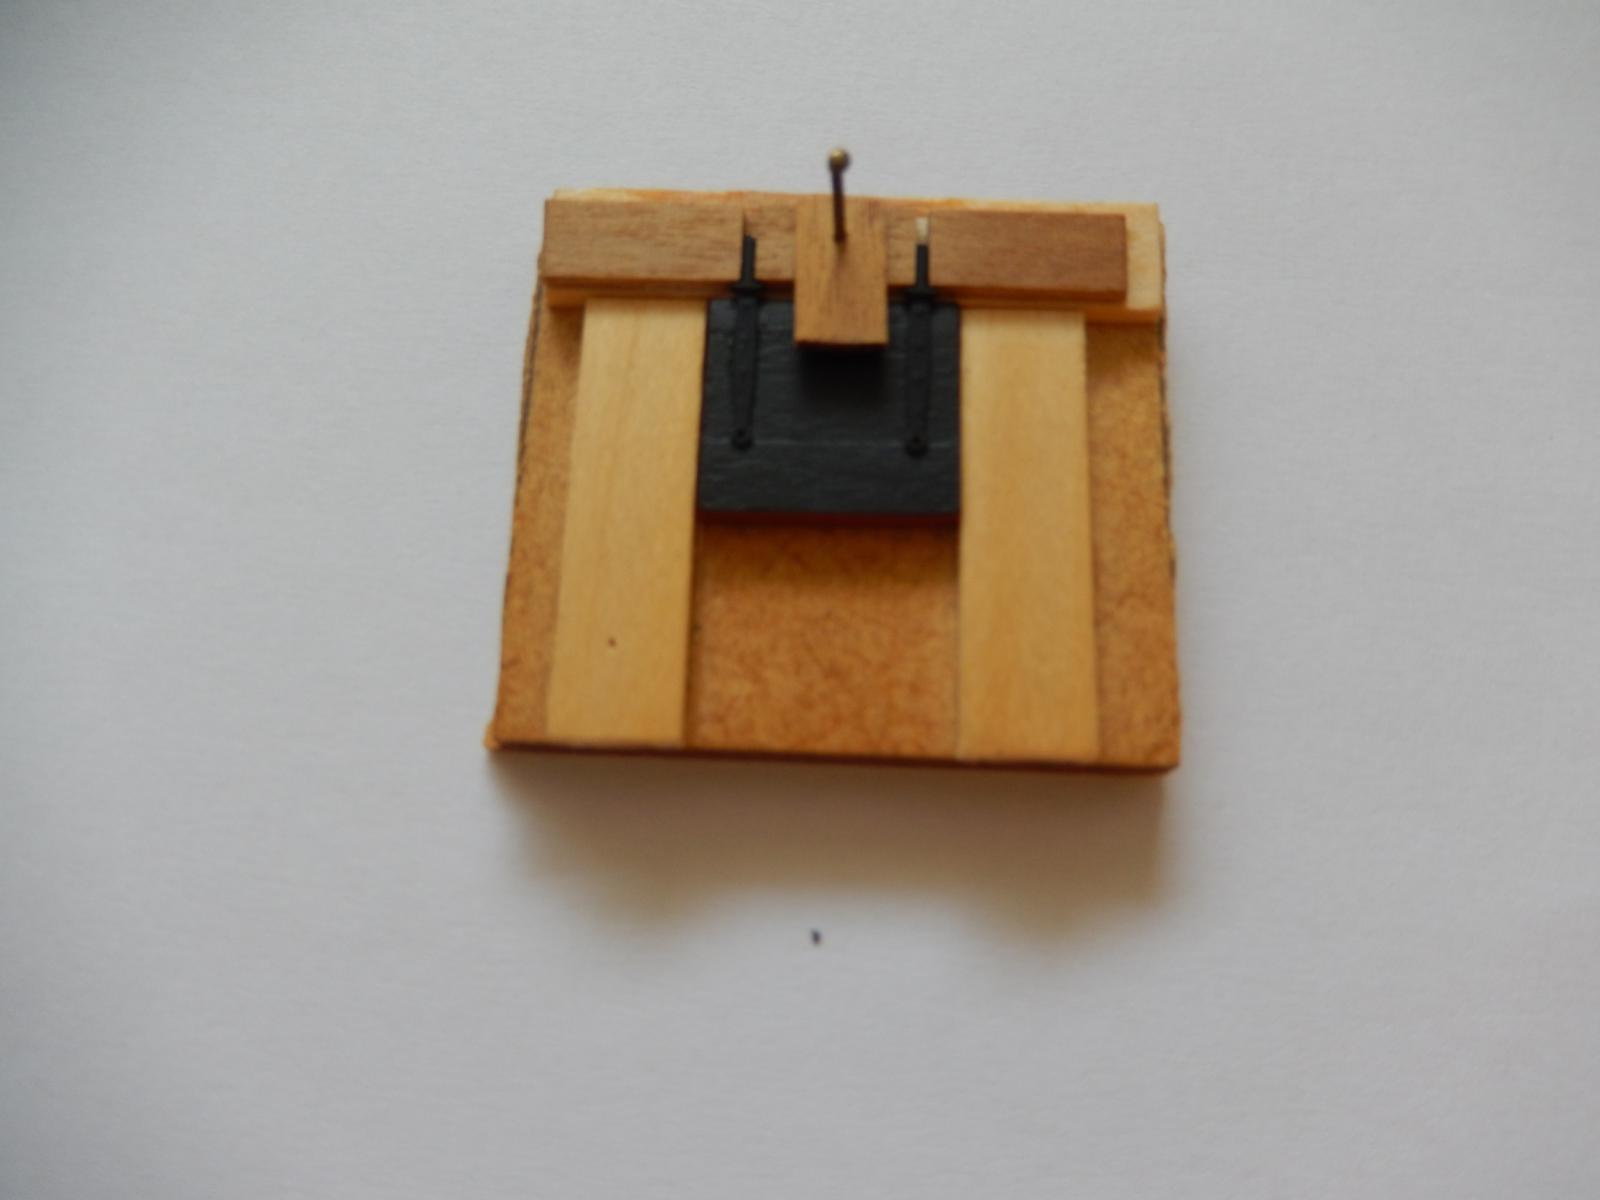
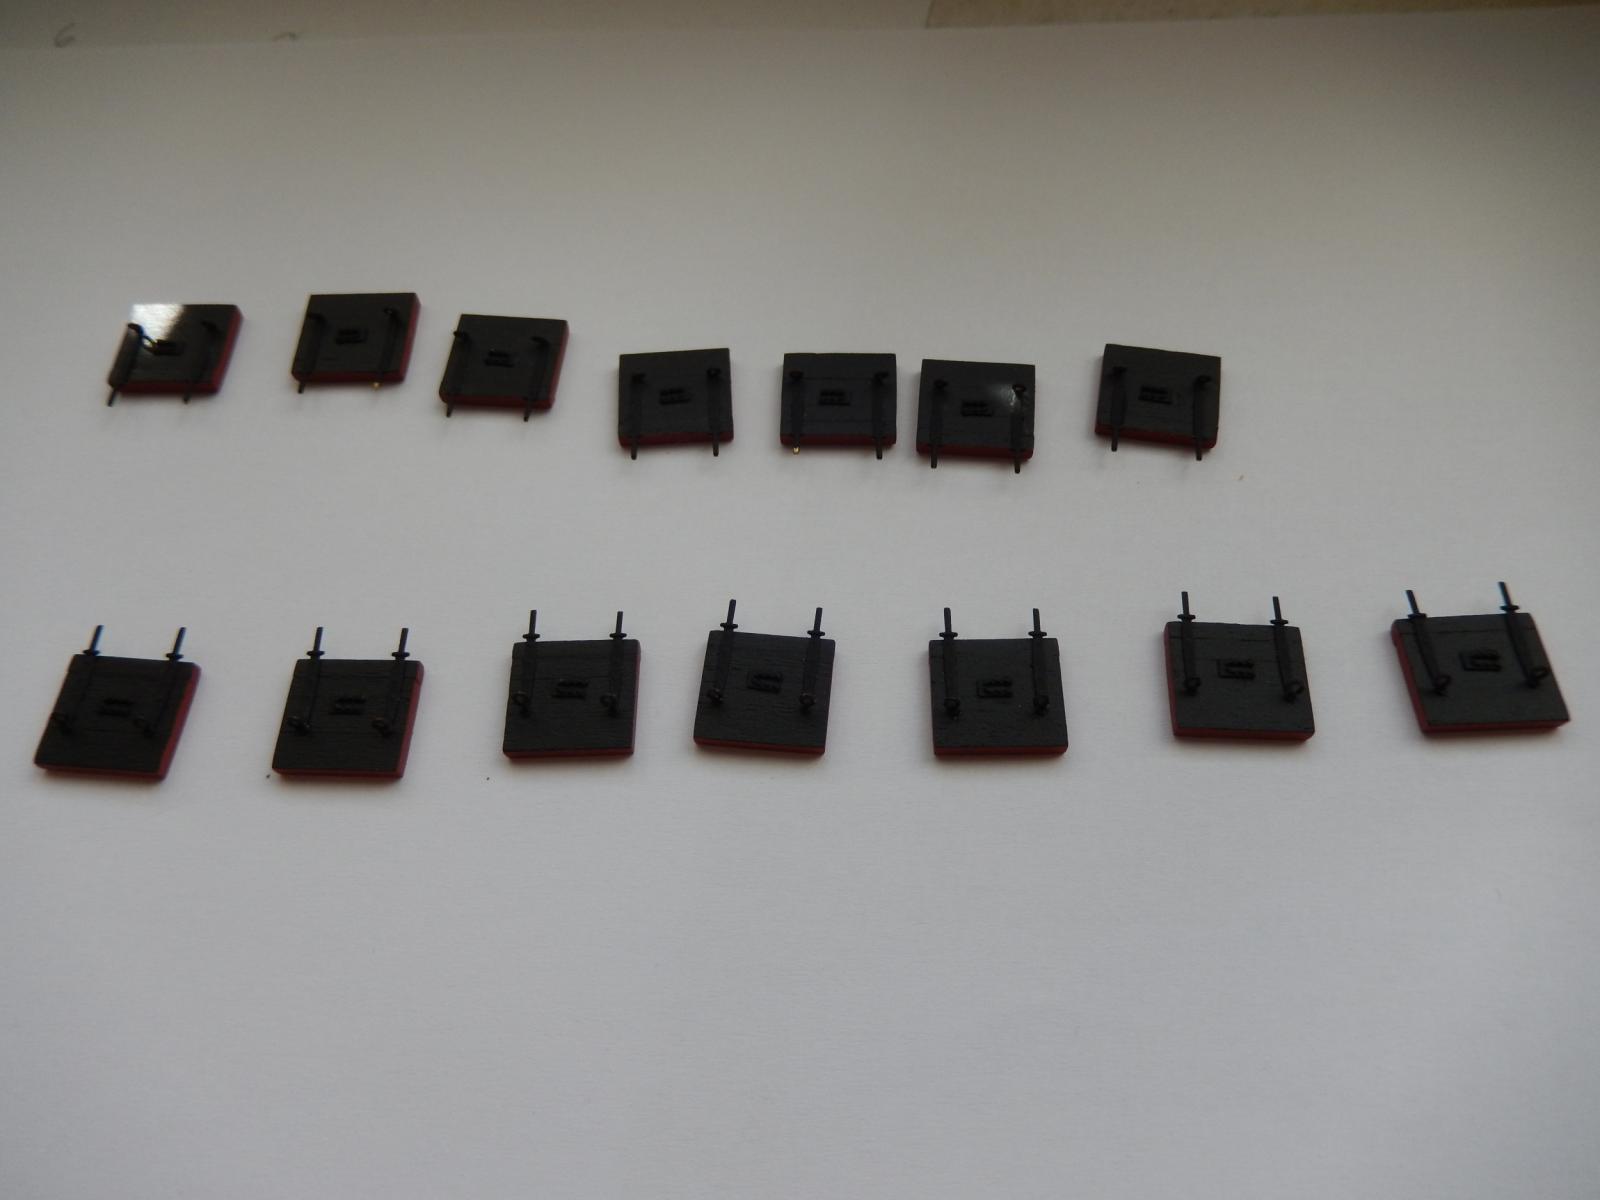
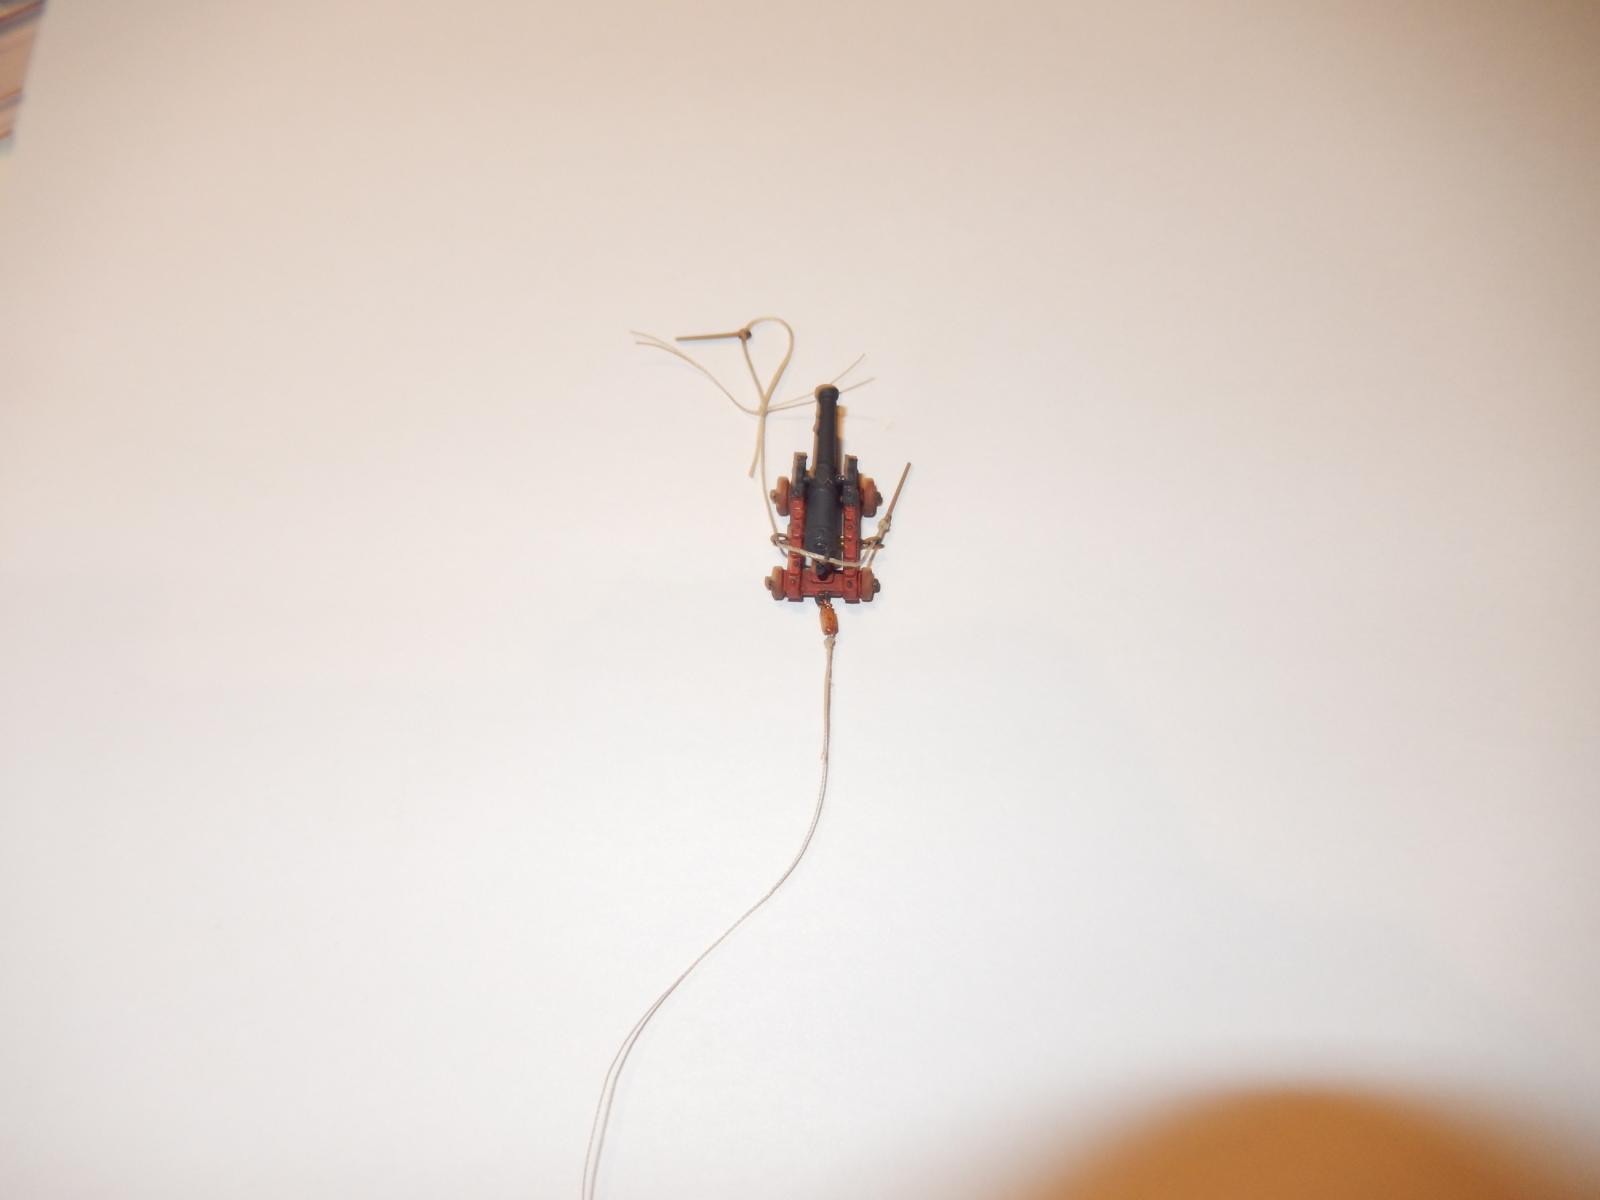
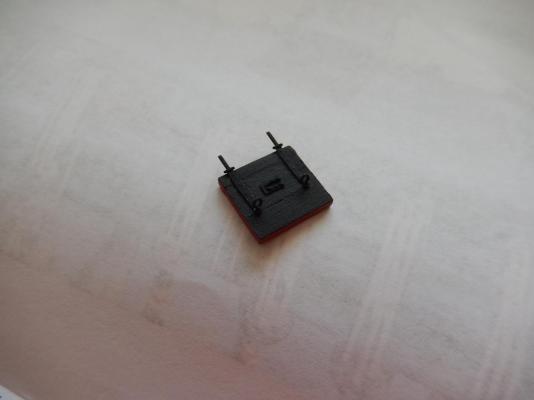
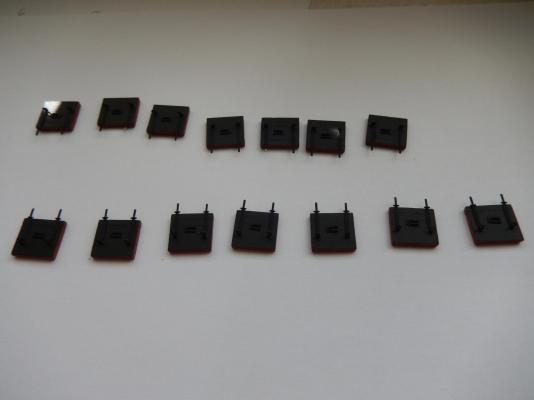
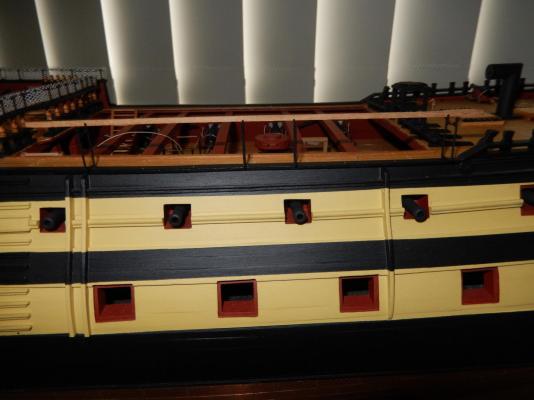
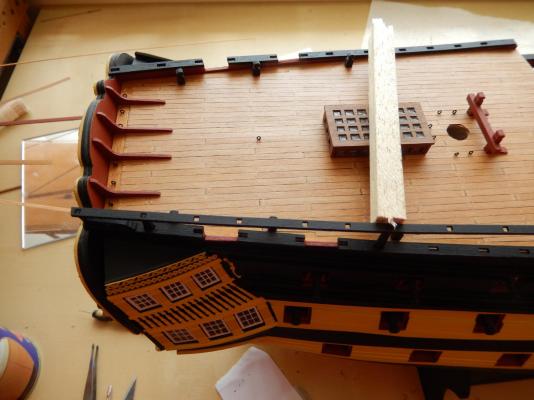
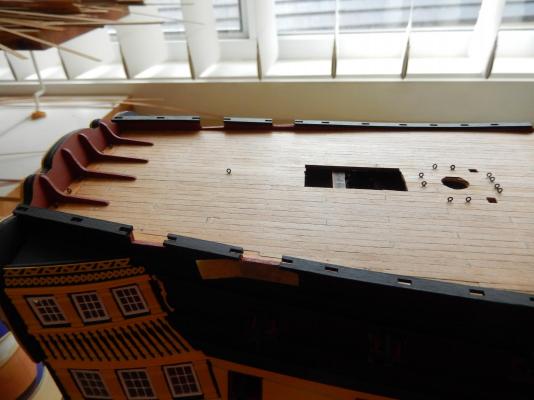
I have begun putting the hinges on the gun port lids. I have made a jig similar to Arthur's to enable their consistent positioning. As well, I added a piece of strip (seen nailed below) to assist spacing of the scuttles. When they are placed in a pair of tweezers, the tweezers held against the strip provides consistent spacing for the scuttle from the top of the lid. (I hope this all makes sense.) In attaching the hinges, I fitted an eyelet through the hole in the hinge (see photo above). Applied gel CA to the hinge; placed the eyelet into the hole I had drilled in the lid, then slid the hinge down onto the lid. To my pleasant surprise, it resulted in perfect positioning of the hinge, without spreading glue everywhere. Here are some of the finished articles. Since taking these photos I have done some minor touching up. Over a miserable, rainy and windy weekend some progress was made on the carronades. They have proved to be a little more demanding than I expected. The quality is very good, but with one disappointment. There is no eye on the barrel through which to put the breaching rope. I have glued small eyes onto the barrels in the same way as I did for the cannons. Once the rope is passed through them, I hope it will disguise any shortcomings and the result will be acceptable.


-
Thanks Nils and JP for your kind comments. It's always nice to get some encouragement. Arthur. Thanks again for taking the time to help. One thing that has occurred to me concerning the spacing between my boats. I earlier noted that the largest boat was higher than the two smaller ones and that as a consequence they fit under the sides of the largest. If I make the the supports of the two boats a mill. or so lower than specified, this will give me slightly more room and should not be noticeable. I remember that in your log you mentioned that the supports provided in the kit were not very satisfactory and needed reworking anyway. I have decided that while I will make provision for the boats, I will delay putting them on permanently as long as possible. Like the open gun port lids, they are one more thing for something to catch on.
-
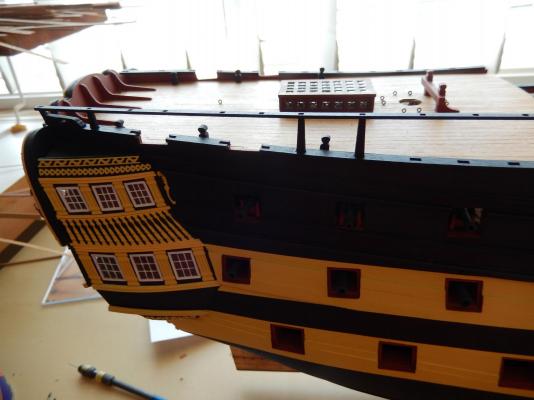
Thanks Arthur. I haven't had a chance to have a look at your suggestion in detail, but it looks the goods and I will certainly try it. This is one of the problems that has been worrying me for a while. I knew the spacing of the boats would be fairly tight but I guess the way my hammock netting and the hand-rail have worked out it's a bit too close for comfort. I have thought about just going with the two larger boats, but this would be a last resort. My earlier error in the spacing of the supporting cross members is also a concern. I have now had a look at Gil Middleton's gun port lids (thanks). I have also made a mistake in the dimensions of the lower gun-ports(they are bigger (vertically) than they should be - though it is not (I hope) noticeable). I wish I had decided to to have one side of the model with the gun ports closed -far too late now. I have now made up the the lids for the lower gun ports for one side of the model (I haven't yet put on the eyelets on the undersides - it wouldn't have occurred to me had I not seen Gil's log) and am reasonably pleased with the result so far (pictures next week). However putting the gun port lids on now is a concern. Those sticking out from the hull is an invitation to disaster - and I haven't often knocked back an invitation. While away over the weekend I hope to work on the Caldercraft carronades which at least seem to be fairy straight forward.
-
Varnish and primer
RMC replied to sygreen's topic in Painting, finishing and weathering products and techniques
Spray polyurethane matt gives a superb finish over enamel paints. I use it whenever possible. See my Vanguard log. Good luck rmc -
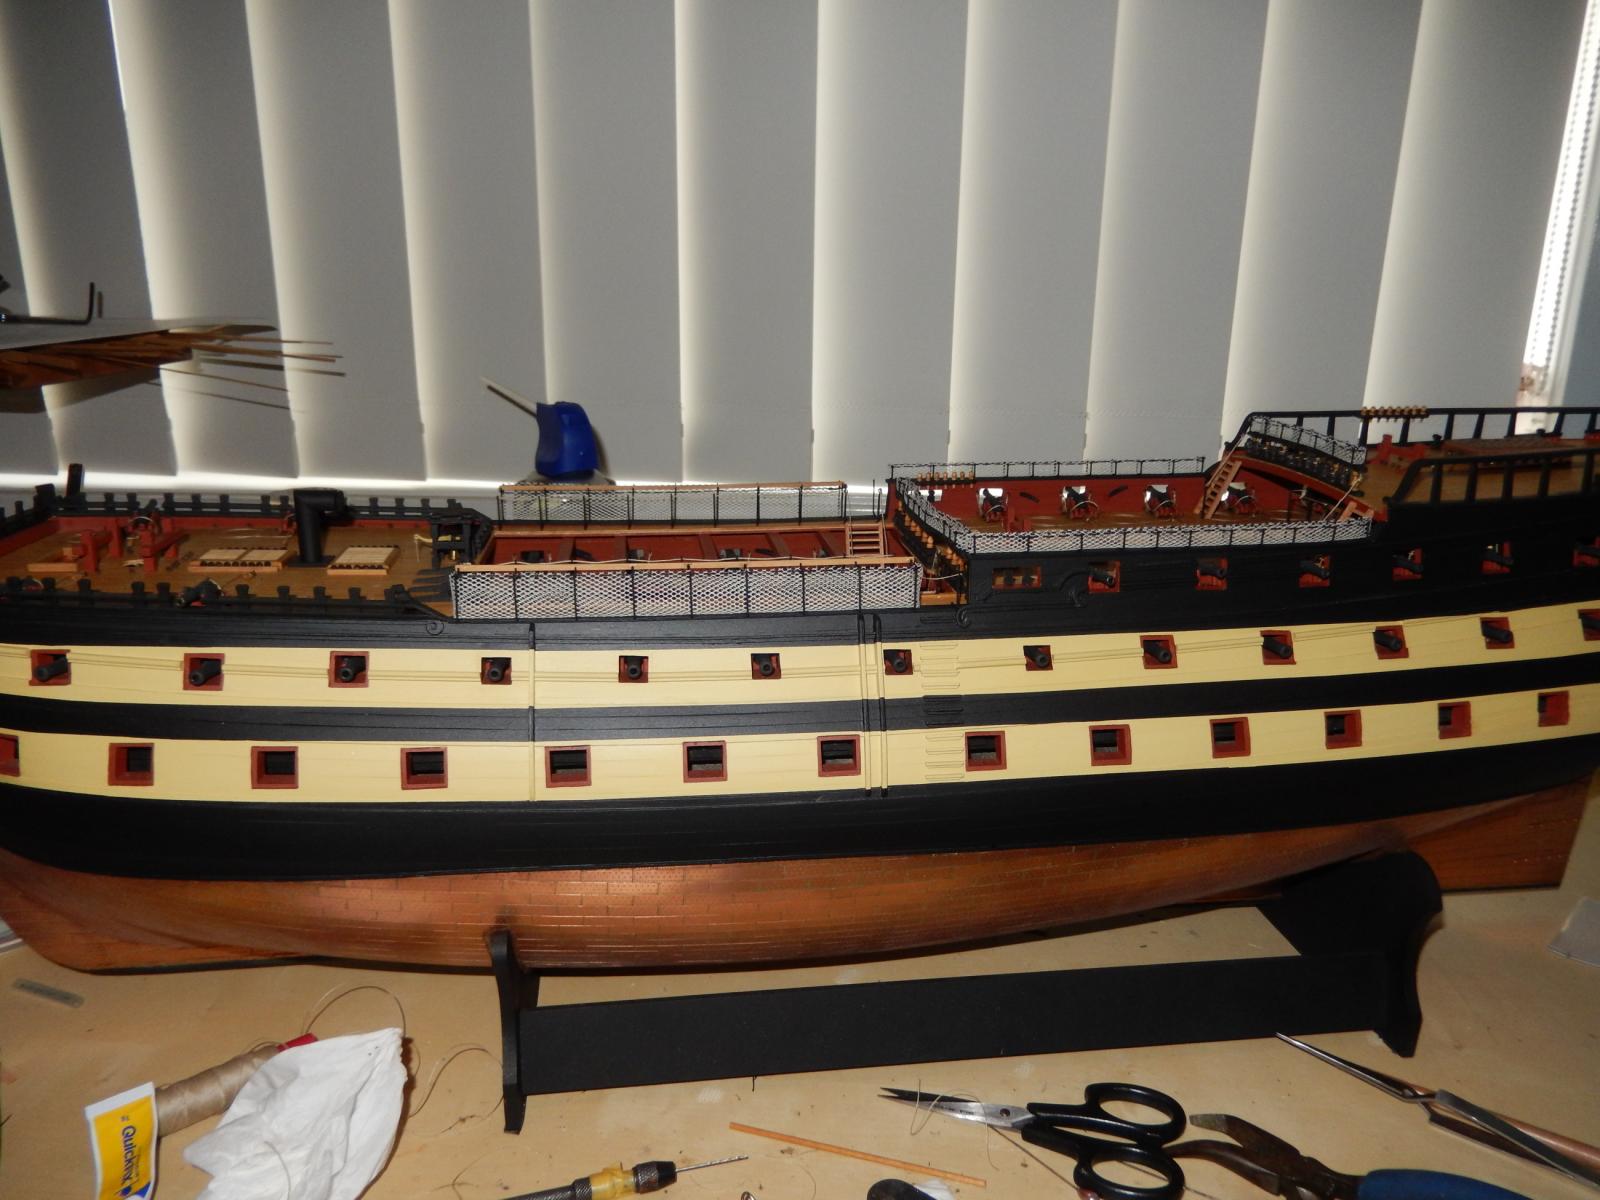
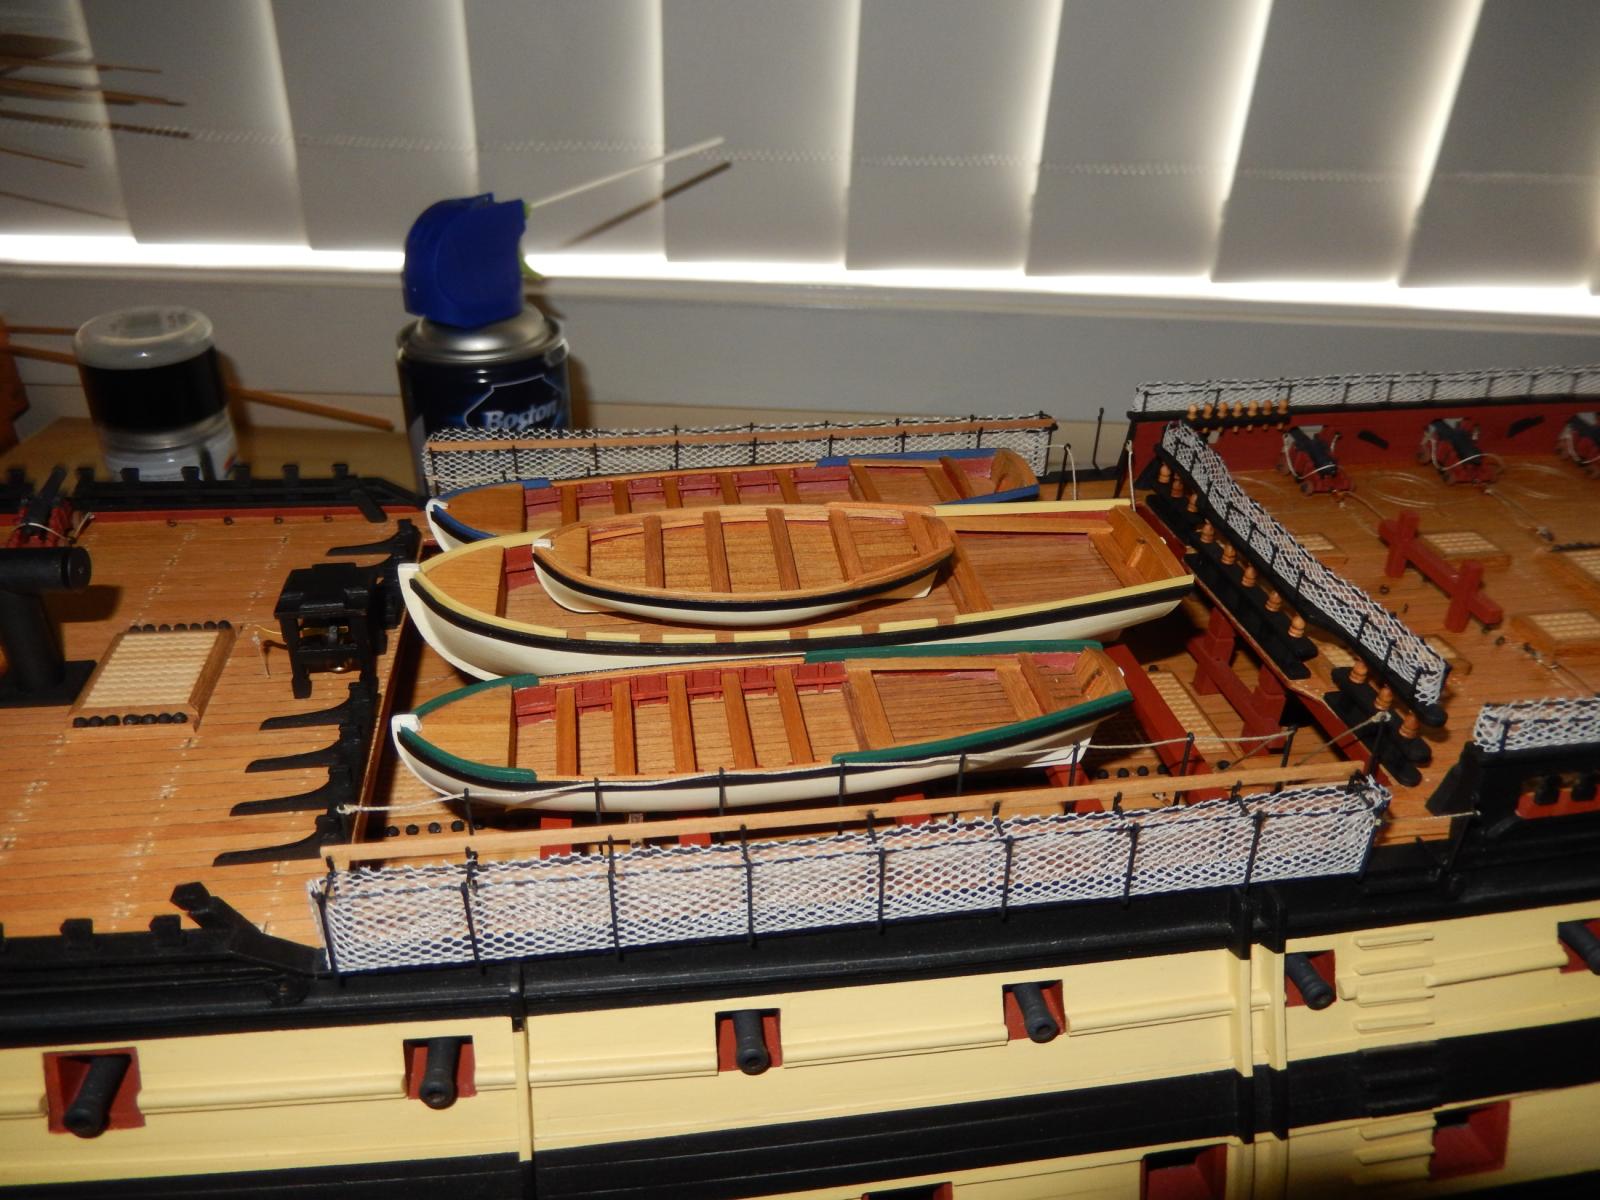
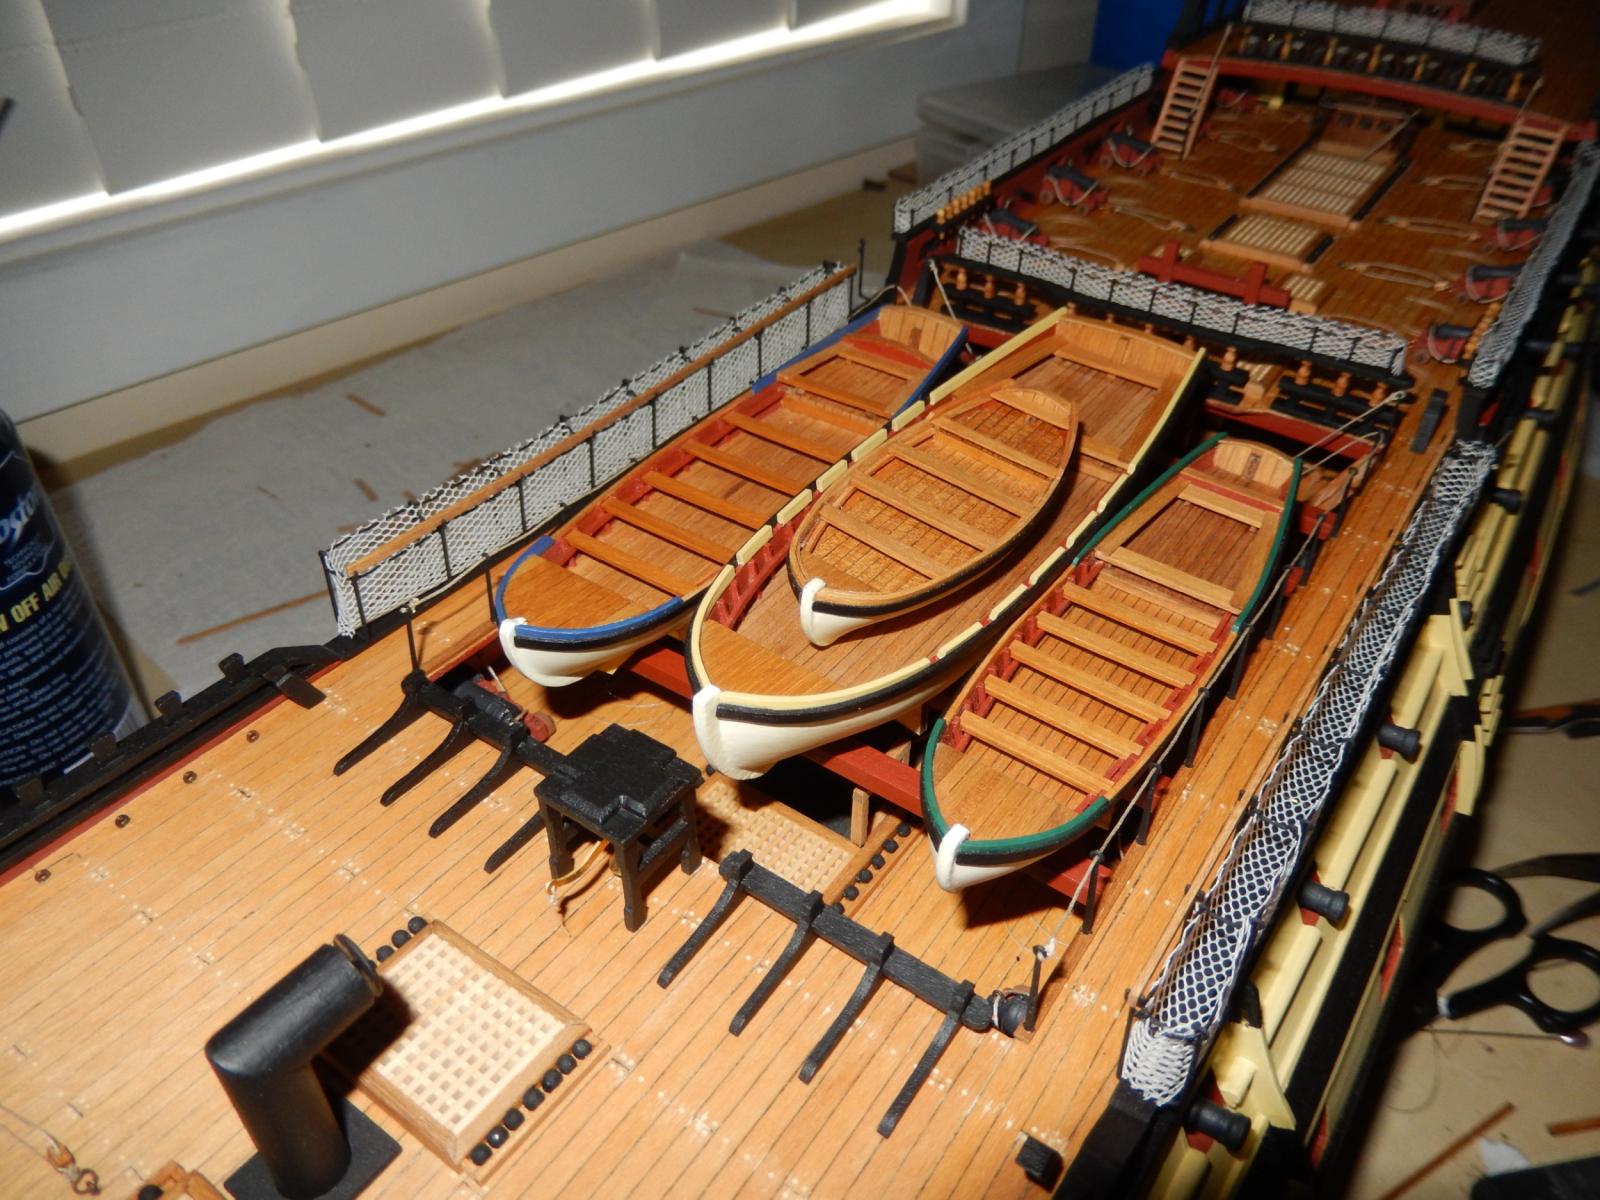
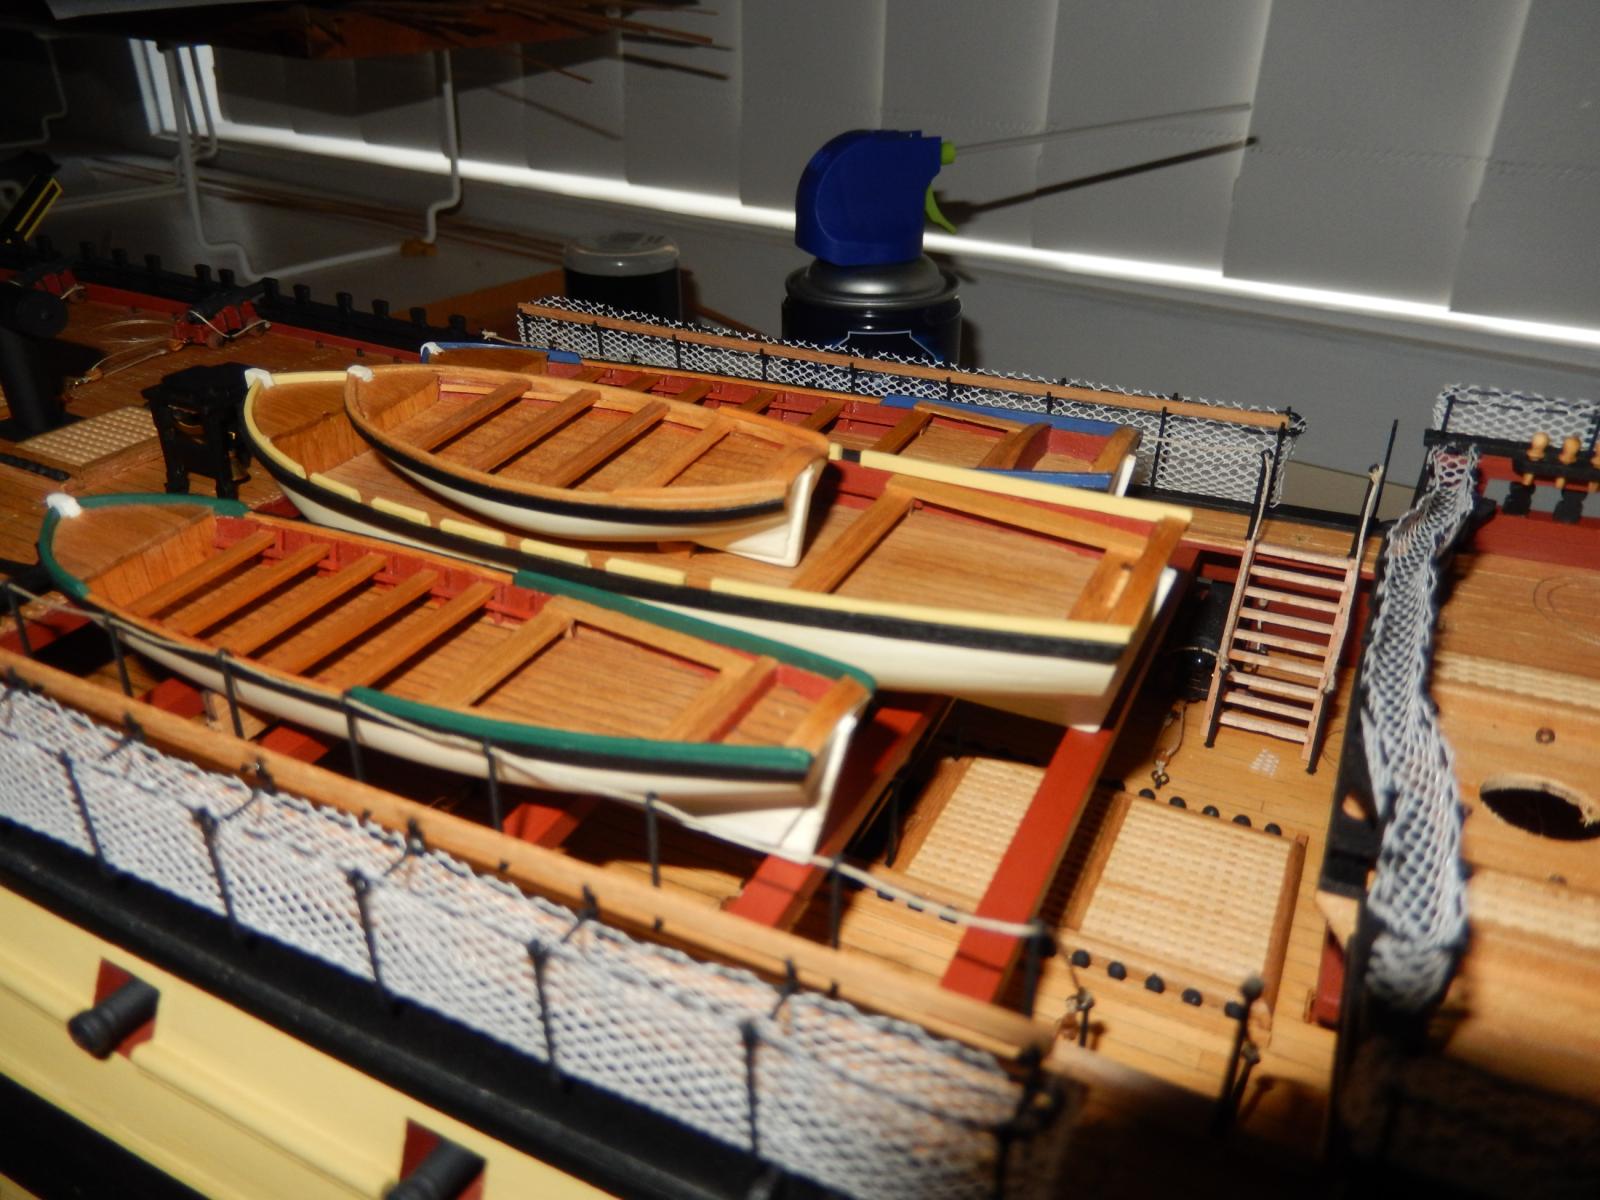
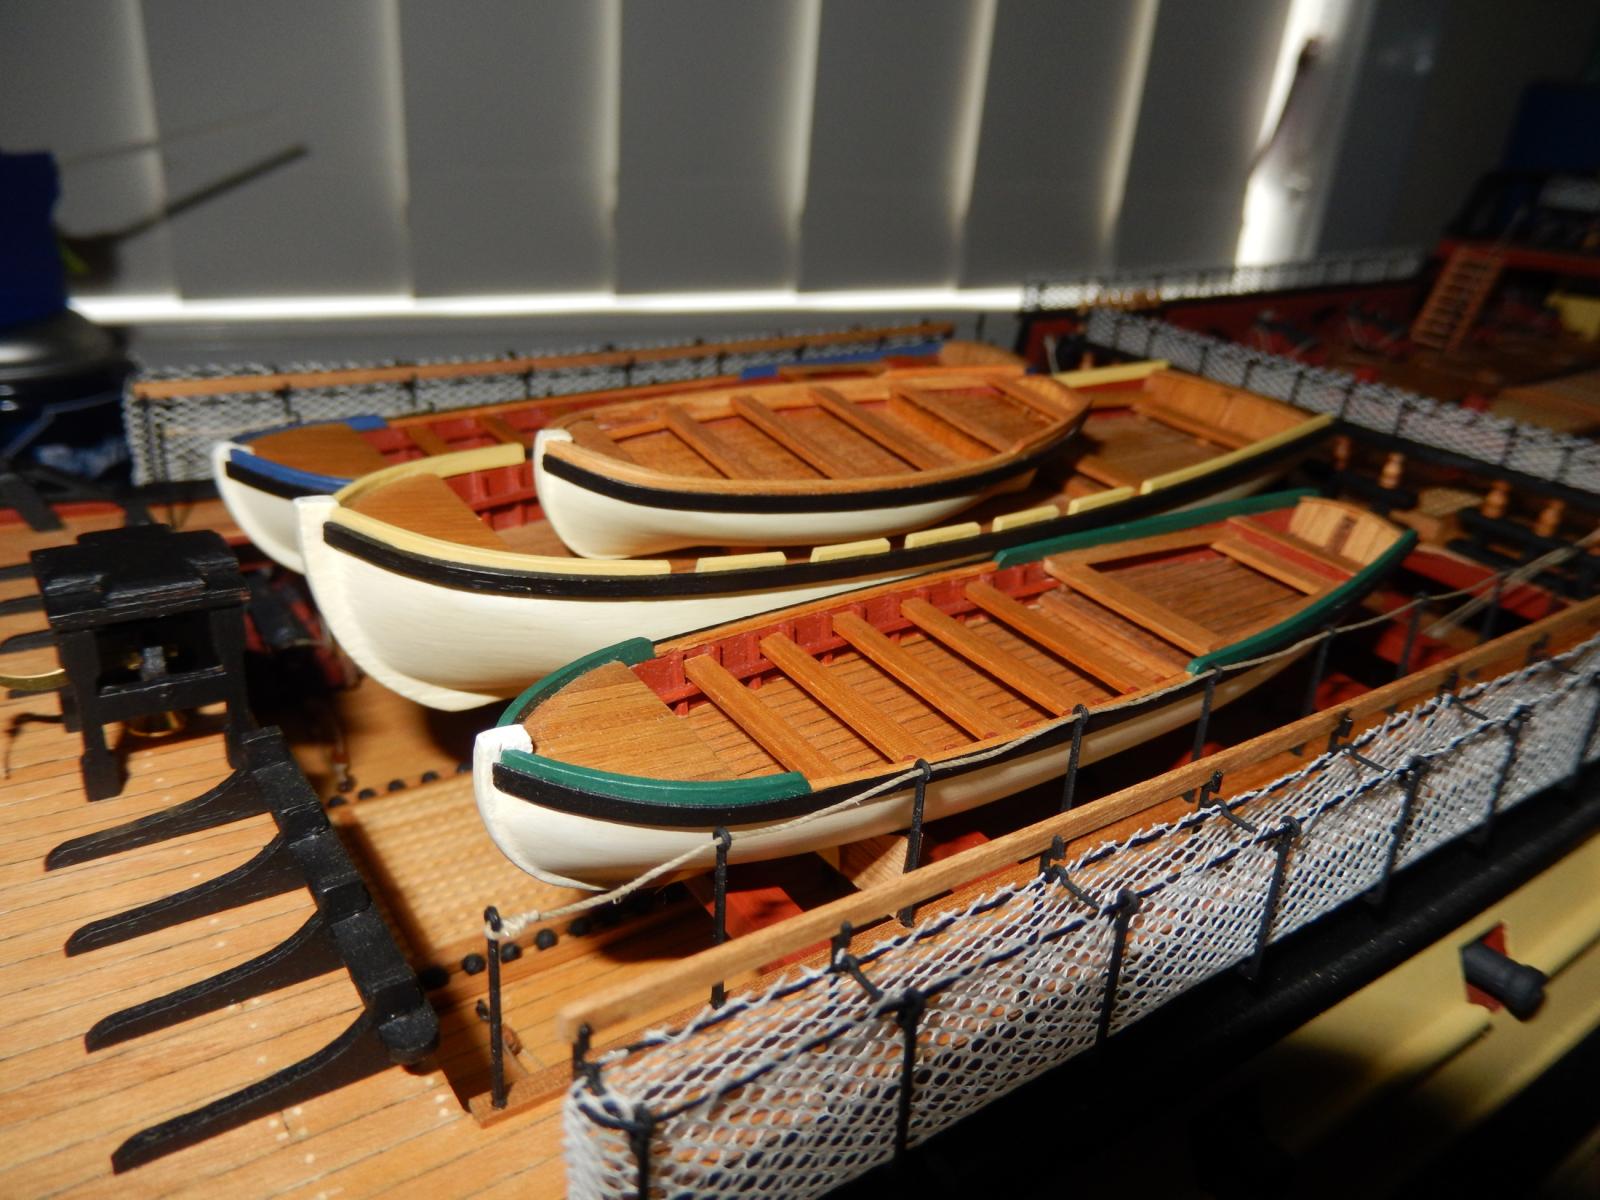
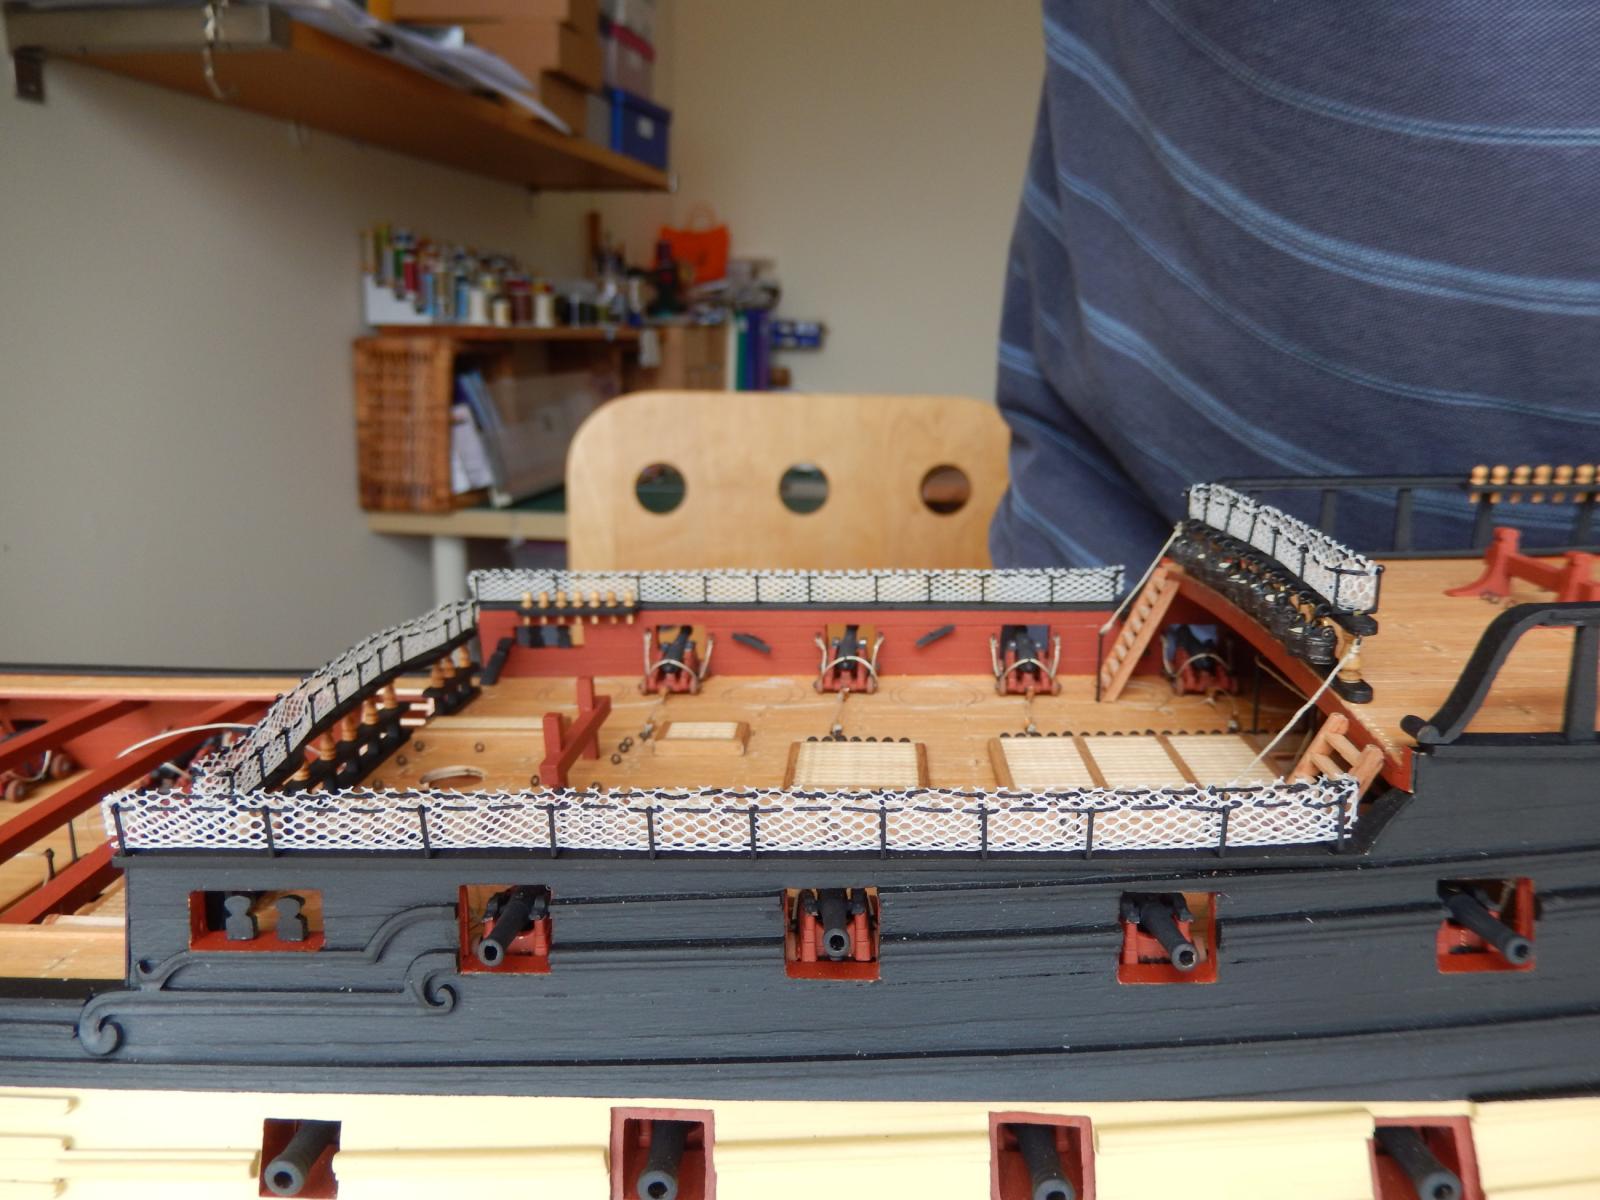
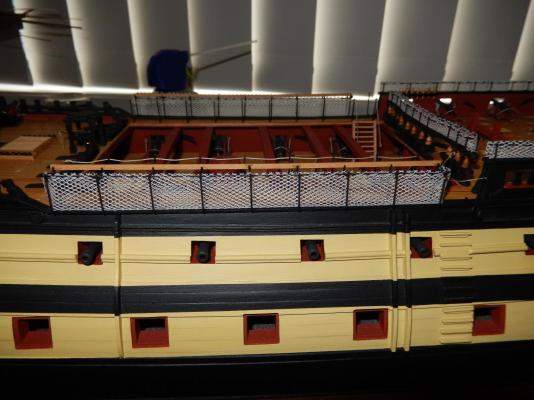
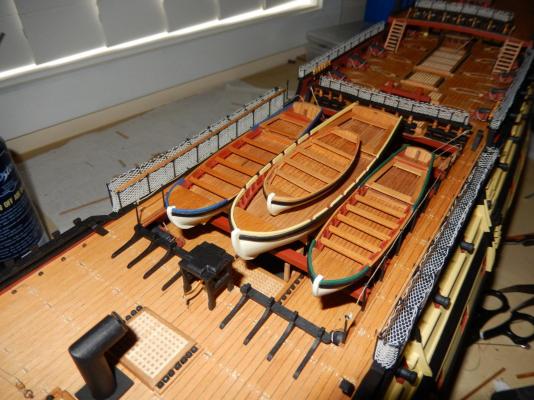
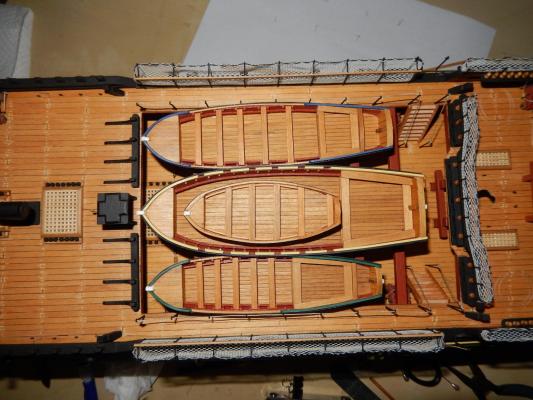
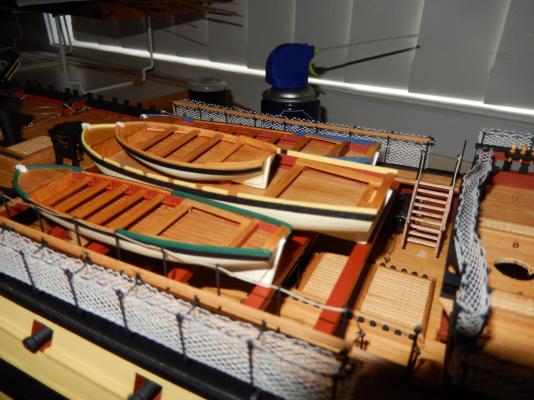
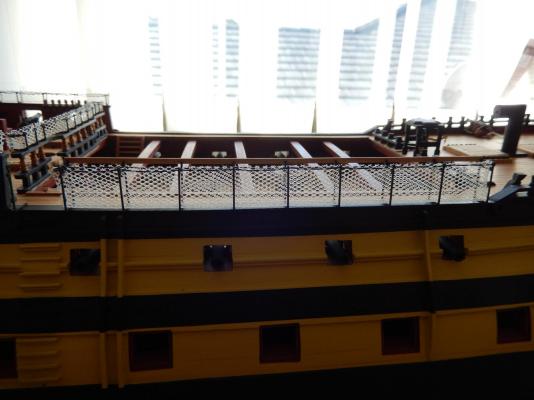
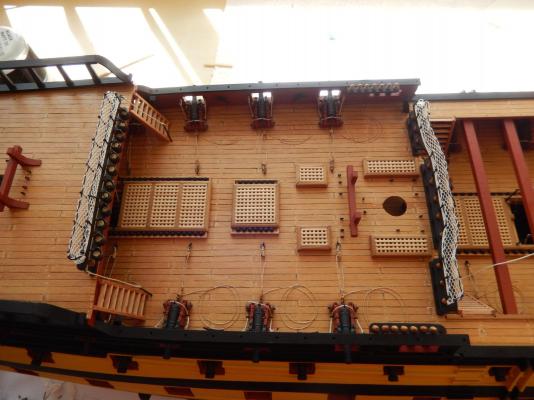
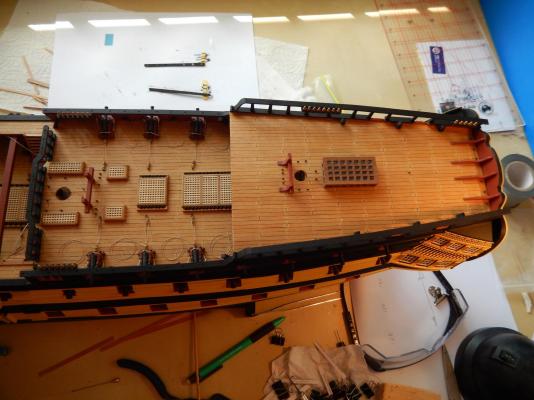
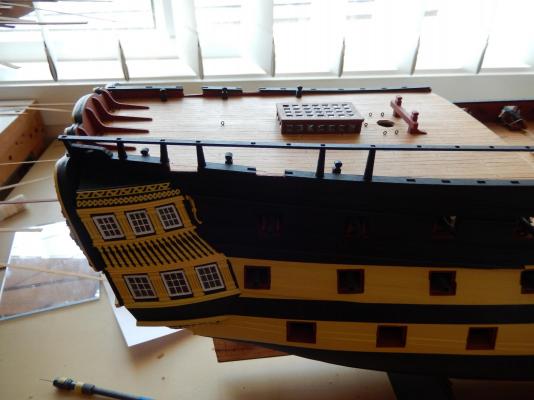
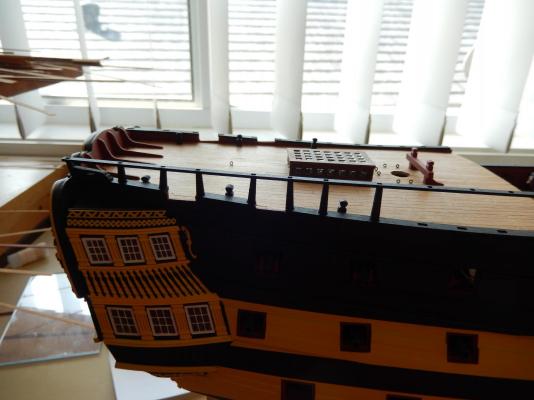
The hammock nettings and the other bits and pieces are now finished. Here is how it all turned out. I have dry-fitted the ship's boats, and it is a very tight fit indeed. At this stage I am not sure just how to attach them permanently. As you can see there is very little space. The largest boat is a little higher than the other two which just gives enough room for the two smaller boats to fit under its sides. Aside from putting together the carronades - I'll do that next weekend - I'm not sure what the next step will be.


- 949 replies
-
- 18
-

-
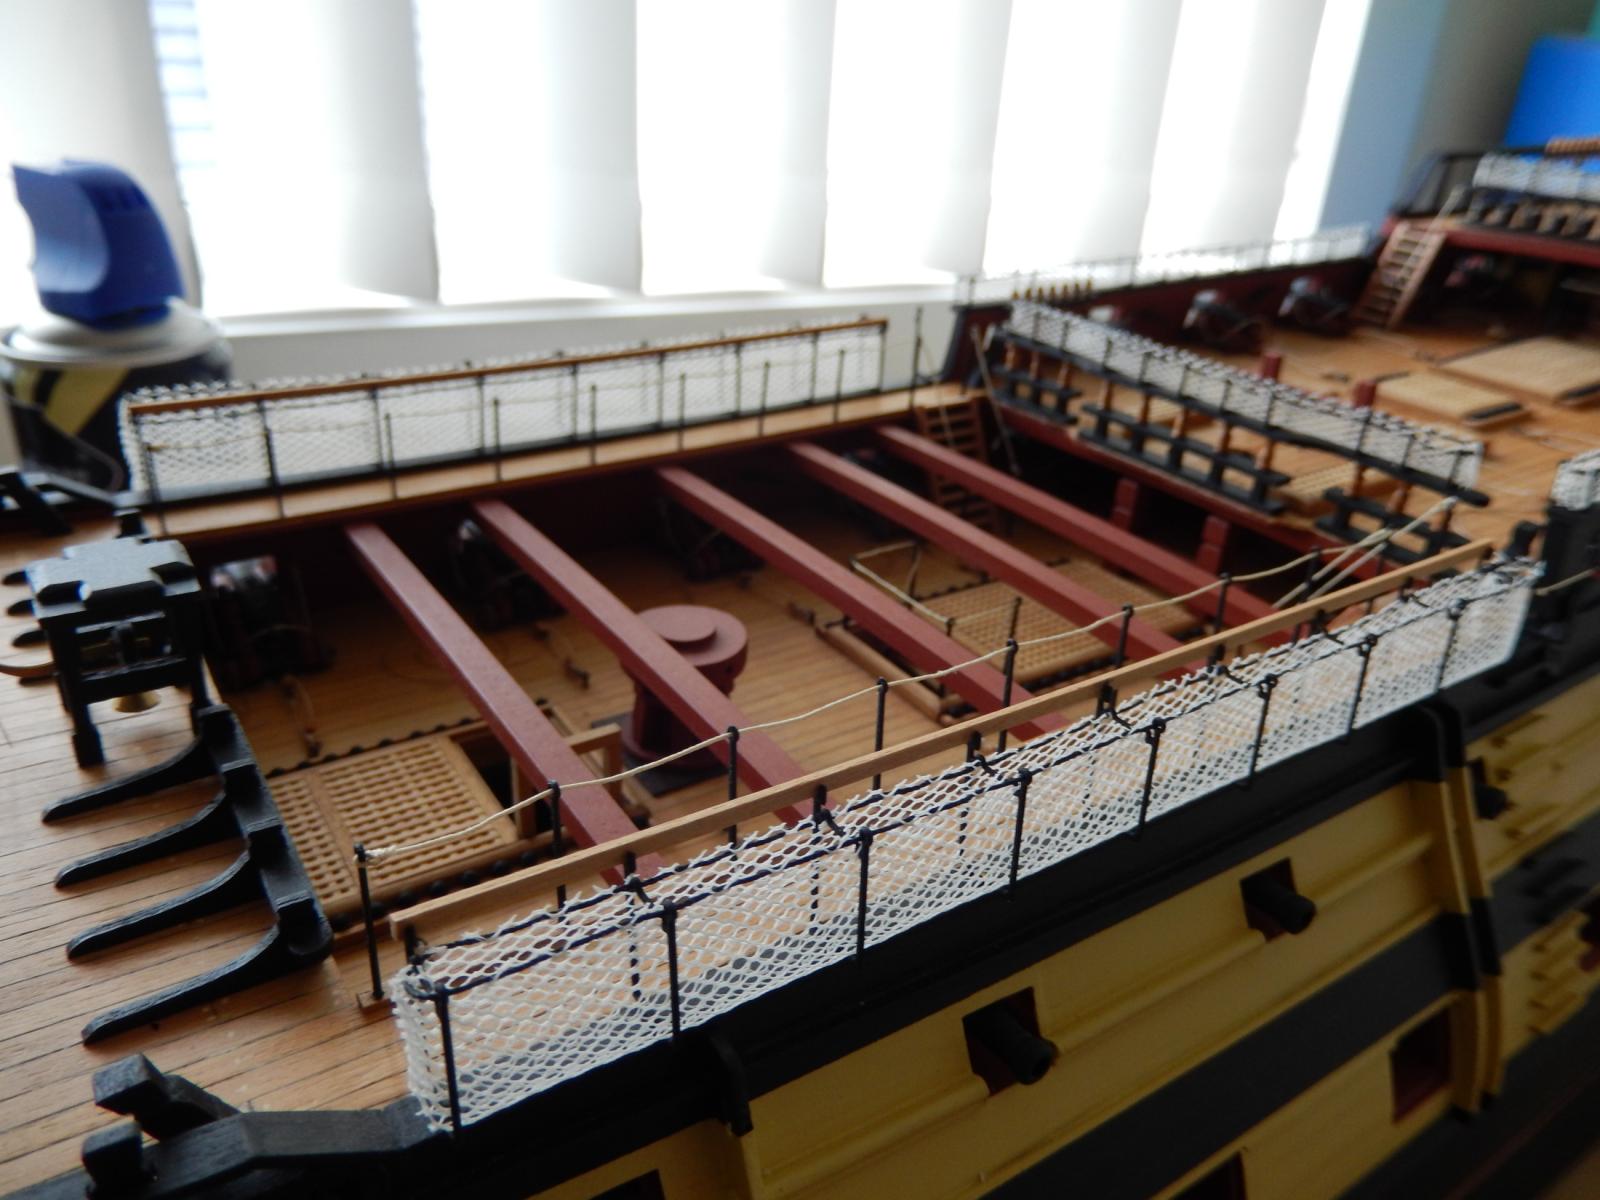
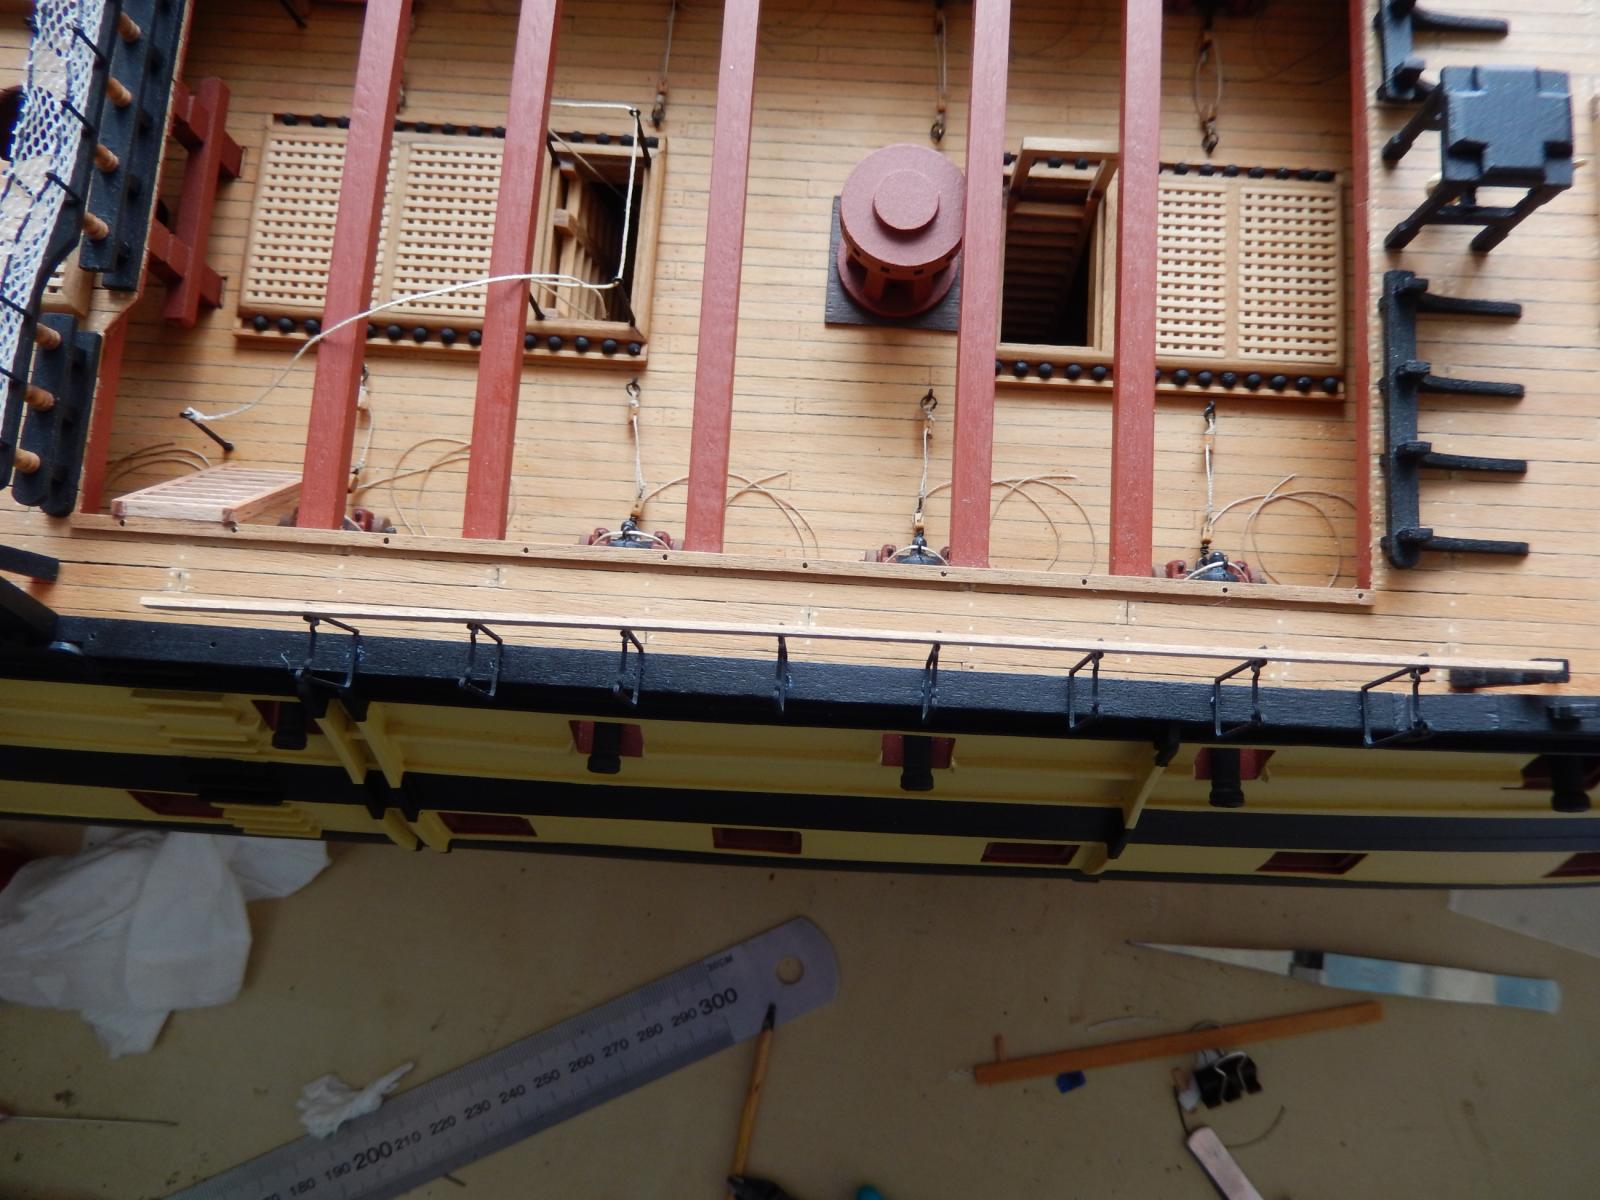
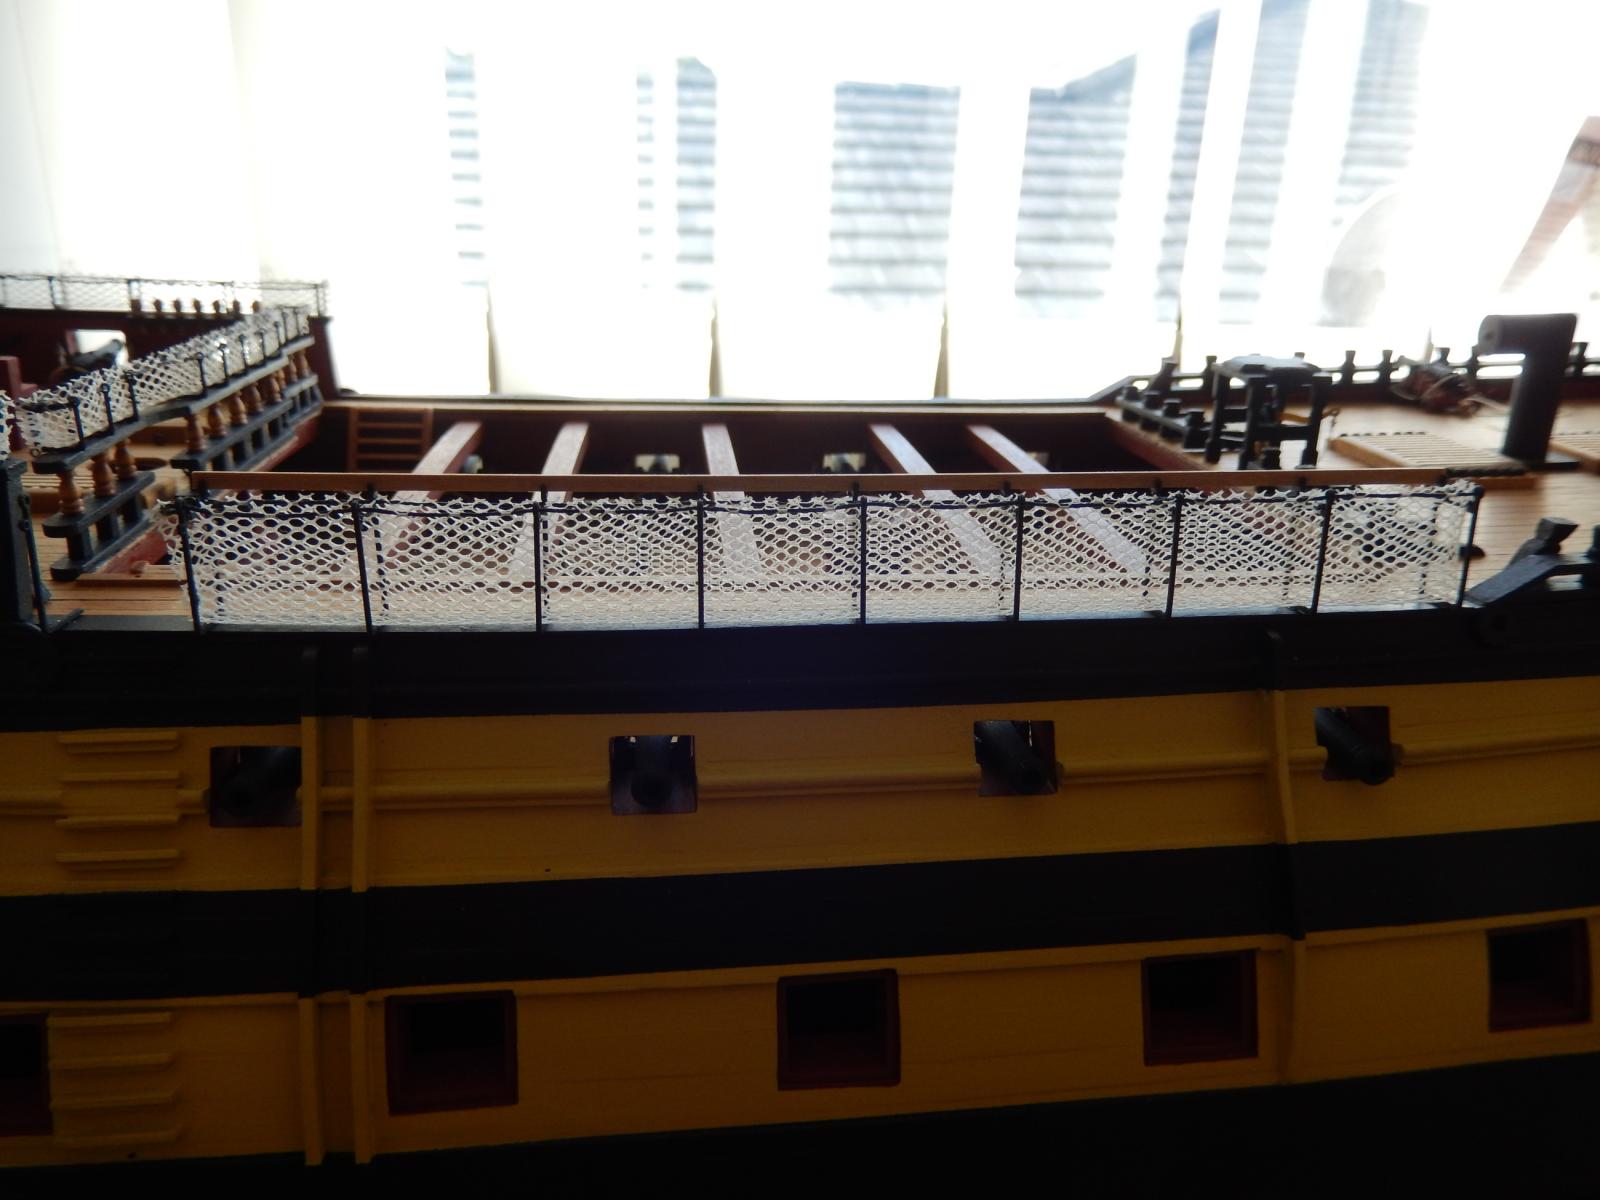
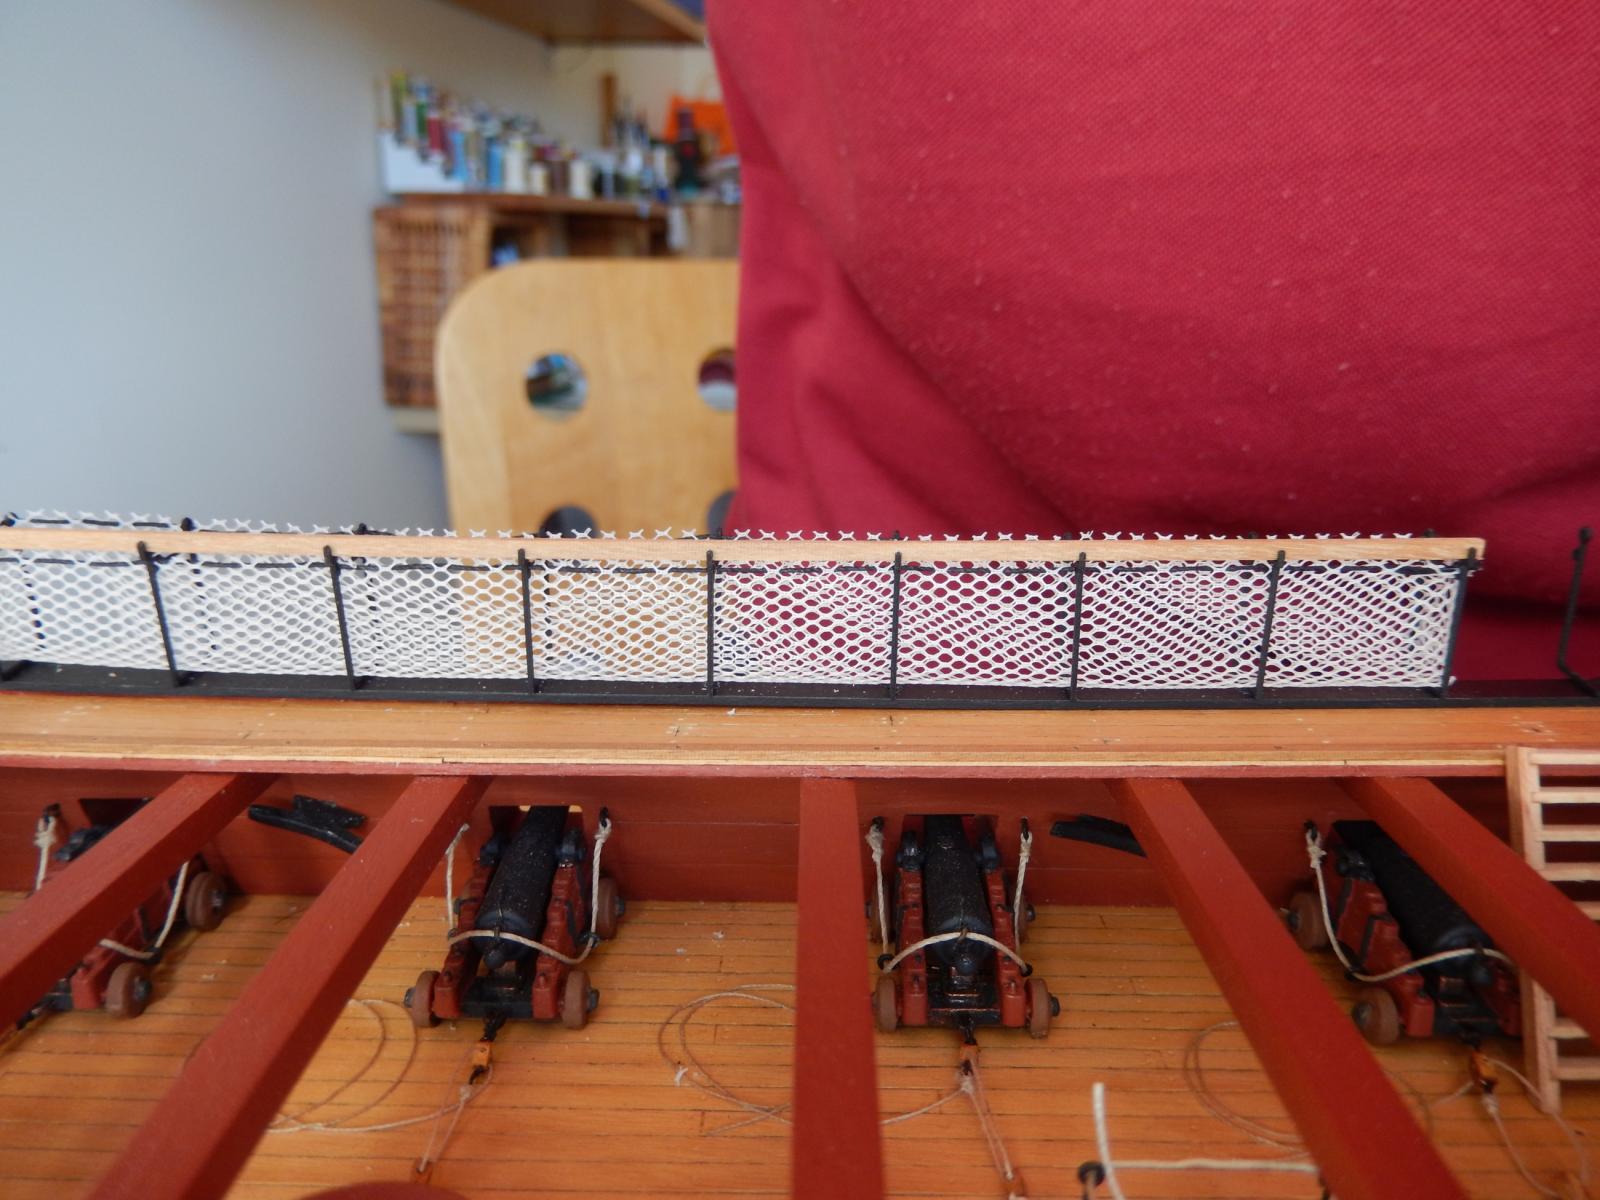
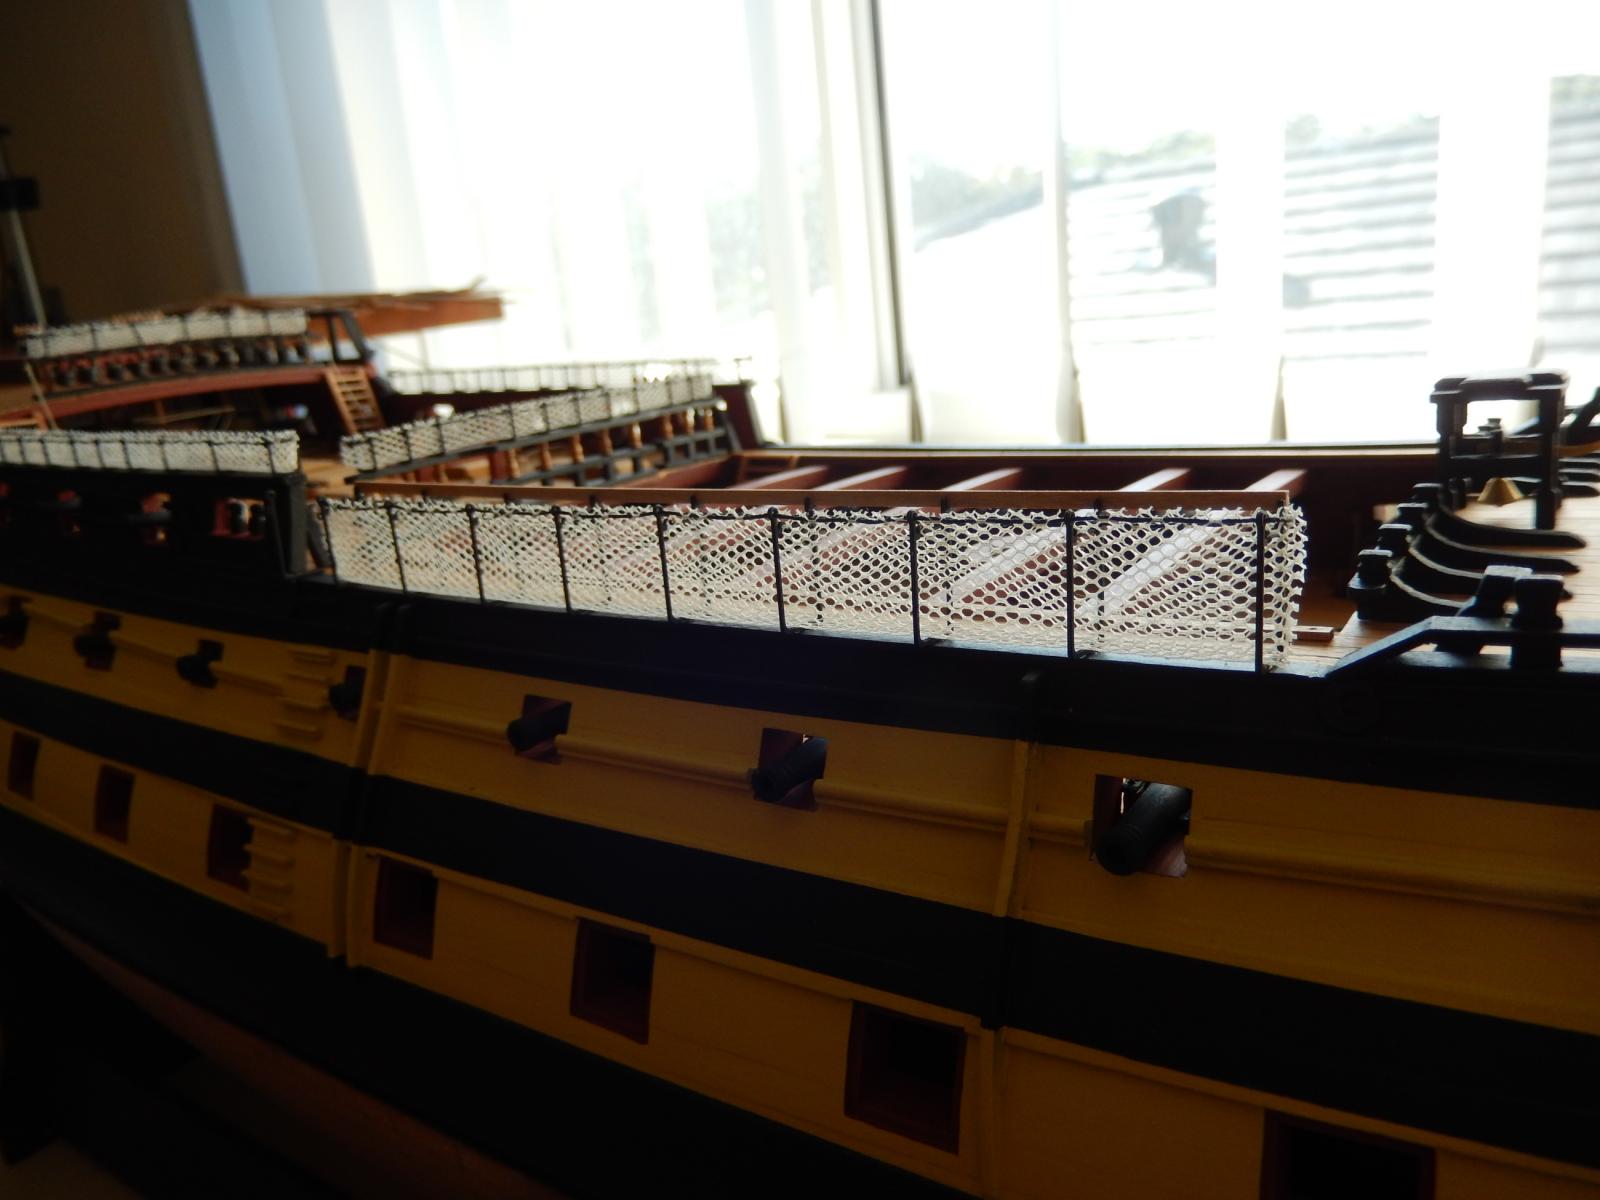
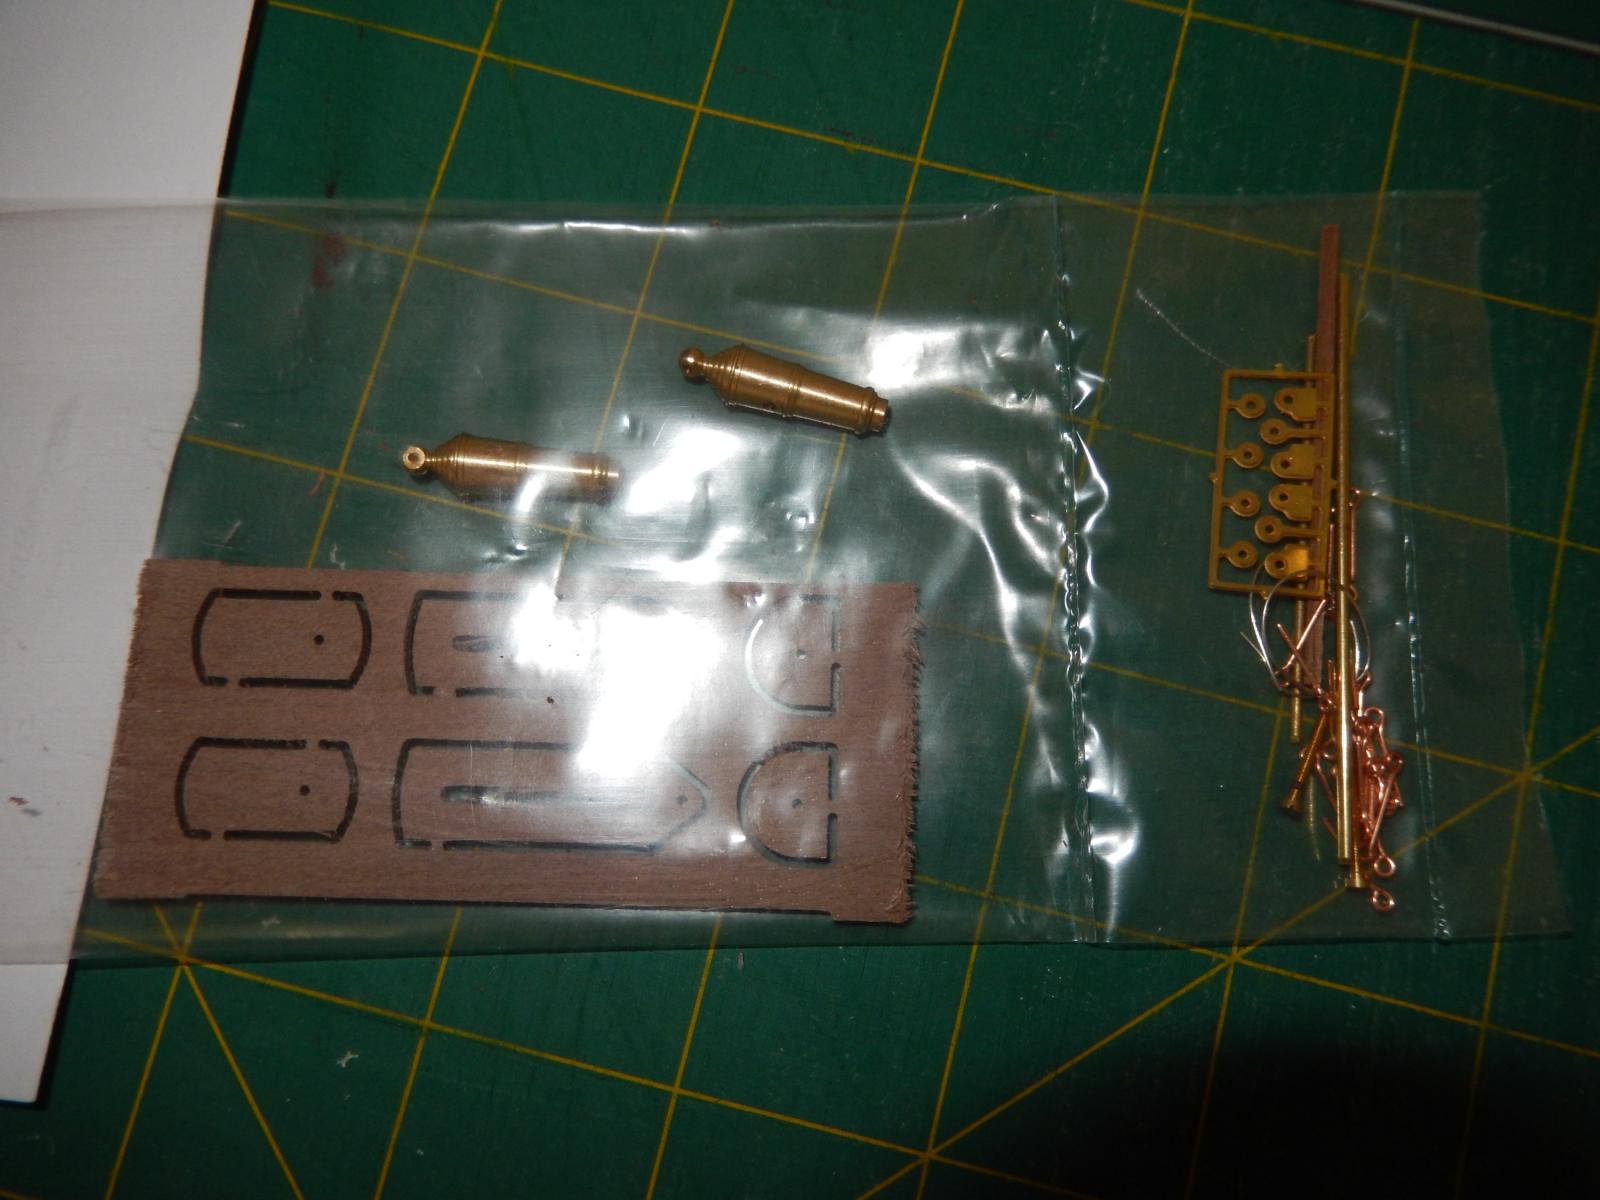
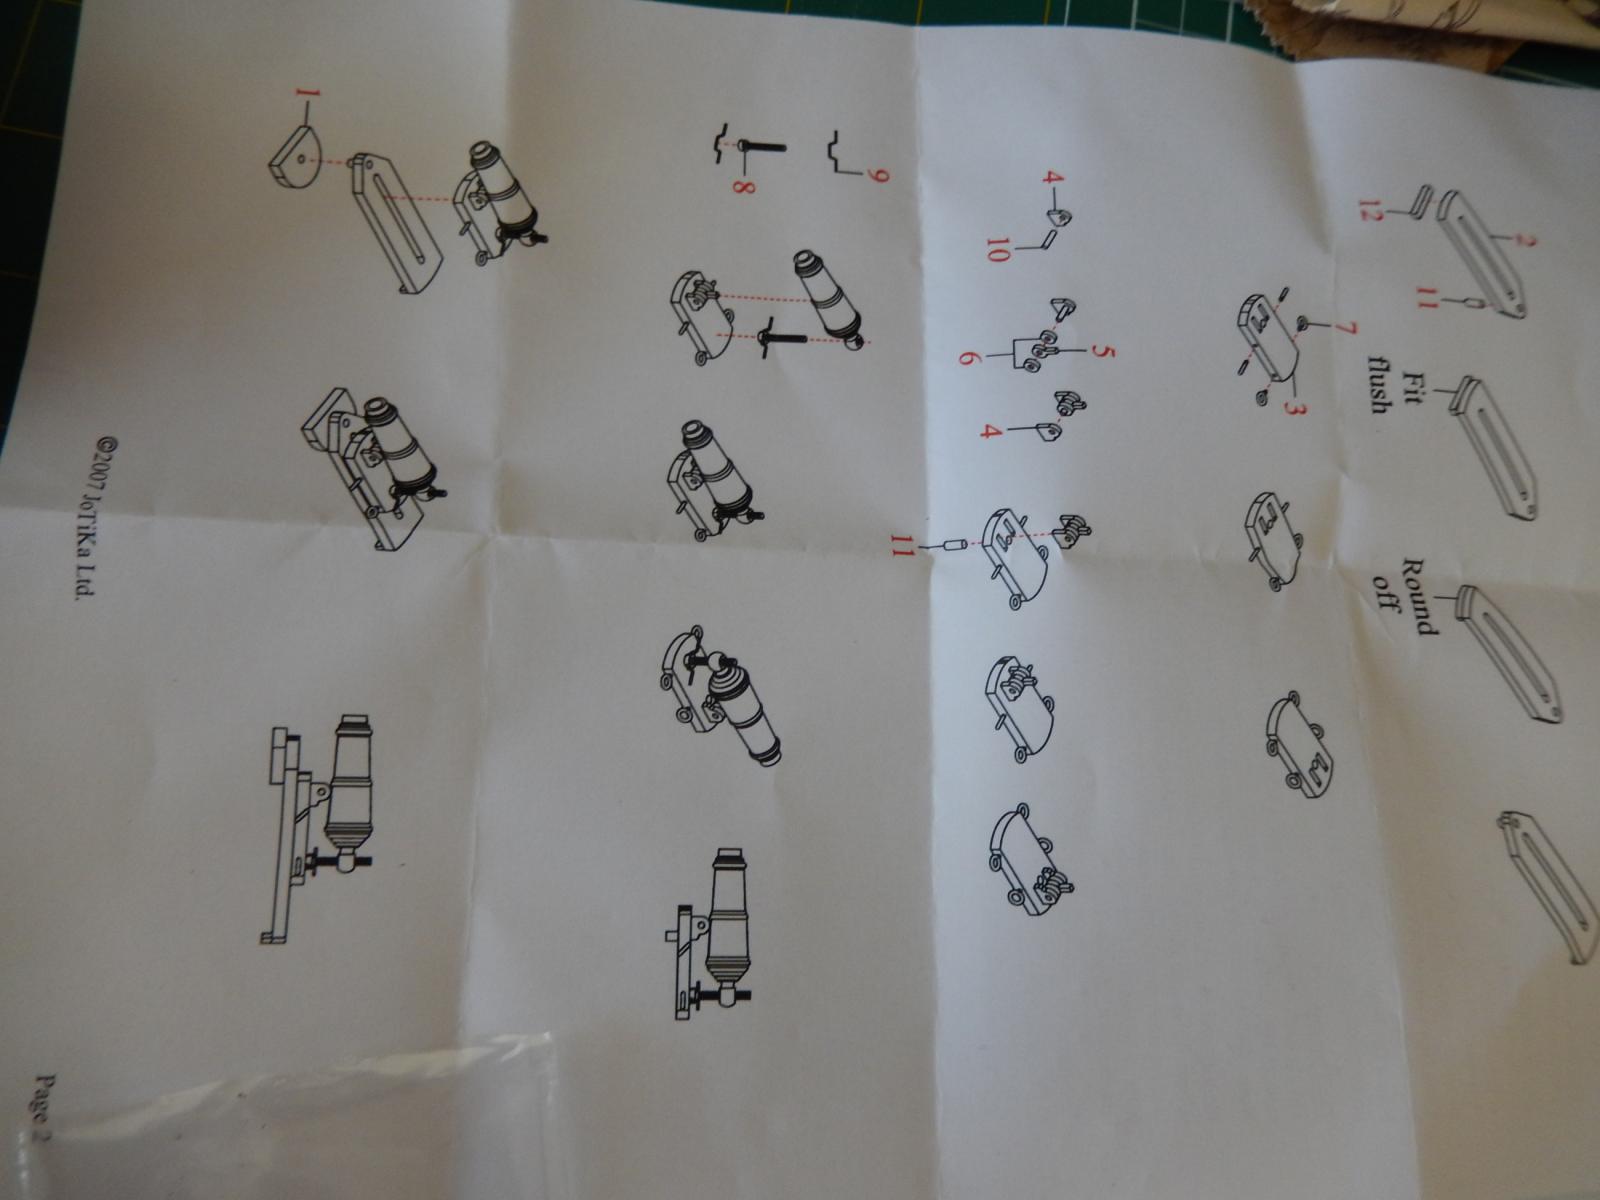
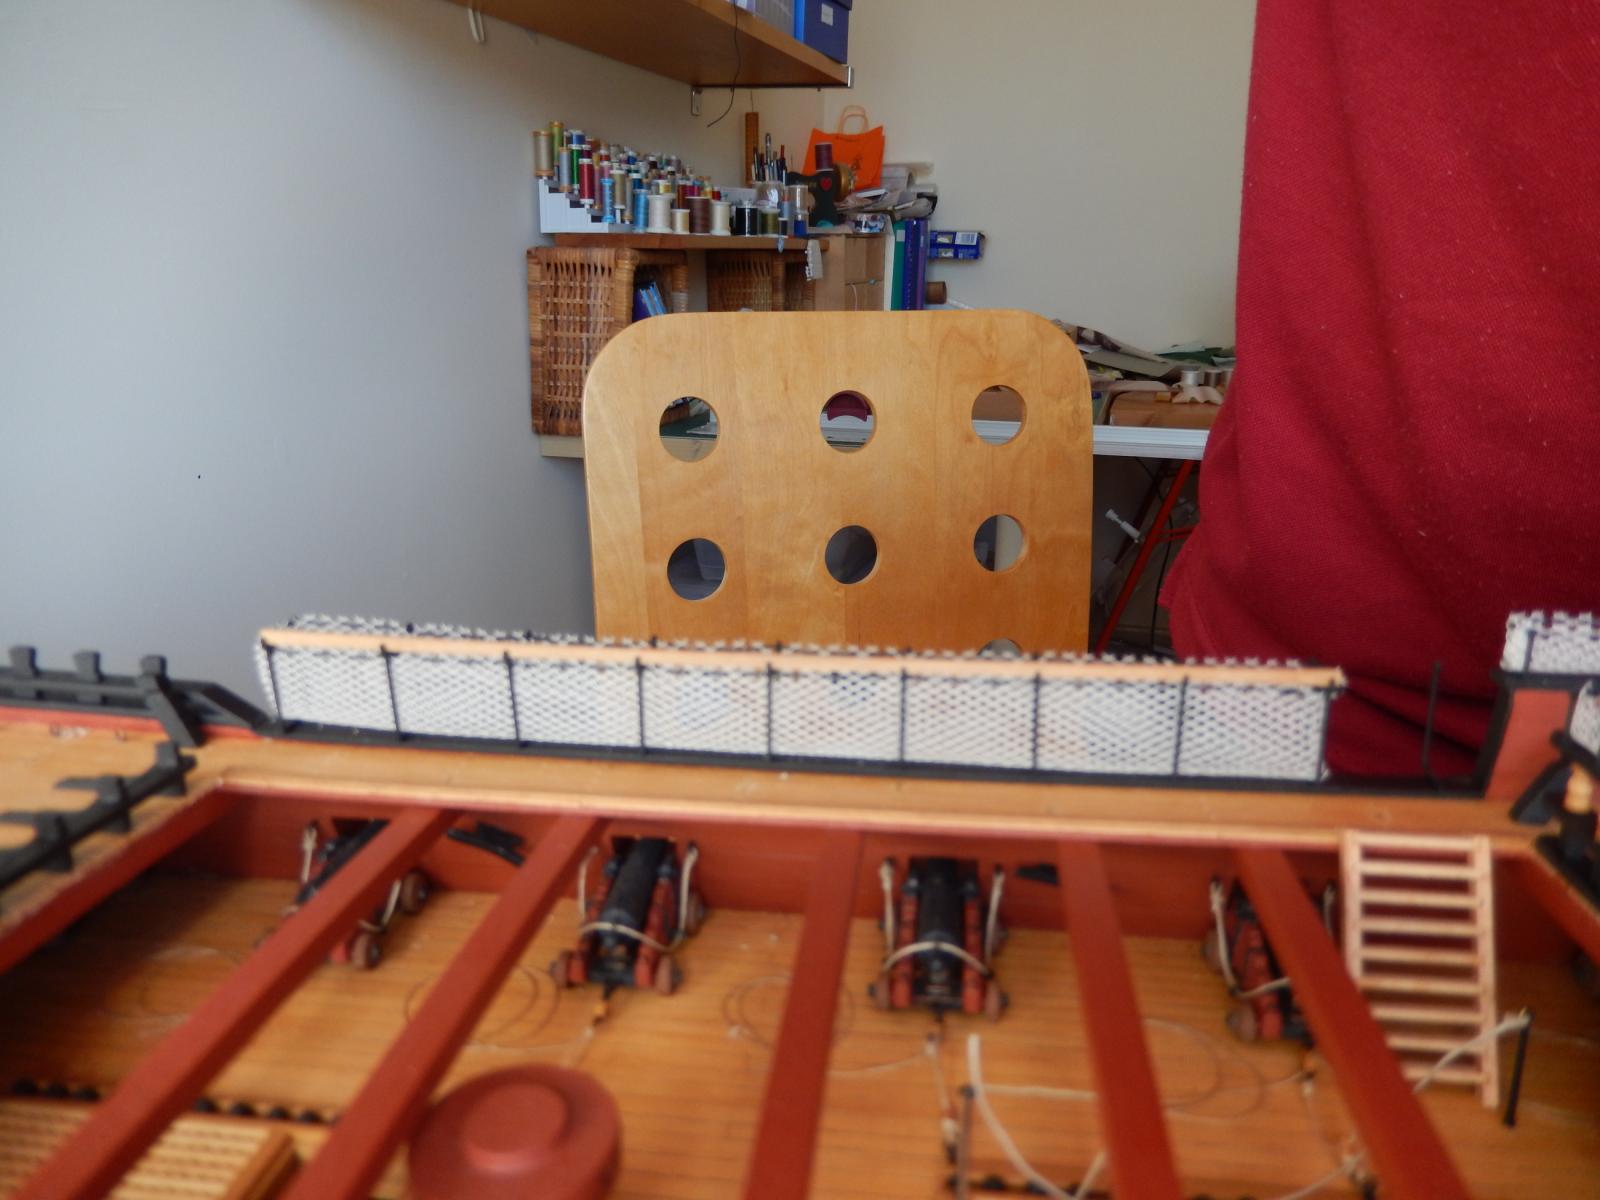
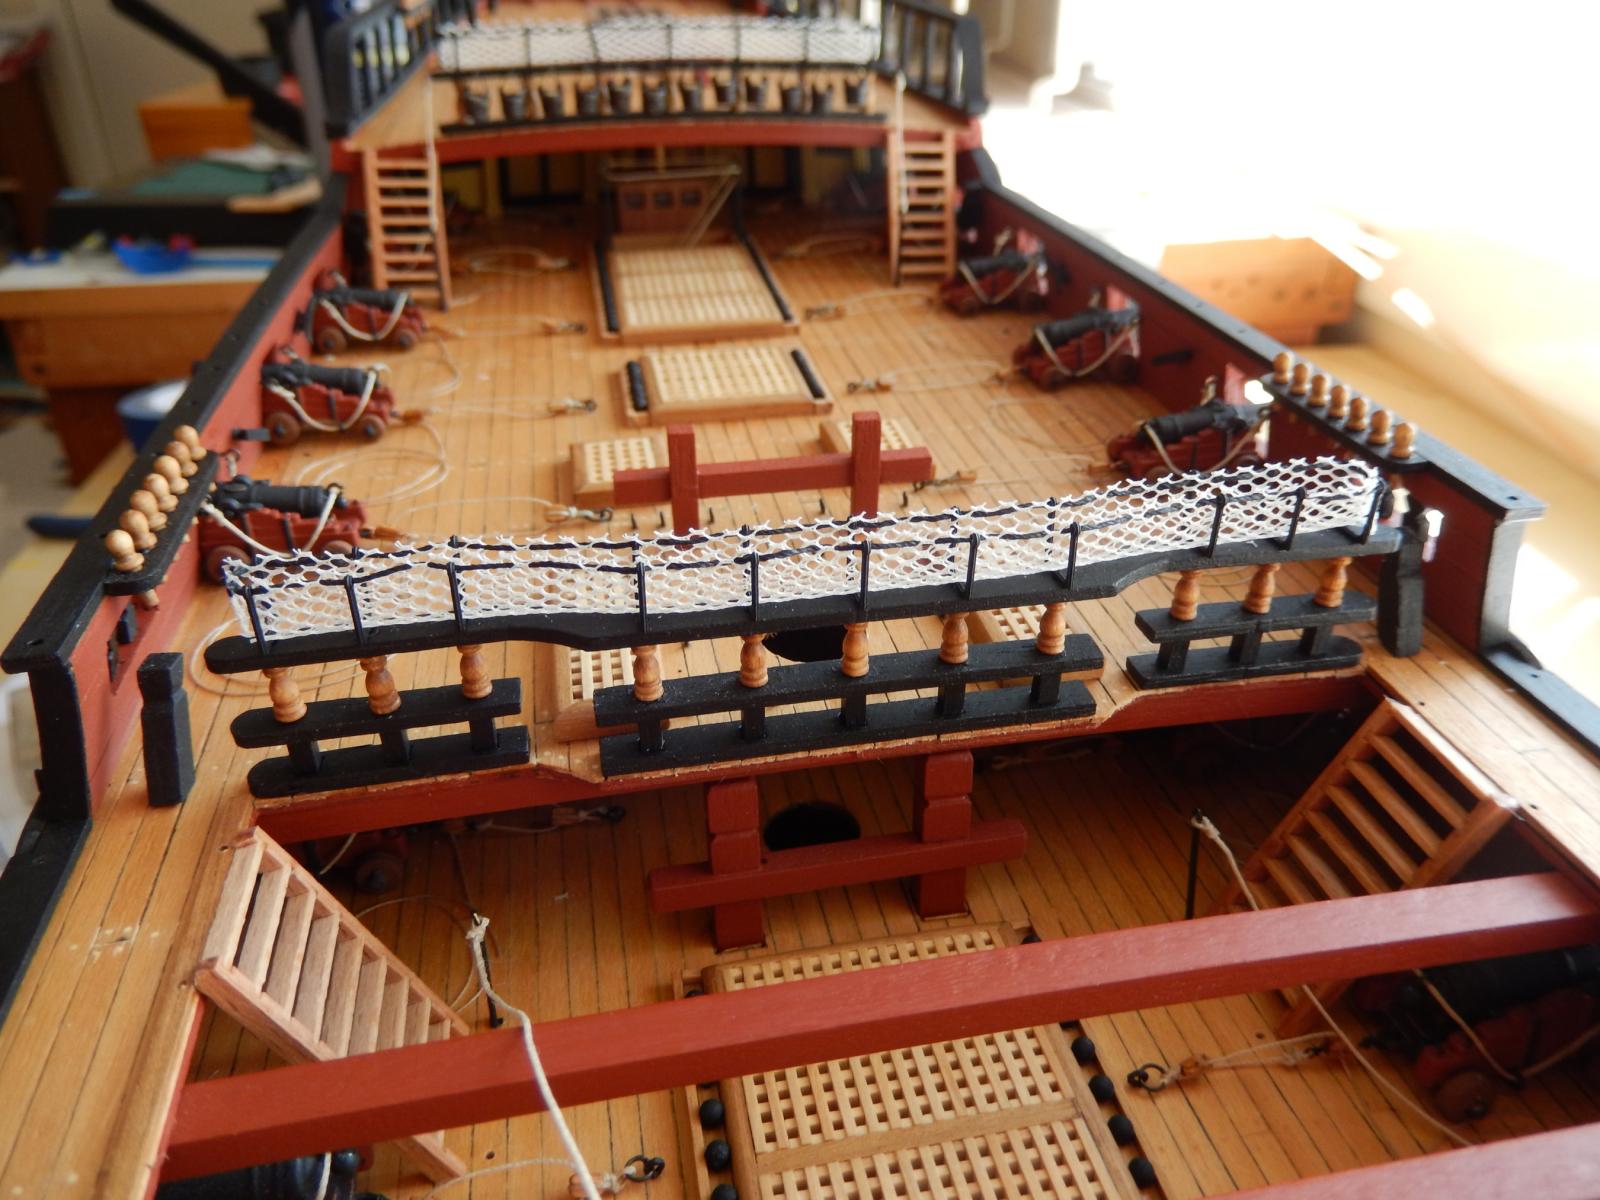
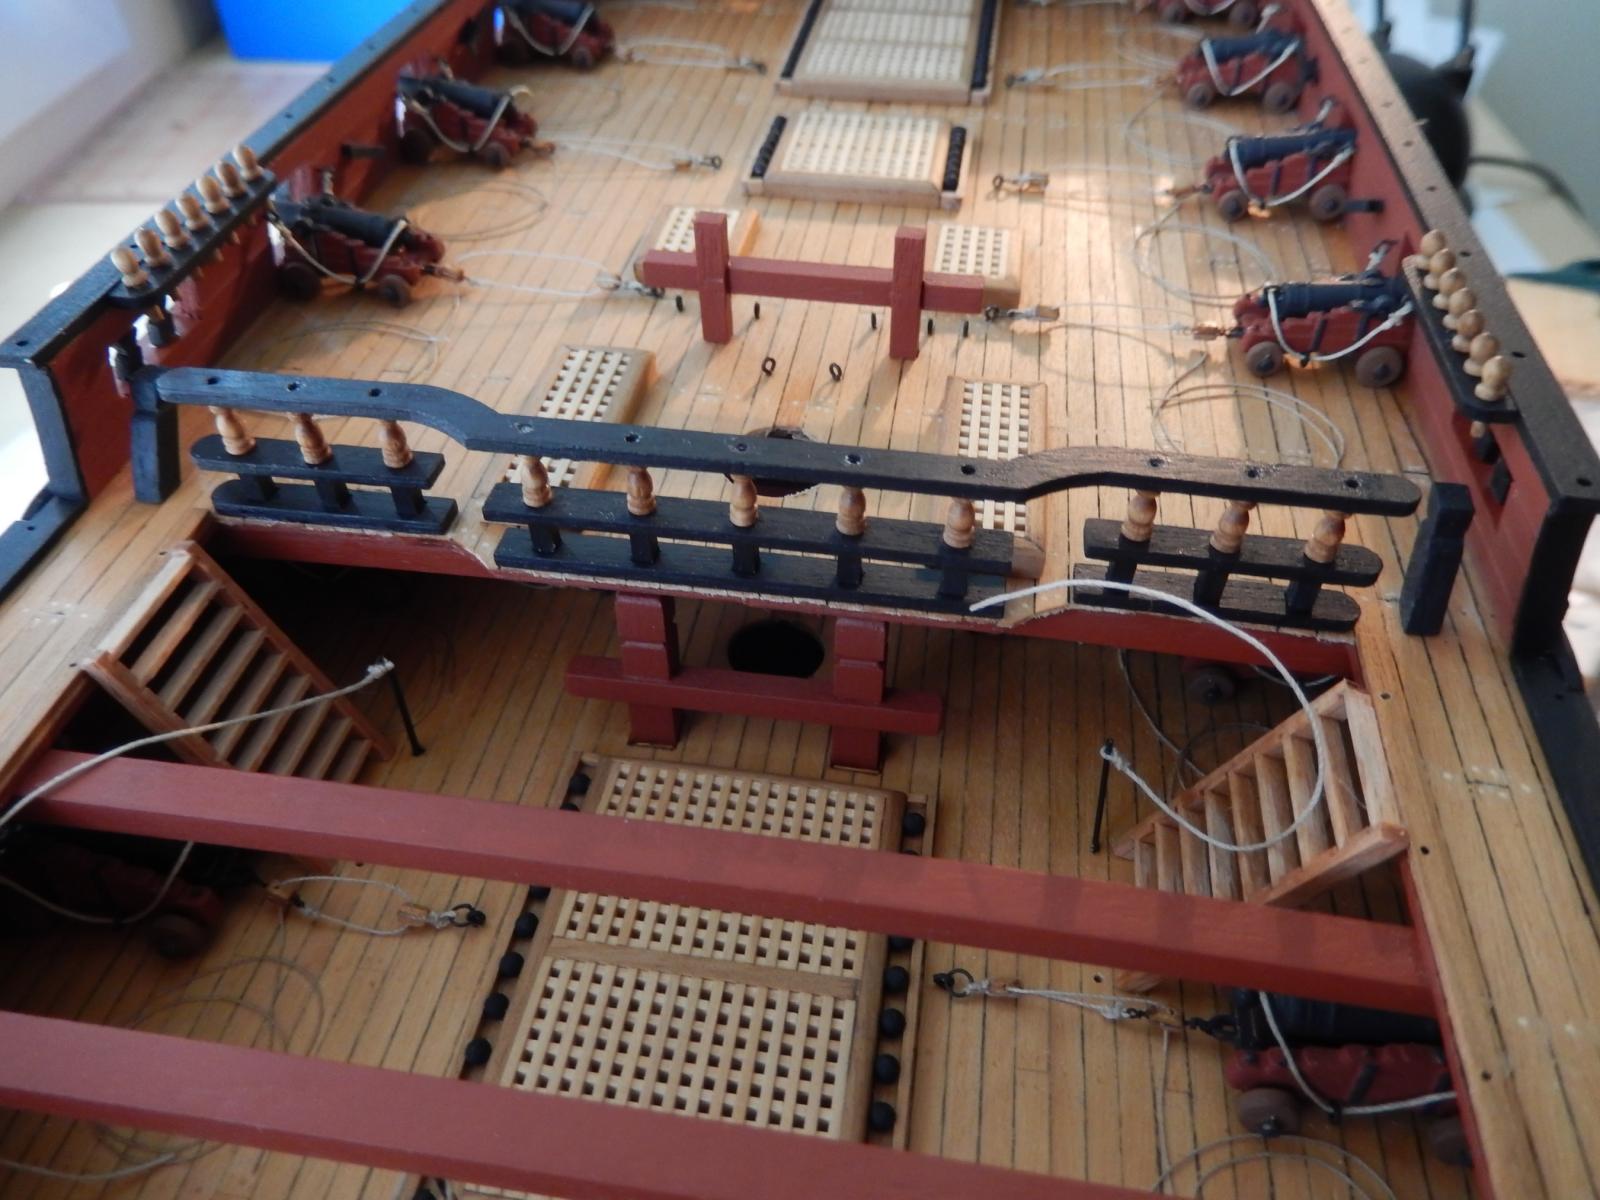
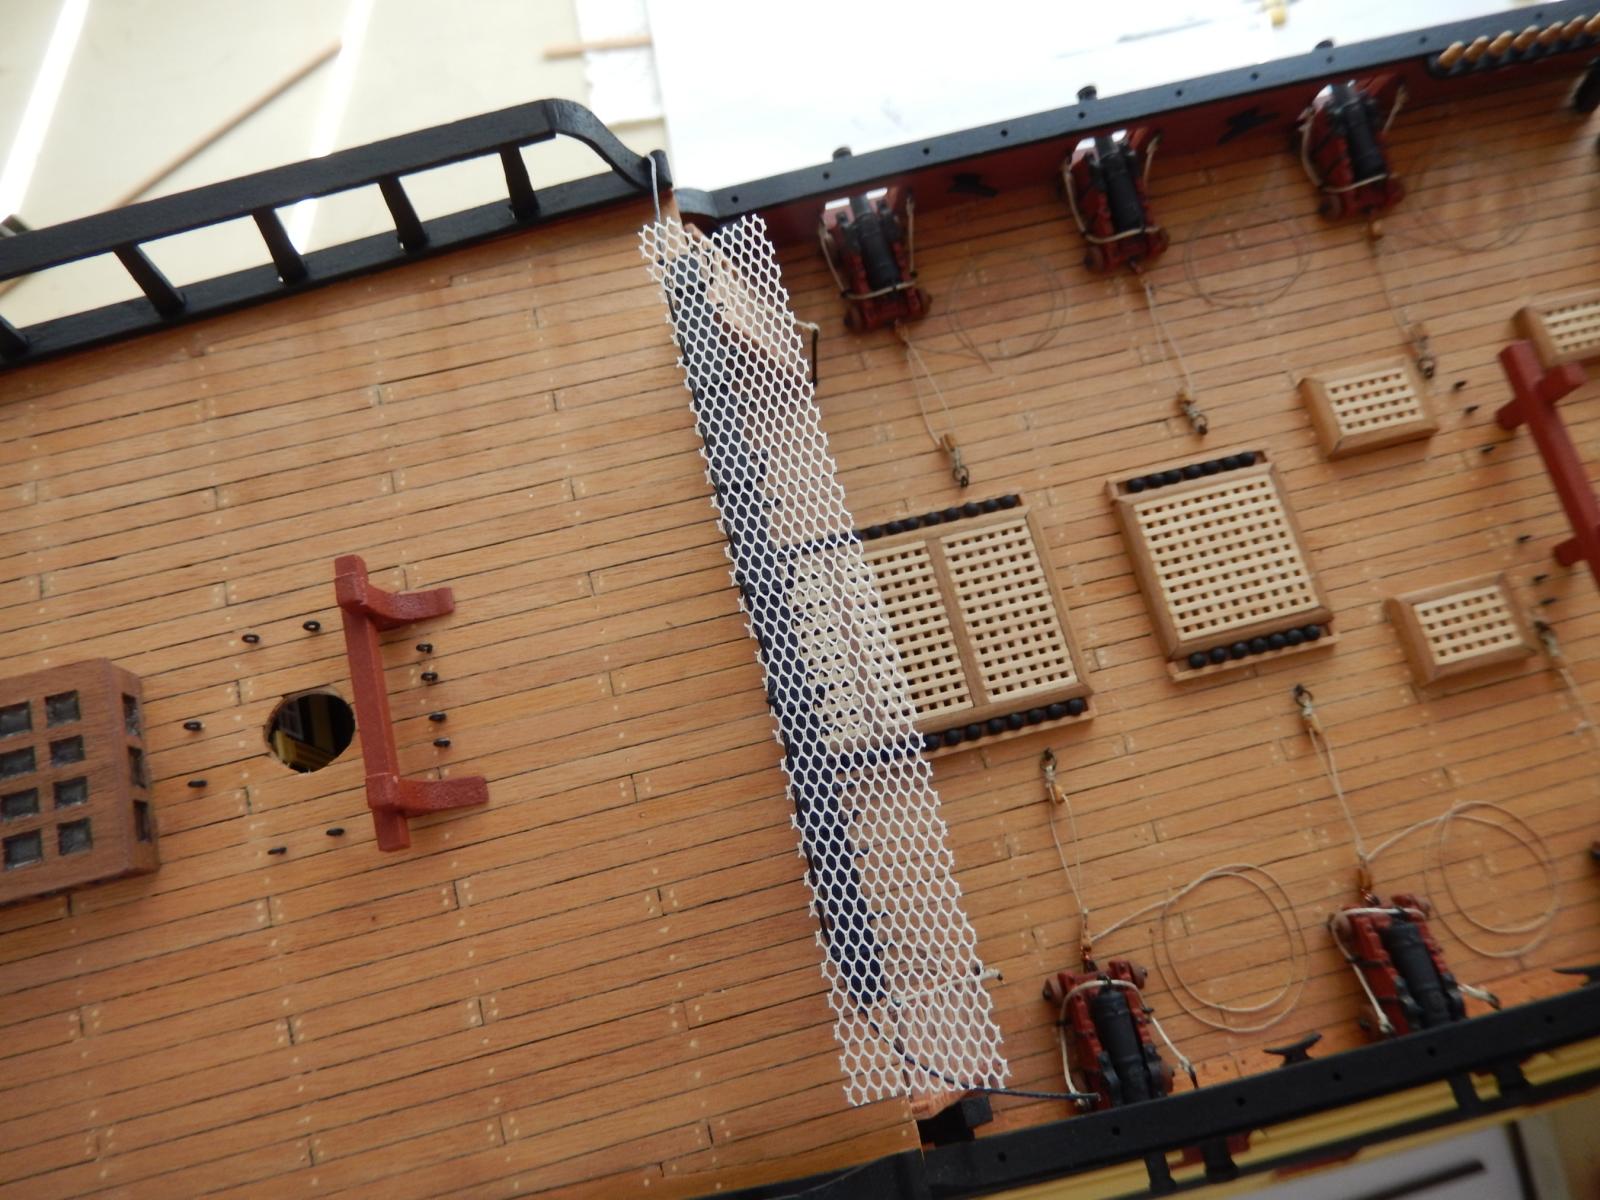
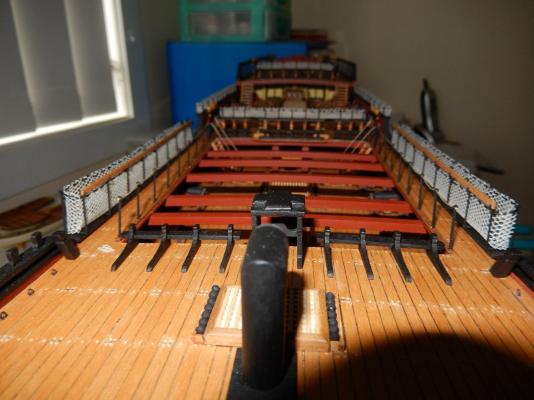
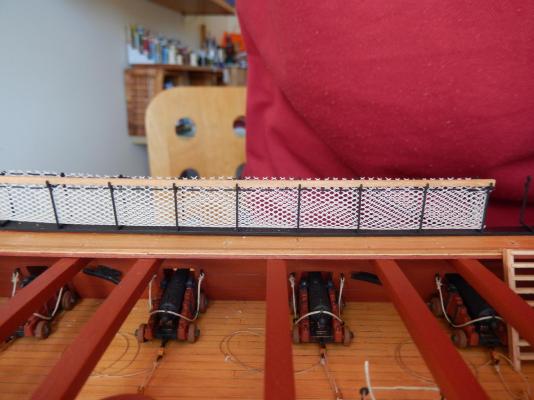
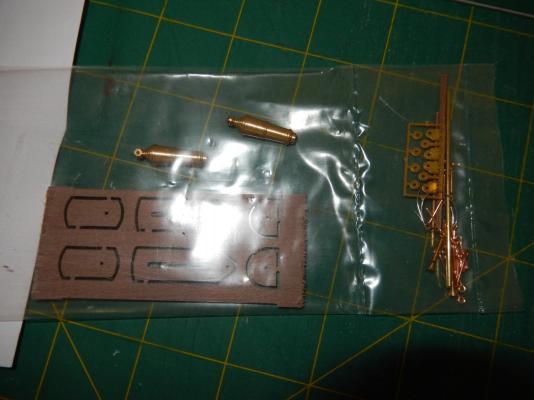
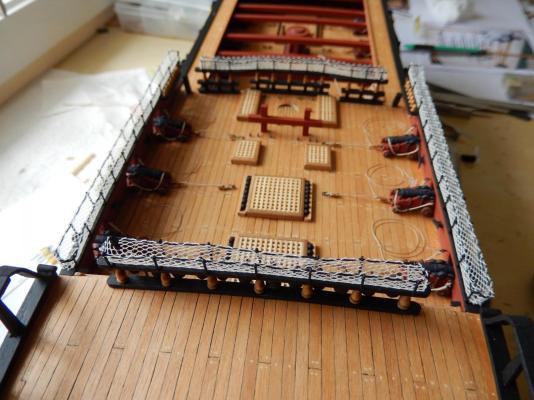
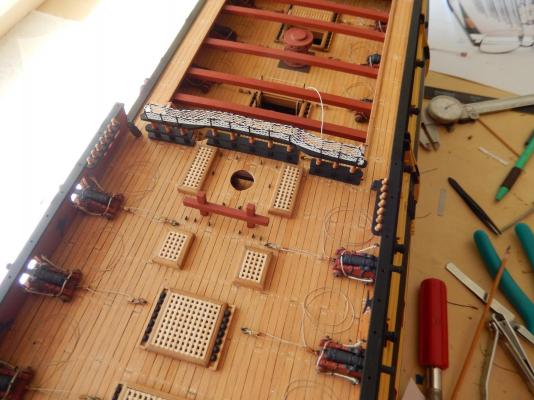
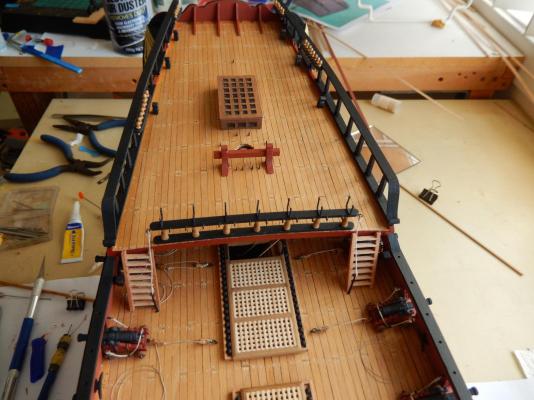
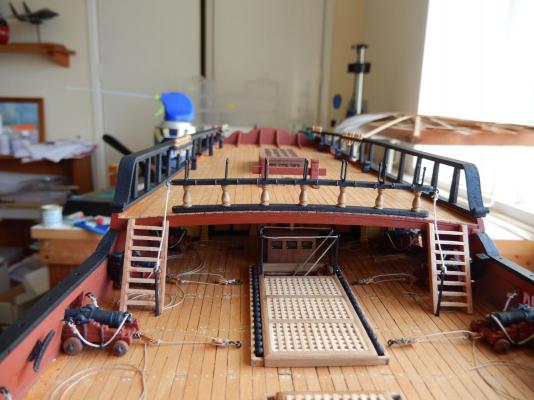
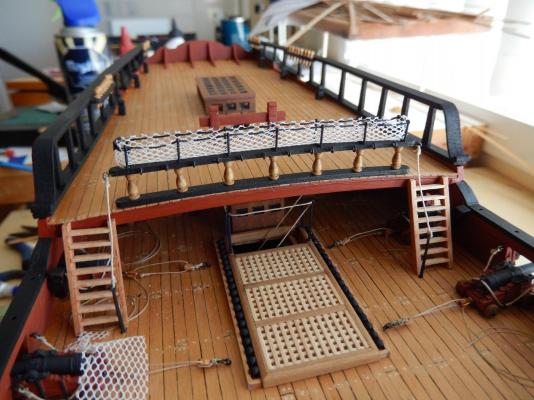
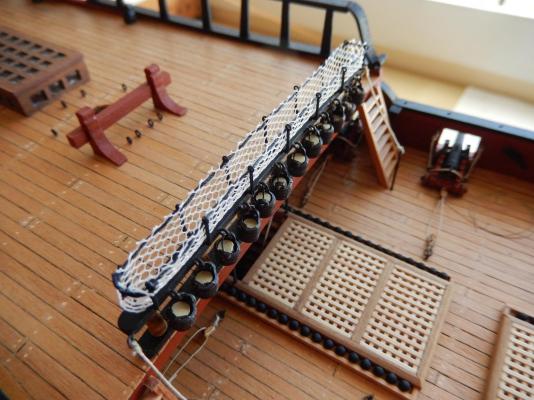
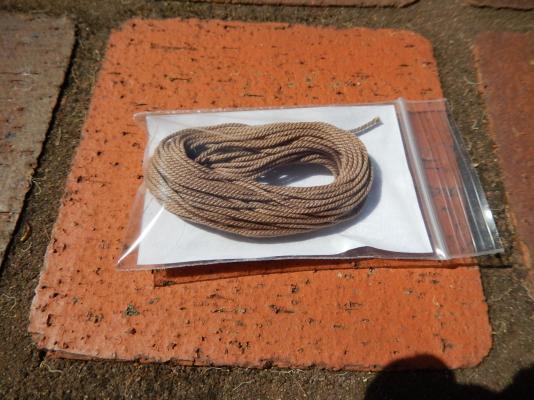
The first of the midships netting has now been finished. It turned out to be quite difficult. When, in effect, there were two layers of netting (ie, one on either side of the supports) the pattern of the netting made it very difficult to see where the it should be cut to enable it to go under the cross members of the supports. I had three goes at it before the result was acceptable. I hope the experience will make the last of the netting a little easier. Here are the steps in the process. First the two end supports were glued. There is a wooden rail running along the supports, so it is necessary to have all of the supports in line. Then two of the middle supports were added, making sure the wooden rail fitted and was straight. All of the supports glued: With the netting. The wooden rail is only dry-fitted. A coat of polyurethane will finish it. Actually, despite appearances I am really quite slim. I ordered the carronades from Cornwall Model Boats last week and they just arrived - very good service. I have has a quick look at them and they appear to be first rate. Here's what the package looks like together with the illustrated instructions. The detail is most impressive. I will work on them when I am next away.


-
Thanks for taking the trouble Arthur. The problem has now been resolved.
-
I have been looking at Len's beautiful Bellerophon again, noting the quality of the Caldercraft carronades. The18lb carronades seem to be about the right size though they are 1:64 scale. The barrels are 22.6mm; the Amati barrels are21mm. However I am having trouble submitting an order to Cornwall Model Boats. Has anyone else had similar problems?
-
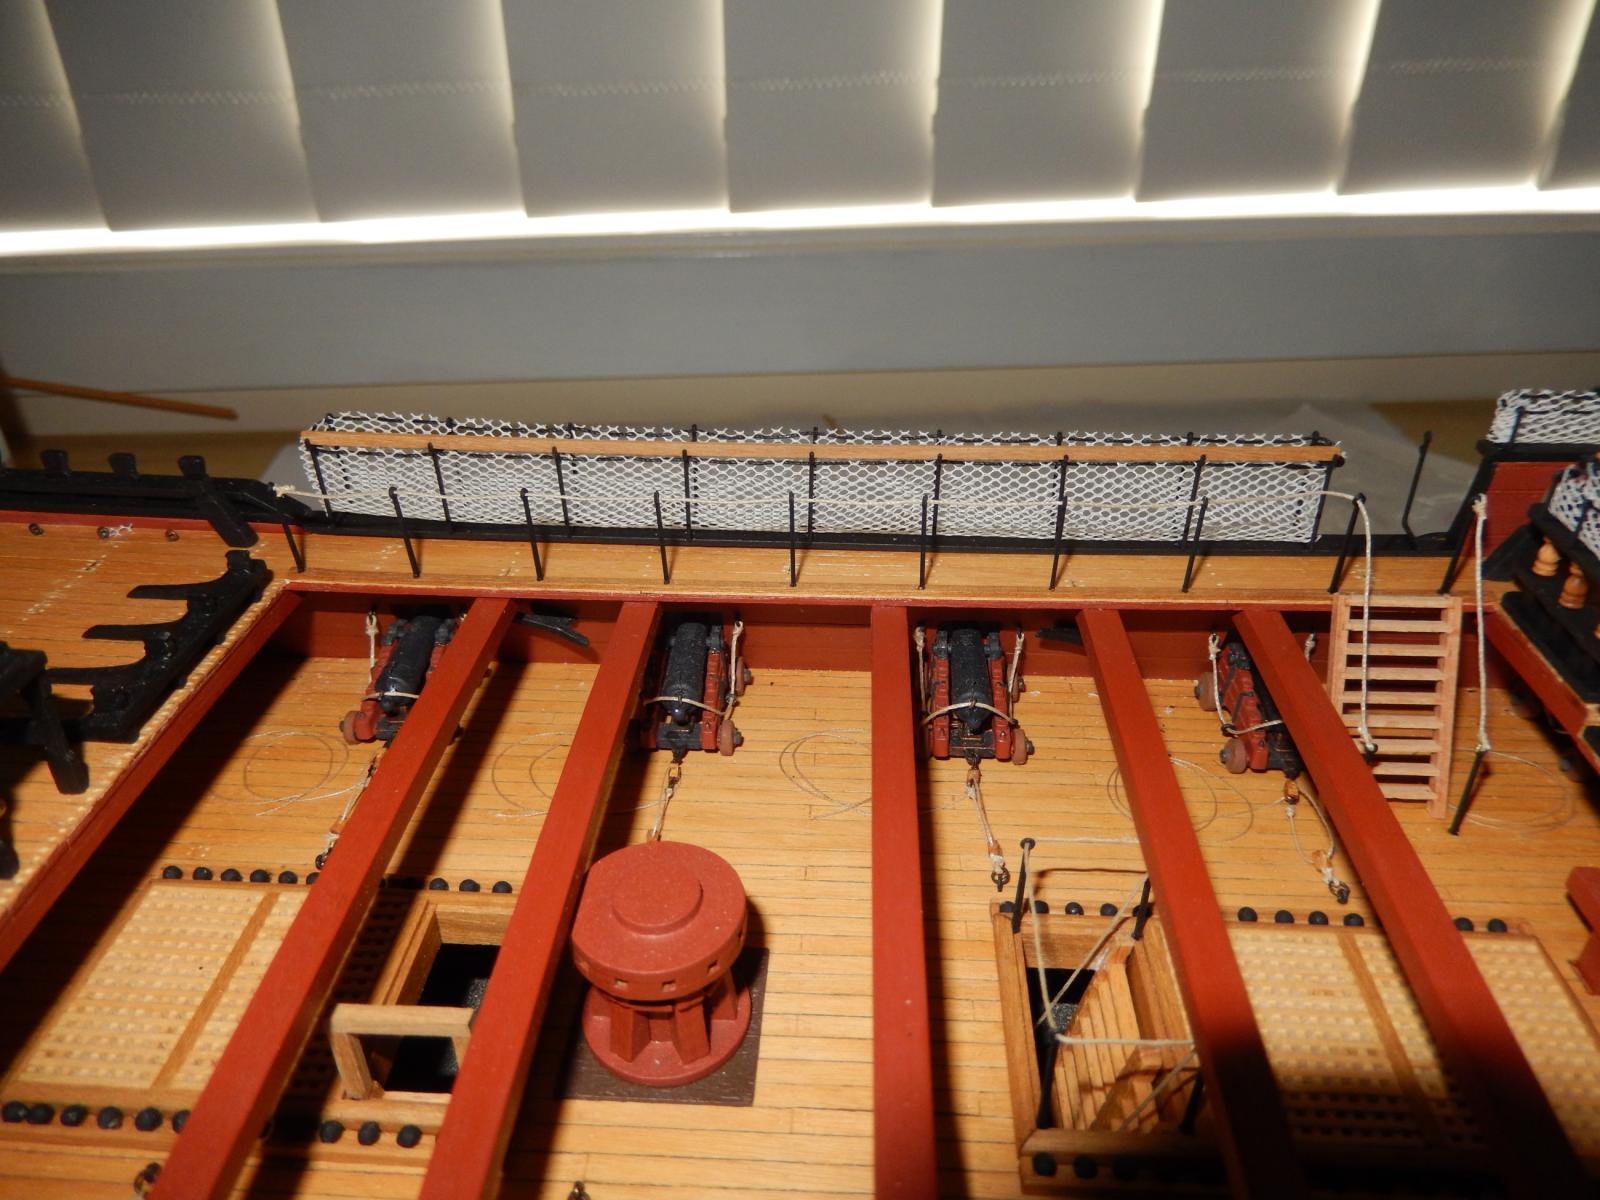
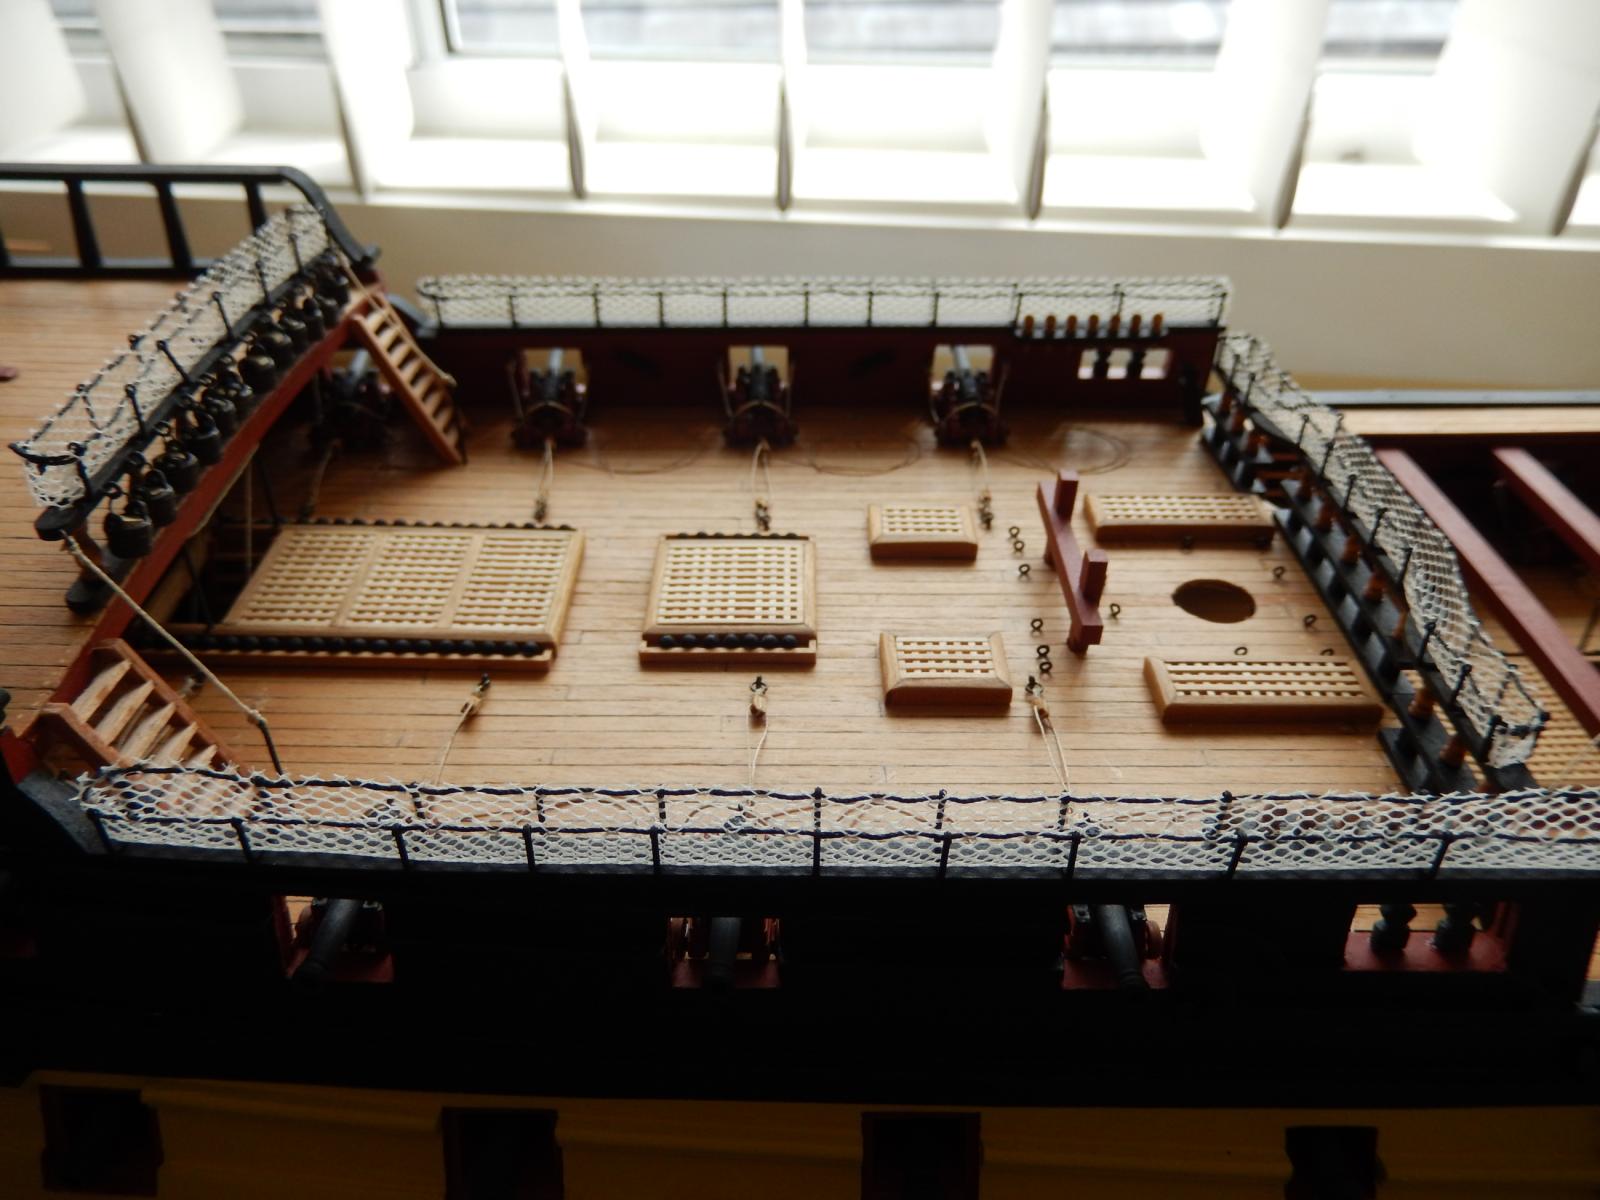
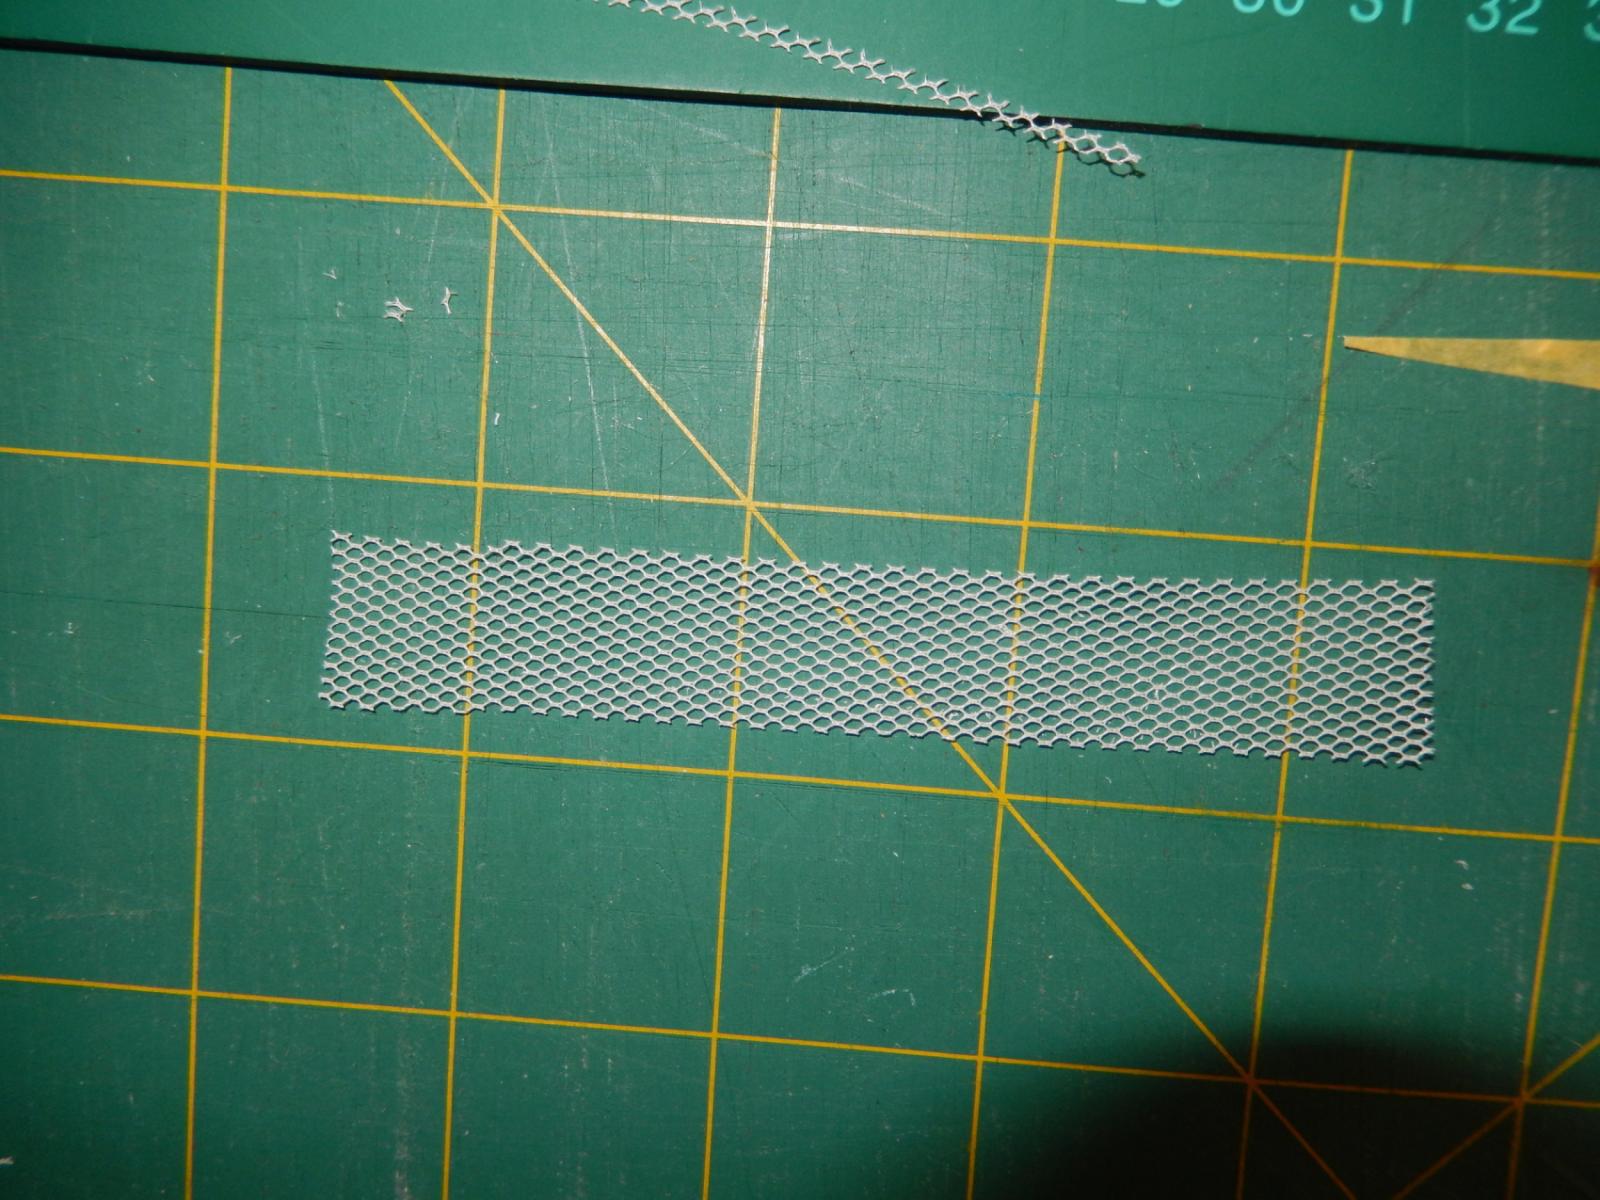
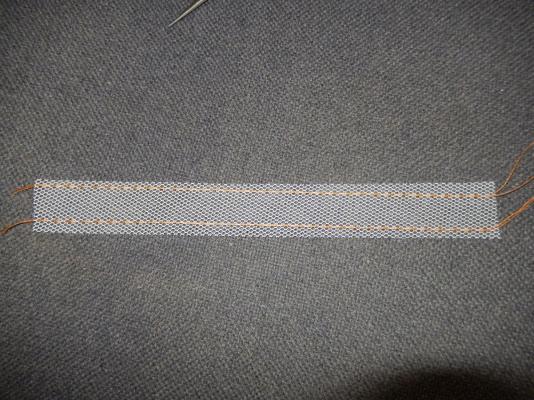
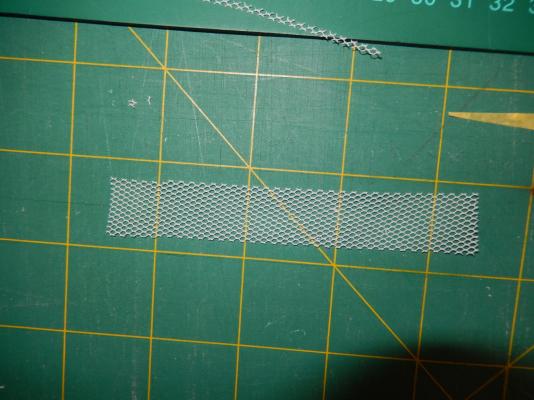
The quarter deck is finally finished. Here is a solution to what turned out to be a problem in cutting the netting material so that the holes are all in line. My first attempts at needle and thread here suggests that sewing is a much overrated hobby. The netting was simply trimmed above the thread. Here are the quarter deck hammock nettings complete. The two hammock nettings still to do on the sides promise to be far more difficult.
-
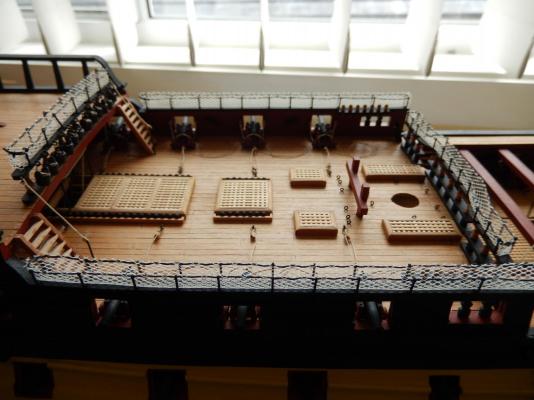
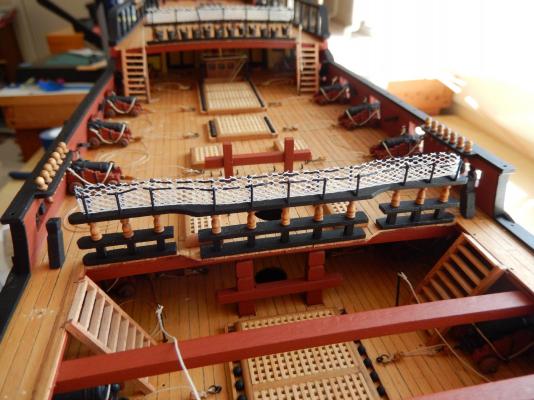
The quarter deck barricade is now finished. The netting supports provide a bit more strength to the barricade which is comparatively fragile. The netting I think, improves the model significantly. Including it would not have occurred to me had I not seen Arthur's log. It certainly shows how useful the site is and how helpful members are.
-
Arthur: the cheque's in the mail .... And there are five more sets of nettings. Aaagh!
-
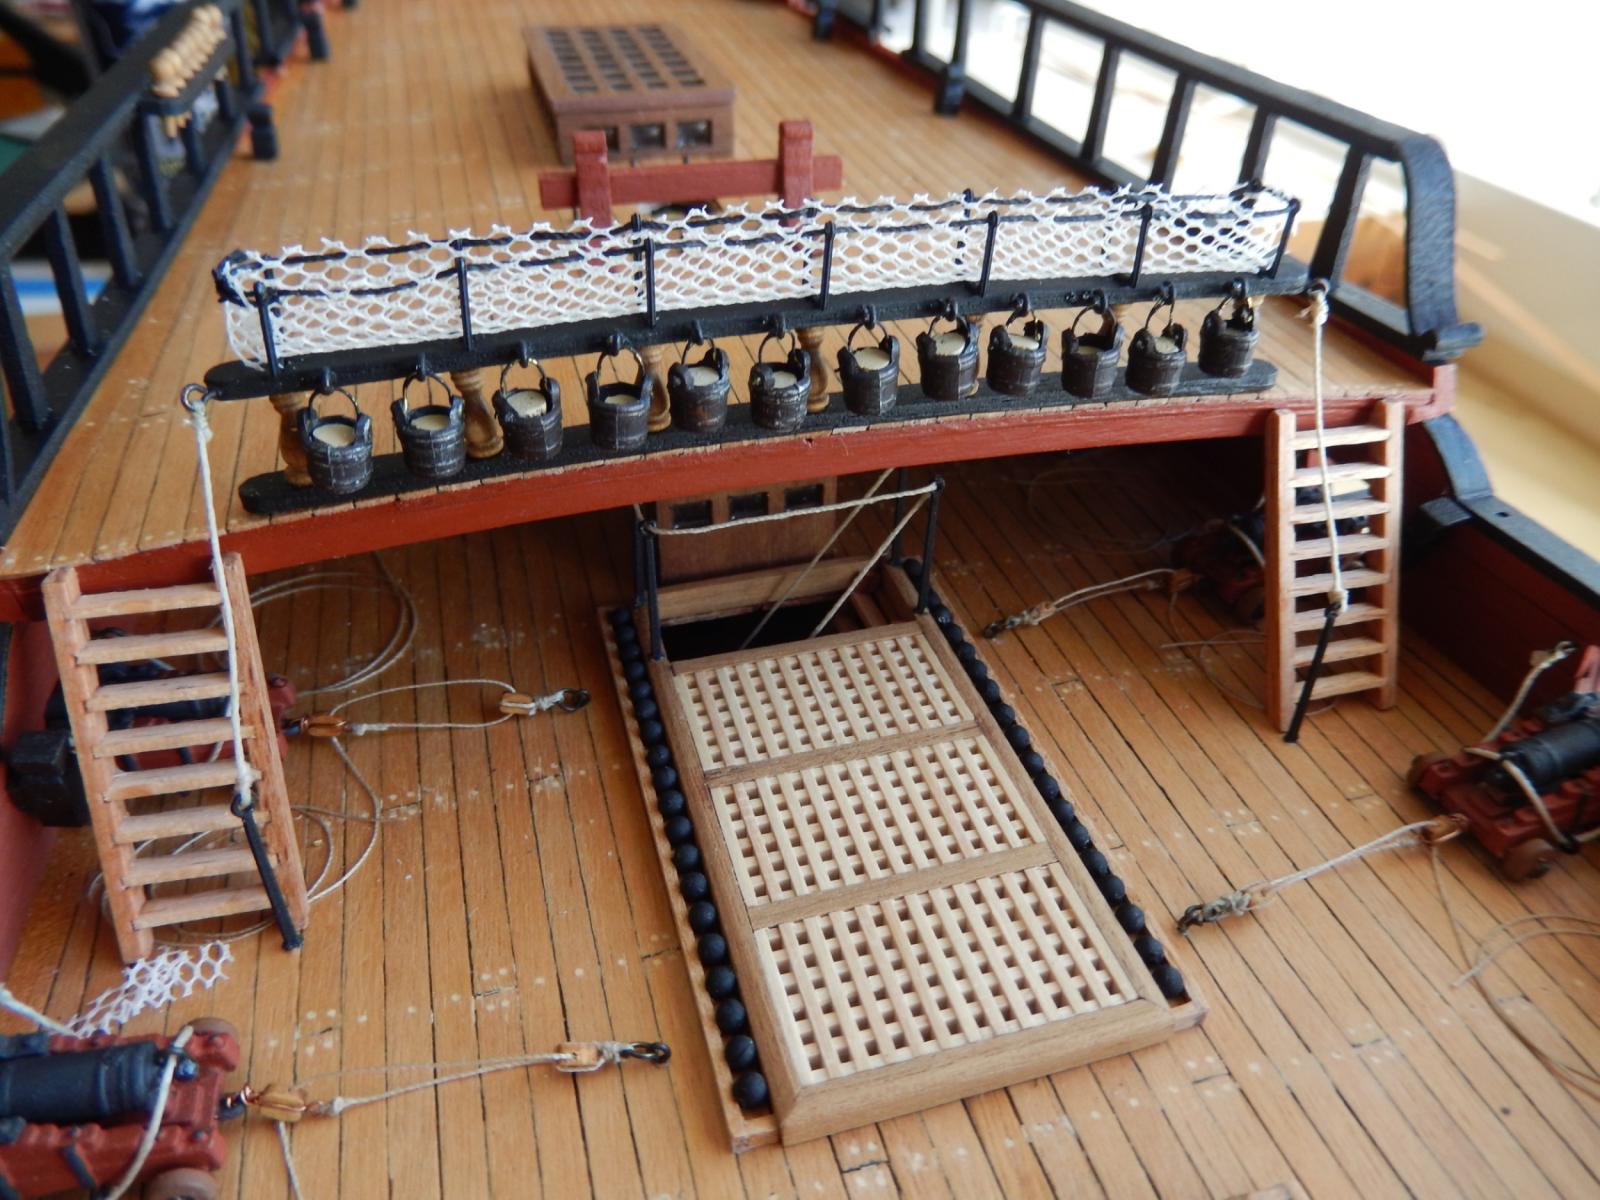
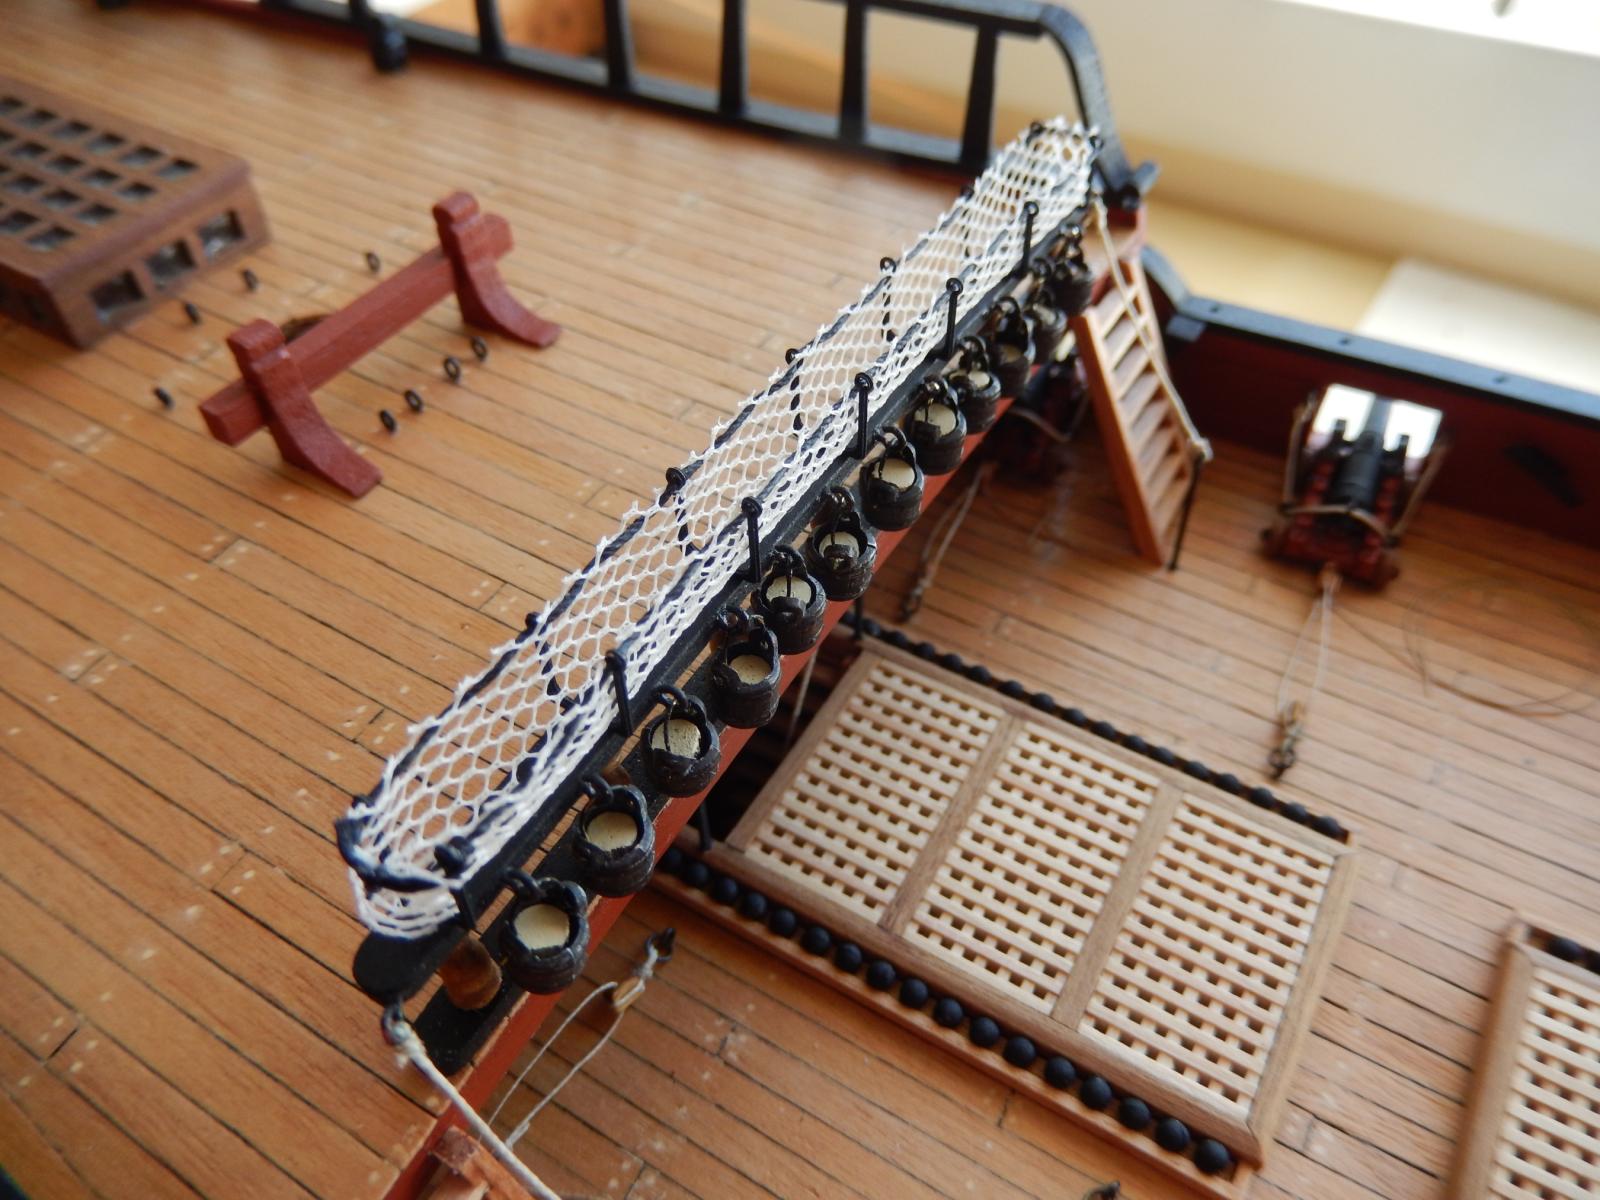
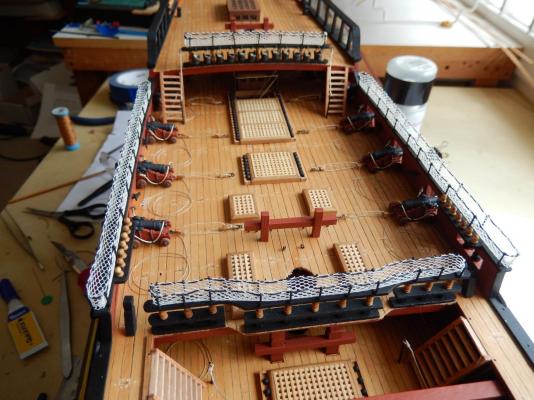
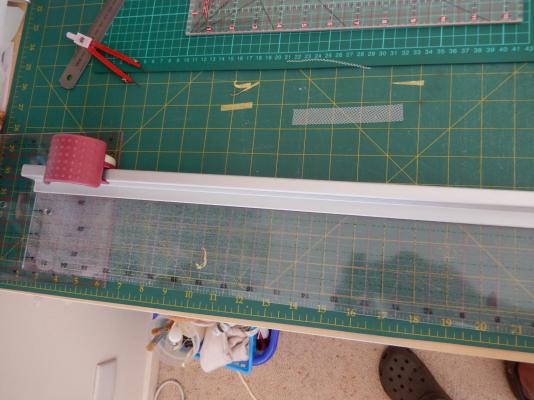
The quarter deck barricade assembly is attached (though the hammock netting is yet to be done) and the poop is now finished. Here is the barricade. and work on the poop deck hammock netting assembly. I decided to appropriate a couple of Arthur's Ideas , though with some trepidation regarding the hammock netting. If I made a mess of it, at least I could get rid of it without too much pain. Fortunately it turned out acceptably, though I am not all that happy with the finish on the ends. It was quite a fiddly job and redoing it is definitely not an option. Cutting the netting turned out to be straightforward. I borrowed some sort of cutting wheel gizmo from my wife who uses it for quilting, and it worked beautifully. The gizmo. One side threaded. Below is another of Arthur's ideas - adding to the buckets small pieces of dowel painted as sand. Incidentally I drilled the holes provided for the bucket hooks on the model. I had not thought beforehand to drill them off the model where it would have been far, far easier. Now there are only three more sets of hammock nettings to go ...


- 949 replies
-
- 10
-
-
Thanks very much Keith. I don't know about definitive - have a look at Arthur's (AEW) Vanguard - and others. But give it a go - there's plenty of help here if you need it. Anyway, it's just fun .. so it really doesn't matter as long as you enjoy it. Best wishes Bob
-
Hi Alistair I had wondered about your absence. Fortunately for me, work is now past tense. From your note it seems as if things have been difficult for you. I hope they are better now. If you come to Sydney sometime there's always a good NZ sav. blanc in our frig to ease the way. All the best Bob
-
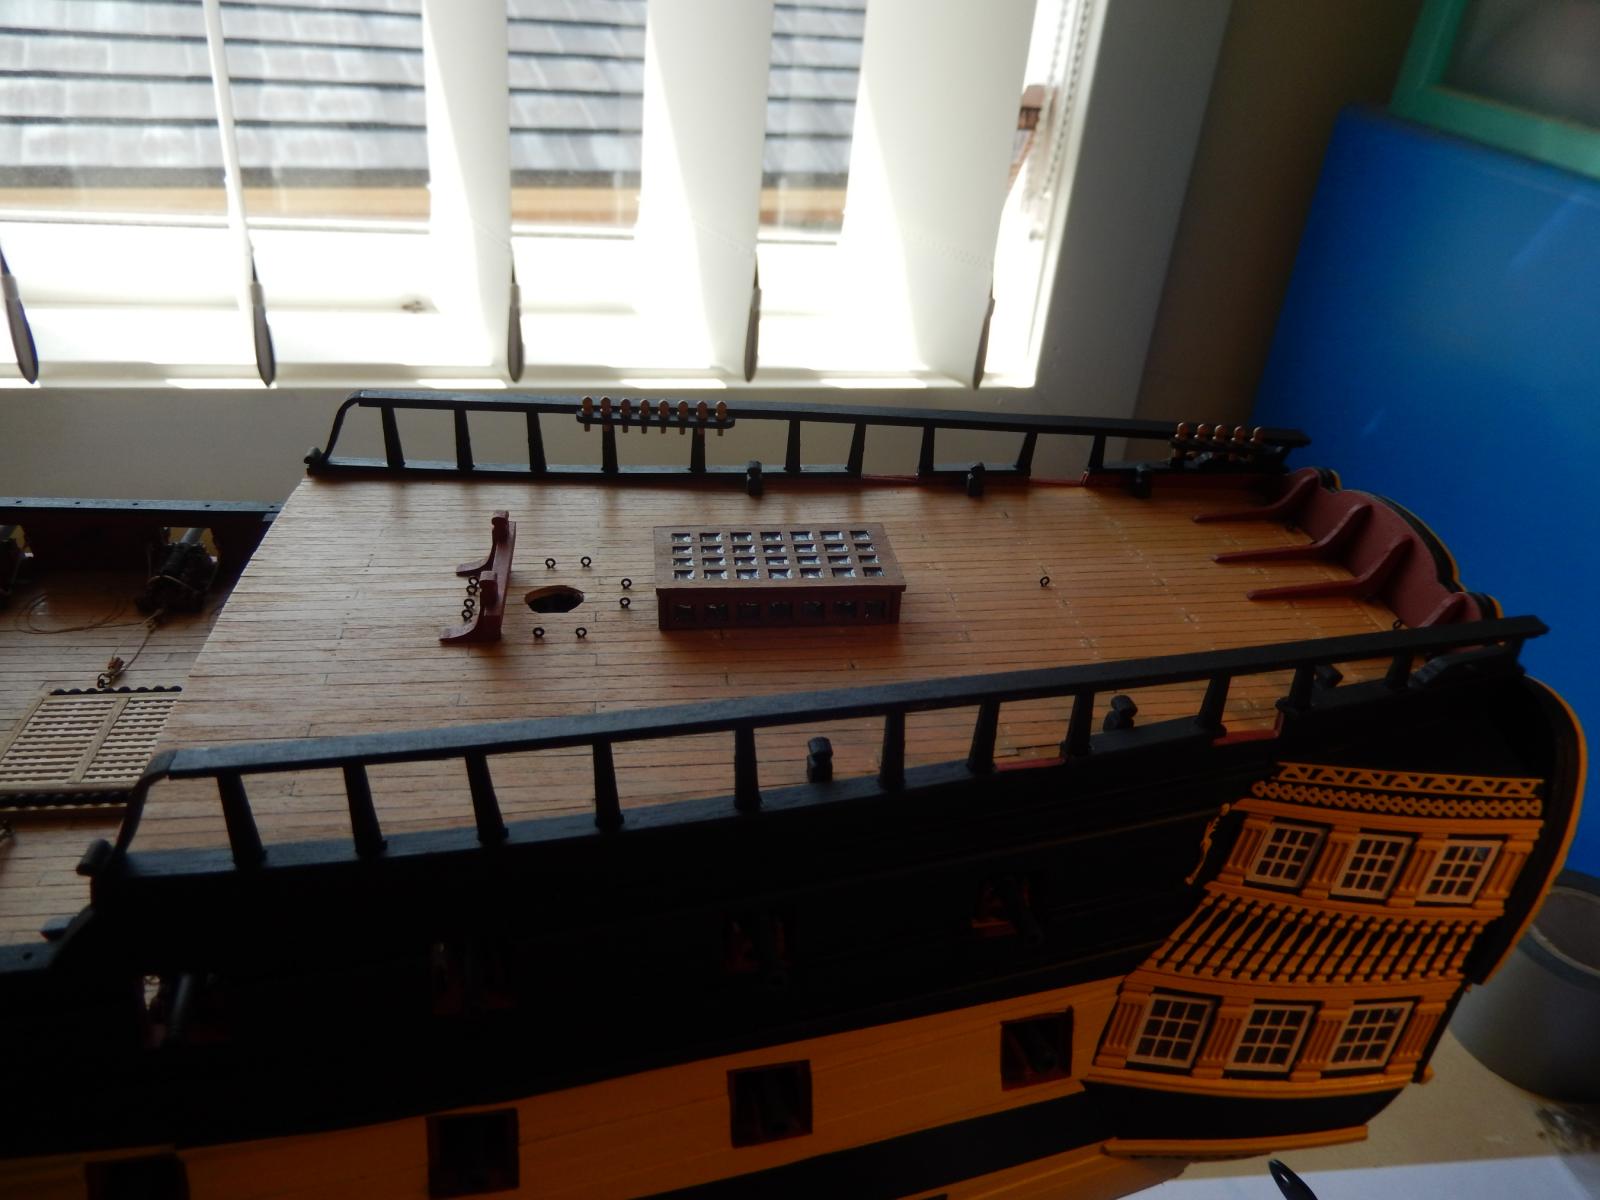
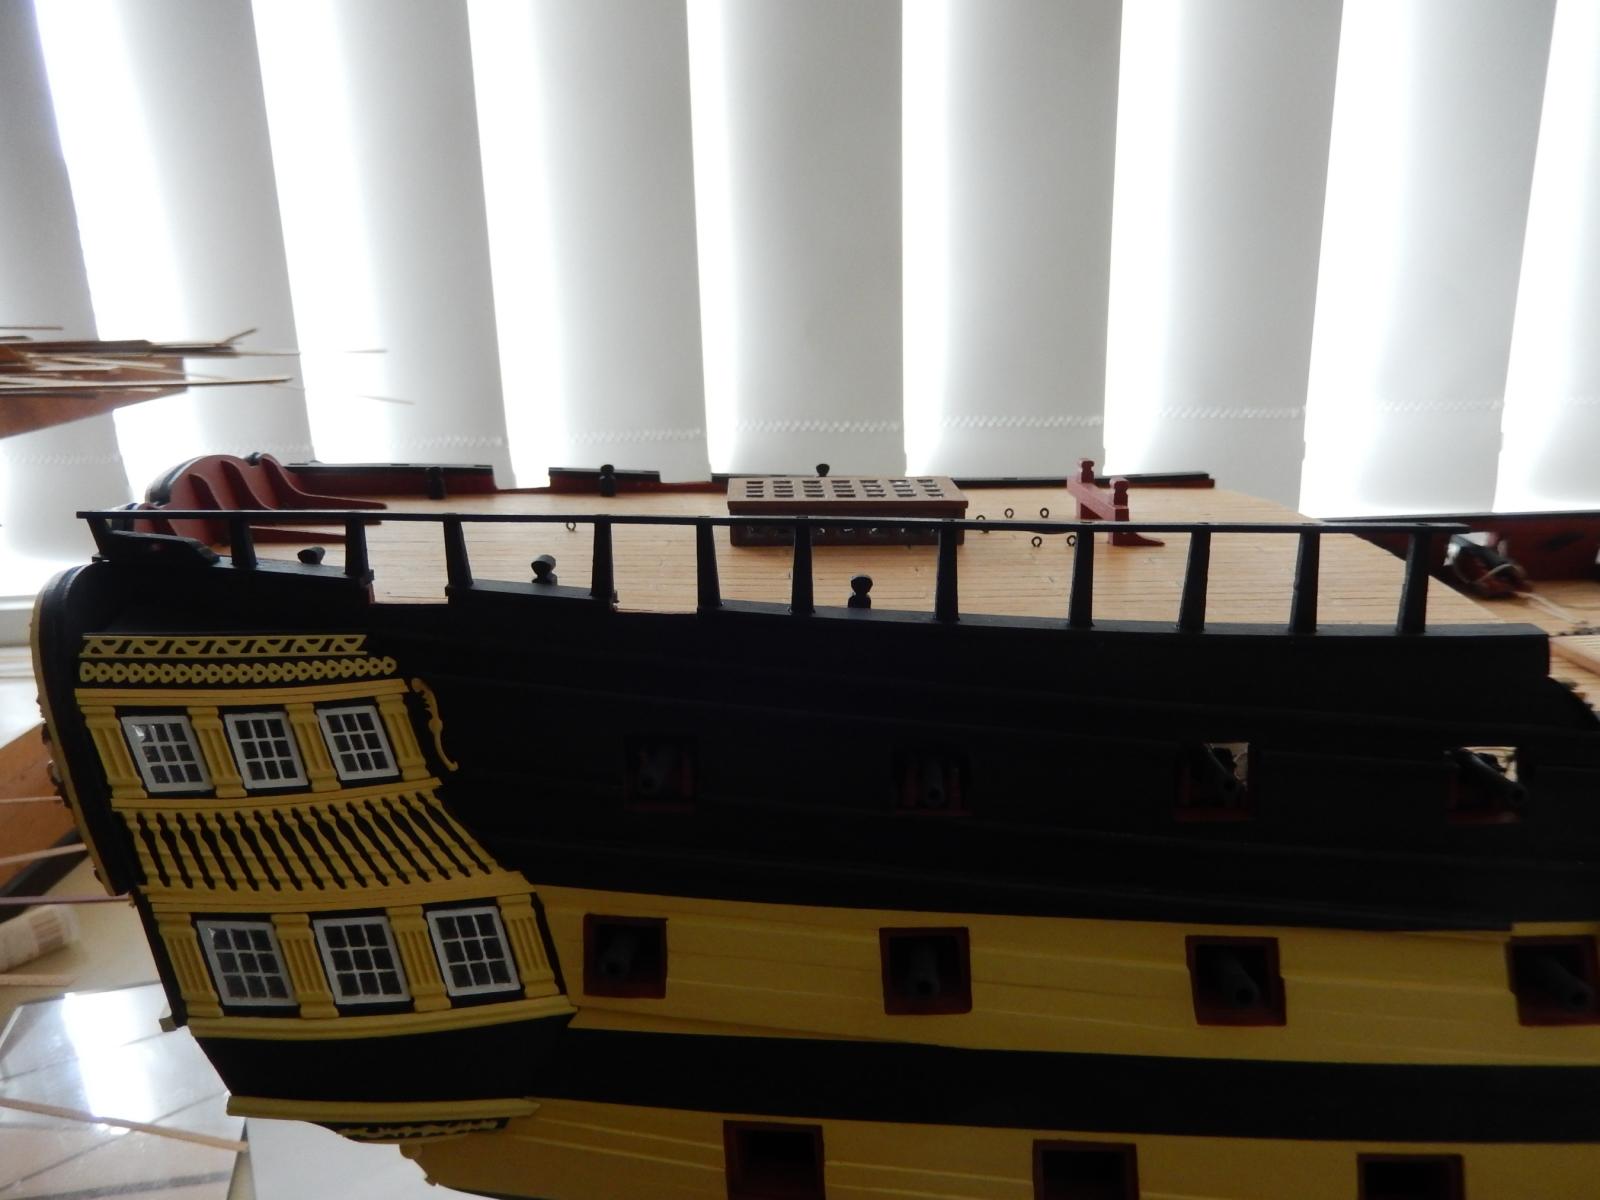
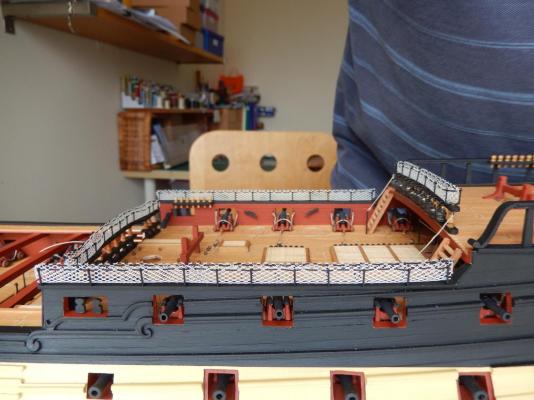
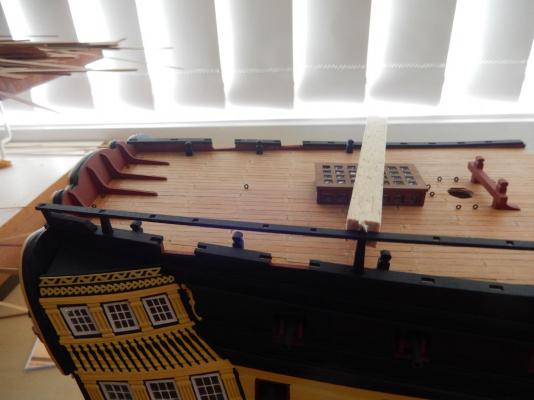
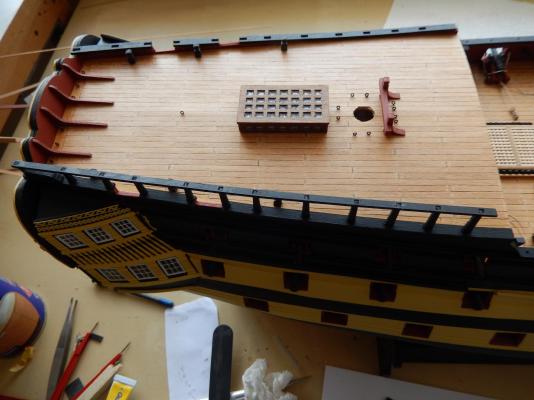
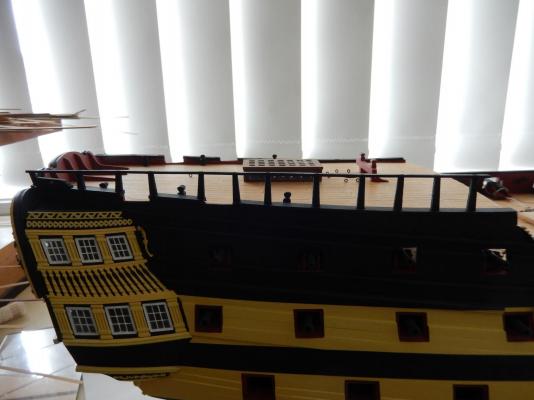
It's finally beginning to look like a ship. Both railings on the poop have been added, though the belaying pin railings on one side are yet to be done. These are proving to be quite difficult. Pins are supposed to be drilled into the rail and then into the side railing as supports. Drilling into the side railing is a bit of a nightmare as the railings are so thin and access to the drill is limited. Moreover, little pressure can be applied to the drill as the railing and its supports are fairly fragile. The quarter deck barricade assembly has been added, together with a few other bits and pieces. So this is how it looks at the moment.


- 949 replies
-
- 12
-
-
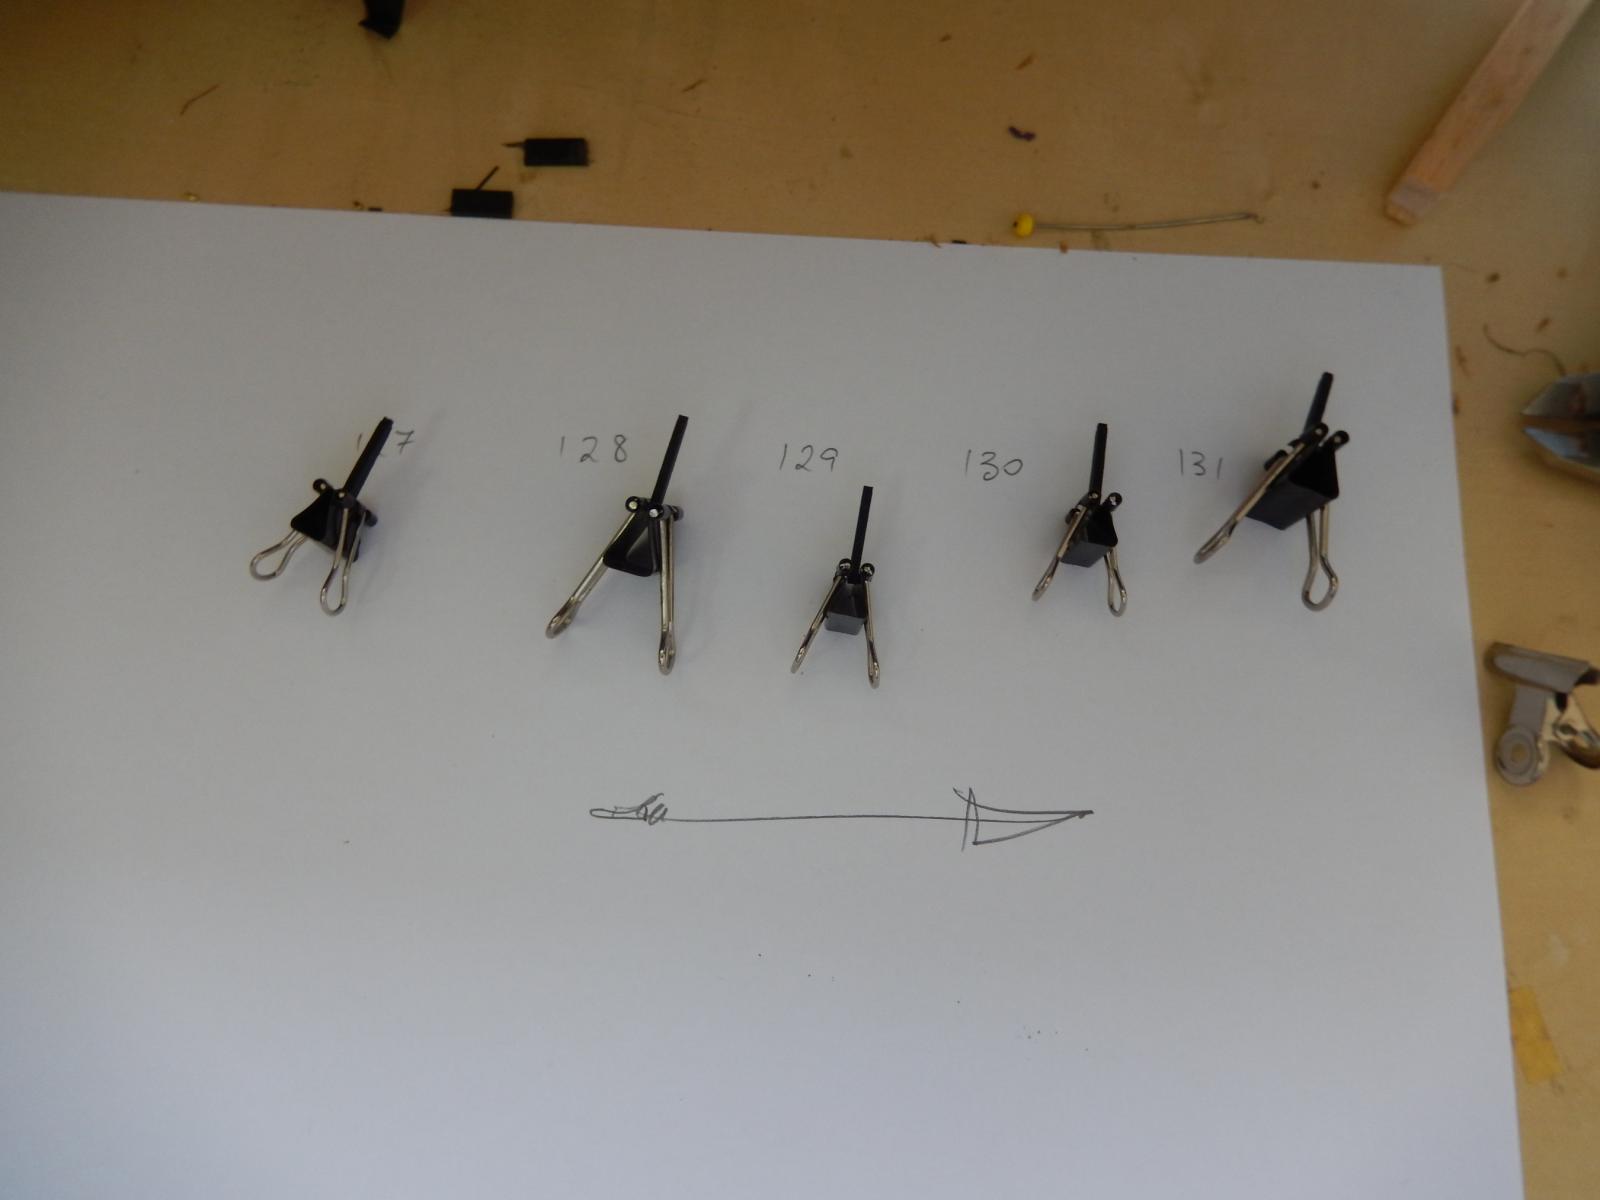
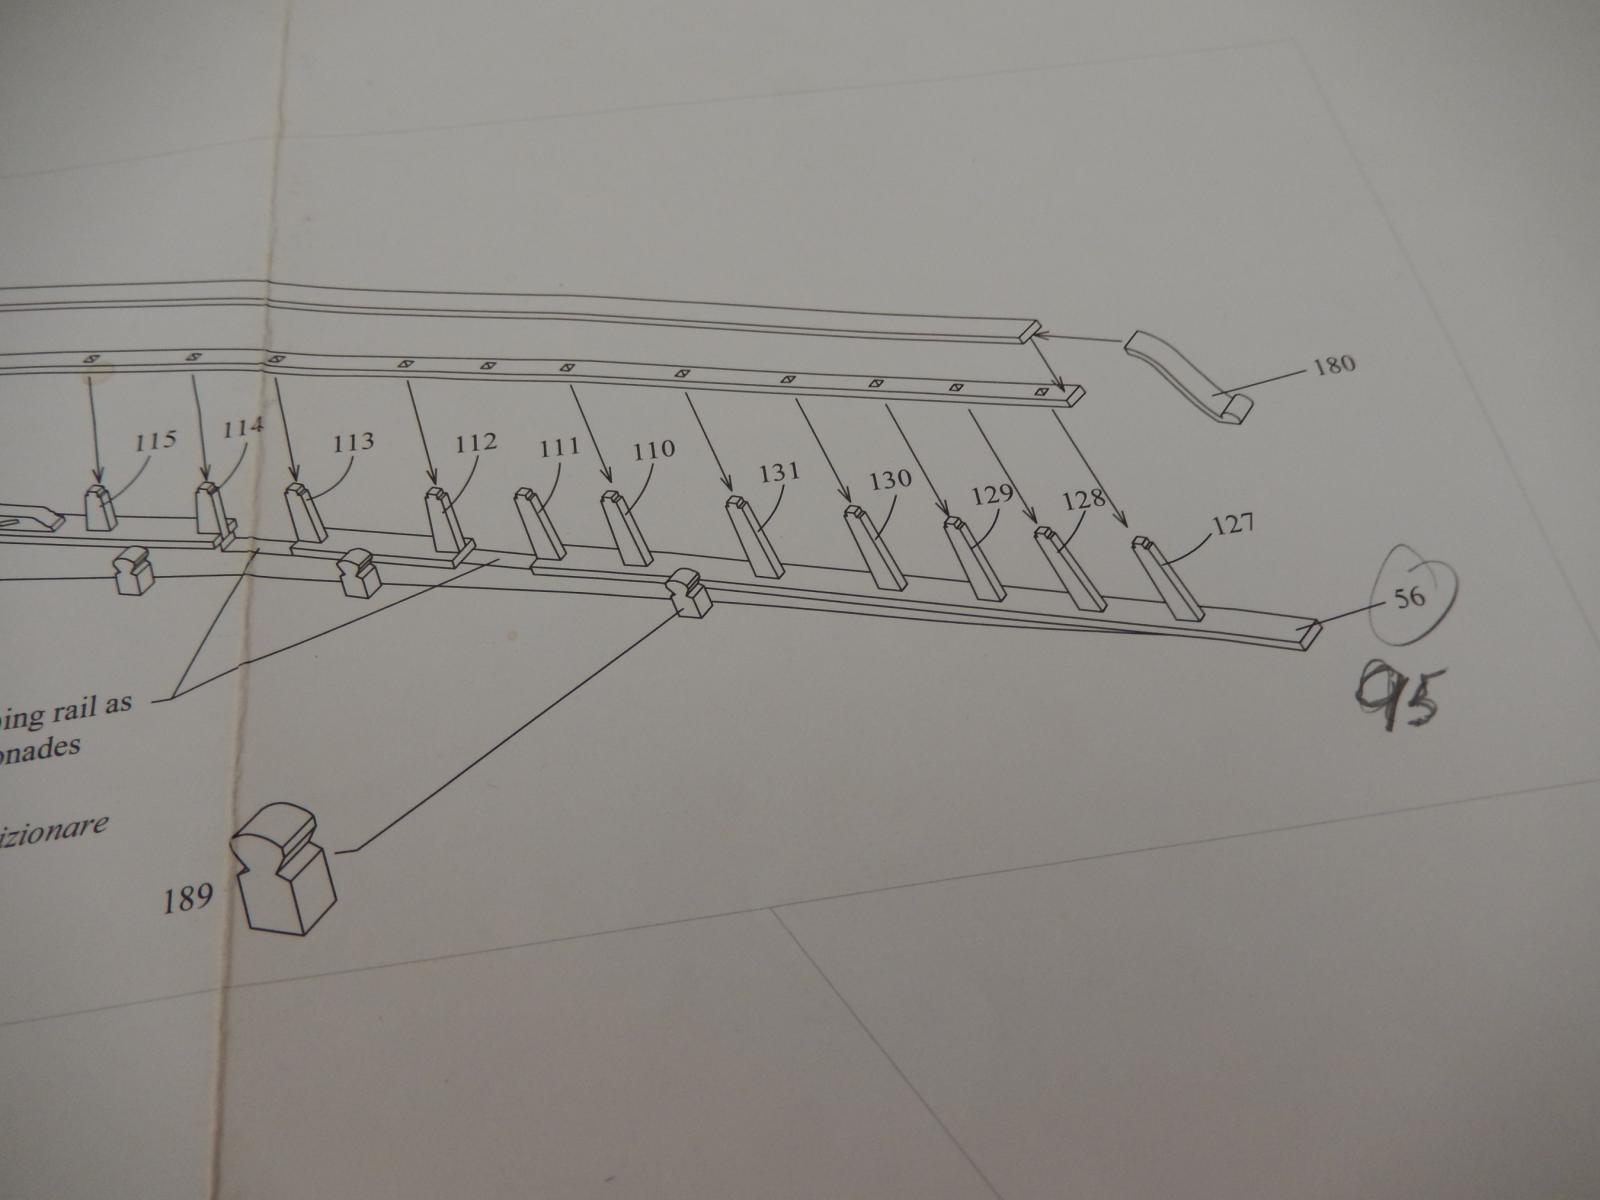
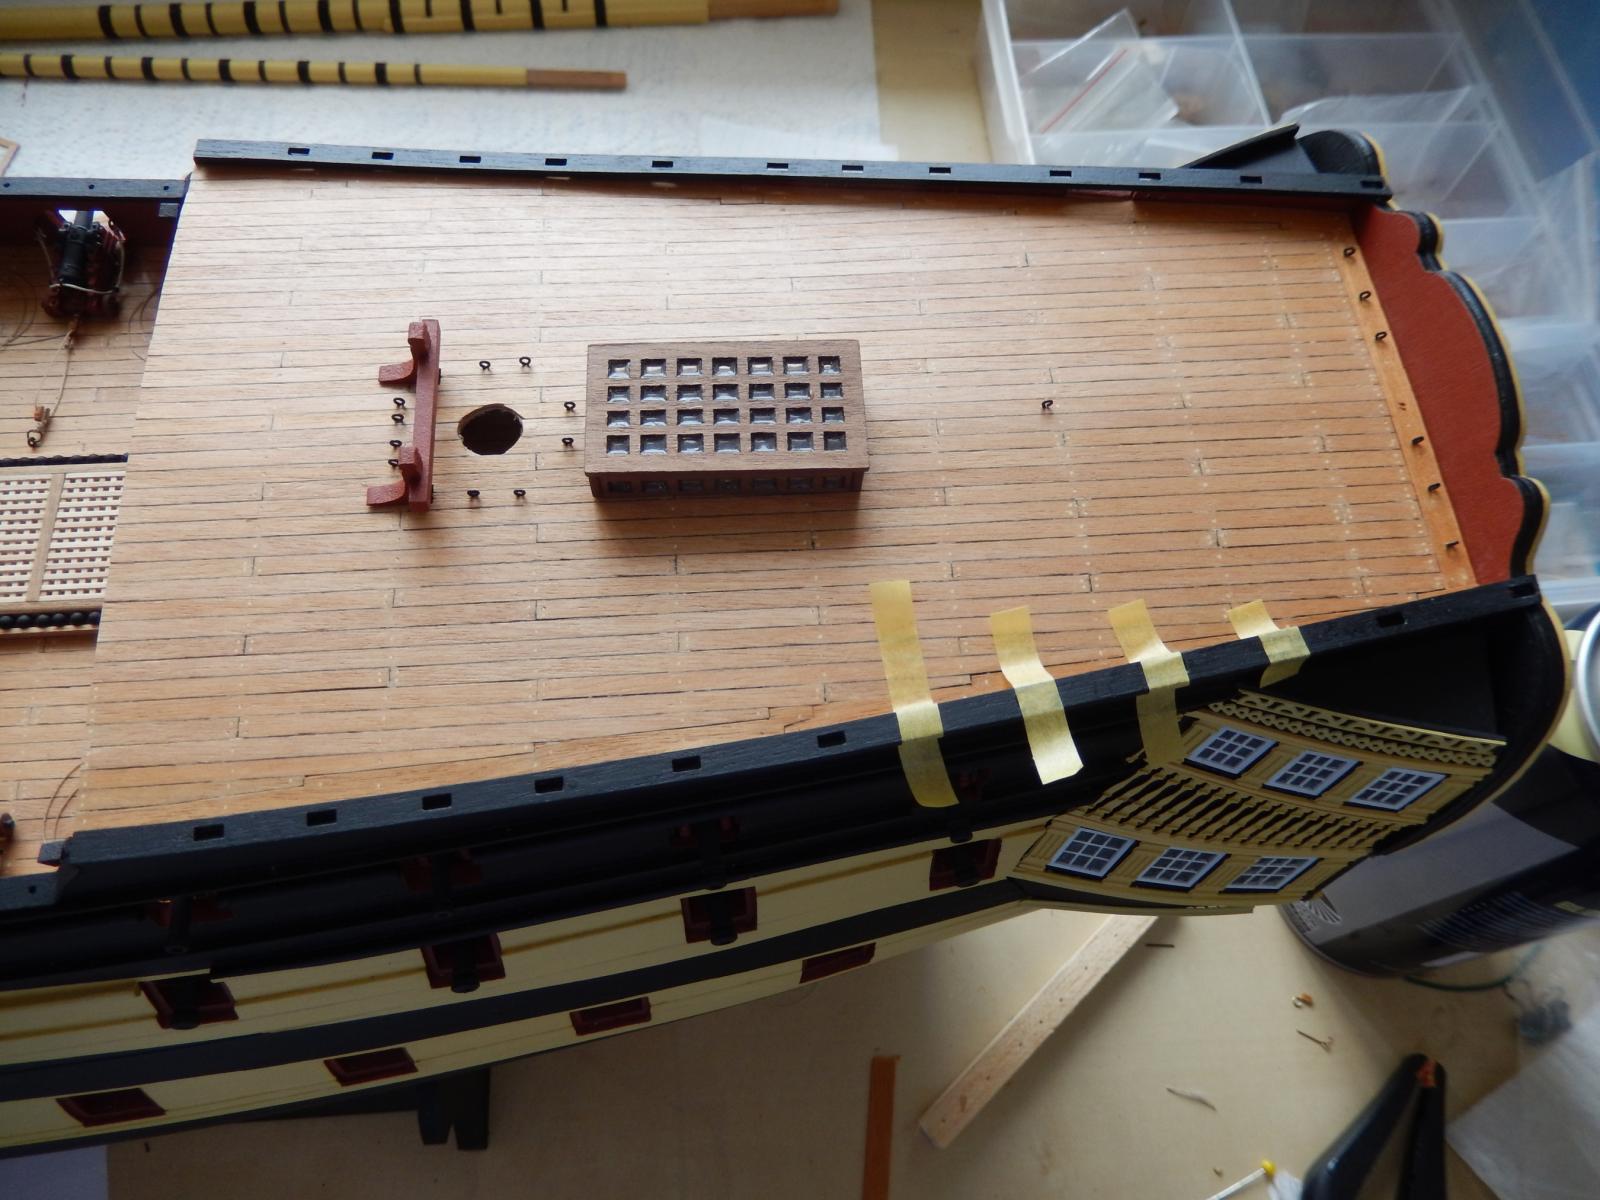
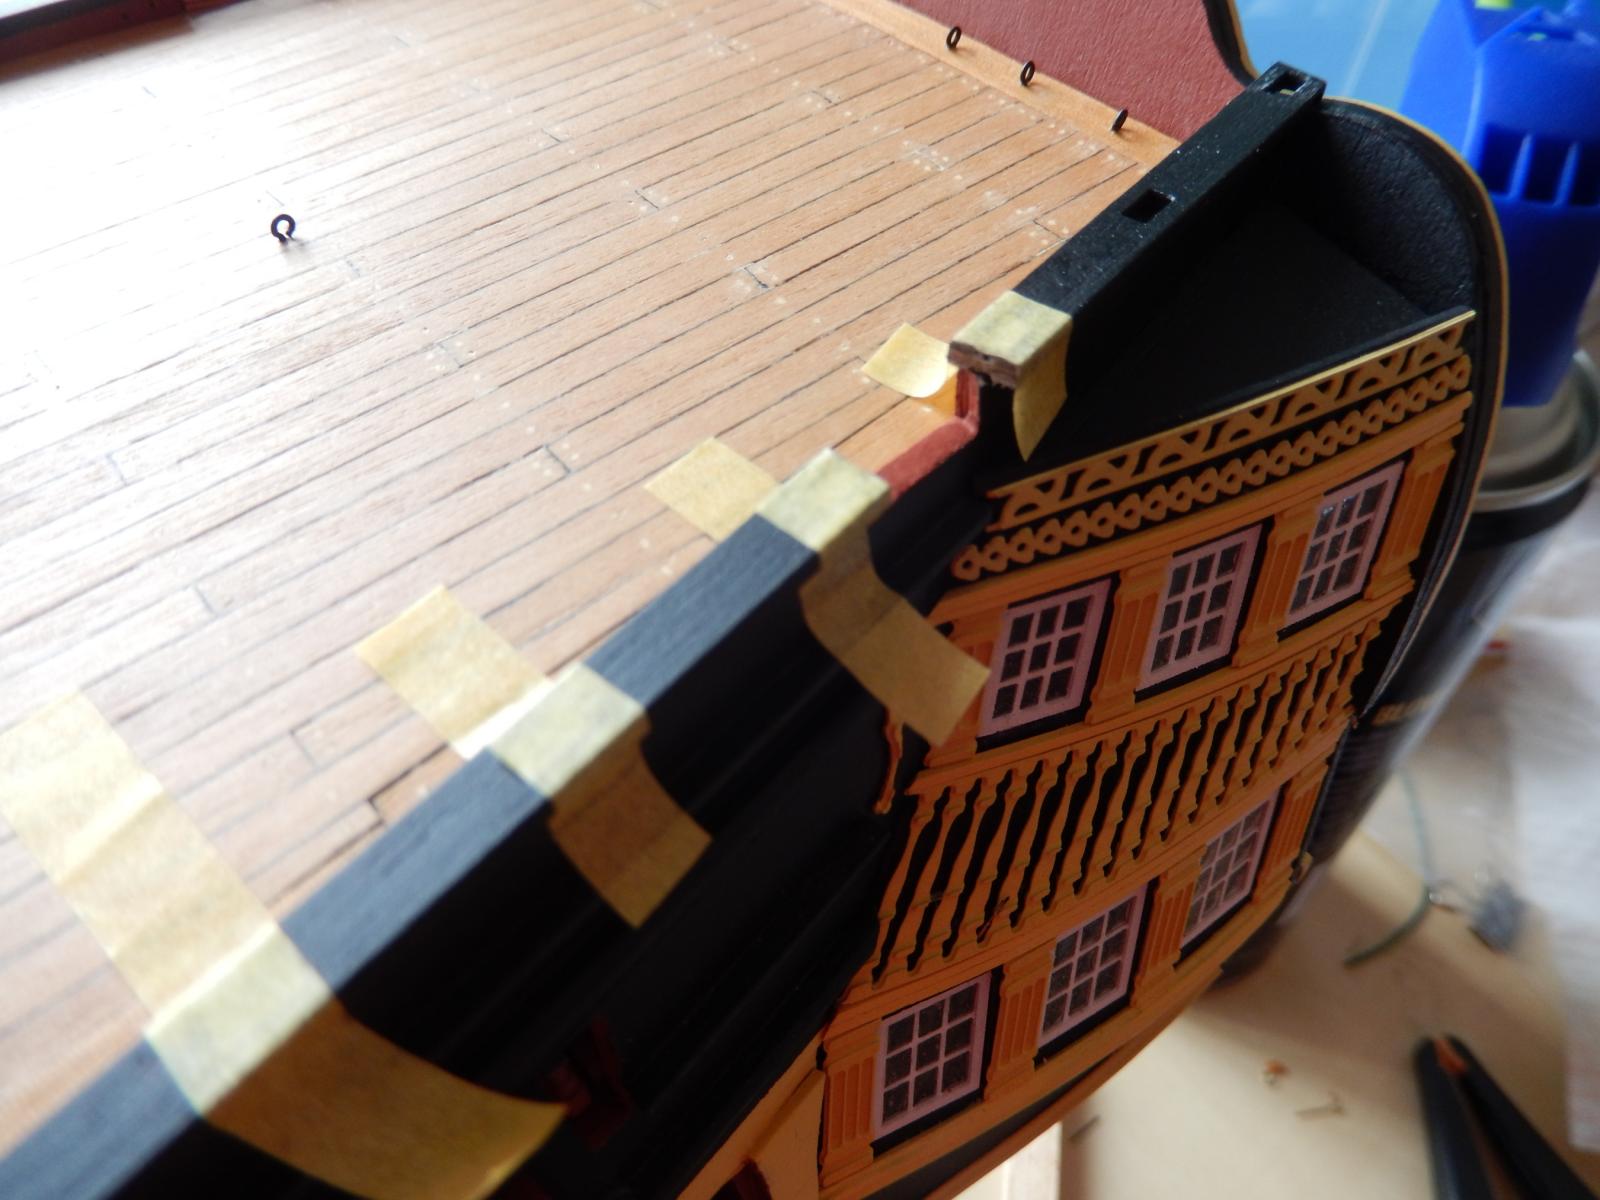
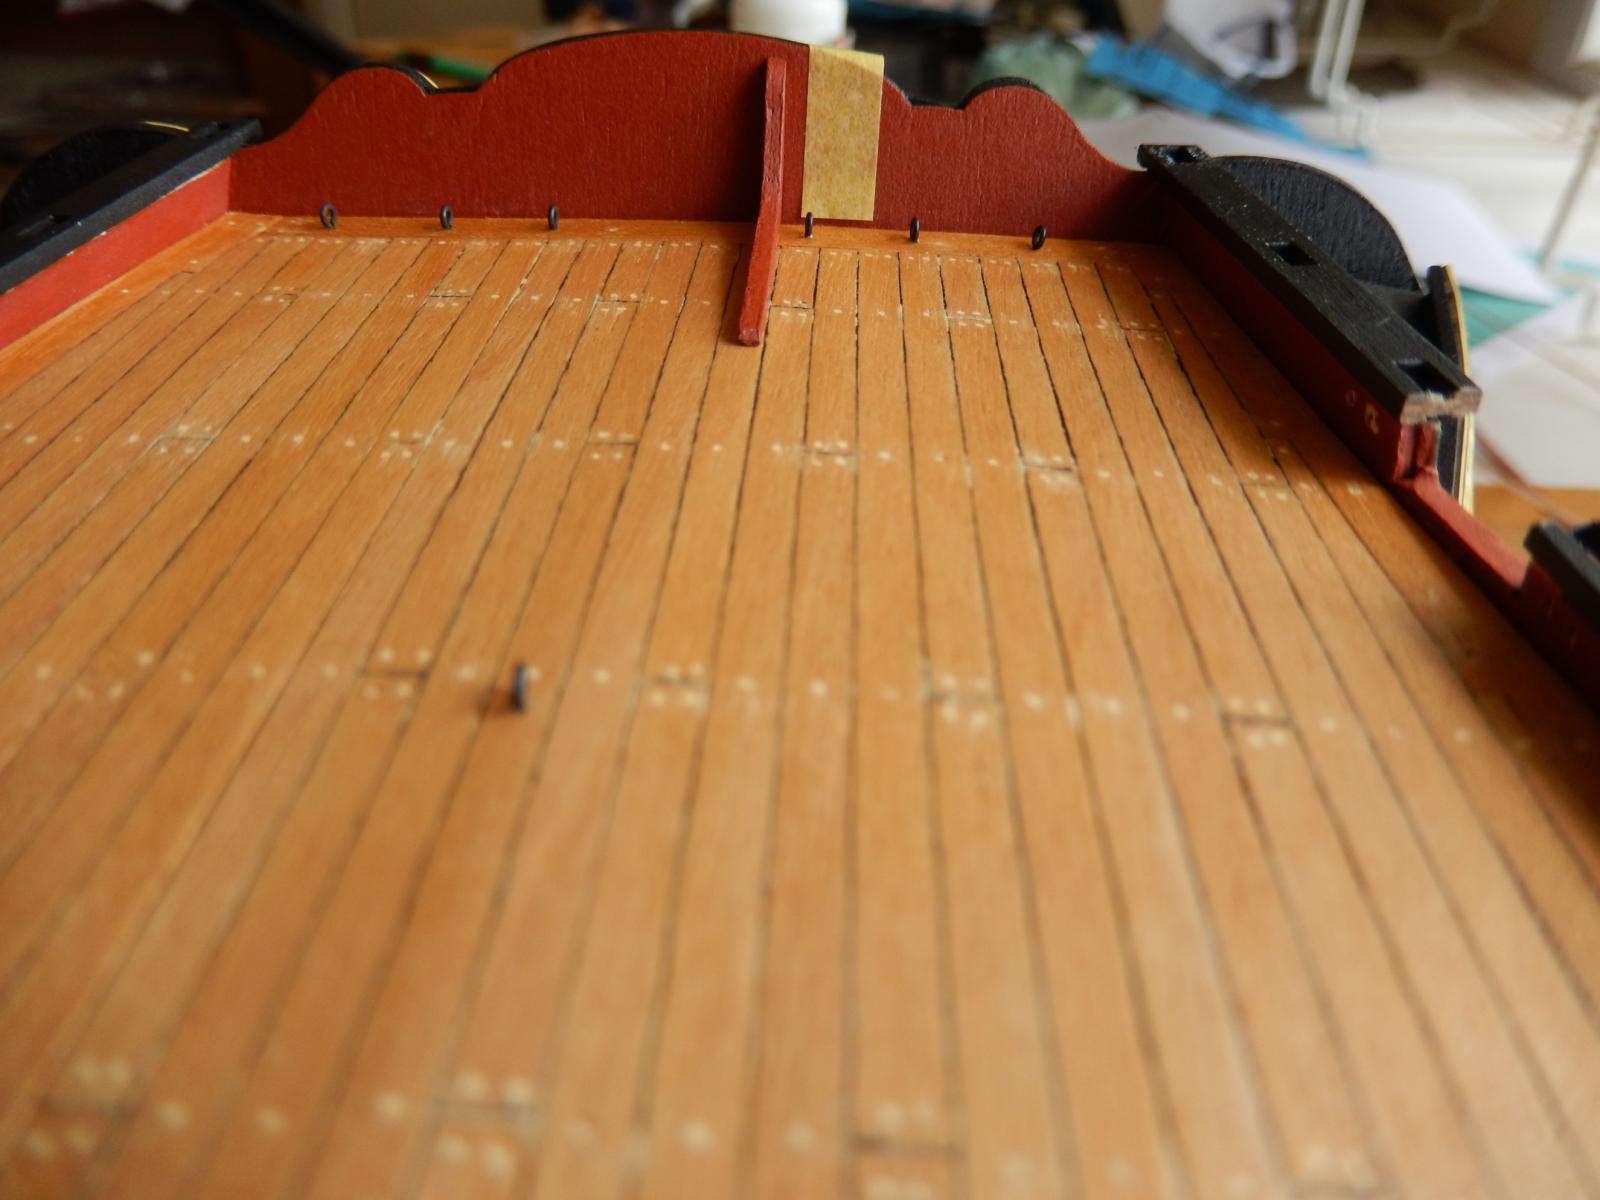
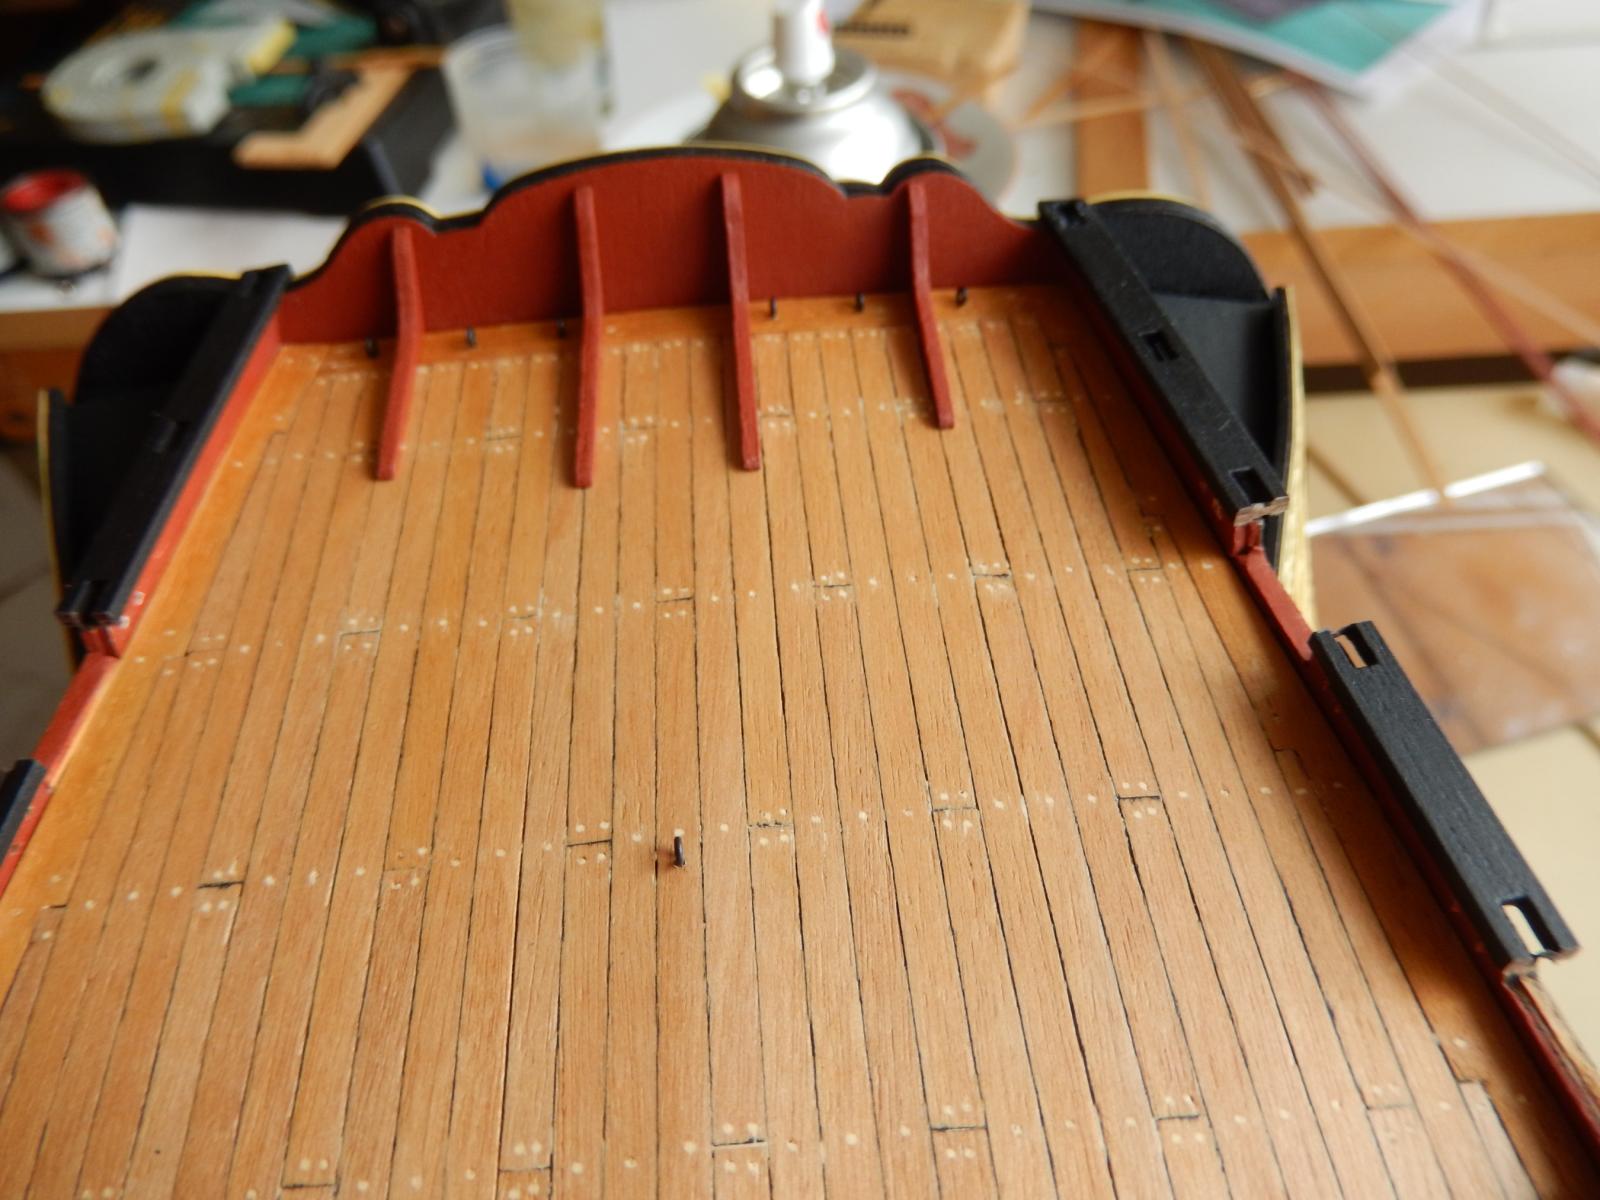
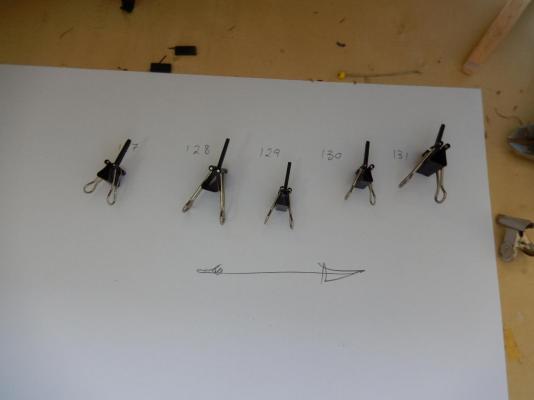
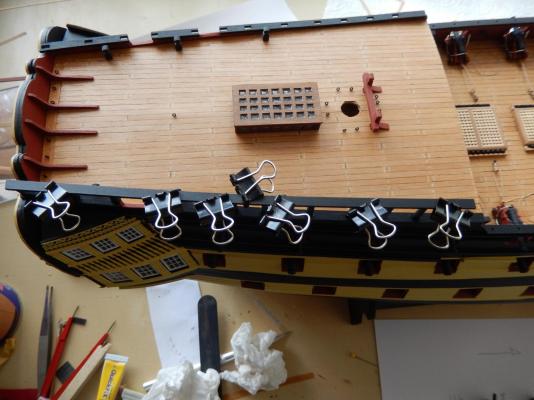
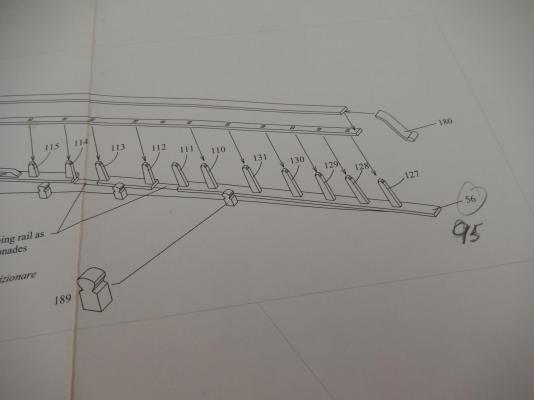
I have finished the first of the poop railings. It proved quite time-consuming and again, a rather fiddly job. I had been putting it off as making a mess of it would have been very obvious and spoiled the whole model. It looks as if it will come out acceptably - I am now waiting for the PVA glue I have used on the top of the railing to properly set. I decided to do all of it in stages. First, the rear support was glued (parts 116 and 201 (see above)) as an anchor and a guide for the rest of the supports. Then support 115 and 110 were added. Care was need to make sure the supports were vertical - hence the piece of balsa supporting the railing. PVA glue was used as small adjustments need to be made. Once these were accurately glued, the remaining supports to the right of part 115 were then glued using Gel CA. Incidentally, when viewed from the side, the supports may appear to be 'wonky' . In fact this is exactly how they look in the plans. They provide three gun ports for the carronades. Once I got to this stage I had a minor disaster. I dropped the remaining supports (127 - 130), so that when I retrieved them, I couldn't easily tell which was which. It took an hour or so and the use of a slightly expanded vocabulary to sort it out. For the next railing I will be more careful in labeling them. I used the bulldog clips to hold the supports so that I could paint their edges easily - note the numbering, something I didn't do the first time. Finally, here are all the supports in place. Make sure to check the heights of the supports as small adjusts may be needed. The top railing being glued. The clips are very useful, though I am a bit worried they may mark the railing. I should have put a strip of thin balsa on top of the rail to act as a cushion. Next time...
-
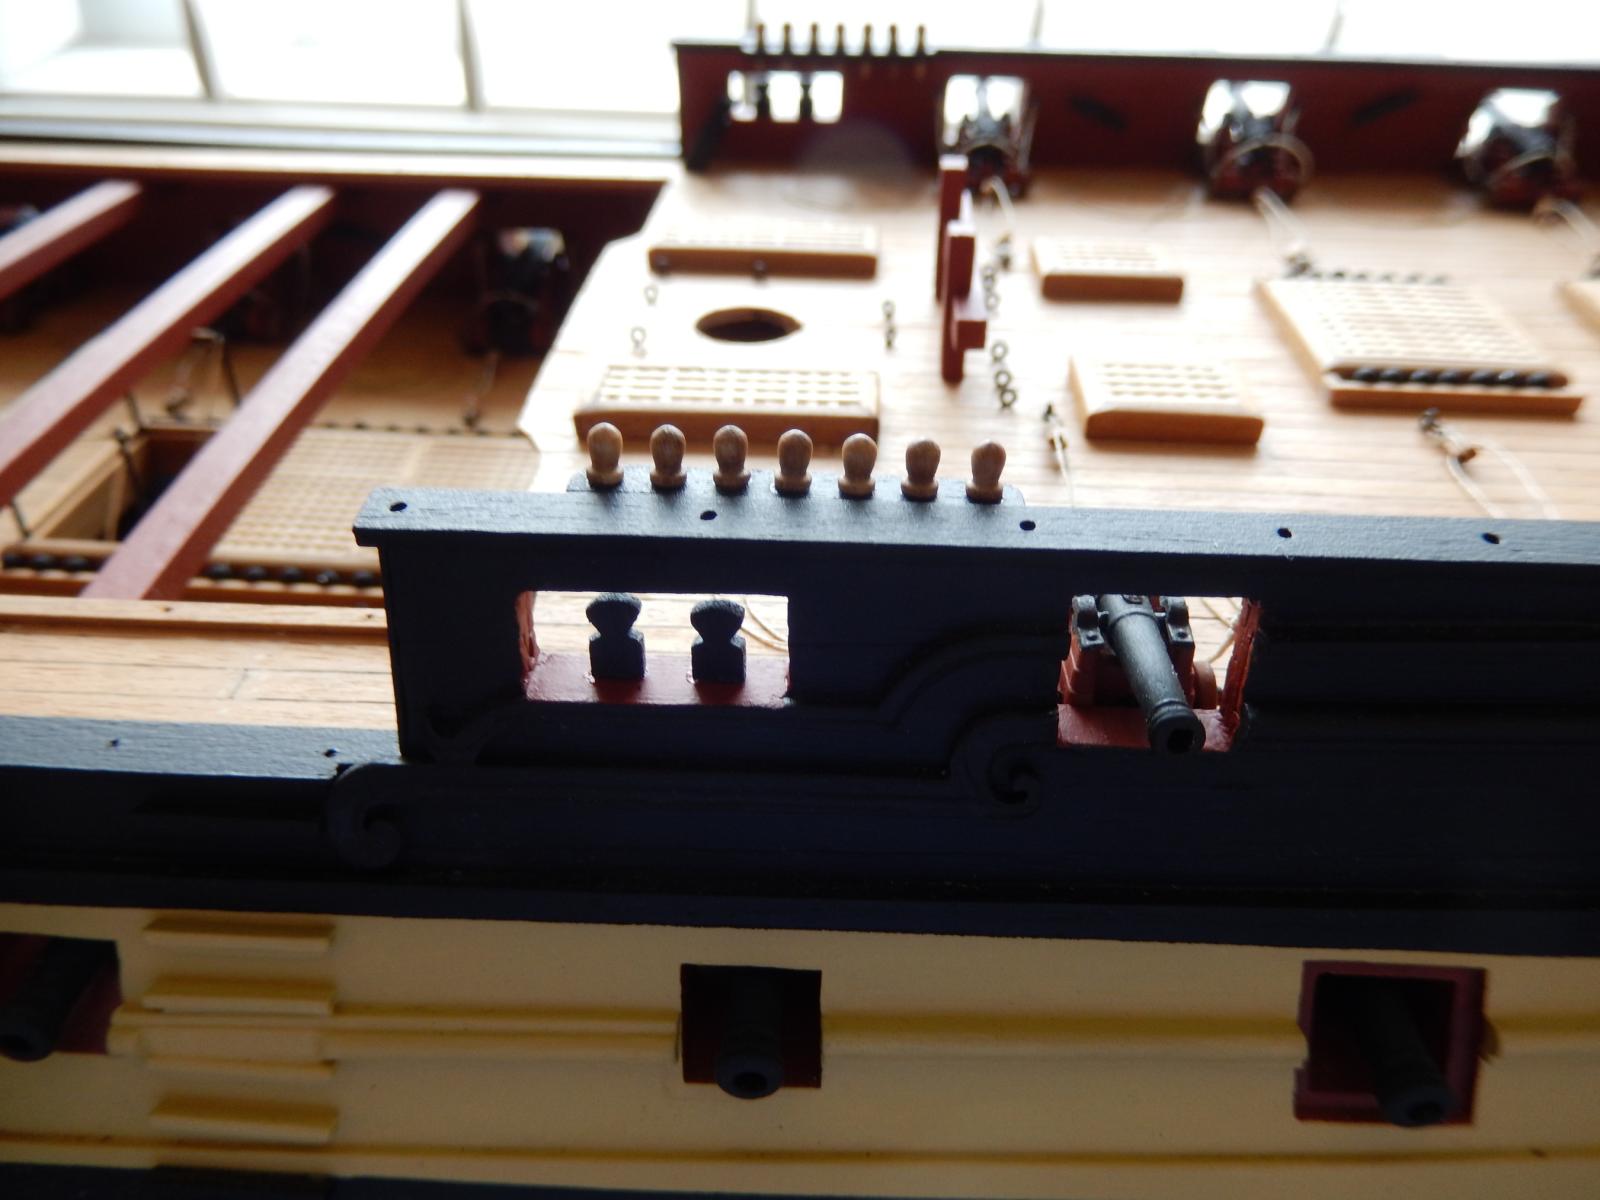
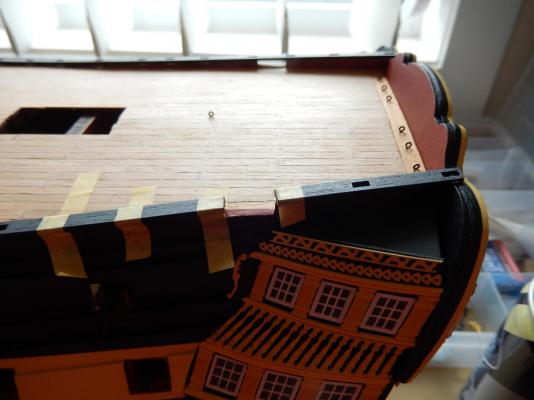
I am back to shipbuilding after a two week break - played very moderate golf on some beautiful courses on the far south coast of New South Wales. Highly recommended. Aside from that, finishing the poop is taking far longer than I expected. There are some quite tricky little bits. Positioning the small timber heads in the opening shown below without spreading glue all over the place is one example. As well I couldn't find a part number for them (still can't) and thought that were the same size as all the others and needed to be trimmed to fit. I stumbled across the correct ones while looking for something else. As well the part number shown in the diagram for the capping of the side rails was transposed (reads 59; should read 95) caused a bit of grumbling. Putting on the capping was fairly straightforward, but needed care. I cut the gaps for the gun ports on the model. Here, having the holes for the railing supports about 1mm further apart would have made things a bit easier. The following photos show how I went about it. First the gaps in the caps were marked with Tamiya tape. The markings were cut using a very fine hand saw. Once all the gaps had been cut, I moved to the stern fascia knees. Getting them to be vertical was another of the tricky things. I used Tamiya tape as a guide. Gel CA was dotted along the bottom of each one, but no glue on the rear. The gel allows a little time for adjustment, so that once each knee is properly aligned stem to stern,, it can be adjusted to the vertical. Having no glue on the rear allows adjustment without spreading glue all over the stern fascia. Here is progress to date.


-
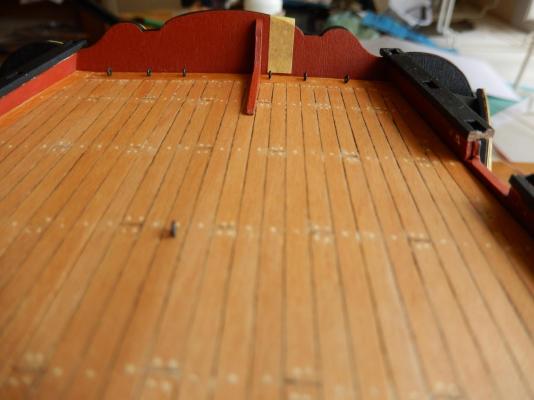
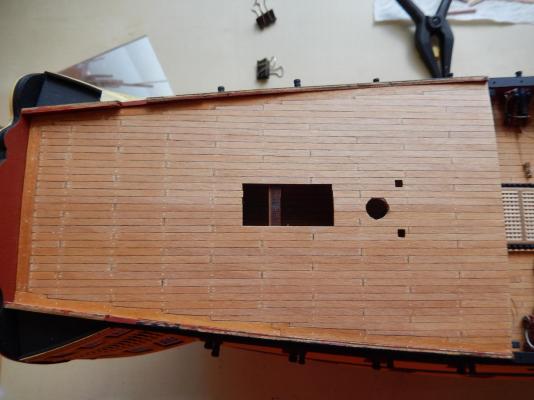
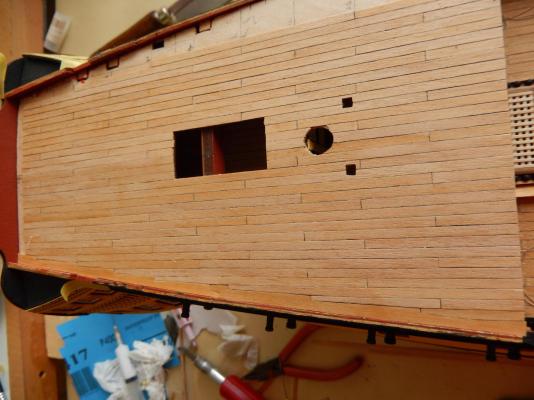
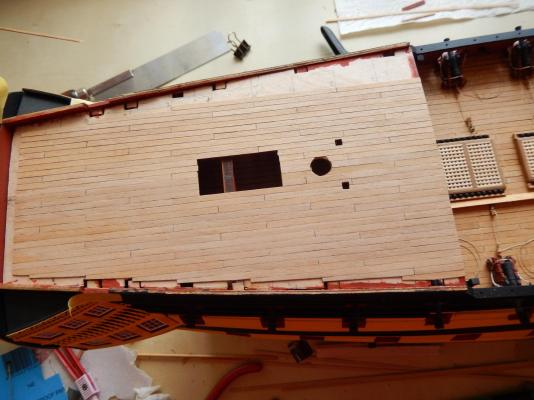
The planking of the poop deck is finally complete. Some of the filler used to represent the tree nails when sanded back shows up on the photos for some reason, but fortunately it cannot be seen when looked at 'in the flesh". I fact rather than sanding back with glass paper, in the main I have used a fairly blunt Stanley Knife blade to scrape back the deck planks. I gives a very good even result. I have finished most of the deck furniture and will put things together over the next day or so.


-
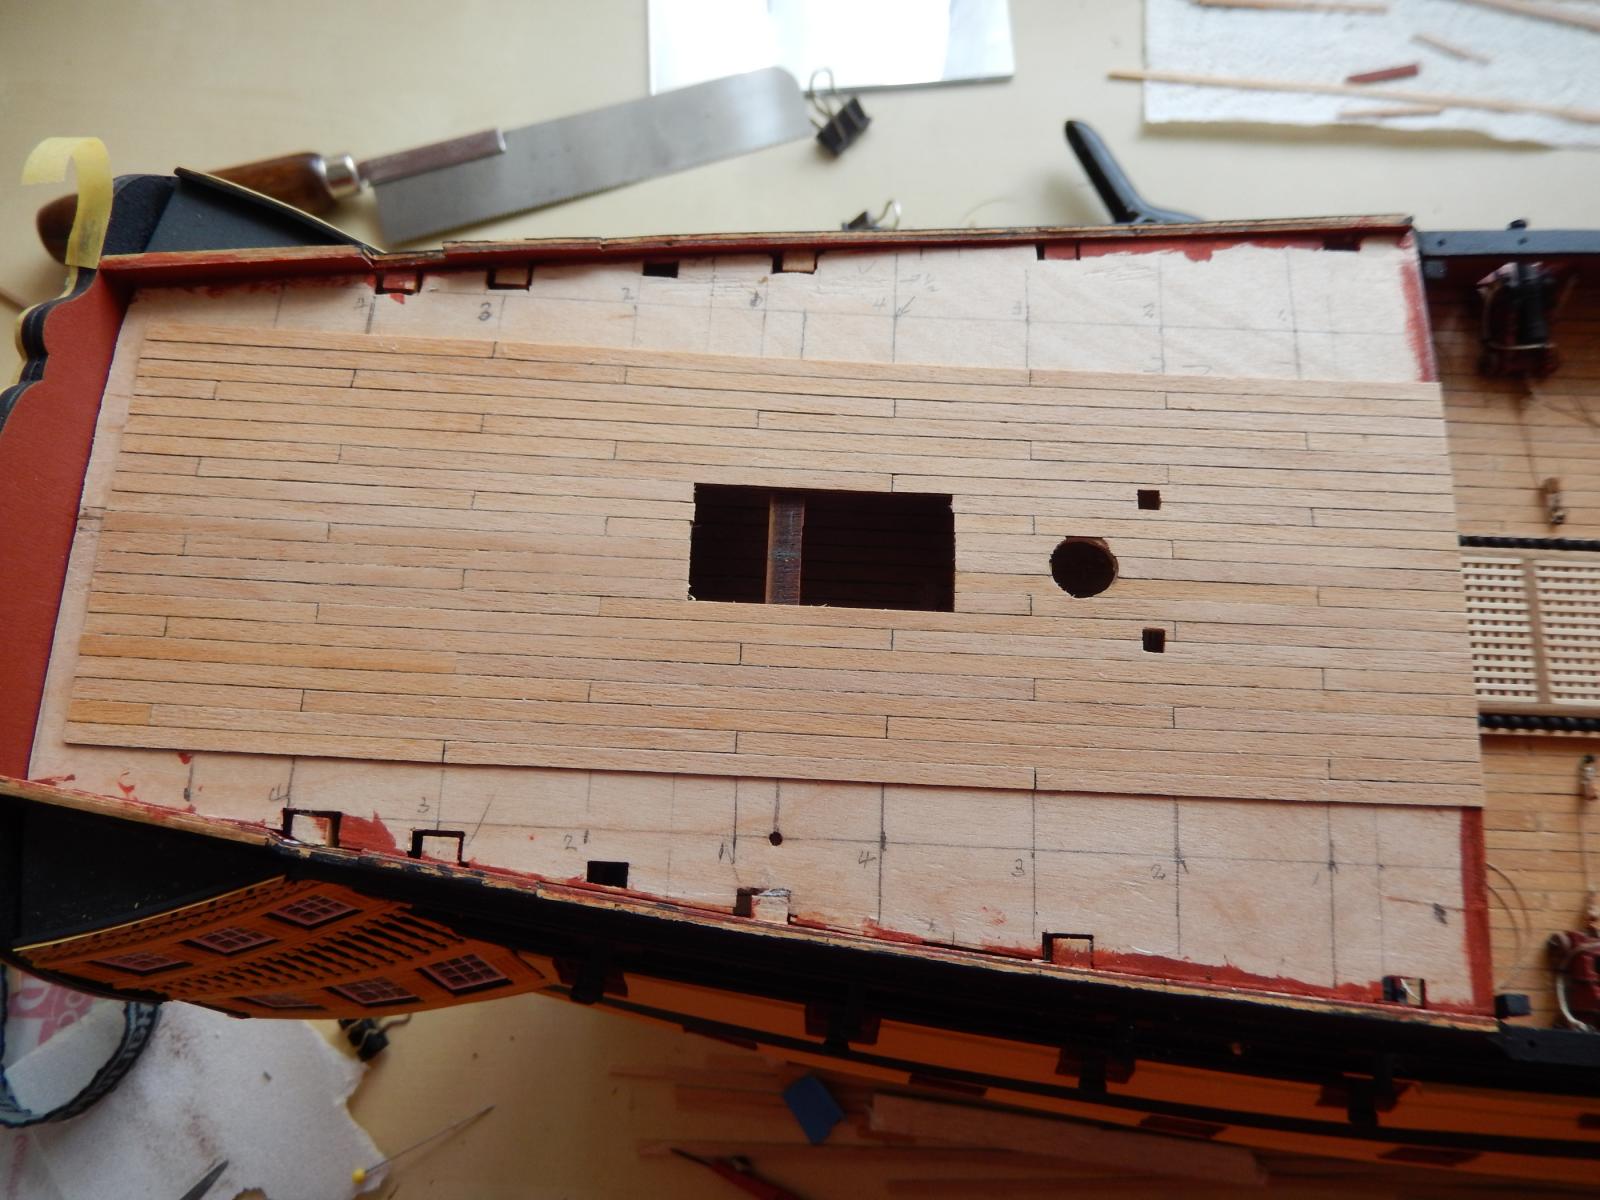
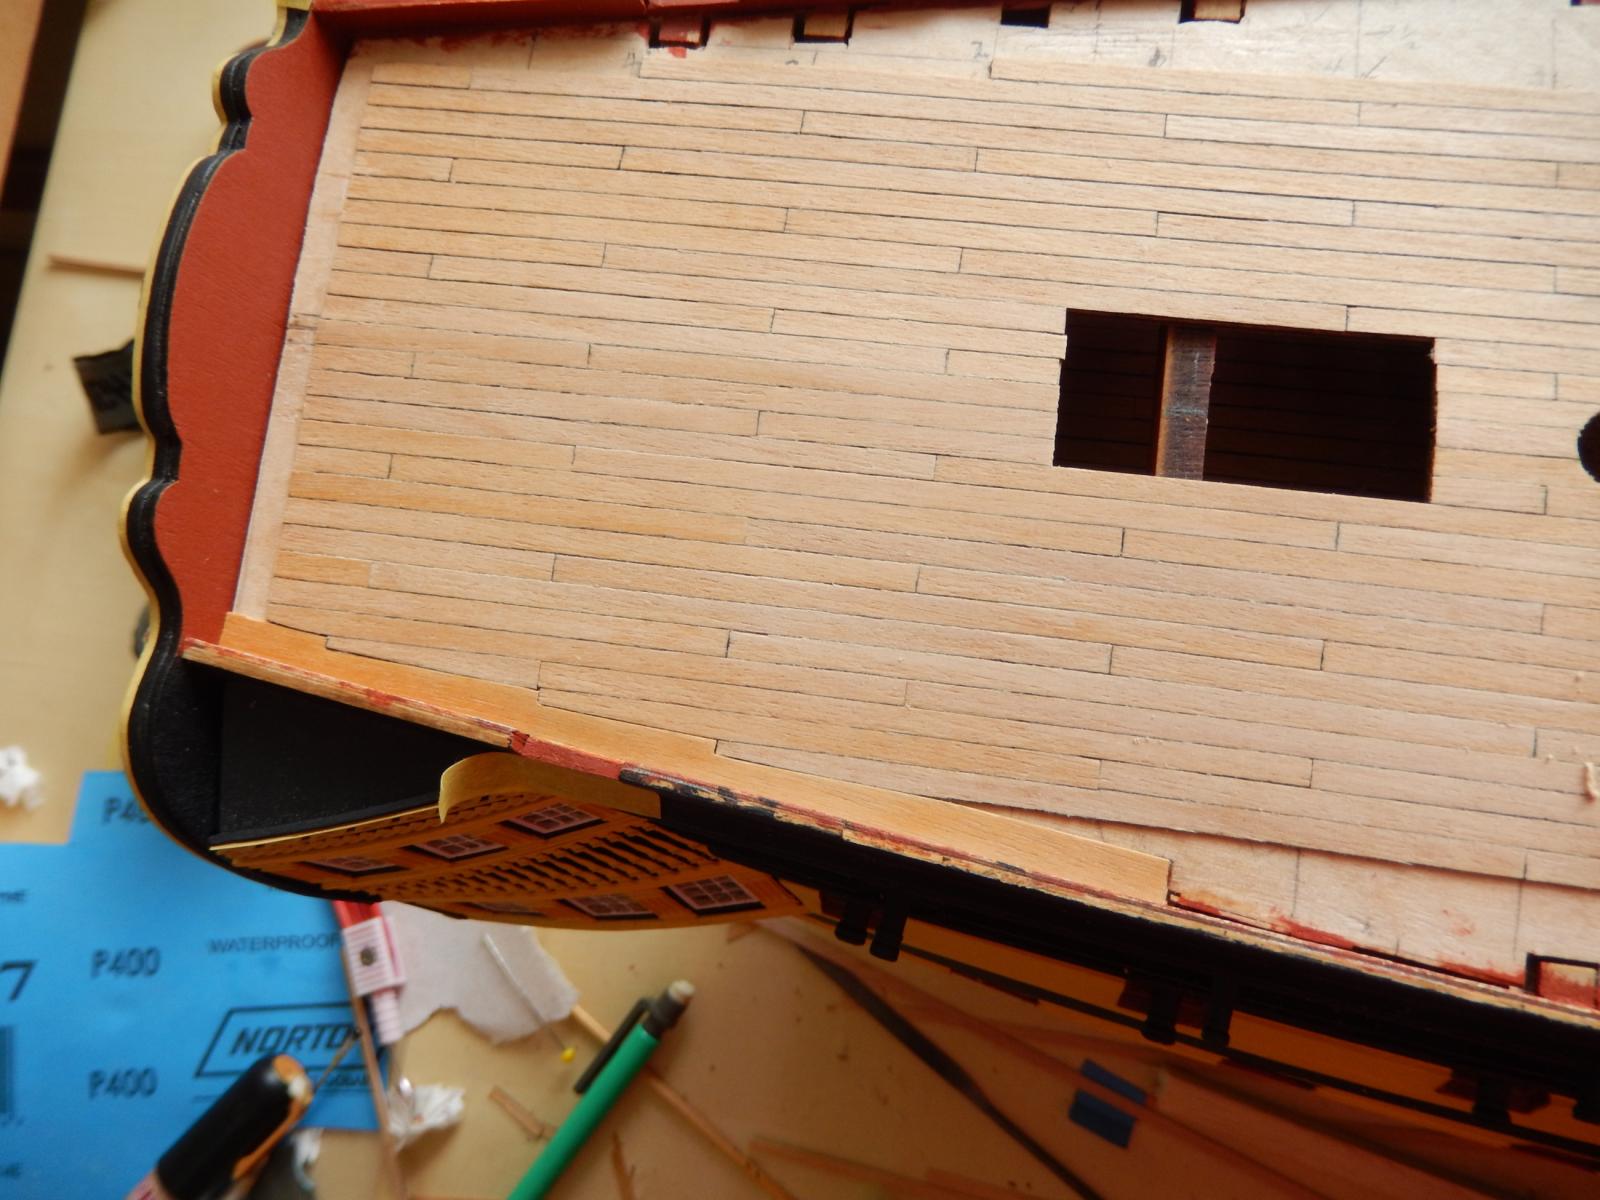
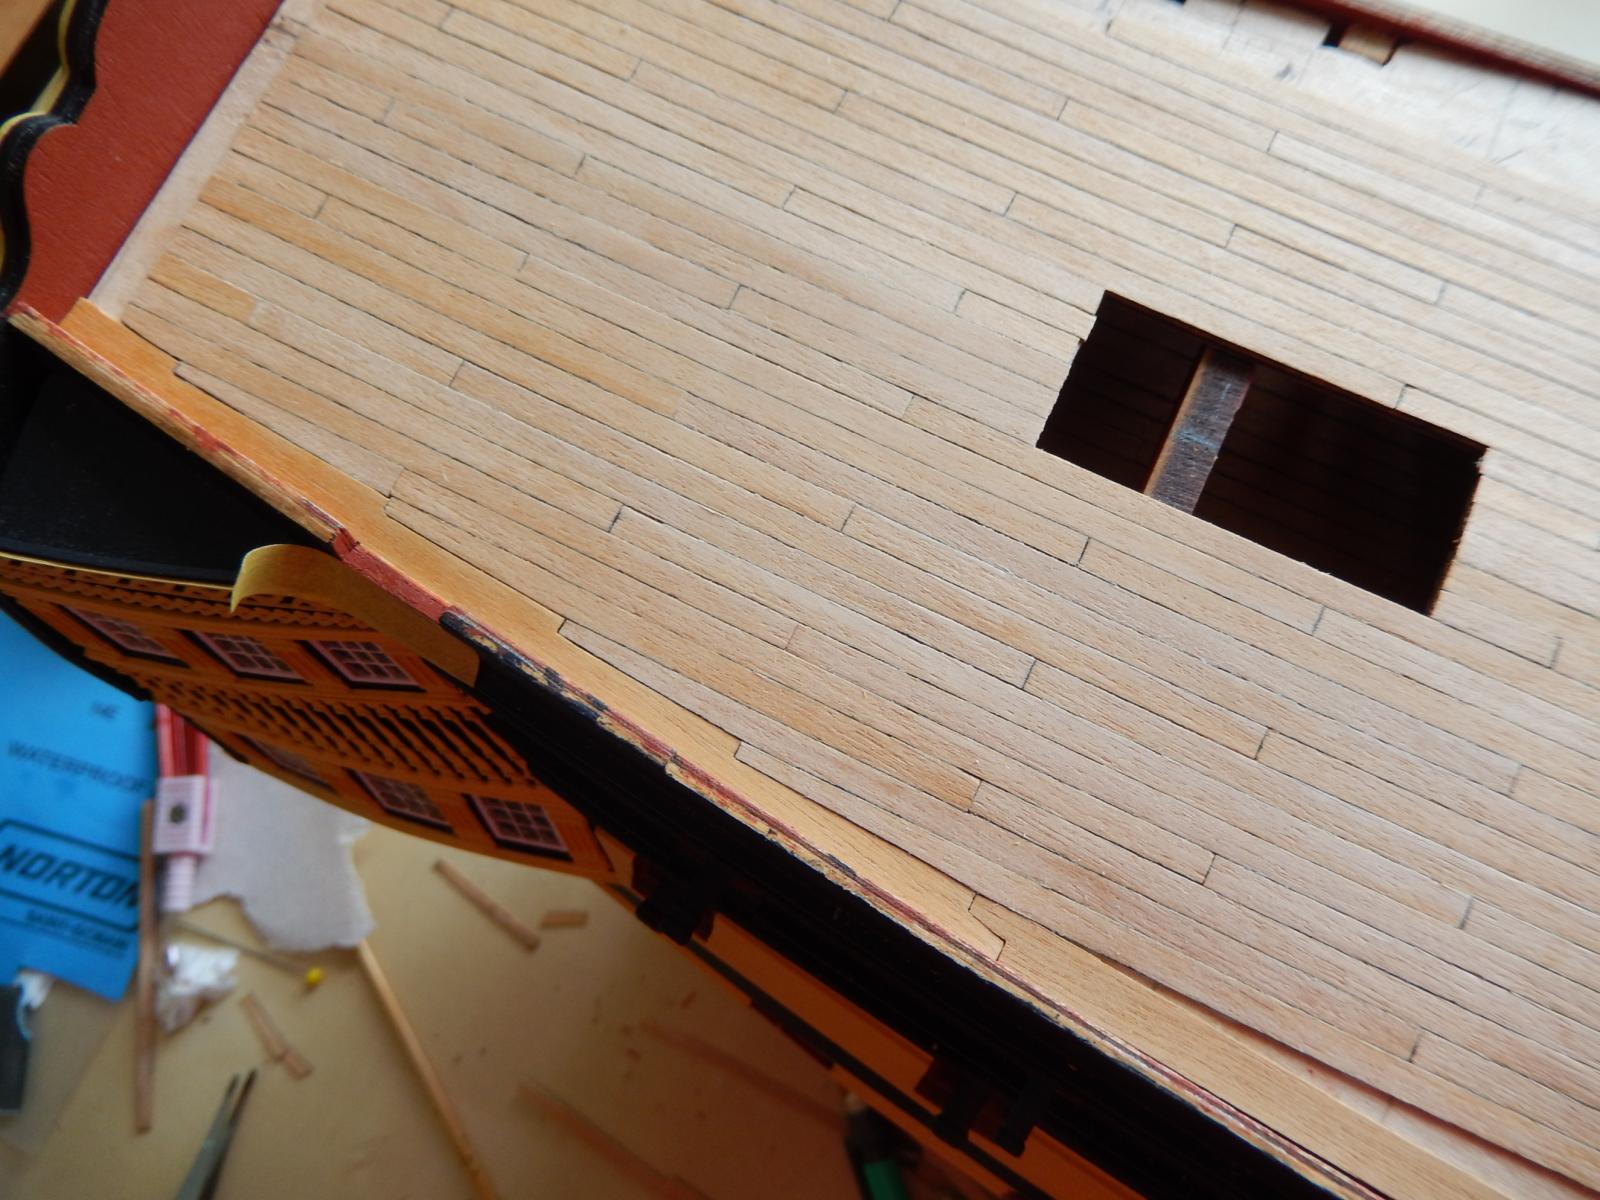
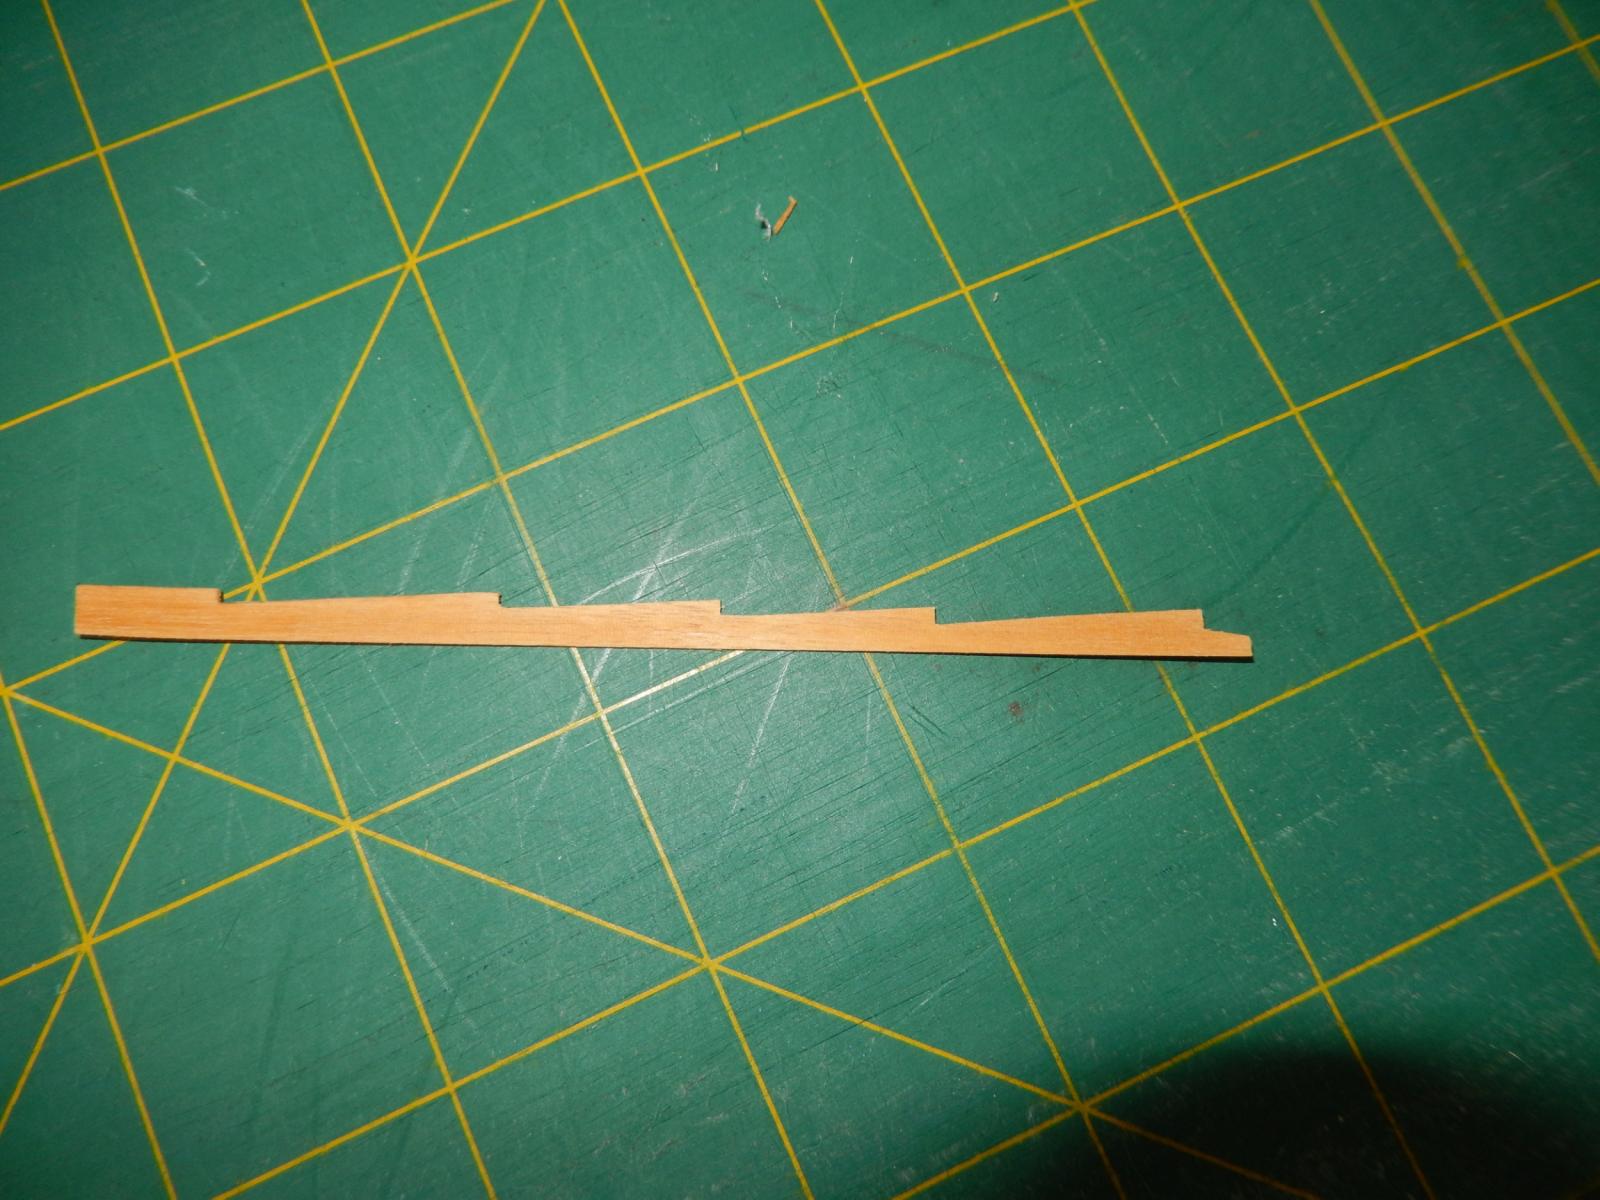
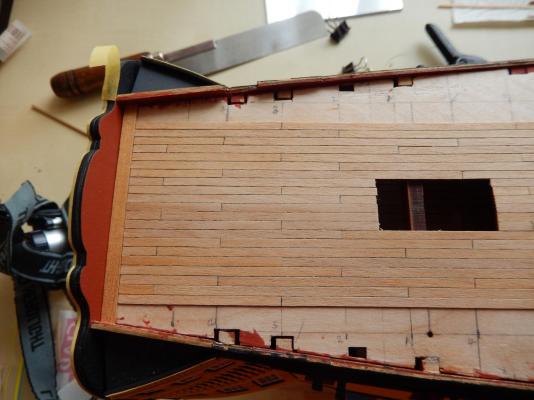
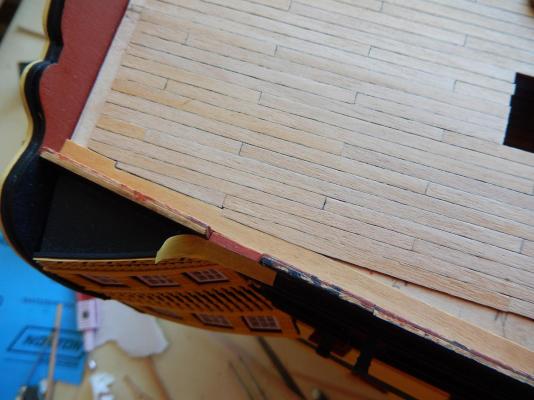
Good progress has been made on planking the poop deck. The following photos show the completion of the starboard side and fitting the margin planks to that side. The margin planks require quite a bit of time and care, and so far I am happy with the results. These shows the steps in fitting the margin planks. Before cutting the notches in the margin planks, on the underside at the point where the notch will be cut I put some gel CA, to prevent the very thin strip from splitting. This is the first plank completed. The second plank completed. How the planking looks before the margin is fitted and glued (white PVA applied with a hypodermic syringe for all planks).


-
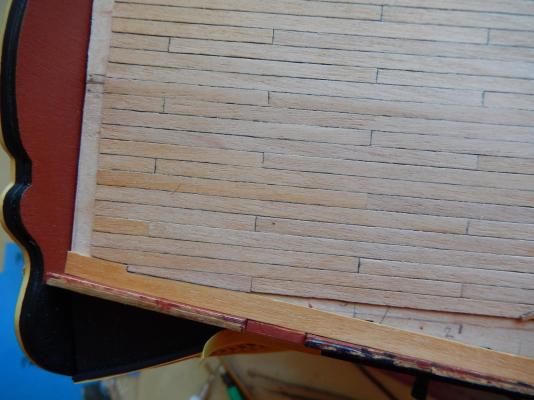
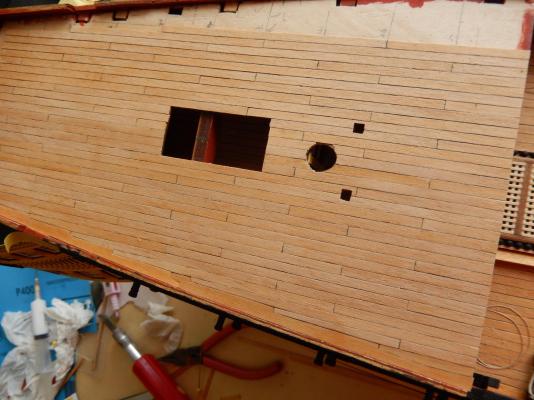
I have exhumed the missing photos, though I have no idea what I have done. This shows a complete three butt shift. Below is one 'row' of the three butt shift taken to the stern. I had forgotten to put in a margin plank at the stern, and consequently had to cut off the four end planks to make provision for it - which was a bit nerve-wracking. The margin plank in the photo is only dry-fitted. On looking at it, it seems a bit wide (though consistent with the plan), but it's a bit late to change. I shall now do 'rows' alternately on either side of the centre line to gradually plank the entire deck. This allows any adjustment to be made to the width of each 'row' (the planking timber varies slightly in width), so that exactly the same number of planks are on each side of the centre line, butting up to the margin planks on each side.
-
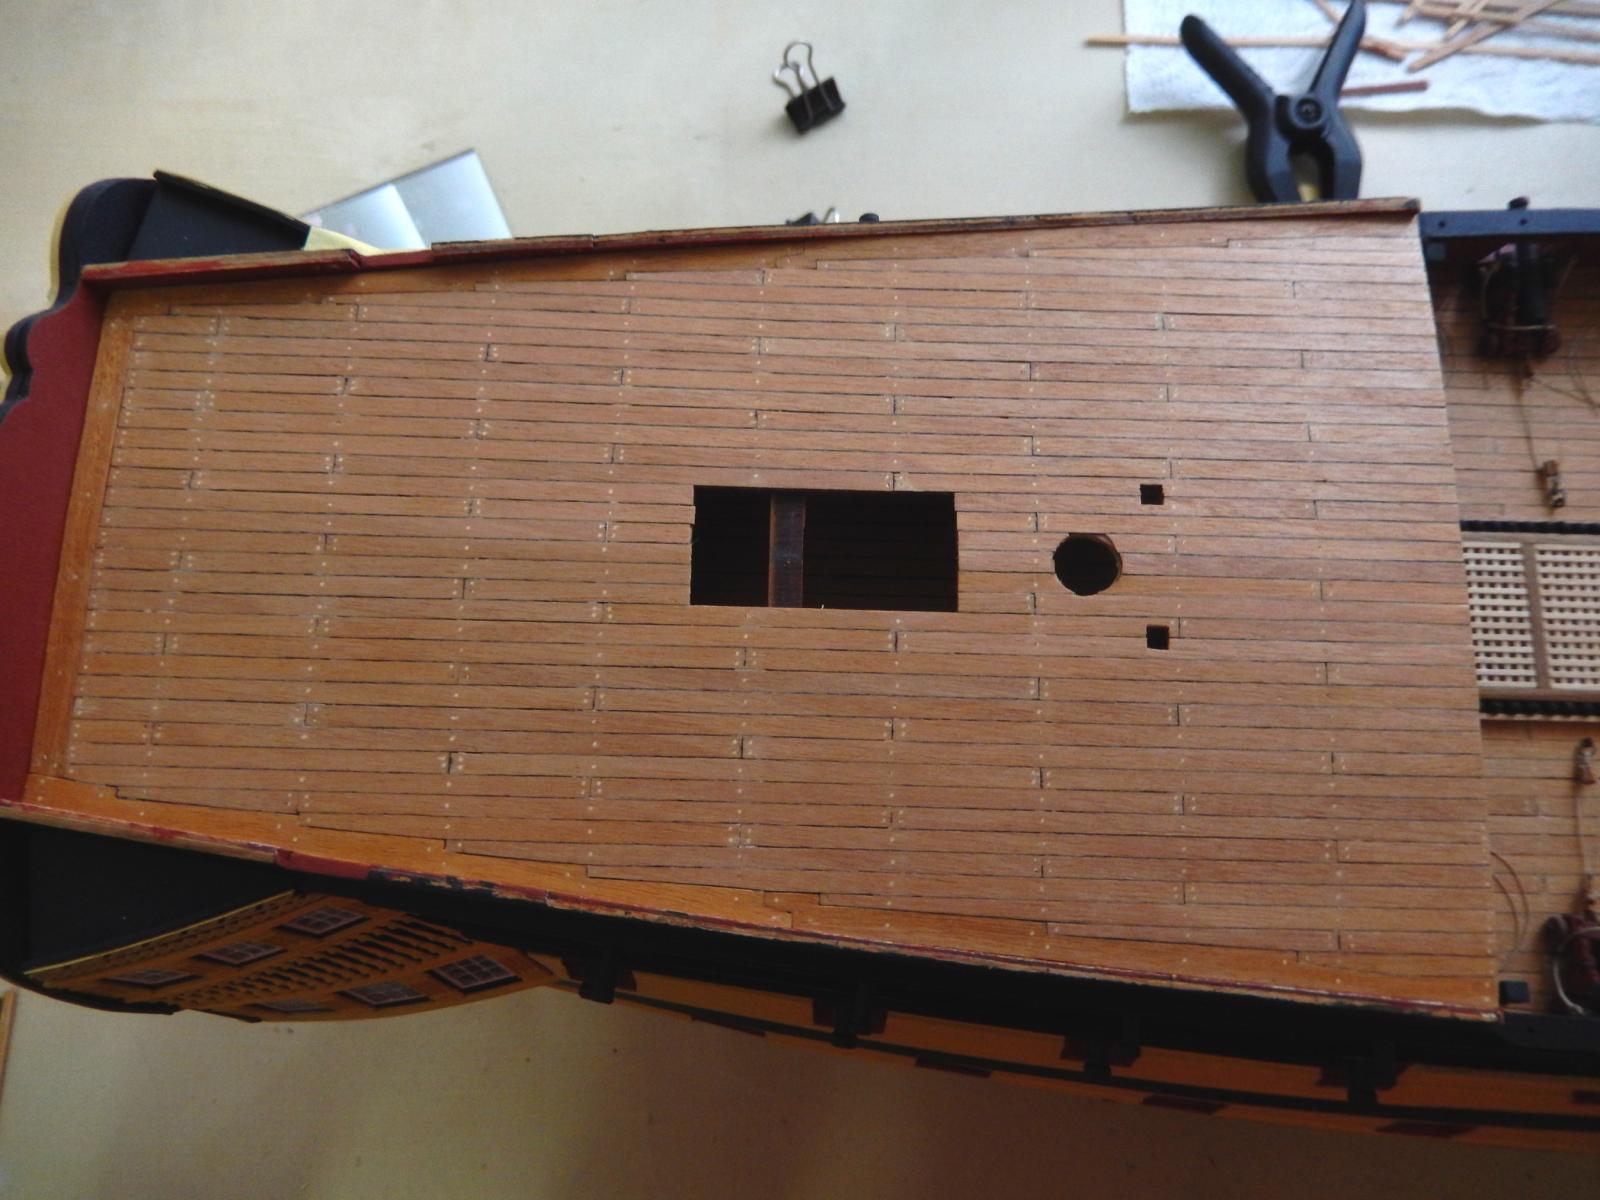
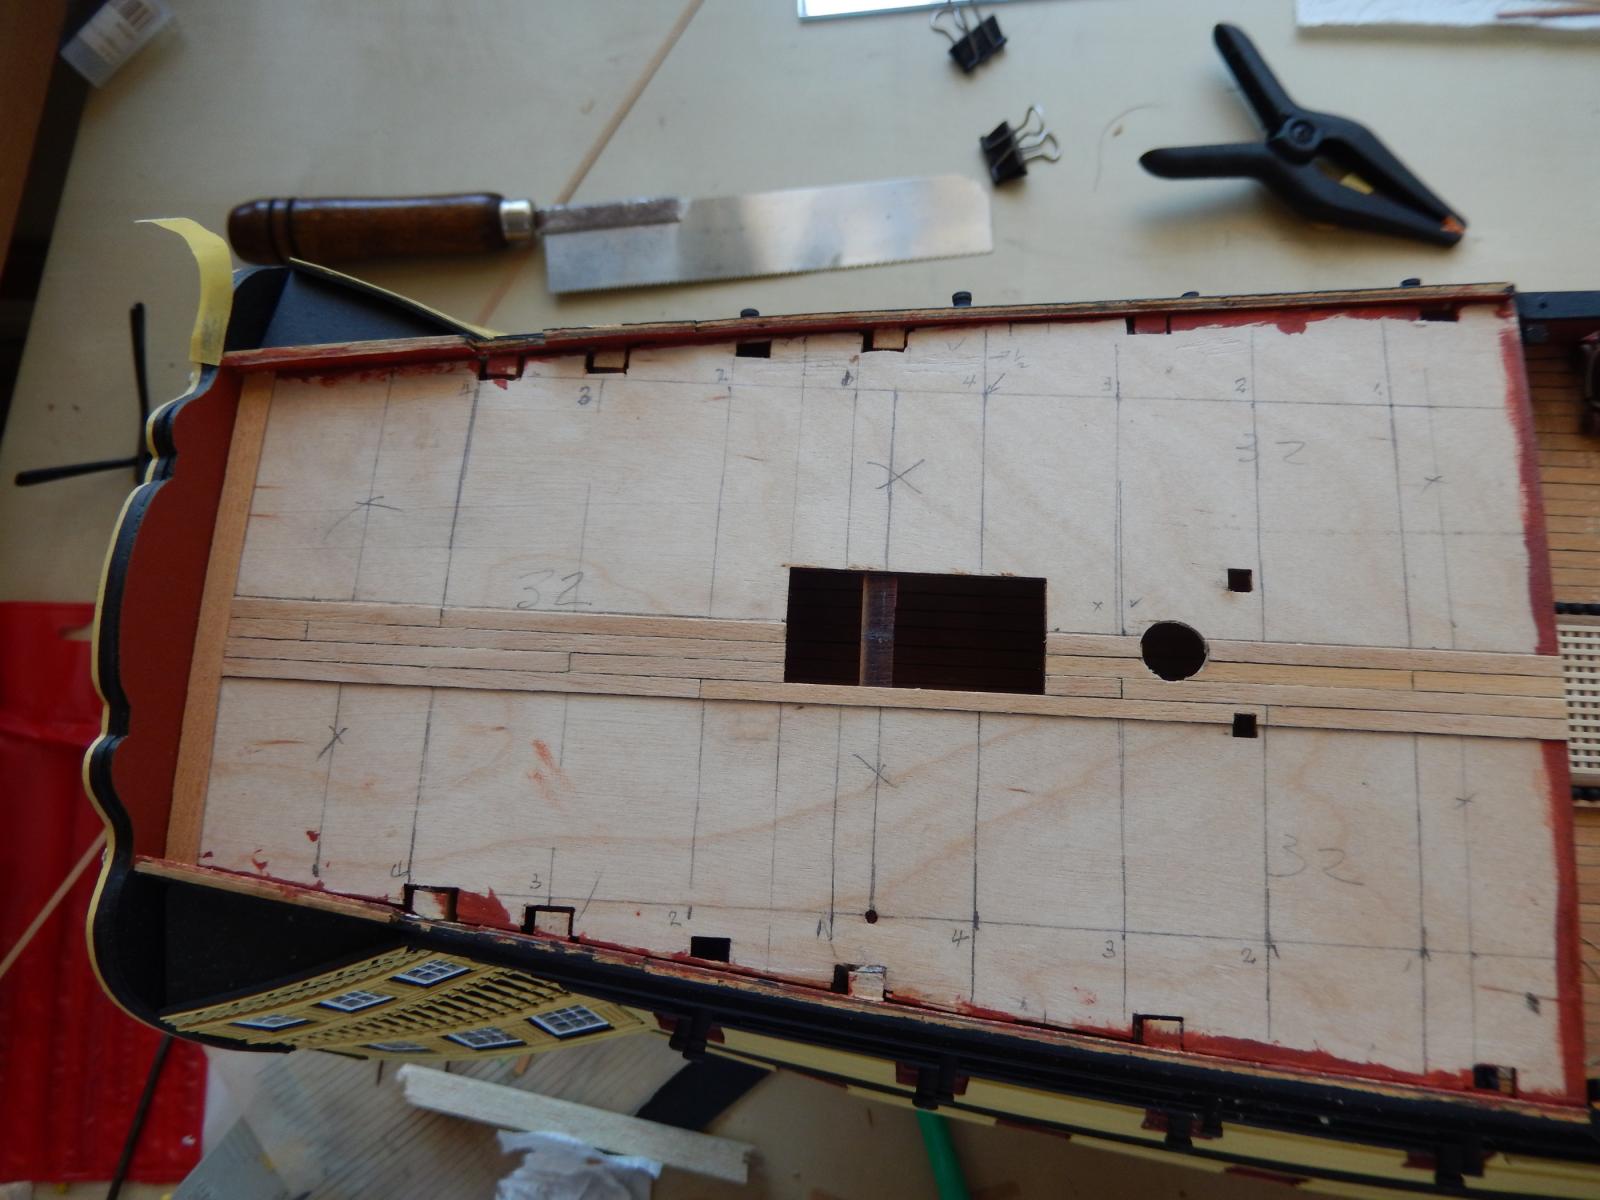
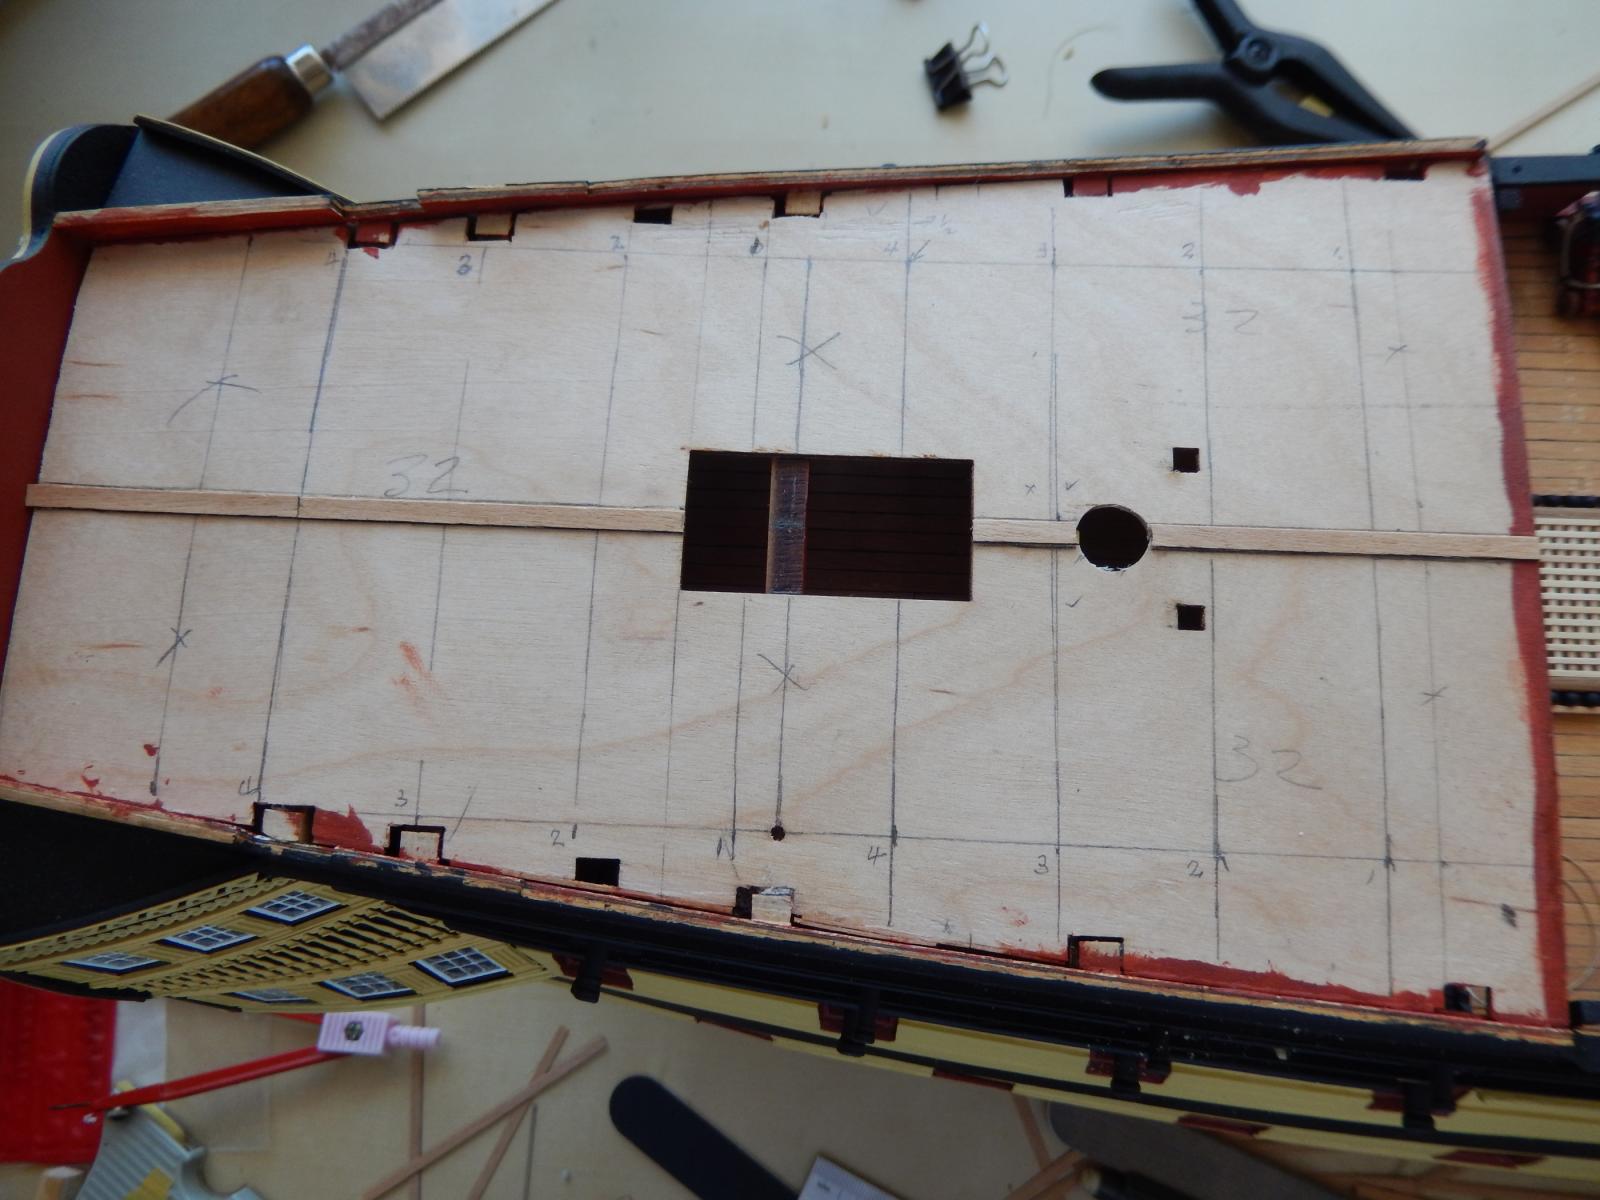
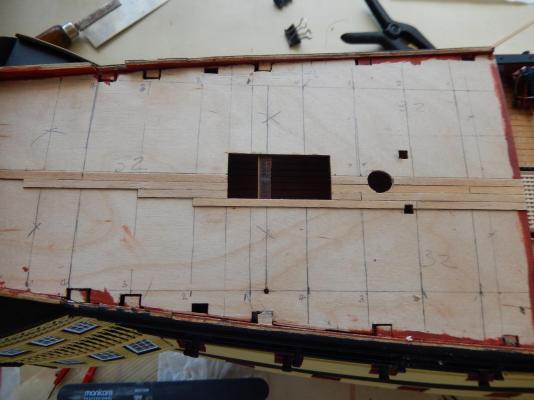
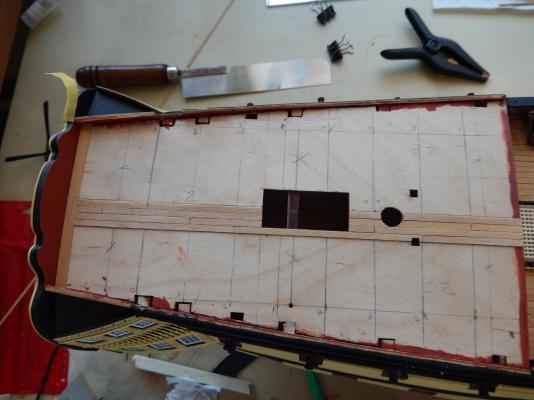
I have begun putting the decking on the poop deck. Something odd has happened in loading the photos. My editing program refuses to load about 3 photos for some reason. First I ran a piece of strip centred on the deck base, then pencilled a line on either side of the strip to provide a guide. This shows the guide. I have also penciled onto the base, a grid in quarter plank lengths before gluing the planks in a three butt shift pattern. The (I hope temporarily ) lost photos show this in more detail. Now to go and do battle with the computer.


-
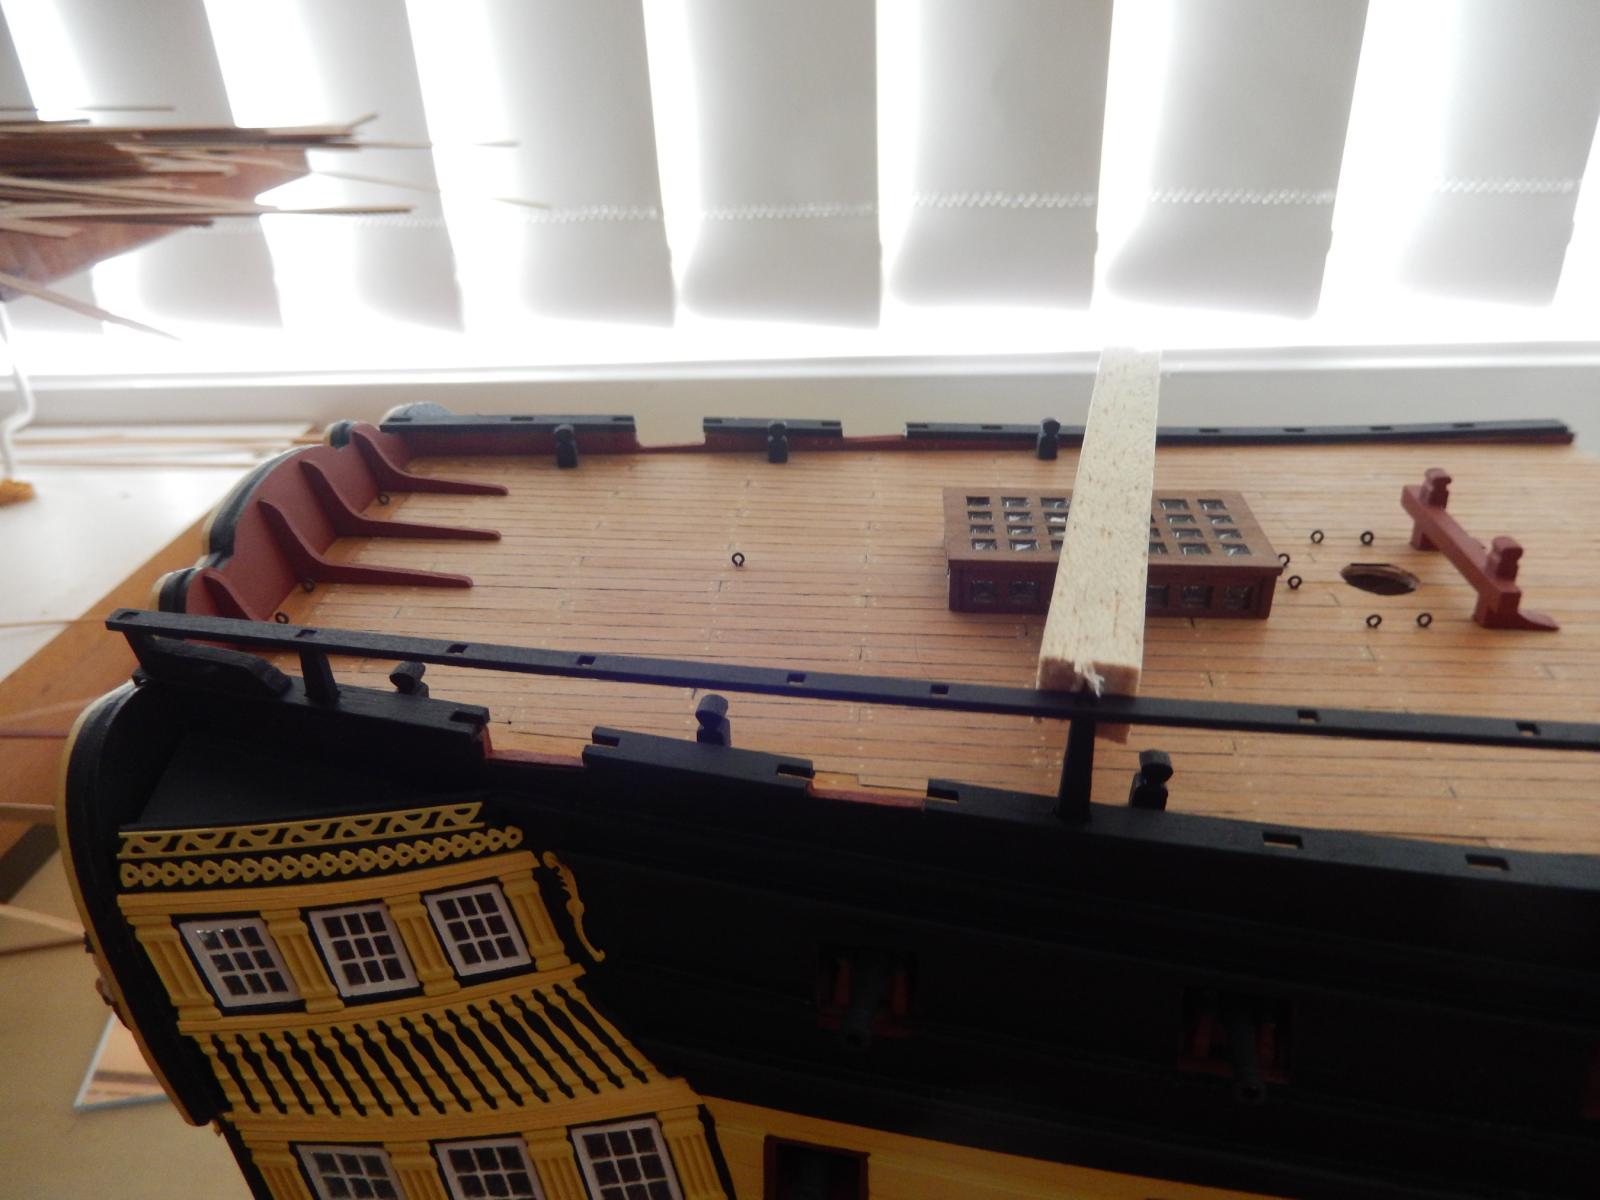
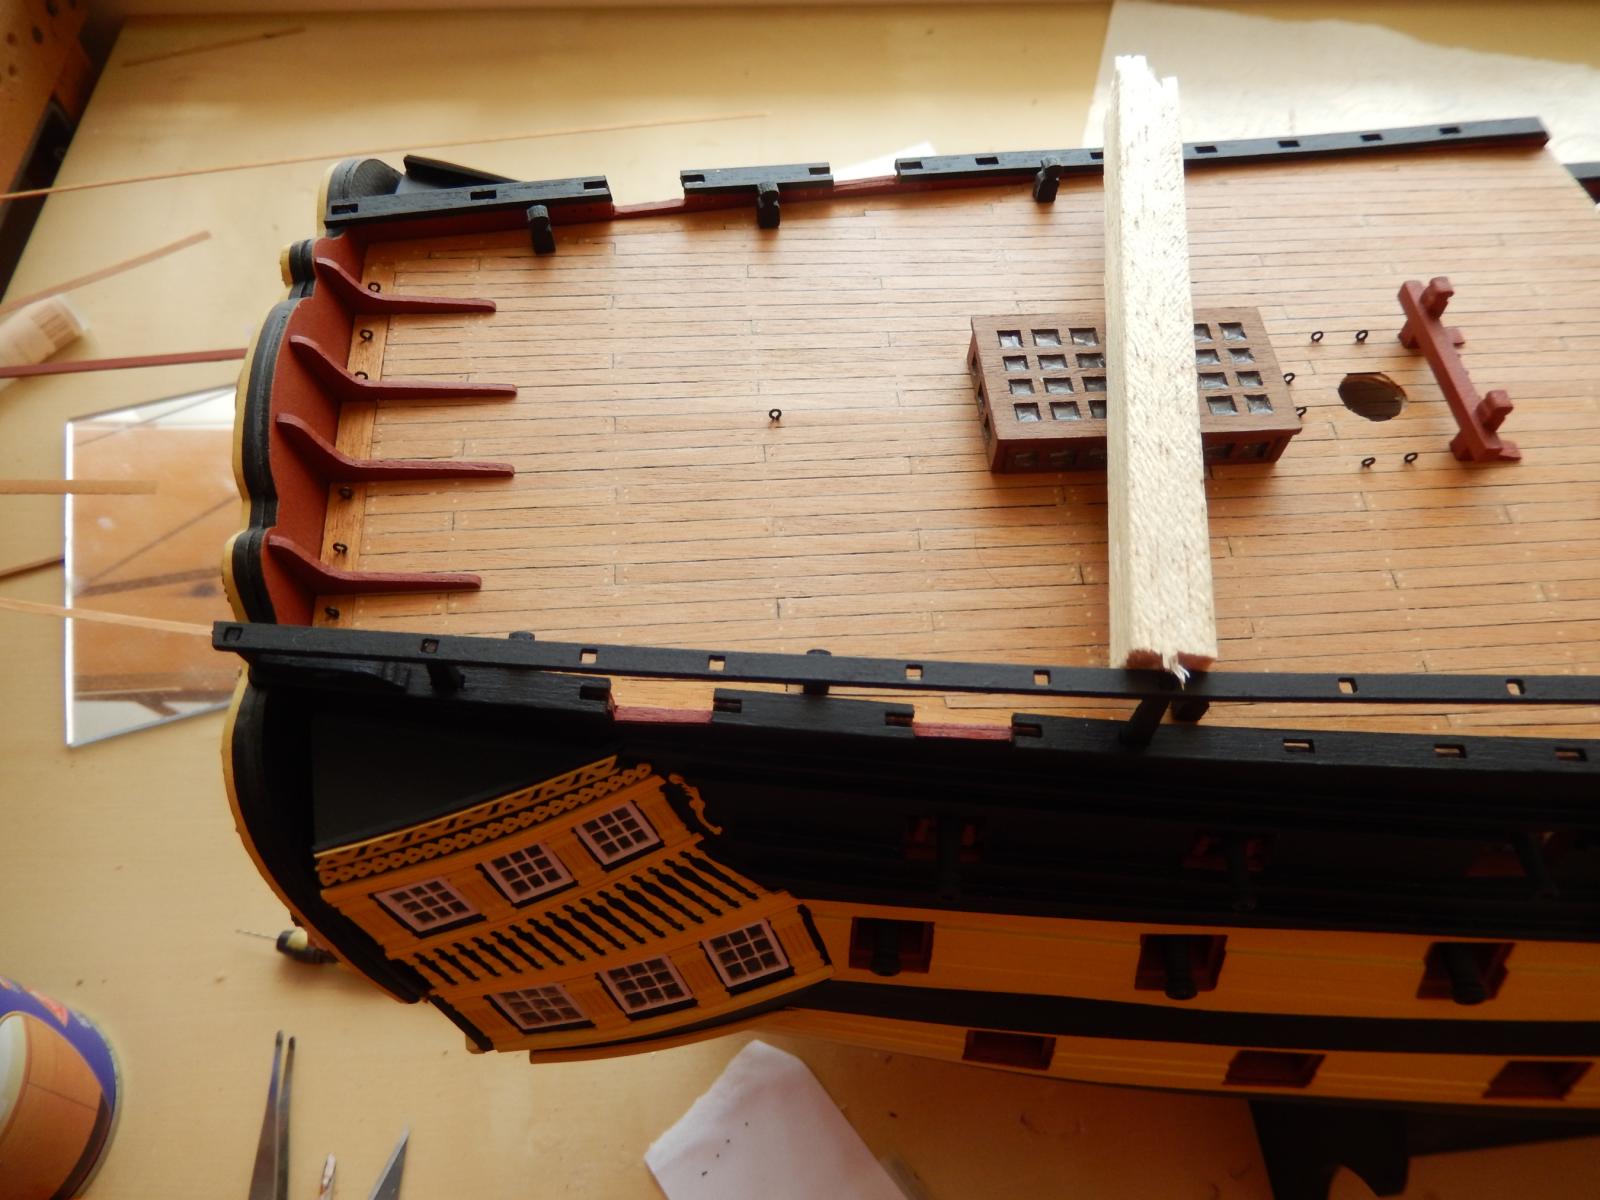
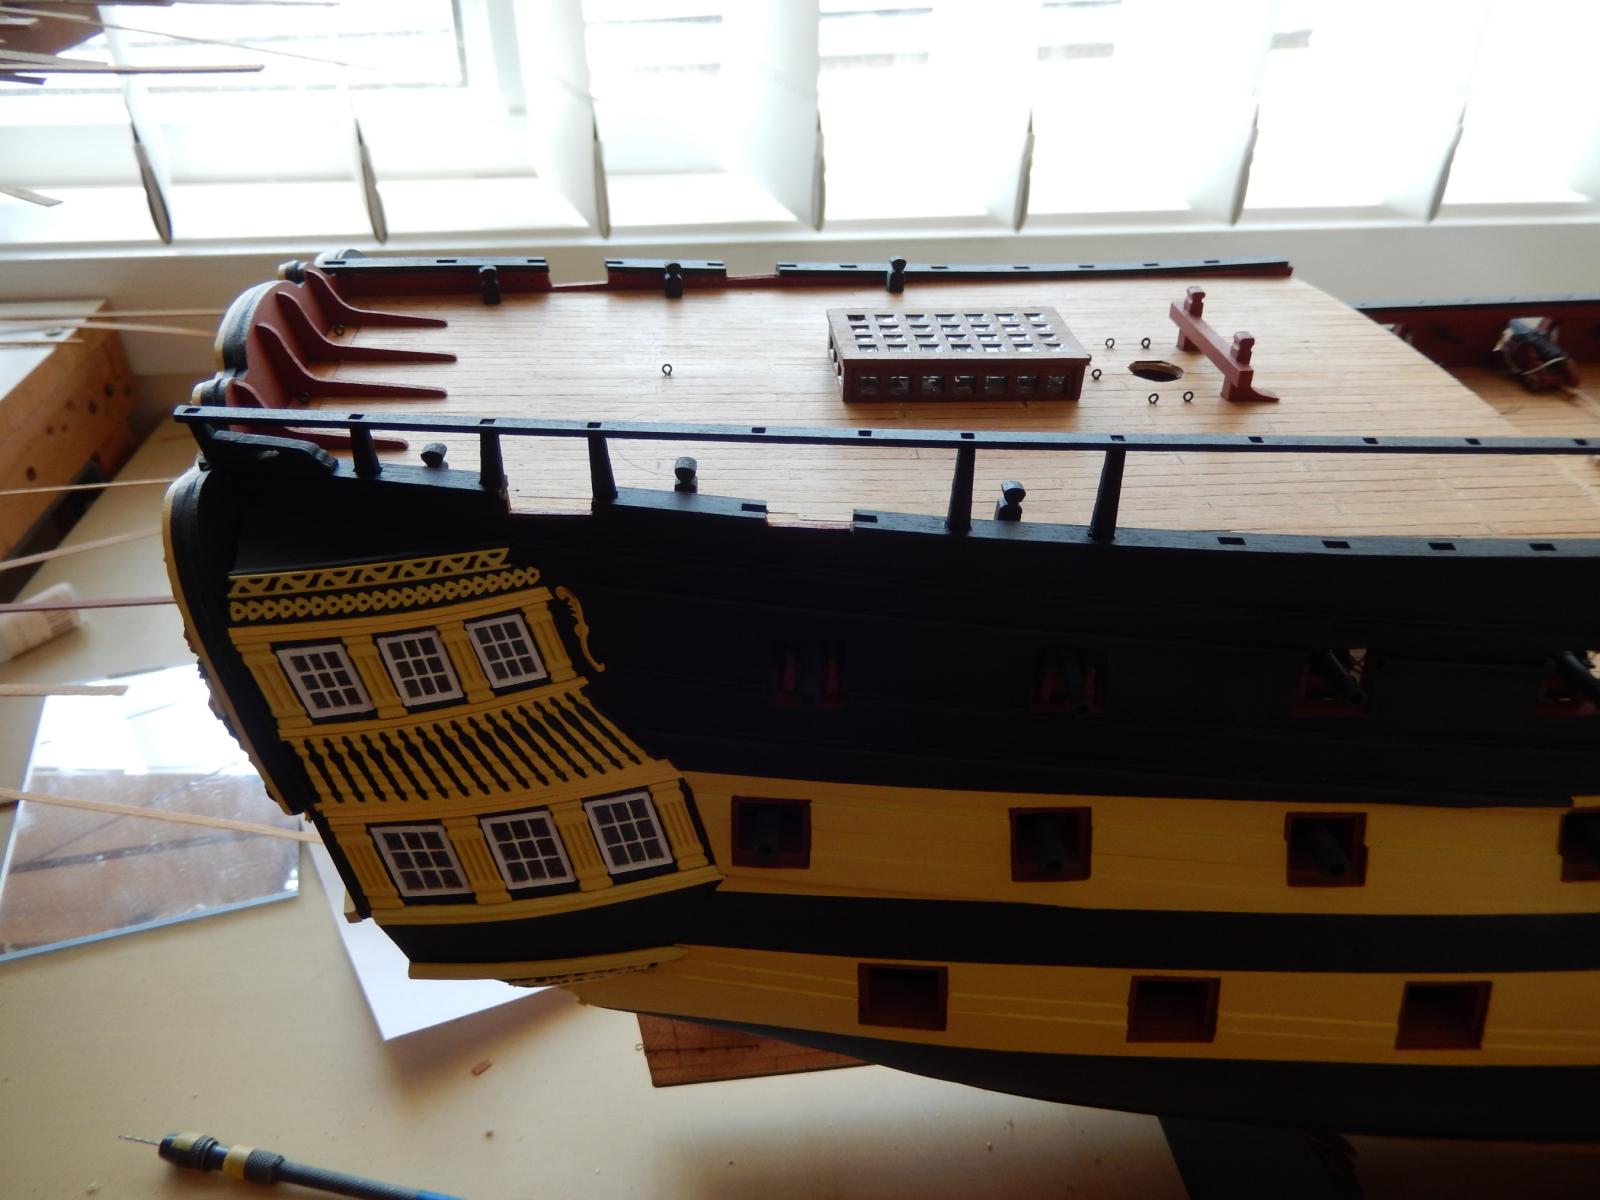
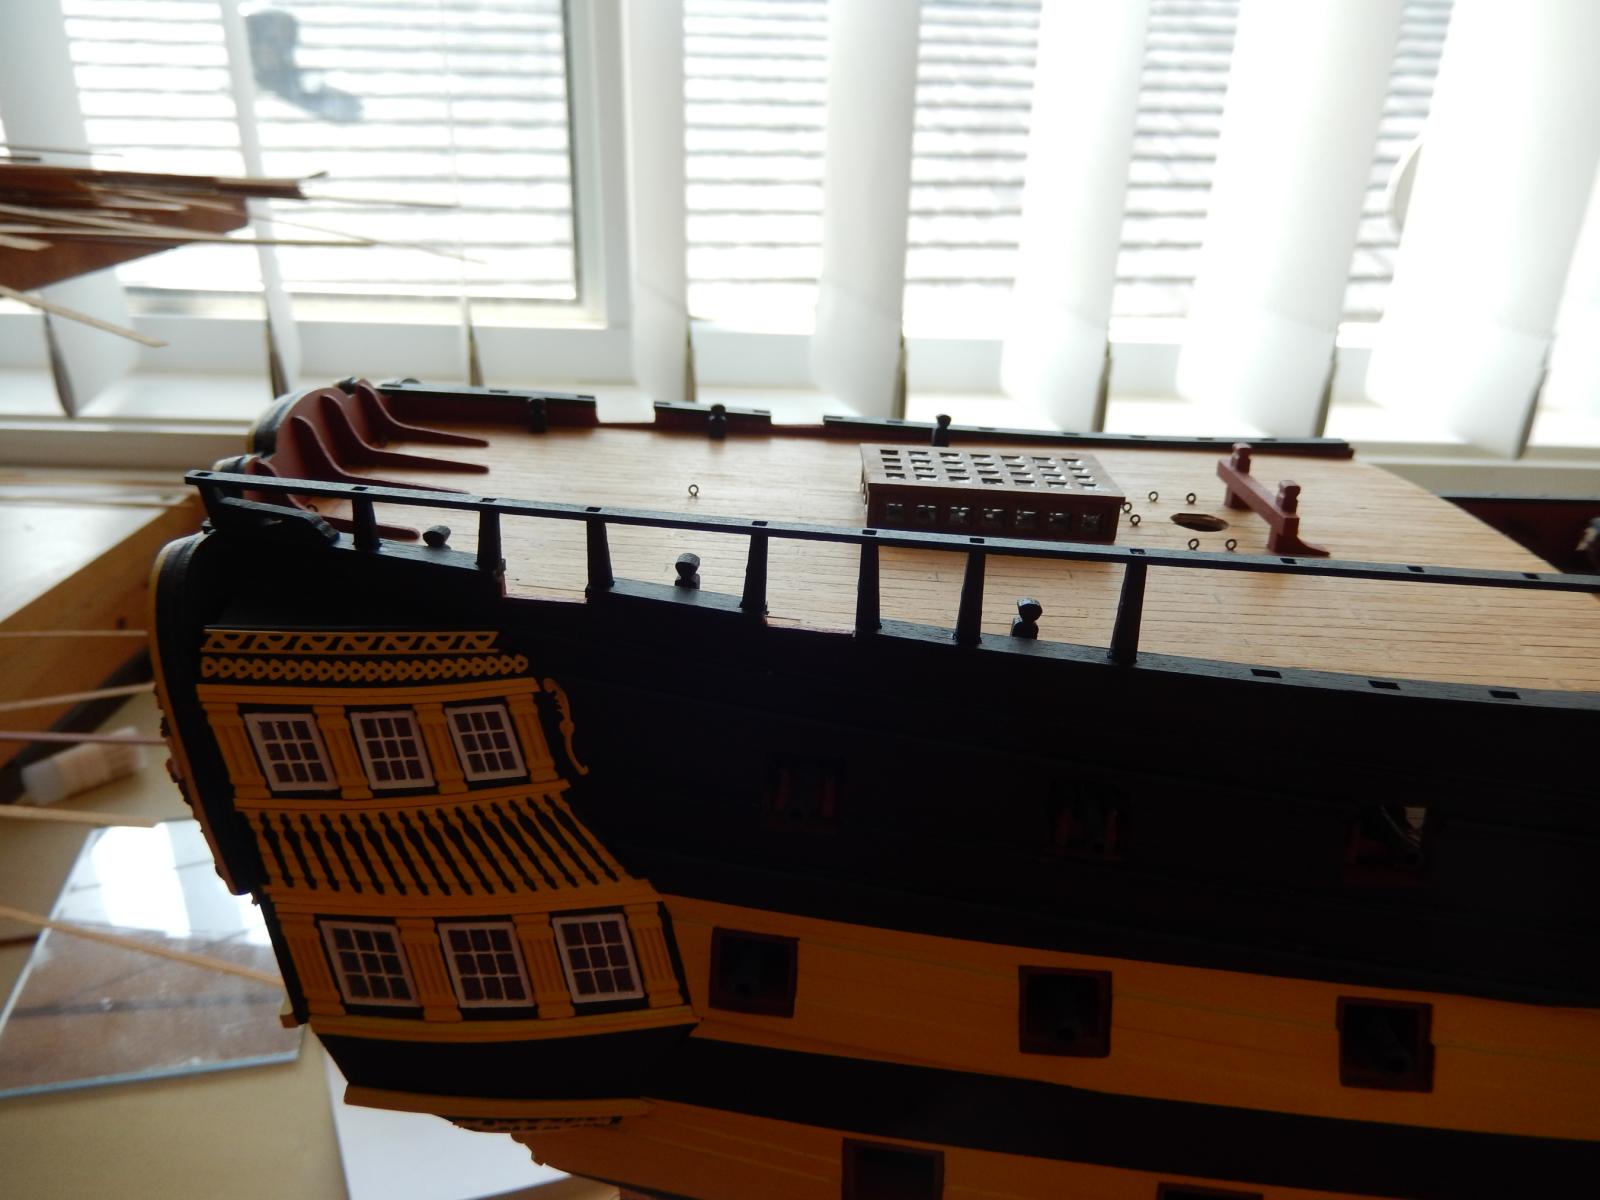
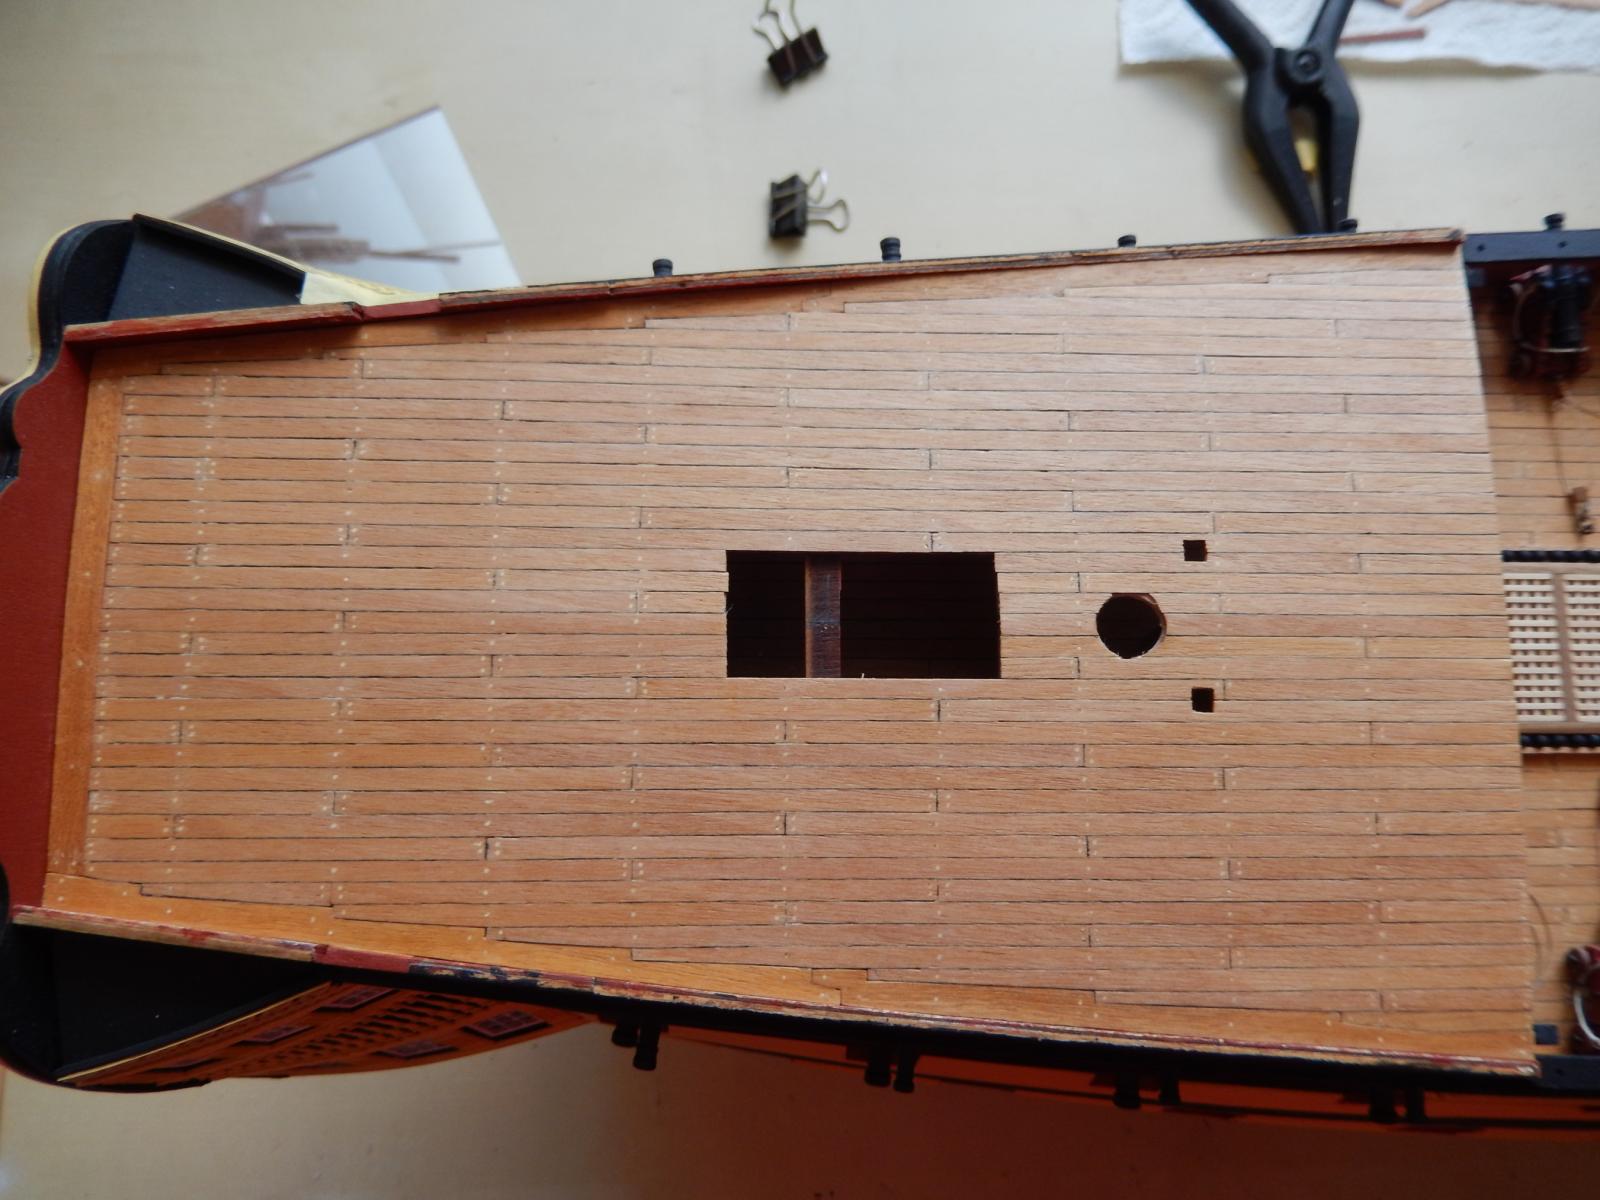
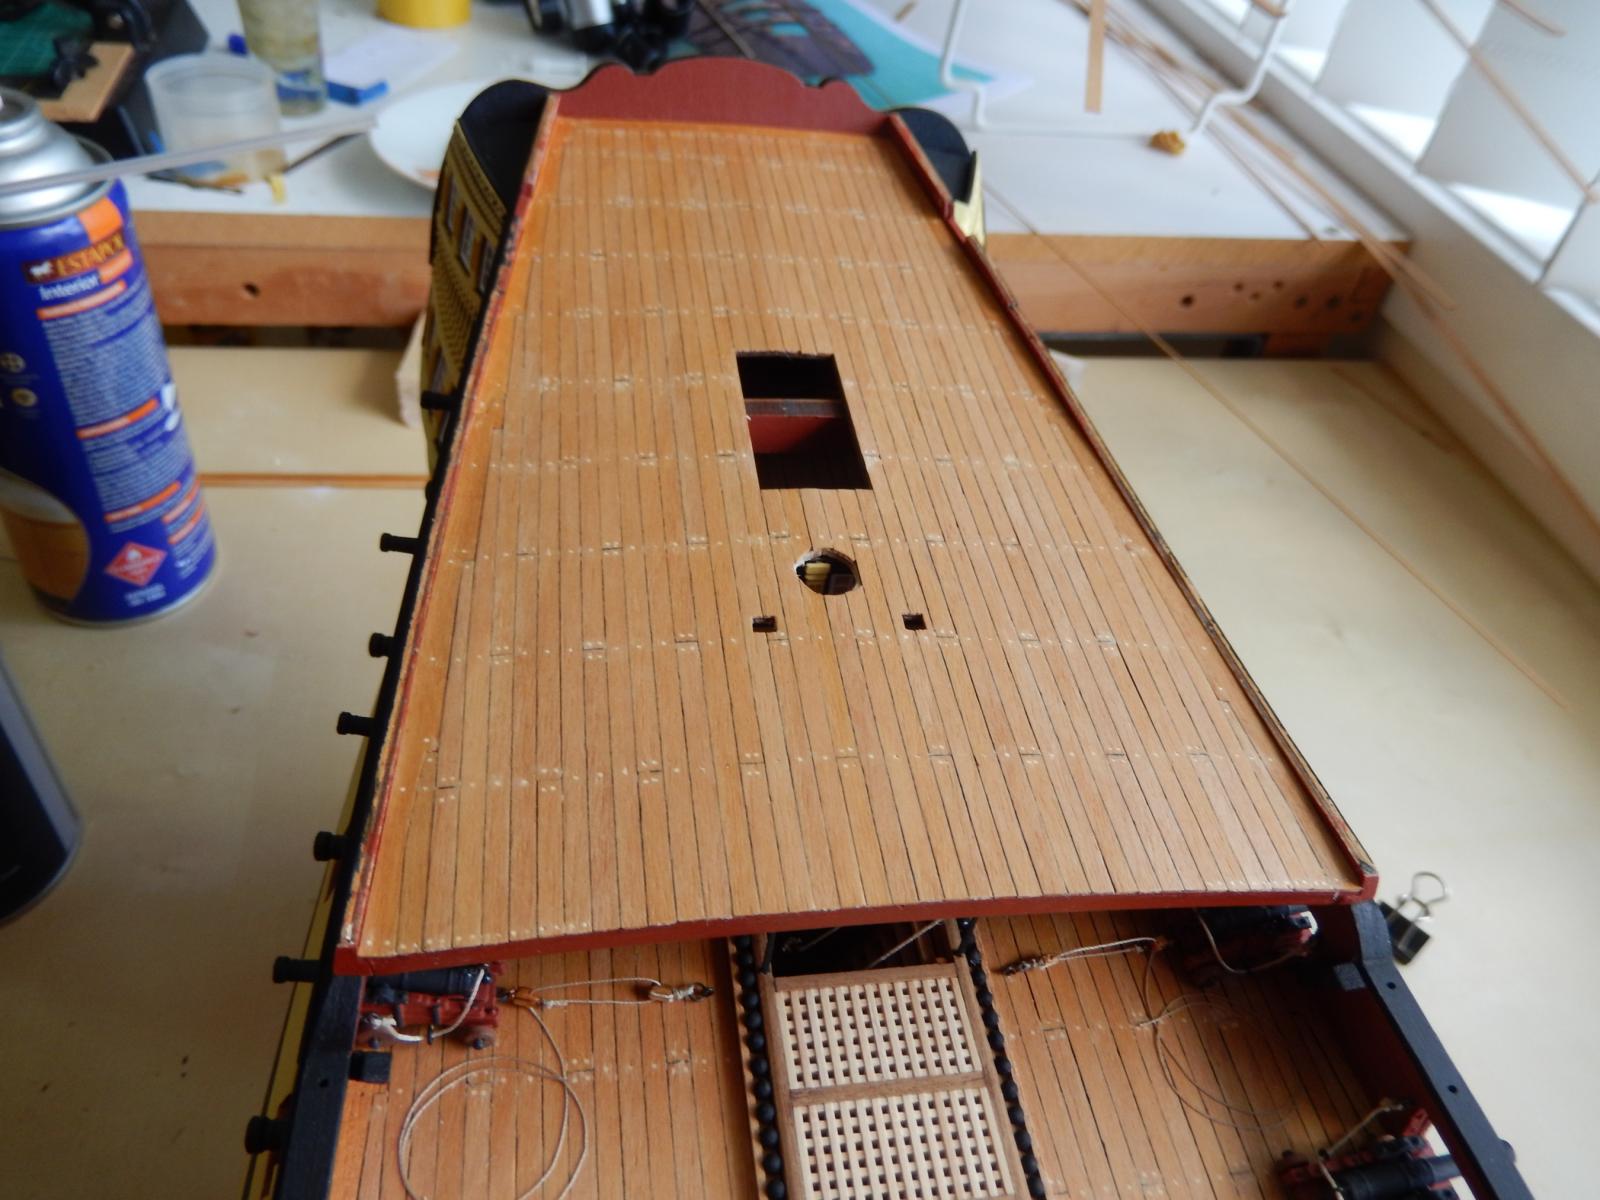
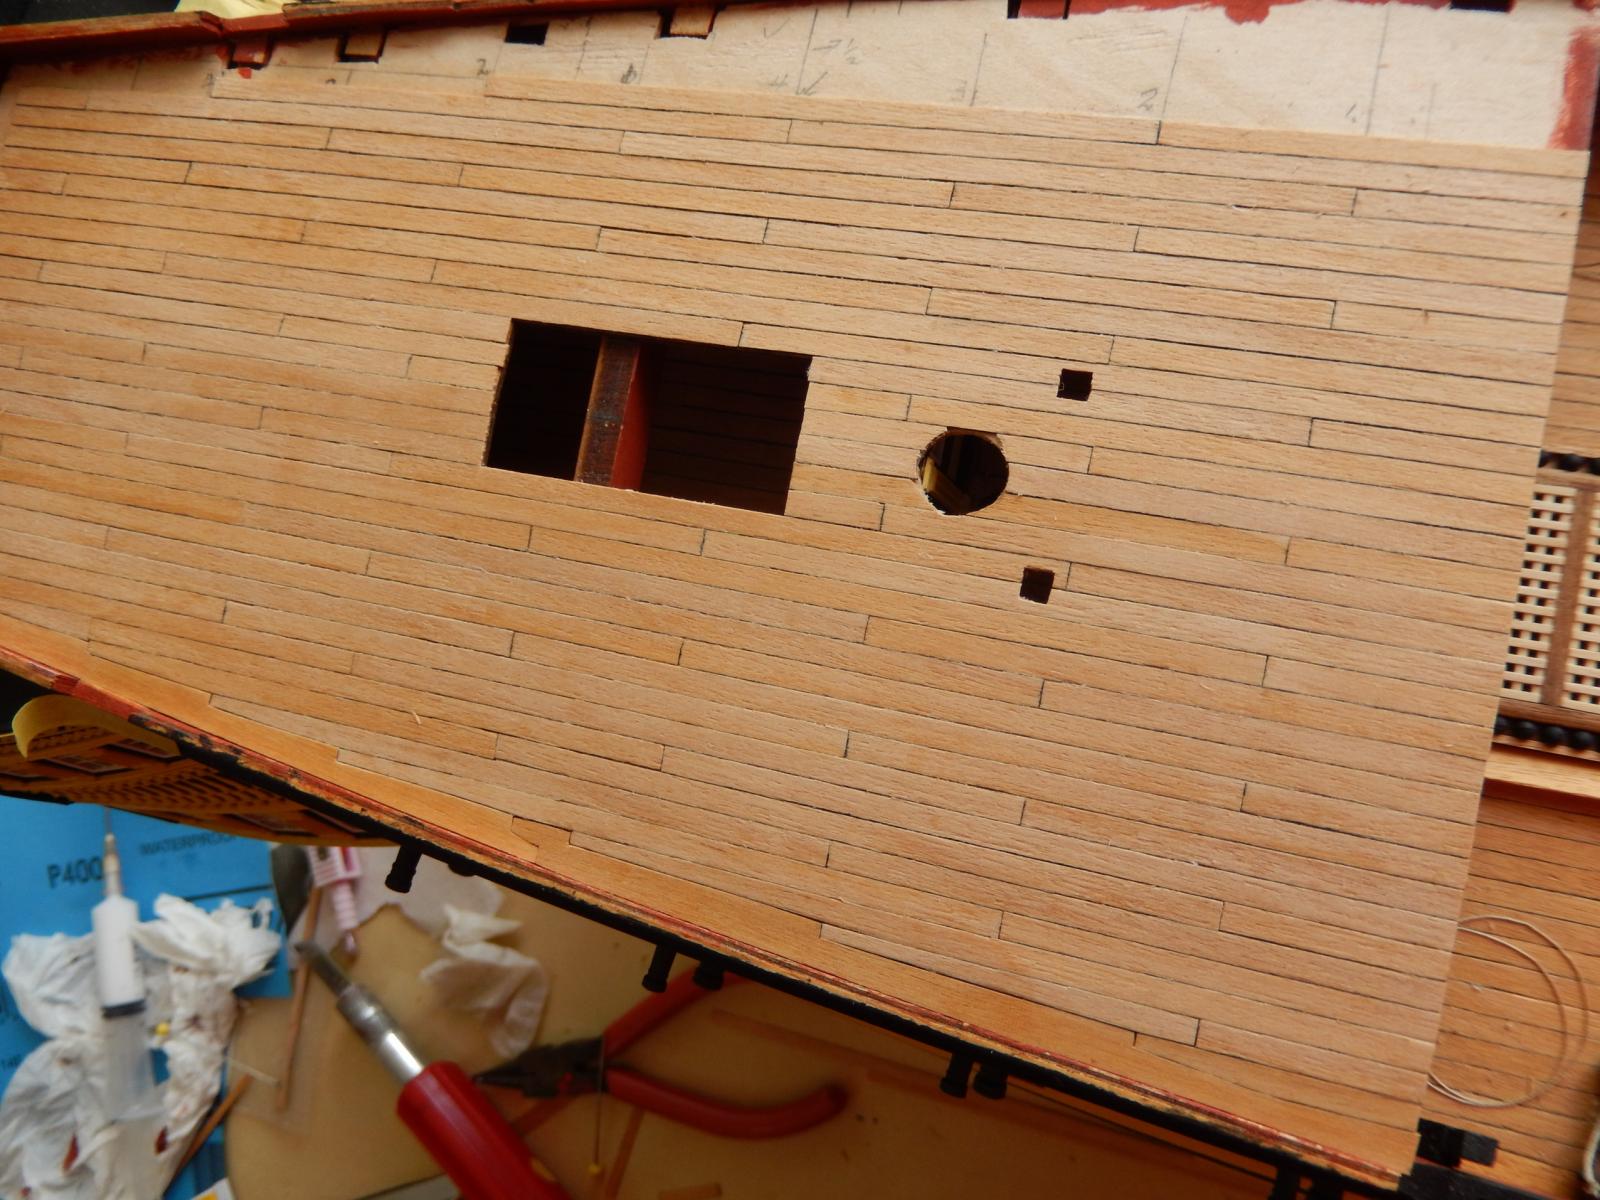
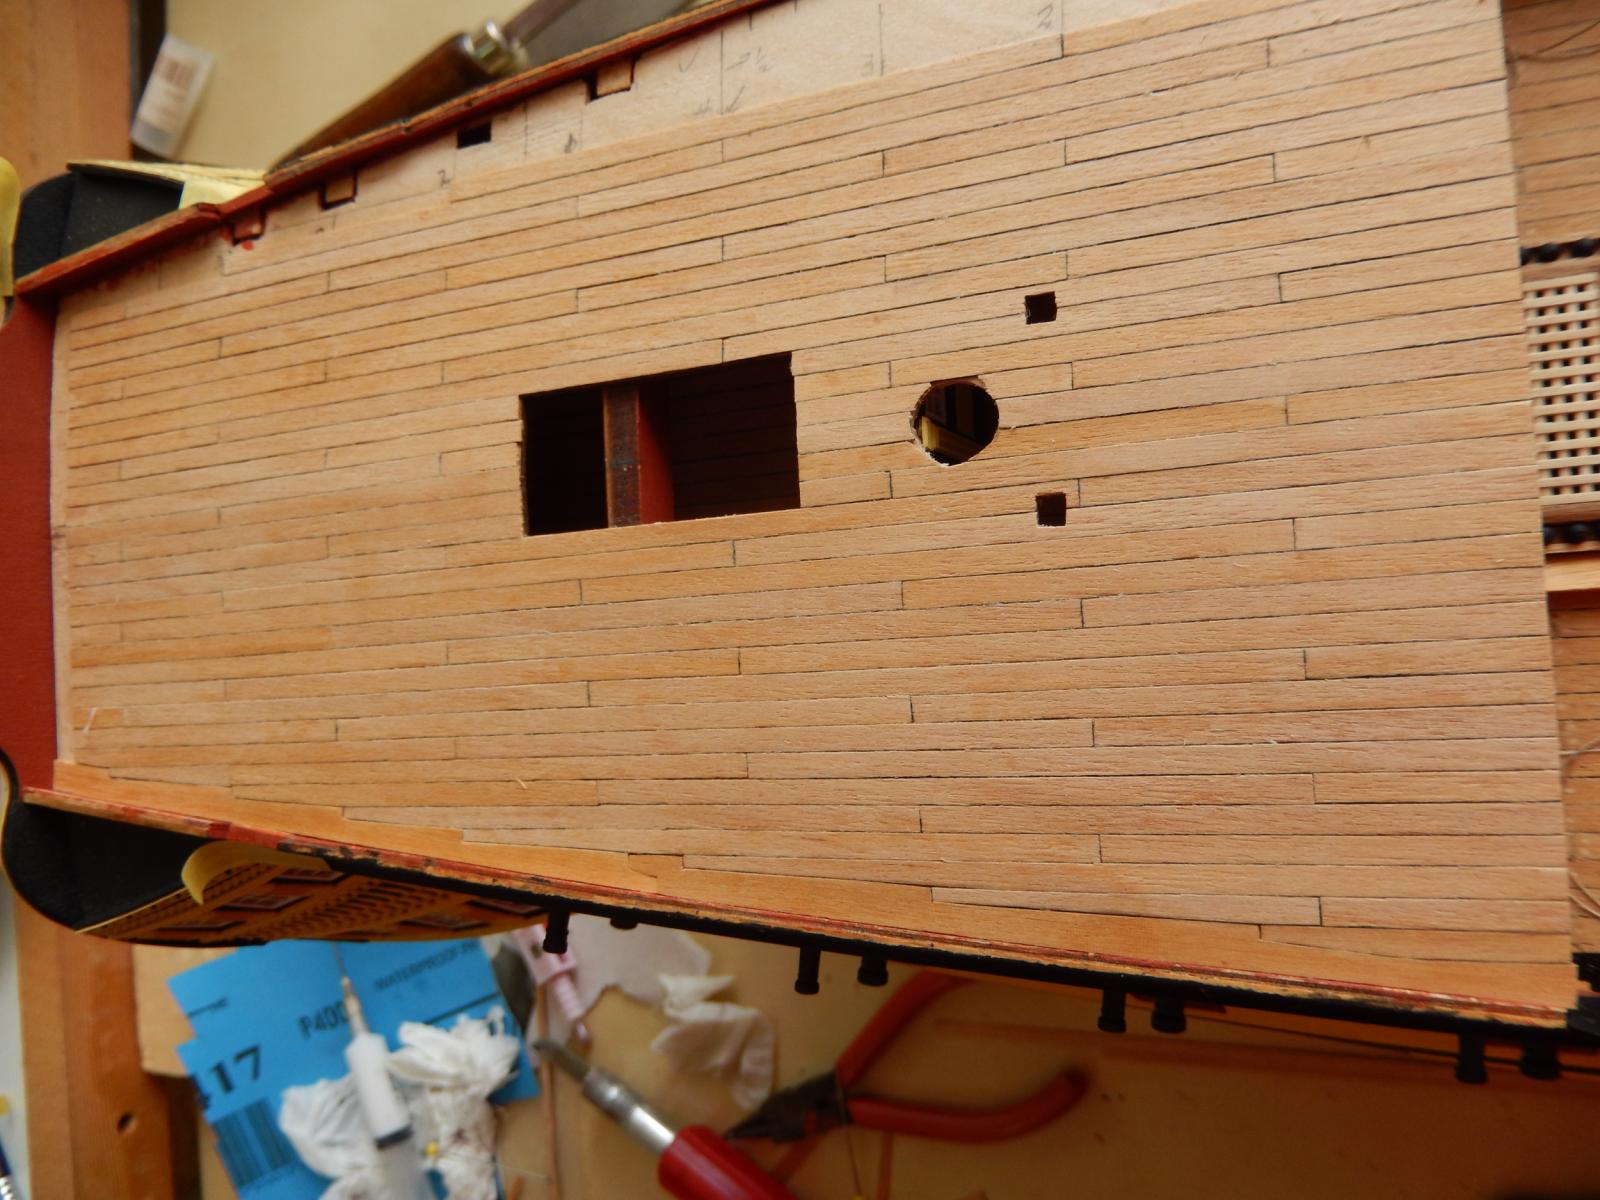
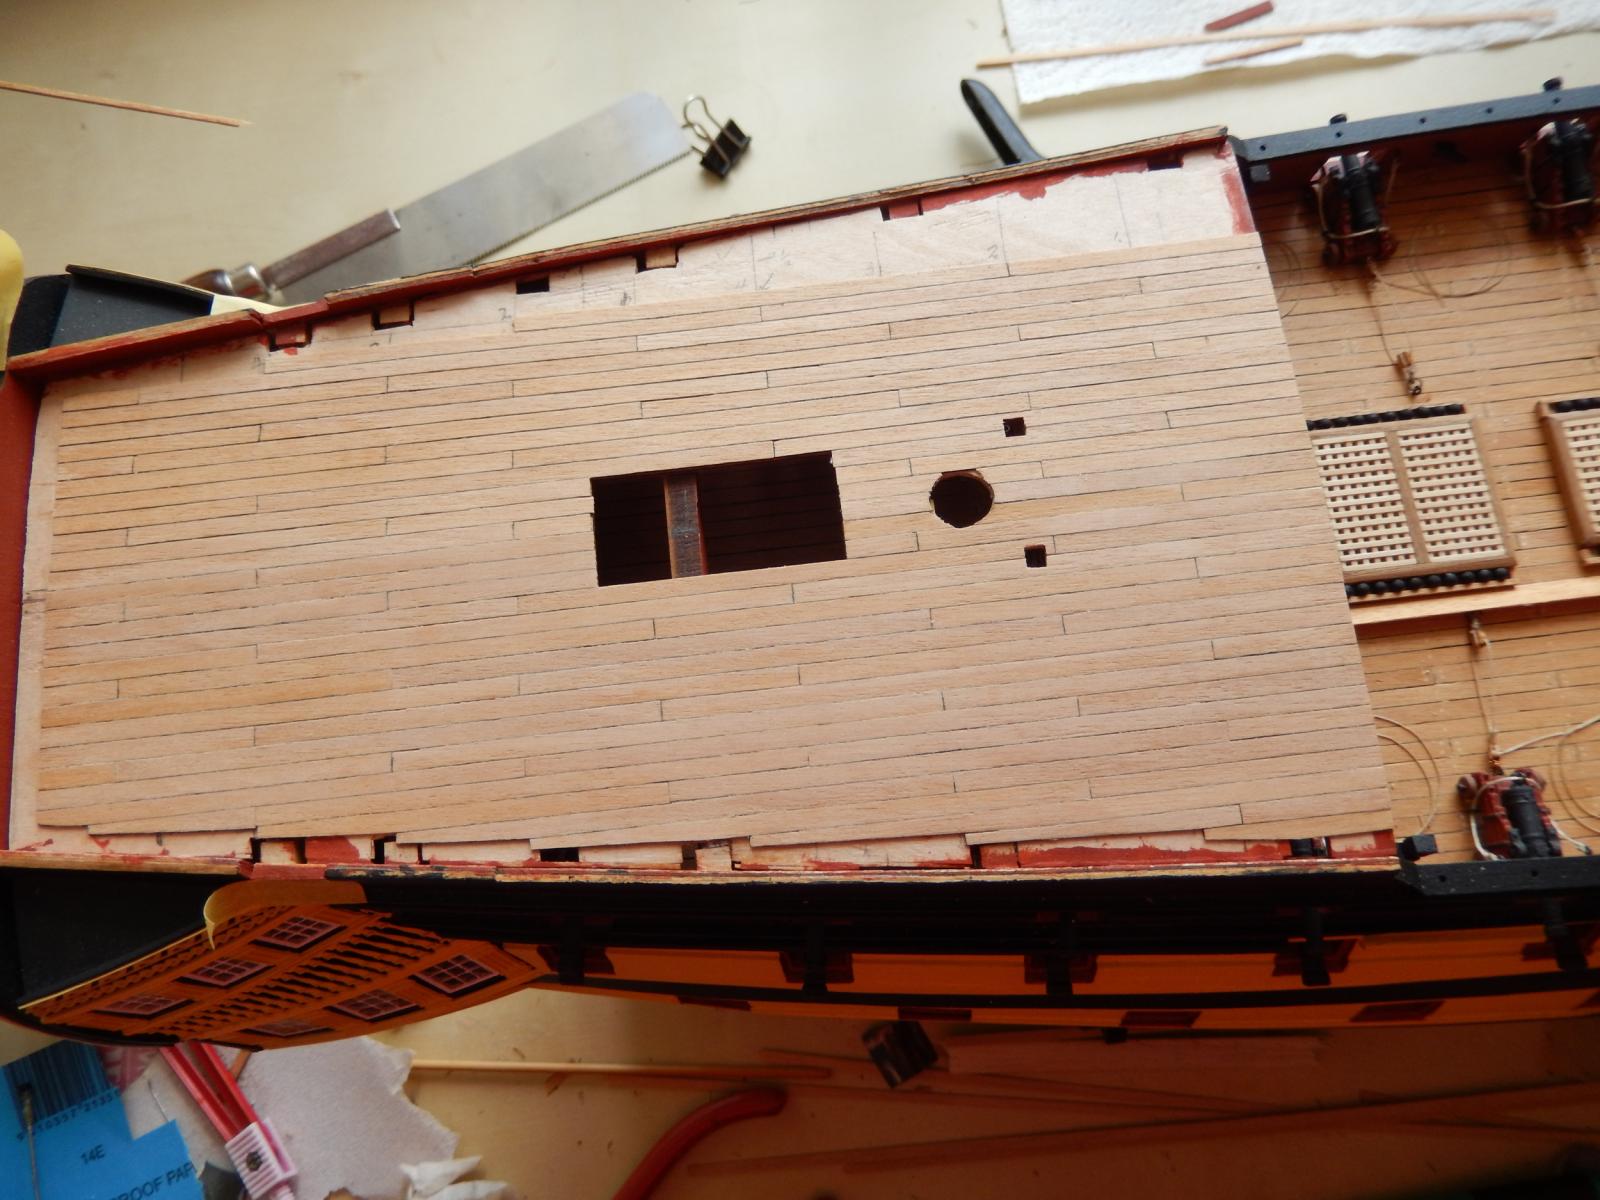
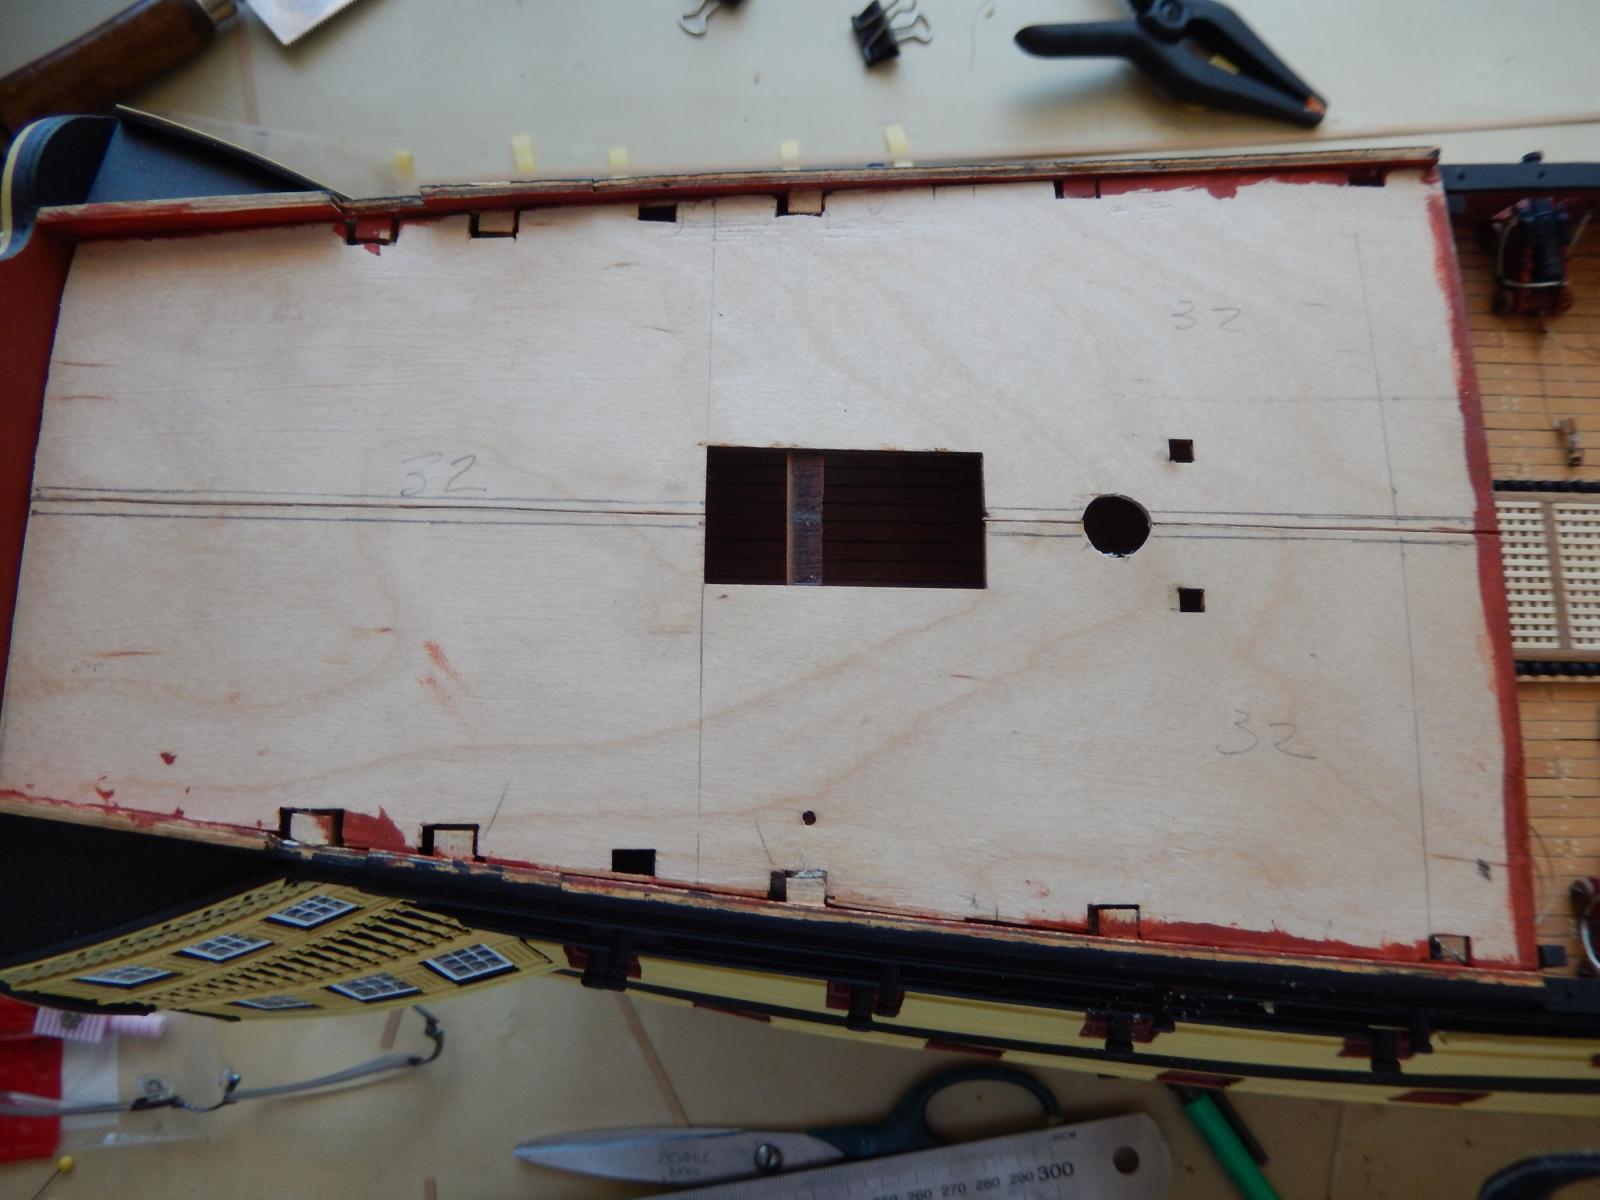
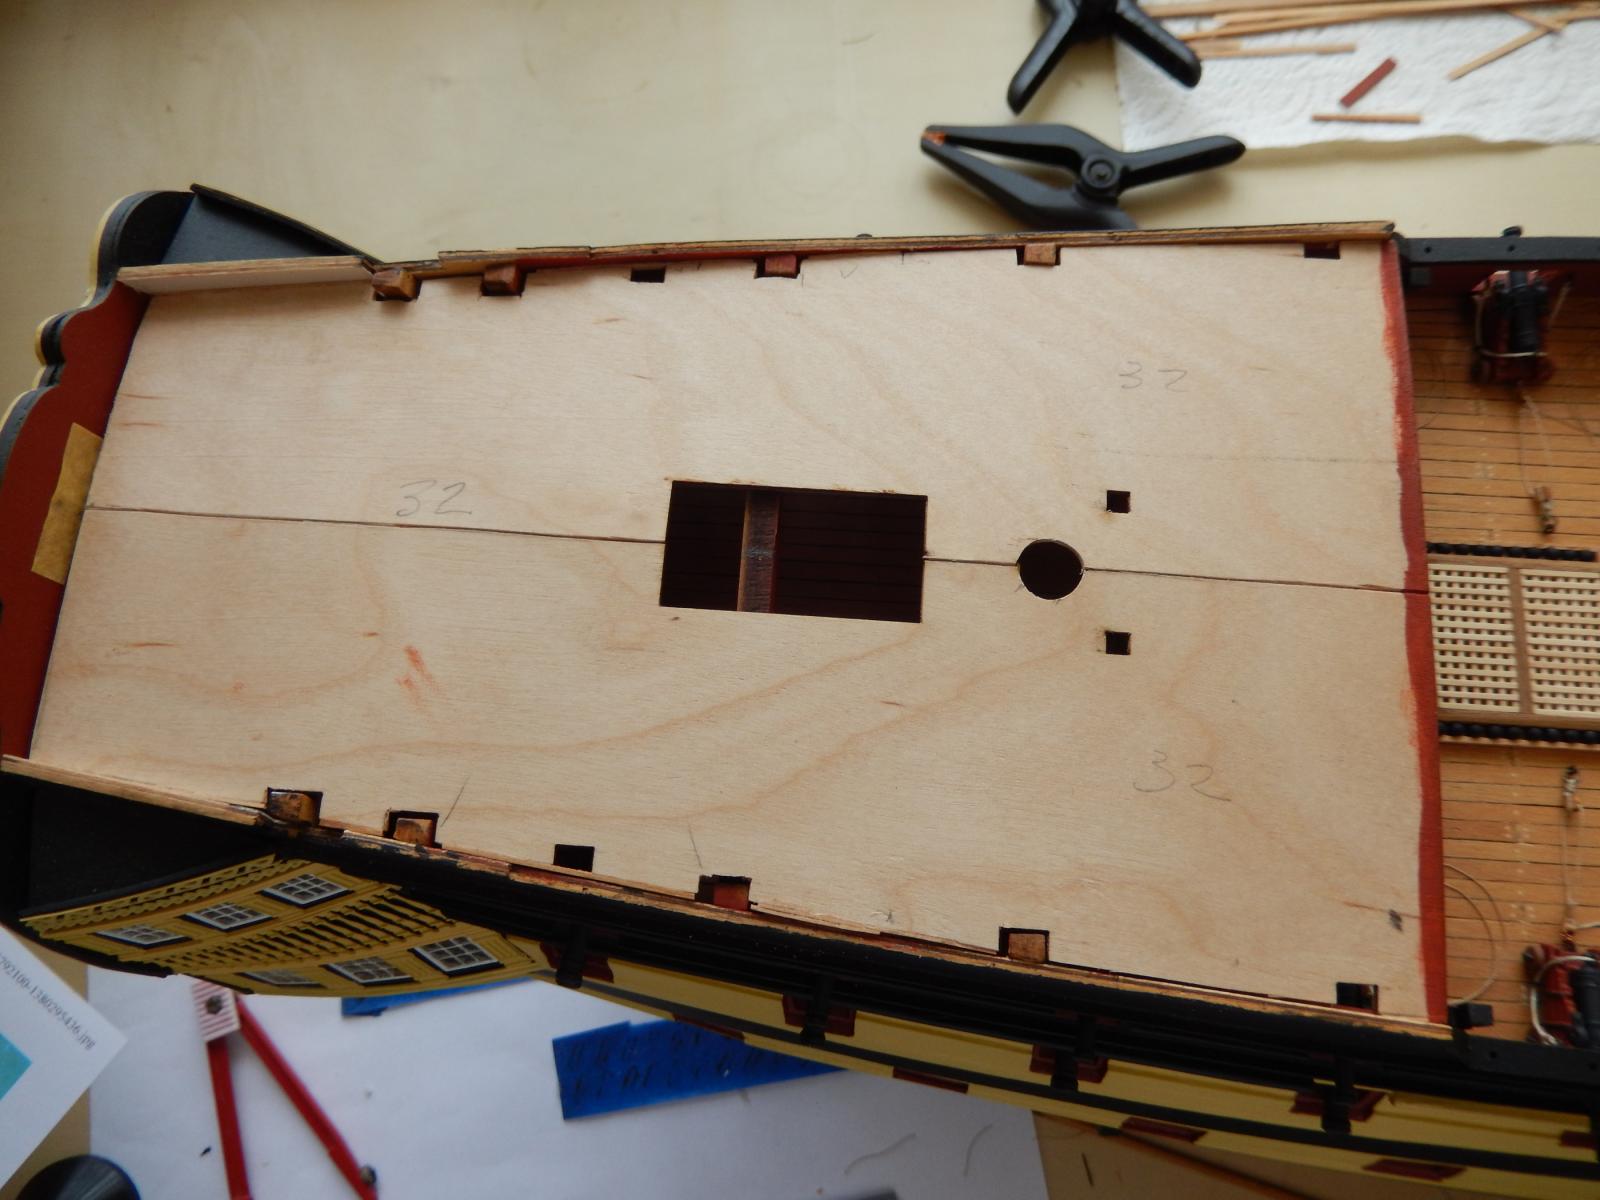
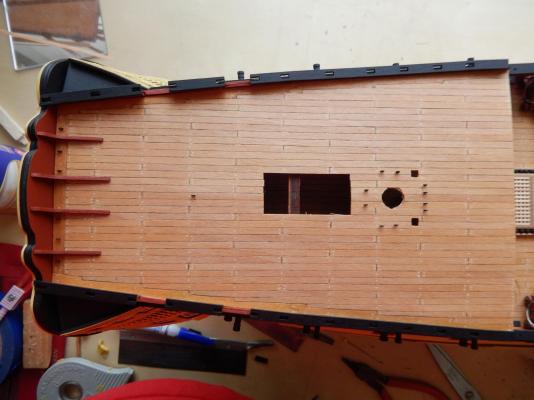
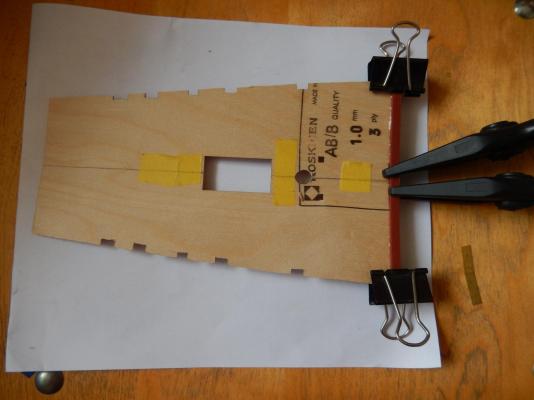
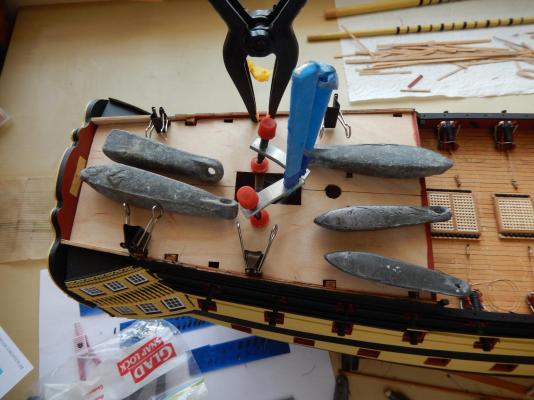
I have now glued on the poop deck base. I'm hoping that nothing has been forgotten as putting it on is rather final. I cut part 32 down the centre to make it easier to fit, though this may not have been necessary. I got a bit carried away in trimming the sides of part 32 to fit, then had to add pieces of strip to fill the gaps I had created. The having cutting the part, the next step is to attach the cross -member. It needed to be trimmed on each end, and again I overdid it. It is not really serious but will need to be rectified later. Here is the deck dry-fitted There is a small gap on either end of the support that will have to be disguised. Checking that the masts are as they should be. Adjusting the hole in the poop for the Mizzen would be too difficult (it's far to close to the screen on the upper deck for comfort) after that deck is fitted. Actually gluing the deck to its supports proved more difficult than I thought. The thing really didn't want to fully bend. I used clamps where possible and some lead sinkers to weigh it down. They are probably better used here than on my fishing efforts.


-
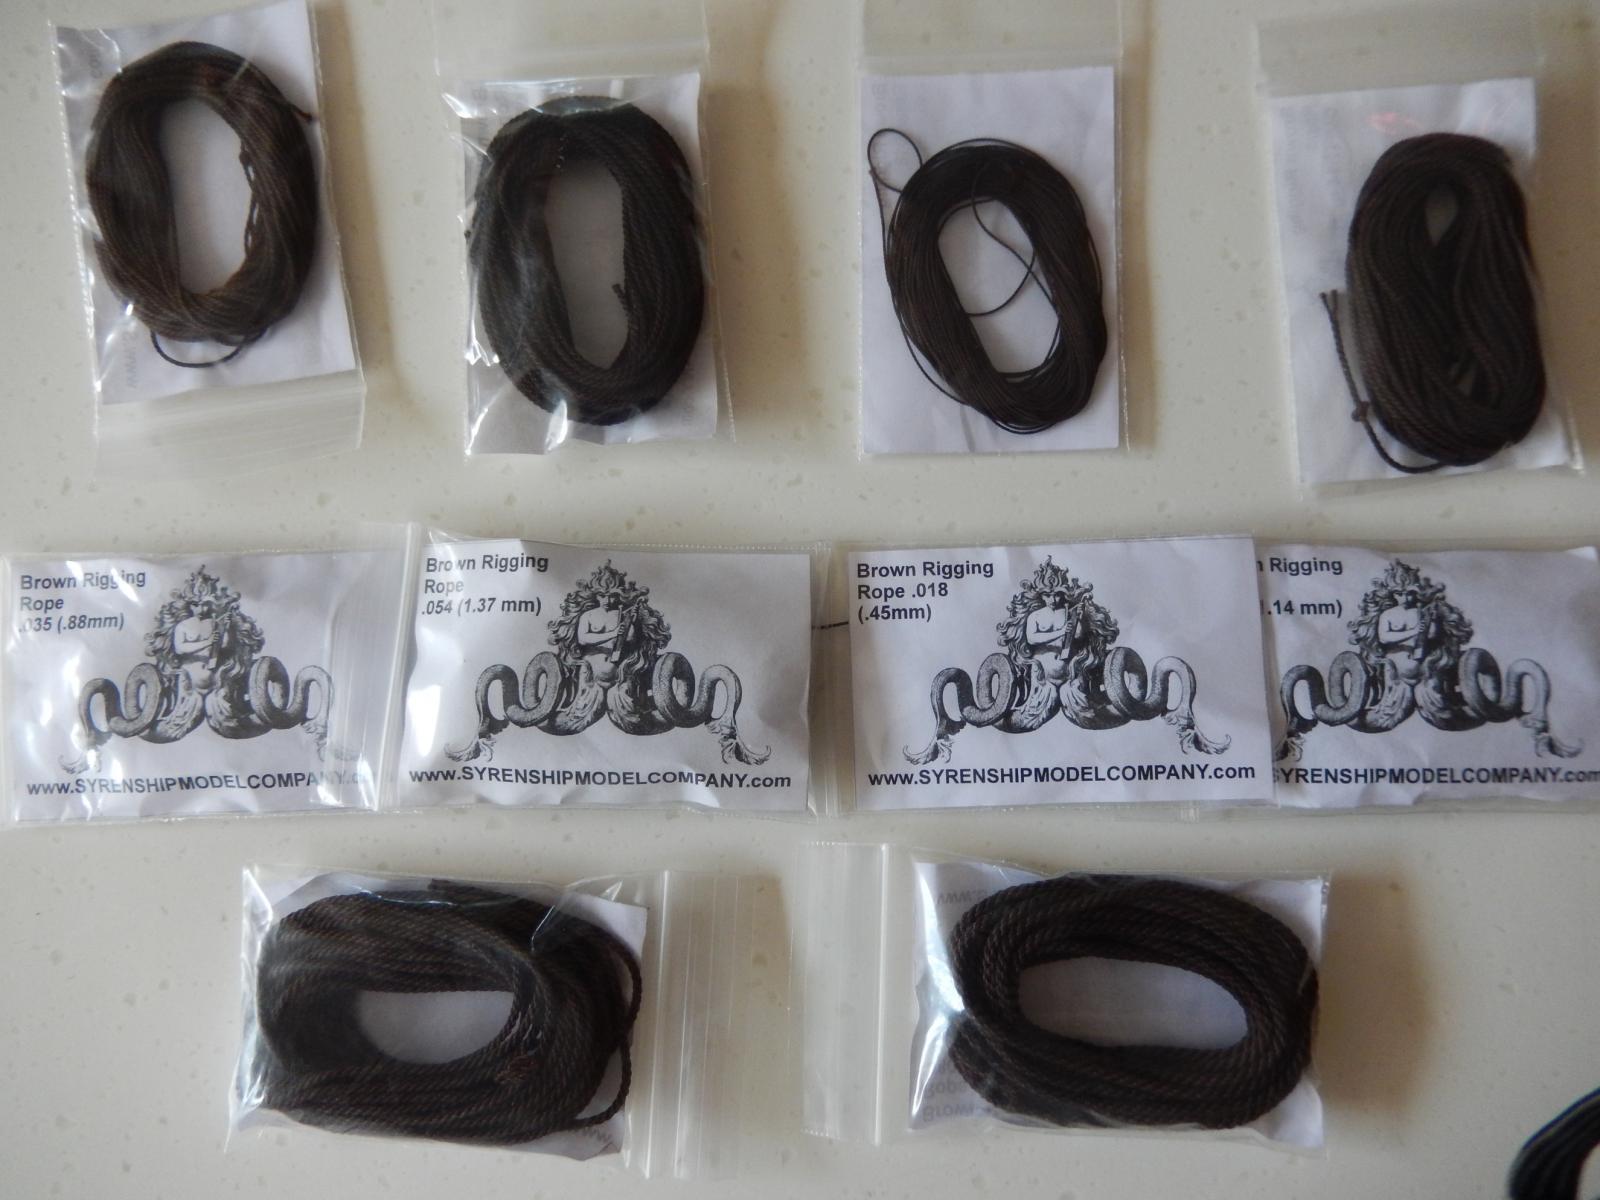
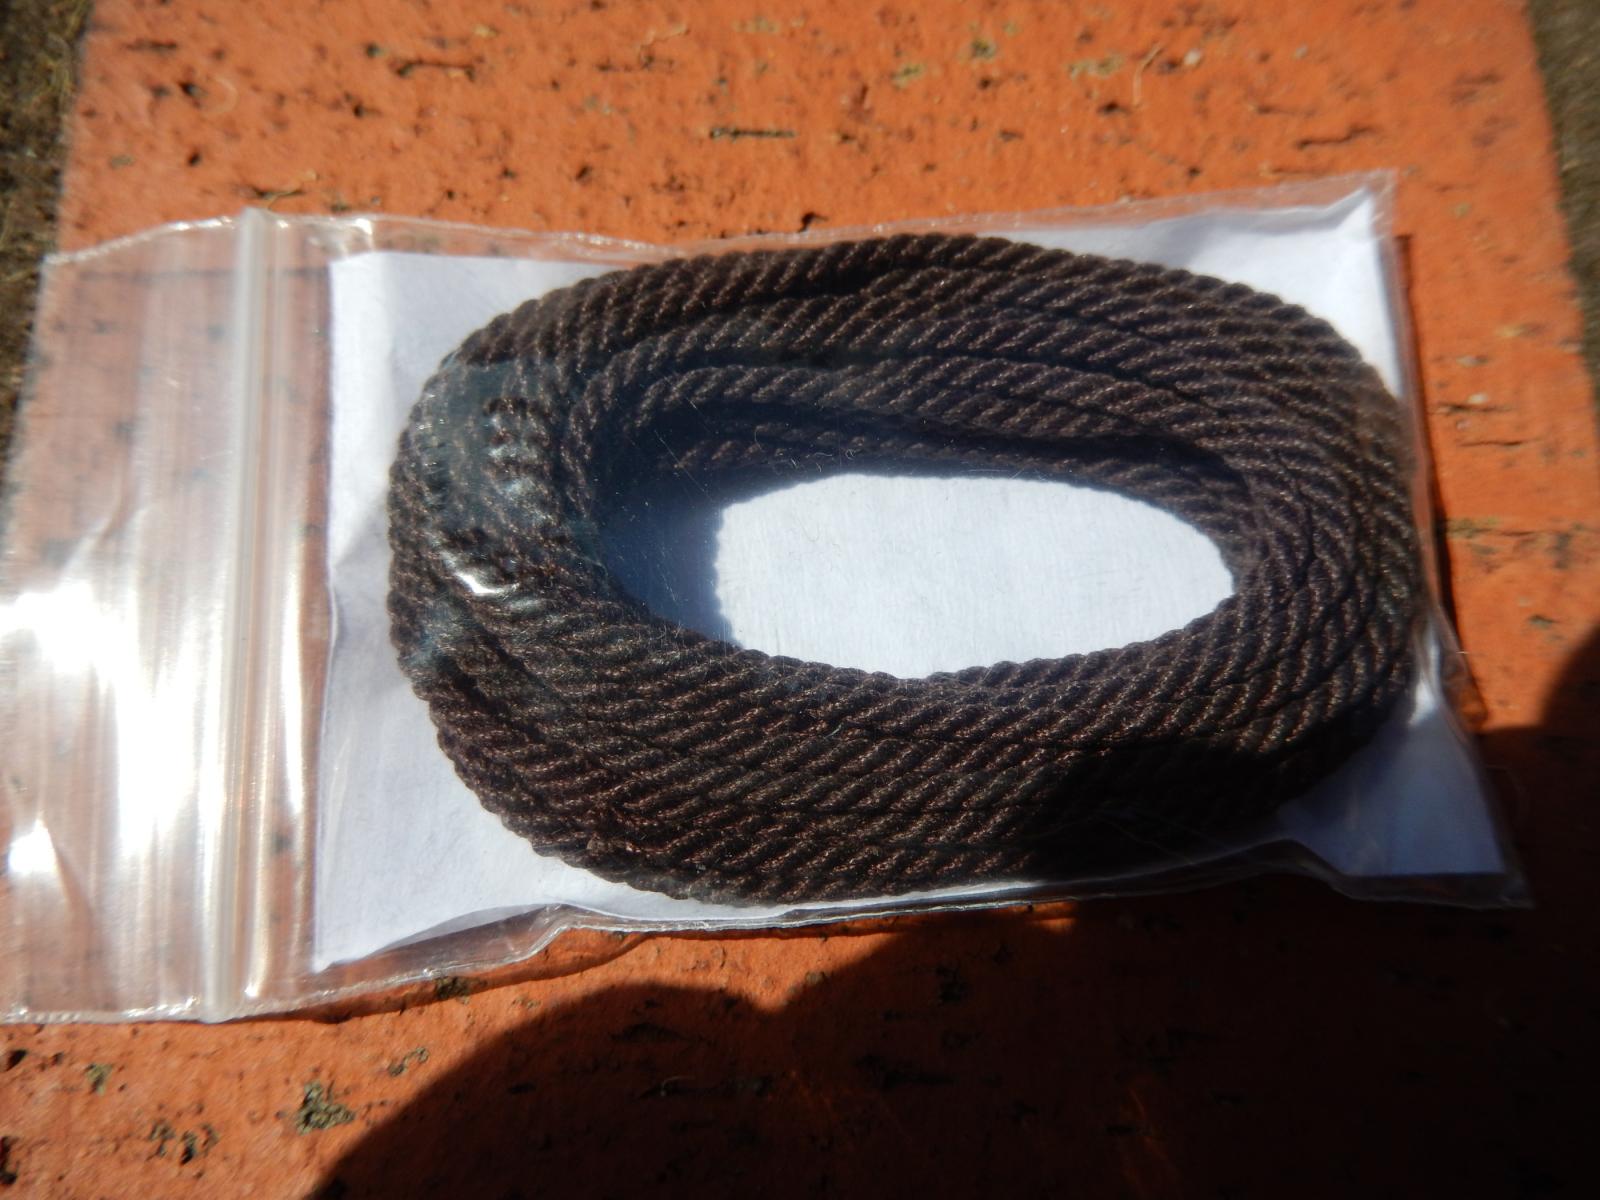
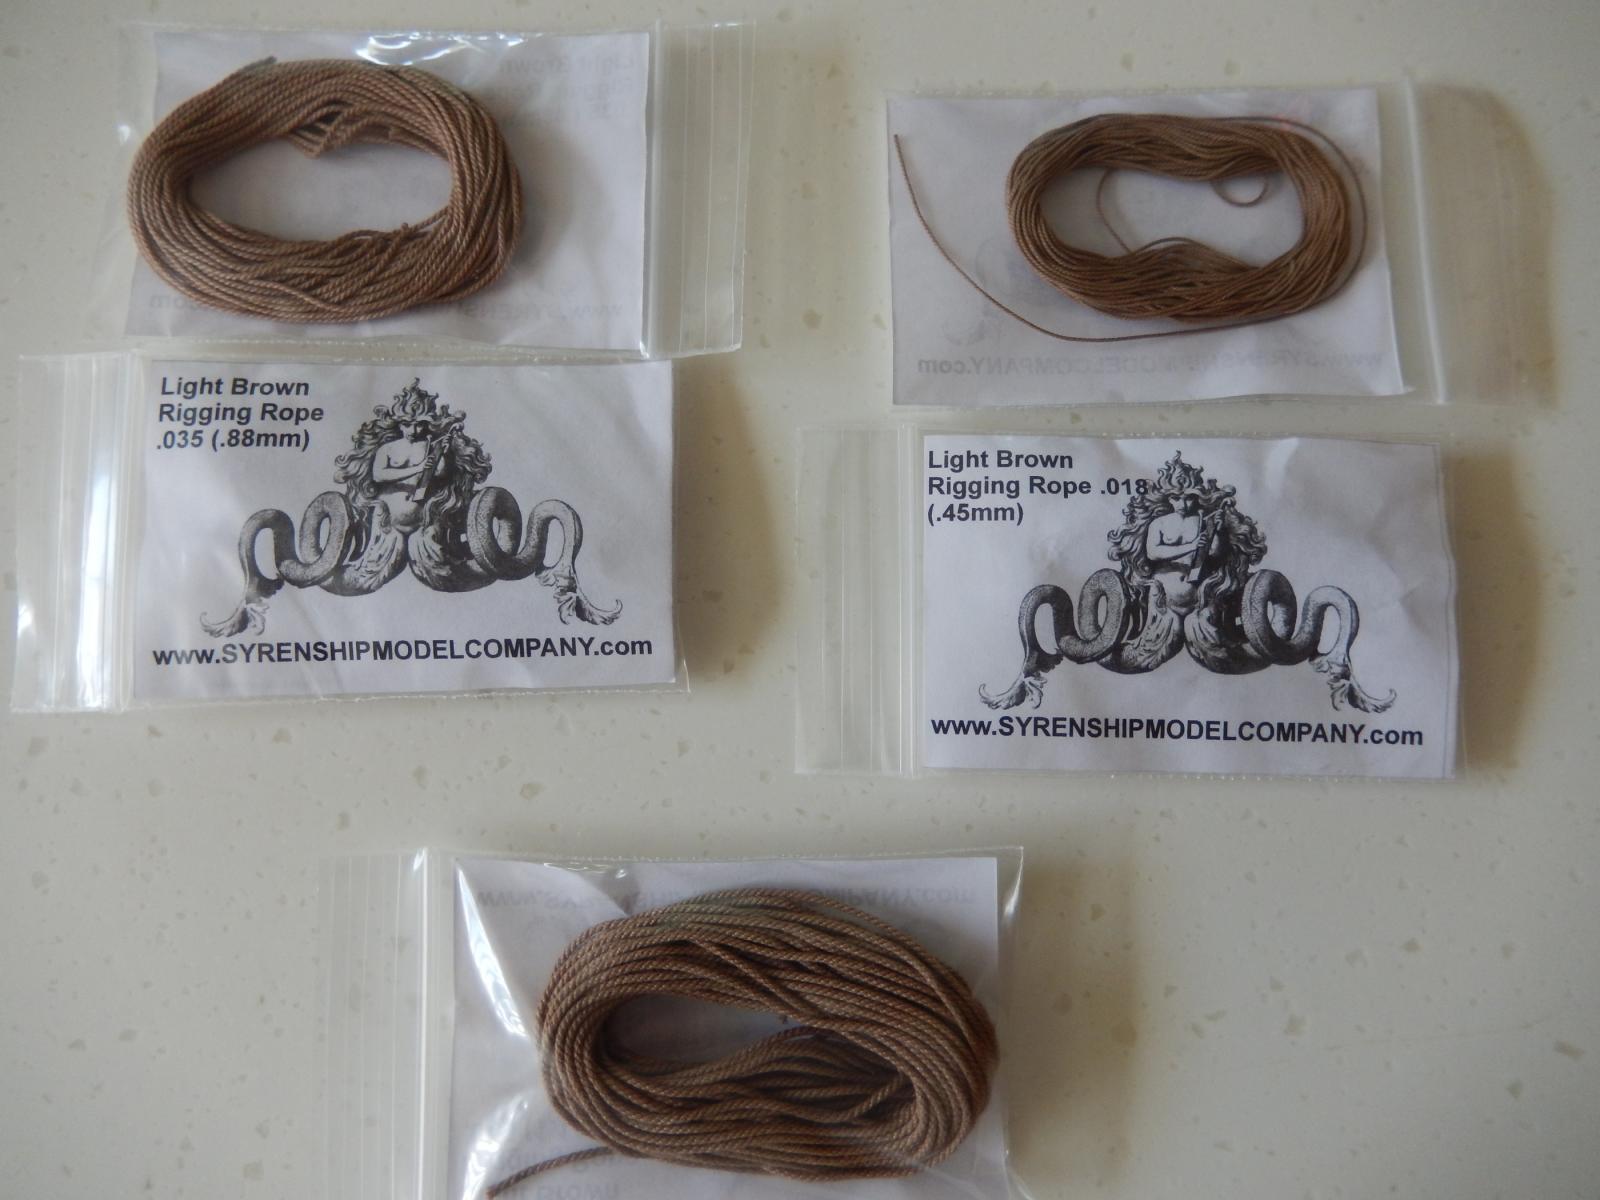
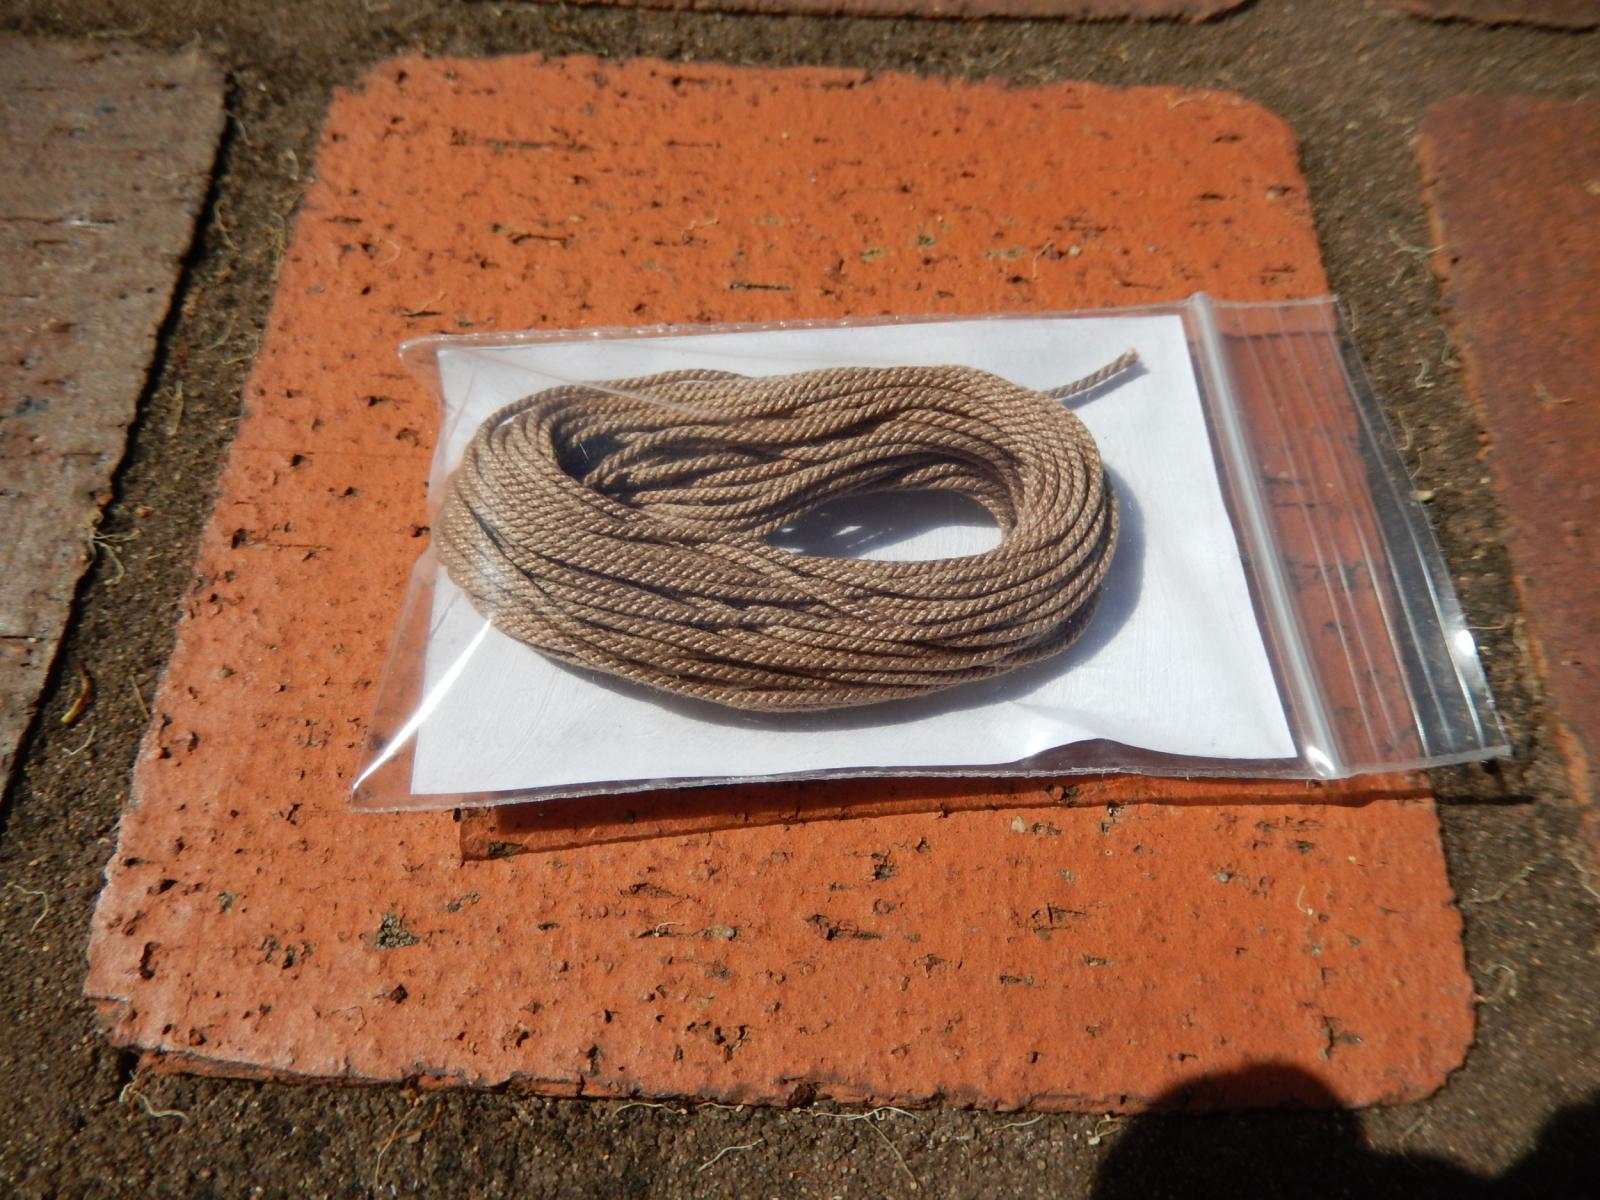
I have received most of the replacement rope from Syren. Some of the sizes were in short supply and I will order the balance when they are available. The quality looks to be excellent and it was delivered promptly. Below are some photos of some of the different sizes - light and dark brown, rather than the black and light tan of the kit. When I first bought the kit about 3 years ago, for some obscure reason I hung some of the black thread over the top of a door and then forgot about it. It was in a light room, but not in direct sunlight. It has not aged well. It is now an uneven dark tan and extremely furry. Perhaps beeswax would solve the problem. Here are the different sizes of the brown. Unfortunately the packaging tends to obscure the thread inside. I hope this gives a better idea of the quality. It was taken in sunlight. Here is the light tan.


-
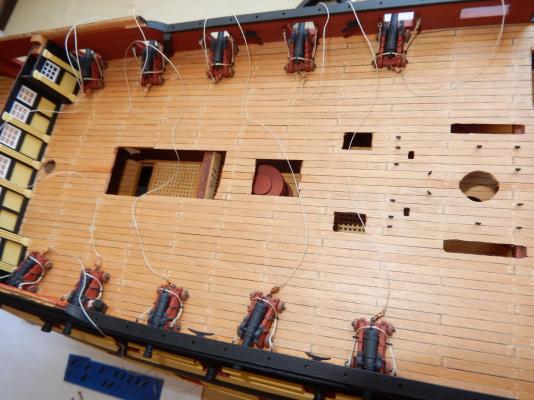
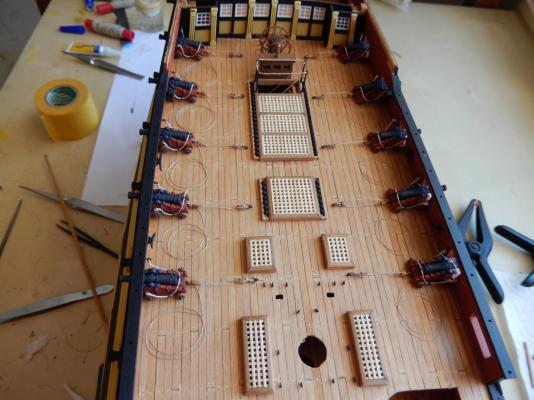
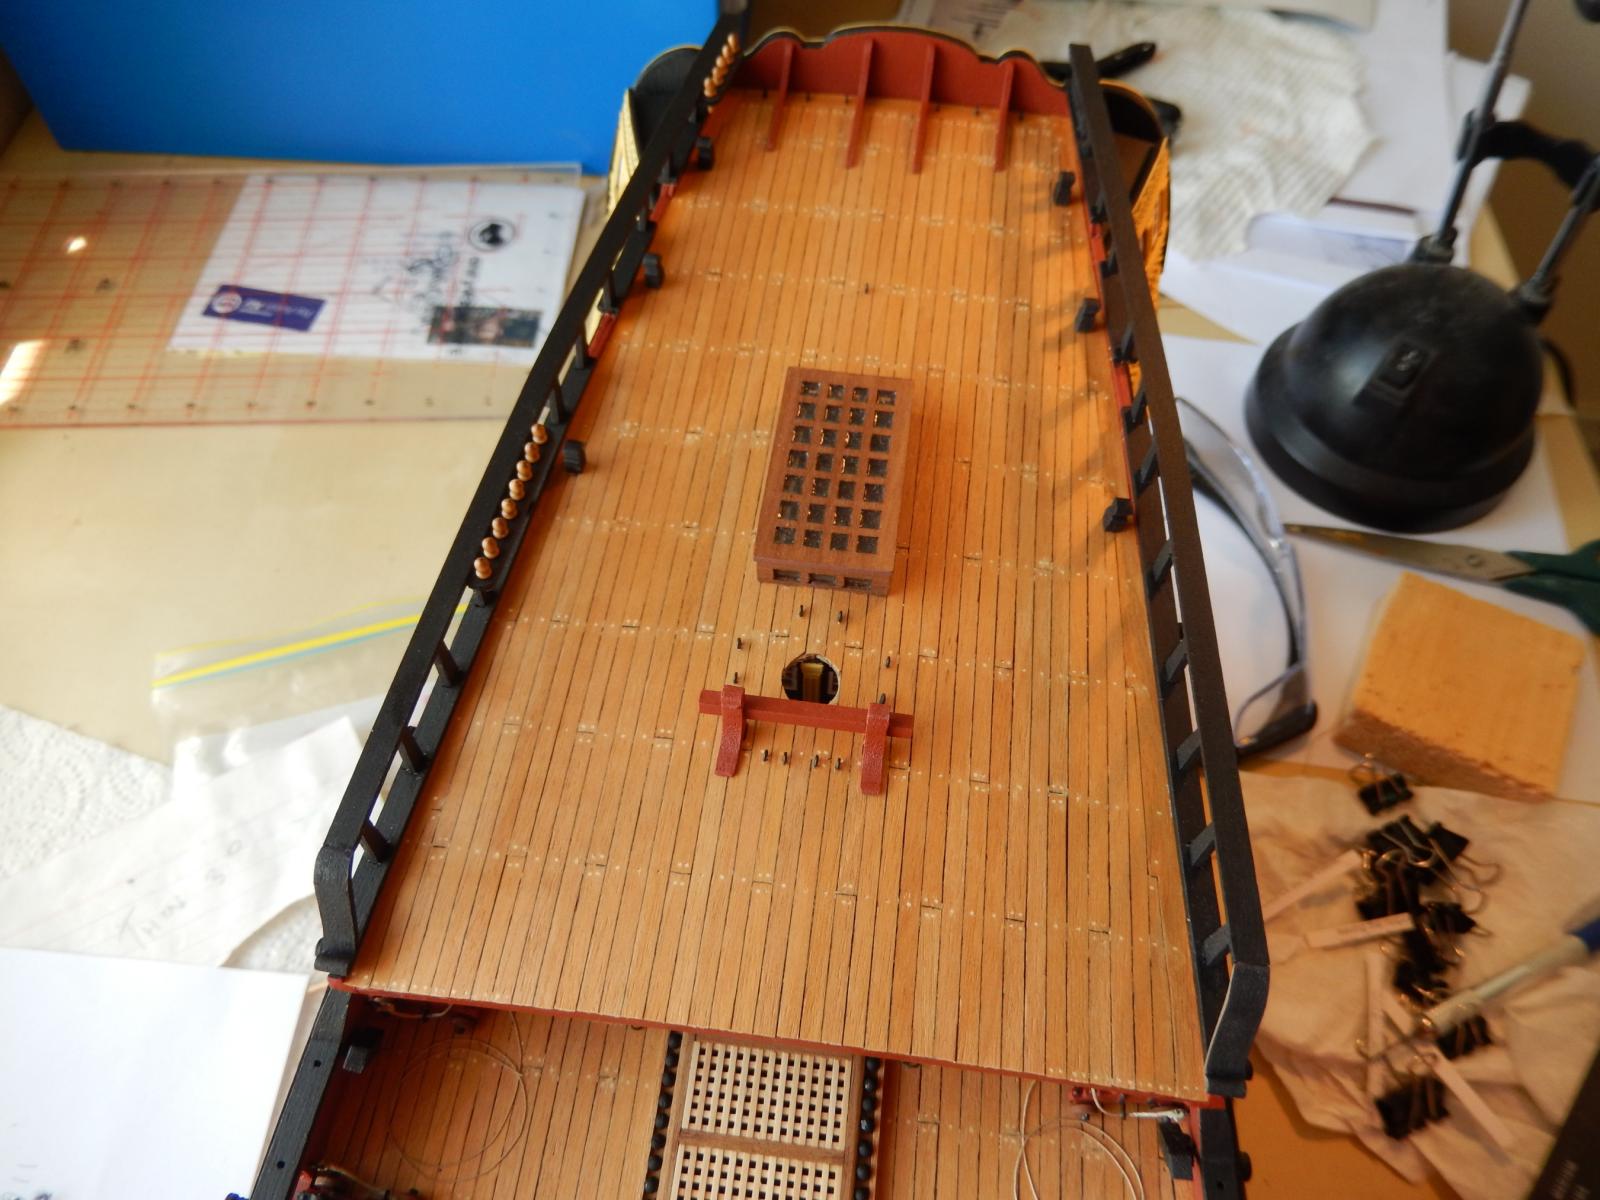
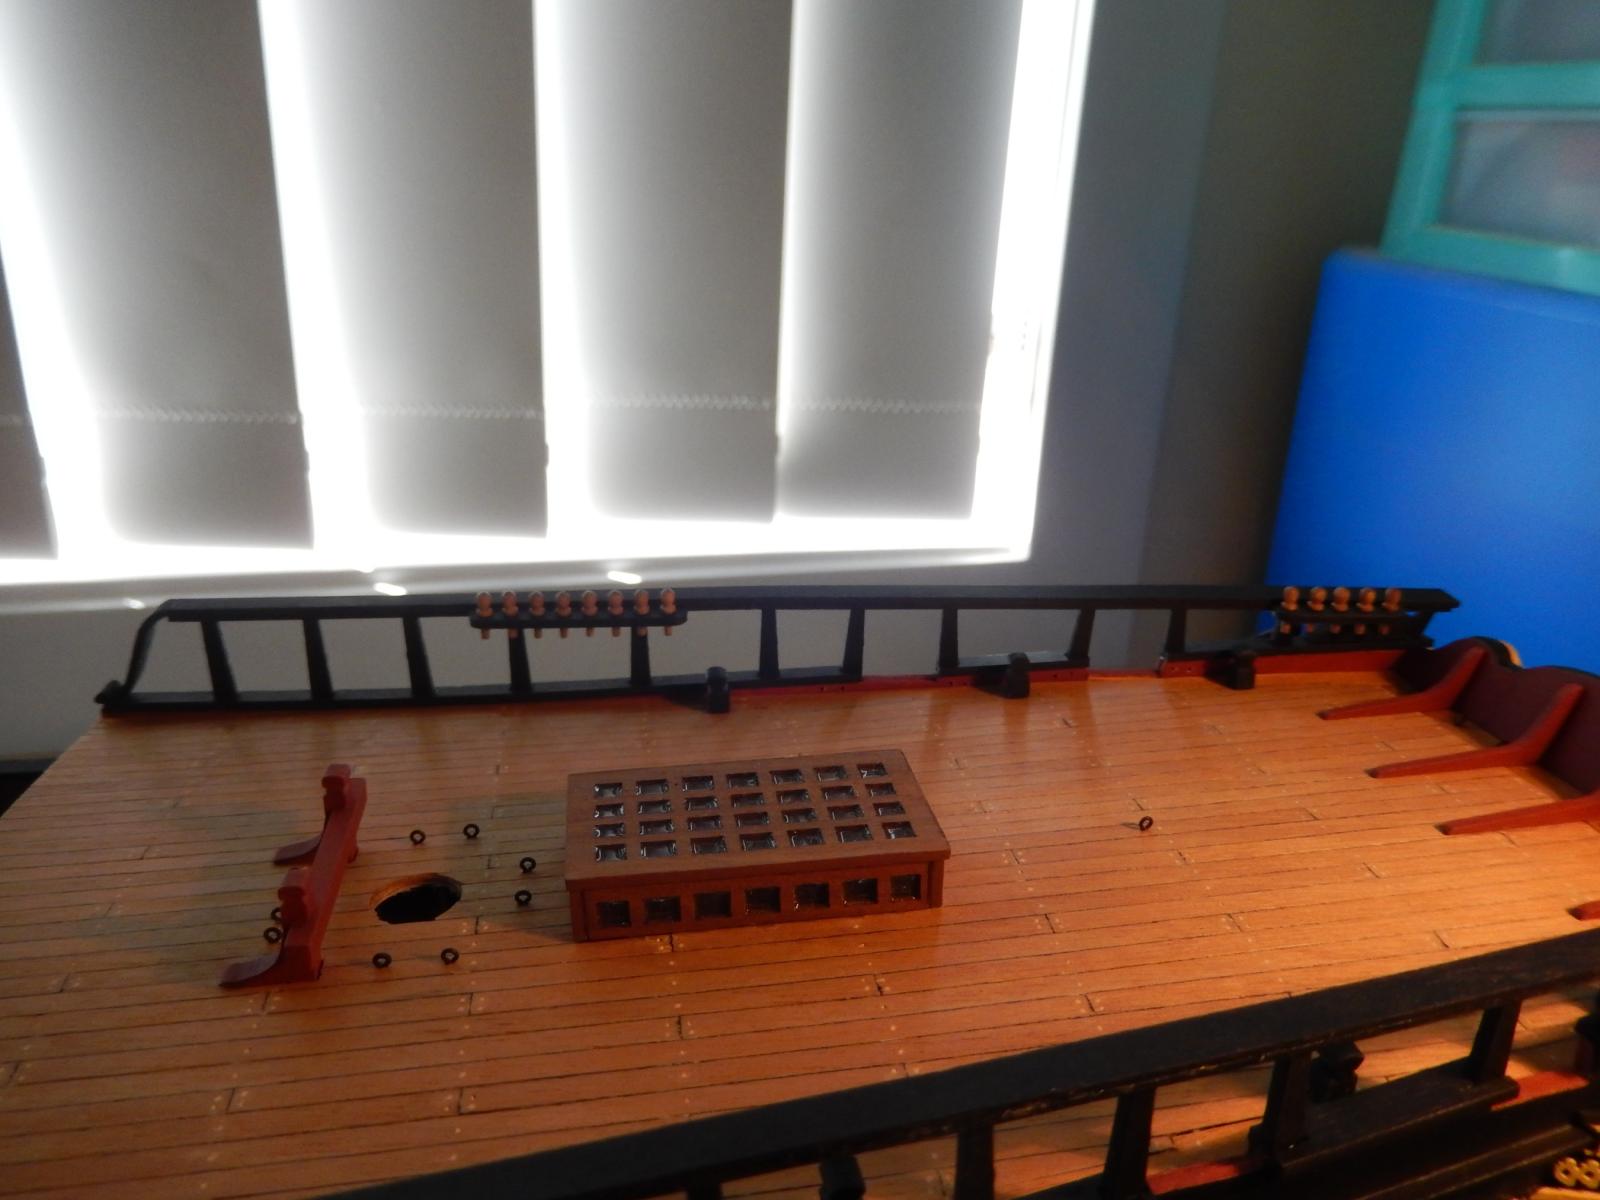
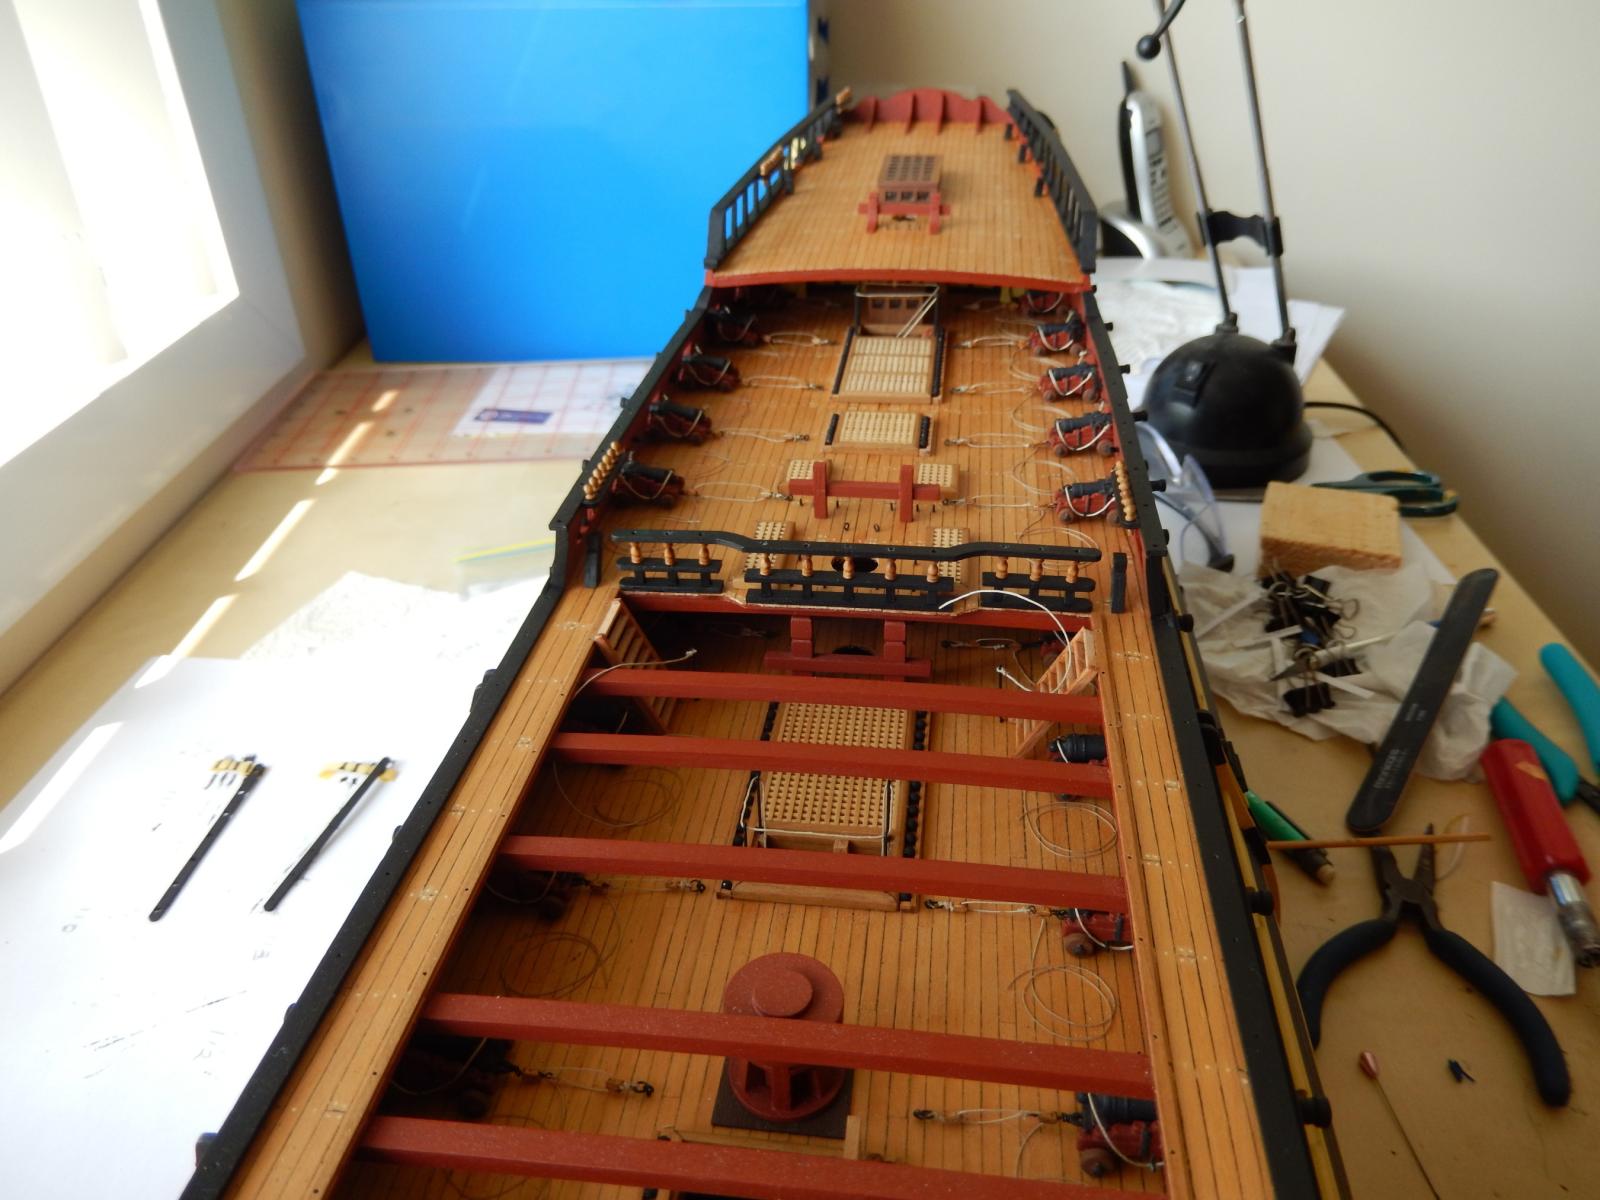
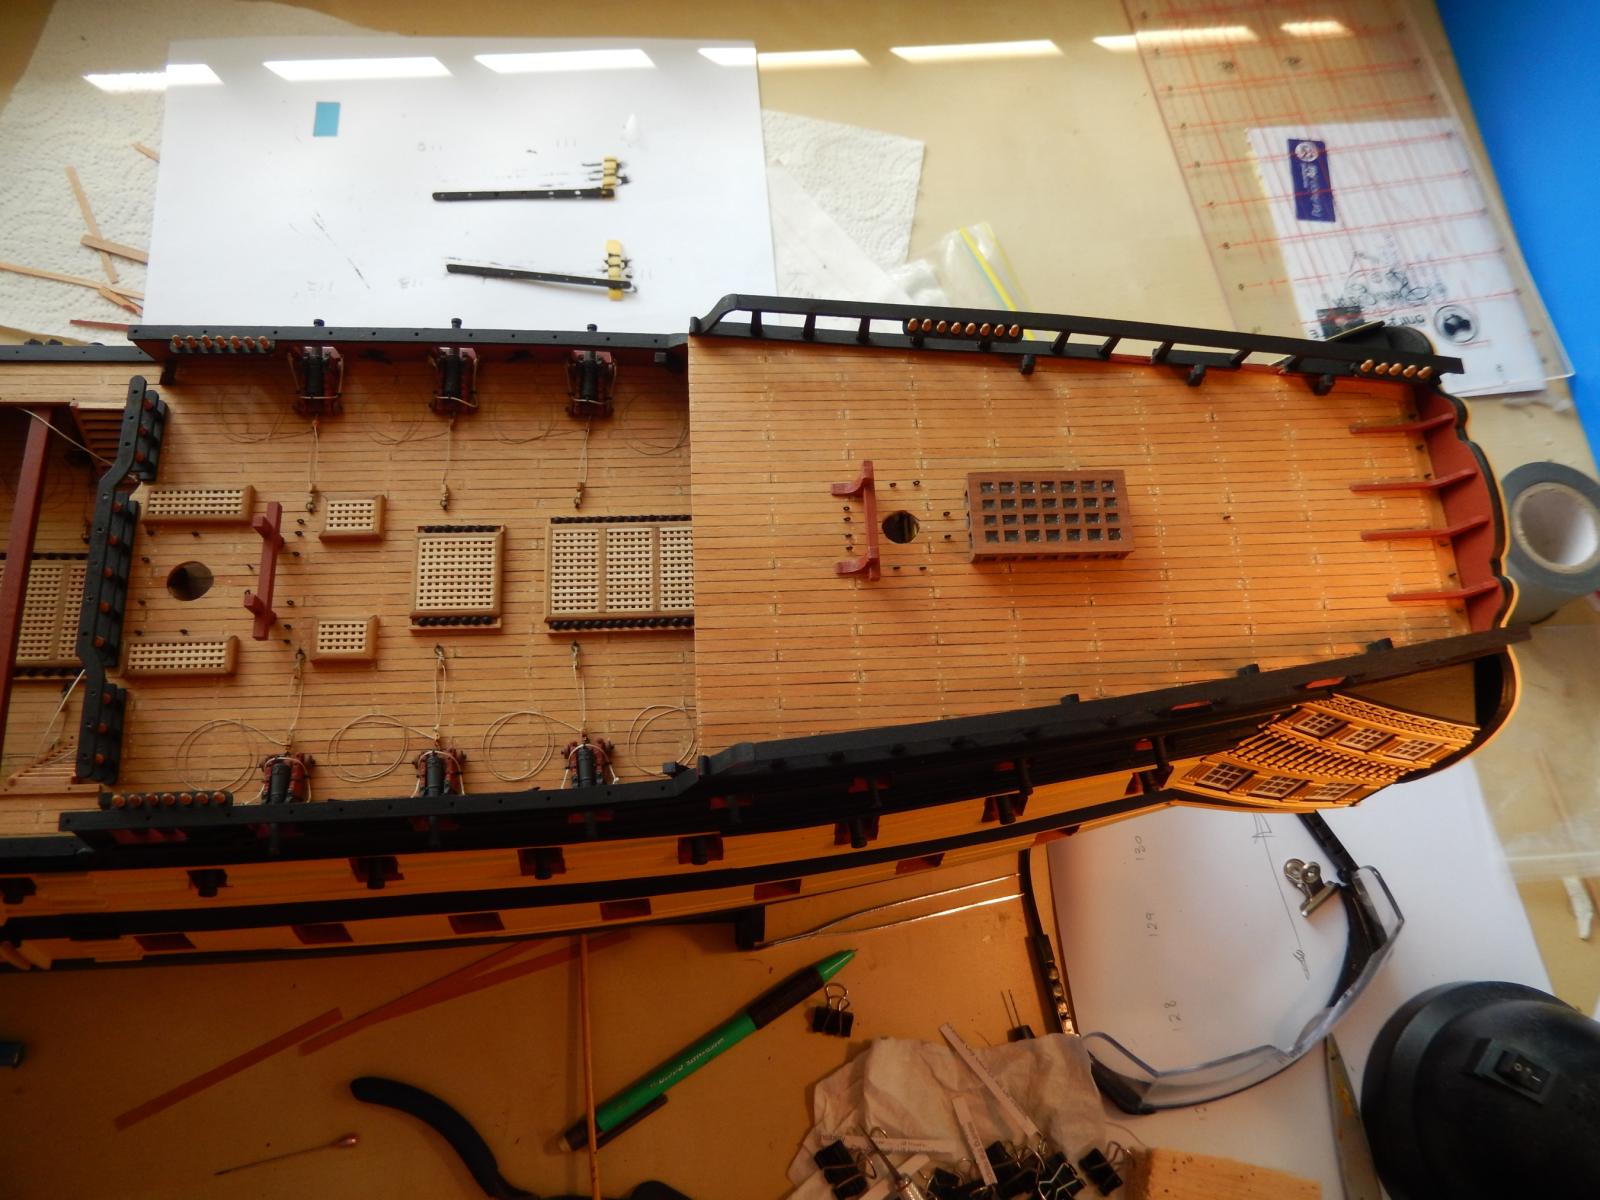
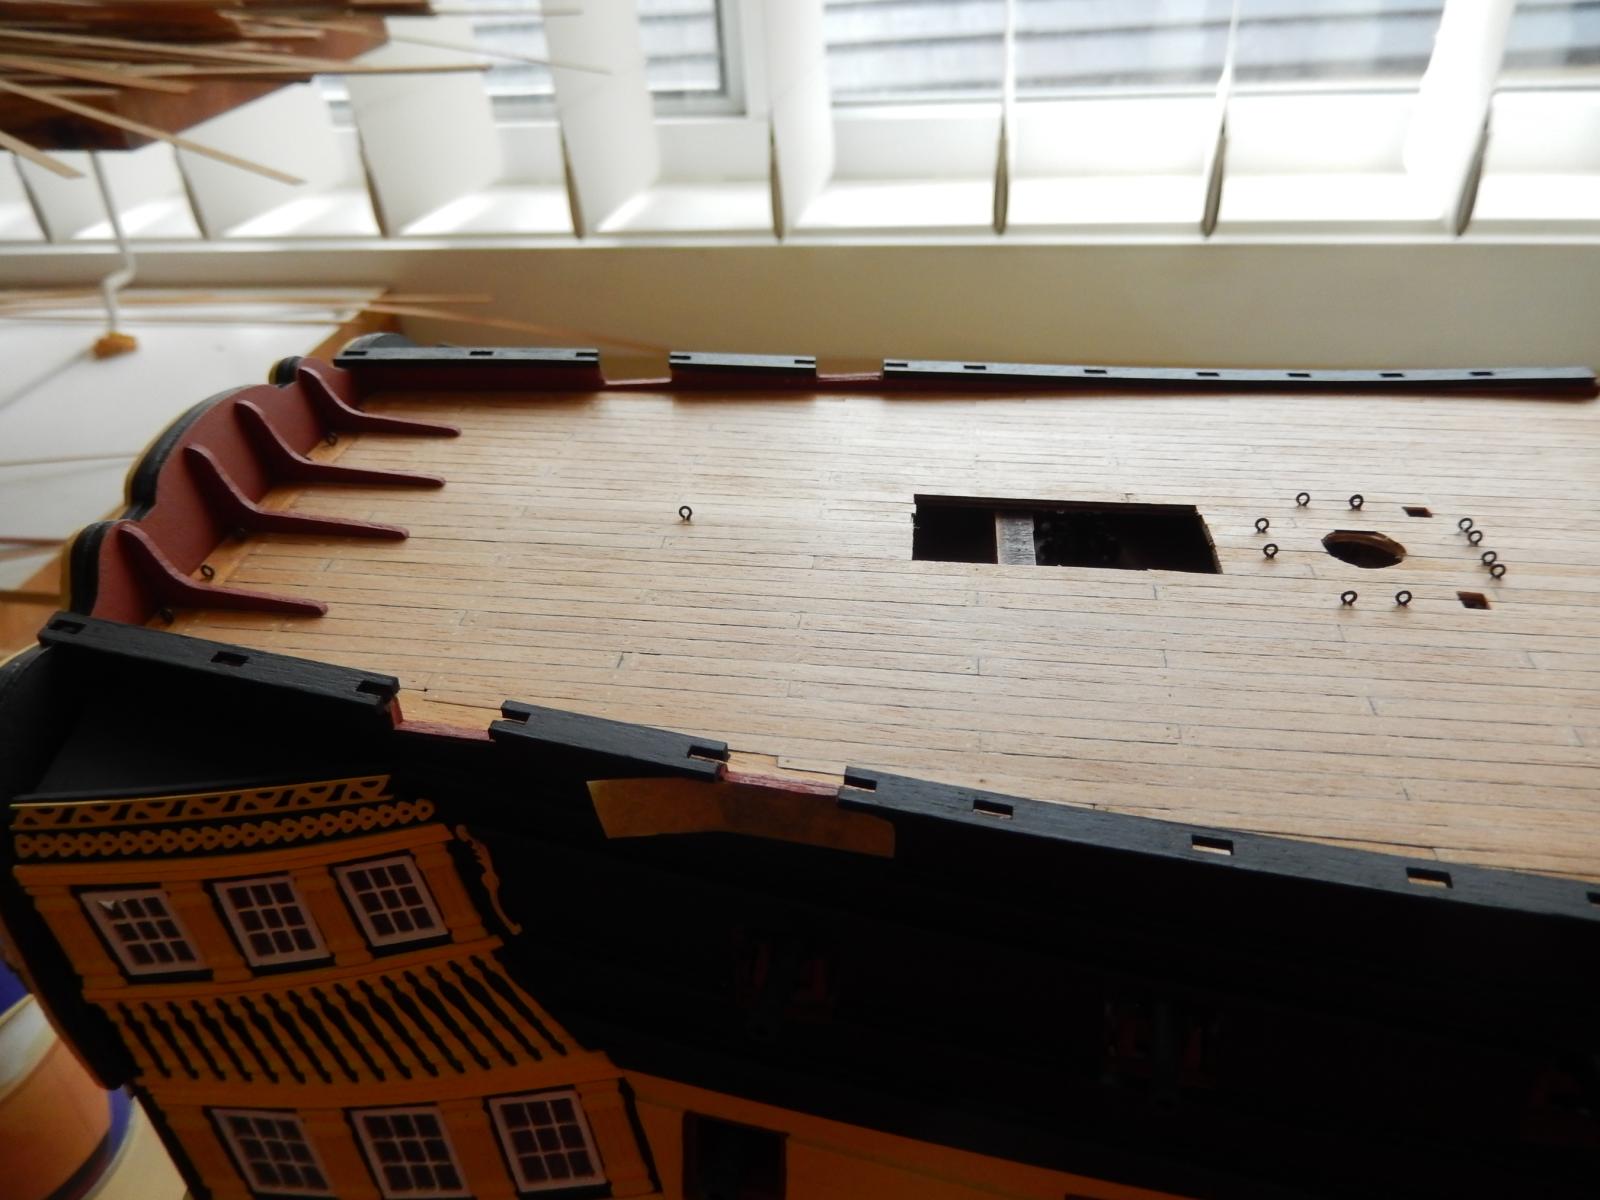
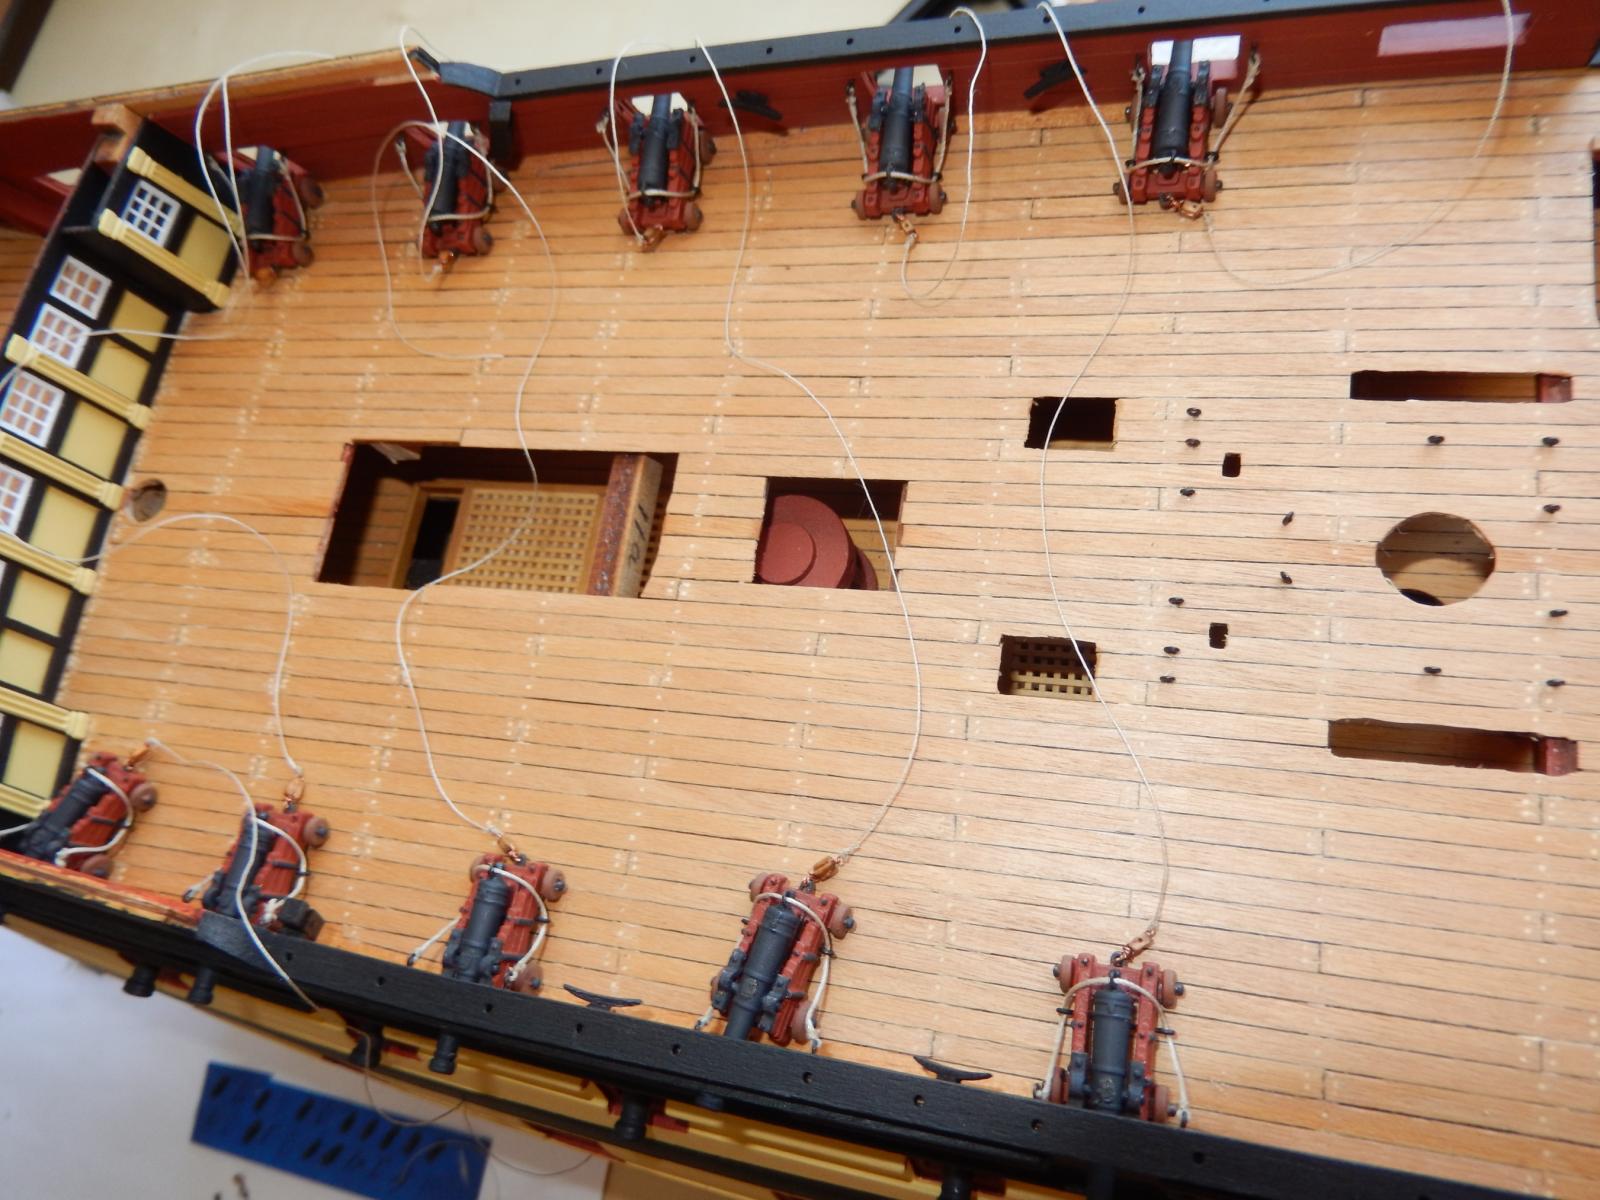
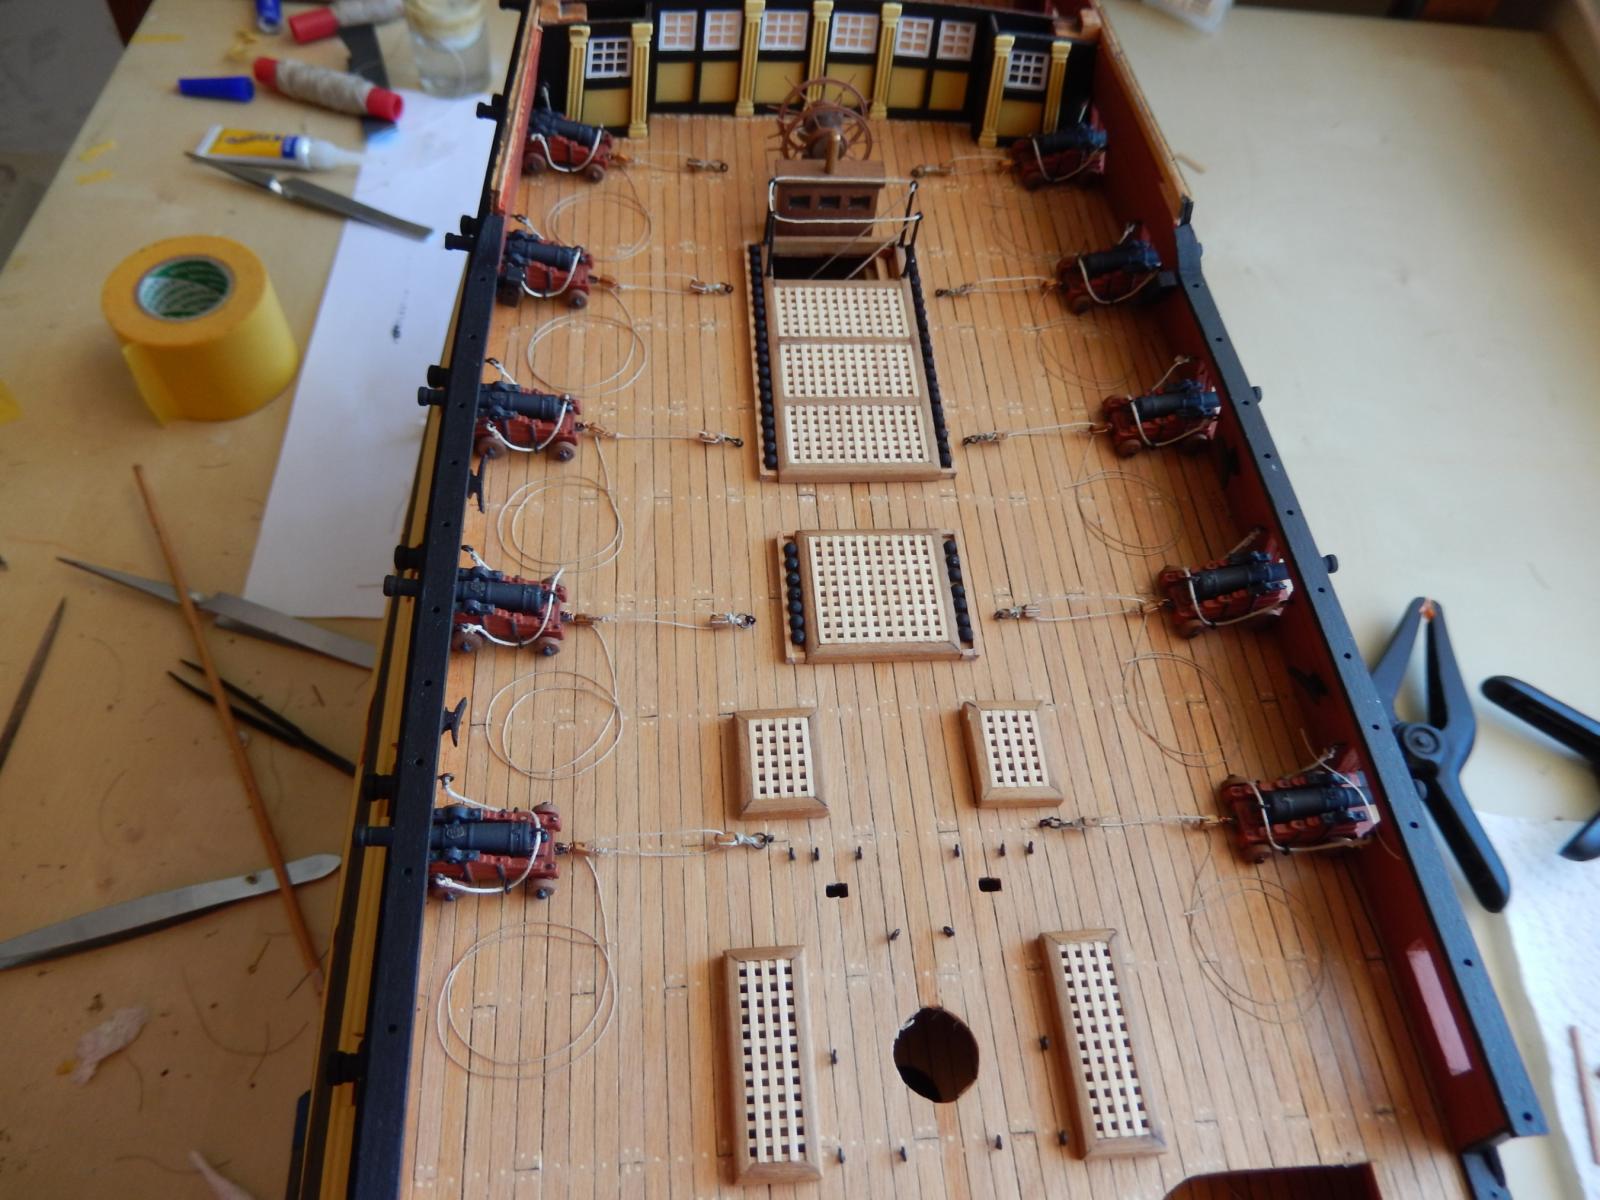
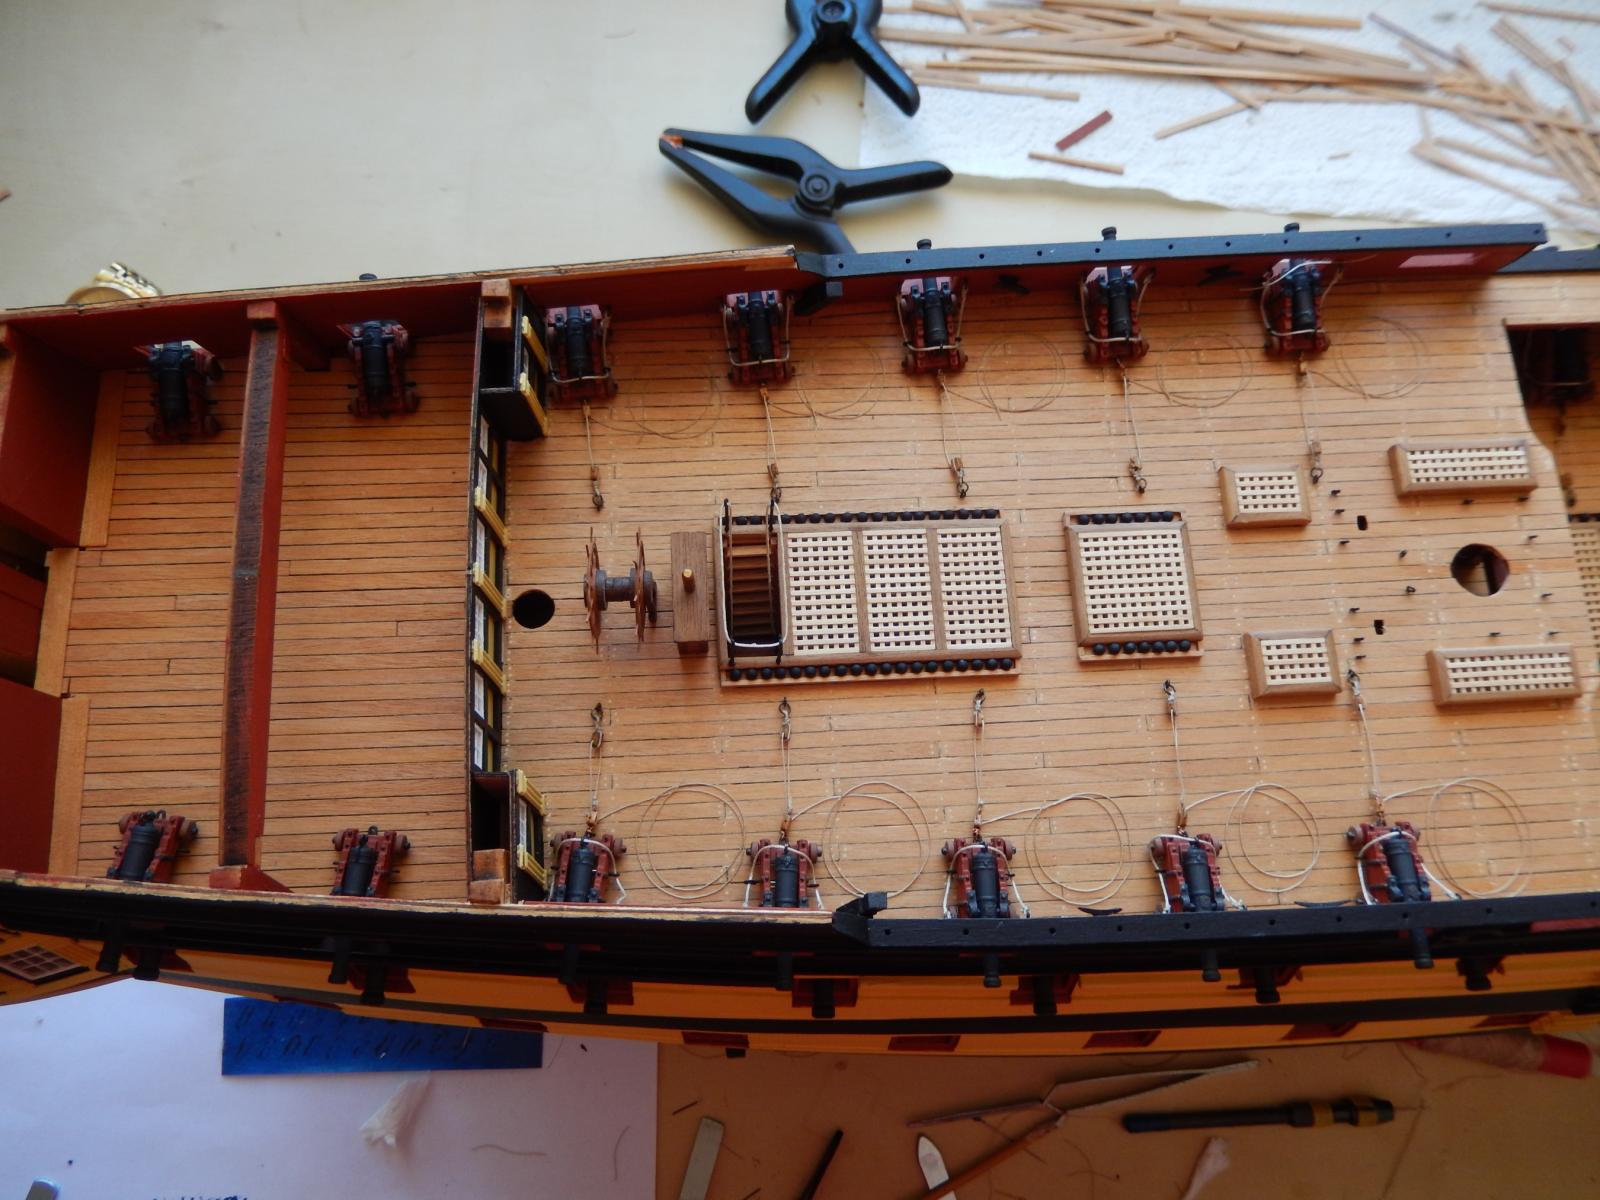
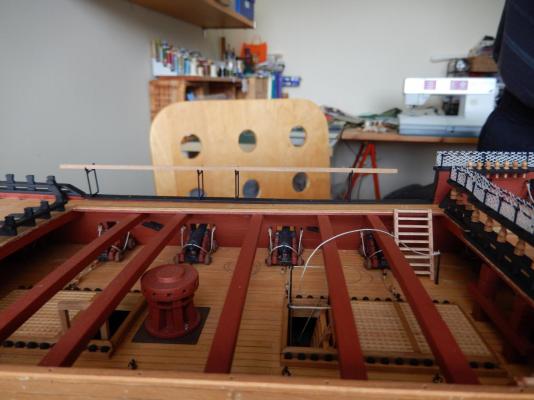
I have finished rigging the guns and have attached all the various hatches etc. The barrels of the cannons do not have any provision for an 'eye' through which to thread rigging rope. I used the head of the eyelets supplied gluing them with CA gel. I now use the gel almost exclusively. An intermediate stage in the rigging: and finally, finished. I have not yet fitted the assembly for the hammock netting. It looks fairly fragile. I am debating the next step, but at his stage I will probably do the poop deck, then finish off the upper deck bits and pieces, and hope I don't destroy anything in the process. Incidentally, the hole provided for the mizzen mast in the poop deck base (part 32) is about 2mm too far to the stern. The mast is very close indeed to the screen. With some rake of the mast it almost touches the screen at the top.The screen is also very close to the gunports immediately in front of it: so close it is difficult to rig the guns. While this may all be historically accurate, setting the screen back about 2mm would make things a lot easier. This would mean moving a bulkhead, so I guess that's not going to happen.